

DIY: Kitchen Window Valance
For the past week my world has been filled with shredding, decluttering, organizing, and the start of new projects for 2011. My mind has been going non-stop about all the things that I want to tackle…of course, I’d love to snap my fingers and it all be done like Barbara Eden in I Dream of Jeannie, but that’s not reality. SO…where to begin… I’ve been working on multiple projects and gave you a sneak peek of one yesterday….here’s my latest….
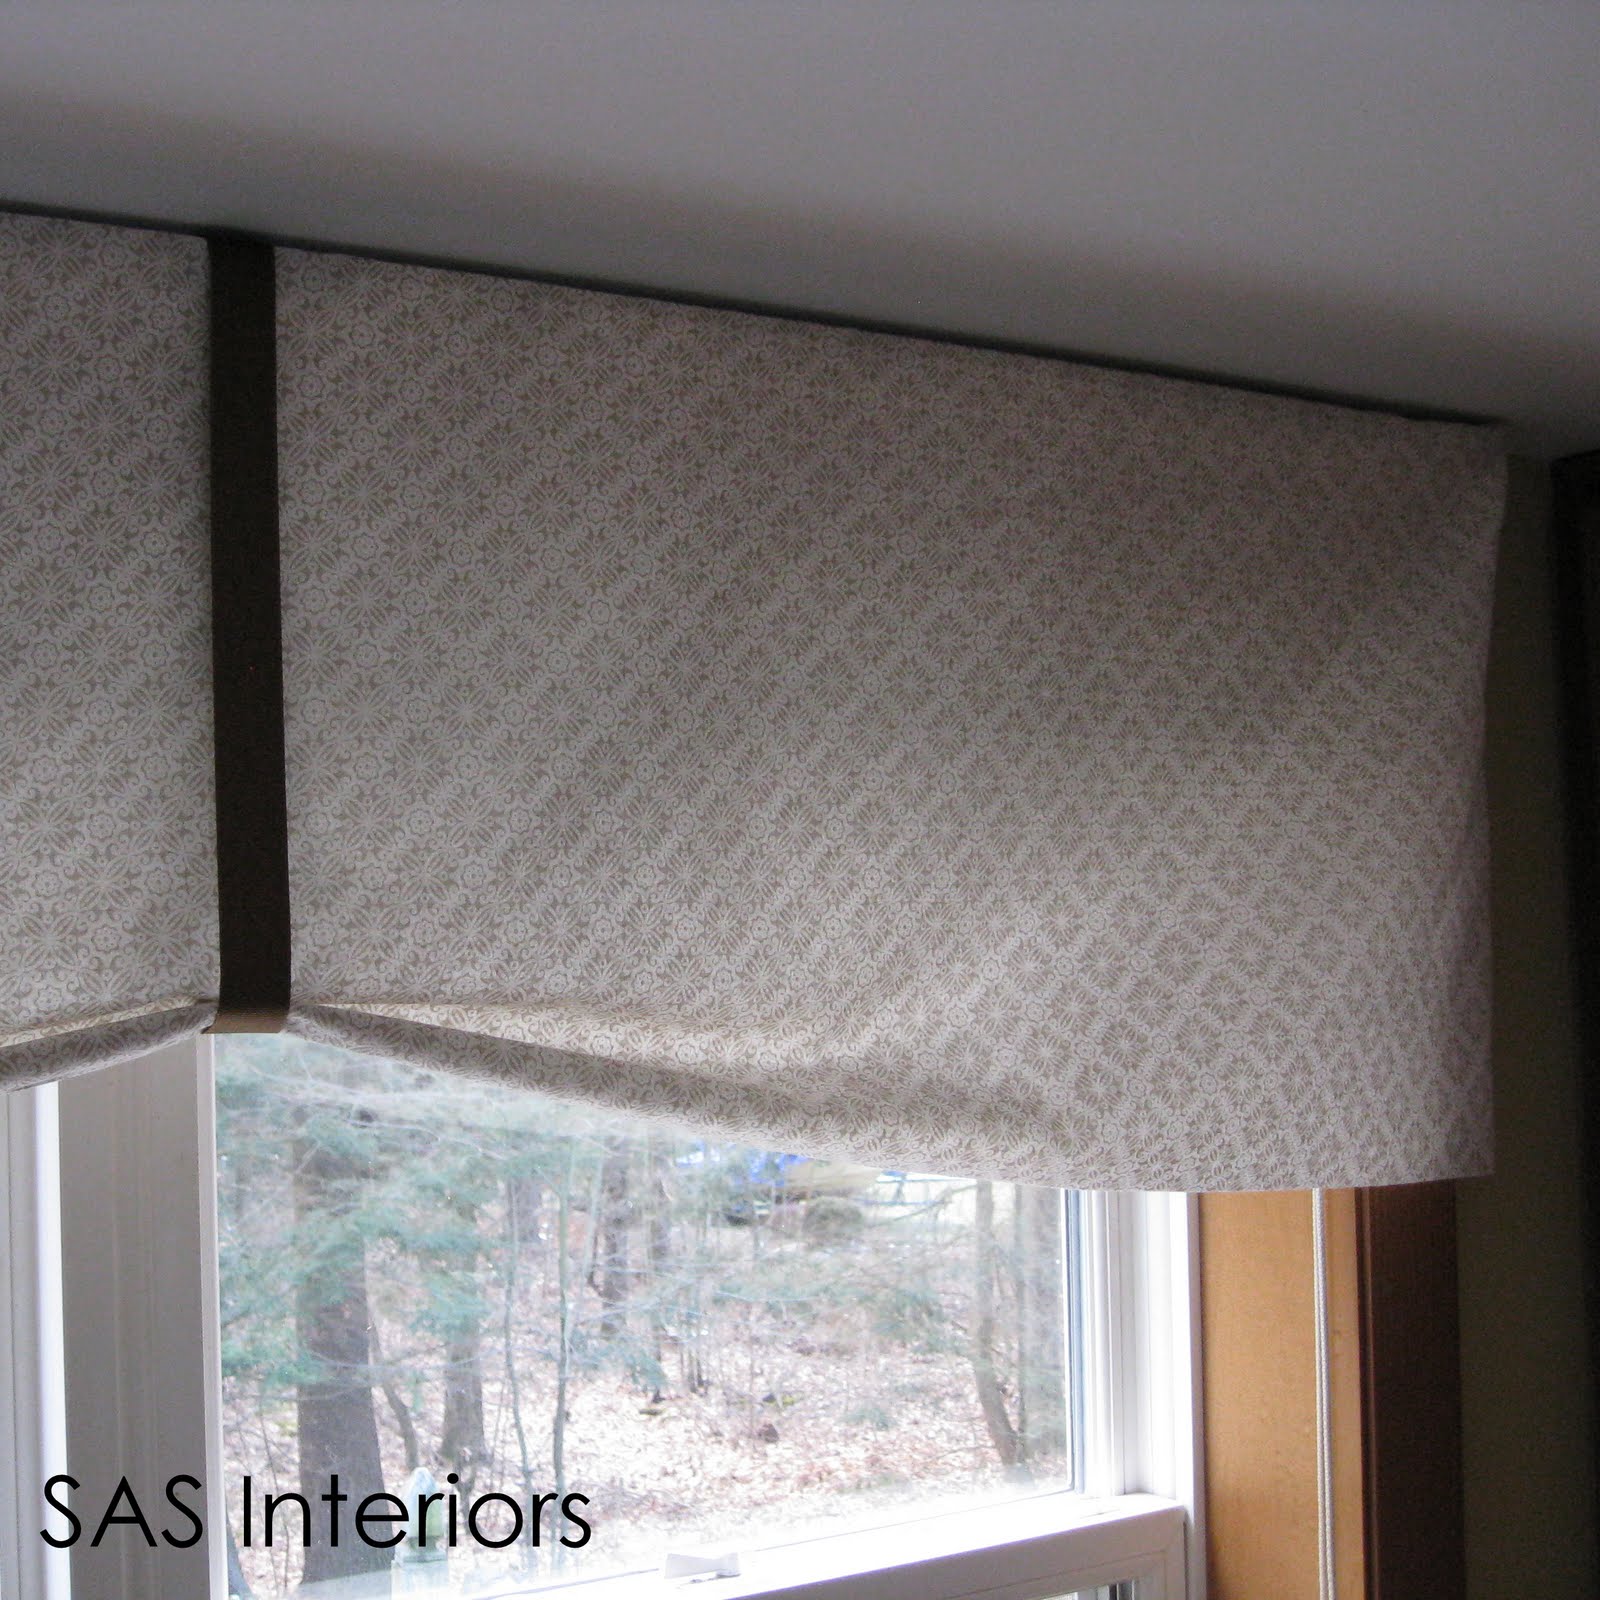
Since moving into our home almost a year ago, I’ve been wanting to install a valance at the kitchen window. The window is almost 90″ wide, so I envisioned creating a treatment that was unique, yet one that didn’t compromise the entering light.
{Kitchen Window ~ COMPLETE}

{Materials}
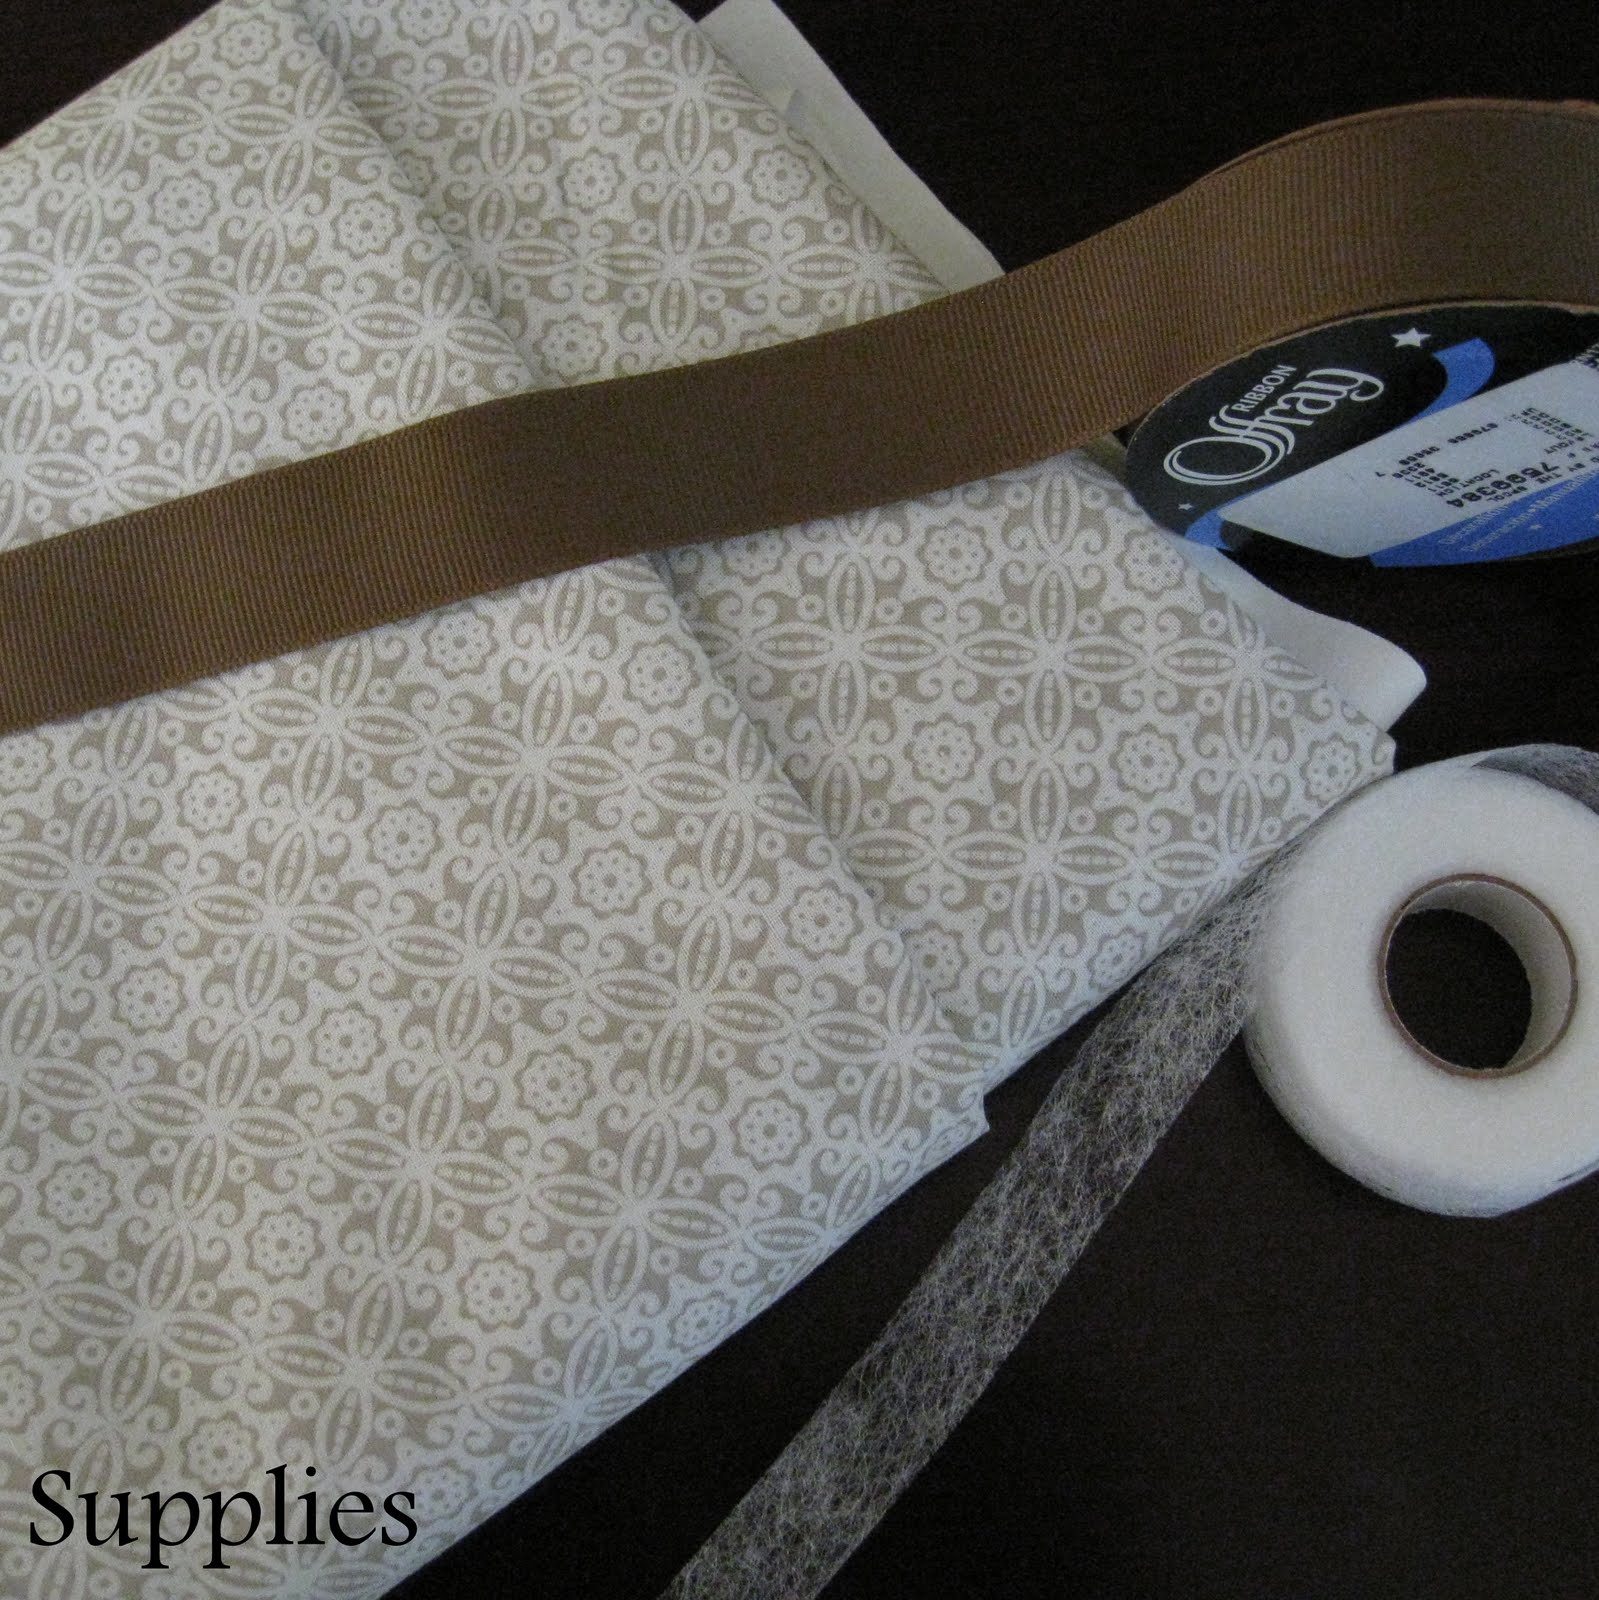
I chose a cotton material that has a WHITE background with taupe accents; It has a casual look and complements my taupe-colored, silk dining room draperies. Not handy on a sewing machine (like me)? Stitch Witch is your answer…create anything using this fusible tape and your iron! Depending on the fabric, this project could cost less than $20.
Supply breakdown:
- 3 yds of fabric (my window is 89″ wide & I used about 2.5 yards ) = $3.99/yd = $11.97
- Stitch Witch fusible tape (heavy duty) = $3 +/-
- Ribbon (18 feet long ~ I used 4 feet) = $3.99
- 1 x 2 wood strip = $2.99
- ‘L’ Brackets = $3 +/-
- Screws (I already had)
- Iron (hopefully you already have this)
My Project Total: $25
Depending on the materials you already have on hand, the project total could be even less!
{Breakdown}

Determine the length (drop) of the valance and double it, so the fabric is two layers. (Hint: I used my wood floor to ‘assist’ in keeping the fabric and wood strip aligned). Once the fabric is positioned at the right length, but the wood strip underneath and pin the fabric to it (so it doesn’t move while stapling). Then STEP TWO!
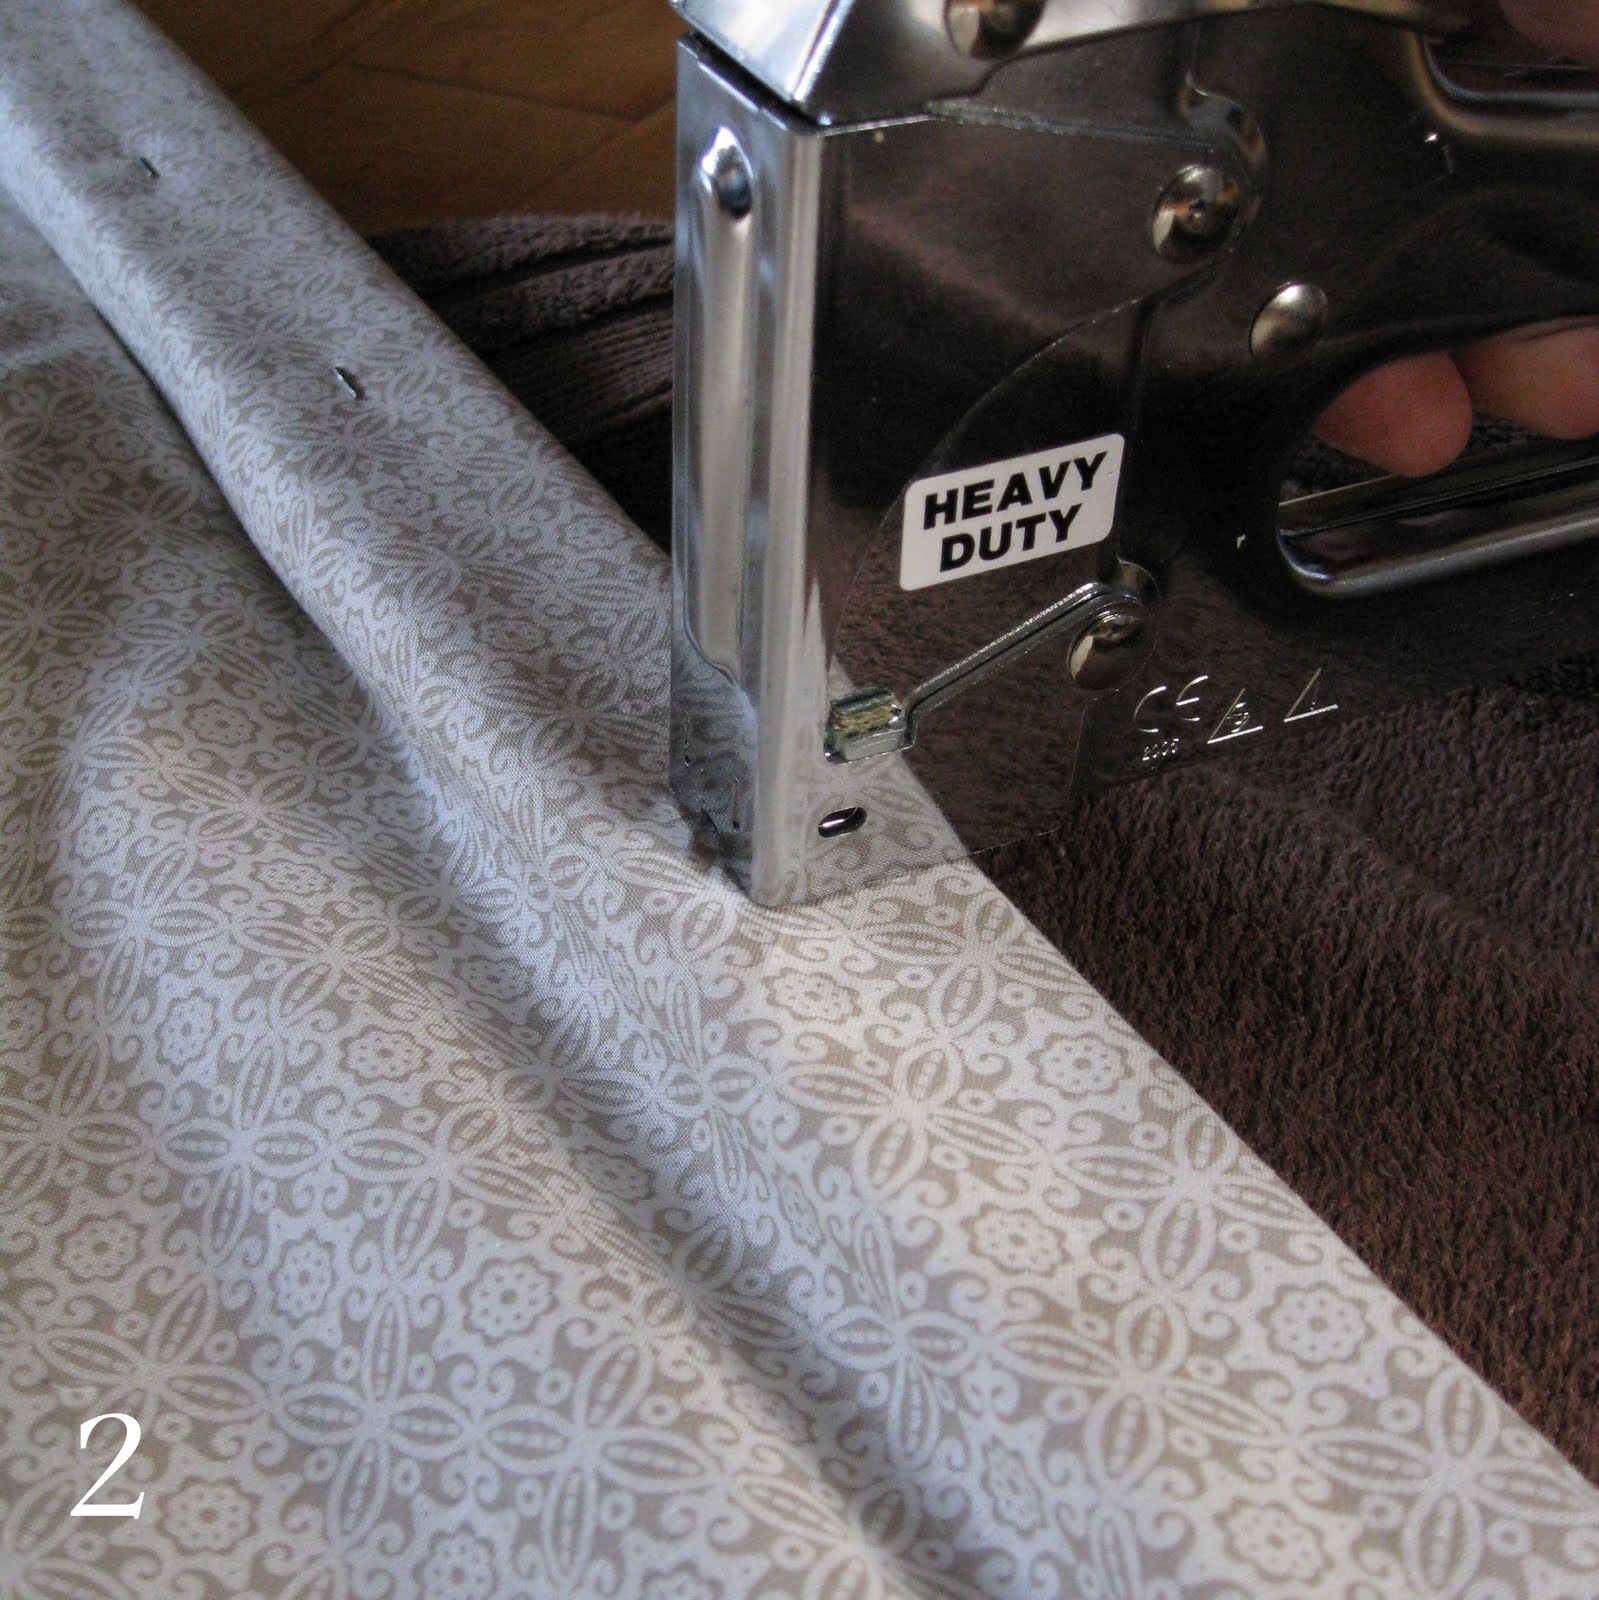
STAPLE! Using your staple gun, afix the fabric to the top of the wood strip.
Remove the pins.
Remove the pins.
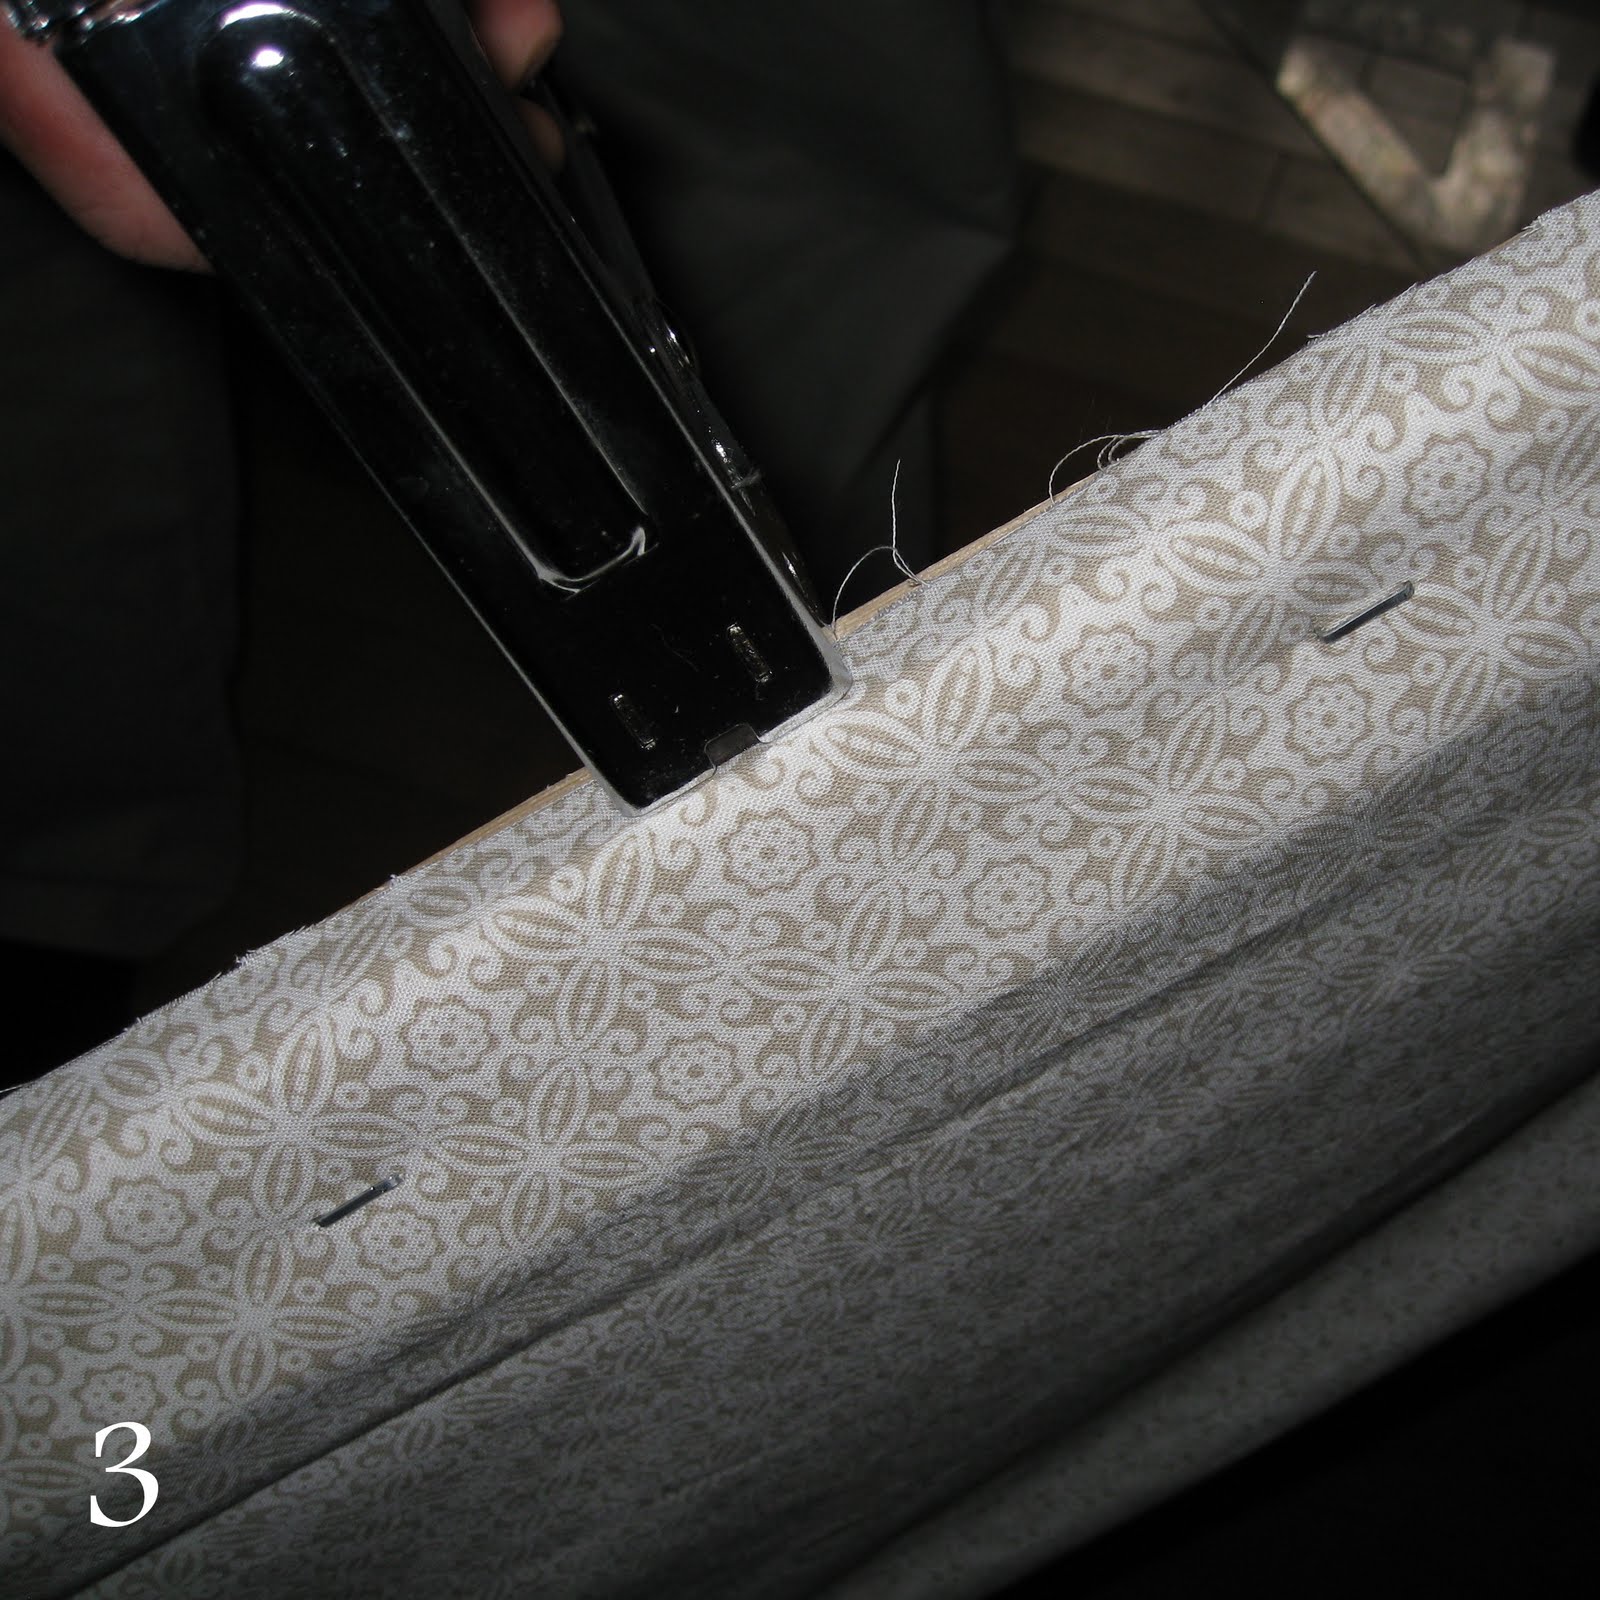
Wrap the fabric around to the back of the wood strip, and STAPLE.
Once that’s complete, trim the fabric.
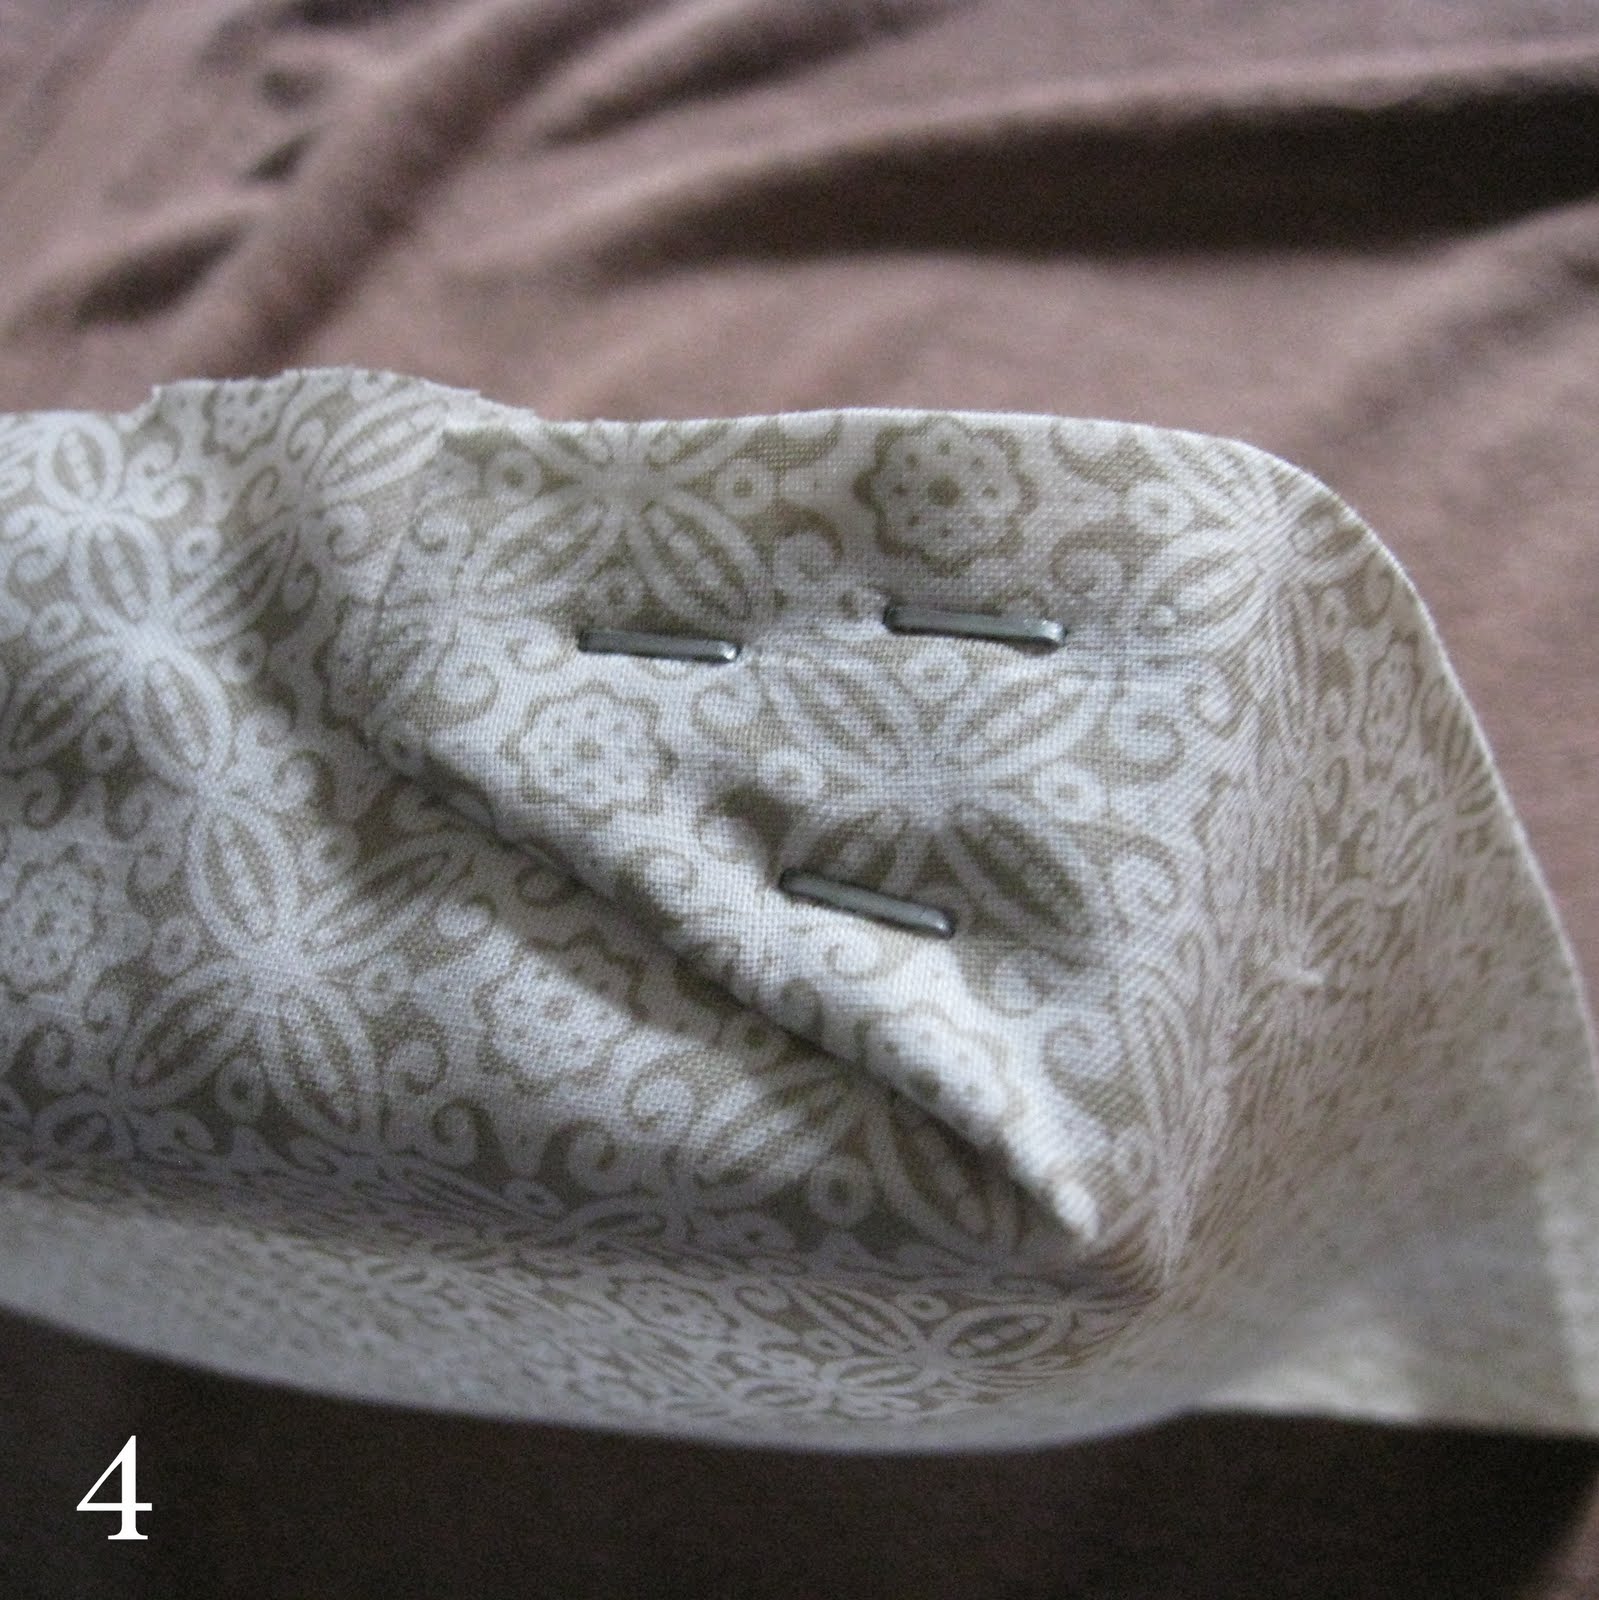
The CORNER! Since the top edge of the wood strip would be against the ceiling, I wasn’t concerned to make it look “pretty”. I wrapped the fabric around the side to create a boxed corner to hide the side / return of the wood strip.
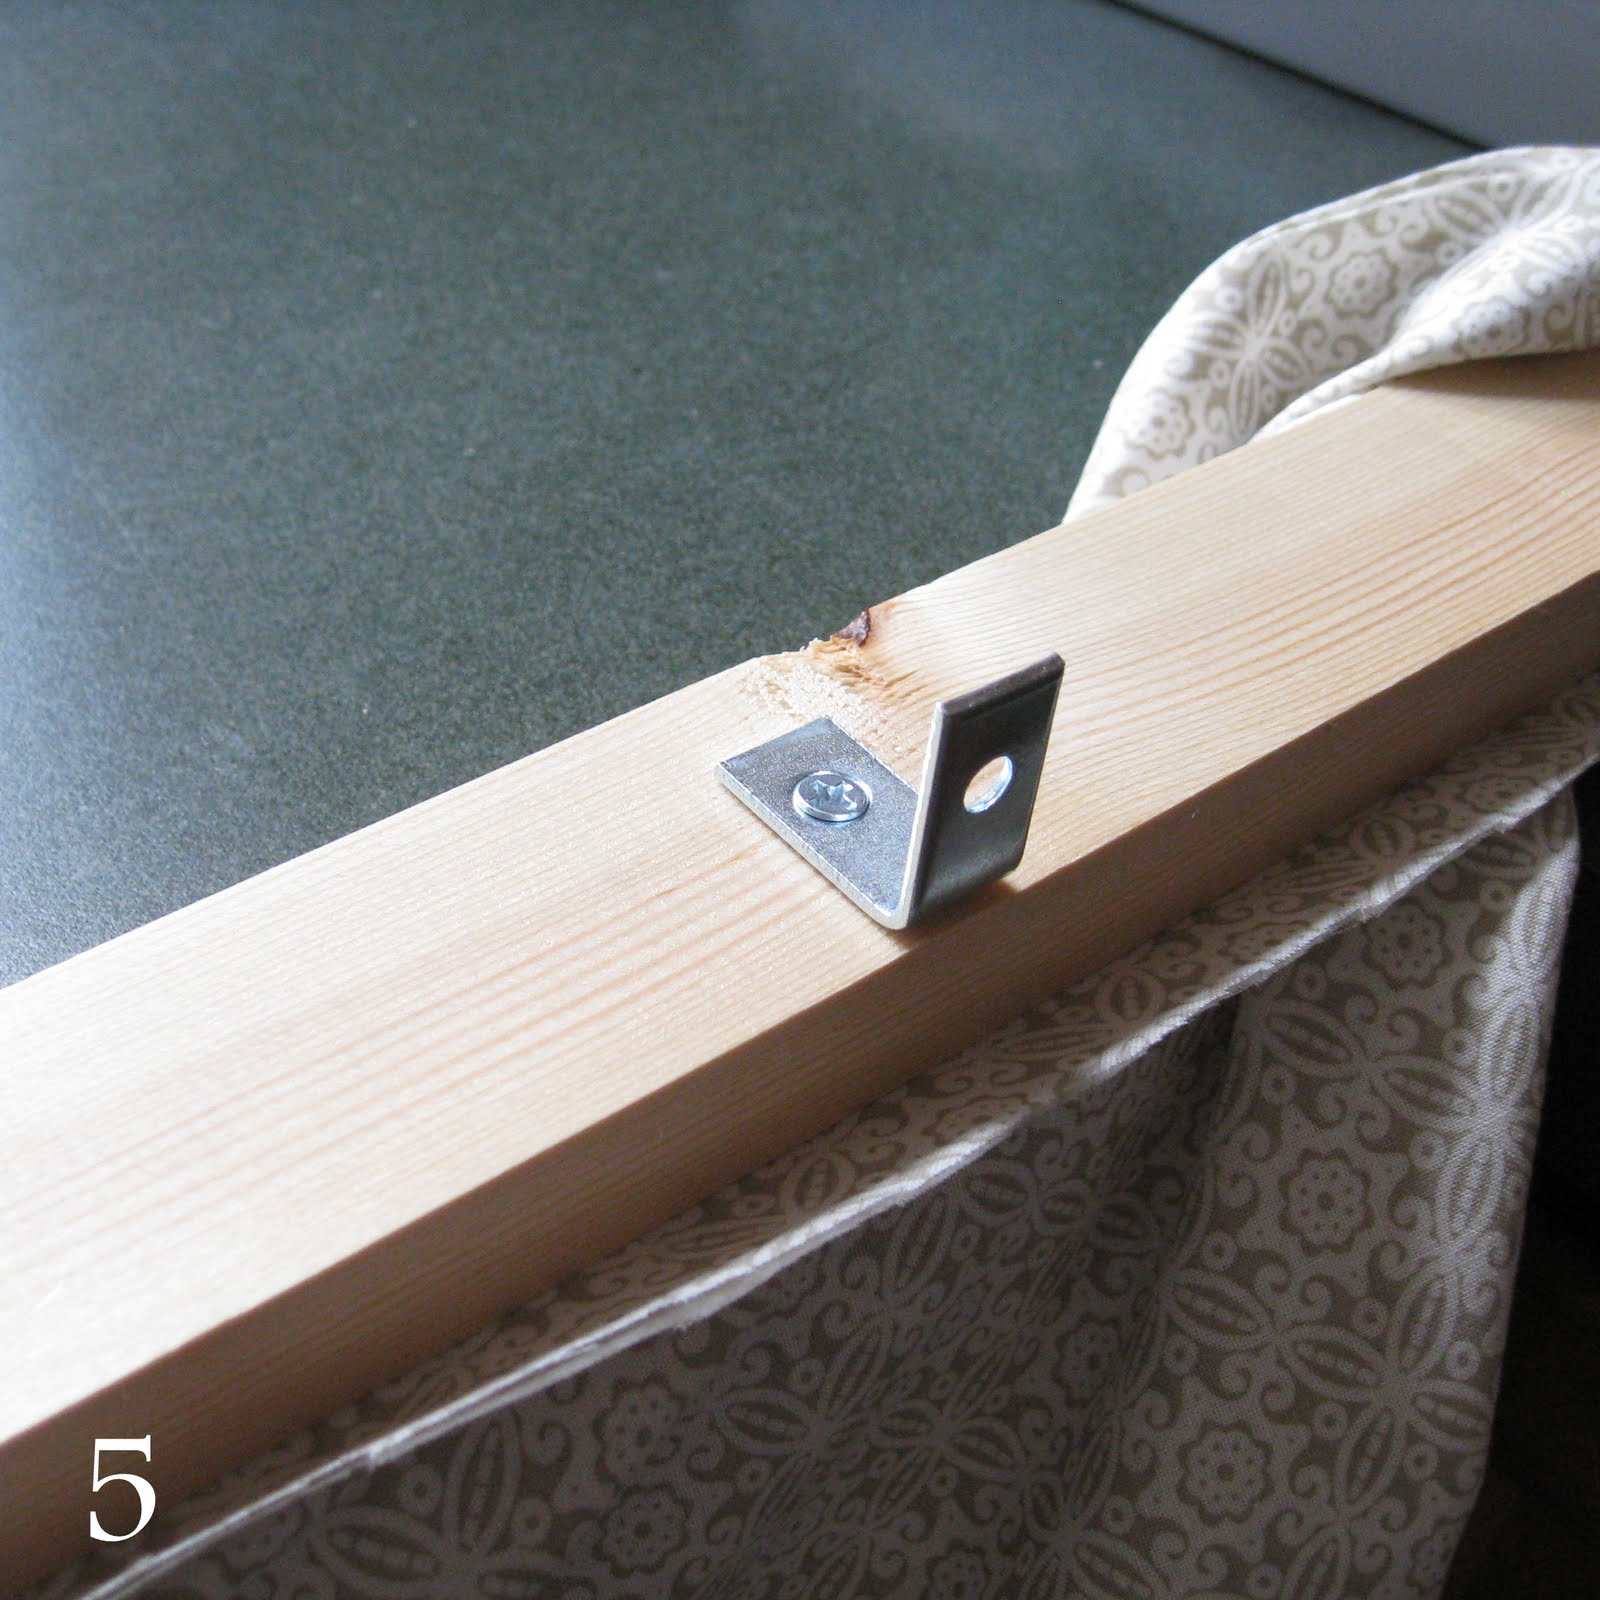
HANGING TIME! Install the ‘L’ brackets to the underside of the valance. Then it’s ready to hang. My window condition was a little tricky and I had to install the valance on the window casing, but it would be best to install it on the wall or against the ceiling. (Hint: Position your window treatment as high as possible on the wall ~ it makes the room feel taller, and also provides close to the same amount of light to enter)
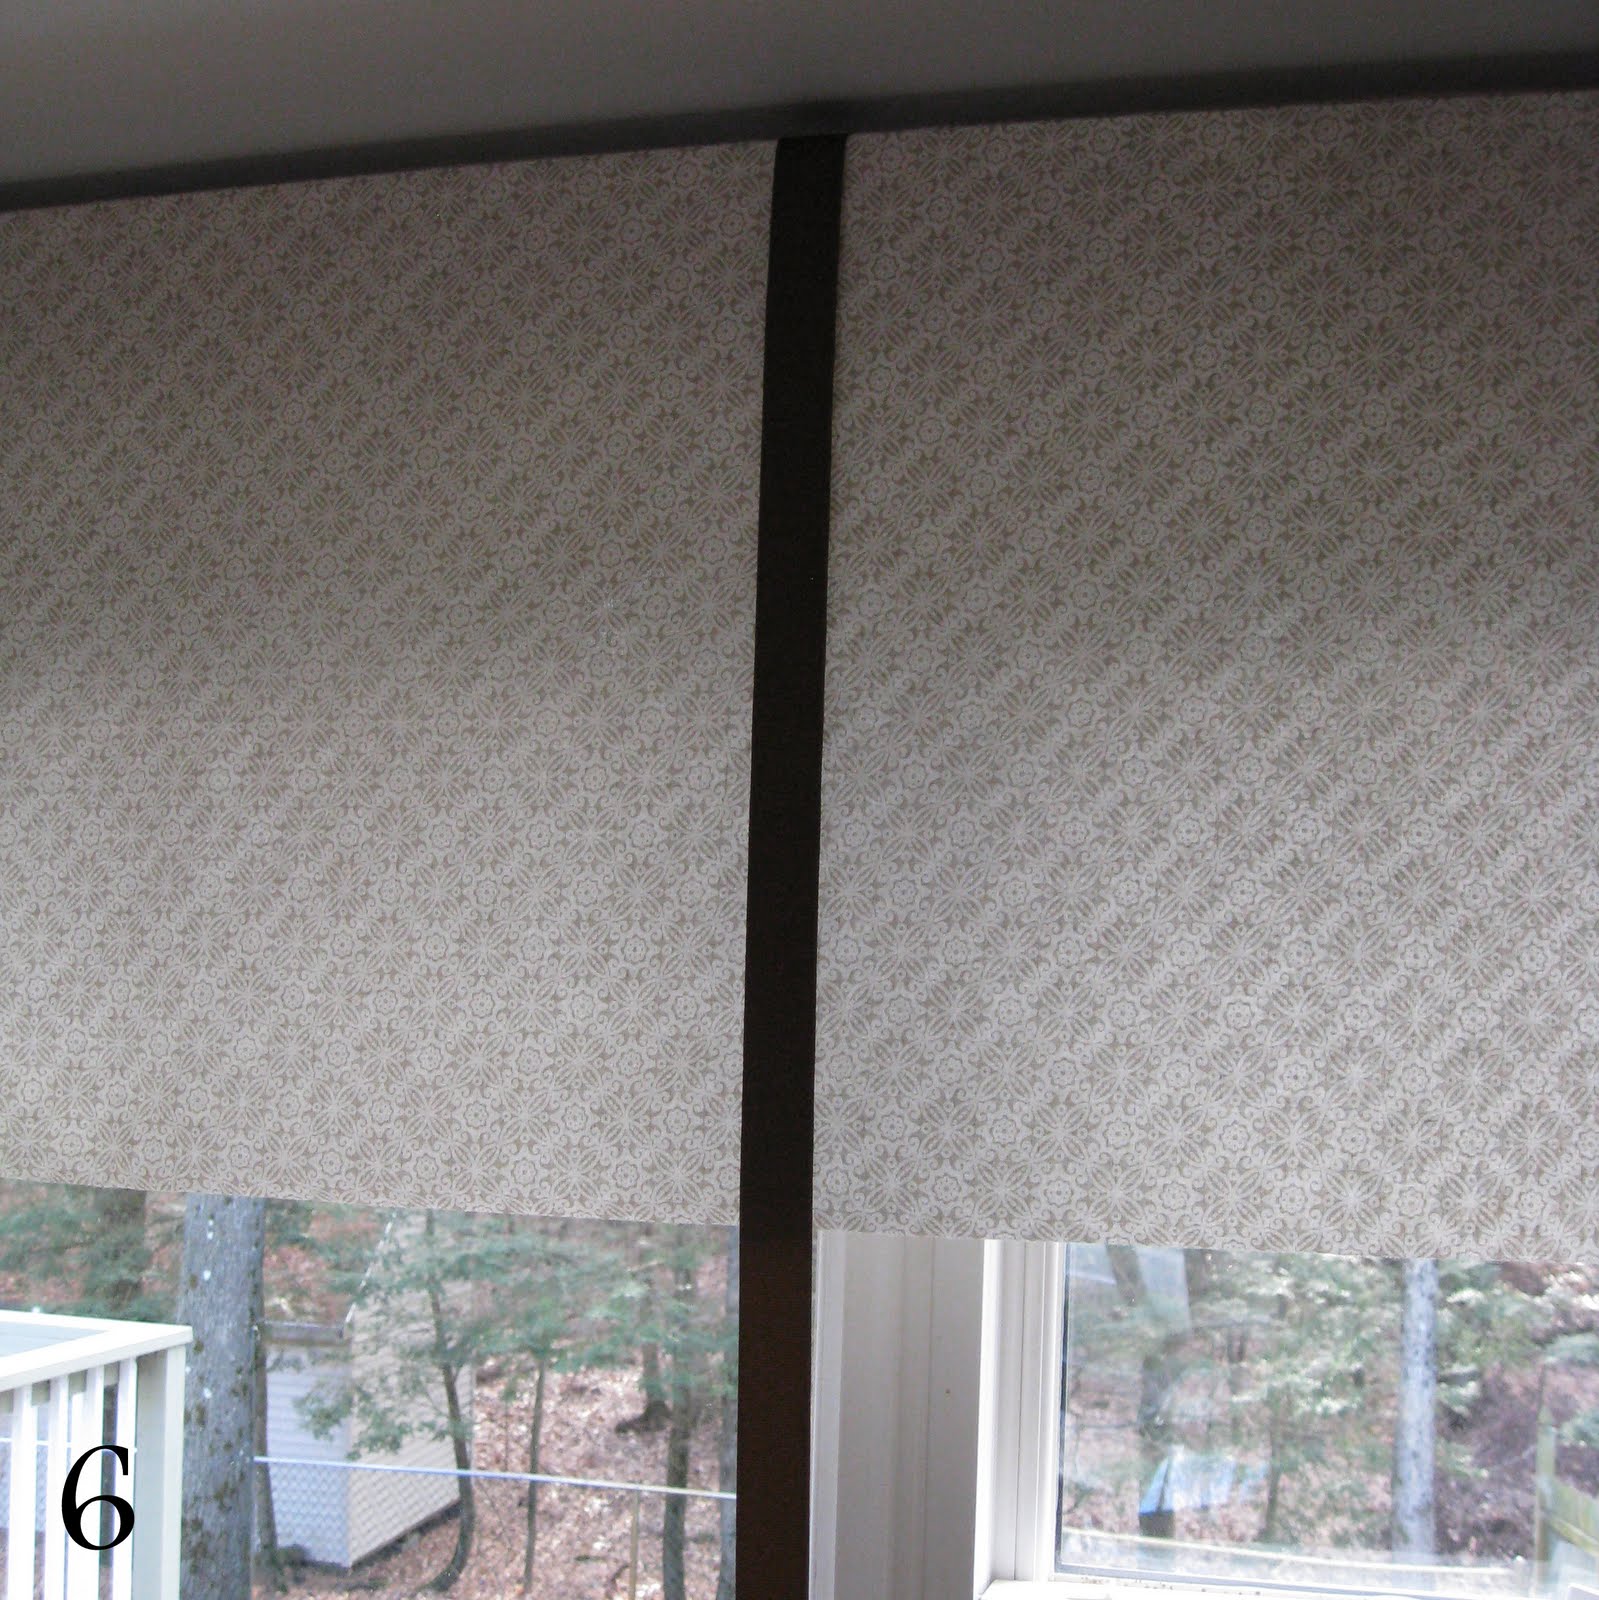
For my valance, I wanted the ribbon to align with the window mullion, so I measured in from the side and stapled one side of the ribbon to the top of the wood strip (This step was done BEFORE installing the valance).
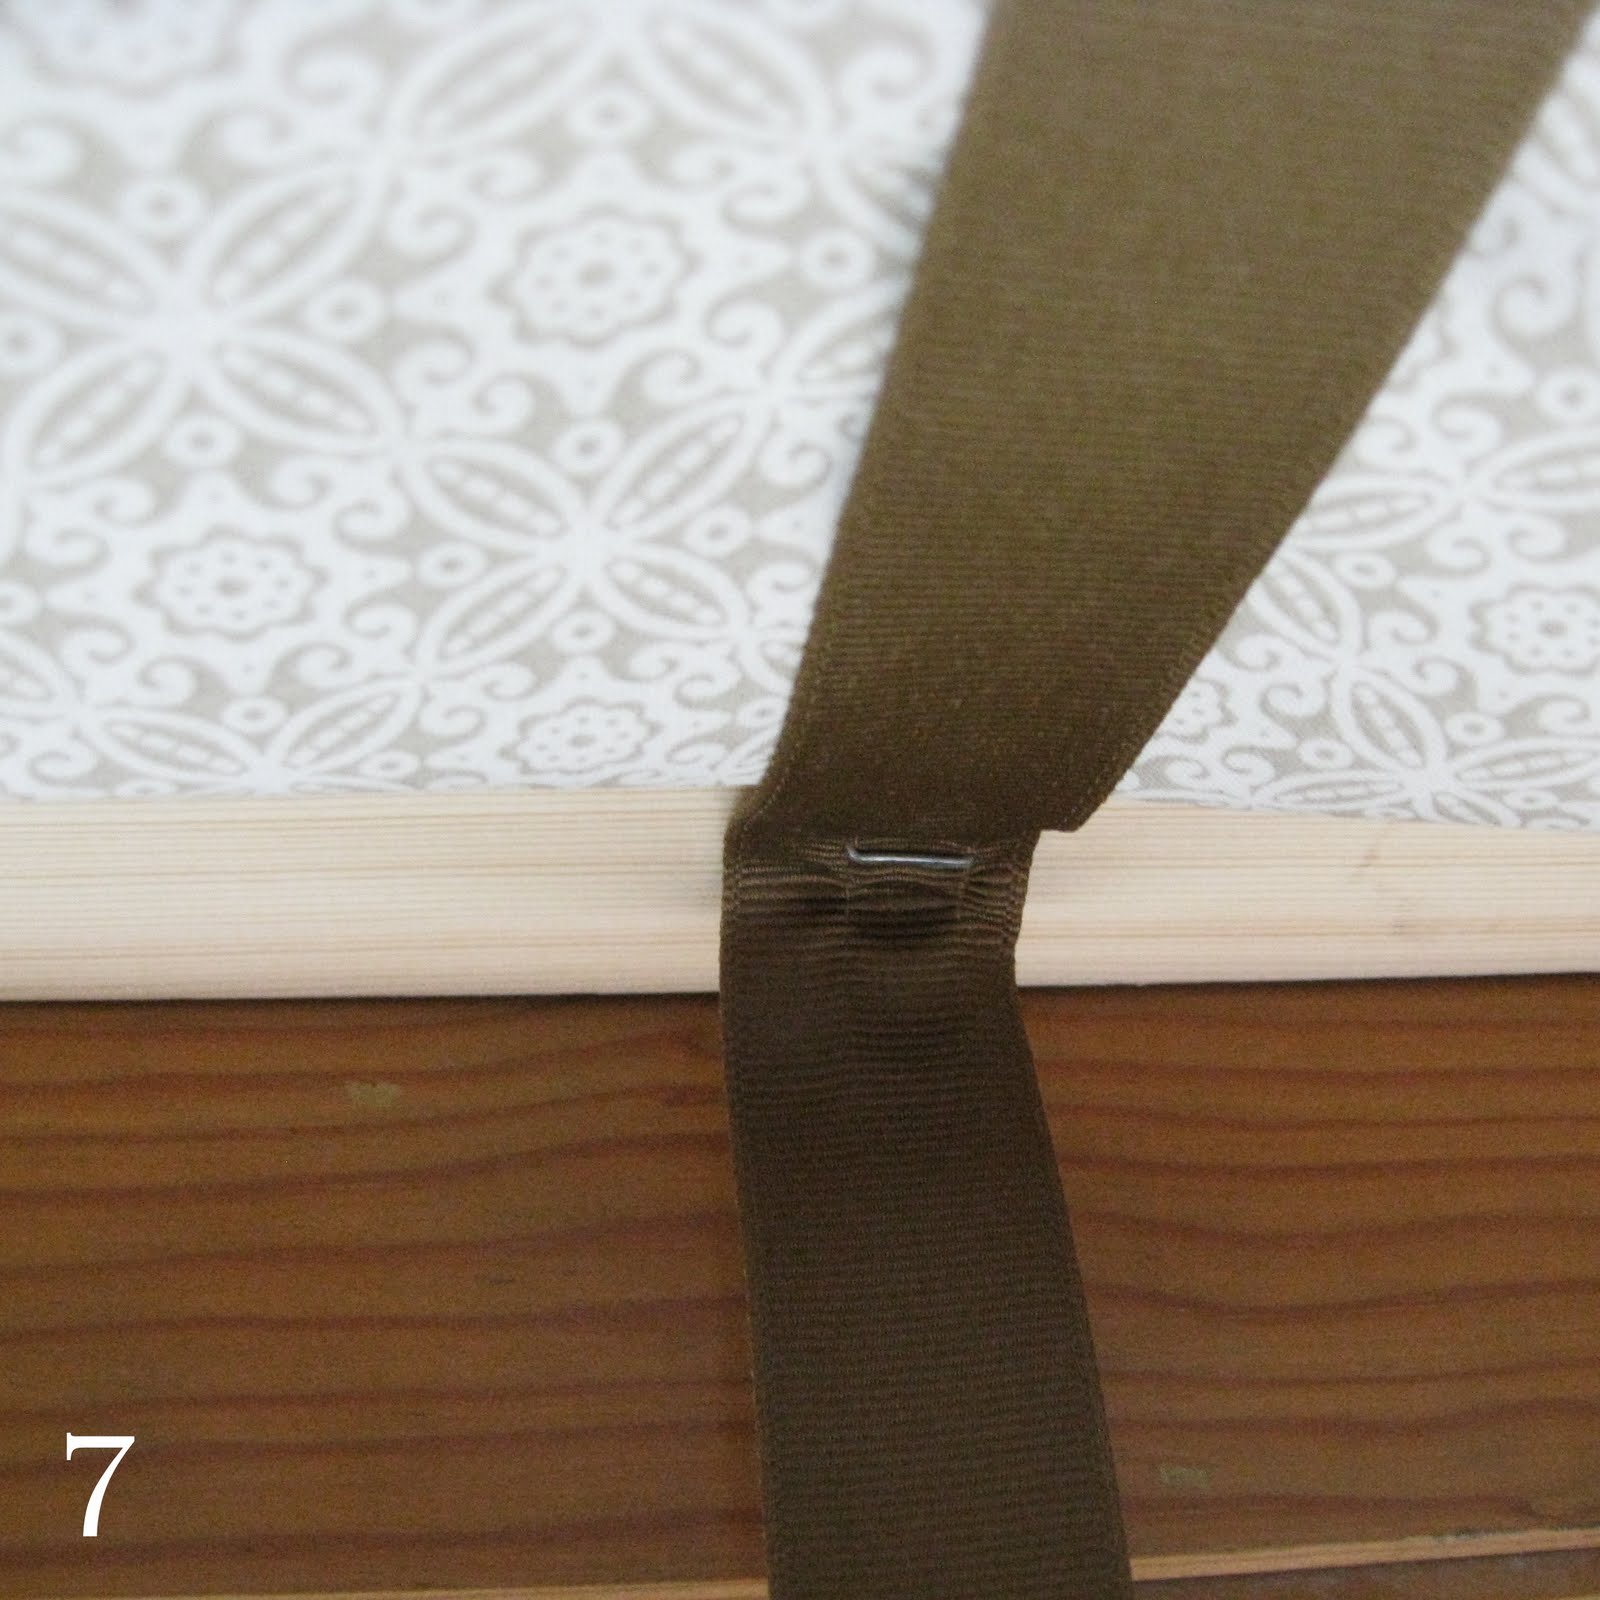
Once I determined the desired ‘swag’ length, I stapled the ribbon on the underside of the wood strip.
{Simple & Sophisticated}


Thanks for checking out my new window valance! This was a fairly easy project, but it’s always best to have a helping hand, especially with a window that’s almost 8′ long, like mine!

Do you have any windows that need updating with new treatments?

You can find my projected linked up to:

Comments are closed.