Month: August 2011

DIY: Personalized Dry Erase Calendar

Last week I shared some inspirational ideas on creating a Central Command Center, as well as my new CCC spot.  One of the features in my newly organized space is the personalized dry-erase calendar that I made.  I had previously purchased a dry-erase board from Tar-Jay, but it was just too small to write all the activities and notes to keep my family on track for the month ahead.

We needed something that had space for our daily schedule, as well as a place for notes, like:
bring books to the library by Tuesday or
pick up the dry cleaning after 6 on Friday or
don’t forget to buy MILK!

Hopefully with this new and much larger calendar, tasks and plans won’t fall through the cracks…


Last week right after finishing this CCC wall, we had some friends over for a bbq.  While enjoying our cocktails, the husband shouts out while pointing to the calendar, “That’s exactly what we need, where did you buy that?”

My response, “I didn’t buy it, I made it”

His response, “really?” … (he totally wasn’t believing it!)

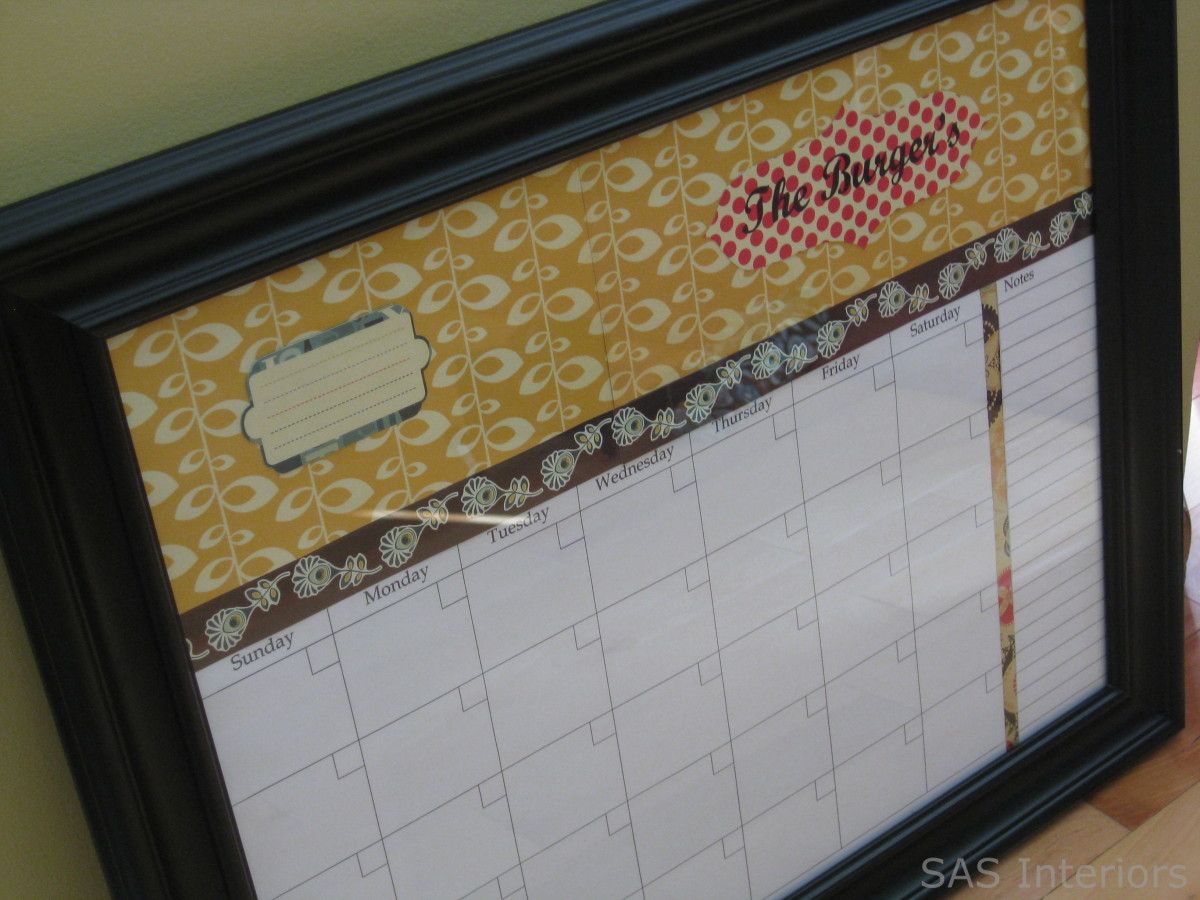
But I really did make it myself and so can you… for less $15! I started off with a 16″ x 20″” frame from AC Moore.  The Portrait frames are always on sale for 40 or 50%, so I scored this for about $13.

At the time of purchase, I wasn’t sure how I was going to pull this calendar together, but I knew I wanted to add some color and pizazz.  I found some pretty scrapbook paper (which was also on sale) for $0.40 a sheet. I loved their modern designs and vibrant hues… a perfect compliment to the kitchen and dining space. (I have a lot of paper leftover, which I will definitely be using for another project!)

Then using the Excel program, I was able to make a calendar and print it on 11 x 17 paper.  I also made a separate sheet for notes.  Using the cells in Excel, it’s really easy to create.  Are you an excel user?  It’s one of my favorite programs to use ~ weird, I know.

Using my good ole’ imagination, along with my pretty paper and magic scissors, I created my personalized dry erase calendar.

To add a bit of personalization, I included our family name – Burger – to the top, using one of the stylish papers and my printer.  No silhouette machine here… ( I would love one though!)

I have to admit, this vibrant red polka-dot paper wasn’t the best choice for writing our name on, but O well, it works.  A quieter background would have been better – you learn from your mistakes, right?  That’s what is great about this personalized calendar… I can continually change the background and it’ll only cost pennies!

Here it is, complete and ready to be used!

After Post Note: I’ve received ALOT of questions about writing directly on the glass.  Just like a dry erase board, a dry erase marker can be used to write on the glass and it’s easy to clean with the felt end tip, a paper towel, or even your finger. DO NOT USE A SHARPIE – that will not erase!

It wasn’t up on the wall for five minutes and was already filled out…

And if you missed my new Central Command Center, here’s a peak and you can read this {post}.

In making this calendar, I was inspired by the personalized calendar that Beth created using one of her favorite go-to resources.  Check out her post {here}. Thanks Beth!

How do you stay organized?  Do you have a ‘go-to’ spot in your home where everything is layed out for the whole family? Do you have a family calendar? or a Central Command Center?  I have to admit, it sure is nice to be organized (at least in one area of my house, ha)!
My New Central Command Center

With back-to-school (well in my case first-time to school since my son is starting kindergarten) around the corner, I wanted to be armed, prepared, and organized for all the papers and plans that will be coming in only a few short weeks.

Creating a Central Command Center has been on my mind for quite some time, and when a wall in my kitchen/dining room area was all of a sudden blank, it was a perfect spot to create this hub-of-the-home.

When visualizing this space, I thoroughly thought through the needs of my family and what we were currently lacking – a family go-to calendar, a place for keys, and all the “stuff” that doesn’t have a home.

In my previous attempt to create a Central Command Center, which can be seen in {this post}, I purchased a dry-erase board that was just too small to fit all the details needed for our daily activities.  This is the wall before and the way-too-small family calendar.

Bye Bye store-bought dry erase board…  Hello to my custom home-made family calendar~

Check back next week for a whole tutorial on how I created this beauty!

I couldn’t just put a calendar on the wall and call it a-day.  I needed more!

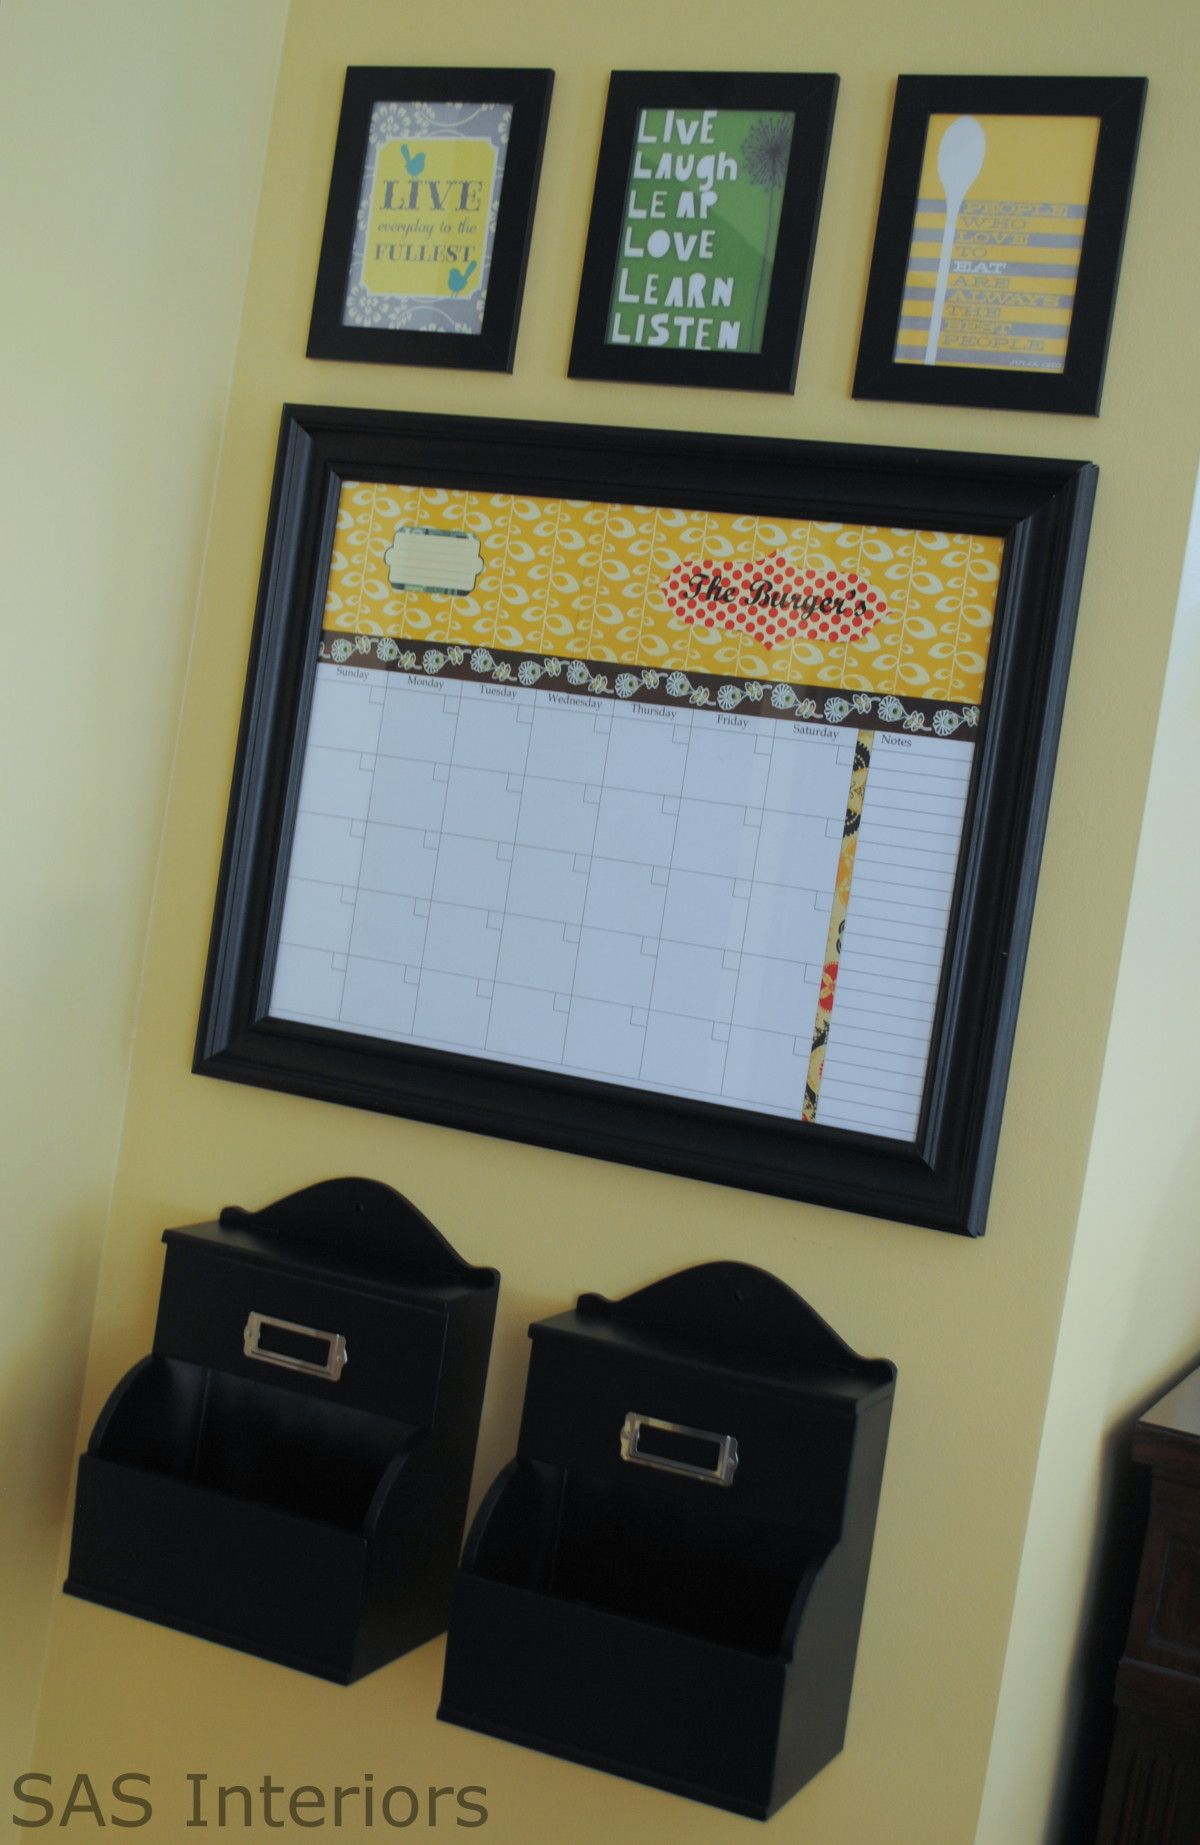
Yes, I needed a spot to put the keys, outgoing mail, digital camera, and all the misc “things” that never have a home.  With this project in my mind for a while, I found these mail caddy’s at TJ Maxx last month and scooped them right up.  At the time of purchase, I didn’t have a plan for them, but since then they’ve gotten quite a transformation.

A little black satin spray paint did the trick to transform these once Sea Shell boxes into sophisticated mailboxes for “The Hub”!

To customize and identify these new mail boxes, I removed the label hardware from an old photo box and used liquid nails to glue the metal labels onto these boxes.  Now I just have to put in a label – ‘his’ and ‘hers’ – and they’ll be complete.  Since these handy mail boxes sit directly under the dry-erase calendar, I added a strip of magnet for the pen… it’s tucked in the corner and will hopefully stay out of sight and reach of little fingers (I hope, but I’m probably wrong).

Another detail added to this CCC, are the framed inspirational pictures above the family calendar.  Aren’t they adorable?!

My go-to place, Pinterest, is filled with inspiration and I found these quotes a while ago and have been saving them for a good place to display.  I love being inspired by great words and this was the perfect spot to see them and be inspired on a daily basis!

I printed them on my computer, cut them, and used simple black Ikea frames, to display them – Art is easy to make!

Before everything went up on the wall, I layed it out on the floor to make sure it all fit and to get the spacing just right.  I also had the intention and need for a cork board, but it got the ax since there wasn’t enough room – I’ll have to put that someplace else.

and here it is…

My Completed Central Command Center

It’s already filled with family events and mail to go out ~

And of course, my son couldn’t resist being in the shot – he used to hate the camera, but now loves it!

It feels great to be getting organized before school begins and I loving having a spot where everyone knows whats happening when!  Check back next week for a tutorial on created a personalized dry-erase calendar.

Have a great weekend!  Any plans or DIY projects in the horizon?

Creating a Central Command Center

If I’ve said it once, I’ve said it a gazzillion times alot…I’m always moving things around my house.  As I’ve mentioned in previous posts, my foyer has been making quite the transformation with repurposed items, along with the newly stenciled wall and glazed cabinet.  With a few moves, there was a wall in my kitchen/dining room that was all of a sudden left empty… Yes, it was blank and something had to be done with it!  A blank wall with nothing on it…that’s sinful (ha)!  I thought and thought…what to do?  what to do? 

Let’s take a step back ~ a while back I had created a central command center by my refrigerator, but it really wasn’t useful.  With much thought, I decided to use this newly blank wall for a new CCC (central command center)!

What’s a central command center, you ask?

Well, I will tell you!  It’s the go-to place for EVERYTHING.  A spot (especially if you have kids) where all the daily details are layed out, where papers are organized, and where there’s a detailed calendar of events so you know where everyone is going at a certain time, on a certain day.  A must need for any home ~ don’t you agree?!

I had alot of thoughts in my head of what I needed and how I wanted to design this space, BUT before I started, I wanted to check around for some inspiration.  Where was my go-to place?  Pinterest, of course!

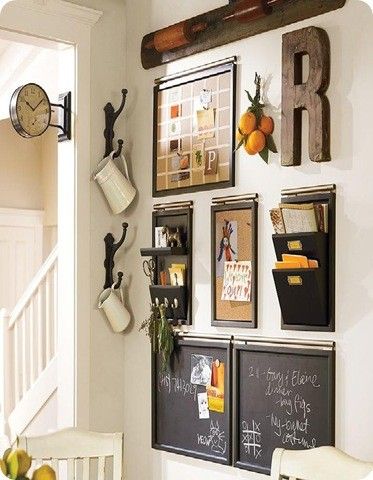
Pottery Barn has some great items to help with organizing your family.  A reader just emailed me yesterday about the picture from this post and it’s the incredible modular system that Pottery Barn offers, that helps pull together any space to create an efficient organzational hub.

Buckets, Baskets, and a Bench… What more do you need to create a central command center?

Isn’t this CCC beautifully layed out and functional?  I really like the idea of having the initial of each member of the family and their information in one place – it’s easy to identify and grab on-the-go!

This Kitchen Command Center created by The Clay Family is a must for any family to stay organized!  With a spot for a daily menu, notes, and kids chore board there is no question of who does what and when…right?!

We all love chalkboard (am I right?) and this CCC that Sarah of The Yellow Cape Cod created is perfect for any large (or small) family.  The daily responsibilities of everyone in the family is simply stated with no questions asked! And I love the quote – “Many Hands Make Light Work” (so true!)

Sometimes a central command center isn’t just for the family, but instead a place where we keep all of our “stuff”.  Candice Stringham created this office/studio/art supply closet to hold all her supplies.  With all the “objects in her office”, now everything has a home.

My kids are young and haven’t been overloaded with homework … YET.  DaNita of Delightful Order created this Homework Bulletin Board for her family, so she can easily keep track of her boys school and activity schedules.  I like how she has added a picture of each of her kids, so their space is easily identifiable.

Two more Pottery Barn spaces that are gorgeously designed.  Great look and fabulous idea for the hub of the home !

House of Fifty (published by one of my favorite bloggers, Janell of Isabella and Max Rooms), a seasonal online magazine has a fabulous article in their premier issue about creating a Command Center for the home.  I love that stylish cork board and just recently made one for myself – I’ll be sharing that soon!

BHG always does it right and has awesome organizational ideas ~ Check out some of their strategies on storage {here}

Lastly (but certainly not least), here’s a sneak peak of my Central Command Center, which I will be revealing tomorrow….

Stay Tuned!

What projects have you been up to lately?

You would have thought after my kitchen makeover that I would have taken a break (that was my intention, but didn’t happen – O, well).  I can’t wait to show you what I created for our new CCC

Kitchen Makeover Reveal

FINALLY the day has come that I can officially say that the kitchen is complete! It feels wonderful to finally make the reveal – you’ve all been very patient and so kind with your comments!  After weeks of project posts and minimal pictures, here it is~

If you haven’t seen the kitchen before, here it is.  The cabinets were an orangey oak color with hunter green laminate on the countertop.  When we first moved into our house about a year ago, we quickly updated the cabinets with new hardware, but left everything else…until now!

Before

When originally sharing the pictures of the kitchen in this post, I was kind of embarrassed.  Now I’m glad to have them because this space has made a huge transformation and it feels so good to say I did it all myself (with a bit of help from my husband too).  With my new kitchen space, I hope to inspire you to know that you can do it too!

Here’s another before ~

Okay, enough of the before… let’s get to what you’ve been waiting for… 

The Process & The Reveal

The process of this kitchen makeover started several months ago.  After contemplating the color of the cabinets and what to do with the countertops (which took forever), I decided to use the Rust-Oleum Transformations Kit in the oynx color for the countertops.  This was the first step taken in transforming the space and that alone made a huge difference!

Then I moved on to painting the cabinets.  Again, it took quite awhile to decide on this color and I love it!  I’m not usually one who likes change and sometimes things have to grow on me, but NOT this color.  As soon as the cabinets were complete, I was in L-O-V-E!  The color is Benjamin Moore Berkshire Beige and the overall tone is a taupe / gray color.  Depending on the time of day though, other hues of blue and green can also be seen.  It’s just so unique and complements the many other colors throughout my home.

Next step? Adding a custom tile backsplash.  I wasn’t sure how tiling over laminate would be, but it worked and the look is fabulous!  The small 1″ x 1″ natural travertine tile has the same hues as the cabinet color and they complement each other beautifully.

Another detail that I added to the kitchen, are faux supported brackets underneath the upper cabinets.  I’ve always loved the look of brackets and chose a profile that was fairly simple and in keeping with the modern sophistication I was trying to achieve for the kitchen.

And there is one more change that I made…I took off the door to the side cabinet to create open shelving.  This space now holds baskets (for my kids plates & cups), as well as some of my cookbooks.

Lastly, to make this kitchen complete, I removed the ugly vinyl toekick (that was falling off anyway) and vent cover.  I replaced the toekick with new ceramic tile (leftover from the fireplace surround) and spray painted the old vent instead of buying a replacement.

You know my love for tiling… it was easy and if you need a step-by-step tutorial to tiling, check out {this} post.

And there you go… that’s it, in a nutshell!  (O, and obviously you saw that we got new appliances as well ~ those old white ones weren’t cutting it anymore).

This is the overall space NOW!

And some little details…

Do you recognize the vase, creamer, and scale?  If you’re a Facebook fan you would ~ check out how much I paid for those and more!

Now we’re ready to get down and finally enjoy this space (and the summer)!

And one more time (I can’t resist) ~

Before

Now

So what do you think?

What projects, transformations, and/or DIY projects have you been up to this summer?

I am sharing this post on:

A Favorite Summer Dish

Despite the summer being more than half way over, I couldn’t resist sharing my favorite summertime dish, Fresh Vegetables & Pasta.

It’s SO simple, yet SO scrumptious!

With all the fresh produce from my local farmers market, this dish is a winner in my house!  With just a few ingredients (and alot of love), this meal is light, refreshing, and O so yummy!

I love this dish because you can add anything you like… Clean out the refrig and add your favorites!

My vegetable preferences are: Onions (I like red because they add a pop of color), Squash, Zucchini, Peppers (red, yellow, and/or green), mushrooms, and garlic.

Simply add a tablespoon of olive oil to a hot pan, and throw in ALL of the vegetables.  Some more olive oil can be added if needed as the vegetables are cooking. You want them to grill, but not burn for about 8 minutes….

Once the veggies are done, toss them with any type of pasta (I prefer whole wheat penne or rotini style)… Add some olive oil to coat the pasta and vegetables.

Serve in a beautiful bowl and top it with a little parmesan or romano cheese….

Lastly, pair it with a light summer white wine, and dinner is complete!

This delicious summer meal is so easy to make for 2 or 12.  Enjoy!

Kitchen Makeover Phase Four: Creating an Open Cabinet

You’re probably saying to yourself…”Isn’t she done YET?”  Who takes this long to redo a kitchen.  Well, between work and summer activities with the kids, my kitchen makeover has definitely been dragging.  And being away this week, hasn’t help matters.  But I can promise you, the FINAL REVEAL will be very soon!  I pinky swear!!

Before I left, I made another change to the kitchen that I am very excited about.  In the ‘before’ kitchen, I had a baker’s rack with baskets that housed alot of misc things.  I didn’t think it meshed with the look of the ‘new’ kitchen, but I still needed a place to put the items that were in the baskets.

So I came up with this solution ~

Here is how the cabinet looked before~

Then I painted it~

After much thought, I decided to make the side cabinet open and removed the door (the previous home of all the cleaning supplies ~ hmmm…where am I going to house them now?).

I painted the interior~

And it was done!

I found the perfect baskets at Tar-Jay (I splurged ~ they were $12.99 each) for the two top shelves and designated the bottom shelf for some of my cookbooks (which add a pop of color to the space).

And here it is ~

Because this upper cabinet sits by itself, it seemed perfect for this type of transformation.  Of course, I wouldn’t throw out the door….I’ve got another project up my sleeve for that 🙂

So I promise, I will definitely be making the FINAL REVEAL very soon!  I hope you’re having a wonderful week!!