Year: 2011

DIY: Child’s Play Kitchen

Aside from blogging, working, and being a mom and wife, I have spent every waking moment of my spare time over the last two weeks, making this…

I didn’t buy it this way.  I made it! I actually can’t believe it myself.  This is what I started with – a wood nightstand with two drawers.

My daughter turned two last month and she really loves to play with pretend food, so I searched and hunted for a play kitchen for her birthday.  I  found a few I liked, but they were either too expensive or too big, so after some thought, I decided to make one on my own.  I DIY everything else, so I was up for the challenge.  In searching for real kitchens on Pinterest, I came across a few pretend kitchens.  Using some ideas that I had seen, and knowing the desired size I was looking for, I’ve been on the hunt for a nightstand for quite some time.  Thankfully my mom came to the rescue a few weekends ago and brought me this beauty.  It was actually difficult for me to transform this nightstand because it was in great shape and looked really nice.  But that thought went out of my head in 5 seconds!  In no time, I was off and working…

What’s great about DIYing, is that you can search for inspiration, and then add your own unique creativity, to make a one-of-a-kind piece.  To make a play kitchen there are a gazillion things you can do and include, but hopefully with my creation, I’ll inspire you to make your own.

That being said, I will spare you the {play by play} details, and instead show some highlights throughout the process.

Thankfully for my anniversary, the mister got me some new tools, and ALL of them came in handy for this project!  I started off sanding the nightstand with an orbital sander.  Once it was nice and smooth, I applied one coat of primer, followed by using my new jigsaw to cut our the hole for the sink.  {MISTAKE} I should have made ALL the cuts and holes before I painted, because what happened?  The dust got into the paint (but, of course).  No problem though, I just sanded the surface one more time.   Mishaps can be rectified!  And there’s a sneak peak of the paint.

Moving on… 

I made a tall back piece out of MDF board and used “L” brackets to secure it to the nightstand top.

Then came the paint.  I chose to use a mustard-yellow hue with a touch of green undertone – Valspar Wasabi. Then the accents of burnt orange and deep purple (sounds kind of like the rest of my house, doesn’t it?).  To make the paint dry as smooth as possible, I added Flood Floetrol (also used in my kitchen makeover) which is a must when trying to achieve a smooth, even finish.

At this point, I was spending many hours in the garage and I’m sure my neighbors thought I was crazy!

I completed the painting phase of the kitchen, by adding two coats of satin Polyurethane.  Once the paint was finally dry, which took longer than I thought because we had some ultra humid days, I was ready to add the details.  To create the backsplash, I used leftover scraps from the personalized calendar and added a few coats of Mod Podge to harden the surface.  Then I finished it off by adding a decorative scalloped edge wood piece at the top.

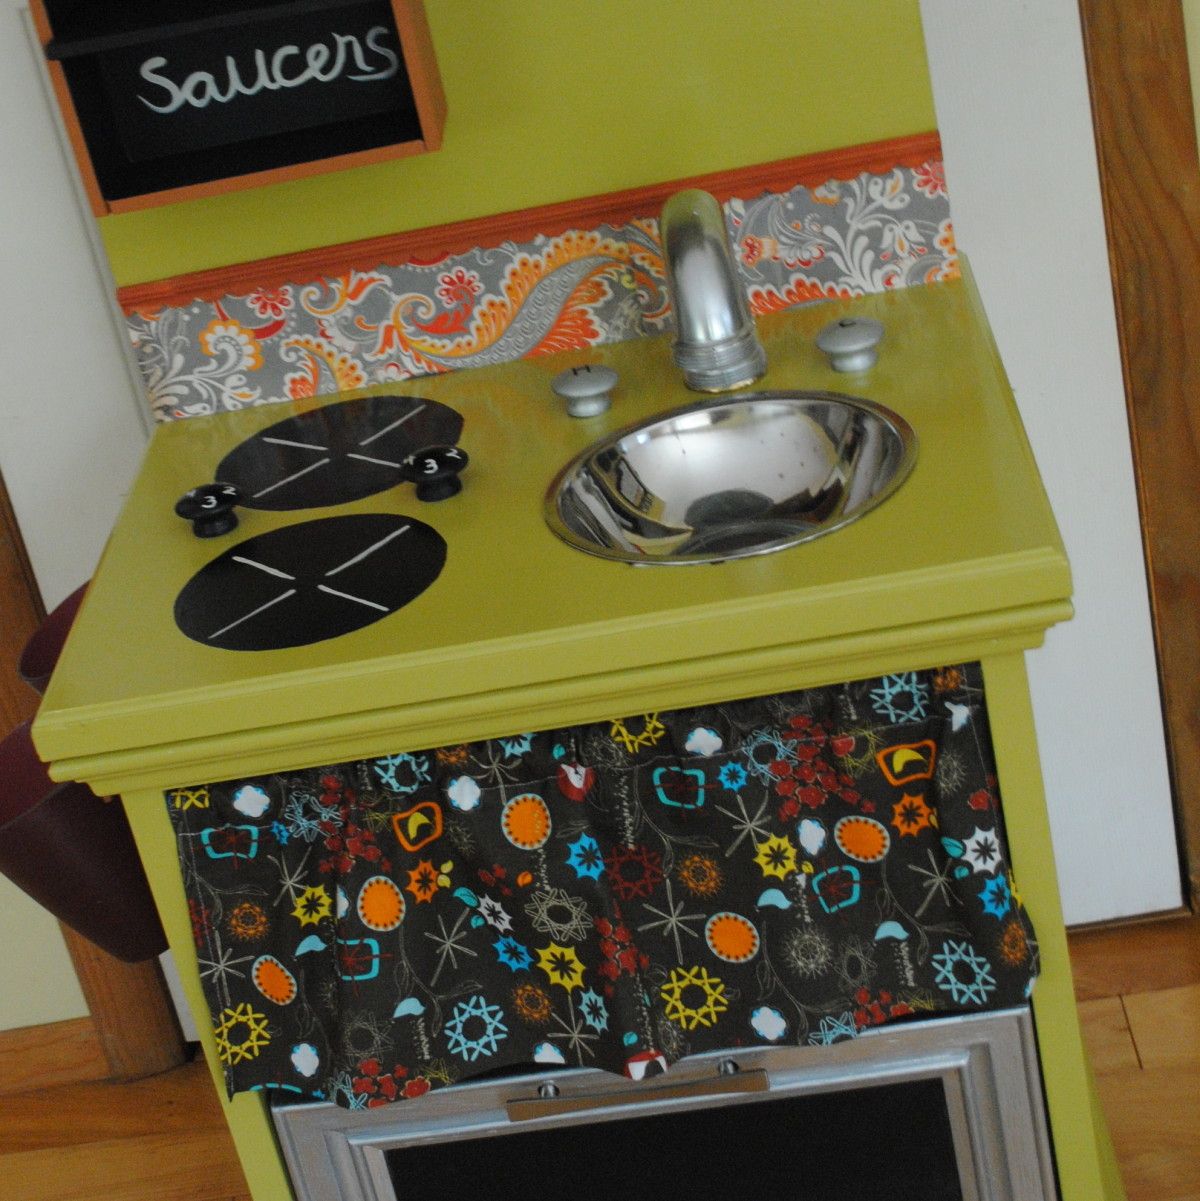
Then came time to create the burners.  Using a round kitchen bowl, I outlined two circles and filled them with black chalkboard paint.  Right before that, I drilled the holes for the sink faucet handles and the burner handles (learned my lesson from last time… drill, THEN paint).

Once everything was dry, I attached the faucet handles and burner handles to the top of the kitchen by using screws from underneath.  By not tightening the screws too much, the handles can actually turn.  Then with white paint, I free-handed the burner coils and numbers on the burner handles, and added the H & C with a black Sharpie.

This is the work surface area of the kitchen all complete.

And the last part to this kitchen was the faucet.  That was a little tricky, because the mister and I were perplexed on how to fasten it onto the kitchen top.  If you remember back a week ago, I showed you this picture~

Yes, that is a P-Trap for the bathroom and using a little metallic silver spray paint, it transformed into a sink faucet.

For the “oven drawer” I also used this same spray paint and the black chalkboard paint in the center.  Looks pretty real to me.  Wouldn’t you say?  And then completed the look with a quick hand-sewn valance that sits in place of the top drawer.

What’s really nice about this kitchen is that it has ALOT of storage.  All their play “things” can be hidden away.

This is the result of the kitchen.  After many long days and endless hours, it really was a joy to create!

And one last time just to show you again where this cute little kitchen started…

This is different than the typical Interior Design and Decorating ideas and inspiration that I like to share on my blog, but it was fun creating something that is a little more “out of the box” for me.  I hope you enjoyed!
5 Minute Autumn Centerpiece

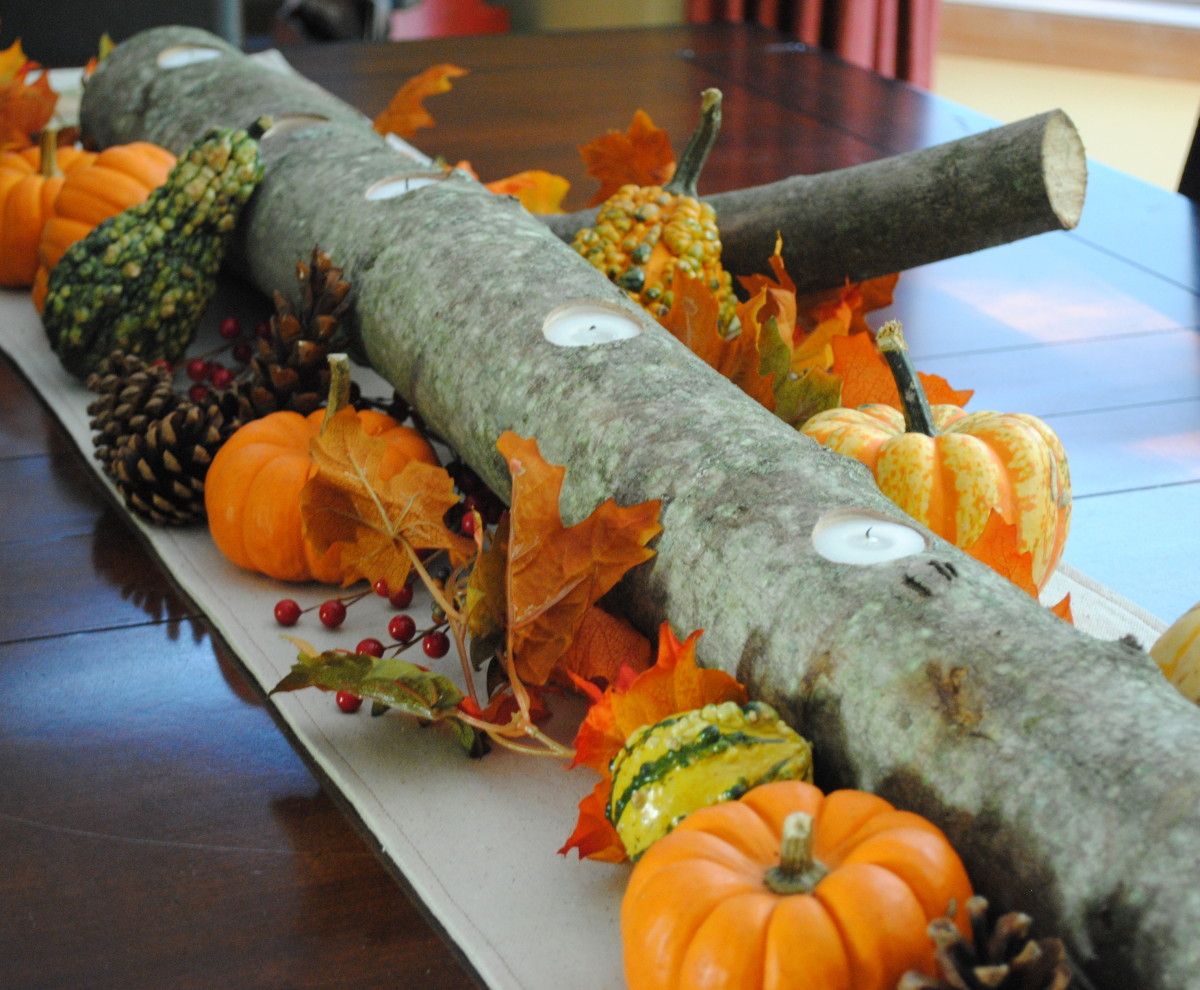
This past weekend when I got my DIY groove back, I made a centerpiece for my dining table that literally took less than 5 minutes and cost nothing!  The pictures, staging, and post took longer than the actual project.  Thankfully I am SO pleased with the results and now my dining table is complete for the Fall season.  Here’s a sneak peak of the final outcome, but let me take you through the steps so you can make one for your table!

Log Centerpiece that takes minutes to create and can be used for so many holidays & occasions!  Designed by @Jenna_Burger of www.sasinteriors.net

A few weeks ago, while going for an evening walk around the neighborhood, there were a pile of cut down trees on the side of the road ready for the next day’s garbage pickup.  I couldn’t stop myself, and ended up grabbing this 4′ beauty and piled it into the Radio Flyer wagon along with the two kids (the remainder of the trip home sure was tight for the kiddos).

As soon as I set my eyes on this log, I knew exactly what I wanted to do – make a centerpiece with tea lights.  I envisioned a simple, yet sophisticated backdrop that can be updated and changed throughout the seasons and holidays!

Unfortunately, it sat and sat in my garage for too long.  Then this weekend, my husband FINALLY got a drill bit that was large enough (1.5″ diameter) to drill into the log to create what I was desiring – My centerpiece creation was finally coming to fruition.

The mister and I drilled 6 holes about 10″ apart, and it was done!  Finito!!  It was that easy and it took less than 5 minutes to create this beautiful centerpiece.

And here it is.  Complete and shining bright!

So simple, yet so beautiful!

I had planned on putting it on my dining table and leaving it alone.  I thought it would “speak” for itself and it’s organic appeal would shine.  I still plan on doing that since we eat at this table everyday, but I also wanted to see how it would look all “dressed up”.  Soooo I took some of the Fall decor from the other vignettes I created and embellished this new log centerpiece.

I surrounded the log centerpiece with varying sizes of sugar pumpkins, pinecones, berries, and artificial leaves – perfect for a Thanksgiving table!

I was so happy to finally get this project complete and I love how it turned out.  How do you decorate your table for Fall?

I link to these parties: Cottage Instincts, Skip to My Lou, Dittle Dattle, Between Naps on the Porch, Today’s Creative Blog, Stories of A to Z, The Lettered CottageAll Things Heart & Home, Savvy Southern Style, House of Hepworths, Shabby Chic Cottage, Finding Fabulous, Creation Corner The Shabby Nest, Tatertots and Jello, Funky Junk, Under the Table & Dreaming

Trash to Treasure: Nursery Lamp Makeover

It’s always fun to make treasure out of trash!

A few weeks ago I was visiting a friend and sharing with her my experience on revamping a recent lamp project.  In turn she said she had acquired a lamp that was from her husband’s childhood, but had no idea what to do with it.  After a trip to the basement to scrounge through a few boxes, she came back with quite the “trash”.  It really wasn’t trash, it was just in desperate need of a makeover to give it new life.

To keep it in the family, her desire was to put it in her son’s room and I had the perfect idea!

Once I got the lamp home, I took it apart from head to toe and snapped a picture, just in case I forgot how to reassemble it later.  The lamp needed to be rewired and since I had just finished my How-To Rewire a Lamp tutorial, I was experienced enough to make the proper updates.  As you can see from the before pictures, the brass had tarnished from age and the colors were drear and in need of a revamp.

I started off by hand sanding each part of the lamp to give it a fresh start before painting.  The horse was a little tricky to sand, but I was able to get into some of the grooves…

Armed with “my staples” (not real staples, I mean spray paints), I was ready and off to transform this little horsey!

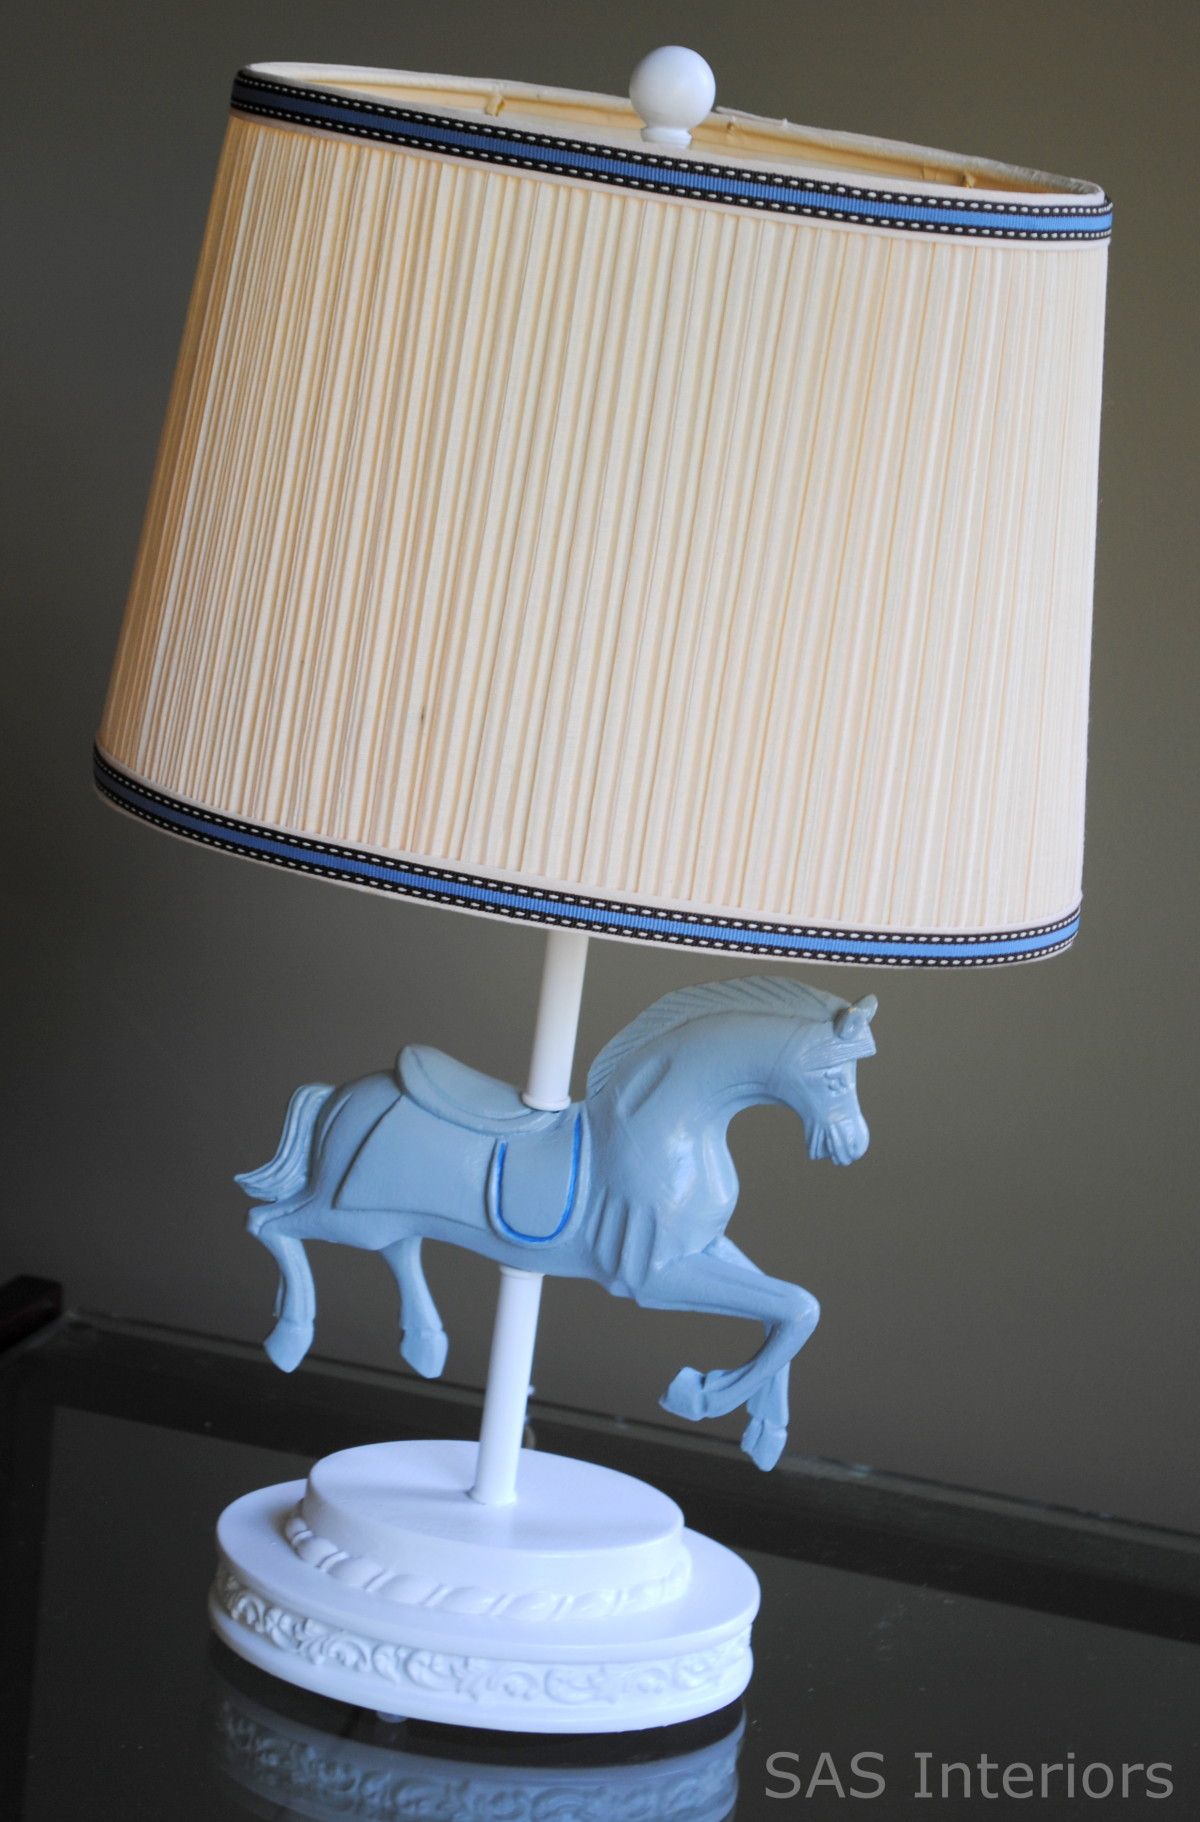
Ba-bye colored horse – Now you’re going to be a horse of a different color.  I spray painted the horse with 3 coats of Rust-oluem Winter Gray (same color as my lamp revamp), the other parts of the lamp (base and tubing) white, and finished it with a top coat of crystal clear enamel.

I had mixed feelings about the lampshade.  I actually had planned on replacing the old shade with a new crisp, white style.  I even bought a new one but it didn’t seem to be the perfect fit.  The existing shade was oval shaped to match the lamp base.  So I said, O heck with it, let’s reuse the shade and simply dress it up by giving it new life with a stylish ribbon.

Before being completely done with this Lamp reVamp, the horse was missing something… he needed a bit of color, so with a small brush and cobalt blue paint, I outlined the edge of it’s saddle to add the perfect finishing touch.  And then…

… it was done!

Again, here is the before…

And here is how the trash was turned into treasure…

Thankfully my friend LOVED the lamp and was so happy to add this new treasure to her son’s bedroom!  What treasures have you made from trash?

Fall Wreath with Fabric Flowers

Fall is right around the corner and what better way to celebrate a new season than to don a new wreath on the front door.  The front door is often thought of as the “mouth” of a home, the entry point of comfort, happiness, and where great opportunities begin. For me the front door, signifies the “entrance of”, so let’s enter this new season with my new Autumn Wreath.

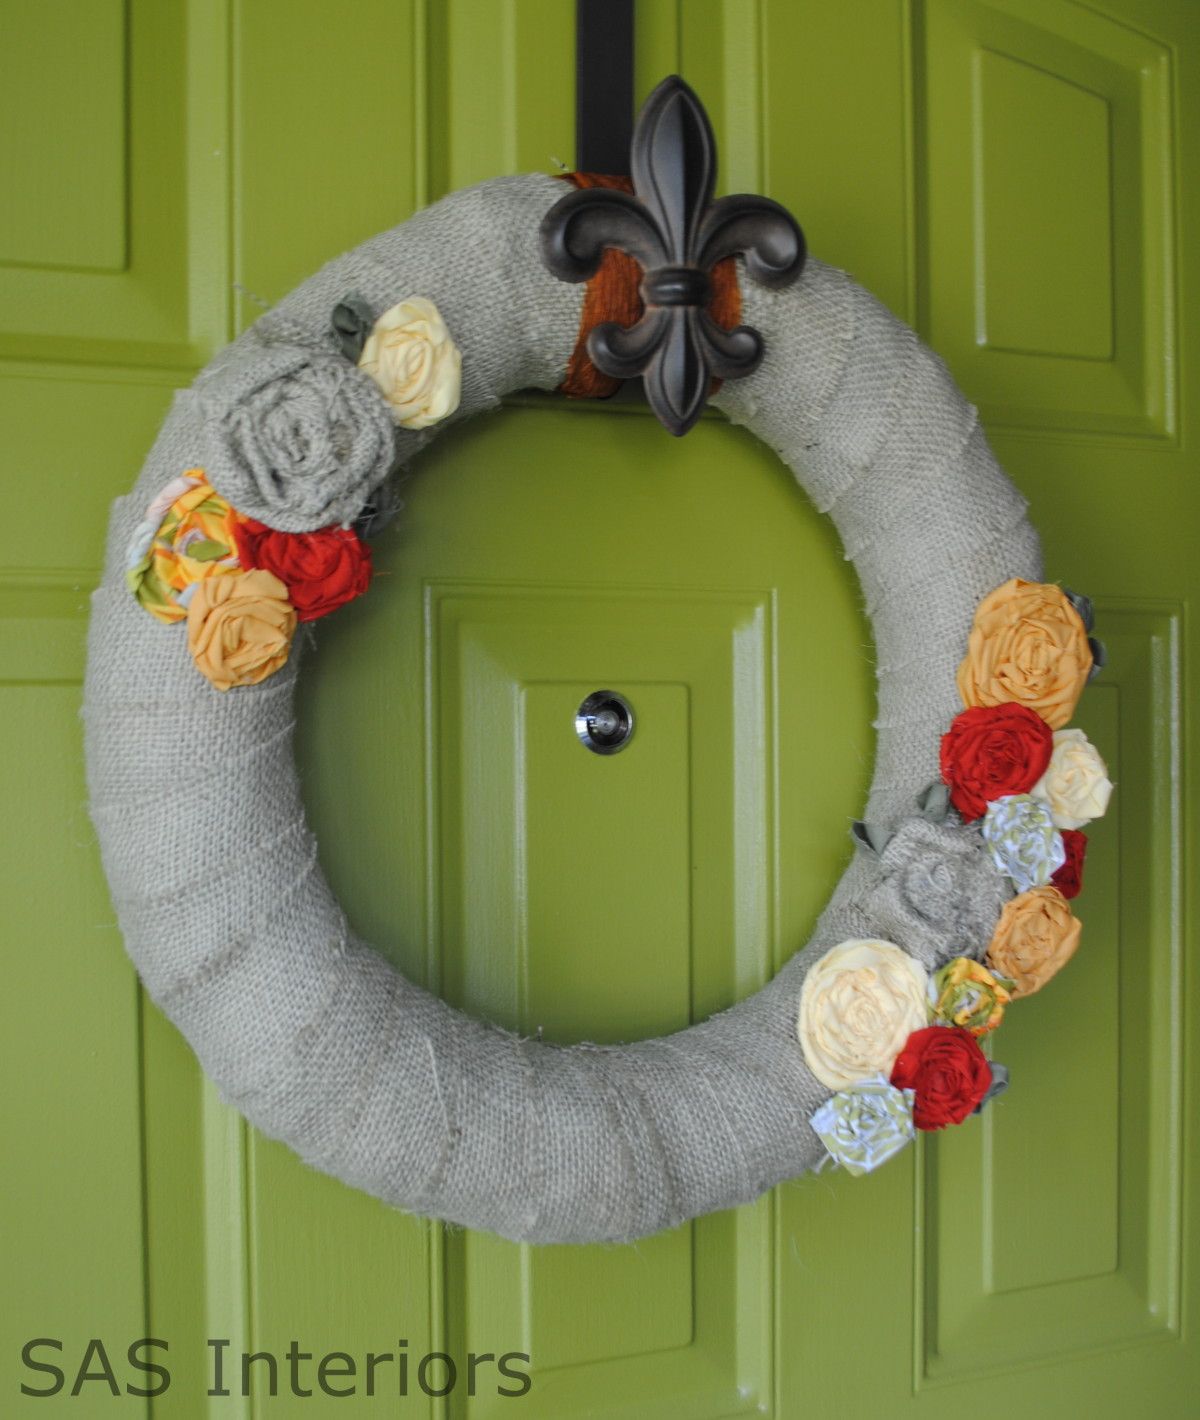
I loved last year’s wreath because it was different and unique, but for a long time, I’ve wanted to jump on the bandwagon and make a burlap round wreath with fabric flowers.  I was going to make this style wreath in the Spring, but made another wreath instead. So finally the time came, when that wreath came down and this new colorful one went in it’s place.

1. To start off, I purchased a round straw wreath from AC Moore which cost just under $3.  (FYI: I left the plastic cover on)

2. I dismantled my Valentine Burlap Wreath and used the burlap from it, to create this wreath.  I was a little tired of that wreath and plan on making something new and different for next V-day.  But I still have the felt flowers and plan on using them again somewhere on something!

If you are starting with new burlap, cut 3″ wide strips (the length doesn’t matter).  Dab alittle hot glue on the back side of the wreath and wrap the burlap around, creating an overlapping pattern (see picture) .  Then again,  dab alittle hot glue on the back of the wreath to complete and hold the burlap strip in place.

3. Continue wrapping the burlap around and around and around (don’t get dizzy…), until the entire wreath is covered!

DONE! Onto creating the fabric flowers…

How-To Make Fabric Flowers

4. Cut 1/2 – 3/4″  strips of fabric. The length of the fabric will depend on how large you want the flower to be.  I created varying sized flowers to give an overlap effect – keep on reading to find out what I’m chattin’ about…

(fuzzy picture sorry 🙂 – I was working on this project kind of late into the evening)

5. Starting from the end of the fabric (which will be the center of your flower), twist and bunch it together, while wrapping it around and around. After about 2 turns, dab alittle hot glue to hold it together.

6. Continue twisting and bunching around and around, and occasionally dab on some hot glue to hold the flower in place.

Continue until you have the perfect sized flower that you want!

7. Once your flower is complete, flip it over and add a backing.  You can use any heavy fabric material or felt is good too.  I had this heavy twill fabric left over from my Chair Makeover

And you’re done! Make as many fabric flowers as your little heart desires!  Use solid colors. Use patterned fabric. Make them different sizes.  I’ll warn you, it’s quite addicting!  I’ve got a few other thoughts on what I want to make more fabric flowers for (headbands, pins, necklaces, etc. – so many ideas, so little time).

Here’s a little grouping ~ so PUR-TAY!

Onto making the wreath with these pretty little additions!

Ta-Da

Layering the Flowers – I first placed the larger flowers on as a base, and layered the smaller flowers on top.  To give a 3-dimensional look, I raised some of the smaller flowers by hot gluing burlap underneath to give them more height.

Here’s a closeup~

And this is how it looks on my apple green colored door~

Any time I show pictures of my front door, I always get the burning question ~ What color is that?

So here’s the info: Valspar Olive Tree WV34010

Welcome, please come and stay awhile.  Want to Tour the rest of my home? Visit HERE

Have you created a beautiful Autumn wreath?  Share it with me and I’ll include it in my Wreath Inspiration Roundup!

DIY: Coffee Sack Ottoman

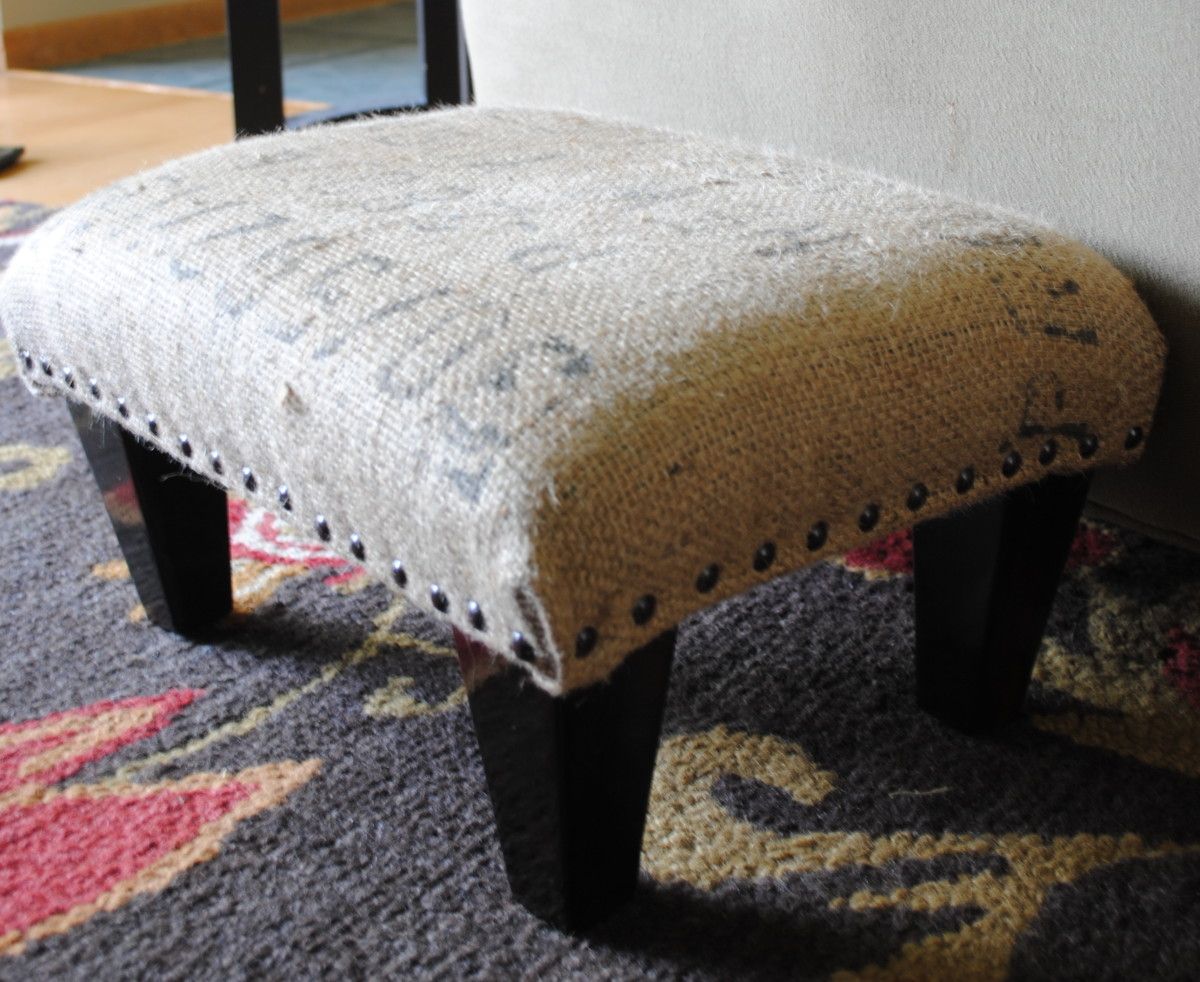
I’m always looking for something to update and I love finding ordinary things and changing their use to be a little more unusual.  Guess that’s what a DIYer is all about.  Yesterday, I shared some very creative ways to recycle and repurpose burlap coffee sacks.  A while ago, I scored some old coffee sacks from a local coffee shop and once my creative juices started to flow, I had just the idea – an ottoman for my living room.  It was a perfect way to show the coffee sack stamping and detailing!  After scoring an ottoman (which was in desperate need of a makeover) at a garage sale for $5, I gathered the rest of my supplies, and set off to begin the project.

Thankfully the ottoman was sturdy and overall, in good condition, so I knew with a little TLC, this little guy could look pretty again!

These are the burlap coffee sacks (or you can buy coffee sacks) that I picked up on my random Saturday morning excursion in downtown Saratoga Springs (and they were free!  The mister just asked for them, and all of a sudden we were the owner of 4 coffee sacks).

The legs of the ottoman screwed into the bottom frame, so I was able to easily remove them, along with the fabric.  The original ottoman legs were an orange-stained oak – not my cup of tea and a little different than the rest of the woods in my home.  I prefer a darker look, so I chose to use a Jacobean finish.

I first gave the legs a good standing ~

Then, it was time to apply the Jacobean stain.  I wanted to achieve a dark finish, so I did not wipe the stain off – I waited (a long time) for it to completely dry.  If you prefer the tone of the Jacobean stain, but desire a lighter, more transparent look, then you can rub the stain off with a soft cloth.  I applied 3 coats to get the look I wanted and it took about 3-4 days for the legs to completely dry.

Like my makeshift drying rack? I used the wire basket from our old refrigerator during the Kitchen Makeover.

In the meantime, I moved on to cutting the burlap coffee sacks to reupholster the ottoman top ~

Then reupholstered the top using a staple gun ~

Almost done…

After the legs dried (which took a loooong time), they were ready to reattach.  At that point, I was happy with the ottoman, but it still needed something.  Hmmm…  how about nail heads?  Yes, that would be the finishing touch that it needed!

It took me quite a long time to find upholstery nails.  Then this kind blogger helped me out and mentioned that Ace Hardware and Home Depot carry them.   Really?  AH and HD…never would have thought it, but she was right.  Thess upholstery nails were just what I needed to complete this makeover.  They were $1.37/pack and I used 3 packs.

To attach the upholstery nailheads, I started off at one corner and then gently nailed in each one into the wood base.  It’s important to keep them evenly separated and in-line, as much as possible.

Then I continued around the entire base~

One important part of this reupholstery project is how I finished the corners.  Especially because the burlap is very heavy, the corners were quite tricky.  I actually had finished the ottoman top, was unhappy with the result, and reworked them.

Here is my first attempt that I wasn’t happy with~

And here is the final, reworked look.  Instead of wrapping the fabric to the side (as seen above), I pulled it underneath, so the finished corner had a clean look. Like this~

And it’s complete!
One more picture of the before~

And here it is now… a comfy place to put my feet up!

Do you think it could be a Ballard Designs Knock-off?

Have you used burlap coffee sacks for any of your DIY projects?  Do you have any projects in mind using these found treasures?  If you want to check out more creative projects using coffee sacks, check out this post ~ Coffee Sack Creations and check out my pins on Pinterest.

DIY: Personalized Dry Erase Calendar

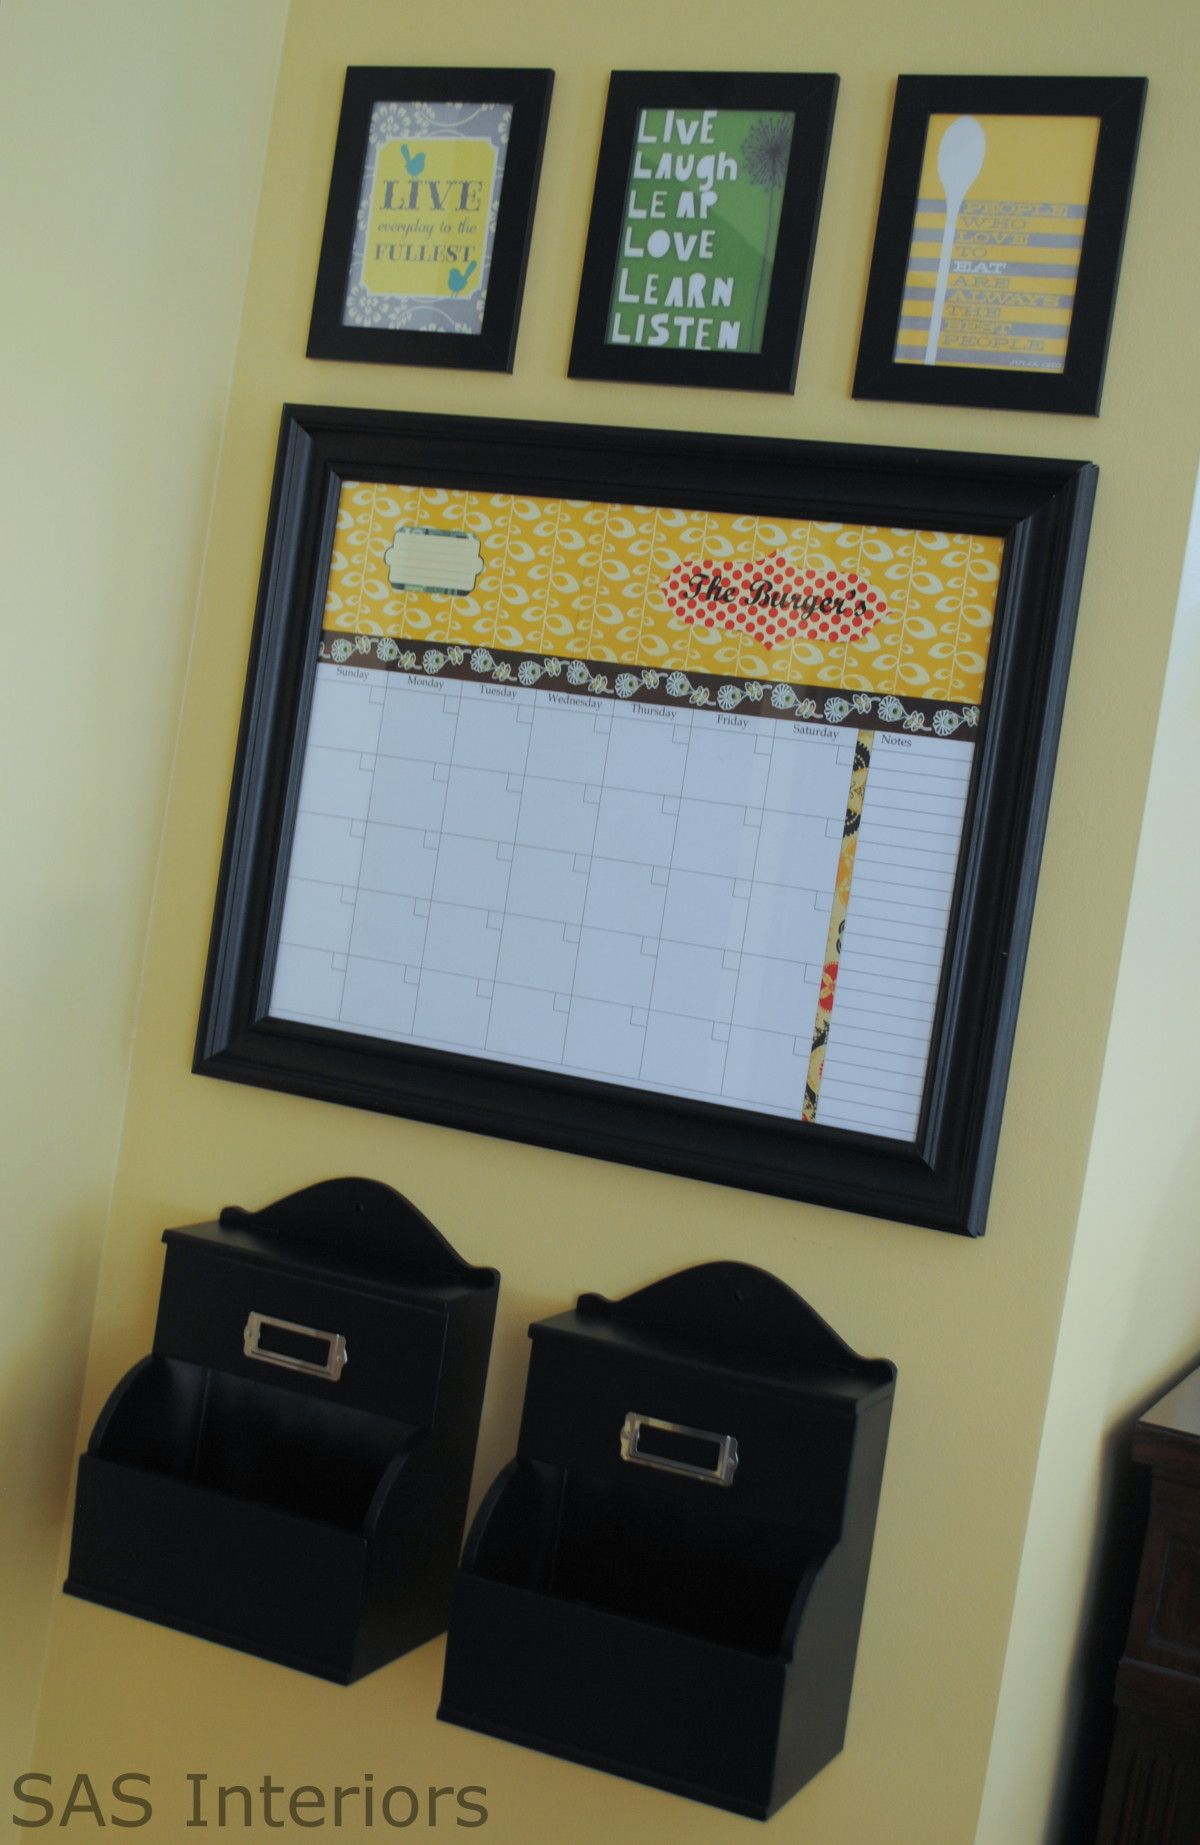
Last week I shared some inspirational ideas on creating a Central Command Center, as well as my new CCC spot.  One of the features in my newly organized space is the personalized dry-erase calendar that I made.  I had previously purchased a dry-erase board from Tar-Jay, but it was just too small to write all the activities and notes to keep my family on track for the month ahead.

We needed something that had space for our daily schedule, as well as a place for notes, like:
bring books to the library by Tuesday or
pick up the dry cleaning after 6 on Friday or
don’t forget to buy MILK!

Hopefully with this new and much larger calendar, tasks and plans won’t fall through the cracks…


Last week right after finishing this CCC wall, we had some friends over for a bbq.  While enjoying our cocktails, the husband shouts out while pointing to the calendar, “That’s exactly what we need, where did you buy that?”

My response, “I didn’t buy it, I made it”

His response, “really?” … (he totally wasn’t believing it!)

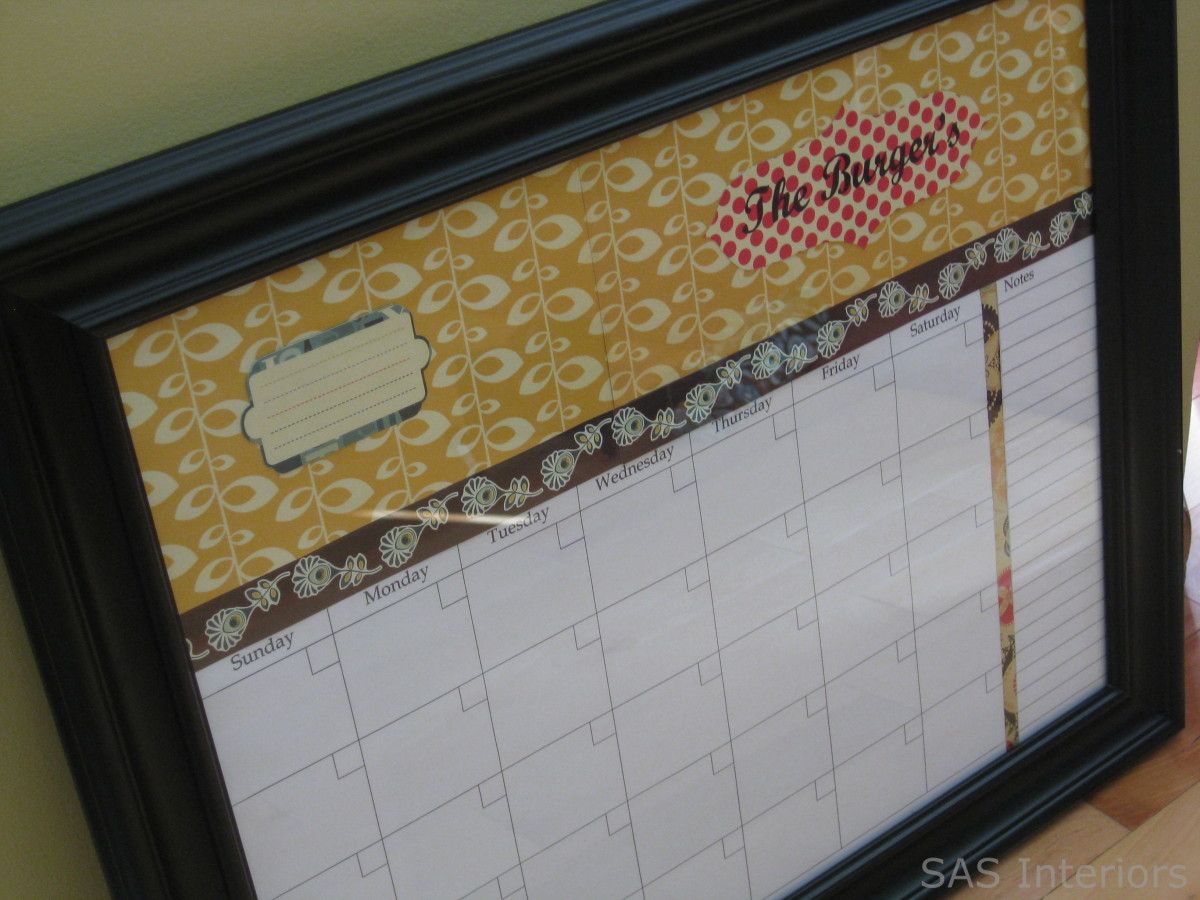
But I really did make it myself and so can you… for less $15! I started off with a 16″ x 20″” frame from AC Moore.  The Portrait frames are always on sale for 40 or 50%, so I scored this for about $13.

At the time of purchase, I wasn’t sure how I was going to pull this calendar together, but I knew I wanted to add some color and pizazz.  I found some pretty scrapbook paper (which was also on sale) for $0.40 a sheet. I loved their modern designs and vibrant hues… a perfect compliment to the kitchen and dining space. (I have a lot of paper leftover, which I will definitely be using for another project!)

Then using the Excel program, I was able to make a calendar and print it on 11 x 17 paper.  I also made a separate sheet for notes.  Using the cells in Excel, it’s really easy to create.  Are you an excel user?  It’s one of my favorite programs to use ~ weird, I know.

Using my good ole’ imagination, along with my pretty paper and magic scissors, I created my personalized dry erase calendar.

To add a bit of personalization, I included our family name – Burger – to the top, using one of the stylish papers and my printer.  No silhouette machine here… ( I would love one though!)

I have to admit, this vibrant red polka-dot paper wasn’t the best choice for writing our name on, but O well, it works.  A quieter background would have been better – you learn from your mistakes, right?  That’s what is great about this personalized calendar… I can continually change the background and it’ll only cost pennies!

Here it is, complete and ready to be used!

After Post Note: I’ve received ALOT of questions about writing directly on the glass.  Just like a dry erase board, a dry erase marker can be used to write on the glass and it’s easy to clean with the felt end tip, a paper towel, or even your finger. DO NOT USE A SHARPIE – that will not erase!

It wasn’t up on the wall for five minutes and was already filled out…

And if you missed my new Central Command Center, here’s a peak and you can read this {post}.

In making this calendar, I was inspired by the personalized calendar that Beth created using one of her favorite go-to resources.  Check out her post {here}. Thanks Beth!

How do you stay organized?  Do you have a ‘go-to’ spot in your home where everything is layed out for the whole family? Do you have a family calendar? or a Central Command Center?  I have to admit, it sure is nice to be organized (at least in one area of my house, ha)!

My New Central Command Center

With back-to-school (well in my case first-time to school since my son is starting kindergarten) around the corner, I wanted to be armed, prepared, and organized for all the papers and plans that will be coming in only a few short weeks.

Creating a Central Command Center has been on my mind for quite some time, and when a wall in my kitchen/dining room area was all of a sudden blank, it was a perfect spot to create this hub-of-the-home.

When visualizing this space, I thoroughly thought through the needs of my family and what we were currently lacking – a family go-to calendar, a place for keys, and all the “stuff” that doesn’t have a home.

In my previous attempt to create a Central Command Center, which can be seen in {this post}, I purchased a dry-erase board that was just too small to fit all the details needed for our daily activities.  This is the wall before and the way-too-small family calendar.

Bye Bye store-bought dry erase board…  Hello to my custom home-made family calendar~

Check back next week for a whole tutorial on how I created this beauty!

I couldn’t just put a calendar on the wall and call it a-day.  I needed more!

Yes, I needed a spot to put the keys, outgoing mail, digital camera, and all the misc “things” that never have a home.  With this project in my mind for a while, I found these mail caddy’s at TJ Maxx last month and scooped them right up.  At the time of purchase, I didn’t have a plan for them, but since then they’ve gotten quite a transformation.

A little black satin spray paint did the trick to transform these once Sea Shell boxes into sophisticated mailboxes for “The Hub”!

To customize and identify these new mail boxes, I removed the label hardware from an old photo box and used liquid nails to glue the metal labels onto these boxes.  Now I just have to put in a label – ‘his’ and ‘hers’ – and they’ll be complete.  Since these handy mail boxes sit directly under the dry-erase calendar, I added a strip of magnet for the pen… it’s tucked in the corner and will hopefully stay out of sight and reach of little fingers (I hope, but I’m probably wrong).

Another detail added to this CCC, are the framed inspirational pictures above the family calendar.  Aren’t they adorable?!

My go-to place, Pinterest, is filled with inspiration and I found these quotes a while ago and have been saving them for a good place to display.  I love being inspired by great words and this was the perfect spot to see them and be inspired on a daily basis!

I printed them on my computer, cut them, and used simple black Ikea frames, to display them – Art is easy to make!

Before everything went up on the wall, I layed it out on the floor to make sure it all fit and to get the spacing just right.  I also had the intention and need for a cork board, but it got the ax since there wasn’t enough room – I’ll have to put that someplace else.

and here it is…

My Completed Central Command Center

It’s already filled with family events and mail to go out ~

And of course, my son couldn’t resist being in the shot – he used to hate the camera, but now loves it!

It feels great to be getting organized before school begins and I loving having a spot where everyone knows whats happening when!  Check back next week for a tutorial on created a personalized dry-erase calendar.

Have a great weekend!  Any plans or DIY projects in the horizon?

My New Central Command Center

With back-to-school (well in my case first-time to school since my son is starting kindergarten) around the corner, I wanted to be armed, prepared, and organized for all the papers and plans that will be coming in only a few short weeks.

Creating a Central Command Center has been on my mind for quite some time, and when a wall in my kitchen/dining room area was all of a sudden blank, it was a perfect spot to create this hub-of-the-home.

When visualizing this space, I thoroughly thought through the needs of my family and what we were currently lacking – a family go-to calendar, a place for keys, and all the “stuff” that doesn’t have a home.

In my previous attempt to create a Central Command Center, which can be seen in {this post}, I purchased a dry-erase board that was just too small to fit all the details needed for our daily activities.  This is the wall before and the way-too-small family calendar.

Bye Bye store-bought dry erase board…  Hello to my custom home-made family calendar~

Check back next week for a whole tutorial on how I created this beauty!

I couldn’t just put a calendar on the wall and call it a-day.  I needed more!

Yes, I needed a spot to put the keys, outgoing mail, digital camera, and all the misc “things” that never have a home.  With this project in my mind for a while, I found these mail caddy’s at TJ Maxx last month and scooped them right up.  At the time of purchase, I didn’t have a plan for them, but since then they’ve gotten quite a transformation.

A little black satin spray paint did the trick to transform these once Sea Shell boxes into sophisticated mailboxes for “The Hub”!

To customize and identify these new mail boxes, I removed the label hardware from an old photo box and used liquid nails to glue the metal labels onto these boxes.  Now I just have to put in a label – ‘his’ and ‘hers’ – and they’ll be complete.  Since these handy mail boxes sit directly under the dry-erase calendar, I added a strip of magnet for the pen… it’s tucked in the corner and will hopefully stay out of sight and reach of little fingers (I hope, but I’m probably wrong).

Another detail added to this CCC, are the framed inspirational pictures above the family calendar.  Aren’t they adorable?!

My go-to place, Pinterest, is filled with inspiration and I found these quotes a while ago and have been saving them for a good place to display.  I love being inspired by great words and this was the perfect spot to see them and be inspired on a daily basis!

I printed them on my computer, cut them, and used simple black Ikea frames, to display them – Art is easy to make!

Before everything went up on the wall, I layed it out on the floor to make sure it all fit and to get the spacing just right.  I also had the intention and need for a cork board, but it got the ax since there wasn’t enough room – I’ll have to put that someplace else.

and here it is…

My Completed Central Command Center

It’s already filled with family events and mail to go out ~

And of course, my son couldn’t resist being in the shot – he used to hate the camera, but now loves it!

It feels great to be getting organized before school begins and I loving having a spot where everyone knows whats happening when!  Check back next week for a tutorial on created a personalized dry-erase calendar.

Have a great weekend!  Any plans or DIY projects in the horizon?

Creating a Central Command Center

If I’ve said it once, I’ve said it a gazzillion times alot…I’m always moving things around my house.  As I’ve mentioned in previous posts, my foyer has been making quite the transformation with repurposed items, along with the newly stenciled wall and glazed cabinet.  With a few moves, there was a wall in my kitchen/dining room that was all of a sudden left empty… Yes, it was blank and something had to be done with it!  A blank wall with nothing on it…that’s sinful (ha)!  I thought and thought…what to do?  what to do? 

Let’s take a step back ~ a while back I had created a central command center by my refrigerator, but it really wasn’t useful.  With much thought, I decided to use this newly blank wall for a new CCC (central command center)!

What’s a central command center, you ask?

Well, I will tell you!  It’s the go-to place for EVERYTHING.  A spot (especially if you have kids) where all the daily details are layed out, where papers are organized, and where there’s a detailed calendar of events so you know where everyone is going at a certain time, on a certain day.  A must need for any home ~ don’t you agree?!

I had alot of thoughts in my head of what I needed and how I wanted to design this space, BUT before I started, I wanted to check around for some inspiration.  Where was my go-to place?  Pinterest, of course!

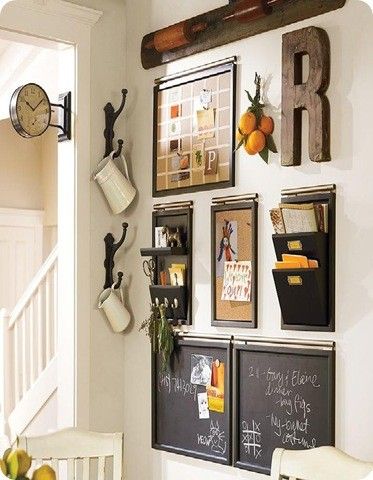
Pottery Barn has some great items to help with organizing your family.  A reader just emailed me yesterday about the picture from this post and it’s the incredible modular system that Pottery Barn offers, that helps pull together any space to create an efficient organzational hub.

Buckets, Baskets, and a Bench… What more do you need to create a central command center?

Isn’t this CCC beautifully layed out and functional?  I really like the idea of having the initial of each member of the family and their information in one place – it’s easy to identify and grab on-the-go!

This Kitchen Command Center created by The Clay Family is a must for any family to stay organized!  With a spot for a daily menu, notes, and kids chore board there is no question of who does what and when…right?!

We all love chalkboard (am I right?) and this CCC that Sarah of The Yellow Cape Cod created is perfect for any large (or small) family.  The daily responsibilities of everyone in the family is simply stated with no questions asked! And I love the quote – “Many Hands Make Light Work” (so true!)

Sometimes a central command center isn’t just for the family, but instead a place where we keep all of our “stuff”.  Candice Stringham created this office/studio/art supply closet to hold all her supplies.  With all the “objects in her office”, now everything has a home.

My kids are young and haven’t been overloaded with homework … YET.  DaNita of Delightful Order created this Homework Bulletin Board for her family, so she can easily keep track of her boys school and activity schedules.  I like how she has added a picture of each of her kids, so their space is easily identifiable.

Two more Pottery Barn spaces that are gorgeously designed.  Great look and fabulous idea for the hub of the home !

House of Fifty (published by one of my favorite bloggers, Janell of Isabella and Max Rooms), a seasonal online magazine has a fabulous article in their premier issue about creating a Command Center for the home.  I love that stylish cork board and just recently made one for myself – I’ll be sharing that soon!

BHG always does it right and has awesome organizational ideas ~ Check out some of their strategies on storage {here}

Lastly (but certainly not least), here’s a sneak peak of my Central Command Center, which I will be revealing tomorrow….

Stay Tuned!

What projects have you been up to lately?

You would have thought after my kitchen makeover that I would have taken a break (that was my intention, but didn’t happen – O, well).  I can’t wait to show you what I created for our new CCC

Kitchen Makeover Reveal

FINALLY the day has come that I can officially say that the kitchen is complete! It feels wonderful to finally make the reveal – you’ve all been very patient and so kind with your comments!  After weeks of project posts and minimal pictures, here it is~

If you haven’t seen the kitchen before, here it is.  The cabinets were an orangey oak color with hunter green laminate on the countertop.  When we first moved into our house about a year ago, we quickly updated the cabinets with new hardware, but left everything else…until now!

Before

When originally sharing the pictures of the kitchen in this post, I was kind of embarrassed.  Now I’m glad to have them because this space has made a huge transformation and it feels so good to say I did it all myself (with a bit of help from my husband too).  With my new kitchen space, I hope to inspire you to know that you can do it too!

Here’s another before ~

Okay, enough of the before… let’s get to what you’ve been waiting for… 

The Process & The Reveal

The process of this kitchen makeover started several months ago.  After contemplating the color of the cabinets and what to do with the countertops (which took forever), I decided to use the Rust-Oleum Transformations Kit in the oynx color for the countertops.  This was the first step taken in transforming the space and that alone made a huge difference!

Then I moved on to painting the cabinets.  Again, it took quite awhile to decide on this color and I love it!  I’m not usually one who likes change and sometimes things have to grow on me, but NOT this color.  As soon as the cabinets were complete, I was in L-O-V-E!  The color is Benjamin Moore Berkshire Beige and the overall tone is a taupe / gray color.  Depending on the time of day though, other hues of blue and green can also be seen.  It’s just so unique and complements the many other colors throughout my home.

Next step? Adding a custom tile backsplash.  I wasn’t sure how tiling over laminate would be, but it worked and the look is fabulous!  The small 1″ x 1″ natural travertine tile has the same hues as the cabinet color and they complement each other beautifully.

Another detail that I added to the kitchen, are faux supported brackets underneath the upper cabinets.  I’ve always loved the look of brackets and chose a profile that was fairly simple and in keeping with the modern sophistication I was trying to achieve for the kitchen.

And there is one more change that I made…I took off the door to the side cabinet to create open shelving.  This space now holds baskets (for my kids plates & cups), as well as some of my cookbooks.

Lastly, to make this kitchen complete, I removed the ugly vinyl toekick (that was falling off anyway) and vent cover.  I replaced the toekick with new ceramic tile (leftover from the fireplace surround) and spray painted the old vent instead of buying a replacement.

You know my love for tiling… it was easy and if you need a step-by-step tutorial to tiling, check out {this} post.

And there you go… that’s it, in a nutshell!  (O, and obviously you saw that we got new appliances as well ~ those old white ones weren’t cutting it anymore).

This is the overall space NOW!

And some little details…

Do you recognize the vase, creamer, and scale?  If you’re a Facebook fan you would ~ check out how much I paid for those and more!

Now we’re ready to get down and finally enjoy this space (and the summer)!

And one more time (I can’t resist) ~

Before

Now

So what do you think?

What projects, transformations, and/or DIY projects have you been up to this summer?

I am sharing this post on: