Month: March 2012

Painted Two-Toned Desk + Tips on Painting Furniture

I’m just about finished with the updates for my son’s bedroom makeover.  It hasn’t been a huge overhaul, but with rearranging the furniture, adding colorful stripes on the wall, and hanging new DIY pallet shelves, this space has received a welcome refresher.  In the midst of moving around the beds and dresser, I realized  my little man is at the age where he really needs a desk to work at and hold all his creative supplies.

If you remember back quite a long time ago, I purchased a beauty of a desk off Craigslist.  It lived in my family room ever since (over 6 months), but wasn’t “right”.  Then pufff… I had an idea – it would be perfect for my son’s room.


And this is the evolution of the Craigslist Desk…

It started off as a stained executive desk typical of the 1940s and is in really great condition.  The only thing it needed was a little makeover to update it and bring it back to life to mesh with today’s decor style.

In knowing that the desk would live in my son’s room, I wanted to do it right.  With my lack of patience, I sometimes skip steps or rush, but with this desk makeover I took my time so the result would be something he could live with for many years.

Supplies: Onto the makeover – here’s my arsenal of supplies…

1. Fill Holes & Sand: I started off removing the hardware, which I decided to replace with simple knobs.  Then I filled all of the scratches, holes, and nicks with wood filler.   And the last step before painting was to sand the overall desk surface with my orbital sander using a 120 grit sandpaper (medium coarse), then a 220 grit sandpaper (very fine coarse).

2. When the sanding was complete, I cleaned off the entire surface with a damp rag before I started priming.

3. Primer: Once the desk was completely dust-free, I added one coat of primer with my favorite Kilz Primer which blocks the stain and allows for a well-prepared surface to paint.

4. Secret Agent: With every painting job, I always add my favorite “formula” to eliminate brushstrokes – Floetrol.  It always works like a charm to achieve a clean, brushstroke-free surface! (And I wasn’t even paid to say that – I truly just love it 😉

Desk Colors:

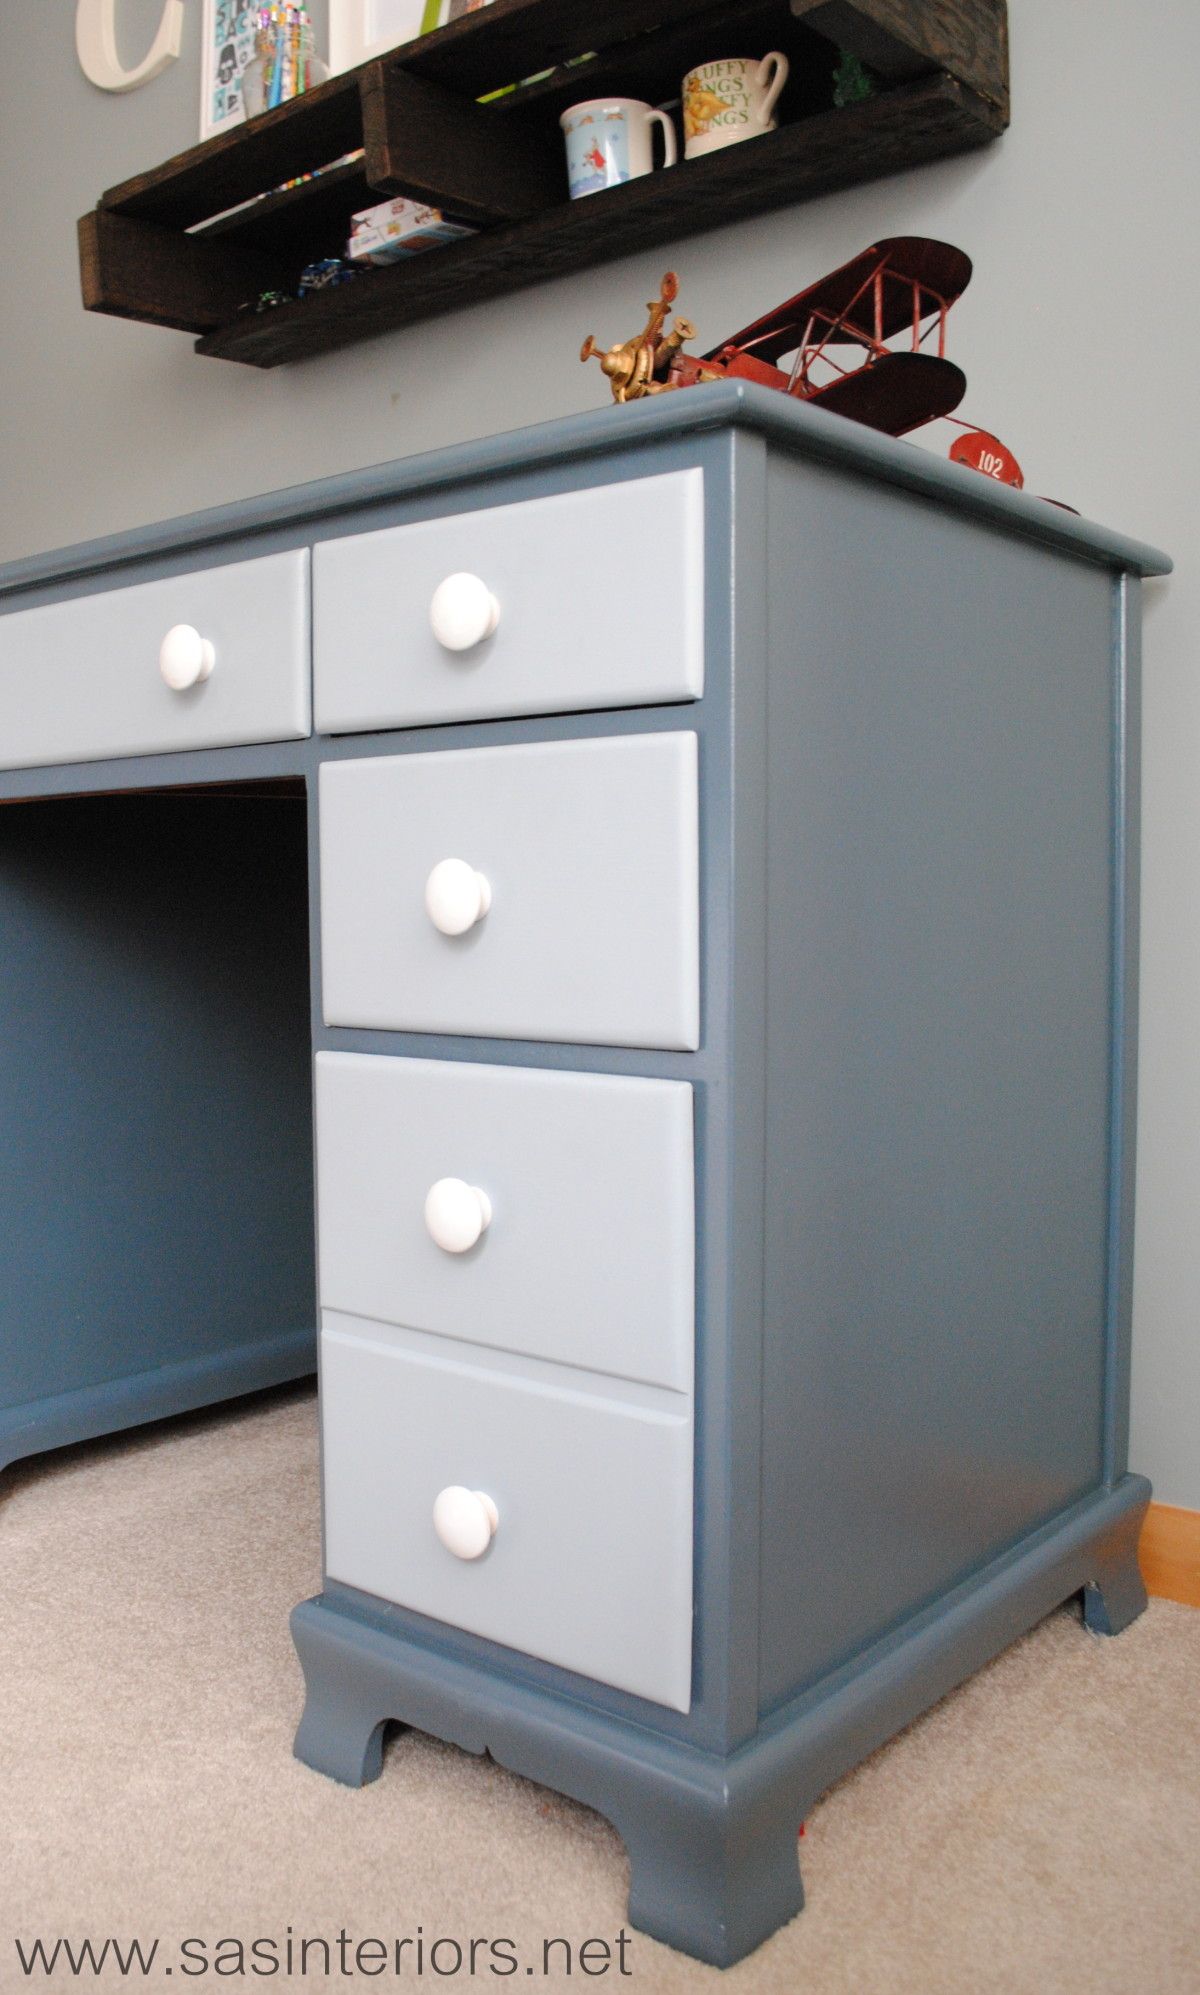
  • Desk Top & Frame – Dutch Boy High Seas
  • Drawer Fronts – Dutch Boy Hurricane Cliffs

5. Paint: After the one coat of primer, I added the first coat of paint, which I used both a brush and roller.  On the top and flat surfaces of the desk, I used a 5″ wide small roller and for the difficult crevices and edges, I used my favorite 1.5″ wide Purdy brush.  *Sometimes, I used the brush first and went over it with the roller.  The roller makes for a smooth surface to avoid brushstrokes.

6. Then onto painting the drawers.  I wanted this desk to be a little playful and not just one color, so I decided to use a lighter color blue on the drawer fronts.

7. Polyurethane: The last painting step was to add a coat of polyurethane – truly the most important part in finishing any piece of furniture!  I usually use water-based clear satin polyurethane, but since I knew this desk would be getting lots of use in the years to come, I decided to use an oil-based polyurethane, which really is more durable (hands-down).

8. Hardware: Once the painting was complete, I drilled one hole in each drawer front for the new knobs, which were originally natural that I spray painted white.  The knobs went in and the desk was complete.

To add a little unexpected fun to the desk, I added a drawer liner that has a geometric pattern with green, blue, and turquoise colors.  My son was quite surprised when he opened the drawers to find this hidden treasure!

And once again here is the before and after…

And these are just a few important tips to remember when painting furniture:

 Do you like painting furniture? Have you painted anything lately?
Spring Mantel with Shades of Turquoise

Last week here in Upstate NY, the weather was amazing and I soaked up every bit of sun I could get. Now it’s a little chillier, but Spring and Summer will be here before ya know it! In the midst of the gorgeous weather, I took some time to put together my new Spring Mantel.

Over the past few months, I have been introducing more cooler colors than the warmer colors that I’ve lived with for many years. So my latest mantel creation has a whole lotta turquoise, which is a beautiful and dynamic compliment to the burnt orange focal wall.

Here it is… What do you think?

Turquoise is absolutely one of my favorite colors and from my past post, Totally Turquoise, many of you love it just as much!  It was kind of risky to have the mantel be dominant in one color and when planning it out in my head, I wasn’t sure if it was going to work.  I think by including a variety of different turquoise shades, the overall composition has alot of depth and intrigue, especially with the backdrop of the burnt orange wall.  Other textures and muted colors of browns were also added within to break up the monotony.

Here’s an in depth look …

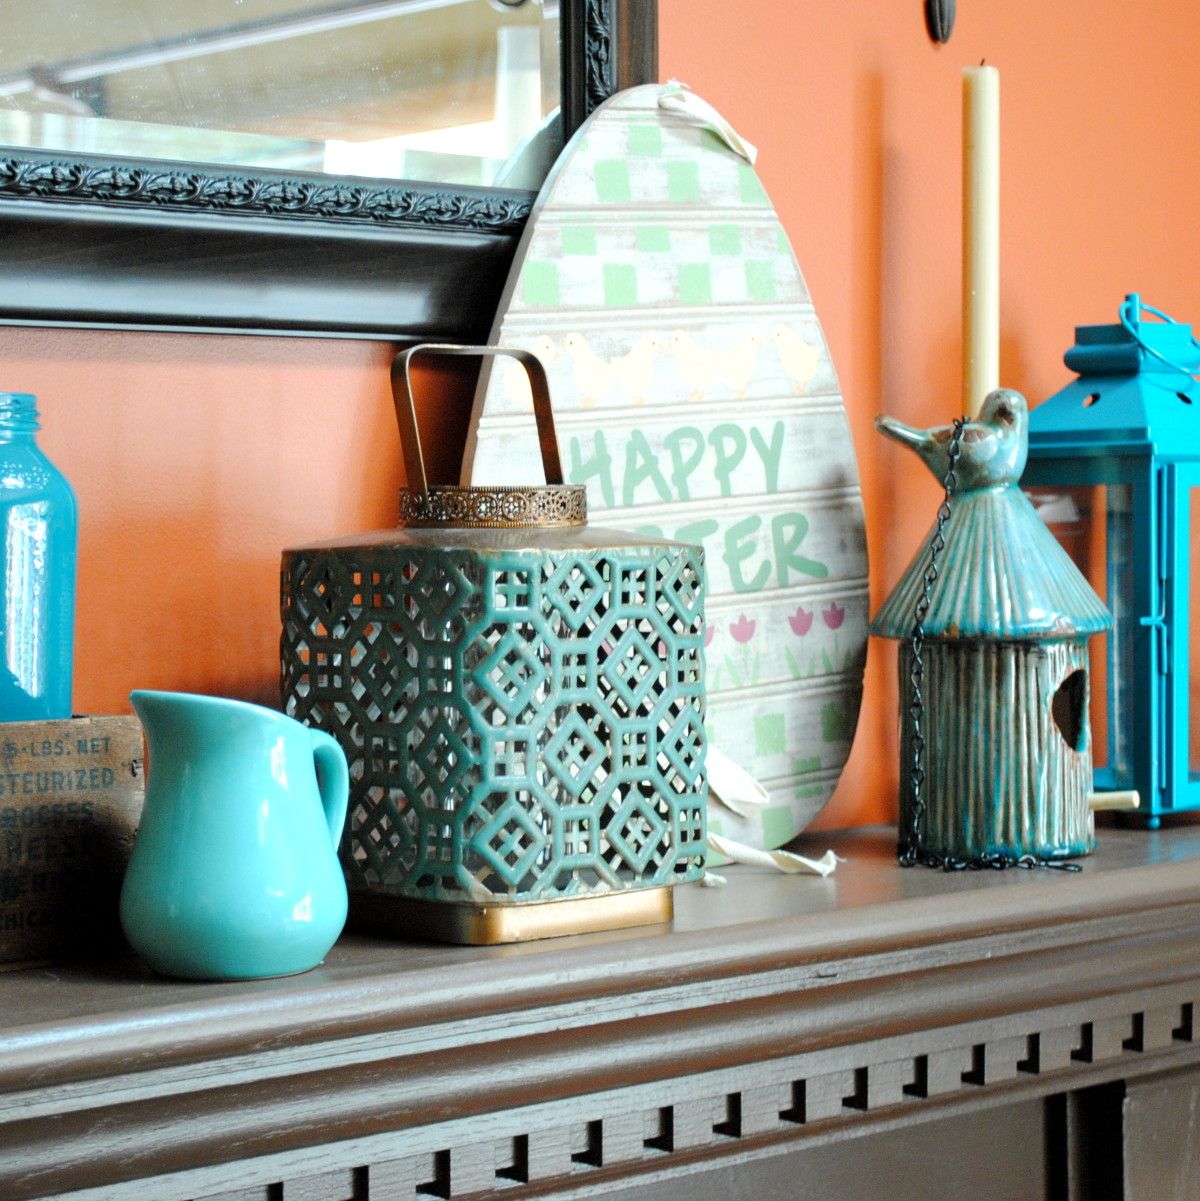
Many of the pieces that make up my new Spring Mantel have been repurposed from around my home or picked up at local stores for very little.  The turquoise glass vase on the left is something new I bought a few weeks ago at TJ Maxx.  I had already had this turquoise-mantel-idea in my head and thought this would make a perfect addition – it was taller and I knew it’d make a great ‘anchor’ piece!  The glass mason jars which I found at an estate sale last year have been showcased on my mantel before and are filled with lentils and a votive candle. To the right is a tall glass jar filled with rocks from last years vacation to the beach.  I love displaying memories and these rocks are a beautiful and quiet shade of blue…  a perfect compliment to the other bold and vibrant colors.

One of my favorite upcycling things-to-do is paint old, used glass jars – tomato sauce jars, apple sauce jars, jelly jars, any jar will do! It’s so easy and unexpected.  In the Blue Label wood box stand two sauce jars that I added a little color to (it’s actually the leftover paint from my kids bathroom cabinet).  My mantels are always about layering, so in front of the wood box is a cute little turquoise pitcher and to the right is a lantern, both of which I purchased at Homegoods.

Of course, I had to add a touch of Easter decor within my Spring mantel.  I love this egg shaped Happy Easter sign that I’ve had for years (forget where I got it), but in a few weeks once the Holiday is over, it’ll be swapped out with a new Spring sign (not sure yet what it’ll be).

Continuing to the other side of the mantel, I added a sweet distressed turquoise ceramic bird feeder.  Originally intended for my daughter’s room, its so cute and fit perfectly amongst the like colors. To “anchor” the other end, I finished the mantel with two different sized bold turquoise lanterns that I purchased from Target.  They have some awesome colors this season like lime green, hot pink, and of course turquoise.

I also whipped up some fun new pillows with accents of turquoise.

Isn’t that owl fabric so cute?!  Love it with the brown and white chevron.

And this is how the entire room looks all pulled together for Spring.  It’s so different from last year’s quieter, frappe colors.

I think this is my favorite mantel design yet!  What do you think?

Do you love turquoise just as much as I do? 

Dried Hydrangea Wreath

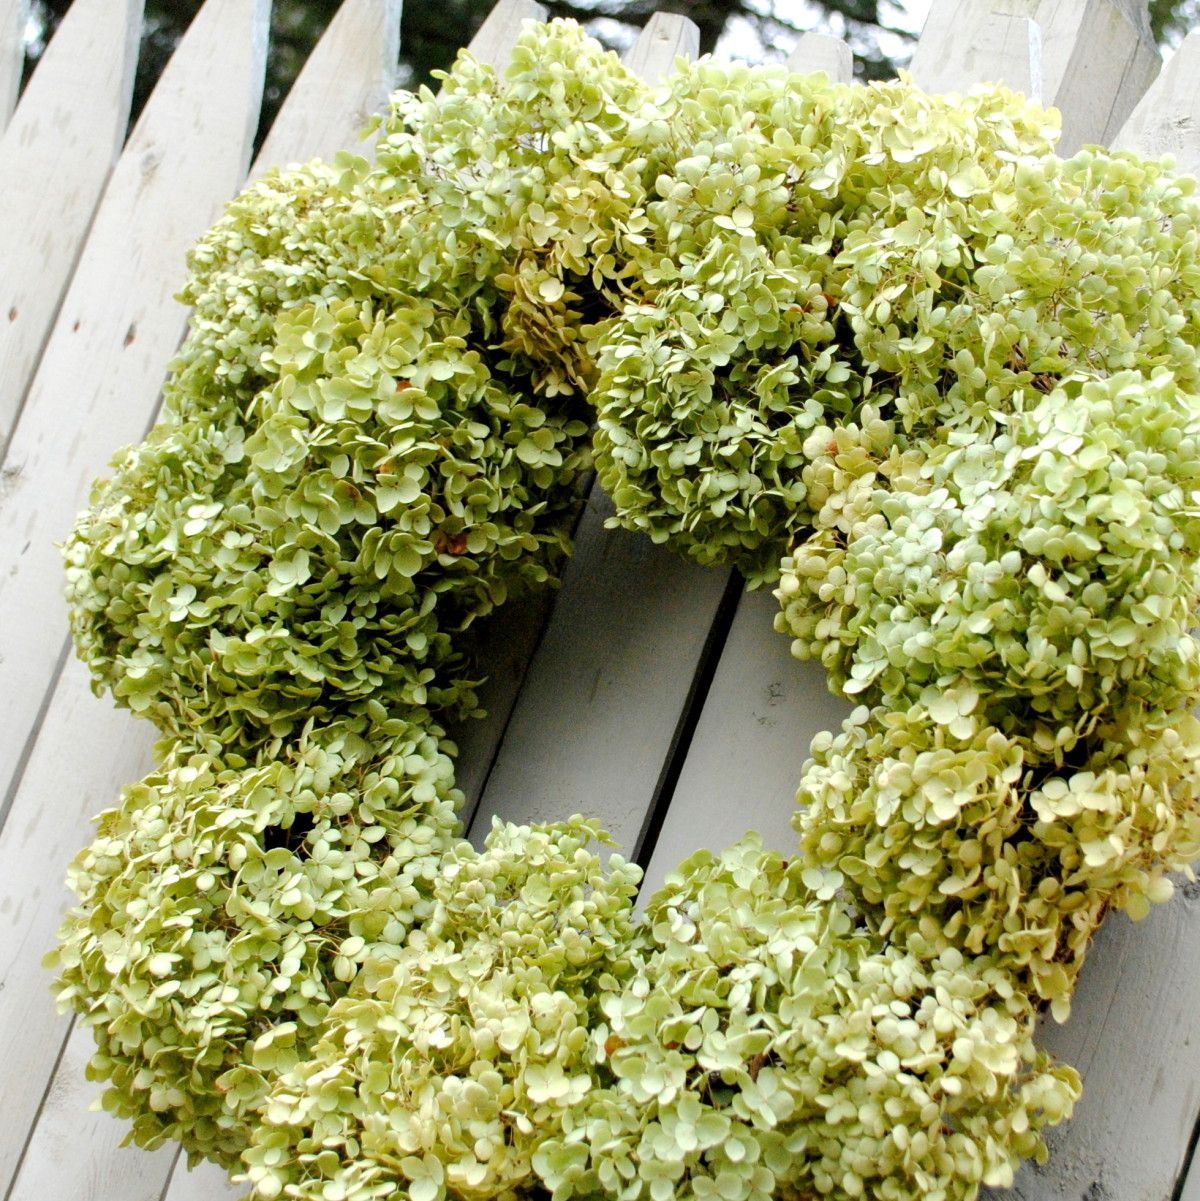
It’s officially Spring! This is definitely a favorite time of year for me when the days are longer and the temps are warmer.  The winter was pretty non-existent in Upstate NY this year, so thankfully a lot of projects that were on the backburner till Spring, already got finished. Over the weekend when the weather was in the 60s and sunny, we started tackling our first outdoor project of the year, but I stepped away from the cutting and hammering for a moment to make this beautiful Dried Hydrangea Wreath.

I had anticipated making this wreath in the Fall and cut off a bunch of hydrangea flowers from my mom’s garden before the first freeze last year.  Unfortunately, I never got around to it, so the hydrangeas sat in my garage since then, but I knew they’d make a beautiful Spring wreath when the time came.

I started off with a grapevine (or twig) wreath that I purchased for $2.88 at AC Moore.  That was the only part of this project that I had to purchase, so essentially it cost me less than $3 to make – no $40 wreath for this girl!

The key to making a full, yet balanced dried hydrangea wreath is to start with the larger flowerheads as the base around the wreath, and then add in smaller flowerheads.

Starting with larger hydrangea flowerheads, I gently threaded the stems through the grapevine wreath.

I then added the medium sized flowerheads and filled in the areas around.

I finished the wreath by adding the smallest flowerheads to any of the open gaps.  The smallest size is really the most important because it really completes the fullness of the wreath.

Note: As you’re threading the stems through the wreath, you may need to secure them with floral wire.  I didn’t need much since the stems were long enough and were tucked fairly tight between the twigs of the grapevine wreath.

Once all of the dried hydrangea flowerheads were added to the wreath, I trimmed the stems in the back of the wreath with a scissor.

And it was complete.  The entire wreath cost less than $3 and took me about 15 minutes to create – simple and inexpensive!  How much better can you get?!  And here’s the result…

I want to mention that the hydrangea leaves are fragile, so it’s important to create this wreath with a gentle hand.  This wreath is also not great for a high traffic place or door (ie: front door).  I’ve got the perfect spot for it though… stay tuned!

Have you made a new wreath for the Spring?

I link my projects to some of these parties: Skip to My Lou, Dittle Dattle, Between Naps on the Porch, Today’s Creative Blog, Stories of A to Z, All Things Heart & Home, Savvy Southern Style, House of Hepworths, Finding Fabulous, Creation Corner, The Shabby Nest, Tatertots and Jello, Thrifty Decor Chick, Tip Junkie

Create a Layered Window Treatment

Whether they are dainty wood blinds or over-the-top dramatic drapery panels, something is needed on every window!   And without, it’s like going to a party wearing a gorgeous dress and  jewelry, but forgetting your shoes. That being said, I’m also a big fan of layering window treatments which means having a combination of functional parts and pretty parts. By adding different layers, the window(s) will have added depth and dimension, plus offer energy efficiency and privacy. To begin, ask yourself a few questions which will help determine the type and amount of layers that you want and need for your window(s).

Here are some suggestions:

  1. Desire privacy for your space?  If so, you may want to consider something that can is functional and can open & close.


  • Desire complete darkness in your space?  If so, you may want to consider black out shades.


  • Desire texture, color, and height? If so, you might consider long drapery panels that are hung high close to the ceiling, plus a bamboo shades.


These are MANY options and those are just a few questions to start the process in deciding what’s right for your situation.  Let’s move on and discuss layering window treatments.

Aesthetics Only (Layer 1)

In many rooms of the home there may be no need for privacy, so a window treatment for an aesthetically pleasing look will be just enough.  Window treatment ideas could include:

  • Long drapery panels that are stationary


  • Roman Shade that is stationary


  • Cornice or Valance (above the window)


The following images show examples of window treatments that are one layer and for mere aesthetic purposes only.


Summer Thornton Design


Little Green Notebook


Amoroso Design


BHG


Privacy (Layer 2)

There are different degrees of privacy that you may want to achieve from your window treatments. You may still desire some light, so a light filtering shade may be the solution in a kitchen or living room, but a shade that completely blocks the light (and your naked silhouette) is better for a bathroom or bedroom. Window Treatments for privacy include:

  • Long drapery panels that are functional and can be pulled across the window (consider blackout lining and/or insulated interlining)


  • Roman shade that is functional (some are light filtering that allow sunlight into the space, while others can be completely room darkening and energy efficient)


  • Woven Wooden Shades (add texture to a space; some are light filtering and some are room darkening)


  • Roller Shades (inexpensive and can almost “disappear” when fully rolled up)


  • Real or Faux Wood Blinds (available in different wood tones which add comfort and character to a space)


  • Cellular Shades (light filtering or room darkening and energy efficient)


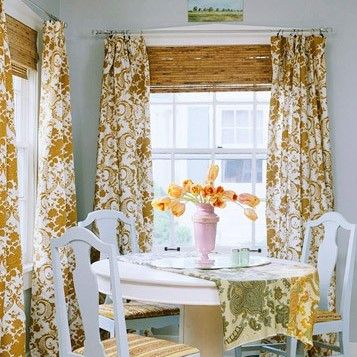
The following images show examples of window treatments that have two layers – a functional layer and a pretty layer.


BHG


BHG


Southern Hospitality


BHG


Sheers (Layer 3)

This layer is optional and usually not needed, but in some cases may be.  Depending on the window treatment design, you may want stationary panels (or a cornice), functional blinds or shades for room darkening / privacy, as well as a third layer for semi-privacy (perhaps for during the day hours).  I actually had this scenario years ago when I lived in the city and my apartment faced a busy street.  I obviously didn’t want people looking in, but I also wanted light to enter during the day, so the solution was to include a sheer in front of the functional blinds which I put down at night and darkened the room.

The following images show examples of window treatments that have three layers – a functional layer, a pretty layer, AND a sheer layer.


The Lettered Cottage


Apartment Therapy

There are many different styles and designs for window treatments, but adding numerous layers truly makes a huge impact in a room.  Imagine your window as a piece of artwork… It would look so blah and boring without the perfect frame to surround it. 

How To Glaze a Cabinet Using Stain

I’ve glazed, antiqued, and distressed furniture for a few projects that I’ve featured in the past, but during the makeover of my master bathroom, I tried a completely new and different way of glazing.  Instead of using my water/paint technique, this time I used stain.

As I mentioned in the master bathroom reveal, I had envisioned a slightly darker cabinet with a light colored glaze.  I had anticipated painting the cabinets, then instead of using my watered-down-brown-paint technique like I’ve done in the past for my cabinet and chair, I thought it would be interesting to try a watered down white paint technique.  In my head it was the perfect idea, but unfortunately it didn’t work – URGH!  I was knee deep already into the project, so I needed to come up with some sort of resolution to turn it around. But how? (that was the million dollar question brewing in my head)

I had remembered that I read a post that Kristi wrote on How to Paint and Glaze a cabinet, in which she used stain to age the piece of furniture.  So I went with it… how much harm could stain over paint do? (it can do alot, but what the heck, I gave it a try)…

So let me step back and share the play-by-play.

I started off by removing the attached toilet paper holder and sanding the entire cabinet with my electrical sander (I also manually sanded the crevices). Plus, I taped the freshly painted walls with painters tape.

I then primed the cabinets using the one-and-only Kilz Primer, and followed it by painting them a darker taupe color, BM Texas Tan, using my awesome Purdy Brush 😉

Ok, here comes the fail part {tears and frustration} well not really… just annoyance that it didn’t work as desired.

So after removing the white mixture (and some of the base coat too), which I thankfully only tried on a small area of the cabinet, that idea was ditched.  I repainted those areas and started with the stain.

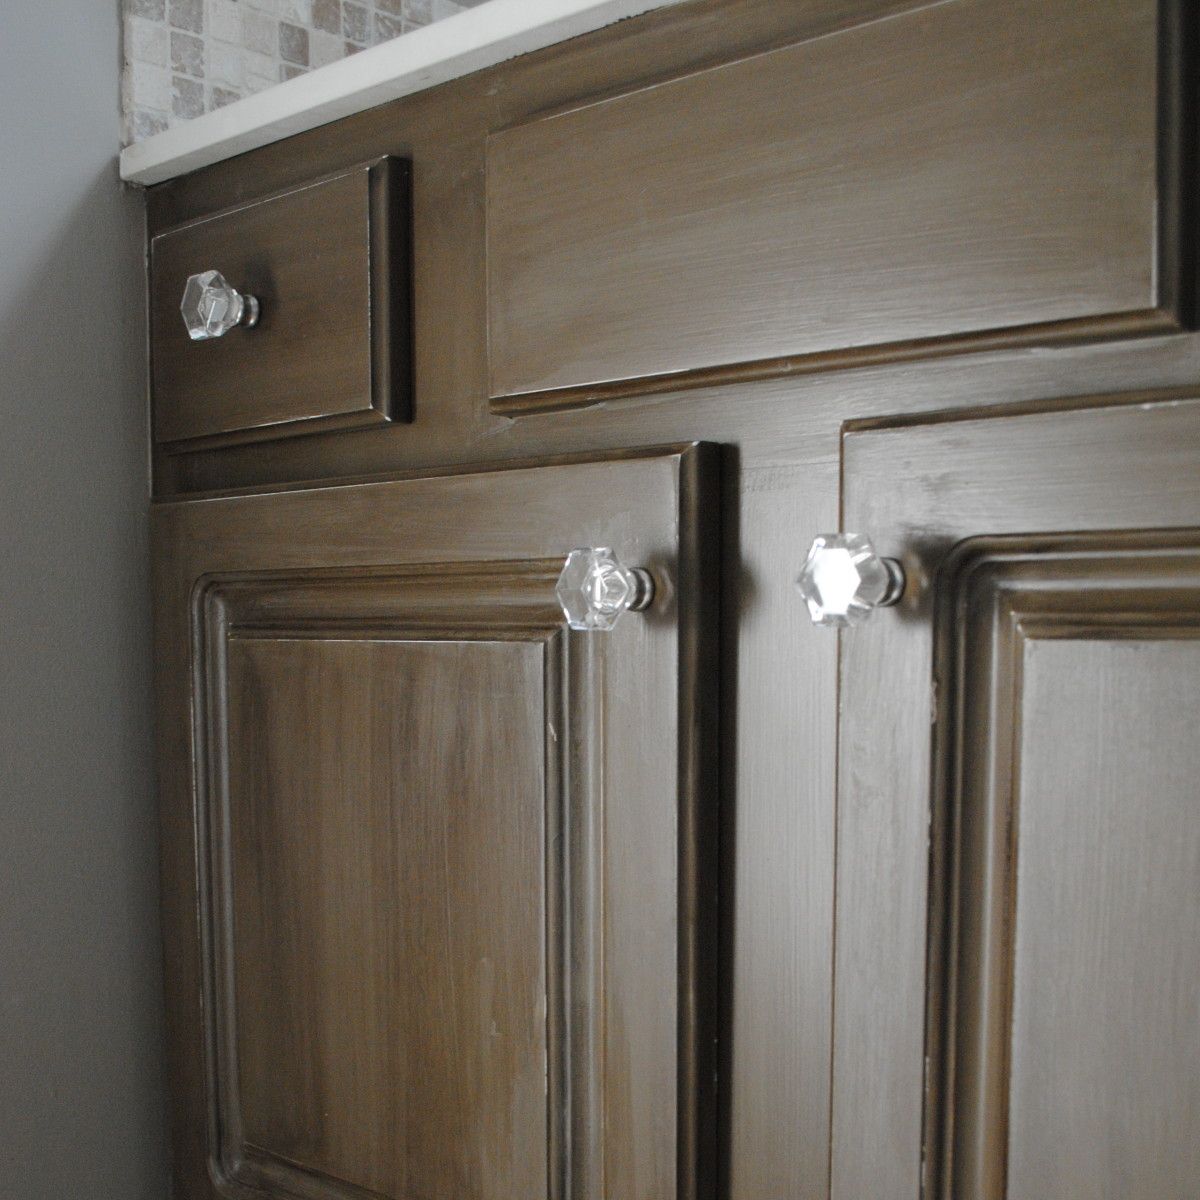
Glaze is meant to be imperfect and give the look of age.  More or less stain can be used depending on the degree of “age” you desire.  If you’re looking for a really antiqued look, you can add “wear” marks to the edges using sandpaper and natural looking dents by using a hammer or chisel.  Also to add more definition to the overall look, add extra glaze in the crevices of the cabinet or piece of furniture.  You can use a smaller brush to get into the indented areas or brush on a second coat of stain in the crevices, and follow it up by gently wiping away so more stain remains.

After completing the entire cabinet, take a look at the result:

Once the entire piece was “stained”, I went back and added some slight distressing.  Not as much as the glazed turquoise chair, but just a little to add some faux “aging”.  And of course to top it all off, I added two coats of polyurethane.  And voila.  The cabinet that I never envisioned creating turned out pretty good, wouldn’t ya say?!

Looking for more tips and tricks on how to age, antique, or distress furniture, check out this post I wrote: 5 Tutorials on How To Distress Furniture

Have you ever had a project FAIL that you turned around to create something you love? How have you added “age” to your furniture transformations?

I link my projects to some of these parties: Skip to My Lou, Dittle Dattle, Between Naps on the Porch, Today’s Creative Blog, Stories of A to Z, All Things Heart & Home, Savvy Southern Style, House of Hepworths, Finding Fabulous, Creation Corner, The Shabby Nest, Tatertots and Jello, Thrifty Decor Chick, Tip Junkie

How To Make Any Curtain into a Shower Curtain

I am thrilled to have my master bathroom complete!  The kind and thoughtful comments that YOU, my awesome readers, have left over the past week have made the craziness all worth it.  So thank you, thank you, thank you.  As I mentioned during the reveal, I DIYed (technically not really a word, but you got it) my shower curtain using two window drapery panels (a.k.a. curtains), and now I’m going to show you how.

I had found these curtain panels a while ago and they were basically the inspiration for the space and everything I chose was set around these beauties.

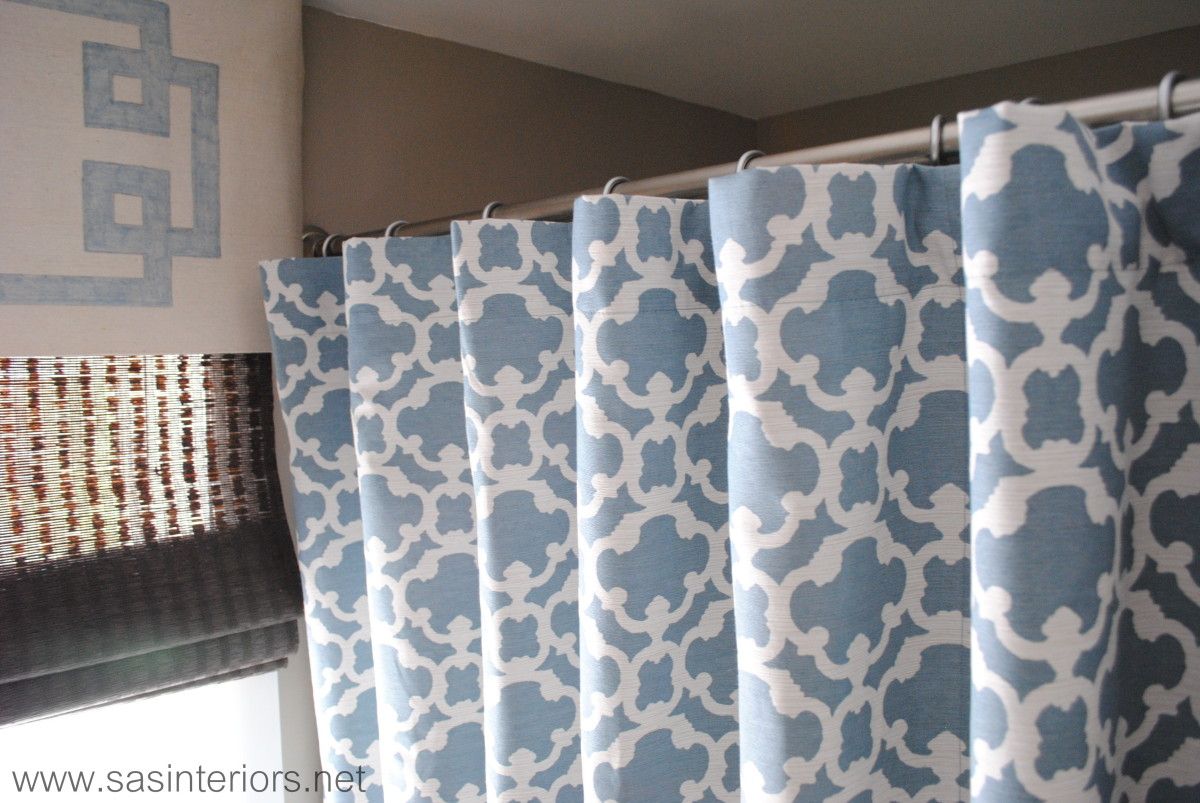
When I originally purchased the window panels my intention was to simply put the shower curtain rod through the already created rod pocket of the window panel.  A problem arose when I went to hang them because the end of the rod was too big (2.5″ dia) for the rod pocket opening in the curtain.  (I hope I didn’t lose ya)…

My first thought was to create a bigger rod pocket on the curtain, but that would have involved sewing and shortening the height of the overall window panels. I nixed that idea right away because I envisioned the window panels as high as possible to heighten the room.  After some thought, I decided to use typical shower rings to create a ring top style panel. Take a look at my quick sketch.

So, here are the steps I took…

I had twelve shower hooks (which is typical for every shower), which I divided amongst the two window panels – 6 and 6.  Then I put a hook at the end of each panel and divided the remaining hooks (4) on the panel.

Note:

  1. My window panels were 54″ wide, times 2 = 108″, wider than a typical shower curtain – that’s okay.  Any width curtain should work and if you’re using this idea for a single shower stall, one window panel should be enough (the length might have to be altered).
  2. A ball-style shower hook would work best.  You can find them in most stores and they are one of the least expensive styles.
  3. As an added step which I have NOT DONE, you can make the cuts more secure by creating a sewn button hole with your sewing machine.
  4. I DID NOT sew the two panels together to create one large “shower curtain” panel, but it’s possible to do.   I left them as two panels in case I decide to use them someplace else in the future.

Once you’ve evenly spaced the shower hooks, using a scissor, cut a 1/2 – 3/4″ slit at each of the shower hook positions (ONLY CUT through the one layer of fabric, not both – the outside layer should look clean and uncut).

Before inserting the ball style shower hooks into the newly cut hole, first put on the shower curtain liner.  Because my window drapery panel was longer than a typical shower curtain, I had to get a longer plastic liner, which I found at Bed, Bath, and Beyond.  It was a little more expensive than a typical plastic liner, but was a must because of the extra length.

Once the plastic liner is in place, put the shower hooks through the “button” holes (or simply the cut holes since I haven’t yet made actual button holes).

And it’s done.  This really is a simple and easy project that makes a huge impact!

Using the two window panels creates for a slightly more flow-y (not in a bad way) shower curtain style as you can see in the image below.  Because the curtain is hung from typical shower hooks, it opens and closes just as a regular shower curtain would.

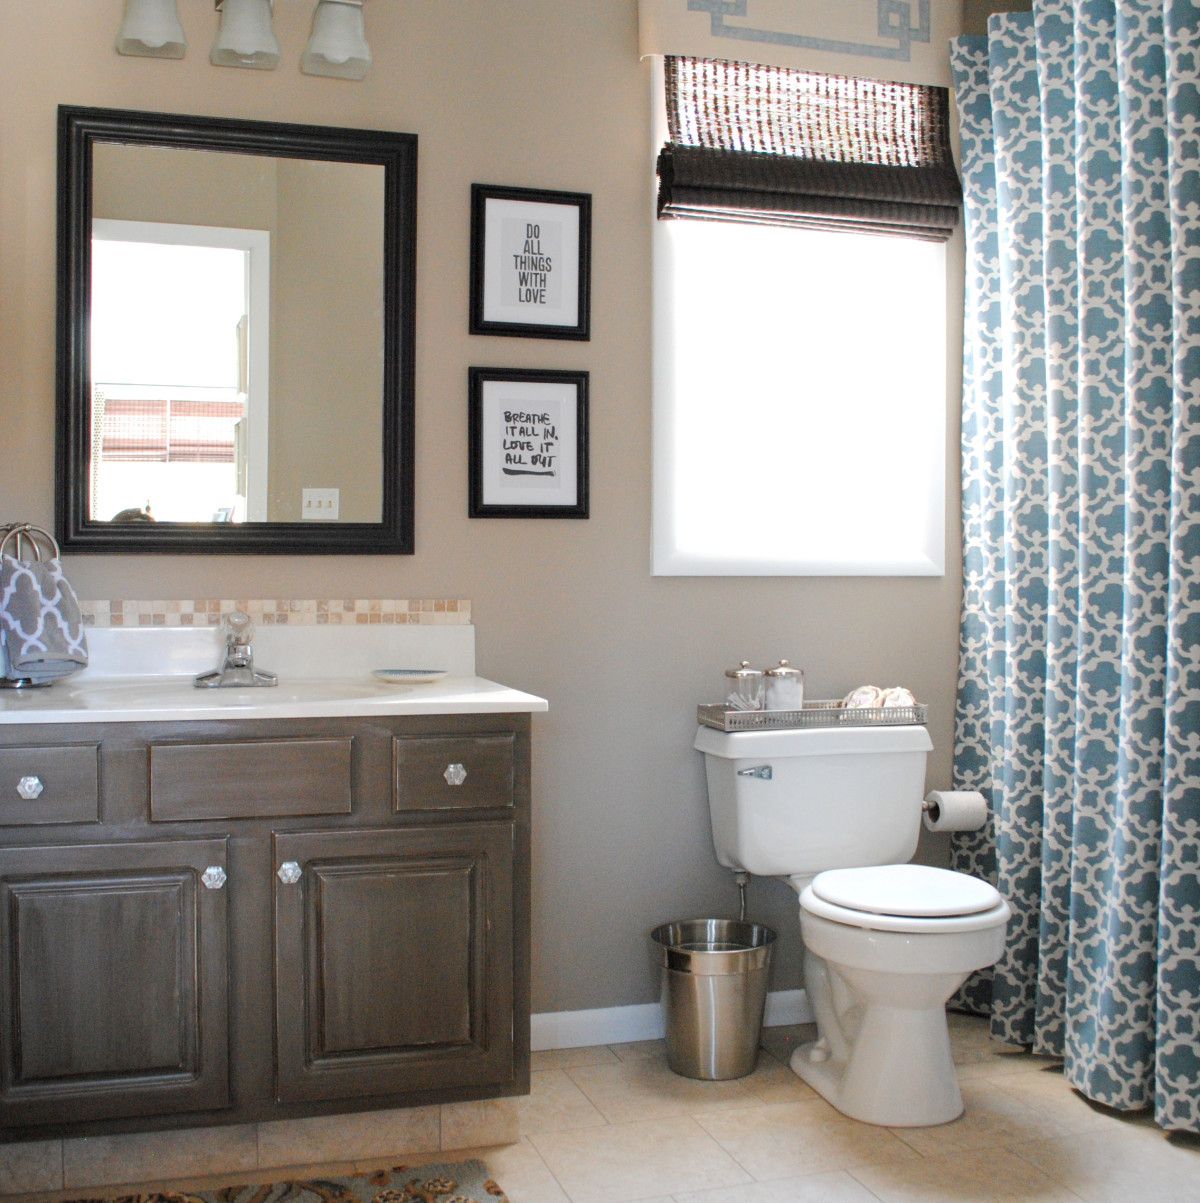
And here is the overall bathroom space –

The taller than typical curtain really gives the space more height, which makes the overall feel of the room much larger.  Actually one reader left me a comment saying, “Wow, you have tall ceilings”.  But honestly, they are only 8′-0″ high – typical of most homes.  But again, the long panel makes the space feel elongated.  This same idea pertains to the window valance, which is hung at the ceiling plane.  If you remember back from this post on The Right Way to Hang Window Drapery Panels, the higher the panels are hung, the larger the space. I have a tutorial coming soon on how I created the window valance, so stay tuned.

I link my projects to some of these parties: Skip to My Lou, Dittle Dattle, Between Naps on the Porch, Today’s Creative Blog, Stories of A to Z, All Things Heart & Home, Savvy Southern Style, House of Hepworths, Finding Fabulous, Creation Corner, The Shabby Nest, Tatertots and Jello, Thrifty Decor Chick, Under the Table & Dreaming

Horrid to Heavenly Master Bathroom Reveal

In one week, my master bathroom went from a place that I dreaded and turned into a heavenly, serene, and spa-like oasis.  The last 7 days have been a whirlwind of working around the clock, but it’s all worth it!  Looking back, I can’t believe I waited so long.  I walk into this space now and I feel a fresh of breathe air.  Take a look…

Pin It

Beautiful right?  But wait until you see the before, and you’ll be sure to appreciate the after even more!

Pin It

I’ve been slightly secretive about the plan that I had for this space.  I didn’t want to reveal too many details and ruin the big reveal.  If you want to see more though, you can check out Part 1 and Part 2 of the Bathroom Makeover.

Can you believe how horrid the bathroom looked before?  Frightening! Enough about that…  Let’s take a tour!

The process for this bathroom makeover started last Friday when I spackled and prepared the walls for painting. Quick backstory: Before we moved into our home, the walls were wallpapered.  The previous owners removed the wallpaper, and painted the walls that horrid pink/purple color.  When they removed the wallpaper, the walls got really damaged, so there was ALOT of prep work before painting could begin.

Along with the walls, we also painted the previously stained mouldings, with a fresh coat of semi-gloss white. This update alone, made the space look completely different!

Once the walls were painted and complete, it was time to lay the new floor.  I decided to use groutable vinyl floor tiles, which I layed directly over my existing floor.  I chose a tile that has a similar look to Botticino natural stone and installed the tile the same way I did for my parents foyer. Groutable vinyl truly looks JUST LIKE ceramic – it’s amazing!

After the joints were grouted and set, I moved onto the sink base cabinet.  This was quite the experiment for sure and turned out nothing as I envisioned, but I’m still happy with the result.  I desired a dark cabinet, but with a light glaze overlay (opposite of my glazed cabinet), but it didn’t work.  After wracking my brain for a bit, I decided to use stain as the glaze.

The shower curtain isn’t a shower curtain at all.  It’s actually two drapery panels made and hung to look like a shower curtain.  I had found these panels at Target and was desperate to use them someplace, and this bathroom was the perfect spot. (Tutorial on how to make any window panel/curtain into a shower curtain).

The window valance I also made using drop cloth fabric and something pretty neat (another tutorial coming soon).

Even though I spent alot of time on this makeover, the process went quite quickly because all the existing plumbing fixtures remained.  The sink, faucet, cabinet, countertop, toilet, and tub are all the same pieces we had before – nothing is new.  Even though the fixtures looked a lil’ sad in the before space, once they were spruced up and surrounded by other beautiful elements, they looked new again.

Surprised that I didn’t do something funky or with more color?  I am, but I truly desired a soft, subtle, and spa-like retreat. And do you blame me after the color I’ve lived with for so long?!

For the existing frameless medicine cabinet that is built into the wall, I added a wood frame surround and secured it with liquid nails.  I took the same steps as I did with the kids bathroom, but without the chalkboard. Simply adding a frame around this somewhat boring style medicine cabinet, gives it new life and a new look for about $15.

I love a good quote and these are simple, to the point, and important to remember every day.

Of course you need a place to put a towel.. or two.  I installed these darling towel hooks right outside of the shower.  I added small frames above the hooks that I spray painted white and the glass with chalkboard paint to create a W (for wife) and H (for husband)…  now each of us knows which towel is whose!

Here’s a recap and rundown of everything in the space –

  1. New lighting fixture from Lowe’s
  2. DIY window valance made of drop cloth material (tutorial coming soon)
  3. 8×10 black frames with quotes I printed on my home printer
  4. Mirror was created using a 24 x 36 picture frame.  I took the existing frameless mirror to a local glass shop, which they reused and cut it down to size to create this new mirror – all for less than $20
  5. New hand and bath towels from TJ Maxx
  6. New tile backsplash (Read Tutorial: how-to install tile backsplash)
  7. Espresso bamboo roman shade from  Lowe’s
  8. Accessories from Target, Home Goods, and various local shops
  9. DIY cabinet makeover (Read Tutorial: how To glaze a cabinet using stain); Crystal knobs from Lowe’s
  10. Wool rug from Target 
  11. Window panels from Target made into a shower curtain (Read Tutorial: how to make any curtain into a shower curtain)
  12. Groutable Vinyl Tile (Read Tutorial: how-to install groutable vinyl tile)


13. Place card frames made into initial frames with white spray paint and chalkboard paint
14. Towel hooks from Hobby Lobby
15. Bath towels from TJ Maxx
16. Bath stand from Home Goods

For about $500 (for supplies and accessories), I think this bathroom makeover was a huge success and a must! Here are a few more pictures for ya…

So would you agree this bathroom is a drastic difference from what it was only one week ago?  I’ve enjoyed many of the comments and thoughts on what y’all thought about the before bathroom… at least I gave you a few chuckles!  I’m just SO glad it’s complete and I’m thrilled with the results!

Tutorials you may want to read:

Thanks to these sites for featuring my Master Bathroom Makeover: Stories of A to Z, Centsational Girl BOTB, Addicted 2 Decorating

How to Make a Pallet Bookshelf

What a week it’s been!  Is it really March already?  I’m still in February!  I really thought I would have the bathroom complete by now to reveal today, but (I know, here it comes) it’s not done – boo hoo.  It’s 95% there, but the finishing touches are still needed, and that’s always the most important part.  So sorry to say, you’ll have to wait a few more days… you don’t mind, right? Instead, I have a fun, easy, and unique DIY project to share with you.

In the midst of my son’s room makeover, the bookcase he had wasn’t fitting anymore, but he still needed something to hold his many of books.  I had wanted to make shelves from old pallets for a long time, so this was the perfect opportunity.  I’ve seen alot of pallet bookshelves around the blogosphere, but hadn’t seen a tutorial (not that I searched long and hard either), so here we go…

After finally snagging a few pallets from my local hardware store, I was ready and working.  Depending on the pallet you find / pick up, you can get two bookshelves from one pallet.  Each end of the pallet is one bookshelf.

Duration of Project: 40 minutes (staining or painting will increase duration of project and may take longer than one day to complete)
Project Difficulty: Easy to Medium
How Many People Needed: 1

1. Remove / pry off the center wood strip(s) from the pallet (as shown in the above image), using the back of a hammer or crowbar.  This wood strip(s) will be reused for the bottom of the bookshelf.  Pallets come in a few difference sizes, so yours may have 1 or multiple center wood strips.  My pallet only had one, so I had to use a wood strip from another pallet to create the bottom for my second bookshelf.

2. Reuse the center wood strip and attach it to the side of the pallet, which will soon be the bottom of your bookshelf.  I reused the nails that were already in the wood strip, but you may need / want to use new nails.

It’s time to cut the wood to create the bookshelves!

3. Measure about 1-2″ above the higher wood strip and make a mark for your cuts.

4. Using a jigsaw, make your cuts.

5. Once the cuts are done, your bookshelf is essentially complete.

6. Sand down all the sharp edges using a hand sander or power sander.

7. Stain.  I used Minwax Jacobean stain for a dark look.  The wood was quite porous, so it soaked it right up!

8. Once completely dry (it took mine a few days to completely dry and not smell anymore), they were ready to hang. To hang the pallet bookshelves, I used Self-Drilling Drywall Anchors which are great to use when you can’t find a stud (never my strong suit).

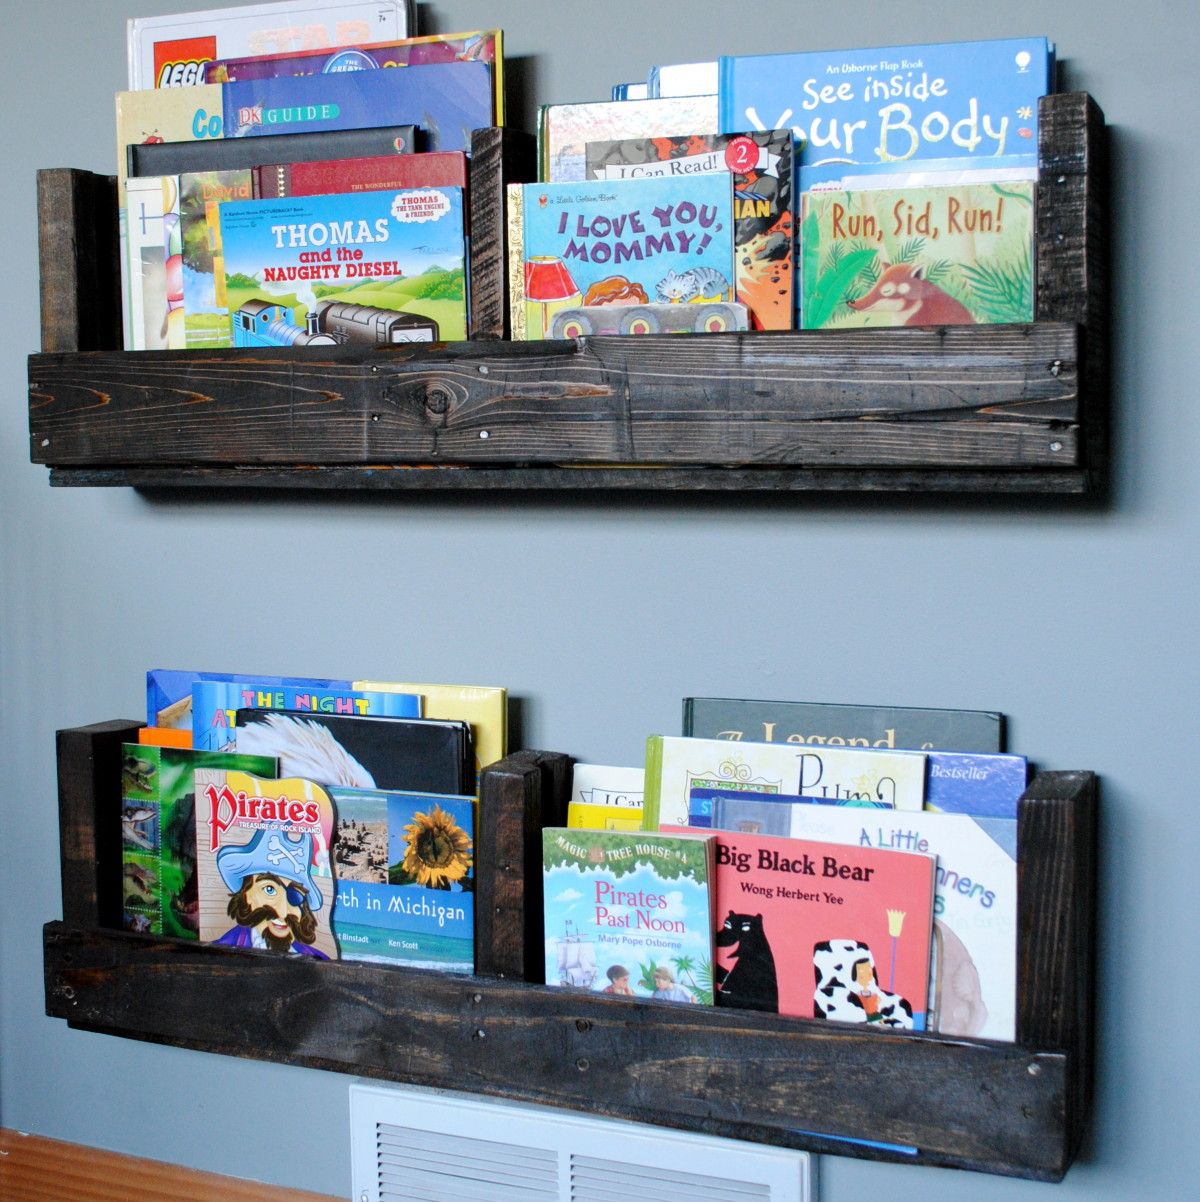
And they’re ready to fill with your child’s favorites books.

I will admit that this style bookshelf doesn’t hold as much as a typical bookshelf, but I love how the kids can see (and choose) the books straight on.  They add so much color into the space!

These pallet shelves are also great for tight spaces since they’re only about 4″ deep.  Imagine a whole wall of them?!  (Ooo, that gives me an idea…)

The room is still coming together, but like the bathroom, it’s 95% complete (story of my life, I guess, lol). I have another exciting project to show you in his room, so stay tuned.

Have a great weekend!

Have you created anything using pallets?  If you’re in need of more pallet ideas, take a look at my post on Do-It-Yourself Projects Using Pallets.