
Month: May 2013

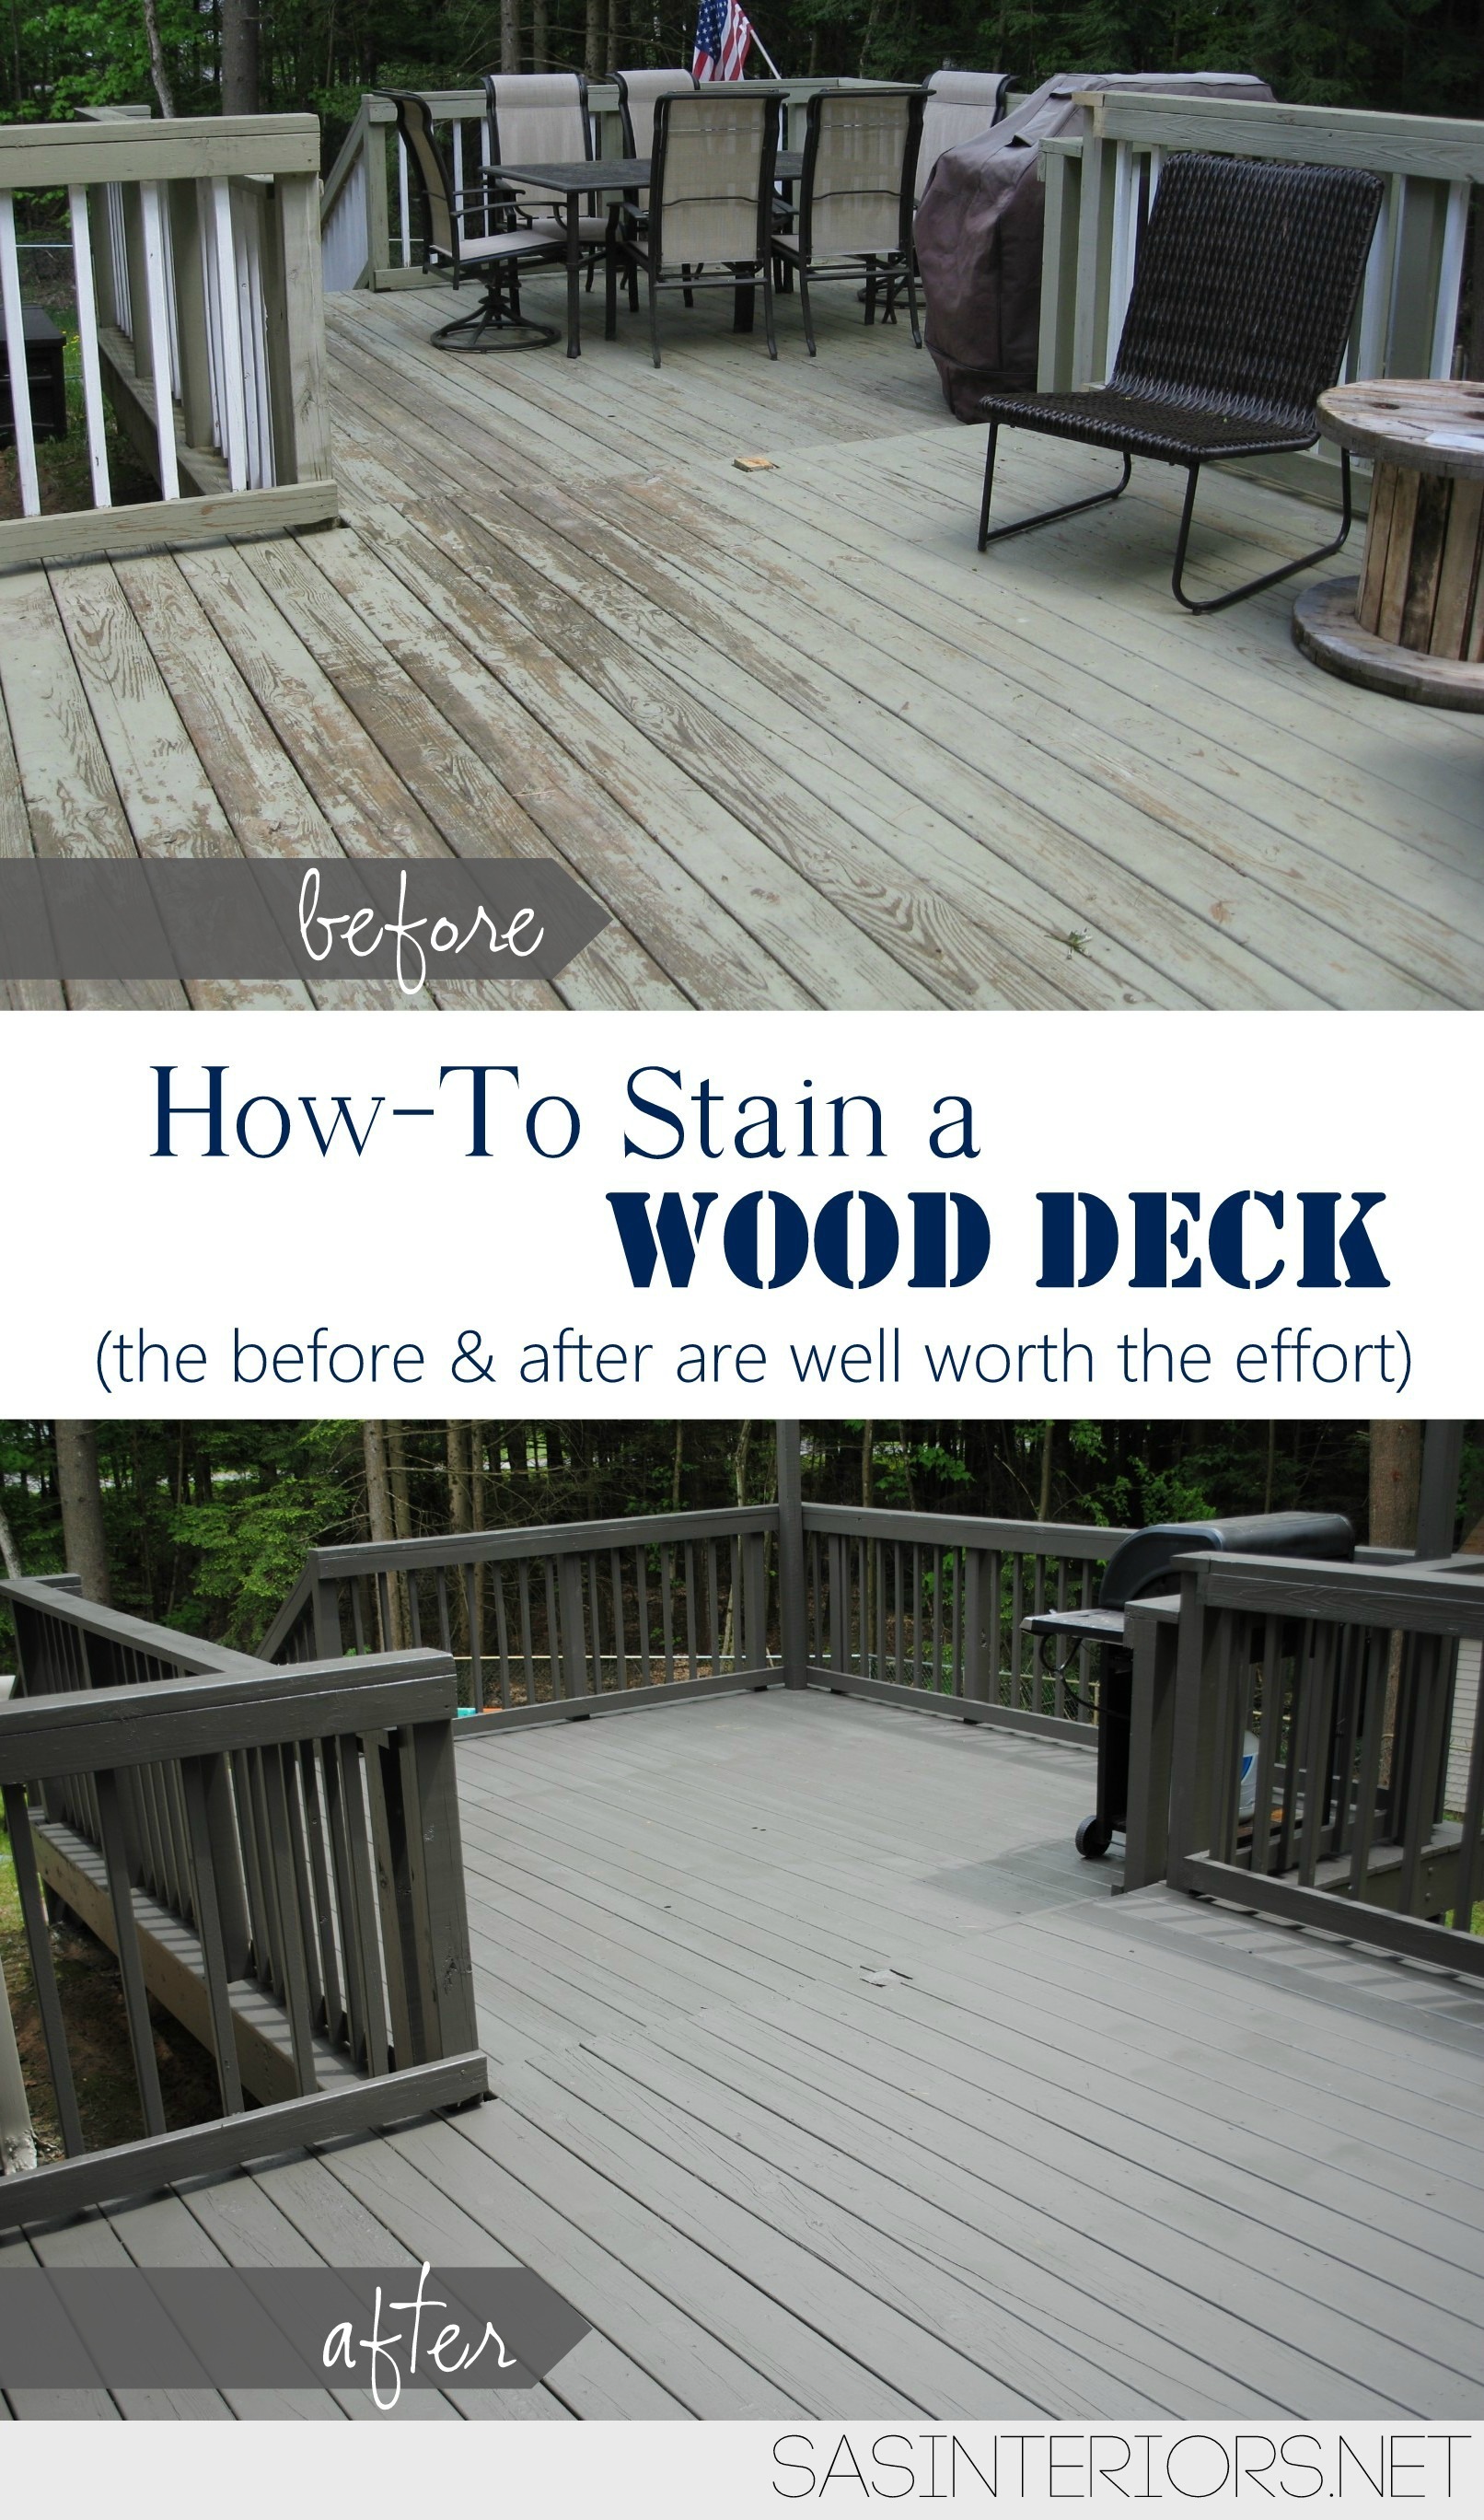
How-To Stain a Wood Deck

For the past few years, we knew something major had to happen with our exterior wood deck, but with SO much work (most of it do-it-yourself projects) to do in other areas of the yard, it kept being put on the back-burner.  Well… Baby didn’t want to be put in the corner no more (I know, that was cheesy), so this year was the year for a makeover.  And boy does she look smokin’…

How to Stain a Wood Deck - Before and After Wood Deck Makeover

I think (well, actually I know) one of the hesitations of the deck was the process.  Well, so I thought.  Honestly, it was so much easier and more manageable than I ever thought possible.  One of the major reasons for that was the use of a hand sprayer. WOW, was spraying easier than hand rolling and/or brushing.  We did that last year with the exterior fence and boy did it take ALL SUMMER LONG.

With a sprayer, the stain is applied (slightly) thicker and the coverage is much more even.  But best of all, it takes way less time and is much less labor intensive.

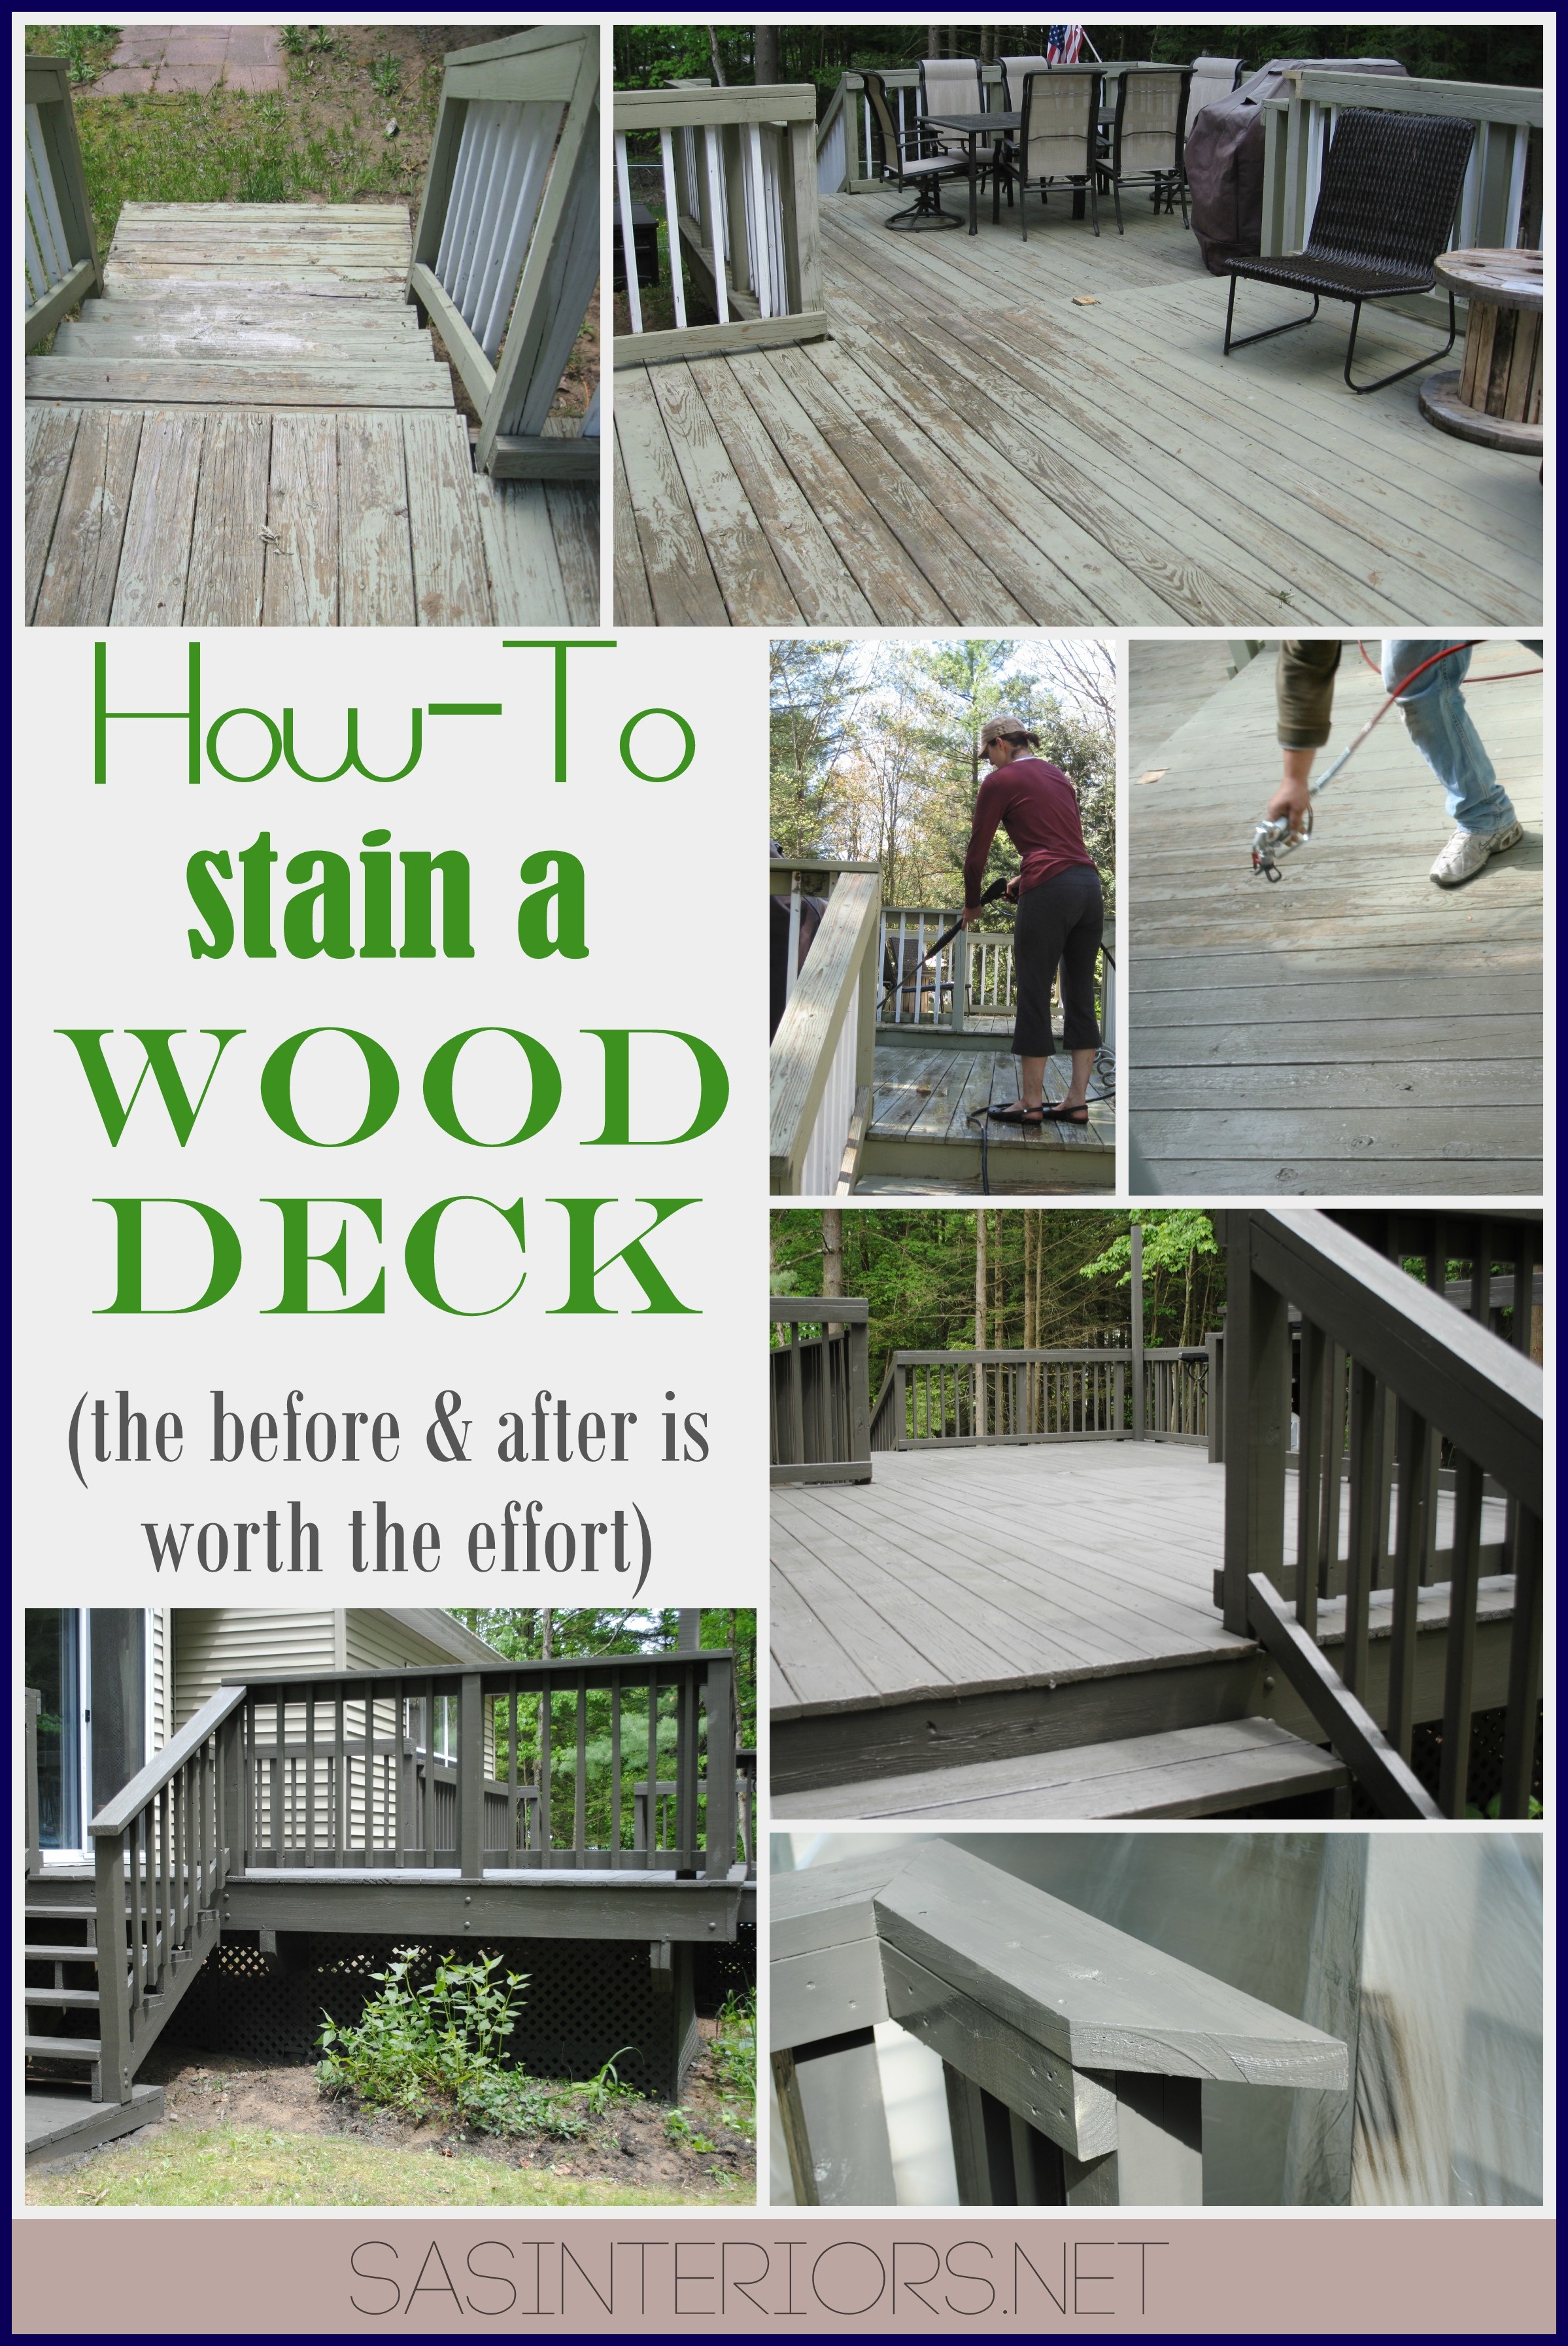
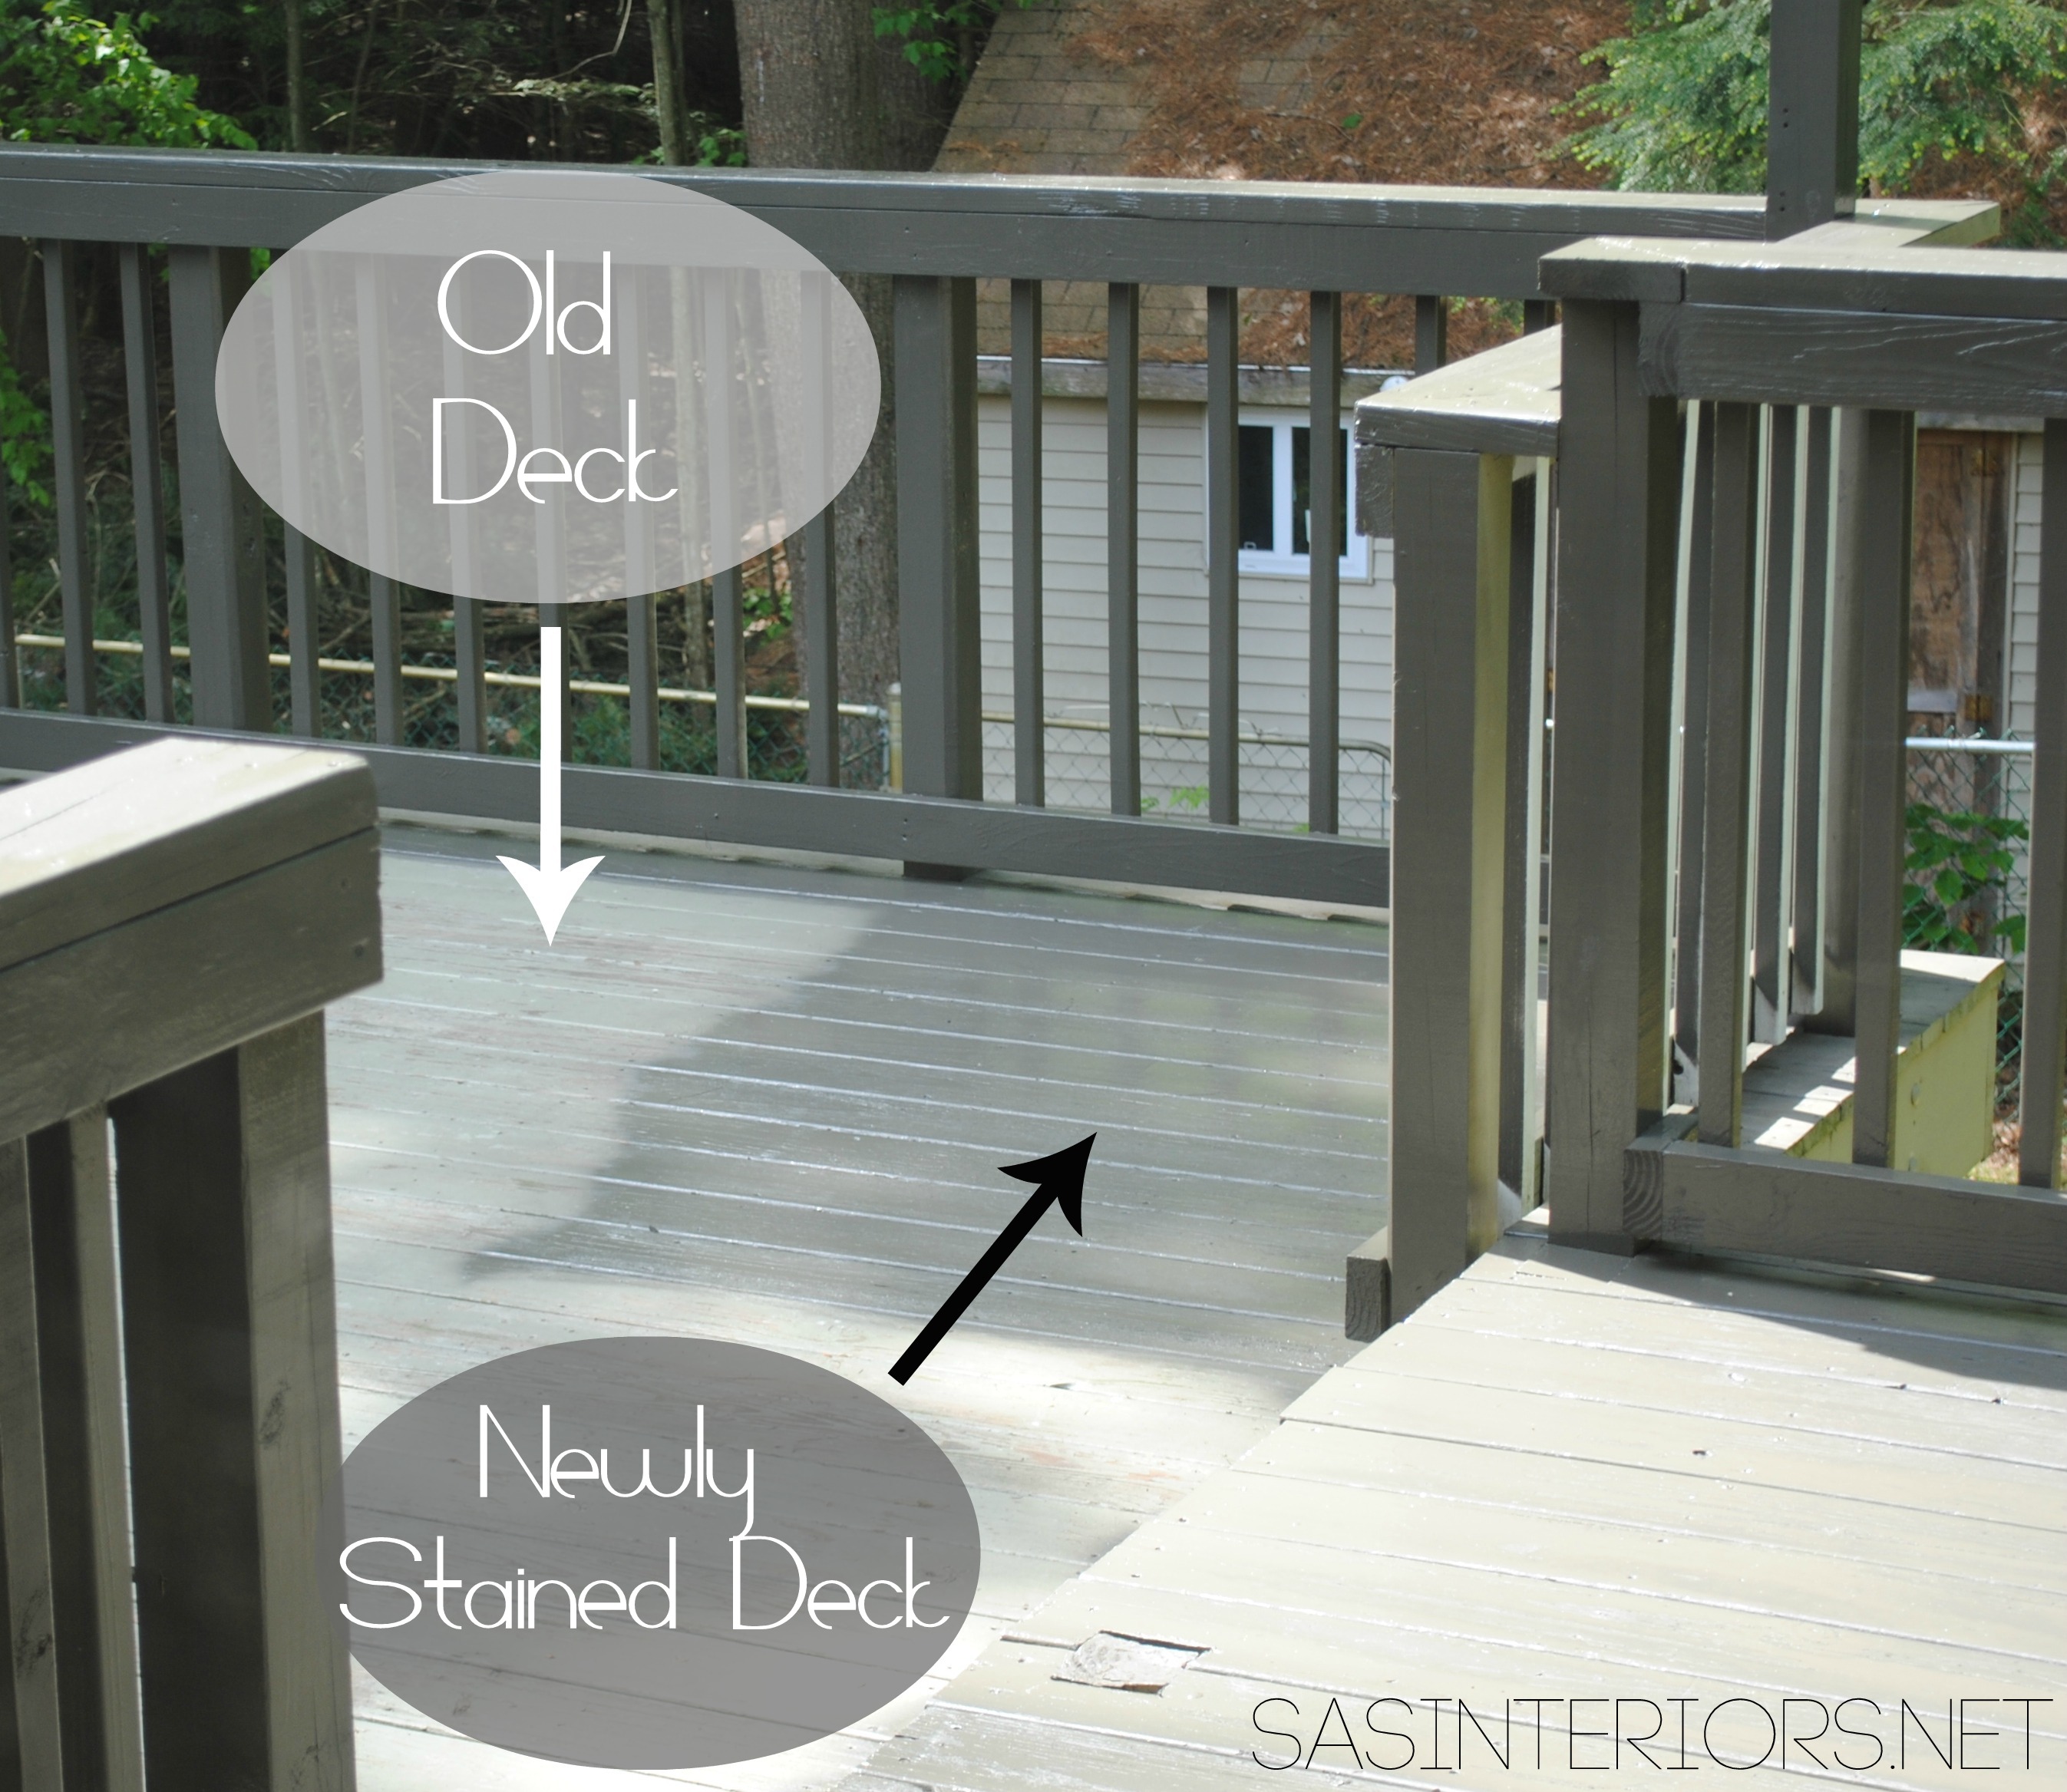
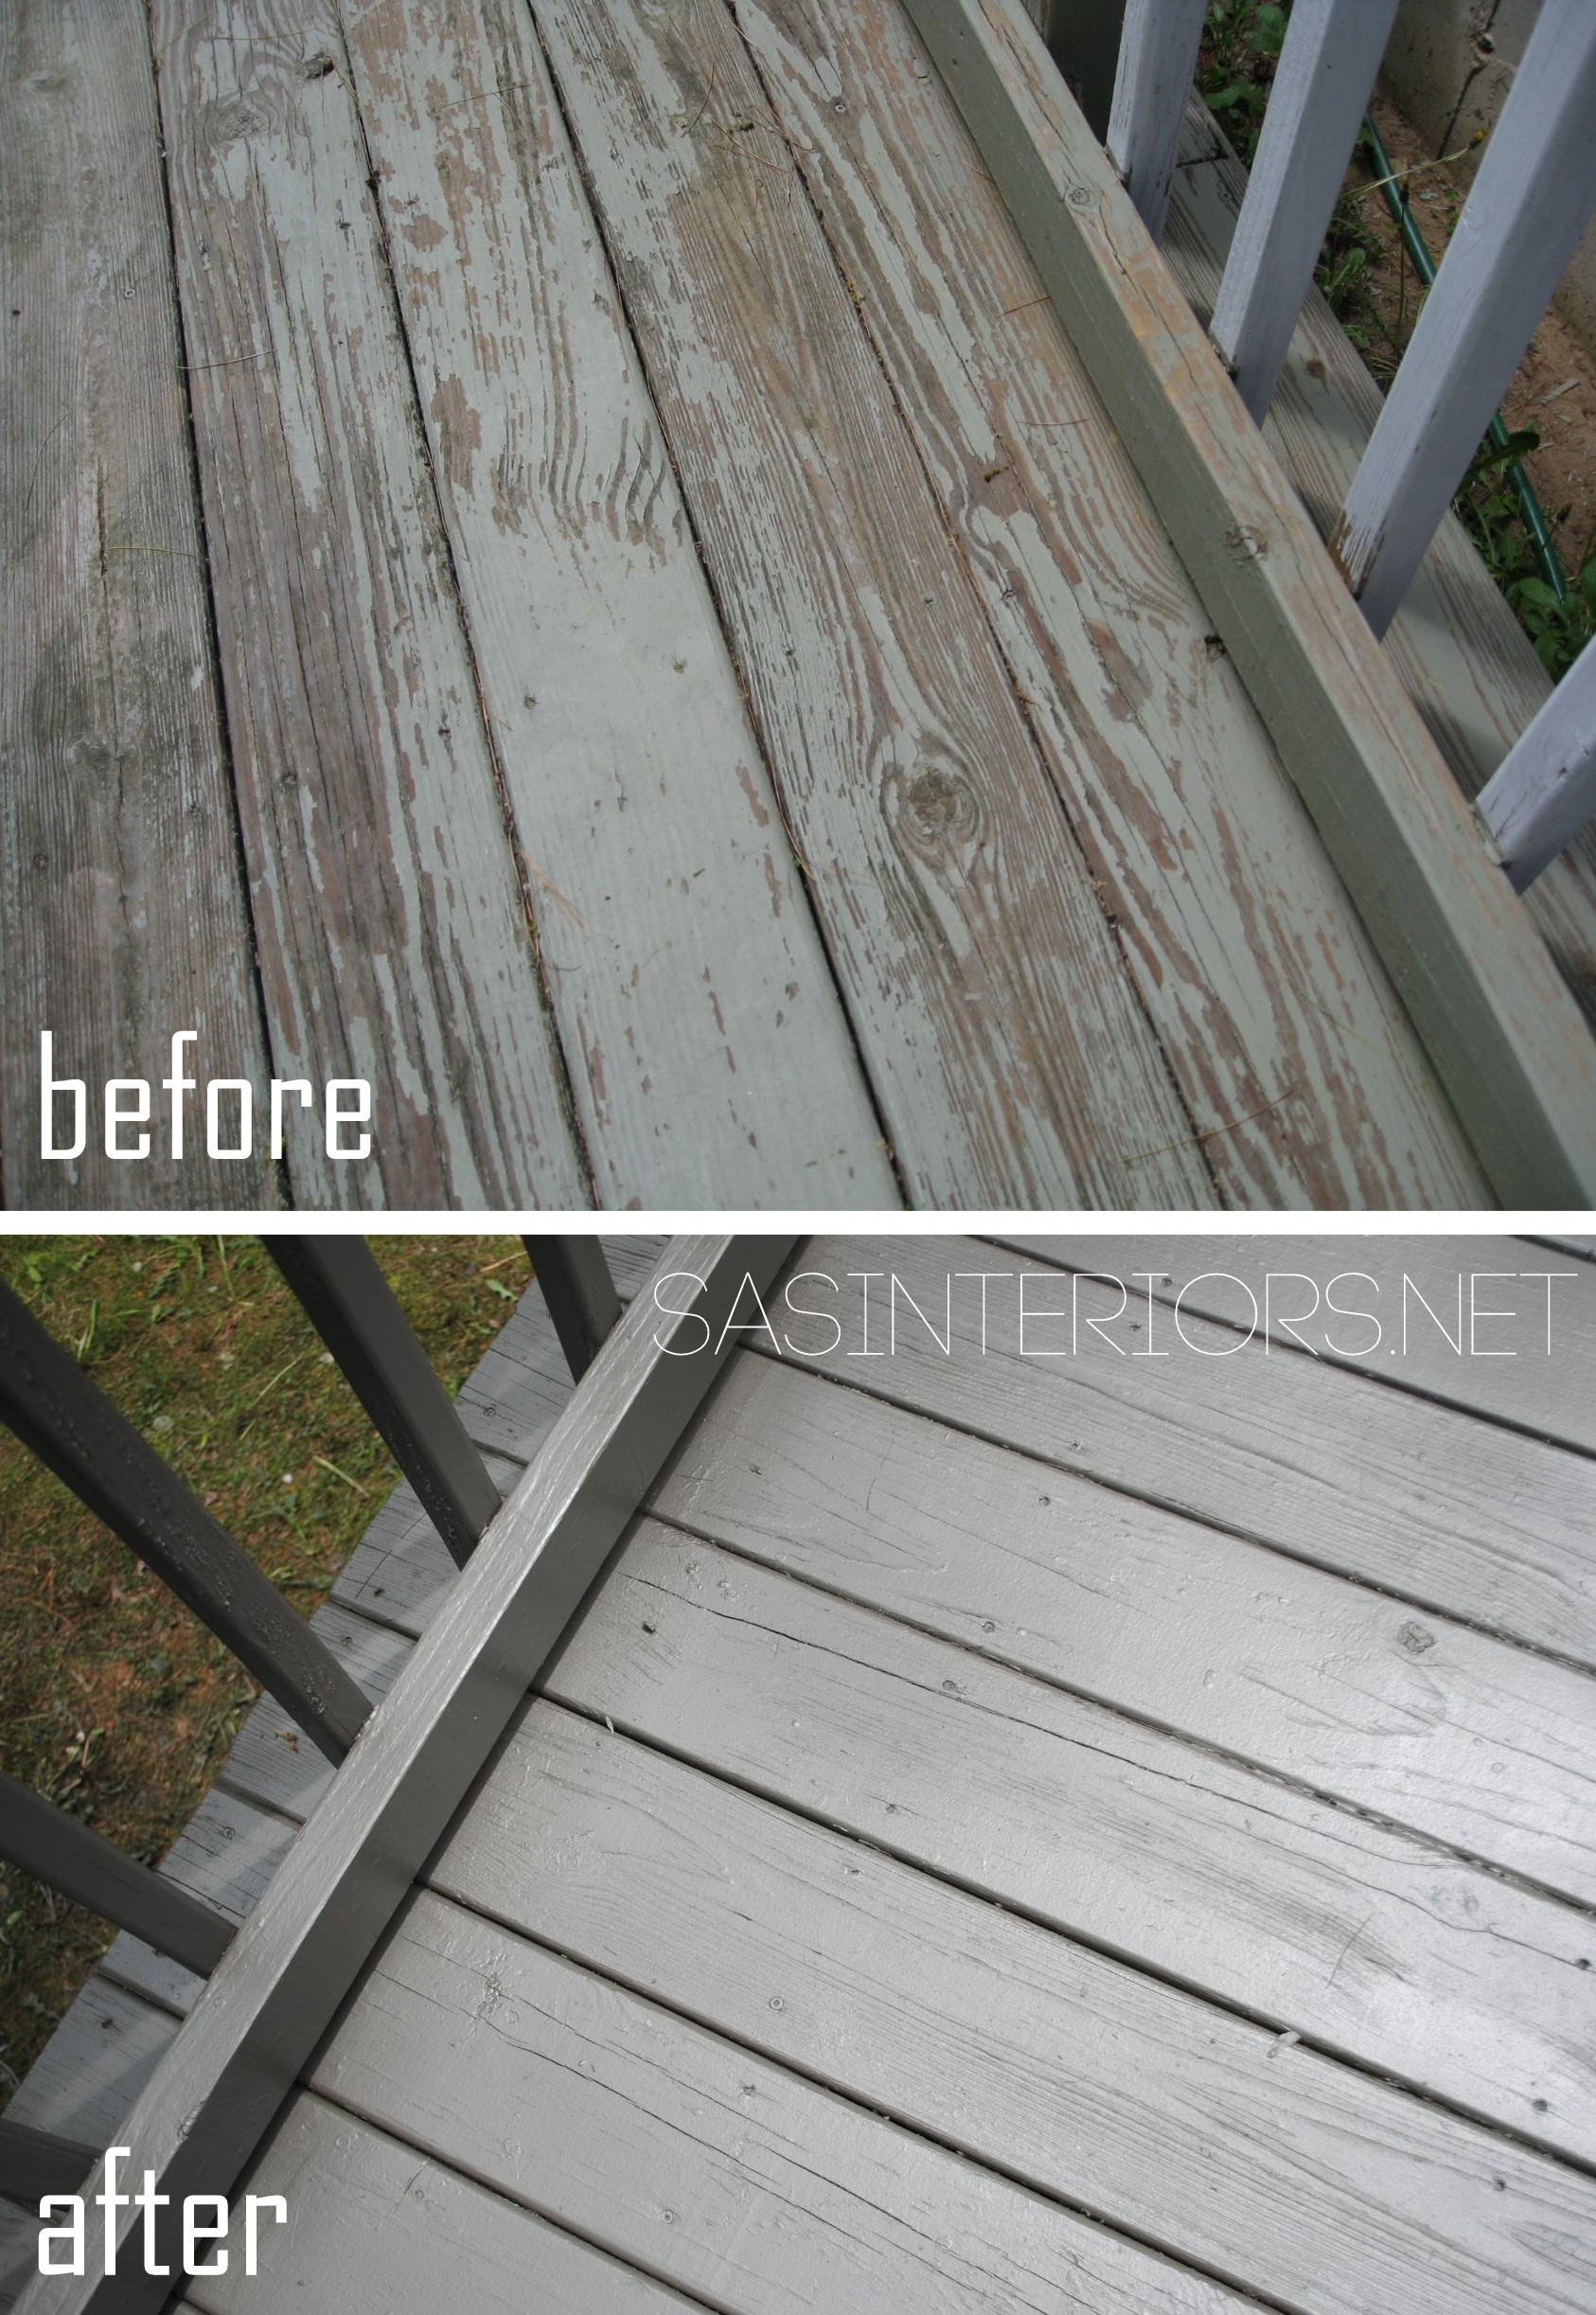
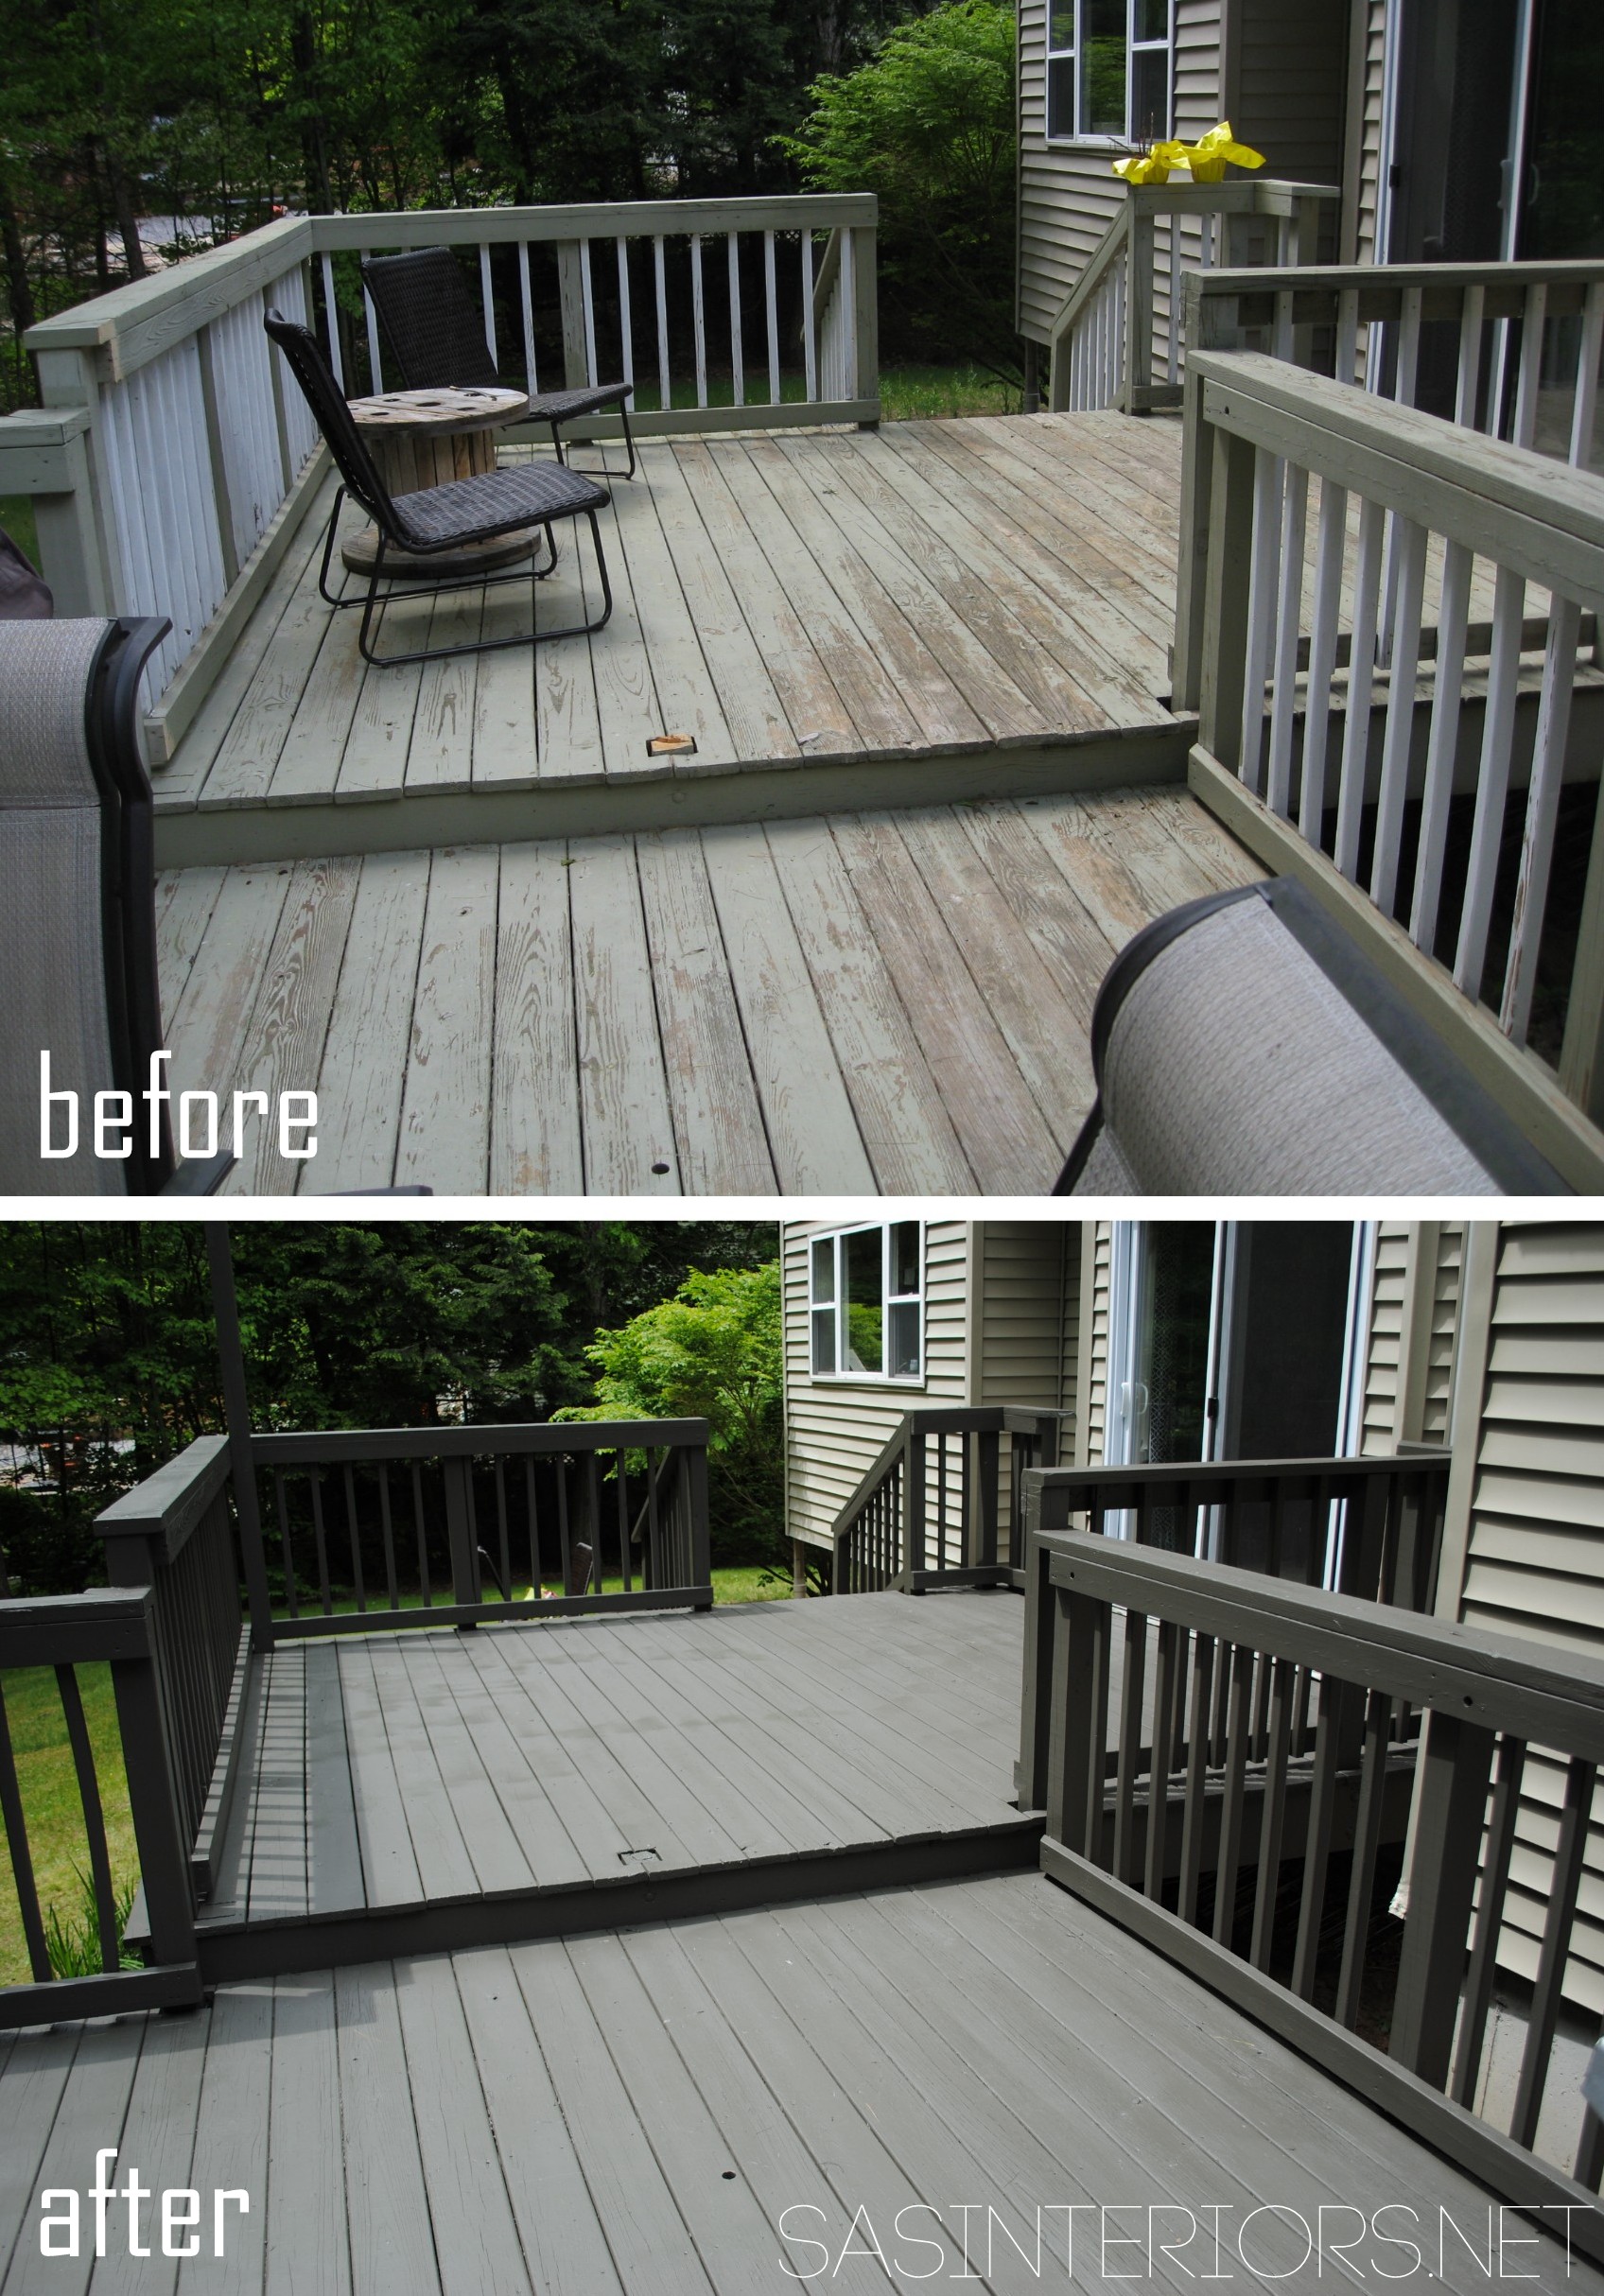
Before we get to any more of the process or the after pictures, here is what the deck looked like before.

How to Stain a Wood Deck - Before and After Wood Deck Makeover

How could a deck get so bad?  I dunno!  Living in this house for only 3 years, I have no clue as to when the last time the deck was done.  Also come to find out, the deck was previously painted, not stained.  Paint on the outside (especially if it’s not the right paint) does not last nearly as long as stain.  Also if you take a look, the spindles were white and after looking closely, they were only primed.  What I suspect happened, is that when the deck was painted last, someone got lazy, and only went as far as painting the deck surface and the handrail around.  Geesh.

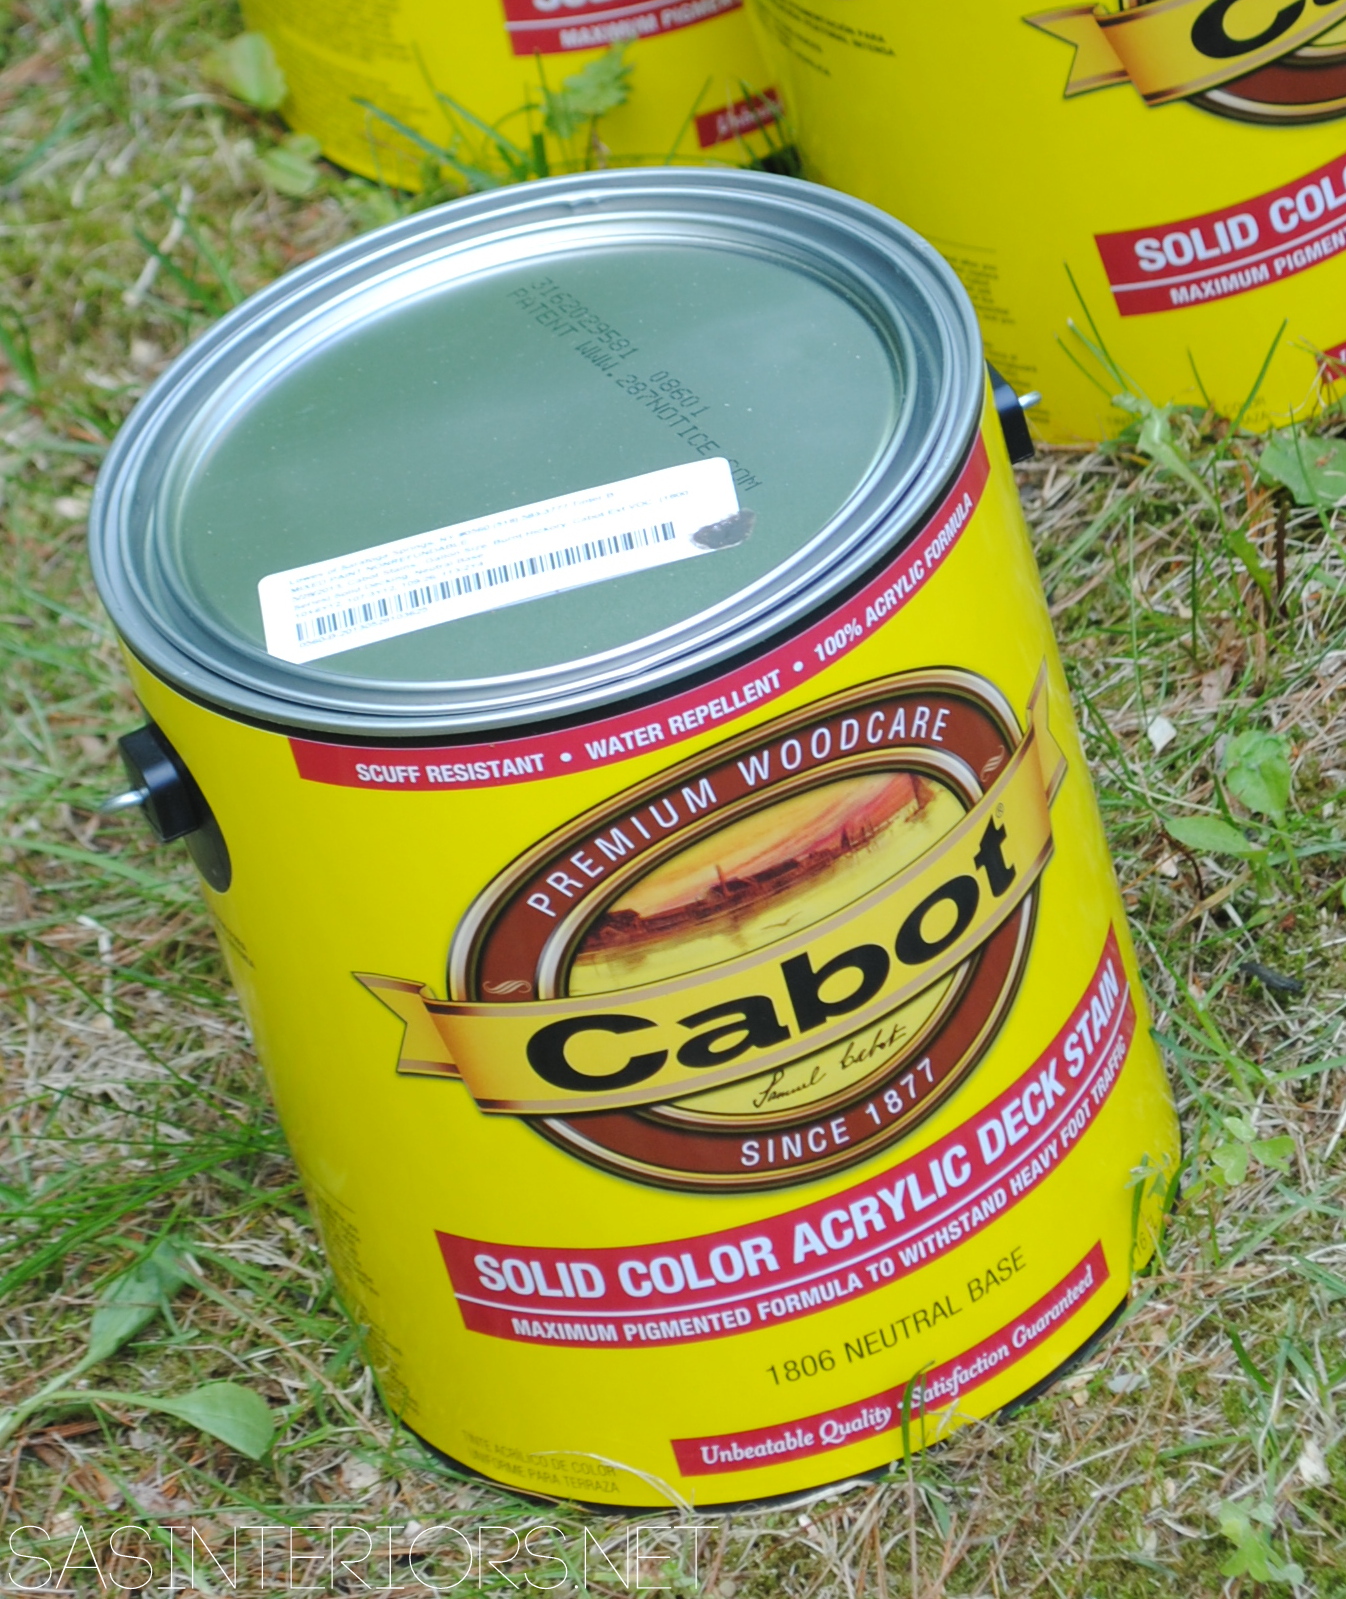
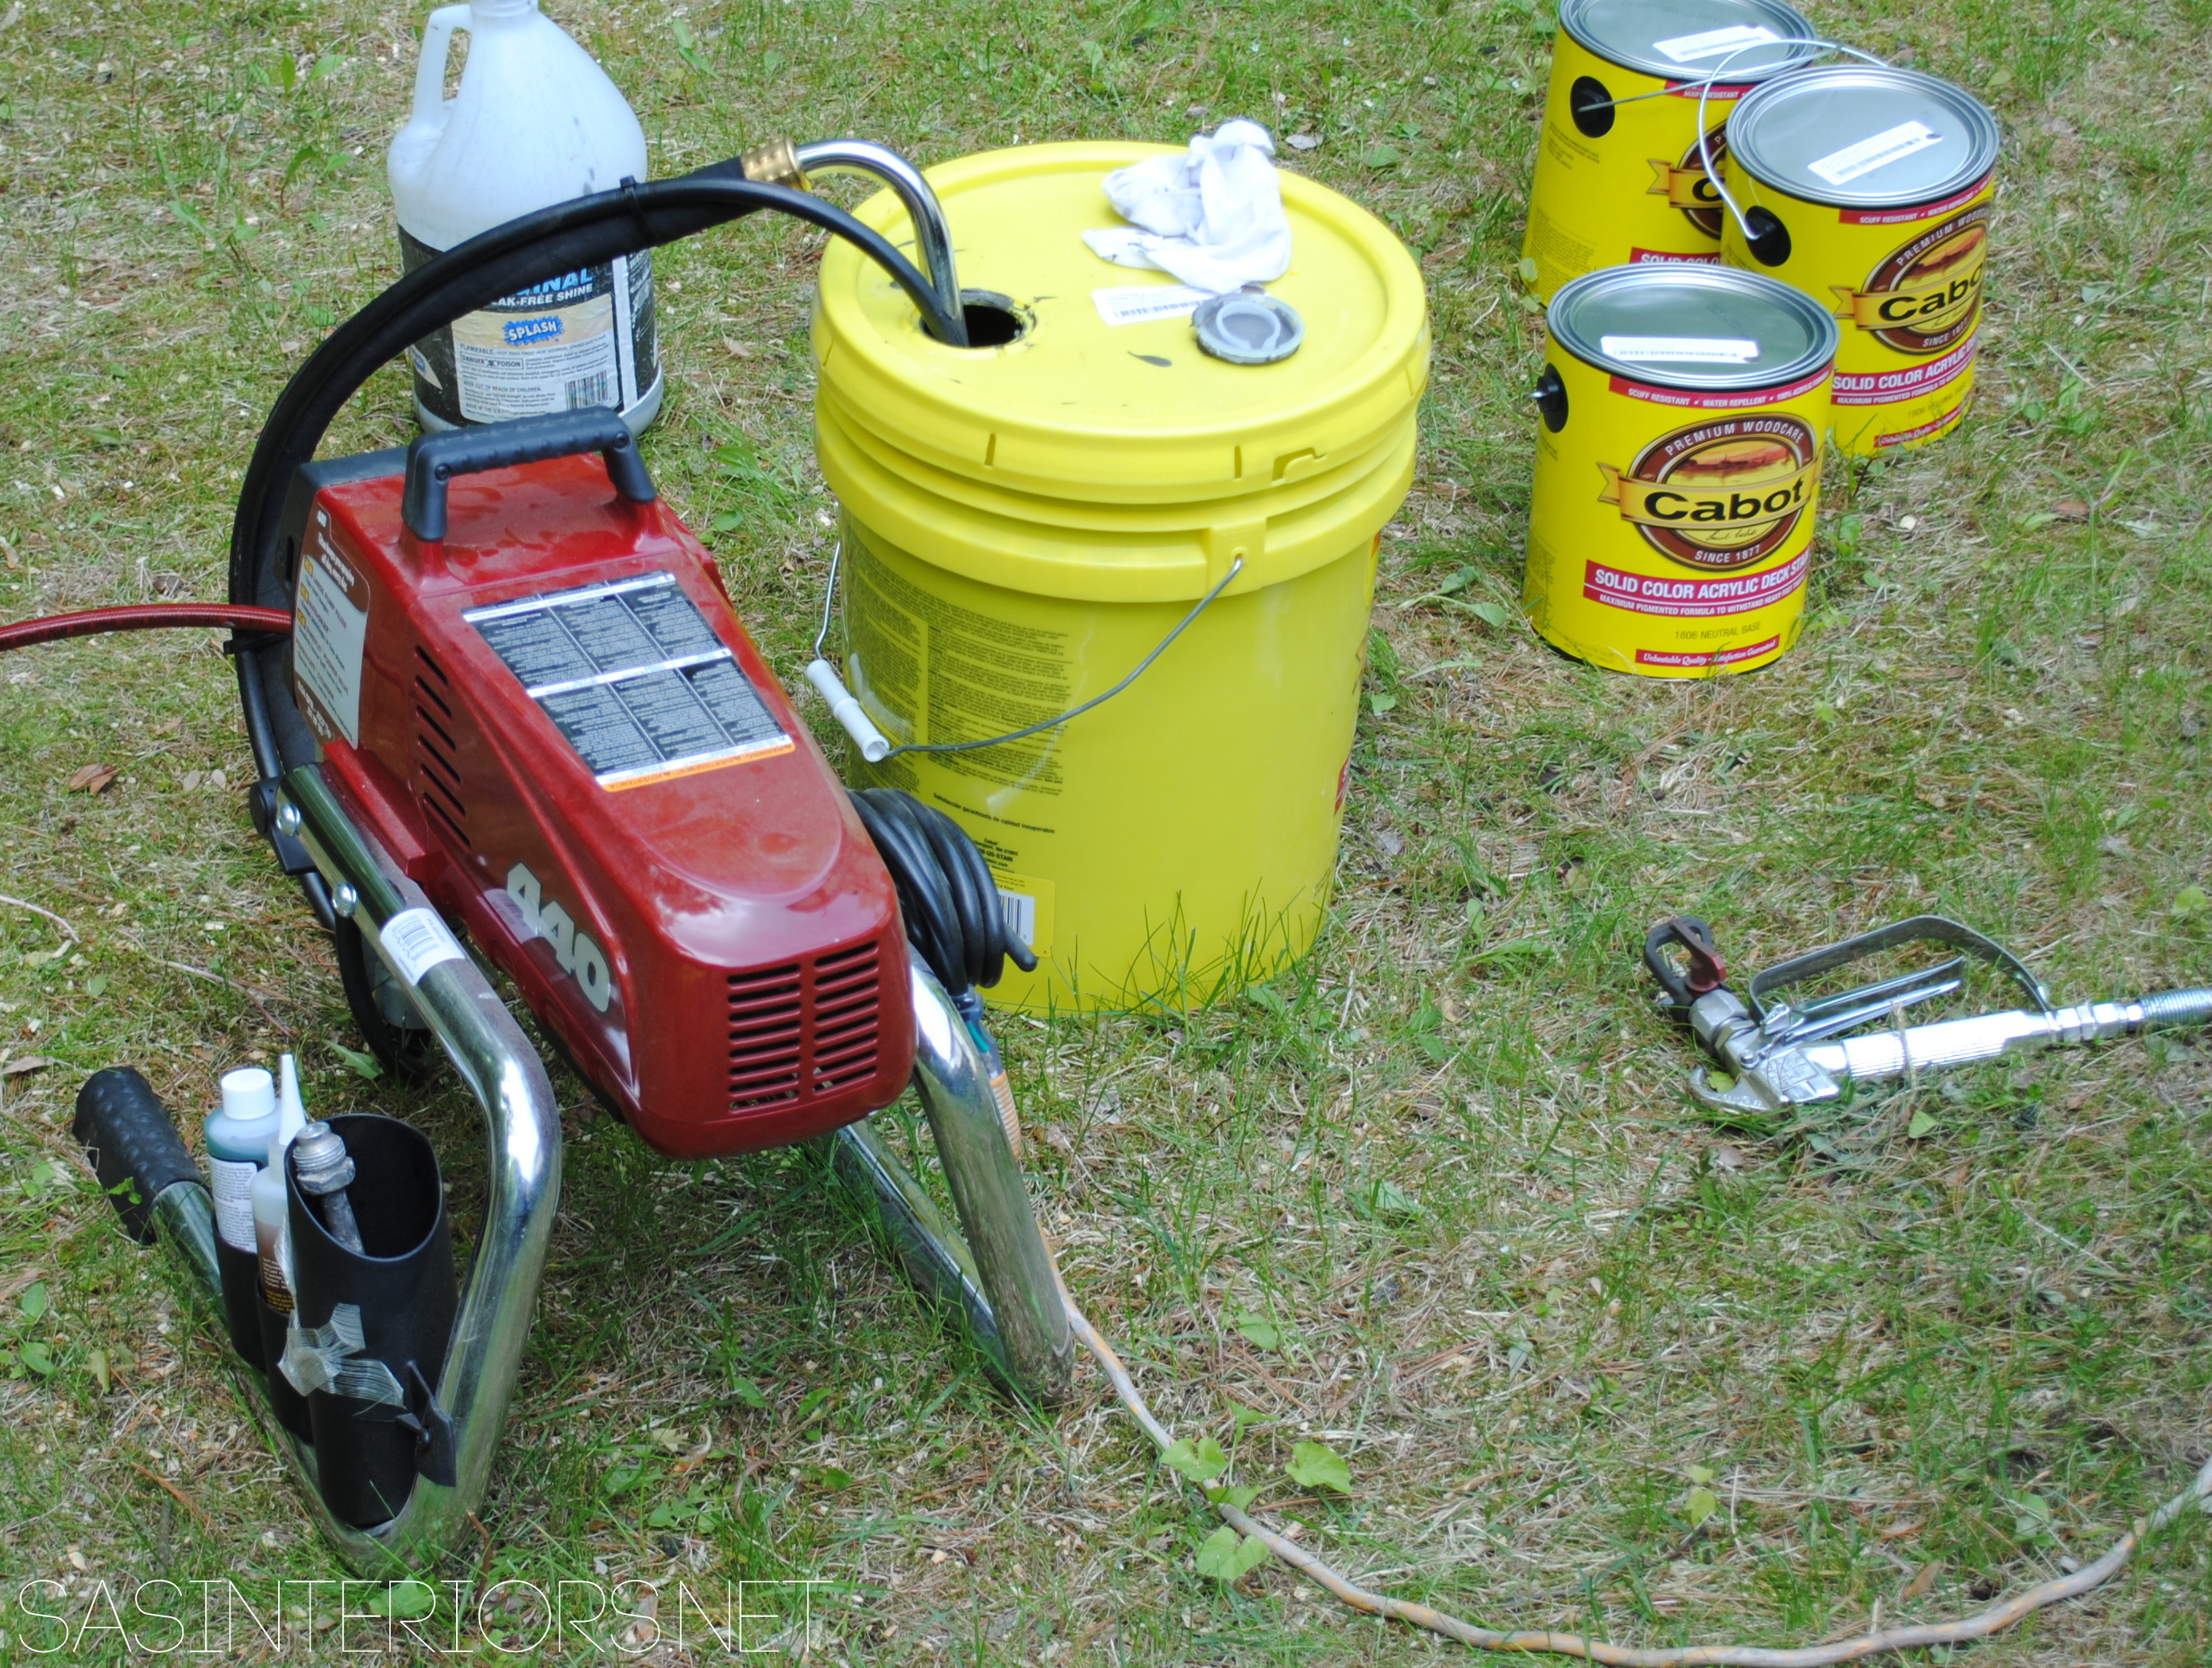
Learning from that, for this before and after deck makeover project, we decided to use Cabot Solid Stain.  Because we were applying it over a painted surface and didn’t want to sand down to the raw wood, a solid stain seemed like the best choice.  Cabot is known for their quality wood products, so there was no doubt that they’d definitely get the job done (after being a disaster for so long)!

How to Stain a Wood Deck - Before and After Wood Deck Makeover

Supplies for staining a deck:

  • Stain (I used a solid stain, but also available are wood tone finishes, semi-transparent finishes, and semi-solid finishes)
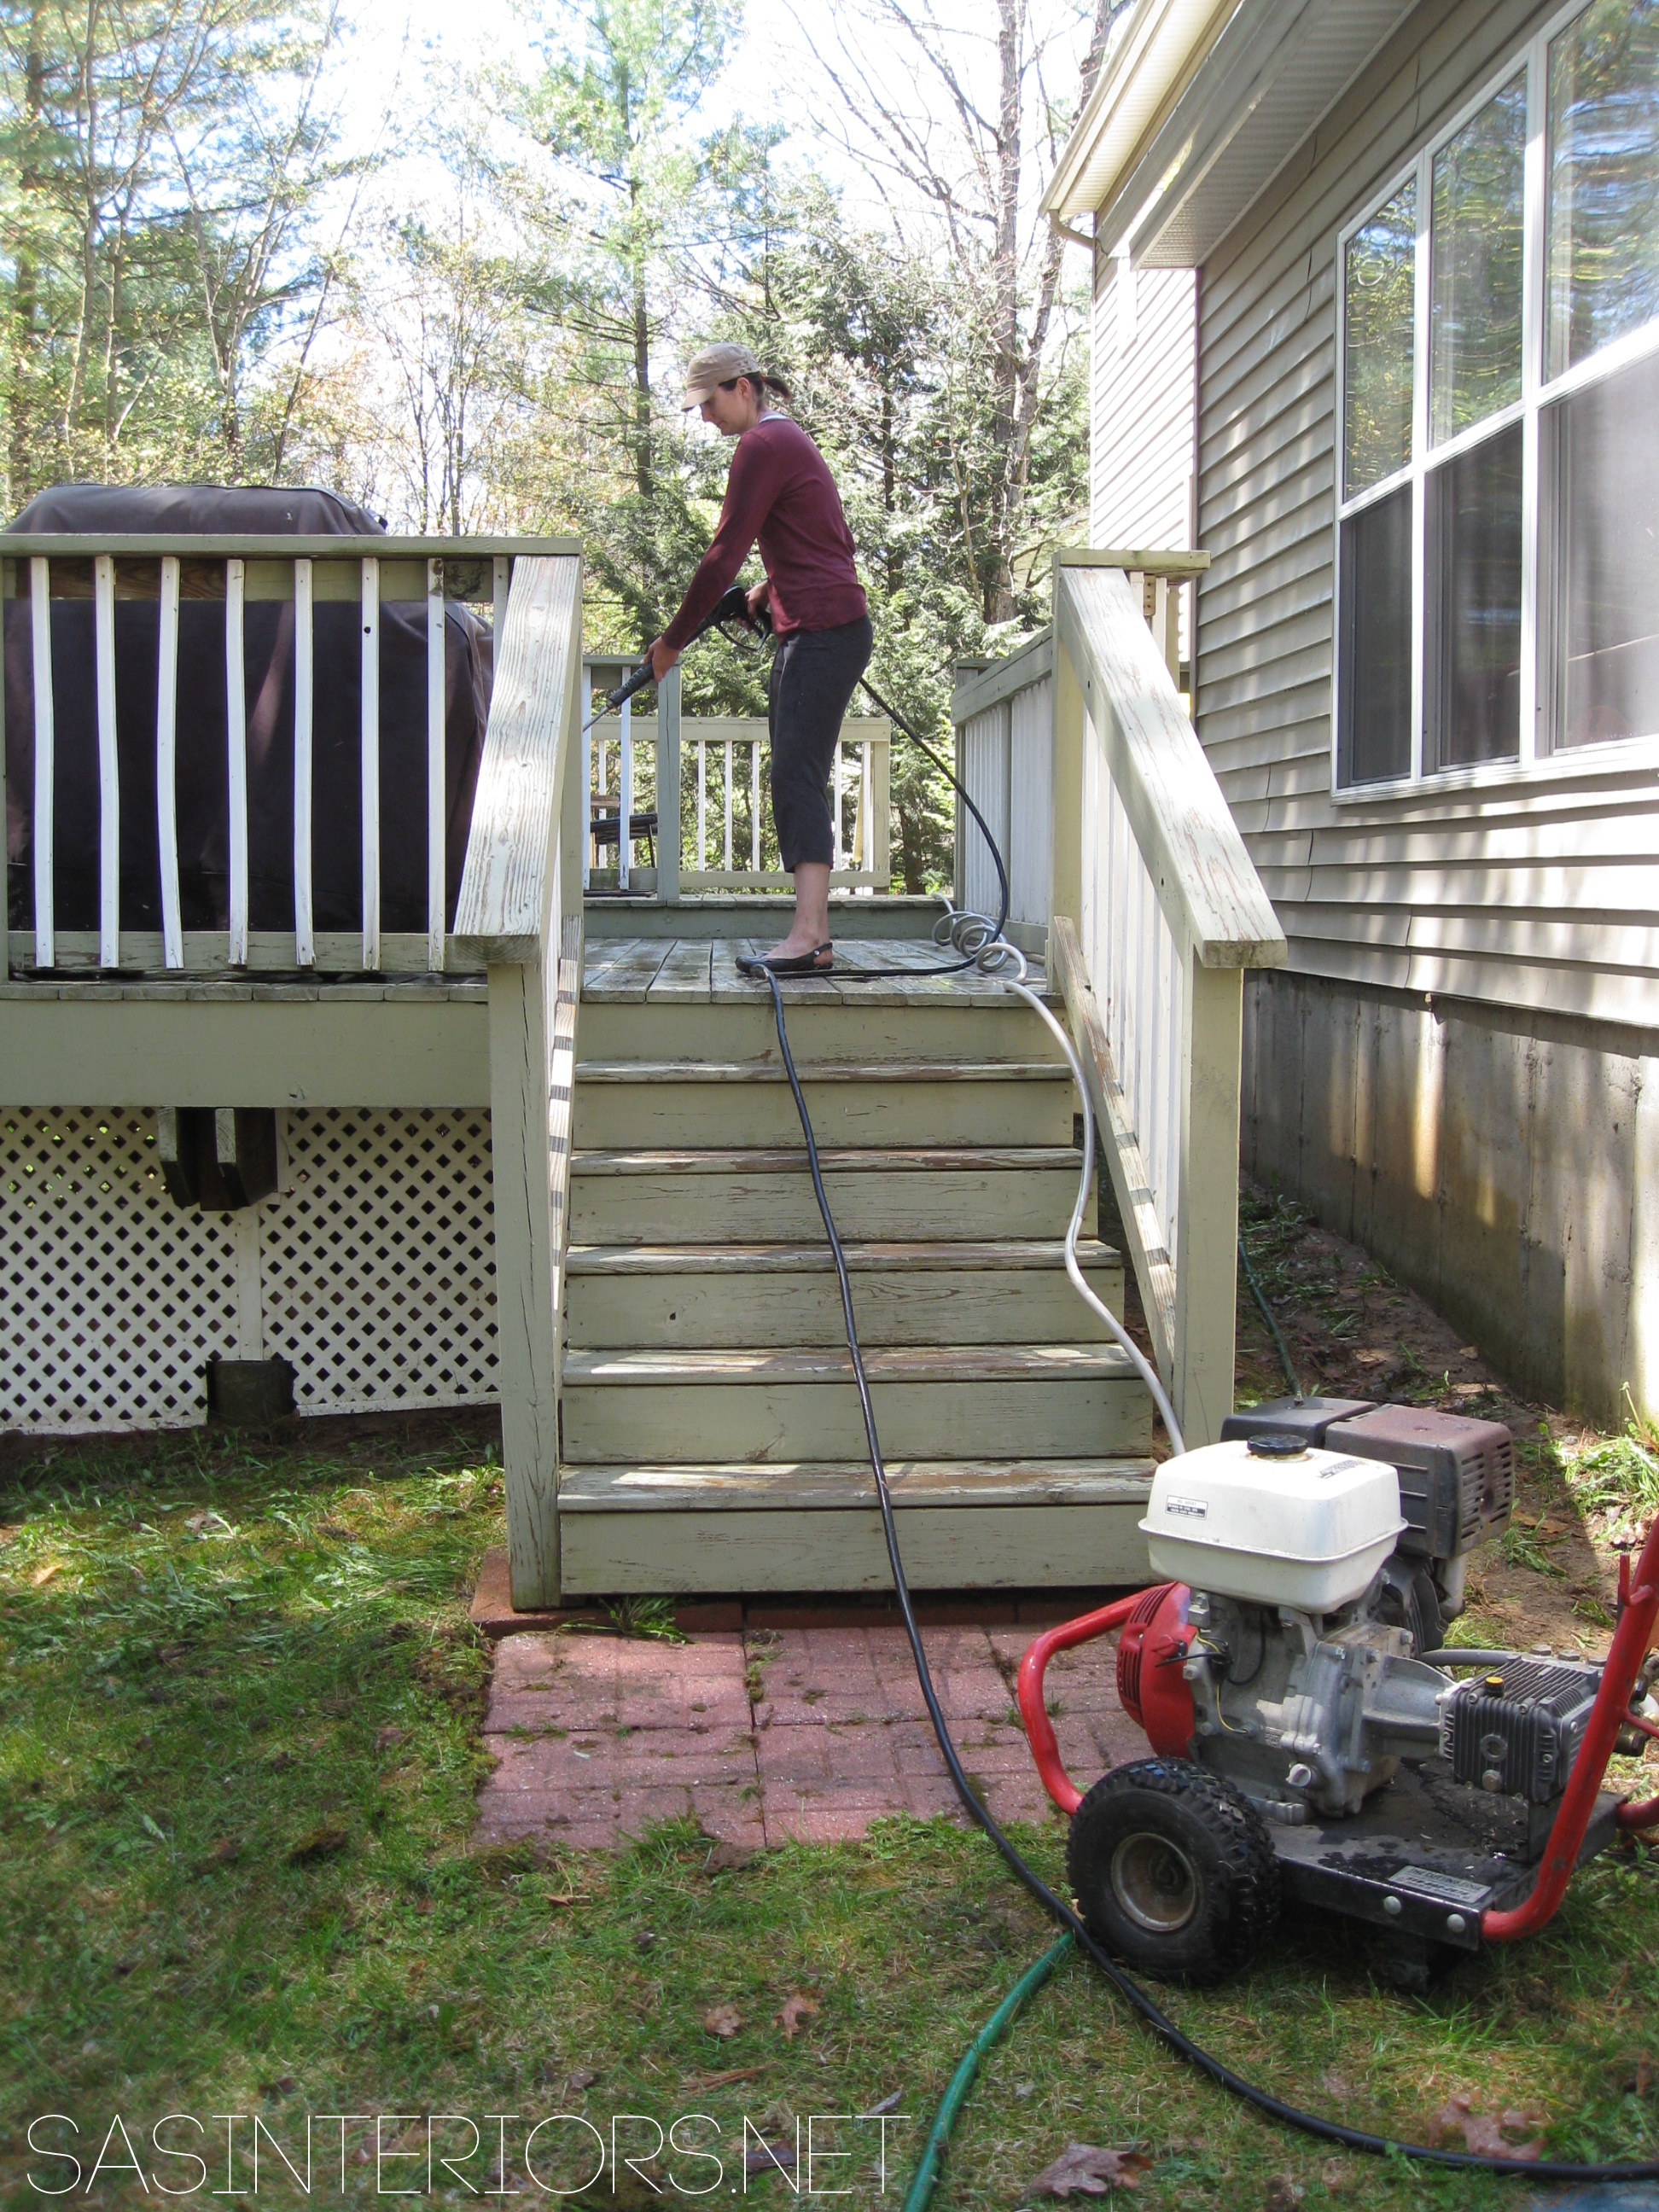
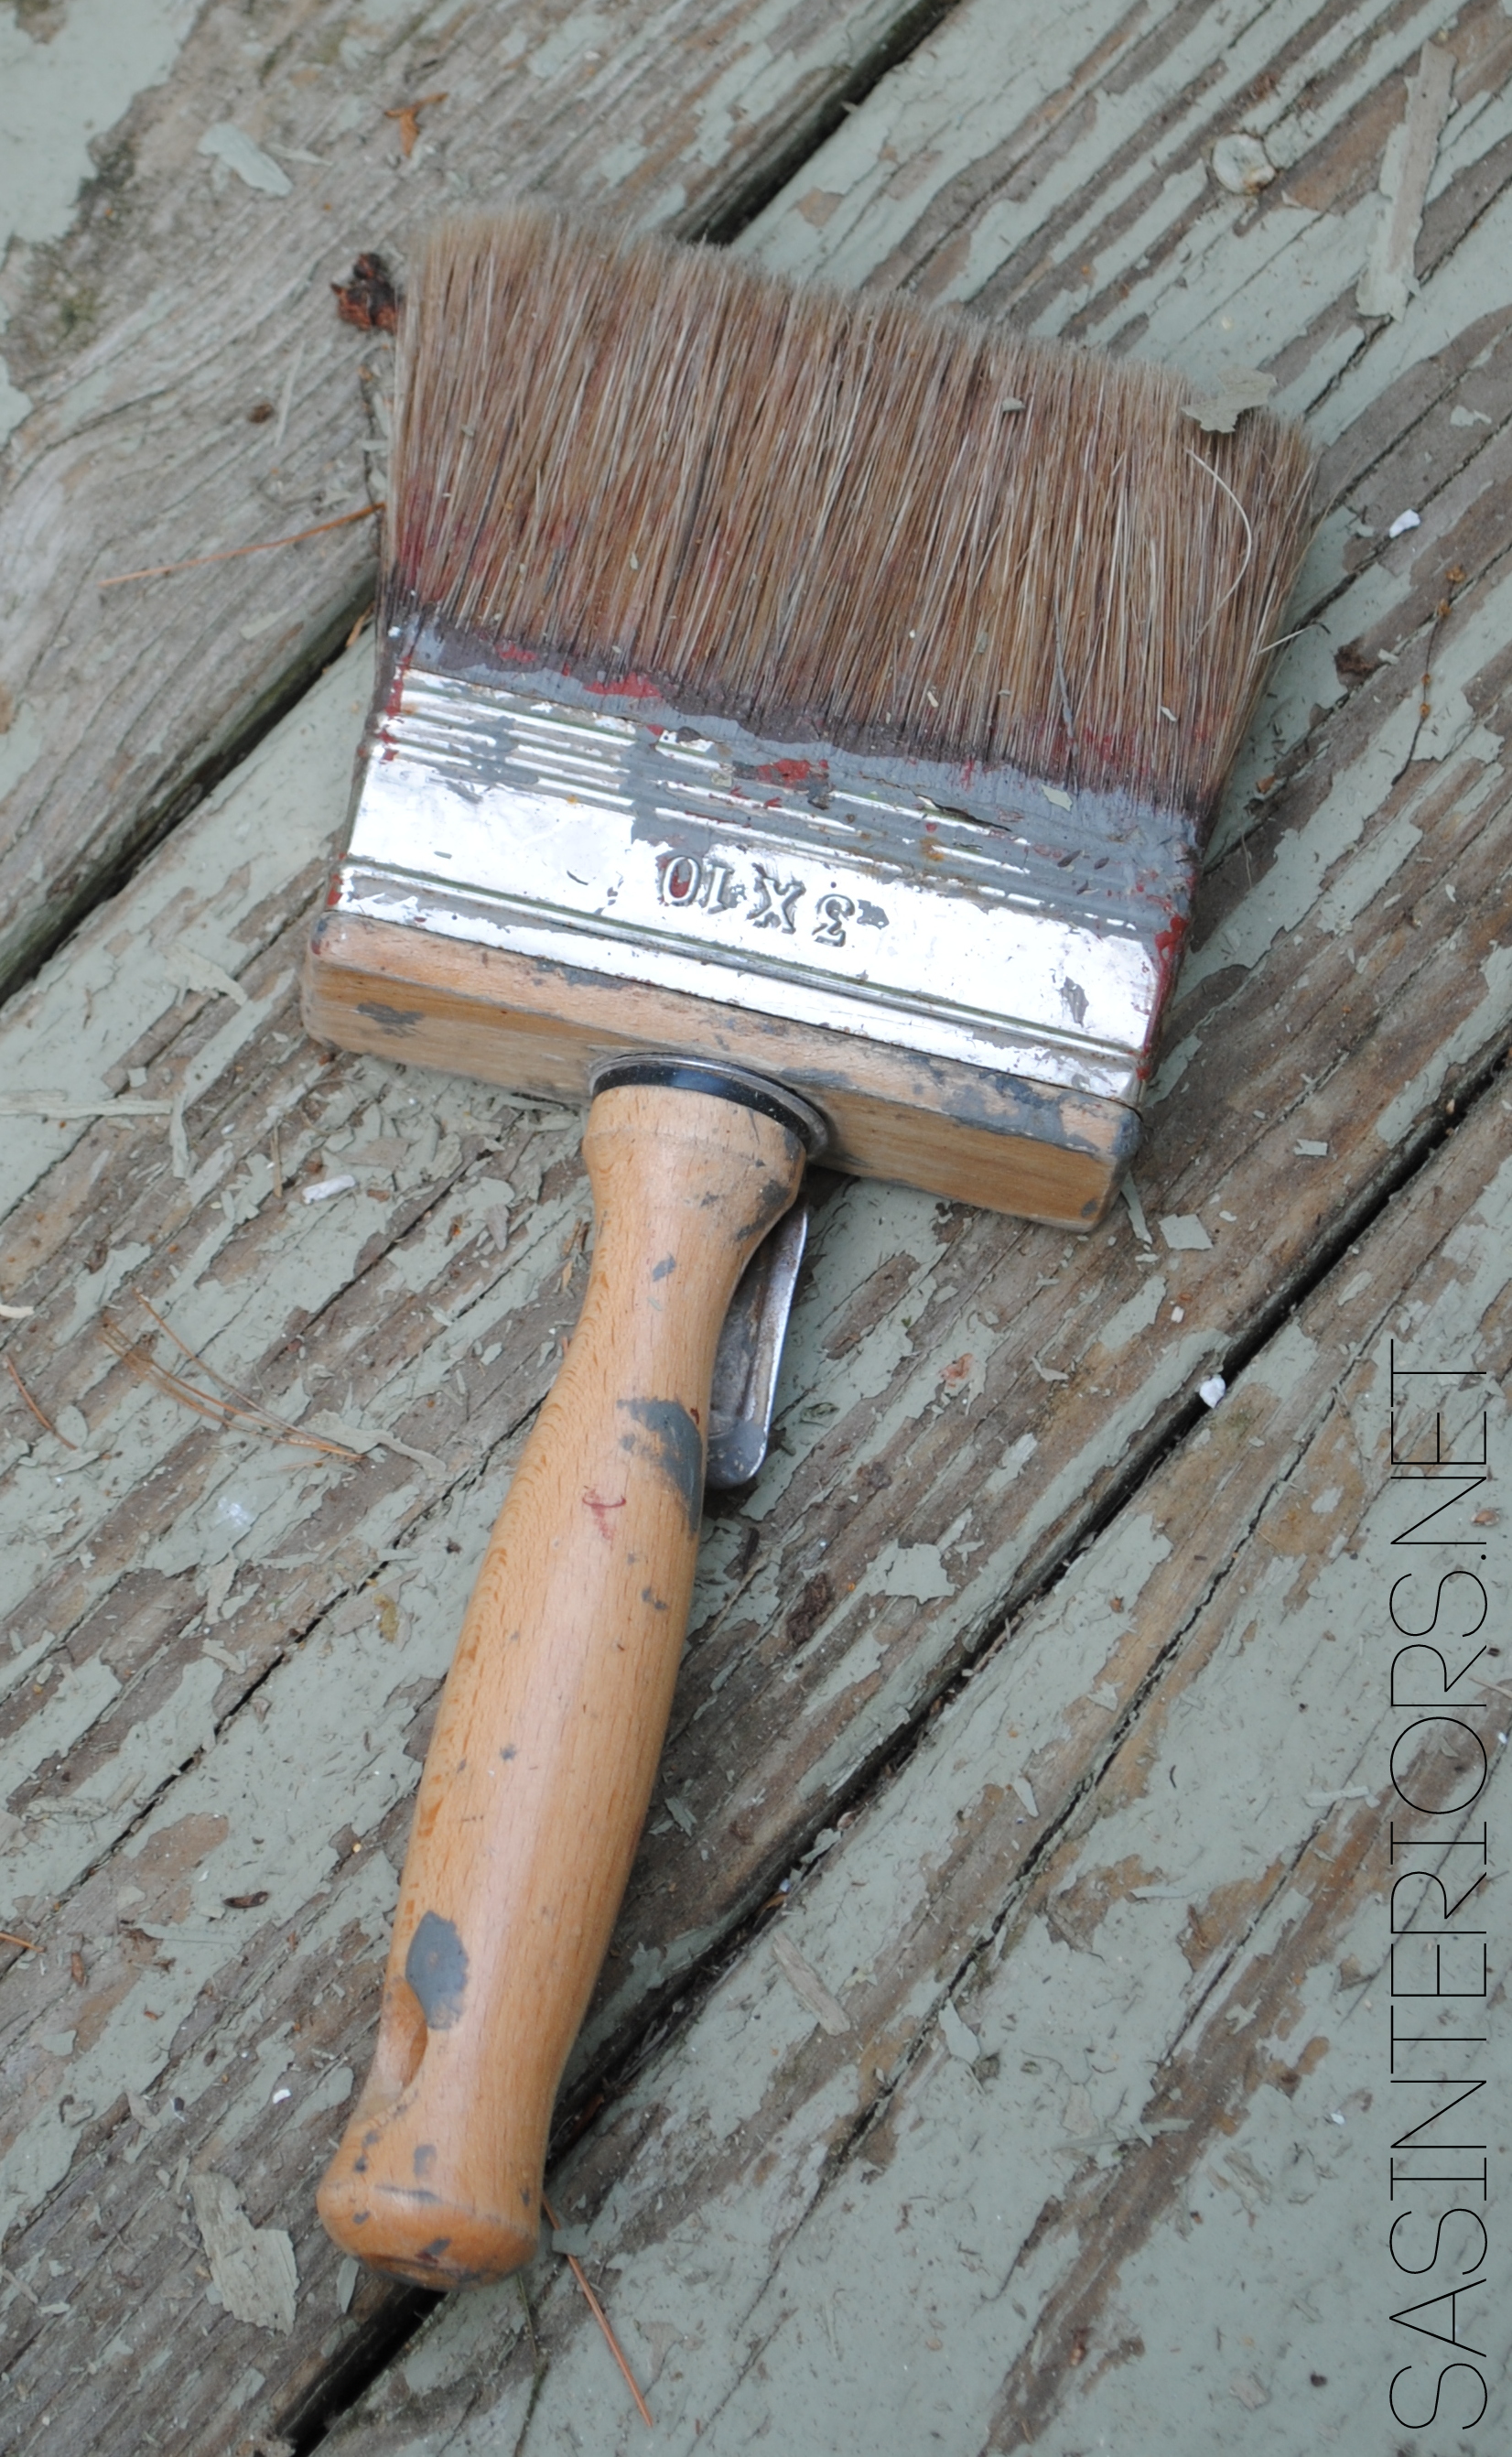
  • Tools to clean / prep the deck surface (I used a power washer, as well as a bristle brush to get dirt off, as well as flaking wood chips)
  • Sprayer (this is a great one that I would recommend <=affiliate link)
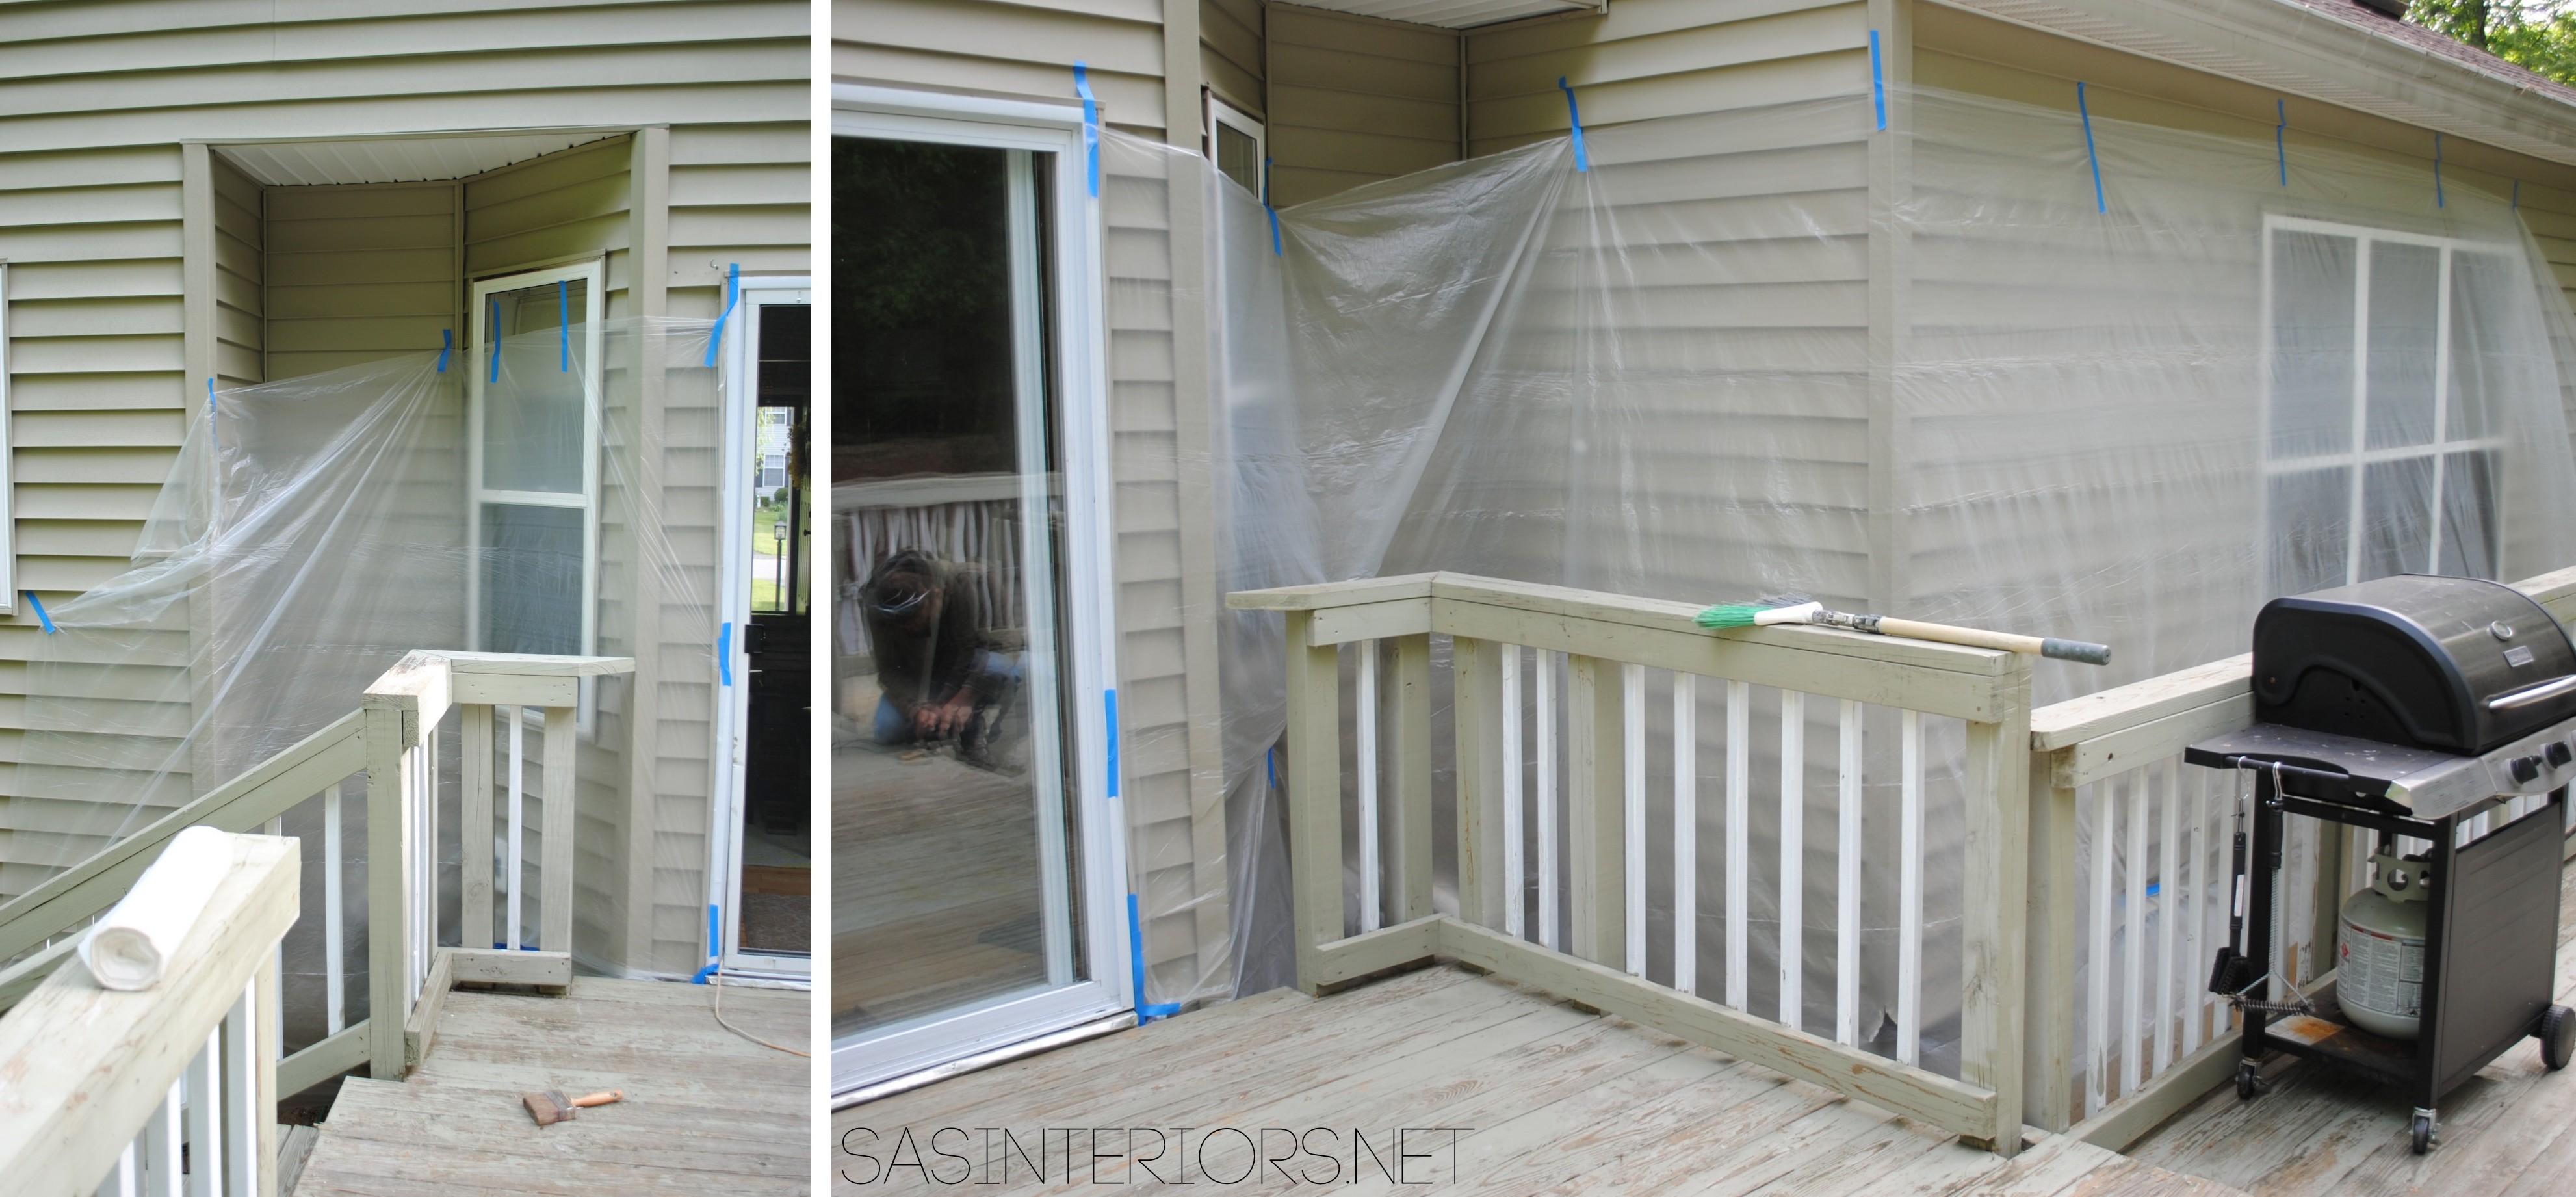
  • Plastic wrap (for protecting areas you don’t want stained)

1. To start off it’s a must to give the deck a good cleaning.  Whether previously coated or bare wood, cleaning the wood deck surface is the MOST IMPORTANT step of the staining process.  A few weeks ago, I borrowed our neighbors power washer and went to town on it.  It was amazing how much dirt and mildew washed away with a quick sweep of the hose. Plus all the chipped and peeling paint was stripped right off.  Because of the power washers strength, it really made a nice clean surface for staining.

How to Stain a Wood Deck - Before and After Wood Deck Makeover

A brush like this with firm bristles is great for removing excess dirt and peeling wood chips.  This was used right before the staining process started.

How to Stain a Wood Deck - Before and After Wood Deck Makeover

2. The house and areas we didn’t want touched were covered with clear plastic wrap.

How to Stain a Wood Deck - Before and After Wood Deck Makeover

3. With the wood deck clean and completely dry, we started staining using a hand sprayer.

How to Stain a Wood Deck - Before and After Wood Deck Makeover

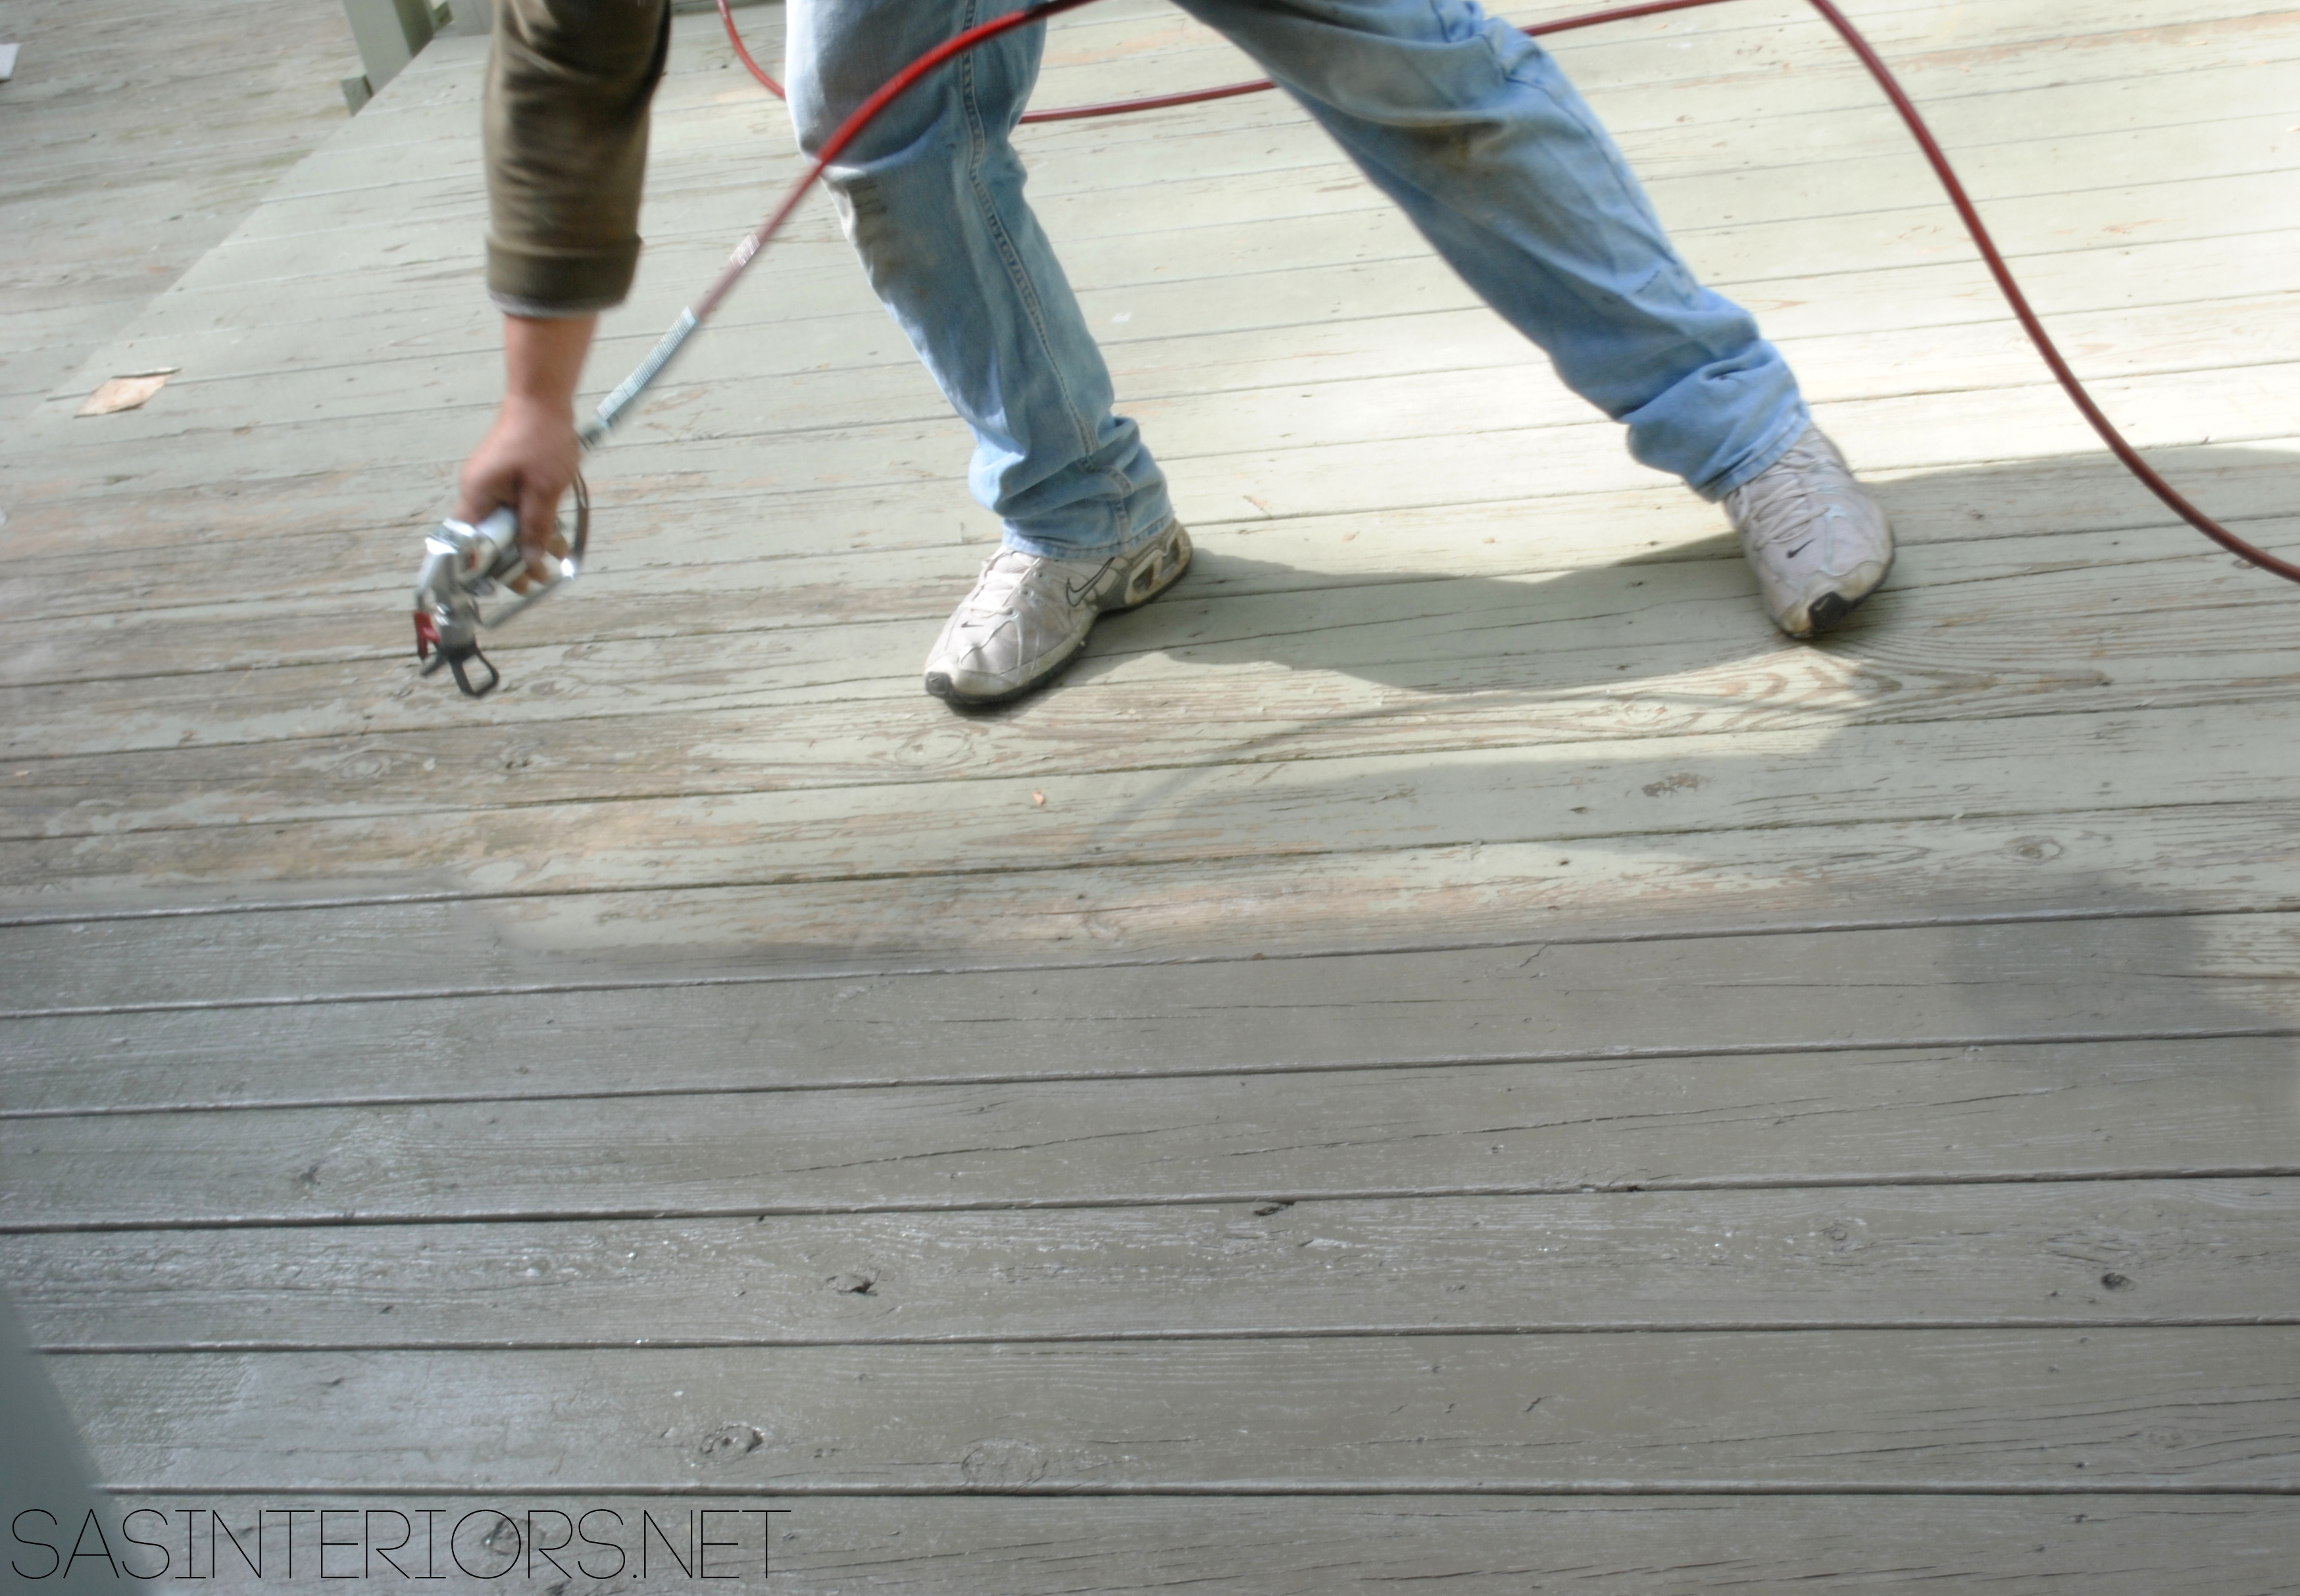
JUST LIKE with spray painting, the key to hand spraying is to:

  • Shake Shake Shake the stain before applying
  • Spray about 7-10″ away for the surface
  • Move back and forth in a steady, rapid motion in the same direction as the wood grain
  • Don’t concentrate the nozzle in any one place at any given time
  • Start spraying in a conspicuous spot (in case is spatters at the start), then continue in a consistent sweep
  • Wear a mask – the fumes aren’t great to breathe in

Most importantly (which has nothing to do with hand spraying, but with staining in general), read the directions.  Apply only the recommended number of coats and be sure not to overapply.

How to Stain a Wood Deck - Before and After Wood Deck Makeover

I will be honest, we had someone help us with the deck (due to lack of time) and he used a more powerful hand sprayer.  Even though it’s smaller, the one I mentioned above would still work great for a deck or fence.  Same rules applies.

And then it was done.

How to Stain a Wood Deck - Before and After Wood Deck Makeover

Let the SUMMER BEGIN!

How to Stain a Wood Deck - Before and After Wood Deck Makeover

I can not wait to get this deck filled with my Summer Essentials – a spot to  eat, a spot to grill, and of course a spot to relax!

How to Stain a Wood Deck - Before and After Wood Deck Makeover

The details on the stain…

I wanted a darker color for the deck so it would stand out against the neutral taupe / beige siding.  As I mentioned before, I decided on a solid stain because I wanted to skip the process of stripping the deck.  I chose Burnt Hickory for the color.  It’s perfect.  I was worried that it would be too dark, but it’s just the right depth of color that I was looking for.

O, you just wait to see what’s coming…  It’s going to be a party deck before you know it!

How to Stain a Wood Deck - Before and After Wood Deck Makeover

Huge difference, right?!

And about 24-48 hours, the deck was ready to use and being transformed as we speak.  Many more deck details to come.  Overall, the process of staining the deck wasn’t at all as difficult as I had envisioned.  Yes it was time consuming.  Yes, it was laborious.  But all well worth it to get this finished look!

Have you ever stained a deck or fence before?  If so, how was your experience?  And how was the result?

Disclosure: Cabot has provided me product for my project.  No one told me what to create, what to buy, how to use the product, or what to write.  All opinions are 100% mine! I truly believe Cabot has a great selection of wood staining products.

Powder Room Remodel: Repairing Wall and Hanging Wallpaper

Between baseball, a birthday party, and celebrating Mother’s Day (shout out to all the moms out there – hope you had a great day), there was very little time to actually get anything major accomplished on the DIY homefront this weekend.  BUT, somehow with 5 minutes here and 10 minutes there, I was able to squeeze in a few trips to Lowe’s (for supplies) and a few moments to hang wallpaper.  And thankfully with those spare moments, I actually got alot done and I feel like I’m making progress – even though it’s slow.

owder Room Remodel: Patching holes and hanging wallpaper - Follow along on this bold transformation #powderroomremodel

Since announcing the plans for the powder room and sharing details on the removal of the toilet and pedestal sink, the room has really taken a drastic turn – for the good. When I left you last, there was a huge hole in the wall from where the tile backsplash was removed and the wall colors were still orange and beige.  Well not anymore.

Before I could even think about wallpapering, the hole had to be repaired.  I’ll admit, I haven’t had the best of luck patching holes and achieving a flawless finish.  It’s definitely an art.  I’m good, but not great.  (need a great tutorial on patching holes in the wall?  check out Sawdust Girl).  THANKFULLY, most of the hole will be covered with the new vanity, so I wasn’t super obsessed with making it perfect and smooth.  To start, I grabbed  a 2′ x 2′ piece of sheetrock from Lowe’s, cut it to fit tightly in the hole (a tight fit is key), and spackled the edges.  This isn’t the best way of patching a hole, but it’s the lazy way I took – again because I know it’ll be covered with the vanity.

It took a few days for multiple thin layers of spackle and drying time before I could give the wall a good sanding.  The hand sander gave a really nice smooth finished surface.

Powder Room Remodel: Patching holes and hanging wallpaper - Follow along on this bold transformation #powderroomremodel

Once the walls were smooth and clean, I was able to paint and wallpaper the room.

I started out with painting the corners and edges at the window and door of the 3 non-wallpapered walls.

Powder Room Remodel: Patching holes and hanging wallpaper - Follow along on this bold transformation #powderroomremodel

The color is Blue Mystery by Valspar and it’s almost an exact match to the background color of the wallpaper.  Even though it’s blue, it has a deep purple / violet hue.  It’s actually a very different blue than my office, but with the foyer in between the two spaces, you can’t notice the differing tones.

Powder Room Remodel: Patching holes and hanging wallpaper - Follow along on this bold transformation #powderroomremodel

Once the walls were done, it was time to get down and dirty with wallpapering!

Powder Room Remodel: Patching holes and hanging wallpaper - Follow along on this bold transformation #powderroomremodel

How-To Wallpaper using Paste

I had thought the wallpaper I chose was a pre-pasted wallpaper (wallpaper that has paste and is activated with water) but when I added water to the back of my sample piece, I quickly learned it wasn’t.  So this was my first time wallpapering using paste.  I was apprehensive at first, but it actually wasn’t at all as difficult as I thought it would be. I wrote a tutorial a long time ago on How-To Hang Prepasted Wallpaper, if you want to check that out.

Supplies:

  • Wallpaper of your choice.  I chose Amy Butler Lacework in Midnight.
  • Wallpaper Paste
  • Smoothing Took
  • Sharp Razor or blade
  • Other handy tools for wallpapering are: a tape measure, a laser level, a pencil

Powder Room Remodel: Patching holes and hanging wallpaper - Follow along on this bold transformation #powderroomremodel

1. To start, I found the center of the wall and made a mark.  Then knowing the width of the roll (20.2″), I determined how far over the edge would need to start (1/2 of the overall which is 10.1″).  I made another mark and used my laser level to make marks all the way up the wall (which will be the location for the edge of the wallpaper).

Powder Room Remodel: Patching holes and hanging wallpaper - Follow along on this bold transformation #powderroomremodel

2. After determining where the wallpaper edge would be placed, I added the wallpaper paste to the center section of the wall using a brush.

Powder Room Remodel: Patching holes and hanging wallpaper - Follow along on this bold transformation #powderroomremodel

* There are several techniques to hanging wallpaper, but I thought it would be best to follow the steps that came with my wallpaper roll.  Another method that is readily used is to apply the paste to the wallpaper back, fold over both ends of the strip (being careful not to crease the paper) so that they meet in the middle.  This gives the paste a chance to activate.  Again, the instructions with my wallpaper said to apply the paste directly to the wall, which is what I did.  If you want to see more on the other application, I found this helpful step by step method.

3. After the paste was applied, I took the end of the wallpaper roll (leaving about 3″ extra at the top) and adhered it to the wall aligning the edge with the mark I made on the wall.  Then continued to roll it out down the wall.

Powder Room Remodel: Patching holes and hanging wallpaper - Follow along on this bold transformation #powderroomremodel

4. As I was adhering the paper to the wall, I used the smoothing tool to eliminate the bumps, wrinkles, and air bubbles.  It’s best to start at the top and move down the wall, as well as from the center of the paper and smooth out towards the edges.  You want to press firmly, but not too hard so all the glue seeps out.  Alittle glue seepage is okay and expected.

Powder Room Remodel: Patching holes and hanging wallpaper - Follow along on this bold transformation #powderroomremodel

5. Once the first panel was hung, it was time to hang the second adjacent sheet.  The same steps should be taken, but this time it’ll be key to align the seams so the design / pattern matches (especially with the paper I was using).

Powder Room Remodel: Patching holes and hanging wallpaper - Follow along on this bold transformation #powderroomremodelphoto credit: my 7 year old!

6. Once the paper is up and in place, it’s time to trim – the ceiling, edges, and base. Using a sharp blade / razor, follow the crease / edge and gently cut the paper.  It might be damp from the paste, so try not to pull the paper because it’ll rip.  Scissors also help.

Powder Room Remodel: Patching holes and hanging wallpaper - Follow along on this bold transformation #powderroomremodel

I also had to trim around the light fixture…  that’s to come.

Powder Room Remodel: Patching holes and hanging wallpaper - Follow along on this bold transformation #powderroomremodel

And the result is…

…a beautiful, bold focal wall!

Powder Room Remodel: Patching holes and hanging wallpaper - Follow along on this bold transformation #powderroomremodel

The quality of this paper is amazing.  Comparing it to the previous time when I wallpapered, this paper is alot heavier which hides many of the imperfections on the wall – score!

Powder Room Remodel: Patching holes and hanging wallpaper - Follow along on this bold transformation #powderroomremodel

Not to shabby going from this…  to this…

Powder Room Remodel: Patching holes and hanging wallpaper - Follow along on this bold transformation #powderroomremodel

Plan of Action for #powderroomremodel:

  • Choose and buy sink
  • Choose and buy toilet
  • Choose and buy faucet
  • Remove sink
  • Remove toilet
  • Repair hole with new sheetrock
  • Repair floor @ sink and toilet
  • Hang wallpaper
  • Paint
  • Add crown moulding (yes, my 1st moulding ever)
  • Assemble sink
  • Install sink and faucet
  • Install toilet
  • Accessorize – mirror, pictures, etc.

7 items crossed off the list since last time.  Now that’s progress!

But there’s still more to come. Stay Tuned.

Have you ever hung wallpaper?  What method did you use?  Was it pre-paste or the kind where you had to add the paste?