


DIY: Pallet Gardening Table
Why yes, another pallet project coming your way.
I’ve only created 328 pallet projects thus far. well maybe that’s a bit of an exaggeration…
Anyway, I’ve been busy with creating something new and different using pallets.
What did I make? A Pallet Gardening Table…

I’ve never seen something like this before (maybe it’s on pinterest, but lately it’s been crushing my creative juices so I try to stay clear)
Why did I create it? Because I needed a spot of my own to do my gardening and potting. As I’ve said before, gardening isn’t my strong-suit, but when I do enjoy it and with time, I hope to get better. Spending hours on the driveaway hunched over, is just not cutting it anymore.
And why did I use pallets? BECAUSE THEY’RE FREE. how much better does FREE get… Plus I really like the size & look of pallets. Don’t you?
In all, this project cost less than $10 to make and basically the money was spent on hardware.
So here is what I gathered to create this Pallet Gardening Table:
- (6) C-Shaped Screws (they need to be heavy-duty)
- (4) 4″ Strap Hinges
- Wood Screws (for outdoor use) to install hinges
- Small C-Hooks
- Chain (about 6′ – 7′ in length) – I got a cute yellow chain from Lowe’s
- (2) Pallets that are the same size

Lowe’s put me to the test this month to create something interesting + for the outdoors, so let me show you the process…
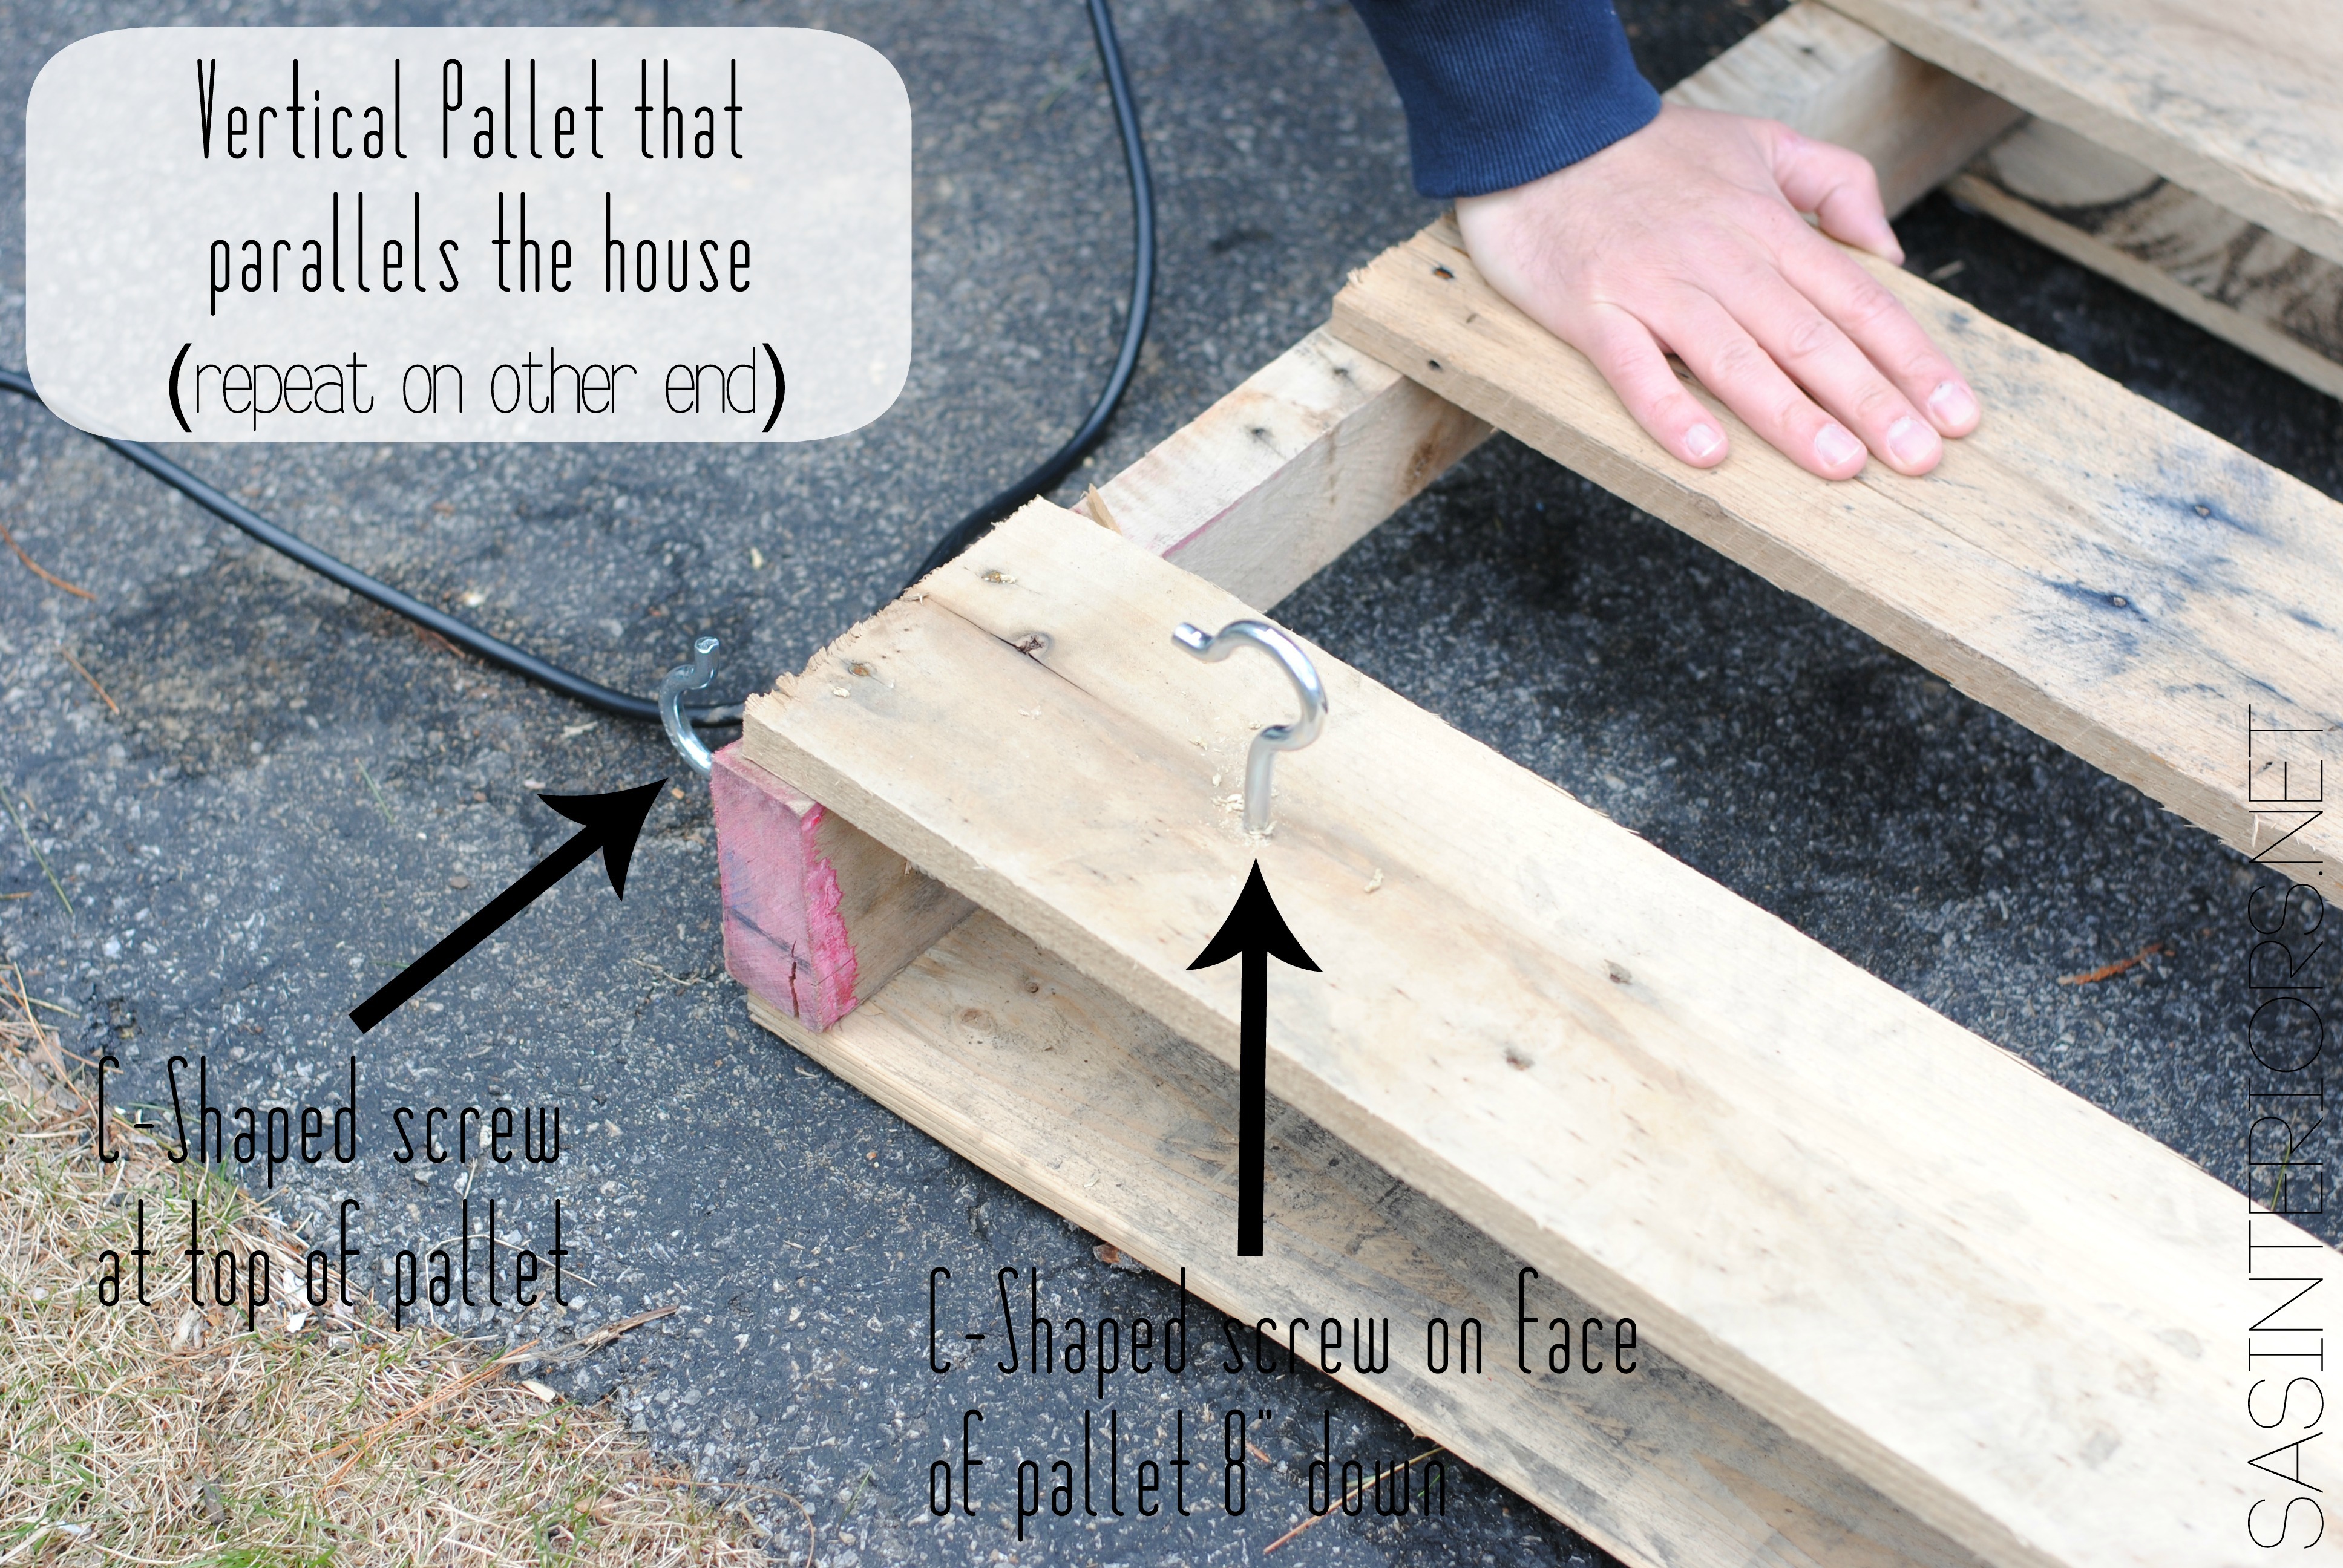
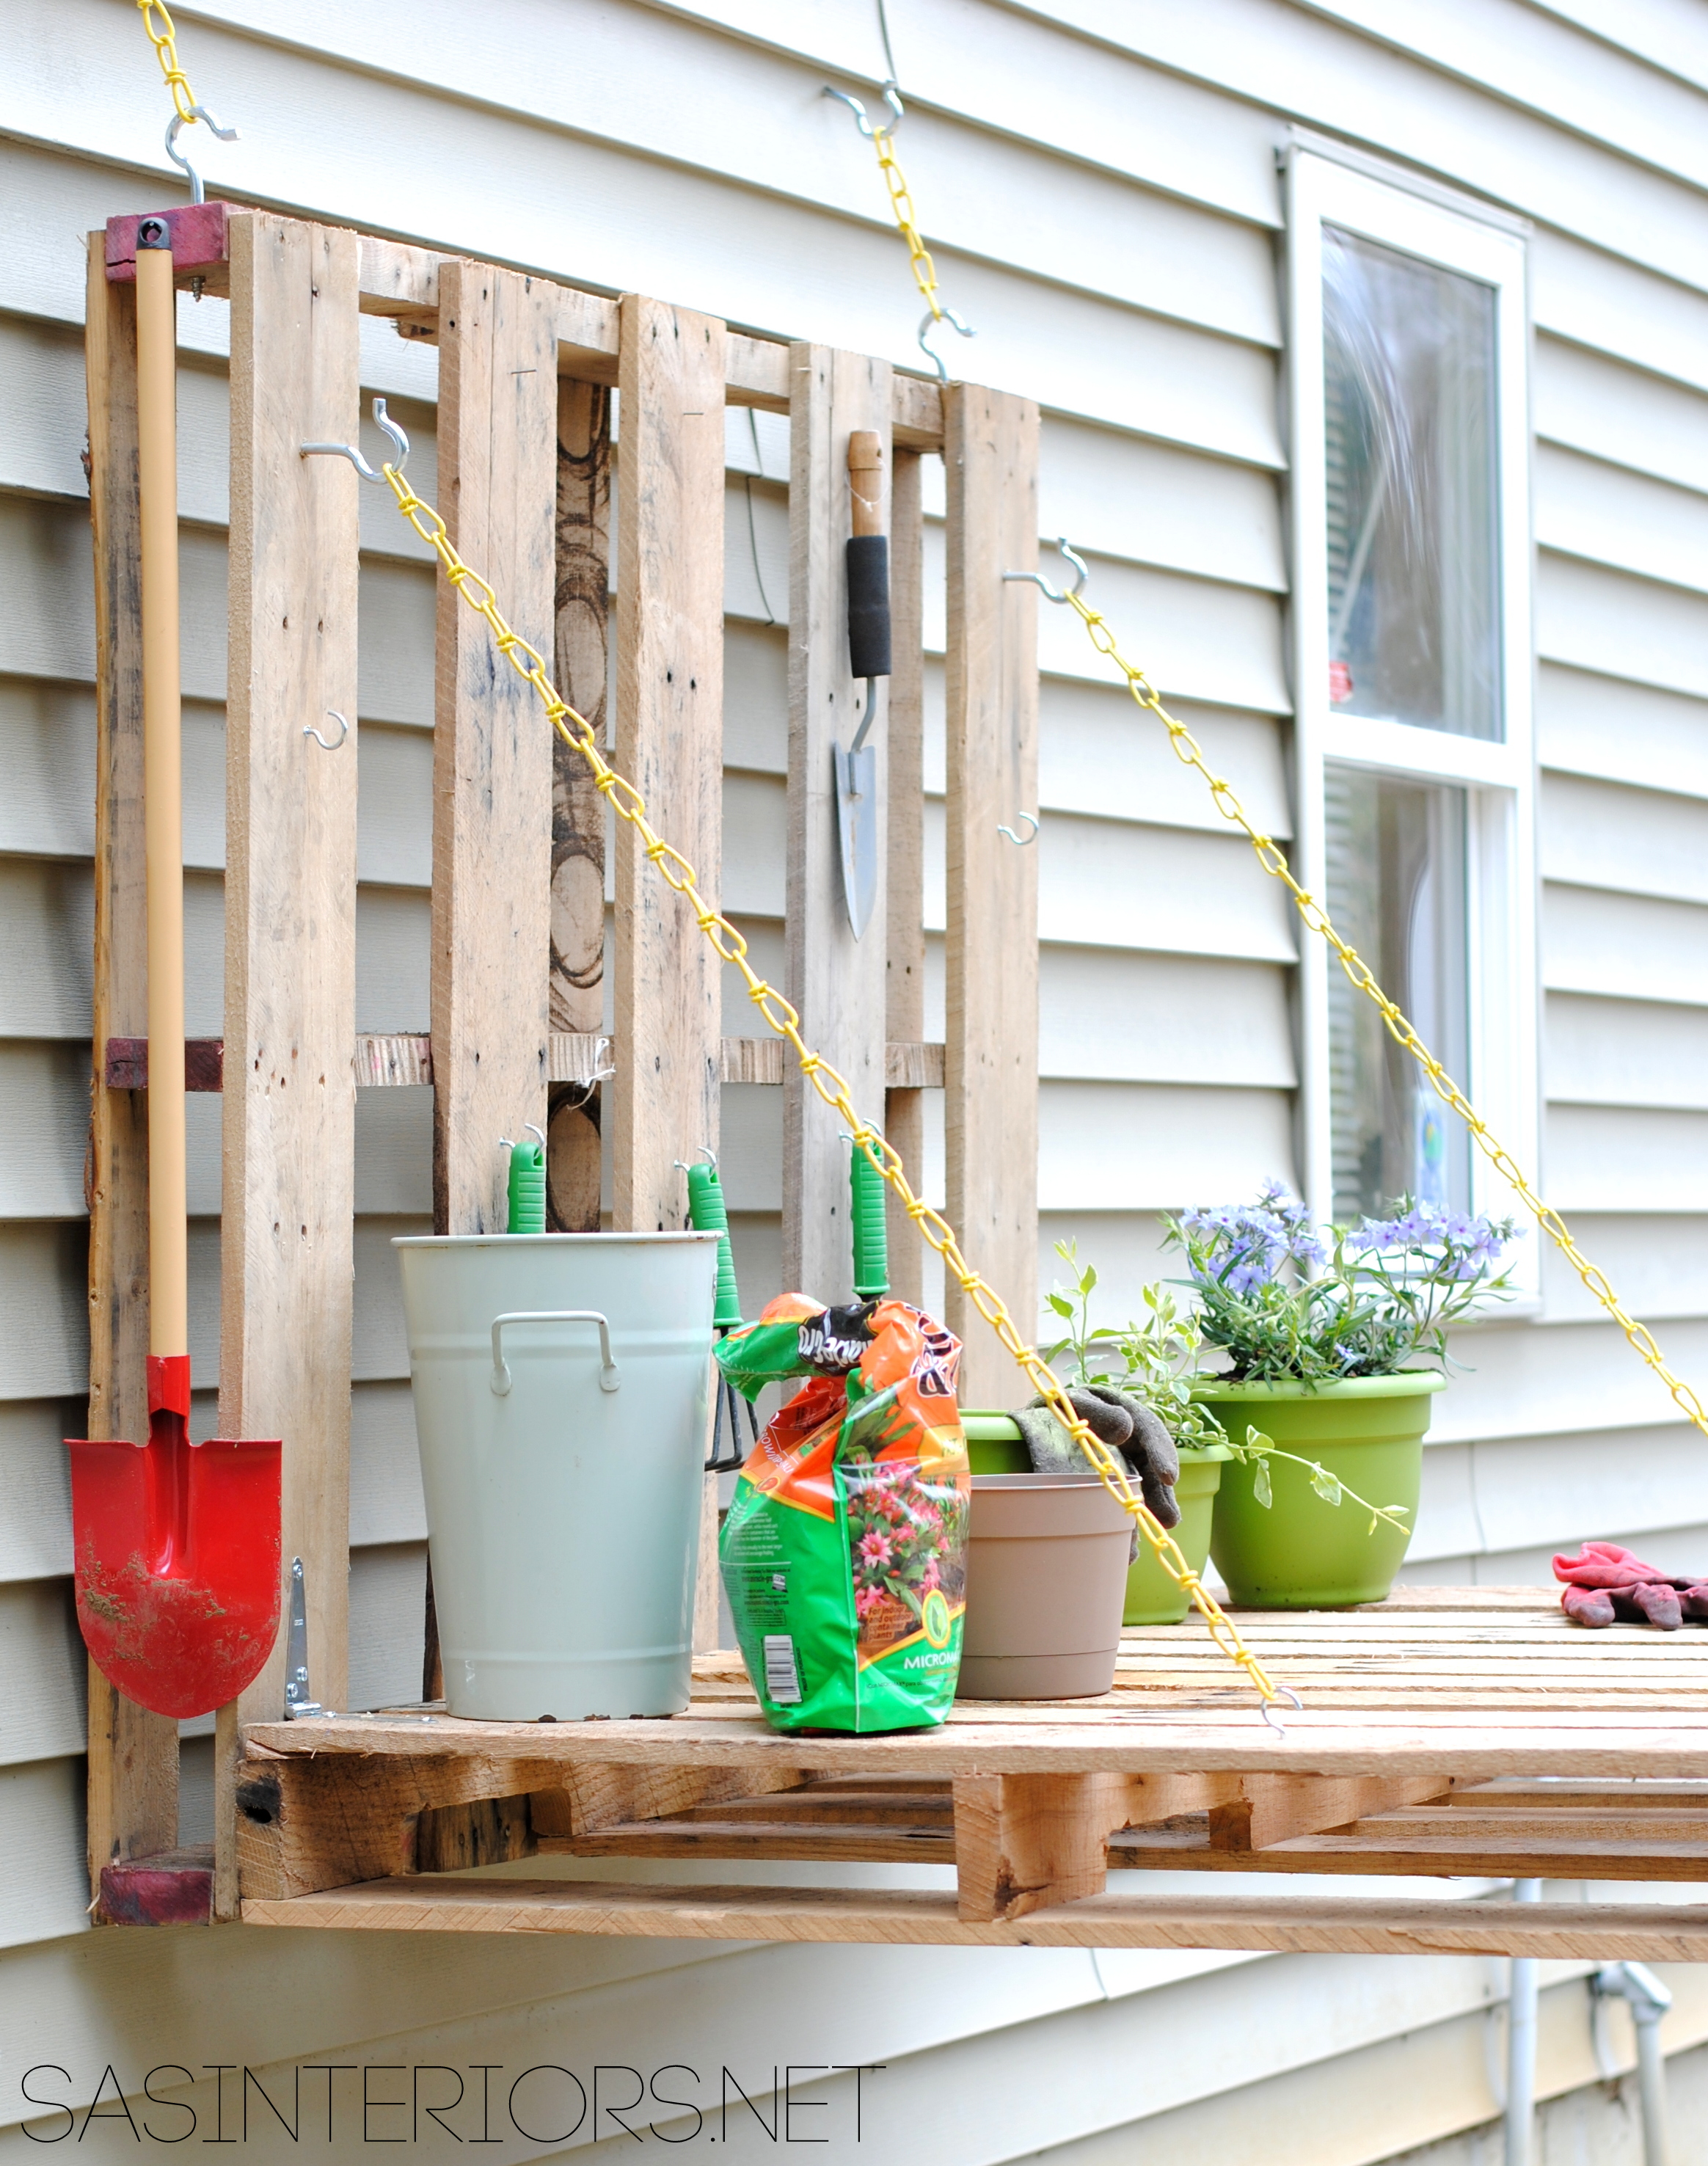
1. I started by adding the C-Screws to the pallet that would sit on the house (if you create something similar, it could also be attached to your deck or in your garage. It’s not a must for just the side of a house).

(1) C-Screw on each side was added to the top of the pallet about 2-3″ in from the end.
(1) C-Screws on each side was added to the face of the pallet about 6″ from the top & in the center of the end planks.
Once complete, that pallet was set aside.
On the other pallet, add (1) C-Shaped Screw on each side to the face of the pallet (which will be your work surface) about 12″ from the edge & in the center of the end planks.
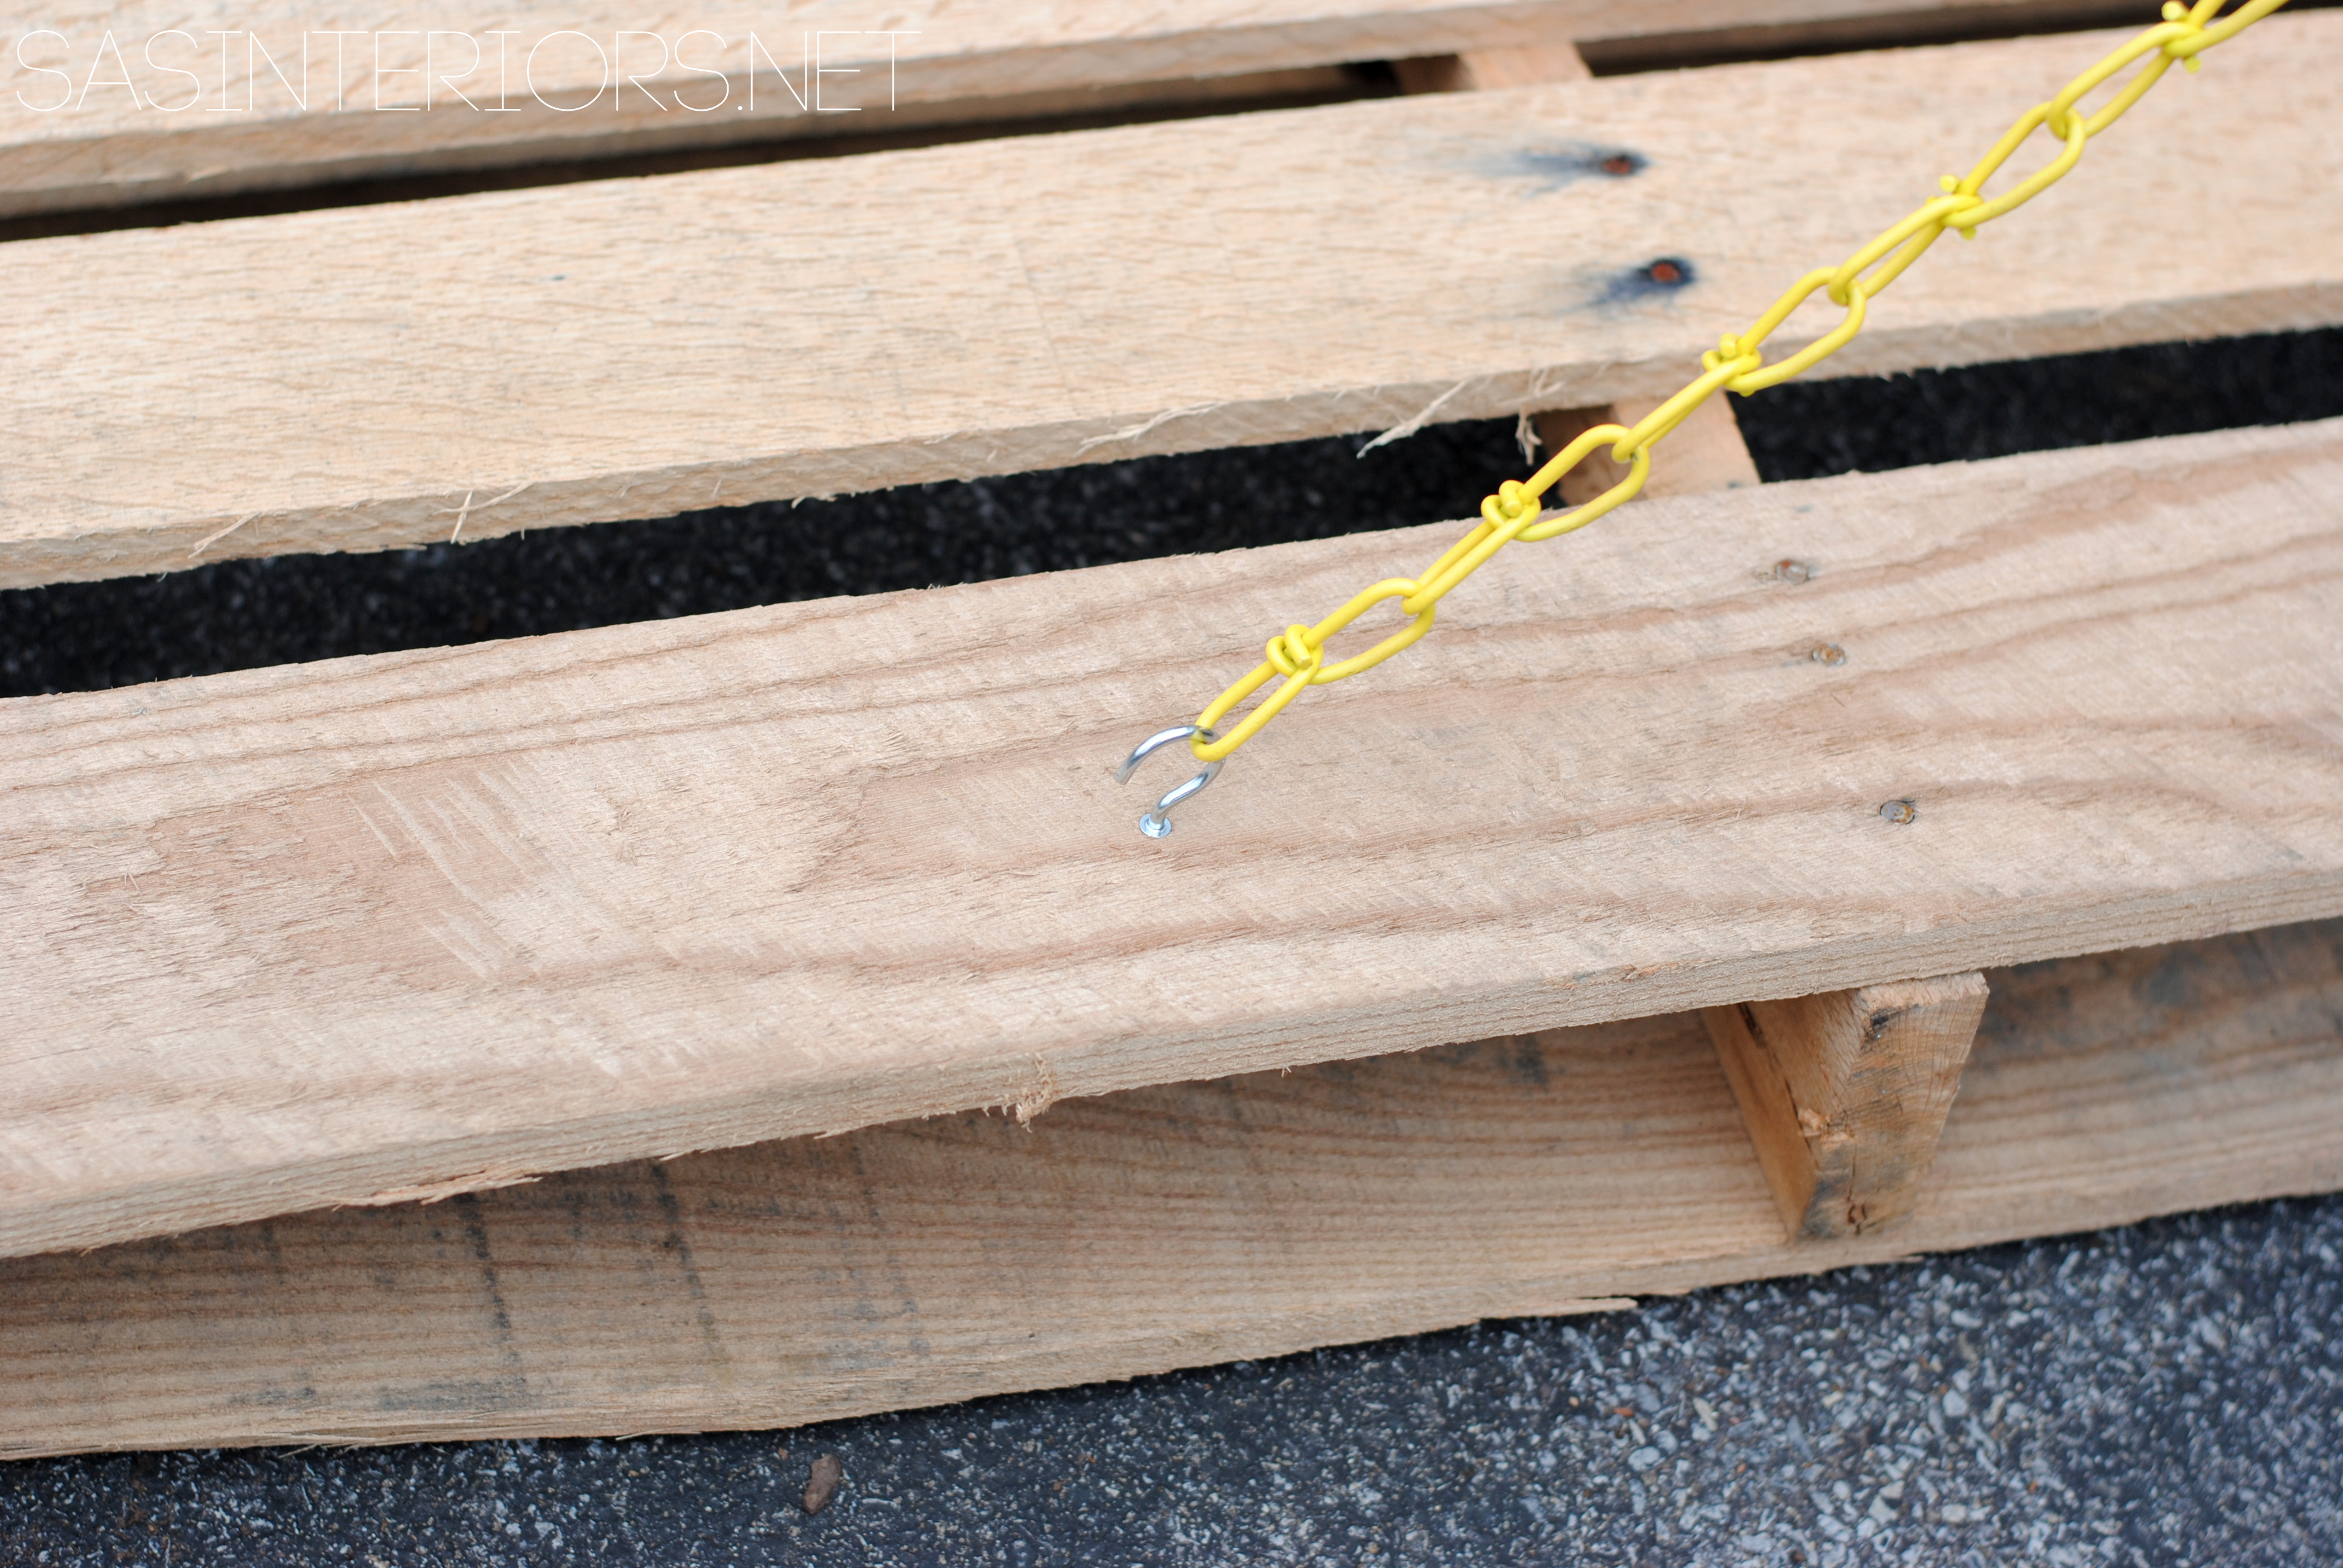
2. Once the (6) C-Shaped Screws are in place, then it’s time to connect the (2) pallets. Using heavy-duty 4″ strap hinges, place (2) at the end planks and the other (2) somewhat evenly spaced in the center.

3. Link the chain onto the C-Screws, so it fits just right for the bench to be open at 90 degrees. The Strap Hinges won’t let the pallet open more than 90 degrees, so essentially the chain isn’t needed, but I liked the extra security + the yellow adds a cute pop of color.

So this bad boy is mega heavy. You will absolutely need 2-3 people to move this… unless your The Hulk.
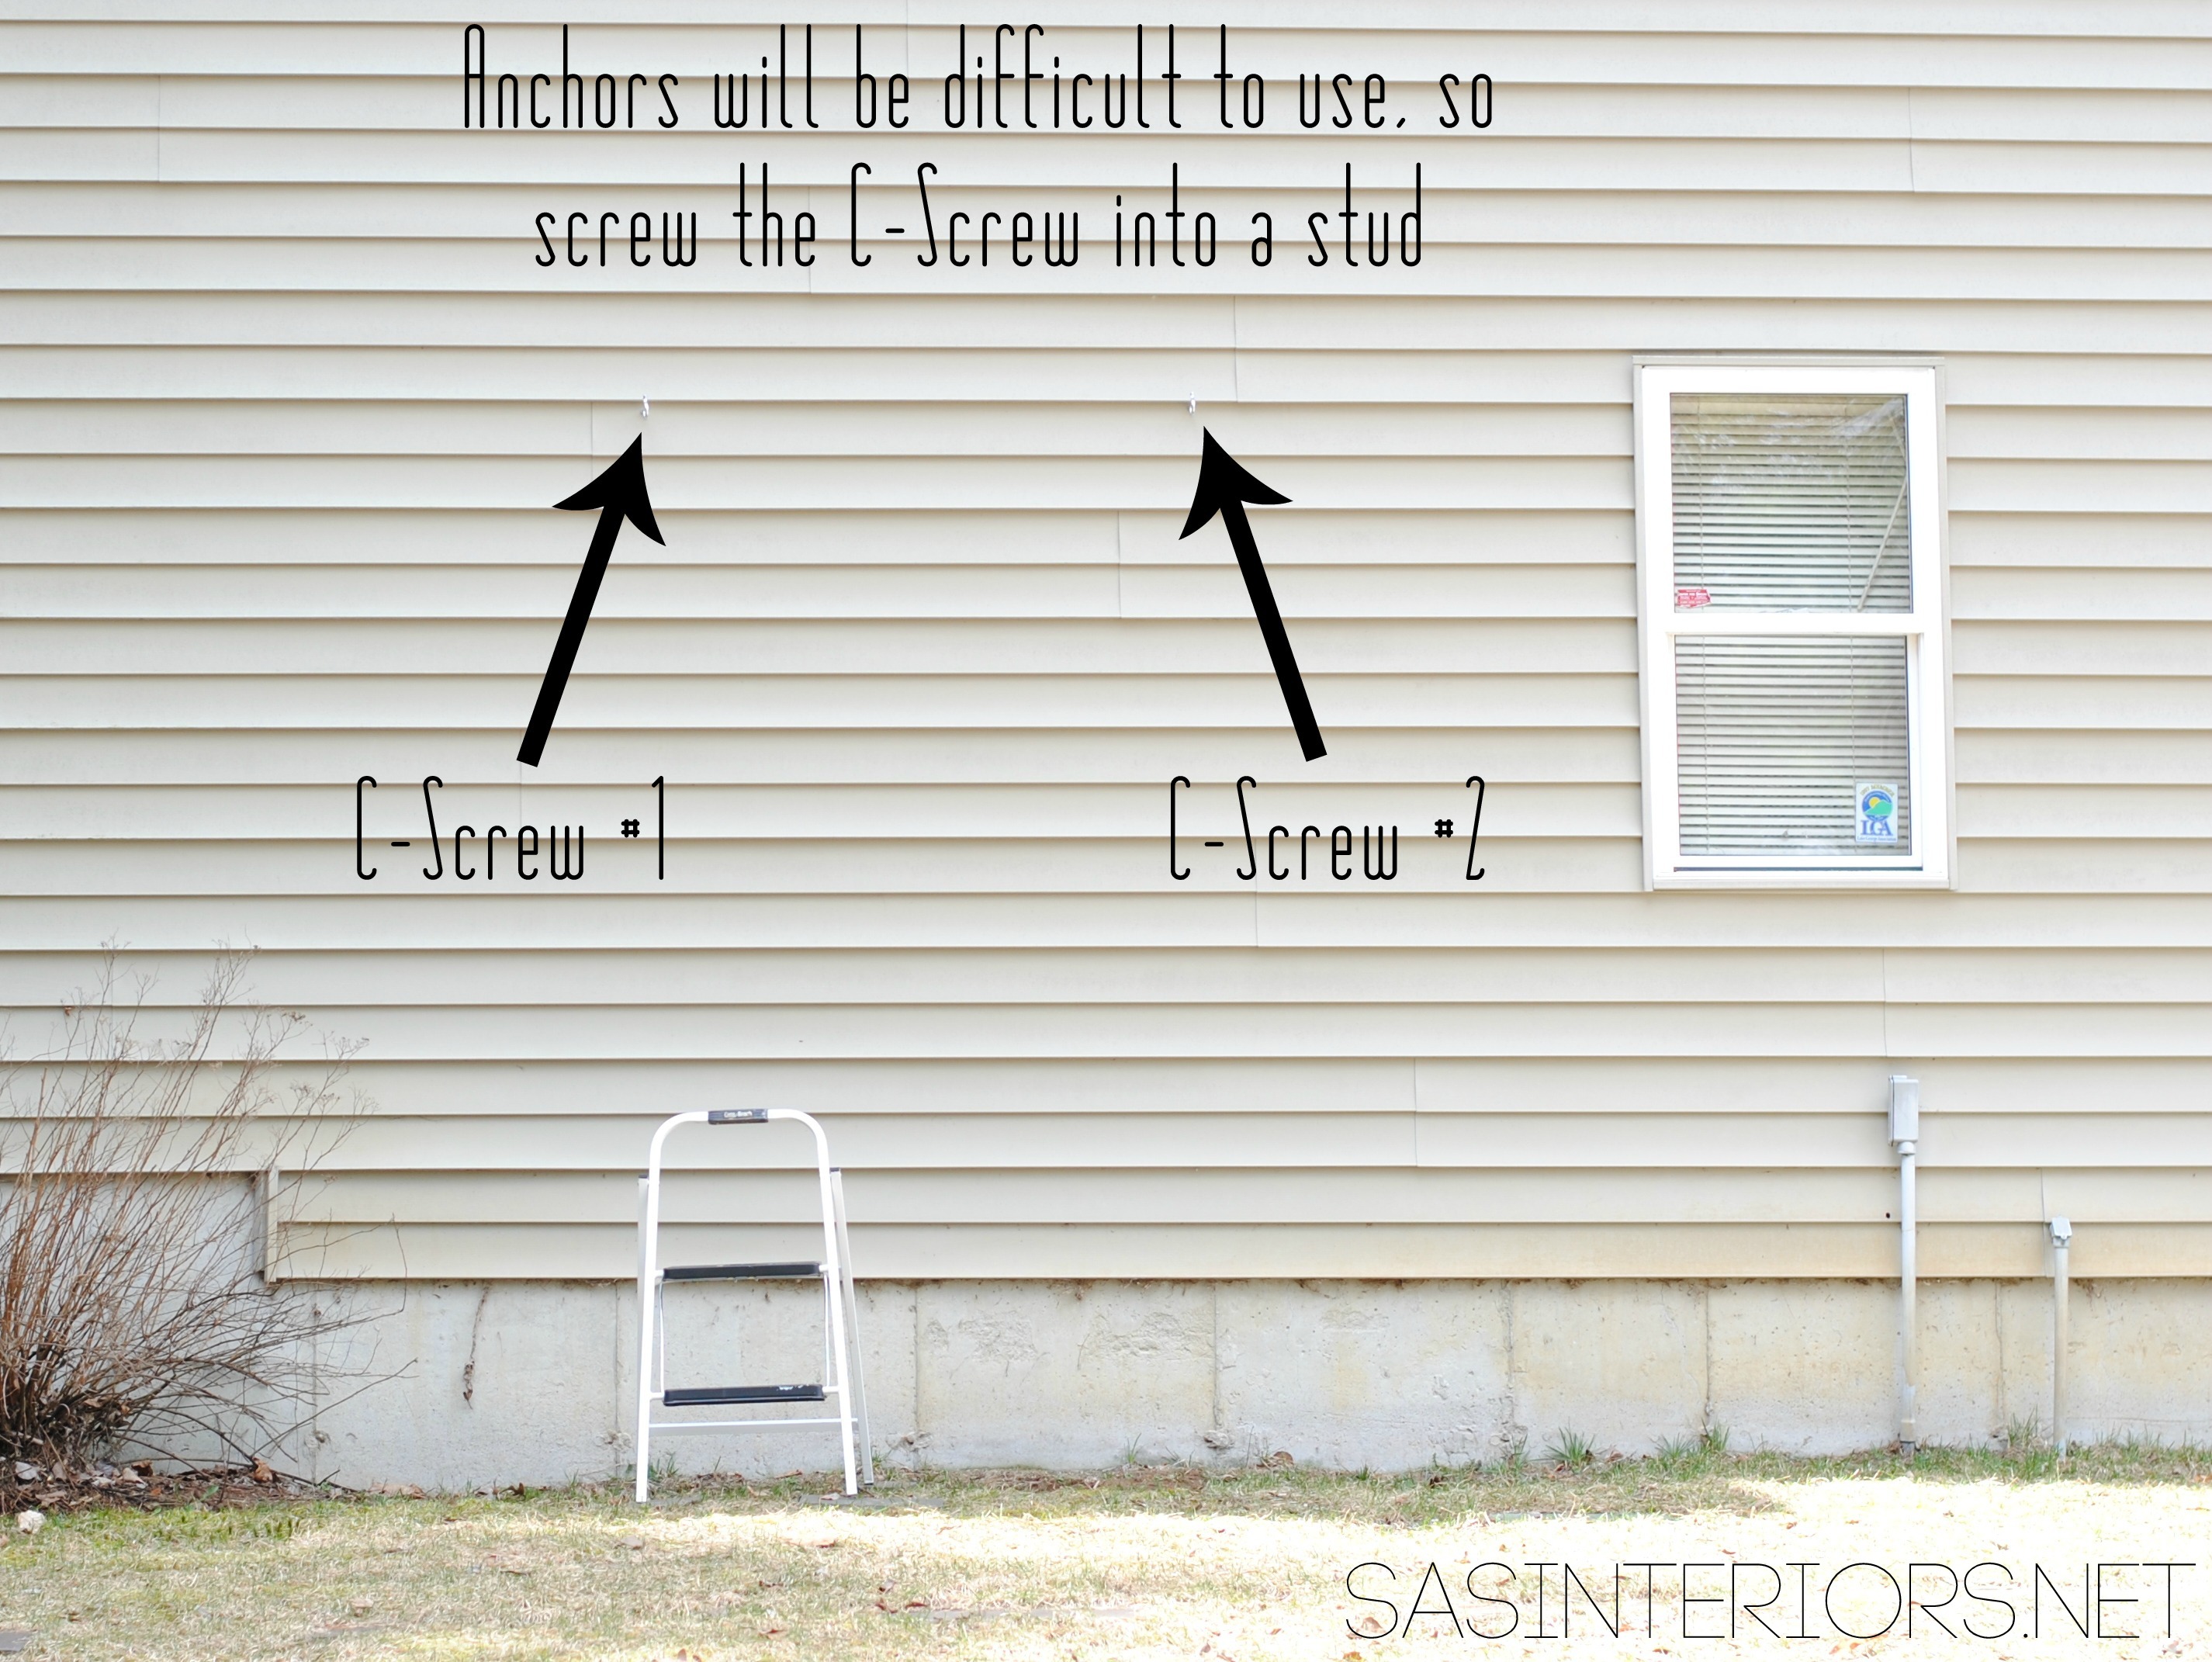
4. Once the bench was done (on the ground), it was time to put it in place on the vertical surface. The work bench should be around 36″ high (typical height of a kitchen countertop), but you can determine if you want it higher or lower. I chose 36″ above the ground. We held it in place and determined where the C-Screws in the house should be placed.
* This is the process I took, but you will have to evaluate your space for the best way to hang the pallets. Don’t hold me accountable for your situation because every vertical surface is different.
Using (2) C-Shaped Screws, we installed them into a stud on the side of the house.
5. Once the C-hooks were in place, we added about 6″ of chain to each side which hooked from the C-Shaped Screws on the house to the C-Shaped Screw on the top of the pallet.
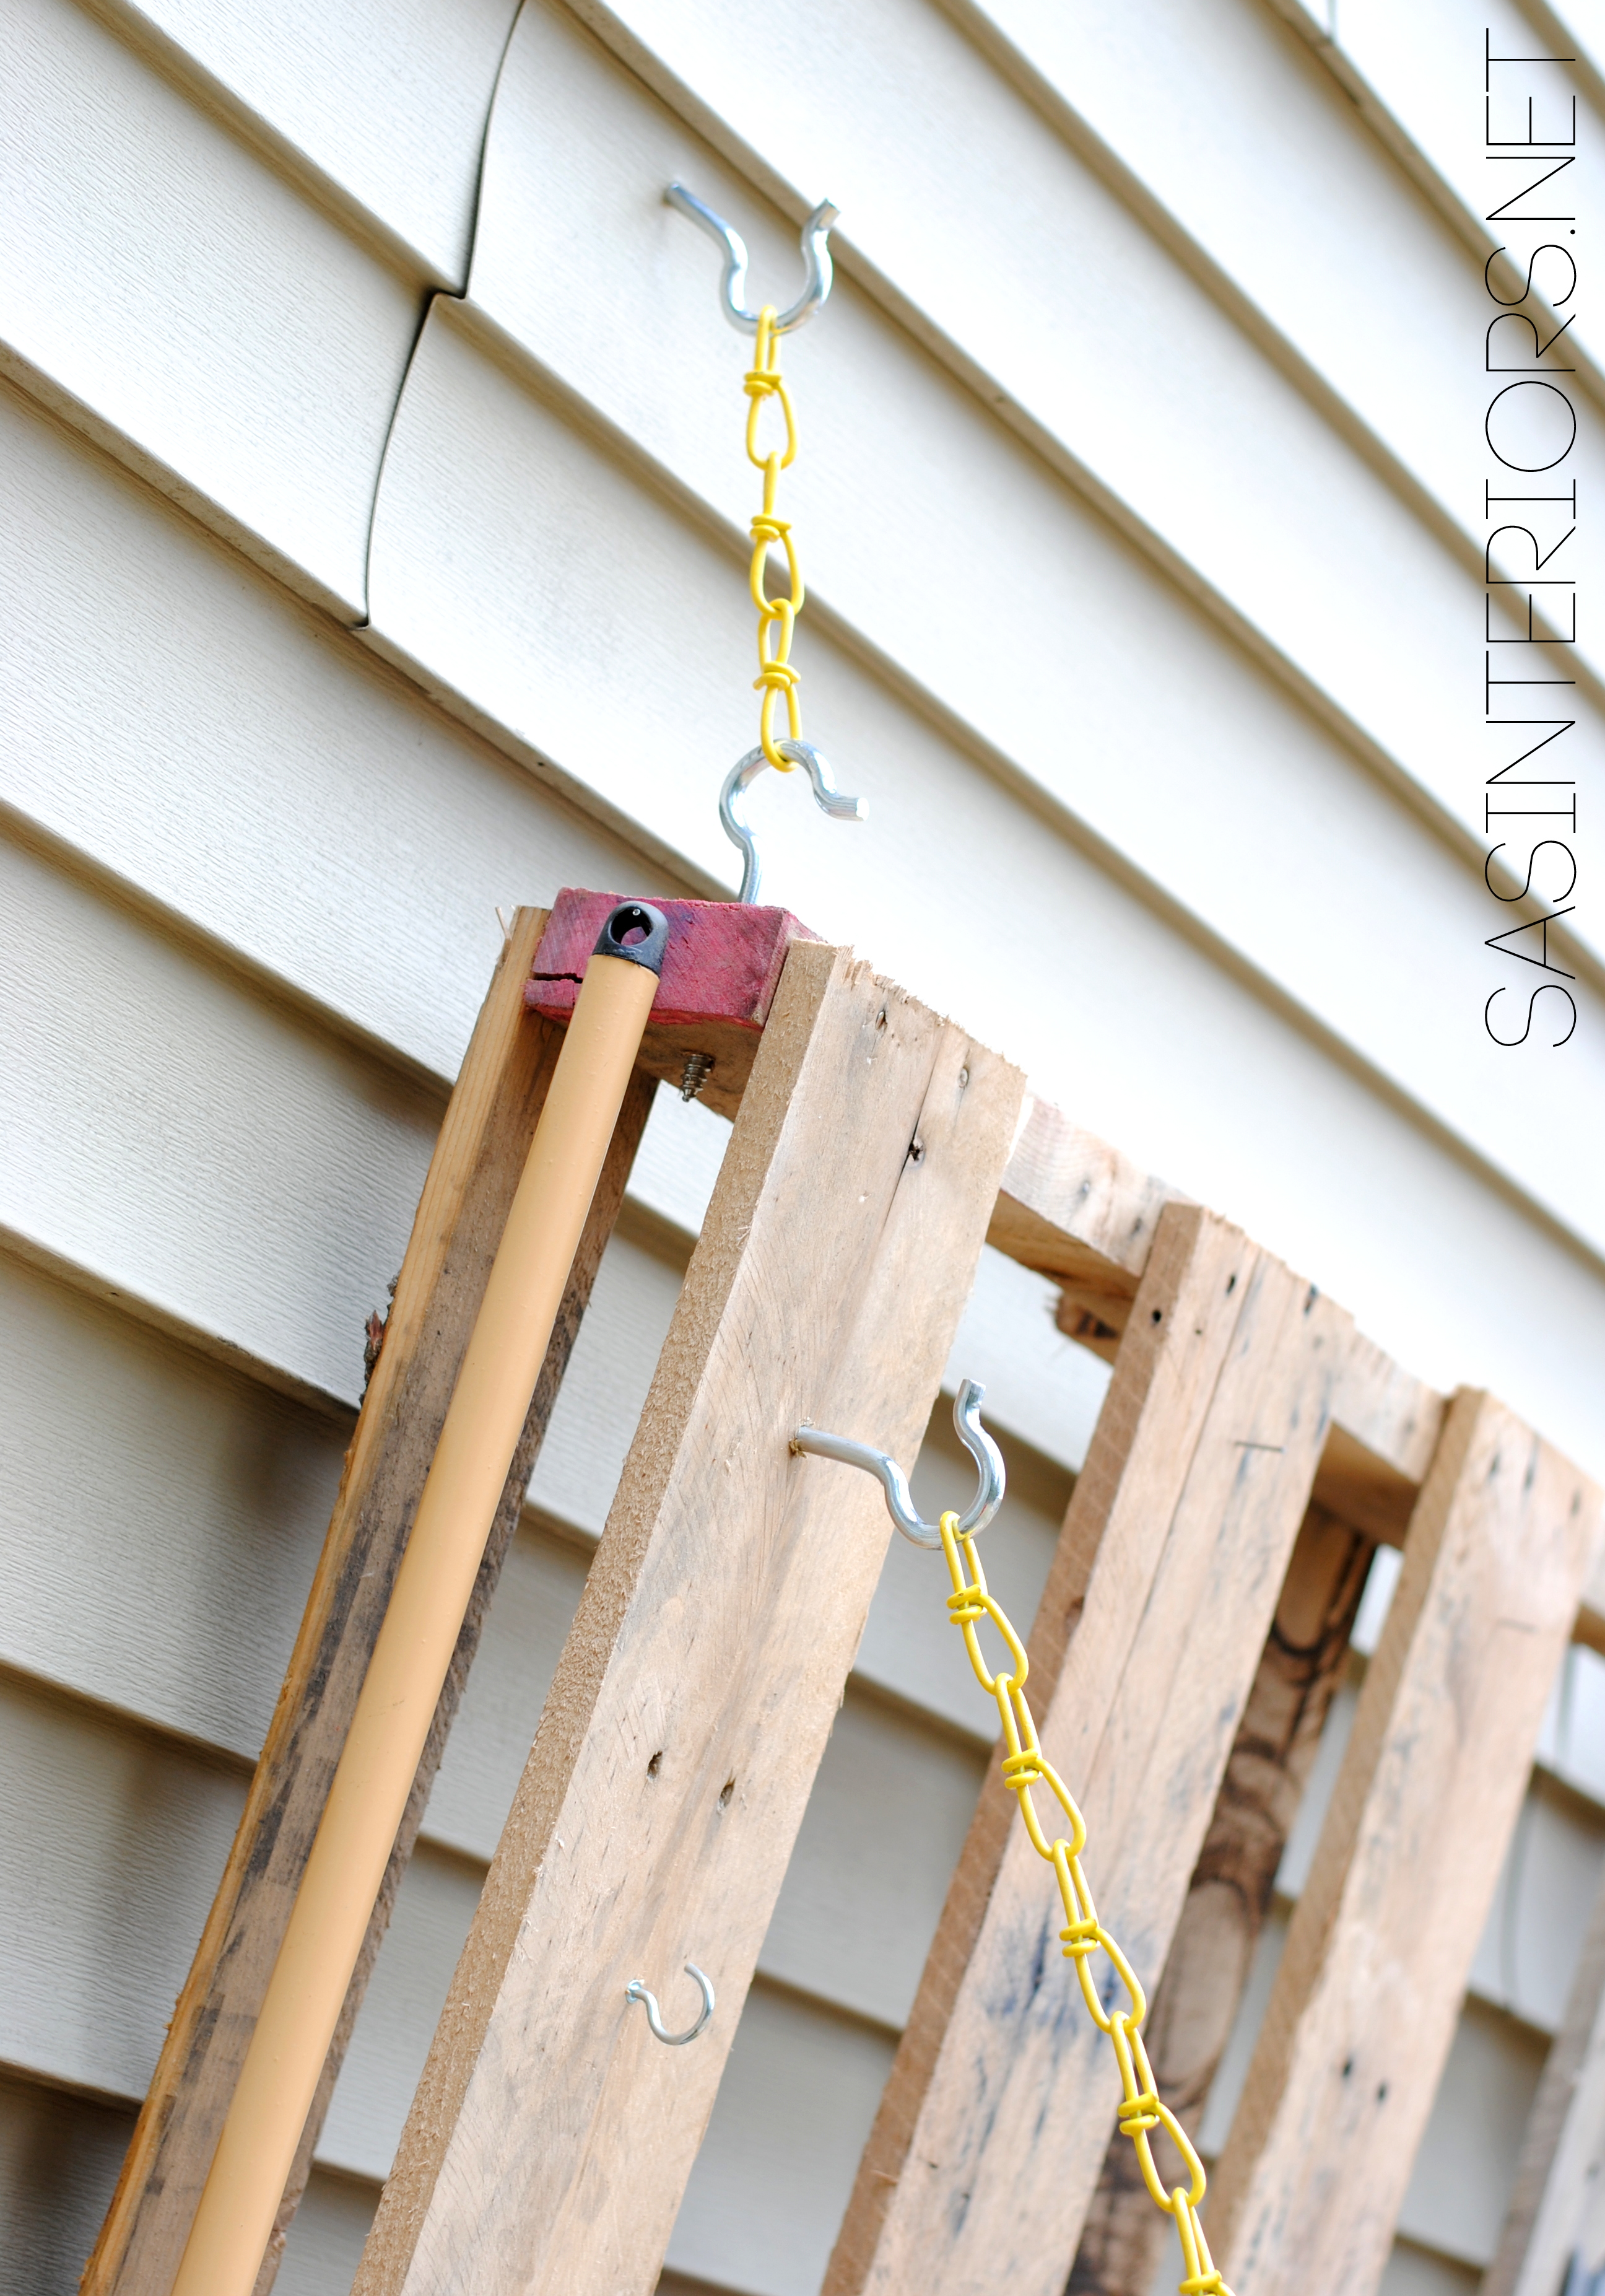
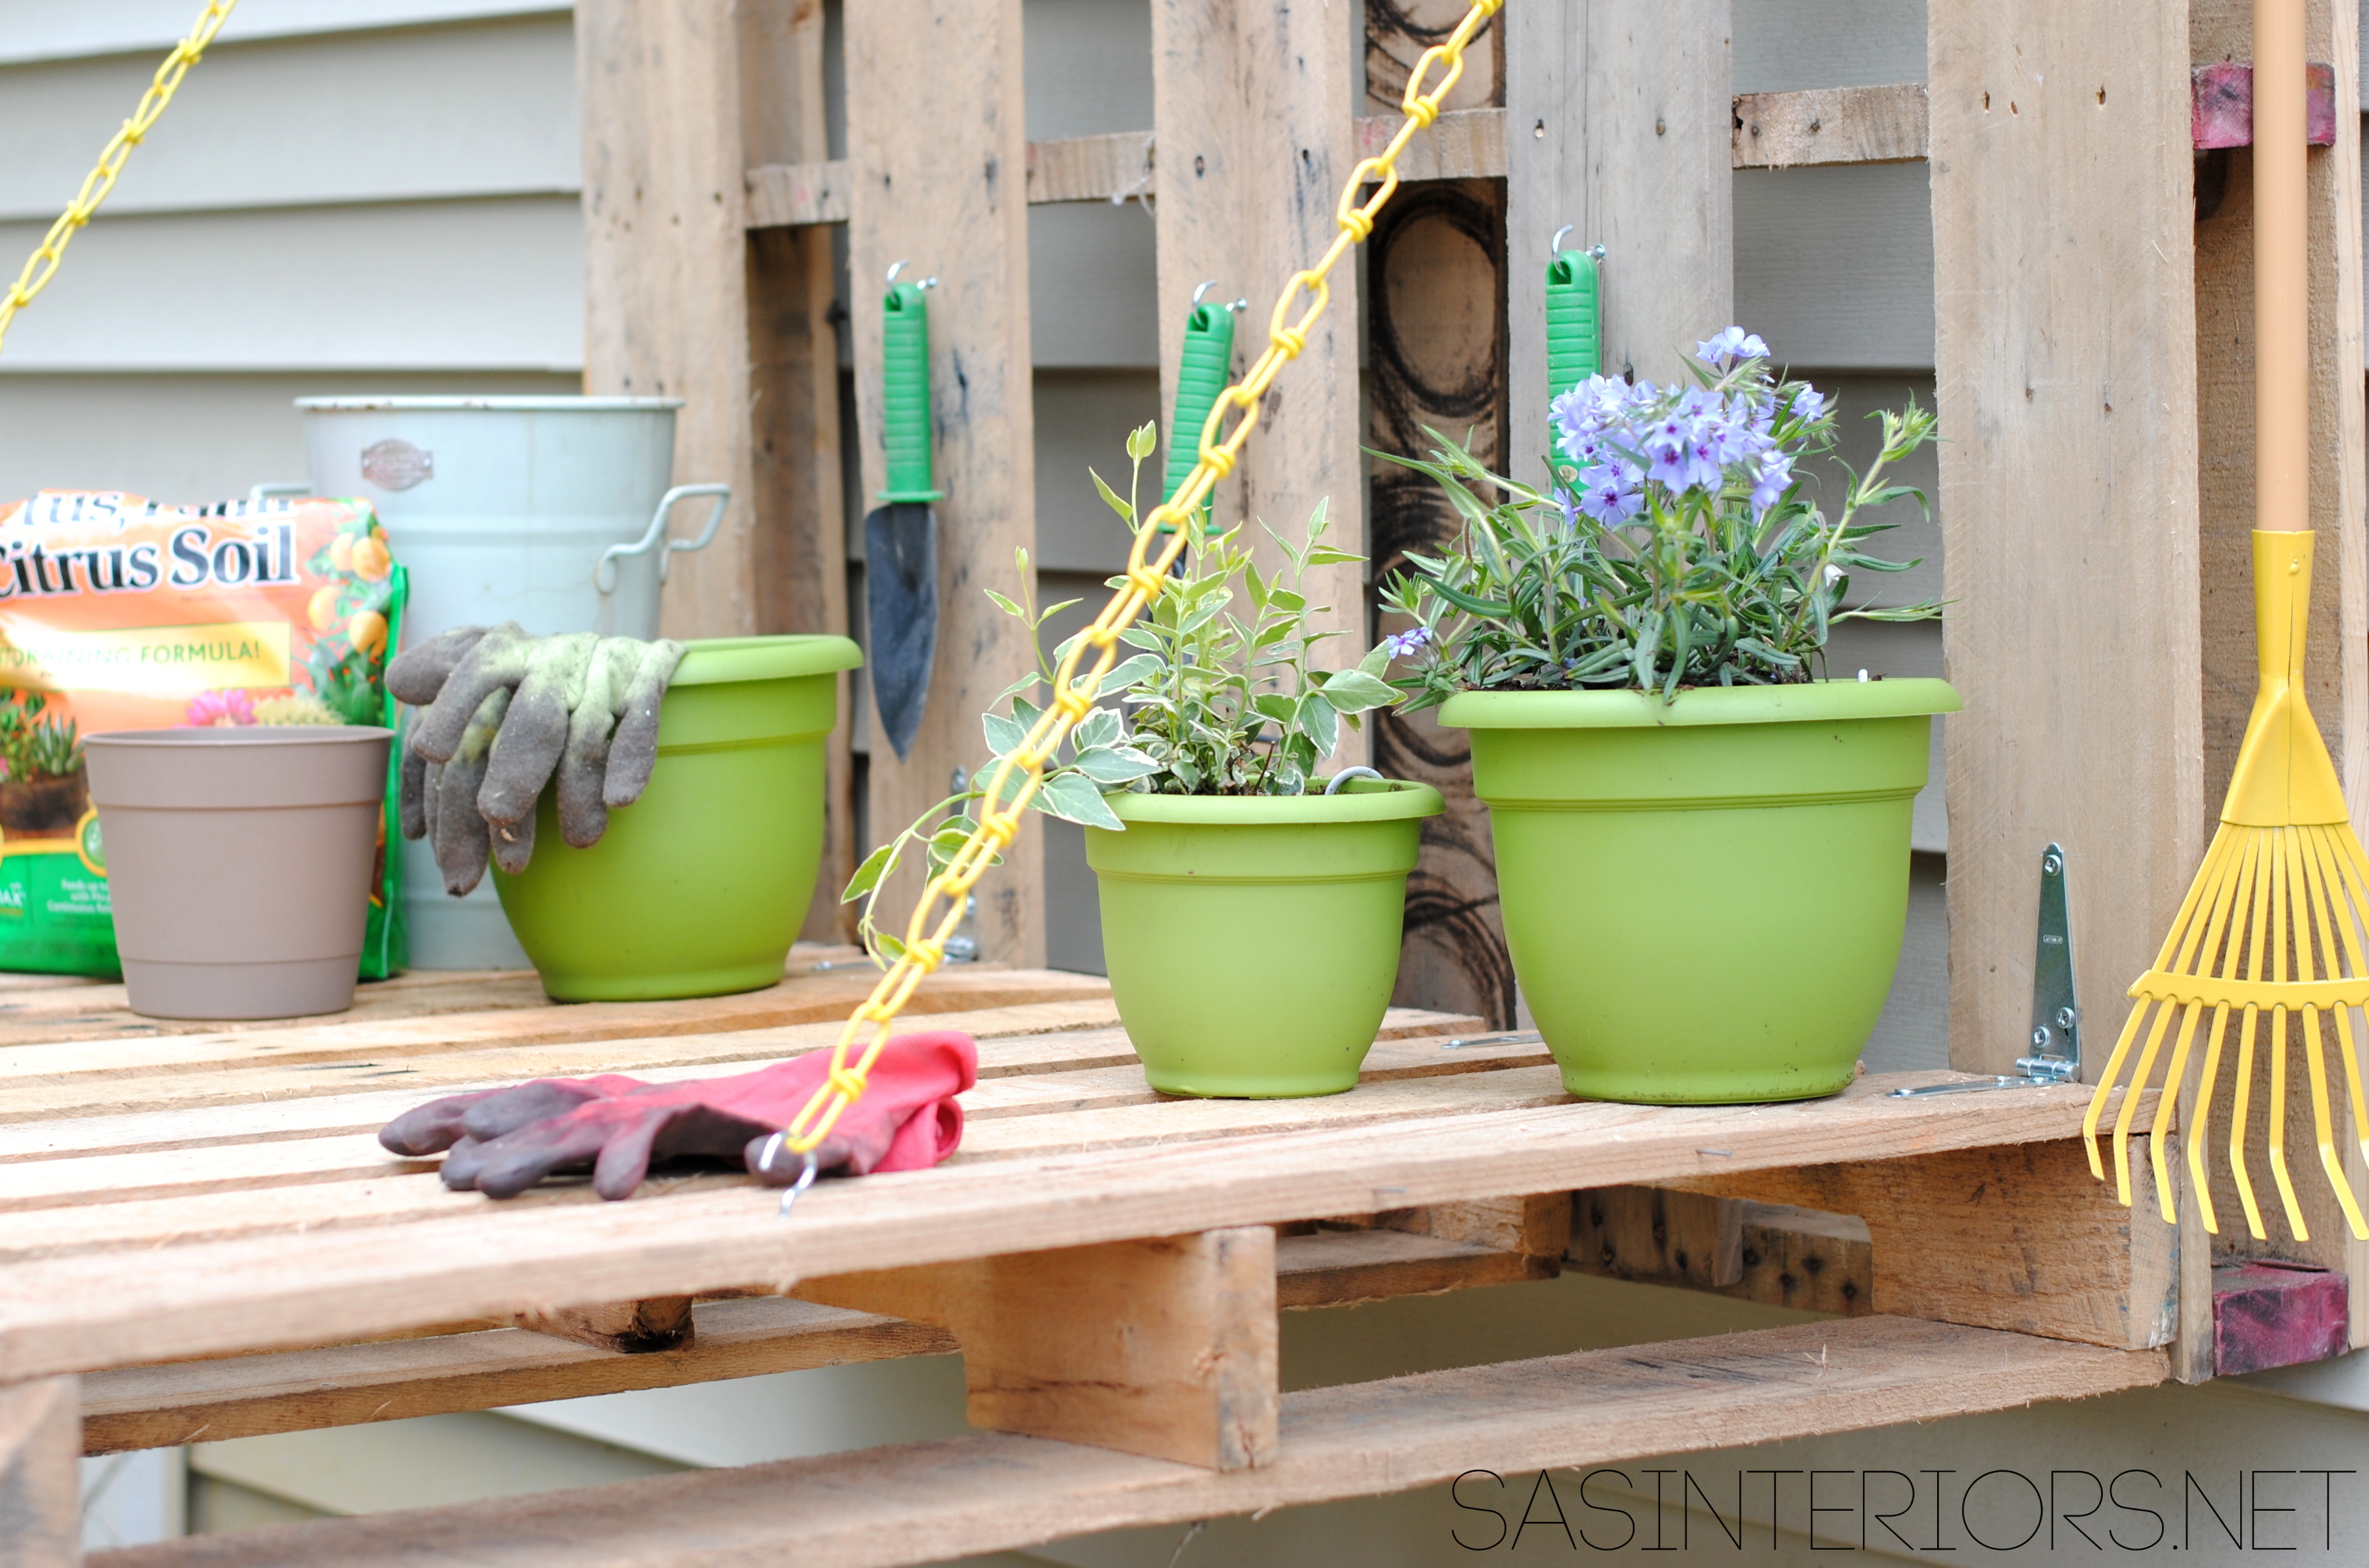
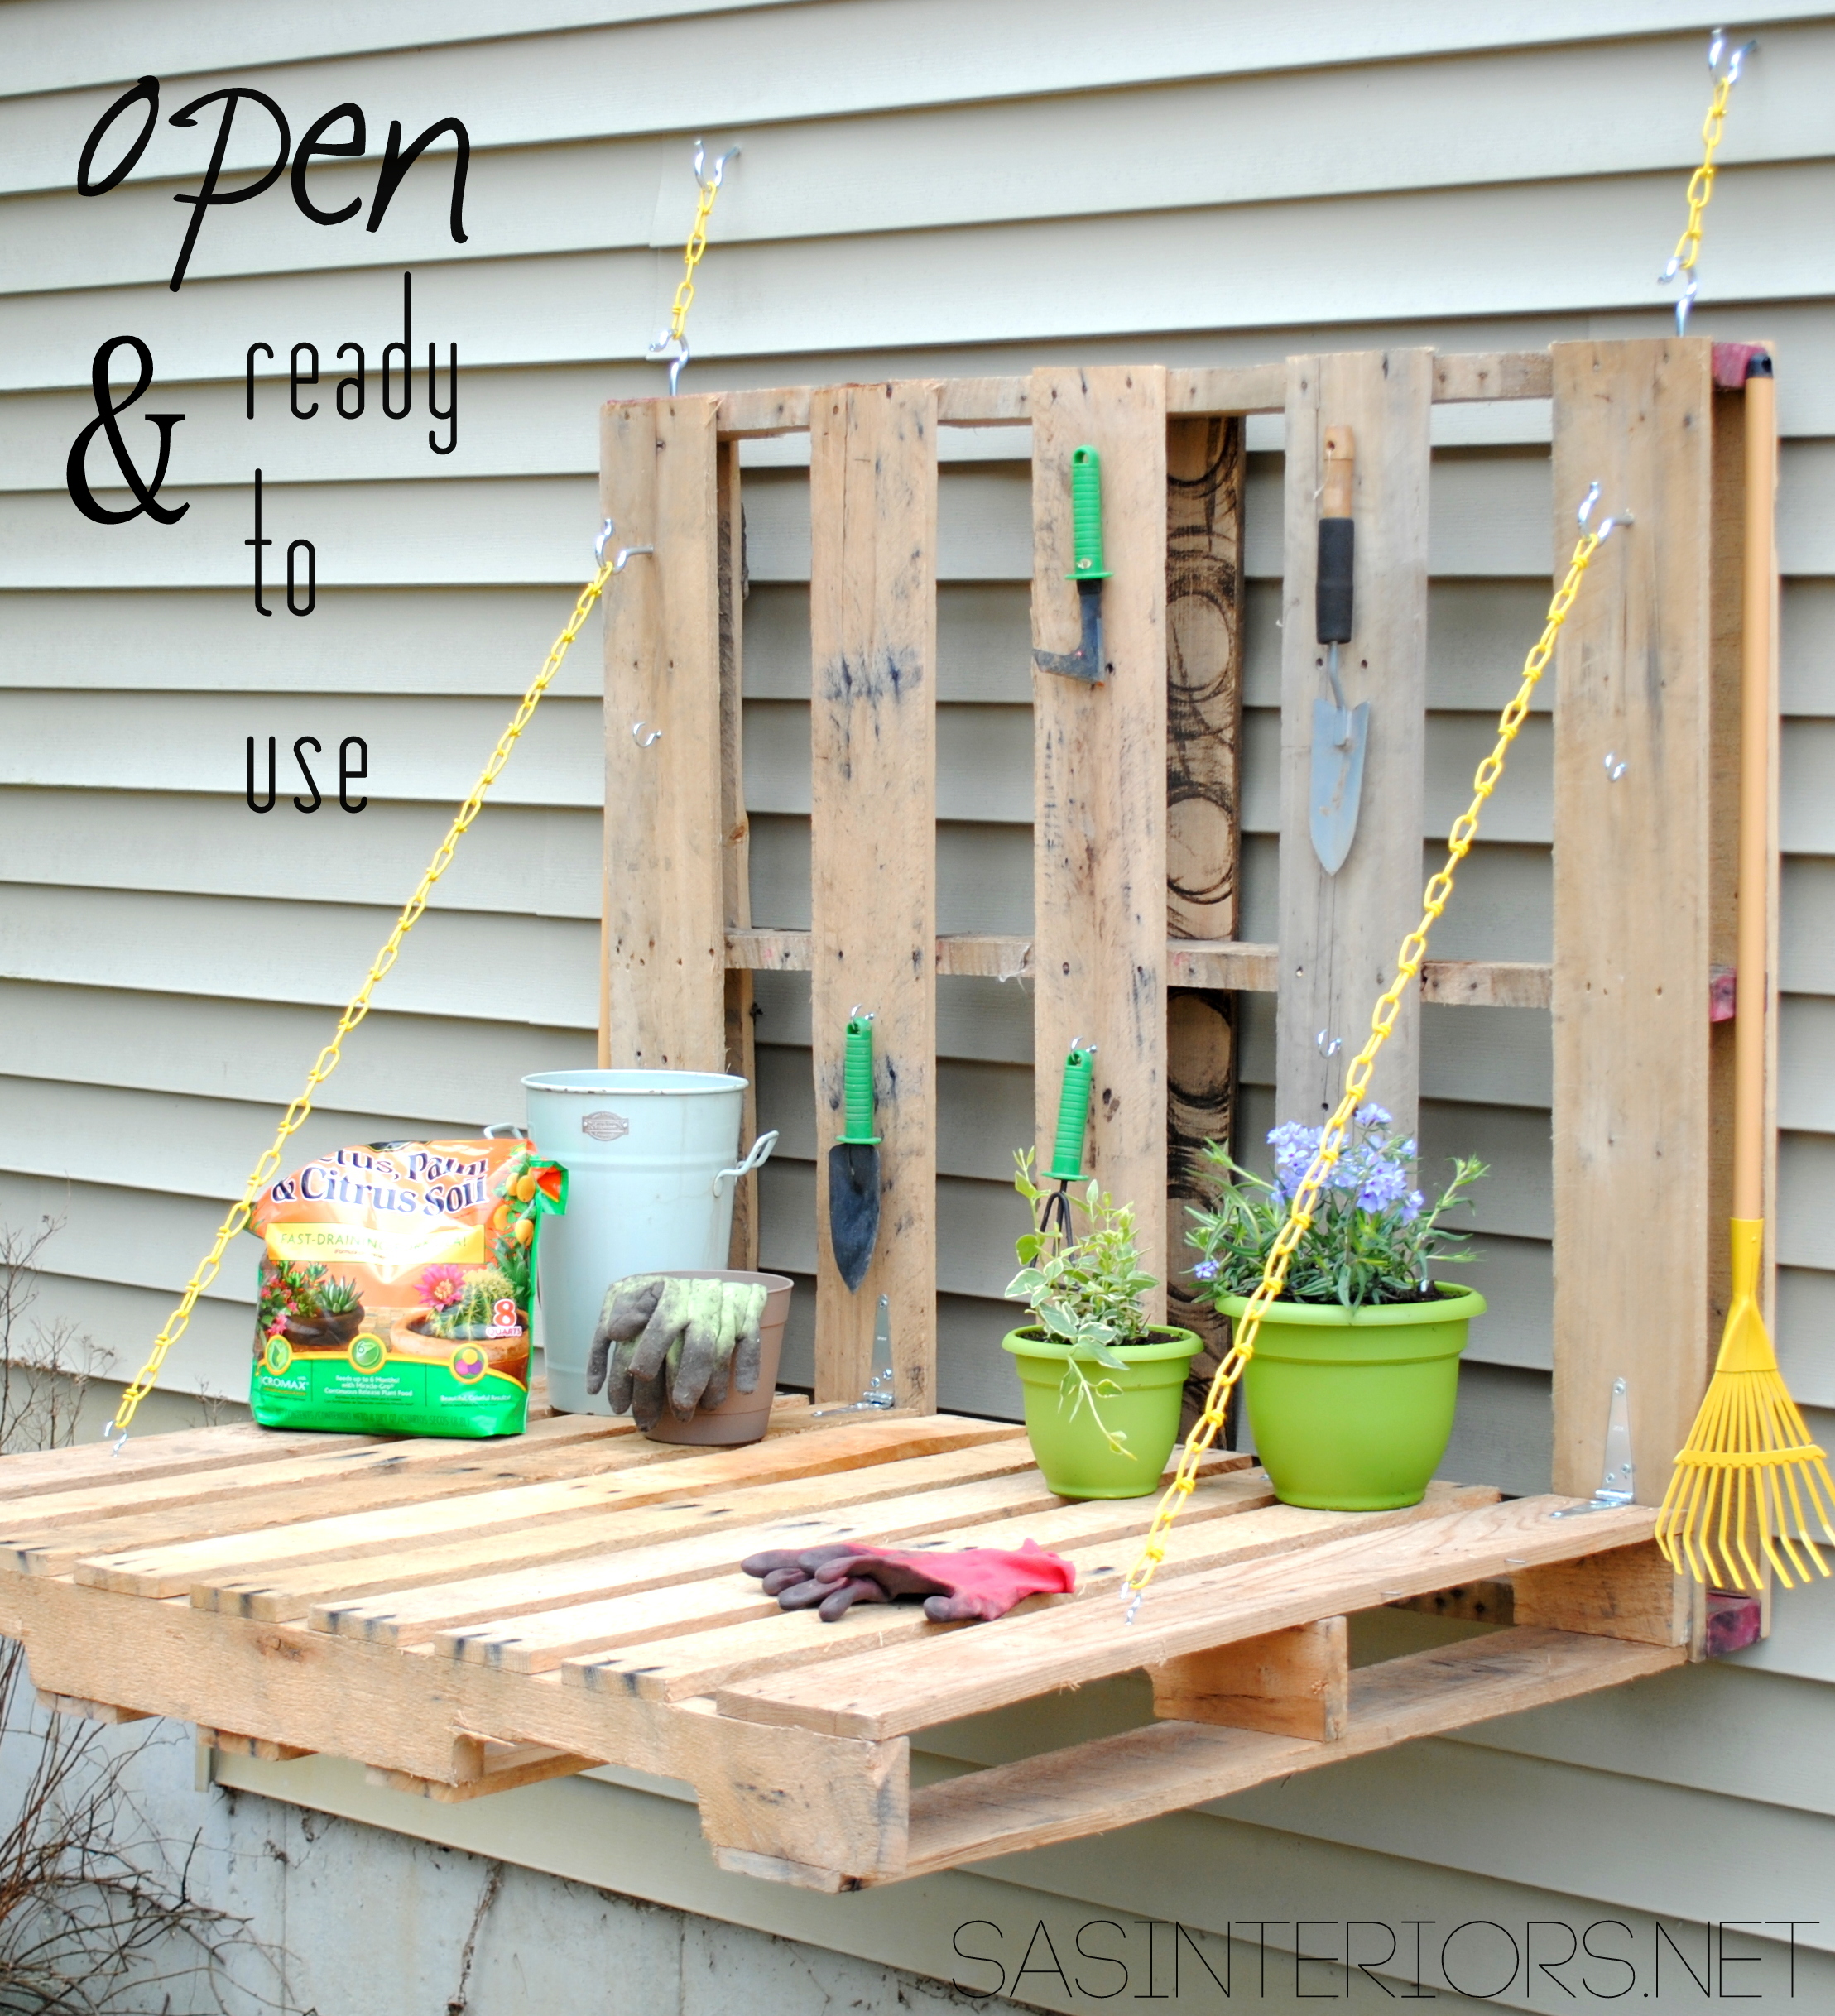
6. At this point, it’s done. The overall project didn’t take long at all – maybe about 30 minutes. The last added detail were hooks along the sides and back of the vertical pallet to hold shovels, a small rake, etc.

And then it was complete!


When it’s not in use, simply push up the horizontal pallet and hook it into place.


So what do you think… Would you be up to creating something like this? I was always in need of a better place to do potting + gardening. Thankfully this gardening table has been a great solution (and has saved many of sore backs…)!
If you’re interested in more of my pallet creations, check these out:
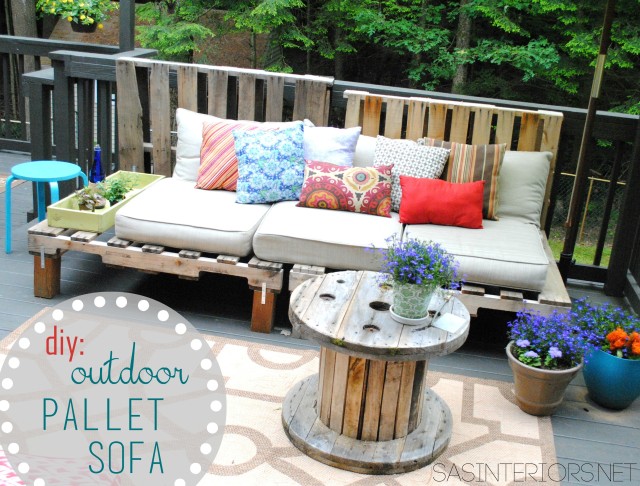
 Monogrammed Chevron Pallet Tray
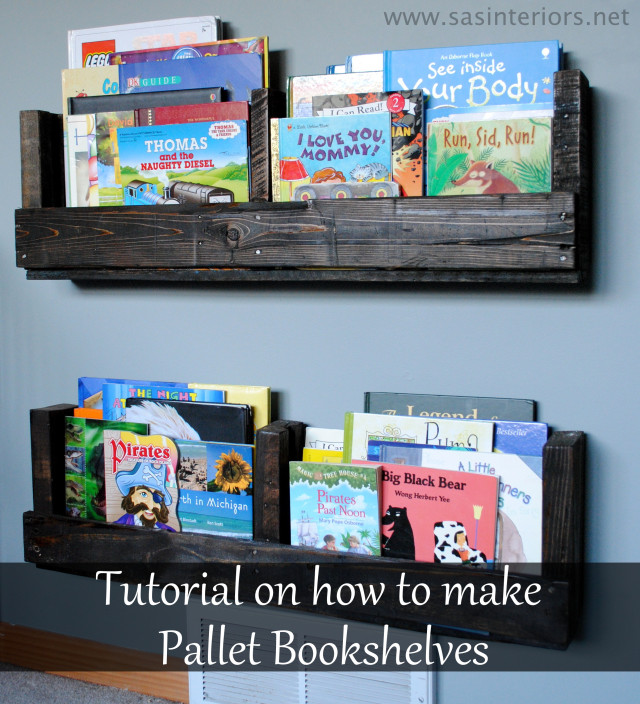 Pallet Bookshelf
Told ya’ I’ve built alot of creations using pallets!
What DIY creations have you made using pallets? What do you love using pallets for? Do you keep them as one or do you like to dismantle them to create something new + different?
Disclosure: I am so grateful to be apart of the Lowe’s Creative Team and was provided with a Lowe’s gift card to purchase items for my project. I was also compensated for my time to use the products. No one told me what to create, what to buy, how to use the product, or what to write. All opinions are 100% mine!
Comments are closed.