


Pallet Christmas Countdown
Christmas is a comin’!
In less than 10 days, we’ll be counting down the 25 days till the arrival of Christmas. To make the countdown a bit more fun and bearable, since for every child (and maybe a few adults) thinks the 25 days leading to the special day are SO LONG, I created a Countdown Calendar in the shape of a tree using my favorite material, pallets and a few other leftover scraps of wood. Check it out…

Isn’t it so colorful? The ornaments truly make it come alive.
When Lowe’s challenged the Creative Team to come up with something for the Holidays, I was so excited to create something unique and perfect to celebrate the coming holiday. Last year, my December project was a creation for holding cards and this year, I wanted to create something just as dynamic. When thinking about a project, I realized we didn’t have a countdown calendar, so that’s what this years project would be.
The project started out by taking 10 steps outside to the garage. Yup, this creation was put together using only materials I already had on hand. This is what I gathered…
- Pallet and wood scraps – the more dented and imperfect, the better
- Nails (3/4″ – 1″ deep)
- Number stencil
- Black Sharpie
- Hammer
- Circular Saw
- (25) Colorful ornaments
1. I first started out by looking through my wood scrap pile and leftover pallet scraps. I collected a bunch of pieces all in different colors and sizes. The more imperfect the better.
Then I took some time and put a drawing together to figure out how many rows of wood would be needed and how the 25 ornaments would sit on the “tree”. In the end, 7 tiers worked best and 2 of the rows have 4 nails, creating the 25 spots.
A little math is needed, but it wasn’t tough…

2. Now that the hardest part was over (a little mathematical equations), I laid out the pieces of wood to determine what looked nice next to each other and then the widths of each tier.
On the backs, I then labeled each row.

3. Then using a circular saw, I cut each piece to form the “tree” shape. Once that was complete, I added a scrap piece of wood to the backs of the pieces to attach them together.
Hammer, hammer, hammer using 3-4/” – 1″ nails.

I added a few more pieces of scraps (old paint sticks, to be specific) to the back. This looks kinda messy, but hey, who’s lookin’ at the back???

No more looking at the back. Let’s turn it over to the front where it’s prettier looking.
Now to the nails + the numbers.
4. By eye (no more math needed), I marked the locations for the 25 ornaments. Then I added a nail at each location leaving about 1/2″ exposed for the ornament to hang.

5. Once the nails were in, it was time for the numbers. Using stencils I had from a previous Martha Stewart project, I outlined the numbers with a black sharpie. Again, the more imperfect the better.

Once the numbers were done, the project was complete. And here’s the result…
Plain + Decorated.

I love how it came out…
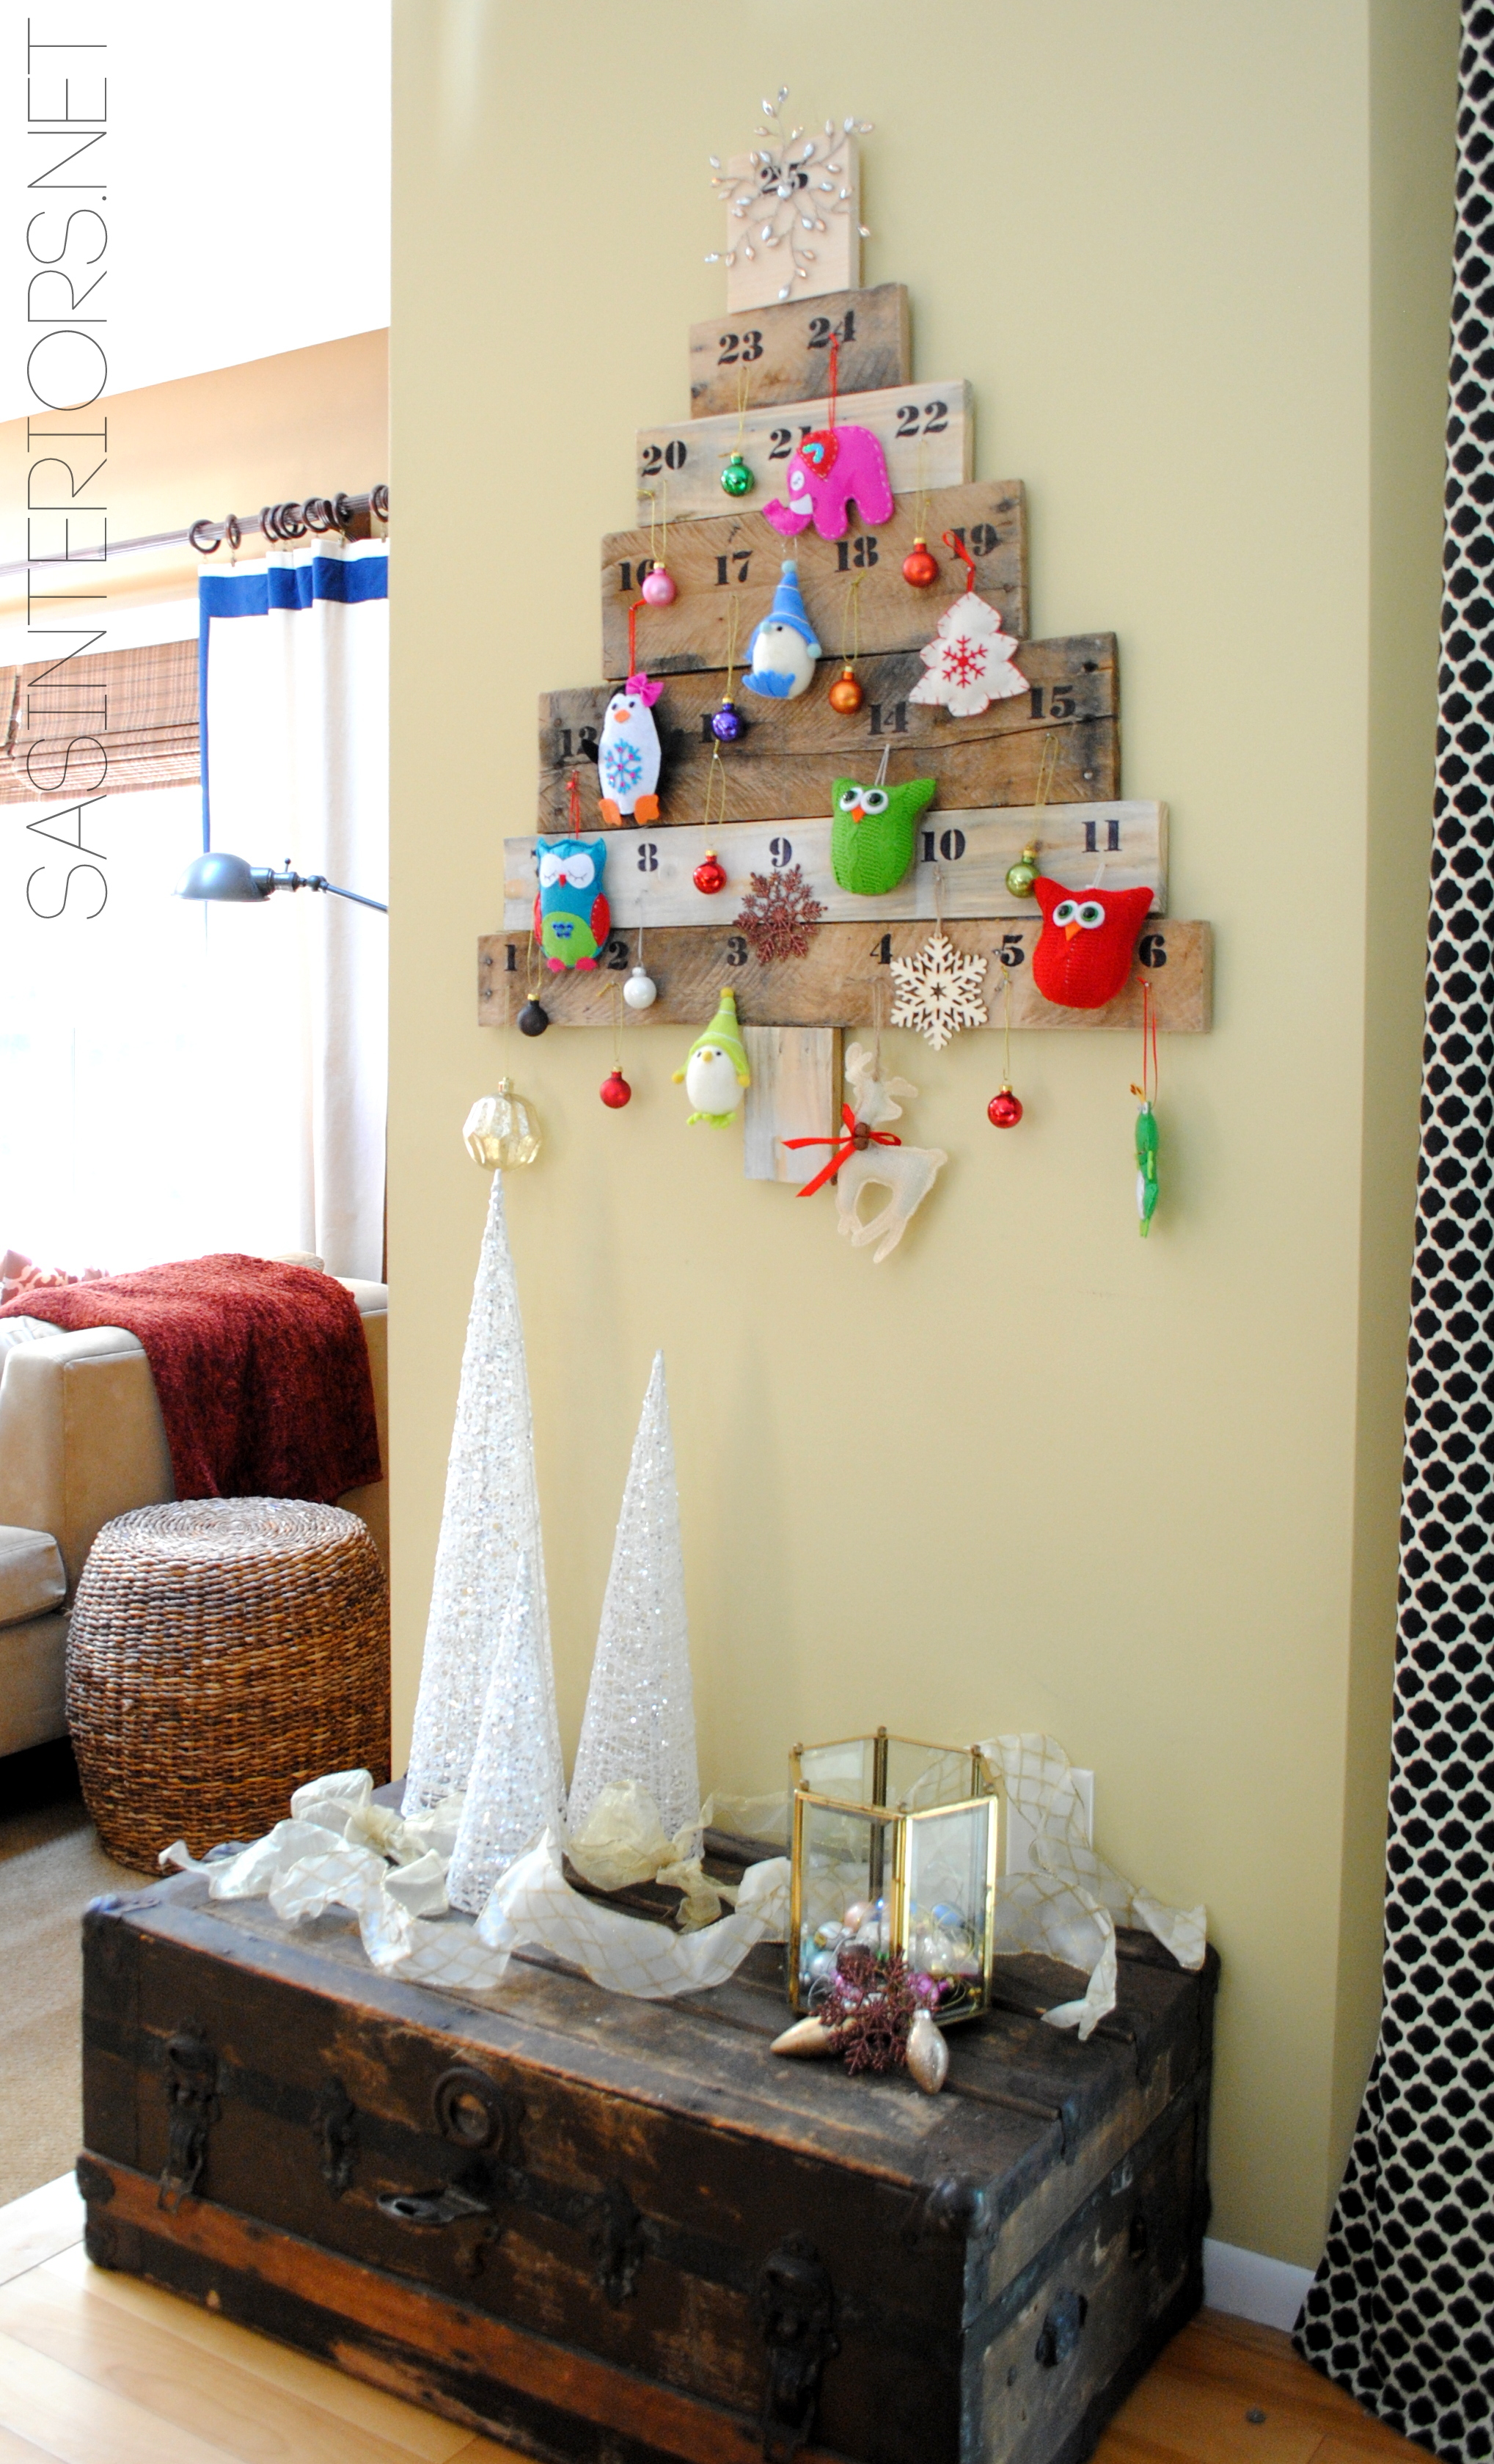
It’s so colorful and brings such whimsy to our holiday home decor.


The kids love it too and they can’t wait for the 1st of December to arrive to start adding an ornament each day. While we wait, the ornaments that all came from this years Lowe’s collection, sit in the brass light turned container.


I hope you enjoyed my latest creation as much as I. It was fairly easy to make, and I loved that I was able to create it using materials I already had. How much better does it get?! The anticipation and excitement leading to Christmas day can be a bit challenging, but hopefully my countdown calendar makes it a tiny bit more fun.

To gather even more unique, fun, and creative ideas for your indoor and outdoor Winter spaces, I would definitely suggest downloading the Lowe’s Creative Ideas app on your iphone and/or ipad. I’m always checking out the FREE app for great seasonal + do-it-yourself inspiration. And even better, this Pallet Christmas Countdown creation will be featured in the upcoming Winter guide – how cool, right?!
![]()
Also consider following Lowe’s on Facebook, Pinterest, and Instagram as well.
Disclosure: I am part of the Lowe’s Creative Team and was provided with a Lowe’s gift card to purchase items for my project. I was also compensated for my time to use the products. No one told me what to create, what to buy, how to use the product, or what to write. All opinions are 100% mine!
Comments are closed.