Valentine Wreath with Paint Chip Flowers
Thanks all for loving my printables so much – I didn’t realize what a hit they’d be. I guess next time I should have more confidence… Weren’t all the other printables along the Blog Hop super cute as well? I am still in the romance mood (that sounded corny), and wanted to share with you a wreath I created last year. It was originally featured on Jen’s blog, but I wanted to give it a refresh and share it all with you. It’s one of my favorites to-date!
Come see how I made this Valentine Wreath with Paint Chip Flowers…

It wasn’t difficult to make at all and the flower petals were actually a bit calming to create.
The supplies I used for this wreath creation were:
- Grapevine wreath ( I got mine on sale at AC Moore for $2.50)
- Eucalyptus leaves
- White spray paint (I used a gloss finish)
- Paint chip samples in an array of pinks and reds
- Hot glue gun
- A heart punch or scissors to manually cut out hearts
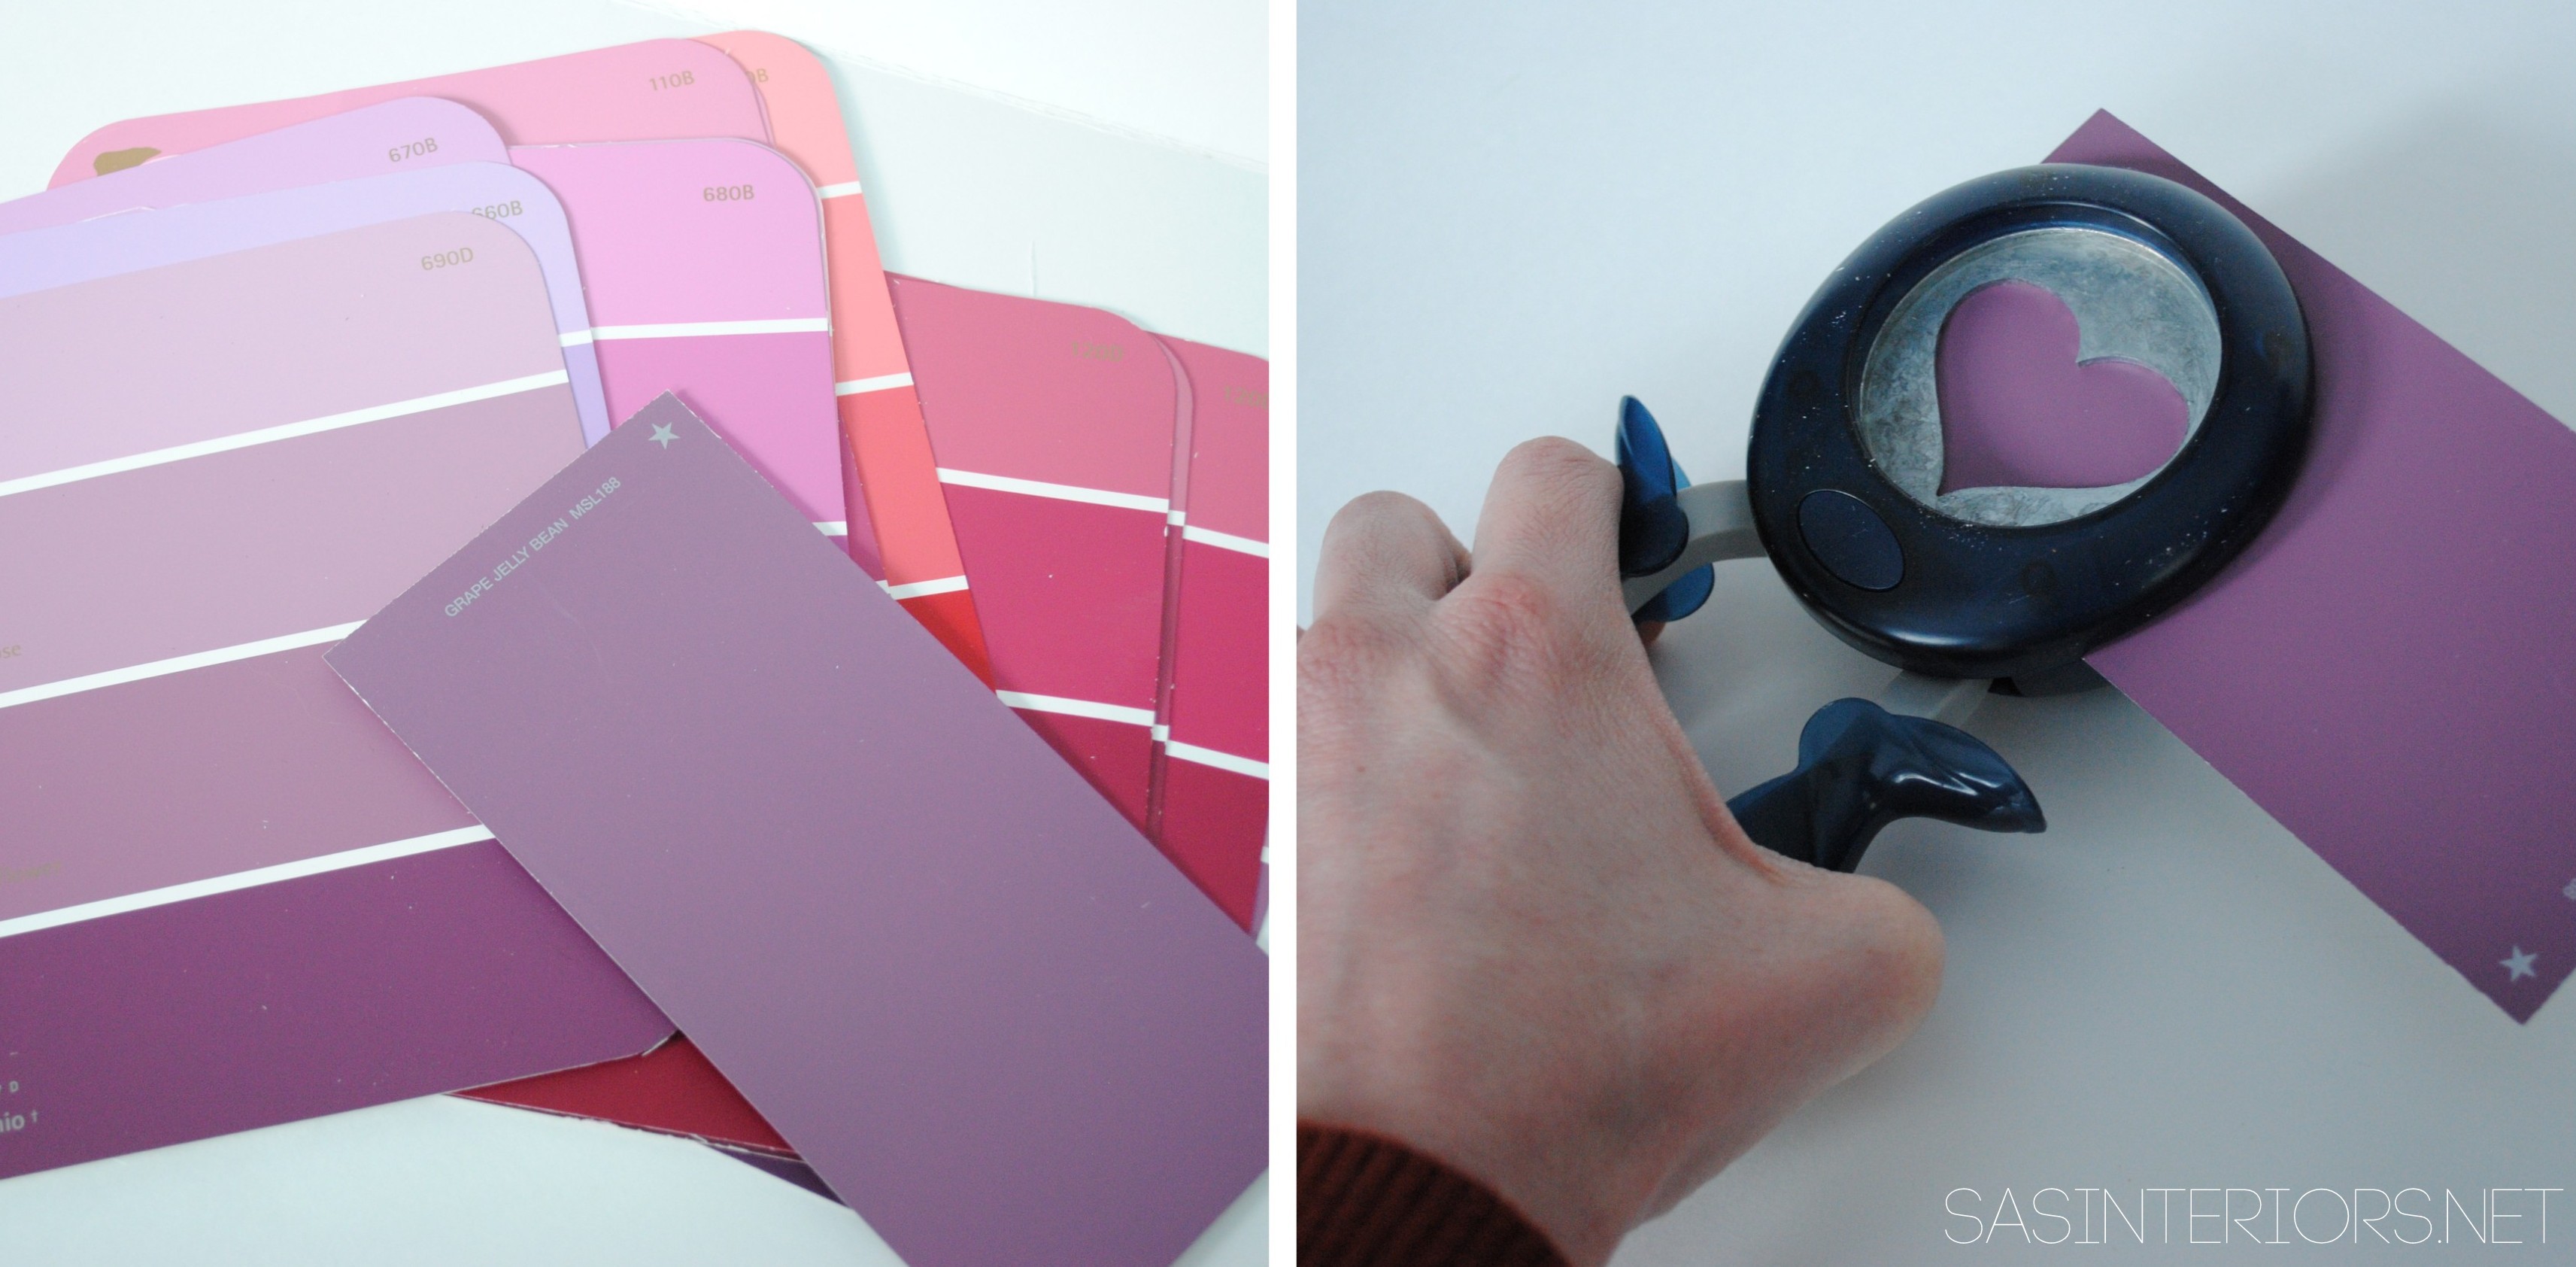
I started off with the paint chip flowers.
Using paint chip samples in a range of colors from pinks to reds to purple, and a 1.5″ heart-shaped hole punch, I cut out about 40 hearts. I got this decorative paper punch at AC Moore for less than $10, but as an alternative, you could cut hearts out with plain ole’ “old school†scissors. The hearts may not result as exact, but the idea is still the same.
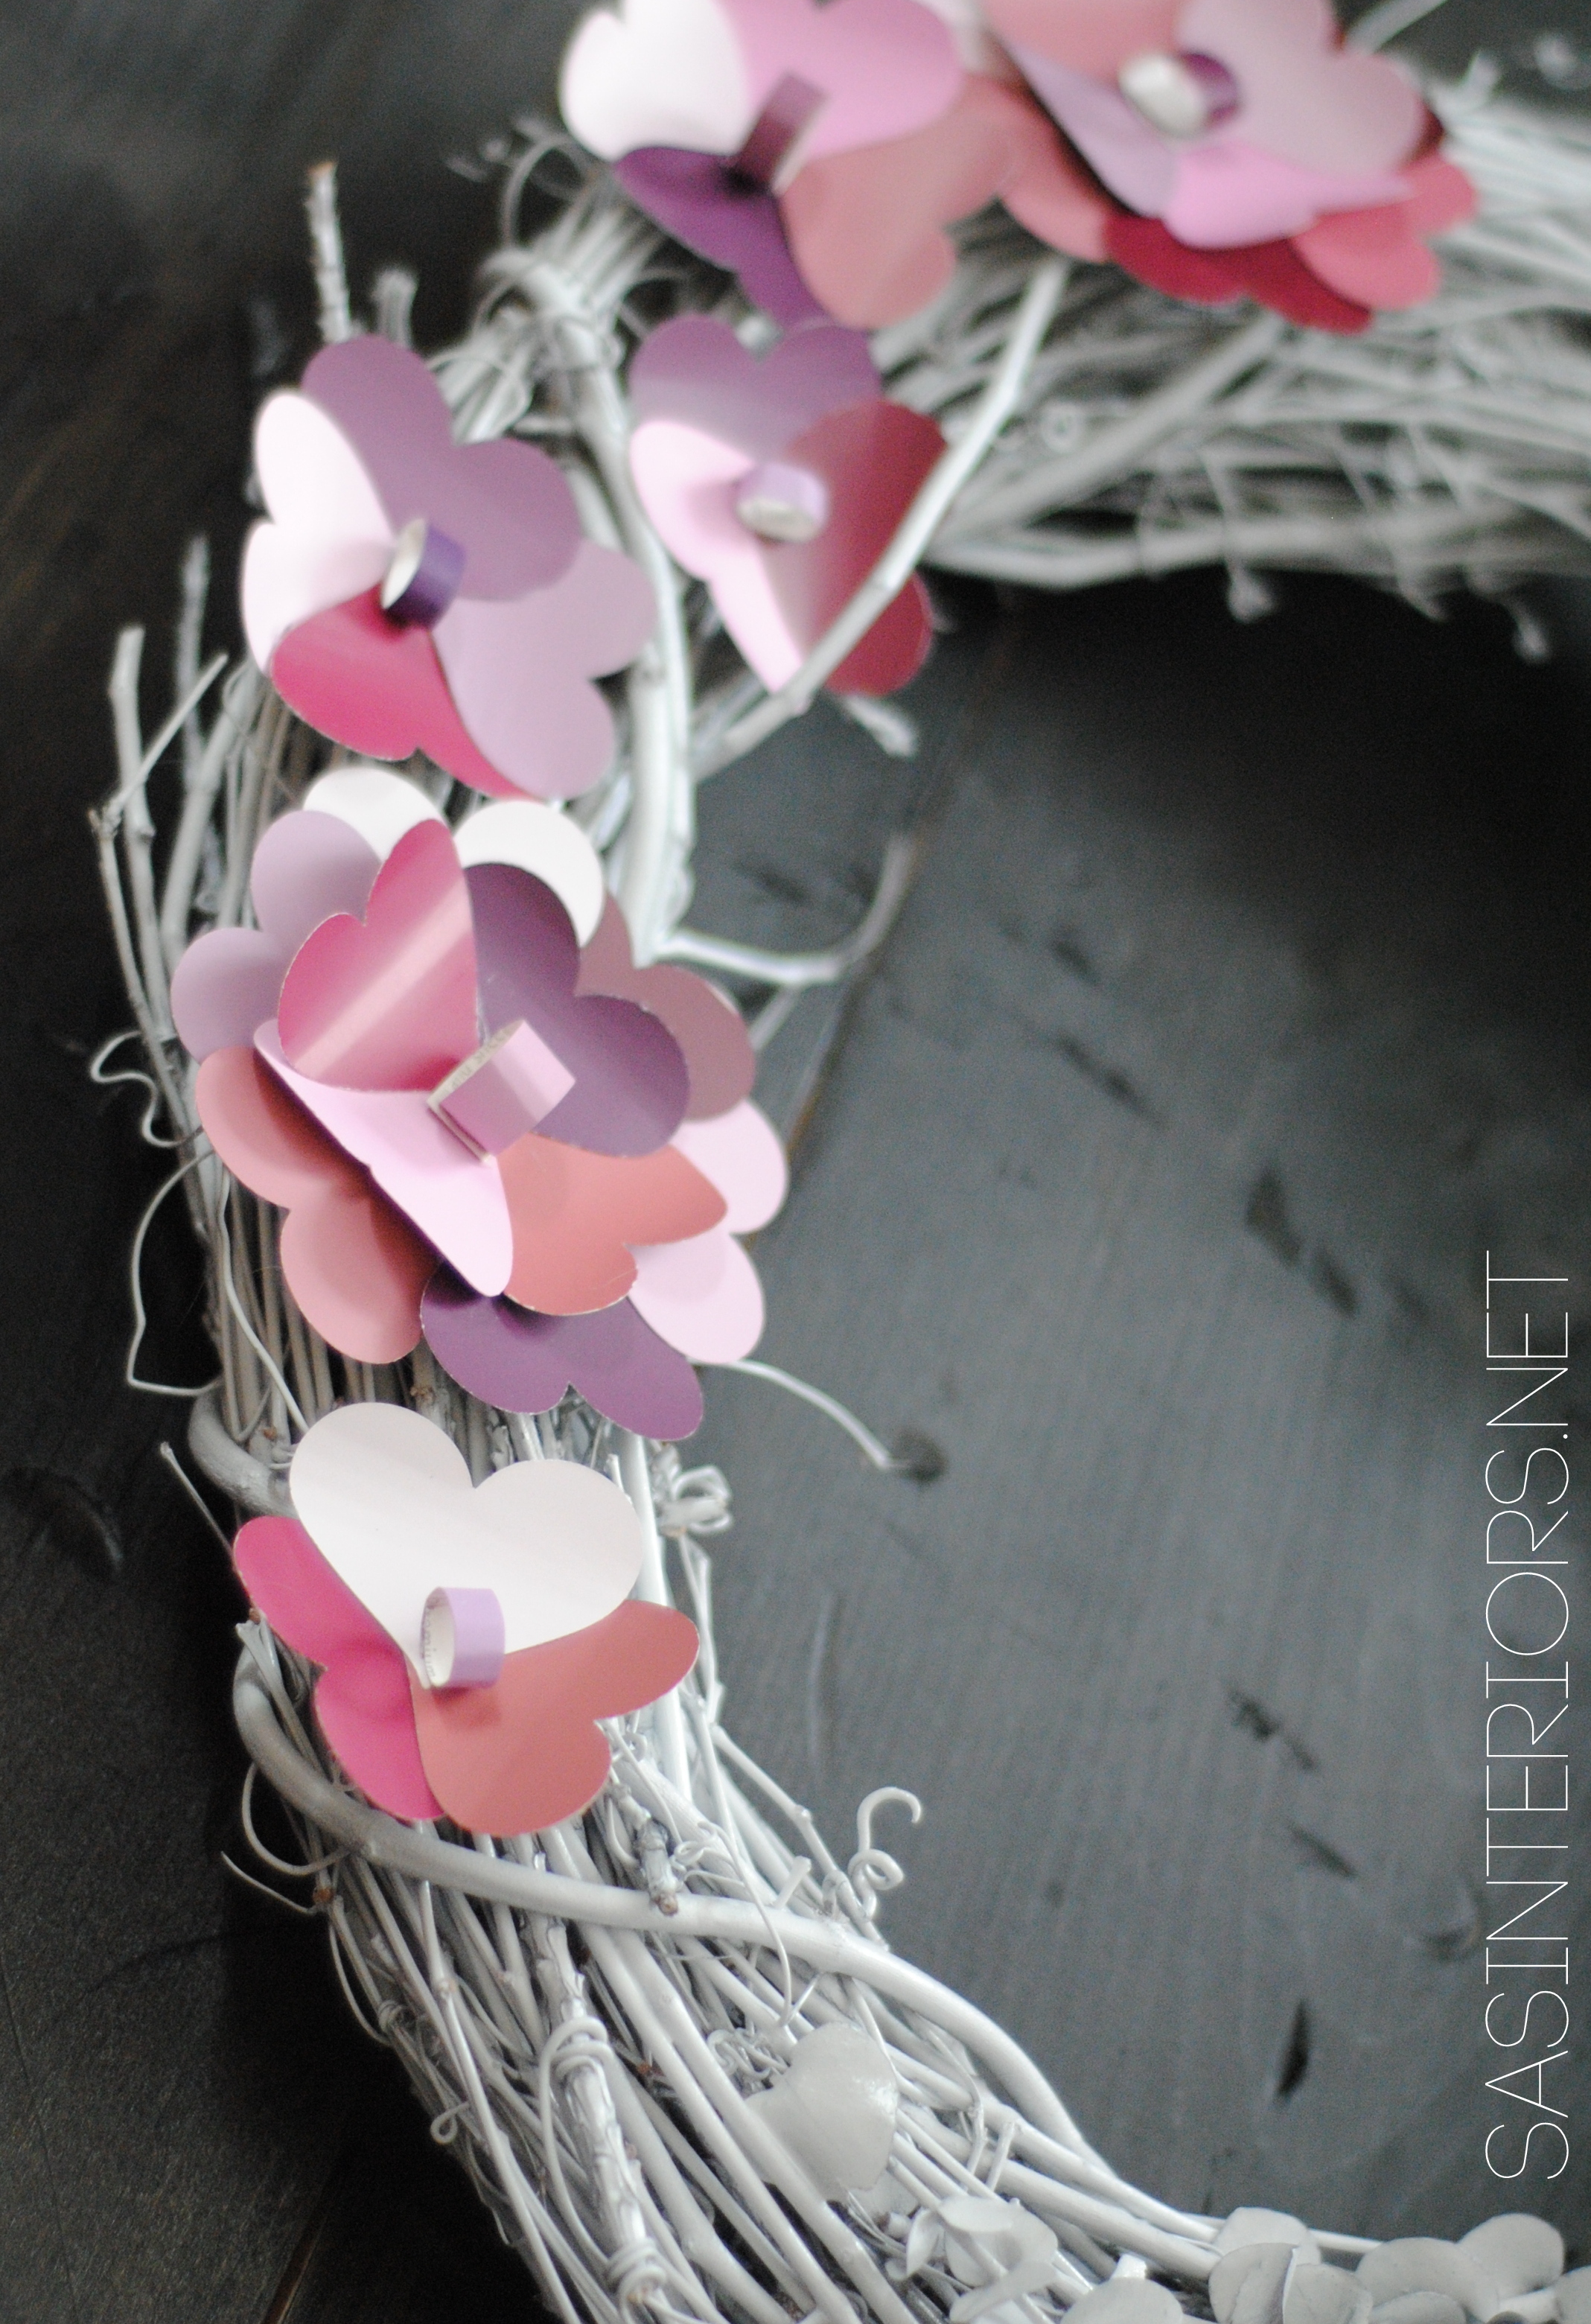
Then I cut a piece of felt about 3″ round (any heavier material will work as well), laid out 6 hearts around the outer edge, and secured them with a nice-sized dab of hot glue.

Then for the inner hearts, I curled the top edge using a pencil to create the look of a flower.

I layered (4) ‘curled’ hearts in the center, on top of the outer edge of hearts. To complete each flower creation, I added a small 3 dimensional piece of paint chip for the center of the “flowerâ€.
After making a few more flowers of different sizes (they don’t all have to be this large size – differing sizes make it more interesting), I added them to the wreath. Having the back of the flowers on felt, allows the ease of adding them to the wreath. With a dab of hot glue, I attached the felt-backed flowers to the wreath. Once Valentine’s Day is over, the flowers can easily be removed from the wreath, and different embellishments can be added for other holidays or occasions.

This wreath truly was a joy to create and took only about an hour to make (I add the eucalyptus & spray painted the wreath Day 1 which took about 15 minutes, then made the flowers and attached them Day 2 which took about 30 minutes).


This festive Valentine wreath would be great hanging on a front door or inside the home. I have it above my fireplace – it’s the perfect centerpiece above my mantel.

Super cute, right?!
I like it so much because it doesn’t scream Valentine’s Day. It could really take you right through the Spring months. Wouldn’t it also look good with fall colored paint chips – Ooo, that gives me an idea!
Want to see some more of my Vday creations? Here are a few:
> The valentine burlap wreath with felt flowers that I created a few years ago
click on image for tutorial
> My ‘love’ connection wood sign. Do you see lame / dorky or wow, she’s really creative?
click on image for tutorial
Do you decorate for Valentine’s day?


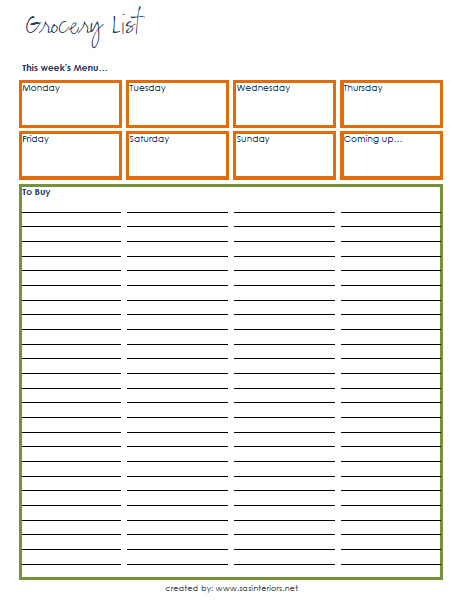
 Click to Print:
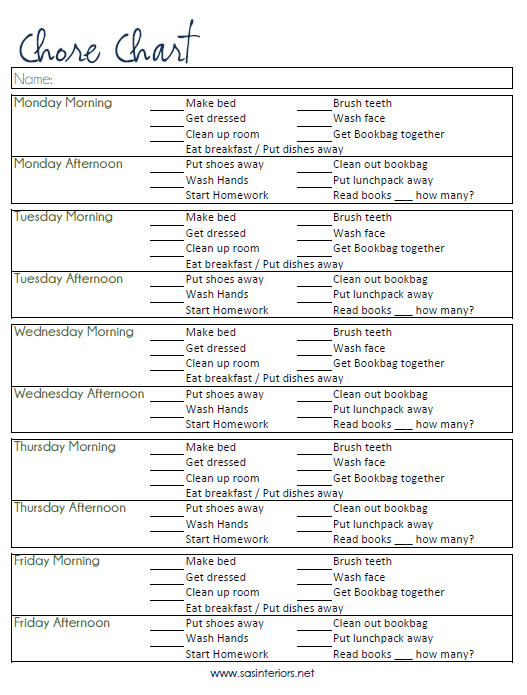