


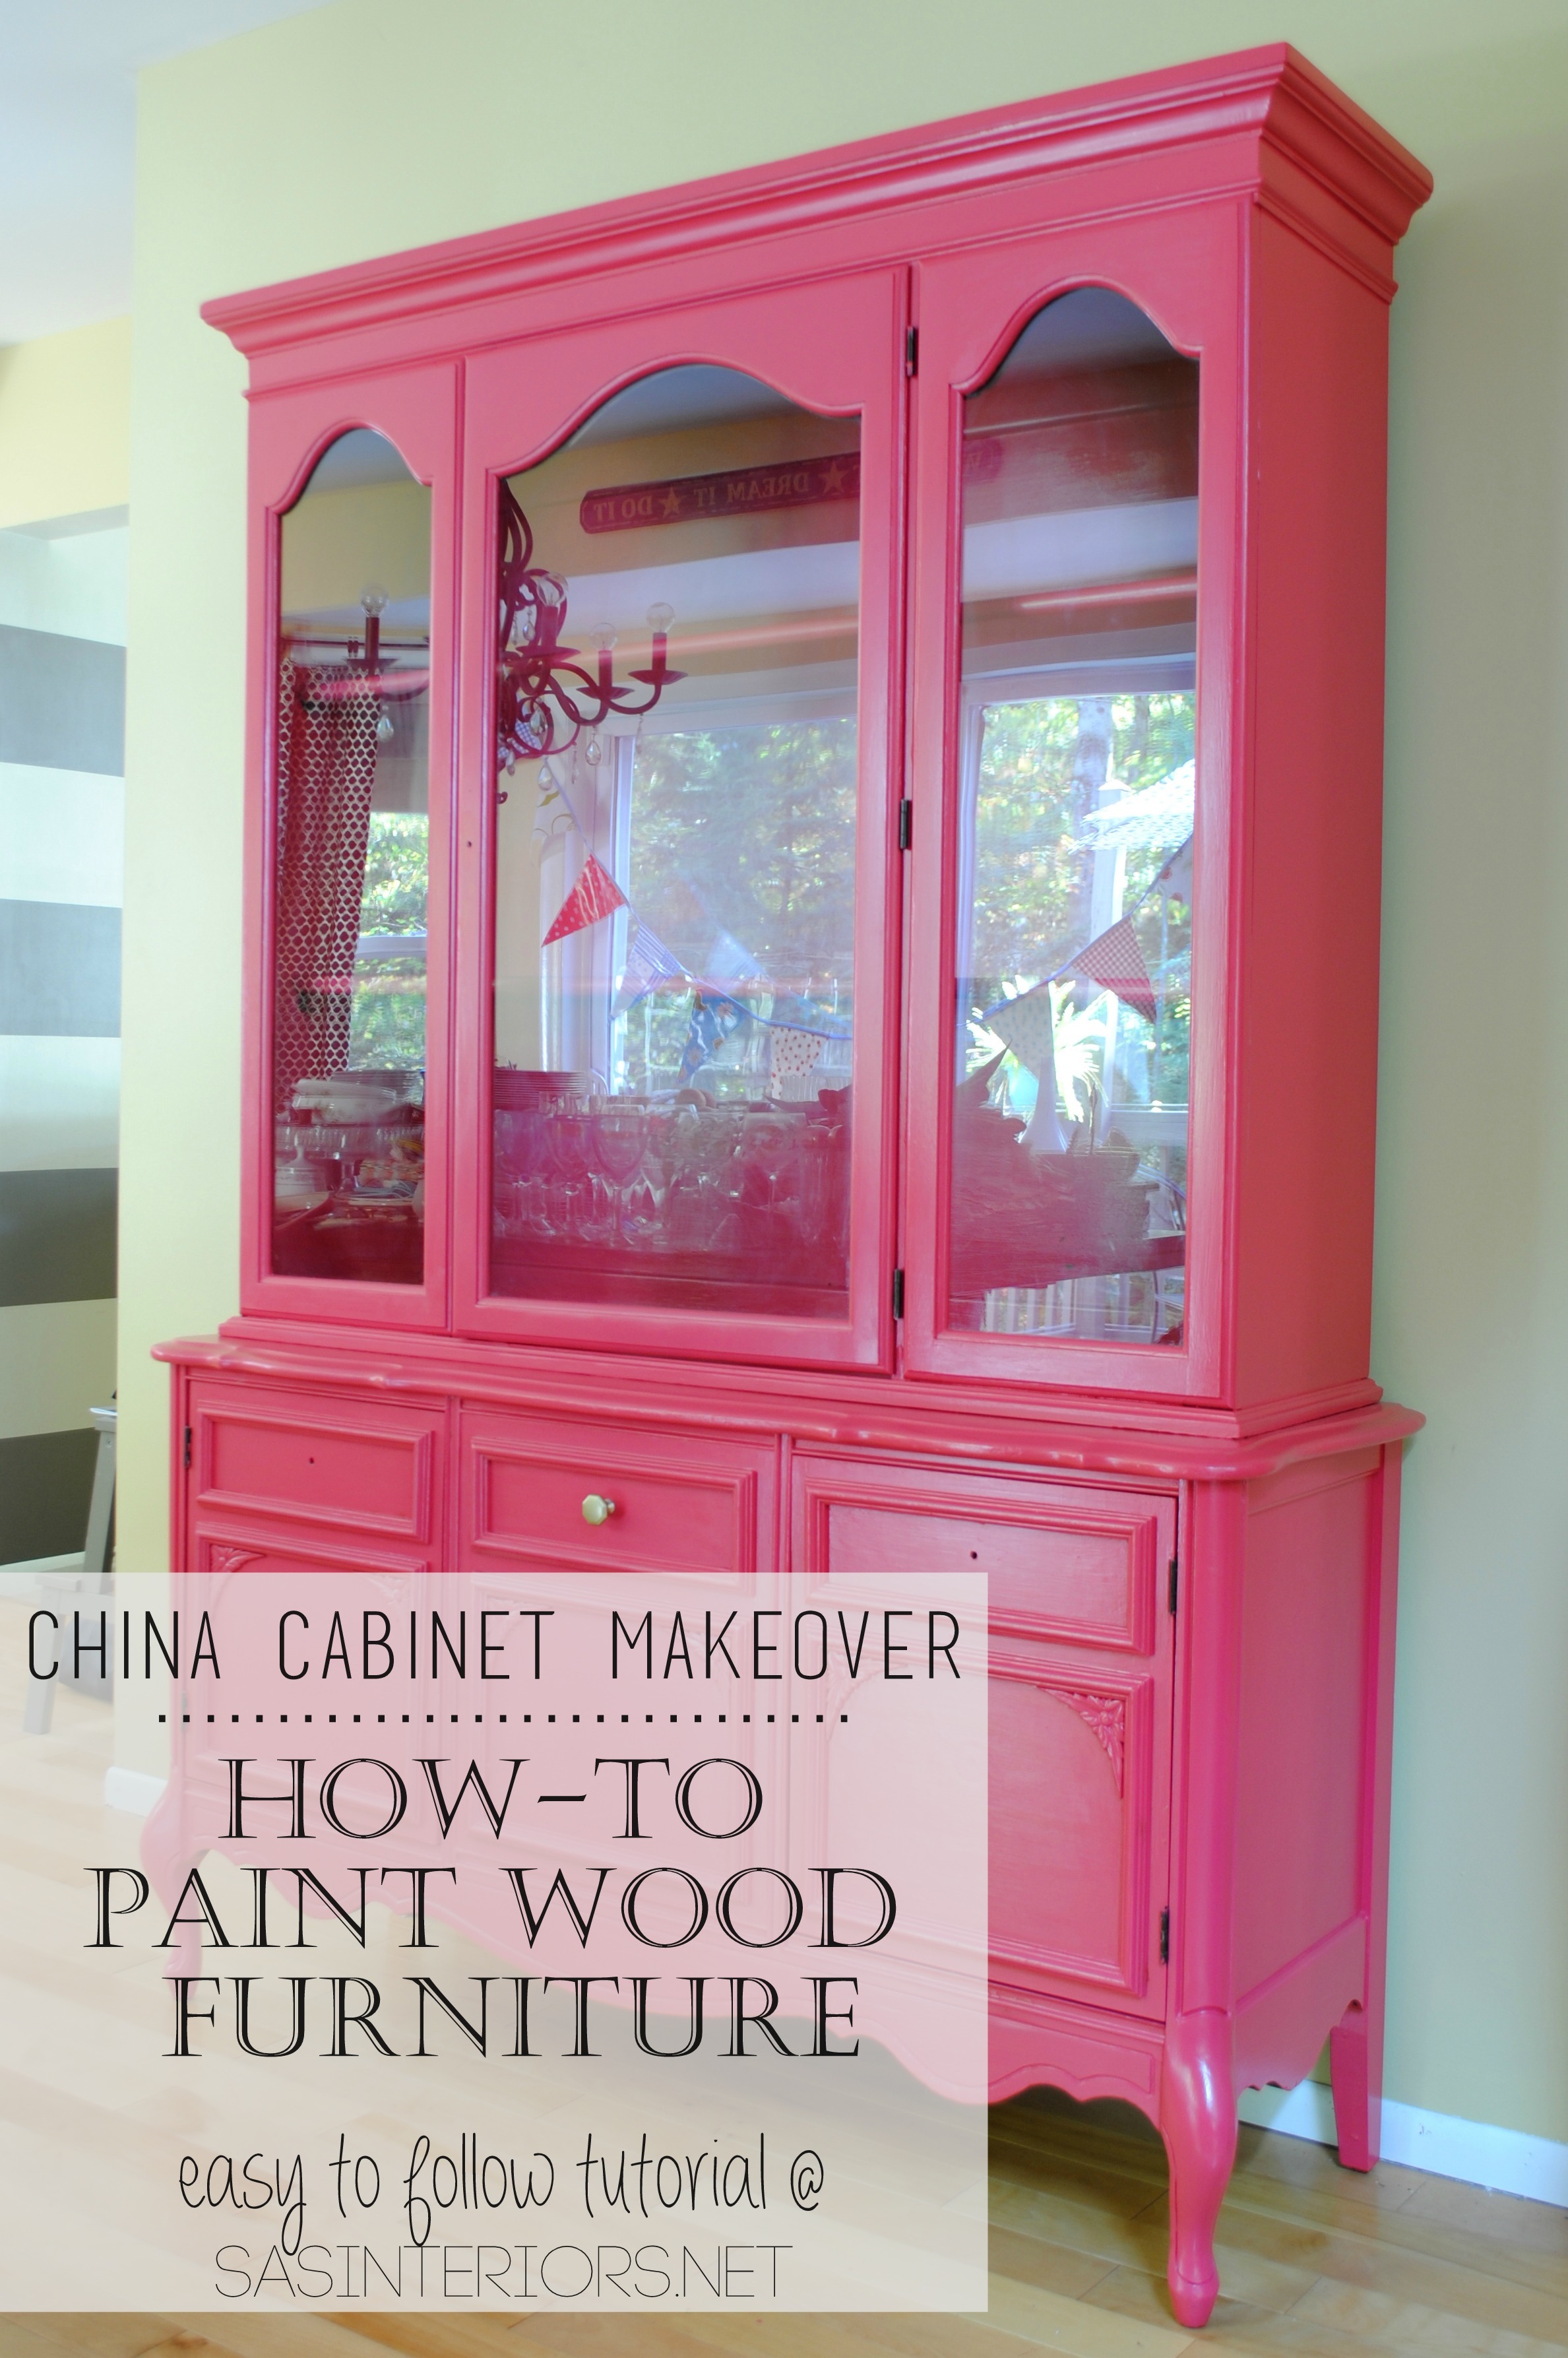
How-To Paint Wood Furniture
Prep is done.
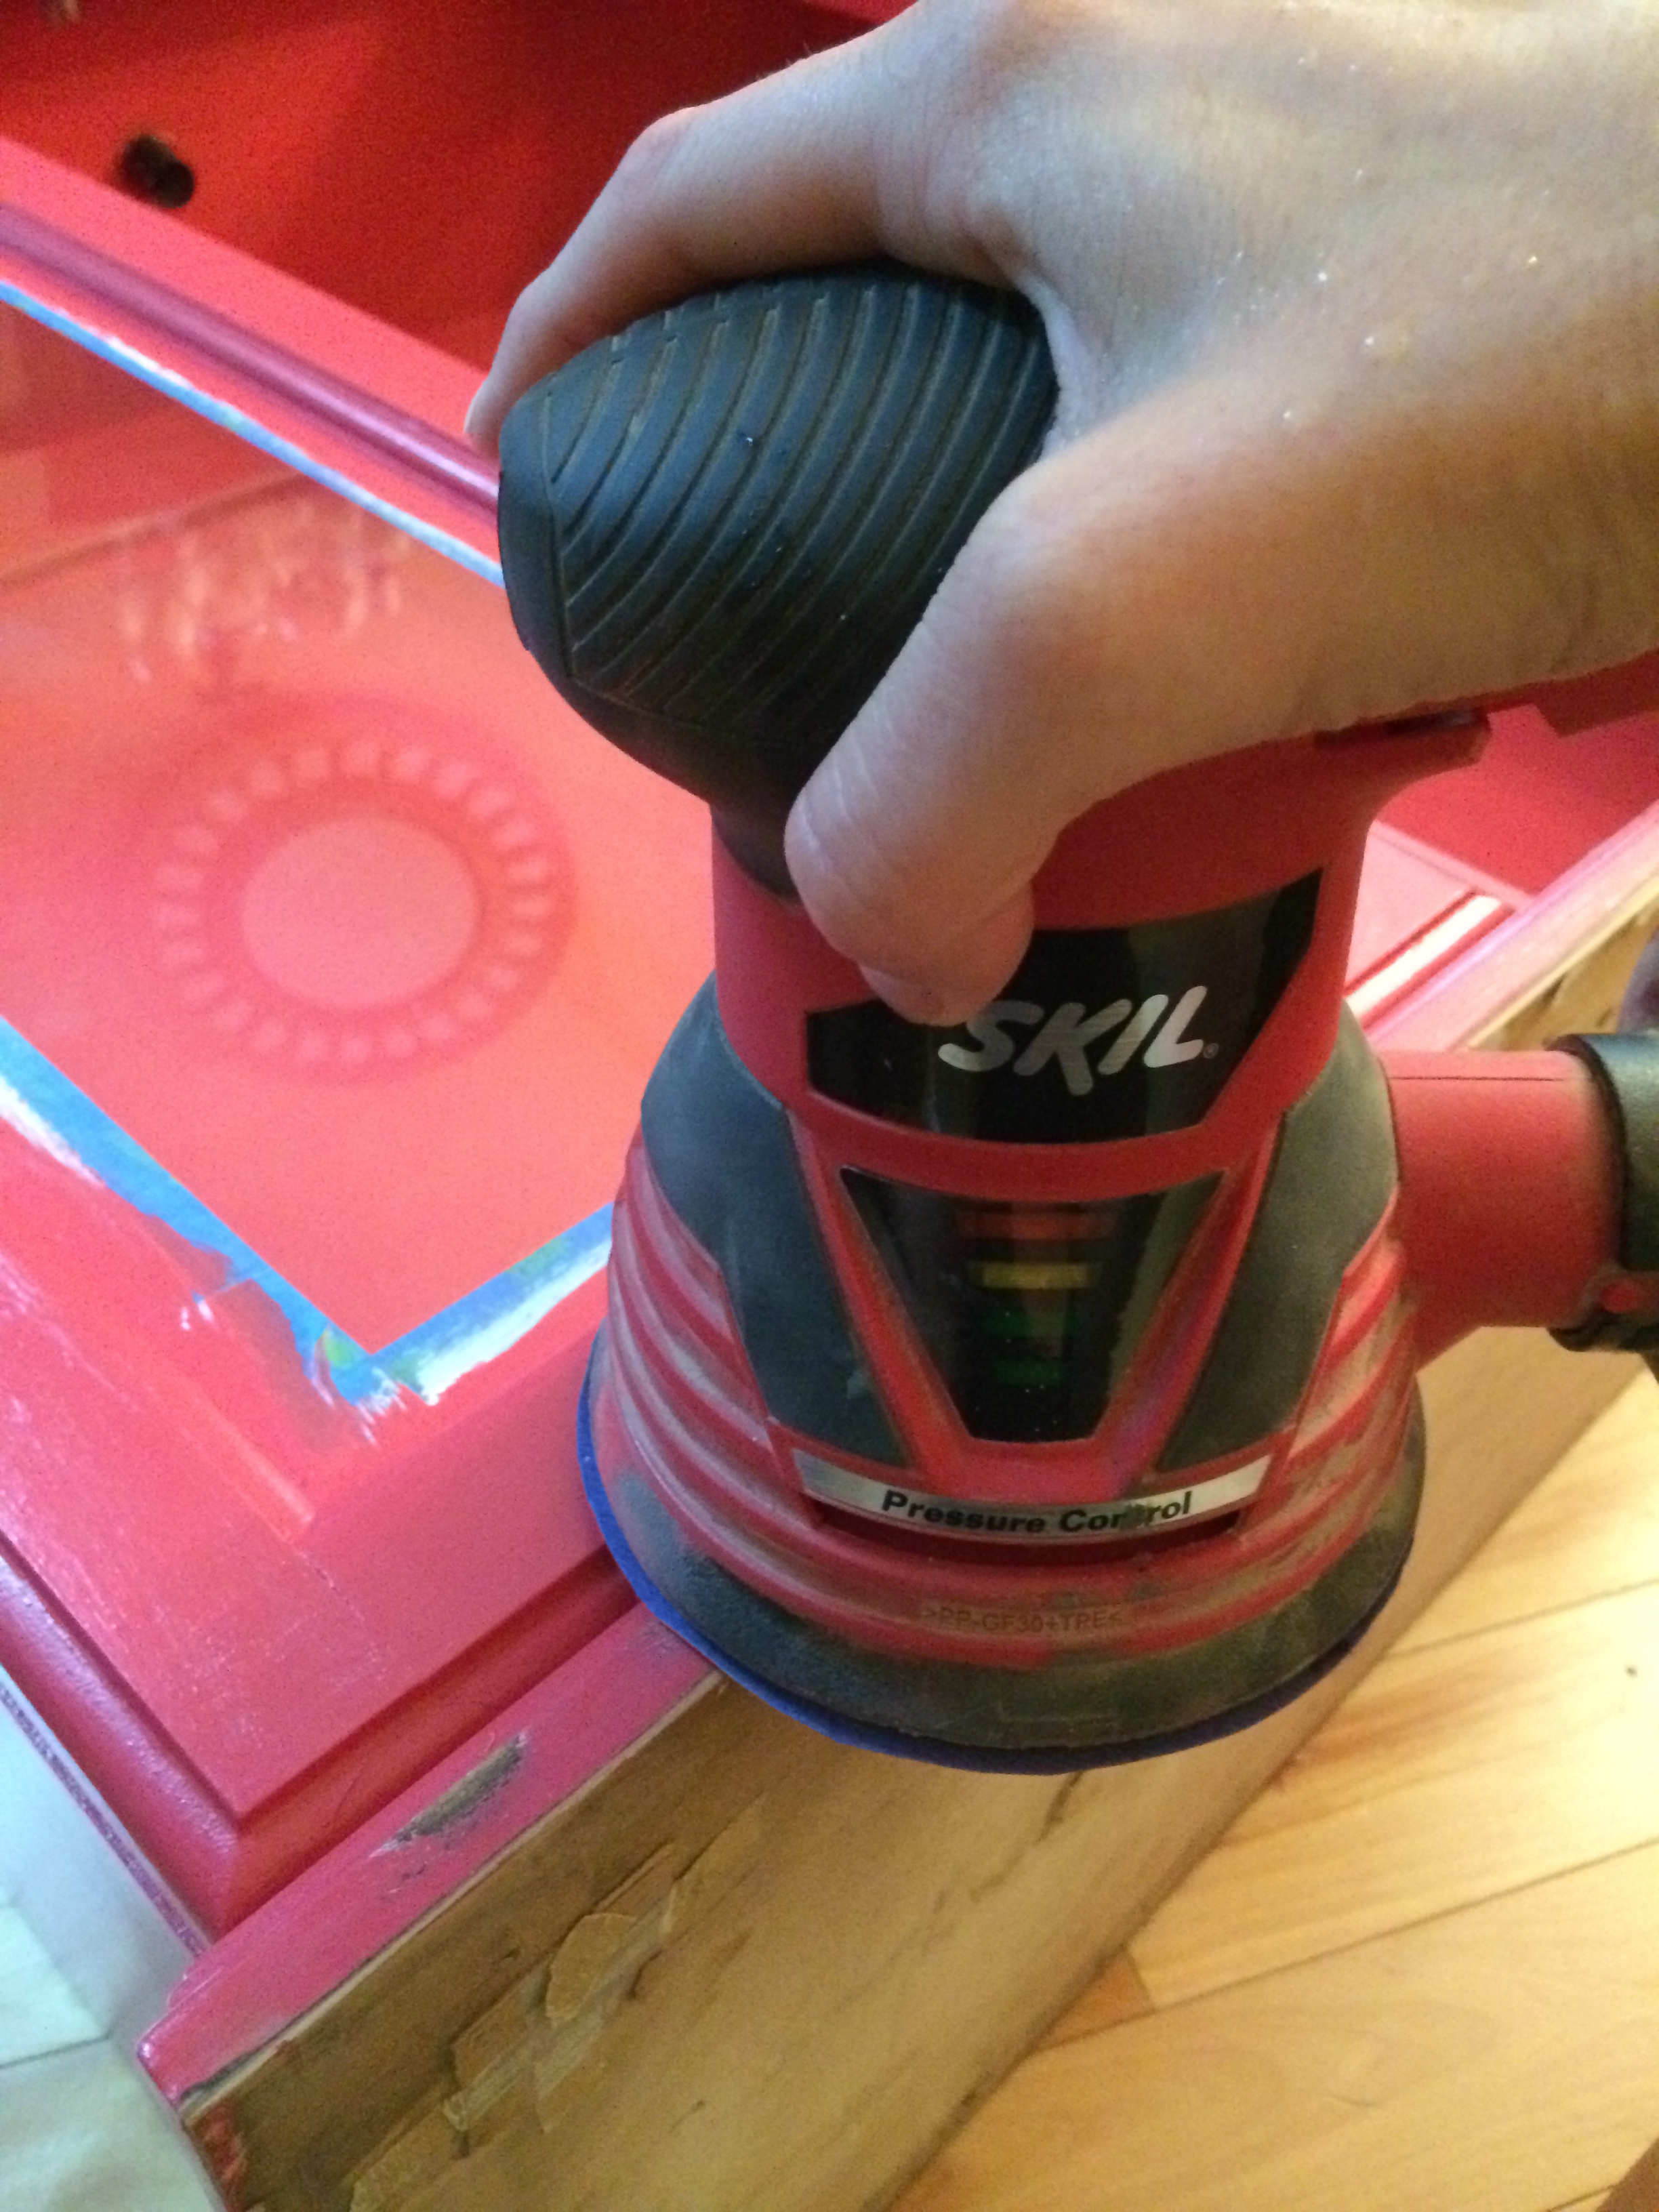
Sanding is complete. >>> [tutorial here]
Priming is finished. >>> [tutorial here]
Now on to the painting. This was definitely the longest + most tedious part of the makeover, but absolutely the most important step to focus on. With all the work that has gone in to prepping this cabinet, or any piece of furniture for that matter, painting it right really makes all the difference in the world to achieve a nice looking end product.
This post is completely dedicated to sharing the steps I took + tips & tricks on how-to successfully paint wood furniture.
As I’ve explained and stressed in the previous two posts, the prep work + priming is very important before paint is applied. To achieve a successful end result, a primer is a must. For this project, I used Glidden Gripper primer (a picture of it + more details can be found in the last post). Once the primer is dry, which typically takes little time (about a day), painting can begin.
Before Painting.
- The Magic Formula. One of my secrets for painting wood furniture is to use floetrol (<- affiliate link). With all furniture painting projects, I always add my favorite “formula†to eliminate brushstrokes. It works like a charm to achieve a clean, brushstroke-free surface! (And I wasn’t even paid to say that – I truly just love it ;)
- The Brush. The brush used for painting really does make a difference. I always use Purdy brushes because they truly make for an easier, better painting result. Yes they are expensive, but it’s worth the cost. Most of the time I use a new brush when starting a project. (Again, I wasn’t paid to say that)
The Color.
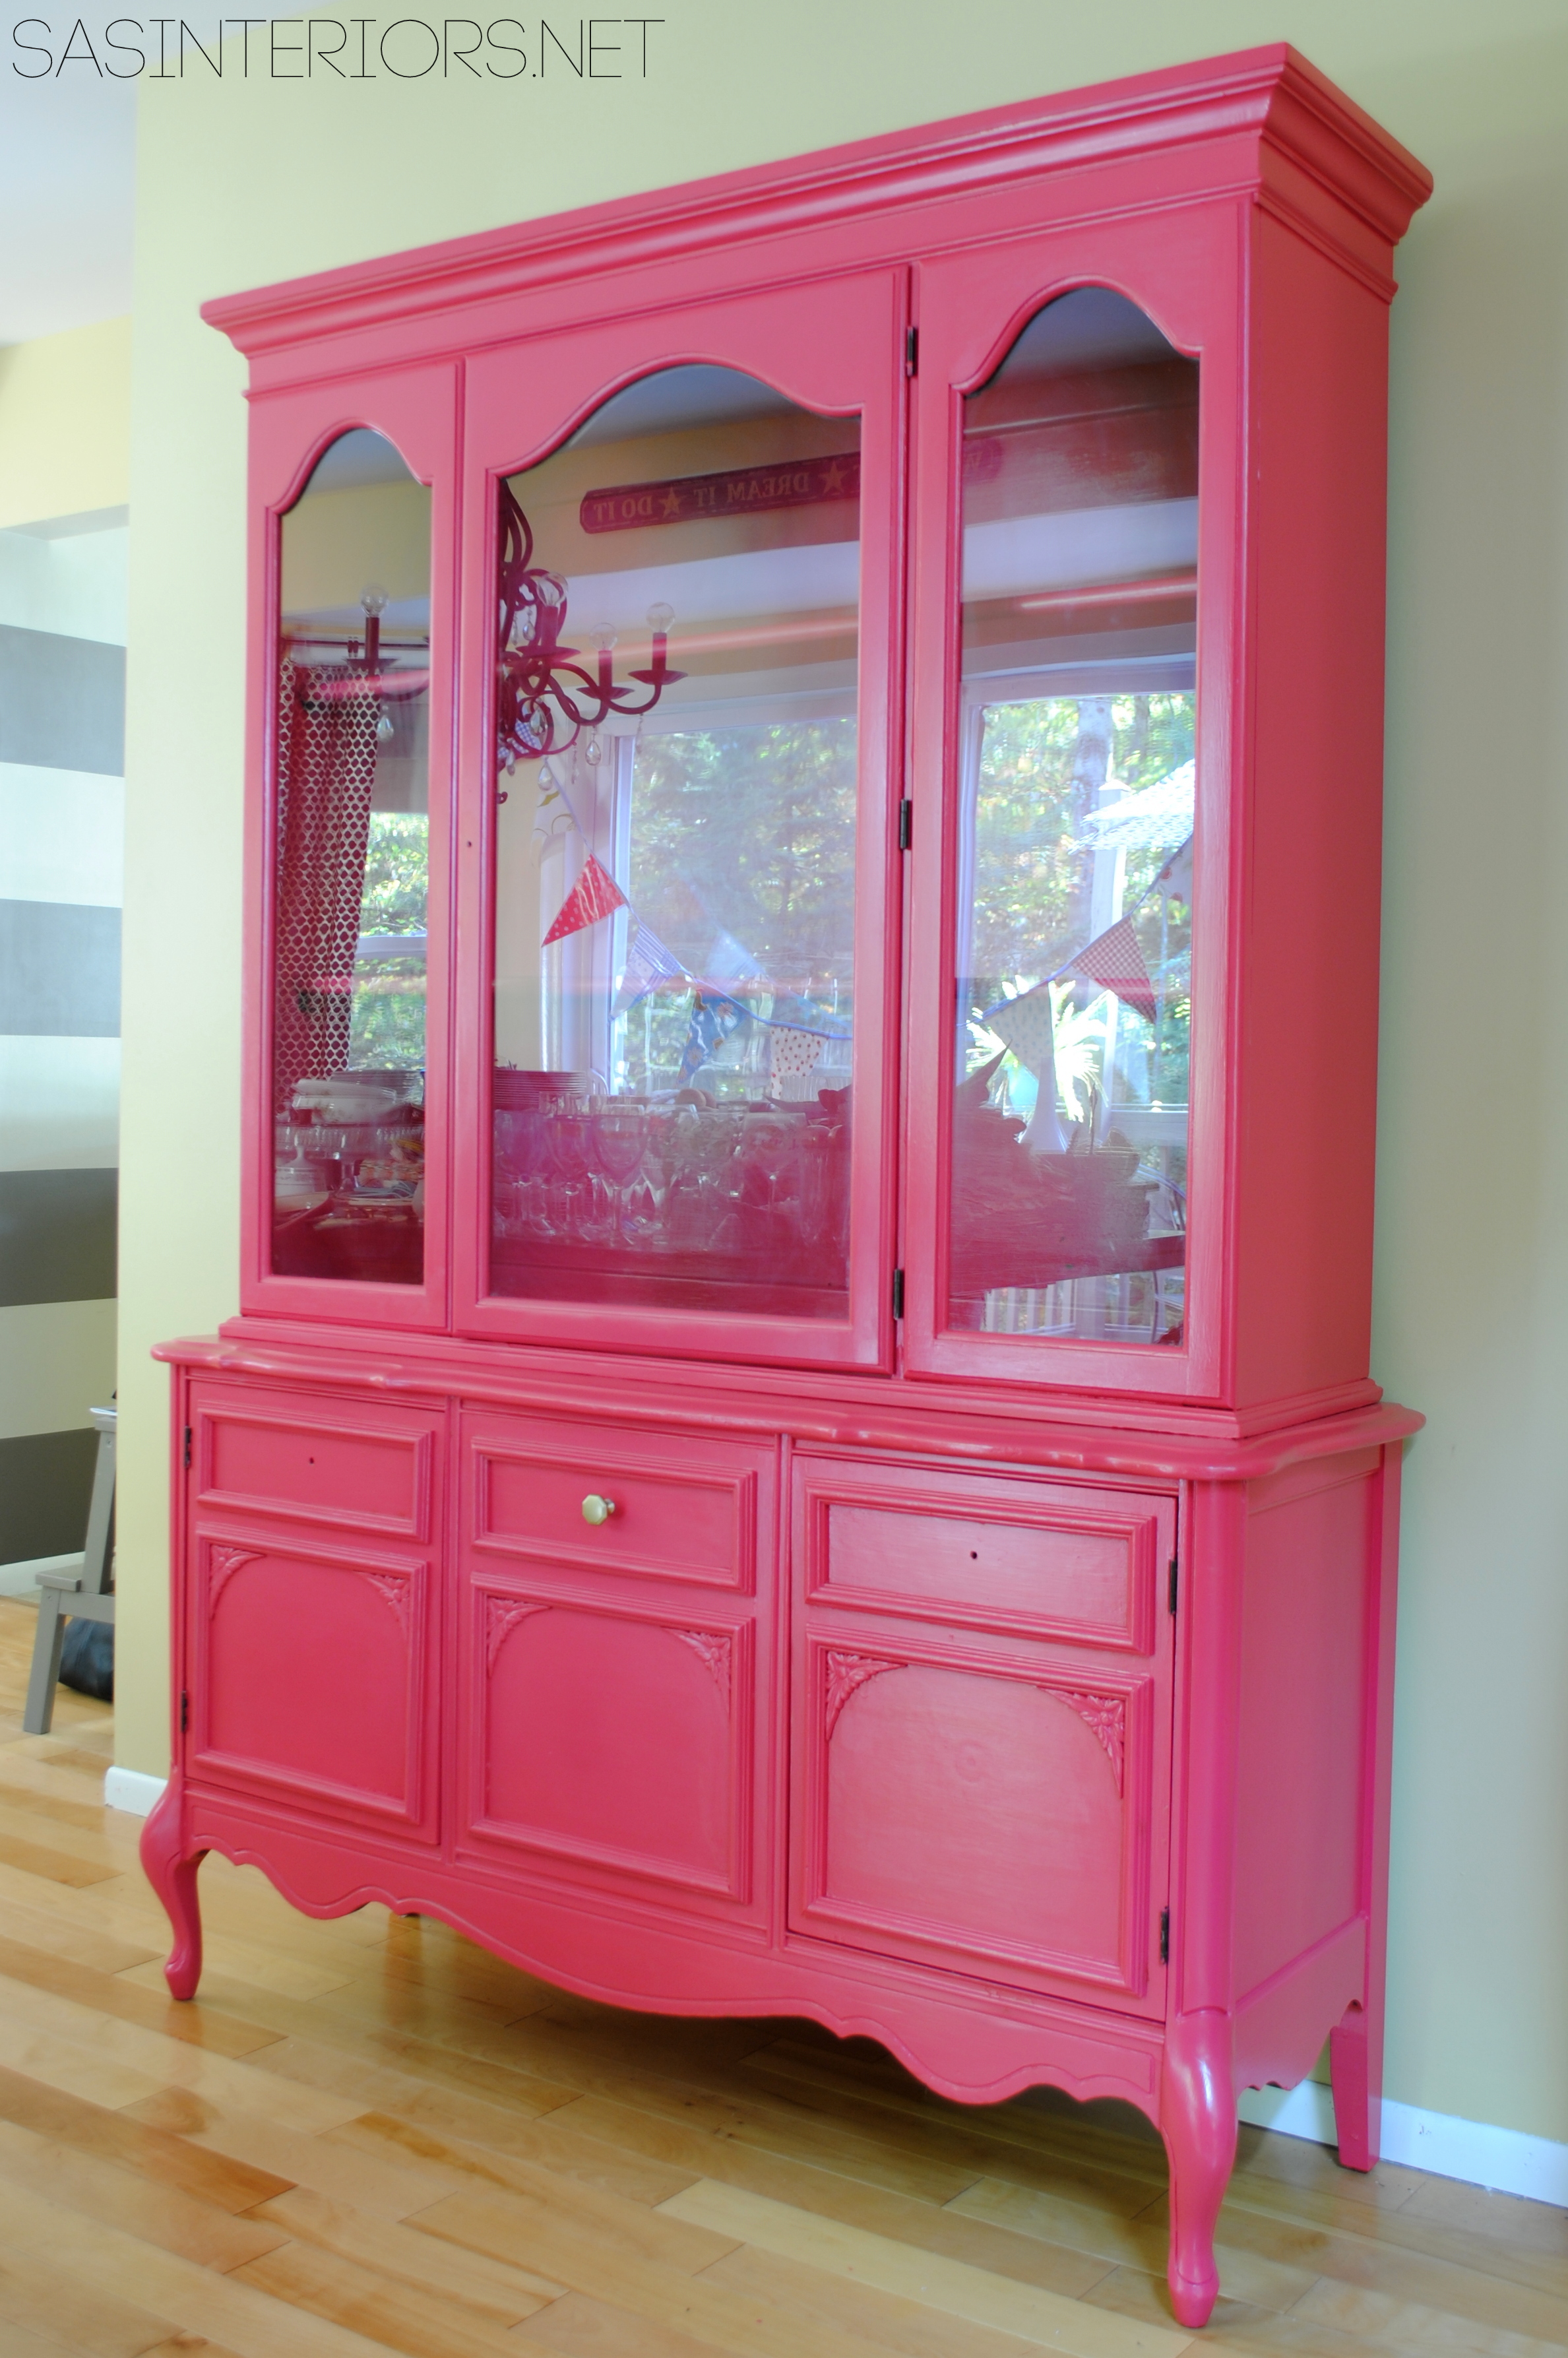
The paint color I chose for this cabinet makeover is Red Red Rose by Glidden.
How-To Paint Wood Furniture.
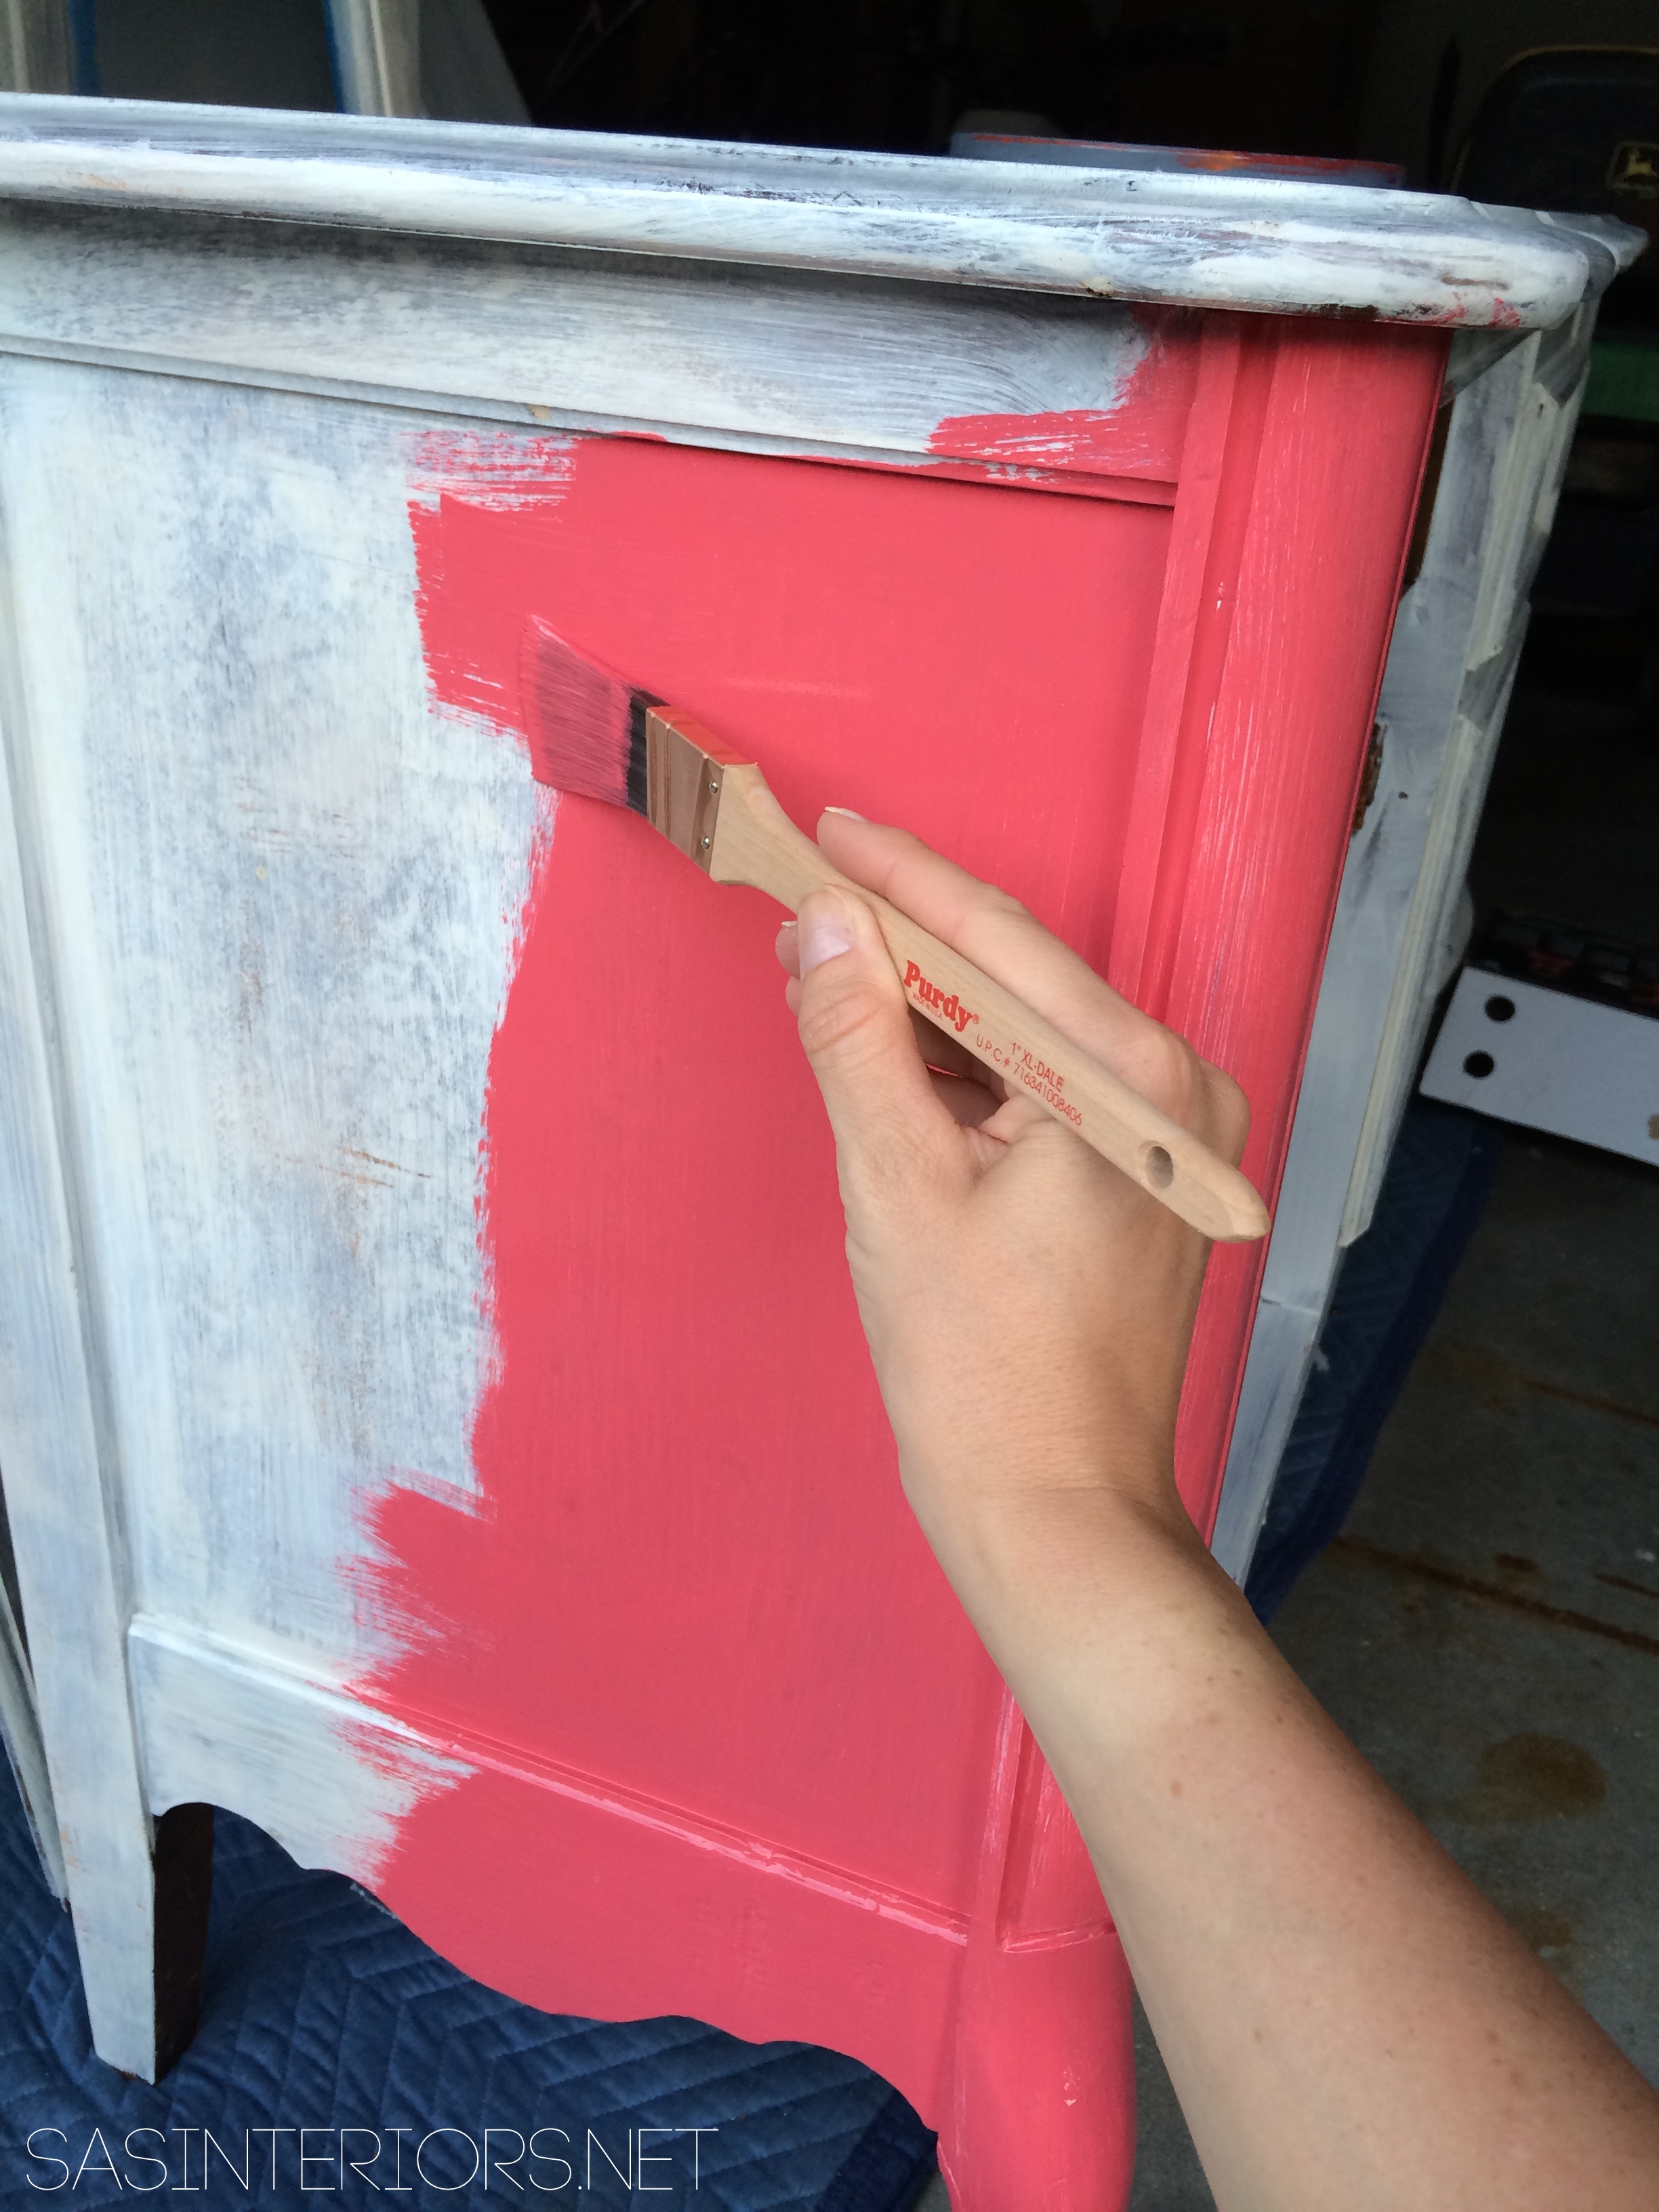
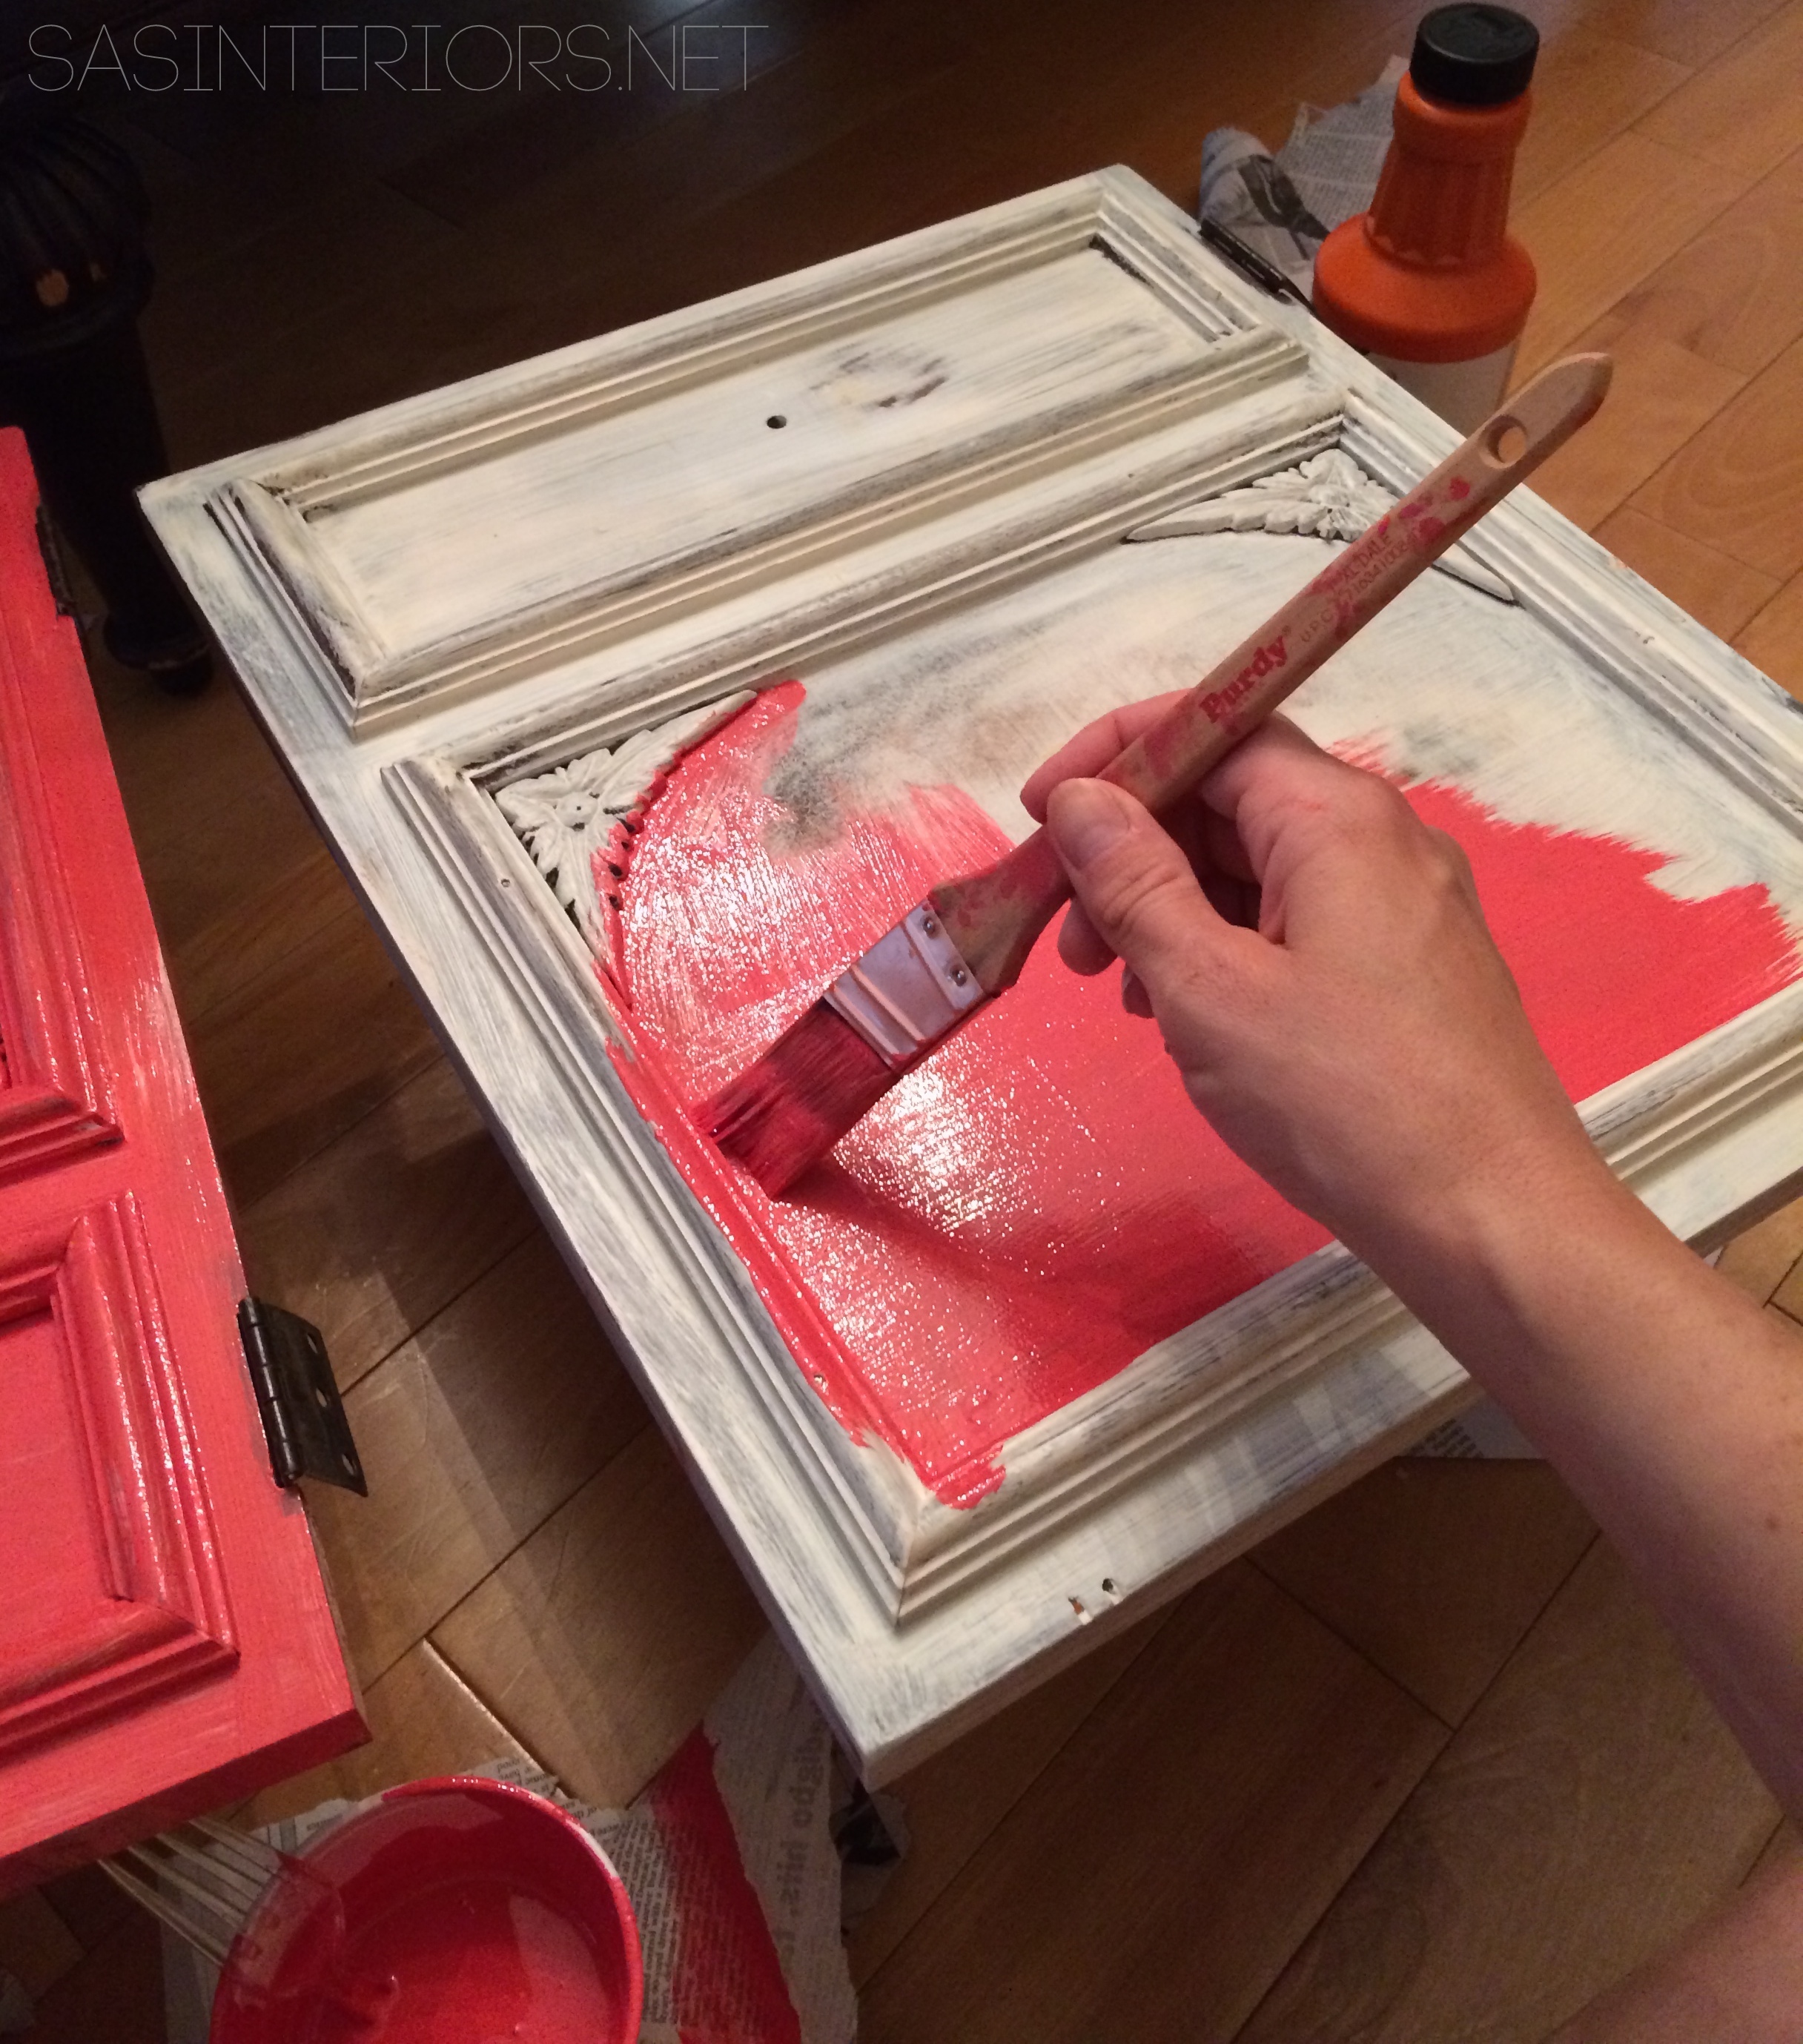
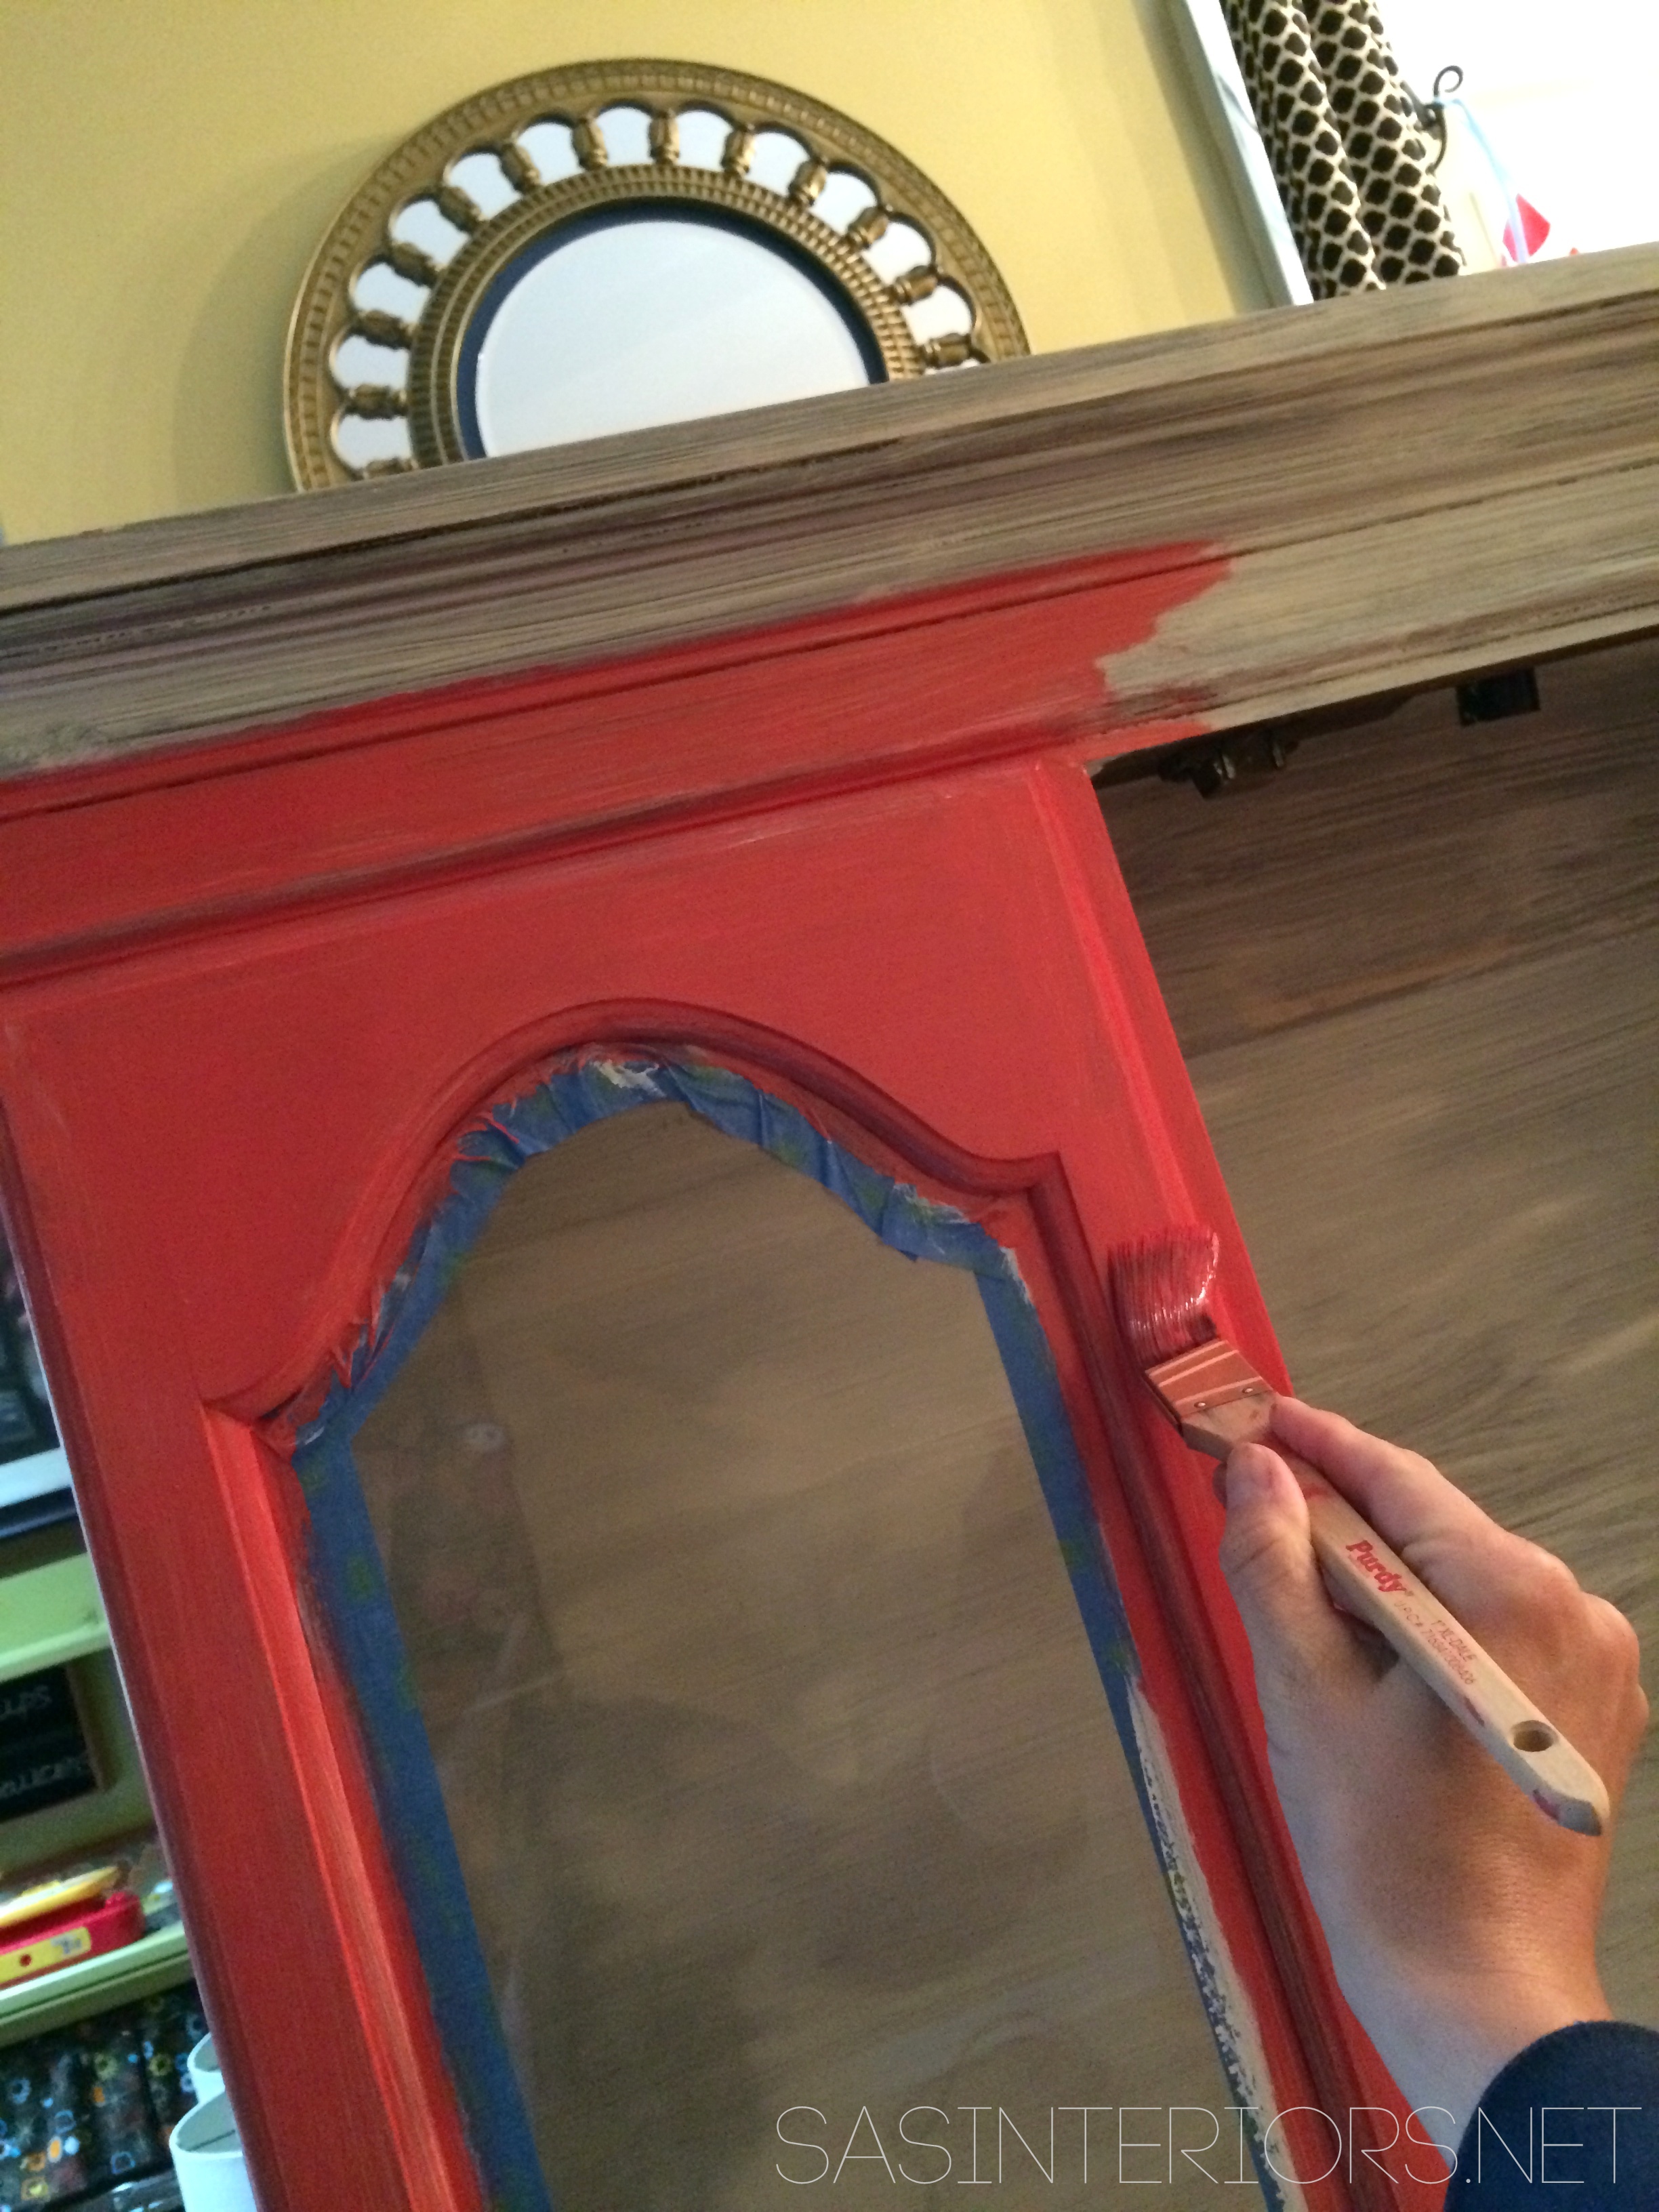
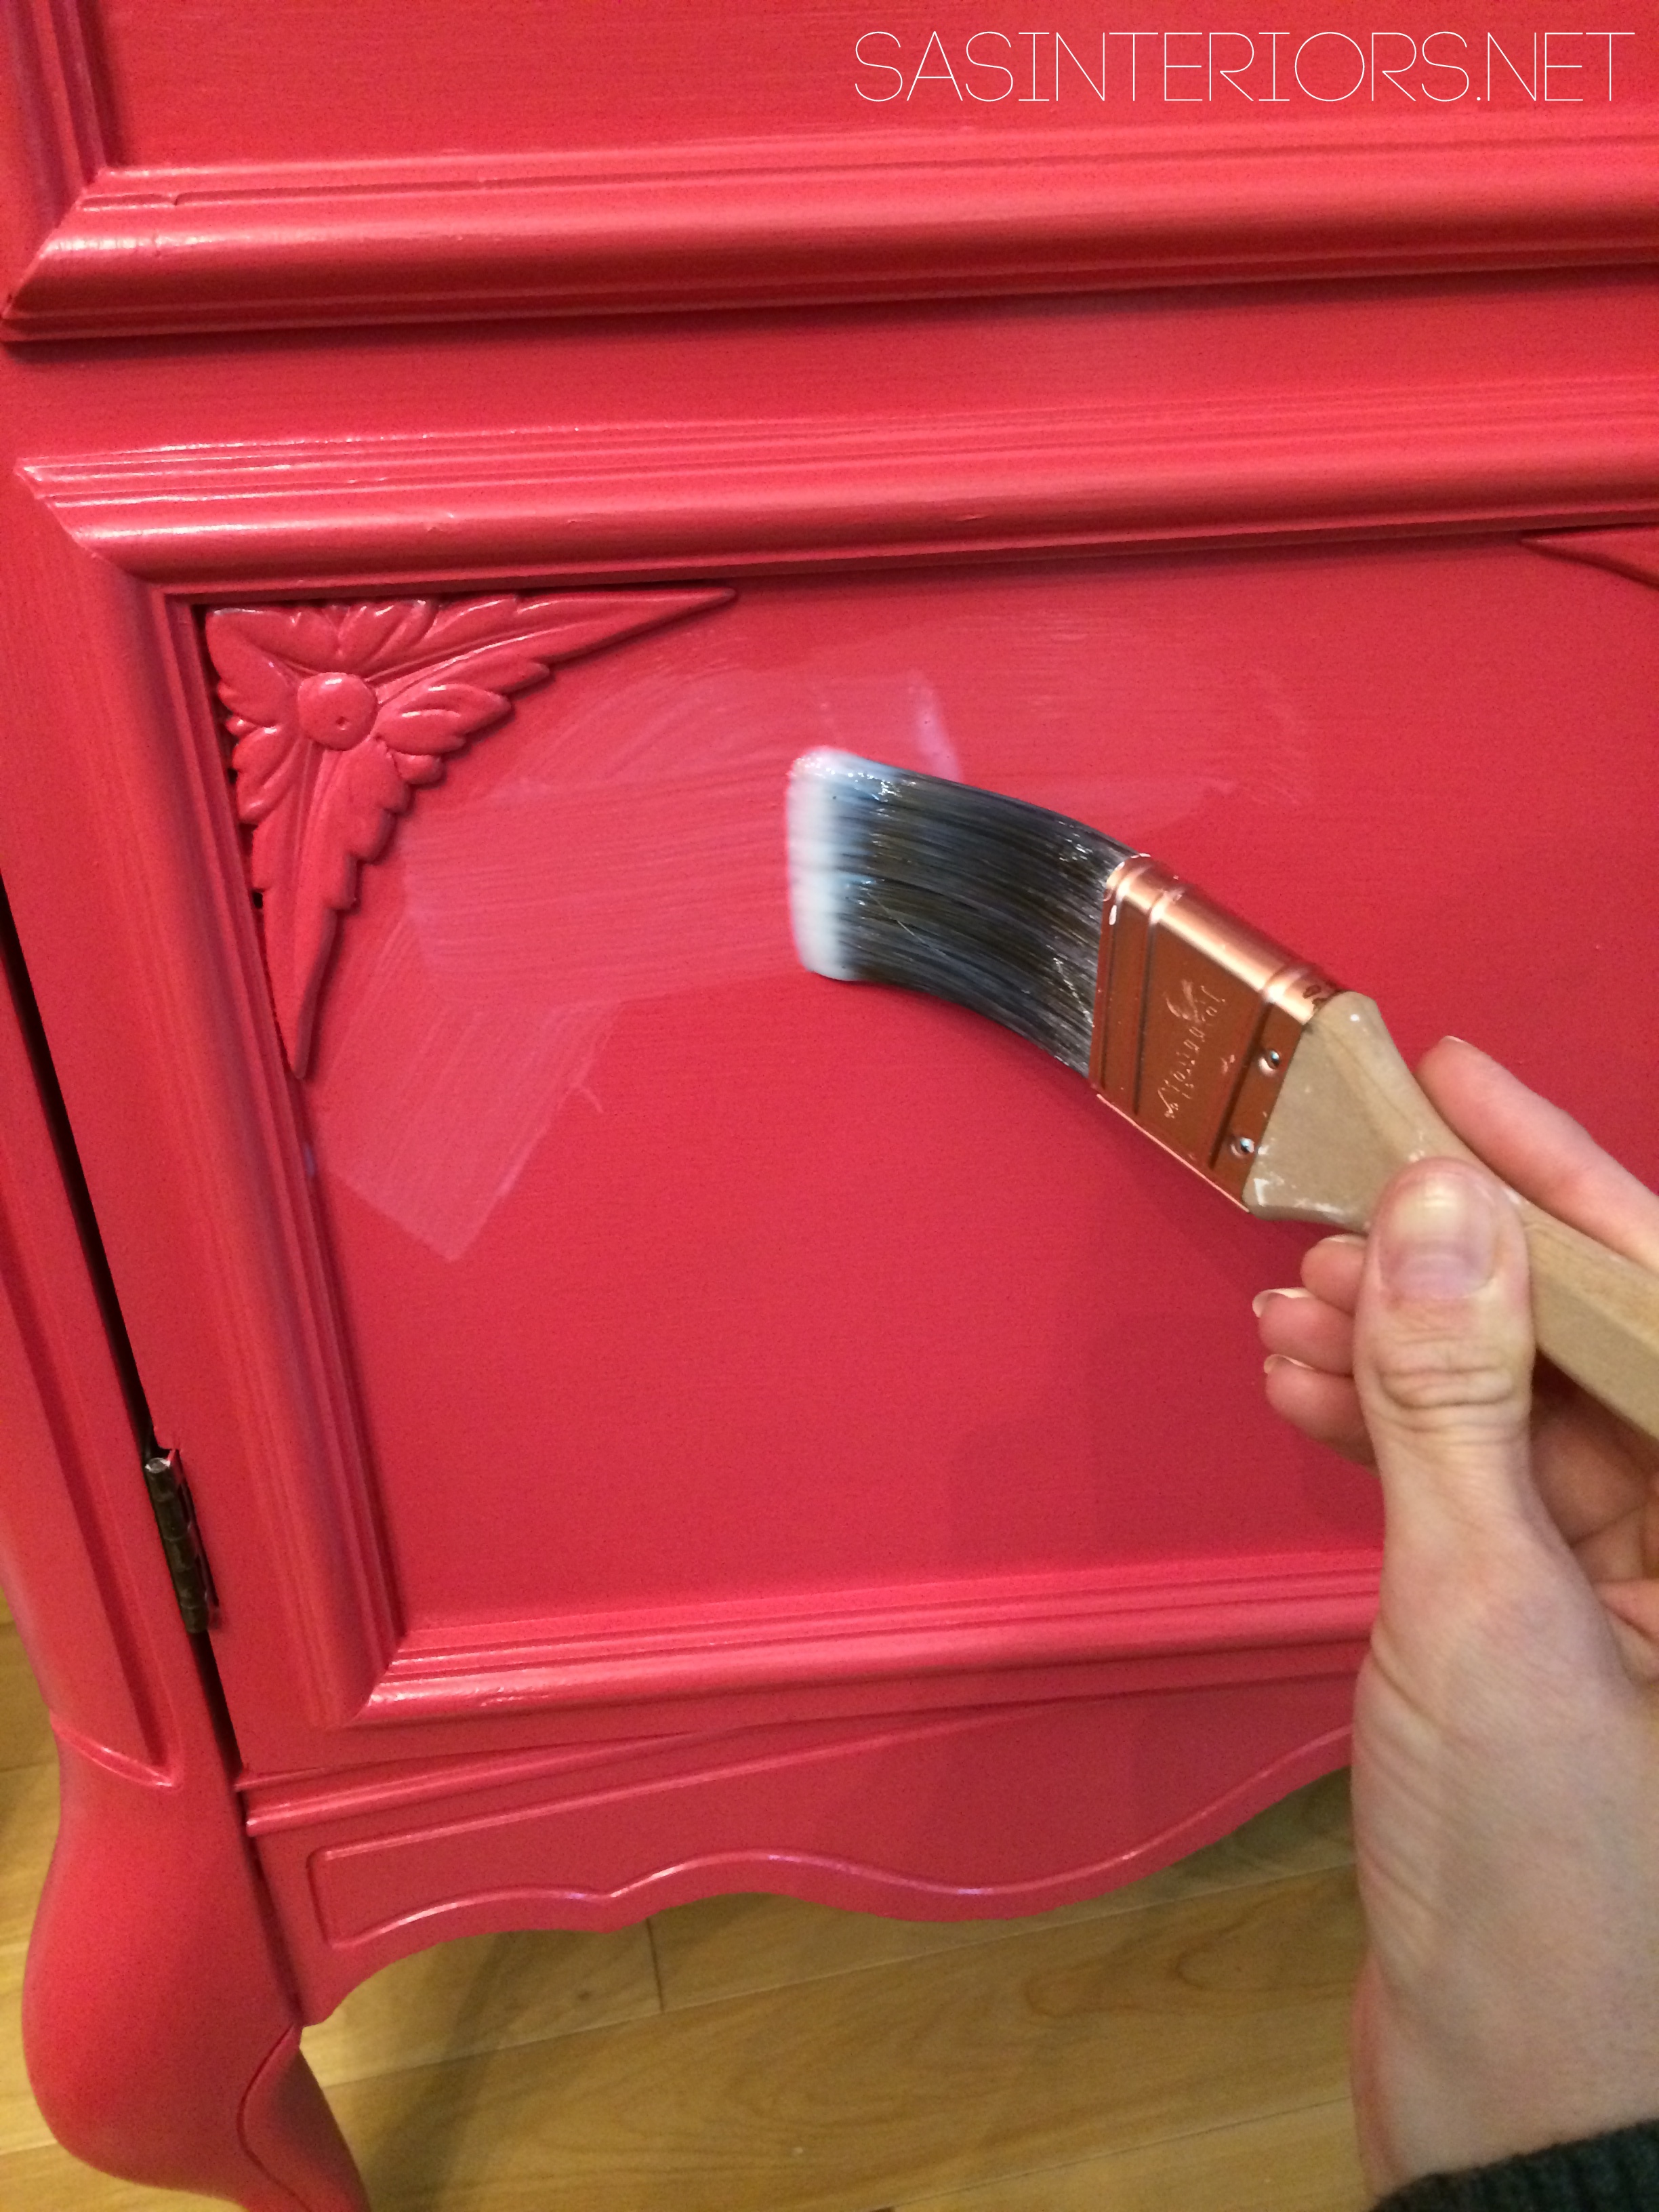
When painting furniture, like this china cabinet, I started on one side of the base cabinet and continued across to the other side while working in small sections. I always continually look at what was just painted to check for drips, which you want to avoid as much as possible!
Typically I will add paint to the overall surface and then go back to smooth it out so all the strokes are in one direction (usually you want to follow the grain of the wood, but it’s not a must since with paint you don’t see the grain).
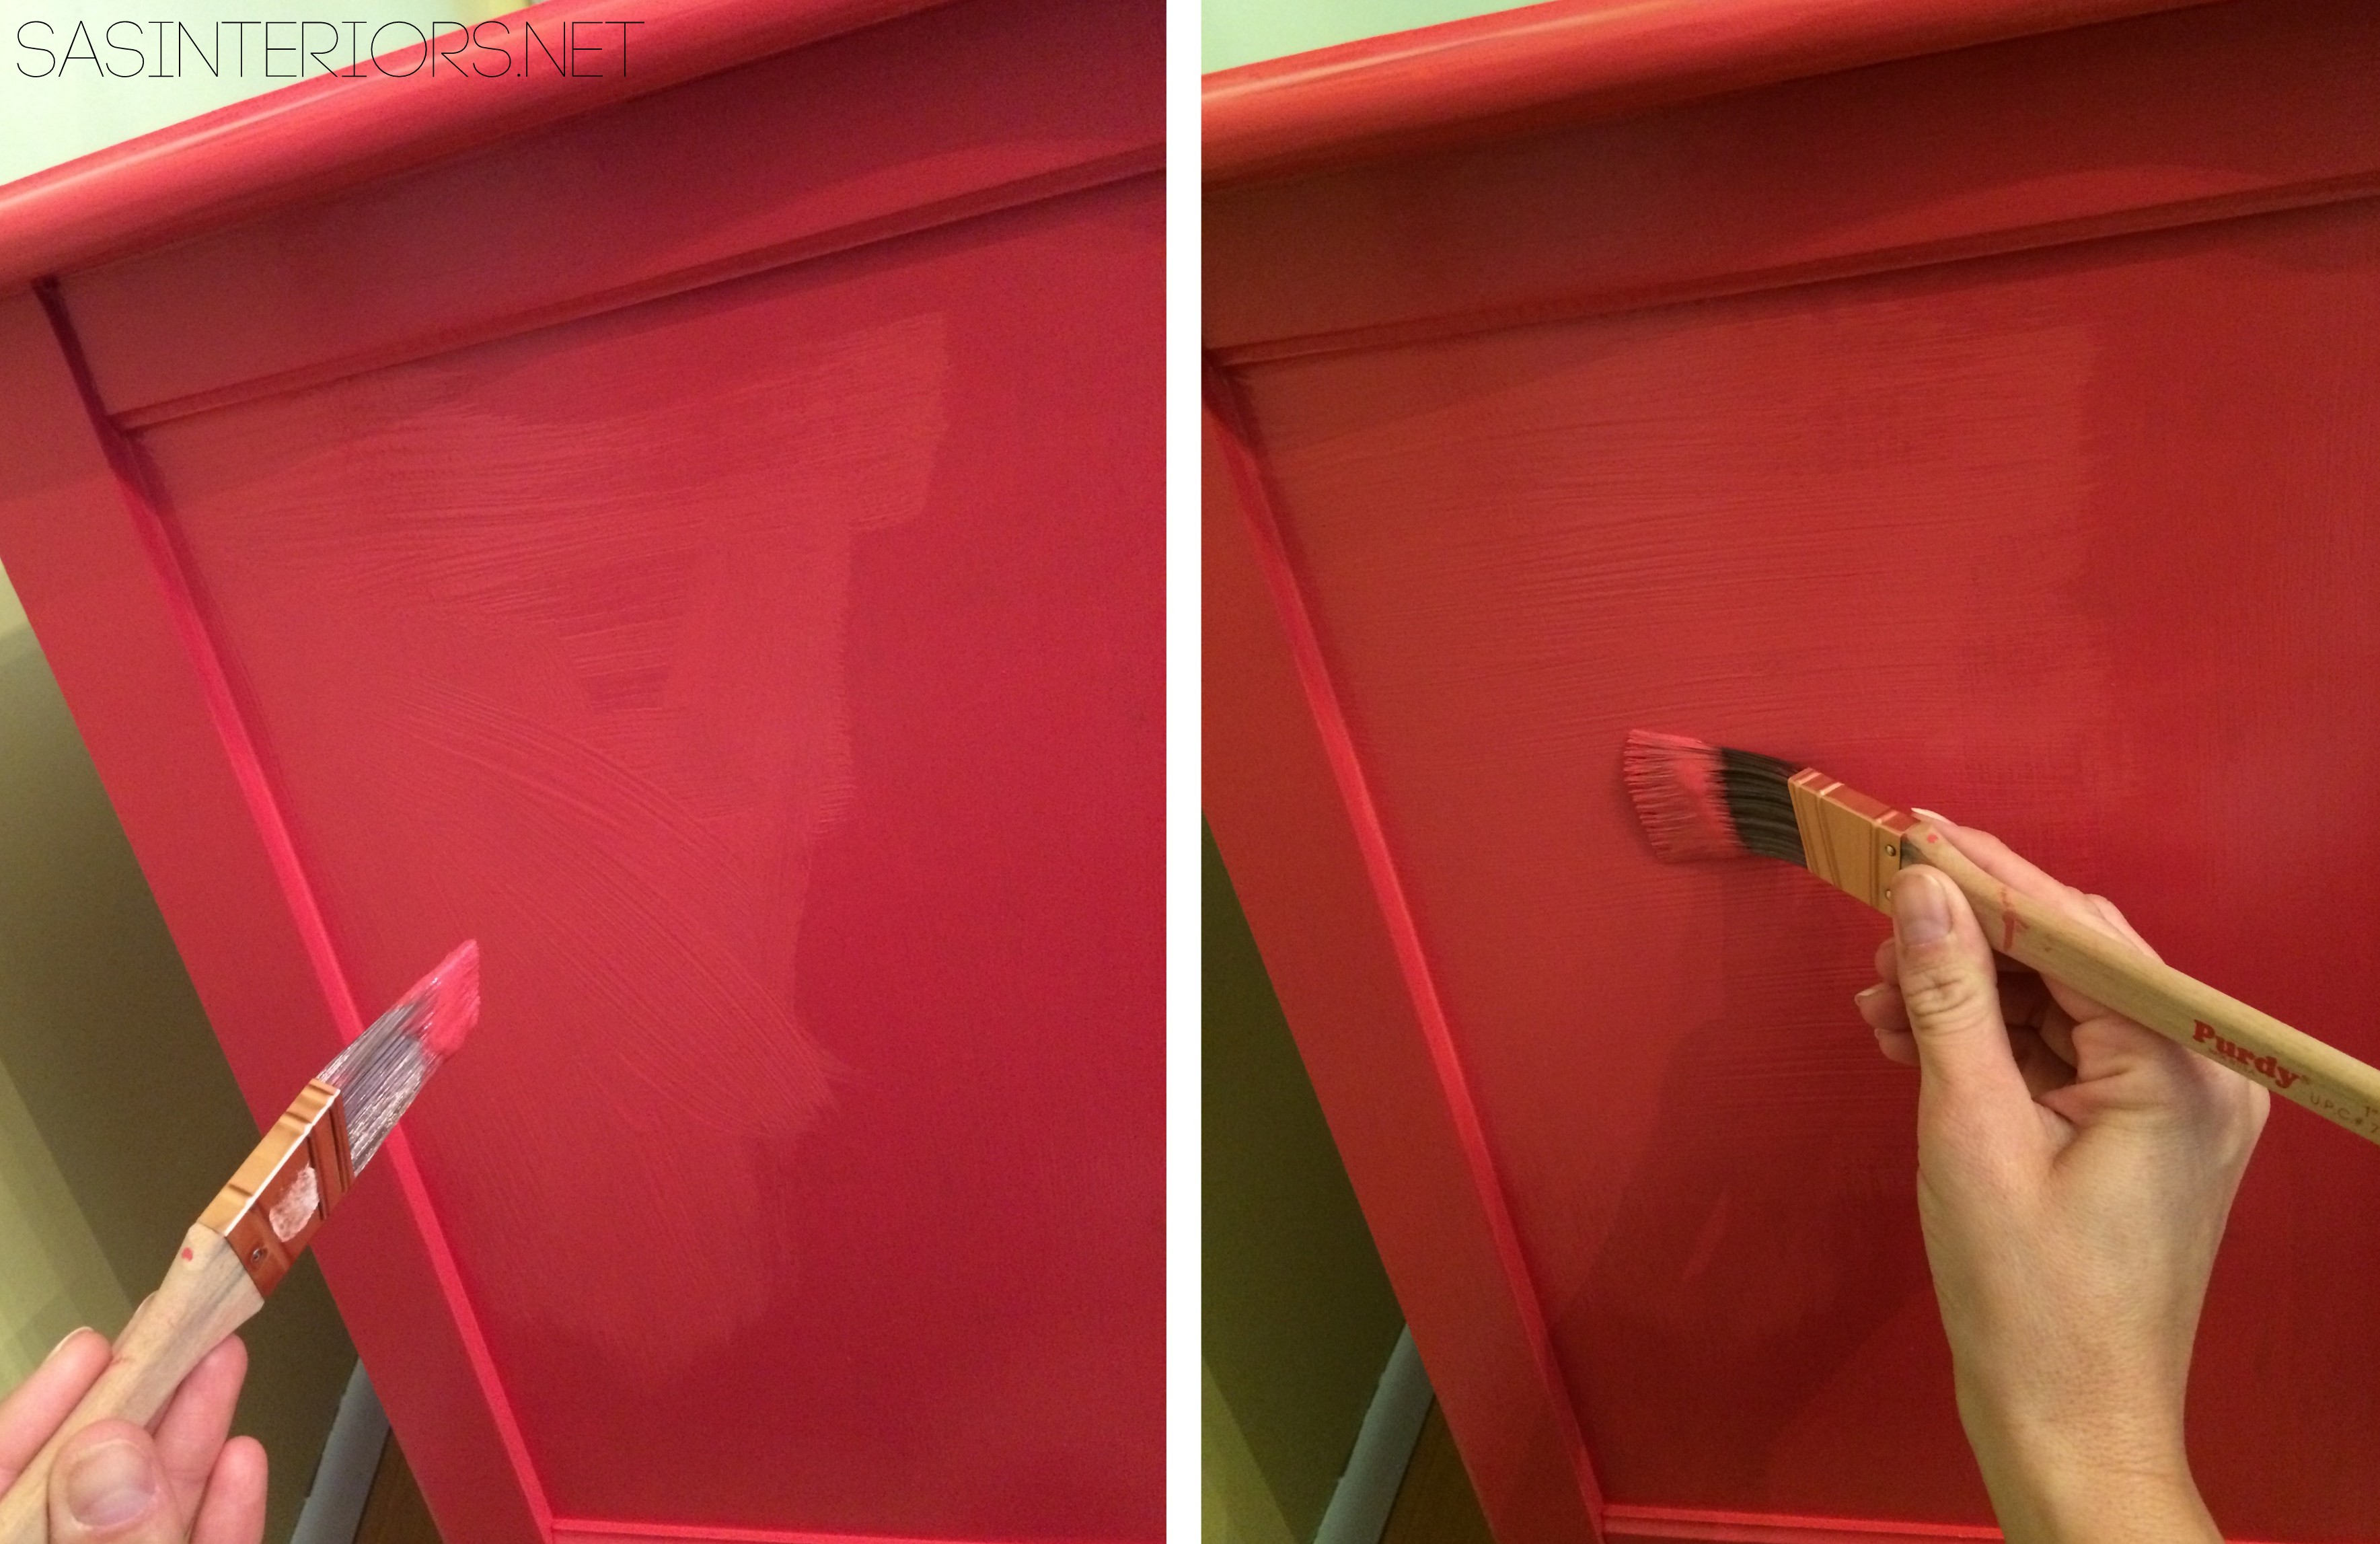
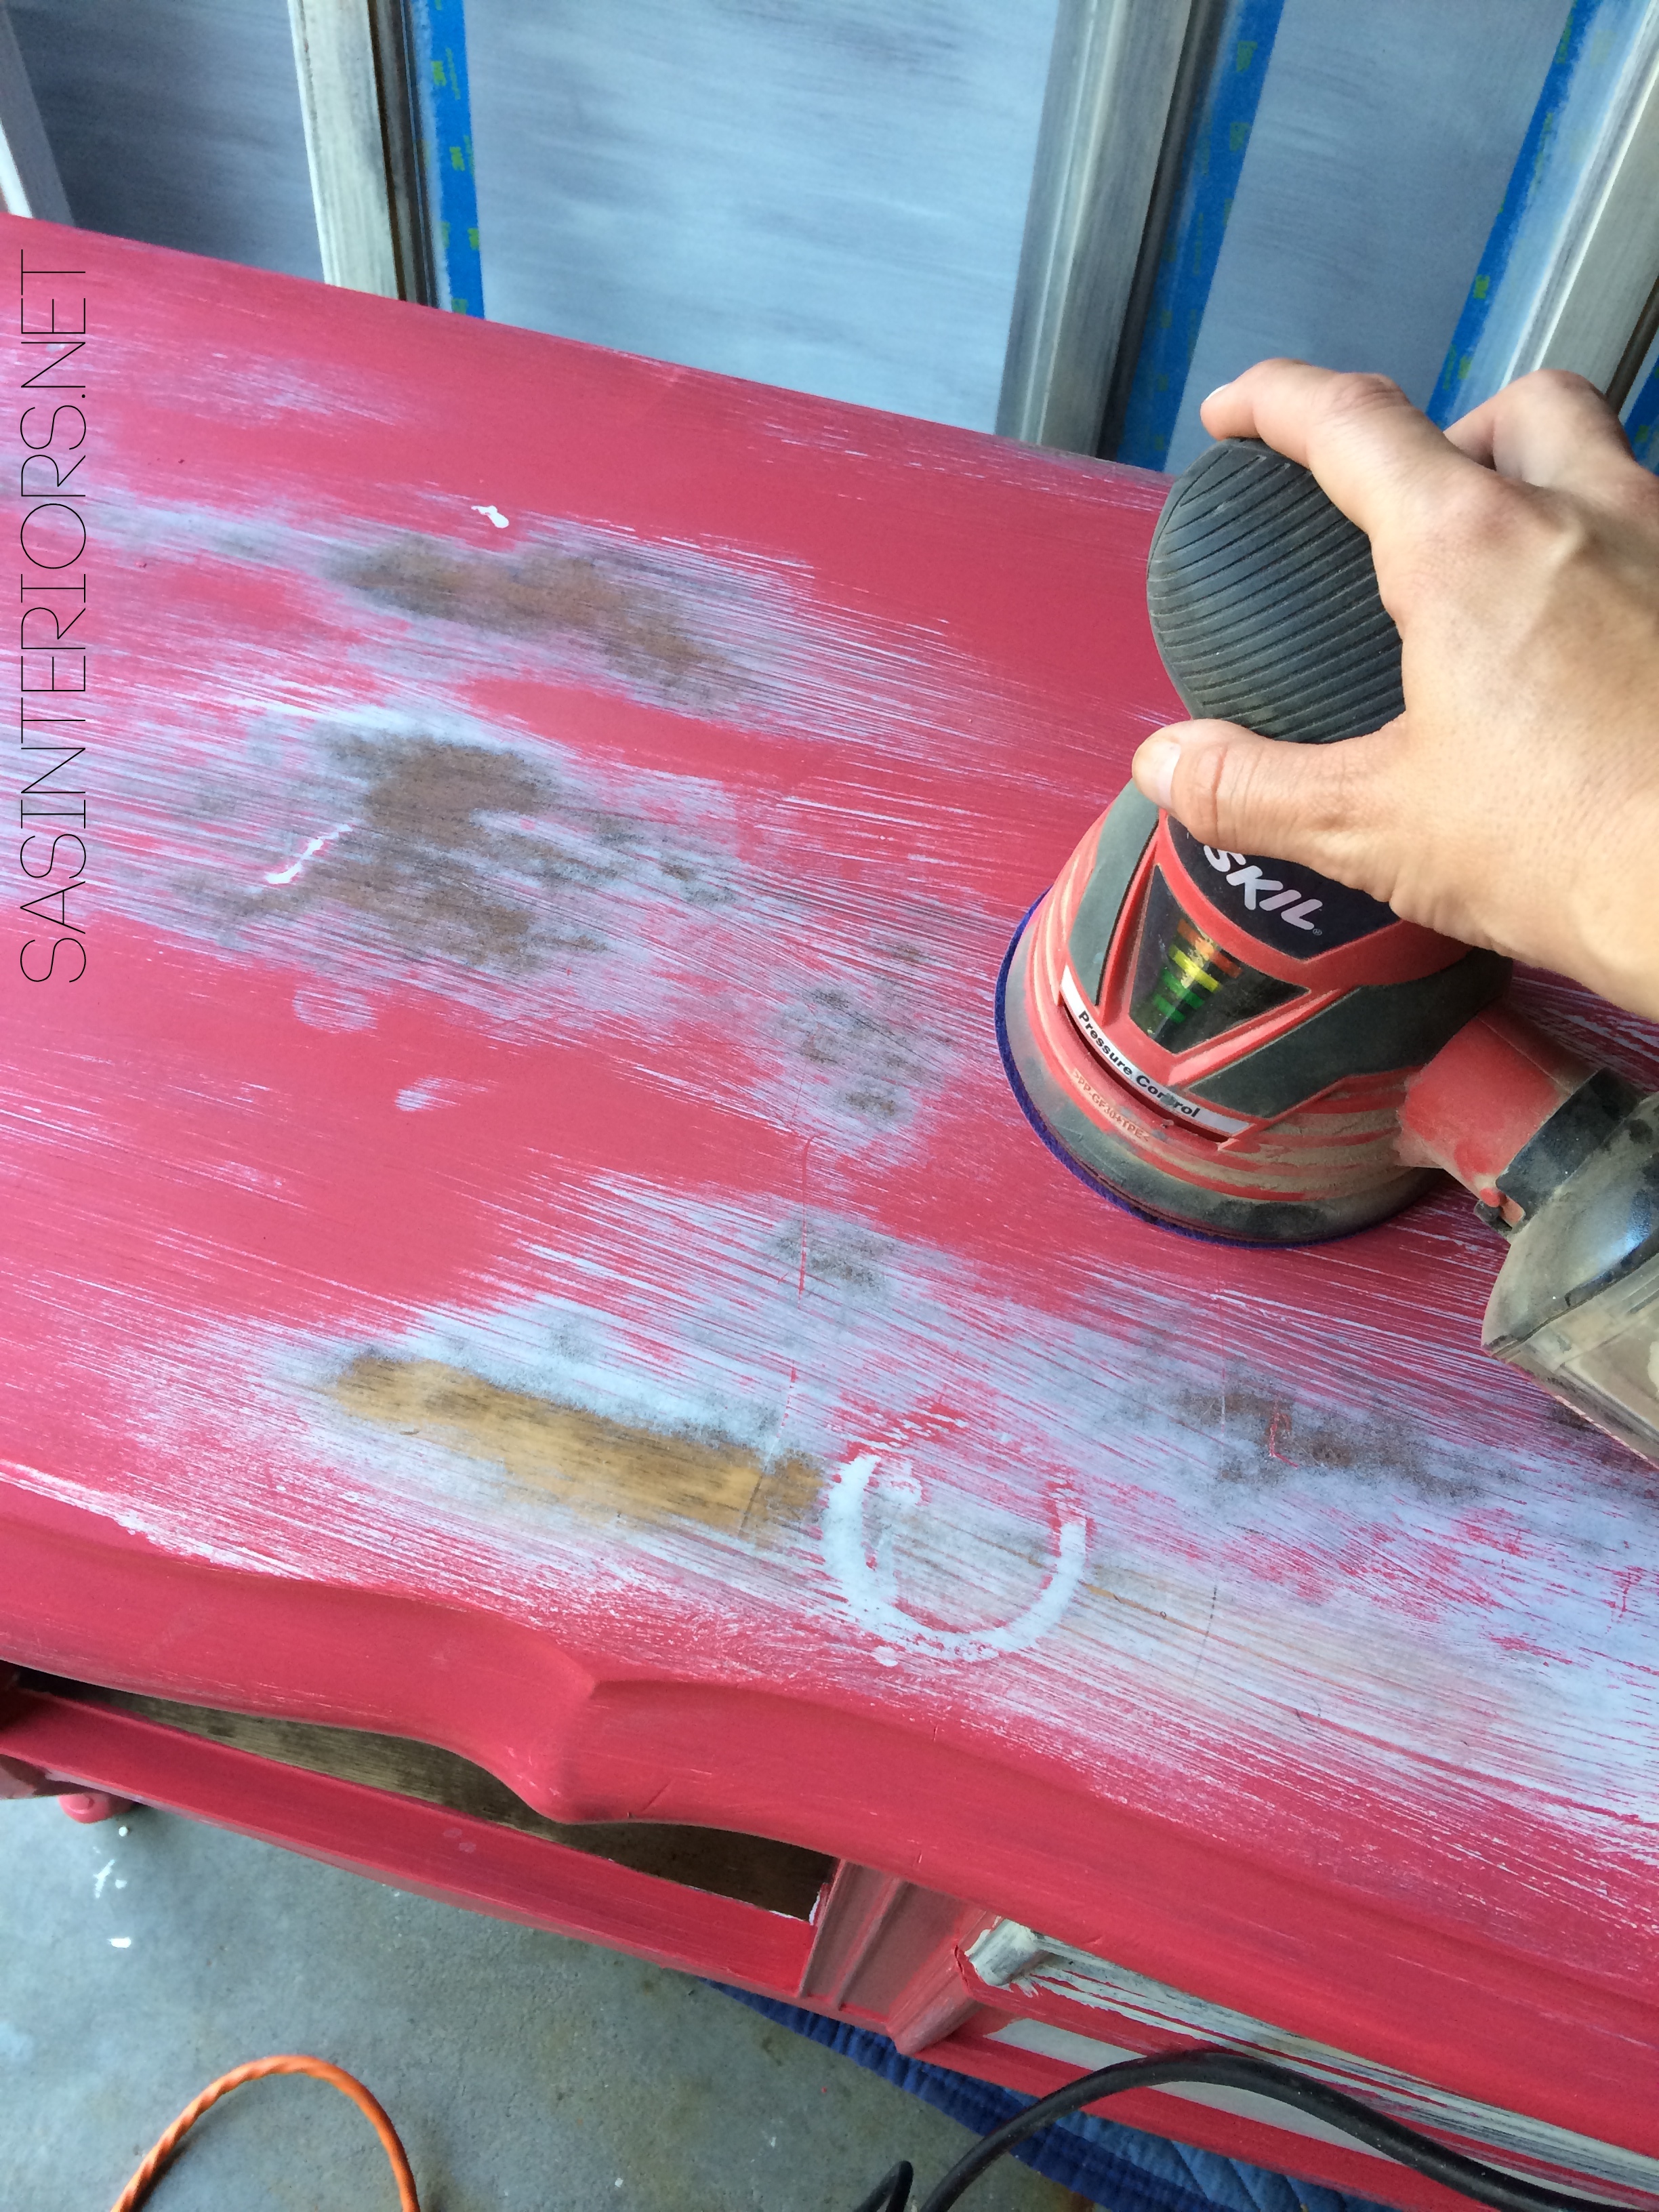
Even if you try to avoid them, drips are normal. To deal with those nasty, inevitable paint drips, I sand them off once they are completely dry. Using an orbital sander is easiest, but sanding the spot by hand also works. If you catch the drip before it’s dry, then go over it with your paint brush to smooth it out.
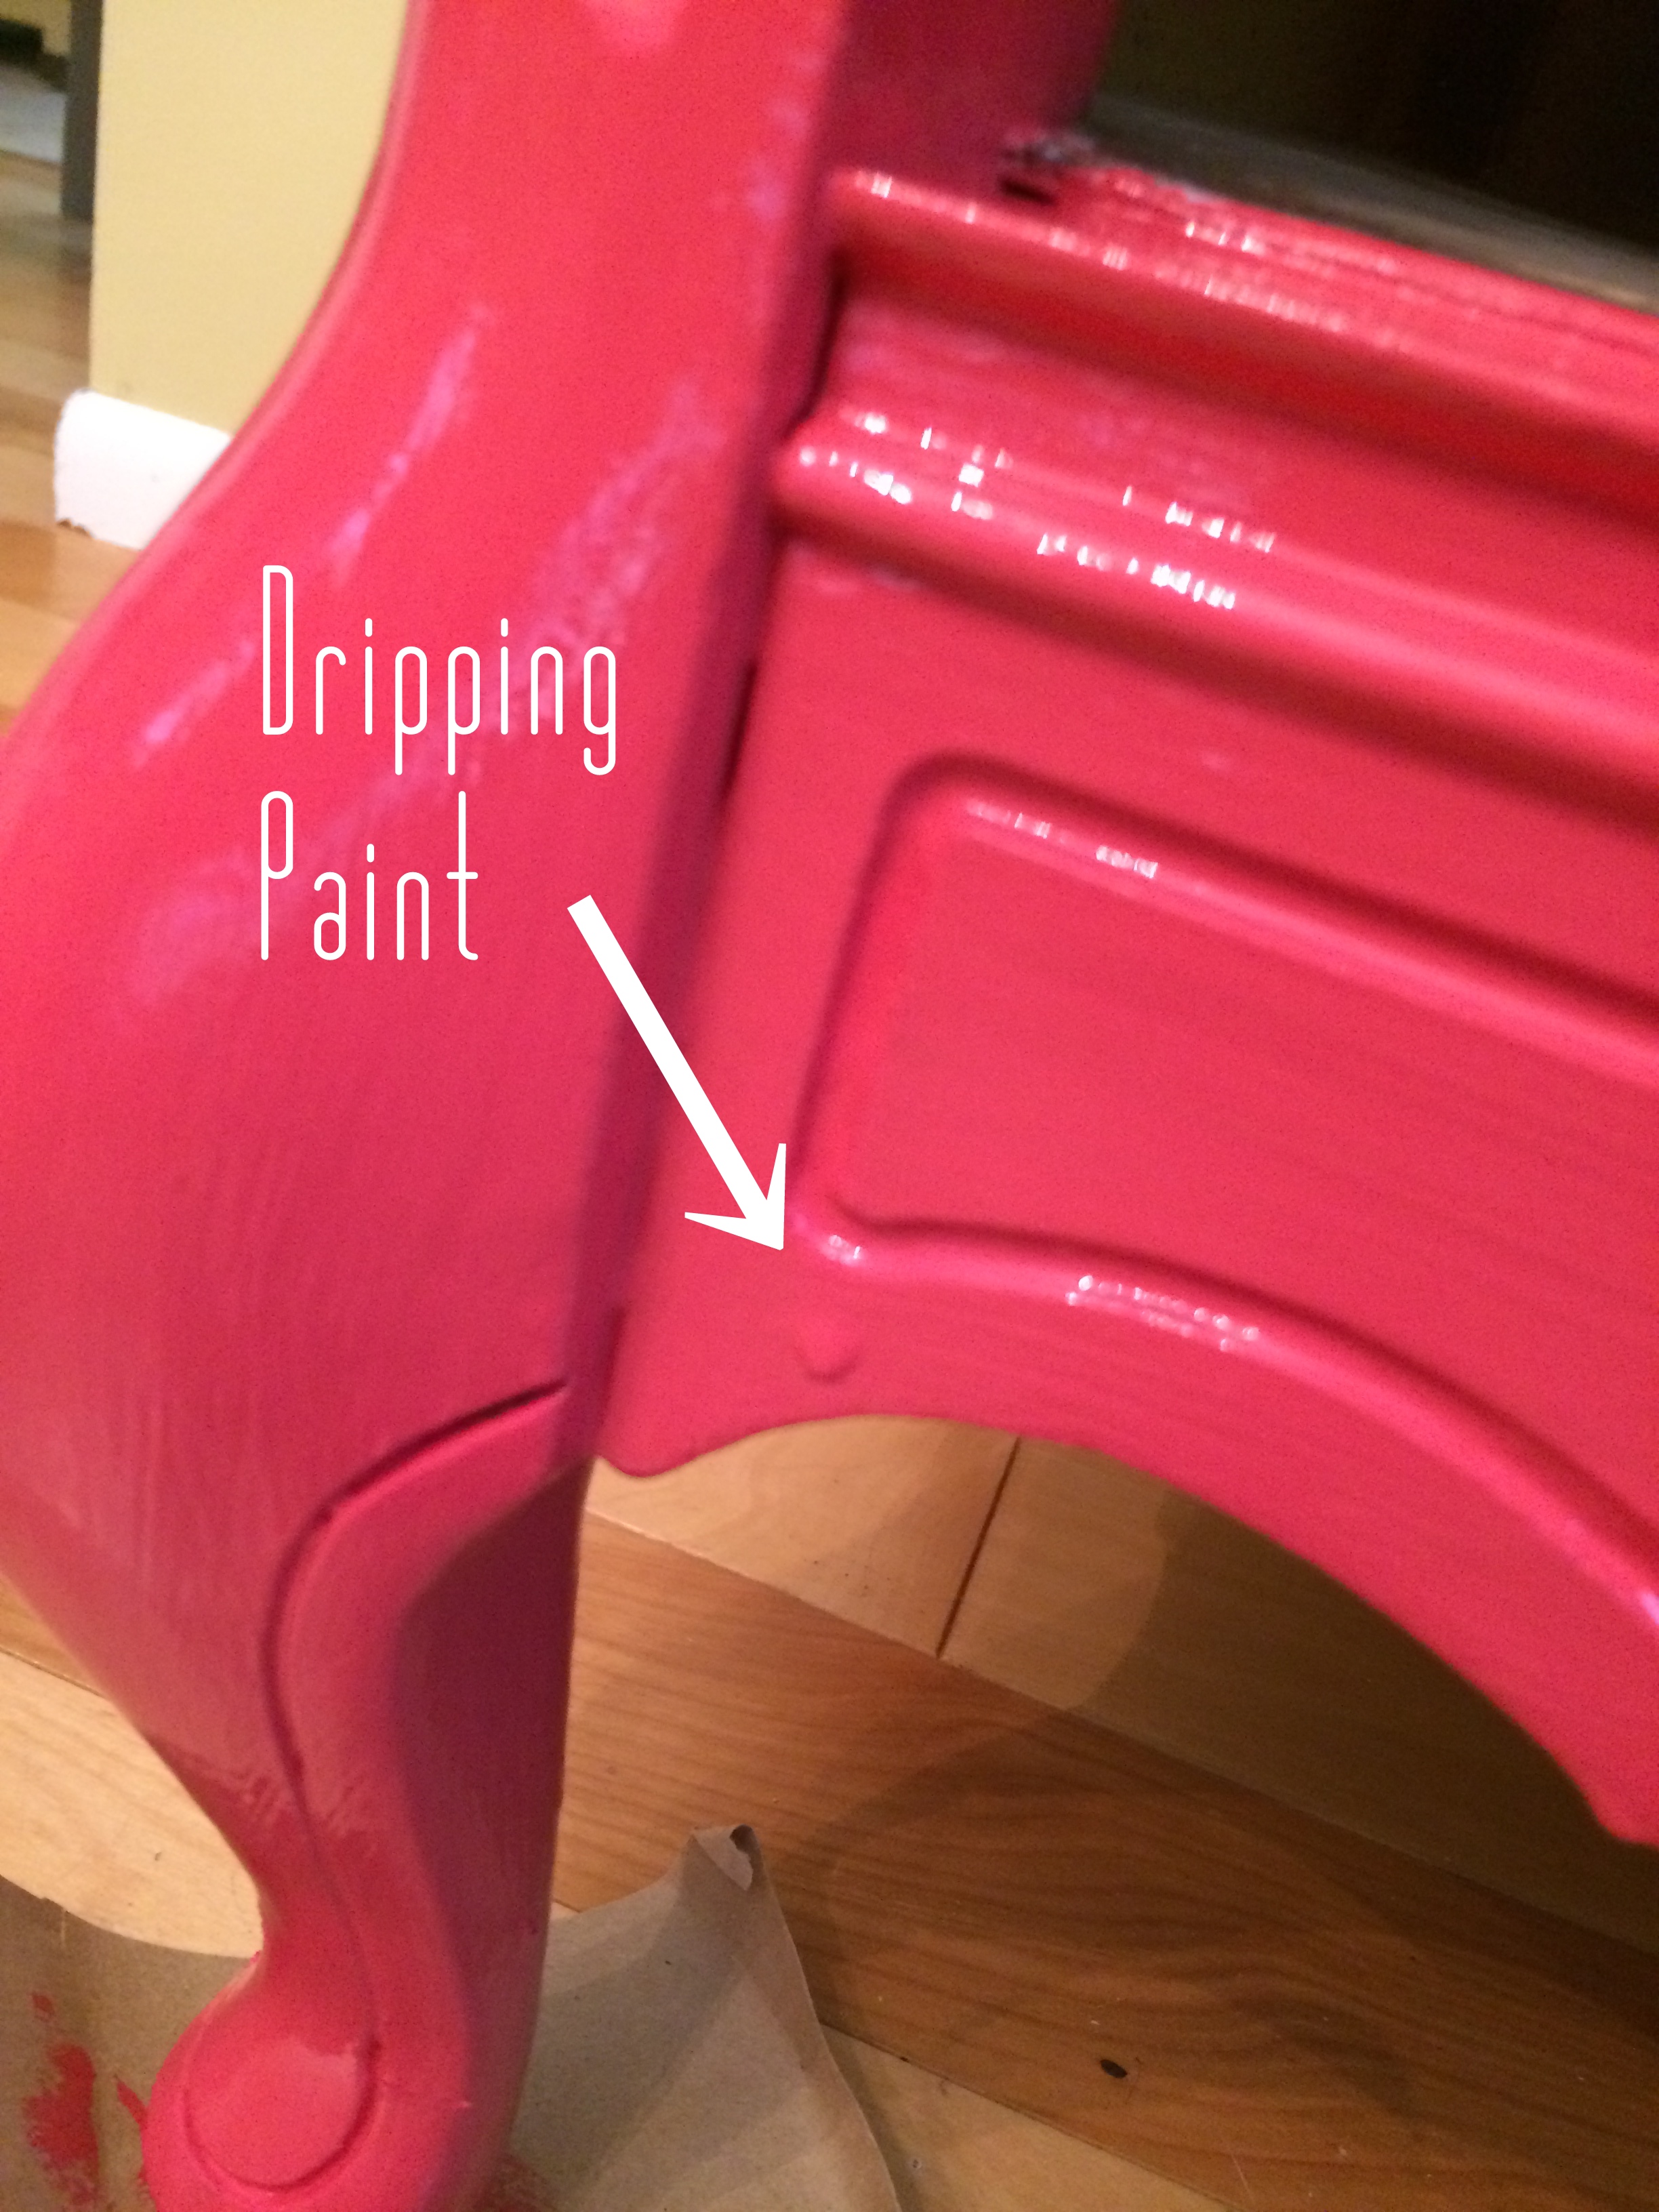
I didn’t take a picture of me sanding that drip, but here is one from another section of the cabinet…
Once the paint was dry, I lightly went over the drip to smooth out the section of cabinet.
Another issue I encountered which I didn’t like was the result of the buffet top once the first coat of paint was on. I guess when I added the primer, I didn’t continue my brush stroke from on side to the other, so the top surface looked bumpy. Once the first coat of paint was dry, I lightly sanded the surface. This left the top very smooth and ready for coat #2.
Coat #2

In all the top got about 3-4 coats. All the other areas of the cabinet got 3 coats. Because of the intense color 2 coats wasn’t enough.
Here are some more outtakes while painting…
The cabinet fronts.
The cabinet top.
The base cabinet after one coat.

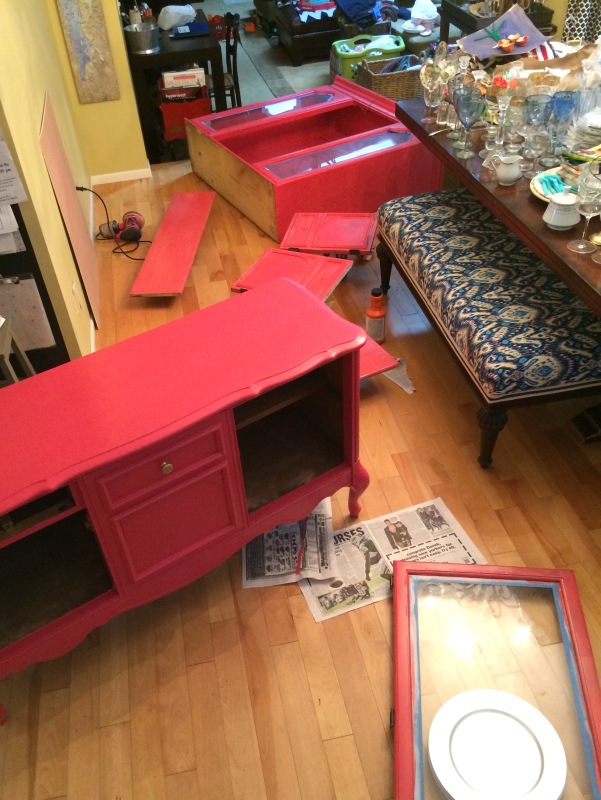
I will tell you, painting the cabinet took a good 3 solid days of off and on work. It was tiring, but well worth it in the end. Most of the painting took place at night after the kiddos went to bed which is why the coloring of the cabinet in the pictures looks a bit off.
Here’s a peak at what was my crazy life for a few days. Just keeping it real…
Once every surface, nook, and cranny were done, it was time to add a coat of polyurethane.
Applying polyurethane is similar to primer… a little goes a long way. It’s also a lot thinner than paint, so it can easily run creating those annoying drips. Applying a light coat and fanning it over the surface is best. It goes on as a white milky liquid, but as you work it into the surface it will be come clear. And of course it dries clear.
For this cabinet, I used a semi-gloss polyurethane.
And then it was done.
Well almost. The painting is complete, but there are still some details that I need to work on, like the hardware and another secret surprise.
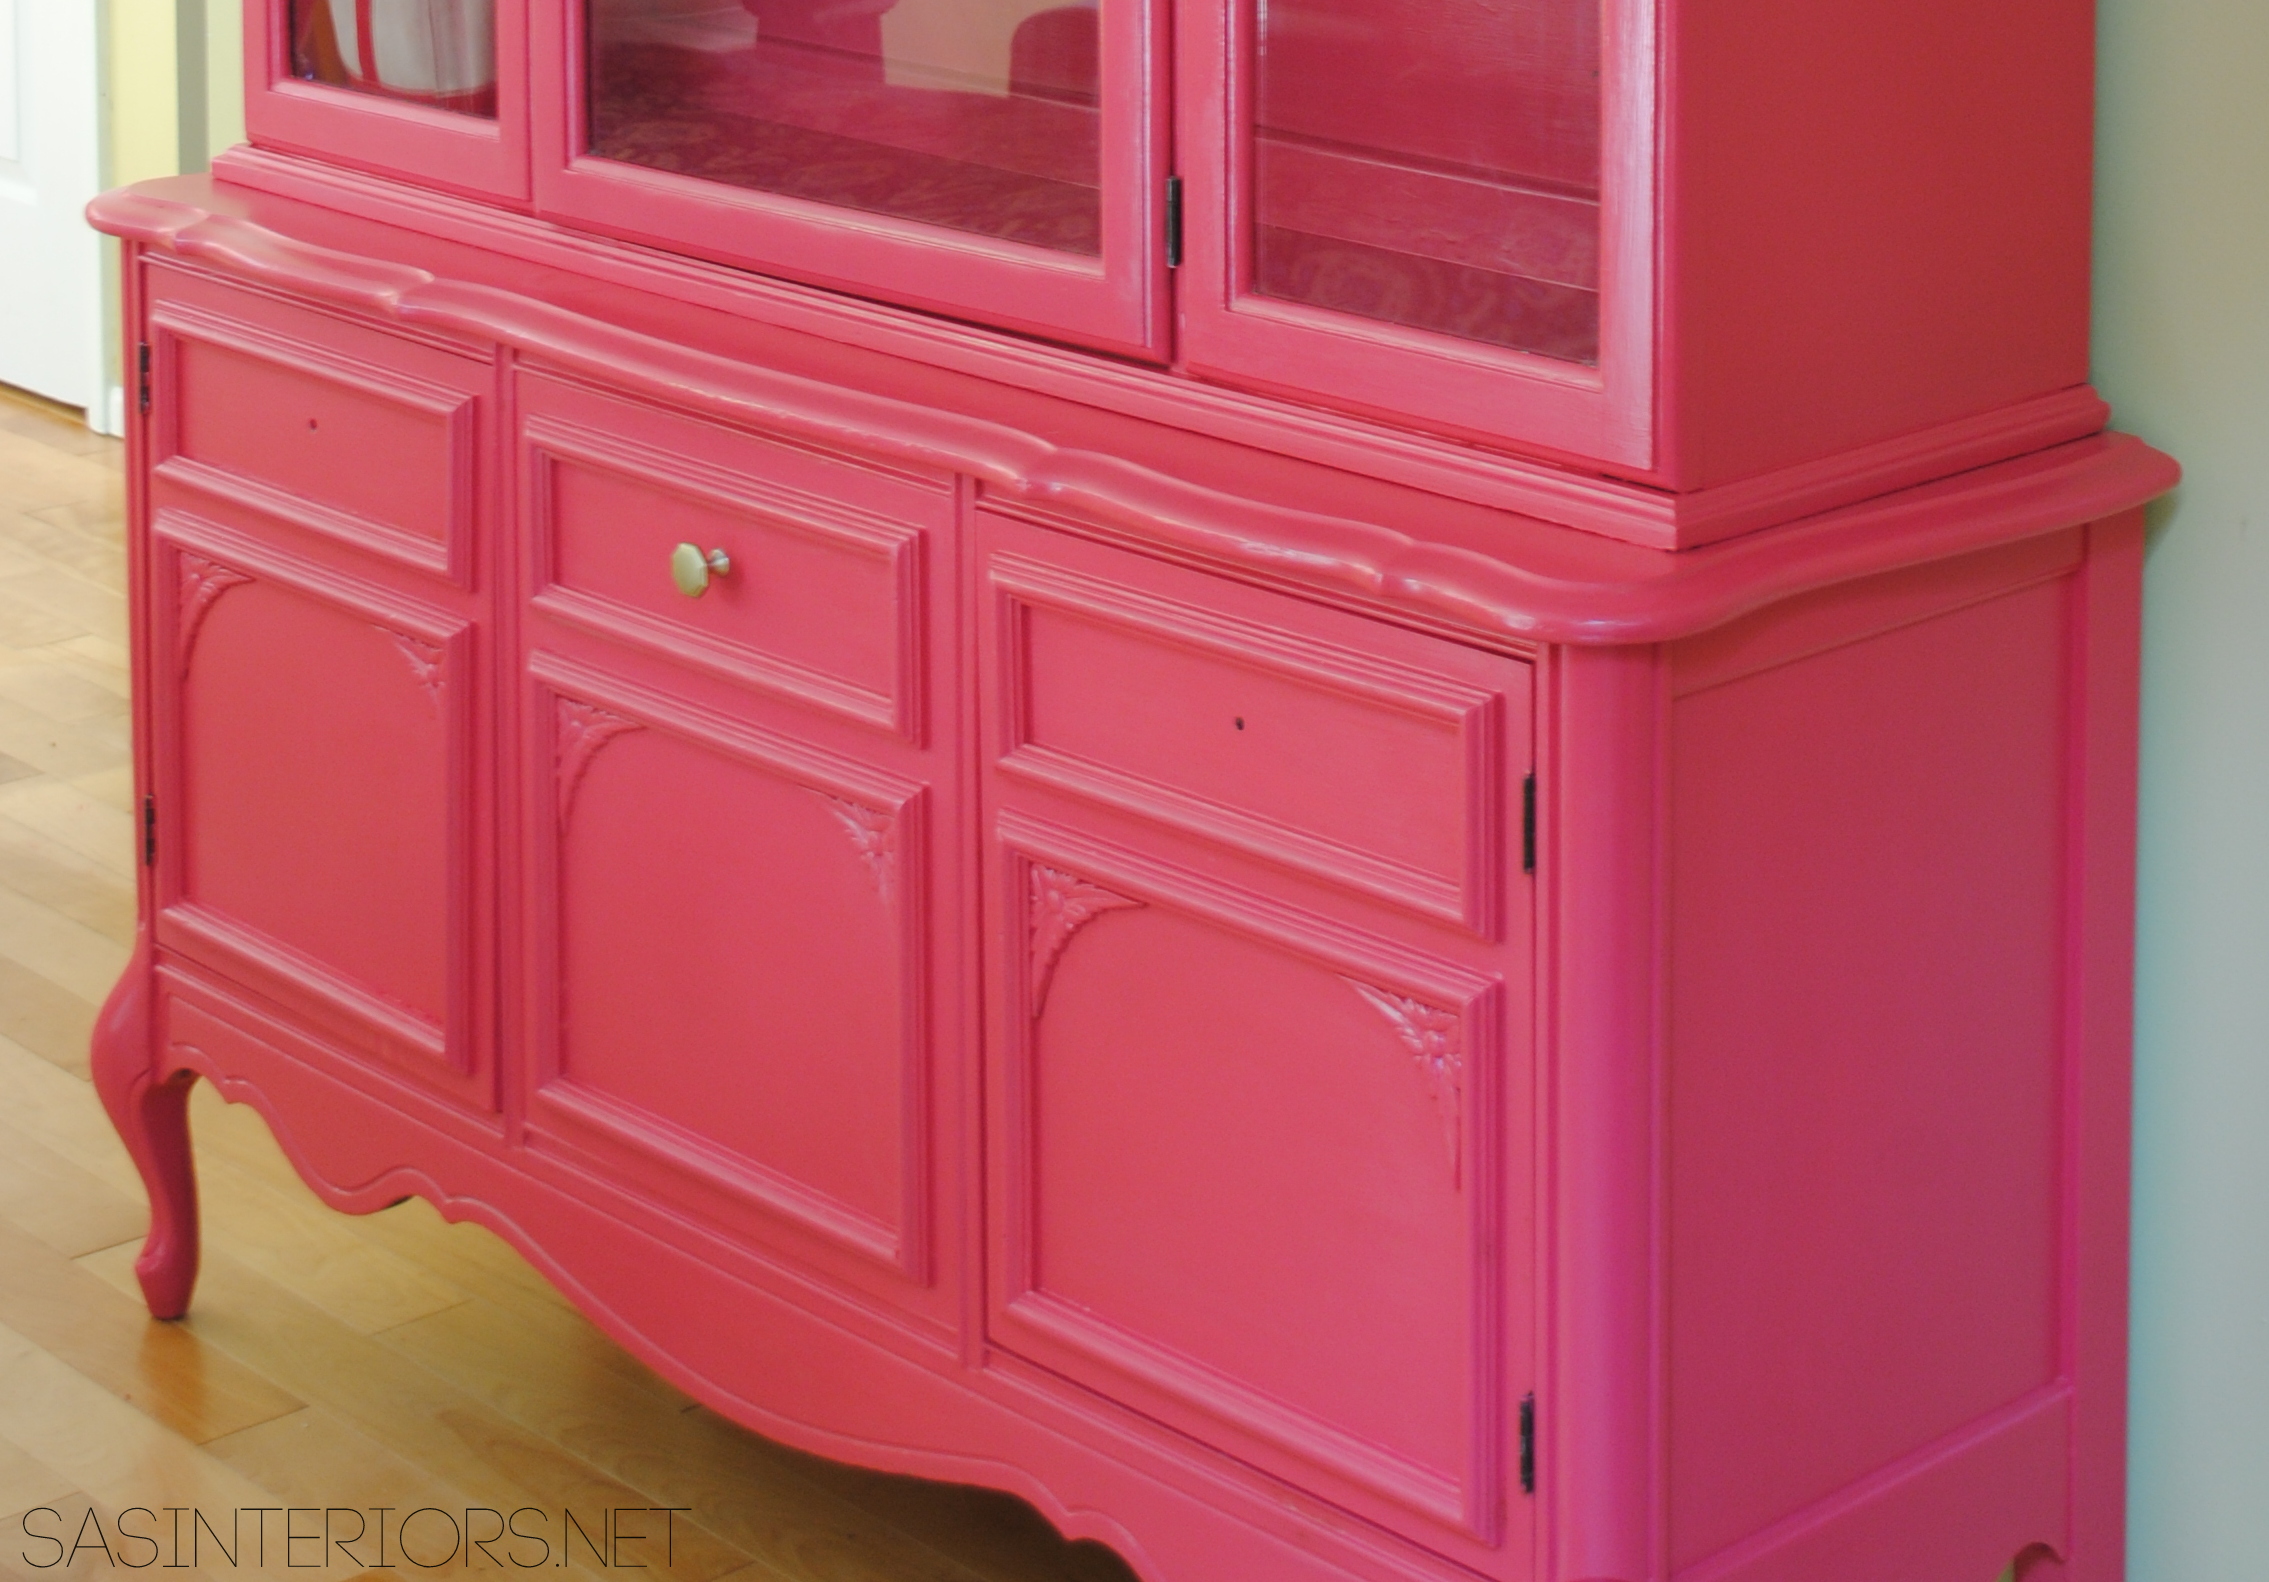
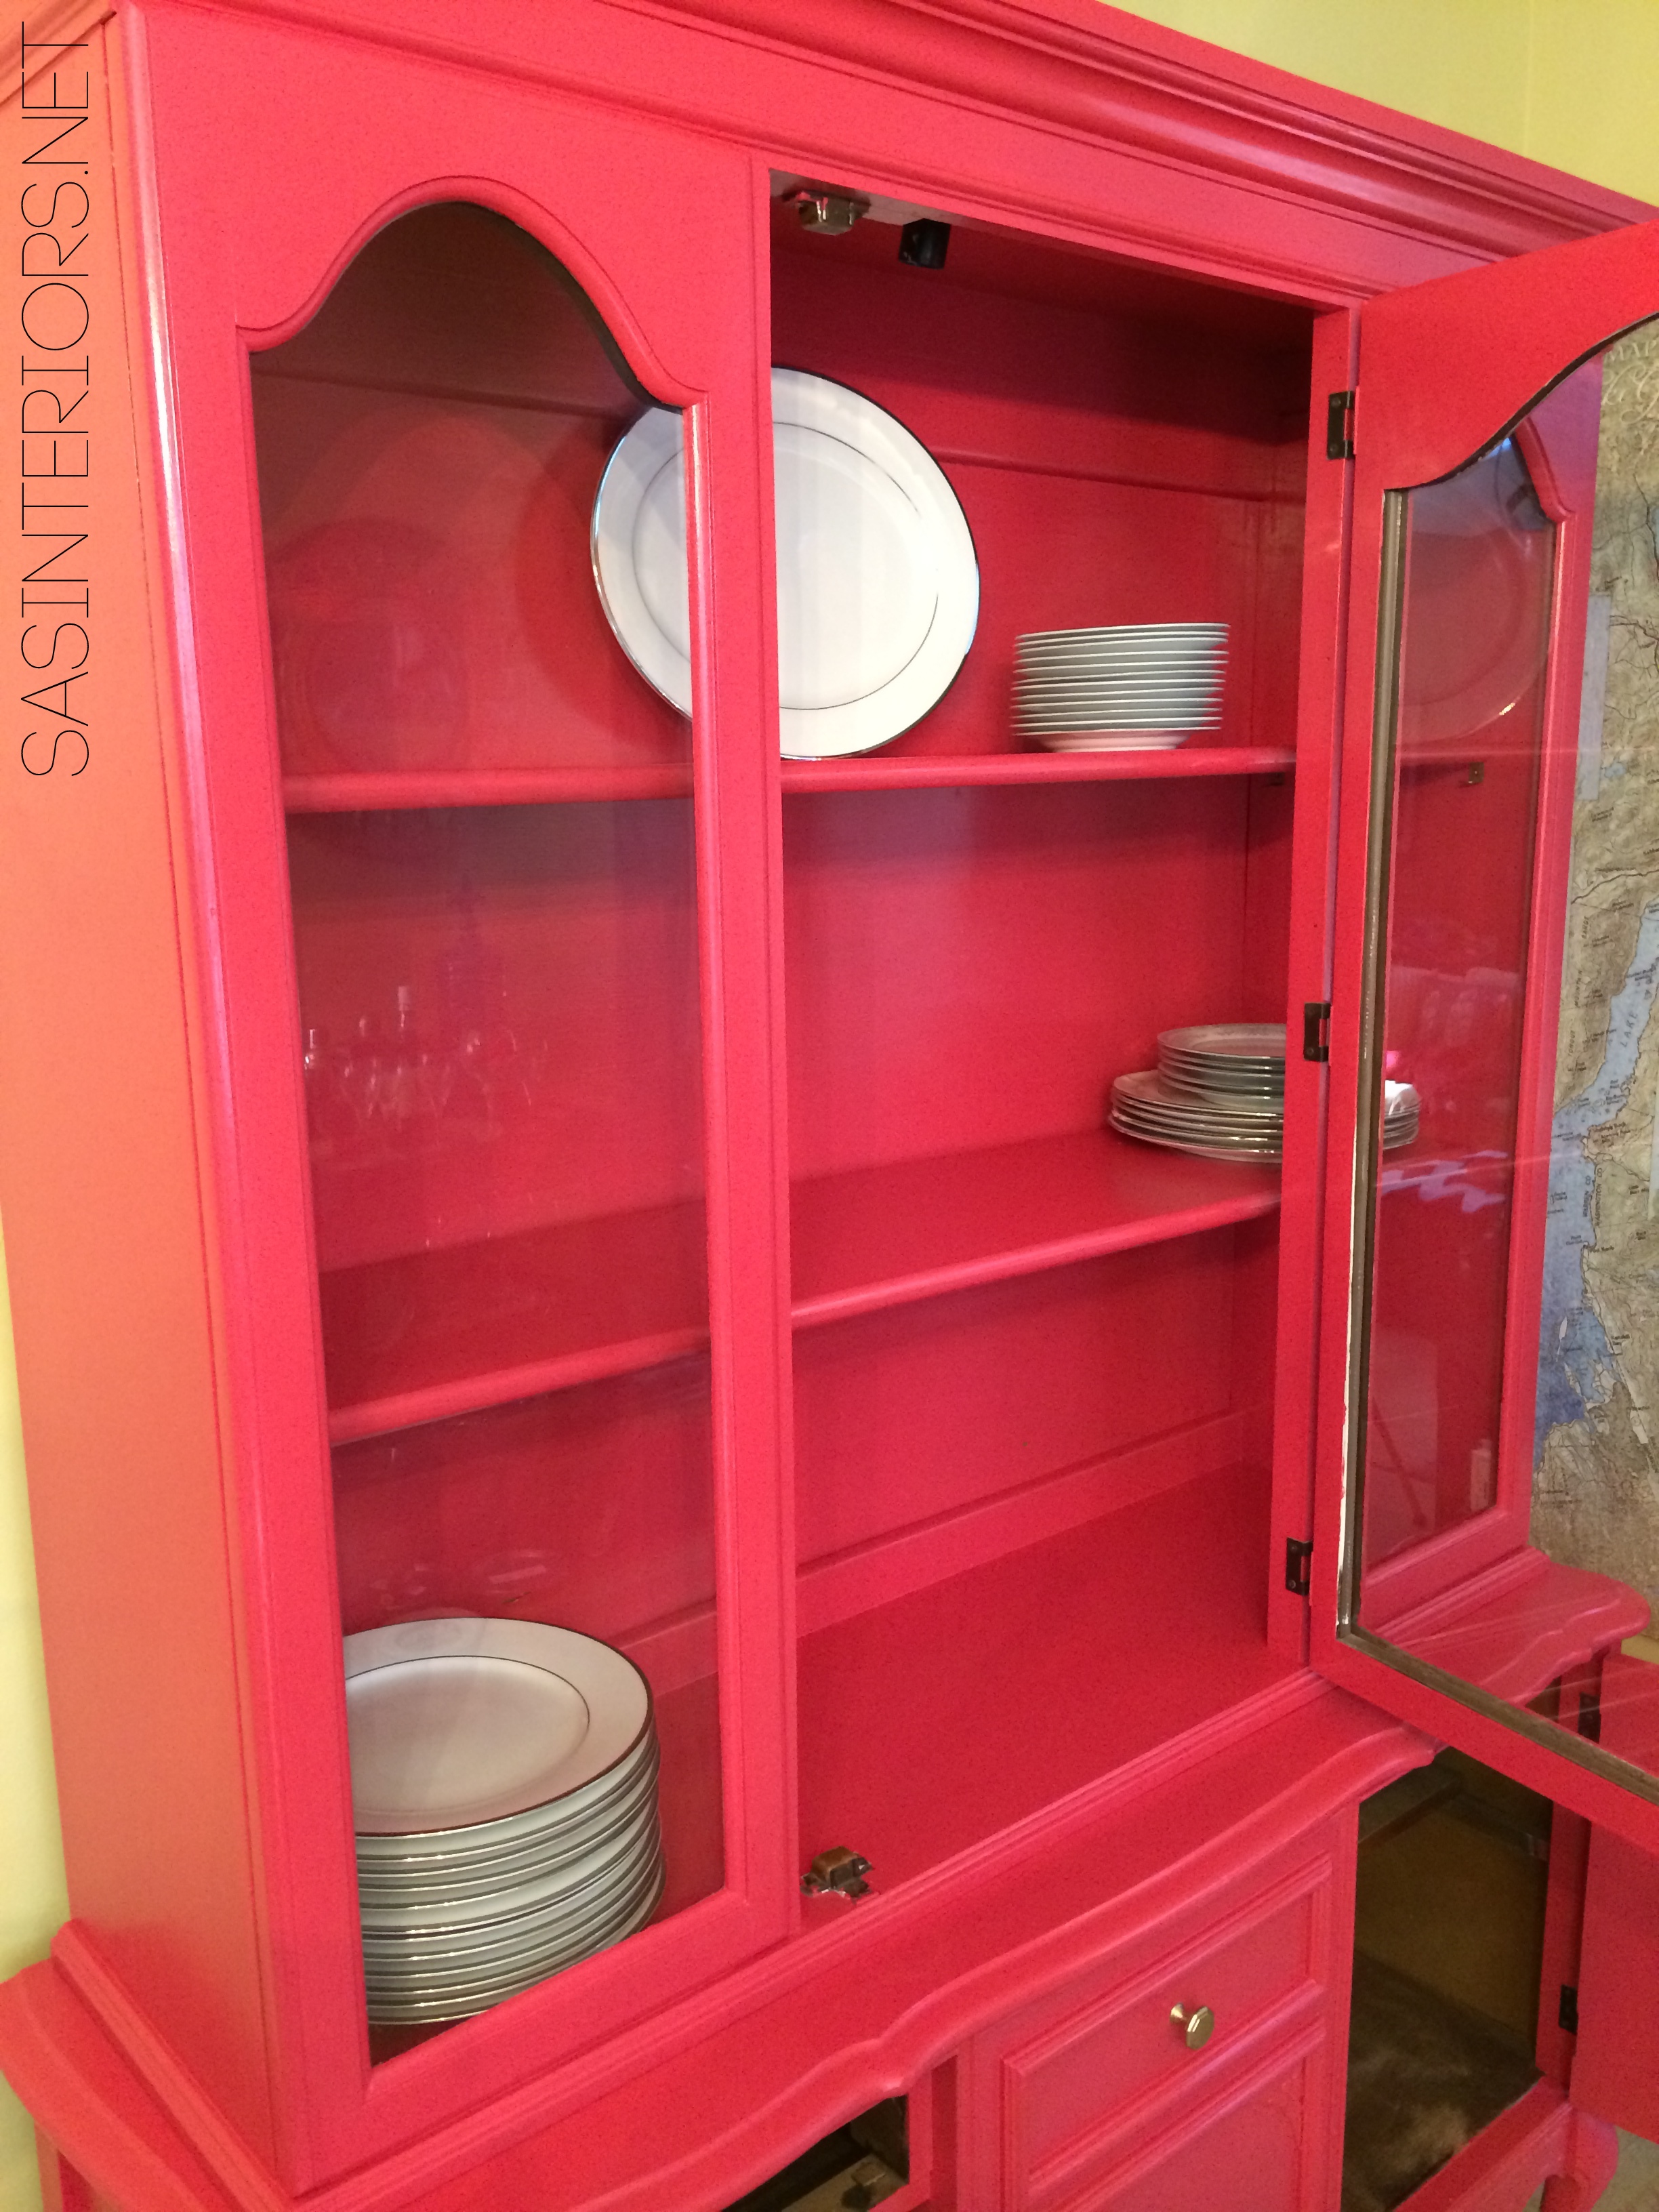
But back to the painting result, here are a few closeups…

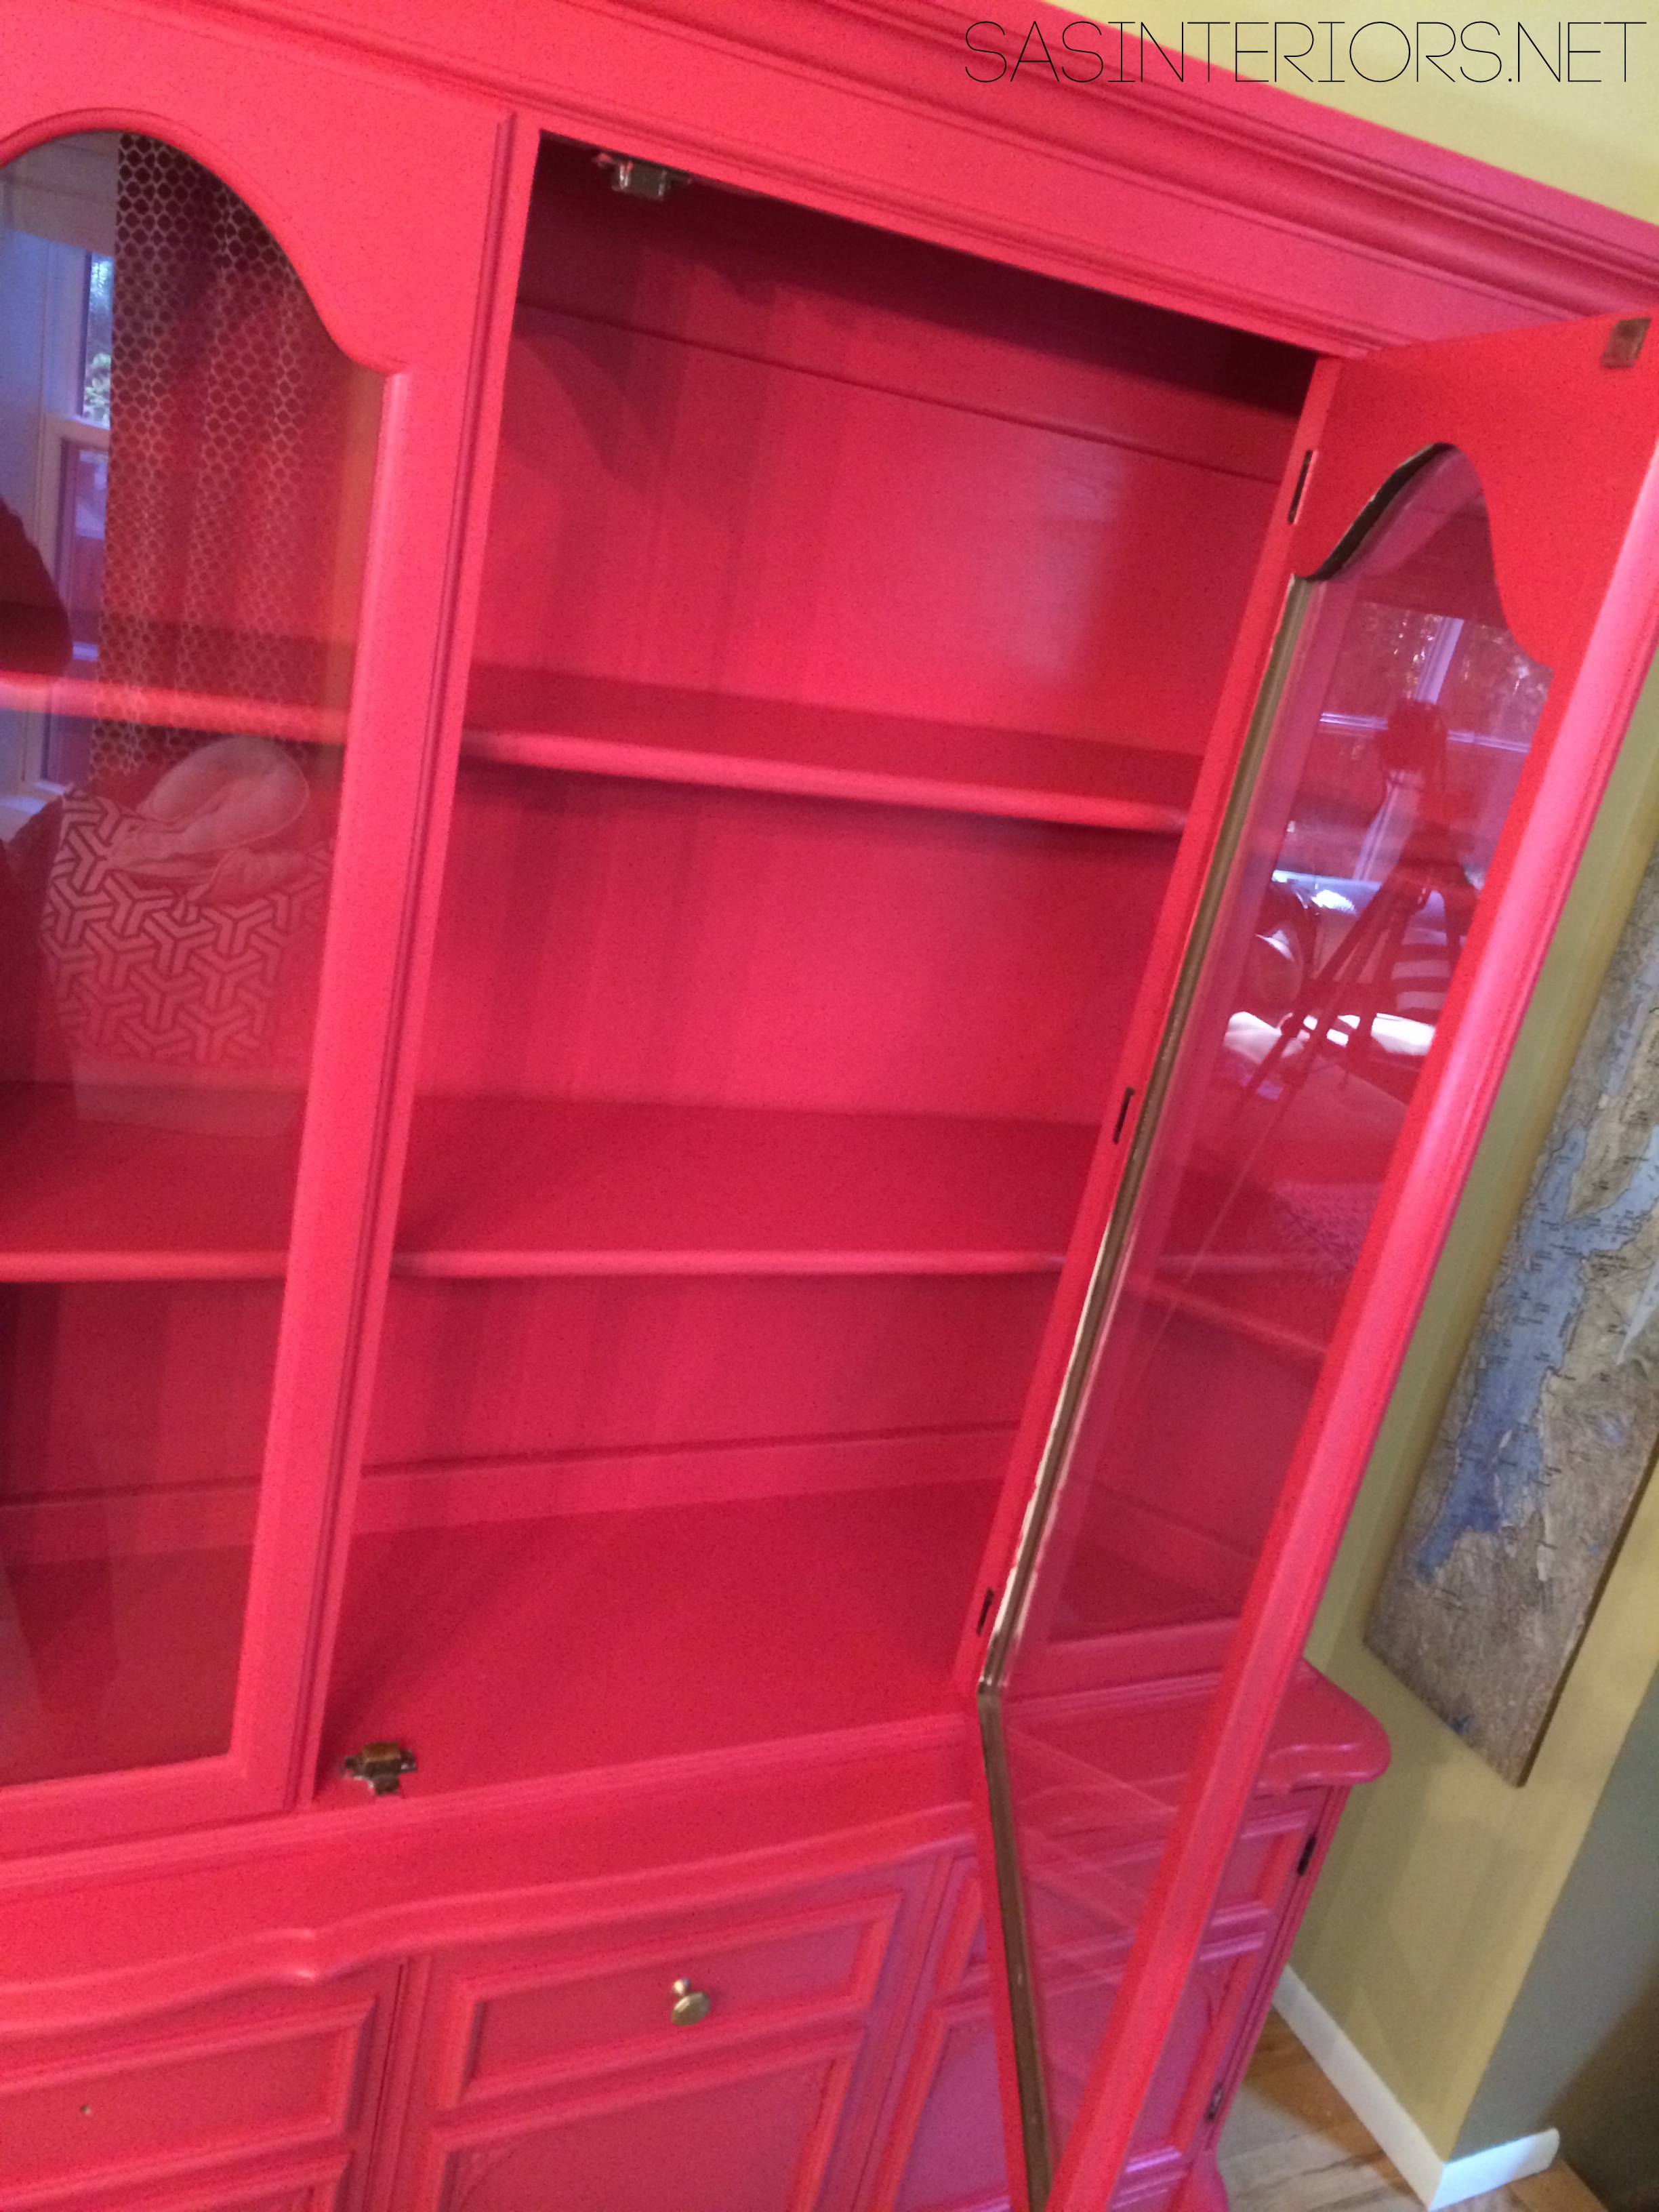
You see that one piece of hardware on there? I couldn’t resist giving you a peak at what it will look like once it’s all done.
Next up… styling this pretty gal. Here’s a peak at the start of the process…
Let’s rewind and take a look at where I started and the progress I’ve made.
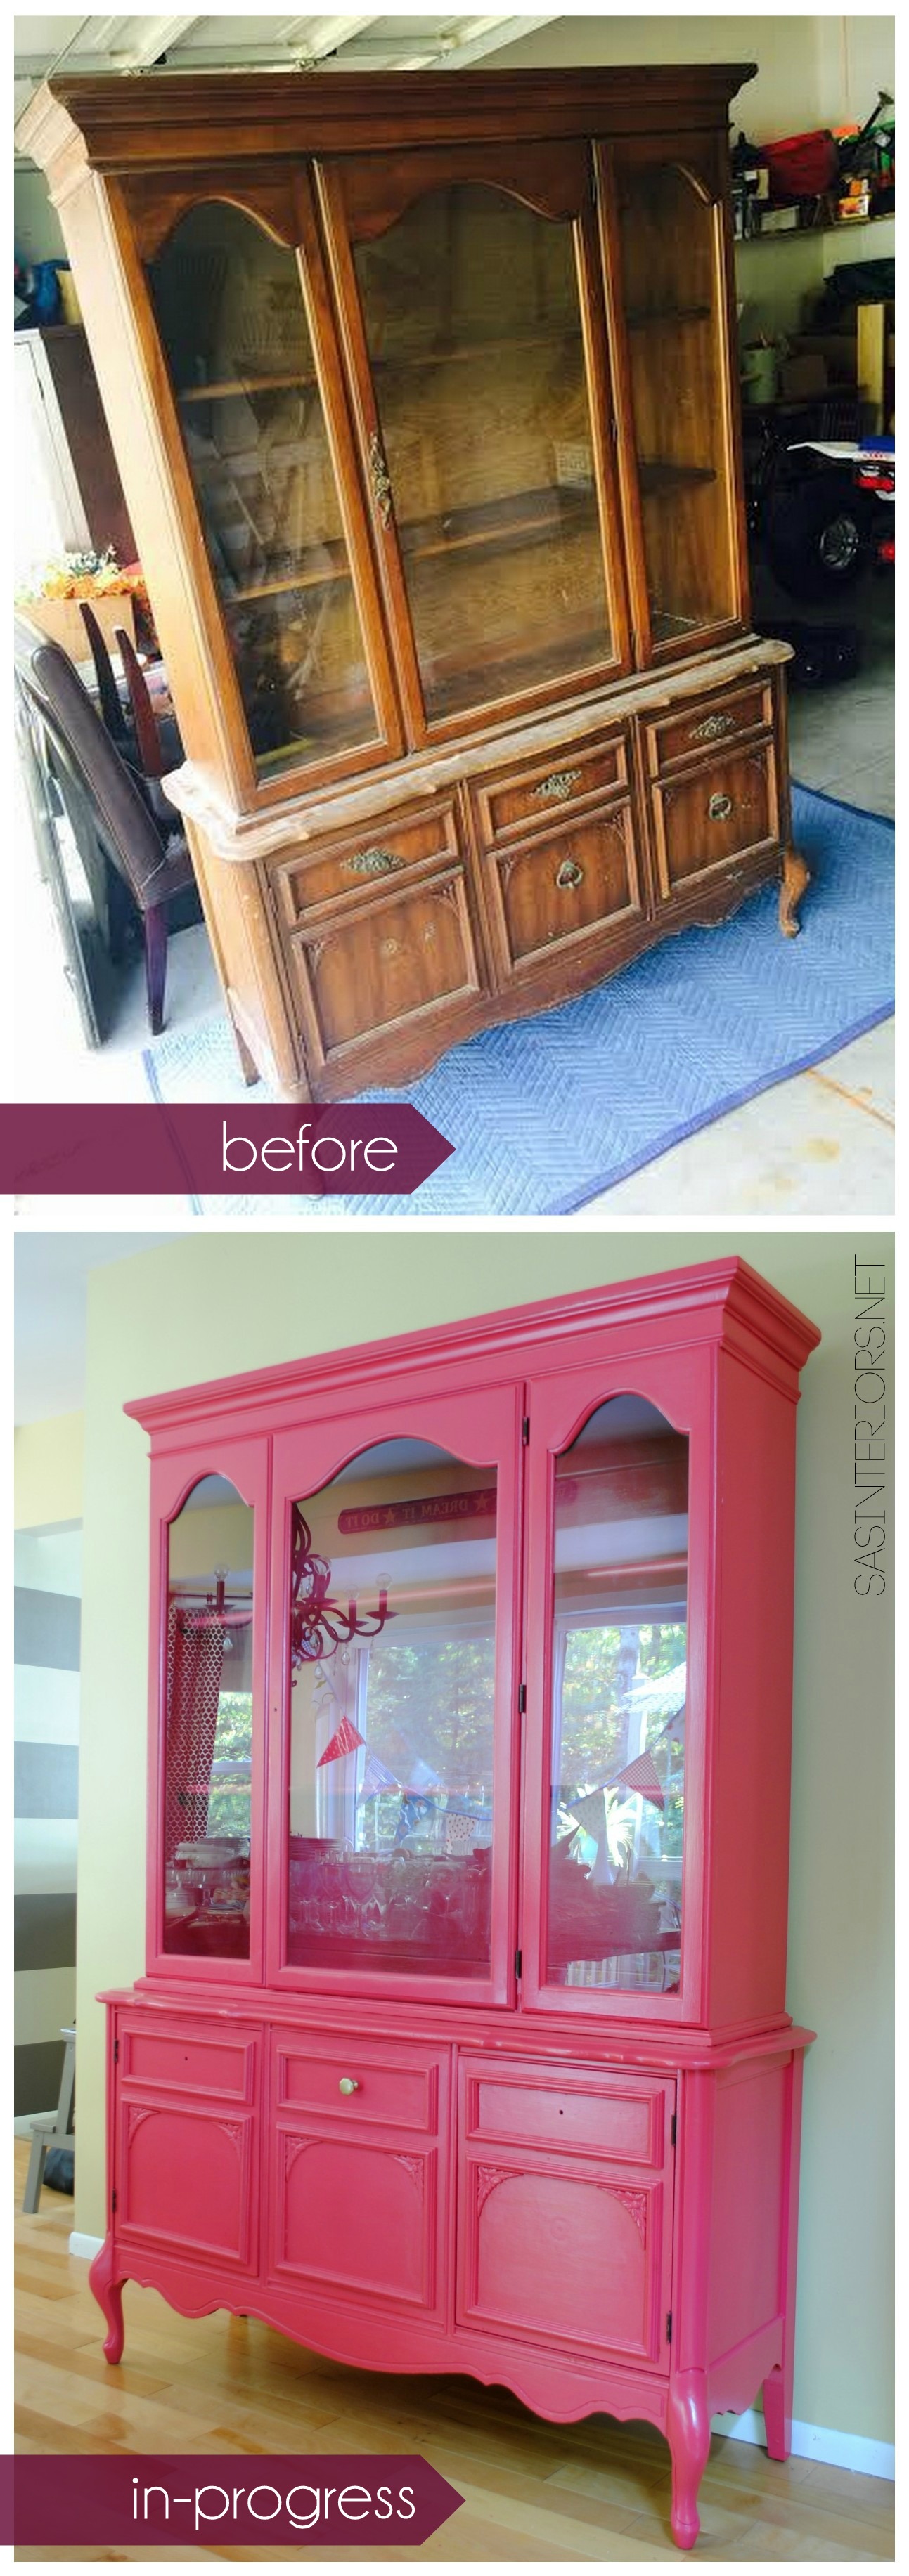
Not too shabby. More to come. Stay tuned.
Follow along on this makeover with these other posts
Backstory + Choosing a Color
Prepping & Sanding Wood Furniture
Why & How to Prime Wood Furniture
Tips + Tricks to Painting Wood Furniture
Accessories, Details, & Styling {China Cabinet Makeover}
Check out the >>> FINAL REVEAL
Comments are closed.