


Modern, Rustic Teen Room + DIY Pallet Wall Tutorial
Hey There! Hope you’re having a great week.
Today, I’m sharing the details of another teen bedroom that I just finished up. The other day I shared the first of the 3 teen rooms (all siblings) and you all were in love. Many of you chimed in and said “this is for a teen? I want this room!” With splashes of pink + shades of gray, it was a winner young OR old. And that geometric rug – you all were gaga over it. See more of that space > here.
On to this new teen room reveal…
As I mentioned the other day, I had a neighbor reach out about remodeling their 3 teens bedrooms. I thought a new splash of paint + a few new throw pillows and it’d be done. Nope! This was an entire makeover from top to bottom for each room. These awesome parents wanted to put the time + money into creating a space that truly reflected each of their blooming personalities. Using some old, adding in quite a bit of new, and DIYing a few fun projects, these room got a total revamp.
WELCOME TO BEDROOM 2
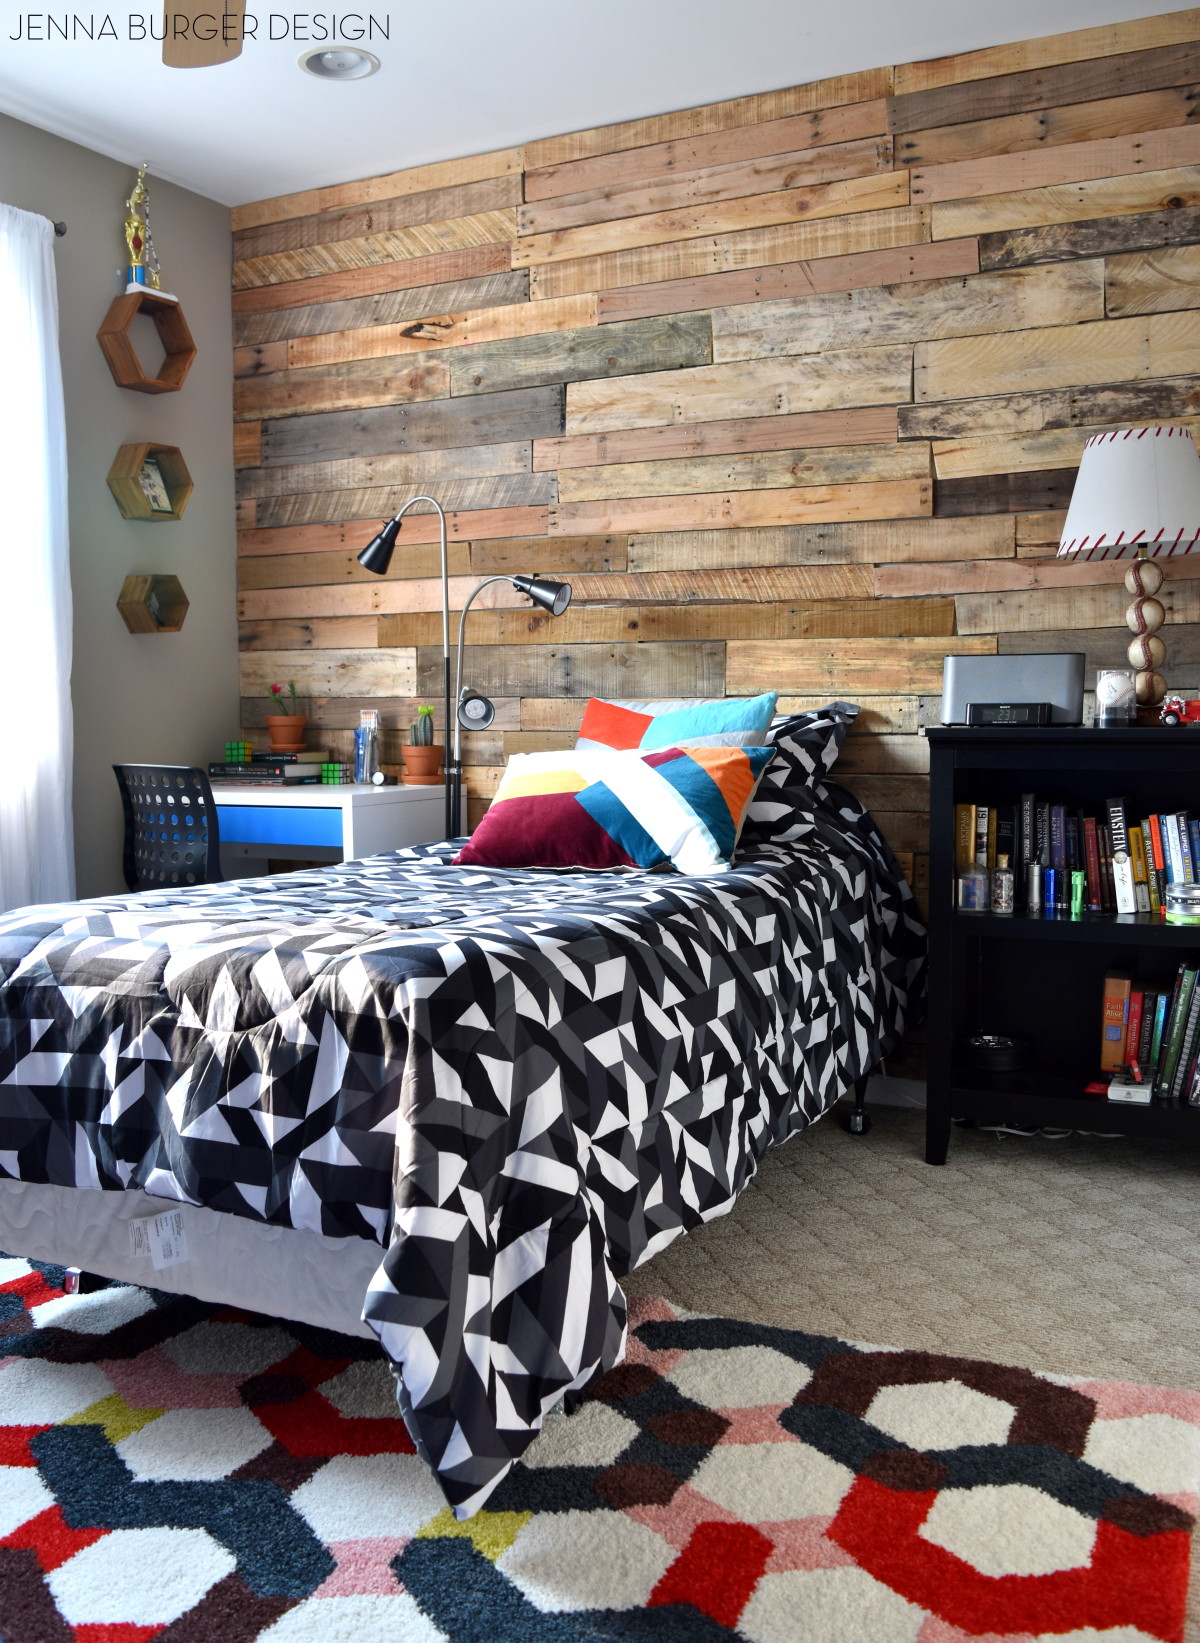
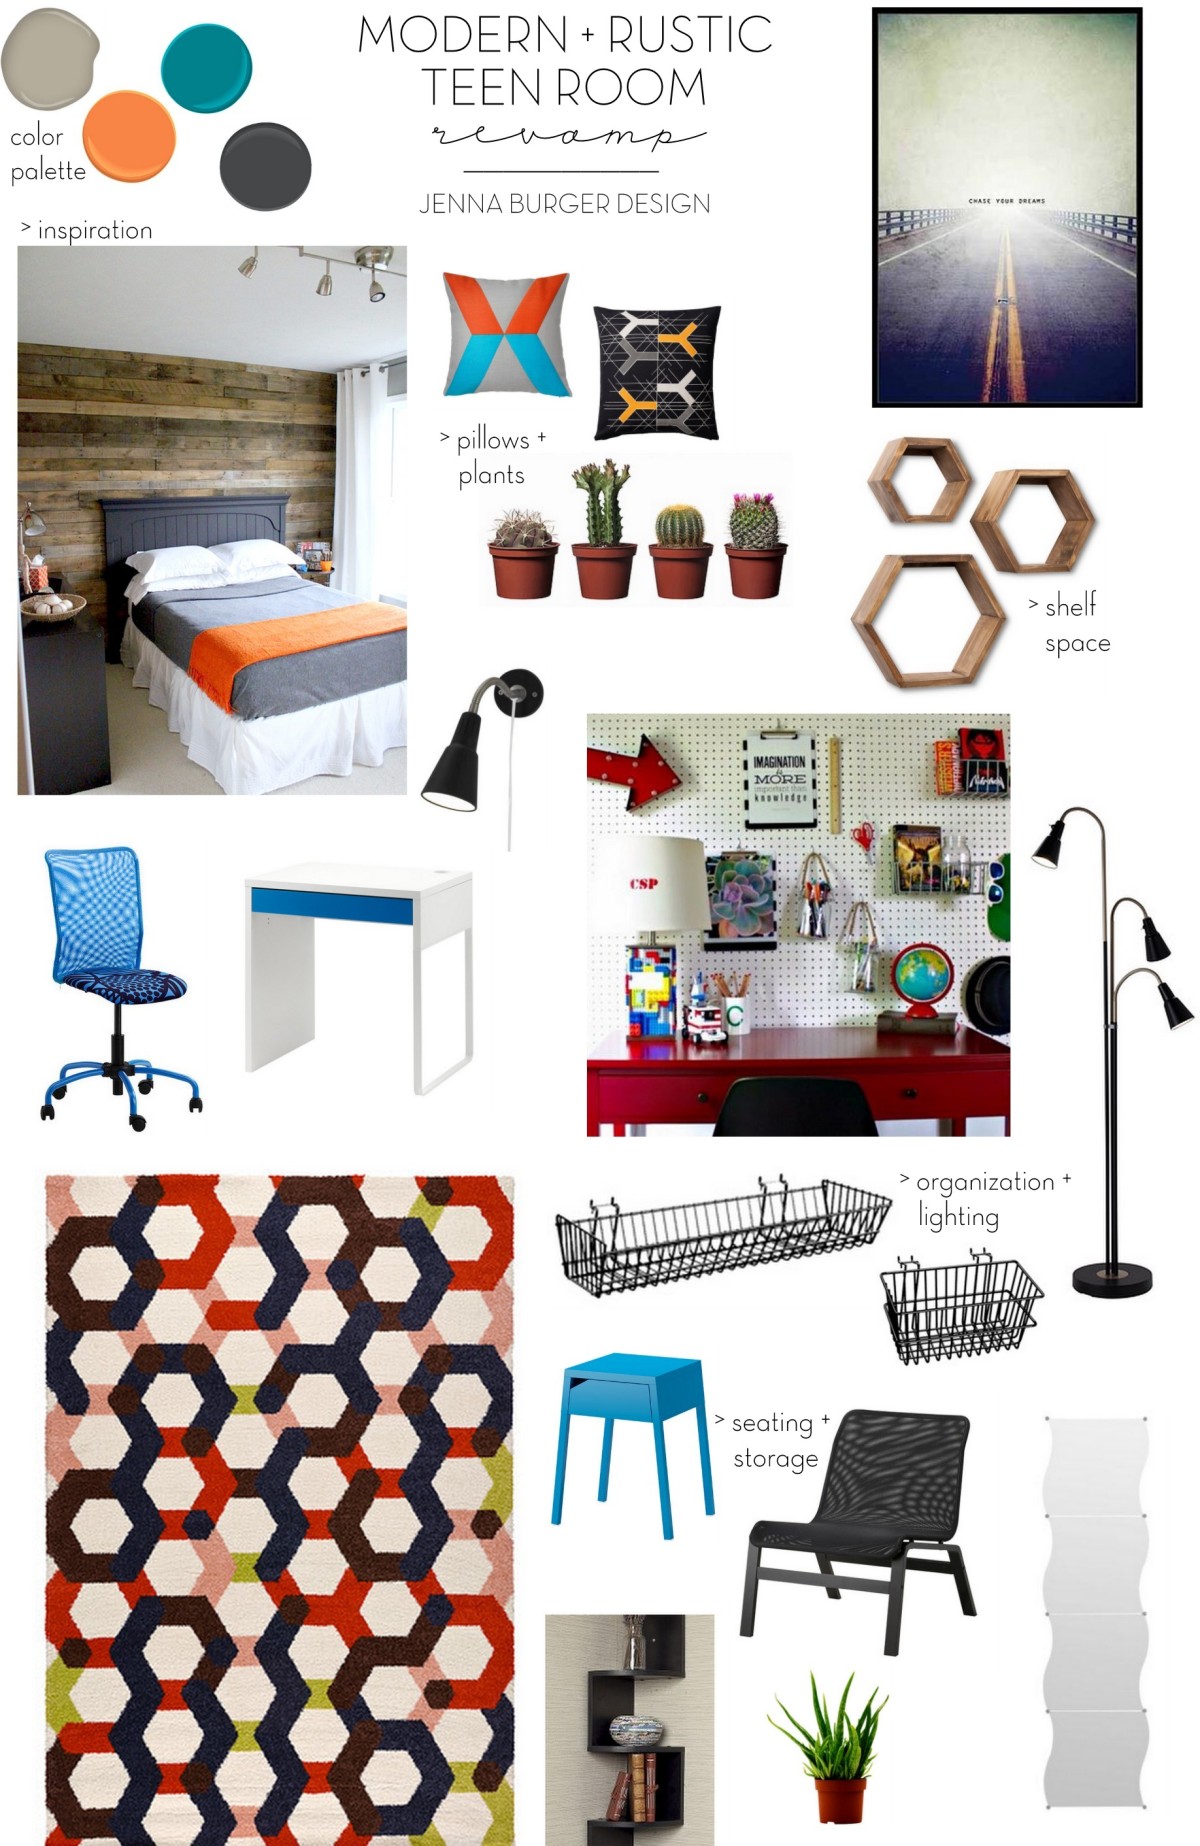
Let’s dissect the details of this teen space with a new rustic pallet focal wall layered with vibrant geometric patterns + bold colors…
The process of revamping each room was fairly similar to how I typically work with clients, yet it was multipled by 3. Three unique personalities. Three styles. Three visions. Not having worked 1-on-1 with a teen before, I wasn’t sure how it was going to pan out, but they came prepared with a plan.
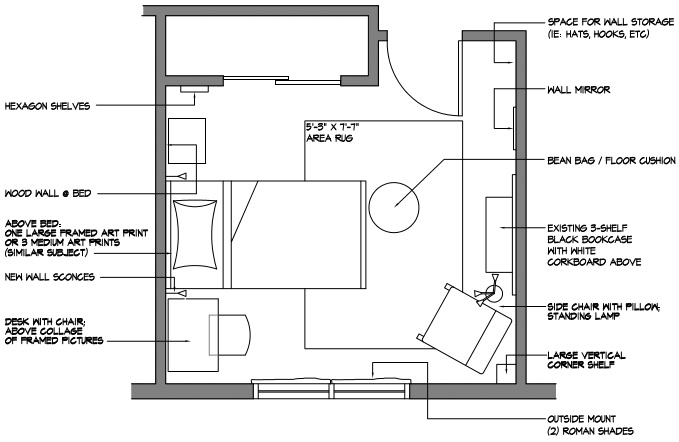
And I was able to execute this for his new pad…
and the floor plan…
This specific teen – a boy – was less decisive about the design direction, so other than a few specifics, I had free rein. I wanted to achieve a modern, but worn aesthetic and as a starting point, I was feeling wood had to be introduced!
A pallet wall?
Would they go for it?
I would do a pallet wall in my house, but how could I “sell” the idea to a client??
Sold. They loved the idea – the teen AND the parents!
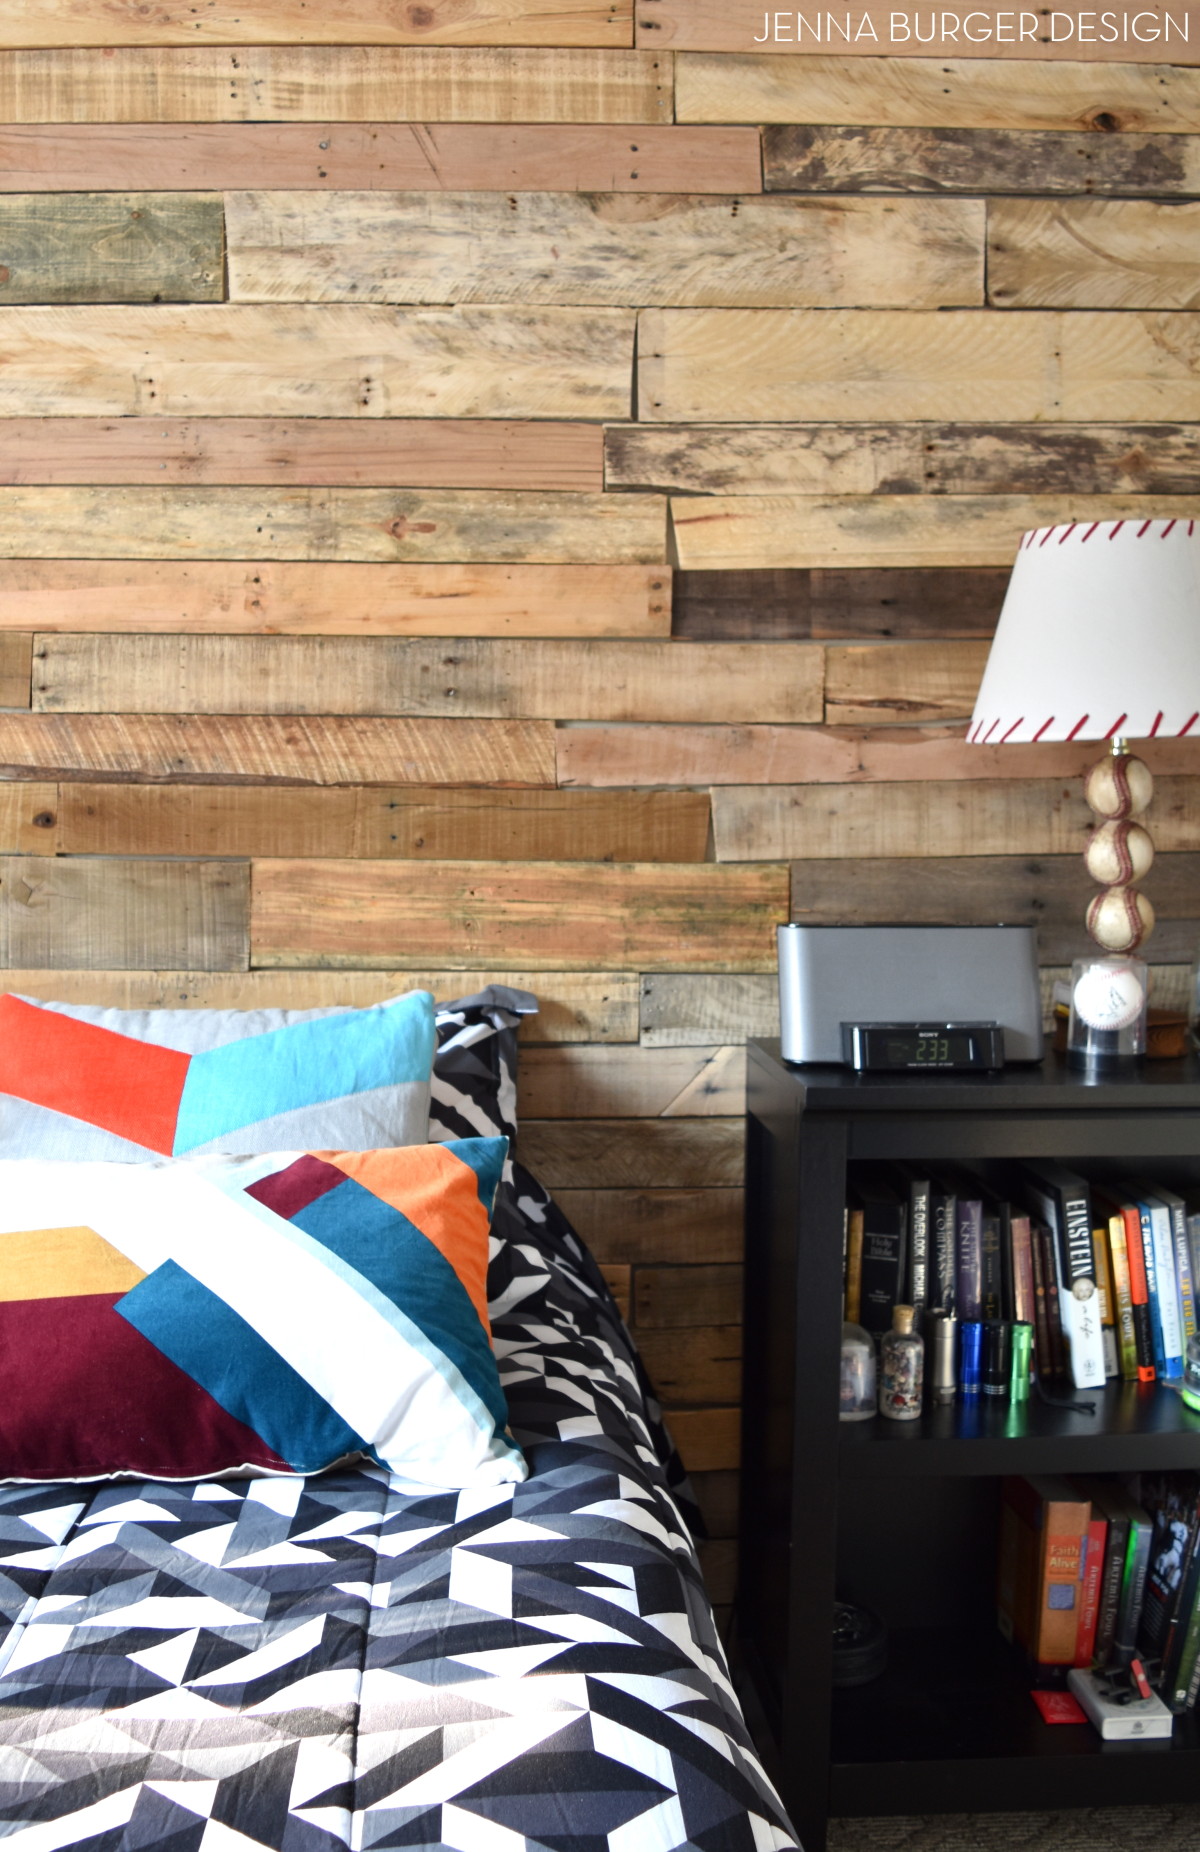
How fabulous does it look as a feature wall?!
After creating the floor plan + vision board (seen above) for each of the teen rooms, I sent them off with a shopping list + tutorials. On their own, they took on the task of gathering pallets, dismantling each pallet, then sanding + cleaning each board. It was a lot of work, but in the end, the project cost nothing AND they made it a family project.
Here is a recap of the process to making the pallet wall…
DO -IT-YOURSELF PALLET WALL
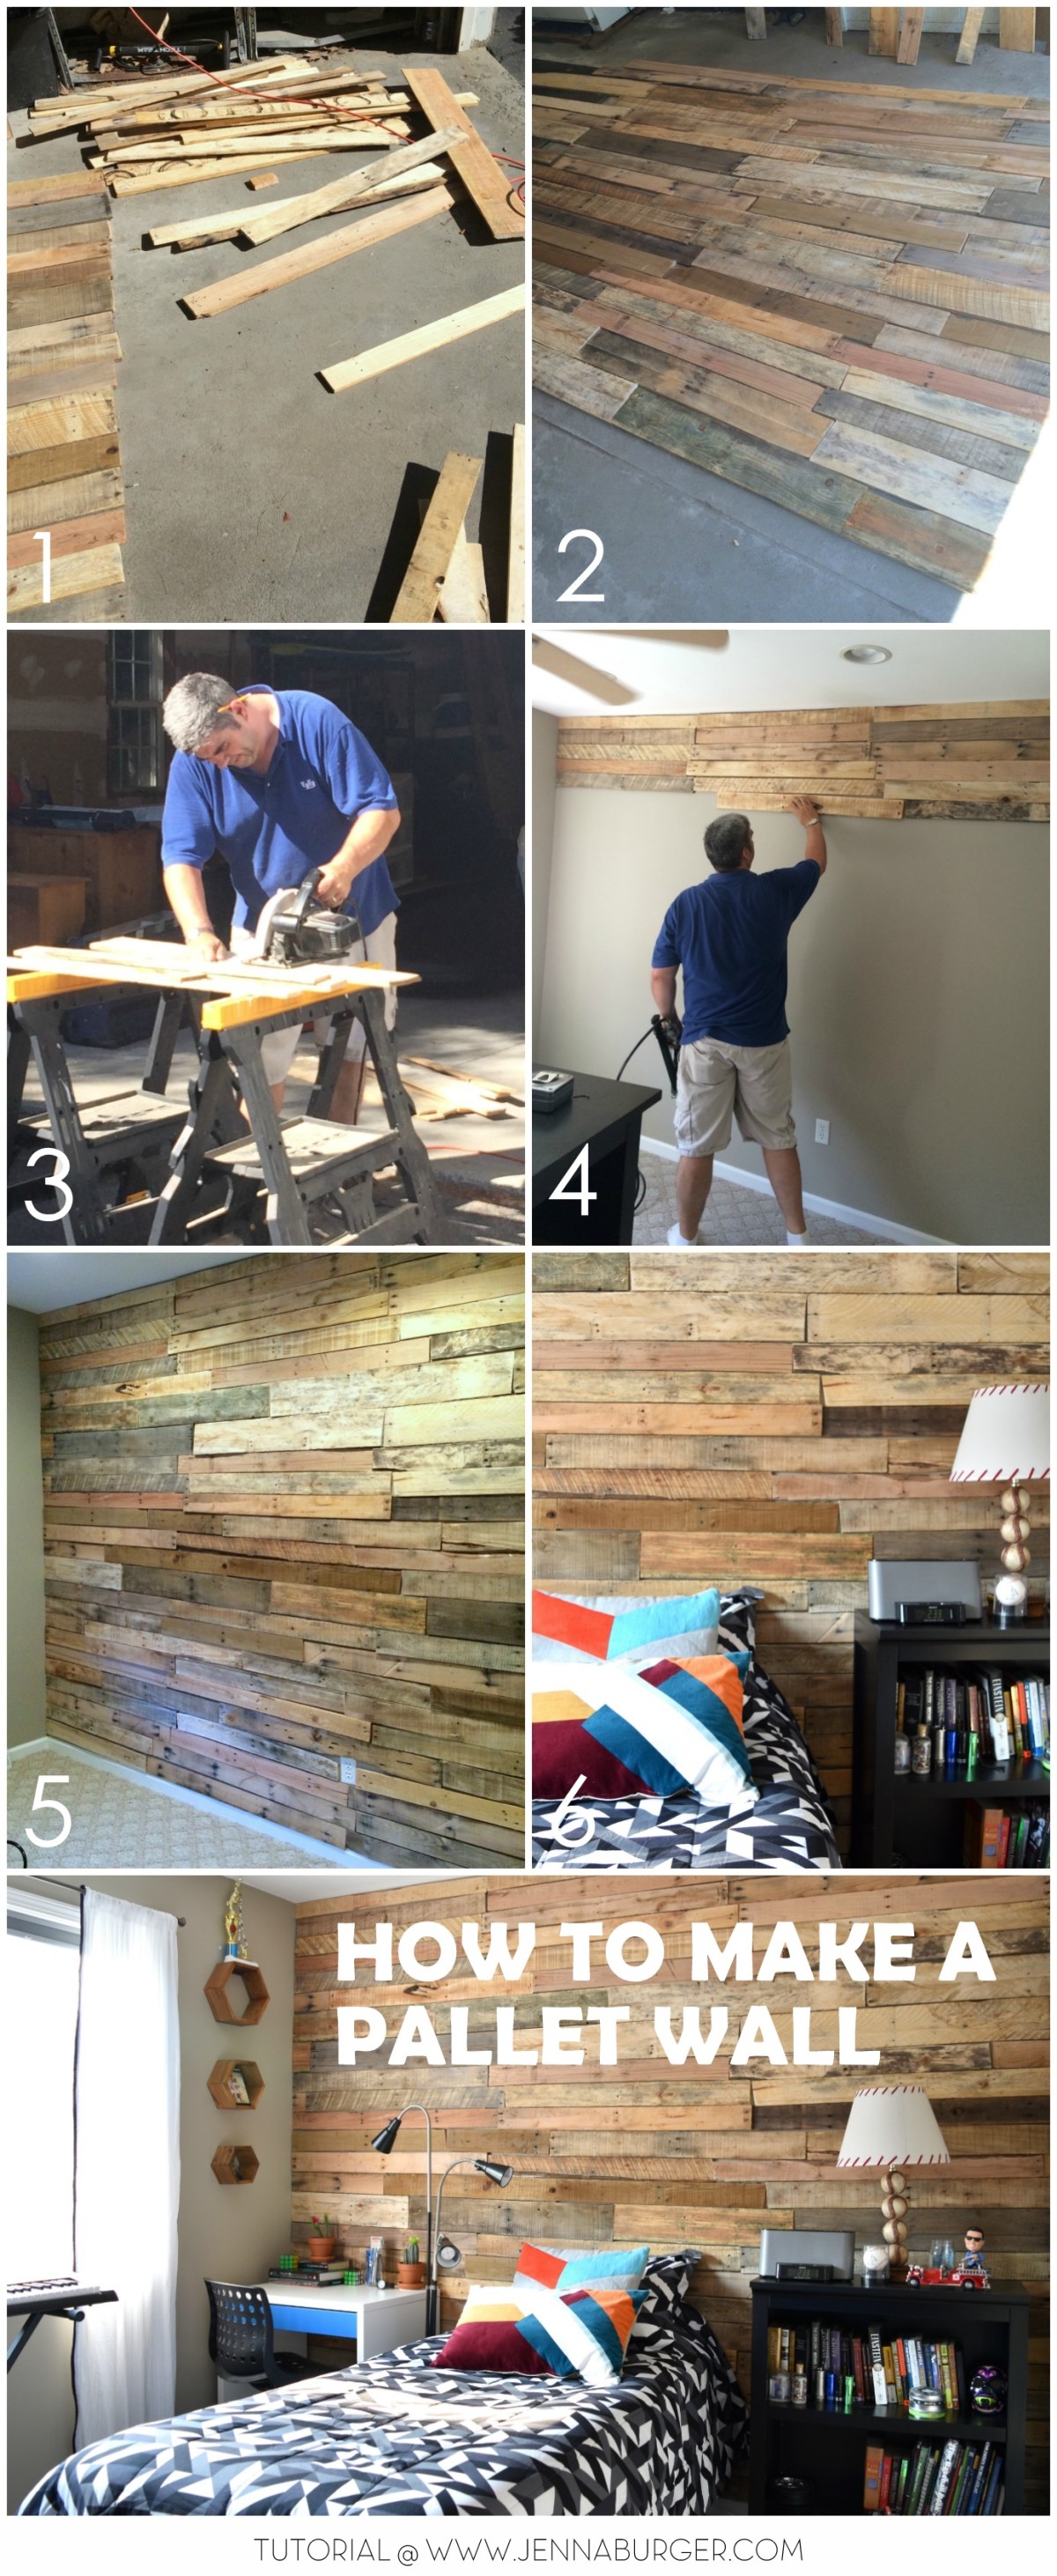
TUTORIAL
1 Find pallets
> For this 10′ wide x 8′ wall, about 100 planks were used. That breaks down to approximately 15 pallets (depending on the size + usability of planks per each pallet)
> I scour the back of my local Lowe’s for used pallets that they’ve given permission to take. Pallet projects are so popular, that some places are selling them, but I would try to find free before paying…
Dismantel the pallets
> Check out this tutorial for tips on dismantling a pallet
> When you have a pile of boards, clean them off with a damp cloth + sand the surface – an orbital sander is easiest and be sure to wear a face mask!
2Lay it out
> Avoid possible mistakes by laying out the wall on the floor BEFORE installing. Because the planks are of varying sizes and widths, this will help determine what works best + looks best when installed on the wall.
3Cut the boards
> Using a powered miter saw, cut the planks to size to fit the wall space.
4Install the boards
> Starting at the ceiling plane, position the planks on the wall and using a nailgun, nail the boards to the wall. This process should be fairly fast since the boards have already been laid out + positioned how you want them to look. Of course, adjustments may need to be made along the way.
> After each row, take a step back to the opposite side of the space to be sure the planks are fairly level. A long level might also be useful to check if the boards are straight, but your eyes should be enough.
5Finish it
> Row by row, make your way down the wall until you’ve reached the floor.
6 Step back
> Step back and enjoy your hard work. This DIY project isn’t difficult, nor expensive, but it’s time consuming.
> A helper isn’t required, but will surely make it easier!
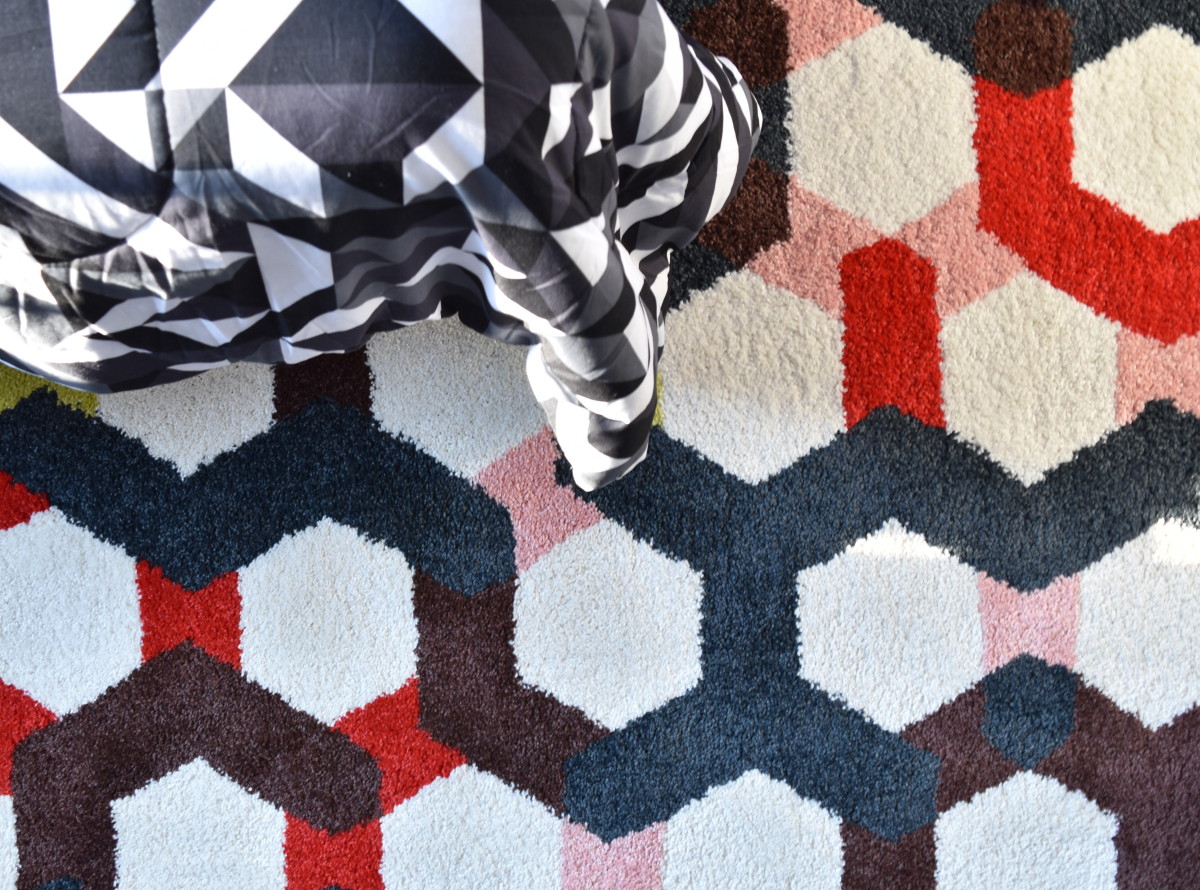
> Layer the beautiful new wall with other rustic accents or contrasting decor as I did with colorful geometric patterns.
THE RESULT
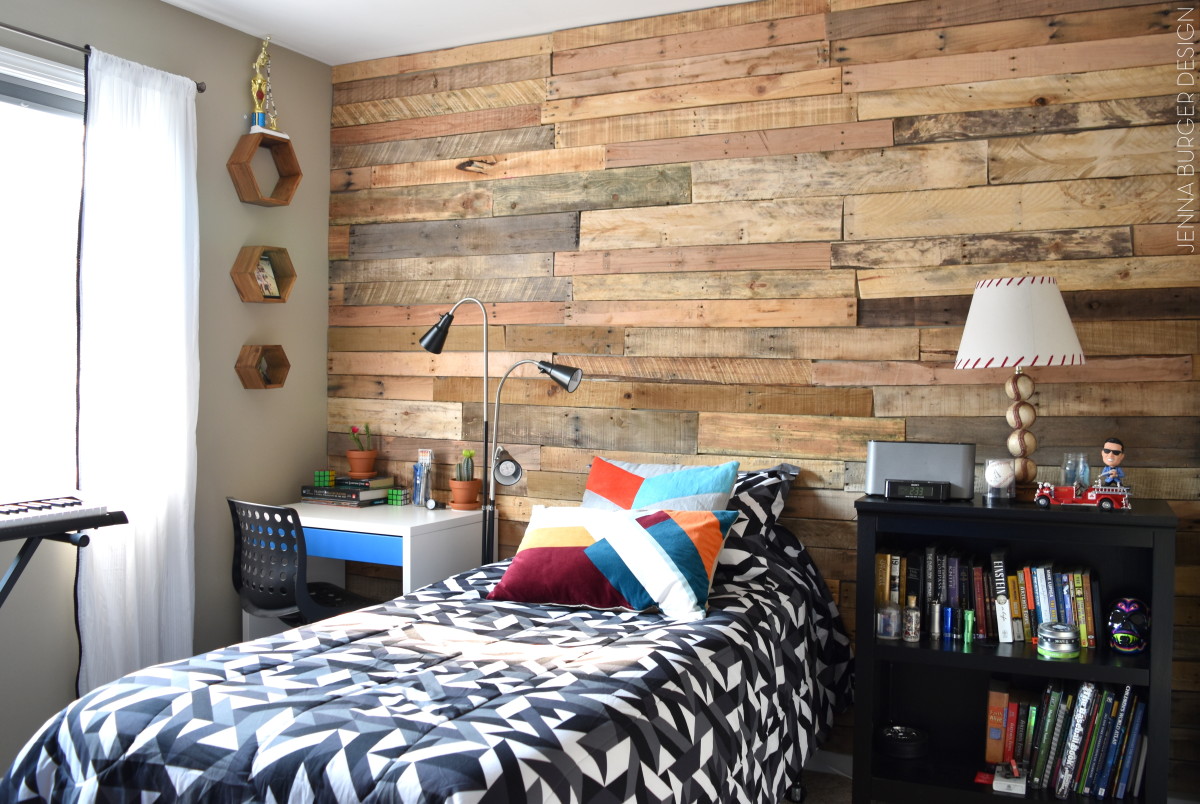
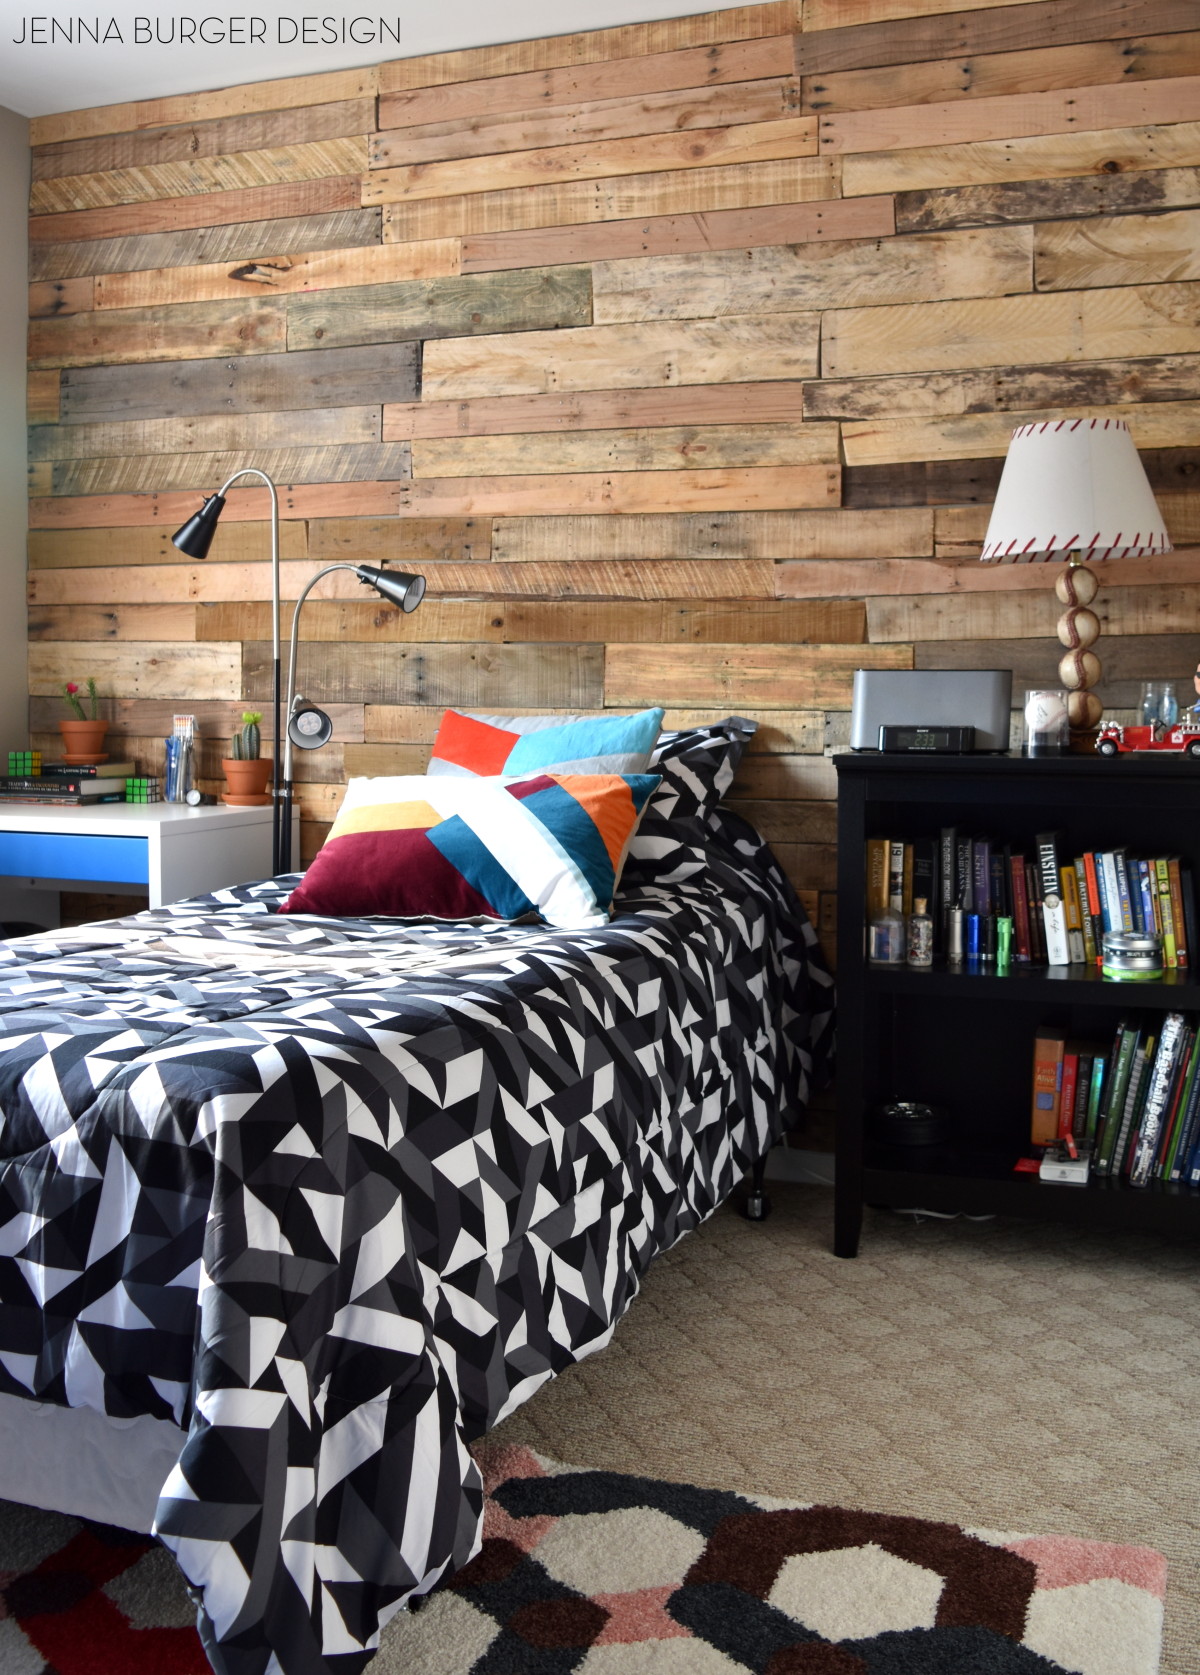
This is absolutely a fun + inviting space for this teen – and his friends – to enjoy for years to come…