
{Tutorial} Personalized Envelope Pillow

I hope you had a wonderful long weekend!  Mine was filled with BBQs, relaxation, spending time with family, and remembering those who have fought and are fighting for our country!  How did you spend this holiday weekend?

Now let me share with you, what I’ve been up to…..

Using my favorite new material – – drop cloth – – I created this stylish, yet simple envelope-style pillow, then stenciled the initial of our last name on the front.   To be honest with you, I’m usually not a monogram-type person, but I have to say, I truly enjoy seeing this cute pillow showcasing our family initial.

Let’s jump right in, so you can make one for yourself!

Supplies

Pillow
* Drop Cloth or a similar heavy weight fabric
* Scissors or rotary cutter
* Measuring Tape
* Cutting Board
* Sewing Machine
* Pillow Insert
* Iron
* Other misc. sewing supplies

1. Gather all of your supplies together and decide the size pillow you want to create.

The pillow that I created was a kidney size ~ 12” x 20”

2. For the front face, add 1” to the length and 1″ to the width – – so the pillow will be 13″ x 21″ (this extra inch will provide enough room to stuff your pillow).  Then with a rotary cutter or scissors, cut out the front face of the pillow.

You will need 2 back pieces, and for EACH add 1” overall for the height, which will give you 13”, and then add 3” to the width.  This additional 3” will give the overlap for the pillow envelope.

Here’s a little math for ya…

Divide the overall length in half and add 3

21 divided by 2= 10.5 + 3 = 13.5

Front Face = 13” x 21”

Back Pieces = (2) 13.5” (envelope edge) x 13″

3. Take one of the back pieces and fold over  1/4”  on the envelope side (this will create the opening for the pillow insert) and IRON the edge.

4. Sew the folded edge. 

Repeat Steps 3 and 4 for the other back piece (envelope side).

5. Lay your front face down (right sides together), then lay the back pieces on top (the sewn envelope sides together and should overlap).  Pin and sew all around the outer edge with a 1/2” seam.

6. Clip the corners.

7. Turn it to the right side and iron the edges flat to make a clean and crisp look.

8. Your envelope pillow has been created ~ add your pillow insert.

Complete…now you have a pretty little pillow

But wait…let’s personalize it!

Some of you lucky ladies out there have silhouette machines that can personalize just about everything.  Well, I don’t have one and I know many of you are in the same boat, so this part of the tutorial is for those that want to personalize the old fashion way.

Supplies

Stenciling
Computer (or stencil)
Fabric paint
Paint brush

1. To create your initial letter, open a Word document and find a font and size you like – – I used the century font at a size of about 150.

2. Print and Cut out the letter with an X-acto blade.

3 /4. Lay it on your pillow and trace the letter using a black Sharpie or pencil.  I used a sharpie because my paint color was black, but if you’re using another color, use a pencil.

5. Paint within the stencil.

Fill in the rest with the fabric paint – – like this one!

Now I have to admit, this project didn’t start off perfect.  Before stenciling on my finished pillow, I did a test run on a scrap.  I originally had skipped the tracing-with-a-marker step and attempted painting right on the stencil.  Nope…that did not work at all.  The paint bled underneath the stencil resulting in ugly, ugly!  Take a look at these pics ~But it’s done and…

Here’s the finished pillow

Along with this “B” personalized pillow, I also made the pretty pillows behind using the same steps.  I wanted to freshen things up for the Spring, so I’ve been making lots of changes – – stayed tuned for more pictures!

I hope you enjoyed this tutorial and found it helpful!  Have you ever made an envelope-style pillow? What about stenciling ~ have you ever stenciled before?

Stenciling: An Inexpensive and Stylish Alternative to Wallpaper

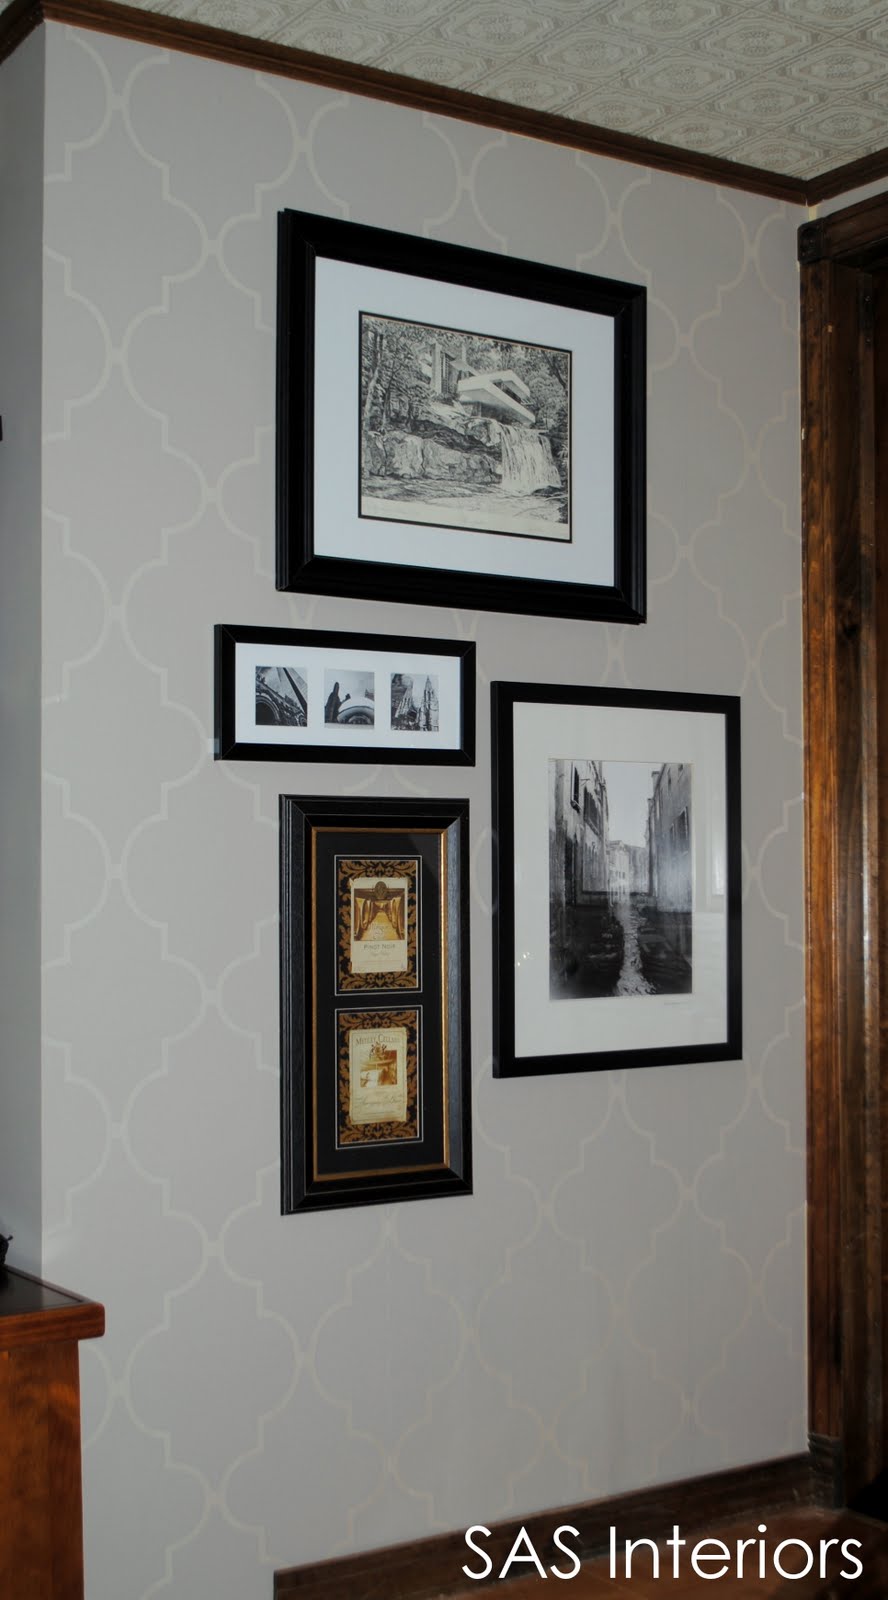
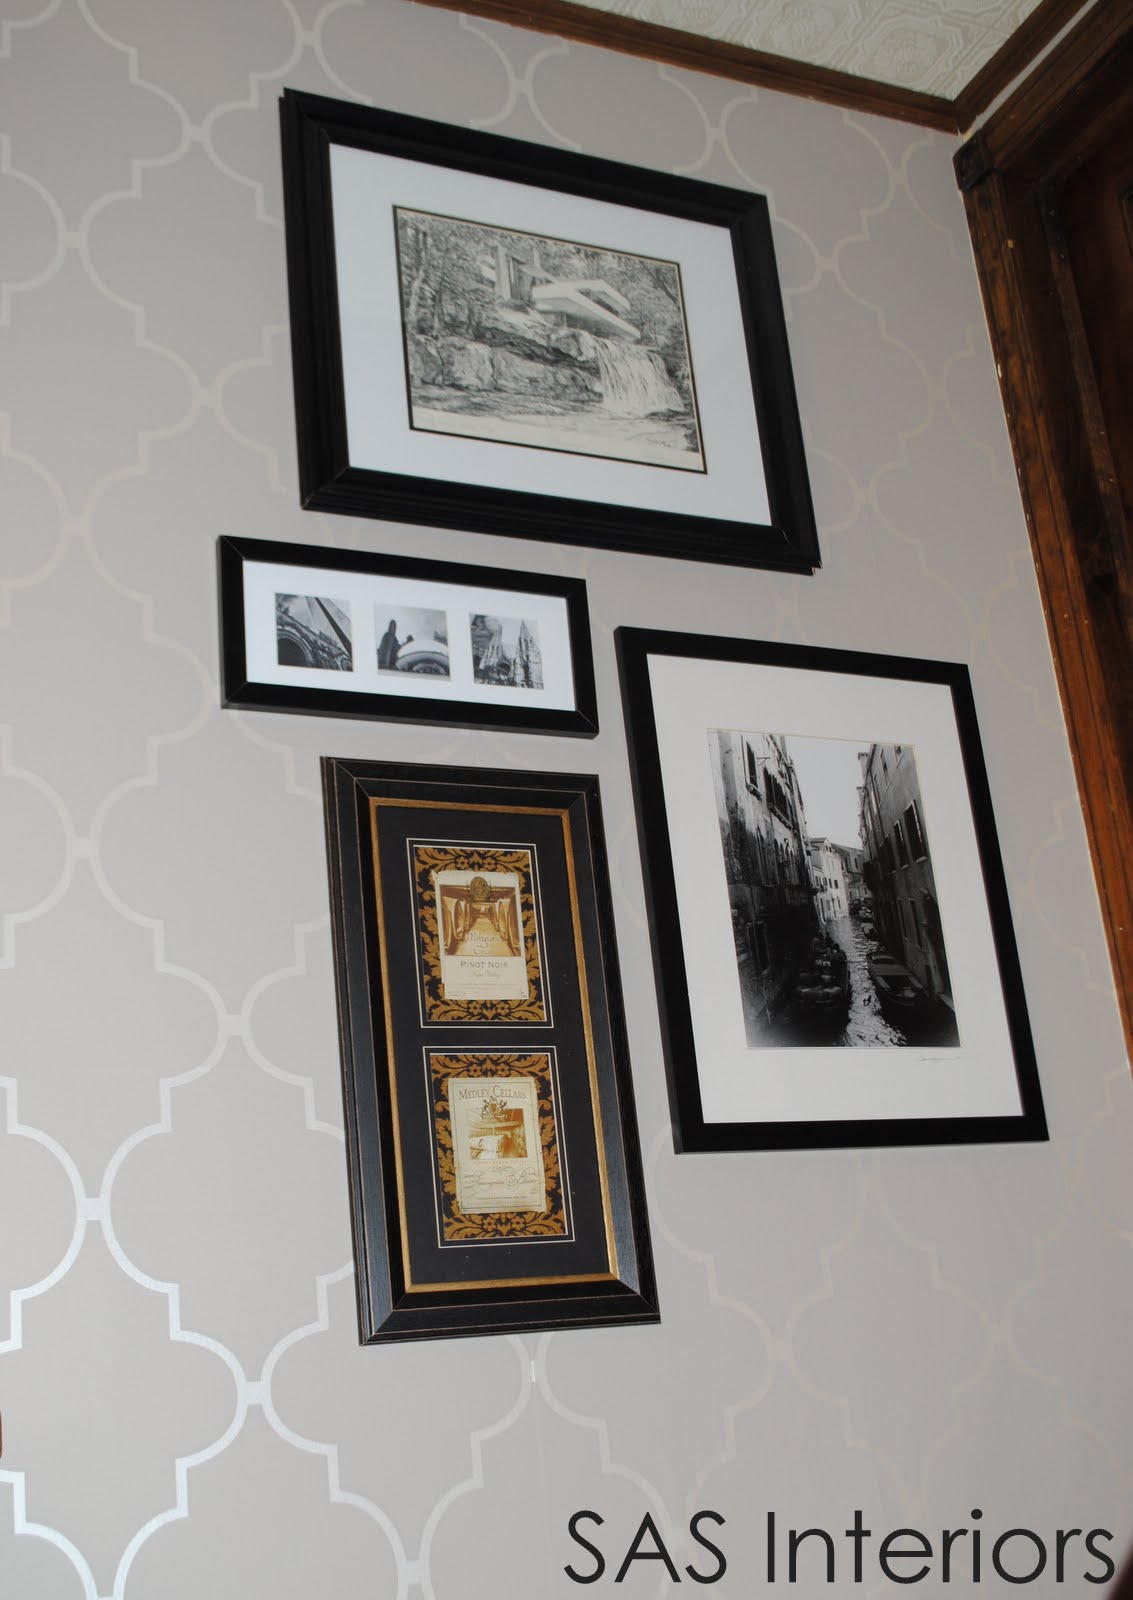
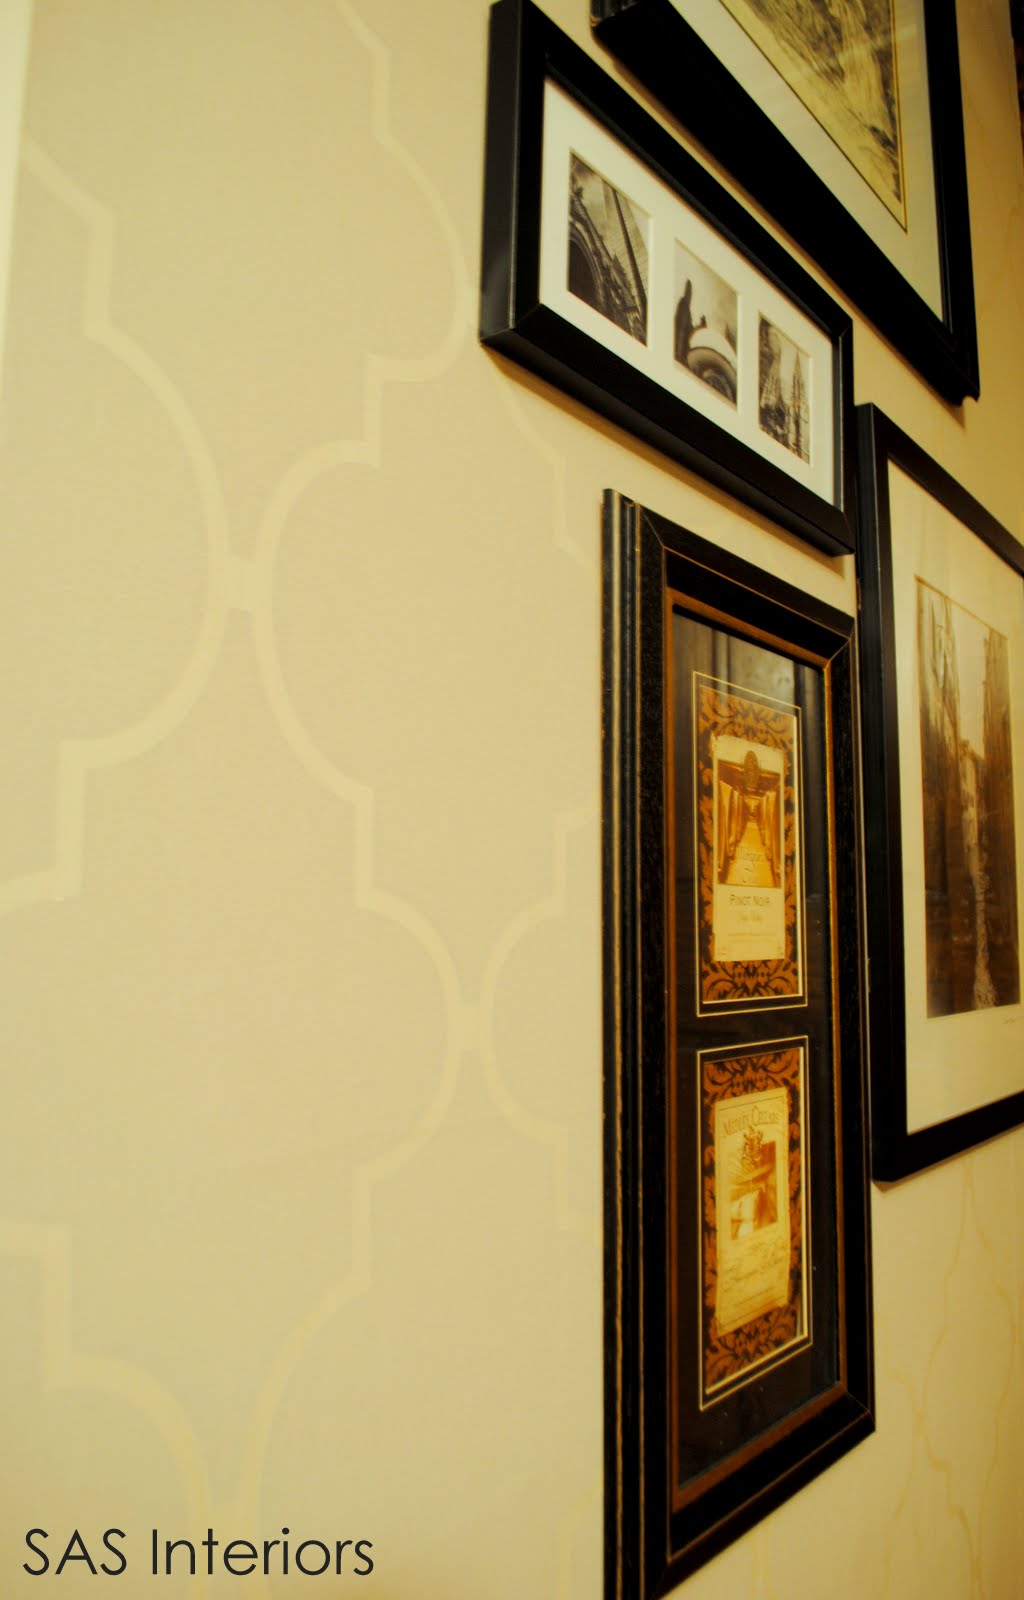
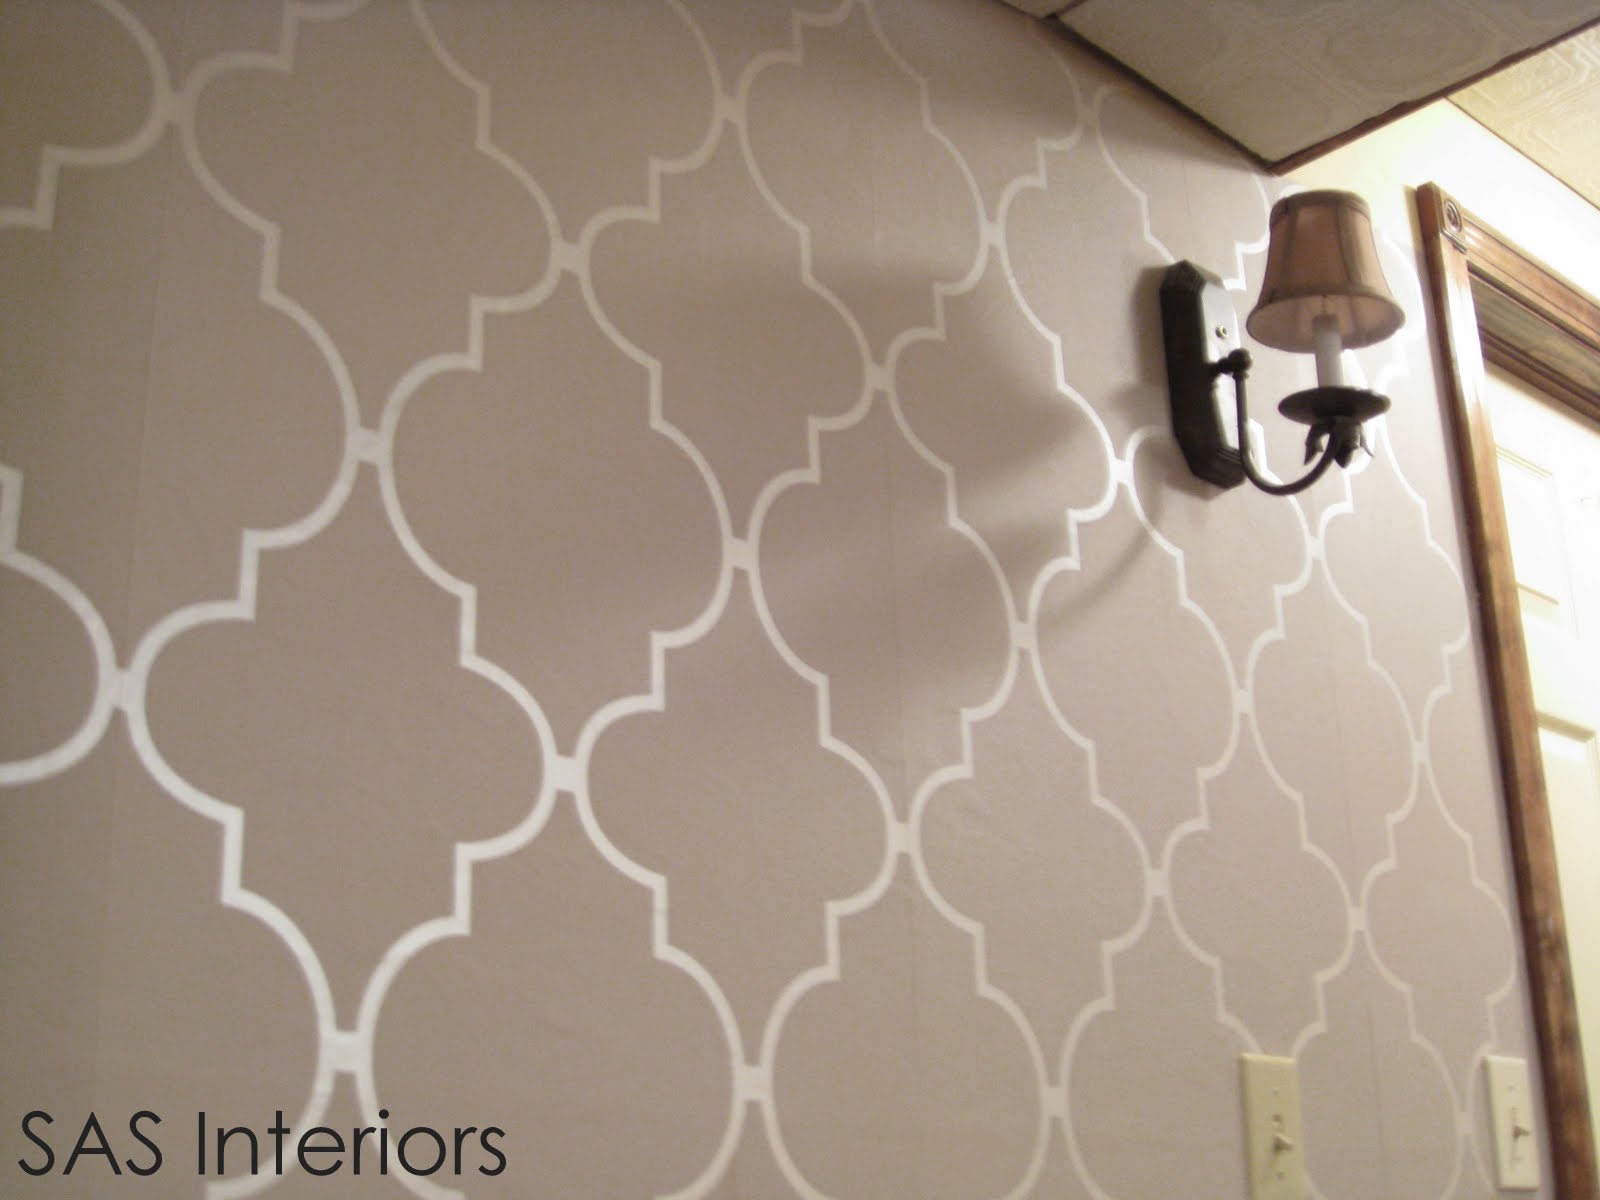
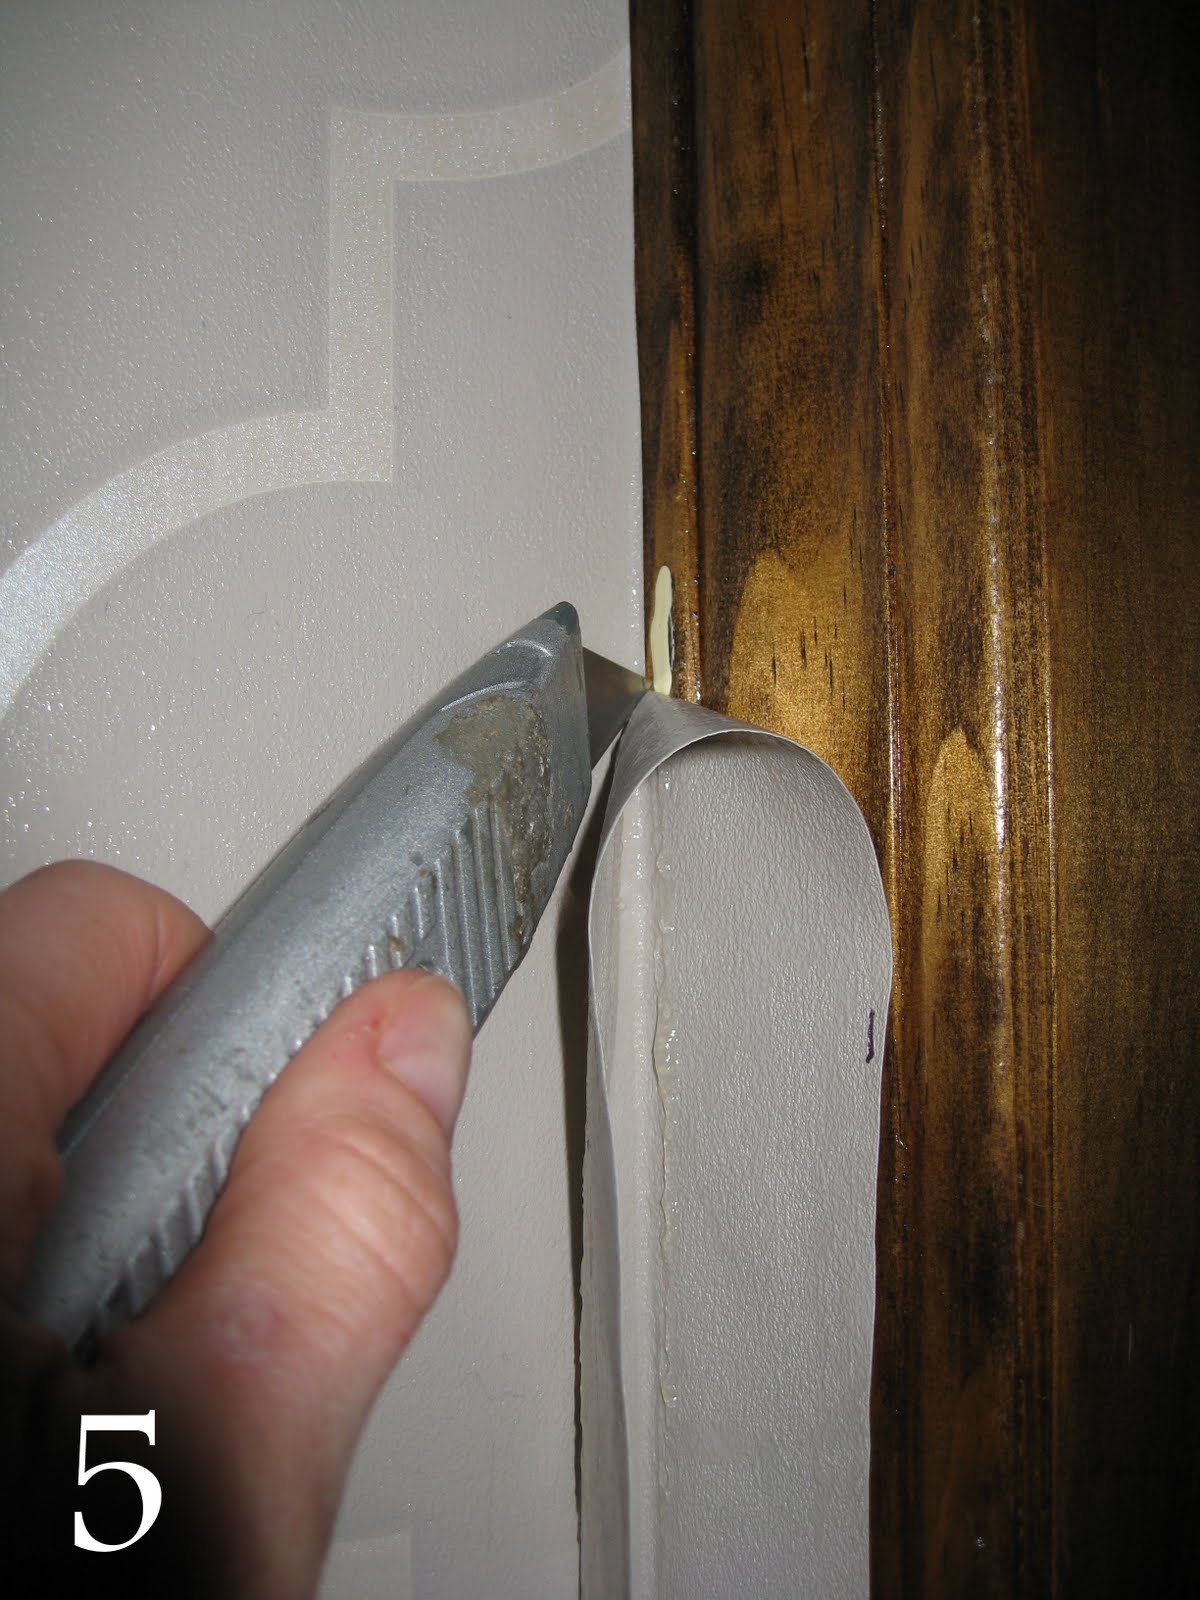
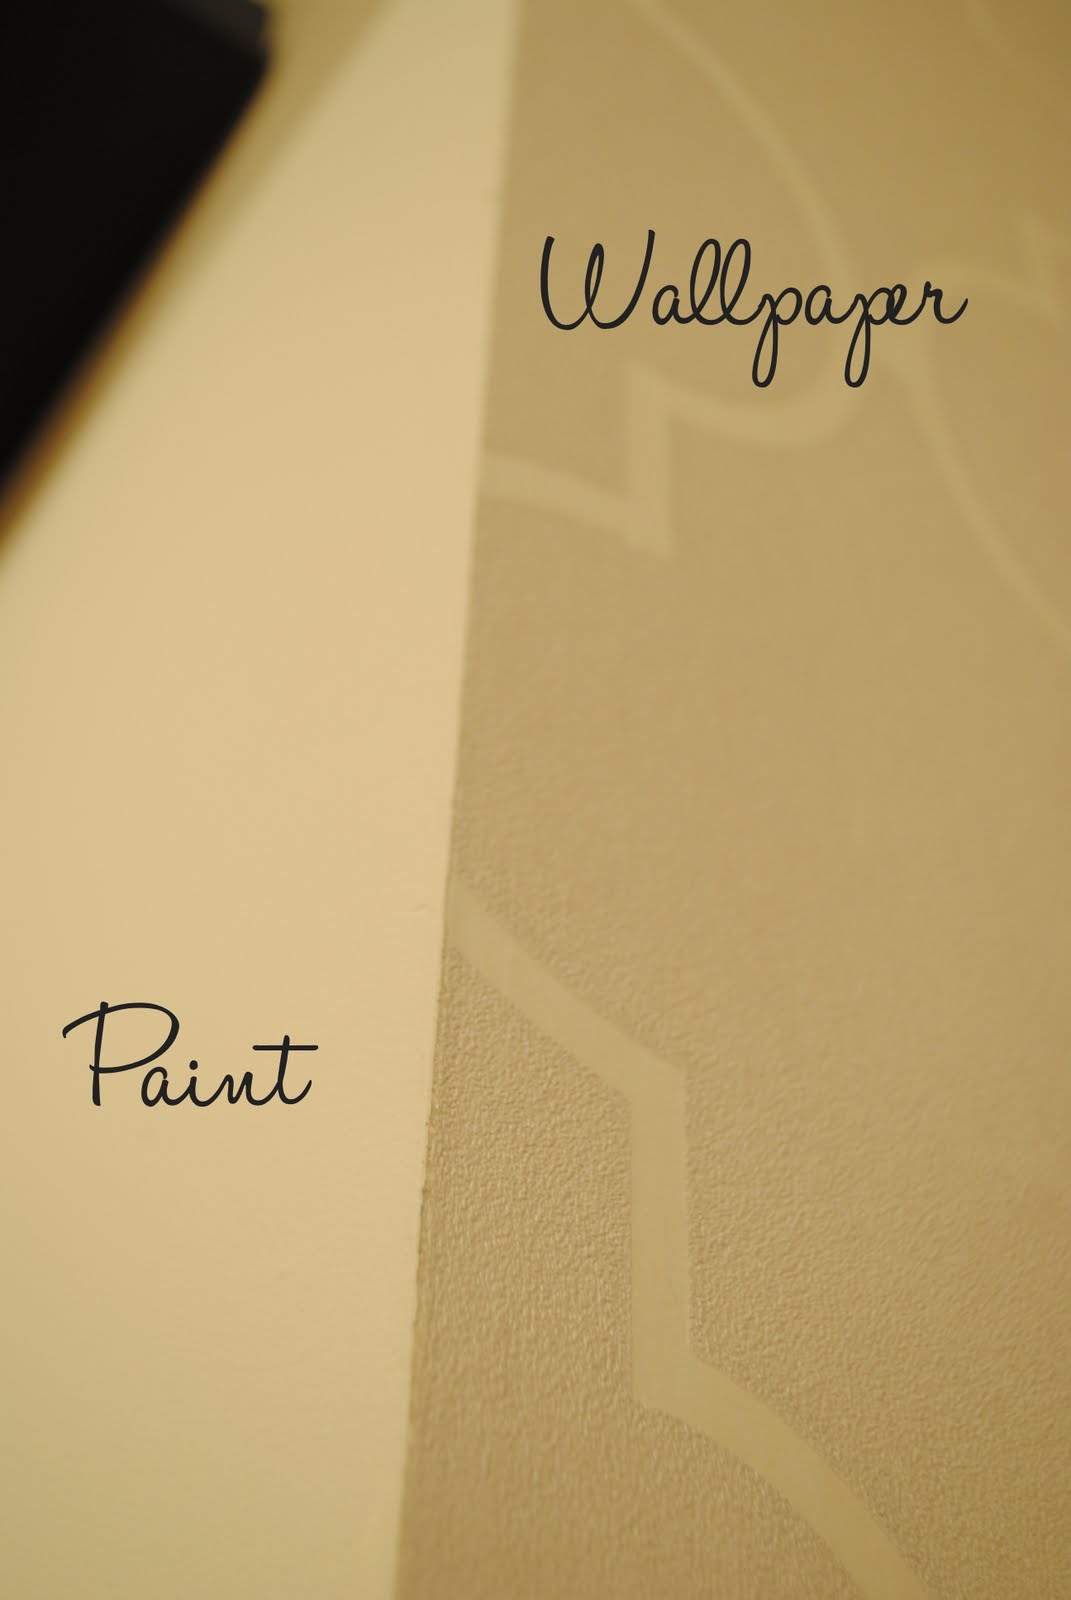
Wallpaper has gone in and out of style like bell bottoms…in the 60s/70s it was ‘in’ style, then by the 80s it was being ripped off the walls, and now over the past decade it’s totally back (any much more updated).  But sometimes you still don’t want the commitment of wallpaper or the hassle of installing it.

The happy compromise?

Stenciling

Stenciling is an inexpensive, yet stylish way to add interest and intrigue to a wall.  With many of the modern stencil designs available, stenciling is a great alternative to wallpaper.

I’ve been thinking of stenciling one of the walls in my foyer and was inspired by these tips from the pros!

Janell from Isabella and Max Rooms created this beautiful stenciled wall that was featured on HGTV.com.  Using a stipple affect, Janell dabbed the paint on the stencil openings to avoid the paint from seeping under the stencil – – great tip!  What an amazing and dramatic space.

Another gorgeous and modern stencil design – – looks like the wallpaper that I used in my Mom Cave. This beautiful space was created by Jesse of Good Girl Gone Glad.  By using a high-gloss paint, the stencil design is a glowing contrast to the flat paint backdrop.

Sometimes the ceiling needs a little love as well…Like Stacy of Not Just a Housewife put it, “Why should the walls have all the fun??”  Well in Stacy’s bedroom makeover, the ceiling definitely had a PAR-TAY.  Using a damask stencil design, Stacy went to town on creating this eye-popping and dramatic ceiling.

You will not believe how this stenciled wall was created (hint, hint: it’s a favorite takeout dinner in many households)….OKAY, I’ll just tell you.  It was made using a pizza box.  Awesome, right?!  Shoshanna of
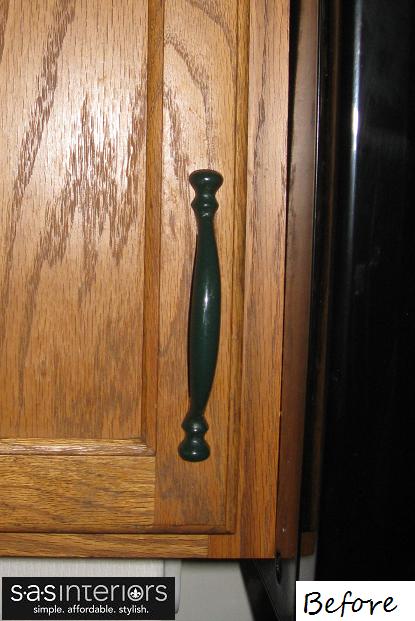
 Love Your Room had this wonderful project featured on Houzz.  Because cardboard is quite strong and durable, it made a perfect template for this very creative project.

While searching the web, I found this awesome stencil company, Cutting Edge Stencils, that makes beautiful stencils that can be used over and over again for different projects.  They have many different styles and designs to choose from.  They also have a great Stenciling Tutorial that will answer all your ‘How-To’ questions.  Their stencils are great for furniture too.

Have you done any stenciling in your home?  If so, what type of design did you choose?  And where/what did you stencil?  I’ll keep you posted on what I do with my foyer…it’s been making quite the transformation – – details to come soon!


DIY: Bow Holder

Last week, I shared my son’s DIY Skateboard Shelves, and this week I’m sharing a DIY project that I recently created for my daughter’s room.  She has quite the collection of {pretty bows} and the box that was holding them, just wasn’t cutting it anymore. With little time in the morning, I was tired of looking for the perfect bow to complement her pretty little outfit….until I created this solution~

It was super easy to make…and here’s how:

Supplies

  • Frame: Any picture frame of any size will do ~ whatever works for your space
  • Fabric: Any fabric will do ~ whatever complements your decor
  • Ribbon
  • Staple gun

1. Start off with your frame ~
I used a picture frame that wasn’t being used to create my PER-TAY Bow Display (no need to buy anything)

2. Wrap your fabric of choice around the cardboard and staple it with a staple gun ~ I used the cardboard that came with the frame since it was already the exact size.  It’s important that the cardboard is thick enough for a staple to go through.  If it isn’t, add an additional piece of cardboard.

3. Time to add the ribbon.  Once you determine your ribbon layout, staple it to the back ~There are LOTS of variations on adding the ribbon.  (I also used hot glue to keep my ribbon in place, then stapled) See more ideas below….

Ribbon Ideas

  • Create a diagonal pattern with your ribbon
  • Use different sized ribbon, but all the same color
  • Use the same size ribbon in different colors

4. You’re DONE…admire your masterpiece!

Wait….it’s NOT quite finished yet…It needs {BOWS}

NOW it’s COMPLETE!

Another view…

This was a fun and easy project to create.  Because I used materials that were just layin’ around, the project cost nothing….$0…my FAVORITE kind of project!  AND it makes my life in the mornings a whole lot EASIER!

Skateboard Shelves

I’ve been meaning to install shelves in my son’s room for awhile, but wanted to do something unique and different.  At four years old, he has SO many interests, but one of his favorites is skateboarding.  So when recently putting the finishing touches on his “space”, I thought making shelves out of skateboards would be the perfect addition!

DIY: Skateboard Shelves - perfect for a boys room, young or old! Super easy to hang & totally rad

Real skateboard decks can start out around $40+ and there was no way I was purchasing shelves for that amount (I admit, I am frugal)! THANKFULLY, I stumbled upon these mini skateboards at Five Below and just like the name of the store, they were $5.  SCORE!

To start out, I bought 4 mini skateboards that are 17″ long (they are shorter than a typical skateboard deck, but they function just the same).  They were perfect for the size wall that I wanted to put them on.

To make sure the skateboards were properly hung, I (along with my husband) used “L” brackets to install the skateboards to the wall. We used brackets that can hold up to 65 lbs….though, I really don’t think something that anything weighing 65 lbs will be sitting on these shelves ~ It’s better to be safe than sorry.

Now, the shelves are ready to be hung…
Once the “L” brackets are in place on the skateboard, they are ready to be hung on the wall. We positioned the skateboard on the wall (making sure it was level) and made a pencil mark of the holes on the “L” bracket.  Then, we put in the anchor ~ If there isn’t a stud (I don’t mean your guy…haha, bad joke, I know) behind the wall, your screw will not hold and your shelf will most likely fall out.  MY ADVICE: USE ANCHORS!

Then hang the shelf…

And the shelves are complete…

DIY: Skateboard Shelves - perfect for a boys room, young or old! Super easy to hang & totally rad

SKATEBOARD SHELF INSPIRATION.

How neat!  Great idea to take off the trucks and wheels, and then hang the board on it’s flat on the wall.  Then add the simple shelving.

Great idea to add some style above the windows.  It gives the white, neutral room a POP of color!

Try regular wiring shelving as I used in my mom cave, and then put the decks on top…totally RAD!  (I had to add some skateboard lingo)

Look at this creative idea…use the skateboard decks as a show rack.

This is the skateboard shelf that is available at Pottery Barn for $70….  I’ll stick with my skateboard shelf for $5!

Do you have shelves in your child’s room?  Did you do anything creative

IMAGES COURTESY OF Home Improve Ideas, Family Fun, Jodeska

Tutorial: How to Hang Wallpaper

For the past few weeks, I’ve been sharing my many recent basement updates with you and today I’ve got another one….  

{How to Hang Wallpaper}

The basement had been the one space in my home that was in major need of sprucing up, hence my many recent DIY project posts.   Last week, I debuted my new Mom Cave / Craft Area that I recently created on a slim budget, and received some amazing and encouraging comments.  BUT, before the new desk went into place and the new shelving was hung, I wanted to give wallpapering a try (this was my first wallpapering experience ~ I know, crazy…who hasn’t hung wallpaper before?!).  I didn’t wallpaper the entire room, just certain walls that were in need of drama and some added interest.  Let’s take a look ~

Supplies
  • Spackle (for repairing any holes & imperfections in the wall)
  • Sandpaper
  • Wallcovering Smoothing Brush and/or Wallcovering SmoothingTool (I recommend the smoothing tool over the brush ~ which you will see in the picture below)
  • Wallcovering Water Bucket
  • Level
  • Tape Measure
  • Sharp blade
  • Scissors (to cut wallpaper)
  • And, lastly but certainly not least ~ Your Wallpaper of choice!
{Step by Step Tutorial}

Most everyone has used regular white spackle to fill a hole or repair a damaged wall.  And in those moments, have you asked yourself,  Is the surface dry yet?  Am I ready to sand?  This spackle product by Dap gives you the answer  ~ the spackle in the container is pink (it was a bit weird to look at) and when it’s dry and ready for sanding, it’ll magically turn completely white (like typical spackle).  No wondering or questions needed!

The most important part of wallpapering (I’m sharing this with you because I found out the hard way) is to make sure your wall is a perfect palette (meaning no holes, no bumps, no nails, etc).  One of the reasons, I intended to use wallpaper was to hide imperfections in the wall.  That didn’t happen.  Every bump will show through.
So let’s get started:

Step 1: Once your wall is completely prepped, you are ready to start hanging the wallpaper.  I used a prepasted wallpaper, which means all I had to do was apply water to the back.  PLEASE, read the instructions carefully for the specific wallpaper you choice for your space ~ the direction for installation may be different!

I first measured and cut my wallpaper piece to fit the size of the wall, leaving a little extra on the top and bottom.  Then I was ready to go.  With the prepasted wallpaper, I dragged it through the Wallcovering Water Bucket until the entire wallpaper backing was covered and wet.

Step 2: Once the wallpaper is entirely wet, fold over the glue sides on each other (as shown above) and let it sit for 5-8 minutes.  This will activate the glue.

Step 3: You’re ready to apply the wallpaper to the wall.  I started the installation from the center of the wall and worked my way out to the edge.  Depending on the space and pattern of your wallpaper, you may want to start in the center of the wall or at the wall edge.  Make sure the wallpaper is plumb by using a level.

Step 4: Once your wallpaper is up, start to smooth it out with your Wallcovering Smoothing Tools.  This will truly adhere the wallpaper to the wall and give you a smooth surface/finish.  The ooey-gooey glue will start to come out the sides (as seen in the picture above)

You are ready for your next piece of wallpaper.  Note: Do not overlap edges!  This is SO important…  I did it at first, and had to remove the wallpaper (which was easy to do ~ at least you have some flexibility with the application).

Step 5: Once your wallpaper is completely hung and dry (if the paper is not dry, it could tear ~ happened to me ), trim the overlapping edges with a sharp razor.

This is the edge where the wallpaper meets the painted wall.  Use a sharp blade to trim the extra wallpaper for a crisp, clean cut.
These are the specific instructions that came with my wallpaper.  My tutorial  above gives a general idea of how to install wallpaper, but it is important to follow the exact directions for your wallpaper of choice.
It went from this… To this….  
{Complete}
This is how the completed wallpapered wall looks.  This is the wall (that had major imperfections before) that is at the landing of the basement.  Believe me, it’s still not perfect, but it is SOOO much better than how it was.  I really disliked opening the basement door before, but now I often open it to sneak-a-peak at this pretty ensemble!
I had been looking for a wallpaper with a simple, yet elegant design.  Even though my new wallcovering is in the basement, I wanted to bring the space up-a-notch and to make it feel as special as the rest of the house!  I looked… and looked… and looked…  I searched high and low to find something that would be affordable and stylish, and then it happened…  

{it was love at first sight}

I truly love the quatrefoil design and never made a purchase so fast.  If this wallpaper appeals to you as well, {here} is the info.

If you haven’t had a chance to check out my NEW Mom Cave  / Craft Area, here are a few pictures of that space with the new wallpaper.

To see the entire look of the new Craft Area and detailed pictures of how I created this space, check it out {here}.

Wallpaper can be a guaranteed show stopper!  The vast selection of wallpapers that are available today, can completely transform any space from blah to beautiful!  I am very happy with the result of 1st wallpapering attempt…I can now say that I am no longer a {Wallpaper Virgin}!  The thought of putting up wallpaper can be a bit daunting, but take your time and have patience…the end result is worth it.  One of my first posts was on my love for wallpaper ~ take a look {here}.

Are you planning on putting up wallpaper in one of your spaces?
Have you hung wallpaper before?   If so, what was your experience and how was the outcome?

A Simple Switch: Changing Your Cabinet Hardware

When we first moved into our home, a renovation to our kitchen space passed my mind, but didn’t happen 🙁  That’s okay….one day (I can dream for now ~ And if I got all my dreams today, I would have nothing to dream/strive for, right?! )  Anyway, SOOO….a quick fix that made a huge change to the overall look of my kitchen was changing the cabinet hardware.  See some before and afters and the step by step changes.  Also check out some some other cabinet pulls and knobs that I love!
 Cabinet hardware is SO easy to change, and makes such an impact!
all you need is a screwdriver and some time.  The existing hardware on my kitchen cabinet was a plastic laqcuered handle in forest green…  See the AFTER…
The cabinet hardware is now a simple, stream-lined look with a matte oil rubbed bronze finish.  The quick switch even made the cabinets themselves look better!
Check out this great resources for Cabinet Hardware:
Here are some samples of my favorite cabinet hardware that would complement any decor.  Hardware also is available in a huge range of finishes (chrome, nickel, oil rubbed bronze, polished, matte, etc)…choose what’s best to suit your space!
   

Decorating for the Fall

Well, my favorite time of year is here again….FALL!  I was excited by this cool weather, and went out this afternoon to buy mums and pumpkins to decorate my front porch.  From that, I was inspired to provide some affordable tips on decorating the front entry of your home.  The entryway and/or porch of your house, is the first thing everyone will see when visiting.  First start off with hanging a festive wreath that has leaves, berries, sugar pumpkins, fall ribbon, and/or sticks.  I prefer a wreath that is simple using only one element, but this focal point into your home can be as ornate as you’d like.  For a step further, get some hay bales and set them up on your porch or at your entry way.  Then arrange some pumpkins, gourds, Indian corn, and/or leaves on the hay bales.  Also add a candle or a small birdhouse to make it even more unique!  Lastly, place the mums in decorative pots that you’re no longer using for your summer flowers and arrange them around the hay bale(s).

Enjoy the Fall!