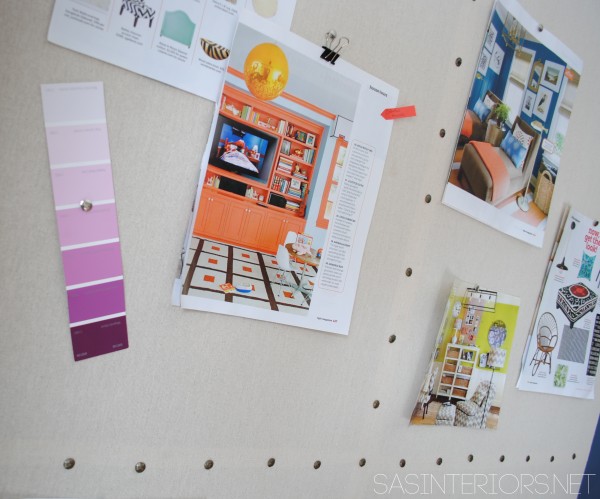
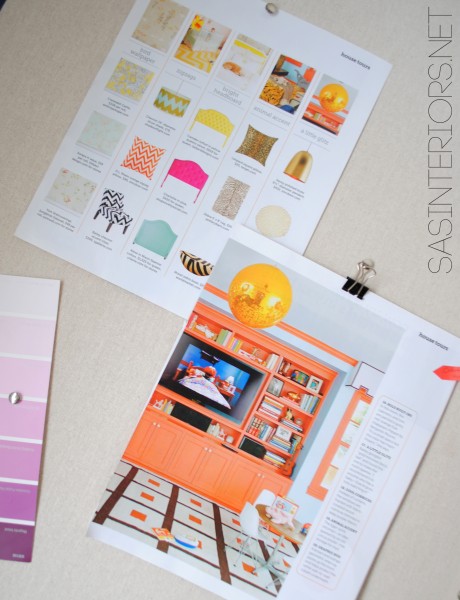
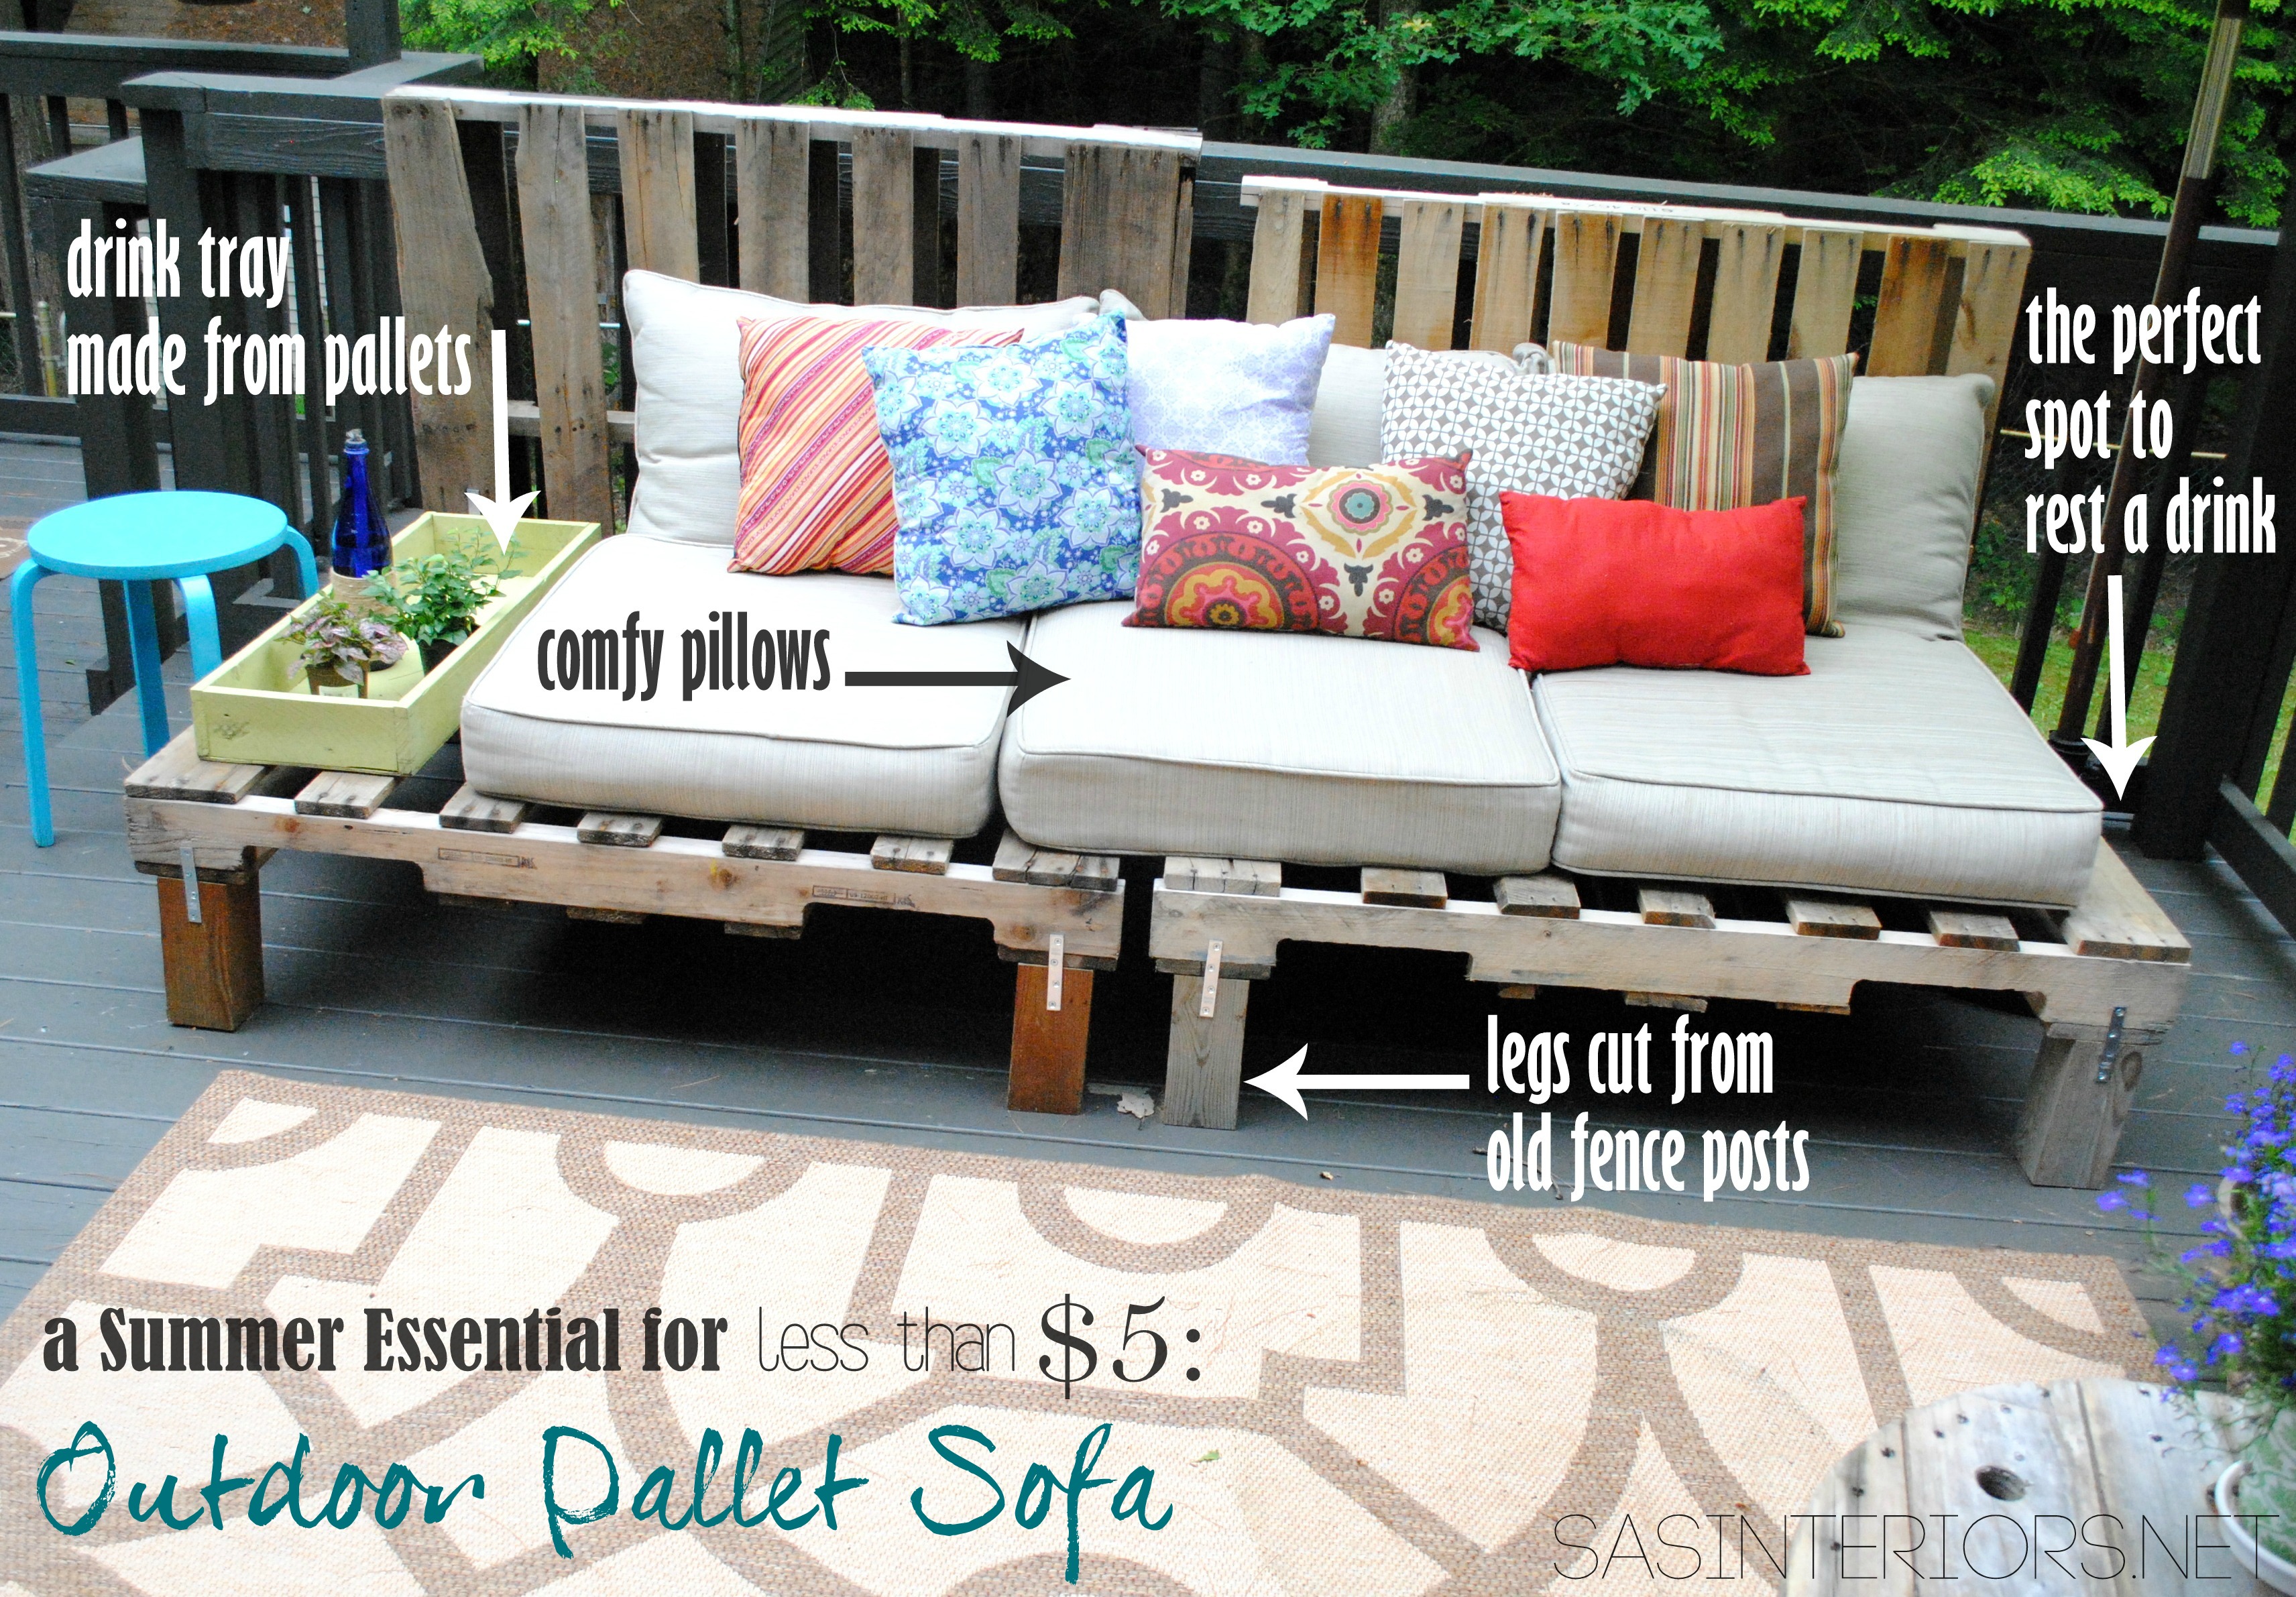
I hope you had a great weekend! I know it’s Tuesday, but since my husband and kids had off yesterday for President’s Day, it feels like the first day of the week for me. In spite of having a no-plan weekend, the 3 days flew by and we were majorly busy (new projects, photographing others, food shopping, car buying, etc.). How does 36 hours fly by that fast? Anyway, since showing you my newly created home office / family room last week, I’ve got a slew of DIY projects to share. First up…
A ‘how-to’ on how I hemmed and created the thin-striped curtain panels (I know a few of you have excitedly been awaiting this tutorial). I was surprised how easy they were to create and they look like they cost alot of $$$ (but they totally didn’t).
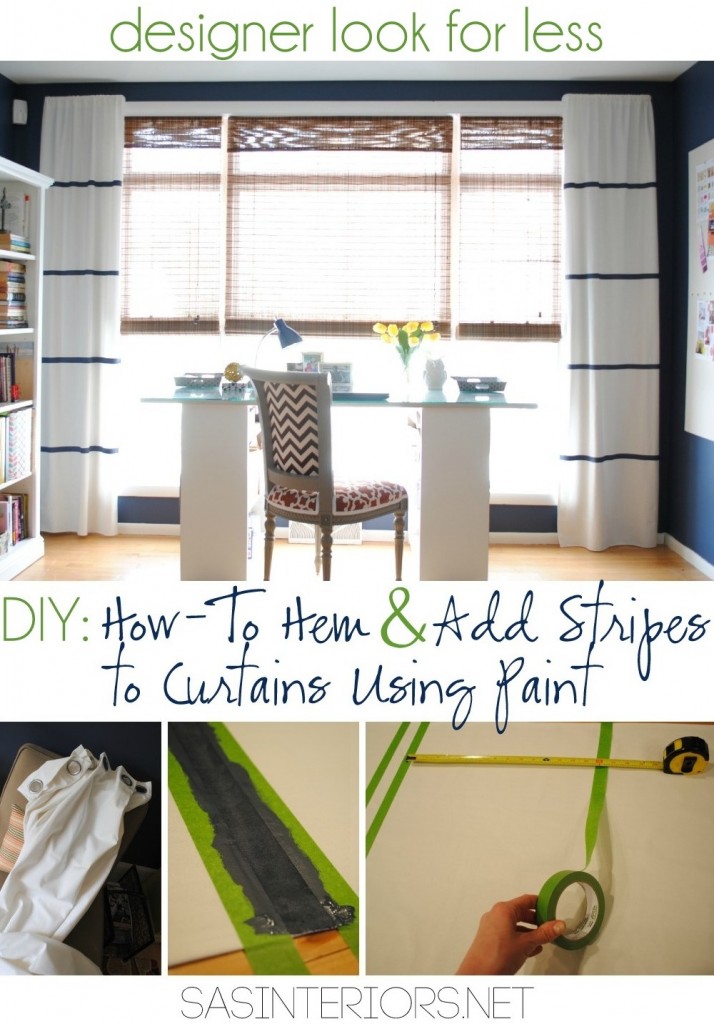
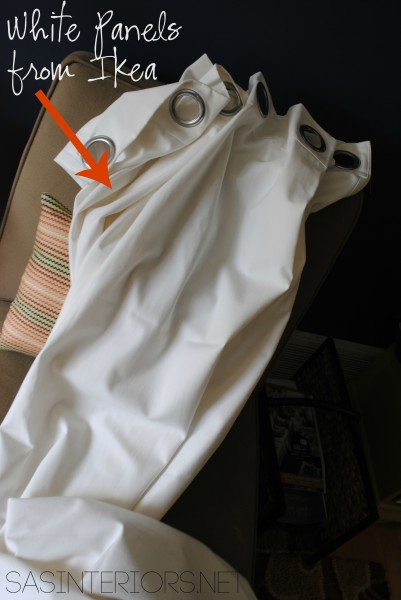
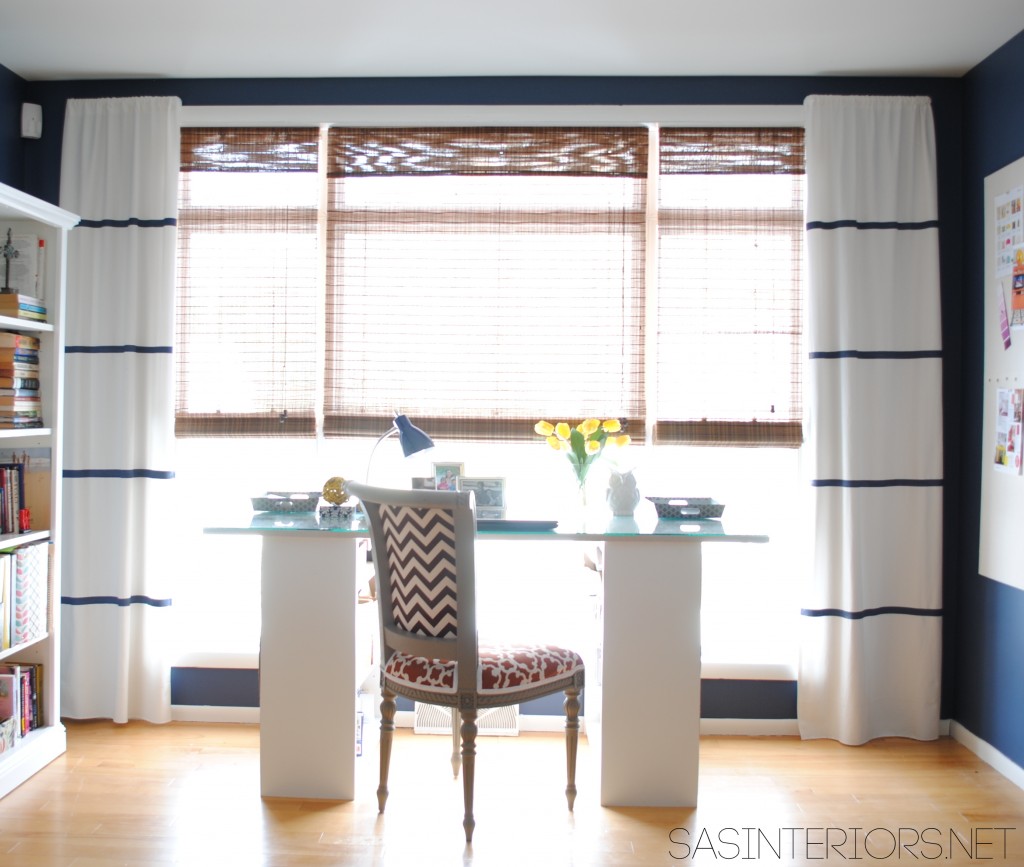
When the royal blue walls were complete last Summer, I knew white curtains would be a great, striking complement. Thankfully, I had an extra pair of panels from my son’s room that were purchased from Ikea 5+ years ago.
I wanted to jazz up the white panels a bit though, and at first thought of a leading edge similar to what I created for my daughter’s room. As more ideas developed, I had seen this living room and pinned it a while back. The thin-striped lines stuck in my head and I knew they would be just the touch to add interest to the stark white panels, yet not overwhelm the room. I’ve seen many striped fabrics in window panels lately, but I wanted something softer and thought thick horizontal lines would be too heavy for the space since the dark blue walls are dramatic enough.

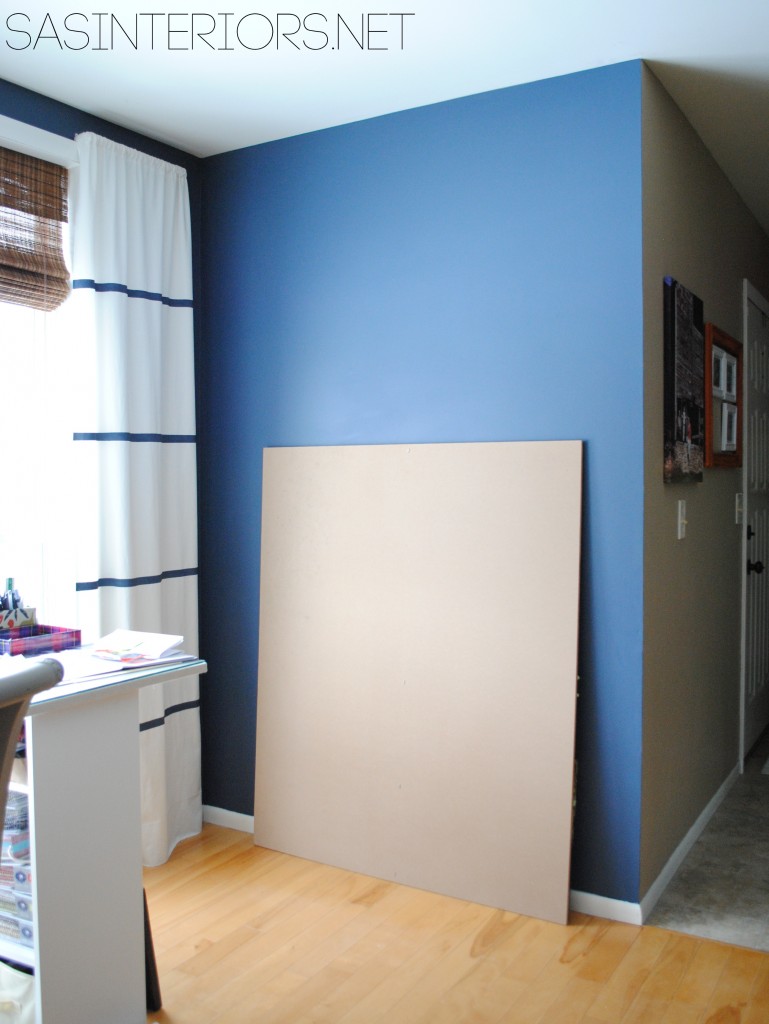
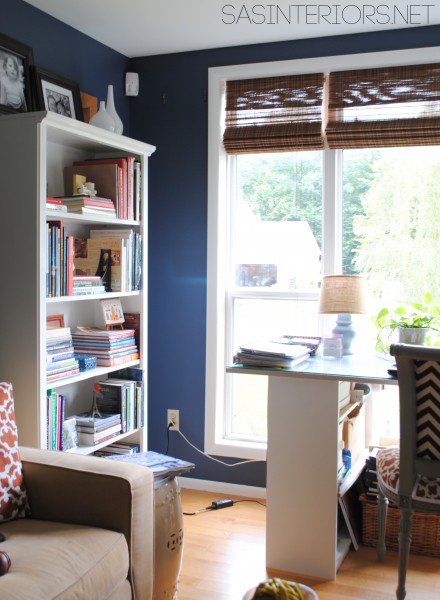
The area for where the new curtain panels were to go, started out like this…
To begin, I hung the white panels on the dark wood rods that were already in place.

Nope they didn’t work.
The dark rod blended in too much with the wall, and the panels looked so low and squat. It totally went against my rule of thumb on how best to hang a curtain.
Onto the idea #2.
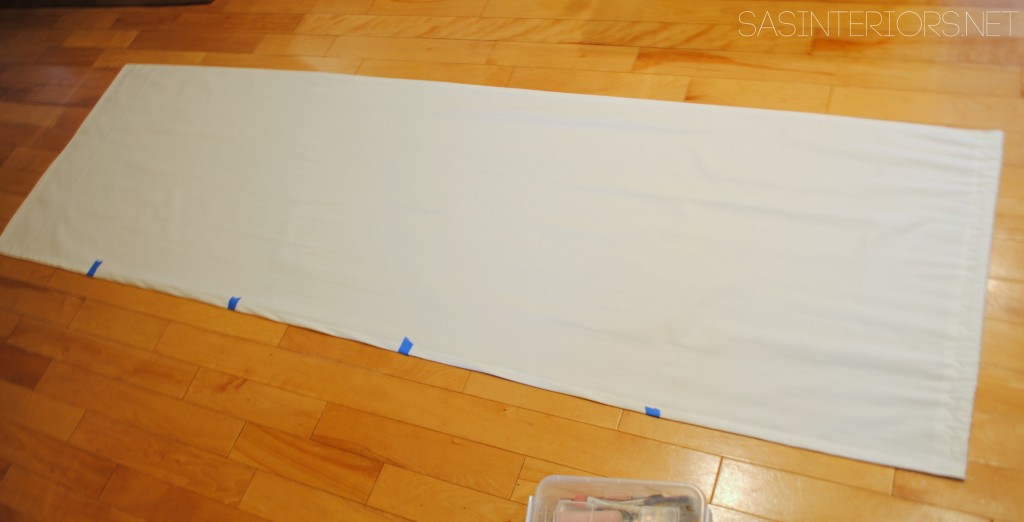
Because of the window height, I couldn’t put a decorative rod above (there wasn’t enough room), so instead I bought a $3 basic metal pocket curtain rod.
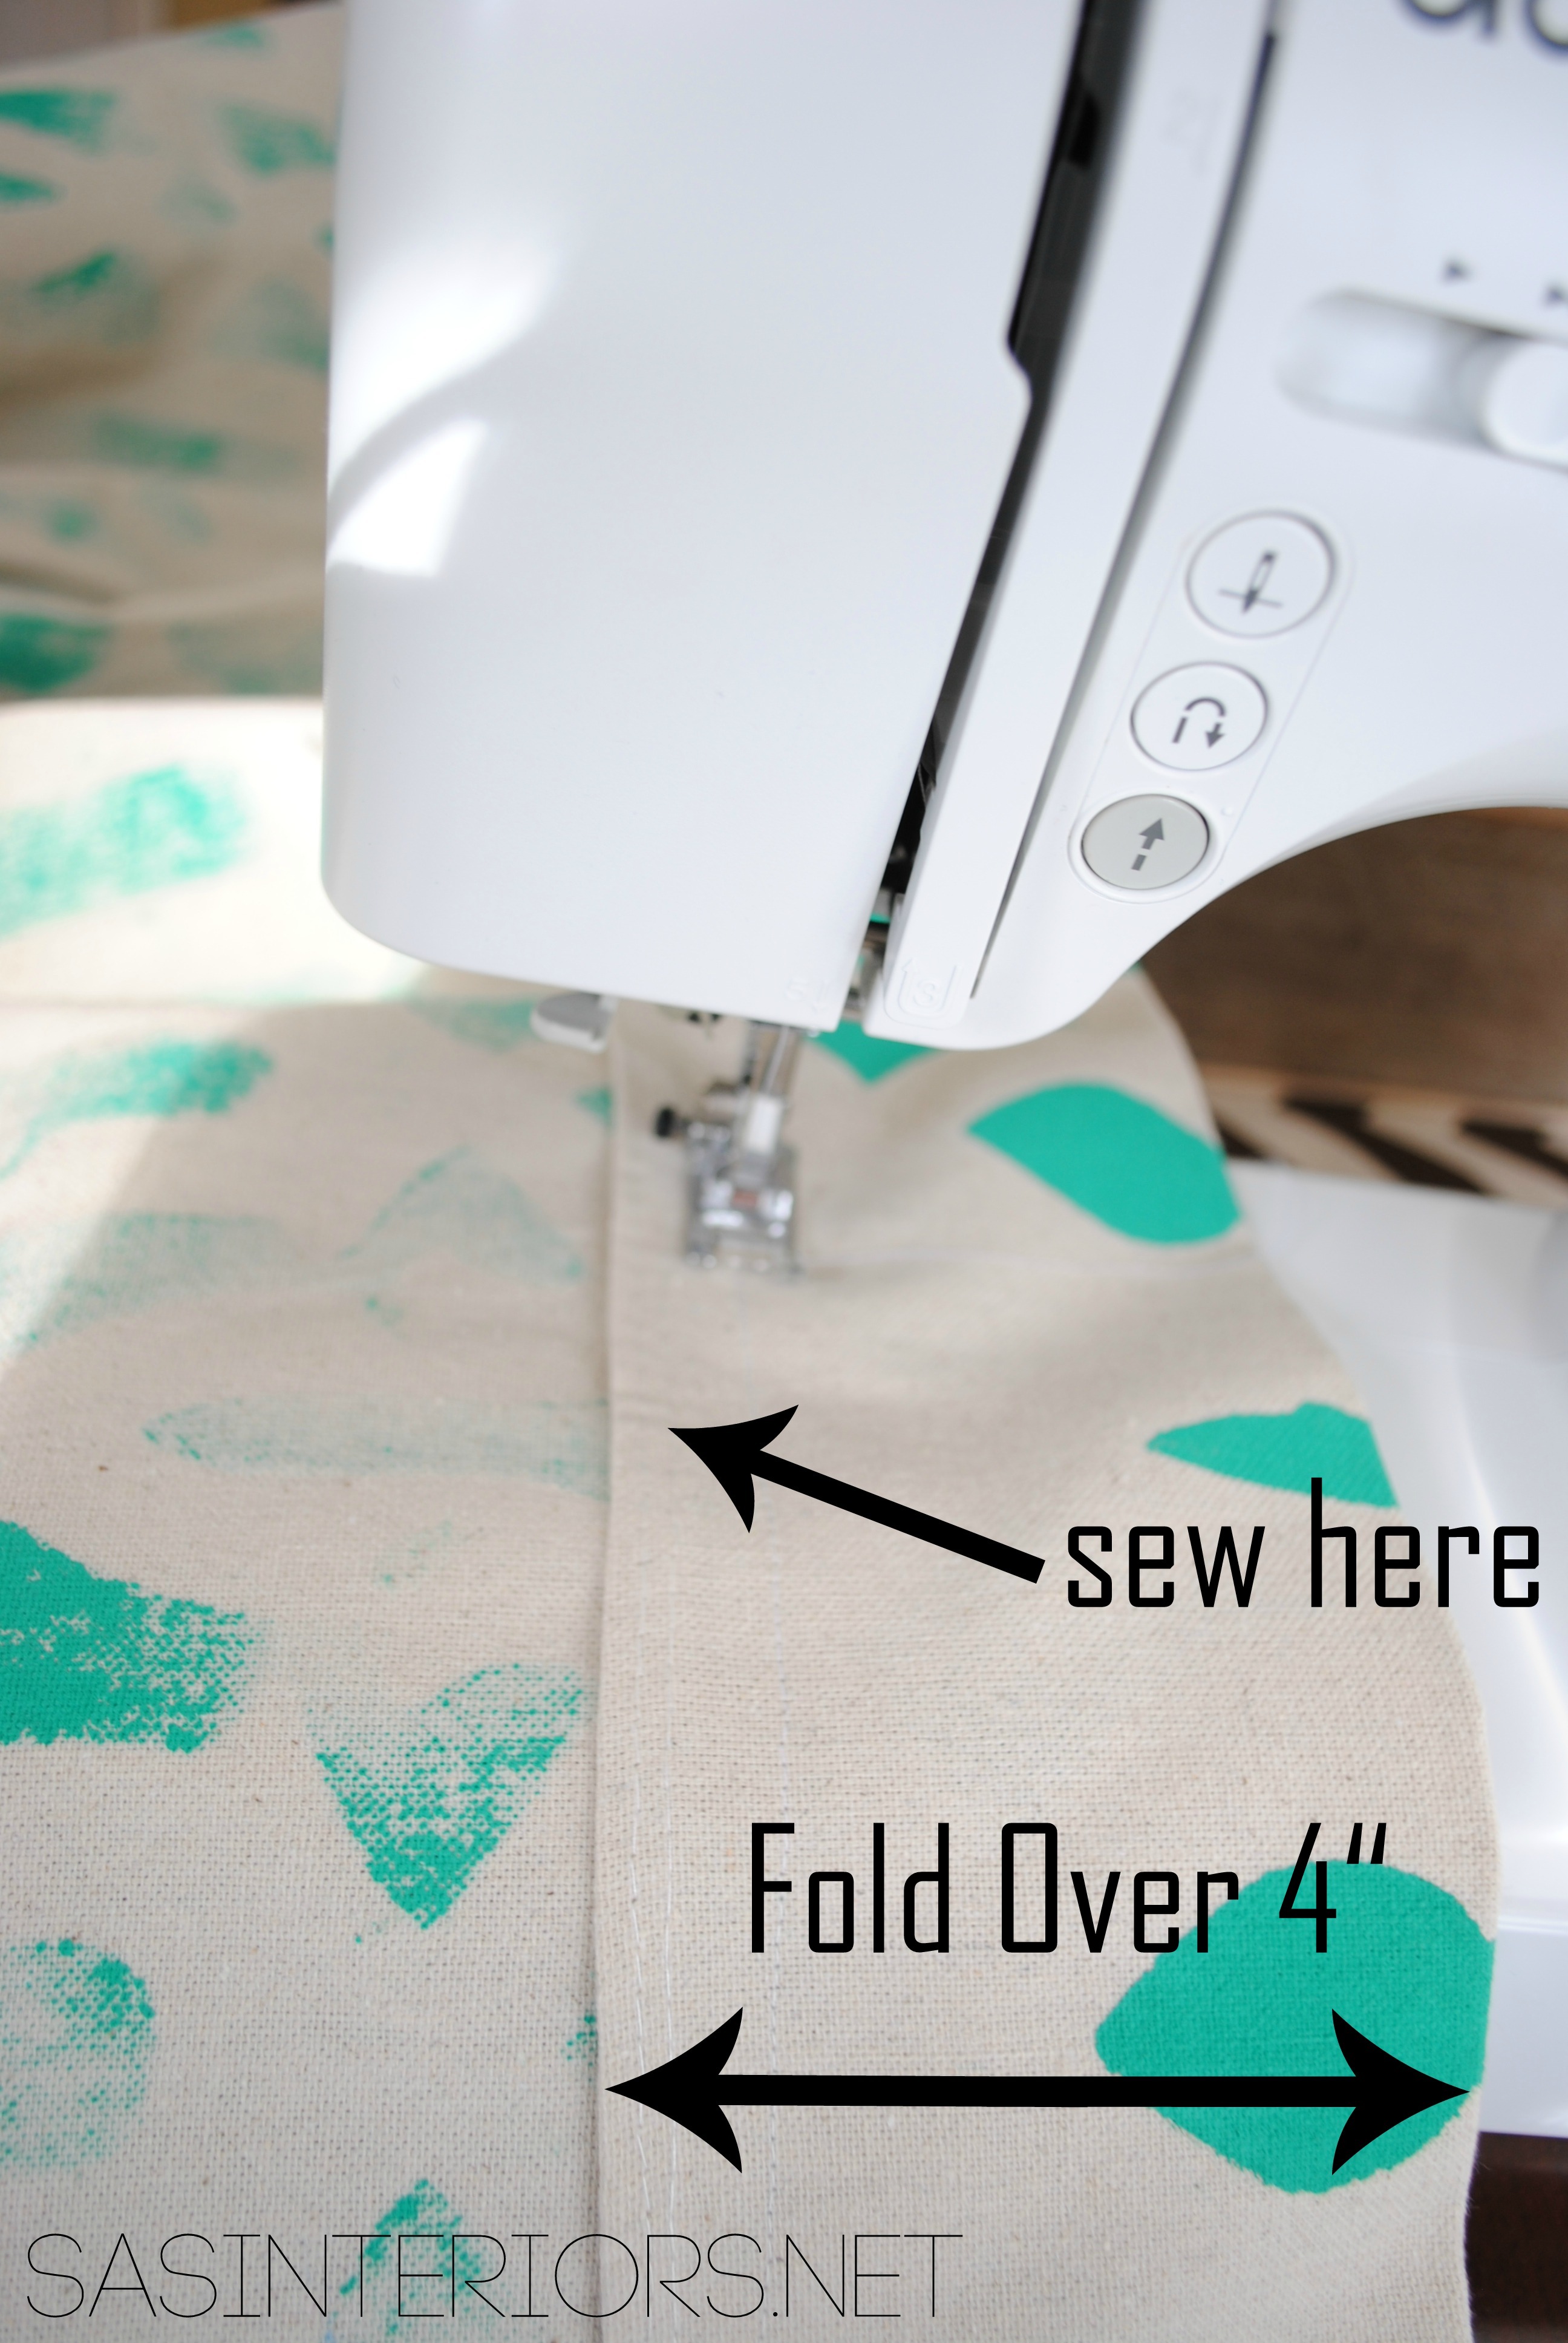
I created the “pocket” at the top of the curtain (fold over top edge, sew or use fusible tape to create a pocket of about 2″ for the rod to slip through). Then the panels had to be hemmed at the bottom because they were too long.
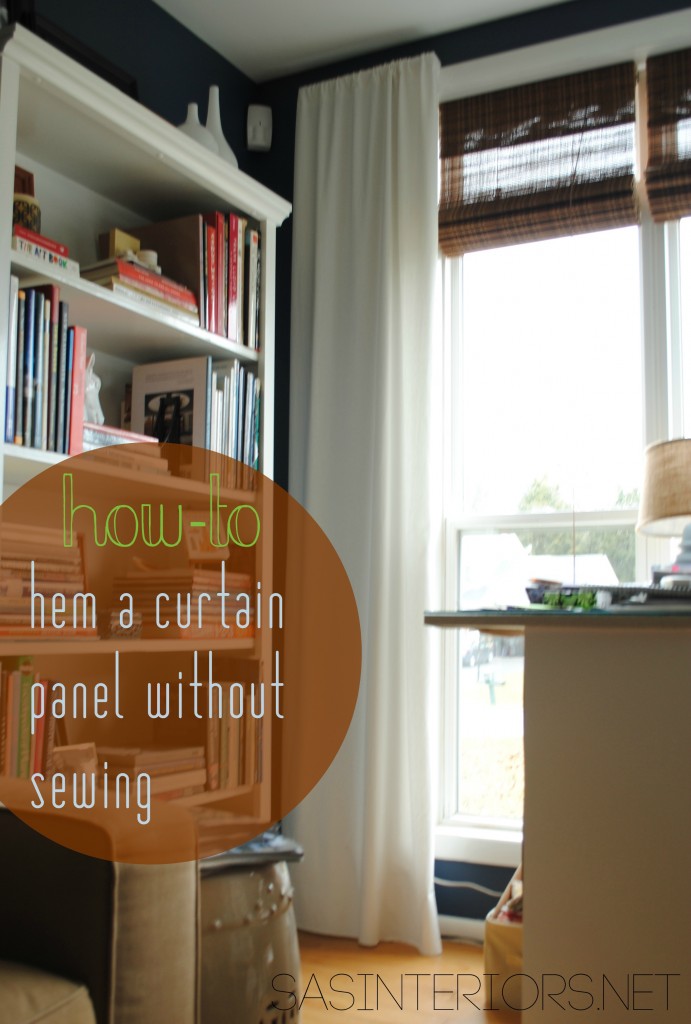
Here’s my quick tutorial on How-To Hem a Curtain ~
1. With your curtain hung on the rod, loosely pull the bottom of the panel and add 2-3 pins at the spot where the panel hits the floor plane.
Hint: Don’t pull the panel tawt because if you pin and sew at that point, your panels will result too short. You want to leave the panel(s) loose, so it just grazes the floor (this is how I feel a curtain panel looks professional. It’s not a must, but it’s my opinion).
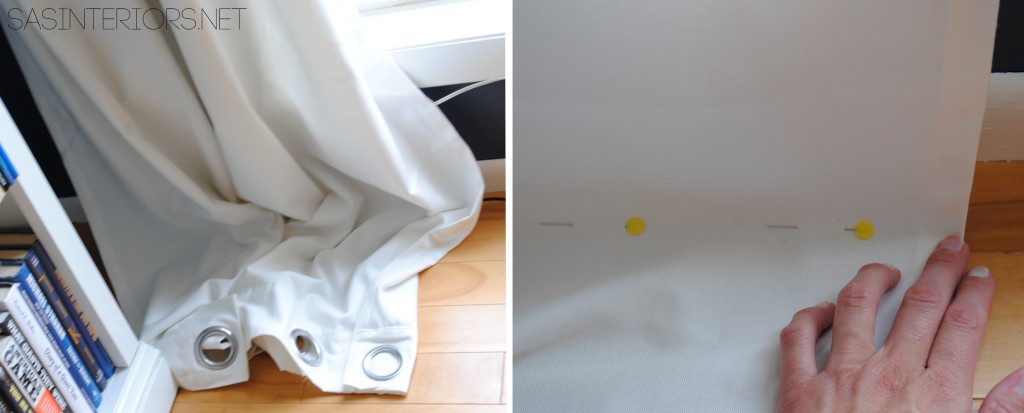
2. With the 2-3 pins indicating the line for which to hem the panel, I used a measuring tape to keep the same length and added more pins all the way across the width of the panel.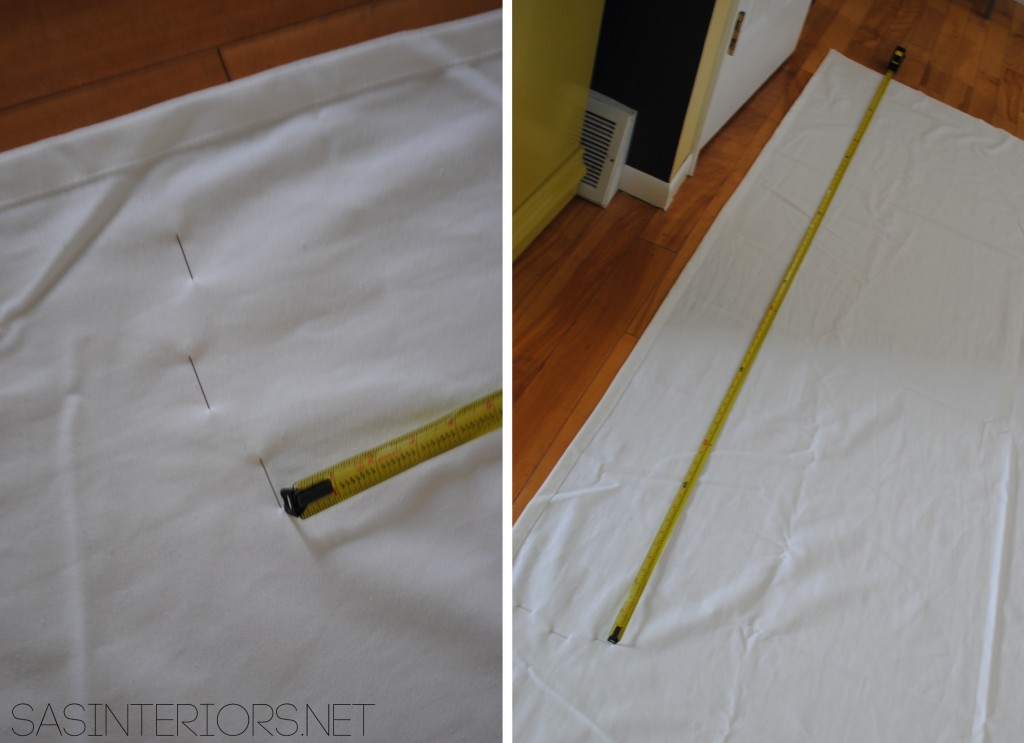
O, and did I tell you the good part about this project – I didn’t use a sewing machine. I was totally feeling lazy that day! You can of course, but it’s not a must. That’s a major plus for my non-sewing friends!
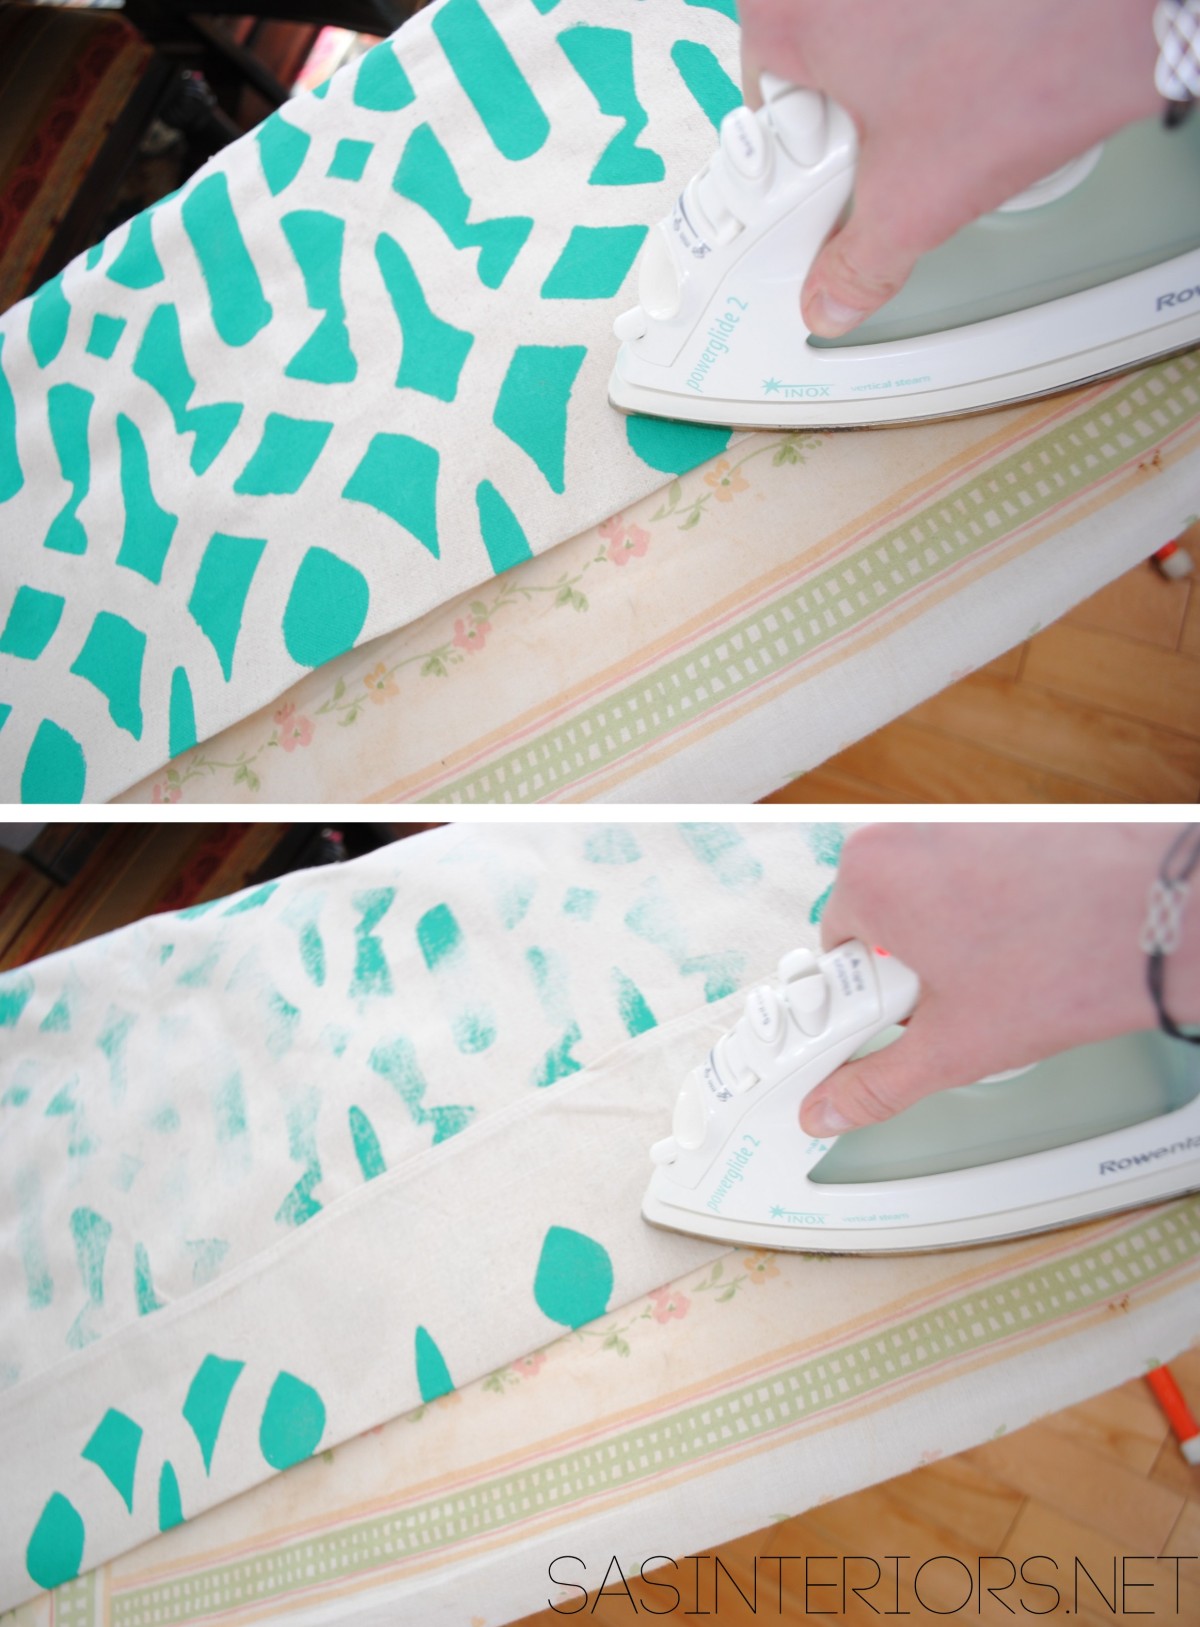
3. Using fusible tape, I folded the bottom edge underneath and hemmed at the line of the pins.

Here’s the result…
Yes, much better!
A perfectly tailored window curtain panel that just grazes the floor. Super easy!
Ok, so now on to the 2nd part of this tutorial…
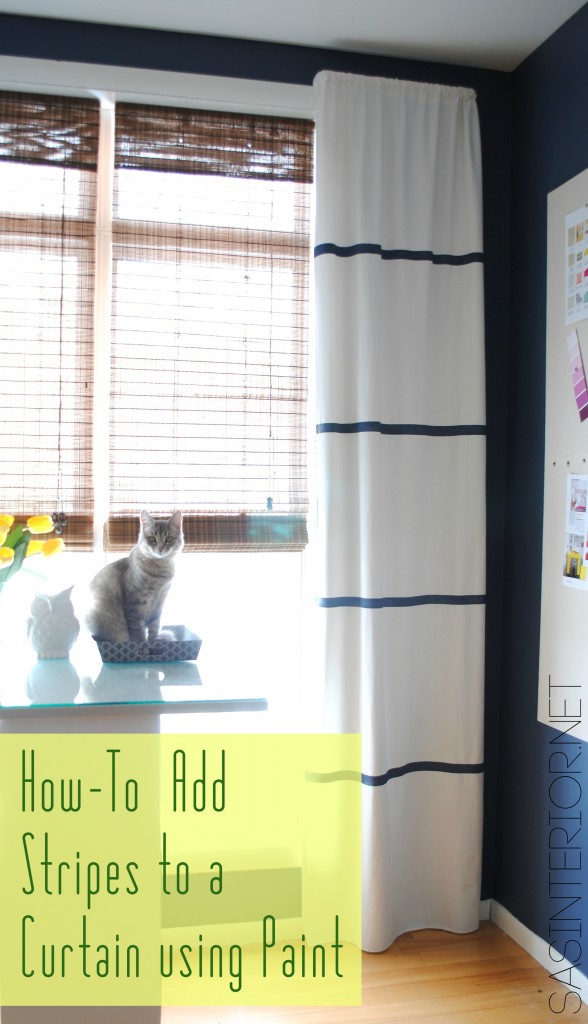
How-To Add Stripes Using Paint ~
FYI – you could totally skip step one if you have already have the perfect length curtain and you can skip this step if you have no interest in adding stripes. Just thought I’d share that tid-bit 😉
For this part of the project, I used the following materials:
- Painters Tape
- Wall Paint that is the same color as the wall
- Paint Brush
- Measuring Tape
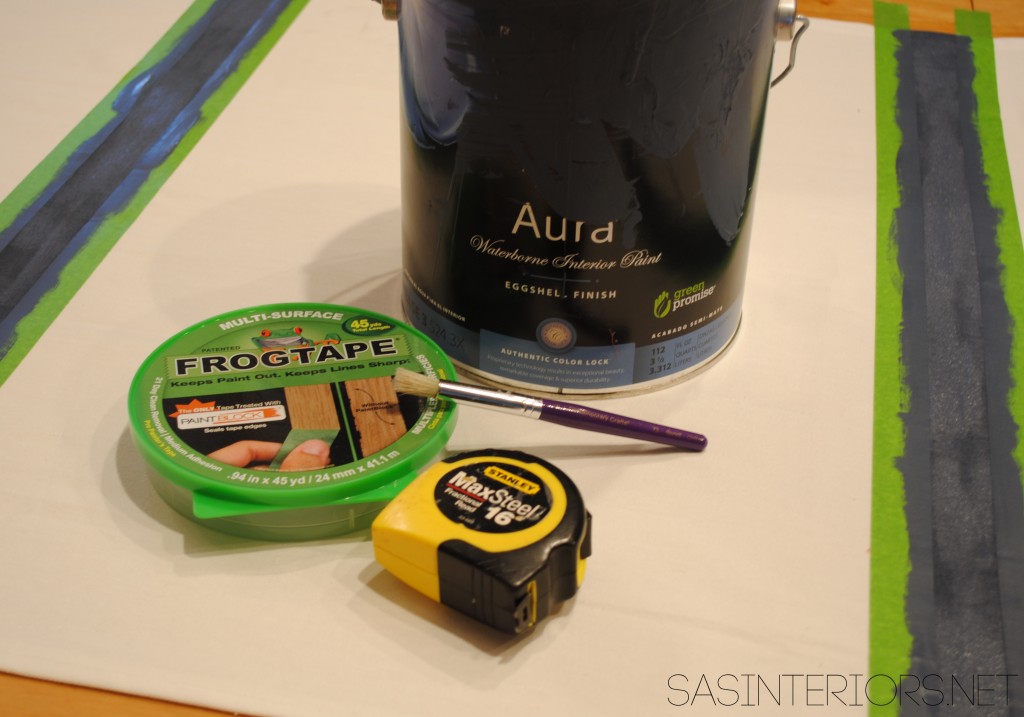
1. To start off, I determined how many stripes I wanted and the width of the stripes.
4 stripes and 1″ wide.
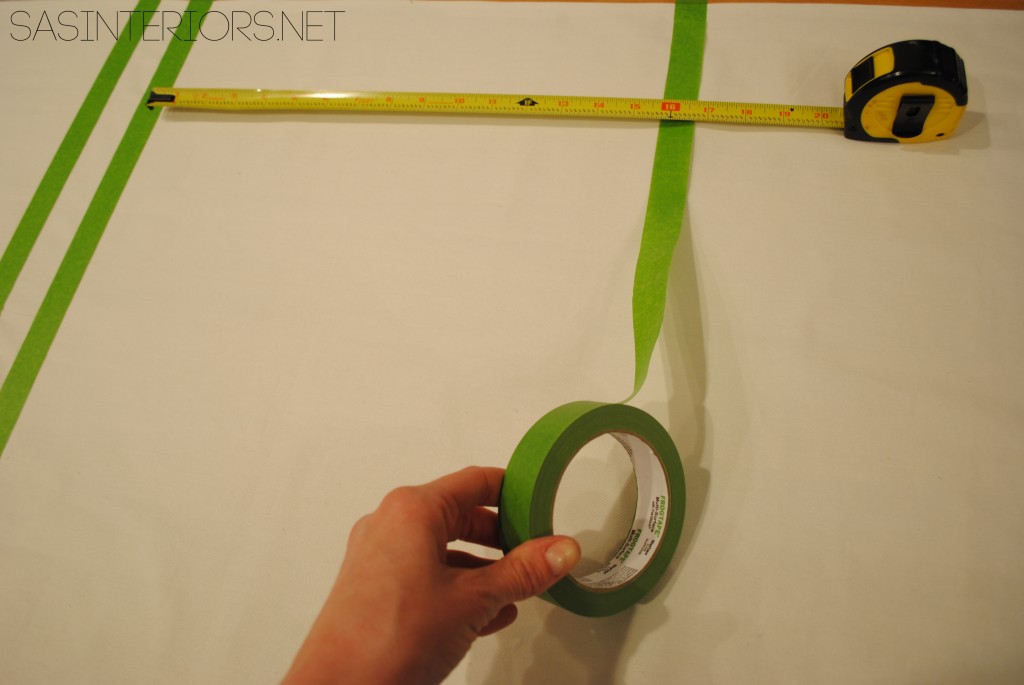
I layed my curtain panel on the floor and using a little math (big UGH), I determined my stripe placement. Using painters tape (because it’s easy to remove), I marked the 4 stripe locations.
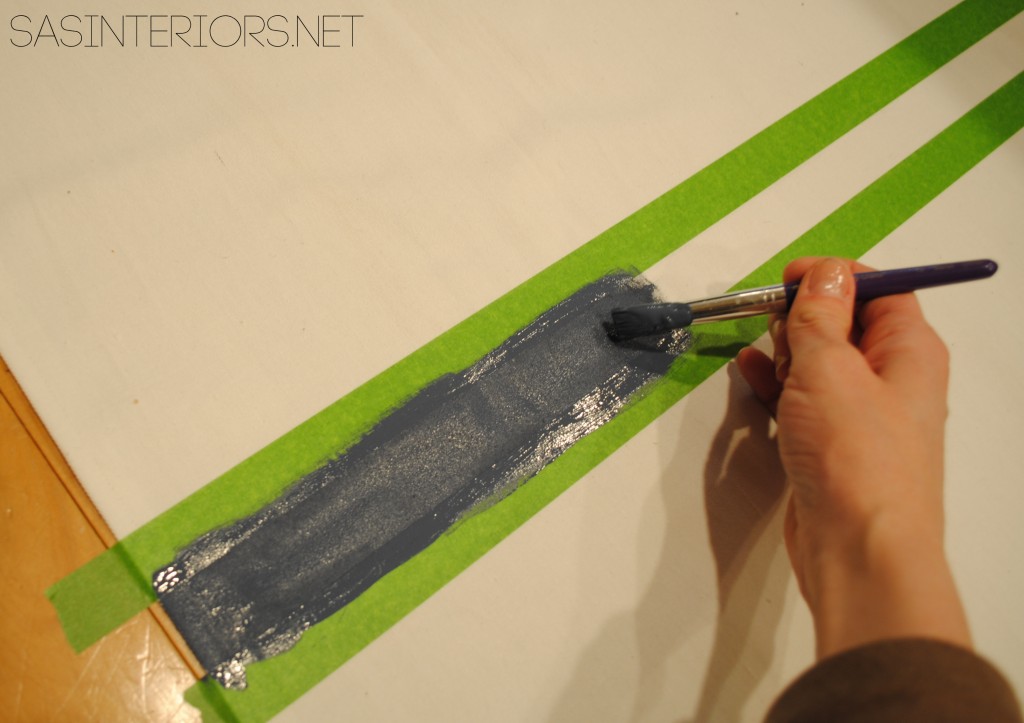
2. Then I added the painters tape and my measuring tape to create the 1″ wide stripe.
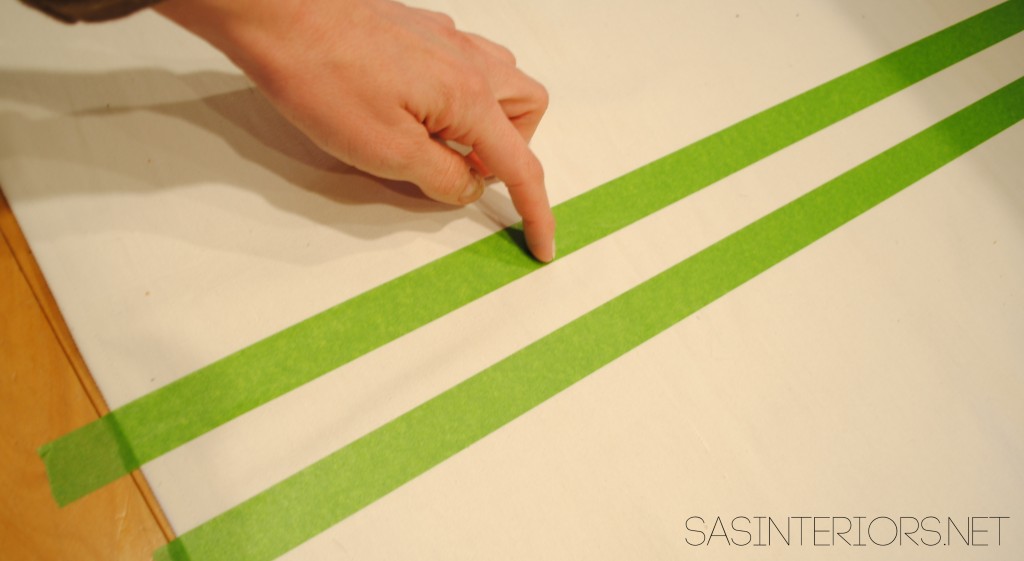
3. * Important part!
Once the tape is in position, it’s important to press hard on it like you’re burnishing it into the fabric. You want to make sure the tape is sealed so the paint doesn’t seep underneath. I ‘burnished’ the edge with my nail.
4. Then using the wall paint that I used in the room (Benjamin Moore Van Deusen Blue), I painted on the stripes using a craft brush. I did not add anything to the paint to make the medium different. It’s straight paint on fabric!
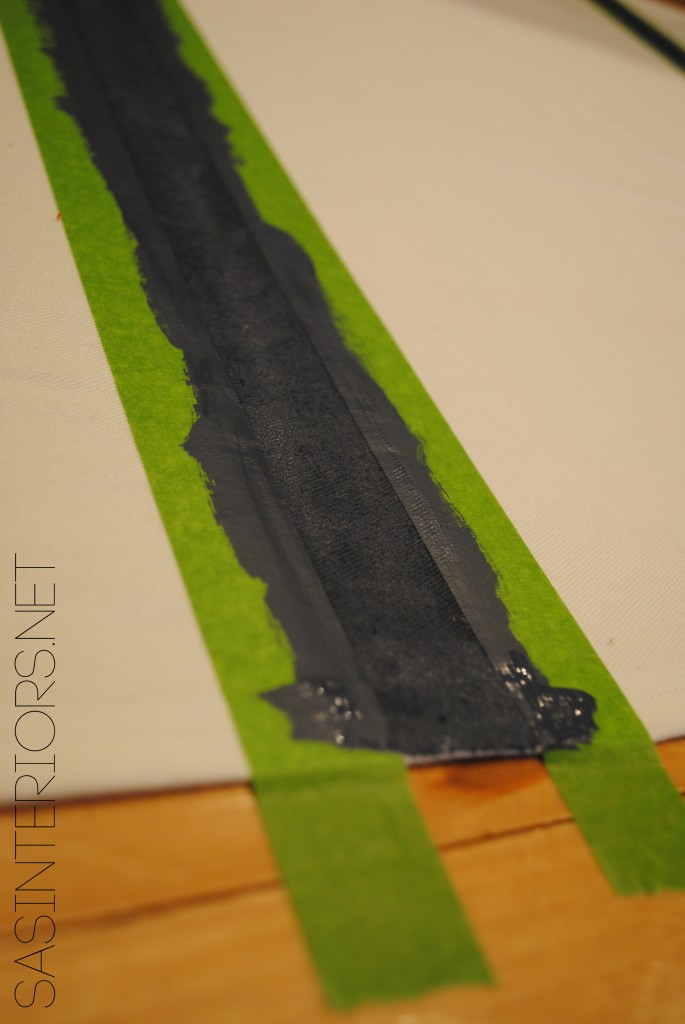
Once all four stripes were done, I took off the tape. Some of the areas weren’t completely dry, and that’s okay.
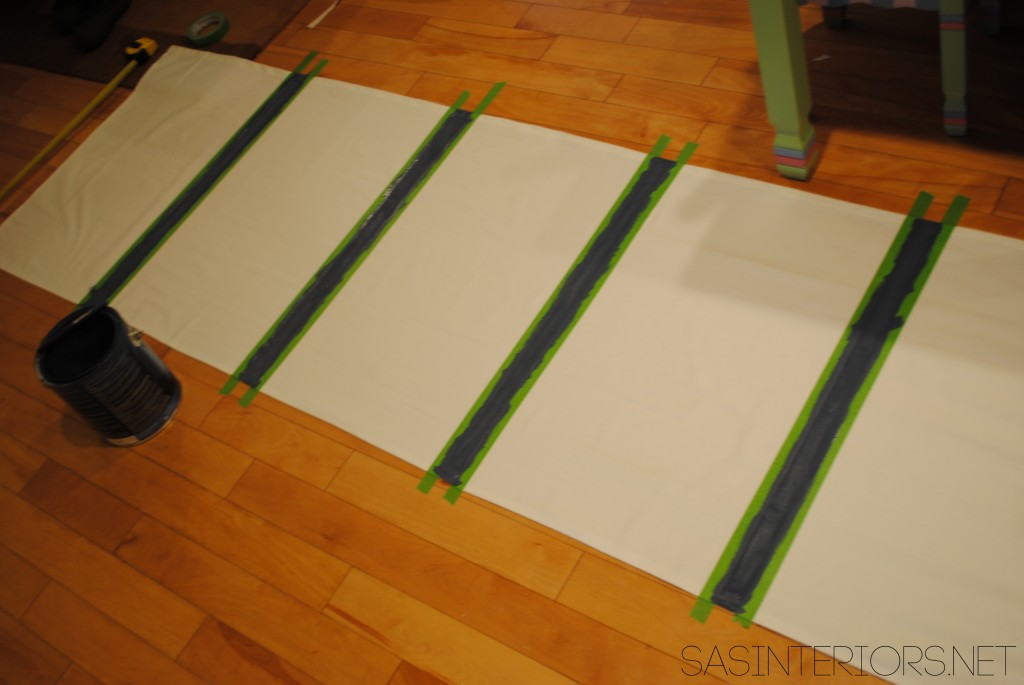
5. When setting up the stripes for the second panel, I layed both curtains side by side so they were perfectly aligned. Then, by eye, I created the stripes on panel #2.
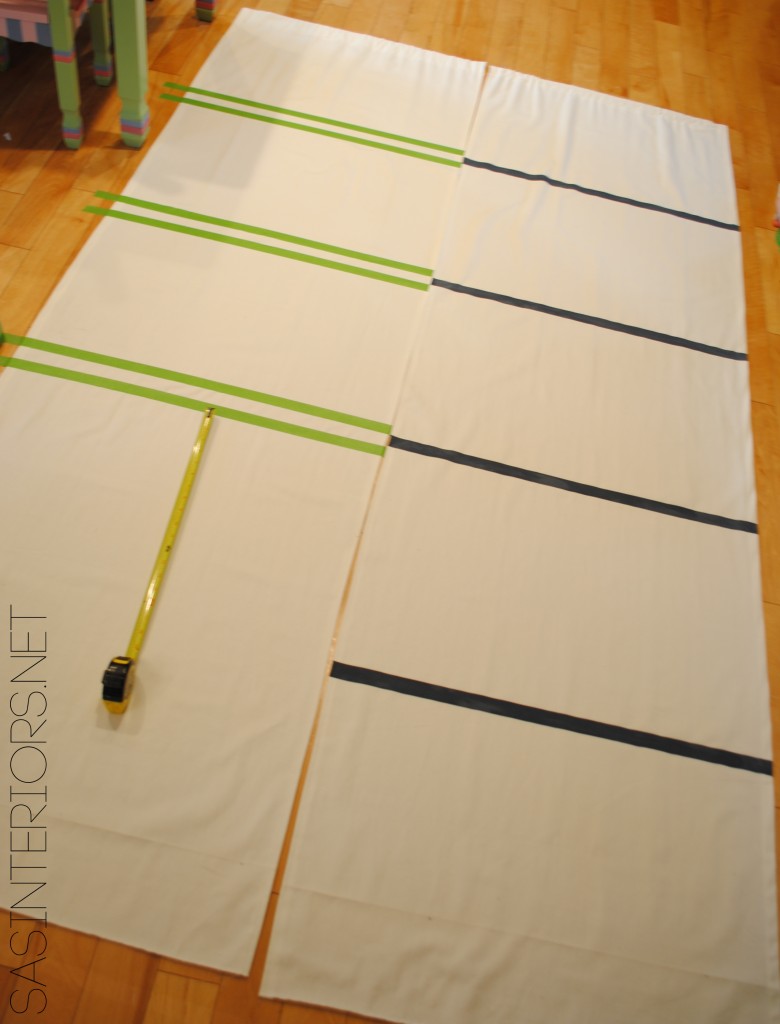
Once they were completely dry, they were ready to hang, and admire! #happygal
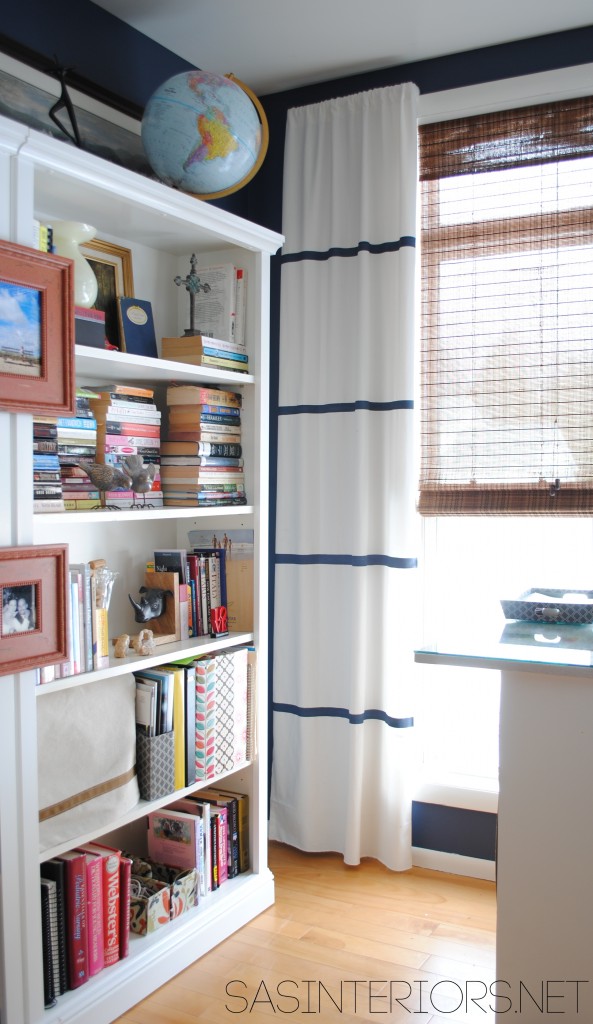
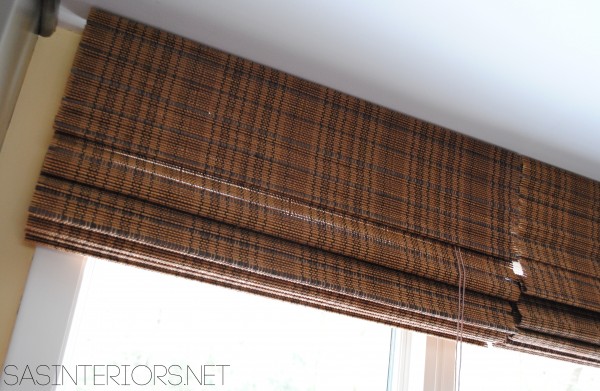
The bamboo shades (which I got from Payless Decor) are a fantastic compliment to the stark white window panels and white moulding trim. You may have seen the bamboo shades in other parts of my home (check this post out) and I adore them! They are of great quality (and an awesome price). The darker hue and texture (which is kind of difficult to tell in the picture because of the natural light coming through) are just gorgeous. On my windows you’ll find the tibet color.
O, and if you like it, would you pin it or share it? Thanks a bunch!
Have questions? Don’t be afraid to ask – I’d be happy to help!
Want to see more drapery projects?
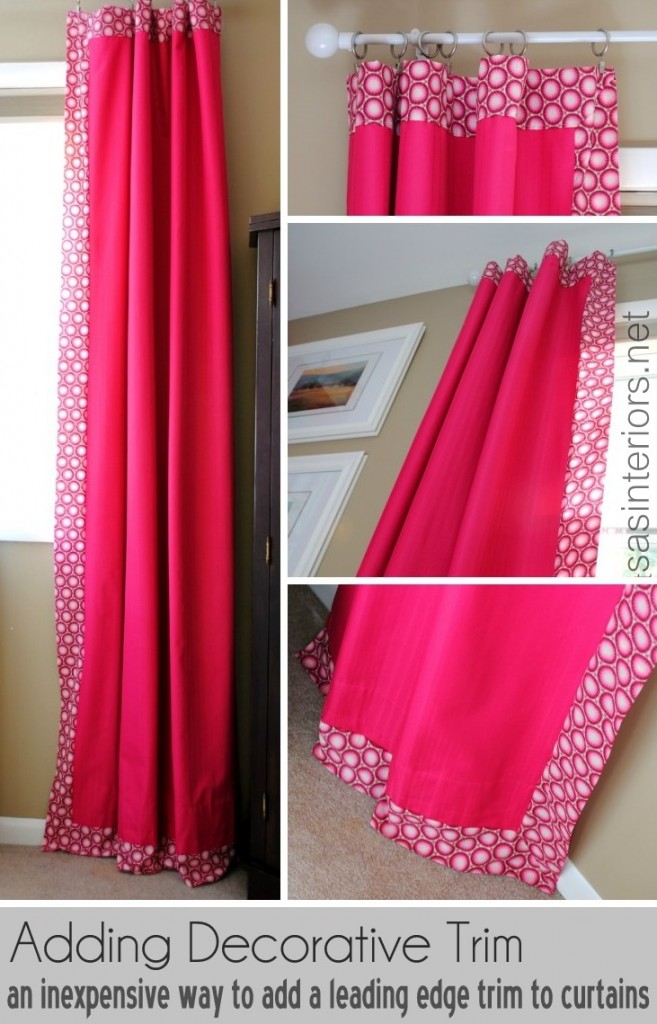
Then you might want to check out this post on Adding Decorative Leading Edge Trim to Curtains ~
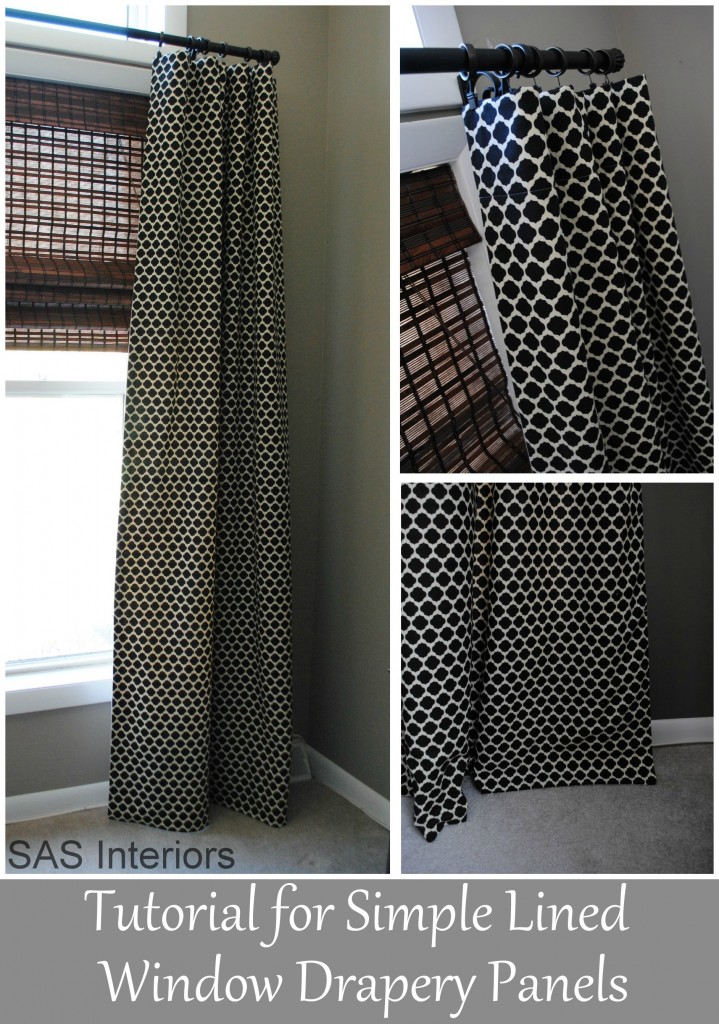
Or this project on How-To Make Curtains from Scratch and Line them with Drop Cloth~
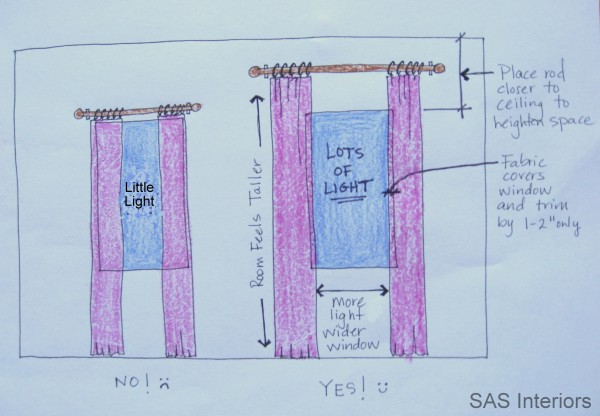
Of course you’ll want to know How-To Best Hang Window Drapery Panels, right?
Thanks for checking out my 2-in-1 tutorial! What a great Tuesday!
Have you ever tried painting on fabric? What about embellishing window treatments? Or even making your own curtains? Share your creations with me – would love to see them!
I link my projects to some of these parties: Skip to My Lou, Dittle Dattle, Between Naps on the Porch, Today’s Creative Blog, Stories of A to Z, All Things Heart & Home, House of Hepworths, Finding Fabulous, The Shabby Nest, Serenity Now, Tatertots and Jello, Thrifty Decor Chick, Tip Junkie


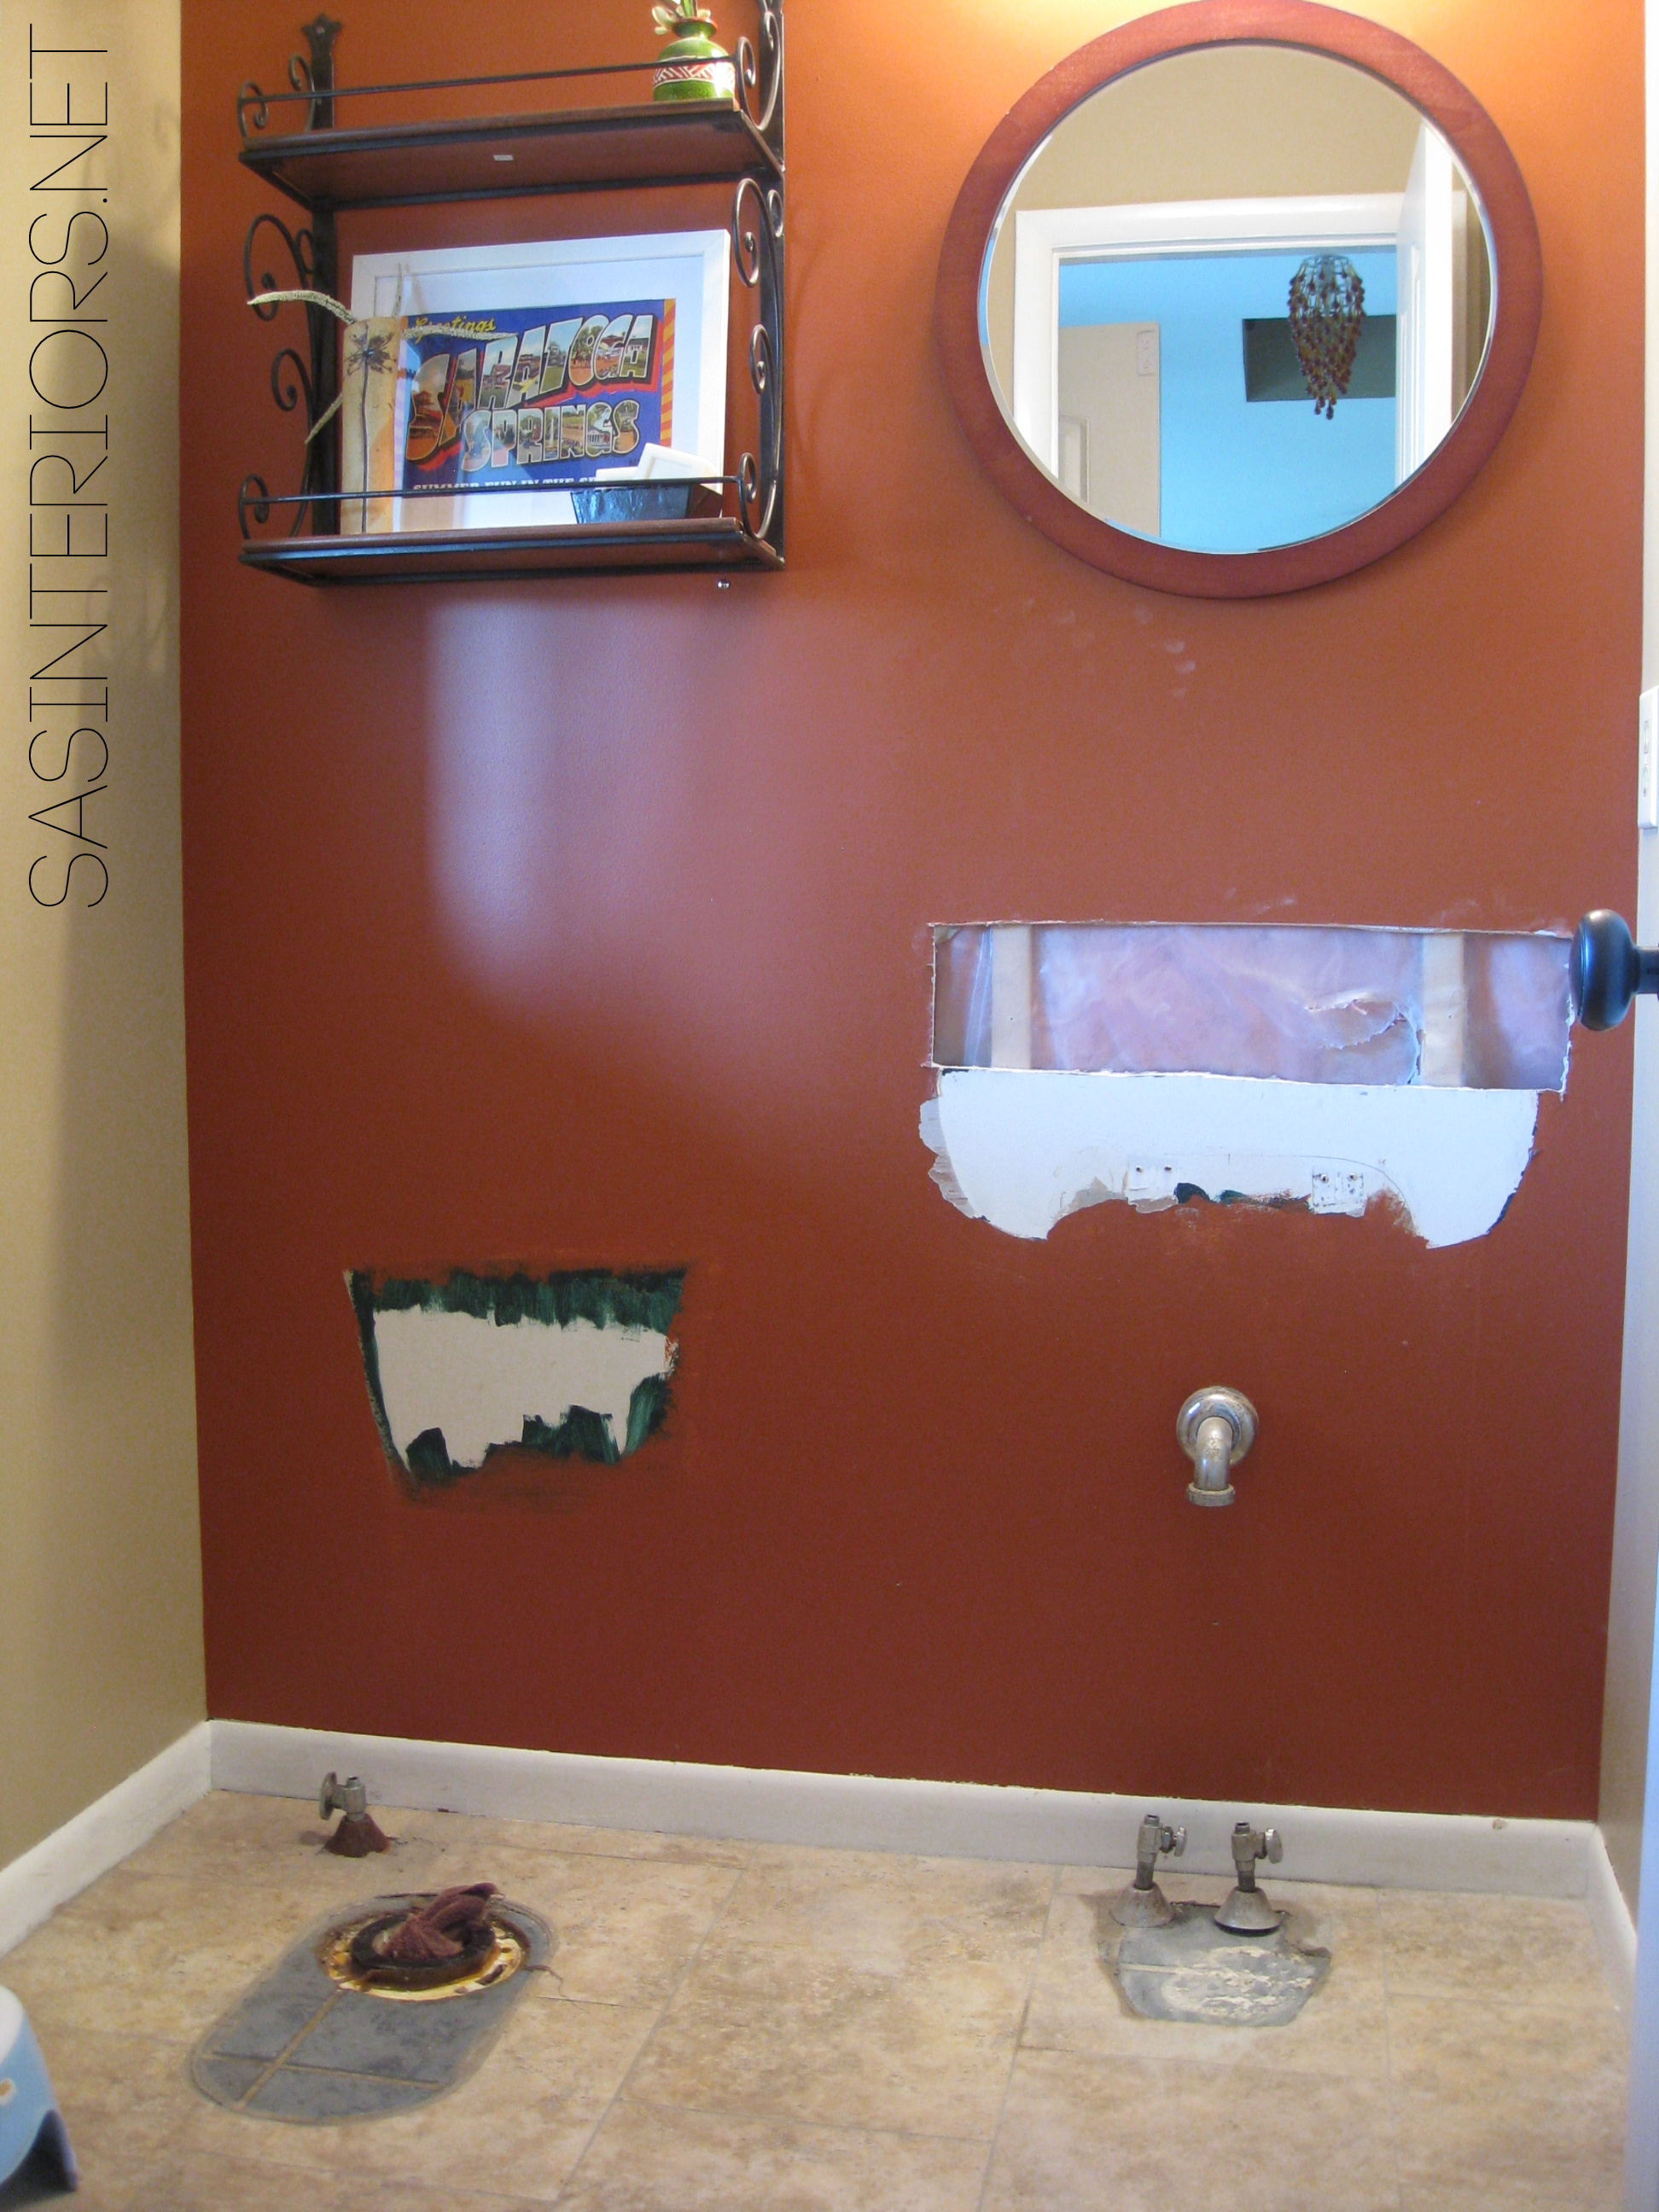


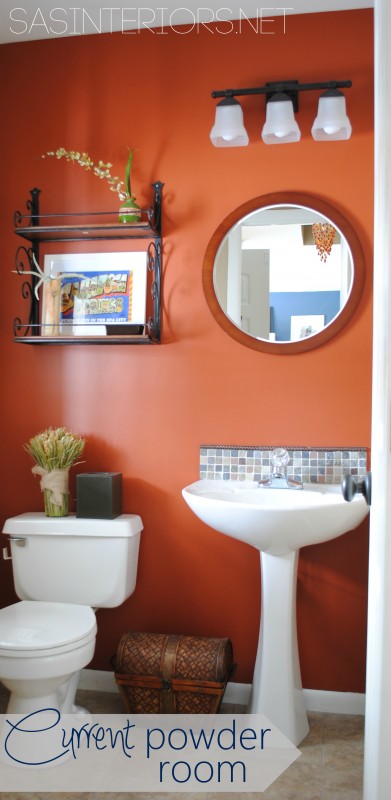 ANYWAY, enough of the chit-chat, I am psyched to share with you that I have decided to spice-up one of my bathrooms. The powder room to be exact.