Simple Spring Wreath

I’m ready for spring.

Winter – thankfully – didn’t hit us hard this year in the North Country of NY, but I’m still ready for warm + sunny weather to once again appear.

To welcome the coming change of season, I wanted to adorn my door with something new. Typically when April hits, I change over the front porch for Spring and kick-off-the-season by hanging my beloved forsythia wreath. This year I wanted something new…

The past weeks have been incredibly busy with little spare time to create + DIY, but last weekend, I squeezed in a few quiet moments to make a new wreath.

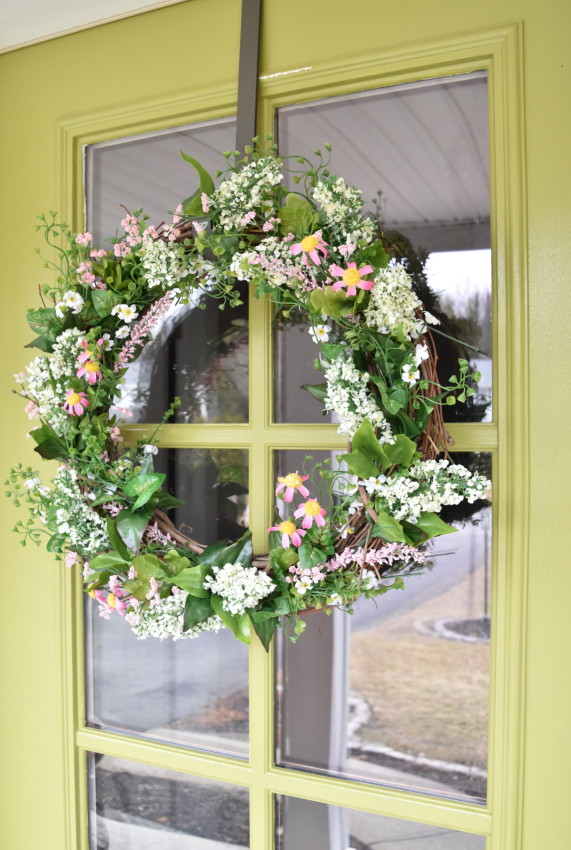
Quick + Simple, AND pretty.  A new wreath to adorn my door…

SPRING WREATH: A simple + easy 10-minute creation to adorn the front door. It couldn't be easier to make and a lot less expensive than buying. Easy-to-follow tutorial @ www.JennaBurger.com

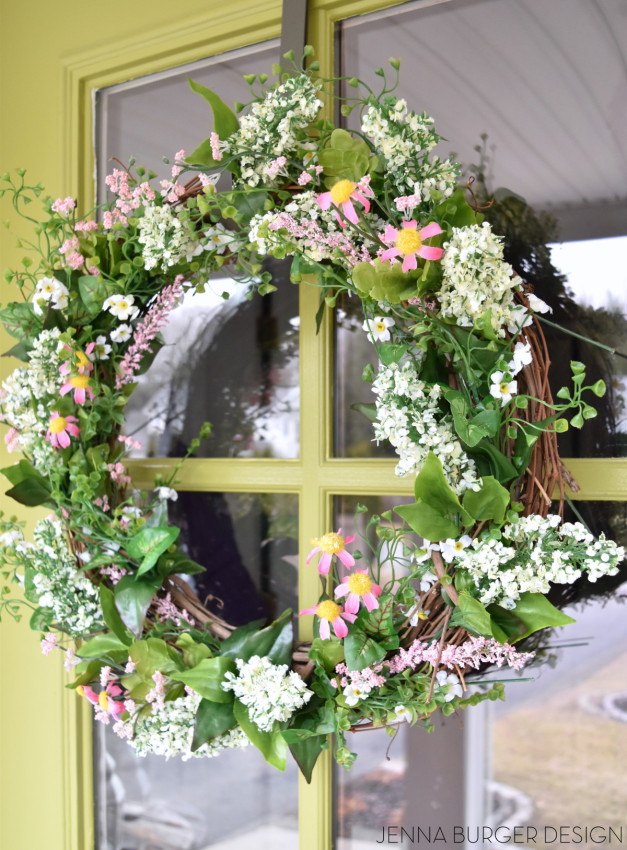
I adore my yellow forsythia wreath – my go to for Spring – but I was wanting something lighter + brighter to give contrast to the apple green painted front door.

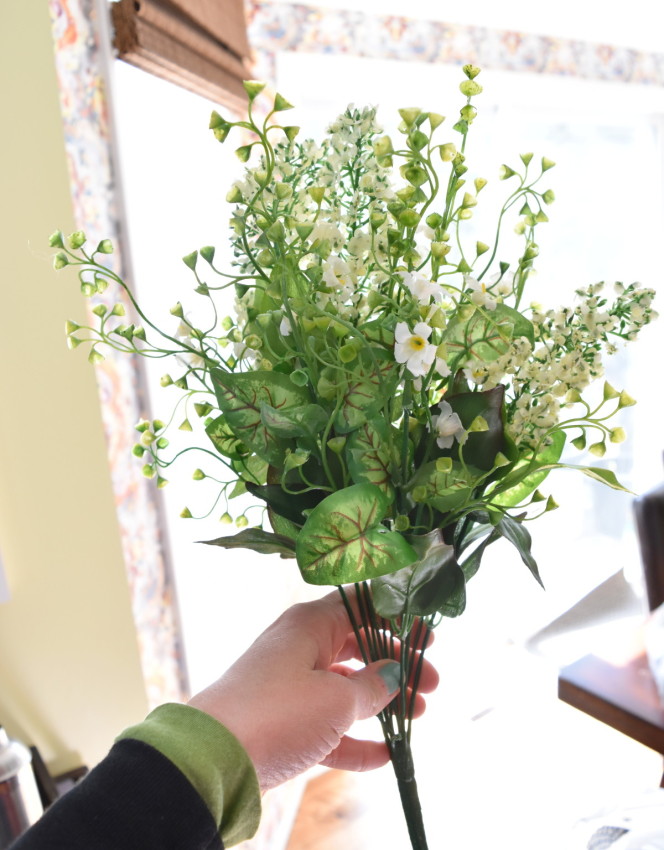
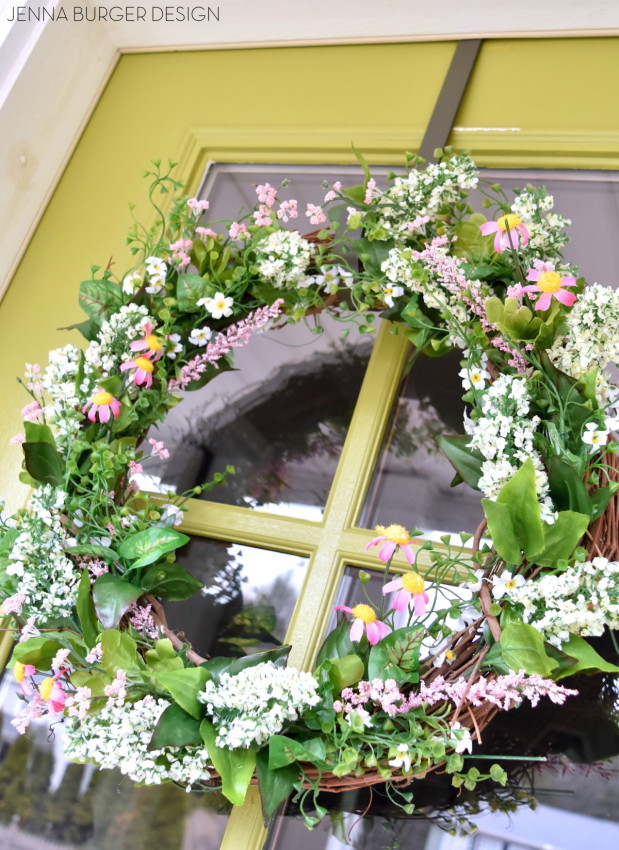
After food shopping last week, I popped into AC Moore and saw so many vibrant + colorful faux flowers for Spring.  Their whole collection was on sale, so I picked up 3 bunches – about $15 total – in soft colors of white, greens, and a pop of pink.

I was excited to get started…

TUTORIAL FOR A SIMPLE 10-MINUTE SPRING WREATH

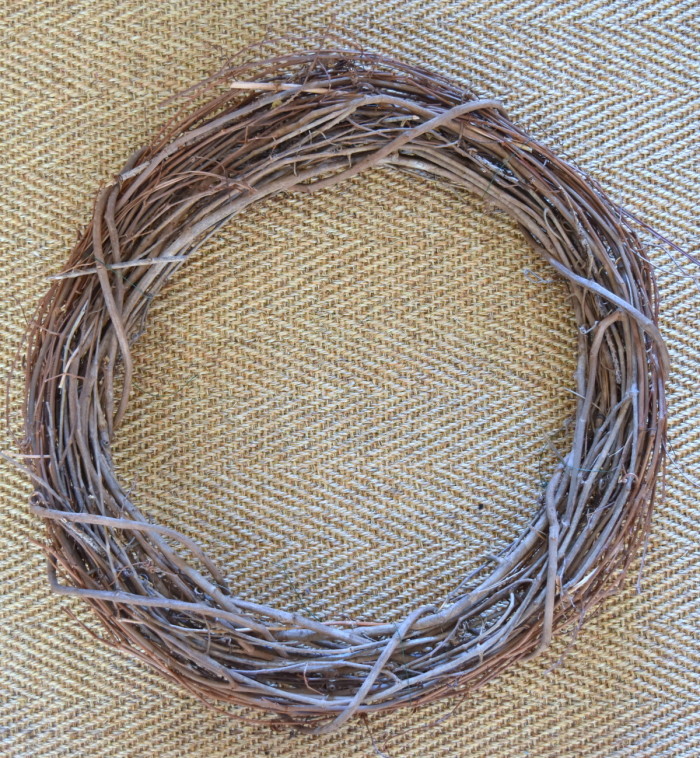
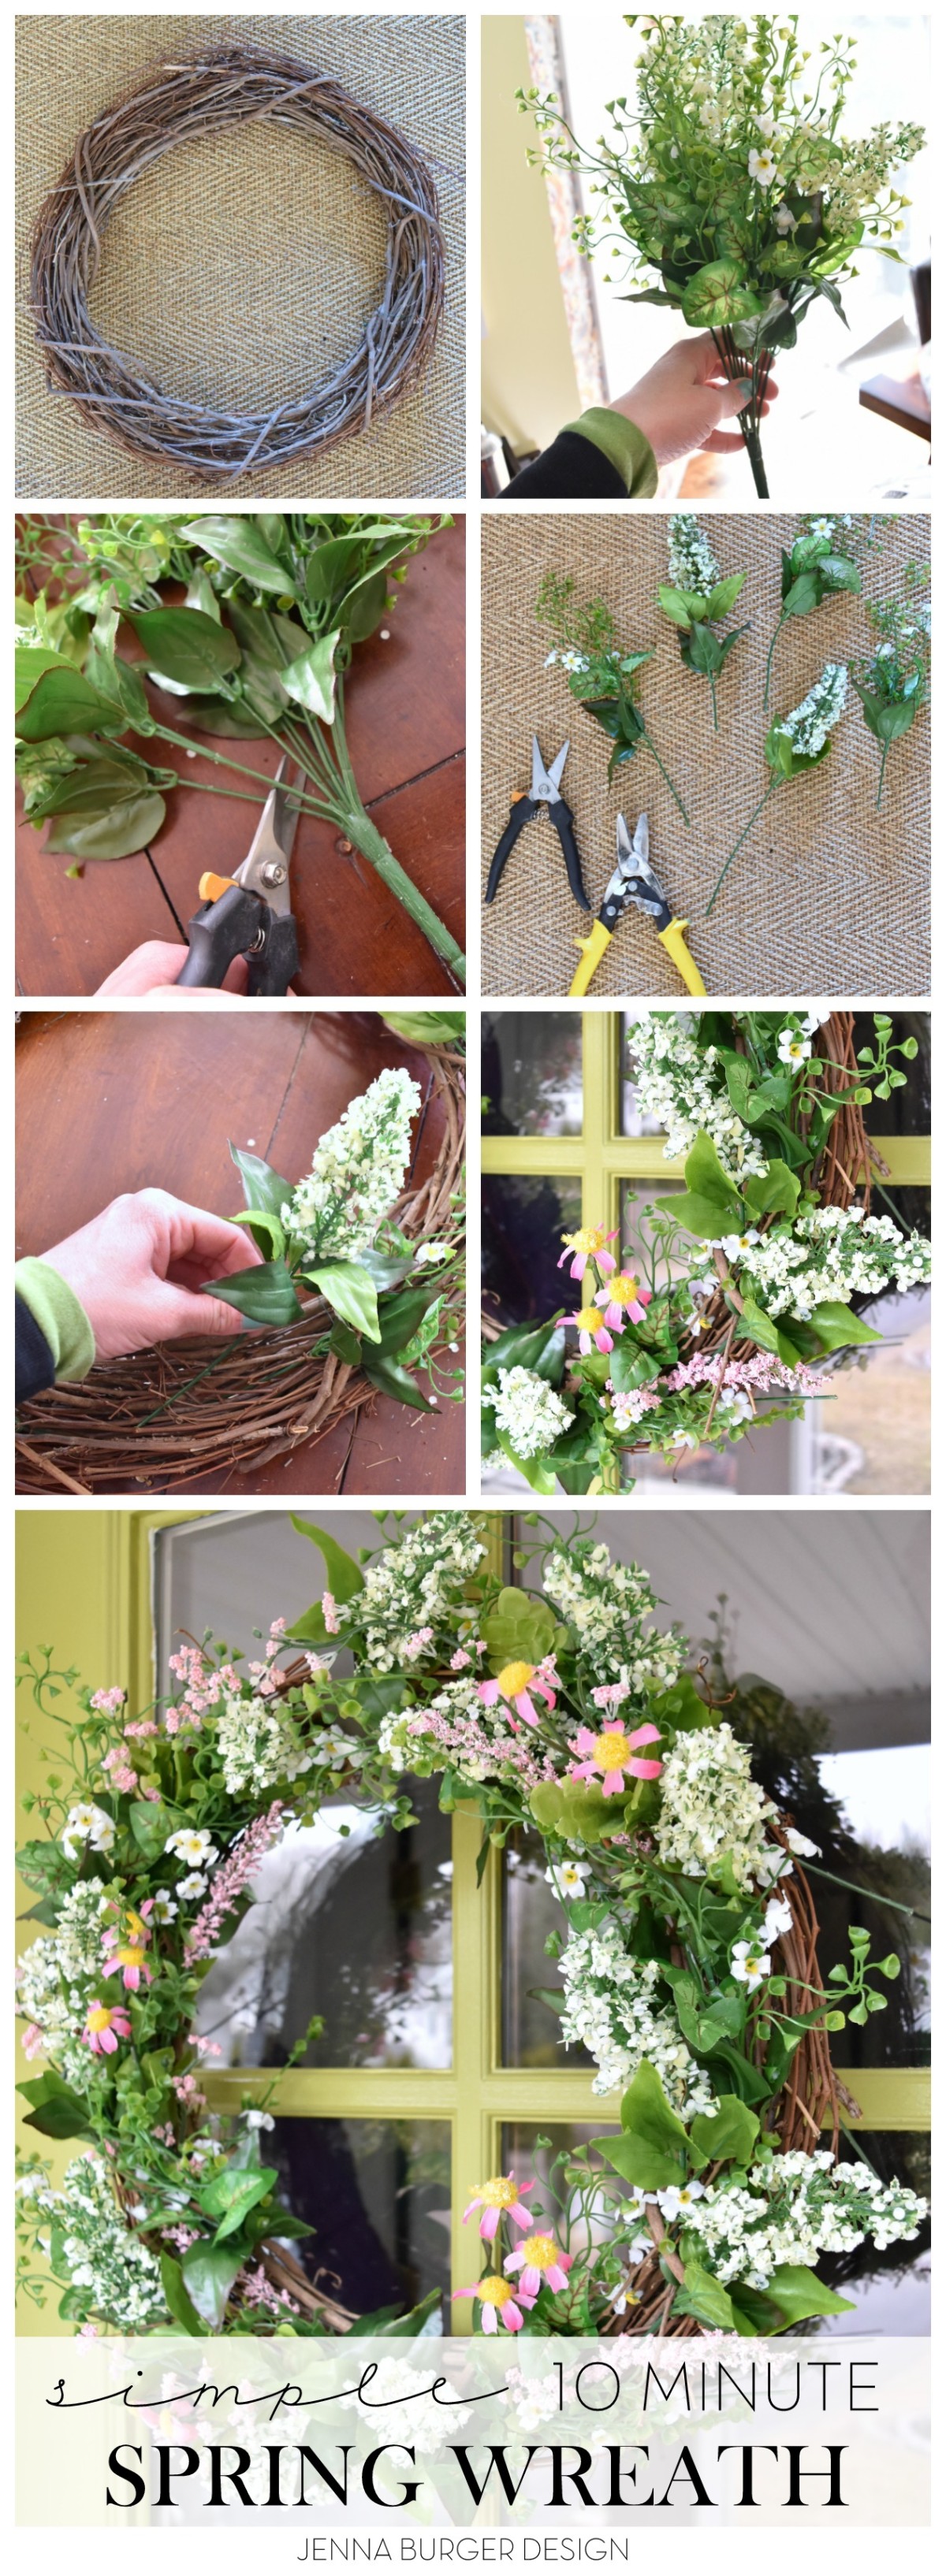
I started off with an 18″ grapevine wreath that I had on hand – but you can find them at most craft stores (even Walmart has them) for around $5.

SPRING WREATH: A simple + easy 10-minute creation to adorn the front door. It couldn't be easier to make and a lot less expensive than buying. Easy-to-follow tutorial @ www.JennaBurger.com

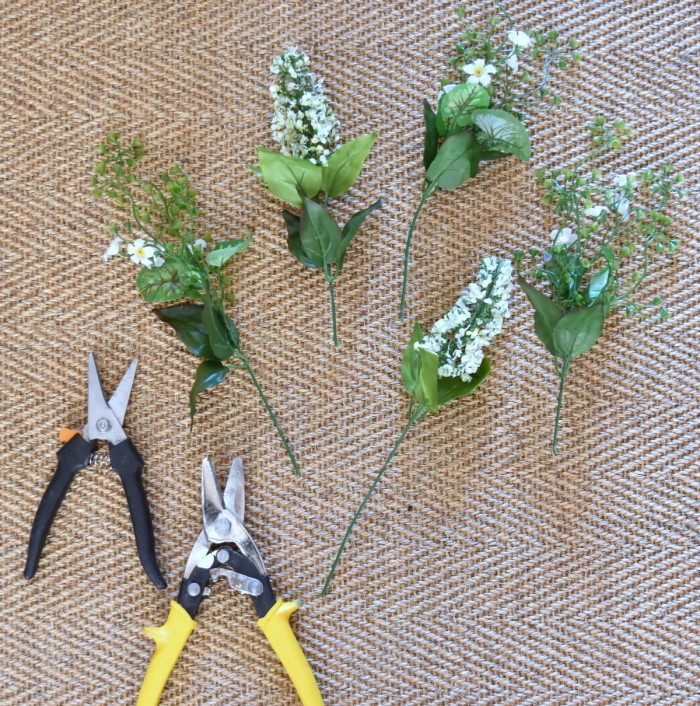
And my 3 bunches of Spring flowers.

SPRING WREATH: A simple + easy 10-minute creation to adorn the front door. It couldn't be easier to make and a lot less expensive than buying. Easy-to-follow tutorial @ www.JennaBurger.com

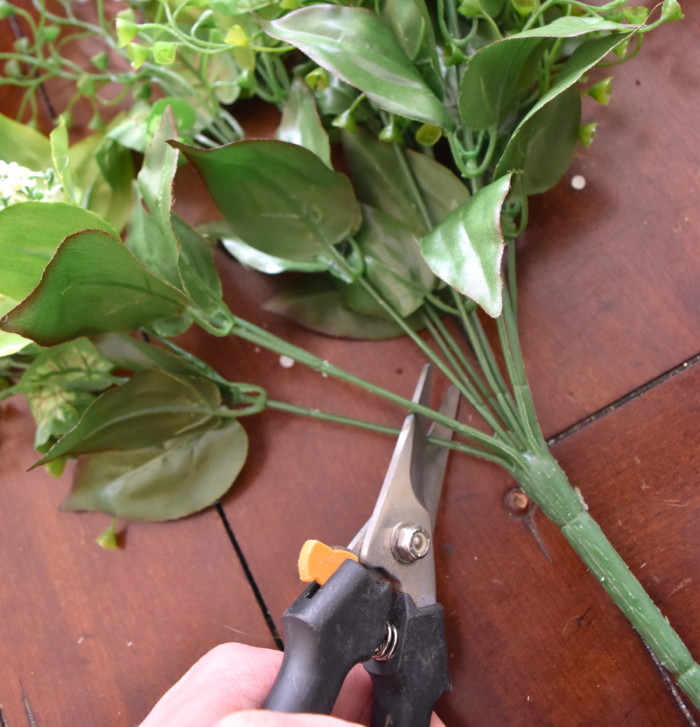
Using snips, I broke apart the flower cluster and was left with individual stems, which gives the flexibility + freedom to place the stems where they look best to give a real-looking result.

SPRING WREATH: A simple + easy 10-minute creation to adorn the front door. It couldn't be easier to make and a lot less expensive than buying. Easy-to-follow tutorial @ www.JennaBurger.com

SPRING WREATH: A simple + easy 10-minute creation to adorn the front door. It couldn't be easier to make and a lot less expensive than buying. Easy-to-follow tutorial @ www.JennaBurger.com

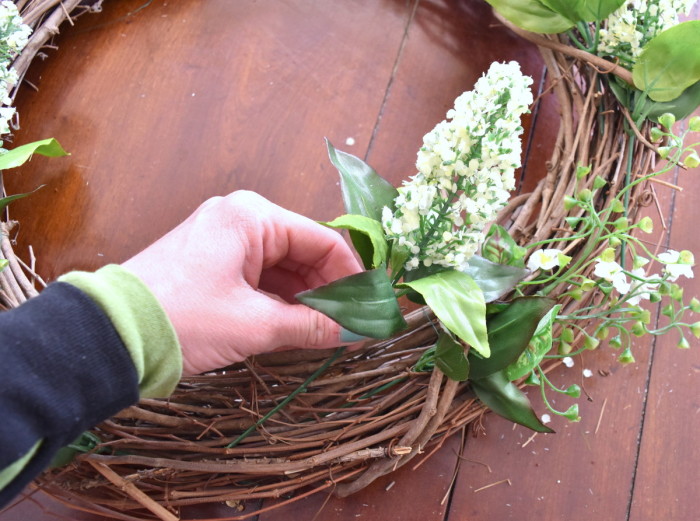
Once all the stems are separated, start weaving them into the wreath.  Secure with floral wire if needed.

SPRING WREATH: A simple + easy 10-minute creation to adorn the front door. It couldn't be easier to make and a lot less expensive than buying. Easy-to-follow tutorial @ www.JennaBurger.com

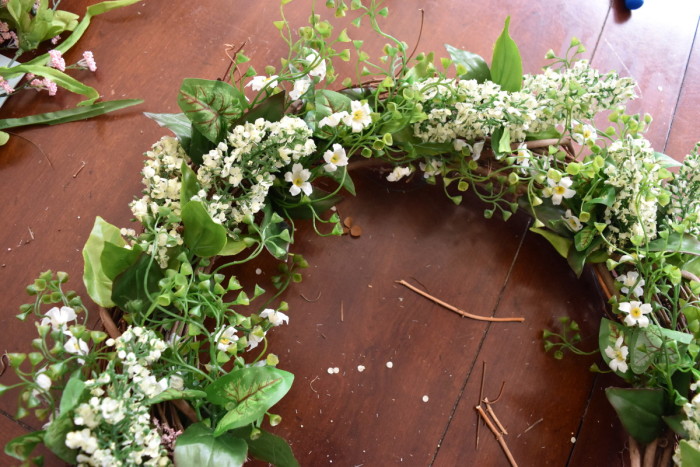
In about 5-8 minutes, I was done and had a new wreath to adorn my door.

SPRING WREATH: A simple + easy 10-minute creation to adorn the front door. It couldn't be easier to make and a lot less expensive than buying. Easy-to-follow tutorial @ www.JennaBurger.com

And here it is… hung and pretty!

SPRING WREATH: A simple + easy 10-minute creation to adorn the front door. It couldn't be easier to make and a lot less expensive than buying. Easy-to-follow tutorial @ www.JennaBurger.com

SPRING WREATH: A simple + easy 10-minute creation to adorn the front door. It couldn't be easier to make and a lot less expensive than buying. Easy-to-follow tutorial @ www.JennaBurger.com

Well unfortunately I think I jinxed myself.  Spring was on it’s way, but over the coming days it’s supposed to feel like winter again.  Ugh.  Soon.  I know it’ll be here soon.

For now, this new wreath will keep me going to send Spring vibes our way.

SPRING WREATH: A simple + easy 10-minute creation to adorn the front door. It couldn't be easier to make and a lot less expensive than buying. Easy-to-follow tutorial @ www.JennaBurger.com

SPRING WREATH: A simple + easy 10-minute creation to adorn the front door. It couldn't be easier to make and a lot less expensive than buying. Easy-to-follow tutorial @ www.JennaBurger.com

SPRING WREATH: A simple + easy 10-minute creation to adorn the front door. It couldn't be easier to make and a lot less expensive than buying. Easy-to-follow tutorial @ www.JennaBurger.com

SPRING WREATH: A simple + easy 10-minute creation to adorn the front door. It couldn't be easier to make and a lot less expensive than buying. Easy-to-follow tutorial @ www.JennaBurger.com

Want to make something similar for your door, here’s a quick recap of how to make it.  I swear, it is simple.  Anyone can tackle this in a cinch!

Sprng Wreath Collage

Want to see more wreaths I’ve made?  Check out my DIY wreath page with lots of easy-to-follow tutorials.

Happy Spring.

Soon.

Christmas Home Tour 2015

Welcome!

I am elated that this day has finally arrived.  I’ve been busily and excitedly preparing + waiting for weeks to give you a tour of my home decorated for Christmas…  And today is the day!

I can not believe it is my 3rd year (check out 2013 + 2014) on the Jennifer Rizzo Holiday Housewalk and I am thrilled to show you lots of new spaces.  If you are following along on tour (start the tour here), I am house #19 and the first on the tour for today.  If you’re continuing through from yesterday, then you just hopped on over from Restoration House.  Wasn’t Kennesha’s house just beautiful with all her fresh greenery?!

holiday housewalk Restoration house, stop 18

Amidst a big renovation (we ripped out our kitchen…), I ‘m shocked that I was able to pull ‘Christmas’ off this year.  I think without this Housewalk Tour planned, decorating for Christmas would have gone to the wayside.  So thank you ALL for the nudge to create this years magical space.

Without further ado, grab a cup of joe or your favorite hot chocolate, put your feet up, and enjoy.

Let the tour begin…
Christmas Home Tour at JennaBurger.com

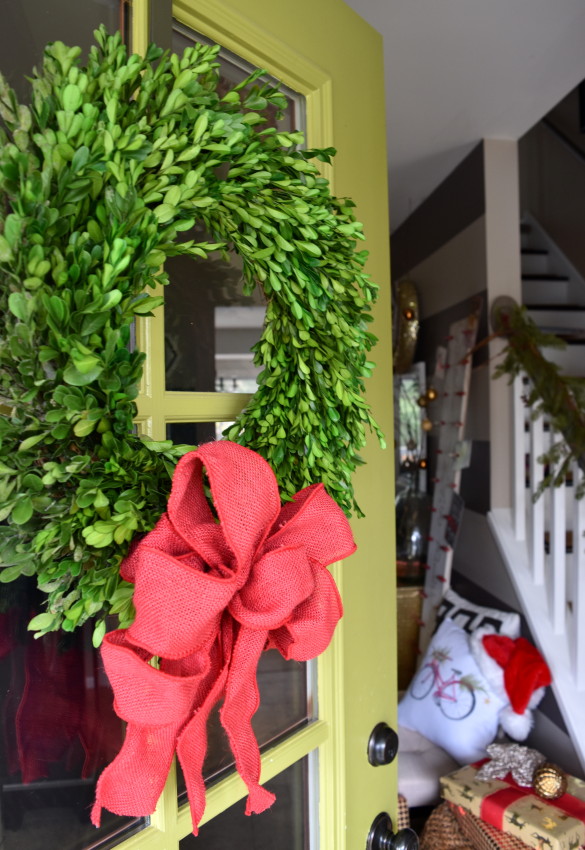
Our beautiful boxwood (by the way, it’s faux…) welcomes us + guests into our home.  It adorns the apple green colored front door and a red burlap bow gives the perfect layering contrast.

Come on in…
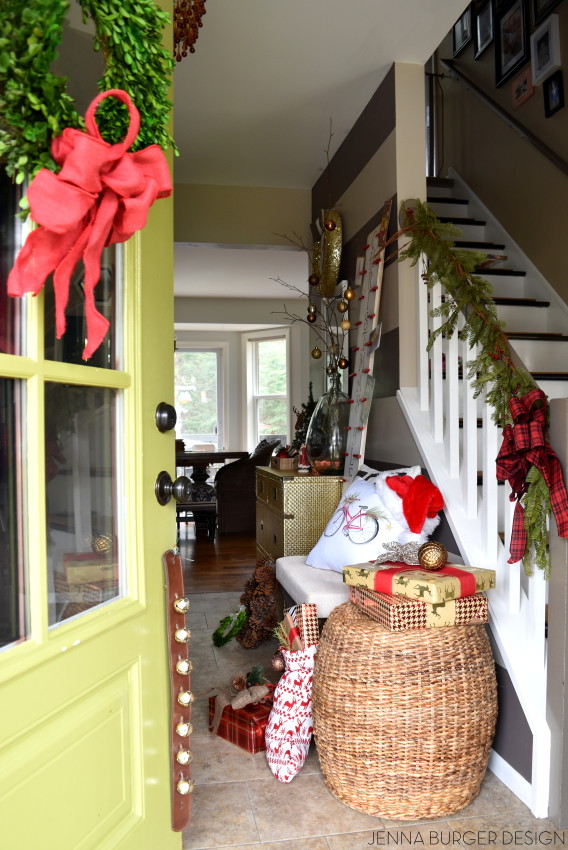
Christmas Home Tour at JennaBurger.com. Come on over...

Not overly large, but well-thought out + functional, our foyer is decorated with hues of golds and reds.

My approach for holiday decorating, especially at Christmas, is to add in seasonal layers amongst the everyday decor.  Accessories are changed out, but our family is still hustling & bustling all day, everyday, so the main elements are still in use.

My new favorite addition to this years holiday decor is the adorable vintage red bicycle pillow created by none other than the fabulous Jennifer Rizzo.  Snag one for yourself at her Society 6 shop!
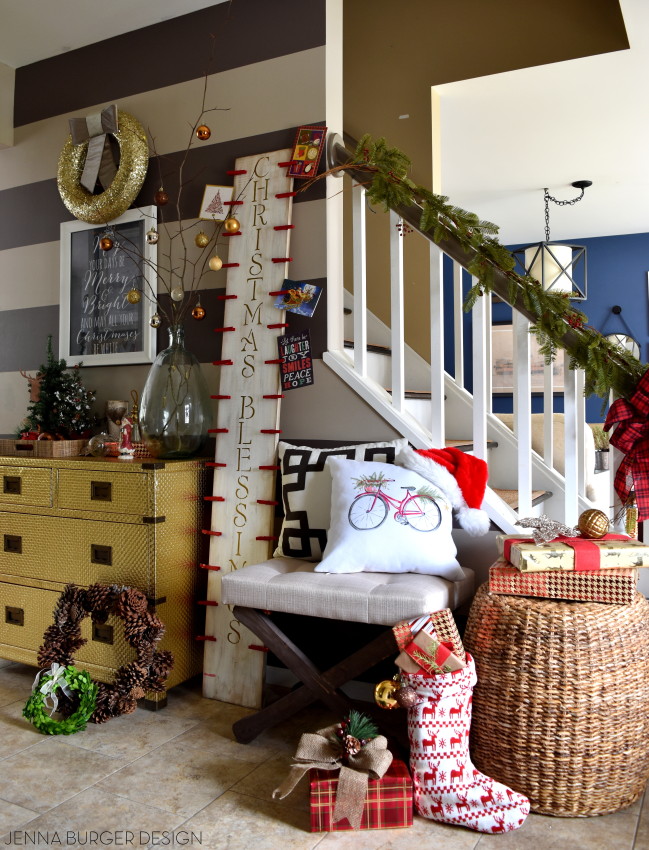
Christmas Home Tour at JennaBurger.com. Come on over...

The beautiful gold dresser (which holds the kids shoes) is still the main focus of our foyer.  I swapped out the pictures above and added in a chalkboard printable that was created by my sweet friend KellieMay you days be merry & bright, And may all your Christmases be white.  Above it I added a simple gold glitter wreath.
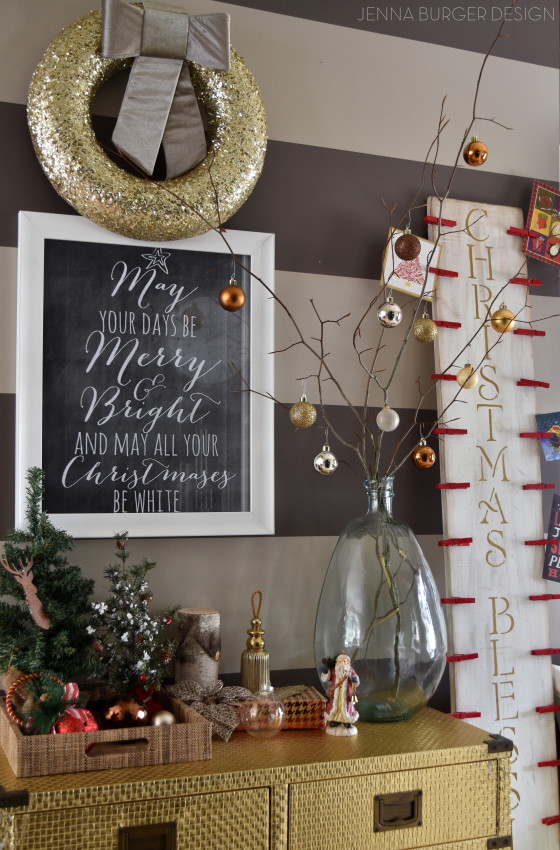
Christmas Home Tour at JennaBurger.com. Come on over...

Atop the dresser, I filled a large vase with branches from the yard and hung medium sized ornaments in shades of chocolate. hmmm. I love the height & ‘drama’ the branch arrangement gives our entry.
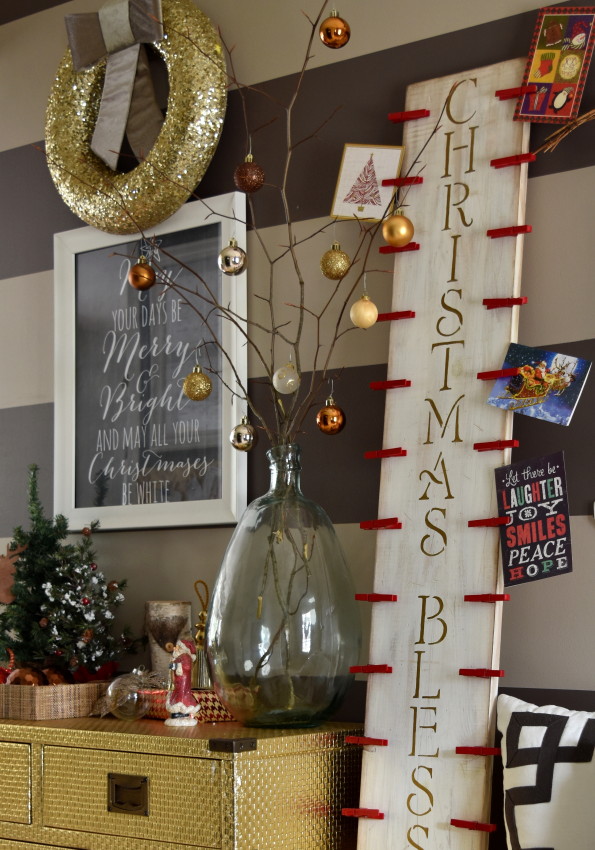
Christmas Home Tour at JennaBurger.com. Come on over...

Other seasonal favorites fill the dresser top including small trees, wrapped presents, and DIY creations like the JOY ornament that I made using a gold Sharpie.
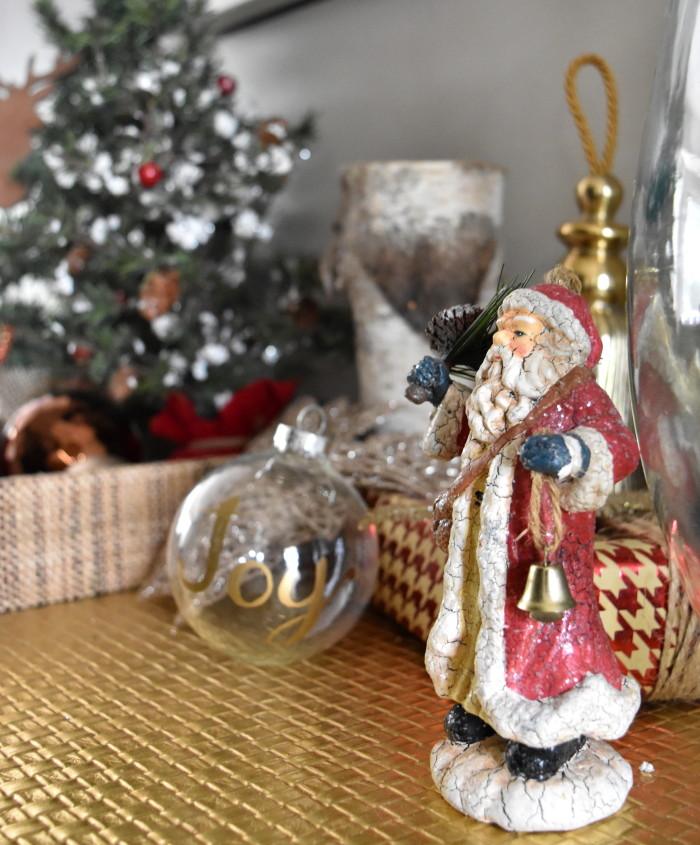
Christmas Home Tour at JennaBurger.com. Come on over...

Since making our CHRISTMAS BLESSING card holder a few years back, I seem to find a ‘new home’ for it each holiday season.  This year it fit perfectly in this spot of the foyer & beautiful cards from friends + family have already started to trickle in.
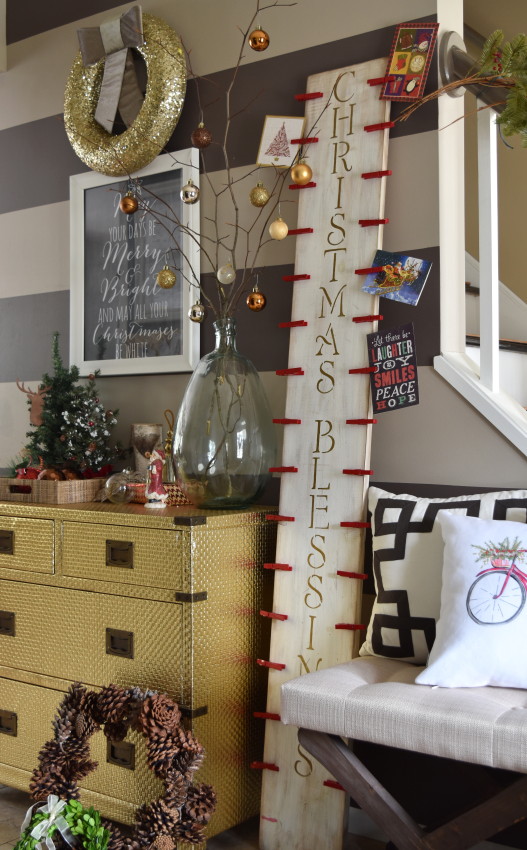
Christmas Home Tour at JennaBurger.com. Come on over...

Pretty paper in patterns of houndstooth, stripes, and a reindeer silhouette were used to wrap presents.  Then ribbon, ornaments, and rosemary were used to dress them up. I love giving a present that smells just as good as it looks…
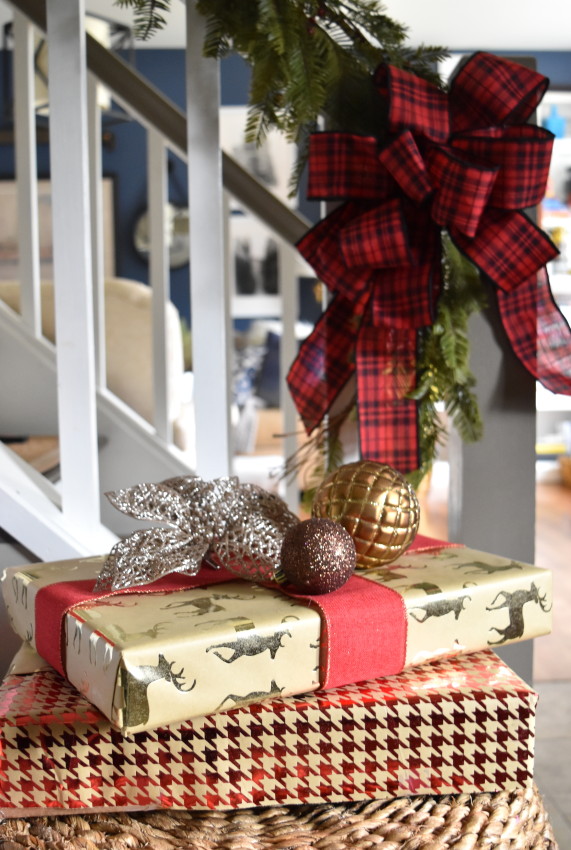
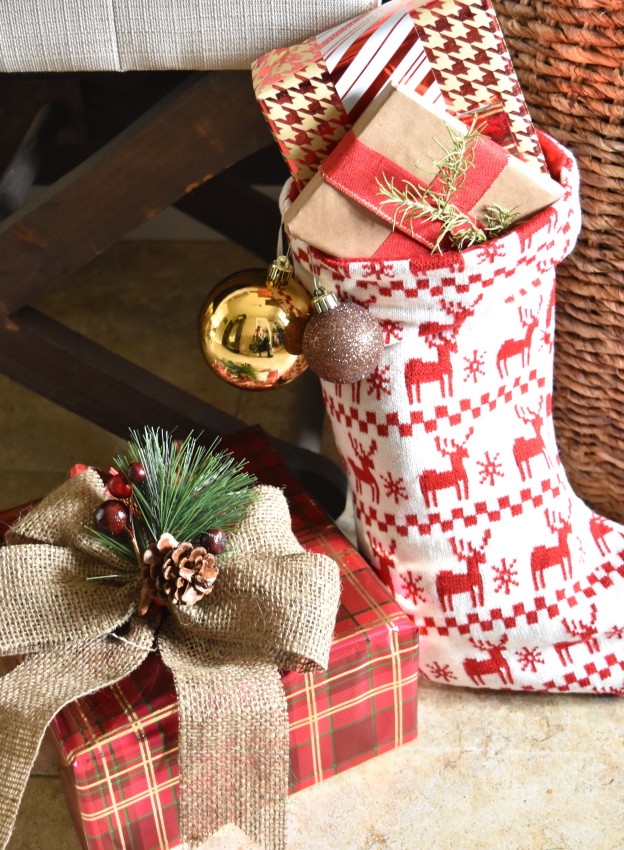
Christmas Home Tour at JennaBurger.com. Come on over...

Christmas Home Tour at JennaBurger.com. Come on over...

Christmas Home Tour at JennaBurger.com. Come on over...

Let’s head from the foyer to the dining room where you can finally get a glimpse of our tree…
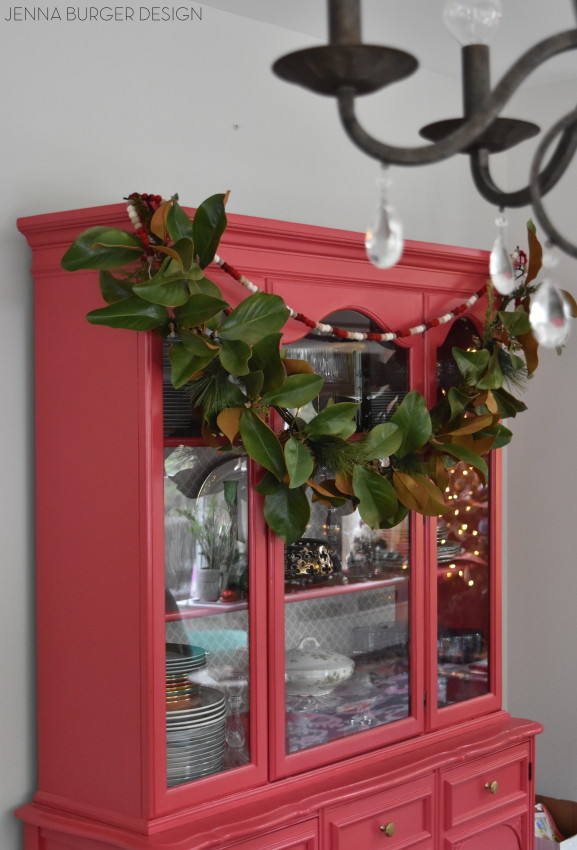
Christmas Home Tour at JennaBurger.com. Come on over...

Do you see it?  Do you see it? White twinkly lights reflected in the glass…  We’re getting closer…

My beautiful Craigslist-found china cabinet is draped with beautiful magnolia garland (again it’s faux) along with a simple strand of pom pom garland (sent by my friends at Minted).

I wish I could show you more of this space, but honestly it’s still kind of a construction zone.  I guess I could put bows on all the boxes & add them tot the tour, but I’ll spare you, lol.

Let’s just keep looking for the lights.  I see another glimpse…
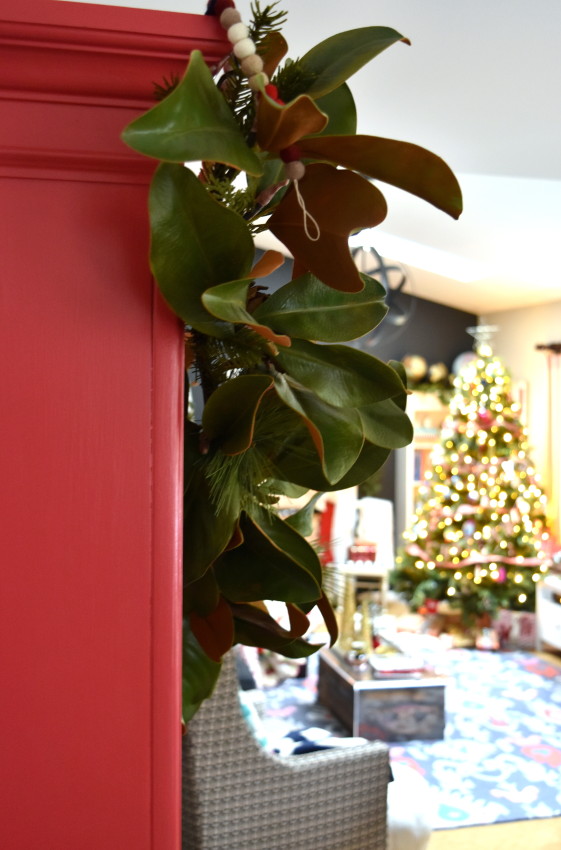
Christmas Home Tour at JennaBurger.com. Come on over...

There it is.  Our Tree. Our beautiful Tree decorated for another Christmas season.
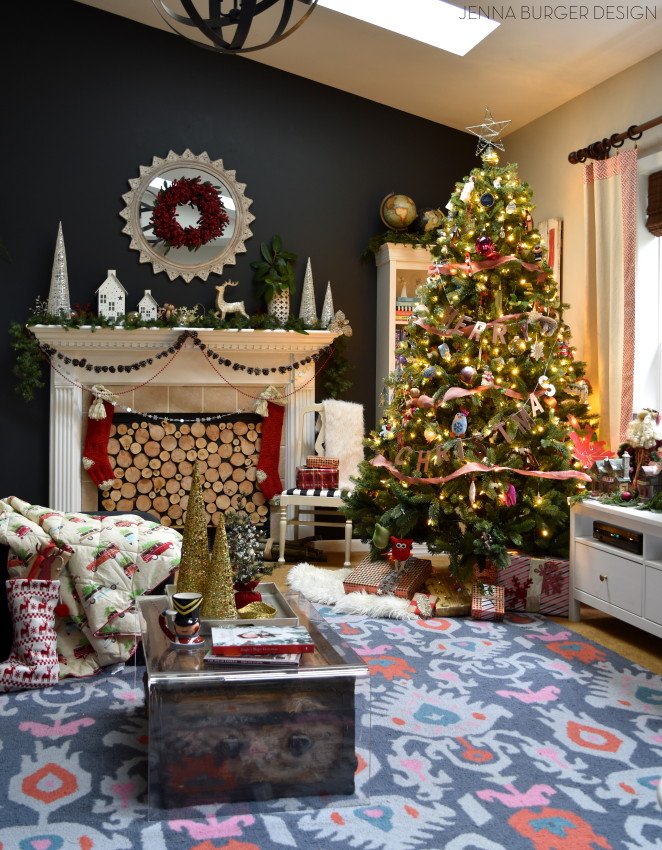
Christmas Home Tour at JennaBurger.com. Come on over...

And the lights off for a different view without the lights…

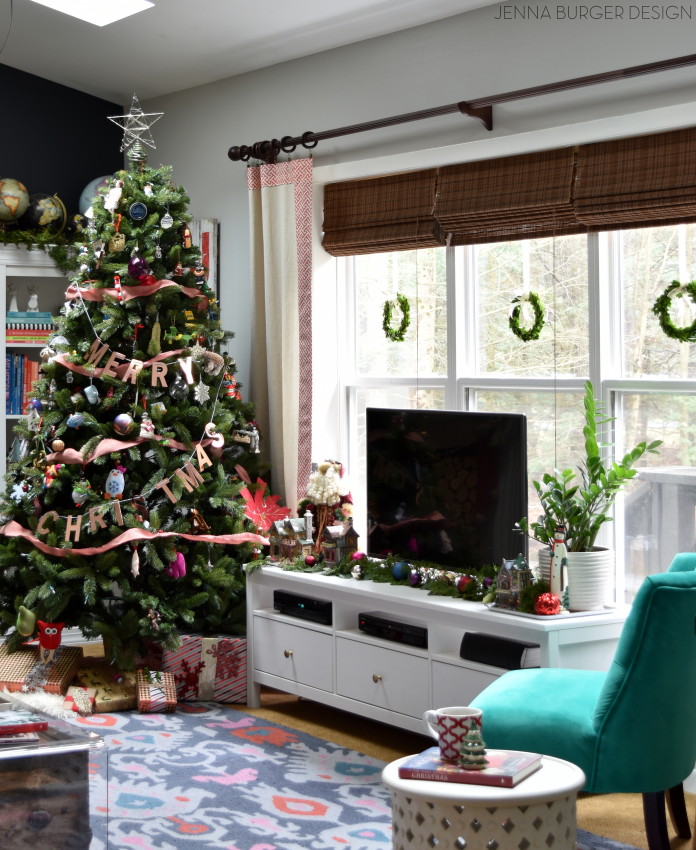
just snagged that copper Merry Christmas garland from Target & I love it!
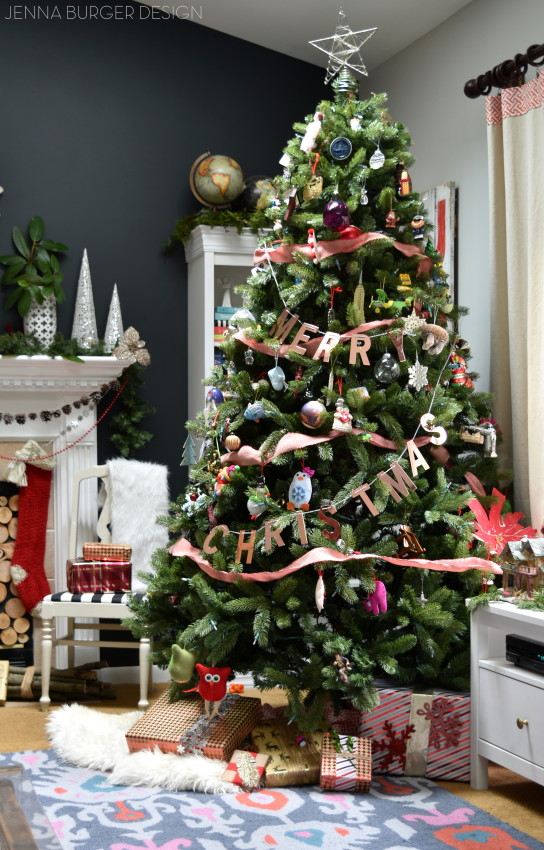
Christmas Home Tour at JennaBurger.com. Come on over...

Yes the tree is a material object, but it symbolizes so much.  It tells so much about our family.

Who we are.

Where we’ve been.

What we love.

I can honestly say, other than putting the garland + ribbon on, I had no part in the creation of the tree.

All the credit goes to these 2 …
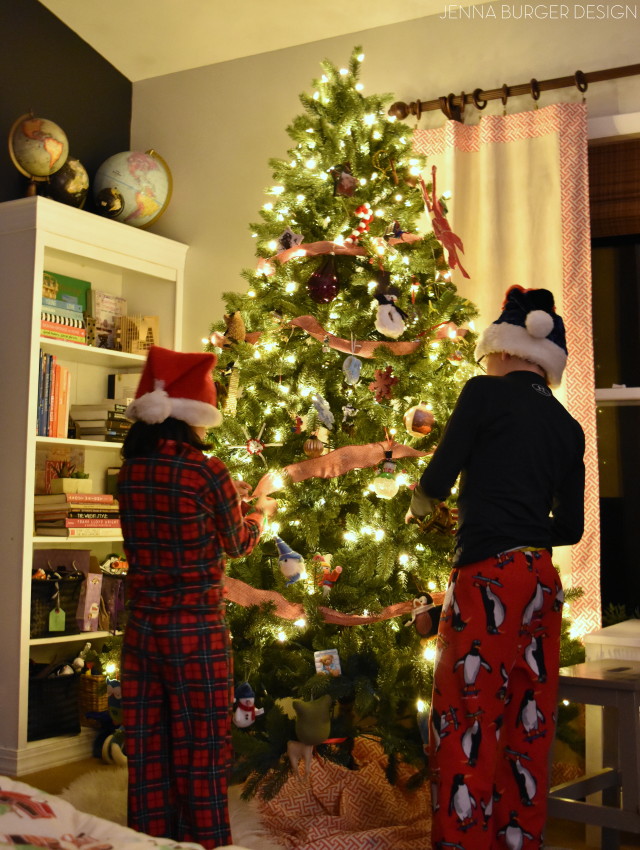
Christmas Home Tour at JennaBurger.com. Come on over...

It might not be the prettiest or ornately decorated (hands down, I know it isn’t), but I don’t care.  My kids l-o-v-e decorating for Christmas and since I have control of creating beautiful vignettes around the house, they have the tree.  Complete ownership goes to them!

No joke, this is me watching & enjoying as they took over…

Christmas Home Tour at JennaBurger.com. Come on over...

To me, FAMILY + MEMORIES is what Christmas is about.

I’m in love with how the family room came together for this Christmas.  It was enjoyable having a new palette to work with since renovating this space earlier in the year.
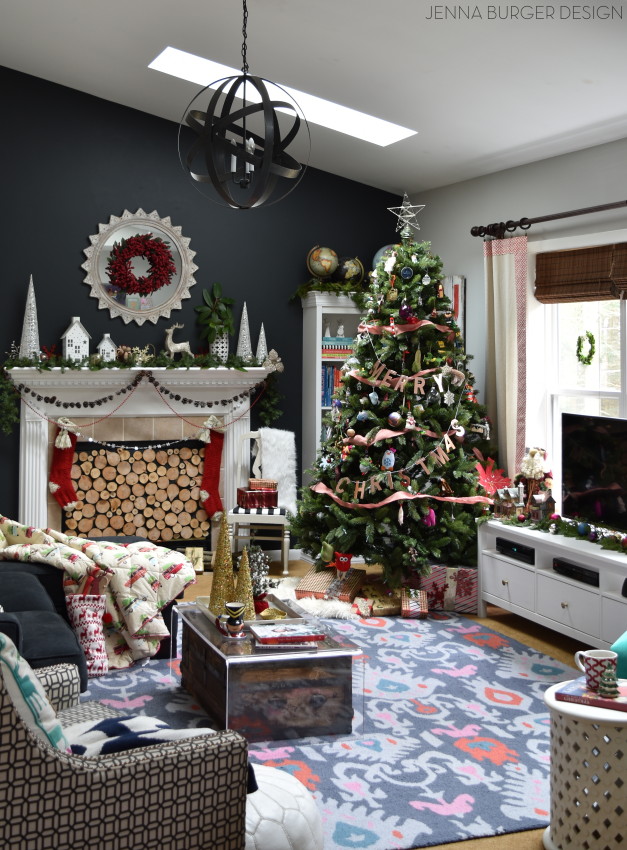
Christmas Home Tour at JennaBurger.com. Come on over...

Again, our everyday is layered with our seasonal favorites, family keepsakes, and DIY creations…

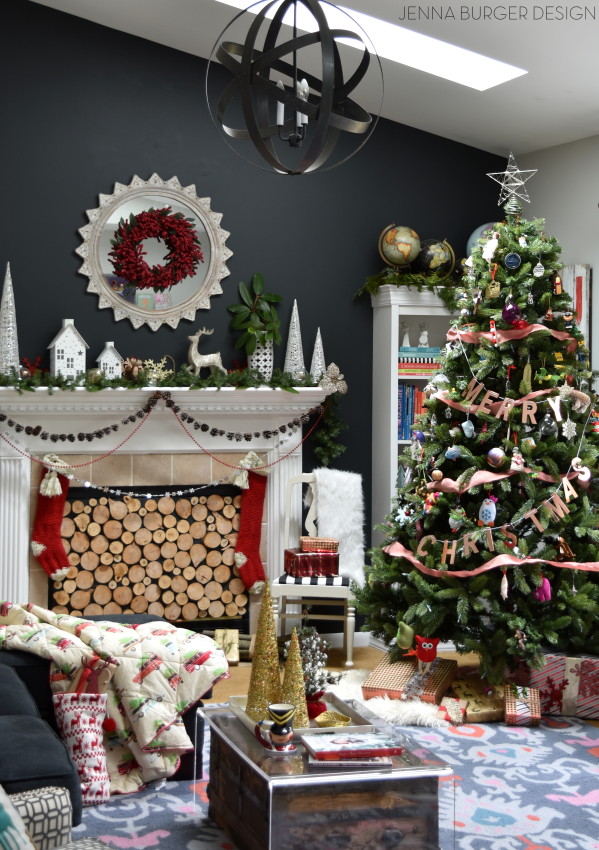
I shared our Christmas Mantel earlier this week, but it got a slight revamp since then.  Check out what’s inside the fireplace…  A lot of logs that my husband laboriously cut (not, it just looks like that – tutorial coming soon).

The look of the logs gives a beautiful focal point to the fireplace especially since we rarely have a roarin’ fire going.

Our stockings are definitely hung by the chimney with care…
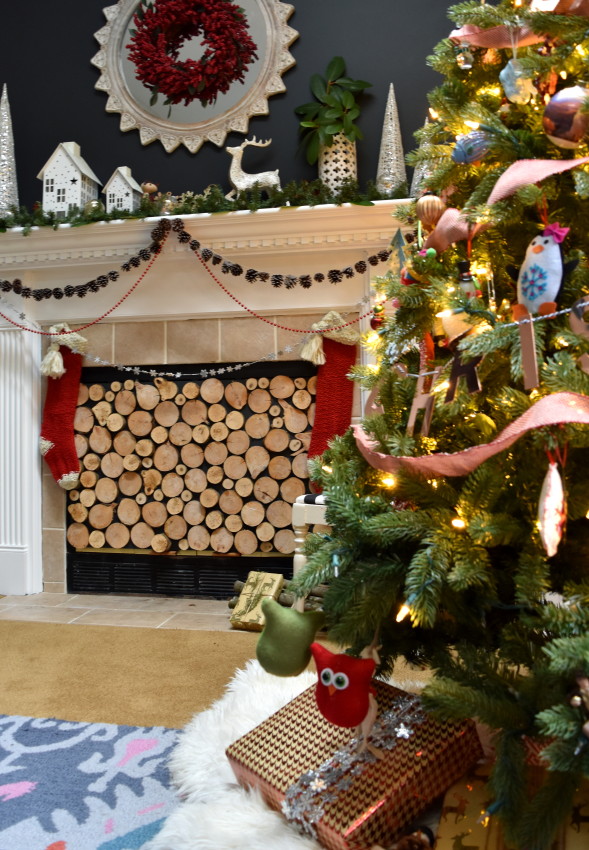
Christmas Home Tour at JennaBurger.com. Come on over...

Christmas Home Tour at JennaBurger.com. Come on over...

This space is our hang-out-do-everything room, so it has to be comfortable + inviting + functional. It’s not stuffy or inhibiting, but instead relaxing, enjoyable, AND most importantly reflects US!

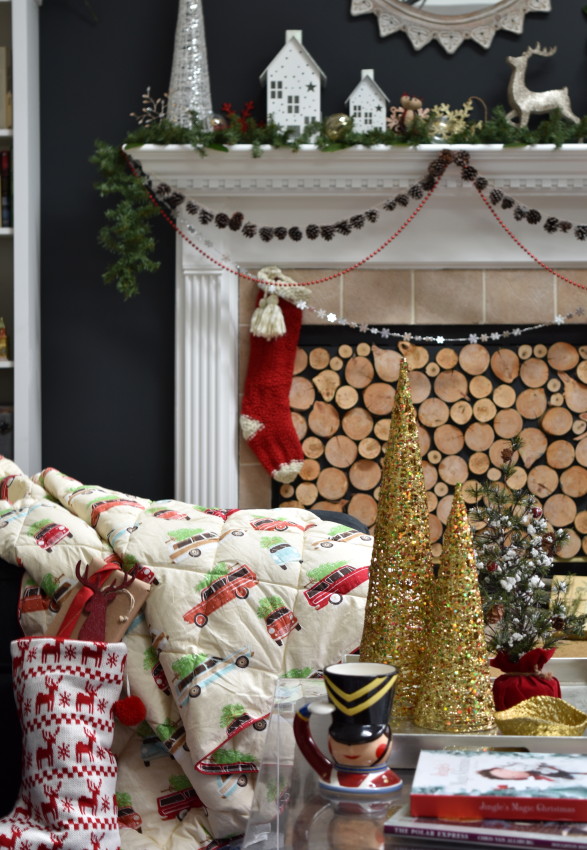
A new favorite this season is this Oh-So-Warm + cute down blanket with the most adorable vintage car pattern.  It’s put us to sleep many-a-nights on this sofa with the TV still on at 3am…
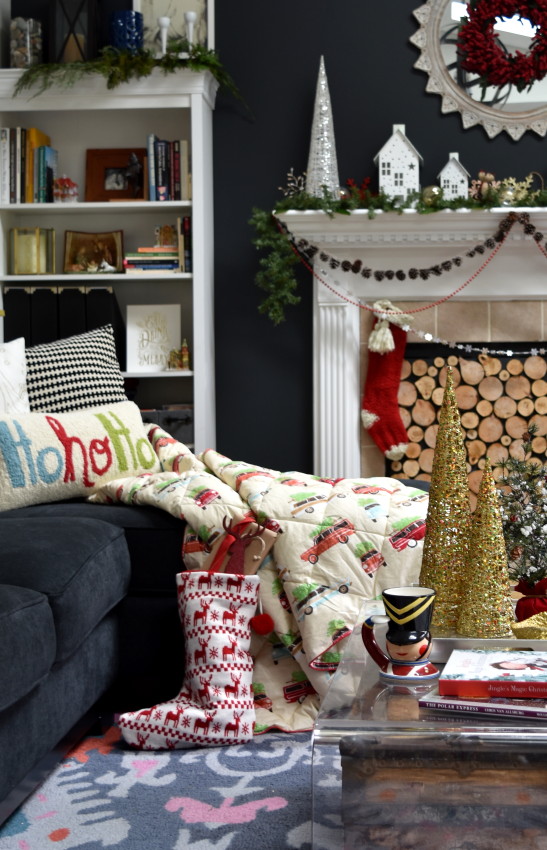
Christmas Home Tour at JennaBurger.com. Come on over...

The Ho Ho Ho knit pillow is another addition this season and makes such a pretty layer on the sofa.
Christmas Home Tour at JennaBurger.com. Come on over...

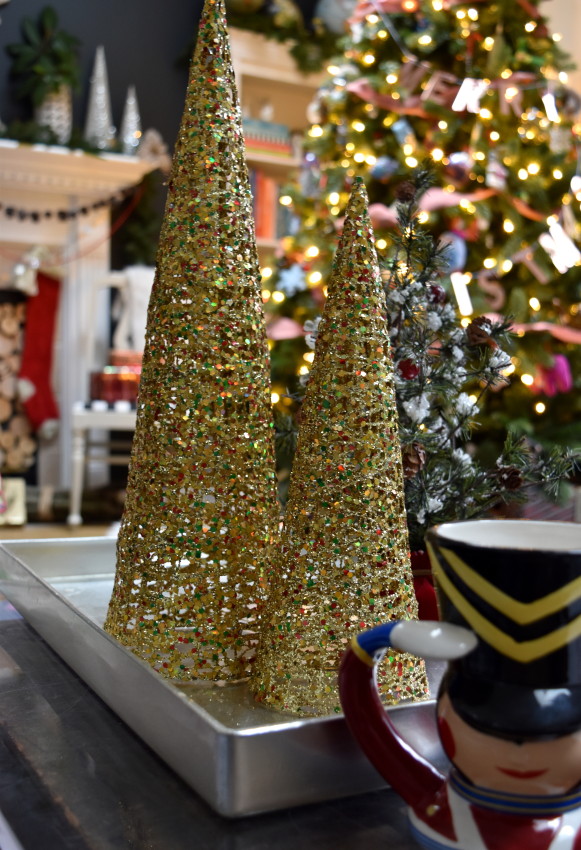
On a typical day, most things that sit on the coffee table get knocked off (thanks to the busy hands of a 17-month old), but for the tour I jazzed it up with gorgeous gold glitter cone trees + a few of our holiday books we love to read as we countdown to the BIG 2-5!
Christmas Home Tour at JennaBurger.com. Come on over...

Christmas Home Tour at JennaBurger.com. Come on over...

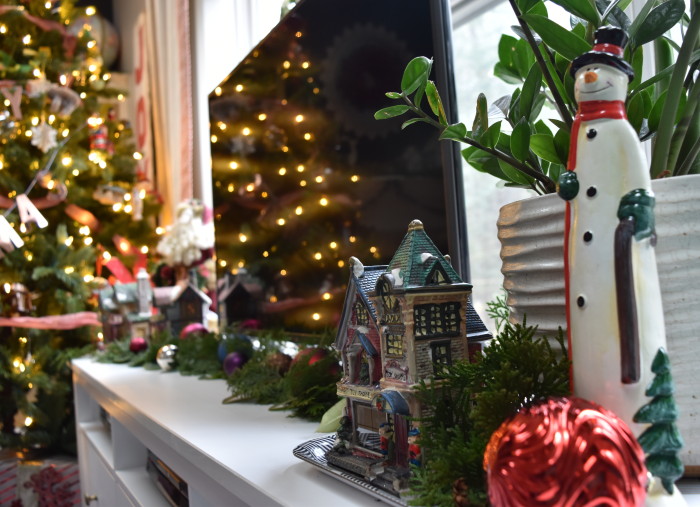
Along with our special keepsakes to decorate with, I also love incorporating elements from nature.  Cut branches and greenery are all around us so where I can, I’ve layered branches + greens on the bookcase tops, the mantel, and in front of the TV…

Christmas Home Tour at JennaBurger.com. Come on over...

Christmas Home Tour at JennaBurger.com. Come on over...

Christmas Home Tour at JennaBurger.com. Come on over...

And on the windows I added three small boxwood wreaths.  They are just the cutest…
Christmas Home Tour at JennaBurger.com. Come on over...

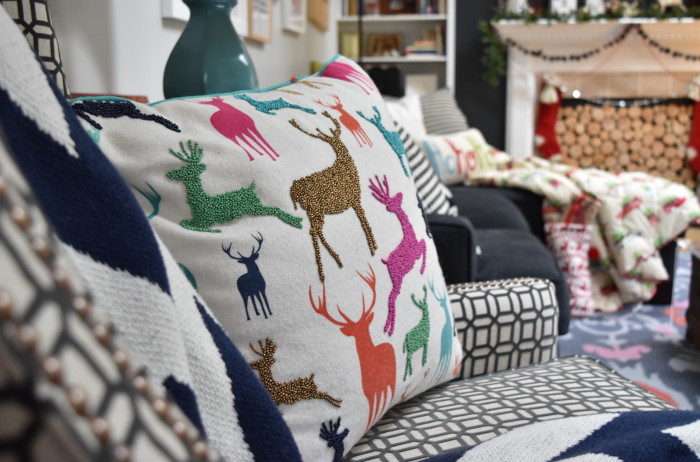
Lots of old mixed in with a few new festive treats, like this pillow that I just couldn’t resist from Target.

There is a definite reindeer ‘theme’ this Christmas…
Christmas Home Tour at JennaBurger.com. Come on over...

Well there you have it.  Thank you so much for taking the tour of my home decorated for Christmas.  A lot of thought + love went into this years seasonal space, but important of all it’s meaningful to our family.

I hope I’ve inspired you with what I’ve created + shared.

Now on to the next house, At the Picket Fence, which is stop #20 on the Holiday Housewalk Tour.

You are in for a treat…

holiday housewalk tour, At The Picket Fence

Christmas Home Tour at JennaBurger.com. Come on over...
Thank you to Joss & Main and Good Housekeeping magazine for partnering with this years Housewalk Tour.  Also a big shout out to Garnet Hill + Lowe’s, who I collaborated with for this years Christmas spaces.  Their decor is gorgeous and I love showcasing their beautiful goods in my home!

Merry Christmas
Christmas Mantel

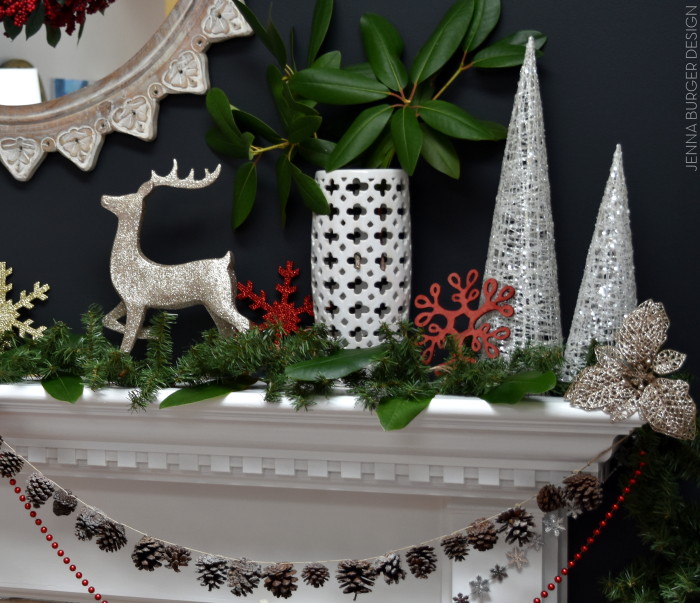
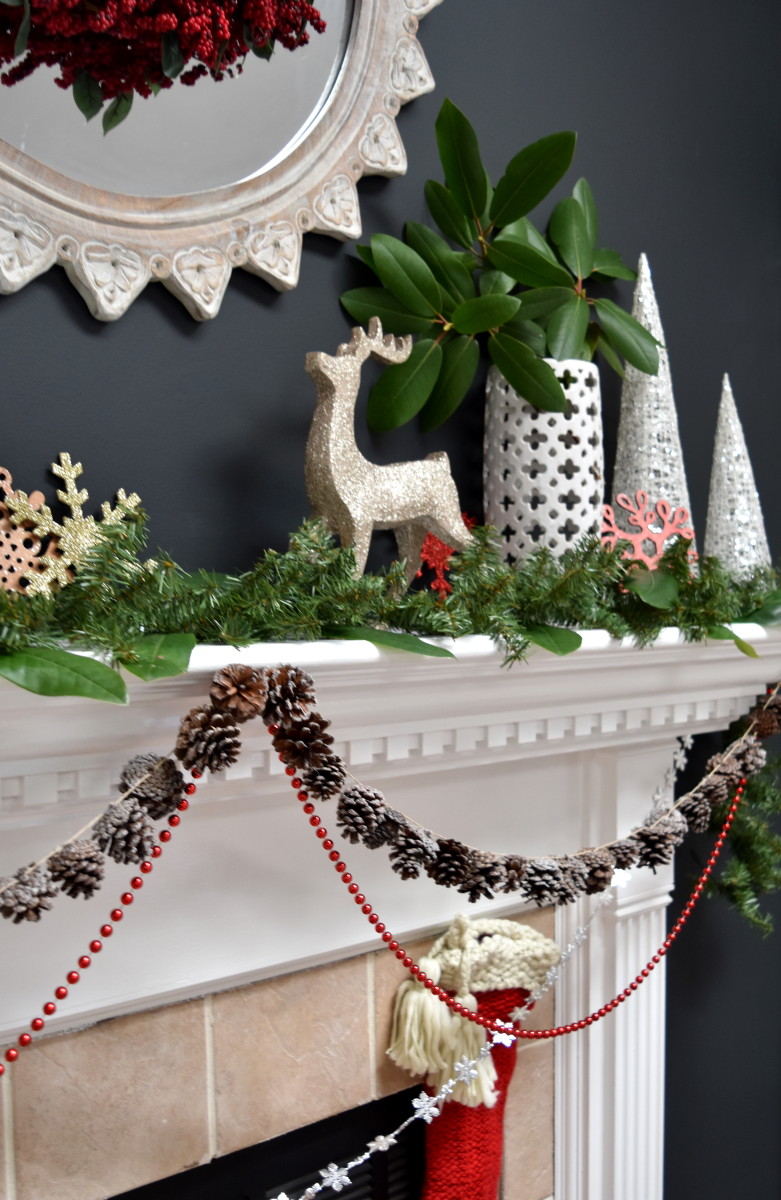
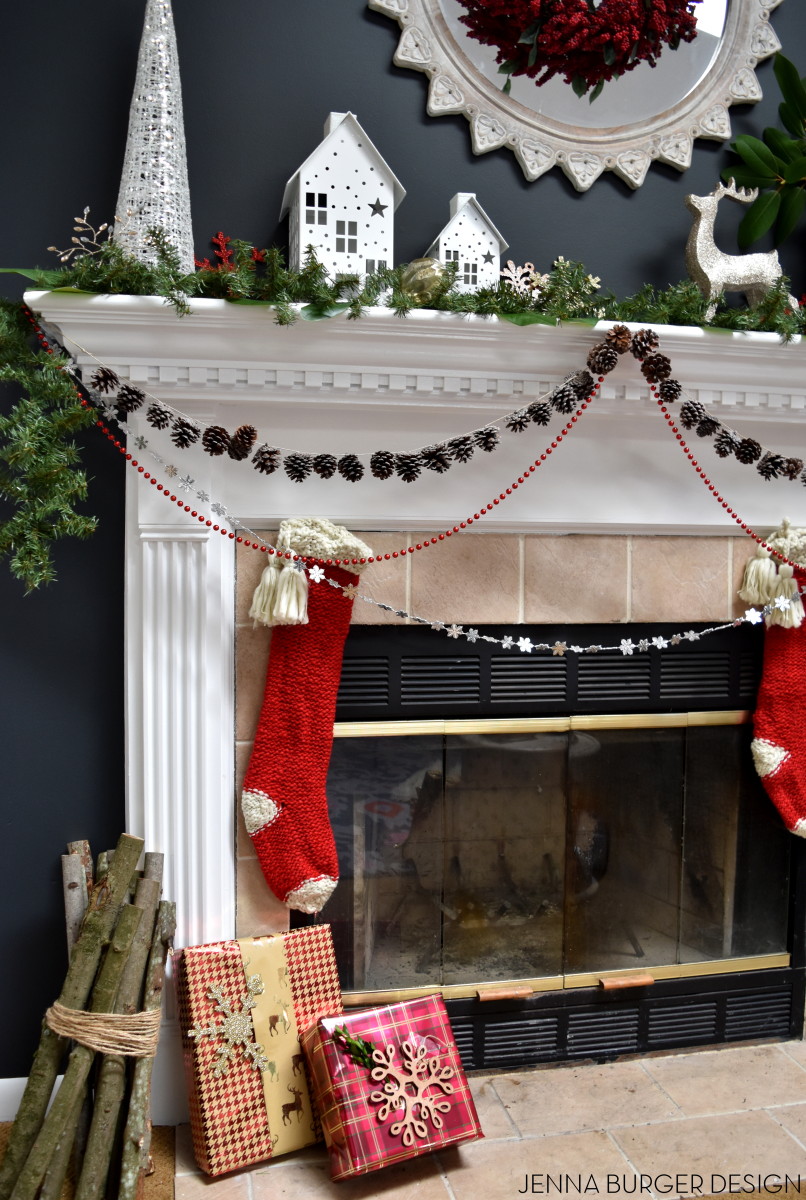
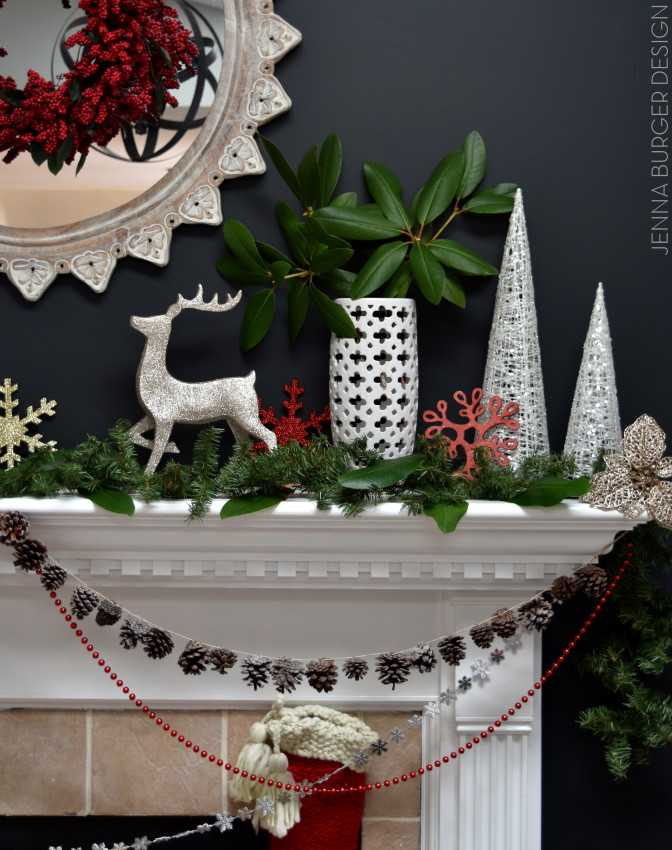
Christmas Mantel filled with old & new. Created by www.jennaburger.com

The Holiday season is underway – yay!

Since Friday – the day after Thanksgiving – we’ve been hustling + bustling indoors and out decorating for Christmas.  This year has been a bit tricky with the kitchen renovation (walls are still being painted & the hardwood floors are still curing), but we are making do with the areas that we can add our festive favorites…

One area of our home that’s been decorated for a few weeks is the mantel.

I got the Christmas bug a few weeks ago after making my way into the Christmas section of Lowe’s and leaving with a handful of new fun finds.  They’re selection of seasonal decor this year is stellar.

I incorporated a lot of new with the old…

Christmas Mantel filled with old & new. Created by www.jennaburger.com

Christmas Mantel filled with old & new. Created by www.jennaburger.com

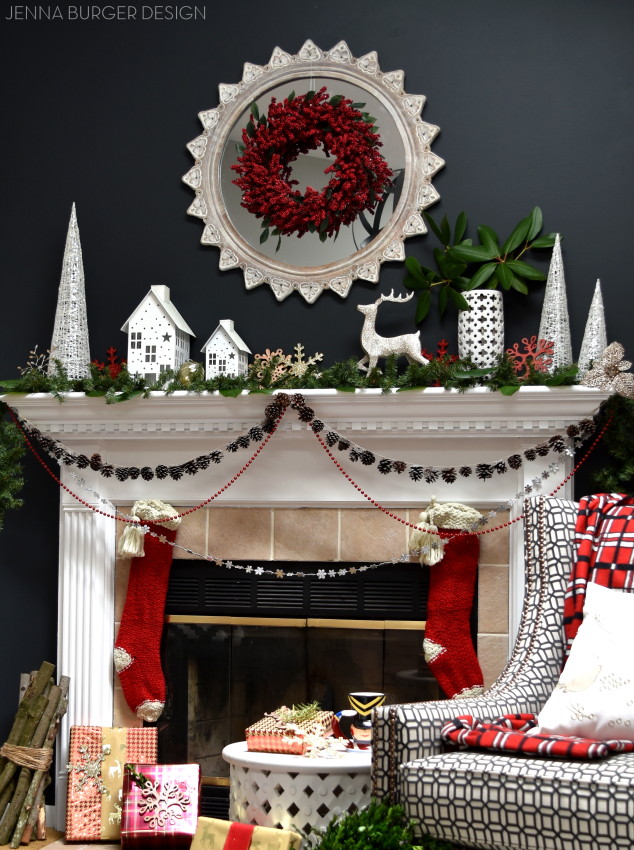
I had such a fun + relaxing (well kinda in my OCD way) time creating this years Christmas mantel.  It was enjoyable to have a different backdrop to work with since this room, specifically the fireplace wall, got a revamp for burnt orange to black earlier this year >>> check out the living room transformation

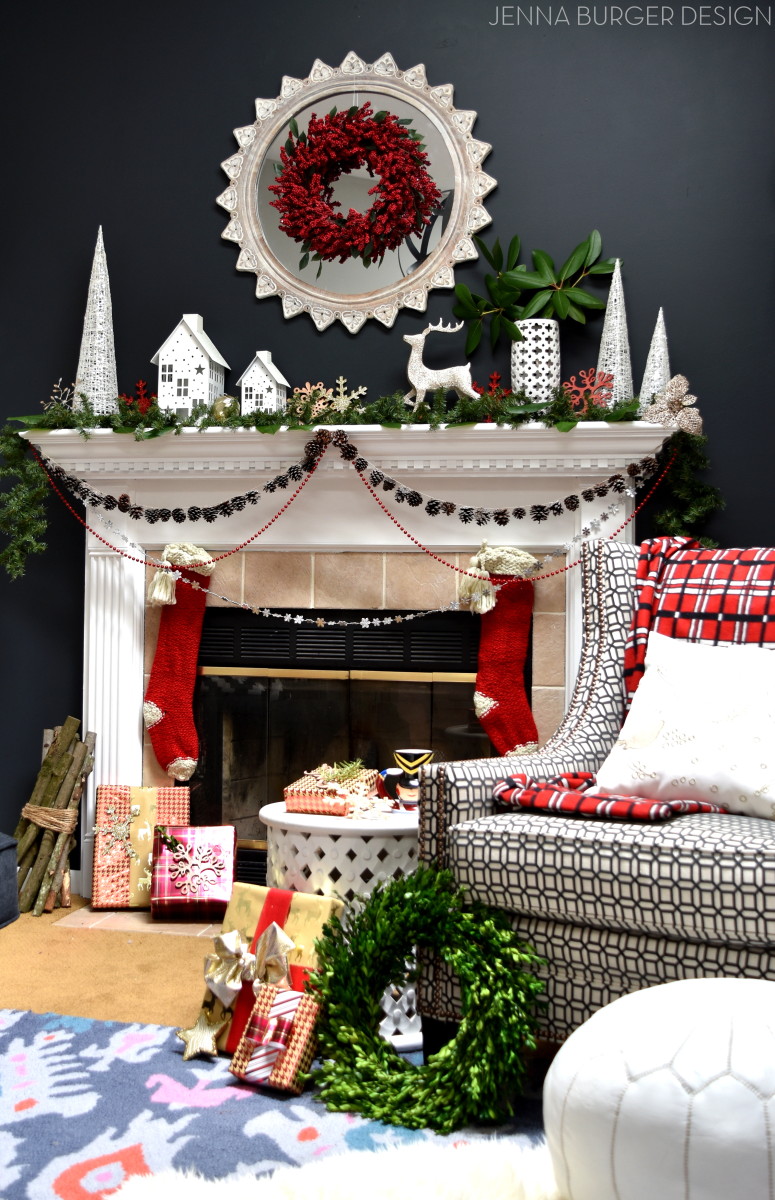
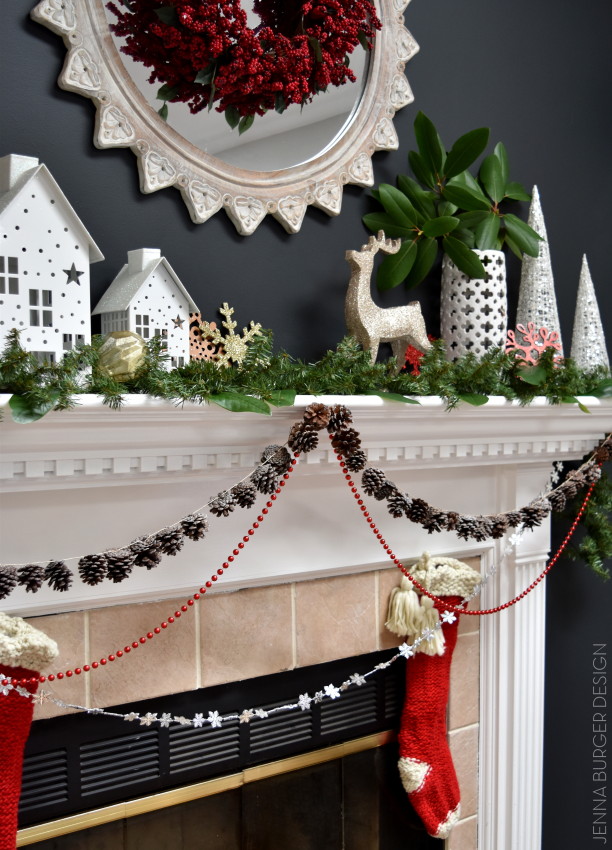
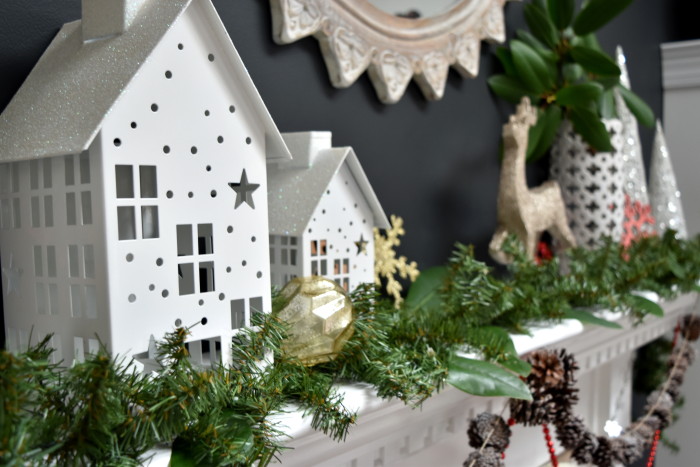
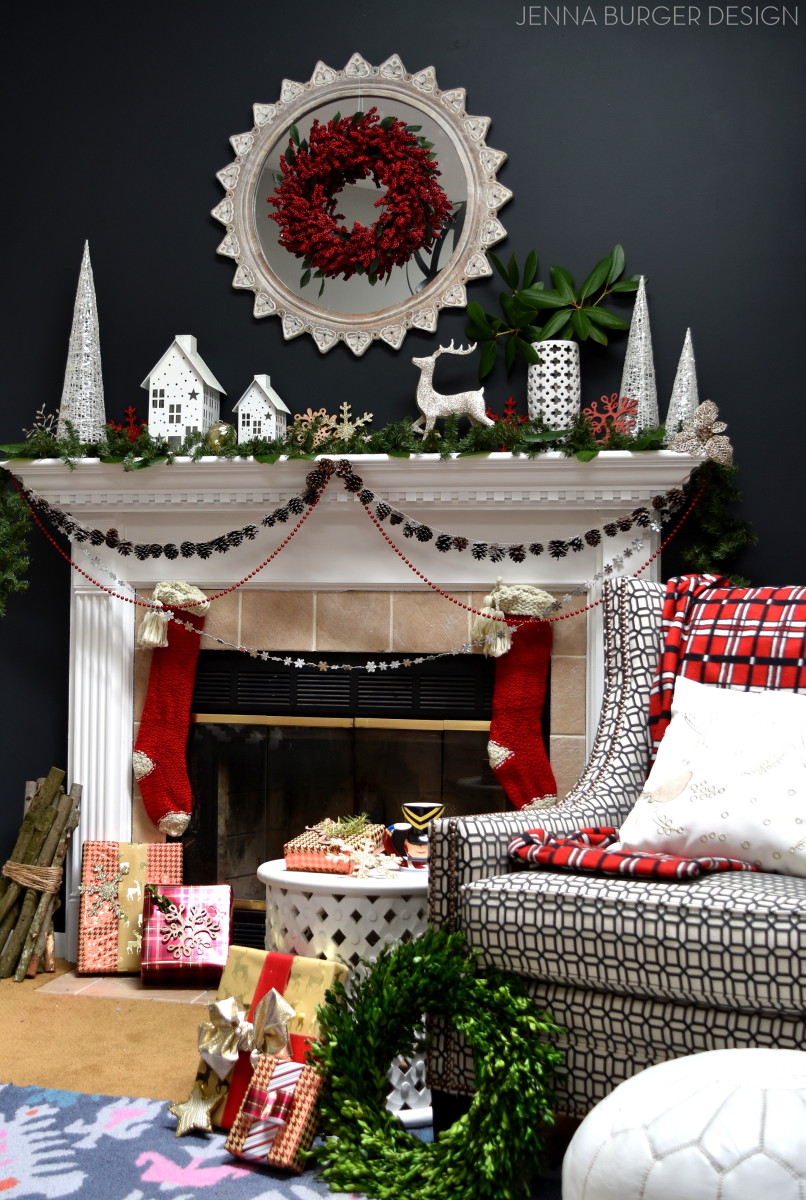
The new black wall – color: Valspar Black Heron – was the perfect backdrop to layering contrast white elements.

Christmas Mantel filled with old & new. Created by www.jennaburger.com

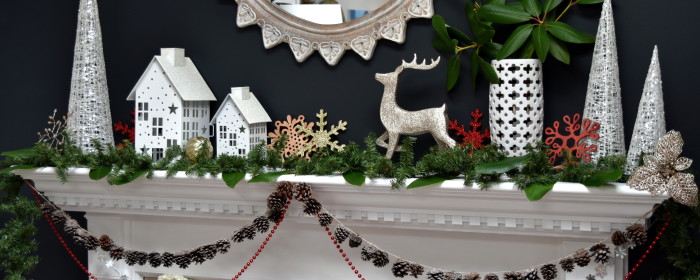
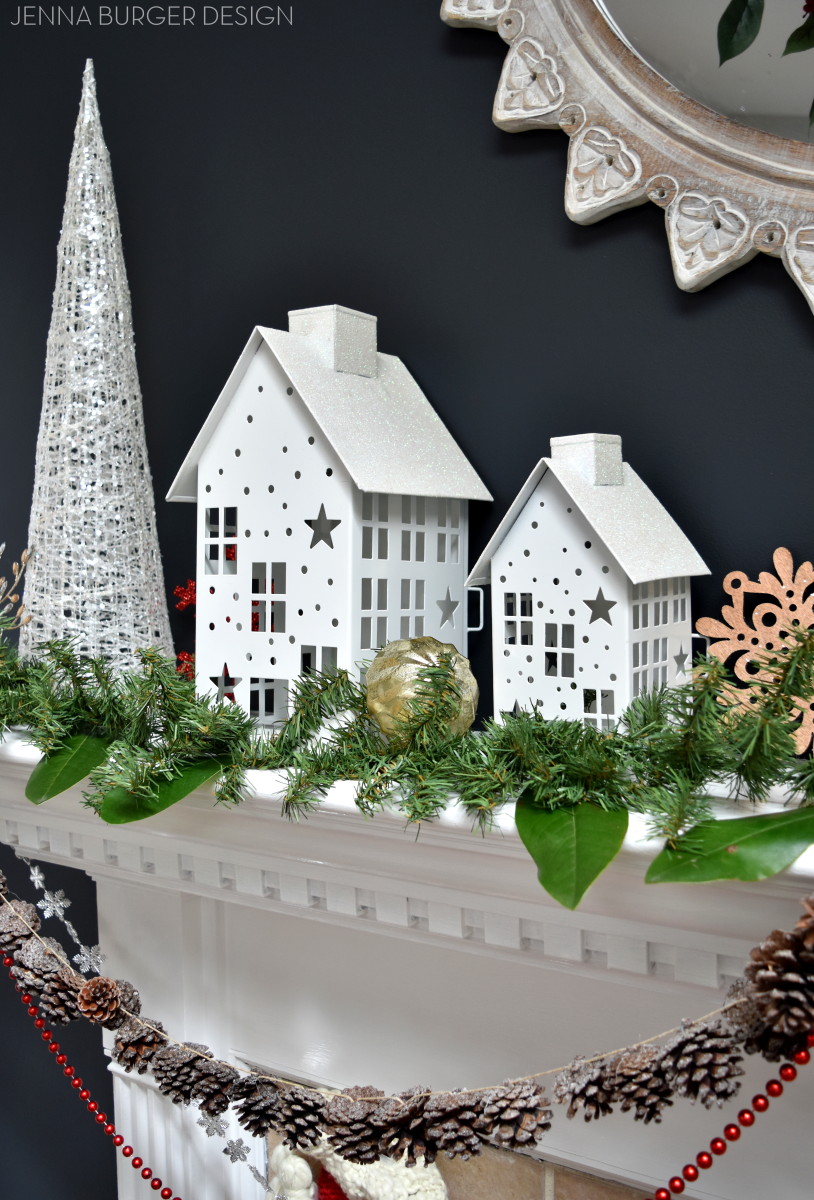
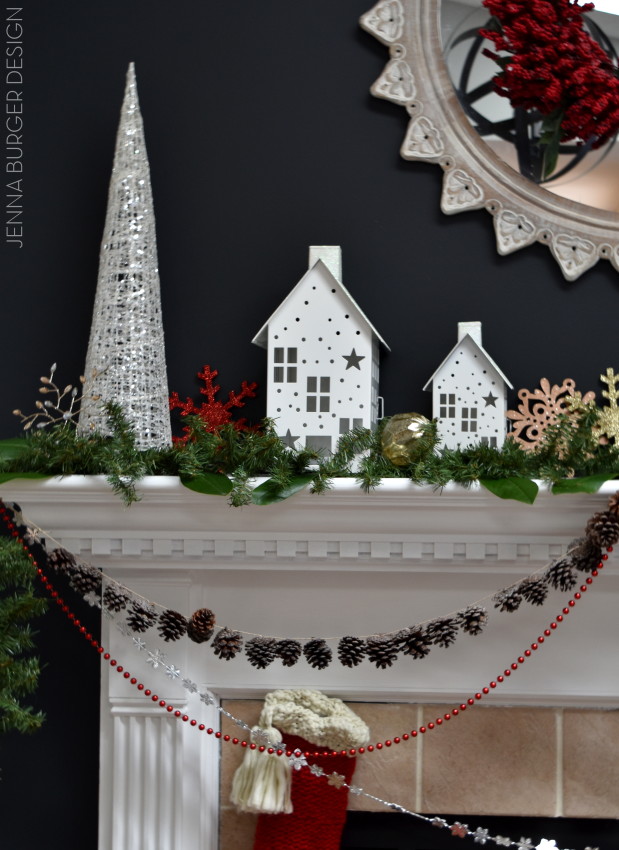
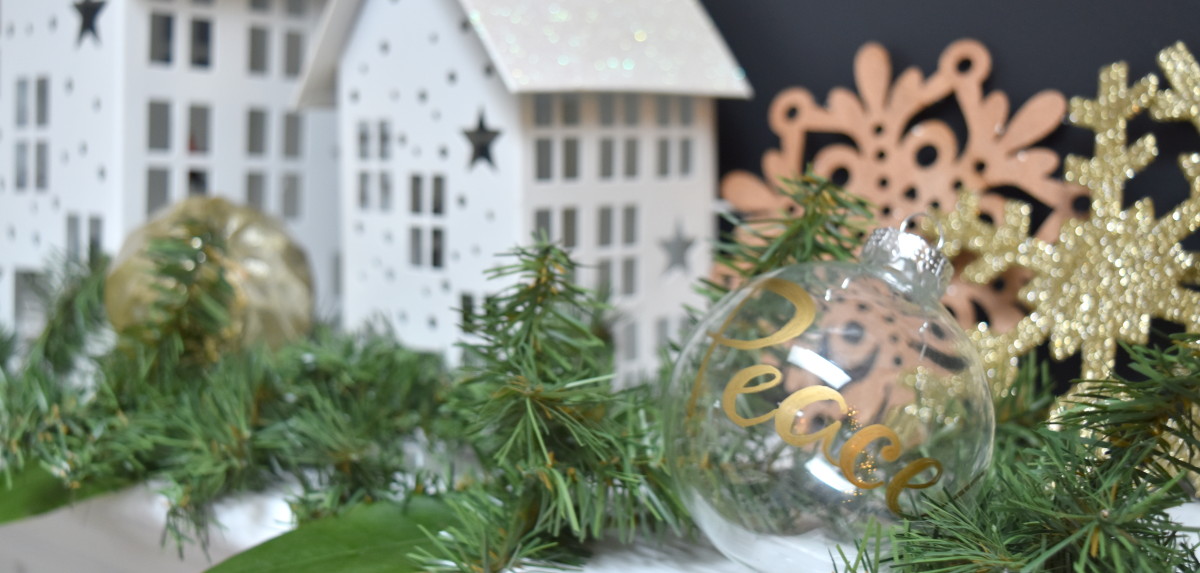
I stumbled upon these adorable white houses – in varying sizes – and couldn’t resist incorporating them in the mantel.  The same houses come in red as well, but I loved the crisp white with glitter roof.

Christmas Mantel filled with old & new. Created by www.jennaburger.com

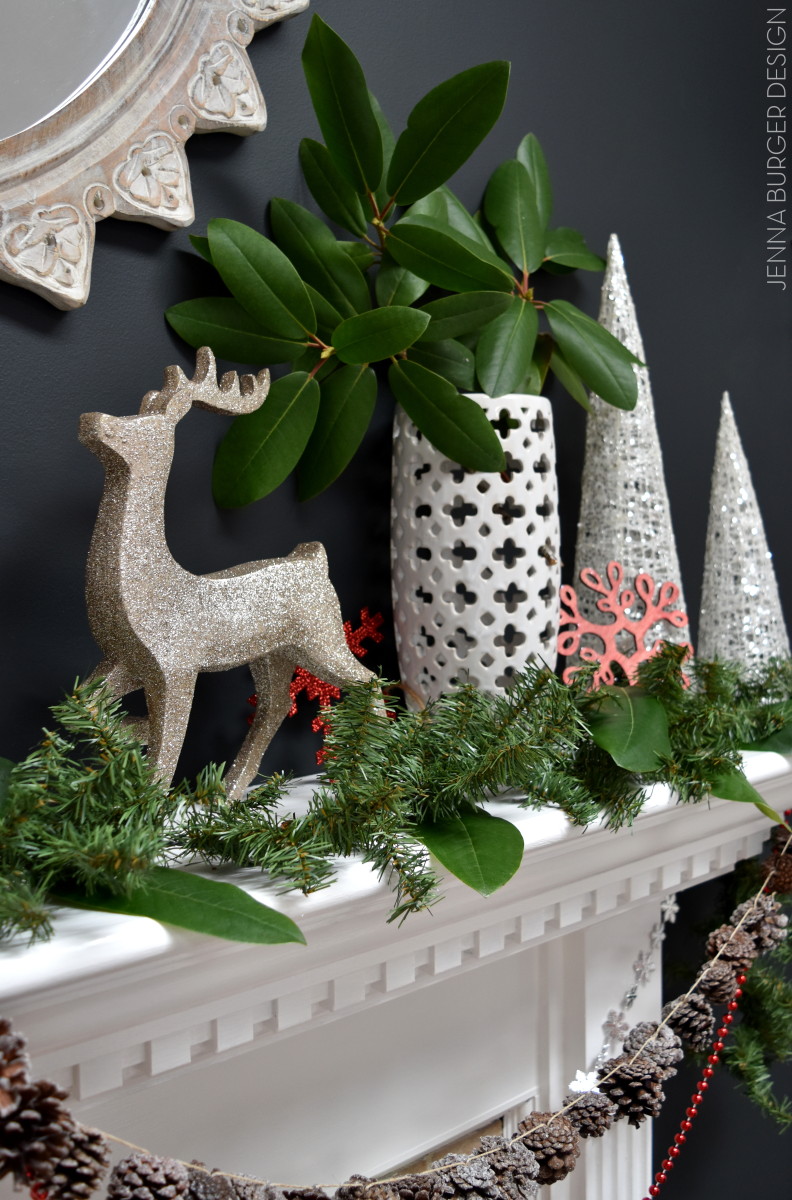
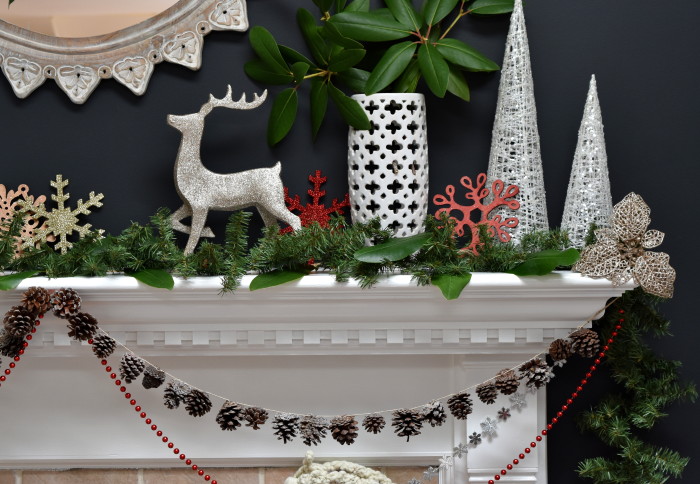
As the base of the mantel, I used a faux greenery garland and added in real cut magnolia leaves that I got from the tree in my yard.

Adding in real leaves amongst the faux, gives such a great look.  It is a nice idea to create a realistic-looking garland without the headache of drying branches + can be used year after year.

I also added a few magnolia branches to a tall white vase to introduce an organic element + height to the fireplace.

Christmas Mantel filled with old & new. Created by www.jennaburger.com

Christmas Mantel filled with old & new. Created by www.jennaburger.com

The sparkly reindeer is another new + fun find and if I could put my finger on a ‘theme’ for this years decor, it would be reindeer…

I snagged a few reindeer elements and I just love what they represent… a woodland, outdoorsy, winter feeling.

Christmas Mantel filled with old & new. Created by www.jennaburger.com

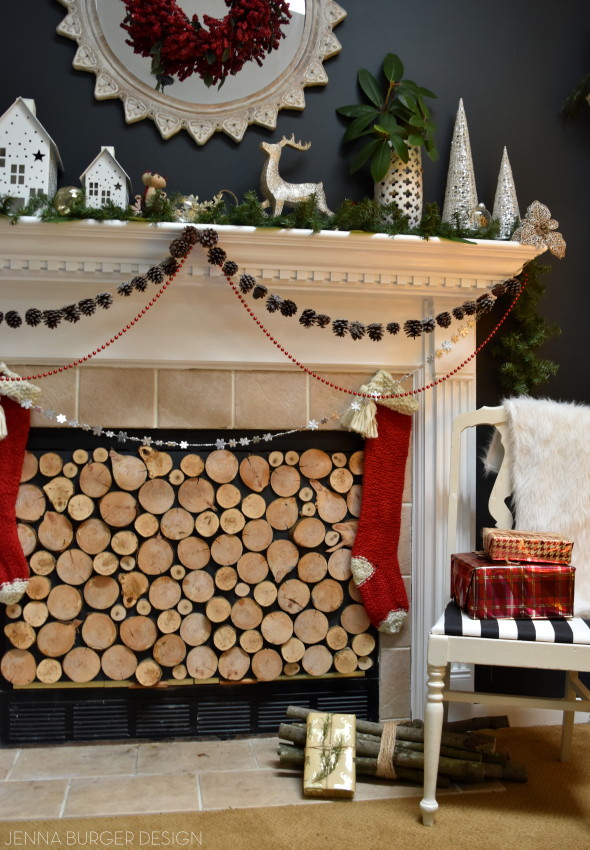
On the face of the fireplace, I draped several strands of differing garland.  I picked up a beautiful pinecone garland – which was a pleasant surprise because I thought they were individual pinecones which I was going to pile in a bowl – and hung it them from end to end on the mantel.

Then using red bead garland – that I got from Dollar General years ago – I hung a longer swag from edge to edge, and finished it with a silver snowflake garland across the front.

Hung by the fireplace with care are adorable knit red + white stockings.  I just love the oversized tassels!

Christmas Mantel filled with old & new. Created by www.jennaburger.com

Christmas Mantel filled with old & new. Created by www.jennaburger.com

Christmas Mantel filled with old & new. Created by www.jennaburger.com

Recognize the mirror?  I used it for my Thanksgiving table, then decided to use it as the focal point above the fireplace and mounted a beautiful berry wreath on the face.

Giving height and grounding each end, I added in my one of my seasonal favorites, the glitter cone-shaped trees in silver + white (check out similar ones here).  I have gold too and they’ll be someplace else in the room.

Christmas Mantel filled with old & new. Created by www.jennaburger.com

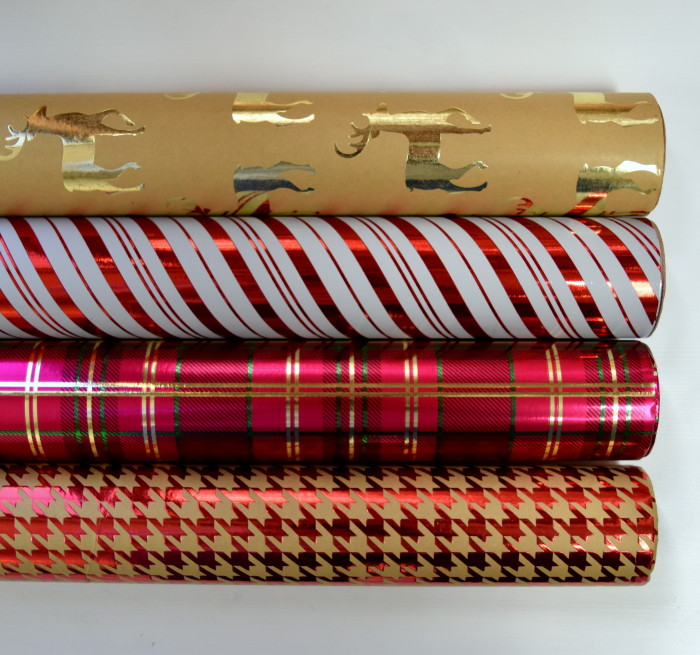
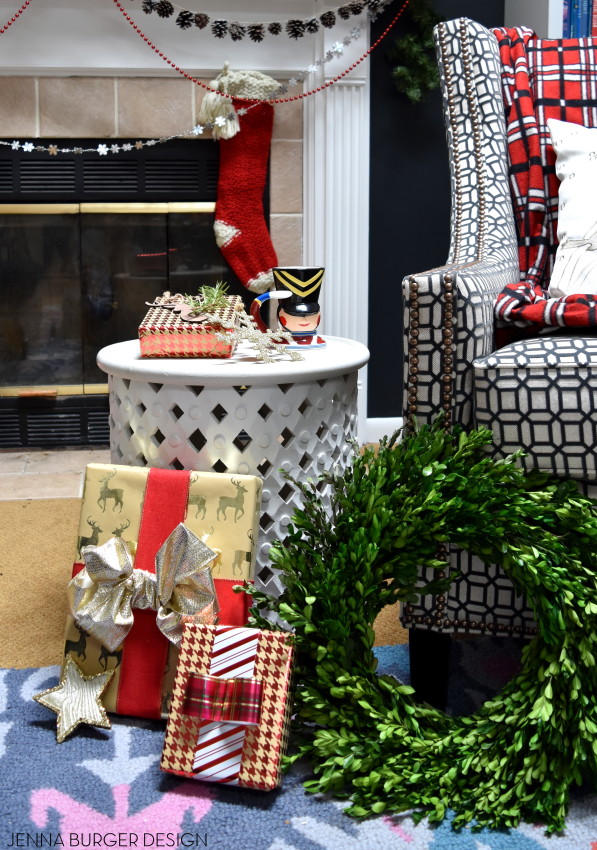
My reindeer ‘theme’ also continued with the wrapping paper I chose.  Check out this paper with the reindeer silhouette – I couldn’t resist.  I loved pairing it with the houndstooth + striped paper.

Christmas Mantel filled with old & new. Created by www.jennaburger.com

Christmas Mantel filled with old & new. Created by www.jennaburger.com

Throughout, I layered in new + old ornaments that added sparkle + shine.  These wood laser-cute ornaments were a surprising find this year and I grabbed a similar wood reindeer ornament version as well.

Christmas Mantel filled with old & new. Created by www.jennaburger.com

I am so happy with how this years Christmas mantel came out.  I had no real plan when I started decorating, but as usual when the everyday decor came down and I was left with a blank canvas, the ideas started to flow.

With some changes + tweaks, the result is pretty fantastically festive…

Christmas Mantel filled with old & new. Created by www.jennaburger.com

I can’t let you go without sharing that the annual Holiday Housewalk hosted by Jennifer Rizzo begins today!  This is the 3rd year that my home will be on the tour along with about 30 others.  You will NOT WANT TO MISS IT.  My home is coming up later in the week, so I hope you will stop back.

Holiday Housewalk hotsed by Jennifer Rizzo

Have a blessed Christmas season and thanks for checking out my mantel.

DISCLOSURE: THIS POST IS A COLLABORATION WITH LOWES, BUT ALL OPINIONS ARE 100% MY OWN.

Decorating the Home using Fall Favorites

The chill is in the air and I’m wearing a sweater today.  I’m actually lovin’ it!

How about in your neck of the woods…  Does it feel like Fall yet?

Aside from my favorite Fall things like wearing oversized cable knit sweaters, going apple picking, and Sunday football with the family, I love the changing over of blankets from light linen to heavy wool, and the swapping out of pillows from bright hues of yellow to deeper plums and emerald.

And that was exactly what I did last weekend.

Check out this living room shot I snapped & shared on Instagram

Decorating for Fall: changing over of blankets from light linen to heavy wool, and swapping out of pillows from bright hues of yellow to deeper plums and emerald

Even though I am not completely ready to say goodbye to the long, warm days of Summer, Fall has a special place in my heart. It’s the season when I got married, it’s the time of year when my daughter was born, and it’s when a routine can once be established as the kids head back to school.

Whether you love the look of warm, rich hues (all year round) or simply adore the Fall and want some inspiration for making a few seasonal updates, there are a simple ways to spruce up your home décor using Fall Favorites…

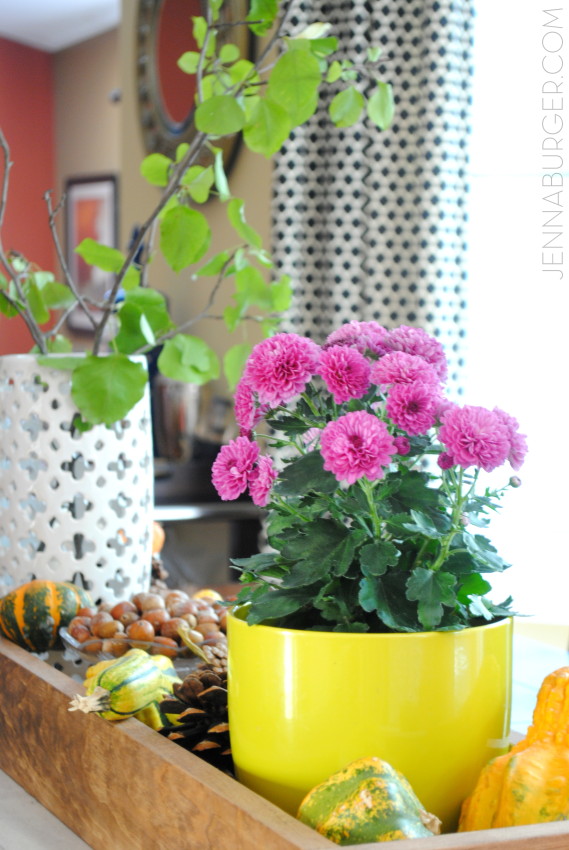
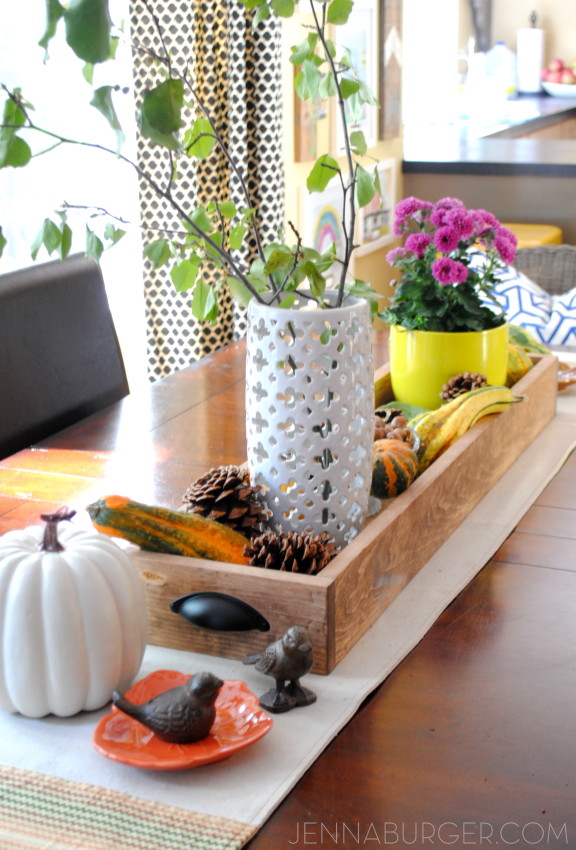
PUMPKINS, GOURDS, PINECONES, APPLES
Fall is all about nature, and layering in as many seasonal favorites amongst your everyday décor can make a simple, but big impact look.

> Pumpkins in a platter.

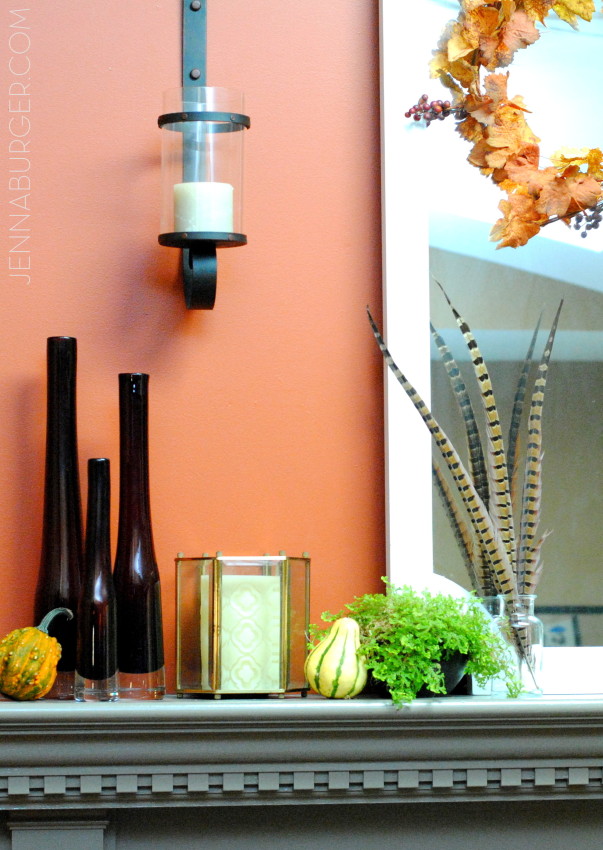
> Gourds on the mantel.

> Pinecones as a centerpiece.

These are all easy and beautiful ways to decorate for the season. Gathering leaves from the yard (or faux from the craft store) can be the perfect base as seasonal go-to’s are layered atop. Or after your family apple picking adventure, put together an overflowing collection of apples in a low bowl or basket that can adorn the dining table.

All simple ideas that make a big impact!

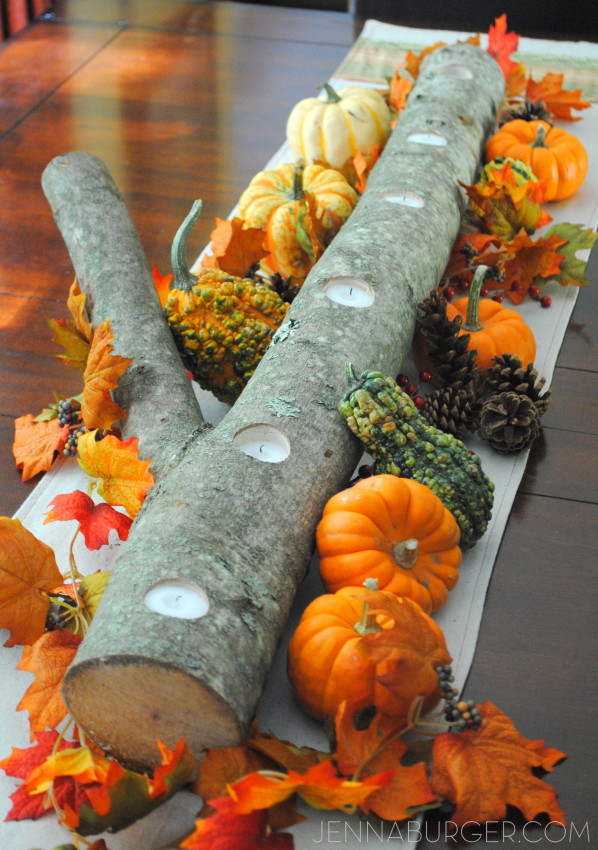
Still one of my favorites EVER… a log centerpiece with leaves + pumpkins.

DIY: Log Centerpiece - perfect for the table or mantel. More Decorating ideas for the Home using Fall Favoritestutorial for >>> log centerpiece

Pumpkins, gourds, leaves on the mantel. More Decorating ideas for the Home using Fall FavoritesFall mantel with feather

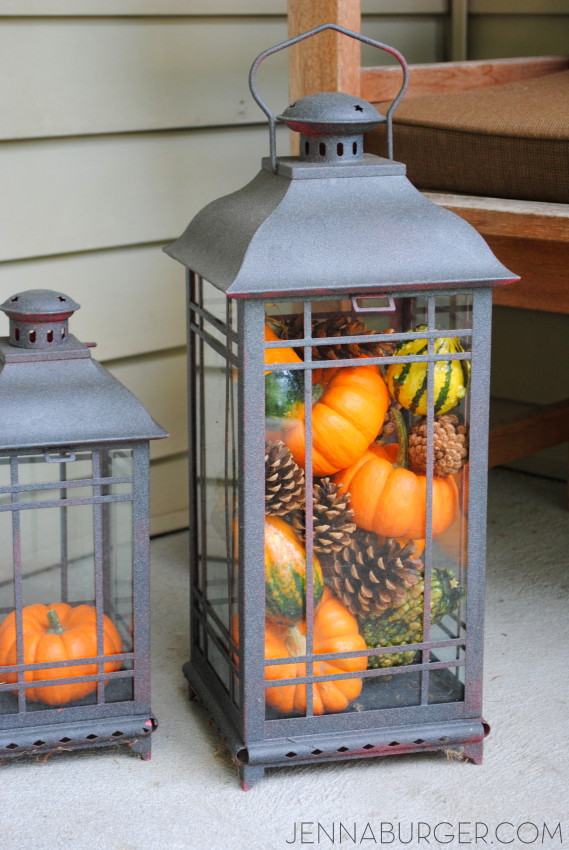
Pumpkin filled lantern. More Decorating ideas for the Home using Fall Favorites.Lantern filled with pumpkins

DECORATE WITH NATURE
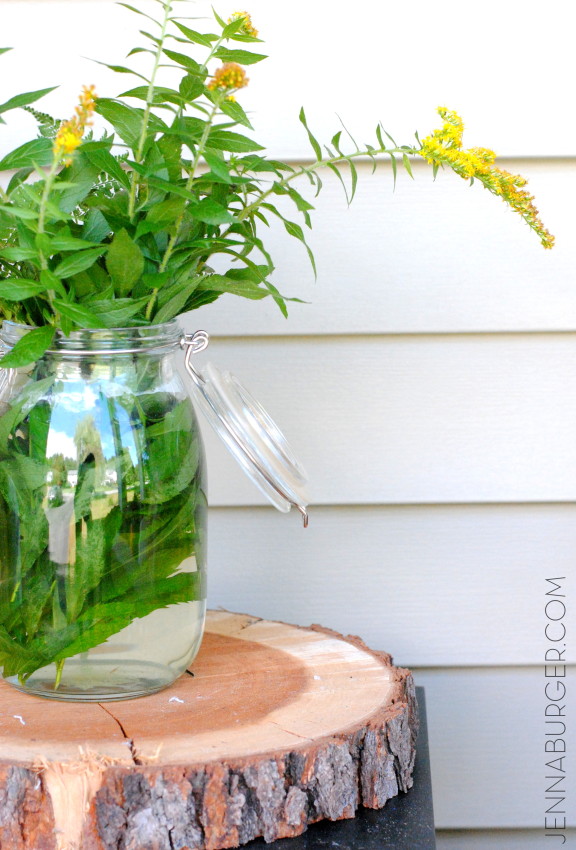
You may not need to go far or spend any money to adapt your décor for the coming season. Be inspired by your surroundings. Head outdoors to collect leaves, branches, and any natural materials that would be ideal to create an eye-catching table centerpiece or wreath. Arrange a bunch of branches with leaves of varying colors in a vase or glass mason jar and display them on a dining table or entry table vignette.

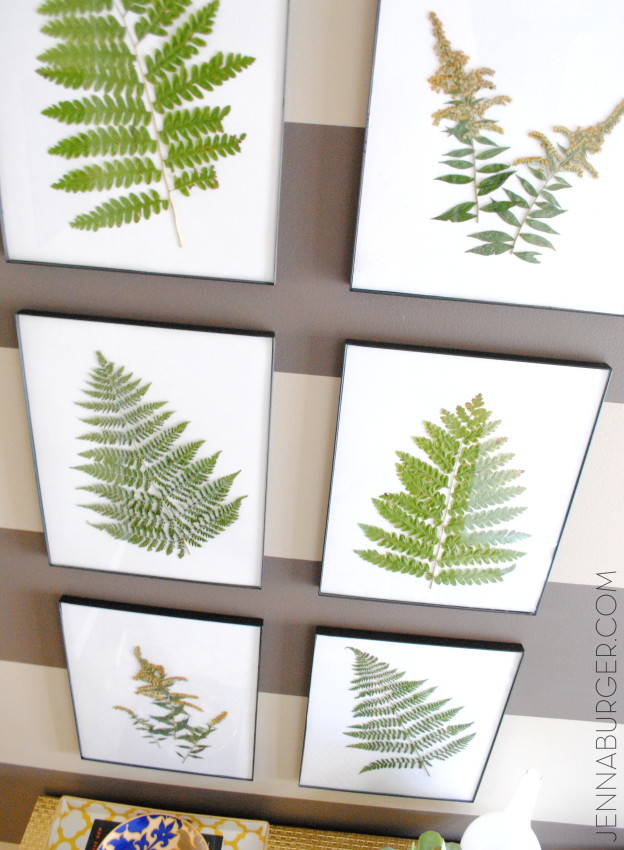
One other idea is to press your leaf findings and display them in a picture frame as I did with these ferns found in my yard.

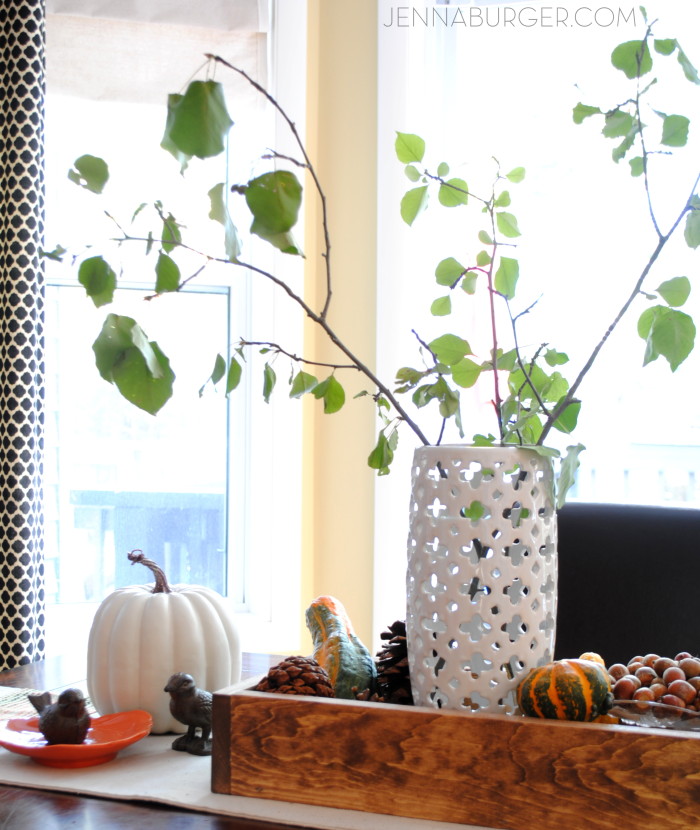
Fall Tablescape: More Decorating ideas for the Home using Fall Favorites.Fall tablescape {gourds galore}

Fern Art in a foyer. More Decorating ideas for the Home using Fall Favorites.tutorial for >>> Fern Art

'leaves' in a vase. More Decorating ideas for the Home using Fall Favorites.

ADORN YOUR DOOR
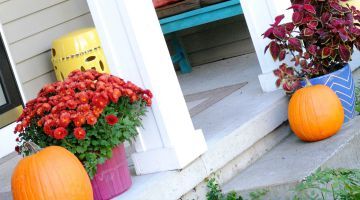
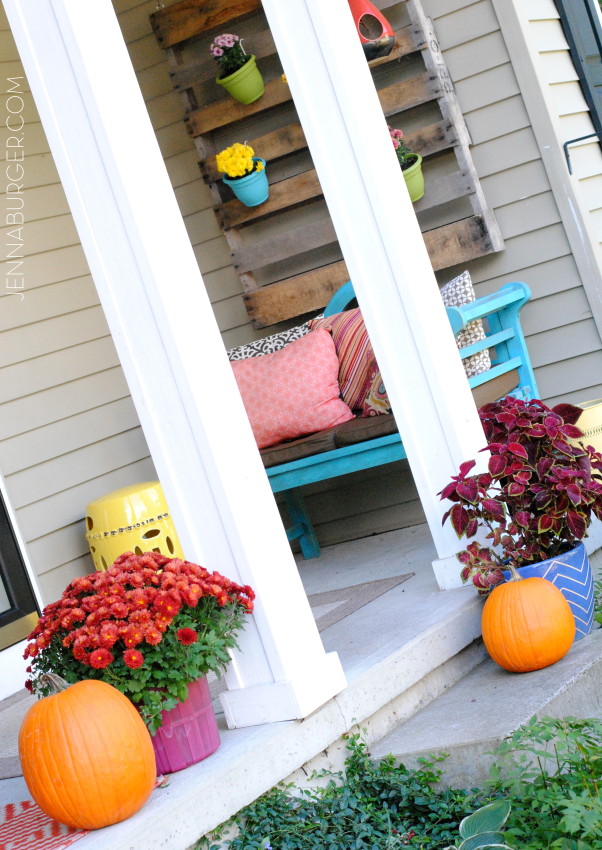
The front door, often thought of as the “mouth” of a home, is the perfect place to make a statement. Have little time or a small budget, focus on the areas of the home that get the most traffic. Adorning your front door with a beautiful seasonal wreath or decorating a front porch with colorful mums will truly create an inviting and welcoming first impression.

Other seasonal favorites to decorate with can be indian corn, hay bales, and varying sizes and colors of pumpkins. Adding in a plaid throw or tweed pillow can truly create the feeling of a textural cornucopia of color for the season as well as the springboard for what’s to come in the homes interior.

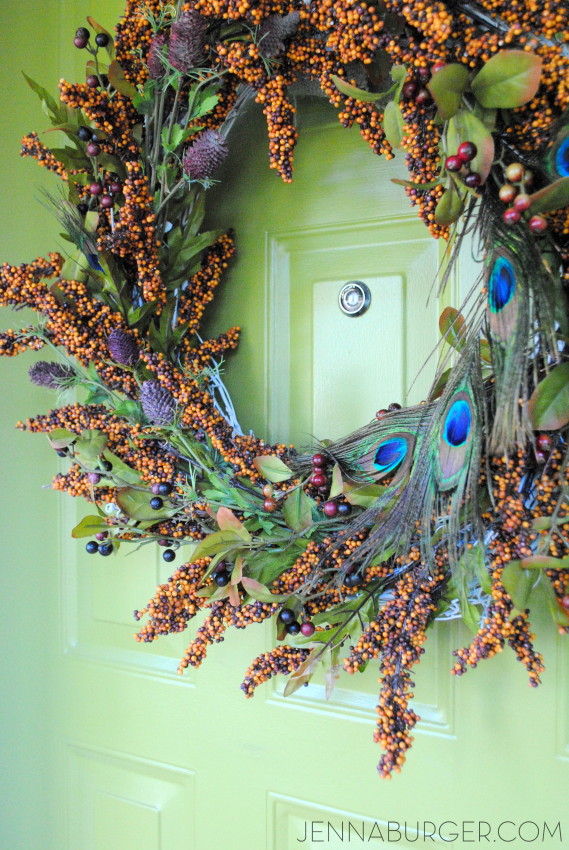
Fall Wreath. More Decorating ideas for the Home using Fall Favoritestutorial for >>> Autumn wreath with plum + peacock accents

SEASONAL COLORS + PATTERNS
The unique and range of seasonal hues including reds, oranges, and yellows can lighten up not only your spirits but add warmth and contrast to your everyday interior. Beyond the typical warmer colors of Fall, other favorites include deep plum, emerald, mustard, and winter white – all ideal to layer in for the coming Fall season.

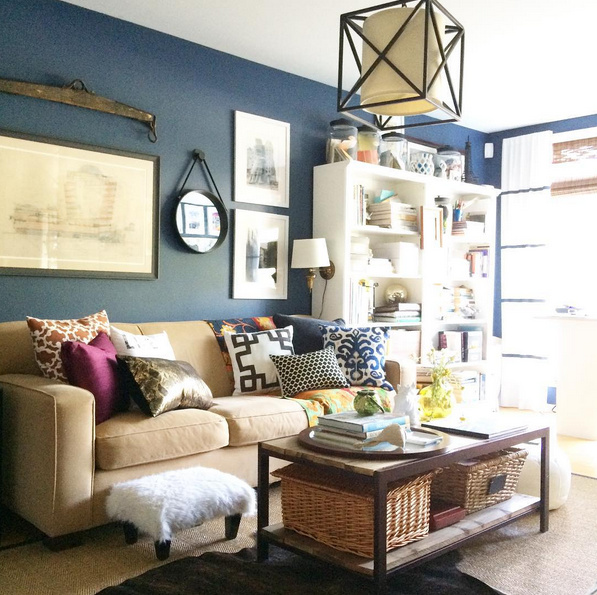
Fall is all about feeling cozy and warm. Swapping your everyday décor staples with ones that have more texture (like a new linen lampshade), will give an instant boost for the season. The simplest and least expensive way to update a space for Fall is to swap out those lighter, brighter throw pillows of Summer for a style that is more lush and soft. Try fabrics like velvet, wool, and flannel in hues of chocolate, golds, and warm pastels.

Another big impact look would be to introduce a new rug that will set the tone for the rest of the space. A rug can anchor a room and can instantly change the aesthetic of a space. A rug with warm hues and an interesting pattern could be the perfect change to immediately update a room.

Fall Porch. More Decorating ideas for the Home using Fall Favorites.Fall Front Porch

Fall Tablescape: More Decorating ideas for the Home using Fall Favorites

Fall Tablescape: More Decorating ideas for the Home using Fall FavoritesFall tablescape {gourds galore}

SMELL MATTERS
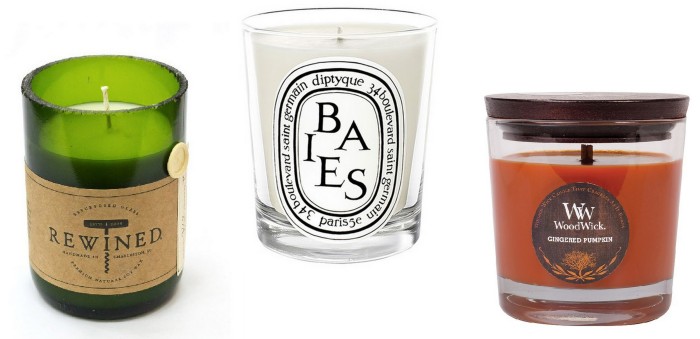
Home is not only about how it looks, but also how it feels and smells. Making a natural air freshener using cinnamon and apples can truly make for a yummy, cozy, welcoming aroma. Or try a candle that has a wood or spice scent.

3 yummy favs…

Favorite Fall candlesRetwined candle / Baies Scented CandleWoodwick Gingered Pumpkin

Autumn is truly like no other as the days turn crisp and the leaves reflect the hues of colorful candy corn. Seasonal décor doesn’t have to be elaborate or time consuming.

A few simple touches go a long way – the simpler, the better.

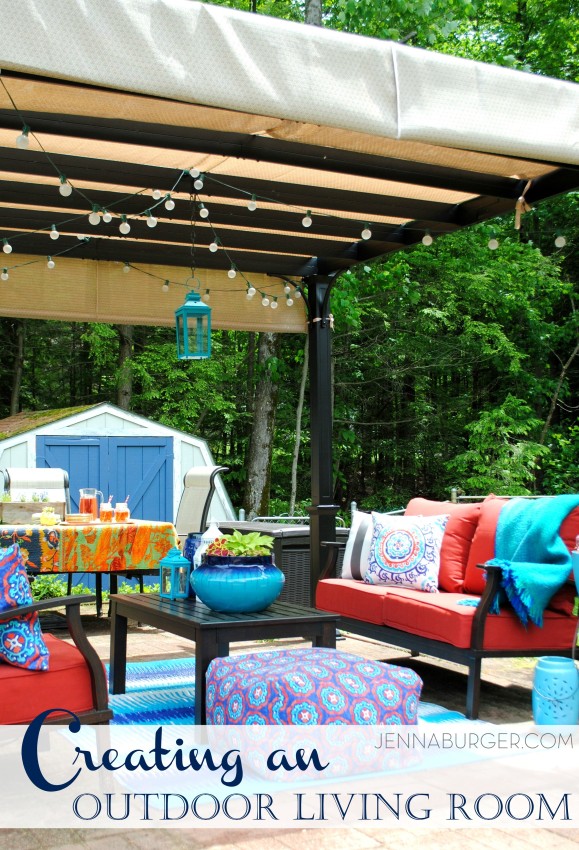
Creating an Outdoor Living Space

I don’t know about you, but around our homestead, it takes a solid 3 weeks to get the outdoors prepped + spruced to enjoy for the coming warmer months ahead.

As the final piles of snow melted only a little over a month ago, work began on Summerizing the exterior.  FINALLY after many trips to the garden center, the last flowers & plants were purchased yesterday, so our exterior living spaces are almost complete and I can’t wait to share them with you… coming soon.

In the meantime, I’ll inspire you with fresh ways + ideas to bring the indoors out with budget-friendly ideas for creating an outdoor living space

Bring the indoors OUT... Helpful budget-friendly ideas to create an outdoor oasis!

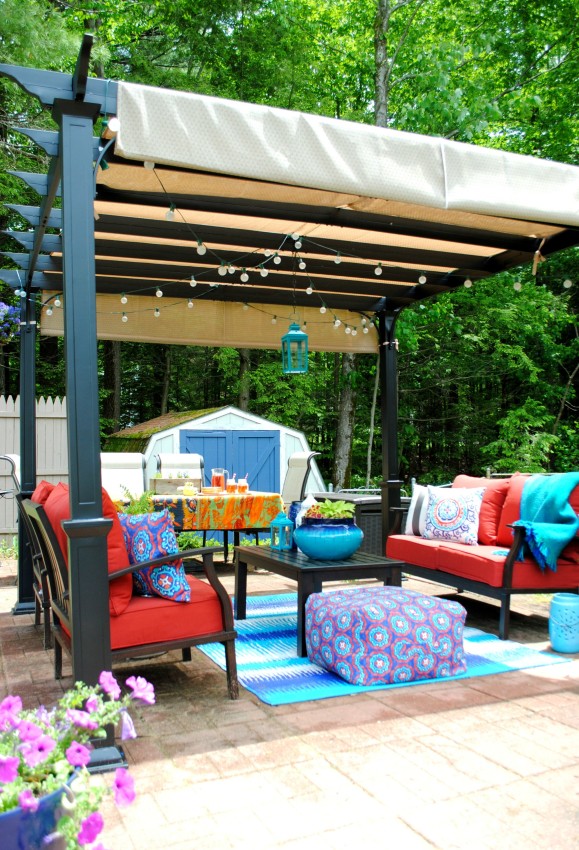
Whether a deck, porch, or patio there are ways to bring the indoors out to create a beautiful, serene, and inviting outdoor oasis. With comfortable seating, stylish layers, and lots of flowers and greenery, your outdoor space will become the most used “room” in, and outside, of the home for the Summer months.

BRING THE INDOORS OUT
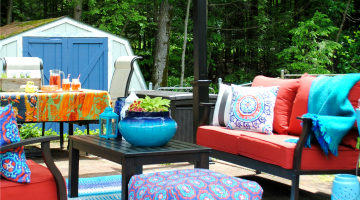
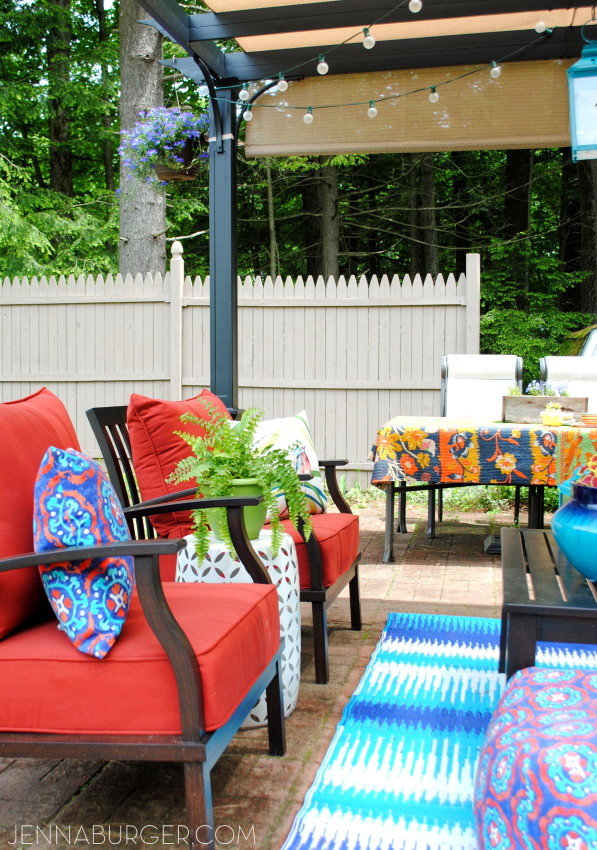
Surround yourself with what you love by bringing the indoors out. Creating an outdoor living room that is truly an outdoor oasis is similar to designing an interior haven. Surround yourself with things that are most meaningful to you and elements that bring you happiness.  Make an outdoor space fun and unexpected by introducing a pretty patterned table cloth, wind chimes that blow in the breeze, and pops of color through pillows.

Bring the indoors OUT... Helpful budget-friendly ideas to create an outdoor oasis!

Similar to a room inside your home, once you have your basics, add in layers – lanterns, candles, flowers, and plants.

Our Summer Deck 2014Bring the indoors OUT... Helpful budget-friendly ideas to create an outdoor oasis!

COMFORTABLE SEATING
An outdoor oasis isn’t complete without lots of comfortable seating. Once the summer months arrive, almost every waking moment will be spent outdoors soaking up the sun. Be the house where everyone gathers on weekend evenings.

Bring the indoors OUT... Helpful budget-friendly ideas to create an outdoor oasis!Our Patio Paradise 2014

Bring the indoors OUT... Helpful budget-friendly ideas to create an outdoor oasis!

Either individual oversized Adirondack chairs or an outdoor sofa fit for two (or more) is a necessity for outdoor living. Load up on comfy pillows and you may never head back indoors.

Put your feet up by adding a few outdoor ottomans that are waterproof to truly create an outdoor living room.

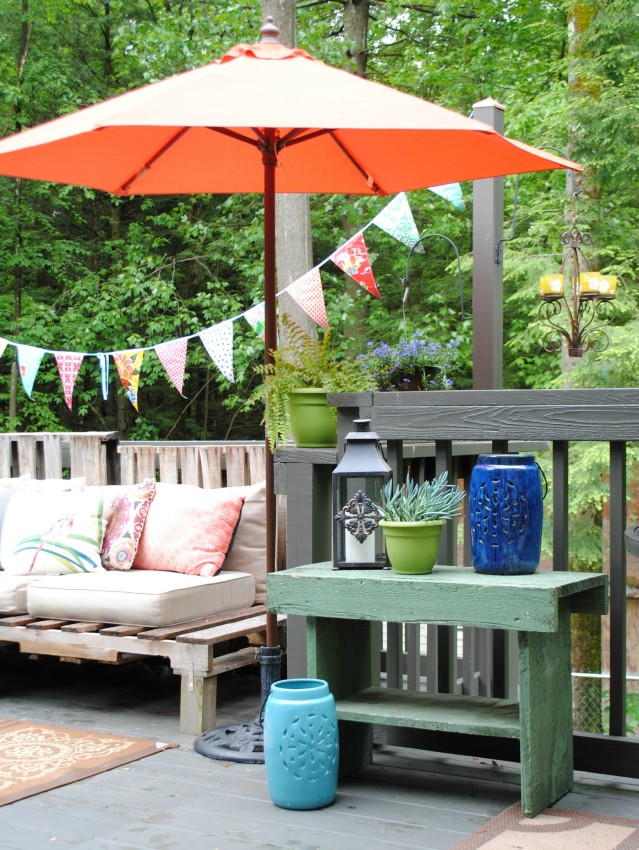
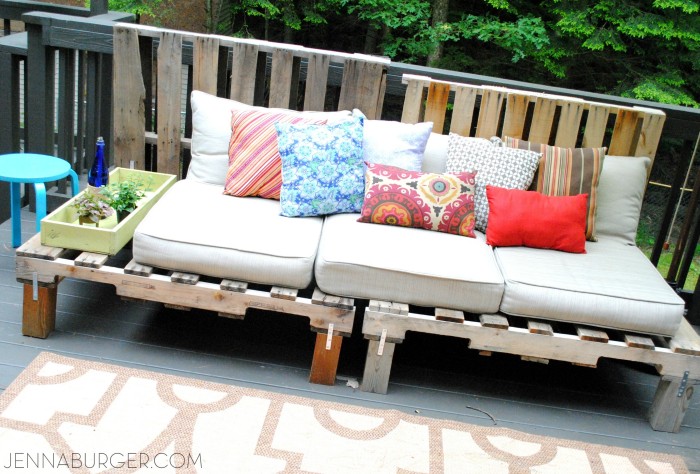
There are many local furniture stores and online shops that have a wide selection of outdoor sofas and chairs that are similar to the comforts of your living room. Or make your own, like I did with shipping pallets.

Bring the indoors OUT... Helpful budget-friendly ideas to create an outdoor oasis!Tutorial for DIY Pallet Sofa

STORAGE
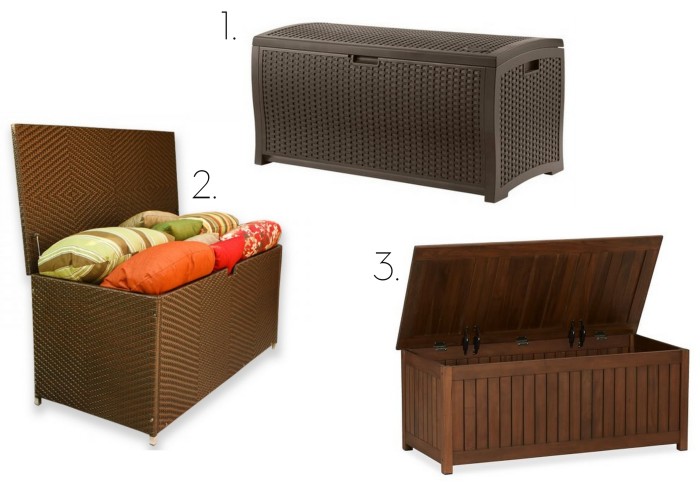
Similar to the indoors, space for storage is a must. No matter if you’re an empty nester or a family of 5, it’s essential to have a spot to store the outdoor pillows, BBQ necessities, and sand toys.

Many outdoor furniture pieces have built-in storage compartments or a stylish storage box that compliments the setting. Alternatively, try an outdoor ottoman flip top that duals as storage.

Outdoor Storage ideasleft to right: resin wicker box / wicker storage chest / wood storage bench

LAYERS
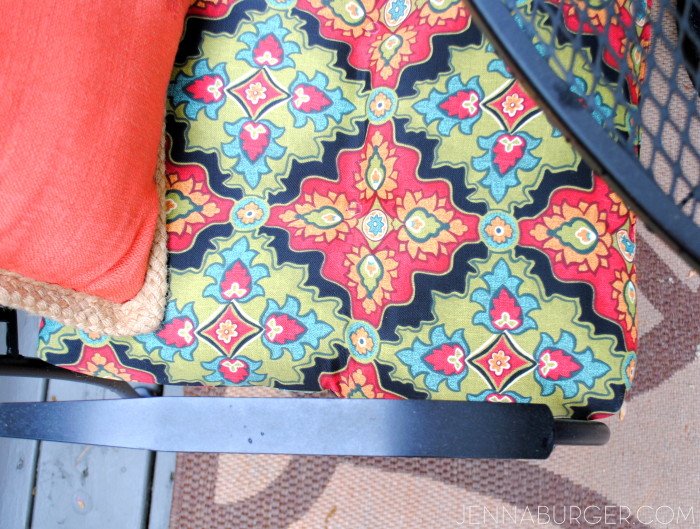
An outdoor setting isn’t complete without a stylish rug. Adding a rug to a porch or patio isn’t just needed to make a space pretty, but it also provides a comfy spot to kick off the flip flops without the fear of a stubbed toe or unwanted splinter. Kids can walk around barefoot (which most love to do in the summer months) while having a barrier between their toes and the hard surface.

Outdoor rugs are a favorite because they can live outdoors for the summer and be brought indoors during the winter. Rugs made for the elements, are also ideal for foyers, mudrooms, and even under dining room tables (especially with youngsters in the home).

I am loving the outdoor rugs made of polypropylene because they are super easy to clean, fold up tight for storage, and are fairly inexpensive!

Bring the indoors OUT... Helpful budget-friendly ideas to create an outdoor oasis!

A sneak at this years front porch with a new 3′ x 6′ rug (upper left) that I found at Five Below for $5…

Bring the indoors OUT... Helpful budget-friendly ideas to create an outdoor oasis!

FLOWERS
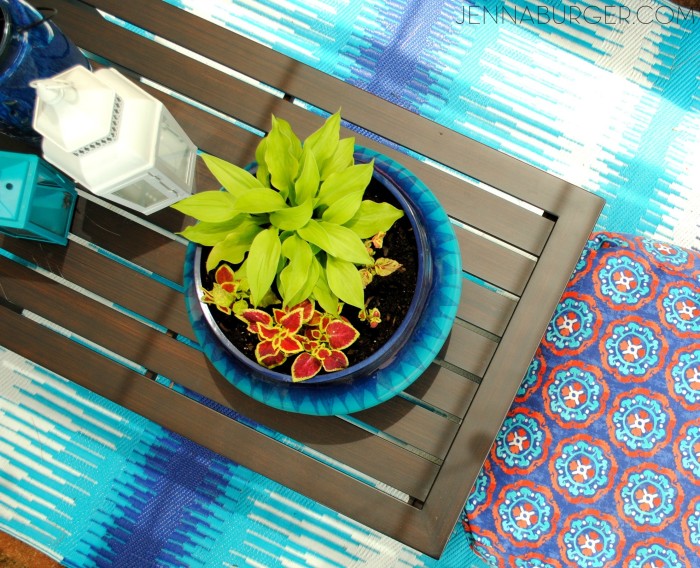
Last, but certainly not least, an outdoor oasis isn’t complete without surrounding it with greenery. Whether your favorite spot is in the sun or the shade, surround your exterior setting with lush plants and colorful flowers in varying sized pots.

Bring the indoors OUT... Helpful budget-friendly ideas to create an outdoor oasis!Potted herbs are a great alternative to flowers. Or try perennials in a pot, then transfer them into the ground at the end of the Summer season so they can be enjoyed again next year.

And there you have it…  5 ways to extend the beauty on the inside to the outdoors.  I’m off to finish up the last potted plants, lay mulch in the side garden, and finally snap some pictures so I can share what I’ve been working on for the last weeks.

Have a wonderful memorial day weekend!

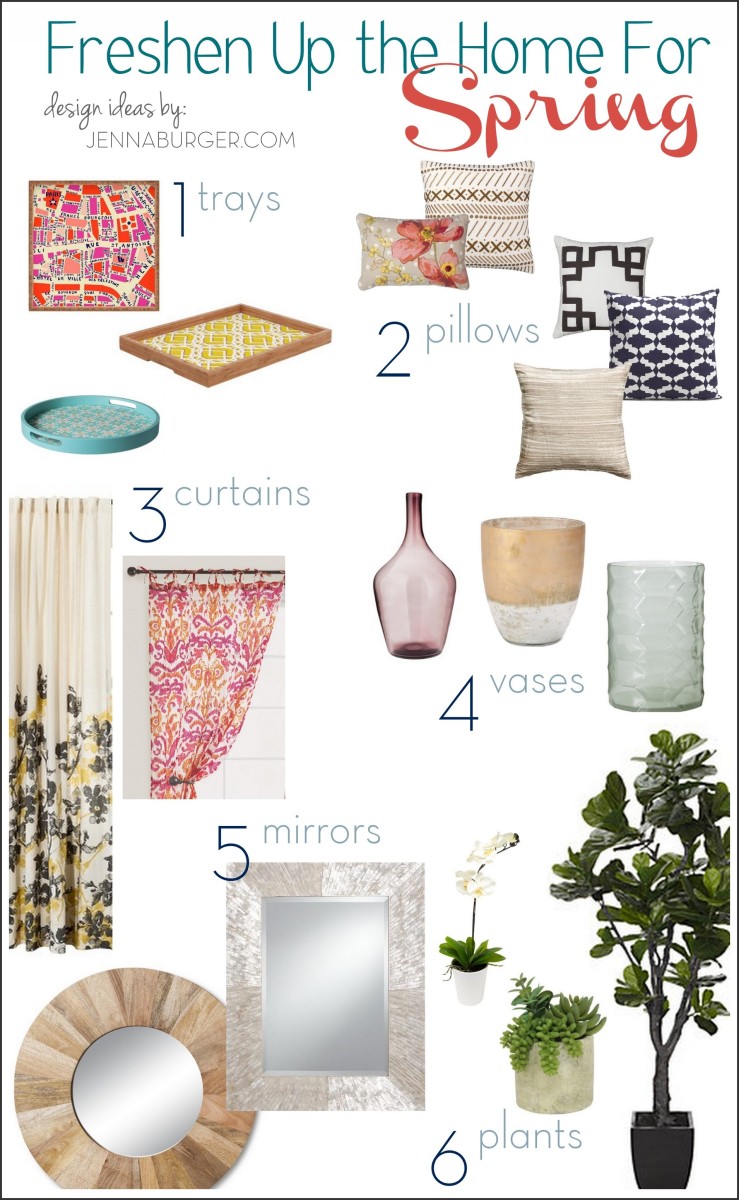
Freshen Up The Home for Spring

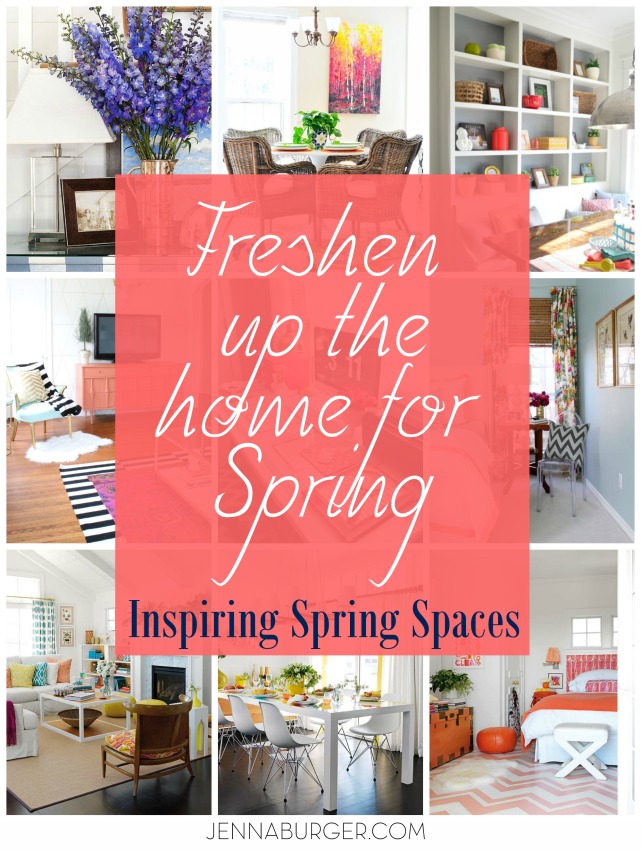
Freshen up the home for SPRING with room inspiration + 6 items that every room can use to give a freshened look! Easy Inspirational ideas by @Jenna_Burger, www.jennaburger.com

Yes, there is still snow on the ground.  Yes, the temps are still only in the 30s.  But it’s officially SPRING!

It has been a looooong winter with a cycle of sickness that our party of 5 can not seem to break out of.  Thankfully, with 50s in the forecast for later this week I am feeling happy + hopefully that Spring is on it’s way and that of course means I am feeling the itch to freshen up our home for Spring.

As Spring starts to spring (hehe) and we begin the process of coming out of hibernation, it organically feels like the best time of year to freshen things up.  To bring in the spirit of the season, here are some of my favorite spaces for Spring that I am pulling inspiration from…

INSPIRING SPACES.

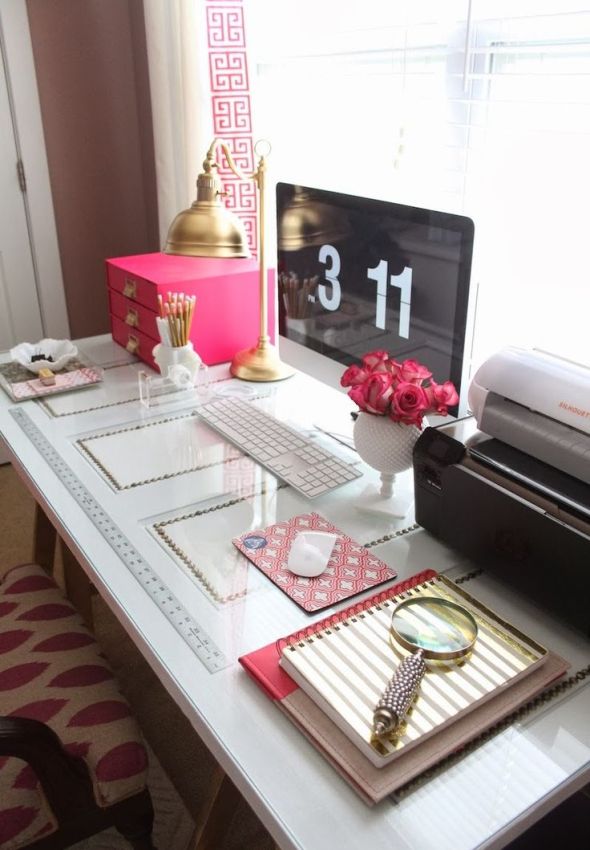
Living Room, Dining Room, and Bedroom spaces filled with a white backdrop + pops of coral, tangerine, yellow, and turquoise – all perfect hues for Spring leading into Summer. Images via HomeditFreshen up the home for SPRING with room inspiration + 6 items that every room can use to give a freshened look! Easy Inspirational ideas by @Jenna_Burger, www.jennaburger.comA dreamy desk for any gal!  via m{pression

Freshen up the home for SPRING with room inspiration + 6 items that every room can use to give a freshened look! Easy Inspirational ideas by @Jenna_Burger, www.jennaburger.com

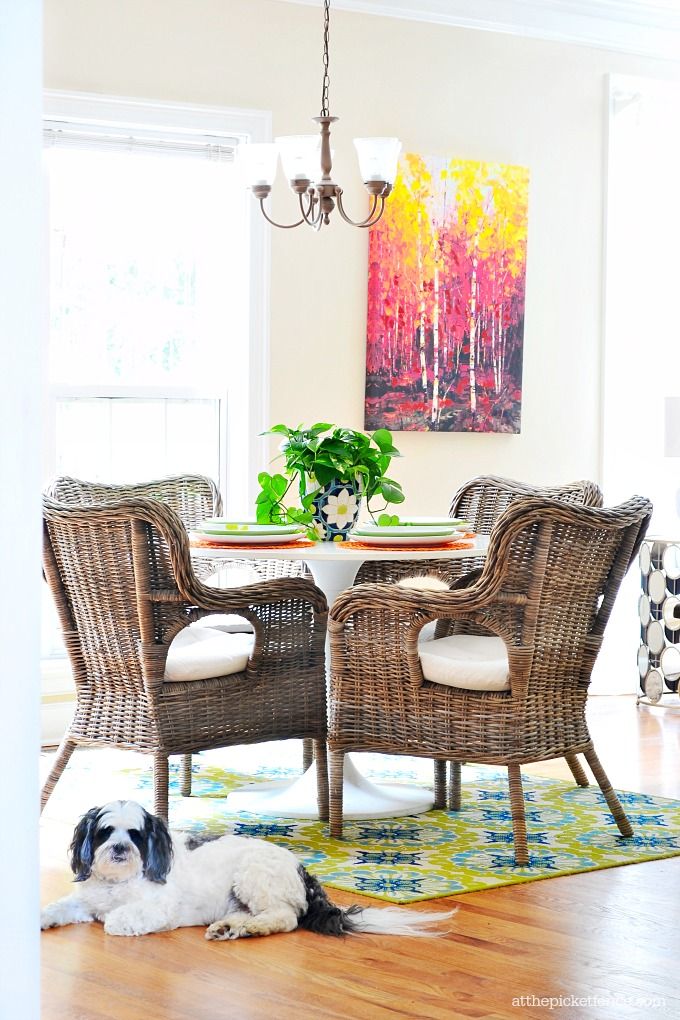
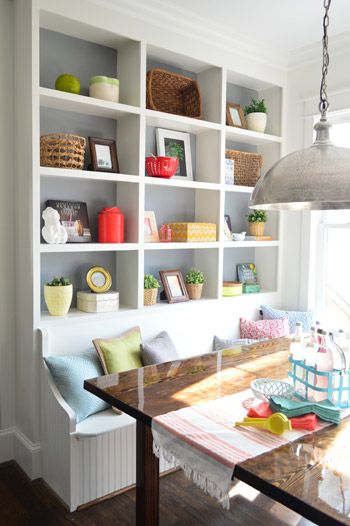
Light & airy is ideal for Spring!  Fresh pops of color in greens & blues makes this breakfast nook so inviting by Heather of At the Picket Fence.

Freshen up the home for SPRING with room inspiration + 6 items that every room can use to give a freshened look! Easy Inspirational ideas by @Jenna_Burger, www.jennaburger.com

More color + texture in the breakfast room by YHL.

Freshen up the home for SPRING with room inspiration + 6 items that every room can use to give a freshened look! Easy Inspirational ideas by @Jenna_Burger, www.jennaburger.com

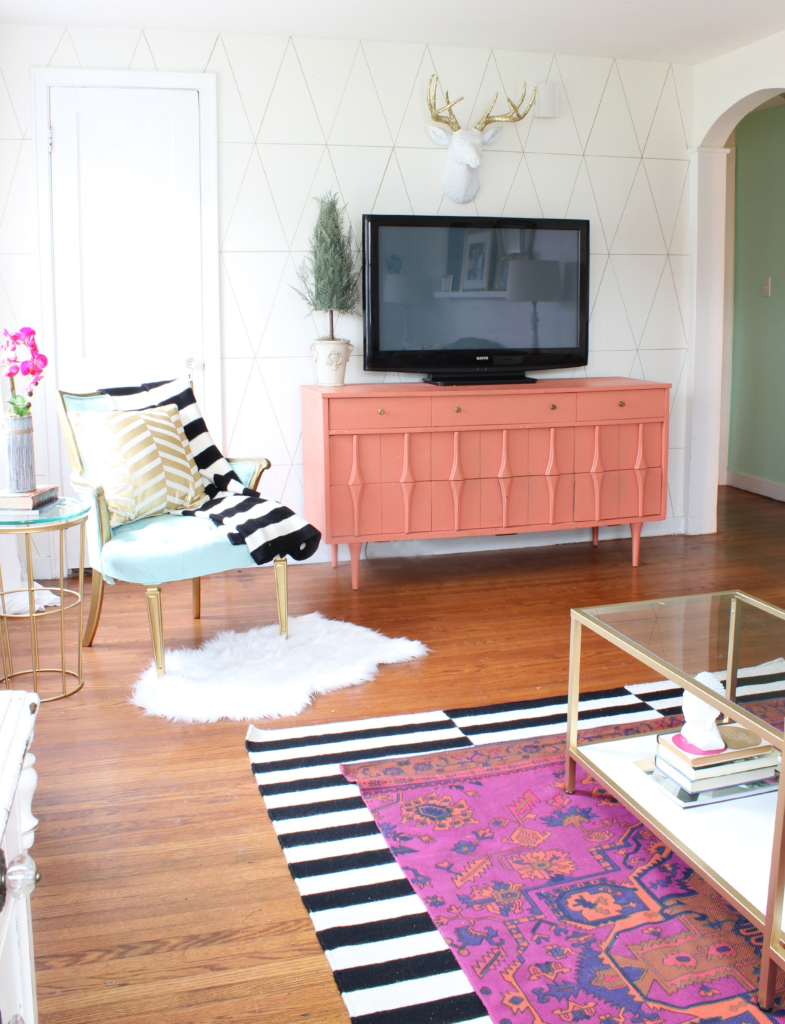
White + black + layers of color make this a favorite space of mine for Spring.  Black can be intense, but when incorporated in small doses, it can give incredible depth to a room! This amazing space was created by the gals of Classy Clutter.

Freshen up the home for SPRING with room inspiration + 6 items that every room can use to give a freshened look! Easy Inspirational ideas by @Jenna_Burger, www.jennaburger.com

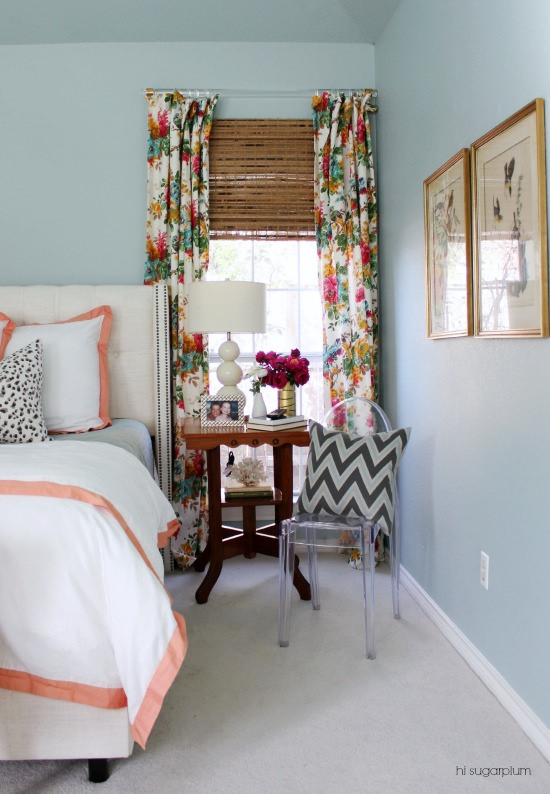
Master Bedroom with soft hues + floral by Hi Sugarplum.

Freshen up the home for SPRING with room inspiration + 6 items that every room can use to give a freshened look! Easy Inspirational ideas by @Jenna_Burger, www.jennaburger.com

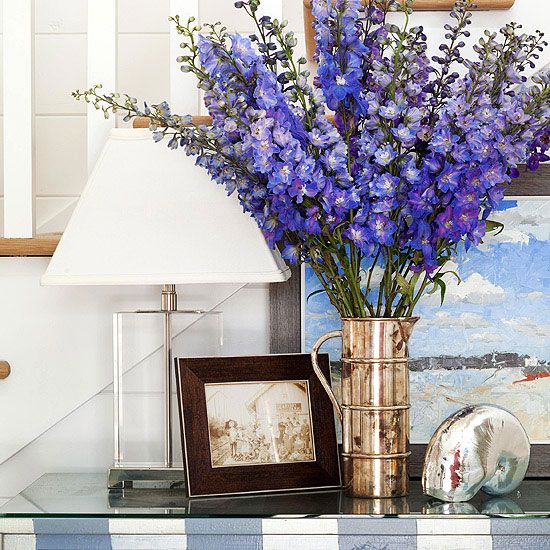
And of course, Spring means flowers and a home filled with flowers of the season is incredibly warm + inspiring…

via BHG

Freshen up the home for SPRING with room inspiration + 6 items that every room can use to give a freshened look! Easy Inspirational ideas by @Jenna_Burger, www.jennaburger.com

For even more inspirational spaces decorated for Spring, you must check out my favorite Pinterest board, Inspirational Spaces & Vignettes!

Freshening up doesn’t mean go out and buy more!  Seasonally, I may snag 1 or 2 new great decor items (that I can’t live without), but I often recycle / restyle what I have on hand to create new vignettes (who really wants to buy more + spend more $$$).  It’s amazing how moving things from one room/space to another makes them look like new!

If you are on the search (or want to shop your home) for a few new things for Spring, every room can come together in a snap with these 6 perfect picks

1 / Pillows bold hues mixed with softer Spring tones will make your sofa perfect for season.
Try hues of coral, pink, mint, and gray for a refreshing pick-me-up.

2 / Mirrors the perfect layer to make a space feel larger. 
Try one large mirror on a wall or a collection in varying sizes.

3 / Vases from the mantel to the coffee table to the desk, one vase filled with your favorite flowers or a collection in multiple tones, vases are a beautiful + inexpensive way to update a space & give depth, height, and color.

4 / Curtains changing up curtain panels for the season can give a room an instant update.  From heavy herringbone for the winter to a light & airy floral, a space can feel like Spring in no time & for little money.  On a tight budget? DIY new curtain panels (give this tutorial a whirl) or try using a flat sheet in a pattern you love.

5 / Plants whether real or faux (as long as it looks good), plants or flowers instantly give a fresh look + feel to a space.

6 / Trays my love for trays will never die. I am a tray addict (I have way too many & all are my favorite) because they are not just functional, but give color + texture + interest to a space or vignette.  A tray can break up a vast coffee table surface or can help keep a bedside table organized with books, reading glasses, and more.

Here are my 6 must-have layers for the Spring season in action…

Freshen up the home for SPRING with room inspiration + 6 items that every room can use to give a freshened look! Easy Inspirational ideas by @Jenna_Burger, www.jennaburger.com

Resources: Paris Map Wooden Tray / Diamond Wooden Tray / Geometric Tray / Floral Print Pillow / Nate Berkus Embellished Printed Pillow / Graphic Print Pillow / Velvet + Linen Pillow / Taped Solid PillowPurple Vase / Mercury Vase / Textured Glass Vase / Climbing Vine Curtain / Pink + Orange Ikat Curtain / Wood Circle Mirror / Capiz Mirror / White Orchid / Succulent / Faux Fiddle Fig

Whether you prefer a minimal modern lamp or a traditional print in paisley, these 6 favorite accessories will absolutely create the layers for a freshened space for Spring.  Whether the living room, family room, or bedroom, these items are ideal to make any room in the home instantly come together – you won’t go wrong.

Dip Dyed Easter Eggs using Food Coloring

I am blown away by how many of you have read + pinned my Easter Egg post that I recently shared.  Over 100,000 so far and it’s only been a week & a half.  Since y’all loved my alternative idea for dying eggs, I have another fun + inexpensive + super easy way to create Easter Eggs that will give you a vibrant + unique result!

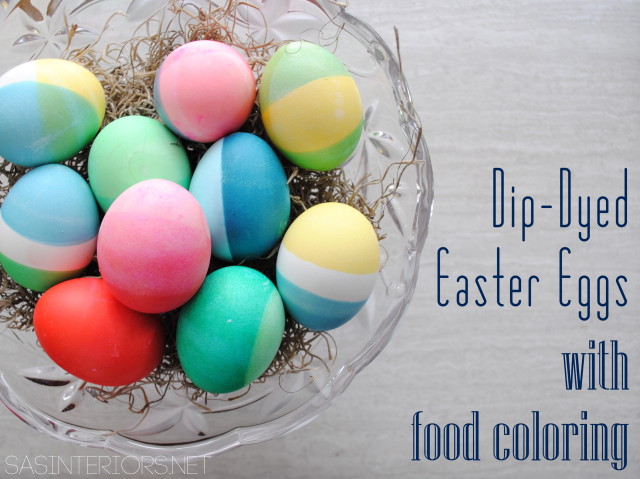
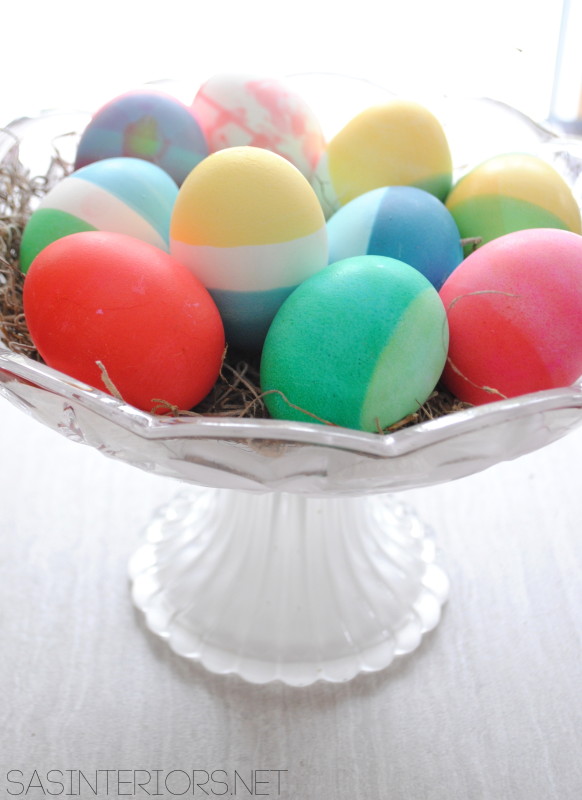
Create colorful EASTER EGGS using food coloring to get vibrant + vivid Dip-Dyed Easter Eggs. It's easy to do + KIDS will LOVE it. Read the tutorial now or Pin for Later!

I was inspired to create these dip-dyed eggs when flipping through the pages of the recent All You magazine that I picked up while shopping at Target.

The magazine has so many creative ideas for Easter egg dying that there will be no reason to ever buy a box again…

All You magazine is filled with so many great ideas for Easter Egg Dying!Use this $1 off coupon (while supplies last) to snag your own All You magazine on newsstands now!

Can I just say, the gold decorated eggs are killer.  I didn’t have a chance to get to the store to buy gold leafing (which I will be doing soon though), so instead used what I had on-hand and chose to try the dip-dyed decorating idea.  Food Coloring… most everyone has that in the cabinets and eggs are a staple in our house.

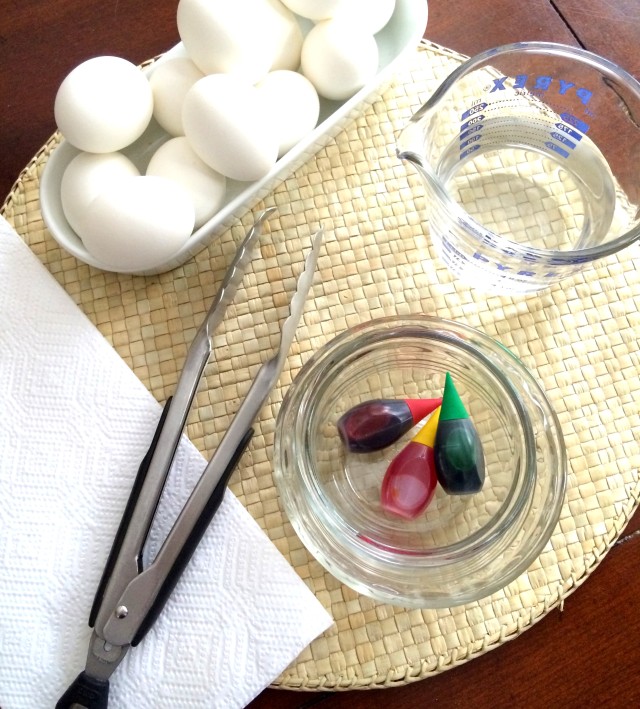
Supplies Needed:

  • Hard-boiled eggs
  • Boiling Water
  • Vinegar
  • Food Coloring
  • Paper Towels
  • Tongs or a Slotted Spoon

Create colorful EASTER EGGS using food coloring to get vibrant + vivid Dip-Dyed Easter Eggs. It's easy to do + KIDS will LOVE it. Read the tutorial now or Pin for Later!

To start off…

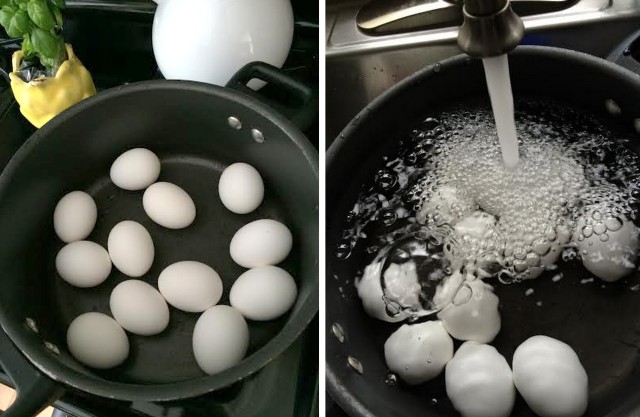
1. Put the eggs in a pot and fill the pot with cold water so it covers the eggs about 1-2″.

2. Once the eggs come to a full boil, remove the pot from the stove and cover for 12 minutes (so they create a hard-boiled egg).

Create colorful EASTER EGGS using food coloring to get vibrant + vivid Dip-Dyed Easter Eggs. It's easy to do + KIDS will LOVE it. Read the tutorial now or Pin for Later!

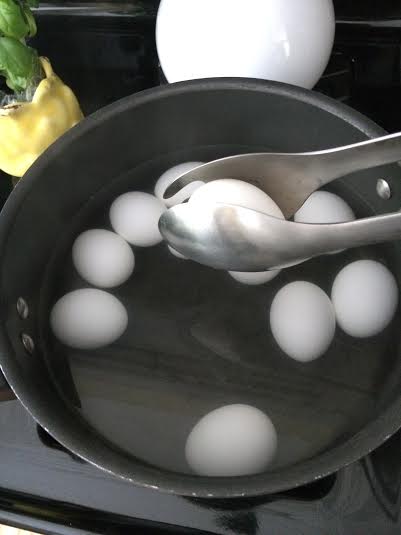
3. Carefully remove the eggs from the pot and let them stand for about 1-2 minutes (the eggs will be very hot, so be sure to use tongs when removing them from the pot).

Create colorful EASTER EGGS using food coloring to get vibrant + vivid Dip-Dyed Easter Eggs. It's easy to do + KIDS will LOVE it. Read the tutorial now or Pin for Later!

4. Once cooled, it’s time to make the magic dying formula

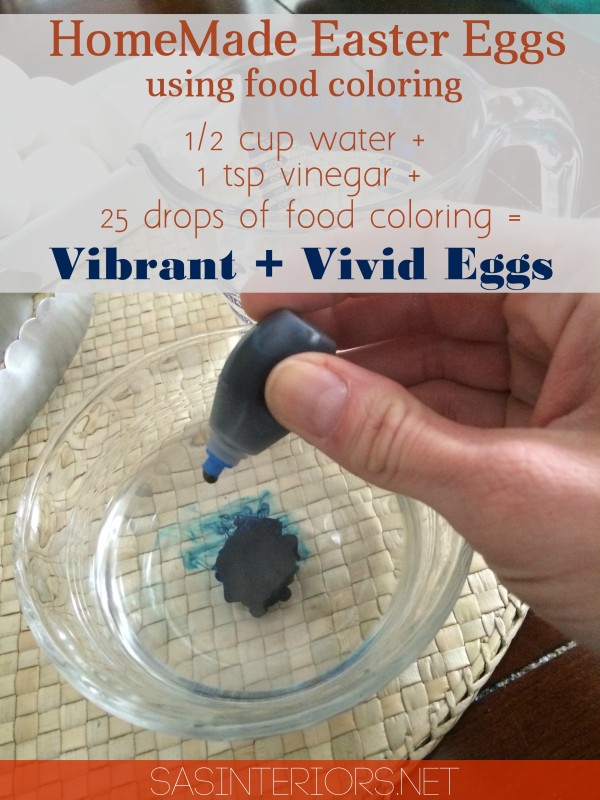
For each color, you’ll need this mixture:

  • 1/2 cup of boiling water
  • 1 tsp vinegar
  • 25 drops of food coloring

and mix together.

Magic Formula for Dip-Dyed Easter Eggs using Food Coloring!

Now here comes the fun part…

Egg 1

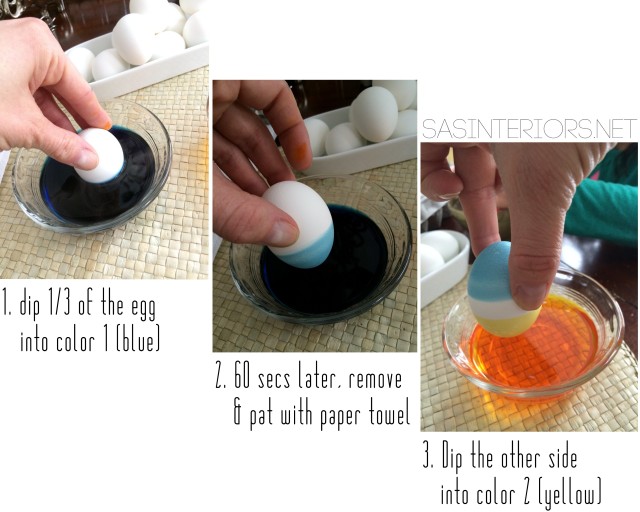
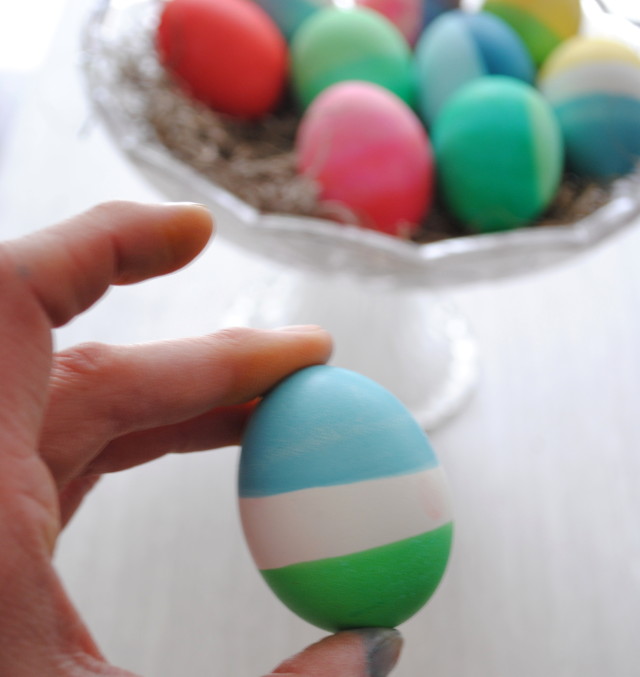
For the first egg, I chose to use 2 different colors (blue & yellow) and dip 1/3 of each side into the colorful mix.

1. Dip 1/3 of the egg into color 1 (blue)

2. About 60 seconds later (longer to achieve a darker color), remove the egg from the dye.  Let it air dry for a few minutes, then pat it with a paper towel.

3. Flip it around and dip 1/3 of the other side into color 2 (yellow). 60 seconds later, take it out, and you’re done!

Create colorful EASTER EGGS using food coloring to get vibrant + vivid Dip-Dyed Easter Eggs. It's easy to do + KIDS will LOVE it. Read the tutorial now or Pin for Later!The result…

Create colorful EASTER EGGS using food coloring to get vibrant + vivid Dip-Dyed Easter Eggs. It's easy to do + KIDS will LOVE it. Read the tutorial now or Pin for Later!

Egg 2

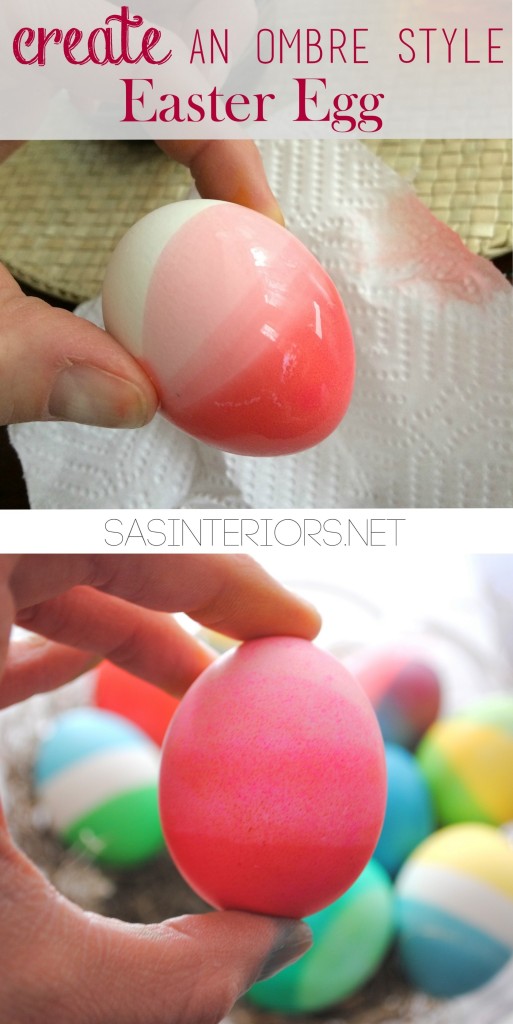
For the second egg, I created an ombre style (color fading from light to dark) egg.

1. Dip the entire egg into a color (red) and immediately remove.  Pat with a paper towel.

2. With your fingers or tongs, hold 3/4 of the egg into the dye for about 30 seconds, then lift out slightly so 1/2 the egg is in the dye.  Hold in place for 60 seconds.

3. To finish the ombre look, hold 1/4 of the egg in the color for a few more minutes to get the darkest hue.

Ombre Easter Egg: Create colorful EASTER EGGS using food coloring to get vibrant + vivid Dip-Dyed Easter Eggs. It's easy to do + KIDS will LOVE it. Read the tutorial now or Pin for Later!

Egg 3

To achieve a bold, deep color, I suggest using a few more drops of food coloring and leaving the egg in the dye for a few minutes.  I’ve tried this when using a box, and it never worked, but with the food coloring, I was able to get a really dark hue.  Take a look at these two…

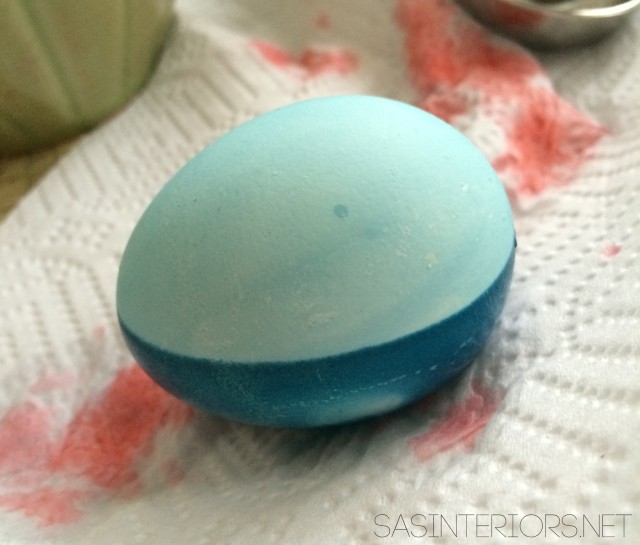
  • This two-toned blue egg was created with a quick dip for one side, while the other was left in for about 5-7 minutes.

Create colorful EASTER EGGS using food coloring to get vibrant + vivid Dip-Dyed Easter Eggs. It's easy to do + KIDS will LOVE it. Read the tutorial now or Pin for Later!

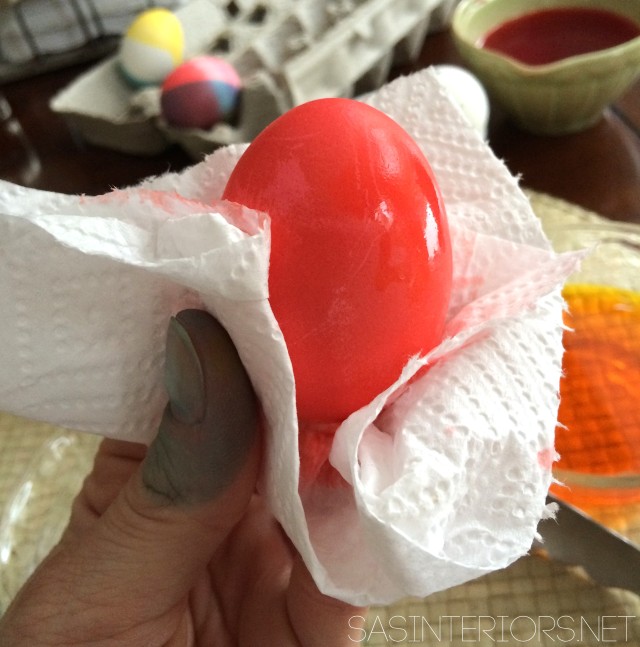
  • This intense red egg was completely submerged in the food coloring dye for about 5-7 minutes.

Create colorful EASTER EGGS using food coloring to get vibrant + vivid Dip-Dyed Easter Eggs. It's easy to do + KIDS will LOVE it. Read the tutorial now or Pin for Later!

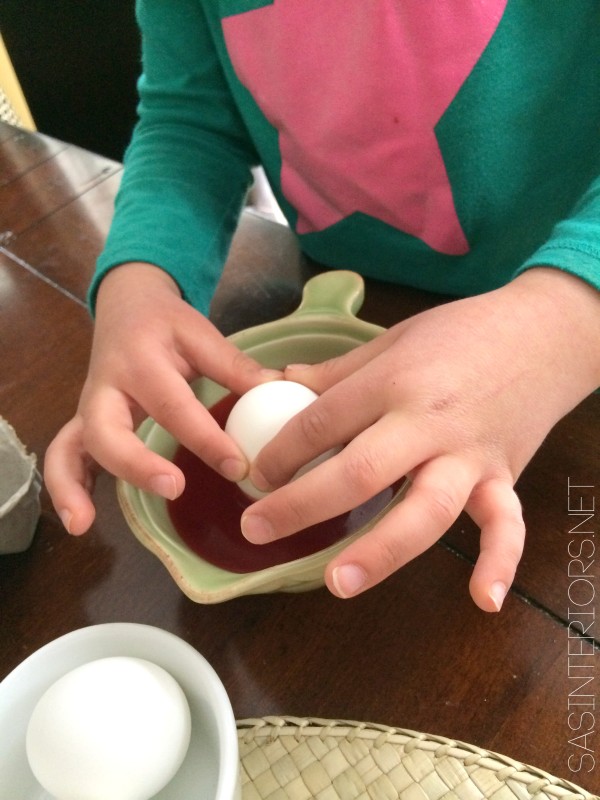
My little lady got involved in the process too…  It was fun. Not every egg turned out perfect, but that is the joy of it, right?!

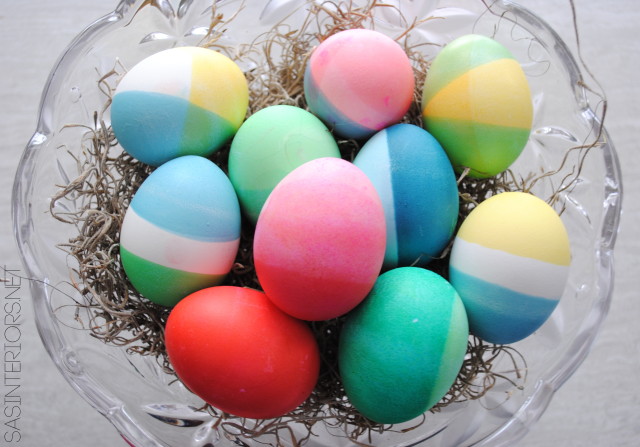
I think our Easter eggs came out pretty good…

It was fun to mix colors, which then created new colors.  Some even created a plaid pattern.

Create colorful EASTER EGGS using food coloring to get vibrant + vivid Dip-Dyed Easter Eggs. It's easy to do + KIDS will LOVE it. Read the tutorial now or Pin for Later!

They are so colorful and so much more vivacious than the results from a typical box you can buy.

Create colorful EASTER EGGS using food coloring to get vibrant + vivid Dip-Dyed Easter Eggs. It's easy to do + KIDS will LOVE it. Read the tutorial now or Pin for Later!

Want to save this project and/or pin it for later use?  Here’s a quick graphic to remember the steps…

Create colorful EASTER EGGS using food coloring to get vibrant + vivid Dip-Dyed Easter Eggs. It's easy to do + KIDS will LOVE it. Read the tutorial now or Pin for Later!

Enjoy and Happy Easter Egg Decorating!

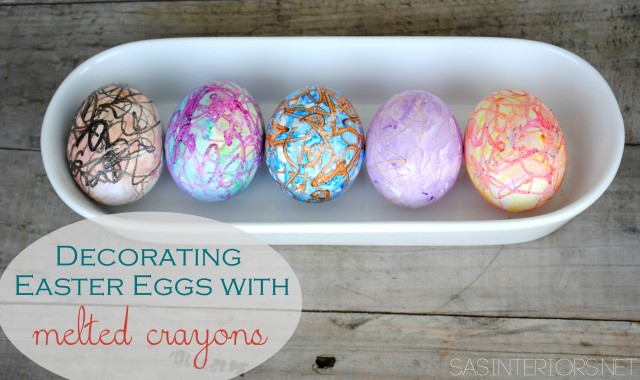
Want another great idea for egg decorating?  Try my melted crayon idea…

Decorating Eggs with Melted Crayons

Disclosure: This post is part of a social shopper marketing insight campaign with Pollinate Media Group and All You Magazine, but as always all opinions are 100% my own. #pmedia #lifeforless http://my-disclosur.es/OBsstV

Fall Front Porch

It’s officially Fall!

I was a bit sad to see the Summer end, but I have to say, with the kids back in school and a routine once again being established, the arrival of the season has actually been quite delightful.  The weather also has been chilly, so it just adds to the thought that Fall is in full swing.

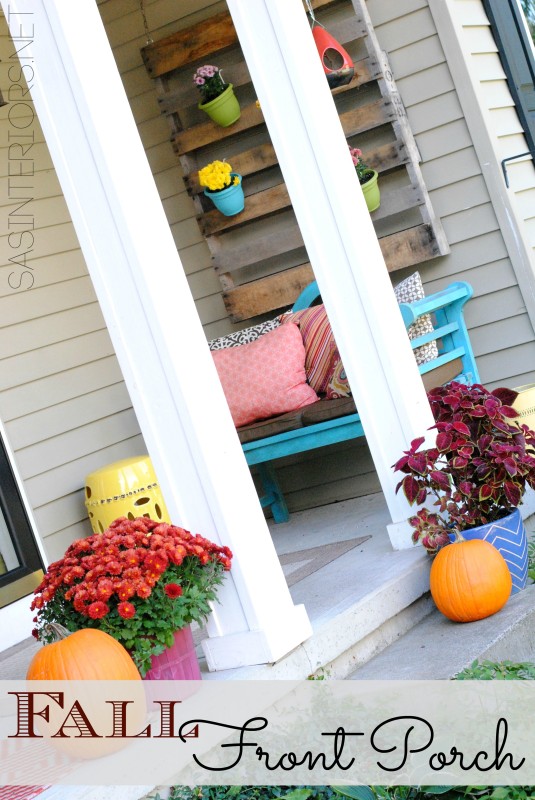
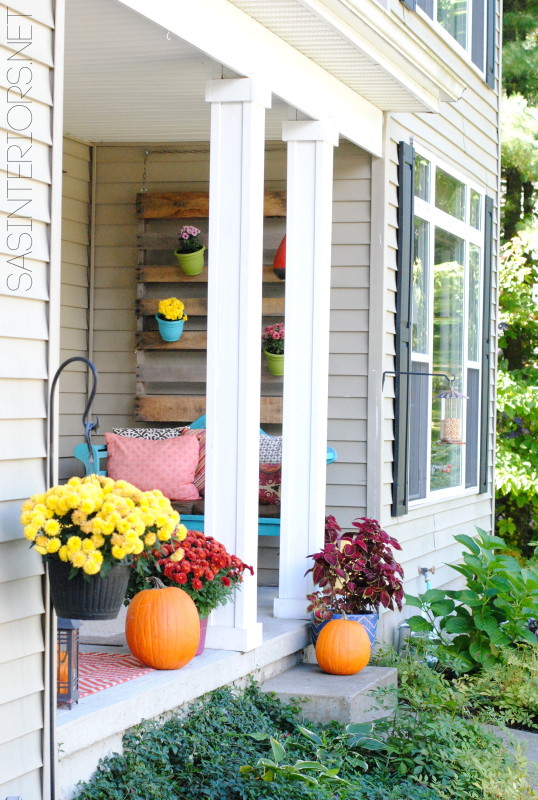
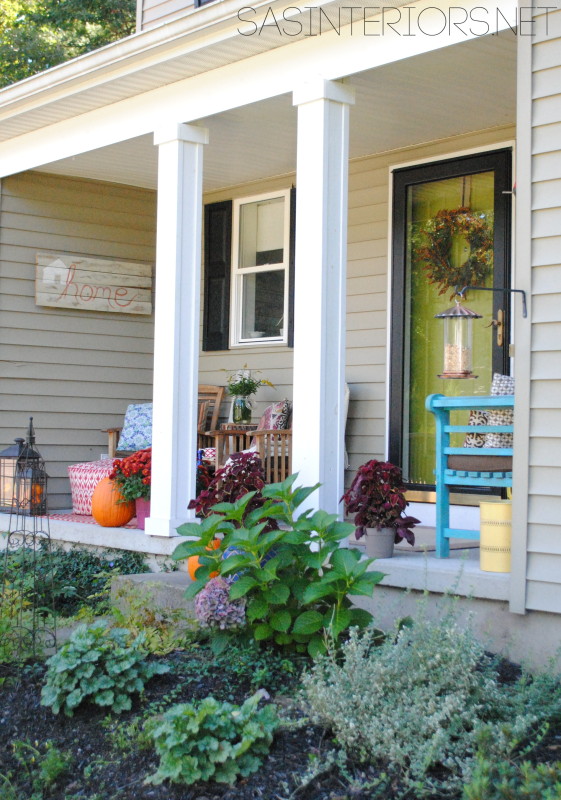
To celebrate the new season, I had to give my front porch a new look.  After finishing it up over the weekend + photographing it yesterday, it’s ready to share + enjoy!

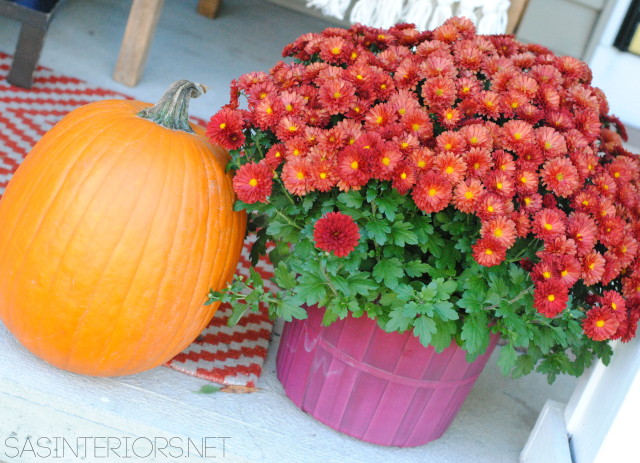
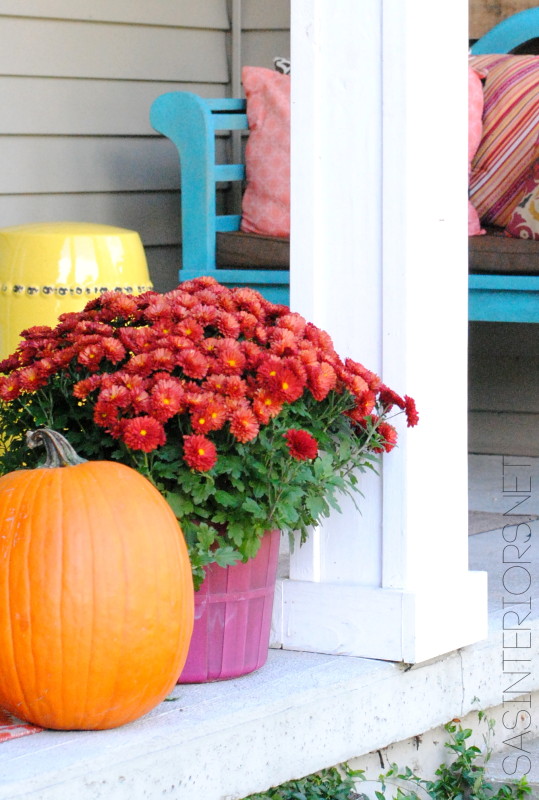
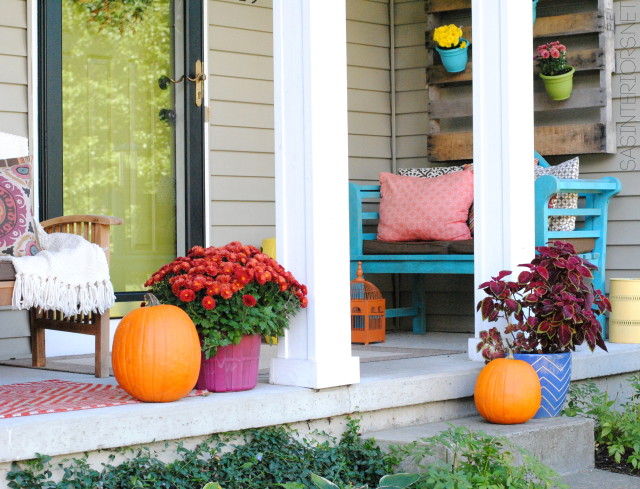
This seasons front porch didn’t change much.  I really just added in a few new layers of color + festive pumpkins, ghords, and mums.

Take a look…
Fall Front Porch by @Jenna_Burger, 
WWW.JENNABURGER.COM

Welcome.

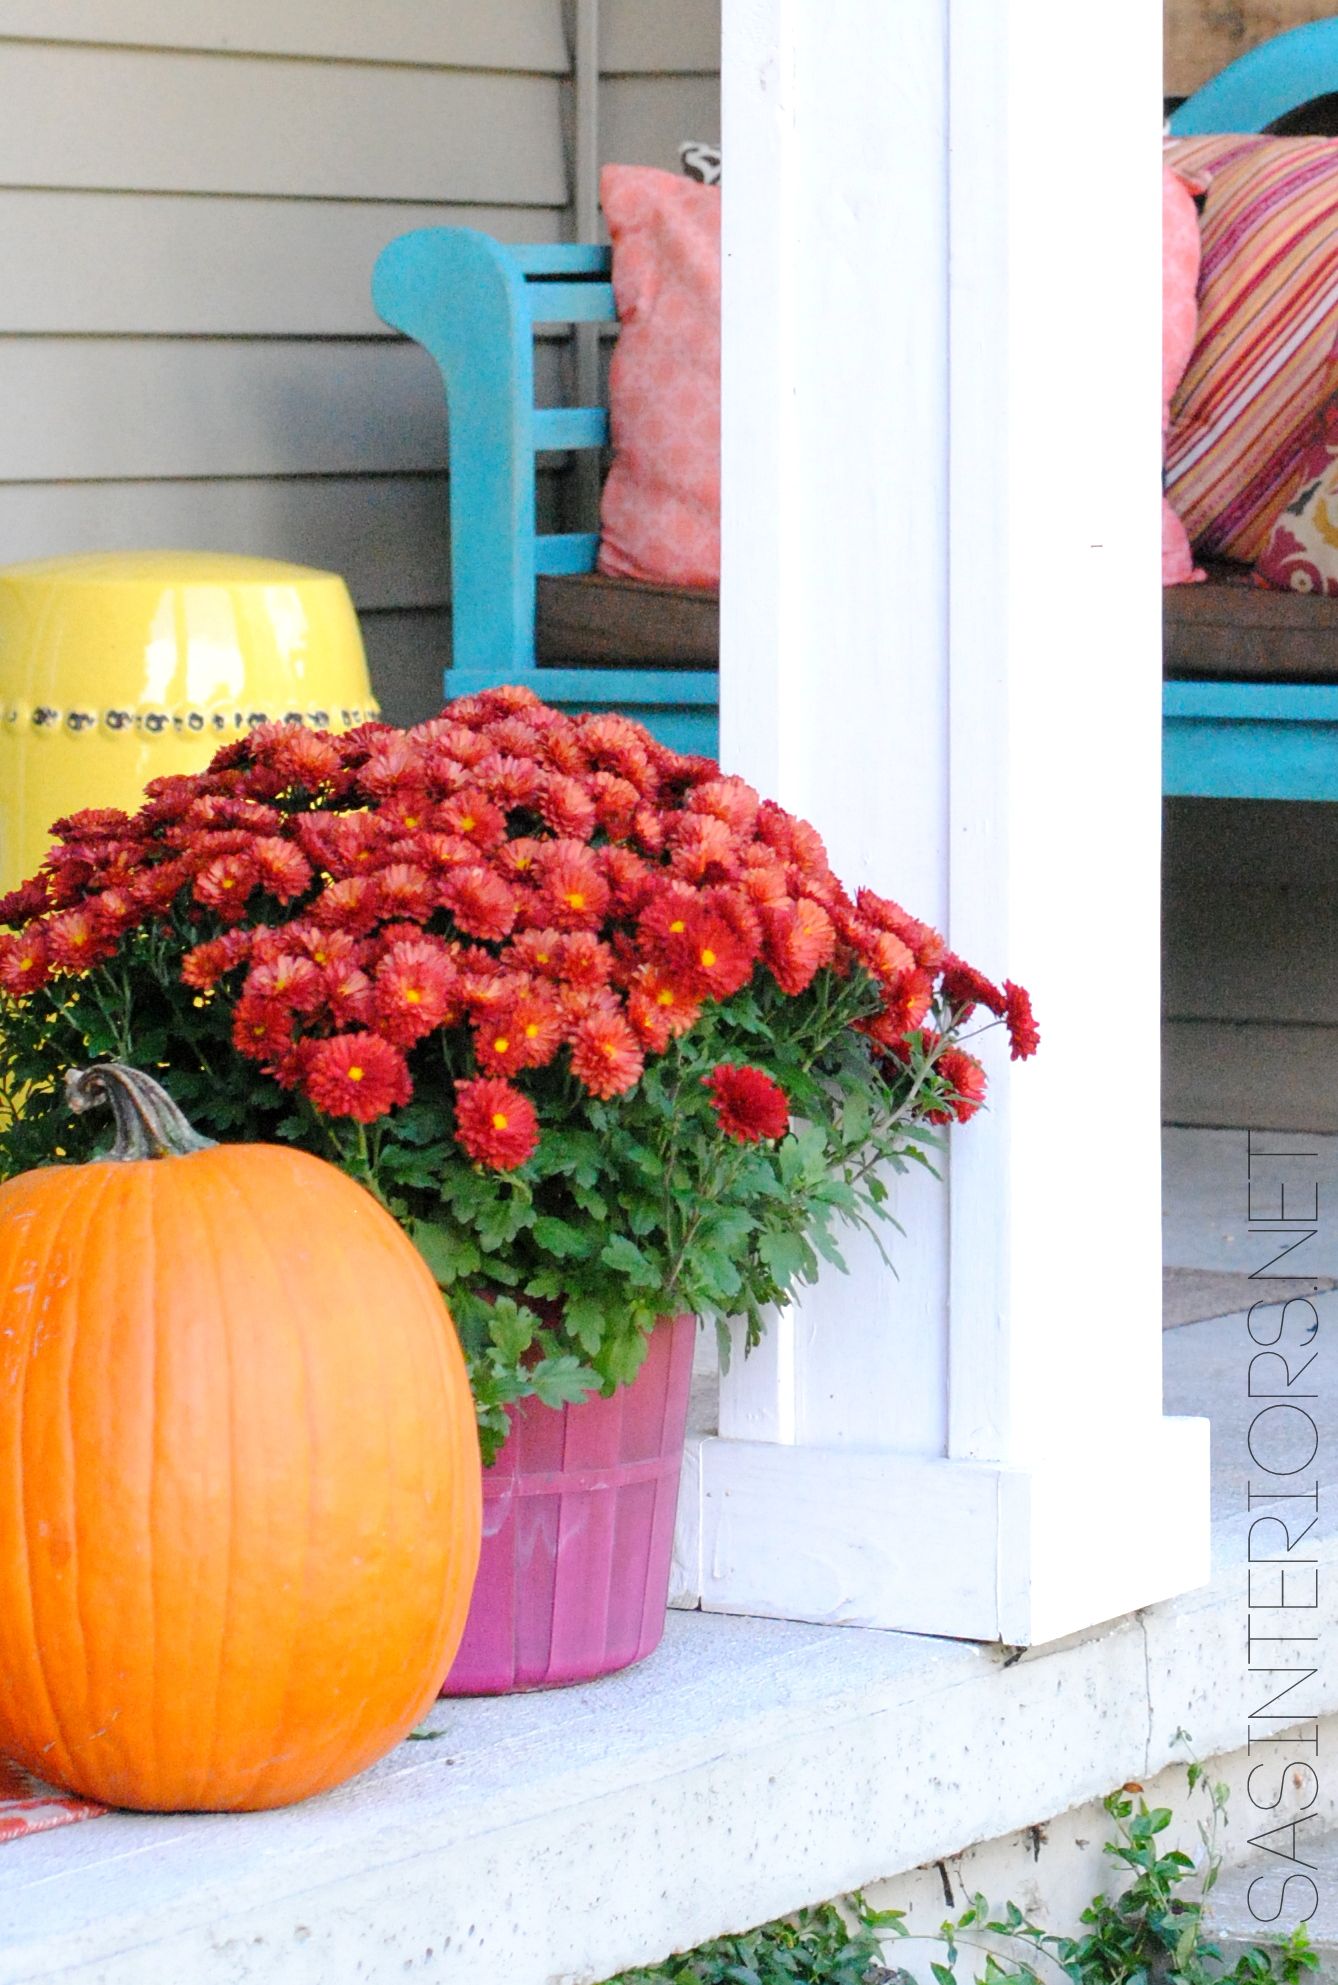
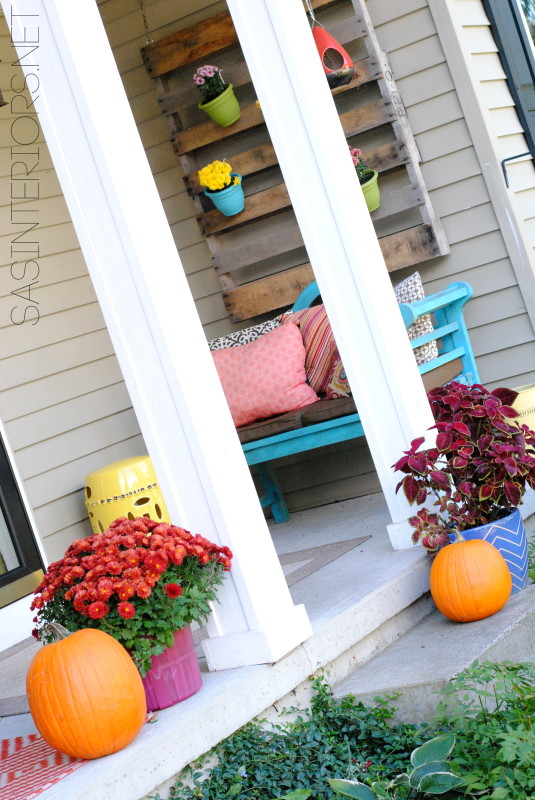
The entrance of a home sets the style + tone for what’s to come on the inside.  I always like to evoke an inviting, colorful, and welcoming aesthetic to my seasonal & holiday front porch creations.  With it being Fall, colorful pumpkins + mums were a must.

Fall Front Porch by @Jenna_Burger, 
WWW.JENNABURGER.COM

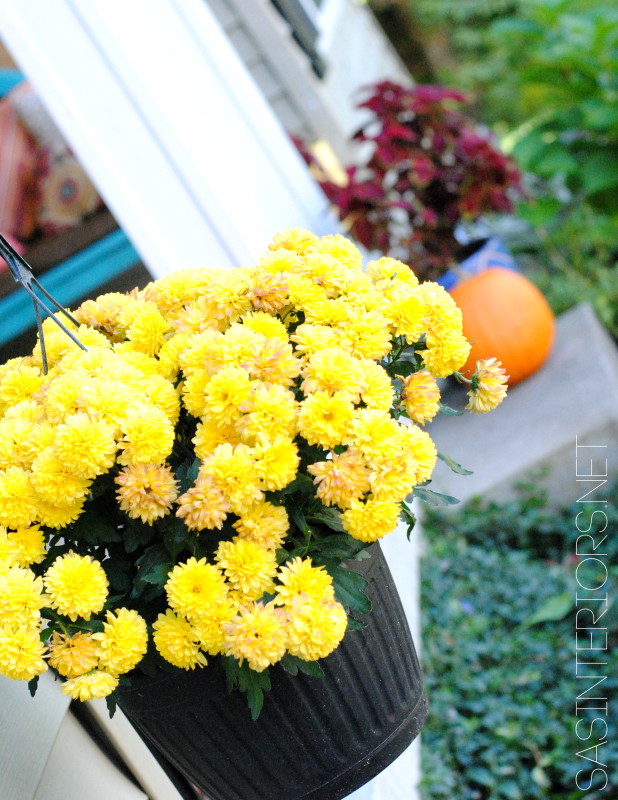
Both bring fantastic color to the porch.

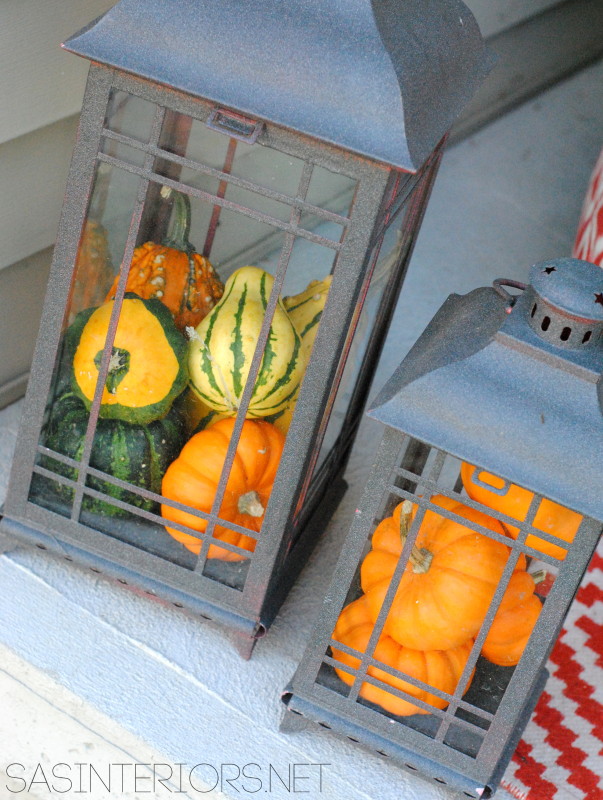
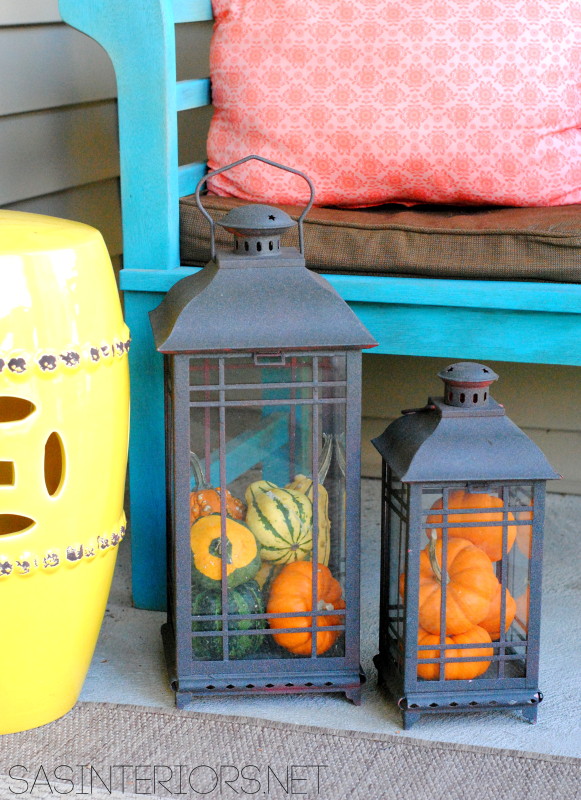
I also filled my lanterns with sugar pumpkins + interesting shaped ghords.

Fall Front Porch by @Jenna_Burger, WWW.JENNABURGER.COM

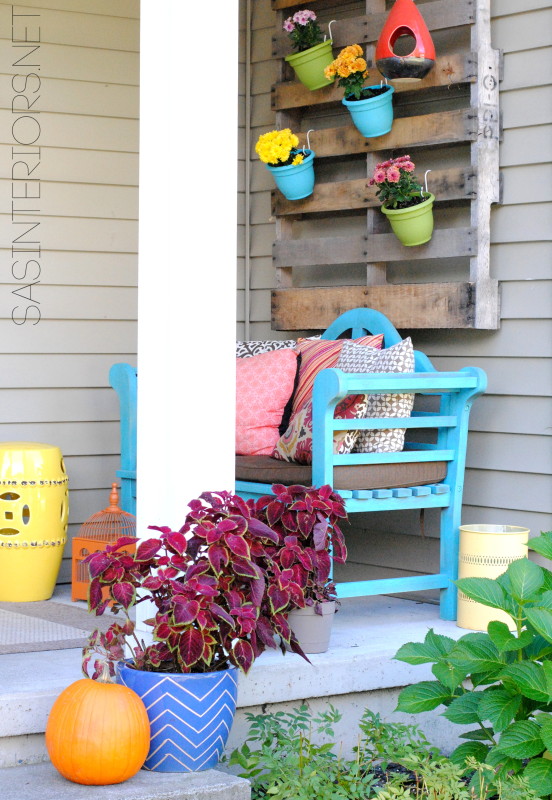
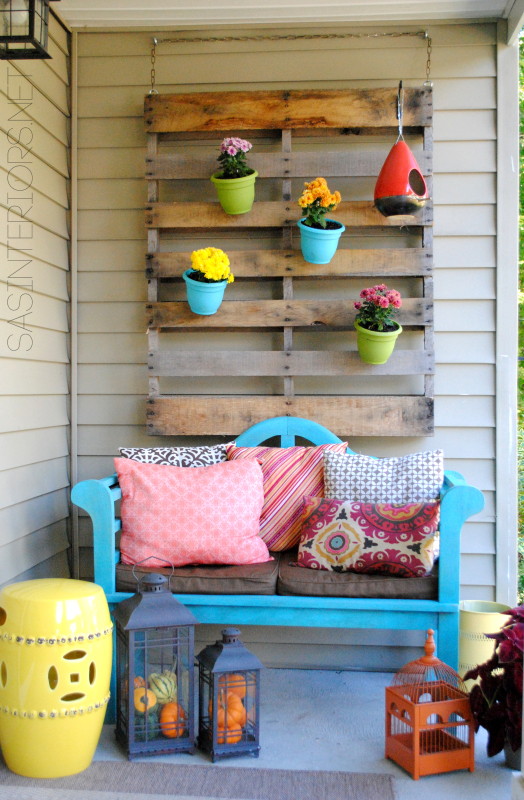
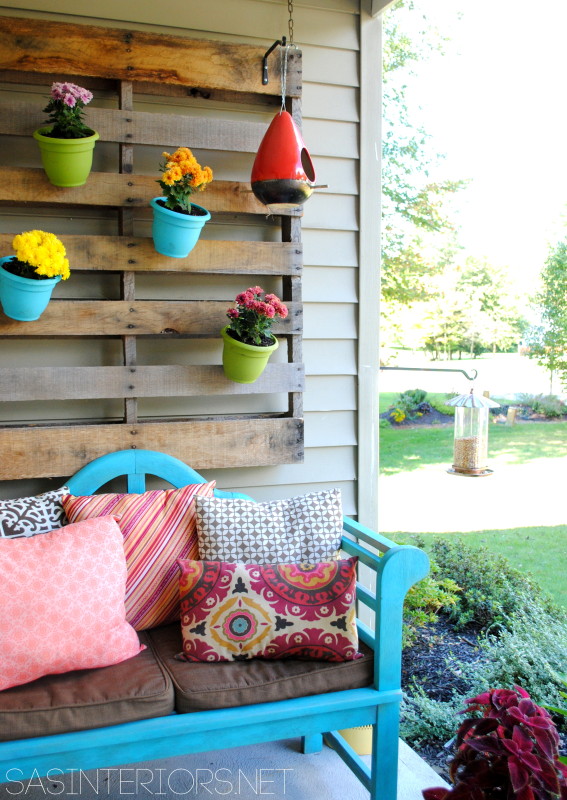
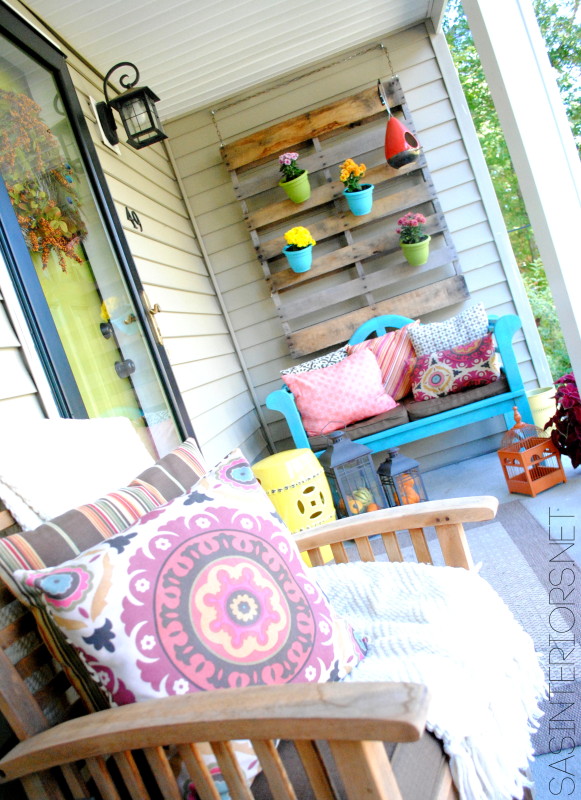
The vertical pallet ‘garden‘ also got a revamp.  Down came the vines + spring flowers and in their place went colorful mums.  I planted them a few weeks ago with the kids.  It was great getting them involved and we got to use my other pallet creation that I made this past summer.

Fall Front Porch by @Jenna_Burger, WWW.JENNABURGER.COM

Fall Front Porch by @Jenna_Burger, WWW.JENNABURGER.COM

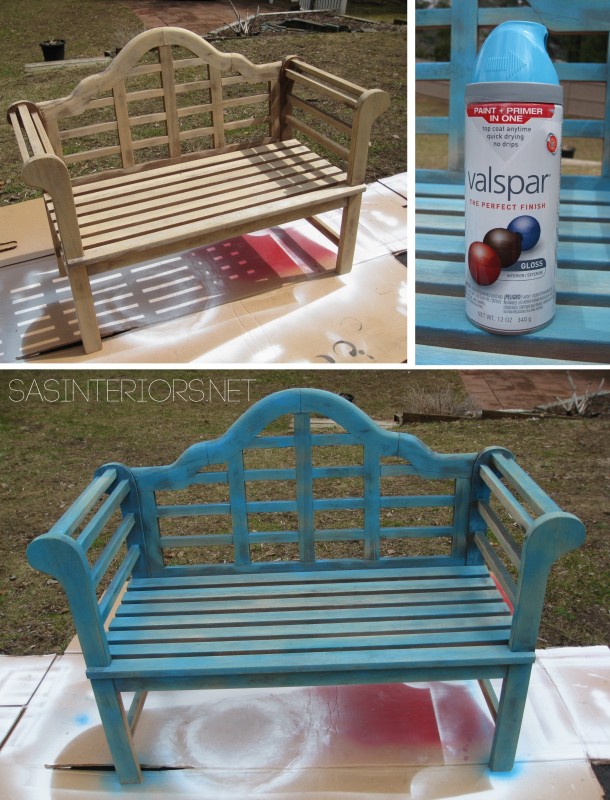
I never shared this on the blog (I kinda forgot with other projects going on), but the lutchens bench that sits under the pallet got a makeover at the beginning of the summer.  It used to be plain wood (natural finish with no stain) and with the desire to bring in more color to the porch, I spray painted it in a turquoise color.  It sure is an eye-catcher!

Lutchens Bench before and after by @Jenna_Burger of WWW.JENNABURGER.COM

It’s amazing how something can look brand new for under $5!

Fall Front Porch by @Jenna_Burger, WWW.JENNABURGER.COM

Fall Front Porch by @Jenna_Burger, WWW.JENNABURGER.COM

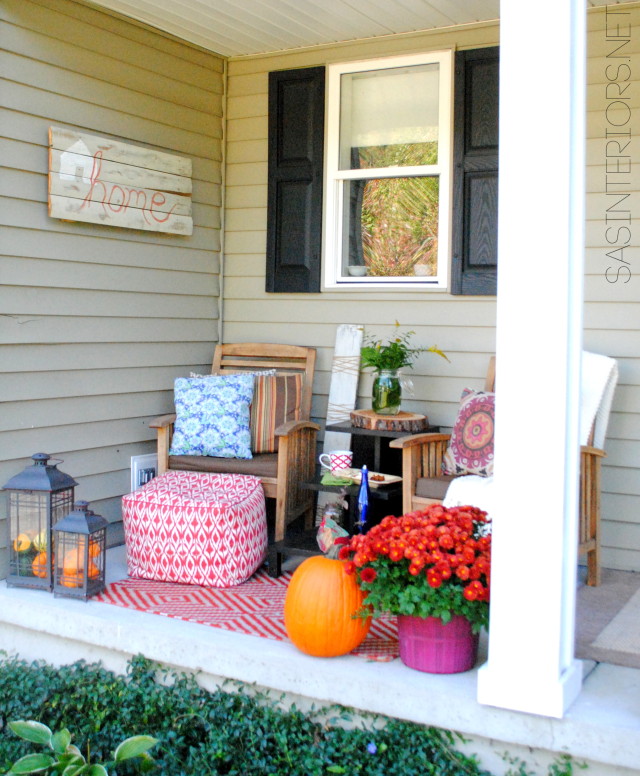
The other side of the front porch is just as delightful with 2 teak side chairs and a tiered table in between.  The table is from West Elm.  It’s seen better days and almost got tossed until I realized outside under the covered porch was the perfect next life for it.

Fall Front Porch by @Jenna_Burger, WWW.JENNABURGER.COM

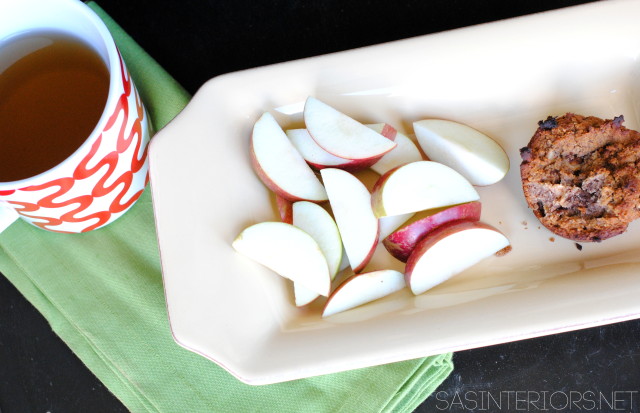
The table is also the perfect spot to rest a cup of tea and enjoy a few treats.  Yesterday a sliced apple + an apple muffin were my treat of choice.

Fall Front Porch by @Jenna_Burger, WWW.JENNABURGER.COM

Fall Front Porch by @Jenna_Burger, WWW.JENNABURGER.COM

Fall Front Porch by @Jenna_Burger, WWW.JENNABURGER.COM

Even though the front porch isn’t a large space, it’s so cozy.  Whether watching the kids on their bikes or simply enjoying a few (rare) quiet moments, I love sitting out there enjoying our home and ‘the fruits of our labor’.

Fall Front Porch by @Jenna_Burger, WWW.JENNABURGER.COM

Want to see how much it’s changed?  Check out these ‘before’ photos from 2 years ago…

Quite the transformation!

Fall Front Porch by @Jenna_Burger, WWW.JENNABURGER.COM

Fall Front Porch by @Jenna_Burger, WWW.JENNABURGER.COM

Fall Front Porch by @Jenna_Burger, WWW.JENNABURGER.COM

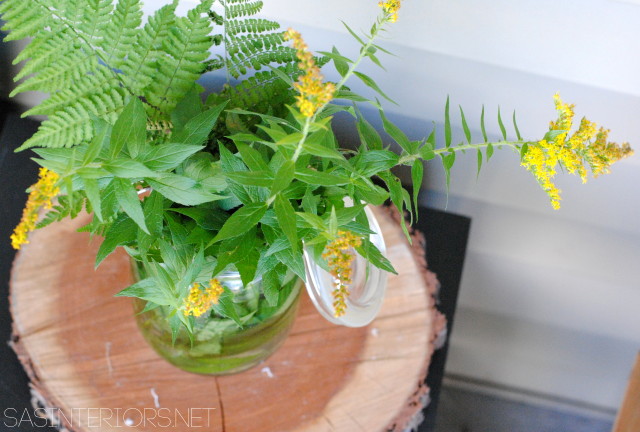
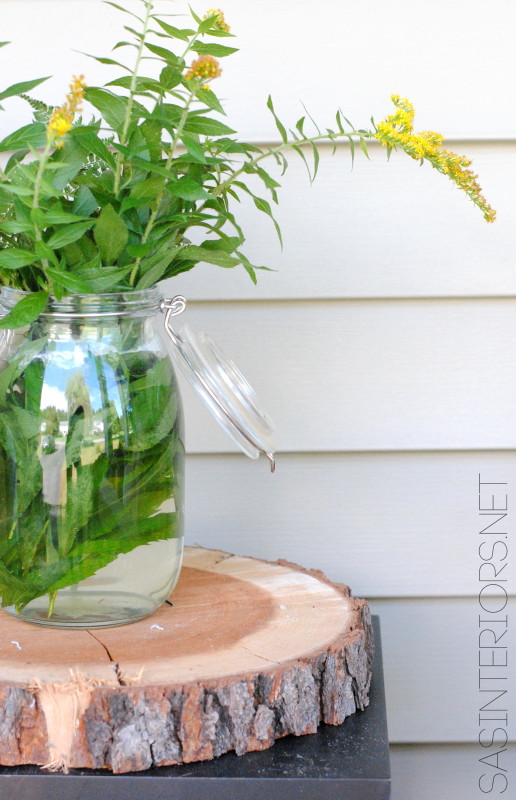
Wild flowers from the yard make the perfect centerpiece.  Not sure if it’s because they’re from our garden or because they’re free, but either way, this simple arrangement makes me so happy.

Fall Front Porch by @Jenna_Burger, WWW.JENNABURGER.COM

Fall Front Porch by @Jenna_Burger, WWW.JENNABURGER.COM

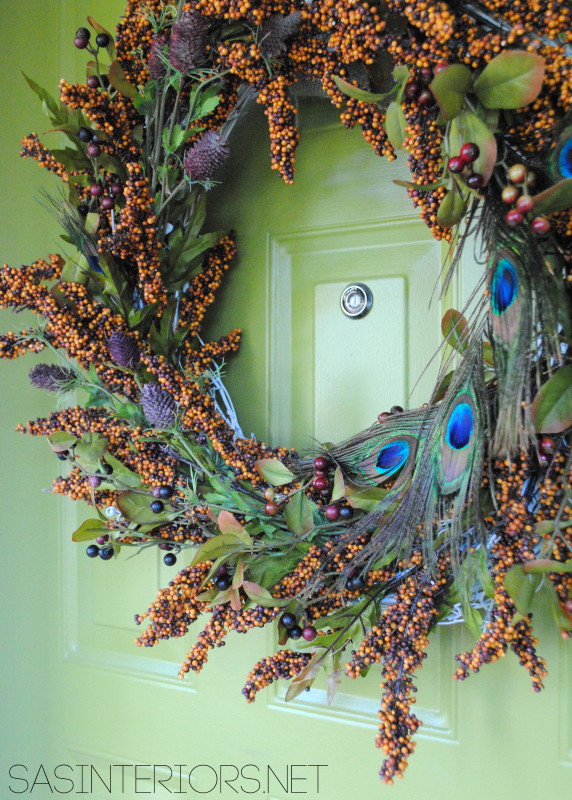
On my apple green front door, sits my latest wreath creation that I shared last week.  I love the plums & navy hues!

Autumn Wreath with Plum + Peacock Accents by @Jenna_Burger, sasinteriors.net

Fall Front Porch by @Jenna_Burger, WWW.JENNABURGER.COM

Thanks for visiting!  I loved having you tour my new festive Fall front porch.  I hope you enjoyed.

Fall Front Porch by @Jenna_Burger, sasinteriors.netWhat elements have you brought in to decorate your Fall front porch?

Christmas Tablescape

We’re only a few days into December, but my table is set and ready for Christmas.

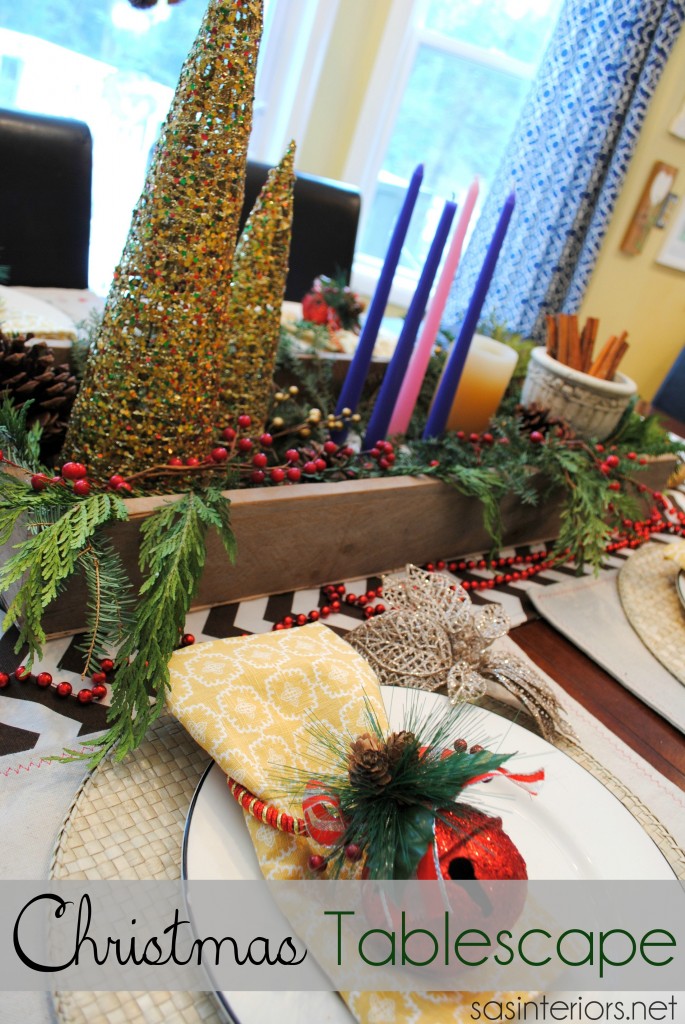
Of course I’ll be using the table between now and then, but I had a little downtime last weekend and was excited to do a trial run for our Christmas dinner and other gatherings throughout the holiday season.  I adore creating new tablescape vignettes and wanted to experiment using a few new accessories that I recently picked up from the Dollar General Holiday décor aisle. I mixed them with a few thrift store finds and DIY projects to create this…

I had alot of fun creating this vignette and we actually enjoyed a scrumptious dinner Saturday night on this beautifully decorated table.  It was a little pre-Christmas meal to start off the countdown to the special Holiday.  As you can see, we also lit the first candle on our Advent wreath.

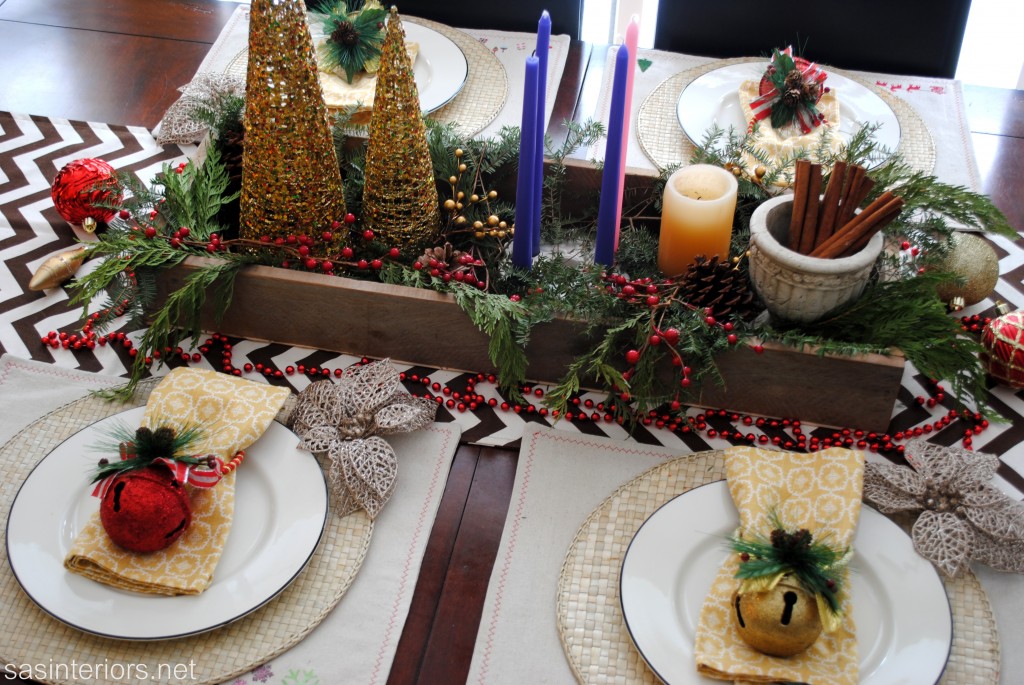
The base of the table started with my DIY chevron table runner that I created.  I actually never shared a tutorial on this specific runner, but it’s similar to the drop cloth runner that I made.

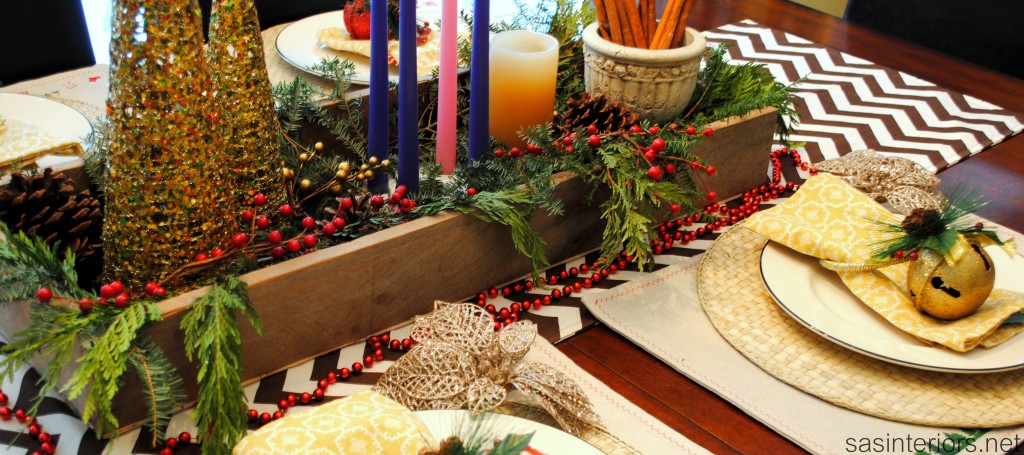
Since this is the table where we have dinner most every night, I needed a centerpiece that could easily move.  A few weekends ago, the Mister and I created this box (using the same technique from the monogrammed chevron tray) using leftover pallet scraps.  The size is 16″ wide X 26″ long and it’s the perfect size for a large scale (yet easily moveble) center focal point.

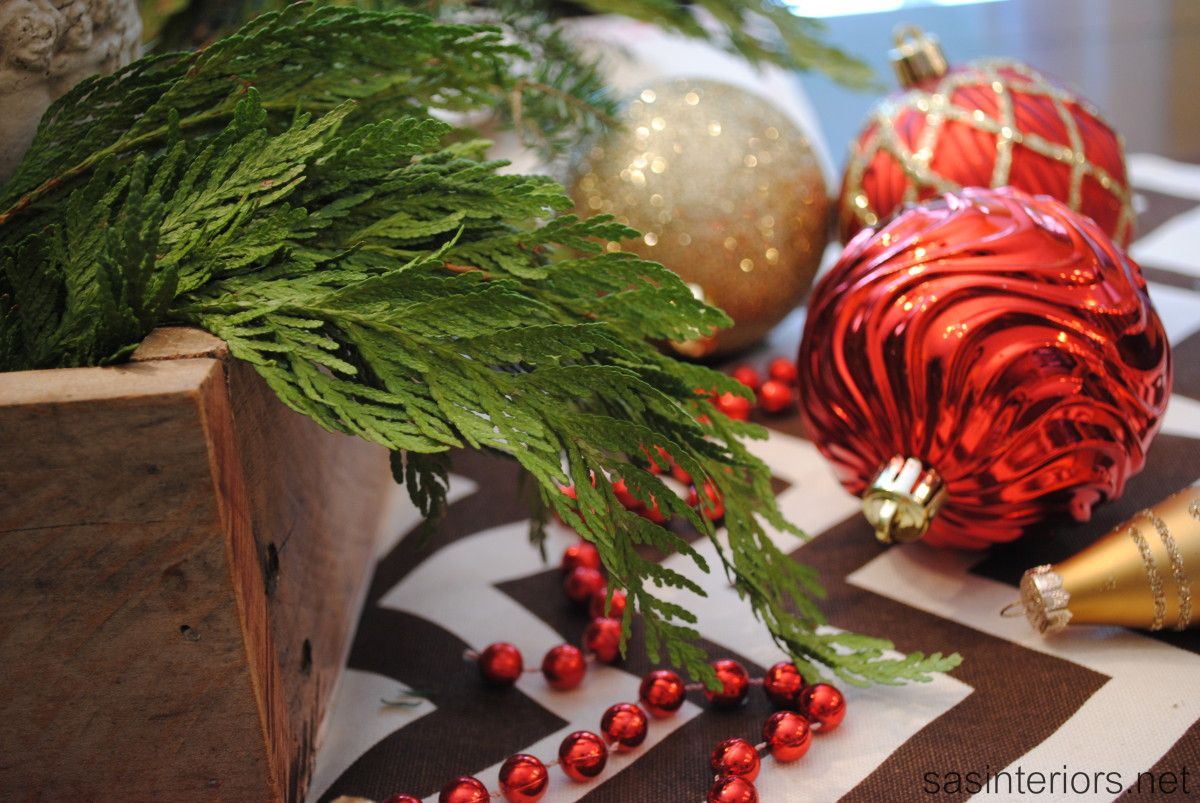
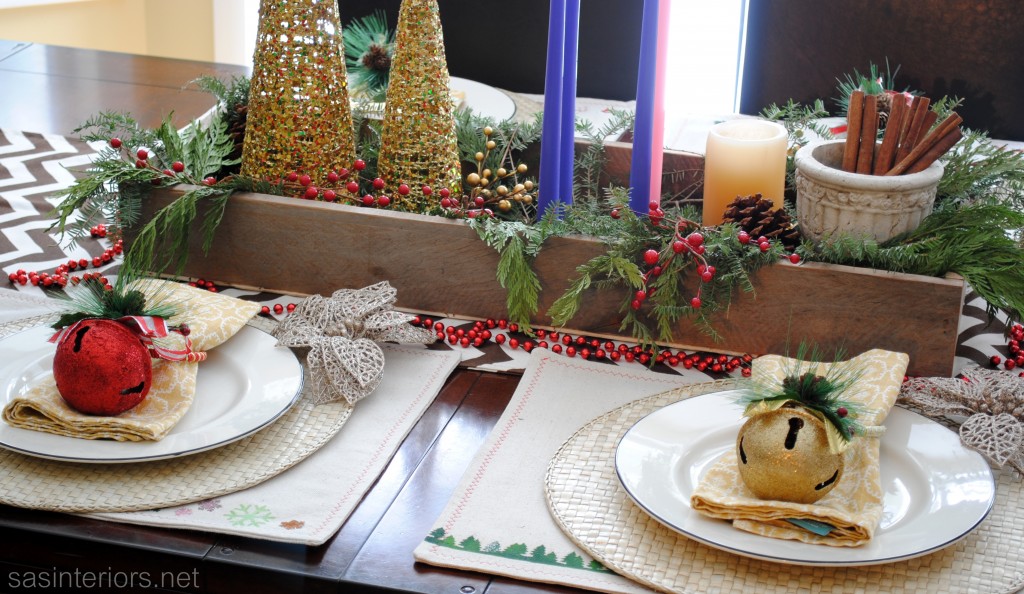
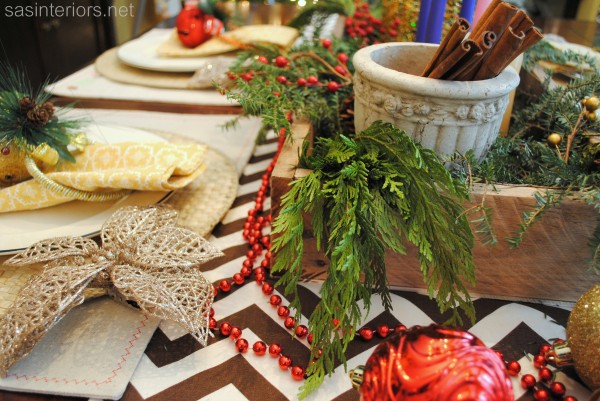
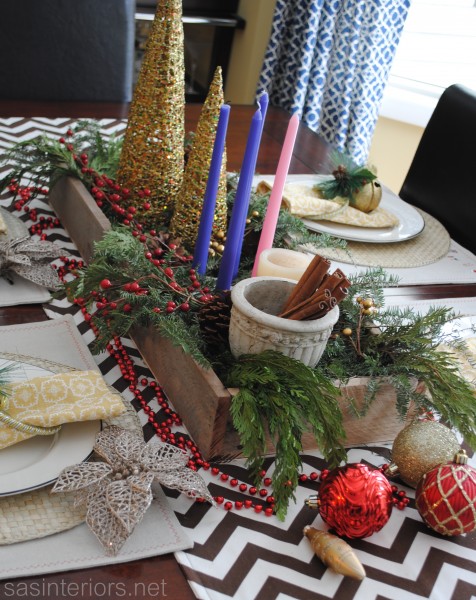
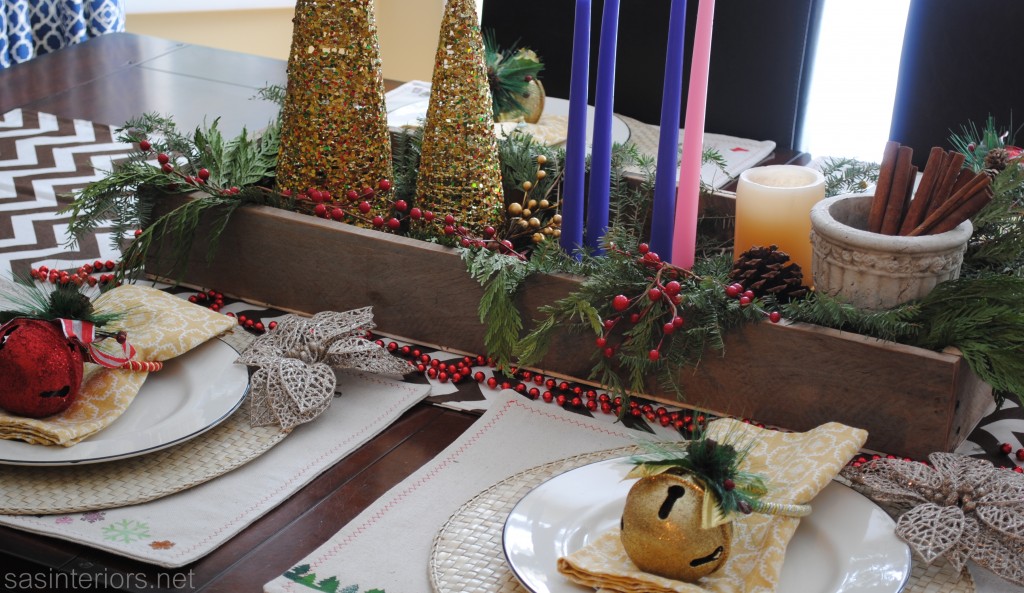
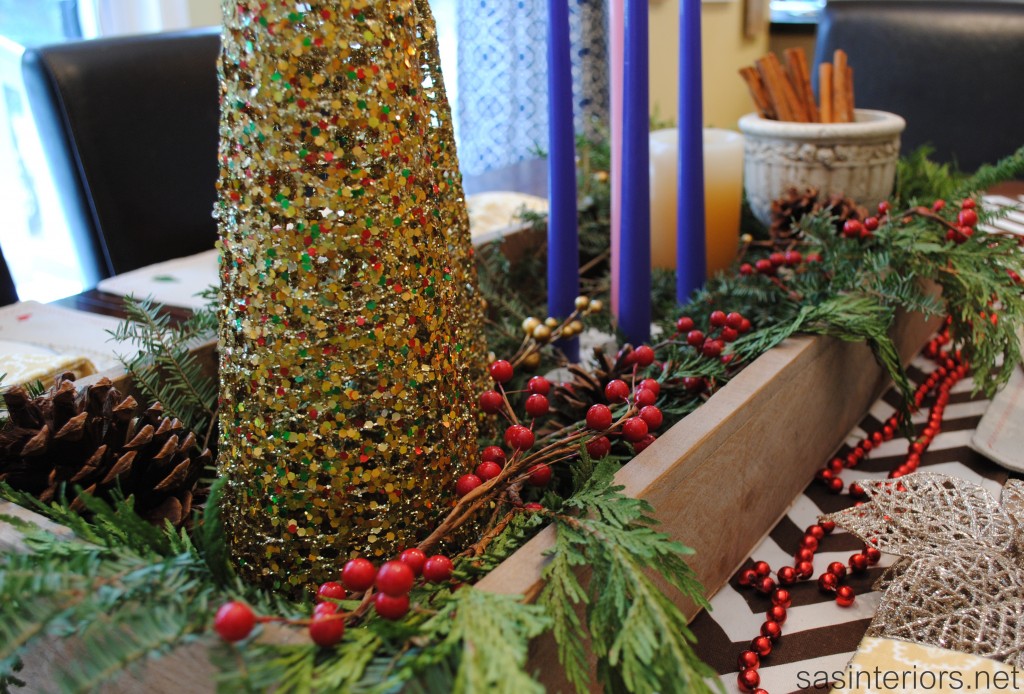
Inside the box I added advent candles, gold sparkly Christmas trees from Dollar General, and a ceramic bowl filled with cinnamon sticks, all surrounded by natural greenery that I trimmed from trees in our backyard. The cinnamon sticks smell so good – they give such a yummy fragrant scent when you pass by.

Dollar stores (like Dollar General) are a great place to find inexpensive items to decorate with.  By ‘shopping your home’ and mixing dollar-store-deals with thrift-store-finds, you can truly create a gorgeous and elegant tablescape or vignette for very little money.

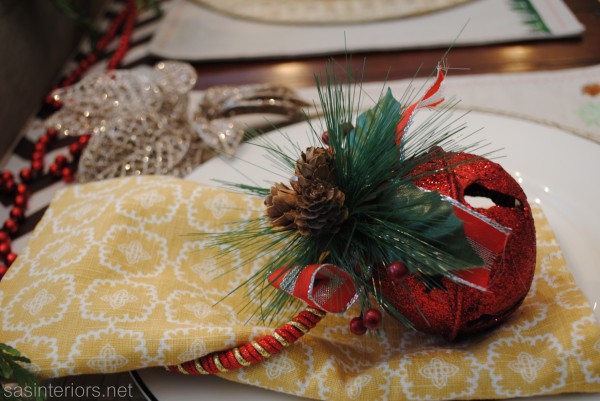
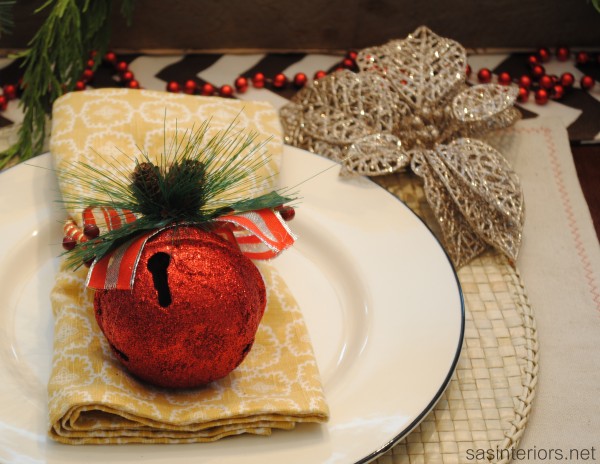
For each table setting, I added a round bamboo charger on top of the drop cloth placemats that I created last year.  The bamboo weave gives nice texture and contrast to the neutral colored plates and placemats.  I then added my everyday cream with black line rimmed dinner plates (a wedding gift from Crate and Barrel) and a buttercup-colored napkin (from Target) threaded through a festive bell ring.  The seasonal bell ring was a great find from Dollar General.  I don’t think they are actually napkin rings, but who cares – they work perfectly!

To add alittle more pizazz to the table, I draped a long strand of red Christmas bead garland around the perimeter of the pallet box.  The bright hue was a perfect accent to the red bells on the napkins and the berries in the centerpiece.

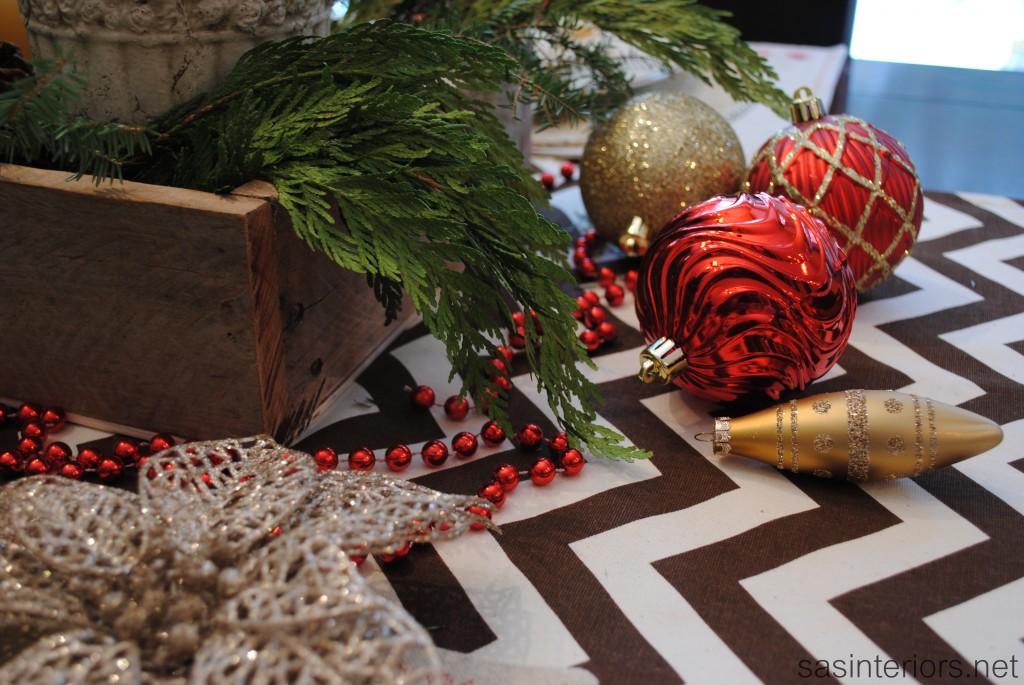
A few loose Christmas ornaments completed the festive look.

Inviting and fun!

I’m really happy with the result of this tablescape.  And the best part is that it’s practical because the main decor is in a box, which can easily move.  I plan on using this newly created tray centerpiece for many upcoming Holidays and occasions – I’m thinking Easter baskets, Spring decor, and Fall foilage.

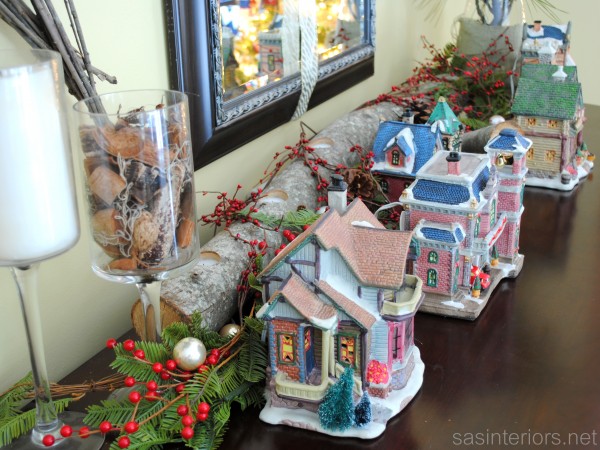
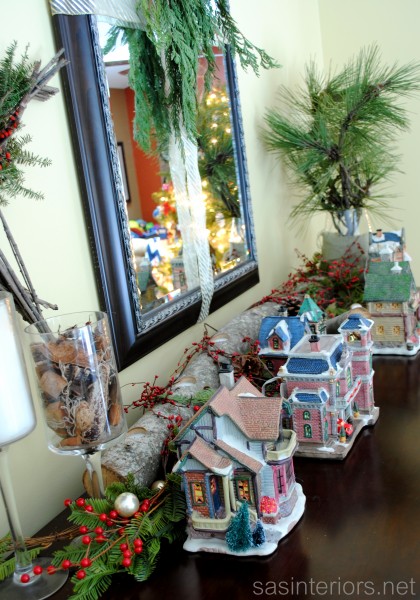
Were you wondering where I put my log centerpiece this year?  Well it’s not here on the table (like last year) and it’s not on the mantel either, but instead I decided to use it as the backdrop for our village.  The log centerpiece made for an AMAZING focal point, but wasn’t so easy to move = not practical.  Since the buffet gets left alone, it was the perfect spot to admire it.  That log centerpiece has been around the block and back, so it couldn’t be stuck away.

This is how it looked last year

And this is how it’s being used now…

I love our little miniature village…  and so do my kids.  Each night, they drag over the stool and love to peak inside.  It’s magical.

It would be nice to have each of you enjoy a delicious meal with me here at my table, but at least we can dream, right?!

I hope you’ve liked taking a glimpse at my tablescape for this Christmas – especially since it cost so little to create.  Dollar General really had some great deals and you connect with them even more to see what they have to offer on the Dollar General Facebook Page.  I sure have enjoyed sharing my tablescape with you!

Happy Holidays!

Visit Sponsor's Site

DIY: Christmas Stockings

Did you check out my newly decorated Christmas mantel?  If not, that’s okay (but head over there now).  In that post you got a little sneak preview of the Christmas stockings that I recently made.  As a family of four, we’ve never had matching stockings.  The mister and I have the same (since we bought those together after getting married), but then came child #1 and he got a different style stocking, and after that child #2 came along and she has an even different style stocking.  Anyway, each year it’s been a mish-mosh of different color and style stockings hung on the mantel, until now.
You know my love for drop cloth, so what did I use?  Yes, you guessed it…the big DC!

I’ve always wanted to make stockings, but was intimidated thinking it would be too difficult – but IT WASN’T!

Using drop cloth material for the main stocking, creme colored felt for the cuff, and the basic sewing essentials, I created these stockings, that now sit at the mantel, in no time!  To start off, I used the old stocking as a template to create the “boot-like” shape.  I then cut an 8″ x 12″ piece of felt for the cuff, and sewed the “right” sides together (see pictorial).

I made 4 stockings (which have 2 sides each), so I had a total of 8 sides.

Once the cuff is attached to the “boot”, open the cuff and iron.  Then put the “right” sides of the boots together and pin all around.  Using a 1/2″ inseam, sew around the entire boot, EXCEPT at the top edge of the cuff.

Once you finished sewing all the way around, turn the stocking to the “right” side using the opening at the top edge.  Then iron the edges flat.

The stocking form is made – YAY!

At this point of the stocking-making-process, the tops of the cuffs will probably not match – that’s OKAY!  Taking a scissor or rotary cutter, trim the top edge of the cuff to get a straight line.

Then it’s time to make the cuff – turn over the felt fabric and adjust it to the amount that you want to see for the “cuff”.  I’ll admit, at this point, I was a wee bit mad at myself for not forethinking what I’m about to share.  There are many different ways to make stockings and honestly, I didn’t do any research beforehand, and just “went for it”.  Kind of a mistake.  When I went to turn the fabric over to make the cuff, I realized that you could see the stitching on what was before the “inside” of the cuff (see right pictorial).  At this point, I was about to ditch the project, but then I realized because the fabric is felt, it won’t fray and it actually gives the edge a decorative look.  I trimmed the edge about 1/4″ off the seam and I’m pretty happy with the result.  Another (slight) fail to success project!

Essentially it’s complete at this point, but of course you need something to hang the stocking.  Using another piece of felt, I simply made a loop that I sewed on to the inside edge of the stocking cuff.

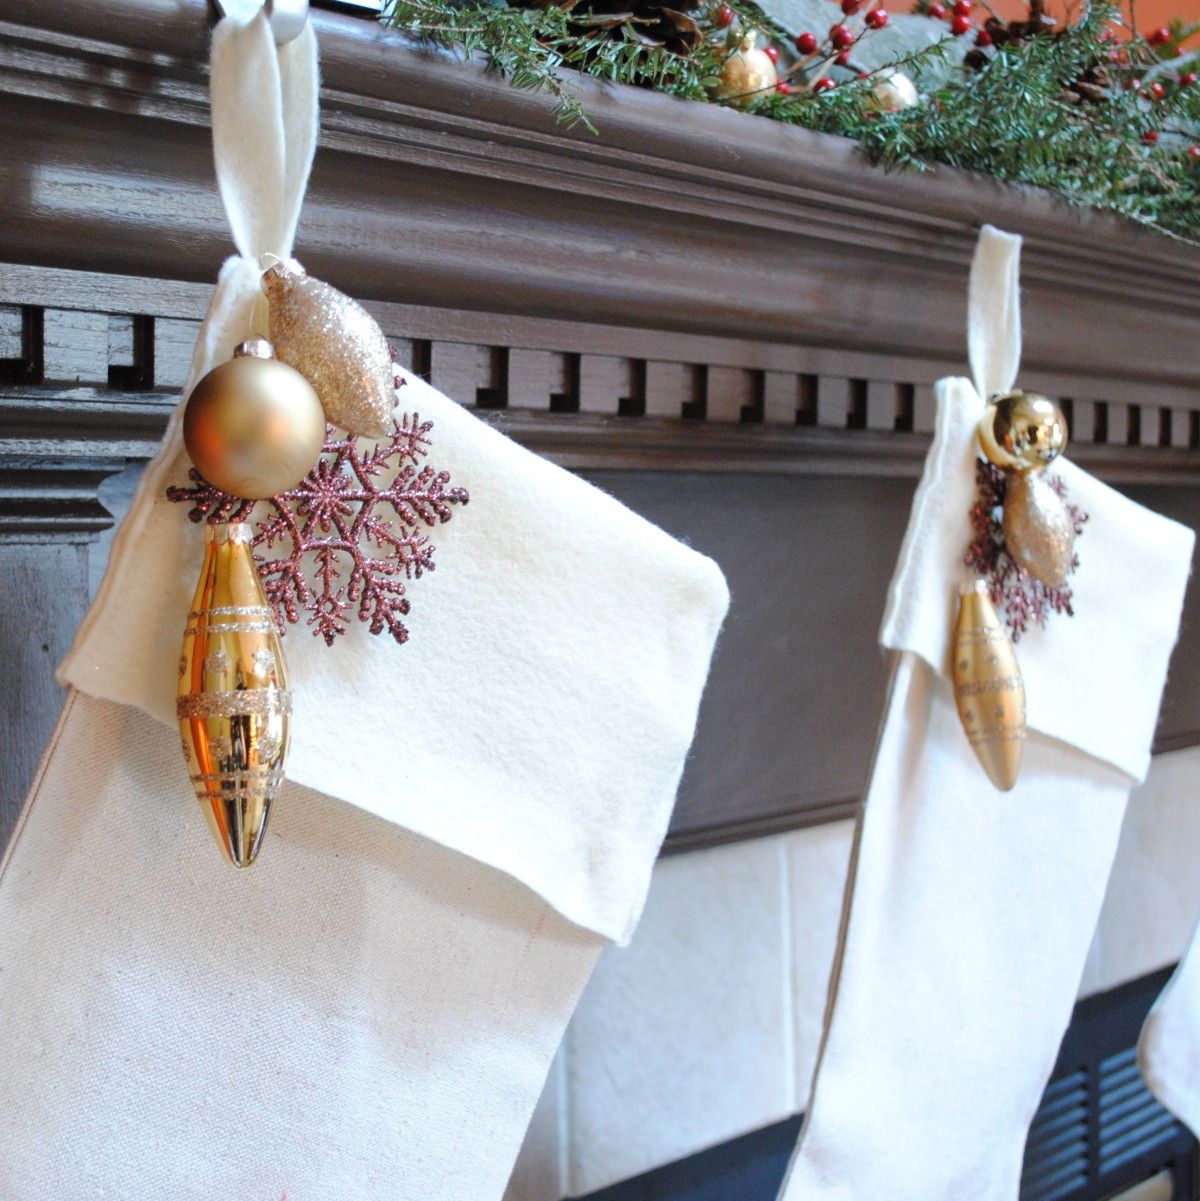
Now they are ready to hang!  If you saw my Christmas mantel the other day, you may have noticed that the stockings were plain and unembellished.  Well that only lasted a day.  Using the ornaments from my Organic Centerpiece that I displayed on my dining table last Christmas, I looped them through clear fishing line and hung them around the felt loop of the stocking.  Also adding a chocolate glitter snowflake, the collection was a beautiful accent to the neutral-colored background fabric.

Also placed on two of the stockings are pins that were favorites of my husband’s late grandmother. A little way he remembers her around the Holidays.

I really love the simplicity of these stockings.  Each year as I change my colors and Christmas decor they will always be a beautiful accent to different embellishments that I can add.  Do you hang stockings at the fireplace?  Are they matching or a mish-mos of different styles like I had for the past years? (and just to set the record straight…  I don’t mind mish-mosh…  it’s eclectic!)
I link my projects to some of these parties: Skip to My Lou, Dittle Dattle, Between Naps on the Porch, Today’s Creative Blog, Stories of A to Z, All Things Heart & Home, Savvy Southern Style, House of Hepworths, Finding Fabulous, Creation Corner, The Shabby Nest, Tatertots and Jello, Thrifty Decor Chick, Under the Table & Dreaming

  • 1
  • 2