
Tag: Chalkboard wall

How-To Make a Chalkboard Wall

Chalkboard walls are not just for kids.  They are super fun & functional for everyone, at any age.  While the kids are busy creating new drawings, us moms are making lists so nothing’s forgotten at the store.  The need for a chalkboard wall in a home can also change and evolve as your family changes and grows.

Another plus about chalkboard walls is that with the use of chalkboard paint, they are super easy to create.  For less than $10 and a few spare hours, a new wall can be created anywhere in your home (or office)!

Inexpensive & Easy-To-Create "Framed" Chalkboard Wall using @frogtape by @Jenna_Burger, SASinteriors.net

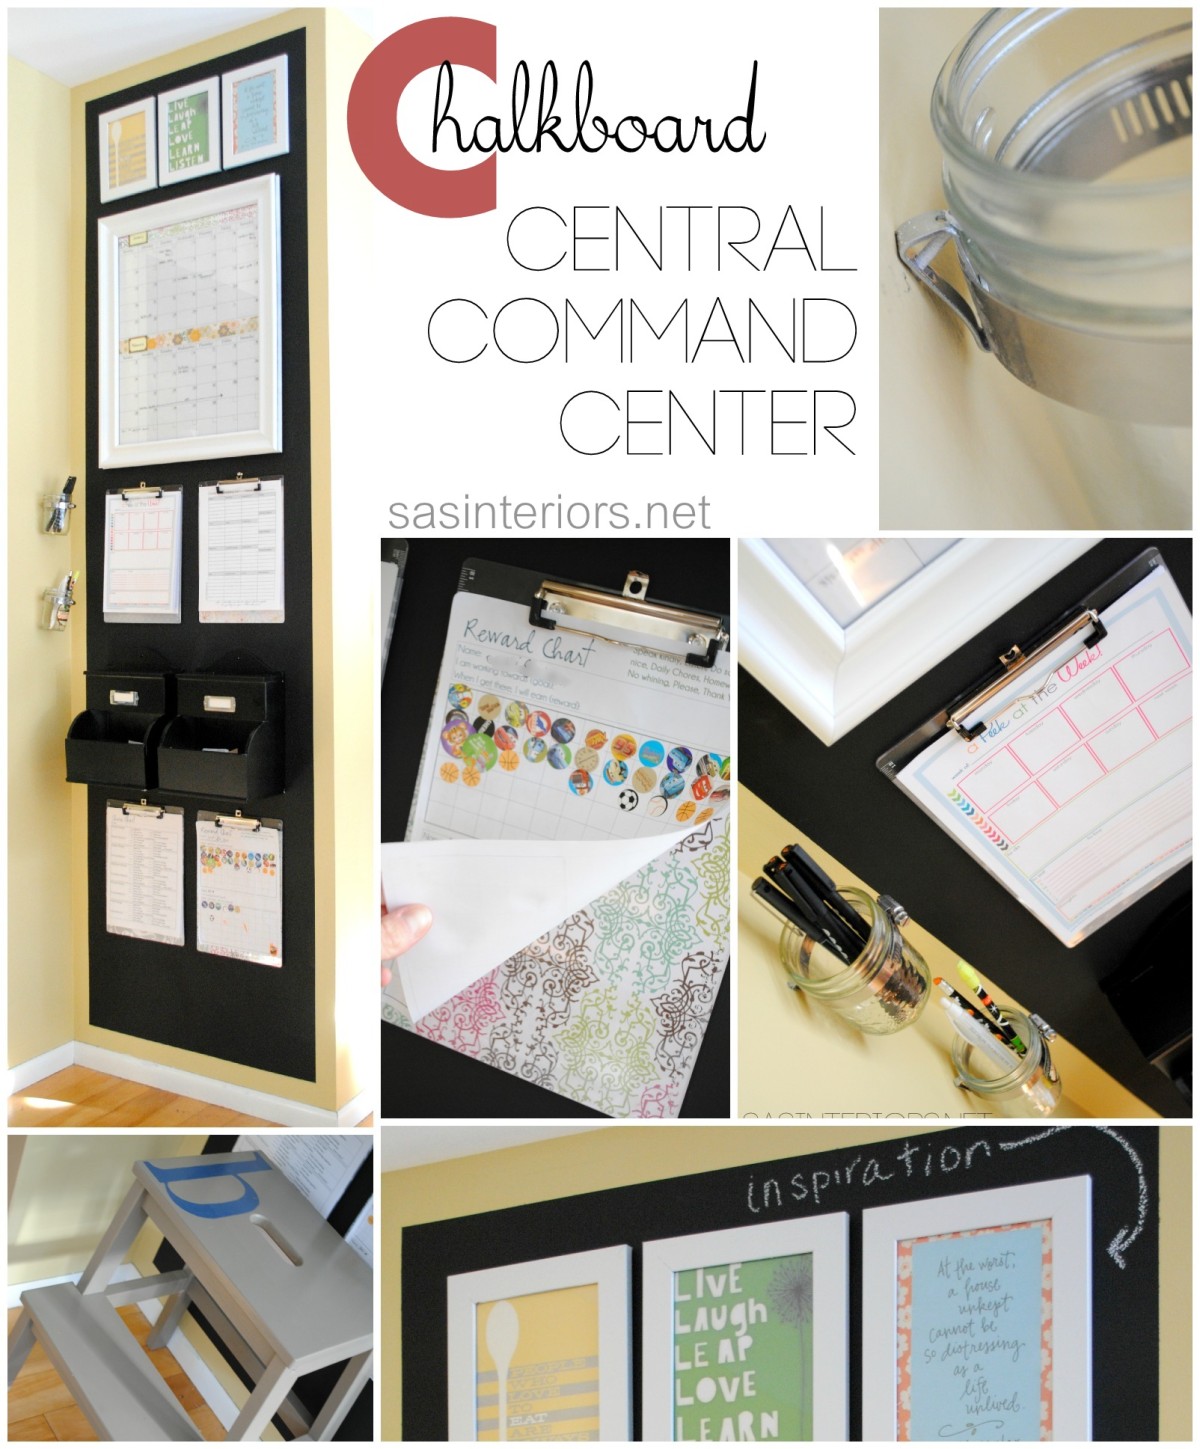
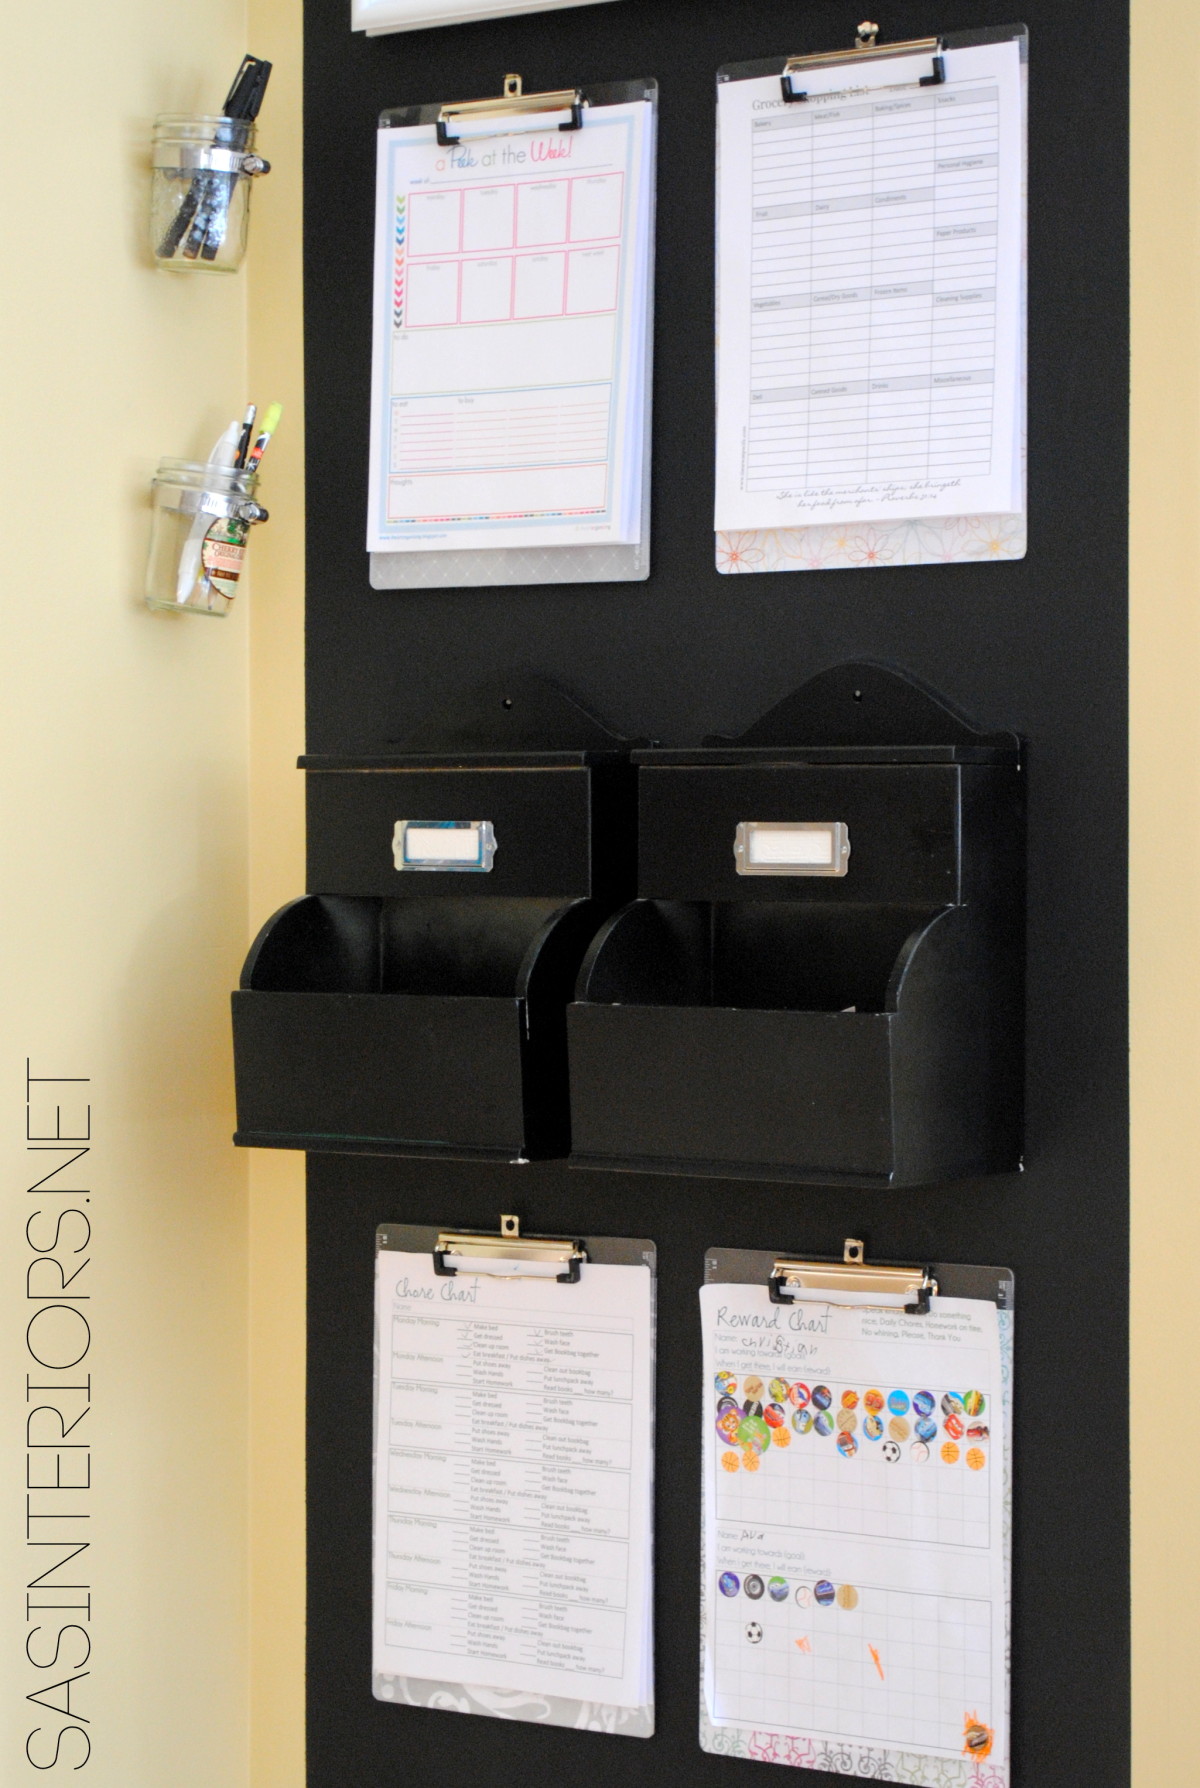
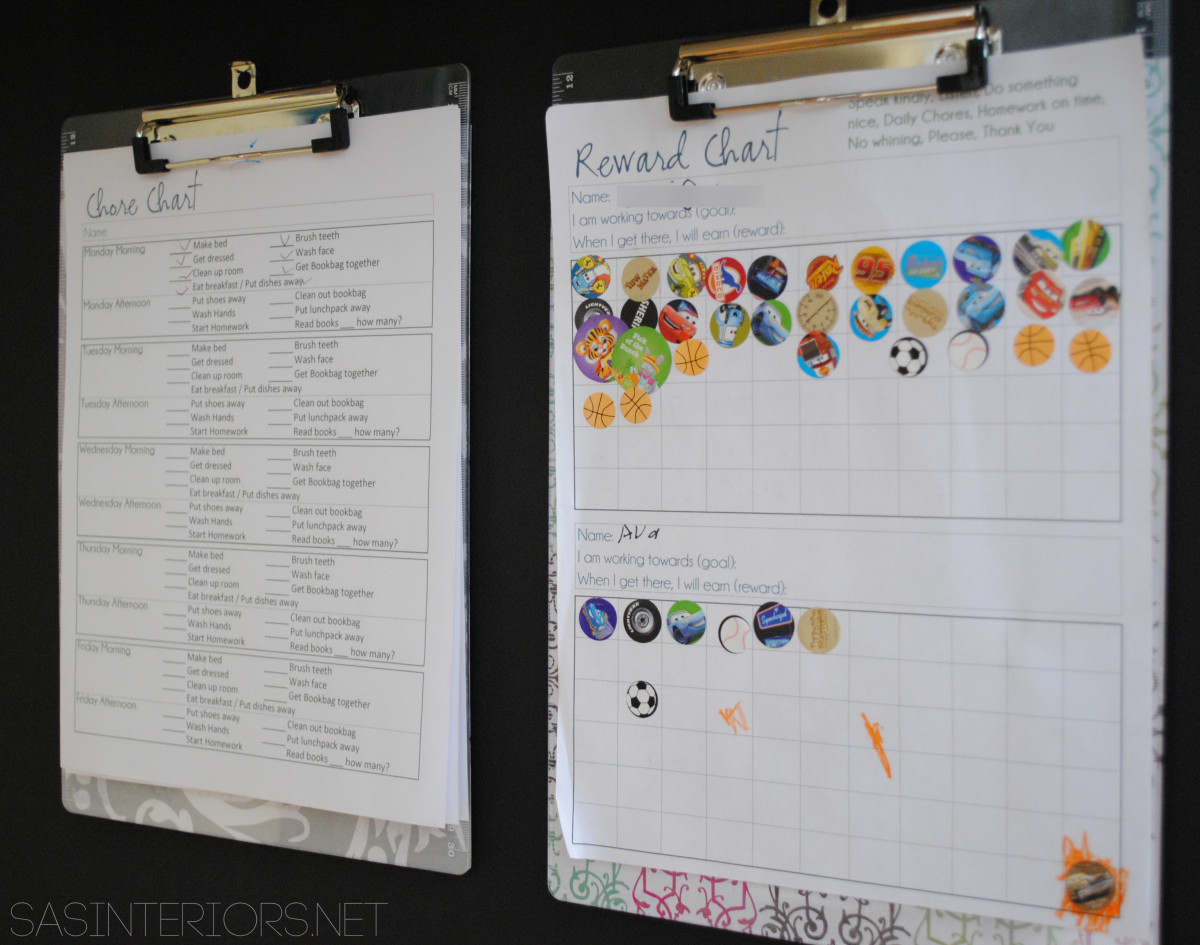
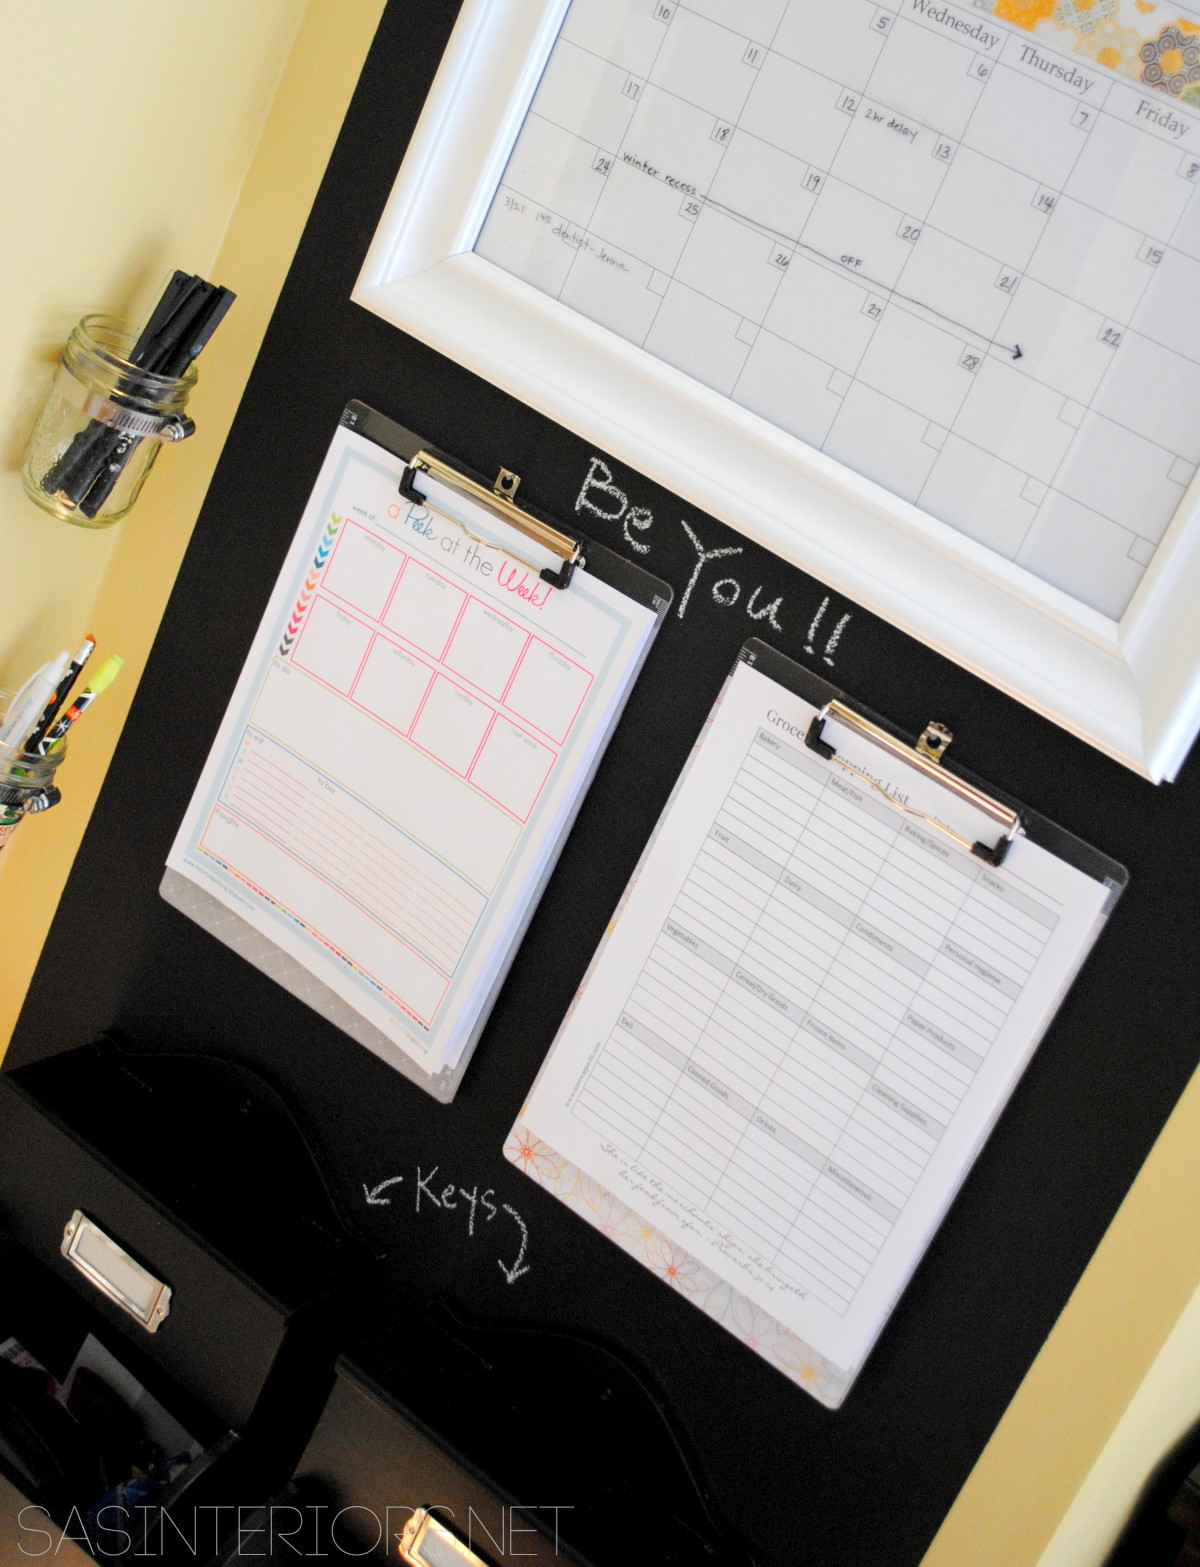
Earlier this week, I shared my revamped CCC {Central Command Center}.  This 30″ wide spot in our home has had about 6 (or maybe more) makeovers, but it’s an intracle spot that keeps our family on track day-to-day.

For this new CCC, I decided to add a chalkboard backdrop.  To create this fun, yet important part of the wall, I used chalkboard paint.

chalkboard paint

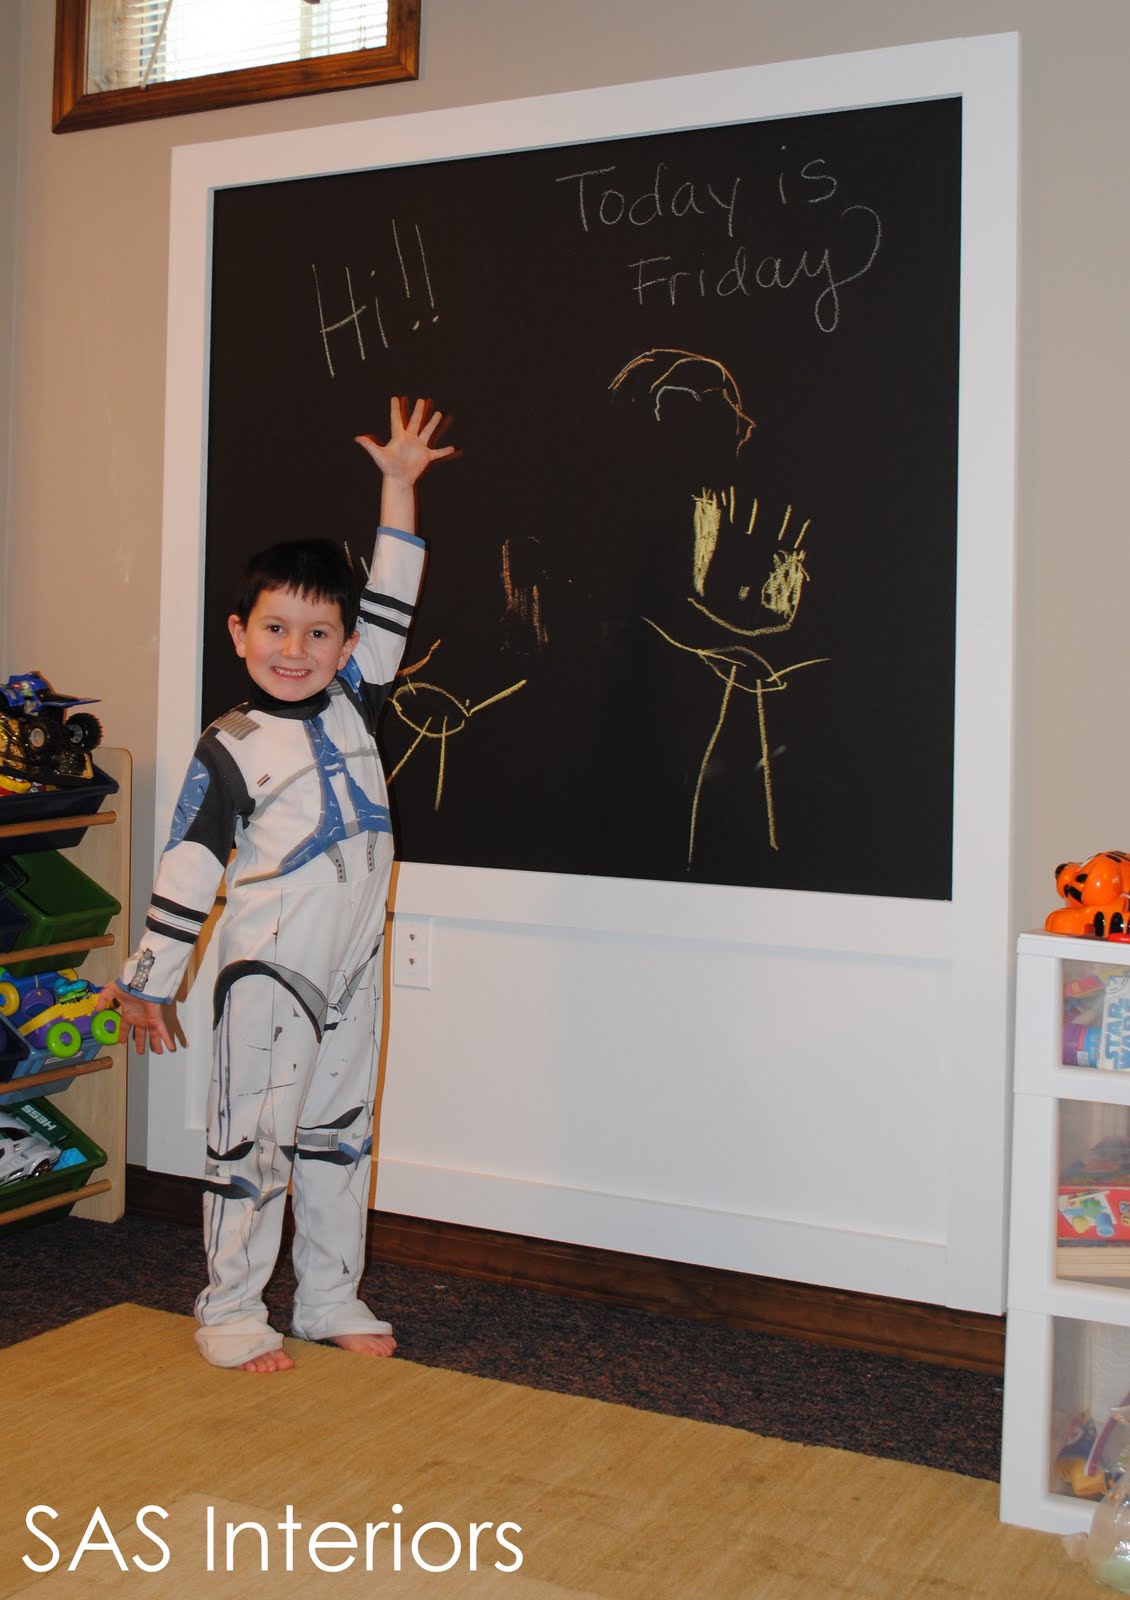
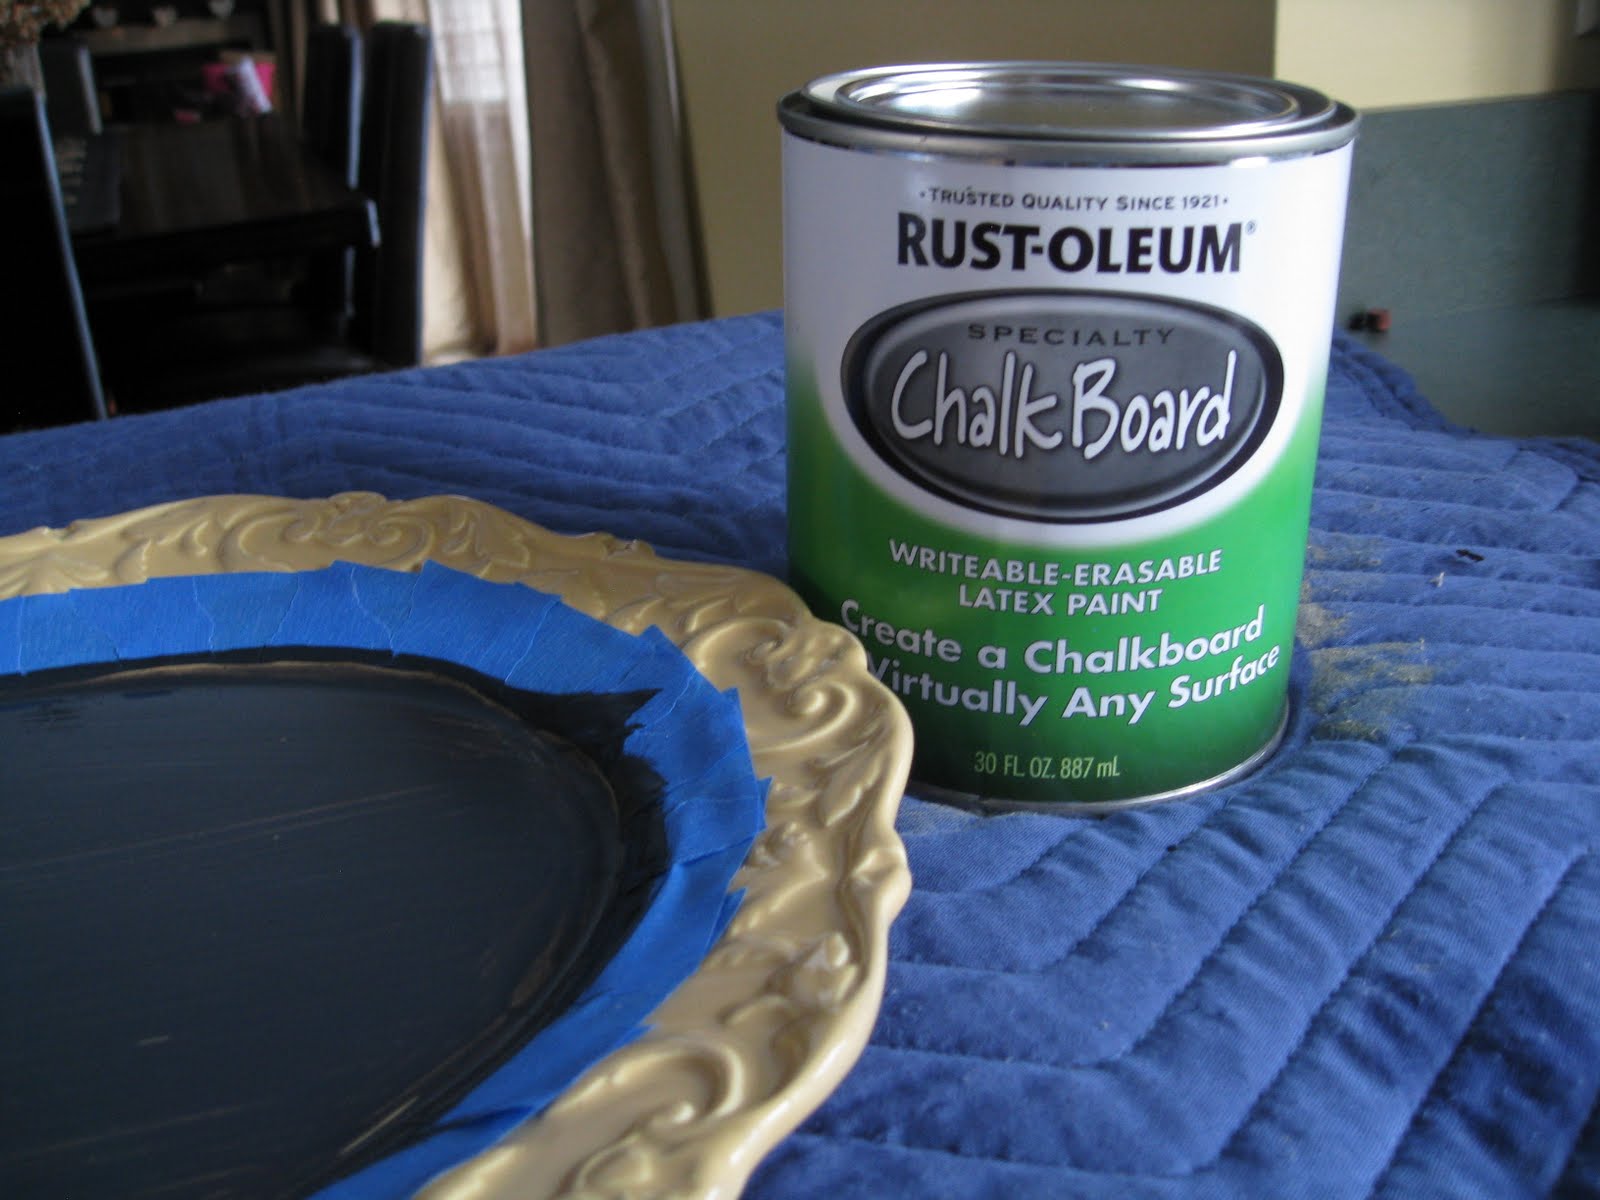
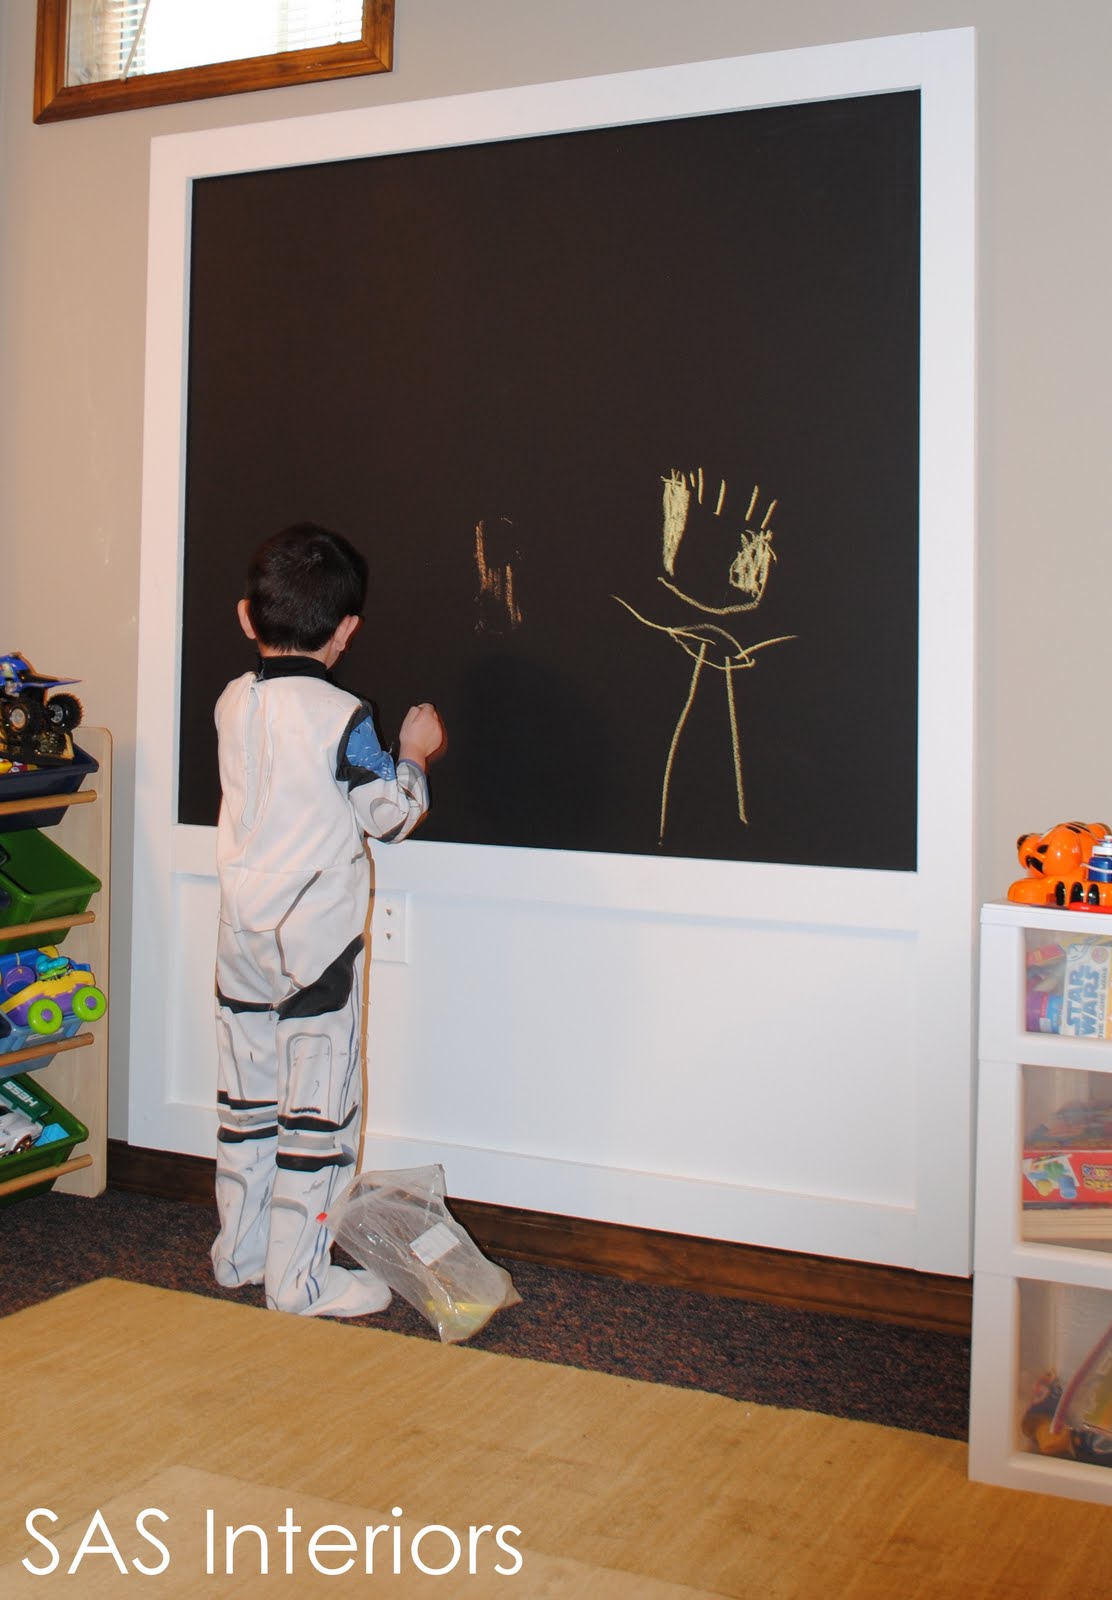
This lil’ old can has been around for almost 2 years and has been used on a ton of projects.  The largest before this project was the chalkboard wall we created in the basement for the kids a couple of years back.  Anyway, this can has lasted a long time!

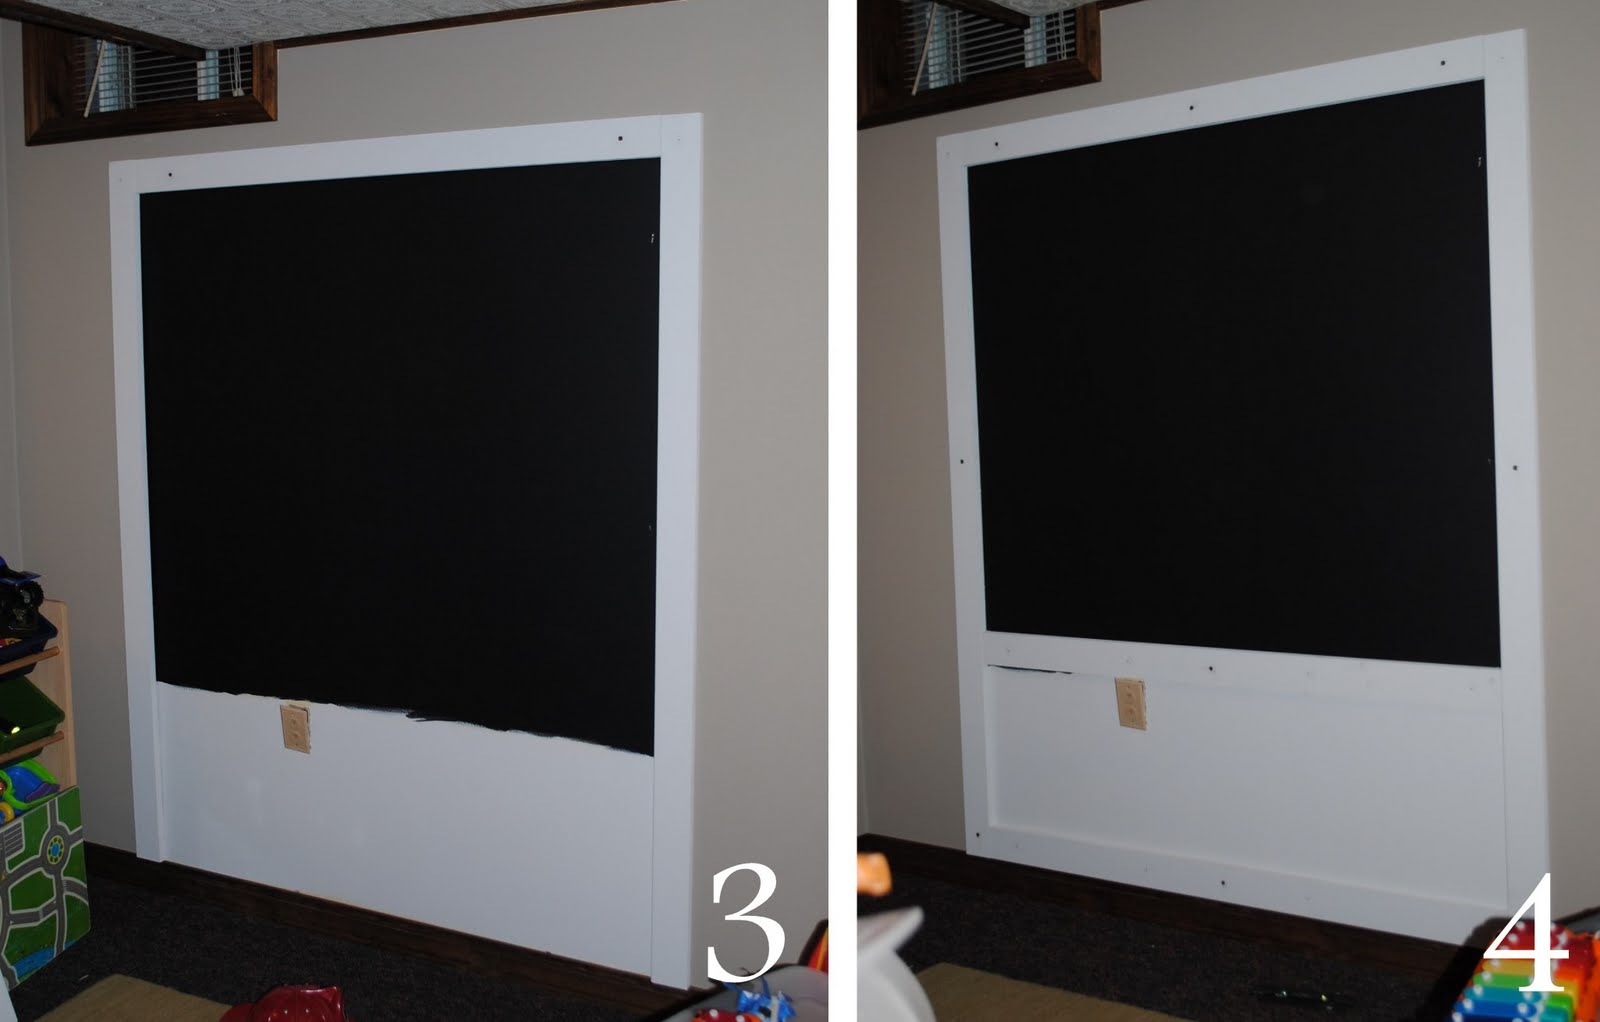
Before starting the chalkboard wall, I decided I wanted to create a “frame” surround.  There really is no “frame” on the wall, but by leaving 3″ of the yellow wall color, a “frame” surround was created.

Inexpensive & Easy-To-Create "Framed" Chalkboard Wall using @frogtape by @Jenna_Burger, SASinteriors.net

To create the frame, I applied two layers (two rows of tape side-by-side) of FrogTape.  This was my first time using FrogTape and I’m in love!  It was great.  Y’all know what a pain of a time I had when I painted the mouldings white, well this stuff would have come in handy.  Basically this tape has a sealer that when applied to the wall it doesn’t let paint seep underneath.  I had a few spots that the paint went under, but for the most part, it was great!

Inexpensive & Easy-To-Create "Framed" Chalkboard Wall using @frogtape by @Jenna_Burger, SASinteriors.netI wasn’t provided product from FrogTape.  I bought it myself because I’ve been wanting to try it out for a long time.  It gets my seal of approval!

Inexpensive & Easy-To-Create "Framed" Chalkboard Wall using @frogtape by @Jenna_Burger, SASinteriors.net

Once I applied the FrogTape and “burnished” it (pressed down really hard at the edges), I was able to start painting.

Inexpensive & Easy-To-Create "Framed" Chalkboard Wall using @frogtape by @Jenna_Burger, SASinteriors.net

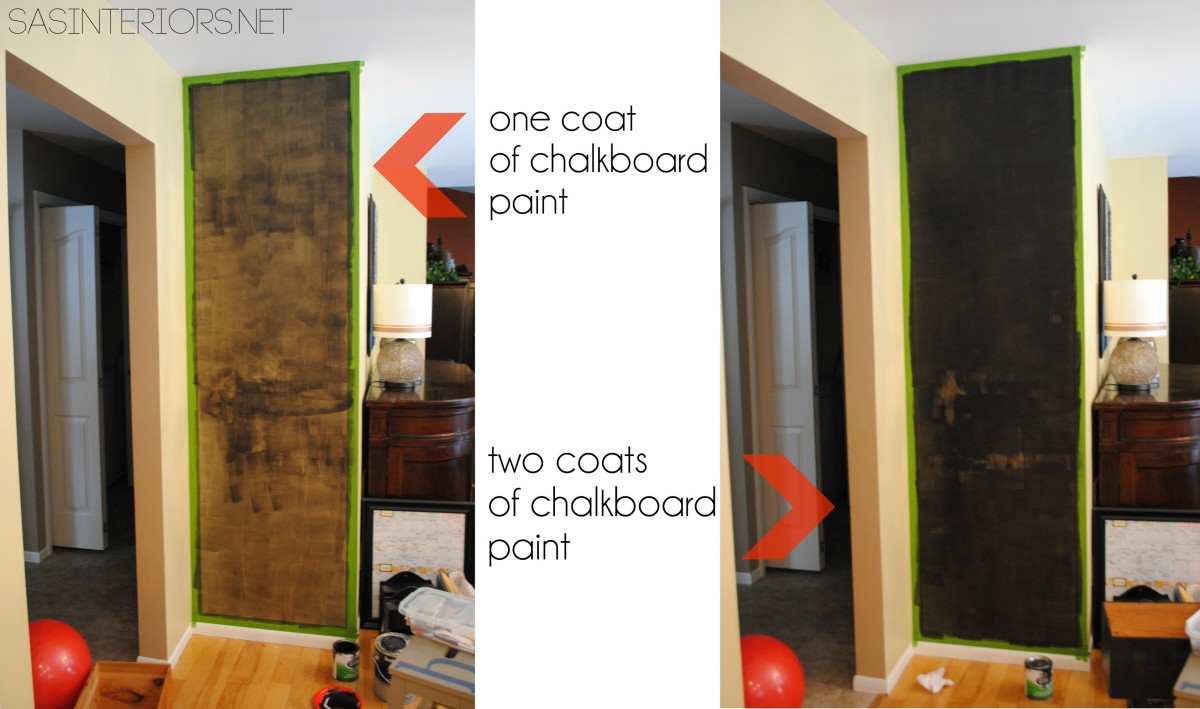
I applied 3-4 coats of the chalkboard paint so the surface was fully covered and no wall color from underneath came through.

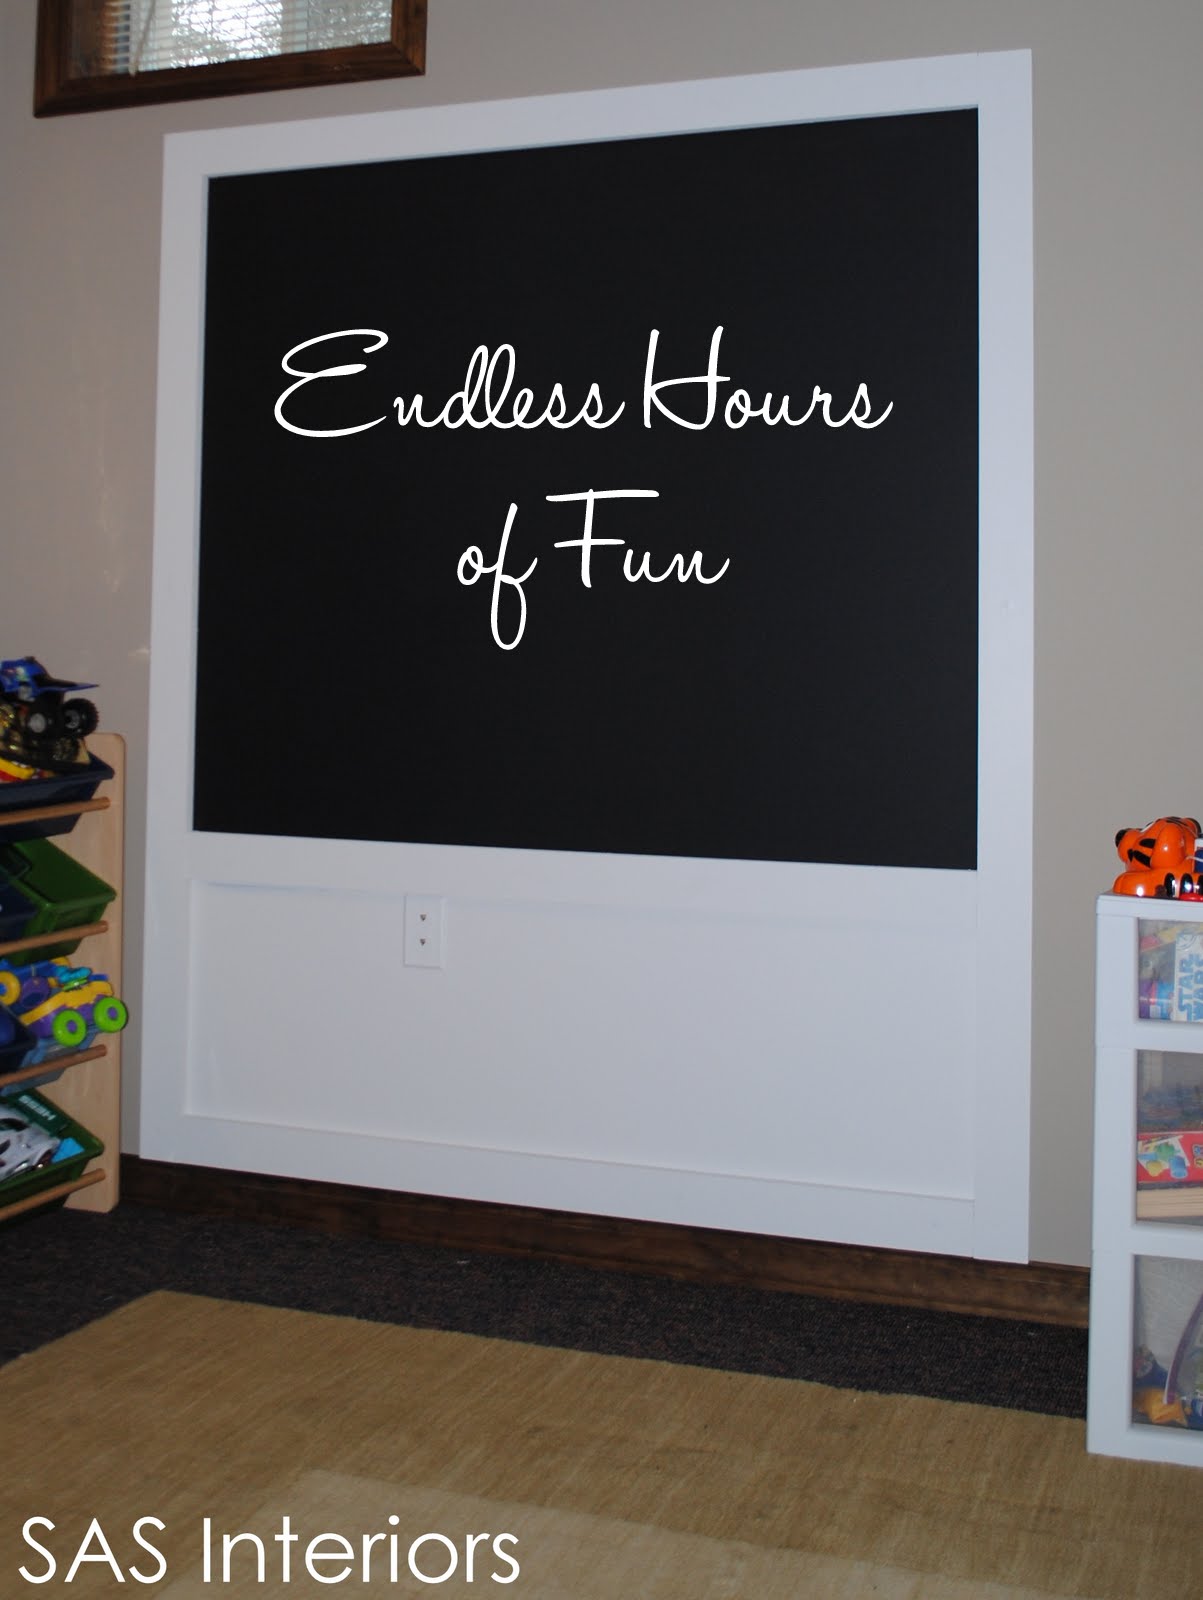
Once I knew no more coats were needed, I removed the paint.  If the paint is still wet, that’s okay.  As you peel away the tape, you’ll see your crisp, clean line! What a beauty.

Inexpensive & Easy-To-Create "Framed" Chalkboard Wall using @frogtape by @Jenna_Burger, SASinteriors.net

And then you’re ready to stand back and admire!

Inexpensive & Easy-To-Create "Framed" Chalkboard Wall using @frogtape by @Jenna_Burger, SASinteriors.net

Once your chalkboard wall is complete, the fun of either drawing or layering can begin! Since this is more of a functional spot than a fun spot, I created a Family Central Command Center.  This is how it resulted…  And you can learn more about it {here}.

Central Command Center_11a

Have you ever used chalkboard paint before? If so, what have you created?

Want to see more of my chalkboard projects (using this one can of paint)?
New Years Sparkly Tablescape with Chalkboard Candles
Kids Play Kitchen
Framed Chalkboard Medicine Cabinet
Chalkboard Platter

Revamped Family Chalkboard Central Command Center

Chalkboard Family Central Command Center for the heart of the home including a monthly calendar, kids charts, inspirational quotes, and more.  Created by @Jenna_Burger via sasinteriors.net

This 30″ wide wall has had more makeovers than any other spot in my home.  In the almost 3 years that we’ve lived here, I think it’s had at least 6 lives – thank goodness it’s not an entire room.  But I have to say, this 30″ wall is the key to how we function – it’s our Central Command Center… a.k.a. CCC

I couldn’t let the year begin without making a few updates to this small, but important part of our home (the previous CCC can be found here).  I actually had made a few changes about a month ago, but it just wasn’t right.  After living with it for a while, I knew what it needed…  A chalkboard.  An entire wall of chalkboard.

The revamp started with removing everything from the CCC, patching up the old holes, and touching it up with some fresh paint.  Once the wall was ready, I was off applying the chalkboard paint.

I’ll share more on the specifics of how I created the chalkboard backdrop in a separate blog post, but in the meantime, let’s take a tour of my NEW Family Central Command Center…

Chalkboard Family Central Command Center for the heart of the home including a monthly calendar, kids charts, inspirational quotes, and more.  Created by @Jenna_Burger via sasinteriors.net

One of the major changes to the CCC is the calendar.  The calendar that I had previously created was for only one month.  SO many of you asked me, “I love the one month, but what do you do with plans you need to write down for the next month?”.  I actually had the same dilemma and now it’s resolved.  There are two calendars for two months.  Problem solved. When the month we’re in is on the bottom, I put the next month’s dates on the top.  It’s a little backwards having the month after above, but it works!

Chalkboard Family Central Command Center for the heart of the home including a monthly calendar, kids charts, inspirational quotes, and more.  Created by @Jenna_Burger via sasinteriors.net

On the picture frame turned calendar, I still use a sharpie, dry-erase pen, or these handy-dandy pens by NameBubbles that are available with their write-on labels.

Did you notice the frames on the calendar & pictures above are now white instead of black?  Once the chalkboard was painted on the wall, the black frames disappeared, so I spray painted the old ones.  Using a white primer spray paint + a white glossy top coat, the frames are as good as new.

I still love my inspirational quotes and those are the same (in their new white frames).

Chalkboard Family Central Command Center for the heart of the home including a monthly calendar, kids charts, inspirational quotes, and more.  Created by @Jenna_Burger via sasinteriors.net

Below the calendar are the new additions to the CCC.  A month ago when the wall got an update, I made these 4 fun clipboards with scrapbook paper.  In between them are our key (and misc stuff) boxes that I had purchased at TJs and spray painted them black.

Chalkboard Family Central Command Center for the heart of the home including a monthly calendar, kids charts, inspirational quotes, and more.  Created by @Jenna_Burger via sasinteriors.net

Chalkboard Family Central Command Center for the heart of the home including a monthly calendar, kids charts, inspirational quotes, and more.  Created by @Jenna_Burger via sasinteriors.net

The top clipboards hold our grocery list & our Peak at the Week schedule.  Now I have no excuses to forget anything at the store – haha (wishful thinking)…

Chalkboard Family Central Command Center for the heart of the home including a monthly calendar, kids charts, inspirational quotes, and more.  Created by @Jenna_Burger via sasinteriors.netLooking to print these out – click {here} for the Peak at the Week chart created by iheartorganizing.com; Click {here} for the Grocery List created by The Time-Warp Wife (thanks to the awesome reader who found the link!)

And below are the kids charts – a chore / responsibility chart for my son and a reward chart where both kids get to add stickers when they’ve made good choices / decisions.

Perfectly at their level!

Chalkboard Family Central Command Center for the heart of the home including a monthly calendar, kids charts, inspirational quotes, and more.  Created by @Jenna_Burger via sasinteriors.netLooking to print these out – click {here} for the chore chart and click {here} for the reward chart

I chose this spot of the home because it’s in the ideal location, kinda close to the foyer and kinda close to the kitchen.  It’s a small spot (a large wall or space isn’t really needed), yet is efficiently and thoughtfully put together for all our family needs.

Chalkboard Family Central Command Center for the heart of the home including a monthly calendar, kids charts, inspirational quotes, and more.  Created by @Jenna_Burger via sasinteriors.net

One of the major needs that was missing in our previous CCCs was something to write with.  Somehow we can NEVER find a pen or a pencil in our home (our kids must eat them – hehe).  Being inspired by others who used mason jars for storage, I grabbed some hose clamps from Lowe’s and installed two pencil / pen holders next to the charts.  I put them high enough, so little fingers hopefully won’t touch them. {A tutorial on how-to create jelly jar pen holders to come soon}.

Chalkboard Family Central Command Center for the heart of the home including a monthly calendar, kids charts, inspirational quotes, and more.  Created by @Jenna_Burger via sasinteriors.net

Chalkboard Family Central Command Center for the heart of the home including a monthly calendar, kids charts, inspirational quotes, and more.  Created by @Jenna_Burger via sasinteriors.net

Something that I haven’t shared, but created a long time ago is our family stool.  It’s something so simple, but used everyday!  From using it in the kitchen and closet or as an extra seat, our Ikea step stool is awesome.  When I bought it, it had a natural wood finish, but with a little paint (the same color as the kitchen), I revamped it.  Then using the same stencil that I created for my pallet box, I added our family initial: b.

Chalkboard Family Central Command Center for the heart of the home including a monthly calendar, kids charts, inspirational quotes, and more.  Created by @Jenna_Burger via sasinteriors.net

Lastly, of course we had to chalk-up our new wall!  That’s the point of chalkboard!!

Chalkboard Family Central Command Center for the heart of the home including a monthly calendar, kids charts, inspirational quotes, and more.  Created by @Jenna_Burger via sasinteriors.net

I love how a chalkboard wall allows you to continually change it.

Chalkboard Family Central Command Center for the heart of the home including a monthly calendar, kids charts, inspirational quotes, and more.  Created by @Jenna_Burger via sasinteriors.net

And that sums up the tour of our 30″ wide everything wall!

Chalkboard Family Central Command Center for the heart of the home including a monthly calendar, kids charts, inspirational quotes, and more.  Created by @Jenna_Burger via sasinteriors.net

 How does your family stay organized?  Do you have a central “spot” in your home?

DIY: Creating a Framed Chalkboard Wall

My son doing his best ‘Vanna White”
As you know from a few previous posts, I have been feverishly working on my basement revamp! One of the many projects  included creating a new Chalkboard Wall for the kids.  They just love using chalk on the driveway, but in these winter months that’s unfeasible.  So I thought… let’s bring the LOVE of CHALK indoors!


Supplies
  • MDF Boards (cut to size)
  • Chalkboard Paint
  • White Paint (preferably semi-gloss)
  • Screws
  • Hammer / Screw gun
  • Measuring Tape
  • Pencil
  • Level
This Chalkboard Wall creation actually cost $0, because all the materials were leftovers from other recent projects. If you were to start from scratch, the project would cost you approximately $20.

{Step By Step}


1. Tape off the area where you’d like to apply the chalkboard paint (from the picture, you can see the old paint in the center and the freshly painted wall around).
NOTE: Your chalkboard wall can be as big or small as you’d like.  I also created a recessed panel below to work with the existing outlet placement ~ you don’t have to do this.(Obviously, I don’t want the kids drawing with chalk on the outlet)
2. Once you’ve painted the chalkboard on the wall, cut your lumber to the appropriate size.  The lumber will cover the line of where the wall paint color meets the chalkboard paint. Start with the top rail.  Make sure that it’s level.
NOTE: We used MDF (medium density fiberboard)…it’s the easiest and cleanest to work with.  I had leftover pieces from creating my craft area and had the rails cut to the exact size at HD.


3. Install the two side rails, but ONLY put in the top screw.
4. Install the middle and bottom rail.  Again, check that they are plumb.  Then return to the side rails, and screw them into place.


Lastly, fill in all your screw holes with spackle.  Once dry, retouch any spots with paint.  It is best to wait a few days before using chalk, see the back of the can for more details.

This is the chalkboard paint that I used:

This is a picture taken when using the chalkboard paint for another project, found {here}


{Ready to USE}

Your chalkboard is done and ready for endless hours of FUN.  This is a fairly straight-forward and easy project that will be a sure hit for the cold winter months (and hot summer days).

As you can see, my son couldn’t wait to start drawing.

Thanks for taking a look at my most recent basement project.
Check back soon for more updates and tutorials!