Tag: Christmas mantel

Christmas Mantel

Christmas Mantel filled with old & new. Created by www.jennaburger.com

The Holiday season is underway – yay!

Since Friday – the day after Thanksgiving – we’ve been hustling + bustling indoors and out decorating for Christmas.  This year has been a bit tricky with the kitchen renovation (walls are still being painted & the hardwood floors are still curing), but we are making do with the areas that we can add our festive favorites…

One area of our home that’s been decorated for a few weeks is the mantel.

I got the Christmas bug a few weeks ago after making my way into the Christmas section of Lowe’s and leaving with a handful of new fun finds.  They’re selection of seasonal decor this year is stellar.

I incorporated a lot of new with the old…

Christmas Mantel filled with old & new. Created by www.jennaburger.com

Christmas Mantel filled with old & new. Created by www.jennaburger.com

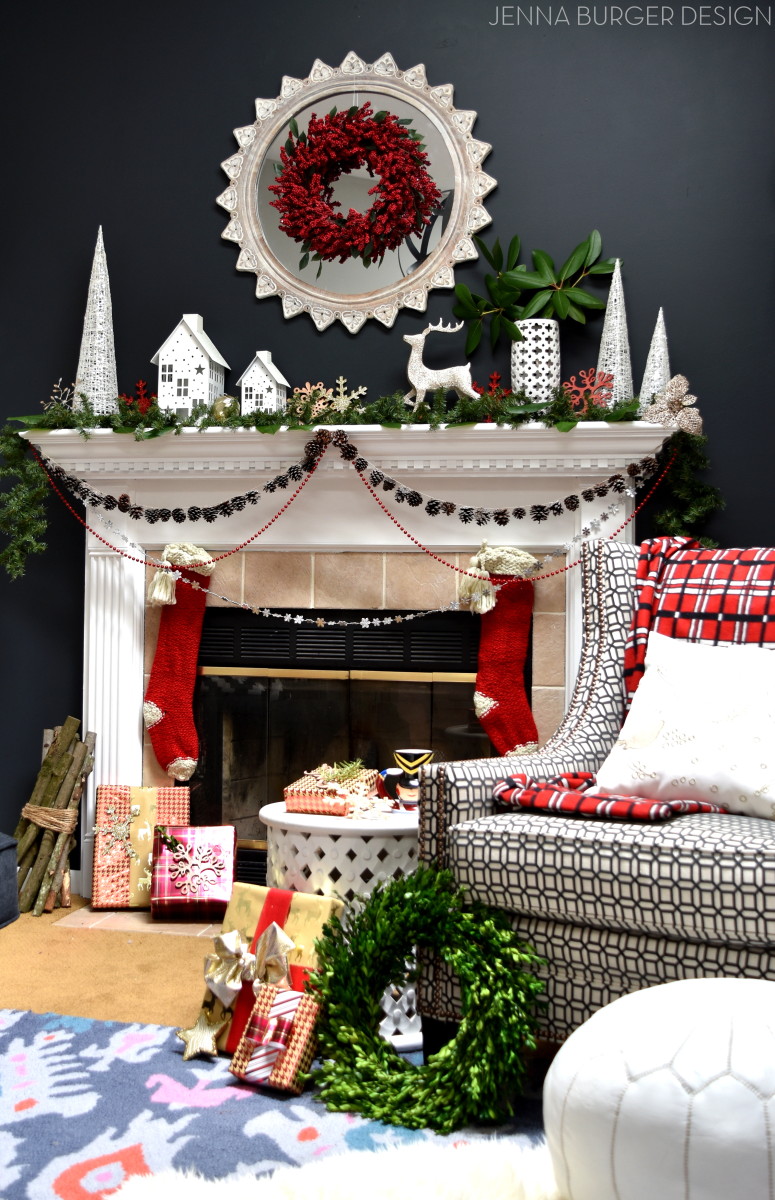
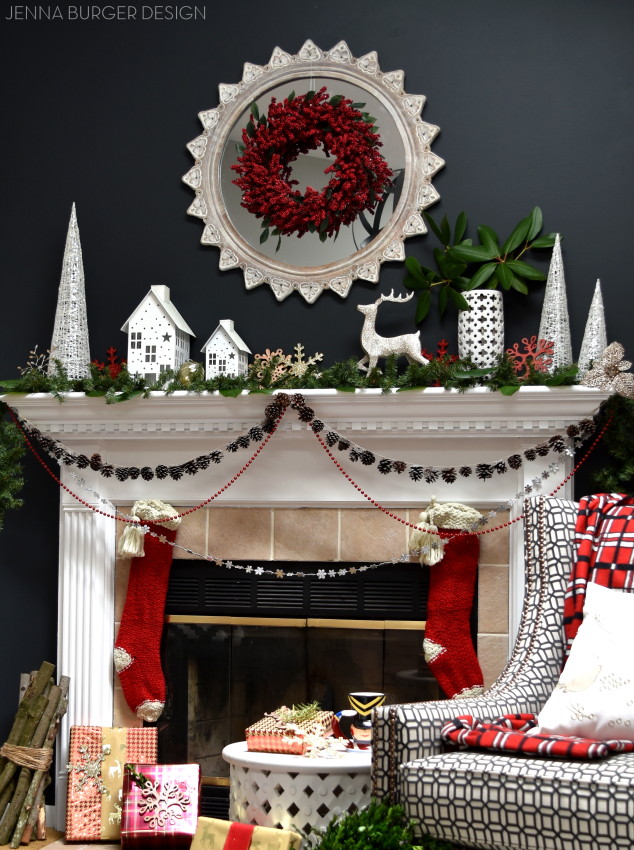
I had such a fun + relaxing (well kinda in my OCD way) time creating this years Christmas mantel.  It was enjoyable to have a different backdrop to work with since this room, specifically the fireplace wall, got a revamp for burnt orange to black earlier this year >>> check out the living room transformation

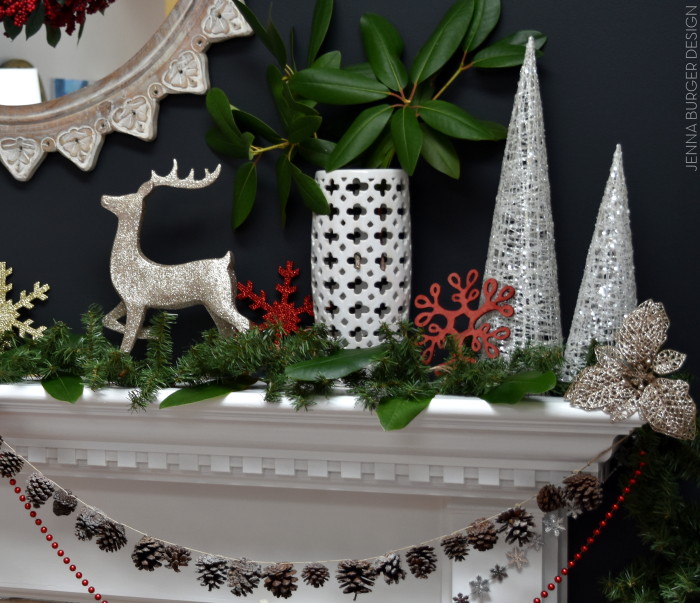
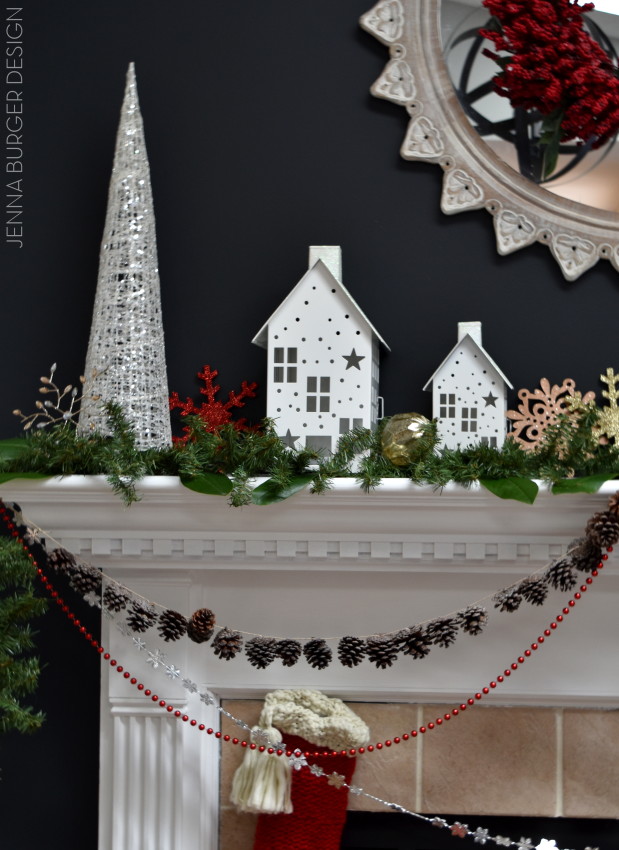
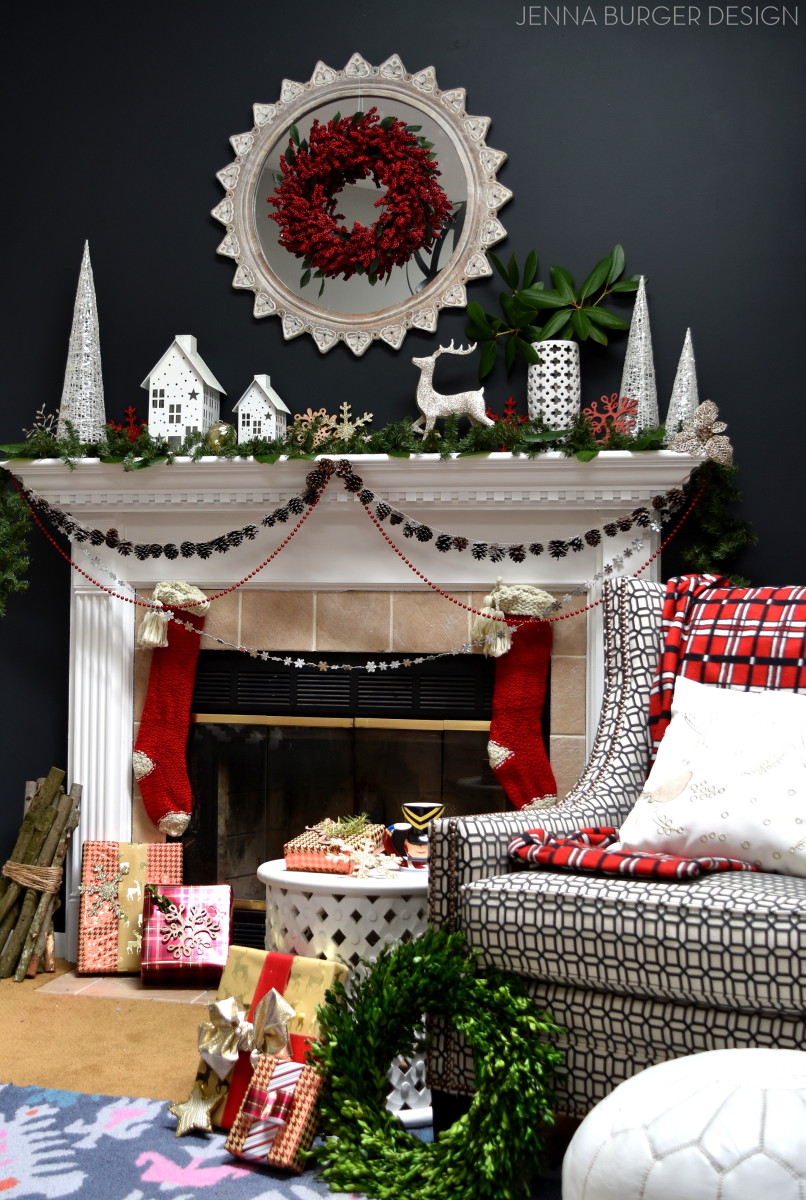
The new black wall – color: Valspar Black Heron – was the perfect backdrop to layering contrast white elements.

Christmas Mantel filled with old & new. Created by www.jennaburger.com

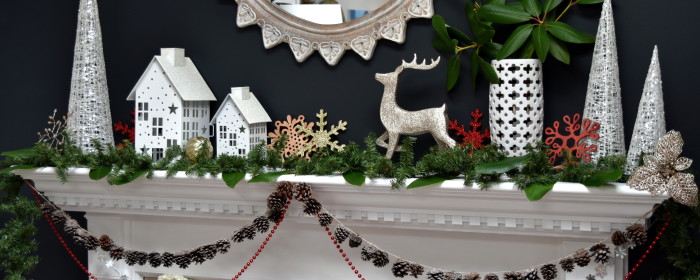
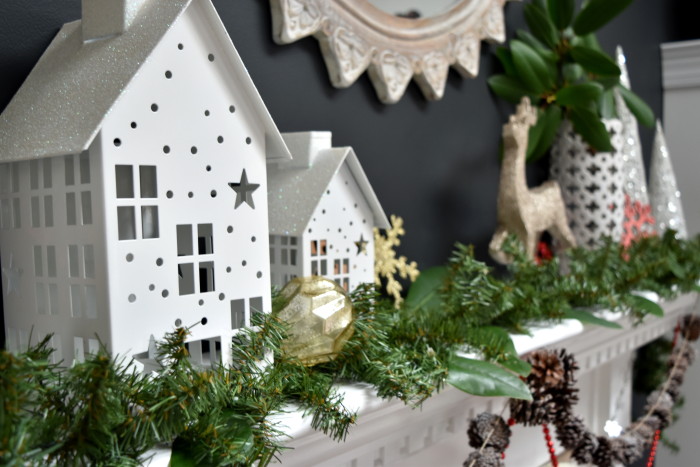
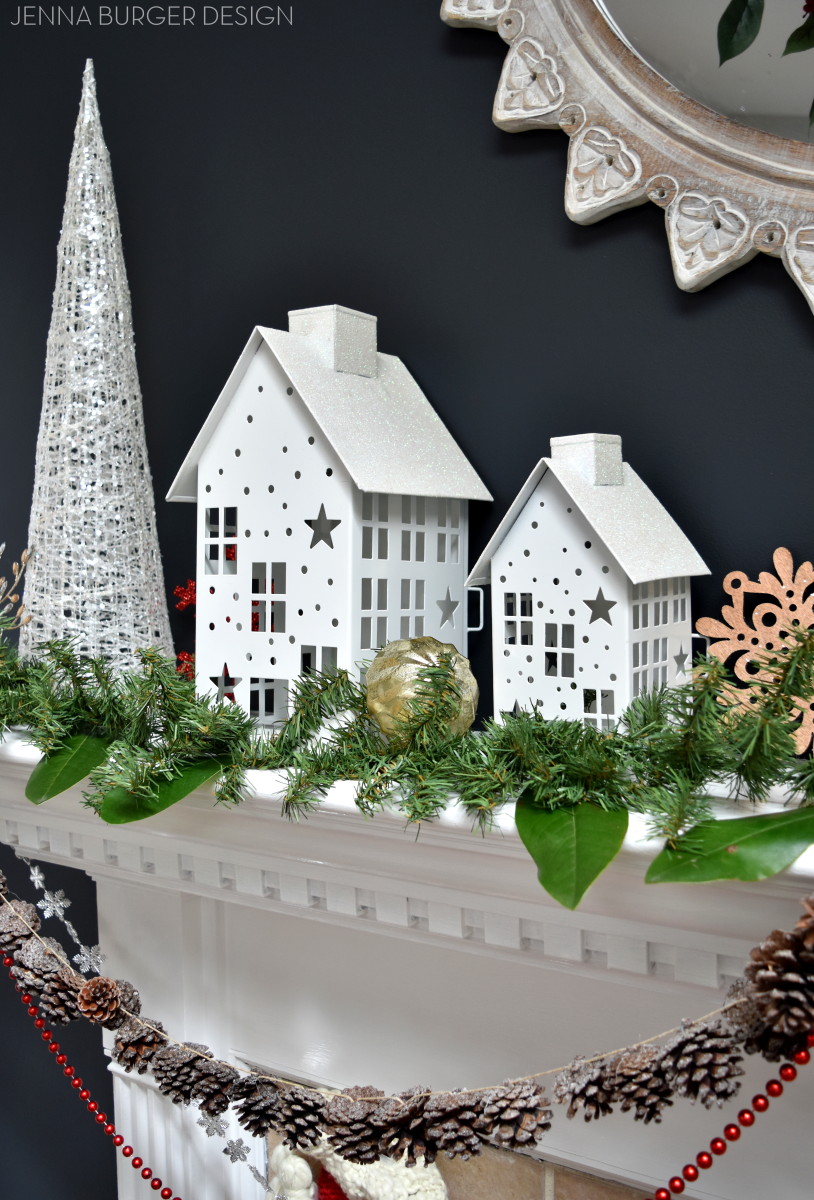
I stumbled upon these adorable white houses – in varying sizes – and couldn’t resist incorporating them in the mantel.  The same houses come in red as well, but I loved the crisp white with glitter roof.

Christmas Mantel filled with old & new. Created by www.jennaburger.com

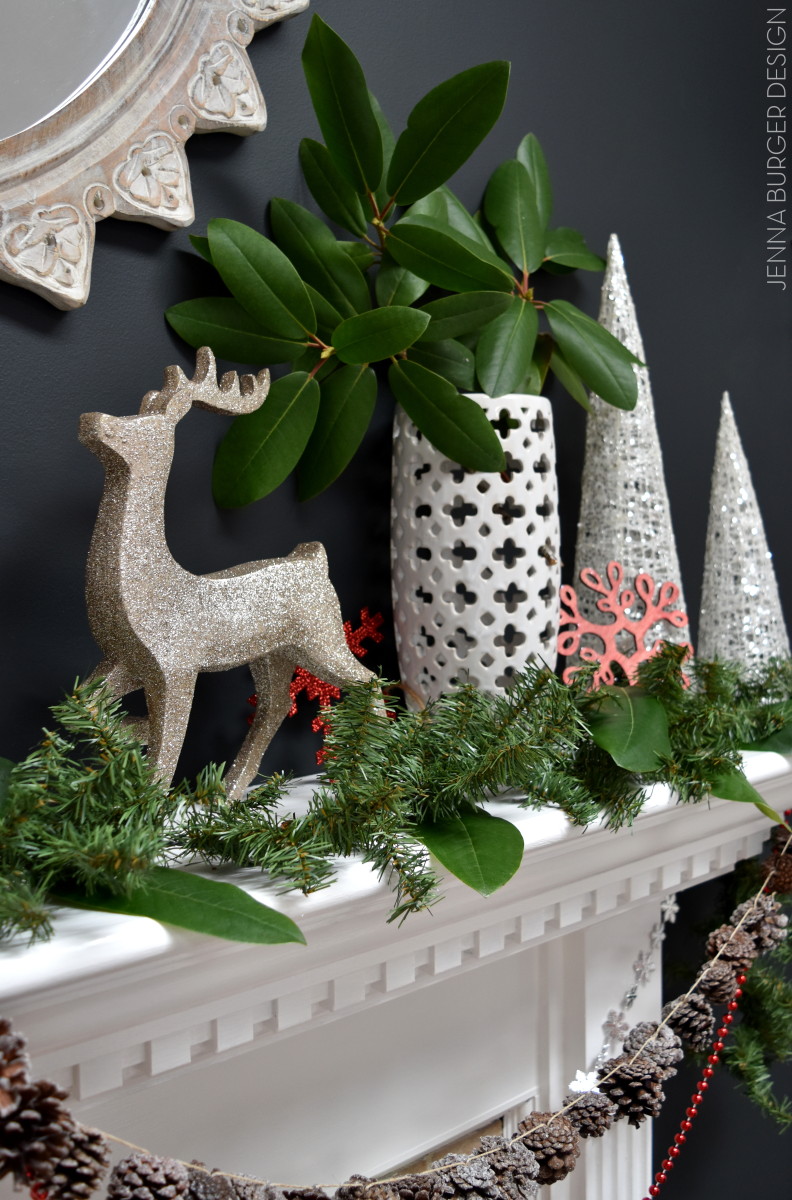
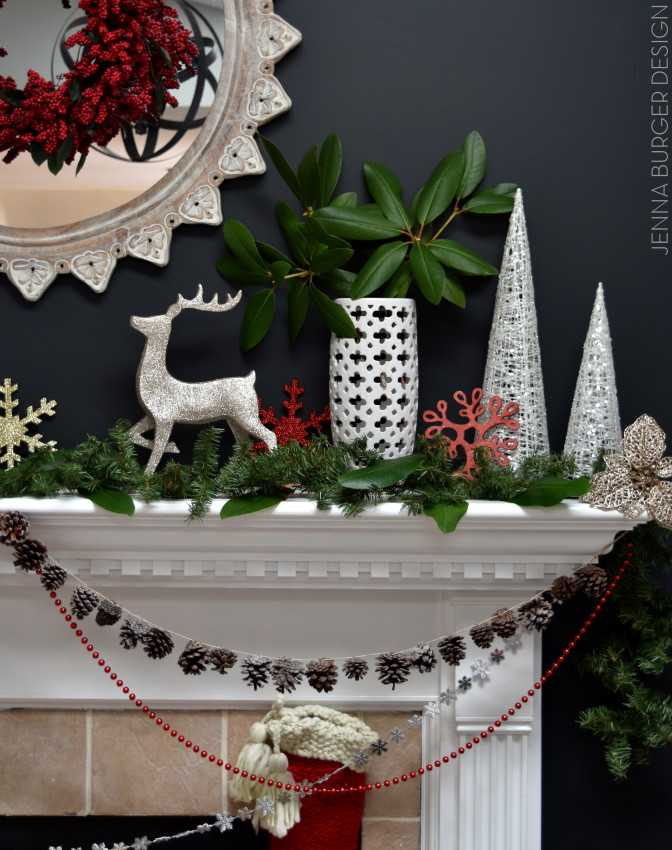
As the base of the mantel, I used a faux greenery garland and added in real cut magnolia leaves that I got from the tree in my yard.

Adding in real leaves amongst the faux, gives such a great look.  It is a nice idea to create a realistic-looking garland without the headache of drying branches + can be used year after year.

I also added a few magnolia branches to a tall white vase to introduce an organic element + height to the fireplace.

Christmas Mantel filled with old & new. Created by www.jennaburger.com

Christmas Mantel filled with old & new. Created by www.jennaburger.com

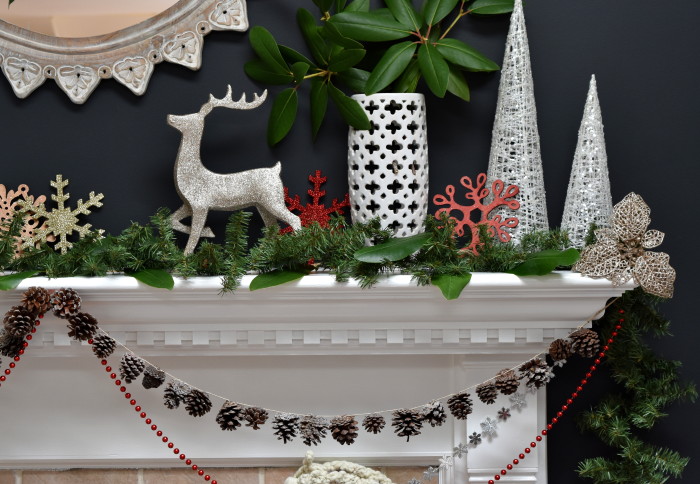
The sparkly reindeer is another new + fun find and if I could put my finger on a ‘theme’ for this years decor, it would be reindeer…

I snagged a few reindeer elements and I just love what they represent… a woodland, outdoorsy, winter feeling.

Christmas Mantel filled with old & new. Created by www.jennaburger.com

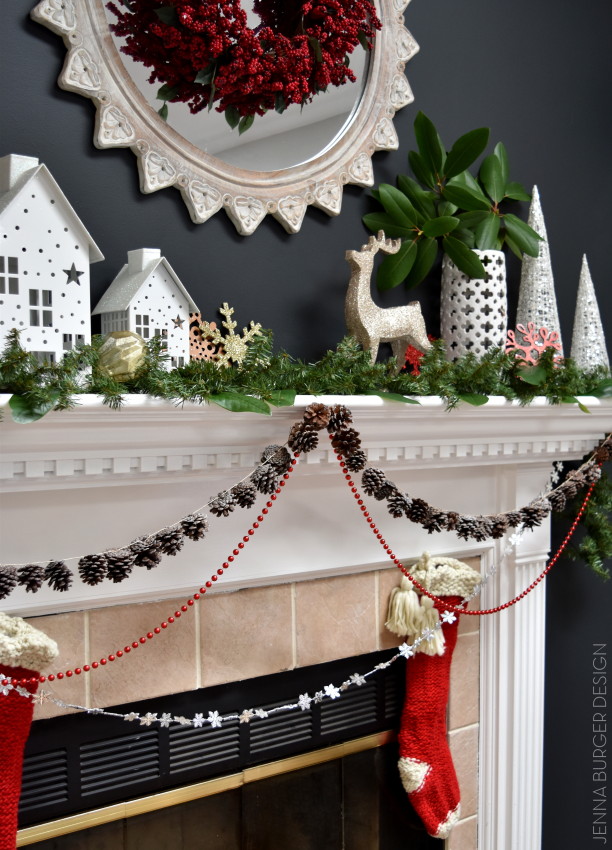
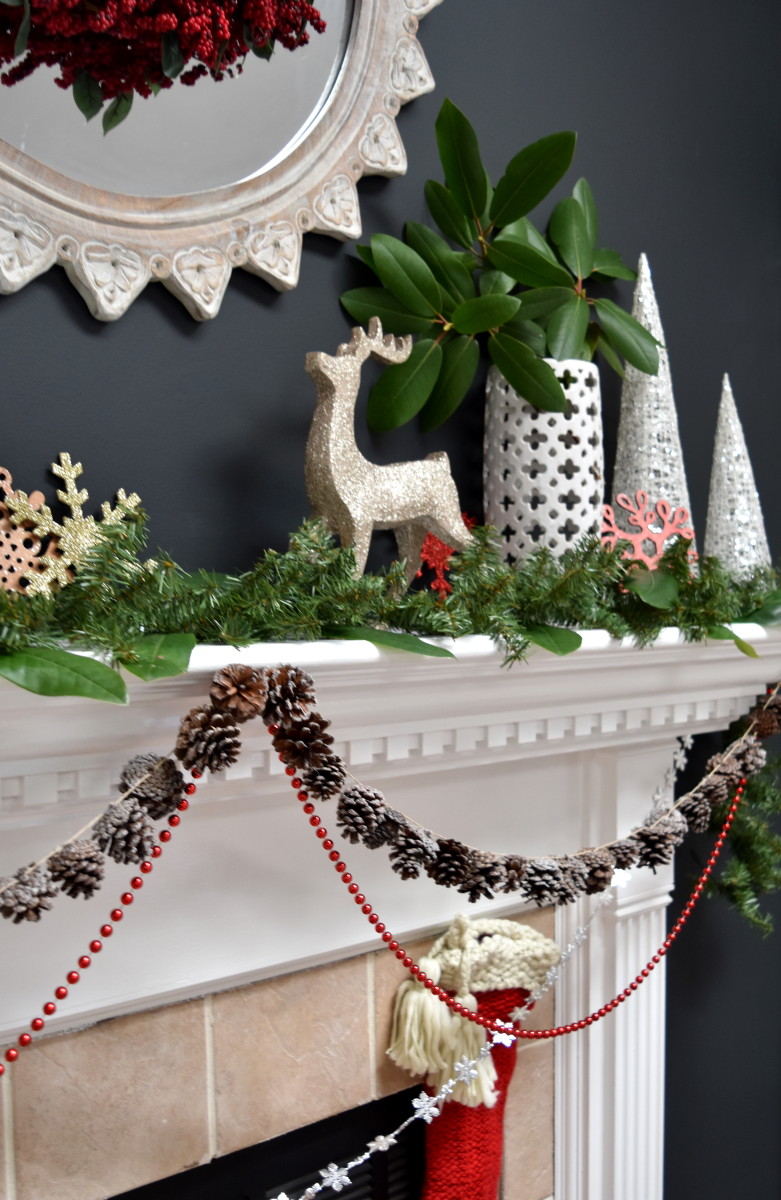
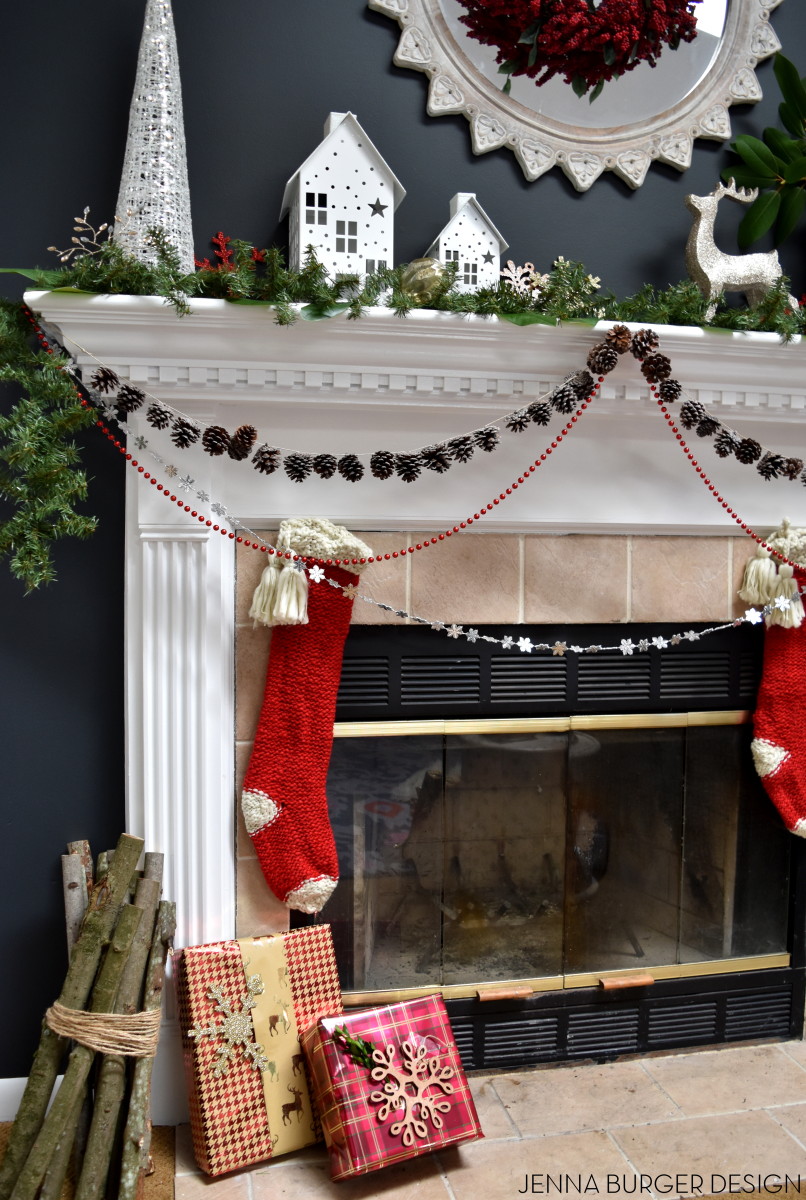
On the face of the fireplace, I draped several strands of differing garland.  I picked up a beautiful pinecone garland – which was a pleasant surprise because I thought they were individual pinecones which I was going to pile in a bowl – and hung it them from end to end on the mantel.

Then using red bead garland – that I got from Dollar General years ago – I hung a longer swag from edge to edge, and finished it with a silver snowflake garland across the front.

Hung by the fireplace with care are adorable knit red + white stockings.  I just love the oversized tassels!

Christmas Mantel filled with old & new. Created by www.jennaburger.com

Christmas Mantel filled with old & new. Created by www.jennaburger.com

Christmas Mantel filled with old & new. Created by www.jennaburger.com

Recognize the mirror?  I used it for my Thanksgiving table, then decided to use it as the focal point above the fireplace and mounted a beautiful berry wreath on the face.

Giving height and grounding each end, I added in my one of my seasonal favorites, the glitter cone-shaped trees in silver + white (check out similar ones here).  I have gold too and they’ll be someplace else in the room.

Christmas Mantel filled with old & new. Created by www.jennaburger.com

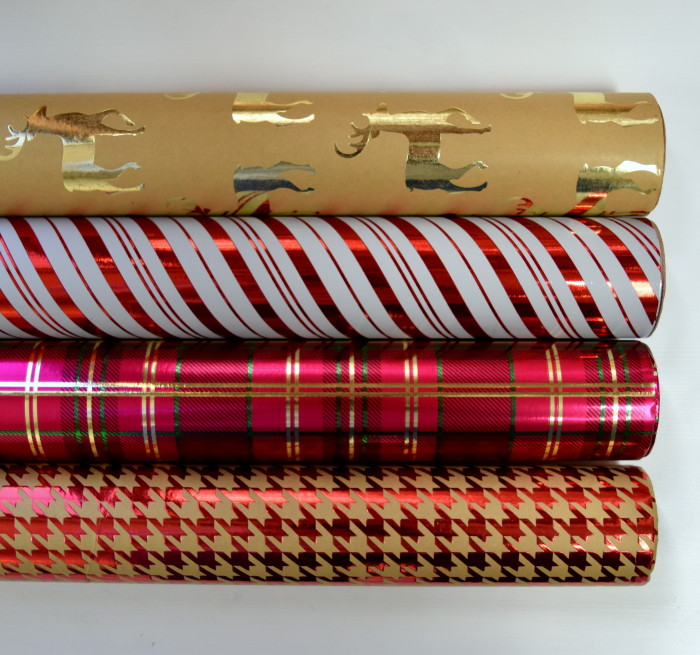
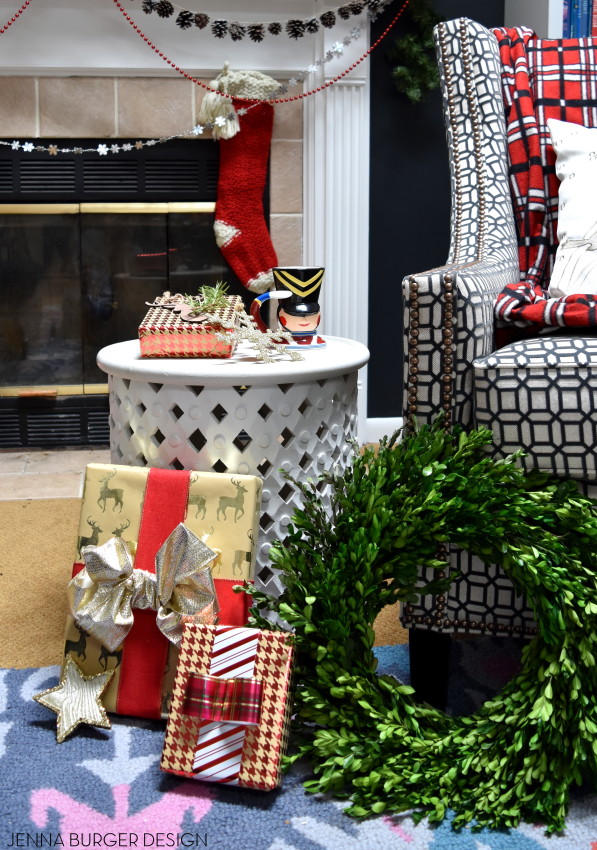
My reindeer ‘theme’ also continued with the wrapping paper I chose.  Check out this paper with the reindeer silhouette – I couldn’t resist.  I loved pairing it with the houndstooth + striped paper.

Christmas Mantel filled with old & new. Created by www.jennaburger.com

Christmas Mantel filled with old & new. Created by www.jennaburger.com

Throughout, I layered in new + old ornaments that added sparkle + shine.  These wood laser-cute ornaments were a surprising find this year and I grabbed a similar wood reindeer ornament version as well.

Christmas Mantel filled with old & new. Created by www.jennaburger.com

I am so happy with how this years Christmas mantel came out.  I had no real plan when I started decorating, but as usual when the everyday decor came down and I was left with a blank canvas, the ideas started to flow.

With some changes + tweaks, the result is pretty fantastically festive…

Christmas Mantel filled with old & new. Created by www.jennaburger.com

I can’t let you go without sharing that the annual Holiday Housewalk hosted by Jennifer Rizzo begins today!  This is the 3rd year that my home will be on the tour along with about 30 others.  You will NOT WANT TO MISS IT.  My home is coming up later in the week, so I hope you will stop back.

Holiday Housewalk hotsed by Jennifer Rizzo

Have a blessed Christmas season and thanks for checking out my mantel.

DISCLOSURE: THIS POST IS A COLLABORATION WITH LOWES, BUT ALL OPINIONS ARE 100% MY OWN.

Christmas Mantel

Christmas mantel filled with old & new and lots of DIY creations!

Happy Friday!  Boy, am I glad it is FRIDAY.  It has been a heck of a week, how about for you?
I hope you enjoyed my Christmas Home Tour that I shared yesterday.  Thank you to all those that left the kindest, sweetest comments – I can not tell you how great they make me feel.  I am really loving how festive & warm our home feels right now and I hope I was able to convey that to you throughout the tour!

As I was putting the post of The Tour together, I was left with many more photos of the fireplace mantel.  Instead of making the post miles long, I thought I would create another post on just the mantel.  I am so smitten over how the mantel resulted this year, so let me show you around.

Come join me in the family room…

Christmas mantel filled with old & new and lots of DIY creations!

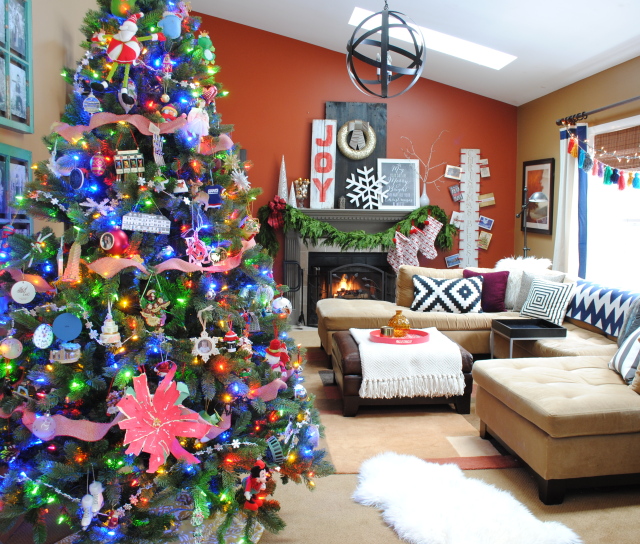
With our tree at one end of the room and the fireplace at the other, this is such a cozy, restful place.  The mantel this year is filled with a little old and a little new.

Christmas mantel filled with old & new and lots of DIY creations!

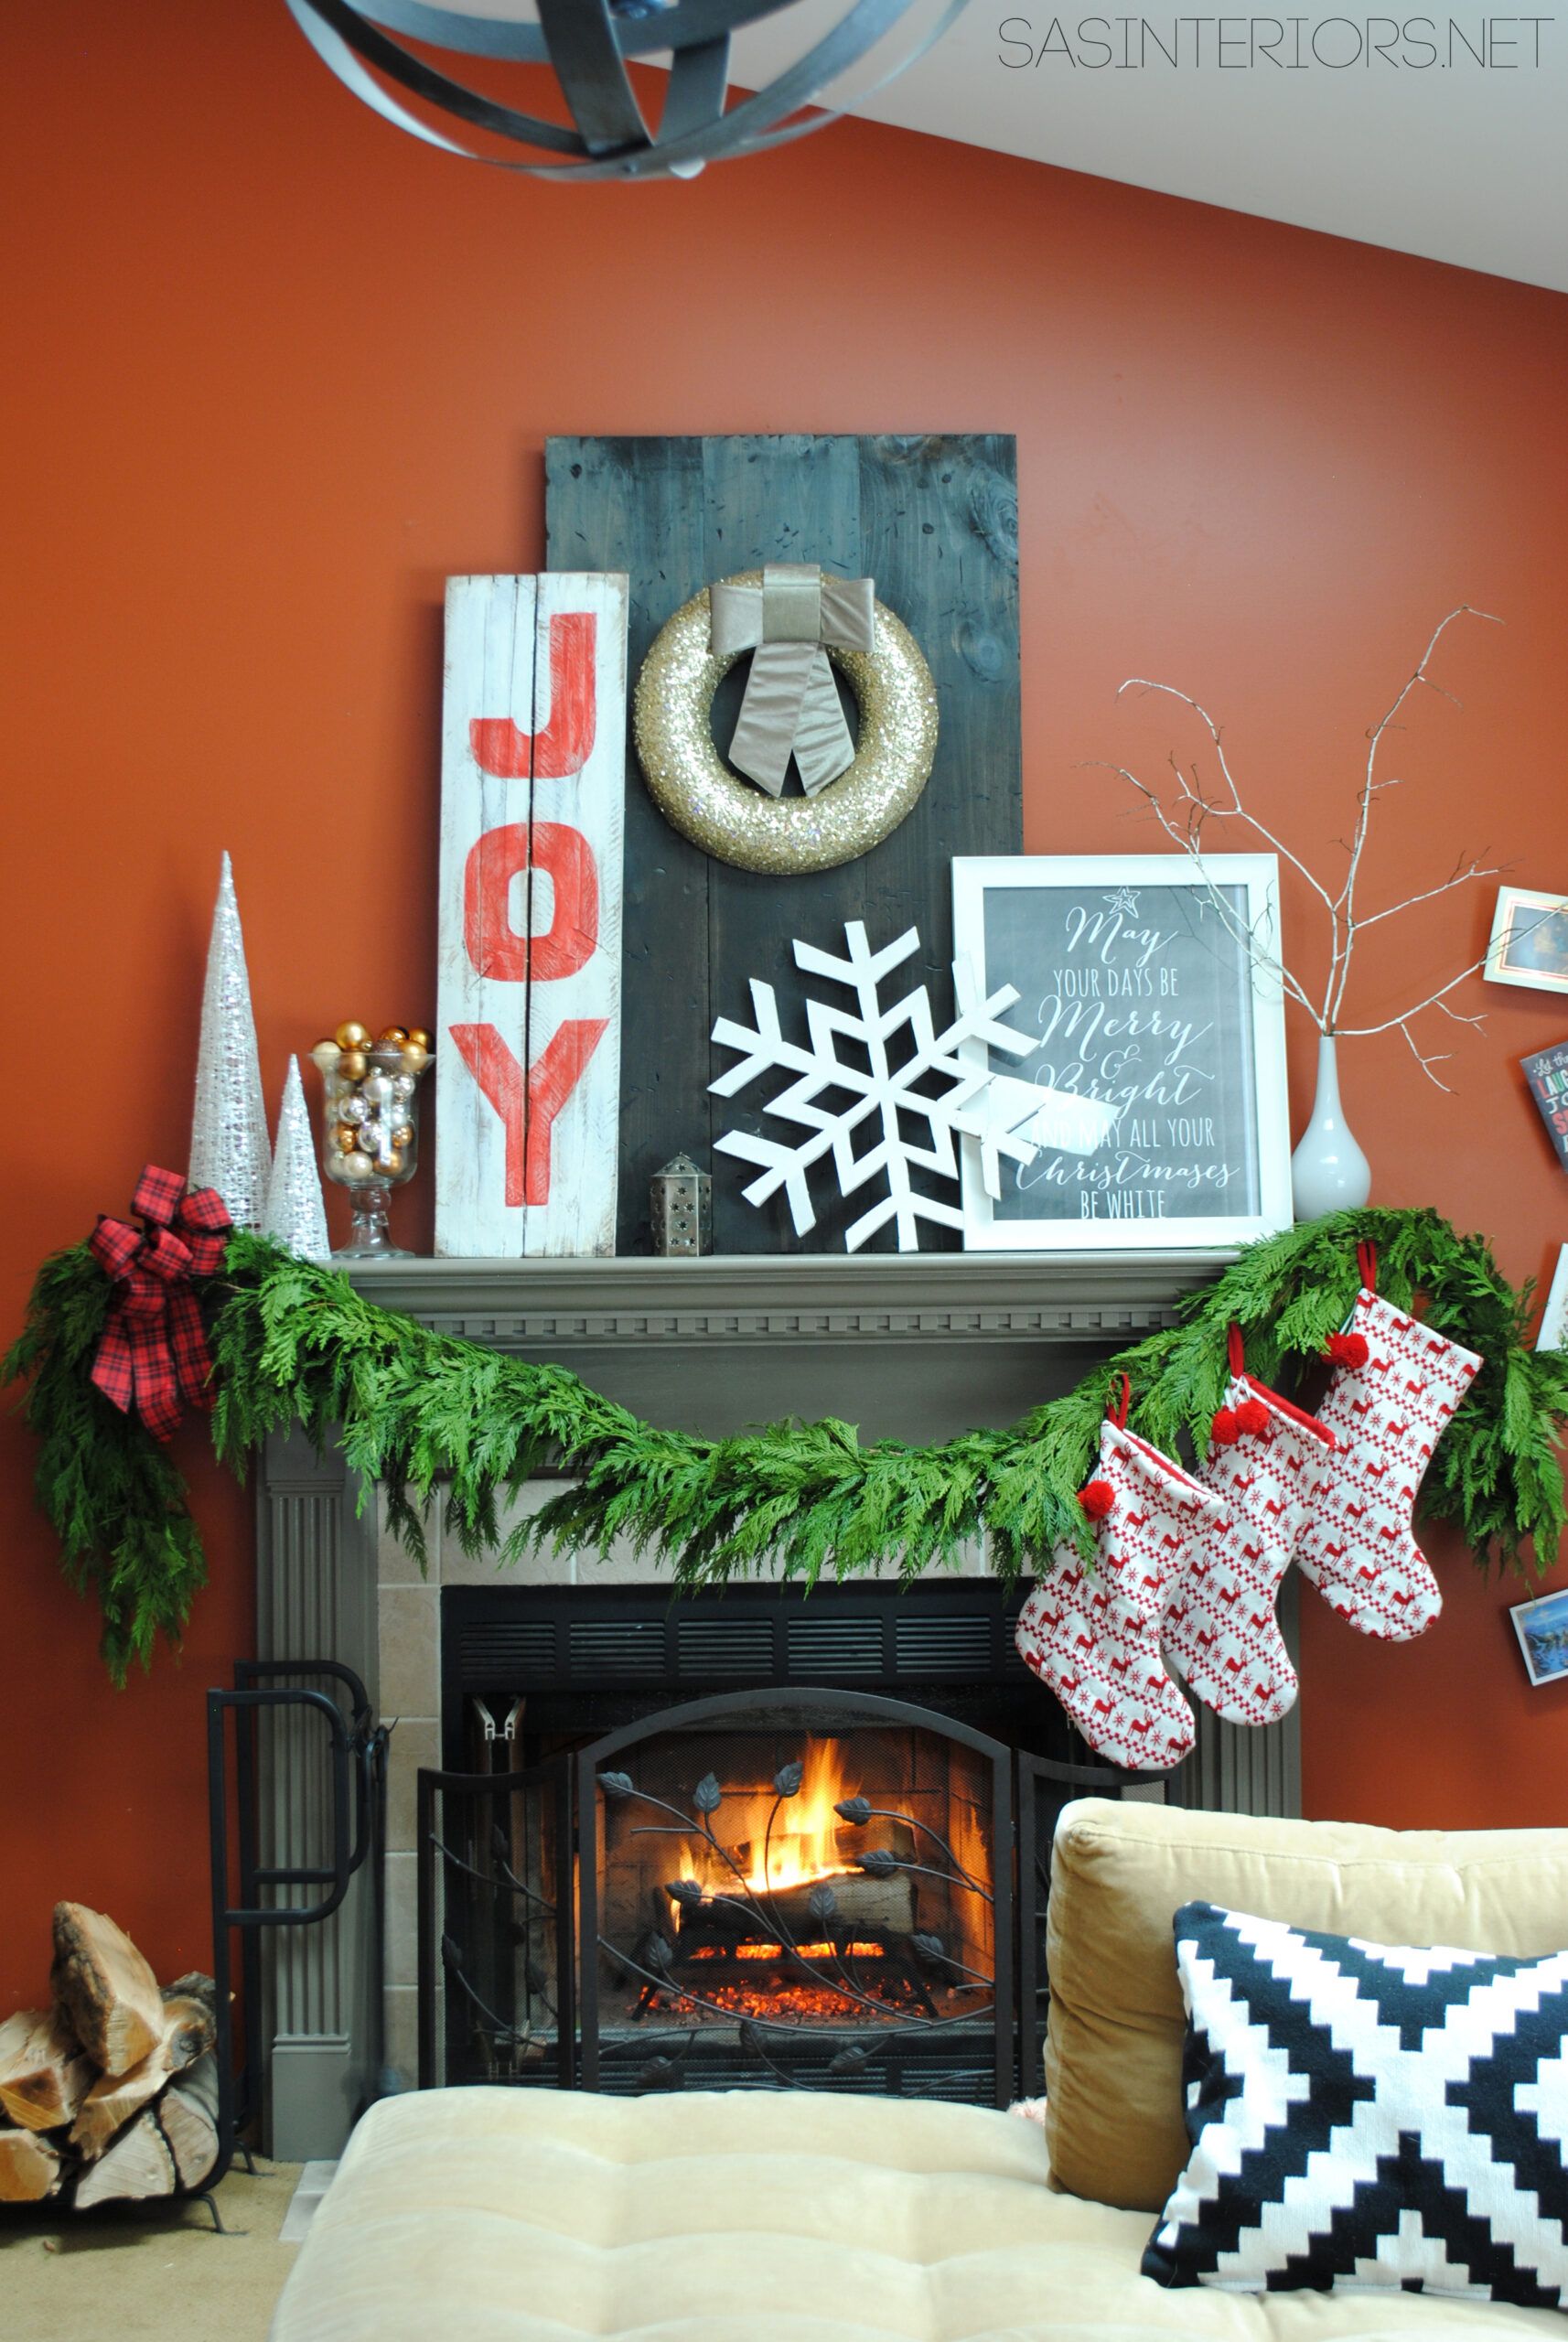
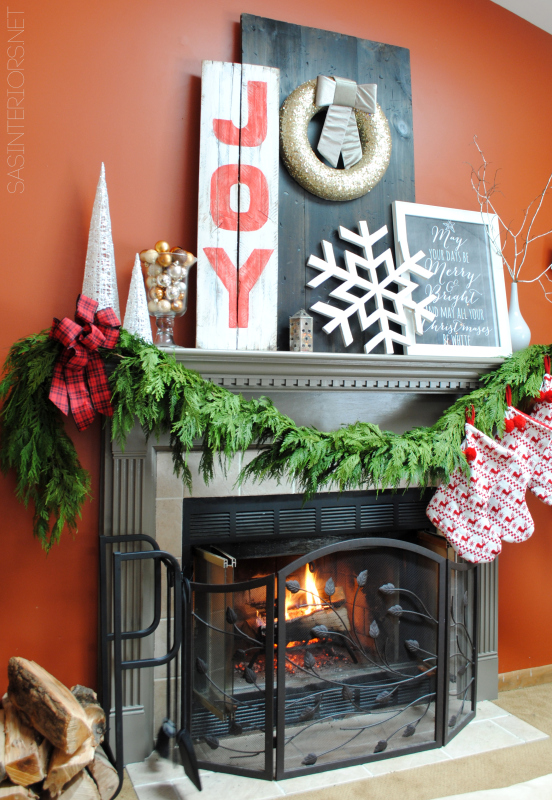
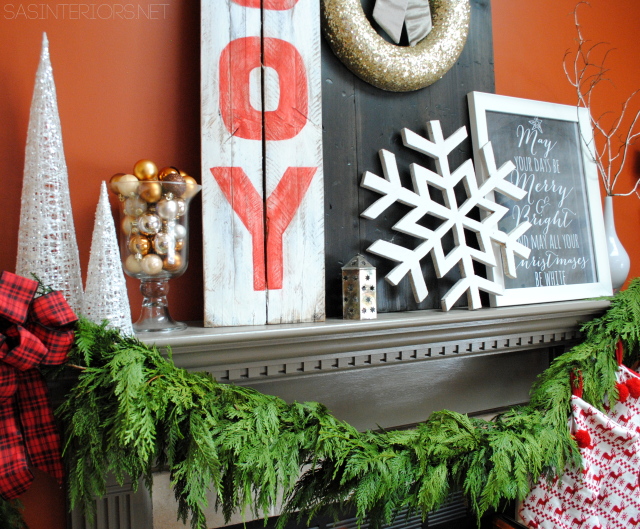
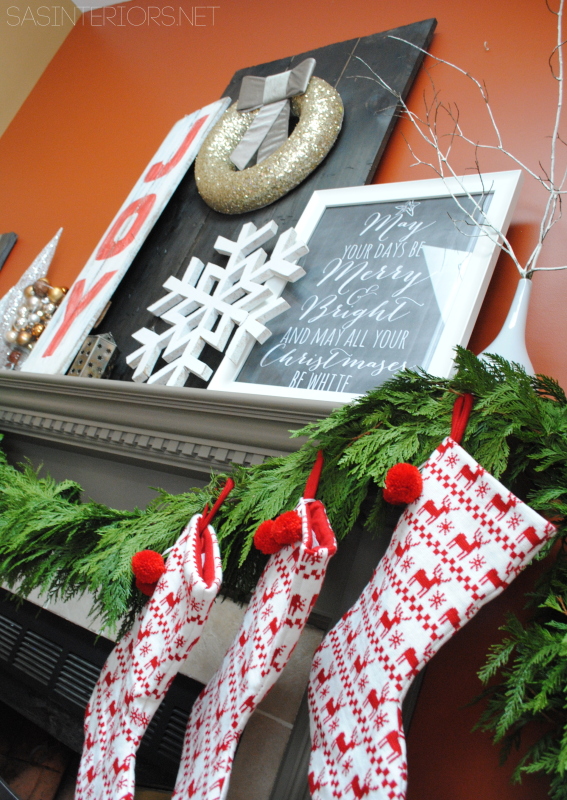
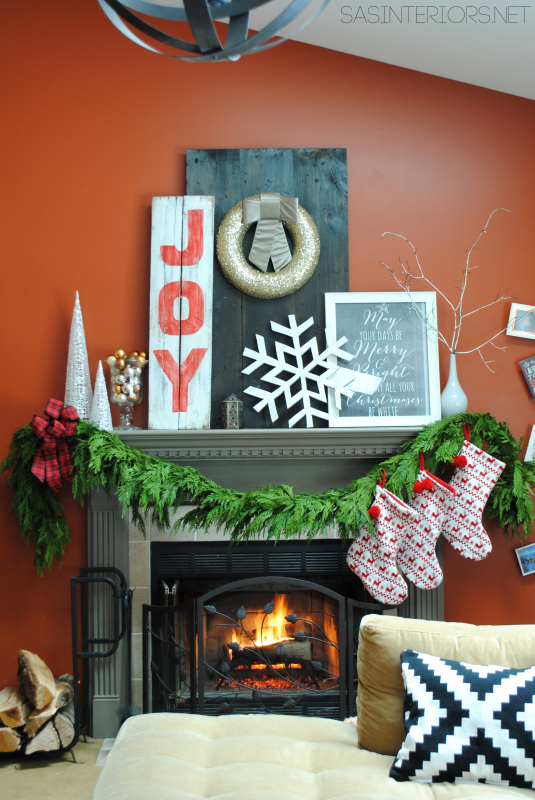
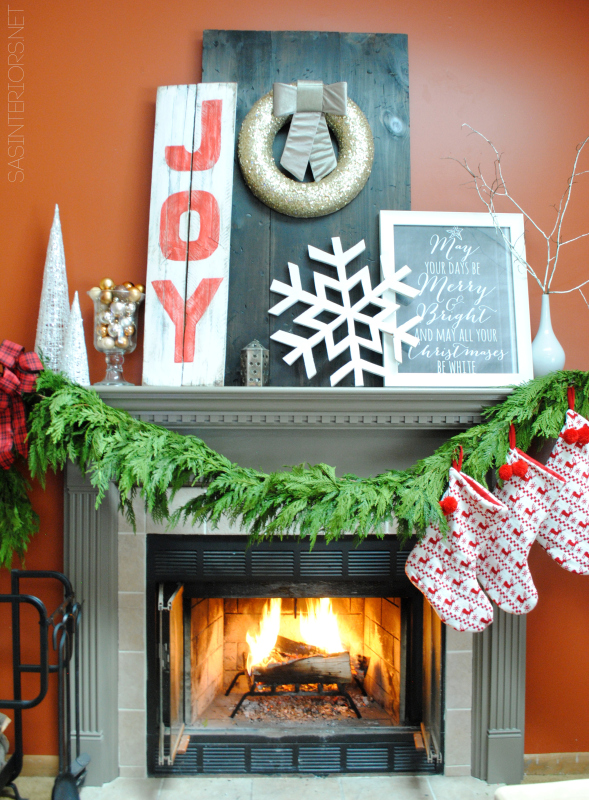
My approach for this years mantel was to lean and layerWhat do I mean?   From front to back, I added height with various items that I simply leaned on each other to give a layered (dimensional) look.

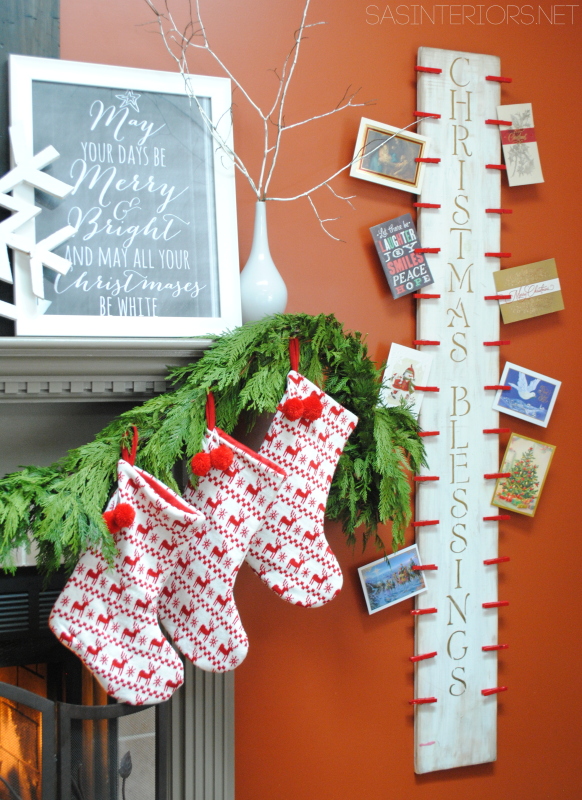
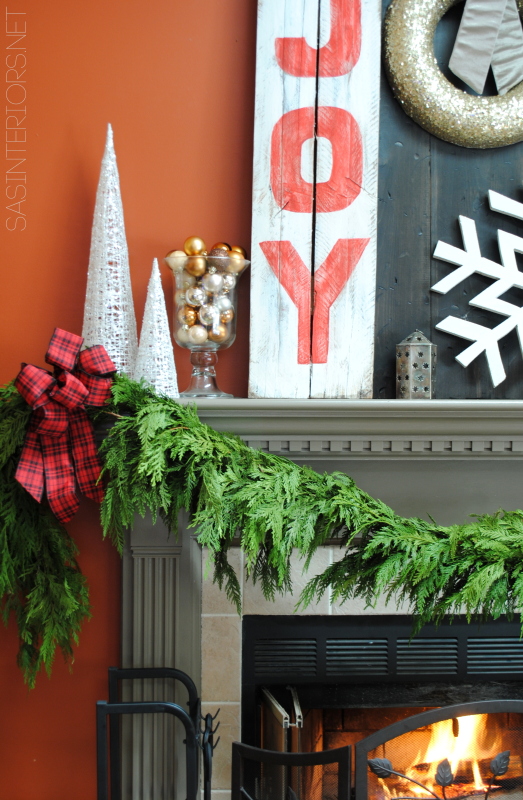
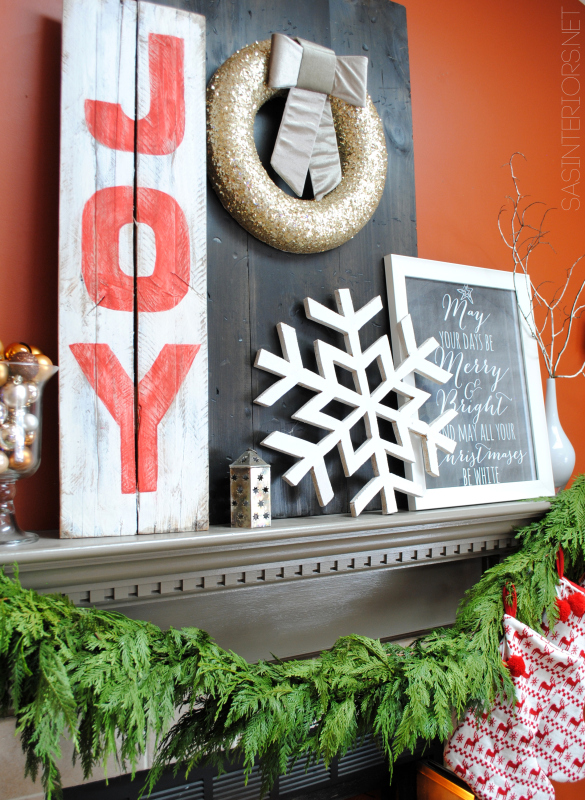
I started with the stained wood backdrop and added the pretty, glittery wreath I got from Lowe’s last year.  Leaning on it, I added the JOY pallet sign, which is really the focal point of the mantel.  Then I added a new chalkboard printable & the oversized wood snowflake (a roadside rescue).  It’s all about the layers!

Christmas mantel filled with old & new and lots of DIY creations!

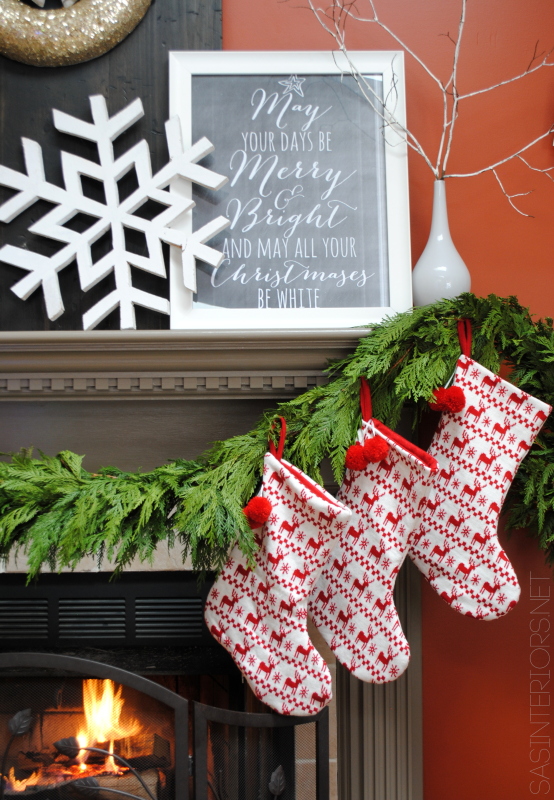
The chalkboard printable is something new this year and it is a creation made by my friend KellieHow did I create it?  I saved the printable to a USB key, brought it to Staples and they printed it on blueprint paper for less than $4.  I then brought it home and framed it.  Easy-Peasy and it is a beautiful addition to the mantel.

https://www.jennaburger.com/2014/12/christmas-home-tour-2014/

For a bit of whimsy, the kids and I collected some branches from the backyard, which I used to fill a simple white vase.  It really grounds the fireplace.

Christmas mantel filled with old & new and lots of DIY creations!

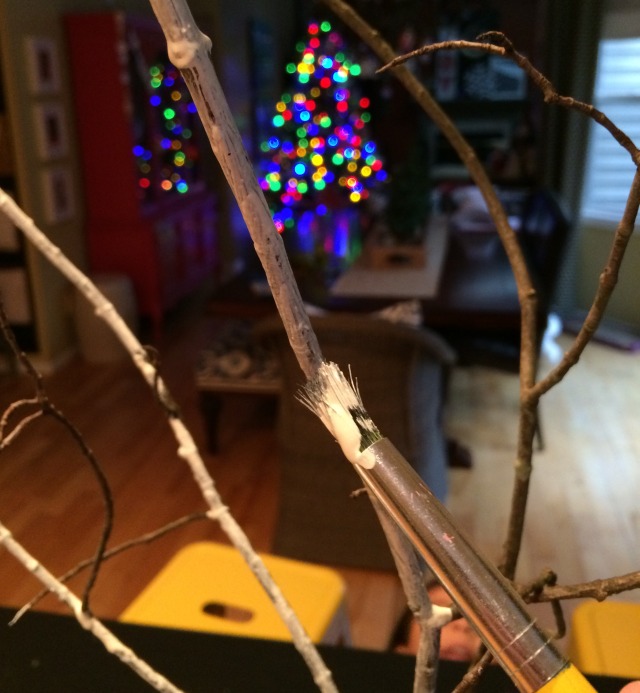
When I initially placed the vase on the mantel, the brown branches got lost against the orange wall.  To make them stand out more, I took some white craft paint and painted them.  A few minutes later, they were finished and dry.

Christmas mantel filled with old & new and lots of DIY creations!

So pretty, right?

When decorating for this Christmas, I ended up changing the place of a few of our festive favorites.  One specific DIY creation that we all love & admire each year is the Christmas Card Holder.  This season, I chose to hang it to the right of the fireplace and it’s already starting to fill up.

Christmas mantel filled with old & new and lots of DIY creations!

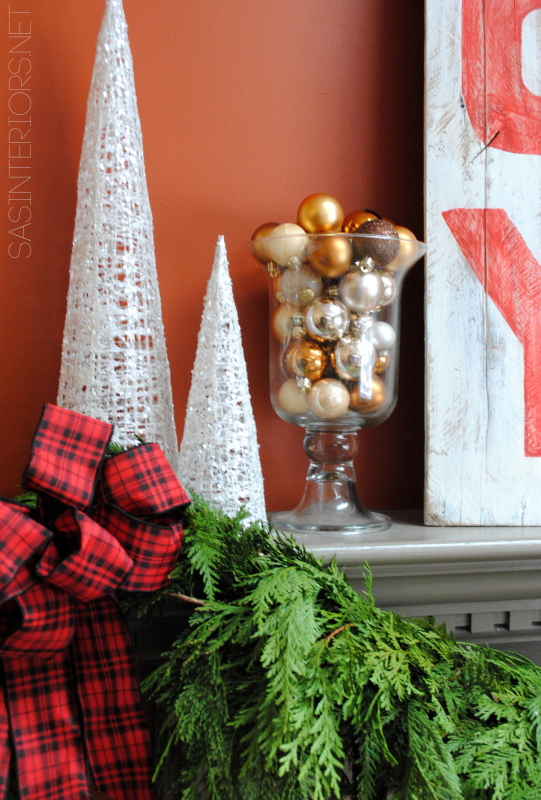
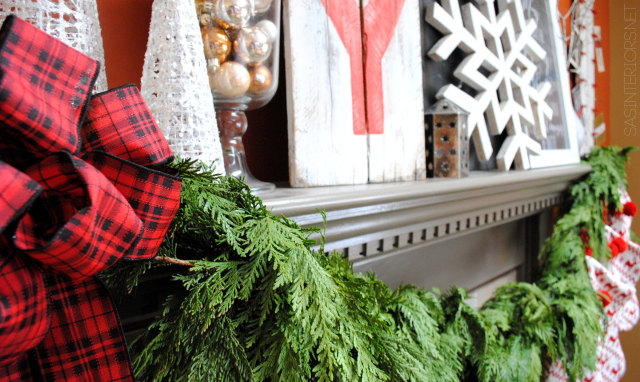
On the other end of the mantel are a few more layered-in elements that give height & interest to the overall mantel.   For the last few years, my go-to favorites for Christmas are these modern cone-shaped Christmas trees from the Christmas Tree Shop a few years back.  We have them in a few different sizes in white and gold.  I just love how sparkly they are!  And how simple, yet glowing is a bowl filled with ornaments.  A 3-second creation that is beauty to the eye!

Christmas mantel filled with old & new and lots of DIY creations!

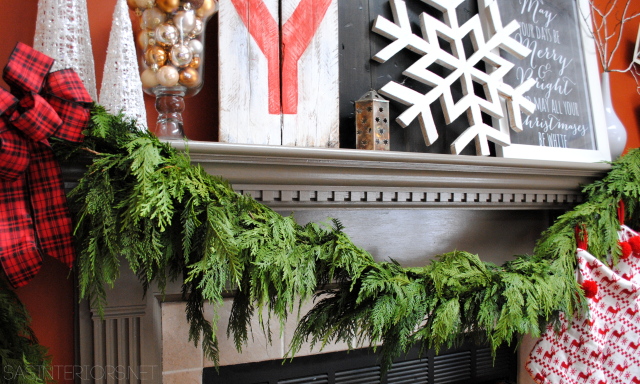
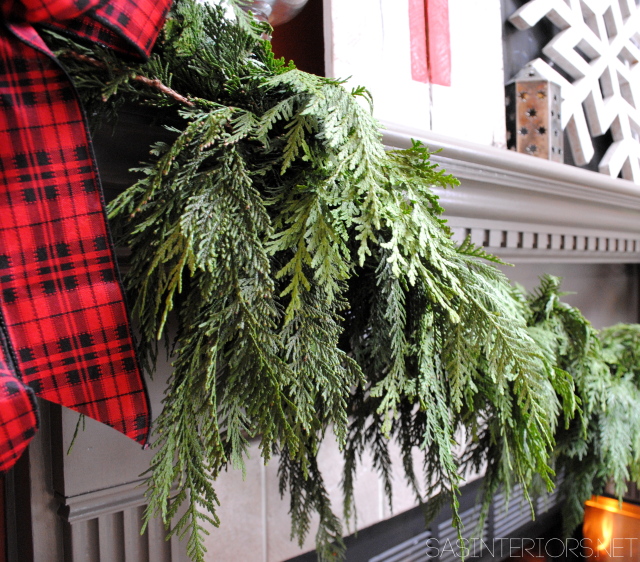
This years mantel would not be complete without a WOW.  The gorgeous cedar garland truly completed this years mantel montage.  I just adore how full and organic it feels.  My idea of being inspired by nature this holiday season really came to fruition with this garland.

Christmas mantel filled with old & new and lots of DIY creations!

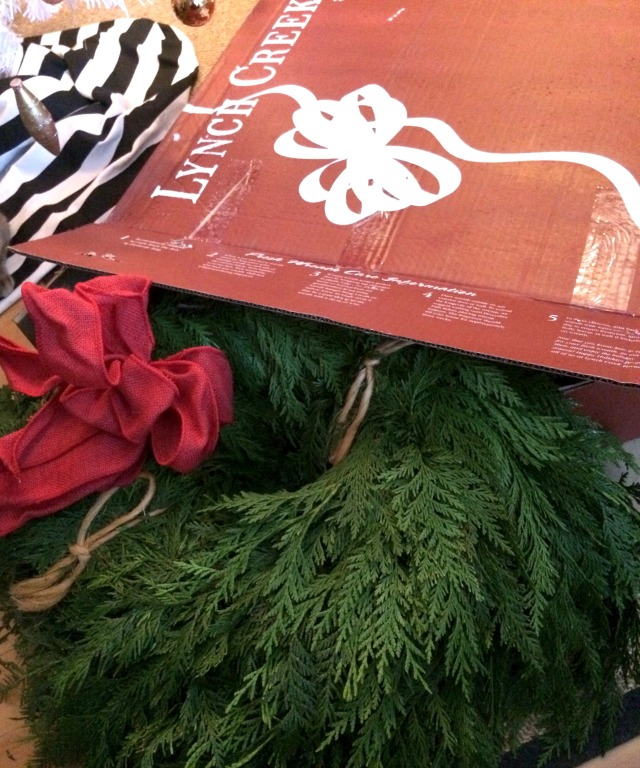
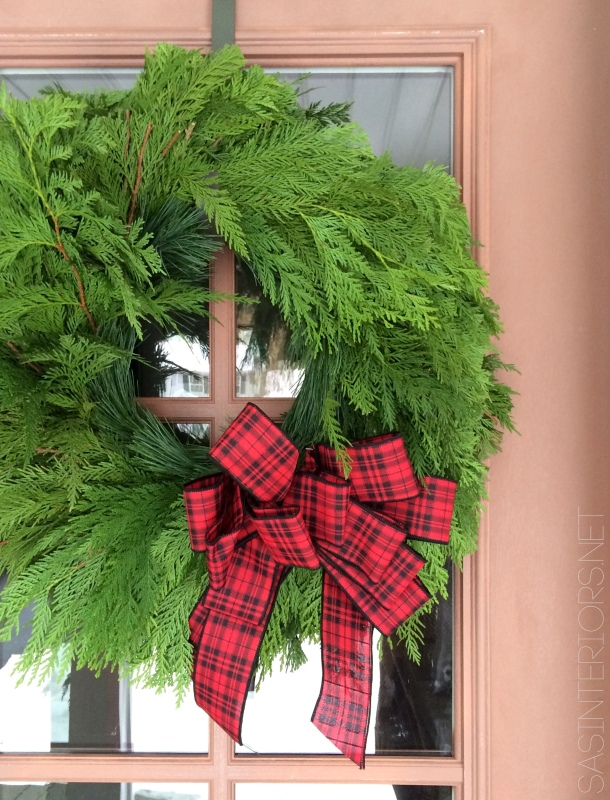
I am so grateful to my friends at Lynch Creek Farm who sent me the garland, as well as the wreath for the front door.  And the smell…  I can’t even begin to explain how yummy our home smells.  I just wish you could dive through your screen to get a whiff.

Lynch Creek Farm

Here is a peek at the gorgeous wreath on the front door which you can see more of in my Christmas Home Tour.

Christmas Home Tour of Jenna Burger, one of the homes featured on the Jennifer Rizzo 2014 Holiday Housewalk

Back to the mantel…

I hung this beautiful cedar garland at each end of the mantel so it has a gentle swag in the center.  On the one side, I added a pretty red + black bow and on the other side, I hung 3 stockings that I just picked up from Lowe’s.

Christmas mantel filled with old & new and lots of DIY creations!

Christmas mantel filled with old & new and lots of DIY creations!

A few more views (I told you I couldn’t stop myself from photographing & sharing this mantel)…

Christmas mantel filled with old & new and lots of DIY creations!


Christmas mantel filled with old & new and lots of DIY creations!

Christmas mantel filled with old & new and lots of DIY creations!

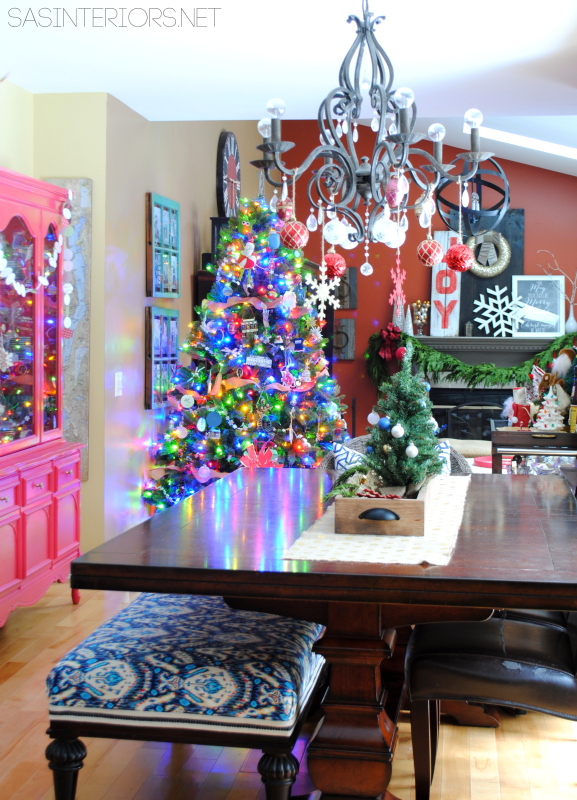
From the kitchen to the dining room to the family room, you can see how the fireplace is a focal point in our home and we are truly admiring this years mantel creation…

Christmas mantel filled with old & new and lots of DIY creations!

Thanks for stopping by to enjoy my home decorated for Christmas!

Have you decorated your home for the holidays yet?

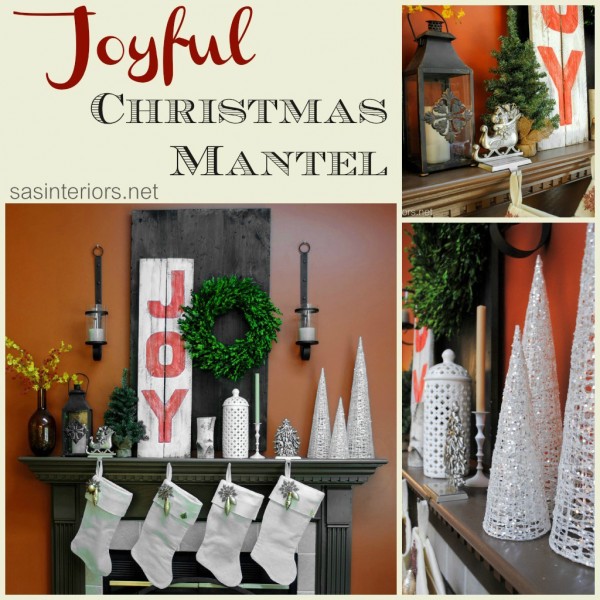
JOYful Christmas Mantel

The hustle and bustle of the Holidays are in full swing, but I was able to step back from the craziness of it all this past weekend to revamp my mantel and deck it out for Christmas.

As a Blogger, I feel so lucky to have a platform to share my new creations.  When the time comes to create a new mantel composition, I push myself to always try something new and different, and raise the bar from the previous year.  Thus the result of my new JOYful Christmas Mantel…

Like with every mantel, I cleared off all the decor from my Fall mantel so I could see the space free and clear!  This always helps start the ball-rolling for my latest montage.  I’ll tell you, I don’t usually go into decorating my mantels (or many areas of my home) with a plan.  Once I see a blank slate, somehow it all starts coming together.

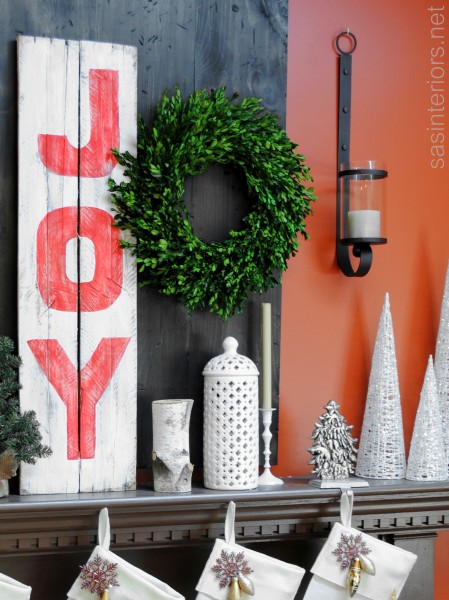
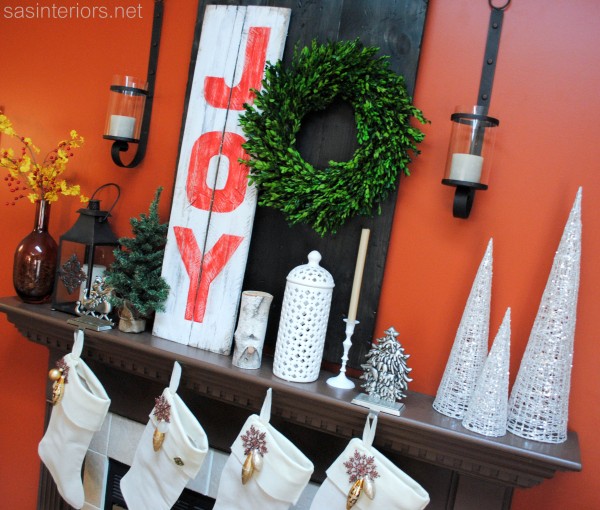
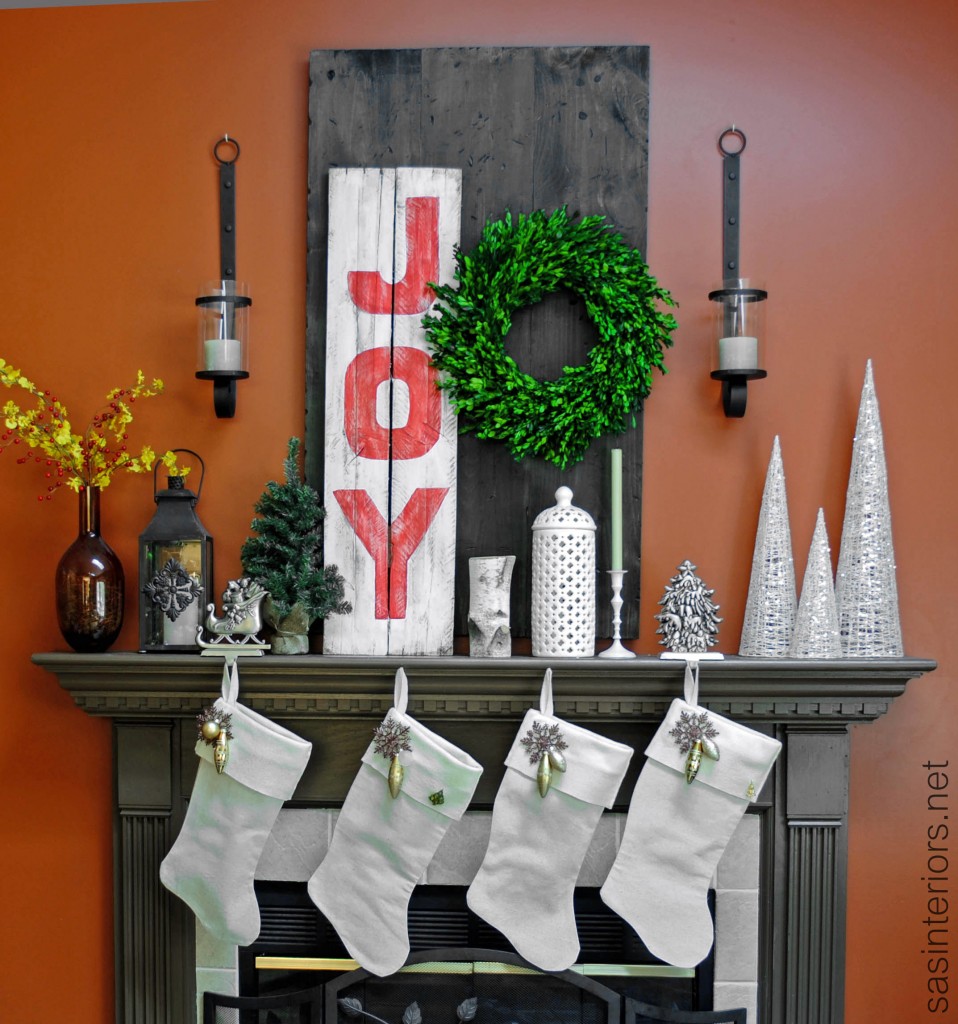
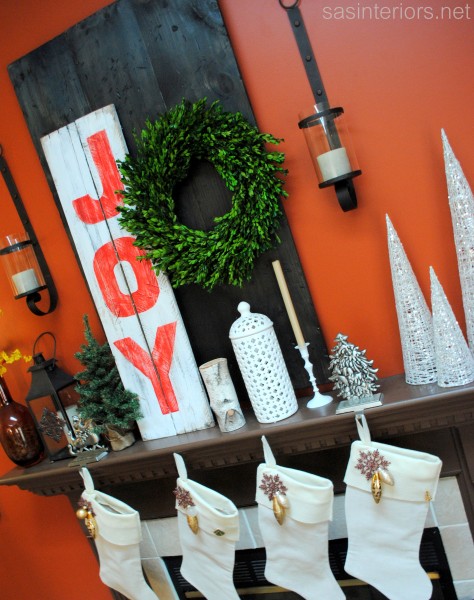
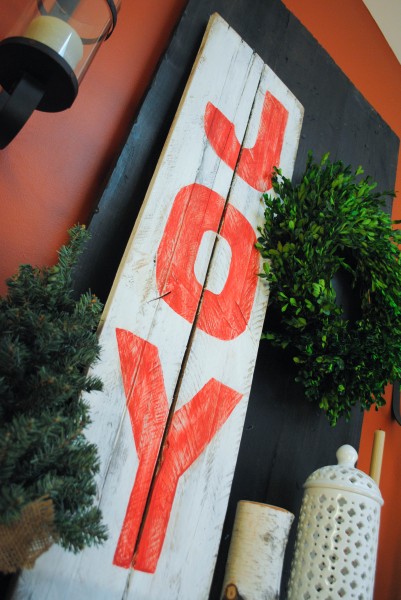
I will say though, I’ve had the idea to create this JOY sign for a while.  I thought it would look beautiful leaning against the new ebony stained wood board backdrop. Thankfully all came together and I’m so pleased with the result – I’ll be sharing a quick and easy tutorial on how I created the sign very soon.

Going for an asymmetrical look,  I added a gorgeous boxwood wreath next to the JOYful sign.  I scored this totally faux, but looks totally real, wreath at Lowe’s – I’m in love, I’m in love, I’m in love.  I love decorating with boxwood and cedar branches, and when I saw this, I grabbed it.  Well actually I thought about making it at first, but after figuring out the cost, this was a better deal.

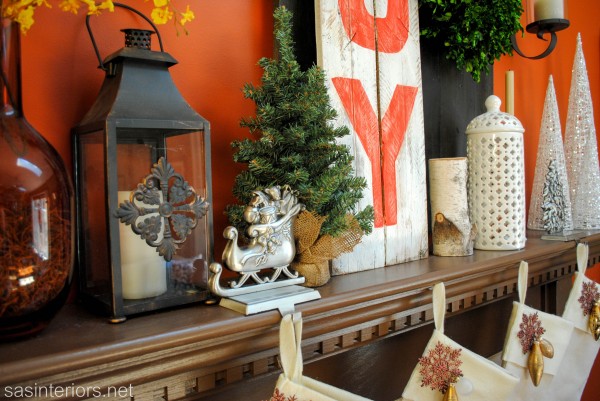
In creating the mantel, I mixed in a few Christmas elements with a few non-Holiday pieces.  I couldn’t dare put away my fabulous white ginger jar that I enjoy looking at everyday, so of course there it is… (along with my easy-peasy presto-chango-with-spray-paint candle stick).  And I think they look great amongst everything else.

Some of the fun, festive decor that I added around it are the:  three sparkly mod Christmas trees, two brushed nickel Christmas stocking holders (which I got forever ago from Target), and one piece of birch log.

My burnt orange wall is a show-stopper in itself, but I always like to add a burst of color in another way.  With this mantel, I brought in a pop of yellow with a few sprigs of forsythia (totally wrong flower for the season, but I love the yellow with the red in the JOY sign).  In the same vase, I added some faux red berries.  Yellow + Red = Perfect Compliment!

The mantel is simple, elegant, and festive.  O, I truly wish you could see it in person!

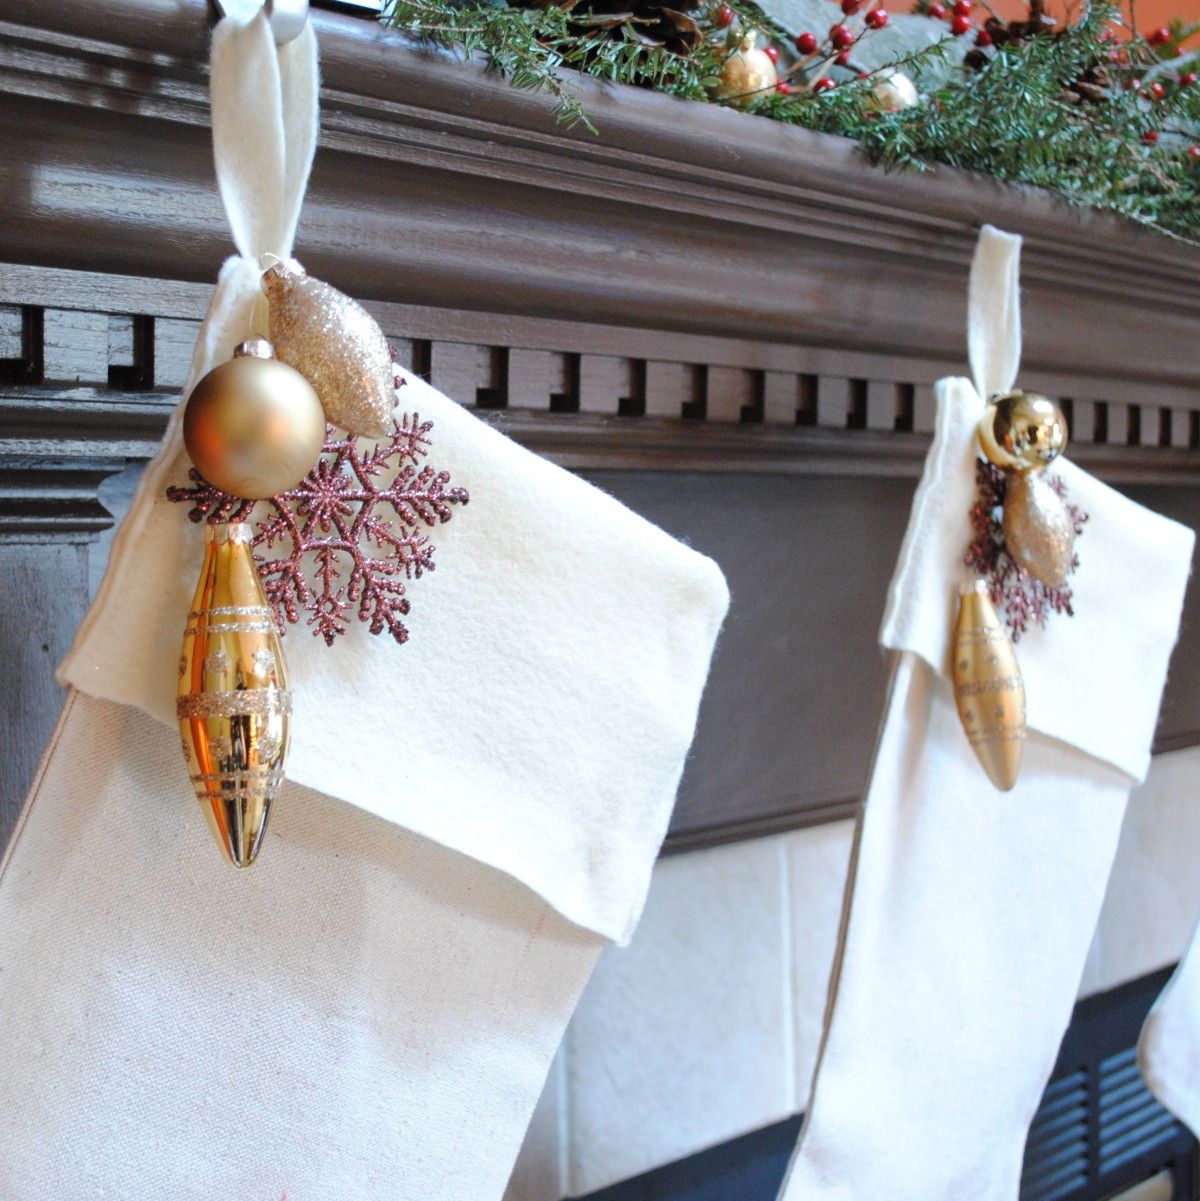
The drop cloth and felt stockings are still a favorite of mine.  I made them last year and added metallic gold ornaments to give a little accent.

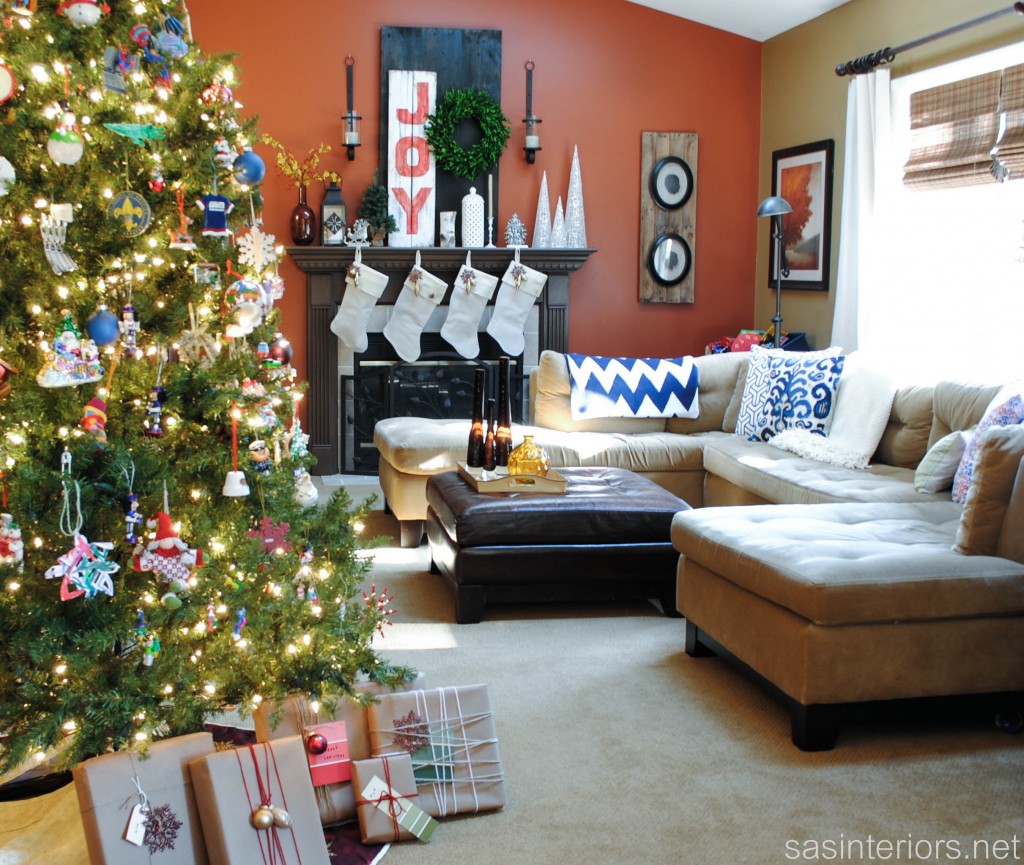
And here’s the overall space…

O, how I love thee!

Thanks for taking a tour of my Christmas Mantel 2012.  Similar to my recent tablescape creation, I mixed in items from around my home with dollar store deals and DIY projects.

Have you decorated your mantel for Christmas yet?  If so, please share the link below so I can visit. 

Looking for tips on how to decorate a mantel? {click here}

I link my projects to some of these parties: Skip to My Lou, Dittle Dattle, Between Naps on the Porch, Today’s Creative Blog, Stories of A to Z, All Things Heart & Home, House of Hepworths, Finding Fabulous, The Shabby Nest, Serenity Now, Tatertots and Jello, Thrifty Decor Chick, Tip Junkie

DIY: Christmas Stockings

Did you check out my newly decorated Christmas mantel?  If not, that’s okay (but head over there now).  In that post you got a little sneak preview of the Christmas stockings that I recently made.  As a family of four, we’ve never had matching stockings.  The mister and I have the same (since we bought those together after getting married), but then came child #1 and he got a different style stocking, and after that child #2 came along and she has an even different style stocking.  Anyway, each year it’s been a mish-mosh of different color and style stockings hung on the mantel, until now.

You know my love for drop cloth, so what did I use?  Yes, you guessed it…the big DC!

I’ve always wanted to make stockings, but was intimidated thinking it would be too difficult – but IT WASN’T!

Using drop cloth material for the main stocking, creme colored felt for the cuff, and the basic sewing essentials, I created these stockings, that now sit at the mantel, in no time!  To start off, I used the old stocking as a template to create the “boot-like” shape.  I then cut an 8″ x 12″ piece of felt for the cuff, and sewed the “right” sides together (see pictorial).

I made 4 stockings (which have 2 sides each), so I had a total of 8 sides.

Once the cuff is attached to the “boot”, open the cuff and iron.  Then put the “right” sides of the boots together and pin all around.  Using a 1/2″ inseam, sew around the entire boot, EXCEPT at the top edge of the cuff.

Once you finished sewing all the way around, turn the stocking to the “right” side using the opening at the top edge.  Then iron the edges flat.

The stocking form is made – YAY!

At this point of the stocking-making-process, the tops of the cuffs will probably not match – that’s OKAY!  Taking a scissor or rotary cutter, trim the top edge of the cuff to get a straight line.

Then it’s time to make the cuff – turn over the felt fabric and adjust it to the amount that you want to see for the “cuff”.  I’ll admit, at this point, I was a wee bit mad at myself for not forethinking what I’m about to share.  There are many different ways to make stockings and honestly, I didn’t do any research beforehand, and just “went for it”.  Kind of a mistake.  When I went to turn the fabric over to make the cuff, I realized that you could see the stitching on what was before the “inside” of the cuff (see right pictorial).  At this point, I was about to ditch the project, but then I realized because the fabric is felt, it won’t fray and it actually gives the edge a decorative look.  I trimmed the edge about 1/4″ off the seam and I’m pretty happy with the result.  Another (slight) fail to success project!

Essentially it’s complete at this point, but of course you need something to hang the stocking.  Using another piece of felt, I simply made a loop that I sewed on to the inside edge of the stocking cuff.

Now they are ready to hang!  If you saw my Christmas mantel the other day, you may have noticed that the stockings were plain and unembellished.  Well that only lasted a day.  Using the ornaments from my Organic Centerpiece that I displayed on my dining table last Christmas, I looped them through clear fishing line and hung them around the felt loop of the stocking.  Also adding a chocolate glitter snowflake, the collection was a beautiful accent to the neutral-colored background fabric.

Also placed on two of the stockings are pins that were favorites of my husband’s late grandmother. A little way he remembers her around the Holidays.

I really love the simplicity of these stockings.  Each year as I change my colors and Christmas decor they will always be a beautiful accent to different embellishments that I can add.  Do you hang stockings at the fireplace?  Are they matching or a mish-mos of different styles like I had for the past years? (and just to set the record straight…  I don’t mind mish-mosh…  it’s eclectic!)

I link my projects to some of these parties: Skip to My Lou, Dittle Dattle, Between Naps on the Porch, Today’s Creative Blog, Stories of A to Z, All Things Heart & Home, Savvy Southern Style, House of Hepworths, Finding Fabulous, Creation Corner, The Shabby Nest, Tatertots and Jello, Thrifty Decor Chick, Under the Table & Dreaming

Holiday Mantel and Table Centerpiece

I know I said a couple of weeks ago that I wasn’t in the Christmas Spirit, but now I finally am!   Last weekend, after our bellies were stuffed with Turkey, we started transforming the house from the Fall / Thanksgiving decor over to Christmas.  I’m not sure why I was so reluctant at first and unprepared for the changing season, but o well, it’s past me and I’m excited for some Holiday Cheer!

The center and focal point of our home is the fireplace (yes, the one on the burnt orange wall), and again it has been decked for the Holidays!  I was quite anxious to get started on the mantel because I knew exactly what I wanted to use and how I envisioned it to look.  I was thrilled with the result of my Fall centerpiece creation and wanted to use the log as the focal point for this year’s Christmas mantel.

Here is a simple run-down of how I created the log.

  1. Find a log of any length that you desire (My log is about 4′ long)
  2. Using a 1.5″ drill bit, drill holes into the log every 5-6″
  3. Insert tea lights or battery-operated candles into the holes.
  4. It’s ready to decorate for any season!

Back to the mantel…

Once I placed the log on the mantel, I simply started layering.  I used faux greenery for the base, then added some natural cut greenery from trees in my backyard throughout.

Then, I took faux berries (purchased at the craft store) and incorporated them throughout the greenery.  Because they are bendable, they are easy to work with.  After that came the final touches…  Ornaments, pinecones, and some other branches and twigs from the outdoors.

It was complete in no time!  This Holiday log decor on the fireplace mantel makes for a beautiful focal point.

Once it was complete, I had to add stockings, of course!  As a family of 4, we’ve never had matching stocks and they’ve always been on my to-do list to make.  I whipped out my sewing machine and a few hours later, added beautiful new stockings to the decor!  I’ll share a tutorial on that later in the week.

We really enjoy how the stockings are hung by the chimney with care

These stockings look kind of plain, but I jazzed them up yesterday…stay tuned and I’ll share more this week!

Part 2 of this post

I had to share this with you too…

Before deciding to decorate the mantel using the log, I was actually planning to display it on the dining room table similar to the fall centerpiece.  Since we use our dining table everyday, it was BEAUTIFUL, but not practical because the natural greenery sheds alot (forewarning).  On the fireplace it works because it’s not moved everyday.

Using the same technique as decorating the mantel, I layered greenery, branches, berries, and pinecones, then finished the centerpiece with decorative ornaments.  If you want to see more on this creation, I shared this project on my TV debut on Fox 23.

Complete with the handmade stenciled drop cloth placemats I made a few weeks ago, the table is set for Christmas!

The Holiday decorating continues…I’ve got many more projects and ideas to come during this countdown to Christmas!   If you’re looking for ideas on some do-it-yourself creations, head over to the Holiday section of Daily Do It Yourself.

I link my projects to some of these parties: Skip to My Lou, Dittle Dattle, Between Naps on the Porch, Today’s Creative Blog, Stories of A to Z, All Things Heart & Home, Savvy Southern Style, House of Hepworths, Finding Fabulous, Creation Corner, The Shabby Nest, Tatertots and Jello, Thrifty Decor Chick, Under the Table & Dreaming