
Tag: do it yourself laundry room

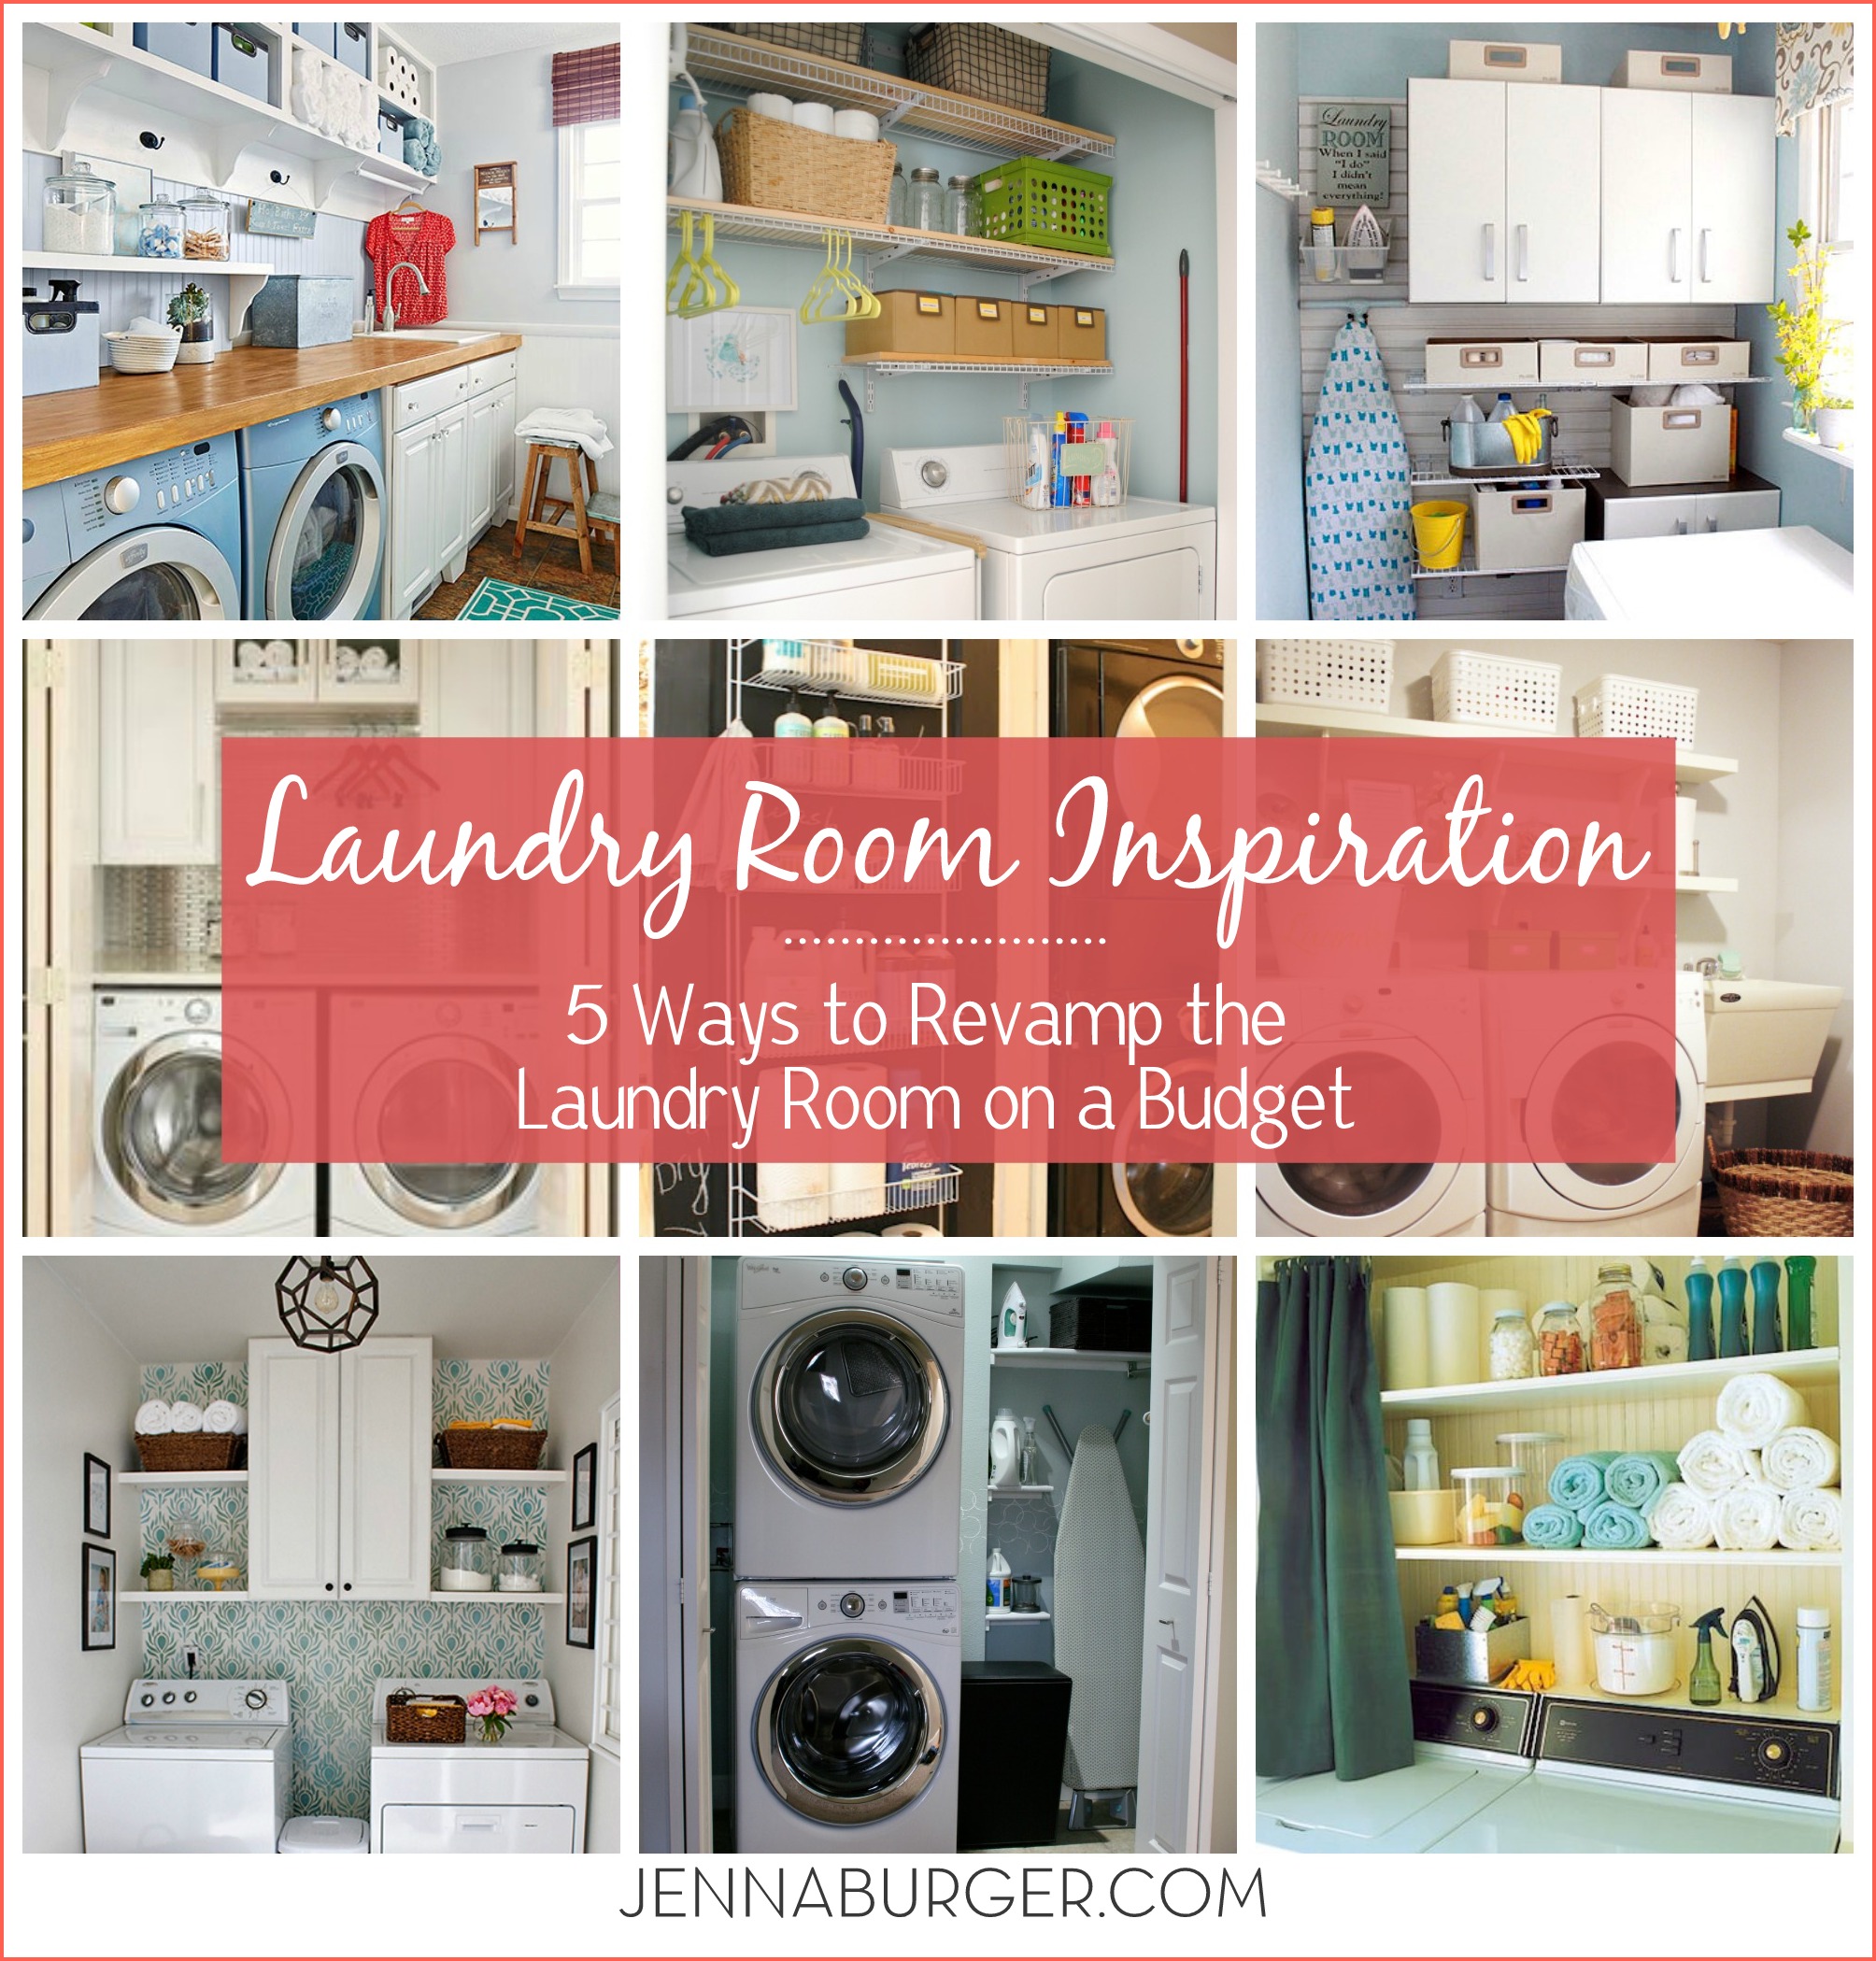
5 Ways to Revamp a Laundry Room on a Budget

It’s been a week since I shared my revamped laundry room and load #7 was just finished & folded.

The new space that took me a weekend + $200 to complete has been a gamechanger for how I feel about doing laundry. Laundry has always been my nemesis. I can’t say I love it now, but for the last week, it hasn’t been so bad… and it’s all due to the changes that were made to make the space more organized & aesthetically pleasing.

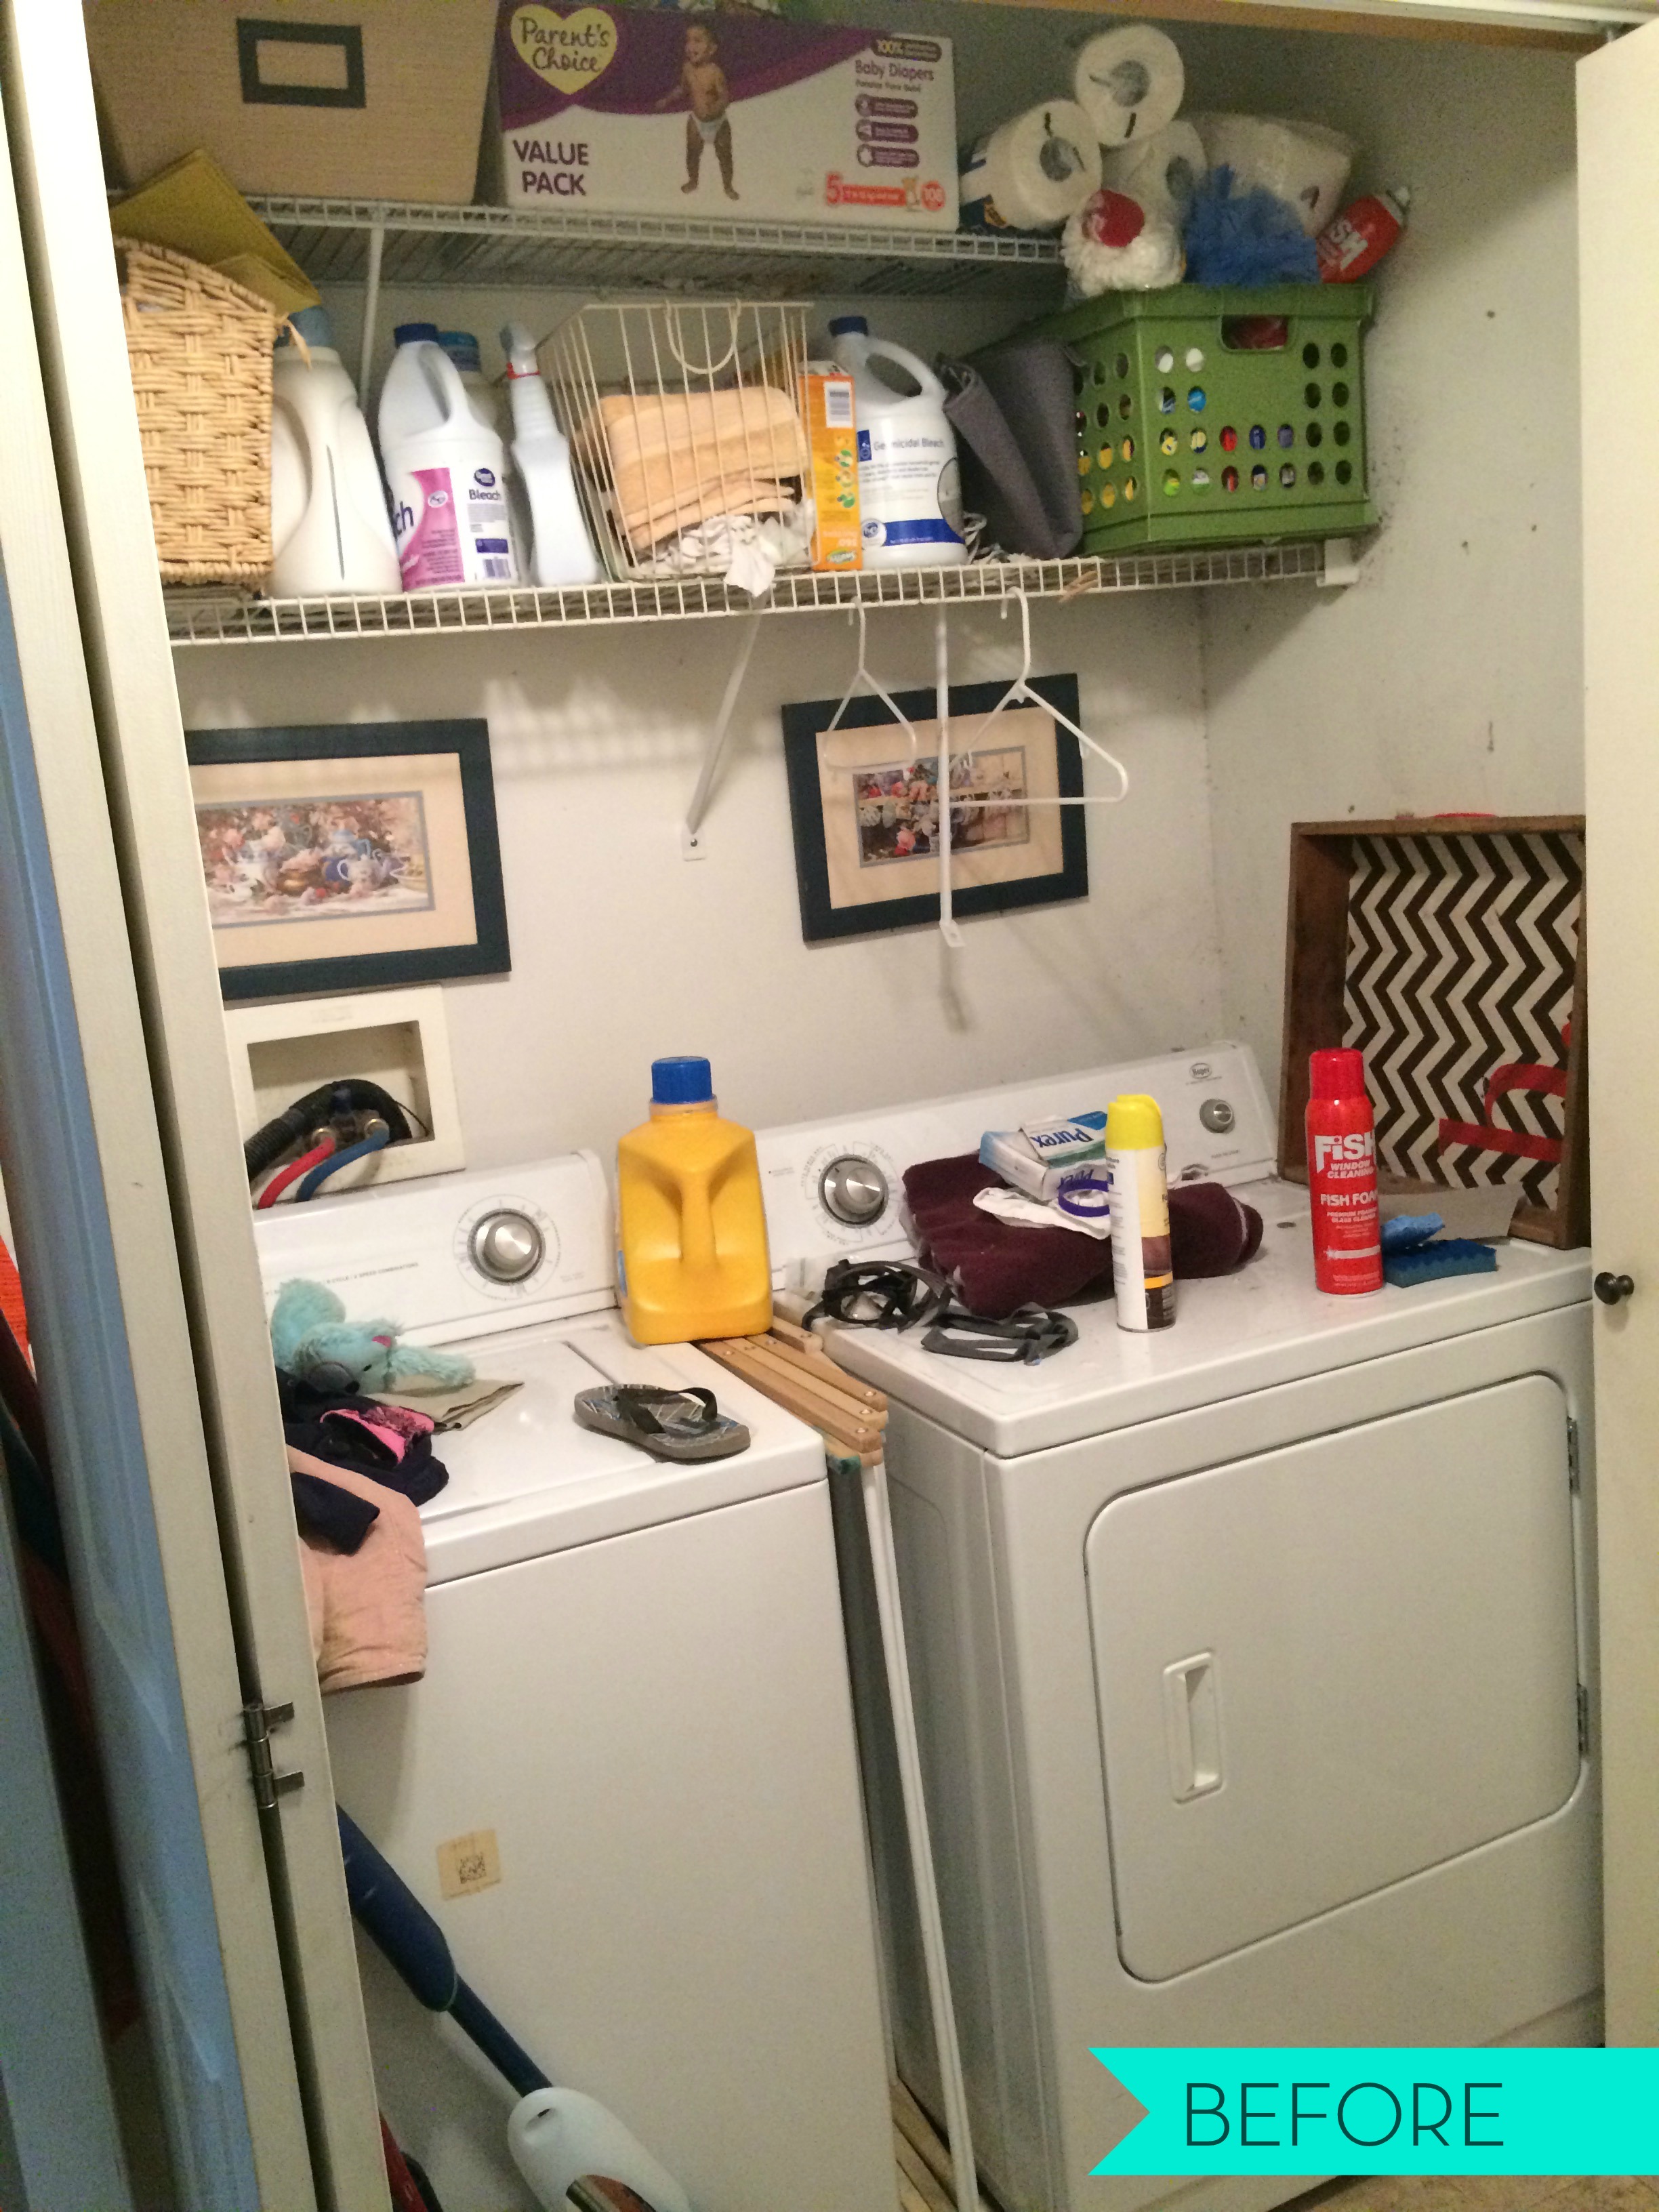
As a clan of 5, we have a lot of laundry and our laundry “closet” couldn’t go another day without a makeover. Not only was it ugly + drear, it wasn’t functioning to it’s utmost potential, and that’s how the space was failing us!

With some outside-of-the-box thinking + a plan-of-action in place, I revamped & created a laundry space that is organized + functionable + pretty on the eyes.

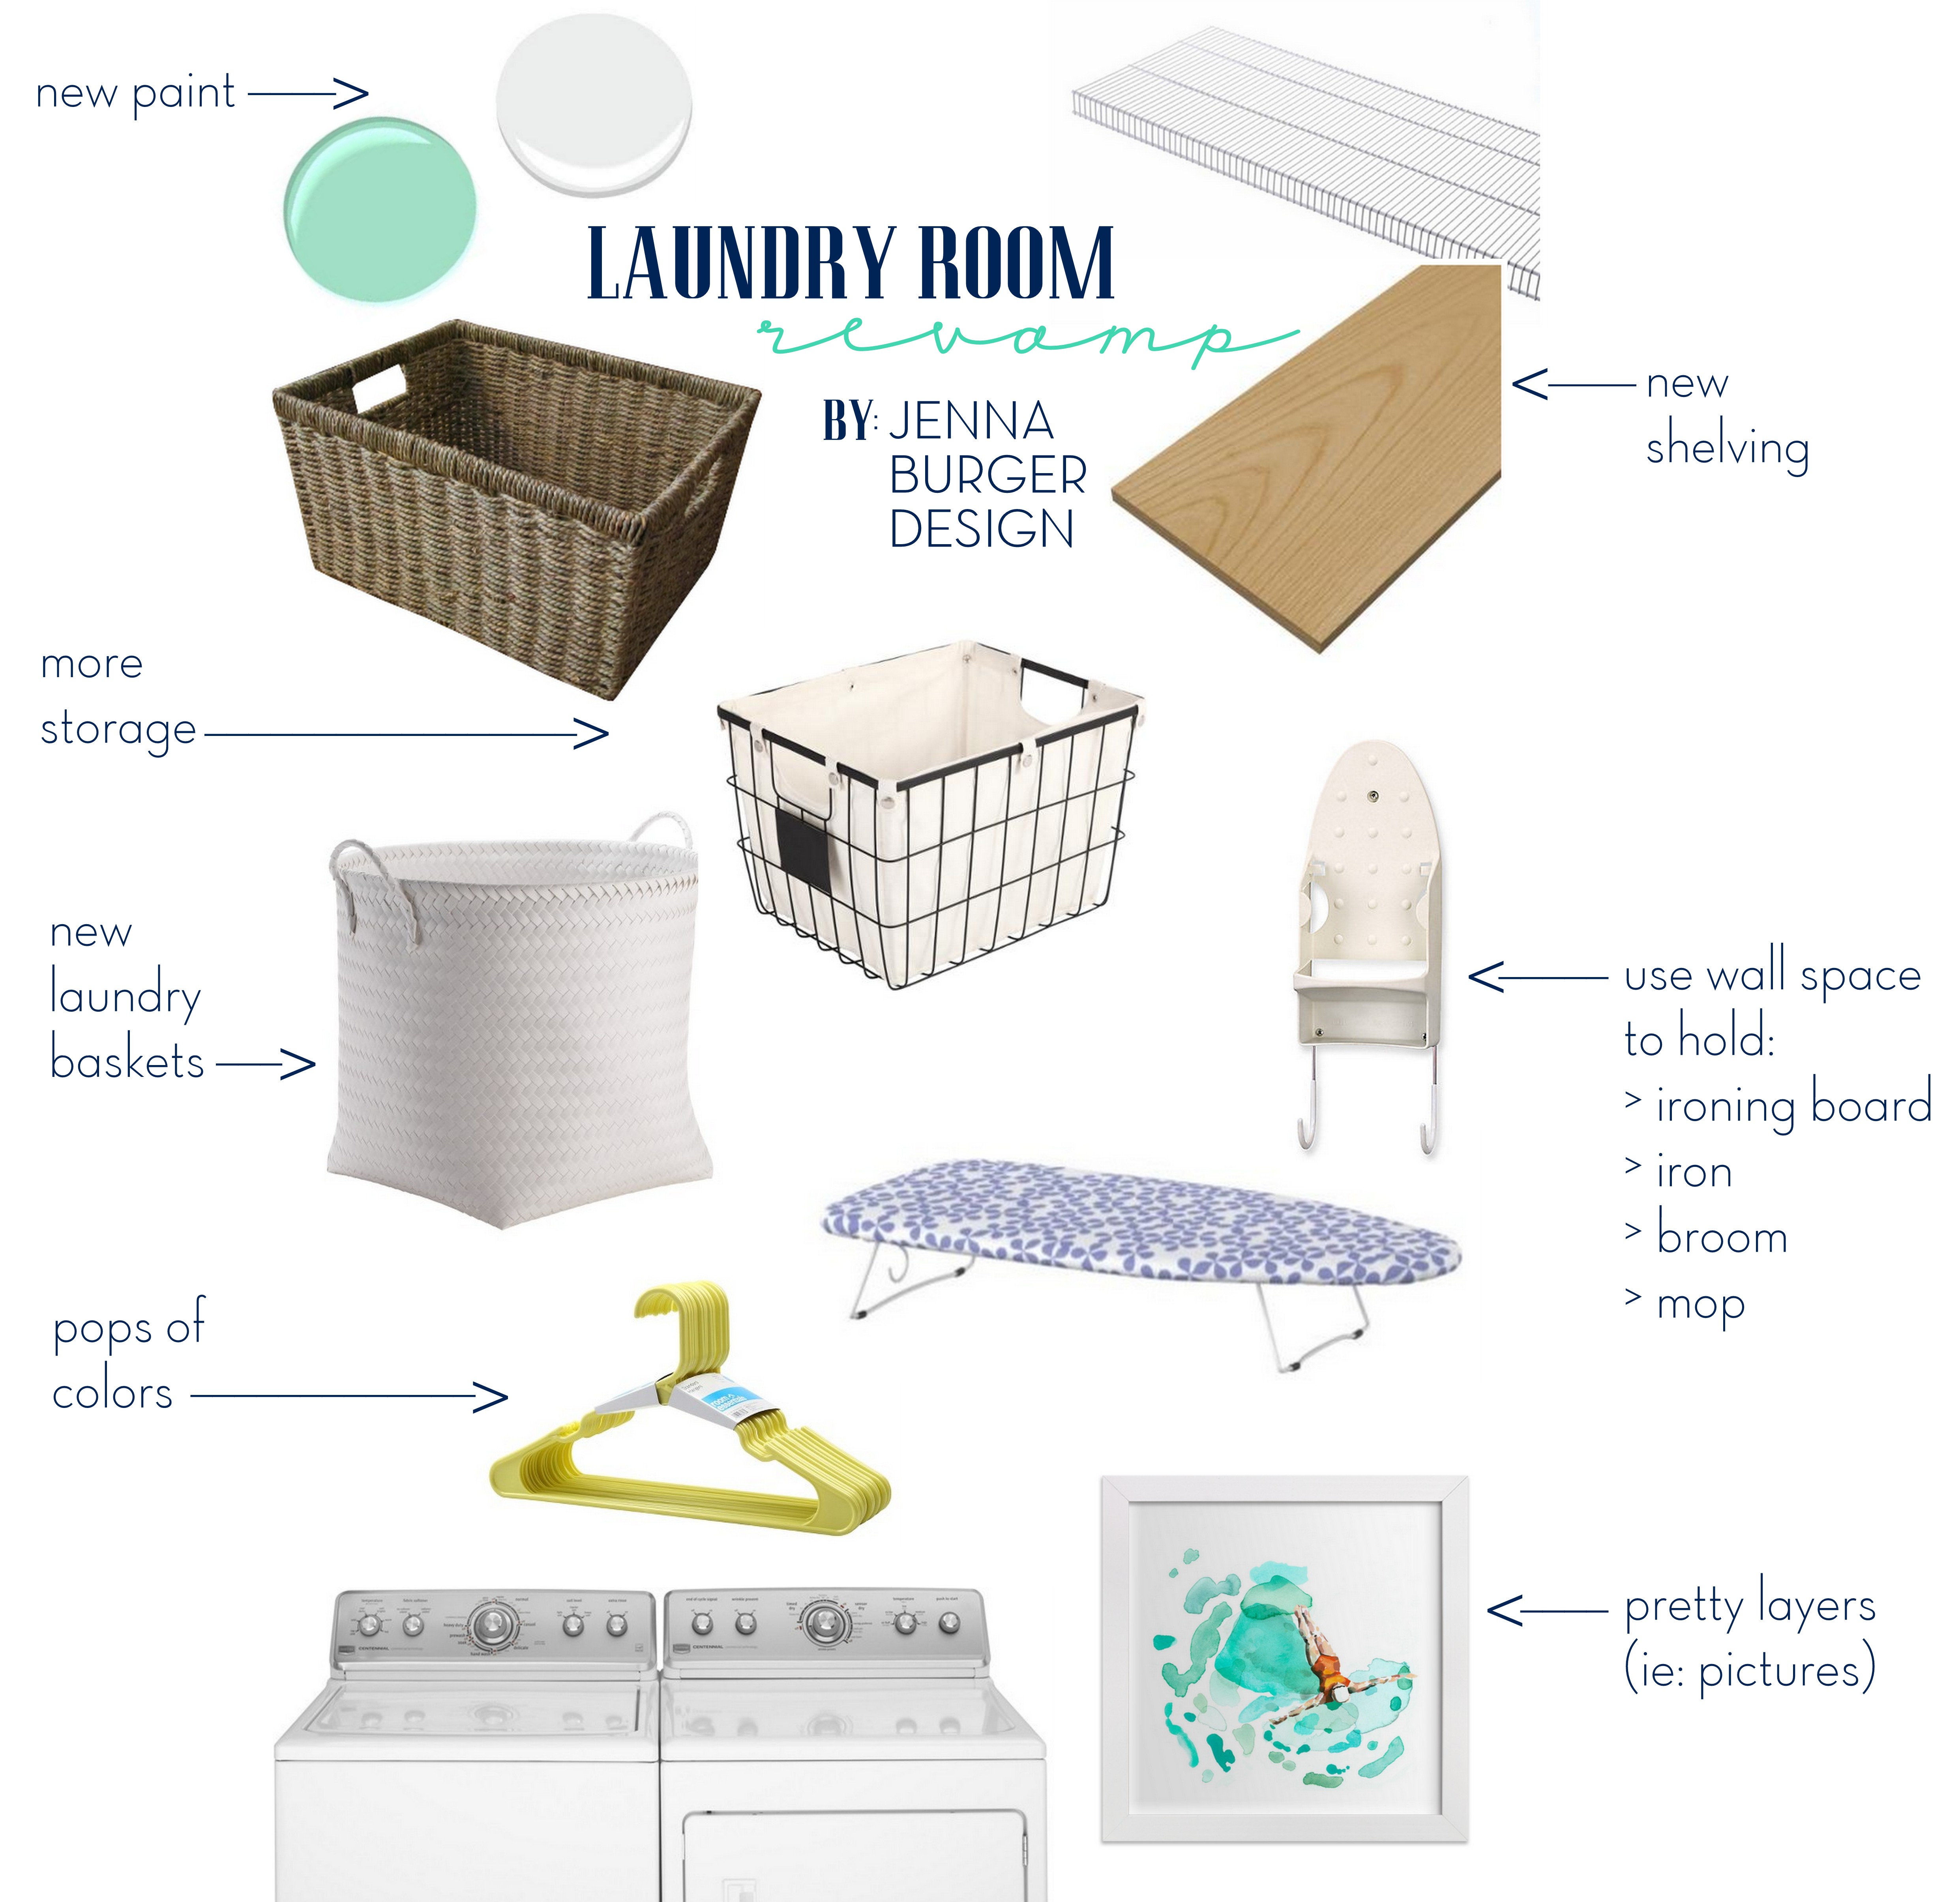
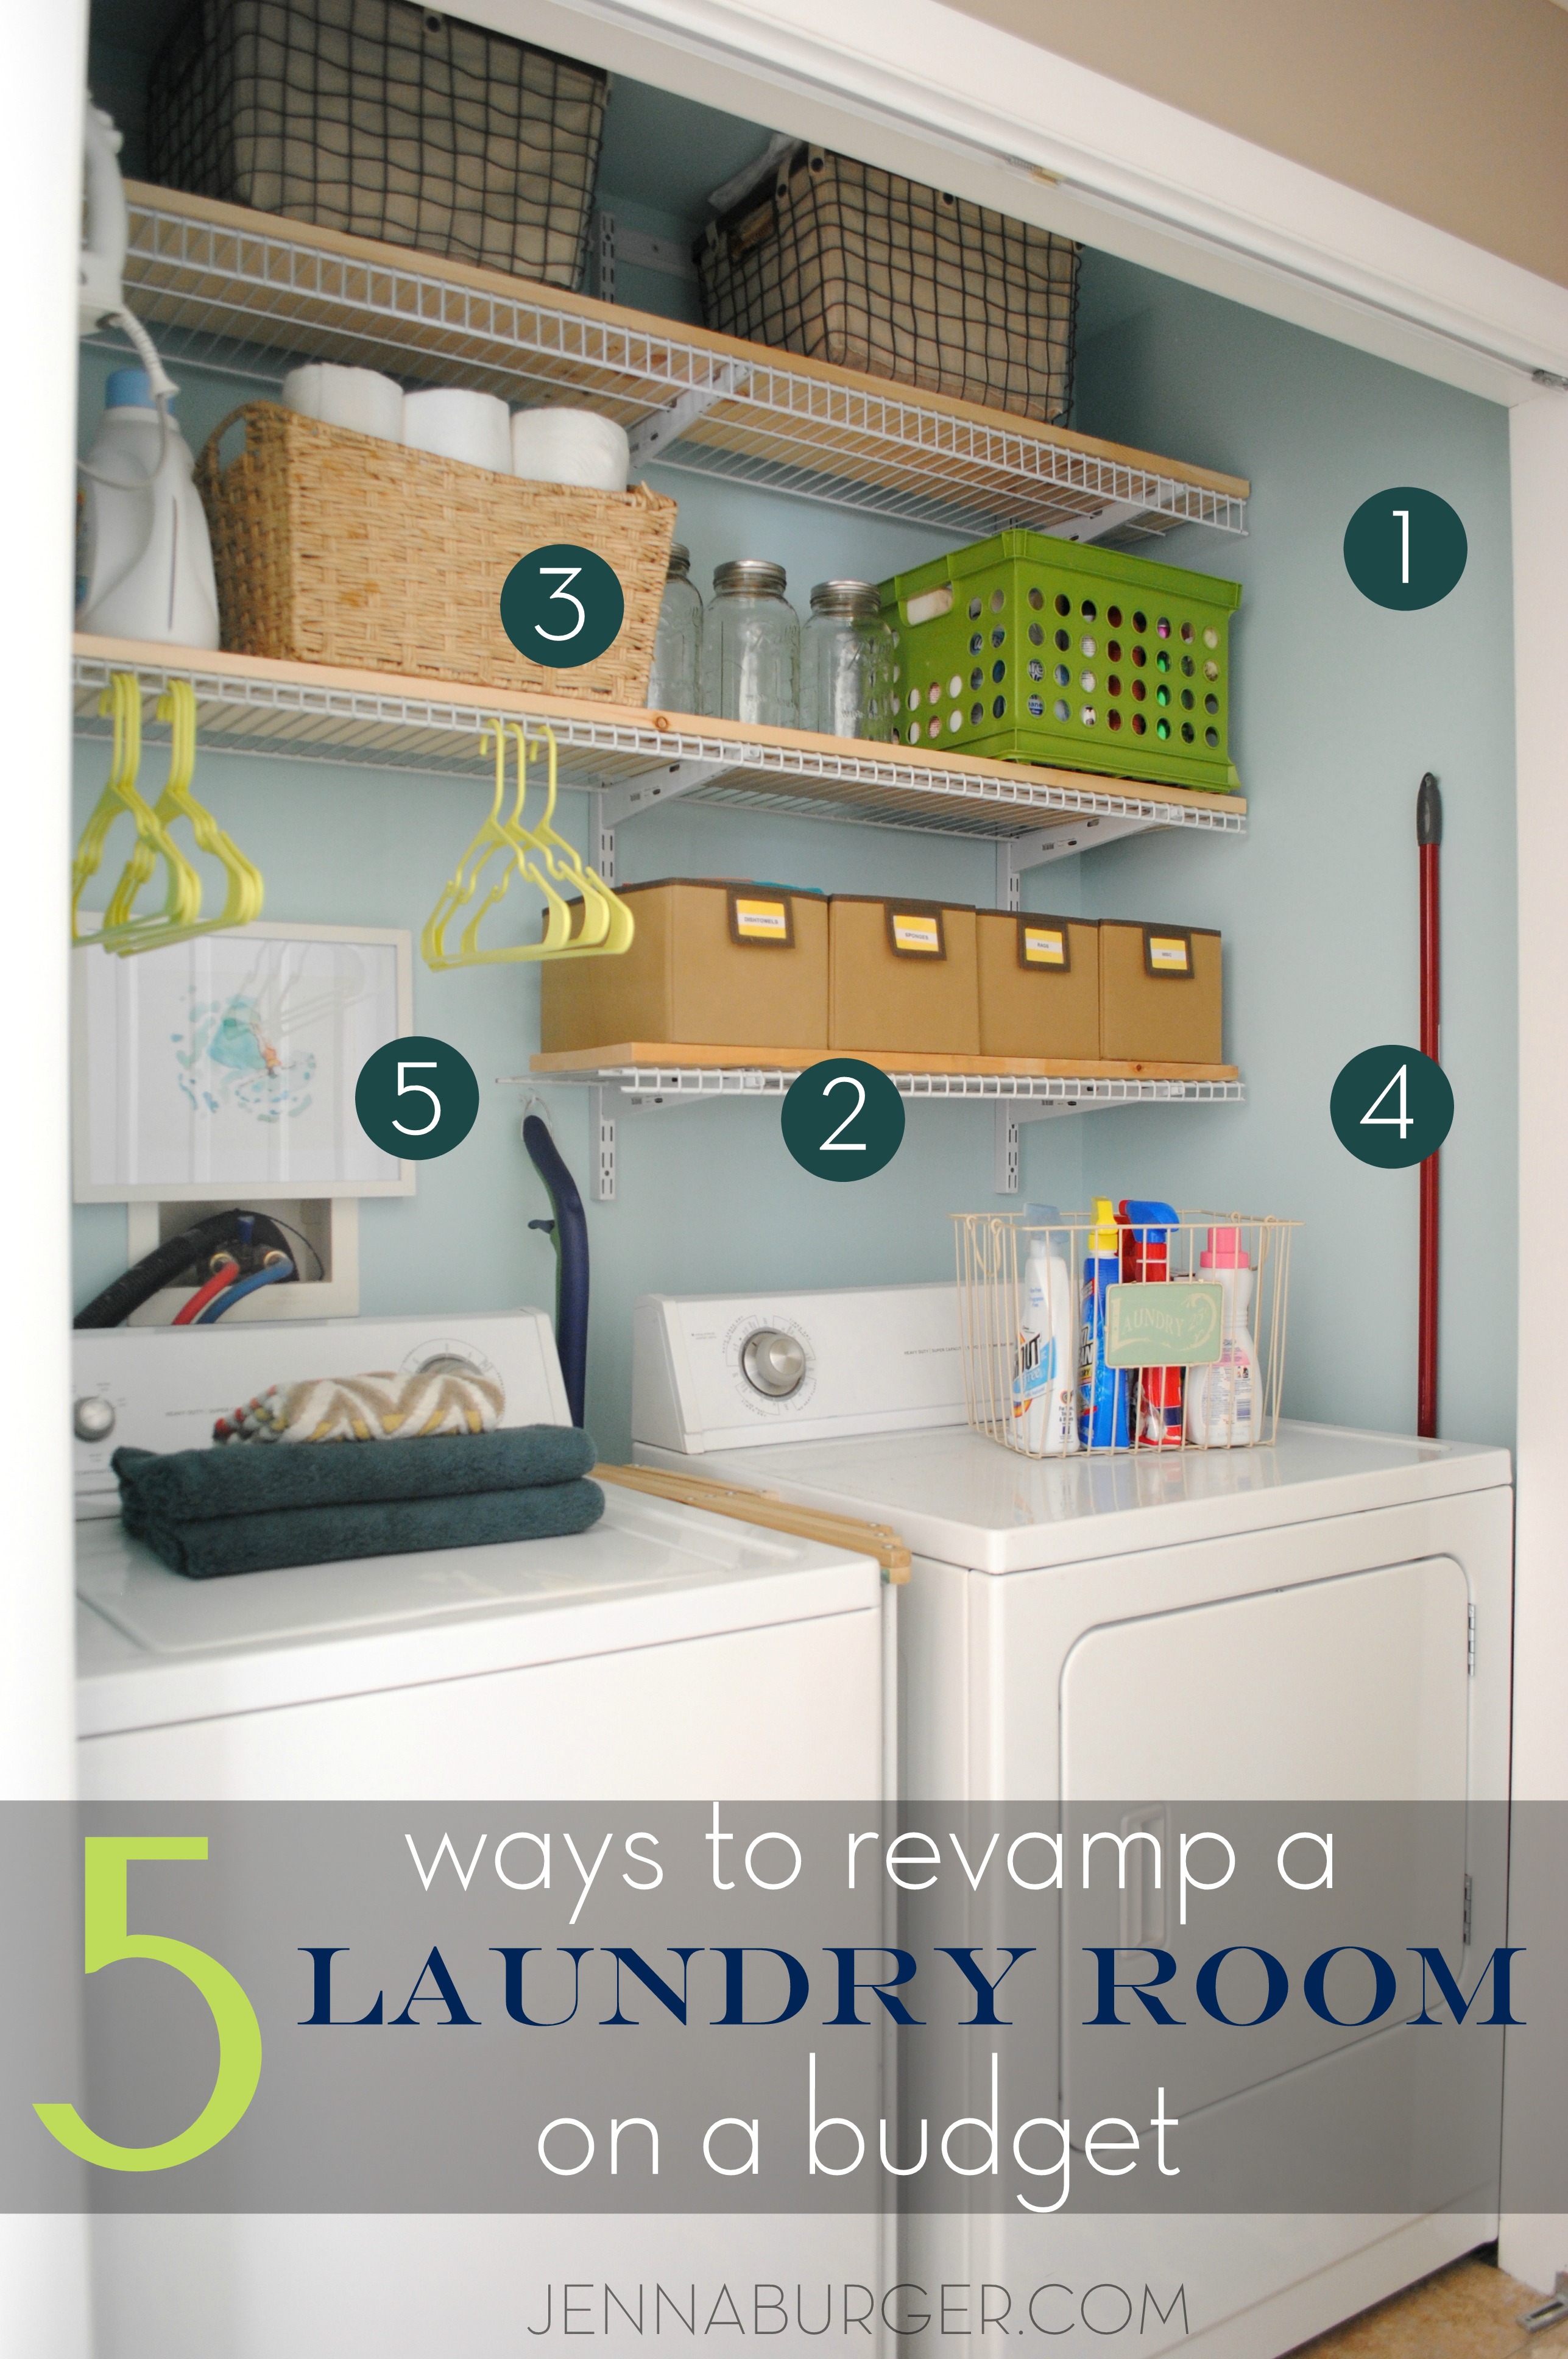
Let’s break it down… Here are 5 ways + tips to revamp a laundry room on a budget…

5 ways + tips for revamping a laundry room on a budget.  See how I transformed my laundry space in one weekend for $200!

Yes, the type of washer + dryer is important to a laundry space (obviously, that’s why it has its name), but the way a laundry space looks & functions really has nothing to do with the model # you have. With my revamp, the W & D stayed and the space around it got jazzed up. My machines are plain ole’ run-of-the-mill white side by side style – Nothing fancy.  They were fine, but the space around it wasn’t.  I chose to work with what I had and that meant using every square inch of the surrounding walls to make this space better.

If you have a stackable W & D in your laundry area, use the space to the side for storage + organization. The takeaway… use what you have and be happy with it; accept it and work with it! Yes, a lavish laundry room would be a delight, but it’s not the reality for most.

Instead of sorting + washing + drying + folding in a room / closet you dislike, here are 5 ways to revamp that laundry space that’s not quite so pretty…

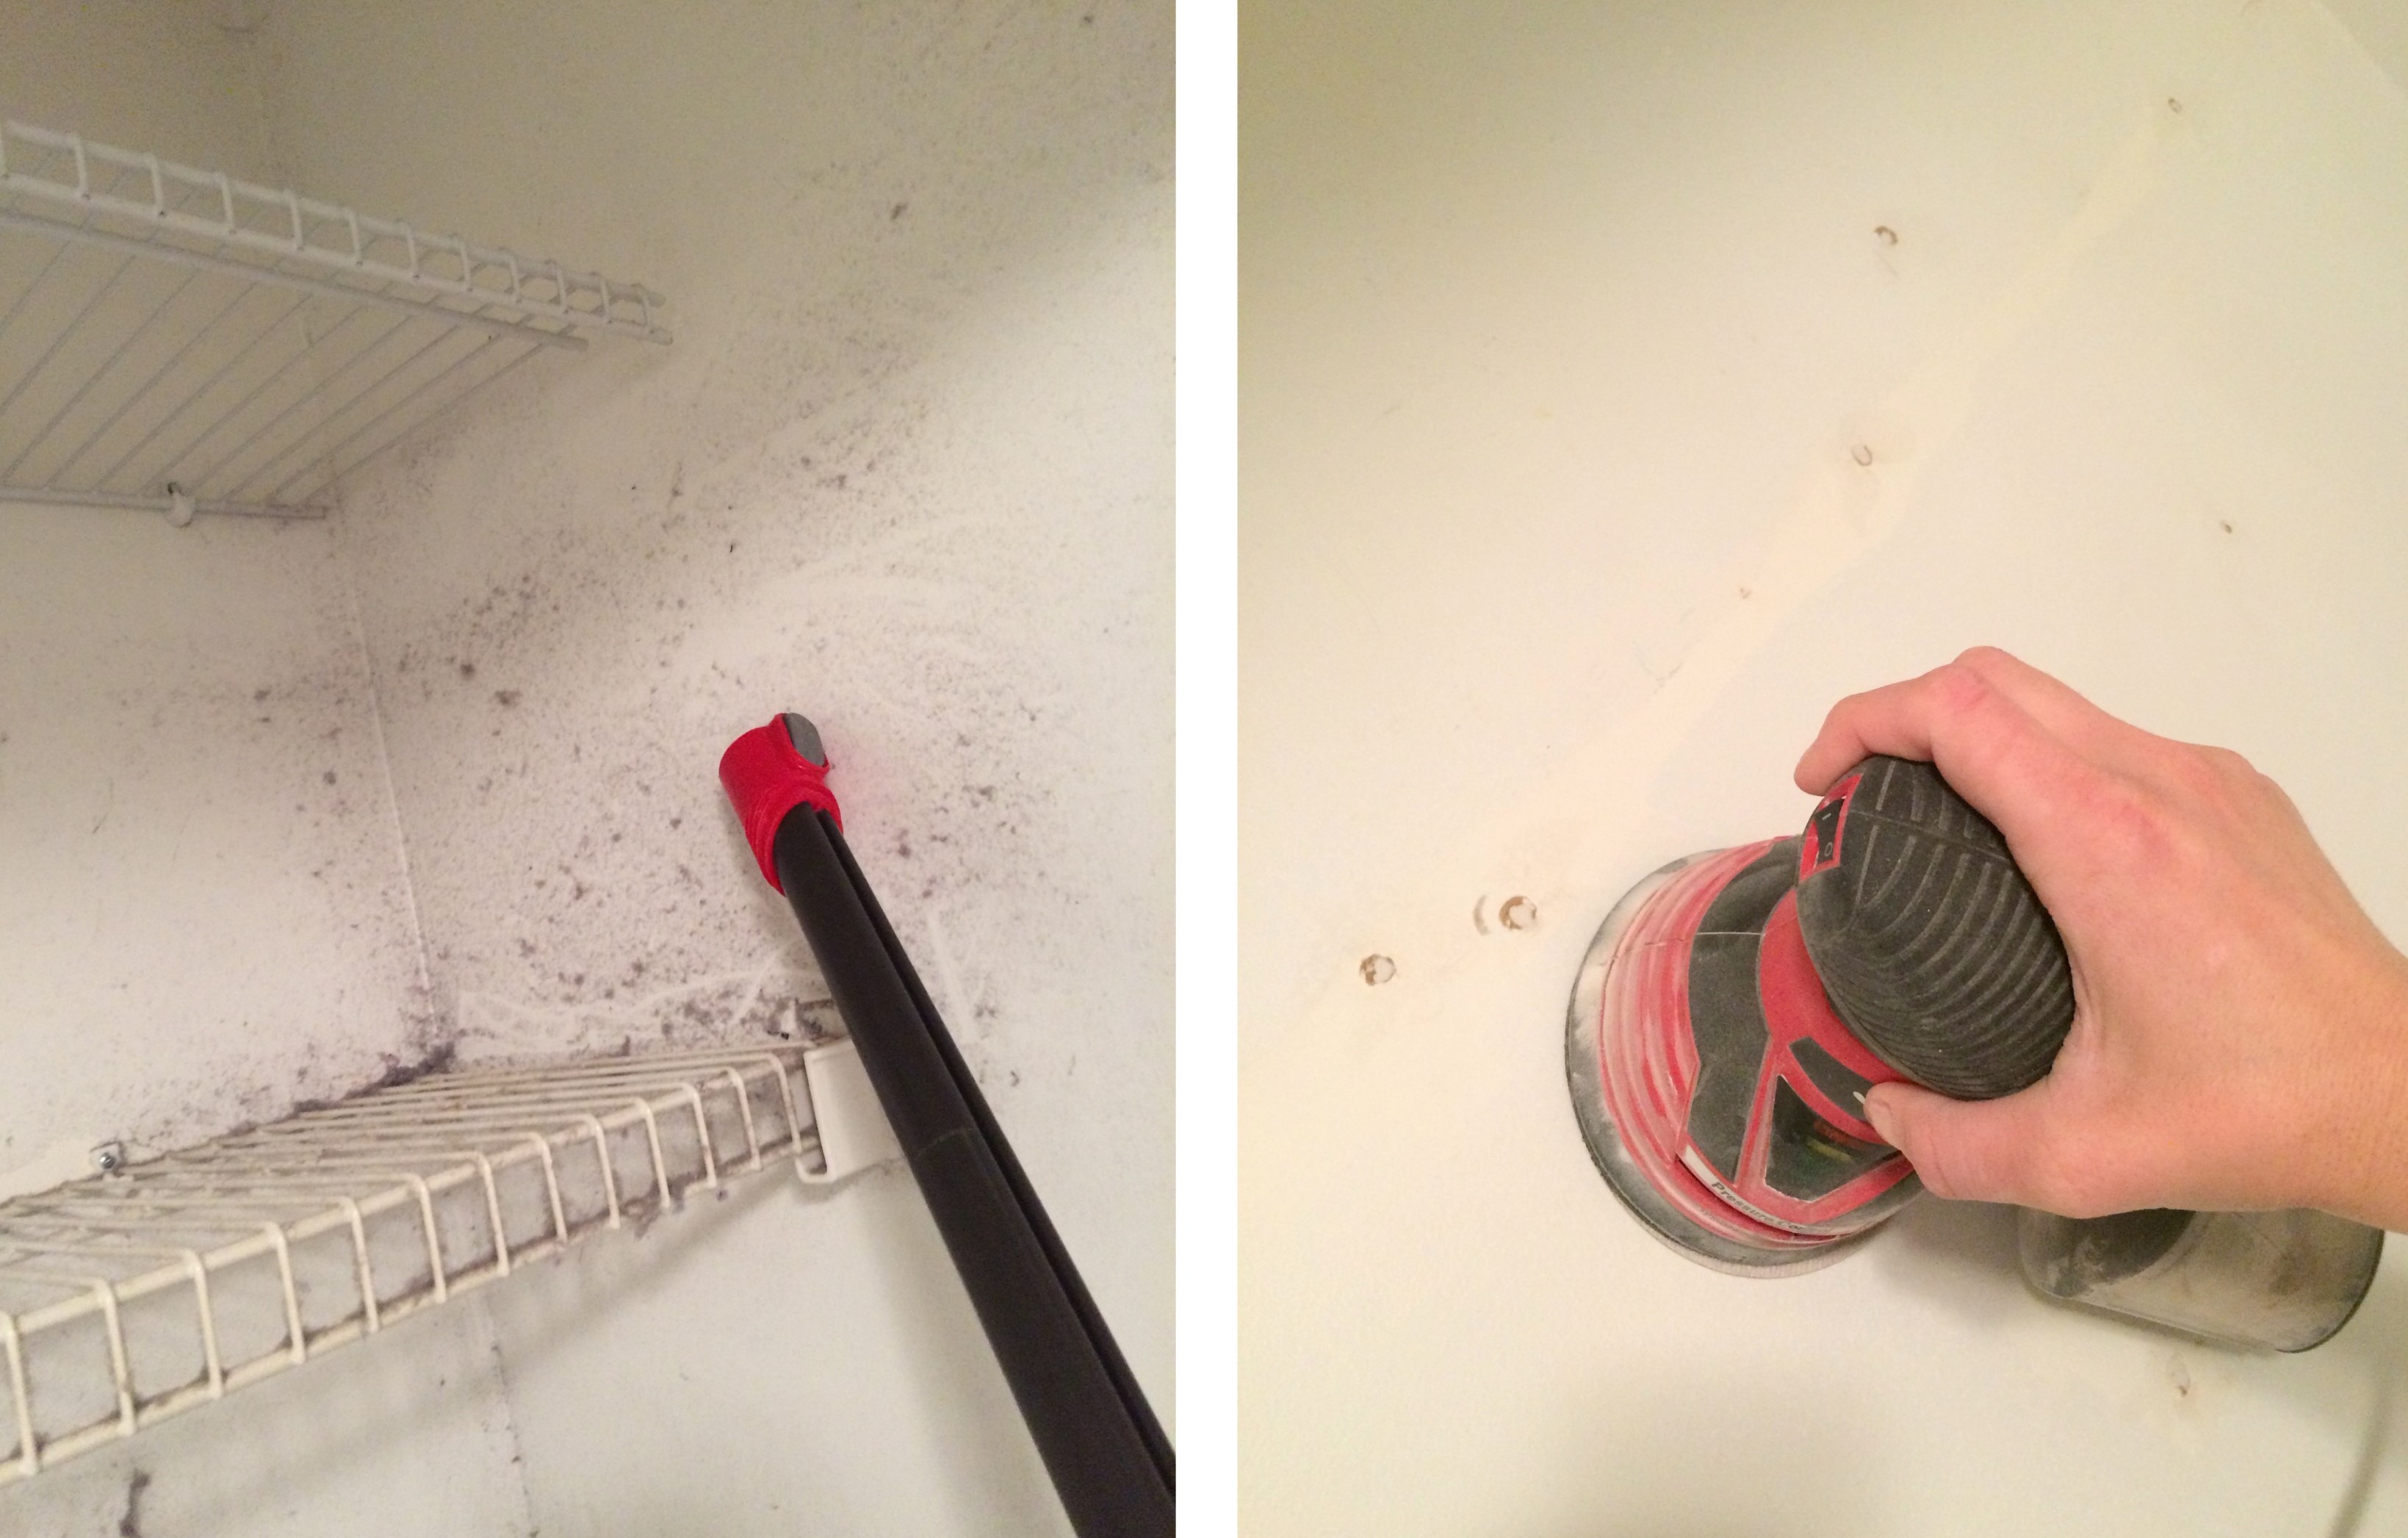
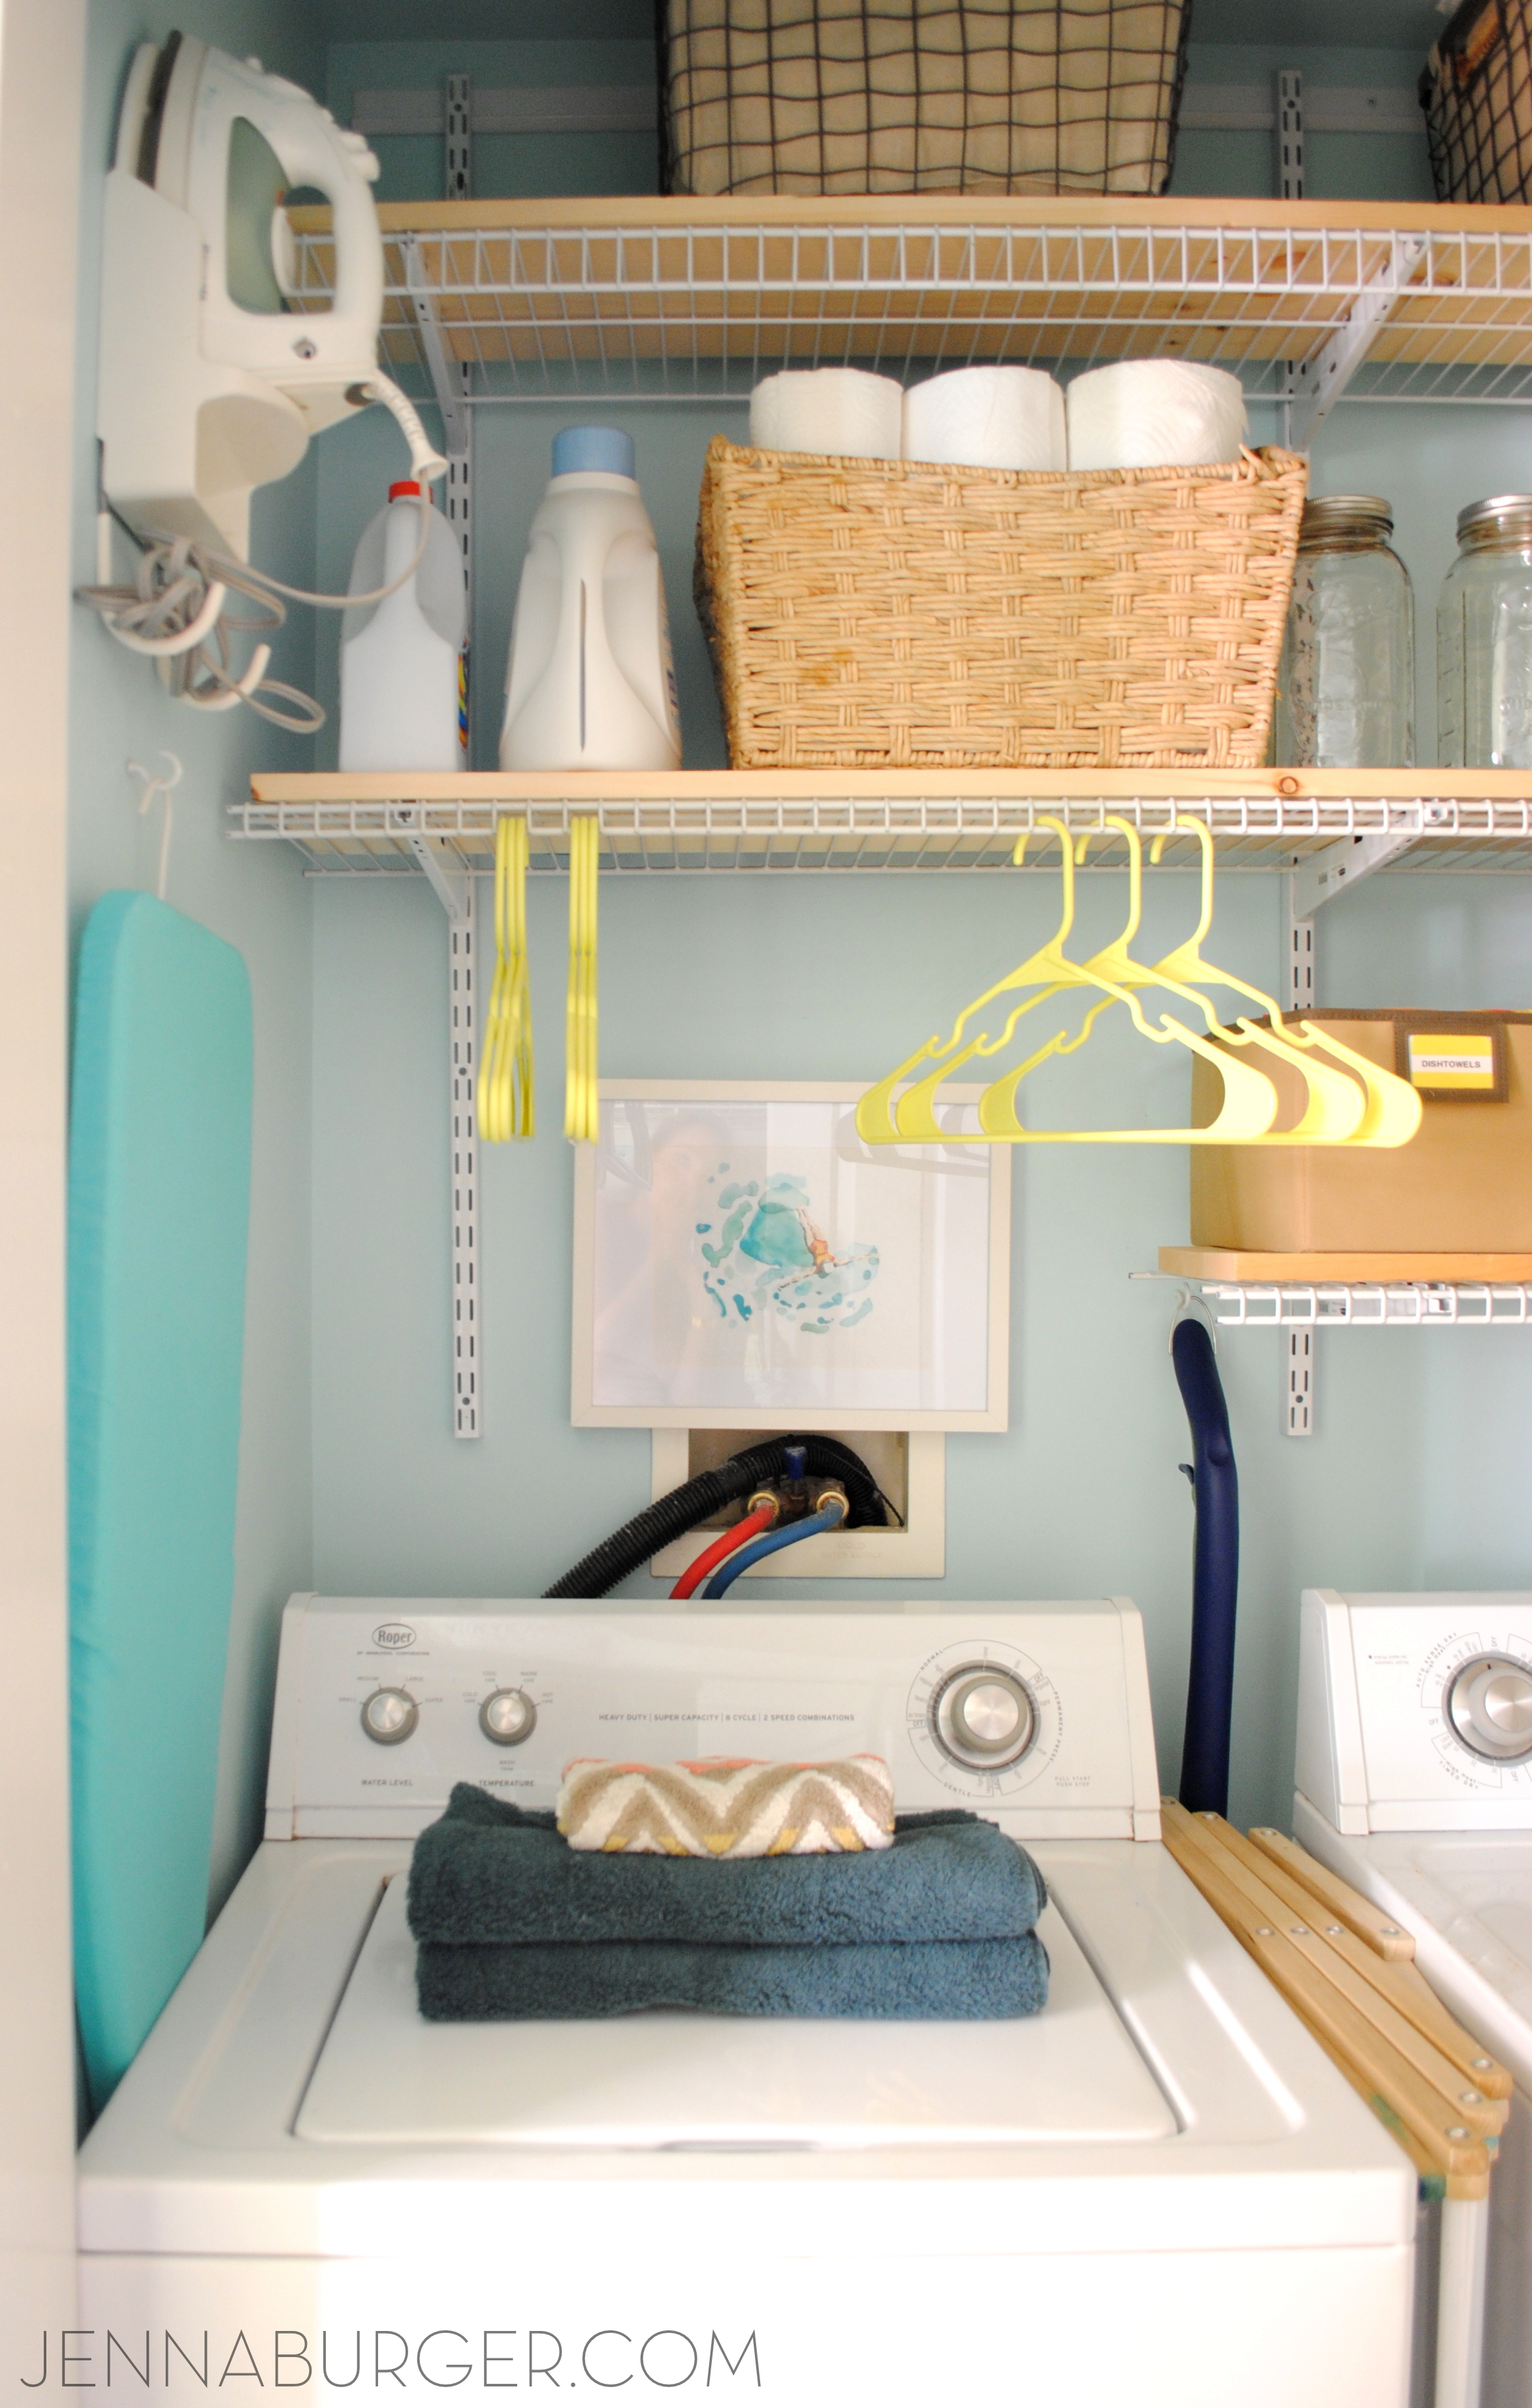
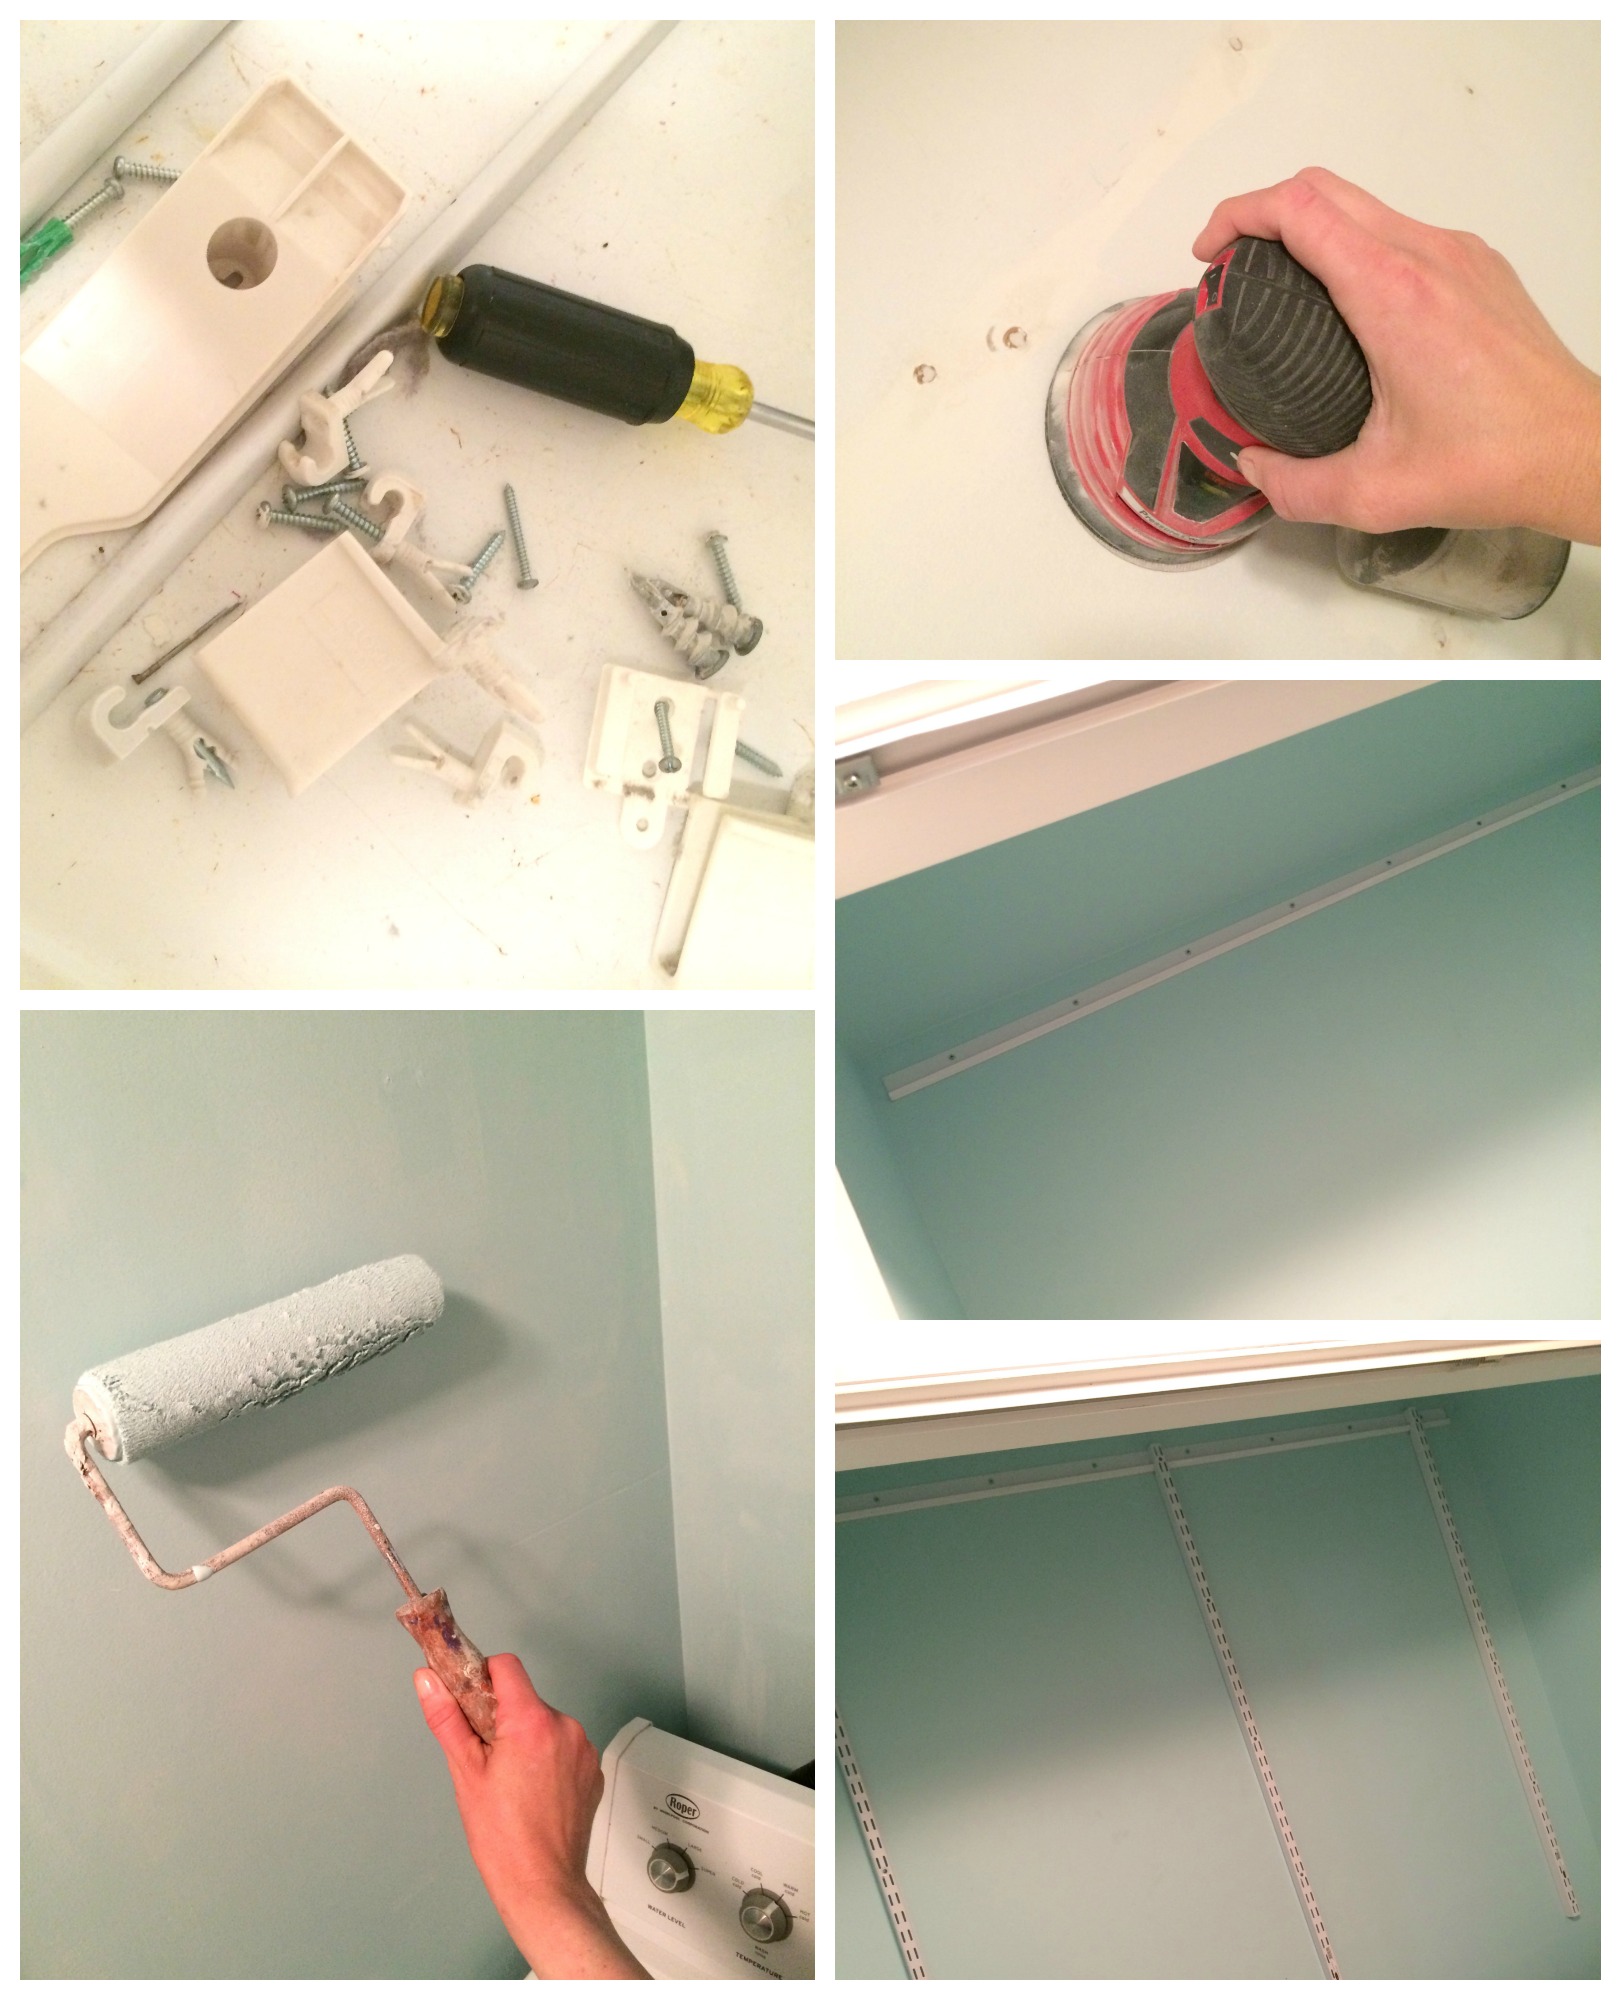
1/ PAINT. Adding a splash of color to a laundry space will give it new life. Whether there is a window or not, a new coat of paint will make it feel fresh & bright. Paint is truly the easiest + least expensive way to freshen up any space, especially the laundry. For my laundry closet revamp, I used a quart of paint which provided 2 coats and the can was $15.

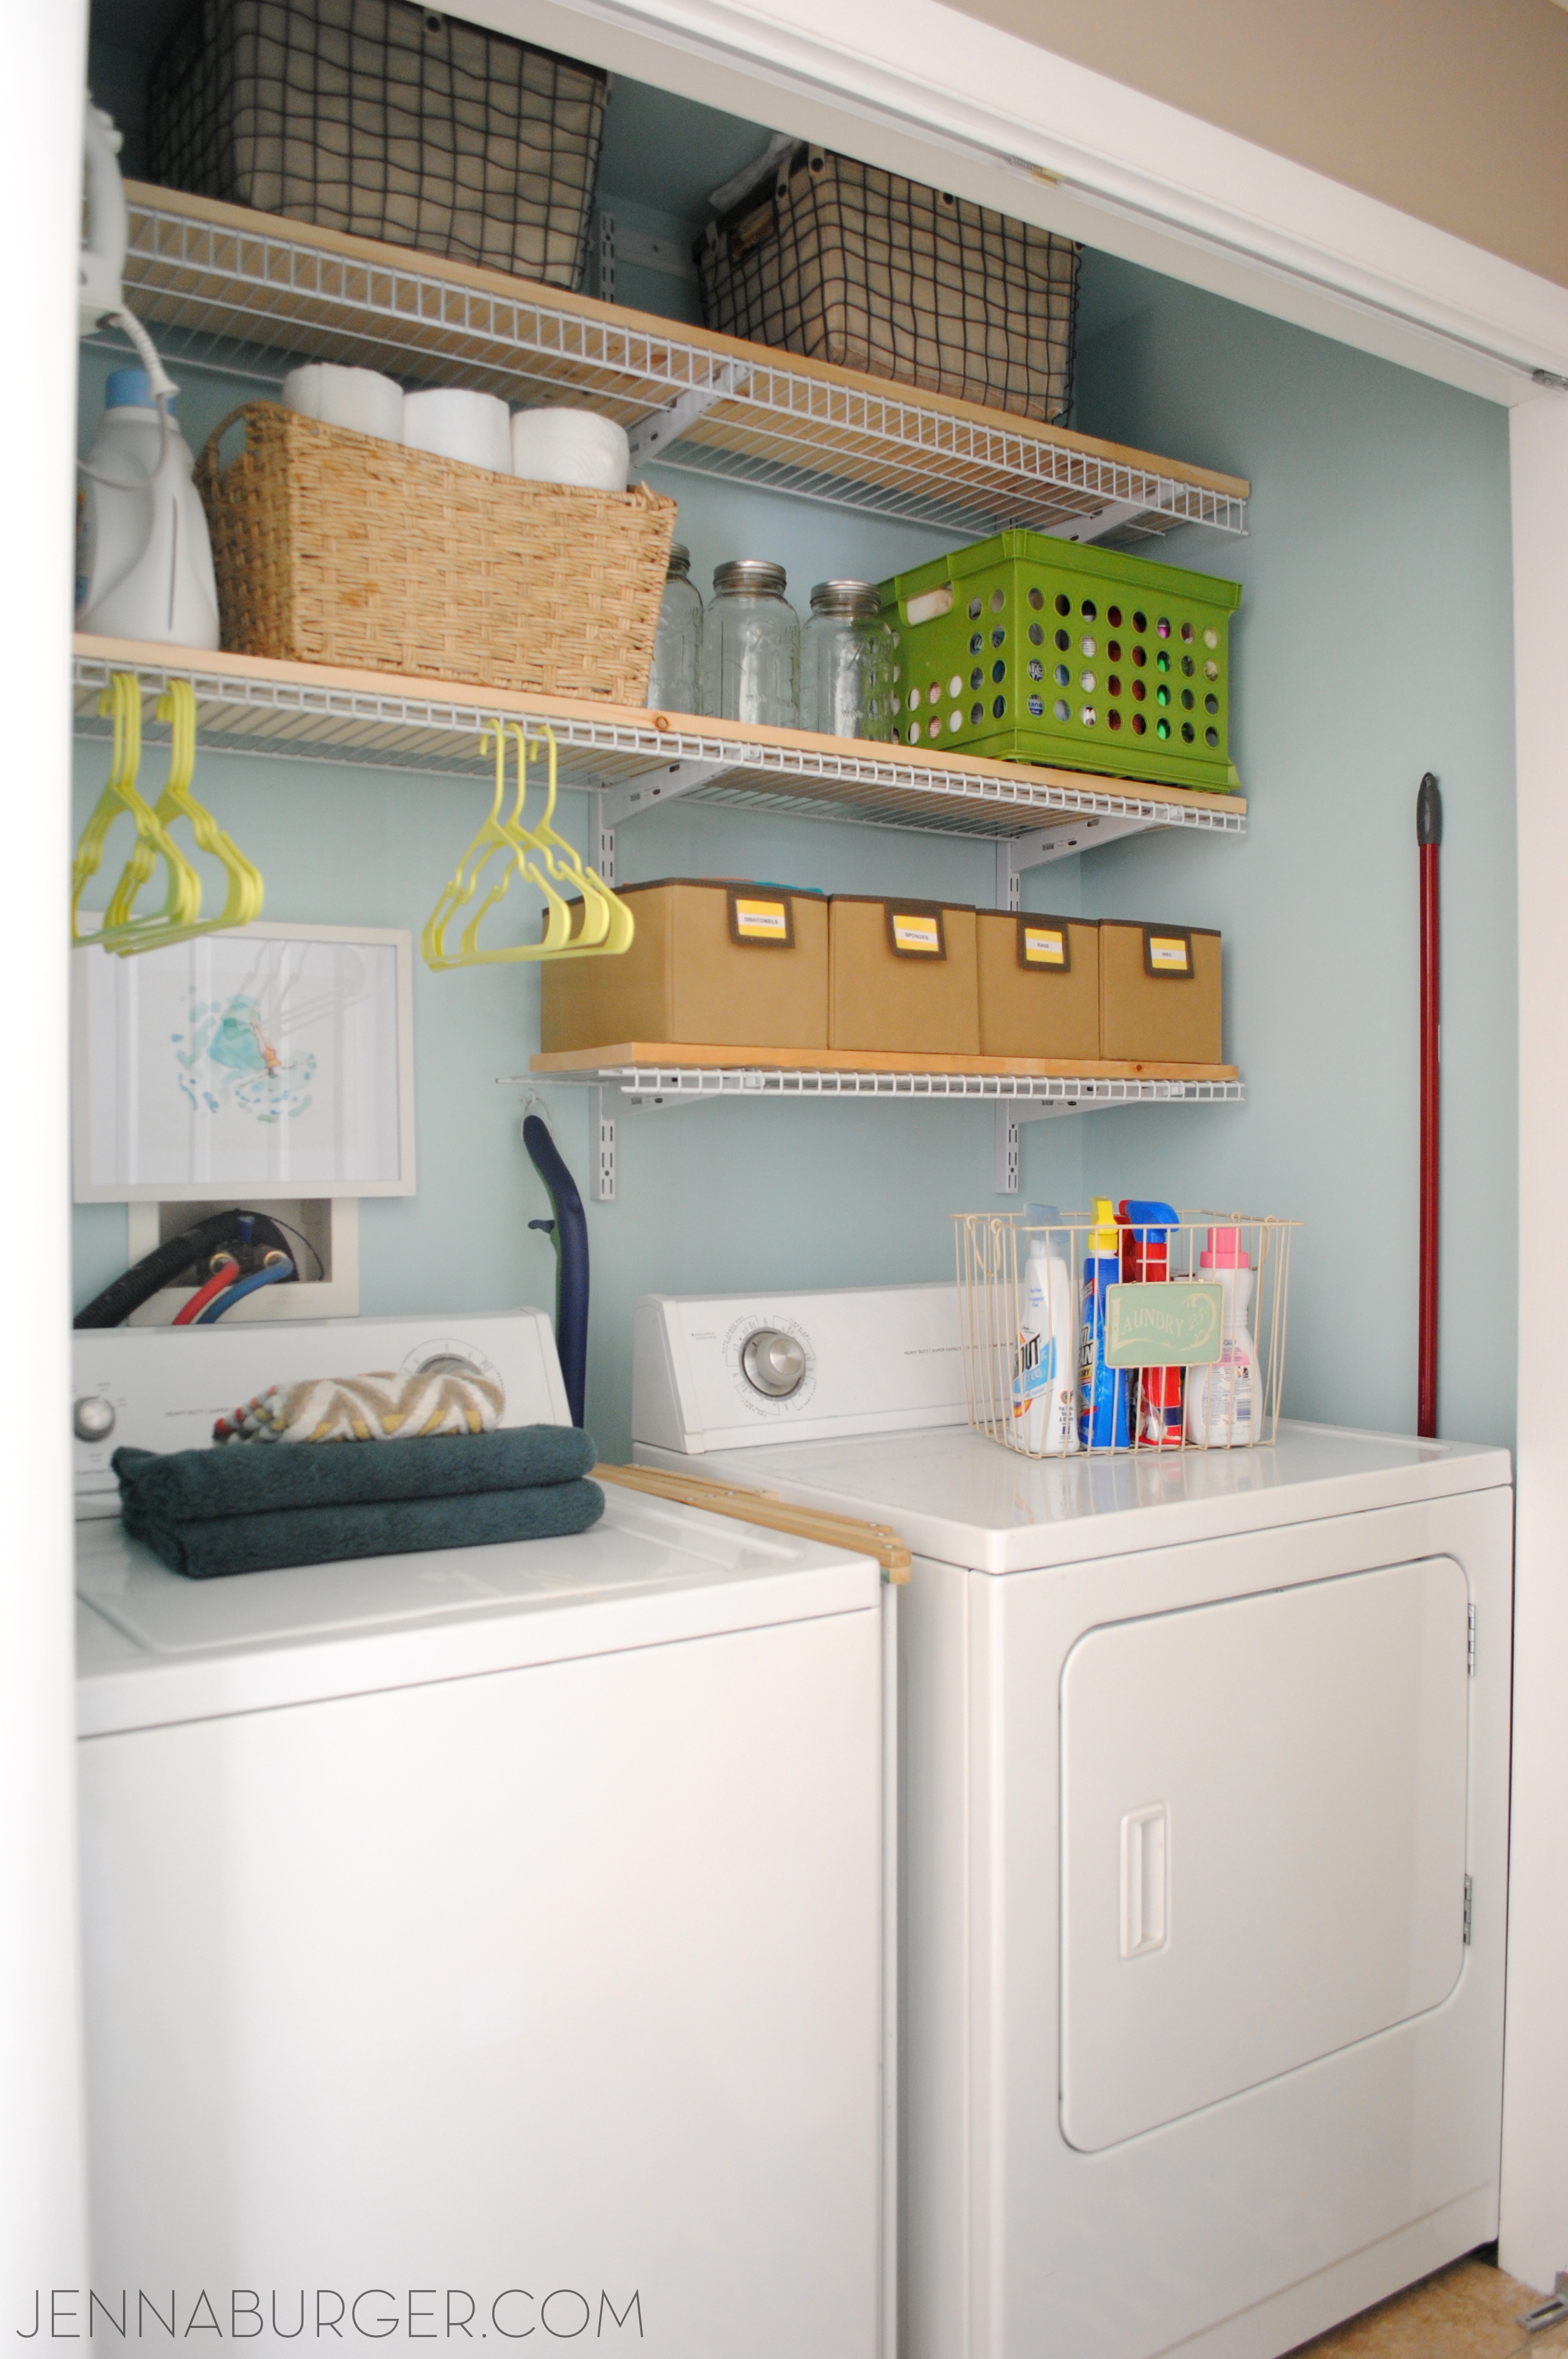
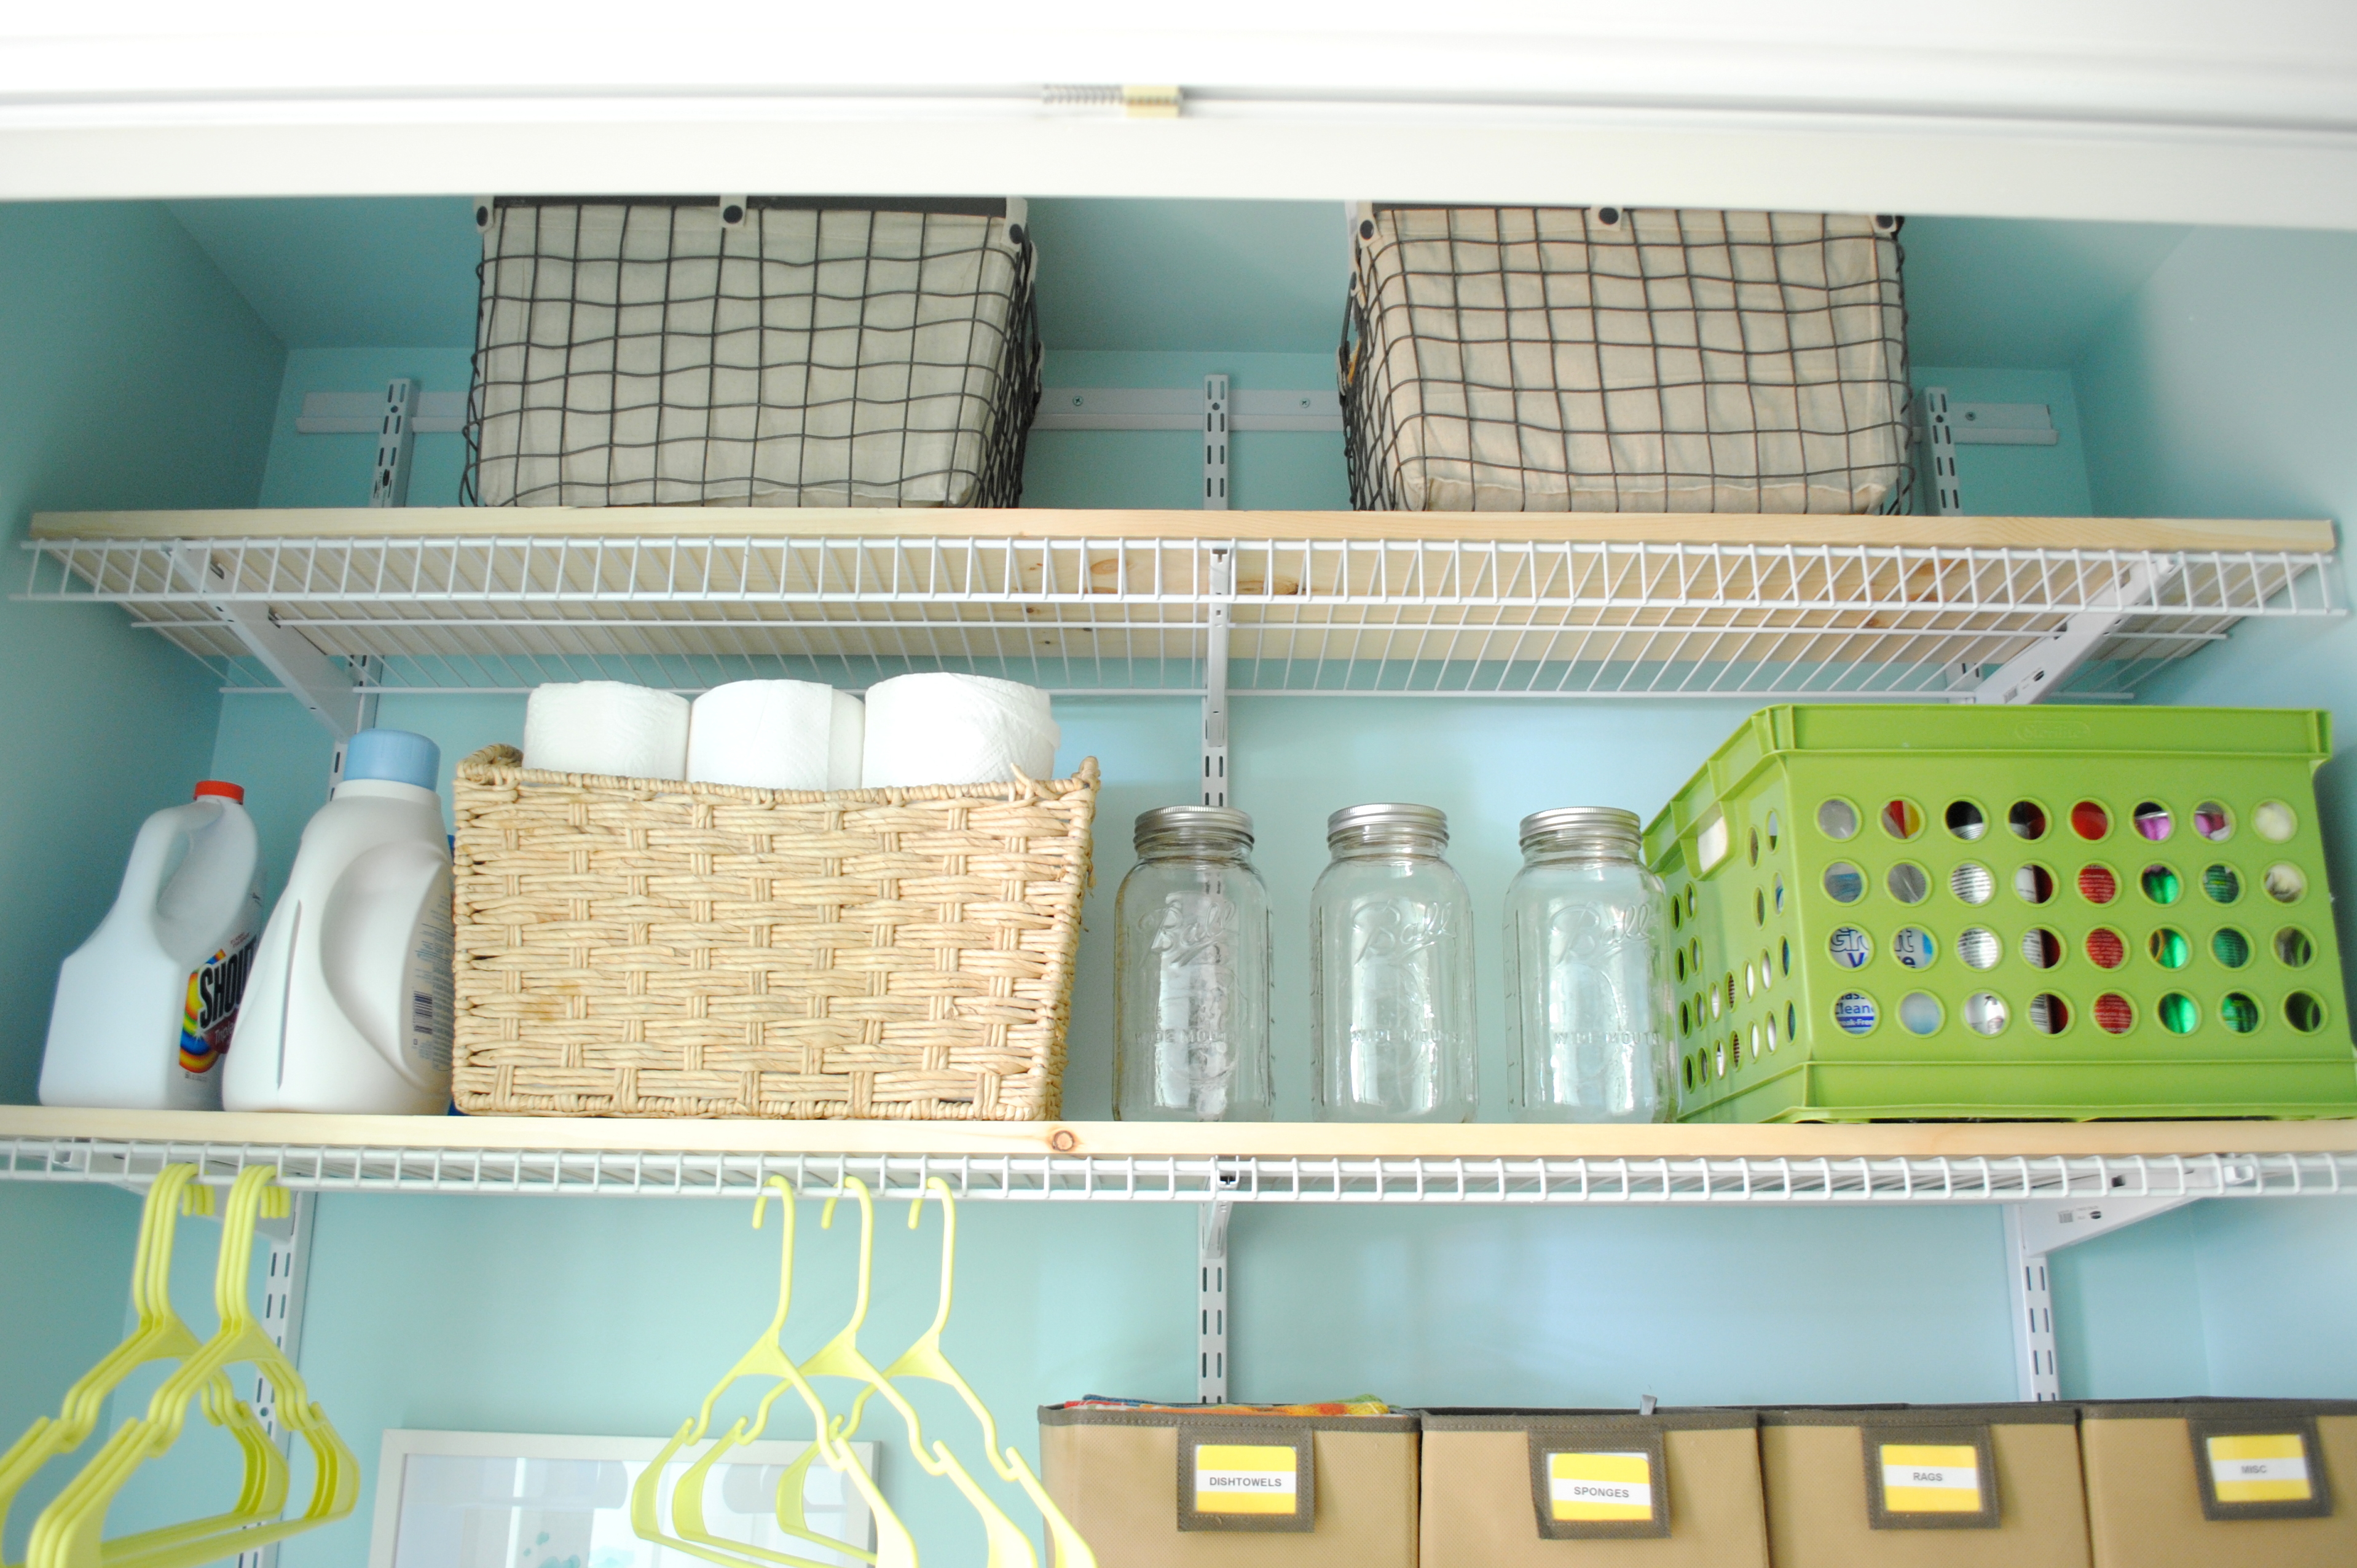
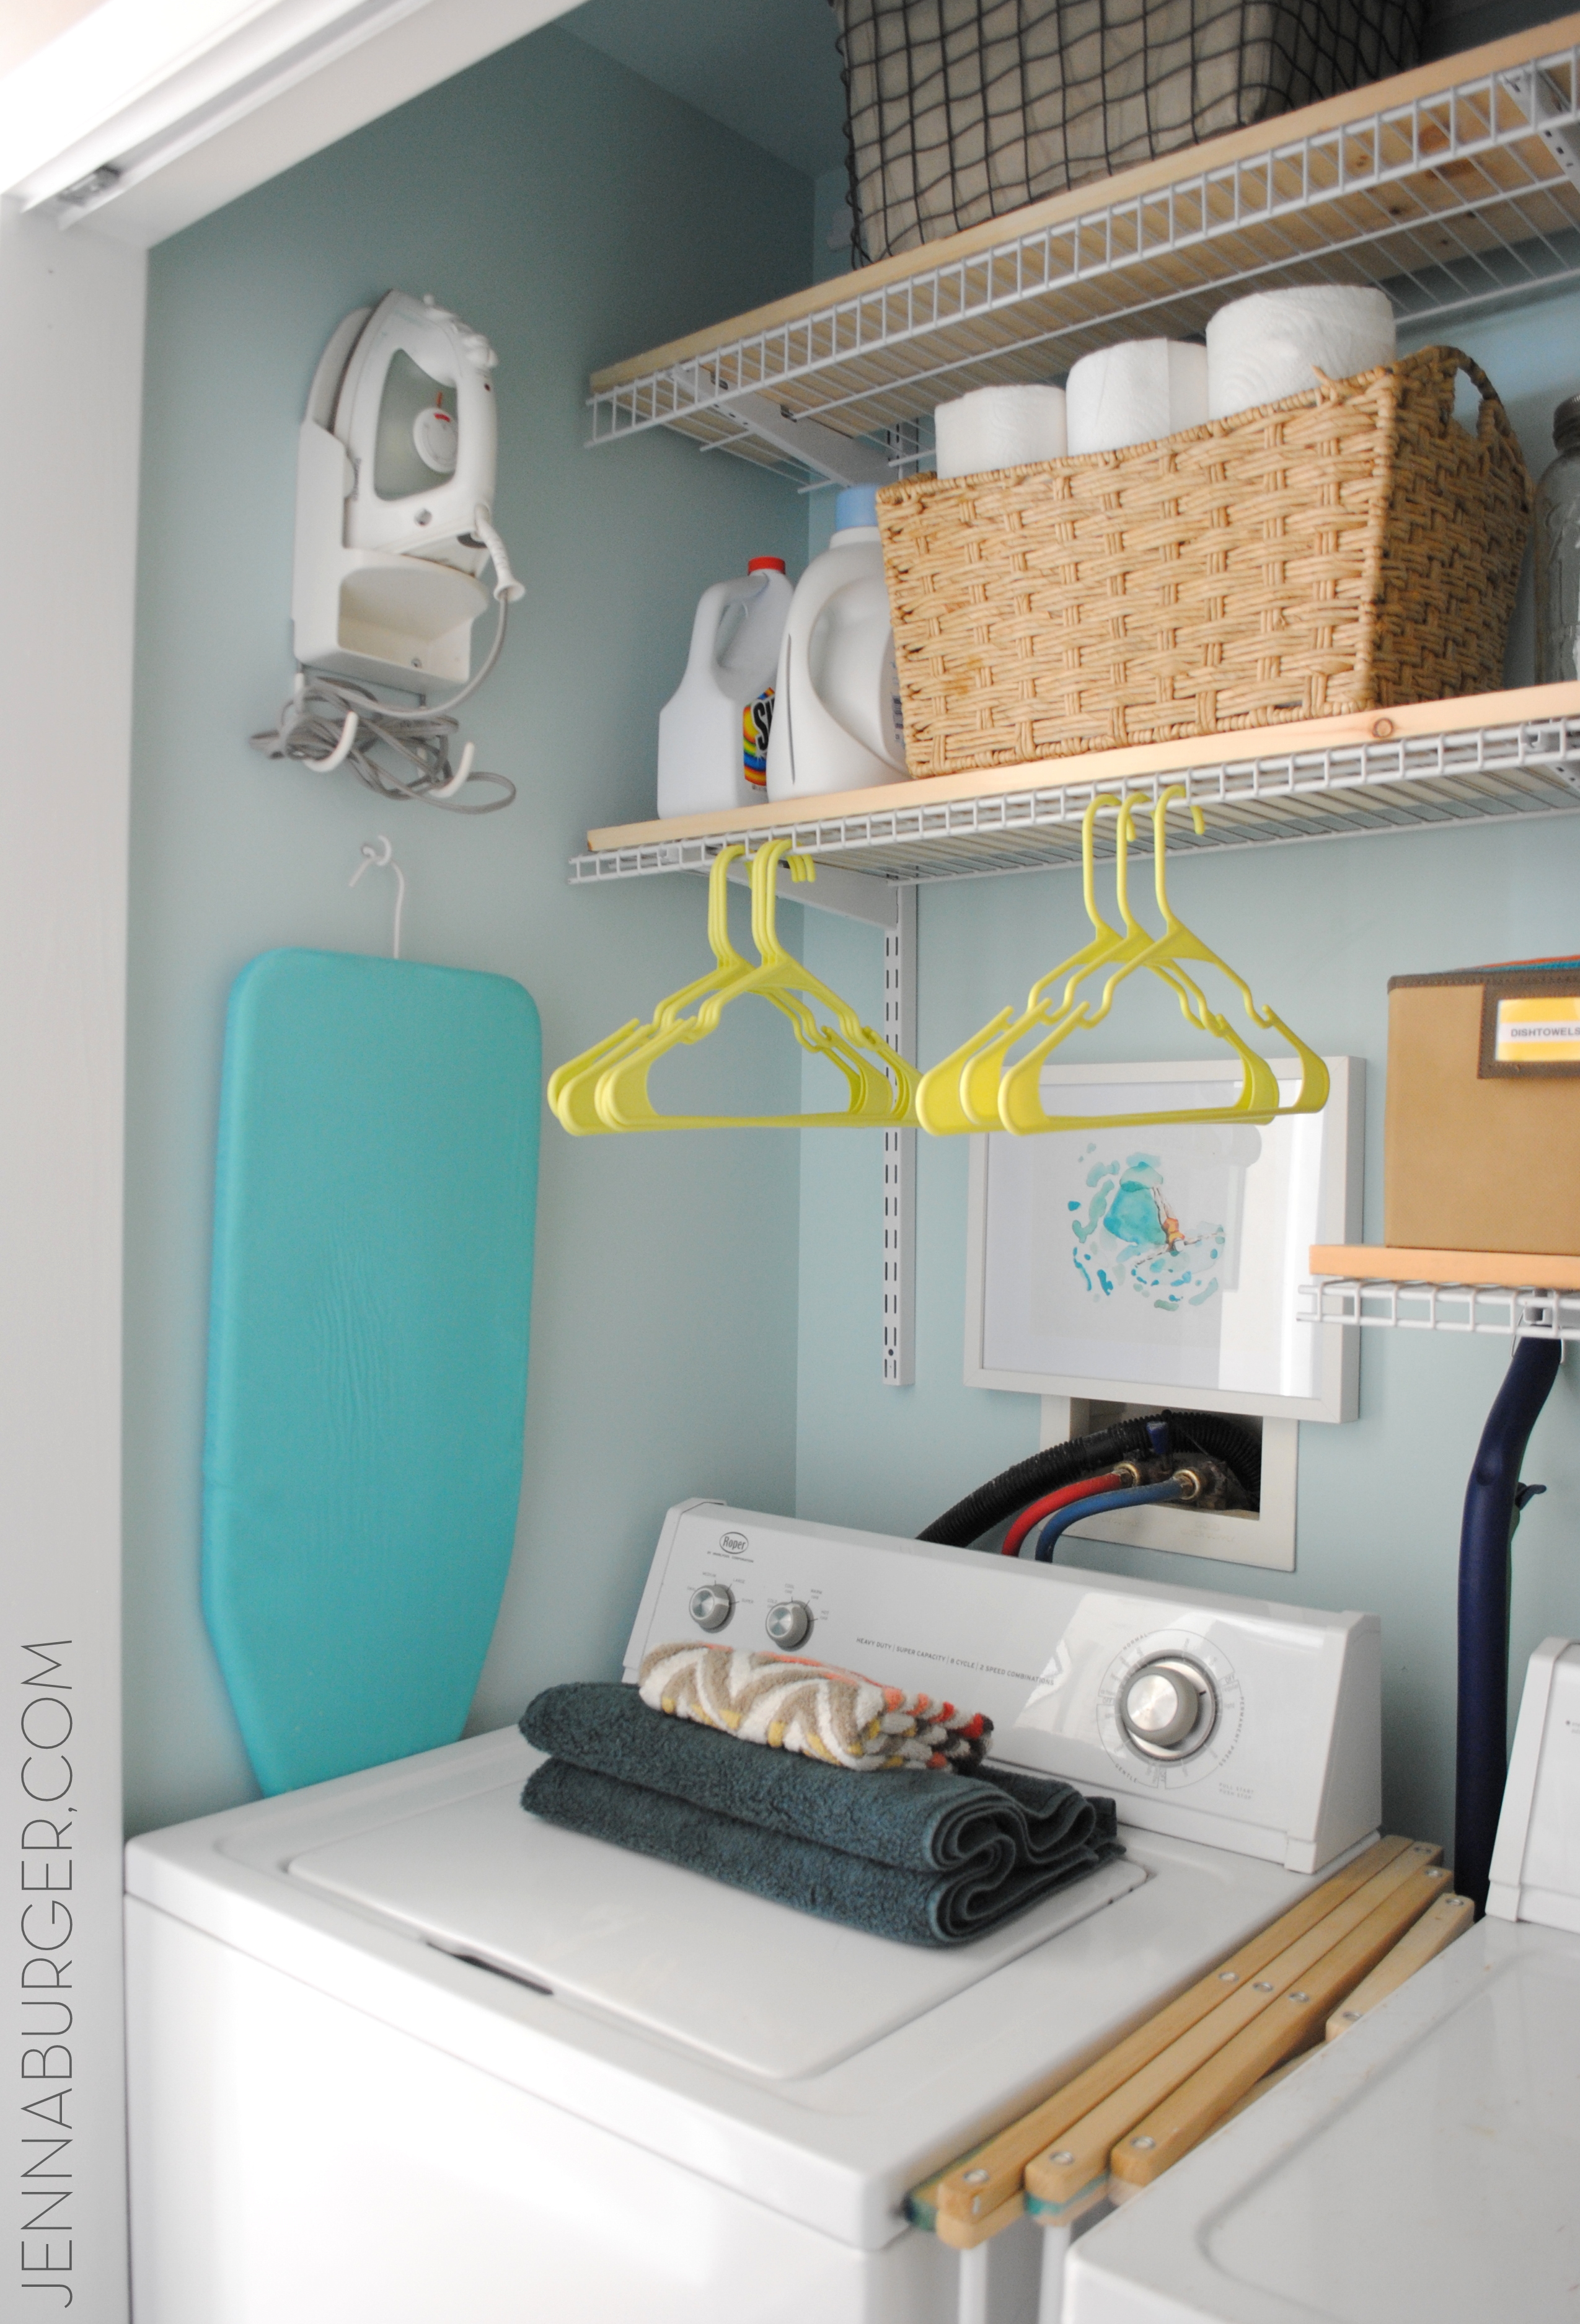
2/ STORAGE. Storage in a laundry is a huge need.  No matter what size the space, no matter what you have to store, storage is important.  Wiring shelves, which is what I used, are the easiest + fastest + least inexpensive type of storage you can add to a laundry space to keep the items organized + tidy.  I chose to add a 1 x 12 piece of wood on top of the wire shelves to make a steadier shelf so items wouldn’t fall between the spaces of the wire.  It’s also important to use as much of the vertical wall space as possible – go as high as you can with the shelving and store non-everyday essentials on the highest shelf & use a stepstool to access.

If you have additional space + a larger budget, wood shelves are a great alternative (but they cost more + take longer to install + aren’t as flexible to move in the future), as is closed cabinetry which can hide away those not-to-be-seen items.

There are many options for storage in a laundry… don’t just stick with the one wire builder-grade shelf above the washer & dryer.  That’s a waste of precious wall space.

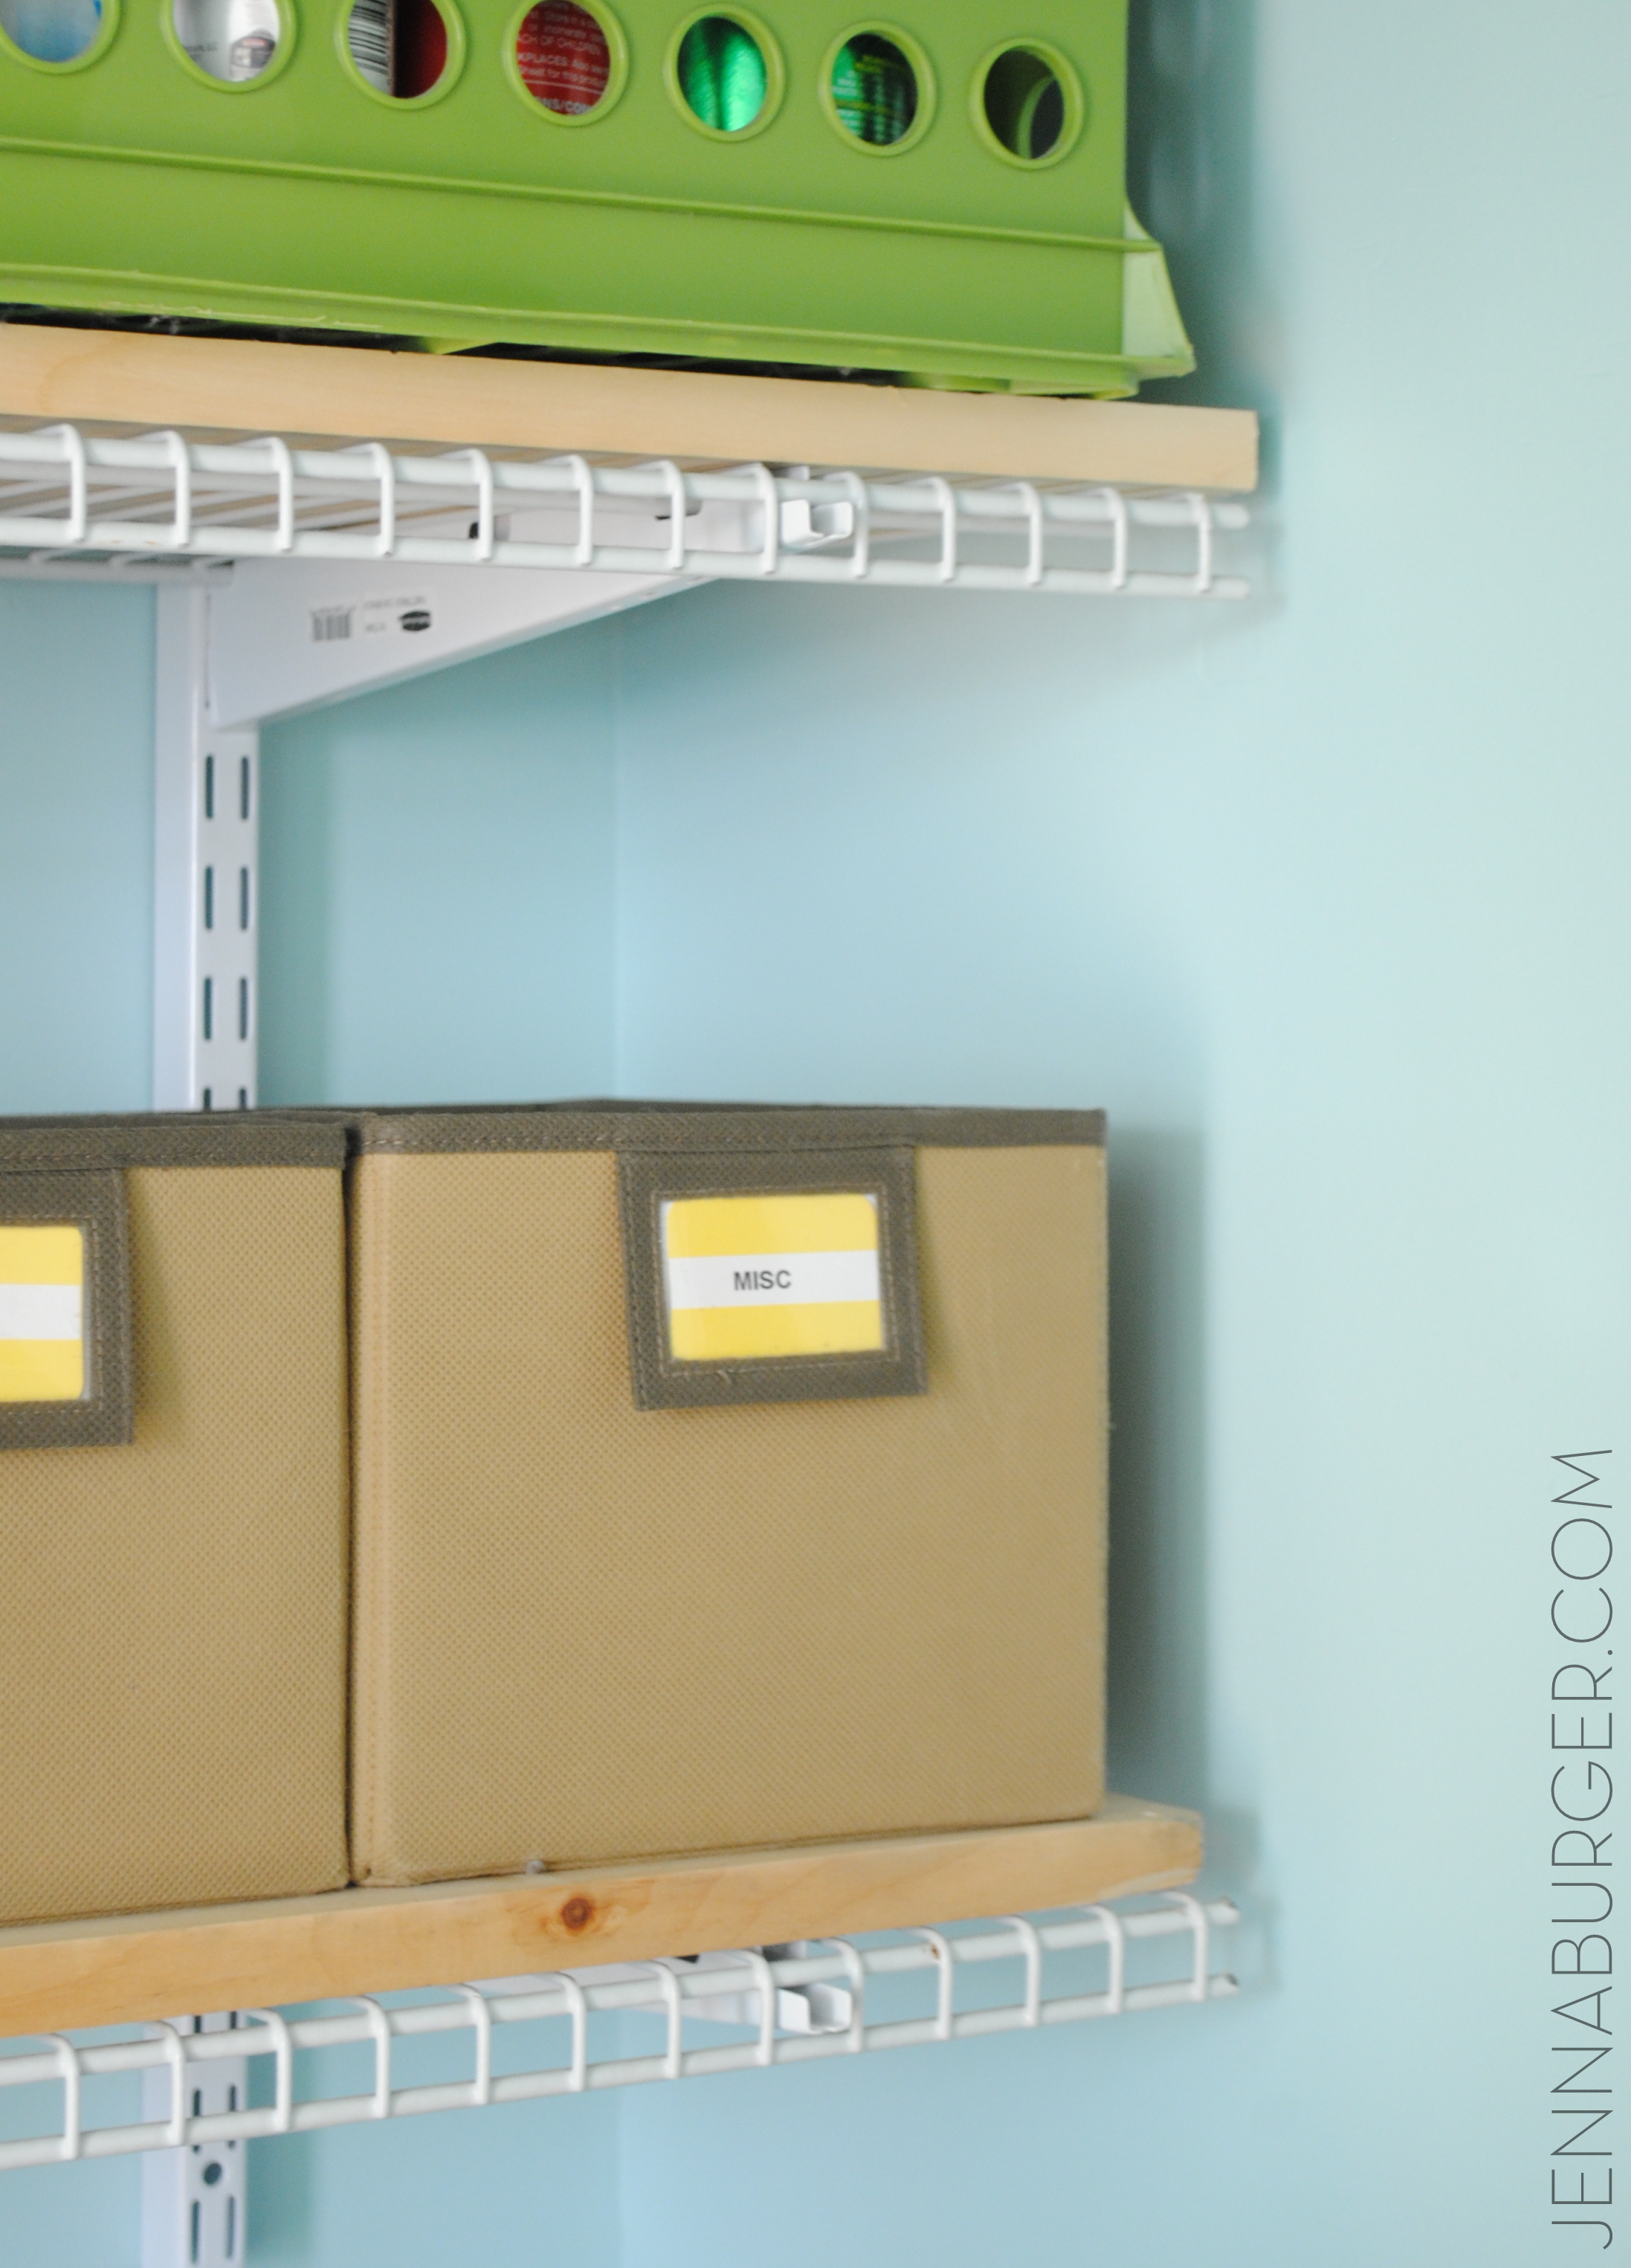
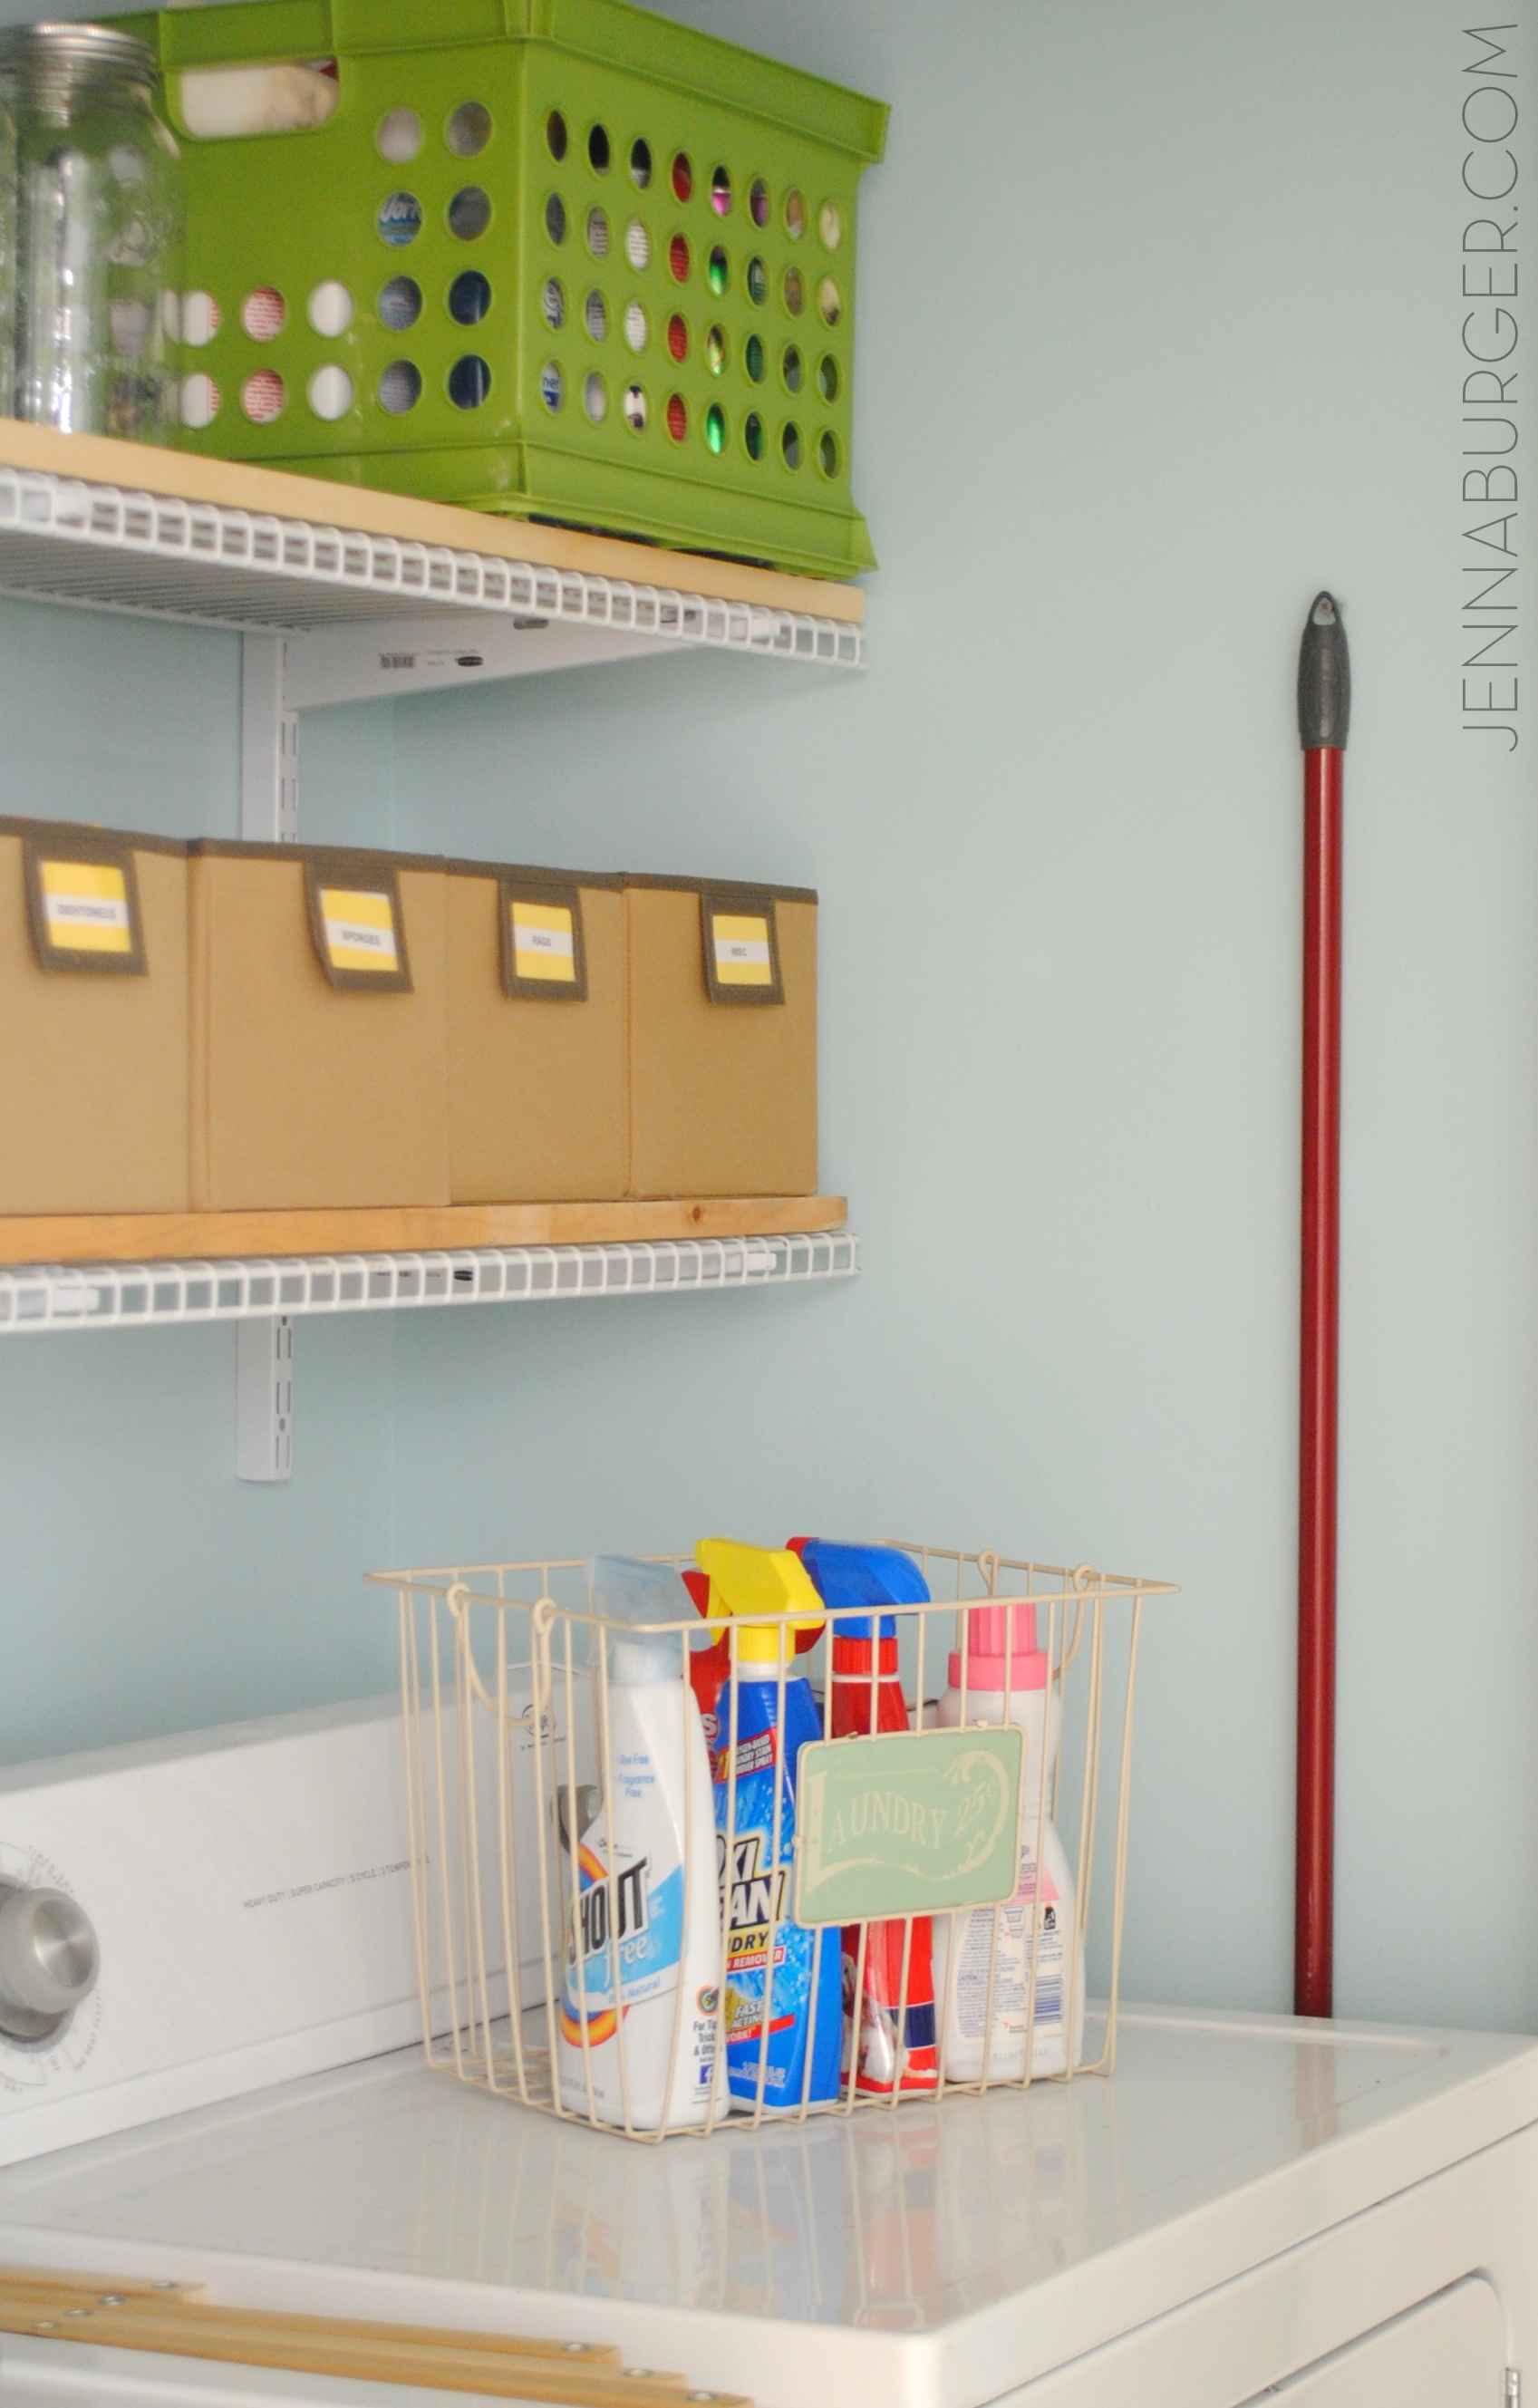
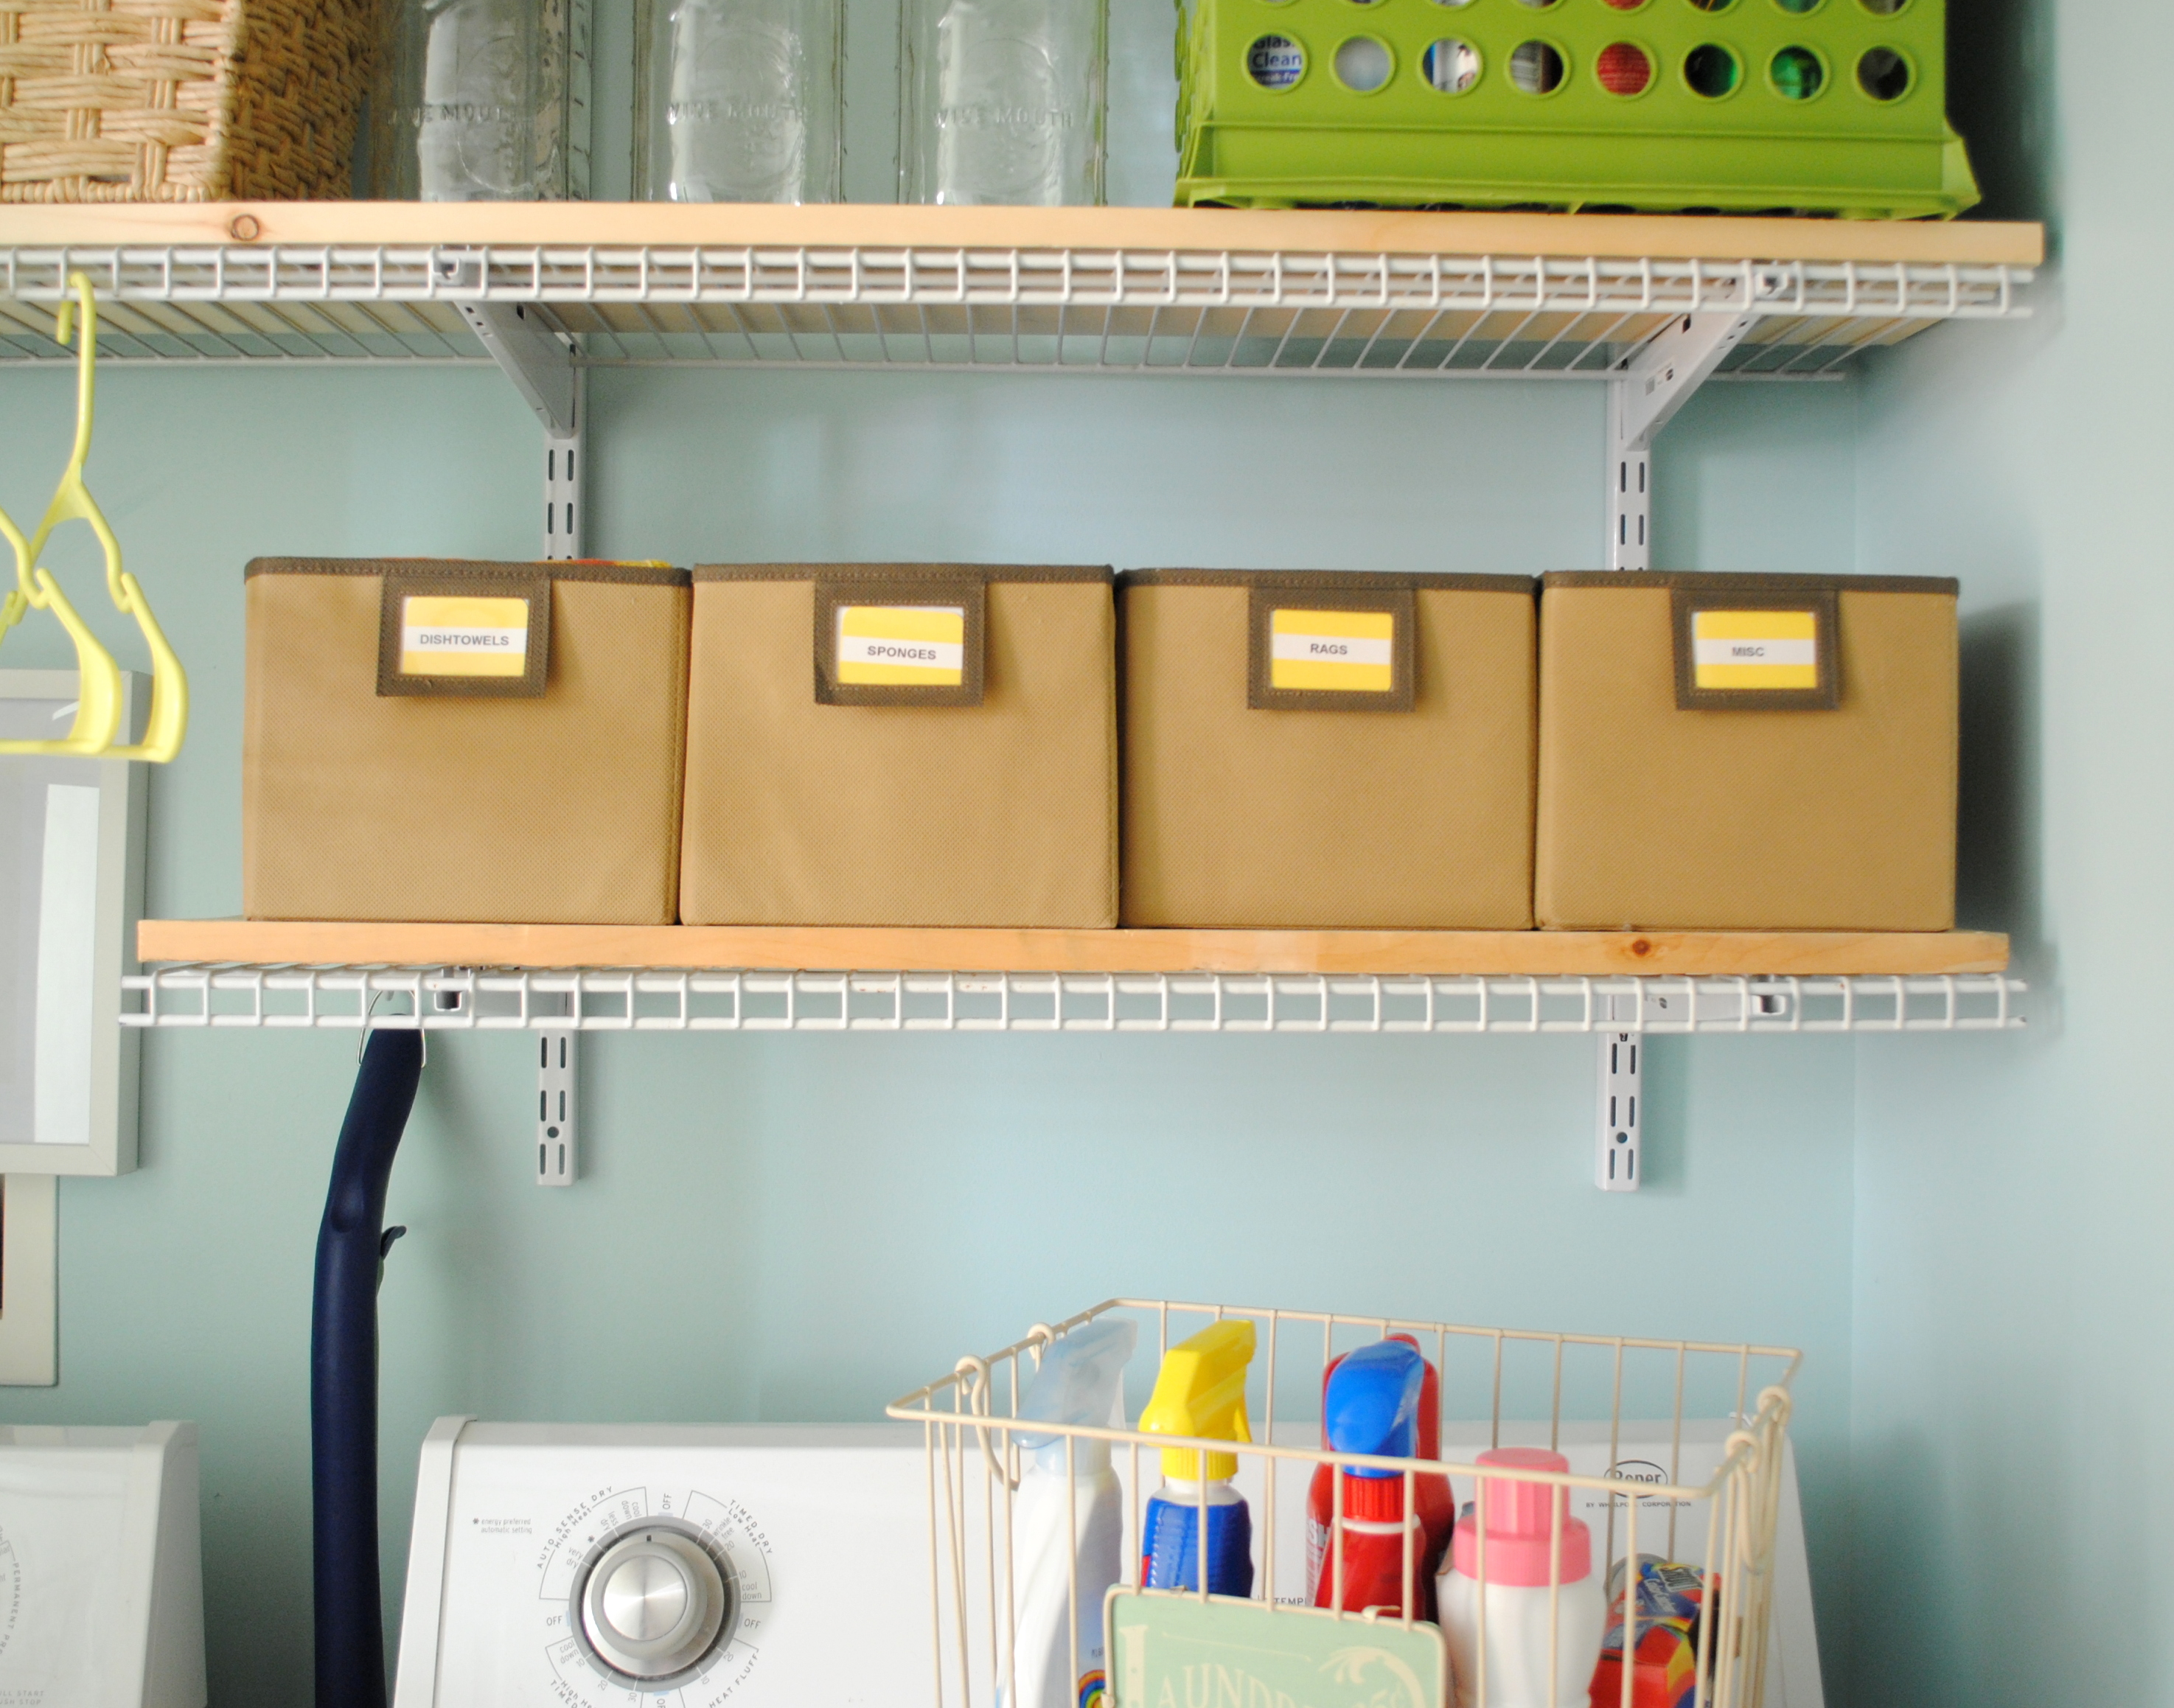
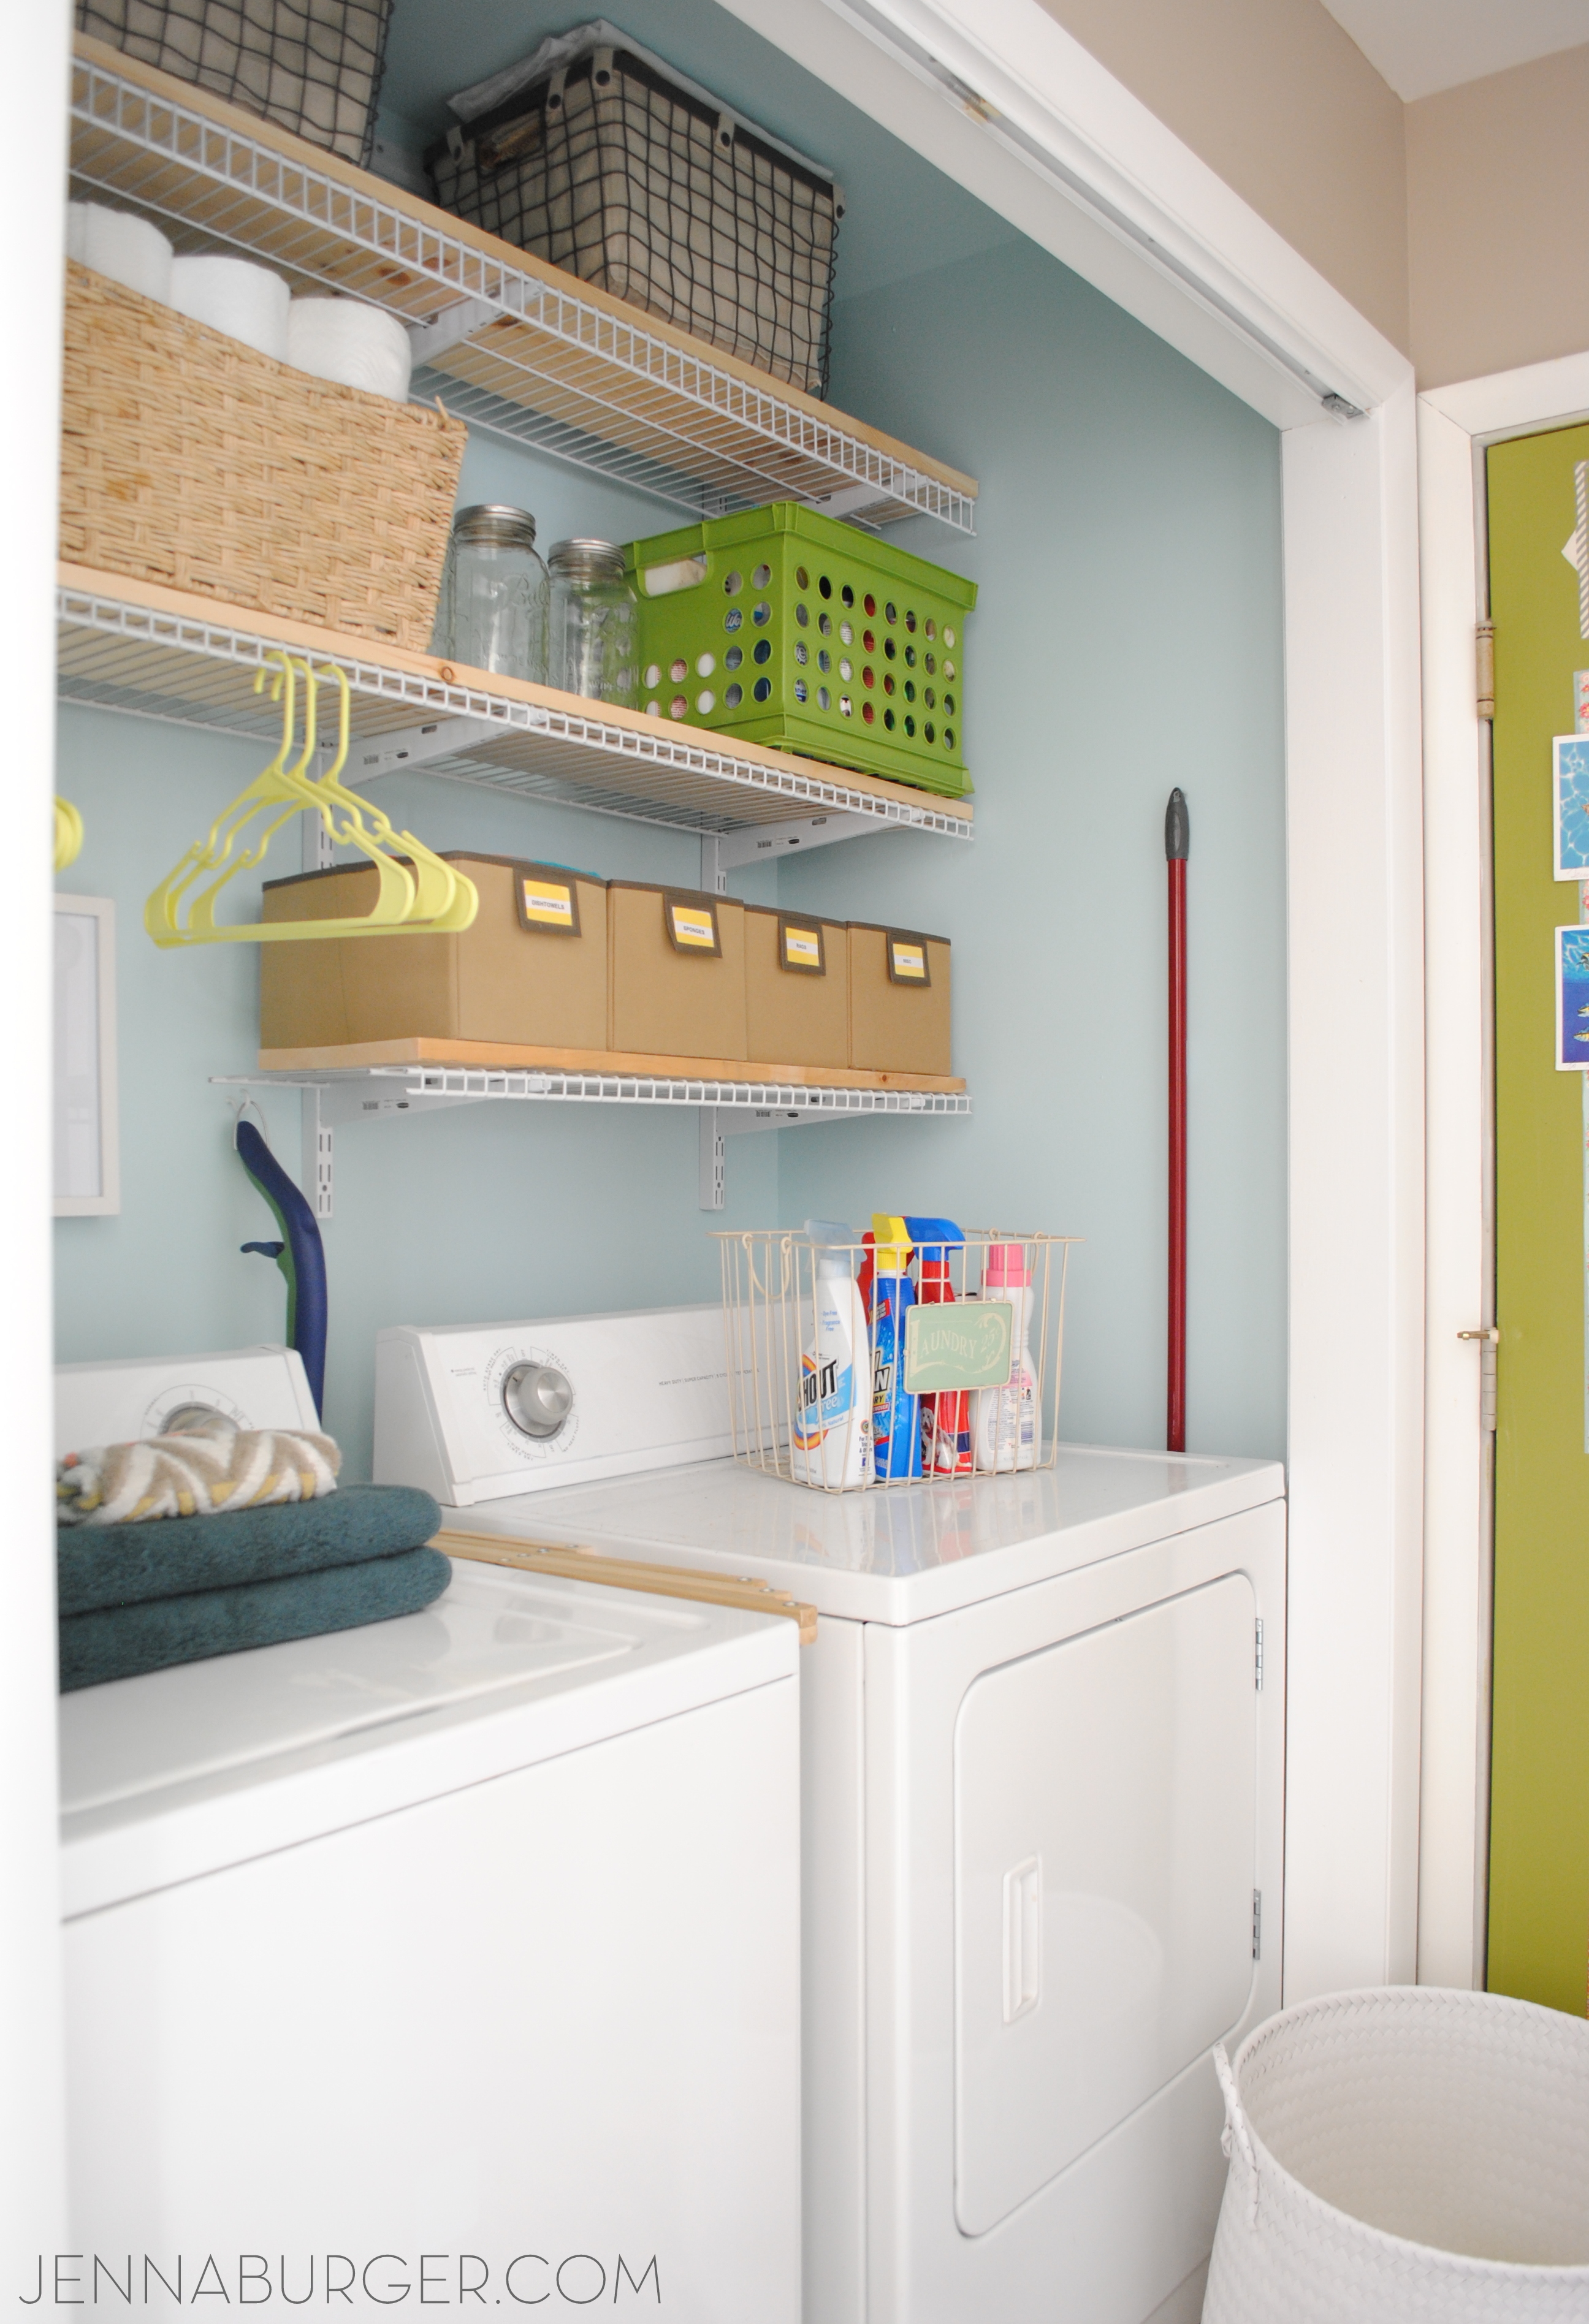
3/ BASKETS + BINS. On those shelves or in those cabinets, organize your items using baskets & bins.  Since revamping my laundry space, having a place for everything has made my life so much easier.  It takes the guesswork out of what goes where.  Use smaller bins for smaller items (dishtowels, sponges, light bulbs, batteries, etc) and larger bins/baskets for larger items (papertowels, napkins, toilet paper, paper goods, etc).

Organizing the bins with labels (i heart my label maker) indicating what is inside has also made my day-to-day more efficient + simpler.  Knowing where items go has taken away the wonderment for the Mister & the kids as well – no more asking “mom, where does this go?” or “hon, do we have rags?”

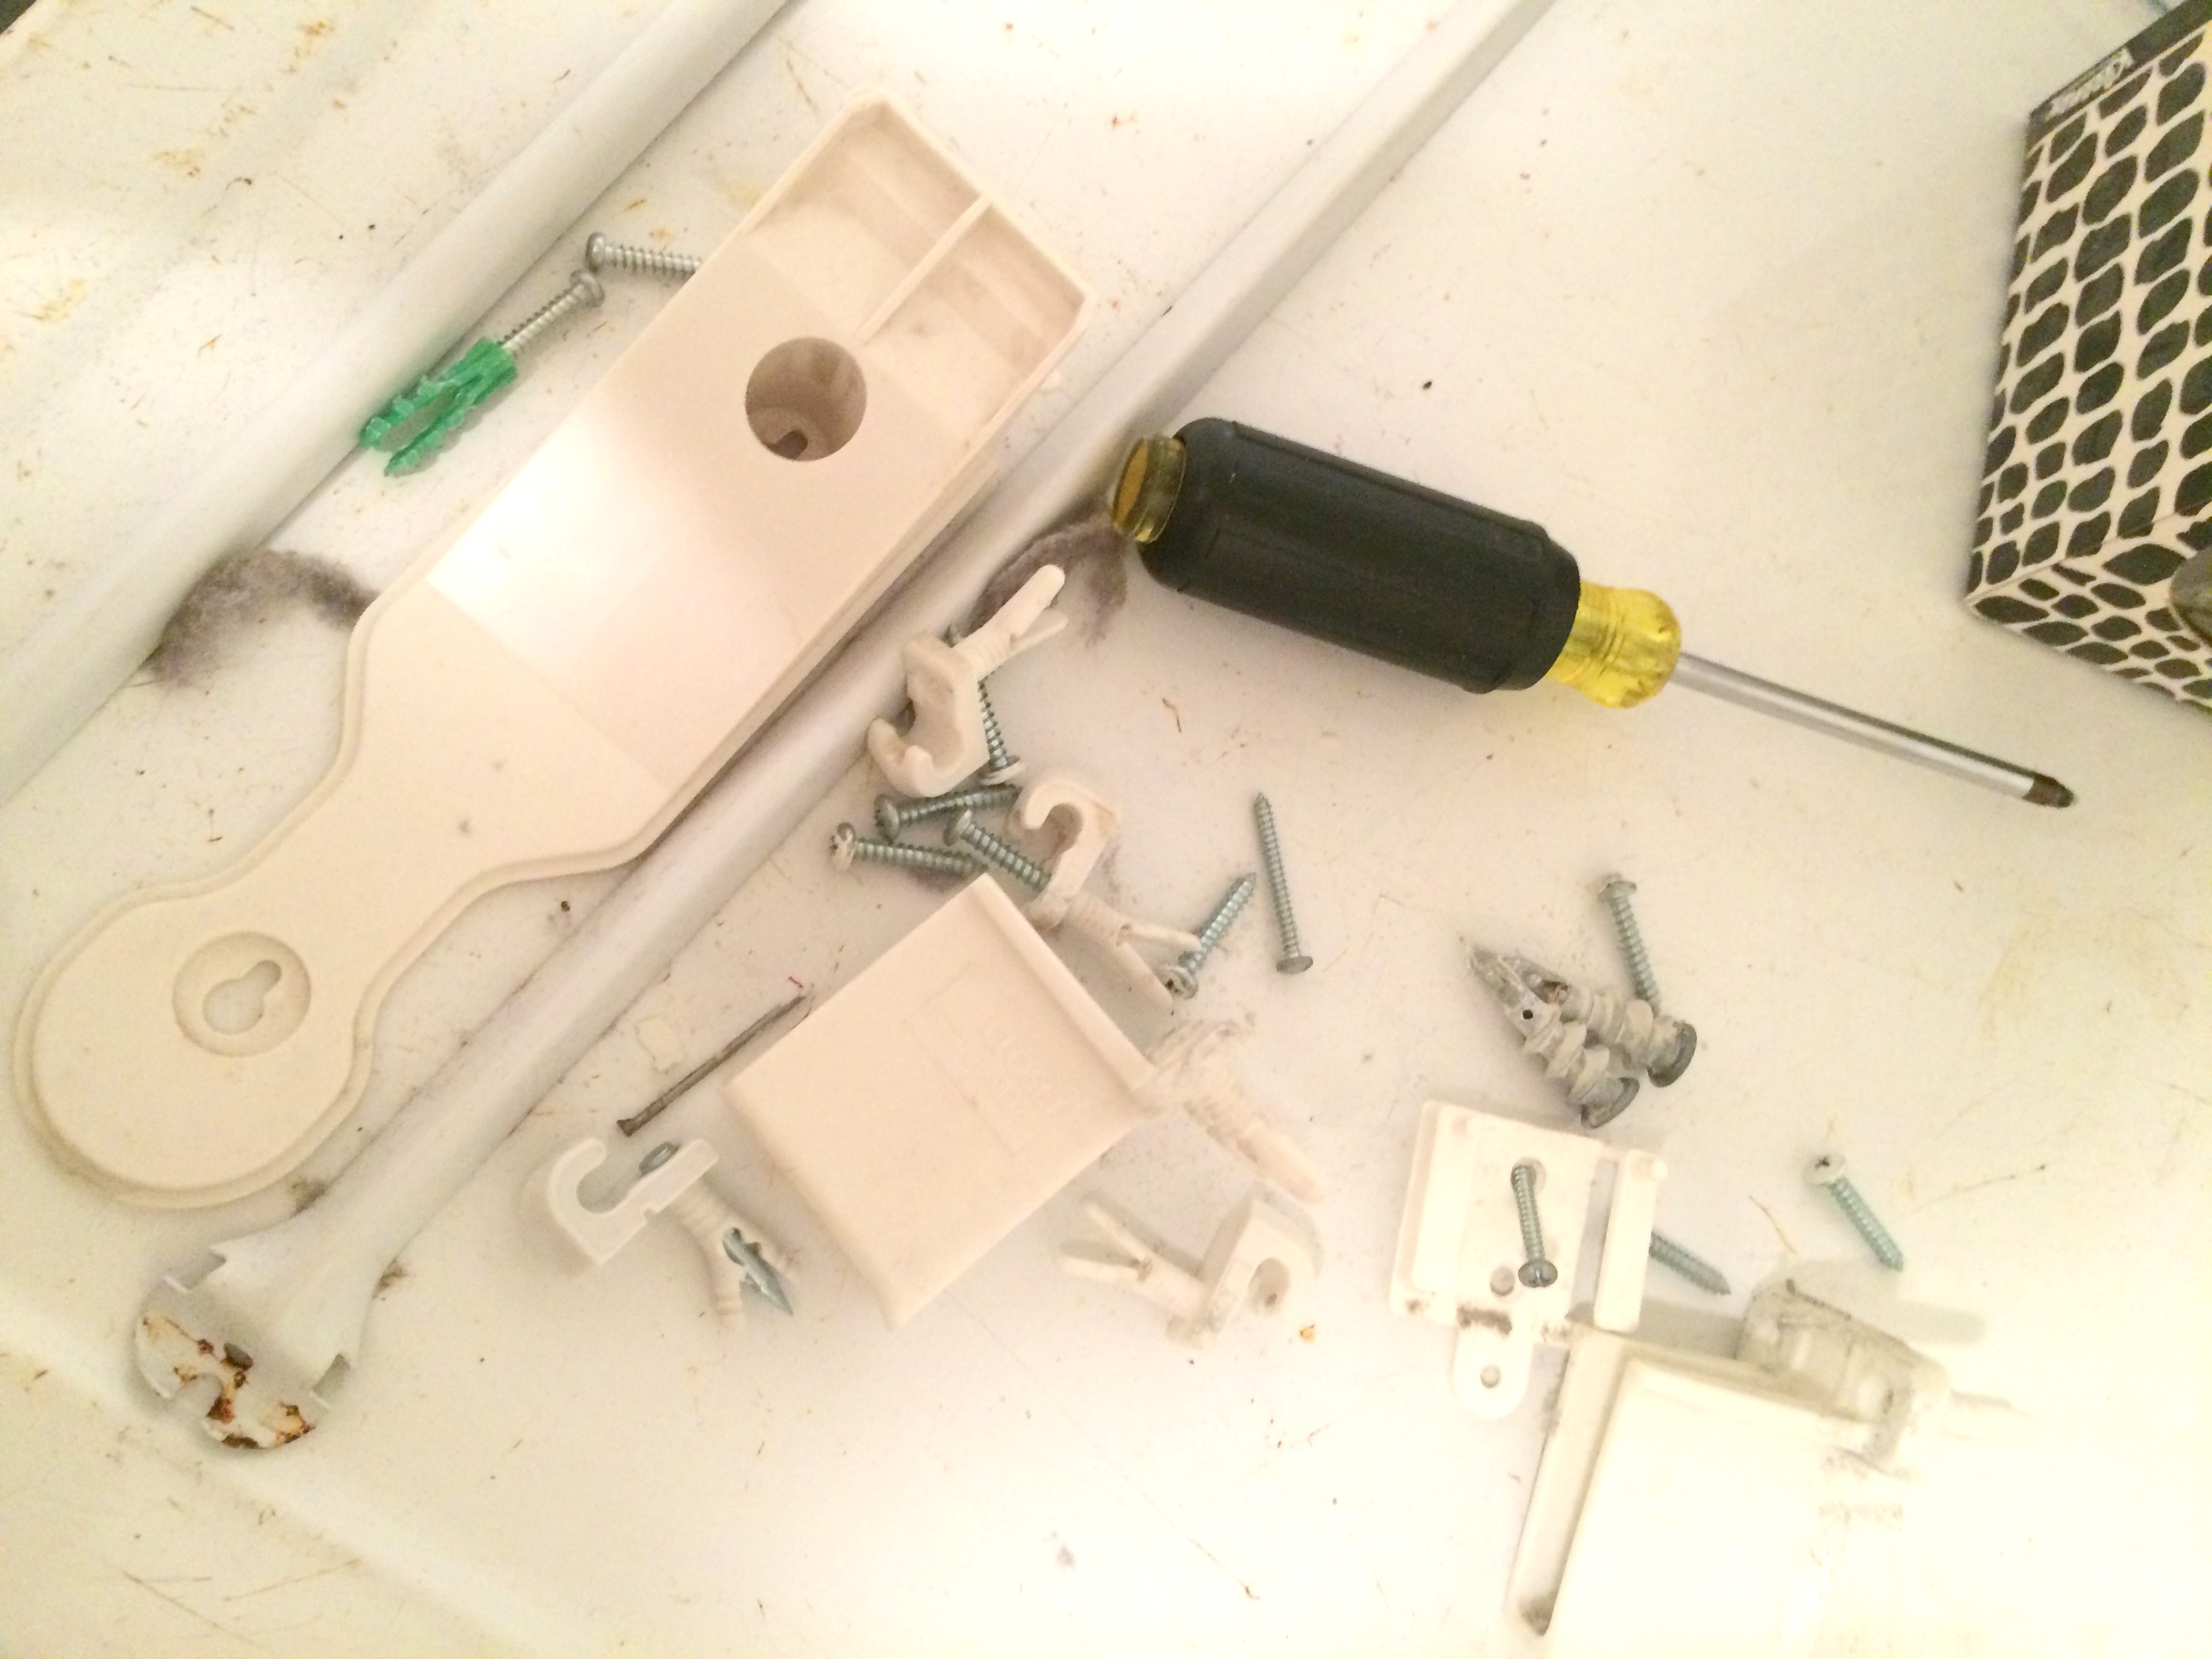
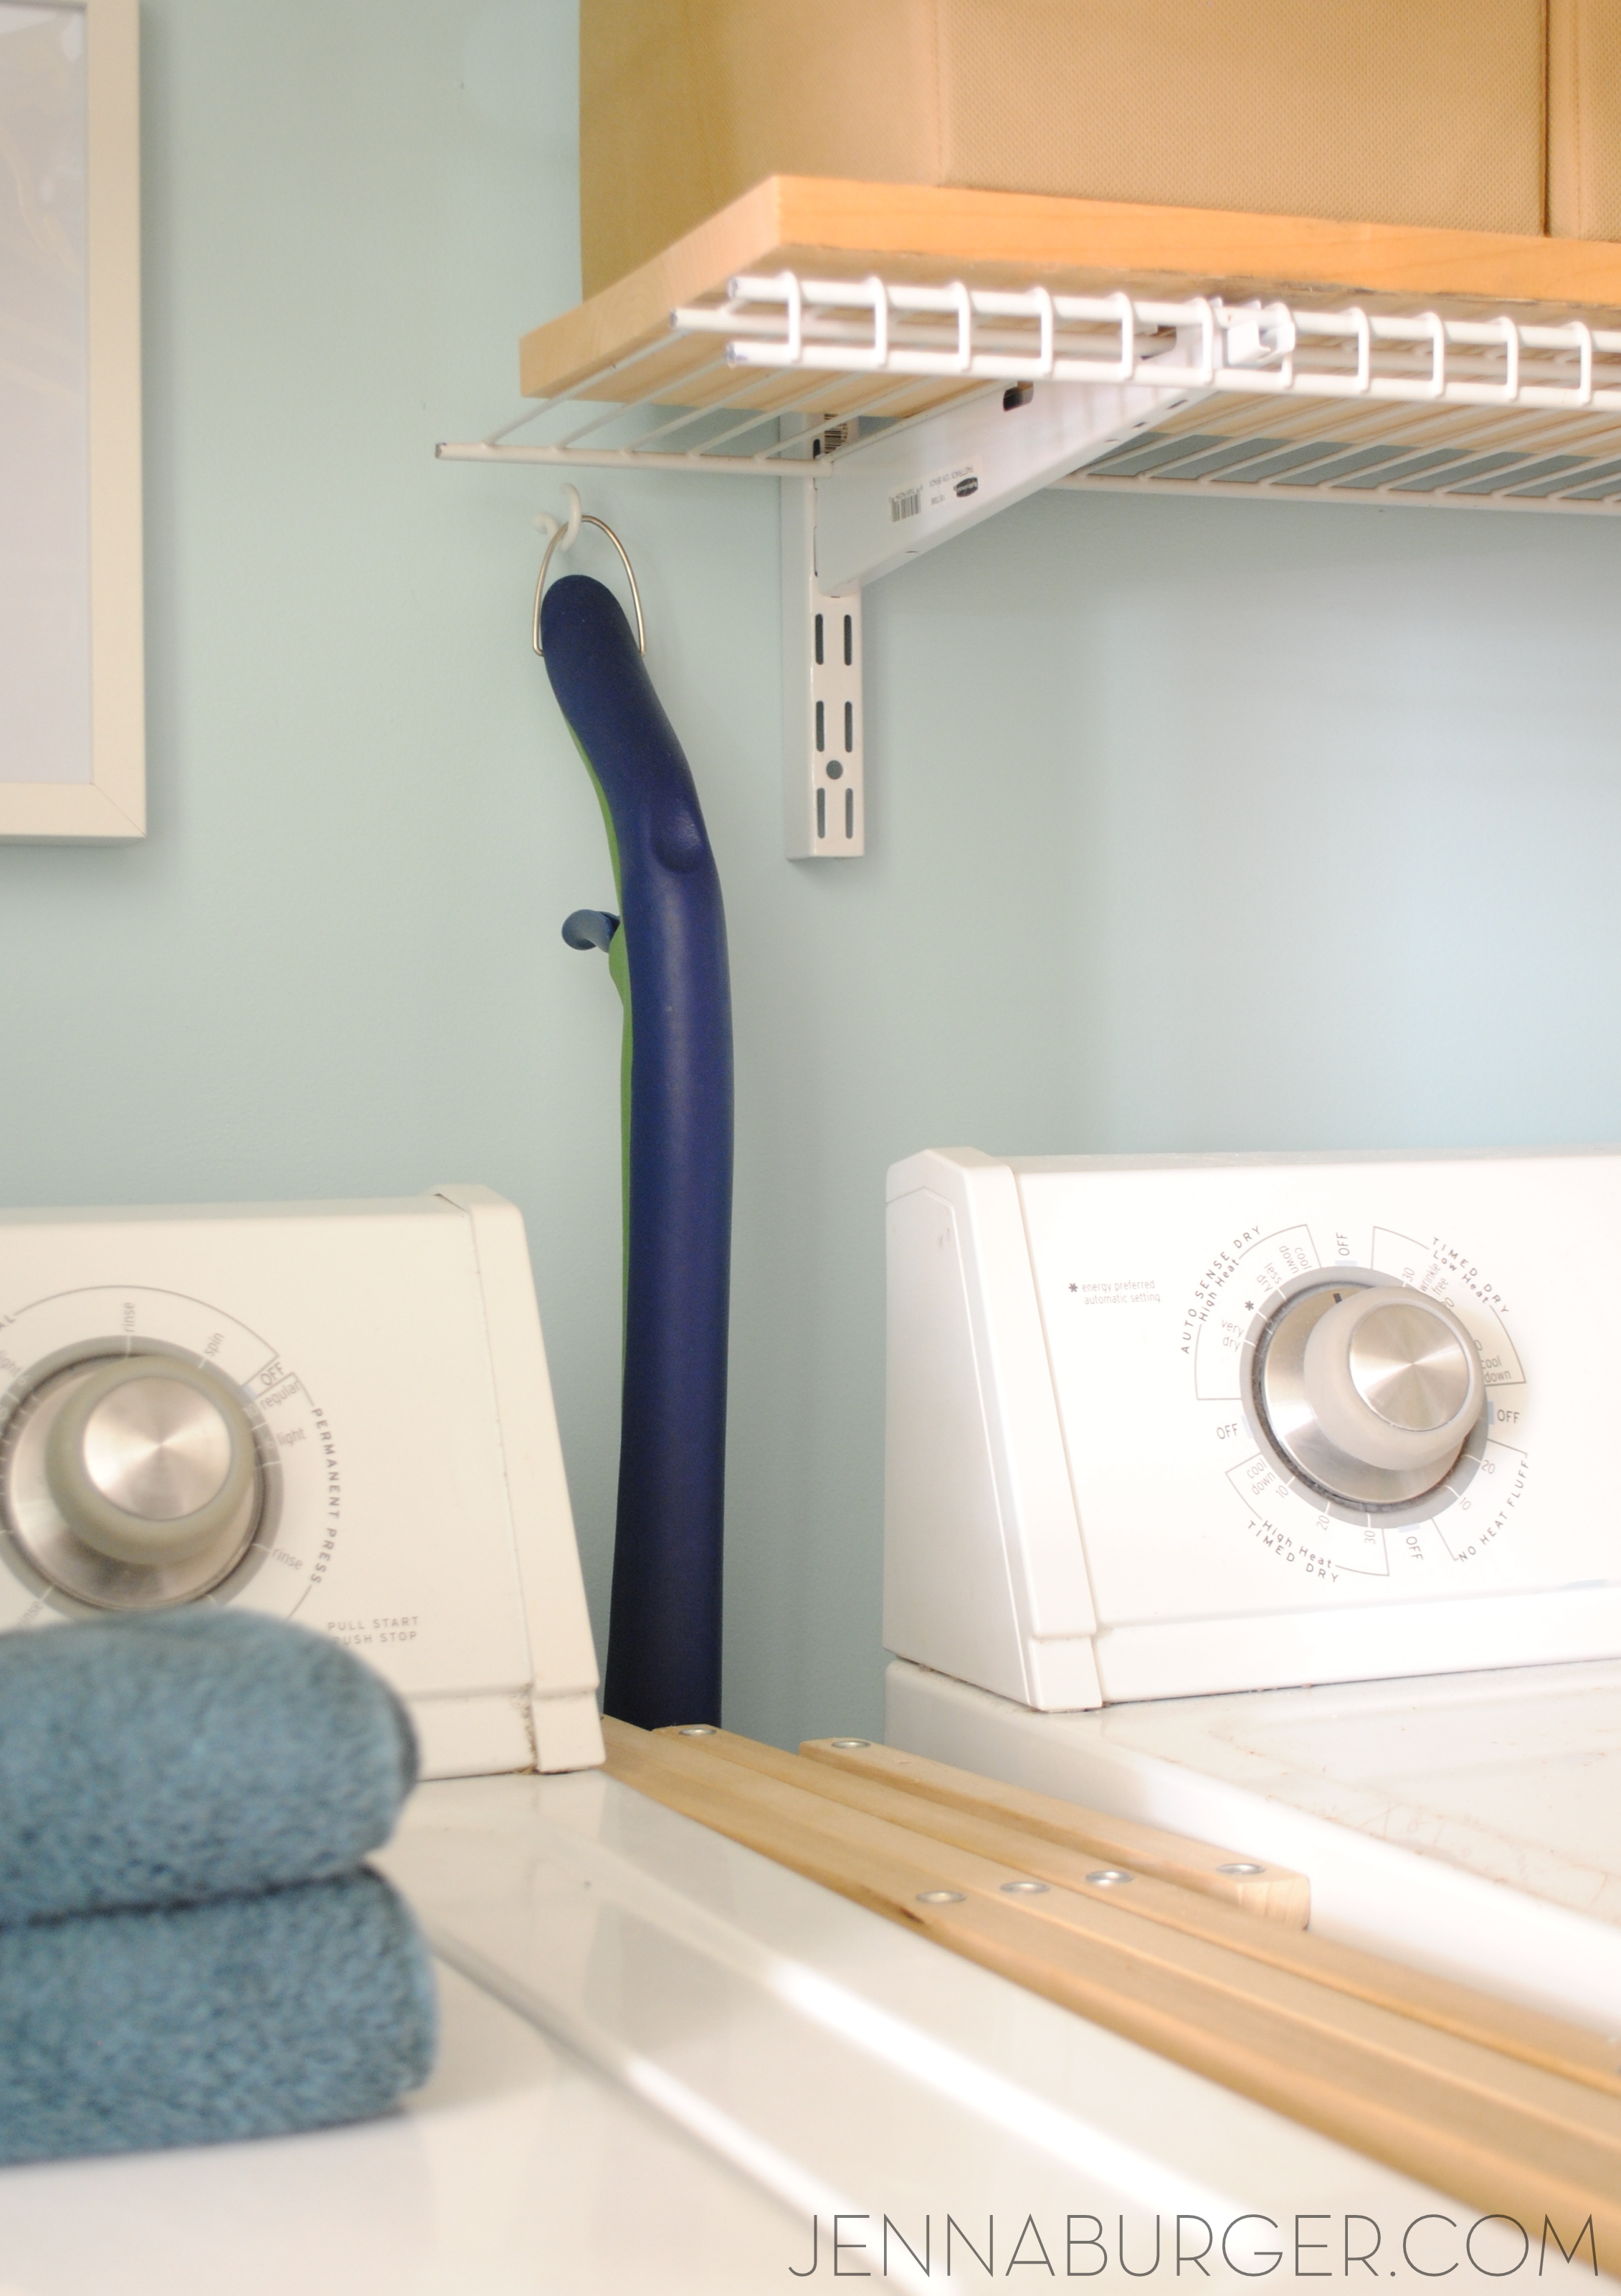
4/ OTHER STORAGE. In a laundry space, there is a need to store items on a shelf, but there is also the slew of other items to stow away like the broom(s), mop, iron, ironing board, etc…  In the “before” laundry, I often would just lean them against the wall and they were ALWAYS in the way.  But with the revamped laundry, I simply added a few hooks to the wall and all of a sudden those cumbersome items have a home.  By using the side walls, that other storage now has a designated ‘spot’ to live.

There are literally gadgets for everything, so find something (or make it) to hang what you need so that something that doesn’t have a place, finally gets one (like the iron that had been sitting on top of my washer for years).  Hooks, screws, holders, etc. are the perfect inexpensive items that will make your life easier and more organized!

5 ways + tips for revamping a laundry room on a budget.  See how I transformed my laundry space in one weekend for $200!

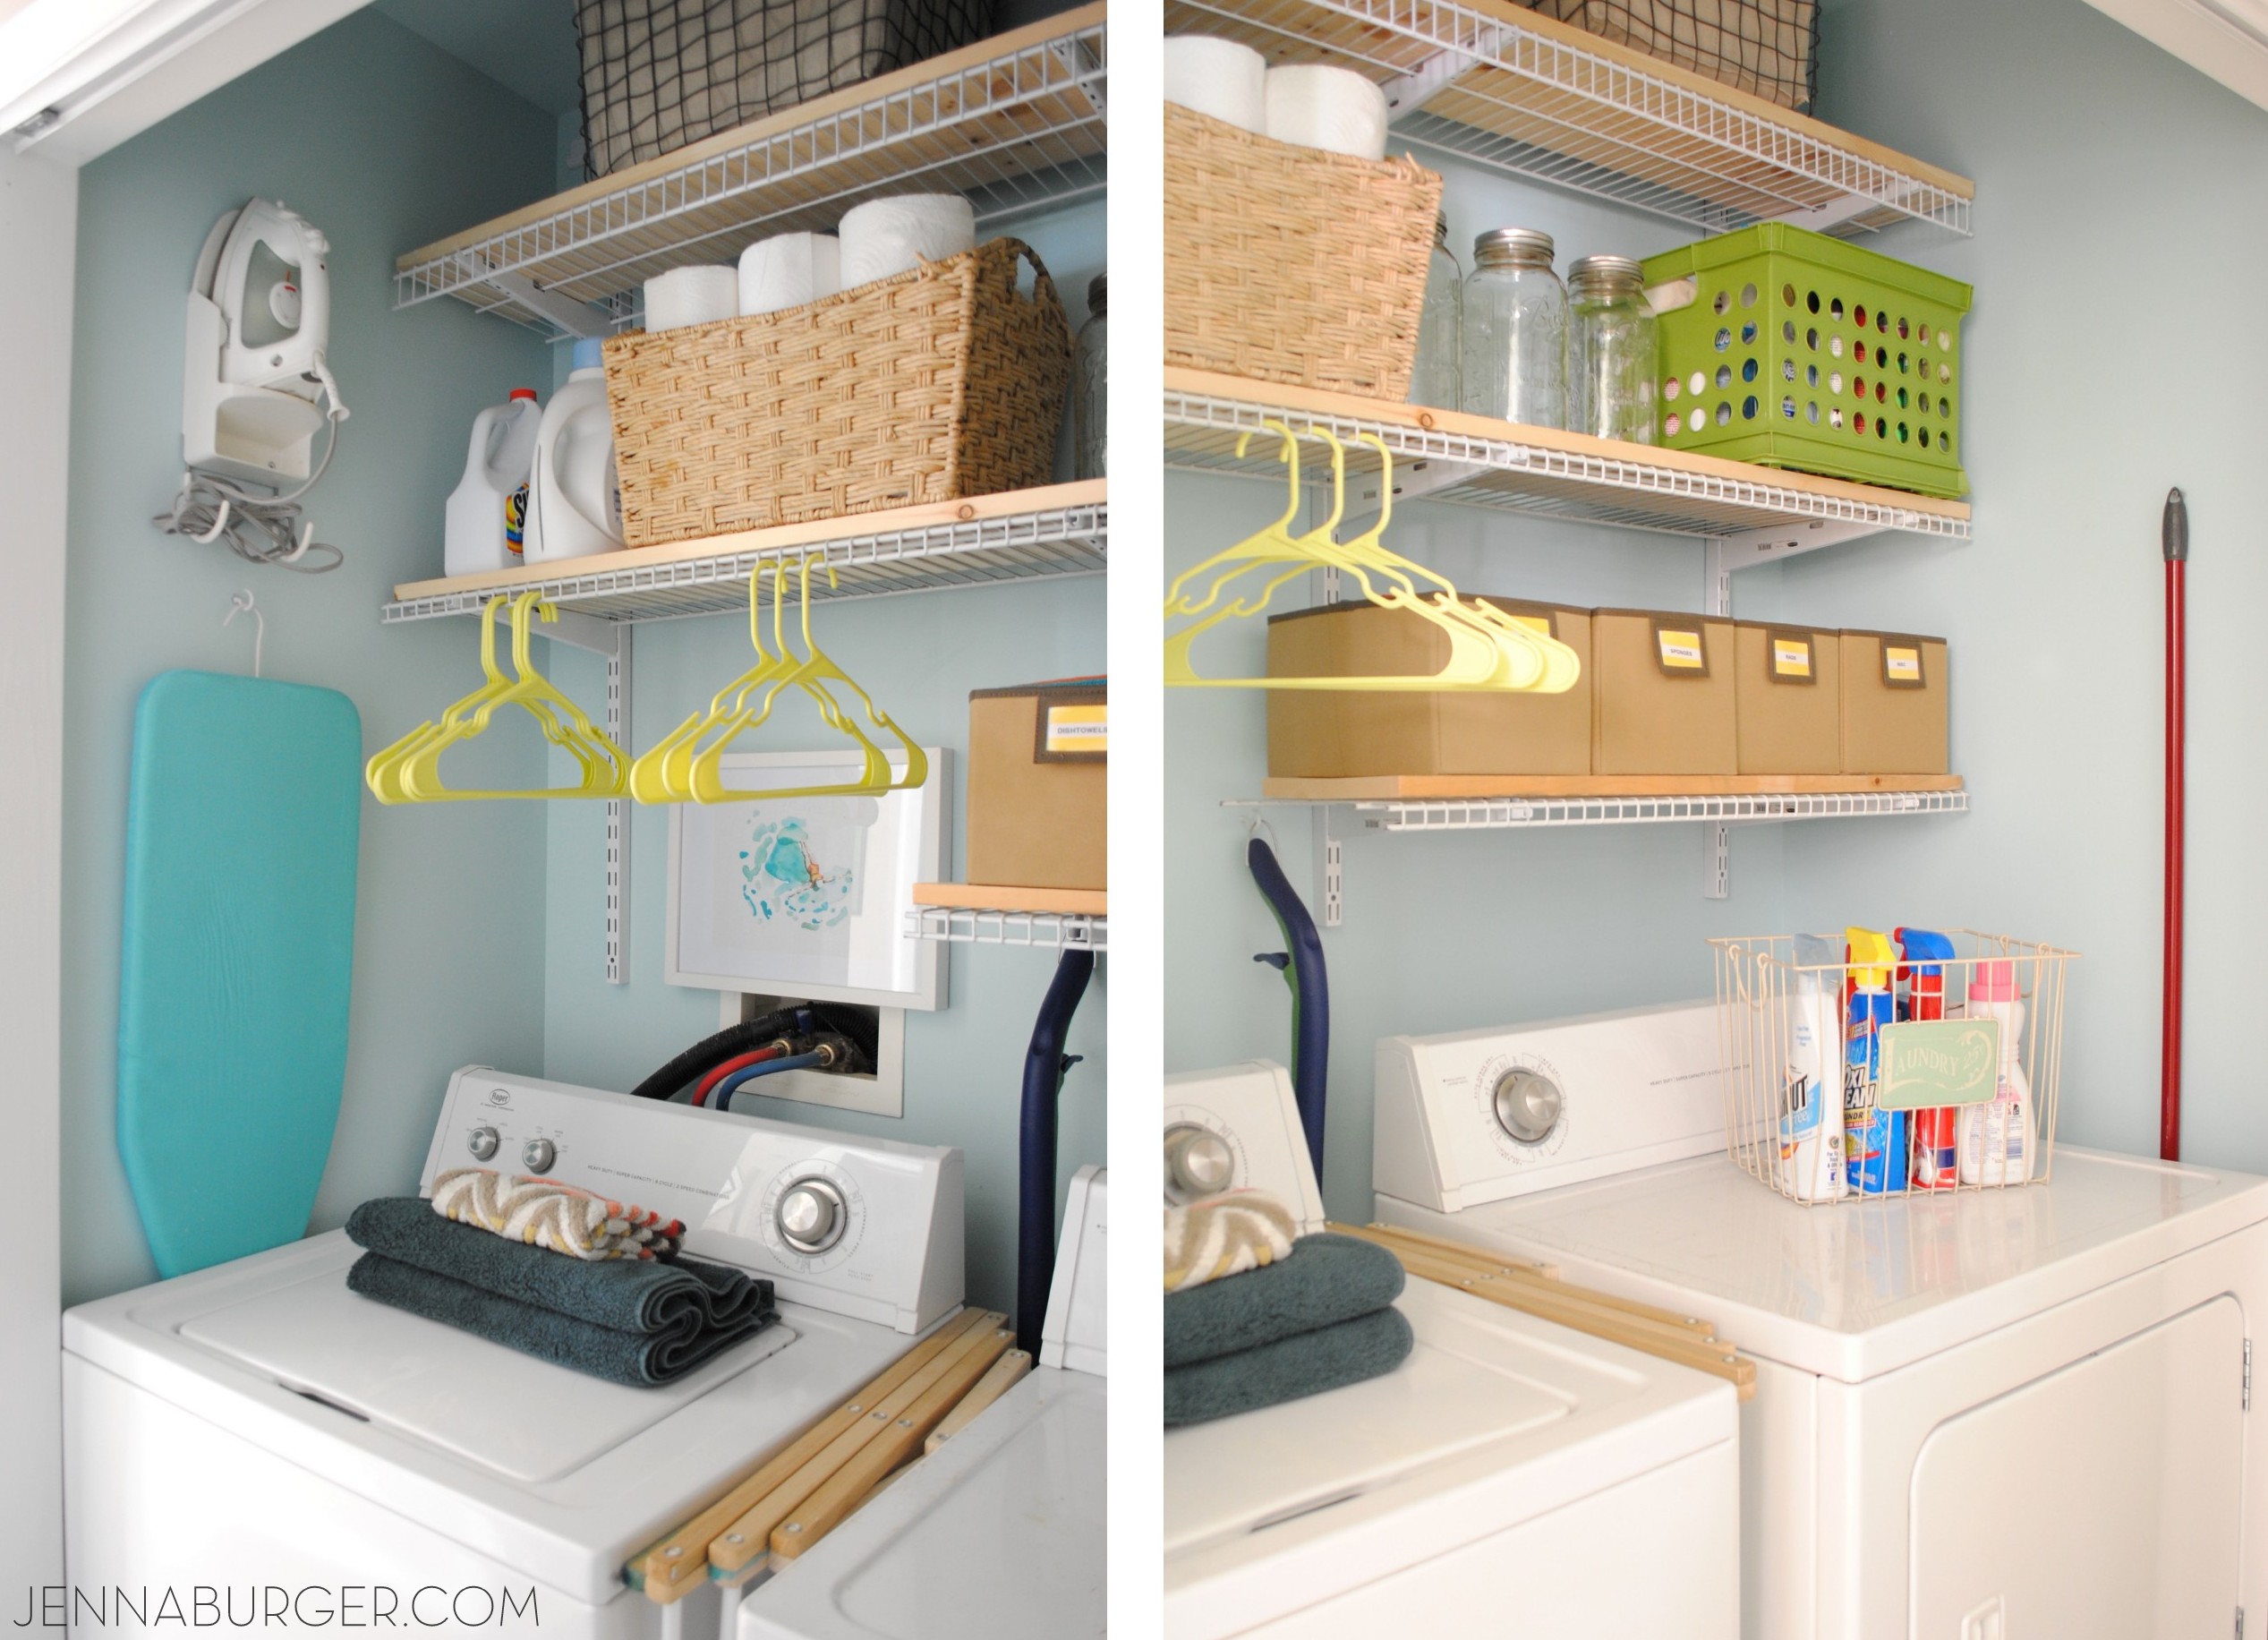
5/ LAYERS. Layers are the best.  Layers are everything.  Layers make ANY space, room, closet COMPLETE… even the laundry area!  From pictures to accessories to colorful hangers, adding meaningful + bright + unexpected layers gives the interest and depth to make a room feel whole.

This post wouldn’t be complete without sharing some more laundry love.

Check out these…

INSPIRATIONAL LAUNDRY SPACES.

Laundry Room Inspiration: 5 Ways to REVAMP  a laundry room on a BUDGET!
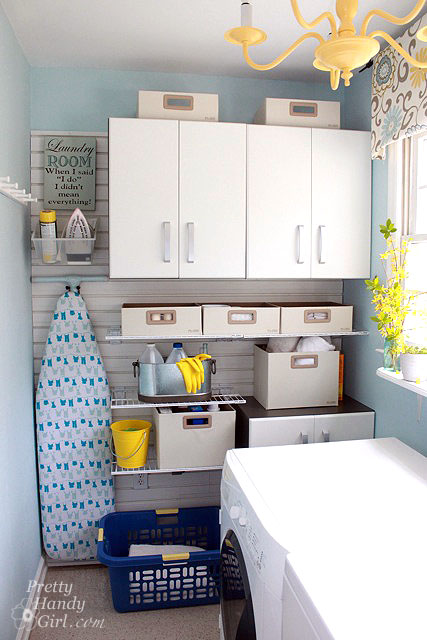
Filled with blues & yellows, Brittany of Pretty Handy Girl created a beautiful laundry room using a wall system that keeps everything organized and in it’s place.

Laundry Room Inspiration: 5 Ways to REVAMP  a laundry room on a BUDGET!You don’t have to love laundry to love your laundry room! And I heart Jen’s laundry room. Even though there is no natural light in this space, it feels airy & bright. I’ll take this space anyday! Check out more of Jen’s laundry room at I Heart Organizing.

Laundry Room Inspiration: 5 Ways to REVAMP  a laundry room on a BUDGET!
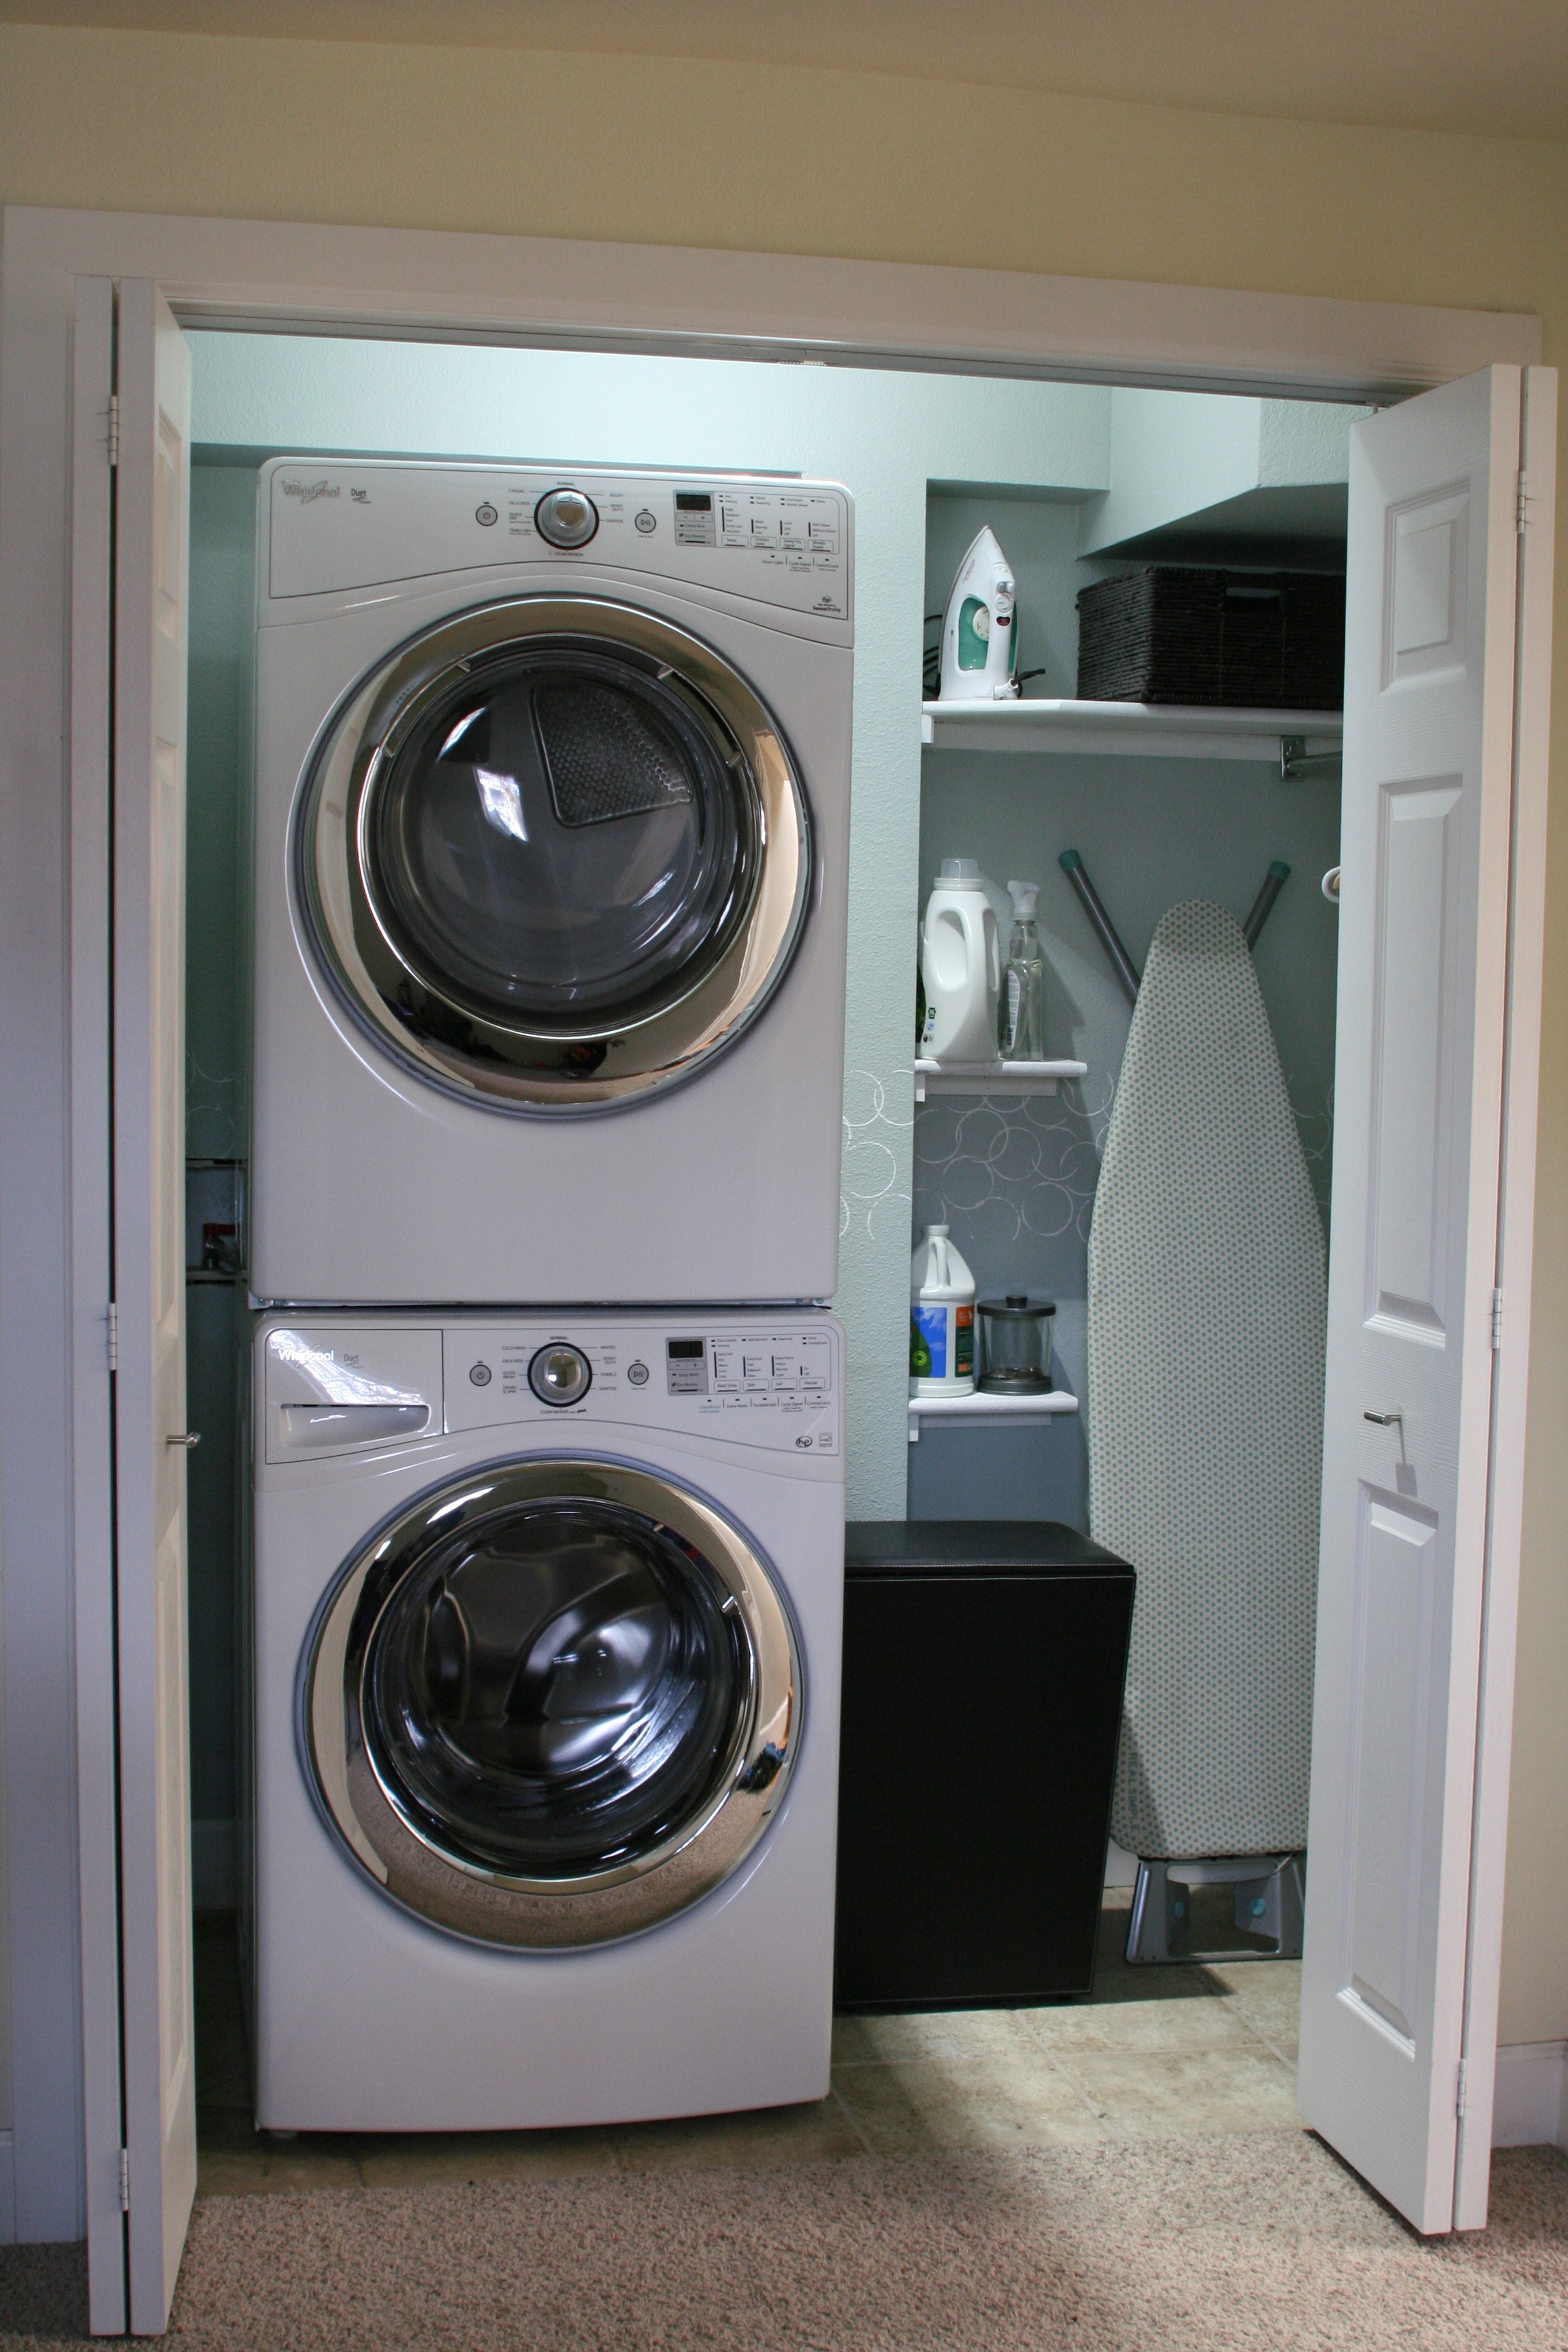
A laundry “closet” similar to mine, but with a stackable washer + dryer. Melinda of Love Melinda created a laundry space that’s packed with shelving + storage! She also added a pretty stencil design which brings a fun, unexpected layer to the space.

Laundry Room Inspiration: 5 Ways to REVAMP  a laundry room on a BUDGET!
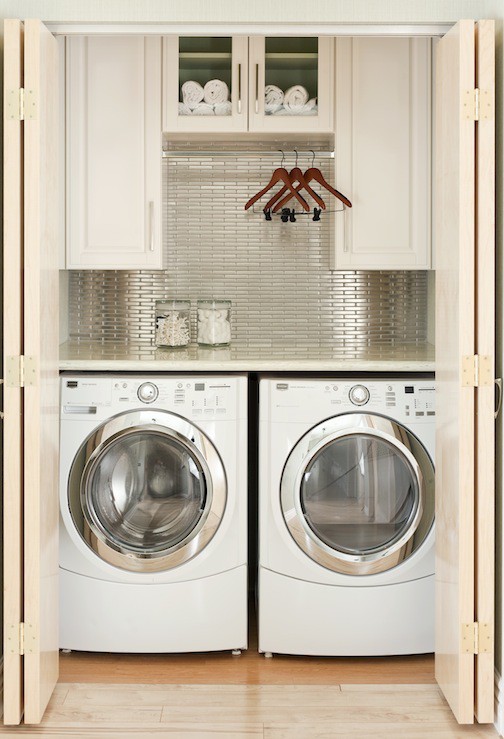
Another laundry “closet” but with side-by-side front loaders. How gorgeous is this “closet”?! Decked out with a solid surface countertop, upper cabinets for storage, and an awesome tiled backsplash, this laundry area is swoon-worthy.

Laundry Room Inspiration: 5 Ways to REVAMP  a laundry room on a BUDGET!

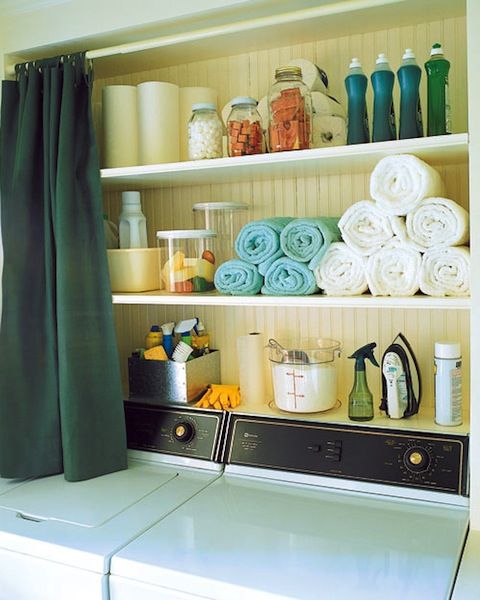
When there is a need to hide the clutter, a little curtain will certainly do the trick! Love this idea by using a tension rod and a simple drapery valance. via Babble

Laundry Room Inspiration: 5 Ways to REVAMP  a laundry room on a BUDGET!
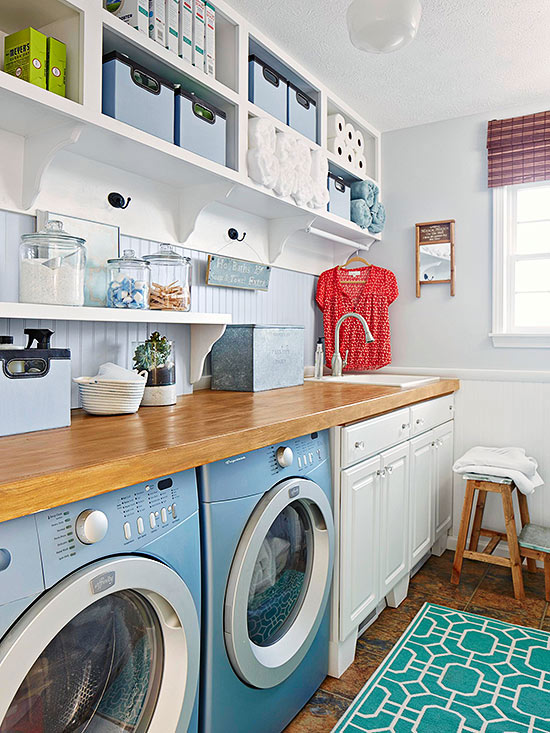
And for those who are blessed with more space than just a teeny closet to call their laundry room, this is beautiful.  From the wood countertop to the blue W & D, to the gorgeous built-ins above, I would never again complain about doing laundry! via BHG

Laundry Room Inspiration: 5 Ways to REVAMP  a laundry room on a BUDGET!
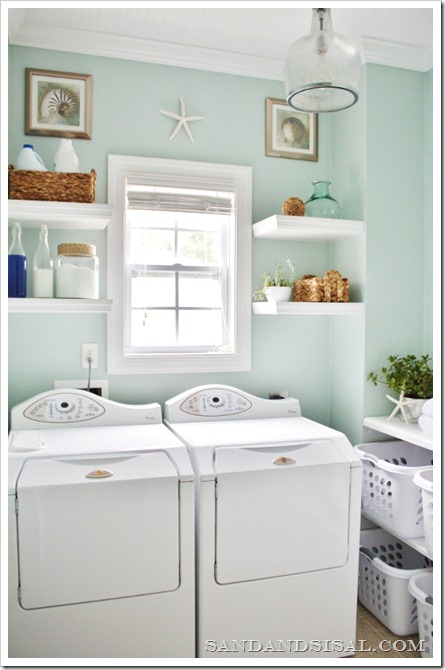
Kim of Sand & Sisal hit it out of the park with her laundry revamp.  How soothing is that blue hue on the walls paired with elements + layers that remind you of the water. Pretty + Functional all tied into one great laundry room!

Laundry Room Inspiration: 5 Ways to REVAMP  a laundry room on a BUDGET!
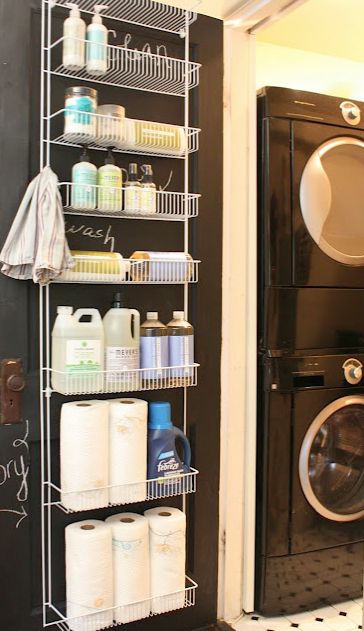
Love this idea by My Sweet Savannah of using an over-the-door wire rack to organize all the laundry items.  What a great idea when there is limited space.

Laundry Room Inspiration: 5 Ways to REVAMP  a laundry room on a BUDGET!
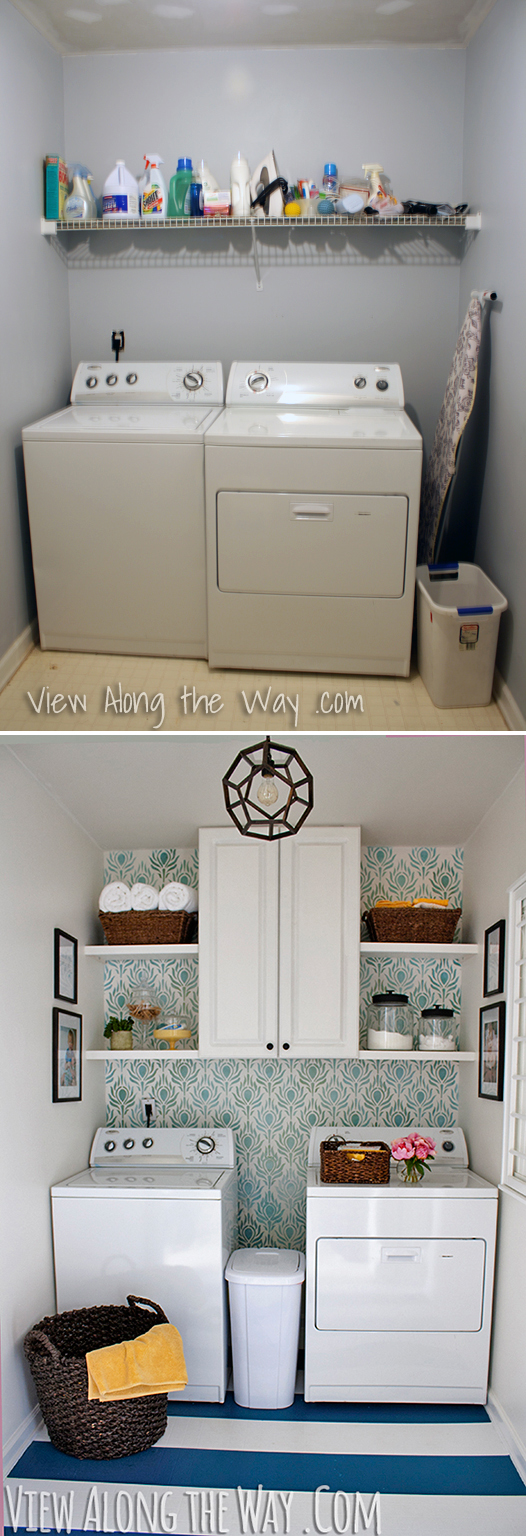
How incredible is this before and after by Kelly of View Along the Way?! Like my laundry revamp, it’s hard to believe that this is the same space. As I said before, ditch the one wire shelf above the W & D and instead use the vertical space of the surrounding walls!  By stenciling the back wall, painting wide stripes on the floor, and adding an upper cabinet + shelves, this laundry room is completely different.

Laundry Room Inspiration: 5 Ways to REVAMP  a laundry room on a BUDGET!
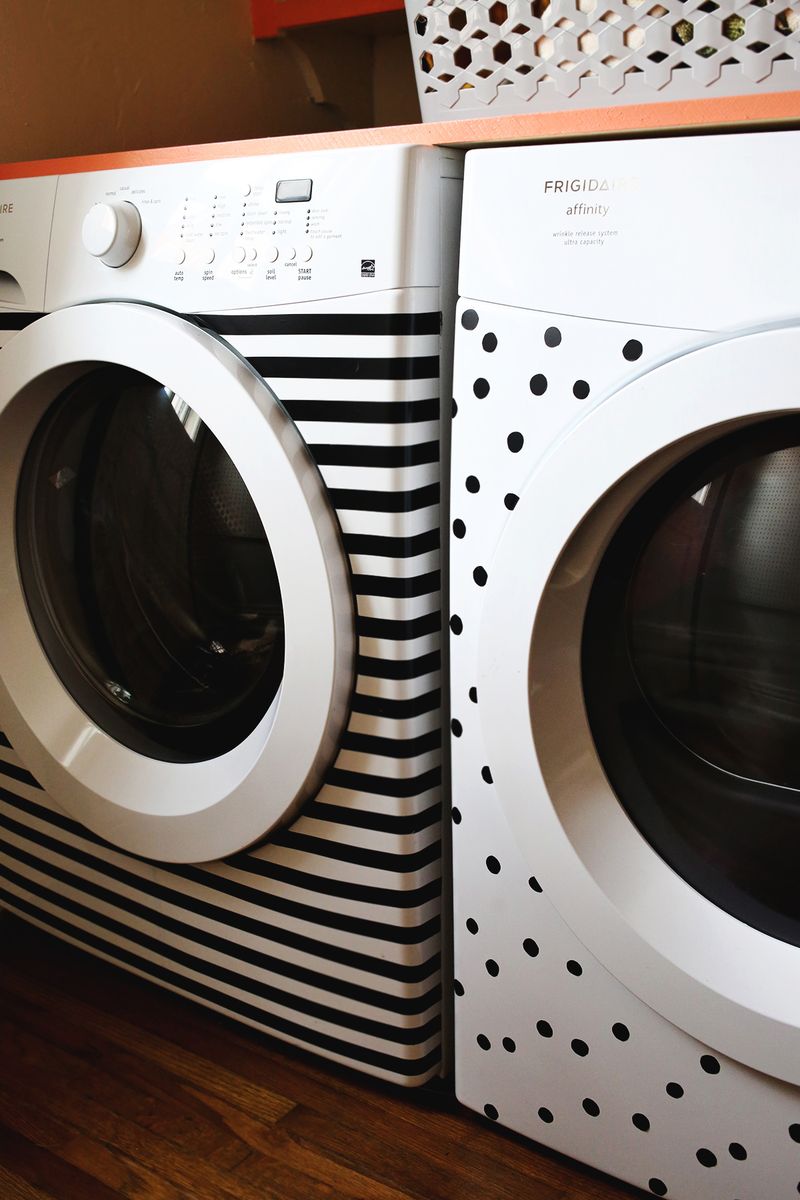
How fun is this?!  Bling out your washer + dryer with some funk by adding decals like these stripes & dots by A Beautiful Mess.

I hope you’ve gathered inspiration to make some updates or totally overhaul your laundry room.  As you can see from my revamp or the other inspirational spaces, you don’t need a huge budget or tons of time.  It’s amazing what can be created with a little effort and outside-of-the-box thinking!

Laundry Room Inspiration: 5 Ways to REVAMP  a laundry room on a BUDGET!

Laundry Room “Closet” {Reveal}

If you didn’t see yesterday’s post, you have to read that first.  This is one of those makeovers where… you have to see the ‘before’ to truly appreciate the ‘after’. 

As I mentioned in yesterday’s post, last weekend was a busy one around the ole’ homestead.  In between activities for the kids + prepping the outdoor gardens for new flowers, we also tackled a revamp to the laundry room (aka the laundry closet because it is just that… a 4′-6″ wide x 2′ deep space).

Our home isn’t huge and the laundry isn’t lavish, but it’s a space that is used A LOT & needs to be as functional as possible.  Sadly over the weeks, months (and probably even years), it’s become a dropping zone for everything from clothes (obviously), tools, paper goods, cleaning supplies, etc.  You name it and it was probably piled high on top of the dryer or on one of the above shelves.  Honestly Embarrassing how messy it was!  The space was REALLY in need of love + attention.

No more chit-chat, here is the result of our weekend DIY Laundry Revamp

LAUNDRY ROOM (closet) REVAMP in one weekend!  New paint, More storage, and Pops of color!  All for about $150.  This laundry "closet" is now 100% functional & pretty on the eyes.  Before & After by Jenna Burger Design, www.jennaburger.com

What a change!

Light. Airy. Functional. Pretty. Organized.

Our laundry area gets a lot of use and with it being right off the foyer, it’s a space that holds more than a typical laundry area.   Not only do we wash + dry + hang clothes in this “closet”,  but it’s also a storage spot for dishtowels, cleaning supplies, rags, napkins + paper towels, tablecloths, paper goods (paper plates, cups, plastic ware), and more.

A view from the foyer…

LAUNDRY ROOM (closet) REVAMP in one weekend!  New paint, More storage, and Pops of color!  All for about $150.  This laundry "closet" is now 100% functional & pretty on the eyes.  Before & After by Jenna Burger Design, www.jennaburger.com[tutorial for how I created a Kids Art Display on our garage entry door]

When revamping this space, I started off by making a list of what was working and what wasn’t (guess which list was longer…).

Then I removed all the existing shelving.

The process of cleaning & prepping for the laundry room revamp

Followed by cleaning the walls (we had a dryer issue a few months ago that left our walls full of lint – it’s since been fixed), spackling the holes, and sanding them.

The process of cleaning & prepping for the laundry room revamp

Once the walls were clean, I was ready to paint (the Mister helped too – gotta give him props for helping me out 😉

The process of cleaning & prepping for the laundry room revamp

After the two coats of paint were applied to the walls, I installed the top rail of the closet system that I got at Lowe’s.  I love these types of closet systems because the installation takes little time (the top rail took about 15 minutes total to install).  Once the top rail was in, I hung the uprights off of it (no install needed) and then attached the shelves.

The process of cleaning & prepping for the laundry room revamp

Once the shelves were on, I added a piece of wood on top that runs the same length as the wire shelf.  With wire shelving there is a gap / small space that sometimes smaller things fall through or don’t stand right straight.  This always frustrated me with this closet, so the wood provides a solid surface for anything I want to store.

LAUNDRY ROOM (closet) REVAMP in one weekend!  New paint, More storage, and Pops of color!  All for about $150.  This laundry "closet" is now 100% functional & pretty on the eyes.  Before & After by Jenna Burger Design, www.jennaburger.com

LAUNDRY ROOM (closet) REVAMP in one weekend!  New paint, More storage, and Pops of color!  All for about $150.  This laundry "closet" is now 100% functional & pretty on the eyes.  Before & After by Jenna Burger Design, www.jennaburger.com

Yes wood shelves could have been installed instead of the wire shelving, but a lot more labor + time would have been needed & there would be no way the shelves could be adjusted in the future (the flexibility to move the wire shelves is another huge bonus).

Once the shelves were in, I filled them right away.  The boxes, bins, and baskets are a mix of new & old.

Items like dishtowels, light bulbs, batteries, sponges, etc. are now stored in the smaller fabric bins on the bottom shelf.  They are easy to grab at any time and I love that everything has a place! This shelf only goes half way across (above the dryer) so there is space for hanging clothes below the middle shelf, above the washer.

LAUNDRY ROOM (closet) REVAMP in one weekend!  New paint, More storage, and Pops of color!  All for about $150.  This laundry "closet" is now 100% functional & pretty on the eyes.  Before & After by Jenna Burger Design, www.jennaburger.com

Adding labels to the bins has taken the guess work out of wondering, what goes where

LAUNDRY ROOM (closet) REVAMP in one weekend!  New paint, More storage, and Pops of color!  All for about $150.  This laundry "closet" is now 100% functional & pretty on the eyes.  Before & After by Jenna Burger Design, www.jennaburger.com

On the middle shelf are the cleaning supplies, a basket filled with extra paper towels & napkins, and the laundry detergents.

On the highest shelf (items I don’t need to access every day) are new wire bins from Lowe’s that are filled with extra paper goods (plates, cups, napkins, etc) & tablecloths / linens.

LAUNDRY ROOM (closet) REVAMP in one weekend!  New paint, More storage, and Pops of color!  All for about $150.  This laundry "closet" is now 100% functional & pretty on the eyes.  Before & After by Jenna Burger Design, www.jennaburger.com

Using every inch of this closet was important, so no wall was left untouched.  On the right wall, I have a new folding ironing board hanging from a hook and above I have the iron in a holder.  This is SO MUCH MORE CONVENIENT than where it was before (both were in the basement – don’t ask me why).

LAUNDRY ROOM (closet) REVAMP in one weekend!  New paint, More storage, and Pops of color!  All for about $150.  This laundry "closet" is now 100% functional & pretty on the eyes.  Before & After by Jenna Burger Design, www.jennaburger.com

On the back wall, I added another hook for the Bona mop (1 of 6 ways I make my home feel instantly clean!) and the space between the washer and dryer, sits the clothing rack.  Lastly, on the right wall is another hook for the broom.  (there is still space above that I am sure will be filled soon).

LAUNDRY ROOM (closet) REVAMP in one weekend!  New paint, More storage, and Pops of color!  All for about $150.  This laundry "closet" is now 100% functional & pretty on the eyes.  Before & After by Jenna Burger Design, www.jennaburger.com

The “pretty” for this space was added in the Float art print (love the colors & the whimsy of the woman floating in the water) that I added to the back wall which kind of hides the ugly plumbing cords, as well as the colorful hangers I snagged from Target.  I love how the citrine color looks with the mint hues.

LAUNDRY ROOM (closet) REVAMP in one weekend!  New paint, More storage, and Pops of color!  All for about $150.  This laundry "closet" is now 100% functional & pretty on the eyes.  Before & After by Jenna Burger Design, www.jennaburger.com

In all, this Laundry Room / Closet revamp was about $200 total.  $30 for the paint (I used a quart) / $80 for the closet components / $20 for the wood / $25 for the wire storage bins / $10 ironing board / $8 iron holder / $5 for the hooks (broom & mop I had).

One bit of information that I forgot to add is that since this space looks so good, I decided to take the doors off.  Honestly, they were open almost all day, every day and ALWAYS getting in the way.  I took the doors off when I painted the trim and the hallway felt so much larger.  Now that the laundry closet is so much more organized, I actually enjoy looking at it (where before, no way!).  Plus keeping the space open for all to see will keep me more accountable to keep the space looking snazzy clean + organized!  FYI, the hardware is still in place if we ever want to put the doors back.

LAUNDRY ROOM (closet) REVAMP in one weekend!  New paint, More storage, and Pops of color!  All for about $150.  This laundry "closet" is now 100% functional & pretty on the eyes.  Before & After by Jenna Burger Design, www.jennaburger.com

It’s really amazing that this space went from this, to this, in just a few hours…

LAUNDRY ROOM (closet) REVAMP in one weekend!  New paint, More storage, and Pops of color!  All for about $150.  This laundry "closet" is now 100% functional & pretty on the eyes.  Before & After by Jenna Burger Design, www.jennaburger.com

DETAILS.

> PAINT: HGTV Sherwin Williams Mint To Be (Lowe’s)

> SHELVING: Rubbermaid closet system – hanging rail, uprights, brackets, 12″ white wire shelves / Wood – 1″ x 12″ x 4′ length

> WIRE BIN (top shelf): Antique Grey Iron Basket (Lowe’s)

> FABRIC BIN WITH LABEL: Closetmaid Fabric Bin (Target)

> IRONING BOARD: Countertop Ironing Board (Target)

> IRON HOLDER: Plastic Iron & Board Holder (Amazon)

> ART: Float art print (Minted)

> HANGERS: Room Essentials 18 pack hangers, yellow (Target)

And there you have it.  It’s amazing what a bit of paint + a little TLC can do.  Small changes + Little Money can really make a BIG IMPACT!

I’m off to do some more laundry…

THIS IS A SPONSORED POST BY LOWE’S.   I REACHED OUT TO THEM ABOUT THIS PROJECT AND THEY CHOSE TO WORK WITH ME ON THIS LAUNDRY REVAMP. I HAVE BEEN PROVIDED WITH PRODUCT FOR THIS PROJECT, BUT AS ALWAYS I WAS NOT TOLD WHAT TO BUY OR WHAT TO WRITE.

A Not-So-Lavish Laundry Room

This past weekend was a busy one at the ole’ homestead!  From exterior work on the garden to shuffling kids to various sports activities, it was non-stop.  And when we did have a few minutes of “down time”, we started a new project inside…

It’s a horrid-looking space that has been a catch-all for stuff for way too long.  Well I should say, was a catch-all because in just a few hours this space I am referring to got a complete new revamp and I am over-the-hill happy!  What space am I referring to?

THE LAUNDRY!

Honestly, I use the word ‘space’ because it’s not at all a room… I wish!  Our laundry area is essentially a closet. A small closet.  A small closet that holds a lot and until now was completely disorganized + a complete MESS.

I dread sharing this, but here WAS (that’s an important word, WAS) the before…

A not-so-lavish laundry room: The Before

Gutsy, huh?!  Yup, no holding back here. My goodness, I can’t believe I just shared that picture.  And you thought all the spaces in my home were beautiful at all times… NOT!

This laundry closet (it’s literally a closet that is 4′-6″ wide) is just off the foyer.  Across from it is the coat closet / pantry and the hallway leads to the garage.  It’s a tight space that is used a lot, and needed a revamp to be as efficient as possible.  It’s something that has been on my radar for a while and I knew with some TLC, it would shine up like a pretty penny (and it sure did – more on that in a moment).

WHAT THIS LAUNDRY SPACE NEEDED.

> More Storage (big & small) for dishtowels, cleaning supplies, rags, napkins + paper towels, tablecloths, paper goods (paper plates, cups, plastic ware)

> Wall Storage for holding the iron, ironing board, broom, mop

> New Shelving

> New Paint on the walls + trim

> Layers: Pops of color + pictures (to make it pretty)

THE PLAN OF ACTION.

Before tackling this space, I made some quick notes on what was working (not much) + what wasn’t (a lot) + what I needed to store on the new shelves that I planned on installing.

After that, I created a quick creative vision board to help me stay on track for how to best tackle the aesthetics for this laundry revamp…

REVAMPED LAUNDRY ROOM: plan of action for this not-so-lavish laundry room

More specifically, this is what each element in the new space will be used for…

REVAMPED LAUNDRY ROOM: plan of action for this not-so-lavish laundry room

And here’s how it played out in a brief timeline…

FRIDAY AFTERNOON: Removed the existing shelving that was falling apart / Cleaned walls of dust build-up / Patched the 92 holes in the wall

EARLY SATURDAY MORNING: Sanded the walls (the orbital sander took a lot less time than hand sanding – there were a lot of holes!) / Applied the first coat of new paint (love the color!)

SATURDAY AFTERNOON: Applied coat #2 of the paint (and done – YAY)

EARLY SUNDAY MORNING: Installed the top rail for the shelving unit / Installed the shelves (one shelf was wrong so the Mister headed back to Lowe’s for trip #2) / Started organizing

SUNDAY NIGHT: Finished organizing the shelves with some old + some new baskets & bins

* this makeover certainly could have been tackled in one day, but with our hectic lives, nothing ever gets accomplished that quickly.

A few sneak peek progress pictures…

REVAMPED LAUNDRY ROOM: progress images for this not-so-lavish laundry room

For a gal that dreads laundry day (which seems like every day of the week with my clan of 5), I have to admit that for the last 2 days, it hasn’t been so bad.  I am LOVING my newly revamped laundry ‘closet’ and even though it still isn’t so lavish it certainly is 1,000,000 times better than it was.

The AFTER coming tomorrow.  Brace Yourself!