
Tag: do it yourself project

DIY: Wood Shelves + Brackets

Two blog posts and it’s still January… impressive. One of my goals / hopes for the year is to share and showcase more of our brick ranch fixer upper projects + in-progress and completed client projects… there’s always so much to show you!

Onto today’s DIY… I shared a picture on instagram the other day of the finished living room. The space has been complete (well nothing is ever done as I’m always moving, adding, or removing little details) for about 6 months and earlier last year, I finally decided what to do with the nook to the right of the fireplace.

We needed more shelf space to display books and accessories, so shelves were the ideal solution for the setback wall space. I originally envisioned floating wood shelves, but I was worried about the length of the shelf and the potential of them bowing + floating shelves seemed very involved to build, so I decided on using shelves with simple brackets.

Here’s the before…

1 / To start, I removed everything in the space. Then I figured out the number of shelves + the heights. 1

> I wanted the one shelf to align with the top of the fireplace mantel, so I determined the shelf heights starting from that point.

2 / BRACKETS – Using a measuring tape, I determined the bracket locations and made marks for the screws. Then with a drill, I installed toggle anchors and screwed the brackets in to the wall.

This is closeup of the finished brackets (I used regular screws and still have to paint the screw paints black).

3 / SHELVES – For the shelves, I chose 2×12 – I like the thicker look of the shelf.

When I purchased the wood at Lowes, I had them cut the boards to the desired length (about 1/2″ less than the exact wall length so there was some wiggle room to install the shelves in place).

4 / STAIN – For the stain, I used special walnut, which is the perfect medium brown. I poured a small amount on the wood shelf and spread it out using a cloth. I covered the entire board (all sides) with the stain. In about 10 minutes all 4 boards were stained. The process is really easy.

This is a closeup of the finished shelf in place…

5 / INSTALL – With the brackets in place and the shelves stained, the project was almost complete. The last step was to set the shelves in place. The shelves were set on to the brackets and screwed in place to the underside of the wood.

Done! This project – start to finish – took about one hour and was fairly easy to execute. The important part is to ensure the proper anchors + screws are used so the brackets are secure!

This is the finished result…

Definitely a big change from when we moved in and the space looked like this…

And now to this…

Next up is sharing pictures of the entire finished room… Maybe another post for January?!?

DIY: Wood Honeycomb Shelves

Even though we veered away from the original design for the revamped shared kids space, my son had his heart set on honeycomb shelves after I showed him the Land of Nod style.  And since this mama can’t let her boy down, I had to pull through.

But instead of buying, what did I do?  DIYed them, of course.  After a little research & this post by A Beautiful Mess, I was confident to move forward.

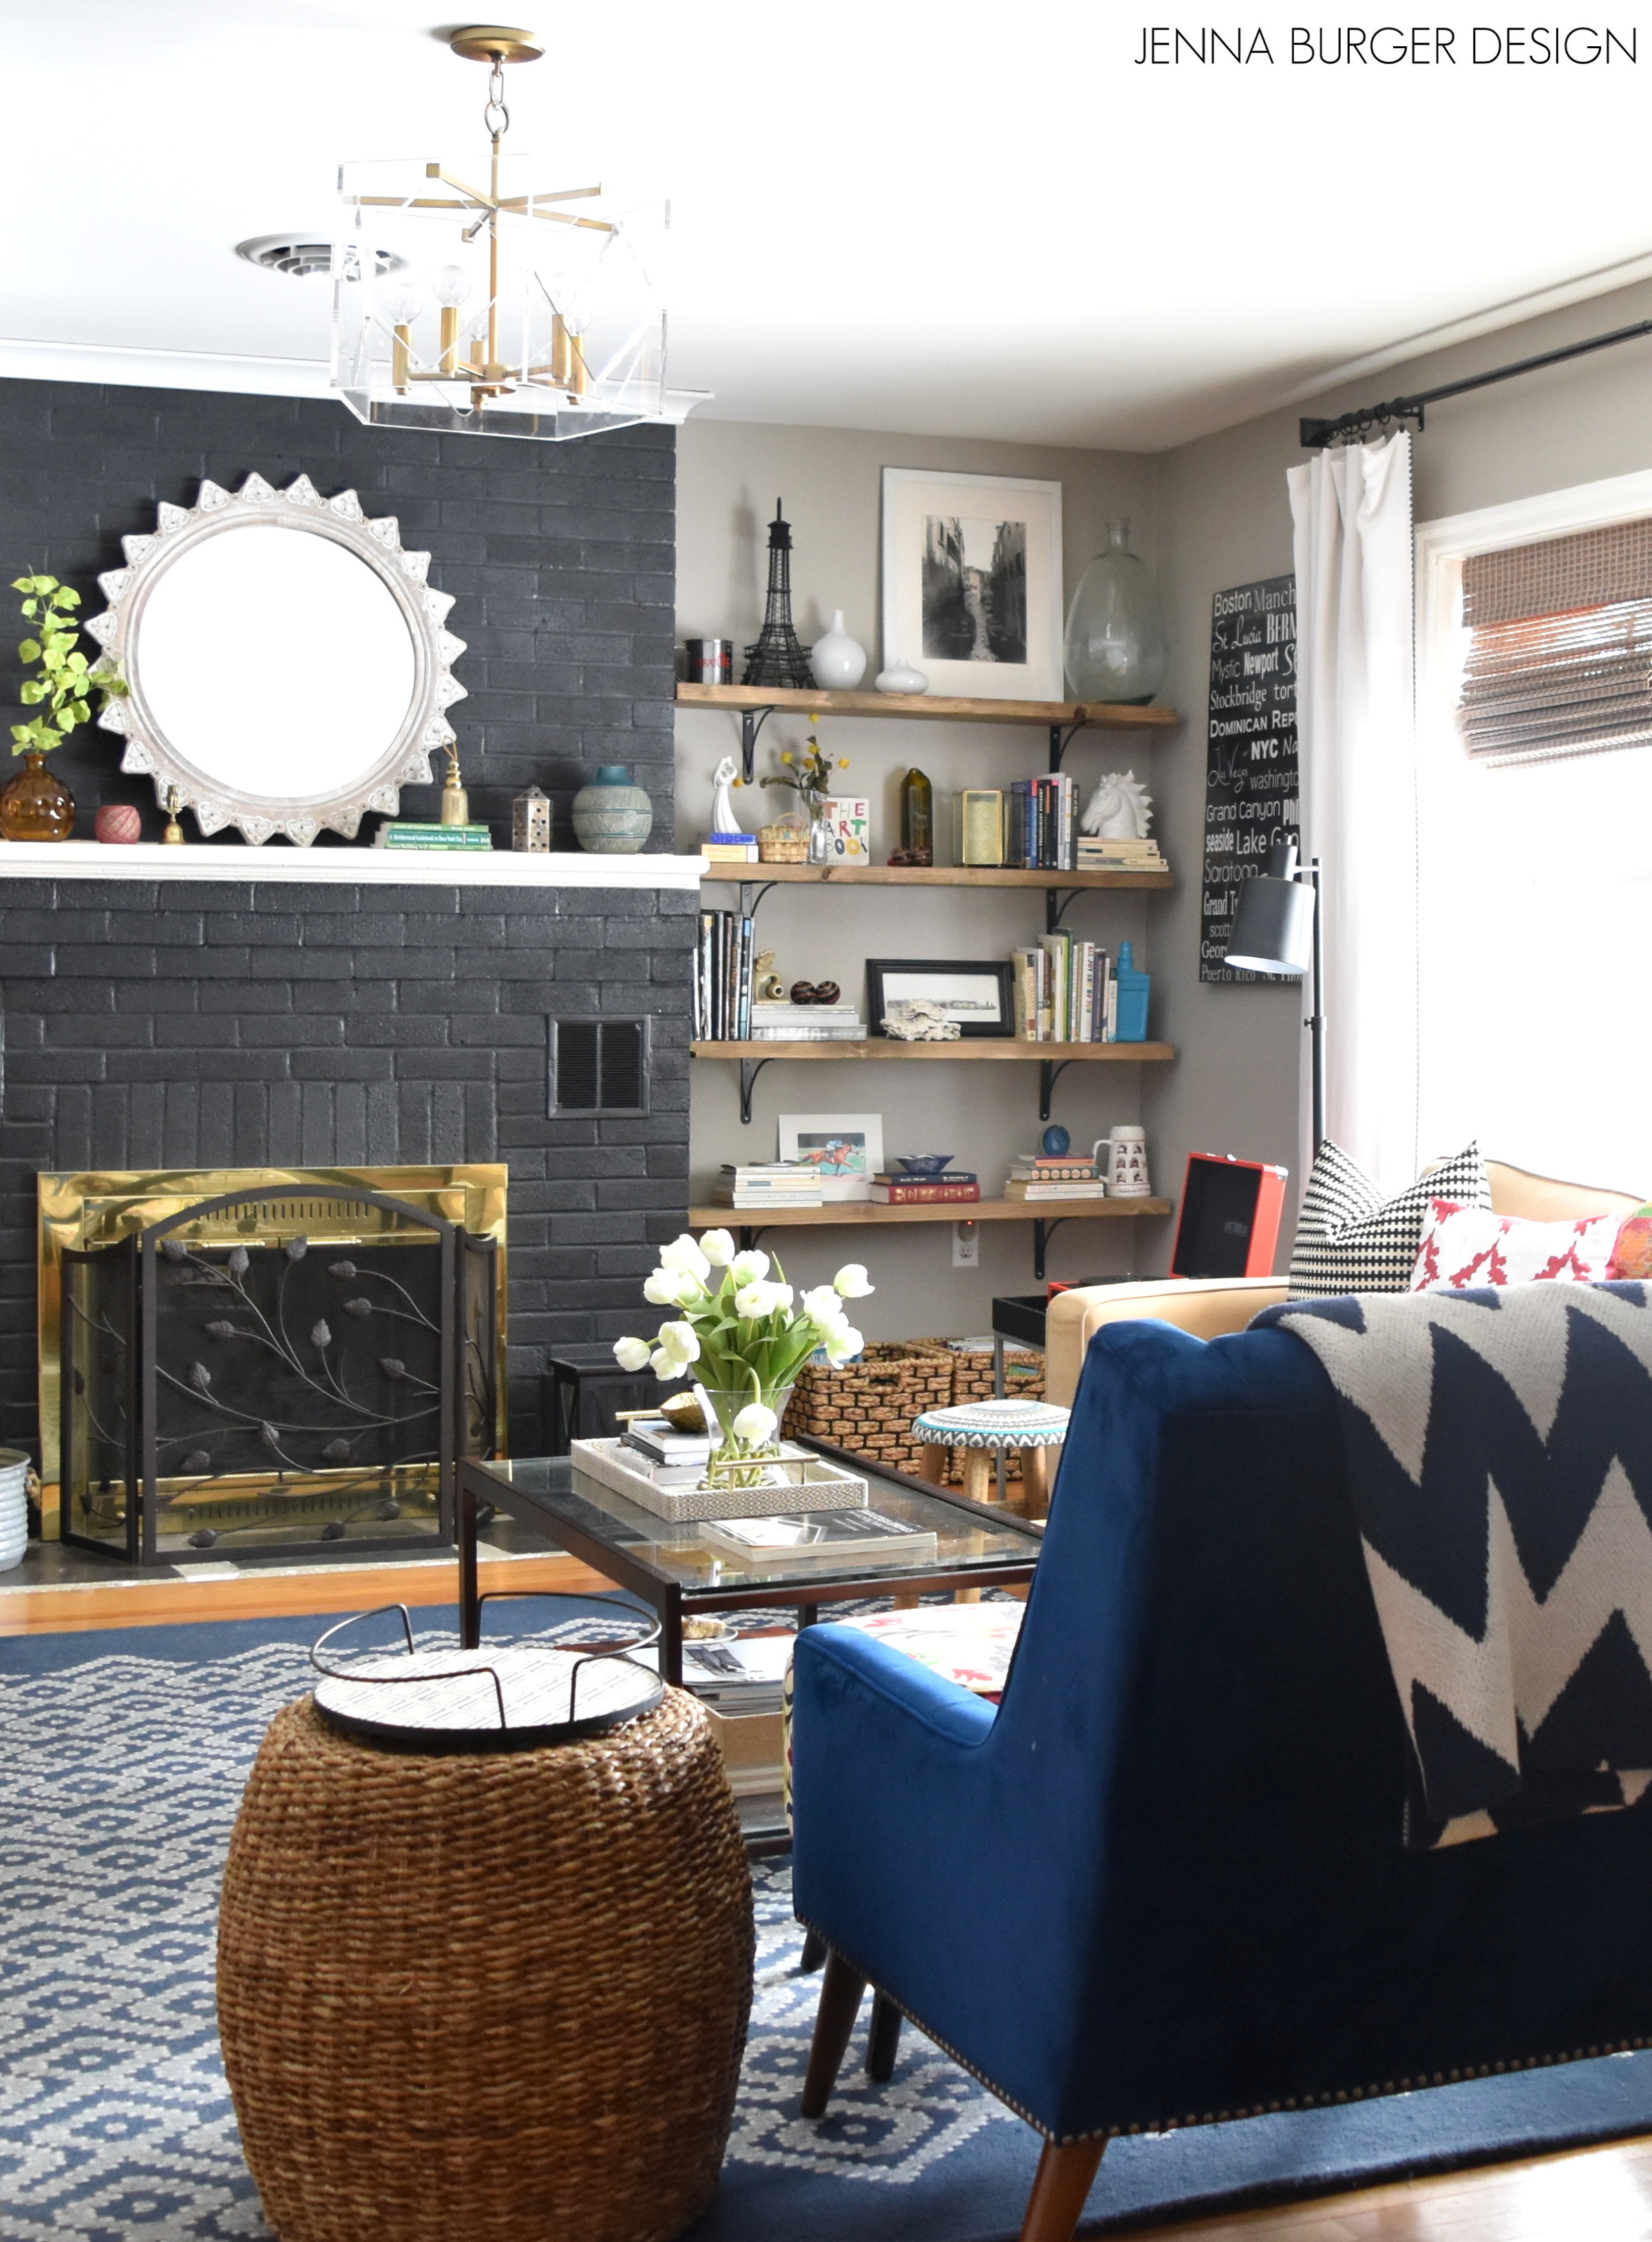
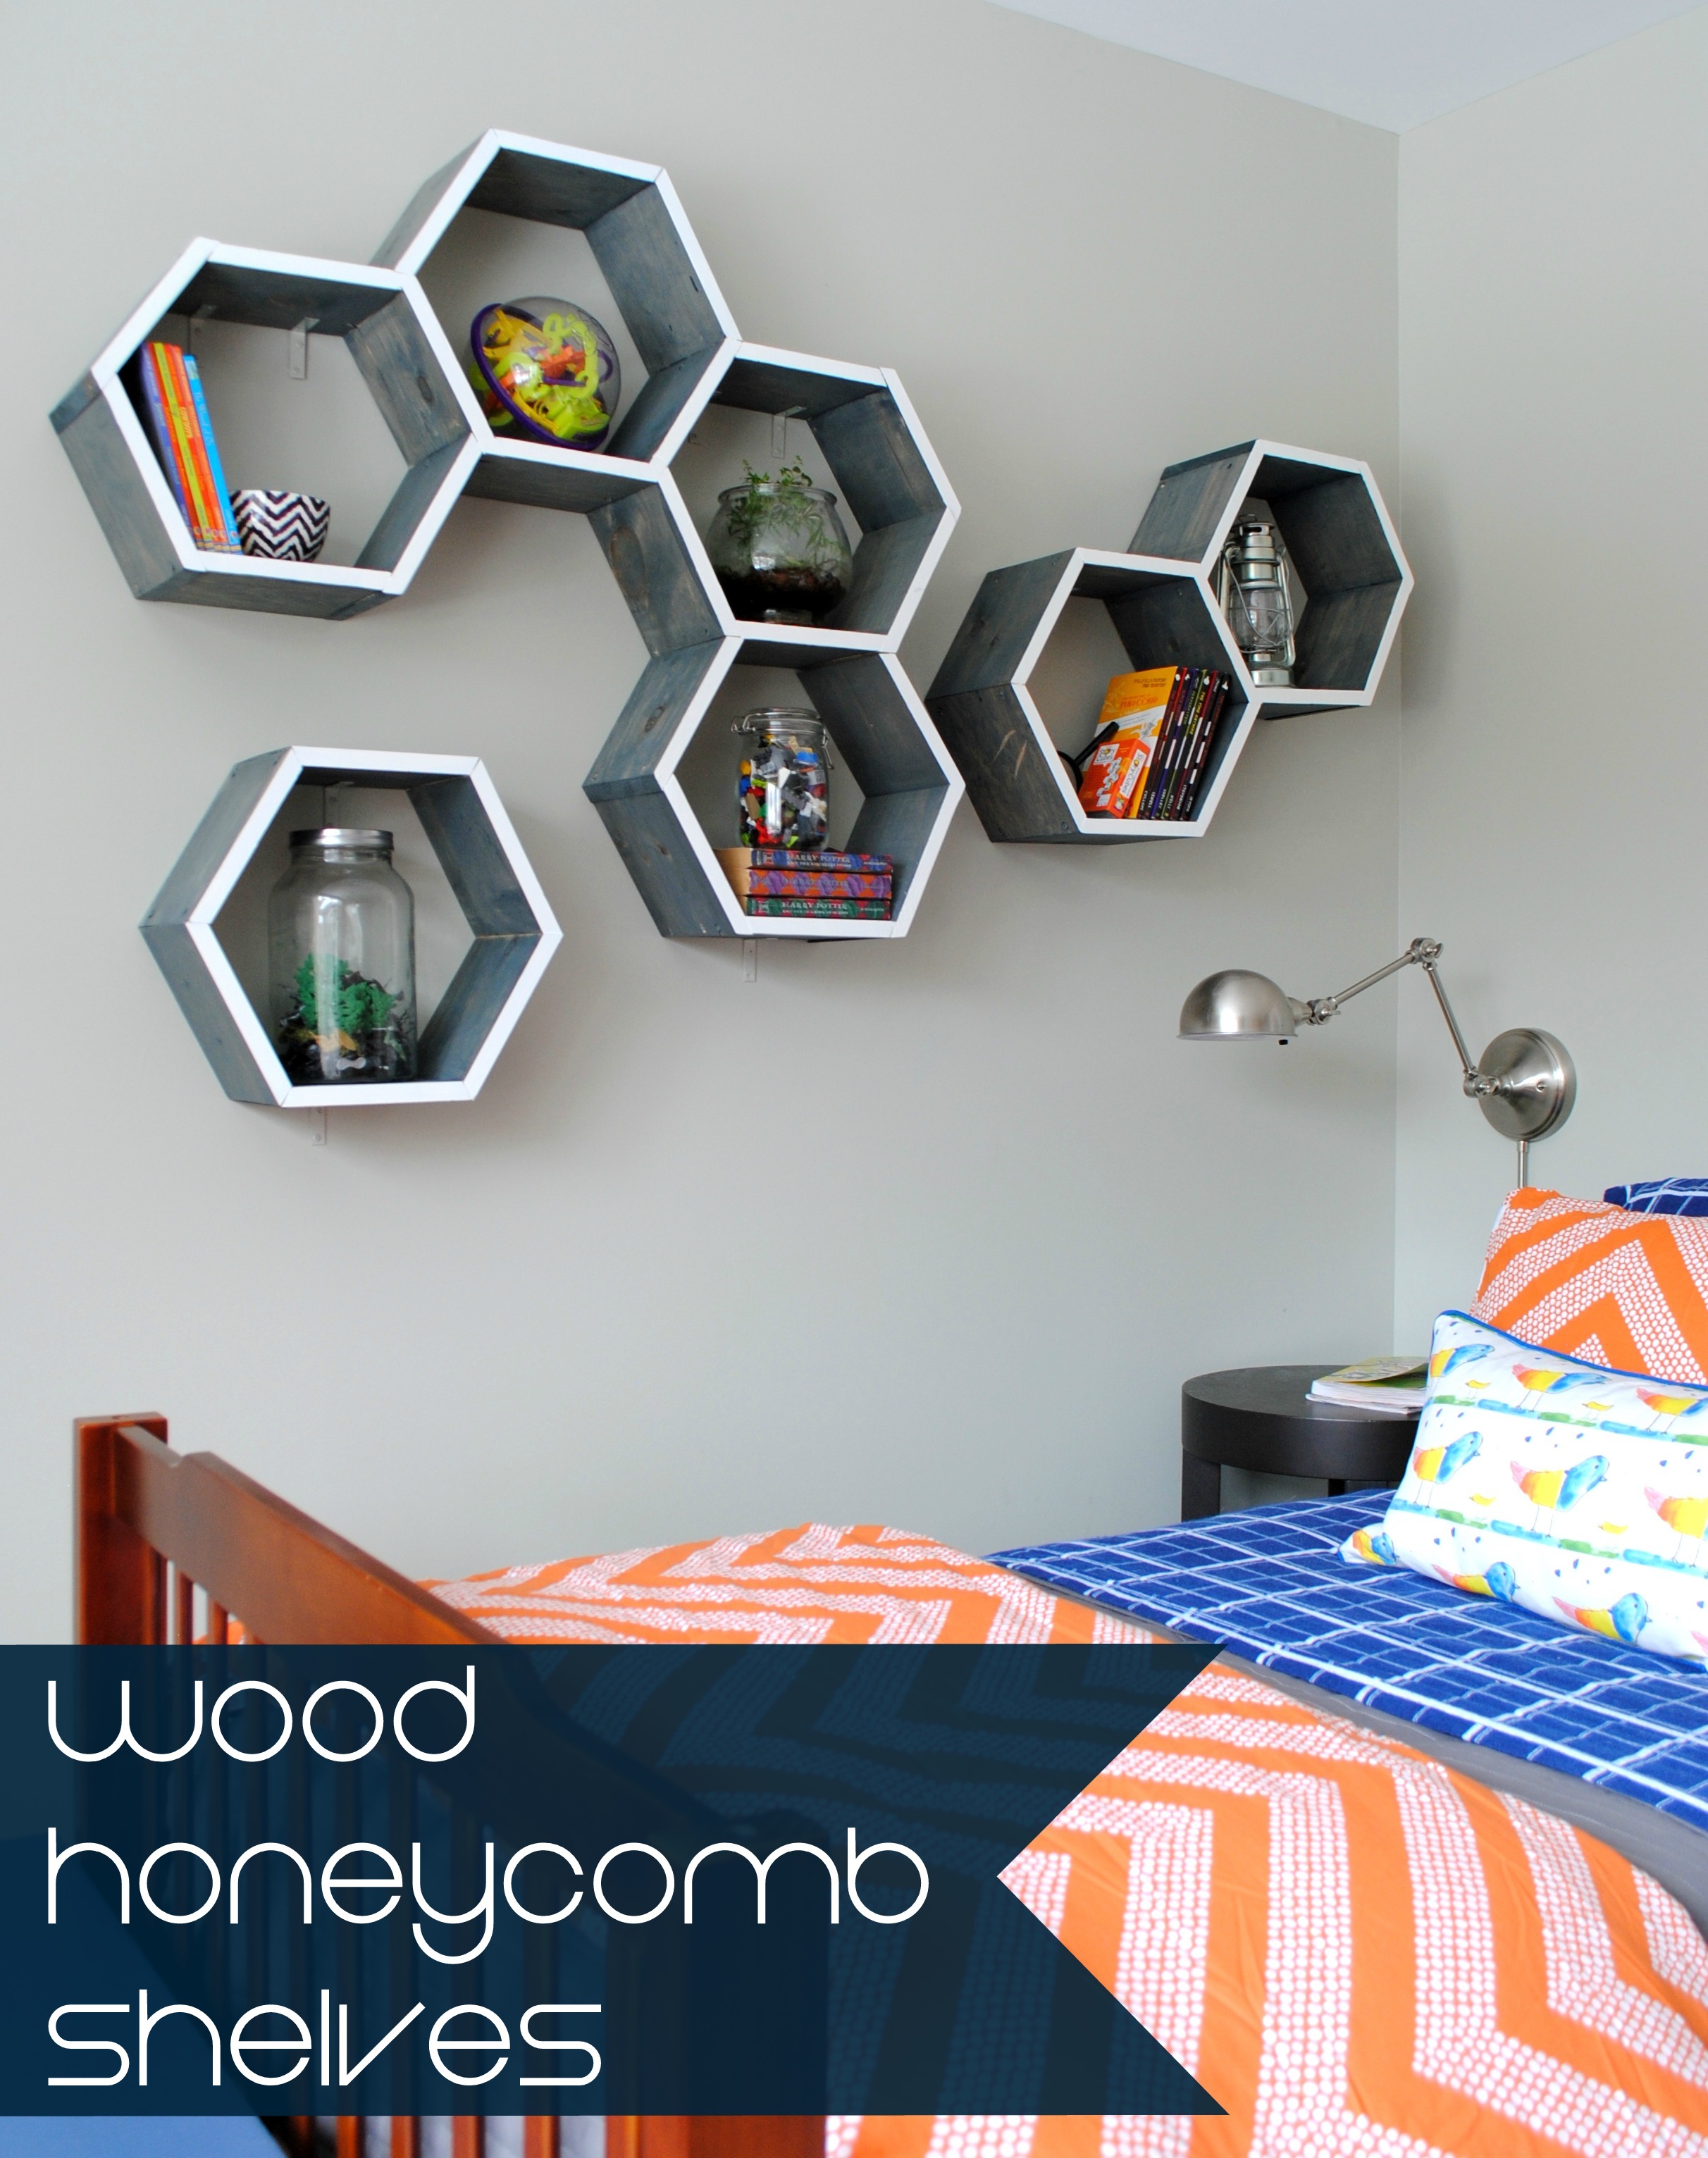
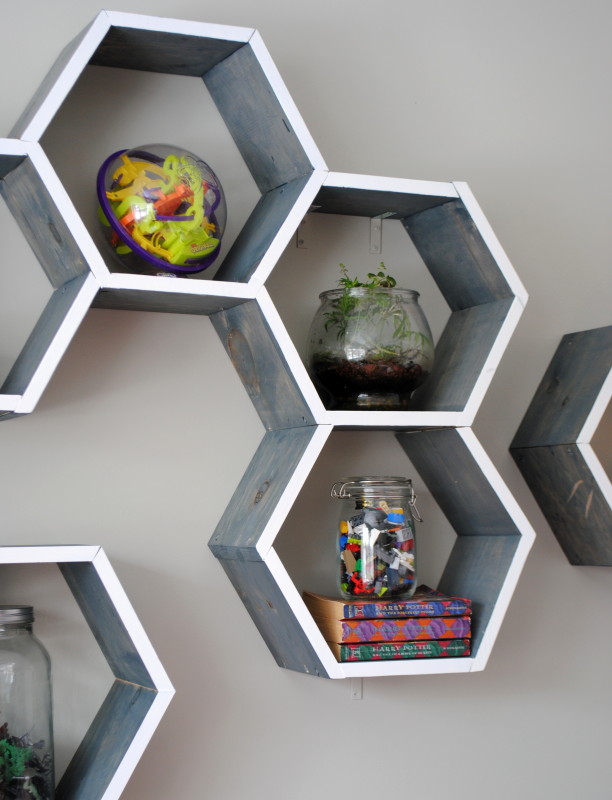
Not only are these honeycomb / hexagon shelves functional, the whole ensemble is like a piece of art.  And instead of painting the shelves a color or staining them a traditional wood finish, I chose an interesting blue hue which is in-trend and spot on with the other tones that I’ve introduced into the room.

Take a look…

{DIY Tutorial} How-To Make Wood Honeycomb Shelves. Why spend hundreds, when you can make them yourself! These shelves complete the look of the room. So many great projects in this kids room makeover.

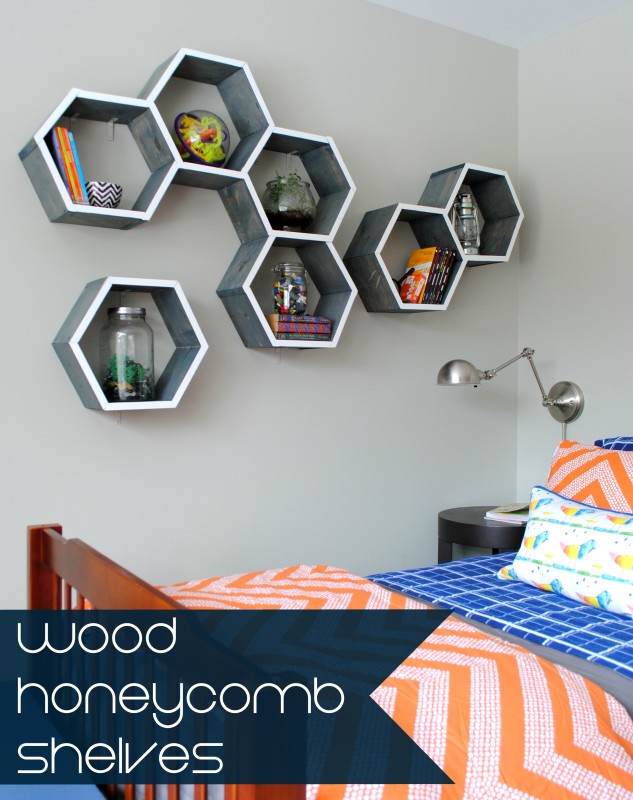
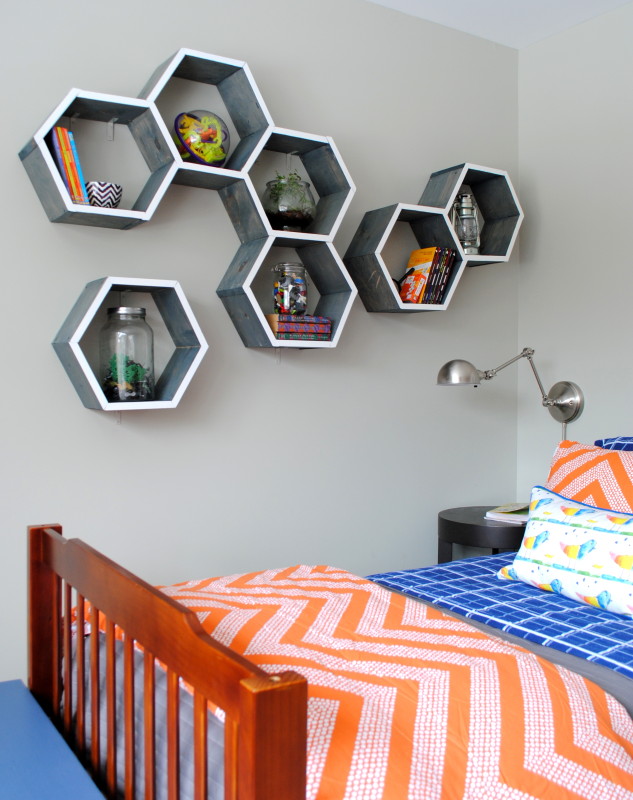
The entire shelf composition runs the length of the twin bed, which is about 80″ long, and makes the entire wall truly come alive.  This “installation” also parallels with my Lowe’s Creative challenge project for this month which focuses on introducing the submerged color trend of watery, cool blue hues into a project.  With the size + interesting finish, this project is by far one of my favorites!

———————————–

Before we move forward, it has to be said that this project was a big challenge, but the bigger the venture, the better the result.  I don’t often do large-scale woodworking projects and at times I thought it was going to be a big F-A-I-L, but in the end the honeycomb shelves MAKE THE ROOM.  Take Away? Don’t be afraid to challenge yourself.  Push through because in the end, it’ll be worth it!

———————————–

Like usual, before starting a larger scale project, I sketched out my idea and figured out the supplies I needed.  This was the first sketch…

Design 1 for honeycomb shelves

And then the shelves ended up evolving into this layout instead so not all of the shelves are actually attached…

Design 2 for honeycomb shelves

Supplies I used:

  • (7) 1″ x 6″ x 6′ long pieces of wood – each shelf took approximately (1) board
  • 1-1/2″ wood screws
  • 1-1/2″ corner brackets
  • Plastic toggle anchors
  • Stain or Paint – depending on how you want to finish the shelf surface
  • Other supplies: miter saw, tape measure, drill, sander, level, pencil

To save on time, I often have my wood cut while at shopping at Lowe’s, but for this project, I cut it at home because of the quantity needed + the angles.

Here are the steps I took:

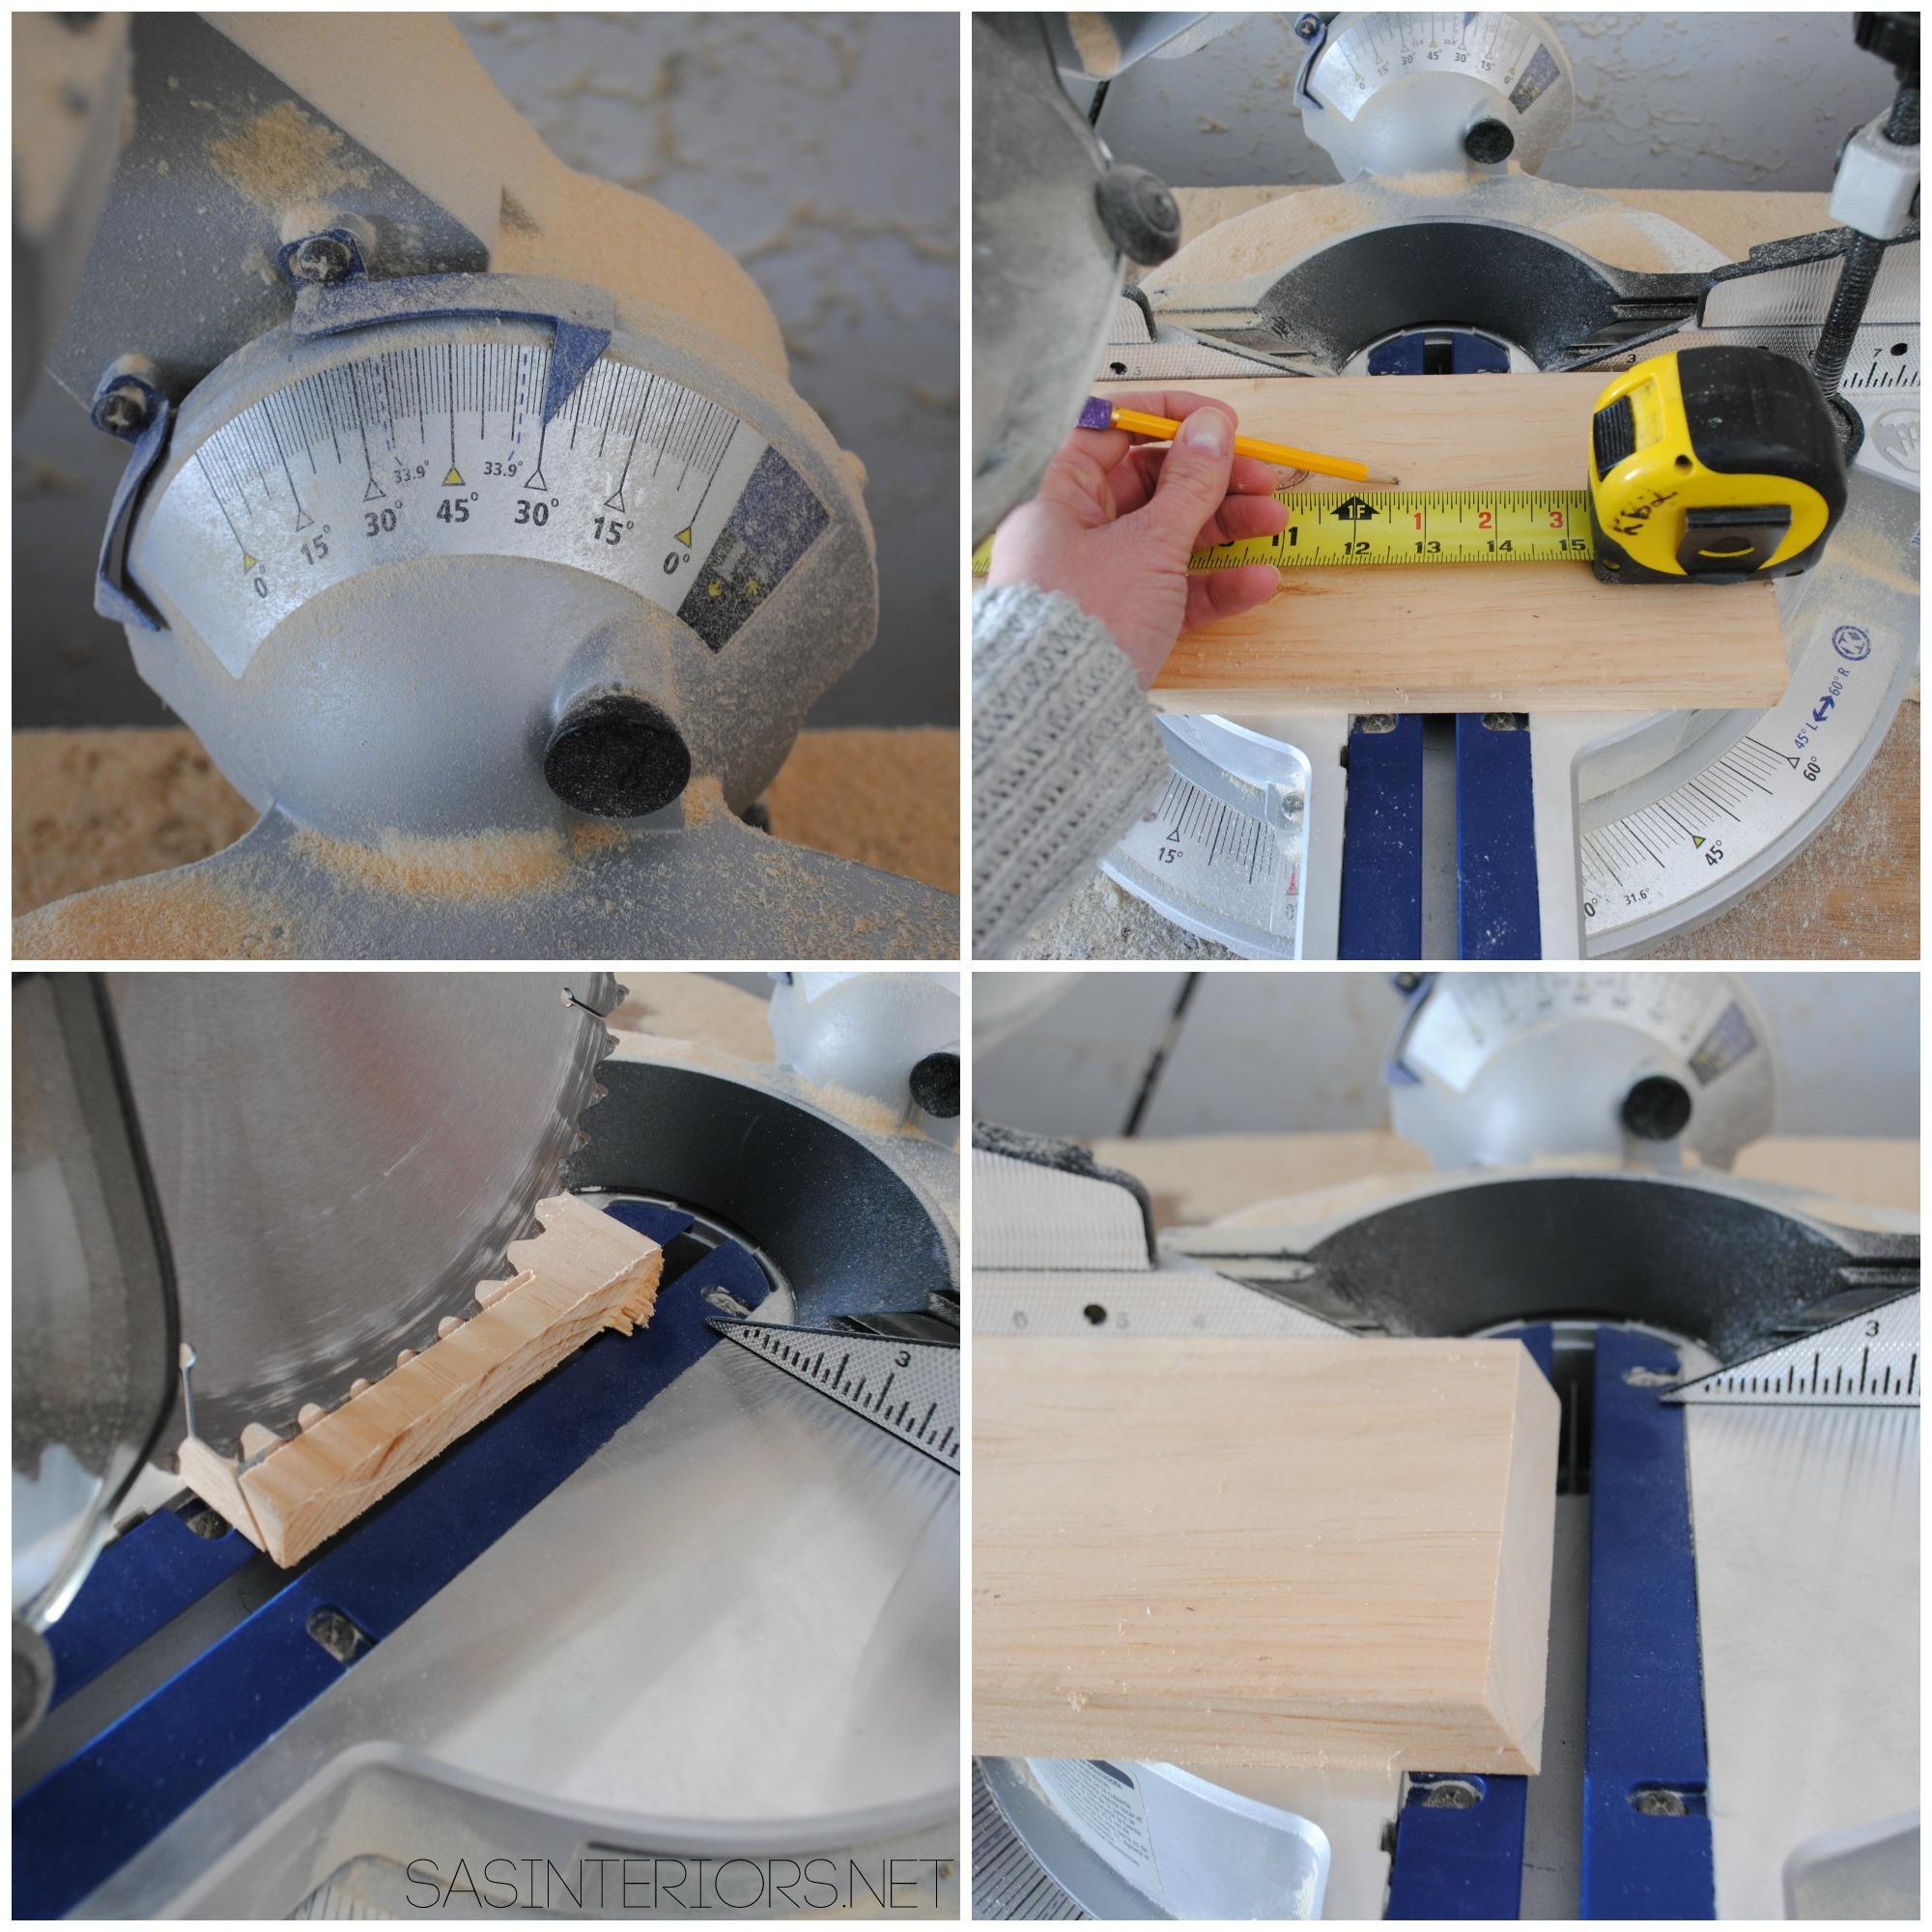
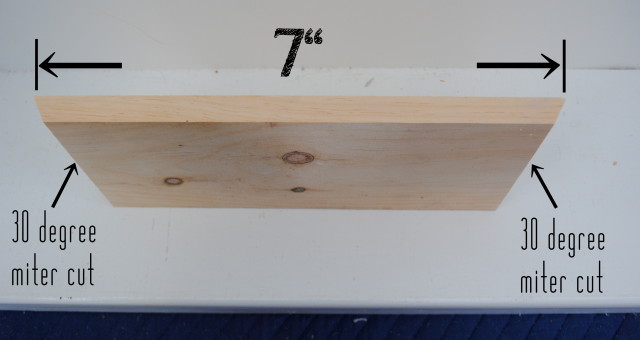
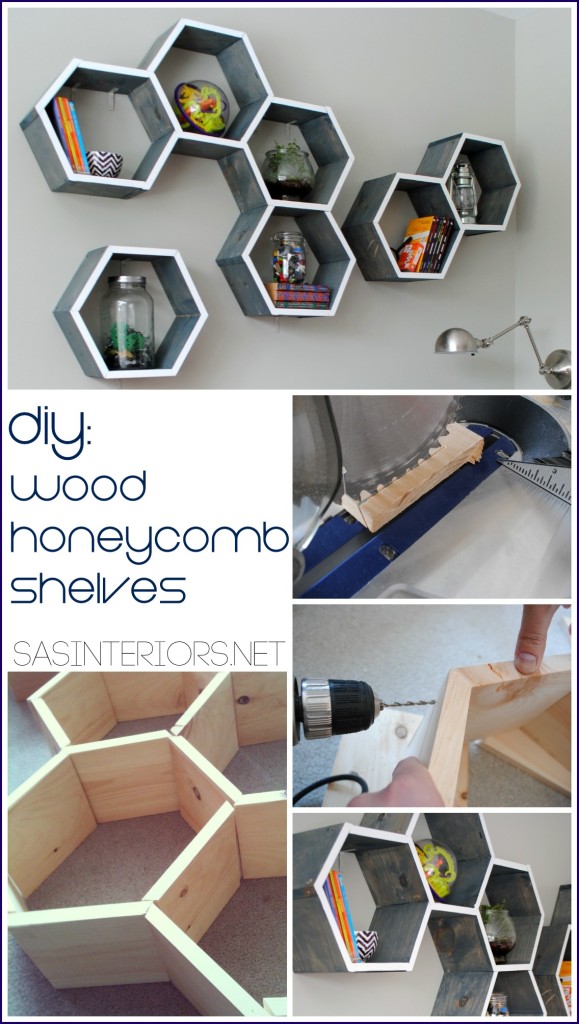
1. I set the miter saw to 30 degrees and never touched the saw again for the entire project.  This angle is crucial so each of the 6 pieces will make the perfect hexagon shape.  I approximated that I wanted each finished shelf to be an overall dimension of about 14″ x 14″, and chose the length of 7″ for the long side of each piece.

After marking the wood with my tape measure + pencil, I made the first cut using the miter saw. Then I flipped the piece of wood over to make the second angled cut.

{DIY Tutorial} How-To Make Wood Honeycomb Shelves. Why spend hundreds, when you can make them yourself! These shelves complete the look of the room. So many great projects in this kids room makeover.

This is what the first piece looked like when cut.

Then I cut about 42 more…

Size of cut for honeycomb shelf

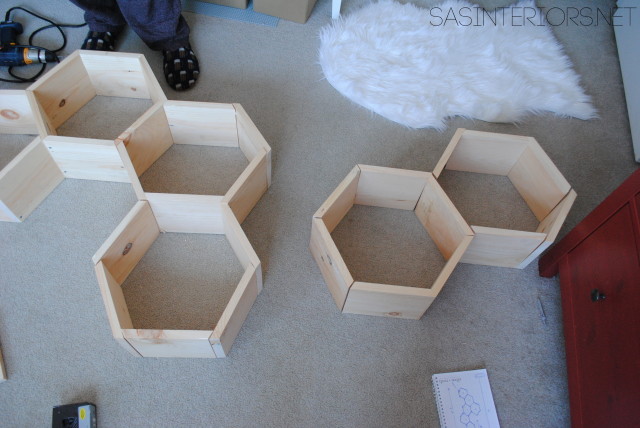
2. Before taking the next steps of attaching each piece to make the shelves, I layed all the pieces out to see how they’d actually go together.

{DIY Tutorial} How-To Make Wood Honeycomb Shelves. Why spend hundreds, when you can make them yourself! These shelves complete the look of the room. So many great projects in this kids room makeover.

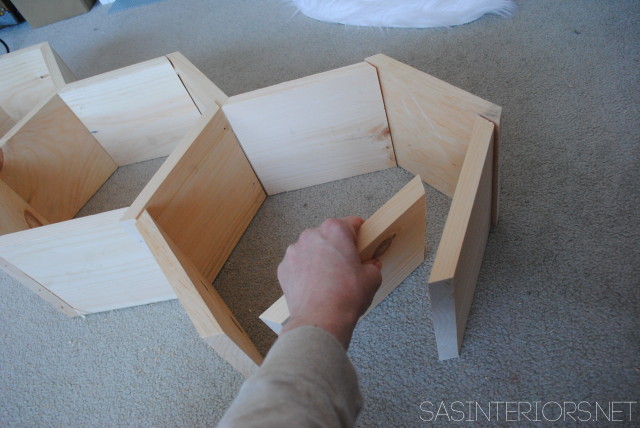
3. Then we were ready to chug forward and attach these bad boys…

The first hexagon box was created using 6 pieces and all the angles faced each other.  It’s best to stand them up on their sides, so the floor acts like the wall. The Mister (who was a huge part of this project as well) and I actually moved from the carpet to a flat, hard surface so the pieces would lay flat.  The carpet was too cushy.

TIP: You must use wood screws for this project.  We started out with screws, but it wasn’t working right (because we didn’t pre-drill), then changed over to using nails.  BIG MISTAKE.

Once you have the angled wood pieces in position, first pre-drill the holes, then drill in the wood screws.  If you don’t pre-drill the holes, the wood will probably split, which is what happened to us atfirst.  Using a nail won’t work because they’ll pull out and the overall shelf won’t be stable / sturdy.  Believe me, these are all lessons we learned along the way!

{DIY Tutorial} How-To Make Wood Honeycomb Shelves. Why spend hundreds, when you can make them yourself! These shelves complete the look of the room. So many great projects in this kids room makeover.

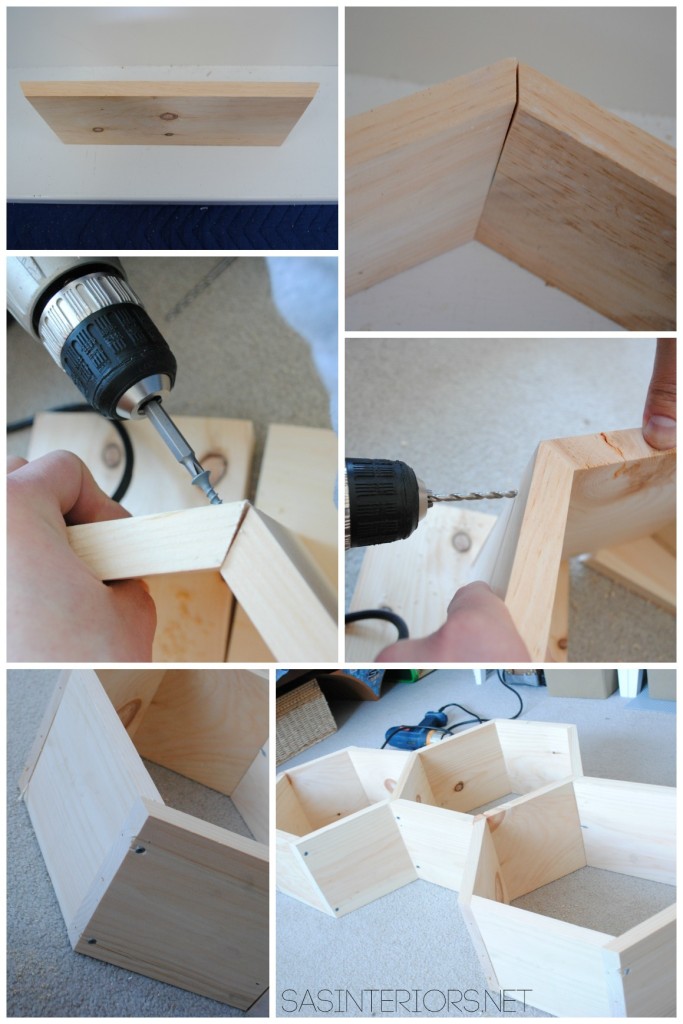
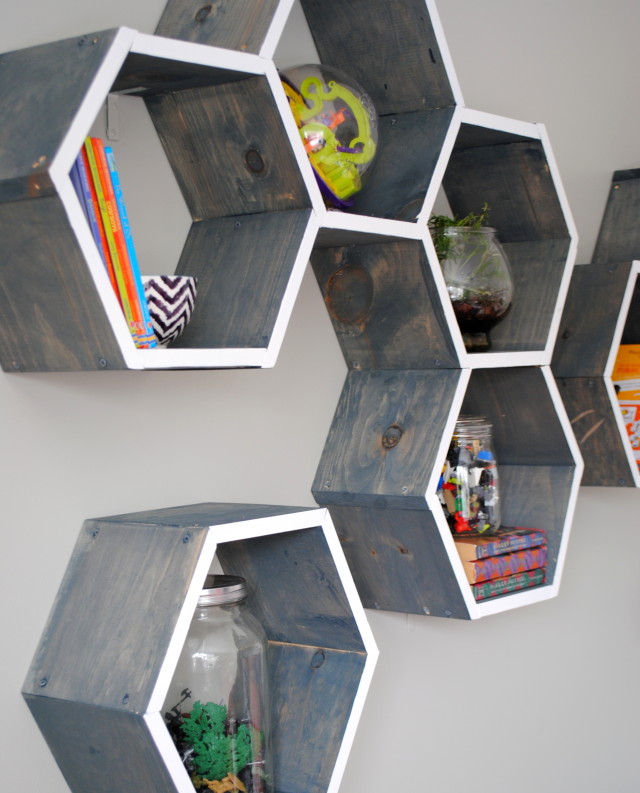
4. When the first box is complete, you can either be done or add on to it to create a multi-honeycomb shelf like ours.  If you continue adding on to the first hexagon, you’ll use one side of the original hexagon to create the second hexagon. This time though, the cut angles won’t touch each other, but instead overlap.  I’ll be honest, it does get tricky at this point and the shelves become a big jigsaw puzzle.  We ended up with (1) 3 box shelf, (1) 2 box shelf, and (1) stand alone shelf.

{DIY Tutorial} How-To Make Wood Honeycomb Shelves. Why spend hundreds, when you can make them yourself! These shelves complete the look of the room. So many great projects in this kids room makeover.

Once all the shelves were screwed together, we were ready for the next steps…  finish the surface + install.

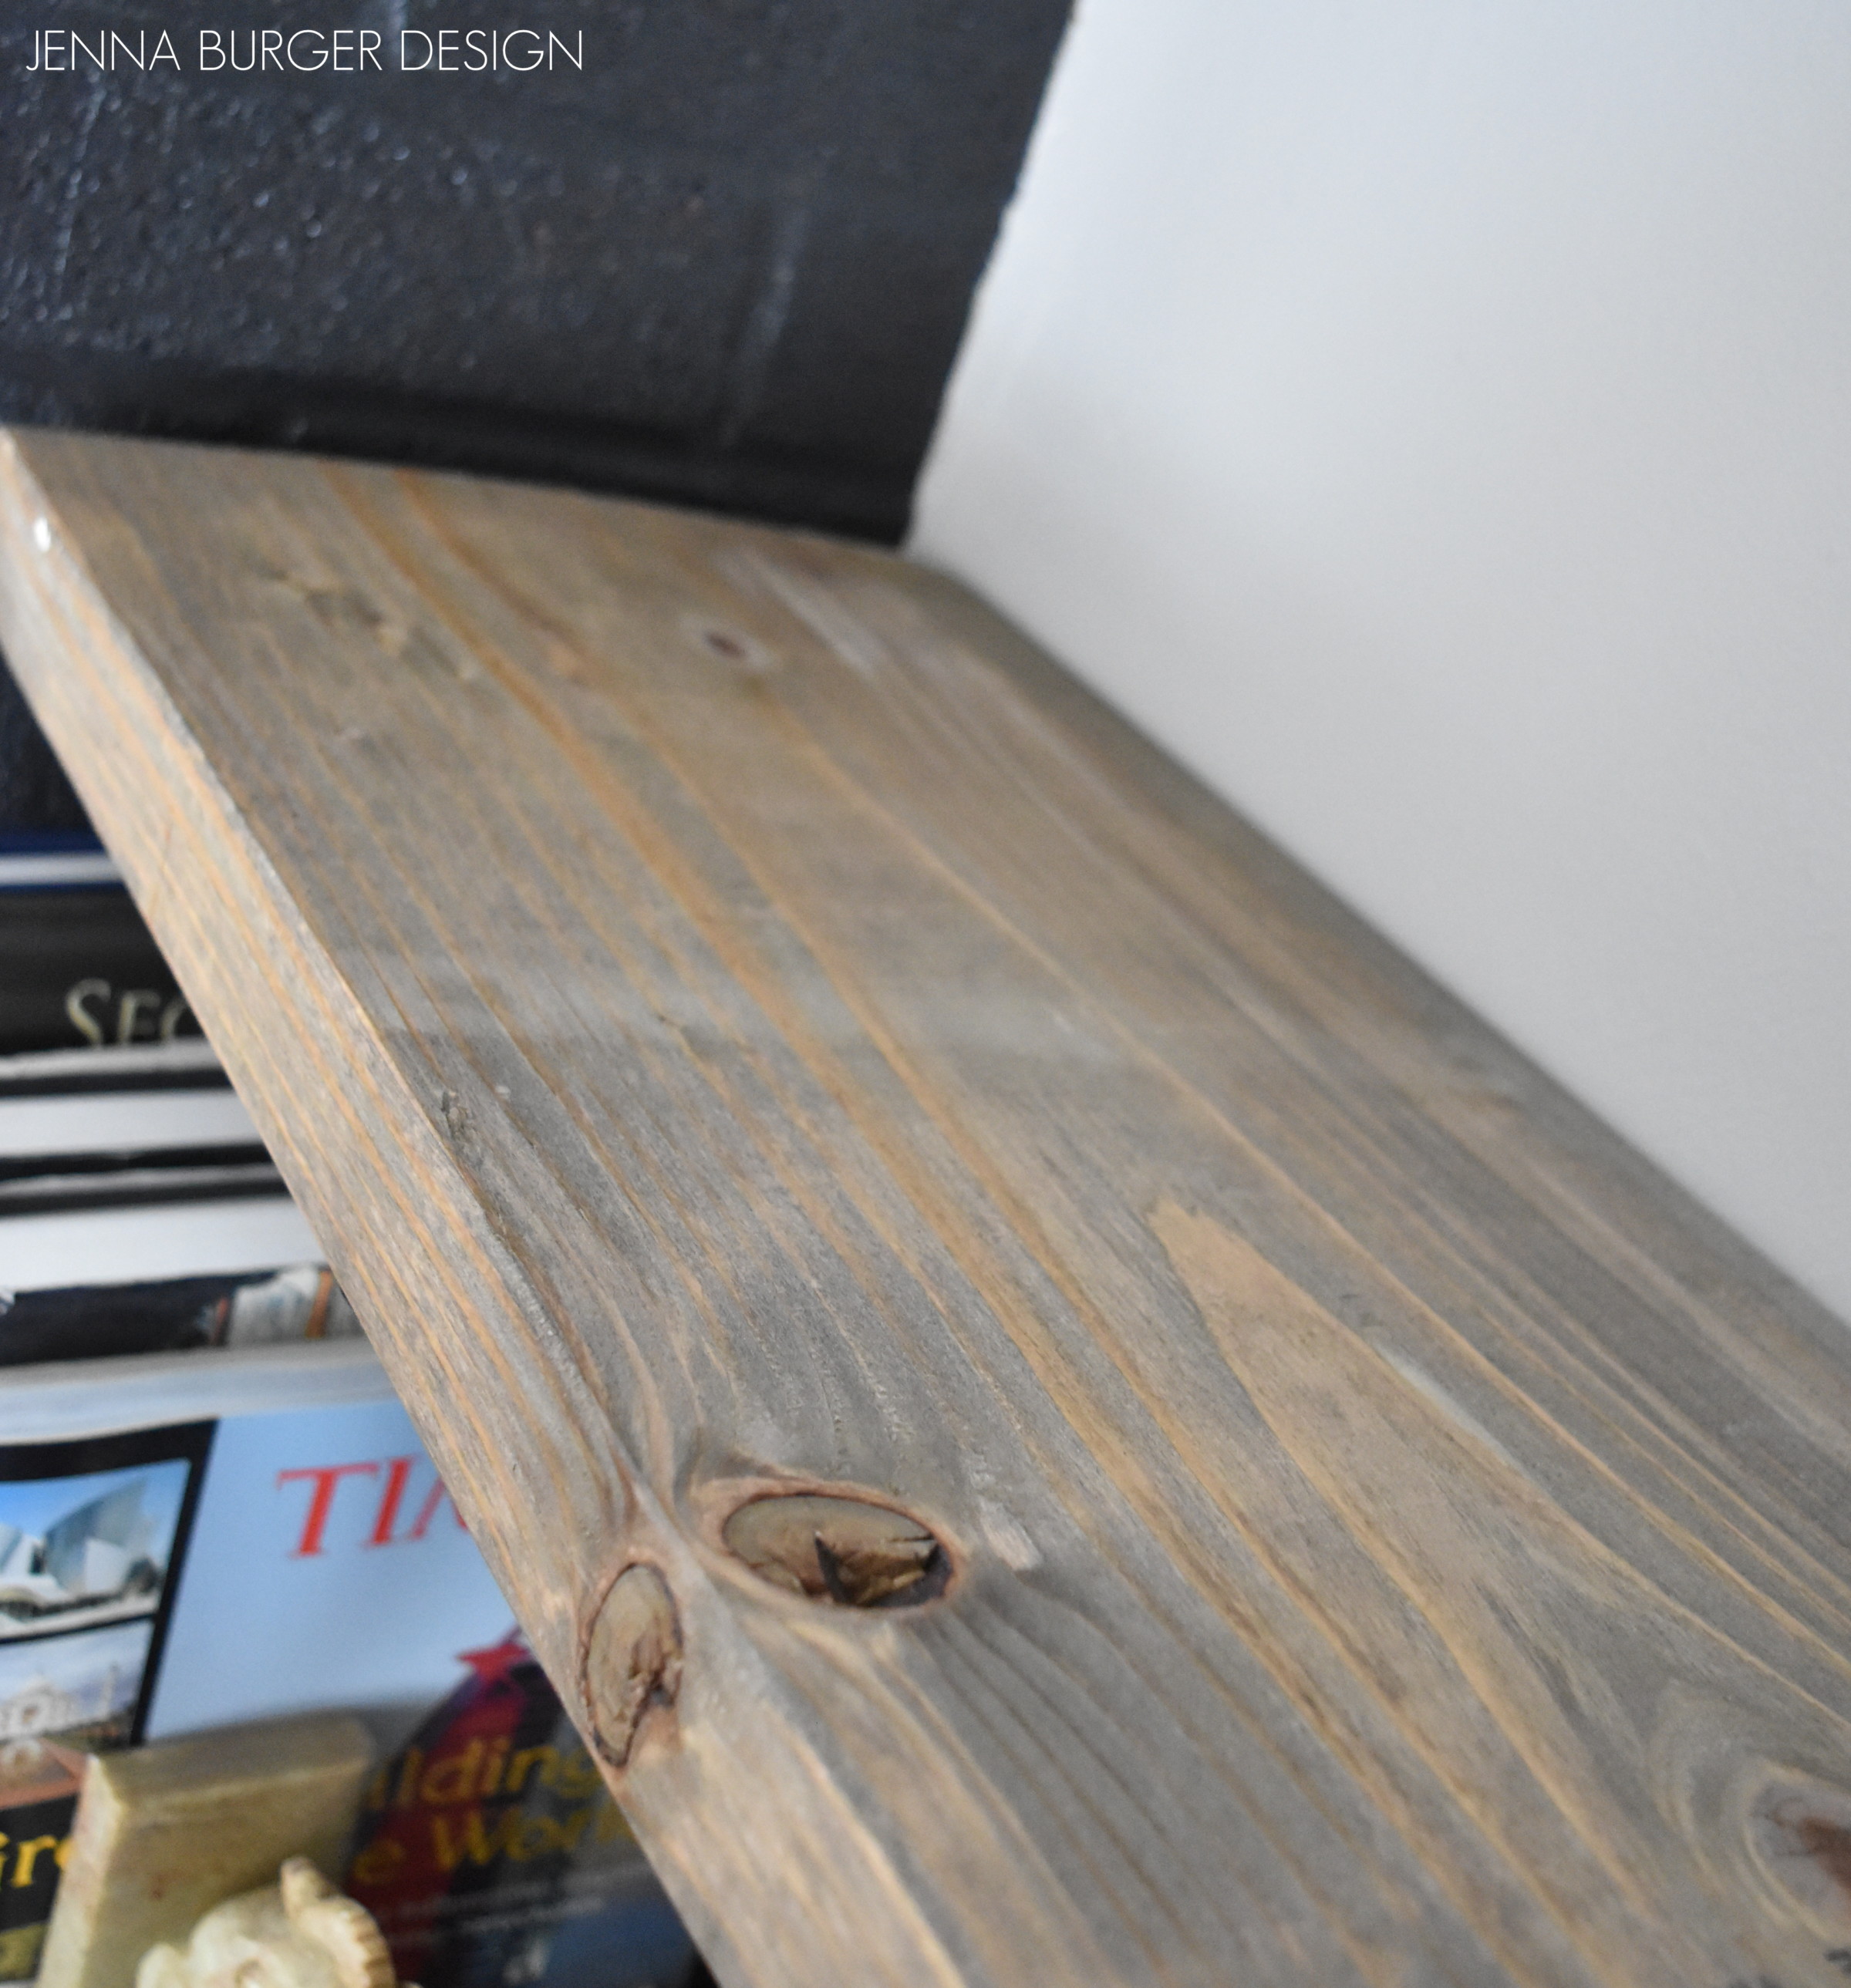
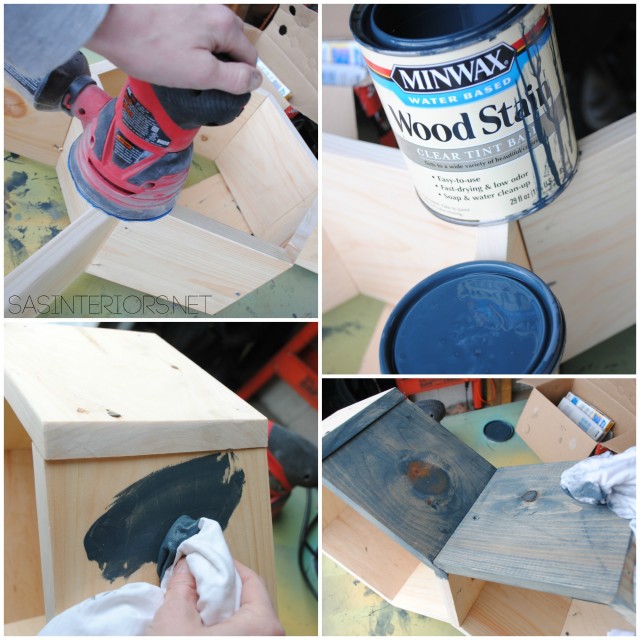
It took me some time to determine how I wanted to finish the shelves.  At first I was going to paint them, but then steered away because I wanted to see the wood grain shine through.  That meant stain.  But, what stain?  In the end, I chose a gray / blue water-based stain by Minwax.  The submerged color seemed perfect with the other hues in the room and was ideal with what’s on-trend right now.

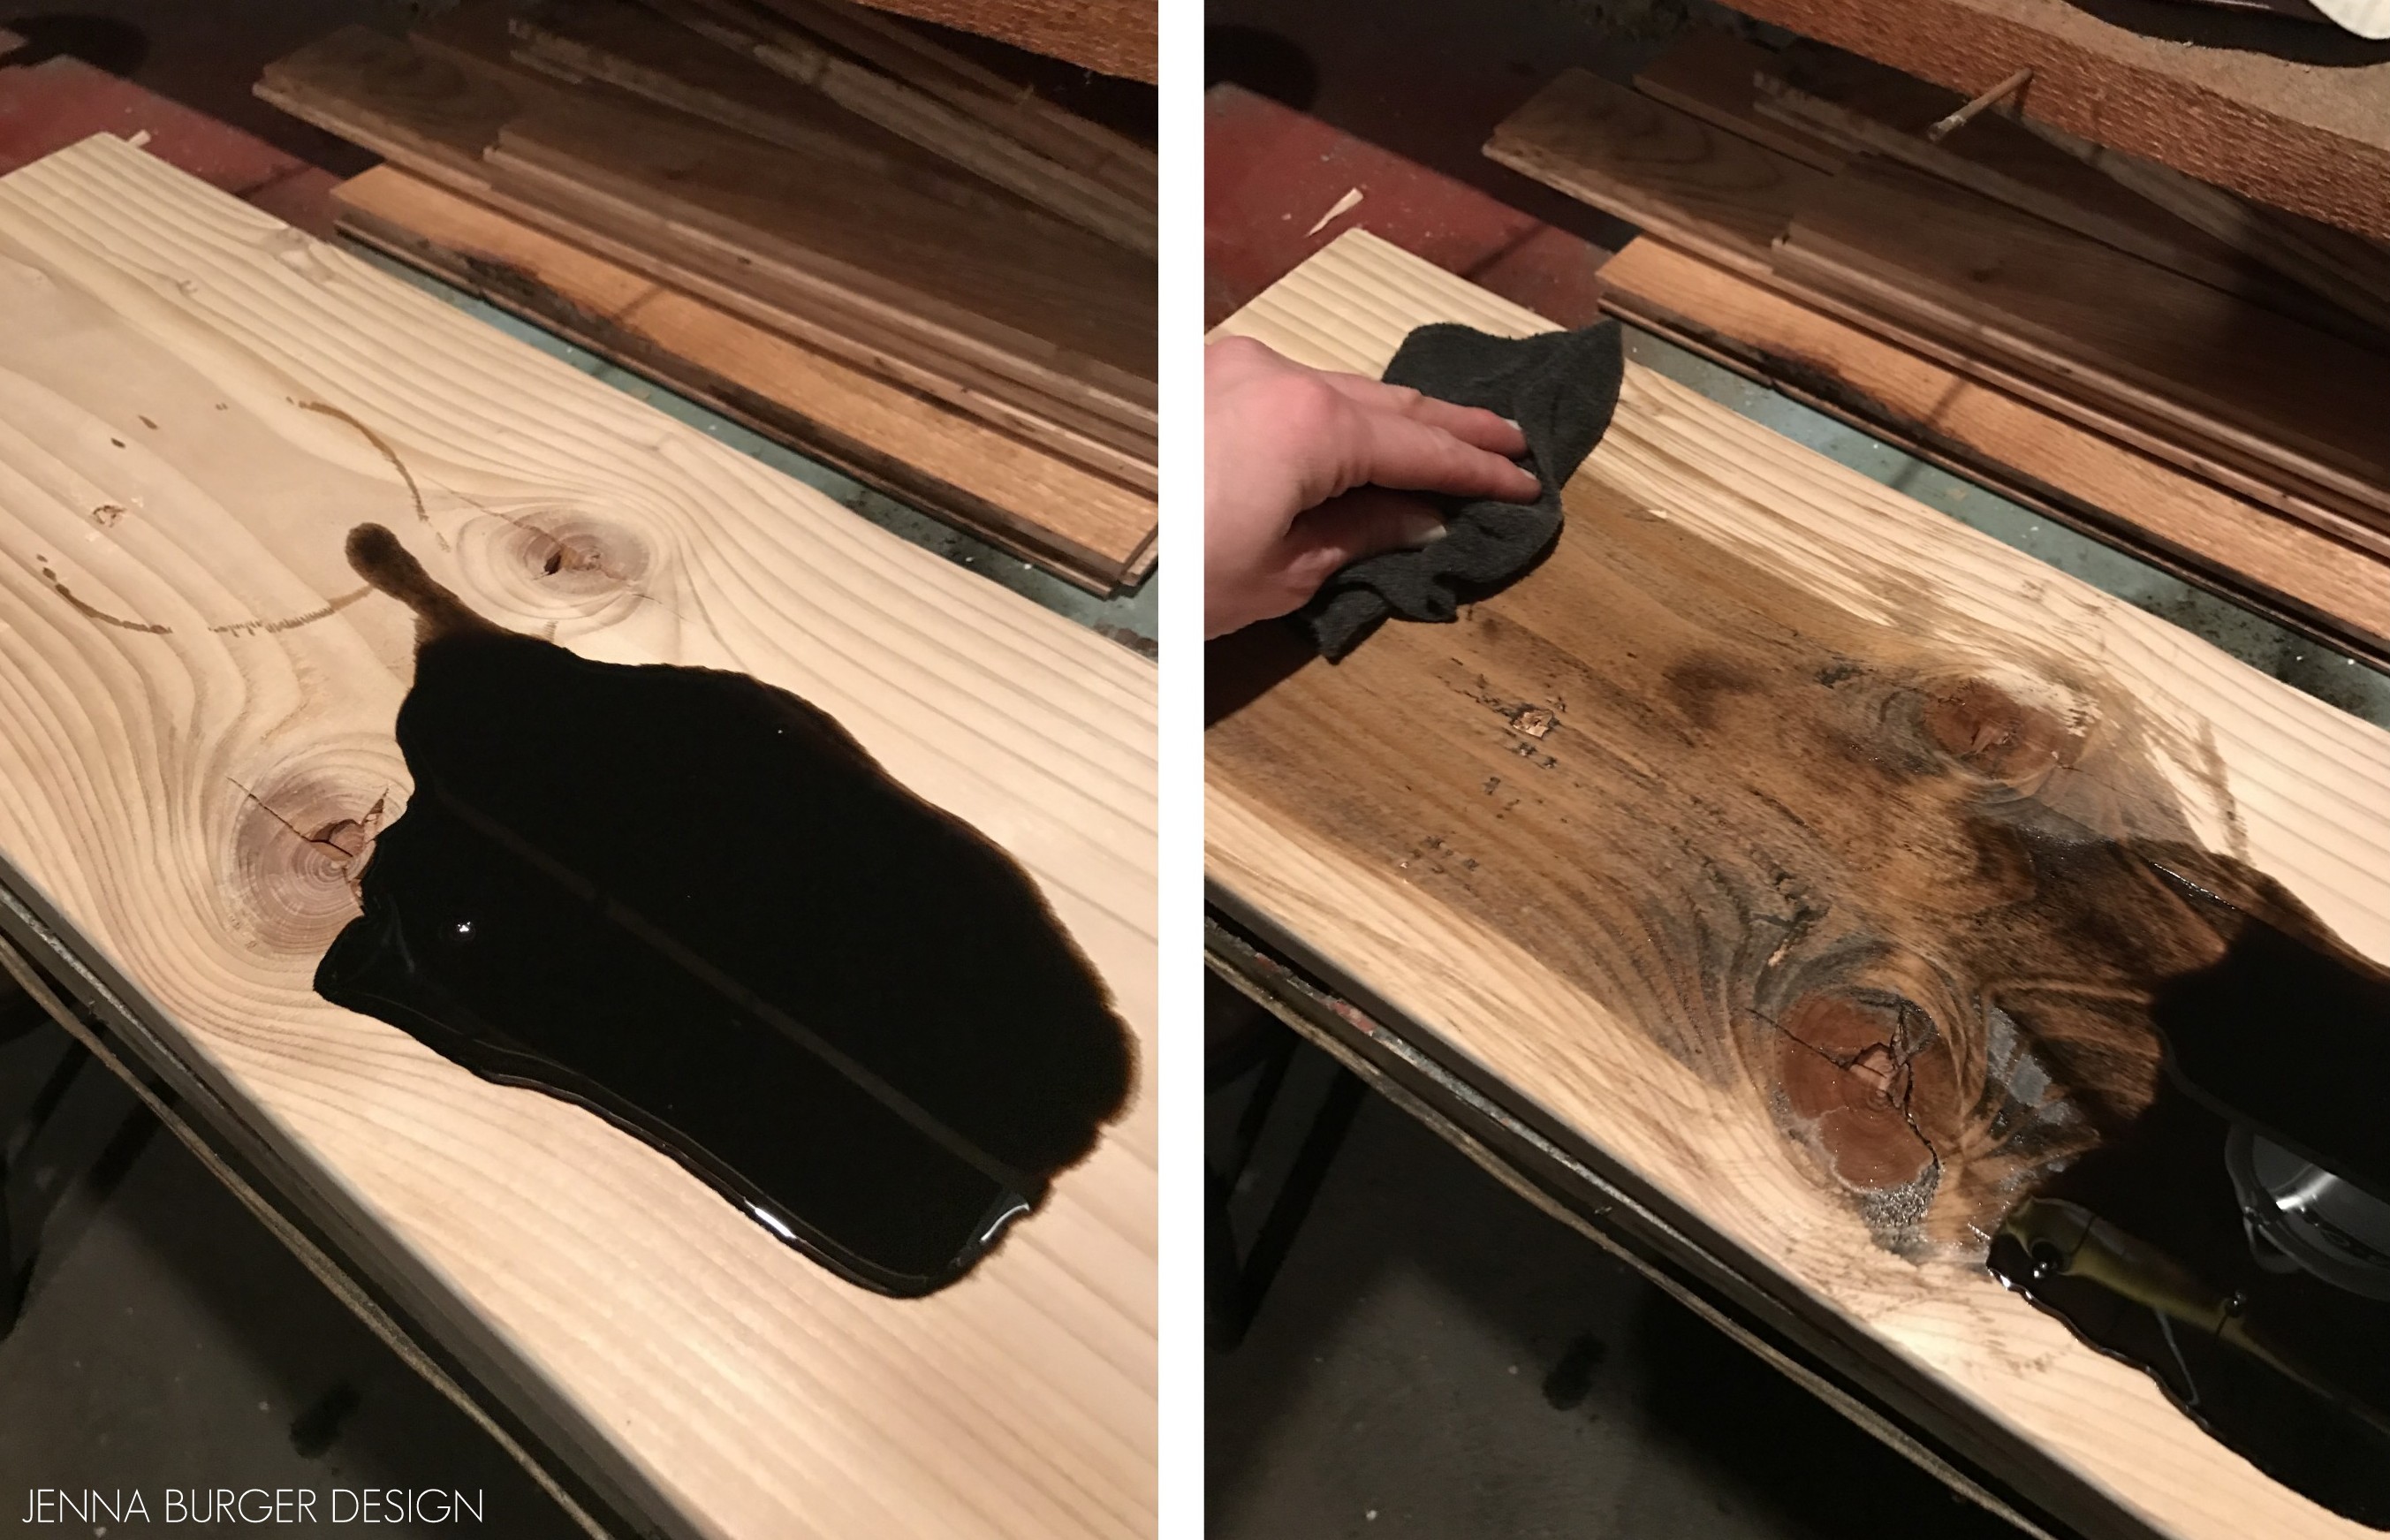
5. First, I gave the edges and all the surfaces a good sanding with my orbital sander.   Then using a rag, I applied the wood stain and almost instantly wiped it away so very little actually soaked into the wood.  Because of this, the drying time was very quick.

{DIY Tutorial} How-To Make Wood Honeycomb Shelves. Why spend hundreds, when you can make them yourself! These shelves complete the look of the room. So many great projects in this kids room makeover.

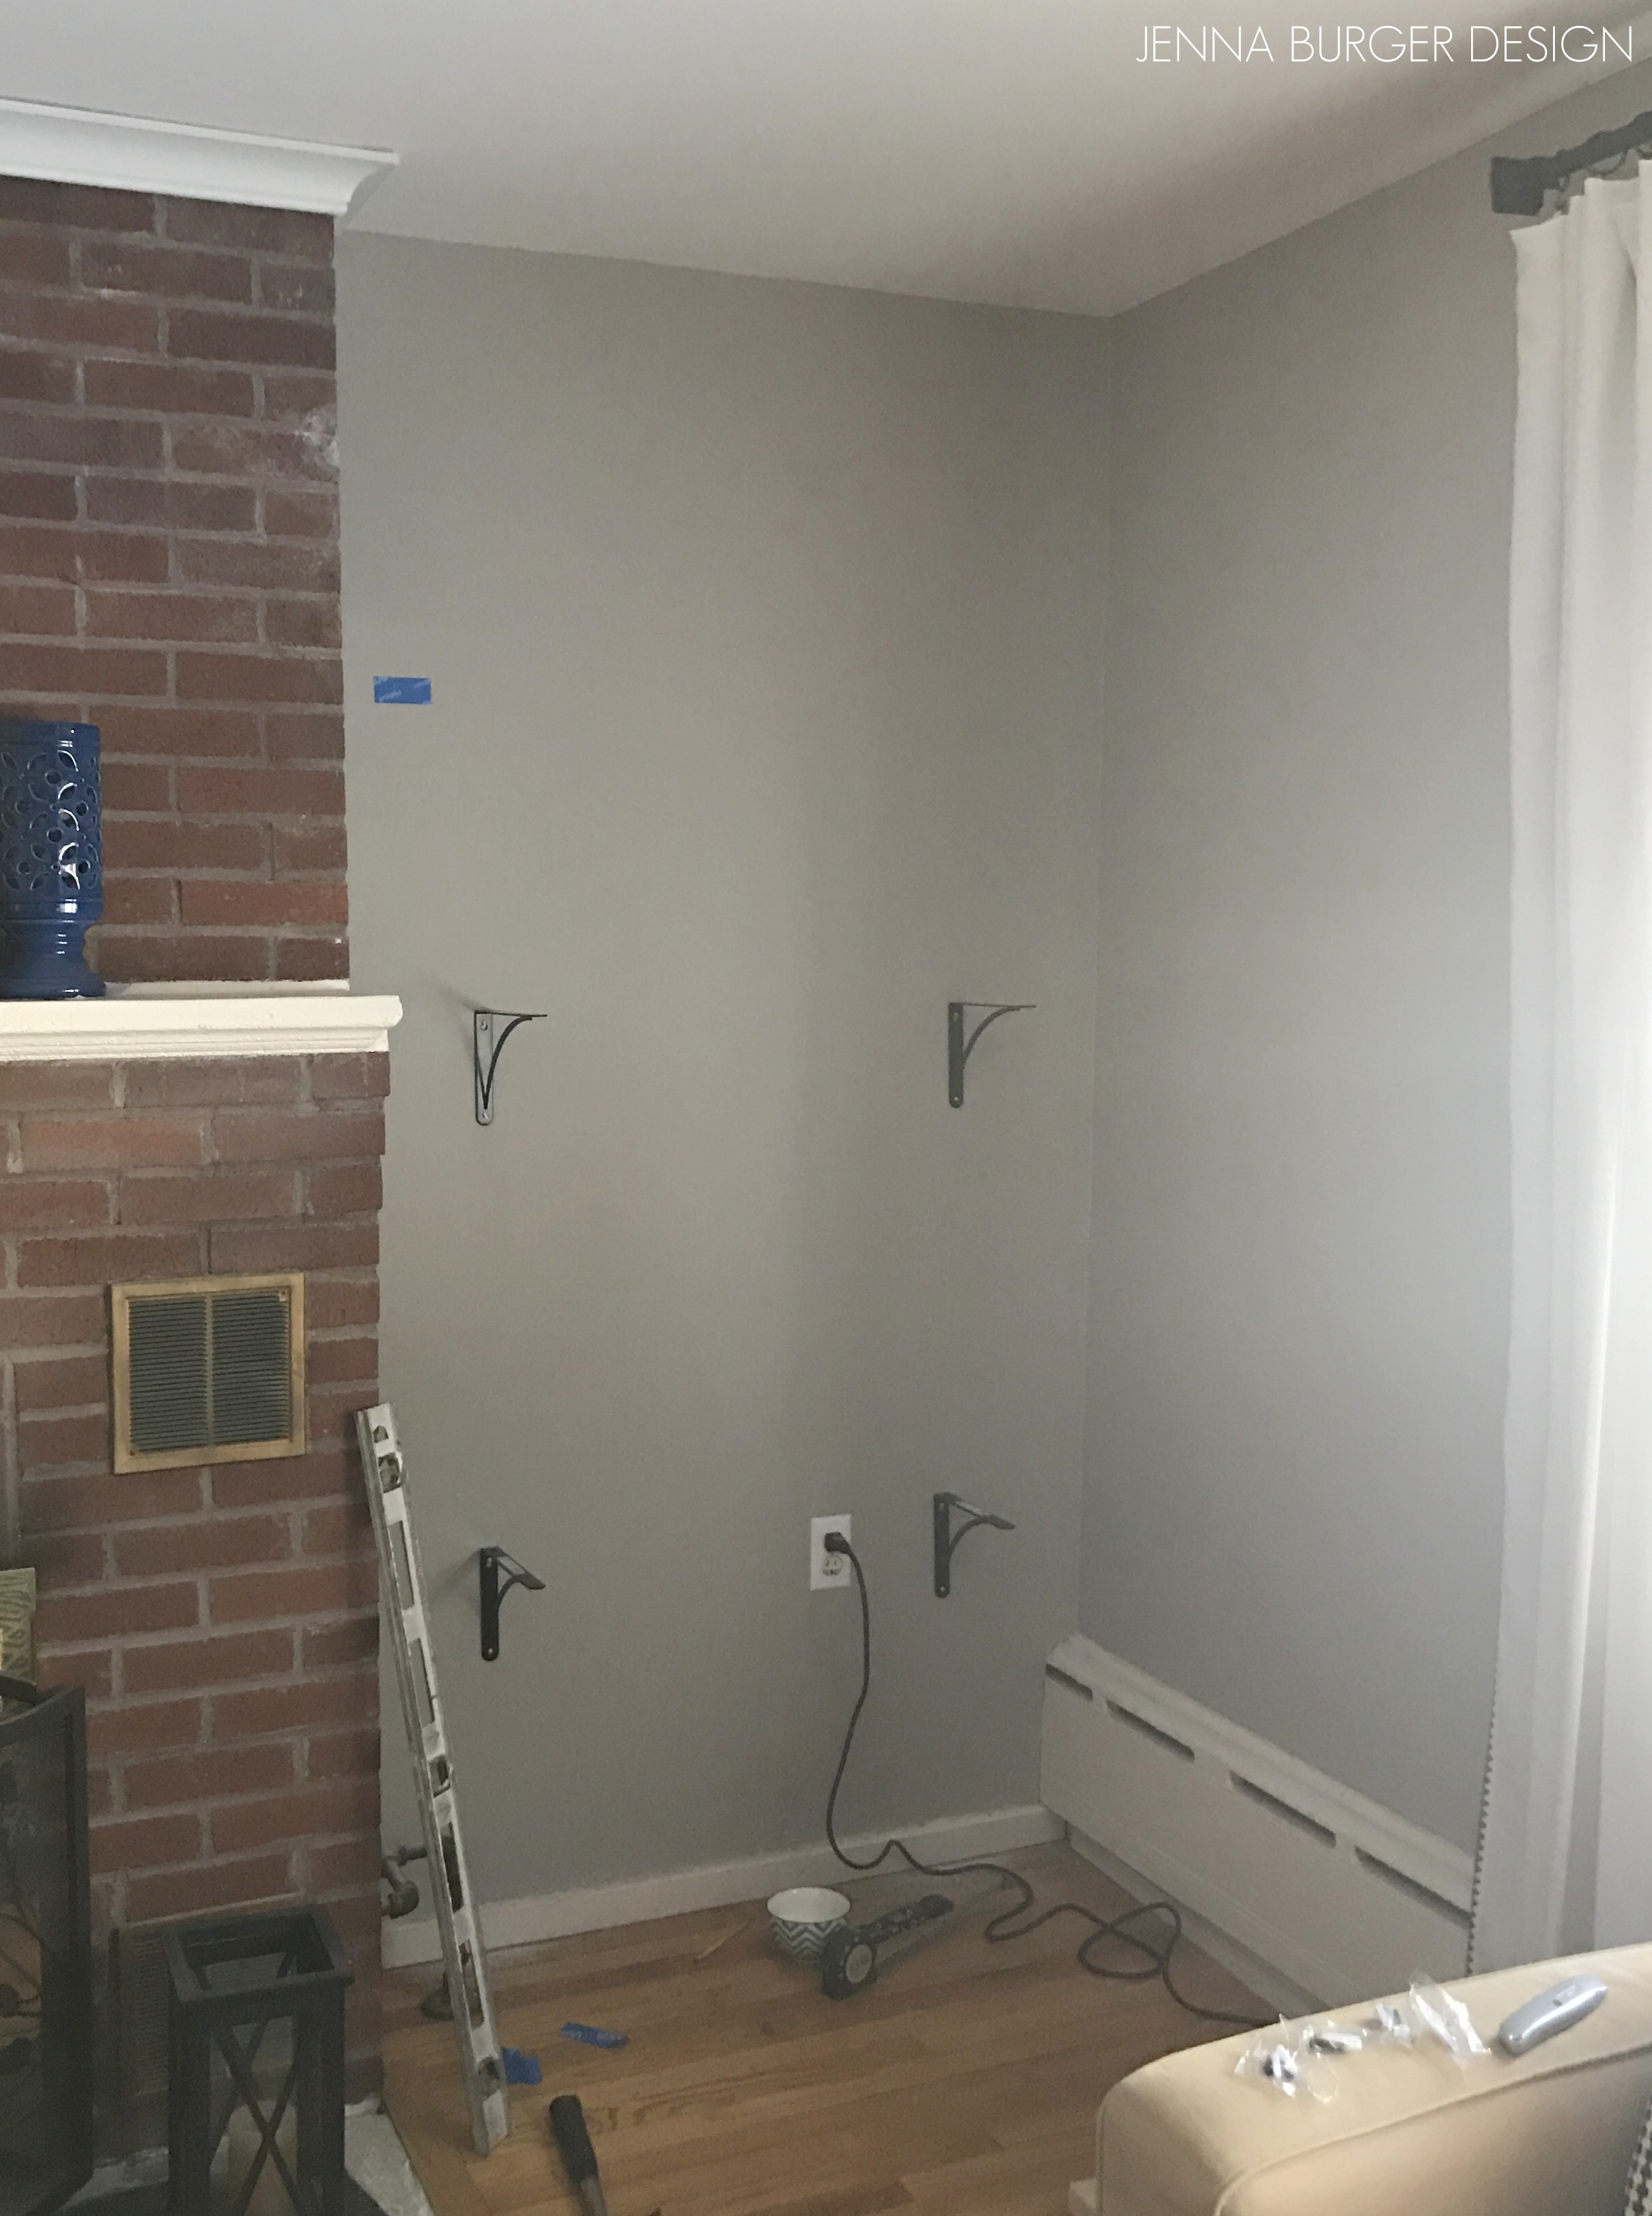
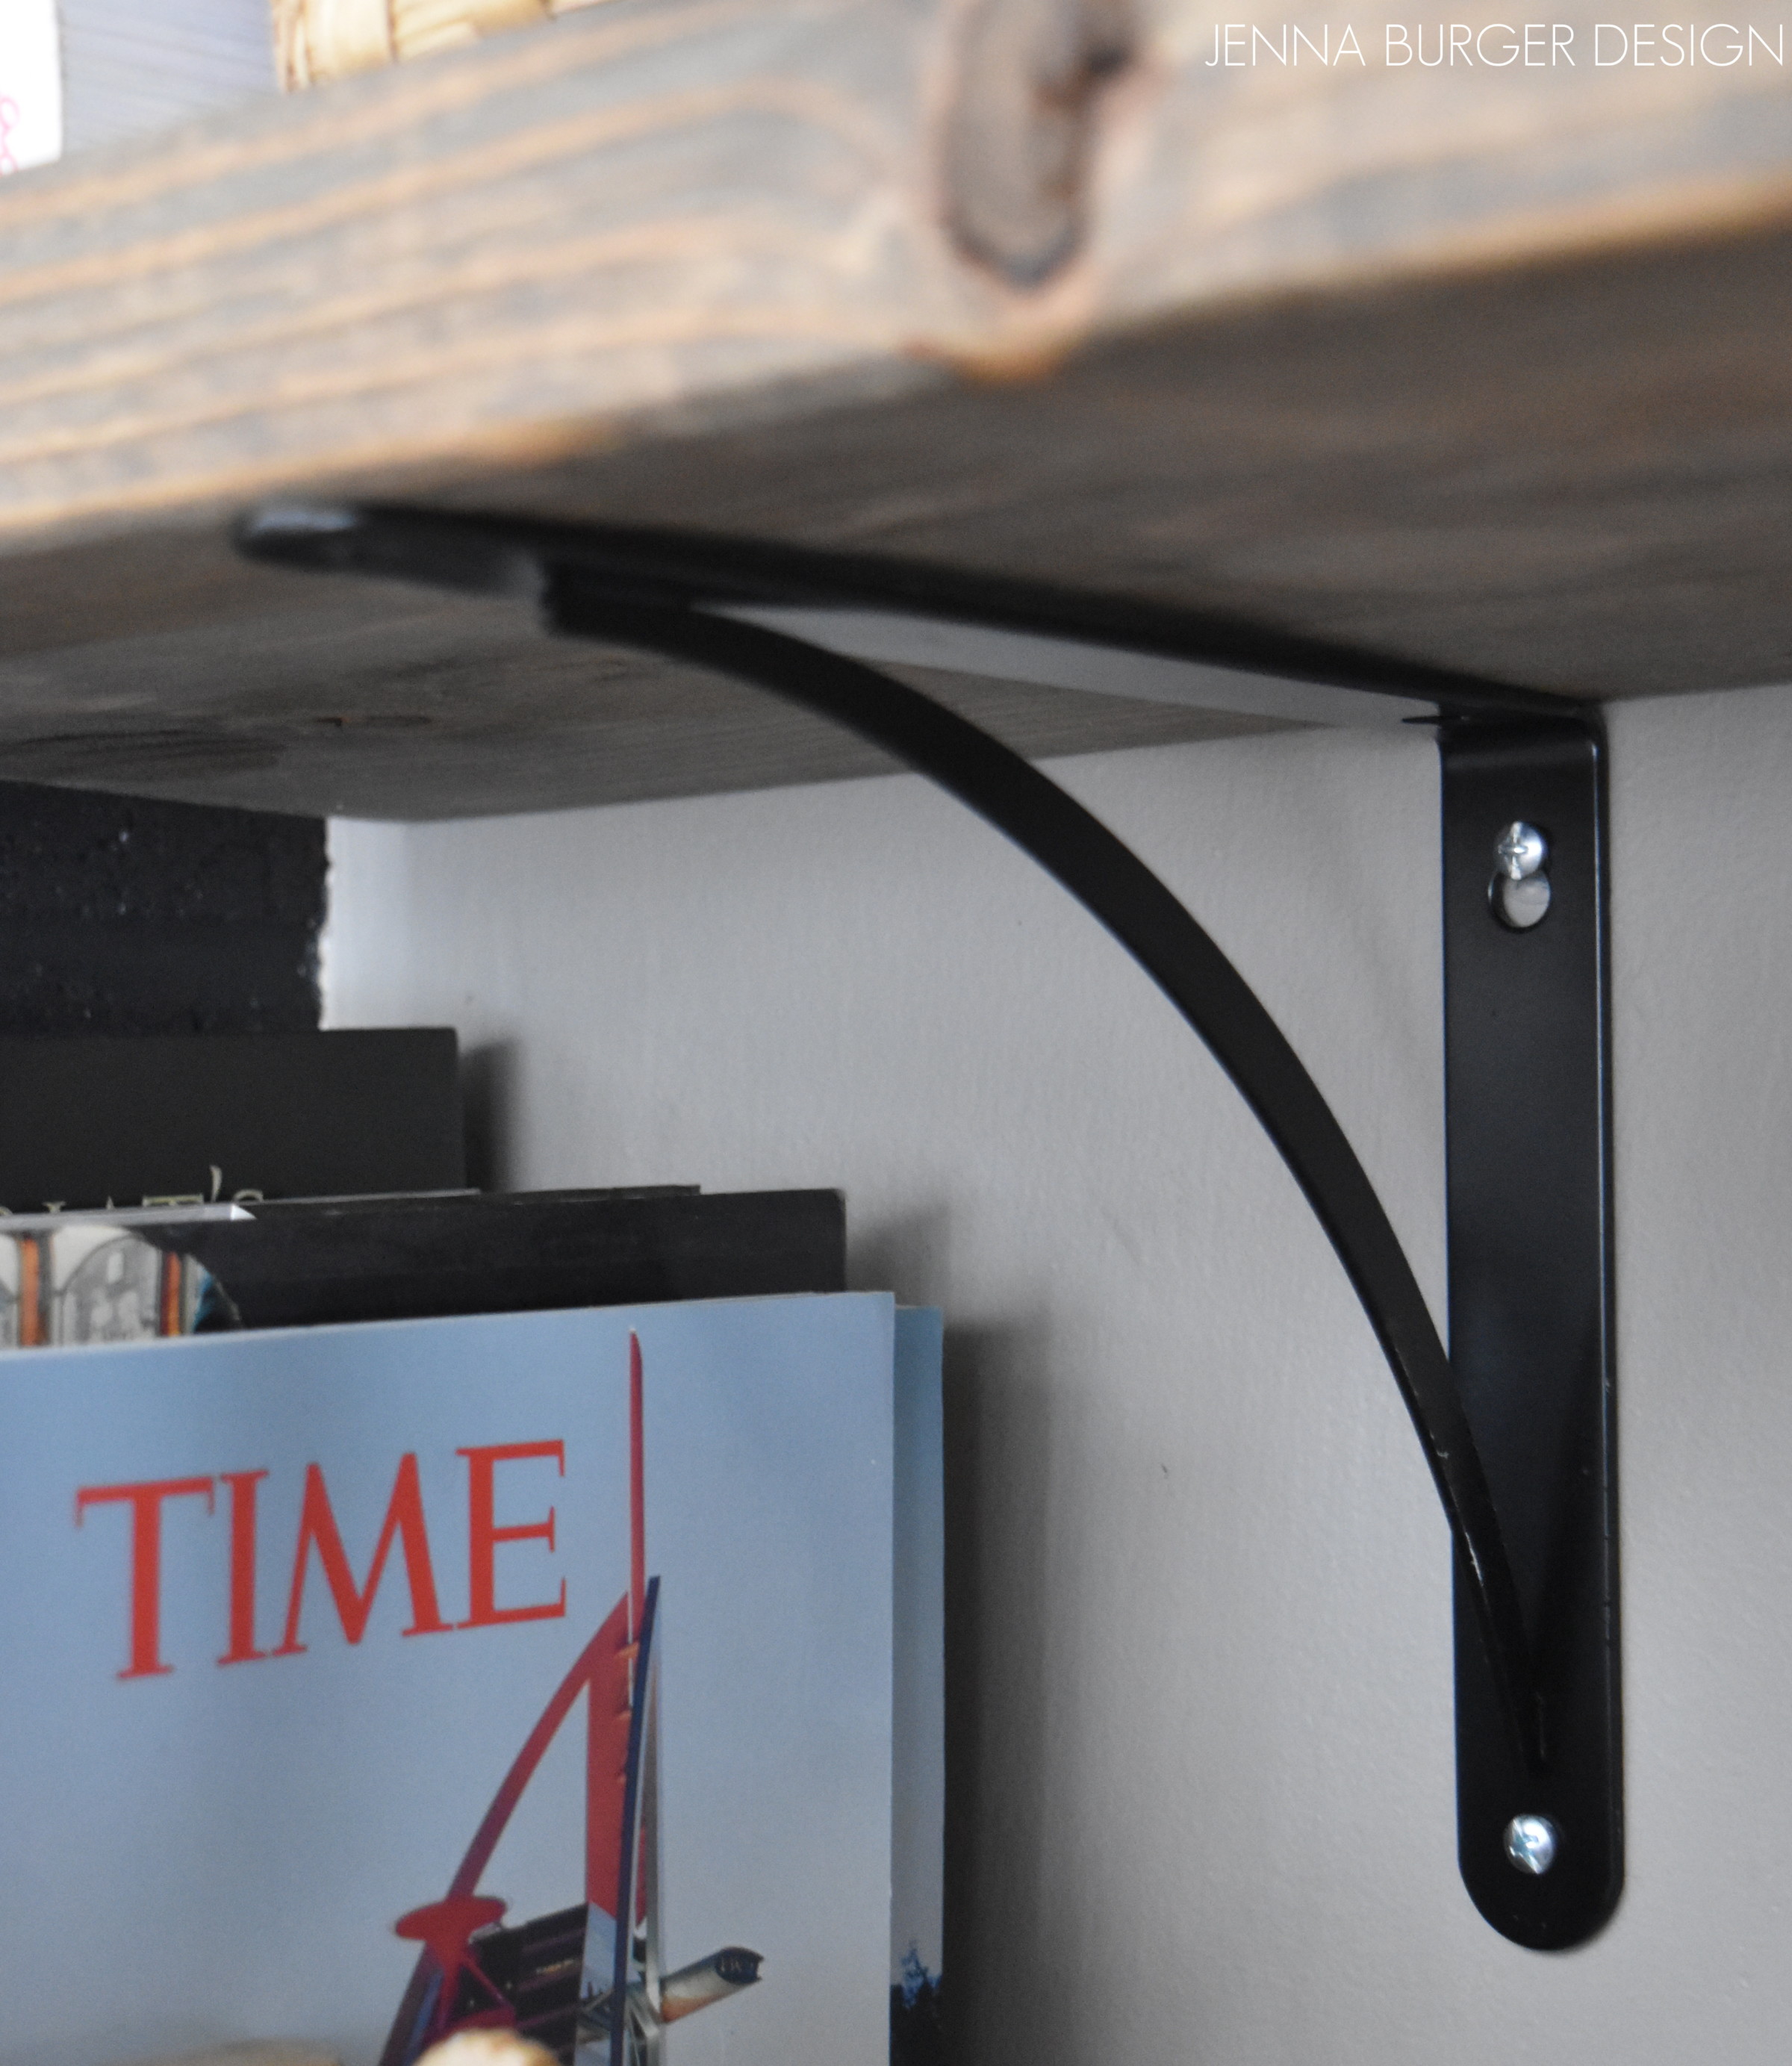
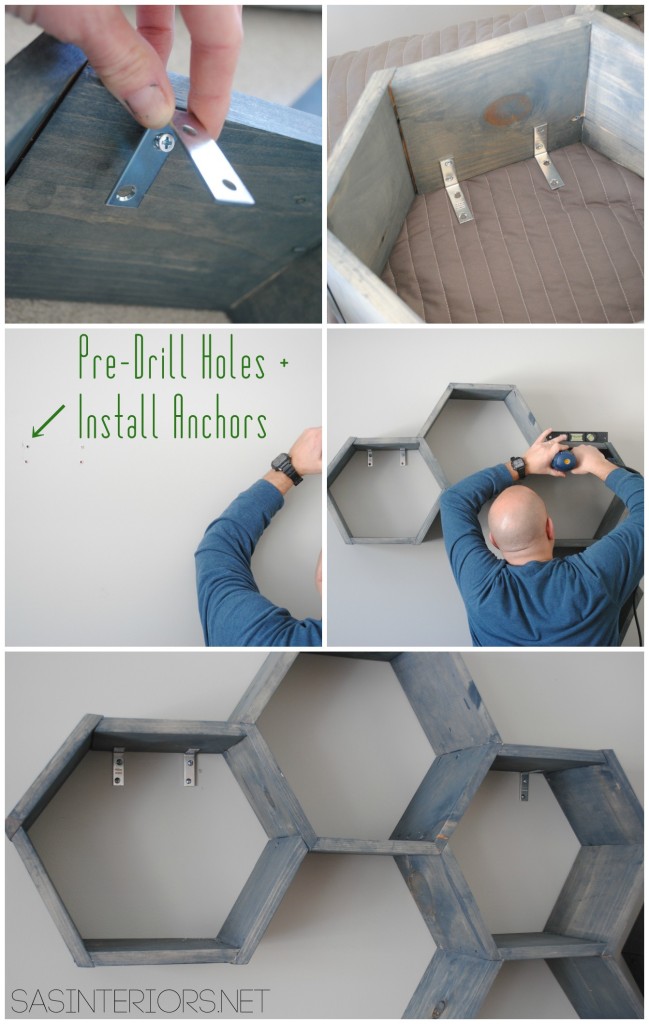
6. About a day later, the shelves were ready to install.  I first attached the metal angle brackets to the shelves. Then I determined the height + positioning of where the shelves would be hung.

Next, the Mister + I marked the holes through the brackets and pre-drilled the holes into the wall.  As with hanging anything, I always love using plastic toggle drywall anchors (I shared a pic recently on Instagram).

Once the anchors were in each hole, we repositioned the shelves in place and screwed them in using a drill + screw.  It’s key to use a level as well so the shelf doesn’t get installed crooked!

{DIY Tutorial} How-To Make Wood Honeycomb Shelves. Why spend hundreds, when you can make them yourself! These shelves complete the look of the room. So many great projects in this kids room makeover.

At this point, the shelves were almost done…

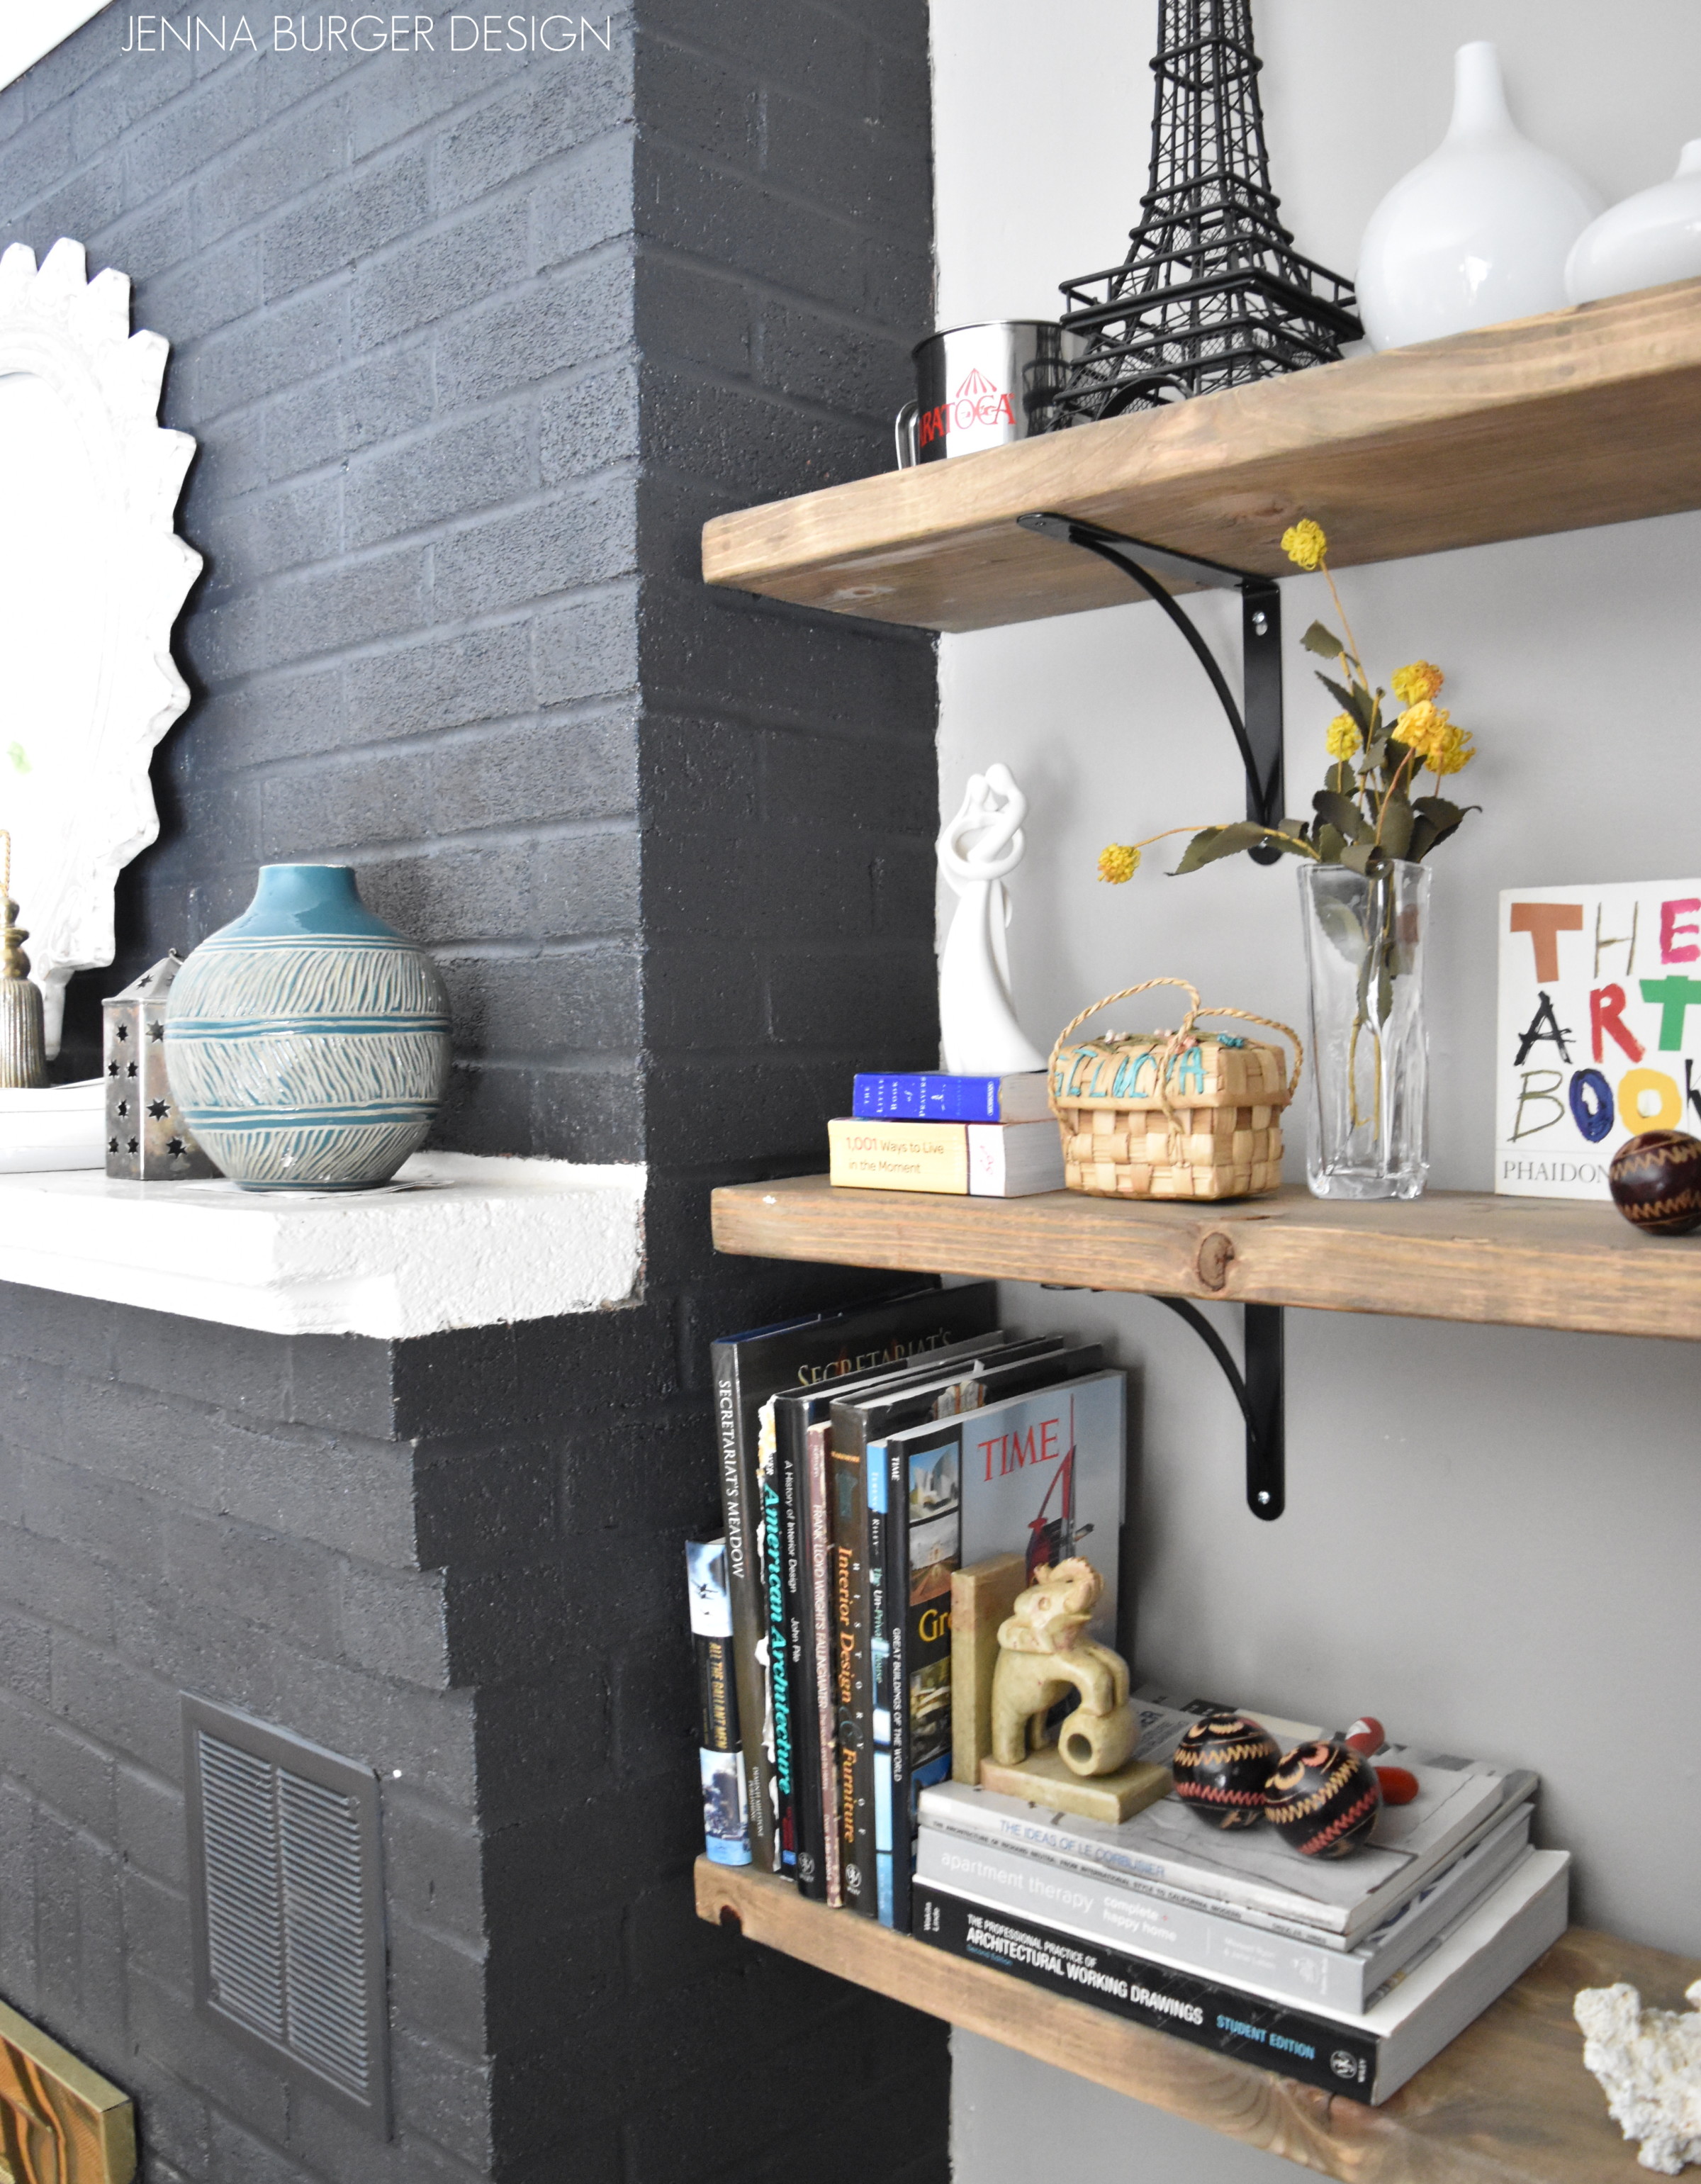
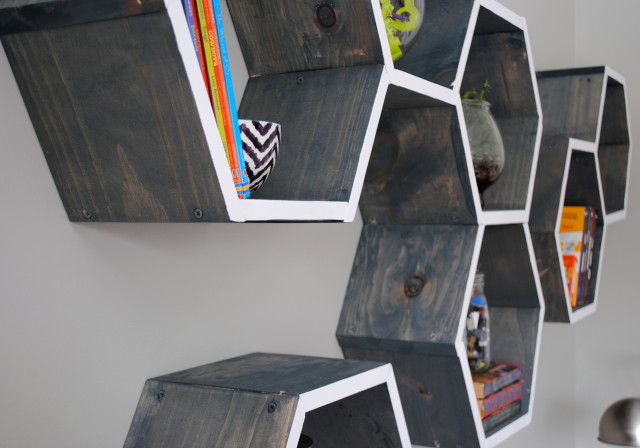
I loved the look of the blue shelves against the lighter gray walls, but I still wanted to make them pop.  To do so, I chose to paint the front edge of the shelves a white color which matches the moulding throughout the room.  Two coats later with a small, flat brush did the trick.

{DIY Tutorial} How-To Make Wood Honeycomb Shelves. Why spend hundreds, when you can make them yourself! These shelves complete the look of the room. So many great projects in this kids room makeover.

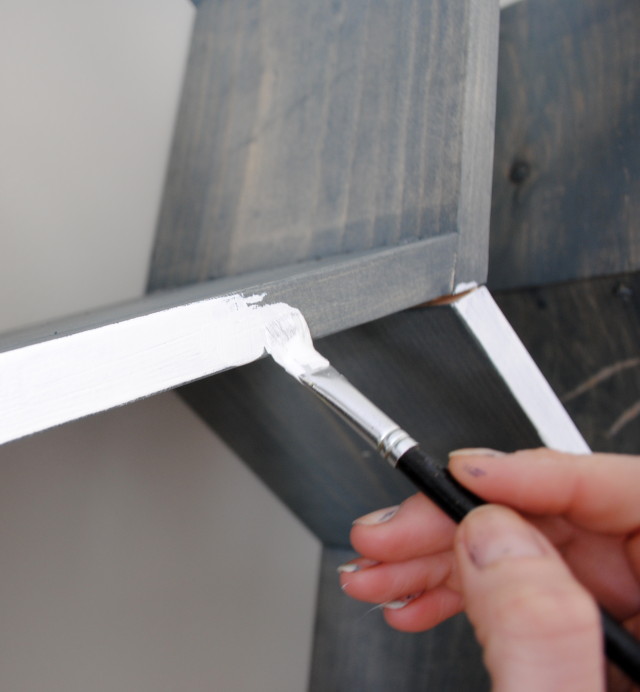
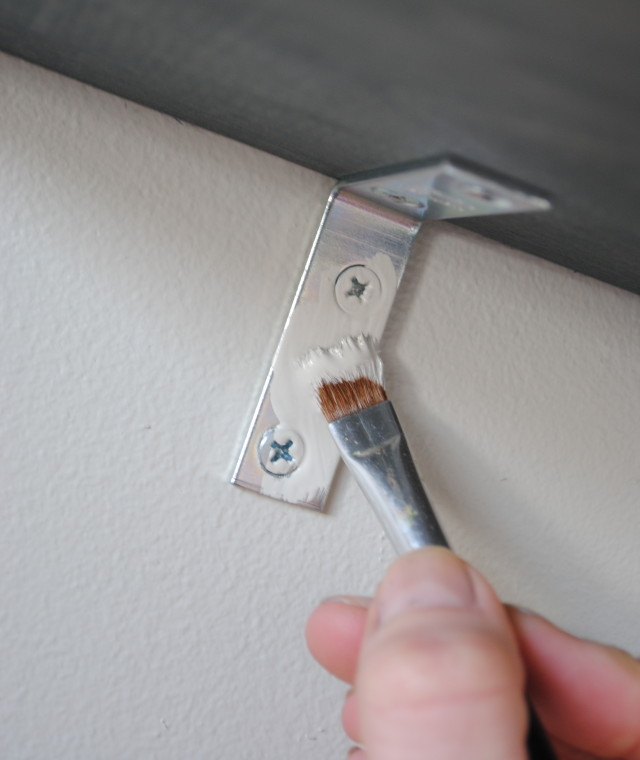
Lastly, so the metal brackets didn’t stand out so much, I painted those as well using the wall paint color.

{DIY Tutorial} How-To Make Wood Honeycomb Shelves. Why spend hundreds, when you can make them yourself! These shelves complete the look of the room. So many great projects in this kids room makeover.

And then they were finally complete!

{DIY Tutorial} How-To Make Wood Honeycomb Shelves. Why spend hundreds, when you can make them yourself! These shelves complete the look of the room. So many great projects in this kids room makeover.

{DIY Tutorial} How-To Make Wood Honeycomb Shelves. Why spend hundreds, when you can make them yourself! These shelves complete the look of the room. So many great projects in this kids room makeover.

Love the under-the-bed wood rolling carts?  I shared the tutorial on how to make them earlier this week.

{DIY Tutorial} How-To Make Wood Honeycomb Shelves. Why spend hundreds, when you can make them yourself! These shelves complete the look of the room. So many great projects in this kids room makeover.

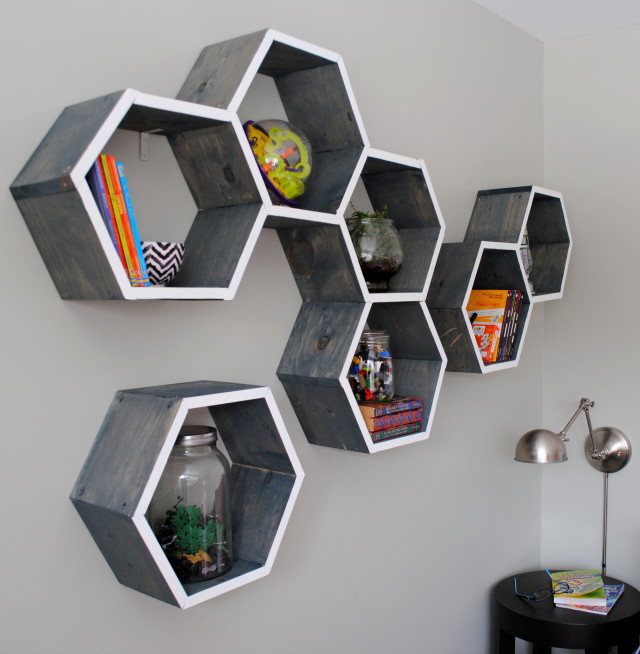
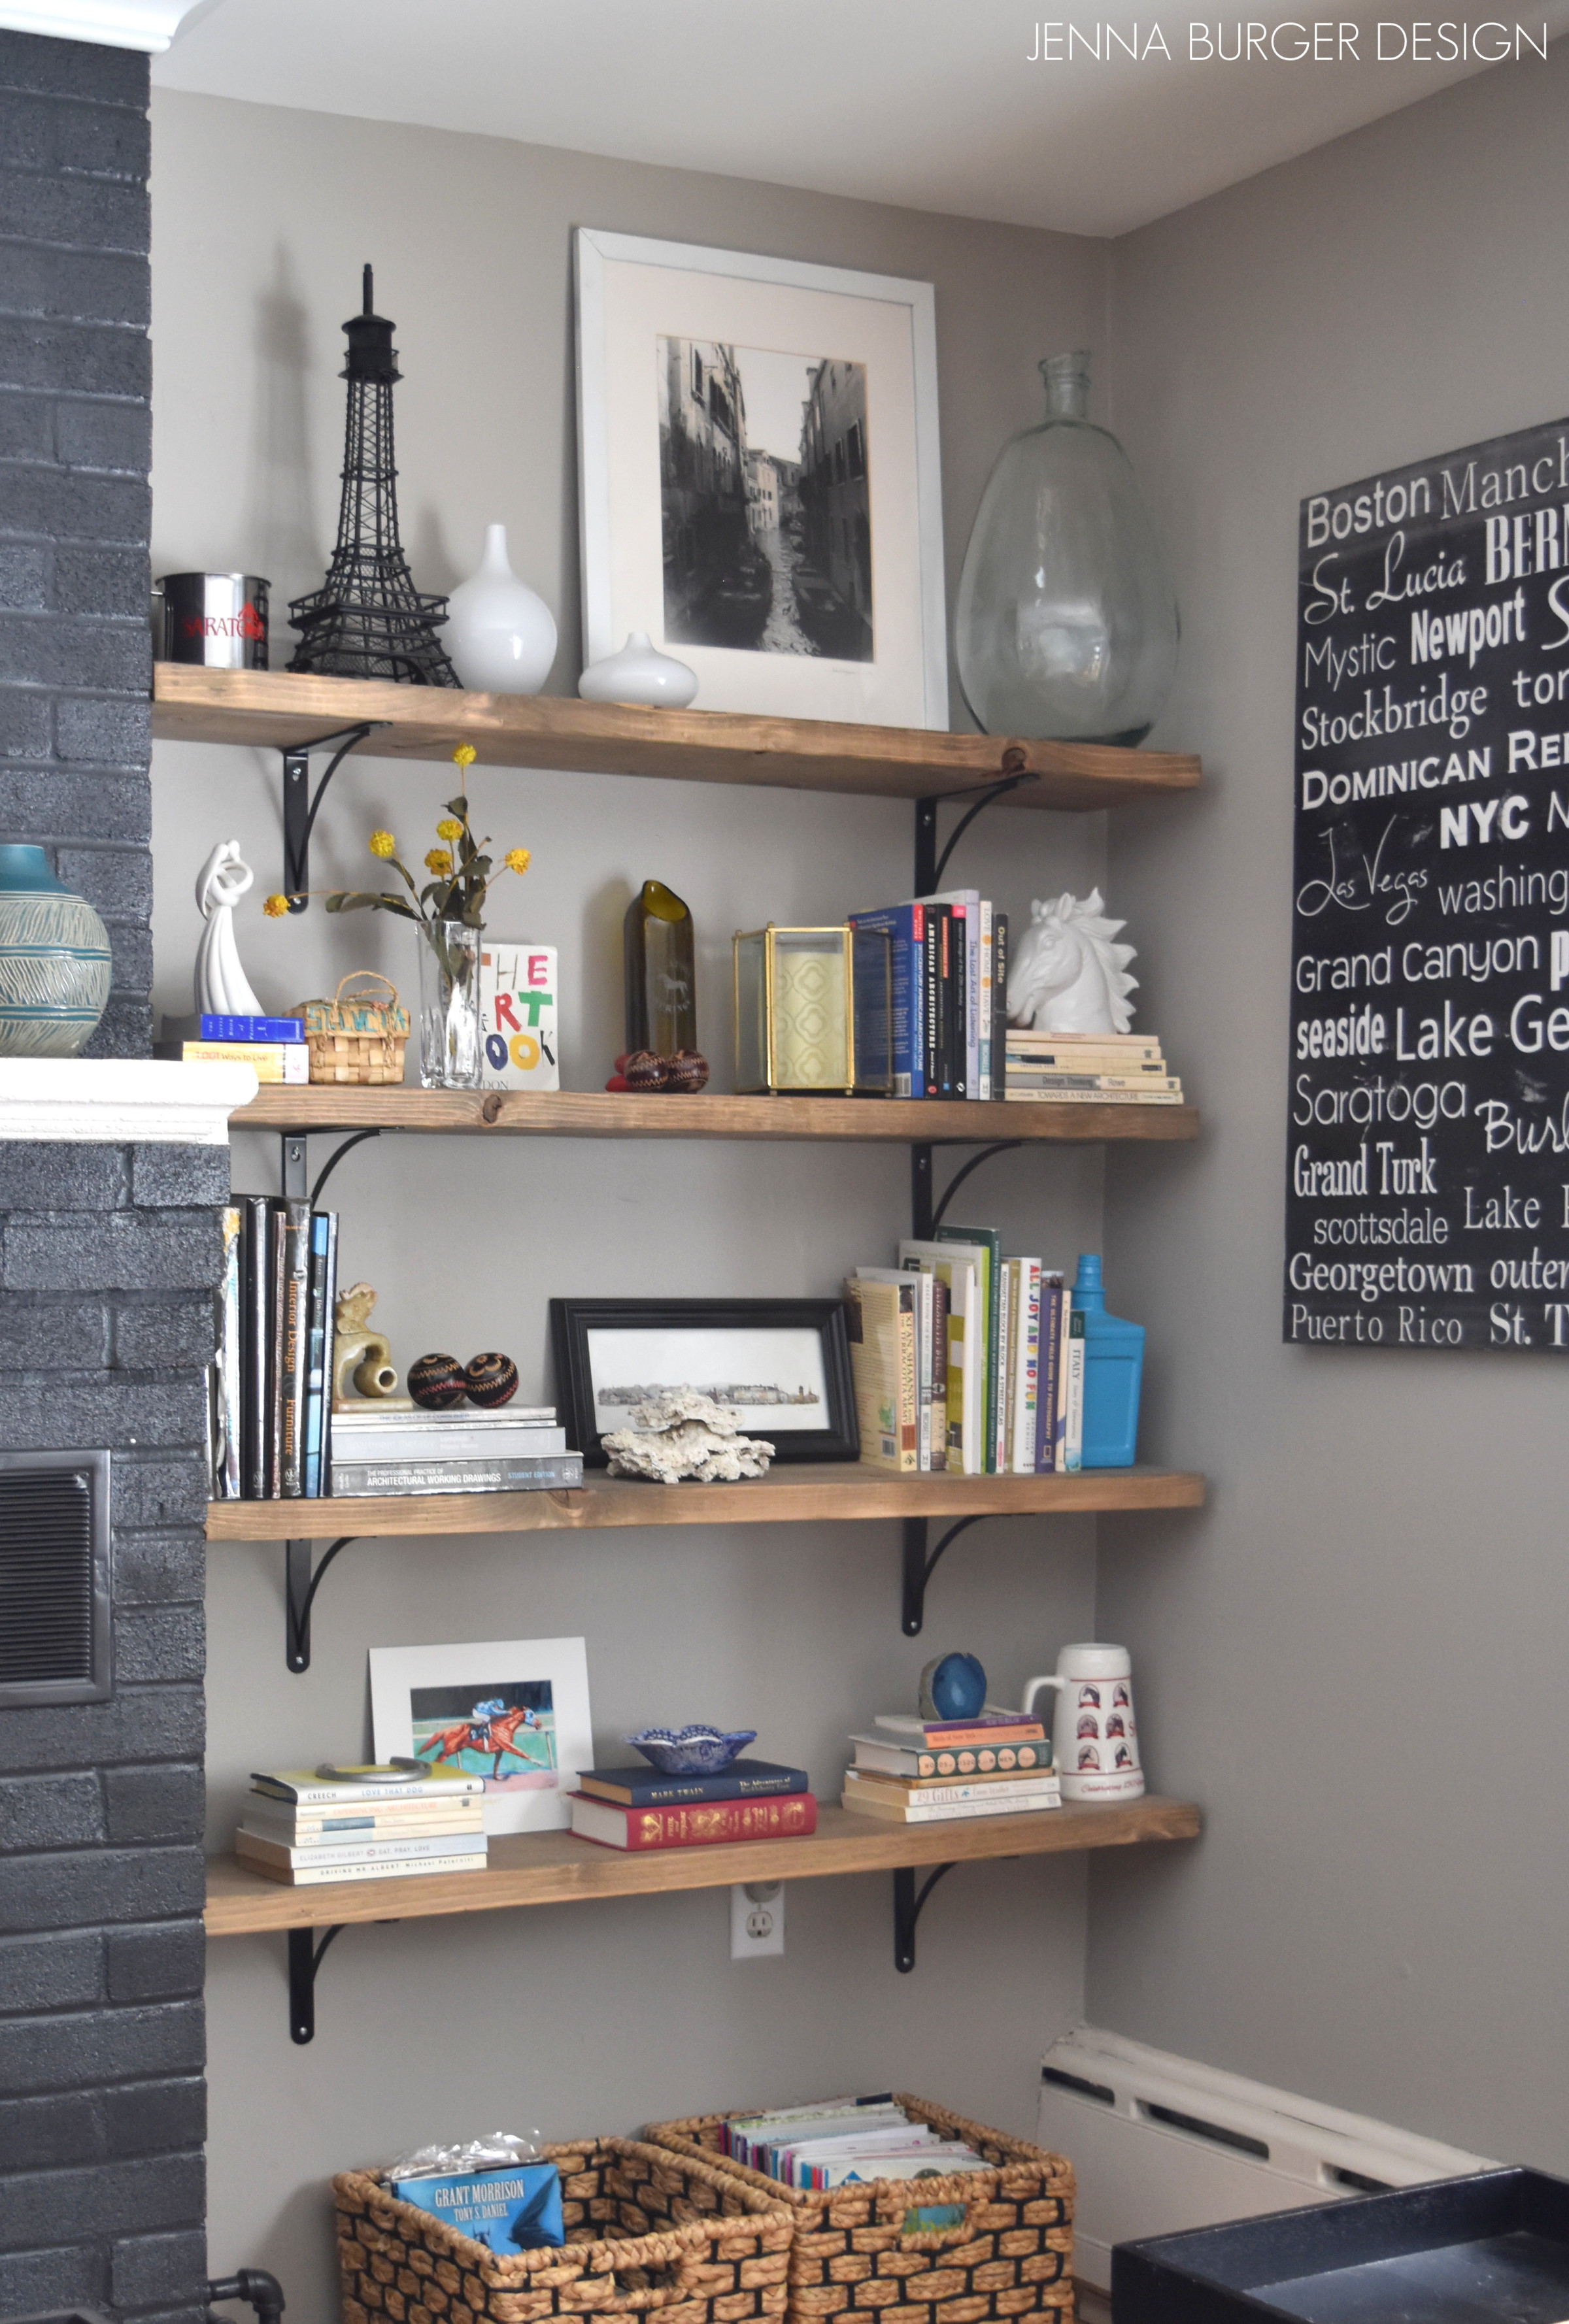
These shelves are perfect to fill with books, toys in containers, and any fun thing(s) to display.

{DIY Tutorial} How-To Make Wood Honeycomb Shelves. Why spend hundreds, when you can make them yourself! These shelves complete the look of the room. So many great projects in this kids room makeover.

{DIY Tutorial} How-To Make Wood Honeycomb Shelves. Why spend hundreds, when you can make them yourself! These shelves complete the look of the room. So many great projects in this kids room makeover.

{DIY Tutorial} How-To Make Wood Honeycomb Shelves. Why spend hundreds, when you can make them yourself! These shelves complete the look of the room. So many great projects in this kids room makeover.

And here is a pretty pinnable picture if you want to remember this project for a later date…

{DIY Tutorial} How-To Make Wood Honeycomb Shelves. Why spend hundreds, when you can make them yourself! These shelves complete the look of the room. So many great projects in this kids room makeover.

So what do you think?

Do you like the honeycomb / hexagon look?  Have you incorporated this new trend into your home? What has been your most difficult DIY project endeavour?

Lowes Creative Team Member Badge - Spring 2014

To gather even more unique, fun, and creative ideas for your indoor and outdoor Spring spaces, I would definitely suggest downloading the Lowe’s Creative Ideas app on your iphone and/or ipad.  I’m always checking out the FREE app for great seasonal + do-it-yourself inspiration.

 Also consider following Lowe’s on Facebook, Pinterest, and Instagram as well.

Disclosure: I am part of the Lowe’s Creative Team and was provided with a Lowe’s gift card to purchase items for my project.  I was also compensated for my time to use the products.  No one told me what to create, what to buy, how to use the product, or what to write.  All opinions are 100% mine!

DIY: Travel Subway Art Sign

I hope you had a great weekend and are enjoying the first officially days of Fall – the leaves are starting to change here, how about in your neck of the woods?

Like usual, I’ve been knee deep in creating new DIY projects and one in particular that I just finished up has been on my to-do list for a long time.  It took me a while to figure out how to make it, but thankfully I’m thrilled with the result, and the main reason is because it cost less than $10 to make – {complete score}!

I’ve gotta give credit for the technique on how to create this Subway Art to Cheri of I Am Momma – Hear Me Roar and Monica & Jess of East Coast Creative.  Both gals created completely different projects, yet both used the same idea of creating an image and having it printed as a blueprint (a thin black & white 24″ x 36″ paper) at Staples for less than $4 – Crazy awesome right?!

Here’s how I did it so you can create a similar travel sign or something completely different using the same cheap blueprint technique…

Using Picasa (my favorite free photo editing program), I started off with a clean white collage using the highest resolution possible and then cropped it to a 24″ x 36″ size so the text would print as clear as possible (at a large scale).   A while ago, I had wrote a list of vacation spots that the mister and I have traveled to together over the years and started adding them to the collage in a variety of different fonts.  (want to see a few of the fonts I used?  Check out my favorites!).

Once I created this collage using my computer, I pulled together the rest of my supplies:

  • (1) 24″ x 36″ Blueprint from Staples for – $3.60
  • (1) 24″ x 36″ 1/4″ piece of plywood – $4.00
  • Spray Glue – $2.50 +/-  (50% off with AC Moore coupon)
  • Mod Podge & Brush
  • Black craft paint & brush
  • 2 pieces of scrap wood or pallet boards

After my stop at Staples to get my inexpensive print, I then headed to Lowe’s to get a piece of plywood.  I found a 3′ x 3′ piece and then had them cut it down to my exact size of 2′ x 3′. Important note: The blueprint might not be exactly to size, so you may want to measure that first before cutting the plywood.  I didn’t, but the plywood was only about 1/16″ larger and I sanded the edge with my orbital hand sander, so it fit to size.

To adhere the blueprint to the plywood, I decided on the Aleene’s Tacky Spray which I purchased at AC Moore.  I was thrilled with their products that I tried out last year, and thankfully this spray glue worked like a charm!

To stick the blueprint to the plywood, I started at the top edge and sprayed a thin, even coat of glue, just like spray paint, from one side to the other side. Then lined up the corner of the blueprint to the corner of the plywood.

Once the top edge of the print was on, I continued to add the glue in small sections – again spraying from one side to the other.

Once the blueprint was fully on the plywood, I added a coat of Mod Podge to protect the paper surface.  I applied the MP from side to side just like the spray glue.

I didn’t forget the sides – it’s a must so the paper doesn’t rip or curl.

Almost done, but I have to admit there were some wrinkly spots once the Mod Podge dried…

Oops, I thought I adhered the blueprint so well.  No worries, I then got out my handy-dandy orbital sander and sanded the edges and top surface of the print.  I also added in a few “wear marks” to give the sign a distressed look.

Almost finished… to complete the look and to hide the plywood side, I used a black craft paint and painted the 4 edges of the sign.

The sign is complete…

…but wait, we’ve gotta mount & hang it!  To give the sign some depth and importance (plus it was slightly bowed because the plywood is thin), I added two vertical pallet pieces to the back.  Using short nails with a small head, I hammered them through the sign into the pallets. Then added picture hooks and wire.

Then it was really done!

So fun, So easy, and less than $10 – you can’t beat awesome, personalized wall decor like that!

I link my projects to some of these parties: Skip to My Lou, Dittle Dattle, Between Naps on the Porch, Today’s Creative Blog, Stories of A to Z, All Things Heart & Home, House of Hepworths, Finding Fabulous, The Shabby Nest, Serenity Now, Tatertots and Jello, Thrifty Decor Chick, Tip Junkie

How-To Paint Laminate Furniture

I recently shared my newly styled bookshelves, but before I added all the colorful books and stylish accessories, I gave the bookcases a much needed makeover.

Since painting the space deep blue, the once faux-wood bookcases got lost in the dark hue of the walls, and they were ready for a transformation. A crisp, fresh coat of white was the perfect solution to make a statement.

I purchased these two bookcases from Walmart about 2 years ago.  Each were around $100 and were not the best of quality (duh, look at the pricetag).  Anyway, they fit the bill at the moment, but recently the shelves started to bow.  Aside from the decision to paint the bookcases, I also needed to make a few updates so they would last a few more years – I’ll get to more on that later in the post.

Before starting the process of painting the laminate, I did a little research on the process and the first article I saw was Lindsay’s post when she transformed her TV cabinet.  It was just what I needed to get me started.

Here’s the bookcase before…

To begin, I gave each bookcase a good sanding with my orbital sander (hands down, my favorite power tool). These bookcases are made of a particle board-like  composite with a faux-wood laminate exterior. It was important NOT to sand too much because otherwise the surface would get ruined (since it’s essentially paper), but at the same time it was important to get them ‘roughed-up’ so the paint would absorb into the surface.

Then the next key step was to prime all the surfaces.  Like usual, I used Kilz Primer which blocks, seals, and preps the surface for the paint to adhere to the surface.  Primer is important, but especially when painting over laminate (as I described above).  Unlike wood, laminate is a smooth, non-porous material, so it really needs something to ‘grab’ on to – primer will do the trick!  It’s suggested that primer takes 7 days to completely dry – you can take that advice if you’d like, but I didn’t (shame, shame on me, I know).  BUT, I did wait about 4 days before painting to really make sure the surface was good-to-go!

My good blogging friend, Diane, recently wrote a post on Gripper Paint.  She uses the Glidden brand (Kilz brand has a similar product), and even though I haven’t tried it, this is another great product to use as a primer.  The name says it all.

Sidetrack Steps…

At this point of the project, I made the decision to make a few much-needed updates to the structure and look of the bookcase.  Instead of moving on to directly painting the bookcase, I decided to replace the shelves and the backing material.

As I mentioned before, the shelves were really bowing – alot – so I took a trip to my hardware store and had a long piece of 2×12 cut into lengths needed for new shelves.

And check out the back of the bookcase…  UGLY!  It was basically paper and when I started to paint the surface, it started warping even more.  Once the decision was made to upgrade the back, I crumbled the paper-backing with one hand…

To fix the backing, I had a thin piece of plywood cut to size.  Then the Mister and I flipped the bookcase onto it’s front and nailed the plywood to the perimeter of the bookcase back. (This step might seem difficult, but please be assured it wasn’t – this was probably one of the easiest steps throughout this project).

Now back on track…

After sanding, priming,and making a few updates, it was time to PAINT!

I used a brush for the corners and a roller for the flat surfaces.  In certain areas, I used a brush first, then went over the same surface with the roller to achieve a smooth, stroke-less surface. Here’s the bookcase with the first coat of paint…

Here’s a tip.  If the surface isn’t sanded or not sanded enough, then the paint will bubble (because it’s not adhering to the surface).  Check this out…

This is a No-No!

I’ll be honest, these bookcases took about 3-4 coats until I felt they were fully covered. And even after they were dry to the surface, I didn’t put anything on the shelves for at least a week.  Paint takes about 30 days to fully cure and with the heavy books and accessories sitting on them, the last thing I would want would be to have them ruined or peel!

And this is the result…

So refreshing!  Then it was time to add the books and accessories.

And here’s a peak at how the bookcases look fully styled with books and accessories.  You can check out more by viewing this post.

Painting laminate wasn’t difficult, but I did find it more time consuming than painting wood.  To sum it up, the most important steps are to sand and prime all the surfaces before painting.  If you were to skip the 2 steps, your paint would have nothing to adhere to and would most likely peel right off.  Going into this project, I wasn’t sure of the result and if the paint would even stay since the surface was so smooth, but with the right preparation, I was thrilled with the outcome.