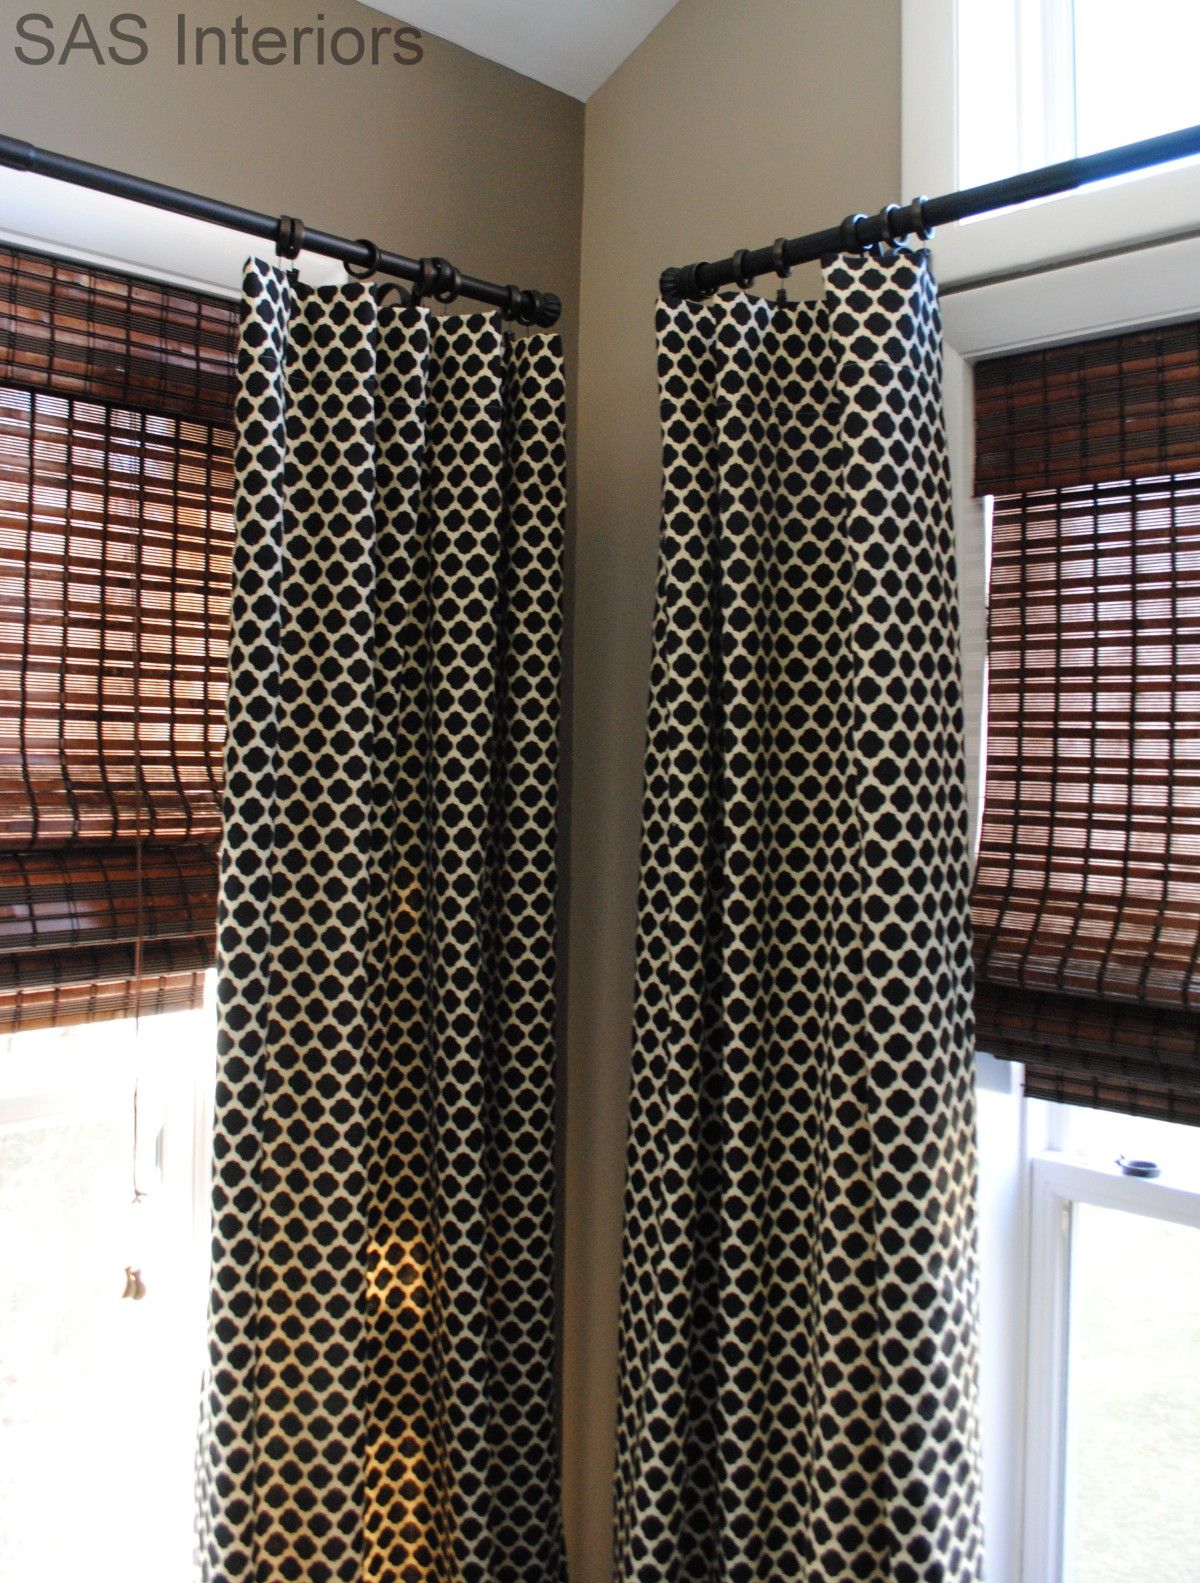
Tag: Drapery Panels

DIY: Drop Cloth Curtain Panels with Leading Edge Detail

I’ll be honest, none of the window curtain panels in my home cost more than $50.  Yet all are custom made.  Not by an uber-expensive fabricator, but by me.

Store-bought and/or custom-made curtain panels can be very pricey, but the same look (or better) can be achieved by making your own.  And guess what, it’s not difficult…

DIY: Drop Cloth Window Panels with Leading Edge Detail. High-end look for less than $20 to make. via @Jenna_Burger, WWW.JENNABURGER.COM


As the calendar turns and another Fall approaches, Lowe’s put The Team to the test this month to create a new window treatment for the home.  I was in need (well more like a want) of new window panels for the dining room, so I knew it was the perfect spot to get my craft on.

I desired something simple, so instead of stopping at the curtain aisle for a typical drape, I headed towards the paint aisle and landed in the drop cloth section.  confession: I can close my eyes and always find the drop cloth section… I’ve confessed my love for drop cloth before, but honestly it is The. Best. Material. hands down.  You can do so much with drop cloth material.  It’s not just for painters!!

Anyway, onto the new panels…

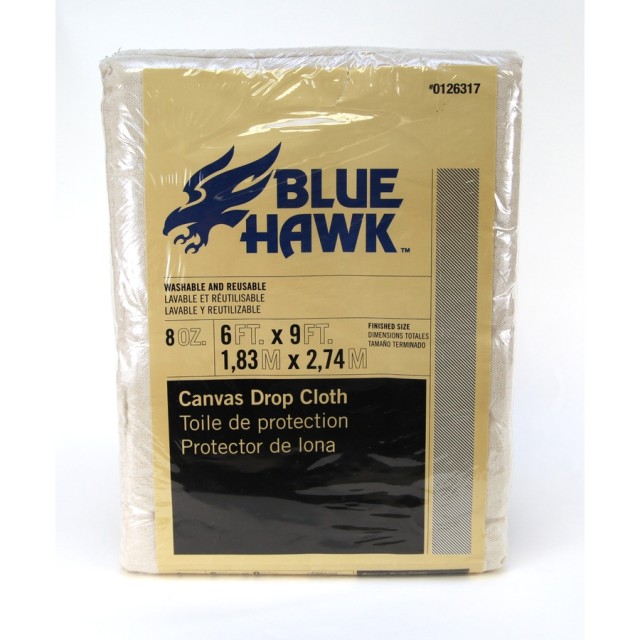
1. At Lowes, I chose a 6 ft. x 9 ft. size panel (about $10), then cut it in half to make (2) 3 ft. x 9 ft. pieces.

Drop Cloth

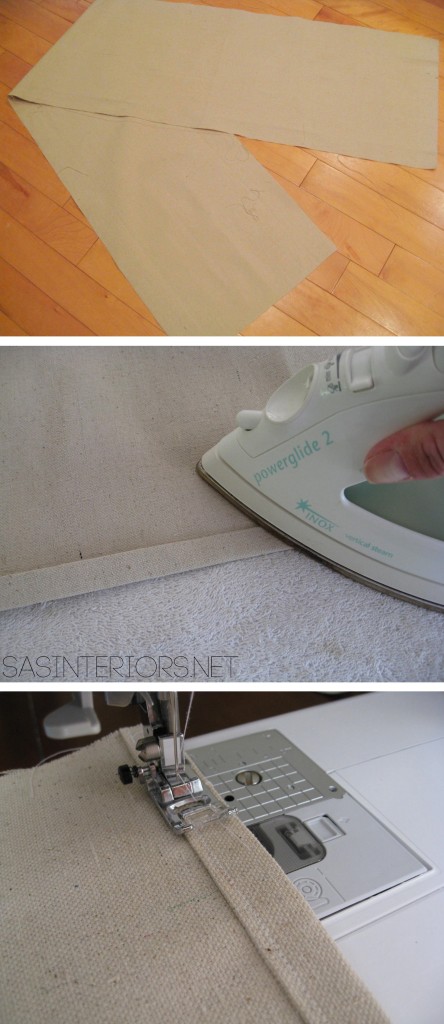
2. The panels are heavy enough, so I didn’t feel that a lining was needed, so I simply squared off the edges (drop cloth isn’t always perfectly straight), folded over the edges, and sewed all around.

DIY: Drop Cloth Curtain Panels

3. Once the panels were complete, it was time to add the decorative leading edge.  I chose a navy blue light cotton fabric which was the perfect contrasting complement to the lighter color of the drop cloth material.

And yes, that says $3 for the yard.  In all these panels cost about $13!
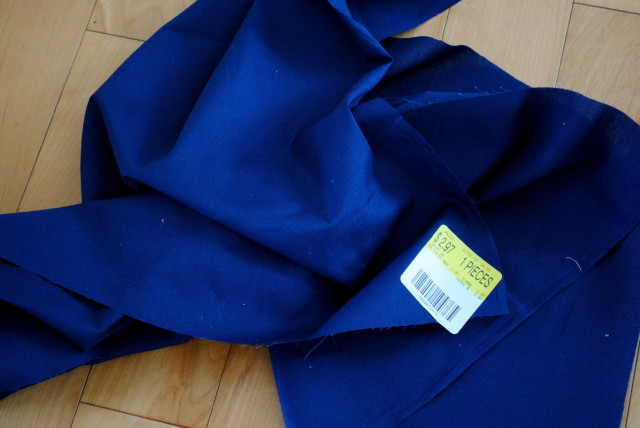
DIY: Drop Cloth Window Panels with Leading Edge Detail. High-end look for less than $20 to make. via @Jenna_Burger, WWW.JENNABURGER.COMThe color of the fabric is showing royal blue in this pic, but it is more navy in actuality.

4. I layed out the fabric length-wise and cut as many 4″ strips as I could.
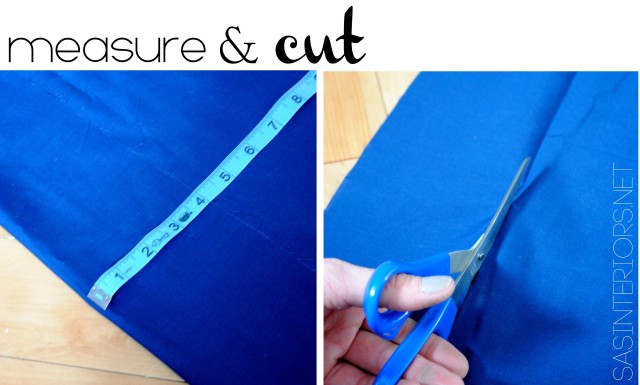
DIY: Drop Cloth Window Panels with Leading Edge Detail. High-end look for less than $20 to make. via @Jenna_Burger, WWW.JENNABURGER.COMagain showing royal blue…  but it’s not.

5. Then I folded over the two side edges 1/2″ each and ironed the seam flat.
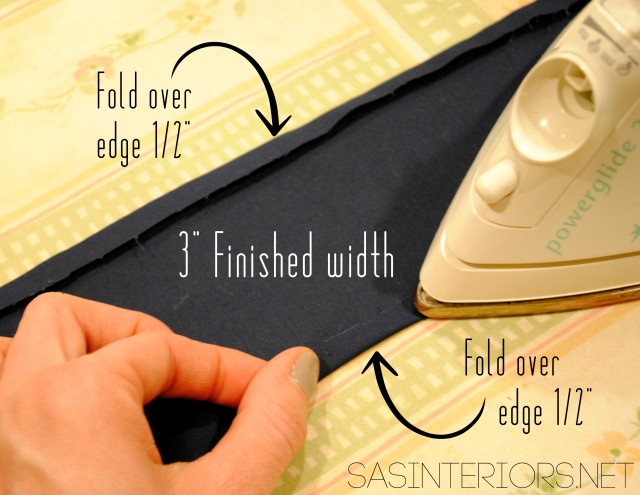
DIY: Drop Cloth Window Panels with Leading Edge Detail. High-end look for less than $20 to make. via @Jenna_Burger, WWW.JENNABURGER.COMThat’s the true color. I swear!

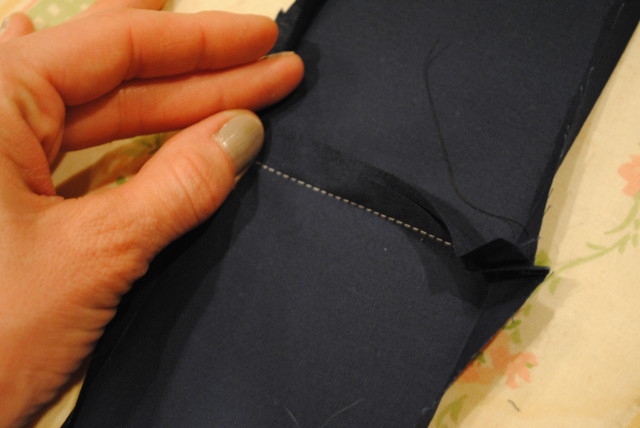
Sidenote: Because of the panel length (a typical panel can be from 84-96″ long), you may need to attach fabric strips to achieve one long strip. I did and before folding over and ironing the seam, I attached two strips and then I had enough length.  Once sewn, iron the seam flat.

DIY: Drop Cloth Window Panels with Leading Edge Detail. High-end look for less than $20 to make. via @Jenna_Burger, WWW.JENNABURGER.COM

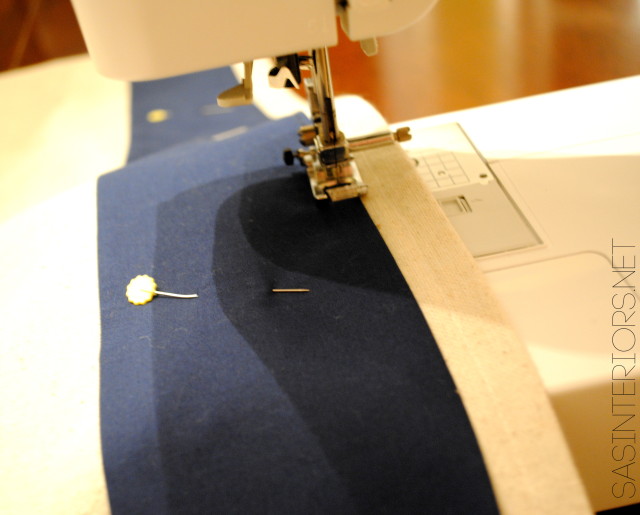
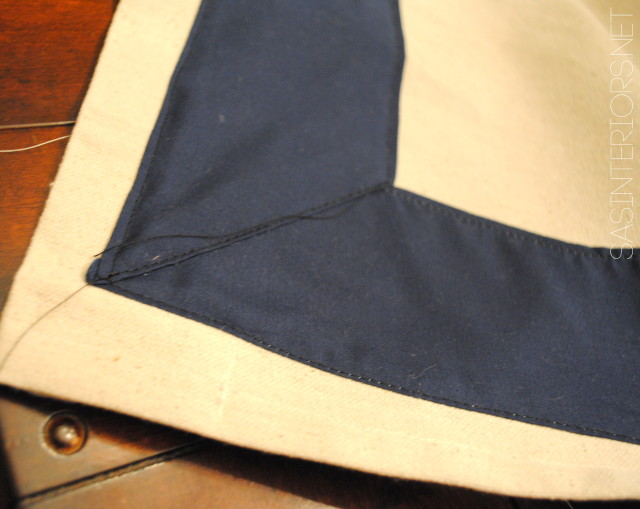
6. Once the seams were ironed, it was time to attach the decorative edge to the drop cloth panel. I decided to have 1″ of drop cloth exposed, then add the navy blue accent.  I first pinned the navy fabric in place and sewed all along the edges using the same color thread.

DIY: Drop Cloth Window Panels with Leading Edge Detail. High-end look for less than $20 to make. via @Jenna_Burger, WWW.JENNABURGER.COM

DIY: Drop Cloth Window Panels with Leading Edge Detail. High-end look for less than $20 to make. via @Jenna_Burger, WWW.JENNABURGER.COM

And that’s it.  A high-end look for $13!

The result…

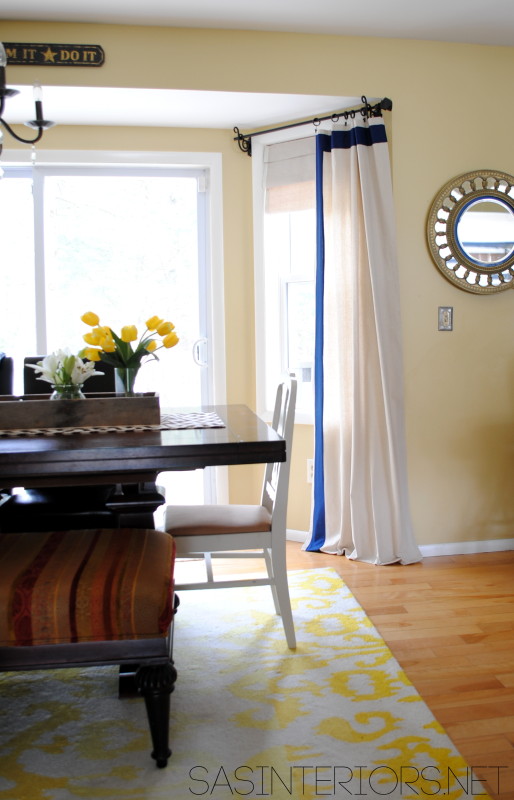
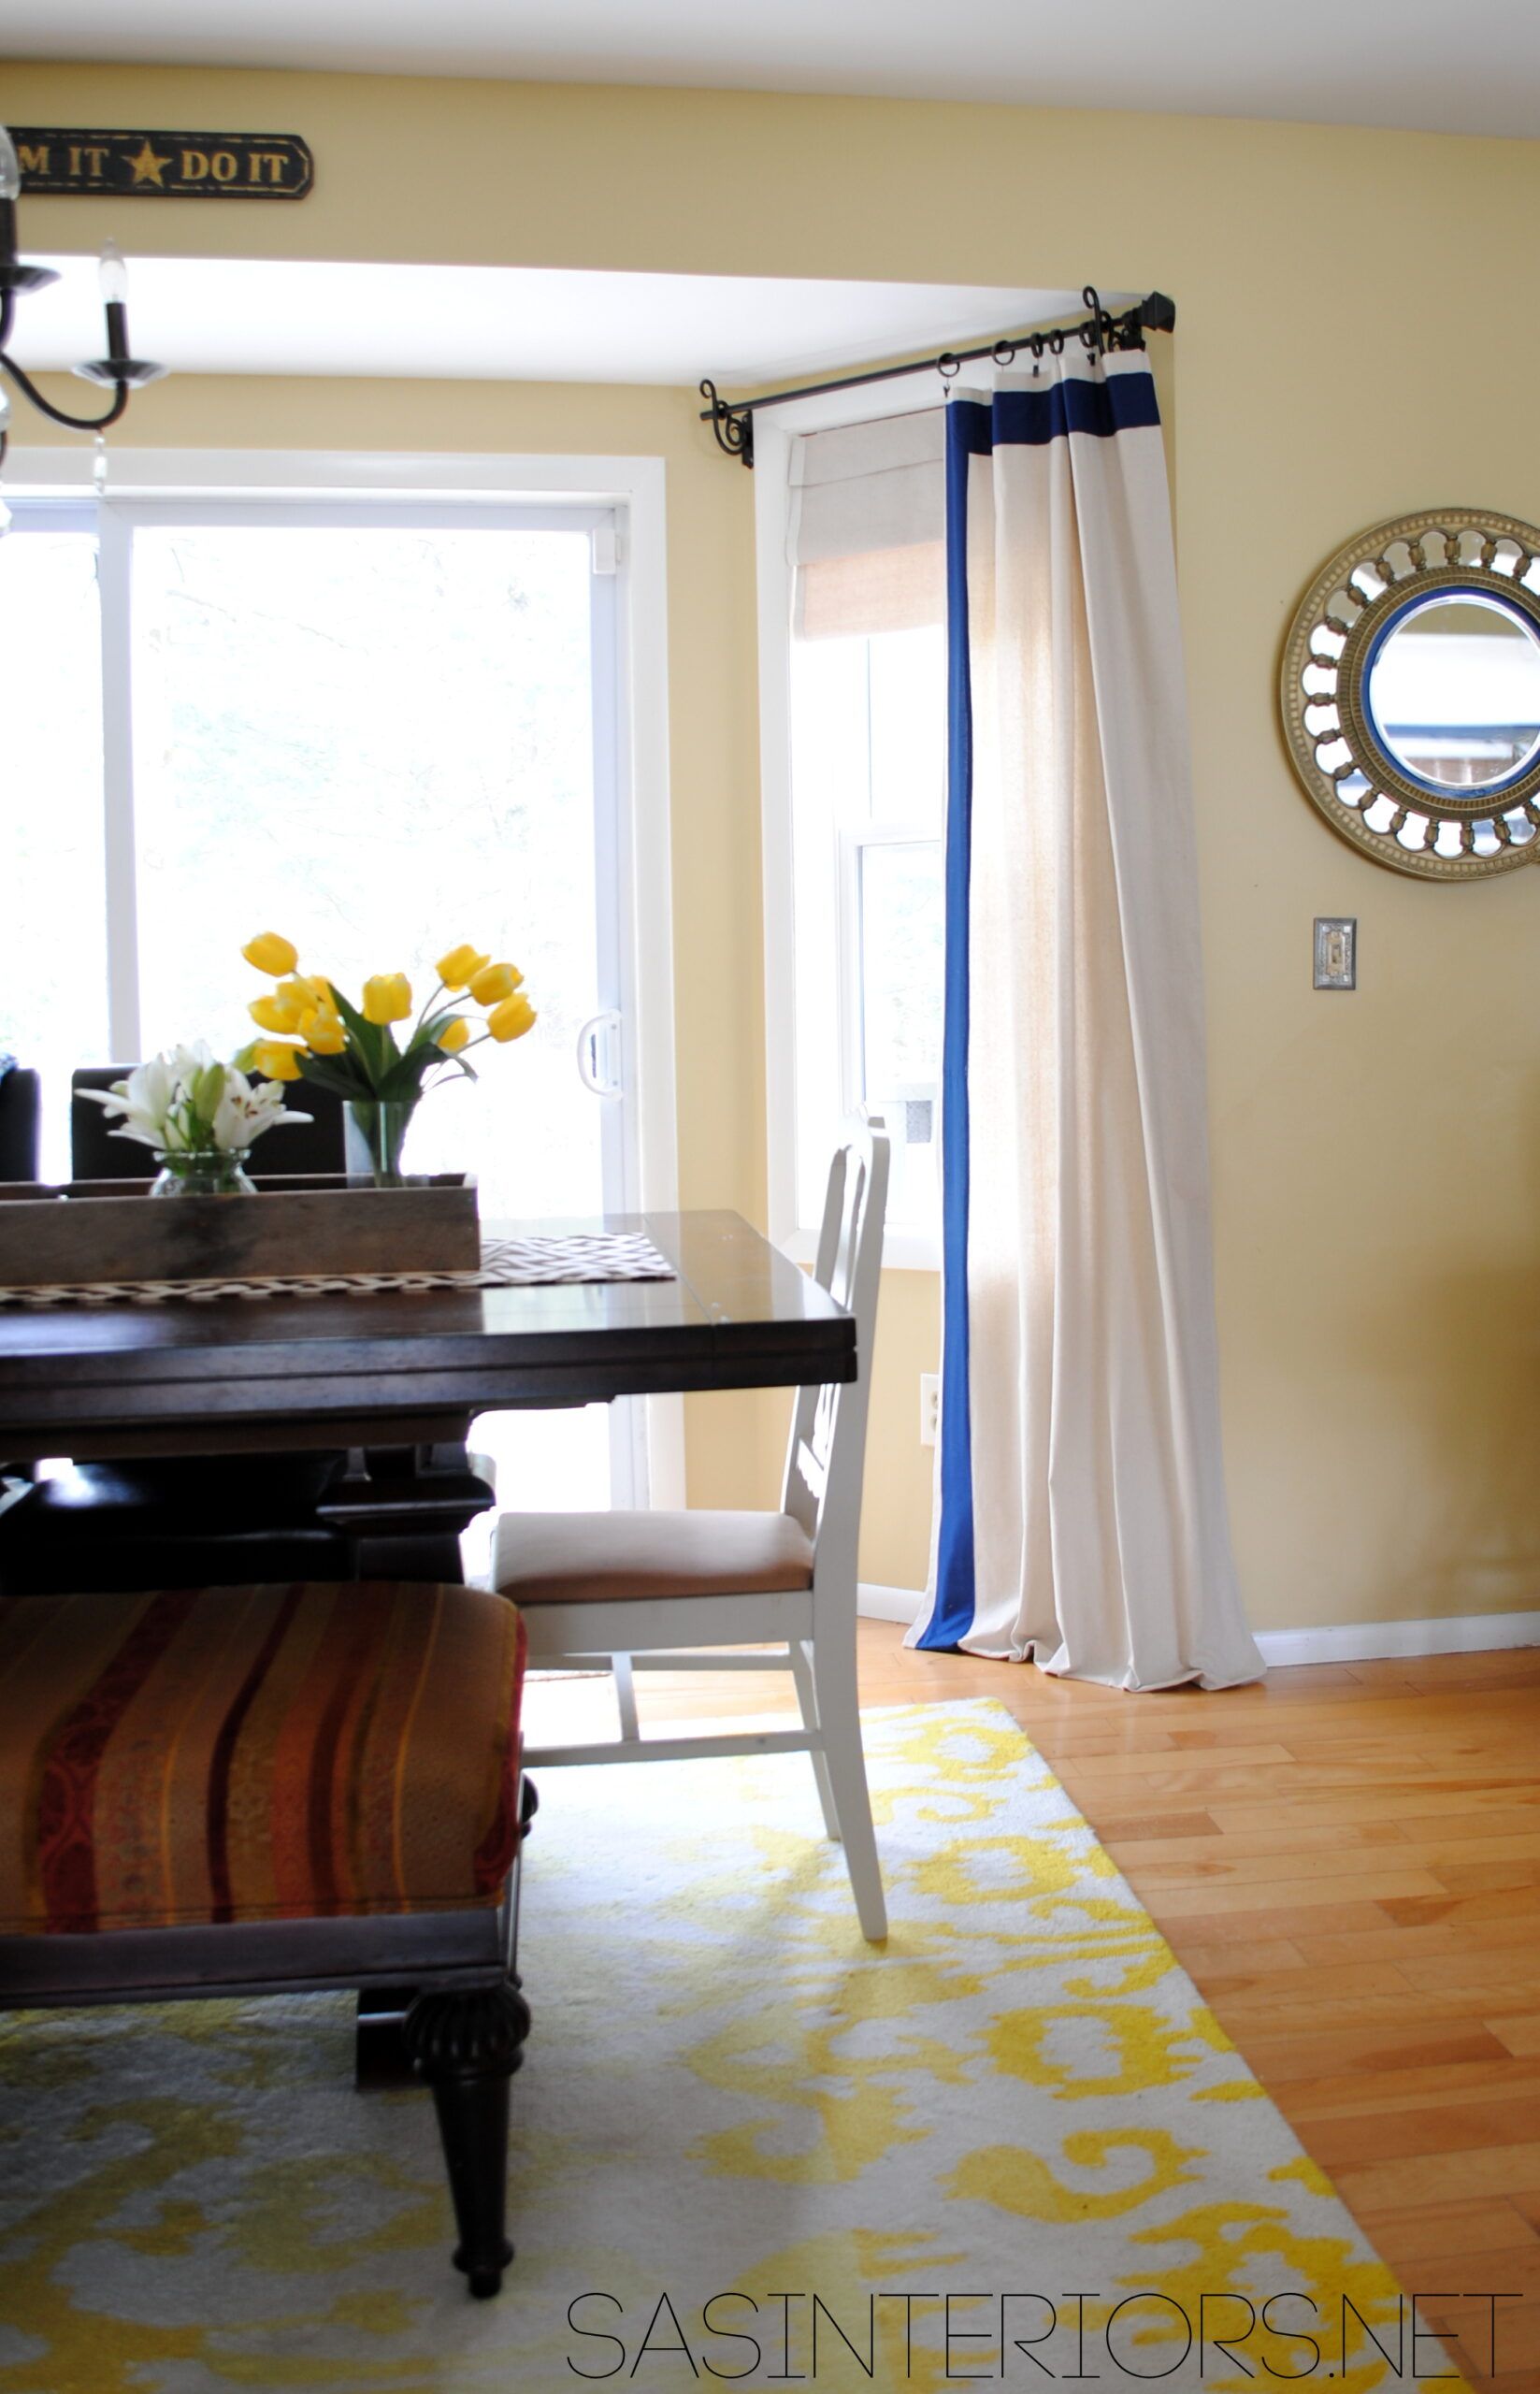
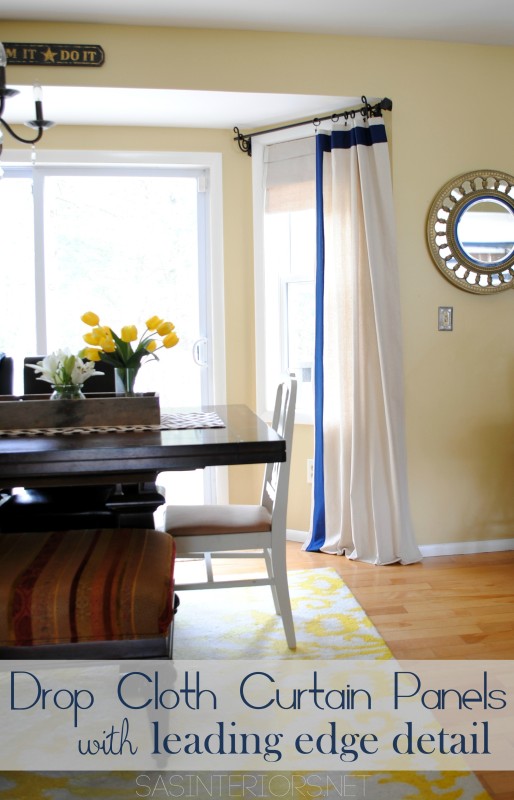
DIY: Drop Cloth Window Panels with Leading Edge Detail. High-end look for less than $20 to make. via @Jenna_Burger, WWW.JENNABURGER.COM

The panels are hung by clip rings and have slight puddle at the bottom.  They are the perfect addition for my dining space.

Other ideas + ways to achieve a high-end look for less…

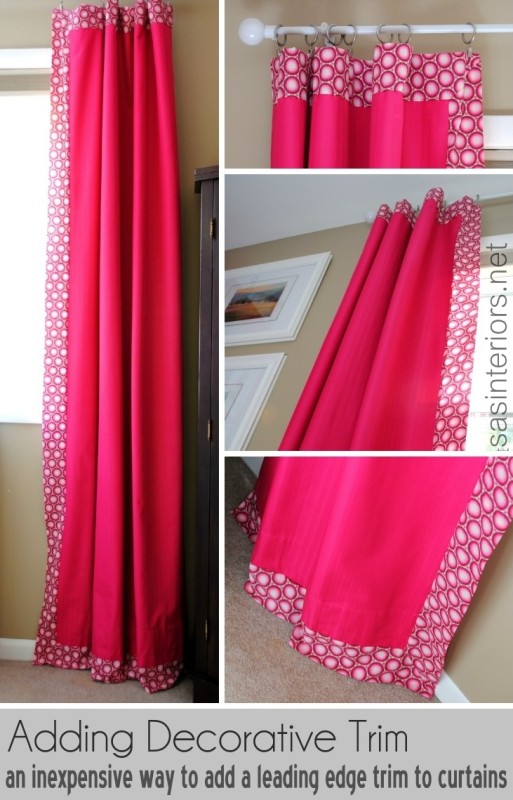
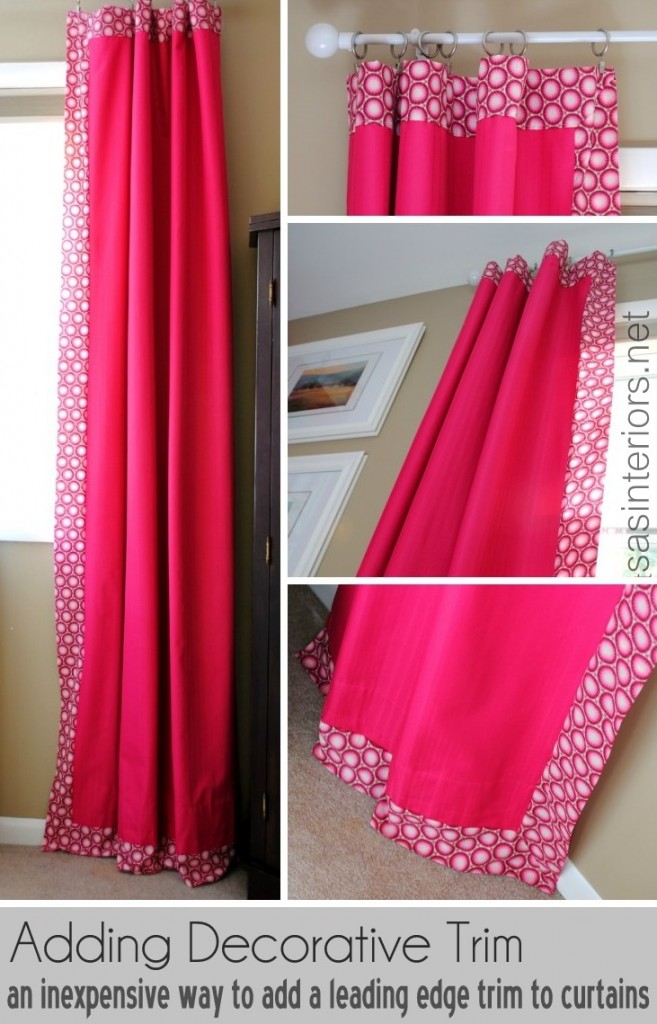
  • You don’t have to use drop cloth to create a similar window curtain panel.  A similar detailed edge can be added to a store-bought curtain, similar to what I did in my daughter’s room.  In her space, I actually added the decorative fabric to the outside edge of the curtain panel instead of on top of the fabric.  The typical store-bought panel wasn’t long enough, but the added fabric made it the ideal length.

How-To Add Decorative Trim to Curtains {for cheap}

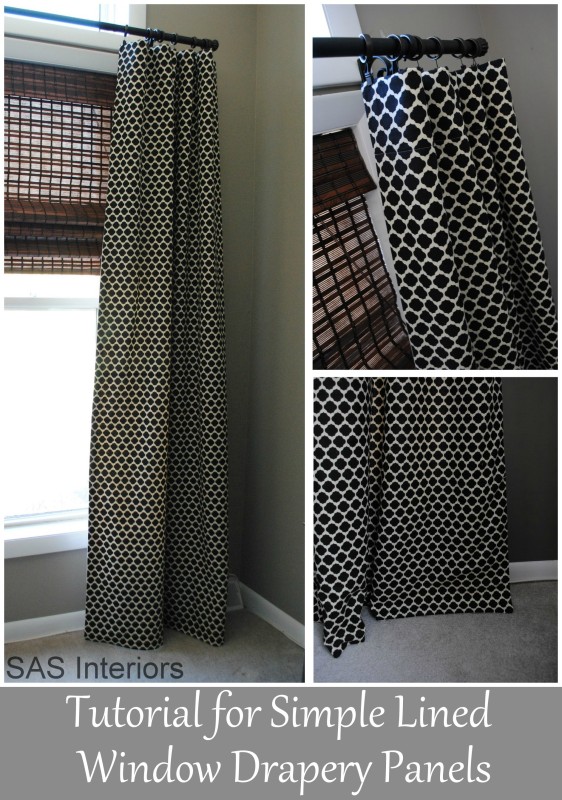
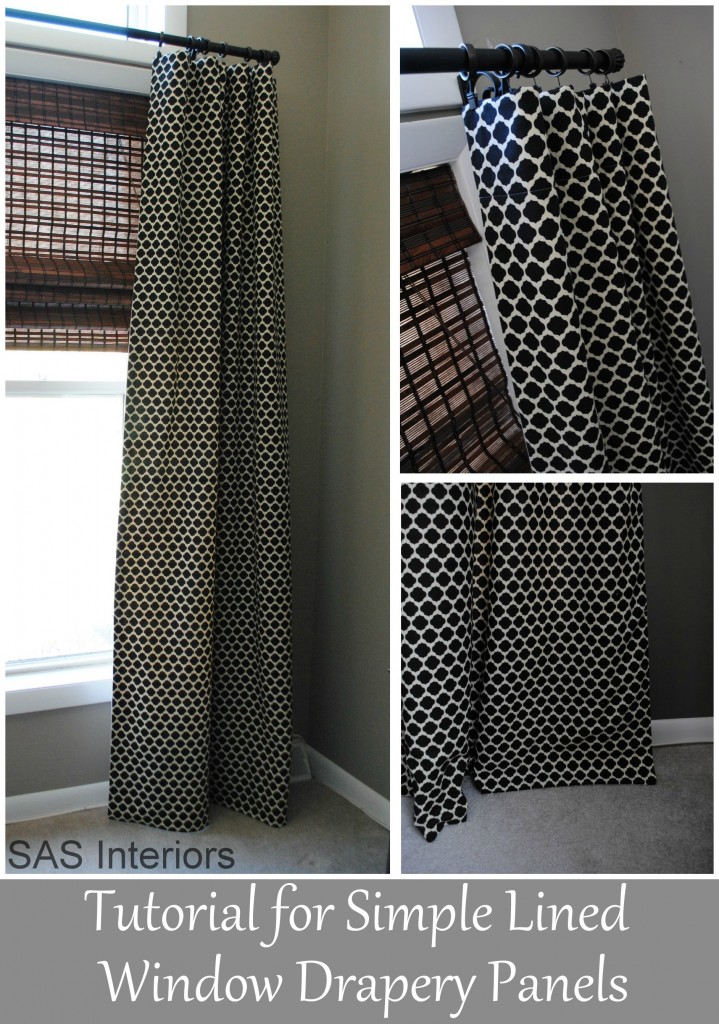
  • If you are using a thinner fabric to create a window panel and want to have a heavier panel that will allow less light to shine through, check out what I did in my bedroom.  Using drop cloth material (AGAIN), I took a regular weight cotton fabric and lined them.  Depending on the fabric pattern, a decorative edge could be added to these style panels as well.

DIY: How to Make Simple Lined Window Drapery Panels

Ideas are limitless for what you can create for your windows!

Thanks to Lowe’s, I was able to create my most recent creation for less than $15.  So next time your combing the paint aisle to grab some spray paint, don’t forget to check out the drop cloth section.  Your mind will go bonkers with all that can be created!

Excited for the Fall and ready to tackle some home improvement and DIY projects?  Lowe’s has it all.

Fall Badge Rectangle

Sign up for their free Lowe’s Creative Ideas Magazine, which is filled with ideas + inspiration!  Plus you can always follow them on Pinterest and Instagram for even more great ideas!

Disclosure: I am so grateful to be apart of the Lowe’s Creative Team and was provided with a Lowe’s gift card to purchase items for my project.  I was also compensated for my time to use the products.  No one told me what to create, what to buy, how to use the product, or what to write.  All opinions are 100% mine!

What have you made using drop cloth? Have you ever thought of jazzing up your window curtain panels to create a custom look?
 

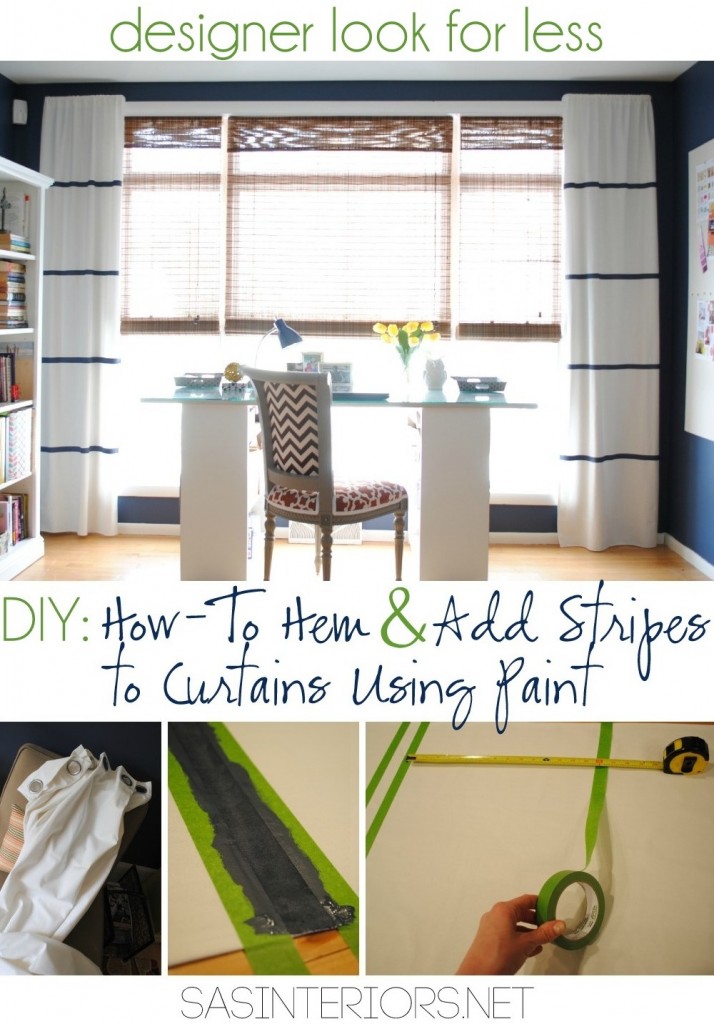
DIY: How-To Hem (no sew) and Add Stripes to Curtains Using Paint

I hope you had a great weekend!  I know it’s Tuesday, but since my husband and kids had off yesterday for President’s Day, it feels like the first day of the week for me.  In spite of having a no-plan weekend, the 3 days flew by and we were majorly busy (new projects, photographing others, food shopping, car buying, etc.).  How does 36 hours fly by that fast?  Anyway, since showing you my newly created home office / family room last week,  I’ve got a slew of DIY projects to share.  First up…

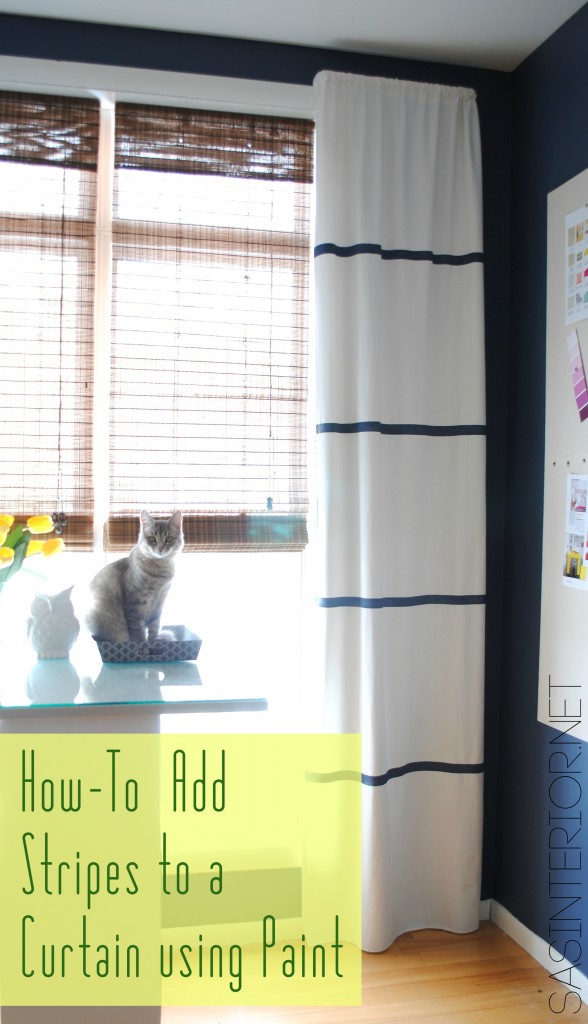
A ‘how-to’ on how I hemmed and created the thin-striped curtain panels (I know a few of you have excitedly been awaiting this tutorial).  I was surprised how easy they were to create and they look like they cost alot of $$$ (but they totally didn’t).

DIY: Tutorial on how to hem a window curtain panel and how-to add stripes using wall paint; Designer look for less by @Jenna_Burger, sasinteriors.net

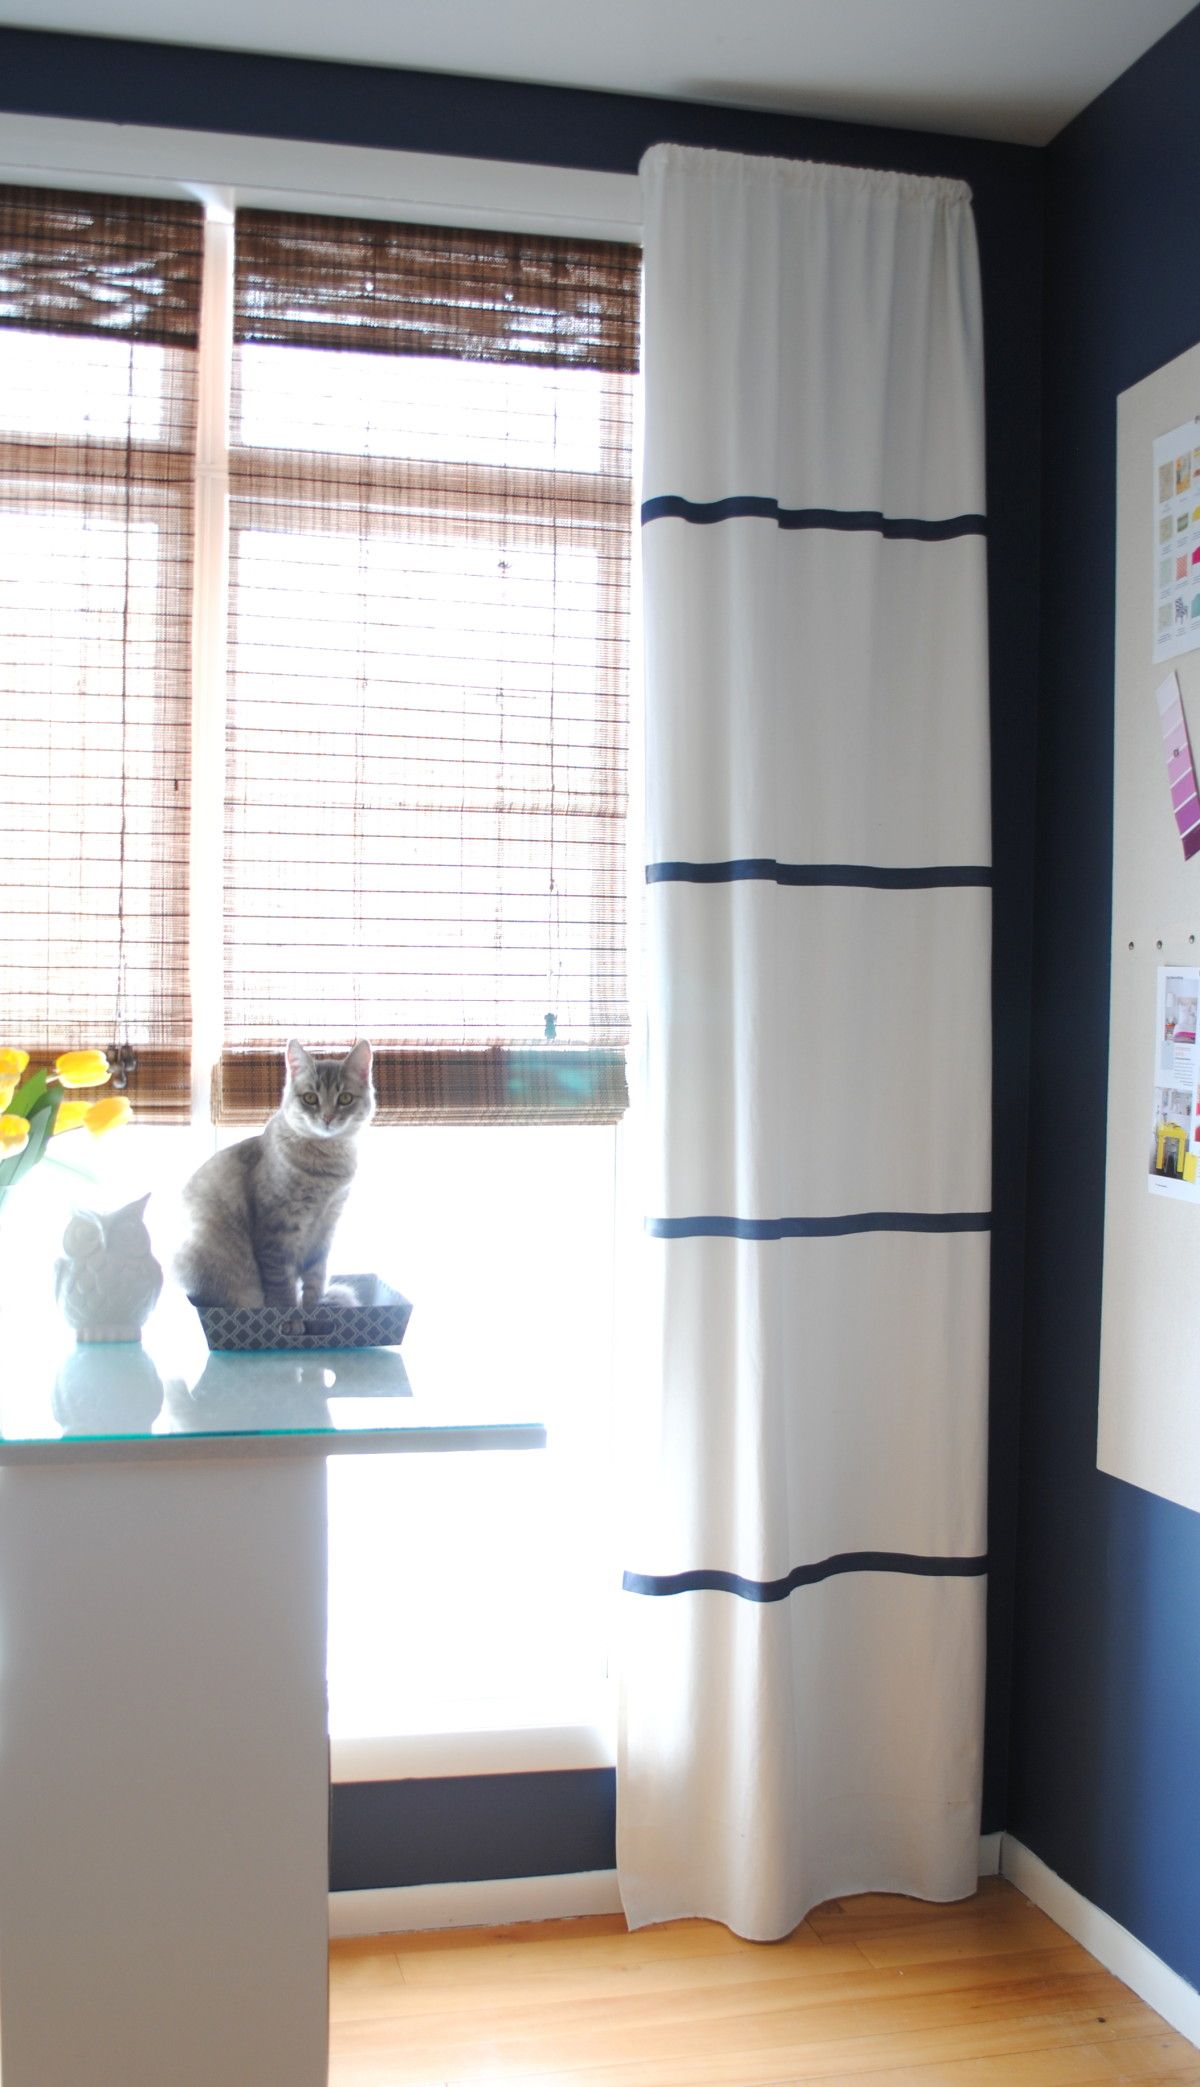
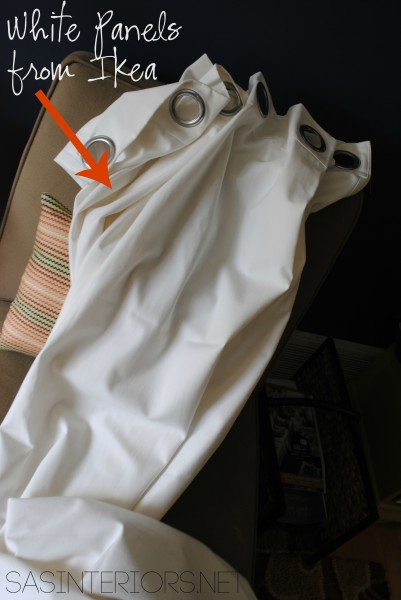
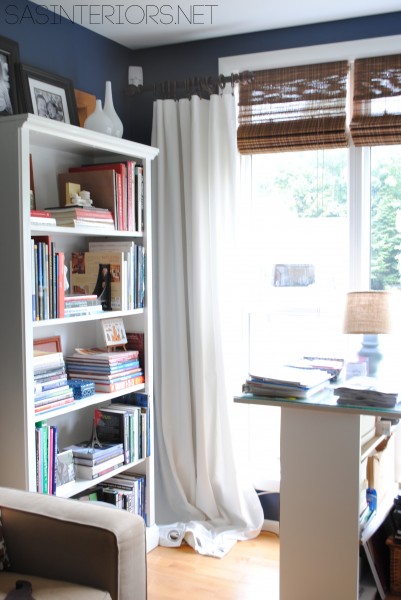
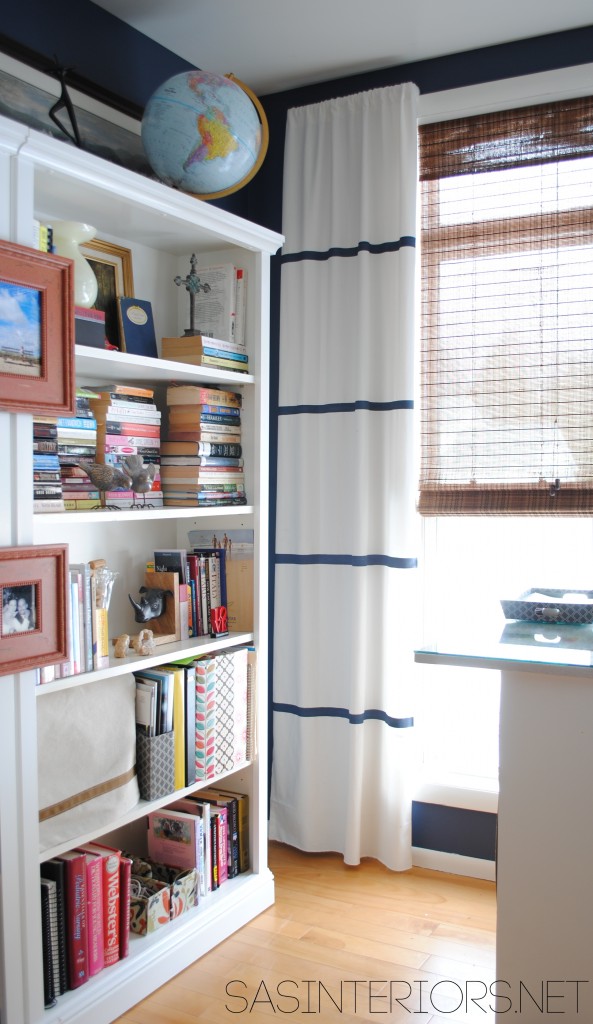
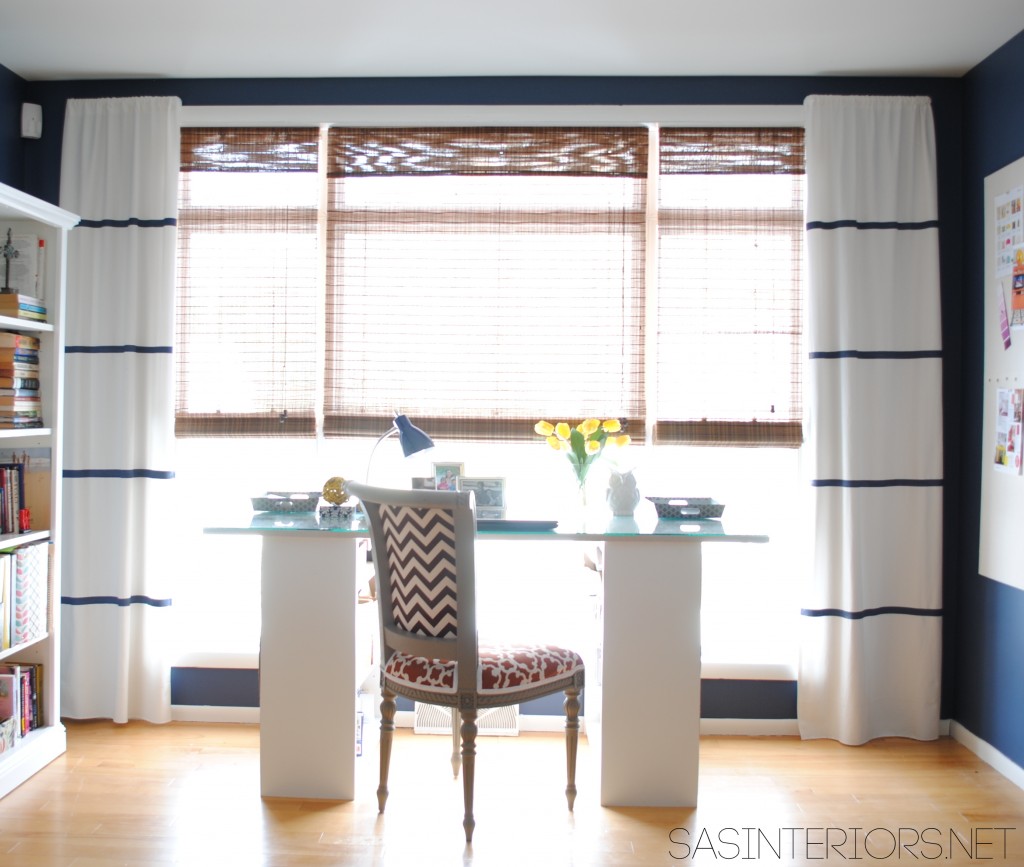
When the royal blue walls were complete last Summer, I knew white curtains would be a great, striking complement. Thankfully, I had an extra pair of panels from my son’s room that were purchased from Ikea 5+ years ago.

DIY: Tutorial on how to hem a window curtain panel and how-to add stripes using wall paint; Designer look for less by @Jenna_Burger, sasinteriors.net

I wanted to jazz up the white panels a bit though, and at first thought of a leading edge similar to what I created for my daughter’s room.  As more ideas developed, I had seen this living room and pinned it a while back. The thin-striped lines stuck in my head and I knew they would be just the touch to add interest to the stark white panels, yet not overwhelm the room.  I’ve seen many striped fabrics in window panels lately, but I wanted something softer and thought thick horizontal lines would be too heavy for the space since the dark blue walls are dramatic enough.

Inspiration for thin-striped curtain panels

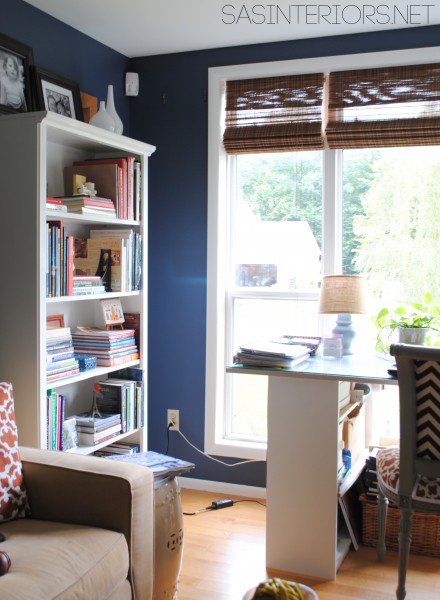
The area for where the new curtain panels were to go, started out like this…

DIY: Tutorial on how to hem a window curtain panel and how-to add stripes using wall paint; Designer look for less by @Jenna_Burger, sasinteriors.net

To begin, I hung the white panels on the dark wood rods that were already in place.

DIY: Tutorial on how to hem a window curtain panel and how-to add stripes using wall paint; Designer look for less by @Jenna_Burger, sasinteriors.net

Nope they didn’t work.

The dark rod blended in too much with the wall, and the panels looked so low and squat.  It totally went against my rule of thumb on how best to hang a curtain.

Onto the idea #2.

Because of the window height, I couldn’t put a decorative rod above (there wasn’t enough room), so instead I bought a $3 basic metal pocket curtain rod.

I created the “pocket” at the top of the curtain (fold over top edge, sew or use fusible tape to create a pocket of about 2″ for the rod to slip through).  Then the panels had to be hemmed at the bottom because they were too long.

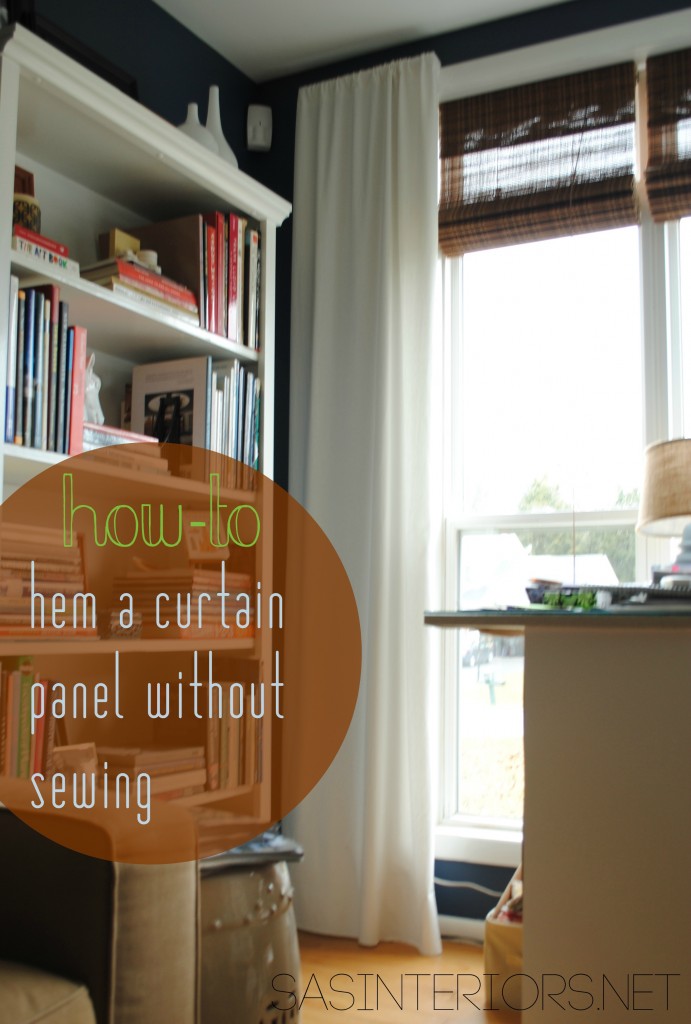
Here’s my quick tutorial on How-To Hem a Curtain ~

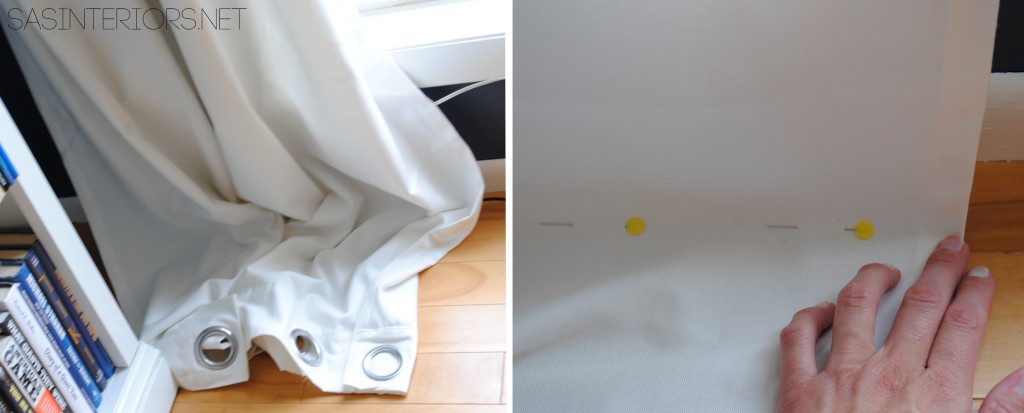
1. With your curtain hung on the rod, loosely pull the bottom of the panel and add 2-3 pins at the spot where the panel hits the floor plane.

Hint: Don’t pull the panel tawt because if you pin and sew at that point, your panels will result too short.  You want to leave the panel(s) loose, so it just grazes the floor (this is how I feel a curtain panel looks professional.  It’s not a must, but it’s my opinion).

DIY: Tutorial on how to hem a window curtain panel and how-to add stripes using wall paint; Designer look for less by @Jenna_Burger, sasinteriors.net

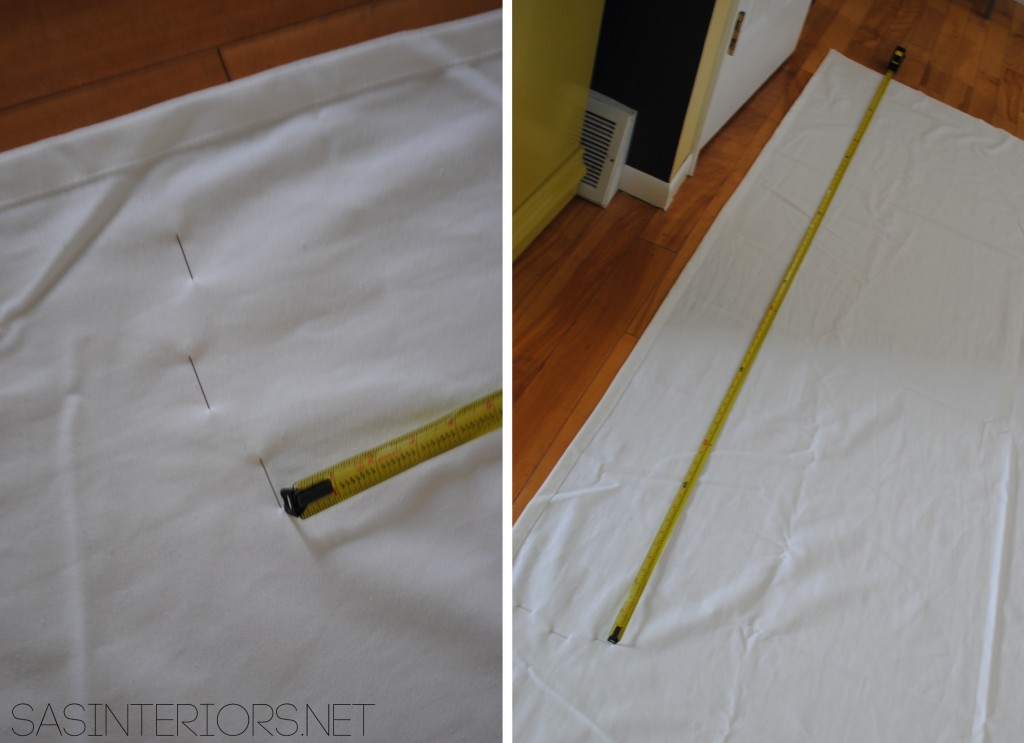
2. With the 2-3 pins indicating the line for which to hem the panel, I used a measuring tape to keep the same length and added more pins all the way across the width of the panel.DIY: Tutorial on how to hem a window curtain panel and how-to add stripes using wall paint; Designer look for less by @Jenna_Burger, sasinteriors.net

O, and did I tell you the good part about this project – I didn’t use a sewing machine.  I was totally feeling lazy that day! You can of course, but it’s not a must.  That’s a major plus for my non-sewing friends!

3. Using fusible tape, I folded the bottom edge underneath and hemmed at the line of the pins.

DIY: Tutorial on how to hem a window curtain panel and how-to add stripes using wall paint; Designer look for less by @Jenna_Burger, sasinteriors.net

Here’s the result…

Yes, much better!

DIY: Tutorial on how to hem a window curtain panel by @Jenna_Burger, sasinteriors.net

A perfectly tailored window curtain panel that just grazes the floor.  Super easy!

Ok, so now on to the 2nd part of this tutorial…

How-To Add Stripes Using Paint ~

FYI – you could totally skip step one if you have already have the perfect length curtain and you can skip this step if you have no interest in adding stripes.  Just thought I’d share that tid-bit 😉

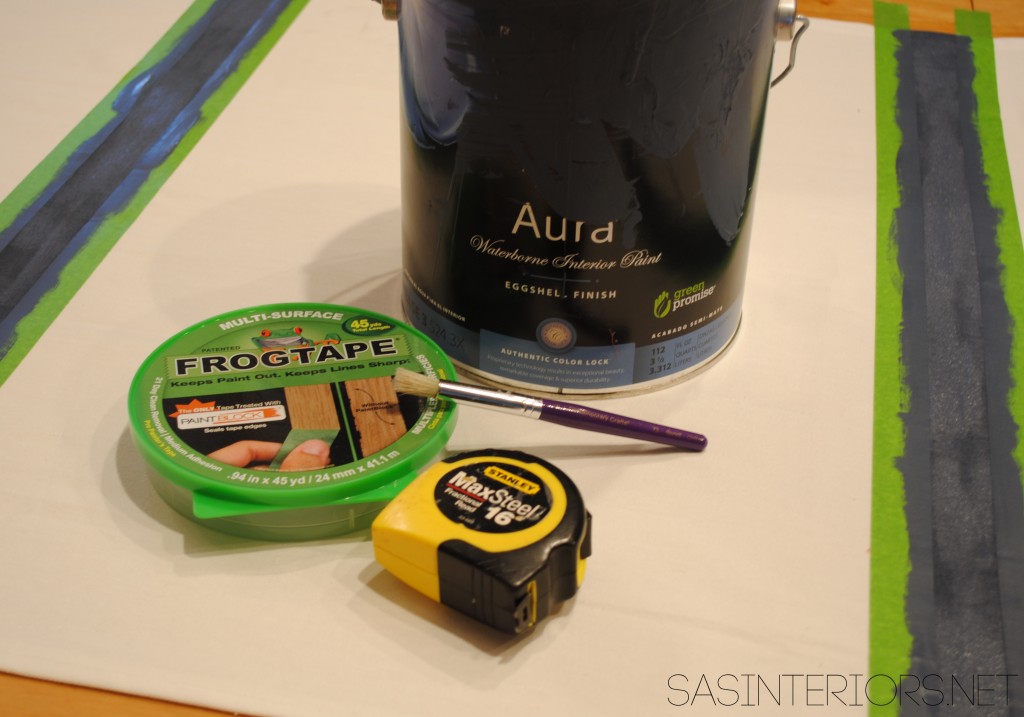
For this part of the project, I used the following materials:

  • Painters Tape
  • Wall Paint that is the same color as the wall
  • Paint Brush
  • Measuring Tape

DIY: Tutorial on how to hem a window curtain panel and how-to add stripes using wall paint; Designer look for less by @Jenna_Burger, sasinteriors.net

1. To start off, I determined how many stripes I wanted and the width of the stripes.

4 stripes and 1″ wide.

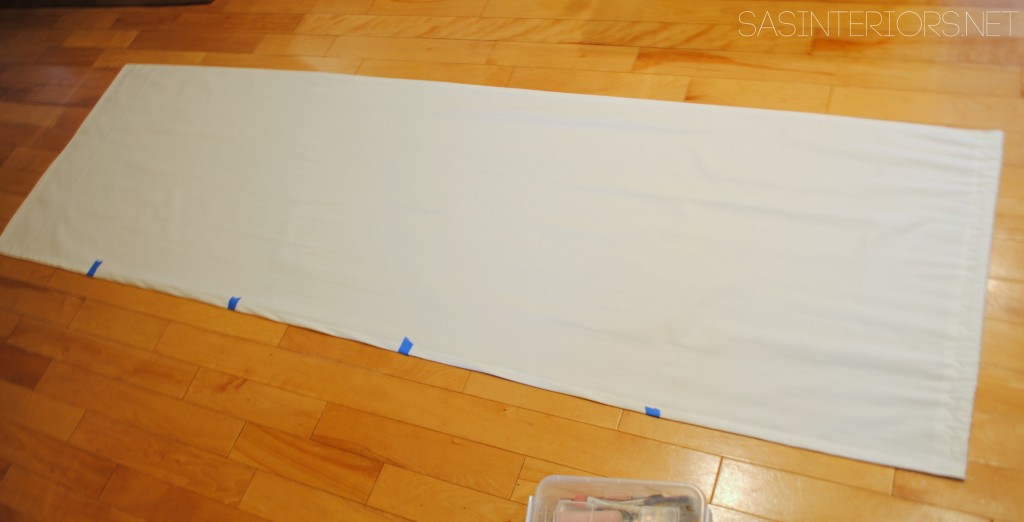
I layed my curtain panel on the floor and using a little math (big UGH), I determined my stripe placement.  Using painters tape (because it’s easy to remove), I marked the 4 stripe locations.

DIY: Tutorial on how to hem a window curtain panel and how-to add stripes using wall paint; Designer look for less by @Jenna_Burger, sasinteriors.net

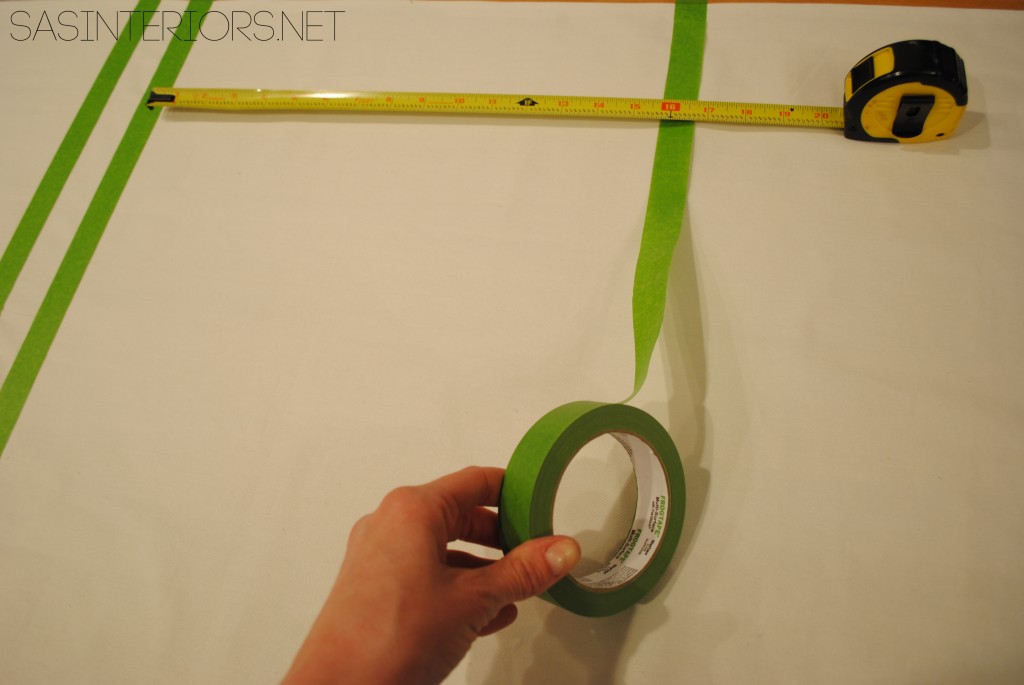
2. Then I added the painters tape and my measuring tape to create the 1″ wide stripe.

DIY: Tutorial on how to hem a window curtain panel and how-to add stripes using wall paint; Designer look for less by @Jenna_Burger, sasinteriors.net

3. * Important part!

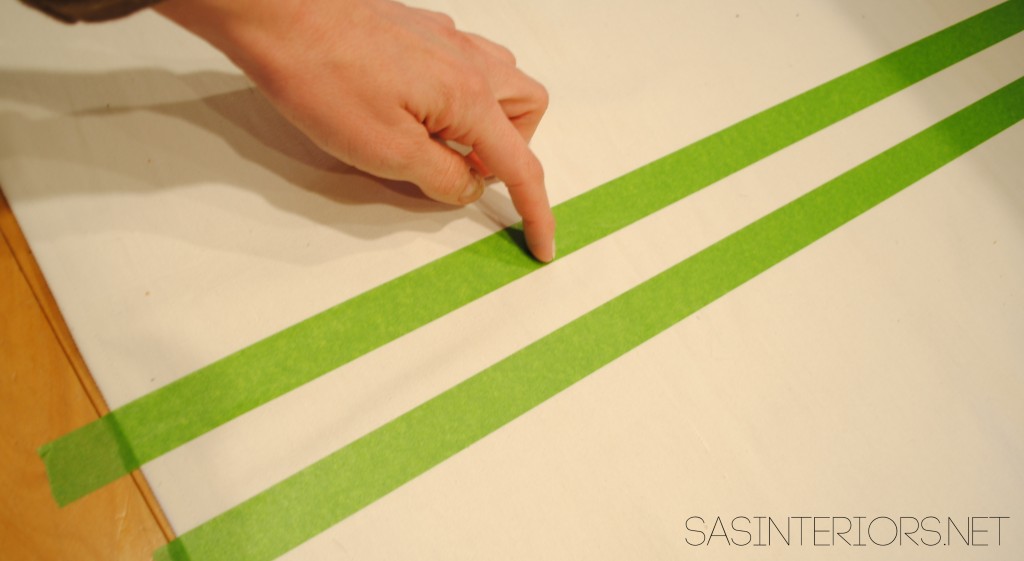
Once the tape is in position, it’s important to press hard on it like you’re burnishing it into the fabric.  You want to make sure the tape is sealed so the paint doesn’t seep underneath. I ‘burnished’ the edge with my nail.

DIY: Tutorial on how to hem a window curtain panel and how-to add stripes using wall paint; Designer look for less by @Jenna_Burger, sasinteriors.net

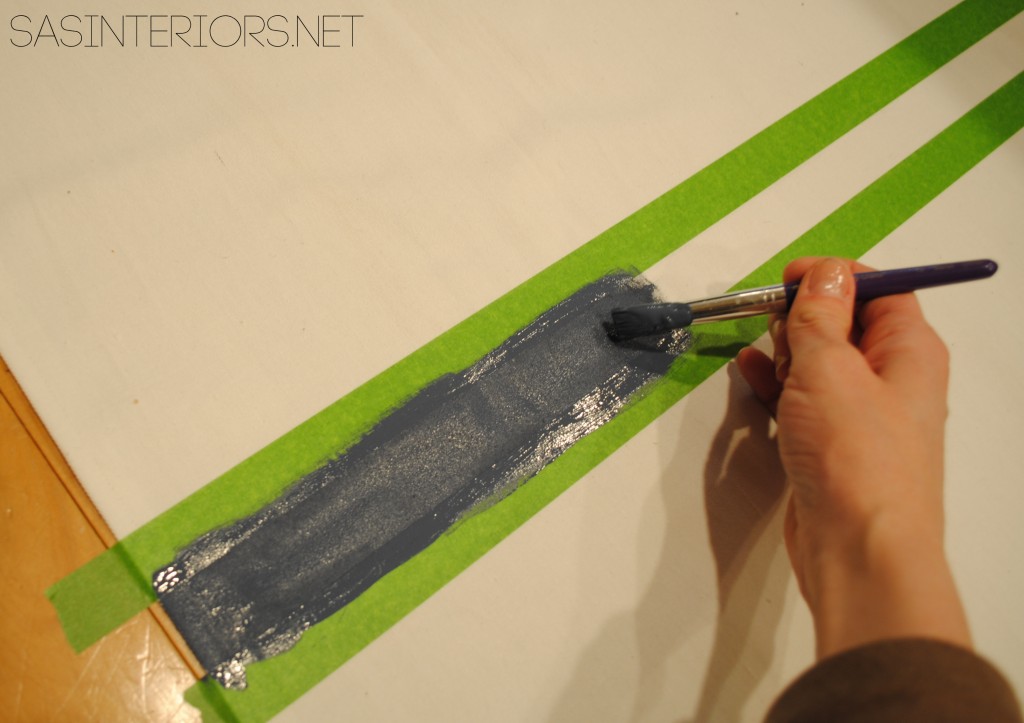
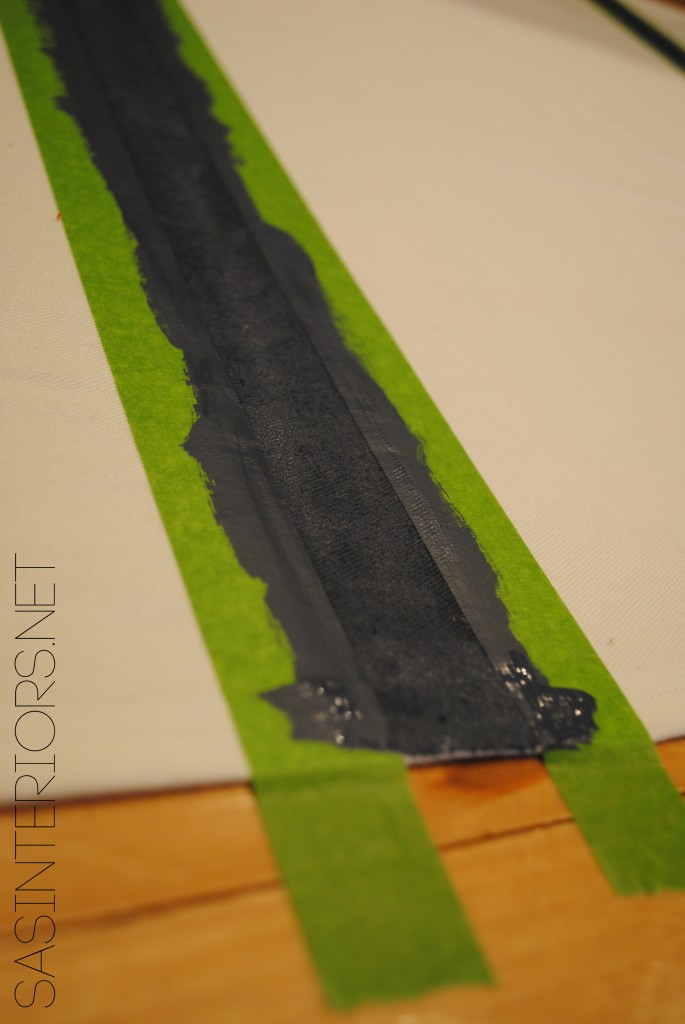
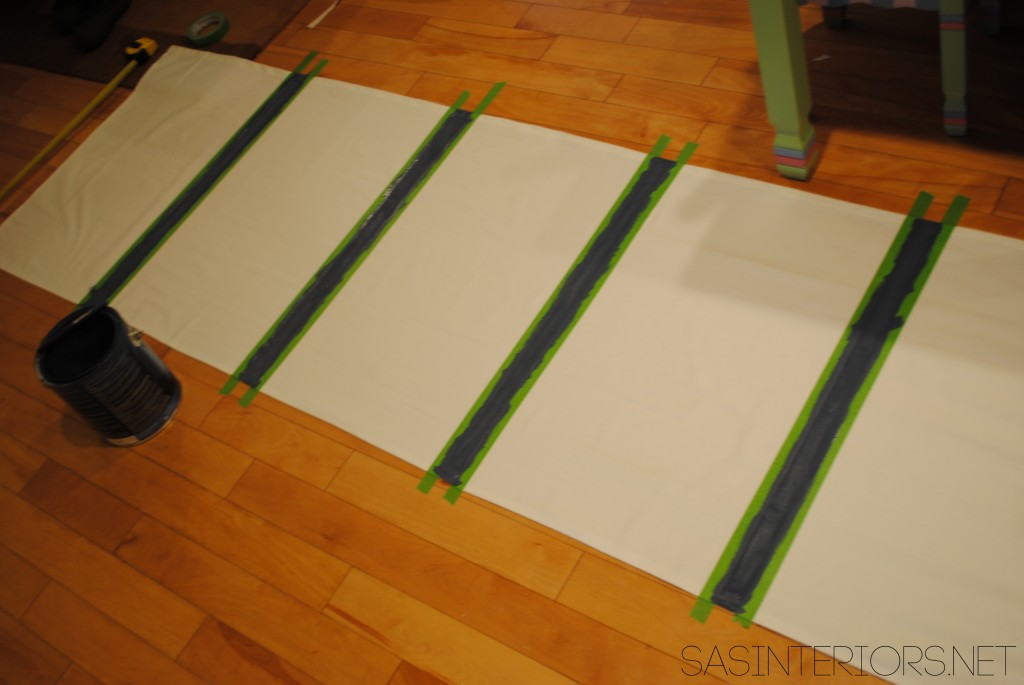
4. Then using the wall paint that I used in the room (Benjamin Moore Van Deusen Blue), I painted on the stripes using a craft brush.  I did not add anything to the paint to make the medium different.  It’s straight paint on fabric!

DIY: Tutorial on how to hem a window curtain panel and how-to add stripes using wall paint; Designer look for less by @Jenna_Burger, sasinteriors.net

DIY: Tutorial on how to hem a window curtain panel and how-to add stripes using wall paint; Designer look for less by @Jenna_Burger, sasinteriors.net

Once all four stripes were done, I took off the tape.  Some of the areas weren’t completely dry, and that’s okay.

DIY: Tutorial on how to hem a window curtain panel and how-to add stripes using wall paint; Designer look for less by @Jenna_Burger, sasinteriors.net

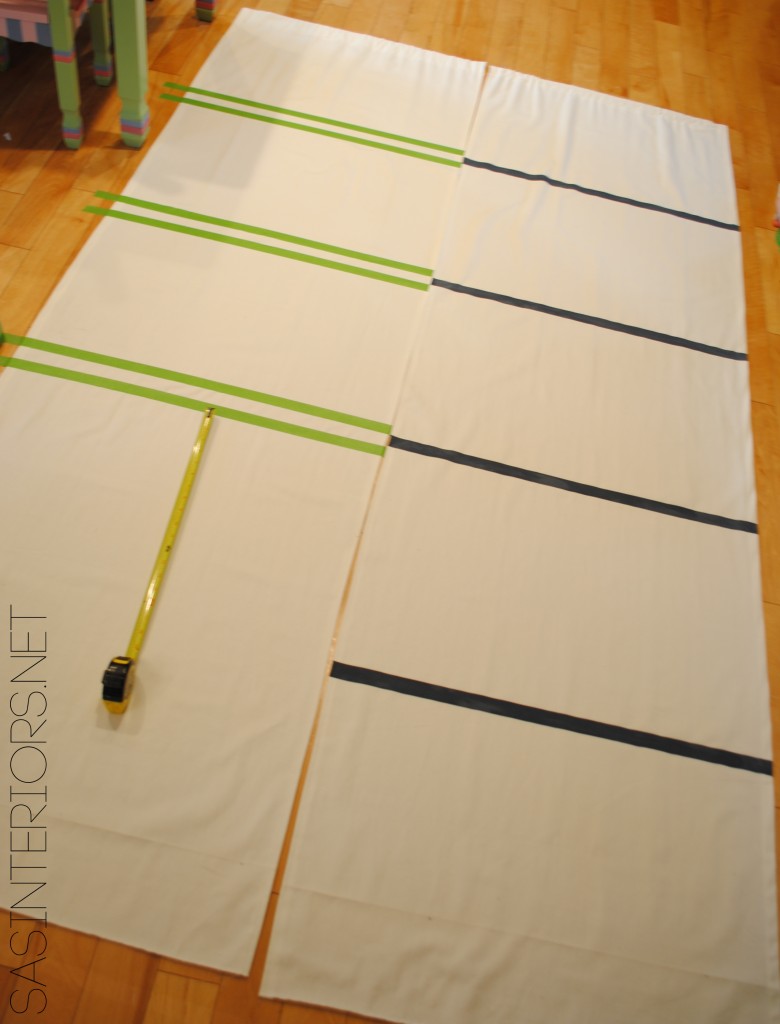
5. When setting up the stripes for the second panel, I layed both curtains side by side so they were perfectly aligned.  Then, by eye, I created the stripes on panel #2.

DIY: Tutorial on how to hem a window curtain panel and how-to add stripes using wall paint; Designer look for less by @Jenna_Burger, sasinteriors.net

Once they were completely dry, they were ready to hang, and admire! #happygal

DIY: Tutorial on how to hem a window curtain panel and how-to add stripes using wall paint; Designer look for less by @Jenna_Burger, www.JENNABURGER.COM

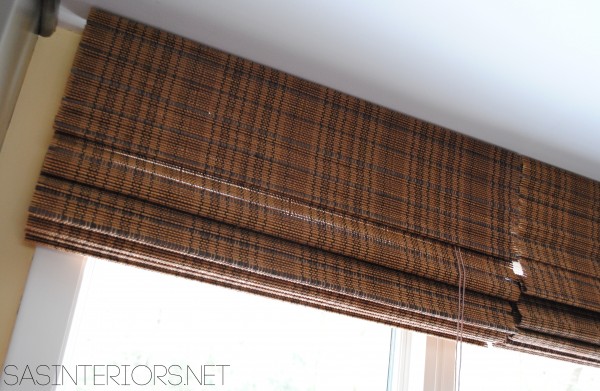
The bamboo shades (which I got from Payless Decor) are a fantastic compliment to the stark white window panels and white moulding trim.  You may have seen the bamboo shades in other parts of my home (check this post out) and I adore them!  They are of great quality (and an awesome price).  The darker hue and texture (which is kind of difficult to tell in the picture because of the natural light coming through) are just gorgeous.  On my windows you’ll find the tibet color.

DIY: Tutorial on how to hem a window curtain panel and how-to add stripes using wall paint; Designer look for less by @Jenna_Burger, www.JENNABURGER.COM

DIY: Tutorial on how to hem a window curtain panel and how-to add stripes using wall paint; Designer look for less by @Jenna_Burger, www.JENNABURGER.COM

O, and if you like it, would you pin it or share it? Thanks a bunch!

DIY: Tutorial on how-to add stripes using wall paint; Designer look for less by @Jenna_Burger, sasinteriors.net

Have questions?  Don’t be afraid to ask – I’d be happy to help!

Want to see more drapery projects?

Then you might want to check out this post on Adding Decorative Leading Edge Trim to Curtains ~

DIY Tutorial on How-To Add a Leading Edge to a Curtain Panel by @Jenna_Burger, sasinteriors.net

Or this project on How-To Make Curtains from Scratch and Line them with Drop Cloth~

DIY-Window Panels101

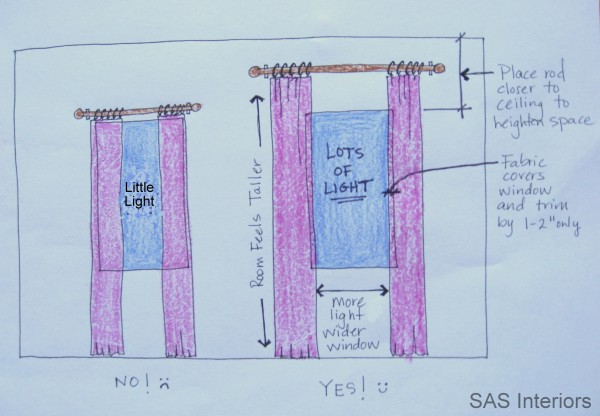
Of course you’ll want to know How-To Best Hang Window Drapery Panels, right?

The Right (and Wrong) Way to Hang Curtains

Thanks for checking out my 2-in-1 tutorial!  What a great Tuesday!

 Have you ever tried painting on fabric?  What about embellishing window treatments?  Or even making your own curtains?  Share your creations with me – would love to see them!

I link my projects to some of these parties: Skip to My Lou, Dittle Dattle, Between Naps on the Porch, Today’s Creative Blog, Stories of A to Z, All Things Heart & Home, House of Hepworths, Finding Fabulous, The Shabby Nest, Serenity Now, Tatertots and Jello, Thrifty Decor Chick, Tip Junkie

How To Make Any Curtain into a Shower Curtain

I am thrilled to have my master bathroom complete!  The kind and thoughtful comments that YOU, my awesome readers, have left over the past week have made the craziness all worth it.  So thank you, thank you, thank you.  As I mentioned during the reveal, I DIYed (technically not really a word, but you got it) my shower curtain using two window drapery panels (a.k.a. curtains), and now I’m going to show you how.

I had found these curtain panels a while ago and they were basically the inspiration for the space and everything I chose was set around these beauties.

When I originally purchased the window panels my intention was to simply put the shower curtain rod through the already created rod pocket of the window panel.  A problem arose when I went to hang them because the end of the rod was too big (2.5″ dia) for the rod pocket opening in the curtain.  (I hope I didn’t lose ya)…

My first thought was to create a bigger rod pocket on the curtain, but that would have involved sewing and shortening the height of the overall window panels. I nixed that idea right away because I envisioned the window panels as high as possible to heighten the room.  After some thought, I decided to use typical shower rings to create a ring top style panel. Take a look at my quick sketch.

So, here are the steps I took…

I had twelve shower hooks (which is typical for every shower), which I divided amongst the two window panels – 6 and 6.  Then I put a hook at the end of each panel and divided the remaining hooks (4) on the panel.

Note:

  1. My window panels were 54″ wide, times 2 = 108″, wider than a typical shower curtain – that’s okay.  Any width curtain should work and if you’re using this idea for a single shower stall, one window panel should be enough (the length might have to be altered).
  2. A ball-style shower hook would work best.  You can find them in most stores and they are one of the least expensive styles.
  3. As an added step which I have NOT DONE, you can make the cuts more secure by creating a sewn button hole with your sewing machine.
  4. I DID NOT sew the two panels together to create one large “shower curtain” panel, but it’s possible to do.   I left them as two panels in case I decide to use them someplace else in the future.

Once you’ve evenly spaced the shower hooks, using a scissor, cut a 1/2 – 3/4″ slit at each of the shower hook positions (ONLY CUT through the one layer of fabric, not both – the outside layer should look clean and uncut).

Before inserting the ball style shower hooks into the newly cut hole, first put on the shower curtain liner.  Because my window drapery panel was longer than a typical shower curtain, I had to get a longer plastic liner, which I found at Bed, Bath, and Beyond.  It was a little more expensive than a typical plastic liner, but was a must because of the extra length.

Once the plastic liner is in place, put the shower hooks through the “button” holes (or simply the cut holes since I haven’t yet made actual button holes).

And it’s done.  This really is a simple and easy project that makes a huge impact!

Using the two window panels creates for a slightly more flow-y (not in a bad way) shower curtain style as you can see in the image below.  Because the curtain is hung from typical shower hooks, it opens and closes just as a regular shower curtain would.

And here is the overall bathroom space –

The taller than typical curtain really gives the space more height, which makes the overall feel of the room much larger.  Actually one reader left me a comment saying, “Wow, you have tall ceilings”.  But honestly, they are only 8′-0″ high – typical of most homes.  But again, the long panel makes the space feel elongated.  This same idea pertains to the window valance, which is hung at the ceiling plane.  If you remember back from this post on The Right Way to Hang Window Drapery Panels, the higher the panels are hung, the larger the space. I have a tutorial coming soon on how I created the window valance, so stay tuned.

I link my projects to some of these parties: Skip to My Lou, Dittle Dattle, Between Naps on the Porch, Today’s Creative Blog, Stories of A to Z, All Things Heart & Home, Savvy Southern Style, House of Hepworths, Finding Fabulous, Creation Corner, The Shabby Nest, Tatertots and Jello, Thrifty Decor Chick, Under the Table & Dreaming

DIY: How to Make Simple Lined Window Drapery Panels

For the past few months, I’ve been thinking about doing some updates to my bedroom.  There’s nothing “wrong” with it, but some of the elements – window treatments, pillows, pictures – have been around for a while and you know me, I always need something to change or update!

First thing on the list?  Window Treatments.

The ‘before’ window panels were from our previous home and the length has always been an issue since I repurposed them in this space.  They are beautifully lined panels from Pottery Barn (with matching pillow covers), but I was just ready for a change!

This is how they looked before~

Well actually the window treatments were the second on the list, first came the fabrics.

After having a concept in my head, I was on the search for new fabrics.  I was stuck on the color of dusty-gray-blue.  Because my interiors are mostly on the warm side, I wanted to bring in some cooler tones.   I combed the net, searched in fabric stores, and found nothing that appealed to me.  Then I made a random trip to Joanne Fabrics one day, and found this fabric which was very inspiring, but totally not the dusty-blue that I had desired.

O well, I loved it and a few fabrics later, I was out the door and ready to start my transformation.

Before I begin the step-by-step tutorial,  I wanted to mention that I decided to line the window treatments, but it isn’t a must for drapery panels.  Even though they were not going to be functional, meaning I wasn’t planning on moving them each day/night to block the light, I still wanted them to have a more substantial feel and heavier weight.  I decided to use drop cloth material because it was the least expensive and I knew from my other projects that drop cloth would really give the panels more substance and hang better.

Making Lined Drapery Panels

1. I started off by measuring the height from the floor to my existing drapery rod.  Once the height was determined, I added about 12″ of additional fabric which gave me some “play” for alterations in later steps.  I layed out the fabric and using my cutting board, clear ruler, and fabric cutter, to measure the length of fabric needed for three panels.

FYI: At this point, measuring does not need to be perfect, because it will be altered later.  That’s the beauty of these panels!

The measurement from my floor to the drapery rod was: 78″, but to allow for enough fabric I made each panel 90″

2. Once the main fabric is cut, lay the right side of your main fabric onto the right side of the lining fabric (in my case, I used drop cloth material because it was the least expensive.  For $16, I got one piece of drop cloth that was 9′ x 12′).

Before cutting, make sure ALL YOUR FABRICS ARE IRONED!  Once ironed, use your main fabric as a template and cut the lining fabric to the same size.

3. Once both fabrics are IRONED and CUT, pin around the edge of the entire panel.

4. Similar to making a pillow, sew around the 4 sides, except leave a 6-8″ opening at one of the shorter ends, so you can pull the right sided fabric through.

After sewing around, pull the fabric through to the right side.

5.  Once pulled through to the right side,  iron all the edges and seams so the panel is nice and crisp! Now that the main part of the lined drapery panel is complete, they are ready to be hung and altered.  There are numerous ways to hang window panels, but I decided to use a basic rod and hang the panels using clip rings.

6. To determine the height for the window panel, measure from the floor to the top of the clip (not to the top of the ring).  Take the unfinished side of your panel and clip the rings to it.  Then adjust the height of the panel up or down, so the panel either just hits / skims the floor OR leaves a slight puddle on the floor (I decided to have them just hit the floor).

The one side of the panel is still unfinished (that’s okay), and here’s how it will look from the back.

Now let’s finish this up…

7. It’s time to trim and finish the top.  Measure down about 4-5″ from the crease where the rings are clipped to.  Trim the rest.

8. (a) With the rings left on, remove the panel from your rod and head back to the ironing board. (b) First, iron in between the rings to get a crisp line.  Then remove the rings and iron the entire crease.  (c) Open the crease and fold over the top edge twice creating a finished edge. (d) Close the crease, iron and pin edge so it can be sewn.

8. Then sew along the bottom edge of the “flap”.

Reinstall the drapery rings and the lined window panels are complete and ready to hang.

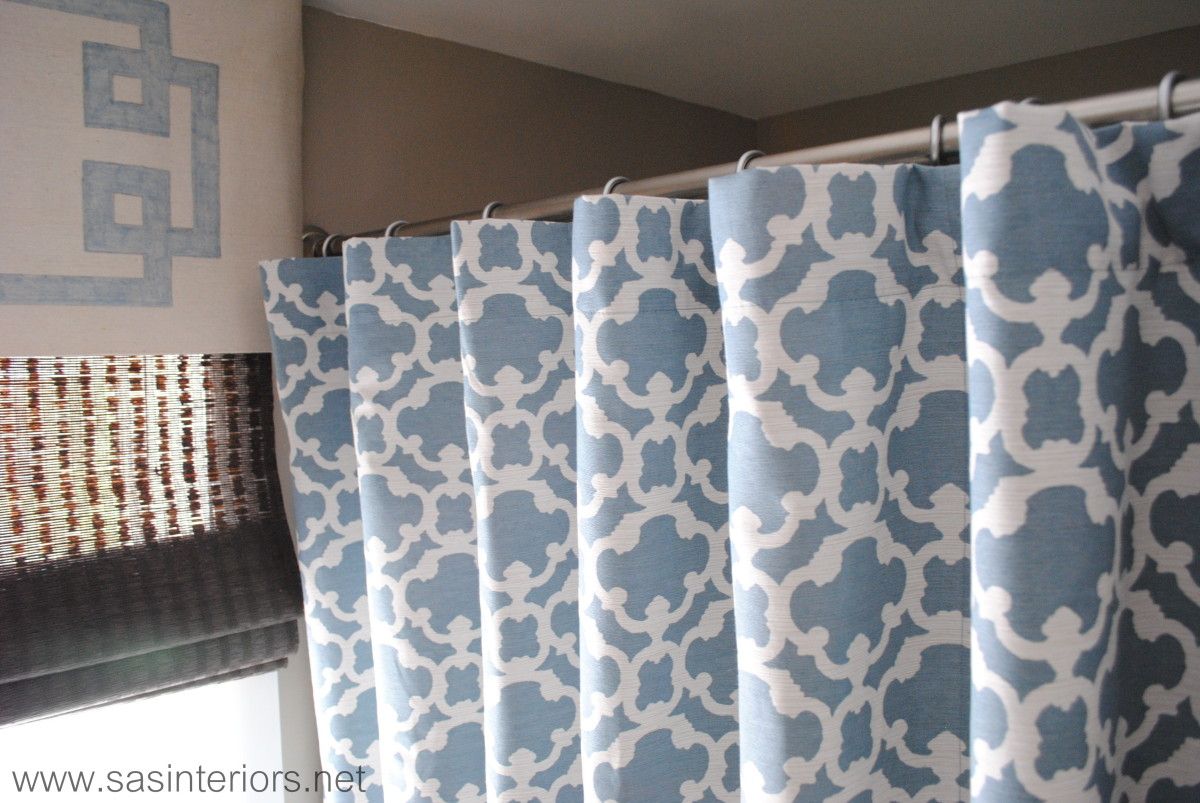
The wall of windows and the entire view of the three lined window panels…

One more time…here is the before and after~

And if you didn’t notice, I got rid of the sheers and replaced them with functional wood roman shades – such a better look!

I’m still in the midst of this master bedroom makeover and I’ll be sharing more soon, so stay tuned!

I link my projects to some of these parties: Skip to My Lou, Dittle Dattle, Between Naps on the Porch, Today’s Creative Blog, Stories of A to Z, All Things Heart & Home, Savvy Southern Style, House of Hepworths, Finding Fabulous, Creation Corner, The Shabby Nest, Tatertots and Jello, Funky Junk, Under the Table & Dreaming