Tag: Jenna Burger

20+ Kitchen Organizing Ideas: Tips that will Change Your Life

This post is more for me than for you… hehe.  After reading it from the first word to the last, you will never have to go anywhere else for more kitchen organizational ideas & tips. I HAVE YOU COVERED – I promise!

Interesting enough, this post started off as a round up of organization inspiration for the ENTIRE HOME, but after scouring the web for tips & tricks to organize every nook & cranny for the house, the post was getting way too long because of the incredible amount of smart solutions & ideas out there…

The result of my plethora of finds is going to be a week of inspirational organizational ideas from the kitchen to the bathroom, from the closets to the garage.  I have found so many creative ideas that will truly change your life.  Most are super inexpensive and can easily be implemented today.

Let’s start with the kitchen

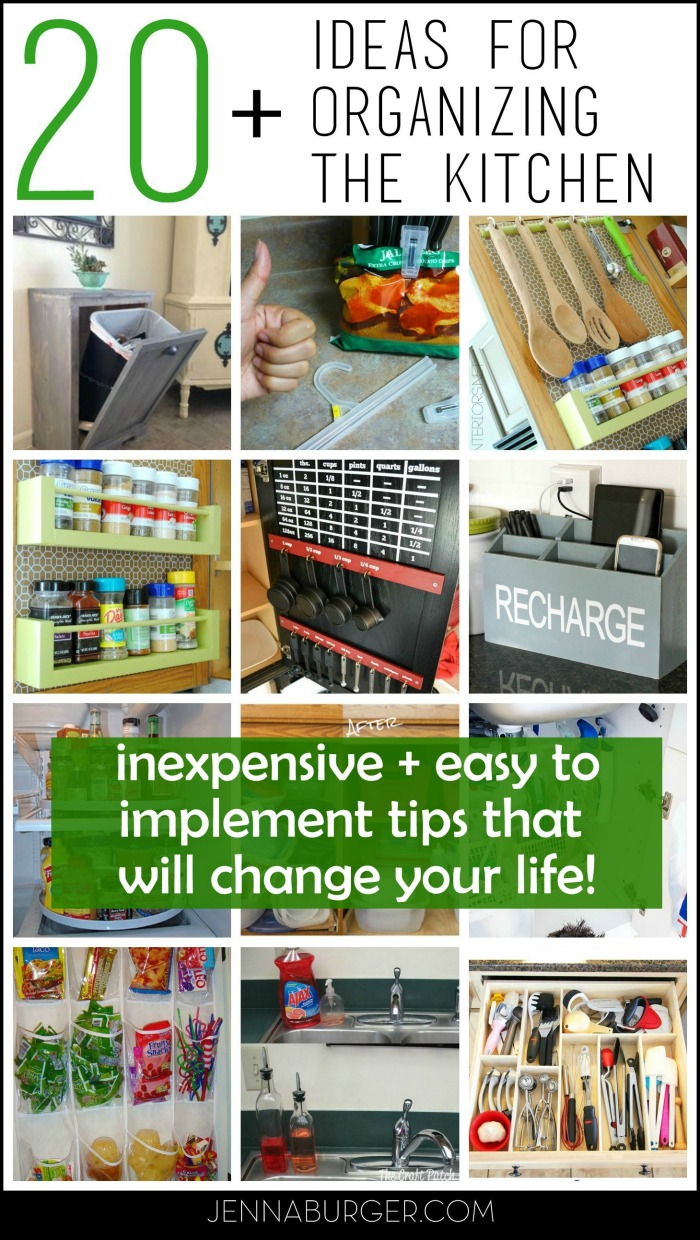
20 + Organizational Ideas for the Kitchen:Tips + Tricks to help organize every nook & cranny of the kitchen!

Here are 20+ ideas for organizing the…

Kitchen / Pantry

Tips & tricks for keeping your kitchen organized… (links to the original source, creation, and/or tutorial are BELOW the picture)

Organizing for the Home: 30+ ideas, tips, & tricks to help organize every nook & cranny in the homePantry organization by Design, Dining + Diapers

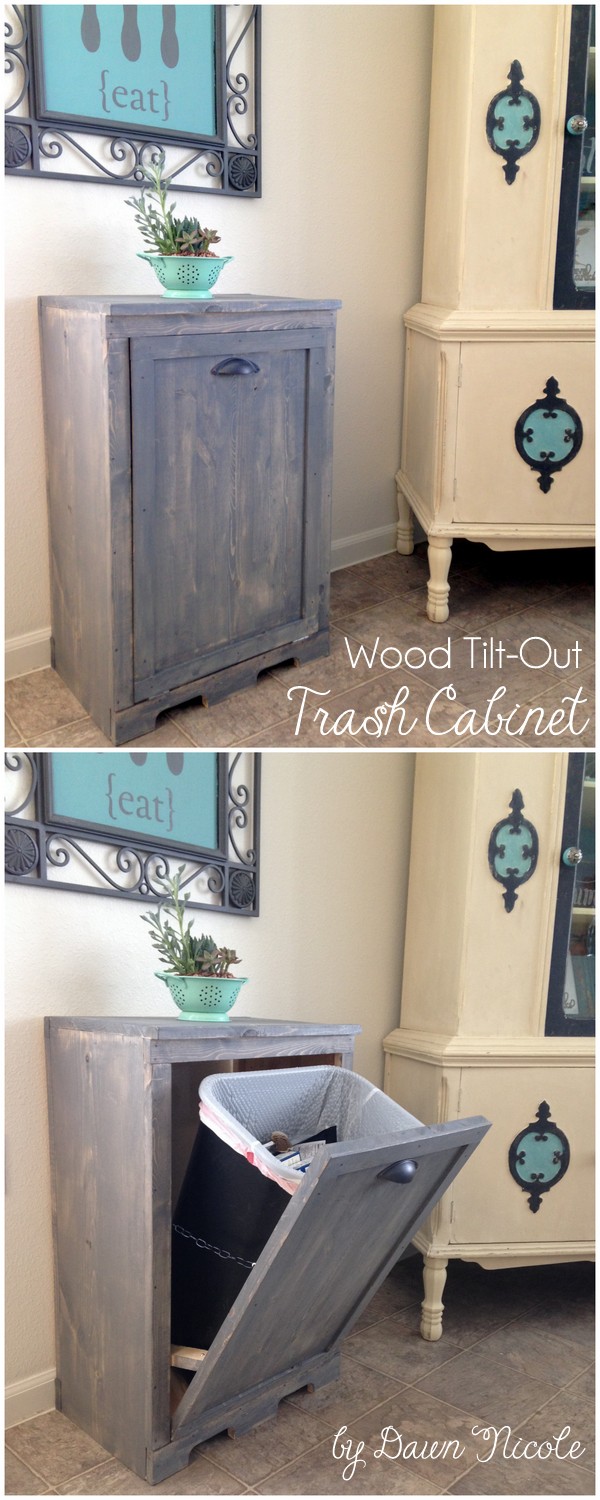
Organizing for the Home: 30+ ideas, tips, & tricks to help organize every nook & cranny in the homeWood Tilt-Out Trash Can by Dawn Nicole

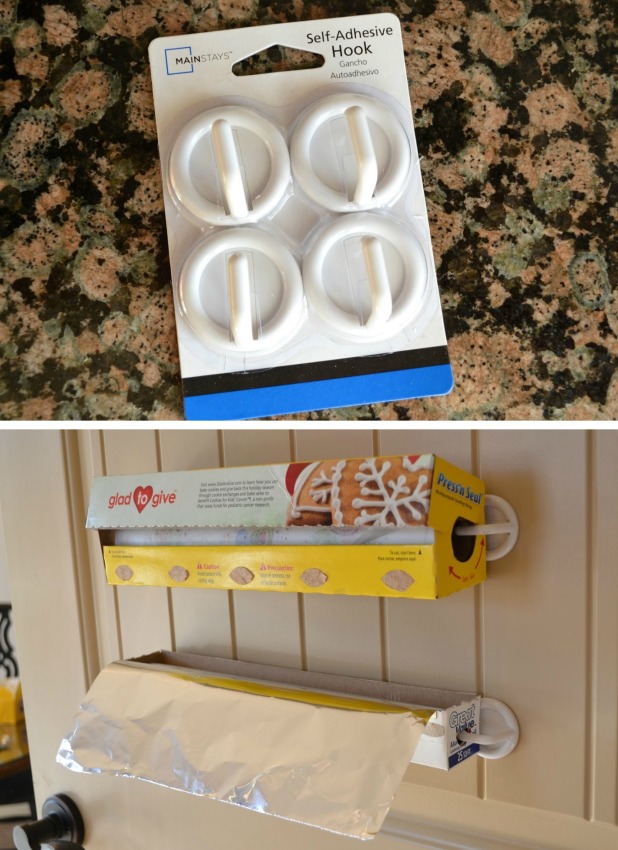
Organizing for the Home: 30+ ideas, tips, & tricks to help organize every nook & cranny in the homePlastic wrap & tin foil holders by Ask Anna

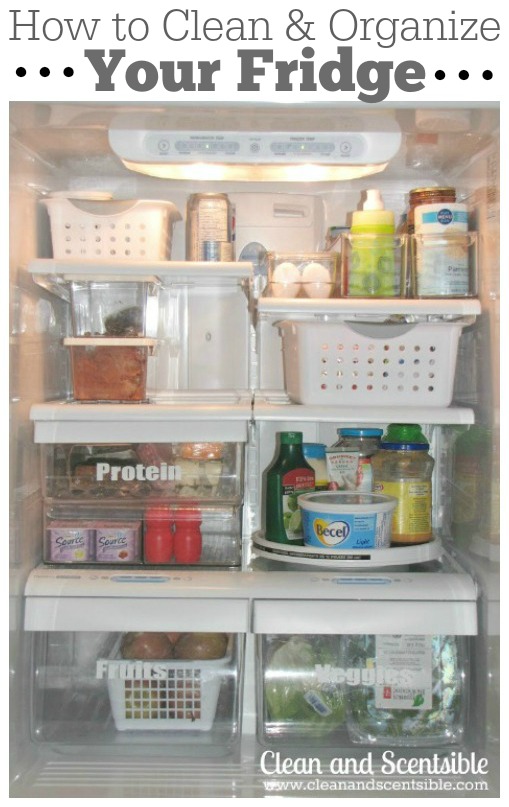
Organizing for the Home: 30+ ideas, tips, & tricks to help organize every nook & cranny in the homeFridge & Freezer organization by Clean and Scentsible

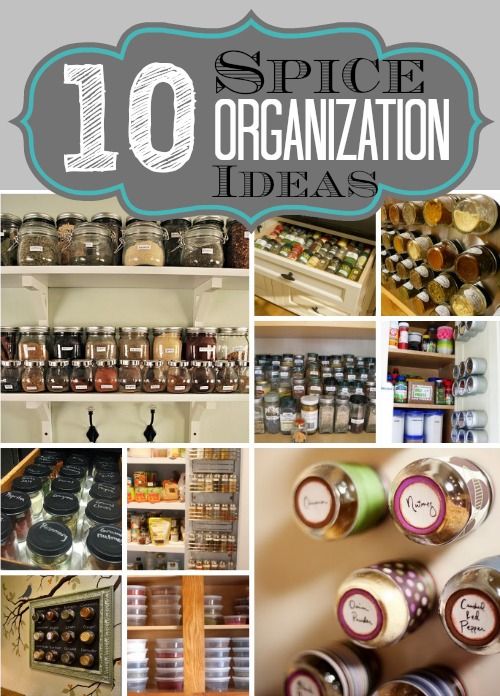
Organizing for the Home: 30+ ideas, tips, & tricks to help organize every nook & cranny in the homeIdeas for organizing your spices via The Blessed Life

Organizing for the Home: 30+ ideas, tips, & tricks to help organize every nook & cranny in the homeDollar Store organization by Ashley Ella Design

Organizing for the Home: 30+ ideas, tips, & tricks to help organize every nook & cranny in the homePots & Pans organization by Organizing Home Life

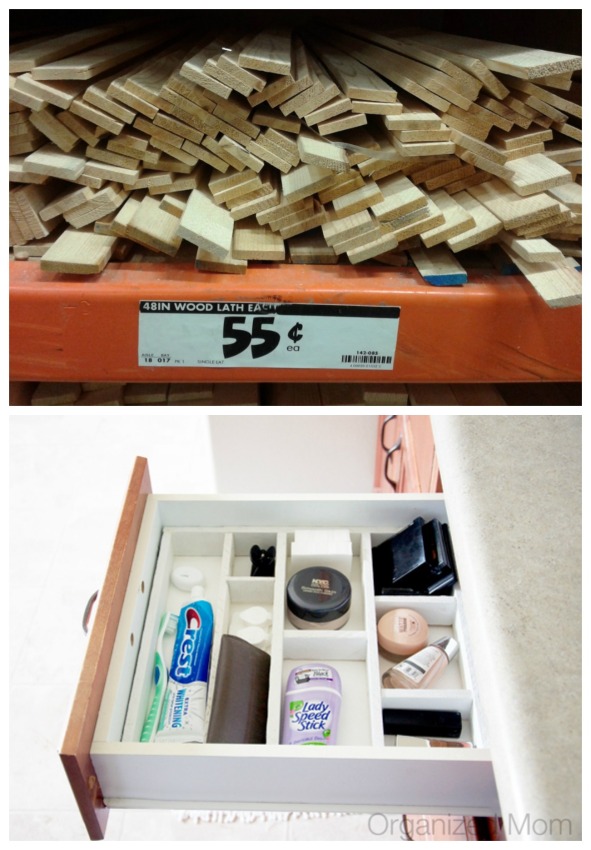
Organizing for the Home: 30+ ideas, tips, & tricks to help organize every nook & cranny in the homeDrawer dividers using inexpensive wood scraps by The Organized Mom

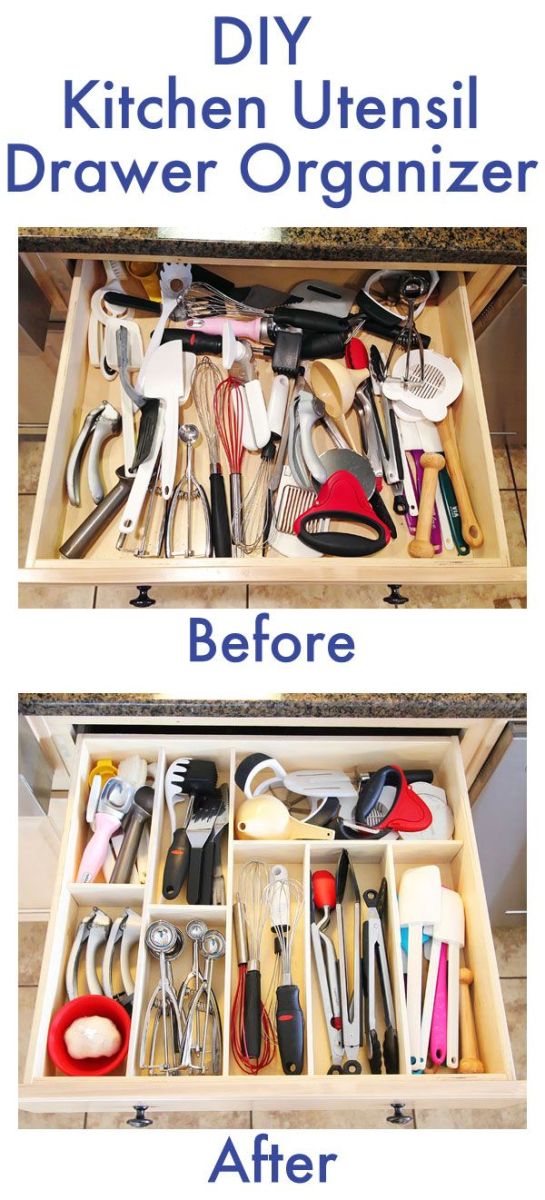
Organizing for the Home: 30+ ideas, tips, & tricks to help organize every nook & cranny in the homeDIY Kitchen utensil dividers by Kevin and Amanda

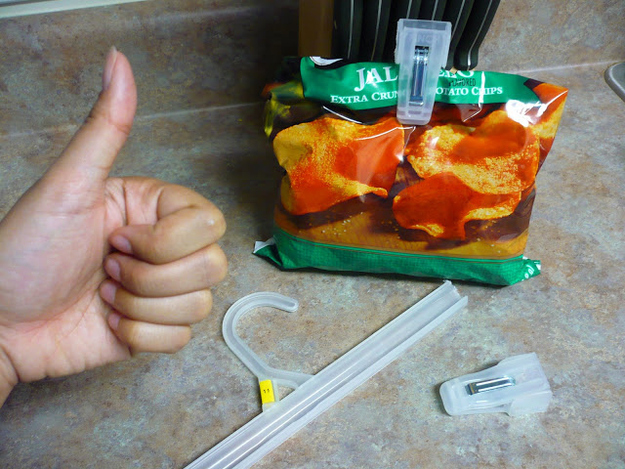
Organizing for the Home: 30+ ideas, tips, & tricks to help organize every nook & cranny in the homeHanger turned clip by Craftster

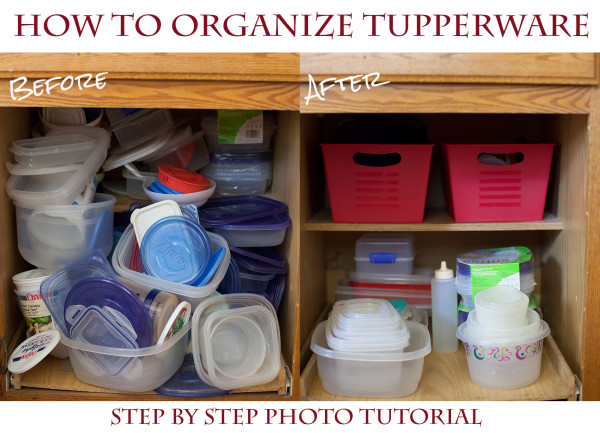
Organizing for the Home: 30+ ideas, tips, & tricks to help organize every nook & cranny in the homeTupperware organization by Eating Rich

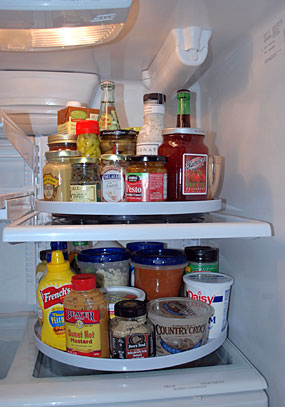
Organizing for the Home: 30+ ideas, tips, & tricks to help organize every nook & cranny in the homeInside the refrigerator organization by Fridge Butler

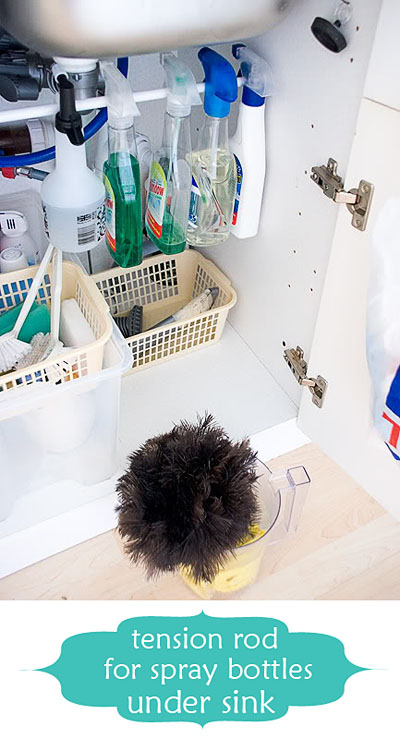
Organizing for the Home: 30+ ideas, tips, & tricks to help organize every nook & cranny in the homeUnder-the-sink cleaning supplies organization by Jen Thousand Words

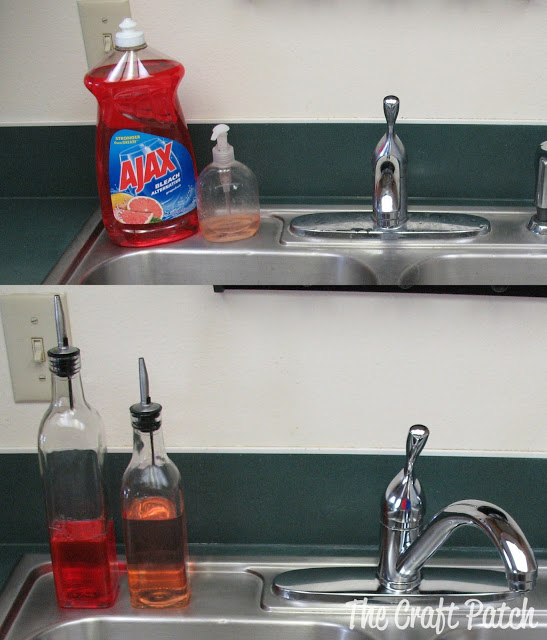
Organizing for the Home: 30+ ideas, tips, & tricks to help organize every nook & cranny in the homeOlive Oil bottles are the perfect solution to ditch the ugly soap bottles. Idea by The Craft Pitch

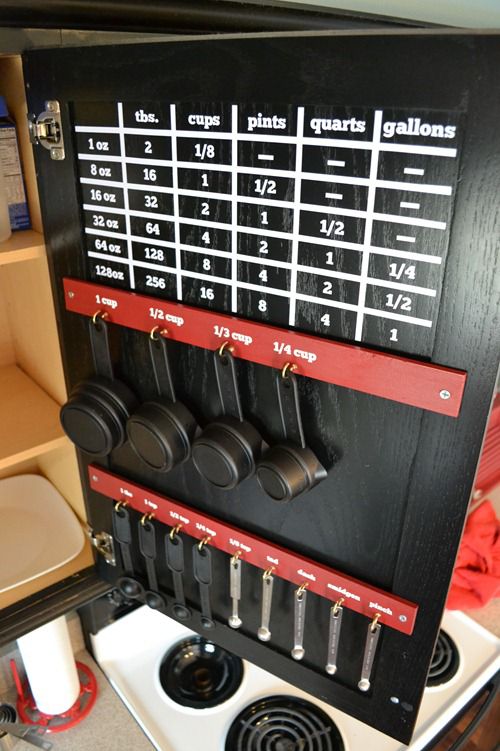
Organizing for the Home: 30+ ideas, tips, & tricks to help organize every nook & cranny in the homeMeasurement conversion chart on the inside of the kitchen cabinet by Infarrantly Creative

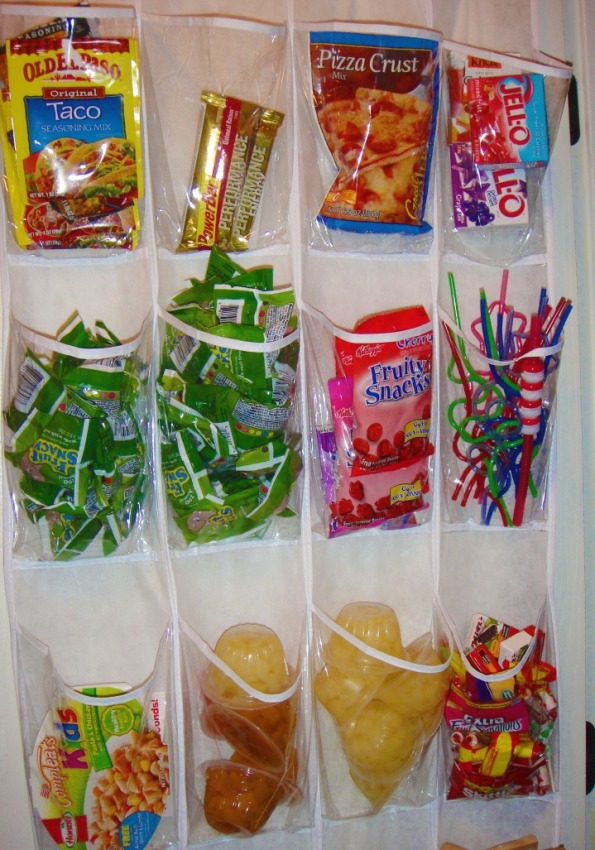
Organizing for the Home: 30+ ideas, tips, & tricks to help organize every nook & cranny in the homeOver-the-door shoe organizer for snacks, coupons, small items by Money Saving Queen

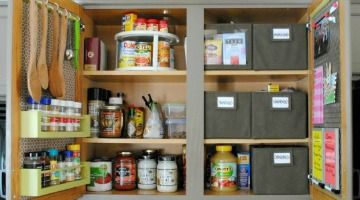
Organizing for the Home: 30+ ideas, tips, & tricks to help organize every nook & cranny in the homeOrganization ideas for the inside of the kitchen cabinets by Jenna Burger

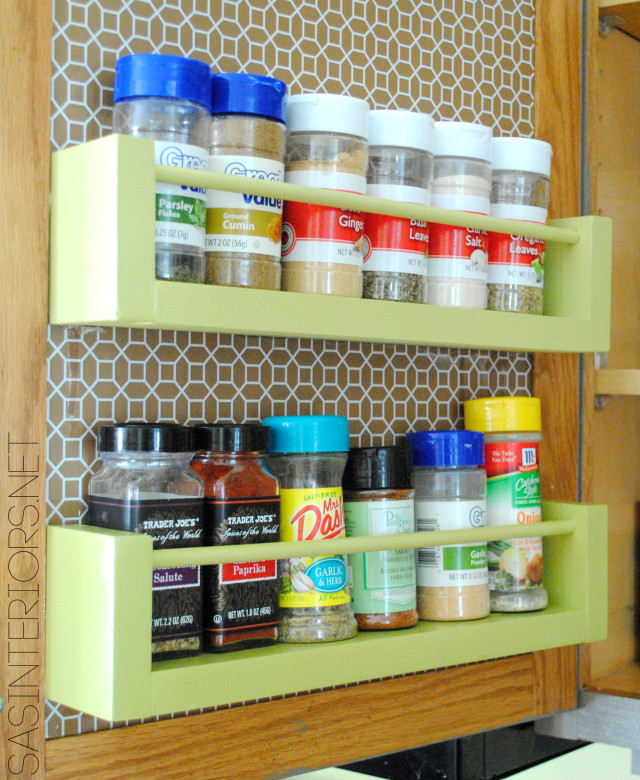
Organizing for the Home: 30+ ideas, tips, & tricks to help organize every nook & cranny in the homeWood Spice Rack by Jenna Burger

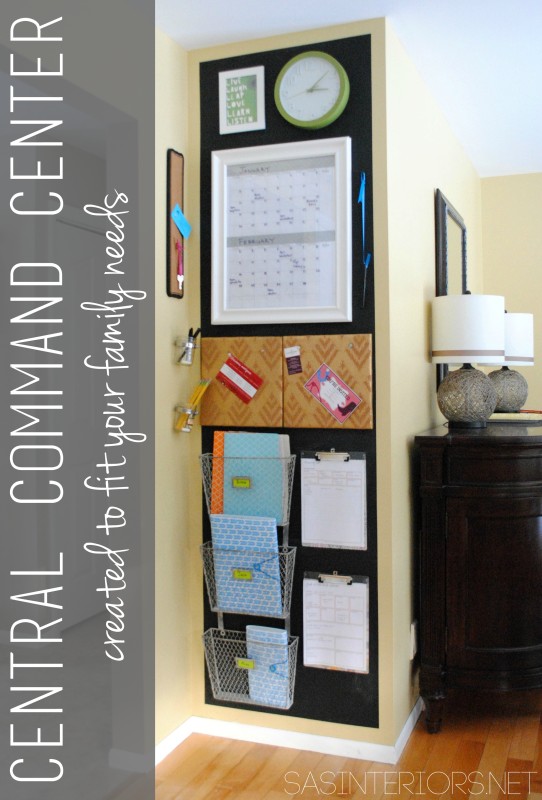
A central command center in the hub of the home is one of the most important ways to keep a family on schedule…

Organizing for the Home: 30+ ideas, tips, & tricks to help organize every nook & cranny in the homeCentral Command Center in the kitchen by Jenna Burger

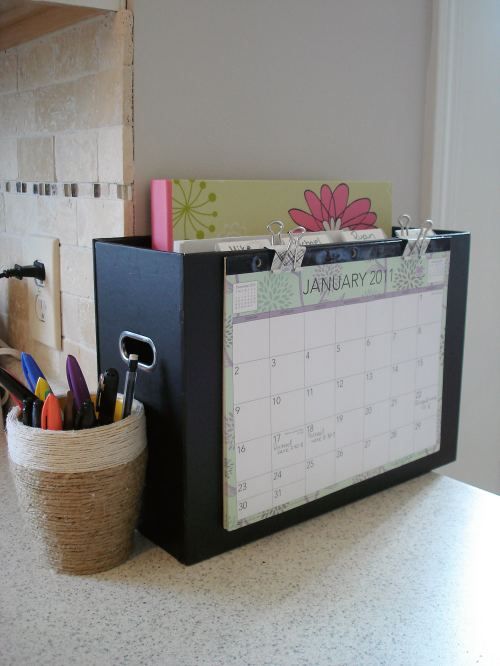
Organizing for the Home: 30+ ideas, tips, & tricks to help organize every nook & cranny in the homeCountertop command center by Lovely Crafty Home

Organizing for the Home: 30+ ideas, tips, & tricks to help organize every nook & cranny in the homeDry erase to-do or menu board by Make and Takes

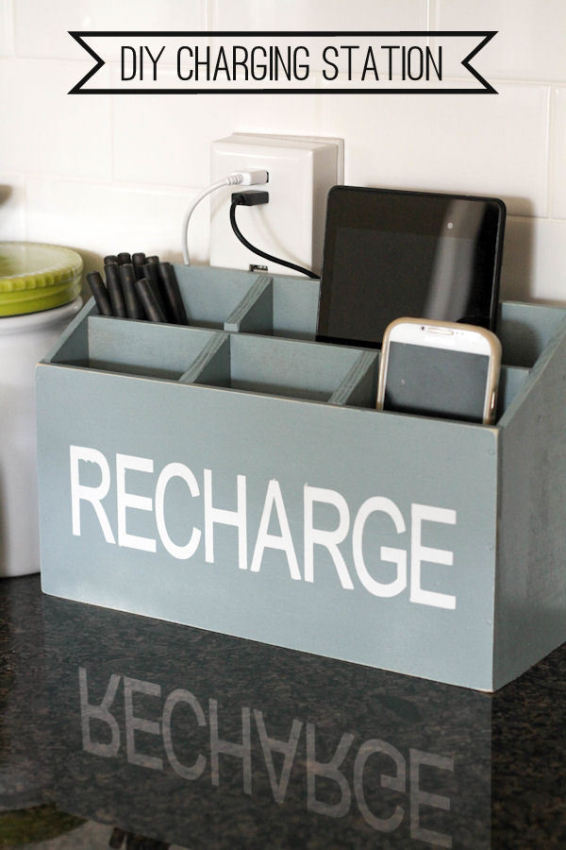
I so need this… a charging station instead of all those wires and plugs!

Organizing for the Home: 30+ ideas, tips, & tricks to help organize every nook & cranny in the homeDIY Charging station created by Lil’ Luna

I am still on a mission to clean this place up, bag it up – send it out, & get organized in 2015!  For me, it’ll never be 100% picture perfect, but this is a home of 5 not a museum.  As I’m working on purging + organizing + renewing my home this year, I am also striving to focus on what’s most important to me and living with intention!  Admittedly, it’s not easy, but with often reminders (to myself) I am working towards being more mindful and living with purpose.

Here is a recap of the week so far (click on the image to bring you to the original post)

Organizing for the Home: 30+ ideas, tips, & tricks to help organize every nook & cranny in the home

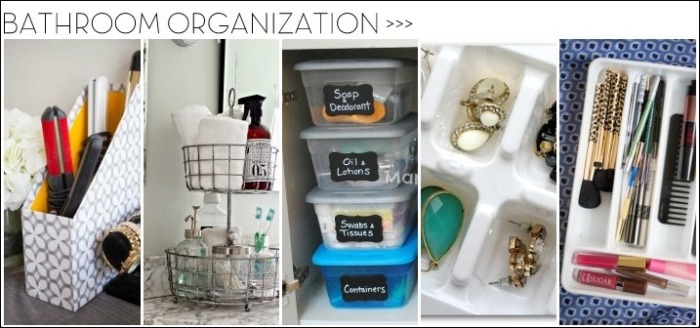
15 + Organizational Ideas for the BATHROOM: Tips + Tricks to help organize every nook & cranny of the bathroom!

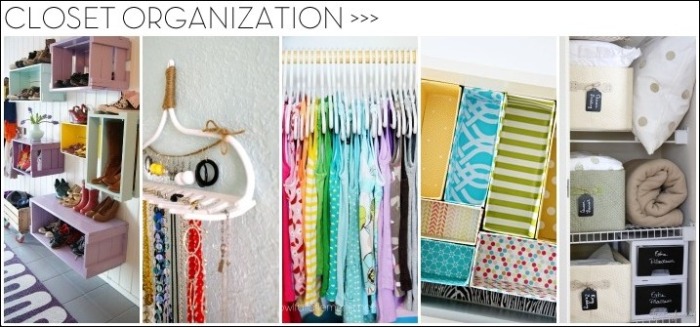
13+ Organizational Ideas for CLOSETS: Tips + Tricks to help organize every all types of closets!

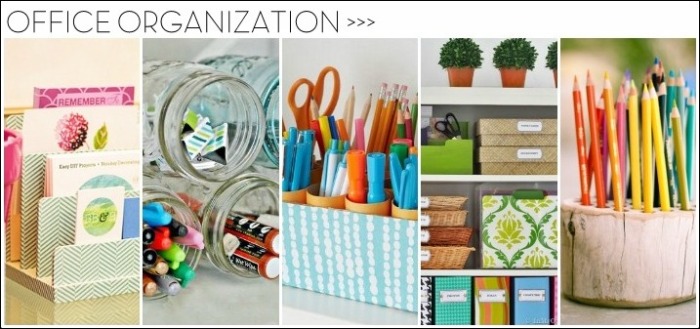
Organzing ideas + tips for the HOME OFFICE!

Ridding the stuff that isn’t needed and organizing what we want to keep has really made a difference!  Tomorrow’s space of focus… THE BATHROOM.

Bathroom Makeover: Reveal

The day is finally here… reveal day of the Bathroom MakeoverThe project that I challenged myself to do in 30 days.  Keeping reading (till the end) to see if I accomplished the goal…

The finished space has taken a wee bit longer than planned to share, but with the holiday high, I got a bit sidetracked.  Good news, Good news… the bathroom is done and has been for a few weeks.  I was planning on sharing the reveal sooner, but thought it would be best to wait till after the Christmas craze.

Without further ado, here it is…
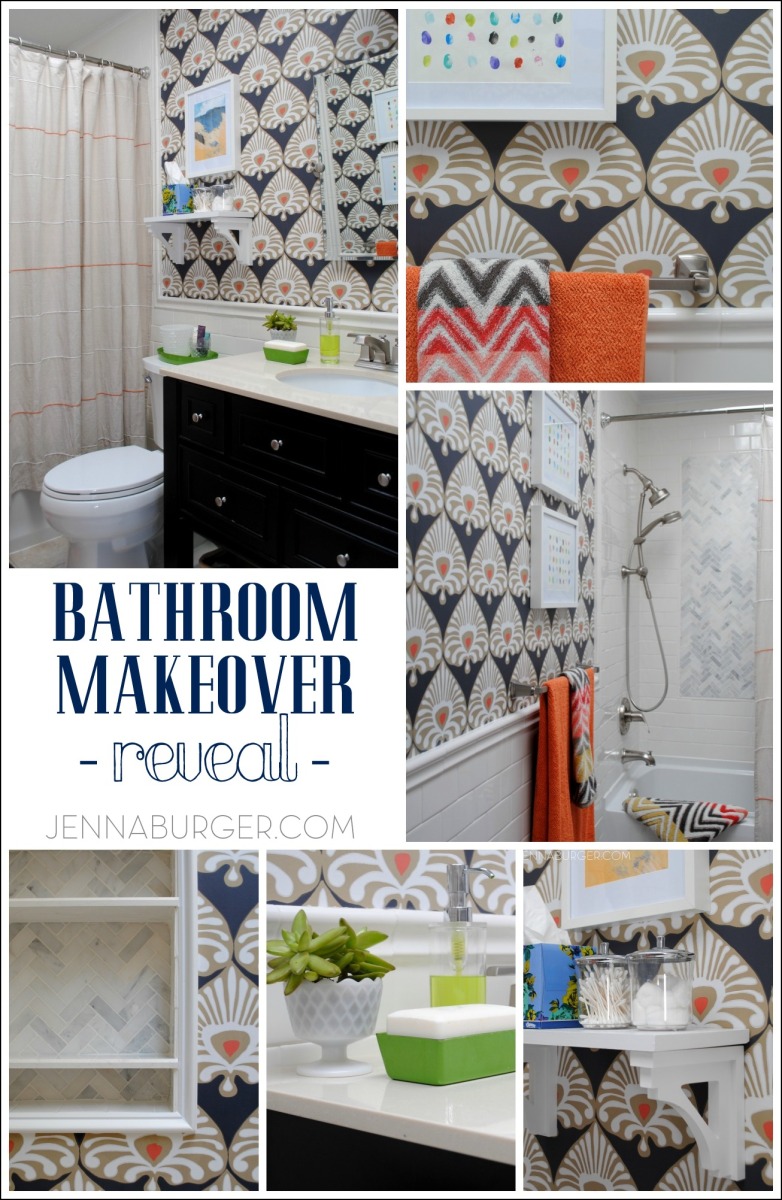
Bathroom Makover with 95% of the space being a DIY project - new tub + tile, vanity, wallpaper, and more!  Lots of details on this multi-post before & after.  Bathroom makeover by Jenna Burger Design www.jennaburger.com

As always, I love partnering with Lowe’s on projects and this bathroom makeover wasn’t any different.  I have worked with Lowe’s on so many projects over the years and not only am I thrilled to be apart of their Creative Team, but I truly love their product line.  Minus a few elements, this entire space was pretty much created using in-stock items that can be found in most of their stores.  How great is it not to have to order and wait 8 weeks for something to arrive?!  Grab & go today – that’s a bonus in my book. (I wasn’t paid to say any of that and am sharing my true, honest thoughts!)

Before sharing more of the ‘after’, I have to state that bathrooms – in my opinion – are so difficult to photograph because of the limited size of the space.  I’m not a pro photog, so I tried capturing it the best I could.  That being said, let’s get to it.

You can’t appreciate the after, without seeing the before.  This bathroom has had quite the evolution.  It was pretty sad when we moved in…
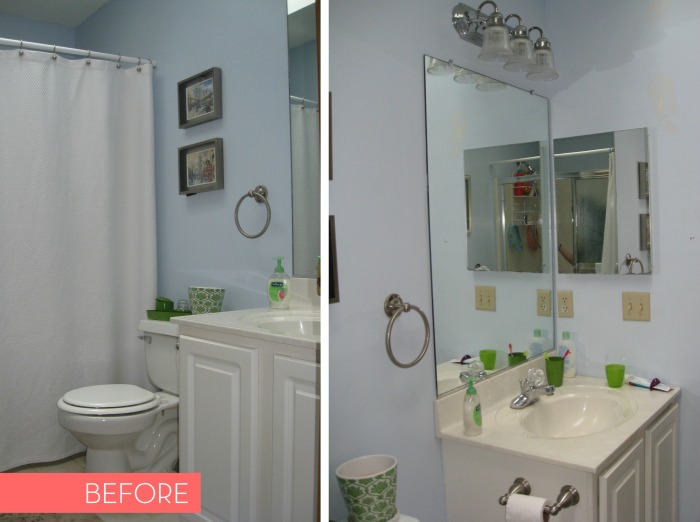
Before Bathroom

Within a year, it was painted & got a little refresh…
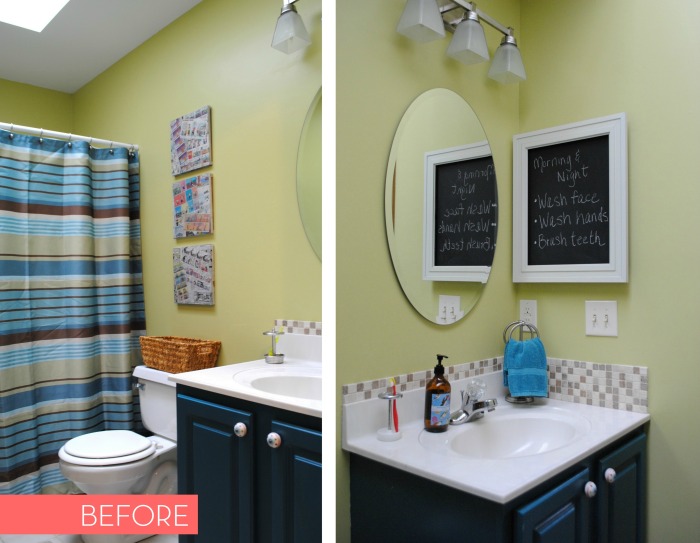
Before Bathroom

Since it’s heavily used by 2 young kiddos it got + gets quite the abuse on a daily basis.  After a while, the exposed walls (sheetrock) + the builder-grade melamine cabinet  just wasn’t fitting the bill anymore.

If you missed following along from the beginning, this was the mood board I created for the new space…
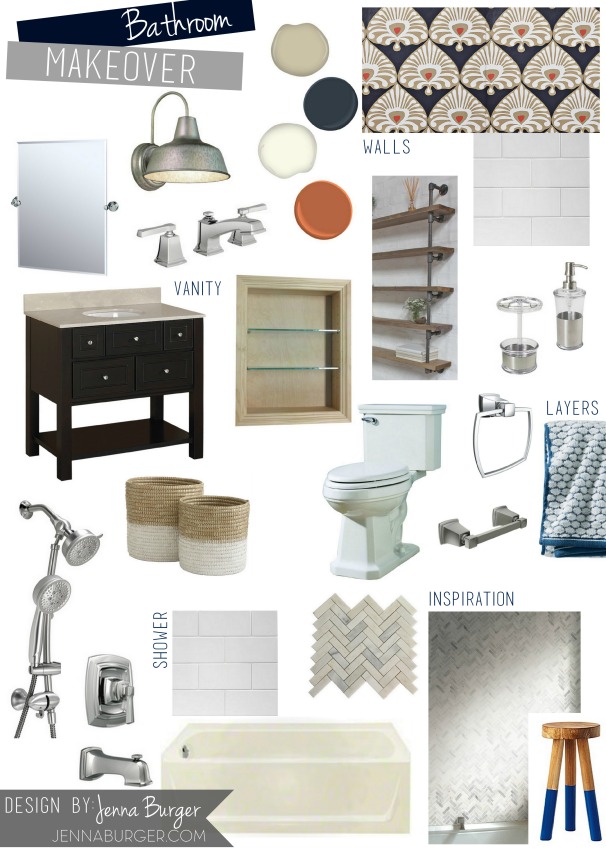
Bathroom Makeover Mood Board / Plan of Direction for space

A few changes had to be made along the way, but the main elements & more so, the main aesthetic / feel of the space, was absolutely achieved.

My goal was to create an updated, modern bathroom with a classic (live-a-long-time) background + lots of eye-popping, unexpected layers.  I am thrilled with the result not only because it’s super functional for the kids (with tile going half way up the walls), but it’s really a dynamic + fun space!

Come on in…
Bathroom Makover with 95% of the space being a DIY project - new tub + tile, vanity, wallpaper, and more!  Lots of details on this multi-post before & after.  Bathroom makeover by Jenna Burger Design www.jennaburger.com

Many have asked, “why did you choose to do the kids bath instead of the Master?”, and the reason for that is I see this bathroom much more throughout the day (plus it seemed more of a manageable DIY project because it’s a smaller space).

This bathroom is right at the top of the stairs and since I am up & down a lot on a daily basis, I wanted it to look & feel new, updated, and fresh.  I’ll get to the Master bath someday.  Even though it was featured in a national magazine, it does need some fixin’ up!

This is what I see each & every time I walk up the stairs…

snapshot from my phone The hallway entry into the remodeled bathroom space...
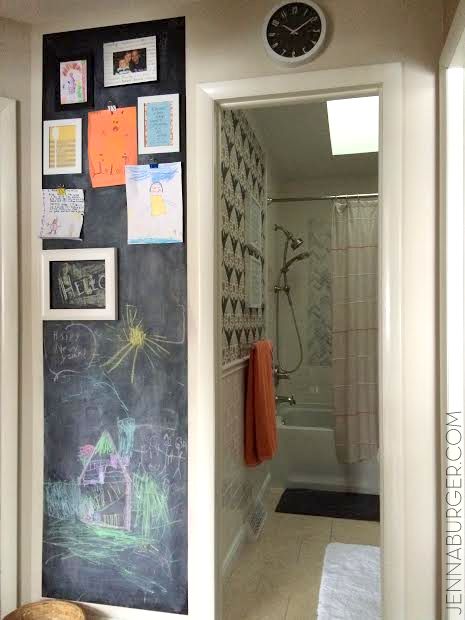
Let’s explore the new bath space more…
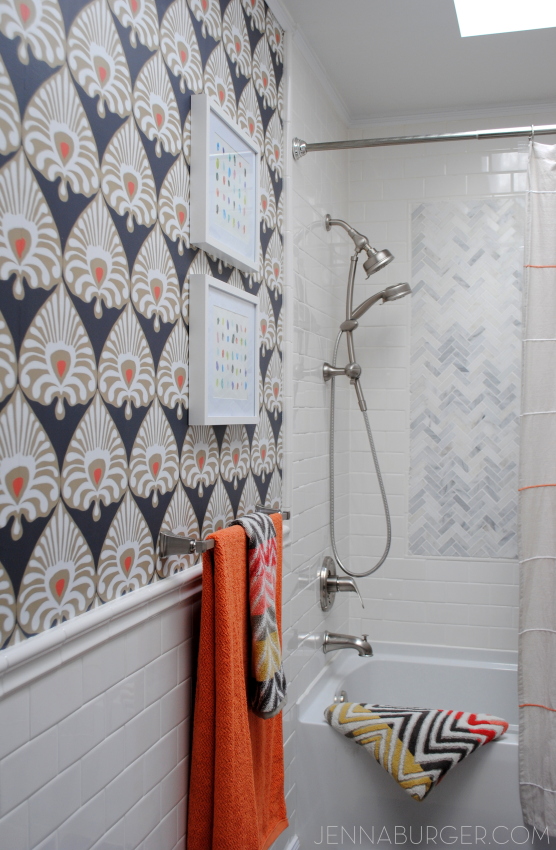
Bathroom Makover with 95% of the space being a DIY project - new tub + tile, vanity, wallpaper, and more!  Lots of details on this multi-post before & after.  Bathroom makeover by Jenna Burger Design www.jennaburger.com

The space is a typical standard 5′ x 8′ bathroom with a sink, toilet, tub layout on one wall & then a straight wall on the other side.

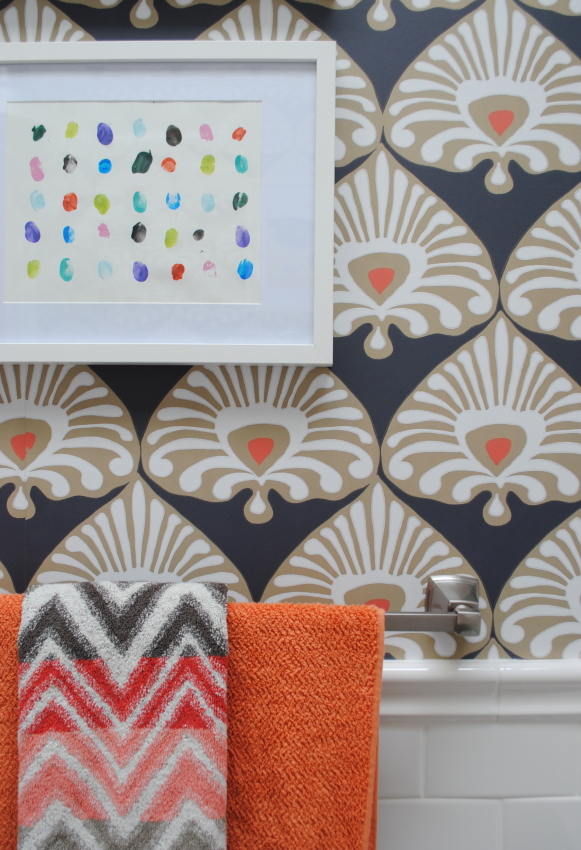
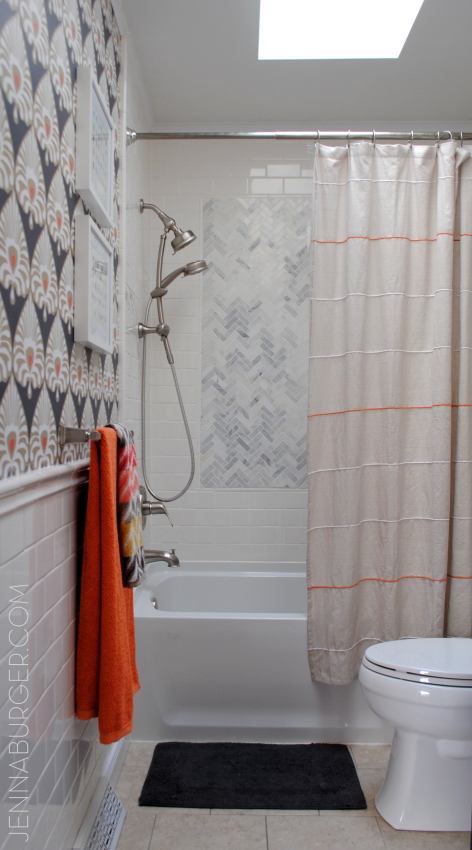
I installed 3×6 subway tile from the tub deck to the ceiling in the tub space and continued the tile about 3′ up the wall in the main part of the bathroom.  Above the tile, I installed a dynamic wallpaper in a beautiful damask pattern with colors of navy, beige, and orange.  It really is the art of the space so I didn’t add much more to the walls.

On the left side, above the towel bar, I hung two framed custom art pieces (created by my 2 older kiddos) which I will be sharing more details on soon.  The frames + matting are white & simple, the perfect contrast to the bold background.
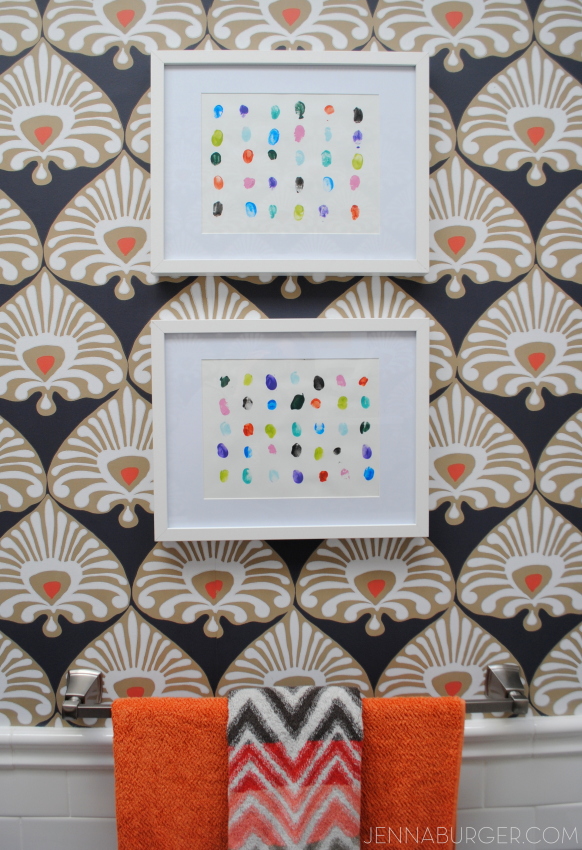
Bathroom Makover with 95% of the space being a DIY project - new tub + tile, vanity, wallpaper, and more!  Lots of details on this multi-post before & after.  Bathroom makeover by Jenna Burger Design www.jennaburger.com

tutorial for >>> how to install wallpaper
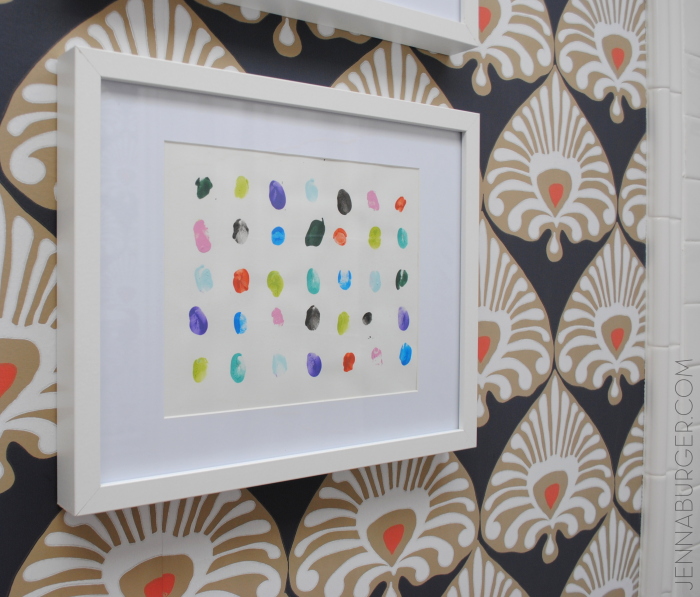
Bathroom Makover with 95% of the space being a DIY project - new tub + tile, vanity, wallpaper, and more!  Lots of details on this multi-post before & after.  Bathroom makeover by Jenna Burger Design www.jennaburger.com

Bathroom Makover with 95% of the space being a DIY project - new tub + tile, vanity, wallpaper, and more!  Lots of details on this multi-post before & after.  Bathroom makeover by Jenna Burger Design www.jennaburger.com

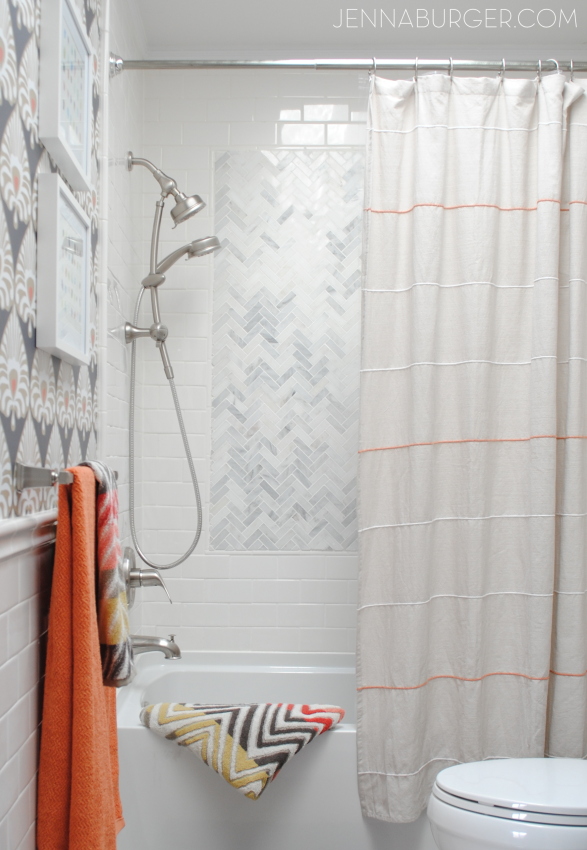
As you continue around the revamped bathroom,  you round the corner to the tub space.  This area is drastically different with new floor to ceiling tile (all installed by me – thank goodness my hands aren’t cracked anymore).

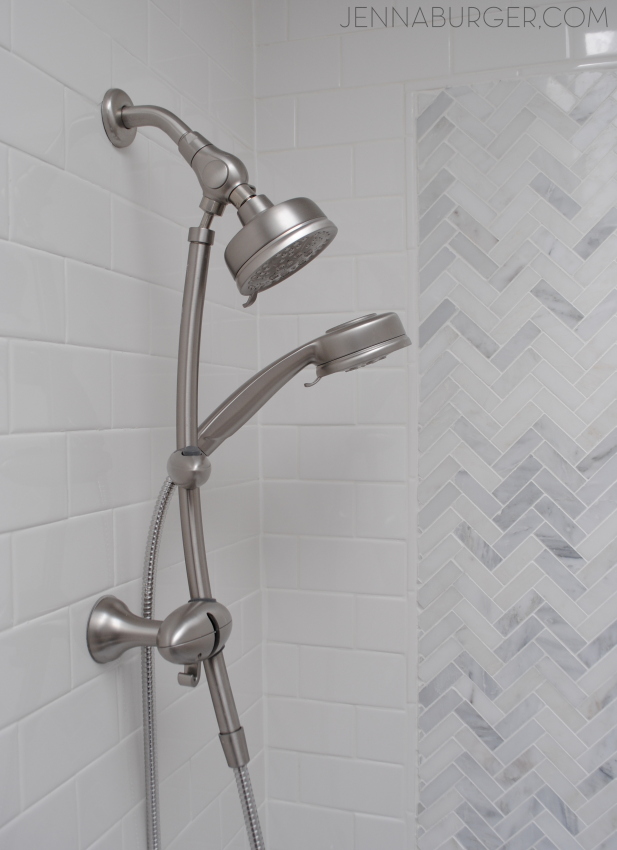
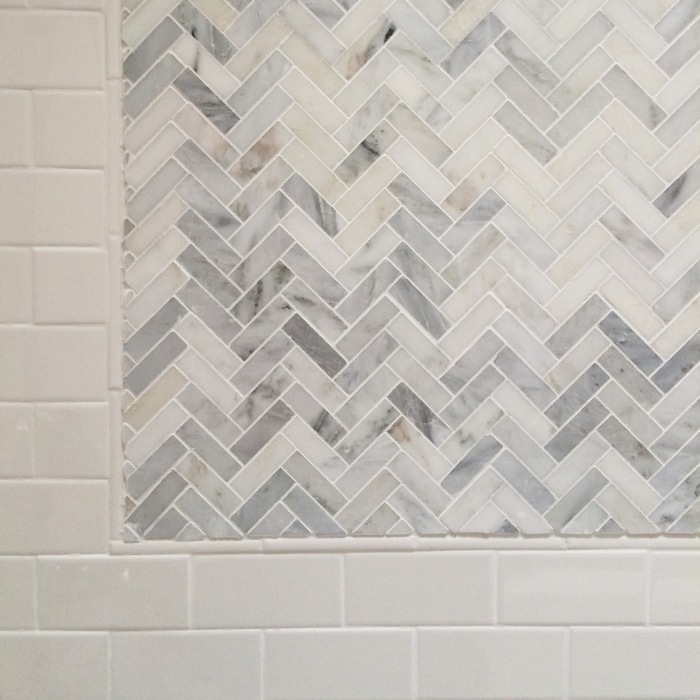
3×6 subway tile was used as the main tile material, which frames an accent tile of natural stone in a small herringbone pattern
Bathroom Makover with 95% of the space being a DIY project - new tub + tile, vanity, wallpaper, and more!  Lots of details on this multi-post before & after.  Bathroom makeover by Jenna Burger Design www.jennaburger.com

3 x 6 subway tile with herringbone accent tile in carrera

tutorial for >>> how to install tile + grout
Bathroom Makover with 95% of the space being a DIY project - new tub + tile, vanity, wallpaper, and more!  Lots of details on this multi-post before & after.  Bathroom makeover by Jenna Burger Design www.jennaburger.com

Bathroom Makover with 95% of the space being a DIY project - new tub + tile, vanity, wallpaper, and more!  Lots of details on this multi-post before & after.  Bathroom makeover by Jenna Burger Design www.jennaburger.com

Bathroom Makover with 95% of the space being a DIY project - new tub + tile, vanity, wallpaper, and more!  Lots of details on this multi-post before & after.  Bathroom makeover by Jenna Burger Design www.jennaburger.com

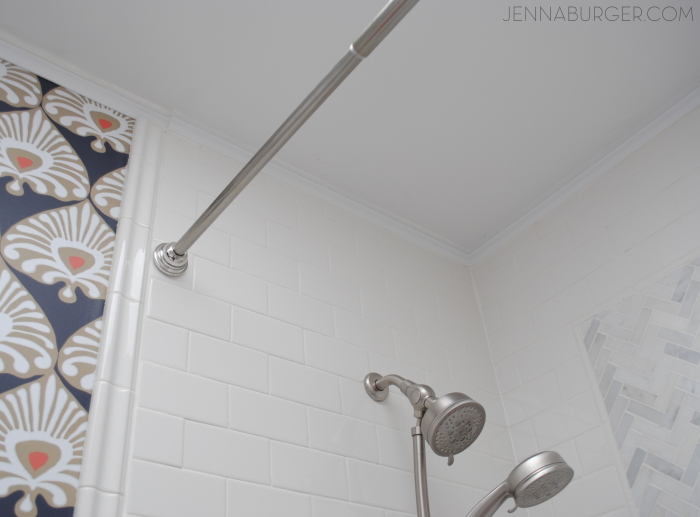
Where the wall meets the ceiling, I added a small decorative moulding, which really gave the space a finished, tailored look.  I am not very good with moulding (remember my troubles in the powder room), so this time I chose a moulding that had a 90 degree angle and it was much more manageable + easy to install since the cut was a simple 45.

Adding the moulding not only provides a finished look, but it allowed the install of the wallpaper to be easier – the wallpaper didn’t have to be perfect at the top because the moulding covered it.  Additionally, the moulding continues in the tub area where I was left with a 1/2″ gap between the last tile and the ceiling – a space too small to install tile.

Here I am installing it…
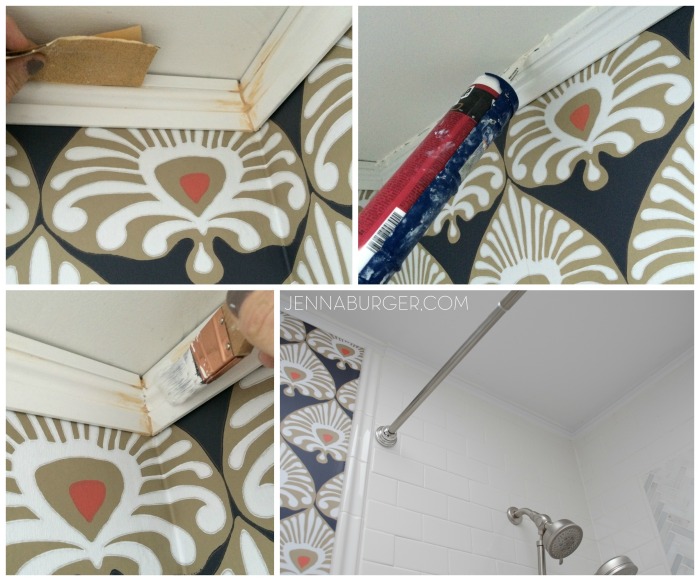
Installing Moulding in the Bathroom

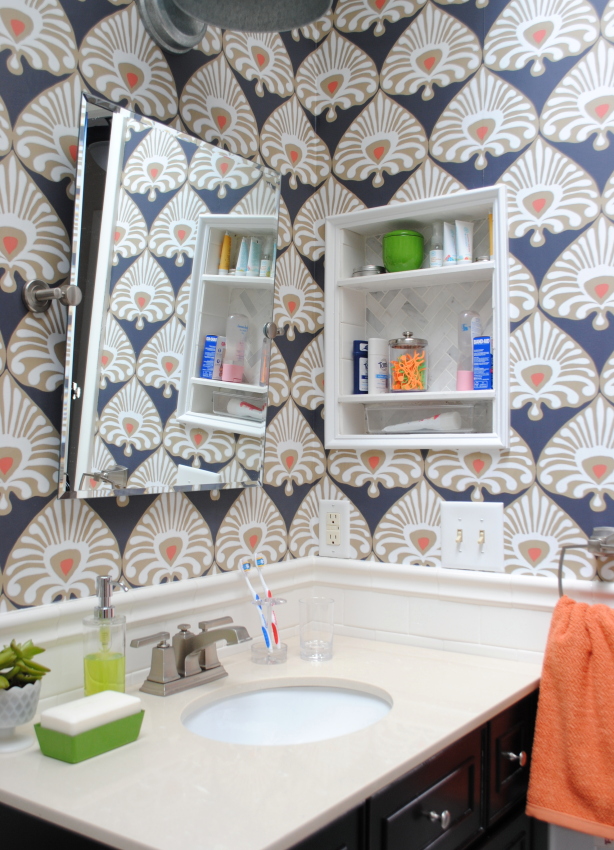
On the other side of the bathroom were more big changes…  a new toilet, vanity, lighting + a new shelf and medicine cabinet turned tiled niche.
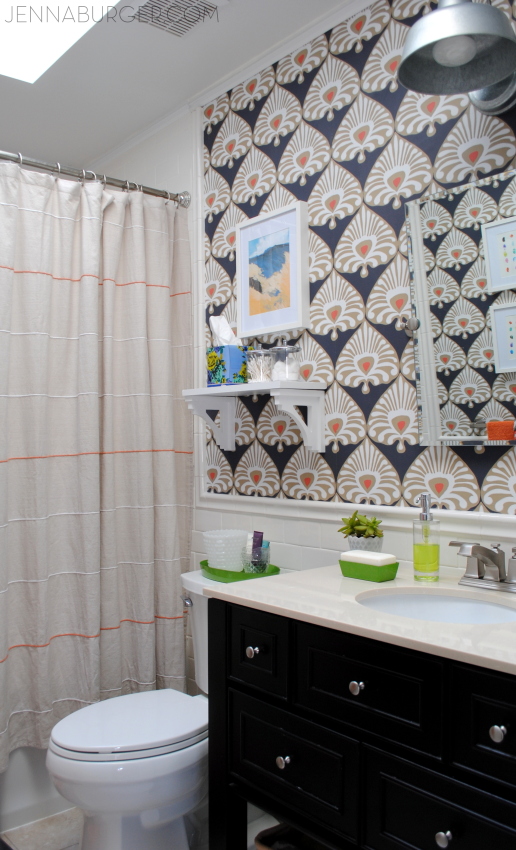
Bathroom Makover with 95% of the space being a DIY project - new tub + tile, vanity, wallpaper, and more!  Lots of details on this multi-post before & after.  Bathroom makeover by Jenna Burger Design www.jennaburger.com

The shelf is a simple DIY project that I will share more about soon.  The original thought / plan was to add an industrial-style shelf above the toilet, but after the wallpaper went up, I just couldn’t bring myself to cover it + with the new vanity there was ample storage.

A simple white shelf along with a few layered accessories and a framed print seemed to be the perfect addition.
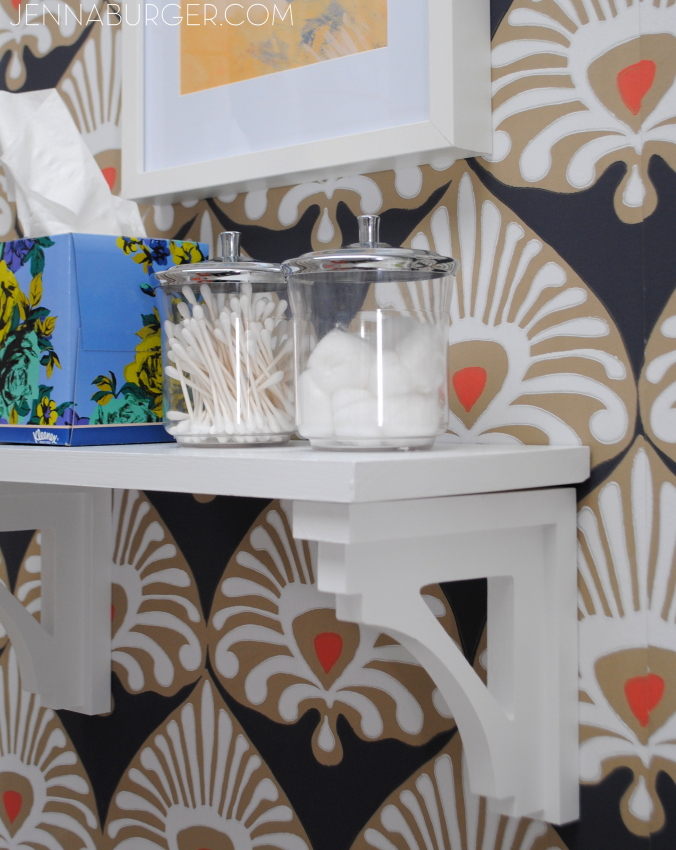
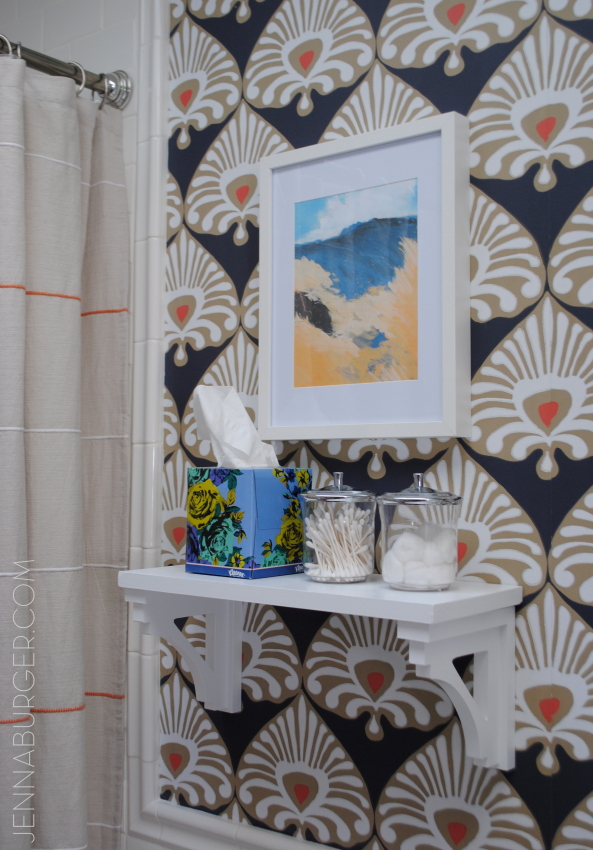
Bathroom Makover with 95% of the space being a DIY project - new tub + tile, vanity, wallpaper, and more!  Lots of details on this multi-post before & after.  Bathroom makeover by Jenna Burger Design www.jennaburger.com

Bathroom Makover with 95% of the space being a DIY project - new tub + tile, vanity, wallpaper, and more!  Lots of details on this multi-post before & after.  Bathroom makeover by Jenna Burger Design www.jennaburger.comTo the vanity…

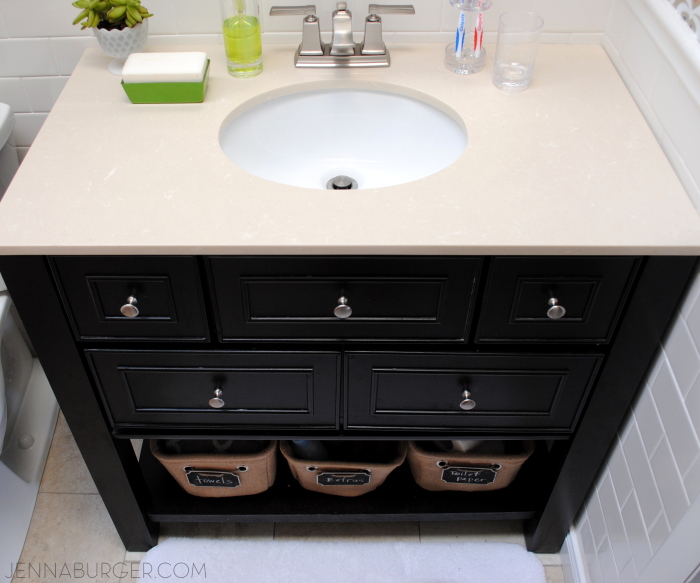
The vanity is a beauty and I love the openness it brings to the space.  This vanity compared to the previous one is about 6″ longer.  There was enough room at the side of the toilet to go a bit wider and the additional inches really makes a difference.  Even though it’s minimal, there seems to be a lot more countertop space.

Also having drawers with this vanity, the amount of storage has tripled versus having 1 large open cavity with the last cabinet.  There looks to be 5 drawers, but the center drawer under the sink is a faux panel.  The 2 smaller side drawers + the 2 larger drawers provide so much room.  As the kids get older & accumulate more stuff, I am sure the drawers will definitely fill up.  For now, they’re fairly unused.
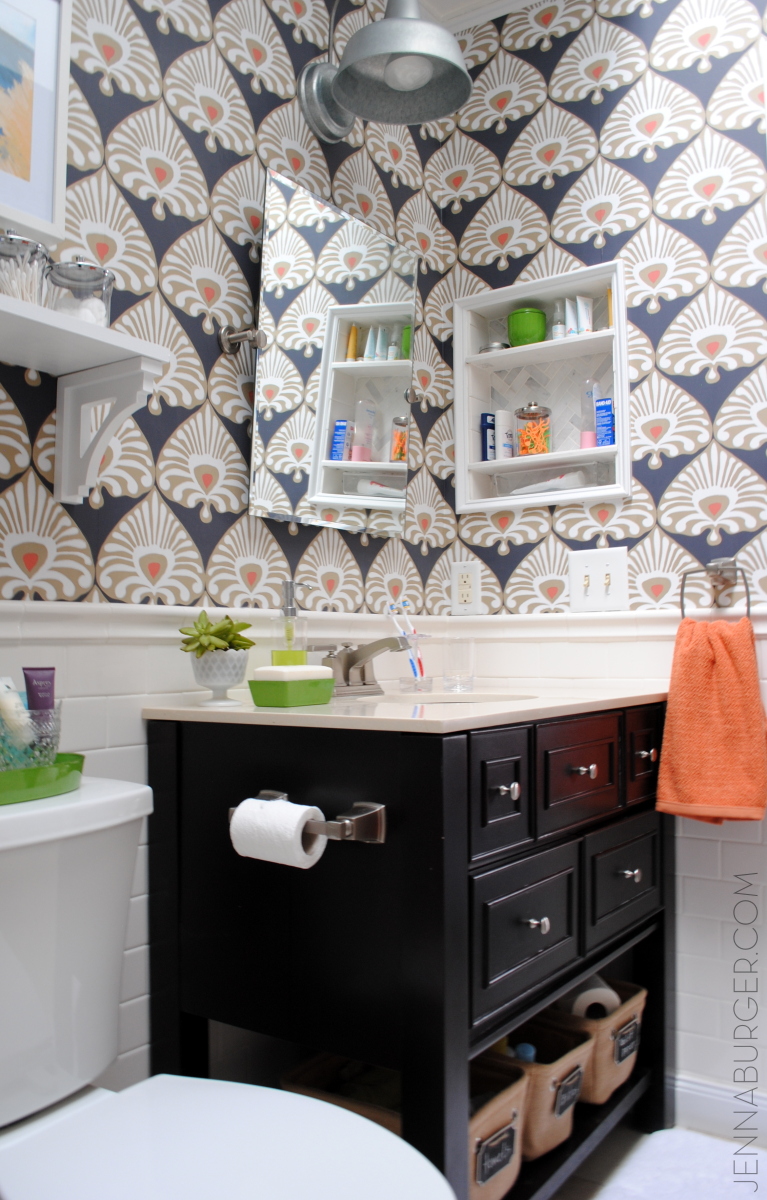
Bathroom Makover with 95% of the space being a DIY project - new tub + tile, vanity, wallpaper, and more!  Lots of details on this multi-post before & after.  Bathroom makeover by Jenna Burger Design www.jennaburger.com

Underneath the closed part of the cabinet is an open shelf perfect for towels, baskets, etc.  I chose these cute burlap bins at Lowe’s and revamped them a bit (of course, how could I not…?)

I loved the texture of the burlap, but the rope pull was slightly too nautical, so I swapped them out for a chalkboard label that I found in the dollar bin at Target.  Using jute rope, I attached them through the holes and in 30 seconds gave these pretty bins a whole new look…

I love how easy & simple something like this can change a space & be unique to your personal aesthetic + style.
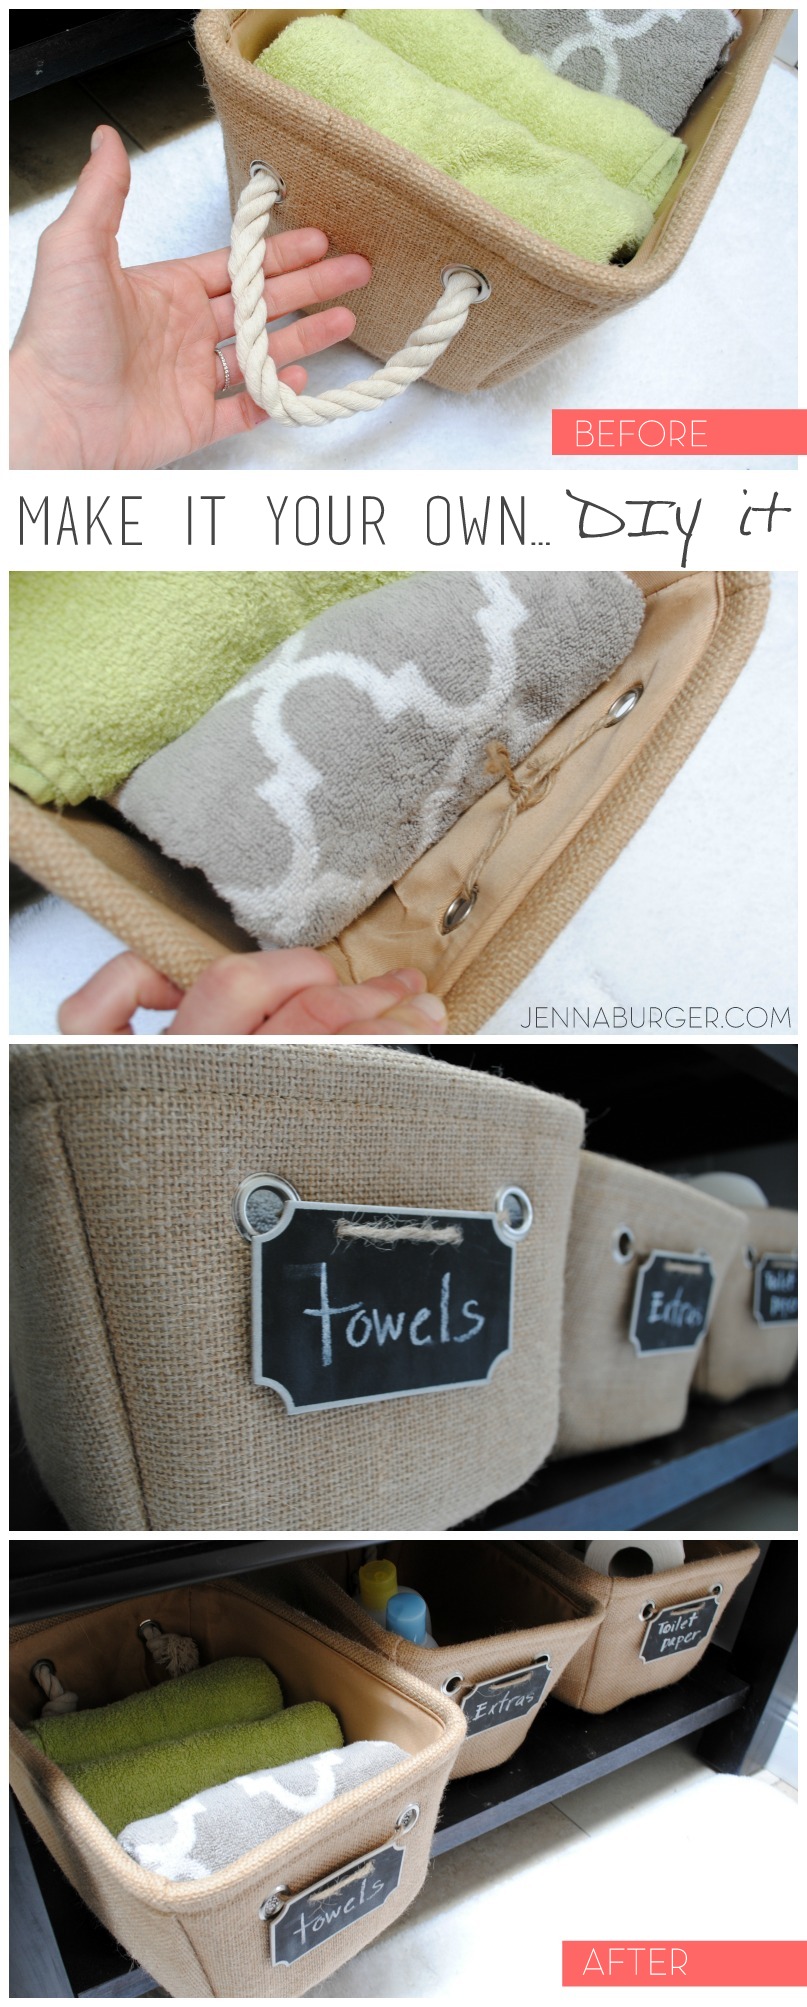
Make it your own by changing up a store-bought item.  From rope pulls to chalkboard labels, this DIY upgrade was less than a $1.

Back up above, the countertop is adorned with a few simple, but must-need items.  I found these really cute accessories – liquid soap holder, toothbrush holder, and cup – that were super inexpensive at Lowe’s.  They are clear (plastic), but look very modern and $$$.  The look of lucite is hot right now.
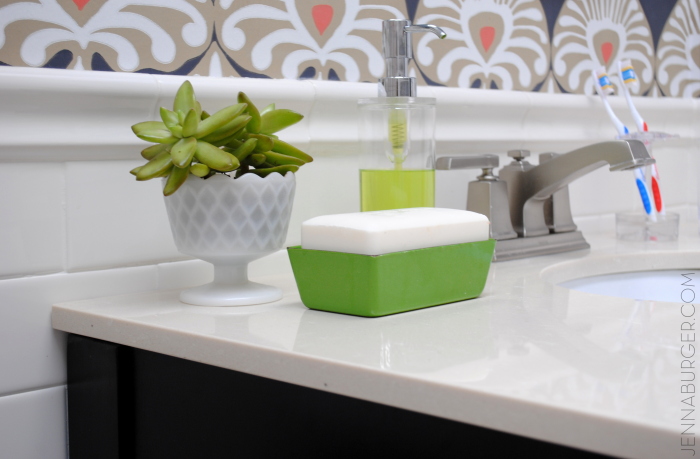
Bathroom Makover with 95% of the space being a DIY project - new tub + tile, vanity, wallpaper, and more!  Lots of details on this multi-post before & after.  Bathroom makeover by Jenna Burger Design www.jennaburger.com

I chose a minimalist-style, frameless, rectangular tilt mirror and an industrial-style oversized outdoor light that is centered above (because of the longer vanity, the light had to move over a few inches – my contractor did that since it’s above & beyond my skillset).
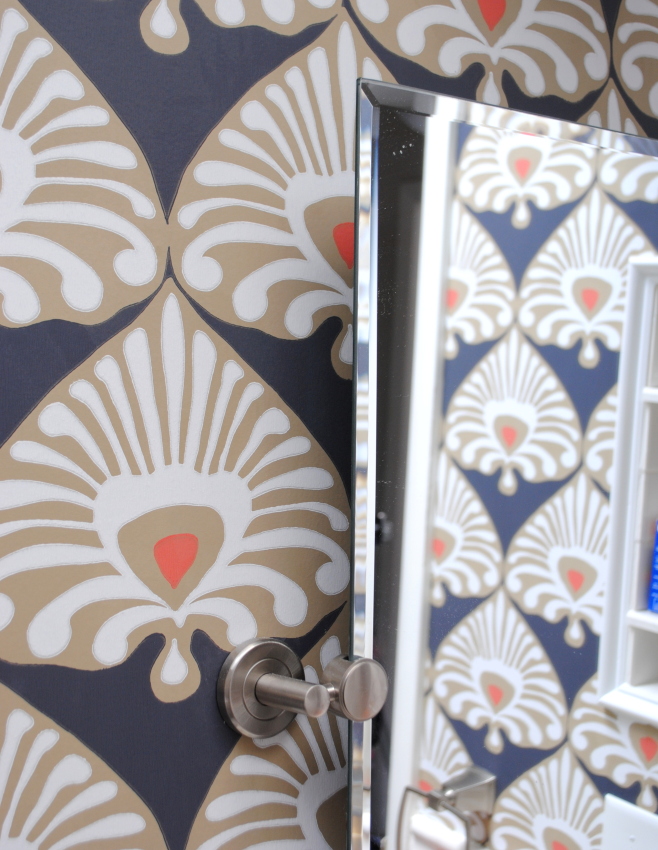
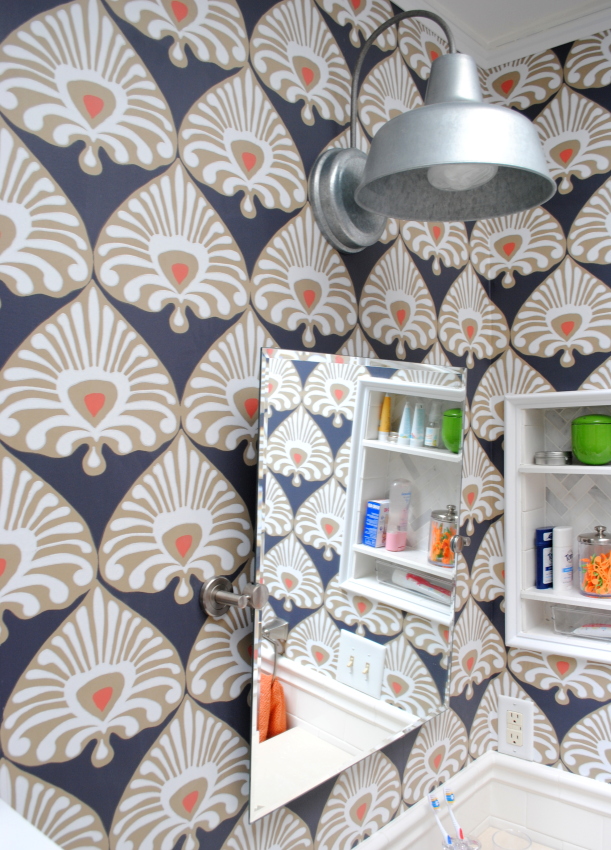
Bathroom Makover with 95% of the space being a DIY project - new tub + tile, vanity, wallpaper, and more!  Lots of details on this multi-post before & after.  Bathroom makeover by Jenna Burger Design www.jennaburger.com

Bathroom Makover with 95% of the space being a DIY project - new tub + tile, vanity, wallpaper, and more!  Lots of details on this multi-post before & after.  Bathroom makeover by Jenna Burger Design www.jennaburger.com

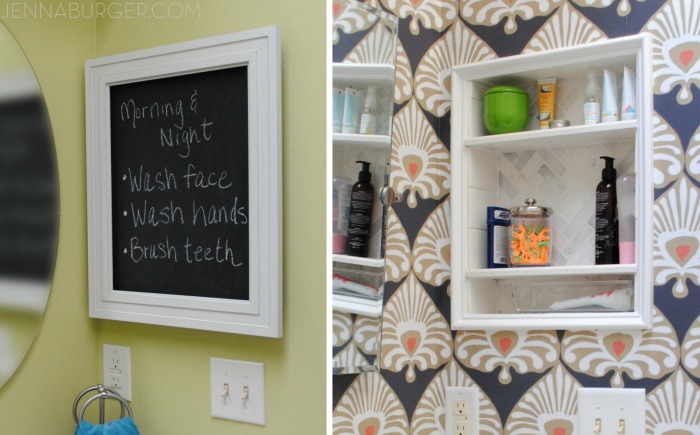
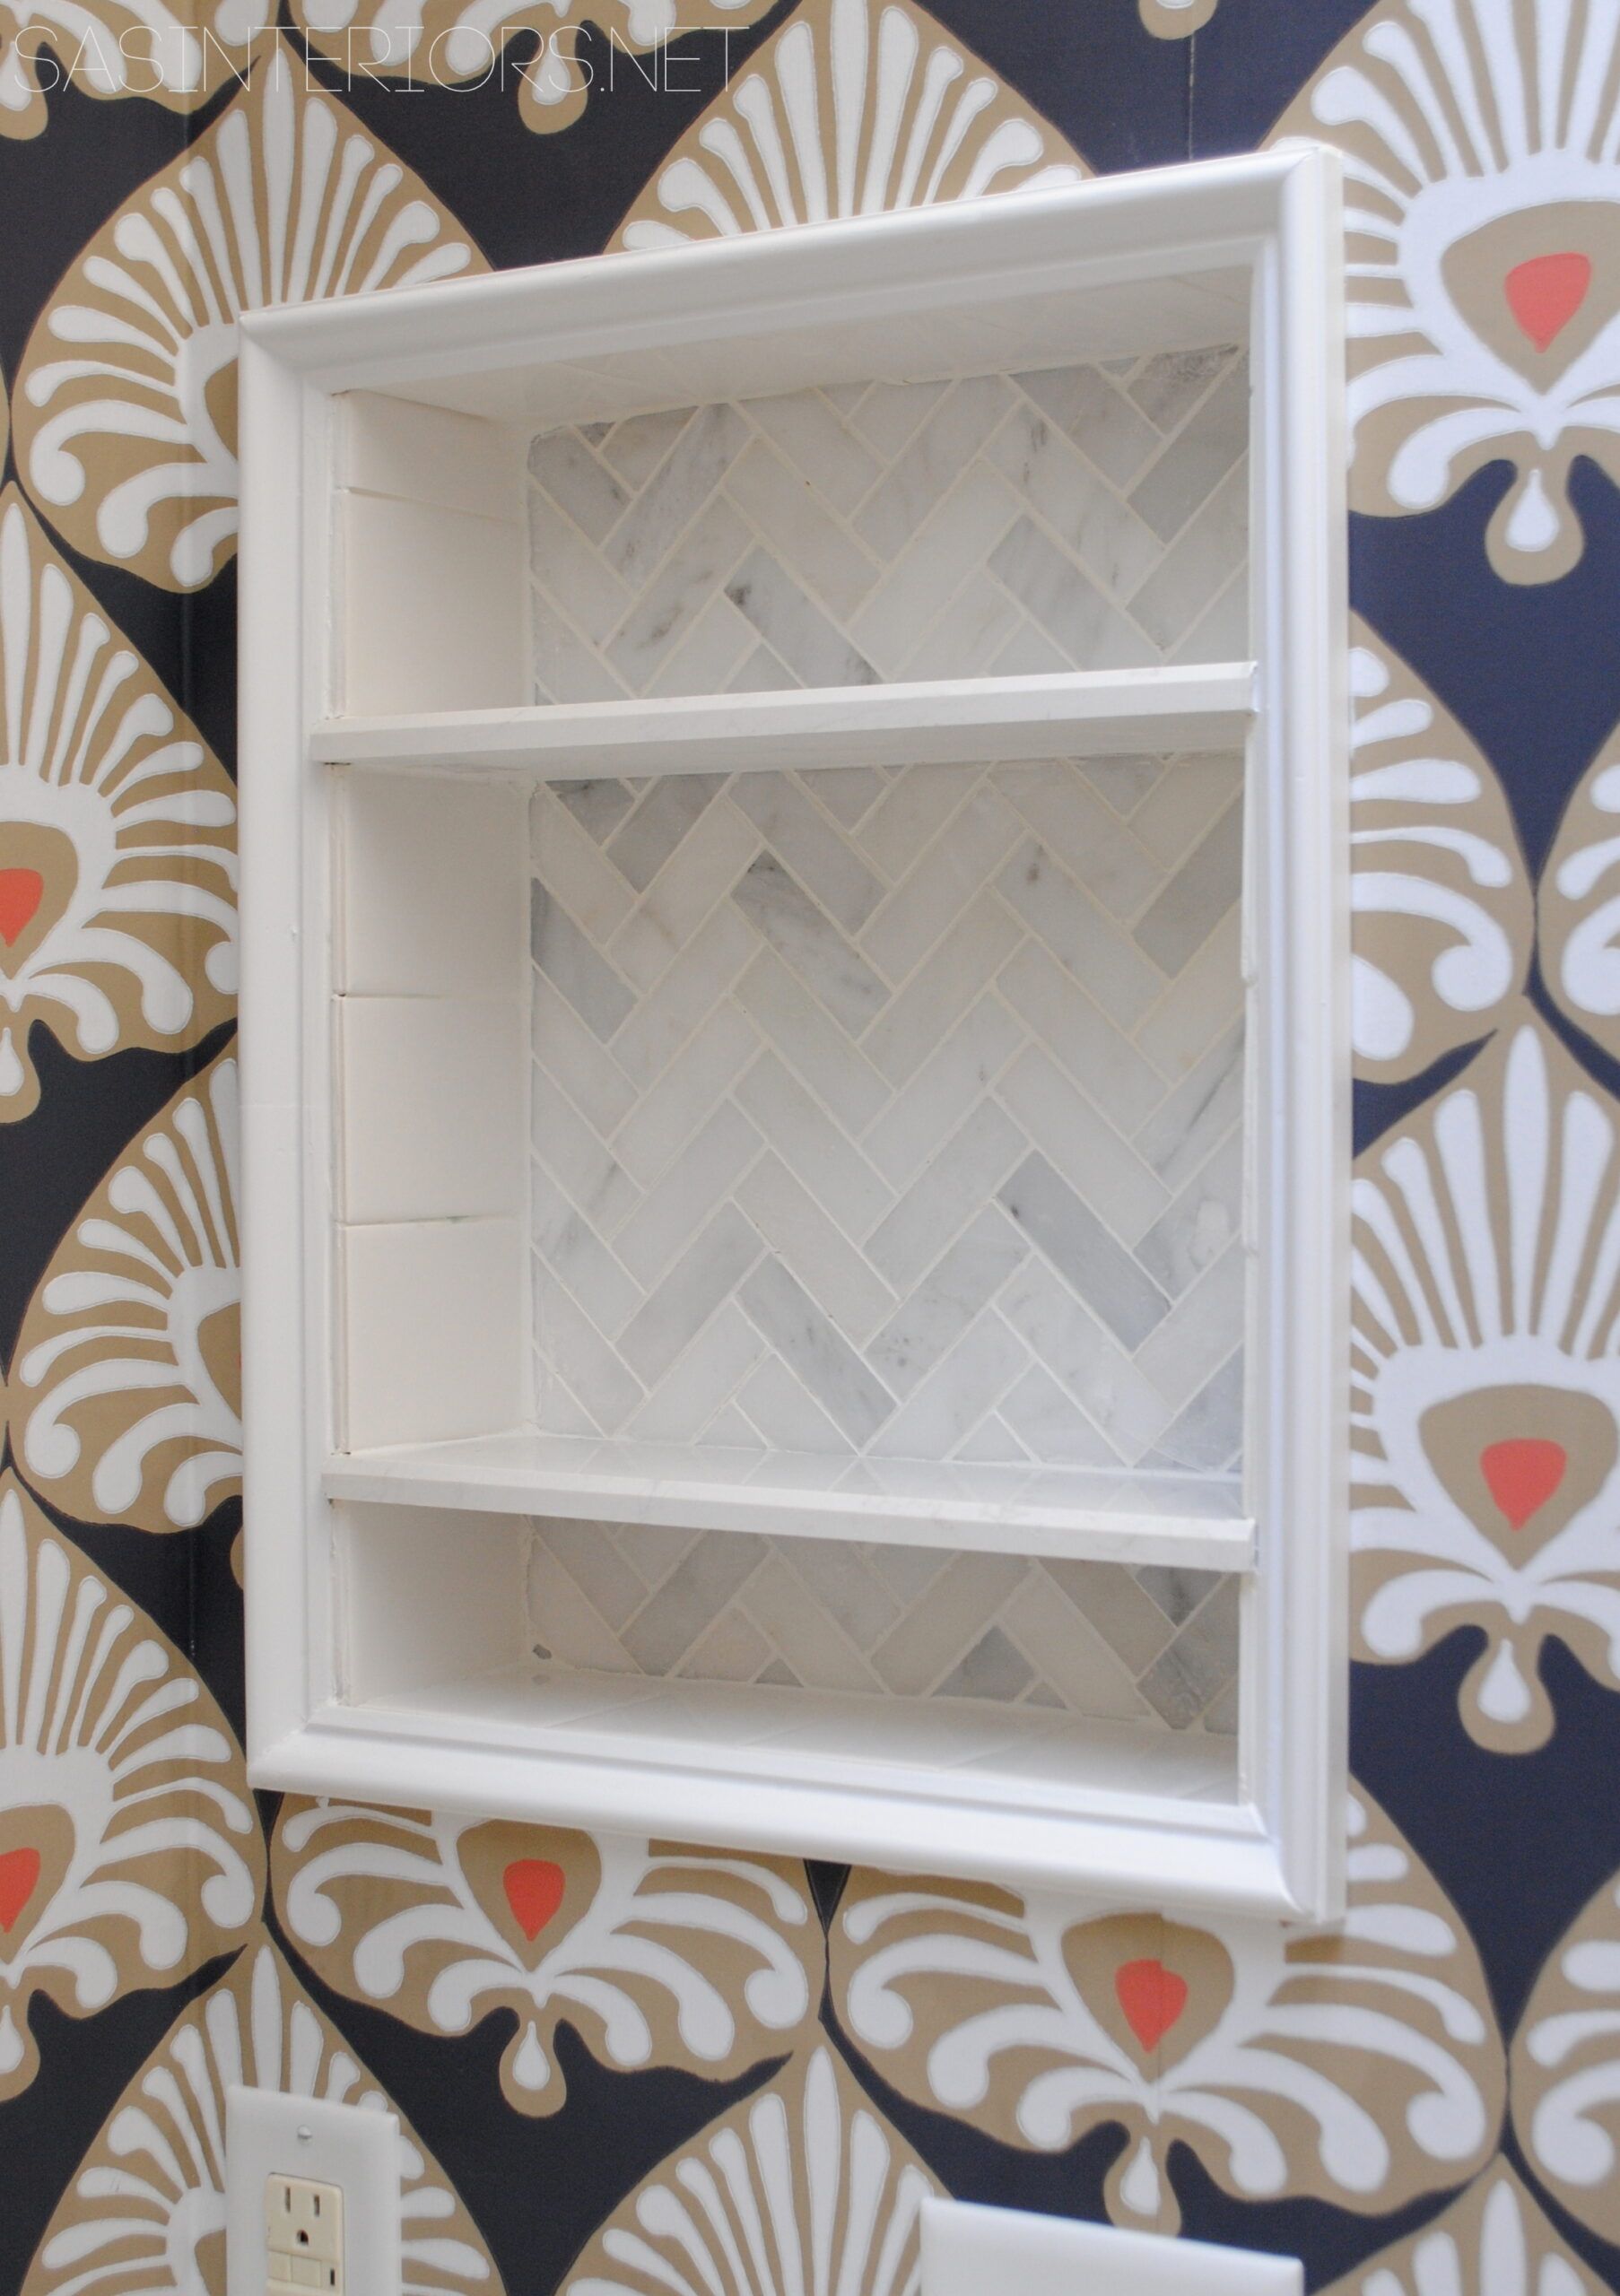
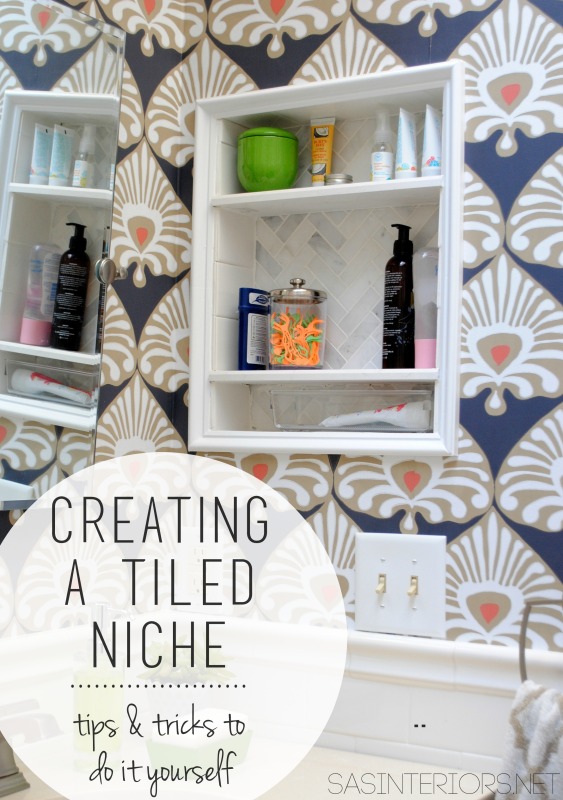
On the wall to the right of the vanity was a medicine cabinet (which I had painted with chalkpaint + added a frame a few years ago) and is now an open tiled niche

Bathroom Makover with 95% of the space being a DIY project - new tub + tile, vanity, wallpaper, and more!  Lots of details on this multi-post before & after.  Bathroom makeover by Jenna Burger Design www.jennaburger.com

A niche is really so much easier for the kids and tiling it makes cleanup so simple.  I was originally going to create the niche using wood and that would have been a big mistake. wood + water = disaster.
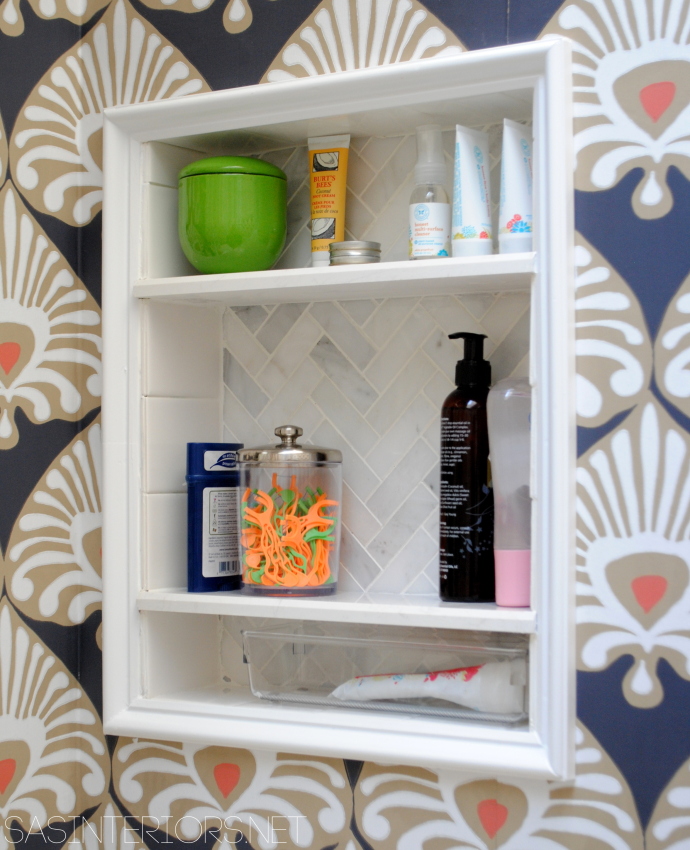
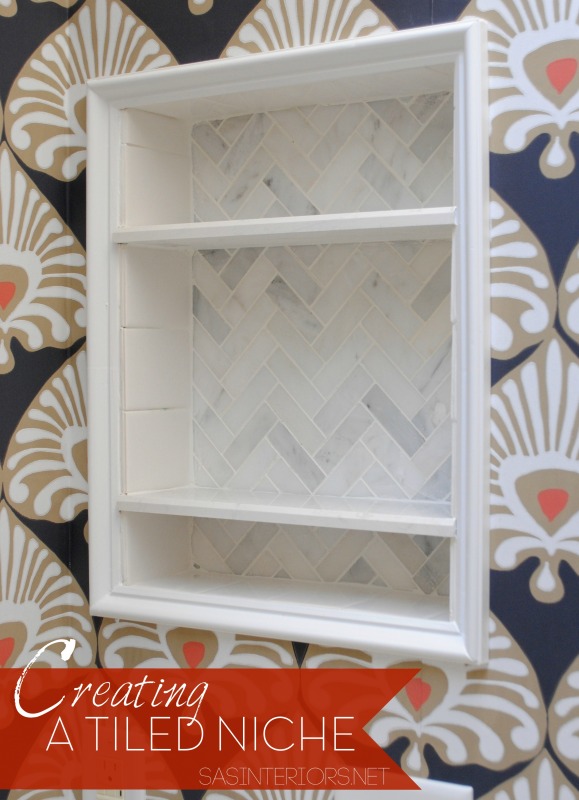
DIY: A tiled niche in place of a medicine cabinet.

tutorial for >>> creating a tiled niche
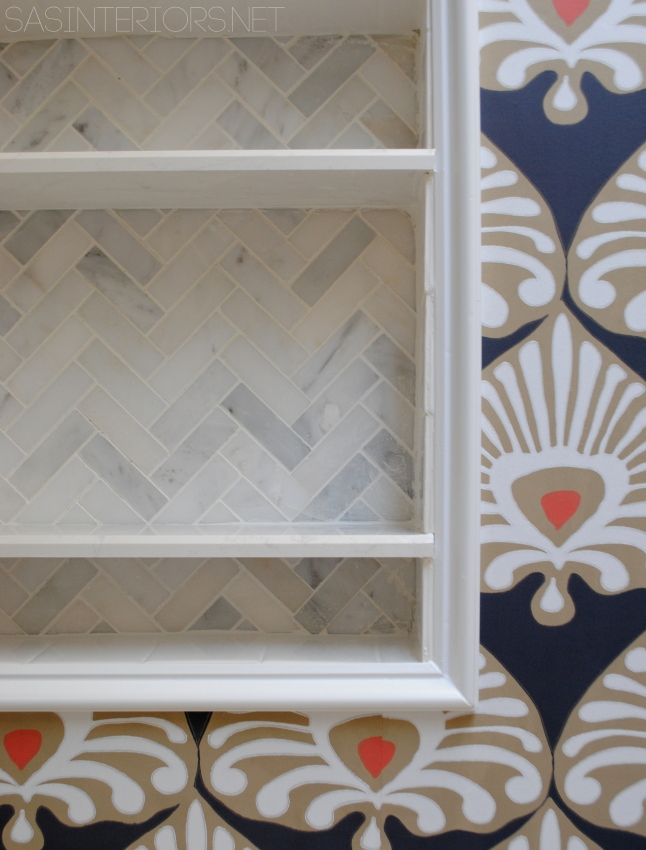
DIY: A tiled niche in place of a medicine cabinet.

before &after DIY: A tiled niche in place of a medicine cabinet.

A few more detail shots…

Bathroom Makover with 95% of the space being a DIY project - new tub + tile, vanity, wallpaper, and more!  Lots of details on this multi-post before & after.  Bathroom makeover by Jenna Burger Design www.jennaburger.com

Bathroom Makover with 95% of the space being a DIY project - new tub + tile, vanity, wallpaper, and more!  Lots of details on this multi-post before & after.  Bathroom makeover by Jenna Burger Design www.jennaburger.com

Bathroom Makover with 95% of the space being a DIY project - new tub + tile, vanity, wallpaper, and more!  Lots of details on this multi-post before & after.  Bathroom makeover by Jenna Burger Design www.jennaburger.com

Bathroom Makover with 95% of the space being a DIY project - new tub + tile, vanity, wallpaper, and more!  Lots of details on this multi-post before & after.  Bathroom makeover by Jenna Burger Design www.jennaburger.com

And of course a look at a few before & afters…
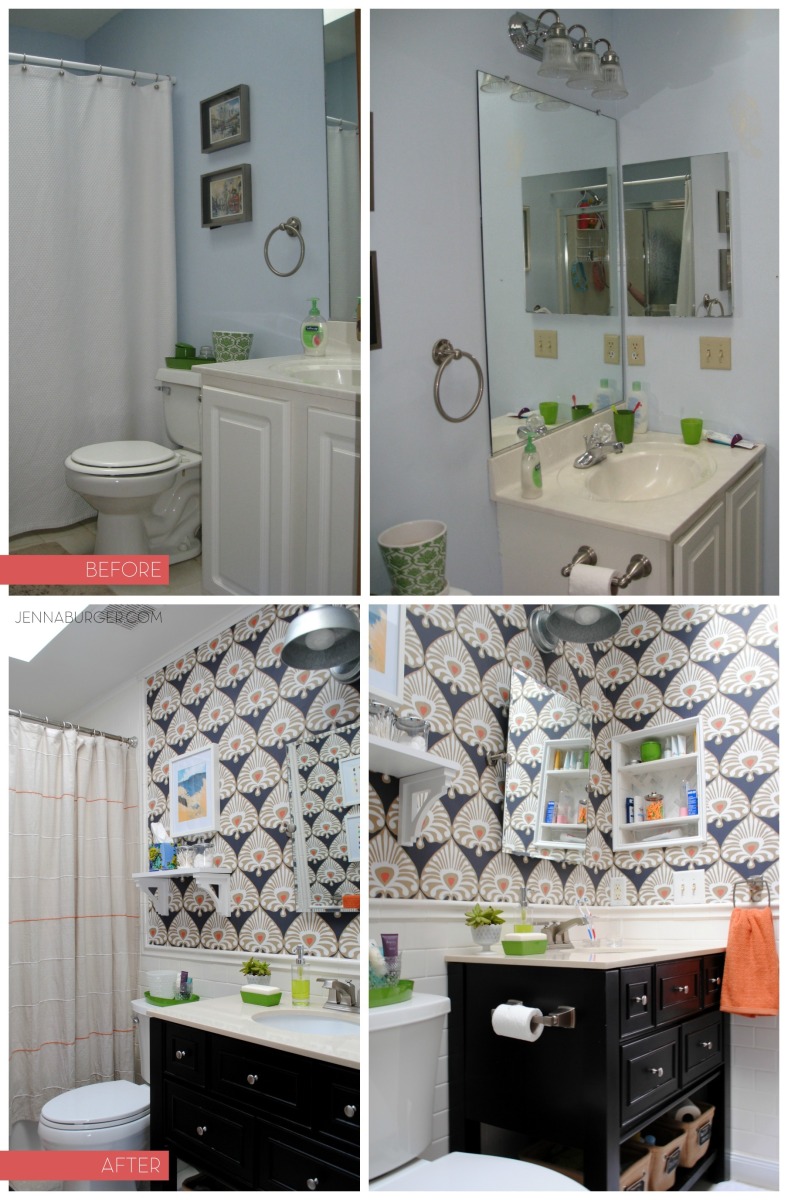
BEFORE & AFTER Bathroom Makover with 95% of the space being a DIY project - new tub + tile, vanity, wallpaper, and more!  Lots of details on this multi-post before & after.  Bathroom makeover by Jenna Burger Design www.jennaburger.comBEFORE & AFTER Bathroom Makover with 95% of the space being a DIY project - new tub + tile, vanity, wallpaper, and more!  Lots of details on this multi-post before & after.  Bathroom makeover by Jenna Burger Design www.jennaburger.comI will admit, I am so happy this bathroom is done.  It was a bit tiring, but in all honesty, it was 100% worth the blood + sweat + tears the effort!  This post was chock full of info on the final stages + reveal of the space, but you really might be wanting where I got it all & the actual resources.  No worries… that post will be coming up later this week – pinky promise.

In all, from start to finish, this bathroom makeover took just around 30 days to complete (95% DIY and mostly all by myself – the mister helped when he could).  So I guess I can say, I met my challenge… which I really only set for myself so I would finish it 100% and not slack off.   10 days, 30 days, 60 days, who cares.  It’s done!  This makeover was a big accomplishment for me as tackling the removal & install of a tub + such a HUGE tile project was nothing that I had done before.  The challenge scared me, but I did it! That’s the beauty of DIY!

From start to finish, these are all the posts pertaining to this bathroom remodel
Plan of Action
Demo: Removal + Installation of the Tub & Walls
How-To Tile + Grout the Bathroom Walls
Installing Wallpaper
Adding a Tile Accent Border
Creating a Tiled Niche
Bathroom Makeover Reveal
Resources

Lastly, I want to give a big shout out to Lowe’s for believing in my talents & choicing to partner with me on this project. They never tell me what to do, what to buy, or what to write, but instead they always say do what you do best… create something good & inspire!

Thanks for following along with me on this bathroom makeover journey!  Cheers to another successful (but tiring) before & after makeover!

Resources for all the items in this bathroom makeover coming later this week.

DIY: Honeycomb Wall Hooks

DIY Tutorial: Honeycomb shaped wall hooks [inspiration for many other fun + functional wall storage ideas] Tutorial by Jenna Burger Design www.jennaburger.com
I am quickly realizing that little girls need lots of storage.  And no matter how much they have, it’s not enough…

As the end of 2014 closed out, I was determined to put the final touches on the shared girls room for my 2 daughters.

There really wasn’t a lot to do since creating the nursery nook, but it’s those little things that add up making it feel incomplete.  Most of the walls were filled & looked fabulous, but the space around the closet needed something.  After contemplating for quite a long time on what to do and knowing the requirements – fun + unique + functional + DIY – I was on the move.  At the request of my daughter to also have something with a honeycomb design (similar, but different to my sons honeycomb shelves), I set out on creating these…  Honeycomb Wall Hooks.

DIY Tutorial: Honeycomb shaped wall hooks [inspiration for many other fun + functional wall storage ideas] Tutorial by Jenna Burger Design www.jennaburger.com

When Lowe’s gave the Creative Ideas Team the freedom this month to choice any style project – bloggers choice – I knew this was the spot for it!  I had a blast making these wall hooks over the holiday break & my daughter is in love with “her” honeycomb creation.

If you’re thinking of creating something similar, this project is just an inspirational stepping stone to so many other great + unique possibilities.  Different shapes could be used (think squares or triangles), different colors (green, blue, gray for a boys room), different arrangement (how about a larger area on a wall).  These wall hooks are not only functional, but beautiful; they are the art of the space.

Here is what I used to create the honeycomb wall hooks

> (2) 1 x 8 x 6′ long – I created 12 hexagons, so the amount of wood needed will depend on the quantity you want to create

> Circular Saw – to cut hexagon shapes (see my recommendations for a circular saw here)

> Pencil, Ruler, and other general supplies

> Paint – colors of your choice

> Knobs – I found knobs at Lowe’s for .87, then painted them

> Drill

> Command Strips (or any wall adhesives)

1

To start out, I cut the wood into squares.  The width of a 1 x 8 is actually 7-1/4″, so I measured and cut the length of the board using the circular saw in 7-1/4″ increments.

DIY Tutorial: Honeycomb shaped wall hooks [inspiration for many other fun + functional wall storage ideas] Tutorial by Jenna Burger Design www.jennaburger.com

2

Once the squares were created, I made the hexagon shape.  I started out with a strategy of how long each “leg” should be, but in the end, I just winged it by eye.  It really doesn’t need to be perfect and there is not “right” way.

I lined up the wood with the saw and figured out that the angle of 22.5 was ideal to cut the angles for the hexagon shape.

DIY Tutorial: Honeycomb shaped wall hooks [inspiration for many other fun + functional wall storage ideas] Tutorial by Jenna Burger Design www.jennaburger.com

Then I cut the 2 opposite angles.  Flipped over the wood and cut the other two angles which created the hex shape.

DIY Tutorial: Honeycomb shaped wall hooks [inspiration for many other fun + functional wall storage ideas] Tutorial by Jenna Burger Design www.jennaburger.com

3

Taking the easy route (and thankfully it worked), I made one hexagon shape and used it as a template to trace the shape on the other 11 pieces.

DIY Tutorial: Honeycomb shaped wall hooks [inspiration for many other fun + functional wall storage ideas] Tutorial by Jenna Burger Design www.jennaburger.com

4

Before the painting process, I gave the edges a quick sanding with sand paper.

DIY Tutorial: Honeycomb shaped wall hooks [inspiration for many other fun + functional wall storage ideas] Tutorial by Jenna Burger Design www.jennaburger.com

And then they were complete…

DIY Tutorial: Honeycomb shaped wall hooks [inspiration for many other fun + functional wall storage ideas] Tutorial by Jenna Burger Design www.jennaburger.com

5

For the paint colors, I used what I had on hand.  Either craft paint or wall paint works…  I used both.  I chose colors of pink, fuchsia, gold, white, turquoise, and coral (which resulted a bit darker, but it works).  Using a foam brush (a regular paint brush would do just fine too), I painted all of the hex shapes the various colors.

DIY Tutorial: Honeycomb shaped wall hooks [inspiration for many other fun + functional wall storage ideas] Tutorial by Jenna Burger Design www.jennaburger.com

6

I snagged wood knobs at Lowe’s for .87 and painted them white for the colored hexagons and mint for the white hexagons.  And for the gold hex shapes, I used the knobs that were previously in the kids bathroom and added super glue to attach them to the surface.

DIY Tutorial: Honeycomb shaped wall hooks [inspiration for many other fun + functional wall storage ideas] Tutorial by Jenna Burger Design www.jennaburger.com

7

For the wood knobs from Lowe’s, I drilled a hole into the wood block, then used the screw that it came with to secure them.

DIY Tutorial: Honeycomb shaped wall hooks [inspiration for many other fun + functional wall storage ideas] Tutorial by Jenna Burger Design www.jennaburger.com

Last step…  to hang them!

8

I had a bit of fun creating the layout.  It took a few tries to get it how I felt looked best. Once the layout was set, I used command strips to hang them to the wall.  This most likely won’t be a forever creation (what is in my house?) so these wall adhesives are great + they leave no damage to the wall.

DIY Tutorial: Honeycomb shaped wall hooks [inspiration for many other fun + functional wall storage ideas] Tutorial by Jenna Burger Design www.jennaburger.com

I hung 10 of the hex shapes on the left side of the wall (since it was fairly bare) and 2 on the other side.  Here’s the result of the honeycomb wall hooks.

DIY Tutorial: Honeycomb shaped wall hooks [inspiration for many other fun + functional wall storage ideas] Tutorial by Jenna Burger Design www.jennaburger.com

Functional Art!

DIY Tutorial: Honeycomb shaped wall hooks [inspiration for many other fun + functional wall storage ideas] Tutorial by Jenna Burger Design www.jennaburger.com


DIY Tutorial: Honeycomb shaped wall hooks [inspiration for many other fun + functional wall storage ideas] Tutorial by Jenna Burger Design www.jennaburger.com

Within minutes this wall was girl-ified with jewels…  costume jewels, of course!

DIY Tutorial: Honeycomb shaped wall hooks [inspiration for many other fun + functional wall storage ideas] Tutorial by Jenna Burger Design www.jennaburger.com


DIY Tutorial: Honeycomb shaped wall hooks [inspiration for many other fun + functional wall storage ideas] Tutorial by Jenna Burger Design www.jennaburger.com

DIY Tutorial: Honeycomb shaped wall hooks [inspiration for many other fun + functional wall storage ideas] Tutorial by Jenna Burger Design www.jennaburger.com

DIY Tutorial: Honeycomb shaped wall hooks [inspiration for many other fun + functional wall storage ideas] Tutorial by Jenna Burger Design www.jennaburger.com

Perfect for dress up too.  Can you imagine a playroom filled with these wall hooks?!

DIY Tutorial: Honeycomb shaped wall hooks [inspiration for many other fun + functional wall storage ideas] Tutorial by Jenna Burger Design www.jennaburger.com

DIY Tutorial: Honeycomb shaped wall hooks [inspiration for many other fun + functional wall storage ideas] Tutorial by Jenna Burger Design www.jennaburger.com

I almost forgot to share a pic of how this space looked before…  Incredible update, right?!

DIY Tutorial: Honeycomb shaped wall hooks [inspiration for many other fun + functional wall storage ideas] Tutorial by Jenna Burger Design www.jennaburger.com

This room has had quite the transformation over the years starting as a nursery, then getting revamped to a big girl room with a 3-in-1 play tent.  Once baby #3 (our littlest lady) came along, a new wall color was added and changes were made to accommodate a nursery nook.  This gorgeous fun + functional wall creation was exactly what the room needed to be complete!

If you’re interested in the colors of the room, the deep fuchsia color is Benjamin Moore Royal Fuchsia and the mint color (which used to be beige) is Benjamin Moore Spring Mint.

Benjamin Moore Spring Mint + Royal Fuchsia

If this project has inspired you, pin it to save for later!

DIY Tutorial: Honeycomb shaped wall hooks [inspiration for many other fun + functional wall storage ideas] Tutorial by Jenna Burger Design www.jennaburger.com

Thanks so much for following along and I really hope you enjoyed seeing the steps I took to make this creation!

Lowes Creative Ideas Team Member

To gather even more unique, fun, and creative ideas for your indoor and outdoor Winter spaces, I would definitely suggest downloading the Lowe’s Creative Ideas app on your iphone and/or ipad.  I’m always checking out the FREE app for great seasonal + do-it-yourself inspiration.

Also consider following Lowe’s on Facebook, Pinterest, and Instagram as well.

Disclosure: I am part of the Lowe’s Creative Team and was provided with a Lowe’s gift card to purchase items for my project.  I was also compensated for my time to use the products.  No one told me what to create, what to buy, how to use the product, or what to write.  All opinions are 100% mine!

6 Foolproof Steps to Purge + Organize + Renew your Home

With the 859,934 organizational pins on Pinterest, I’m already feeling a bit behind + overwhelmed and it’s only the 5th of January!  Deep breath. Deep breath.  Please tell me I’m not alone… BUT I am strongly pushing away those anxious thoughts and instead putting my efforts on living with intention, my focus for the coming year.

Organizing doesn’t come easy to me.  I am known to be a hoarder collector & have difficulty parting with things – keep or toss, keep or toss???  But over the past few months things around the little ole’ homestead of mine have gotten a wee bit out of hand (I guess anew baby can do that to ya) and I am ready to rise above & take back this joint!

As we wind down from the Christmas craze, January typically is a quiet + cold + drear month in our neck of the woods.  As I start the process of transitioning our home back to the everyday after the holiday mayhem, I always feel the New Year is ideal to clear the mind and begin a fresh start.  Now is the time to clean house and create a more organized home!!

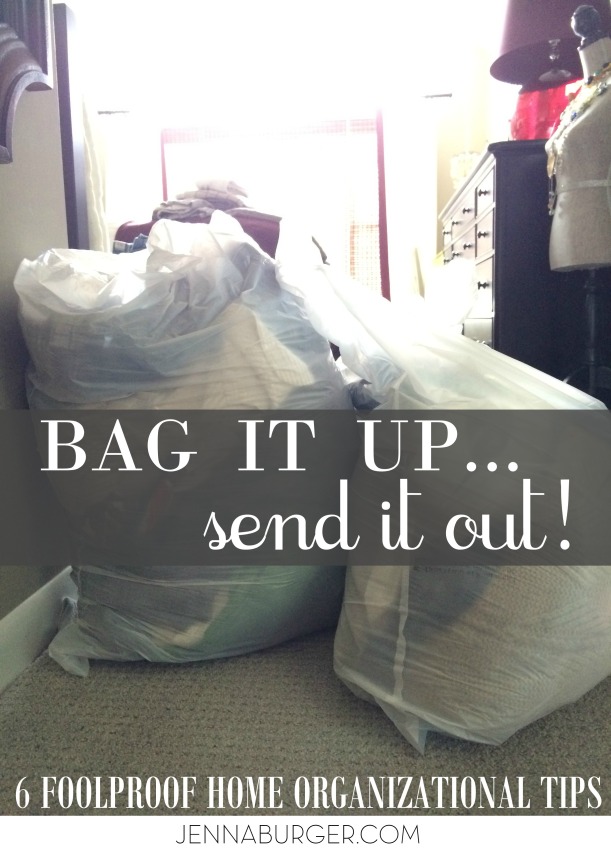
This past weekend, actually news years day to be exact (because over the past week I’ve completely lost track of time), I started the clearing out/organizing process.  4 bags have already gone to goodwill… go me!  Coming from the person who hates to throw things away, this is big.

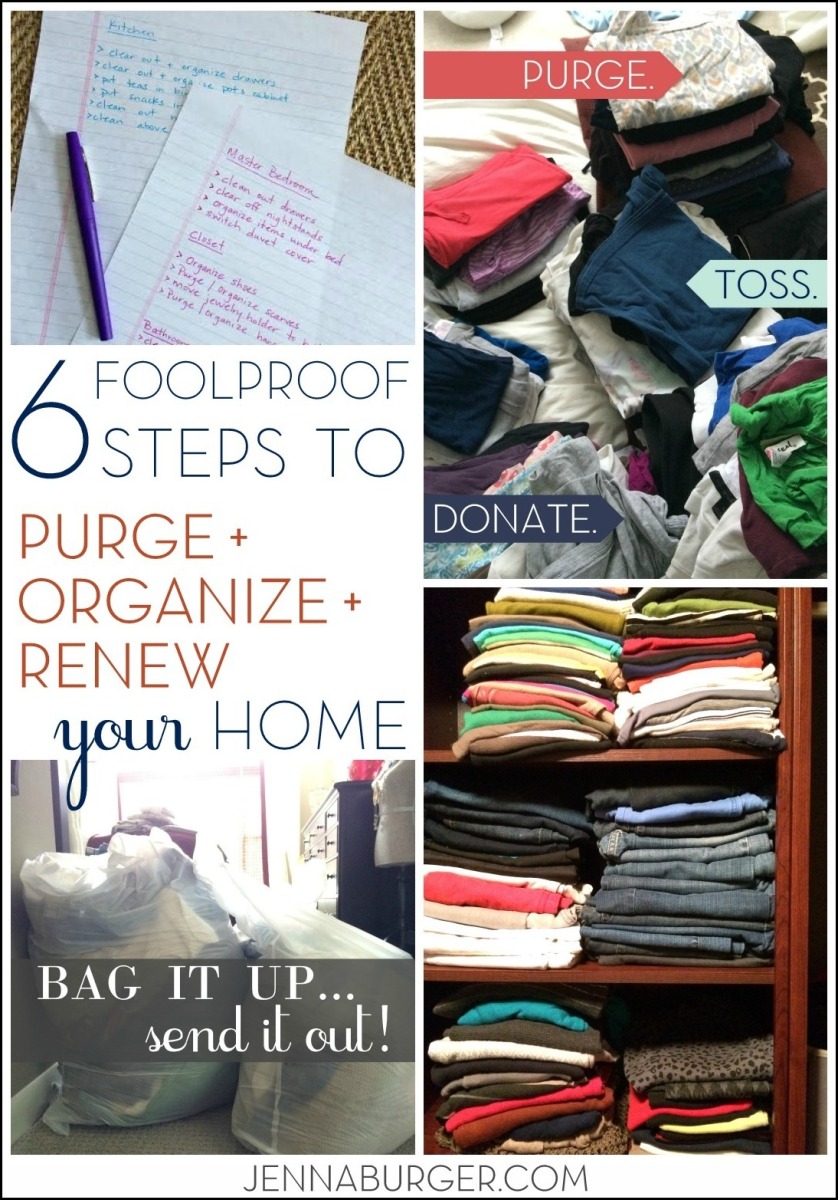
Here are the 6 steps that I have found really work [my foolproof tips] to purge + organize + renew your home for a fresh step in the right direction for the New Year

6 Foolproof steps to PURGE + ORGANIZE + RENEW your home in the new year! www.jennaburger.com

1. Make a list
I am a list person. I love to write it down, perform the task, and then cross it off.  To me, the “cross off” is the best part.  I feel so accomplished afterwards! So here is what I do…

Go room to room around the home and make a list of what is working and what isn’t.  Look in the closets, peek under the beds, and open the drawers. Create a page for each room and write down a plan of action for what you want to organize and what you need to lose (ie: organize sock drawer, purge papers/magazines, donate unused toys, etc).

6 Foolproof steps to PURGE + ORGANIZE + RENEW your home in the new year! www.jennaburger.com

A list will keep you focused + stay on track. When a task is complete, cross it off. Once all the tasks on your list are finished, the best part is reflection; looking back at all your hard work + efforts. It will also keep you motivated to do more!

2. Get Moving

Once your plan of action is in place, it’s time to get moving. Don’t analyze (which I’m known to do) Just start.Choose a room to start with and let your list guide you. Most likely, the whole house won’t be fully organized in a day – it’s simply not possible unless you already live in a spotless pad.

Instead of stressing and overwhelming yourself, set a time limit or a specific goal to work towards. Once it’s reached, be done. Then the next day, do the same. This will help avoid burn-out and will keep you motivated to continue. Organizing and taking control of the stuff in your home can be exhausting, so mentally prepare yourself for the job.

You’ll be amazed at how much better every room in your home looks once you get rid of the useless items.  Like I said 4 bags already packed up & shipped out.  Many more to go!

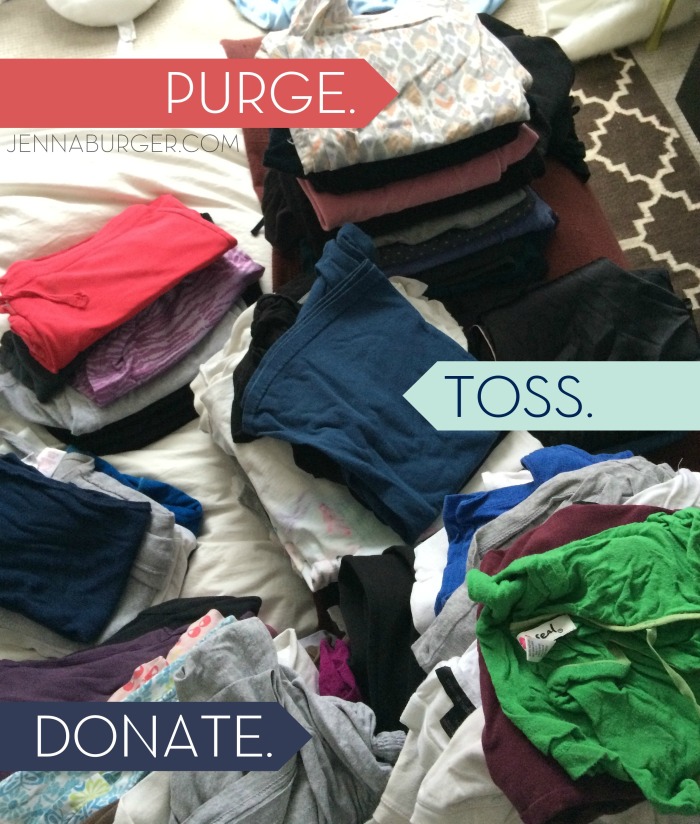
3. Purge. Toss. Donate.

Just keep saying to yourself… purge, toss, donate.  purge, toss, donate.  purge, toss, donate.

When going room by room, start by sorting through the items you no longer need, use, and/or want. Set up 3 boxes or bags (I typically use large heavy-duty garbage bags) to purge, toss, and/or donate. This will make the process faster + more efficient.  Have you ever tried the 3-for-1 rule?  For every new item you bring into the home (think about all those Christmas presents – shirts, books, toys, etc.), say goodbye to three things. Keep in mind, if something hasn’t been touched/used in 6-12 months, you probably don’t need it.

If you don’t use it, lose it.

PURGE. TOSS. DONATE. 6 Foolproof Home Organizational Tips that will get you pointed in the right direction NOW!

Once you have everything bagged up, ship it on out as soon as you can.  That way there can’t be regrets or second guessing!

6 Foolproof steps to PURGE + ORGANIZE + RENEW your home in the new year! www.jennaburger.com

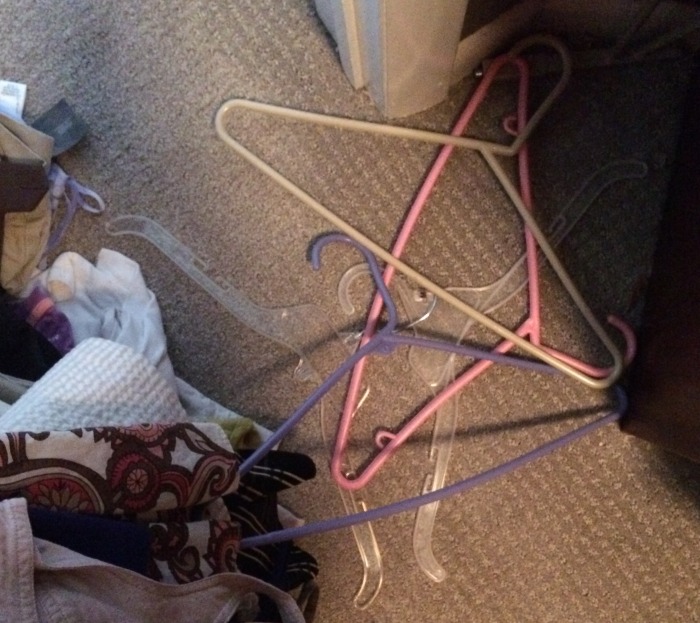
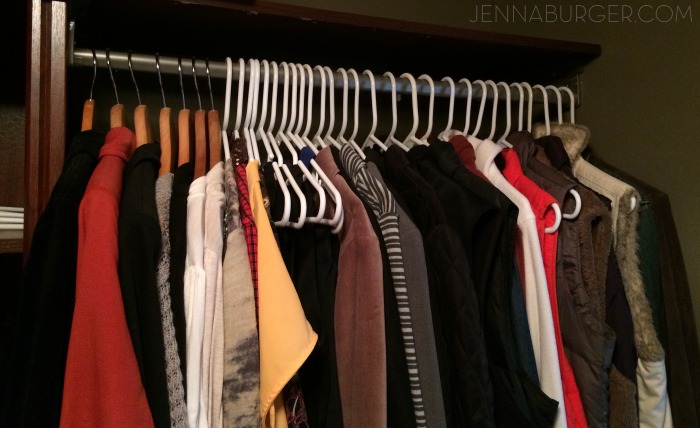
And toss the miss-matched hangers! Go for all one color… IT’S LIBERATING!

PURGE. TOOSS. DONATE. 6 Foolproof Home Organizational Tips that will get you pointed in the right direction NOW!

4. Organize

Organizing is different than cleaning.  Sometimes the 2 can get confused (according to my Mister).  I am a great cleaner (surface cleaning), but when you open a drawer, it often doesn’t look so hot.

Once you’ve removed your unused items, it’s time to organize. I have found baskets, bins, trays, and other storage caddies are a great way to organize items you want to keep. Make a point to have a spot / a place for everything. This is especially key to keep the clutter in check with kids toys, books, games, and art supplies.

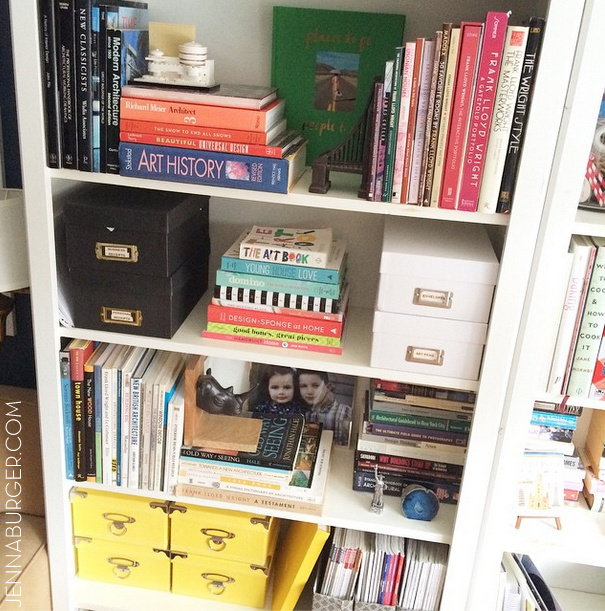
Fullscreen capture 152015 100438 AM.bmpMy newly revamped bookcase…  Baskets + Boxes + Bins are my happy place!

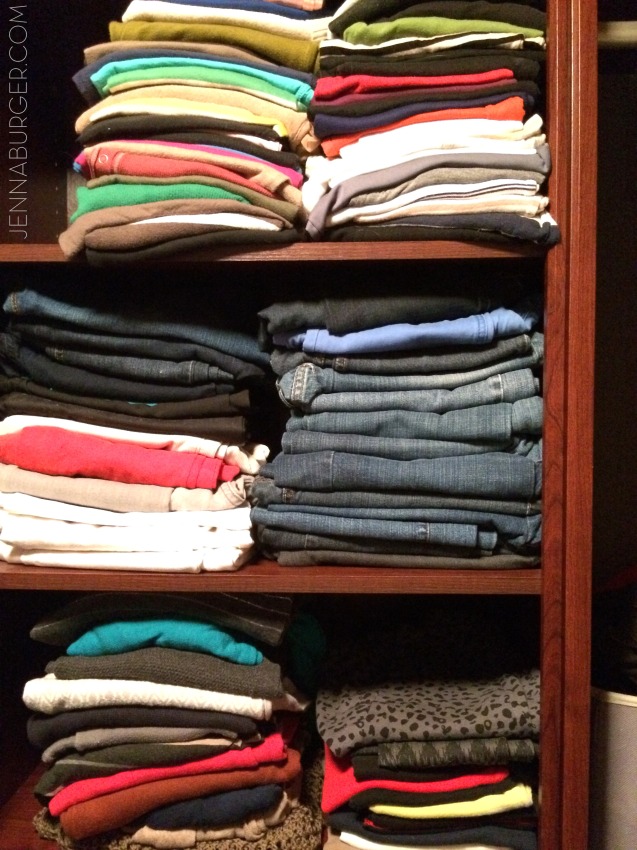
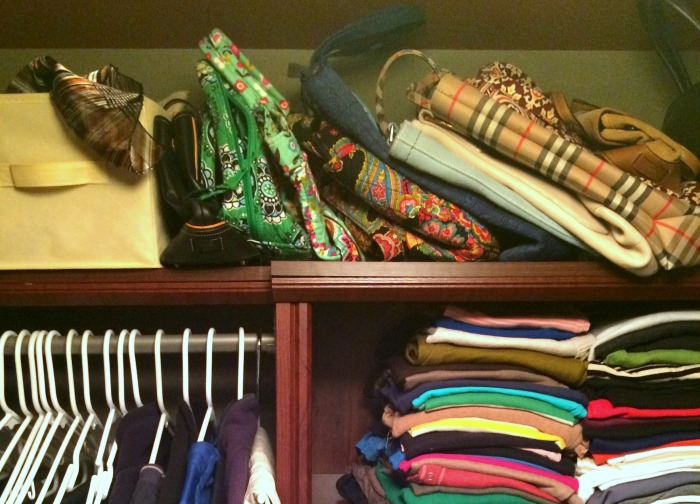
And keep in mind, it doesn’t have to look perfect because the reality is it won’t stay that way for long.  As long as everything you keep is needed and placed/arranged in an orderly way, that is ‘perfect’.  Take a glimpse at my newly organized closet…  To some it may still look a mess, but to me, this is good!  Shirts are together.  Pants are in one section. Scarves are in a bin. Bags are in place.  DONE!

PURGE. TOSS. DONATE. 6 Foolproof Home Organizational Tips that will get you pointed in the right direction NOW!

These were snapped with my iphone cam which is why they’re a bit grainy, sorry…

Did I really just share a picture of my closet???

PURGE. TOOSS. DONATE. 6 Foolproof Home Organizational Tips that will get you pointed in the right direction NOW!

5. Go Vertical

Maximize your storage capabilities by using more wall space. Bookshelves are great for going vertical to get things off the ground, thus creating more floor area. In closets, add shelving as high as possible for extra storage of blankets or non-everyday essentials. Add hooks in the entry for additional coat/bookbag storage. Hang additional shelving in the basement and/or garage for more space to put large bins.

Get Organized! For an easy entry upgrade, add built-in coat hooks and wooden crates [easy do it yourself project] www.jennaburger.comour entry coat rack > click for DIY Tutorial

A side tip for you >>> Choose furniture that can serve double duty to save on space!

6. Commit

The most important, but most difficult part of organizing…

Getting organized is one thing, but staying organized is truly a commitment. Once you’re organized, take the extra 10 minutes each day to tidy up and monthly to go through each room to purge any unused items or papers. Each night once the kids are in bed, I make sure all their toys are back in place, the dishes are done, the counters + tables are cleared off.  It’s amazing what 10-15 can do to get the job done rather than piling up day after day!

Decide.  Commit.  Succeed.

Expect that there will be minor setbacks throughout the year (not a biggie), but remaining positive+ focused will help keep you motivated to stay organized.

While the snow is piling up outside, put that overabundance of extra energy and efforts into purging and organizing inside.  The simpler we live, the saner we are! Rid your lives of the clutter and unused things to achieve a more meaningful, organized home.

What ideas / tips / suggestions can you share that keep your home organized + clutter free?

Bathroom Makeover: Tiled Niche {Day 19 + 20}

The last few weeks have been a whirlwind with decking the halls and preparing for the Christmas season, resulting in the bathroom makeover being put on the backburner.  BUT, progress is still being made and it is almost complete – YAY!

I can officially say, the walls are complete.  Last I shared, I had finished the install of the wallpaper & the tile accent border.  It’s Day 19 & 20 of this Bathroom Makeover in 30 Days Challenge and it’s focused on creating a tiled niche near the vanity.  Here is the result…

Bathroom Makeover: a tutorial on how to create a tiled niche + many more DIY projects.

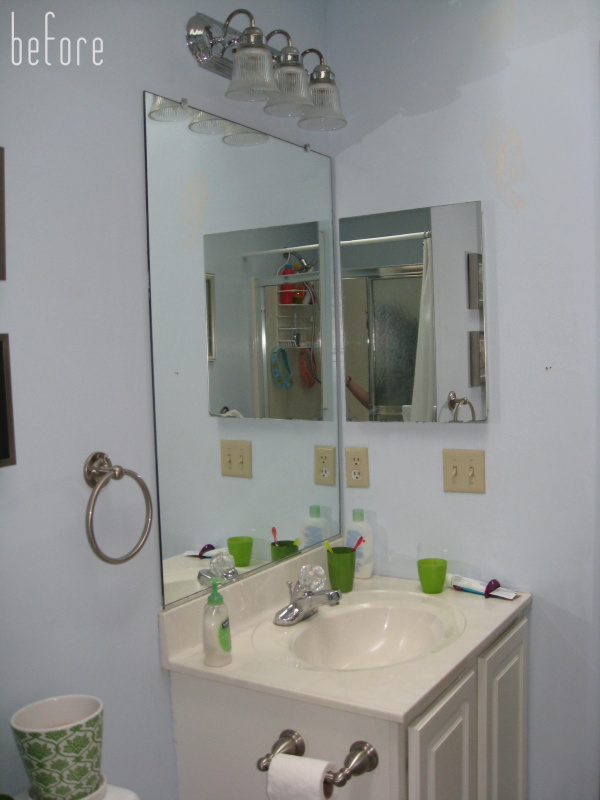
Before this niche was created, there was a medicine cabinet in this space. This is how it looked when we moved into our home about 5 years ago…

before bathroom makeover

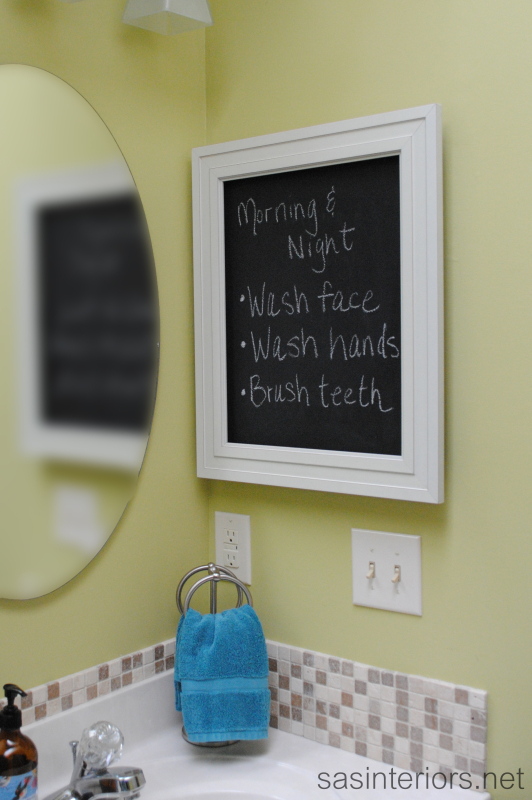
Then about 3 years ago when I gave this bathroom a refresh, I painted the glass of the medicine cabinet with chalkboard paint and added a frame…

before bathroom makeover with chalkboard medicine cabinet

While creating the plan of action for this bathroom makeover, I had the idea of removing the medicine cabinet to create a niche – the perfect small storage solution.   Since I already had the natural stone herringbone tile planned for the shower, I thought the niche would be another ideal spot for it.   Unexpected & a great tie-in.

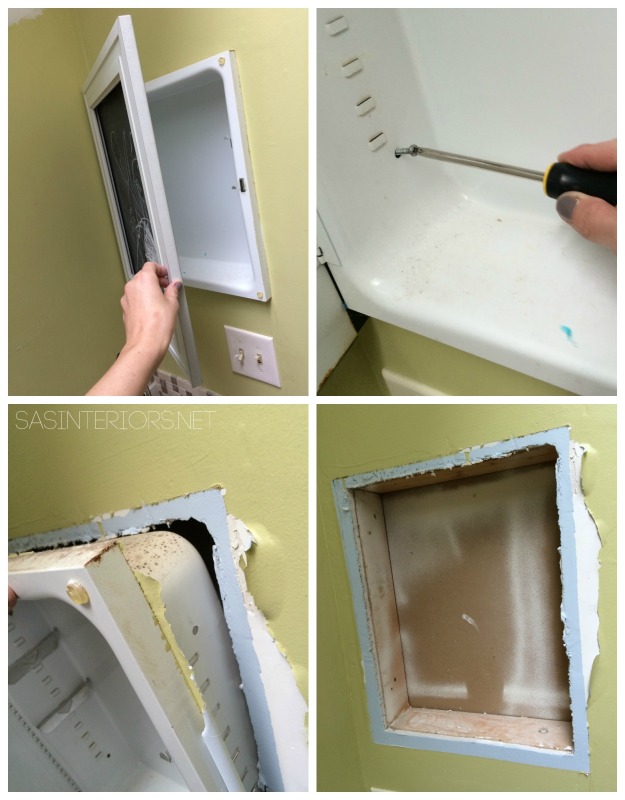
During the demo phase of the bathroom, I removed the medicine cabinet from the wall by unscrewing a few screws.  It was much easier than I thought it’d be.  In the end I was left with a sheetrocked cavity.

Removing the medicine cabinet

I wasn’t expecting “the hole” to be sheetrocked and was originally planning on needing to create a box to fit in the hole.  Upon removing the cabinet and discovering this, I was pleasantly surprised.  I was able to install the tile directly on the sheetrock that was already in place.

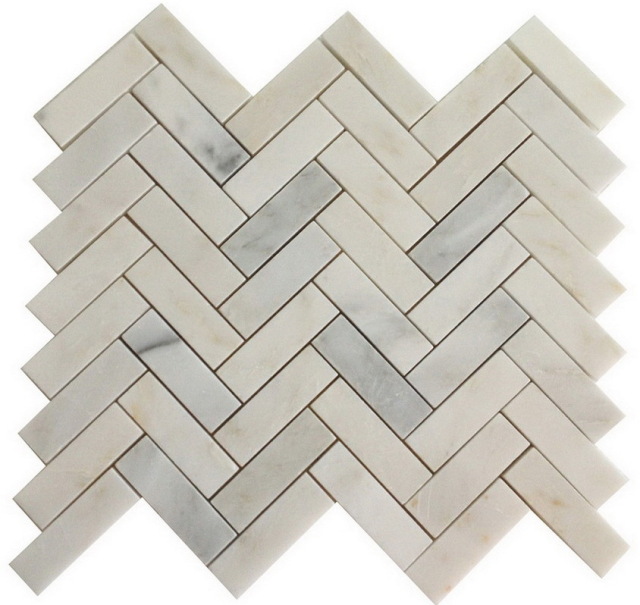
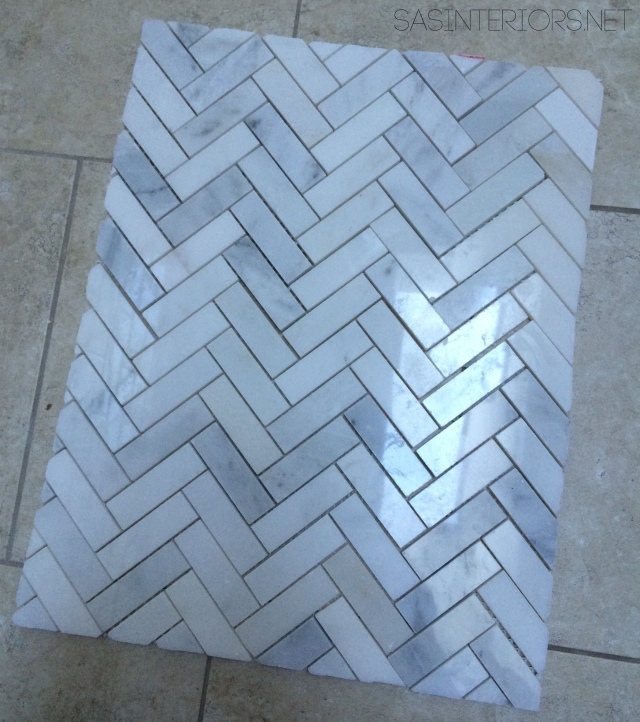
To create the tiled storage niche, I used the beautiful 13″ x 13″ natural stone herringbone mosaic and the 3 x 6 white subway tile that I found at Lowe’s.

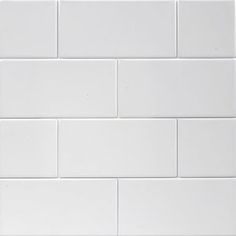
White subway tile - the most classic, most beautiful (an one of the least expensive) tile you can get!

Lowes Herringbone Carrera Marble

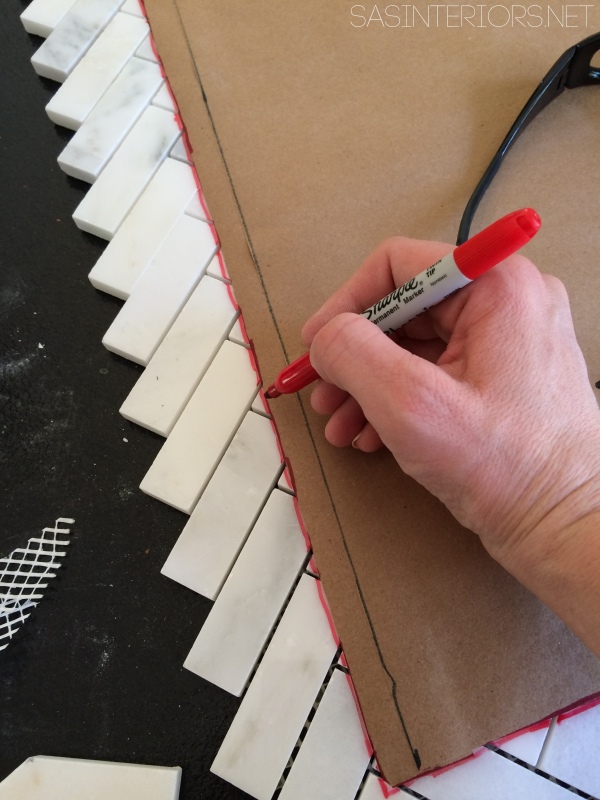
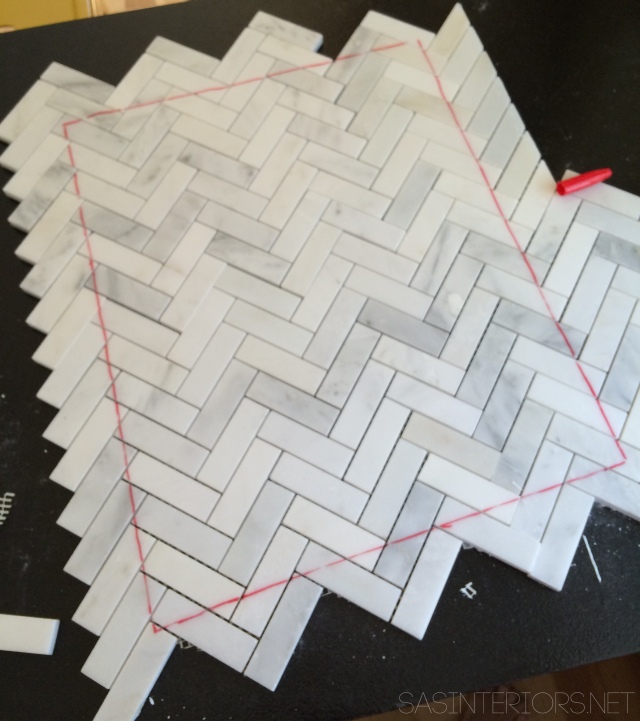
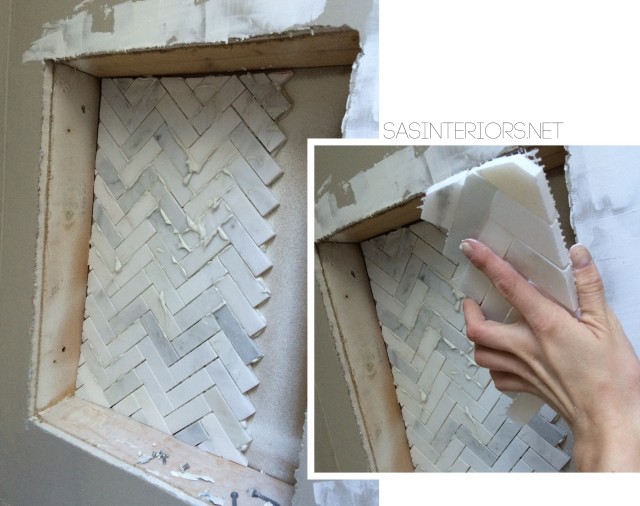
1. To start, I created a template of the back surface of the niche using craft paper.  Then I layed it on the herringbone tile and traced the outline using a marker.

Bathroom Makeover: a tutorial on how to create a tiled niche + many more DIY projects.

Bathroom Makeover: a tutorial on how to create a tiled niche + many more DIY projects.

2. Then using the wet saw, the Mister (gotta give him creditwink, wink) cut along the line.

Bathroom Makeover: a tutorial on how to create a tiled niche + many more DIY projects.

3. Then I layed the tile inside the niche to make sure it was the right size (it wasn’t perfect, but I knew the grout would “hide” any imperfections).  It fit – yay – so using adhesive (the same method I used to install the wall tile), I added the herringbone accent tile to the back surface of the niche.

Bathroom Makeover: a tutorial on how to create a tiled niche + many more DIY projects.

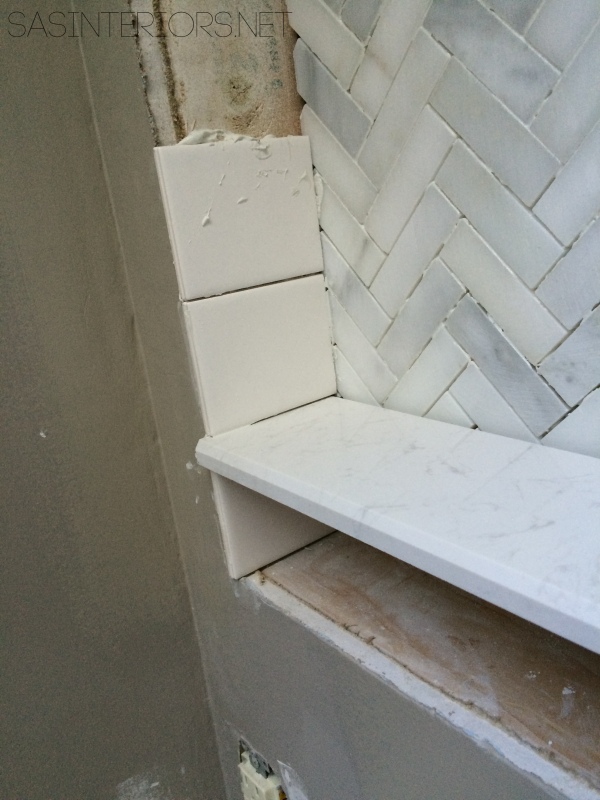
4. When the back was finished, I cut and added 3 x 6 subway tiles (same tile as shower) on the sides, top, and bottom.

As I was working from bottom to top on the sides, I cut and added (2) shelves (marble slabs typically used for a door threshold) at varying heights.  The Mister cut it to the right length using the wet saw and we made sure it was long enough so it fit between + sits on the subway tiles.

Bathroom Makeover: a tutorial on how to create a tiled niche + many more DIY projects.

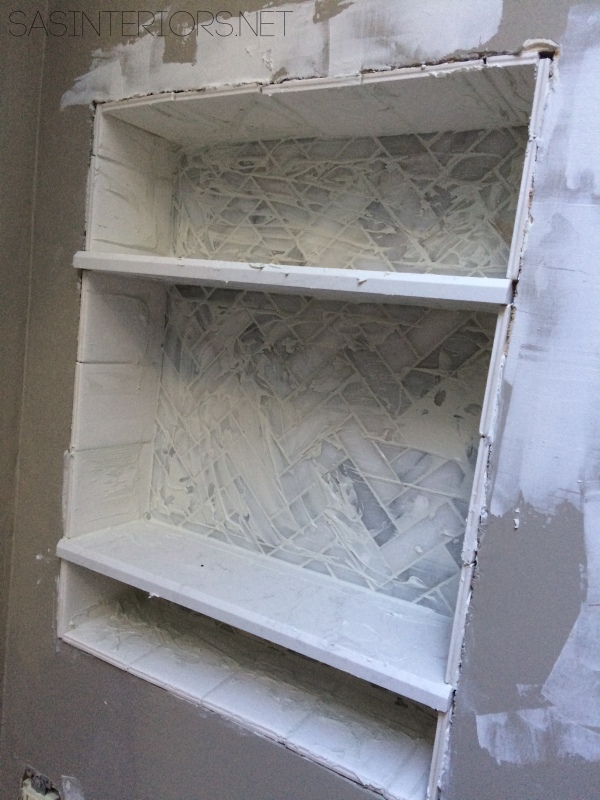
5. Once the tiles were in place, I grouted all the joints using the same method as the wall tile.

Bathroom Makeover: a tutorial on how to create a tiled niche + many more DIY projects.

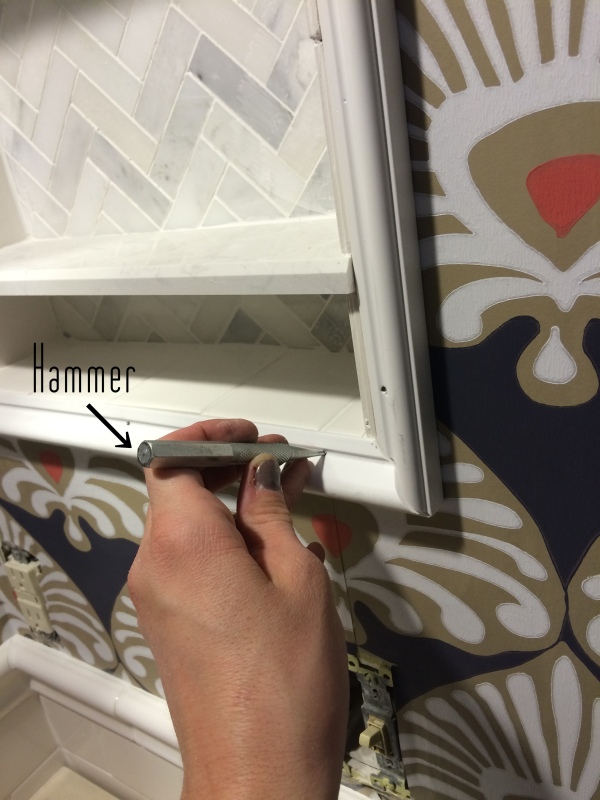
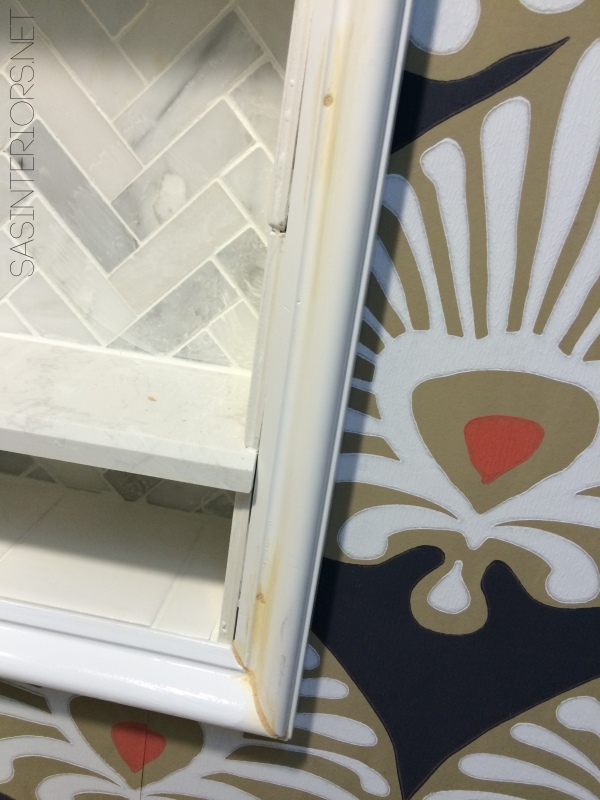
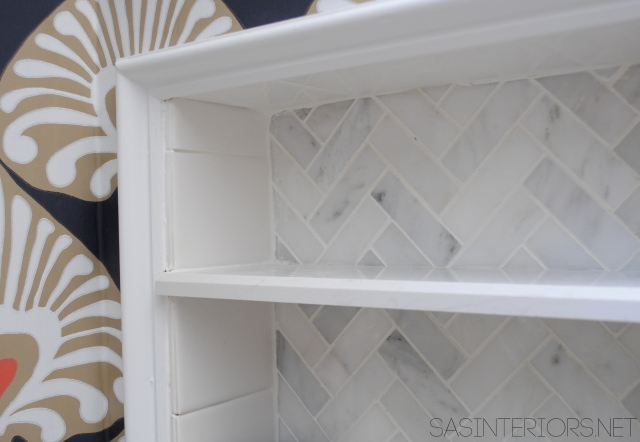
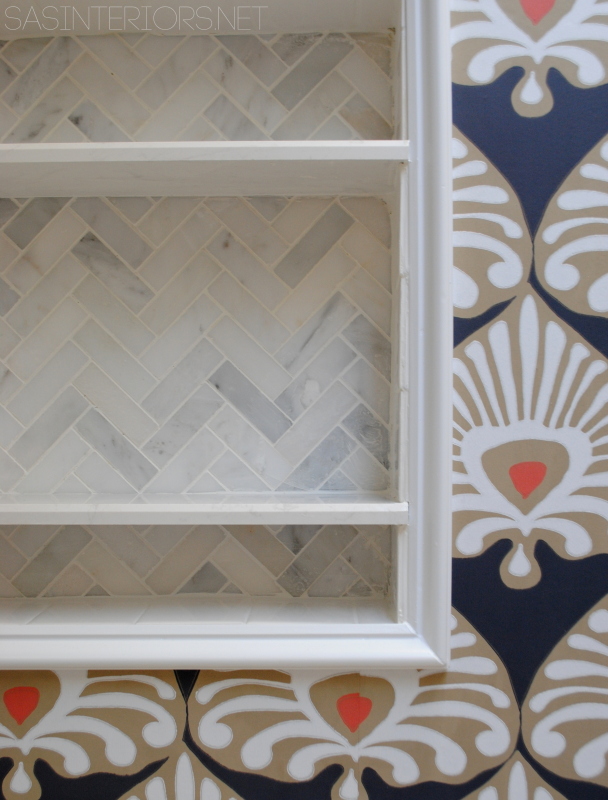
6. After the joints were filled and the tile was cleaned off, I added trim around the edges using a 3/4″ decorative moulding.  It was basically like creating a picture frame surround. I cut all the pieces using the miter saw and nailed them in place with finishing nails.  To give an extra tap in place I also used a nail punch to drive home the nails – love that tool.

Bathroom Makeover: a tutorial on how to create a tiled niche + many more DIY projects.

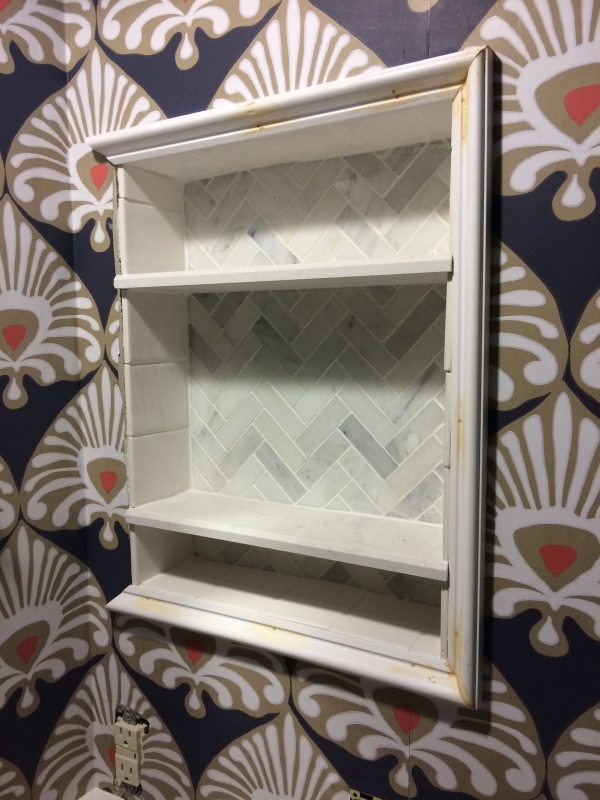
7. Then I filled in all the holes using wood filler.

Bathroom Makeover: a tutorial on how to create a tiled niche + many more DIY projects.

Bathroom Makeover: a tutorial on how to create a tiled niche + many more DIY projects.

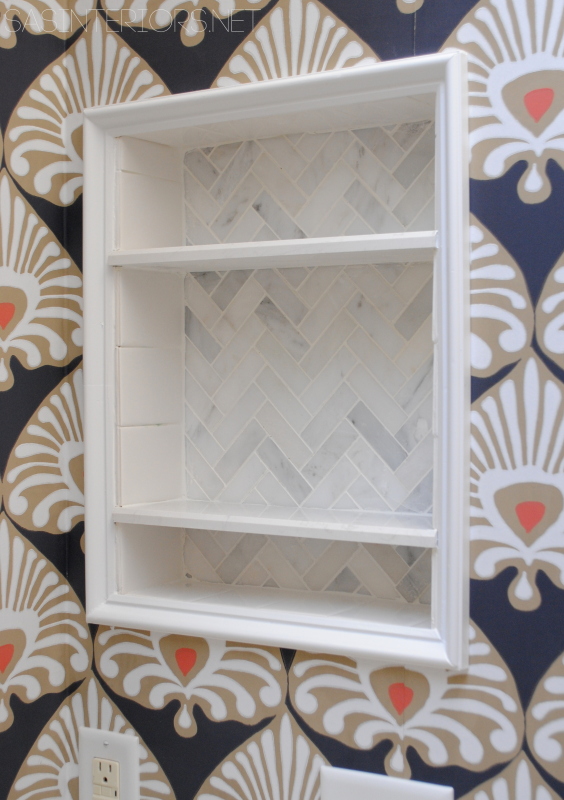
After the last piece was put in place, I gave the moulding a light sanding, and painted it with semi-gloss white.  Here’s the result…

Bathroom Makeover: a tutorial on how to create a tiled niche + many more DIY projects.

A closeup…

Bathroom Makeover: a tutorial on how to create a tiled niche + many more DIY projects.

Bathroom Makeover: a tutorial on how to create a tiled niche + many more DIY projects.

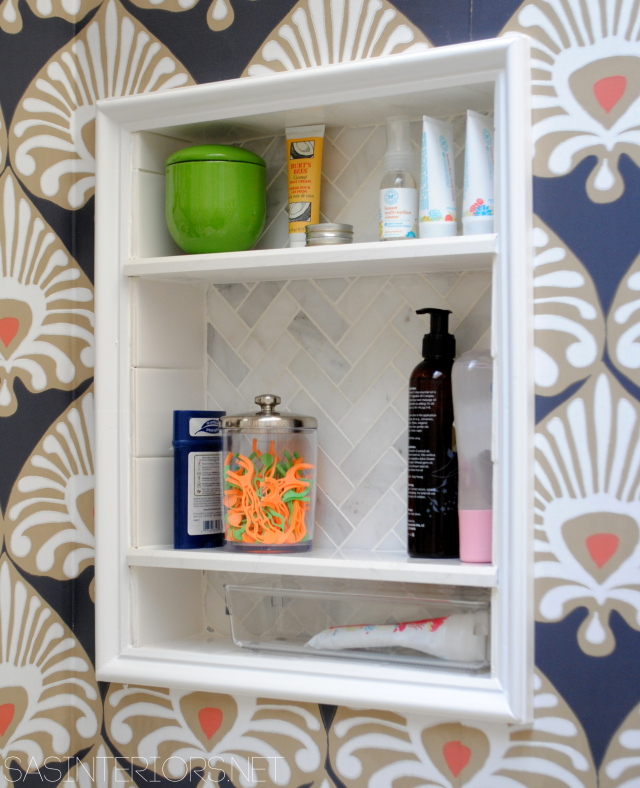
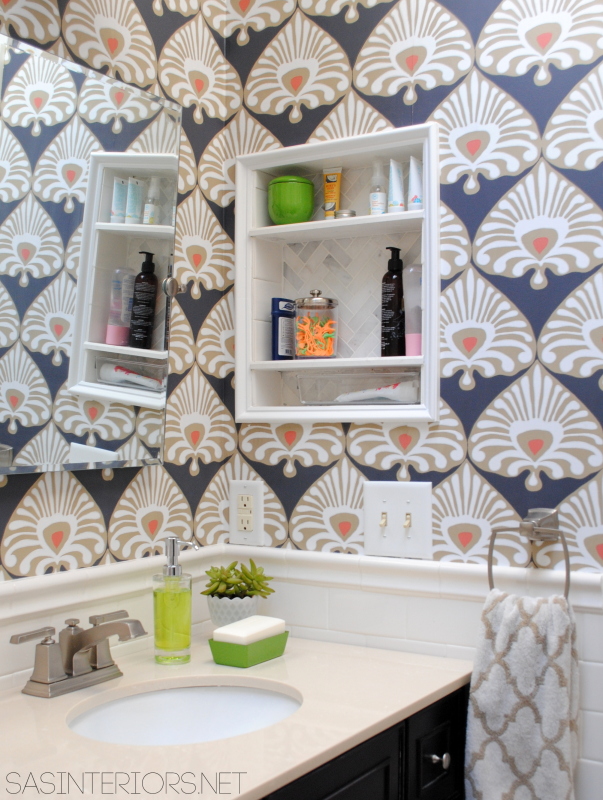
This new niche is such a fun, unexpected addition to the bathroom.  Pretty + Functional = A great storage solution

Here is the niche filled with a few things…

Bathroom Makeover: a tutorial on how to create a tiled niche + many more DIY projects.

And a glimpse a few steps back…

Bathroom Makeover: a tutorial on how to create a tiled niche + many more DIY projects.

Bathroom Makeover: a tutorial on how to create a tiled niche + many more DIY projects.

A few more details to go and I will be able to call this bathroom makeover DONE!  Adding a tiled niche on Day 19 + 20 is complete!  Up next… adding details – moulding, lighting, and accessories.  More to come soon!

The installation of the tiled niche took 2 days, about 4 hours each day

From start to finish, these are all the posts pertaining to this bathroom remodel
Plan of Action
Demo: Removal + Installation of the Tub & Walls
How-To Tile + Grout the Bathroom Walls
Installing Wallpaper
Adding a Tile Accent Border
Creating a Tiled Niche
Bathroom Makeover Reveal
Resources

{Day 19+20} Tiled Niche – Complete!  10 more days to go…

Lowes Creative Ideas Team Member

To gather even more unique, fun, and creative ideas for your indoor and outdoor Winter spaces, I would definitely suggest downloading the Lowe’s Creative Ideas app on your iphone and/or ipad.  I’m always checking out the FREE app for great seasonal + do-it-yourself inspiration.

Disclosure: I am part of the Lowe’s Creative Team and was provided with a Lowe’s gift card to purchase items for my project.  I was also compensated for my time to use the products.  No one told me what to create, what to buy, how to use the product, or what to write.  All opinions are 100% mine!

Christmas Mantel

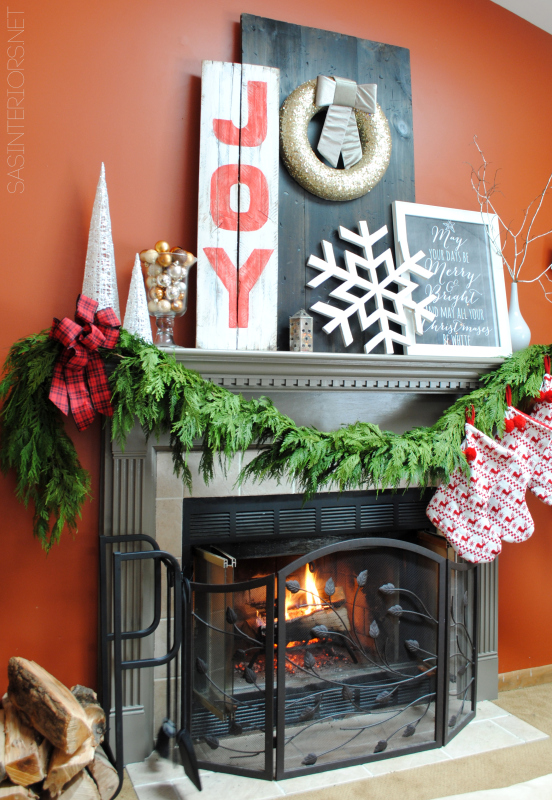
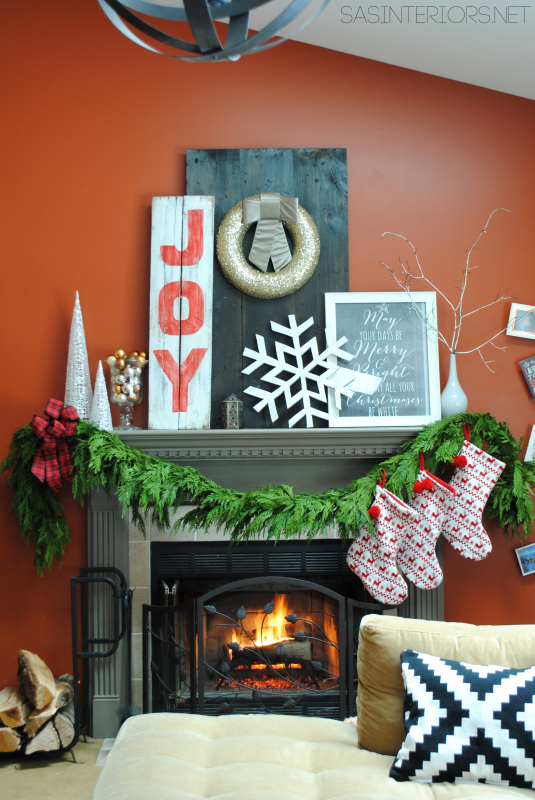
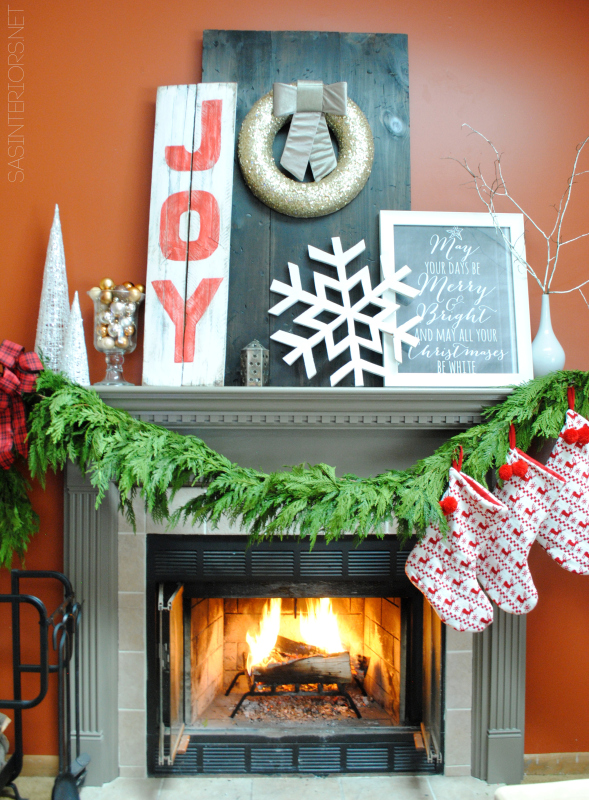
Christmas mantel filled with old & new and lots of DIY creations!

Happy Friday!  Boy, am I glad it is FRIDAY.  It has been a heck of a week, how about for you?

I hope you enjoyed my Christmas Home Tour that I shared yesterday.  Thank you to all those that left the kindest, sweetest comments – I can not tell you how great they make me feel.  I am really loving how festive & warm our home feels right now and I hope I was able to convey that to you throughout the tour!

As I was putting the post of The Tour together, I was left with many more photos of the fireplace mantel.  Instead of making the post miles long, I thought I would create another post on just the mantel.  I am so smitten over how the mantel resulted this year, so let me show you around.

Come join me in the family room…

Christmas mantel filled with old & new and lots of DIY creations!

With our tree at one end of the room and the fireplace at the other, this is such a cozy, restful place.  The mantel this year is filled with a little old and a little new.

Christmas mantel filled with old & new and lots of DIY creations!

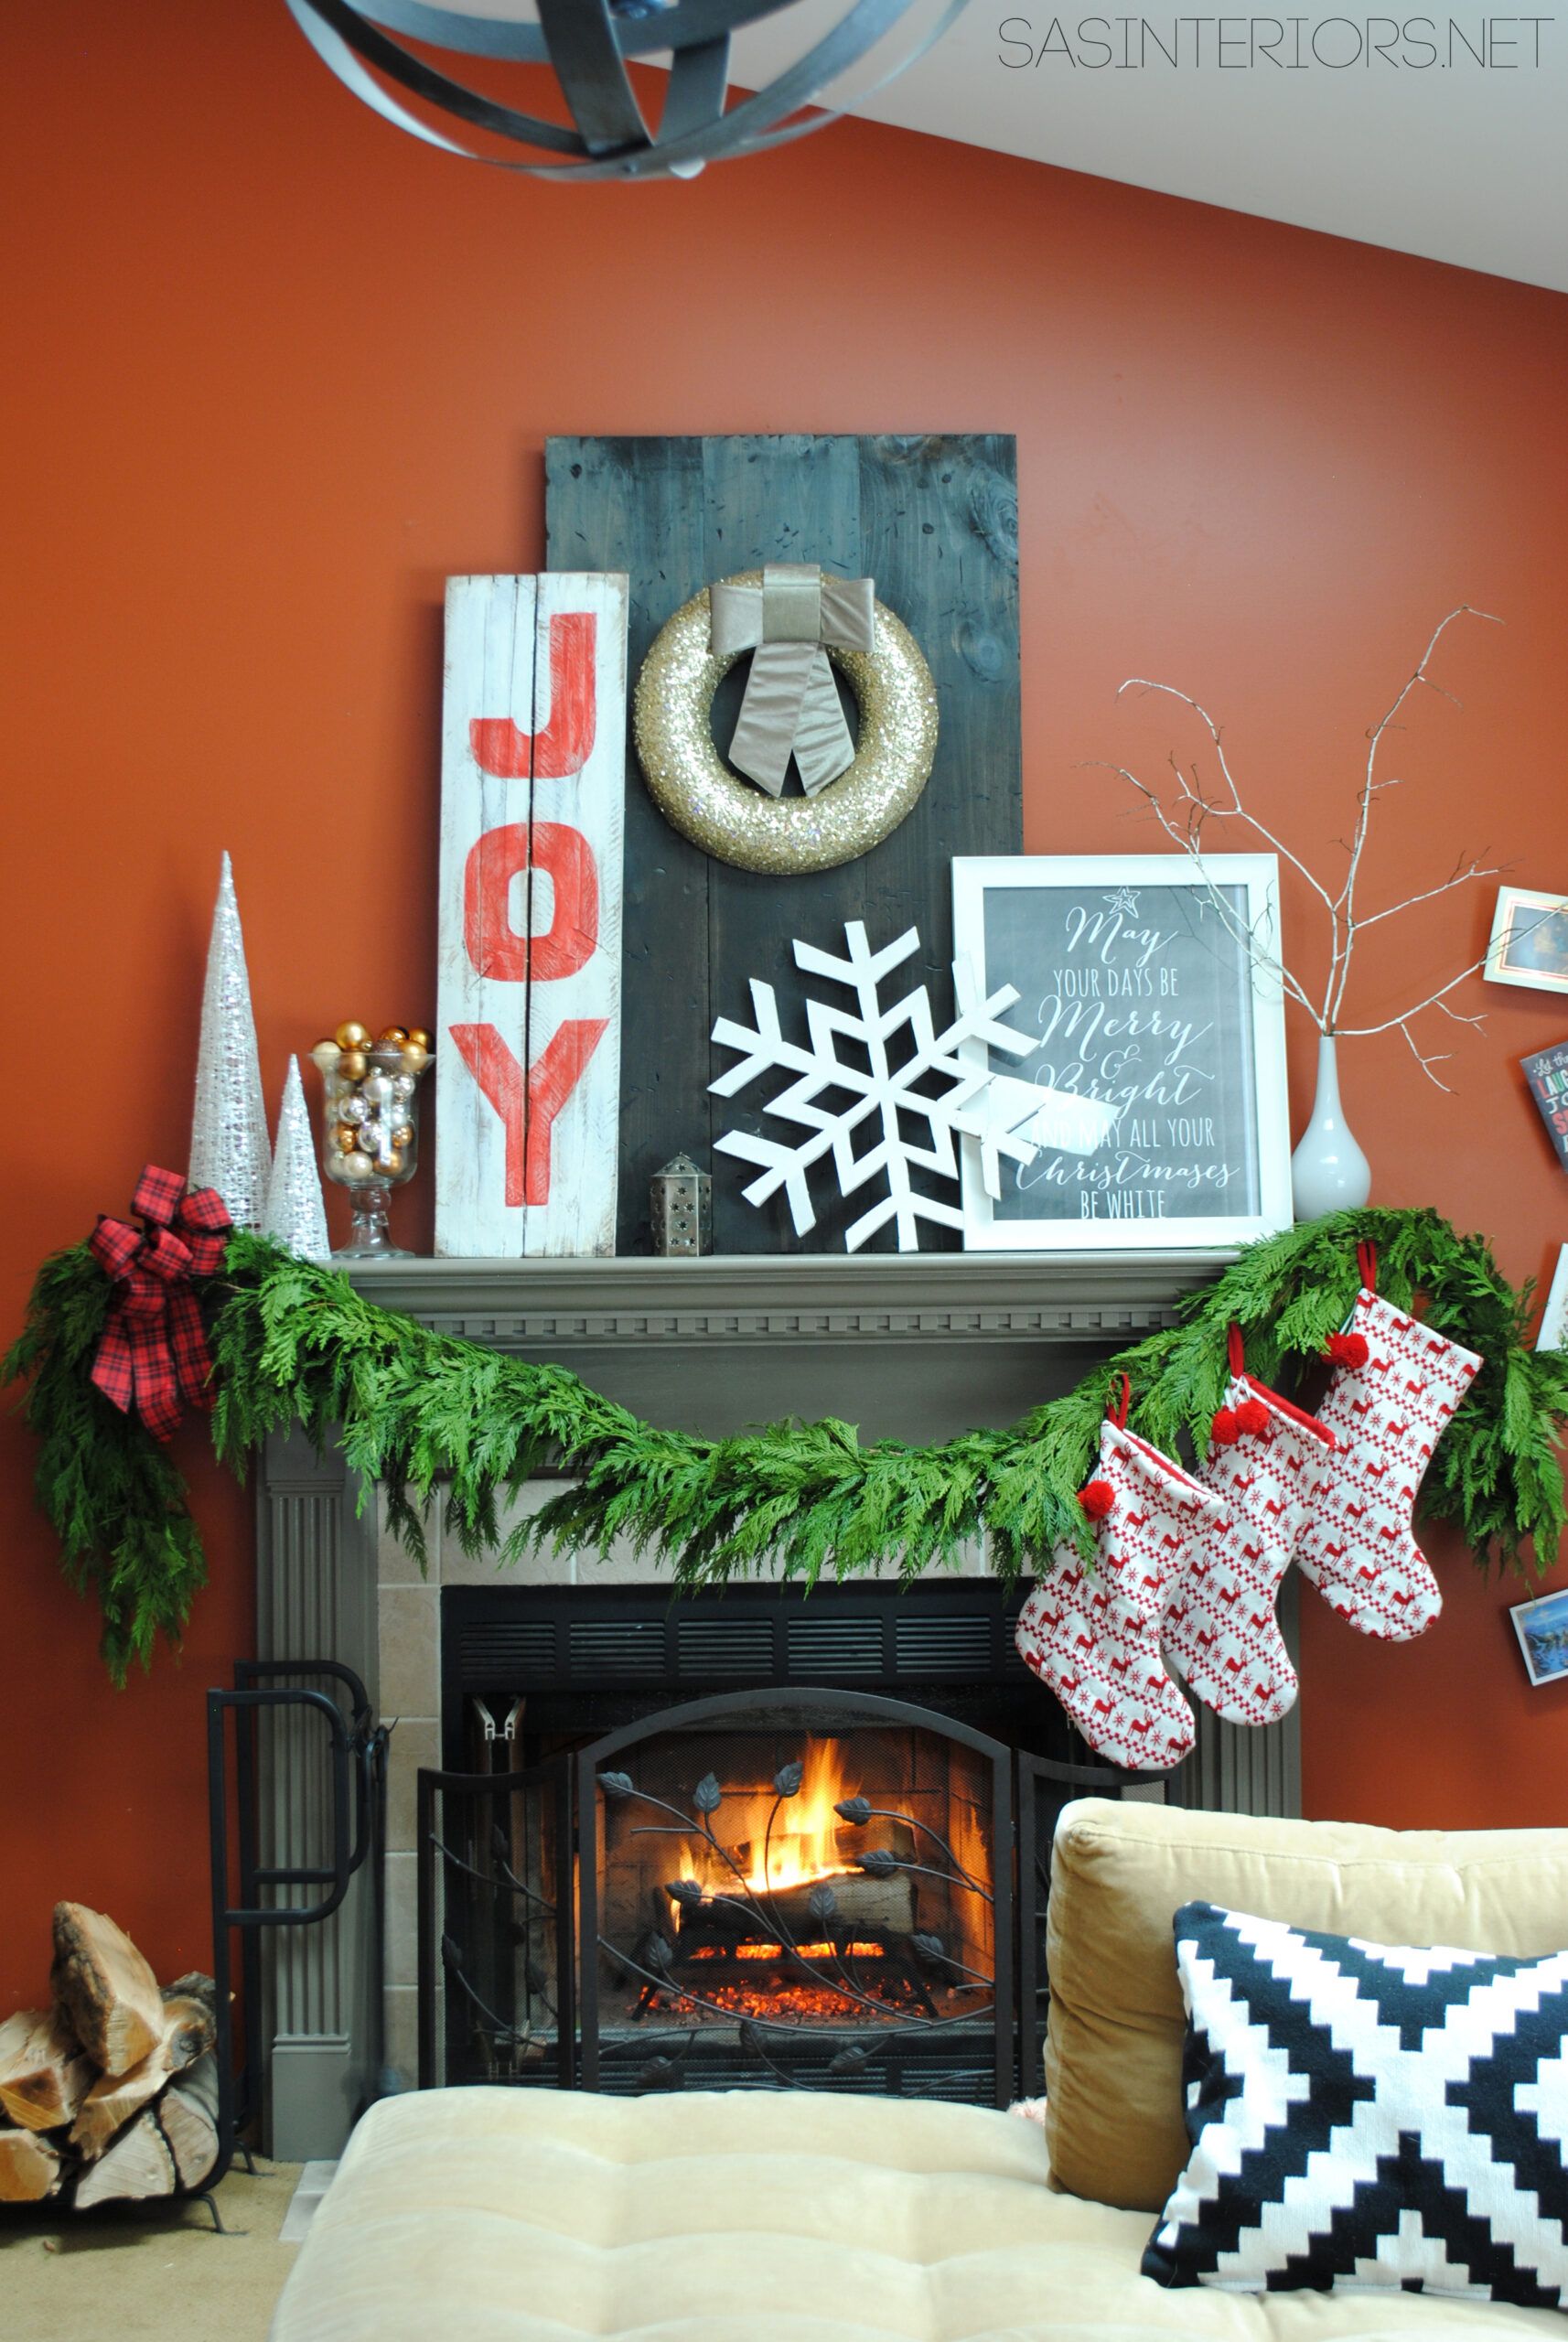
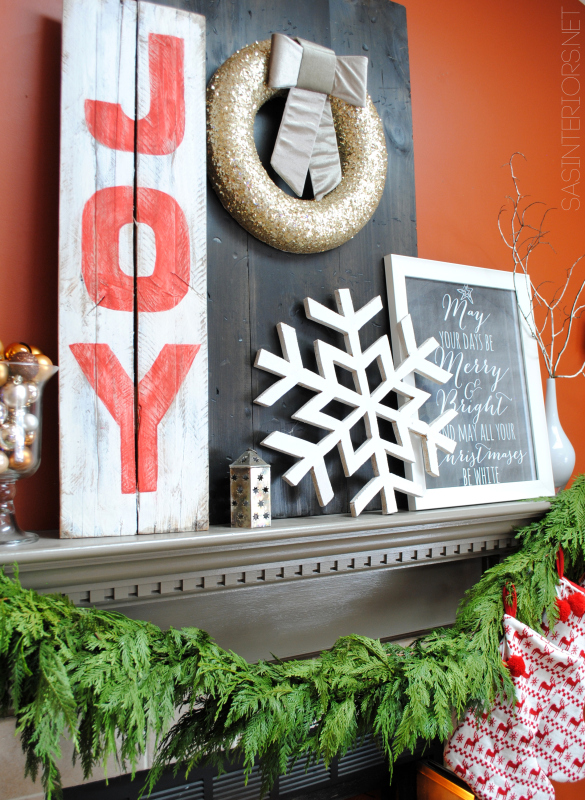
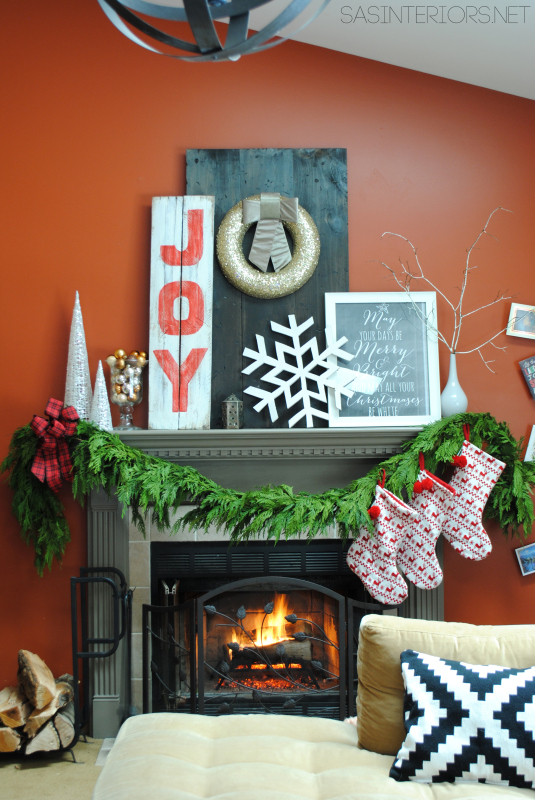
My approach for this years mantel was to lean and layerWhat do I mean?   From front to back, I added height with various items that I simply leaned on each other to give a layered (dimensional) look.

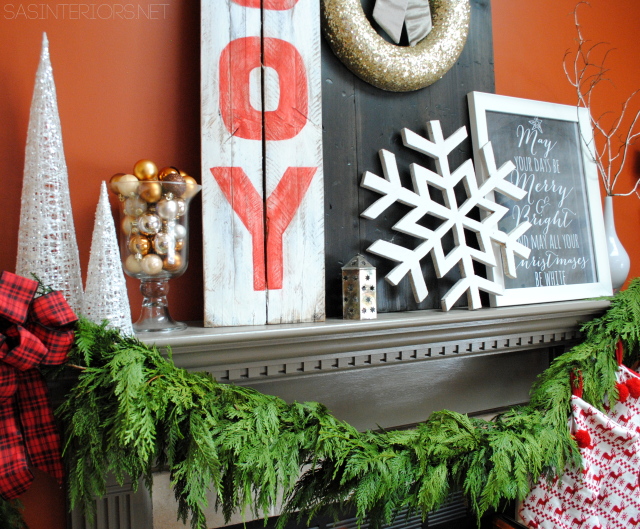
I started with the stained wood backdrop and added the pretty, glittery wreath I got from Lowe’s last year.  Leaning on it, I added the JOY pallet sign, which is really the focal point of the mantel.  Then I added a new chalkboard printable & the oversized wood snowflake (a roadside rescue).  It’s all about the layers!

Christmas mantel filled with old & new and lots of DIY creations!

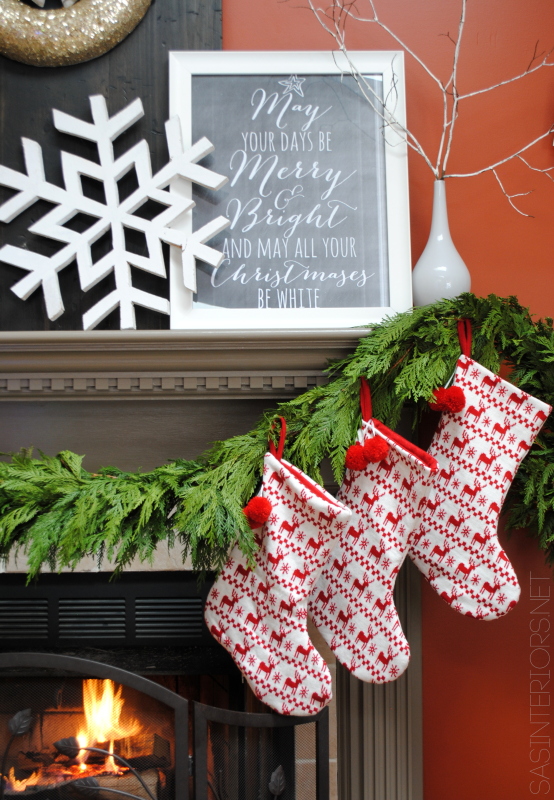
The chalkboard printable is something new this year and it is a creation made by my friend KellieHow did I create it?  I saved the printable to a USB key, brought it to Staples and they printed it on blueprint paper for less than $4.  I then brought it home and framed it.  Easy-Peasy and it is a beautiful addition to the mantel.

https://www.jennaburger.com/2014/12/christmas-home-tour-2014/

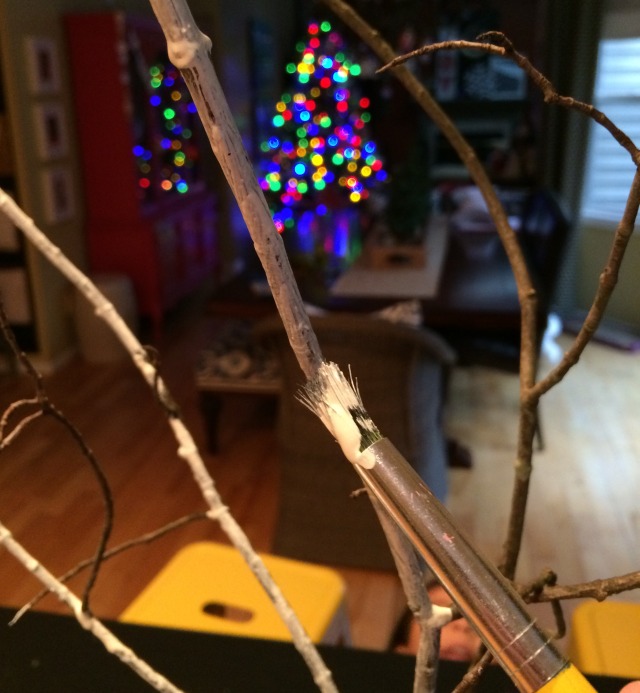
For a bit of whimsy, the kids and I collected some branches from the backyard, which I used to fill a simple white vase.  It really grounds the fireplace.

Christmas mantel filled with old & new and lots of DIY creations!

When I initially placed the vase on the mantel, the brown branches got lost against the orange wall.  To make them stand out more, I took some white craft paint and painted them.  A few minutes later, they were finished and dry.

Christmas mantel filled with old & new and lots of DIY creations!

So pretty, right?

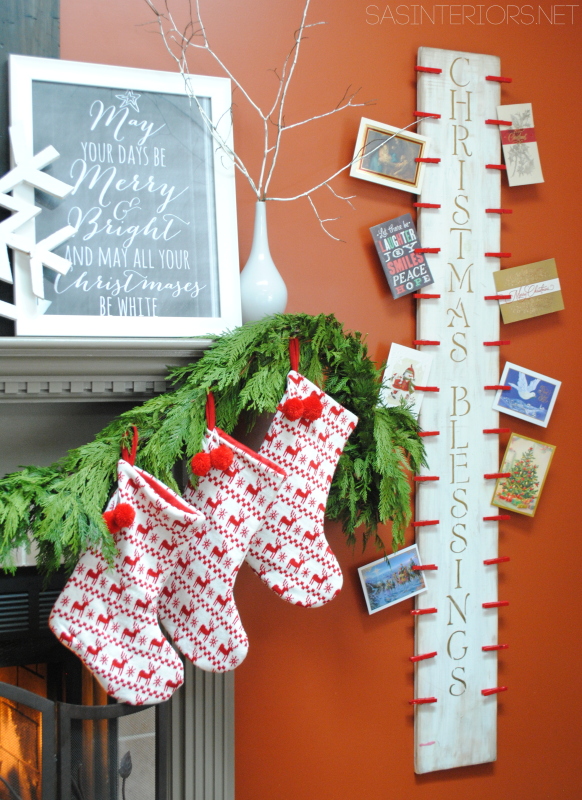
When decorating for this Christmas, I ended up changing the place of a few of our festive favorites.  One specific DIY creation that we all love & admire each year is the Christmas Card Holder.  This season, I chose to hang it to the right of the fireplace and it’s already starting to fill up.

Christmas mantel filled with old & new and lots of DIY creations!

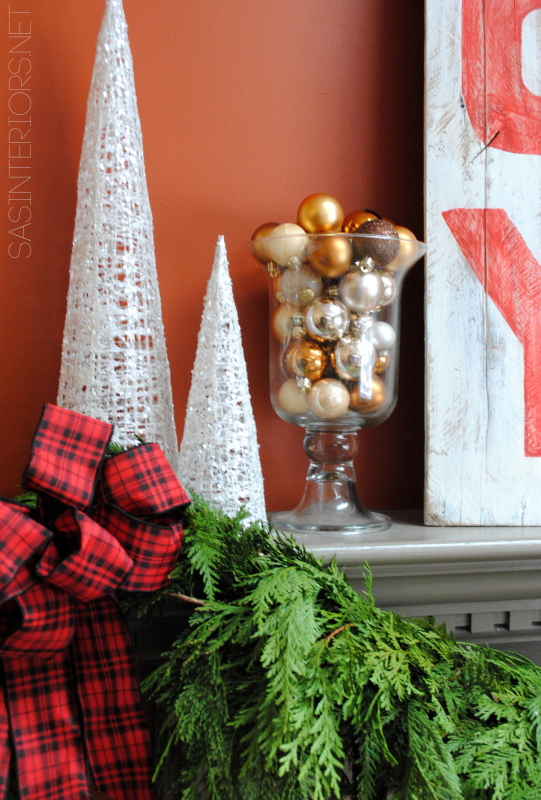
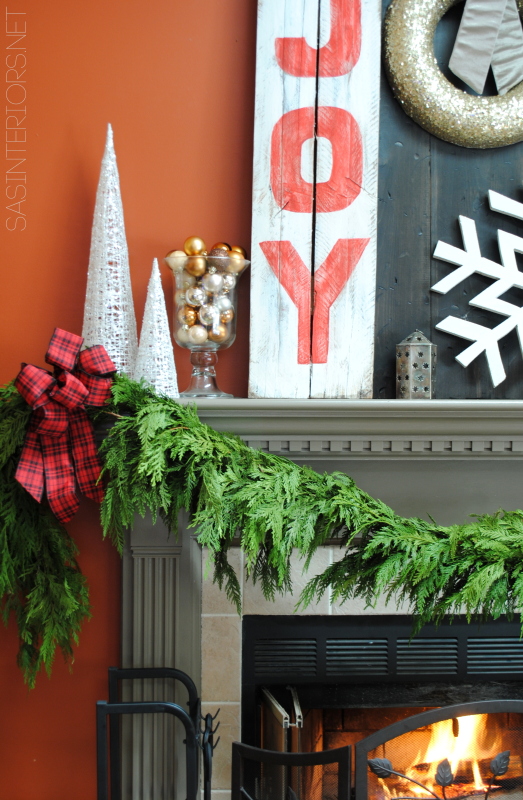
On the other end of the mantel are a few more layered-in elements that give height & interest to the overall mantel.   For the last few years, my go-to favorites for Christmas are these modern cone-shaped Christmas trees from the Christmas Tree Shop a few years back.  We have them in a few different sizes in white and gold.  I just love how sparkly they are!  And how simple, yet glowing is a bowl filled with ornaments.  A 3-second creation that is beauty to the eye!

Christmas mantel filled with old & new and lots of DIY creations!

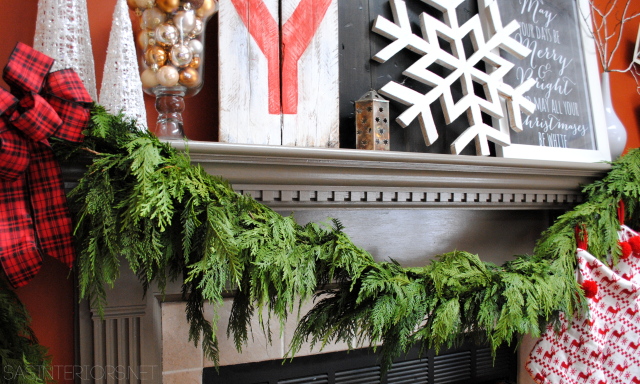
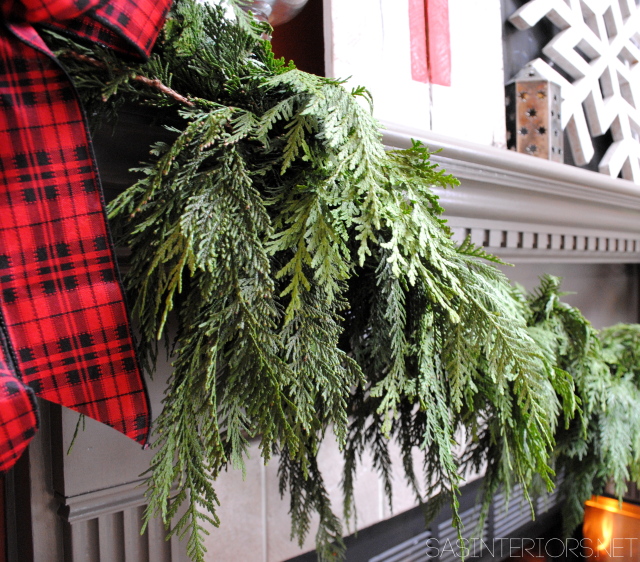
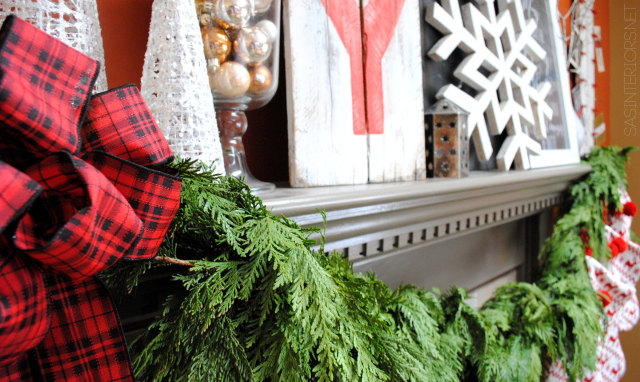
This years mantel would not be complete without a WOW.  The gorgeous cedar garland truly completed this years mantel montage.  I just adore how full and organic it feels.  My idea of being inspired by nature this holiday season really came to fruition with this garland.

Christmas mantel filled with old & new and lots of DIY creations!

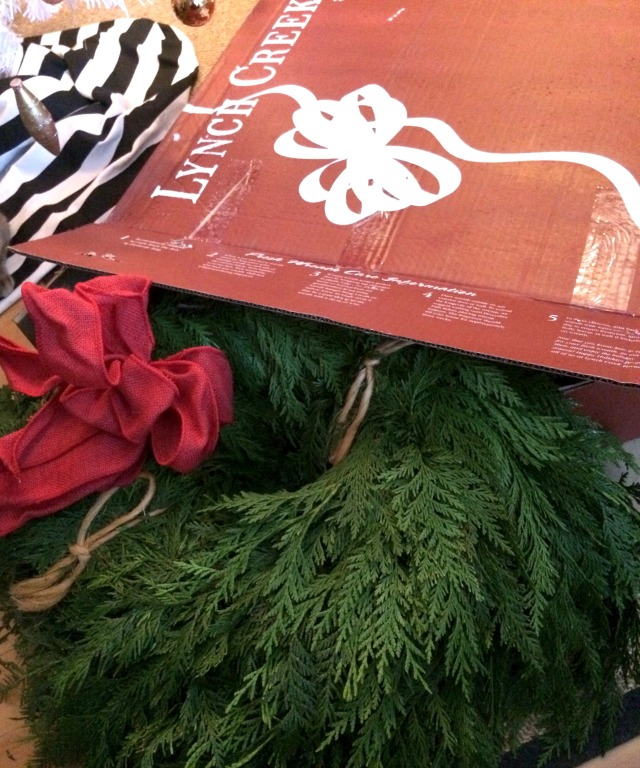
I am so grateful to my friends at Lynch Creek Farm who sent me the garland, as well as the wreath for the front door.  And the smell…  I can’t even begin to explain how yummy our home smells.  I just wish you could dive through your screen to get a whiff.

Lynch Creek Farm

Here is a peek at the gorgeous wreath on the front door which you can see more of in my Christmas Home Tour.

Christmas Home Tour of Jenna Burger, one of the homes featured on the Jennifer Rizzo 2014 Holiday Housewalk

Back to the mantel…

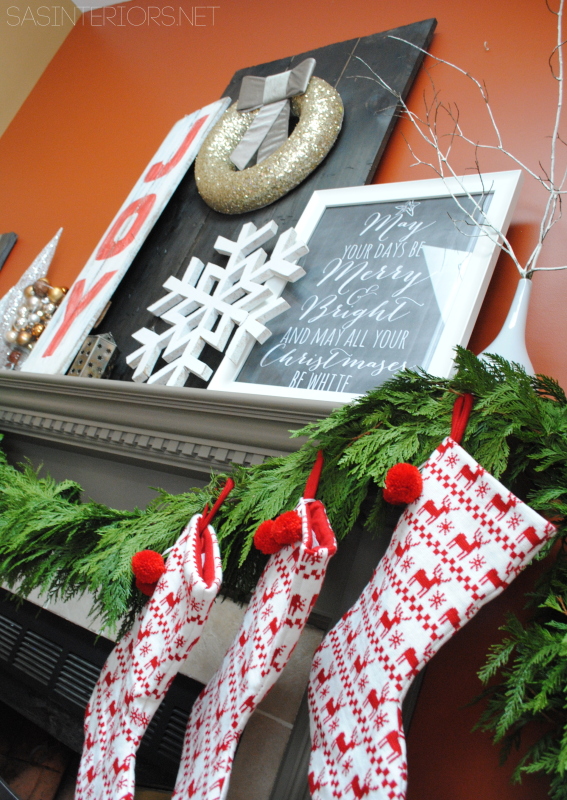
I hung this beautiful cedar garland at each end of the mantel so it has a gentle swag in the center.  On the one side, I added a pretty red + black bow and on the other side, I hung 3 stockings that I just picked up from Lowe’s.

Christmas mantel filled with old & new and lots of DIY creations!

Christmas mantel filled with old & new and lots of DIY creations!

A few more views (I told you I couldn’t stop myself from photographing & sharing this mantel)…

Christmas mantel filled with old & new and lots of DIY creations!


Christmas mantel filled with old & new and lots of DIY creations!

Christmas mantel filled with old & new and lots of DIY creations!

From the kitchen to the dining room to the family room, you can see how the fireplace is a focal point in our home and we are truly admiring this years mantel creation…

Christmas mantel filled with old & new and lots of DIY creations!

Thanks for stopping by to enjoy my home decorated for Christmas!

Have you decorated your home for the holidays yet?

Christmas Home Tour 2014

Christmas Home Tour 2014Welcome!

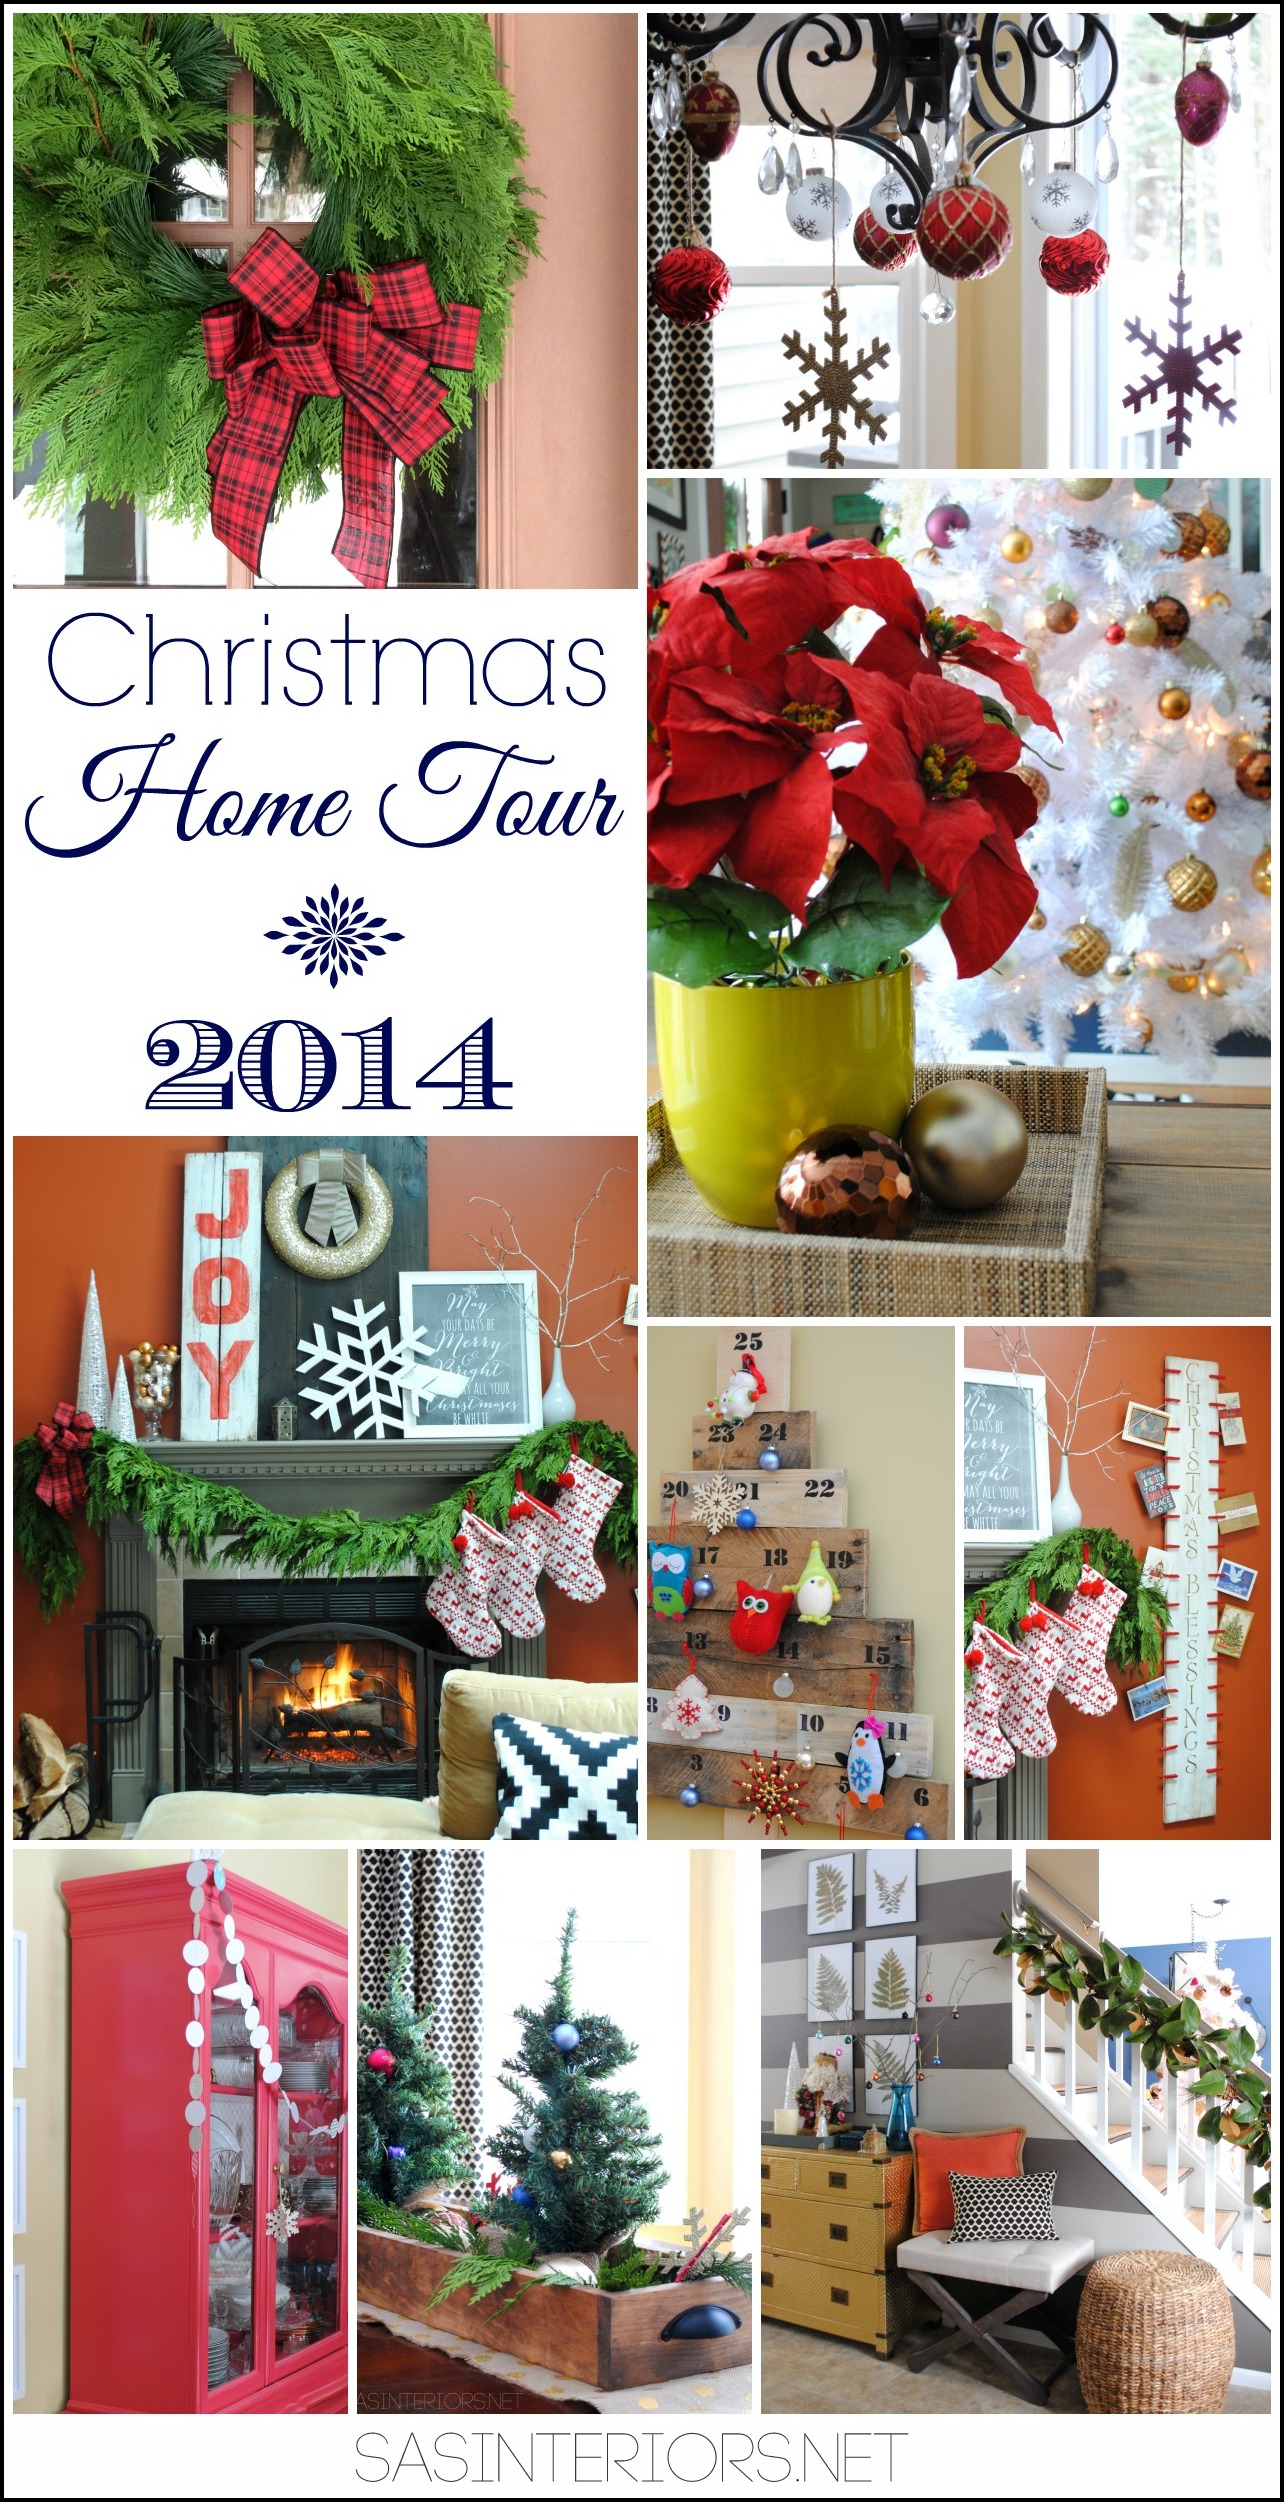
I have been waiting for this day for so long.  Another holiday season is upon us and I am thrilled you are here to take the tour of my home decorated for Christmas.

If you are following along on the Jennifer Rizzo Holiday Housewalk (start the tour here), I am house #24 and you just came from Monica’s home at East Coast Creative.

east coast creative

Wasn’t it awesomely decorated?  She has such a creative style!  I am so happy to be on the tour for the second year in a row (click to see last years Christmas tour) and let me tell you… you are in for a treat!

Over the past year, I have made many changes to our beautiful abode and it has been enjoyable to put new touches on our latest additions.  Without further ado, grab a cup of something, put your feet up, and enjoy.

Let the tour begin…

Christmas Home Tour of Jenna Burger, one of the homes featured on the Jennifer Rizzo 2014 Holiday Housewalk

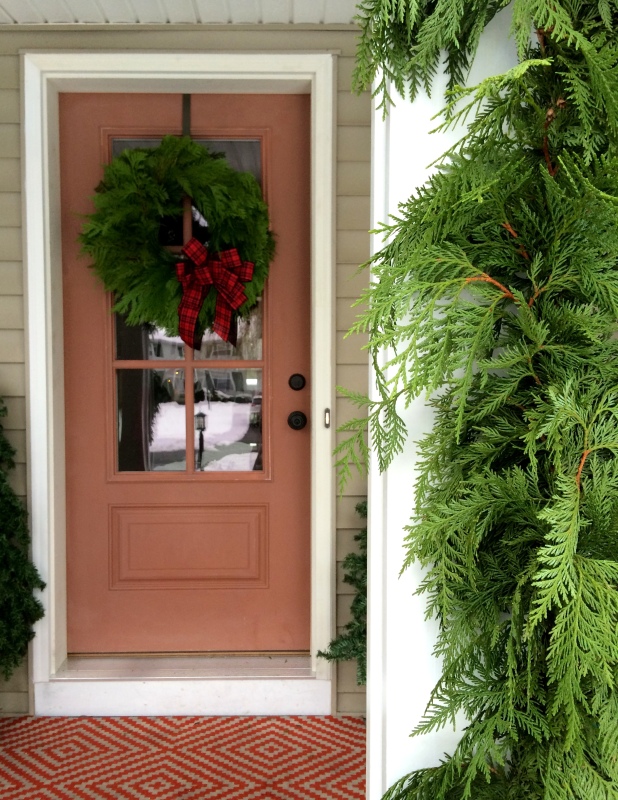
Our front porch + (new) front door are adorned this Christmas season with gorgeous greenery in a mix of cedars (thanks to my awesome friends at Lynch Creek Farm).  The garland on the front columns & the wreath on the door beautifully surround our entry and create the most perfect welcoming feeling.

We just had this new glass front door installed a few weeks ago and even though it’s only primed – yes the brownish red color is how it came primed – I am loving how much light in filters into the front entry.  I have more planned for this door (like a pop of color) but it’ll have to wait till Spring.  For now, I hung this beautiful wreath and I am calling in done!

Come on in…

Christmas Home Tour of Jenna Burger, one of the homes featured on the Jennifer Rizzo 2014 Holiday Housewalk

For seasonal decor, I don’t believe that every space needs to filled with floor to ceiling decorations.  Often a few small touches, are ideal and just enough.  Our entry isn’t overly spacious and with 5 of us, there is a lot of foot traffic throughout all hours of the day.

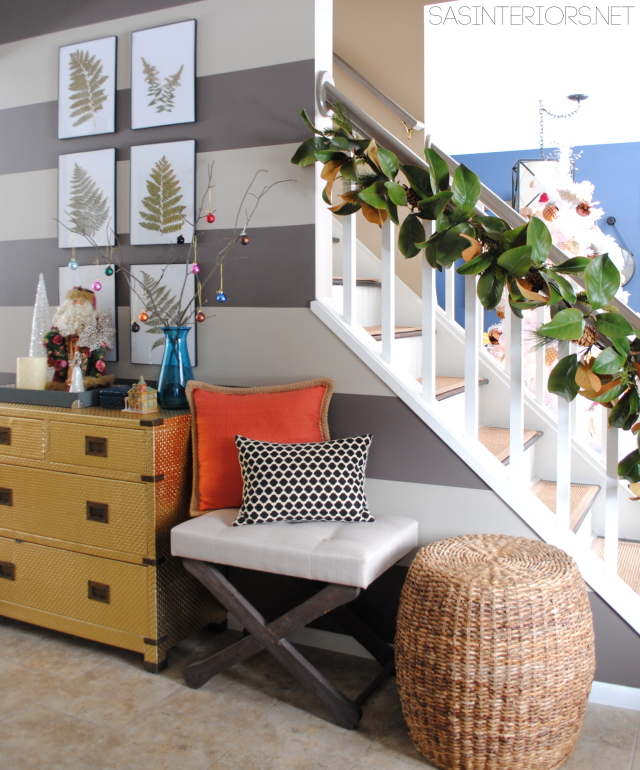
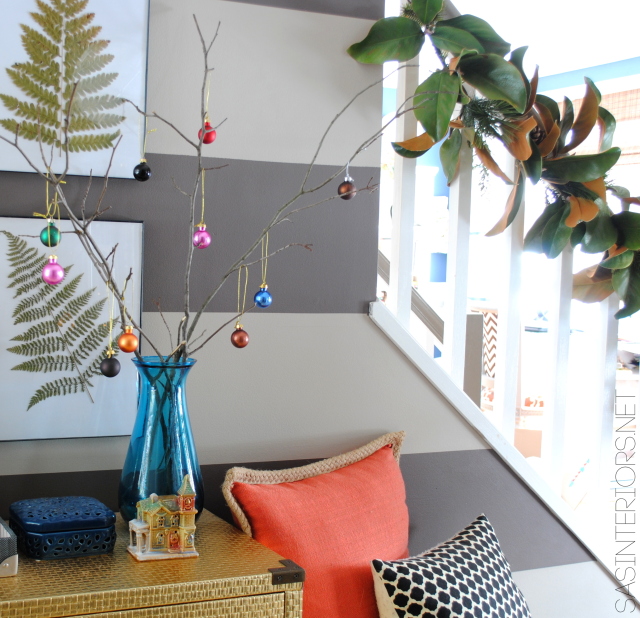
My holiday decorating approach for the entry/foyer space was to set the tone for the other spaces and to add a few festive layers to our everyday decor.  I loved the ornament tree (small colorful ornaments hung from tree branches found in our backyard) that I created for our buffet last year, so this season I reenacted a similar idea on the gold dresser (which isn’t only glamorous but actually is functional too holding shoes, keys, and lots of stuff), and brought in a few festive favorites.

Christmas Home Tour of Jenna Burger, one of the homes featured on the Jennifer Rizzo 2014 Holiday Housewalk

A few weeks back I mentioned my design ‘theme’ for this Christmas was to be inspired by nature.  With that in mind while decorating, I was able to hone in on what made sense and to not overwhelm the spaces with non-meaningful things.  The result being, we truly feel surrounded – inside and out – by many natural elements and things that we love most.

Along the stair railing, I hung a beautiful magnolia garland that I got from Balsam Hill – simple, but sophisticated.  It’s artificial, but it has a realistic look without the fuss.

Christmas Home Tour of Jenna Burger, one of the homes featured on the Jennifer Rizzo 2014 Holiday Housewalk

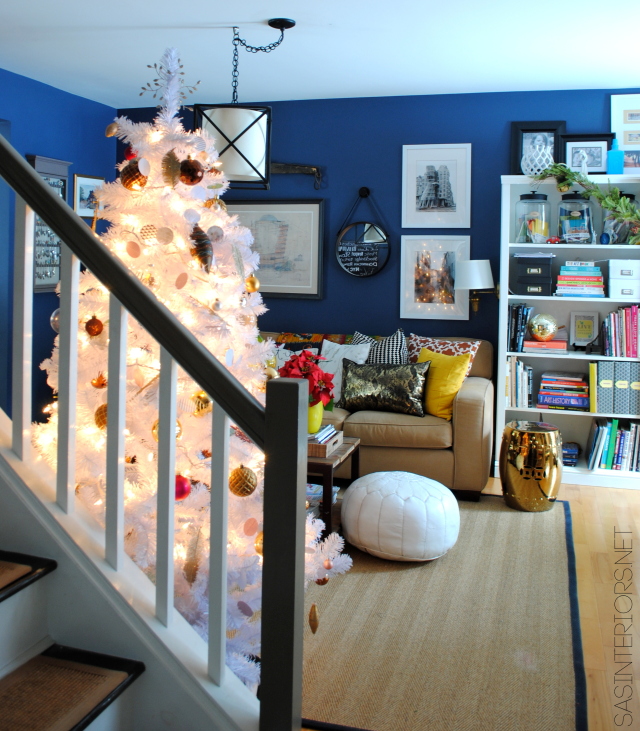
To the right of our entry is the office / living room.  I love how the room glows in the evening with our sparkly white tree…

Christmas Home Tour of Jenna Burger, one of the homes featured on the Jennifer Rizzo 2014 Holiday Housewalk

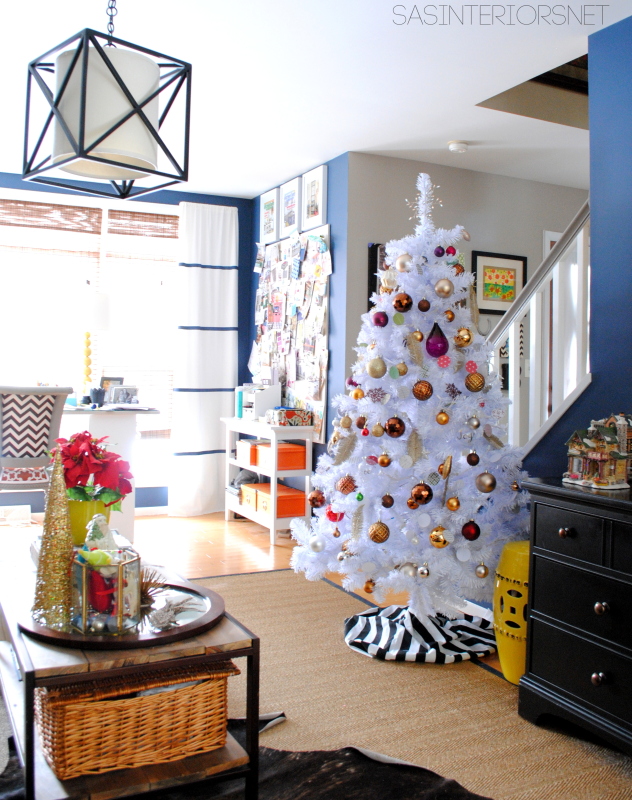
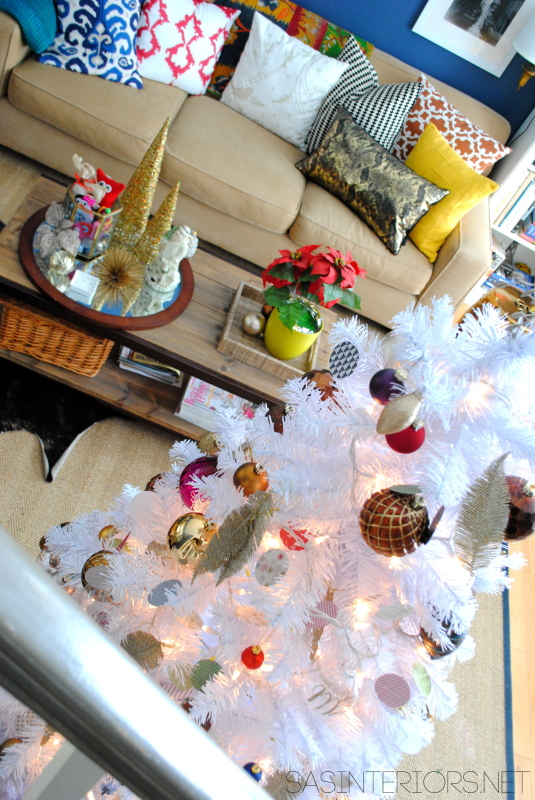
As you can see from the light that filters into the photo, this space is incredibly bright.  I chose to display our all-white tree in front of the stair railing this year and decorated it with colorful ornaments in shades of pinks, purples, browns, and golds. It’s beautifully lit with white lights and finished off with my easiest + fastest + cheapest tree skirt EVER!

Christmas Home Tour of Jenna Burger, one of the homes featured on the Jennifer Rizzo 2014 Holiday Housewalk

Christmas Home Tour of Jenna Burger, one of the homes featured on the Jennifer Rizzo 2014 Holiday Housewalk

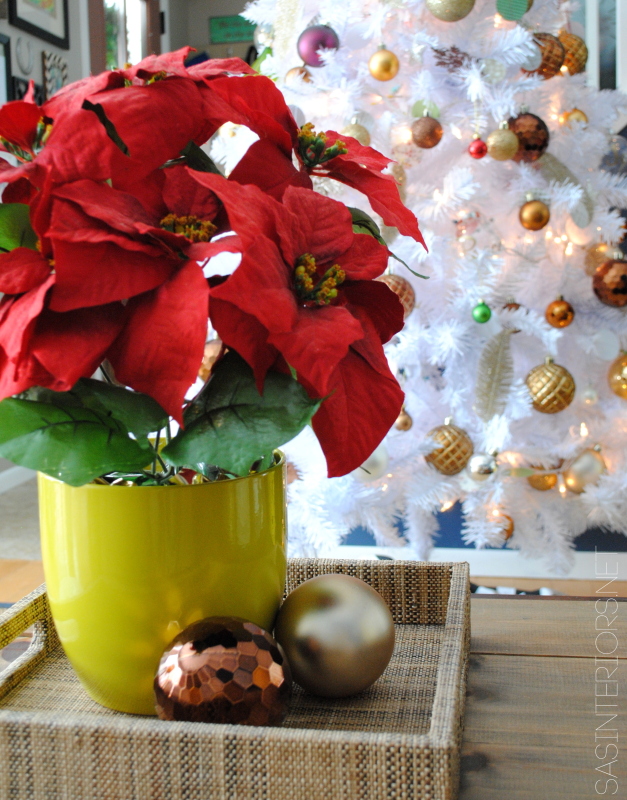
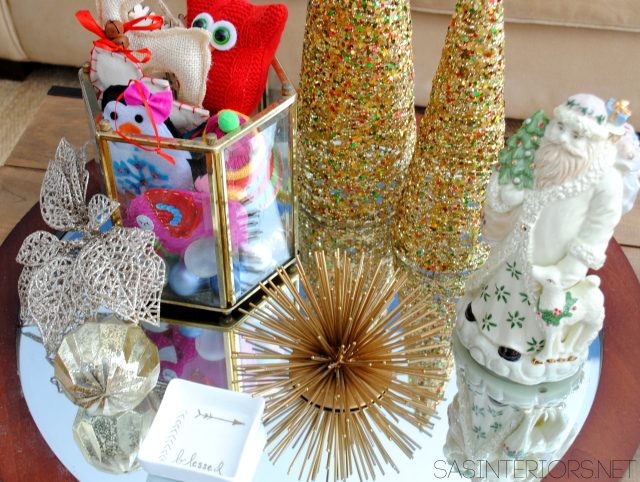
A mirror turned horizontal makes for the perfect seasonal coffee table vignette. The festive montage is topped with a few Christmas favorites including gold trees (from the Christmas Tree Shop), the light turned vase filled with ornaments, and of course Santa.  Also displayed in a tray on the coffee table is a colorful poinsettia (fake artificial) in a bright yellow vase (which I typically have filled with a fern).  Pops of color all around…

Christmas Home Tour of Jenna Burger, one of the homes featured on the Jennifer Rizzo 2014 Holiday Housewalk

As we come down the stairs each morning, this is the view we are blessed with…

Christmas Home Tour of Jenna Burger, one of the homes featured on the Jennifer Rizzo 2014 Holiday Housewalk

As we continue on the tour, my living room/office leads us to the kitchen and dining space…

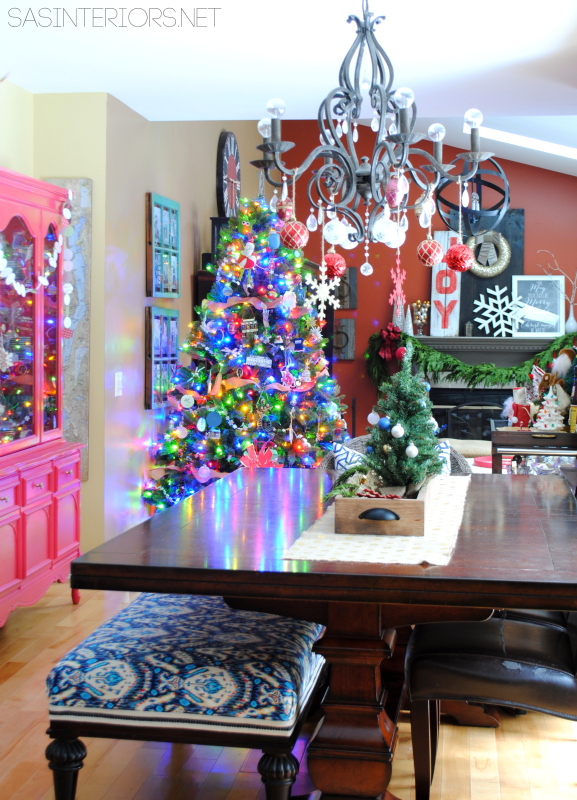
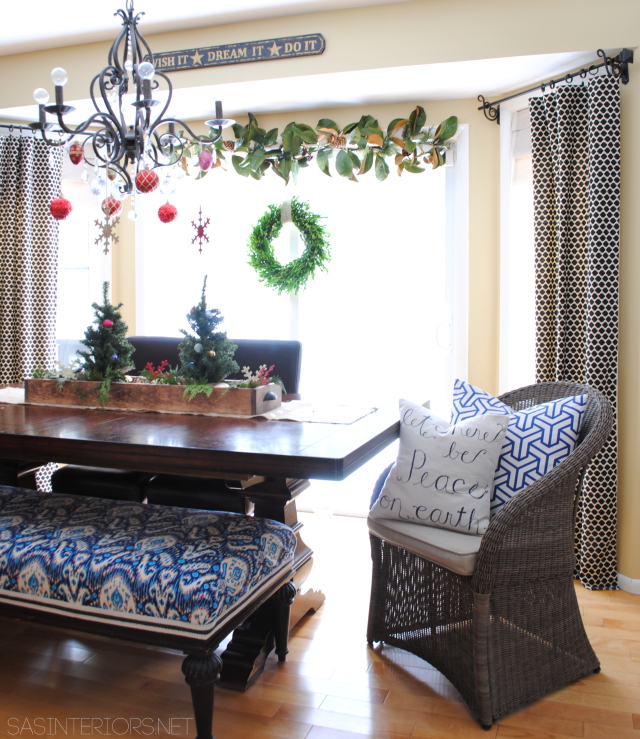
This is our main dining table for breakfast & dinner, so again the space had to remain functional for the every day, so a few seasonal layers were just enough to bring in the magic.

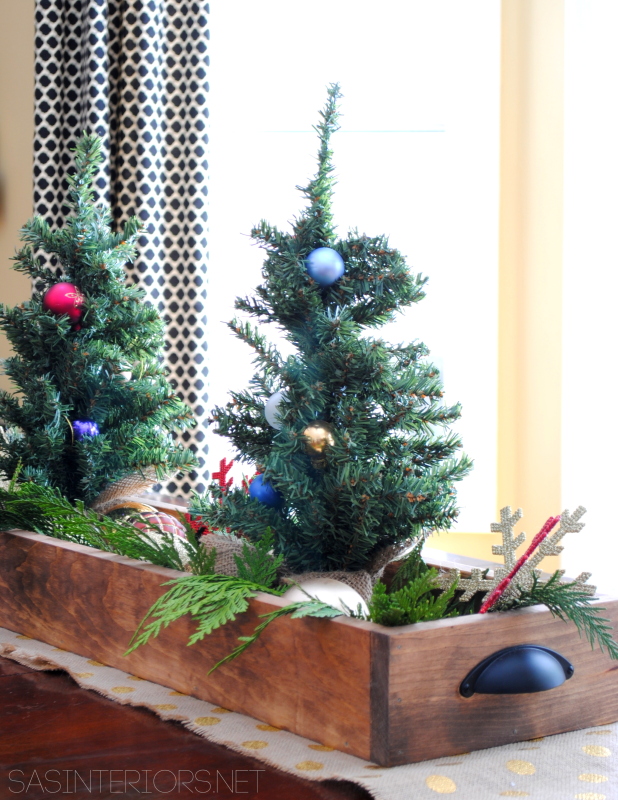
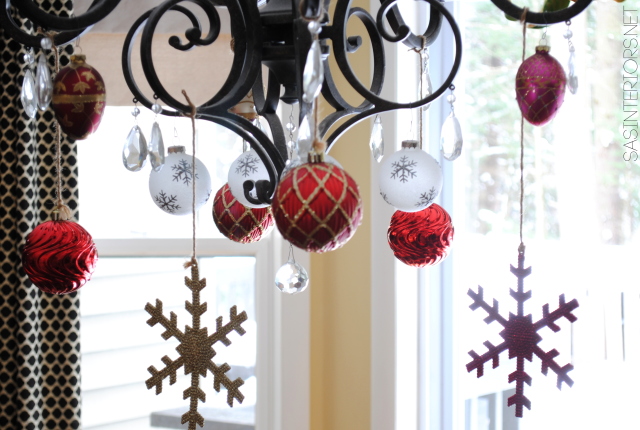
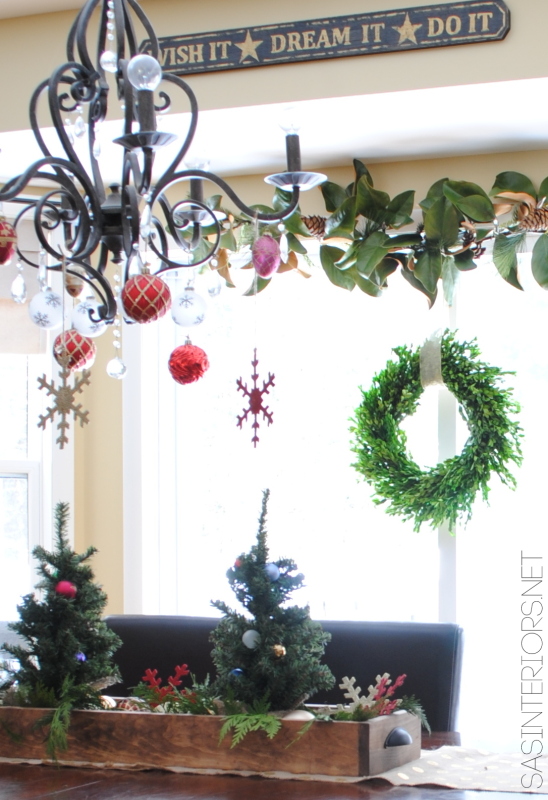
Above the sliding door, I added another (faux) magnolia garland and below is a simple boxwood wreath (last year from Lowe’s) hung from the door frame by a pretty gold ribbon.  Hanging from the chandelier are some colorful + bright ornaments and for the table centerpiece, I used the stained wood box that I recently made and filled it with small Christmas trees, greenery, and more ornaments.

Christmas Home Tour of Jenna Burger, one of the homes featured on the Jennifer Rizzo 2014 Holiday Housewalk

I love decorating with trays.  It makes creating vignettes so easy & moving them (especially at the dinner table) is a cinch.  There is no way a display like this directly on the table could be moved twice a day.

Here’s a closeup…

Christmas Home Tour of Jenna Burger, one of the homes featured on the Jennifer Rizzo 2014 Holiday Housewalk

Christmas Home Tour of Jenna Burger, one of the homes featured on the Jennifer Rizzo 2014 Holiday Housewalk

Christmas Home Tour of Jenna Burger, one of the homes featured on the Jennifer Rizzo 2014 Holiday Housewalk

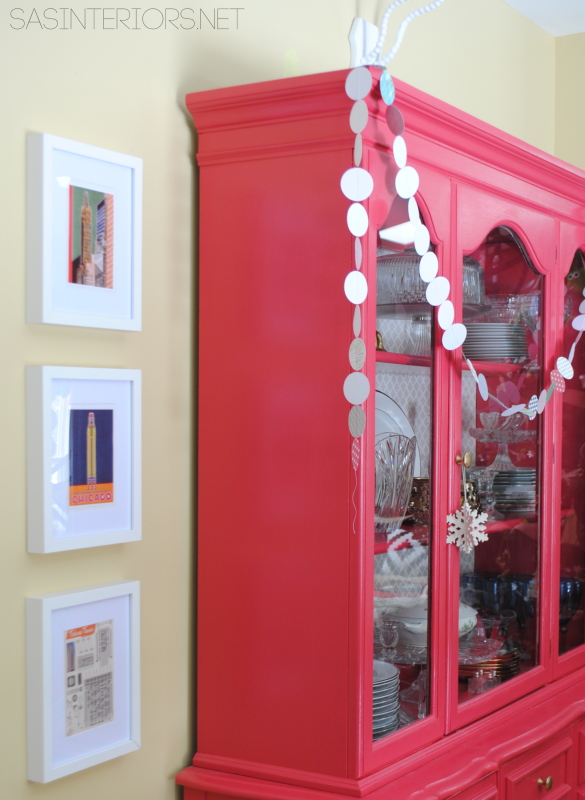
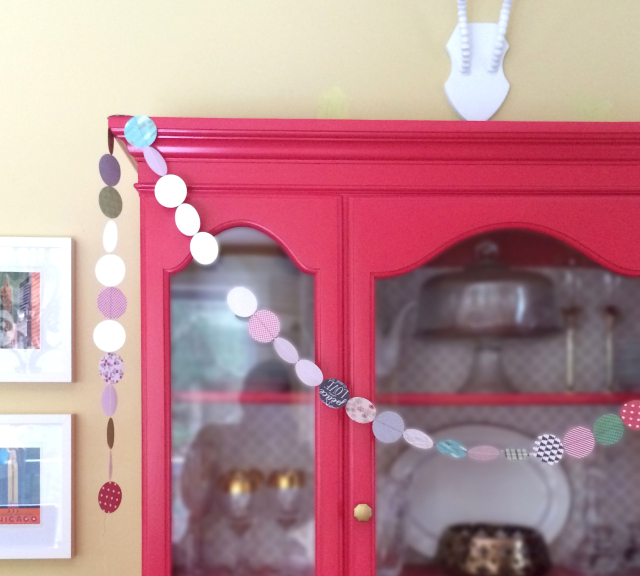
For the recent Craigslist-found china cabinet the I transformed, I let the color stand strong and draped a simple paper garland from edge to edge.

Christmas Home Tour of Jenna Burger, one of the homes featured on the Jennifer Rizzo 2014 Holiday Housewalk

Using a round 1.5″ diameter paper puncher, I cut out circles from Christmas scrapbooking paper, and sewed them together with the method I used to make the crib mobile. So simple, yet festive.

Christmas Home Tour of Jenna Burger, one of the homes featured on the Jennifer Rizzo 2014 Holiday Housewalk

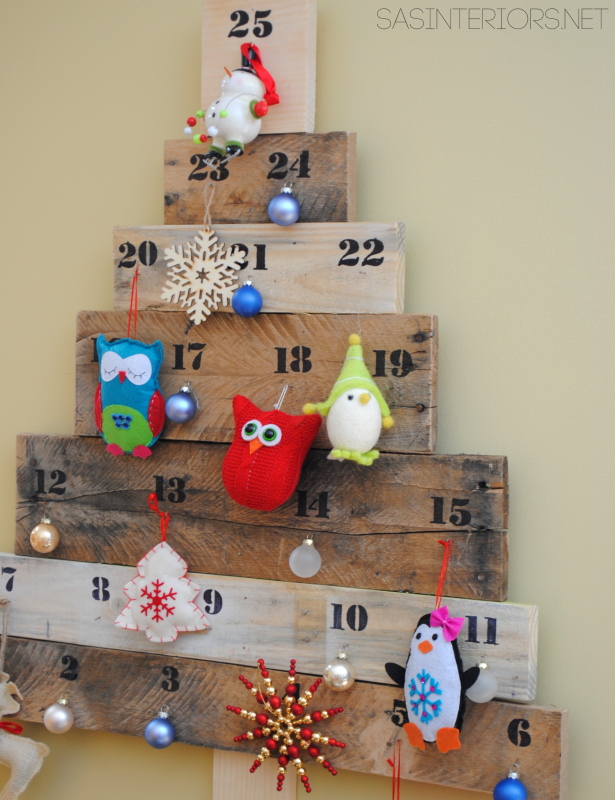
The Christmas Countdown pallet tree that I made last year is still gong strong and is still one of my most favorite creations.

Christmas Countdown Pallet Tree

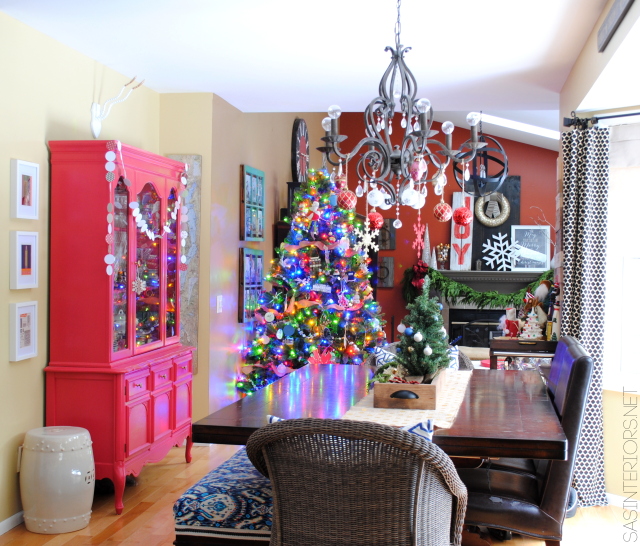
Here’s an overall view of the entire space…

Christmas Home Tour of Jenna Burger, one of the homes featured on the Jennifer Rizzo 2014 Holiday Housewalk

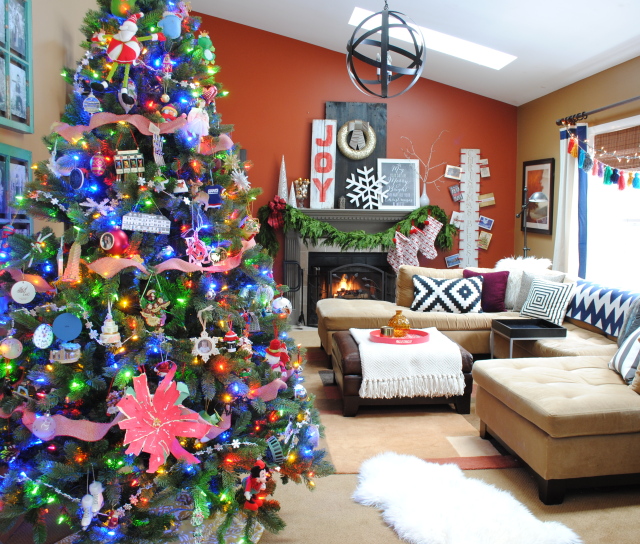
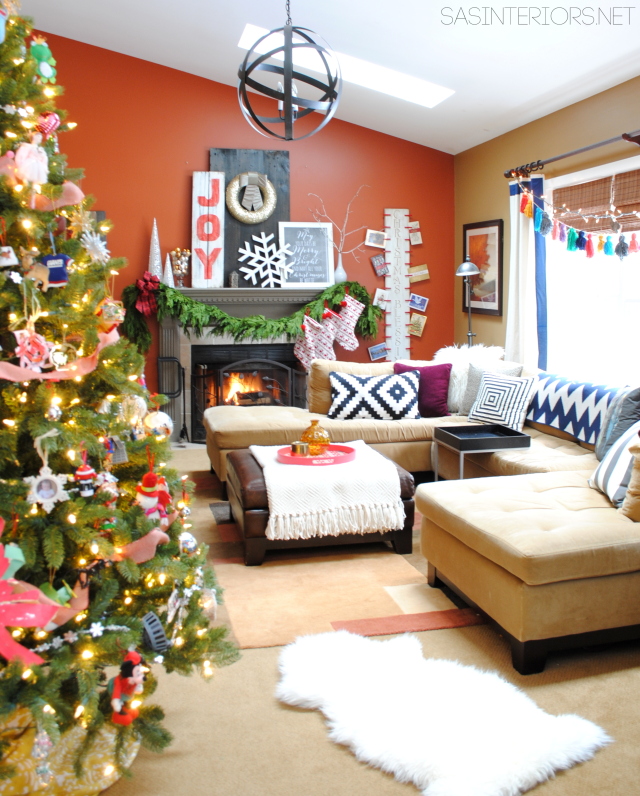
As you continue from the dining room, the adjacent space is our family room where we put our feet up and chill.  It’s a comfy space with a big ole sofa and a fireplace to keep us toasty warm.

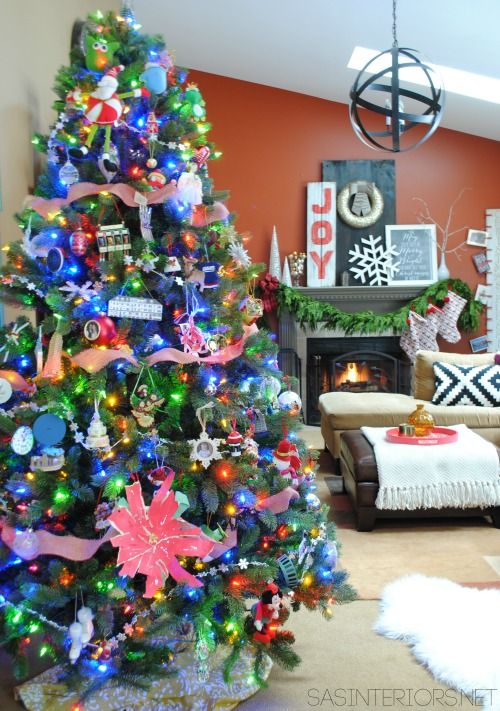
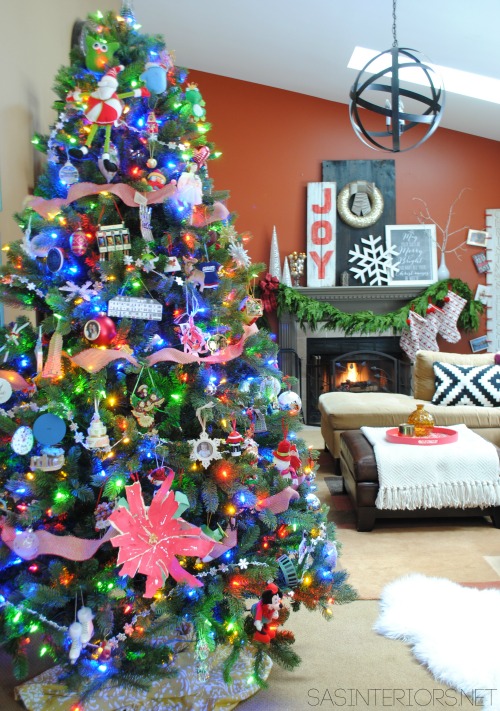
This year we have a new (artificial) Christmas tree that is the focal point of the room.  Our previous tree hit it’s life span.  Of course once the old tree went curbside, the big debate of choosing between white or multi-color lights for the new tree began.  Well this tree is the perfect solution… It has both!  As easy as you can change the lights with a scroll of the mouse, is as easy as we can change from white to color with a click up a button.  When in life, can you make everyone in the household happy???  Well I did it with this great find!

white…

Christmas Home Tour of Jenna Burger, one of the homes featured on the Jennifer Rizzo 2014 Holiday Housewalk

and

color…

Christmas Home Tour of Jenna Burger, one of the homes featured on the Jennifer Rizzo 2014 Holiday Housewalk

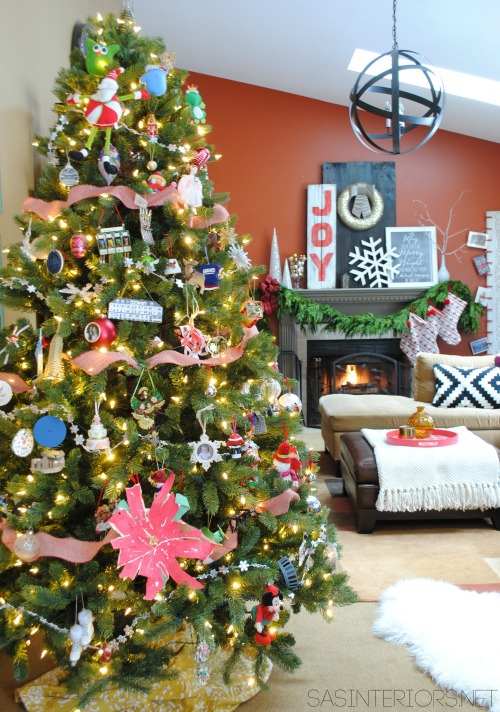
Here is the overall space with a roaring fire and all!  The Mister is a master at making the best, toasty fires.  Me?  Not so much.  I attempted to make a fire a few weeks ago and forgot to put up the flue.  Enough said.

That cute, colorful yarn garland hanging over the window is a recent creation that I used this tutorial to make.  I love how whimsical it looks.  Here is another glimpse of it hanging on my fireplace that I shared on Instagram.

Christmas Home Tour of Jenna Burger, one of the homes featured on the Jennifer Rizzo 2014 Holiday Housewalk

As you continue in the room, our fireplace is decked out this year with a little old and a little new!

Christmas Home Tour of Jenna Burger, one of the homes featured on the Jennifer Rizzo 2014 Holiday Housewalk

The fun, vintage JOY sign is something I made a few years ago and is a favorite of mine as the focal point of the mantel.  The wood sign made of pallets is layered in front of a larger espresso stained wood sign/backdrop.  A few other glittery, sparkly favorites like the wreath, trees, and ornaments are scattered about.

Christmas Home Tour of Jenna Burger, one of the homes featured on the Jennifer Rizzo 2014 Holiday Housewalk

Christmas Home Tour of Jenna Burger, one of the homes featured on the Jennifer Rizzo 2014 Holiday Housewalk

To the side of the fireplace, I hung our Christmas Card holder.  It’s a new spot for this DIY creation and I am really loving it.  The cards are starting to arrive and before we know it, this card holder will be all filled up.

Christmas Home Tour of Jenna Burger, one of the homes featured on the Jennifer Rizzo 2014 Holiday Housewalk

Here is a separate post with more pictures of the mantel!

And that’s a wrap.  Thank you for stopping by for my Christmas Home Tour 2014.  And don’t forget to give a little jingle, jingle on your way out…

Christmas Home Tour of Jenna Burger, one of the homes featured on the Jennifer Rizzo 2014 Holiday Housewalk

Merry Christmas!

Christmas Home Tour of Jenna Burger, one of the homes featured on the Jennifer Rizzo 2014 Holiday Housewalk

I hope you take the time to continue on the Jennifer Rizzo Holiday Housewalk.  Next up is the home of Between You & Me

between you and me

I wish you a happy holiday season!

You may also be interested in checking out my Christmas House Tour from last year >>>

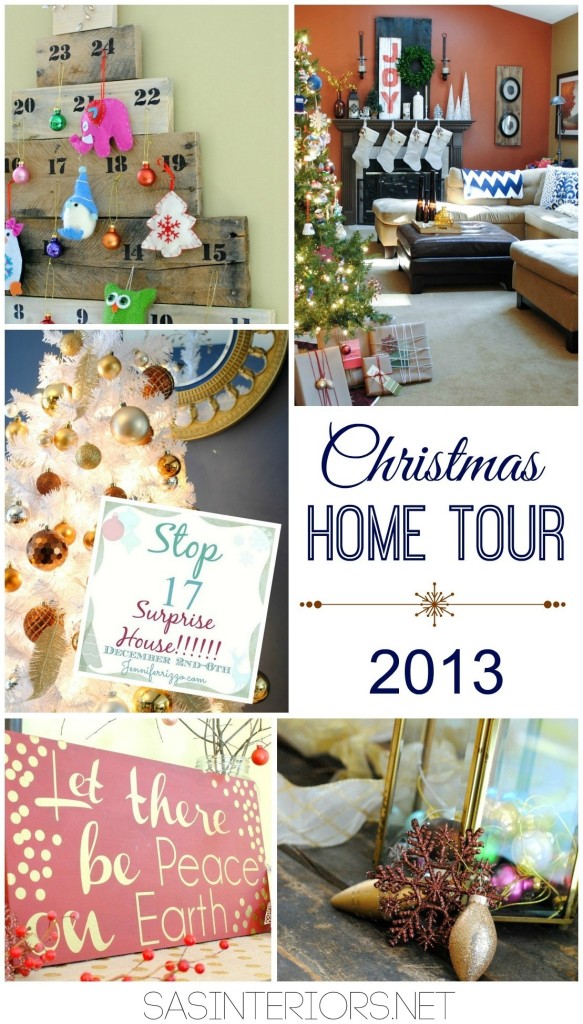
Christmas Home Tour 2013

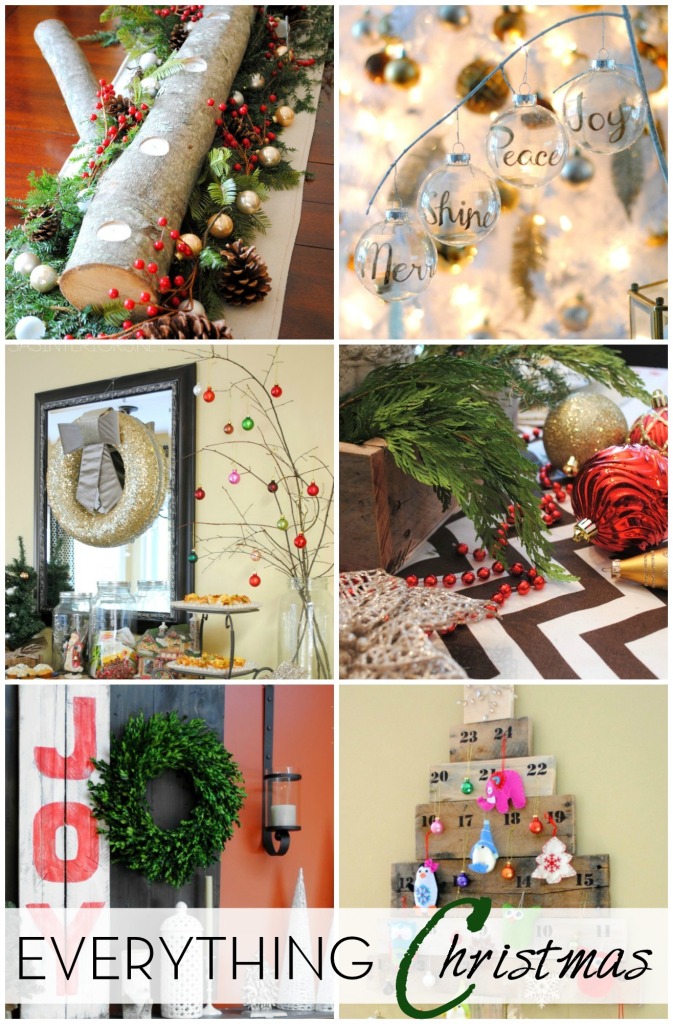
As well as ALL the creations I’ve ever made for Christmas time (5 years of seasonal projects) in my EVERYTHING CHRISTMAS post >>>

Everything christmas - All Christmas and seasonal creations in one post!

Bathroom Makeover: Tile Accent Border {Day 18}

Since the wallpaper, the last phase of the bathroom makeover, was fairly quick taking only a day from start to finish, I was able to move on the next step pretty quick.  With the completion of the dynamic + bold wallpaper, I am feeling so happy with how the bathroom is coming along.  There were a few points that I questioned my decisions + selections, but I feel the wallpaper really pulled it together and added the interest needed to make this new space + funky against the stark white tile.  It’s all about the balance and the contrast…

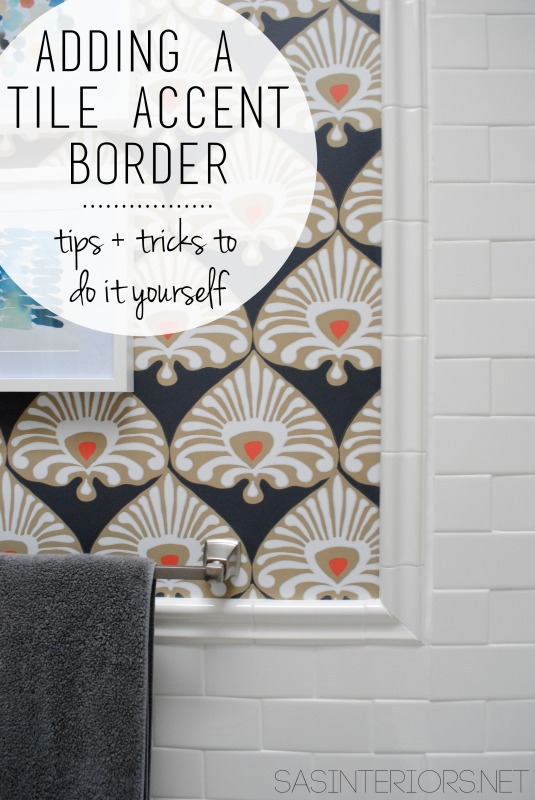
Onto the next phase to get this space done.  I’m on Day 18 of this Bathroom Makeover in 30 Days Challenge and it was spent adding a tile accent (trim) border to finish the edge of the subway tile.

Take a look…

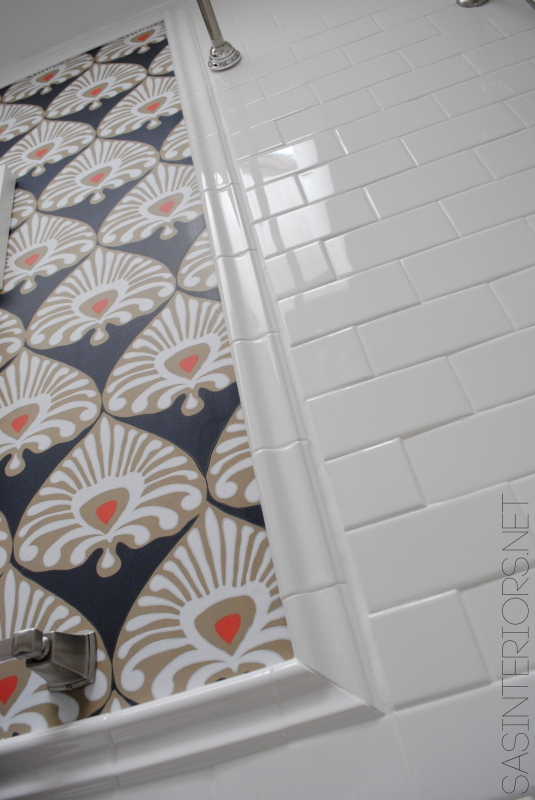
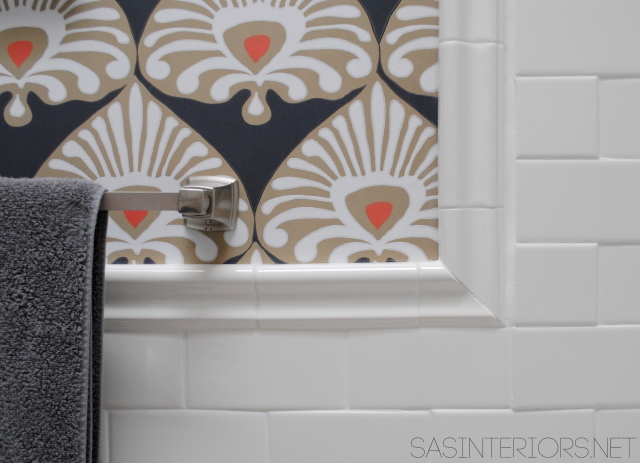
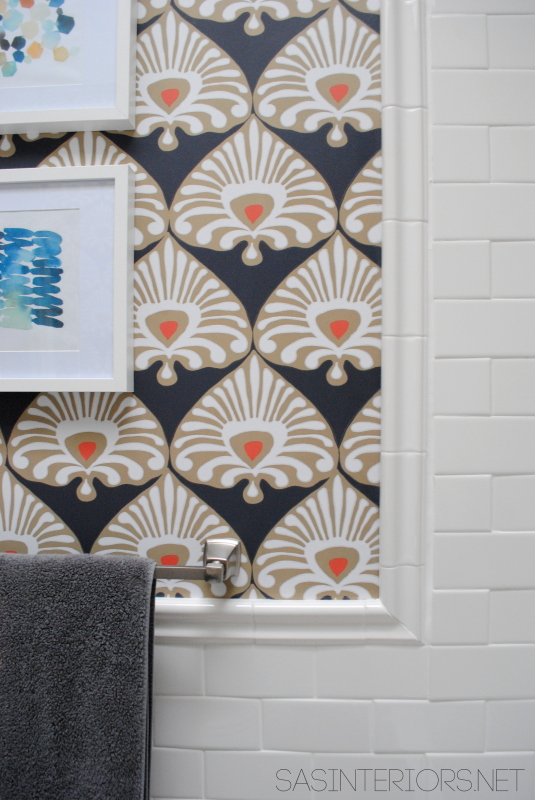
Adding a Tile Trim Border in a bathroom to give a finished edge!

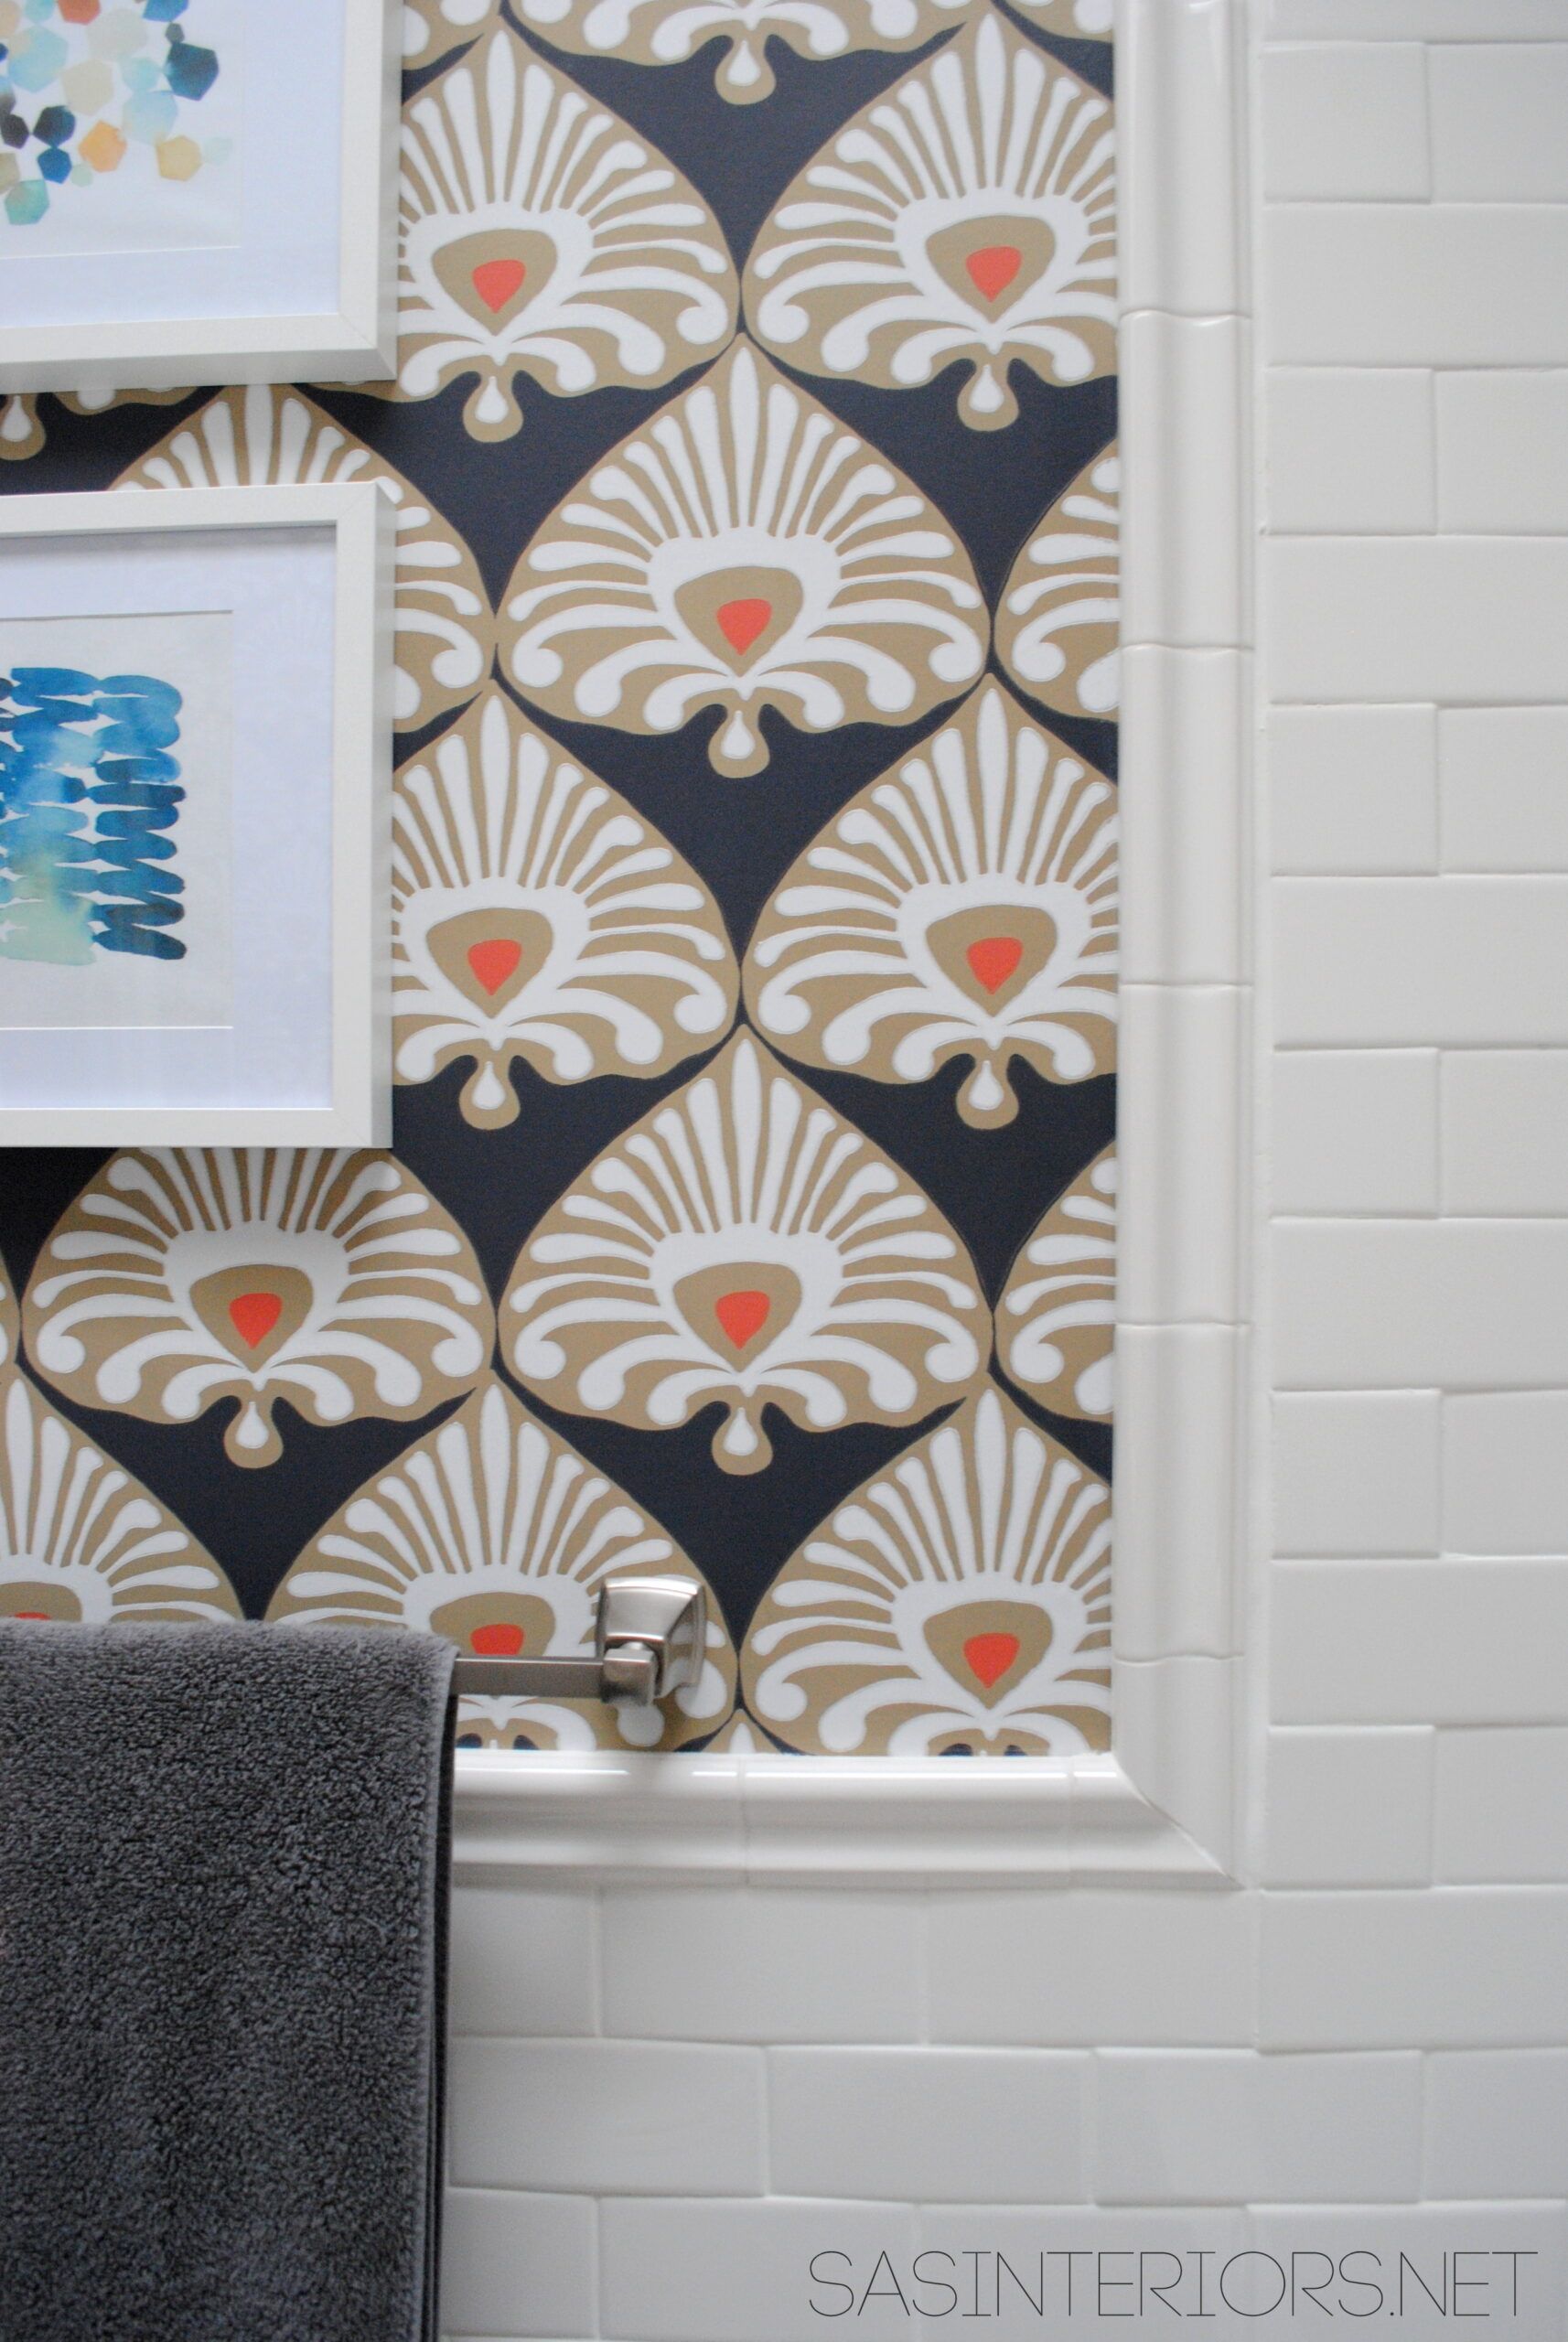
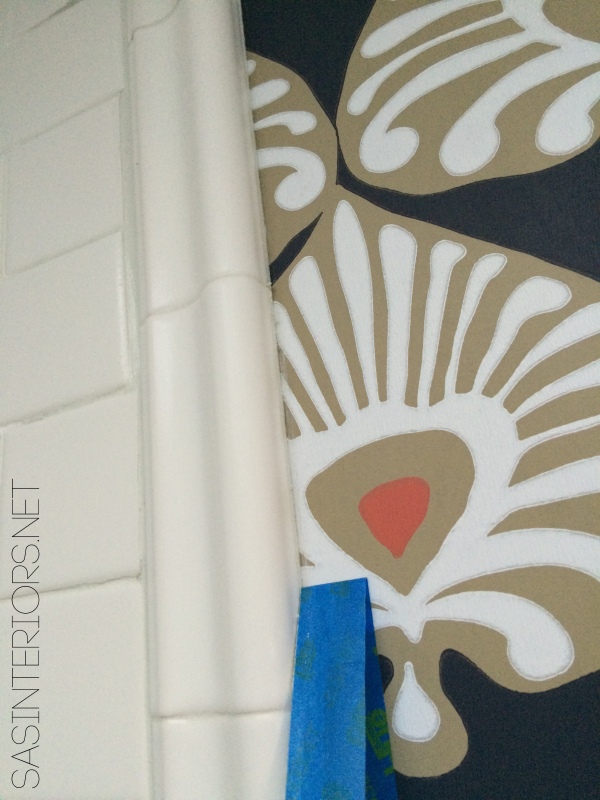
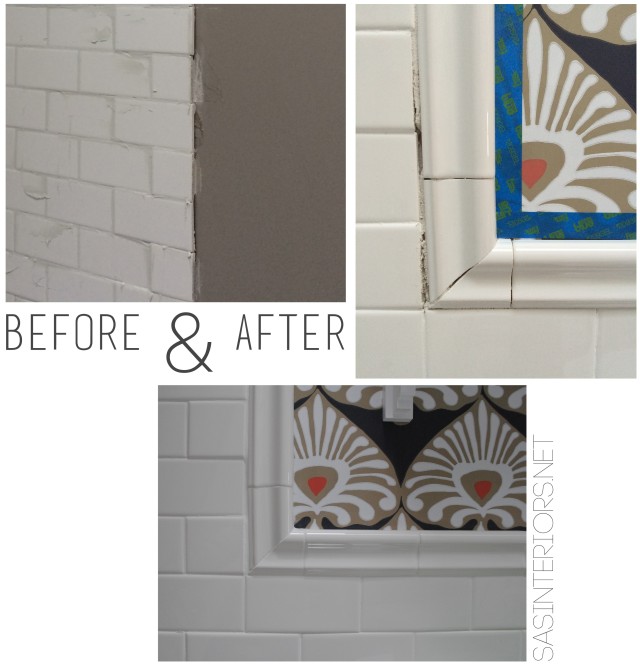
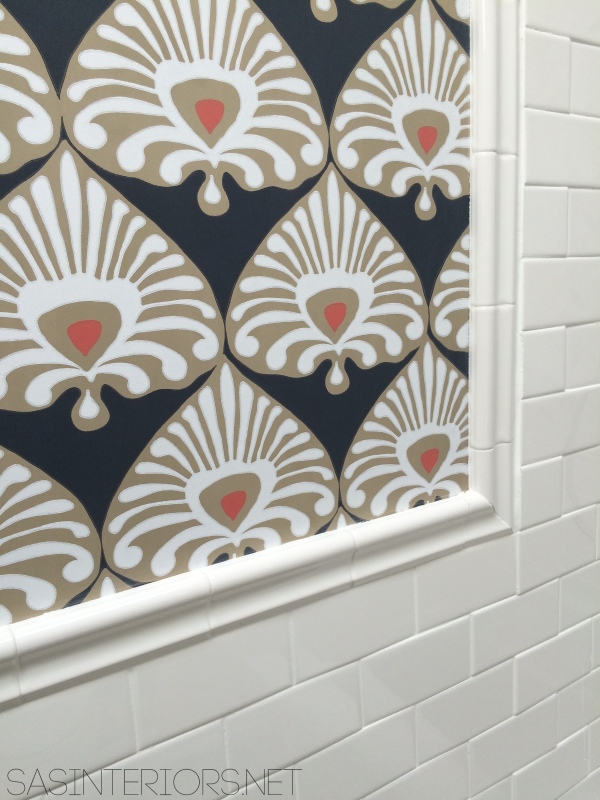
From the start, I had intention of using a tile board to finish off the subway tile, but once the installation of the horizontally layed subway tile was complete, it confirmed that something was definitely needed to finish the ends.  I chose a pretty decorative tile at Lowe’s that was the perfect complement to the subway tile.

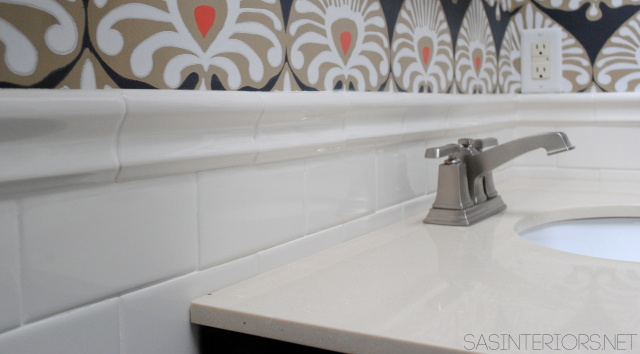
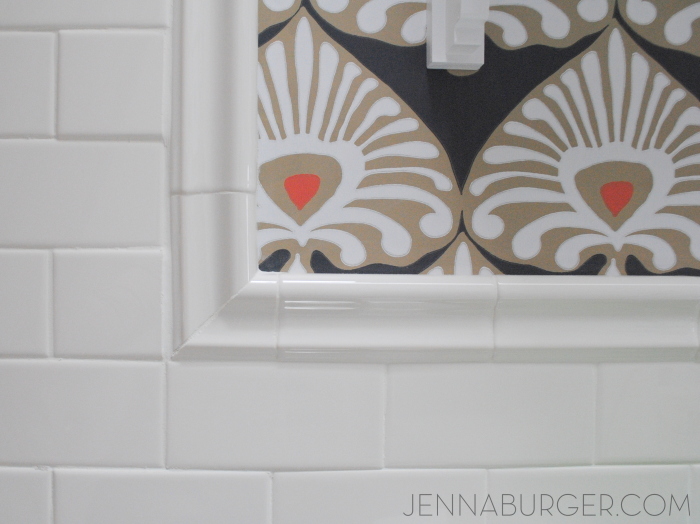
American Olean Linea Gloss Ice White Ceramic Chair Rail Tile (Common: 2-in x 6-in; Actual: 2-in x 6-in)I chose to use the border tile vertically to border the shower tile and then turn it horizontally to border the subway tile on the walls outside of the shower space.  Originally I was going to use this accent barliner to border the herringbone tile in the shower as well, but I chose a simpler tile instead > see it here.   Like I said before, this has been my biggest tile job EVER.  I HAVE NEVER ventured into a project as big, so I was learning as I worked.  I questioned my skillset a few times along the way, but in the end I am very happy with the result.

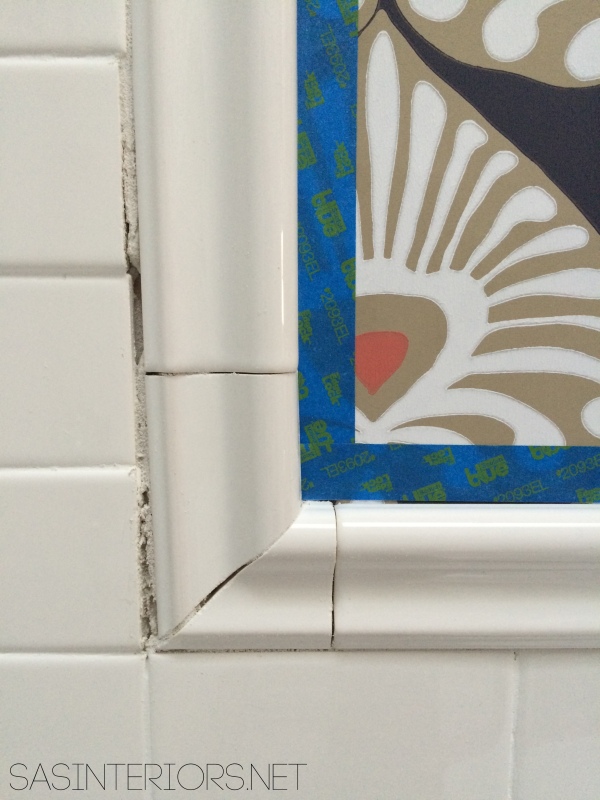
For the tile border, I started with the corner pieces because they had to be cut on a 45 degree angle.  I measured and cut the two pieces using a wet saw and then worked my way up vertically and over horizontally.

Adding a Tile Trim Border

I installed the accent tile using the same method as I did for the subway tile.  To learn more about installing the tile, check out my post on How-To Tile + Grout Bathroom Walls

Once the tile border was in place, I used painters tape to tape off the wallpaper so the grout would not get on it.  After installing that gorgeous paper, the last thing I wanted was to get it ruined!

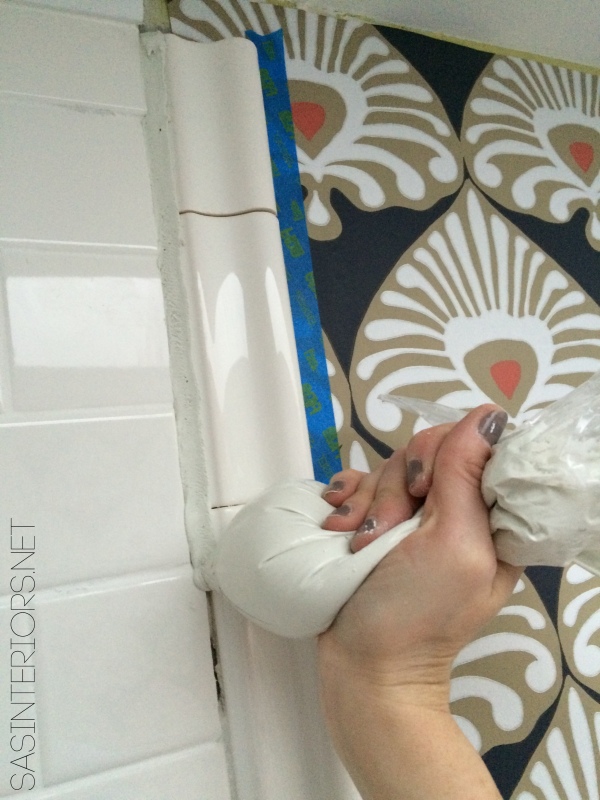
Then it was time to grout.  After mixed + made the grout mixture, I put it in a ziploc bag and cut one corner creating a small hole for the grout to come out of.  Kind of like icing a cake…  Then I worked the grout into the cracks & crevices.

Adding a Tile Trim Border

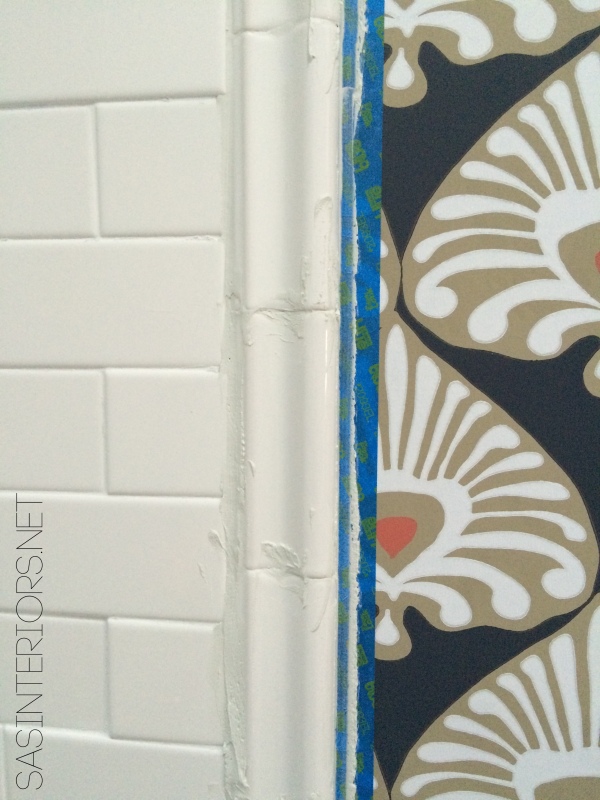
It was a little messy, but using the Ziploc bag was very helpful to direct the grout where I wanted it, instead of going on the entire tile surface.

Adding a Tile Trim Border

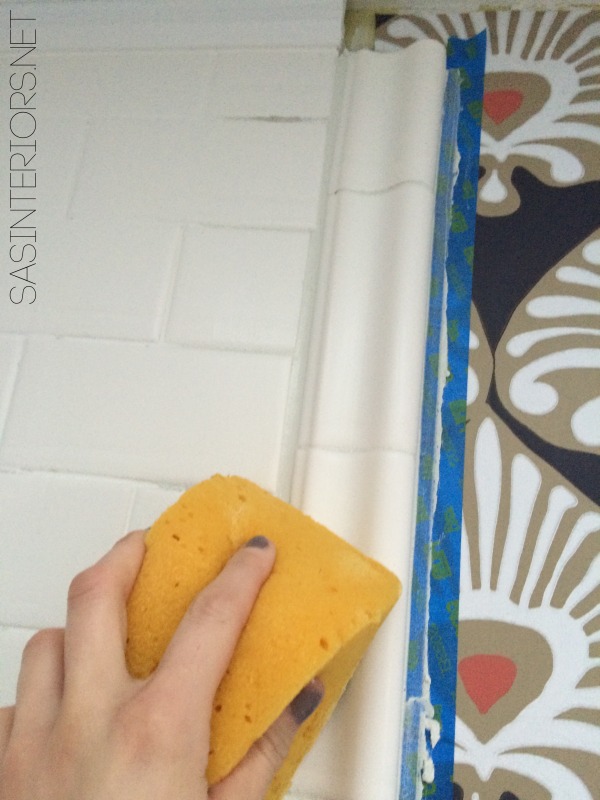
Once I filled all the holes and crevices, I used a damp sponge to smooth out the grout.  This not only cleans the tile face but smooths out the grout joints.

Adding a Tile Trim Border

If your walls are painted or have wallpaper on them, like mine, go slow + be careful so the wall surface doesn’t get grout on it otherwise it’ll become hazy.  Thankfully the wallpaper was easy to wipe off, but I am sure paint wouldn’t be as simple.  I guess you could always touch up those spots…

BEFORE THE GROUT DRIES, REMOVE THE TAPE!  This is in caps because if not the tape will dry into the grout.  Yes, it’s happened to me (not on this project thankfully).  As soon as you finish grouting while the grout is still moist, pull the tape off.

Adding a Tile Trim Border

From start to finish…

Adding a Tile Trim Border in a bathroom to give a finished edge!

And the result…

Adding a Tile Trim Border

BathroomAdding a Tile Trim Border in a bathroom to give a finished edge!

Adding a Tile Trim Border in a bathroom to give a finished edge!

Adding a Tile Trim Border in a bathroom to give a finished edge!

And a peek at a few other things happening {art + accessories}…

Adding a Tile Trim Border in a bathroom to give a finished edge!

The tile accent border is truly a beautiful addition.  Not only did it hide a lot of little mistakes and imperfect spots, but it has given this bathroom such an elegant + sophisticated finished look.  I am so happy that I installed the wallpaper before adding the border because it has really given a nice clean edge.  If / when I ever want to remove the wallpaper, my plan would be to score the edge of the accent tile with a sharp blade and then peel the paper off.

Adding a tile accent border on Day 18 is complete!  Up next… creating a tiled niche.  I removed the old medicine cabinet and replaced the space with a tiled niche.  More to come next week!

The installation of the tile accent border took about 4 hours on one day

From start to finish, these are all the posts pertaining to this bathroom remodel
Plan of Action
Demo: Removal + Installation of the Tub & Walls
How-To Tile + Grout the Bathroom Walls
Installing Wallpaper
Adding a Tile Accent Border
Creating a Tiled Niche
Bathroom Makeover Reveal
Resources

{Day 18} Tile Accent Border – Complete!  12 more days to go…

This post is sponsored by Lowe’s, but all thoughts and opinions are 100% my own.  I am thrilled (and a bit nervous) about tackling this project, but very excited to be partnering with Lowe’s on creating an entirely new bathroom space.  I’d love for you to follow along on this new project!

Trash To Treasure: Upcycled Light To Vase

Sometimes the most unlikely objects can turn from trash to treasure.

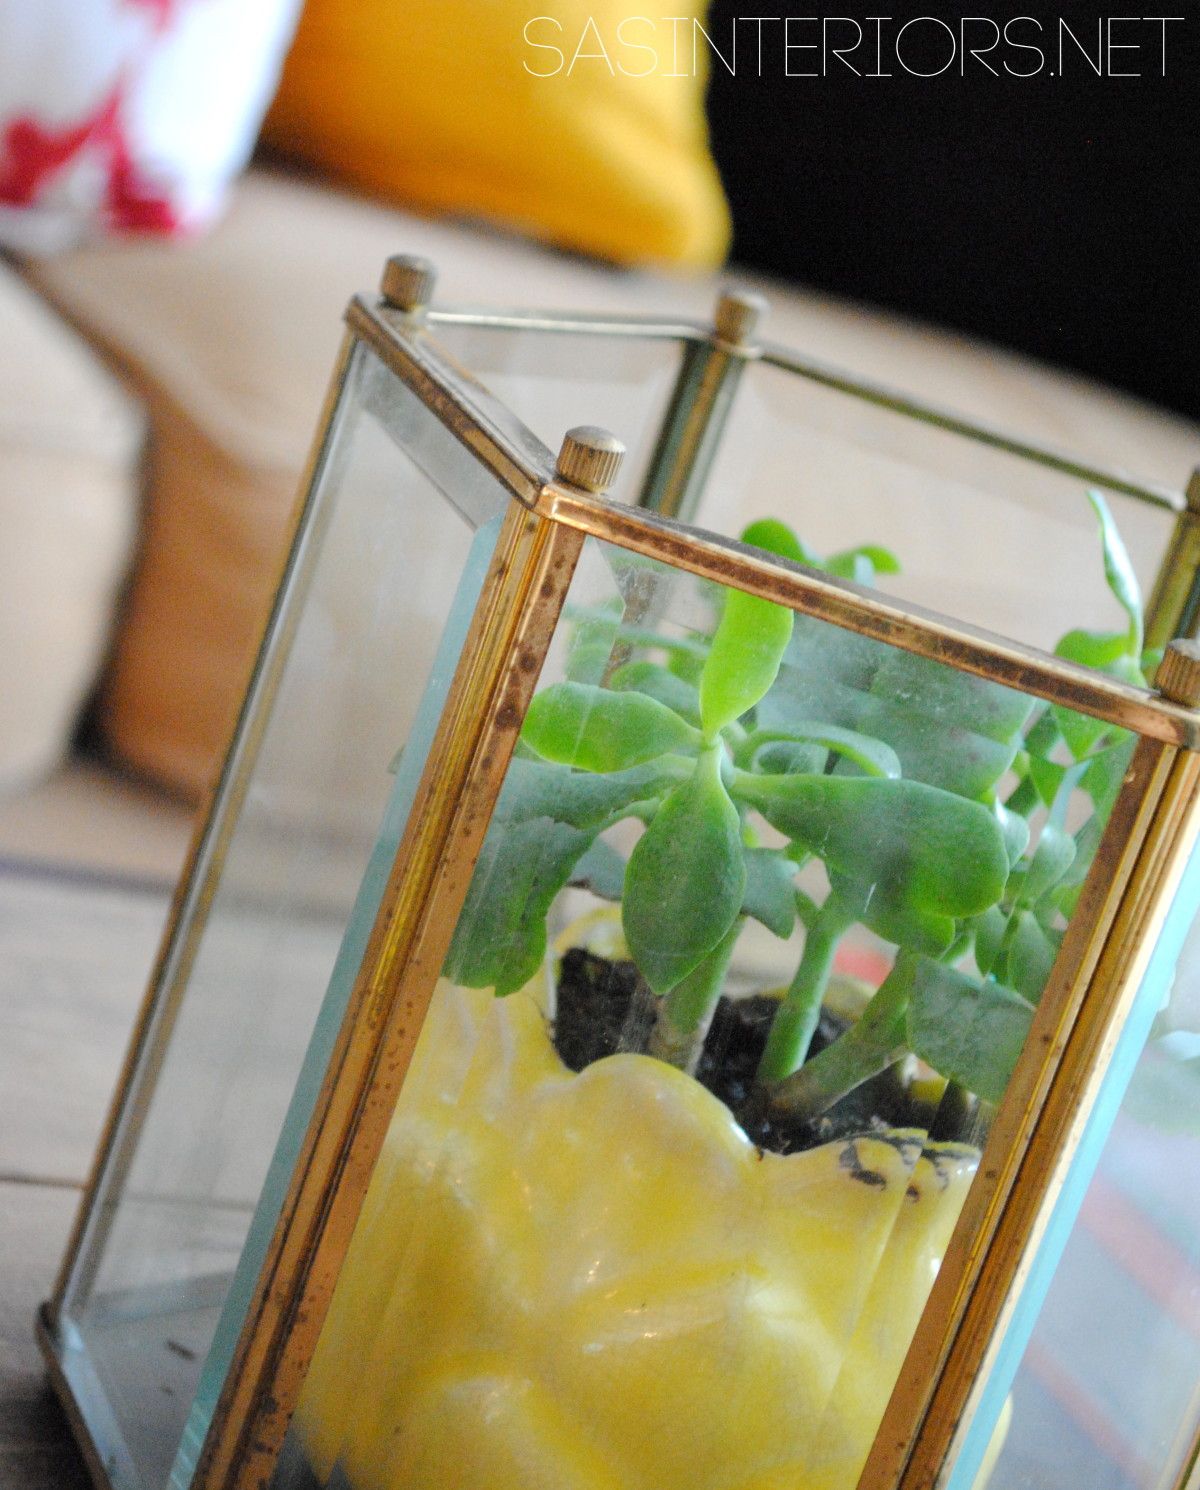
Trash to Treasure: Upcycled Light to Vase created by @Jenna_Burger, sasinteriors.net

As we’ve been changing the light fixtures throughout our home over the last 3 years (I’m pretty sure every. single. one. has now been updated), most went straight to the curb.  A few weekends ago when the last old, brassy light came down in the upstairs hallway, it was half way to the trash, until I had a thought…

Could I upcycle it into something else?  But what?? A cloak?  Another light?  A vase?  Should I spray paint it or leave it brass?  Lots of thoughts were brewing.

Of course, I forgot to take a pick of the light in it’s old home, but here’s what it looked like right after taken down from the ceiling.

Dust and all…

Trash to Treasure: Upcycled Light to Vase created by @Jenna_Burger, sasinteriors.net

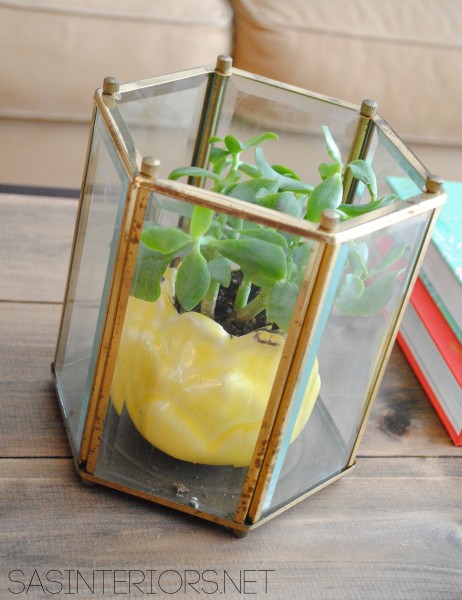
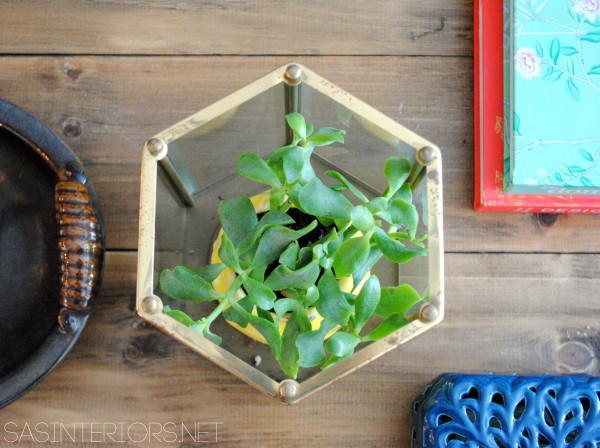
After giving it a good scrubbing, I decided to leave the brassy finish (I liked the warm hue) and use it as an accessory to hold a vase.  A vase within a vase.  Yes!  Perfect!

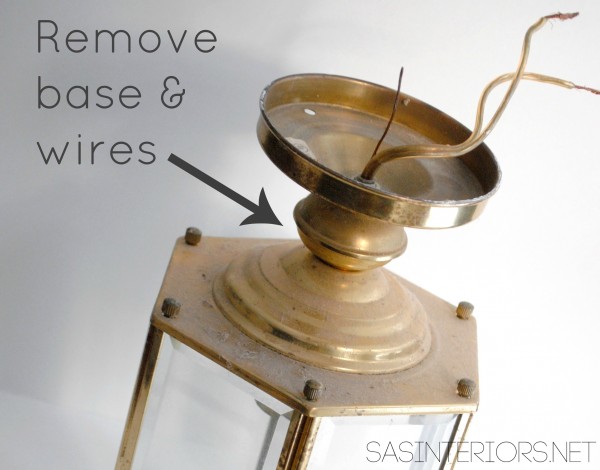
I removed the base (which I was going to you as a candle stick, but it all fell apart), as well as the wires.

Trash to Treasure: Upcycled Light to Vase created by @Jenna_Burger, sasinteriors.net

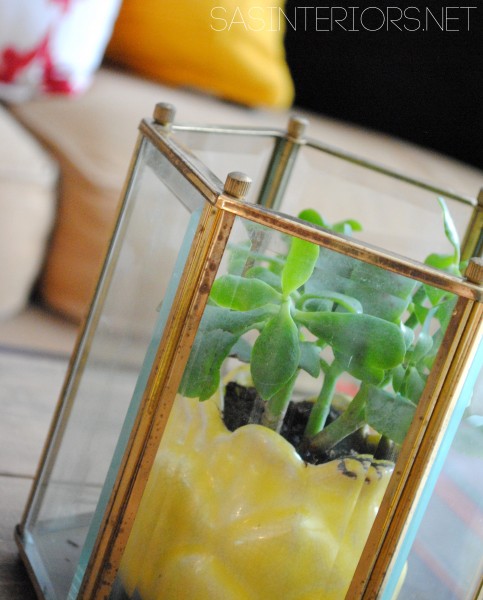
And then within minutes it went from ugly to this treasure…

Trash to Treasure: Upcycled Light to Vase created by @Jenna_Burger, sasinteriors.net

O, you know how I love to spend $0 and shop my home!

Trash to Treasure: Upcycled Light to Vase created by @Jenna_Burger, sasinteriors.net

Trash to Treasure: Upcycled Light to Vase created by @Jenna_Burger, sasinteriors.net

Trash to Treasure: Upcycled Light to Vase created by @Jenna_Burger, sasinteriors.net

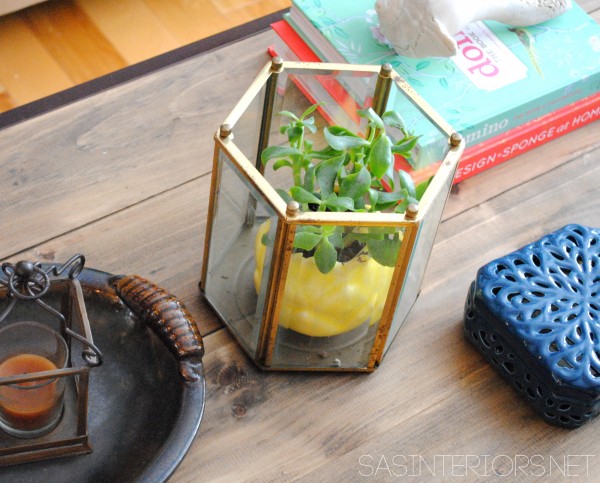
I’m in love! Such a silly thing made into something spectacular.  For now it sits on the coffee table, but I’ve got other ideas for my new found treasure.  We’ll see where my thoughts and ideas take me…

What items have you upcycled in your home?  How have you made treasure out of trash?

I link my projects to some of these parties: Skip to My Lou, Dittle Dattle, Between Naps on the Porch, Today’s Creative Blog, Stories of A to Z, All Things Heart & Home, House of Hepworths, Finding Fabulous, The Shabby Nest, Serenity Now, Tatertots and Jello, Thrifty Decor Chick, Tip Junkie


DIY: 3 in 1 Kids Play Tent – A Lowe’s Creative Idea

I hope you’re having a great week and I want to thank all of you who left such kind comments about my daughter’s room makeover. I already shared one DIY creation in the room (the washi tape initial) and I’m back today to share another part of the space for my first challenge as a Lowe’s Creative Team Member (learn more about that here).

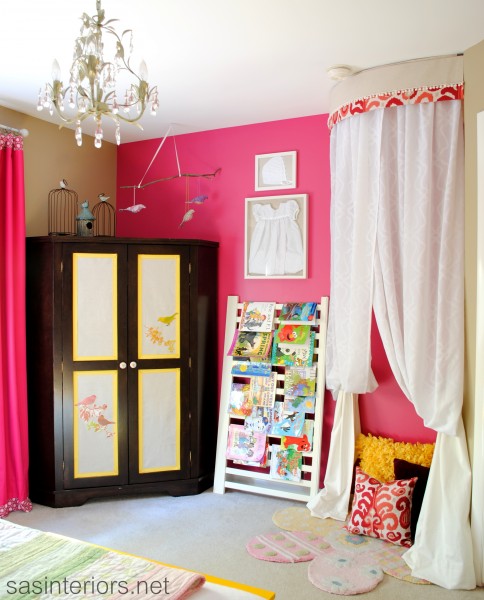
One of my favorite parts of the room was creating a play tent. My kids, as most kids do, love creating forts and tents with blankets and pillows. They love the idea of a hidden place to play, read books, and tell stories. When embarking on this makeover, I thought a play tent would be the perfect addition for a small space in the corner of her room.  I didn’t want to make the tent dominate the space, but I also didn’t want it to be too small because what fun is that?!

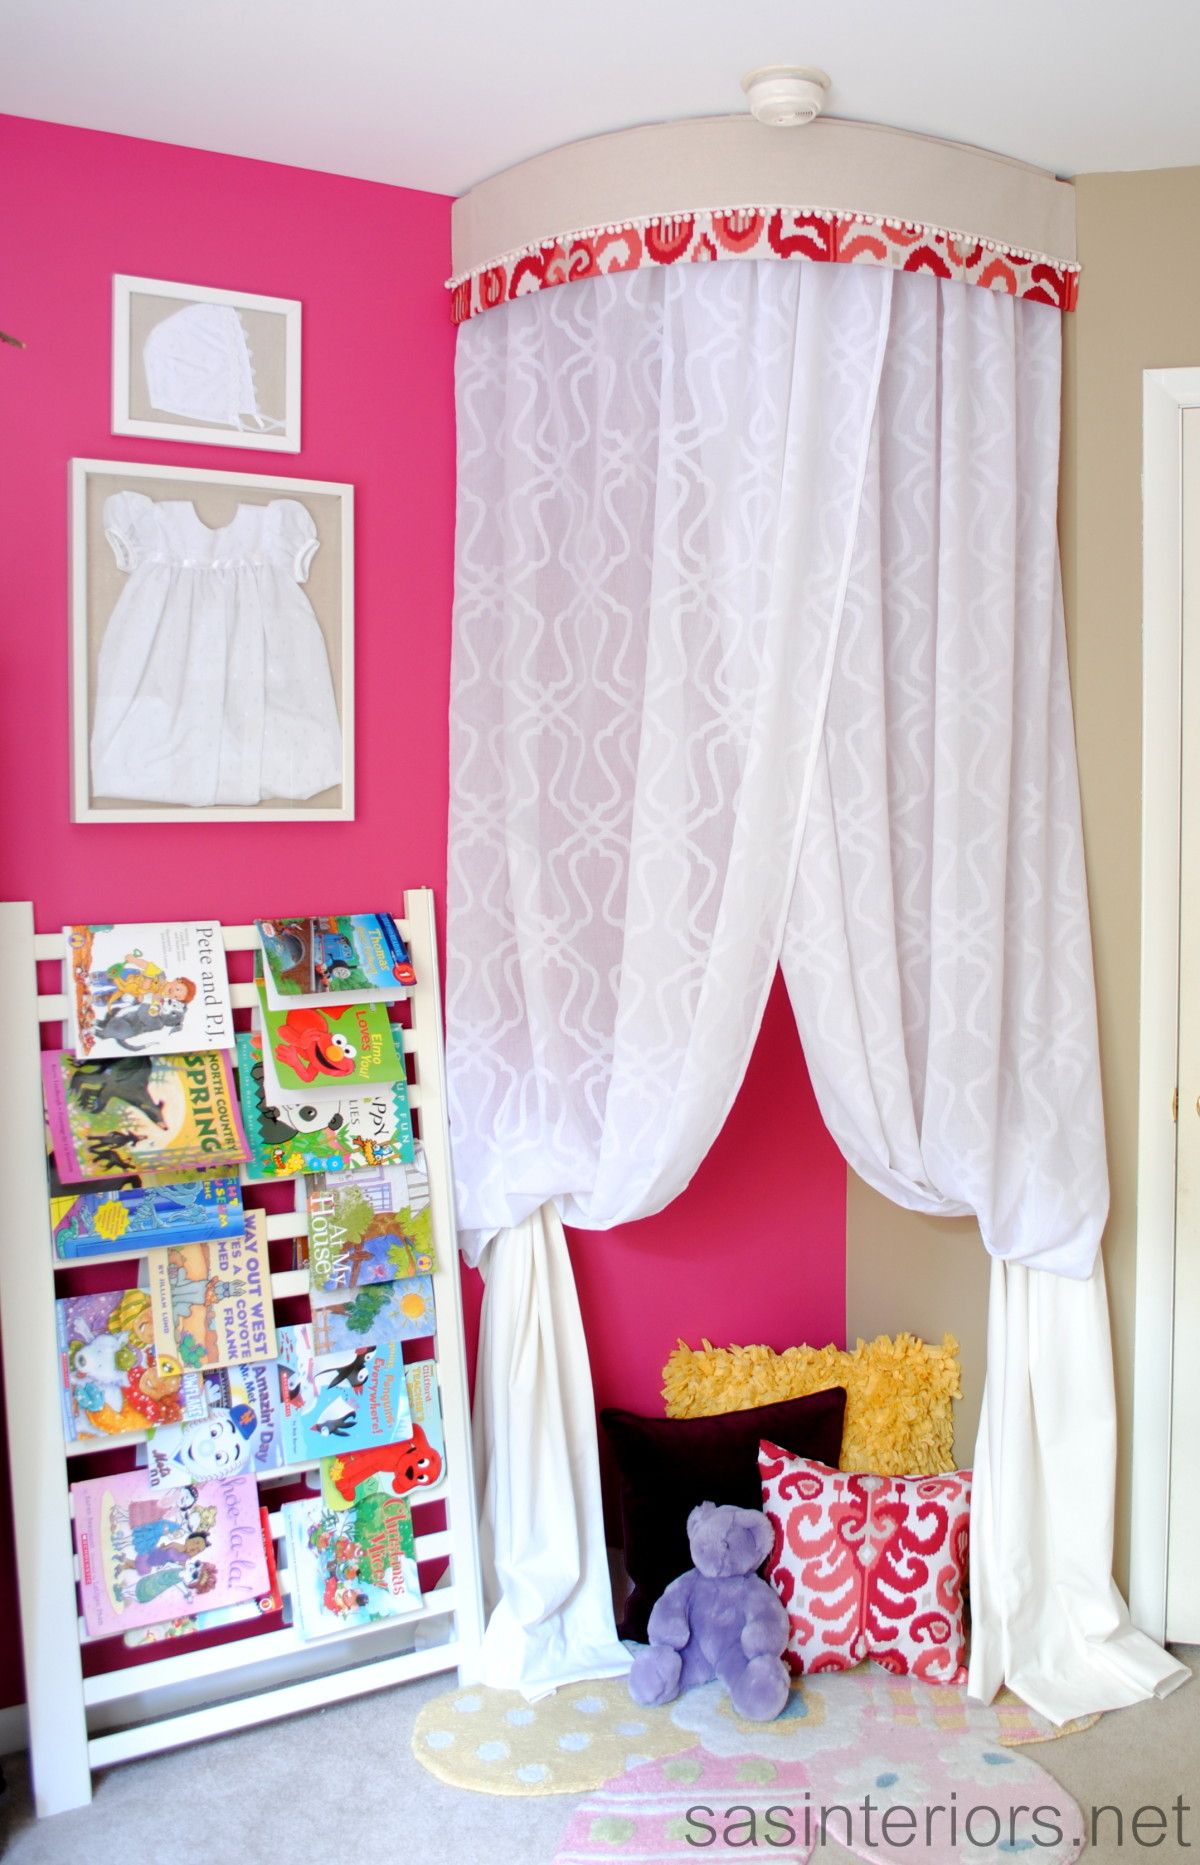
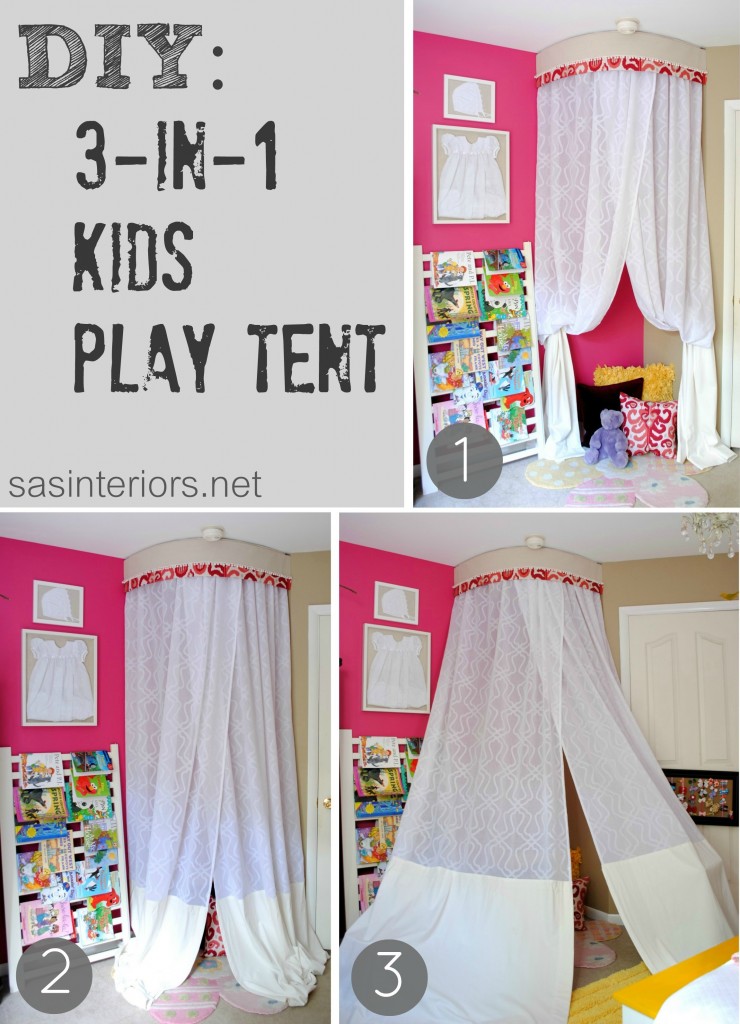
My solution for the dilemma… A 3-in-1 tent with long panels to allow room for 1 child or 5.

Kids love options – am I right?!  You never know if they want to play by themselves in a little cocoon or if they want all their friends around to have a tea party, play barbies, or battle like droids (parents of Star War fans know what I’m talking about).

When starting this project, I of course, headed to Lowe’s to gather my supplies.

  • 1 x 6 board
  • flexible wood board (I ended up using a 4″ wide x 8′ long) wood toe kick thanks to the suggestion by a Lowe’s sales person)
  • nails, screws, and anchors
  • fabric of your choice
  • ribbon of your choice
  • drapery panels

To start off, I headed to my favorite home improvement store, Lowe’s, to gather my supplies.

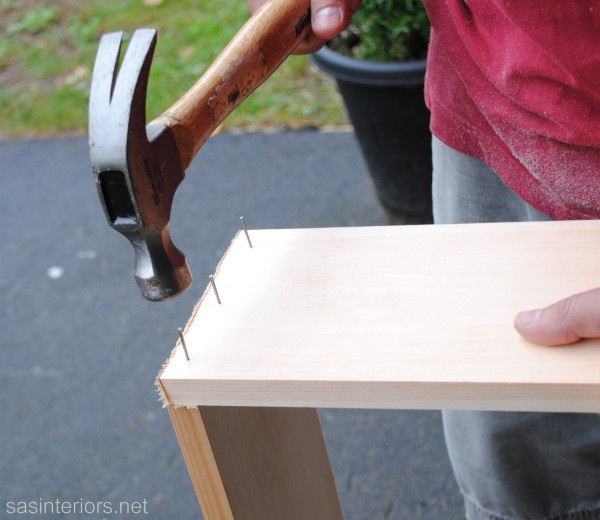
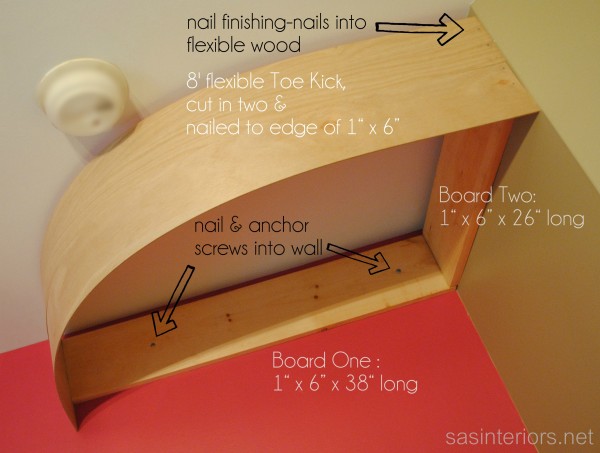
1. Once home, I cut the 1″ x 6″ board into a 38″ piece and a 26″ piece (Lowe’s will also cut your wood pieces to size).  The nailed the two ends together.

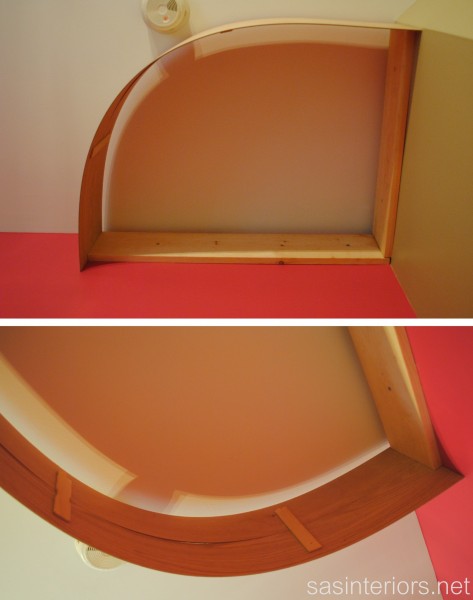
2. Using anchors and screws ( I always use the self-screwing kind), I attached to the two pieces of wood to the corner space.  Then for the curve, I cut the 4″ wide x 8′ long toe kick in half.  Using finishing nails, I attached the flexible curved wood to the end of each 1″ x 6″ to finish the canopy base.

The curved wood was a little flimsy (obviously so it can bend), so I secured it in the back by hot gluing on paint sticks.

Once the base was done, the fun part started… adding the fabric.

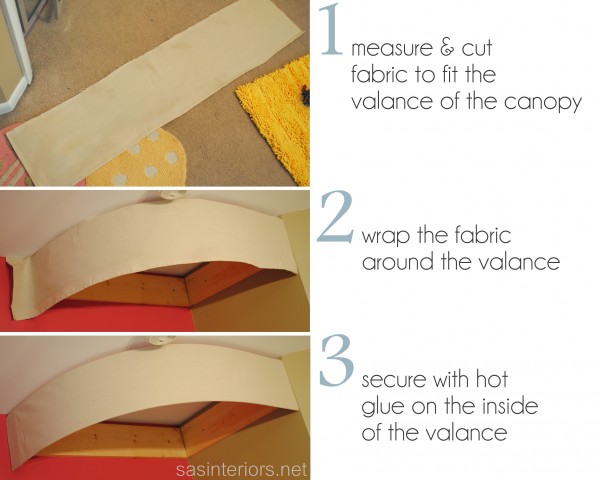
In knowing that I was going to use white long panels, I wanted to add a bit of whimsy and fun to the valance, so I used a fun Duralee Ikea fabric along with drop cloth and a white pom-pom trim.

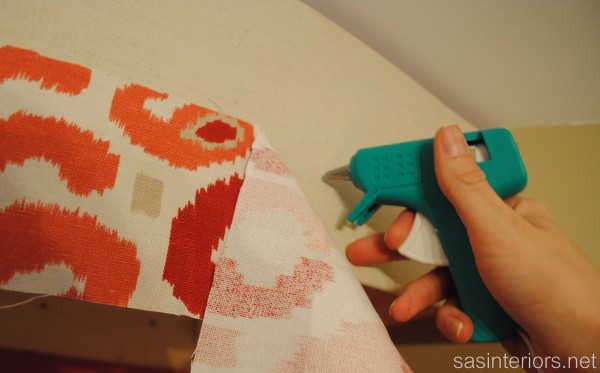
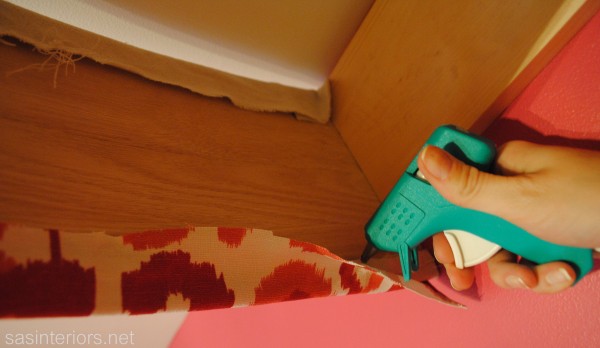
3. I cut a piece of drop cloth that was slightly larger that the valance, then wrapped it around the front of the valance and secured it in the back with hot glue.  The curved front sits about 1/2″ from the ceiling so I was able to wrap the fabric at the top as well.

Time to jazz it up!

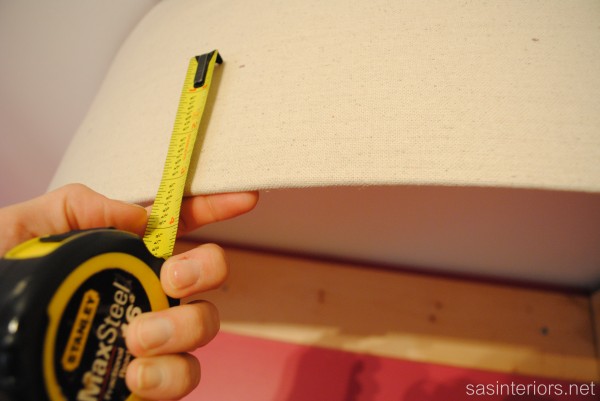
4. After the drop cloth was in place, I added the colorful Ikat fabric.  I determined that I wanted to have a 3″ band of the fabric and marked it along the valance.  Then once again, I hot glued on the fabric.  Easy-Peasy!

secured the fabric in the front…

secured the fabric on the back…

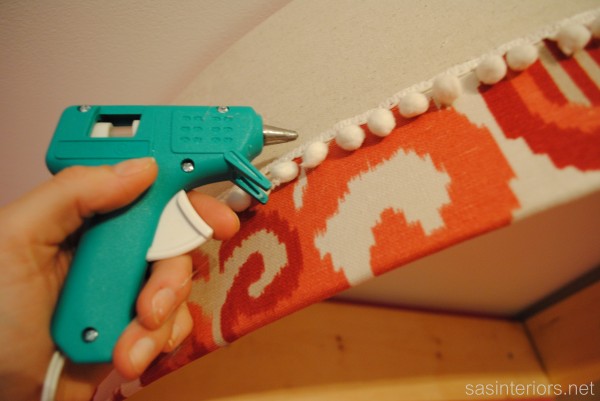
5. Then I added the cute white pom-pom trim. Of course with hot glue… again.

For the last part of this 3-in-1 Kids Play Tent, are the panels.

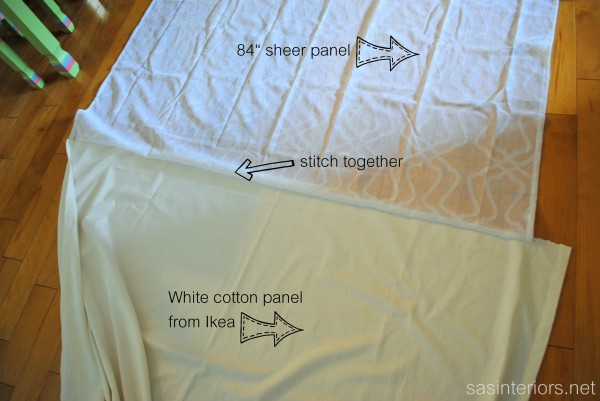
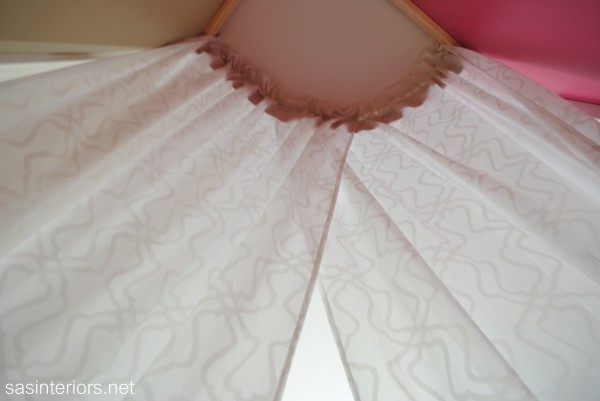
Ok, so let’s take a step back and let me explain how and why I created these panels. Because of the dynamic fuschia in the room, I thought white panels would be a quieter, fresh contrast.  I also wanted them to feel light and airy, so decided on a sheer panel with a small pattern (sheers from Target).  The overall length was only 84″ and needed to be much longer, so I added a solid white cotton fabric (used from Ikea window panels) to the bottom.  They look pretty for the tent, but could also be used as drapery panels at a later date – I love creating things that can be used now AND later.

6. With right sides together, I sewed the two short ends of the panels.  I wasn’t worried about the length because the longer the better – this is how the large canopy is created.

7. Once the two panels were created, I attached them with staples to the ceiling on the inside of the valance.  I also overlapped the two panels creating a natural opening / closure.

8. Lastly, I added metal tie backs that I purchased at Lowe’s.  These tiebacks are perfect to pull back the panels and have the space wide open – like a stage for the kids to put on a play.


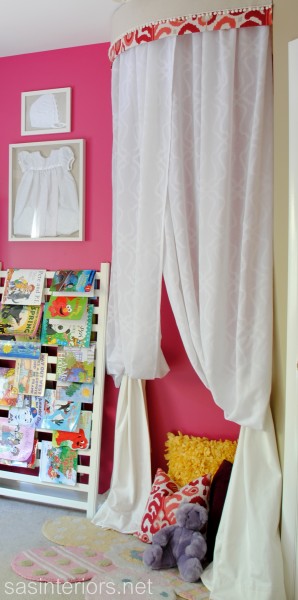
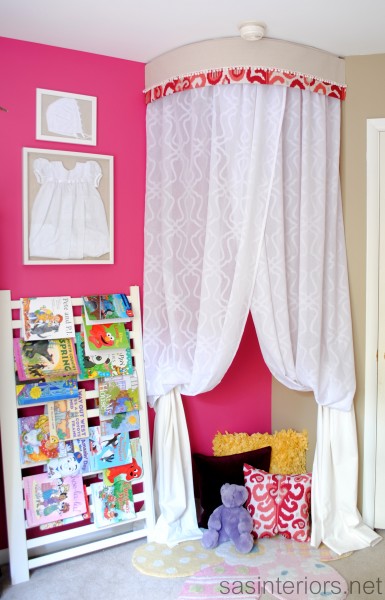
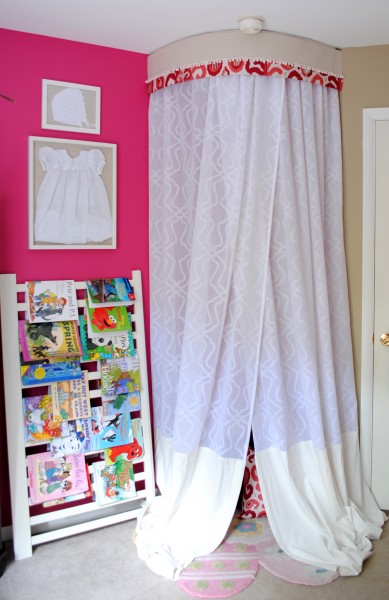
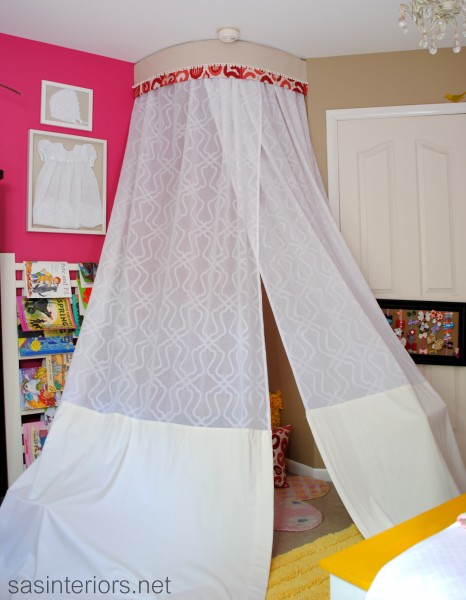
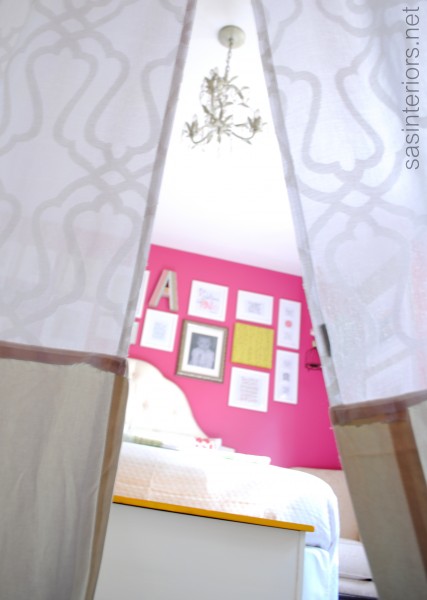
And it’s done. An exciting 3-in-1 Kids Play Tent.

1 – Panels completely pulled back

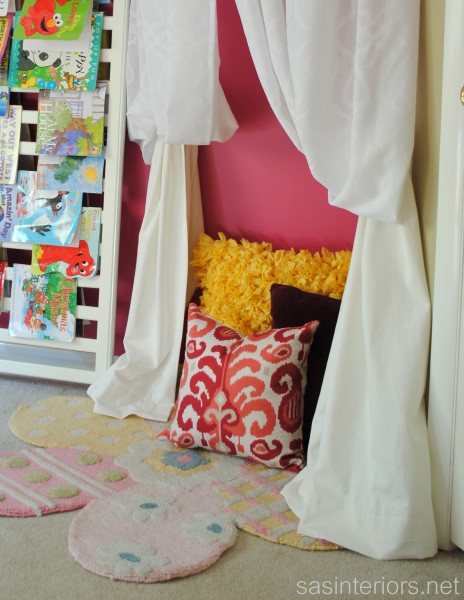
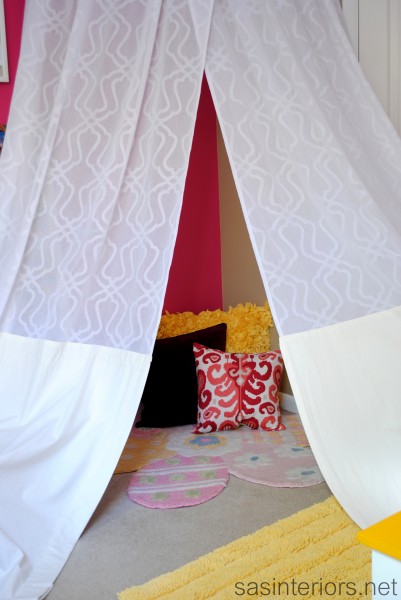
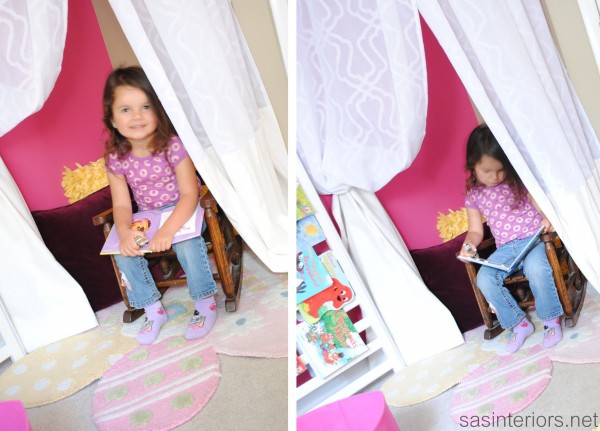
2 – A cozy hidden nook with panels drawn

3 – Panels pulled out creating a larger “tent”

What a fun spot! Within minutes of having this space done, my kids had all their stuffed animals, blankets, and pillows tucked away inside.

Well my little girl is calling me to go back into her tent – I gotta go!

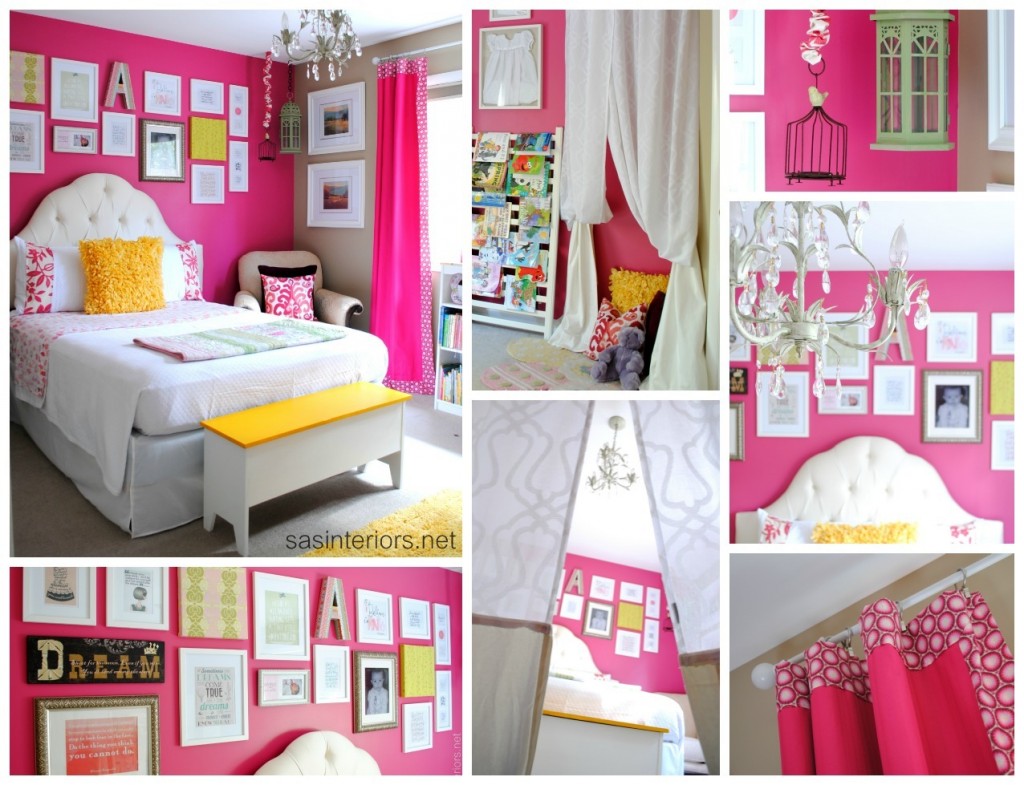
To see more on this space, click over to see the Big Girl Bedroom {Reveal}

You can find more DIY creations in the Lowe’s Creative Magazine or the Lowe’s Ipad App for FREE!

Disclosure: I am part of the Lowe’s Creative Team and was provided with a Lowe’s gift card to purchase items for my project.  I was also compensated for my time to use the products.  No one told me what to create, what to buy, how to use the product, or what to write.  All opinions are 100% mine!

I link my projects to some of these parties: Skip to My Lou, Dittle Dattle, Between Naps on the Porch, Today’s Creative Blog, Stories of A to Z, All Things Heart & Home, House of Hepworths, Finding Fabulous, The Shabby Nest, Serenity Now, Tatertots and Jello, Thrifty Decor Chick, Tip Junkie