Tag: Paint

Kitchen Renovation: Paint + Wallpaper

You know if we’re at the point of talking about paint, it has to almost be complete.

That’s right… we are mere days away from wrapping up the kitchen renovation and I still can’t believe it’s real.  When I look over to our kitchen area and my eyes see an entire new space, I want to cry.  It’s so good!

Kitchen Renovation: Choosing a paint color for an open concept floor plan + adding accents of wallpaper. Follow along on this before + after kitchen remodel @ www.JennaBurger.com

One challenge I had when creating the plan of action for the kitchen was the paint color for the walls.  After living with the mustardy-yellow for 5 years, I new light + neutral was the right direction – but then along the way my thoughts changed.  keep reading…

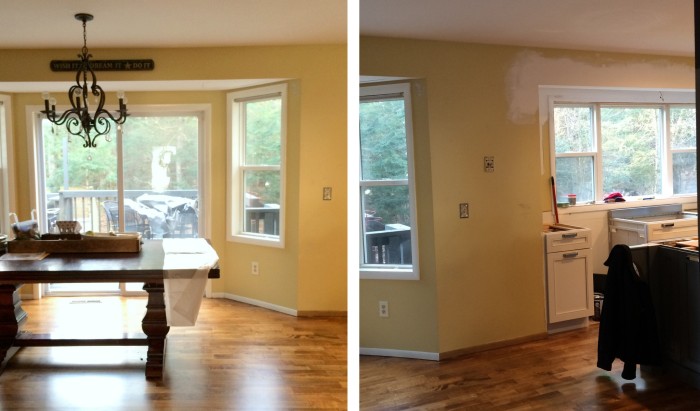
This is the old color.

Old mustardy-yellow paint color that had to go!

The first floor of our home is an open concept plan, so basically it’s one room that leads to the next, that leads to the next. There has always been a different paint color in each room, which I feel defines each of the spaces bringing uniqueness and character.

Creating definition, but at the same time a flow with various paint colors can be challenging, but if a color palette is set that works well together, the result can be gorgeous.

Of course, that’s what I was striving for >>> VARIATION + FLOW

THE PAINT STORY

After the kitchen cabinets were installed, the Lowe’s independent contractors got to work on painting the kitchen + dining room walls because it’s one large open space.

Painting the walls

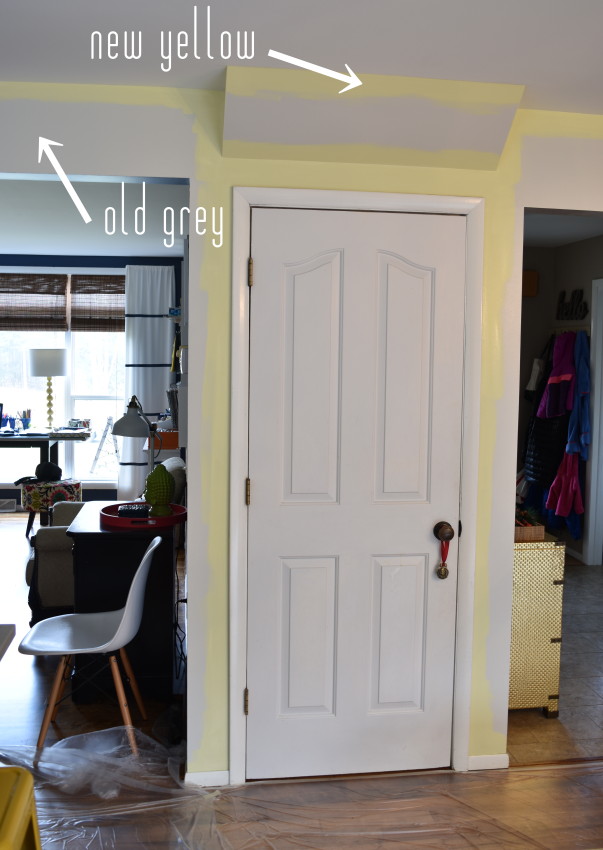
I chose a paint color that was a light grey tone.  It was a pretty hue, but once all the walls were covered, I knew it wasn’t right. Because the kitchen flows straight to the family room that also has grey-toned walls, the definition that I wanted to achieve was gone.

Big Mistake – eek. 

What to do?  Leave it + live with it for a while?

I knew leaving it wasn’t the answer.  After a few days, of living with it, I chose a new color.  It was the first time ever that I got small color sample pods to put on the wall.  It was the right decision and seeing the colors at various times throughout the day was key to choosing the best paint hue for the space.

Color Change…

Kitchen Renovation: Choosing a paint color for an open concept floor plan + adding accents of wallpaper. Follow along on this before + after kitchen remodel @ www.JennaBurger.com

As soon as the ‘new, new’ color went up, I felt at peace.  Yes, that’s it.  And who knew, back to yellow – but a very different hue of yellow – would be the right color?!

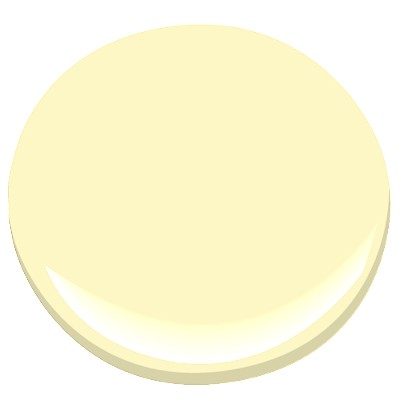
For the walls in the kitchen + dining room, I chose to use the color White Citrus HGSW1237 by HGTV Home by Sherwin Williams, which is available at Lowe’s.  The sheen is eggshell (one step up in sheen from flat) and I used their Showcase line of paint.

White Citrus HGSW1237 by HGTV Home by Sherwin Williams

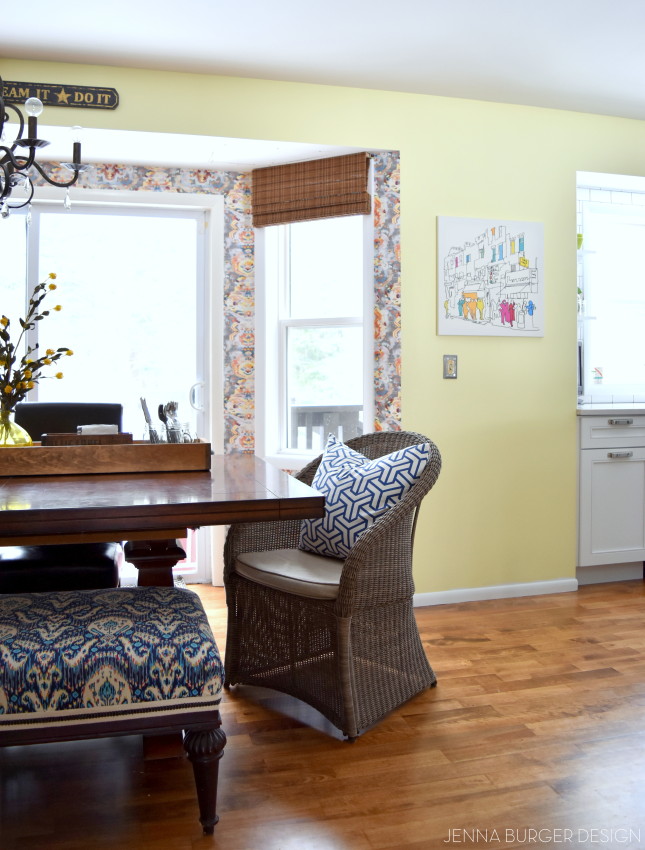
The color on the wall is just gorgeous and brings all the spaces together.  It’s not very far off from the last yellow paint color, but at the same time, it feels so new + fresh.  To sum it up, this White Citrus paint color is a light buttery + sunny hue with subtle green undertones.

Sherwin Williams has always been a favorite paint of mine to use.  The quality is like no other.  I’ve used a lot of paint in my day, and have come across a lot I will never use again.  When I was introduced to the HGTV Home collection by Sherwin Williams, I was intrigued because it was available at Lowe’s, a place I always shop.  So the big question I had… Is the quality the same as the Sherwin Williams brand it’s always been or did they ‘change the formula’ for the big box store?

I had the opportunity to speak with a rep for Sherwin Williams, who has worked with them for over a decade and he assured me the quality is the same and their collaboration with Lowe’s was a ‘next step move’ to continue their growth and brand awareness to a new market.  Basically, they want to reach even more people and by being in Lowe’s (versus just their own stand-alone store), they hope to do that!

I was skeptical about the quality, but I will say I had a great experience using the Showcase line of HGTV Home paint.  It went on smoothly with a roller AND a brush. Most paint takes 2, maybe 3 coats, to get full coverage on the wall, but this paint went on in one coat yet it wasn’t thick and goopy.  Of course, I went over it with a 2nd coat, but it really wasn’t needed.

THE PAINT RESULT

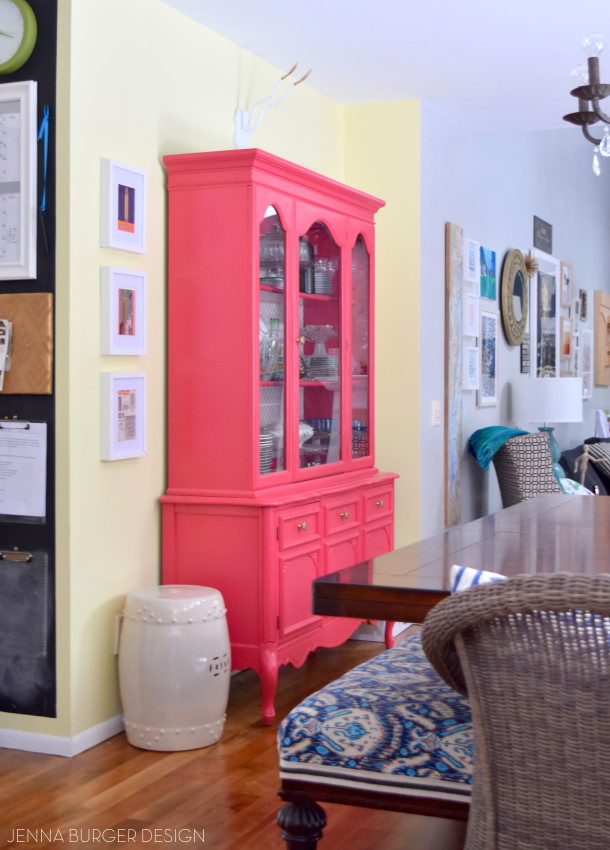
The yellow hue defines the kitchen + dining room space, yet flows with the neutral colors in the family room beyond…

Kitchen Renovation: Choosing a paint color for an open concept floor plan + adding accents of wallpaper. Follow along on this before + after kitchen remodel @ www.JennaBurger.com

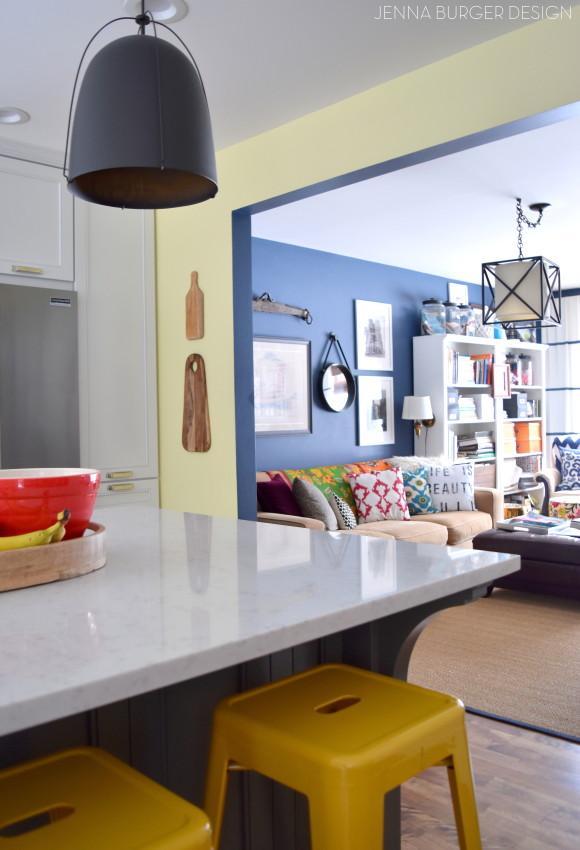
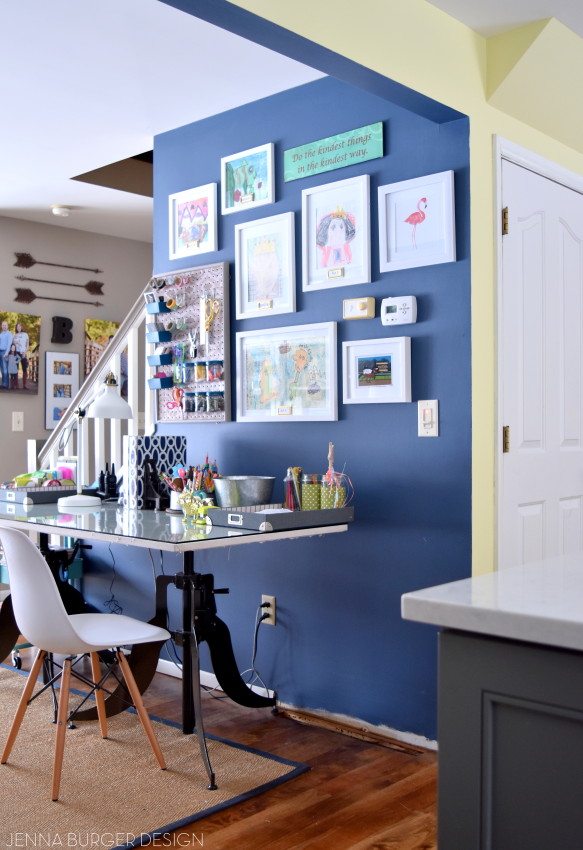
Next to the kitchen is the living room / office which is a deep navy hue, and the yellow works beautifully with that as well…

Kitchen Renovation: Choosing a paint color for an open concept floor plan + adding accents of wallpaper. Follow along on this before + after kitchen remodel @ www.JennaBurger.com

Kitchen Renovation: Choosing a paint color for an open concept floor plan + adding accents of wallpaper. Follow along on this before + after kitchen remodel @ www.JennaBurger.com

THE WALLPAPER

I heart wallpaper and really wanted to use it somewhere in the new kitchen space. At the same time, I always wanted to define the bay area in the dining area with a different paint color.

How about ditching the paint idea and instead add wallpaper in the bay nook? YES, perfect solution.

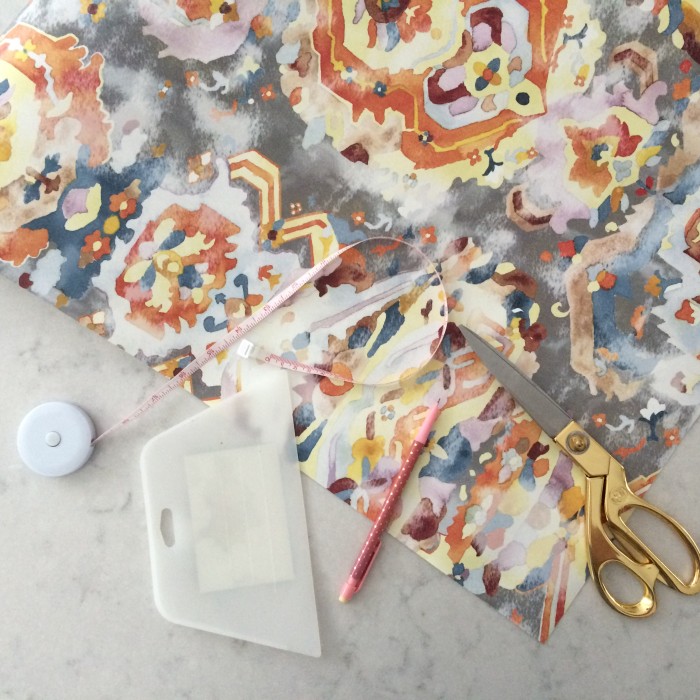
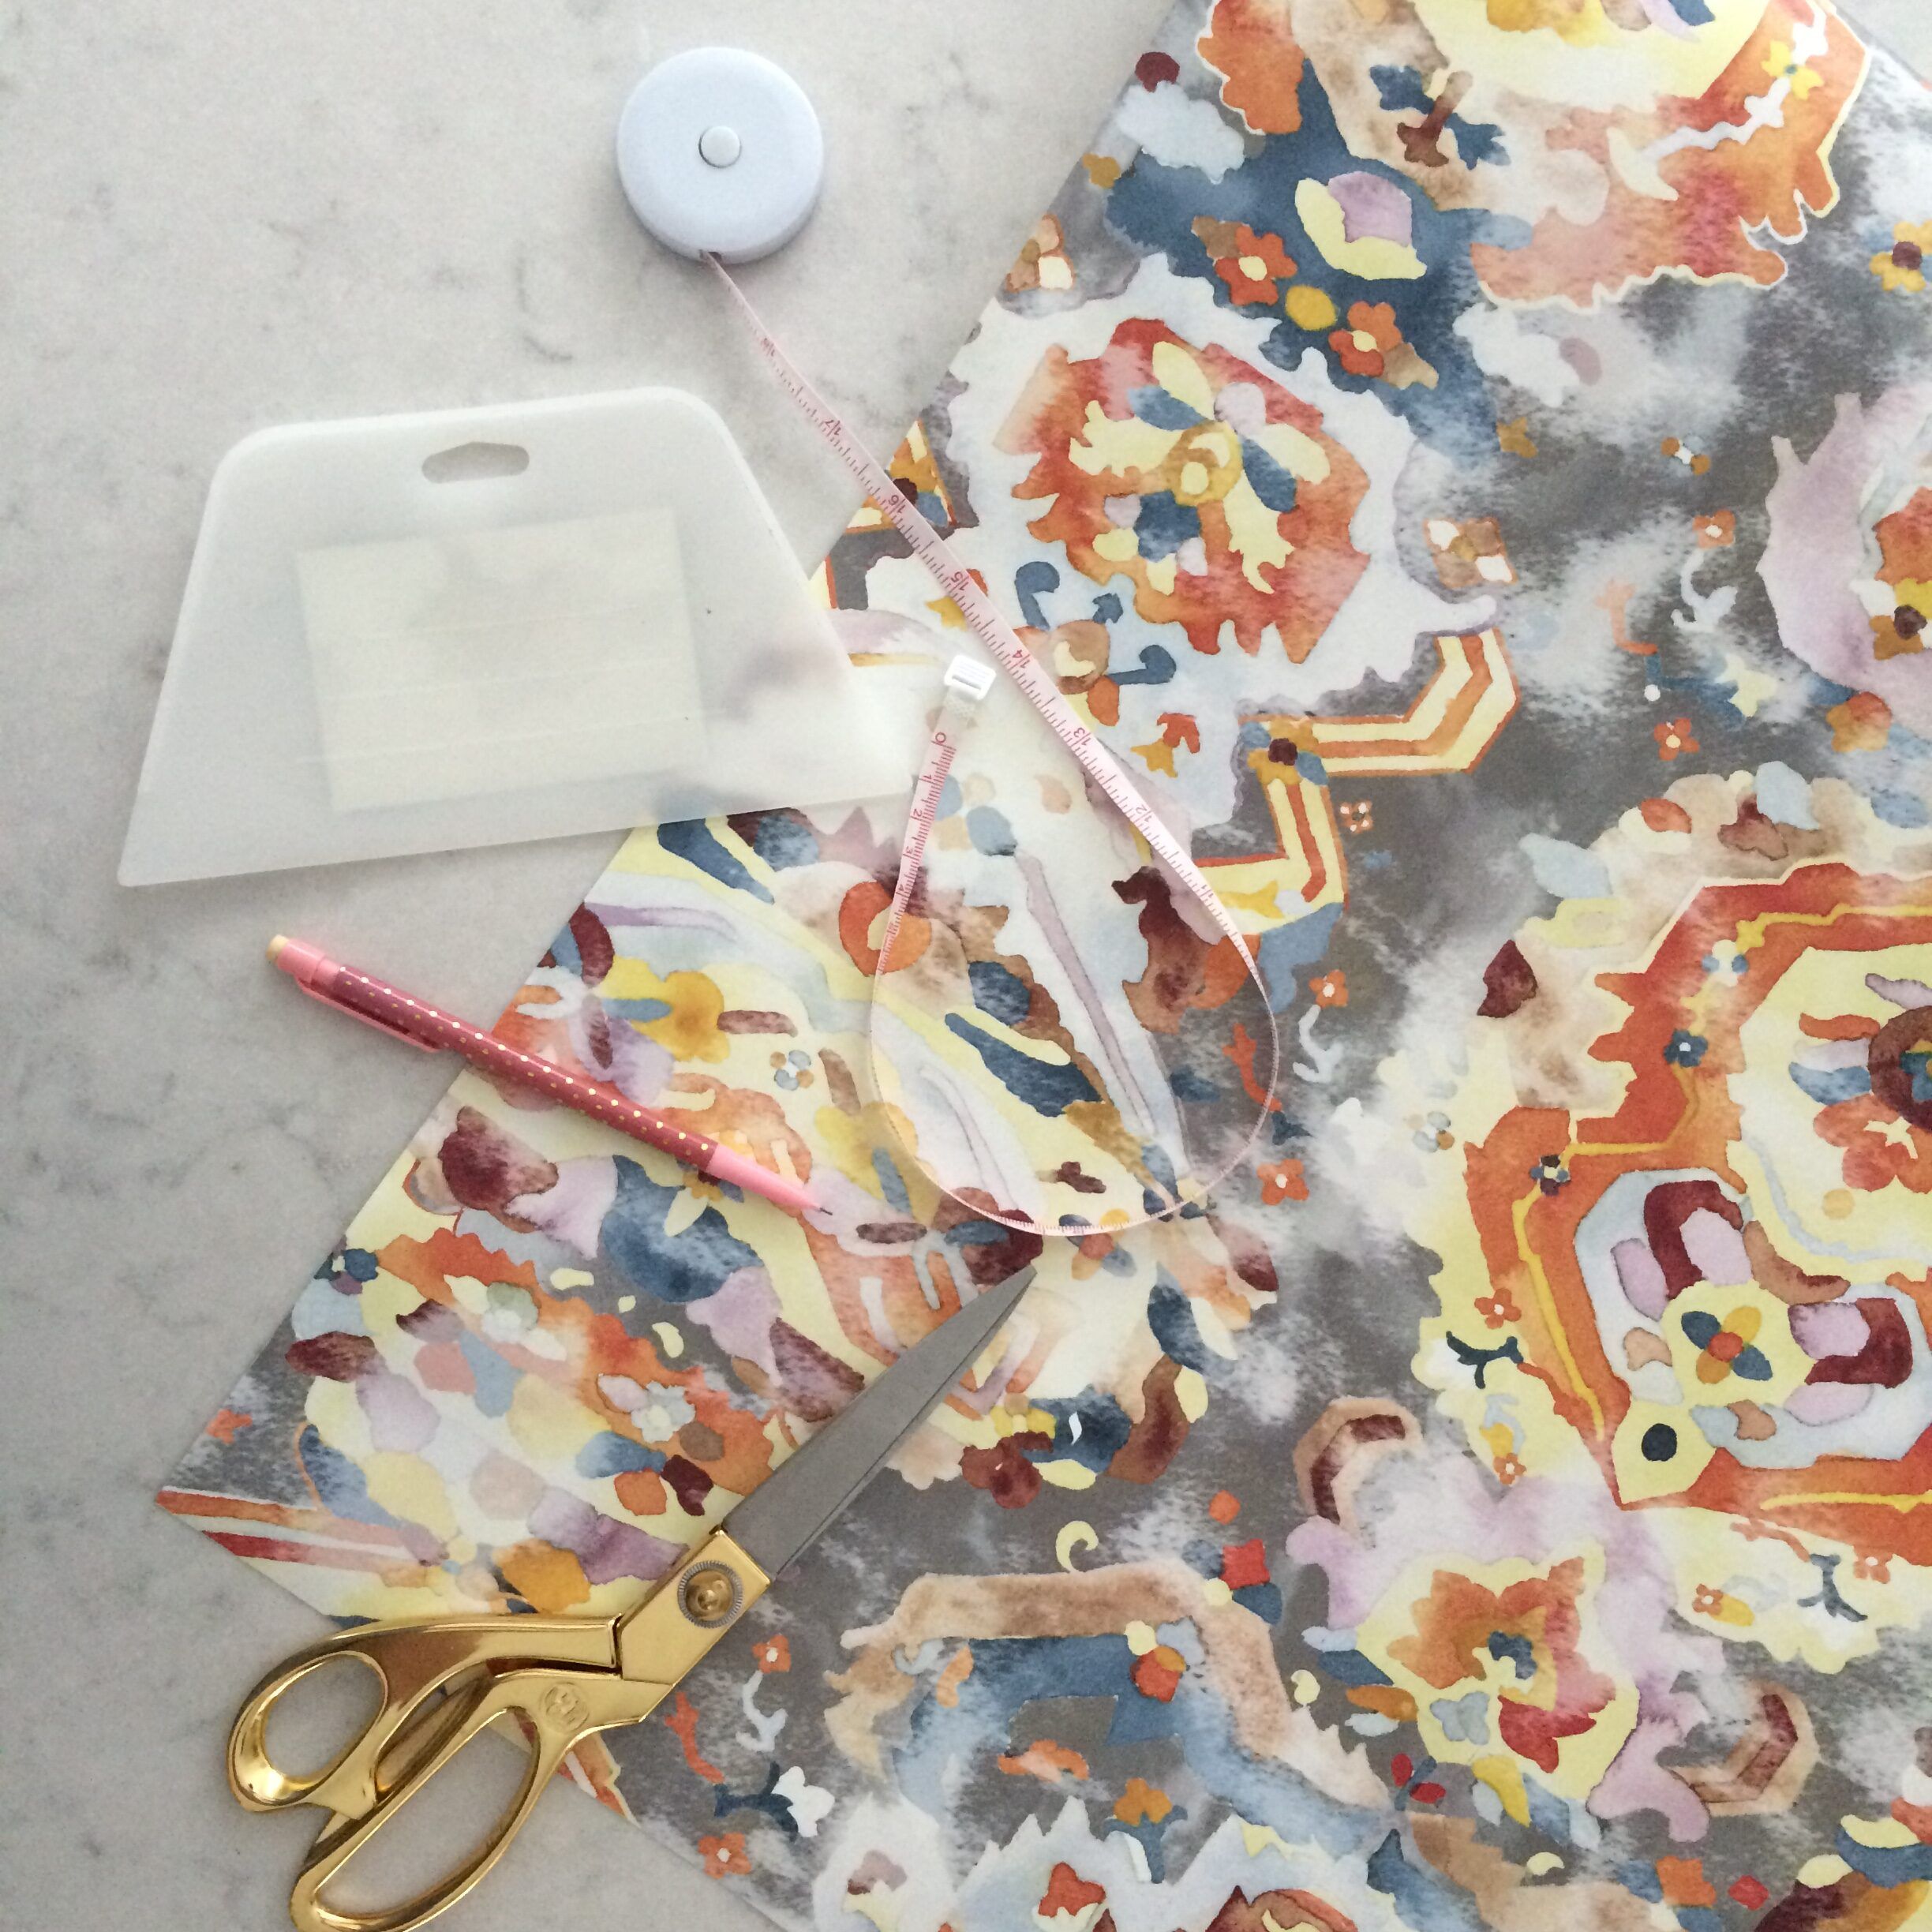
I found this incredible bold + colorful wallpaper from Anthropologie.  The rich colors of orange, blue, yellow, gray, raspberry perfectly summed up all the colors in my home… I had to have it!

Kitchen Renovation: Choosing a paint color for an open concept floor plan + adding accents of wallpaper. Follow along on this before + after kitchen remodel @ www.JennaBurger.com

Once it was delivered a few days later, I got to work.

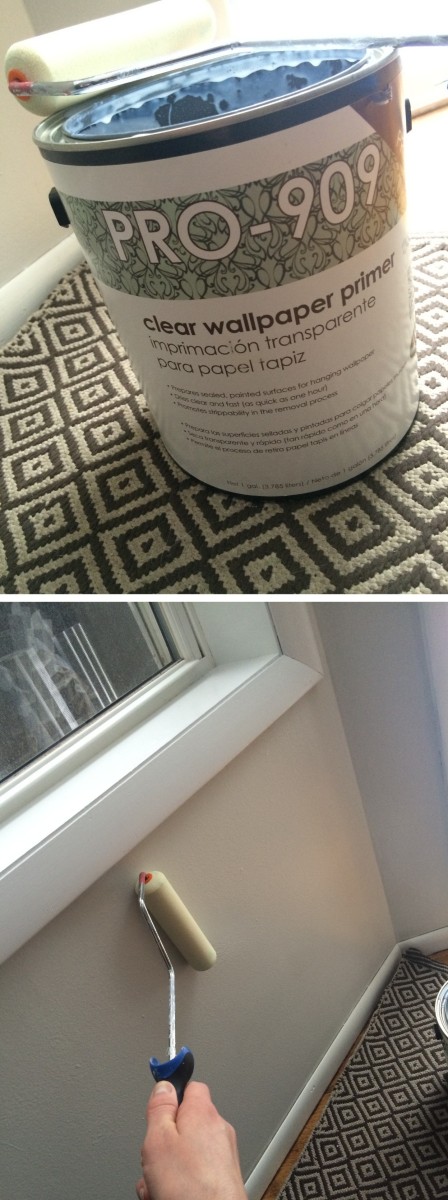
I primed the walls first.

Prime the walls before wallpapering!

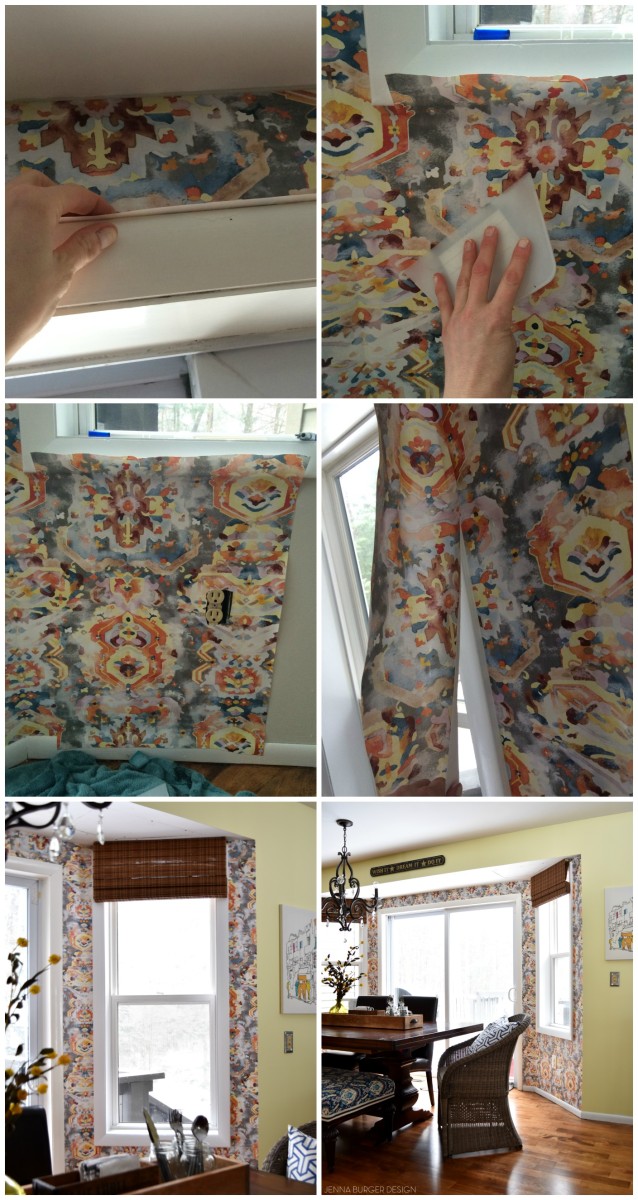
Then installed the wallpaper which took about 3 hours total for this bay area.

Adding wallpaper can add drama and definition to a space. Use a bold pattern in a small area or subtle pattern in a large space. Either way, it will bring beautiful depth and texture to a room. Check out this new kitchen and dining room by www.JennaBurger.com

Want to know how to hang wallpaper?  Check out these WALLPAPER TUTORIALS

Hanging a Bold Wallpaper in the Bathroom

How-To Hang Wallpaper Like a PRO!

How-To Hang Wallpaper using Paste (in the powder room)

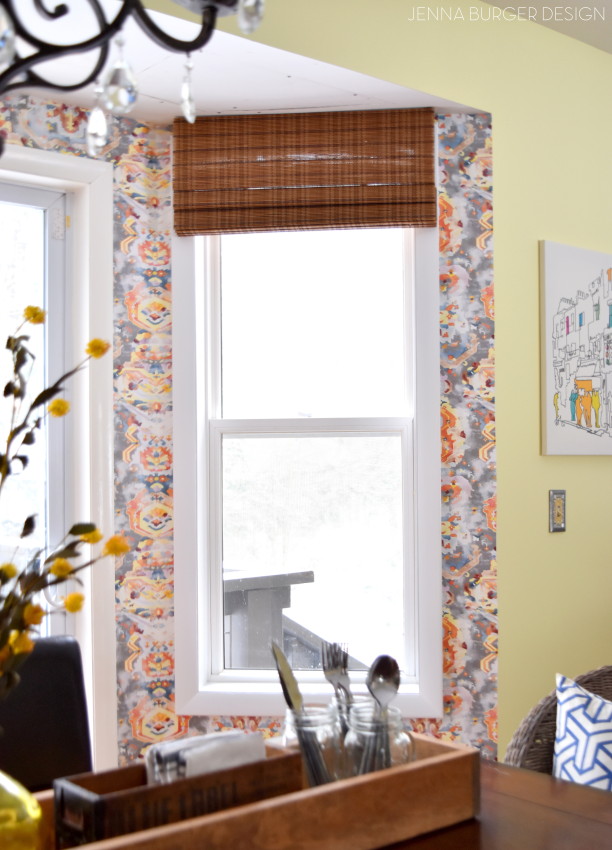
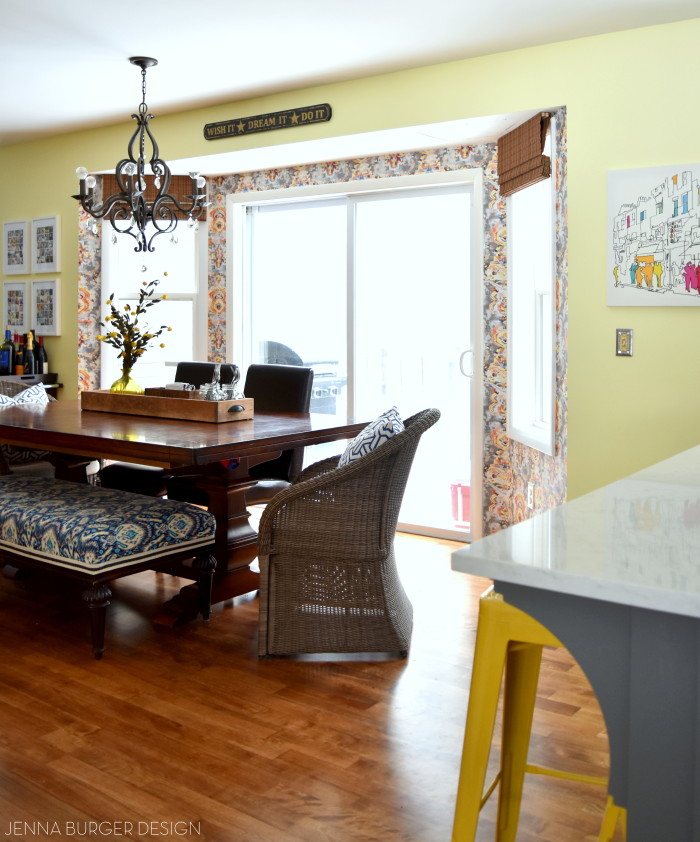
I’ve shared enough wallpaper tutorials, so I’ll spare you the details of the process, but this is the result…

Kitchen Renovation: Choosing a paint color for an open concept floor plan + adding accents of wallpaper. Follow along on this before + after kitchen remodel @ www.JennaBurger.com

Kitchen Renovation: Choosing a paint color for an open concept floor plan + adding accents of wallpaper. Follow along on this before + after kitchen remodel @ www.JennaBurger.com

And there you have it.  Mistakes were made.  Sleepless nights were had (well kinda), but the Paint + Wallpaper ARE DONE!

Another checkmark on the to do list.  Next up are the final details and then the reveal…

If you want to see all the posts documenting the kitchen renovation, here they are from start to finish:
Wonderful White Kitchen Inspiration
Kitchen Remodel: Before + Plan of Action
Demo Day: Steps for Demolishing the Kitchen
Kitchen Progress: Staining Hardwood Floors
The Cabinets Arrive + Get Installed
Natural Quartz Countertops in the Kitchen
10 Countertop Materials to Consider for the Kitchen
Subway Tile Installation + Choosing the RIGHT Subway
Kitchen Backsplash Tile Options + Inspiration
Choosing a Paint Color + Wallpaper for the Kitchen and Dining Room
Kitchen Renovation: The Appliances
Dissecting the Details
Kitchen Renovation: REVEAL + RESOURCES

DISCLAIMER: THIS KITCHEN RENOVATION IS A COLLABORATION WITH LOWE’S USING HGTV HOME BY SHERWIN WILLIAMS.  ALL OPINIONS + SELECTIONS ARE MY OWN WITH THE ASSISTANCE OF THE LOWE’S DESIGN TEAM.
WOW to Painting Wicker

I’ve been excited all weekend to share an amazing WOW, Ah-Ha moment!

For the past few weeks, I’ve slowly been transitioning my decor to Fall by adding in seasonal favorites.  NO huge updates or changes, but a few touches here and there around the home to welcome the season.  One main focus has been the front porchI even shared a peek at it last week on Instagram when my prop assistant ran away with my gourds.  I feel like the entry of the home is a good place to put the most effort since it’s the first area you & your guests see as they enter the home AND a little effort can make a big impact.
I bought mums (some of which died – my black thumb has returned) and I have a few new trash-to-treasure items that I’ve slowly been introducing.  You got a peek of them a few weeks back – remember?

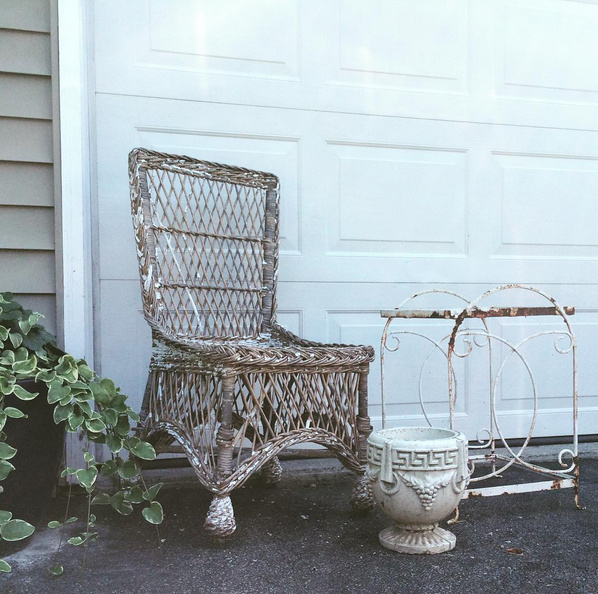
One new-to-me item was a wicker chair.  I was looking for a sister, and I found “her”.   They needed a bit of sprucin’ up, but I wasn’t in the mood to paint them.  Who wants to paint wicker?  NOT ME!  So they sat.

BUT THEN, I decided to finally use my hand paint sprayer that has been sitting in the garage for months and voila, no joke, 20 minutes total THEY. WERE. DONE.

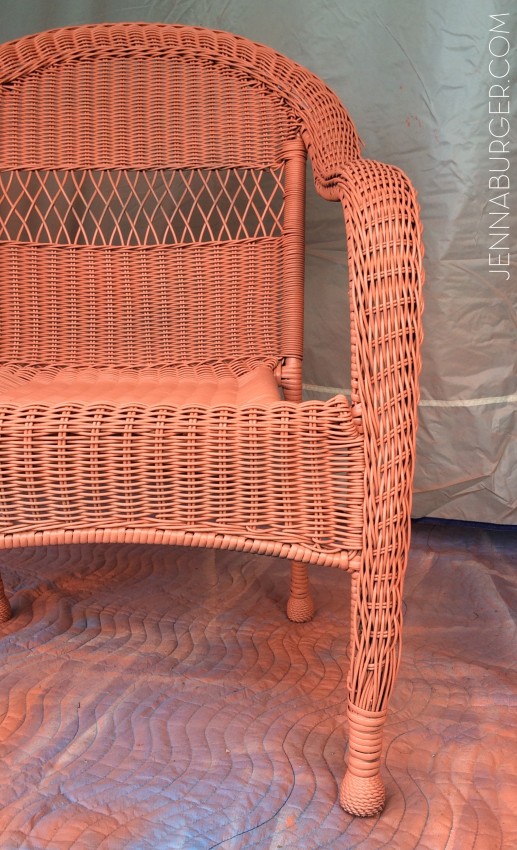
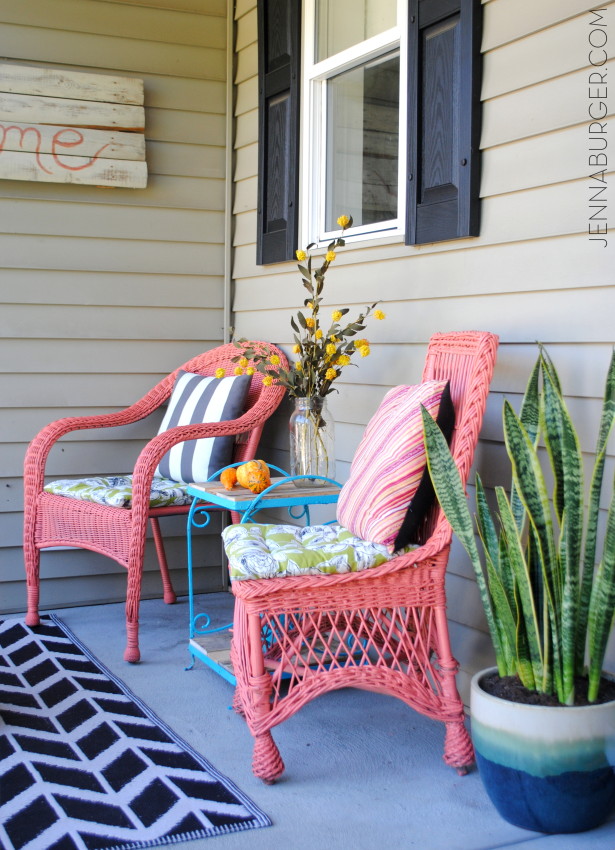
THE RESULT.

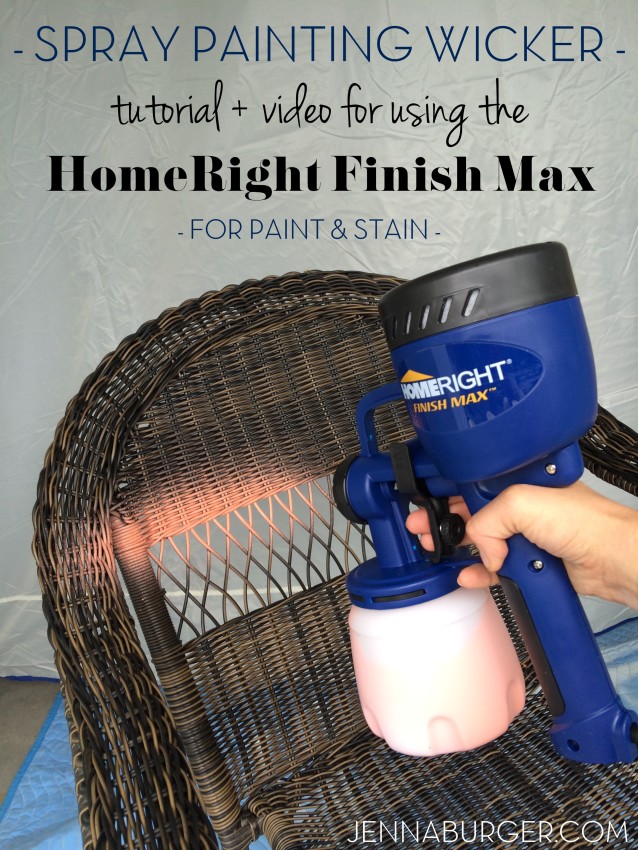
DIY tutorial for painting wicker using the HomeRight finish max hand sprayer. I painted 2 wicker chairs in less than 10 minutes. That would be impossible with a paint brush. A hand sprayer is a MUST TOOL for paint projects. Check out a step-by-step tutorial + video of how fast it covers > www.jennaburger.com

And guess what I didn’t do most of the work. WHAT? Why?

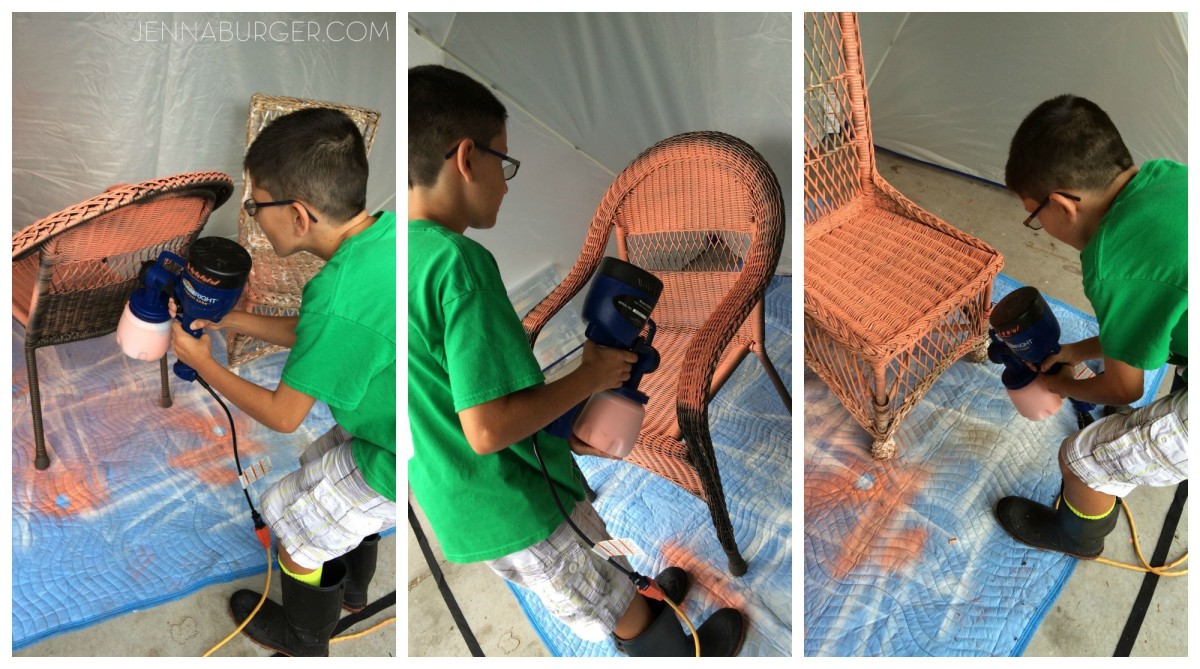
Yup, my 9 year old took over the job.  Literally we had so much fun spraying these 2 wicker chairs that we were battling who got the sprayer.  #hewon

DIY tutorial for painting wicker using the HomeRight finish max hand sprayer. I painted 2 wicker chairs in less than 10 minutes. That would be impossible with a paint brush. A hand sprayer is a MUST TOOL for paint projects. Check out a step-by-step tutorial + video of how fast it covers > www.jennaburger.comSeriously though, this hand spray painter by HomeRight is amazing.  It is incredible.  I am just mad at myself that I have not used it sooner.

REWIND.

Before I get ahead of myself with excitement, let’s rewind…  A few weeks back I had major success at a garage sale and snagged a bunch of new-to-me ‘trash treasures’.

I had shared this picture on InstagramGarage sale finds

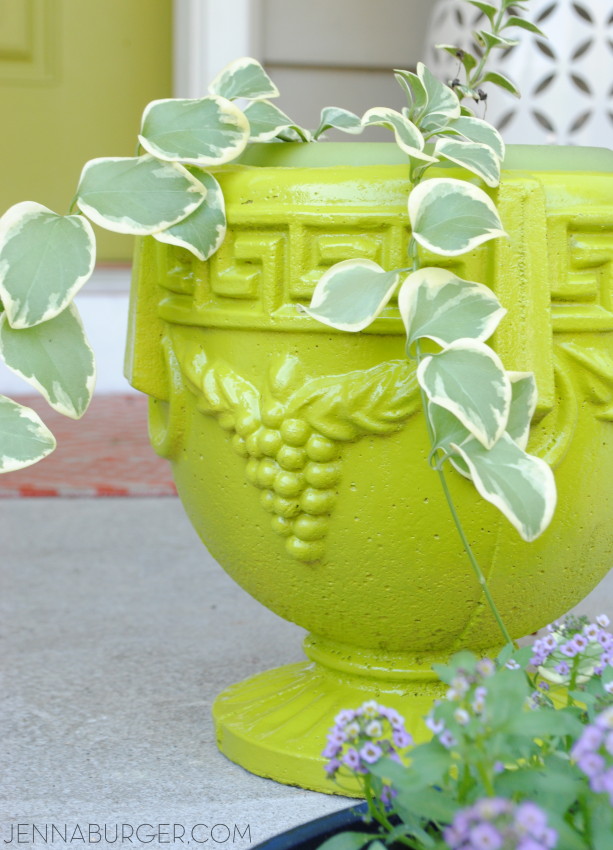
I transformed the planter with the most gorgeous green hue…

Before and After planter - $1 garage sale find transformed with Green Citrus spray paint

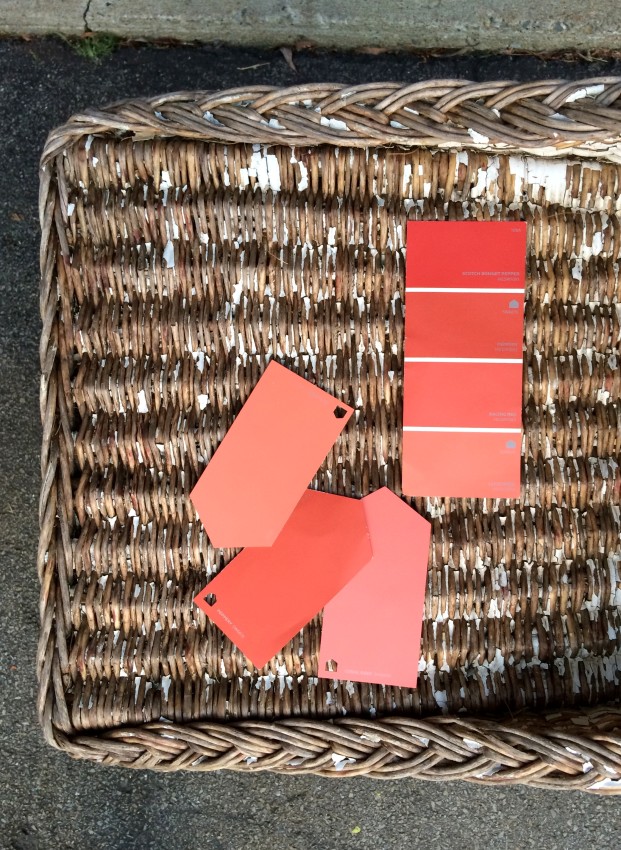
…And now it was time to finally paint the wicker chair (plus another one I found) a fun coral color.

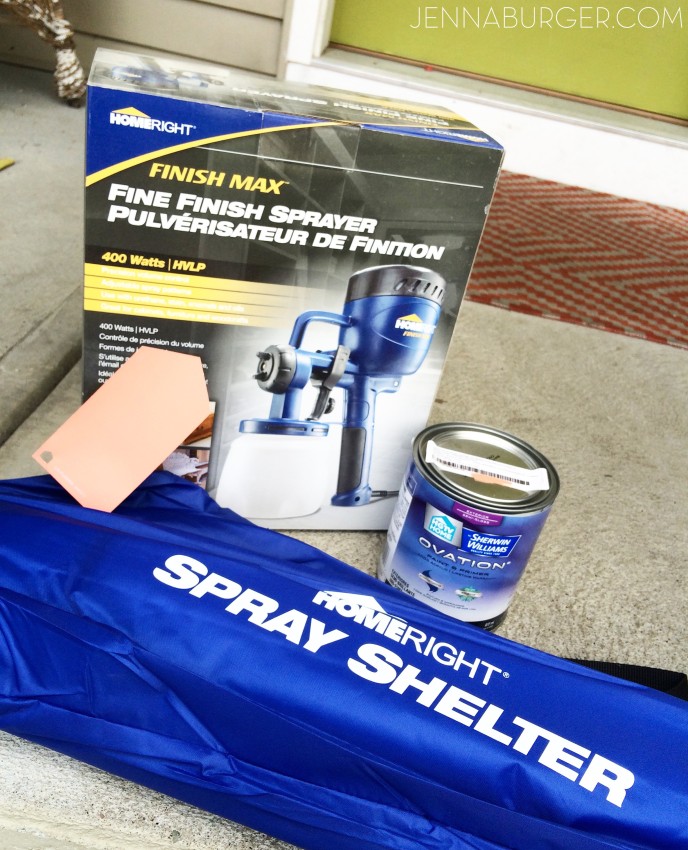
It took a few days to choose a color, but I decided on Sherwin Williams HGTV Home (available @ Lowe’s) Lei Flower – SW6613.

DIY tutorial for painting wicker using the HomeRight finish max hand sprayer. I painted 2 wicker chairs in less than 10 minutes. That would be impossible with a paint brush. A hand sprayer is a MUST TOOL for paint projects. Check out a step-by-step tutorial + video of how fast it covers > www.jennaburger.com

I was ready to GO!

DIY tutorial for painting wicker using the HomeRight finish max hand sprayer. I painted 2 wicker chairs in less than 10 minutes. That would be impossible with a paint brush. A hand sprayer is a MUST TOOL for paint projects. Check out a step-by-step tutorial + video of how fast it covers > www.jennaburger.com

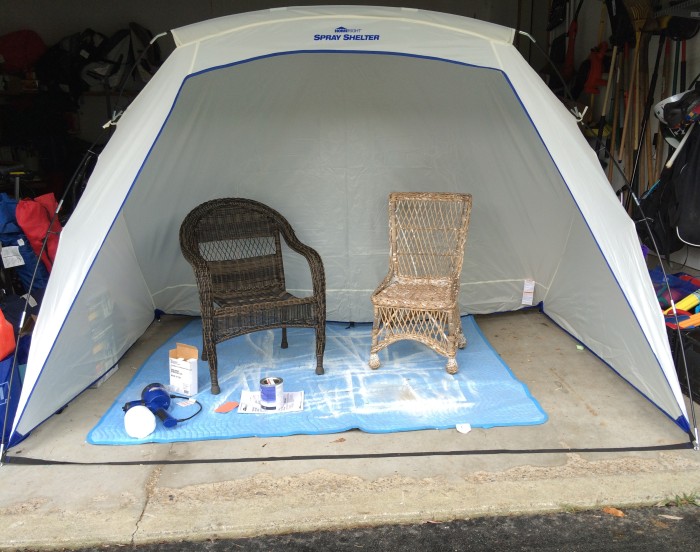
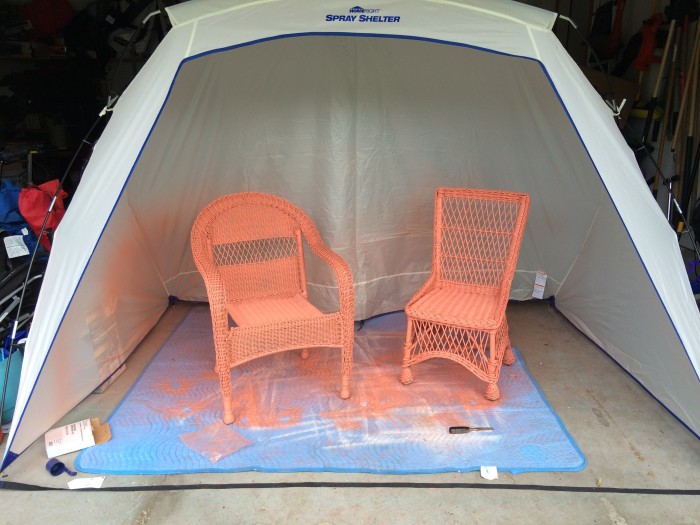
I didn’t want the paint to spray everything in sight, so the Spray Shelter by HomeRight really came in handy.  It too was my first time using it, but set-up took about 5 minutes and I had my son helping me a bit.  Assembly was just like putting a tent or beach shelter together.

The instructions are attached directly to the bag that the shelter comes in, which is genius!

DIY tutorial for painting wicker using the HomeRight finish max hand sprayer. I painted 2 wicker chairs in less than 10 minutes. That would be impossible with a paint brush. A hand sprayer is a MUST TOOL for paint projects. Check out a step-by-step tutorial + video of how fast it covers > www.jennaburger.com

Right when I was done erecting the shelter, it started to rain.  Just my luck, ha.  So I moved it to the garage…

DIY tutorial for painting wicker using the HomeRight finish max hand sprayer. I painted 2 wicker chairs in less than 10 minutes. That would be impossible with a paint brush. A hand sprayer is a MUST TOOL for paint projects. Check out a step-by-step tutorial + video of how fast it covers > www.jennaburger.com

NOW, I was ready!

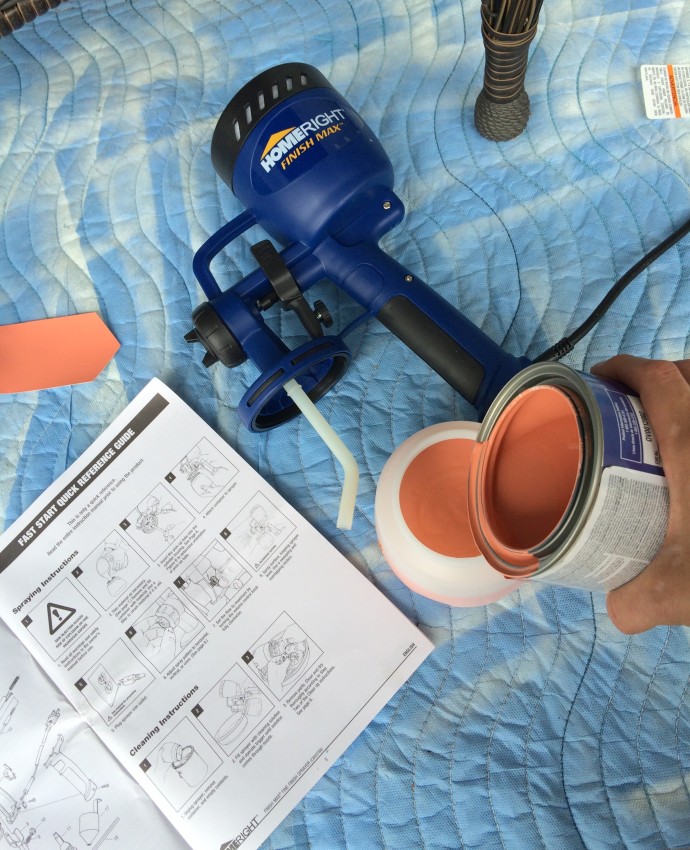
Being totally honest, I was nervous to use this ‘machine’, but there really was no learning curve and there was little set-up / clean-up.  I hate reading directions, but HomeRight has made it so easy with a one-page Fast Start Quick Reference Guide.  Within 3 minutes of opening the box, I was ready!

DIY tutorial for painting wicker using the HomeRight finish max hand sprayer. I painted 2 wicker chairs in less than 10 minutes. That would be impossible with a paint brush. A hand sprayer is a MUST TOOL for paint projects. Check out a step-by-step tutorial + video of how fast it covers > www.jennaburger.com

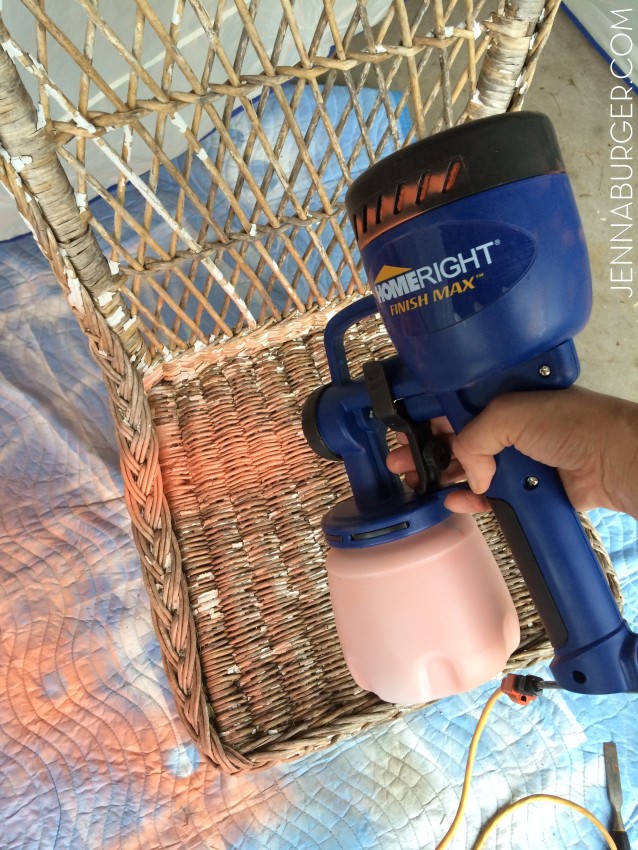
With the paint in the canister (read my helpful tips below before starting), I was ready to start.  I pushed the trigger and the paint started to flow.

DIY tutorial for painting wicker using the HomeRight finish max hand sprayer. I painted 2 wicker chairs in less than 10 minutes. That would be impossible with a paint brush. A hand sprayer is a MUST TOOL for paint projects. Check out a step-by-step tutorial + video of how fast it covers > www.jennaburger.com

Details on the HomeRight Finish Max Fine Sprayer

VIDEO

I never take videos, but I couldn’t resist.  I had to show you how quick + easy the paint covered the chair.

On to the next chair…

DIY tutorial for painting wicker using the HomeRight finish max hand sprayer. I painted 2 wicker chairs in less than 10 minutes. That would be impossible with a paint brush. A hand sprayer is a MUST TOOL for paint projects. Check out a step-by-step tutorial + video of how fast it covers > www.jennaburger.comIn about 10 minutes, both chairs were covered with coat #1.   A bit later I sprayed them again with a second coat and they were done.

DIY tutorial for painting wicker using the HomeRight finish max hand sprayer. I painted 2 wicker chairs in less than 10 minutes. That would be impossible with a paint brush. A hand sprayer is a MUST TOOL for paint projects. Check out a step-by-step tutorial + video of how fast it covers > www.jennaburger.com

TIPS + TRICKS

Here are some tips + tricks I learned along the way (plus my friends Jaime & Ashley shared a few tips with me on Instagram) so you too can ditch the nervousness of using this sprayer…

> Get full coverage of all nooks & crannies by moving the piece of furniture to spray at different angles – I especially had to do this with wicker!

> Paints & Stains need to be watered down so they flow through the sprayer properly.  With the sprayer comes a handy gadget to determine the appropriate water needed + there is a helpful chart in the instruction booklet.

> The Finish Max can spray horizontal, vertical, or in a cone pattern.  You can easily choose the direction by turning the dial on the front of the sprayer.

> There is no need to clean the sprayer between coats. Leave the paint or stain in the container (of course if time between coats is days long, then clean it).

My new coral chairs looks Ah-Mazing on my front porch and it’s almost complete for Fall.

Want a peek?

Enjoy.

DIY tutorial for painting wicker using the HomeRight finish max hand sprayer. I painted 2 wicker chairs in less than 10 minutes. That would be impossible with a paint brush. A hand sprayer is a MUST TOOL for paint projects. Check out a step-by-step tutorial + video of how fast it covers > www.jennaburger.com

More to come later this week…

Want to save this tutorial for a later date – you know you want to try this sprayer 😉

PIN IT!

DIY tutorial for painting wicker using the HomeRight finish max hand sprayer. I painted 2 wicker chairs in less than 10 minutes. That would be impossible with a paint brush. A hand sprayer is a MUST TOOL for paint projects. Check out a step-by-step tutorial + video of how fast it covers > www.jennaburger.com

DISCLOSURE: THIS IS A SPONSORED POST WITH HOMERIGHT.  ALL WORDS + OPINIONS ARE 100% MY OWN – I TRULY LOVE THIS PRODUCT.  AFFILIATE LINKS ARE ALSO INCLUDED IN THIS POST.

Pop of Color: How-To Paint a Door

I’m still working on my boys room. It’s almost done, but it’s probably been the longest room makeover in history (well maybe not, I think that was the master bedroom which I am happy to say is complete – well 95% complete).  Even though I want to call this latest makeover DONE, a room often does AND should take time to create and come together. The transformation of a space is like a 1000 piece puzzle, it takes time and patience to get all the pieces just right and often, it’s the final stretch that takes the longest.  And that’s okay.

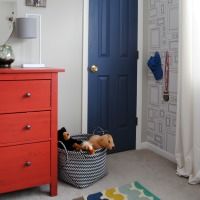
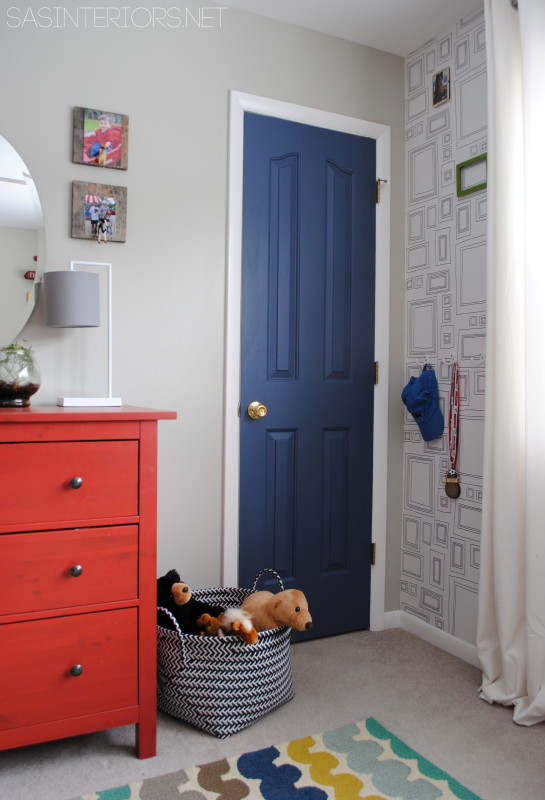
As I am rounding up the room finishing up the final details (the window treatments are the last element which I’m just not feelin’ yet), I wanted to share one element that has really given the space added color + the punch it needed… a newly painted closet door.  It’s amazing how the wall (and actually the overall room) came alive with a new hue.

Take a look…

Add a Pop of COLOR by painting the door. Ditch the typical white (interior or exterior) door and add a splash of color. Check out this great how-to with 5 easy steps to transform a door!

Adding a pop of color was my Lowe’s Challenge for this month and I think I surely succeeded.  Huge difference, wouldn’t you say?!

Updating a door (interior or exterior) is super easy and if a space is fairly neutral, painting the door will make a huge impact.  If you happen to remember, I initially wasn’t overly fond of this very neutral / light wall color, BUT now I am loving it.  WHY?  It’s been able to provide a neutral backdrop for lots of color in all the layers like the red dresser to the left + the fun Frames Wallpaper + the honeycomb shelves on the opposite wall.

Choosing the RIGHT COLOR for the door!

When shopping for a color for the door, choose something that picks up on other colors in the room.  Also a semi-gloss finish is best (so marks can easily be wiped away), but eggshell or satin will also work.

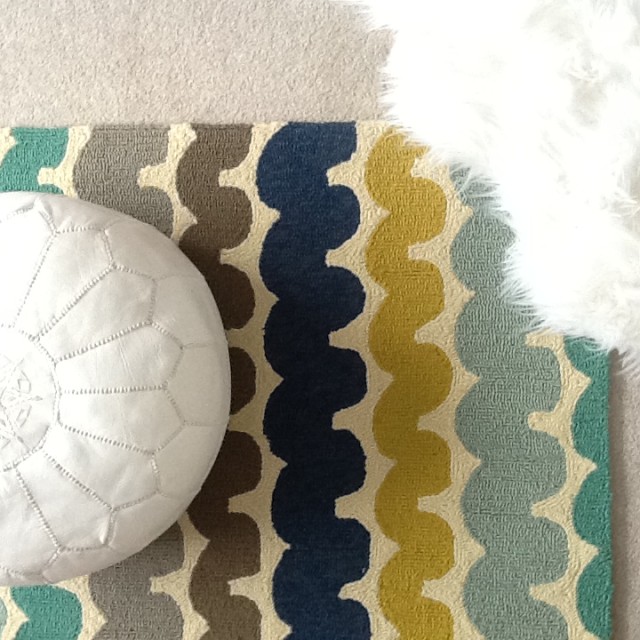
For my boys closet door, I picked up a color from the new rug and chose a deep blue hue (which was leftover paint from my office makeover – Benjamin Moore Van Deusen Blue) in an eggshell finish.

Benjamin Moore Van Deusen Blue HC-156

Inspiration for the new Blue Hue on the closet door!

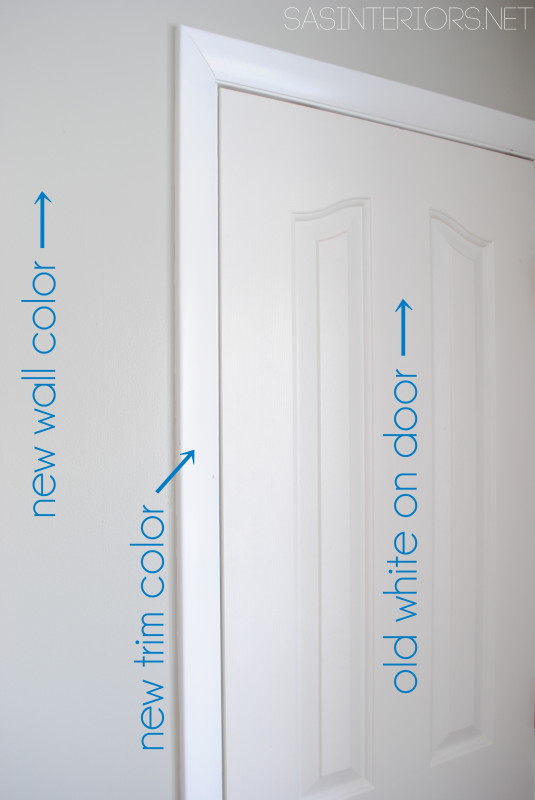
Along with wanting to add a pop of color to the room, the new trim/moulding color and the old door color were 2 very different and competing whites.  So it was in good reason that this door needed a makeover!

Here’s a closeup:

Steps to take for Painting a Door - Add a Pop of COLOR by painting the door. Ditch the typical white (interior or exterior) door and add a splash of color. Check out this great how-to with 5 easy steps to transform a door!

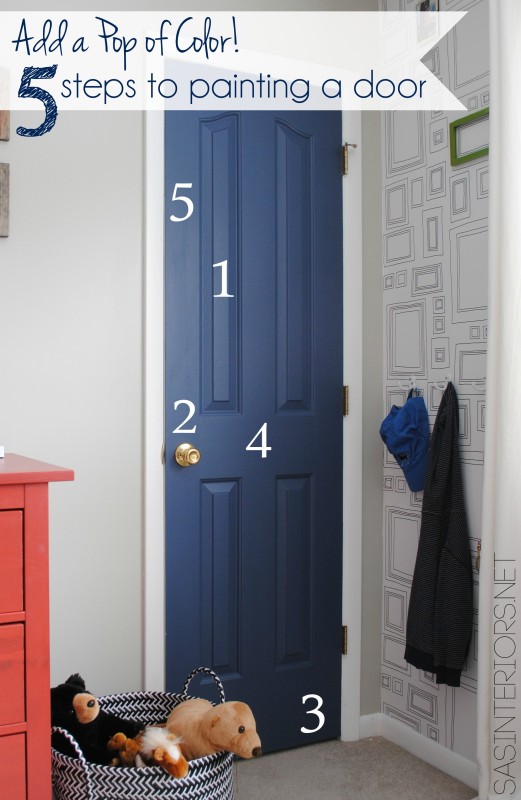
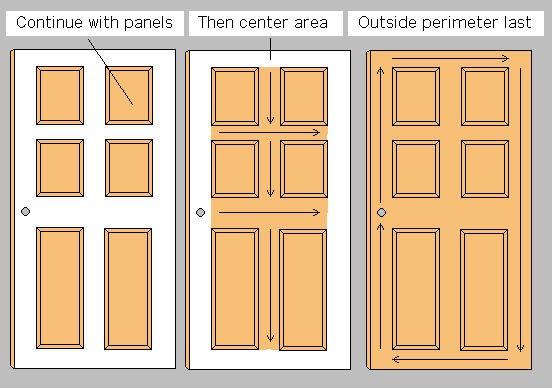
Here are the easy-peasy steps to adding a pop of color on a door:

Add a Pop of COLOR by painting the door. Ditch the typical white (interior or exterior) door and add a splash of color. Check out this great how-to with 5 easy steps to transform a door!

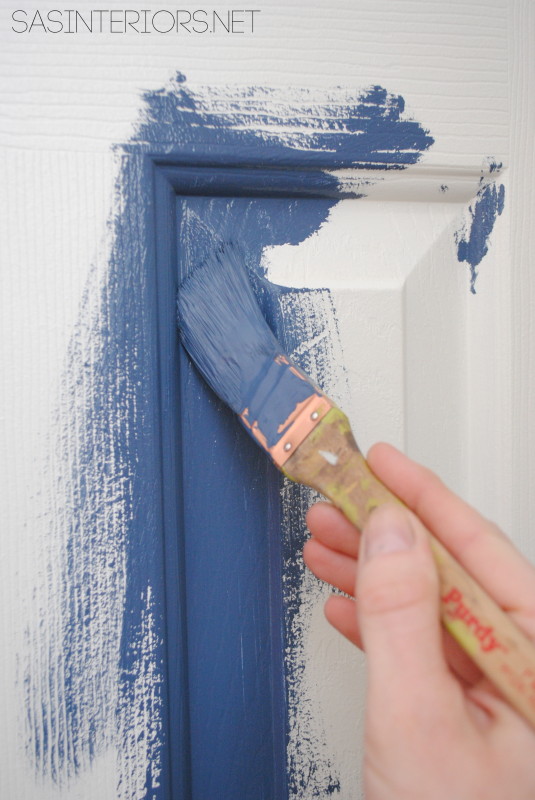
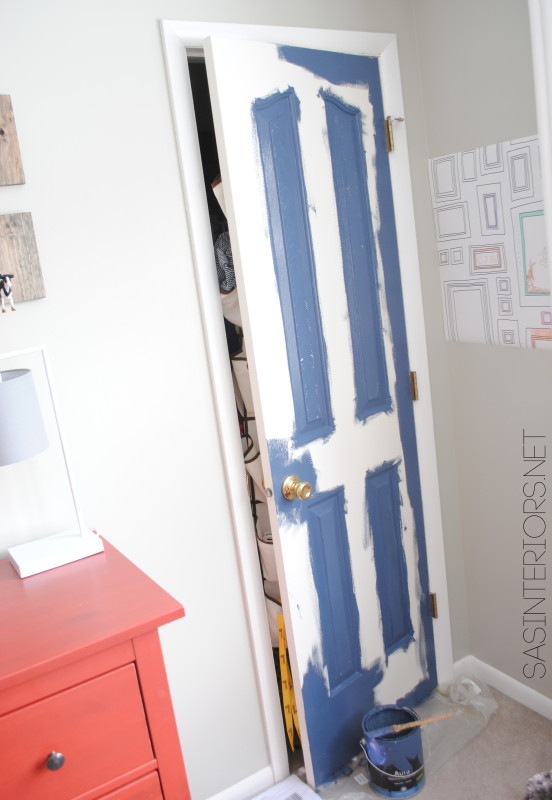
1. PANELS: No matter what style doore, start off with the crevices / nooks-and-crannies.  Using a quality brush (a 1″ or  1-1/2″ Purdy angled brush is my favorite) start with the panels of the door.

Steps to take for Painting a Door - Add a Pop of COLOR by painting the door. Ditch the typical white (interior or exterior) door and add a splash of color. Check out this great how-to with 5 easy steps to transform a door!

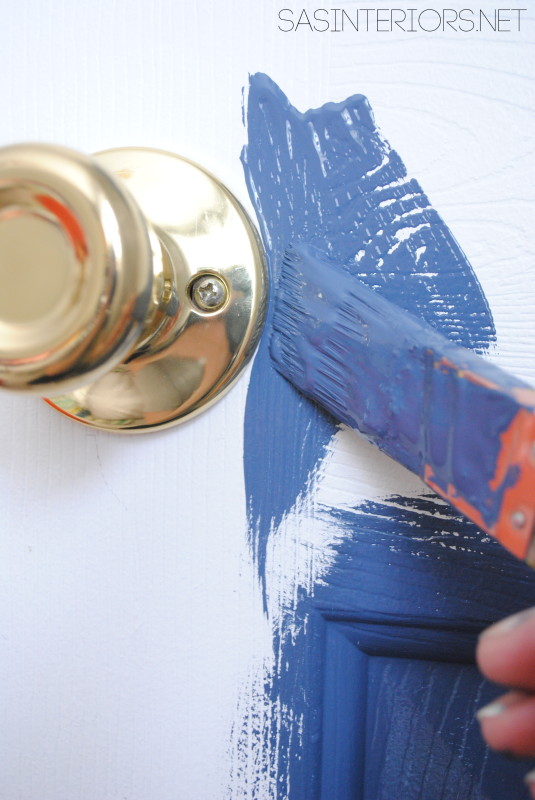
2. HARDWARE: I decided not to remove the hardware before painting (because of pure laziness) and painted around the door knob using my angled brush. The result was great…

Steps to take for Painting a Door - Add a Pop of COLOR by painting the door. Ditch the typical white (interior or exterior) door and add a splash of color. Check out this great how-to with 5 easy steps to transform a door!

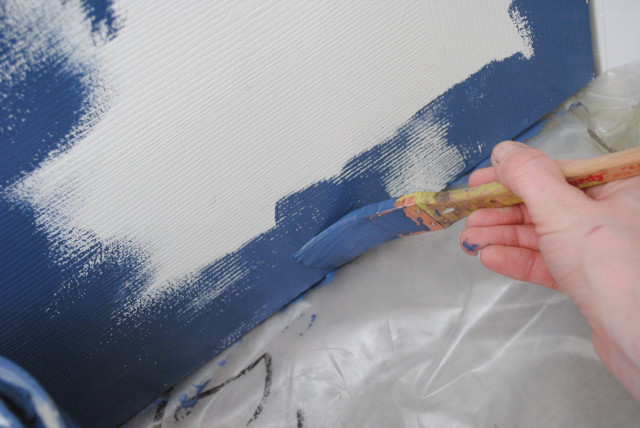
3. EDGES: After the panels an the hardware, comes the edges of the door.  Be sure to lay a dropcloth or plastic under the door so paint doesn’t get on the floor.  Also, it’s best to open the door so no paint gets on the door frame.  When painting the side edges, don’t drag the brush, but instead start from the door center and pull away to get a nice clean edge and no paint on the side of the door.

Steps to take for Painting a Door - Add a Pop of COLOR by painting the door. Ditch the typical white (interior or exterior) door and add a splash of color. Check out this great how-to with 5 easy steps to transform a door!

Once all the panels + hardware, and most of the edges were done, here’s how the door looked…

Steps to take for Painting a Door - Add a Pop of COLOR by painting the door. Ditch the typical white (interior or exterior) door and add a splash of color. Check out this great how-to with 5 easy steps to transform a door!

The next  + last steps are the rails…

4 & 5. RAILS: Use a brush or roller for the rails.  If the door has a slight texture to it (like mine) then a brush will do fine because you won’t see brushstrokes, but if the door is smooth, you’ll want to choose a small roller.  You can also use floetrol, an additive that can be mixed with paint to avoid brushstrokes.  I didn’t use it for this project, but I did for my kitchen cabinets.

It’s one of my favorite products.

flood-floetrol-02

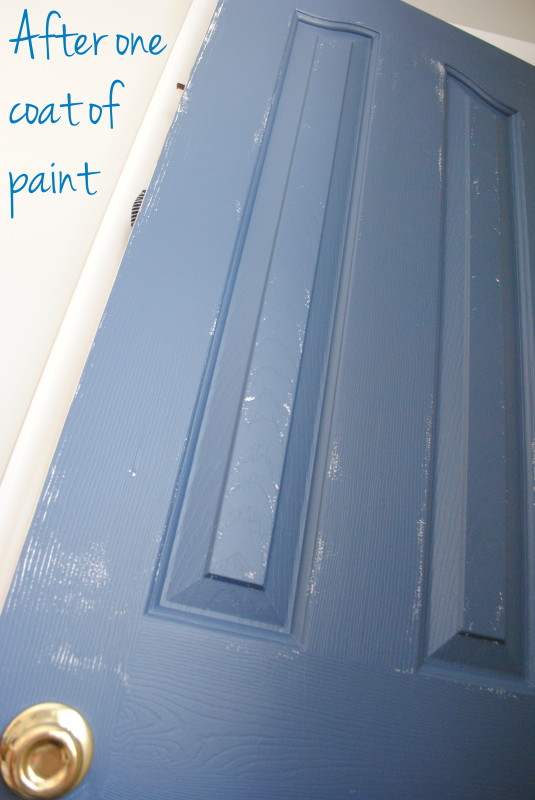
Once the first coat of paint was finished, this is how the door looked.

Steps to take for Painting a Door - Add a Pop of COLOR by painting the door. Ditch the typical white (interior or exterior) door and add a splash of color. Check out this great how-to with 5 easy steps to transform a door!

After another coat of paint using the same steps above, the door was done…

Add a Pop of COLOR by painting the door. Ditch the typical white (interior or exterior) door and add a splash of color. Check out this great how-to with 5 easy steps to transform a door!

Pretty big change for no money & very little time.

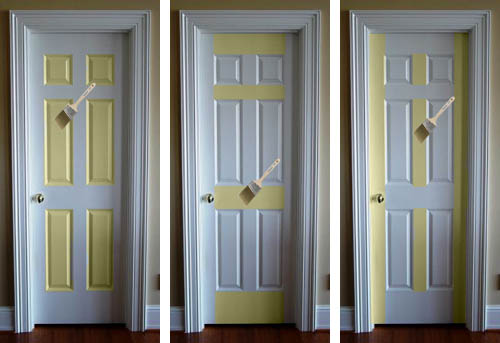
When looking around the net at other homeowner door makeovers, I found 2 helpful tutorials that you might benefit from if you’re looking to add a pop of color to your door(s)…

Steps to take for Painting a Door - Add a Pop of COLOR by painting the door. Ditch the typical white (interior or exterior) door and add a splash of color. Check out this great how-to with 5 easy steps to transform a door!via

Steps to take for Painting a Door - Add a Pop of COLOR by painting the door. Ditch the typical white (interior or exterior) door and add a splash of color. Check out this great how-to with 5 easy steps to transform a door!via

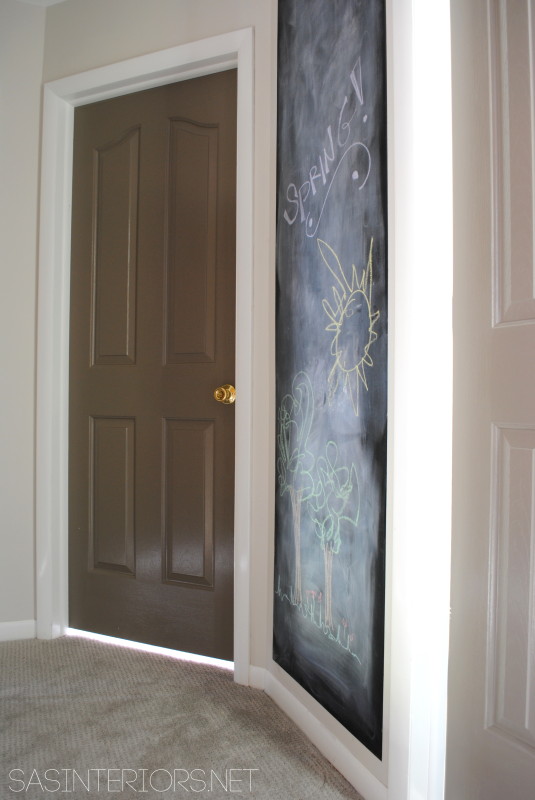
O, and one more place in my home where I decided to add some color to the doors…  the upstairs hallway.   Just last week, I shared how I updated the space with a new chalkboard wall, but to also add some color in, I chose to paint the doors my favorite Benjamin Moore Texas Leather.

Benjamin Moore Texas LeatherHere’s how the hallway evolved…

Add a Pop of COLOR by painting the door. Ditch the typical white (interior or exterior) door and add a splash of color. Check out this great how-to with 5 easy steps to transform a door!

Add a Pop of COLOR by painting the door. Ditch the typical white (interior or exterior) door and add a splash of color. Check out this great how-to with 5 easy steps to transform a door!

What a huge difference painting a door makes, especially when the walls of a space are neutral.  This was a fun project to work on and once again, it shows that with a little effort, a space can surely be transformed in no time and with little or no money.

Have you ever thought on painting your interior or exterior door(s)?

Lowes Creative Team Member Badge - Spring 2014

To gather even more unique, fun, and creative ideas for your indoor and outdoor Spring spaces, I would definitely suggest downloading the Lowe’s Creative Ideas app on your iphone and/or ipad.  I’m always checking out the FREE app for great seasonal + do-it-yourself inspiration.

Disclosure: I am part of the Lowe’s Creative Team and was provided with a Lowe’s gift card to purchase items for my project.  I was also compensated for my time to use the products.  No one told me what to create, what to buy, how to use the product, or what to write.  All opinions are 100% mine!