Tag: painting furniture

China Cabinet Makeover {Reveal}

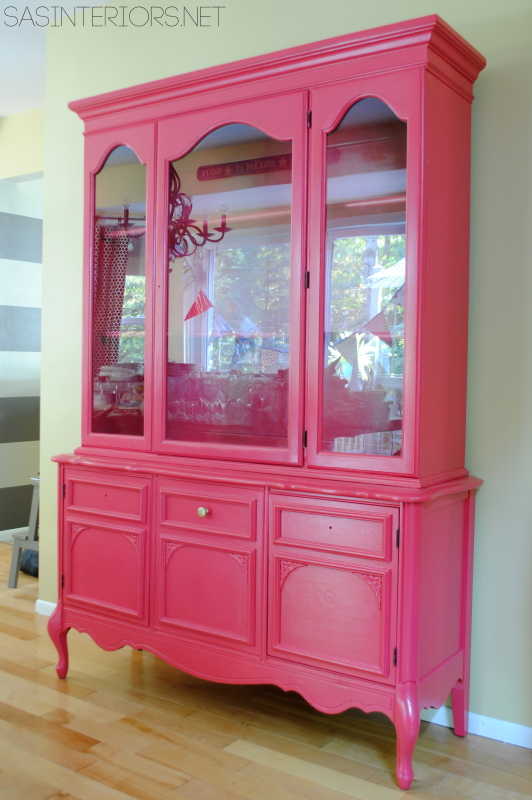
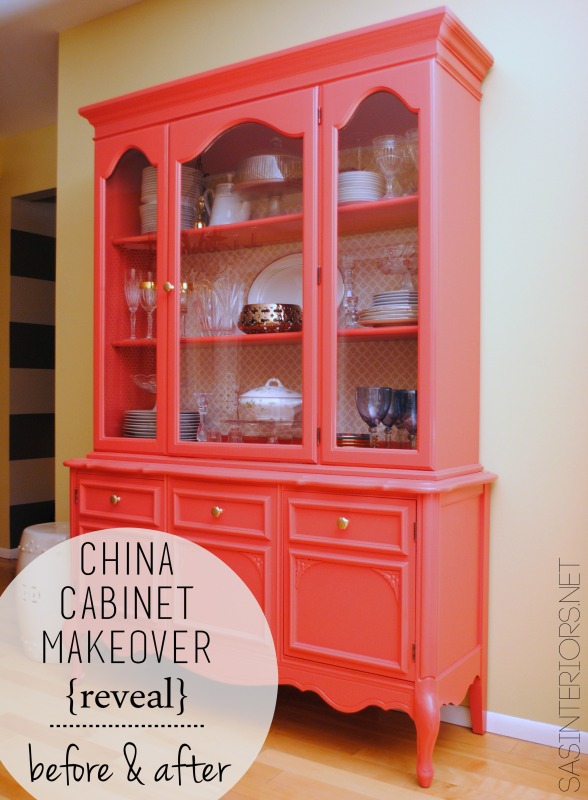
It’s done!  What a journey it’s been for this china cabinet.

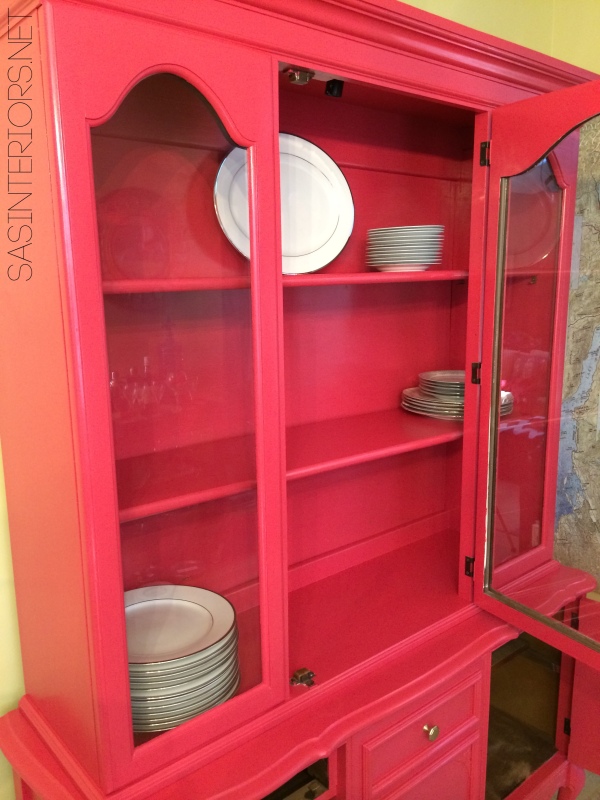
Upon finding this diamond-in-the-rough on Craigslist and rescuing it from a dilapidated garage that housed chickens, roosters, and a few other unknown animals (I was afraid to even look around), the once trash-bound cabinet now sits beautifully in my dining room with a vibrant new color & a complete designer makeover…

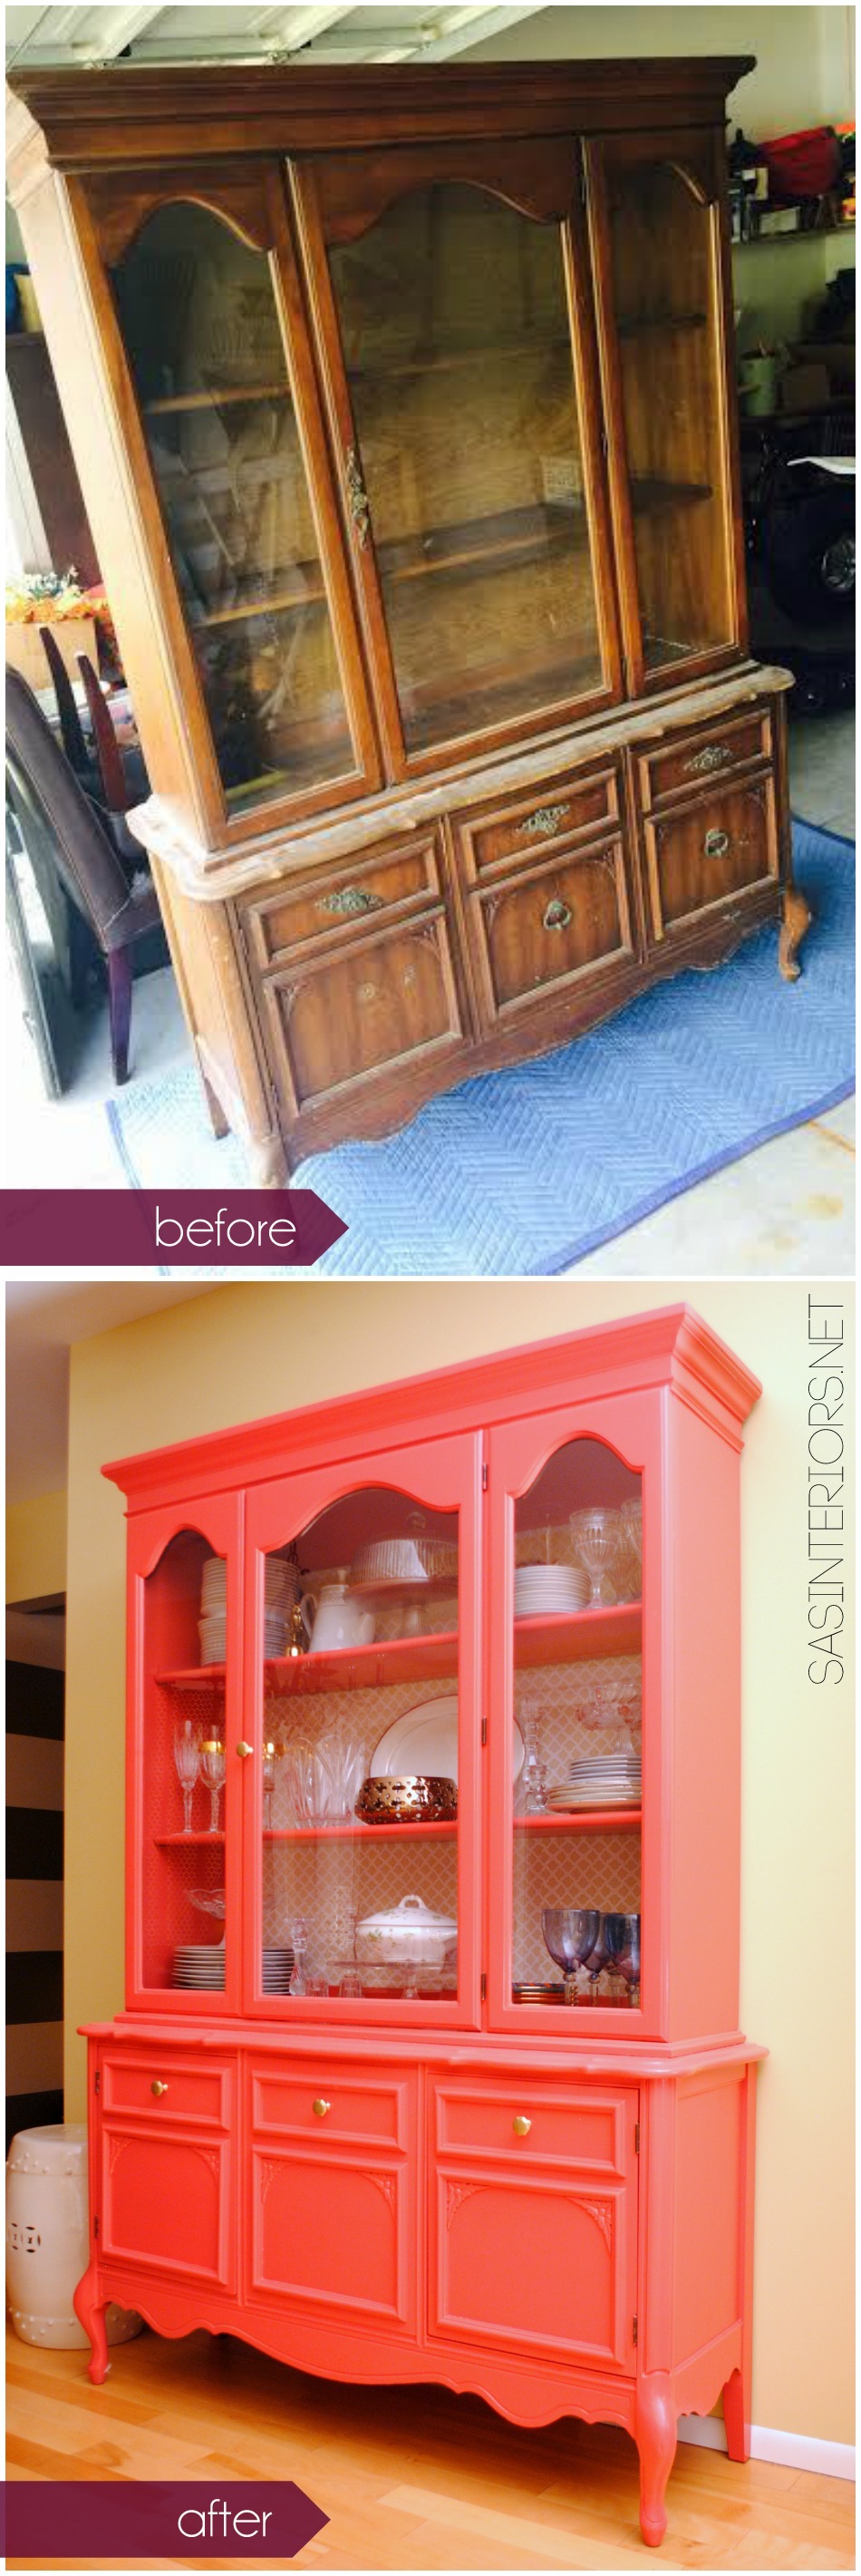
China Cabinet before & after >>> The process of giving this piece of a furniture a complete makeover!

It has been quite the task of getting her to this point, but she’s complete!

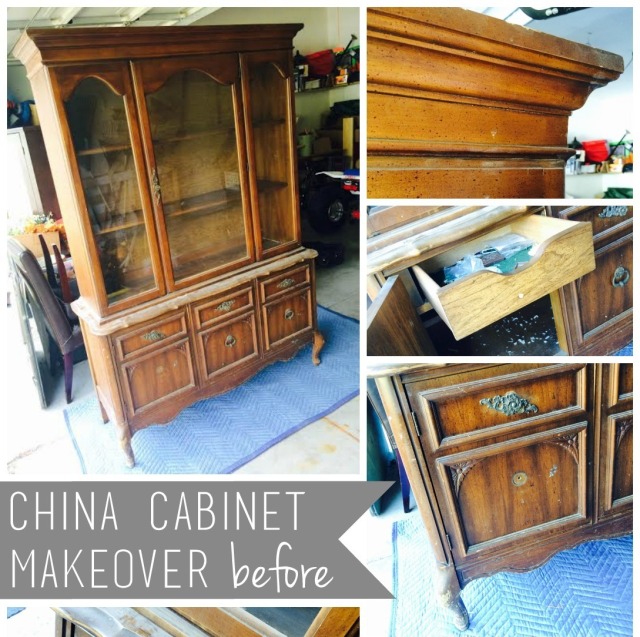
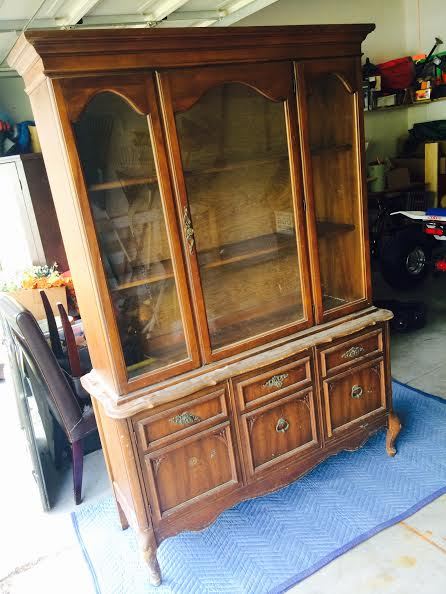
We can’t appreciate the ‘after’ without looking at the ‘before’.  Remember what she looked like a few short weeks ago…

China Cabinet >>> before - details prior to the makeover

China Cabinet >>> before - details prior to the makeover

>>> read more on The Backstory + Choosing a Color <<<

Like I said, it’s been quite a journey. Let’s reminisce…

I was psyched to bring her home.  Once she landed in our garage, I started the prep work by removing all the hardware, the doors, and the shelves.

China Cabinet before & after >>> The process of giving this piece of a furniture a complete makeover!

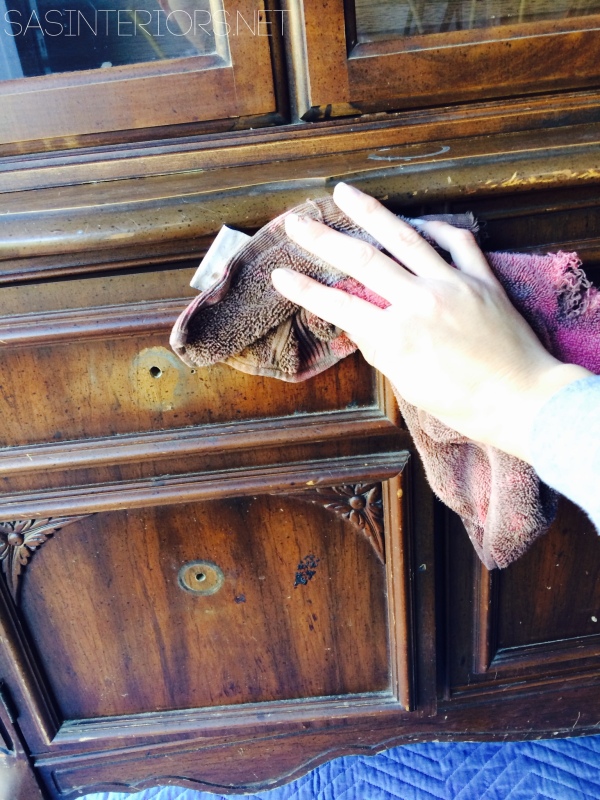
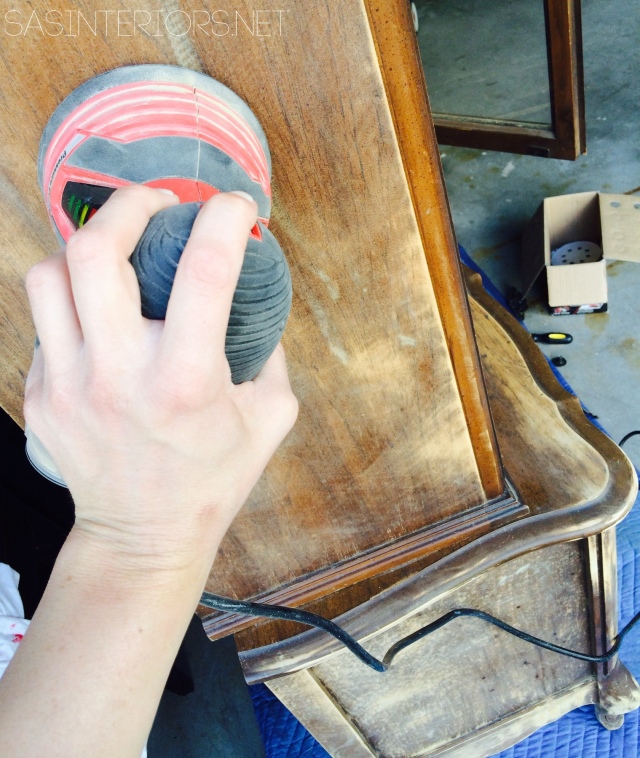
I cleaned her up a bit + lightly sanded all the surfaces.

China Cabinet before & after >>> The process of giving this piece of a furniture a complete makeover!

>>> read more on Prep + Sanding Wood Furniture <<<

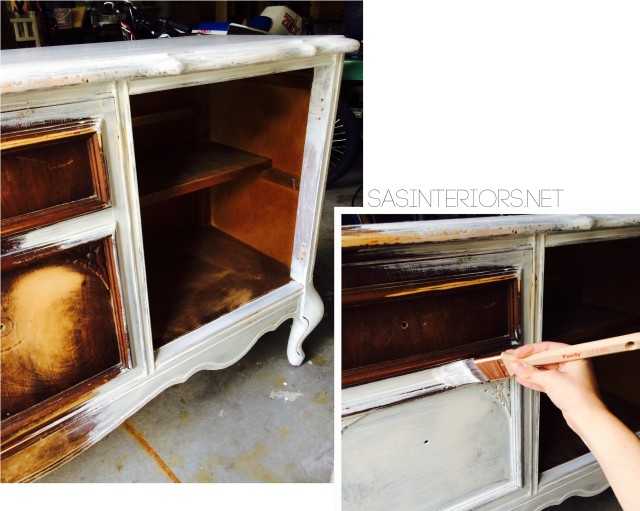
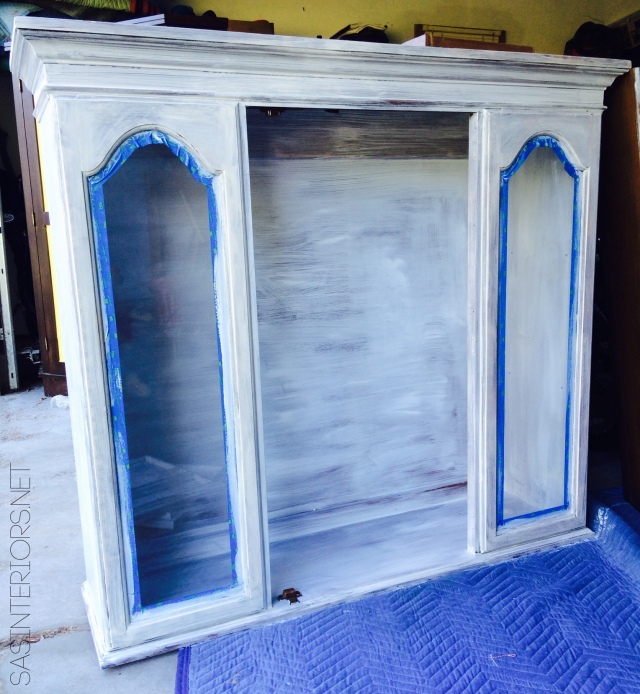
Once all the surfaces were ready, it was time to prime!  As I’ve shared over & over, priming is SO IMPORTANT.  The purpose of paint is to provide color, but the purpose of primer is to provide the ideal base for the paint to be applied.  The paint + primer in one is fine for walls, but a true primer like Glidden Gripper (which is what I used) will block the stain from bleeding through and will provide the needed base for the paint to adhere!  If you’re painting furniture, YOU MUST USE PRIMER.

China Cabinet before & after >>> The process of giving this piece of a furniture a complete makeover!

China Cabinet before & after >>> The process of giving this piece of a furniture a complete makeover!

>>> read more on Why & How-To Prime Wood Furniture <<<

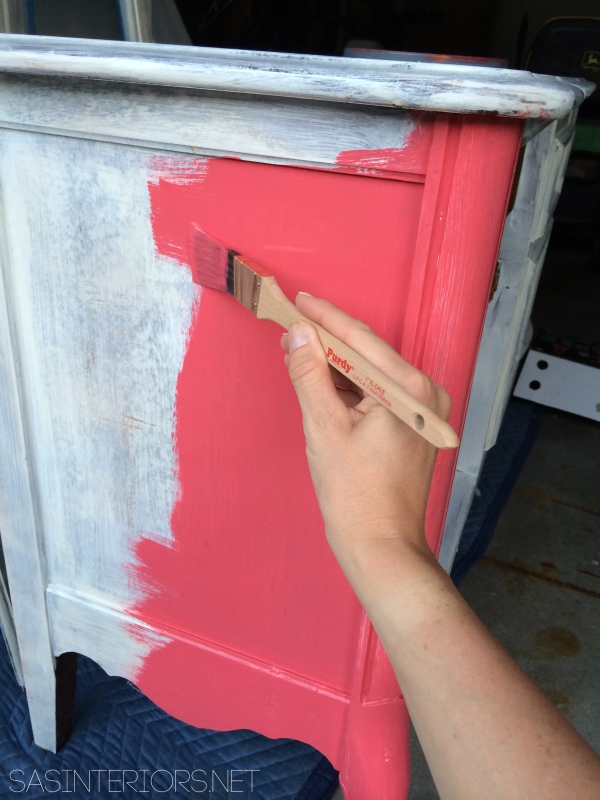
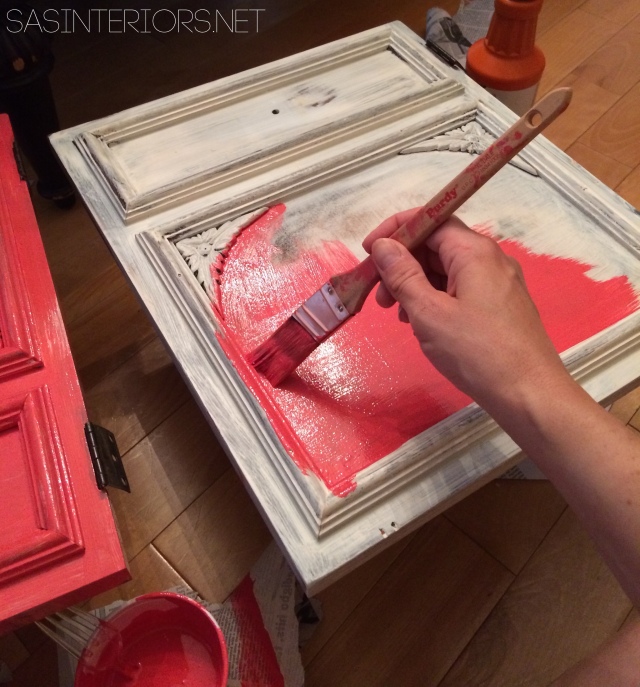
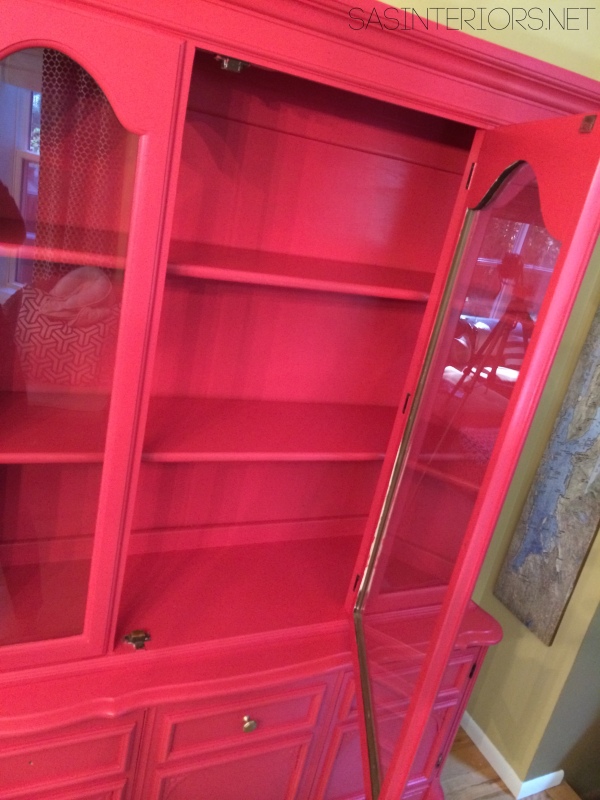
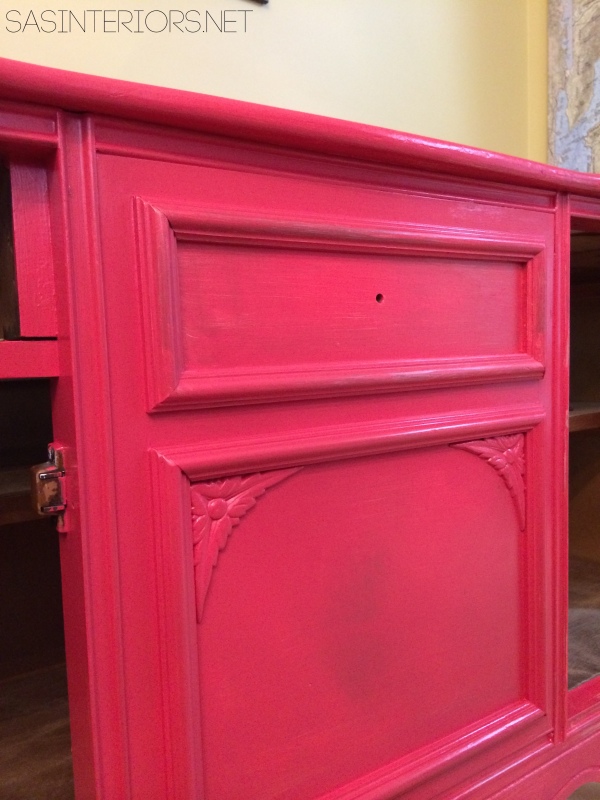
After the key step of priming all the surfaces, it was time to PAINT!  Finally, right?!  I chose the color Red Red Rose by Glidden using the Glidden’s new simplified color palette.China Cabinet before & after >>> The process of giving this piece of a furniture a complete makeover!This is a real wow-factor color and even before finding the china cabinet, I knew this rosy, raspberry hue would be perfection.  Typically I have the piece before choosing the color, but not in this case.  The other hues + layers in the dining space are fairly minimal and neutral, so I knew a focal point piece that would be the eye-catcher of the room would make a real impact.  It’s all about the contrast and the balance between neutrals and bolds.

The process of painting this beauty was laborious, but O So Worth the time + effort!

China Cabinet before & after >>> The process of giving this piece of a furniture a complete makeover!

China Cabinet before & after >>> The process of giving this piece of a furniture a complete makeover!

>>> read more on How-To Paint Wood Furniture <<<

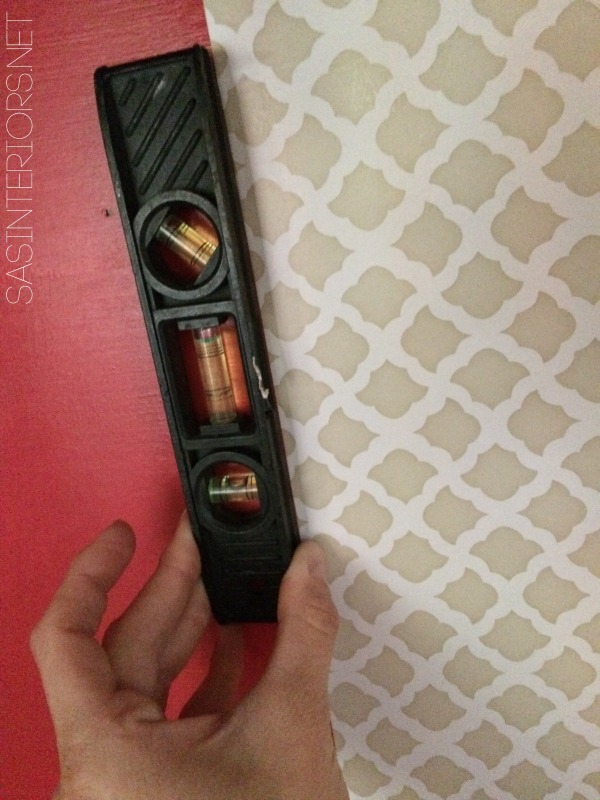
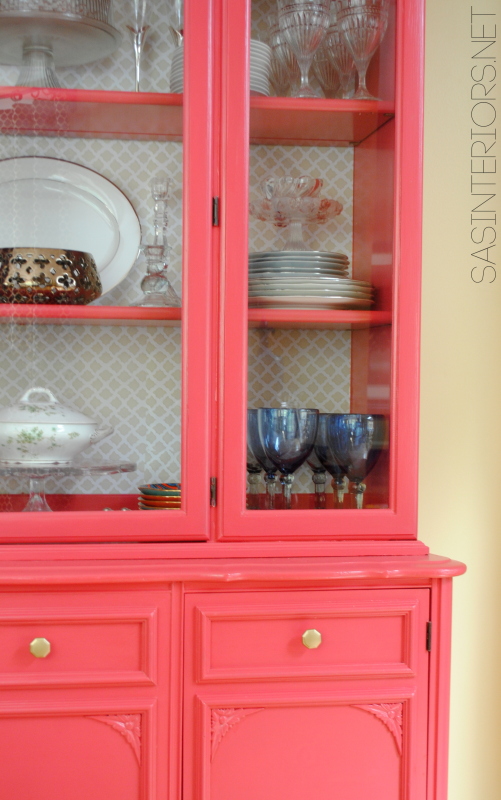
Once the china cabinet was painted & sealed, I wanted to add a few fun, unexpected details.  I chose to add self-adhesive, contact paper to the back of the cabinet interior which provided a beautiful backdrop for all my dishes, platters, and china.

China Cabinet before & after >>> The process of giving this piece of a furniture a complete makeover!

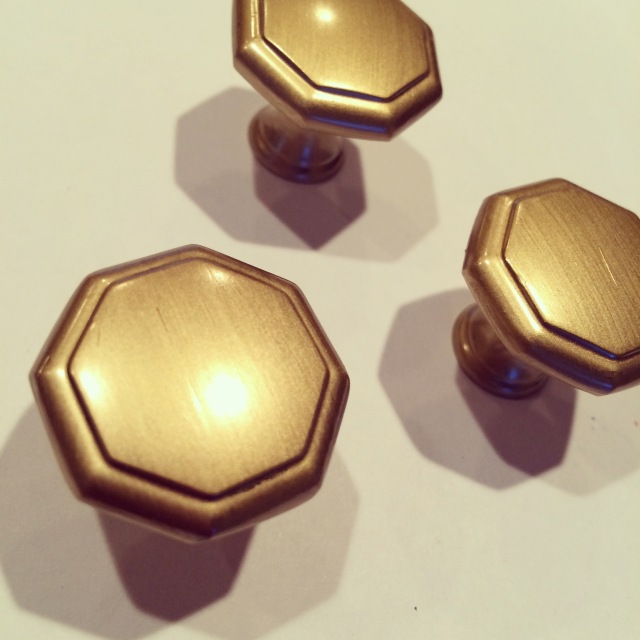
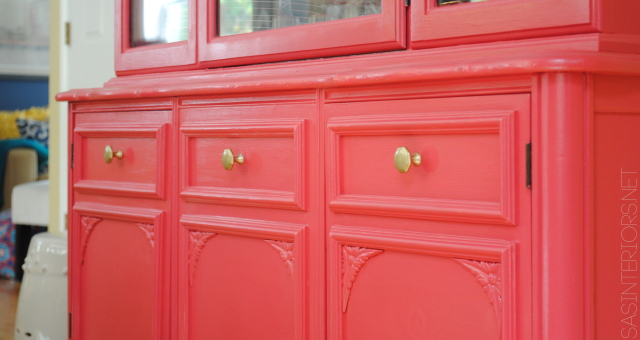
When I couldn’t find the exact hardware I had envisioned, I DIYed it to create exactly what I wanted at a fraction of the cost.

China Cabinet before & after >>> The process of giving this piece of a furniture a complete makeover!

Once the jewels hardware was set, it was time to style this gorgeous gal!

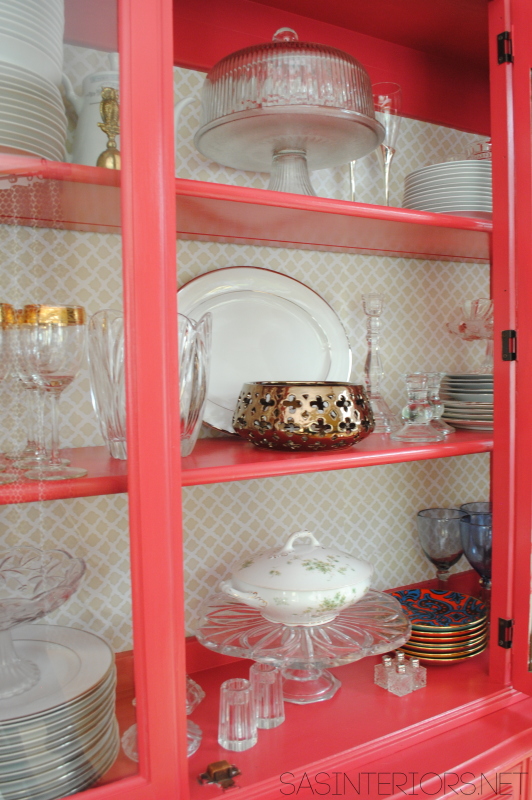
It’s now all filled up with our collected plates, glasses, and platters…  Believe me, not one new thing was bought for this revamped beauty.

China Cabinet before & after >>> The process of giving this piece of a furniture a complete makeover!

>>> read more on the Details + Hardware + Styling <<<

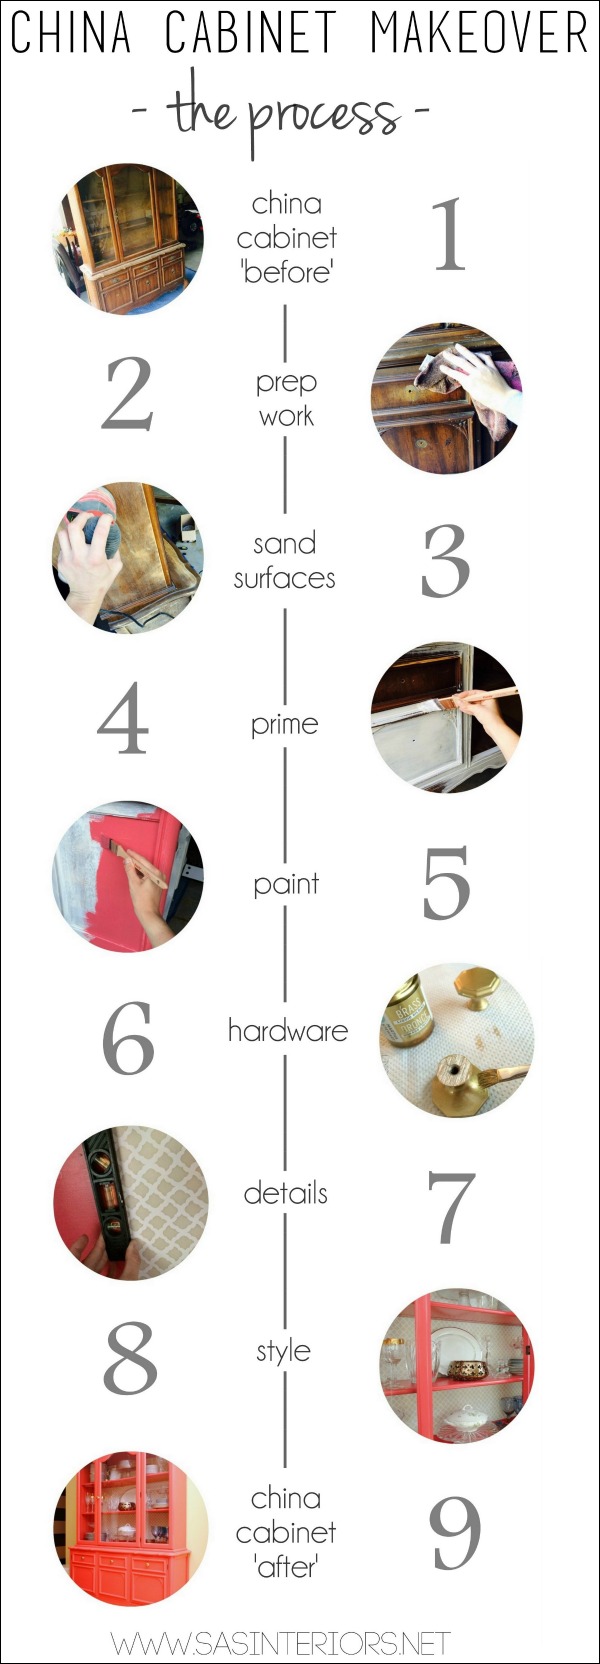
a recap of the process…

China Cabinet before & after >>> The process of giving this piece of a furniture a complete makeover!

And then she was complete!

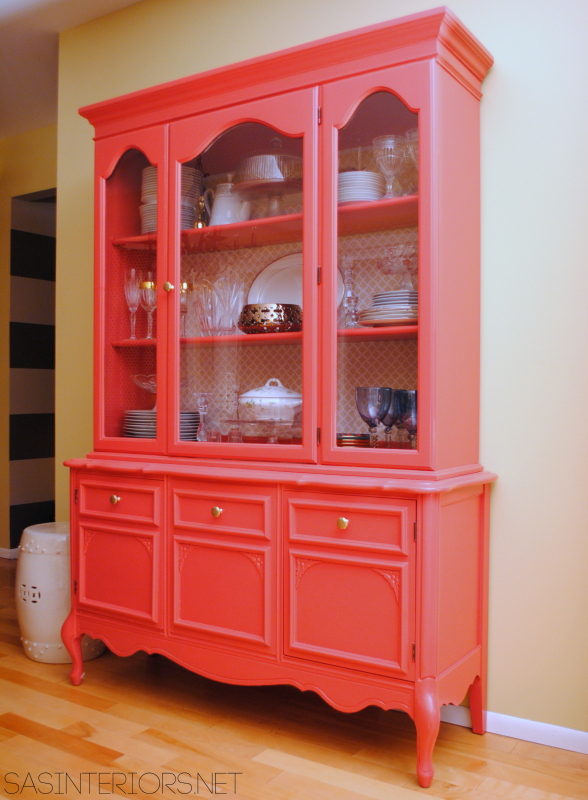
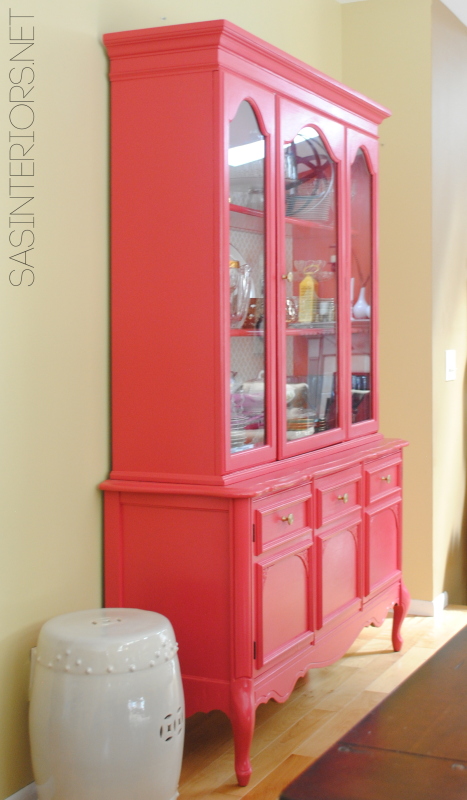
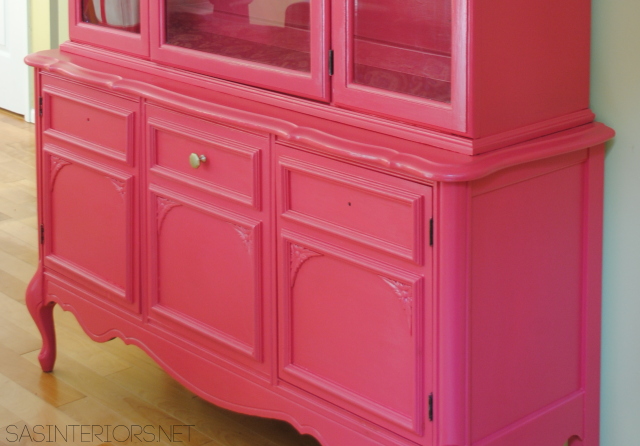
The ‘after’…

China Cabinet before & after >>> The process of giving this piece of a furniture a complete makeover!

China Cabinet before & after >>> The process of giving this piece of a furniture a complete makeover!

China Cabinet before & after >>> The process of giving this piece of a furniture a complete makeover!

Styling Tips: Adding unique, one-of-a-kind details to the finish the china cabinet makeover!

Let’s compare one more time…

China Cabinet before & after >>> The process of giving this piece of a furniture a complete makeover!

What do you think?  Pretty major change, right?!

Thank you so much for following along on this Tale of a China Cabinet Makeover!  I’ve received countless emails, comments, and messages on how the multiple posts and step-by-step breakdown of the process has been an inspiration.  From your notes, it sounds like many of you have had the urge to paint that piece of furniture but either didn’t know how, weren’t sure of the process, or didn’t have the inspiration needed to get started.  I hope I’ve pushed you enough to make the move!

Here are the many posts related to this before and after
Backstory + Choosing a Color
Prepping & Sanding Wood Furniture
Why & How to Prime Wood Furniture
Tips + Tricks to Painting Wood Furniture
Accessories, Details, & Styling {China Cabinet Makeover}
China Cabinet Makeover {Reveal}

This post is sponsored by Glidden paint, but all thoughts and opinions are 100% my own.  I am so excited about this project & was thrilled to partner with Glidden paint on this furniture makeover.
How-To Paint Wood Furniture

Prep is done.

Sanding is complete. >>> [tutorial here]

Priming is finished. >>> [tutorial here]

Now on to the painting.  This was definitely the longest + most tedious part of the makeover, but absolutely the most important step to focus on.  With all the work that has gone in to prepping this cabinet, or any piece of furniture for that matter, painting it right really makes all the difference in the world to achieve a nice looking end product.

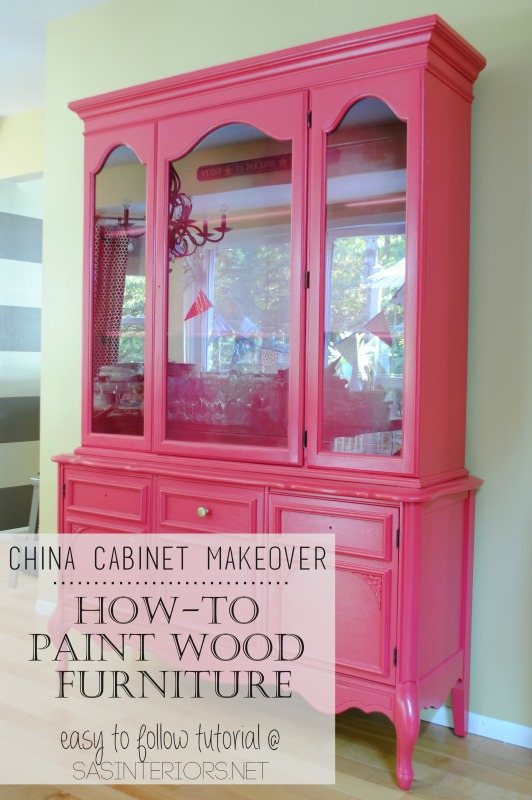
This post is completely dedicated to sharing the steps I took + tips & tricks on how-to successfully paint wood furniture.

DIY Tutorial: tips + tricks on How-To Successfully Paint Wood Furniture. Follow along on this multi-post blog series of transforming a china cabinet. Easy-to-follow directions and all the steps fully explained!

As I’ve explained and stressed in the previous two posts, the prep work + priming is very important before paint is applied.  To achieve a successful end result, a primer is a must.  For this project, I used Glidden Gripper primer (a picture of it + more details can be found in the last post).  Once the primer is dry, which typically takes little time (about a day), painting can begin.

Before Painting.

  • The Magic Formula. One of my secrets for painting wood furniture is to use floetrol (<- affiliate link).  With all furniture painting projects,  I always add my favorite “formula” to eliminate brushstrokes. It works like a charm to achieve a clean, brushstroke-free surface! (And I wasn’t even paid to say that – I truly just love it ;)
  • The Brush.  The brush used for painting really does make a difference.  I always use Purdy brushes because they truly make for an easier, better painting result. Yes they are expensive, but it’s worth the cost.  Most of the time I use a new brush when starting a project. (Again, I wasn’t paid to say that)

DIY Tutorial: tips + tricks on How-To Successfully Paint Wood Furniture. Follow along on this multi-post blog series of transforming a china cabinet. Easy-to-follow directions and all the steps fully explained!

The Color.

The paint color I chose for this cabinet makeover is Red Red Rose by Glidden.

How-To Paint Wood Furniture.

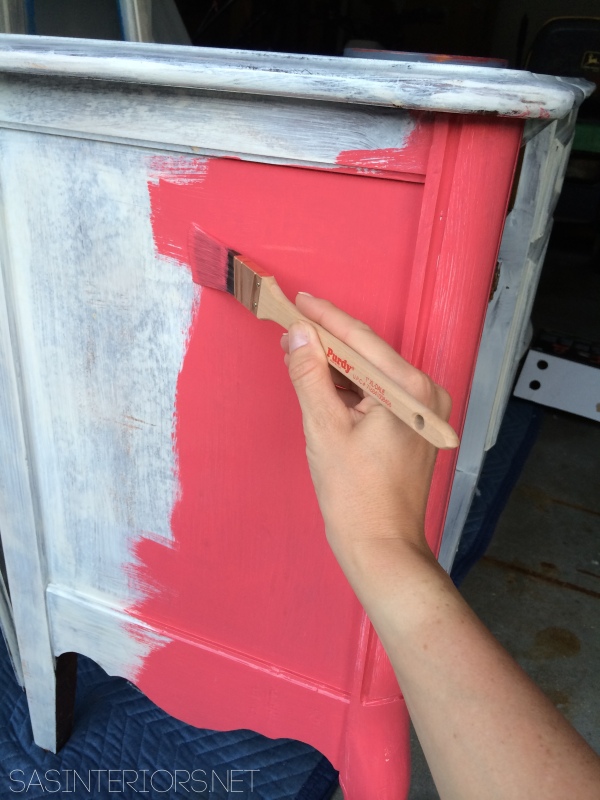
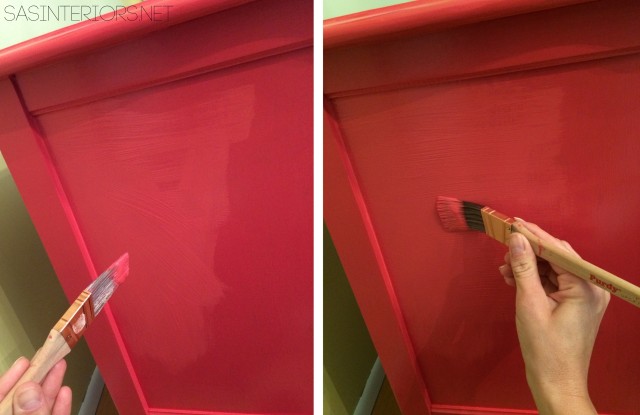
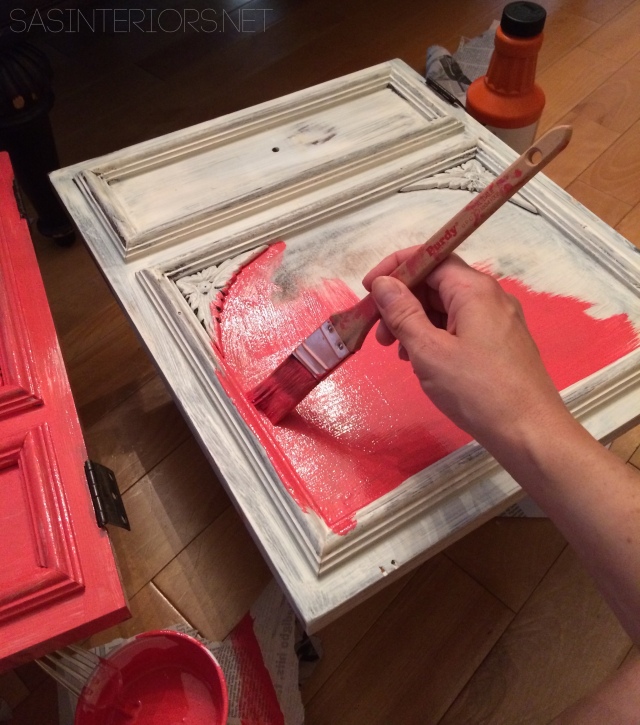
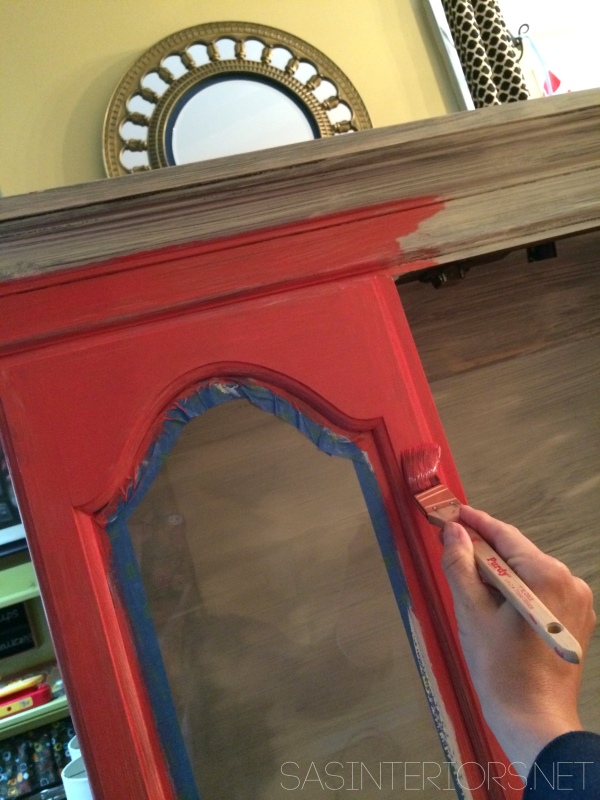
When painting furniture, like this china cabinet, I started on one side of the base cabinet and continued across to the other side while working in small sections.  I always continually look at what was just painted to check for drips, which you want to avoid as much as possible!

Typically I will add paint to the overall surface and then go back to smooth it out so all the strokes are in one direction (usually you want to follow the grain of the wood, but it’s not a must since with paint you don’t see the grain).

DIY Tutorial: tips + tricks on How-To Successfully Paint Wood Furniture. Follow along on this multi-post blog series of transforming a china cabinet. Easy-to-follow directions and all the steps fully explained!

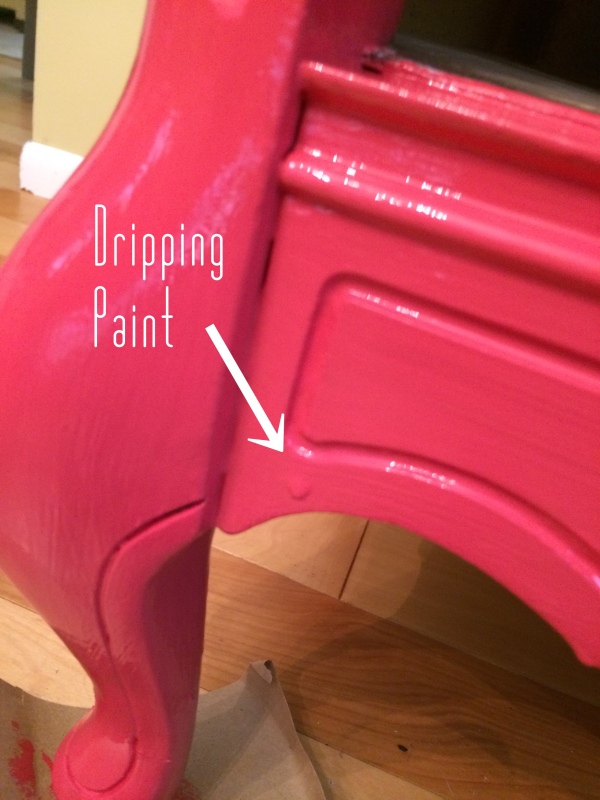
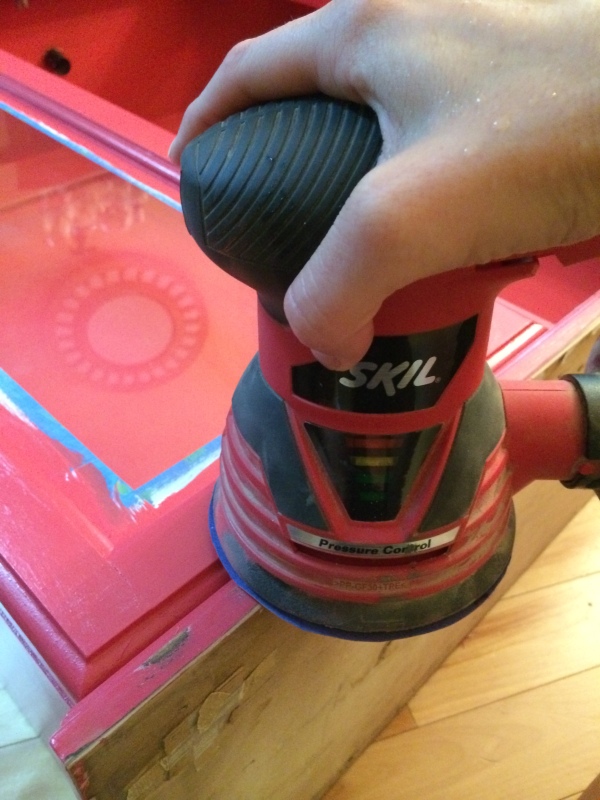
Even if you try to avoid them, drips are normal.  To deal with those nasty, inevitable paint drips, I sand them off once they are completely dry.  Using an orbital sander is easiest, but sanding the spot by hand also works.  If you catch the drip before it’s dry, then go over it with your paint brush to smooth it out.

DIY Tutorial: tips + tricks on How-To Successfully Paint Wood Furniture. Follow along on this multi-post blog series of transforming a china cabinet. Easy-to-follow directions and all the steps fully explained!

I didn’t take a picture of me sanding that drip, but here is one from another section of the cabinet…

Once the paint was dry, I lightly went over the drip to smooth out the section of cabinet.

DIY Tutorial: tips + tricks on How-To Successfully Paint Wood Furniture. Follow along on this multi-post blog series of transforming a china cabinet. Easy-to-follow directions and all the steps fully explained!

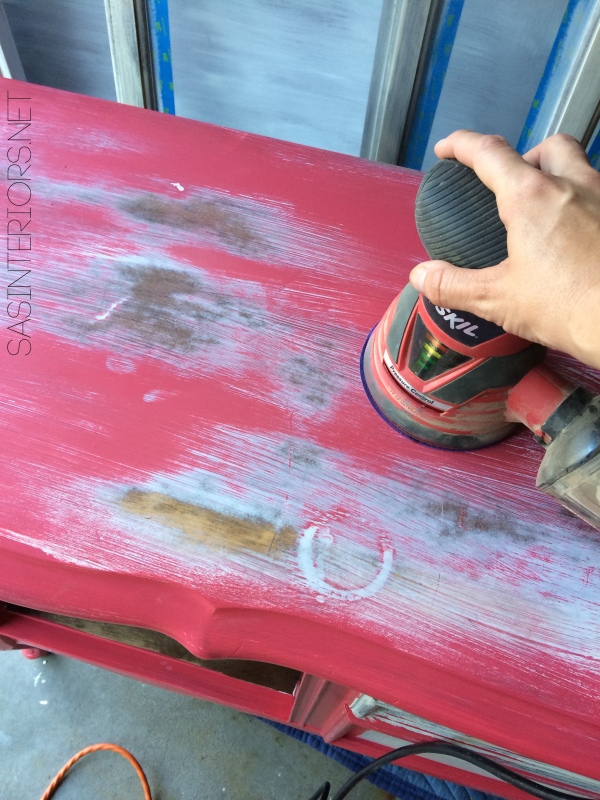
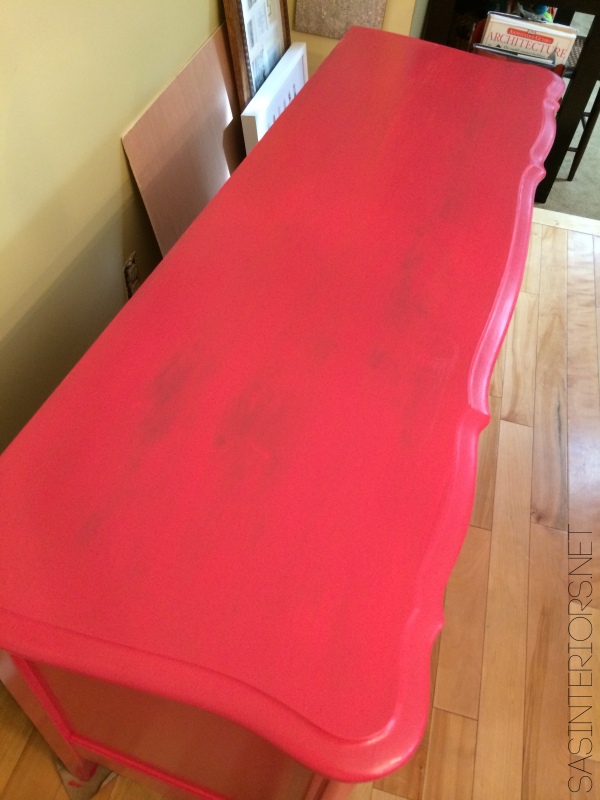
Another issue I encountered  which I didn’t like was the result of the buffet top once the first coat of paint was on.  I guess when I added the primer, I didn’t continue my brush stroke from on side to the other, so the top surface looked bumpy.  Once the first coat of paint was dry, I lightly sanded the surface. This left the top very smooth and ready for coat #2.

DIY Tutorial: tips + tricks on How-To Successfully Paint Wood Furniture. Follow along on this multi-post blog series of transforming a china cabinet. Easy-to-follow directions and all the steps fully explained!

Coat #2

DIY Tutorial: tips + tricks on How-To Successfully Paint Wood Furniture. Follow along on this multi-post blog series of transforming a china cabinet. Easy-to-follow directions and all the steps fully explained!

In all the top got about 3-4 coats.  All the other areas of the cabinet got 3 coats.  Because of the intense color 2 coats wasn’t enough.

Here are some more outtakes while painting…

The cabinet fronts.

DIY Tutorial: tips + tricks on How-To Successfully Paint Wood Furniture. Follow along on this multi-post blog series of transforming a china cabinet. Easy-to-follow directions and all the steps fully explained!

The cabinet top.

DIY Tutorial: tips + tricks on How-To Successfully Paint Wood Furniture. Follow along on this multi-post blog series of transforming a china cabinet. Easy-to-follow directions and all the steps fully explained!

The base cabinet after one coat.

DIY Tutorial: tips + tricks on How-To Successfully Paint Wood Furniture. Follow along on this multi-post blog series of transforming a china cabinet. Easy-to-follow directions and all the steps fully explained!

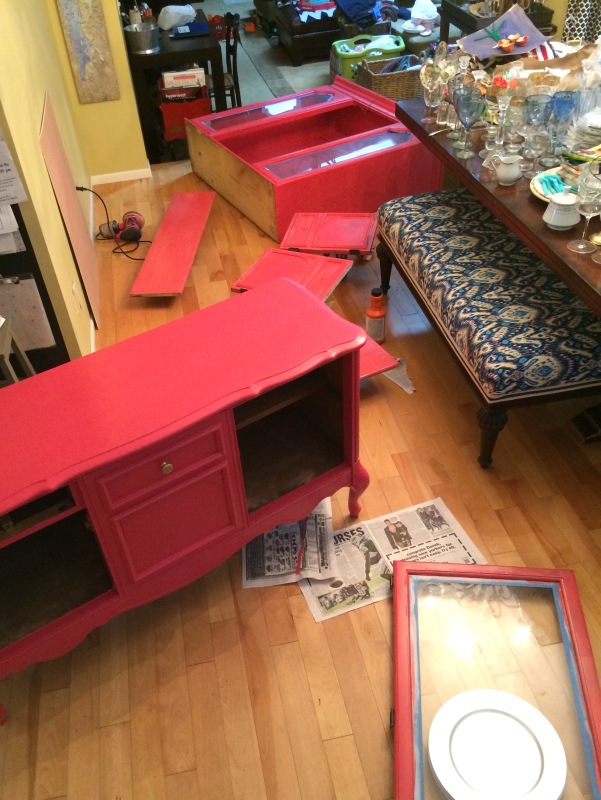
I will tell you, painting the cabinet took a good 3 solid days of off and on work.  It was tiring, but well worth it in the end.  Most of the painting took place at night after the kiddos went to bed which is why the coloring of the cabinet in the pictures looks a bit off.

Here’s a peak at what was my crazy life for a few days.  Just keeping it real…

Once every surface, nook, and cranny were done, it was time to add a coat of polyurethane.

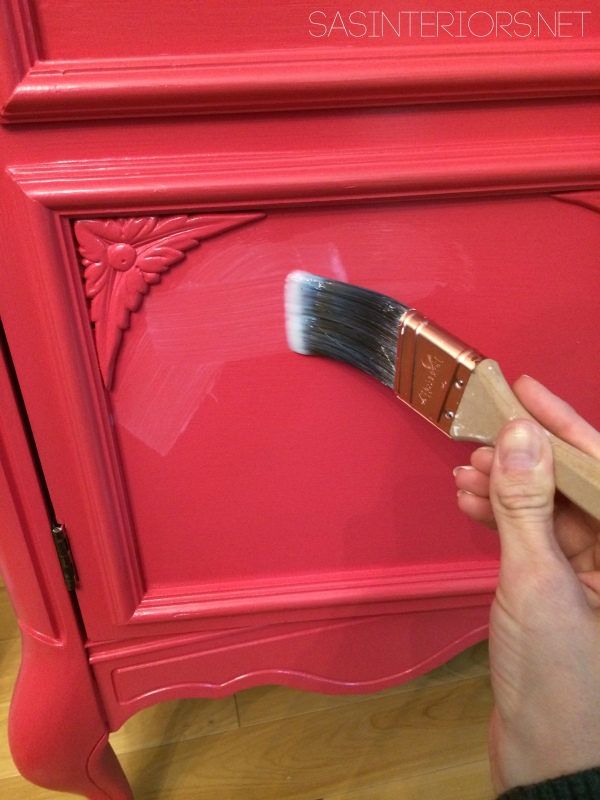
Applying polyurethane is similar to primer… a little goes a long way.  It’s also a lot thinner than paint, so it can easily run creating those annoying drips.  Applying a light coat and fanning it over the surface is best.  It goes on as a white milky liquid, but as you work it into the surface it will be come clear.  And of course it dries clear.

For this cabinet, I used a semi-gloss polyurethane.

DIY Tutorial: tips + tricks on How-To Successfully Paint Wood Furniture. Follow along on this multi-post blog series of transforming a china cabinet. Easy-to-follow directions and all the steps fully explained!

And then it was done.

DIY Tutorial: tips + tricks on How-To Successfully Paint Wood Furniture. Follow along on this multi-post blog series of transforming a china cabinet. Easy-to-follow directions and all the steps fully explained!

Well almost. The painting is complete, but there are still some details that I need to work on, like the hardware and another secret surprise.

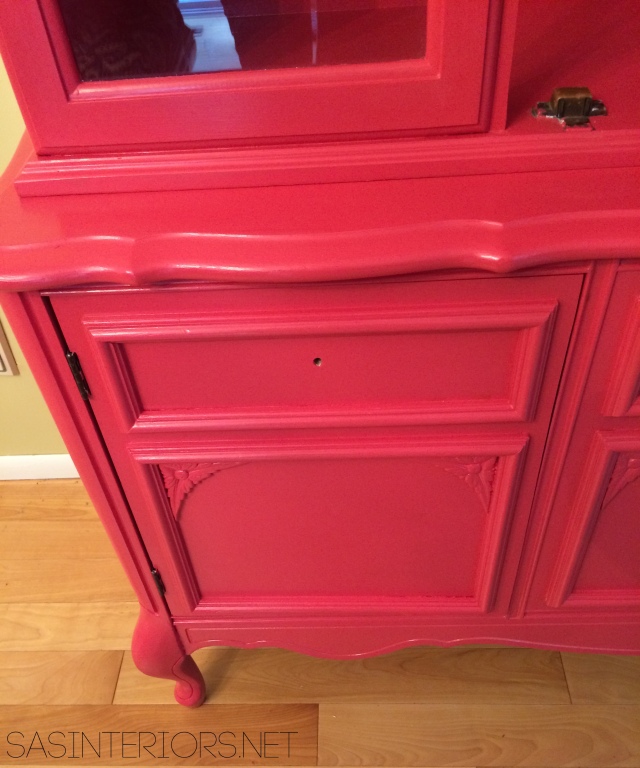
But back to the painting result, here are a few closeups…

DIY Tutorial: tips + tricks on How-To Successfully Paint Wood Furniture. Follow along on this multi-post blog series of transforming a china cabinet. Easy-to-follow directions and all the steps fully explained!

DIY Tutorial: tips + tricks on How-To Successfully Paint Wood Furniture. Follow along on this multi-post blog series of transforming a china cabinet. Easy-to-follow directions and all the steps fully explained!

DIY Tutorial: tips + tricks on How-To Successfully Paint Wood Furniture. Follow along on this multi-post blog series of transforming a china cabinet. Easy-to-follow directions and all the steps fully explained!

You see that one piece of hardware on there?  I couldn’t resist giving you a peak at what it will look like once it’s all done.

Next up… styling this pretty gal.  Here’s a peak at the start of the process…

Let’s rewind and take a look at where I started and the progress I’ve made.

DIY Tutorial: tips + tricks on How-To Successfully Paint Wood Furniture. Follow along on this multi-post blog series of transforming a china cabinet. Easy-to-follow directions and all the steps fully explained!

Not too shabby.  More to come.  Stay tuned.

Follow along on this makeover with these other posts
Backstory + Choosing a Color
Prepping & Sanding Wood Furniture
Why & How to Prime Wood Furniture
Tips + Tricks to Painting Wood Furniture
Accessories, Details, & Styling {China Cabinet Makeover}

Check out the  >>> FINAL REVEAL


Painted Two-Toned Desk + Tips on Painting Furniture

I’m just about finished with the updates for my son’s bedroom makeover.  It hasn’t been a huge overhaul, but with rearranging the furniture, adding colorful stripes on the wall, and hanging new DIY pallet shelves, this space has received a welcome refresher.  In the midst of moving around the beds and dresser, I realized  my little man is at the age where he really needs a desk to work at and hold all his creative supplies.
If you remember back quite a long time ago, I purchased a beauty of a desk off Craigslist.  It lived in my family room ever since (over 6 months), but wasn’t “right”.  Then pufff… I had an idea – it would be perfect for my son’s room.


And this is the evolution of the Craigslist Desk…

It started off as a stained executive desk typical of the 1940s and is in really great condition.  The only thing it needed was a little makeover to update it and bring it back to life to mesh with today’s decor style.

In knowing that the desk would live in my son’s room, I wanted to do it right.  With my lack of patience, I sometimes skip steps or rush, but with this desk makeover I took my time so the result would be something he could live with for many years.

Supplies: Onto the makeover – here’s my arsenal of supplies…

1. Fill Holes & Sand: I started off removing the hardware, which I decided to replace with simple knobs.  Then I filled all of the scratches, holes, and nicks with wood filler.   And the last step before painting was to sand the overall desk surface with my orbital sander using a 120 grit sandpaper (medium coarse), then a 220 grit sandpaper (very fine coarse).
2. When the sanding was complete, I cleaned off the entire surface with a damp rag before I started priming.

3. Primer: Once the desk was completely dust-free, I added one coat of primer with my favorite Kilz Primer which blocks the stain and allows for a well-prepared surface to paint.

4. Secret Agent: With every painting job, I always add my favorite “formula” to eliminate brushstrokes – Floetrol.  It always works like a charm to achieve a clean, brushstroke-free surface! (And I wasn’t even paid to say that – I truly just love it 😉

Desk Colors:

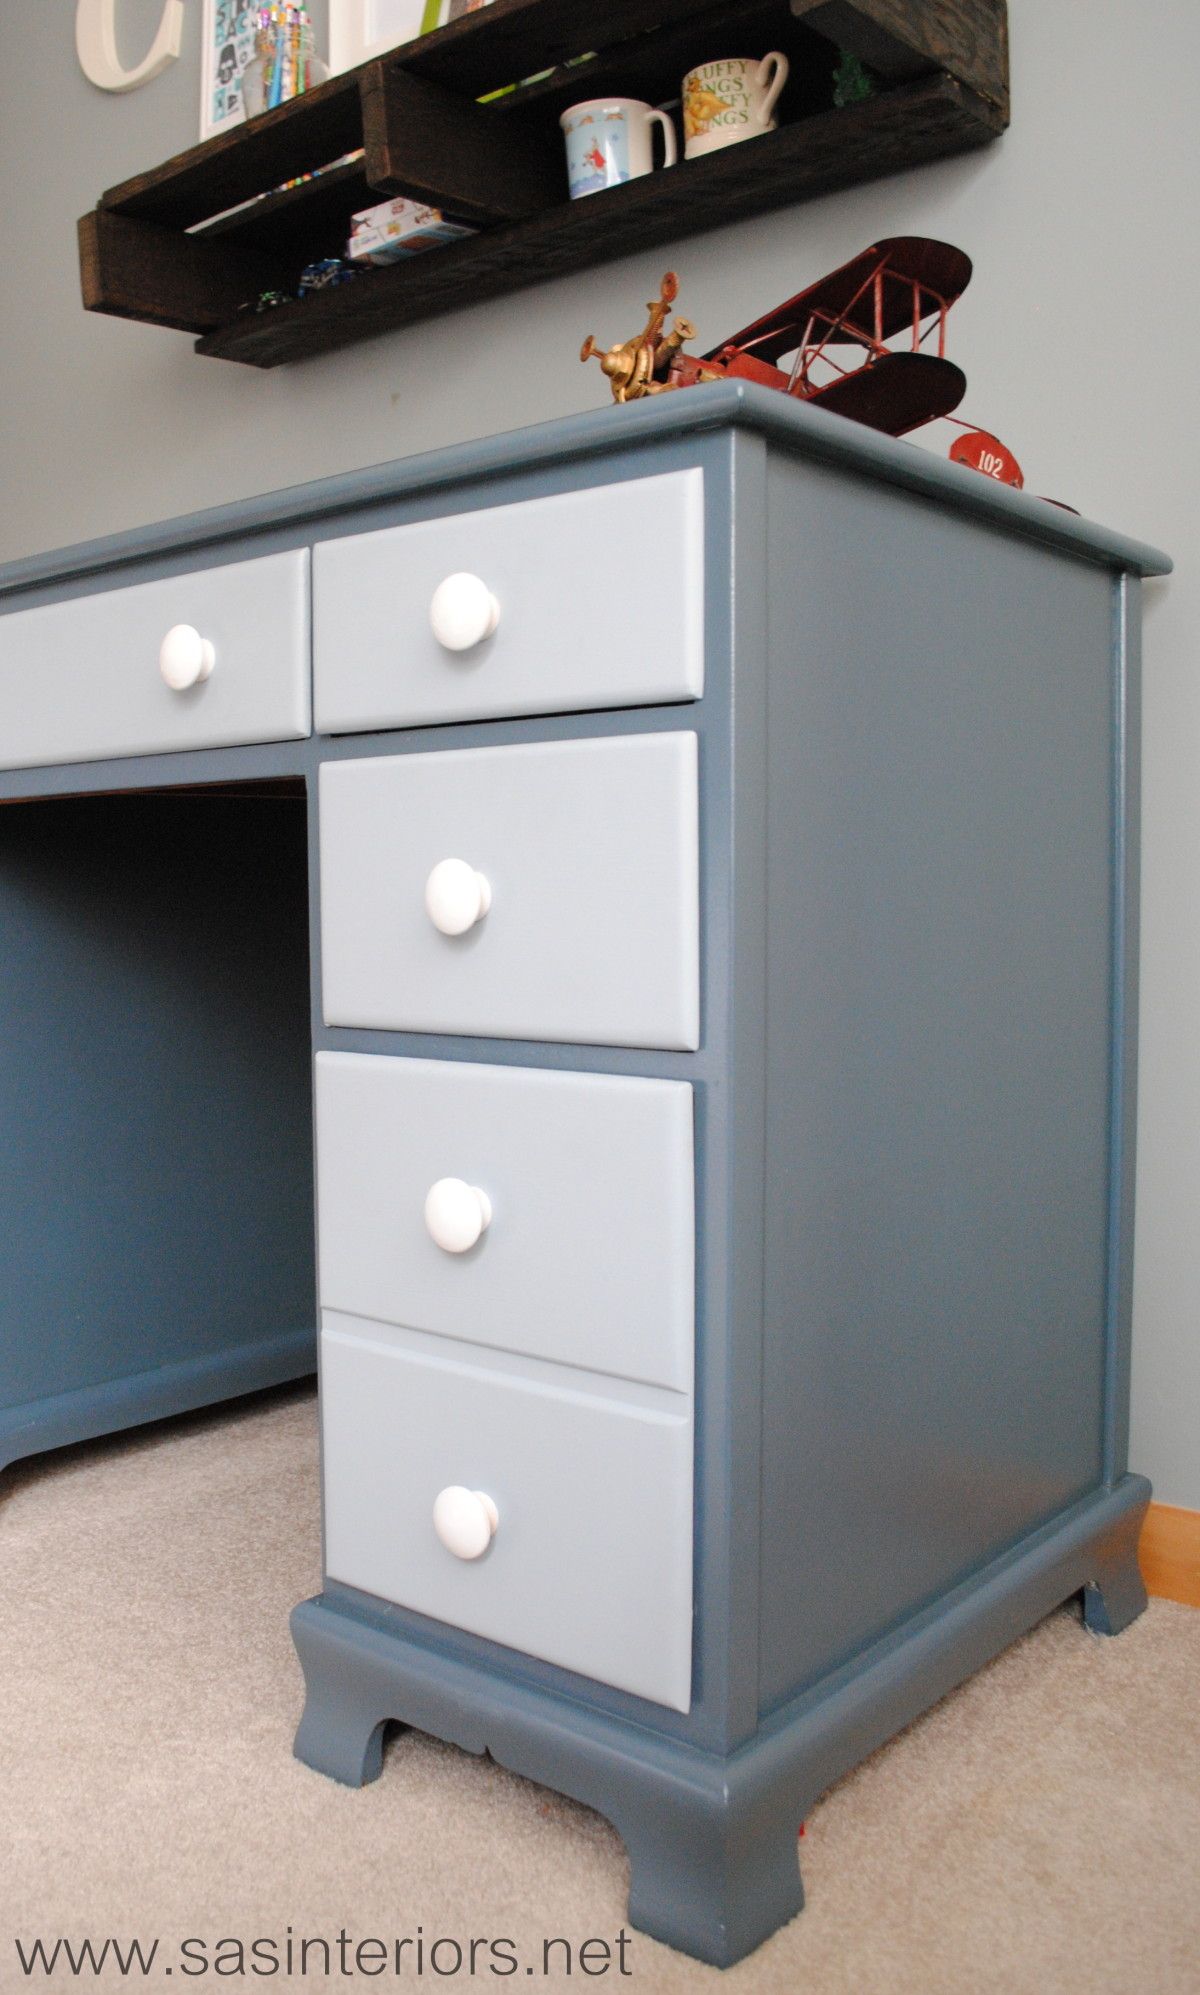
  • Desk Top & Frame – Dutch Boy High Seas
  • Drawer Fronts – Dutch Boy Hurricane Cliffs

5. Paint: After the one coat of primer, I added the first coat of paint, which I used both a brush and roller.  On the top and flat surfaces of the desk, I used a 5″ wide small roller and for the difficult crevices and edges, I used my favorite 1.5″ wide Purdy brush.  *Sometimes, I used the brush first and went over it with the roller.  The roller makes for a smooth surface to avoid brushstrokes.

6. Then onto painting the drawers.  I wanted this desk to be a little playful and not just one color, so I decided to use a lighter color blue on the drawer fronts.

7. Polyurethane: The last painting step was to add a coat of polyurethane – truly the most important part in finishing any piece of furniture!  I usually use water-based clear satin polyurethane, but since I knew this desk would be getting lots of use in the years to come, I decided to use an oil-based polyurethane, which really is more durable (hands-down).

8. Hardware: Once the painting was complete, I drilled one hole in each drawer front for the new knobs, which were originally natural that I spray painted white.  The knobs went in and the desk was complete.

To add a little unexpected fun to the desk, I added a drawer liner that has a geometric pattern with green, blue, and turquoise colors.  My son was quite surprised when he opened the drawers to find this hidden treasure!

And once again here is the before and after…

And these are just a few important tips to remember when painting furniture:

 Do you like painting furniture? Have you painted anything lately?

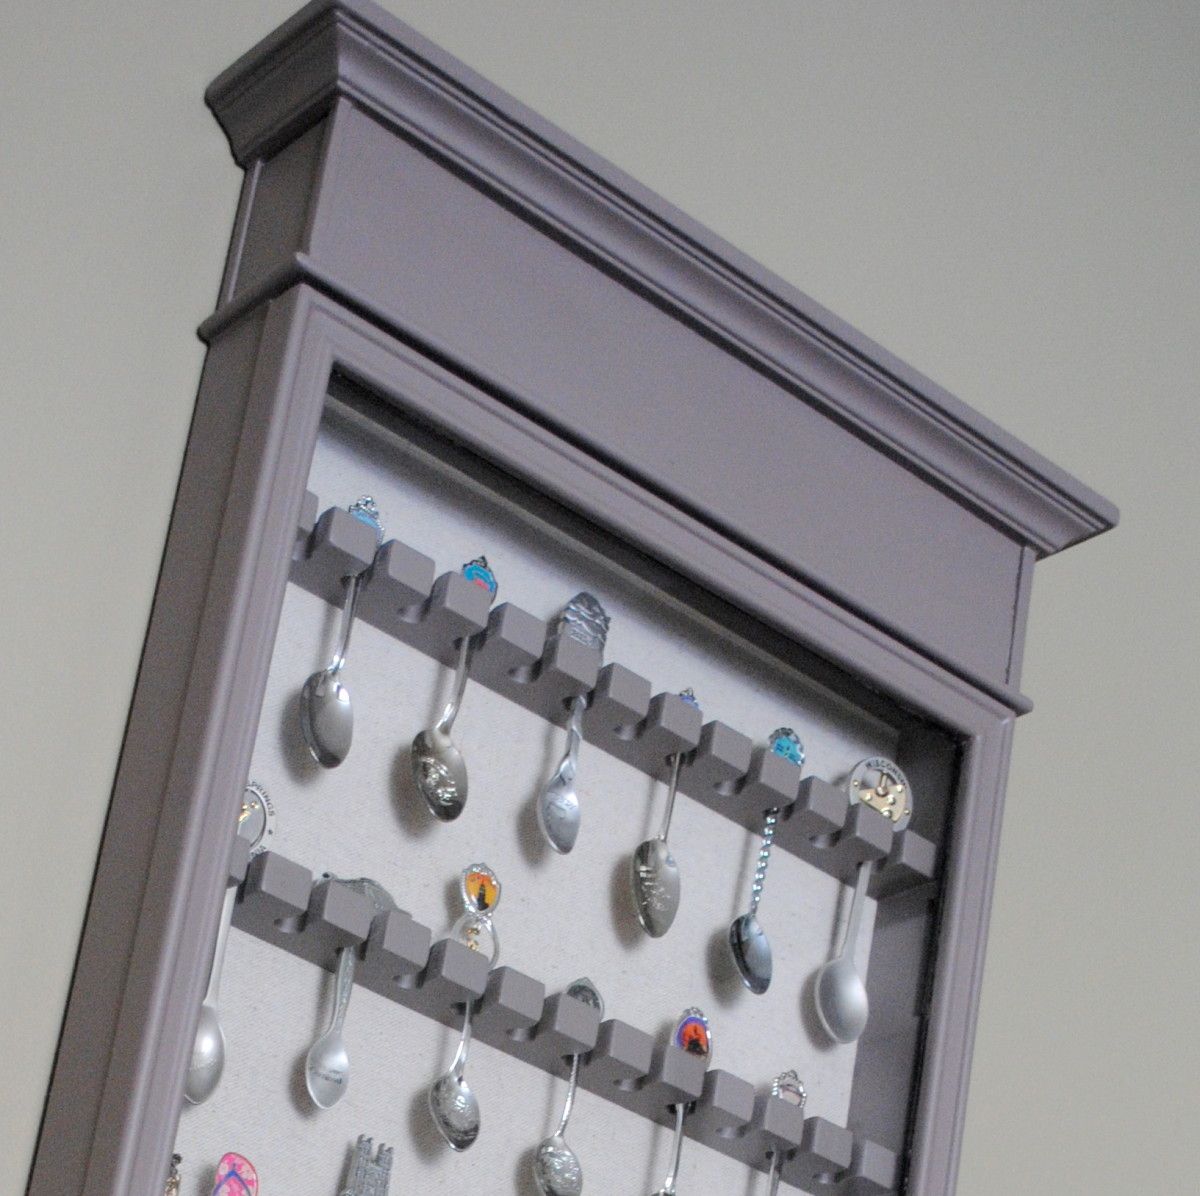
Traditional to Transitional Spoon Rack Revamp

As you know, I have a little obsession (well more than a little – little would be an understatement) with transforming and updating the decor around my home.  Most of the furniture or accessories though, have been of little or no value, which always makes me less apprehensive about jumping into a project.  If I mess up, who cares!  There are many pieces that I would love to change, but feel I don’t have the skill set (yet) and would be very upset if the result was NOT what I envisioned.

BUT, recently I took a (reluctant) leap of faith, and changed a special piece… my spoon rack, that houses my growing collection of spoons from our family trips and travels.  It’s a special piece and I was quite apprehensive about touching it, but I really was just tired of the traditional style with heavy black wood and red velvet fabric backing.  The style needed an update for my decor and I couldn’t look at it anymore without wanting to give it a lighter, simpler overhaul.

Well, here “she” is.  It was quite the process to get “her” to this point, but I have to say, I am quite satisfied.

I actually wrote about my spoon collection and my special spoon rack when I first started blogging.  It’s kind of dorky and a bit of a cliche to collect spoons, but other than my memories and pictures, the only tangible connection from our family trips are these spoons and they’re a pleasant reminder of the places we’ve been.

I purchased the spoon rack about 7 years ago from the Bombay Company, which I don’t think is even in business anymore.  At the time, the style went well with my aesthetic and I really liked how different this spoon rack looked compared to what was typical.  But recently, my style has been going more casual and less ornate, so a change was a must.

The before… And the after…

Thankfully, this year the Winter has been non-existent and a few weeks ago, the weather was so nice that I was able to work on this project outdoors.  I hadn’t planned on tackling the tranformation till Springtime, but when the opportunity allowed, I jumped on the chance!

I started off sanding all the surfaces with my orbital hand sander, as well as using sandpaper by hand to get in the nooks and crannies.

Then, I applied one coat of primer to all the surfaces to allow for a good base before painting.

All primed and ready to paint!

I was originally going to paint the spoon rack the same color as my kitchen cabinets, since my plan was to put the rack in the adjacent room, and the two spaces would tie together.  After giving it some thought, painting it would have been ALOT OF WORK.  So spray paint was the answer.  Thin, Slow, Even Strokes always leads to spray painting success!

My spray paint color of choice for this project? Thorny Brush in Satin (a taupe hue)

After completely spray painting the frame, I tackled the glass door.  This was a little trickier, but using painters tape around the edge and foil in the center, I was able to spray paint the outer edge without getting any paint on the glass. Once it was dry, I ripped off the tape (carefully, of course).

**CONFESSION** ~ I should have taken my own advice.  At first, I DIDN’T use foil for the center and after putting on the tape, just started spray painting.  SHAME, SHAME. Paint got on the glass.  THANKFULLY, I have a quick fix = Brillo and a sharp knife.  Using an abrasive brush or pad (like Brillo), gently scrub the paint off the glass, but steer clear of the edges.  For those tough parts, a sharp knife is perfect to scrape off the paint.

The last step to finish up this spoon rack overhaul was to change the fabric back.  Originally, I thought about using a bright color, then I thought about a fun and funky fabric, but in the end I wanted the spoons to “speak”, so decided on a quiet linen fabric.

What a change!  Once it was complete, I gave a HUGE *sigh* of relief!!  The spoons got to go back to their home.

It’s complete and hung on the wall {happy}!

Throughout the process, I quietly cursed a few times and bit my fingernails alot, but in the end, I am quite happy with the result!  I’m proud of myself for taking a chance on something that I was so unsure about.

Have you transformed or upcycled any projects recently?  Have you ever changed a piece of furniture or decor that you truly treasured? and if so, what was the result?

I link my projects to some of these parties: Skip to My Lou, Dittle Dattle, Between Naps on the Porch, Today’s Creative Blog, Stories of A to Z, All Things Heart & Home, Savvy Southern Style, House of Hepworths, Finding Fabulous, Creation Corner, The Shabby Nest, Tatertots and Jello, Thrifty Decor Chick, Under the Table & Dreaming