Tag: pallet creation

Modern, Rustic Teen Room + DIY Pallet Wall Tutorial

Hey There! Hope you’re having a great week.

Today, I’m sharing the details of another teen bedroom that I just finished up. The other day I shared the first of the 3 teen rooms (all siblings) and you all were in love. Many of you chimed in and said “this is for a teen? I want this room!” With splashes of pink + shades of gray, it was a winner young OR old. And that geometric rug – you all were gaga over it. See more of that space > here.

On to this new teen room reveal…

As I mentioned the other day, I had a neighbor reach out about remodeling their 3 teens bedrooms. I thought a new splash of paint + a few new throw pillows and it’d be done. Nope! This was an entire makeover from top to bottom for each room. These awesome parents wanted to put the time + money into creating a space that truly reflected each of their blooming personalities. Using some old, adding in quite a bit of new, and DIYing a few fun projects, these room got a total revamp.

WELCOME TO BEDROOM 2

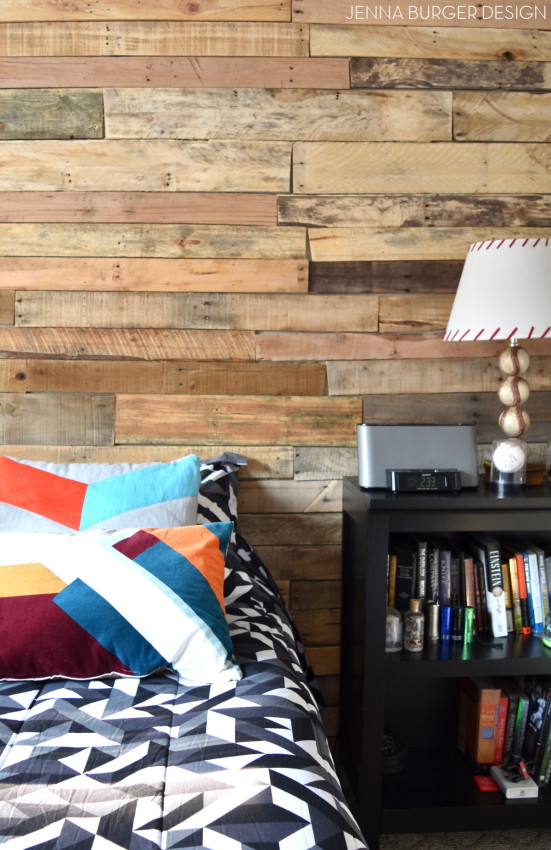
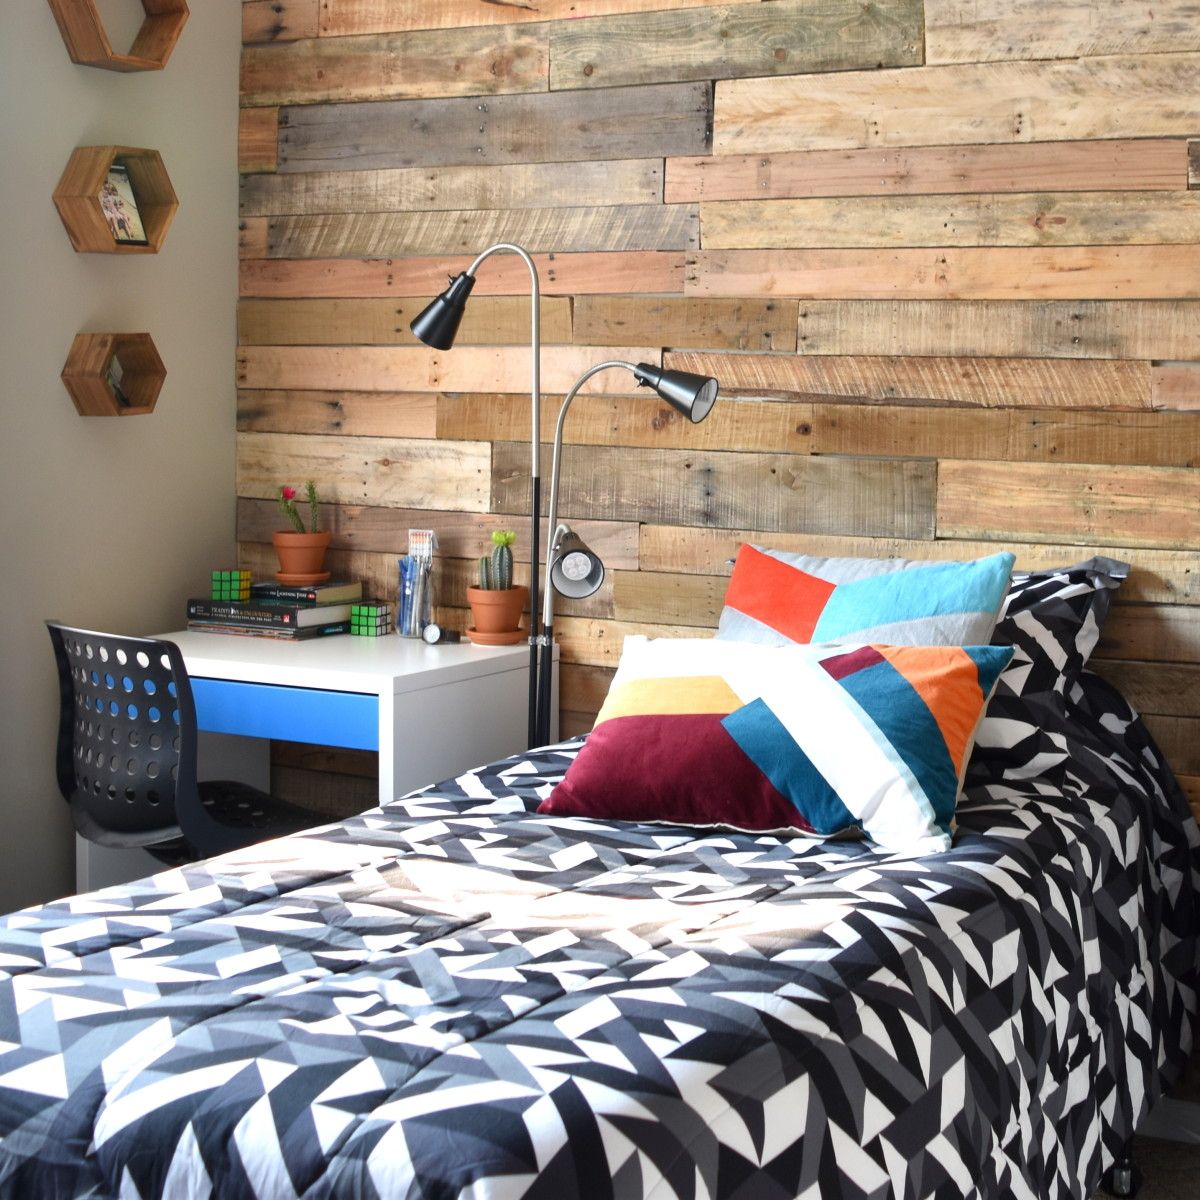
Let’s dissect the details of this teen space with a new rustic pallet focal wall layered with vibrant geometric patterns + bold colors

Teen Room Revamp: A pallet wall was added to the focal / bed wall and geometric patterns in bold colors were layered in. Check out more of this space + SOURCES @ www.JennaBurger.com

The process of revamping each room was fairly similar to how I typically work with clients, yet it was multipled by 3. Three unique personalities. Three styles. Three visions. Not having worked 1-on-1 with a teen before, I wasn’t sure how it was going to pan out, but they came prepared with a plan.

And I was able to execute this for his new pad…

Teen Room Revamp: A pallet wall was added to the focal / bed wall and geometric patterns in bold colors were layered in. Check out more of this space + SOURCES @ www.JennaBurger.com

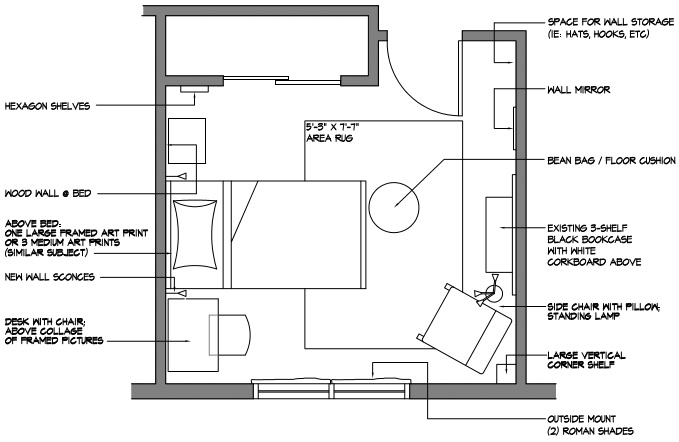
and the floor plan…

Teen Room Revamp: A pallet wall was added to the focal / bed wall and geometric patterns in bold colors were layered in. Check out more of this space + SOURCES @ www.JennaBurger.com

This specific teen – a boy – was less decisive about the design direction, so other than a few specifics, I had free rein. I wanted to achieve a modern, but worn aesthetic and as a starting point, I was feeling wood had to be introduced!

A pallet wall?

Would they go for it?

I would do a pallet wall in my house, but how could I “sell” the idea to a client??

Sold. They loved the idea – the teen AND the parents!

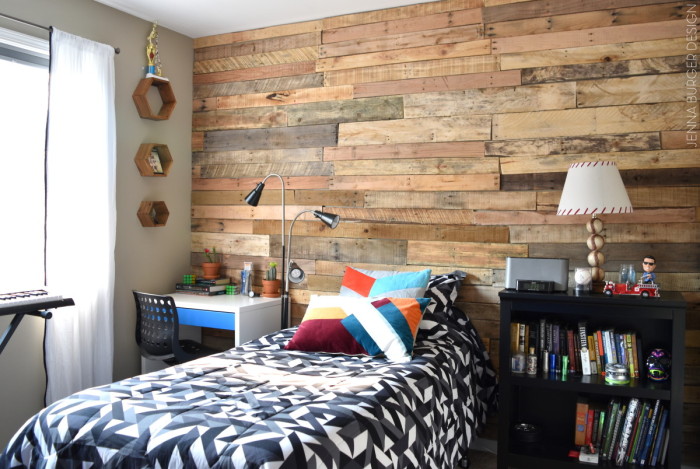
Teen Room Revamp: A pallet wall was added to the focal / bed wall and geometric patterns in bold colors were layered in. Check out more of this space + SOURCES @ www.JennaBurger.com

How fabulous does it look as a feature wall?!

After creating the floor plan + vision board (seen above) for each of the teen rooms, I sent them off with a shopping list + tutorials. On their own, they took on the task of gathering pallets, dismantling each pallet, then sanding + cleaning each board. It was a lot of work, but in the end, the project cost nothing AND they made it a family project.

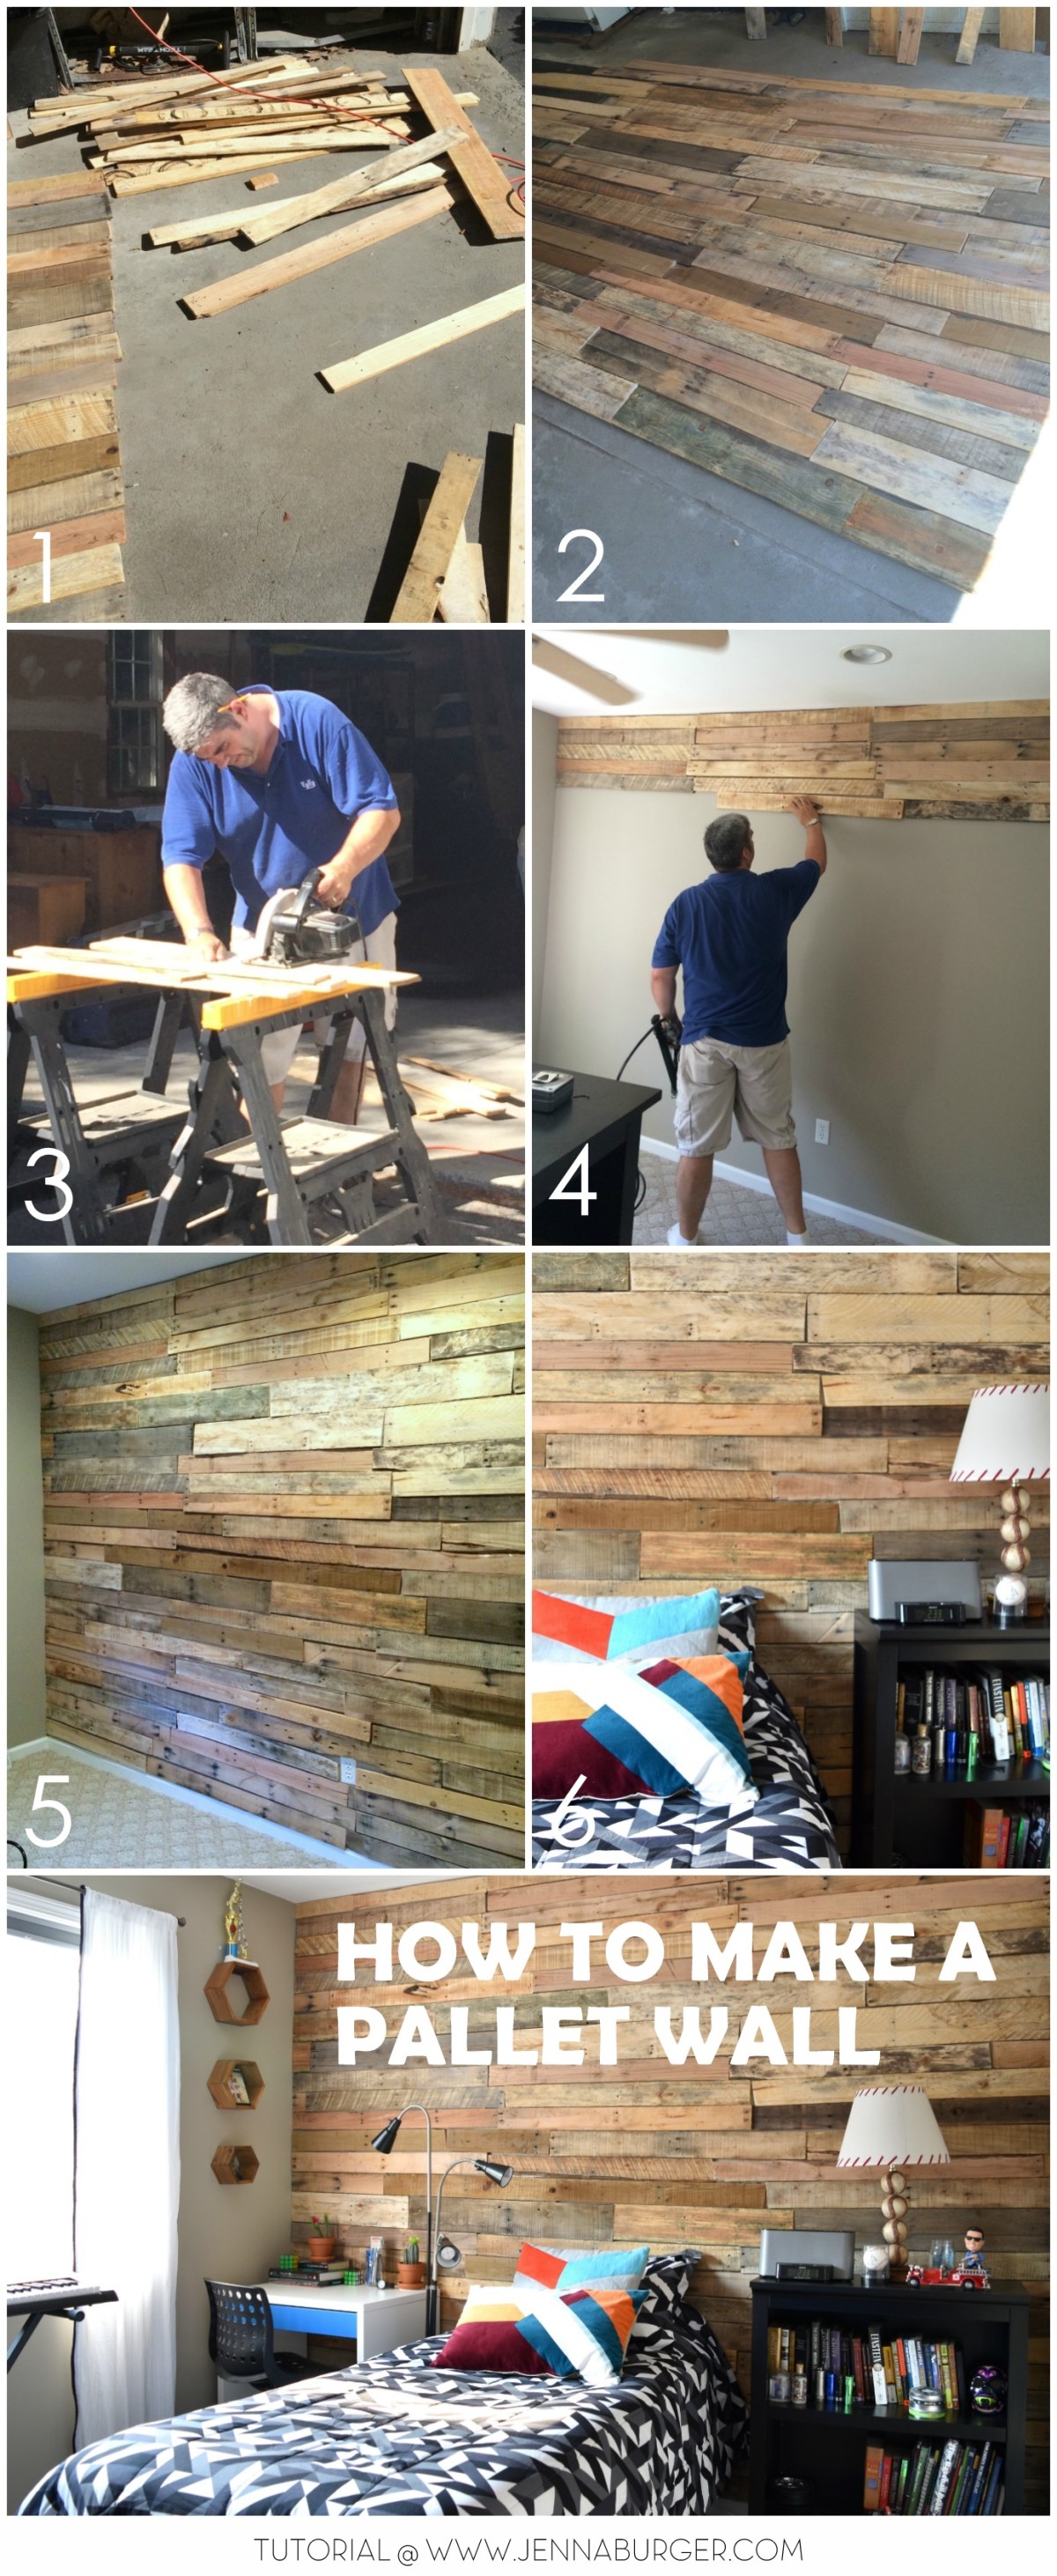
Here is a recap of the process to making the pallet wall…

DO -IT-YOURSELF PALLET WALL

DIY Tutorial for how-to build a pallet wall to create a rustic + warm feel to a space. Lots of labor BUT FREE! Tutorial @ www.JennaBurger.com

TUTORIAL

1 Find pallets

> For this 10′ wide x 8′ wall, about 100 planks were used. That breaks down to approximately 15 pallets (depending on the size + usability of planks per each pallet)

> I scour the back of my local Lowe’s for used pallets that they’ve given permission to take. Pallet projects are so popular, that some places are selling them, but I would try to find free before paying…

Dismantel the pallets

> Check out this tutorial for tips on dismantling a pallet

> When you have a pile of boards, clean them off with a damp cloth + sand the surface – an orbital sander is easiest and be sure to wear a face mask!

2Lay it out

> Avoid possible mistakes by laying out the wall on the floor BEFORE installing. Because the planks are of varying sizes and widths, this will help determine what works best + looks best when installed on the wall.

3Cut the boards

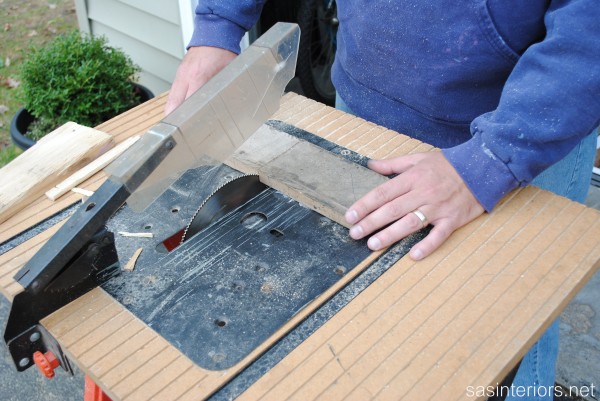
> Using a powered miter saw, cut the planks to size to fit the wall space.

4Install the boards

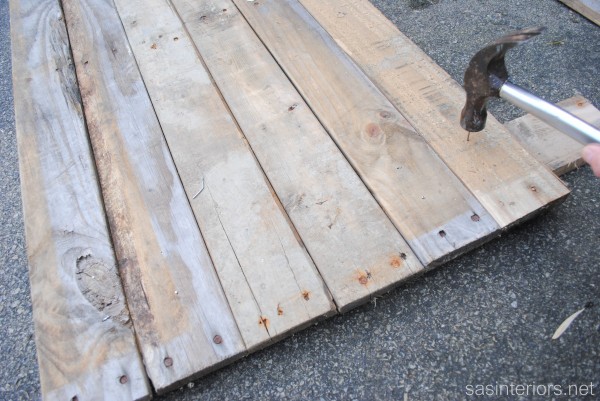
> Starting at the ceiling plane, position the planks on the wall and using a nailgun, nail the boards to the wall. This process should be fairly fast since the boards have already been laid out + positioned how you want them to look. Of course, adjustments may need to be made along the way.

> After each row, take a step back to the opposite side of the space to be sure the planks are fairly level. A long level might also be useful to check if the boards are straight, but your eyes should be enough.

5Finish it

> Row by row, make your way down the wall until you’ve reached the floor.

6  Step back

> Step back and enjoy your hard work. This DIY project isn’t difficult, nor expensive, but it’s time consuming.

> A helper isn’t required, but will surely make it easier!

> Layer the beautiful new wall with other rustic accents or contrasting decor as I did with colorful geometric patterns.

THE RESULT

Teen Room Revamp: A pallet wall was added to the focal / bed wall and geometric patterns in bold colors were layered in. Check out more of this space + SOURCES @ www.JennaBurger.com

Teen Room Revamp: A pallet wall was added to the focal / bed wall and geometric patterns in bold colors were layered in. Check out more of this space + SOURCES @ www.JennaBurger.com

Teen Room Revamp: A pallet wall was added to the focal / bed wall and geometric patterns in bold colors were layered in. Check out more of this space + SOURCES @ www.JennaBurger.com

This is absolutely a fun + inviting space for this teen – and his friends – to enjoy for years to come…
DIY: Pallet Gardening Table

Why yes, another pallet project coming your way.

I’ve only created 328 pallet projects thus far.  well maybe that’s a bit of an exaggeration…

Anyway, I’ve been busy with creating something new and different using pallets.

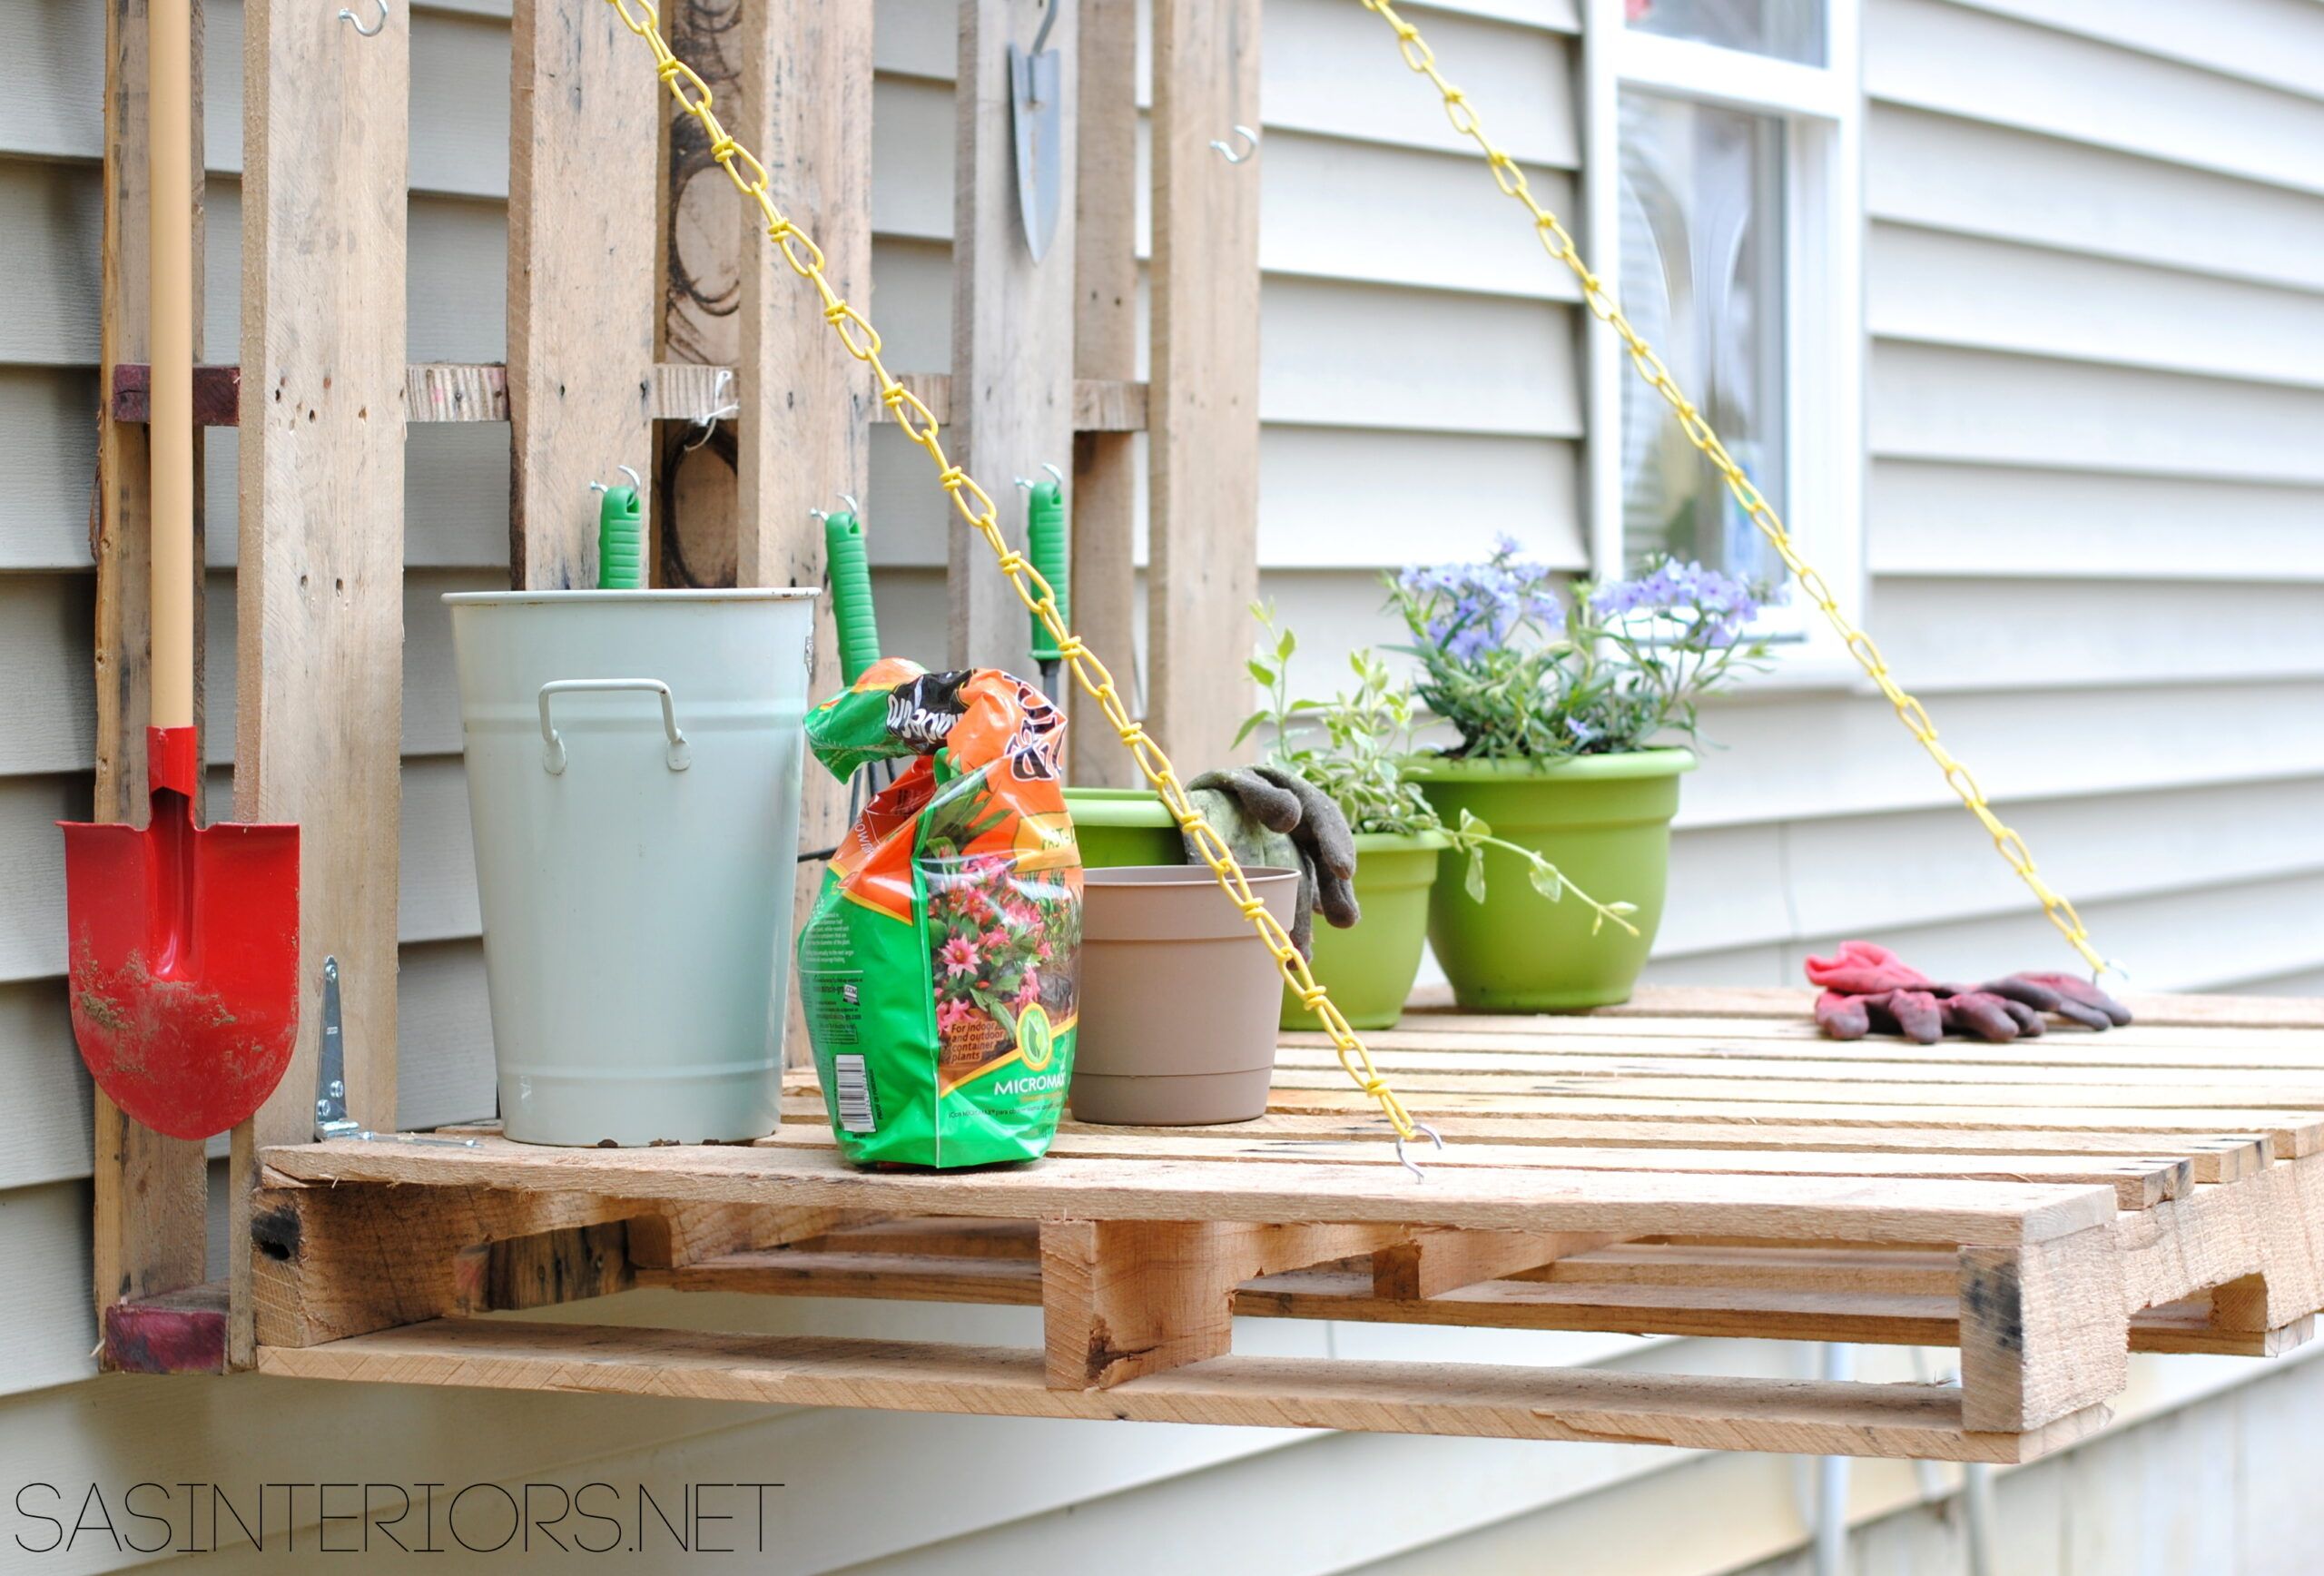
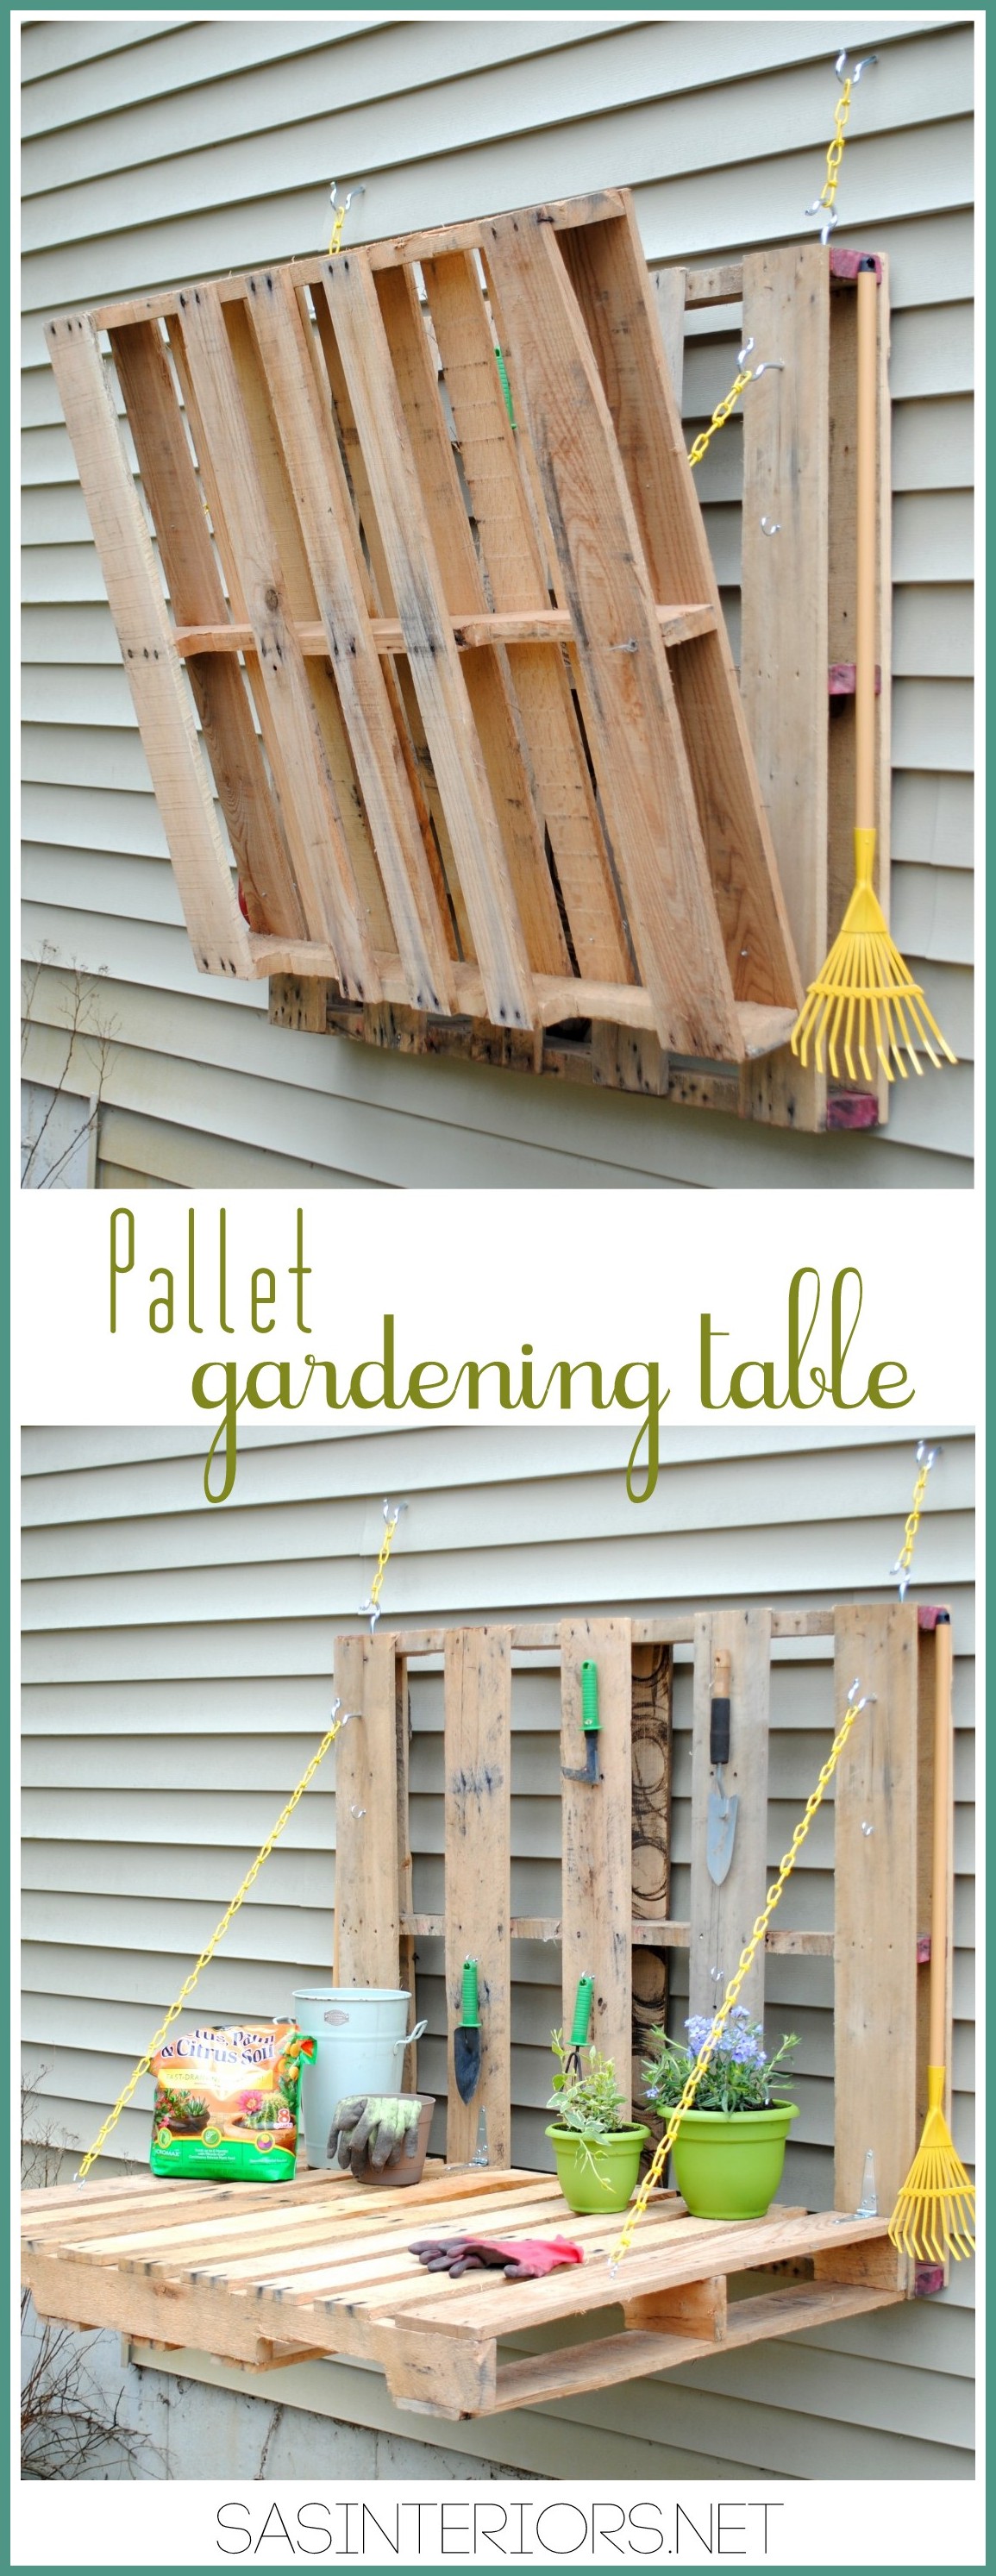
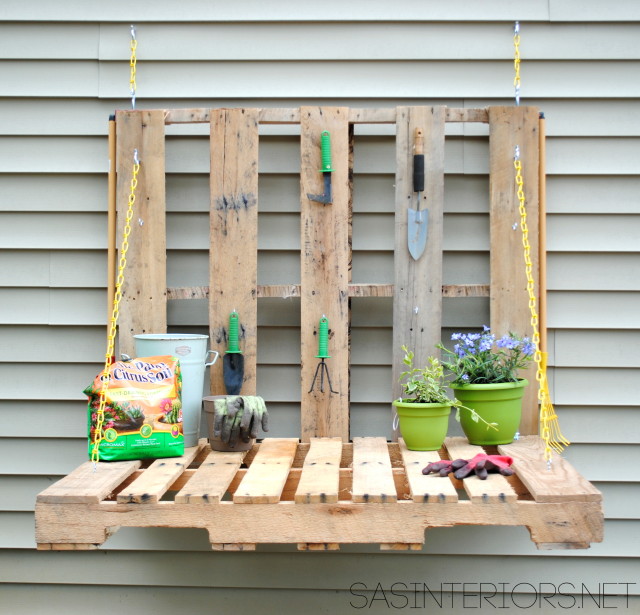
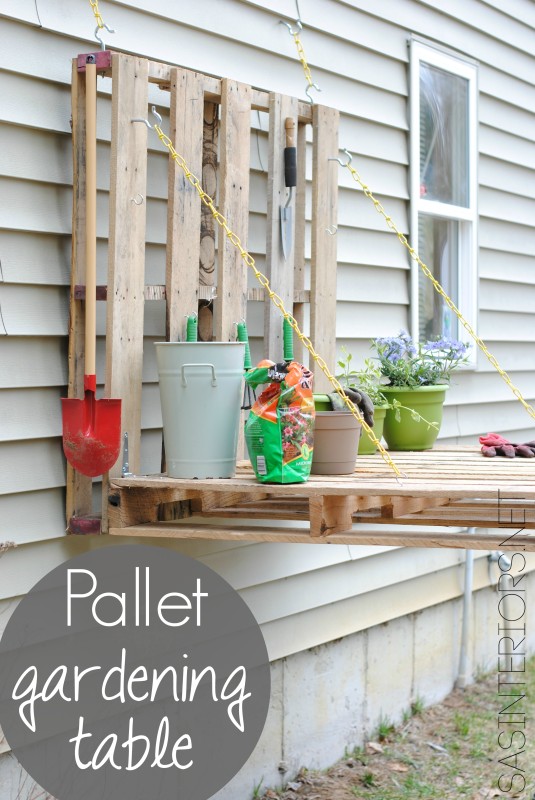
What did I make? A Pallet Gardening Table…

#DIY: Vertical Pallet Gardening Table - No more gardening on the ground with a hurt back. Create a garden table for less than $10. Created by @Jenna_Burger of WWW.JENNABURGER.COM

I’ve never seen something like this before (maybe it’s on pinterest, but lately it’s been crushing my creative juices so I try to stay clear)

Why did I create it? Because I needed a spot of my own to do my gardening and potting.  As I’ve said before, gardening isn’t my strong-suit, but when I do enjoy it and with time, I hope to get better.  Spending hours on the driveaway hunched over, is just not cutting it anymore.

And why did I use pallets? BECAUSE THEY’RE FREE.  how much better does FREE get…  Plus I really like the size & look of pallets.  Don’t you?

In all, this project cost less than $10 to make and basically the money was spent on hardware.

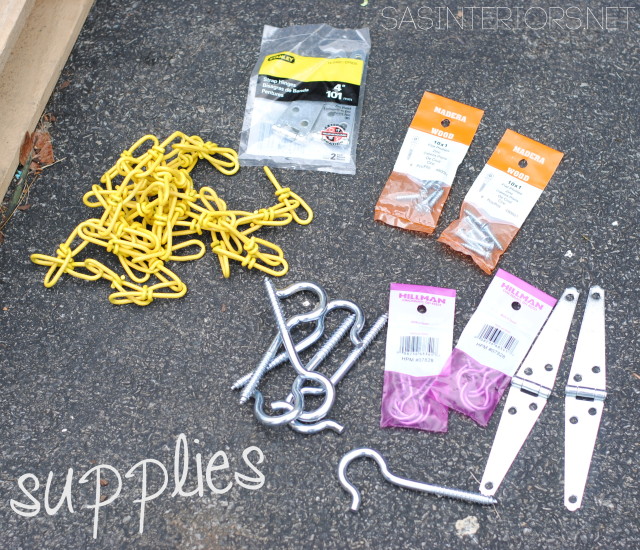
So here is what I gathered to create this Pallet Gardening Table:

  • (6) C-Shaped Screws (they need to be heavy-duty)
  • (4) 4″ Strap Hinges
  • Wood Screws (for outdoor use) to install hinges
  • Small C-Hooks
  • Chain (about 6′ – 7′ in length) – I got a cute yellow chain from Lowe’s
  • (2) Pallets that are the same size

Supplies for the Vertical Pallet Garden Bench

Lowe’s put me to the test this month to create something interesting + for the outdoors, so let me show you the process…

1. I started by adding the C-Screws to the pallet that would sit on the house (if you create something similar, it could also be attached to your deck or in your garage.  It’s not a must for just the side of a house).

#DIY: Vertical Pallet Gardening Table - No more gardening on the ground with a hurt back. Create a garden table for less than $10. Created by @Jenna_Burger of WWW.JENNABURGER.COM

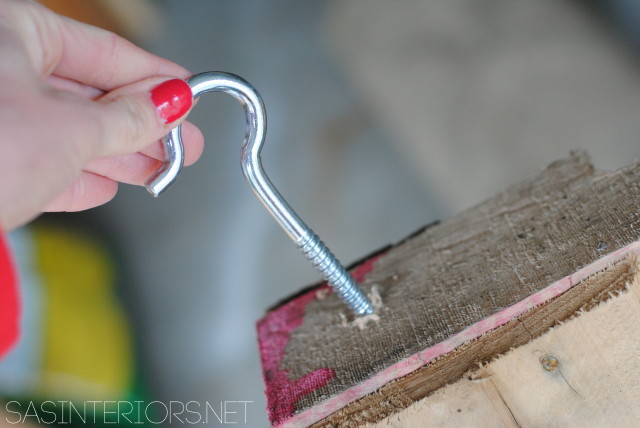
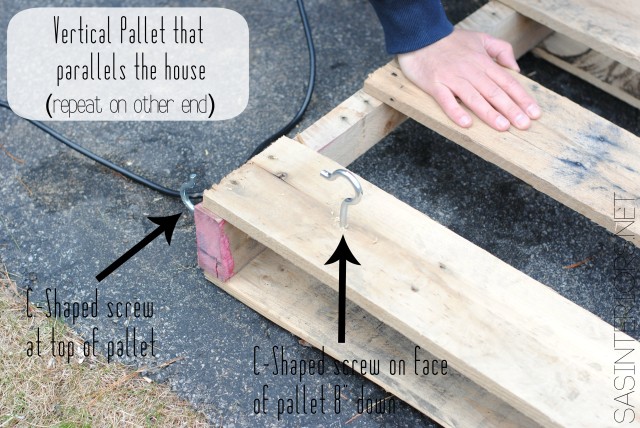
(1) C-Screw on each side was added to the top of the pallet about 2-3″ in from the end.

(1) C-Screws on each side was added to the face of the pallet about 6″ from the top & in the center of the end planks.

Once complete, that pallet was set aside.

#DIY: Vertical Pallet Gardening Table - No more gardening on the ground with a hurt back. Create a garden table for less than $10. Created by @Jenna_Burger of WWW.JENNABURGER.COM

On the other pallet, add (1) C-Shaped Screw on each side to the face of the pallet (which will be your work surface) about 12″ from the edge & in the center of the end planks.

#DIY: Vertical Pallet Gardening Table - No more gardening on the ground with a hurt back. Create a garden table for less than $10. Created by @Jenna_Burger of WWW.JENNABURGER.COM

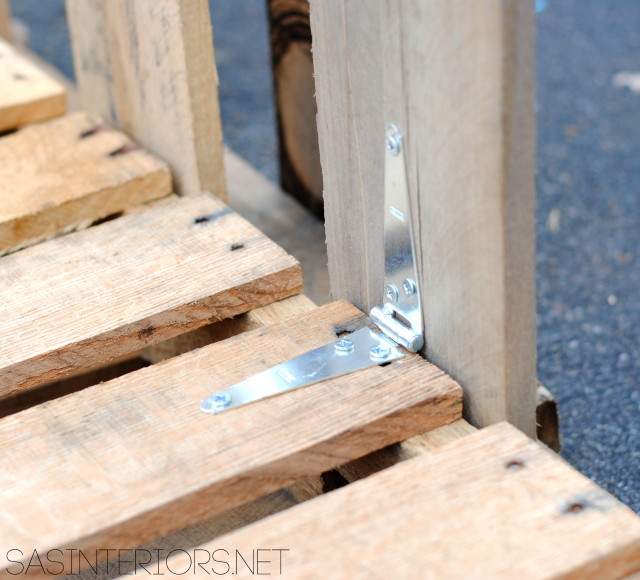
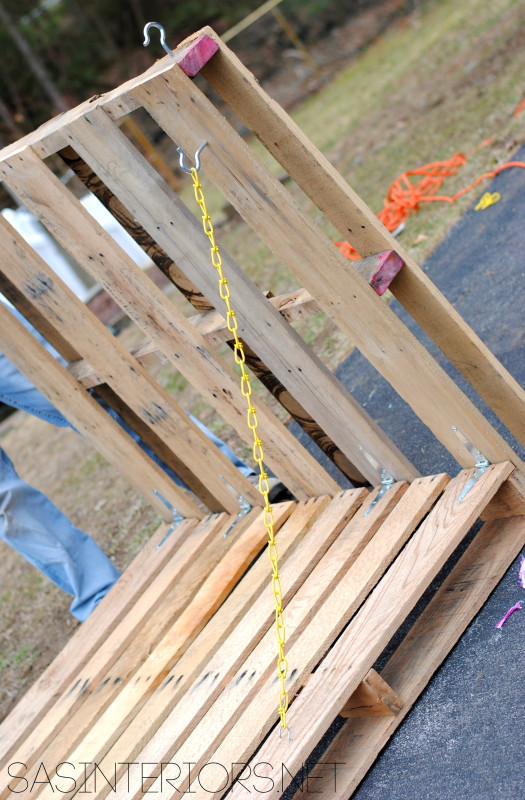
2. Once the (6) C-Shaped Screws are in place, then it’s time to connect the (2) pallets.  Using heavy-duty 4″ strap hinges, place (2) at the end planks and the other (2) somewhat evenly spaced in the center.

#DIY: Vertical Pallet Gardening Table - No more gardening on the ground with a hurt back. Create a garden table for less than $10. Created by @Jenna_Burger of WWW.JENNABURGER.COM

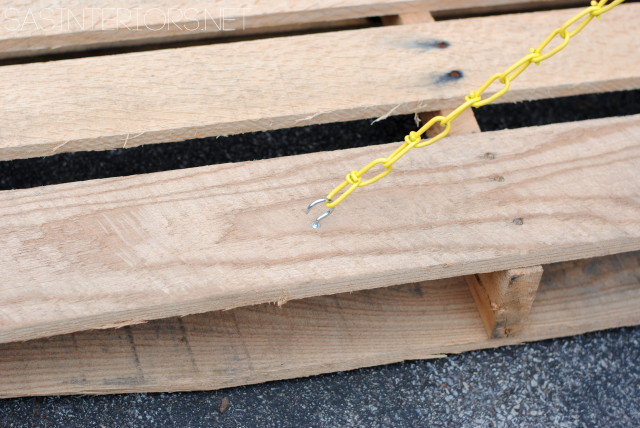
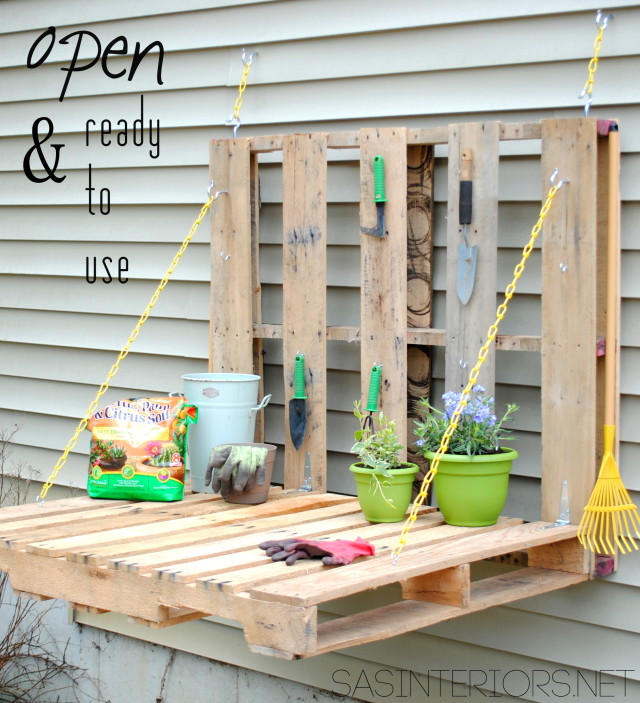
3. Link the chain onto the C-Screws, so it fits just right for the bench to be open at 90 degrees.  The Strap Hinges won’t let the pallet open more than 90 degrees, so essentially the chain isn’t needed, but I liked the extra security + the yellow adds a cute pop of color.

#DIY: Vertical Pallet Gardening Table - No more gardening on the ground with a hurt back. Create a garden table for less than $10. Created by @Jenna_Burger of WWW.JENNABURGER.COM

So this bad boy is mega heavy.  You will absolutely need 2-3 people to move this…  unless your The Hulk.

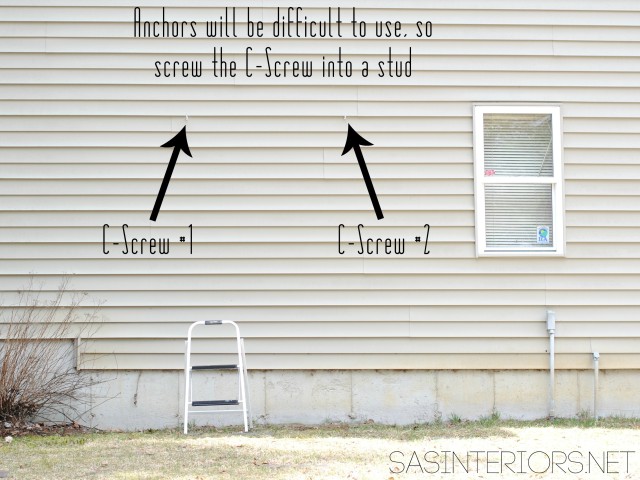
4. Once the bench was done (on the ground), it was time to put it in place on the vertical surface.  The work bench should be around 36″ high (typical height of a kitchen countertop), but you can determine if you want it higher or lower.  I chose 36″ above the ground.  We held it in place and determined where the C-Screws in the house should be placed.

* This is the process I took, but you will have to evaluate your space for the best way to hang the pallets.  Don’t hold me accountable for your situation because every vertical surface is different.

Using (2) C-Shaped Screws, we installed them into a stud on the side of the house.

#DIY: Vertical Pallet Gardening Table - No more gardening on the ground with a hurt back. Create a garden table for less than $10. Created by @Jenna_Burger of WWW.JENNABURGER.COM

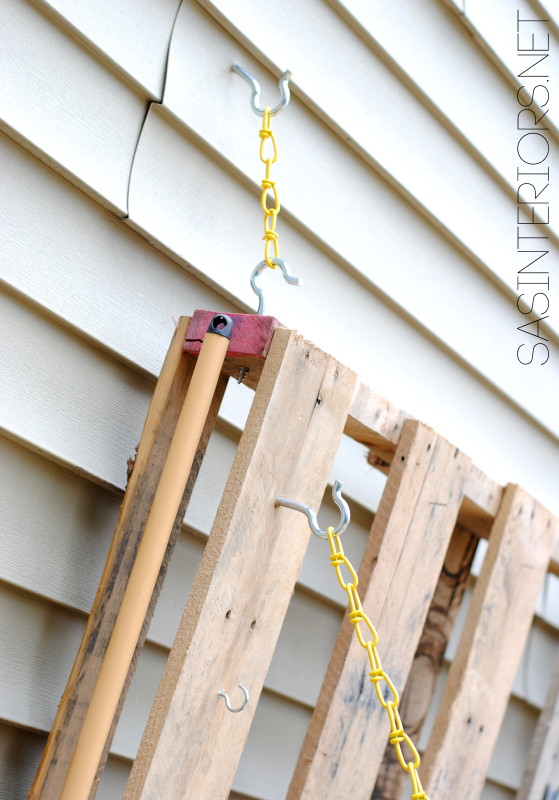
5. Once the C-hooks were in place, we added about 6″ of chain to each side which hooked from the C-Shaped Screws on the house to the C-Shaped Screw on the top of the pallet.

#DIY: Vertical Pallet Gardening Table - No more gardening on the ground with a hurt back. Create a garden table for less than $10. Created by @Jenna_Burger of SASinteriors.net

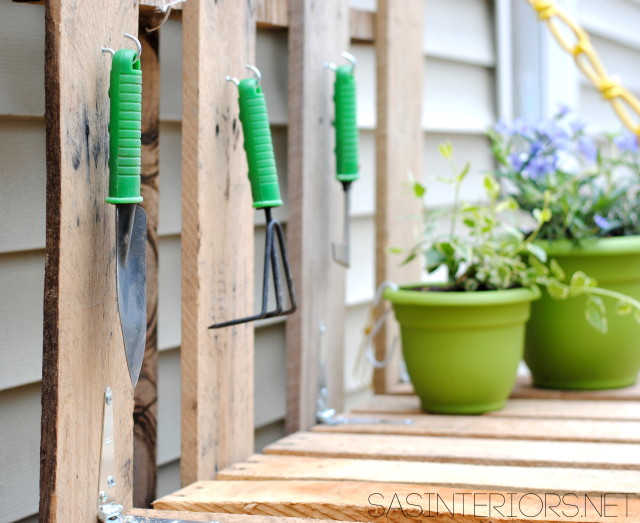
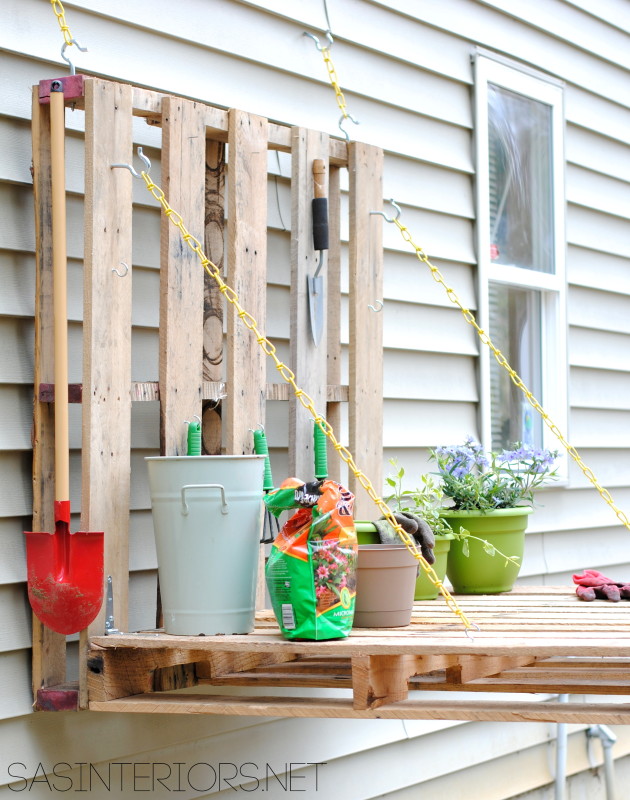
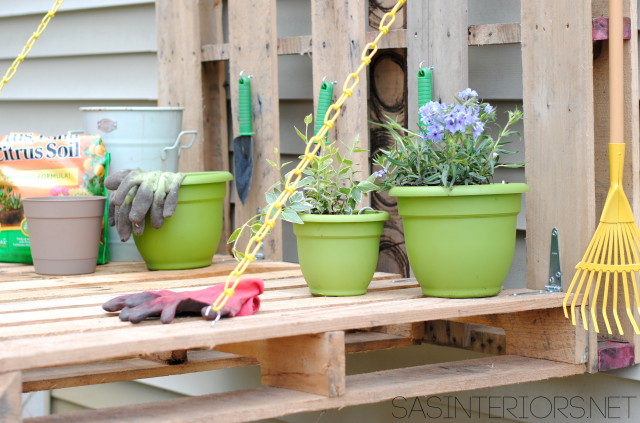
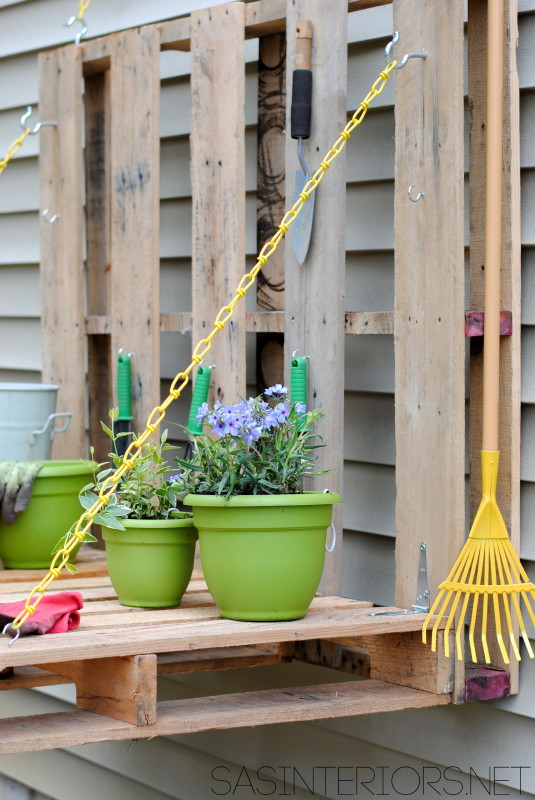
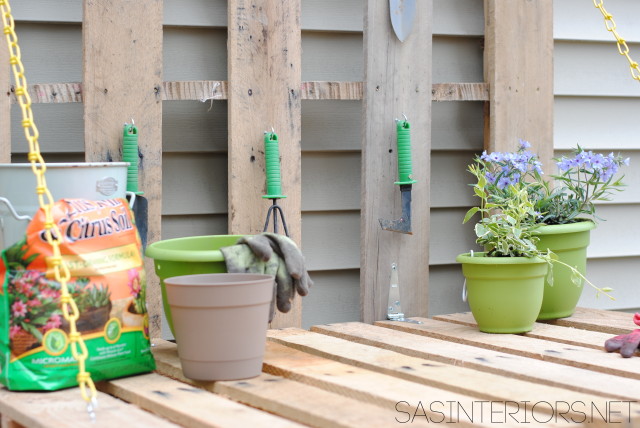
6. At this point, it’s done.  The overall project didn’t take long at all – maybe about 30 minutes.  The last added detail were hooks along the sides and back of the vertical pallet to hold shovels, a small rake, etc.

#DIY: Vertical Pallet Gardening Table - No more gardening on the ground with a hurt back. Create a garden table for less than $10. Created by @Jenna_Burger of WWW.JENNABURGER.COM

And then it was complete!

#DIY: Vertical Pallet Gardening Table - No more gardening on the ground with a hurt back. Create a garden table for less than $10. Created by @Jenna_Burger of WWW.JENNABURGER.COM

#DIY: Vertical Pallet Gardening Table - No more gardening on the ground with a hurt back. Create a garden table for less than $10. Created by @Jenna_Burger of WWW.JENNABURGER.COM

#DIY: Vertical Pallet Gardening Table - No more gardening on the ground with a hurt back. Create a garden table for less than $10. Created by @Jenna_Burger of WWW.JENNABURGER.COM

#DIY: Vertical Pallet Gardening Table - No more gardening on the ground with a hurt back. Create a garden table for less than $10. Created by @Jenna_Burger of WWW.JENNABURGER.COM

#DIY: Vertical Pallet Gardening Table - No more gardening on the ground with a hurt back. Create a garden table for less than $10. Created by @Jenna_Burger of WWW.JENNABURGER.COM

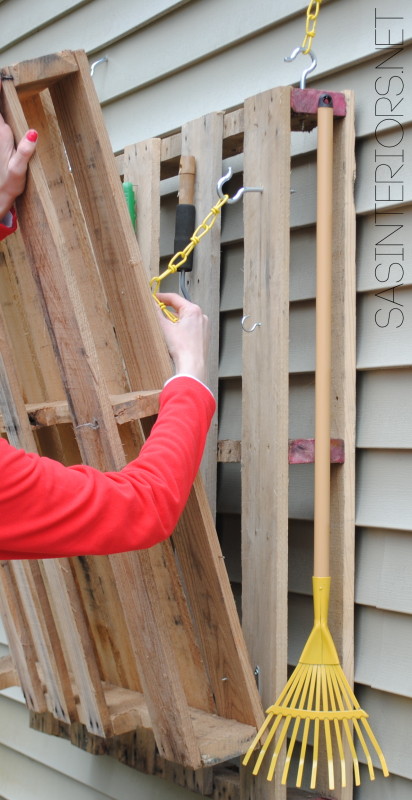
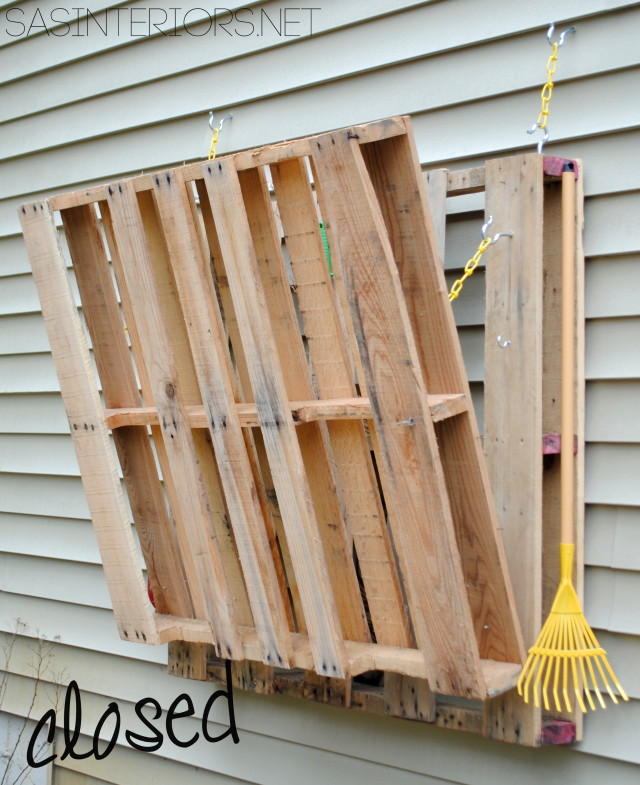
When it’s not in use, simply push up the horizontal pallet and hook it into place.

#DIY: Vertical Pallet Gardening Table - No more gardening on the ground with a hurt back. Create a garden table for less than $10. Created by @Jenna_Burger of WWW.JENNABURGER.COM

#DIY: Vertical Pallet Gardening Table - No more gardening on the ground with a hurt back. Create a garden table for less than $10. Created by @Jenna_Burger of WWW.JENNABURGER.COM

#DIY: Vertical Pallet Gardening Table - No more gardening on the ground with a hurt back. Create a garden table for less than $10. Created by @Jenna_Burger of WWW.JENNABURGER.COM

#DIY: Vertical Pallet Gardening Table - No more gardening on the ground with a hurt back. Create a garden table for less than $10. Created by @Jenna_Burger of WWW.JENNABURGER.COM

So what do you think…  Would you be up to creating something like this?  I was always in need of a better place to do potting + gardening.  Thankfully this gardening table has been a great solution (and has saved many of sore backs…)!

If you’re interested in more of my pallet creations, check these out:

DIY_Monogrammed Chevron Pallet TrayMonogrammed Chevron Pallet Tray

#DIY - Vertical Pallet GardenVertical Pallet Garden

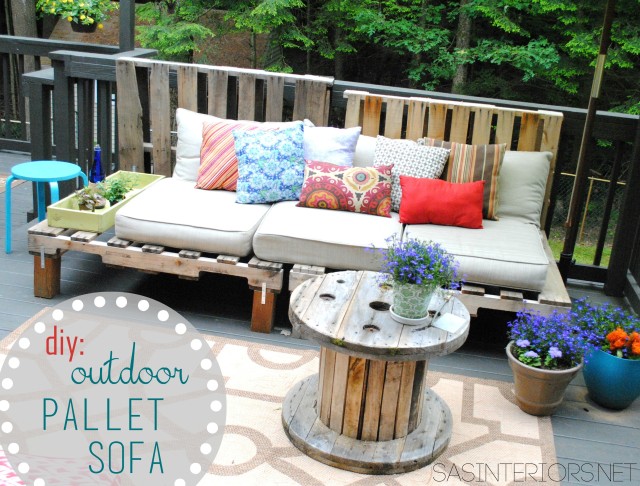
#DIY: Outdoor Pallet Sofa Outdoor Pallet Sofa

#DIY: Pallet BookcasePallet Bookshelf

Told ya’ I’ve built alot of creations using pallets!

What DIY creations have you made using pallets?  What do you love using pallets for?  Do you keep them as one or do you like to dismantle them to create something new + different?

Disclosure: I am so grateful to be apart of the Lowe’s Creative Team and was provided with a Lowe’s gift card to purchase items for my project.  I was also compensated for my time to use the products.  No one told me what to create, what to buy, how to use the product, or what to write.  All opinions are 100% mine!

DIY: Vertical Pallet Garden

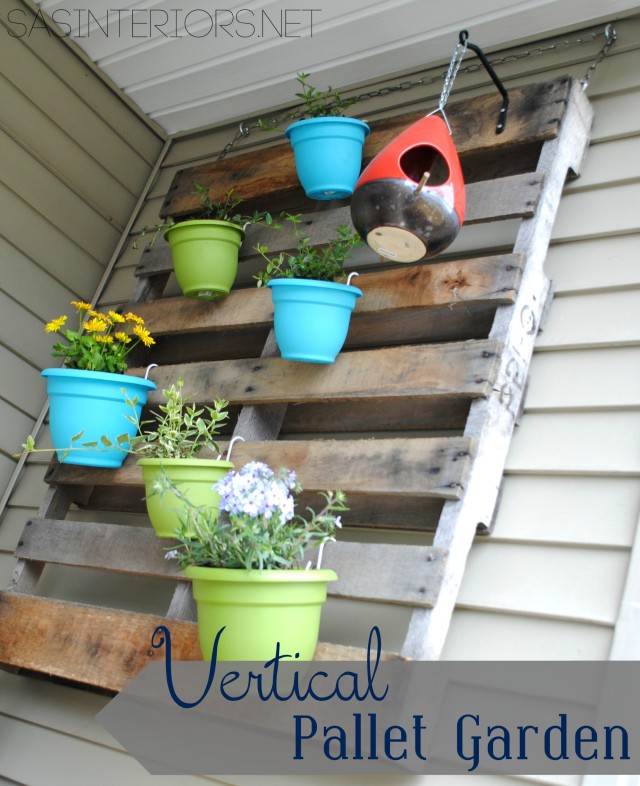
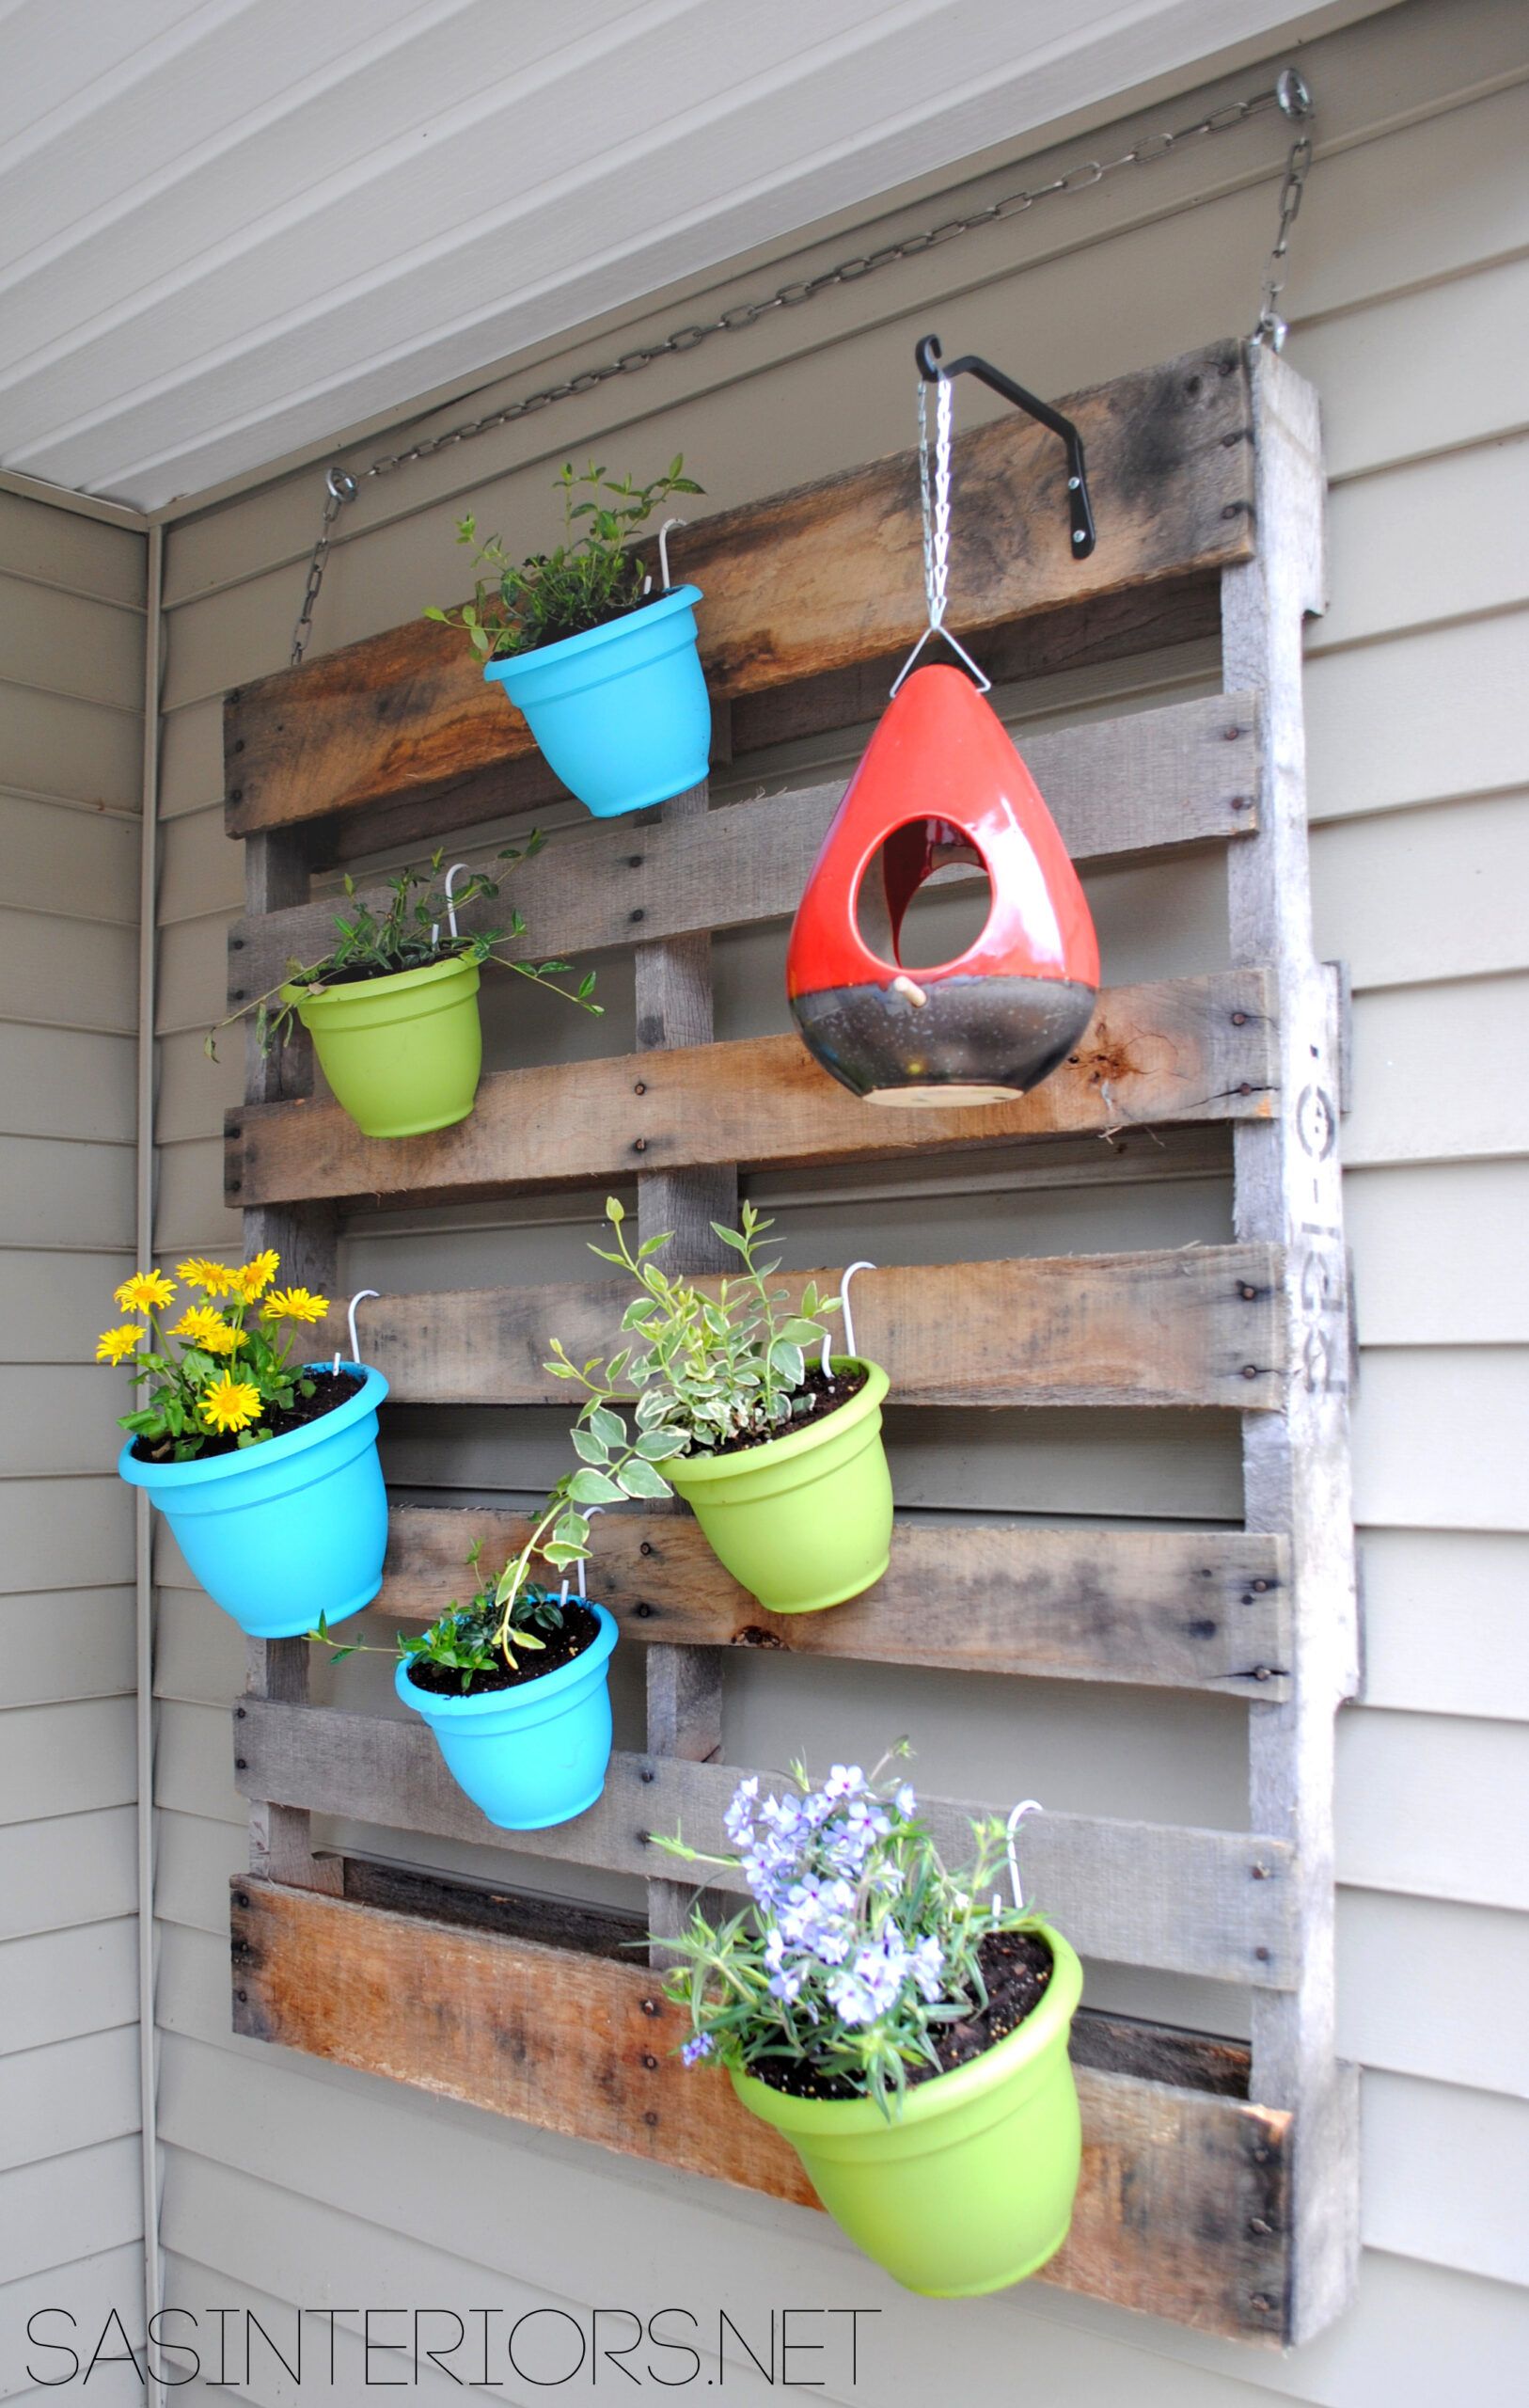
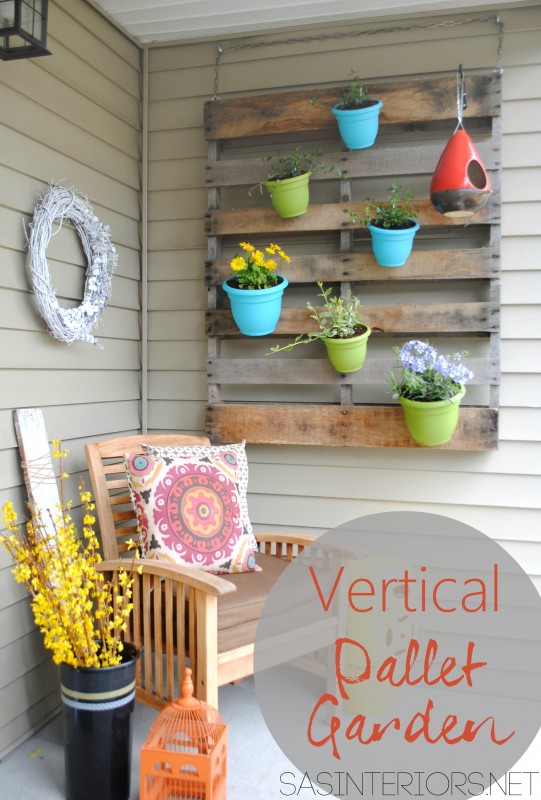
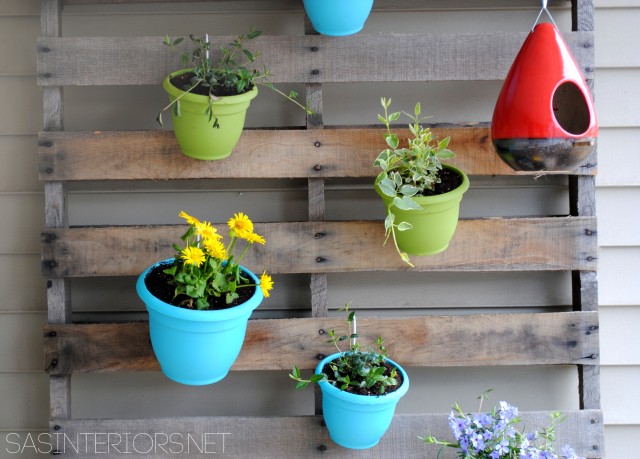
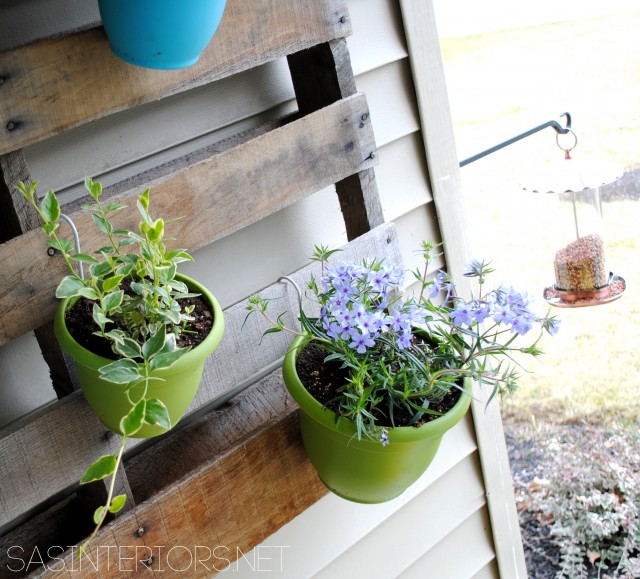
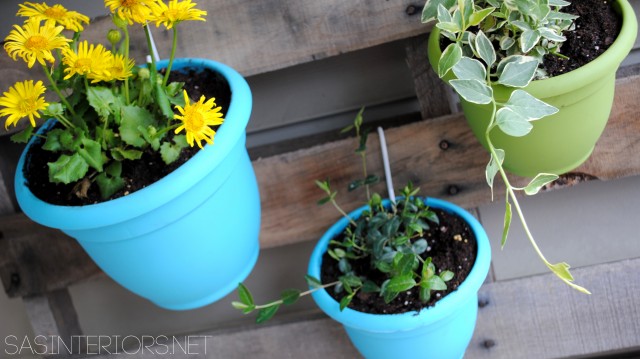
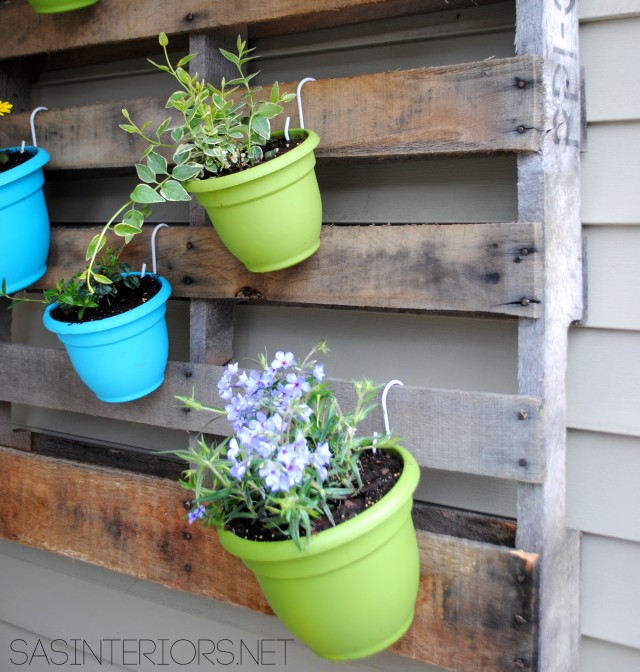
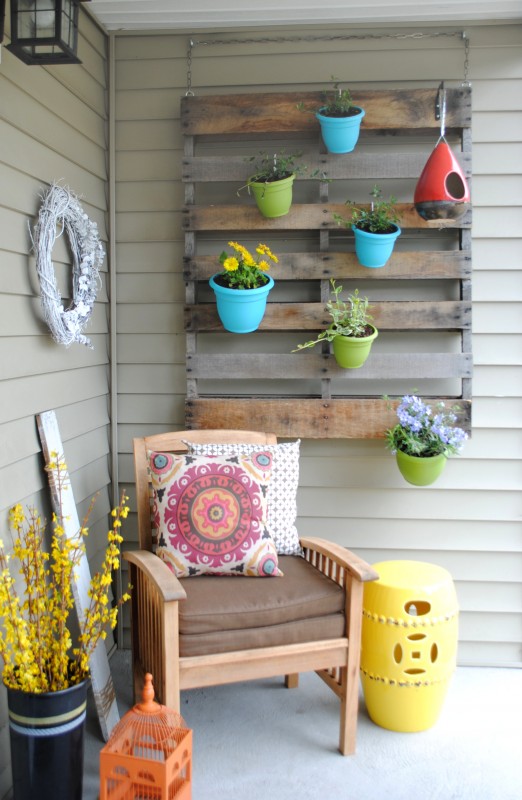
The warmer weather has got me movin’ and groovin’ outdoors.  This past weekend I got my DIY mojo on for this months Lowe’s challenge and created (what I think) is something pretty cool.  Check out my newly created Vertical Pallet Garden using colorful pots…

DIY: Vertical Pallet Garden by @Jenna_Burger, WWW.JENNABURGER.COM

Though the flowers are finally starting to peak through around the yard, I was in need of color NOW to start decorating my front porch for Spring.  I, of course, hit up my local Lowe’s garden center to get my color fix.  It’s still the early days of Spring, so the selection (at my local Lowe’s in NY) was limited, but I was able to find a few perennials for shaded areas that would be ideal for under the front covered porch.  I chose a few colorful perennials & vines because they could easily be transplanted to the garden at the end of the season (smart & savvy thinking).

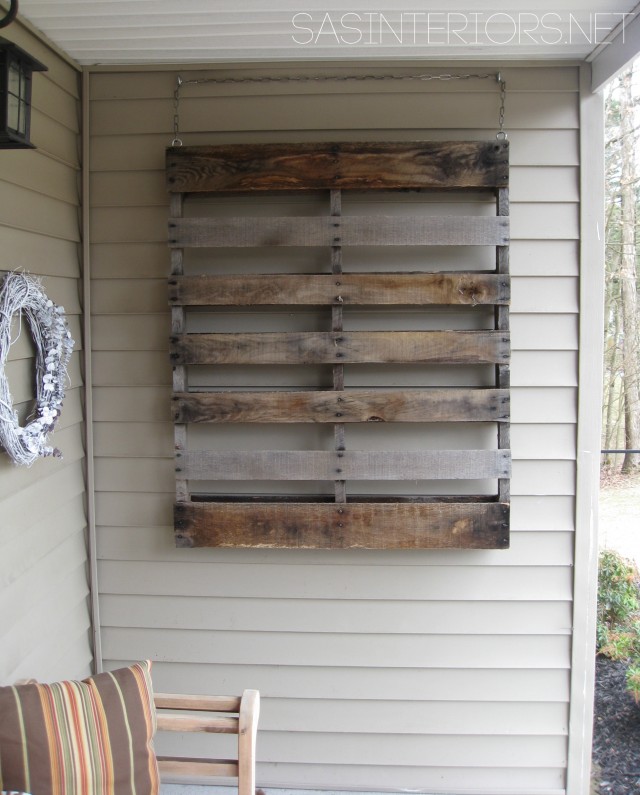
Pallets have been all-the-rage for a while, but I just don’t get tired of them – probably because they’re free.  I’ve created so many DIY projects with pallets and I just love their old, worn texture and aesthetic.  When thinking about this seasons porch, my major desire was to add height.  Height = drama, and that was my goal. 

DIY: Vertical Pallet Garden by @Jenna_Burger, WWW.JENNABURGER.COM

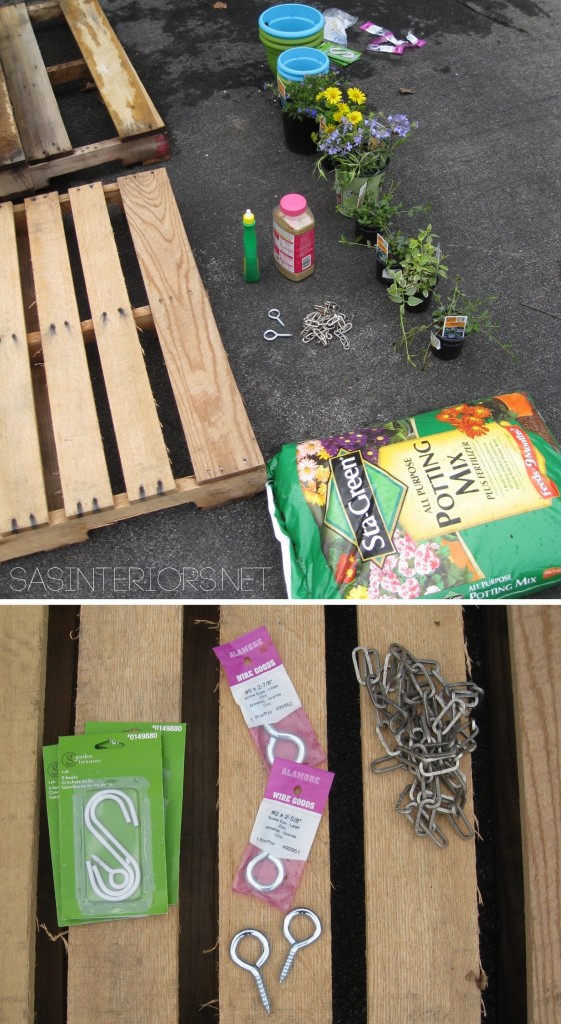
For this project, the materials I used were:

  • Pallet (which I snagged – with their permission of course – for free in the back on my local Lowe’s)
  • (4) Eye hooks for 100 lbs+
  • 3′ of metal chain
  • Plastic pots (I used lime green and turquoise from Lowe’s)
  • Drill with 1/4″ drill bit
  • 3″ S hooks (found in the outdoor section of Lowe’s)
  • Vise Grip

DIY: Vertical Pallet Garden by @Jenna_Burger, WWW.JENNABURGER.COM

Here’s the DL (downlow for short) on how I created the Vertical Pallet Garden

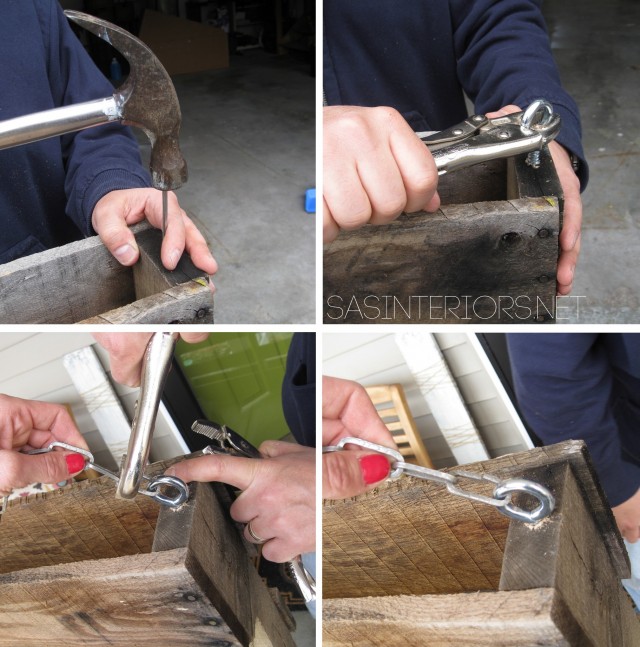
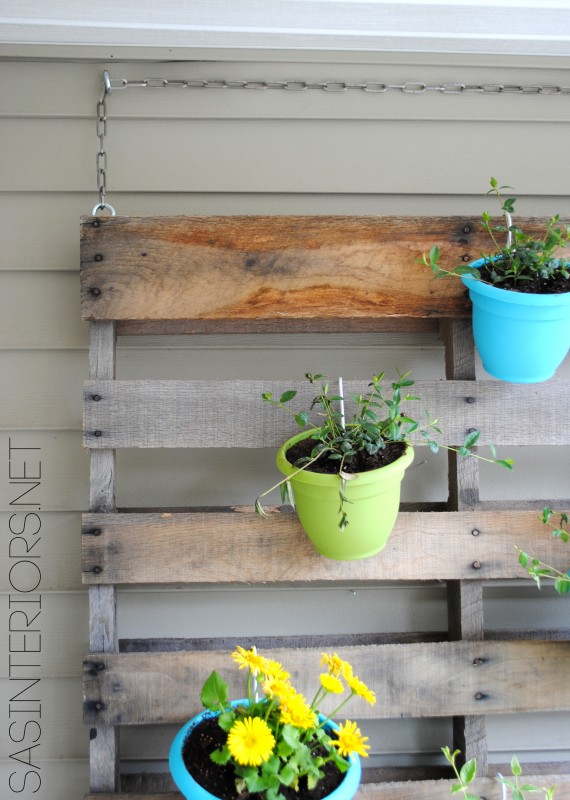
1. At the top of the pallet (slats oriented horizontally), screw in (1) eye hook at about 2-3″ in from each end. It’s best to start out by using a large nail to start the hole.  Once the hole is started, screw in the eye hooks with the help of a vise grip to get leverage.  Unless you’re the Hulk, it’ll probably be impossible with just your bare hands.

2. With the Misters help, we then unlinked one of the chain links and linked it through the eye hook. (one side only – the other side has to wait until hung)

DIY: Vertical Pallet Garden by @Jenna_Burger, WWW.JENNABURGER.COM

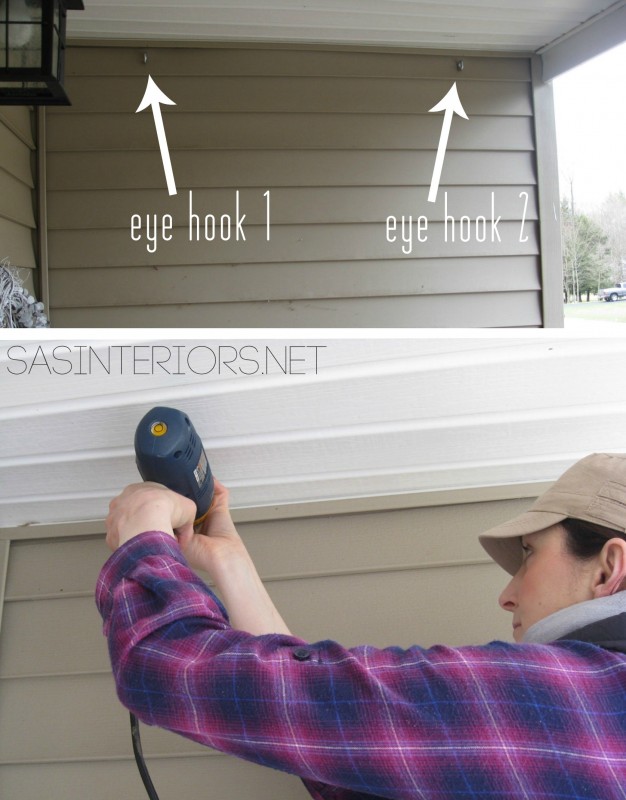
3. Heading over to the house, we installed the eye hooks (using a drill to start the hole) through the siding and into the house about 2″ below the ceiling plane at the same distance apart as the hooks in the pallet.

DIY: Vertical Pallet Garden by @Jenna_Burger, WWW.JENNABURGER.COM

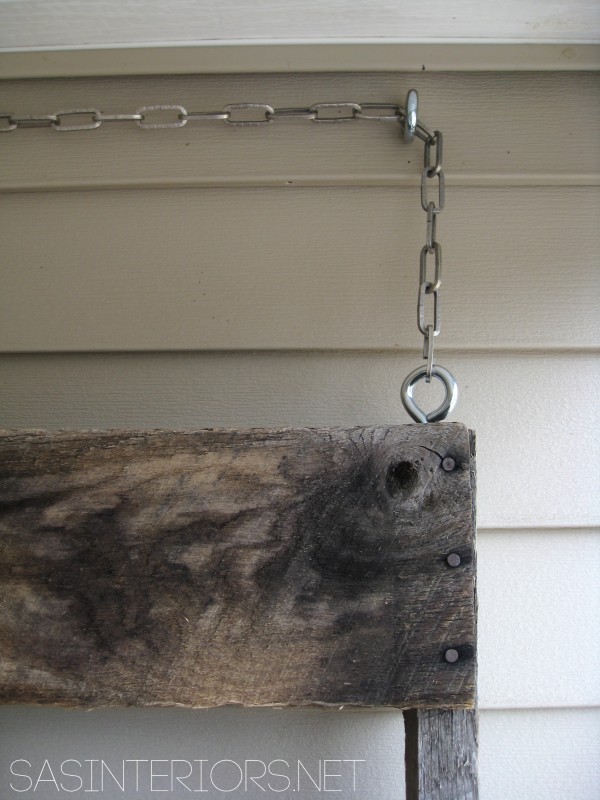
4. Once the eye hooks were in, we took the loose end of the chain of the pallet, slipped it through the eye hooks, and secured the chain on the other side.

DIY: Vertical Pallet Garden by @Jenna_Burger, WWW.JENNABURGER.COM

The pallet base is complete!

DIY: Vertical Pallet Garden by @Jenna_Burger, WWW.JENNABURGER.COM

Then it was time to create the “garden”.

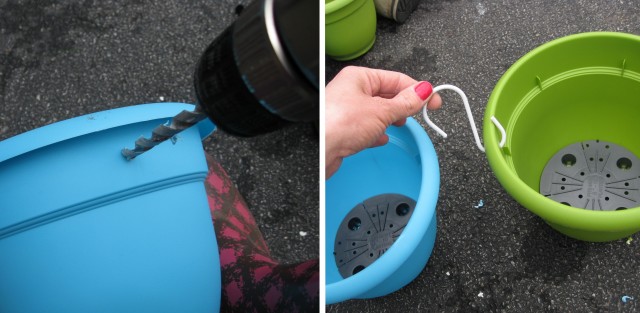
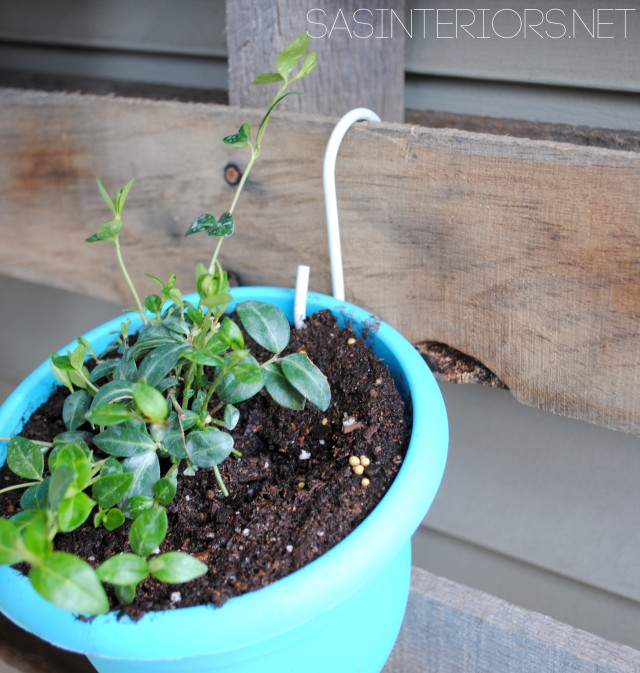
5. Using varying sized plastic pots in fun colors, drill a 1/4″ hole about 1″ down from the top rim. Using a 3″+/- S hook, slip it through the hole.

DIY: Vertical Pallet Garden by @Jenna_Burger, WWW.JENNABURGER.COM

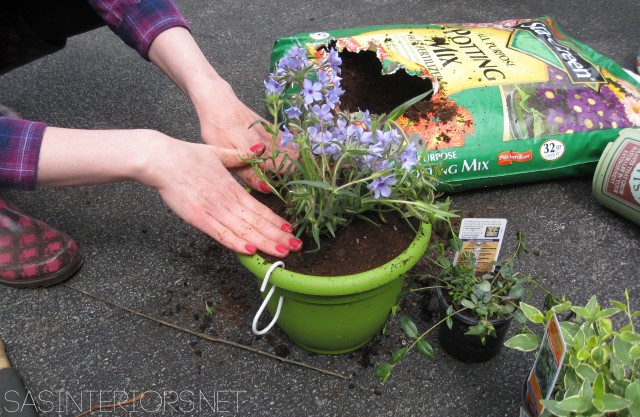
6. Plant the pretty flowers…

DIY: Vertical Pallet Garden by @Jenna_Burger, WWW.JENNABURGER.COM

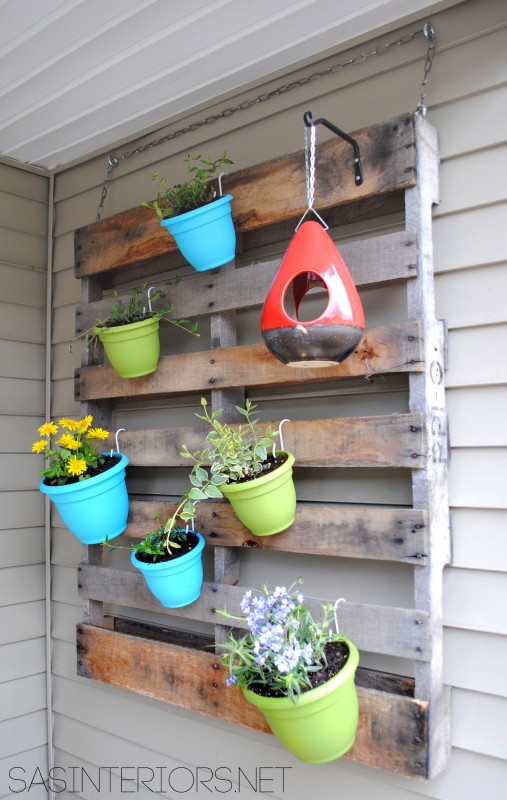
…And it was complete!

DIY: Vertical Pallet Garden by @Jenna_Burger, WWW.JENNABURGER.COM

DIY: Vertical Pallet Garden by @Jenna_Burger, WWW.JENNABURGER.COM

DIY: Vertical Pallet Garden by @Jenna_Burger, WWW.JENNABURGER.COM

The vertical pallet garden adds so much color to the front porch.

DIY: Vertical Pallet Garden by @Jenna_Burger, WWW.JENNABURGER.COM

S-hooks make it easy to move the flower pots around or bring them into the sun.

DIY: Vertical Pallet Garden by @Jenna_Burger, WWW.JENNABURGER.COM

A beautiful focal point for the porch.

DIY: Vertical Pallet Garden by @Jenna_Burger, WWW.JENNABURGER.COM

If you’re wondering about the pretty white wreath, that was a DIY project that was featured on Jen’s blog.  It was created for Valentine’s Day, but I took off the paint chip flowers and just hung the wreath plain and simple.  Who knows how I will transform it for another holiday or season to come.

DIY: Vertical Pallet Garden by @Jenna_Burger, WWW.JENNABURGER.COM

I’m still working on the rest of the porch since it’s still in need of more color and pizazz.  By late May, I hope to have that done and ready to share.  Right now we’re still getting alot of rain and most nights are still way too chilly to get my gardening-on.

DIY: Vertical Pallet Garden by @Jenna_Burger, WWW.JENNABURGER.COM

I couldn’t be more thrilled with the outcome of this fun and easy DIY project.  It’s brought gorgeous height and beautiful color to my Spring front porch.

To see more creations of mine using pallets, click on the links below:
How-To Make a Pallet Shelf
Monogrammed Pallet Chevron Tray
Pallet Picture Holder
Eclectic Family Gallery Wall

Disclosure: I am part of the Lowe’s Creative Team and was provided with a Lowe’s gift card to purchase items for my project.  I was also compensated for my time to use the products.  No one told me what to create, what to buy, how to use the product, or what to write.  All opinions are 100% mine!

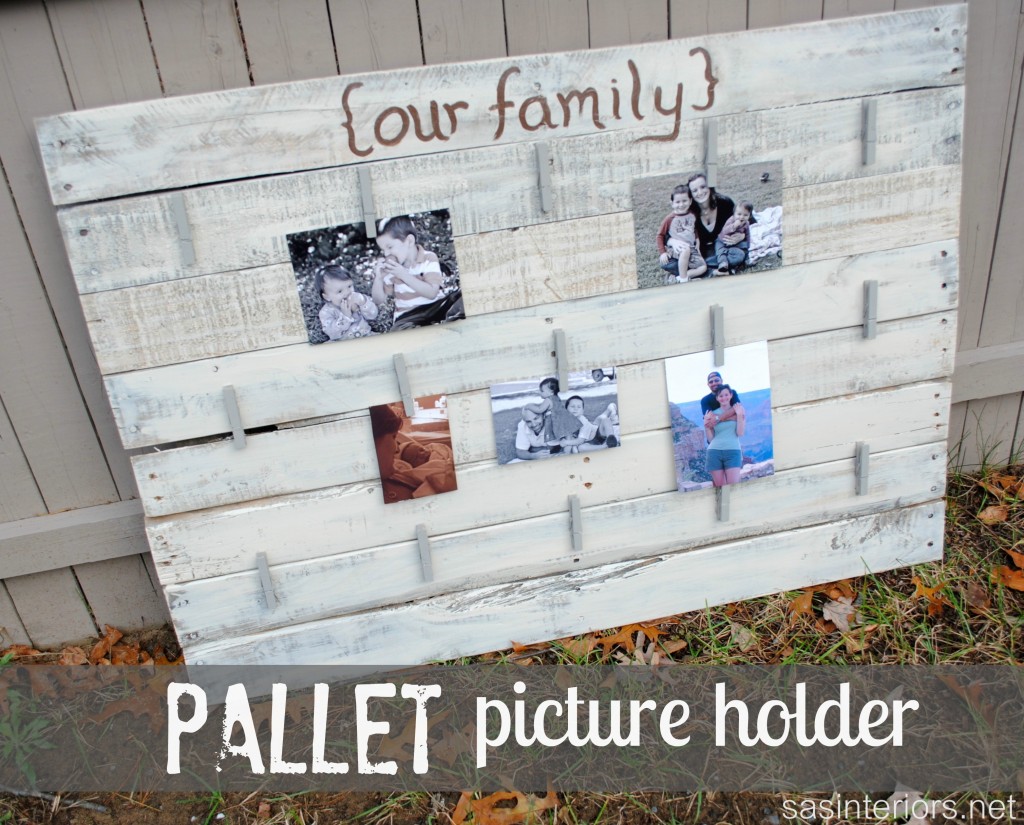
DIY: Pallet Picture Holder

Just last week I finished up a really cute project for a client (which I was super close to keeping, but she was glad I didn’t) and I’m excited to share it with you today!

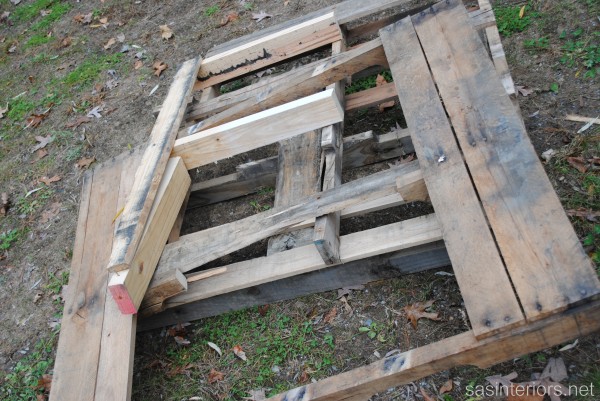
I’ve been making my way through the huge stash of pallets that I’ve had stored in the garage for quite some time.  Pallets are great for projects like this when you’re looking for a distressed, worn result and want to spend little (or no) money. Most pallets, a.k.a. shipping crates, have already been used-and-abused, so they are easy to dismantle and start upcycling.

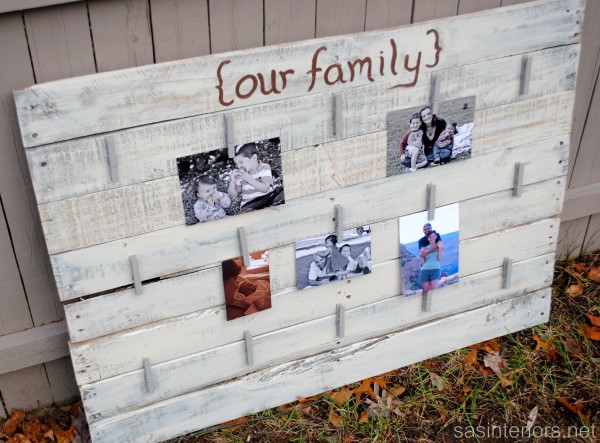
When finishing up the final details on this clients family room, I showed her this picture of a similar pallet project and her response was YES! And off I was creating this Pallet Picture Holder

I started off by looking through my pallets (some were new and some had been picked through) to choose the 8 that looked best with each other.

Every pallet that I’ve taken apart (except one), has been constructed using twisted nails, and they are a BIG PAIN!  A typical crowbar or hammer won’t be helpful here and so I always use a reciprocating saw.  It’s a lifesaver!  Actually during this project, my original reciprocating saw broke – what a bummer.  Understandable though since I use it ALOT + it wasn’t top of the line (lesson learned: buy quality, buy once).

Anyway, once I took apart the pallet, I gathered the planks I needed (8 total which were about 40″ long) and then cut two pieces for the back that would hold the planks in position.

The overall size of this pallet picture holder is (about) 40″ x 28″.

Using finishing nails, I nailed two in each plank on each side into the back plank.

This was the result when done (from the back)…

I tell ya, this bad boy is heavy! I forgot to take a picture of the picture hanging wire I added to the back, but if you try something similar, make sure the hardware is for at least 100 lbs+.  The last thing you’d want is this falling down.  It doesn’t weigh 100 lbs, but it’s better to be safe than sorry!

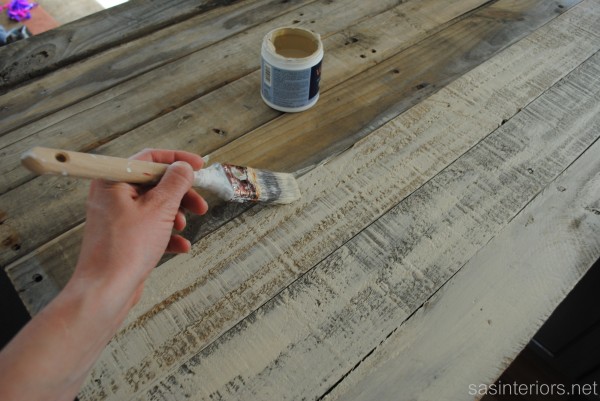
This wall decor picture holder is going on a soon-to-be dark chocolate colored wall, so we (the client and I) decided that it’d look best to have the planks be lighter in color.  To do this, I added a quick sweep of paint to the surface.  The wood of the planks still show through underneath, giving it a rustic worn aesthetic.

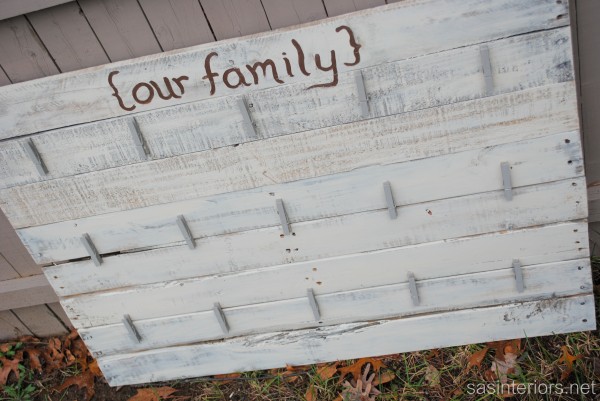
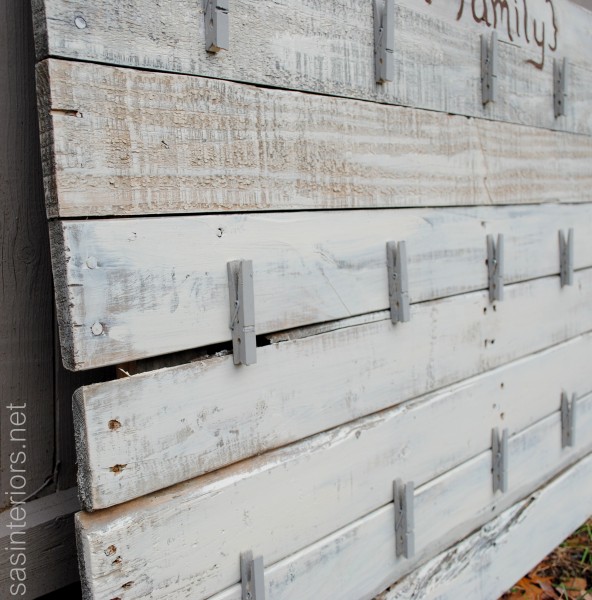
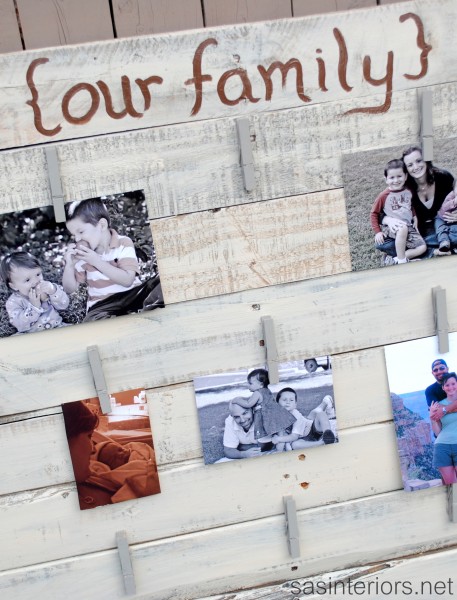
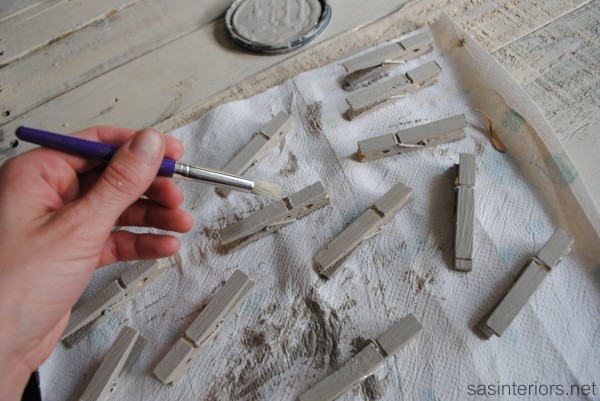
This was the point where the pallet went from a blank canvas to a picture holder.  And the simple way that happened was by adding clothes pins.  Before that though, I gave them a little color.  I used a slightly darker color taupe – Annie Sloan French Linen to be exact.

Once the clothes pins were dry, they were ready to be placed onto the pallet.

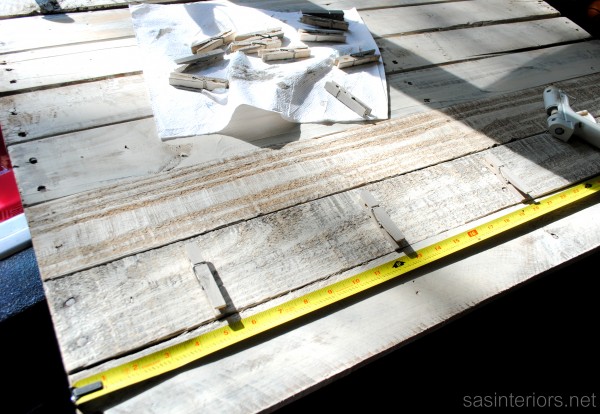
I wanted to give the option to use 4×6 or 5×7 sized pictures, and with the size of the pallet, I’d determined that 3 rows or 5 across would be the magical number.

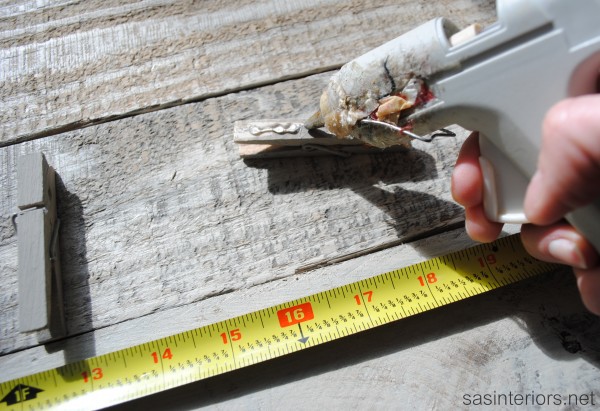
Using a tape measure and starting off in the center, I marked where each clothes pin would be placed.

Once the positioning was just right, I added hot glue to the backs of the clothes pins and stuck them in place.  They were good as gold!

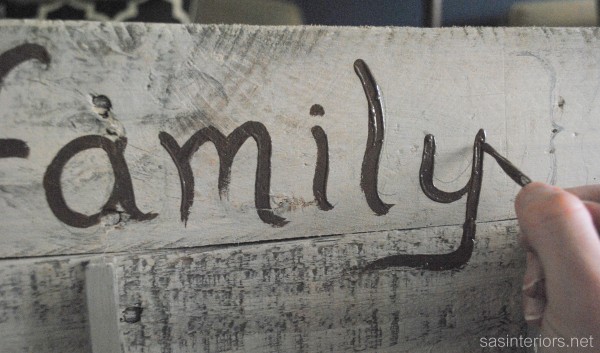
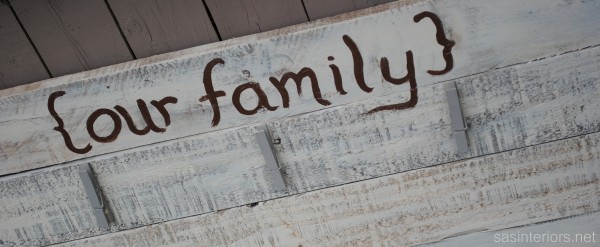
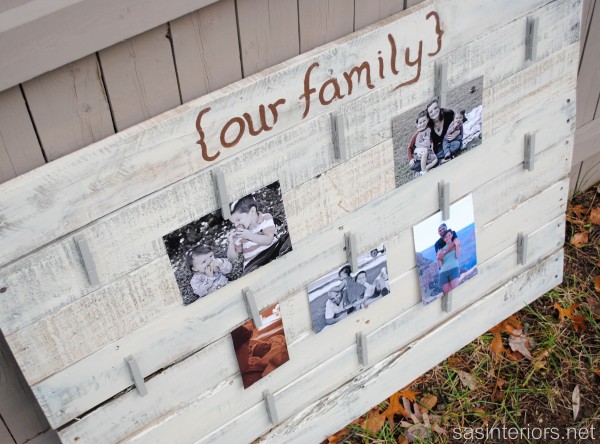
The last step was personalizing it a bit and adding {our family}.  My client is a photographer and huge picture-person, so this totally fit the bill!

And then to finish it all, I gave it a quick sanding with my orbital sander to distress the words and edges.

And the Pallet Picture Holder was complete!

It’s nice “naked”, but pictures make it pretty!

I also had a thought that this would make a great Holiday Card Holder too!

What projects have you created using pallets?

Want to see more of my pallet creations, check them out:
How To Make a Pallet Bookshelf
Wall Decor in my Eclectic Family Gallery Wall
Travel Subway Art Sign
Monogrammed Chevron Pallet Tray
Succulent Arrangement in a Pallet Container

Monogrammed Chevron Pallet Tray

As a Blogger, finding support throughout the blogging community is important for blog growth, friendship, and creative inspiration. For the past several weeks, I’ve joined forces with a few fabulous DIY bloggers and we’ve been helping each other with various aspects of blogging.  Along with our helpful “chats”, we were given a Blogging Challenge by Beckie of Infarrantly Creative to create a DIY project using specific materials – additional items could be added, but it was a must to use the required five.

What did I create you ask?

Well take a look… (and then keep on reading for the details)

Included in our Blogging 2 Better group was Monica & Jess of East Coast Creative, Allison of House of Hepworths, Brook of Being Brook, and Kim of Sand & Sisalall incredibly talented and inspiring women and friends!

To begin, this is the list of items that we were required to use, and actually I pretty much just stuck to the list and didn’t use many additional items.

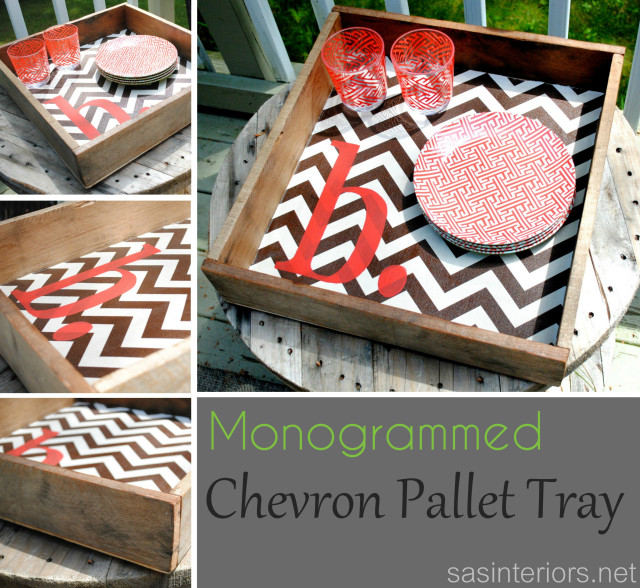
Fun, but definitely challenging!  I was quite nervous at first trying to think about what to create with these 5 items and then it came to me…  A tray that would be perfect to bring items in and out while BBQing (or even just to display on the coffee table – you know I love trays).

Once I had the idea, my project was quickly underway, especially since I already had a stash of pallets in my garage for a few other projects.

Item #1 – Pallet

To start off, I determined the size of the tray that I wanted to make (17″ x 17″), so the Mister and I measured (4) 17″ long pallet pieces.

Using the reciprocating saw, we buzzed right through that wood :-/

I’m always leary about using the BIG TOOLS (even though my friend Brittany has empowered me with the right skills), but I helped out and made a boo-boo when cutting. No problemo – the Mister came to the rescue with his Band Saw and cleaned the edges right up.  In no time the (4) pieces of pallet were ready to make into a box.

Lining up the corners of the pallet planks, we hammered 2 nails into each corner.

Onto the bottom of the tray…

The only material used that wasn’t on the list was a piece of 1/8″ thick plywood that I used for the bottom of the tray.  Once the pallet “frame” was made, we measured the distance to the outer edges and cut it using the Band Saw.

Once the plywood was cut to the right dimensions, we nailed it onto the bottom of the pallet “frame”.

I gave the overall tray a quick sanding, and within 20 minutes it was done!

Now onto the fun part…  Using my second and third required items, fabric and Mod Podge, I lined the bottom of the tray with a brown and white chevron fabric.

To start off, I spread a nice coat of Mod Podge along the entire bottom of the tray.

Item #2 Mod Podge

Then I added the fabric onto the glue-y surface and made sure to get it nicely in the corners as well.  Make sure the fabric size is larger than the surface because in the next step, I’ll show you how I trimmed it.

Item #3 – Fabric

Once the fabric was well stuck to the Mod Podge, it was time to trim the fabric (this can be done before the glue underneath is dry).  Using a very sharp blade, I dragged it along the edge of the tray to trim the excess fabric.

Once the fabric was cut, I add a layer of Mod Podge OVER the fabric – no worries, it will dry clear!

Once the Mod Podge was dry (fully about 1 day later), it was time to add my last 2 items – the stencil and the color coral.

Using a new Word Doc, I found a font I liked (credit valley) and printed a large letter ‘B’ in lowercase for Burger (my last name).  Then I cut it out with a scissor and traced the outline on the fabric.

Item #4 – Stencil

Then filled in the stencil with a beautiful color coral (it needed about 4 coats, but it didn’t take long).

Item #5 – Coral

And here it is all complete!  My Blogging 2 Better Challenge was done and I was quite happy with the result.  What do you think?  Perfect for the indoors or out!

And you of course have to check out the other B2B Challenge Projects using the same materials.  It’s truly amazing how they’re all SO DIFFERENT!

Rustic Industrial Storage Bins by Monica & Jess of East Coast Creative Blog

Dangle Earring Frame by Allison of House of Hepworths

Fabric Wall Art by Brook of Being Brook

Pallet Art Surfboard by Kim of Sand & Sisal

I’m sure you know all these ladies, but if not, you are REALLY missing out!  Be sure to visit each of their great Challenge projects, as well as their daily DIY creations.

I link my projects to some of these parties: Skip to My Lou, Dittle Dattle, Between Naps on the Porch, Today’s Creative Blog, Stories of A to Z, All Things Heart & Home, Savvy Southern Style, House of Hepworths, Finding Fabulous, Creation Corner, The Shabby Nest, Tatertots and Jello, Thrifty Decor Chick, Tip Junkie

How to Make a Pallet Bookshelf
What a week it’s been!  Is it really March already?  I’m still in February!  I really thought I would have the bathroom complete by now to reveal today, but (I know, here it comes) it’s not done – boo hoo.  It’s 95% there, but the finishing touches are still needed, and that’s always the most important part.  So sorry to say, you’ll have to wait a few more days… you don’t mind, right? Instead, I have a fun, easy, and unique DIY project to share with you.

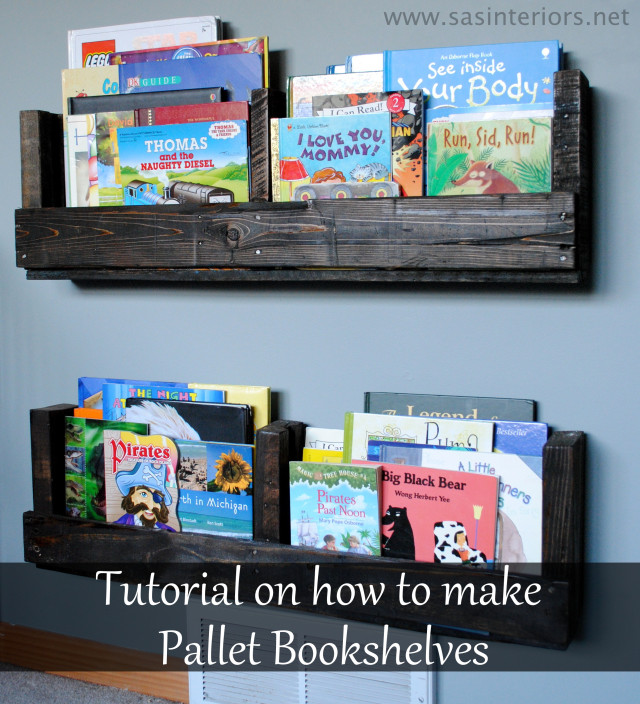
In the midst of my son’s room makeover, the bookcase he had wasn’t fitting anymore, but he still needed something to hold his many of books.  I had wanted to make shelves from old pallets for a long time, so this was the perfect opportunity.  I’ve seen alot of pallet bookshelves around the blogosphere, but hadn’t seen a tutorial (not that I searched long and hard either), so here we go…

After finally snagging a few pallets from my local hardware store, I was ready and working.  Depending on the pallet you find / pick up, you can get two bookshelves from one pallet.  Each end of the pallet is one bookshelf.

Duration of Project: 40 minutes (staining or painting will increase duration of project and may take longer than one day to complete)
Project Difficulty: Easy to Medium
How Many People Needed: 1

1. Remove / pry off the center wood strip(s) from the pallet (as shown in the above image), using the back of a hammer or crowbar.  This wood strip(s) will be reused for the bottom of the bookshelf.  Pallets come in a few difference sizes, so yours may have 1 or multiple center wood strips.  My pallet only had one, so I had to use a wood strip from another pallet to create the bottom for my second bookshelf.

2. Reuse the center wood strip and attach it to the side of the pallet, which will soon be the bottom of your bookshelf.  I reused the nails that were already in the wood strip, but you may need / want to use new nails.

It’s time to cut the wood to create the bookshelves!

3. Measure about 1-2″ above the higher wood strip and make a mark for your cuts.

4. Using a jigsaw, make your cuts.

5. Once the cuts are done, your bookshelf is essentially complete.
6. Sand down all the sharp edges using a hand sander or power sander.

7. Stain.  I used Minwax Jacobean stain for a dark look.  The wood was quite porous, so it soaked it right up!

8. Once completely dry (it took mine a few days to completely dry and not smell anymore), they were ready to hang. To hang the pallet bookshelves, I used Self-Drilling Drywall Anchors which are great to use when you can’t find a stud (never my strong suit).

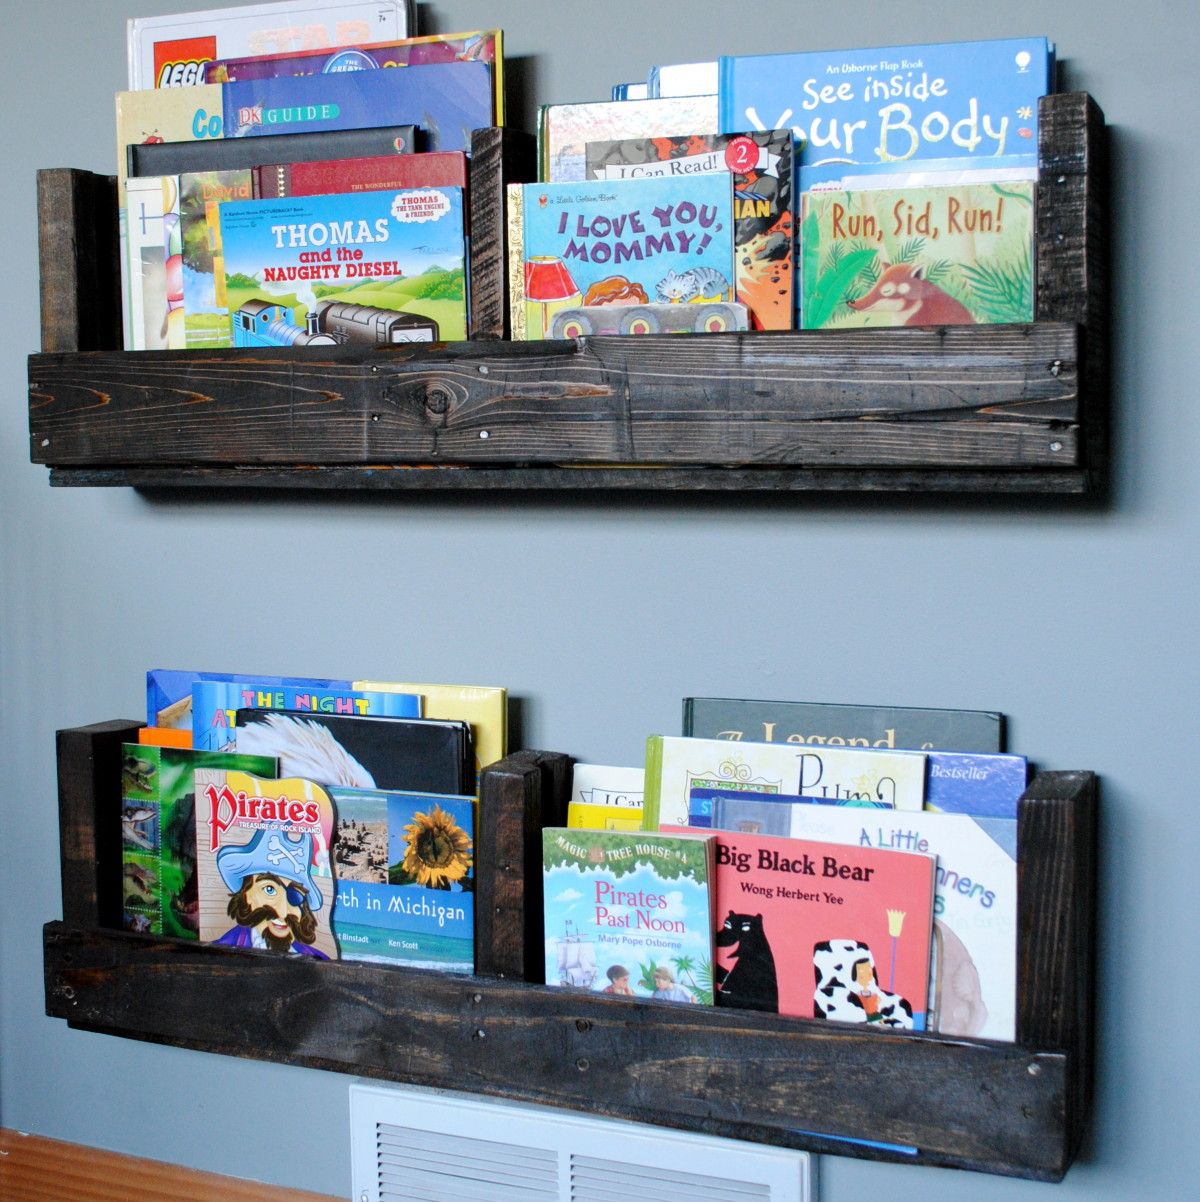
And they’re ready to fill with your child’s favorites books.

I will admit that this style bookshelf doesn’t hold as much as a typical bookshelf, but I love how the kids can see (and choose) the books straight on.  They add so much color into the space!

These pallet shelves are also great for tight spaces since they’re only about 4″ deep.  Imagine a whole wall of them?!  (Ooo, that gives me an idea…)

The room is still coming together, but like the bathroom, it’s 95% complete (story of my life, I guess, lol). I have another exciting project to show you in his room, so stay tuned.

Have a great weekend!

Have you created anything using pallets?  If you’re in need of more pallet ideas, take a look at my post on Do-It-Yourself Projects Using Pallets.