
Tag: pallets

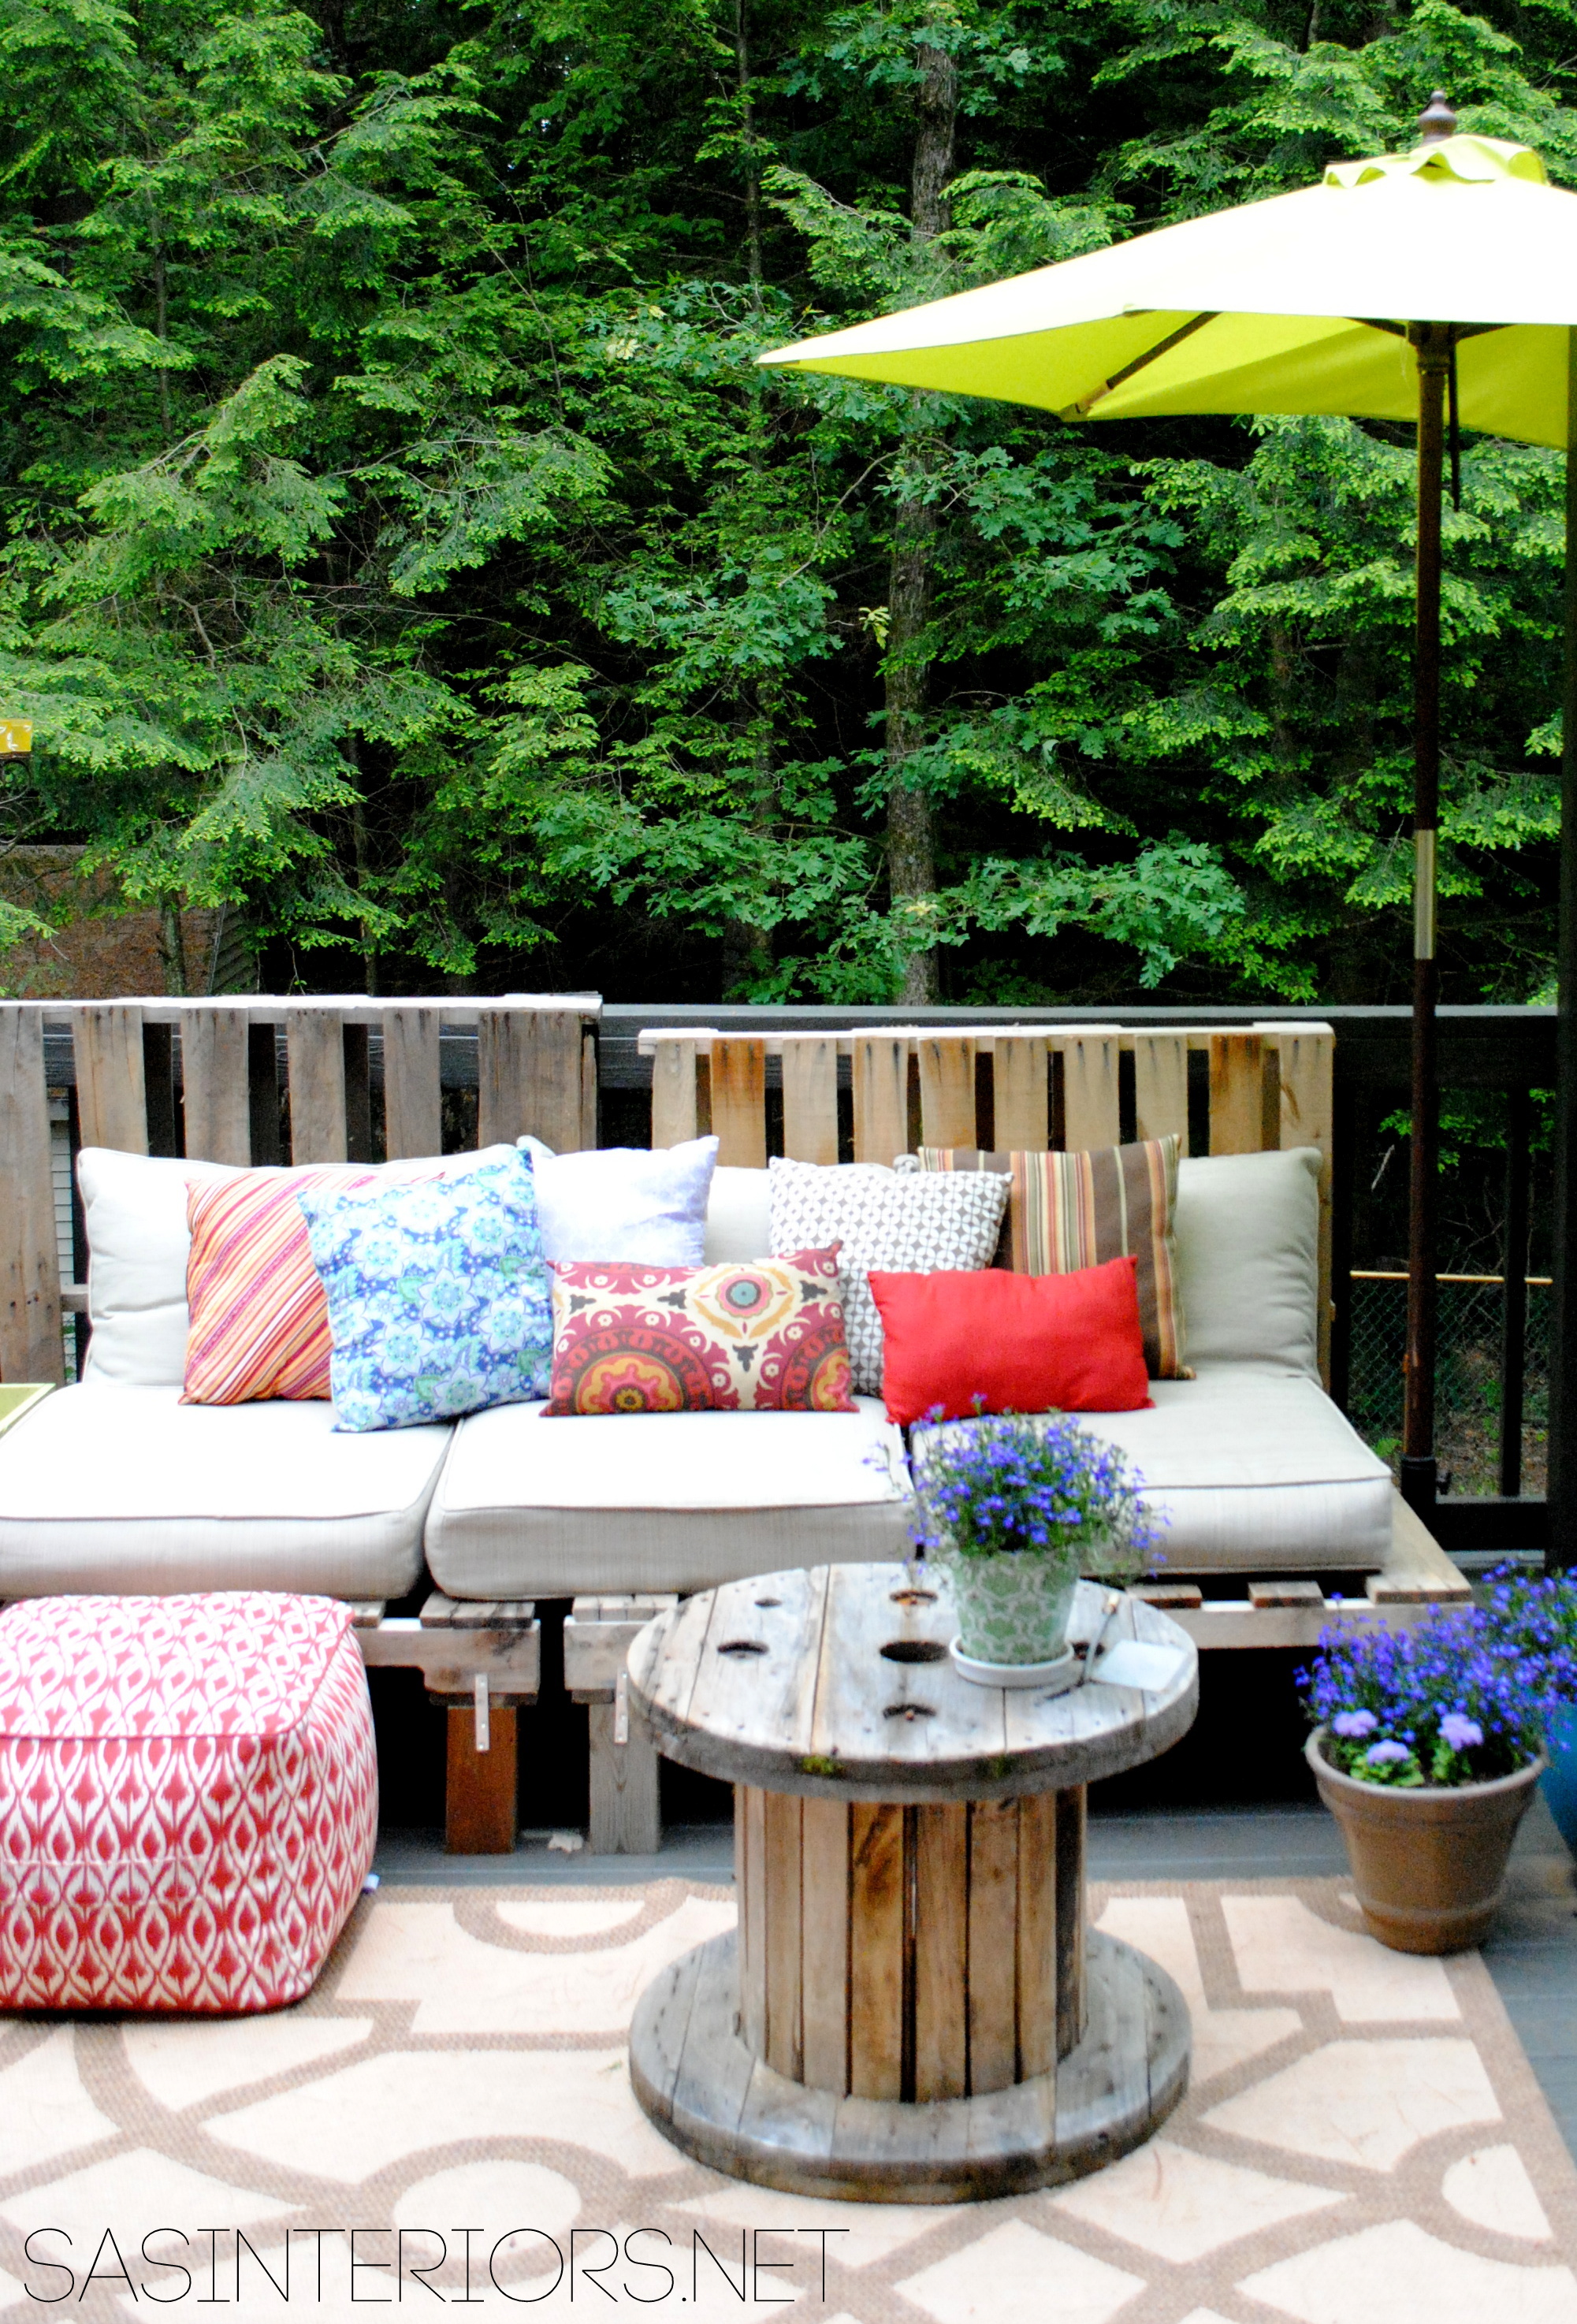
DIY: Outdoor Pallet Sofa

Despite the drear weather lately, the deck decor is coming together!

We power washed, we prepped, we stained, we built…

…an outdoor pallet sofa!

It is heaven.  Take a look (or just come on over to enjoy…)

A Summer Essential for the patio or deck: an Outdoor Pallet Sofa - Easy to make and costs less than 5 dollars!

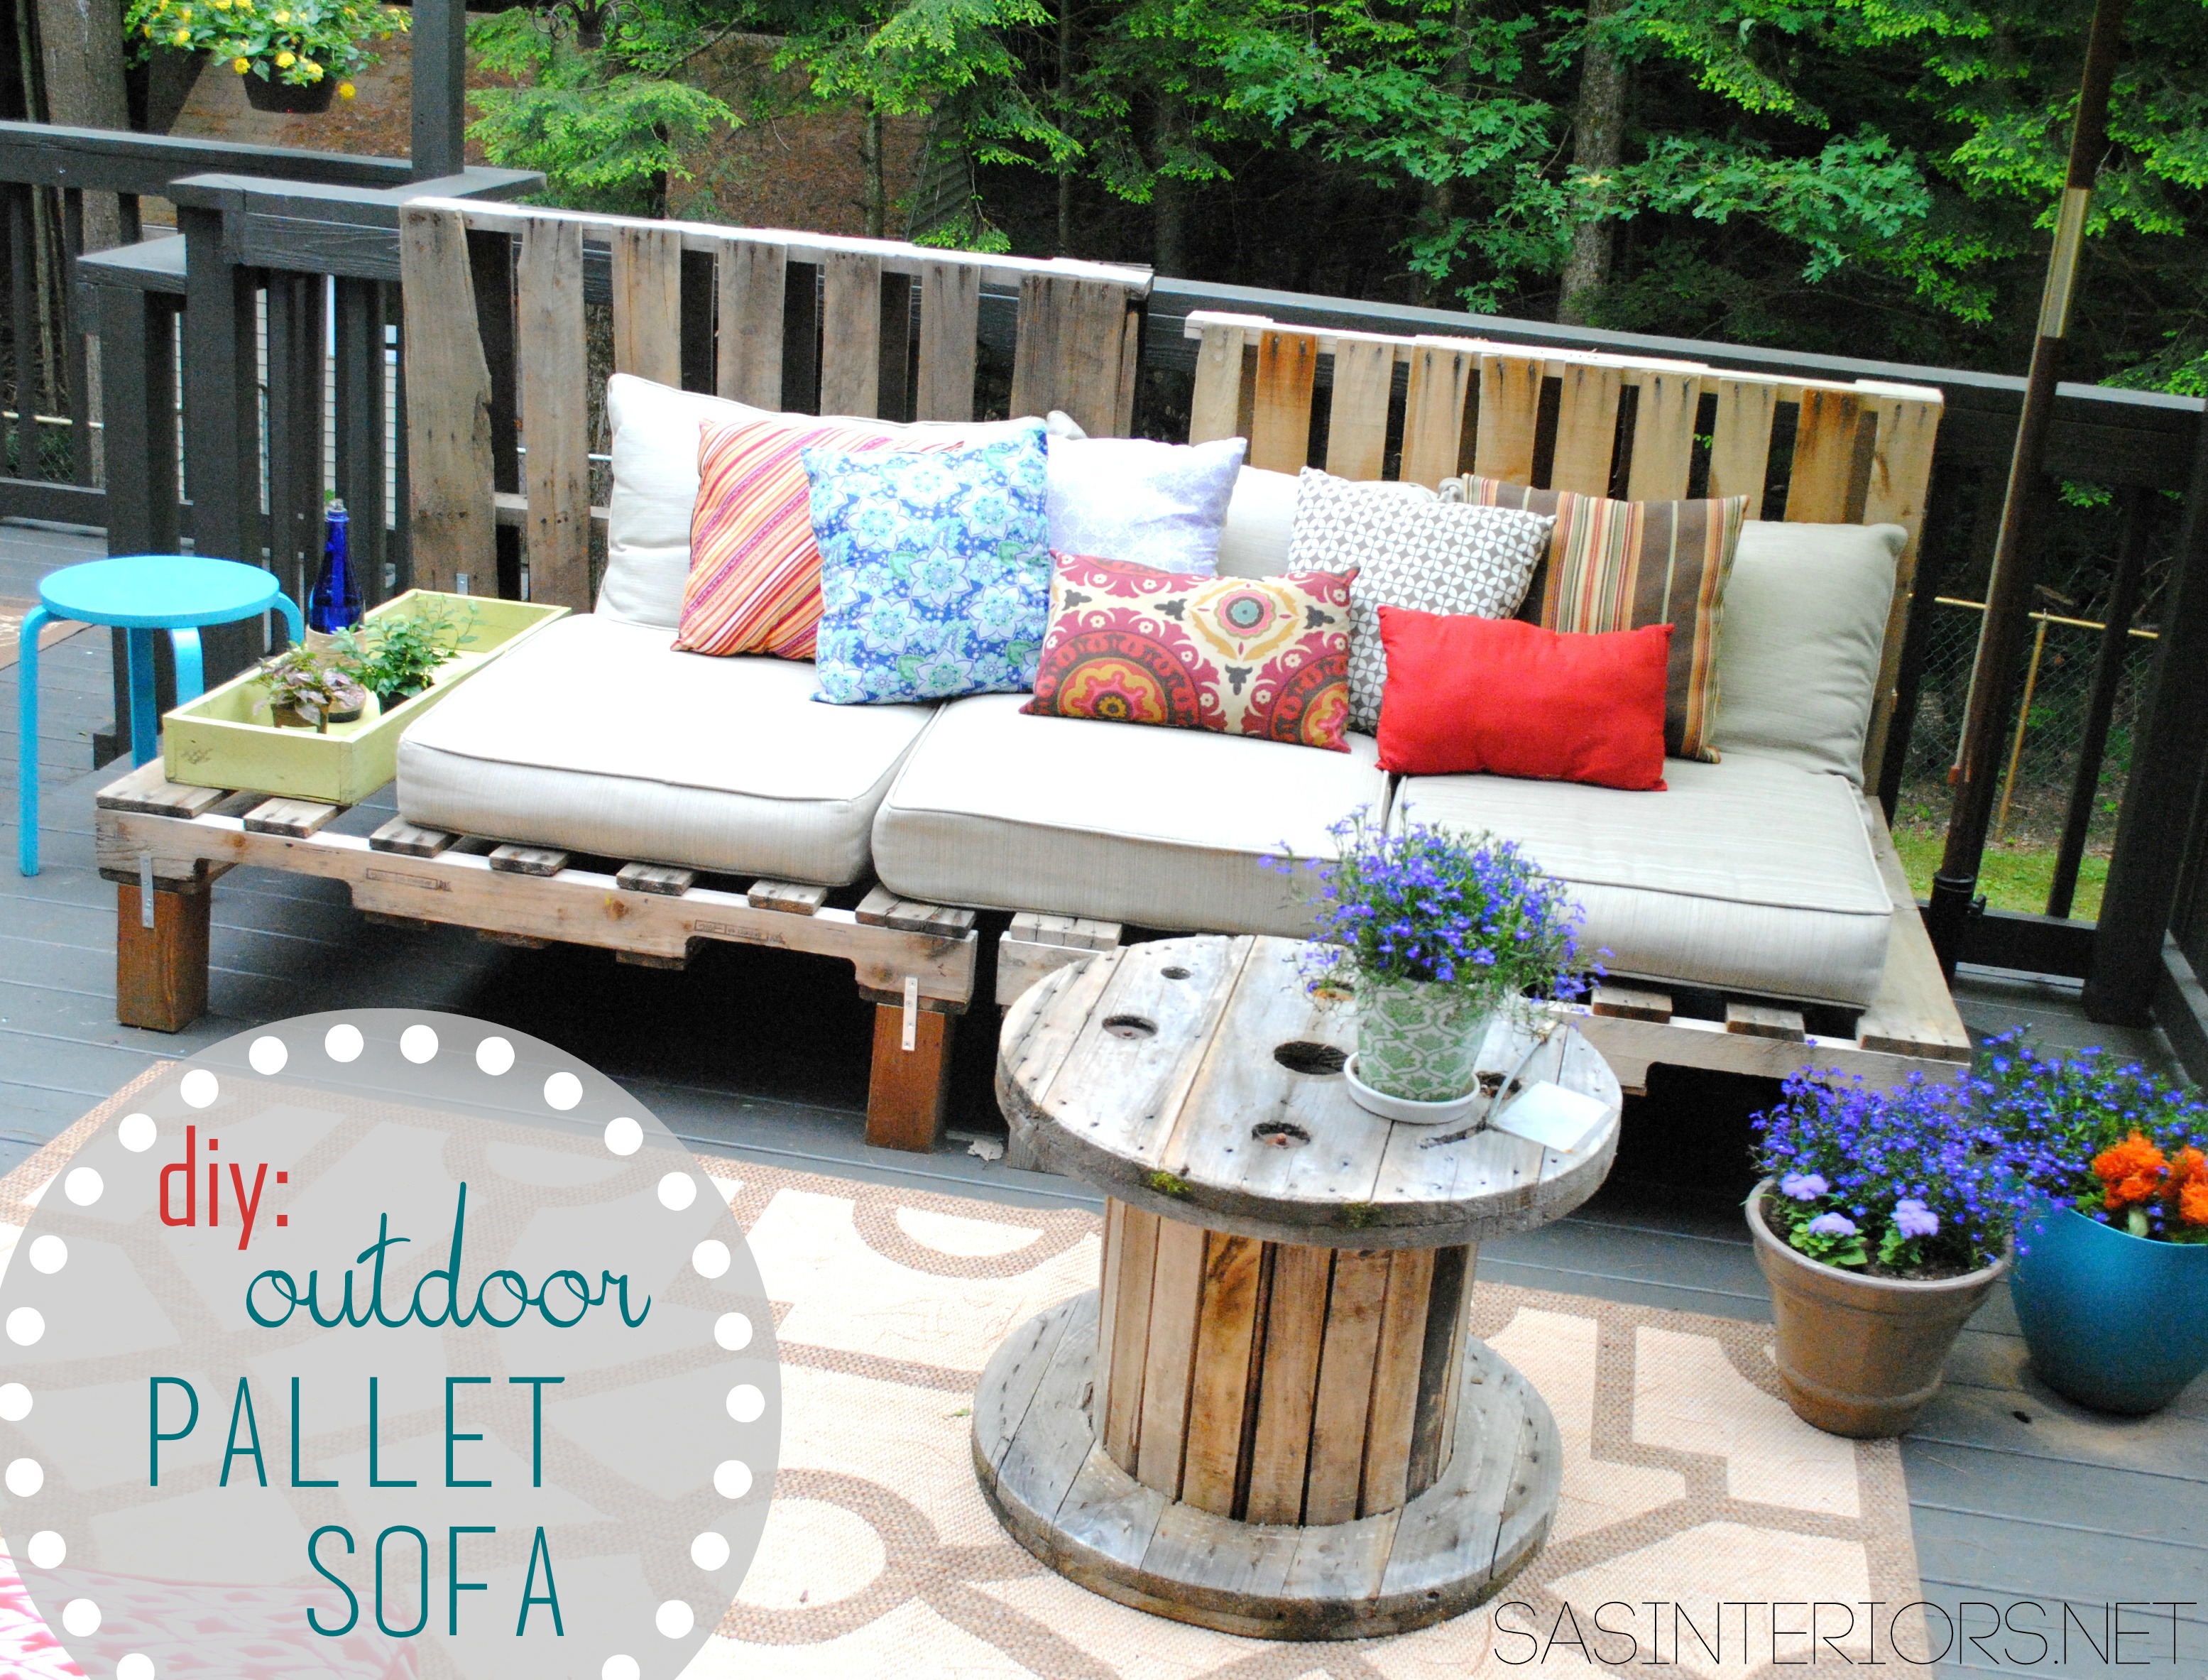
And guess what’s the best part?  It cost less than $5.

Thankfully pallets are readily available in our neck of the woods (for free).  I usually snag mine from the back of my local Lowe’s – thanks Lowe’s, you’re the best!

After staining the deck, I knew I wanted something nice and comfy to fill the space right outside of our dining room slider.  It used to look like this before…

Deck before the super awesome makeover

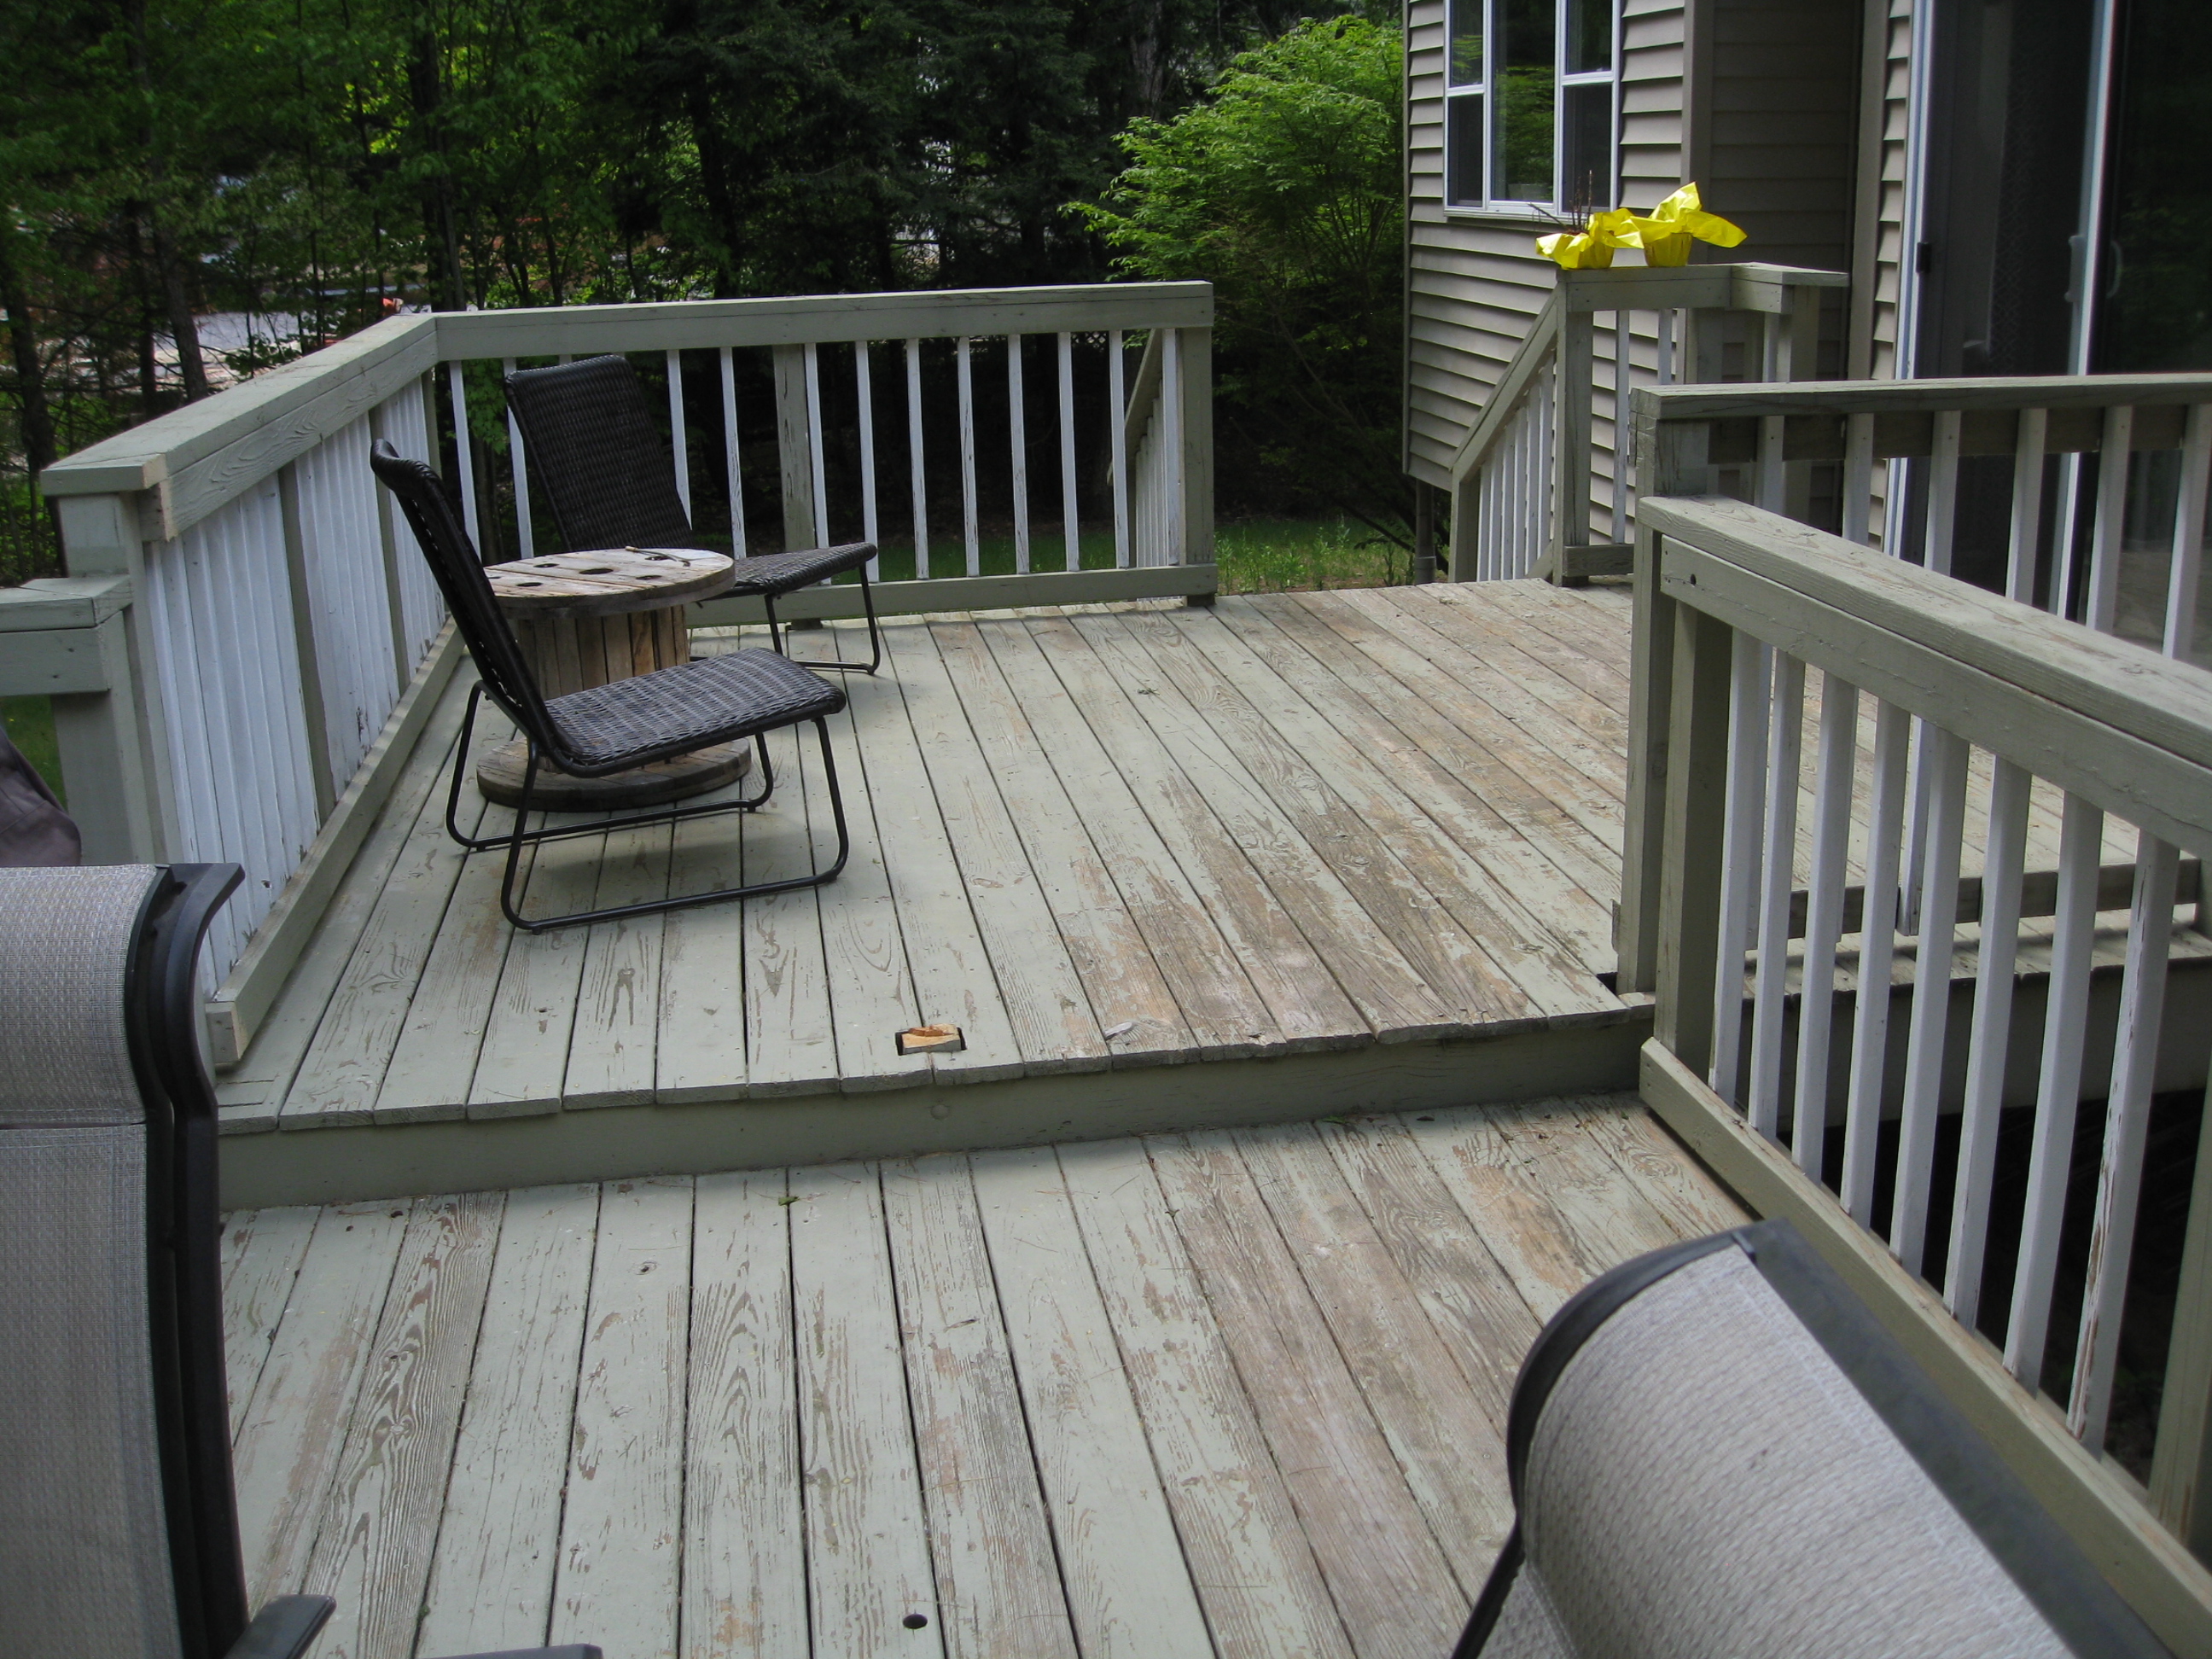
But went to this with a little TLC…

A Summer Essential for the patio or deck: an Outdoor Pallet Sofa - Easy to make and costs less than 5 dollars!

Here’s how:

I got 4 pallets that were all about the same size (40″ x 30″) and made 2 “sofas”.  If you’re wanting to make something similar, then you can make yours as small or large as you desire.  If you’ve got a big patio or deck to fill, think about making a humungo sectional. How cool would that be?!

A Summer Essential for the patio or deck: an Outdoor Pallet Sofa - Easy to make and costs less than 5 dollars!

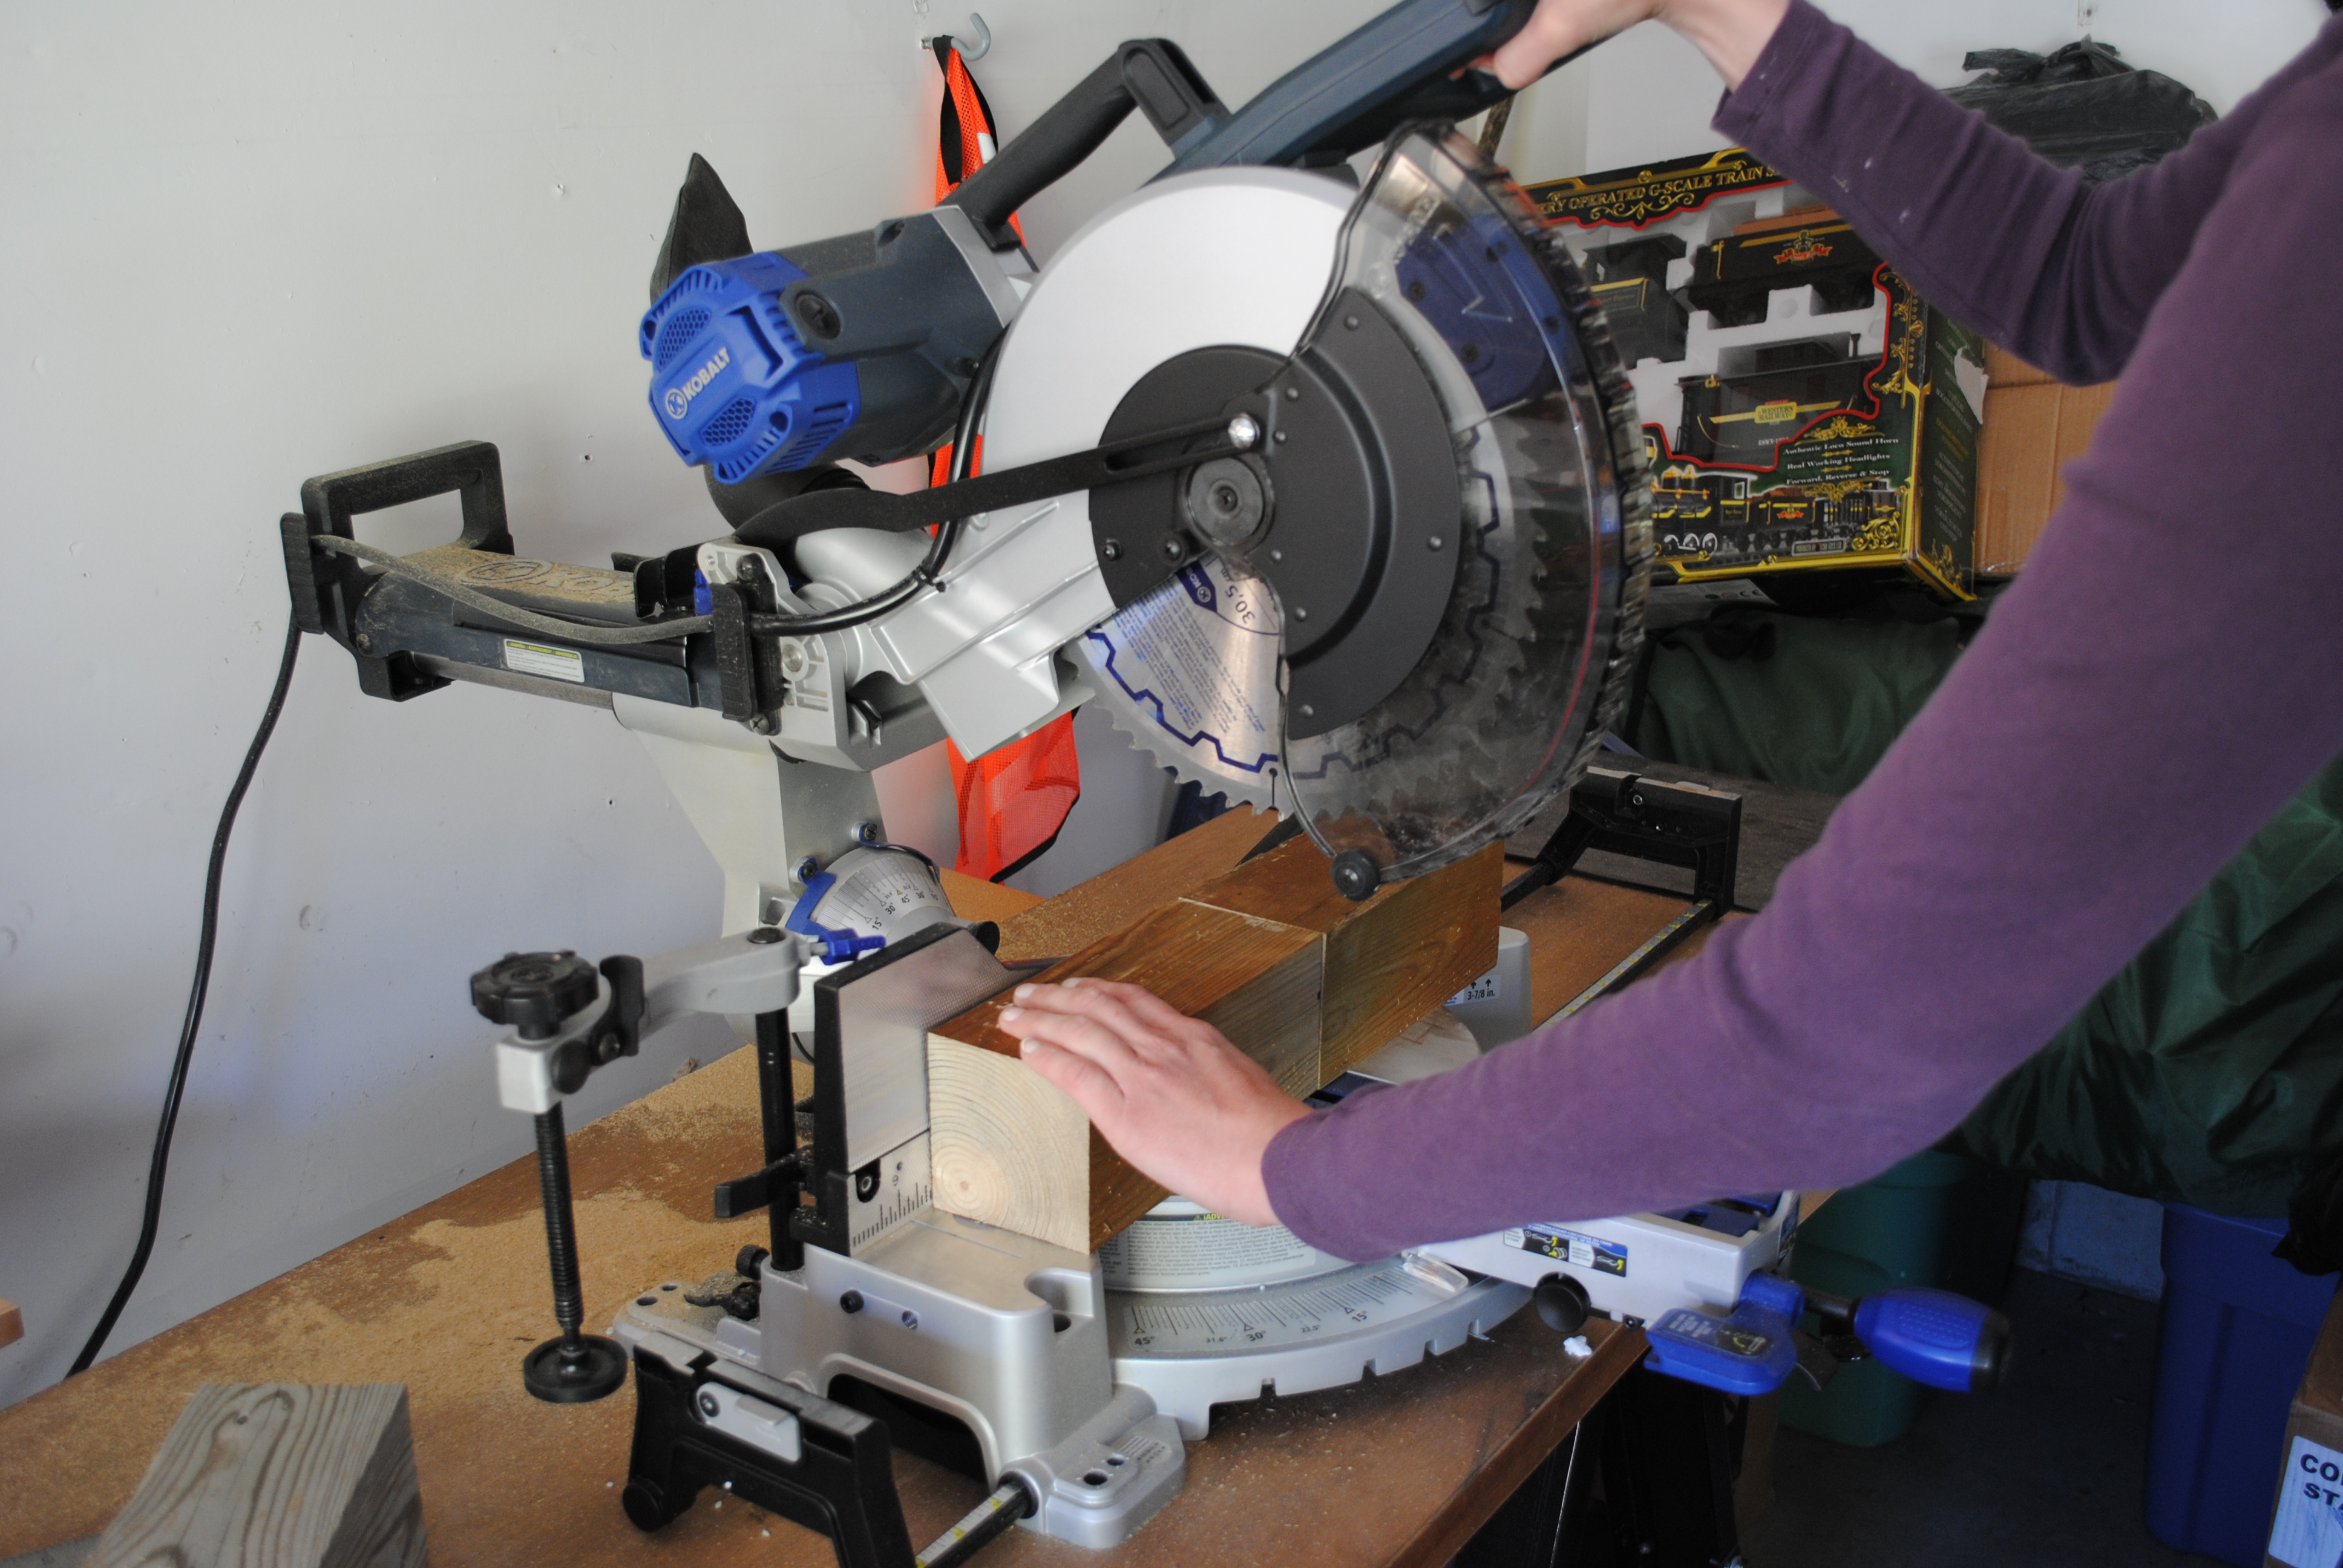
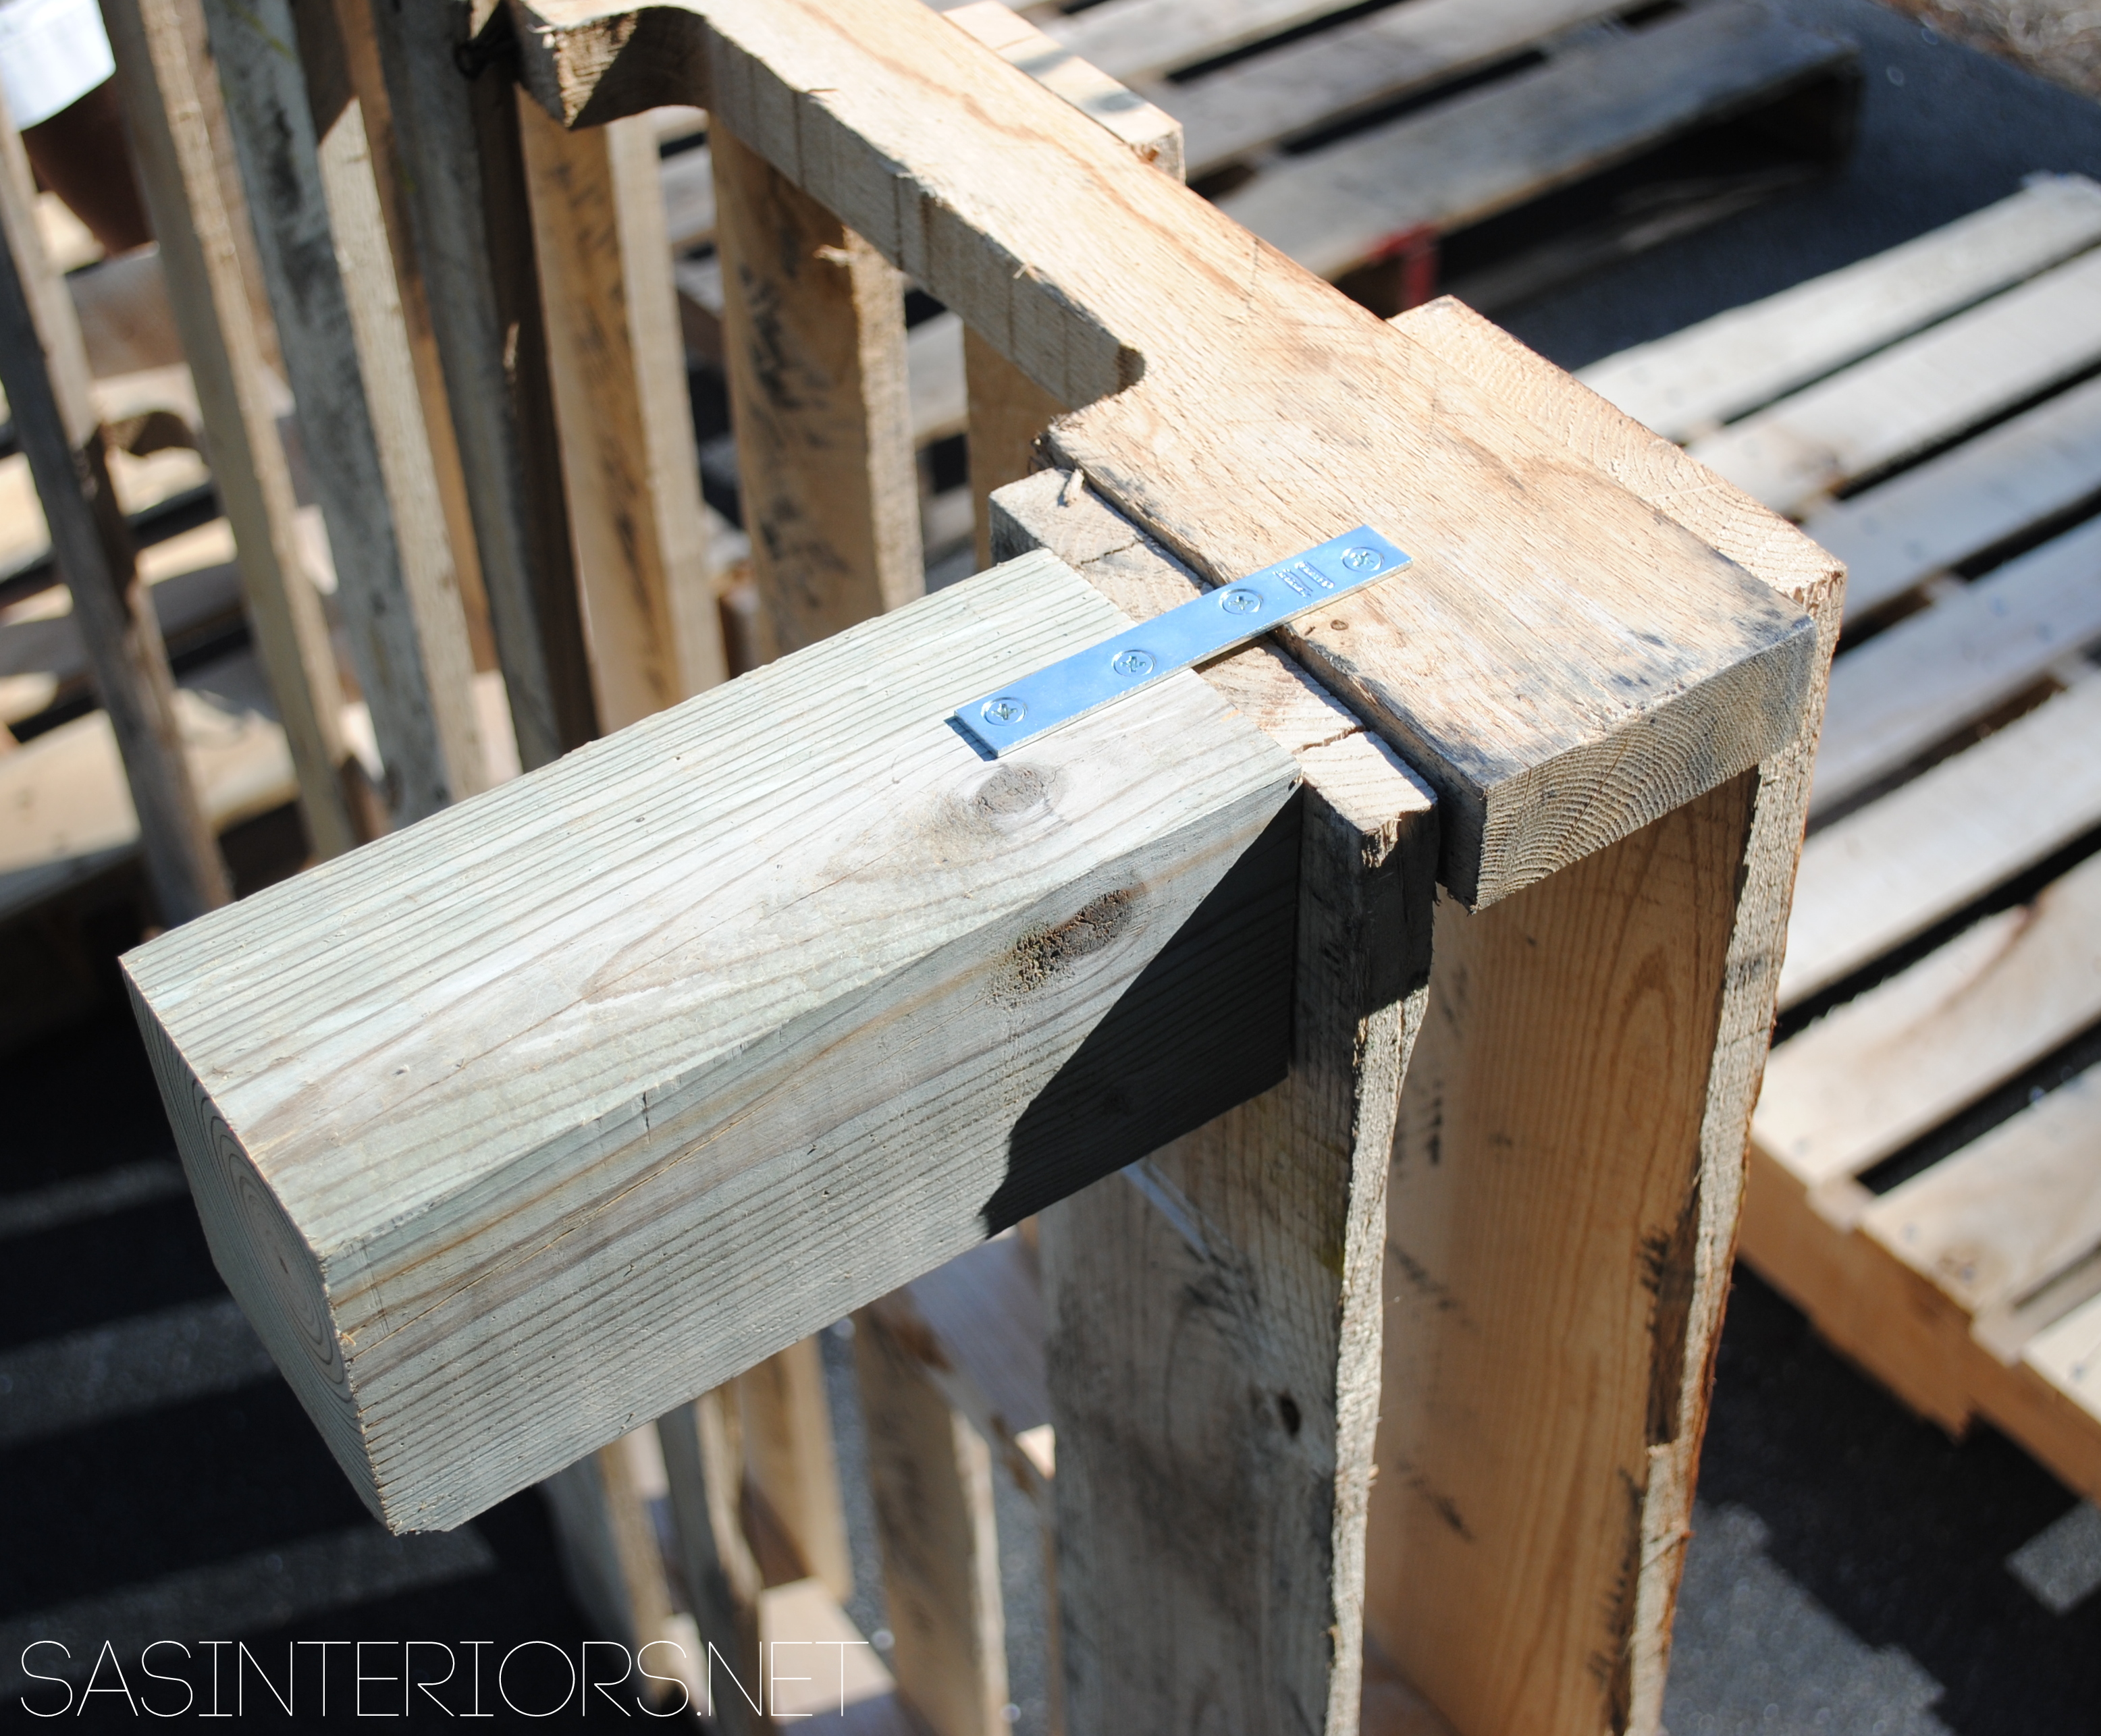
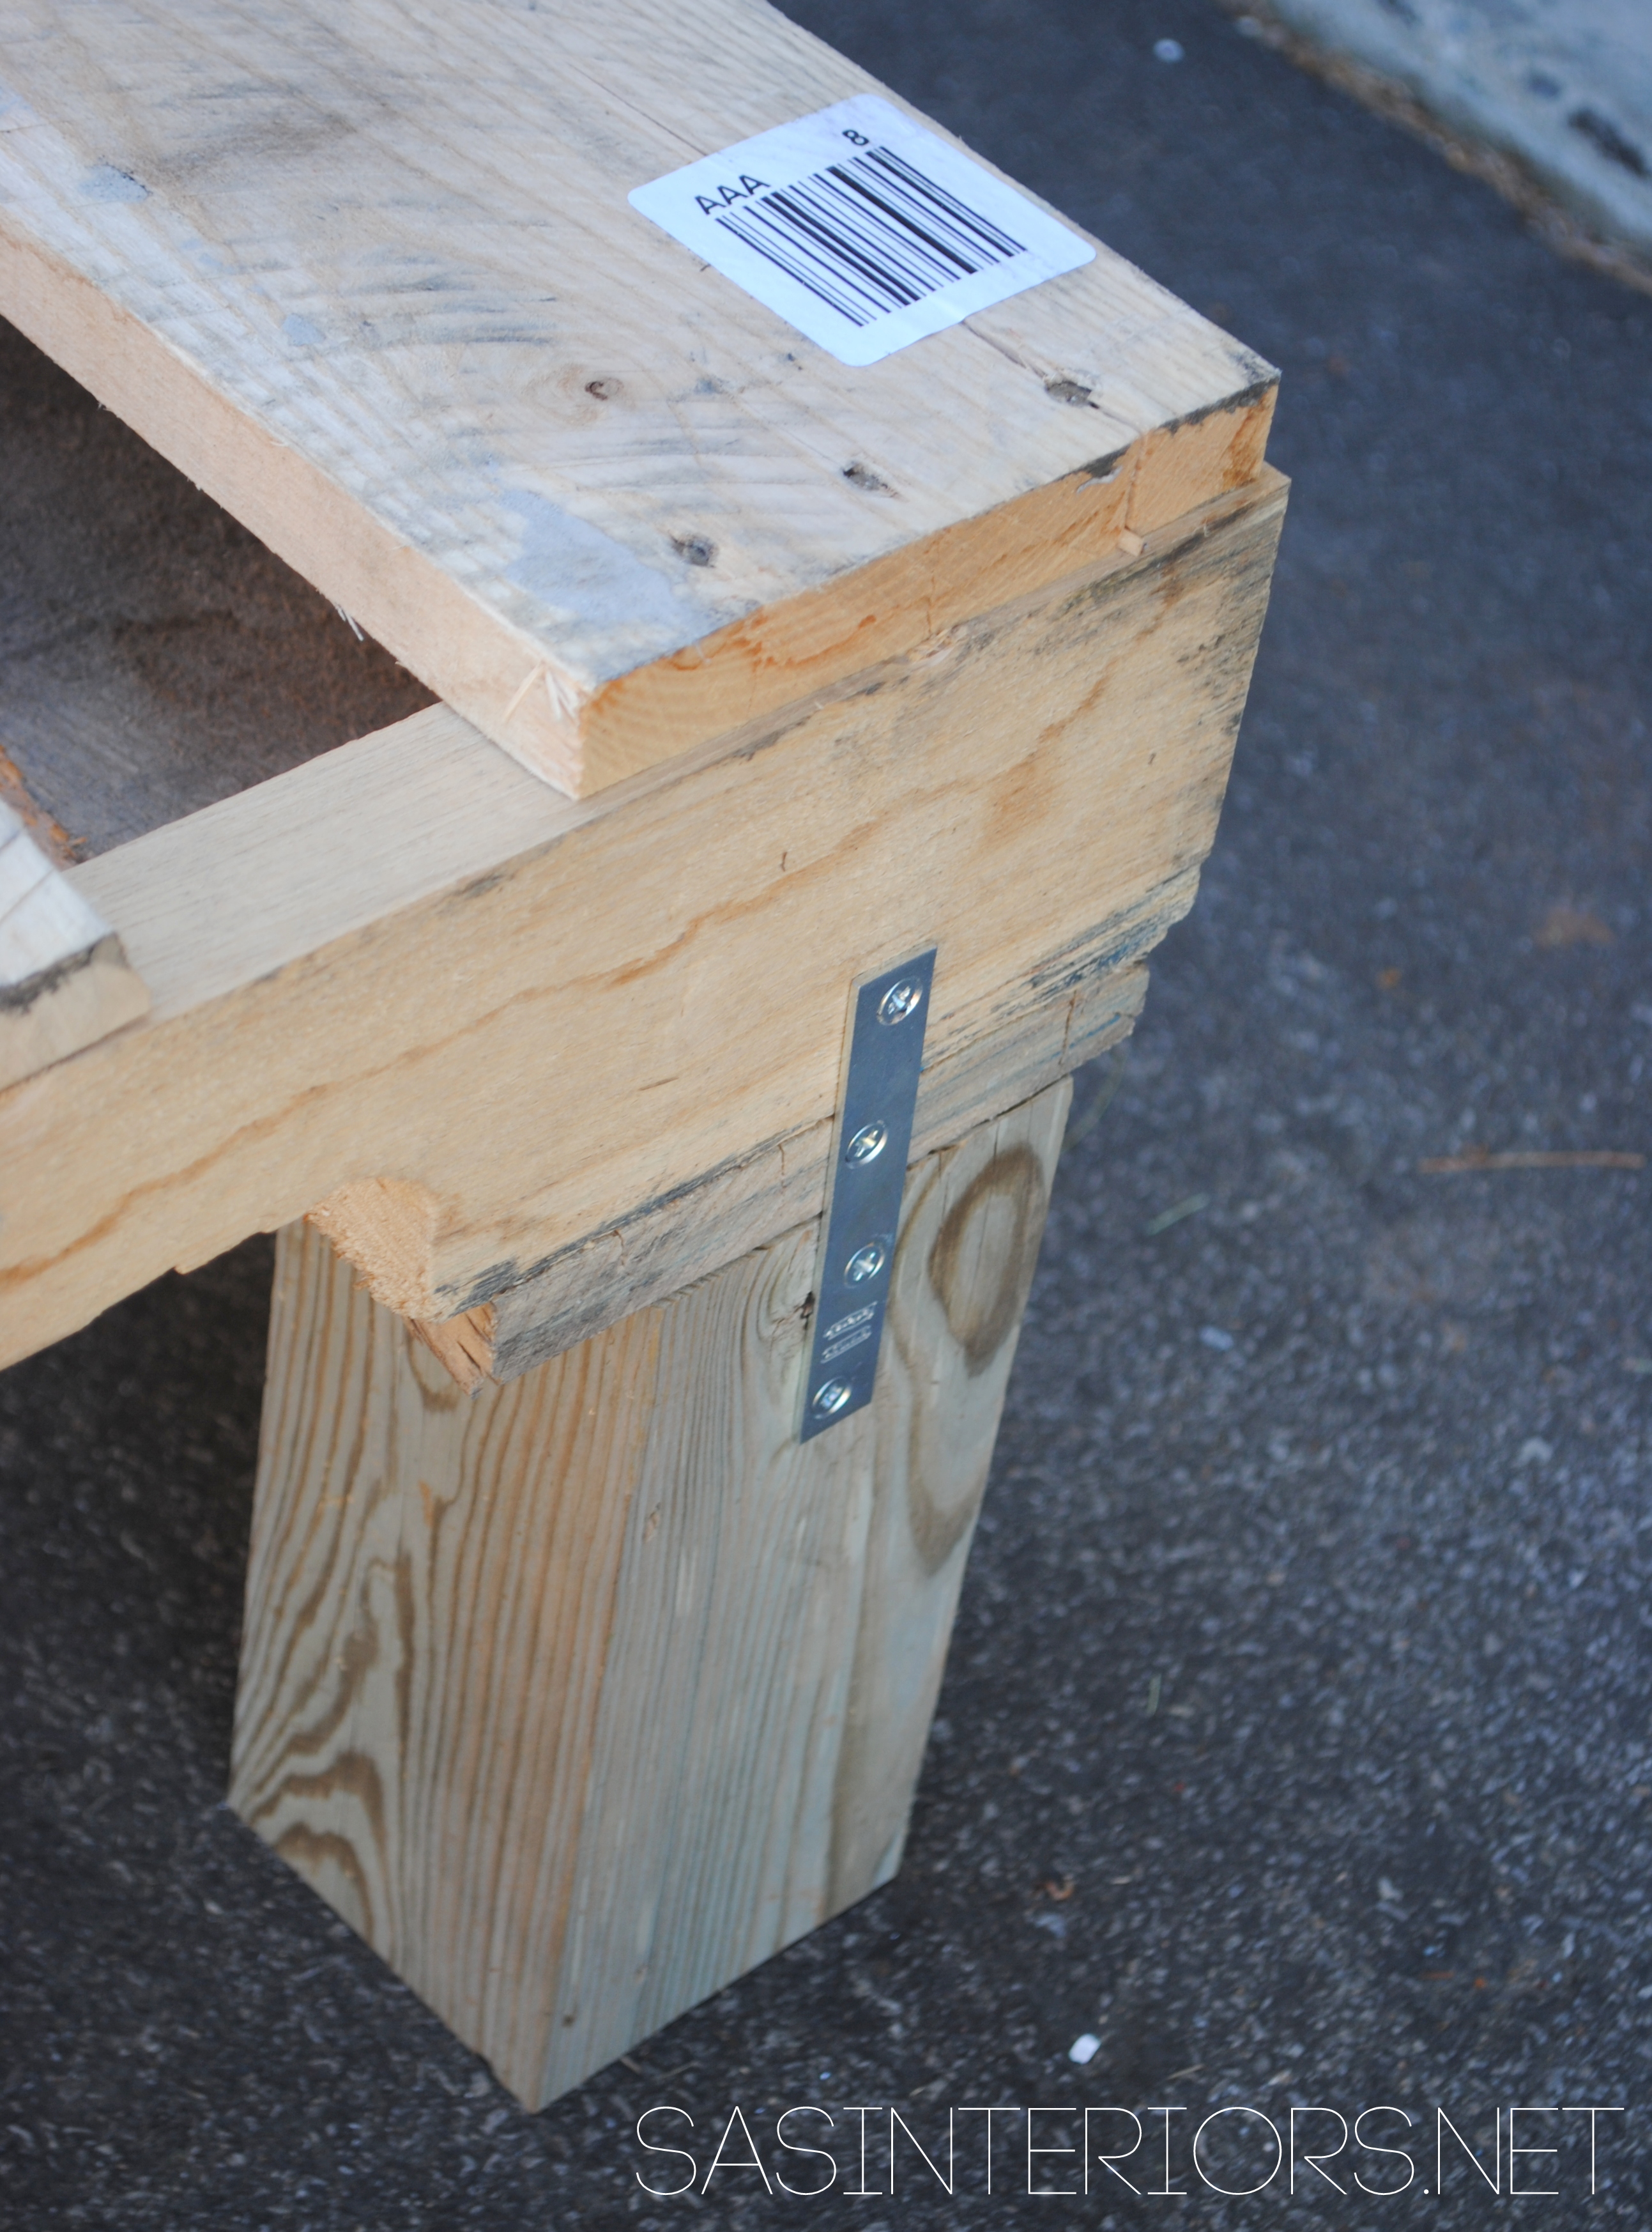
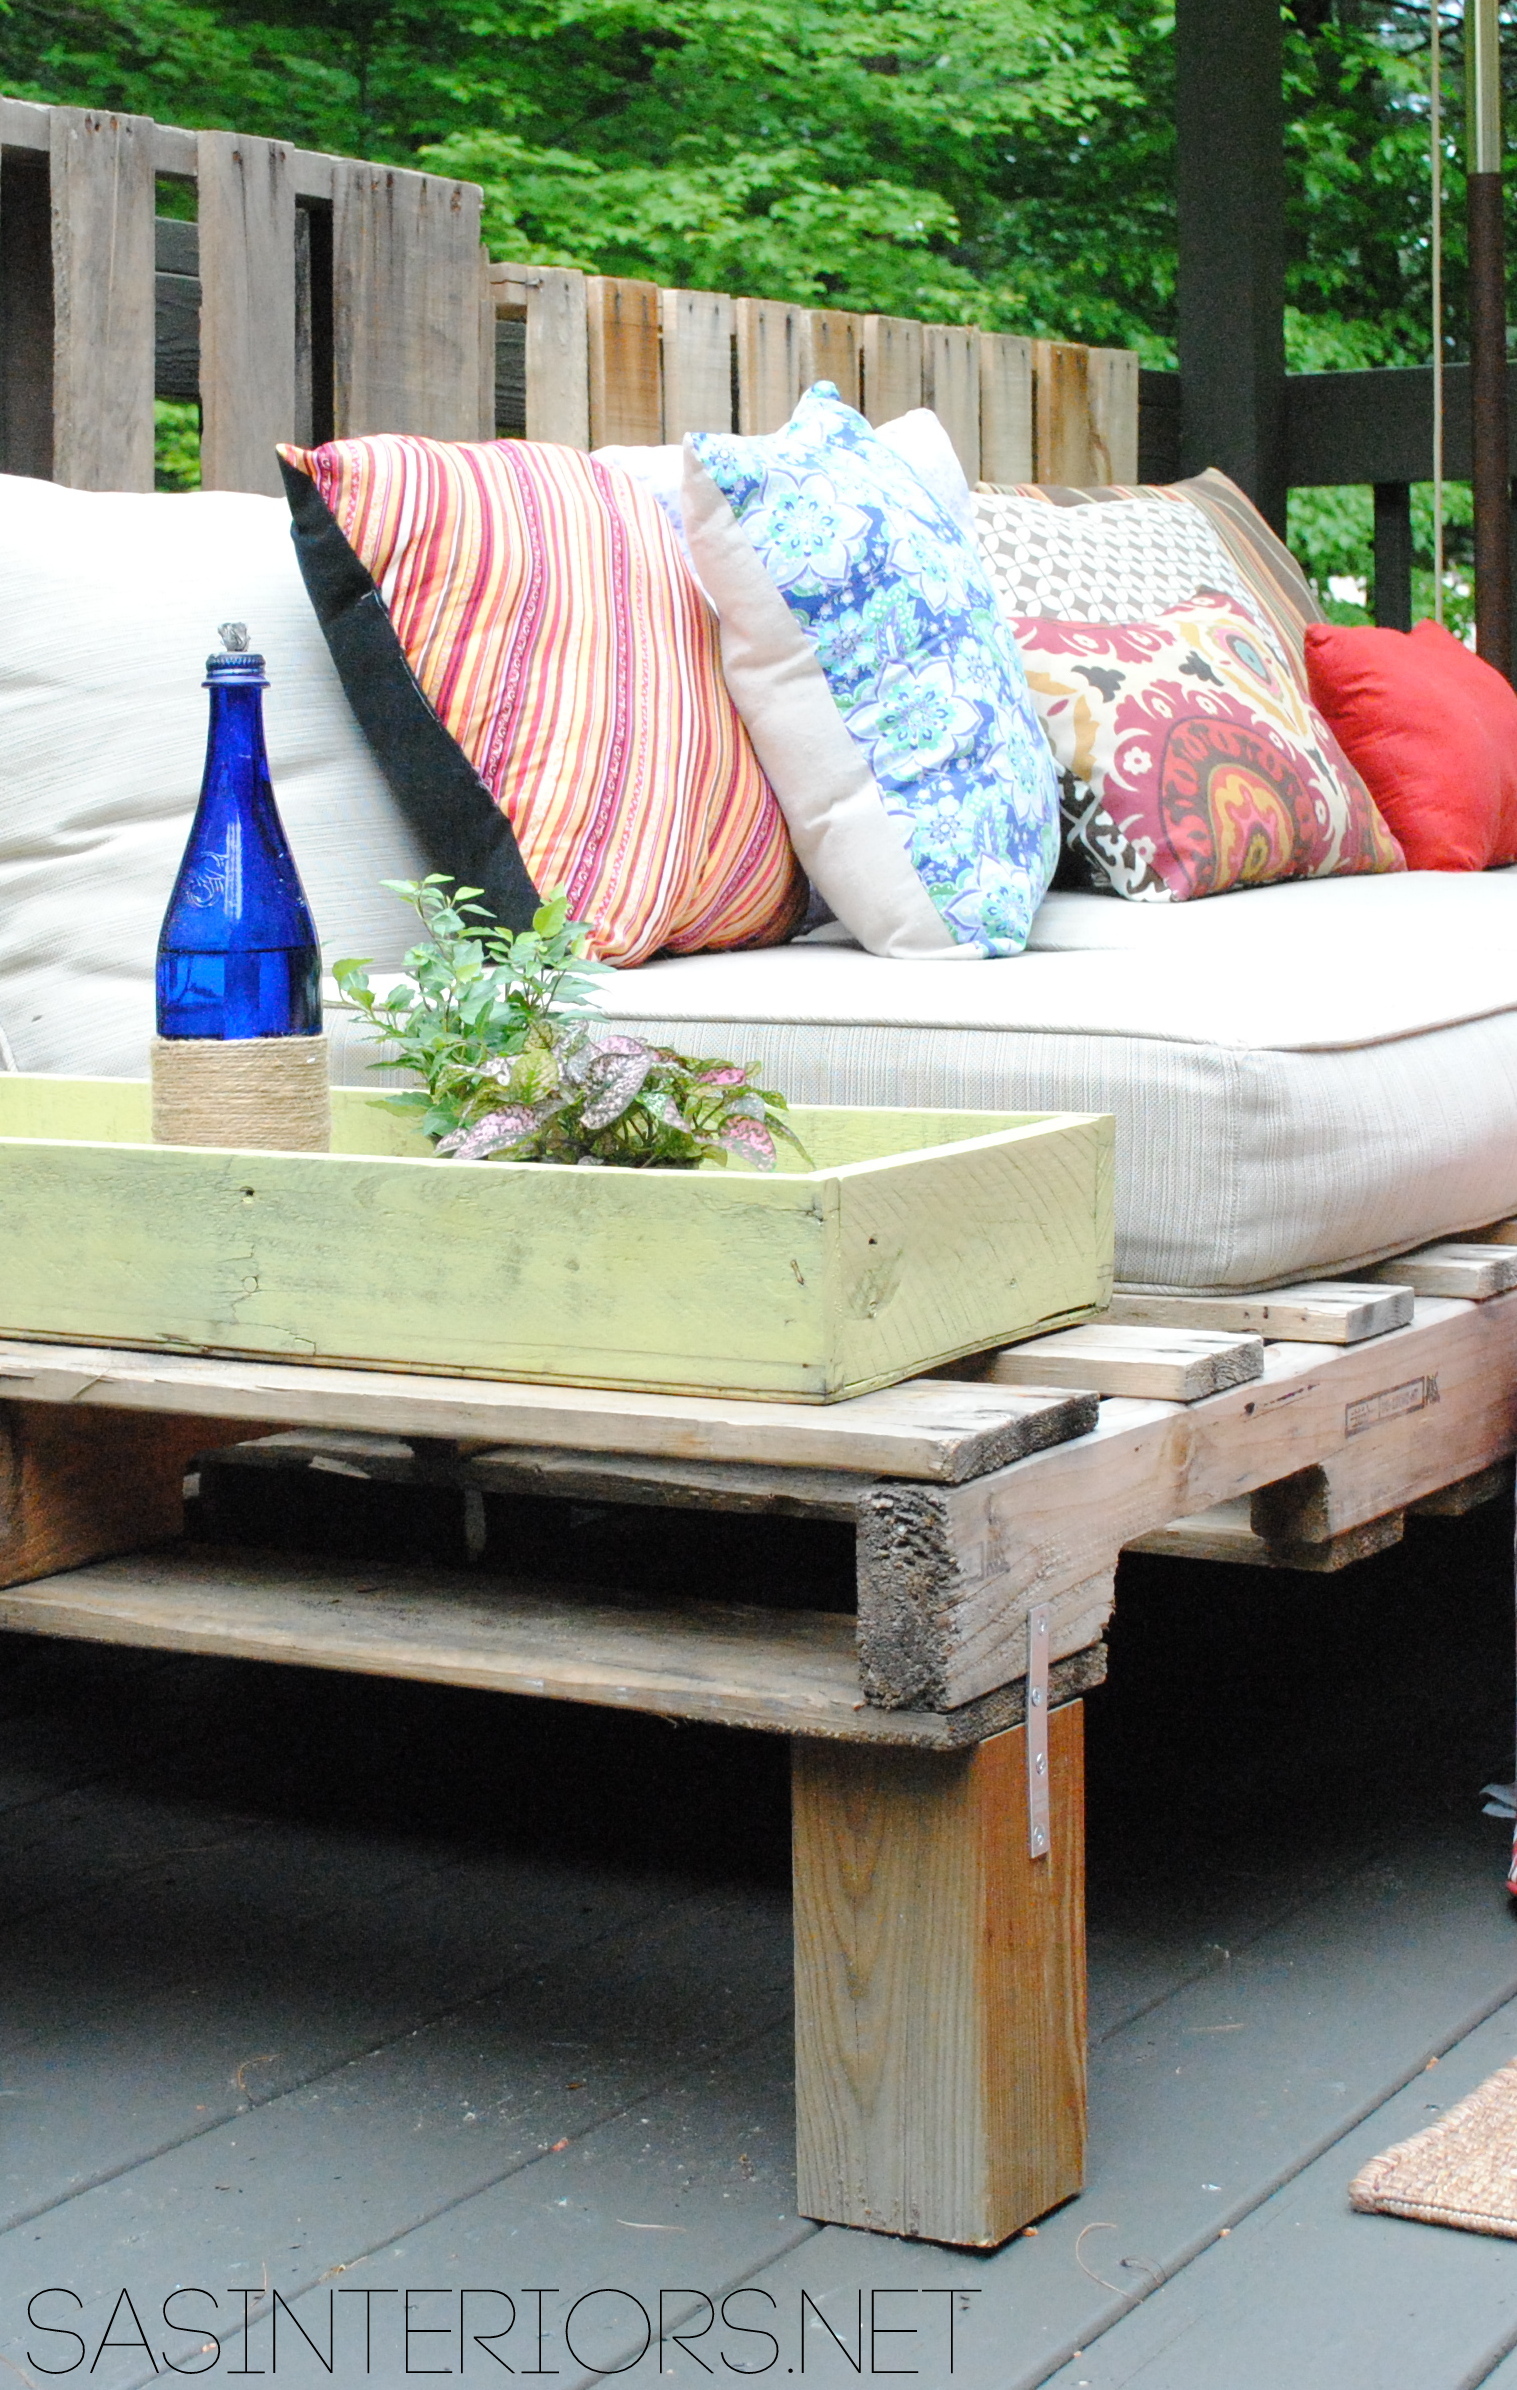
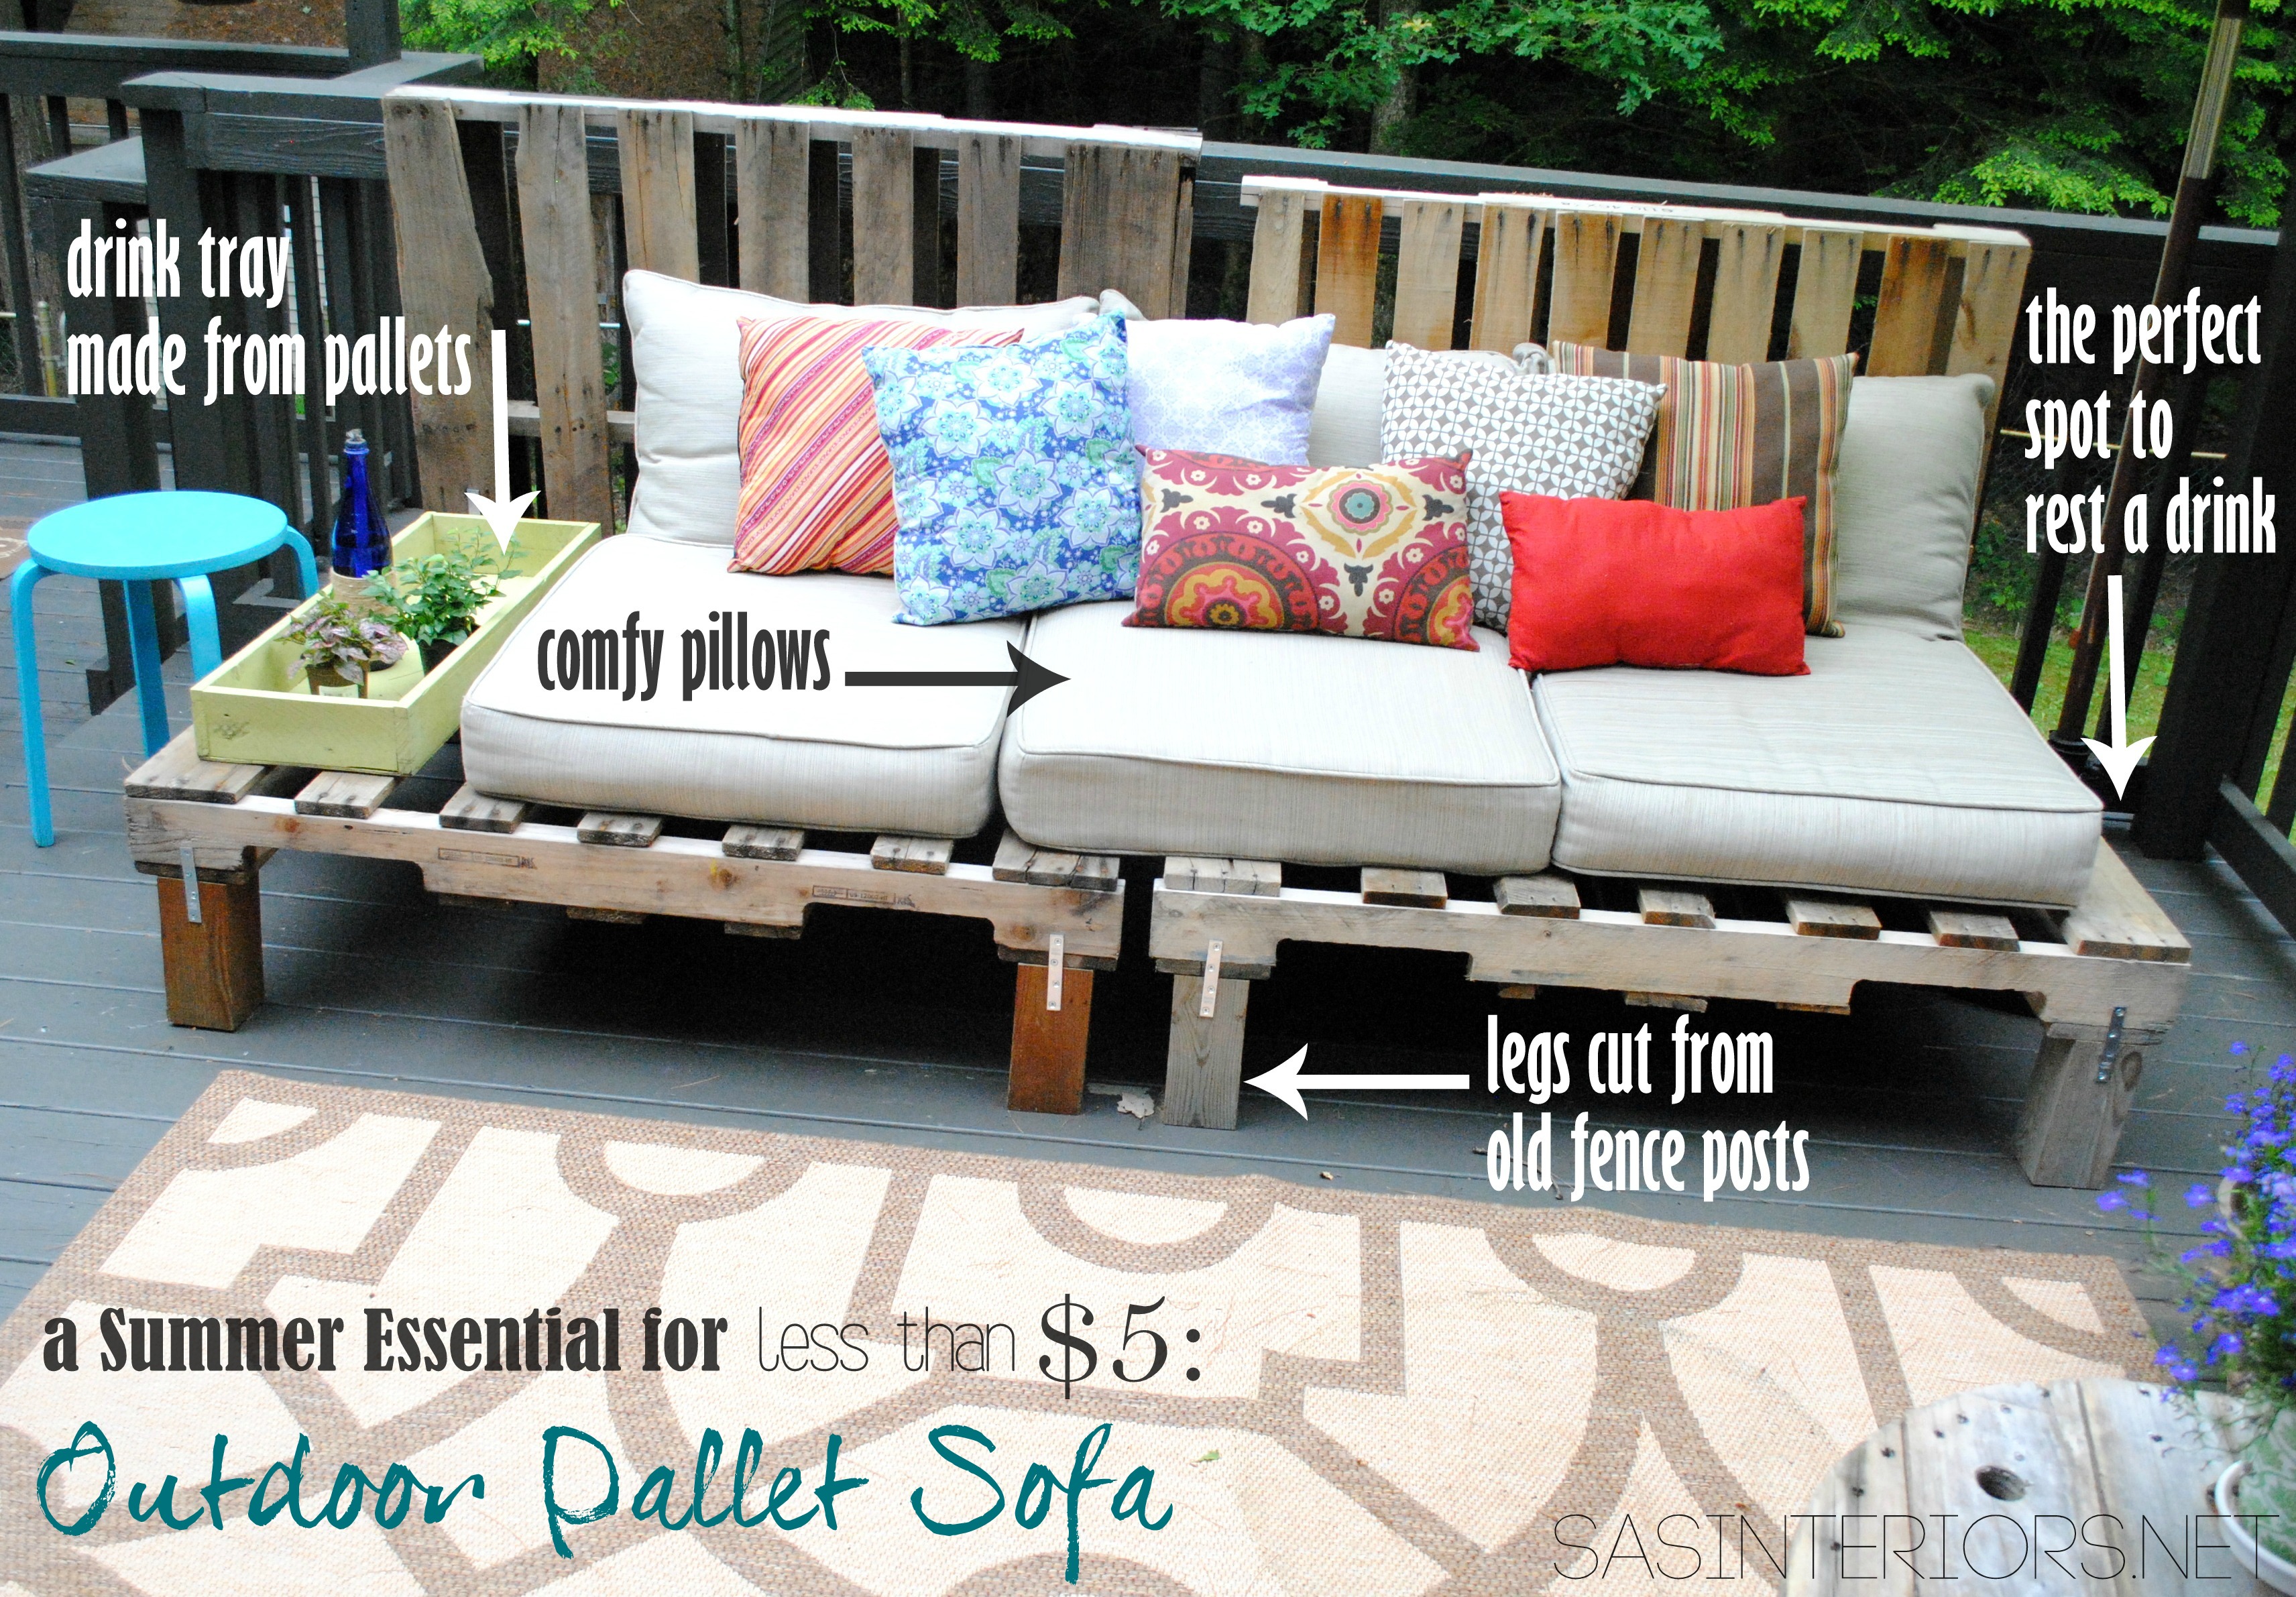
Using 4″x4″ posts from the fence we took out last year, we cut the legs using a compound miter saw (this is a favorite of mine <= affiliate link).

Determine the height of the legs:  A typical seat height is 18-20″, so we measured the height of the cushion we bought (4″ high) + the pallet thickness (5″ high), so the legs needed to be 10″.

Cutting the legs for the Pallet Sofa

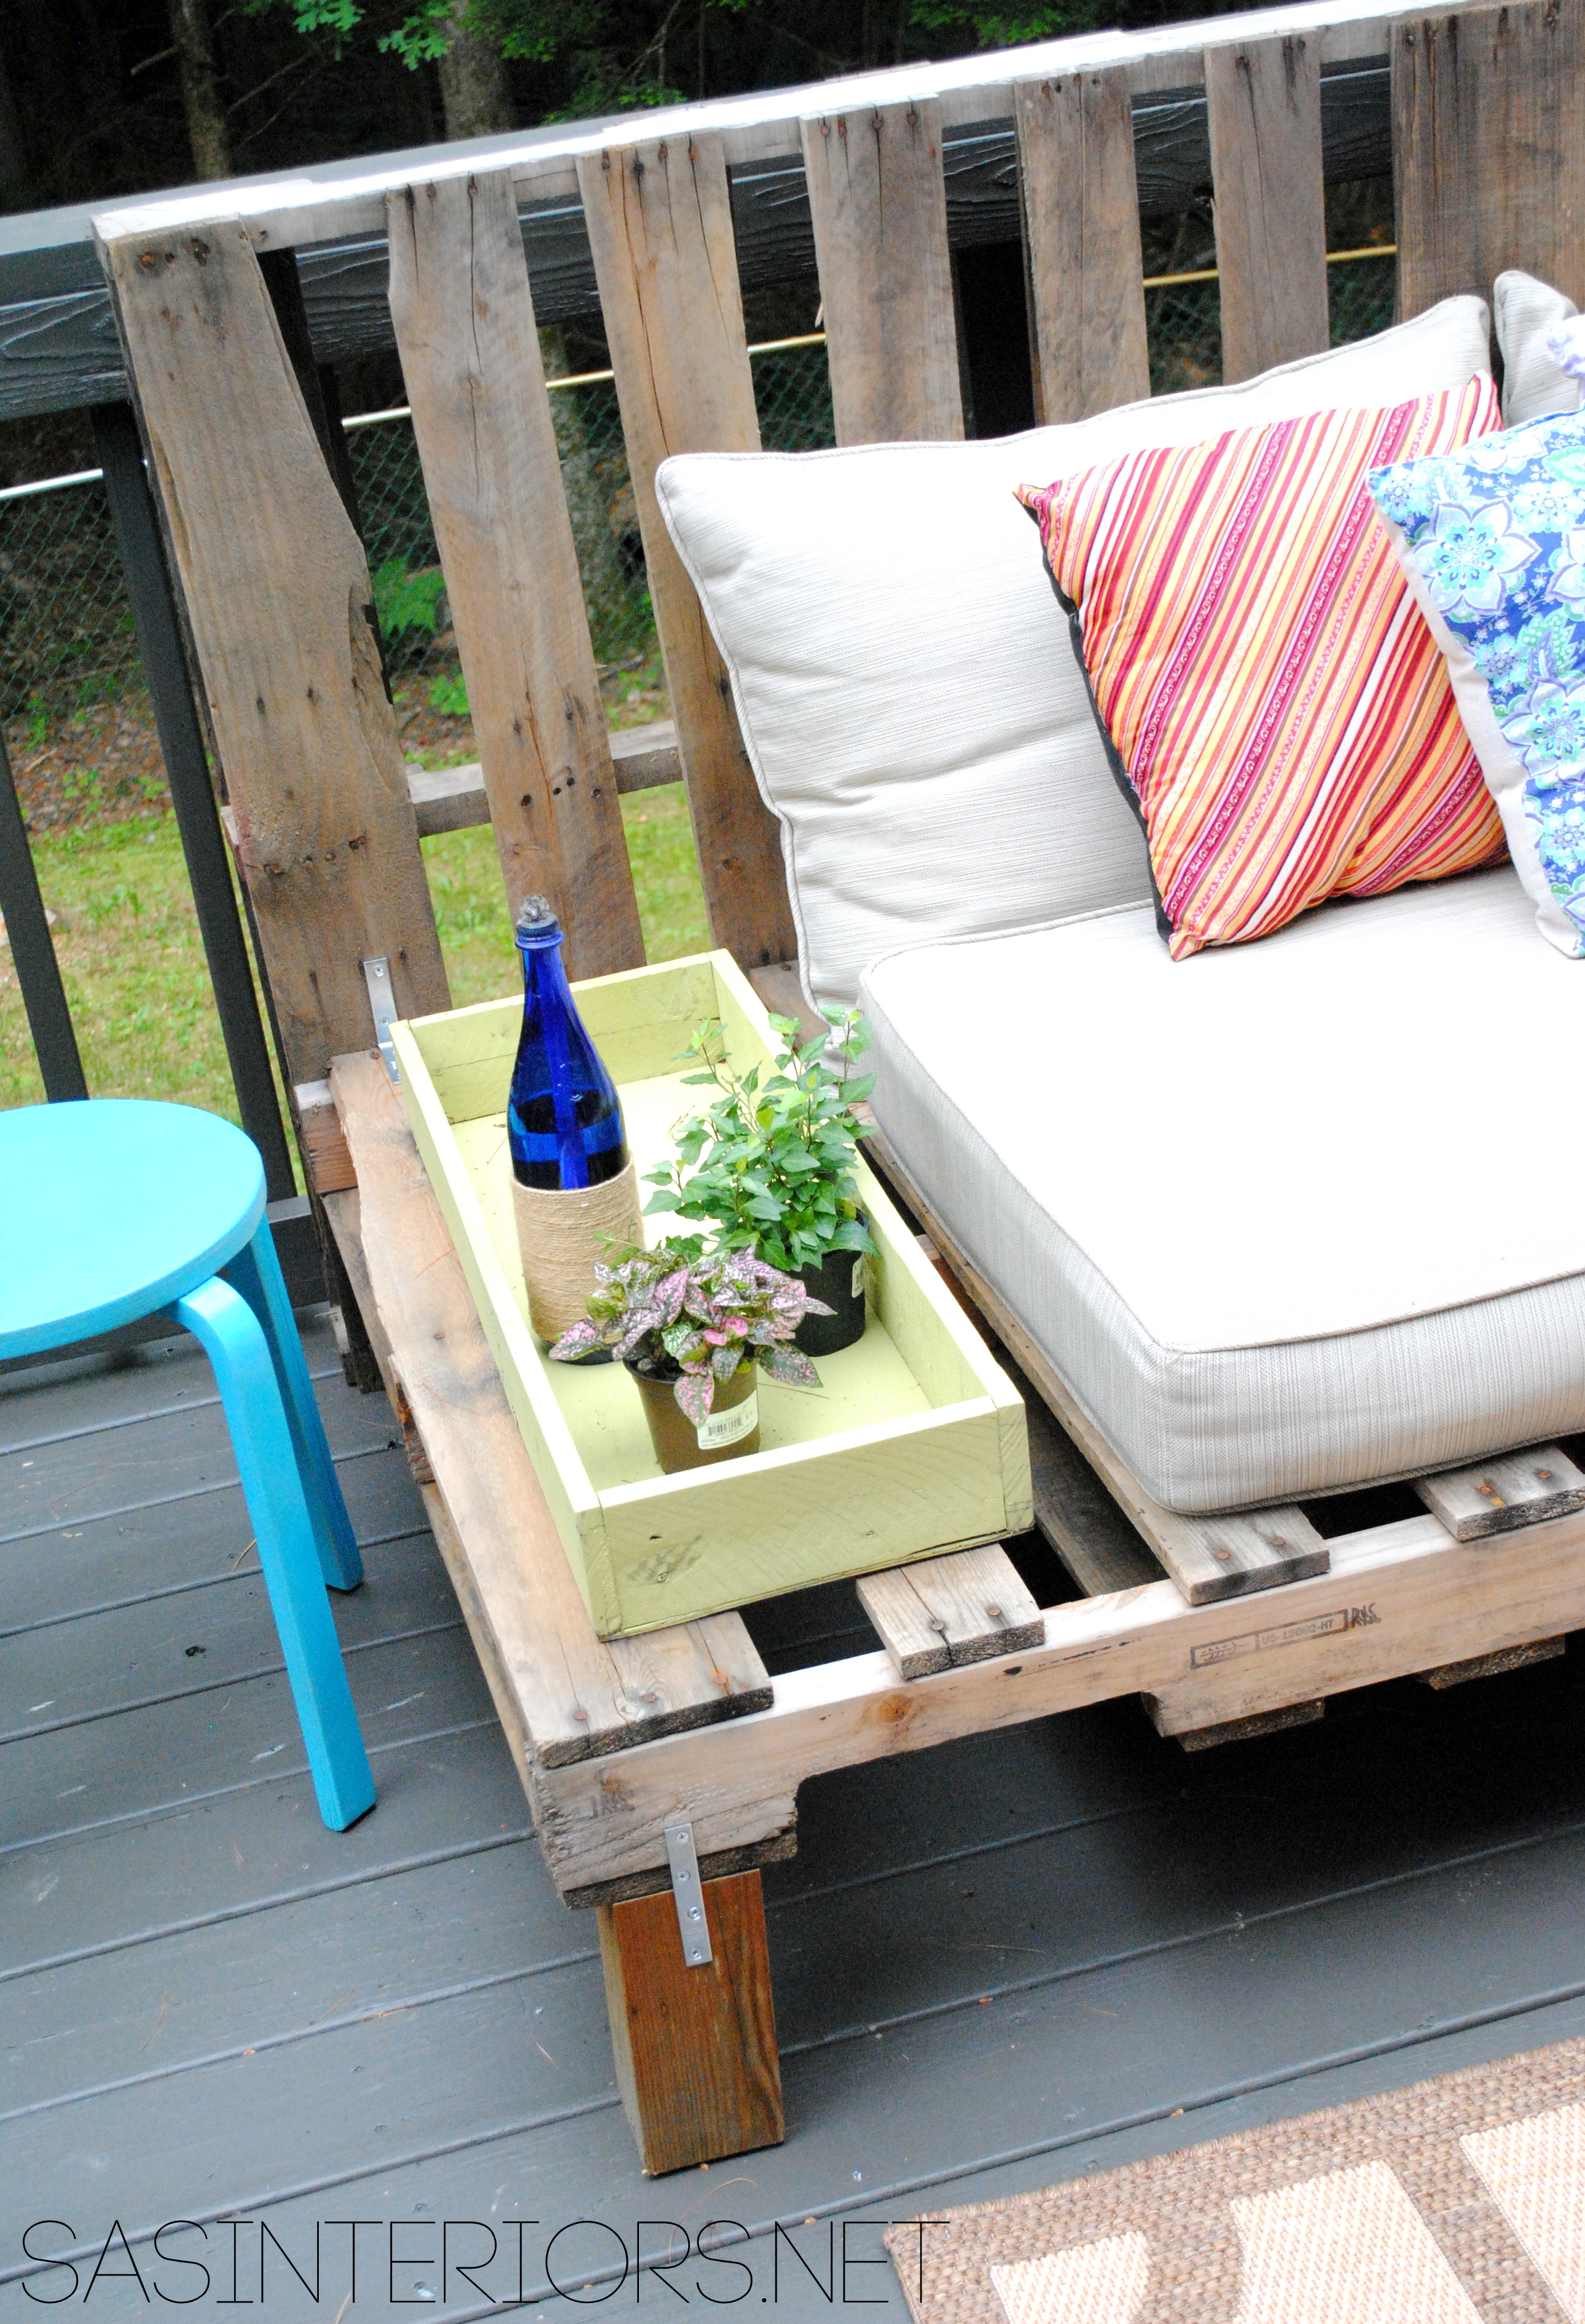
To attach the legs, we used flat brackets (mending plate <= affiliate link) and braced them from the leg to the pallet edge.

Attaching the legs to the pallet sofa

Outdoor pallet sofa legs

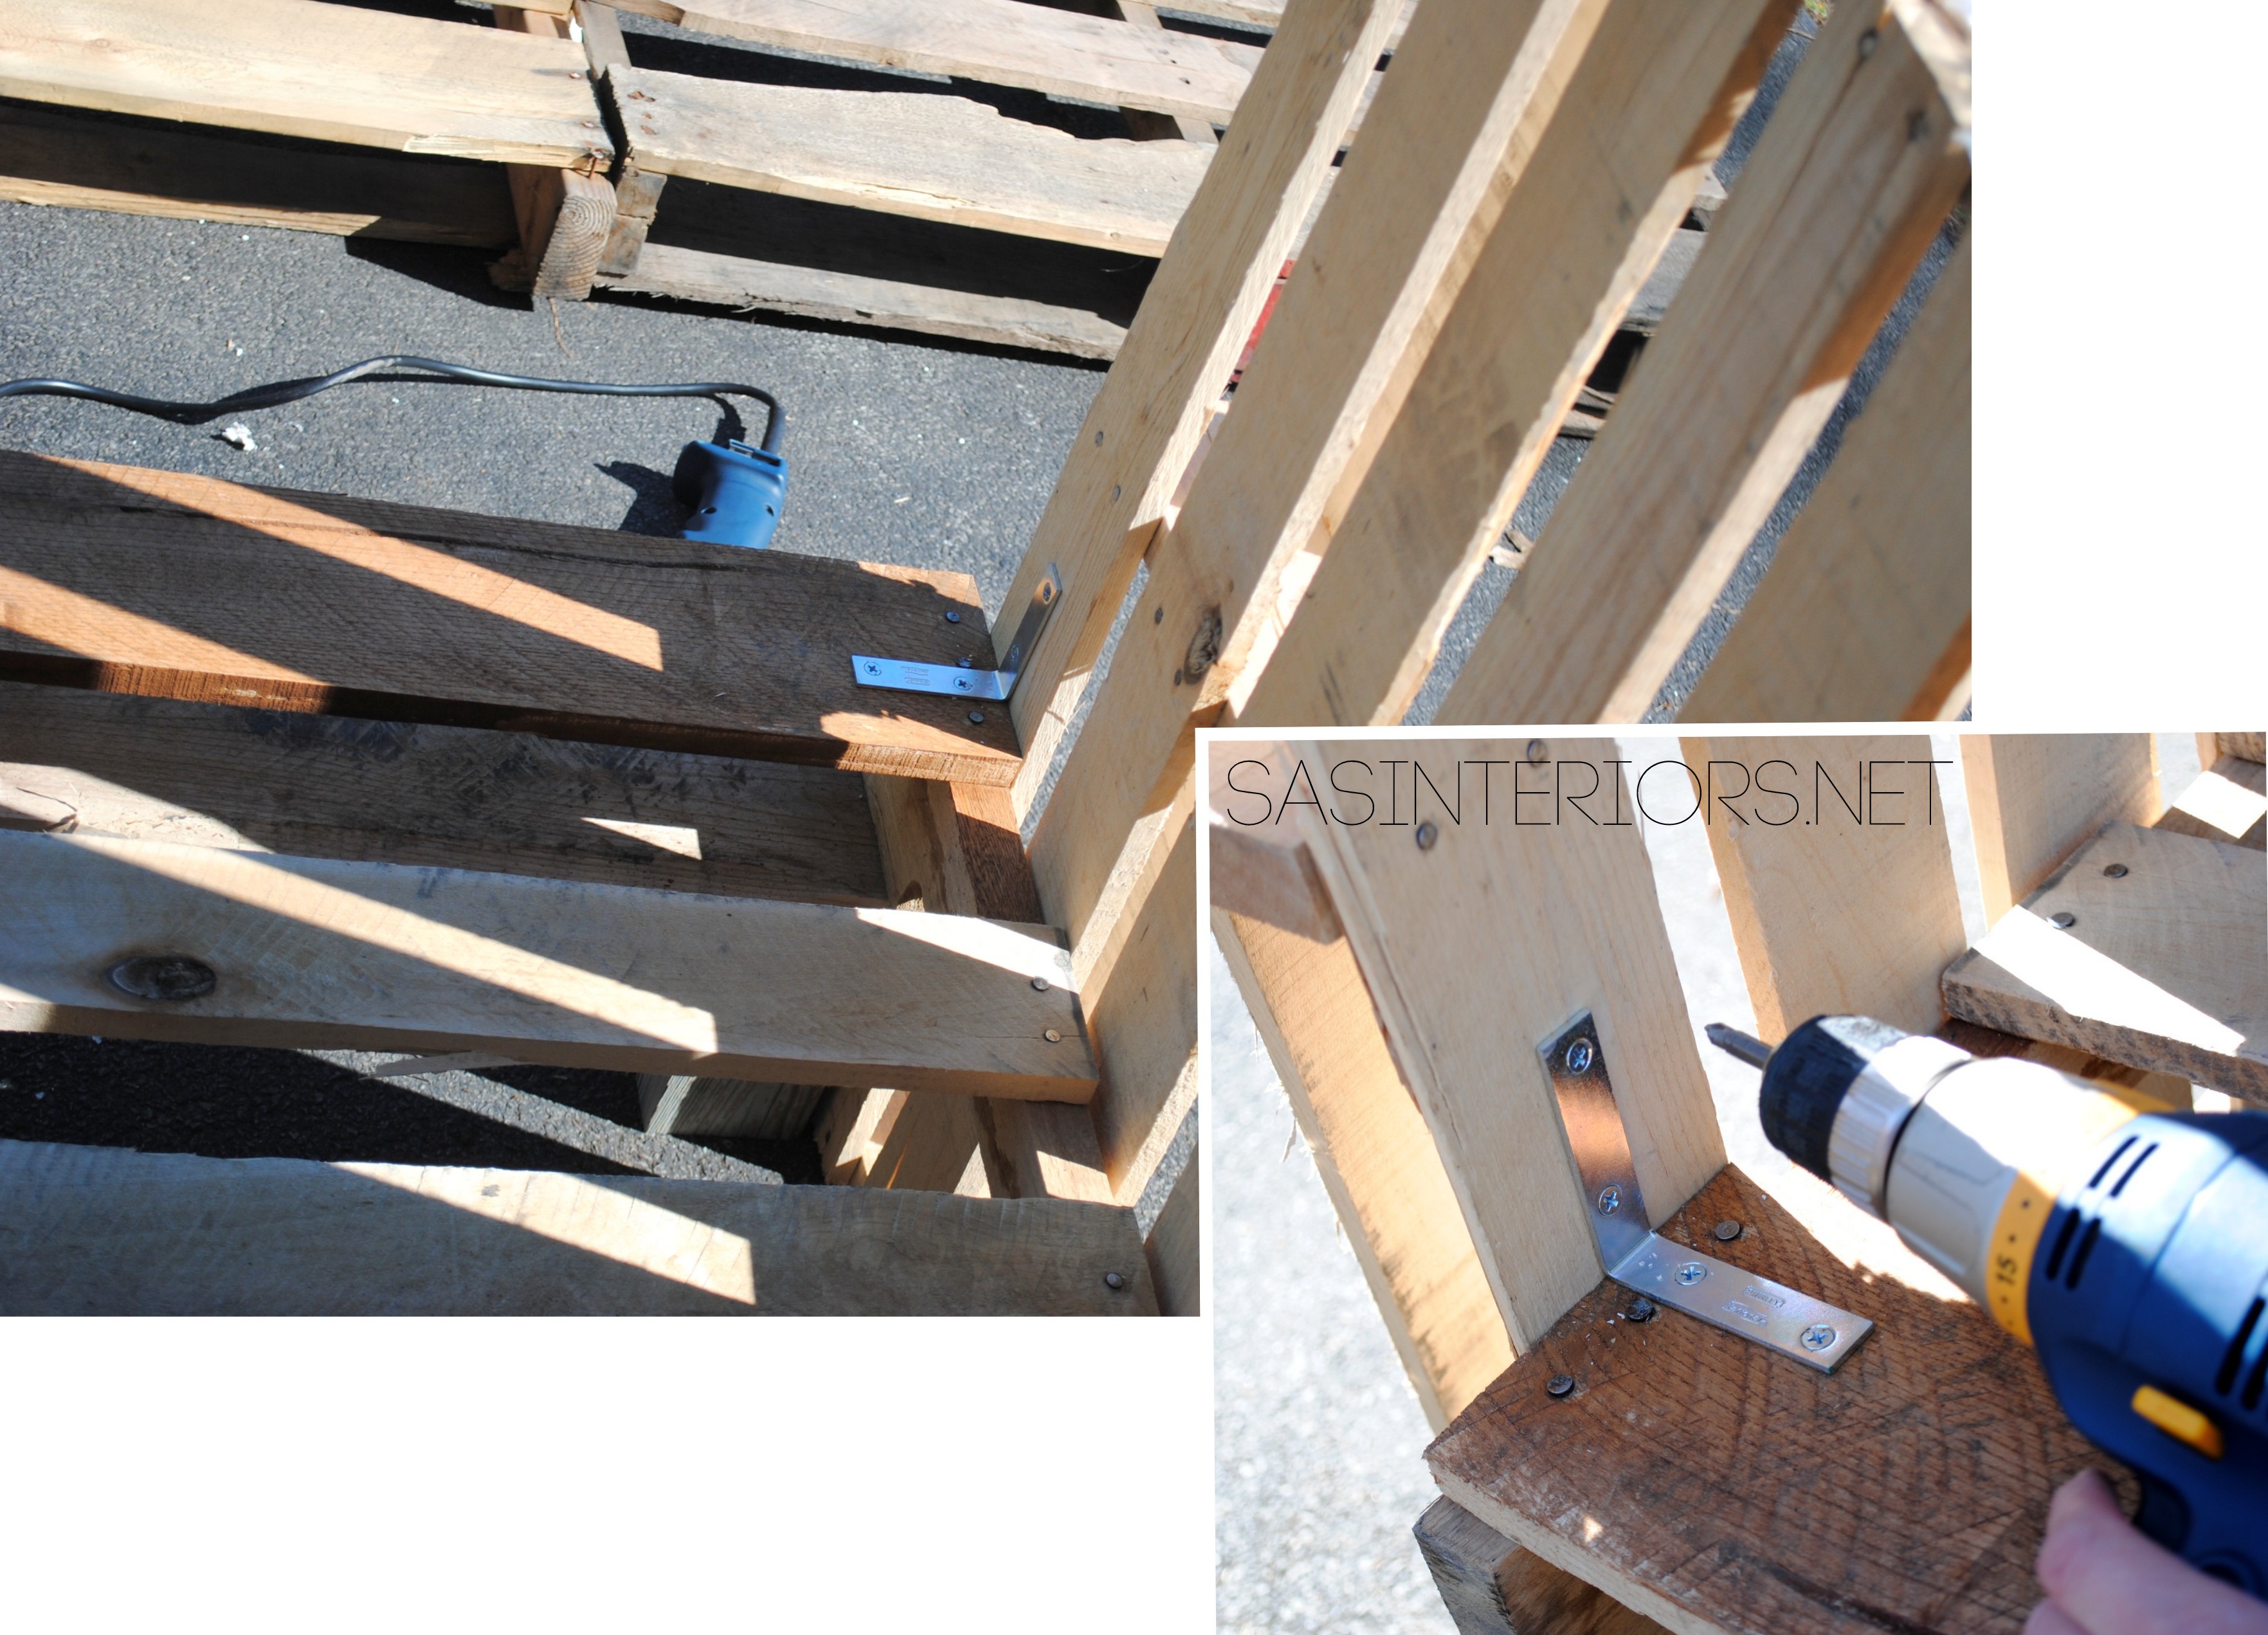
To attach the back pallet, we used (3) 90 degree L-brackets (corner brace <= affiliate link)  for each “sofa”, so 6 in all.

Attaching the back of the pallet sofa

Then it was complete.  That’s how easy these bad-boys are to make,  But I will warn you…  THEY ARE HEAVY.  So you will definitely need some muscles & braun to lift and move the pallet sofas.

Once they were in place, we were in love!

Check out my little guy chilaxin’…
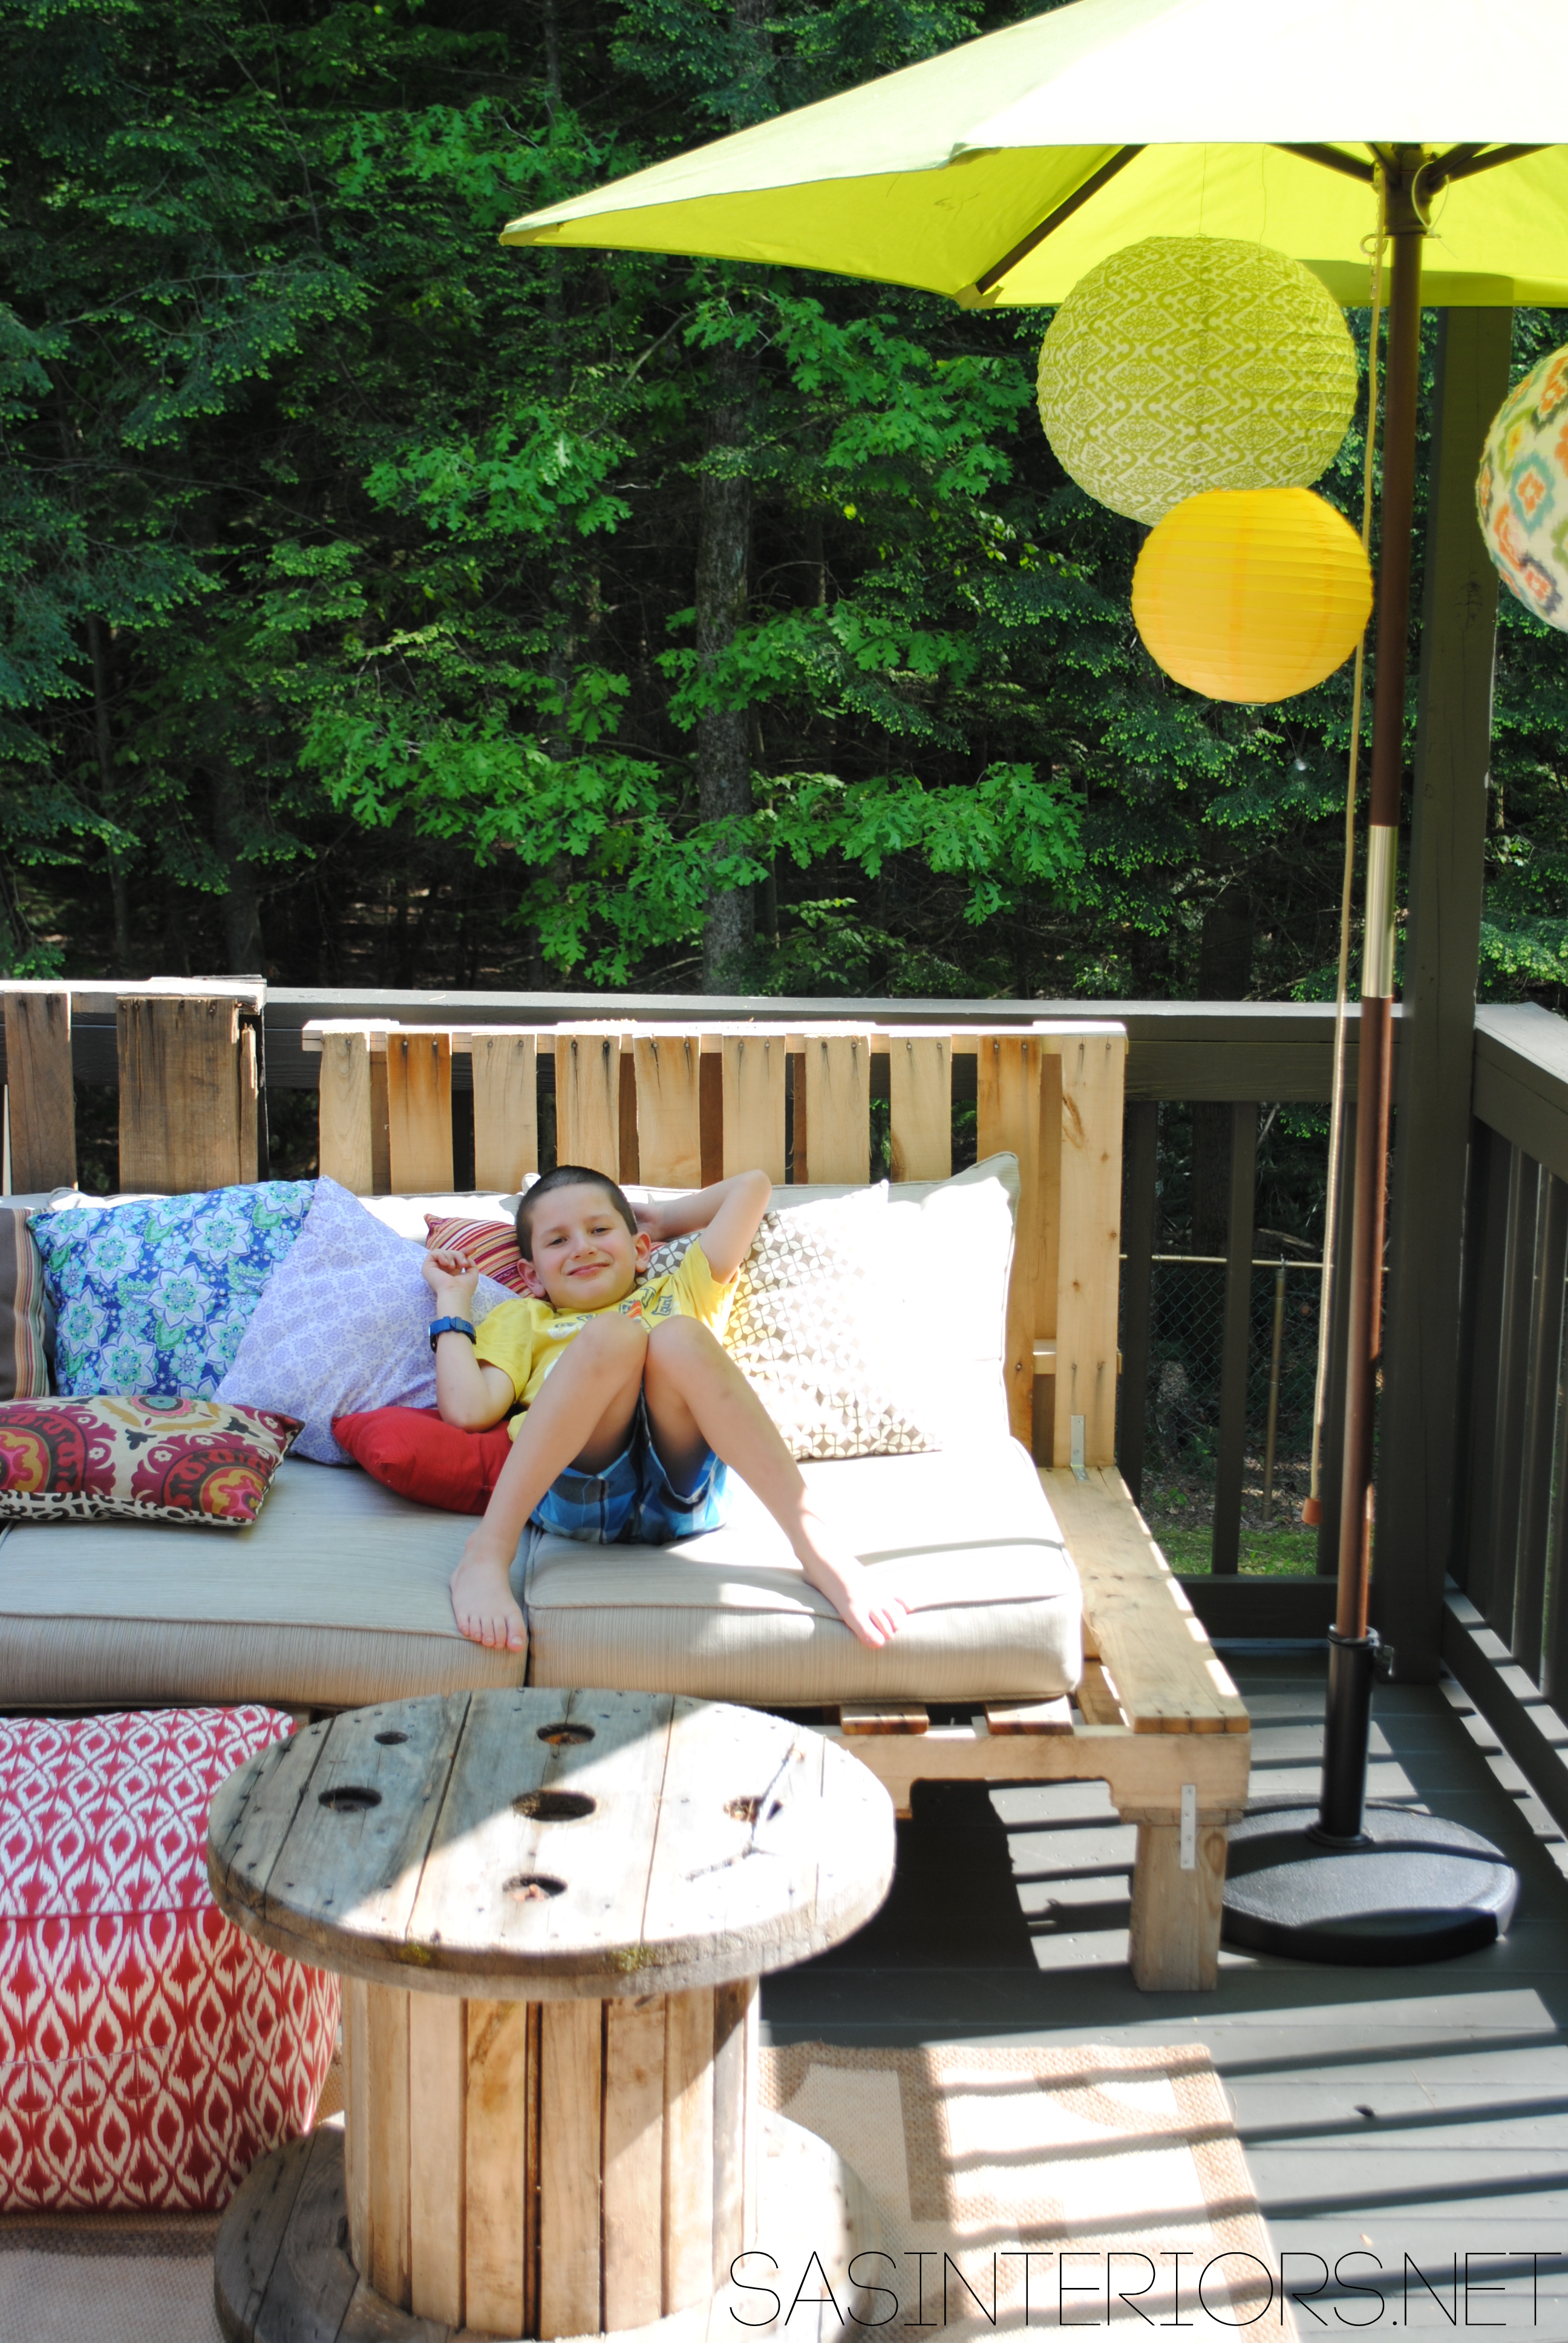
A Summer Essential for the patio or deck: an Outdoor Pallet Sofa - Easy to make and costs less than 5 dollars!

Heaven.

A Summer Essential for the patio or deck: an Outdoor Pallet Sofa - Easy to make and costs less than 5 dollars!

A Summer Essential for the patio or deck: an Outdoor Pallet Sofa - Easy to make and costs less than 5 dollars!

One more step we could have taken, but haven’t (yet or maybe never) is to paint or stain the pallets.  They certainly don’t need to be left the raw wood, it just depends on the look you desire.

A Summer Essential for the patio or deck: an Outdoor Pallet Sofa - Easy to make and costs less than 5 dollars!

A Summer Essential for the patio or deck: an Outdoor Pallet Sofa - Easy to make and costs less than 5 dollars!

I’m sure you’re wondering about the cushions. Right?  Boy, they were difficult to find.  I found lots of cushions, but they were all too $$$.  The tricky part was the seat depth of the pallet sofa which is 30″.  It’s the perfect spot for lounging and napping (you’ll never want to get up), but finding a cushion to fit was rough.  In the end, I ended up finding these oversized seat-with-back-cushions at Lowes.  They were a bit pricey at $55/each, but they are mega thick and durable.  They’ve been left in the rain a few times and survived, thankfully.  With the cushy back, they fit just right for the 30″ depth.

A Summer Essential for the patio or deck: an Outdoor Pallet Sofa - Easy to make and costs less than 5 dollars!

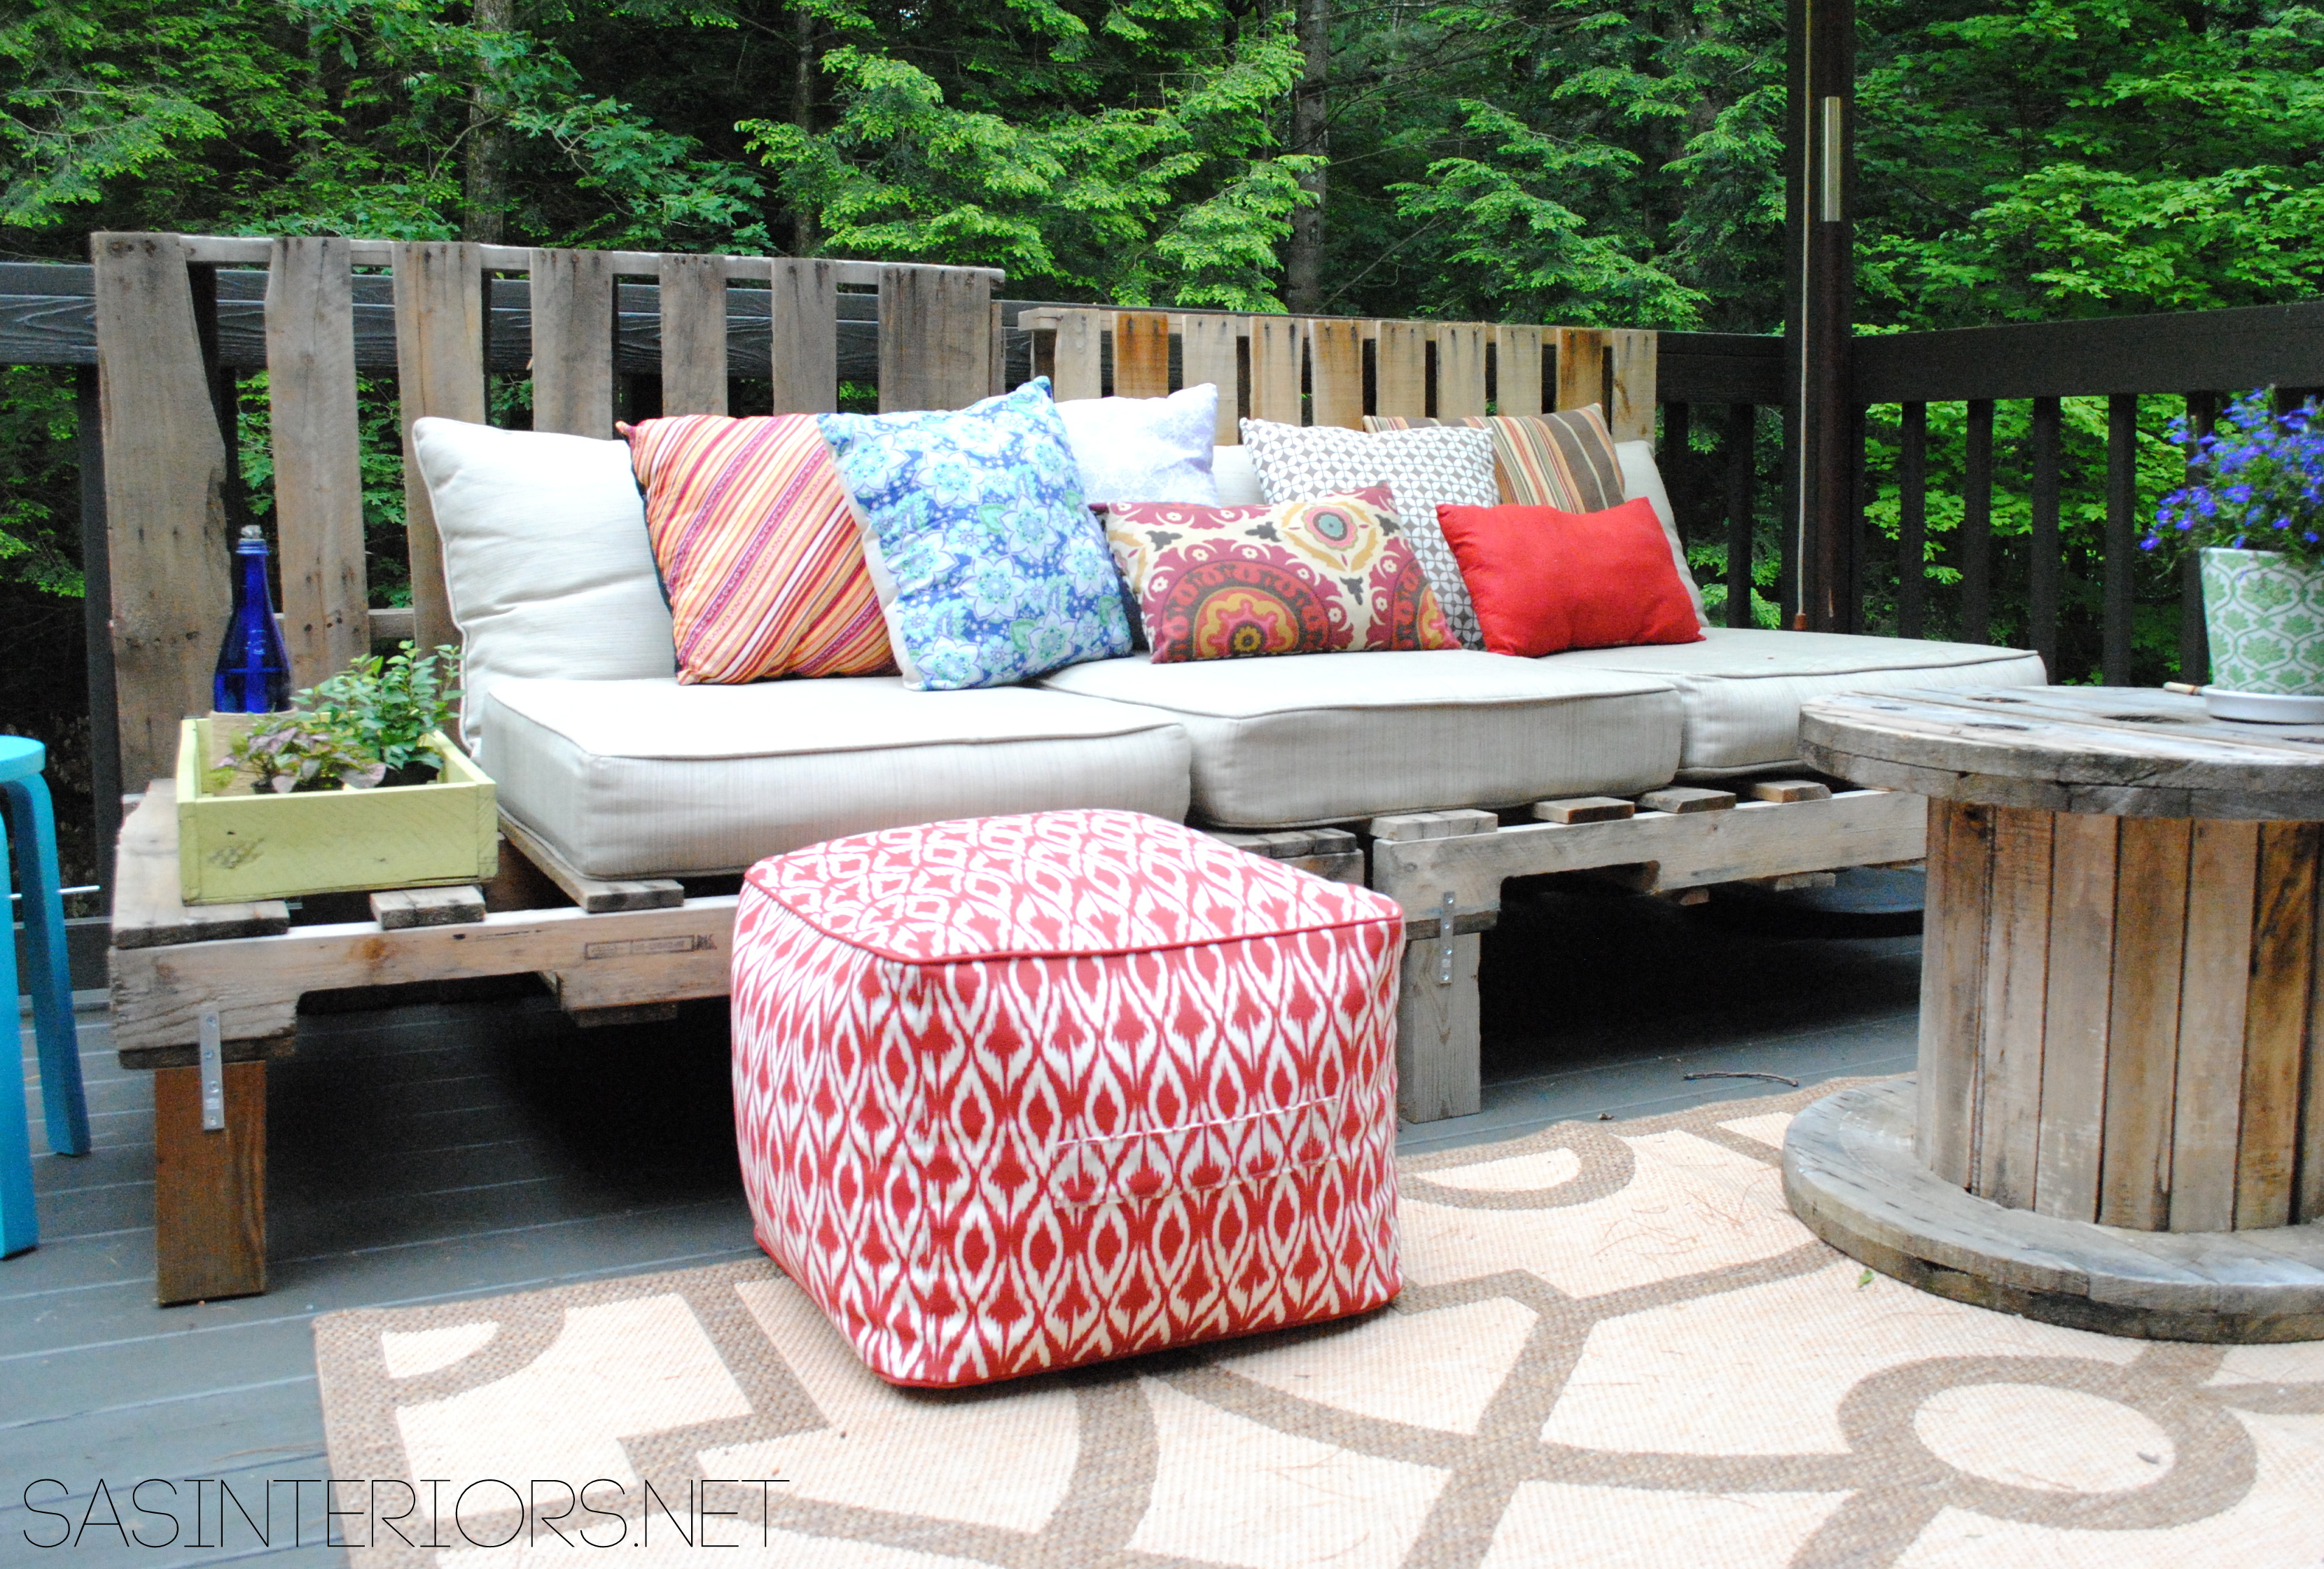
With 3 cushions across, they were just the right size to allow for some extra room on the ends of the pallets to rest a drink & drink tray.

A Summer Essential for the patio or deck: an Outdoor Pallet Sofa - Easy to make and costs less than 5 dollars!

Even though it’s been practically raining every day, I have been totally loving our new deck space.  Many a days ahead will be spent snoozing lounging!  A more thorough deck tour to come – I promise!  Until then, you’ve gotta make this pallet sofa!

DIY: Pallet Picture Holder

Just last week I finished up a really cute project for a client (which I was super close to keeping, but she was glad I didn’t) and I’m excited to share it with you today!

I’ve been making my way through the huge stash of pallets that I’ve had stored in the garage for quite some time.  Pallets are great for projects like this when you’re looking for a distressed, worn result and want to spend little (or no) money. Most pallets, a.k.a. shipping crates, have already been used-and-abused, so they are easy to dismantle and start upcycling.

When finishing up the final details on this clients family room, I showed her this picture of a similar pallet project and her response was YES! And off I was creating this Pallet Picture Holder

I started off by looking through my pallets (some were new and some had been picked through) to choose the 8 that looked best with each other.

Every pallet that I’ve taken apart (except one), has been constructed using twisted nails, and they are a BIG PAIN!  A typical crowbar or hammer won’t be helpful here and so I always use a reciprocating saw.  It’s a lifesaver!  Actually during this project, my original reciprocating saw broke – what a bummer.  Understandable though since I use it ALOT + it wasn’t top of the line (lesson learned: buy quality, buy once).

Anyway, once I took apart the pallet, I gathered the planks I needed (8 total which were about 40″ long) and then cut two pieces for the back that would hold the planks in position.

The overall size of this pallet picture holder is (about) 40″ x 28″.

Using finishing nails, I nailed two in each plank on each side into the back plank.

This was the result when done (from the back)…

I tell ya, this bad boy is heavy! I forgot to take a picture of the picture hanging wire I added to the back, but if you try something similar, make sure the hardware is for at least 100 lbs+.  The last thing you’d want is this falling down.  It doesn’t weigh 100 lbs, but it’s better to be safe than sorry!

This wall decor picture holder is going on a soon-to-be dark chocolate colored wall, so we (the client and I) decided that it’d look best to have the planks be lighter in color.  To do this, I added a quick sweep of paint to the surface.  The wood of the planks still show through underneath, giving it a rustic worn aesthetic.

This was the point where the pallet went from a blank canvas to a picture holder.  And the simple way that happened was by adding clothes pins.  Before that though, I gave them a little color.  I used a slightly darker color taupe – Annie Sloan French Linen to be exact.

Once the clothes pins were dry, they were ready to be placed onto the pallet.

I wanted to give the option to use 4×6 or 5×7 sized pictures, and with the size of the pallet, I’d determined that 3 rows or 5 across would be the magical number.

Using a tape measure and starting off in the center, I marked where each clothes pin would be placed.

Once the positioning was just right, I added hot glue to the backs of the clothes pins and stuck them in place.  They were good as gold!

The last step was personalizing it a bit and adding {our family}.  My client is a photographer and huge picture-person, so this totally fit the bill!

And then to finish it all, I gave it a quick sanding with my orbital sander to distress the words and edges.

And the Pallet Picture Holder was complete!

It’s nice “naked”, but pictures make it pretty!

I also had a thought that this would make a great Holiday Card Holder too!

What projects have you created using pallets?

Want to see more of my pallet creations, check them out:
How To Make a Pallet Bookshelf
Wall Decor in my Eclectic Family Gallery Wall
Travel Subway Art Sign
Monogrammed Chevron Pallet Tray
Succulent Arrangement in a Pallet Container