
Tag: photo gallery wall

Easy-To-Make Instagram Photo Collage

With the 2000+ pictures I took & shared on Instagram (follow me if you’d like) last year, somehow + someway I wanted to enjoy them more than viewing them on the 2.5″ x 2.5″ screen of my phone.

As the new year rolled around and I was reflecting on 2014 and looking towards 2015, I got to reminiscing on all the personal + professional pictures I’ve showcased on my Instagram account and thought creating a photo collage would be the best way to enjoy those precious moments of my life from the years past.  There are plenty of sites out there where you can create posters and/or other fun creations using Instagram pics (or digital pictures too), but they’re pricey and spending bucks just doesn’t jive with me when I know I could make something comparable (or better) for mere dollars.

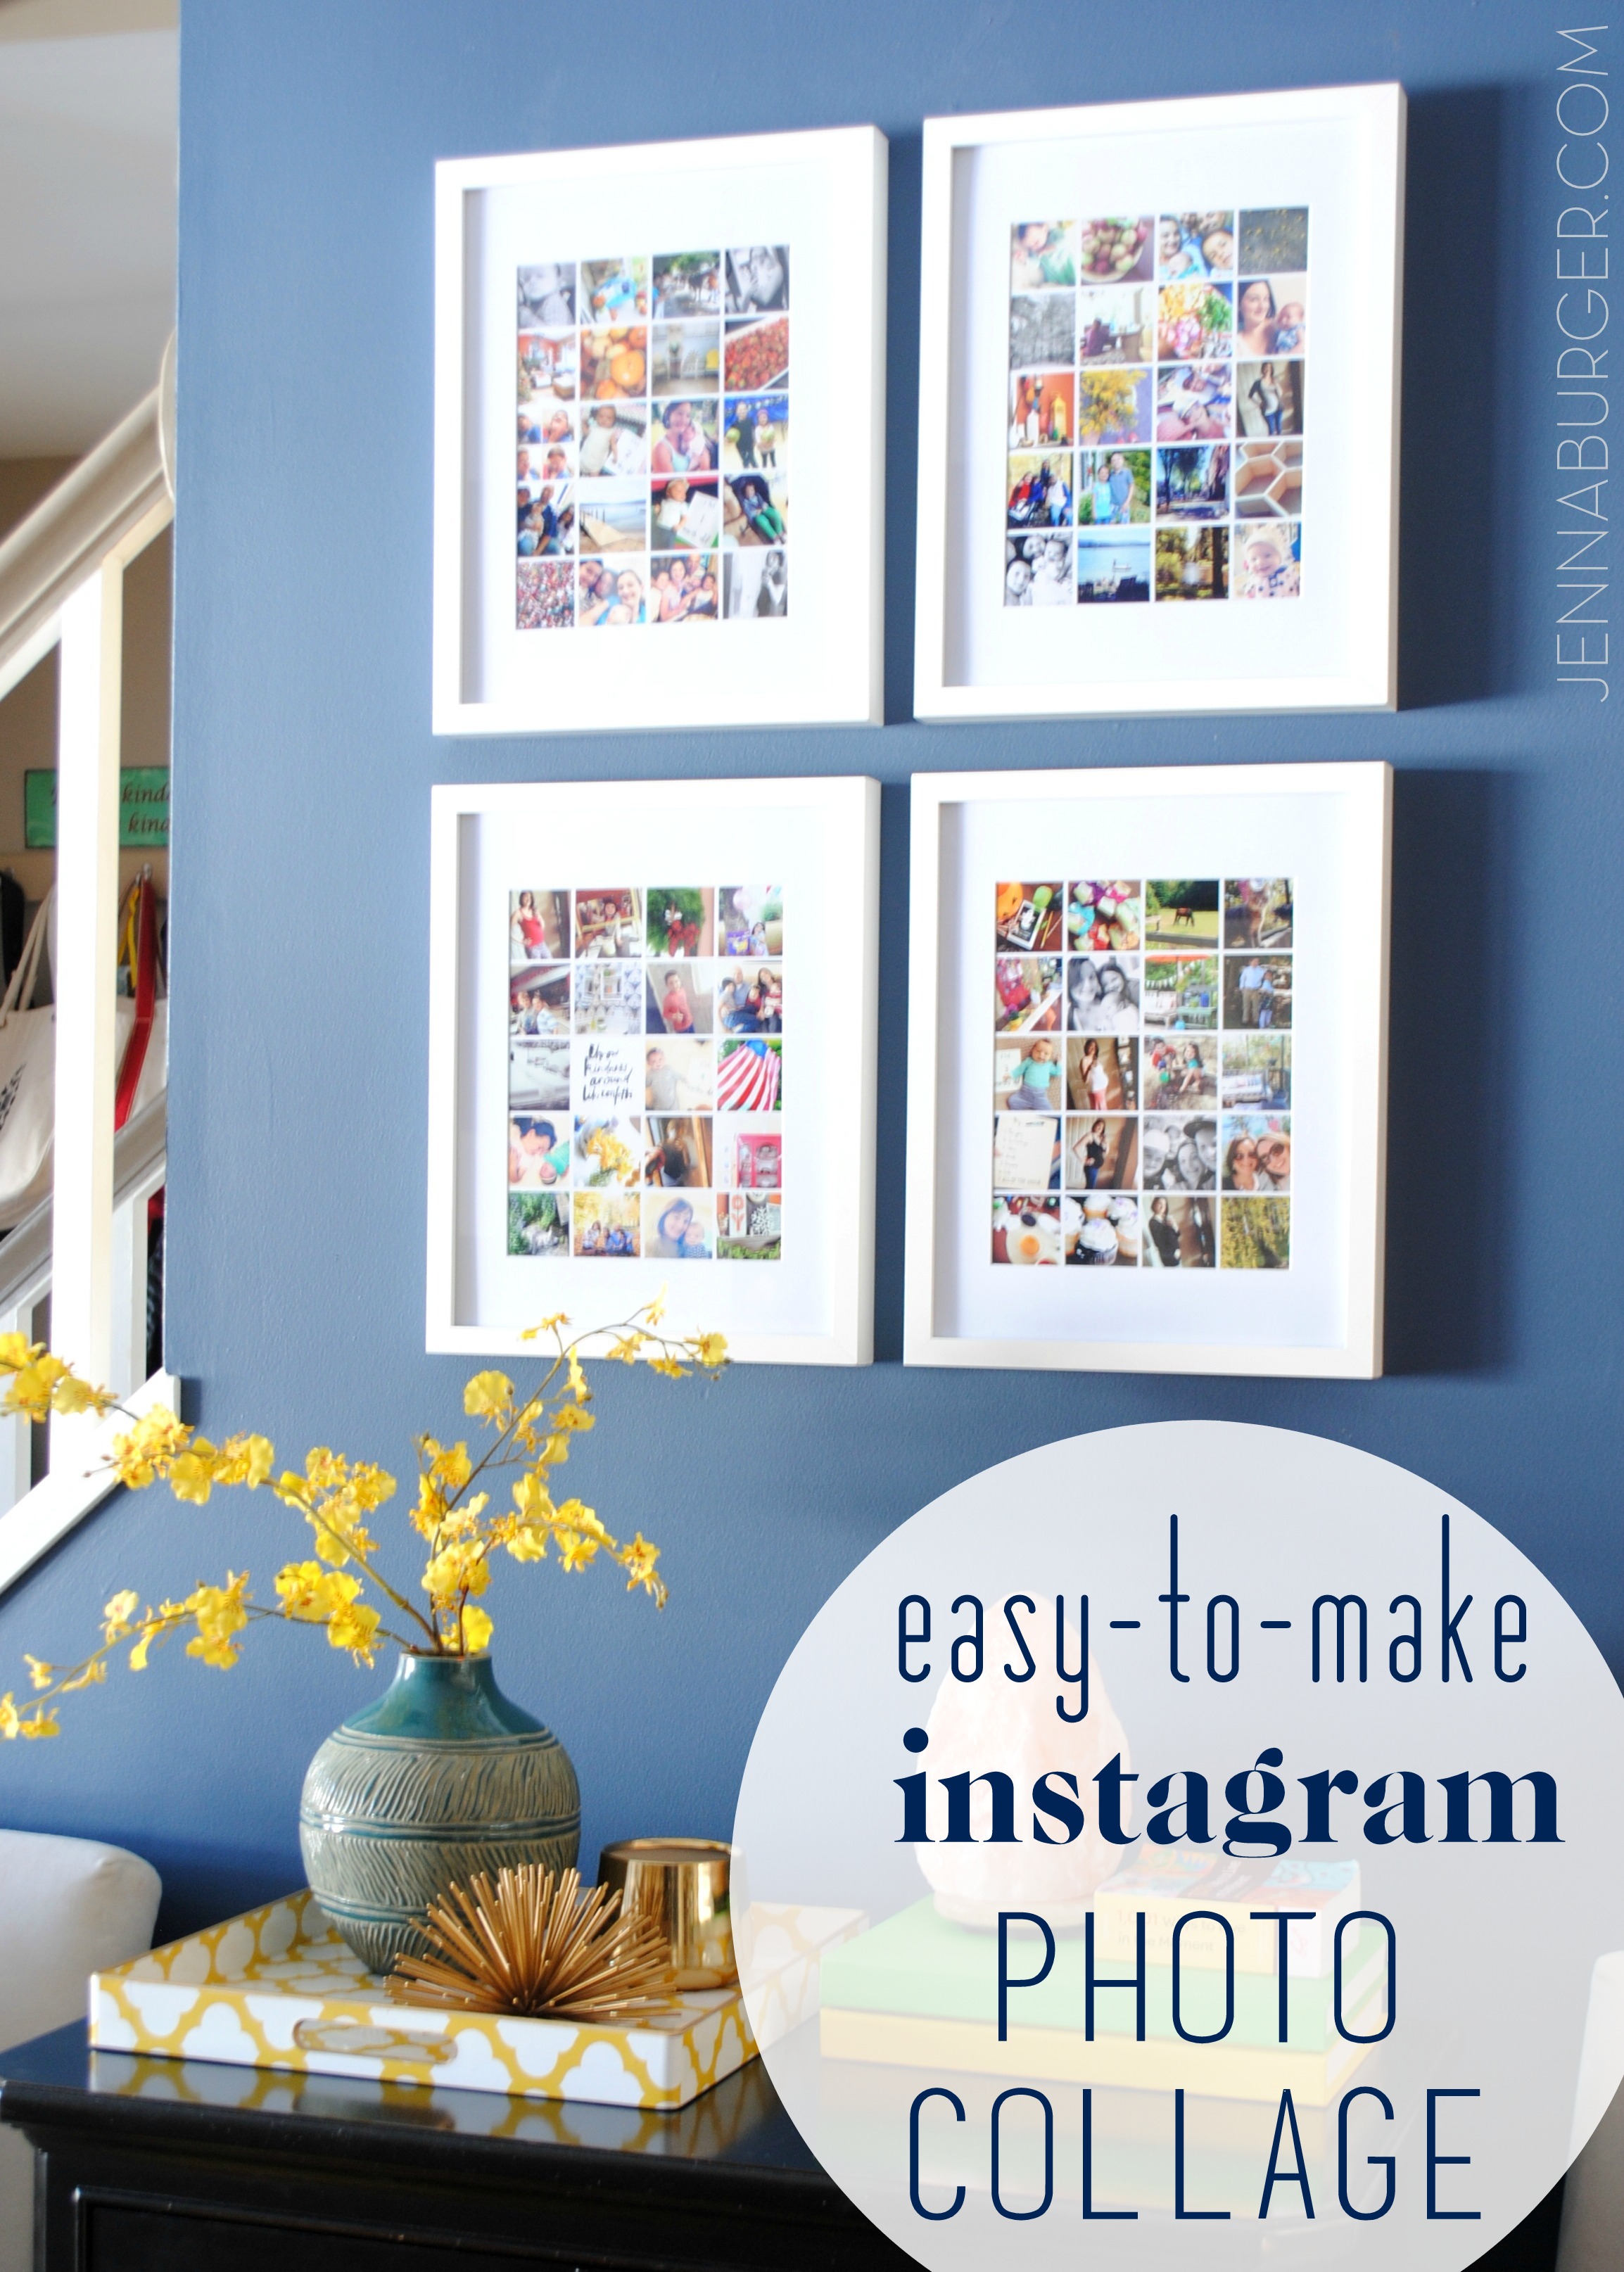
I got to thinking & creating and with a bit time, I created a 4 photo collages that captured some truly great moments from 2014…

Easy-to-Make Photo Collage using Instagram or digital photos for $5.  Tutorial by Jenna Burger, www.jennaburger.com

Easy-to-Make Photo Collage using Instagram or digital photos for less than $5.  Tutorial by Jenna Burger, www.jennaburger.com

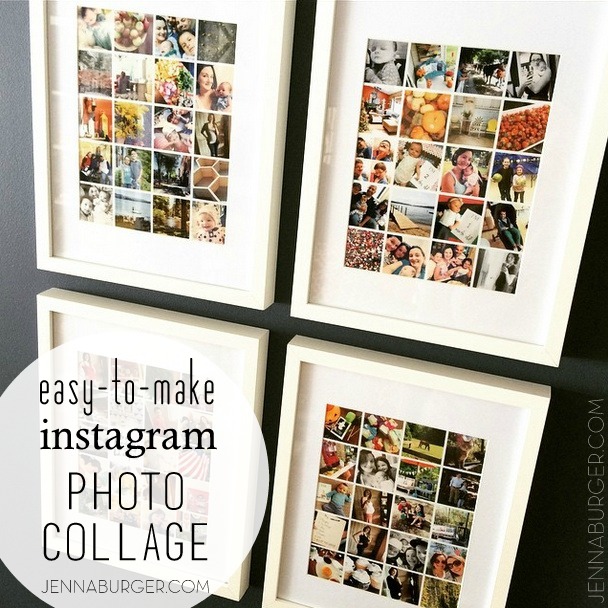
The best part about this 80 picture photo collage is that it cost about $5. How much better does it get?!  more details on the $$$ below…

So obviously this photo collage doesn’t have to be created using only photos from Instagram.  Images from your phone or digital pictures from a snap & go camera can also be used to create a similar photo collage.  Since there are multiple ways to make this collage, I am sharing tutorials for all…

Creating a Photo Collage using Instagram Images

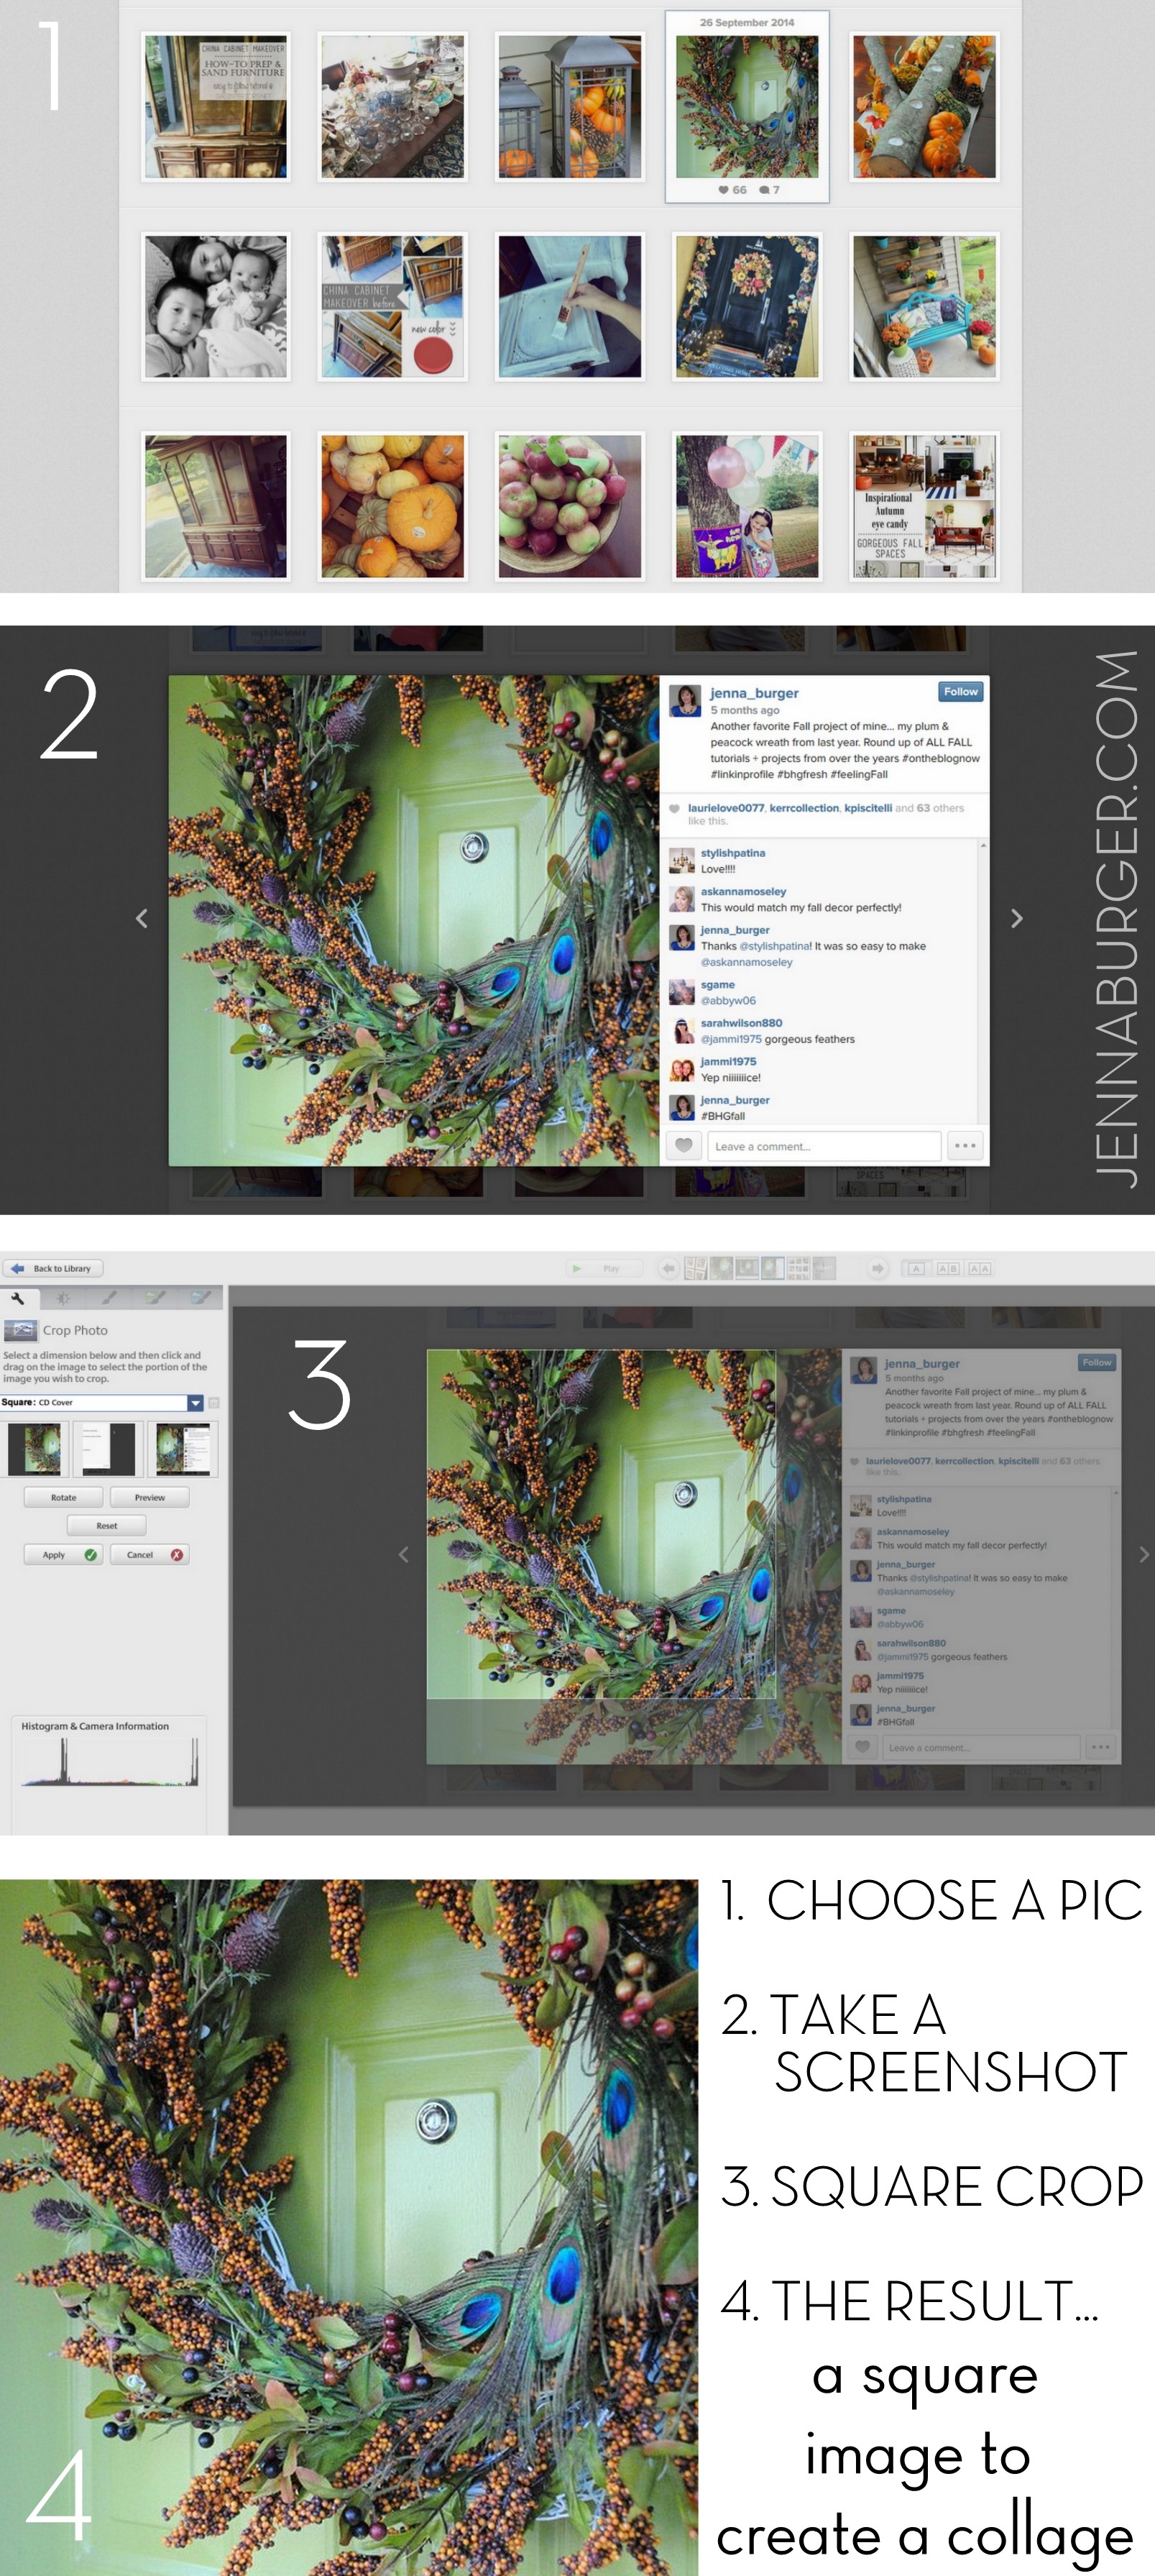
1. Go to your Instagram page.

2.  Choose a picture and take a screenshot of the image. If you are unfamiliar with what a screenshot is (as I was only a few years ago), you can capture a “shot” of your screen with a click of a button.  On my computer the button is towards the top right corner and it says PrintScreen (your computer might be different, but with all computers it’s possible).

3. Using a photo editing program – I use the free program, Picasa – crop your screenshot image so it is square.
Easy-to-Make Photo Collage using Instagram photos

if you don’t have an instagram account and want to create a similar photo collage using images from your phone or camera, follow this tutorial…

Creating a Photo Collage using a picture from your phone or Digital Image from your computer

Phone: Download the picture to your computer and crop it to a square size. Then save a copy.

Computer: Crop your picture of choice to a square size and save a copy.

Easy-to-Make Photo Collage using Instagram photos

The reason for cropping?  An image downloaded from your phone or a digital image on your computer doesn’t have to be cropped as showed above, but be sure that the image is fairly close up or “cropped” close so it shows detail.  Because the pictures on the final collage are small, a close-up/detailed image is best.

Next up… Creating the photo collage. 

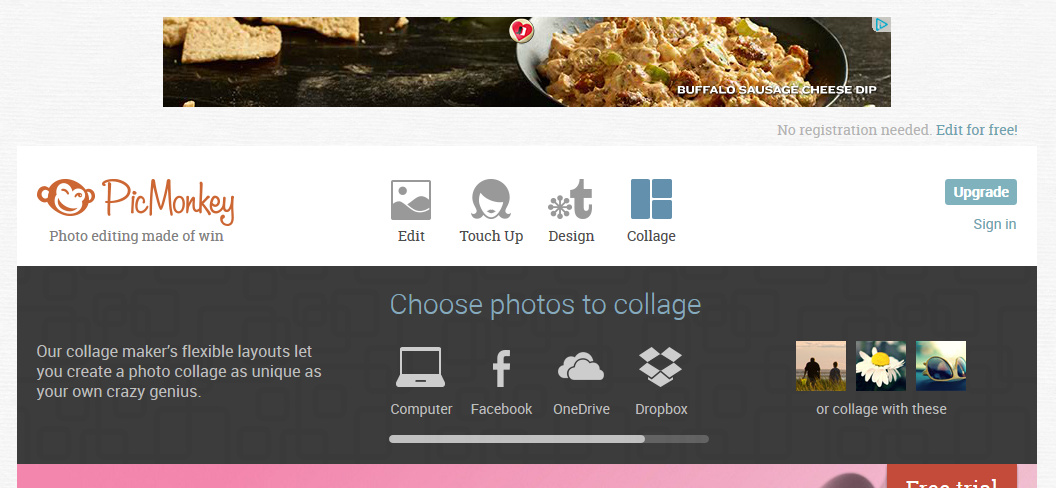
For the collage, I used the free program of PicMonkey.  They offer different collage layouts, one specifically being a square template. When you go to PicMonkey, click collage.

Easy-to-Make Photo Collage using Instagram or digital photos for less than $5.  Tutorial by Jenna Burger, www.jennaburger.com

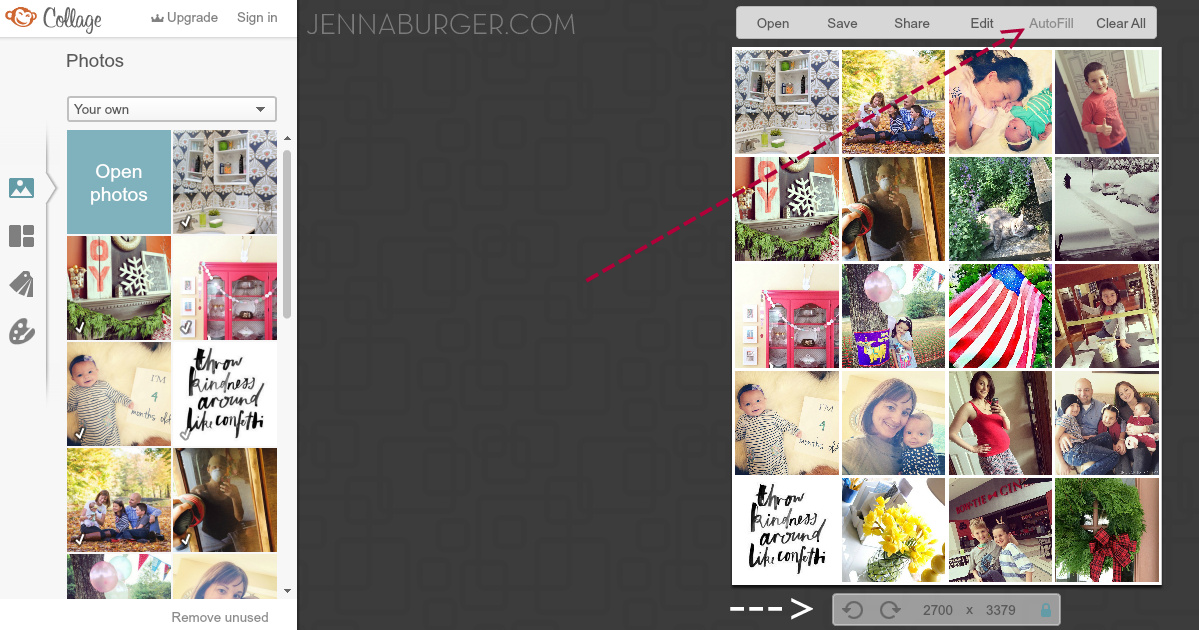
After clicking collage, you’ll be able to open & choose the 20 images (I think 20 images per 8 x 10 looks best) you want to use to create the photo collage. After choosing the images, click layouts (2nd button down on the left) and choose the template with 5 across & 5 down.  Then remove (by clicking “X” on the box) the boxes on the end row so you are left with 4 boxes across and 5 boxes down.

Easy-to-Make Photo Collage using Instagram or digital photos for less than $5.  Tutorial by Jenna Burger, www.jennaburger.com

First go to the bottom and set the size of your image to 2700 x 3379, which creates an 8 x 10 image.  Then click Autofill at the top and the 20 images will be inserted into the boxes.  If you want to move the images around to different locations, you can.

Easy-to-Make Photo Collage using Instagram or digital photos for less than $5.  Tutorial by Jenna Burger, www.jennaburger.com

Save the collage to your computer.  Depending on the amount of collages you want to create, follow the steps over and over again.

I chose 80 of my favorite images (out of 2k instagram images, it was very difficult to pair down and choose, but I did it) and then created (4) 8 x 10 collages – each collage has 20 pictures with 4 across and 5 down.  It was trial and error figuring out how many pictures would be best on each page so each image wouldn’t look too big or too small.  In the end, I am happy that I chose 20 images per page and the size of each image is about 2″ high x 2″ wide.  The images are not exactly square, but almost.

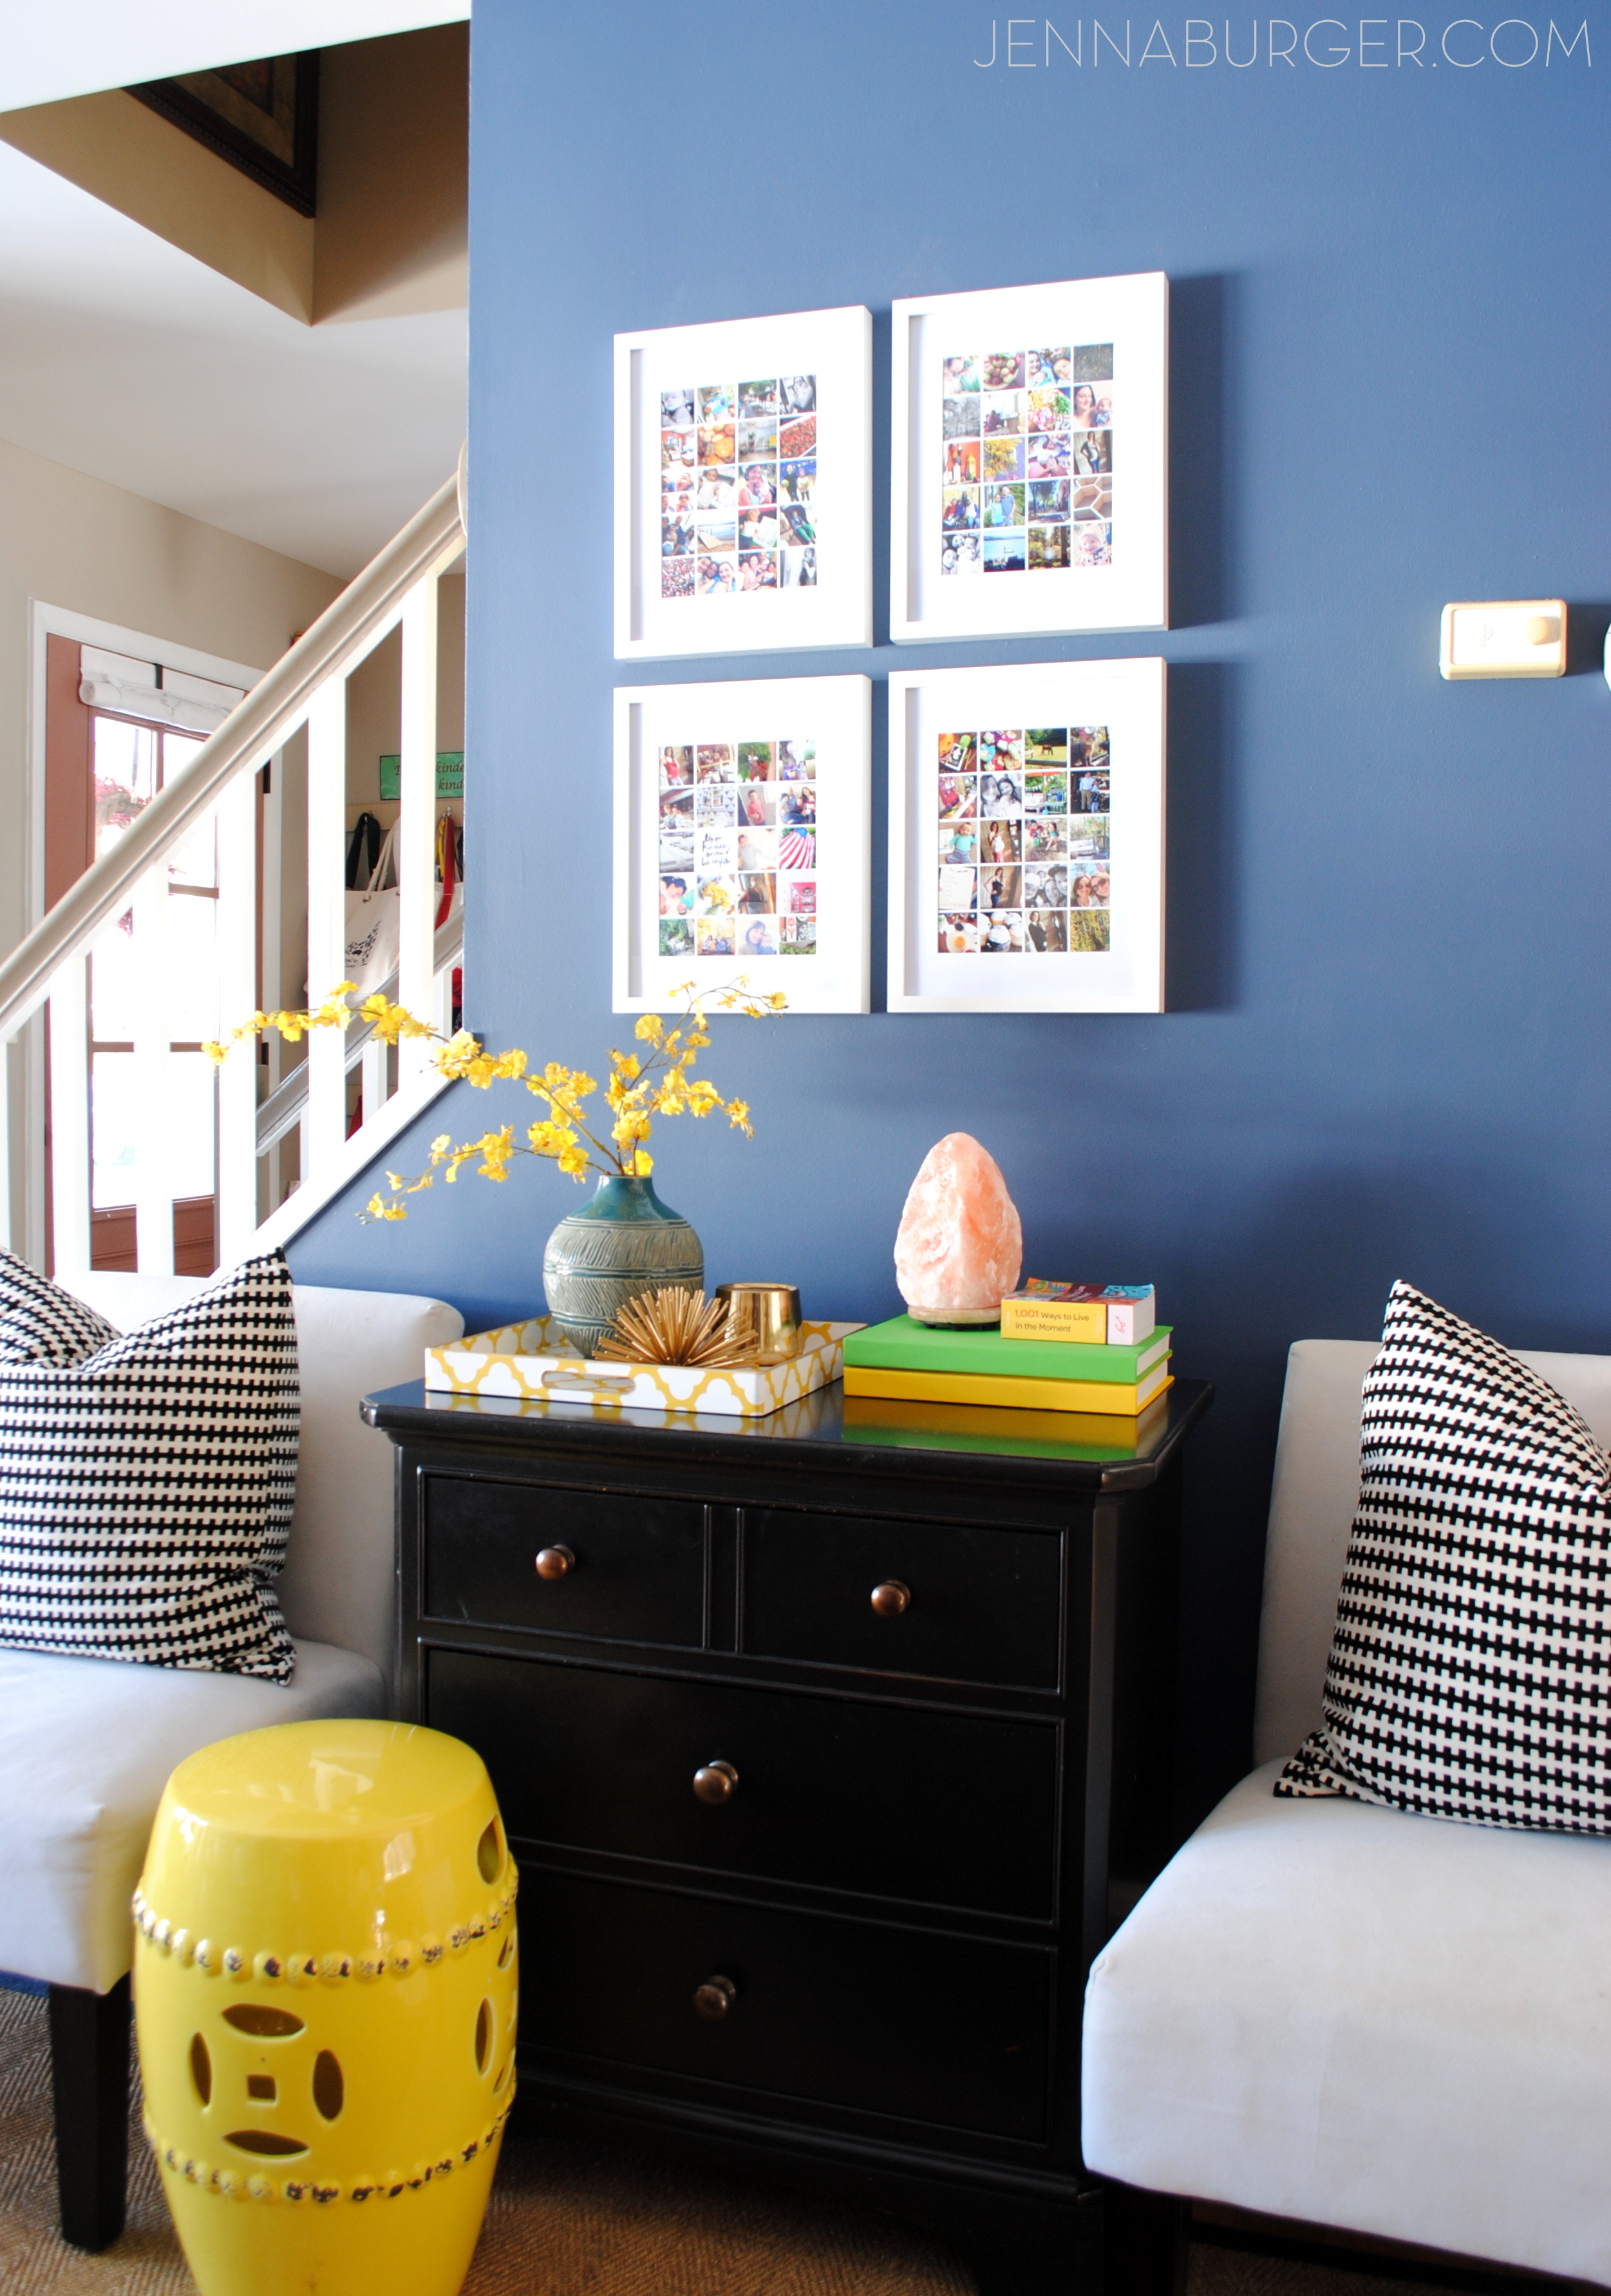
The result of my 4 photo collages which cost about $5…

Easy-to-Make Photo Collage using Instagram or digital photos for less than $5.  Tutorial by Jenna Burger, www.jennaburger.com

Once the 8 x 10 photos were created, I uploaded them to Snapfish to have them printed.  Typically an 8 x 10 image is $2.99 but they’re often on sale (right now there is a 50% coupon).  Other online retailers or local stores where you can print pictures works too.

Easy-to-Make Photo Collage using Instagram or digital photos for less than $5.  Tutorial by Jenna Burger, www.jennaburger.com

A photo collage like this is also a great way for capturing and enjoying kids artwork.  Kiddos come home with SO MANY beautiful creations, but it’s impossible to keep everything.  Instead of tossing them putting them in a box, snap a picture and then create a collage like this using the same steps.  Your child(ren) will feel so proud that their work can be displayed on the walls of your home!

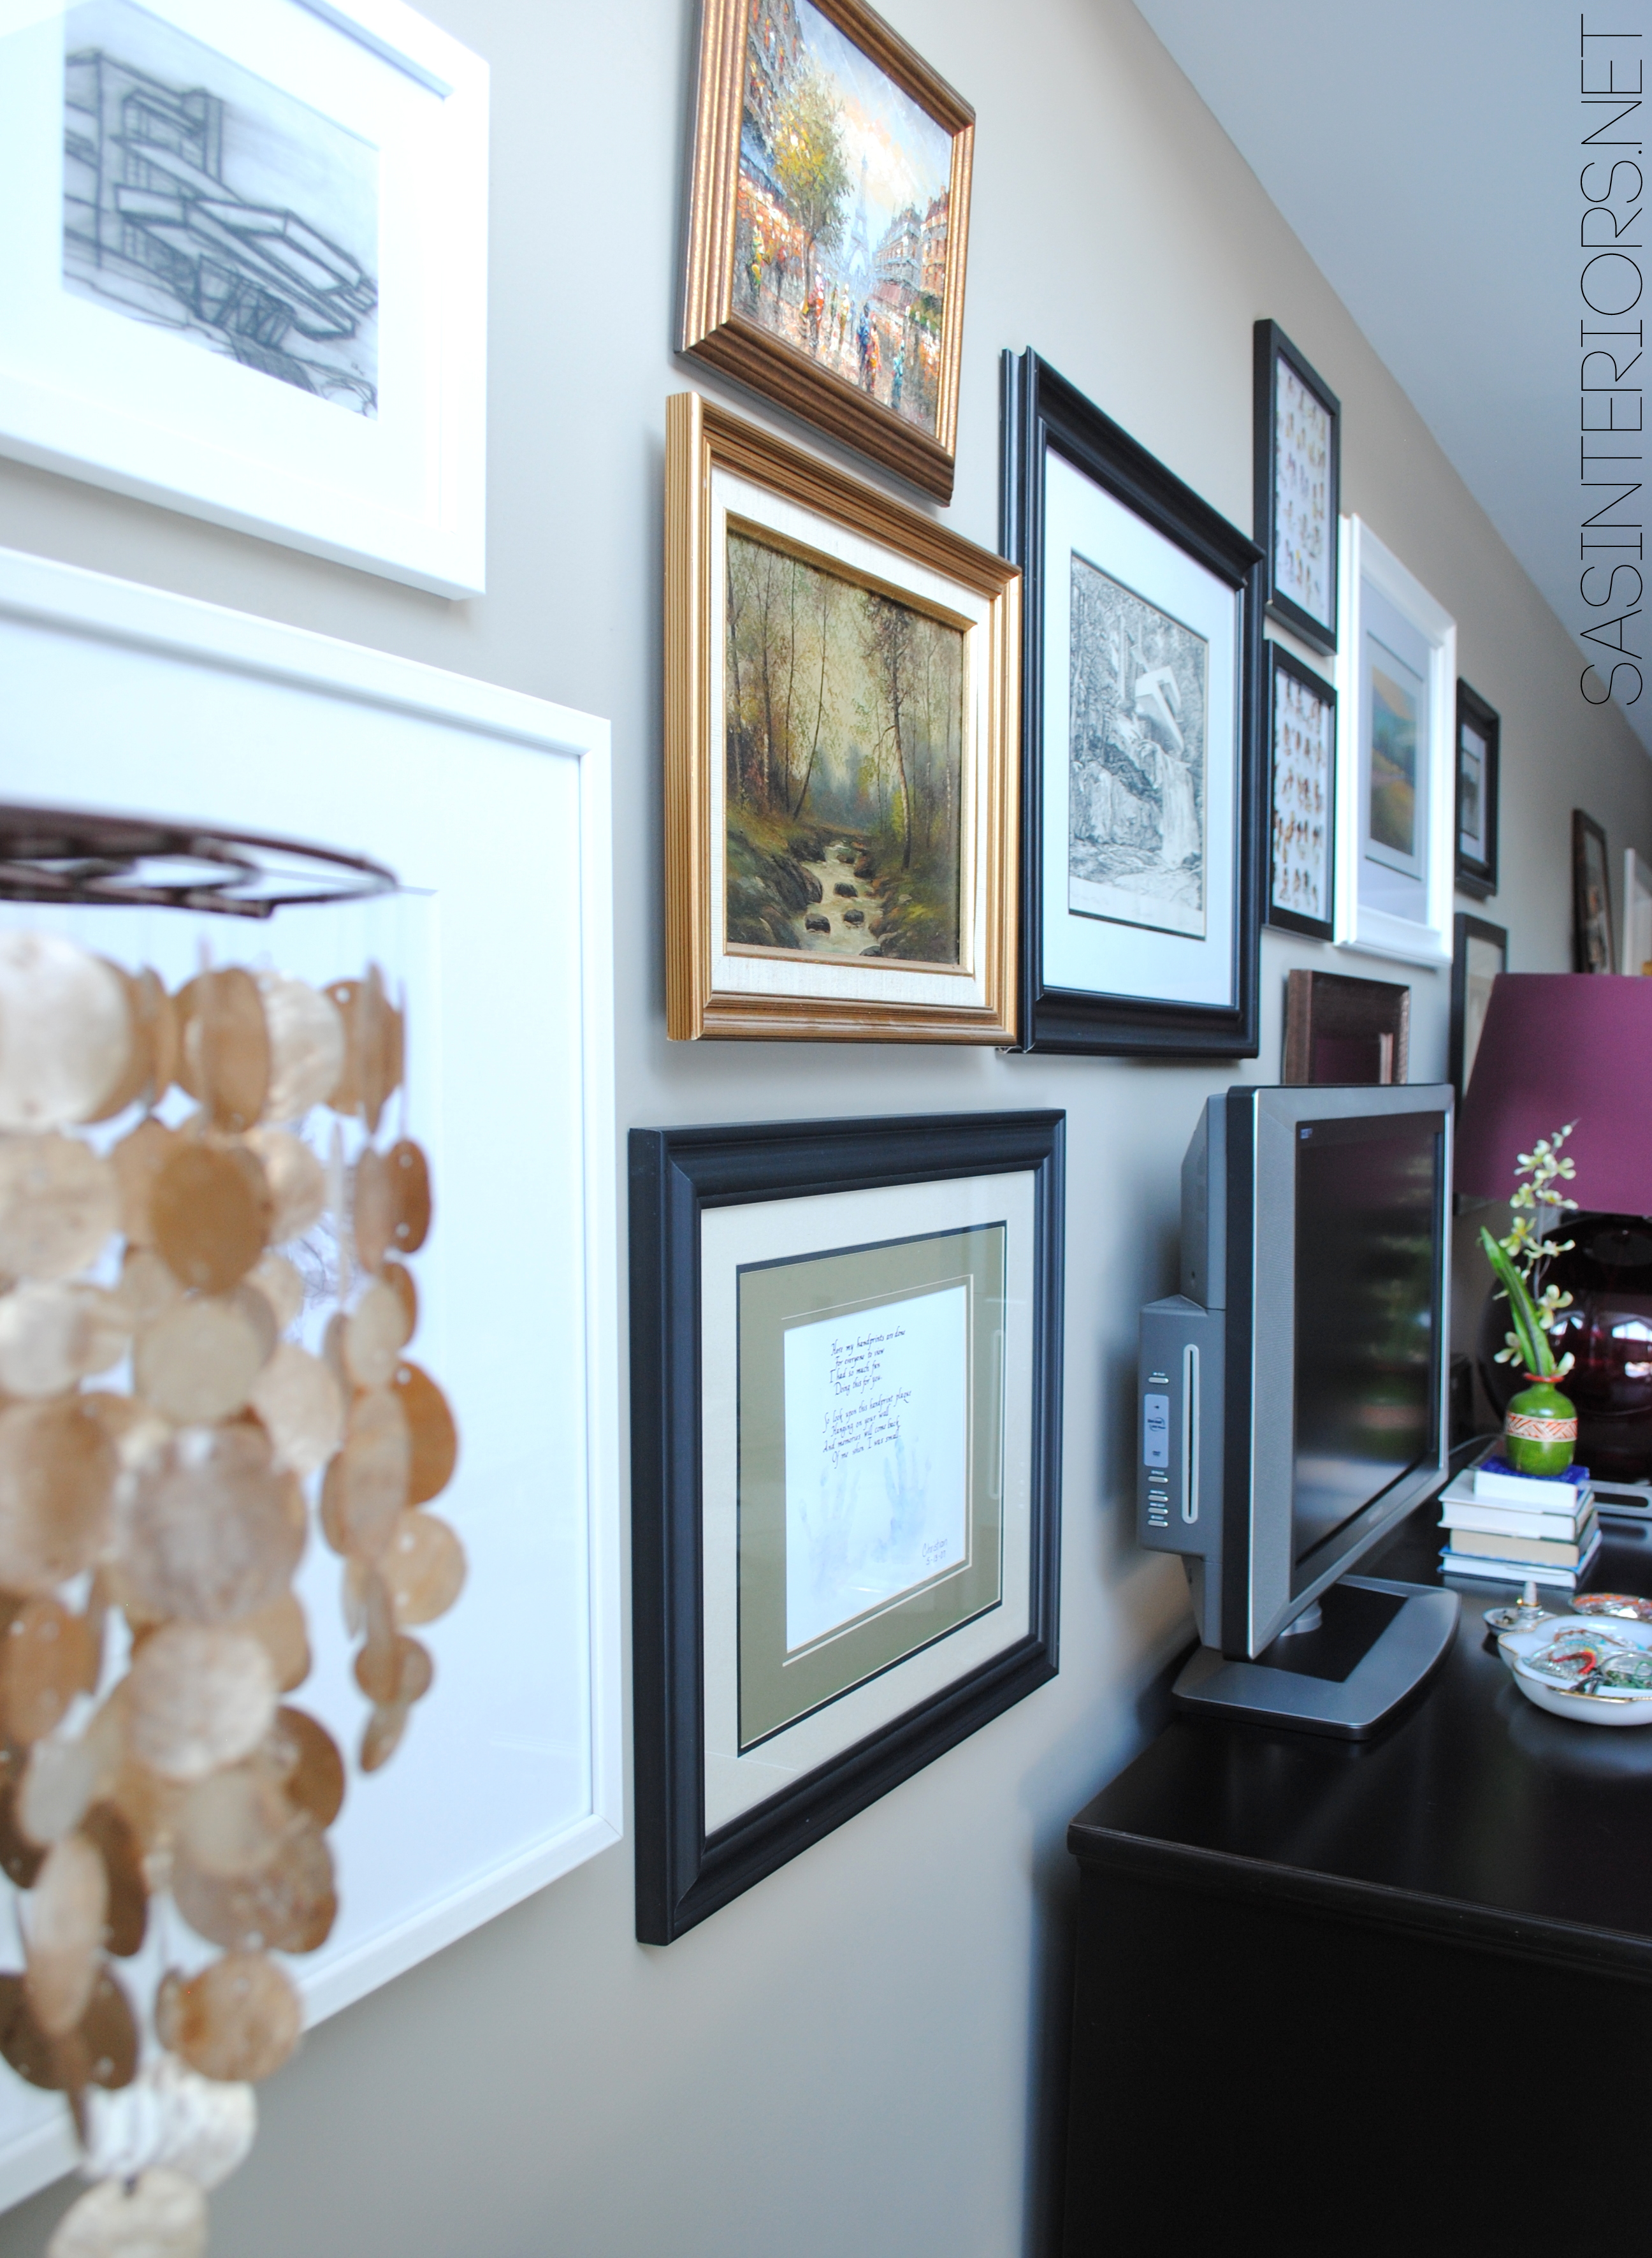
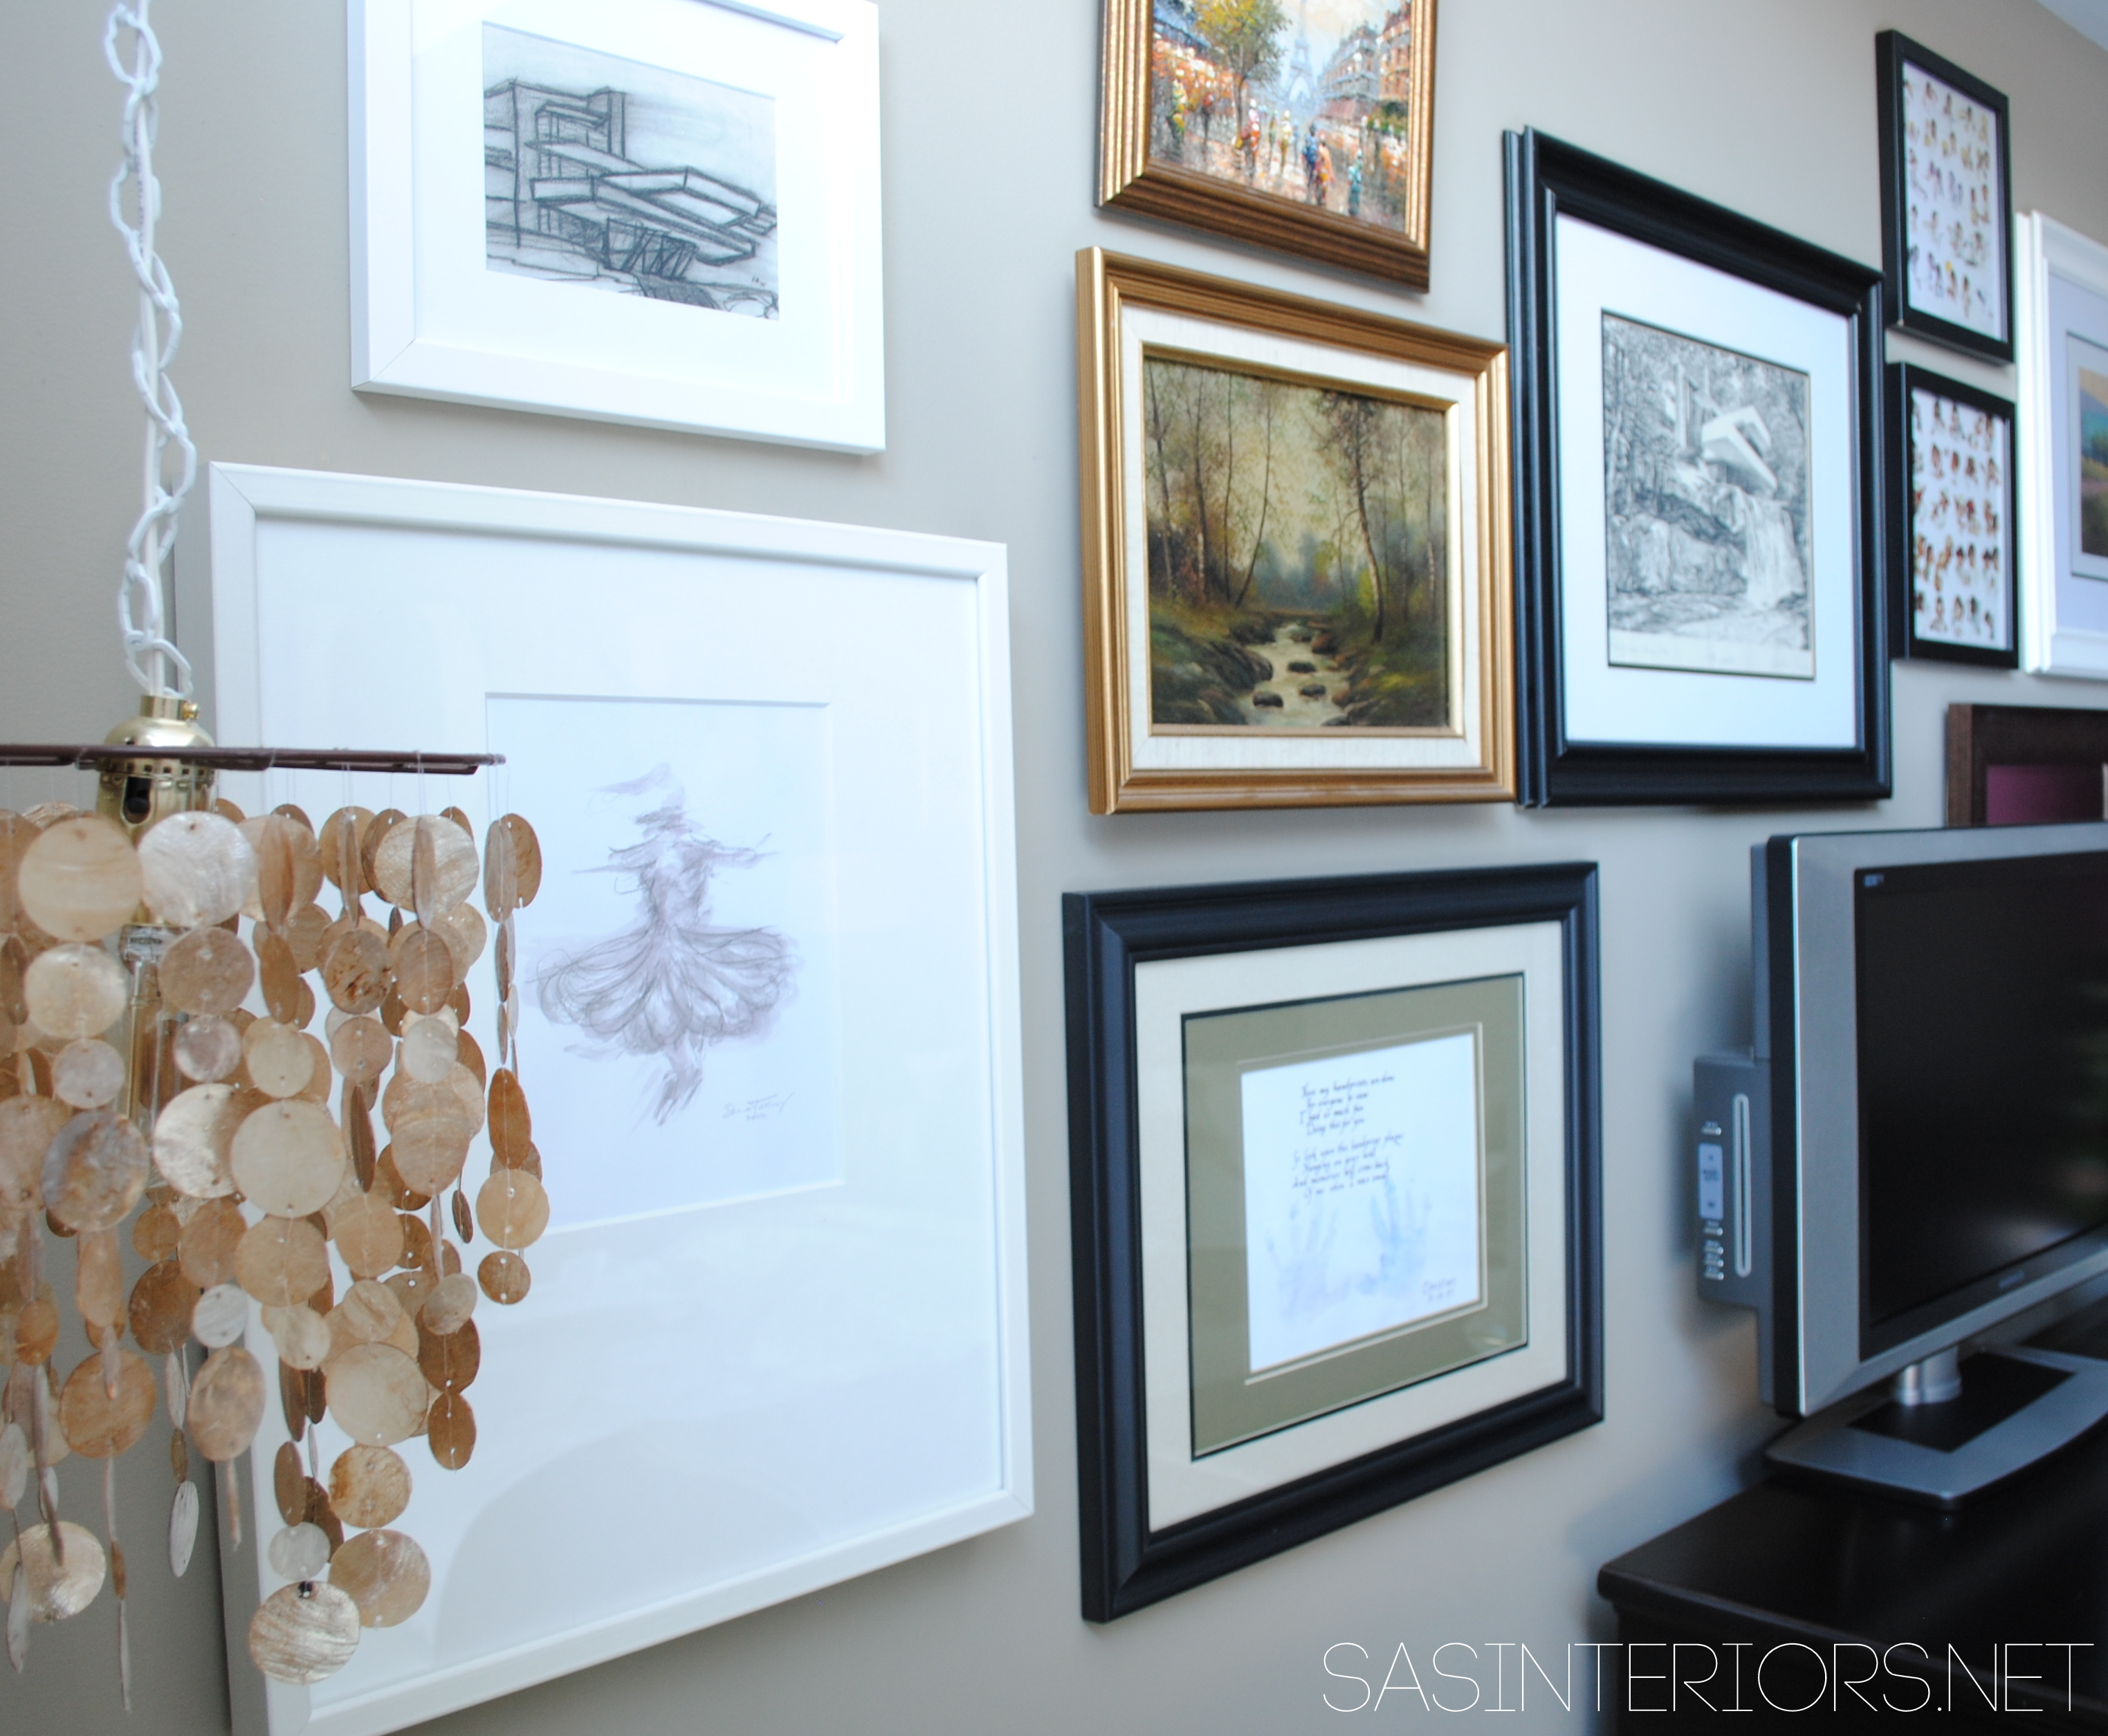
The new photo collages that I created now deck the walls of my office / living room and replaced the travel subway art, which I moved to another spot.

Easy-to-Make Photo Collage using Instagram or digital photos for less than $5.  Tutorial by Jenna Burger, www.jennaburger.com

The frames that I used for the collages are a simple white style that I picked up at AC Moore for $6/per frame.  Inexpensive frames from Ikea would also make this project creation super inexpensive.

Easy-to-Make Photo Collage using Instagram or digital photos for less than $5.  Tutorial by Jenna Burger, www.jennaburger.com

Easy-to-Make Photo Collage using Instagram or digital photos for less than $5.  Tutorial by Jenna Burger, www.jennaburger.com

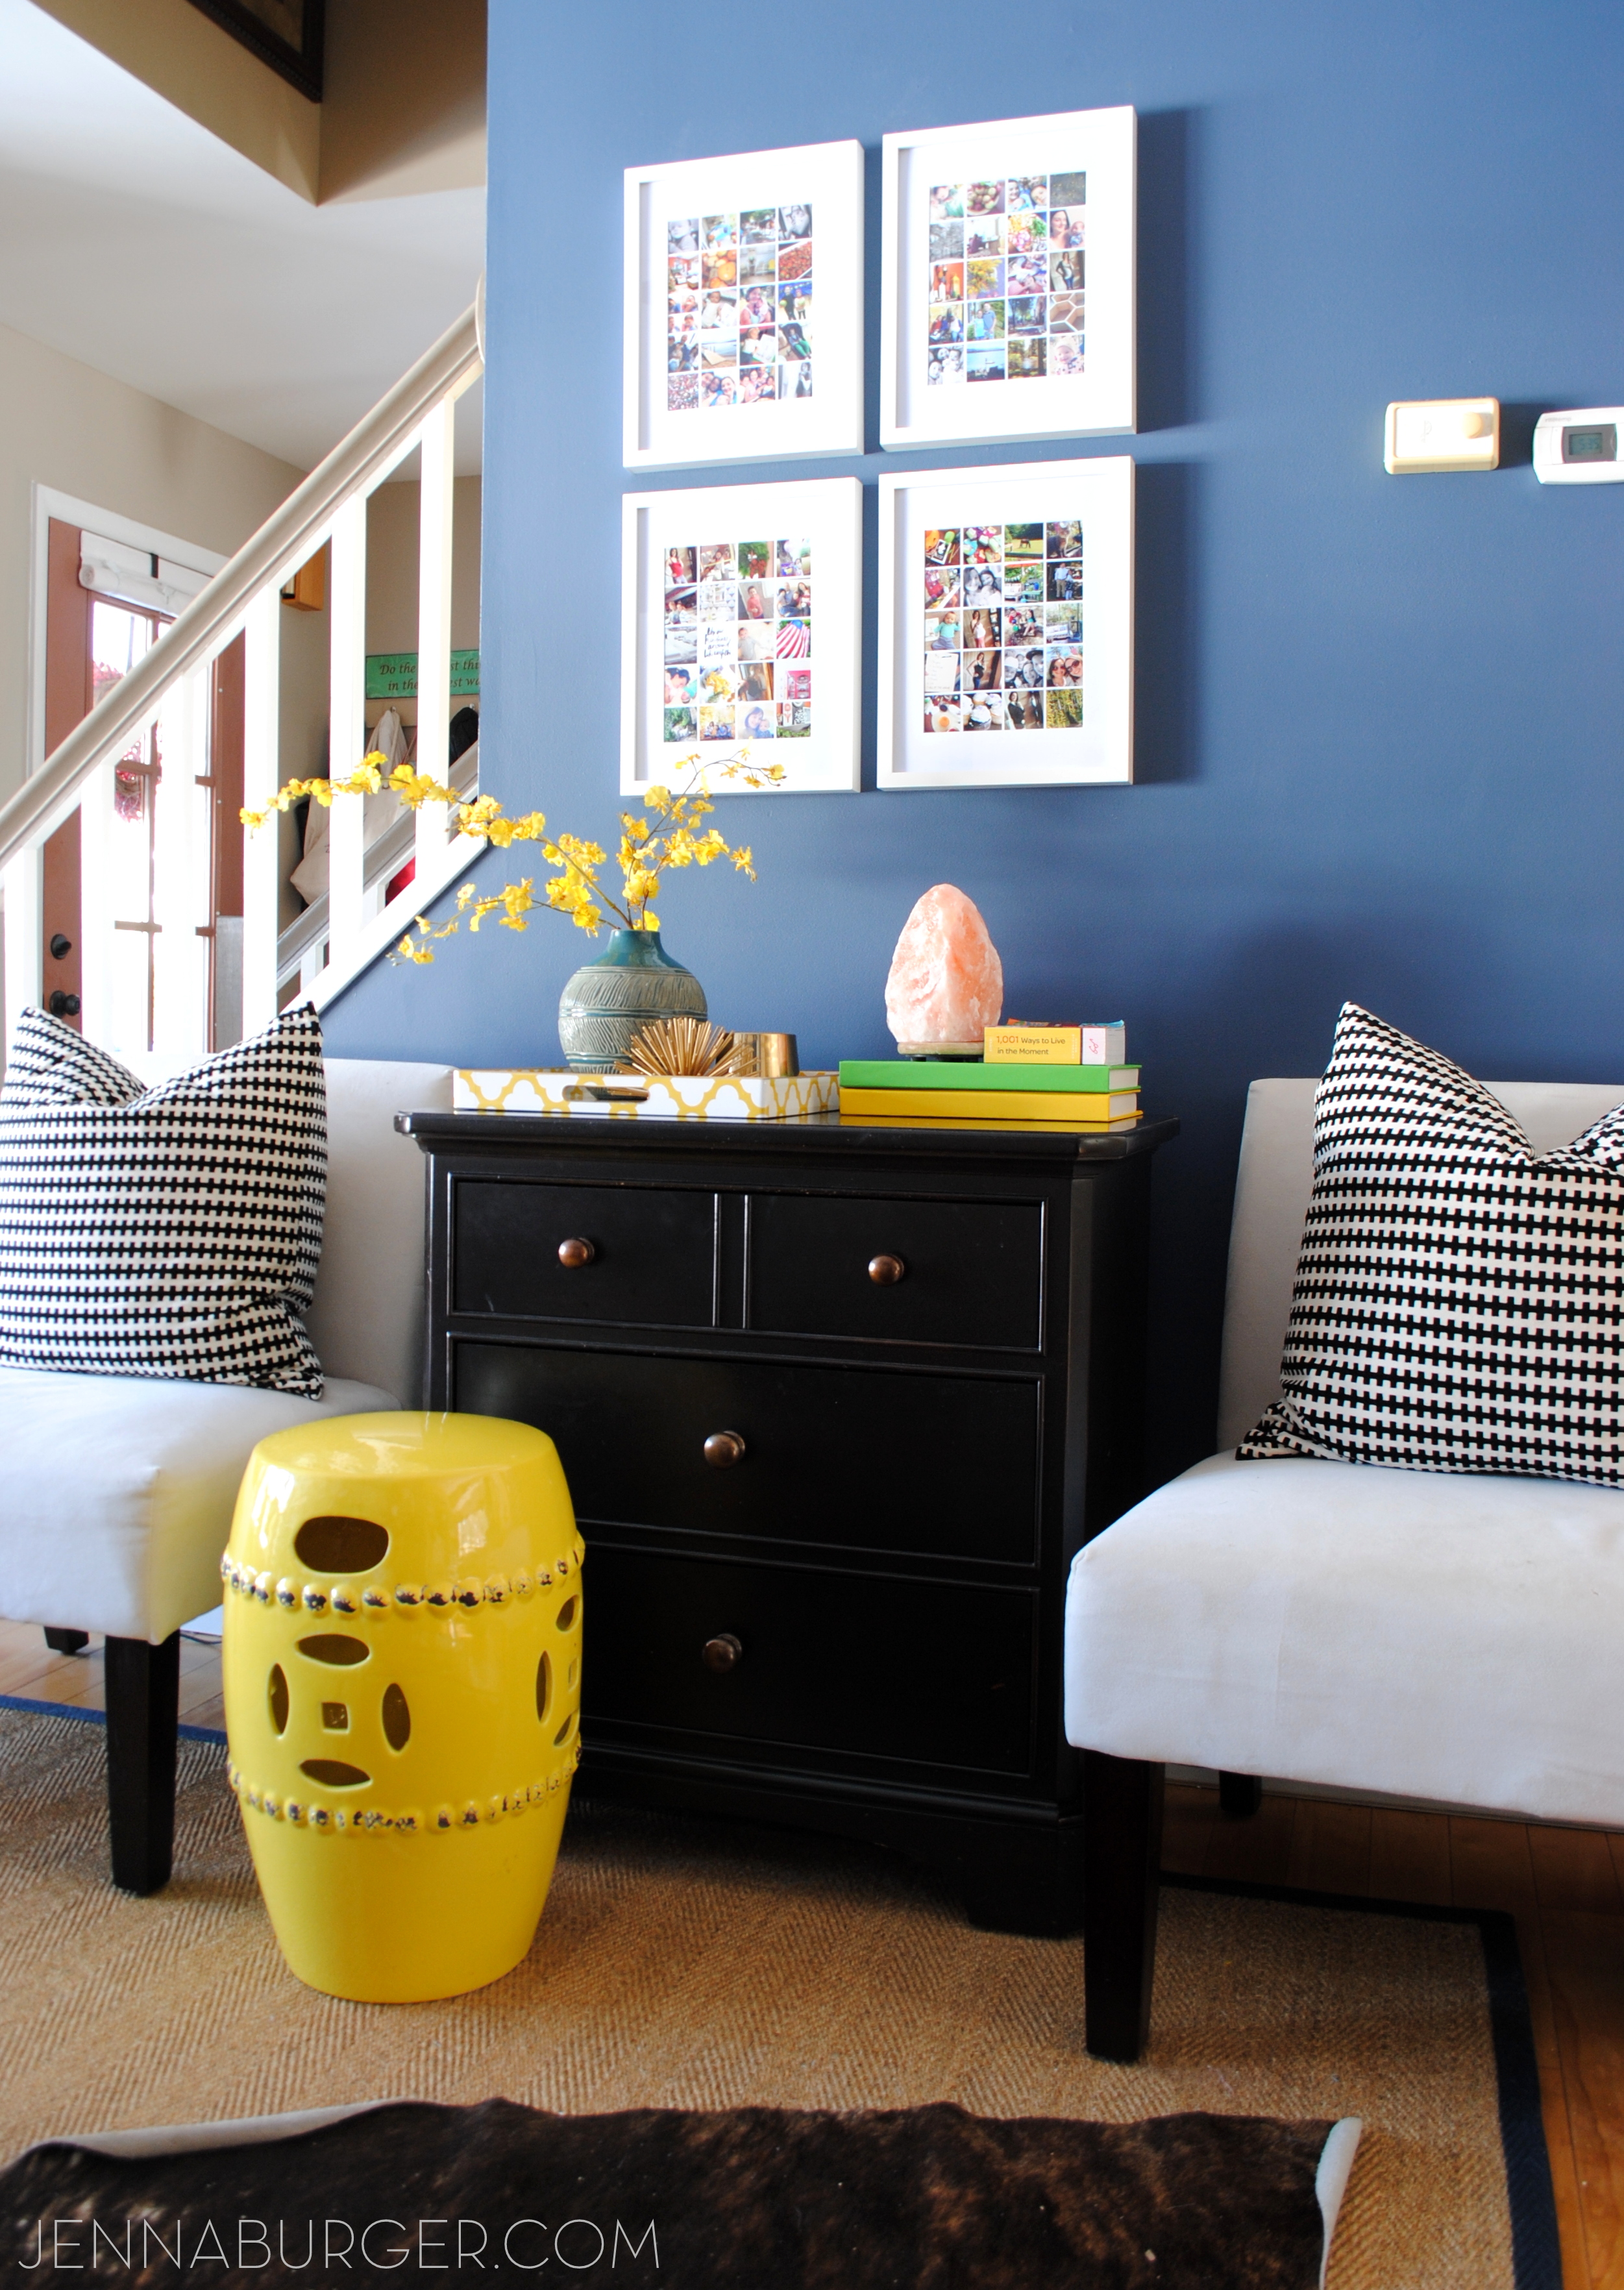
The walls of our home are adorned with pictures & meaningful art.  These new photo gallery creations just add another layer to our family’s story…

Master Bedroom: Picture Gallery Wall

One topic on the blog that I’ve shared inspiration on the most times, have received the most pins, and gets the most questions + comments, is creating a gallery wall.

Gallery walls are one of my most favorite design elements in a home because it tells so much.  Whether putting together a collection of a few large black and white family photos or creating a wall from wall edge to wall edge filled with colorful instagram images + momentos from your travels, a gallery wall is an expression of who you and your family are; truly the most important part of creating a meaningful home.

As the plans for my master bedroom were originally coming together, I knew I wanted to relocate the TV and create a gallery wall opposite of the bed.  The room just called for it.  It asked to have more photos.  I love being surrounded by photos, artwork, and elements that are most special to me.  In the bedroom, it makes the most sense.

Creating a gallery wall behind a TV + tips on how to implement your own gallery wall. So many ideas & inspiration on this blog!

The opposite of the bed used to have a large mirror (which was part of a bedroom matching set that I broke up) and the TV mounted to the side with a table underneath.  Very plain jane.  The space certainly didn’t reflect ‘us’.

Master Bedroom that didn't reflect 'us'

We removed the wall-mounted TV and the mirror, and placed the TV on top of the dresser.  The dresser, which is about 5′ long has a lot of surface space, so in addition to the TV, I added in one of my all-time favorite lamps that I hadn’t found the right home for since we moved here.   It’s a purchase from Crate and Barrel years ago and used to be in our previous home’s guest room.  I’m so happy to have found such a prominent place for it! #happygal

Gallery wall in progress

These two elements – the TV and the lamp – were the perfect size, and balance each other well.  The TV isn’t the focal point anymore and with the pictures that are about to be mounted on the wall, the TV will “disappear” and/or appear as just another frame on the wall.

As for the art / pictures on the wall, nothing was purchased.  ALL came from other areas around my home or my storage closet with all my extra goodies.  I wasn’t worried about the color of the frames or the images themselves, I just wanted only things that were important to us.  This is the wall we wake up to and see every morning…  It’s a great way to start the day (most days).

I don’t have too many in-progress pictures because I was so in-the-moment, but I started the gallery wall with the square mirror.  Part of it is actually behind the TV, so the TV overlaps it, which creates a shadow = depth.  Then I continued with the surrounding pictures – the square pictures above (Norman Rockwell prints) and the black and white Fallingwater image.

Gallery Wall Progress

As the wall continued, it started to take form, but it wasn’t smooth as butter.  Creating a gallery wall takes time, planning, and most likely a few mishaps before it’s just right!  Believe me, I didn’t snap my fingers and say Presto, to have it all complete in 5 minutes.  It definitely took a few days and a few moves.  As I’m working on a big project, especially something like a gallery wall, I like to do it and then take a step back to reflect.

Creating a successful gallery wall

After hanging most of the images and reflecting on it, I realized something was off.  Many of the frames were too in line and not overlapping enough.  To create a successfully balanced gallery wall, I feel it’s important to have a mix of larger and smaller pieces, along with them being staggered / overlapping.

I took a picture of why I didn’t feel this 1st attempt wasn’t right…

Creating a Gallery Wall around a TV

And take a look at the change after a few adjustments / moves…

Creating a gallery wall behind a TV by @Jenna_Burger, WWW.JENNABURGER.COM

Creating a gallery wall behind a TV by @Jenna_Burger, WWW.JENNABURGER.COM

Many of the pieces of art were given to me and a few are store-bought finds.

> The sepia image of the flower was in our previous powder room and purchased at Homegoods.  It’s actually part of a pair, but I broke them up.

> The black and white image above is a charcoal drawing of a house that the Mister drew.  He’s so talented!

> The pretty sunset image in the larger white frame to the right used to be in my daughter’s room, but I stole it 🙂

> Continuing to the right, the 2 square images are Norman Rockwell prints – Day in the Life of a Little Boy + Day in the Life of a Little Girl.  They remind us so much of our little kids.

Norman Rockwell Prints - Day in the Life of a Little Girl / Day in the Life of a Little Boy

More of the wall…

> To the right of the Norman Rockwell images is a black and white picture of Frank Lloyd Wright’s Fallingwater that was gifted to my husband for his graduation.  We were both Architecture majors in college, so it means a lot to us.

> The gold framed image at the top is an oil painting of Paris gifted to me after my Mom and I took a trip there 10 years ago.

> The other gold framed oil painting is a random picture that was given to me from my parents (or maybe I just took it from their house – can’t remember)

> In the black frame below are my little boys handprints – my first mother’s day gift.

The rest of the wall…

Creating a gallery wall behind a TV by @Jenna_Burger, WWW.JENNABURGER.COM

> The white framed ballerina piece of art was recently given to me by the talented Donna Talley, stylist and producer for BHG.  She’s been a very special person in my life as of late!  She has provided me with some amazing opportunities.

> The other white framed image above is another charcoal work by my husband of Falling Water.

The wall in it’s entirety…

Creating a gallery wall behind a TV by @Jenna_Burger, WWW.JENNABURGER.COM

Now that I’ve shared the result of the entire wall, I thought it would be helpful to show you where I started (with the mirror #1) and how it took shape.

Laying out a Gallery Wall

Some tips for creating a gallery wall:

  • Start with one framed picture and continue laying out the wall off of it.  Laying out the gallery wall on the floor first can also be helpful.  I did that on this previous wall I created…

  • Stagger the framed pictures instead of laying them out in one line.
  • Overlap framed pictures to give depth.
  • Create balance with a variety of larger and small pictures

For more ideas + inspiration, visit this previous posts:

Creating a Photo Wall Display
Useful Ideas and Layouts to Create a Photo Gallery Wall
Ideas + Solutions for the Wall Behind the TV

If you want to check out my EASY tip on hanging a picture or artwork, check out this post:
The Best Tip to Hang a Picture

Let me show you the rest of the wall.

Creating a gallery wall behind a TV by @Jenna_Burger, WWW.JENNABURGER.COM

Creating a gallery wall behind a TV by @Jenna_Burger, WWW.JENNABURGER.COM

The view as we enter our bedroom with lots of beautiful light filtering in…

Creating a gallery wall behind a TV by @Jenna_Burger, WWW.JENNABURGER.COM

Creating a gallery wall behind a TV by @Jenna_Burger, WWW.JENNABURGER.COM

Creating a gallery wall behind a TV by @Jenna_Burger, www.sasinteriors.net

The before, in-progress, and after is pretty different.  I’m so happy with the transformation because it’s a space I created that truly reflects us!

Before, In-Progress, & After Gallery Wall

The gallery wall… the final project before the big reveal.

Even though you’ve pretty much seen the entire room throughout all the DIY projects that I’ve shared over the past few weeks, the final reveal is coming later this week!