Tag: Spring Flowers

DIY: Vertical Pallet Garden

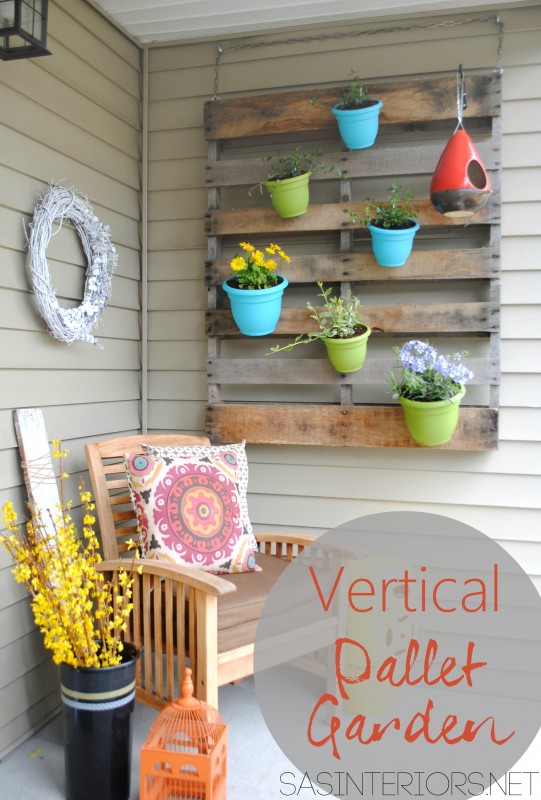
The warmer weather has got me movin’ and groovin’ outdoors.  This past weekend I got my DIY mojo on for this months Lowe’s challenge and created (what I think) is something pretty cool.  Check out my newly created Vertical Pallet Garden using colorful pots…

DIY: Vertical Pallet Garden by @Jenna_Burger, WWW.JENNABURGER.COM

Though the flowers are finally starting to peak through around the yard, I was in need of color NOW to start decorating my front porch for Spring.  I, of course, hit up my local Lowe’s garden center to get my color fix.  It’s still the early days of Spring, so the selection (at my local Lowe’s in NY) was limited, but I was able to find a few perennials for shaded areas that would be ideal for under the front covered porch.  I chose a few colorful perennials & vines because they could easily be transplanted to the garden at the end of the season (smart & savvy thinking).

Pallets have been all-the-rage for a while, but I just don’t get tired of them – probably because they’re free.  I’ve created so many DIY projects with pallets and I just love their old, worn texture and aesthetic.  When thinking about this seasons porch, my major desire was to add height.  Height = drama, and that was my goal. 

DIY: Vertical Pallet Garden by @Jenna_Burger, WWW.JENNABURGER.COM

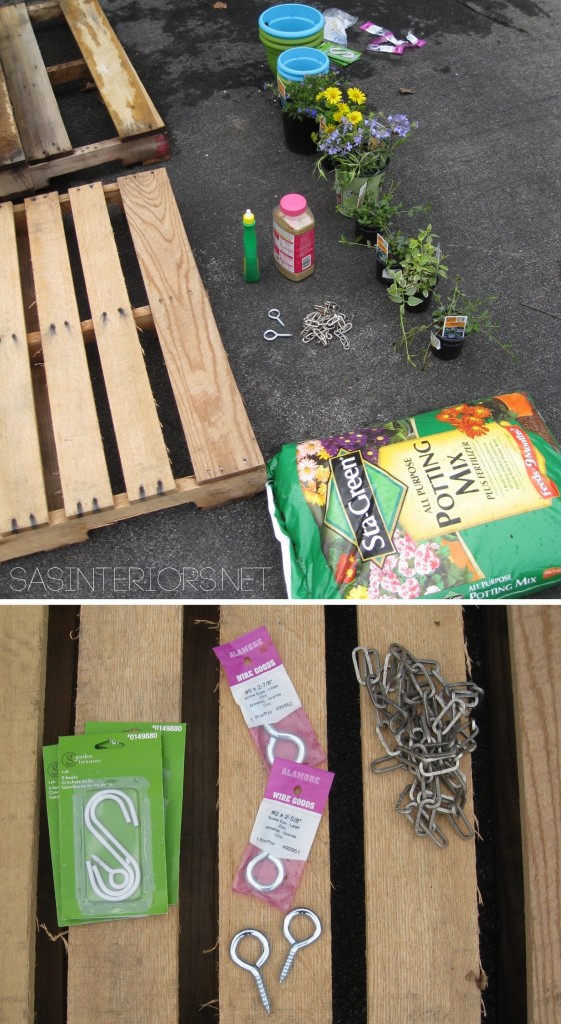
For this project, the materials I used were:

  • Pallet (which I snagged – with their permission of course – for free in the back on my local Lowe’s)
  • (4) Eye hooks for 100 lbs+
  • 3′ of metal chain
  • Plastic pots (I used lime green and turquoise from Lowe’s)
  • Drill with 1/4″ drill bit
  • 3″ S hooks (found in the outdoor section of Lowe’s)
  • Vise Grip

DIY: Vertical Pallet Garden by @Jenna_Burger, WWW.JENNABURGER.COM

Here’s the DL (downlow for short) on how I created the Vertical Pallet Garden

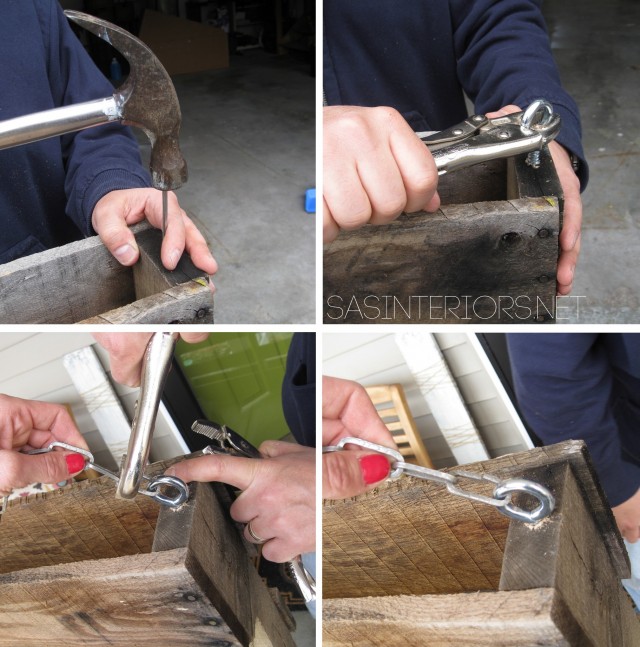
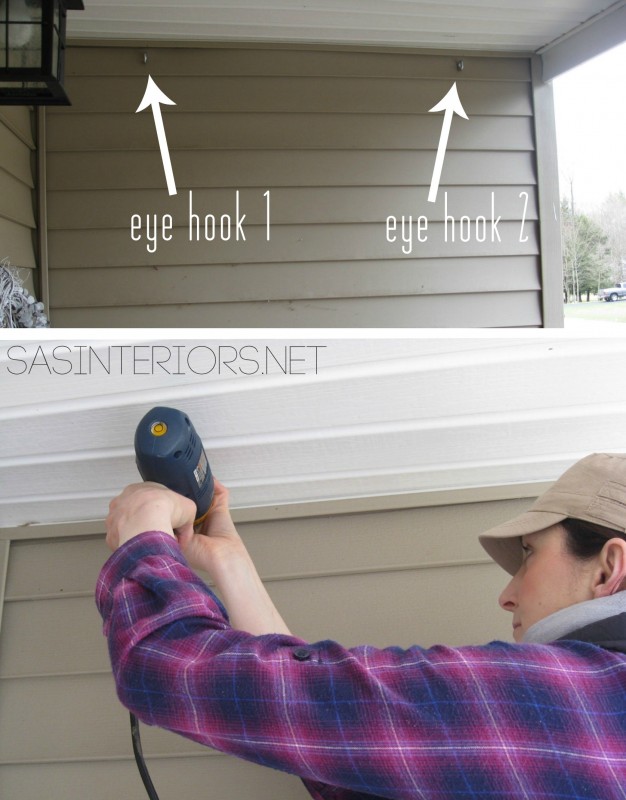
1. At the top of the pallet (slats oriented horizontally), screw in (1) eye hook at about 2-3″ in from each end. It’s best to start out by using a large nail to start the hole.  Once the hole is started, screw in the eye hooks with the help of a vise grip to get leverage.  Unless you’re the Hulk, it’ll probably be impossible with just your bare hands.

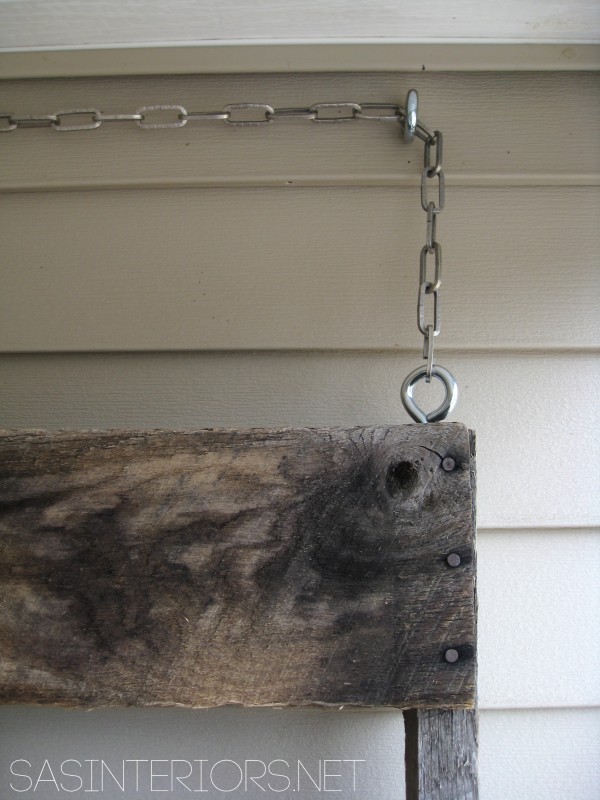
2. With the Misters help, we then unlinked one of the chain links and linked it through the eye hook. (one side only – the other side has to wait until hung)

DIY: Vertical Pallet Garden by @Jenna_Burger, WWW.JENNABURGER.COM

3. Heading over to the house, we installed the eye hooks (using a drill to start the hole) through the siding and into the house about 2″ below the ceiling plane at the same distance apart as the hooks in the pallet.

DIY: Vertical Pallet Garden by @Jenna_Burger, WWW.JENNABURGER.COM

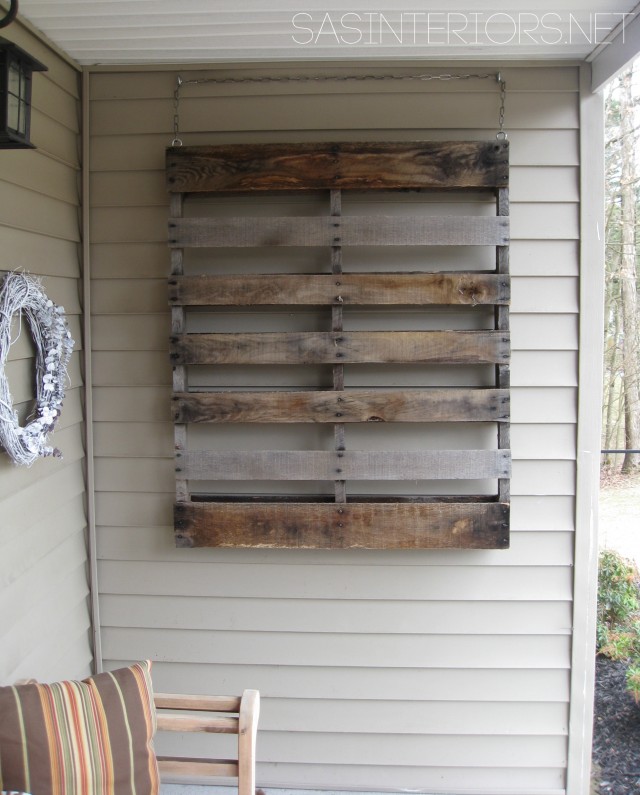
4. Once the eye hooks were in, we took the loose end of the chain of the pallet, slipped it through the eye hooks, and secured the chain on the other side.

DIY: Vertical Pallet Garden by @Jenna_Burger, WWW.JENNABURGER.COM

The pallet base is complete!

DIY: Vertical Pallet Garden by @Jenna_Burger, WWW.JENNABURGER.COM

Then it was time to create the “garden”.

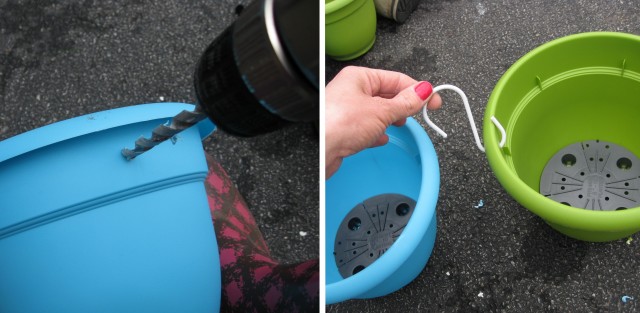
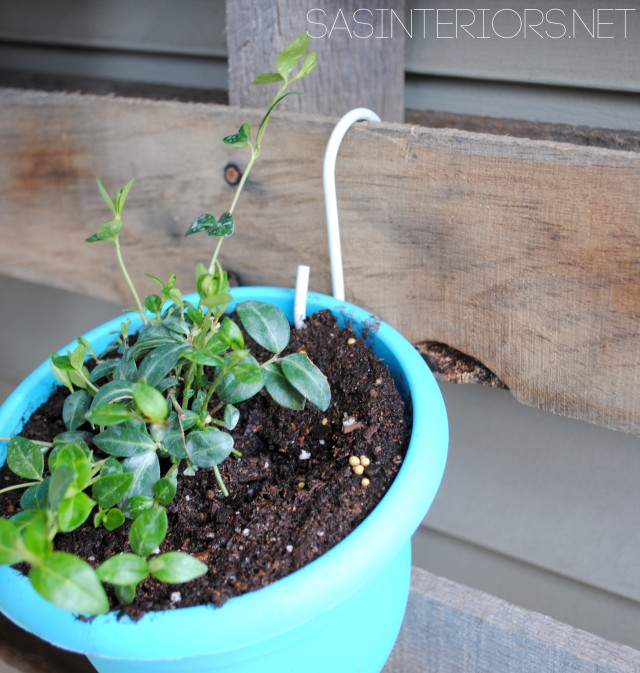
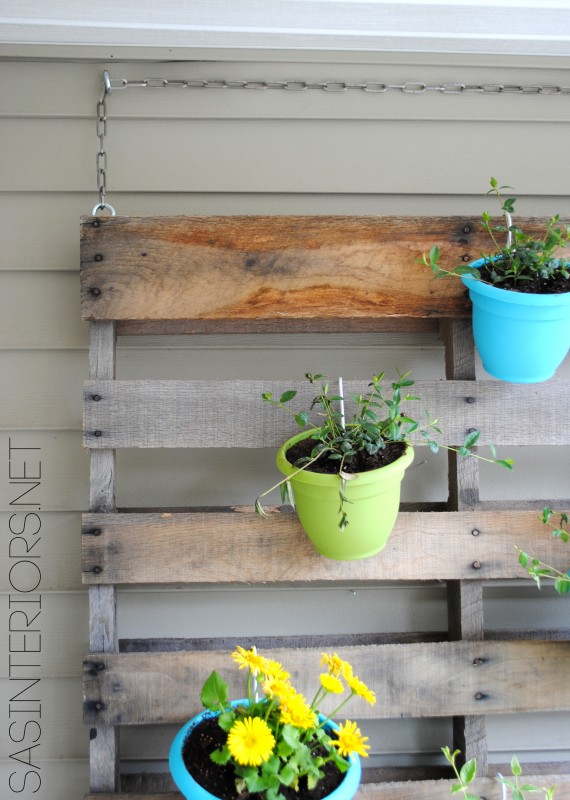
5. Using varying sized plastic pots in fun colors, drill a 1/4″ hole about 1″ down from the top rim. Using a 3″+/- S hook, slip it through the hole.

DIY: Vertical Pallet Garden by @Jenna_Burger, WWW.JENNABURGER.COM

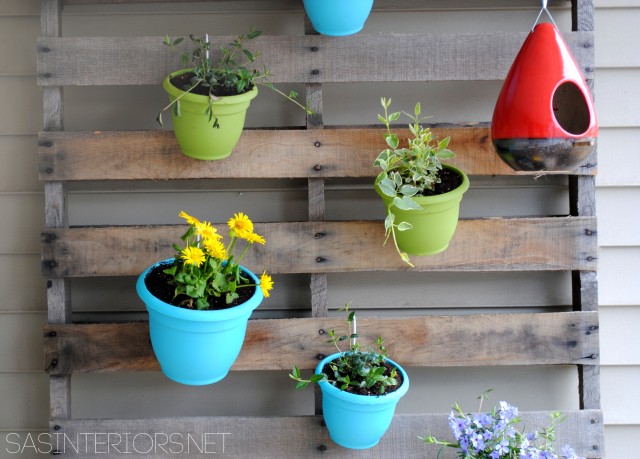
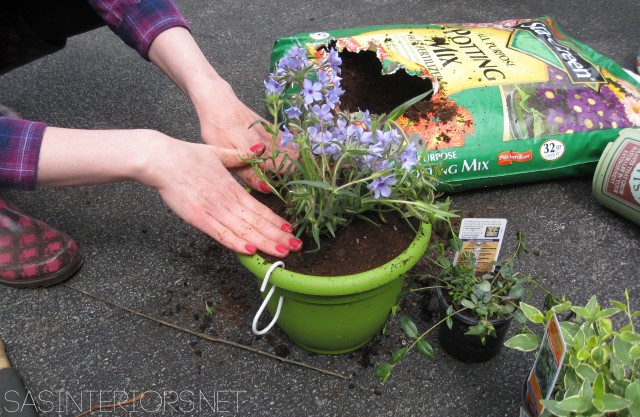
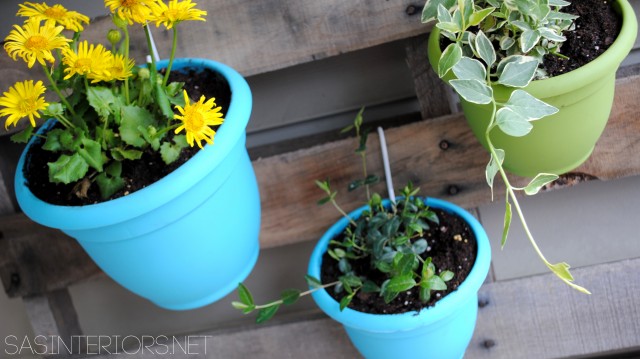
6. Plant the pretty flowers…

DIY: Vertical Pallet Garden by @Jenna_Burger, WWW.JENNABURGER.COM

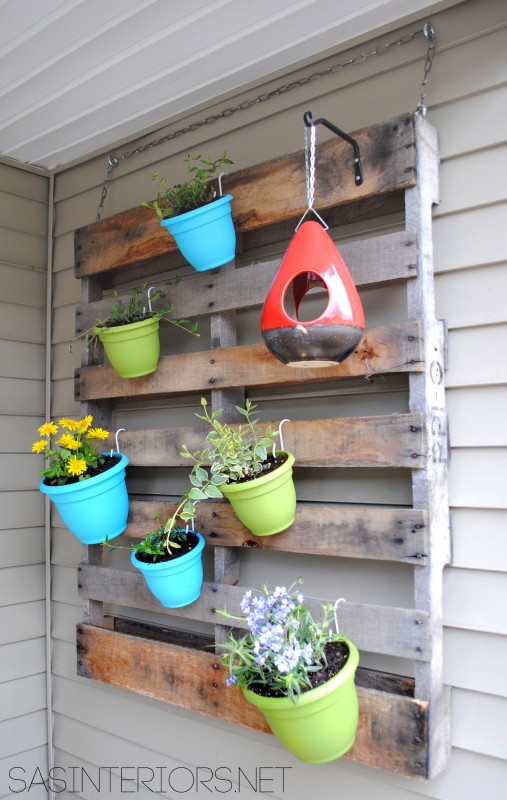
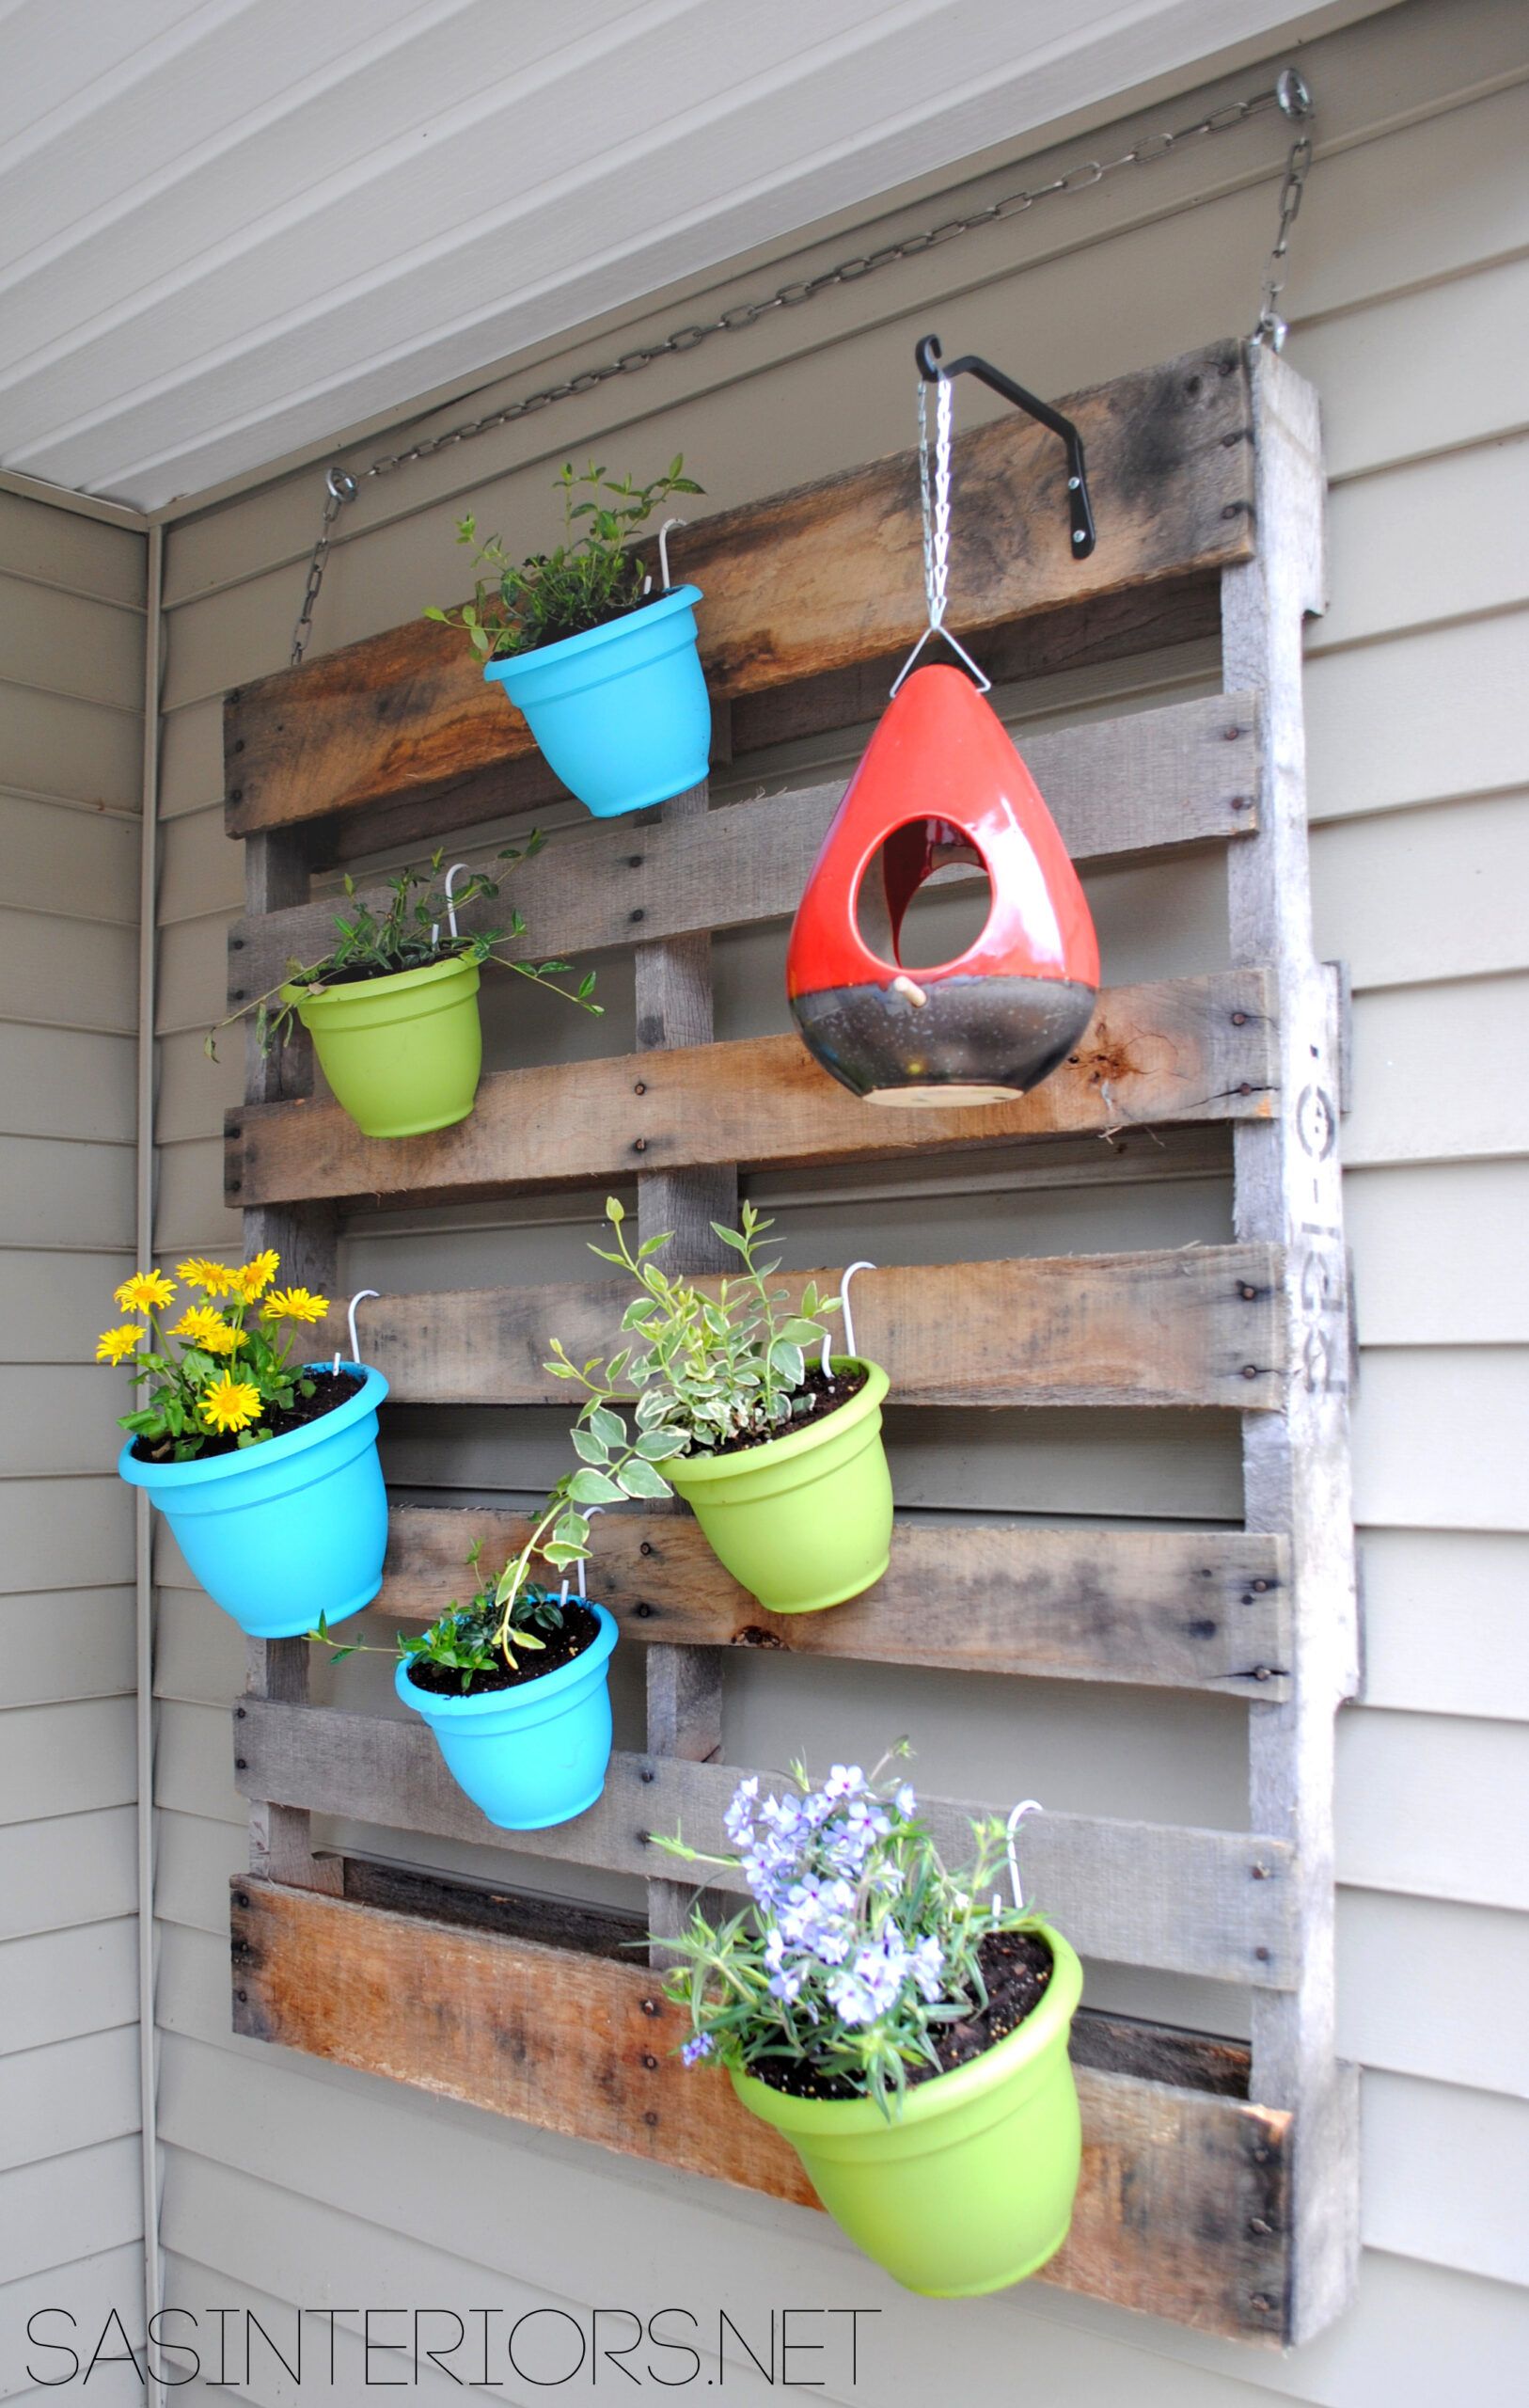
…And it was complete!

DIY: Vertical Pallet Garden by @Jenna_Burger, WWW.JENNABURGER.COM

DIY: Vertical Pallet Garden by @Jenna_Burger, WWW.JENNABURGER.COM

DIY: Vertical Pallet Garden by @Jenna_Burger, WWW.JENNABURGER.COM

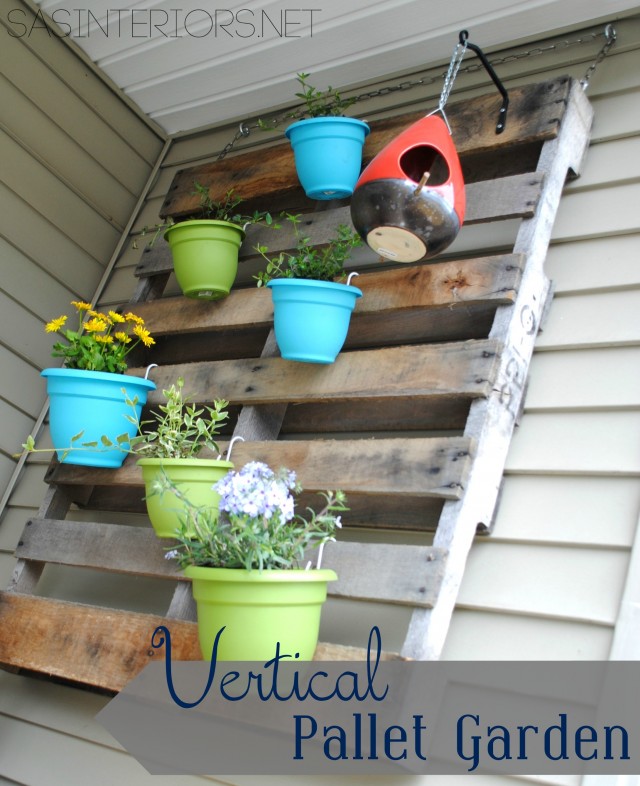
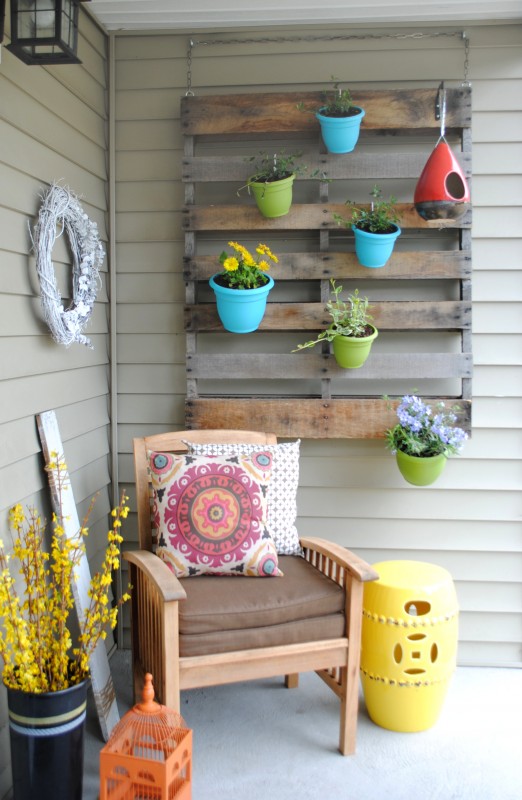
The vertical pallet garden adds so much color to the front porch.

DIY: Vertical Pallet Garden by @Jenna_Burger, WWW.JENNABURGER.COM

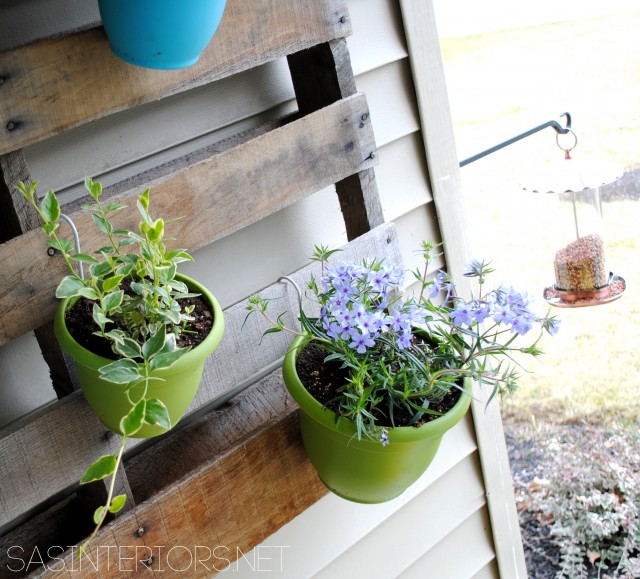
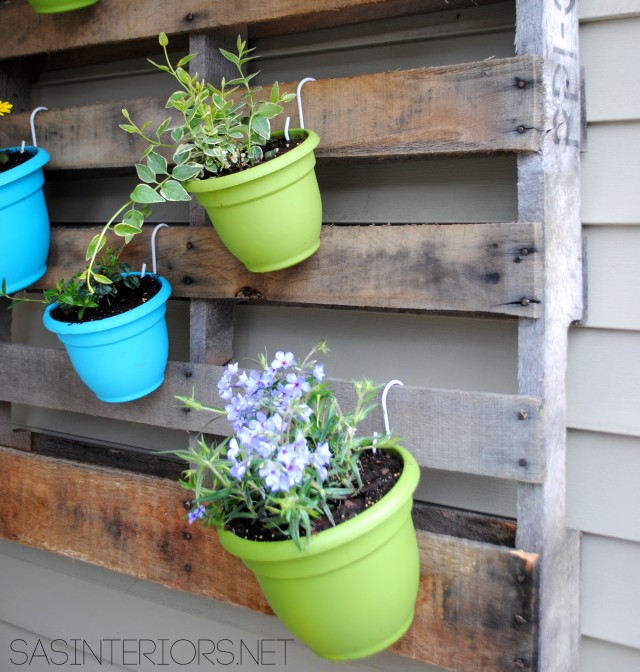
S-hooks make it easy to move the flower pots around or bring them into the sun.

DIY: Vertical Pallet Garden by @Jenna_Burger, WWW.JENNABURGER.COM

A beautiful focal point for the porch.

DIY: Vertical Pallet Garden by @Jenna_Burger, WWW.JENNABURGER.COM

If you’re wondering about the pretty white wreath, that was a DIY project that was featured on Jen’s blog.  It was created for Valentine’s Day, but I took off the paint chip flowers and just hung the wreath plain and simple.  Who knows how I will transform it for another holiday or season to come.

DIY: Vertical Pallet Garden by @Jenna_Burger, WWW.JENNABURGER.COM

I’m still working on the rest of the porch since it’s still in need of more color and pizazz.  By late May, I hope to have that done and ready to share.  Right now we’re still getting alot of rain and most nights are still way too chilly to get my gardening-on.

DIY: Vertical Pallet Garden by @Jenna_Burger, WWW.JENNABURGER.COM

I couldn’t be more thrilled with the outcome of this fun and easy DIY project.  It’s brought gorgeous height and beautiful color to my Spring front porch.

To see more creations of mine using pallets, click on the links below:
How-To Make a Pallet Shelf
Monogrammed Pallet Chevron Tray
Pallet Picture Holder
Eclectic Family Gallery Wall

Disclosure: I am part of the Lowe’s Creative Team and was provided with a Lowe’s gift card to purchase items for my project.  I was also compensated for my time to use the products.  No one told me what to create, what to buy, how to use the product, or what to write.  All opinions are 100% mine!
Spring Front Porch {Reveal}

Confession…

I didn’t even have 5 minutes to start my staircase carpet removal this past weekend – Huge Bummer, I know!  I’m sure some of you are disappointed {I am} after my exciting Another DIY Project is Born post from Friday, buuuuut I have to say the weekend was not filled with R & R.  Instead of embarking on my latest DIY idea (removing the ugly, old, worn carpet on the stairs), we continued our efforts on the exterior instead.

Take a look…

Pretty snazzy, right?  Boy, did it take A-L-O-T of effort and my butt is still aching, but it was definitely worth it.  AND there is still a few weekends ahead of us before it’s complete (if ever).  Let me show you around…

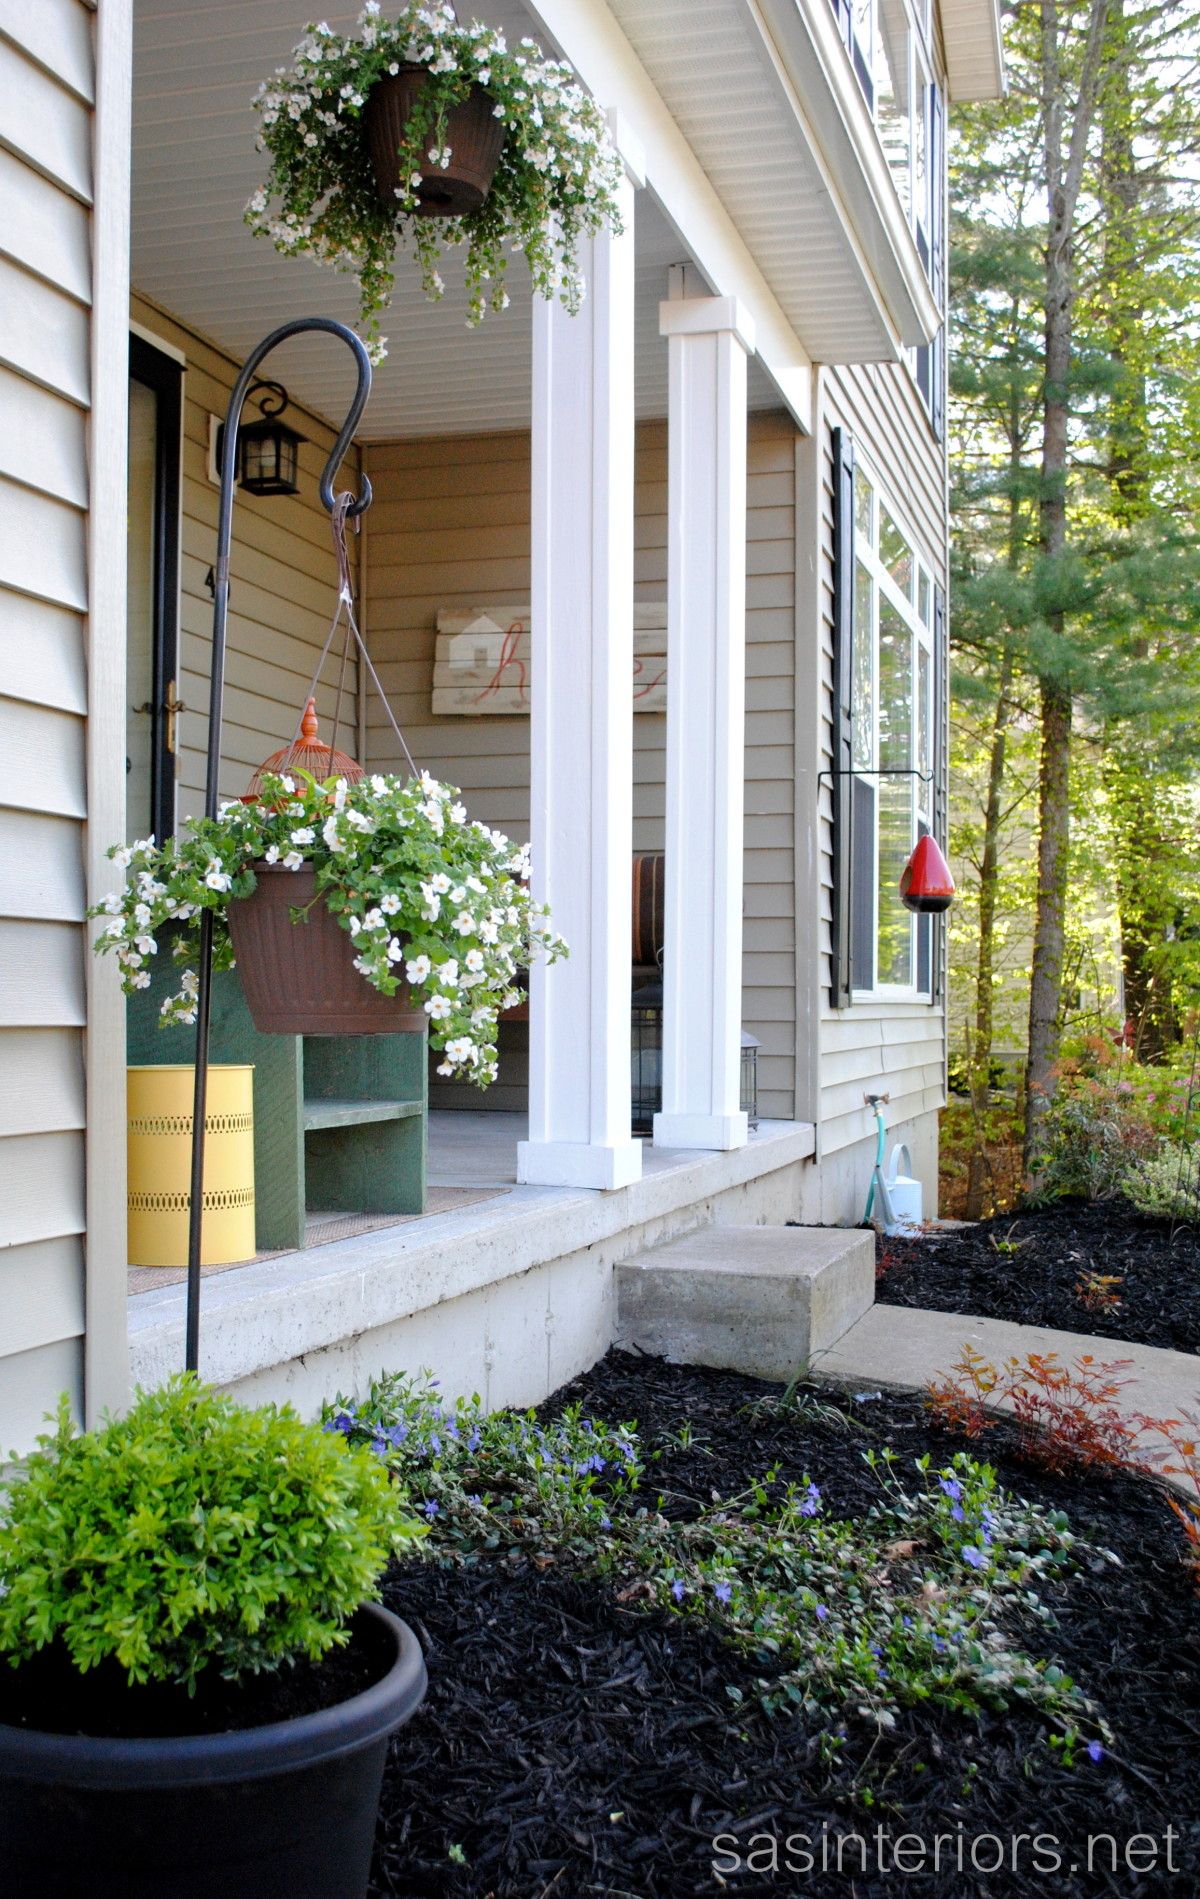
Last week I mentioned that the Mister and I enlarged the exterior columns and I finally took pictures, so here they are!  I’ve got a ‘thing’ for beefy columns and the 3″ wide style we had before always bothered me.  Now… the larger style columns, which are about 8″ wide, make the house appear more grounded and the overall scale actually feels larger – to me anyway.

So what do you think?

Want to see how it looked before? These are a few pictures from the time when we moved in two years ago up until last year when we started the transformation process.

Even looking at these pictures myself, I’m surprised at how much work we’ve done over the last two years.  With lots of Tender Loving Care, our outdoor front space has truly changed.  Last year we started with a few plantings and they’re really growing – I’m kinda shocked since I have no green thumb.

I have to show you my favorite plant in the garden (thus far), which is the bleeding heart.

And the new hanging baskets.

All the plantings in the front beds are perennials and started off much smaller last year and have continually been growing.  So far this year, I got two new hanging baskets with annual flowers, as well as two boxwoods that I planted in large black pots that flank the garage. From my understanding (which I was told by our local gardening center), the boxwoods will continue to grow and should last up to 10 years – we shall see.

Aside from the flowers, I’ve added bursts of color with accessories and pillows throughout the porch area.  Even though it’s not an overly large porch, it’s quaint and a great place to sit, relax, and read a book.

The burnt orange bird feeder is another colorful addition to the front porch. I wasn’t sure how it would look, but I’m loving how it brightens up the porch and hopefully birds will come for some good food.

And to give you an update on the side yard, the tree stumps are out and I seeded the 3000 sq.ft.  area – O, do I hope that grass grows!

But, I can say, I got this pond up and running too this weekend – another FINALLY!  It’s been here since we moved in, but hasn’t worked.  Until now.

Thanks so much for visiting and allowing me to share my progressing front porch and plantings with you.  There’s lots more to come! Have you started planting flowers yet this Spring?

How to Make Fake Flowers Look Real

Even though it’s technically Spring, it’s difficult to believe, with all the snow still on the ground here in NY.  Thankfully my mindset is already on pretty Spring flowers to get me through the final days of the long drawn-out Winter.  I’m continually changing and updating my Dining Room display depending on the season and holiday.  I love the look of fresh flowers (who doesn’t?), but sometimes an artificial arrangement is simpler and more practical to maintain.

When shopping for your arrangement, look for flowers that have a natural, “real” appearance and that hang similar to a real flower.  Vary the size and texture of the faux flowers.  If your chosen flower is in a bunch, separate it, so you have individual stems.  By taking apart the pre-made flower bunch, it’ll give you more freedom to vary the heights and  discard parts of the bunch you may not want to use.

Like always, it’s important to use the appropriate tools for the job! Wire Cutters are perfect for this project.

Let’s get started…

Start arranging your flowers just like you would if using real flowers.  I chose a vase with a small opening, but the look of the arrangement will depend on the size, shape, and opening of the vase you choice.   Hot Tip: If you decide on a vase with a large opening, make a grid using clear tape. This will keep the flowers in place and the arrangement looking full.

I scored this vase at TJ Maxx for less than $4!

Begin by placing a handful of the flowers in the vase.  Then remove and trim them one by one. Vary the heights and sizes to create a balanced arrangement. Remember, just like when arranging “real” flowers, it won’t be perfect and that’s the beauty of it.

With the busy lives we lead, buying and maintaining fresh cut bouquets is sometimes just NOT possible.  If done right,  an artificial arrangement can look just as beautiful and the enjoyment of flowers can still be achieved.

Here is my completed arrangement…

O, I forgot to mention, I made two…

And here is an overall photo of my dining space…

I’m usually a “real” girl, but fake can sometimes do the trick!

I’ll be linking up {here}