
Tag: Trash to Treasure

Trash To Treasure: Upcycled Light To Vase

Sometimes the most unlikely objects can turn from trash to treasure.

Trash to Treasure: Upcycled Light to Vase created by @Jenna_Burger, sasinteriors.net

As we’ve been changing the light fixtures throughout our home over the last 3 years (I’m pretty sure every. single. one. has now been updated), most went straight to the curb.  A few weekends ago when the last old, brassy light came down in the upstairs hallway, it was half way to the trash, until I had a thought…

Could I upcycle it into something else?  But what?? A cloak?  Another light?  A vase?  Should I spray paint it or leave it brass?  Lots of thoughts were brewing.

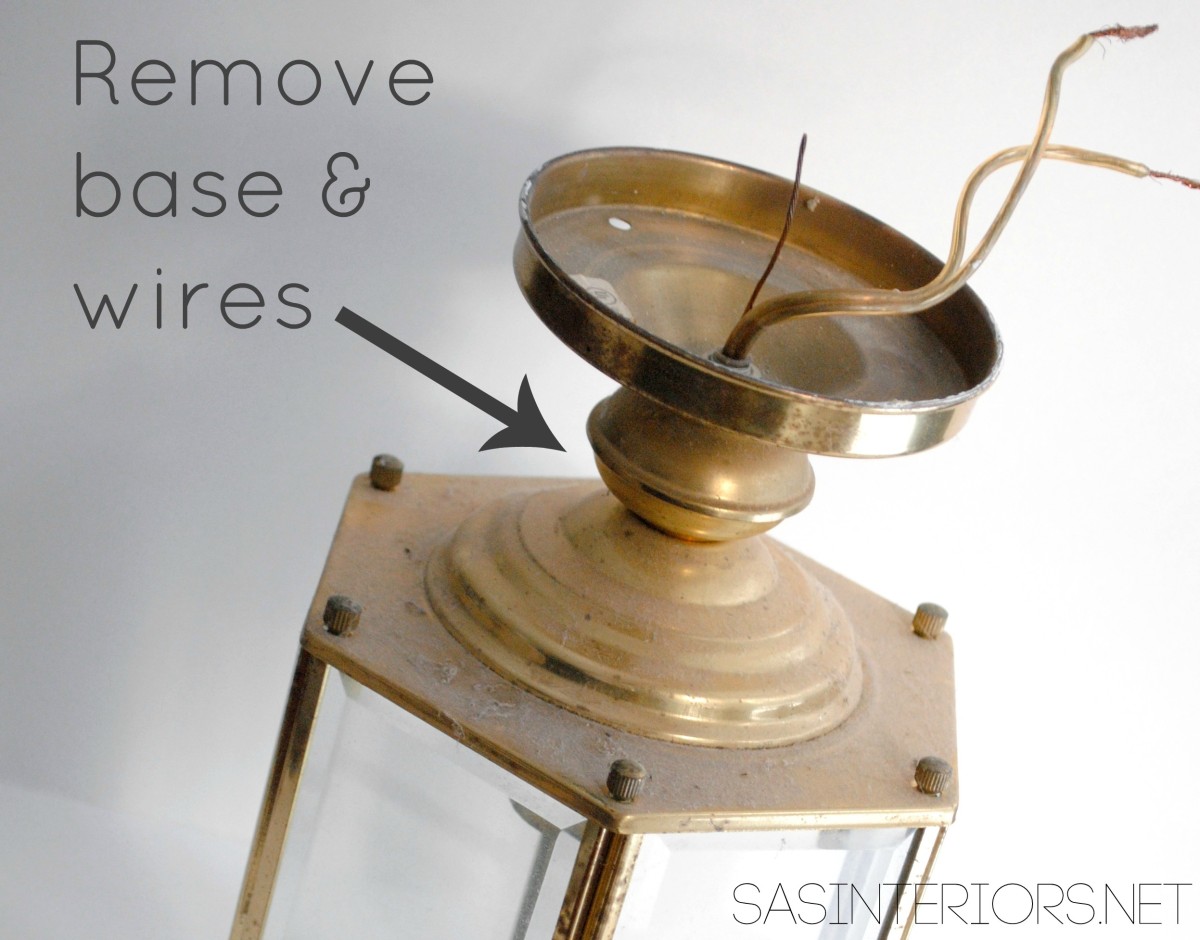
Of course, I forgot to take a pick of the light in it’s old home, but here’s what it looked like right after taken down from the ceiling.

Dust and all…

Trash to Treasure: Upcycled Light to Vase created by @Jenna_Burger, sasinteriors.net

After giving it a good scrubbing, I decided to leave the brassy finish (I liked the warm hue) and use it as an accessory to hold a vase.  A vase within a vase.  Yes!  Perfect!

I removed the base (which I was going to you as a candle stick, but it all fell apart), as well as the wires.

Trash to Treasure: Upcycled Light to Vase created by @Jenna_Burger, sasinteriors.net

And then within minutes it went from ugly to this treasure…

Trash to Treasure: Upcycled Light to Vase created by @Jenna_Burger, sasinteriors.net

O, you know how I love to spend $0 and shop my home!

Trash to Treasure: Upcycled Light to Vase created by @Jenna_Burger, sasinteriors.net

Trash to Treasure: Upcycled Light to Vase created by @Jenna_Burger, sasinteriors.net

Trash to Treasure: Upcycled Light to Vase created by @Jenna_Burger, sasinteriors.net

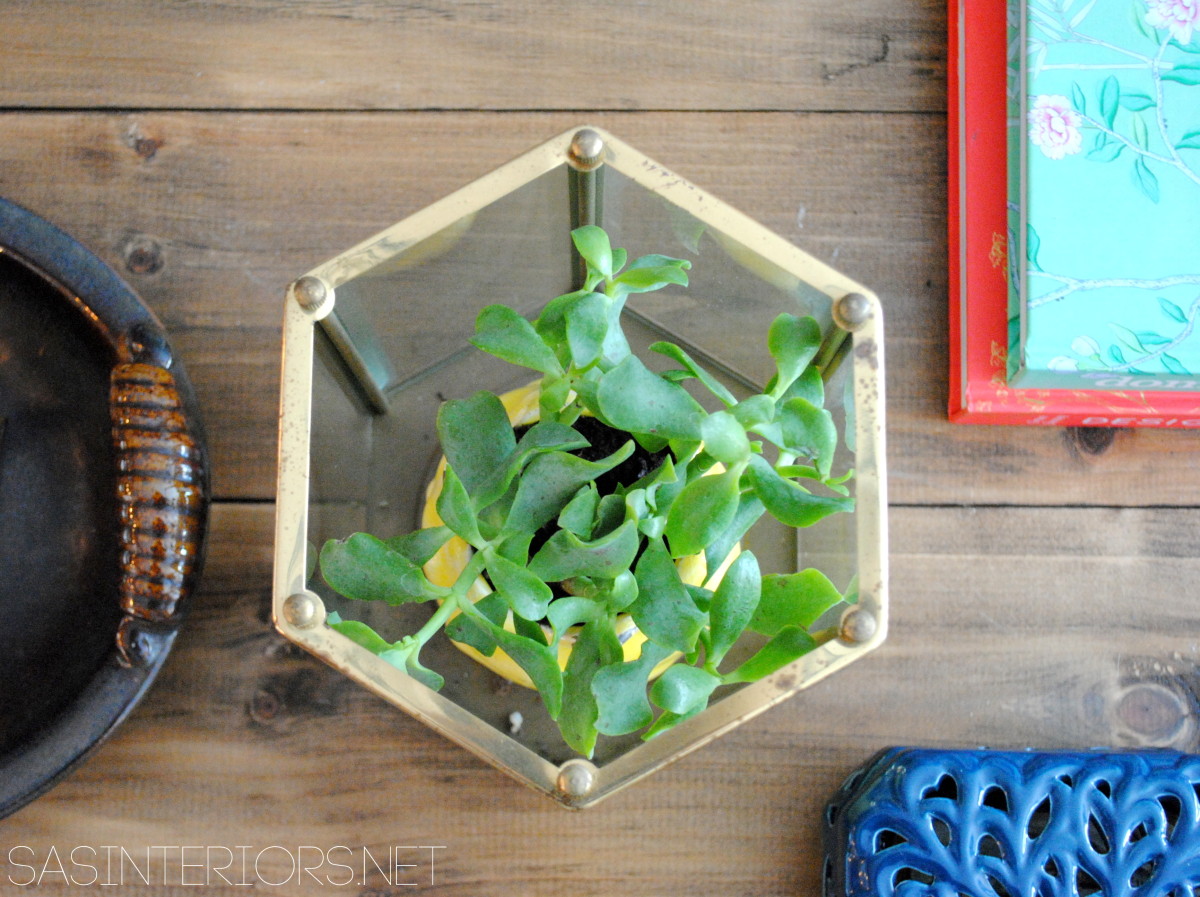
I’m in love! Such a silly thing made into something spectacular.  For now it sits on the coffee table, but I’ve got other ideas for my new found treasure.  We’ll see where my thoughts and ideas take me…

What items have you upcycled in your home?  How have you made treasure out of trash?

I link my projects to some of these parties: Skip to My Lou, Dittle Dattle, Between Naps on the Porch, Today’s Creative Blog, Stories of A to Z, All Things Heart & Home, House of Hepworths, Finding Fabulous, The Shabby Nest, Serenity Now, Tatertots and Jello, Thrifty Decor Chick, Tip Junkie


Outdoor Sculpture Made From Trash

DIY: Outdoor Sculpture using metal straps from an old barrel. Big impact with little work + no cost!

I hope you had a wonderful weekend!  It was a half rainy, half sunny weekend in my neck of the woods, so I took the opportunity to do some thrifting with my mom on Saturday and then some major DIYing on Sunday.  I actually worked on about 6 different DIY projects and am super psyched to share some of them over the next week or two.

One project in particular is a new outdoor sculpture that now sits in my garden that I made using, well…  trash.  It’s kinda crazy, but I love it!

Before the cleanout began for the sideyard makeover (which I’ve mentioned here and there over the last few months), there was an old wood barrel planter sitting in the corner, falling apart, and in desperate need for the trash.  When the time came for the barrel to hit the garbage, there was a DIY fairy that sat on my shoulder telling me to keep the corroded metal straps that once, long ago, kept the barrel together.


I had NO IDEA what I would do with them, but in the shed they went… for about two months… until the revelation hit me… How about making them into a sculpture??  Hmmm… That could work!

There was part of the garden on the sideyard that was bare and instead of planting more flowers, the vacant spot was perfect for my new-found idea.

How to Make the Trash Turned Sculpture

This sculpture took minutes to make – probably less than 10 minutes in all!  Using a drill with a metal drill bit, the Mister and I worked together and drilled 2 holes in each ring.  The holes were placed directly opposite of each other.

Once all the holes were drilled, we aligned the top and bottom holes of each ring.  We secured the rings at the top with a nut and bolt, and for the bottom, we used a 6″ tent stake which went into the ground.

And that was it!  I rotated the rings until the positioning was just right, and then sat back to admire this trash to treasure.

So what do you think?  Pretty neat, right?
What treasures have you made from trash?

I link my projects to some of these parties: Skip to My Lou, Dittle Dattle, Between Naps on the Porch, Today’s Creative Blog, Stories of A to Z, All Things Heart & Home, Savvy Southern Style, House of Hepworths, Finding Fabulous, Creation Corner, The Shabby Nest, Tatertots and Jello, Thrifty Decor Chick, Tip Junkie

Trash to Treasure: Nursery Lamp Makeover

It’s always fun to make treasure out of trash!

A few weeks ago I was visiting a friend and sharing with her my experience on revamping a recent lamp project.  In turn she said she had acquired a lamp that was from her husband’s childhood, but had no idea what to do with it.  After a trip to the basement to scrounge through a few boxes, she came back with quite the “trash”.  It really wasn’t trash, it was just in desperate need of a makeover to give it new life.

To keep it in the family, her desire was to put it in her son’s room and I had the perfect idea!

Once I got the lamp home, I took it apart from head to toe and snapped a picture, just in case I forgot how to reassemble it later.  The lamp needed to be rewired and since I had just finished my How-To Rewire a Lamp tutorial, I was experienced enough to make the proper updates.  As you can see from the before pictures, the brass had tarnished from age and the colors were drear and in need of a revamp.

I started off by hand sanding each part of the lamp to give it a fresh start before painting.  The horse was a little tricky to sand, but I was able to get into some of the grooves…

Armed with “my staples” (not real staples, I mean spray paints), I was ready and off to transform this little horsey!

Ba-bye colored horse – Now you’re going to be a horse of a different color.  I spray painted the horse with 3 coats of Rust-oluem Winter Gray (same color as my lamp revamp), the other parts of the lamp (base and tubing) white, and finished it with a top coat of crystal clear enamel.

I had mixed feelings about the lampshade.  I actually had planned on replacing the old shade with a new crisp, white style.  I even bought a new one but it didn’t seem to be the perfect fit.  The existing shade was oval shaped to match the lamp base.  So I said, O heck with it, let’s reuse the shade and simply dress it up by giving it new life with a stylish ribbon.

Before being completely done with this Lamp reVamp, the horse was missing something… he needed a bit of color, so with a small brush and cobalt blue paint, I outlined the edge of it’s saddle to add the perfect finishing touch.  And then…

… it was done!

Again, here is the before…

And here is how the trash was turned into treasure…

Thankfully my friend LOVED the lamp and was so happy to add this new treasure to her son’s bedroom!  What treasures have you made from trash?