


DECORATE WITH… Mirrors
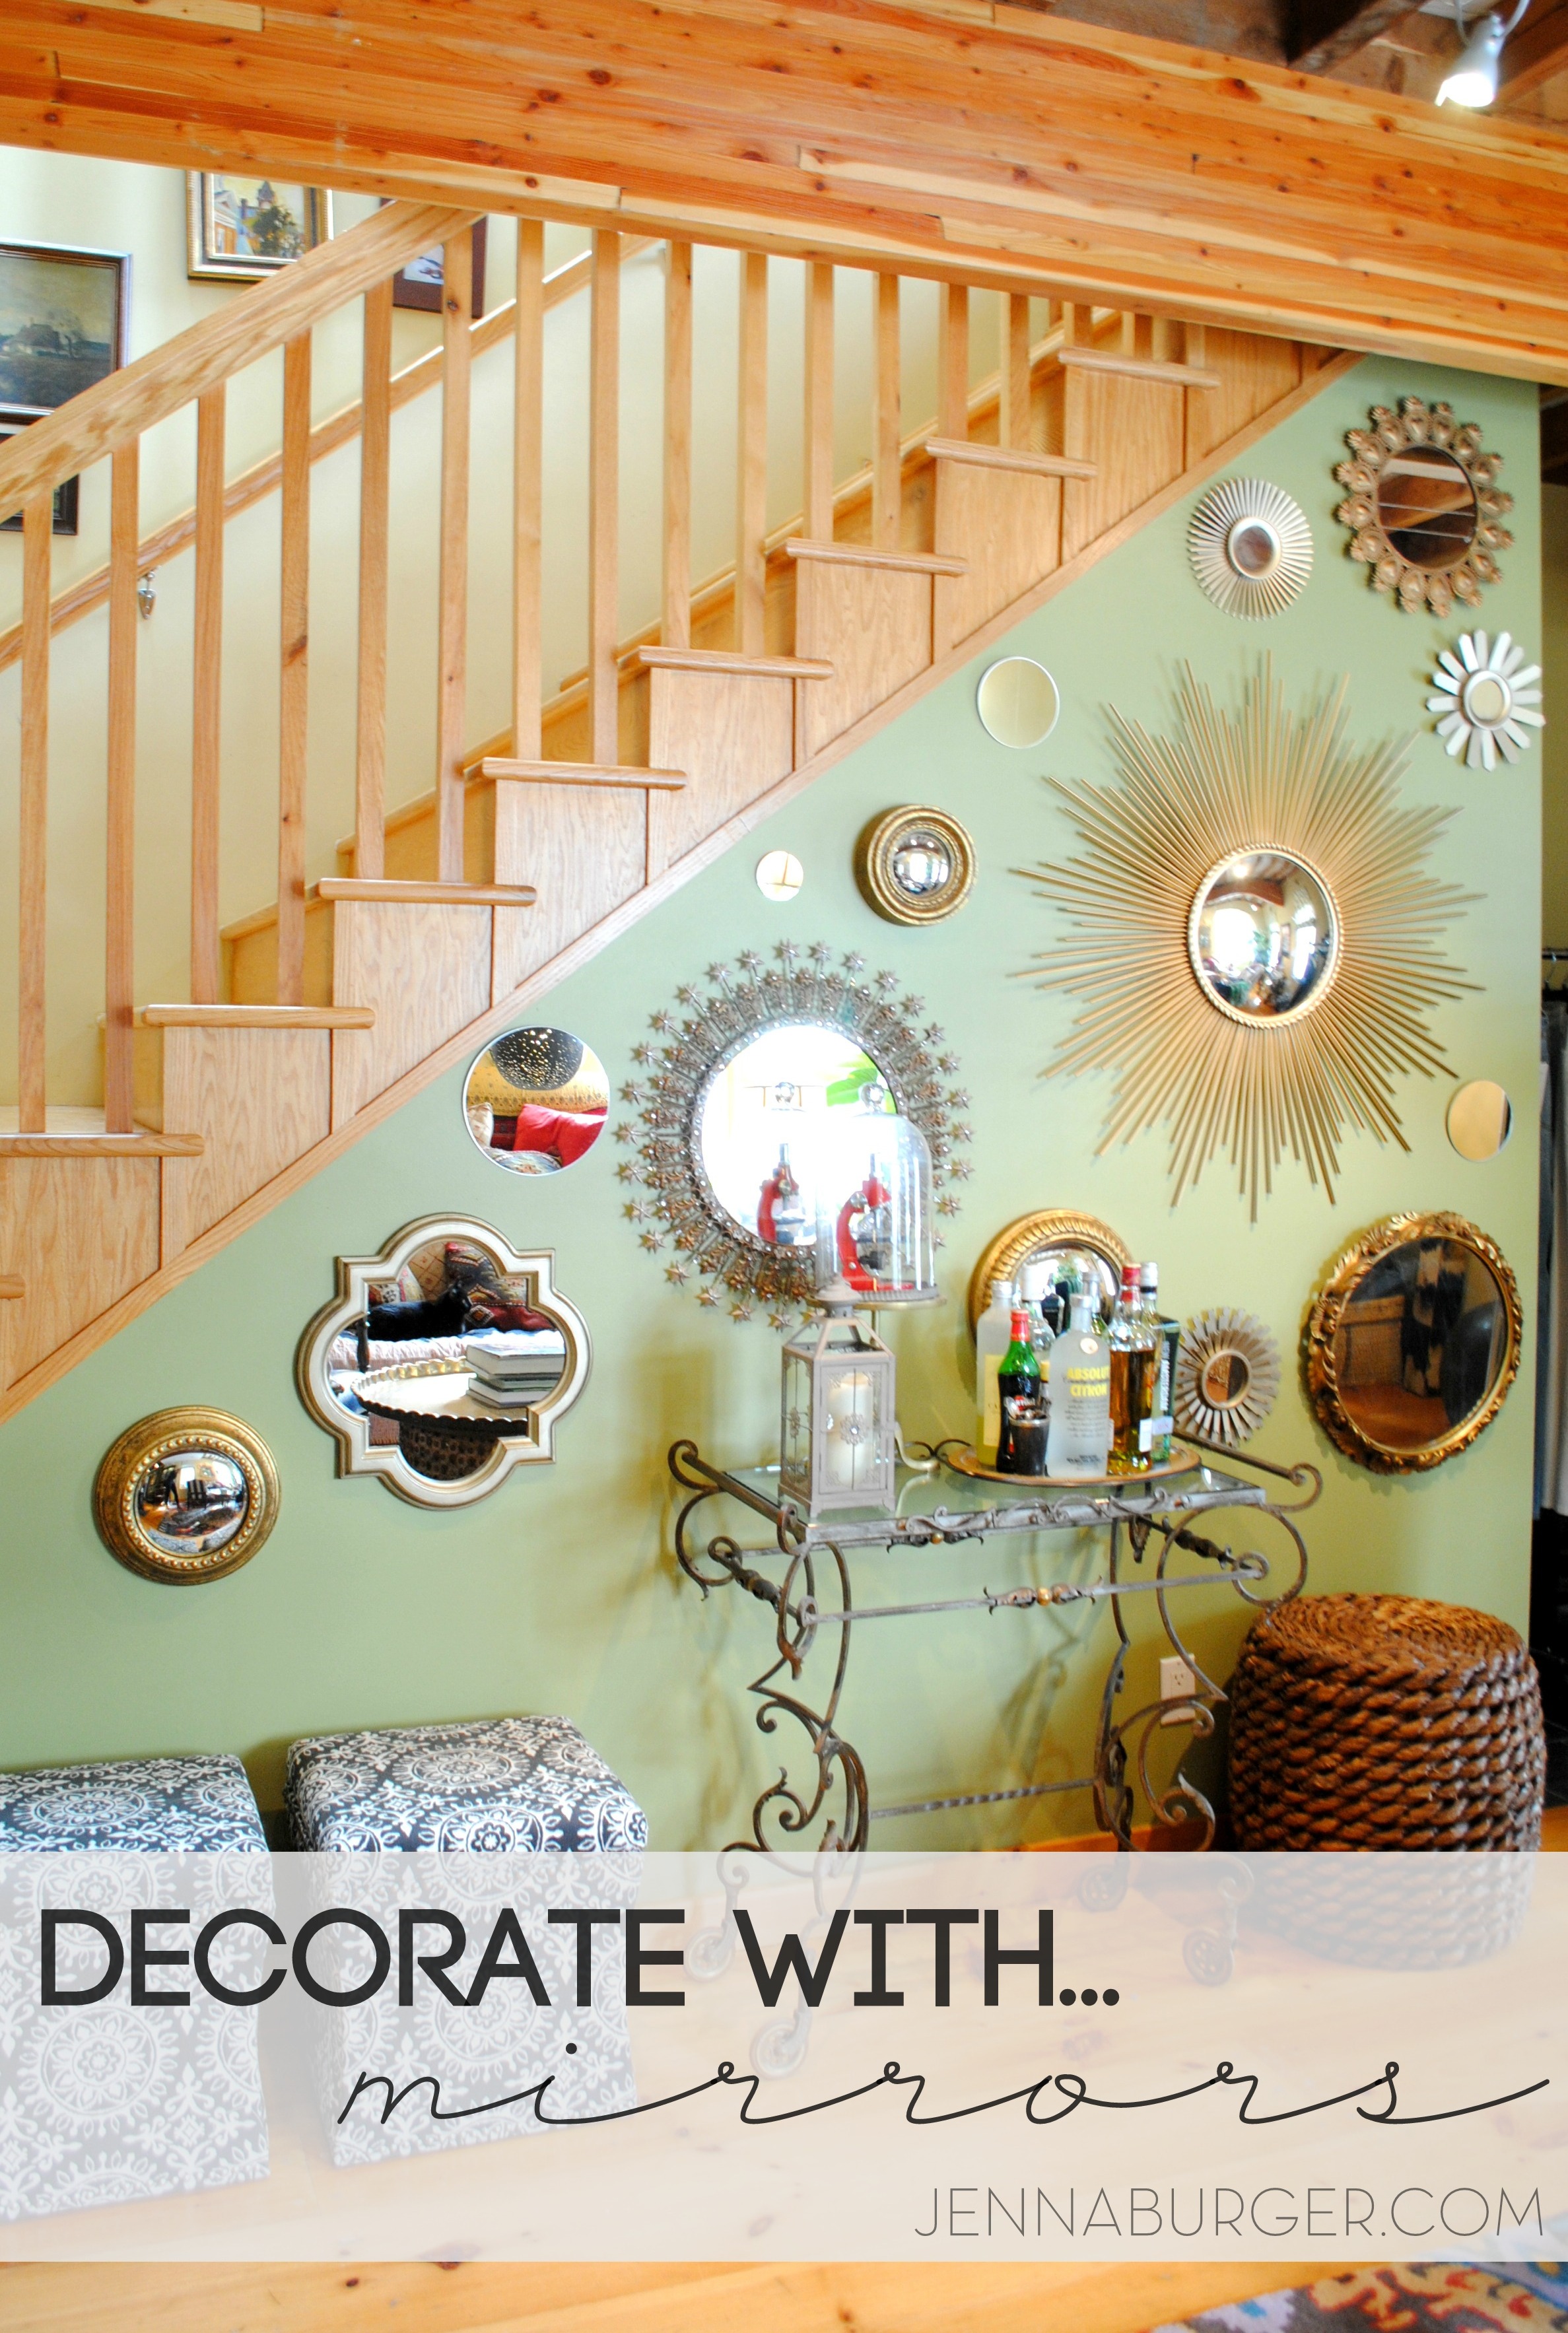
No matter the size, we’re always looking for ways to make a room appear bigger! Introducing mirrors – of any size and in any room – will give the illusion of a larger space, as well as providing visual interest + depth.
It often seems like with decorating, there are rules to follow to create a balanced, proportional space, but when you mix in mirrors, there really aren’t any rules to follow. Aside from being great wall “fillers”, mirrors can bring depth and light into a room.
Whether your desire is to display one large mirror, a grouping of the same mirrors, or a collage of different style mirrors, you truly will create a statement wall of art! Mirrors provide dimension and depth, and can be the focal point and conversation piece for any room.
INSPIRATION.
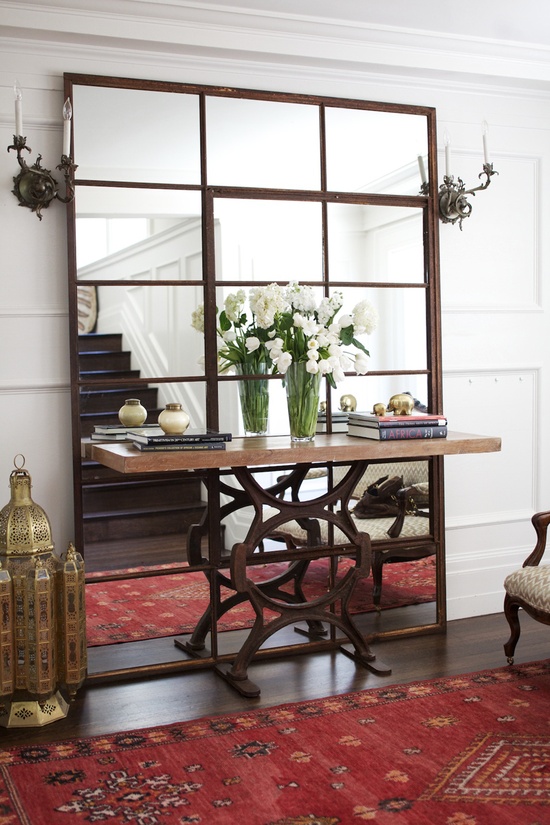
 Picture inspiration via Coco Cozy
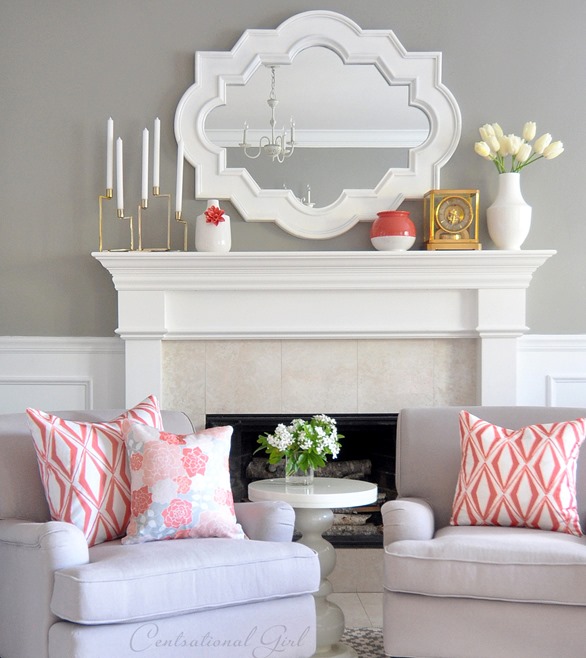
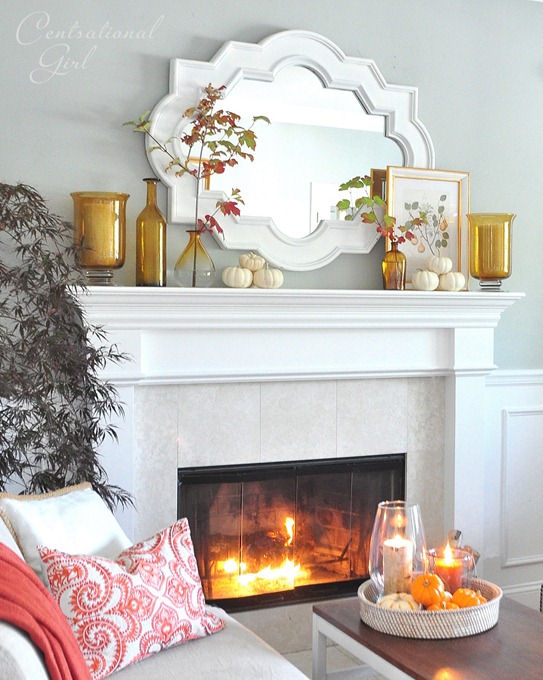
Kate of Centsational Girl always creates beautiful mantels for the seasons + holidays, but consistantly she will use her one large mirror as a backdrop to make a dramatic, bold statement…
 Picture inspiration via Rue Magazine
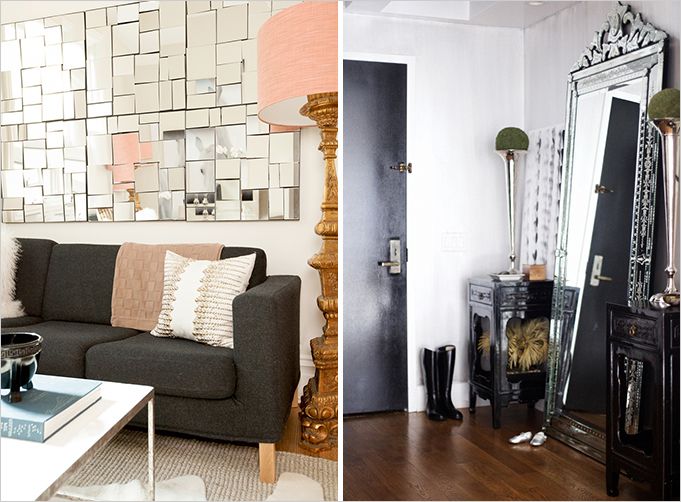 Picture inspiration via Rue Magazine
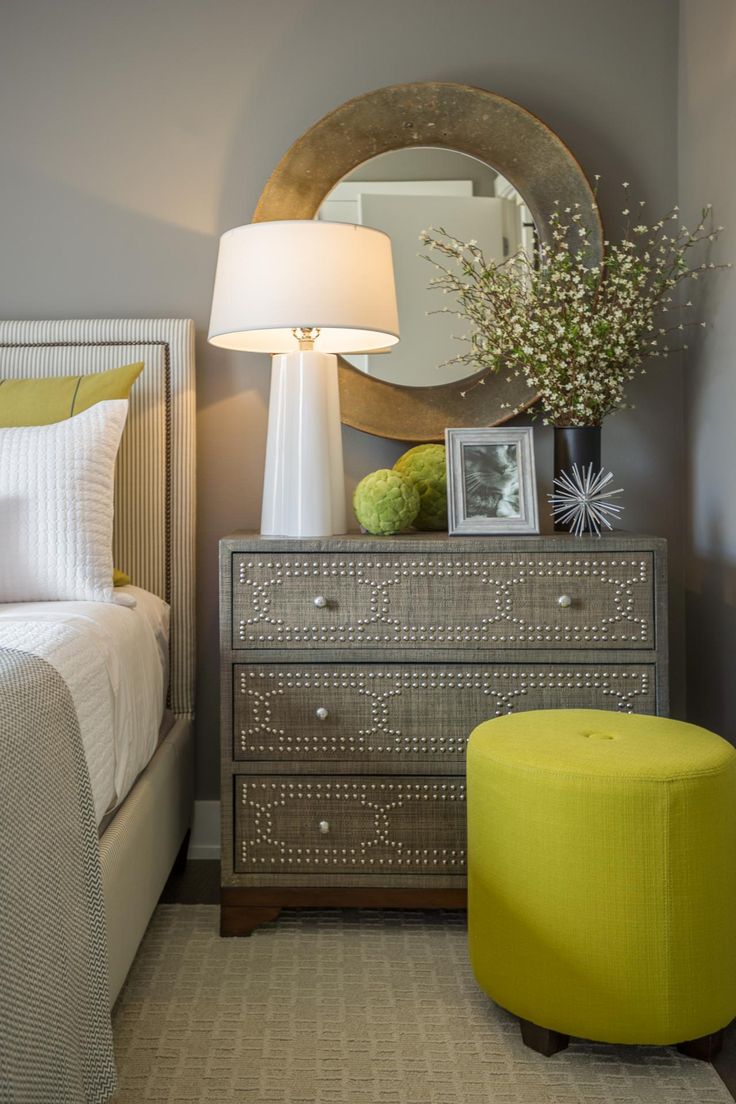 Large round mirror behind a nightstand via HGTV
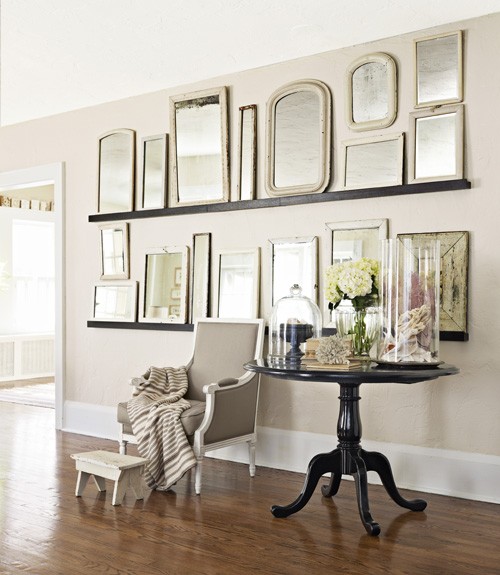
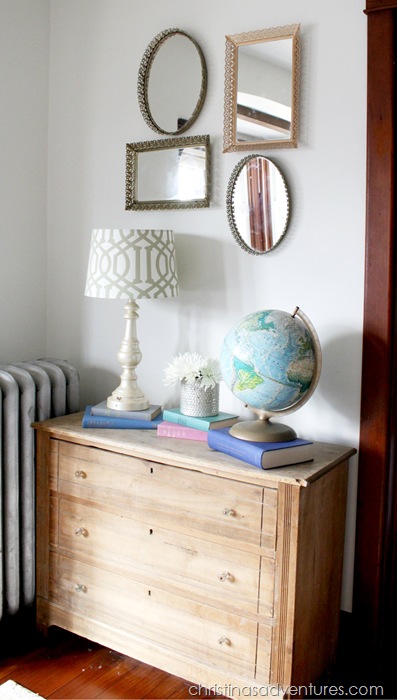 Simple vintage mirror wall by Christina’s Adventures
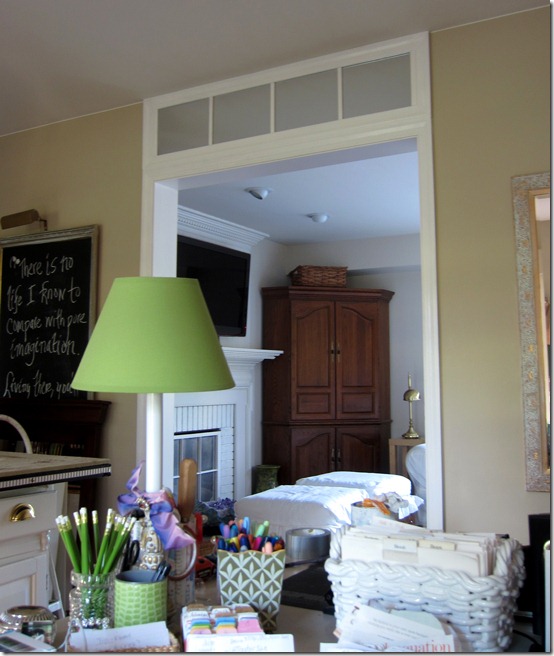
Check out how Diane of In My Own Style used a mirror to dress up a door opening… So clever!
TIPS.
> Check out some helpful tips + tricks for adding mirrors – big and small – into a space…
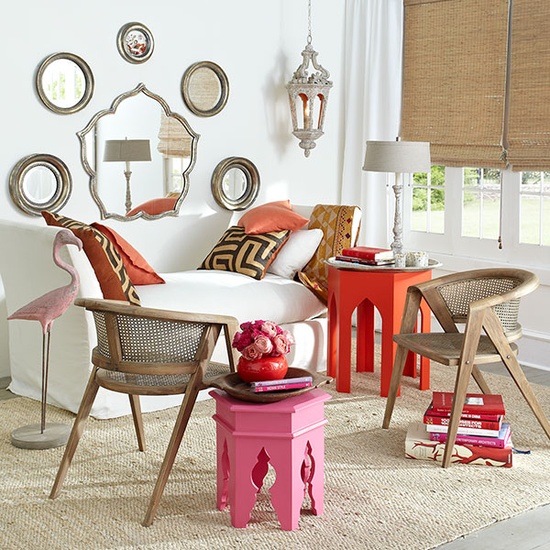
1 Forgo one large mirror, and instead group smaller mirrors in varying sizes to make a large, bold statement.
 Mirror collection by Wisteria
2 Unify a collection of mirrors by choosing a similar frame shape, size, or style.
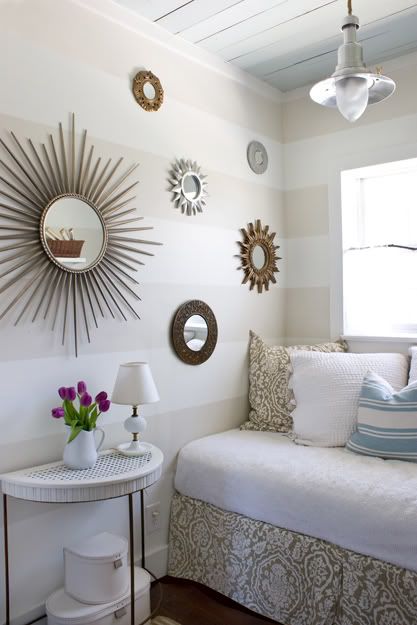 Varying sized sunburst mirrors in a bedroom by The Lettered Cottage
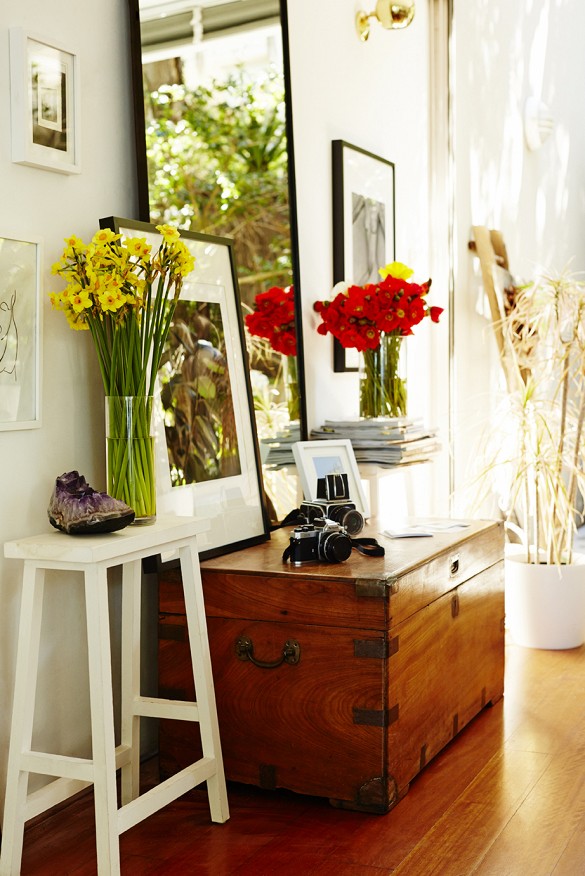
3 Use a mirror on the wall behind a tabletop vignette to create a backdrop, then add layers of accessories in front to give depth.
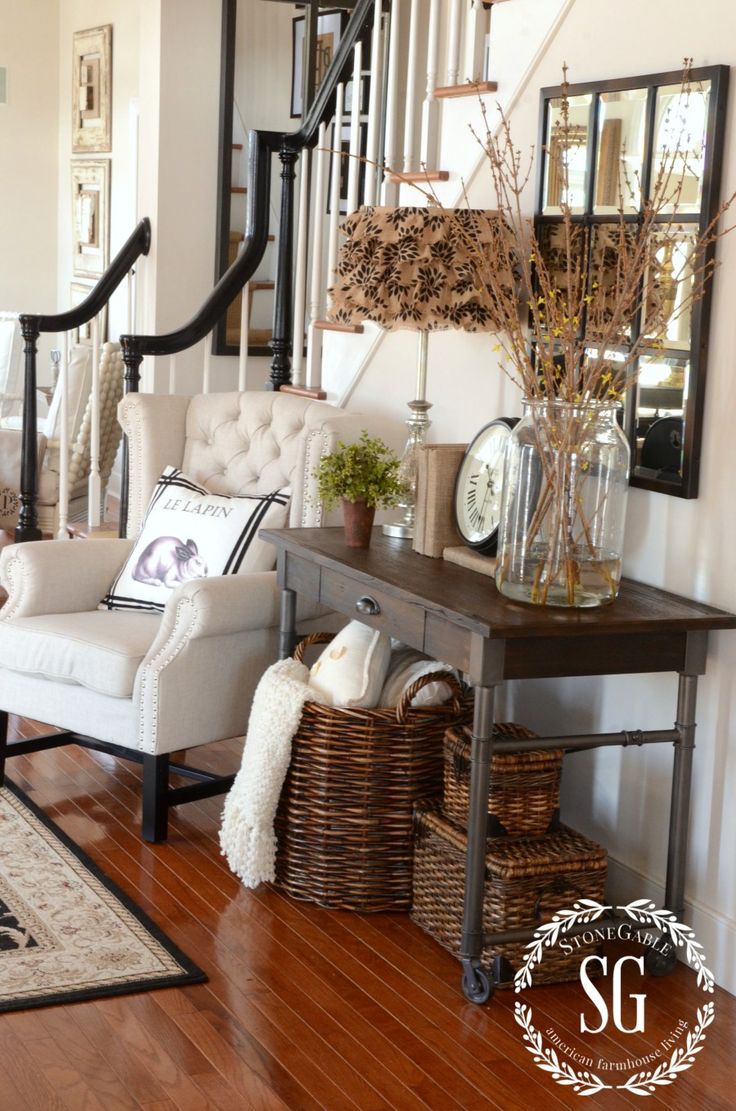 Tabletop vignette with mirror behind, by StoneGable
 This intricately detailed mirror by Wisteria makes a beautiful backdrop to a foyer tabletop entry.
4 Layer mirrors to make an architectural statement & to create the look of art. Add a decorative smaller mirror (or just a frame) over a larger simple mirror like this…
 Layered mirrors in this vignette by My Blessed Life
5 Don’t want to commit or put nails into he wall, try a large leaning mirror.
 Large leaning mirror on a table top vignette in the home of Vicki Lee, painter and founder of lifestyle brand TheTwentyTwo, featured on My Domaine
 Leaning mirror with a rustic reclaimed wood frame in the living room of YES Spaces
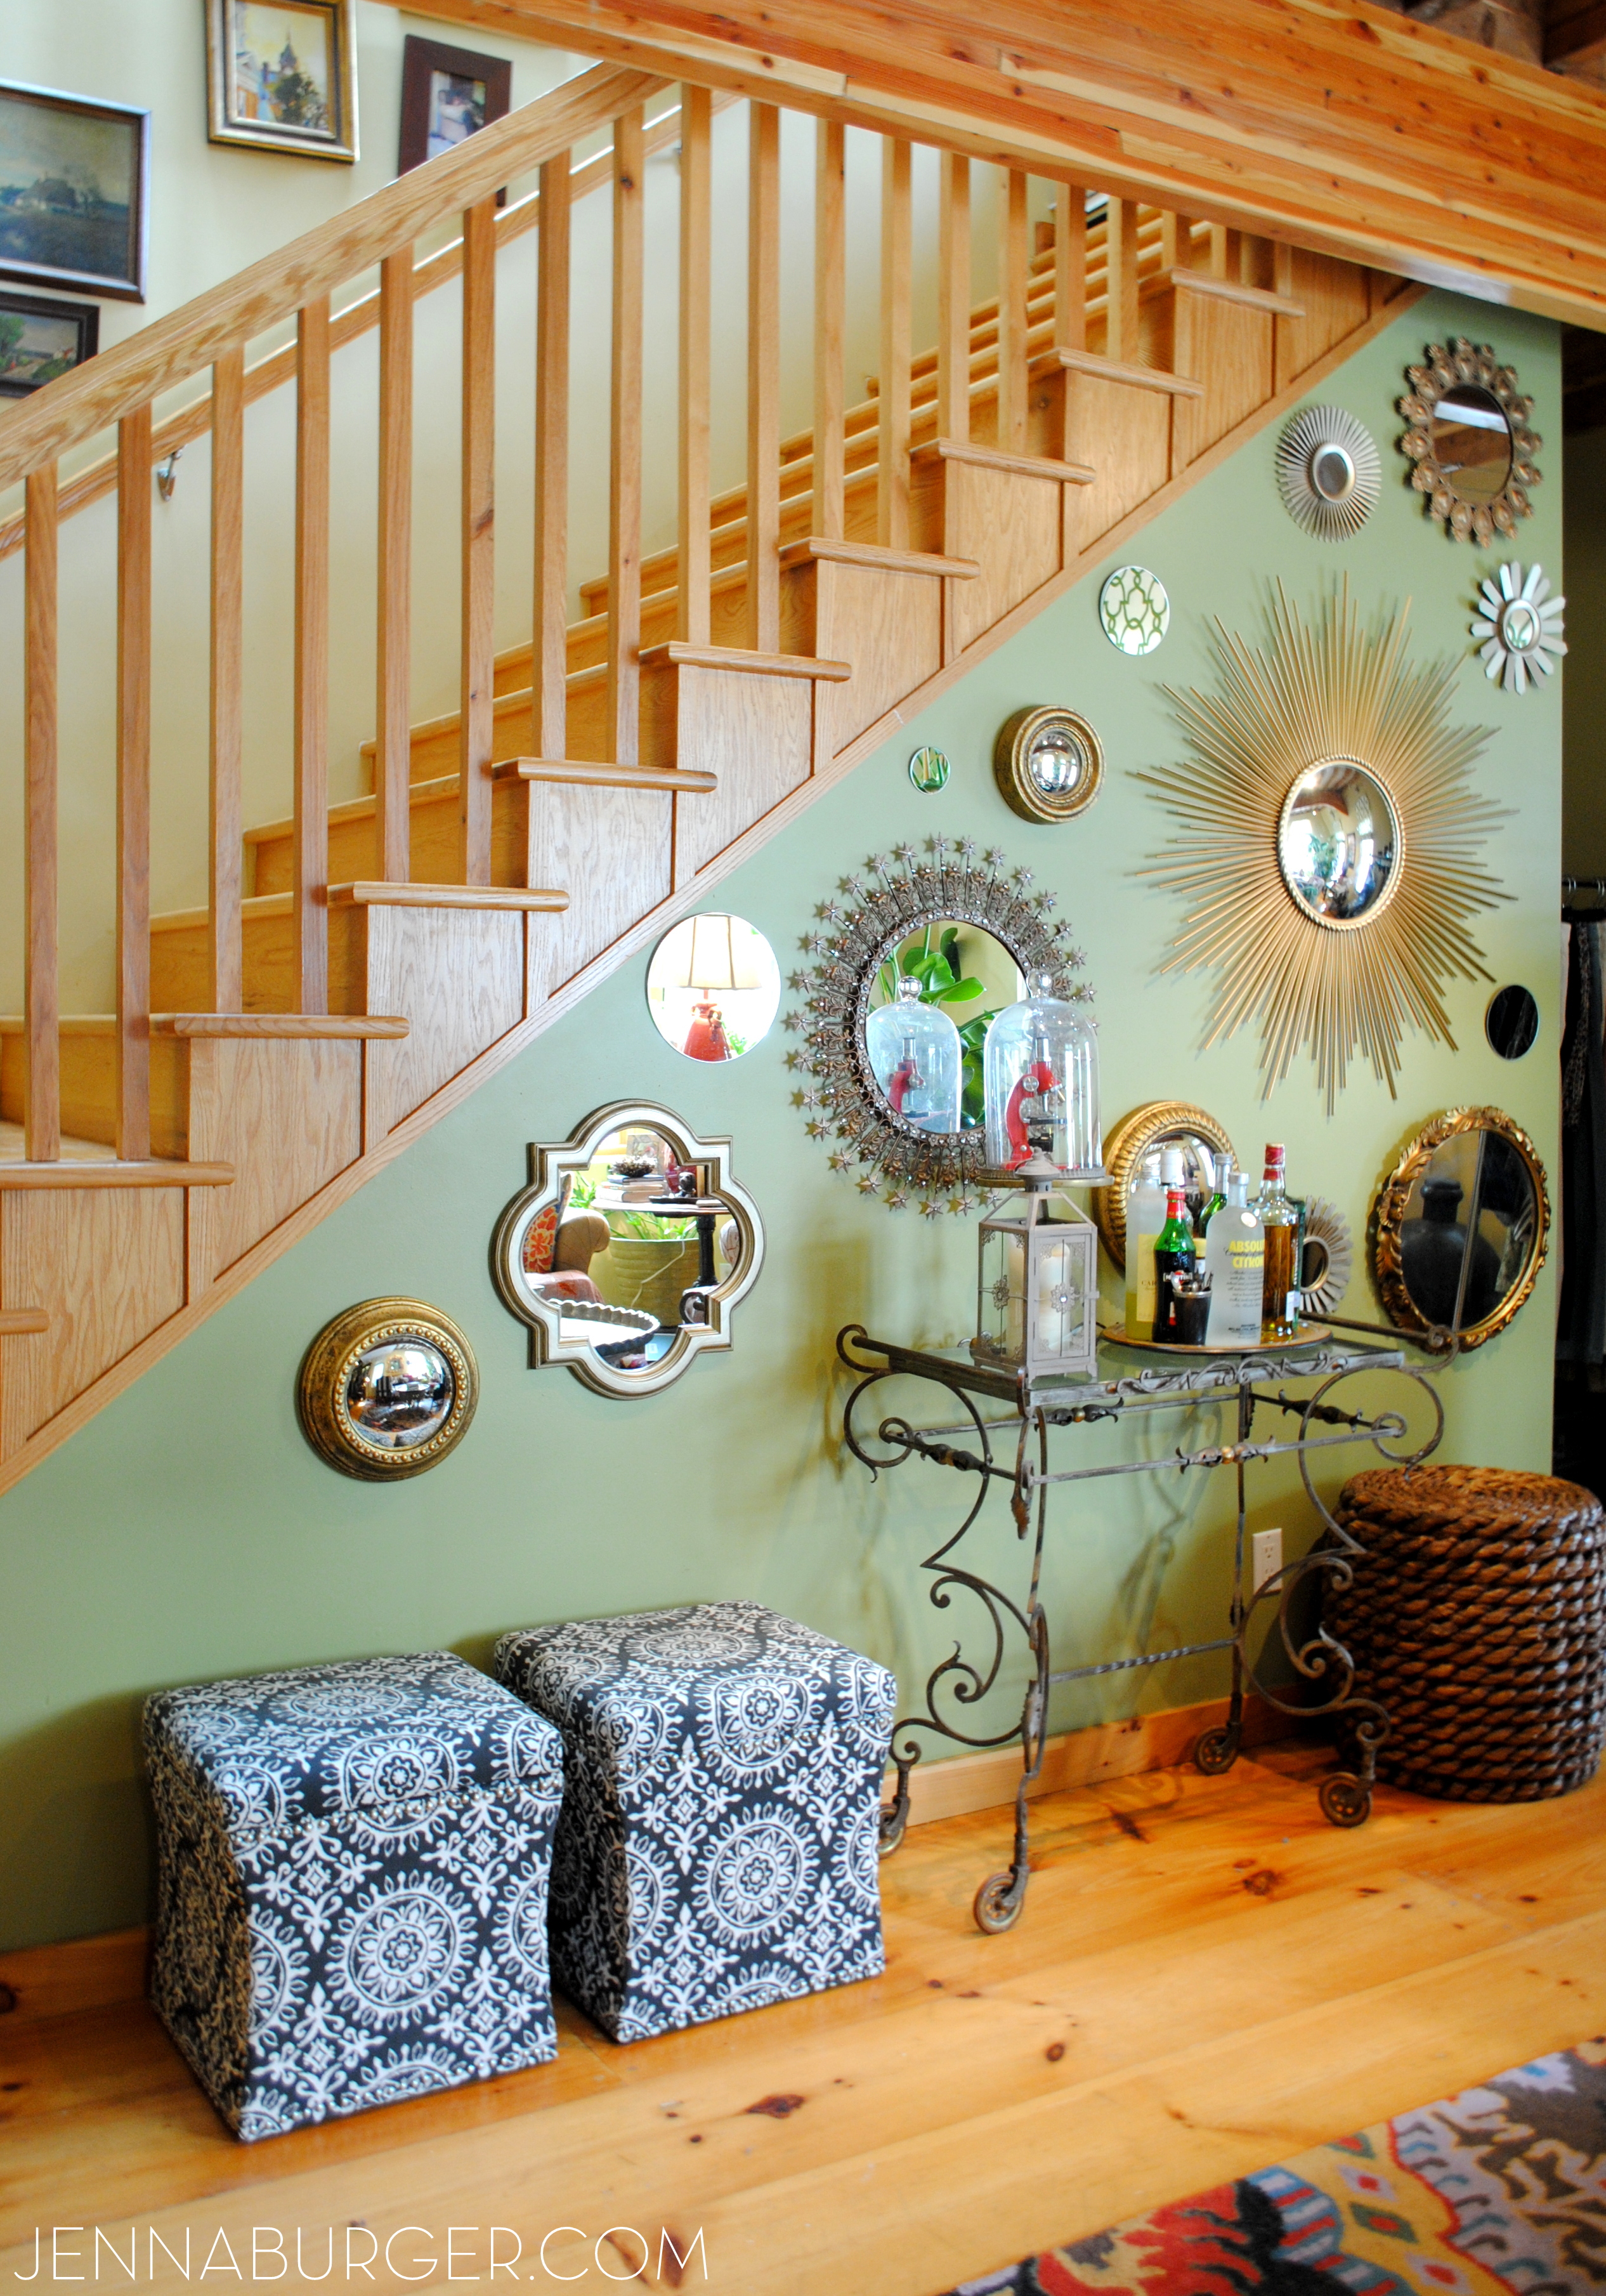
6 Forgo pictures by add a collage or wall of mirrors to make a bold, unexpected composition.
Back in the day, my grandmother had a wall of mirrors in her living room and it looked SO dated… but like they say “everything old is new again” and the wall of mirrors has made the return, but with a twist. Here are 3 ideas…
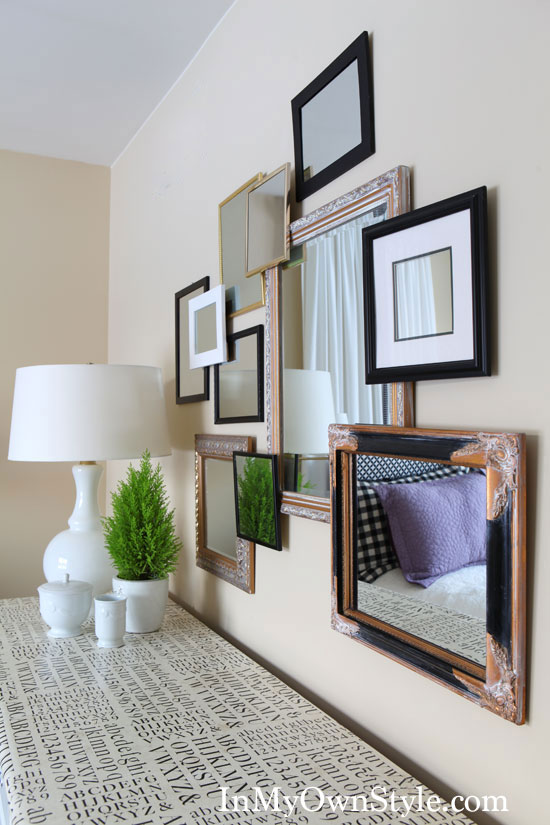 Diane of In My Own Style displays a beautiful collection of mirrors over a dresser
 Different mirrors all in the same color (gorgeous kelly green) by Dimples & Tangles
 Check out the house tour of this homes kitchen + living room!
FABULOUS FINDS.
 3 FAVORITES / starburst mirror / jaipur mirror / gothic mirror
I hope you’re inspired with how to DECORATE WITH… mirrors! So much inspiration. So many ideas.

![DIY Tutorial: Honeycomb shaped wall hooks [inspiration for many other fun + functional wall storage ideas] Tutorial by Jenna Burger Design www.jennaburger.com](https://www.jennaburger.com/wp-content/uploads/2015/01/41.jpg)
![DIY Tutorial: Honeycomb shaped wall hooks [inspiration for many other fun + functional wall storage ideas] Tutorial by Jenna Burger Design www.jennaburger.com](https://www.jennaburger.com/wp-content/uploads/2015/01/2B.jpg)
![DIY Tutorial: Honeycomb shaped wall hooks [inspiration for many other fun + functional wall storage ideas] Tutorial by Jenna Burger Design www.jennaburger.com](https://www.jennaburger.com/wp-content/uploads/2015/01/collage2.jpg)
![DIY Tutorial: Honeycomb shaped wall hooks [inspiration for many other fun + functional wall storage ideas] Tutorial by Jenna Burger Design www.jennaburger.com](https://www.jennaburger.com/wp-content/uploads/2015/01/DIY_HexagonCoatRack-001.jpg)
![DIY Tutorial: Honeycomb shaped wall hooks [inspiration for many other fun + functional wall storage ideas] Tutorial by Jenna Burger Design www.jennaburger.com](https://www.jennaburger.com/wp-content/uploads/2015/01/collage.jpg)
![DIY Tutorial: Honeycomb shaped wall hooks [inspiration for many other fun + functional wall storage ideas] Tutorial by Jenna Burger Design www.jennaburger.com](https://www.jennaburger.com/wp-content/uploads/2015/01/DIY_HexagonCoatRack-002.jpg)
![DIY Tutorial: Honeycomb shaped wall hooks [inspiration for many other fun + functional wall storage ideas] Tutorial by Jenna Burger Design www.jennaburger.com](https://www.jennaburger.com/wp-content/uploads/2015/01/192.jpg)
![DIY Tutorial: Honeycomb shaped wall hooks [inspiration for many other fun + functional wall storage ideas] Tutorial by Jenna Burger Design www.jennaburger.com](https://www.jennaburger.com/wp-content/uploads/2015/01/181.jpg)
![DIY Tutorial: Honeycomb shaped wall hooks [inspiration for many other fun + functional wall storage ideas] Tutorial by Jenna Burger Design www.jennaburger.com](https://www.jennaburger.com/wp-content/uploads/2015/01/171.jpg)
![DIY Tutorial: Honeycomb shaped wall hooks [inspiration for many other fun + functional wall storage ideas] Tutorial by Jenna Burger Design www.jennaburger.com](https://www.jennaburger.com/wp-content/uploads/2015/01/161.jpg)
![DIY Tutorial: Honeycomb shaped wall hooks [inspiration for many other fun + functional wall storage ideas] Tutorial by Jenna Burger Design www.jennaburger.com](https://www.jennaburger.com/wp-content/uploads/2015/01/DIY_HexagonCoatRack.jpg)
![DIY Tutorial: Honeycomb shaped wall hooks [inspiration for many other fun + functional wall storage ideas] Tutorial by Jenna Burger Design www.jennaburger.com](https://www.jennaburger.com/wp-content/uploads/2015/01/151.jpg)
![DIY Tutorial: Honeycomb shaped wall hooks [inspiration for many other fun + functional wall storage ideas] Tutorial by Jenna Burger Design www.jennaburger.com](https://www.jennaburger.com/wp-content/uploads/2015/01/102.jpg)
![DIY Tutorial: Honeycomb shaped wall hooks [inspiration for many other fun + functional wall storage ideas] Tutorial by Jenna Burger Design www.jennaburger.com](https://www.jennaburger.com/wp-content/uploads/2015/01/121.jpg)
![DIY Tutorial: Honeycomb shaped wall hooks [inspiration for many other fun + functional wall storage ideas] Tutorial by Jenna Burger Design www.jennaburger.com](https://www.jennaburger.com/wp-content/uploads/2015/01/132.jpg)
![DIY Tutorial: Honeycomb shaped wall hooks [inspiration for many other fun + functional wall storage ideas] Tutorial by Jenna Burger Design www.jennaburger.com](https://www.jennaburger.com/wp-content/uploads/2015/01/21a.jpg)
![DIY Tutorial: Honeycomb shaped wall hooks [inspiration for many other fun + functional wall storage ideas] Tutorial by Jenna Burger Design www.jennaburger.com](https://www.jennaburger.com/wp-content/uploads/2015/01/3a.jpg)
![DIY Tutorial: Honeycomb shaped wall hooks [inspiration for many other fun + functional wall storage ideas] Tutorial by Jenna Burger Design www.jennaburger.com](https://www.jennaburger.com/wp-content/uploads/2015/01/9a.jpg)
![DIY Tutorial: Honeycomb shaped wall hooks [inspiration for many other fun + functional wall storage ideas] Tutorial by Jenna Burger Design www.jennaburger.com](https://jb.spacityhosting.com/wp-content/uploads/2015/01/110.jpg)
![DIY Tutorial: Honeycomb shaped wall hooks [inspiration for many other fun + functional wall storage ideas] Tutorial by Jenna Burger Design www.jennaburger.com](https://www.jennaburger.com/wp-content/uploads/2015/01/7a.jpg)
![DIY Tutorial: Honeycomb shaped wall hooks [inspiration for many other fun + functional wall storage ideas] Tutorial by Jenna Burger Design www.jennaburger.com](https://www.jennaburger.com/wp-content/uploads/2015/01/6a1.jpg)
![DIY Tutorial: Honeycomb shaped wall hooks [inspiration for many other fun + functional wall storage ideas] Tutorial by Jenna Burger Design www.jennaburger.com](https://www.jennaburger.com/wp-content/uploads/2015/01/before-after.jpg)

![DIY Tutorial: Honeycomb shaped wall hooks [inspiration for many other fun + functional wall storage ideas] Tutorial by Jenna Burger Design www.jennaburger.com](https://www.jennaburger.com/wp-content/uploads/2015/01/overall-collage.jpg)


