
Tag: Wallpaper

Vibrant Wallpaper in the Foyer

As the cold days have continued (it’s still feels like winter even though it’s been officially spring for almost a month), we’ve slowly been making changes to our new-to-us brick ranch fixer upper. I actually can confidently say that we’ve been making our envisioned updates faster than I’ve had time to share on the blog… life has admittedly been full.

Right after Christmas – the day after to be exact – I took the plunge into updating the foyer with a vibrant new wallpaper.

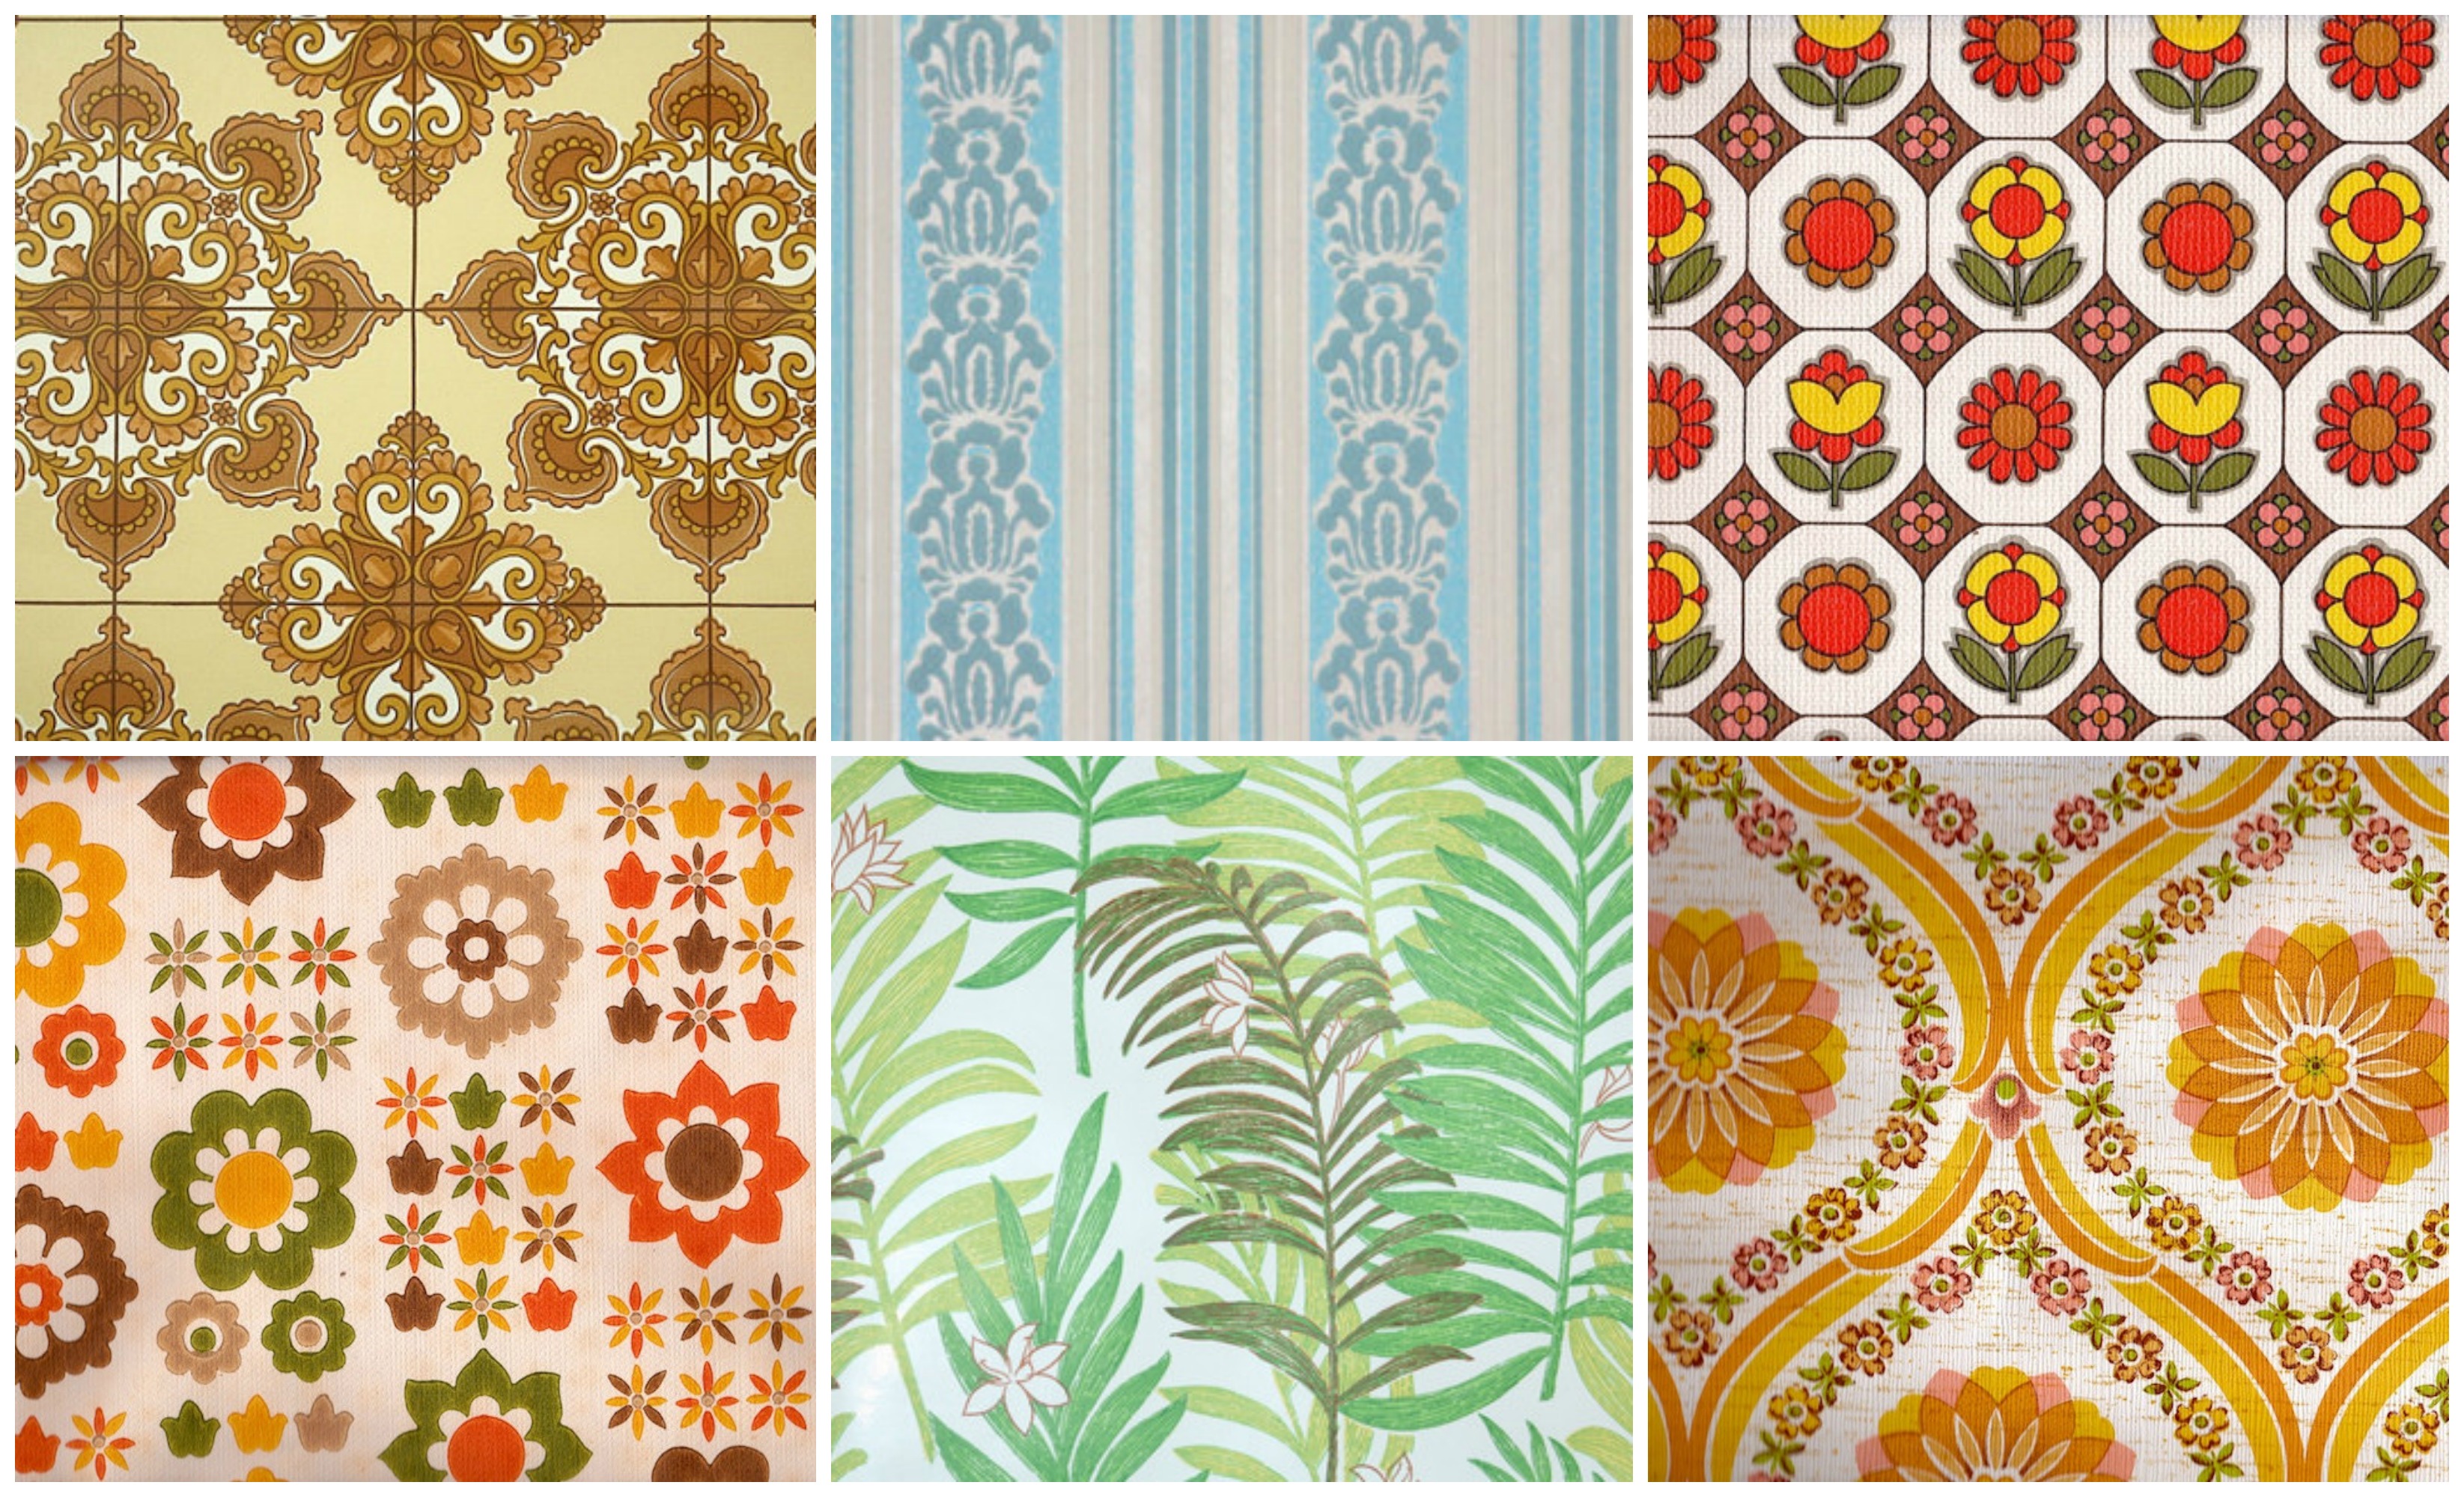
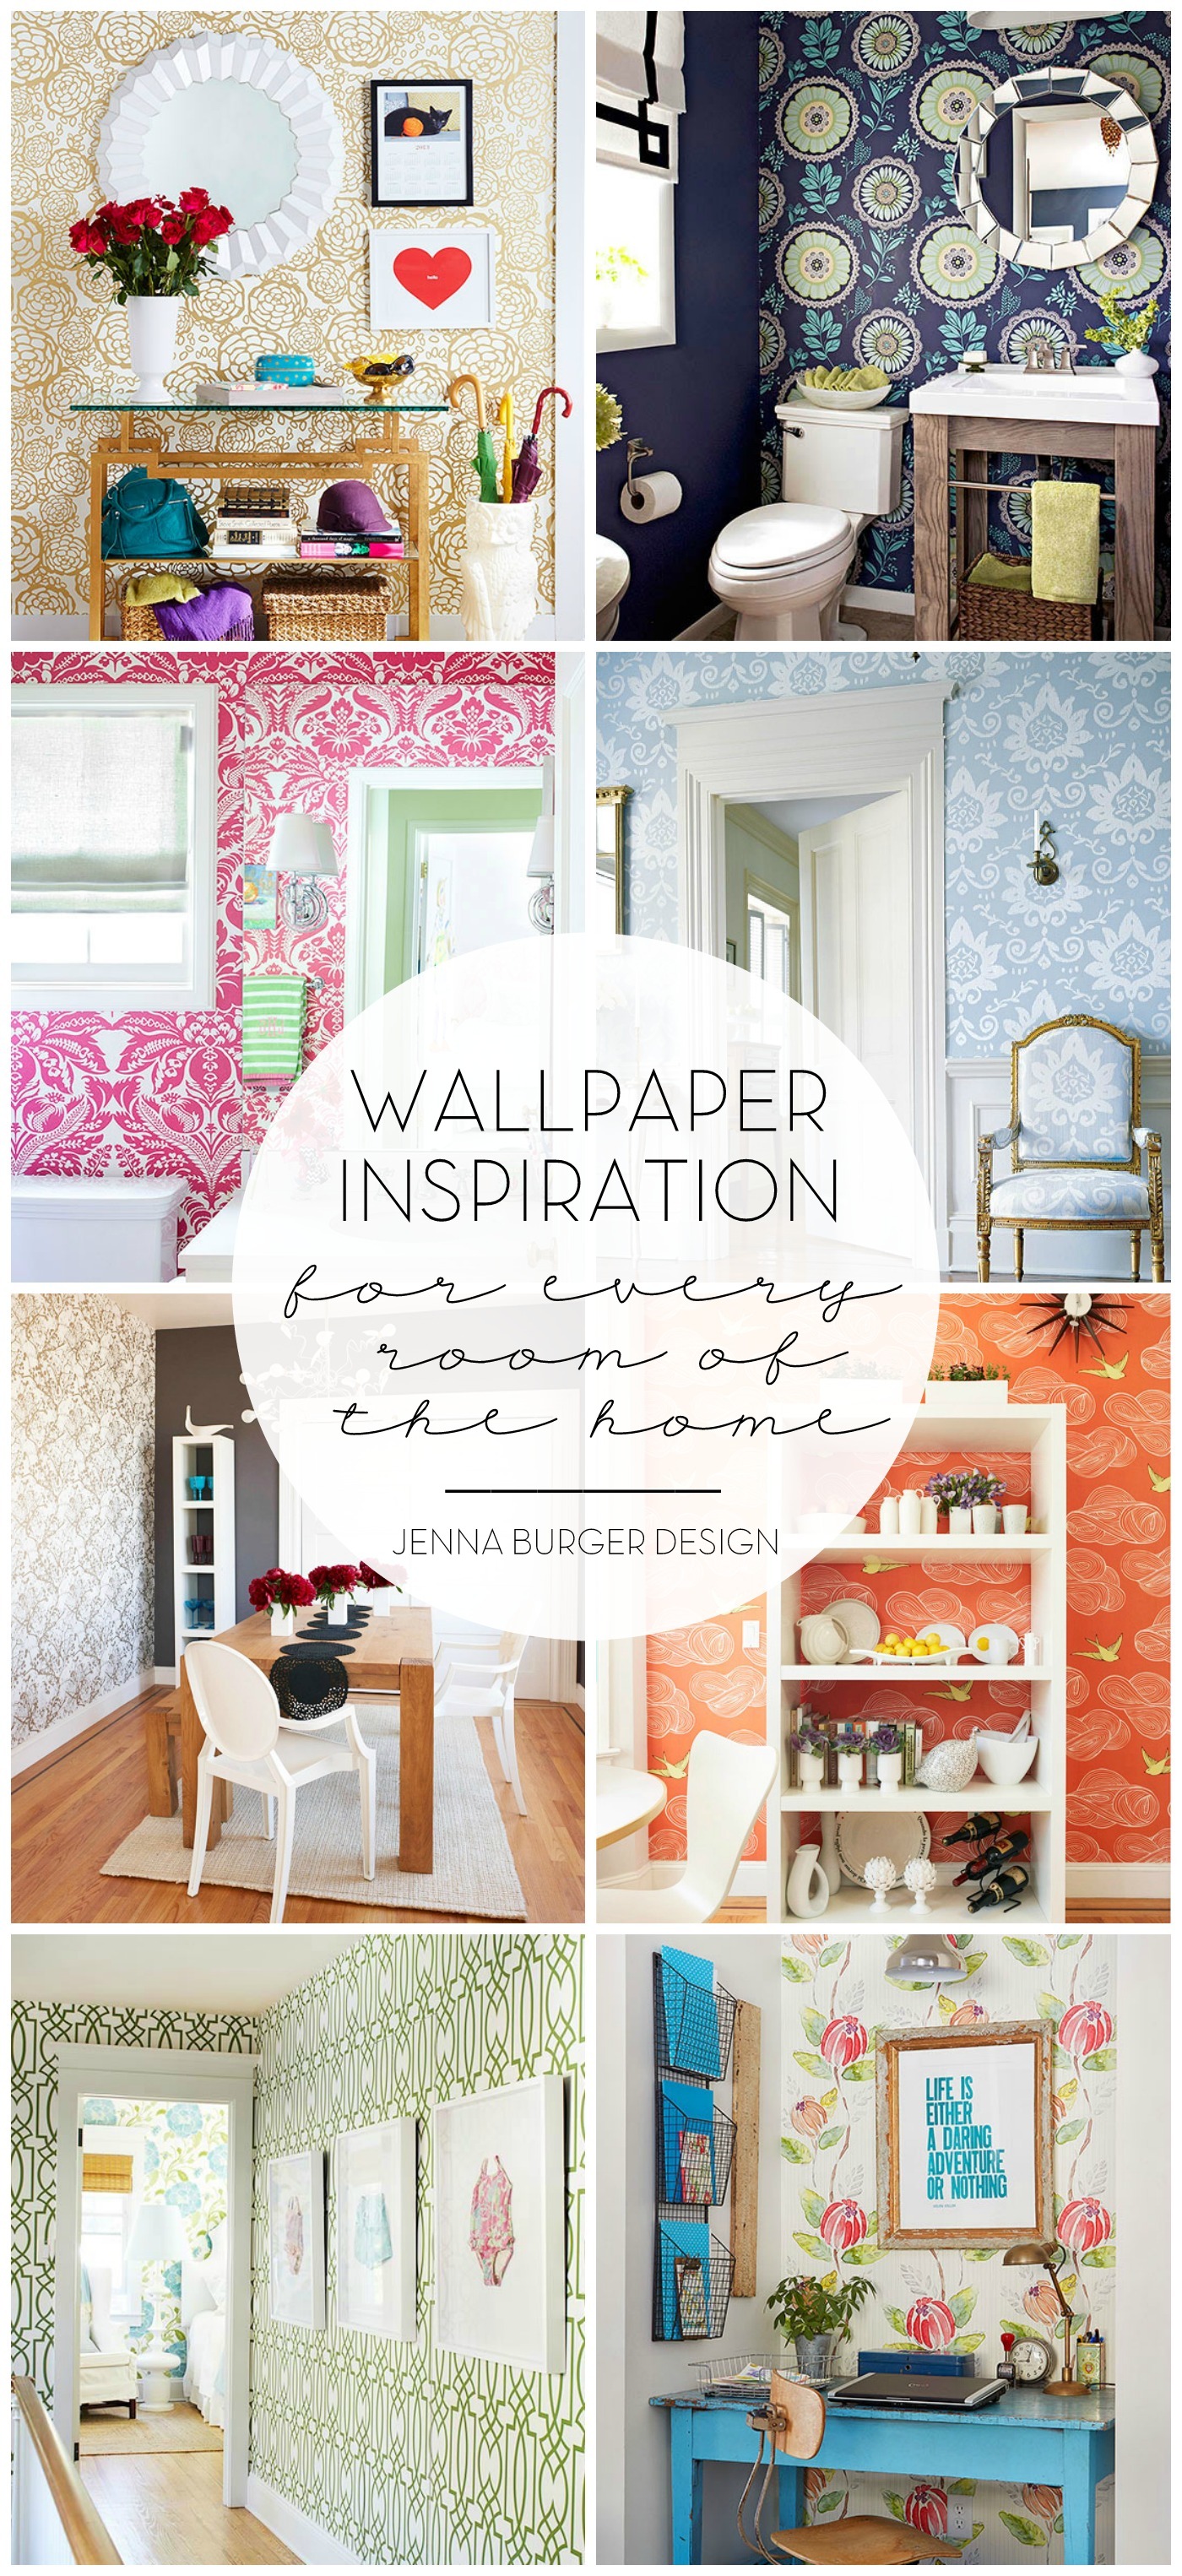
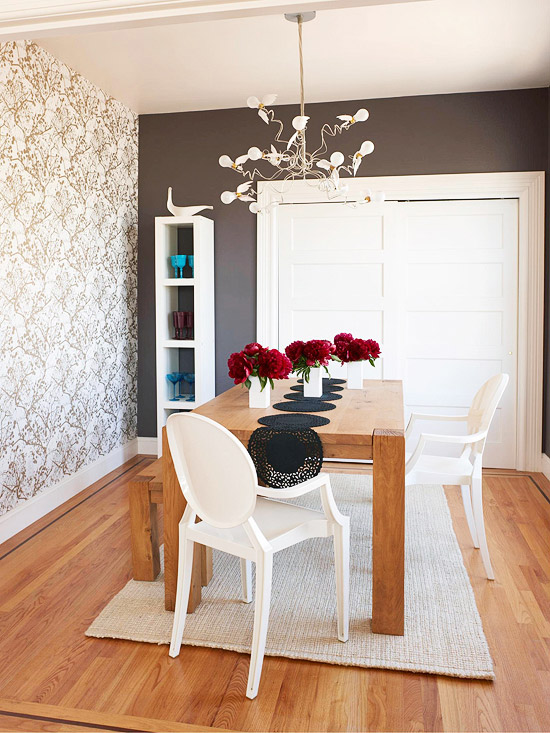
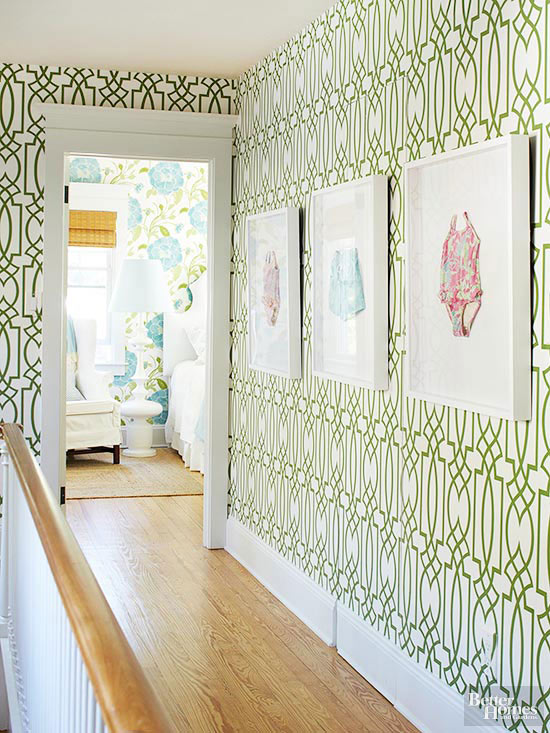
I am wallpaper obsessed and would love to adorn every wall with a colorful pattern. Thankfully in reality, I know where to draw the line and I know how to balance a dramatic wallpaper with a more subtle surrounding.

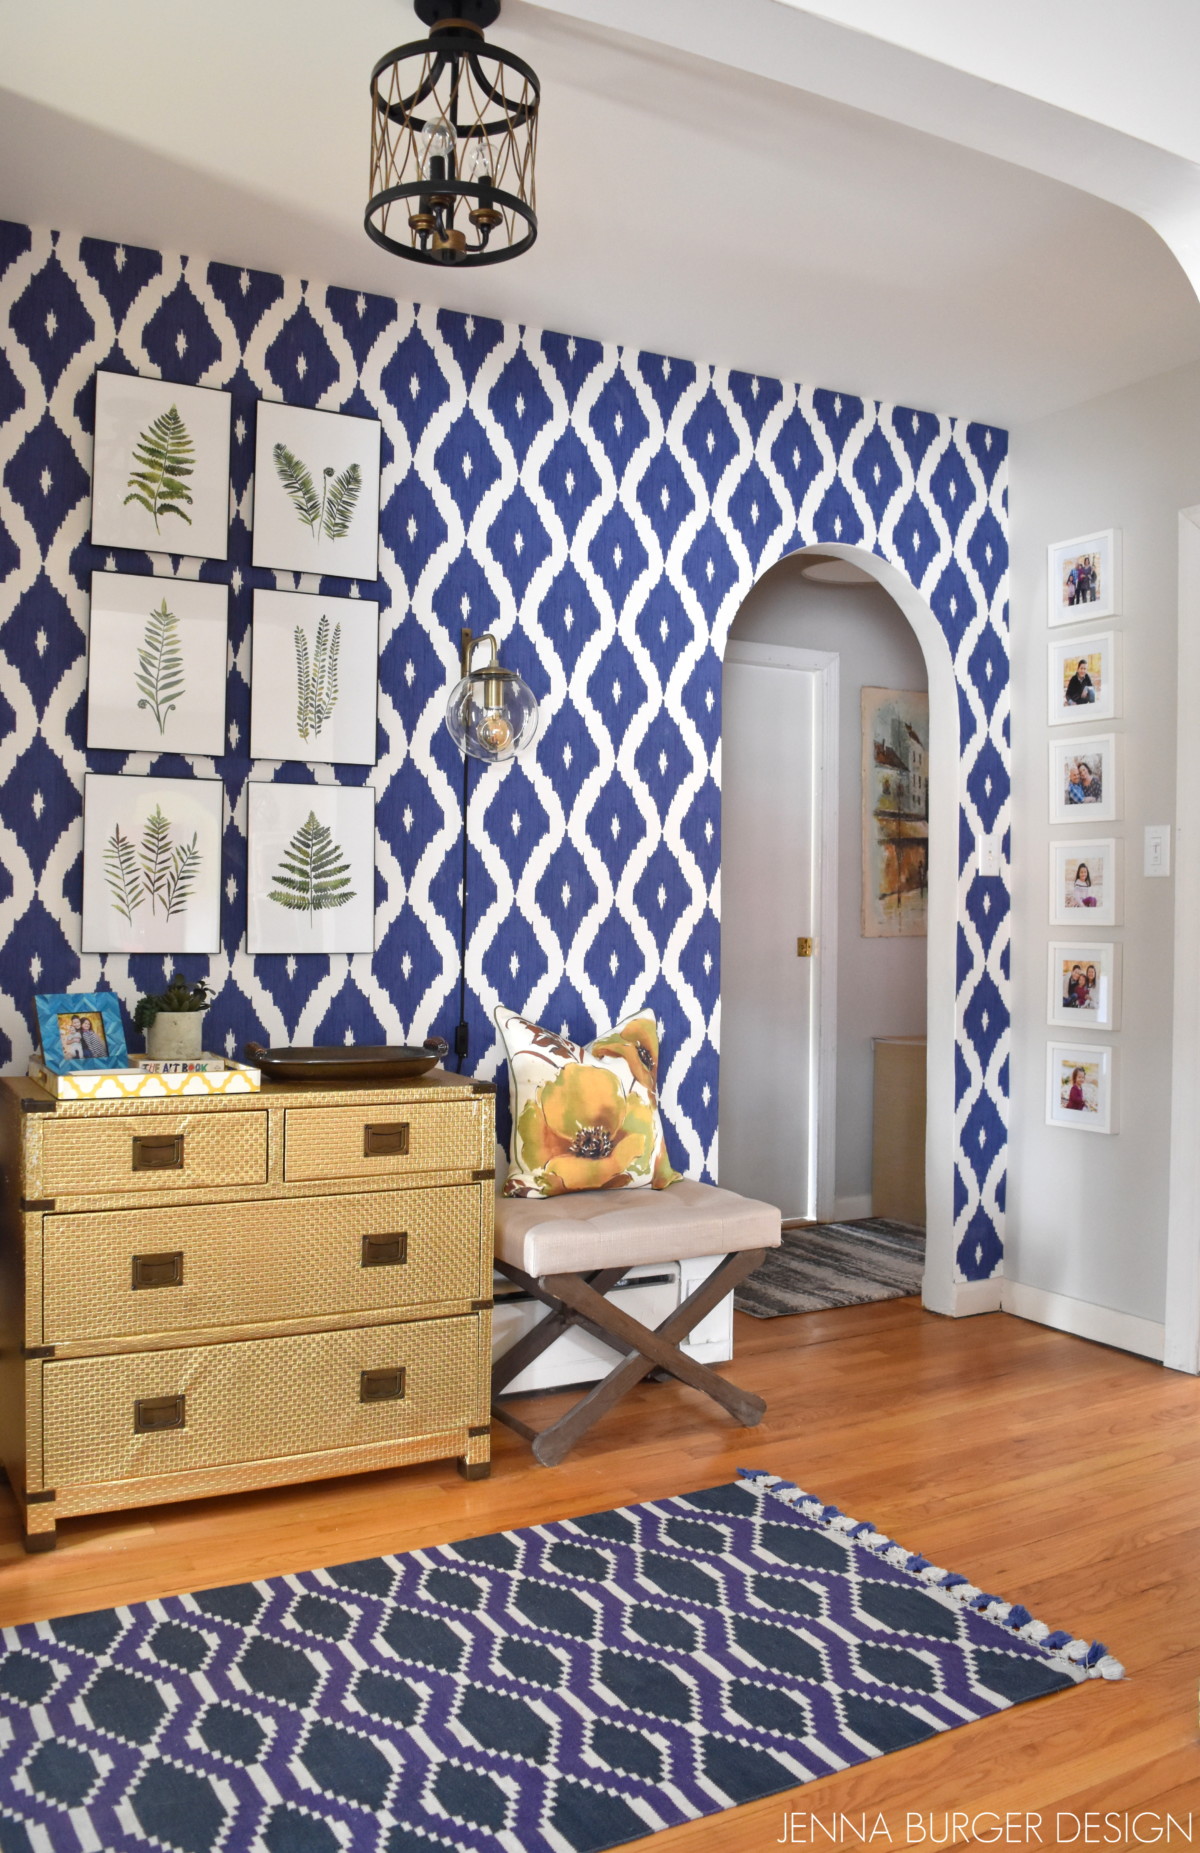
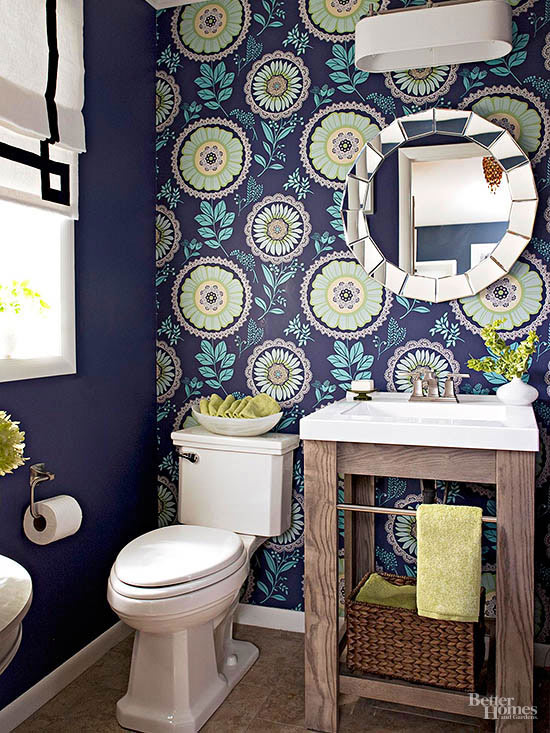
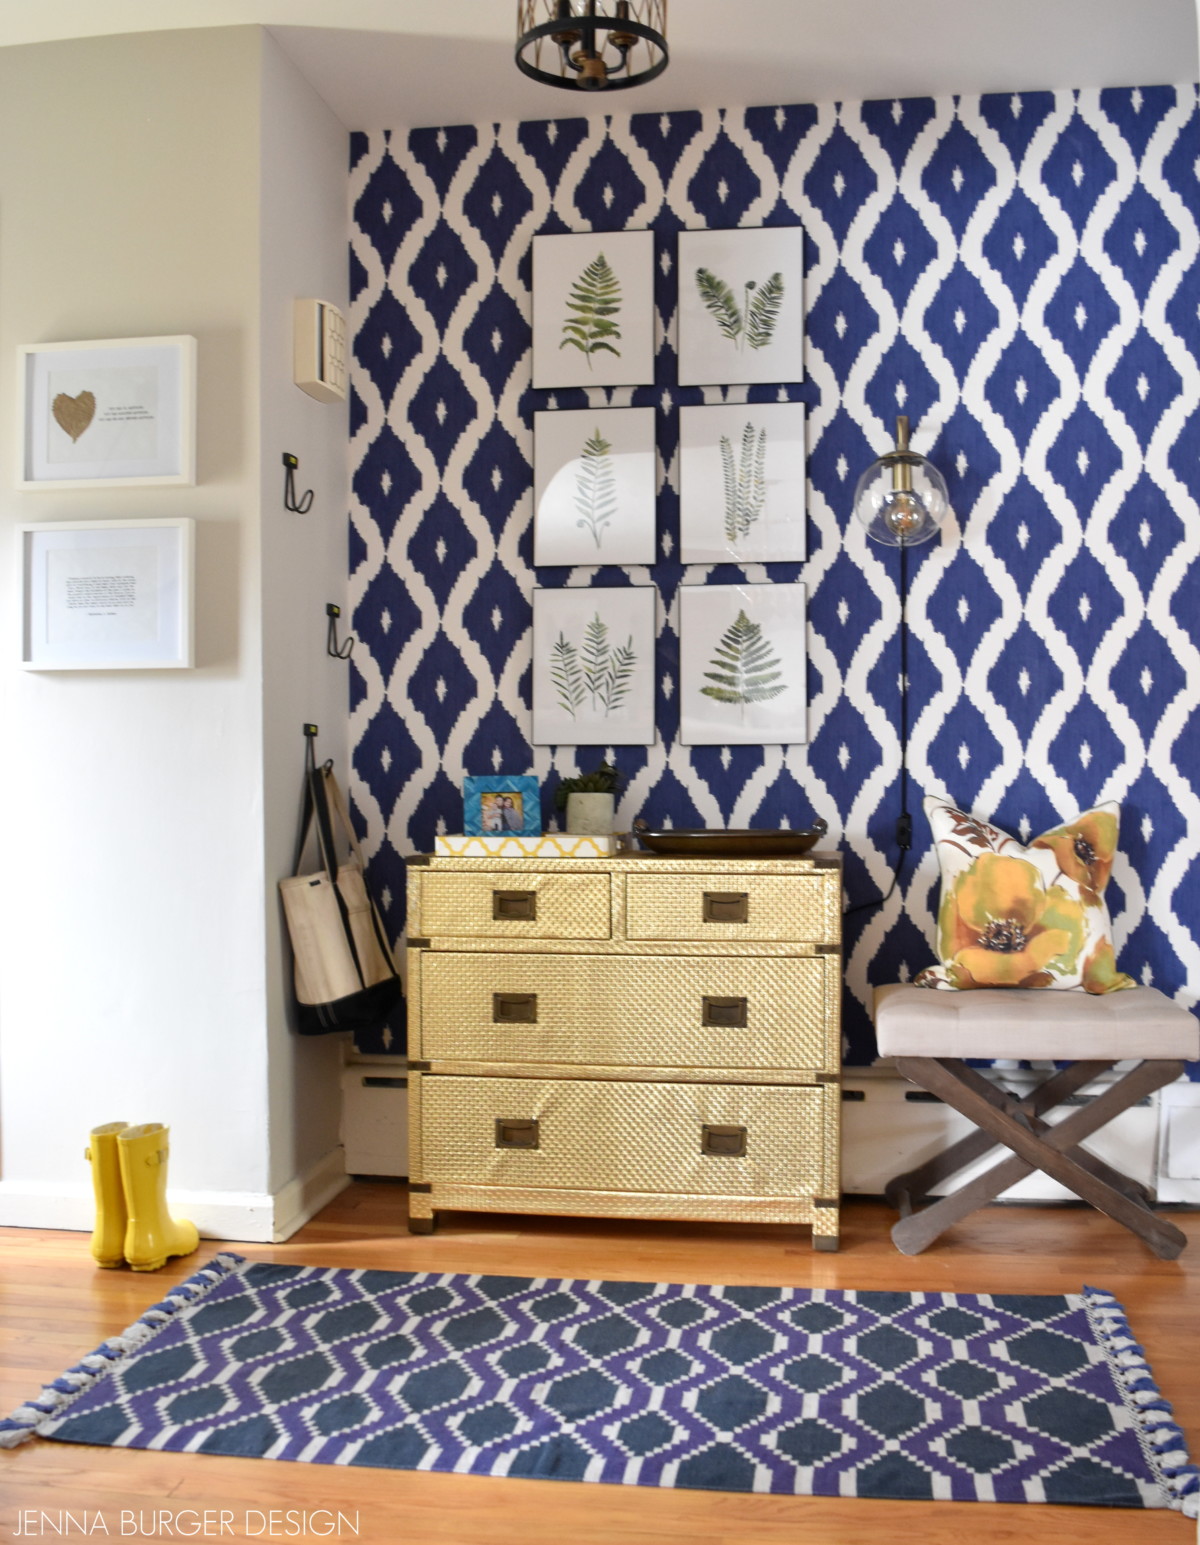
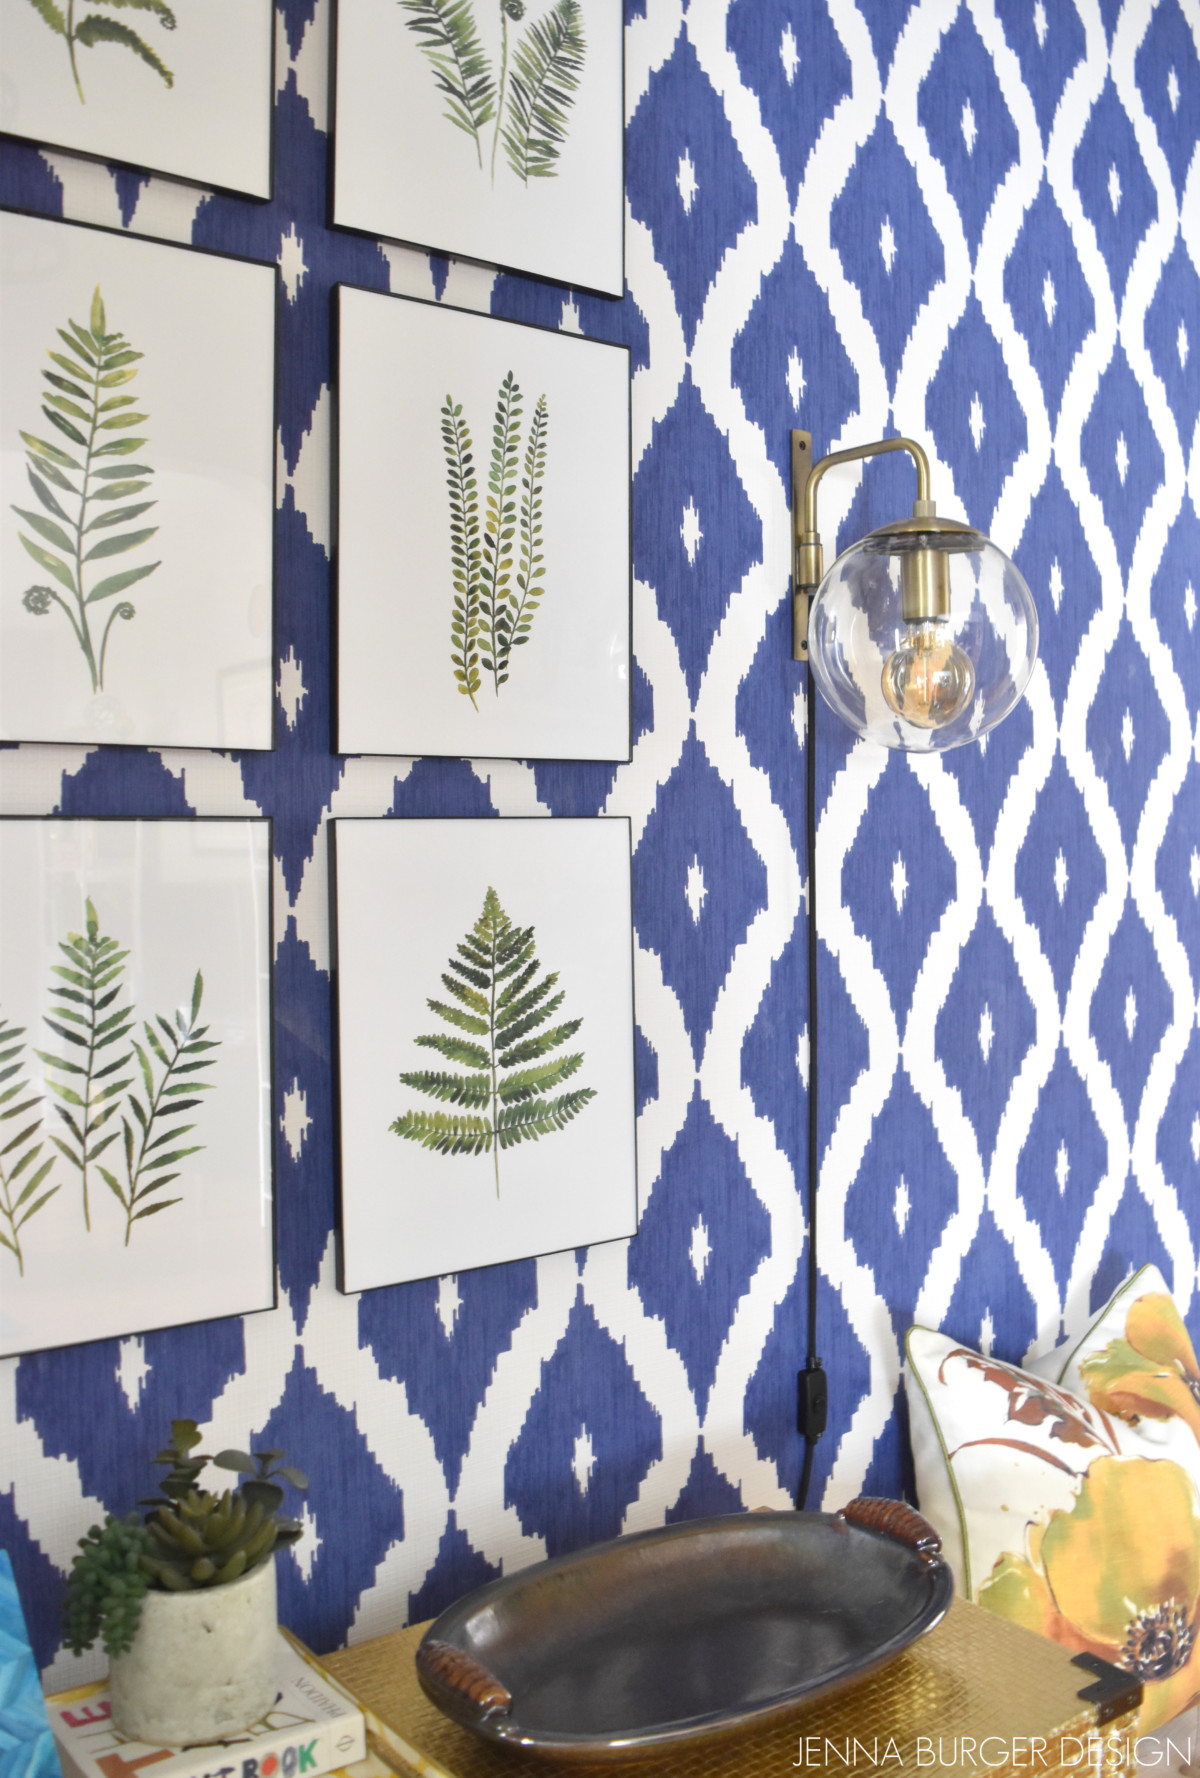
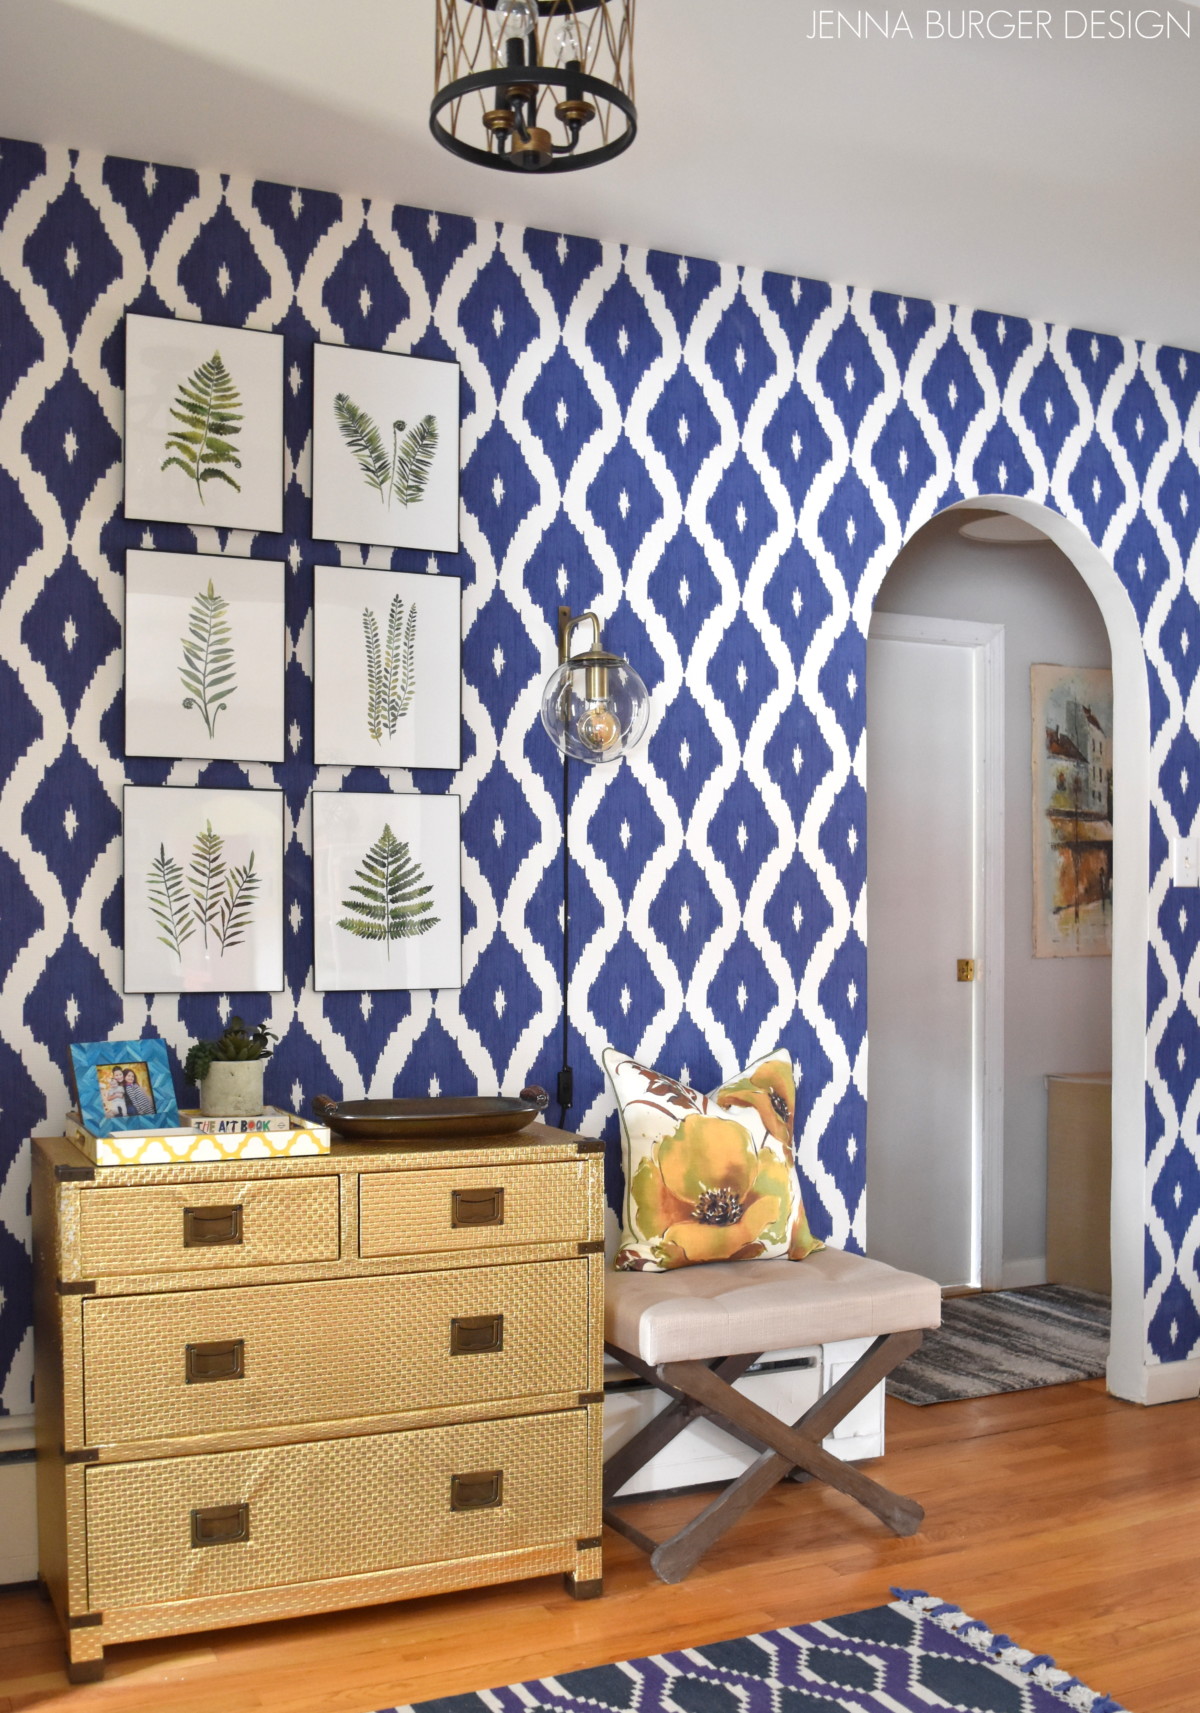
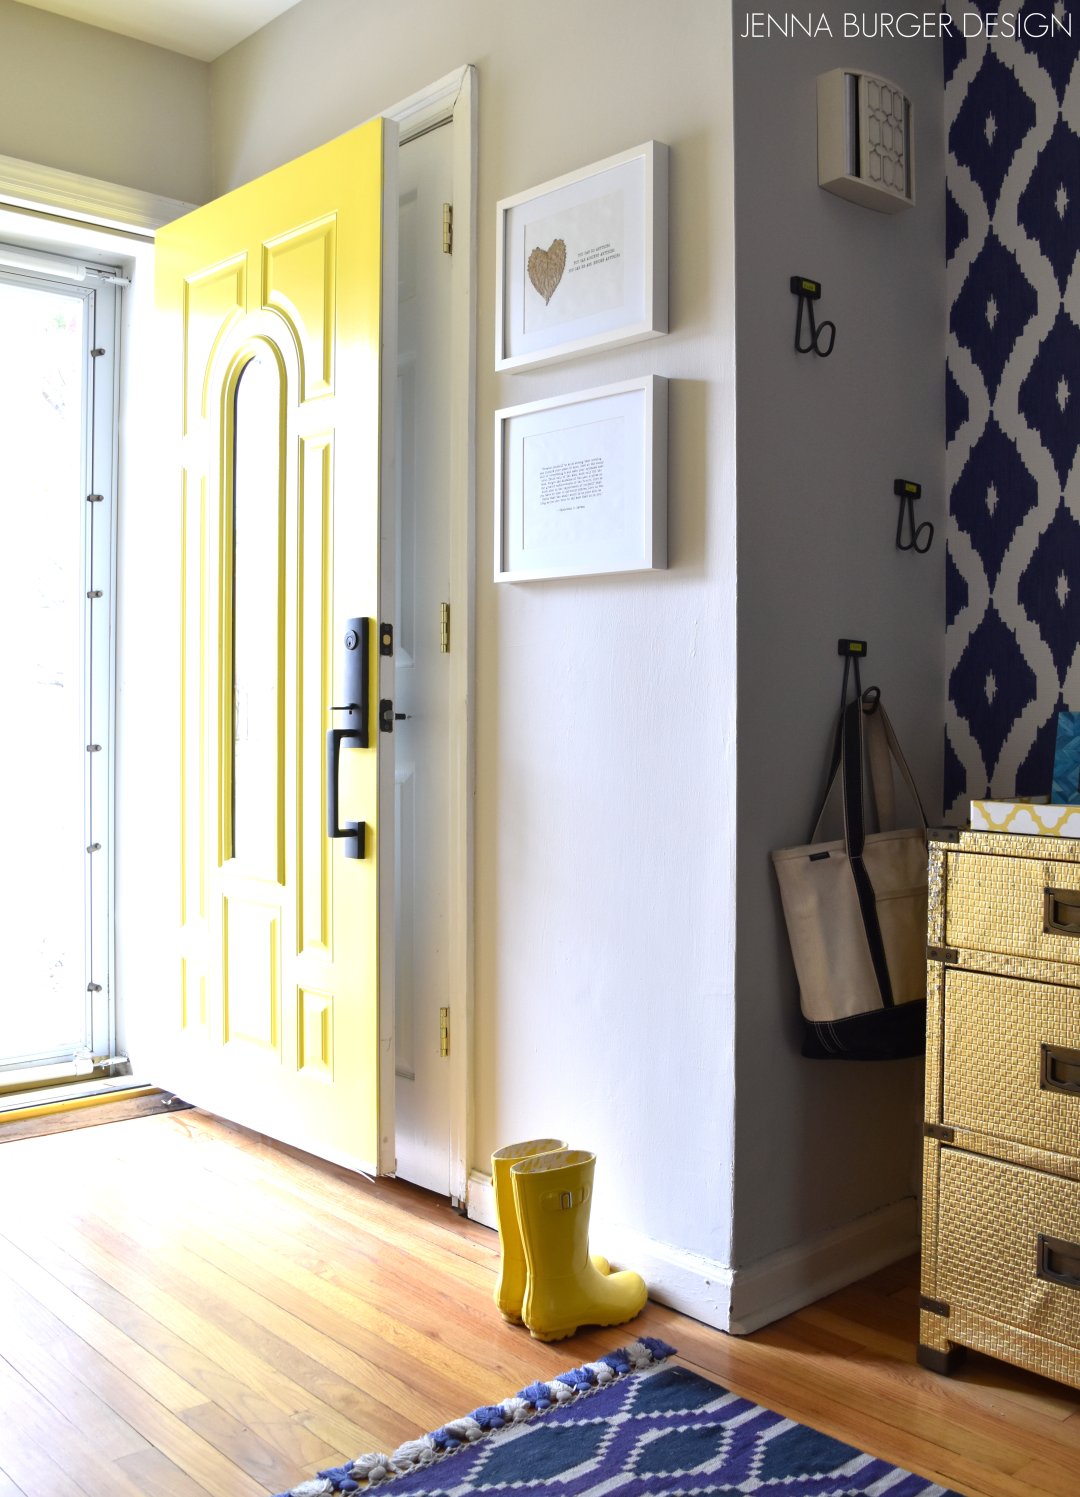
For the foyer space, a vibrant + colorful paper on all walls would have been overload. Instead I chose to use this blue & white Ikat patterned wallpaper by Graham and Brown on one wall and then balance the deep hue with a light neutral, Valspar Snowy Dusk, on the remaining walls.

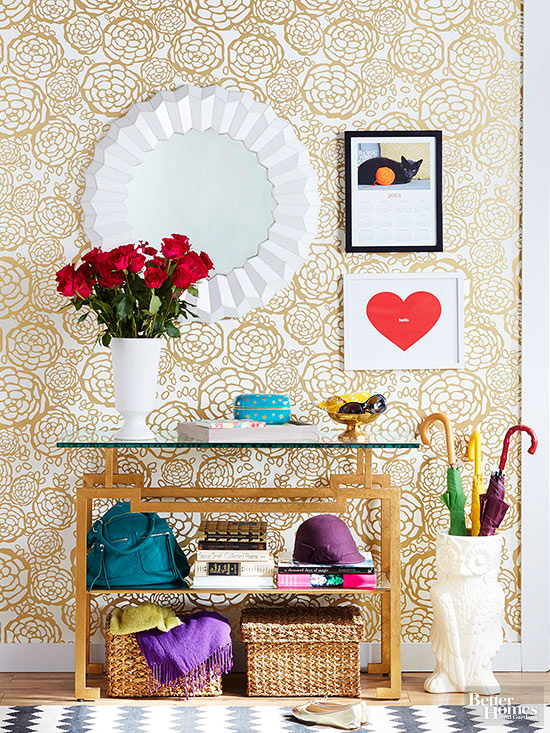
The result is so pretty. Most of the elements in the space were seen in the foyer of our previous home – the gold dresser, the fern art prints, the ottoman, and the rug.

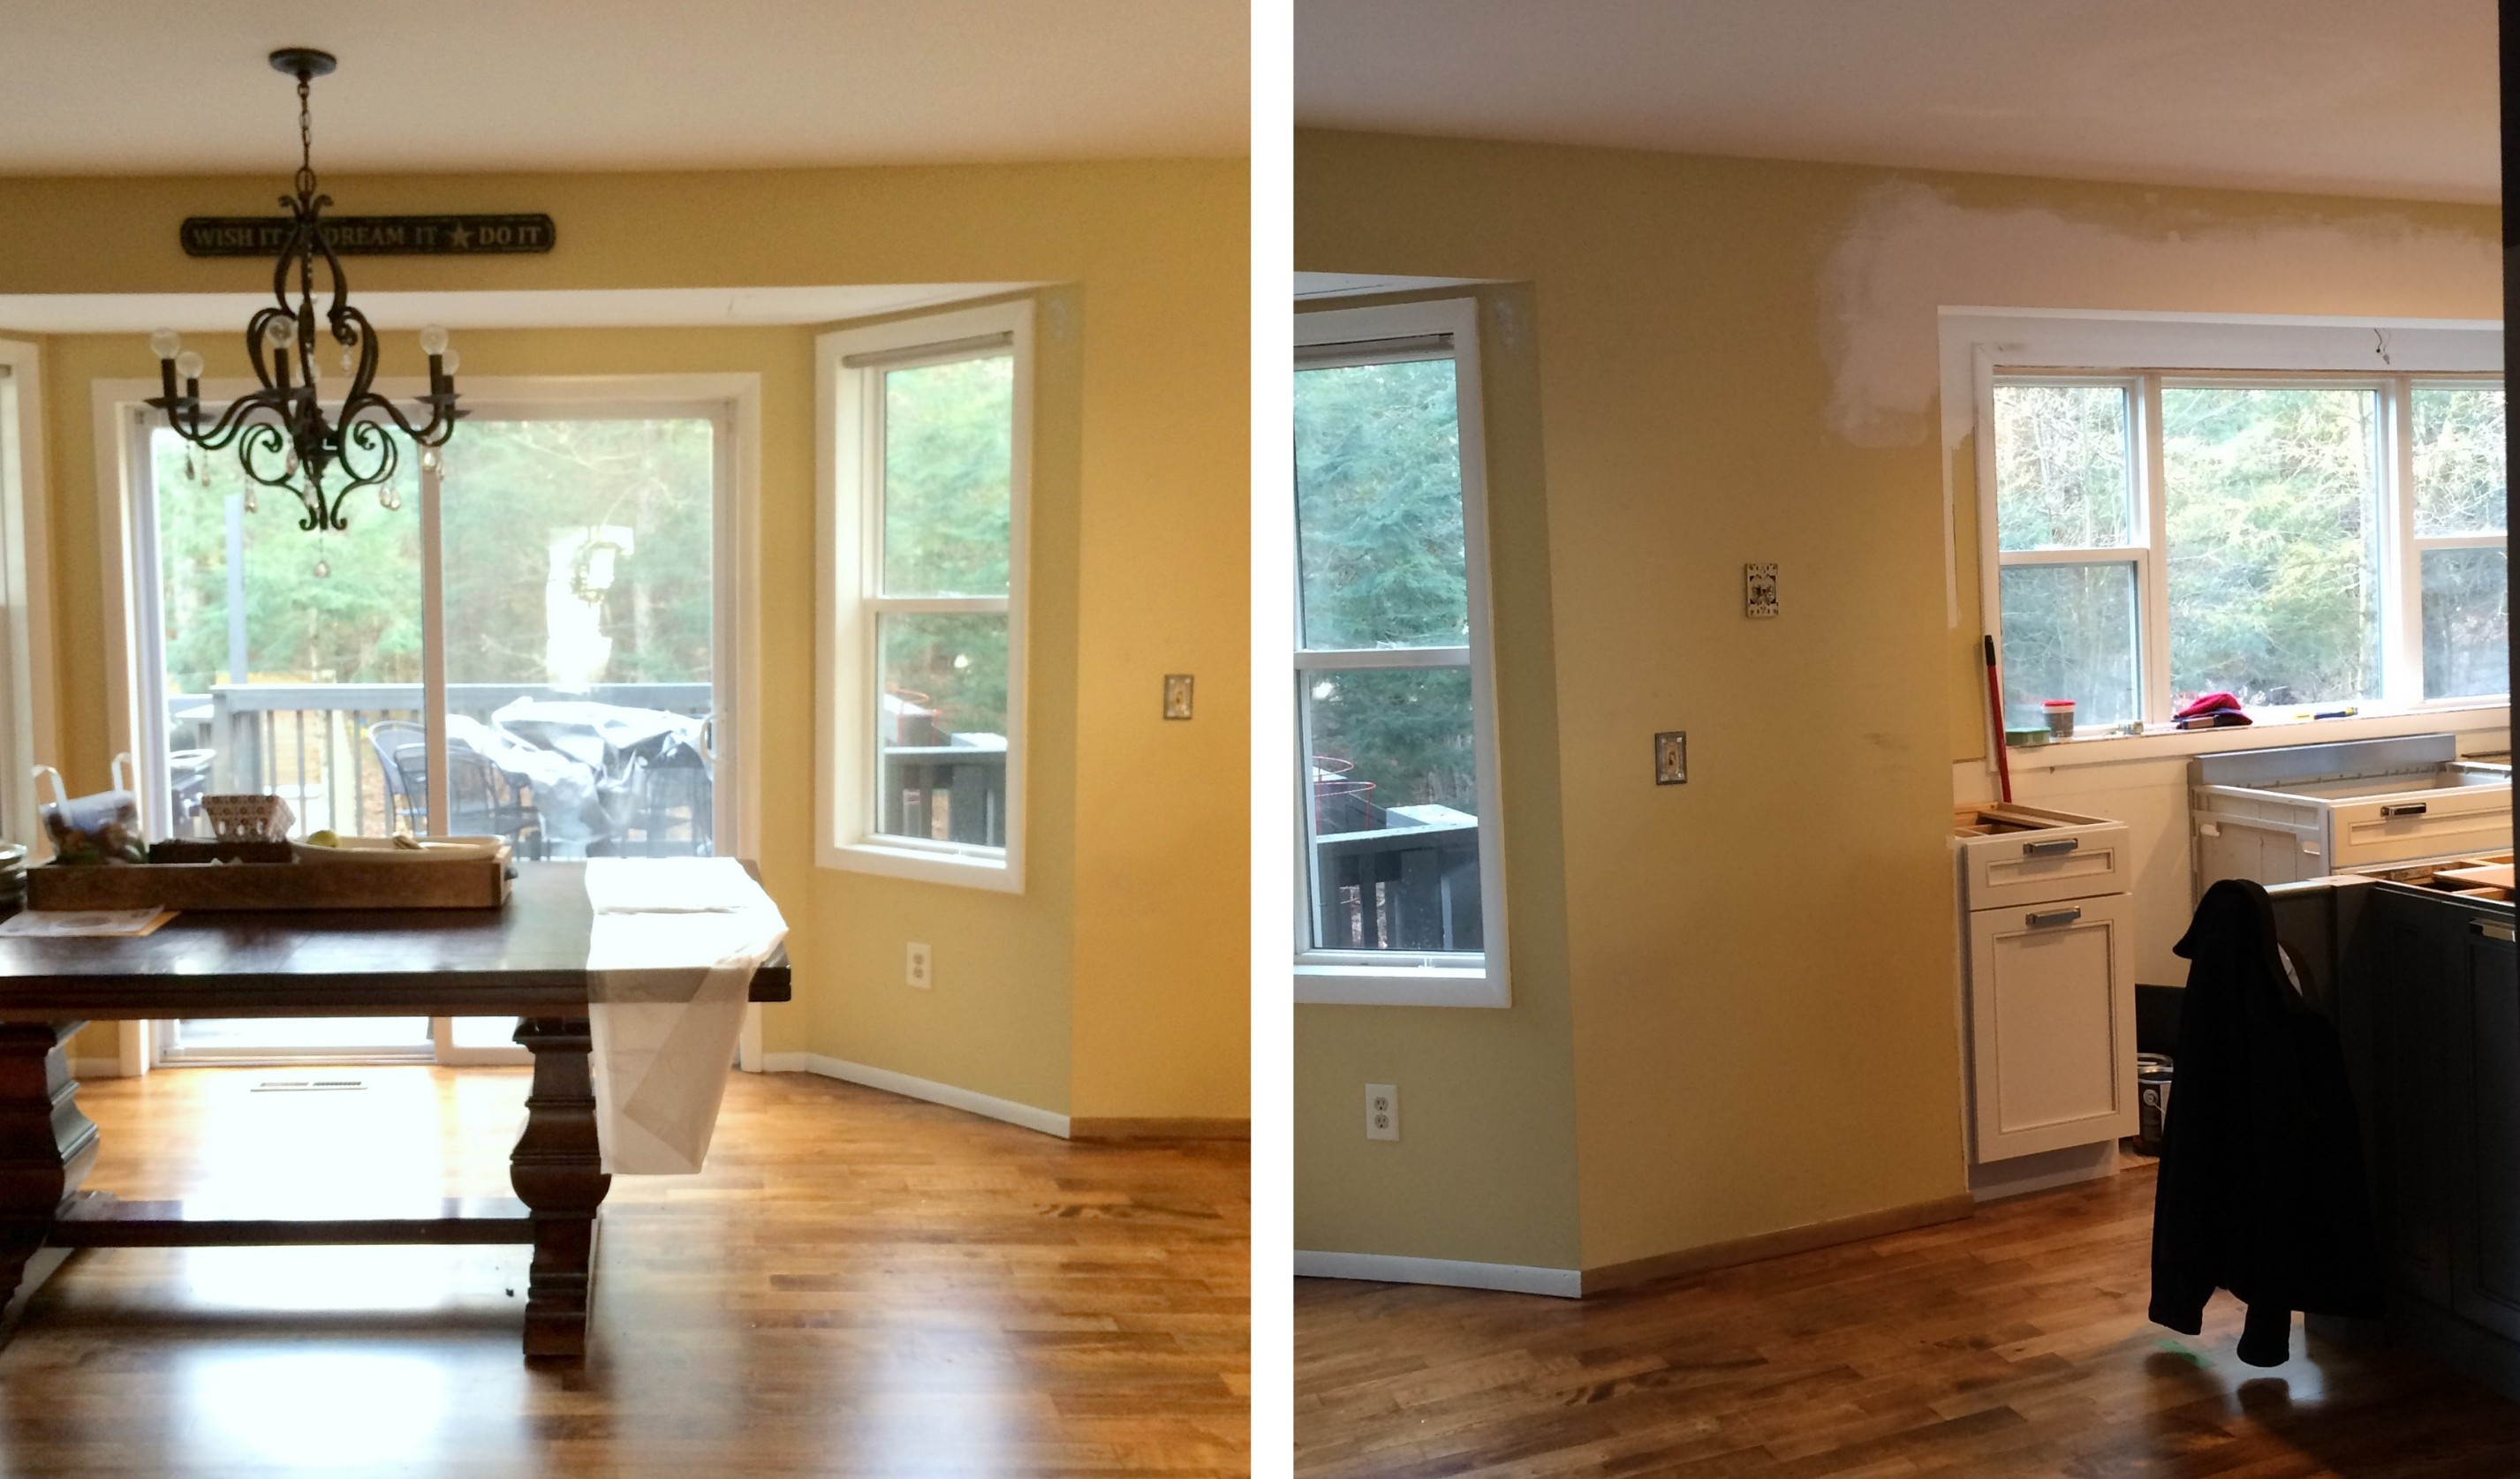
As always to appreciate the ‘after’, you have to take a look at the ‘before’…

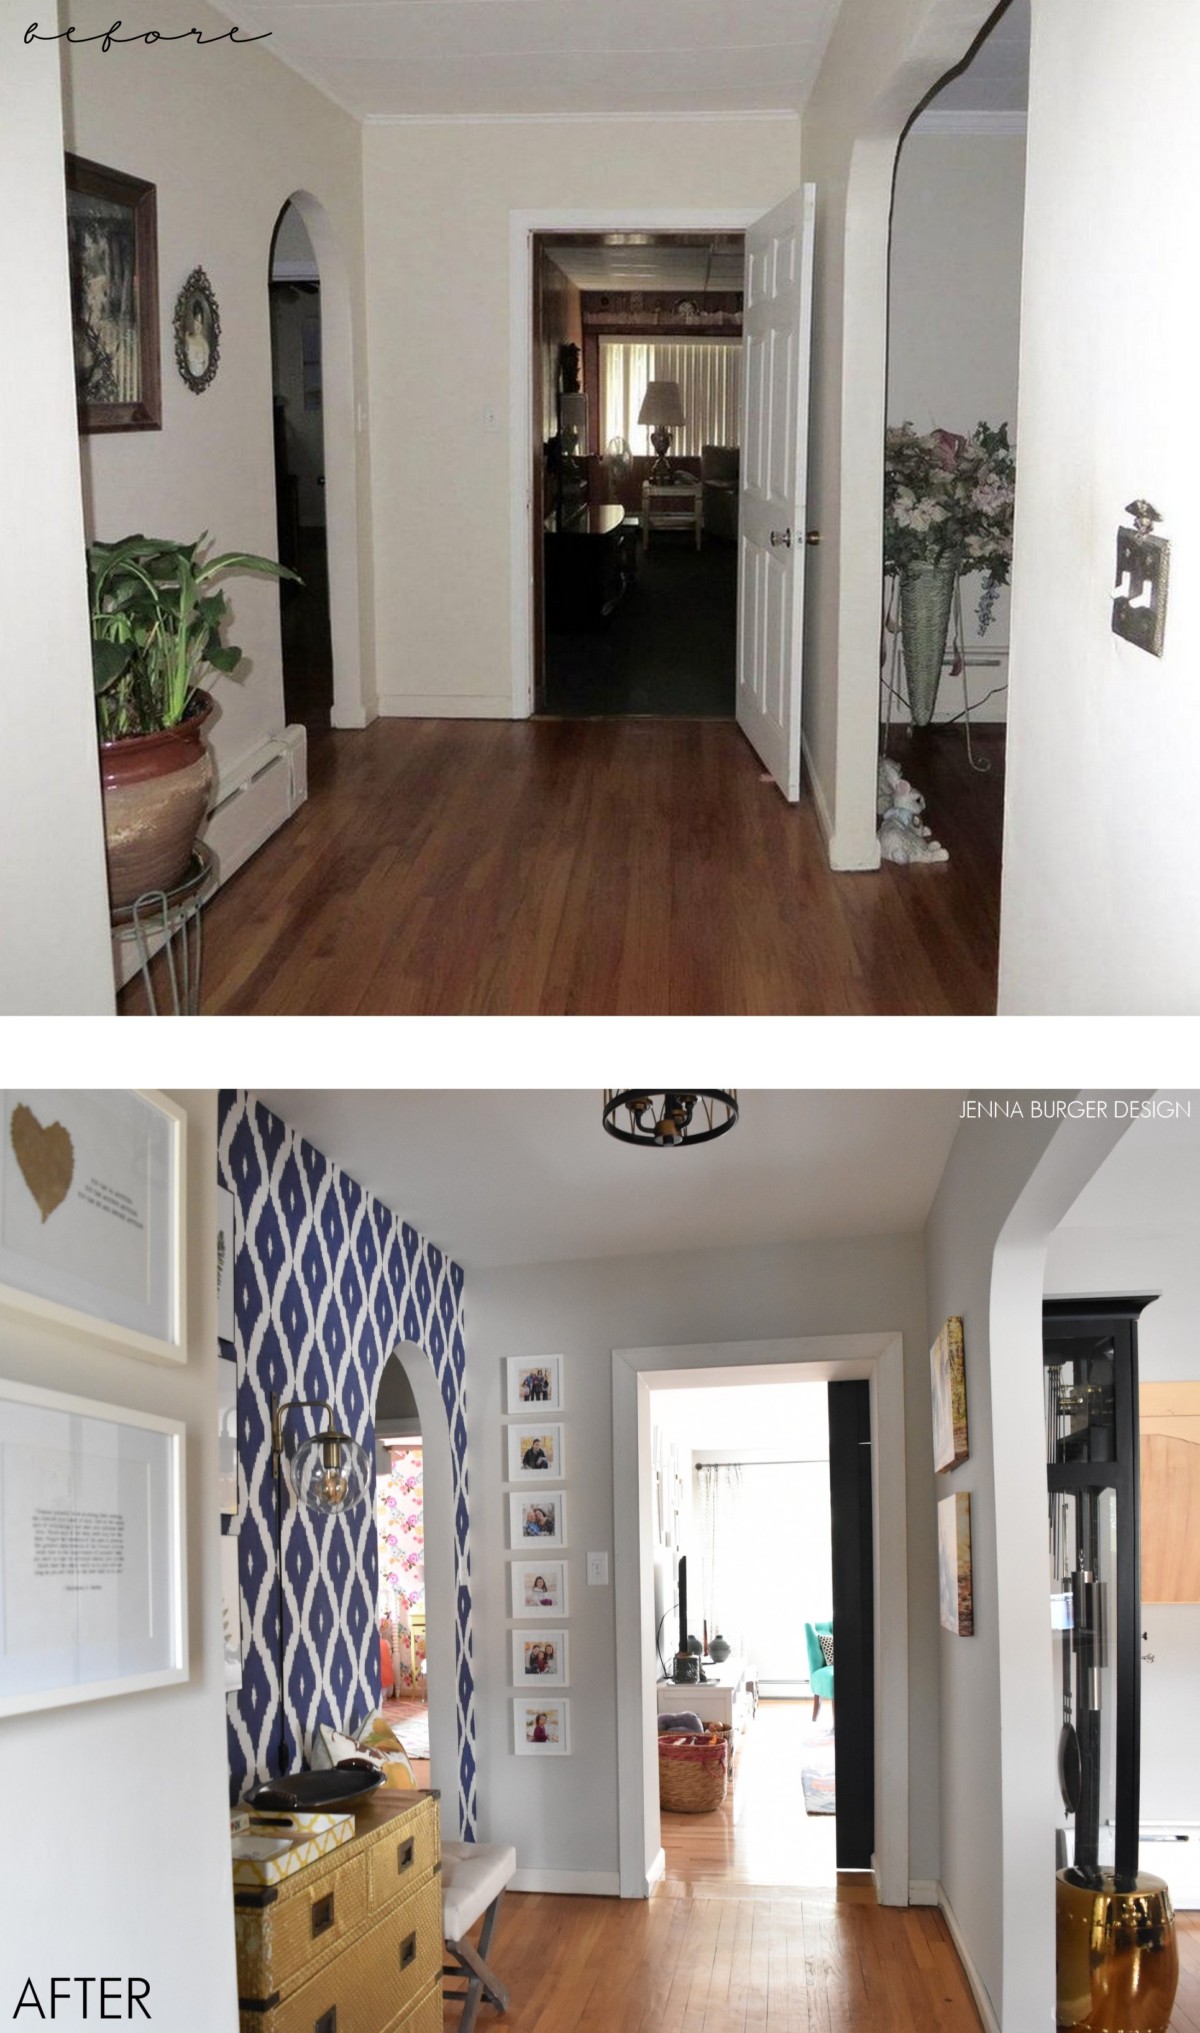
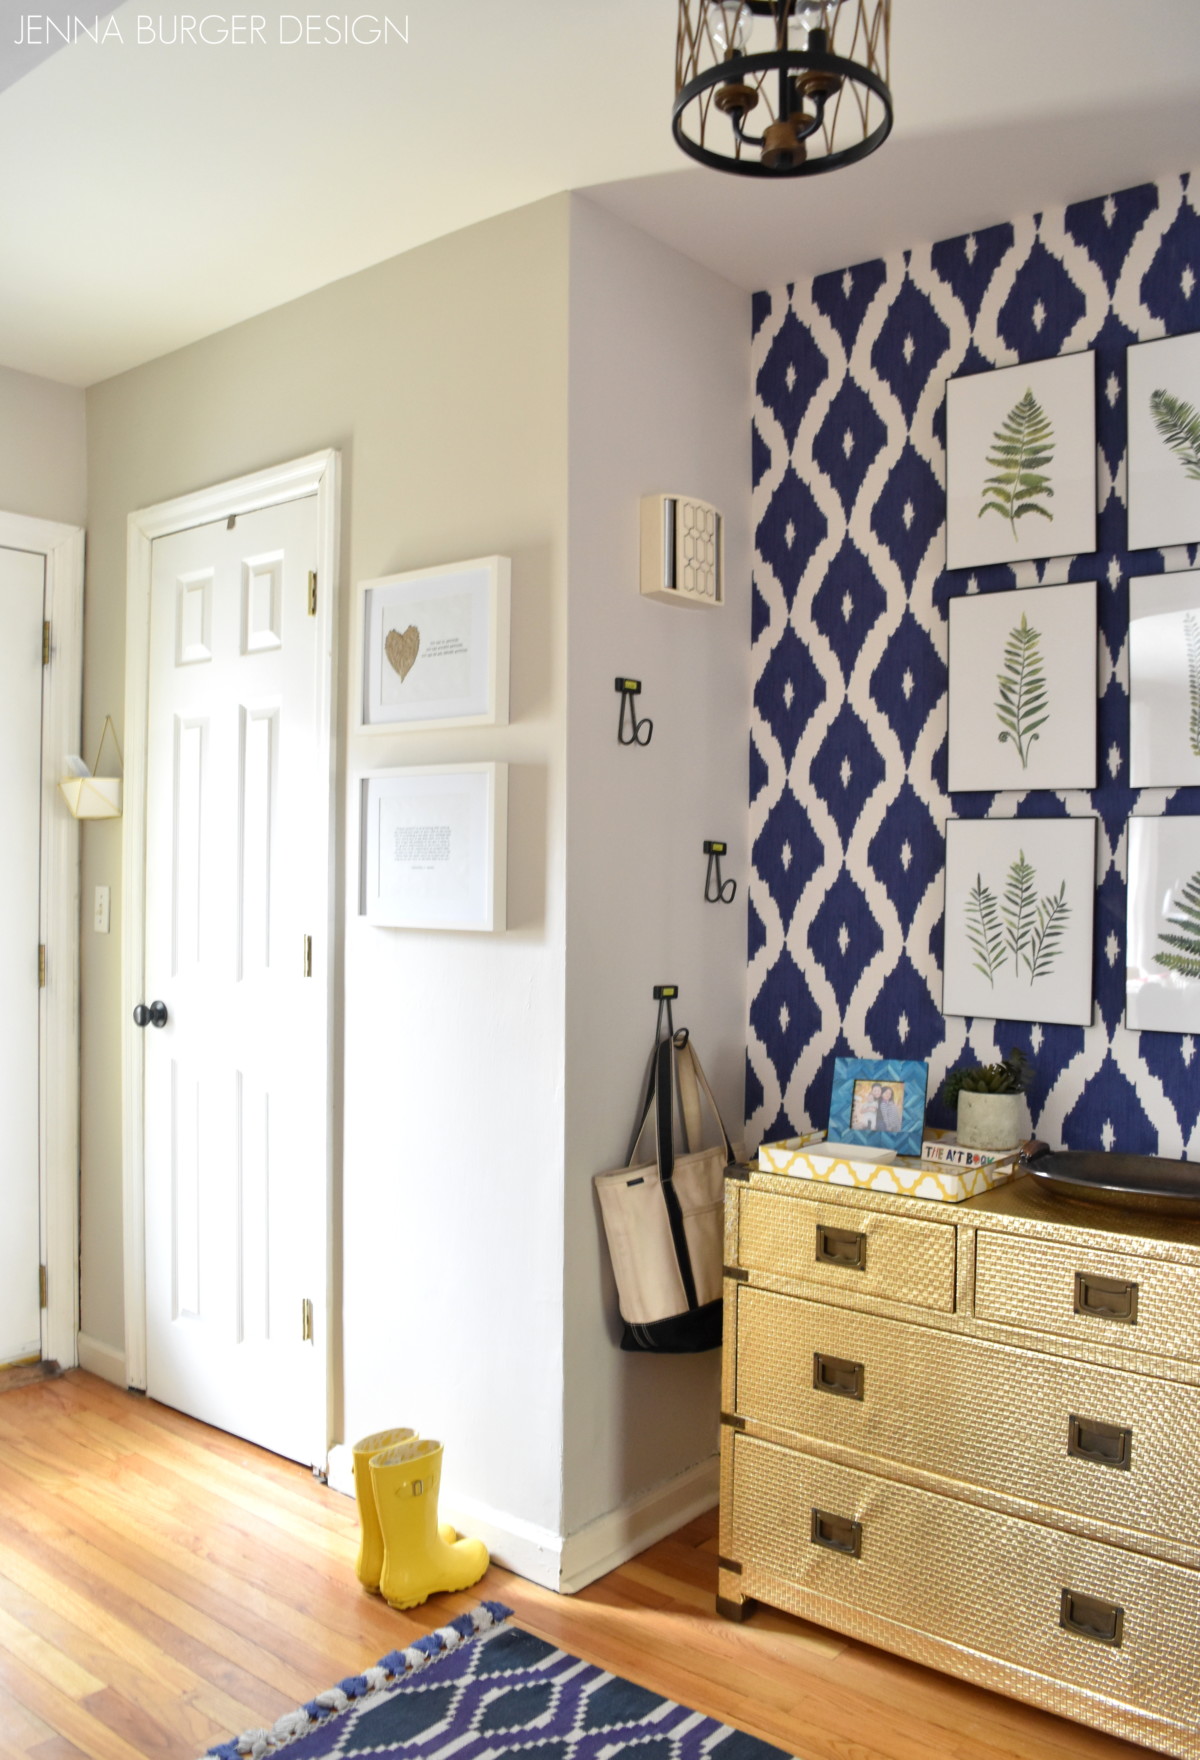
Once we moved in, the space was a black canvas.  I knew I wanted to add in a pop of color, but I didn’t want to overpower the space.  I chose to use one wall – the side wall of the entry space – to add the wallpaper.

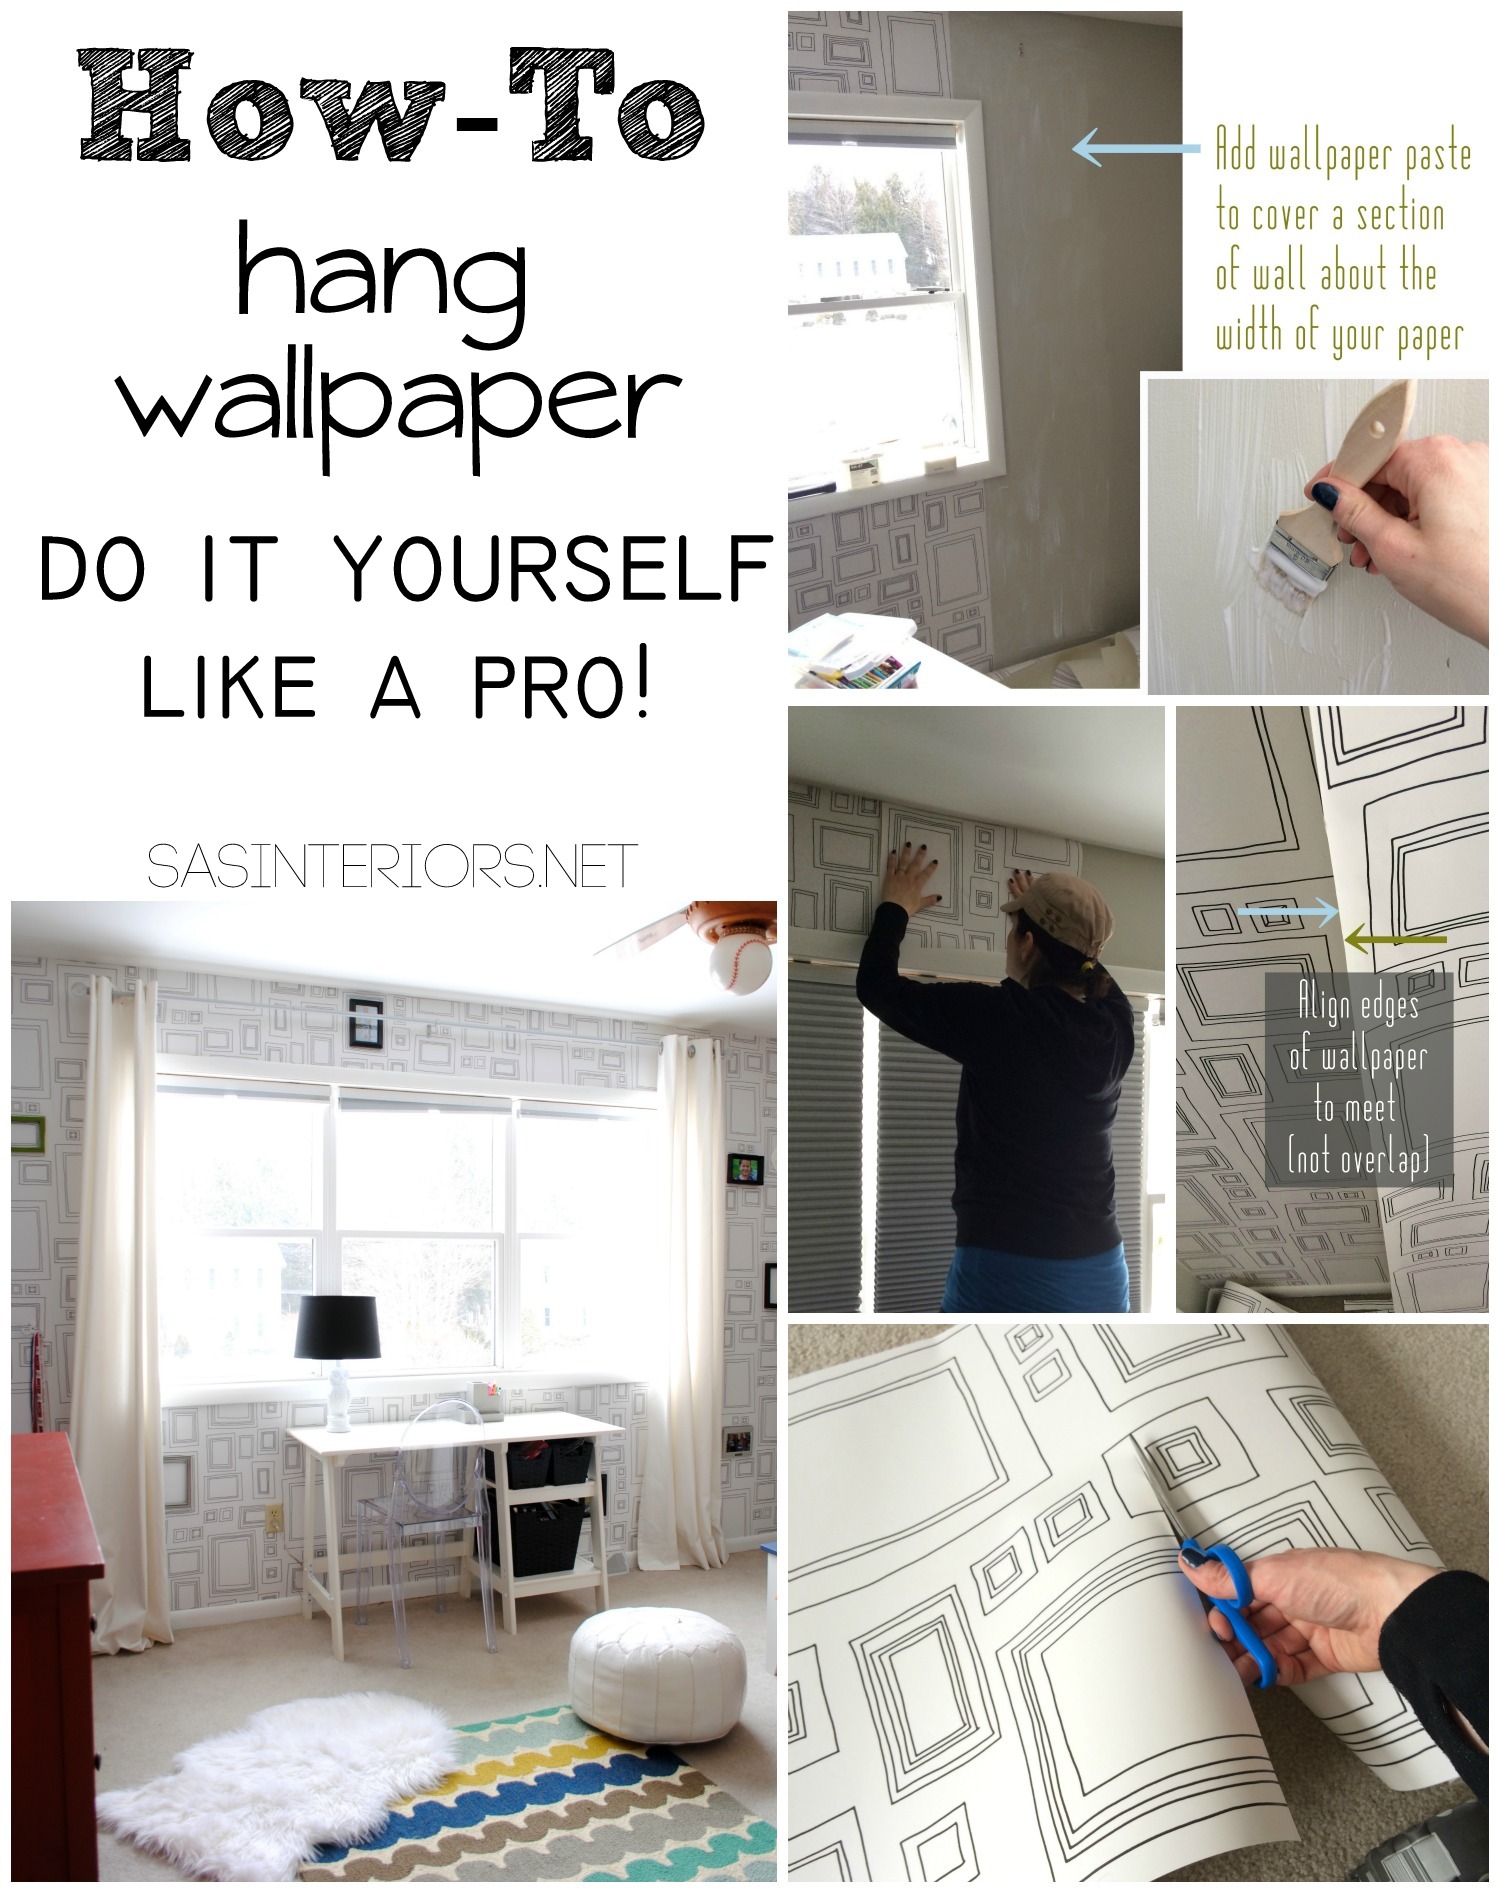
I’ve shared tutorials here and here for how to wallpaper a wall, but I’ll share another quick rundown…

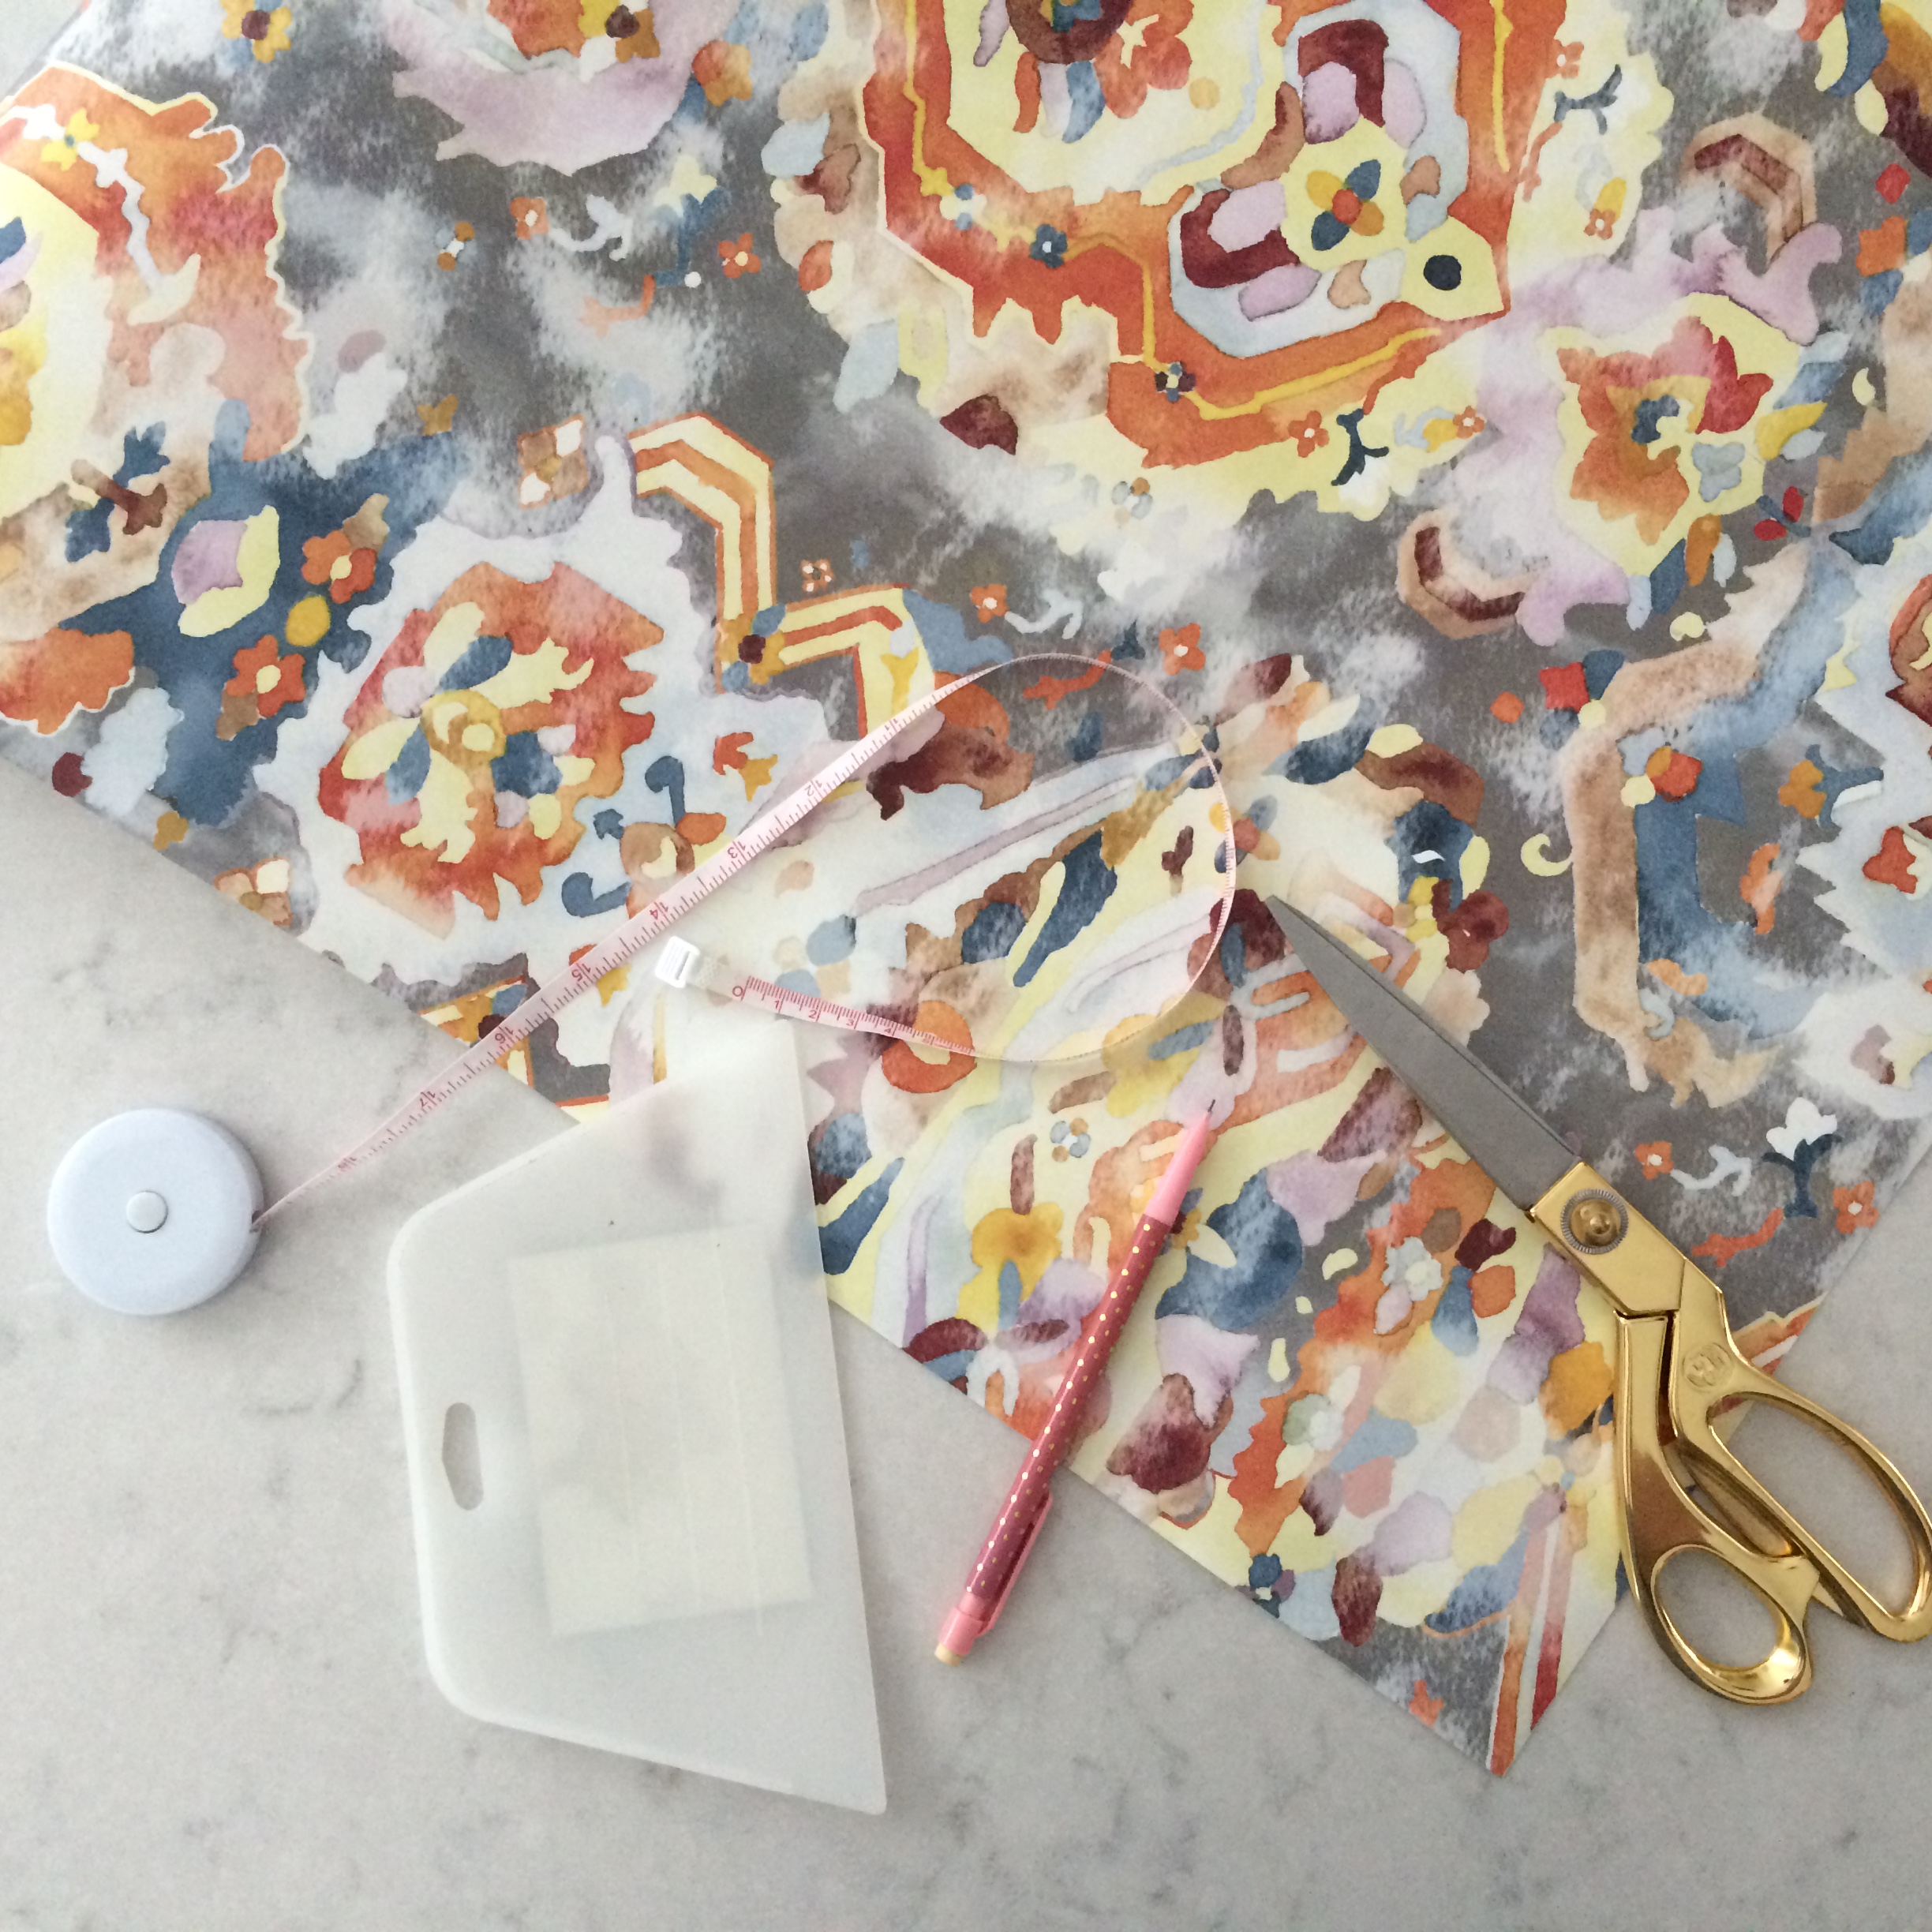
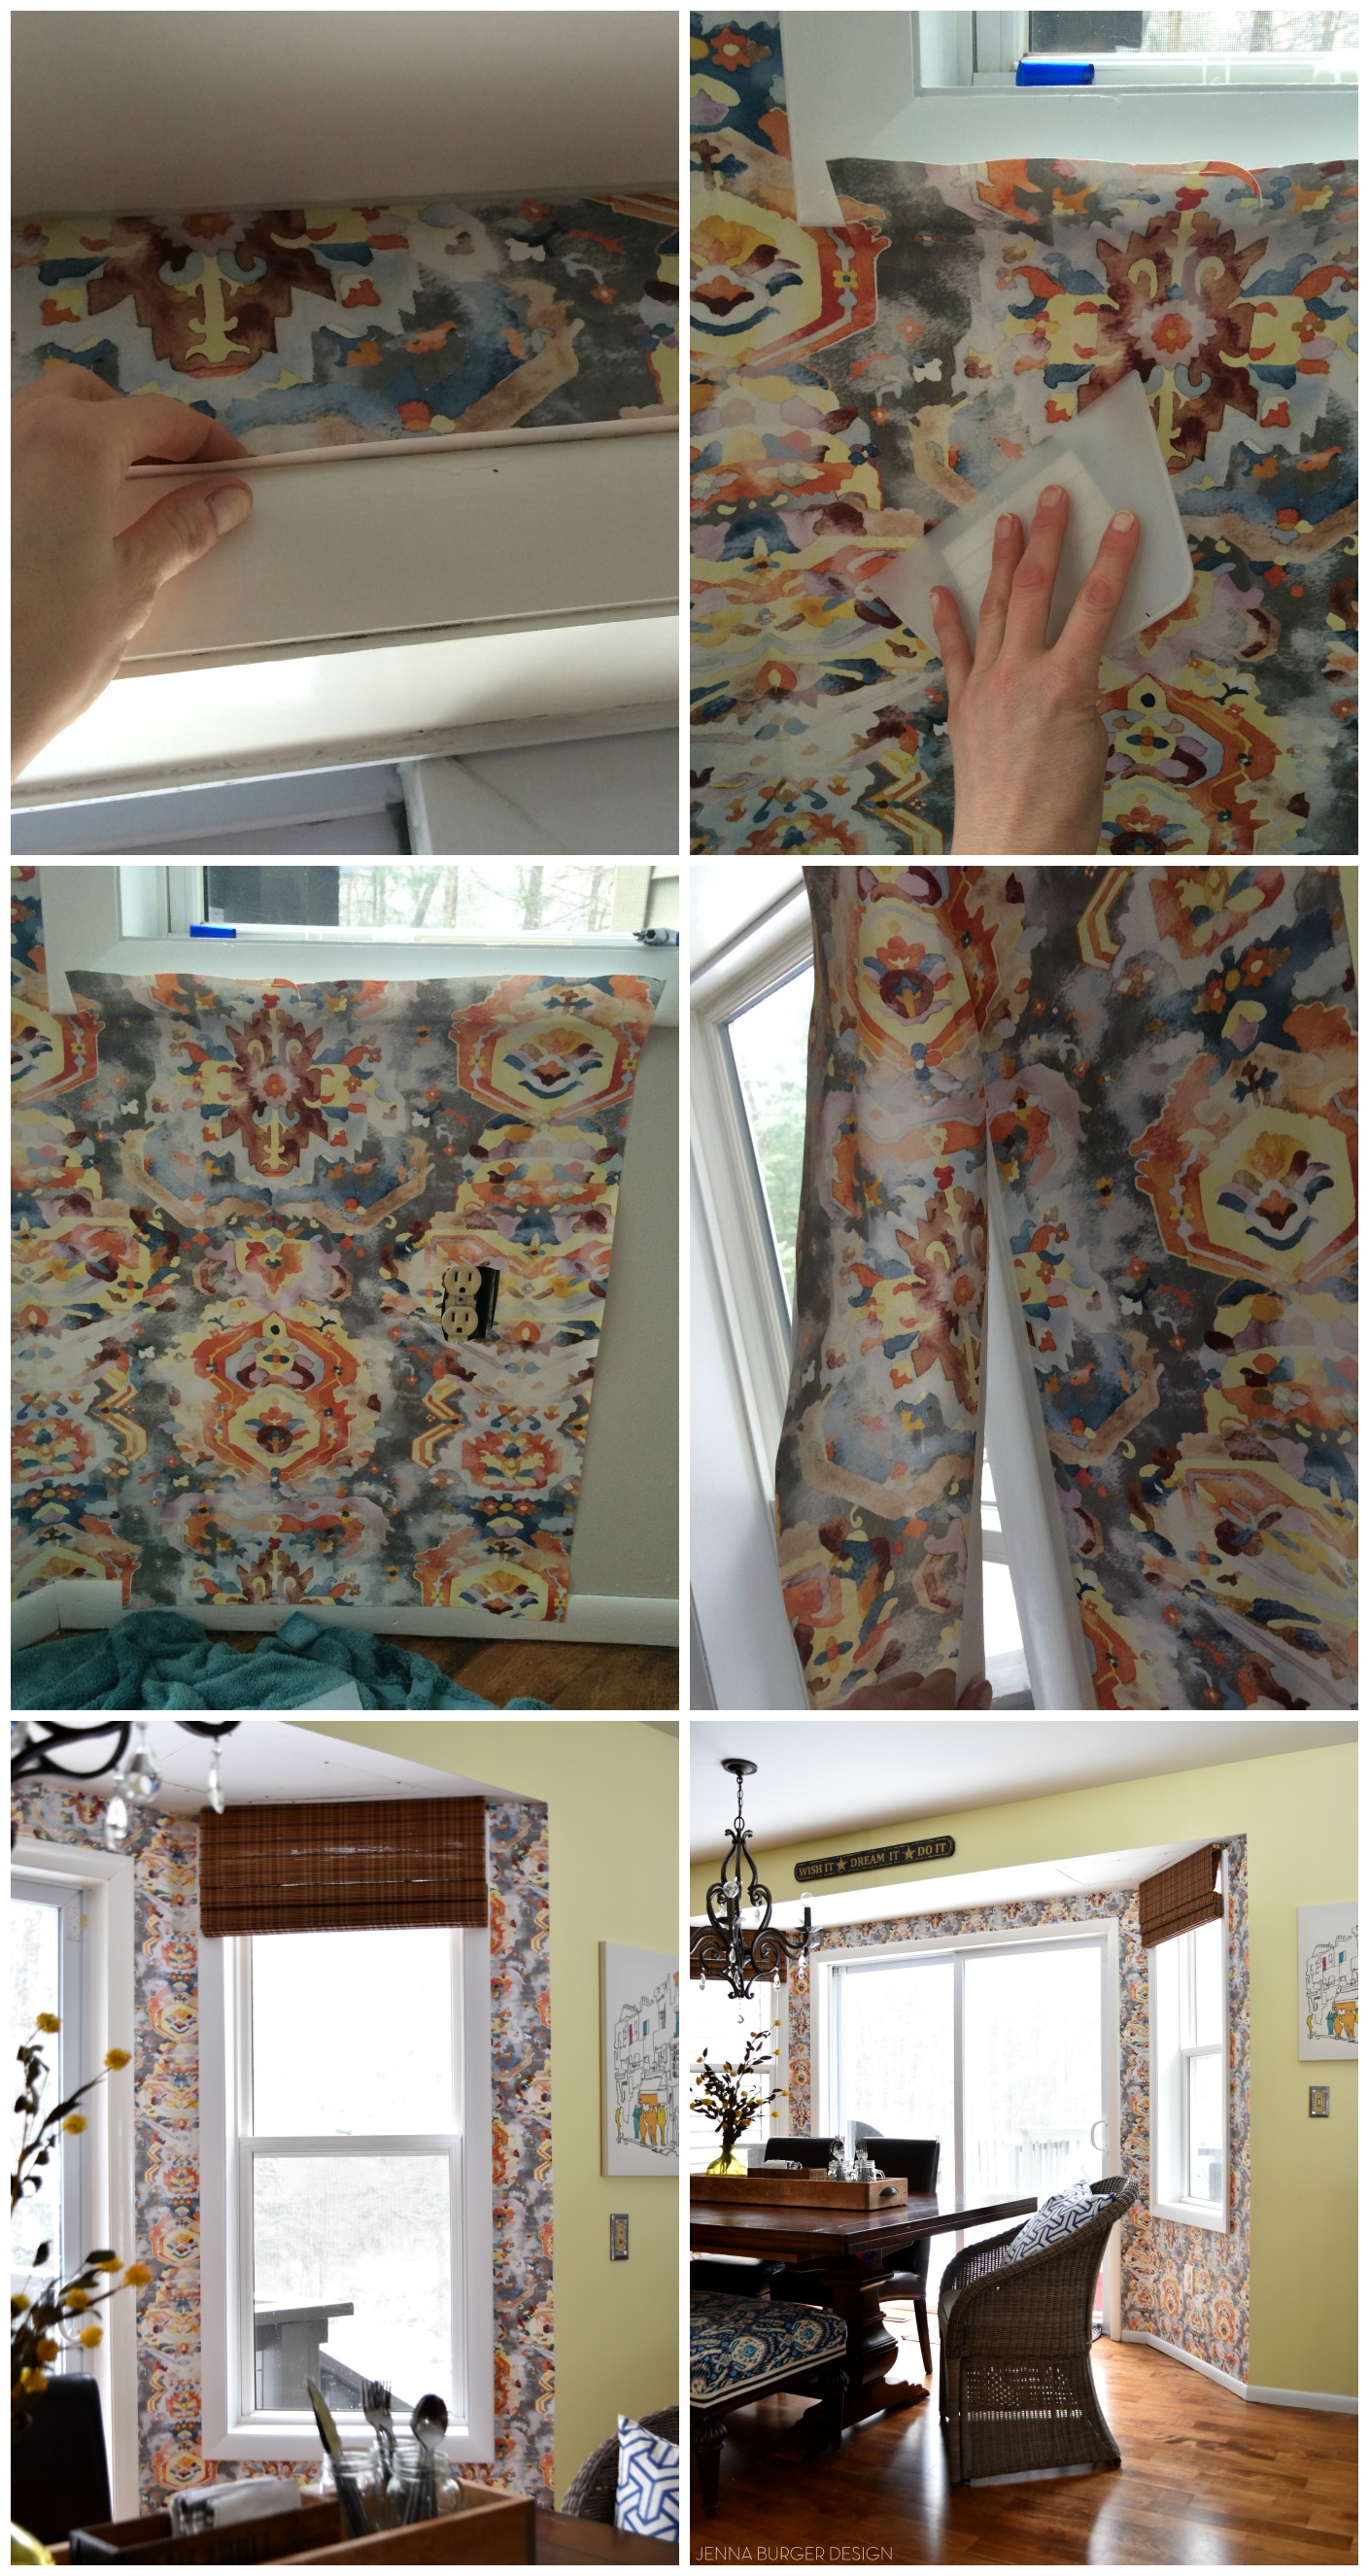
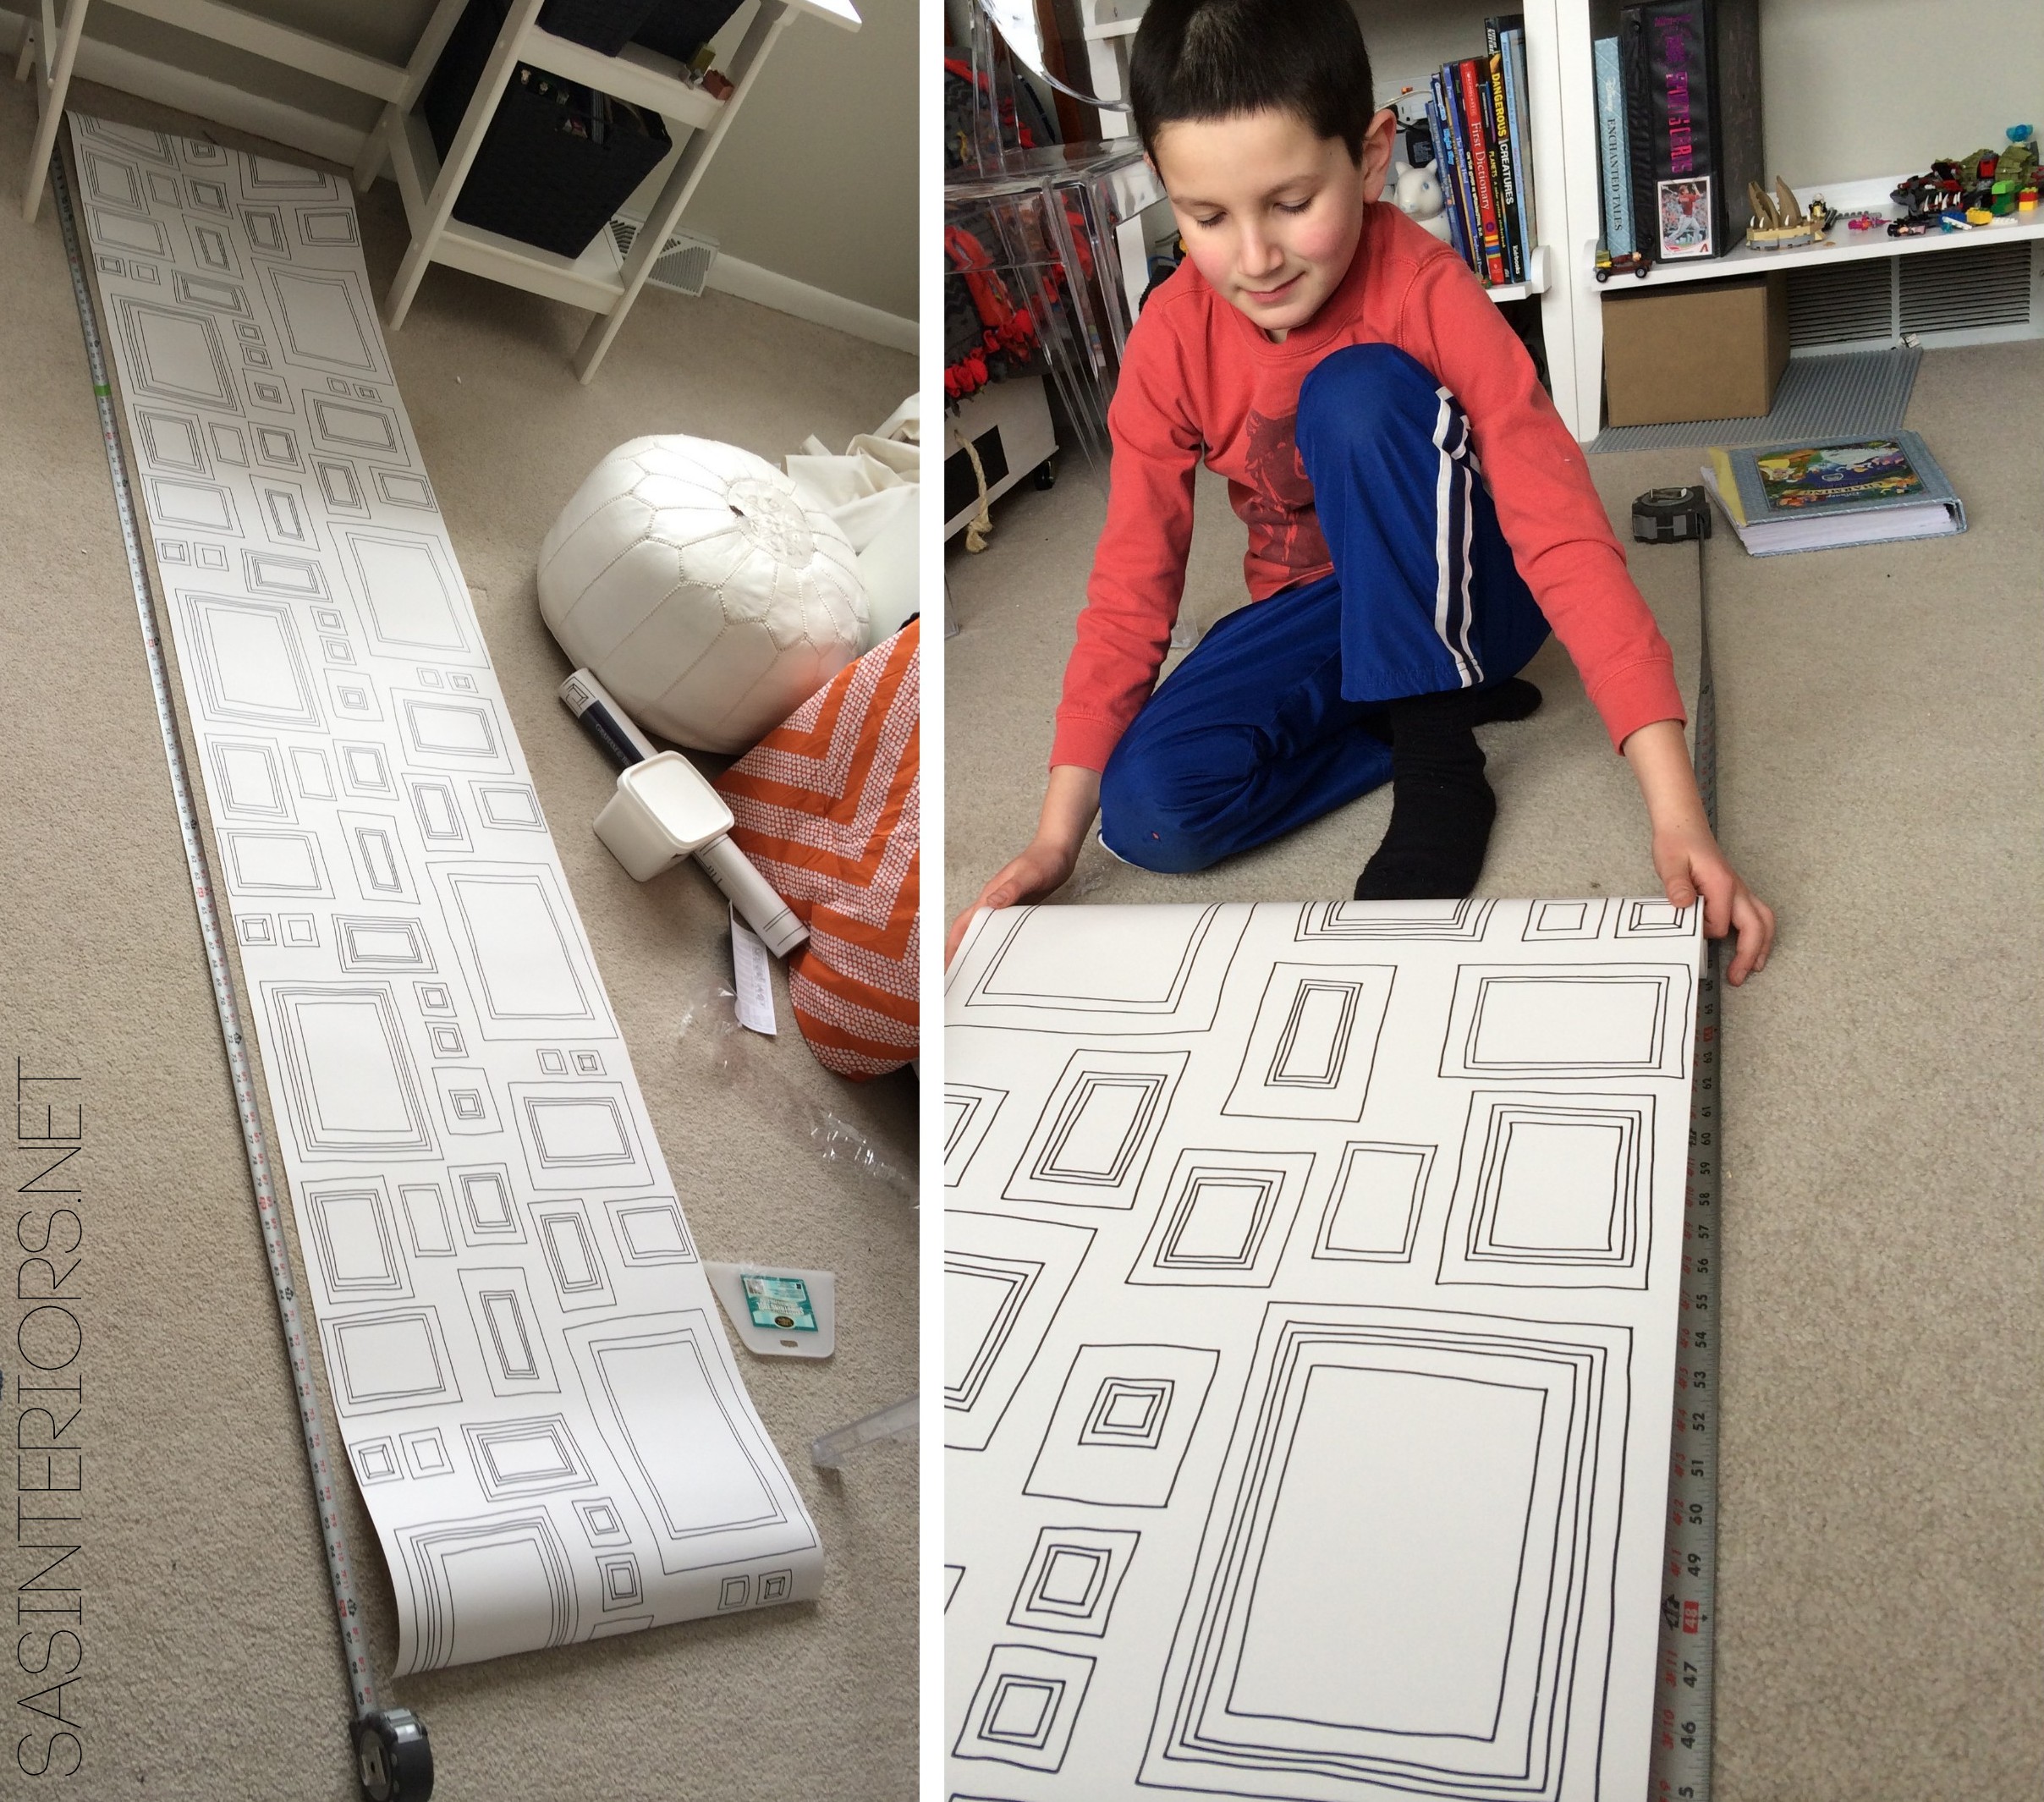
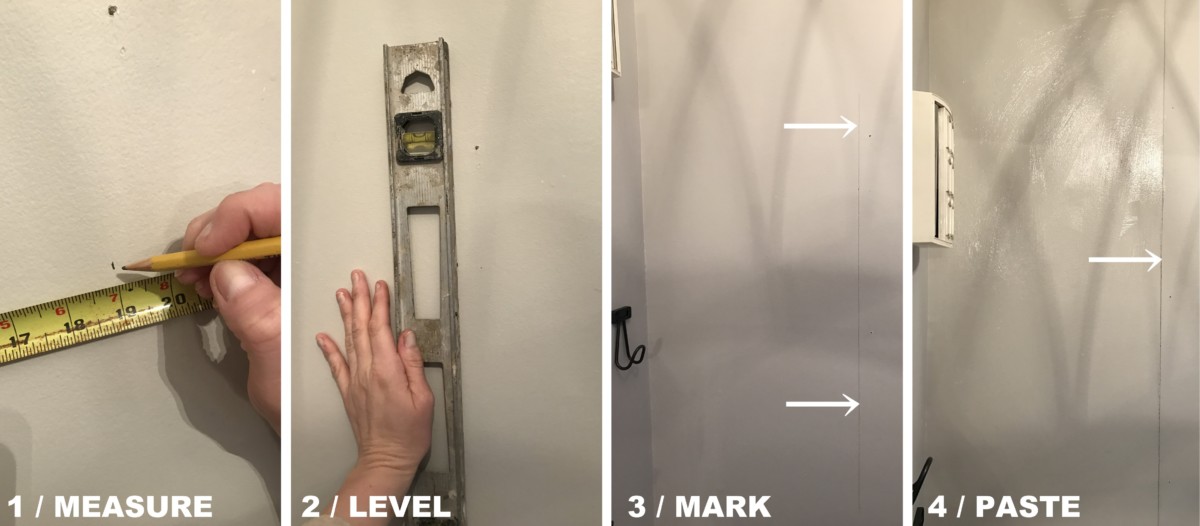
1 / starting from the center of the edge of the wall (depending on the design), measure the wall to mark the width of the wallpaper

2 / line up a level on the on the measurement

3 / mark a level line with pencil – this will be the edge for the paper to align to

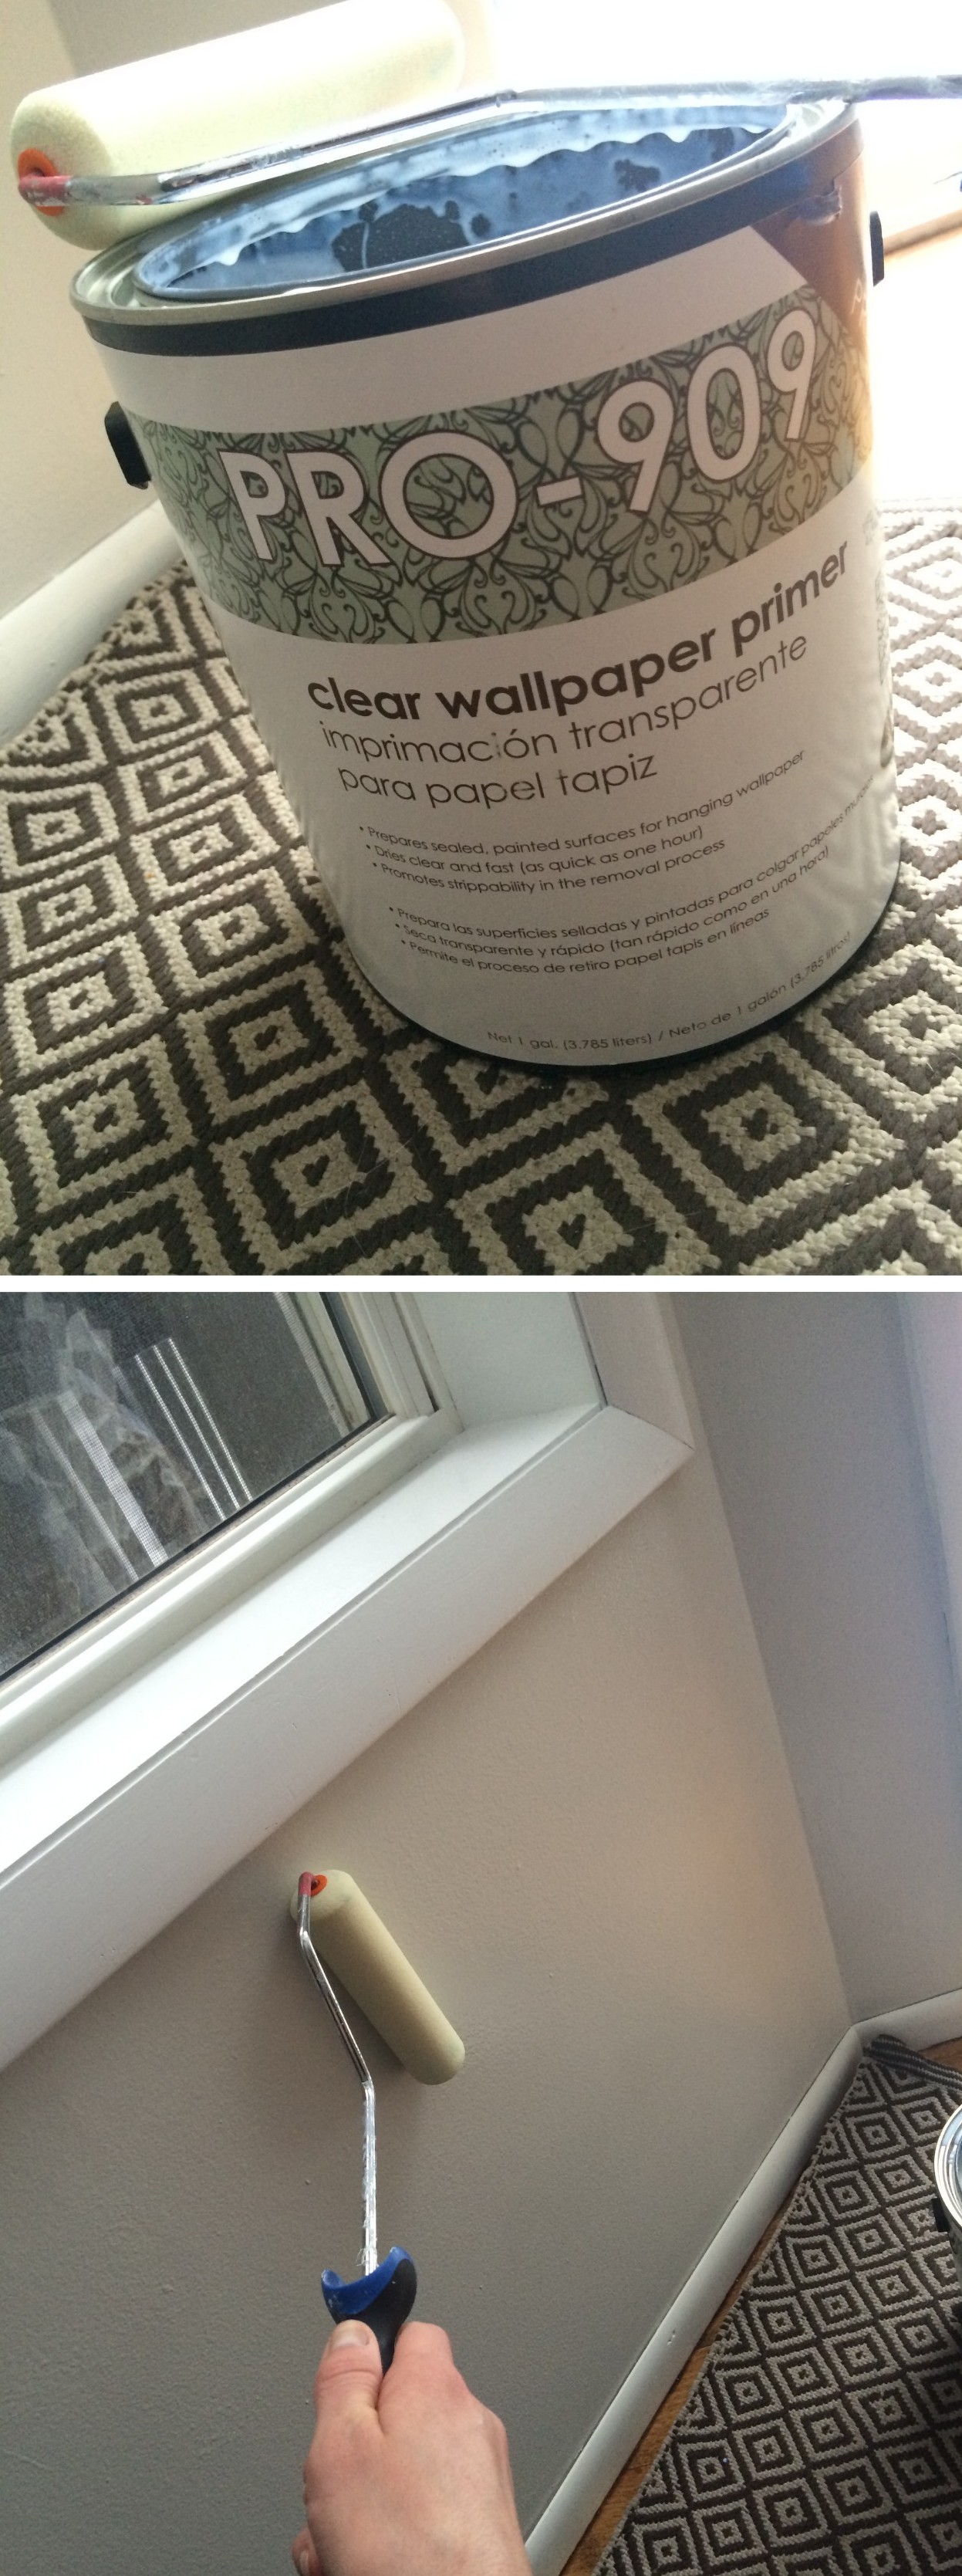
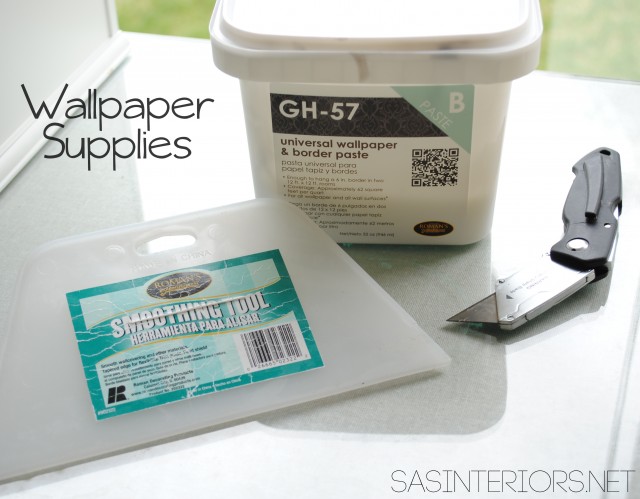
4 / this paper required to use wallpaper paste, so using a paint brush, I ‘painted’ the paste onto the wall, then applied the paper

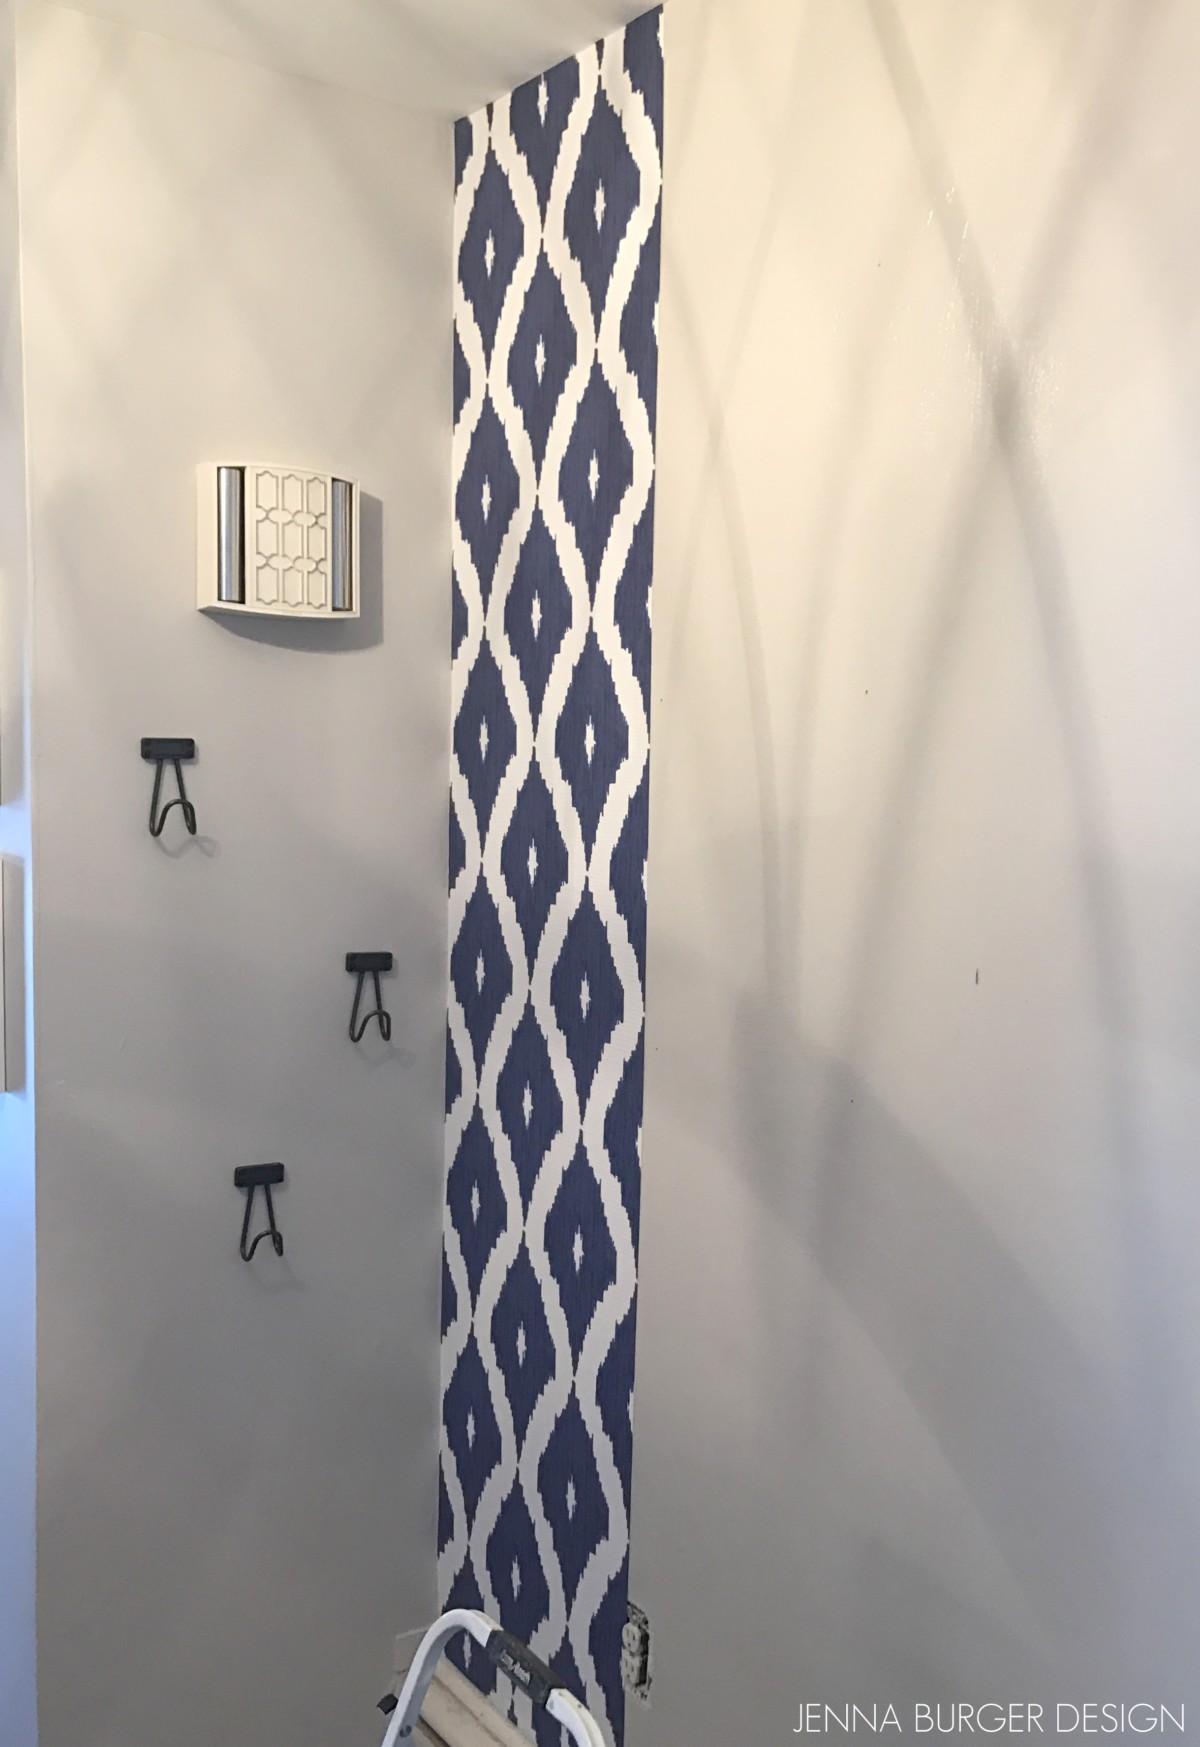
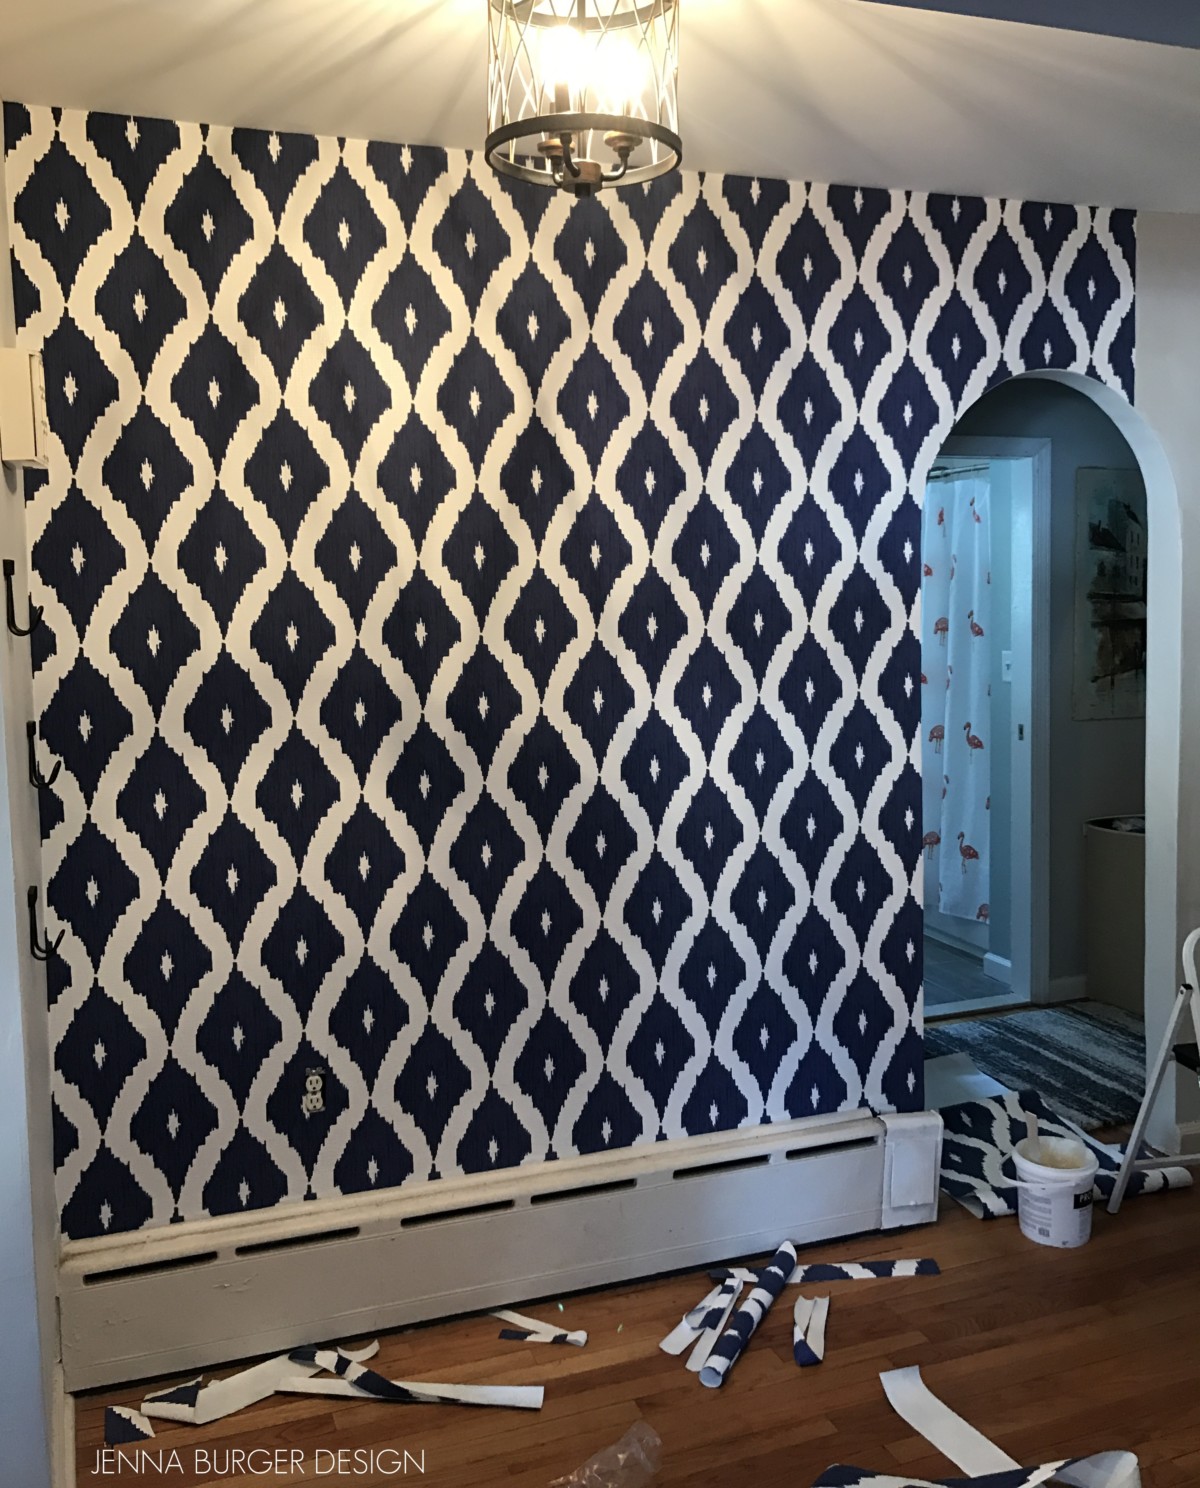
First line of paper went up easily…

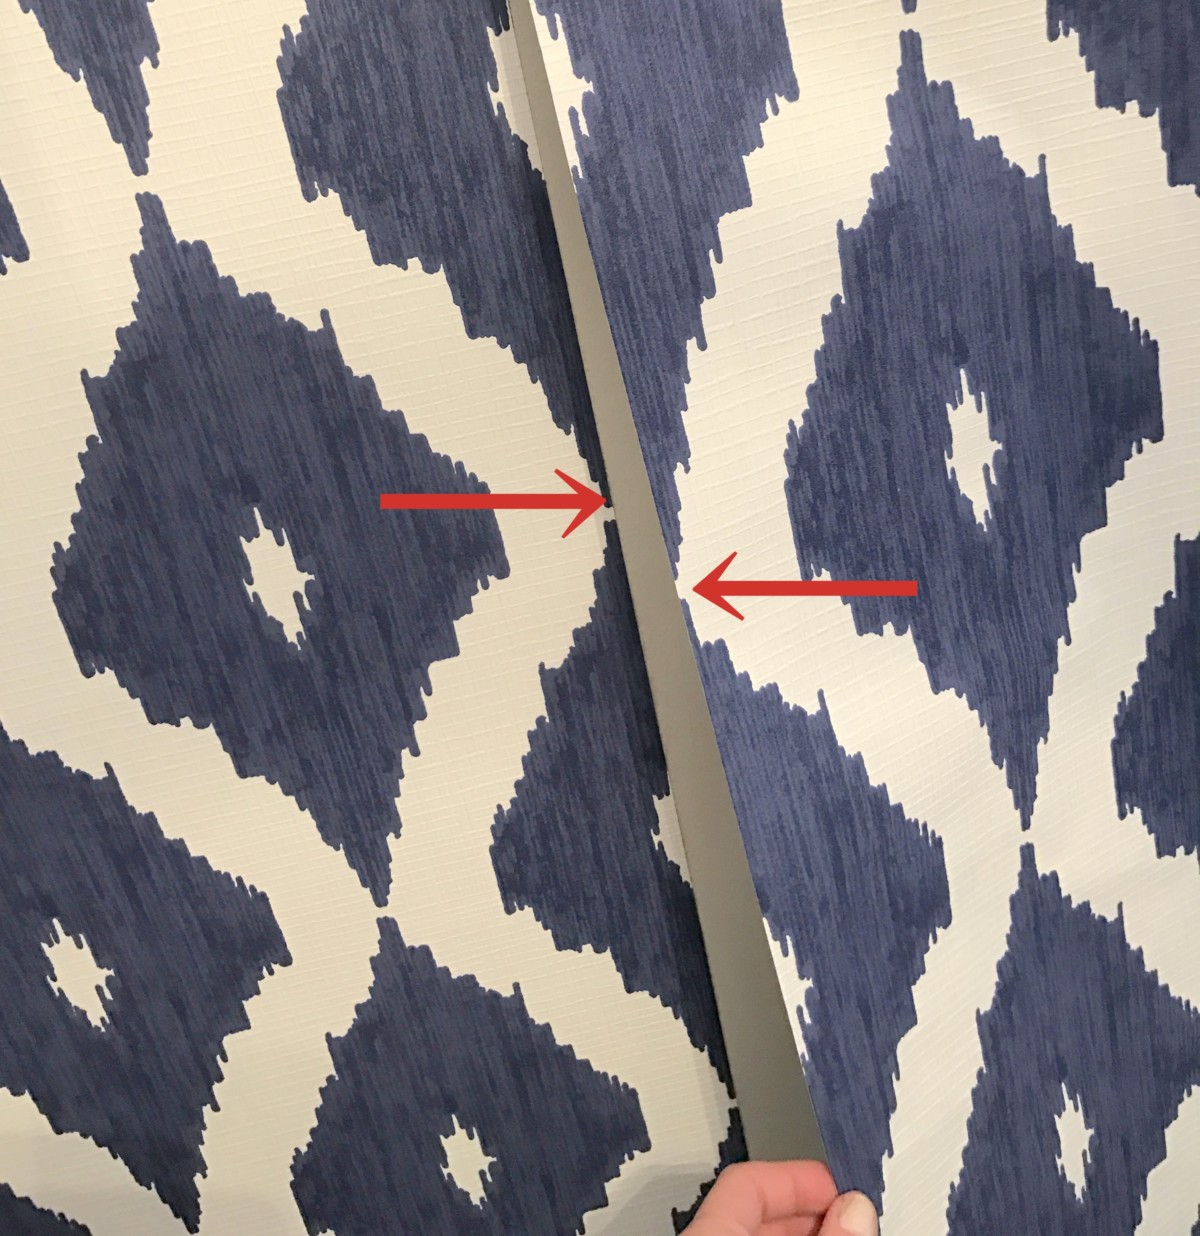
The most important part of installing wallpaper is to line the edges up with the next panel.  The edges can’t overlap but have to join side by side without a gap.

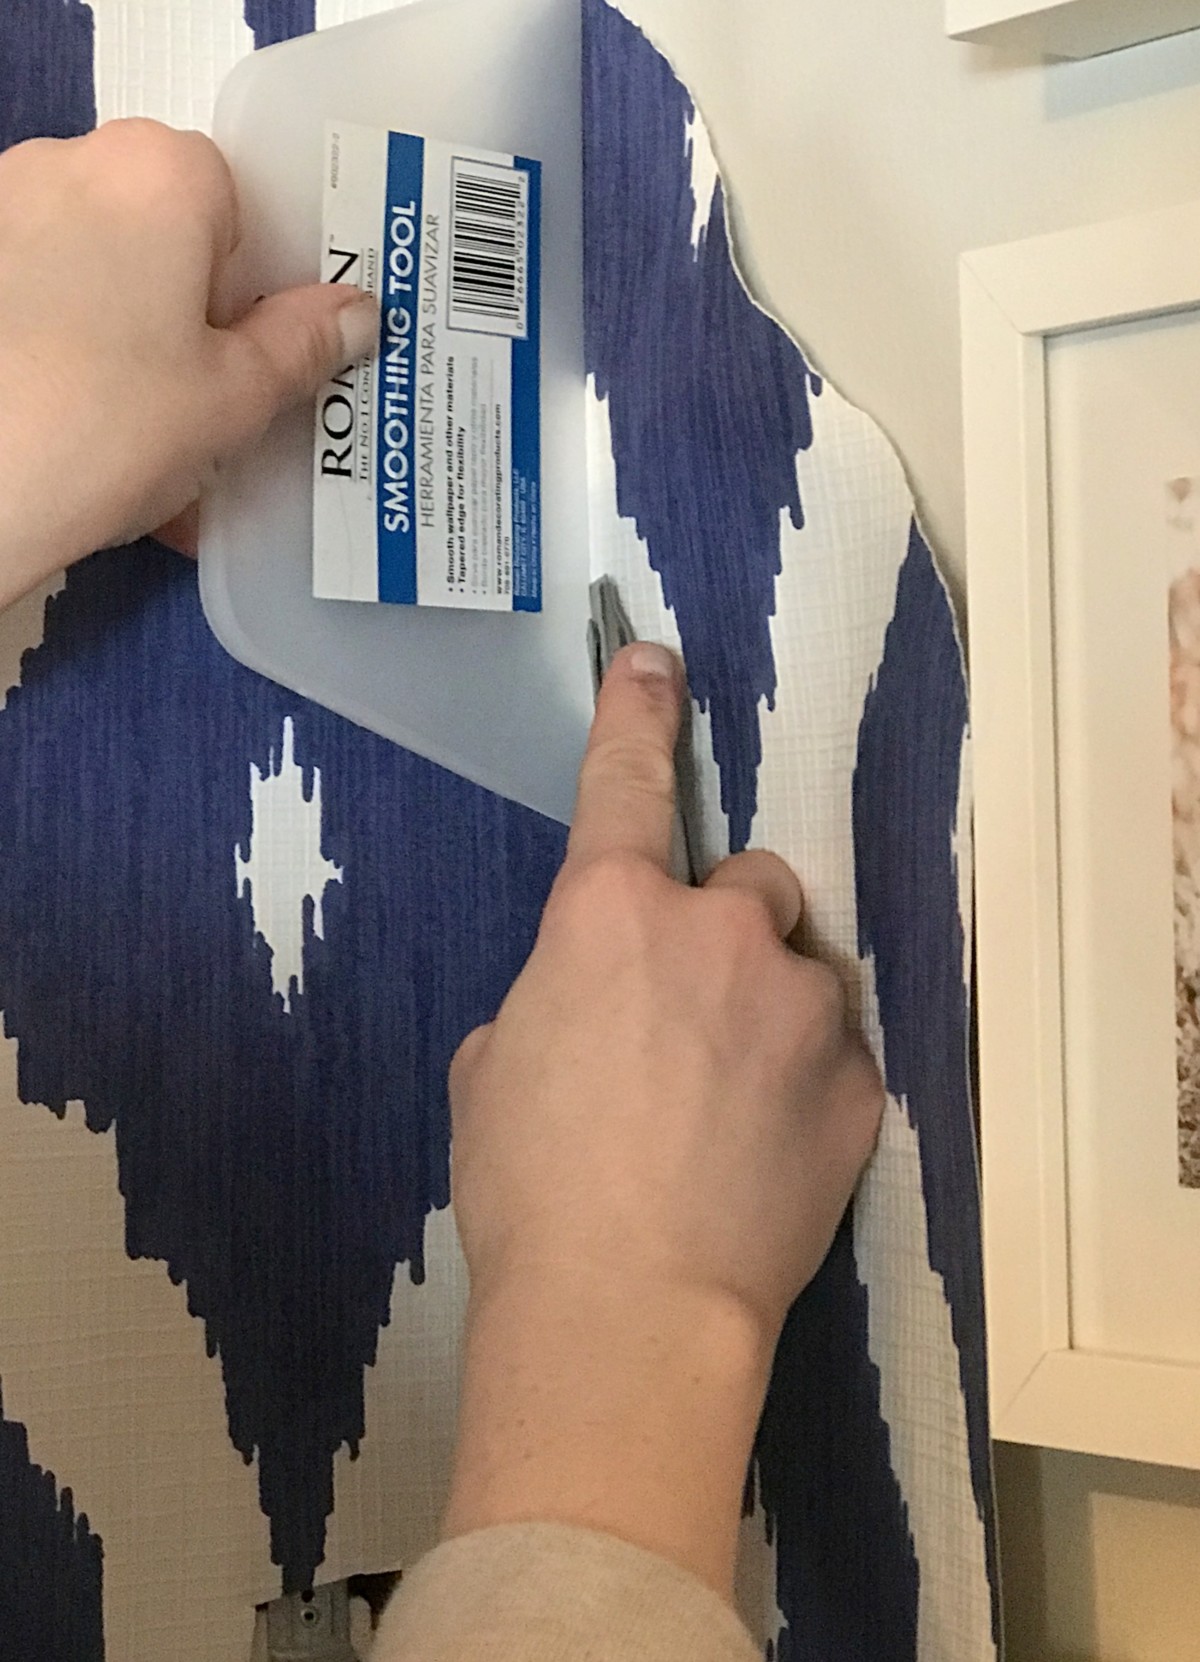
Once the paper is positioned, then using a wallpaper smoothing tool, lightly glide over the paper towards the seam / edge to smooth any air bubbles.  Then wipe away any excess glue with a damp cloth.

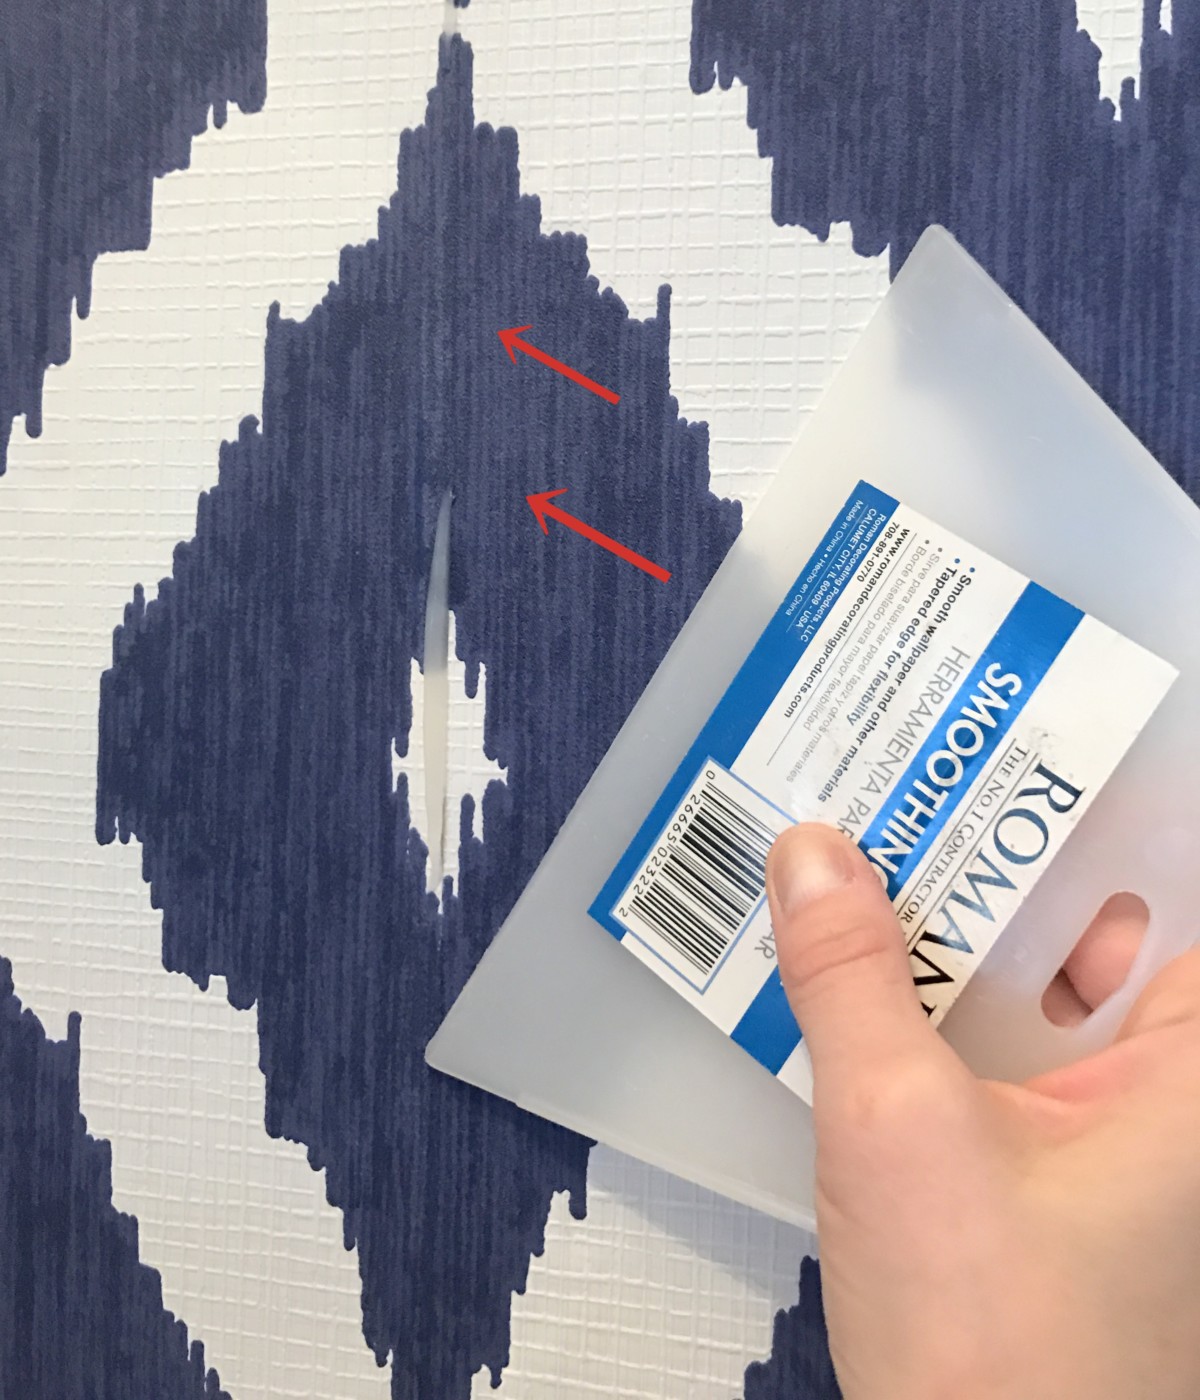
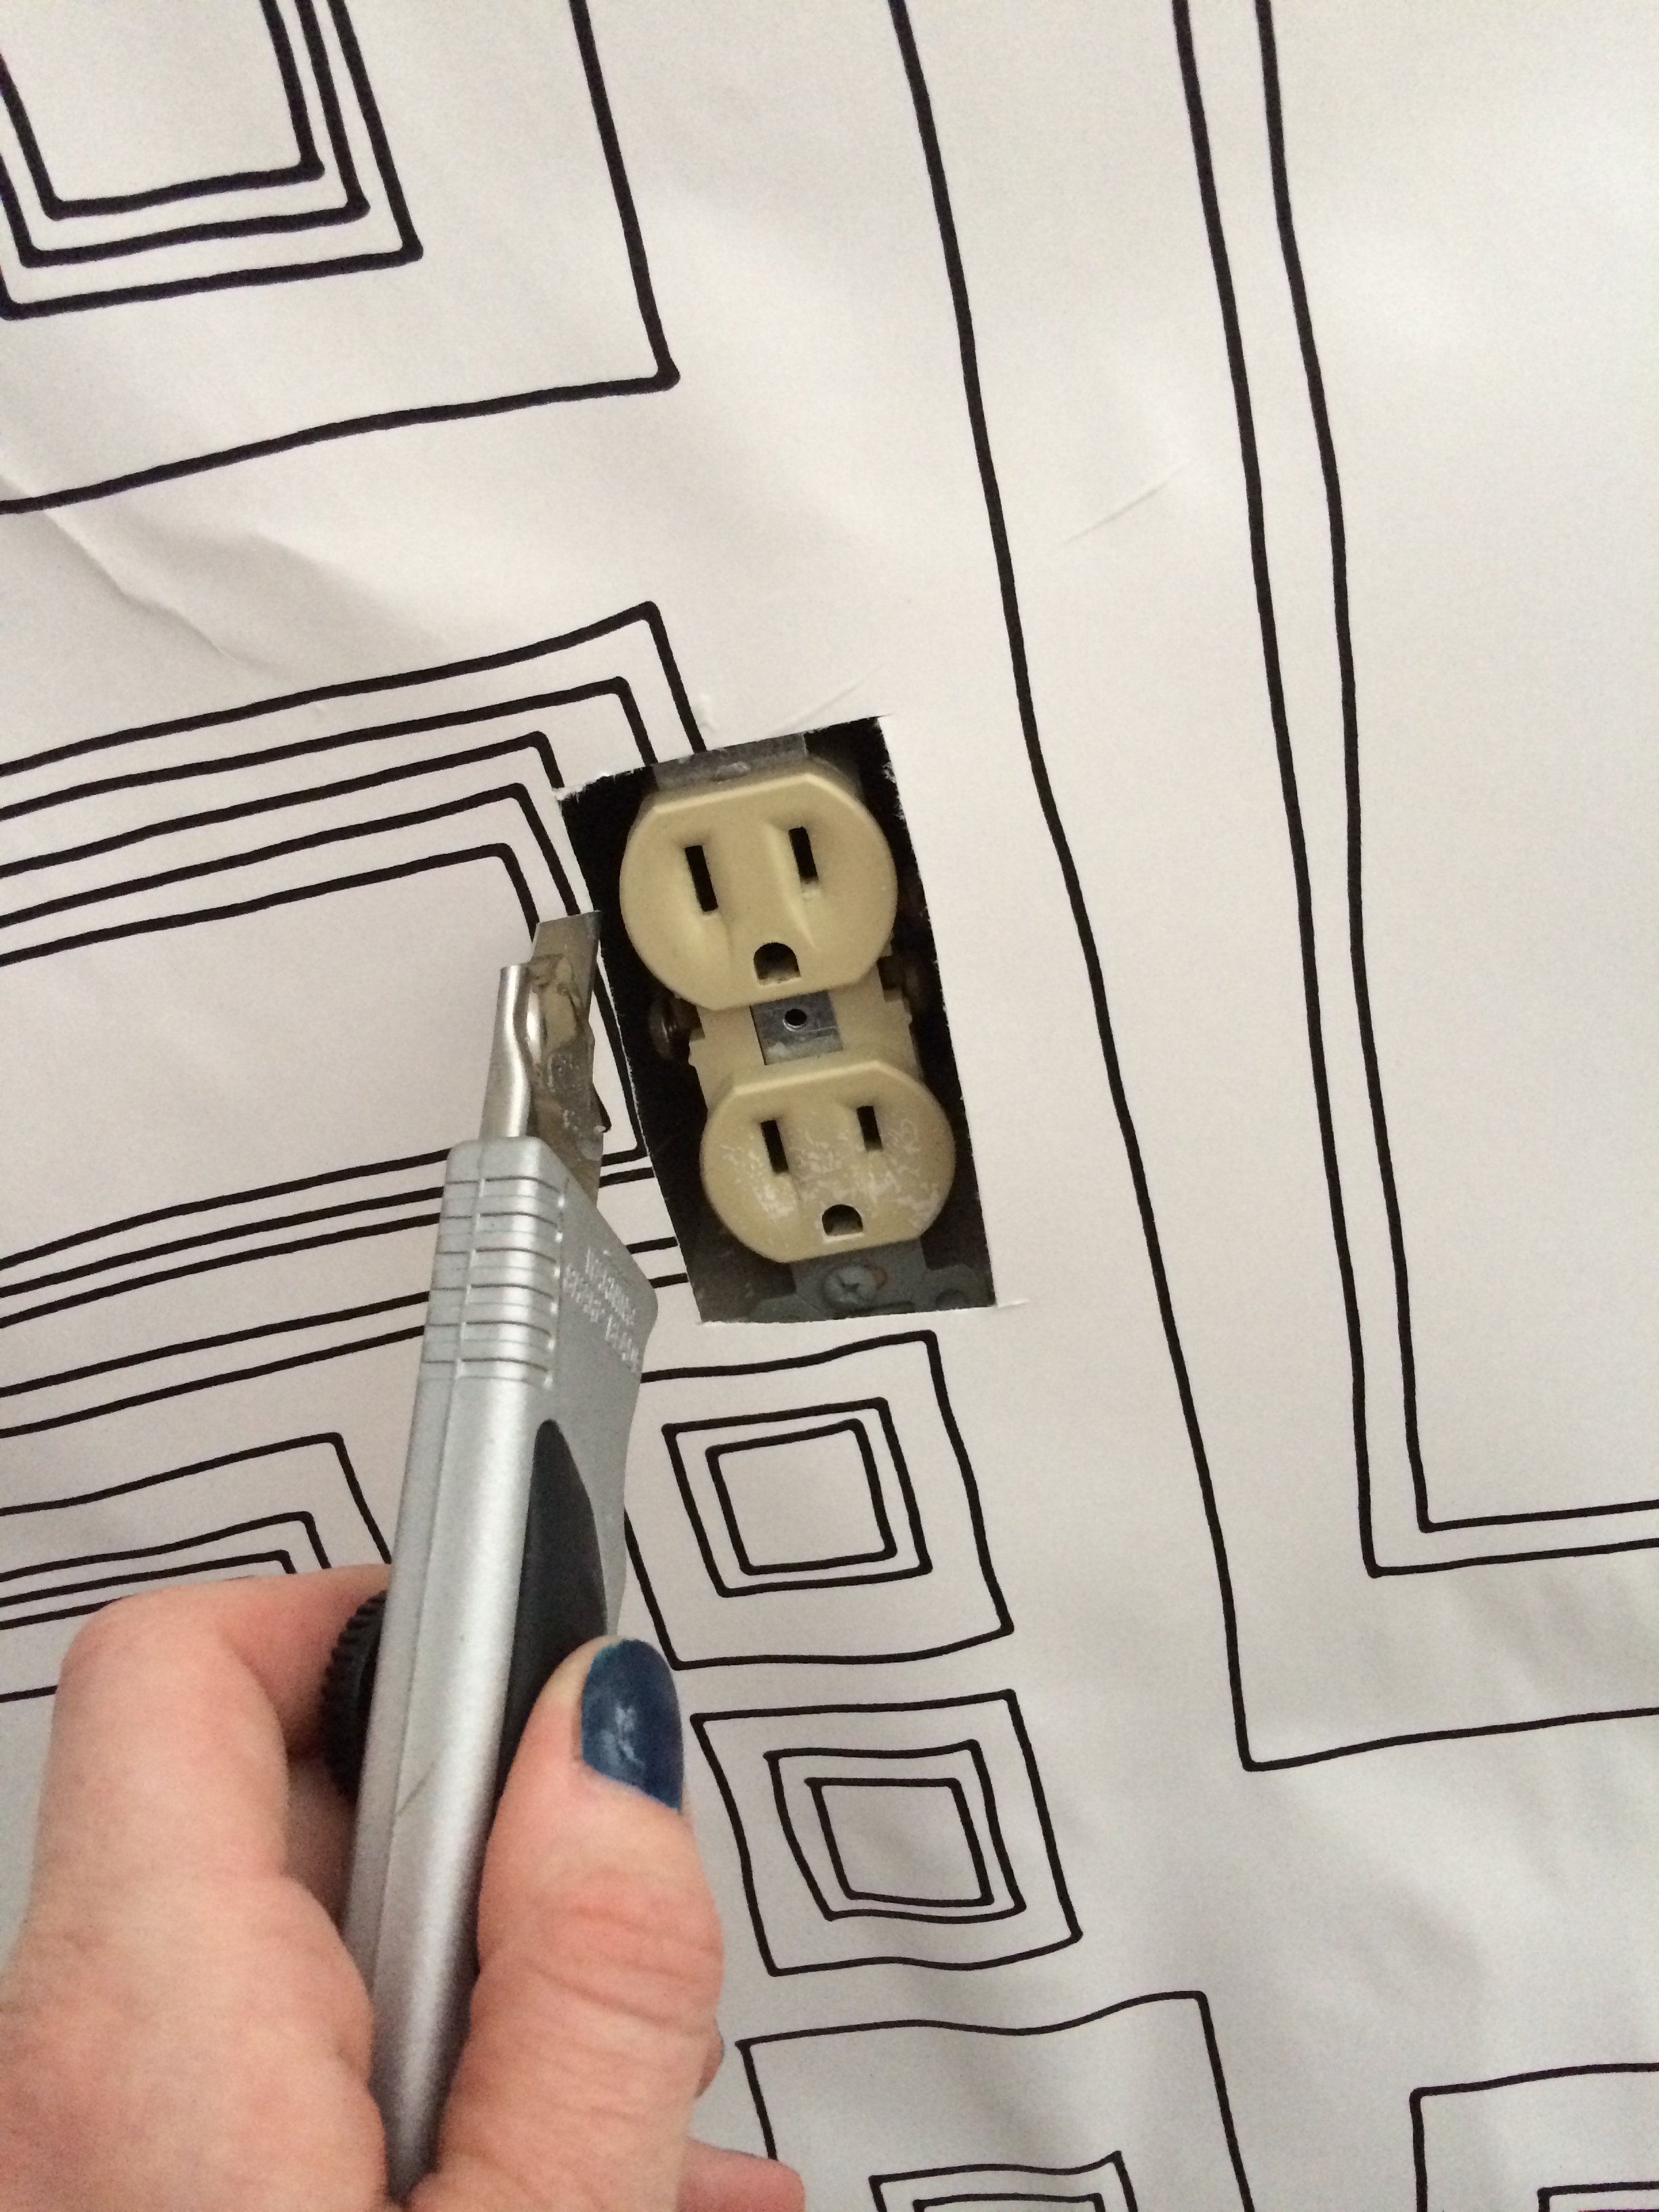
At the wall corners, ceiling, and base use a sharp blade + the smoothing tool to carefully cut the extra wallpaper.

This one wall took about 2 hours to wallpaper start to finish.

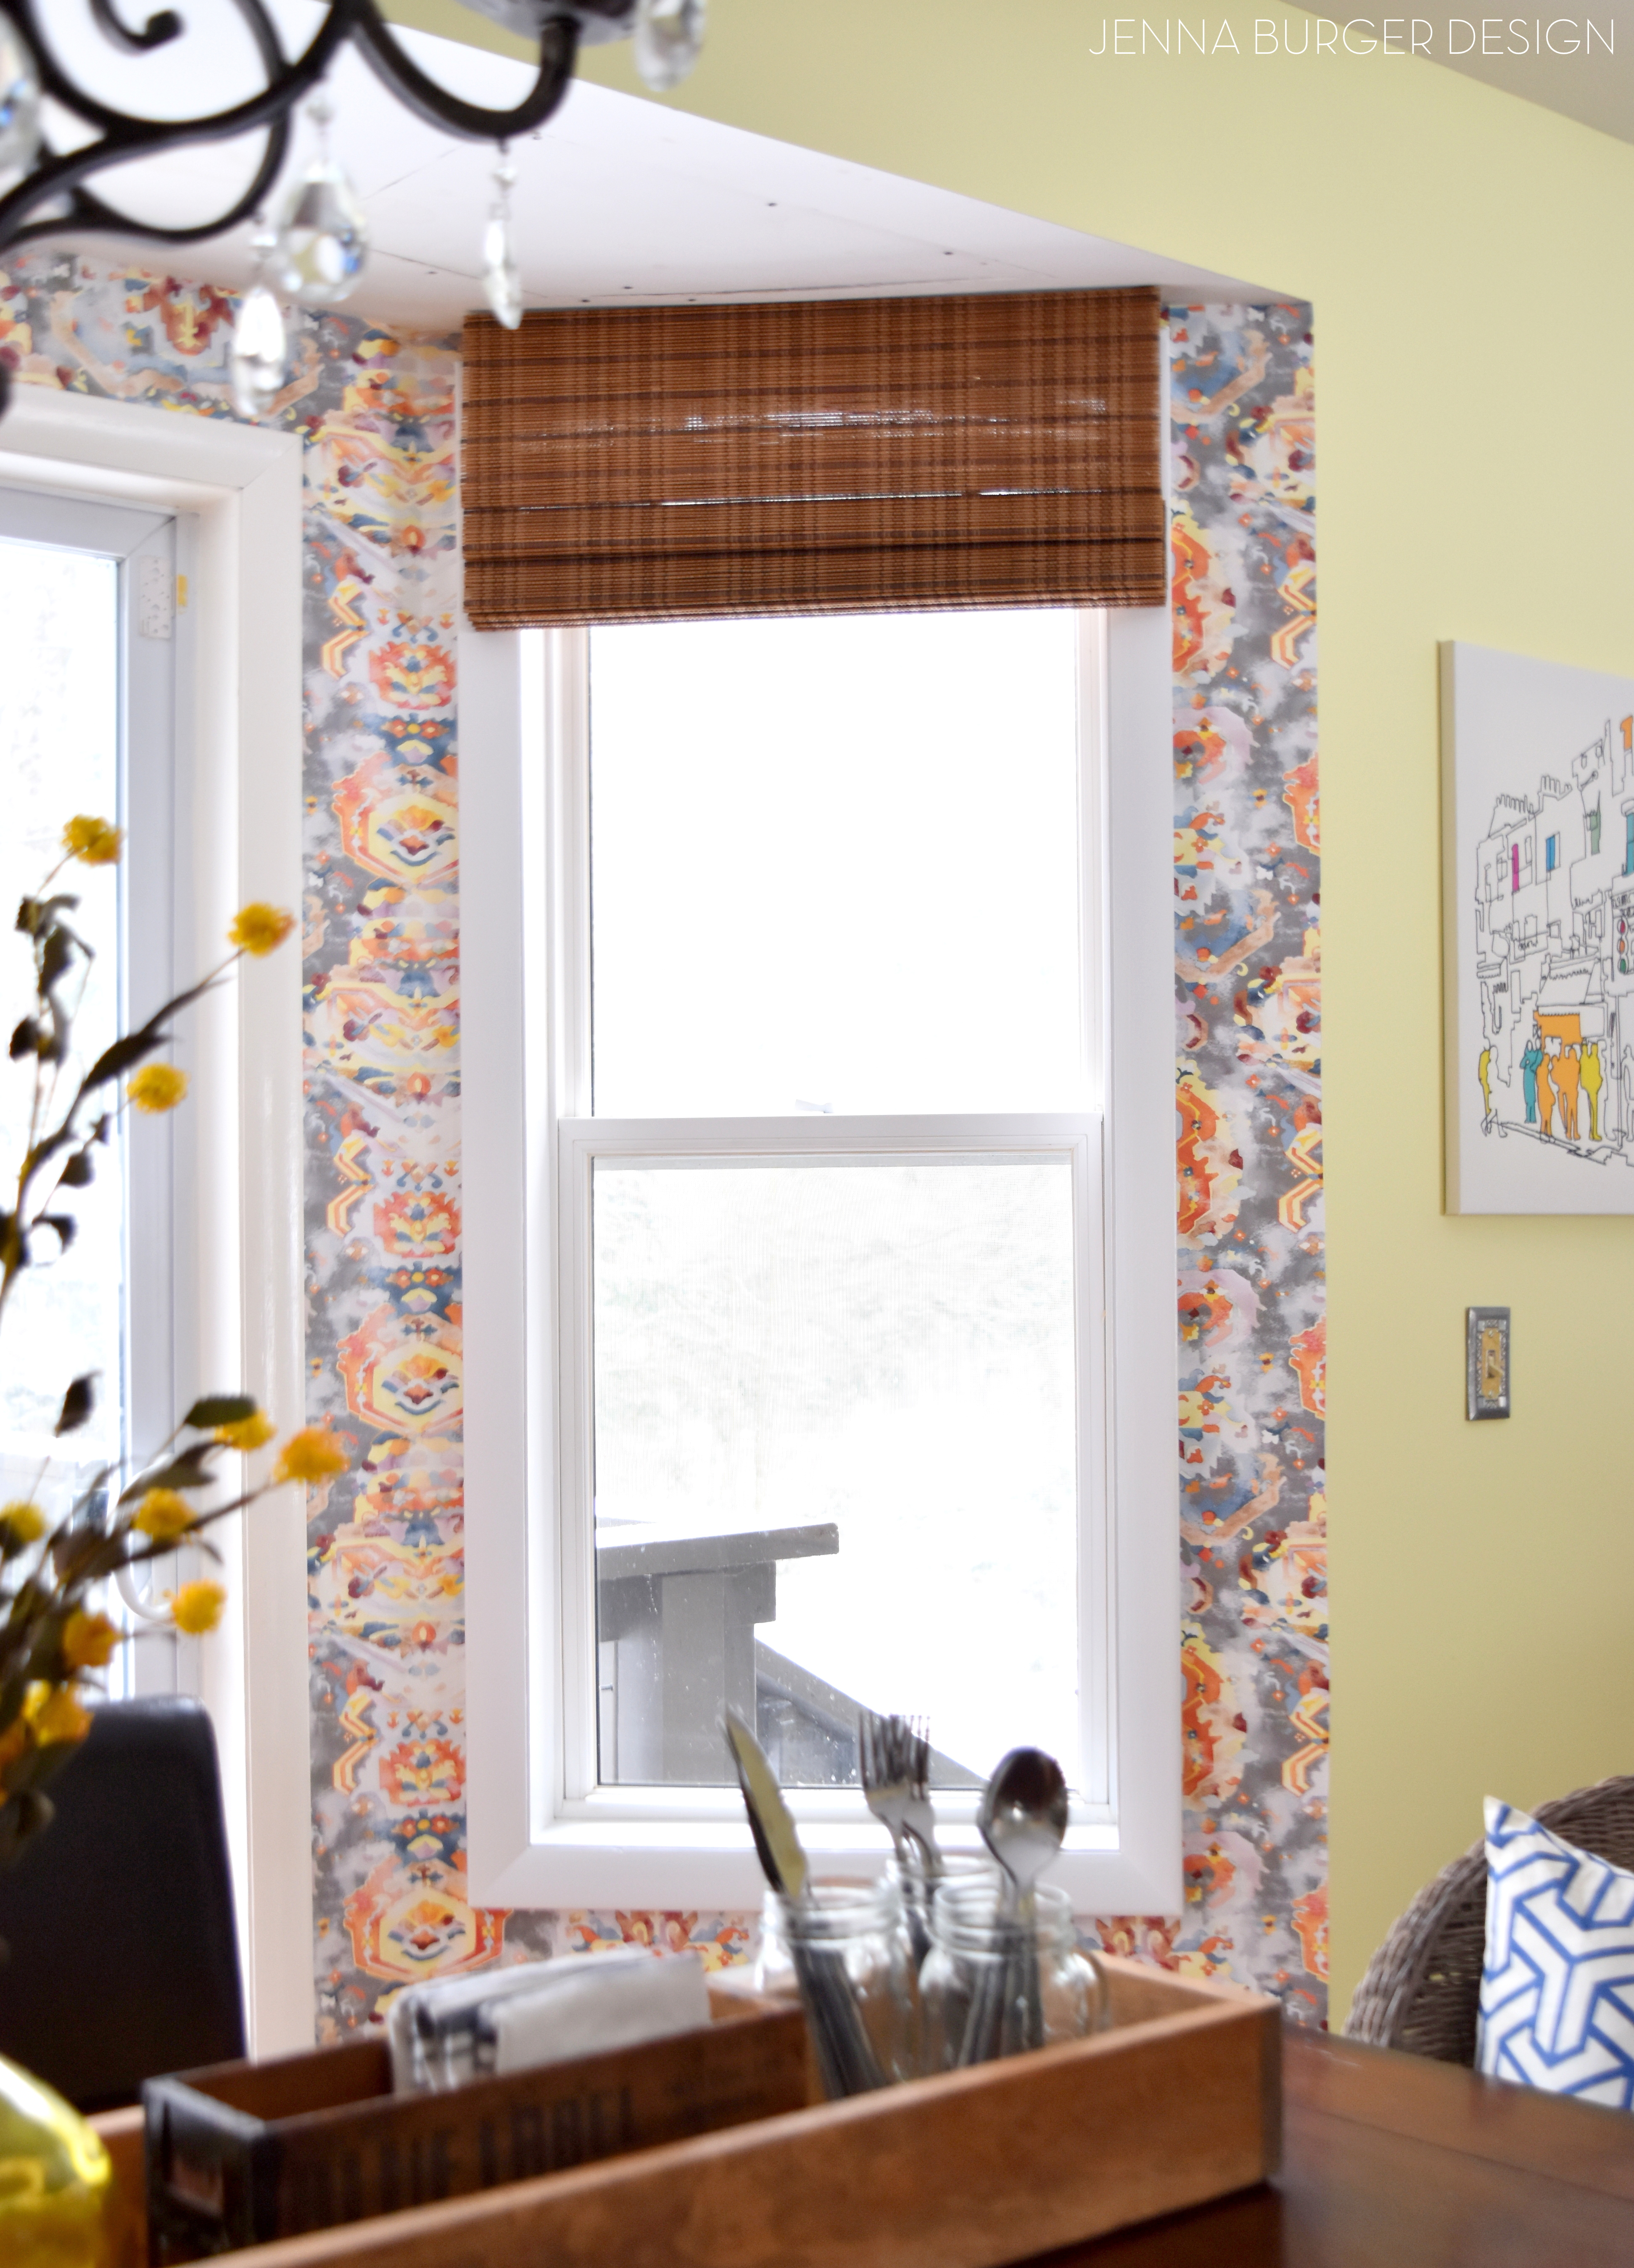
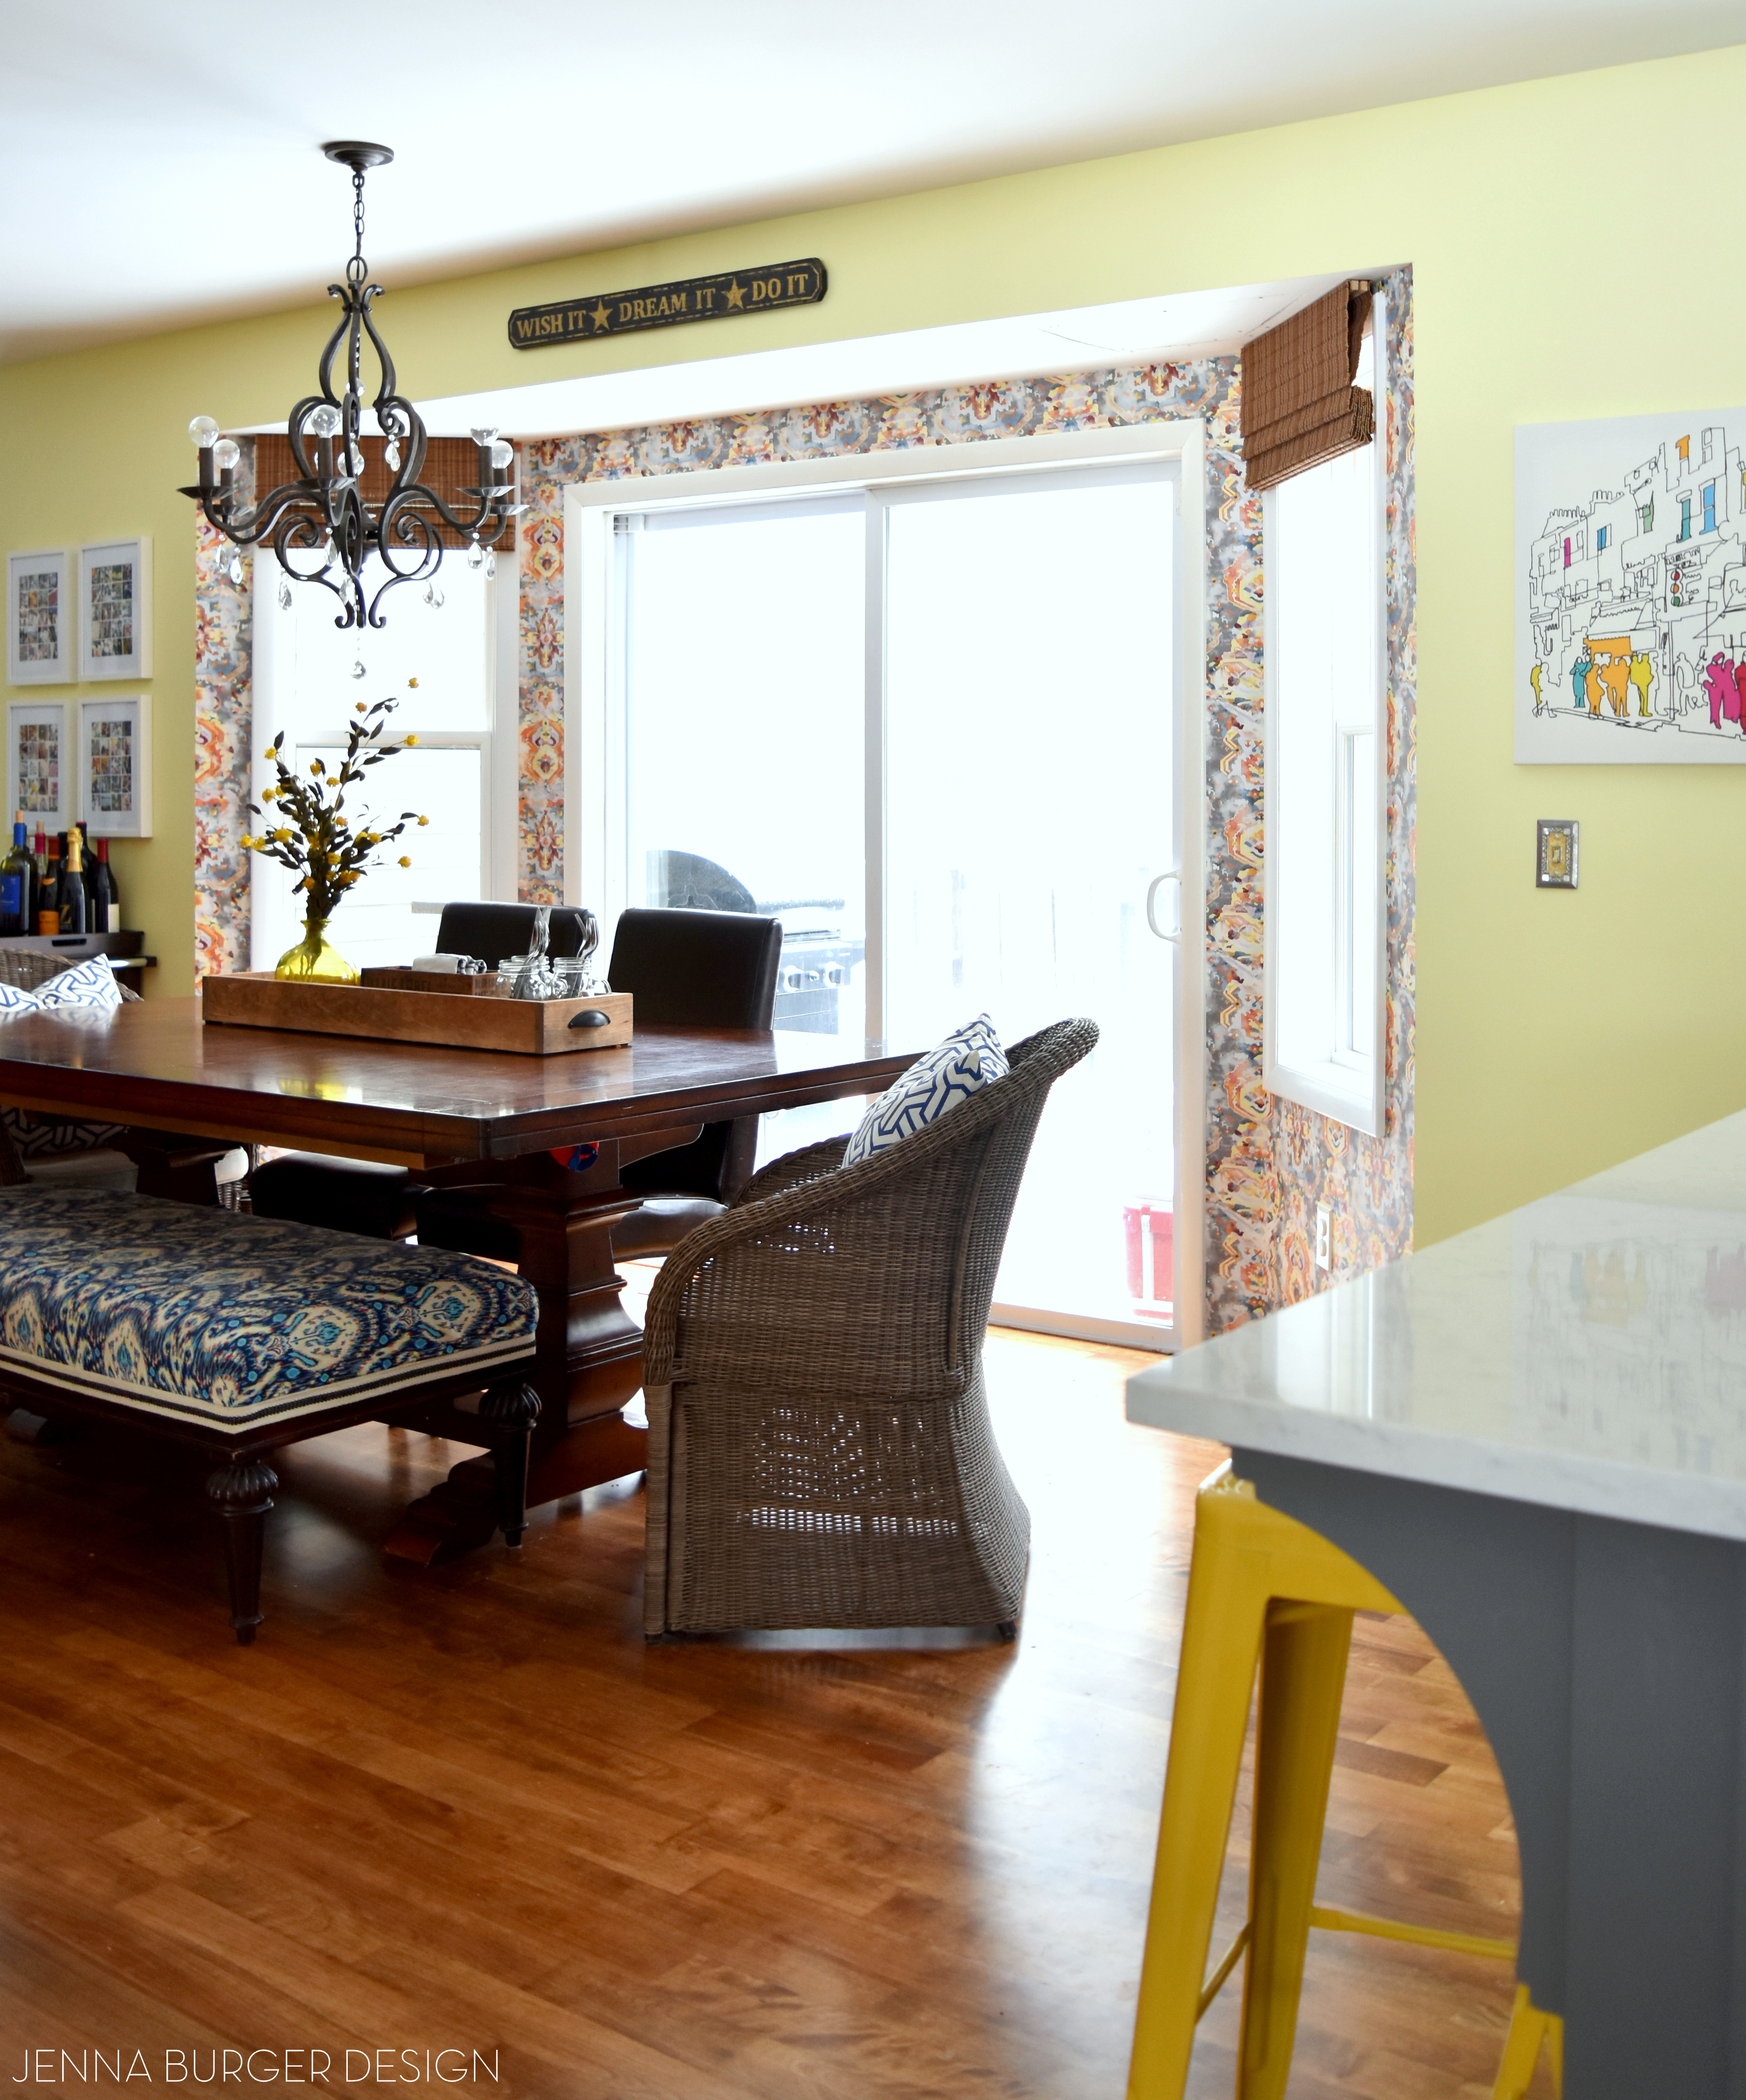
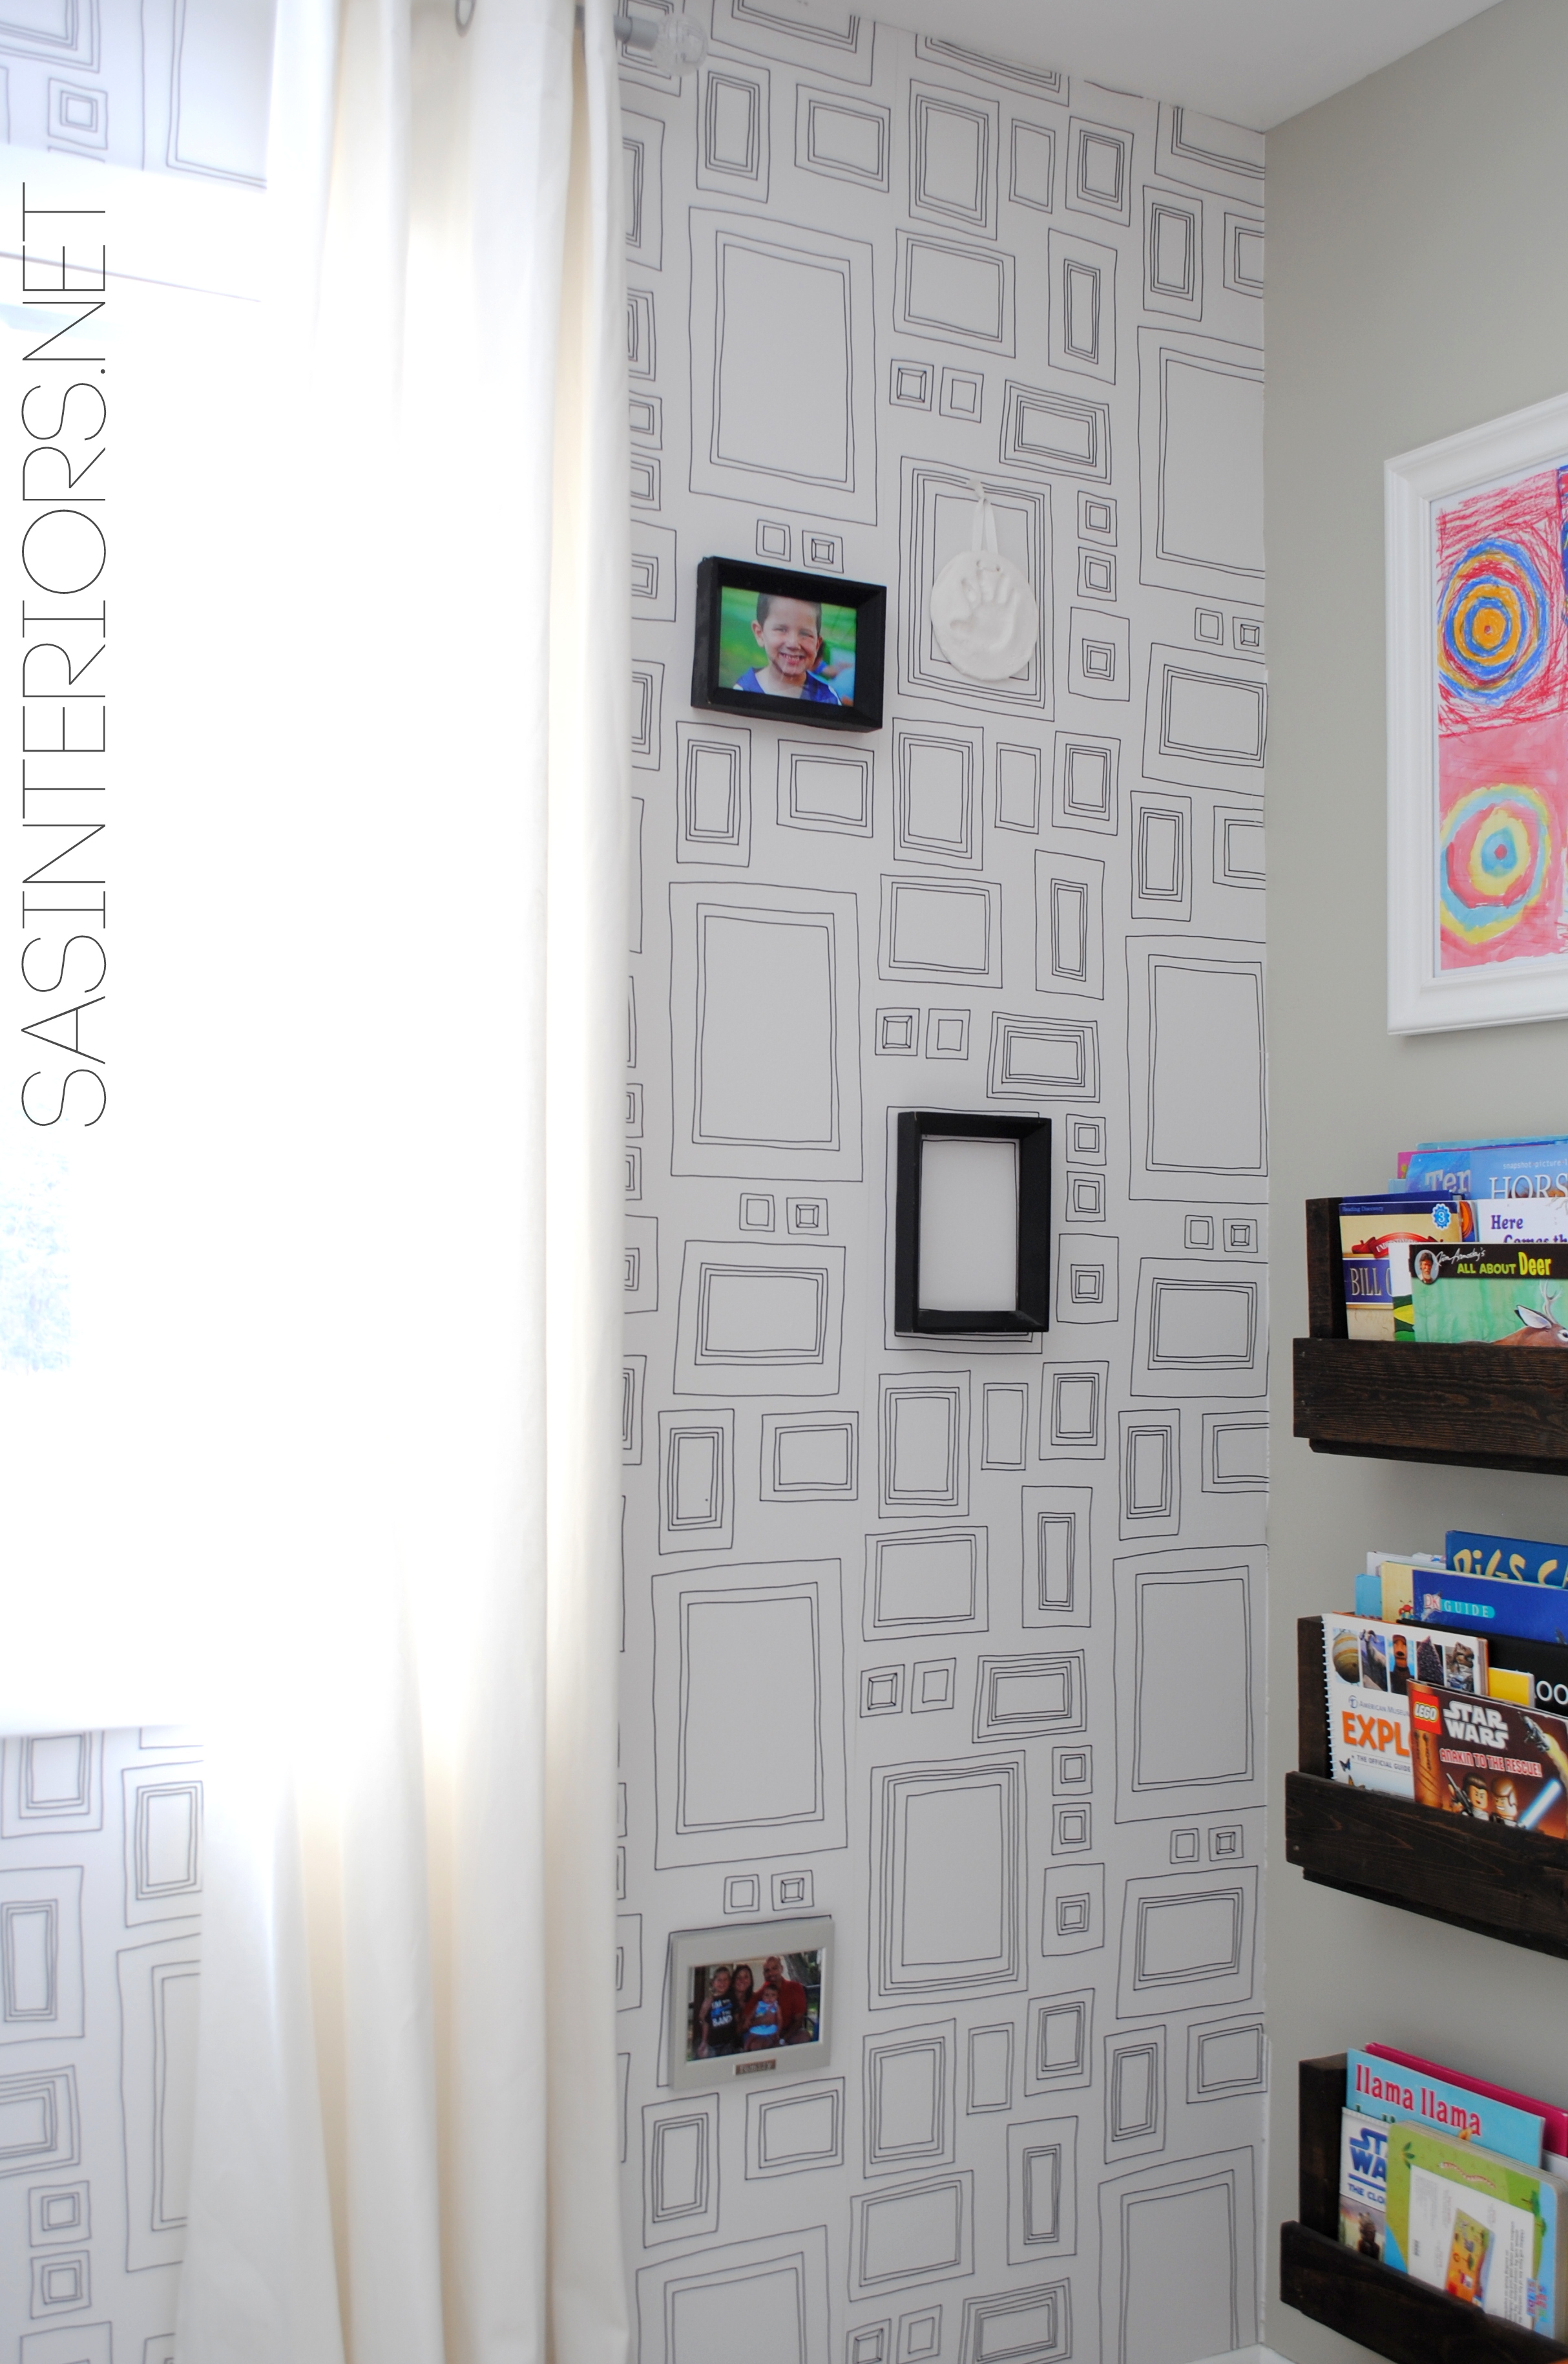
From how it looks before to now, the difference is quite dramatic…

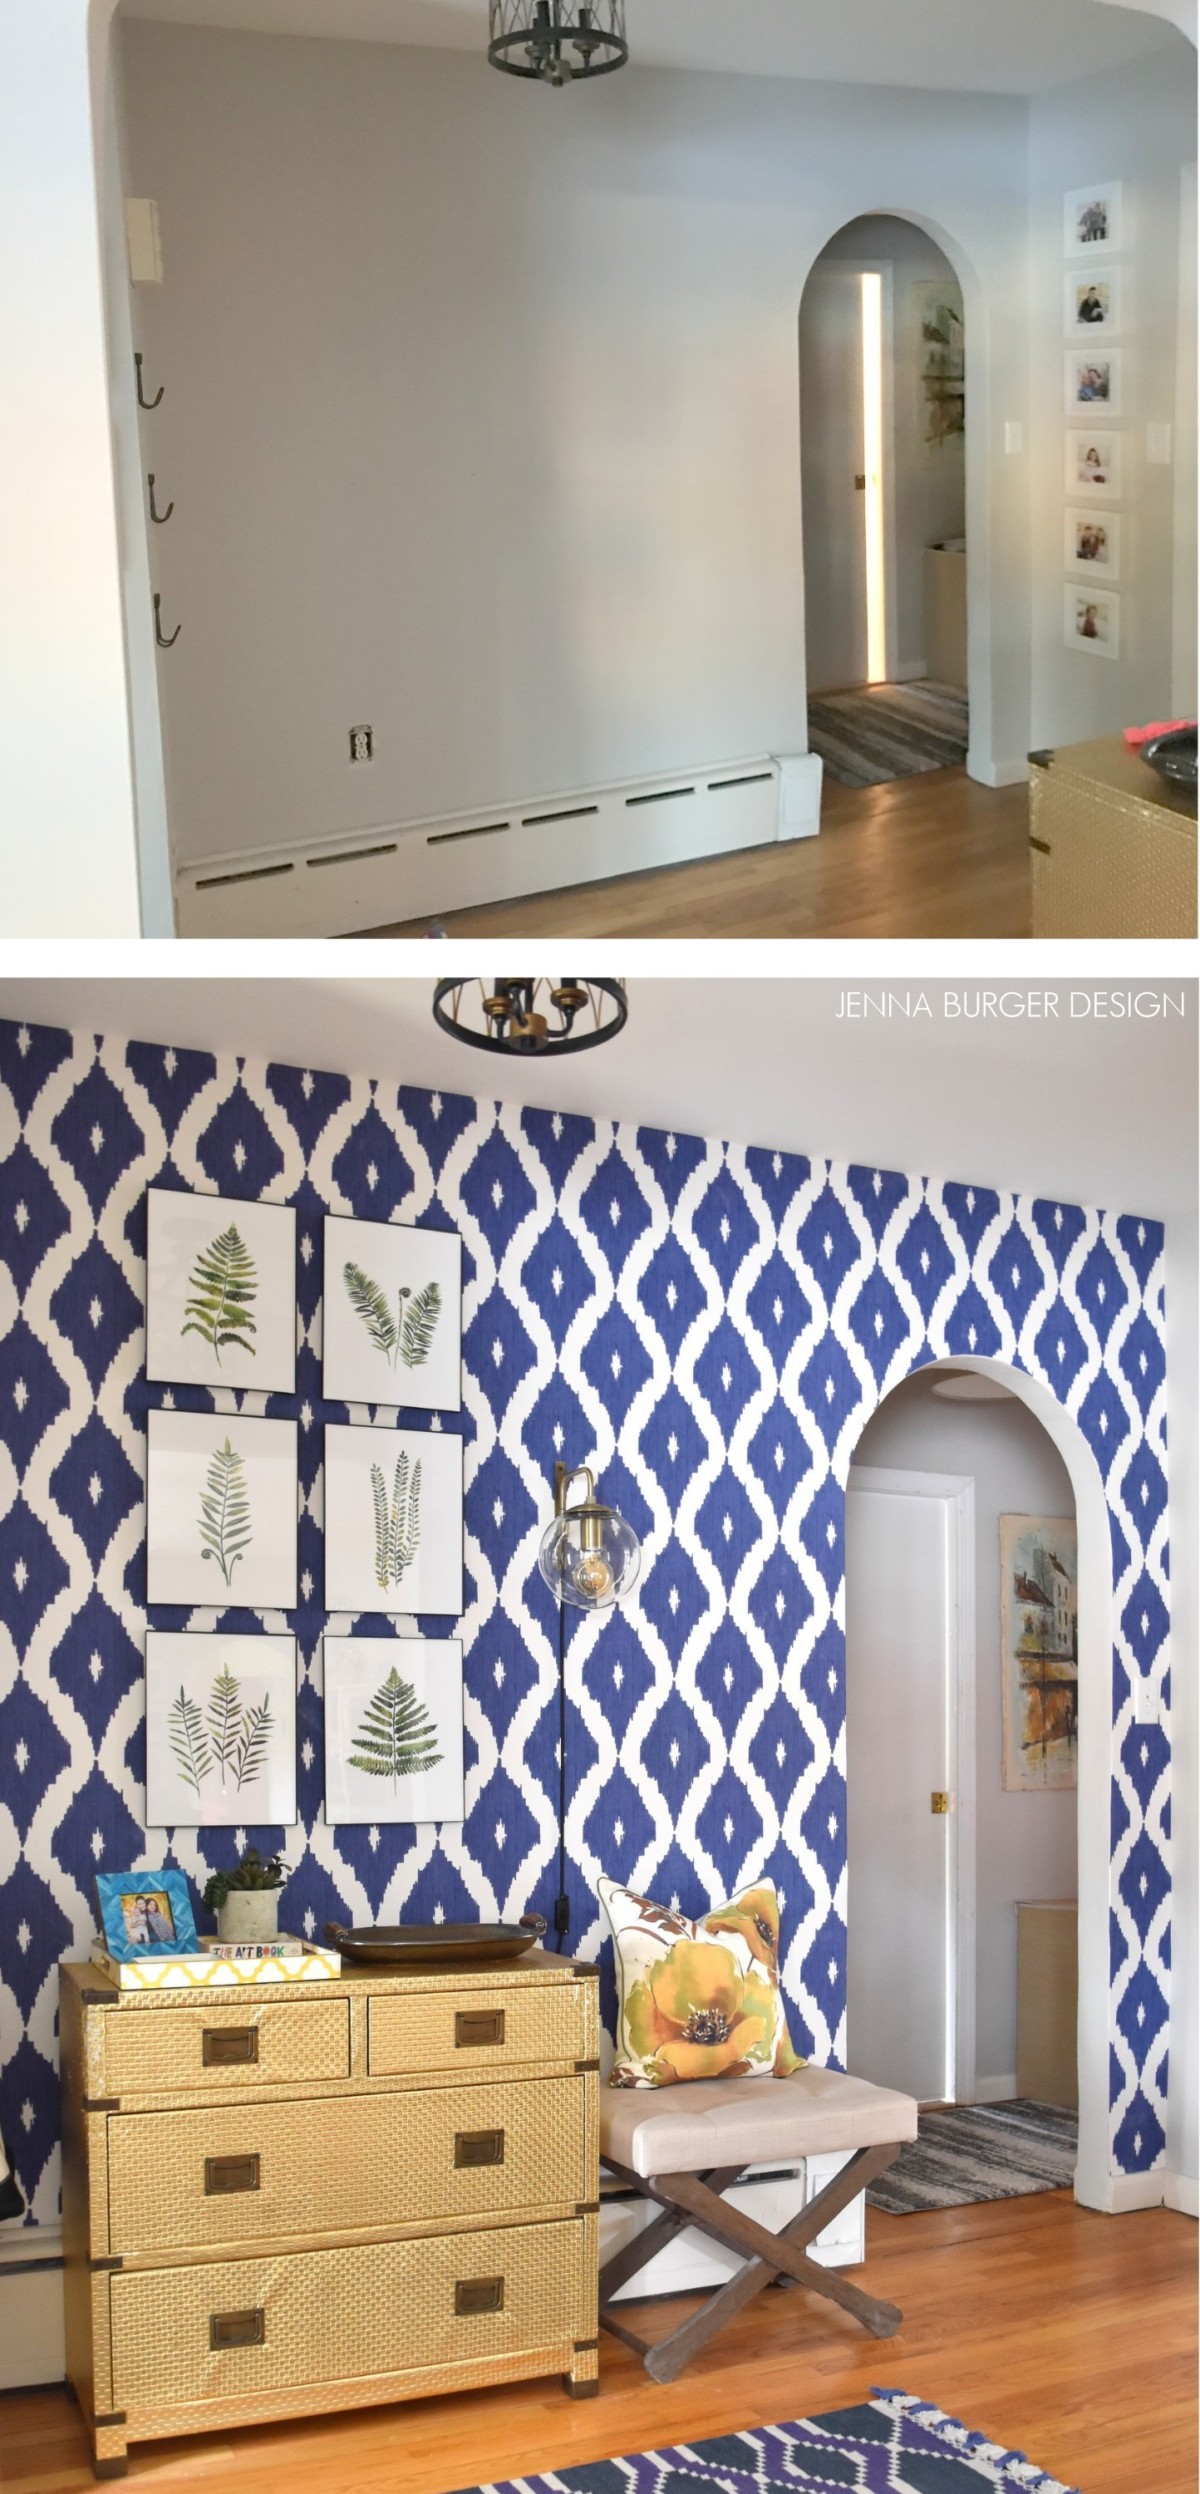
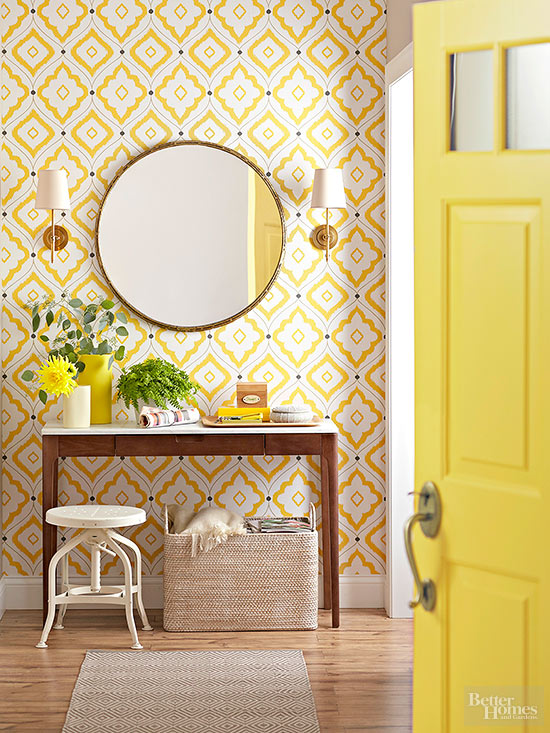
The foyer space is so striking and inviting now with the bold wallpaper backdrop.

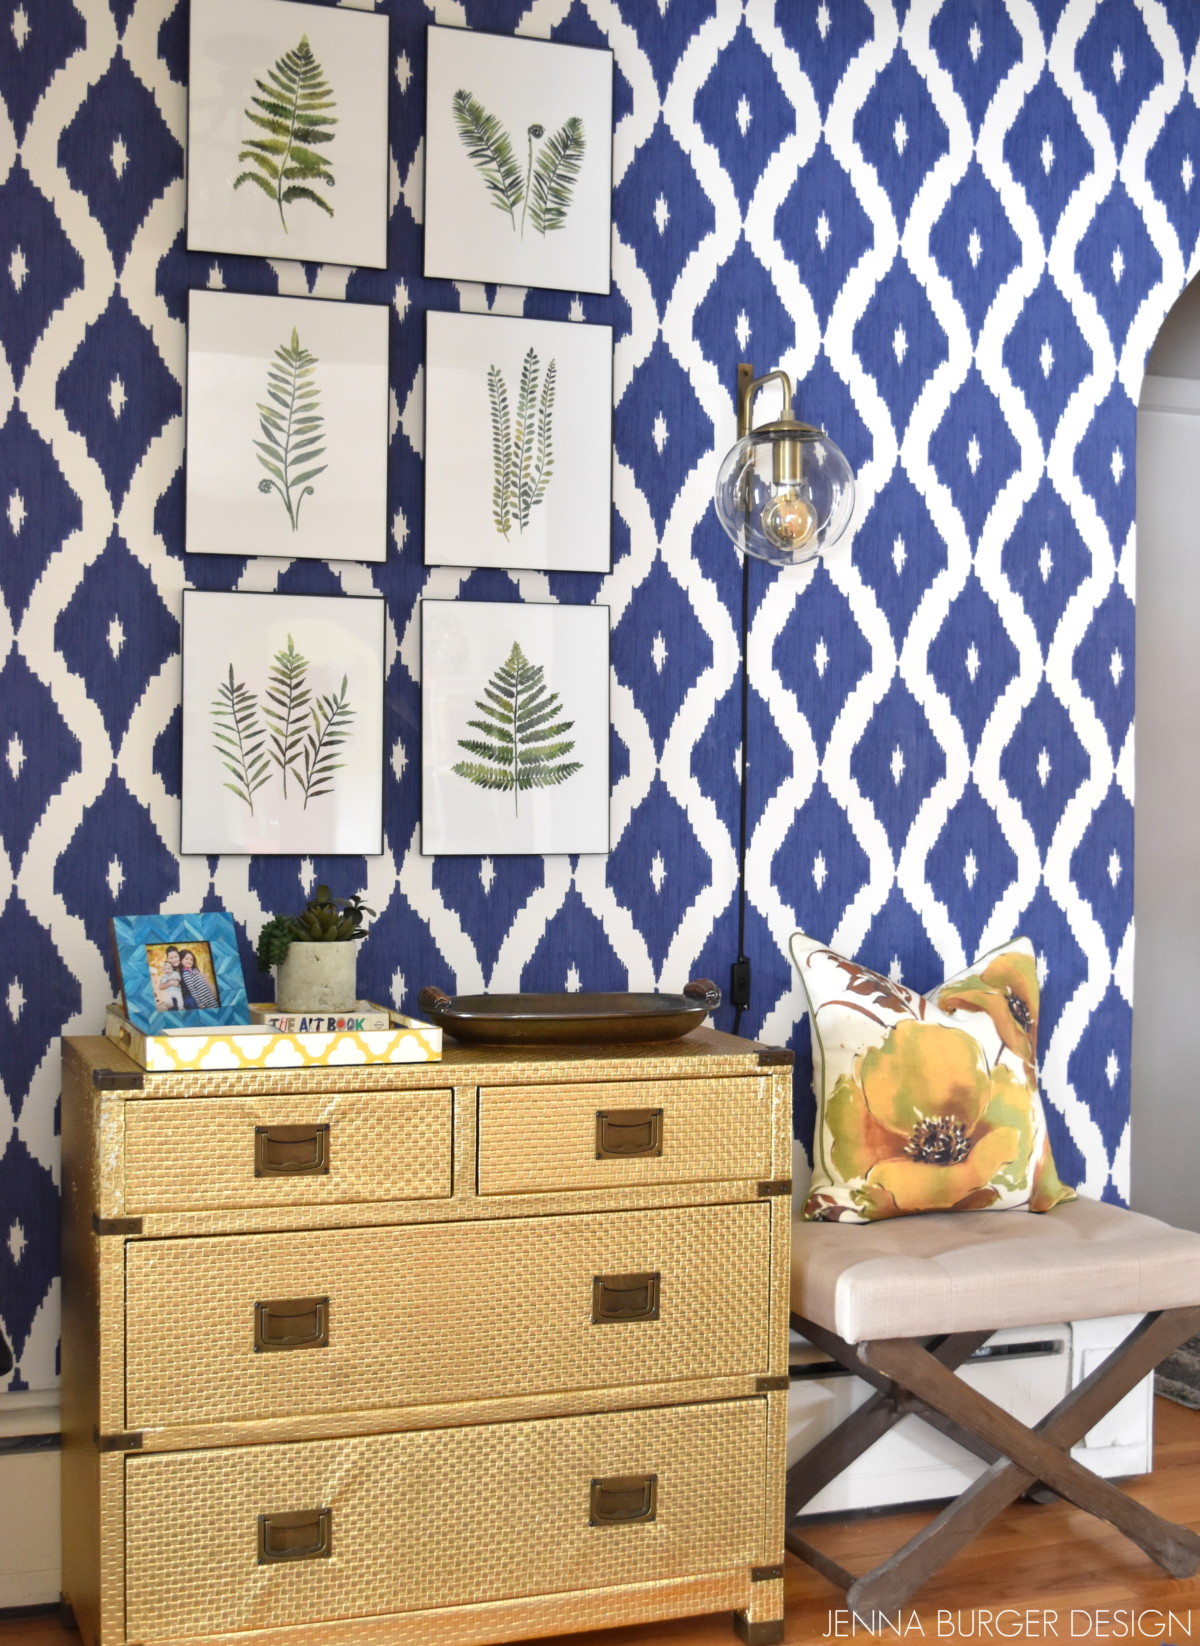
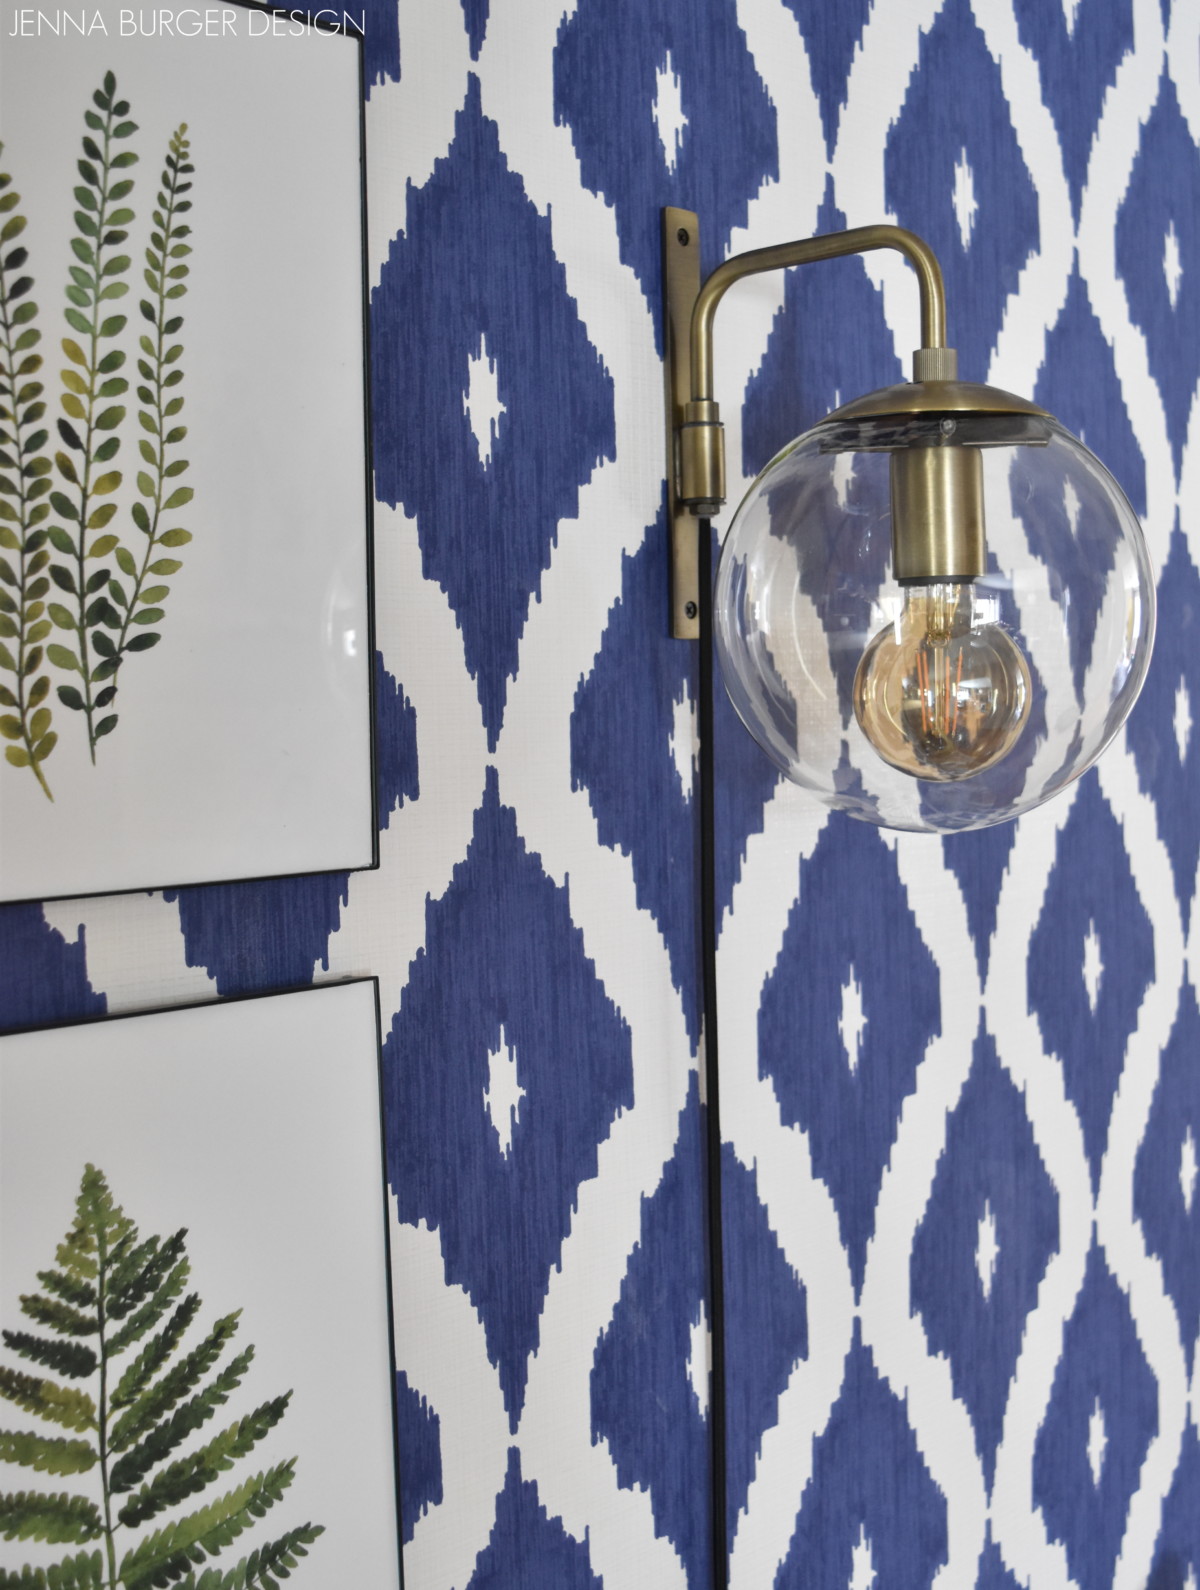
Even though there is a new pendant ceiling light in the space, I added a plug-in wall sconce that has brought beautiful ambient light.  It was a great find from World Market for less than $60! I adore the pretty, soft glow in the evening hours.

The 6 fern framed pieces are watercolors. Years ago I framed dried ferns, but over time they started to brown, so I found these watercolor prints through Etsy (wonderful shop by the way) and made the plunge to purchase them. I love how they look so real and bring an organic vibe to the space.

The gold dresser has been around for 5+ years (sorry, can’t find the source) and the bench adjacent to it was from One Kings Lane (again, no source but it’s a typical x-leg bench stool).  The pretty pillow was a recent markdown, red sticker sale item I picked up from Home Goods.  The yellow + apple green hues perfectly paired with the other elements and colors throughout the house.

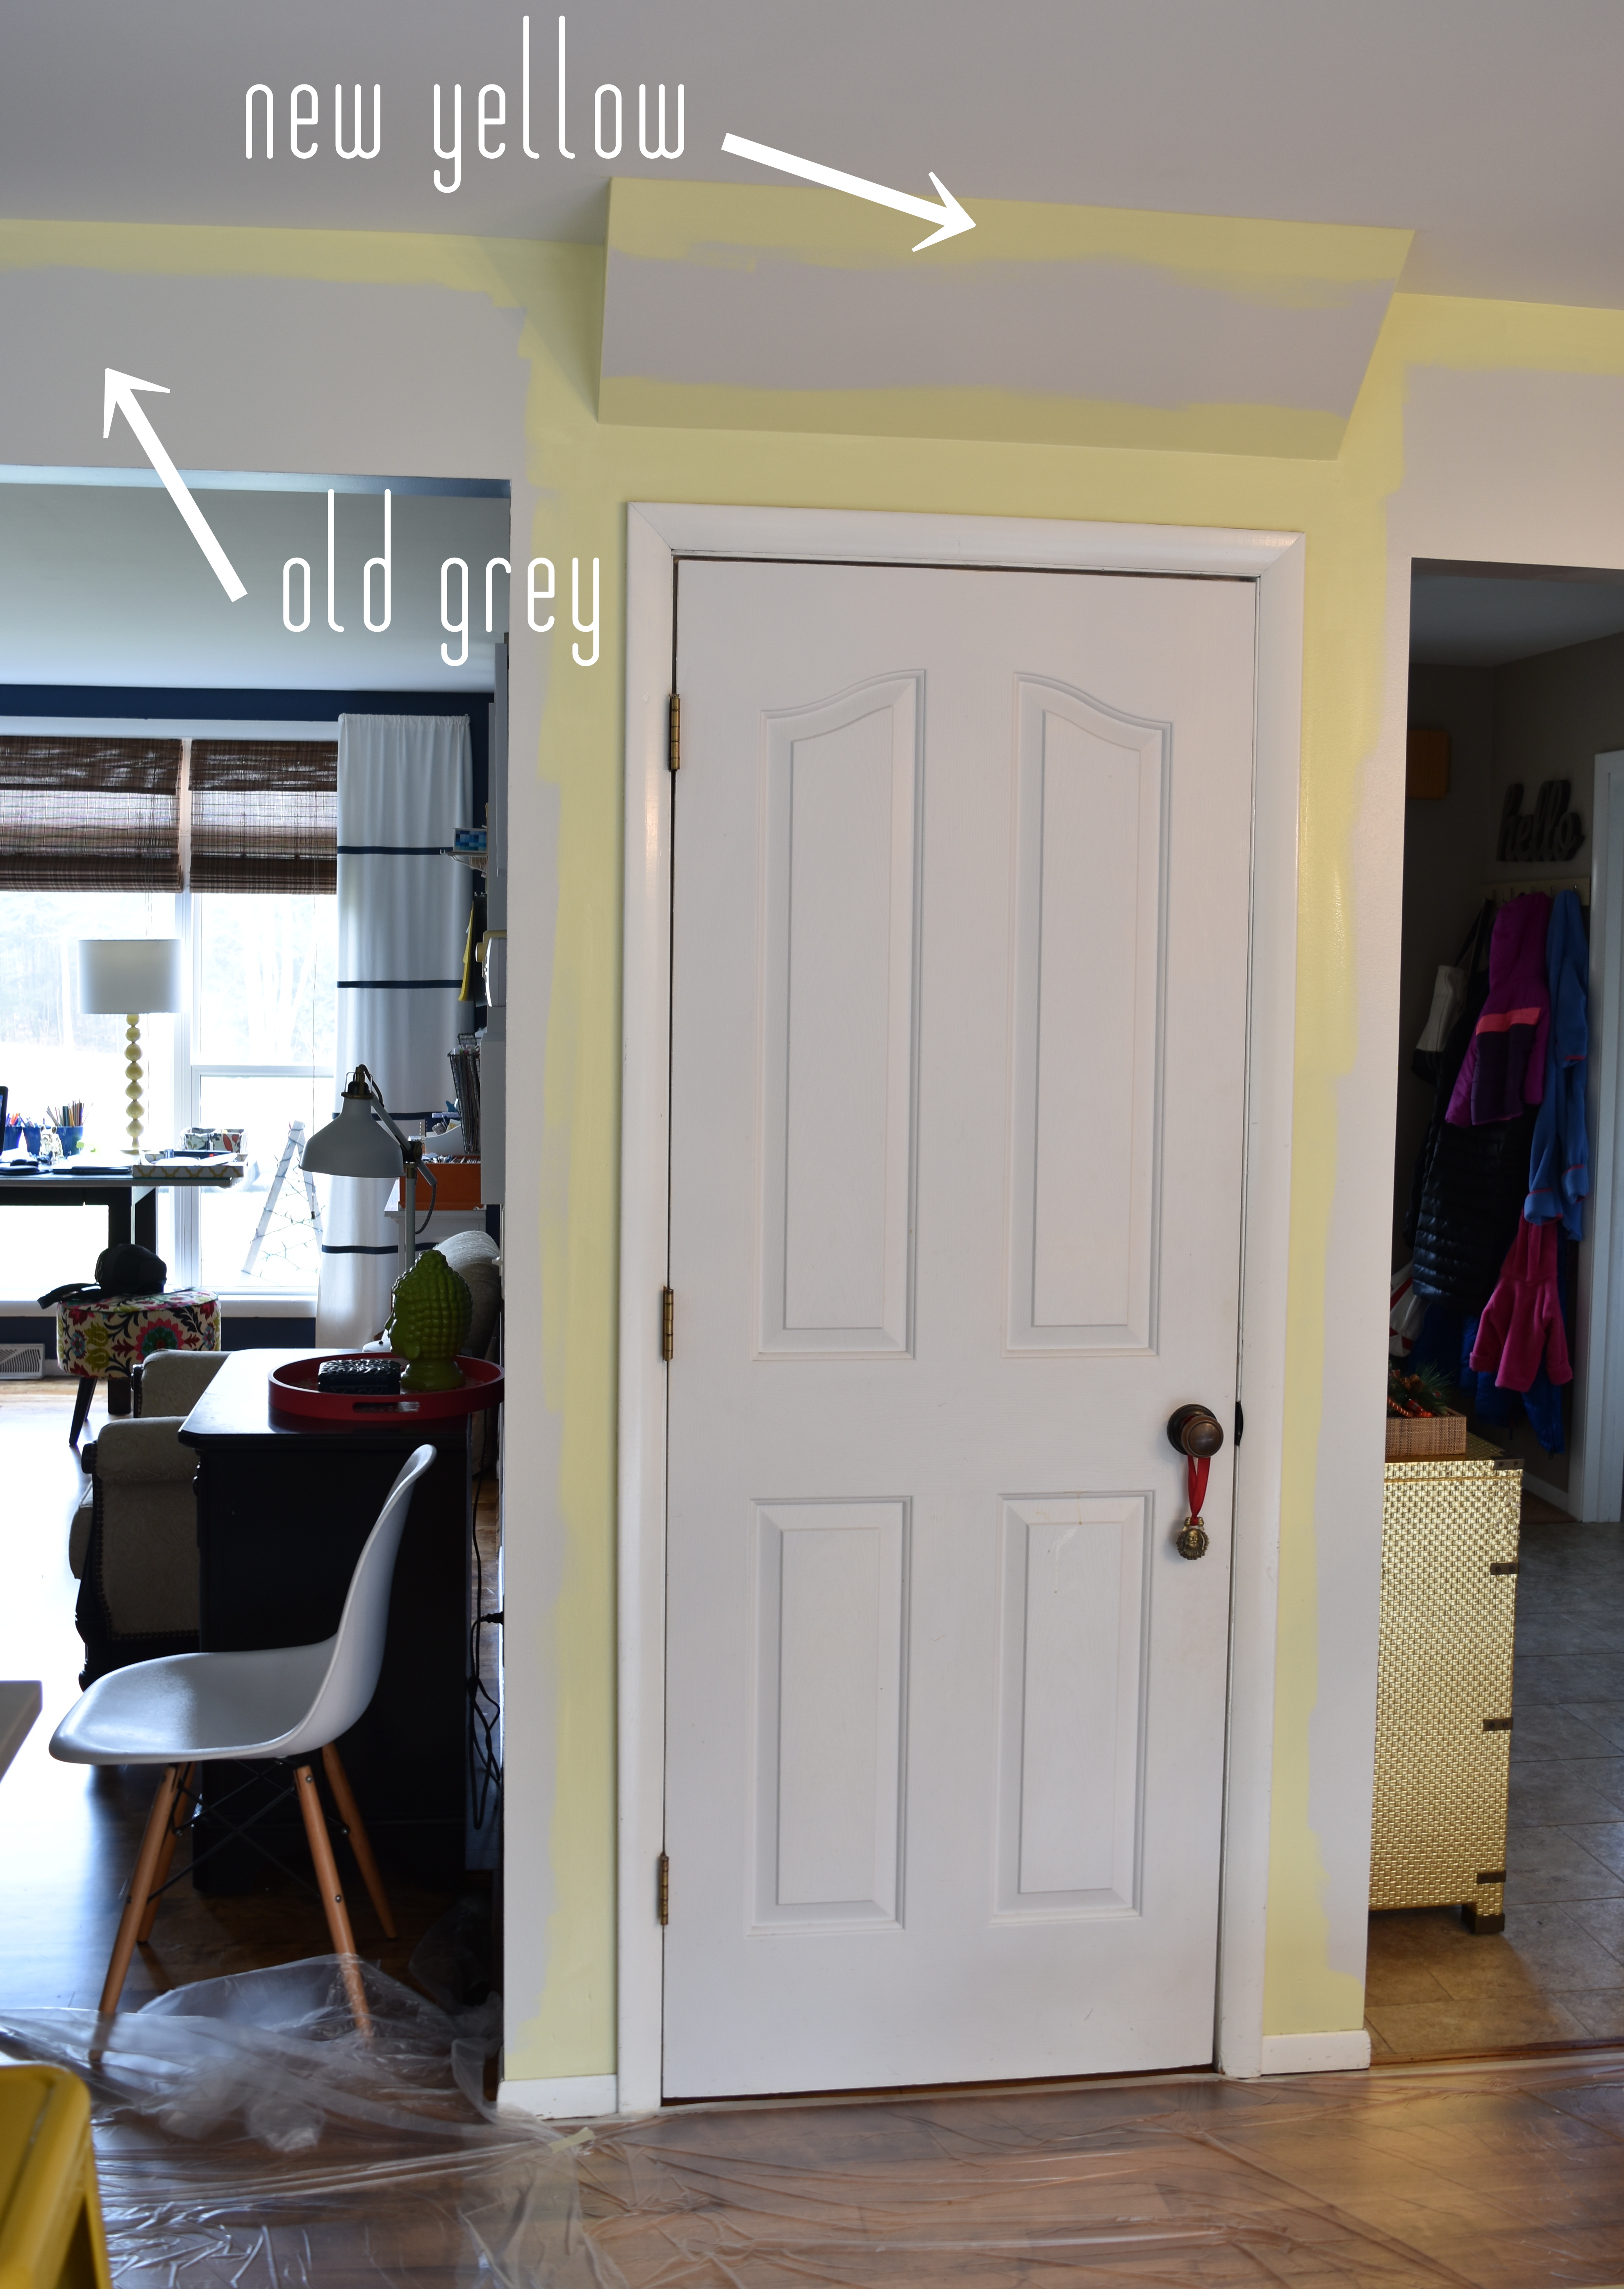
We also have a new color on the front door… we went from apple green in our previous home to a vibrant, bold yellow.

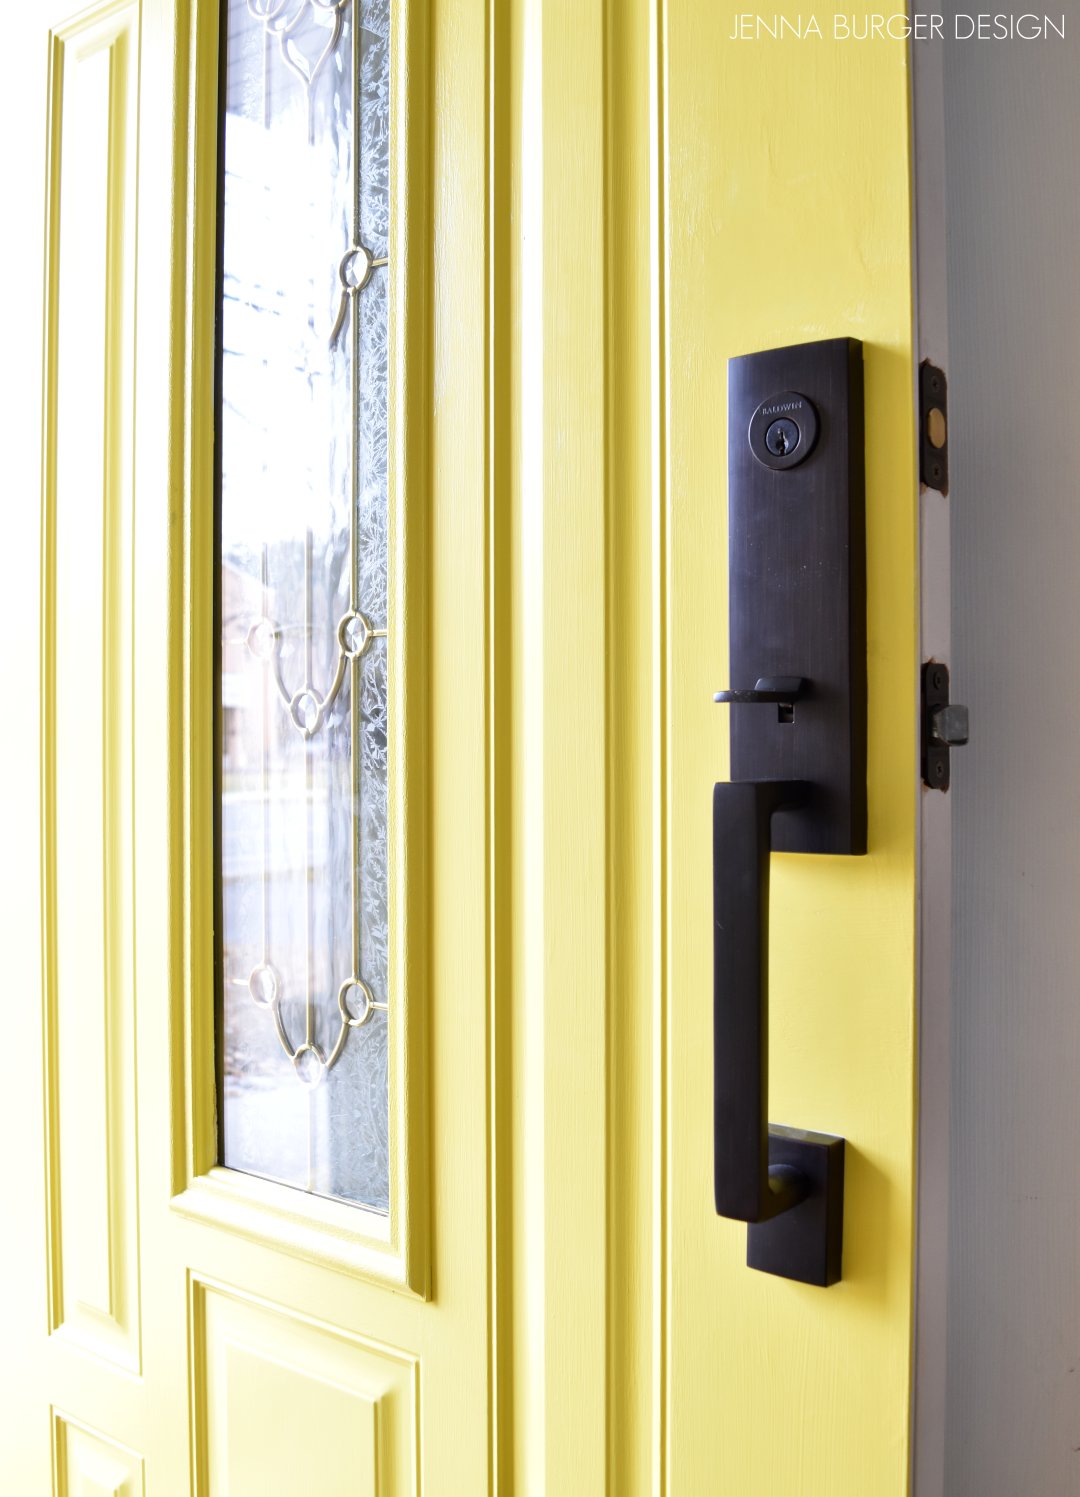
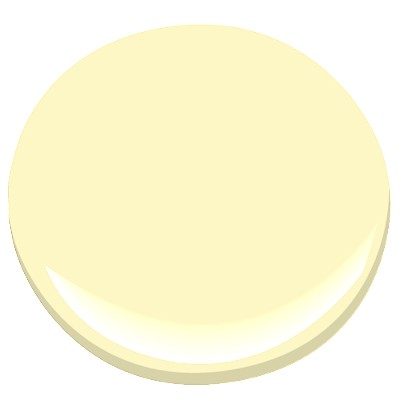
The color is Valspar Lemon Curd and is a true yellow hue.  If you haven’t checked out our recently renovated Pajama Lounge, the rich + bold color is also used cohesively throughout the space as well.

A new black lockset also adorns the door and brings an updated modern look to the mid-century house.

From the moment you step on the porch and set foot inside, the goal we set for ourselves and for those that visit is to feel greeted with a colorful, vibrant space balanced with warmth and an inviting ambiance.  Do you think we achieved that?

Thanks for visiting and please return soon for more room renos + DIY projects!

DISCLAIMER: THIS POST ON CREATING A COHESIVE COLOR PALETTE IS A COLLABORATION WITH LOWE’S. ALL OPINIONS + SELECTIONS ARE MY OWN.

In-Trend Wallpaper Inspiration + Sources

Wallpaper from the 70’s… Some patterns are still bareable, but many have lived their life on the wall to the max.

Recognize any of these patterns from decades past?

1970 Wallpaper patterns

As soon as you saw the title of this post on the topic of wallpaper, you might have cringed.  But don’t stop reading… please!

For many, the thought of wallpaper might bring you back to your childhood home with the walls covered in bold, intense patterns in hues of pea green and orange. Those ugly retro patterns adorning not only the walls of each room, but also the curtains, sofas, and more, will forever be engrained in our heads.

After the many years of removing wallpaper from our fixer upper homes to rid the intense, dated look for a more soothing aesthetic, the thought of wallpapering again was far from thought.

I can gladly attest that wallpaper patterns have made a complete 180.  And after living with paint for so many years, I new something more on the walls would pull the space together and that missing element was wallpaper.  I now have 4 different wallpaper patterns throughout my home and it looks nothing like the overwhelming 70s style.

There is a vast selection of wallpapers available today and honing in on just the right pattern + style can be quite daunting. Once the right one is found, it can completely transform any space from blah to beautiful!

Wallpaper Inspiration for every room of the home + WALLPAPER RESOURCES. It's amazing the impact that wallpaper can make in a room. Roundup + Inspiration @ www.JennaBurger.com

Whether a subtle geometric pattern in a bedroom or a vibrant, modern floral in the bathroom (like my powder room), wallpaper makes an impact!

Let’s dissect + be inspired…

INSPIRATION

This large scale baby blue wallpaper in a hallway is reminiscent of a damask pattern from the turn of the century. The subtle, but strong paper makes a statement and compliments the height of the space + the detailed architectural mouldings.

I’m not often drawn to coordinating patterns on multiple surfaces, but with this style space it truly works.  The pattern of the paper is repeated on the traditional side chair which continues the classic style.

Even though a bit too traditional for my aesthetic, I adore this soothing, yet dramatic space.

Wallpaper Inspiration for every room of the home + WALLPAPER RESOURCES. It's amazing the impact that wallpaper can make in a room. Roundup + Inspiration @ www.JennaBurger.com

VIA HGTV

Wallpaper shouldn’t overwhelm a room and with an intense pattern, it can easily happen.  Drawn to a powerful paper?  Use it on a focal wall and choose a complimentary color for the other surfaces in the space.

The gold-looking botanical print in this dining room is intense but is complimented by the other walls being painted a shade of chocolate.  Not only does the deep warm hue evoke a warm feeling, it’s also contrasted by lots of white – the door, mouldings, chandelier, display shelf, and the chairs.

It’s all about contrast…

Wallpaper Inspiration for every room of the home + WALLPAPER RESOURCES. It's amazing the impact that wallpaper can make in a room. Roundup + Inspiration @ www.JennaBurger.com

VIA BHG

Wallpaper in a hallway or transition space is a great ‘neutral’ between rooms to create a cohesive thread. You can never go wrong with a modern geometric pattern to tie spaces together.  This modern wallpaper in a kelly green hue is detailed, yet simple in a bold way.  It’s the perfect compliment to the oversized flower print in the bedroom beyond.

And I can not move on without commenting on those adorable framed toddler-sized swimsuits.  What a playful + unexpected addition to a 2nd floor hallway.

Wallpaper Inspiration for every room of the home + WALLPAPER RESOURCES. It's amazing the impact that wallpaper can make in a room. Roundup + Inspiration @ www.JennaBurger.com

VIA BHG

Smaller scale patterns are perfect in smaller spaces.  Not only will the proportion of the design feel more suited for the scale of the space, the repeat of the paper will be more visible.

This entry is such a sunny space!

Wallpaper Inspiration for every room of the home + WALLPAPER RESOURCES. It's amazing the impact that wallpaper can make in a room. Roundup + Inspiration @ www.JennaBurger.com

VIA BHG

The modern floral pattern makes such a statement in this entry and works so well with the colorful elements that are layered atop.  The organic patterned paper is also offset by pieces that have interesting architectural lines seen in the mirror and console table.

Wallpaper Inspiration for every room of the home + WALLPAPER RESOURCES. It's amazing the impact that wallpaper can make in a room. Roundup + Inspiration @ www.JennaBurger.com

VIA BHG

Similar to using a dark paint in a small room, many people are reluctant to use wallpaper, thinking that it will make the space feel smaller.  Just a myth!  If you have a small space, such as a powder room, foyer, or office, adding wallpaper will make it dramatic and unique, similar to this modern floral design I used in my powder room.

Instead of overwhelming the 4 walls of this small space, I wallpapered the main wall (sink wall) only and painted the other 3 walls using a complimentary paint that I matched to the background color of the wallpaper.  All the other elements in the space – vanity, toilet, roman shade, light – are white, which give the perfect contrast to the dark + bold walls.

Wallpaper Inspiration for every room of the home + WALLPAPER RESOURCES. It's amazing the impact that wallpaper can make in a room. Roundup + Inspiration @ www.JennaBurger.com

MY POWDER ROOM, PHOTOGRAPHED FOR KBMO MAGAZINE, PHOTO VIA BHG

This is another example of using a bold wallpaper in a small area to make a big impact look.  This watercolor floral pattern creates a beautiful focal point for this office nook.

It would look nice with a contrasting paint color in the nook, but it truly makes a statement with the addition of the wallpaper.

Small commitment, but a big look!

Wallpaper Inspiration for every room of the home + WALLPAPER RESOURCES. It's amazing the impact that wallpaper can make in a room. Roundup + Inspiration @ www.JennaBurger.com

VIA BHG

Wallpaper doesn’t always need to be bold + dramatic.  Soft and subtle on one or all walls of a space can create an engaging, unique aesthetic.  This modern, geometric pattern is a lovely addition to this bedroom filled with grays and shades of lavendar.

Wallpaper Inspiration for every room of the home + WALLPAPER RESOURCES. It's amazing the impact that wallpaper can make in a room. Roundup + Inspiration @ www.JennaBurger.com

VIA BHG

Go big or Go Home!  This vibrant orange wallpaper with a bird + cloud design makes a big statement on this focal wall.  A paper like this isn’t for an entire room but instead ideal for an accent wall or a ceiling, with whites + neutral layers and accents.

This breakfast area works so well because the paper has ‘it’s moment’, which is complimented by the white layers + minimal, simple furniture.

Wallpaper Inspiration for every room of the home + WALLPAPER RESOURCES. It's amazing the impact that wallpaper can make in a room. Roundup + Inspiration @ www.JennaBurger.com

VIA BHG

Decades ago when rooms were wallpapered, there often was no order or level of importance to the elements in the room. An intense wallpaper adorned the walls, but an equally dramatic sofa, chair, rug, bookcase made the space overwhelming, stuffy, and just too much!  There was no statement.  No heirarchy.  No ONE ELEMENT to rest the eye on.

Wallpaper can be a lot and if a dramatic, bold paper is the right choose for you, it will only work when all other elements are minimal and quiet.  This bathroom is a perfect example… The traditional patterned paper in a deep raspberry hue is bold, but it works well because all the other elements are minimal and plain jane.

Once again, it comes down to contrast.  For this space, it’s contrasting the intense wallpaper with the minimal layers.

Wallpaper Inspiration for every room of the home + WALLPAPER RESOURCES. It's amazing the impact that wallpaper can make in a room. Roundup + Inspiration @ www.JennaBurger.com

VIA BHG

WALLPAPER SOURCES

With all that inspiration, are you looking to wallpaper a spot or entire room in your home?  Not sure where to start looking for the right wallpaper to fit your style?

Here are 15 favorite sources for wallpaper…

15 Favorite Sources for Wallpaper!

GRAHAM AND BROWN
THIBAUT
HYGGE & WEST
GROW HOUSE GROW
CAVERN HOME
ANTHROPOLOGIE
WALNUT WALLPAPER
FARROW & BALL
CAITLIN WILSON
FERM LIVING
COLE & SON
JUJU PAPERS
SPOONFLOWER
ESKAYEL
SERENA & LILY

Interested in seeing where I’ve incorporated wallpaper into my home?

Check out my pad…

Wallpaper Inspiration for every room of the home + WALLPAPER RESOURCES. It's amazing the impact that wallpaper can make in a room. Roundup + Inspiration @ www.JennaBurger.comDining Room / Kitchen – Anthropologie wallpaper

Wallpaper Inspiration for every room of the home + WALLPAPER RESOURCES. It's amazing the impact that wallpaper can make in a room. Roundup + Inspiration @ www.JennaBurger.com2nd floor bathroom – Serena & Lily wallpaper

Wallpaper Inspiration for every room of the home + WALLPAPER RESOURCES. It's amazing the impact that wallpaper can make in a room. Roundup + Inspiration @ www.JennaBurger.comPowder Room – Amy Butler wallpaper

Wallpaper Inspiration for every room of the home + WALLPAPER RESOURCES. It's amazing the impact that wallpaper can make in a room. Roundup + Inspiration @ www.JennaBurger.comBoys Bedroom – Graham and Brown ‘Frames’ wallpaper

I’m on the hunt for the next wall or room to wallpaper.

Are you ready to start wallpapering?

Kitchen Renovation: Paint + Wallpaper

You know if we’re at the point of talking about paint, it has to almost be complete.

That’s right… we are mere days away from wrapping up the kitchen renovation and I still can’t believe it’s real.  When I look over to our kitchen area and my eyes see an entire new space, I want to cry.  It’s so good!

Kitchen Renovation: Choosing a paint color for an open concept floor plan + adding accents of wallpaper. Follow along on this before + after kitchen remodel @ www.JennaBurger.com

One challenge I had when creating the plan of action for the kitchen was the paint color for the walls.  After living with the mustardy-yellow for 5 years, I new light + neutral was the right direction – but then along the way my thoughts changed.  keep reading…

This is the old color.

Old mustardy-yellow paint color that had to go!

The first floor of our home is an open concept plan, so basically it’s one room that leads to the next, that leads to the next. There has always been a different paint color in each room, which I feel defines each of the spaces bringing uniqueness and character.

Creating definition, but at the same time a flow with various paint colors can be challenging, but if a color palette is set that works well together, the result can be gorgeous.

Of course, that’s what I was striving for >>> VARIATION + FLOW

THE PAINT STORY

After the kitchen cabinets were installed, the Lowe’s independent contractors got to work on painting the kitchen + dining room walls because it’s one large open space.

Painting the walls

I chose a paint color that was a light grey tone.  It was a pretty hue, but once all the walls were covered, I knew it wasn’t right. Because the kitchen flows straight to the family room that also has grey-toned walls, the definition that I wanted to achieve was gone.

Big Mistake – eek. 

What to do?  Leave it + live with it for a while?

I knew leaving it wasn’t the answer.  After a few days, of living with it, I chose a new color.  It was the first time ever that I got small color sample pods to put on the wall.  It was the right decision and seeing the colors at various times throughout the day was key to choosing the best paint hue for the space.

Color Change…

Kitchen Renovation: Choosing a paint color for an open concept floor plan + adding accents of wallpaper. Follow along on this before + after kitchen remodel @ www.JennaBurger.com

As soon as the ‘new, new’ color went up, I felt at peace.  Yes, that’s it.  And who knew, back to yellow – but a very different hue of yellow – would be the right color?!

For the walls in the kitchen + dining room, I chose to use the color White Citrus HGSW1237 by HGTV Home by Sherwin Williams, which is available at Lowe’s.  The sheen is eggshell (one step up in sheen from flat) and I used their Showcase line of paint.

White Citrus HGSW1237 by HGTV Home by Sherwin Williams

The color on the wall is just gorgeous and brings all the spaces together.  It’s not very far off from the last yellow paint color, but at the same time, it feels so new + fresh.  To sum it up, this White Citrus paint color is a light buttery + sunny hue with subtle green undertones.

Sherwin Williams has always been a favorite paint of mine to use.  The quality is like no other.  I’ve used a lot of paint in my day, and have come across a lot I will never use again.  When I was introduced to the HGTV Home collection by Sherwin Williams, I was intrigued because it was available at Lowe’s, a place I always shop.  So the big question I had… Is the quality the same as the Sherwin Williams brand it’s always been or did they ‘change the formula’ for the big box store?

I had the opportunity to speak with a rep for Sherwin Williams, who has worked with them for over a decade and he assured me the quality is the same and their collaboration with Lowe’s was a ‘next step move’ to continue their growth and brand awareness to a new market.  Basically, they want to reach even more people and by being in Lowe’s (versus just their own stand-alone store), they hope to do that!

I was skeptical about the quality, but I will say I had a great experience using the Showcase line of HGTV Home paint.  It went on smoothly with a roller AND a brush. Most paint takes 2, maybe 3 coats, to get full coverage on the wall, but this paint went on in one coat yet it wasn’t thick and goopy.  Of course, I went over it with a 2nd coat, but it really wasn’t needed.

THE PAINT RESULT

The yellow hue defines the kitchen + dining room space, yet flows with the neutral colors in the family room beyond…

Kitchen Renovation: Choosing a paint color for an open concept floor plan + adding accents of wallpaper. Follow along on this before + after kitchen remodel @ www.JennaBurger.com

Next to the kitchen is the living room / office which is a deep navy hue, and the yellow works beautifully with that as well…

Kitchen Renovation: Choosing a paint color for an open concept floor plan + adding accents of wallpaper. Follow along on this before + after kitchen remodel @ www.JennaBurger.com

Kitchen Renovation: Choosing a paint color for an open concept floor plan + adding accents of wallpaper. Follow along on this before + after kitchen remodel @ www.JennaBurger.com

THE WALLPAPER

I heart wallpaper and really wanted to use it somewhere in the new kitchen space. At the same time, I always wanted to define the bay area in the dining area with a different paint color.

How about ditching the paint idea and instead add wallpaper in the bay nook? YES, perfect solution.

I found this incredible bold + colorful wallpaper from Anthropologie.  The rich colors of orange, blue, yellow, gray, raspberry perfectly summed up all the colors in my home… I had to have it!

Kitchen Renovation: Choosing a paint color for an open concept floor plan + adding accents of wallpaper. Follow along on this before + after kitchen remodel @ www.JennaBurger.com

Once it was delivered a few days later, I got to work.

I primed the walls first.

Prime the walls before wallpapering!

Then installed the wallpaper which took about 3 hours total for this bay area.

Adding wallpaper can add drama and definition to a space. Use a bold pattern in a small area or subtle pattern in a large space. Either way, it will bring beautiful depth and texture to a room. Check out this new kitchen and dining room by www.JennaBurger.com

Want to know how to hang wallpaper?  Check out these WALLPAPER TUTORIALS

Hanging a Bold Wallpaper in the Bathroom

How-To Hang Wallpaper Like a PRO!

How-To Hang Wallpaper using Paste (in the powder room)

I’ve shared enough wallpaper tutorials, so I’ll spare you the details of the process, but this is the result…

Kitchen Renovation: Choosing a paint color for an open concept floor plan + adding accents of wallpaper. Follow along on this before + after kitchen remodel @ www.JennaBurger.com

Kitchen Renovation: Choosing a paint color for an open concept floor plan + adding accents of wallpaper. Follow along on this before + after kitchen remodel @ www.JennaBurger.com

And there you have it.  Mistakes were made.  Sleepless nights were had (well kinda), but the Paint + Wallpaper ARE DONE!

Another checkmark on the to do list.  Next up are the final details and then the reveal…

If you want to see all the posts documenting the kitchen renovation, here they are from start to finish:
Wonderful White Kitchen Inspiration
Kitchen Remodel: Before + Plan of Action
Demo Day: Steps for Demolishing the Kitchen
Kitchen Progress: Staining Hardwood Floors
The Cabinets Arrive + Get Installed
Natural Quartz Countertops in the Kitchen
10 Countertop Materials to Consider for the Kitchen
Subway Tile Installation + Choosing the RIGHT Subway
Kitchen Backsplash Tile Options + Inspiration
Choosing a Paint Color + Wallpaper for the Kitchen and Dining Room
Kitchen Renovation: The Appliances
Dissecting the Details
Kitchen Renovation: REVEAL + RESOURCES

DISCLAIMER: THIS KITCHEN RENOVATION IS A COLLABORATION WITH LOWE’S USING HGTV HOME BY SHERWIN WILLIAMS.  ALL OPINIONS + SELECTIONS ARE MY OWN WITH THE ASSISTANCE OF THE LOWE’S DESIGN TEAM.

How-To Hang Wallpaper Like a Pro!

If you follow me on Instagrammy favorite place on the web to share snippets throughout my day – then you know I had a busy weekend wallpapering. The kids room took a design turn after we found out a few weeks ago that baby #3 is going to be a girl.  In the end, as a family, we decided the kids will stay in the rooms they are currently in and the girls will eventually share a room once the baby is ready to move in.  So what does that mean??  Design changes!  The room that was going to be a shared boy / girl room was no longer needed.  Since we had already started on the transformation for my little guy, it meant we had to continue chugging along.  And let me tell ya, he’s a happy camper!

After choosing a new paint color (Benjamin Moore Hazy Skies) that I was very unsure of, because it was way lighter of a color than I’m used to, I am now thrilled with the decision.  Why?  Because I’ve been adding in colors in other ways.  Layers, my friends!  Layers are huge and in a kids room, books and toys add an amazing pop!  BUT, I was in need of more.  Yes more!  And that more resulted in a fun + unique wallpaper for the focal window wall that instantly turned the entire 12′ width into a photo gallery wall

Turn any wall into a Photo Gallery Wall with wallpaper! It adds dimension and endless possibilities for any space.

How fun is that?!  And before we go any further, I want to give you a peak at the before and after…

Turn any wall into a Photo Gallery Wall with wallpaper! It adds dimension and endless possibilities for any space.

I want to show you more of the room because it’s turning out pretty fantastic, but I can’t.  That’s to come – pinky swear!

Turn any wall into a Photo Gallery Wall with wallpaper! It adds dimension and endless possibilities for any space.

This incredible wallpaper is made by Taylor & Wood through Graham & Brown and it truly brings a wall to life.  I knew I wanted to do something fun on this focal wall.  Originally I was thinking a stencil, but this is way better.  So let’s jump right into how I installed it…

Tutorial + Tips + Tricks for hanging wallpaper. Do It Yourself but get the results of a PRO! Splurge on the paper / Save money on the install.

How-To Hang Wallpaper…  LIKE A PRO!

Similar to the last time I hung wallpaper in the powder room, this paper was also NOT pre-pasted (wallpaper that has paste and is activated with only water).  After wallpapering a few areas in my home, I have found that higher-quality wallpapers typically are not pre-pasted, so instead a paste has to be added.  I actually think the paste is easier to use than putting the paper through water.  I wrote a tutorial a long time ago on How-To Hang Prepasted Wallpaper, if you want to check that out.

Supplies:

  • Wallpaper
  • Wallpaper Paste
  • Smoothing Took
  • Sharp Razor or blade
  • Other handy tools for wallpapering are: a tape measure, a laser level, a pencil

Supplies for wallpapering like a PRO!

The Steps:

1. To start off, I found it best to measure the wall and cut a piece of wallpaper the length of the wall + an additional 6-8″ for extra at the top (ceiling) and bottom (floor).

a little helper is always fun + keeps you entertained!Tutorial + Tips + Tricks for hanging wallpaper. Do It Yourself but get the results of a PRO! Splurge on the paper / Save money on the install.

Tutorial + Tips + Tricks for hanging wallpaper. Do It Yourself but get the results of a PRO! Splurge on the paper / Save money on the install.

2. I wasn’t worried about centering the paper on the wall for this project (in the powder room I did) and started at the left most edge of the wall. When hanging wallpaper, I find it best to add the best directly to the wall, THEN add the paper.  I used a cheap $1 brush to add enough paste to cover the width of the wallpaper (not the entire wall).

Tutorial + Tips + Tricks for hanging wallpaper. Do It Yourself but get the results of a PRO! Splurge on the paper / Save money on the install.

3. Once the paste is in place, then I started at the ceiling (adding about 2-3″ extra paper to trim), I hung the paper making sure to match the seam of the adjacent paper.  NEVER overlap the paper.

Tutorial + Tips + Tricks for hanging wallpaper. Do It Yourself but get the results of a PRO! Splurge on the paper / Save money on the install.

4. When the paper initially adheres to the wall, there are always bumps and wrinkles.  No worries.  Simply smooth them out with the plastic smoothing tool.  It’s best to start at the top and move down the wall, as well as from the center of the paper and smooth out towards the edges.  You want to press firmly, but not too hard so all the glue seeps out.  Alittle glue seepage is okay and expected.

Tutorial + Tips + Tricks for hanging wallpaper. Do It Yourself but get the results of a PRO! Splurge on the paper / Save money on the install.

5. Cutting around windows, doors, and outlets.  Thought to be tricky, but really not.  For the large window, I added the paste to the wall.  Then I hung the paper temporarily (very lightly) and trimmed the paper around the window using a scissor, leaving about 2 extra inches for trimming.  Once I cut the paper, THEN I went back and adhered the wallpaper to the wall properly.

Tutorial + Tips + Tricks for hanging wallpaper. Do It Yourself but get the results of a PRO! Splurge on the paper / Save money on the install.

Here is a picture of me trimming the wallpaper around an outlet.  I used a sharp razor, cutting a small hole at the outlet and trimmed so the entire outlet was exposed.  The paper was wrinkled, but I smoothed it out after the hole was cut.

Tutorial + Tips + Tricks for hanging wallpaper. Do It Yourself but get the results of a PRO! Splurge on the paper / Save money on the install.

CONFESSION: totally my opinion... Wallpaper is kind of like giving birth (that’s all I thought about throughout the process).  Going into it, your excited and ready to do “the work”.  You’re in the midst of it cheering yourself on.  Then there are some snags along the way and you start to get frustrated and defeated.  The end is almost near. You’re exhausted and your patience is done.  AND it’s over.  All is beautiful and you can sit back and relax.  After a few days, the memories start to fade and within no time, you think back that it wasn’t so bad after all.  Until the next time…

Anyway, let’s move on.  Obviously you  know where this prego girls head is.

Here are some pictures mid-project (the moments when exhaustion started to set in).

Tutorial + Tips + Tricks for hanging wallpaper. Do It Yourself but get the results of a PRO! Splurge on the paper / Save money on the install.

Tutorial + Tips + Tricks for hanging wallpaper. Do It Yourself but get the results of a PRO! Splurge on the paper / Save money on the install.

And the result once finished.  The part of enjoyment…

Tutorial + Tips + Tricks for hanging wallpaper. Do It Yourself but get the results of a PRO! Splurge on the paper / Save money on the install.

Tutorial + Tips + Tricks for hanging wallpaper. Do It Yourself but get the results of a PRO! Splurge on the paper / Save money on the install.

I started to jazz up the wall by hanging a few real picture frames over the “frames”.  It started to bring in some color and dimension!  I used a few pieces of command strips to keep the frames in place instead of nailing them to the wall.

Tutorial + Tips + Tricks for hanging wallpaper. Do It Yourself but get the results of a PRO! Splurge on the paper / Save money on the install.

We (meaning my son + I) have a lot more ideas for making this wall even better.  In the meantime though (after hours of joyous wallpaper hanging) a few pictures and frames did the trick for fun.

Tutorial + Tips + Tricks for hanging wallpaper. Do It Yourself but get the results of a PRO! Splurge on the paper / Save money on the install.

I even added some hooks for hanging a few hats and metals.

Tutorial + Tips + Tricks for hanging wallpaper. Do It Yourself but get the results of a PRO! Splurge on the paper / Save money on the install.

Tutorial + Tips + Tricks for hanging wallpaper. Do It Yourself but get the results of a PRO! Splurge on the paper / Save money on the install.

So there you have it.  A 2 in 1.  A tutorial on how-to hang wallpaper + a fun & unique way to create an instant photo gallery wall.  A LOT more is happening in this room to make it suit the style of my little guy.  More to come soon…