Month: April 2011

Giving Birth to a Quilt + Sewing Lingo & Basics

My first quilt is officially done…  AND it really felt like giving birth.  Every step of the way, I wasn’t sure what I was doing and I was so afraid of making a mistake with possible repercussions down the line.

BUT….like giving birth, my quilt is a beautiful outcome!

I’m being a lil’ sarcastic…it’s not REALLY like giving birth.  Been there, Done that two times and birthing was MUCH MORE DIFFICULT.

On a real note ~ I truly can’t believe I sewed this.  Never would have believed it a few weeks ago.

It would be great if I could actually take you through the whole process, but since this is my FIRST quilt, it’d kind of be a joke if I wrote a tutorial.  Search the web and I know you’ll find some amazing bloggers who are pros at quilting. BUT, here are a few progress pictures.

The center is done after sewing each square together.

Figuring out the border and binding fabrics.

Will there be more quilts, you ask?…. I don’t know.  Since this took me half a century ~ (haha) well, maybe not that long ~ I think I’ll stick to quick, 1-day projects for now.  I’m an instant gratification girl, and this took a wee bit long for me.  BUT, I do have to say….I am quite impressed with myself and glad that I stuck it out!

Along the way, I learned some crazy sewing lingo that is probably part of the everyday language for someone who frequently sews, but for a beginner like me, it was quite interesting.

Here are just a few:

‘Walking’ Foot ~ Yes, I walk with my feet, but how does it pertain to sewing??   A ‘walking’ foot is a special sewing machine foot that moves the top and bottom layer of fabric together to avoid shifting or puckering.  It’s an essential for attaching bindings, straight line quilting, and curves ~ WHO KNEW?!  And I used this 80% of the time when making my quilt, so it’s a must-need tool when sewing! To learn more, take a look at this article: What is a Walking Foot?

Fat Quarter ~ WHAT?  A fat quarter..that’s a crazy name! A fat quarter is a quarter yard of fabric that typically measures 18″ x 22″.  It’s proportioned differently than if you cut a typical quarter yard of fabric cut from a bolt of fabric which would be only 9″ x 44″.  Fat quarters are GREAT for small projects.  The center part of my quilt was all made using fat quarters.  Here is a great article on What’s a Fat Quarter?

Stitch in the Ditch ~ Does that mean I’m supposed to bring my sewing machine outside and sew in a ditch??  NO, NOT AT ALL!  The term ‘stitch in the ditch’ means to sew long, straight lines between the seams (or “ditches”) on the quilt top using your walking foot. This is how the front and the back of the quilt stay together and in position. To read more, view this article, How do I “stitch in the ditch”?  Take a look at the picture below of how I ‘stitched in the ditch’ with white thread.

Those are just a few of the interesting (to say the least) terms that I learned throughout the process of creating my first quilt.

Even though sewing can often be thought of as challenging and intimidating, with the right materials and a few basic skills, it’s easy AND fun!

And to start with, it’s important to have a good sewing machine. For years, I had a basic machine that had limited options and had a needle that kept on breaking, UGH! Recently, I invested in a new machine, and it’s the reason why I’ve been loving to sew. Sewing machines can cost $1000s, but unless you are an expert, you really do not need to invest that much $$!

This machine is probably something you’ll want to pass on especially if you’re just starting out!

BUT, here are a few sewing machines that I recommend for a beginner that can grow with you and still be used at an intermediate and/or expert level.
Brother CP-7500 (this is the machine I got)
Singer 7258
Brother CS6000i

When looking at a machine, it’s best to find one that includes lots of extras, like these:

Now that I’m an expert sewer – NOT!  OK, OK ~ a beginner / allllllmost intermediate sewer (seamstress)…I can say that sewing is really not that difficult.

Here are a few more pictures of my FIRST QUILT —

And here’s my daughter enjoying her new beauty~

If you ever wanted to learn to sew, but thought it was too difficult, let me tell you….it’s NOT. I did take a class to get me started / motivated and it gave me the jump-start to begin something that I’ve been wanting to do for years!

Just Do It!! (I sound like a Nike ad, lol)

Linking up to:
Between Naps on the Porch-Met Monday, All Things Heart & Home-All Things Inspired,Savvy Southern Style-B&A Party, House of Hepworths , Shabby Chic Cottage-Transformation Thursdays, The Shabby Nest, Tatertots and Jello-Weekend Wrapup, Thrifty Decor Chick

Comic Art using Mod Podge

Who doesn’t love reading the ‘funnies’, a.k.a. the Sunday comics?  I remember being a kid and asking my parents to take out the comic section from the Sunday newspaper.   I enjoyed reading them, but did I actually ‘get’ the jokes?  Well, I’m not so sure…

Once it was time to add the final touches to my Kids Bathroom makeover, I want to do a project with Mod Podge.  My first thought was to use fun fabrics or patterned papers, but then my husband had the suggestion of using comics….I had a complete {Ah Hah} moment.  Kids and Comics…how perfect?!

Here’s how it came out ~And here’s the process…

Continue reading

Tour My Home: Boys Room ~ Skateboard Haven

The goal of my blog is to share inspirational ideas about design, and with that I like to showcase areas of my own home to actually show how a high-end look can be done for less (and no one has to know).  With being an Interior Designer, I have worked with clients that have limitless funds to spend, and others than have a barebone budget.  Either way, a well thought-out and designed space can be achieved.

Through my blog series, Tour My Home, I enjoy sharing different areas of the space I’ve created for my family. We last visited my daughter’s Honeysuckle Retreat, and the Next Stop: My son’s room ~ Skateboard Haven.

Continue reading

Blah to Beautiful: Bathroom Makeover on a Budget

I feel like I’ve been talking (and thinking) about this bathroom for decades, but in reality, it’s really only been a few weeks.  Somehow it took longer to execute than anticipated but I can thankfully say….IT’S DONE!

All things considered, this was (simply) a minor bathroom makeover.  Even though I dreamed of new white tile, a dark wood cabinet, and a fresh new sink, I’m very happy with the updates and the outcome.  My “overhaul dream” bathroom will come someday in the future!

SO here it is ~

(sorry for the narrow picture, it’s a bit difficult to take photos in such a small space)

And here it was ~

Do you happen to remember a few weeks ago when I shared my handy dandy Sherwin Williams Paint Visualizer tool?? Well it worked like a charm.  When testing out some paint colors using the visualizer, I really liked how these two options turned out, so I combined the look…

…and this is how it turned out (in real life)~

My inspiration for the space started with this towel rack that I picked up on my first visit to Hobby Lobby.  YES, it was only a few short weeks ago that I went to Hobby Lobby for the first time.  WOW, I know!

I don’t think I mentioned this earlier in the post, but this bathroom is the kids (FYI-I envision my bath to look a bit more lux).  I wanted to make it fun and reflect their personalities.  I liked the colors and style of this numbers towel rack and thought it would be an adorable start to the space. Above the towel rack, my son painted this priceless one-of-a-kind piece of art.  (He had some limitations ~ I only gave him paints that matched the room…I know, I’m sneaky!)

So here’s another view of the before…
Mirror: GONE
Light Fixture: REPLACED
Cabinet: PAINTED
Medicine Cabinet: TRANSFORMED

It went from this…

To this….

With a fresh coat of paint on the walls and the cabinet, the kids bathroom took on a new life!  The before cabinet did not have hardware, so I added new stylish knobs to dress em’ up a bit.  There was also quite a gap between the countertop edge and the wall, so I added a tile sidesplash, and continued two rows at the backsplash.  It was so easy and I installed it the same way as I did for the powder room backsplash.

Did you happen to see the medicine cabinet?  I kind of skipped over that and don’t want to give too much detail away…but I completely transformed it from what it was before.  Stay Tuned for a future post!

As for the mirror, the existing was removed, and in it’s place, I chose a simple frameless oval with a beveled edge. It’s clean and understated (especially next to the medicine cabinet).  With a new lighting fixture (and GFI outlets), the electric is up-to-date and complements this newly modern-edge bathroom.

The finishing touches were topped off with my Comic Art Mod Podge Project.  Another post to come for details!

So that’s it!  A space that I dreaded looking at everyday (well numerous times a day since it’s at the top of the second floor landing) is now fun and refreshing.

O, and the shower curtain…I had it from our old house (bought it at Bed, Bath, and Beyond years ago). No joke, I didn’t even remember I had it until after I chose the paint colors, and realized it coordinated perfectly!

So blah to beautiful is possible on a budget!  From paint to accessories, the total for this bathroom makeover cost about $150 (the mirror and the lighting fixture were the most costly items).  Not bad!

Have you made over your bathroom lately?  Or is there a plan to do so in the near future?

Whimsical Spring Forsythia Wreath

I was so completely inspired when putting yesterday’s post together on Spring Wreath Inspiration.  There are so many amazing and talented bloggers out there and I was so happy to showcase their work!

Now it’s my turn….

I created a lot of wreaths over the past months for the various seasons and holidays.  Now it’s time to celebrate the arrival of SPRING!  YAY!!

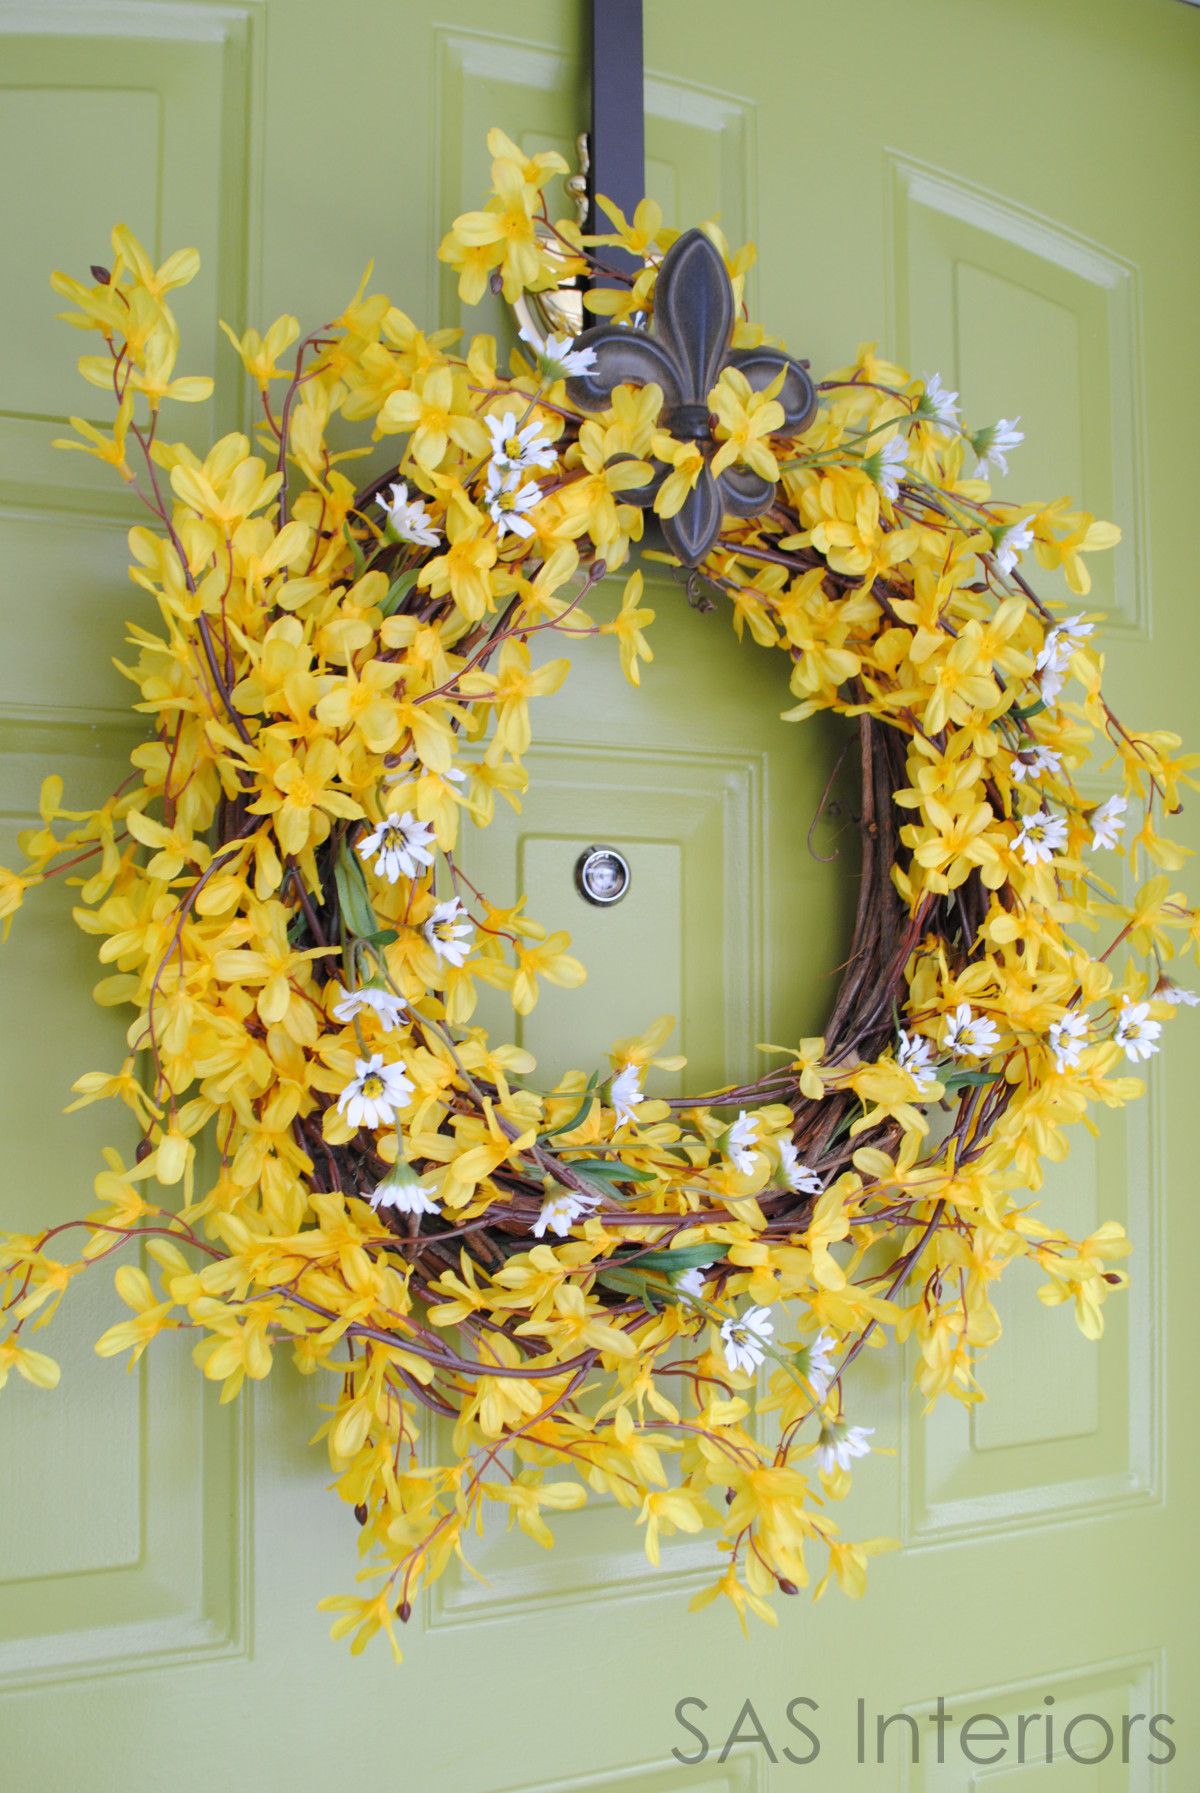
Here’s a sneak peak at my NEW Whimsical Spring Wreath ~

This is how the wreath looked before… BIG change, right?

My mom gave me this wreath quite awhile ago and it had been sitting in my garage for months.  My repurposing mind was in action and the transformation began.

To start off, I un-decorated the wreath.(If you want to create a wreath like mine, you obviously can skip the above step and start with a fresh, new wreath)

I wanted to create a whimsical wreath for the Spring ~ fun and flowery was my goal.  I decided to use (faux) Forsythia branches.  Similar to my faux centerpieces, I cut and separated the branches, then started to weave them through the wreath and used floral wire to secure.

Here it is…done~

WOOO…not quite yet…it’s missing something.  Seems kind of BLAH.
Let’s add alittle Wild Daisy, like this ~

Now it’s COMPLETE!

Simple, but just what I wanted!

WELCOME to my HOME

Have you seen my other wreaths?  If you missed them, here they are ~

My green door has been through many transformations!  I painted it this apple green color only a year ago, but I’m thinking that ‘It’ needs it’s own transformation for Spring….hmmm.  What do you think?

Whimsical Spring Forsythia Wreath

I was so completely inspired when putting yesterday’s post together on Spring Wreath Inspiration.  There are so many amazing and talented bloggers out there and I was so happy to showcase their work!

Now it’s my turn….

I created a lot of wreaths over the past months for the various seasons and holidays.  Now it’s time to celebrate the arrival of SPRING!  YAY!!

Here’s a sneak peak at my NEW Whimsical Spring Wreath ~

This is how the wreath looked before… BIG change, right?

My mom gave me this wreath quite awhile ago and it had been sitting in my garage for months.  My repurposing mind was in action and the transformation began.

To start off, I un-decorated the wreath.(If you want to create a wreath like mine, you obviously can skip the above step and start with a fresh, new wreath)

I wanted to create a whimsical wreath for the Spring ~ fun and flowery was my goal.  I decided to use (faux) Forsythia branches.  Similar to my faux centerpieces, I cut and separated the branches, then started to weave them through the wreath and used floral wire to secure.

Here it is…done~

WOOO…not quite yet…it’s missing something.  Seems kind of BLAH.
Let’s add alittle Wild Daisy, like this ~

Now it’s COMPLETE!

Simple, but just what I wanted!

WELCOME to my HOME

Have you seen my other wreaths?  If you missed them, here they are ~

My green door has been through many transformations!  I painted it this apple green color only a year ago, but I’m thinking that ‘It’ needs it’s own transformation for Spring….hmmm.  What do you think?