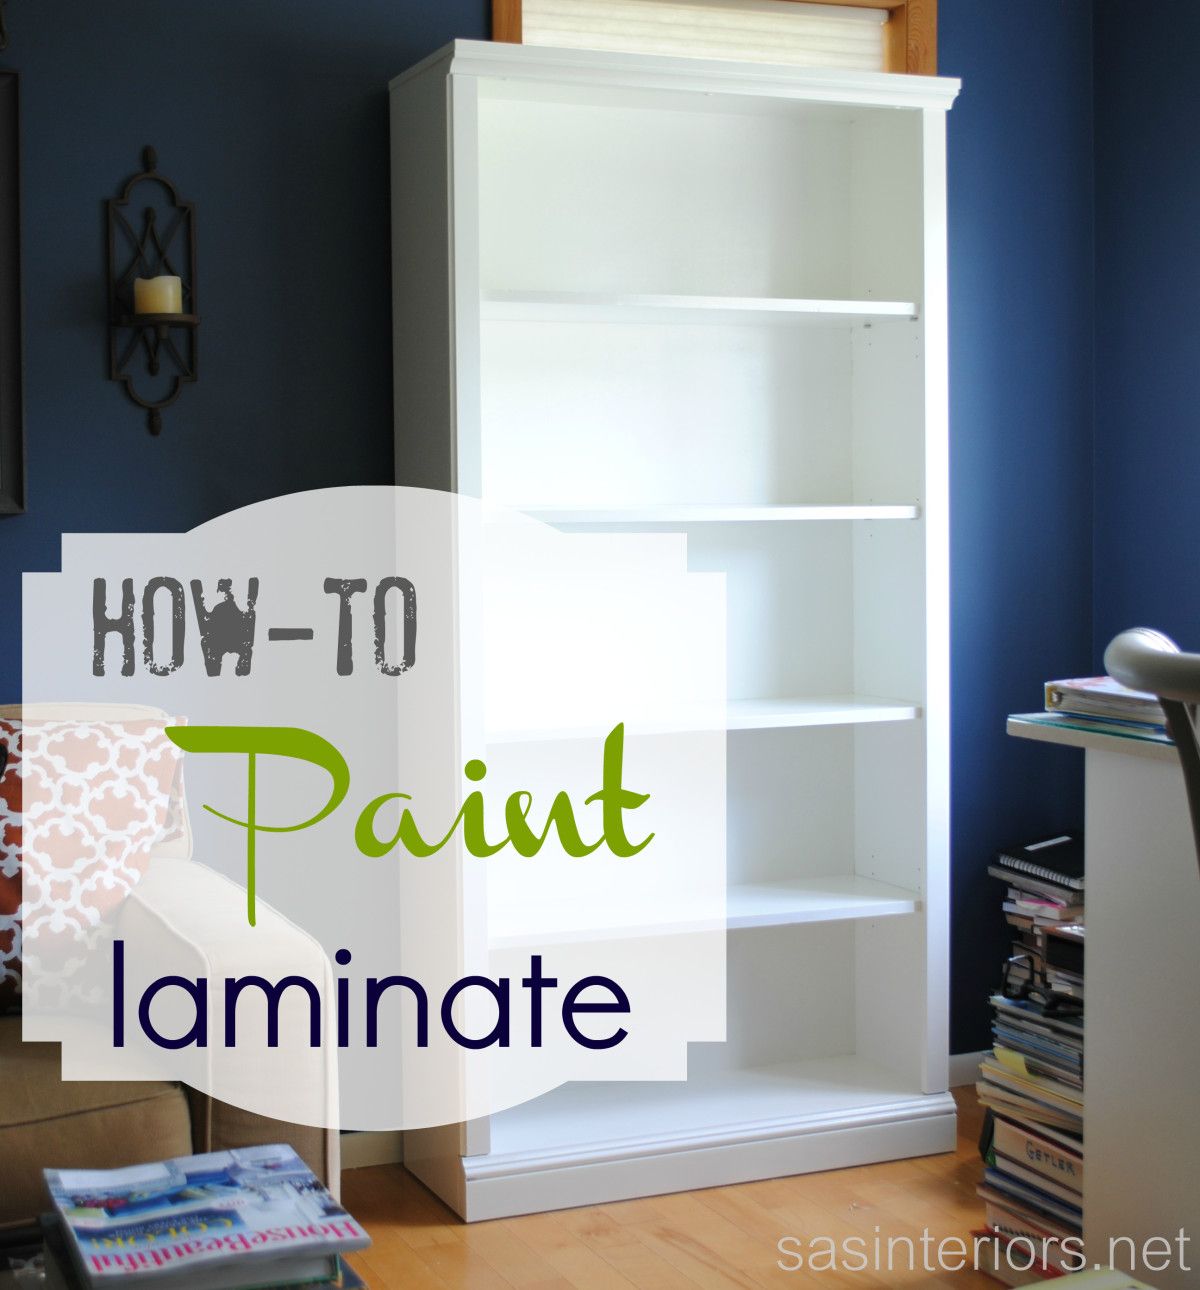
How-To Paint Laminate Furniture

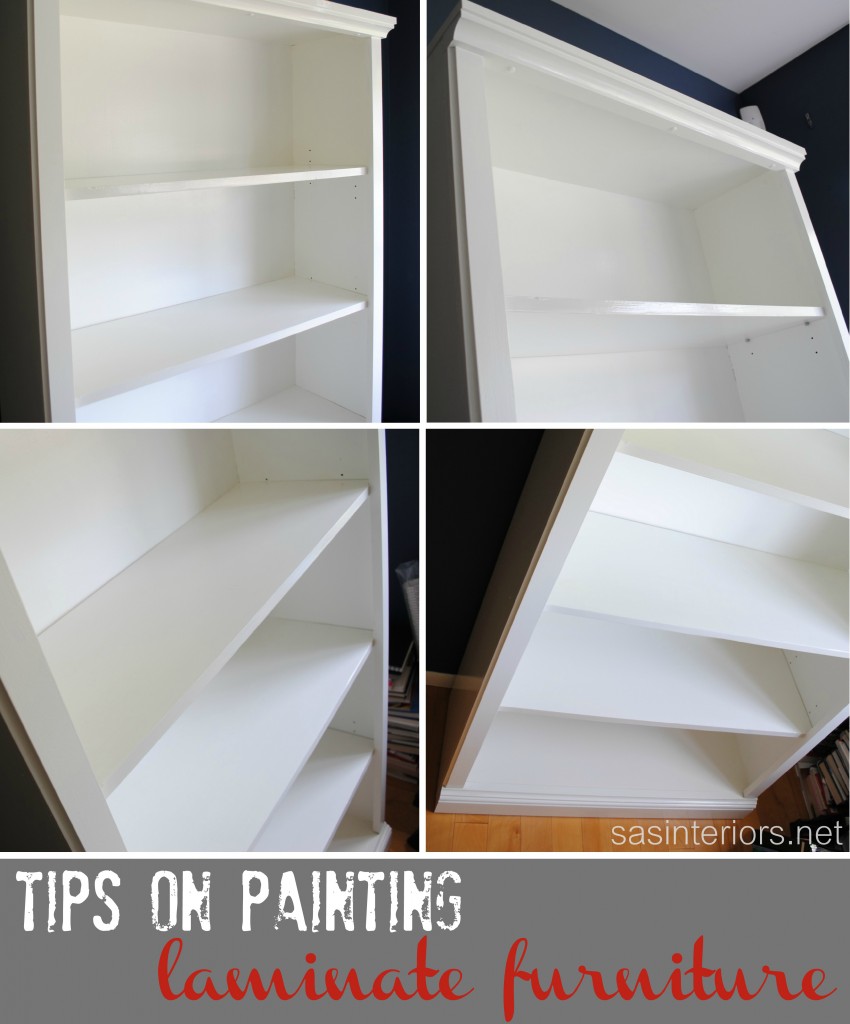
I recently shared my newly styled bookshelves, but before I added all the colorful books and stylish accessories, I gave the bookcases a much needed makeover.

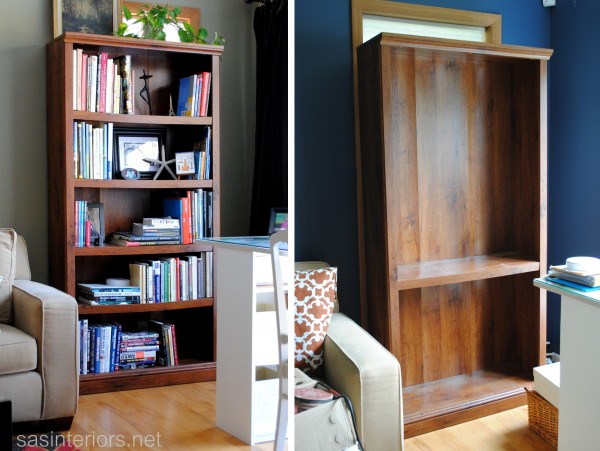
Since painting the space deep blue, the once faux-wood bookcases got lost in the dark hue of the walls, and they were ready for a transformation. A crisp, fresh coat of white was the perfect solution to make a statement.

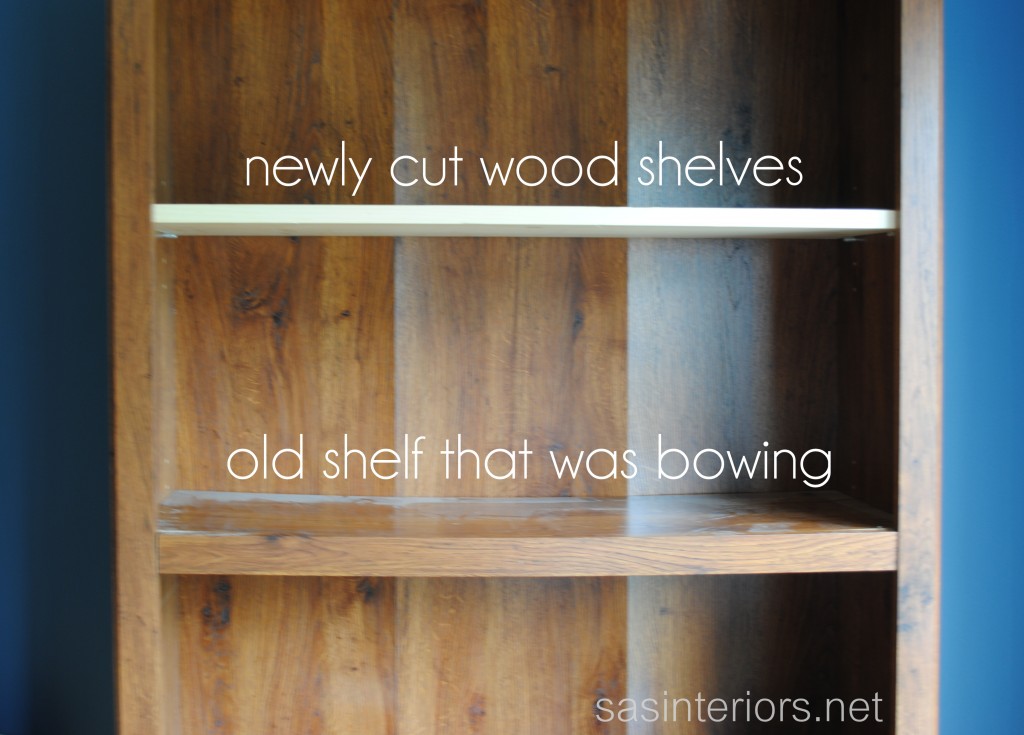
I purchased these two bookcases from Walmart about 2 years ago.  Each were around $100 and were not the best of quality (duh, look at the pricetag).  Anyway, they fit the bill at the moment, but recently the shelves started to bow.  Aside from the decision to paint the bookcases, I also needed to make a few updates so they would last a few more years – I’ll get to more on that later in the post.

Before starting the process of painting the laminate, I did a little research on the process and the first article I saw was Lindsay’s post when she transformed her TV cabinet.  It was just what I needed to get me started.

Here’s the bookcase before…

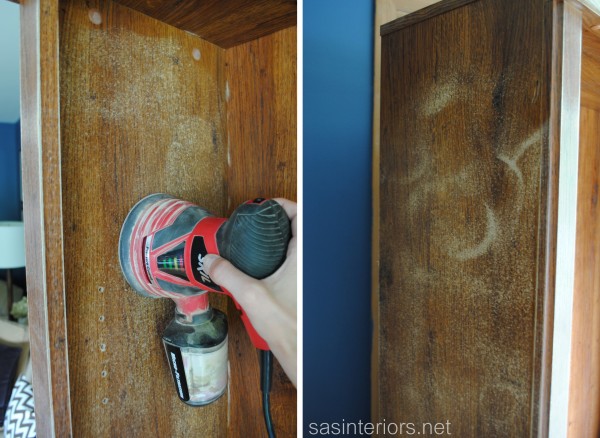
To begin, I gave each bookcase a good sanding with my orbital sander (hands down, my favorite power tool). These bookcases are made of a particle board-like  composite with a faux-wood laminate exterior. It was important NOT to sand too much because otherwise the surface would get ruined (since it’s essentially paper), but at the same time it was important to get them ‘roughed-up’ so the paint would absorb into the surface.

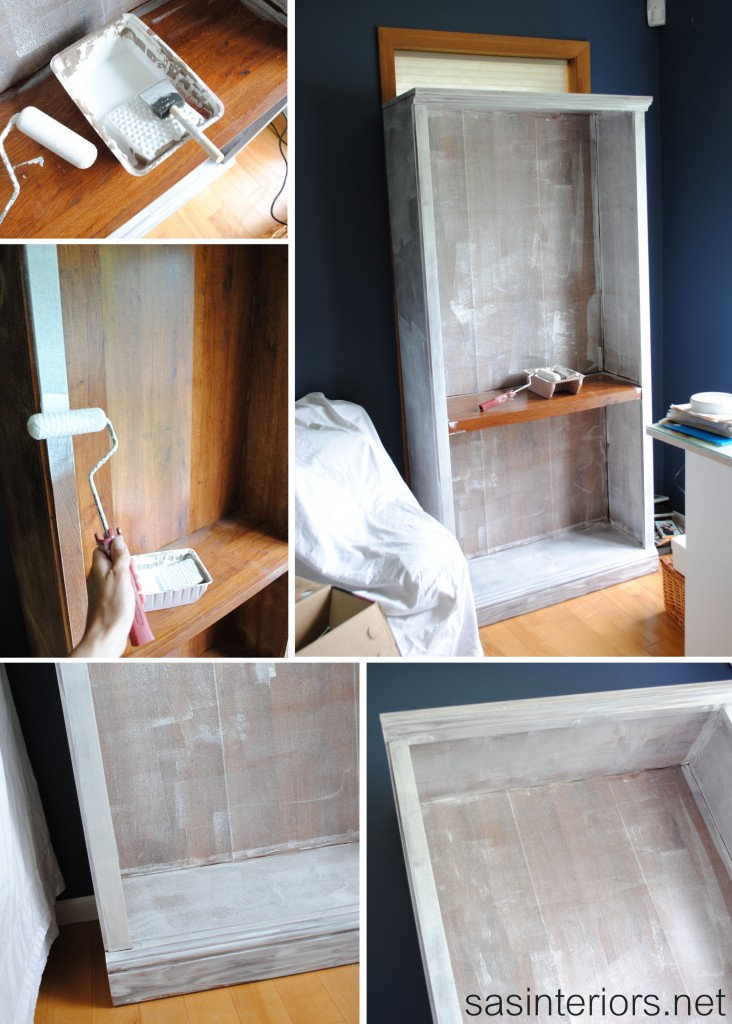
Then the next key step was to prime all the surfaces.  Like usual, I used Kilz Primer which blocks, seals, and preps the surface for the paint to adhere to the surface.  Primer is important, but especially when painting over laminate (as I described above).  Unlike wood, laminate is a smooth, non-porous material, so it really needs something to ‘grab’ on to – primer will do the trick!  It’s suggested that primer takes 7 days to completely dry – you can take that advice if you’d like, but I didn’t (shame, shame on me, I know).  BUT, I did wait about 4 days before painting to really make sure the surface was good-to-go!

My good blogging friend, Diane, recently wrote a post on Gripper Paint.  She uses the Glidden brand (Kilz brand has a similar product), and even though I haven’t tried it, this is another great product to use as a primer.  The name says it all.

Sidetrack Steps…

At this point of the project, I made the decision to make a few much-needed updates to the structure and look of the bookcase.  Instead of moving on to directly painting the bookcase, I decided to replace the shelves and the backing material.

As I mentioned before, the shelves were really bowing – alot – so I took a trip to my hardware store and had a long piece of 2×12 cut into lengths needed for new shelves.

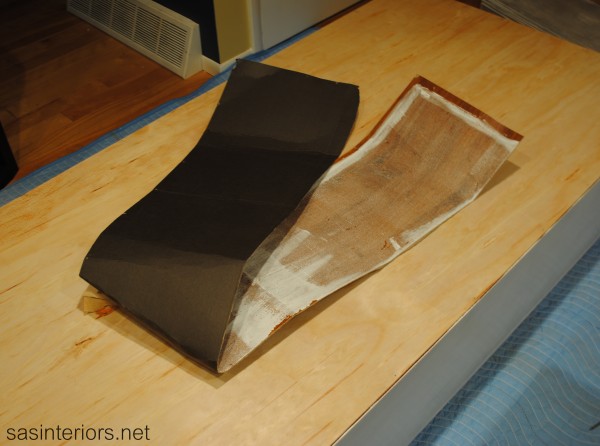
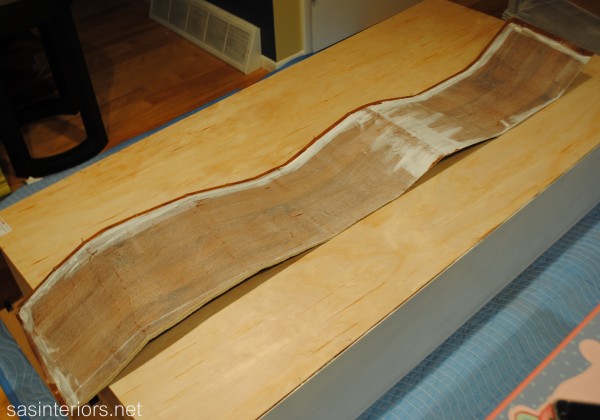
And check out the back of the bookcase…  UGLY!  It was basically paper and when I started to paint the surface, it started warping even more.  Once the decision was made to upgrade the back, I crumbled the paper-backing with one hand…

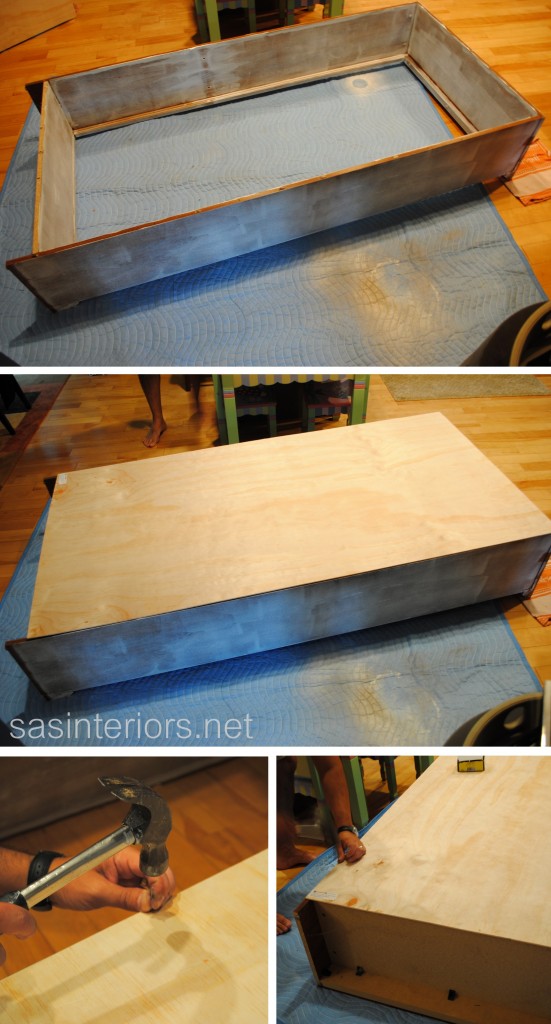
To fix the backing, I had a thin piece of plywood cut to size.  Then the Mister and I flipped the bookcase onto it’s front and nailed the plywood to the perimeter of the bookcase back. (This step might seem difficult, but please be assured it wasn’t – this was probably one of the easiest steps throughout this project).

Now back on track…

After sanding, priming,and making a few updates, it was time to PAINT!

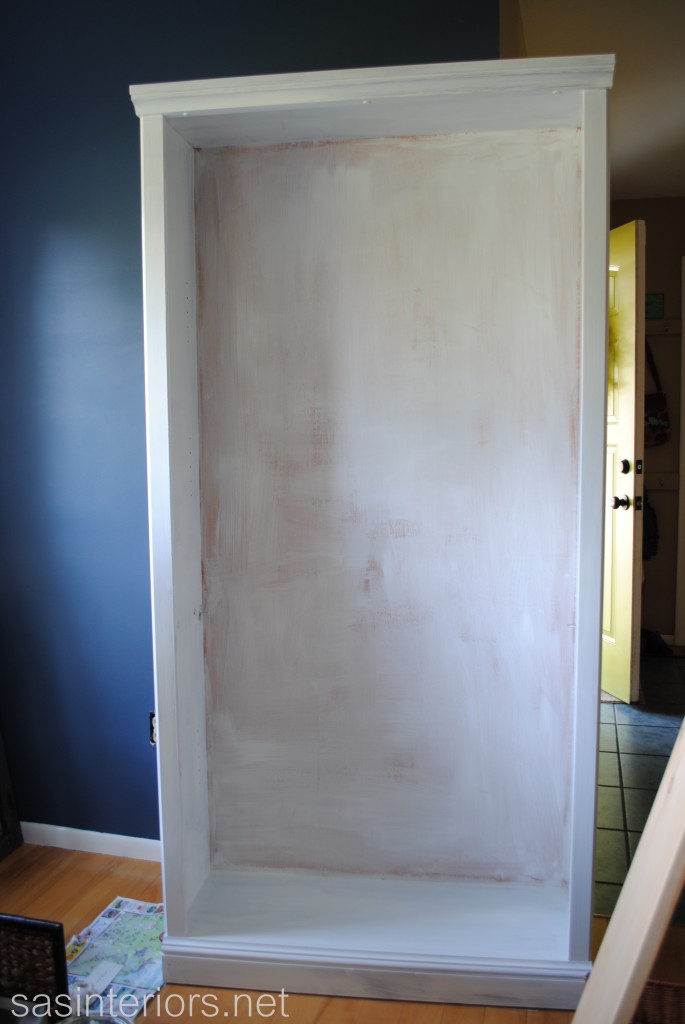
I used a brush for the corners and a roller for the flat surfaces.  In certain areas, I used a brush first, then went over the same surface with the roller to achieve a smooth, stroke-less surface. Here’s the bookcase with the first coat of paint…

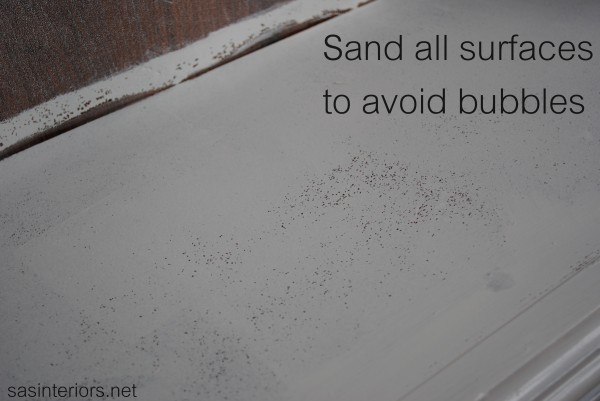
Here’s a tip.  If the surface isn’t sanded or not sanded enough, then the paint will bubble (because it’s not adhering to the surface).  Check this out…

This is a No-No!

I’ll be honest, these bookcases took about 3-4 coats until I felt they were fully covered. And even after they were dry to the surface, I didn’t put anything on the shelves for at least a week.  Paint takes about 30 days to fully cure and with the heavy books and accessories sitting on them, the last thing I would want would be to have them ruined or peel!

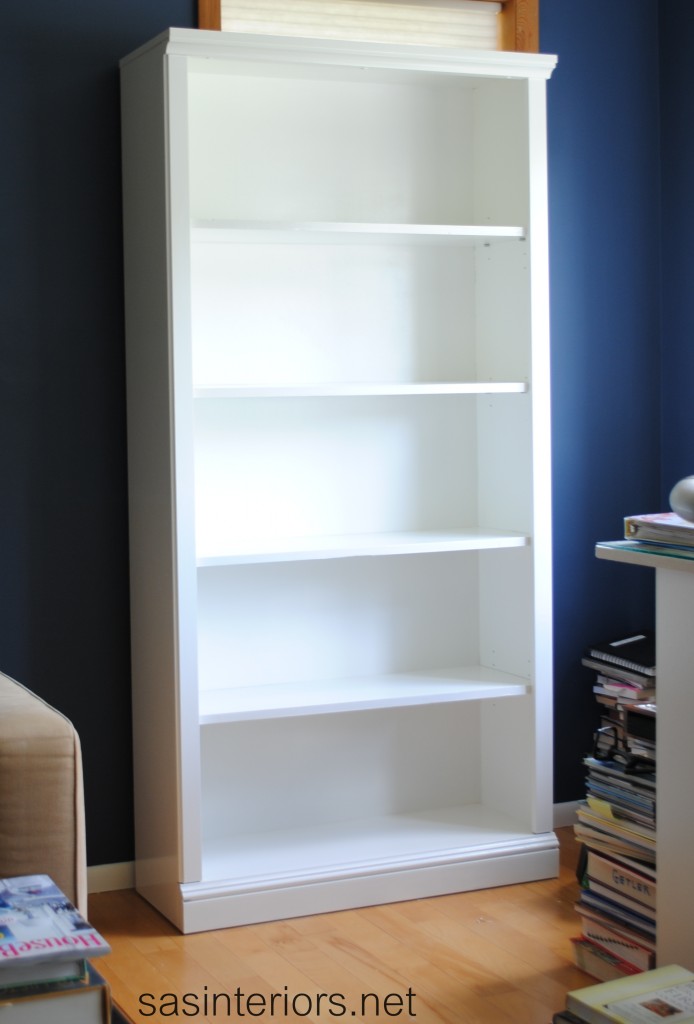
And this is the result…

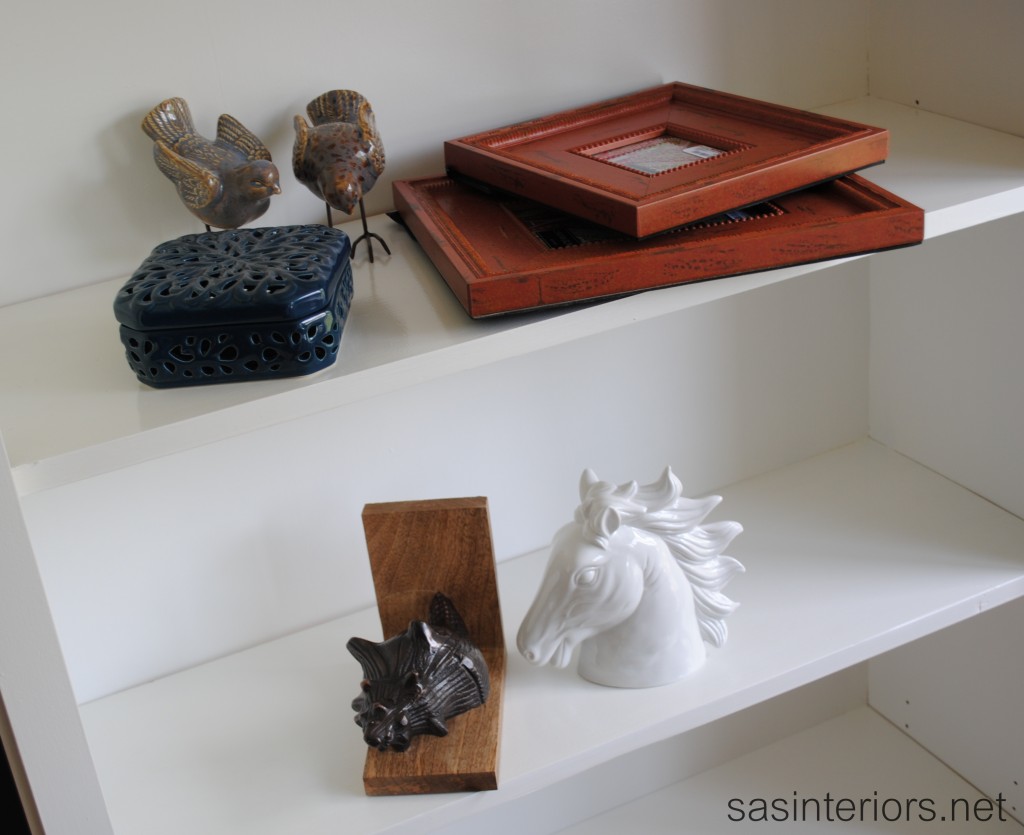
So refreshing!  Then it was time to add the books and accessories.

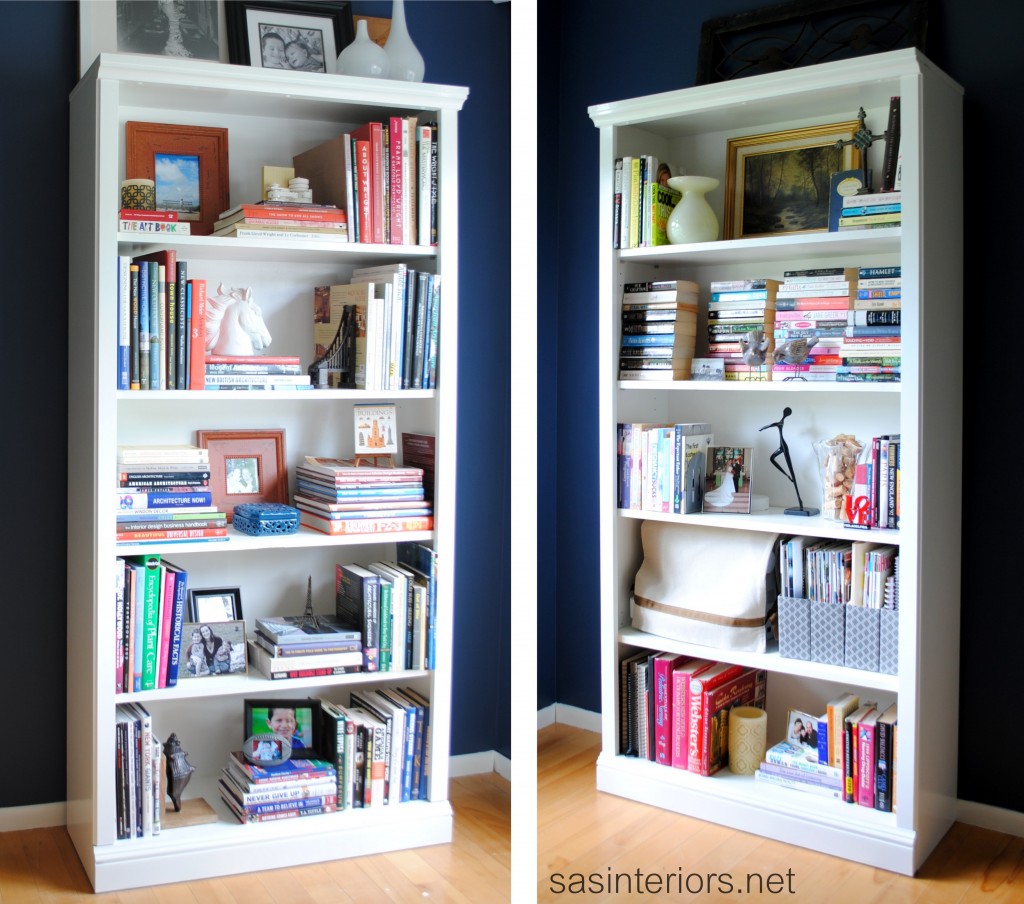
And here’s a peak at how the bookcases look fully styled with books and accessories.  You can check out more by viewing this post.

Painting laminate wasn’t difficult, but I did find it more time consuming than painting wood.  To sum it up, the most important steps are to sand and prime all the surfaces before painting.  If you were to skip the 2 steps, your paint would have nothing to adhere to and would most likely peel right off.  Going into this project, I wasn’t sure of the result and if the paint would even stay since the surface was so smooth, but with the right preparation, I was thrilled with the outcome.
Leave a Reply

Your email address will not be published. Required fields are marked *

173 Comments

Wow, those look amazing! Taking the time to do this rather than get new is so worth it. This is a great tutorial! I have never painted on a laminate piece, but now I know I can, and get beautiful results. Thanks giving the 411!

I have painted laminate before, following these basic steps. The paint on the shelves did start to scratch and come off eventually, but it was still worth while. I was able to get a couple of extra years out of the piece, which was my goal. If the items don’t get moved all that often, you may have better luck.

Those look great! You mentioned Glidden Gripper paint. I am a huge fan of it, and use the gripper primer on any project that I think I will have difficulty getting paint to stick. I even used it on old countertops years ago, before they came out with countertop refinishing kits.

I actually have never painted laminate furniture, and I am definitely a little afraid to. This is a great tutorial, and doesn’t make me so nervous anymore after seeing how beautiful these shelves turned out. You are getting pinned today :)

Thanks for this information (I found your link on Google +). I have a laminate dresser (given by a friend when he moved out of town) that I want to paint, you’ve helped me get started. Mary

I love this! Ive been thinking of doing laminate painting for a while. Has anyone here ever done laminate cabinets in a bathroom setting? Or a half bath? (No shower/tub for steam). Id love some advice on that. Id like to temporarily redo our baths til we get more funds!

Yes, did paint my bathroom and kitchen cabinets (both laminated) several years ago. The bathroom has held up extremely well. The kitchen cabinets painted a dark color tend to chip a bit, but I just touch them up with leftover paint and they are good as new.

Painted a laminate powder room sink base with laminate wicker on the front. Sanded lightly, cleaned well, used gripper and two coats of chocolate brown semi-gloss paint. Looks great even after 4 years.

Hi Jenna, thanks for your tutorials on how to paint laminate furniture. I have an Ikea desk that I want to paint and hope it turns out as nice as your supercool bookshelves. They make a great contrast to the blue walls!

Jule from inside9B

Thanks Jule! Sand, Prime, and Paint – that will be the perfect combo. Just take your time and it’ll turn out great! xo Jenna

Jenna, I arrived here from Today’s Creative Blog. I’ve been wanting to paint my ugly laminate cheap-o bookcase for a long time. Since reading your article, I’m not as afraid! I guess some could say that after all that work, you might as well buy a new bookcase, but my husband and I are wanting to buy a house in the next few years and are focused on cutting spending wherever possible so we can work our way to that dream. Thanks for your practical help for a family that doesn’t have money to throw around for new bookshelves but believes with a little tlc, we can create things we love from the stuff we already have.

Welcome Stacy – so glad you found me through TCB! Definitely don’t be afraid to jump in and revamp your laminate furniture – it’s really not as difficult as you may think. Sand, Prime, and Paint are the 3 easy steps! And yes it would have been easy to toss and buy new, but with minimal money, I was able to revamp them. xo Jenna

I love the color of your walls! I have been looking everywhere for the perfect shade of blue for my dining room. What color did you use?!

I would really suggest using a primer that will block and seal the surface before painting. Try Kilz or Linsser primers. The primer + paint is okay for walls, but I would be afraid it wouldn’t give you the base needed for the paint to adhere. -Jenna

Hello Ladies, I recently started re-vamping my shelves as well. I tried to skip a step and kept hearing great things about Valspar Primer+paint. Terrible idea, I immediately got the terrible bubbling and had to strip everything and start at the beginning. My advice, dont waste your time or money, Sand, Prime, then Paint. Dont combine them…

Absolutely Kayla. Those prime + paints are good, but there is nothing like using actual primer followed by paint. Sorry you had to learn the hard way, but it’s a good lesson to know!

I have painted a laminate desk. I did not sand the surface. I used a primer specifically made for “no sanding required”. The name of the primer is Bullseye 1 2 3. I painted it using latex. The paint could still scratch off easily, however, I gave it 3 coats of polyeurethane and it’s been fine ever since. I use it as my craft desk. On my blog, I have pics of the desk before and after.

I often use the Zinnser Bullseye 123 as well and it works good. Did you let the primer cure for 30 days before painting? If not, that could have been the issue of the paint scratching. It really takes a long time for paint to fully cure. But you’re right, polyurethane is amazing and truly keeps the surface protected!

I painted a laminate CD tower…….I used TSP (trisodium phosphate) to chemically “sand” the surface. Instead of replacing the back, I glued in a textured wallpaper. It worked beautifully.

I used all water based paint. I’m not a fan of oil-based because it bothers my nose, plus it often yellows over time, so I’d rather use water-based.

It’s not worth it to me to use smelly primers like Kilz and Bullseye (but especially Kilz). I’m planning to try Annie Sloan Chalk Paint and clear wax on my laminate furniture that needs updating.

Please let me know how the Chalk paint works out on the laminate furniture! I have a bookcase I would like to redo and am curious how it turns out!

Thanks!

This post is so old…but I thought I’d chime in anyway. I painted our ikea island which was the white laminate beadboard look cabinets and drawers. I used Annie Sloan chalk paint, 2 coats clear wax and then dark wax. I didn’t even prime (because I’m impulsive AND lazy…a terrible combination. BUT, the chalk paint has held up extremely well over the past two years. And I even painted a panel of whiteboard/dry erase board that I used as a backing at the seating area and with two years of 3 kids sitting there kicking the panel…not a smudge! It’s a miracle and a wonder!

Great tips. I often see laminate books shelves at garage sales. Maybe I wont pass them up next time. I want some with wainscot on the back.

So glad to have inspired you Kelli. Definitely don’t pass up those seen-better-days bookcases at garage sales. You can surely transform them into something beautiful! xo Jenna

I have similar bookshelves that I bought years ago and with the same problems as yours. Shelves bowing and ugly backing! Thanks for sharing a way to update them in function as well as aesthetics. I am a newbie at painting furniture, as a matter of fact, I just posted my first ever attempt in painting a wooden surface {I am not too happy with the result, but it is good practice.}These bookshelves are on my to-do list once I gain some confidence at doing this. May I ask what type of roller did you use and which paint brush would you recommend? P.S. I found you through HomeTalk.

HI Lama, so glad you found SAS Interiors! For all painting projects, I always use my Purdy brushes – they really are the best. As for a roller for furniture, I often use a low nap roller or even a foam roller because the surface is fairly smooth. Stick with your furniture makeover. With each experience you learn more and more! xo Jenna

We found an old hotel bar/safe cabinet that we turned into kitchen island. After an unsuccessful attempt at painting one of the laminate doors with a brush and water-base paint, I found that spray paint for plastic surfaces worked really well. It actually took only 2 coats to completely cover the surface.

I have an entire bedroom set of laminiate furniture that I have been trying to figure out what to do with. My only problem with just painting it is there are a few places where the laminate is bubbled, ripped, peeled off, or stained from candle wax. Any ideas on how to get it to work with those issues or am I out of luck?

I used Benjamin Moore Aura paint for the top coat. It is a primer + paint in one, but I used a primer beforehand to seal the wood stain from coming through.

Welcome to SAS Interiors, Ashley – thanks for stopping by. I hope you’ll take a peak around more at my many DIY projects and decorating inspiration. xo Jenna

Thanks so much for this great info! I have two bookcases exactly like yours that I am refinishing and this information is SO helpful! I had heard from someone to not sand them and then when I got the paint the guy at the store told me to sand them to rough them up a bit. So this info couldnt have helped more for me to clear up the confusion! My hubs has a hand power sander like the one you used and we have medium grit sand paper. My question is do you think the medium grit is OK to use or should I go to a fine grit in order to not sand too deep? Thanks for your help!

What is the best paint to use after you use primmer on the laminate furniture? I have purchased latex paint and was going to spray paint it. Any suggestions?

No need to sand if you use the gripper primer! When used with a paint/primer combo, you need a coat of the gripper and 2 coats of paint. I would always follow up with a satin poly-acrylic to seal.

No need to sand? I’ve used gripper, and not sanded, but used liquid sander. Have you tried that? Do you think it would work instead of sand paper? Afraid not to sand at all.

I was wondering about a Finishing Coat. Thank you for the suggestion. I’ve painted my kitchen cabinets and did not use a finishing coat. Now I have scuffs and paint worn off. I may need to touch up and put a finishing coat on.

Hi,
I was wondering if you have ever painted lacquered furniture. I was going to try it following the same steps you used for laminate. I don’t want to ruin what I have if it won’t work. Any thoughts

Thanks so much,

Doris

I have never painted lacquer furniture, but I would think the same steps could be taken. Rough up the surface with a sander or sandpaper, then use a gripper primer before your paint color. If you try it, let me know how it turns out. Good Luck! Jenna

Not sure what I did wrong in painting my laminate shelves. It’s a dark blue gloss and days and days after painting, if wiped with a dry cloth/paper towel, it’s rubs off bluish. Is it just not fully cured yet?

O No! Did you sand the shelves first and apply a primer before painting on the blue? And did you add a coat of polyurethane after the blue coats? Yes, paint does take about 30 days to fully cure, but if you took the following steps, the blue shouldn’t have rubbed off after a few days of drying. The poly coat really sets and seals the whole application. Good Luck!

Hi, thank you for this great step-by-step tutorial. I really like how you took the time to get new shelves and a new backing.

I have a dresser that needs a new backing and I was wondering if “anyone else would do that.” It’s funny because the entire dresser is real wood and extremely heavy but the back is…well you know. :)

I shared on fb.

Maryann

You are very welcome Maryann – so happy to have inspired you! If the dresser is in good condition other than the back, I’d definitely fix it – it probably won’t cost much. I would use a thin piece of plywood and nail it to the frame of the dresser, similar to what I did with the bookcase. Good Luck! xo Jenna

I love this. i have never painted anythig in my life and a little nervous. I plan to follow your instructions and paint a similar bookcase. what type of paint did use. was it oil or latex?

Hi Jane, I used all latex paint for the laminate shelves. The primer is most important to seal the current wood finish and prepare it for the new color. Good Luck! Jenna

loved what u did with the bookcases, just curios about the paint on your walls, I LOVED IT!!!, what is it called and where can i find it?? loved the combination.

You must have a lot of free time. I always count my time when considering things like this, being a freelancer. I figure I could have made enough to buy nice wood cabinets (maybe from Craigslist) with the time and expense it took you to do two of these. Still, I have a treasured childhood dresser with one of those thick, laminate tops that is worth the time to me, so it’s good to know how to paint the top. P.S. I just re-read my comment and it sounds harsh. I’m just jealous that you have time to do all this stuff. Everyone needs a hobby. Mine is gardening, which I can only justify by growing food, so I should not criticize people for doing what they love doing. Nice job on the cabinets, btw. They’ll probably last you many more years with the new shelves and backs. :)

Hi Jenna, I’m wondering about painting the actual shelves. Did you lay them out flat and paint one side and the edges, and then after that was dry, reverse and do the other side? My concern is that it would be just my luck to flip them after painting the first side (and thinking they were dry enouogh), only to have them then end up sticking to the newspaper – or whatever material I was using underneath my project. So anyway, could you tell me how you painted the shelves? Thanks!

Good Question! When painting the first side, I balanced them on a can of paint so I could paint the top and all edges. Once they were dry (a few days later), I flipped them over, layed them on a soft surface (so they wouldn’t get damaged) and painted the other side. I hope this helps and Good Luck!

I always lay wax paper on top of my drop cloth to keep things from sticking and to keep my drop cloth cleaner longer.

It looks great, but have you ever tried Annie Sloan’s chalk paint?
You don’t have to sand or prime before-hand! It is pricey and can be difficult
to find, but it is SO worth it! I will never paint furniture any other way since
discovering chalk paint. I have even tried some homemade chalk paint recipes
to save money, but it didn’t cover nearly as well.

Soooo true! Was wondering why no one had mentioned AS Chalk Paint. I use it to paint everything! No sanding or priming needed! In fact, my next project is to paint an old ugly Walmart bookcase.

Hi Jenna,
Thanks for the great information. I have this exact same bookshelve in our office currently. y wife and I were just talking about getting rid of it because it did not match our ideas for redoing our office space. Now thanks to your great article I wil be redoing the piece and using it in another room. Thanks for the great idea. Do you mind if I feature this article on our website? It is just to good to not pas on to our readers. Check out our site and let me know. Thank You!
http://www.homeinformationguru.com Home and Garden DIY Information.

Hi Tom,

Thanks for the kind compliments. You can gladly use 1-2 pictures on your site along with a link back to my original post on the laminate tutorial. Thank you for asking and good luck with your project!

Best,
Jenna

Hi, loved your tutorial. I have done this before but didnt need to sand as i bought a primer specifically for laminate or melamine. The shelves lasted for years as I painted with satin, not emulsion or gloss paint. I’m in Ireland so hope the terms and names used make sense to those in USA.

Interesting Alison. A few of the terms are different than we use in the US, but I got the gist of what you did. I probably didn’t need to primer before since I used a sealing primer, but just to be safe, I did. Do you still use you shelves?

Best,
Jenna

Our bookshelf was about $35 and I guess I could get a white (the color I want now) for $35. Is the price of the sander/paint and primer more than that? Debating buying new or fixing ours up a bit.

Yes, you’ll of course have to evaluate if it’s worth the money and time. For me, I felt the shelves were in fairly good condition, I didn’t want to dispose of them, and I already had most of the materials on hand. If your shelves were about $35, the materials to revamp them will be about the same, but any leftovers can be used for future projects. Good Luck!

Best,
Jenna

I just did a makeover on the exact same bookshelf using Java Gel Stain followed by Poly/Acrylic Satin finisher…looks like a high end bookshelf.

New 2 almost all info here. I’ve several pieces 2 redo & had no thorough knowledge till now. THXS, BEST WEBSITE-I’VE LOOKED! HA! Also, the small details make a big diff- great job. :) Ok, I put a multi purpose primer/sealer on without sanding. Should I remove it b4 painting? Or paint & follow w/poly or poly acrylic? Any diff? GB, Lisa

Thank you do much for this tutorial! I have a large wardrobe I was given by a friend that was converted into a pantry a few years ago. It is ugly, but it worked. Now it’s going into my craft room for storage and I really want to give it a makeover. The back has already been replaced, along with the shelves, so this should be really easy with your tutorial. Thanks!

Do you know if this would work for Ikea furniture as well?

I would think laminate is laminate, so furniture from Ikea would be the same process. I don’t know for sure, but it’s my assumption. Good Luck with your transformation!

I wish I had found this information BEFORE I attempted to paint my daughter’s laminate bookcase. I took the advice of a part-time teenager in the paint department. (glaringly obvious mistake now, lesson learned) I did finally get it painted but not very well. Any tips on repainting a painted laminate bookcase?

Thanks much!
Heather

I’m about to do this since my friend just picked some up off the curb for me! They are in rough shape. I dare say most people would give them a DNR if they had power of attorney ;D!

I’ll give it a shot!

There is actually a primer made for laminate. I used this on a pair of horrible-looking tall dressers that I got from the Salvation Army for $20. They were faux golden oak laminate with the drawer fronts in white laminate. The knobs were the same golden oak. Golden oak is ugly enough, but paired with white is REALLY bad.

With the primer, I only had to clean and just lightly sand. I think I was able to paint over the primer the very same day. No issues with bubbles. I painted two coats of satin finish latex in black then added oval, brushed nickel knobs. For about $40 I created two good sized, attractive dressers for my son’s college dorm.

Fast forward 4 years – his wife recently repainted them a deep mocha to match the other furniture in their new apartment. They are only particle board and laminate so won’t last forever. However, the paint and updated knobs have made them reasonably stylish. Assuming the kidlettes don’t smash them with a hammer, they should be functional and attractive for at least another 5 – 10 years.

Pretty good for a pair of dressers that even the Salvation Army was ready to throw into the junk bin!

Thanks so much for this tutorial! I’m a poor college student that wants to redo some hand-me-downs but I was unsure on how to paint all my laminate. I am still unsure how much is enough sanding, I couldn’t quite tell from the picture. Should I just lightly go over everything once or twice? Or just go over until everything feels nice & rough?

Hi Kat, Don’t sand too much, but just enough to rough up the laminate surface. If it was real wood it would be slightly different, but with the laminate, you don’t want to put too much pressure on the surface or go too deep as to ruin what’s there. Alittle is fine. Good Luck! xo Jenna

I did a recent DIY project with Rustoleum Universal Paint & Primer and it worked amazingly well on the Laminate. You MUST wear a mask because you’ll inhale a lot of paint and it gave me a heck of a sinus infection. The result on the laminate was AMAZING though.

I’ve done this type of thing but I painted my bathroom cabinet. It’s that MDF stuff with the fake wood finish. I hand sanded it, and then just painted it with acrylic paints. It’s been several years and the paint hasn’t peeled or anything even with all the humidity in the bathroom. I’m really surprised it hasn’t come off.

I saw you said you used BM Aura paint. Can you tell me what color and finish you chose? I found your post because I’m about to redo an entertainment center (also from WalMart), from faux-wood to bright white, so the color you chose is exactly what I’m looking for. Also, how is it holding up? I was thinking I’d have to buy something meant for kitchen cabinets to stand up to the abuse i’m sure my 12yo son will dole out to it, so I’m curious to see where you are 7 months later. Thanks.

No sanding here – kids with allergies. But I tried Sherwin-Williams Multi-Purpose Primer. After de-glossing, one coat of primer and 3 thin coats of SW Pro Classic satin finish. BEAUTIFUL!!!! Thanks so much for the tut – so encouraging for us newbie DIYers!!

The unit had come with adjustable metal shelf pins that I reused with the new wood shelves. Thankfully nothing had to be purchased for that!

Hello, have just found your fabulous blog but can’t find where I subscribe via email. Help please. Many thanks.

I just painted an antique bed that had previously been painted with white latex and then covered with Disney character stickers. After using a razor scrapper to remove the stickers, I wiped off the last 30-40 years of dust then used chalk paint and clear wax. It is absolutely beautiful. I even painted it in my house because it is order less. Chalk paint is the greatest thing since Kilz. However, it is expensive but worth it. Cuts the work in half. As an alternative to buying the chalk paint, google a recipe for chalk paint. It’s simply plaster of Paris added to the paint! It is good stuff. You won’t regret using it.

Thanks for the tutorial and the encouragement to take on this project. I am in the process of paint a laminate night stand. Have primed with Zinsser and am painting with satin latex. My question – did you sand between coats of your latex paint? I want a smooth finish, but have sanded the first coat and that removes the paint in spots. What’s a girl to do?

Hi Rosie,

I did not sand between coats because I found the same thing… the paint started to peel off. I would try adding floetrol to your paint to slow down the process of drying to avoid brushstrokes. Also if sanding was removing paint in only certain spots, you might not have sanded the surface enough originally. You do need to lightly sand so the paint adheres to the surface. I think you will be fine without sanding between coats. Good Luck!

Jenna

Great job, I have a couple of bookshelves I’m considering painting myself. Your tips are really helpful. Thanks

I just found this on Pinterest, and I’m so glad I did. We have a couple of laminate cabinets that need to be repurposed for the kids’ room. I’m so glad to have found a way to give them a fresh paint job!

Hi you did an awesome job. Looks great. Now my question can you use a paint that looks like a stained finish.And if so can you use a clear coat. Oh for got what grit sandpaper did you use.
Much appreciated
Mike

Thanks Mike. Not sure what you mean by a paint that looks like a stained finish. After you paint, you can add a distressed overlay / glaze on top – that would work. As far as the danpaper, I would start with a coarse grit sandpaper and then move to a finer grit sandpaper. Good Luck! Jenna

I recently researched all the ways to paint furniture, including laminate. Some of you may have heard of Annie Sloan’s chalk paint (not to be confused with chalkboard paint). It is expensive at about $30 a quart and finishes with a clear wax or if you want to distress the piece, you finish with a dark wax. the whole point of chalk paint is to be able to paint any surface without all the fuss.

Well I decided I wasn’t going to do all that waxing so I decided to mix two processes.

I mixed up my own chalk paint using plaster of paris, a bit of water and regular paint from Lowes with a satin finish (don’t use semi gloss or flat). I painted the piece with two coats. It has a flat chalky feel to it which is ok with me because I plan on finishing it off with a water based Polycrylic.

I don’t have a website right now but might start one soon!

To add a little extra pop, I have decoupaged laminate without the need to sand. It would probably be a big task to do the whole thing, but doing the shelves or the back inside of the cabinet may be appealing in a crafty sense as well. It may also save on some sanding and painting time. I used black and white polka-dot paper on a smaller project and it turned out fabulously.

I am getting a laminate desk for my daughter for homeschooling. I love the design of the desk~it is a corner desk, but I would love to paint it and make it more girly and special for her. Do you think if I followed the same steps you did that the paint would hold up on the desk top where she would be working a lot?
Thanks

It should. Keep in mind though, a painted DIY piece vs. a store-bought piece that has a baked-on finish isn’t the same. There is a beauty with a DIY project, but it doesn’t always result or sustain the same way as something store-bought. Maybe stain the top of her desk or use a desk organizer so the top doesn’t get ruined. Good Luck!

No need to sand or prime or do any prep to any surface. Make your own chalk paint it is amazing and will cover anything with one coat then wax or glaze. It will not scratch off and paint dries immediately. You can paint any surface with this paint with no prep and very cheap to make. Just YouTube chalk paint

Hi I just made the mistake of buying a dresser that is particle board with a wood finish made from thin paper that is glue on much like wallpaper. Will I still be able to paint it.

I did the same with my shelving from a dollar store. I dragged them outside and sanded the heck out of them–tore off the old backing and left it open because I dug the look and feel–then I actually used a Rustoleum Matte Black because it adheres to anything and everything. Since I did black, I didn’t prime! I also used a spray paint and did this outside in the warm sun. They dried quickly enough to be brought back inside and only needed two coats. Like having new shelves!

I really don’t want to sand! In art class they say you can gesso any surface to prime it, then paint whatever on it…..

Great tutorial! I have two questions: I would like to paint my son’s bedroom furniture purchased from Rooms To Go, which appears to be part laminate, part wood. Can I use the same process on both materials? Also, is there a way to paint it while giving it a darker wood look, as if I had used wood stain (or can I just use stain)?Thank you!

Hi Lisa, With your furniture, you should be able to to use the same process as I used for the laminate furniture. It’s key to sanding the surface and then priming it before painting anything. That will give you the proper foundation. Stain would not work as you would need to start with raw wood to actually “stain” it. But you could get the look of stain similar to what I did for my bathroom. Here is a tutorial: http://www.sasinteriors.net/2012/03/how-to-glaze-a-cabinet-using-stain/

Great tutorial. I have a bathroom cabinet that is mdf painted white. Moisture has got into it in a couple of places and the colour is peeling/chipping off. Could I apply this tutorial to restore the cabinet to its former glory??

Thanks Stephanie! You can absolutely use the same process for any wood or faux-wood, like MDF which is fiberboard. BUT, it’s really important that the existing surface is sanded and a primer is used before the painting process. This is key for a successful painting project. Try and out and see…

Those are beautiful!! I am attempting to paint an ikea dresser. It started black. I primed it but these red lines appeared! I then did my first coat of paint and they bled through that too! Like…rust? Help! Do you know what’s happening? It was black…where is this red coming from? Its even getting on my brush.

These look great, you did a really good job, same process works to paint paneling on the walls and I have used bead board paneling on the back of a book case before, question – shelves 2×12 or did you use 1×12?

The shelves are 1 x 12. I was worried that they’d bow, but I’ve never had an issue. If they started to bow, my thought was to turn them over so they’d wear equally on both sides.
Best,
Jenna

Hi! So glad I came across your blog. I am planning to paint a laminate dresser for our baby coming in a few months. It’s one of those 1980 ugly things but I think with paint and new knobs it would be pretty. My question is – there are some engravings in the laminate that I don’t care for. I was planning to fill them with wood putty or something. Have you done this? How would I incorporate this into the process? Thanks!

Just found you via Hometalk. Very nice job!
I hope by now, in the years since, you’ve discovered the joys of adhesive, oil-based primer. Oil based primer is different than oil paint. Gripper was only the beginning. Zinzer,(might not be spelling that right) Stx, BIN all kinds. Kilz is really made for drywall, which is probably another reason you had trouble.

I’m now going to paint floor-to-ceiling book cases I got from a law firm. How cheesy of them to use MDF laminate! LOL I did some storage cabinets with Zinsser and it was incredible the coverage. 4 years later, they’re still crisp and nice.

How’s your book case holding up? I like the thicker shelves.

Jenna, about two years ago, I purchased the Rustoleum Kit for cabinets. I had builder grade white laminate cabinets. I followed the directions straight away (and I can’t even count how many furniture pieces I have refinished but mostly wood). I honestly had my doubts but I did it. Initially, they looked pretty good (I changed the white to espresso). Within 7 months, I could see the wear starting to set in. After all that work, I came to hometalk to see what I should do. I knew it would be a lot of work, but I too got the same sander you have out and away I went. I had Lowe’s mix and espresso to match and painted over what I sanded. It started to really take shape. After 4 coats and several days, I finished with Poly and they look beautiful now. I am so happy with the depth of color I achieved and I love the satin finish of poly. As much as I dreaded redoing it, I am thrilled I did. There is NO HINT of laminate in site!!! Your instruction are great by the way. Thanks.

That is so wonderful Valerie – thank you very much for sharing your success story. I love hearing that I inspired others through my projects!!
xo
Jenna

Hi, I have some questions on how to paint my dark-brown IKEA TV unit white. The descriptions of the TV stand says solid pine, stained, clear acrylic lacquer. I took one of the pieces of the white bookcases that I was trying to paint match the TV stand to Home Depot and they made me a semi-gloss water-based paint and primer in 1. They said since the surface is smooth I didn’t need to sand. However, after the second coat of paint the paint could easily come off by scratching with fingernail. I don’t know much about painting but whether I use water-based or oil-based paints I don’t think it’s supposed to come off with a simple scratch like that. Does clear acrylic lacquer mean laminate? I’ve been researching on how to paint furniture but I don’t know if laminate furniture is what’s underneath the surface or what’s on the surface. I think the surface could be laminate but not the material since it says solid pine. I don’t know if I need to go buy a primer in addition to already having a paint with primer in it so the paint will stick better. Do I need to sand it down and paint even though the paint shop person told me I don’t have to? I have a small child who constantly plays with his toys on this TV unit so it needs to be able to withstand the wear and tear of children’s play. I can’t return the paint since it was custom made so I need to know a way to paint it using the paint I already have. If you could give me some suggestions on what to do I would greatly appreciate!!

I would definitely recommend a light sanding, as well as using a separate primer from the paint+primer in one. Those dual paints are fine for walls, but not for painting furniture. You really should use a primer that blocks the stain from coming through and preps the surface for paint. I would recommend using Glidden Gripper primer, Zinnser, or Kilz. Additionally, paint takes about 20-30 days to fully cure. Before that time, paint could scrape or peel off, so I would try to avoid lots of wear and tear. With a light sanding, a good primer, and waiting 2 weeks (or so) to really”use” the piece, you should have a great new TV cabinet!

Good Luck!

O gosh, it’s difficult to say, but I am thinking it took a few weeks from the time I started the project until it was completely finished. Maybe a month in all.

I just painted a laminated nightstand also purchased from Walmart. It looks great, it was a dark wood stain and now I painted it white. I have read that I should seal it with a polycrilic, but am afraid I’d it turning yellow. Did you seal your bookcases and if so, with what product?

Hi Tracey, I’ve never used polycrilic so I can’t say if it would yellow. I have used polyurethane and to be honest in some spots over time it has yellowed slightly. If possible, try to use a non-yellowing polyurethane. Good Luck! Jenna

Hi Jenna, I hope I can still comment on your tutorial as it is 2016 now! I’m sure I’ll be using it soon! Do you have a tutorial on painting the composite wood shelves that are not laminated?

Turned out beautiful! Just a couple questions. I am going to paint a bookcase I made to but have read that sometimes latex paint is tacky even after long dry periods and can stick to your books or items. Have you had any issues with that? What kind of white paint did you use? Latex or oil based and what was the finish? Matte? Eggshell? Etc. Thank you so much in advance for your help and insight!

Hi Ellen, I haven’t had any issues with the latex paint feeling sticky after long periods of time. Yes, paint takes a few weeks to fully cure, but after that it should be good to go. The paint I used for the laminate bookcases was latex, not oil, and the finish was semi-gloss. Always use semi-gloss for furniture and trim work. Good Luck with your project! xo Jenna