Month: July 2013

Inspiring + Vibrant Craft Room Reveal

It’s been a while since I gave you an update on the mega craft room & office space that I’ve been working on for a local client. The room is 98% complete minus a few wall decor pieces. Aside from that, the space is looking dynamite, so I thought I’d give you a tour.

Before


After


The space will be used for the clients new business, Creative Nest, a new informational craft blog that will be launching later this year. I asked my client to share a few thoughts about the space and here is what she shared:

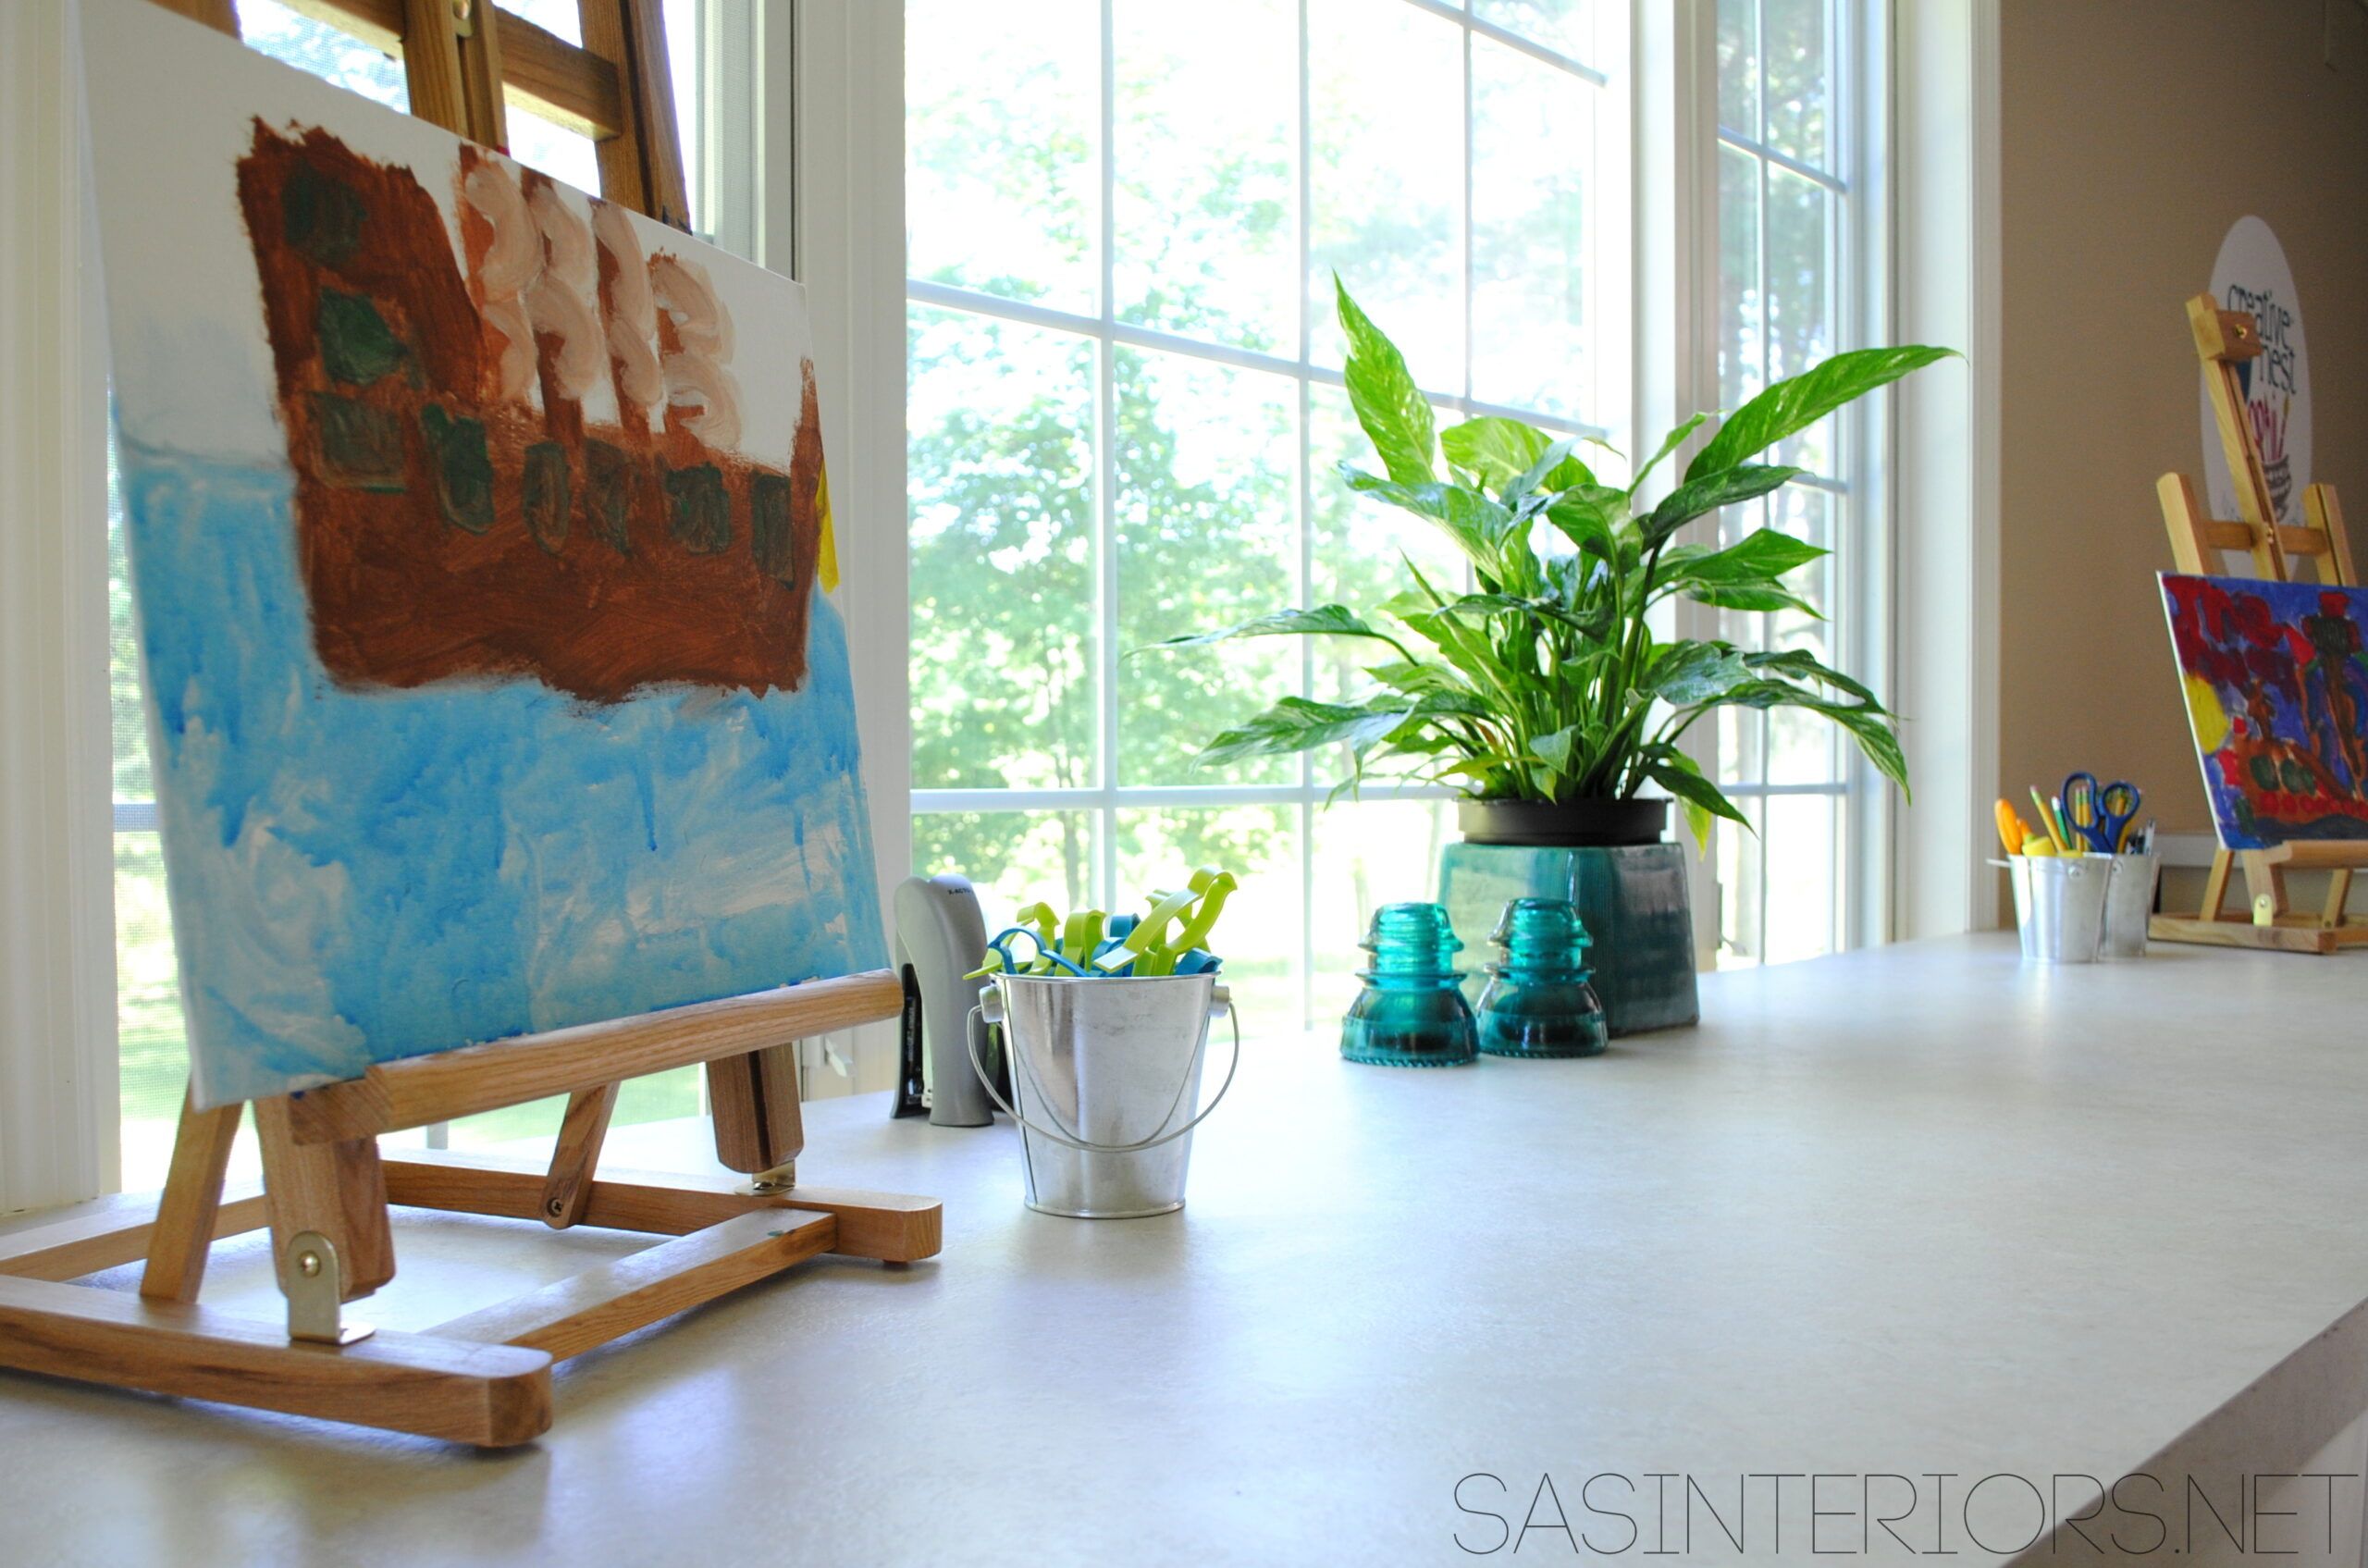
The development of an arts and crafts room in my home has, for years, been one of my goals. I envisioned a very special place where my son could make messy discoveries and be free to make his own place in the world with glitter, glue, and paint.

I had the perfect location: Our living room. In most houses, they’re big, stuffy rooms filled with nice things that kids aren’t allowed to enjoy and not typically a welcoming environment for a child. Instead, I wanted to fill the space with shelves, bins, and drawers, all overflowing with materials. I wanted a room that inspire my son’s imagination, a nurturing environment that would be as attractive to him as TV or video games. And that’s all true in this creative nest we’ve developed.

Fittingly, this art room is also the heart of another Creative Nest, which is the name of an informative craft blog I’m launching later this year. The blog will provide parents with plenty of ideas and craft projects to do with their children, and will feature tips and resources from art teachers and other experts. I hope Creative Nest becomes a resource that makes it easy for parents to share art time with their kids and show them that there’s more to life than precut shapes and step-by-step directions. As all parents know, great art often comes from happy accidents and the full exploration of the imaginative process. Having this wonderful space and this creative nest in which to play and share has been an amazing experience. I am so happy with the results.


The work large desk gives ample space for creating. At about 5′ long, quite a few artists can work at the same time. The ghost chairs are the perfect seat by allowing the architectural millwork to “speak” and having the ability to easily wipe away mistaken spills.


Cubbies are the ideal way to stay organized. There is a place for everything & everything in it’s place. Crayons. Markers. Paints. All put away in their own containers.


The storage zone is the ideal spot all the crafting supplies.


I didn’t take a picture looking from the craft space to the office, but here’s a progress pic during construction…


This is what the desk space looks like now. Beautiful and functional.


On the other side is a comfy, cozy lounge space with a humungo built-in bench with a lot of storage below and an awesome built-in shelf at the end. The owner’s son is an amazing 6 year old artist and mom loves to display his creations in each of the recessed panels. I’ll tell you, the panels were not created for the pictures, but it just so happened that they were the perfect fit and they bring gorgeous color and meaning to the space.


Refreshing. Energizing. Inspiring. Creative. Fun. All words that, to me, describe this incredible new craft room space.
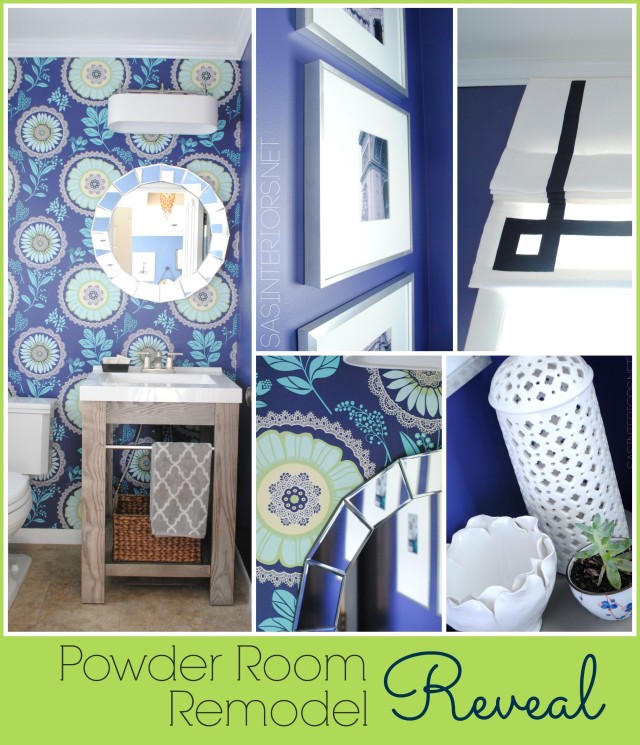
Powder Room Remodel Reveal

The powder room remodel is finally complete!

I hope you weren’t holding your breathe because it’s been 2 + months since my last progress postBoy, did I surely leave you hangin’…

BUT (and it’s a big but), it’s all worth it because this is the result >

Powder Room Remodel {REVEAL} #powderroomremodel

Big Time Awesome!

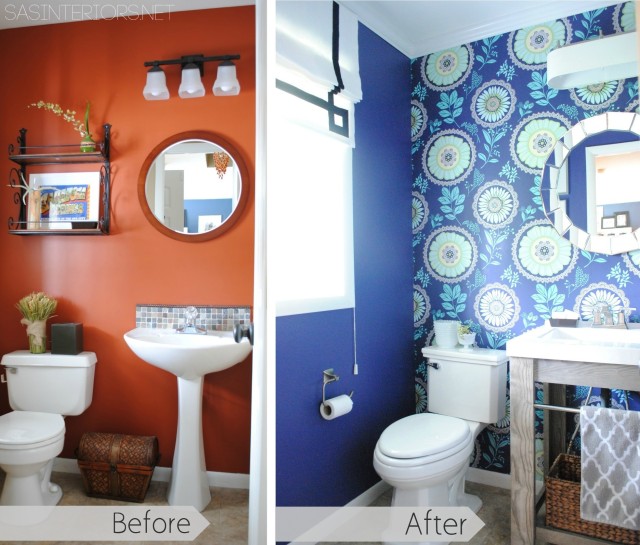
And just to remind you where we started, here is the before >

Powder Room Remodel {REVEAL} #powderroomremodel

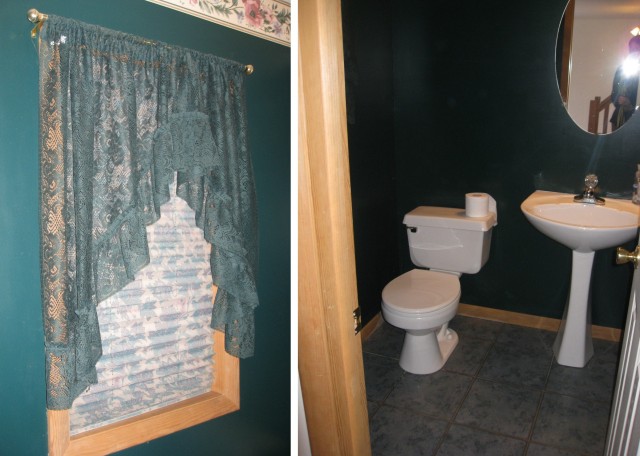
And before that (when we moved in to the house), this is what the space looked like >

Before Powder Room Remodel

A bit scary, don’t ya think?!

Back to the progress…

Since the last post when I shared the steps of fixing the wall from the previous tile and hanging the wallpaper, we were busy with >

  • Hanging crown moulding (1st time ever, wow it was tough)
  • Hanging the new light (twice because the 1st one that I thought I loved, I really didn’t)
  • Painting the crown moulding
  • Putting together and installing the vanity
  • Installing the toilet
  • Hanging the mirror
  • Choosing and changing the pictures
  • Designing and installing the custom roman shade
  • Touch ups!

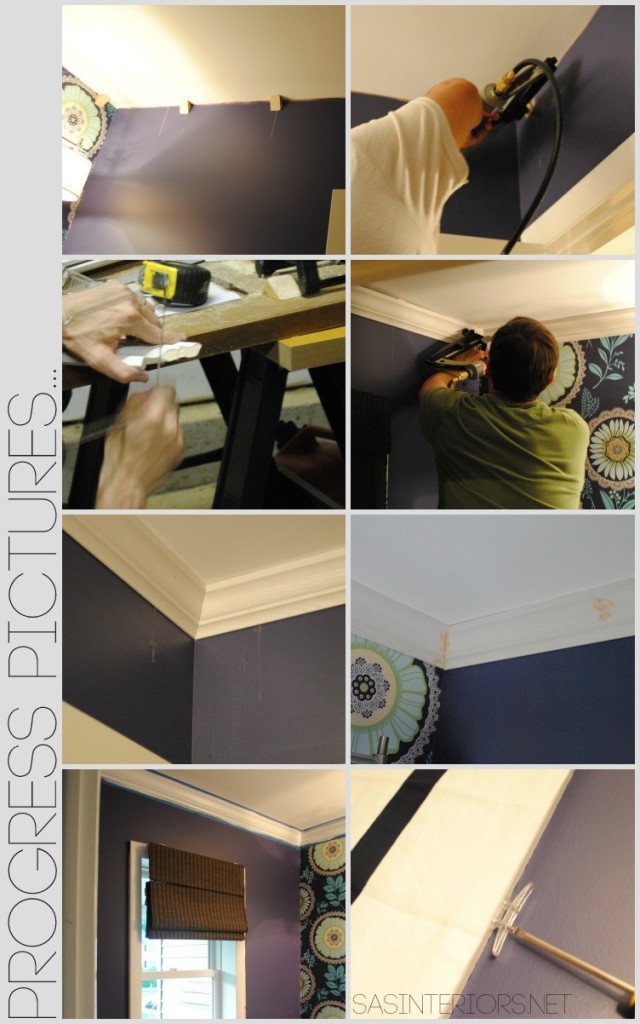
O, well now I know why it took me 2 months to show you the reveal.  That was alot.  Here are some progress pictures along the way…

Powder Room Remodel {REVEAL} #powderroomremodel

Alot happened to this small space.  The most challenging was absolutely the installation of the crown moulding.  It was the first time that the Mister and I ever tackled installing moulding and it was tough.  We made lots of mistakes day after day, and in the end called in a friend who has major talent for woodworking.  He’s not a professional woodworker, but someone who does it as a hobby and is quite knowledgeable and maticulous.  Anyway, he really made the bathroom what it is because without, the space wouldn’t have the same depth and pizazz.
If you’re familiar with installing moulding, our crafty guy used the coping method, which results in really tight corner joints.  Once the moulding was installed, there was very little need for wood filler.  With the time it took to do this simple bathroom (about 3-4 hours), I couldn’t imagine doing a large room or an overall house.  I’ve been drawing mouldings for client homes for years, but now I have the appreciation of how difficult it is to actually install.  Not sure I’ll be doing that again any time soon…

Want to learn more on the coping technique for crown moulding? Check out this post I found.

Anyway, it’s complete and I’m in love with the overall space.  Want to see more of the reveal?  I bet you do.  Go…
Powder Room Remodel {REVEAL} #powderroomremodel

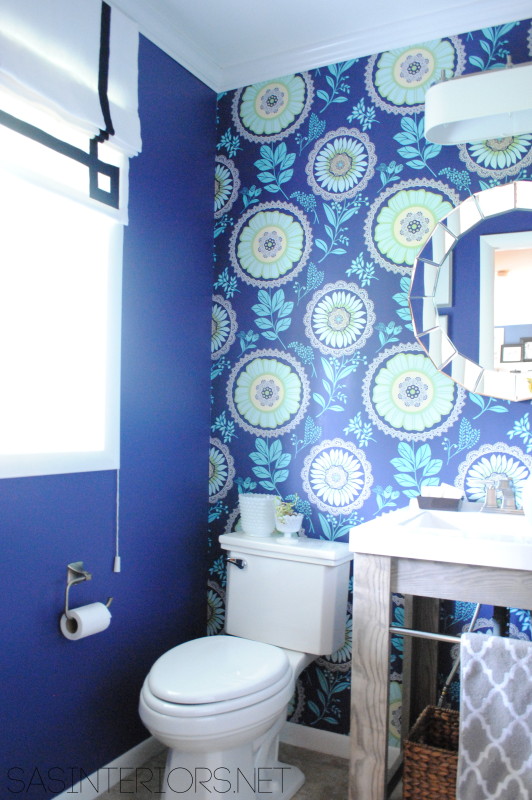
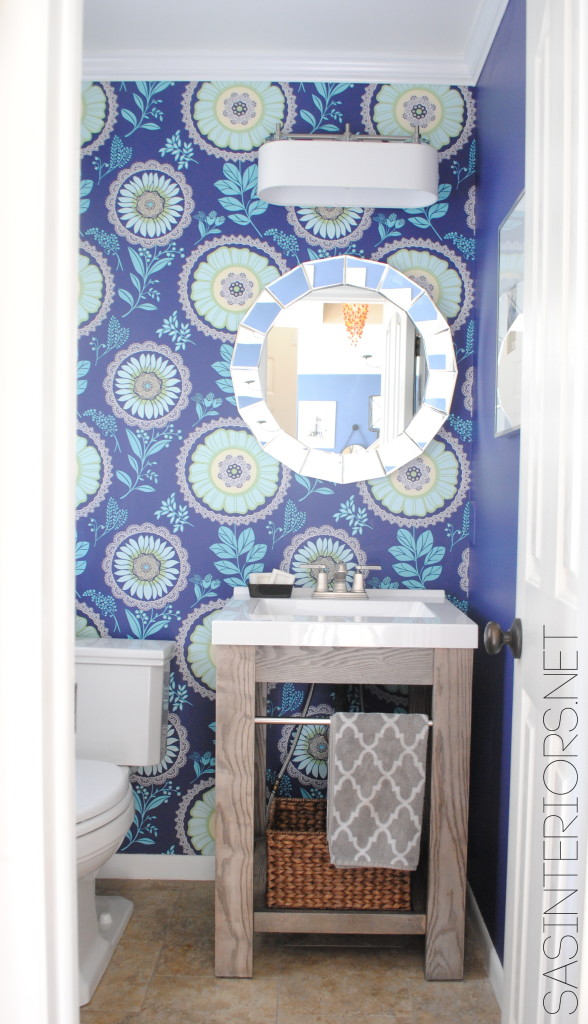
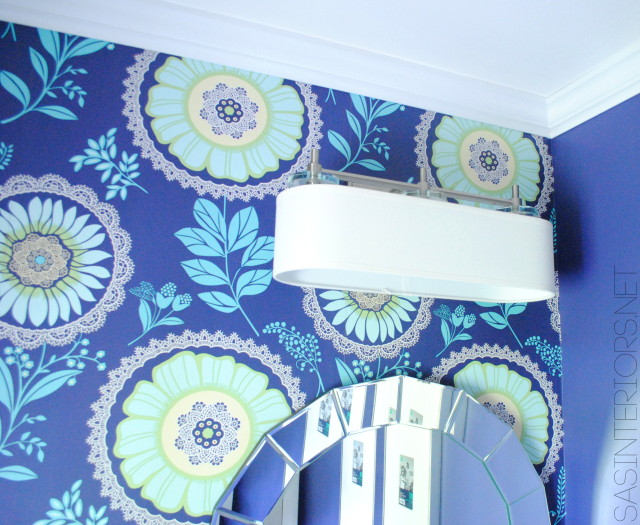
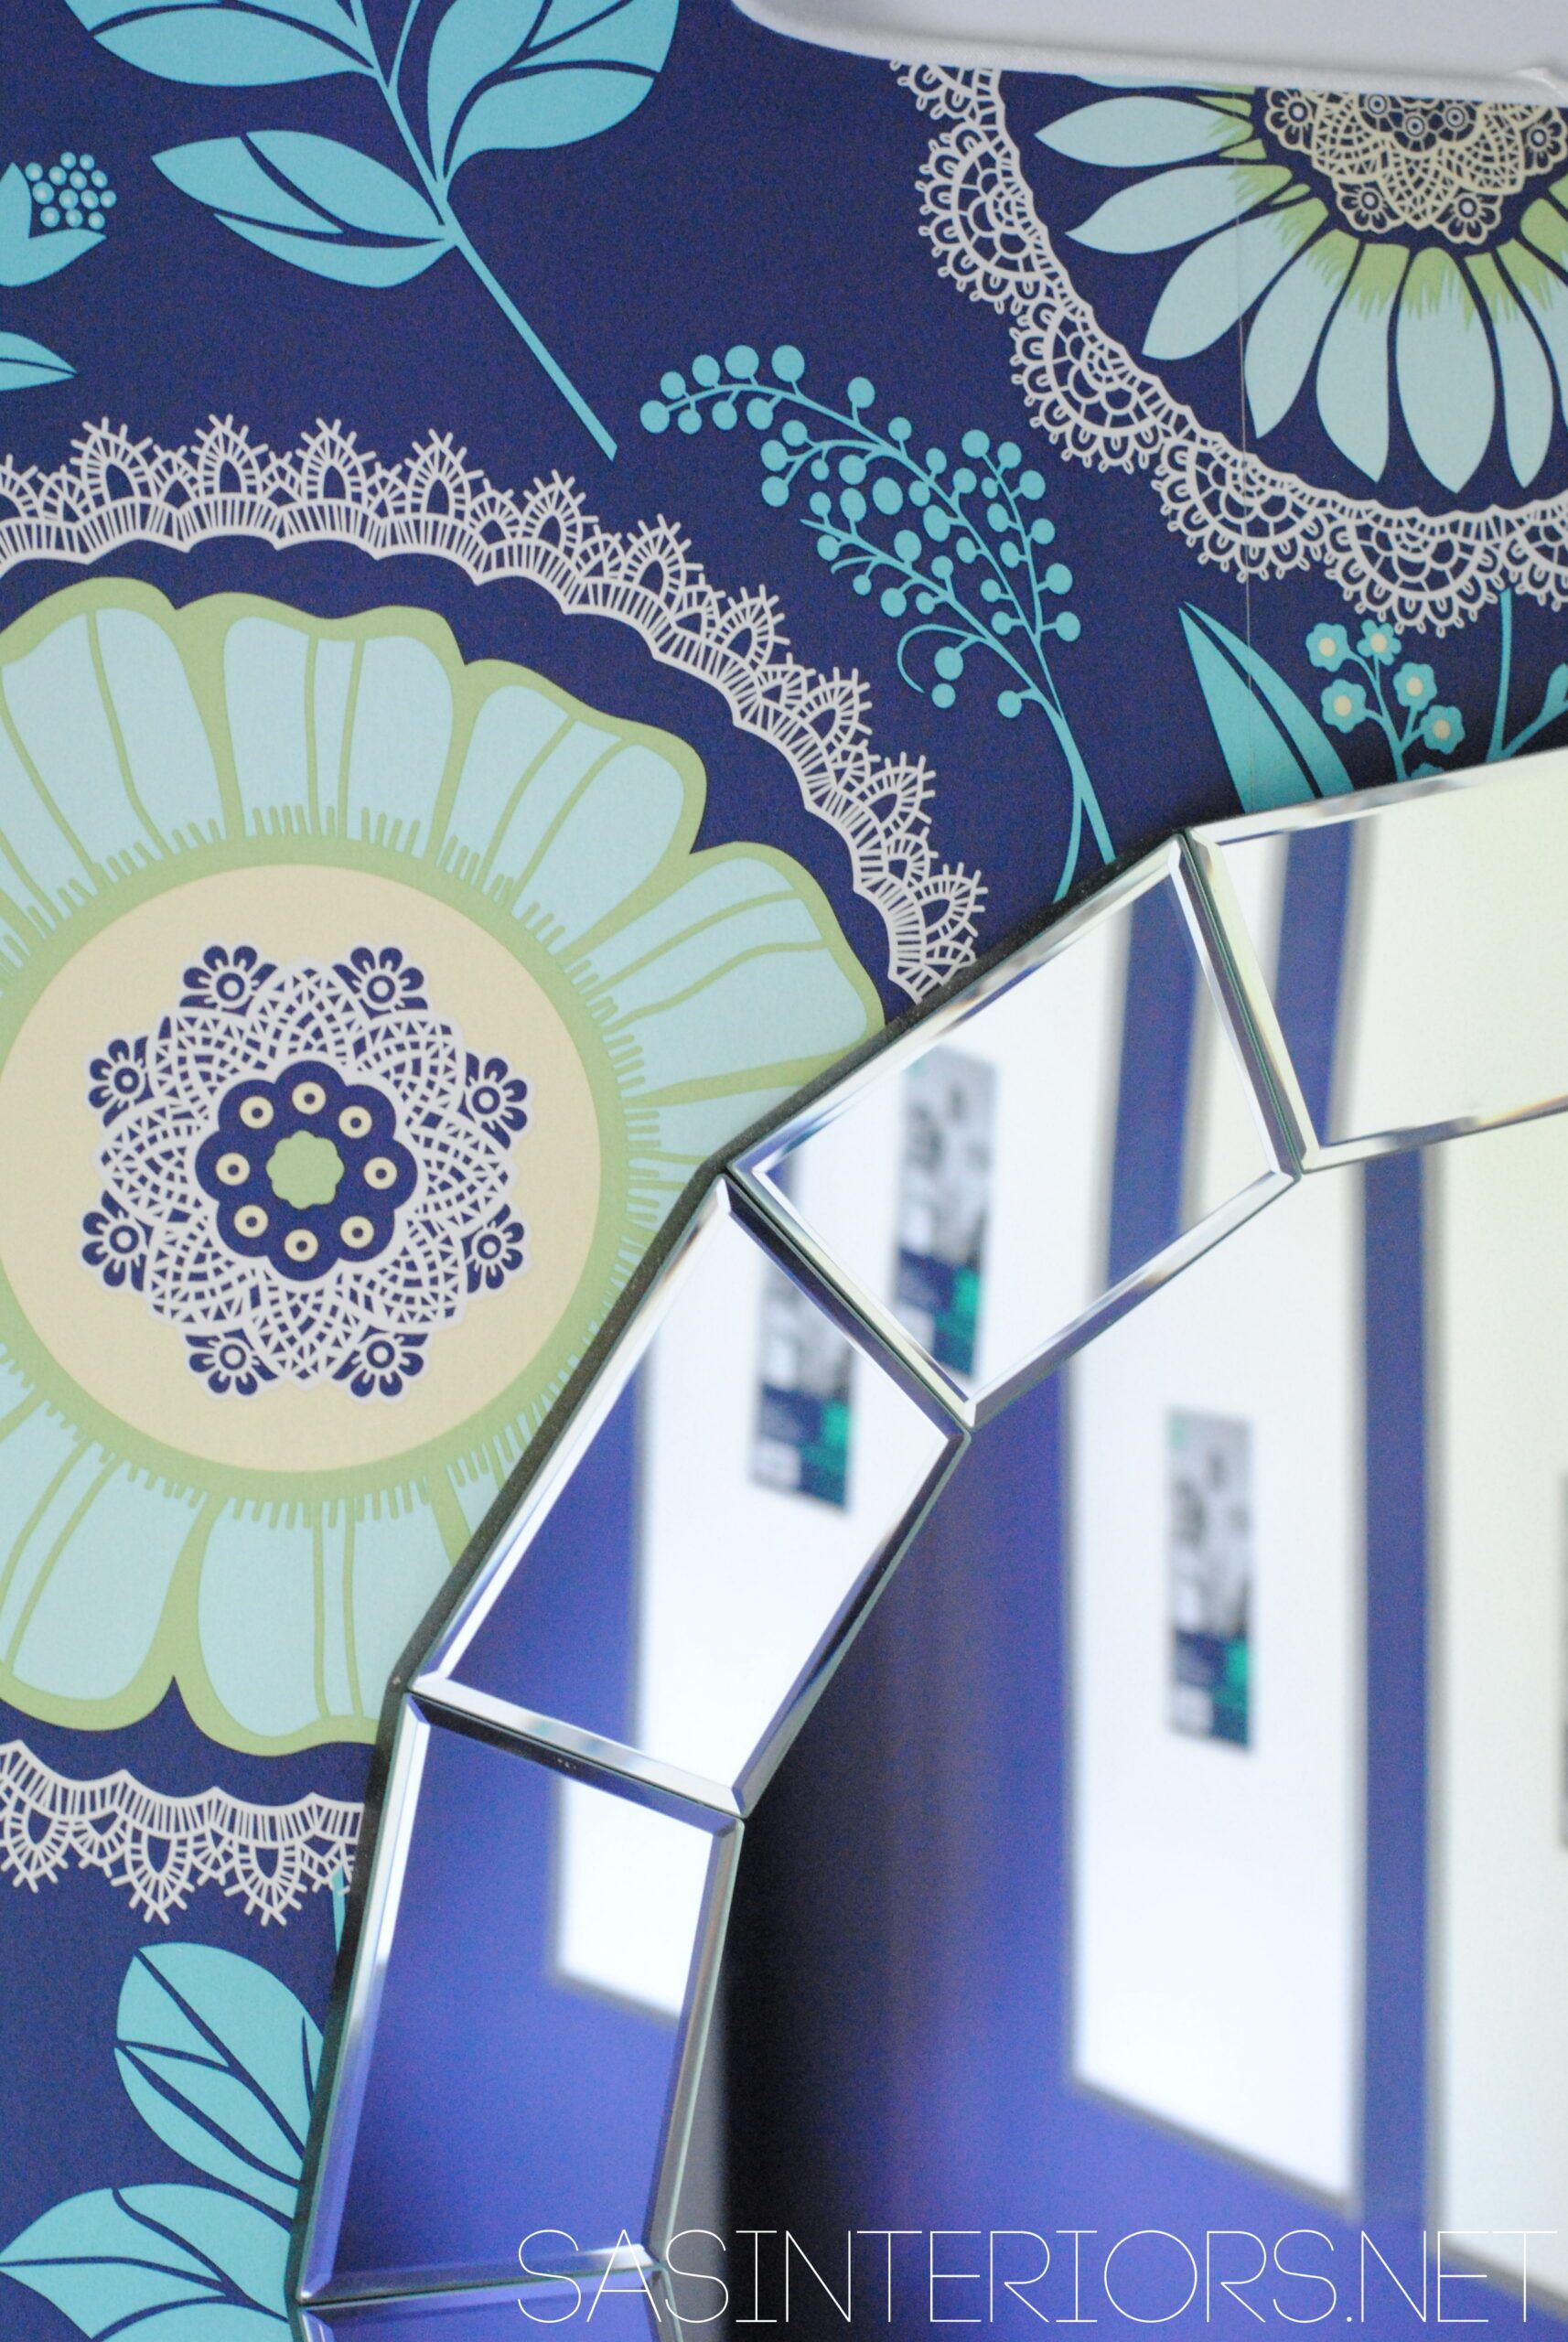
The vibrant and eye-popping Amy Butler wallpaper sets the tone for the room.  It’s surely the statement of the space and the one element that started the design.  From the mirror to the vanity to the framed pictures on the wall, everything is very simple so the wallpaper can ‘speak’.

Powder Room Remodel {REVEAL} #powderroomremodel

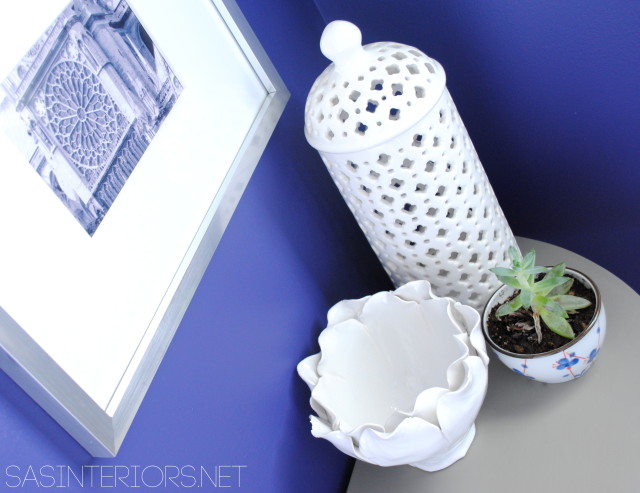
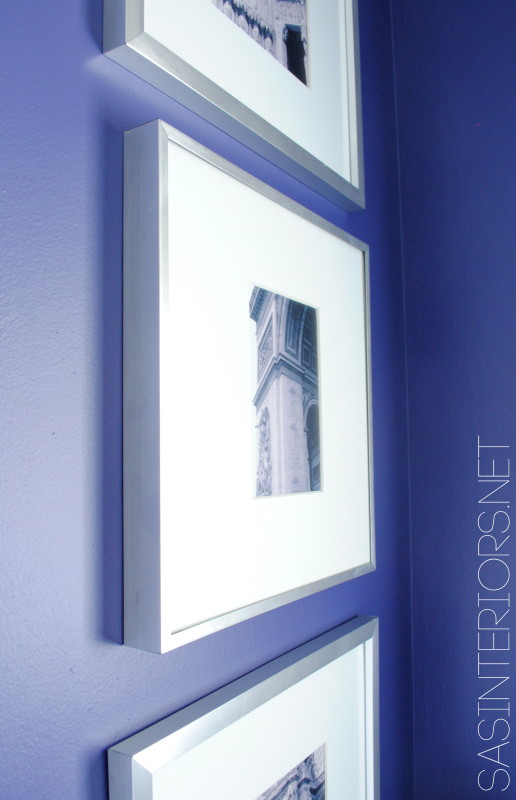
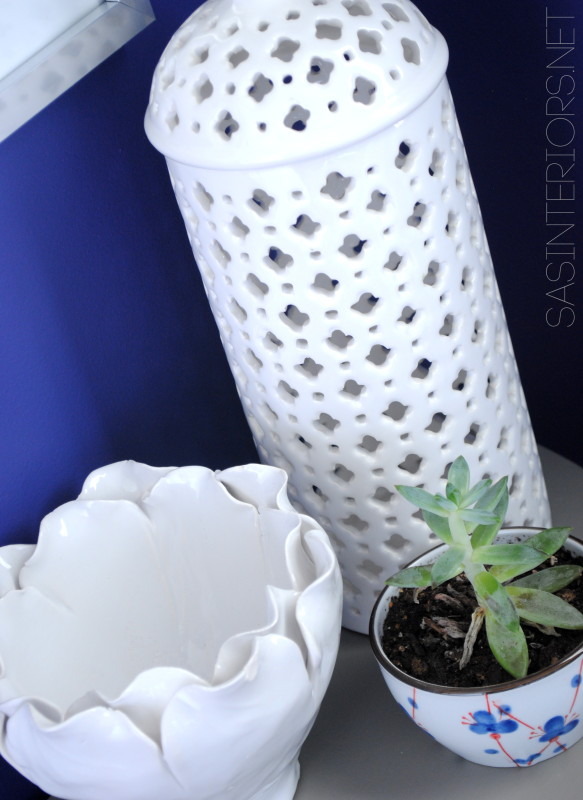
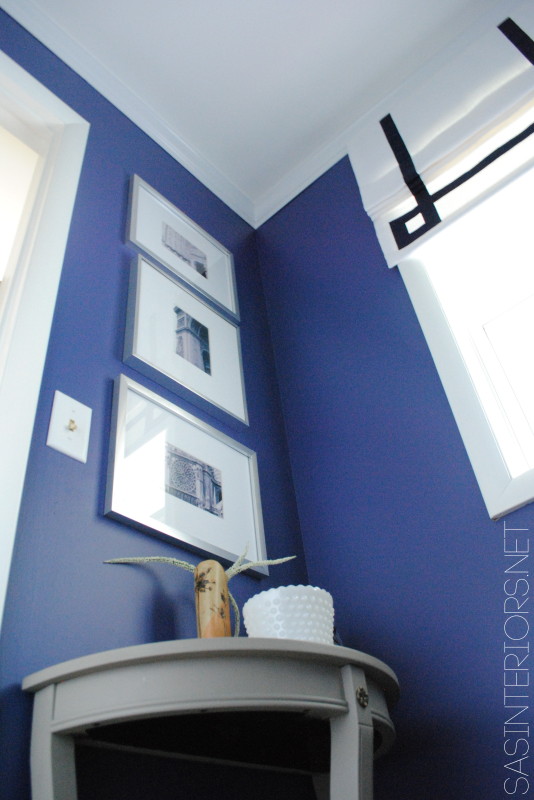
Pretty white accessories fill the space, along with black and white framed images from my travels.  Both are beautifully set against the deep blue walls.

Powder Room Remodel {REVEAL} #powderroomremodel

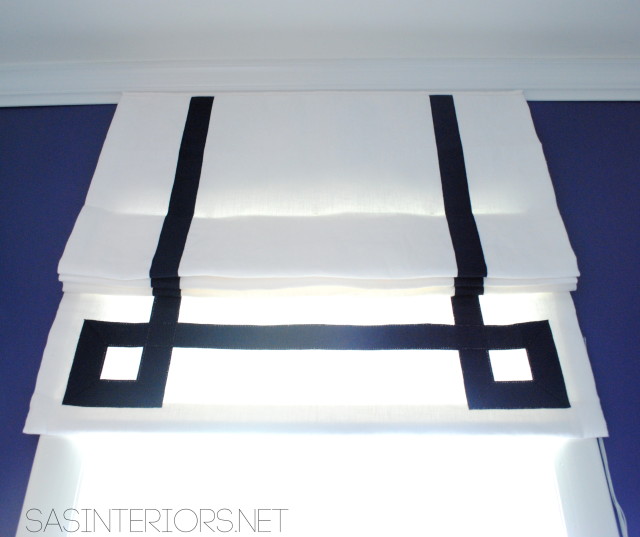
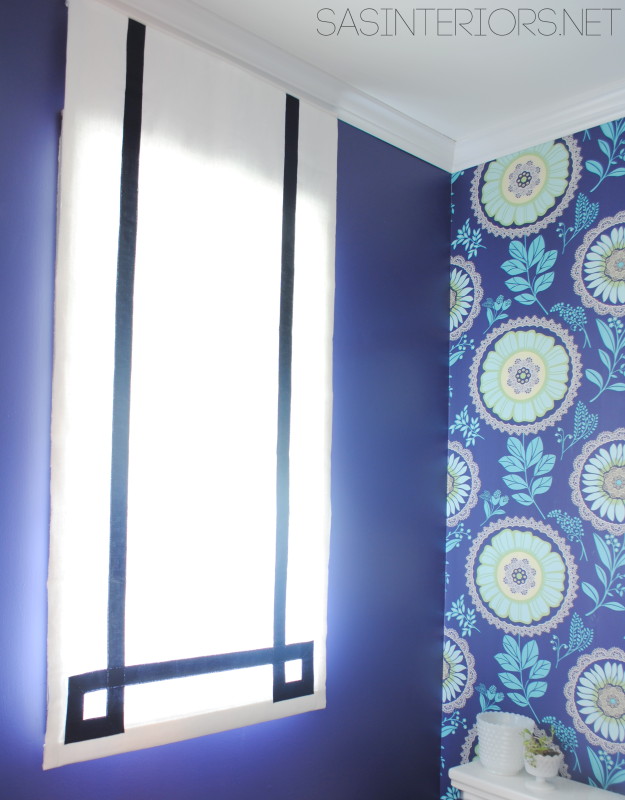
The new roman shade is another amazing element in the room.  I designed it and the creative folks at Tonic Living fabricated it.  They are amazing. They offer an array of services for creating window treatments, pillows, futon covers, and more.  Their offering of fabrics is huge and very much in-trend.

Powder Room Remodel {REVEAL} #powderroomremodel

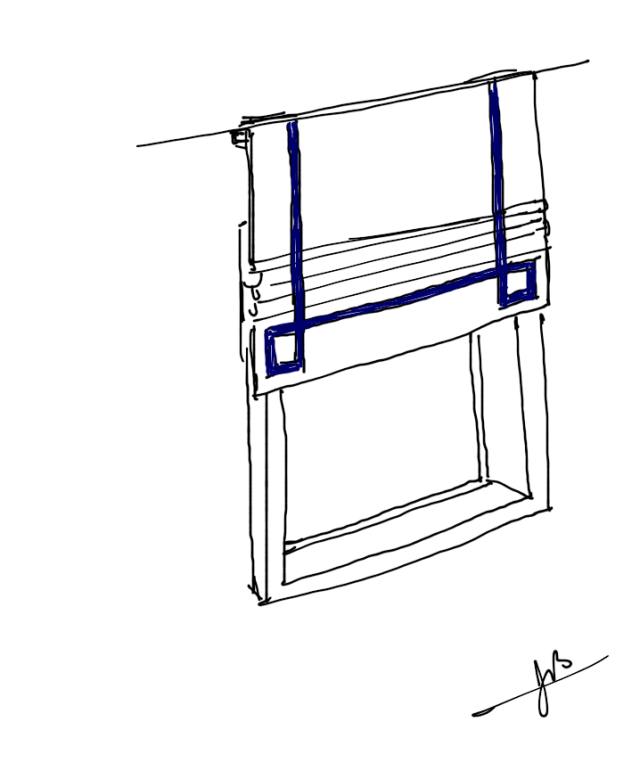
This was the sketch I sent them and you see the result…Window Treatment sketch

The top of the shade sits right under the bottom of the crown moulding and when fully lowered, you see the full border design.  The fabric is a heavy white linen and the border detail is a 2″ thick navy ribbon.

Powder Room Remodel {REVEAL} #powderroomremodel

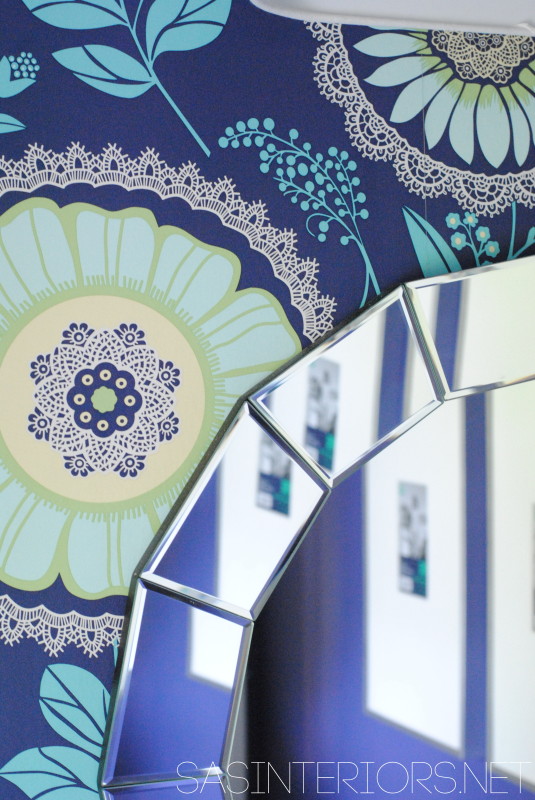
The mirror was definitely the most difficult selection to choose.  I wanted something that was interesting, but minimal so the wallpaper behind would still shine through.  I finally decided on this mirror from Lowe’s and am thrilled with the overall look.  I like it’s round shape that emulates the flowers in the wallpaper, as well as it’s frameless design.

Powder Room Remodel {REVEAL} #powderroomremodel

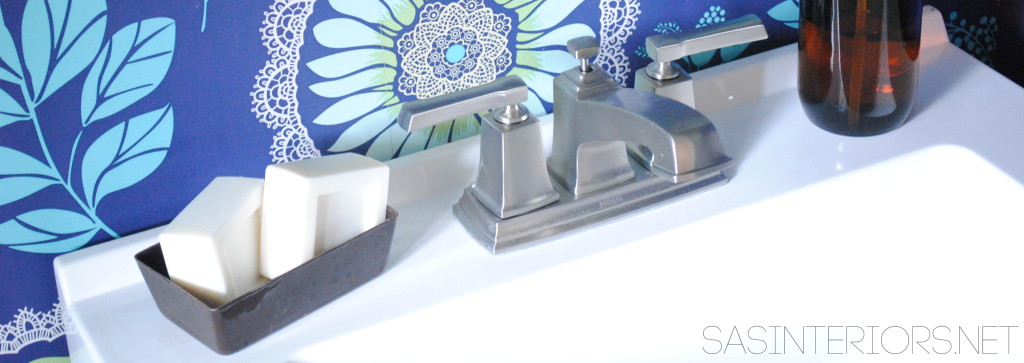
The vanity and faucet are another element of the room that I adore.  The Moen faucet is the same style and finish that I used in my master bathroom.  It has great lines and works beautifully in the space. Plus the major awesome part is the finish doesn’t leave spots.  Read more about it here!
Powder Room Remodel {REVEAL} #powderroomremodel

More details…

Powder Room Remodel {REVEAL} #powderroomremodel

Powder Room Remodel {REVEAL} #powderroomremodel

The light fixture is a $17 steal from Lowe’s (on their website it’s more $$$).   I had previously chosen another light, but wasn’t thrilled with the look once home.  Actually this fixture is also hung upside down.  When I held it in place before install, the junction box was very high on the wall and a fixture hanging down was more appropriate.  My genius husband came to the rescue and said, “Why don’t we install it upside down?”  And that’s what we did.  You would never know and it looks great!

Powder Room Remodel {REVEAL} #powderroomremodel

Powder Room Remodel {REVEAL} #powderroomremodel

And I think my most favorite part of the new space is how I can enjoy it from so many other parts of my home…

This is my view from the office / family room looking through the foyer and into the new powder room.

Powder Room Remodel {REVEAL} #powderroomremodel

Here is a recap of all the elements in the newly created powder room:

Thank you for taking the tour of my new powder room.  What a refreshing new space to see and enjoy when you enter our home.

DIY: Rope Wrapped Vases + Glass Jars

Earlier this week, I excitedly announced that I recently partnered with Apartments.com to share simple solutions for small space living.  Specifically, I will be showcasing tips and strategic ideas for overcoming the obstacles and hurdles of apartment life to create an inviting, stylish, and most of all, functional space.  Additionally, each month I will be creating a DIY project that is perfectly fit for an apartment and/or small space.  Like this…
DIY: Rope Wrapped Vases perfect for creating & displaying in an apartment and/or small space #apartment #diy #apartmentliving

Do-It-Yourself + Apartment Life isn’t always an easy combo.  In my book a DIY project/craft best suited for an apartment has to be the following:

-> Easy to create using simple supplies (no major power tools here)

-> Easily moveable – something that can be repositioned and/or moved to another room.  In a small space, a few accessory moves will make the entire place feel fresh and new.

-> Unique, interesting, one-of-a-kind (of course)

For my first DIY project, Apartments.com put me to the challenge of creating something for the Summer.  Not to tricky.  To me, Summer brings to mind words like beach, sand, sun, sea, nautical, light, bright, airy…

For the project, I wanted to create something using the word nautical, which then in turn rope material came to mind, thus the creation of rope wrapped vases.  Knowing that I already had a plethora of glass vases and glass jars around the house, I started out by shopping my home.  How much better does it get not to have to spend a dime?!
TIP: In a small space, storing extra of anything, especially home decor accessories, isn’t easy.  My suggestion would be to have one shelf, one box, or one ‘spot’ where you can keep extra accessories or home type elements to rotate with what you currently have throughout your home.  When I shop, I usually purchase items because I love them and they have meaning, versus buying something just to buy.  But that means when I get it home, I might not use it right away.  Having a small place to store items like vases, baskets, extra candles, etc. will allow you to always have the ability to freshen up your space in no time without the need to go out and search/buy for something meaningless.  The box or shelf you choice is perfect because it will allow you to stay within the designated area.  Small spaces surely don’t allow for excess.
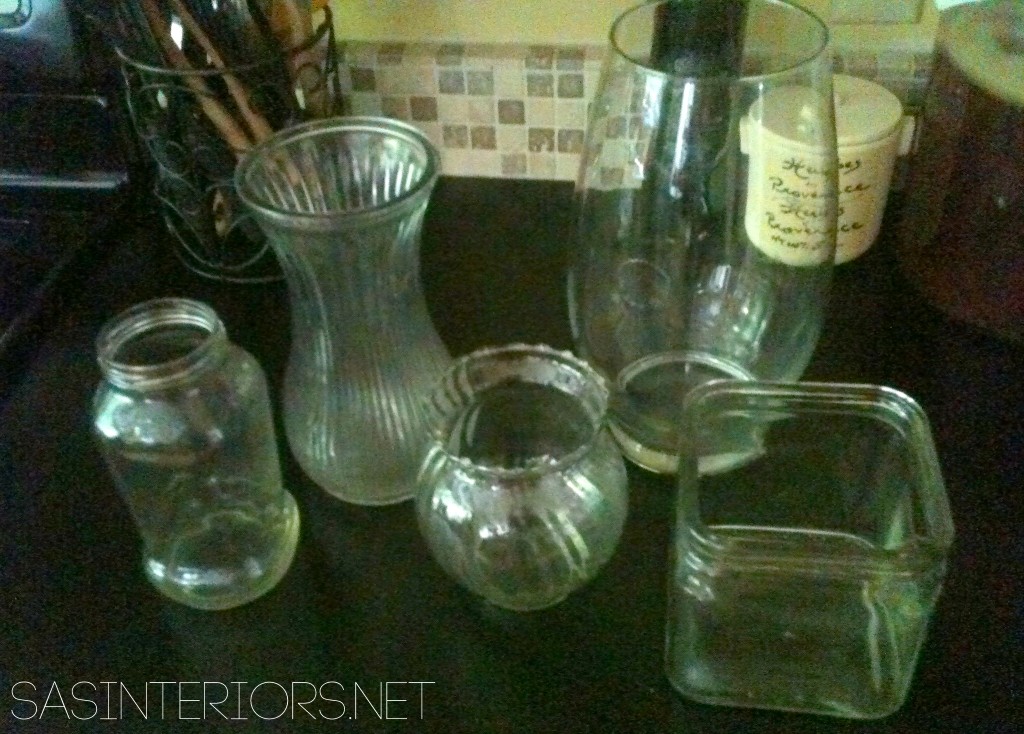
Vases and used glass jars (sauce or salsa jars are my favorites) or mason jars are always keepers for my accessory shelf.  At the moment they might not be of use, but I know they will always come in handy in the future.  For this project, I went right to the shelf and found a collection of 5 glass jars of varying heights and sizes.

DIY: Rope Wrapped Vases perfect for creating & displaying in an apartment and/or small space #apartment #diy #apartmentliving

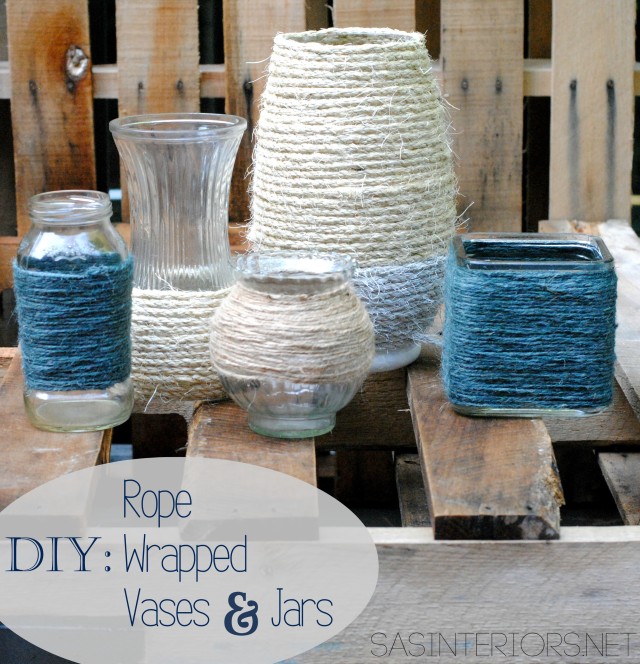
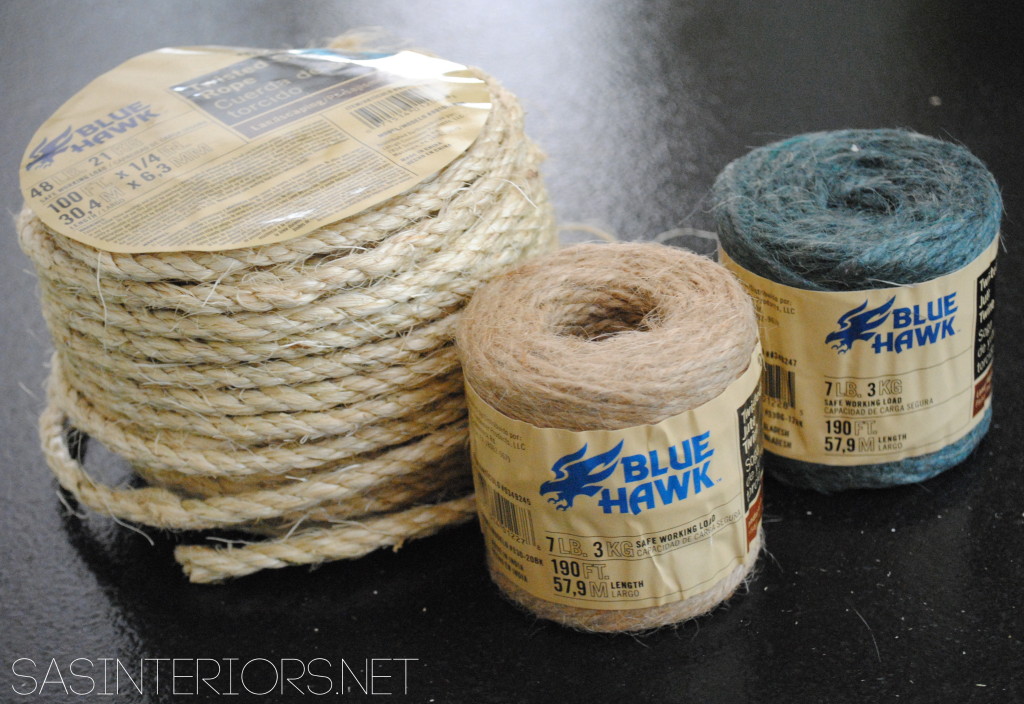
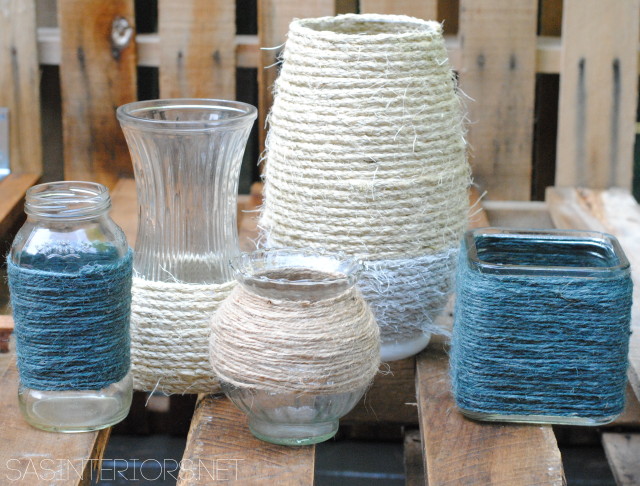
Instead of wrapping all the vases/glass jars in the same rope, I decided to use rope, twine, and jute of different sizes and colors.

These 3 styles I got at Lowes >

DIY: Rope Wrapped Vases perfect for creating & displaying in an apartment and/or small space #apartment #diy #apartmentliving

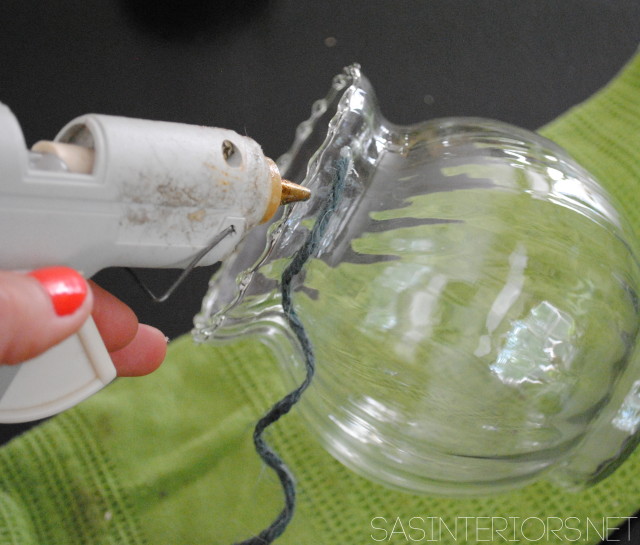
Using my hot glue gun, I dabbed a bit of the hot glue at the point where I wanted to start and then attached the end of the twine.

4

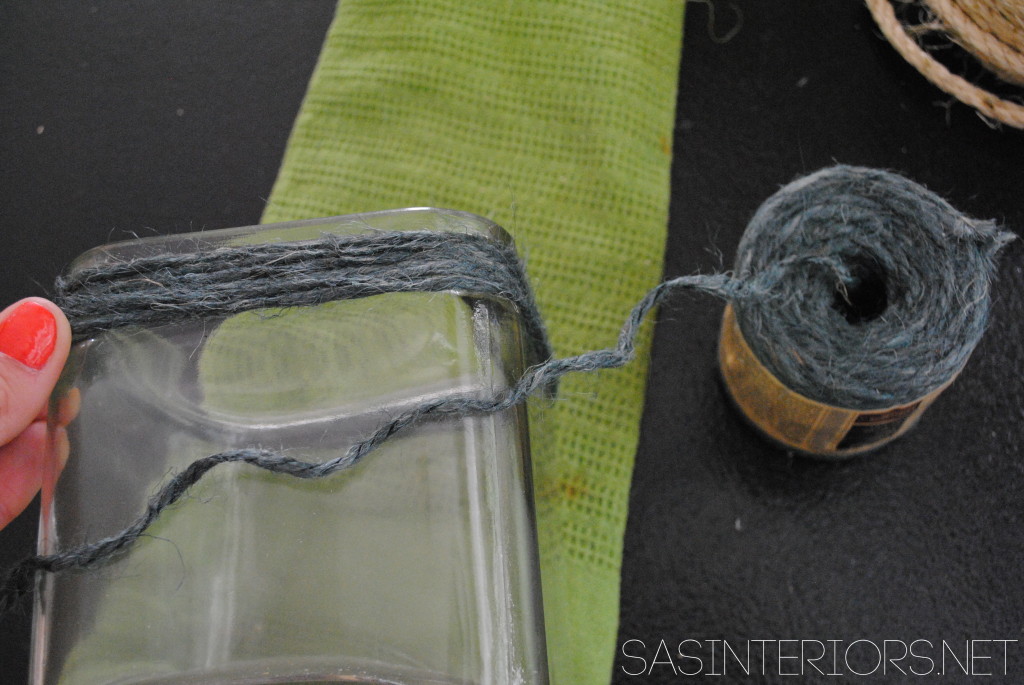
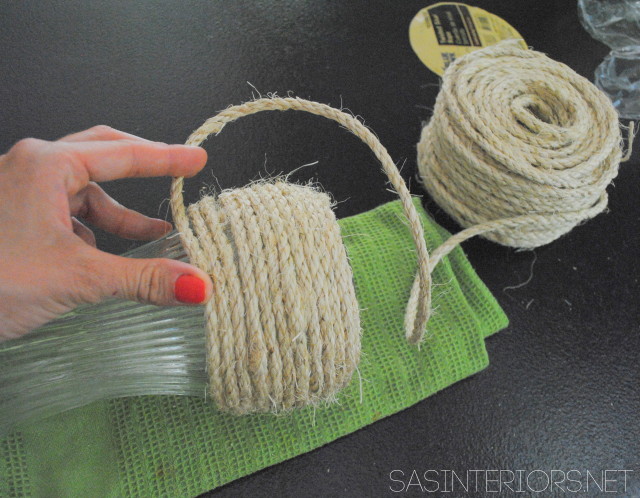
Then I wrapped and wrapped and wrapped around the glass jar.  Every so often I added another dab of hot glue to be sure that the twine / jute / rope was secure.

DIY: Rope Wrapped Vases perfect for creating & displaying in an apartment and/or small space #apartment #diy #apartmentliving

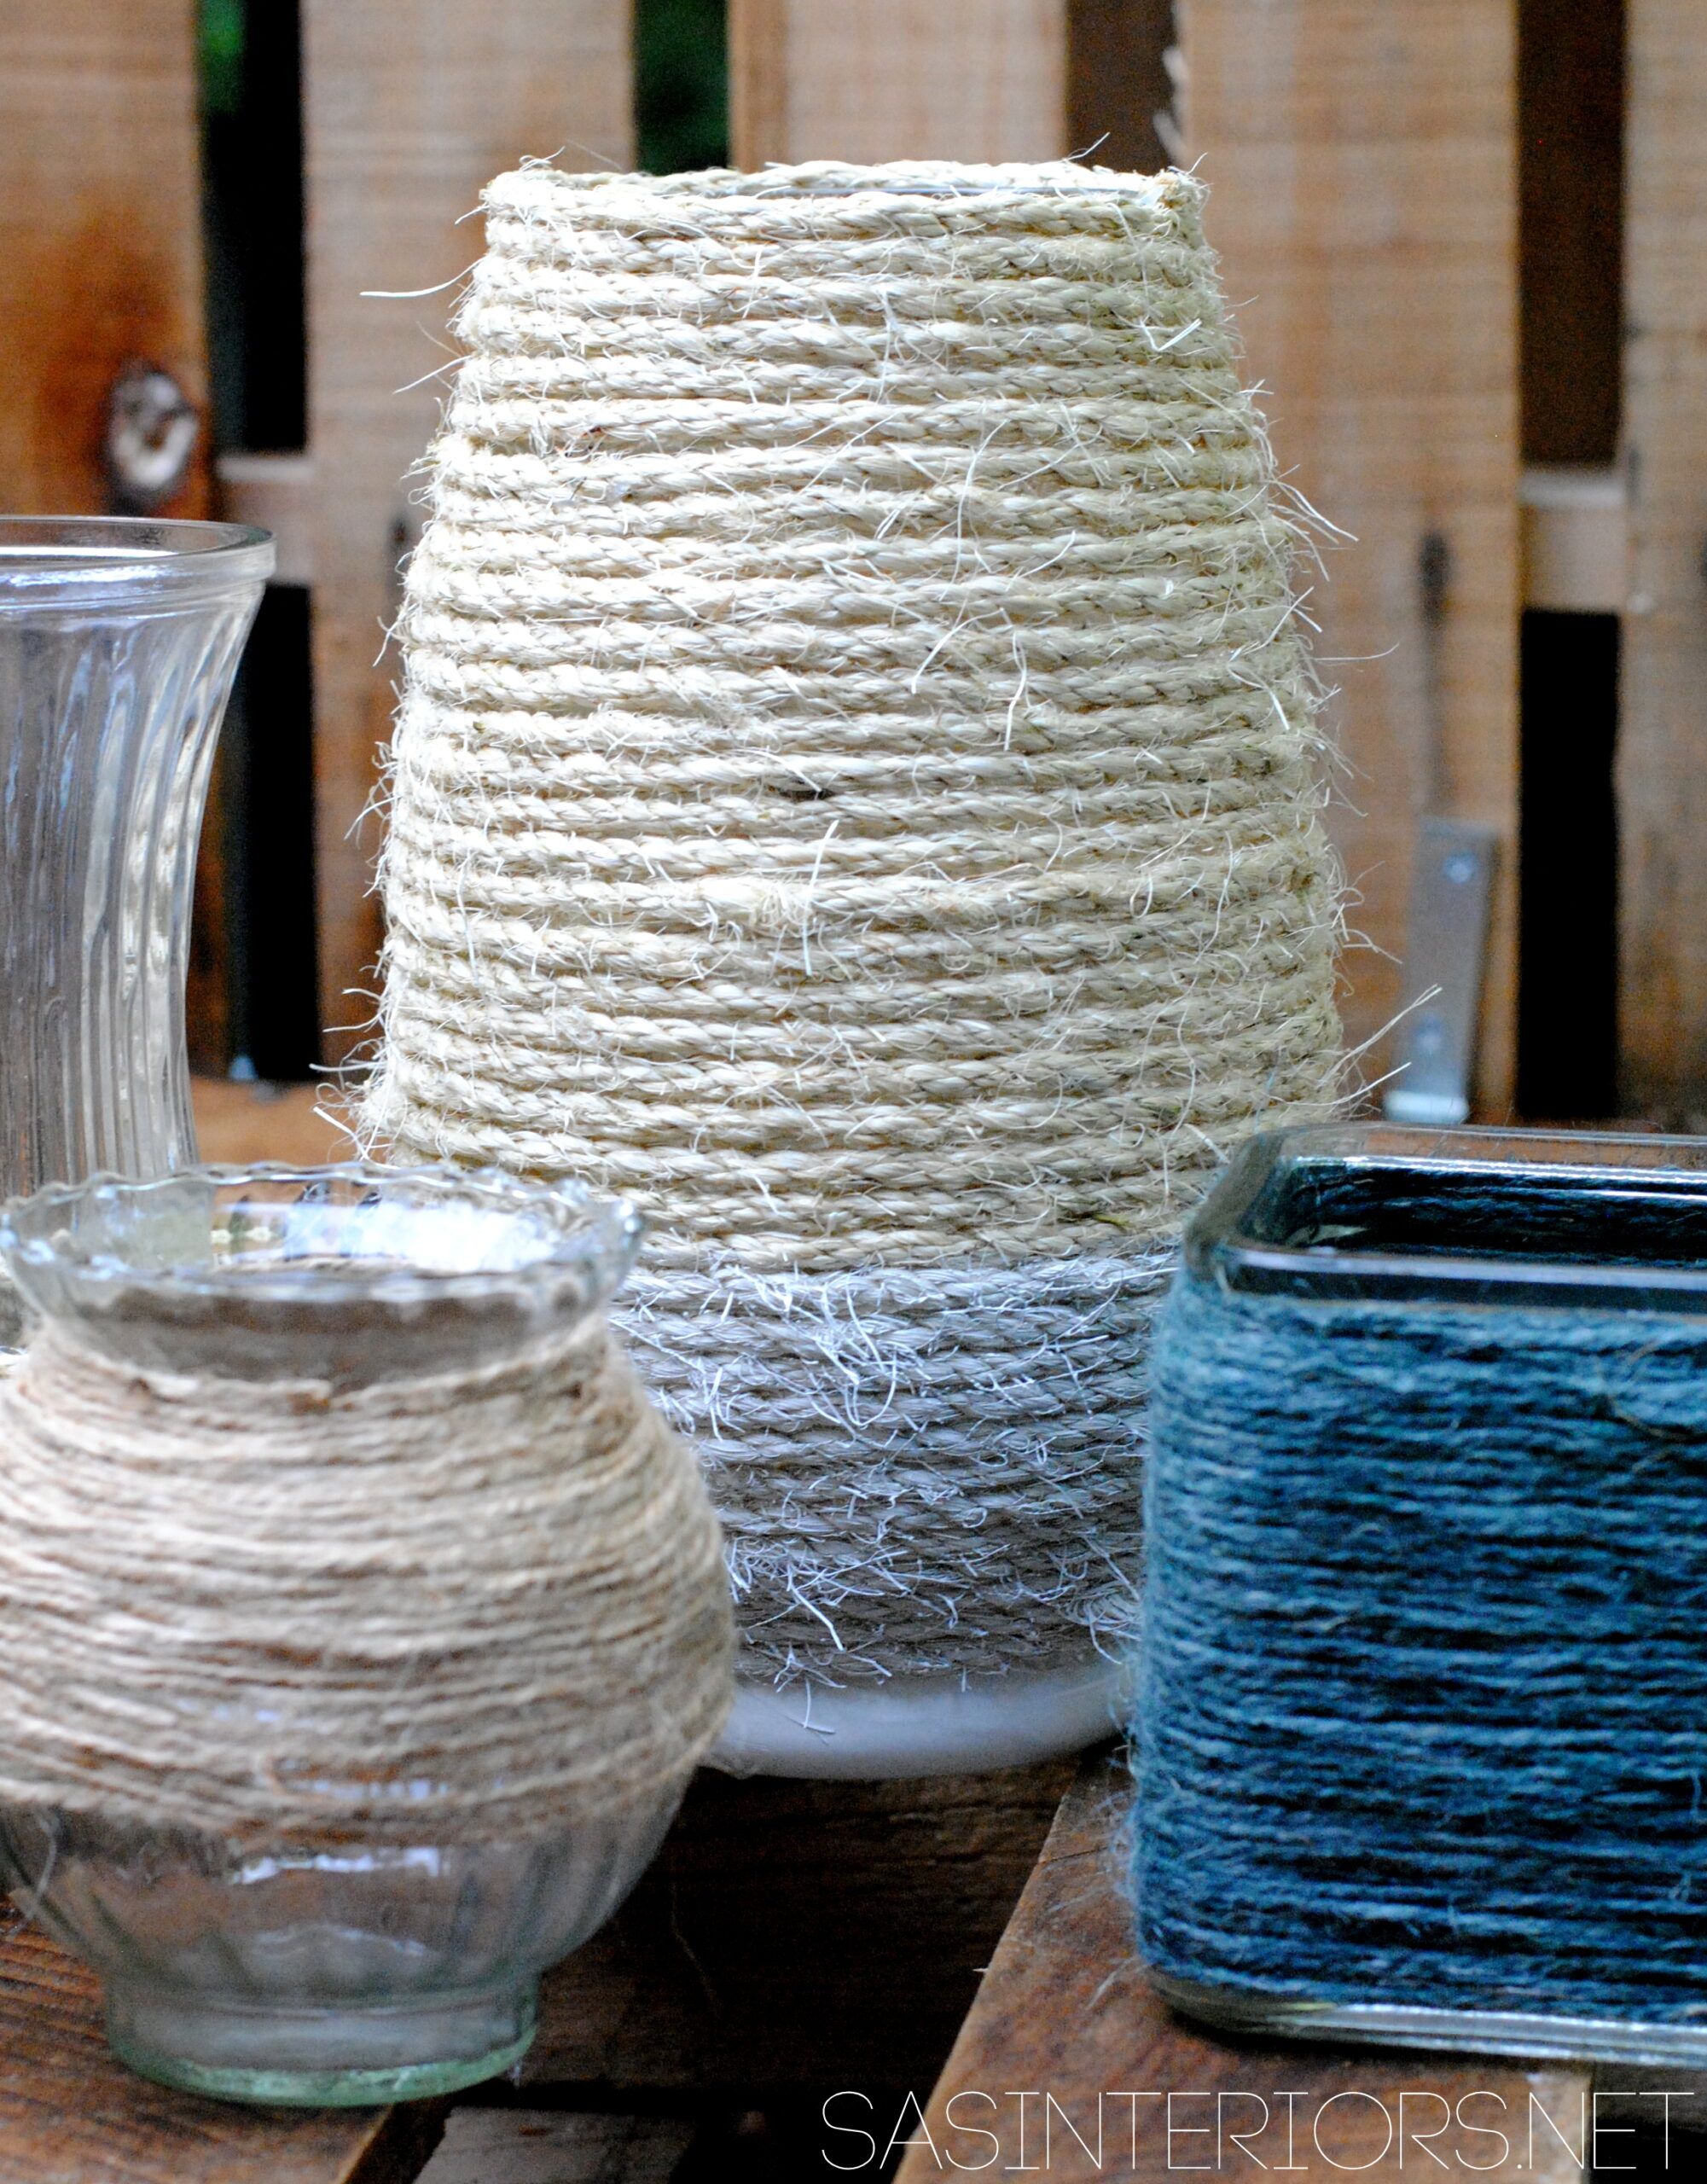
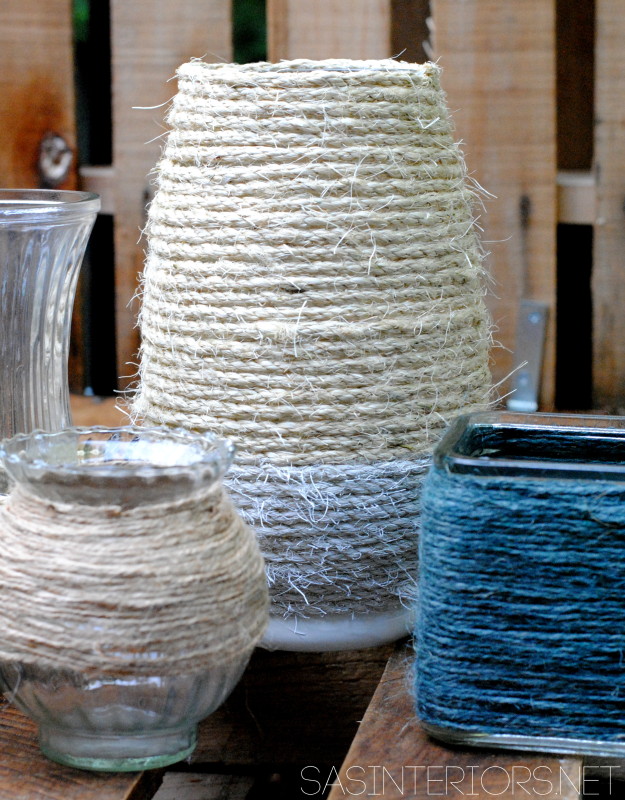
The large rope was my favorite because it gave the glass vase some great texture.

DIY: Rope Wrapped Vases perfect for creating & displaying in an apartment and/or small space #apartment #diy #apartmentliving

Each jar / vase is a different height and size, so I made each one even more unique with the color and/or application of the rope.  Some got fully covered in rope where others only a portion of the ‘body’ got covered.  It adds an interesting, one-of-a-kind quality.

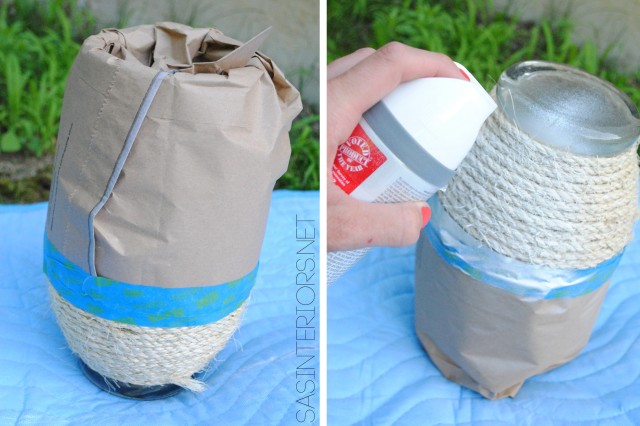
For the largest vase of all, I fully covered it in rope and then added a little color (white to be specific – some say it’s not technically a color) with a splash of spray paint. To do this, I decided the area that I wanted to spray paint and covered the rest.  I used painters tape along with a piece of paper (a staples bag to be exact, lol – it was the perfect size), flipped over the vase so the top was on the ground, and started to spray.  A few coats later, it was done.

DIY: Rope Wrapped Vases perfect for creating & displaying in an apartment and/or small space #apartment #diy #apartmentliving

The result >

DIY: Rope Wrapped Vases perfect for creating & displaying in an apartment and/or small space #apartment #diy #apartmentliving

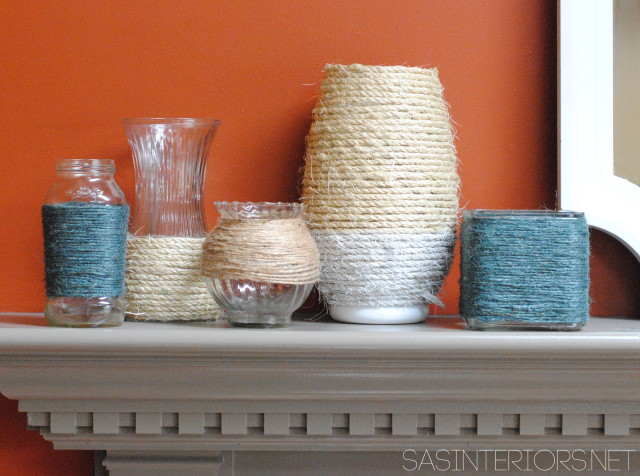
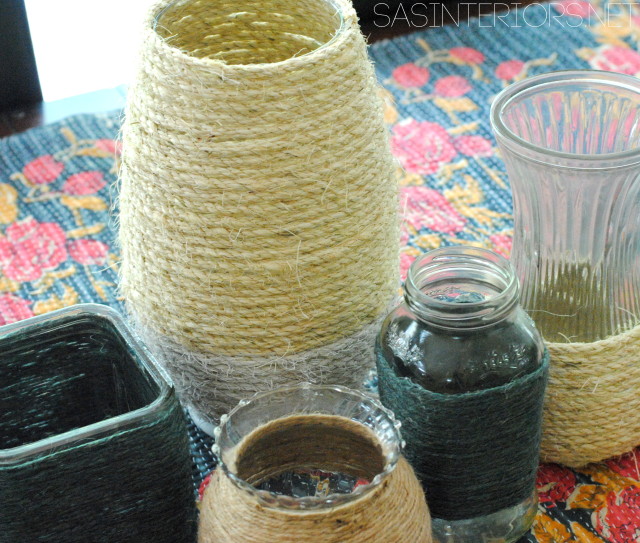
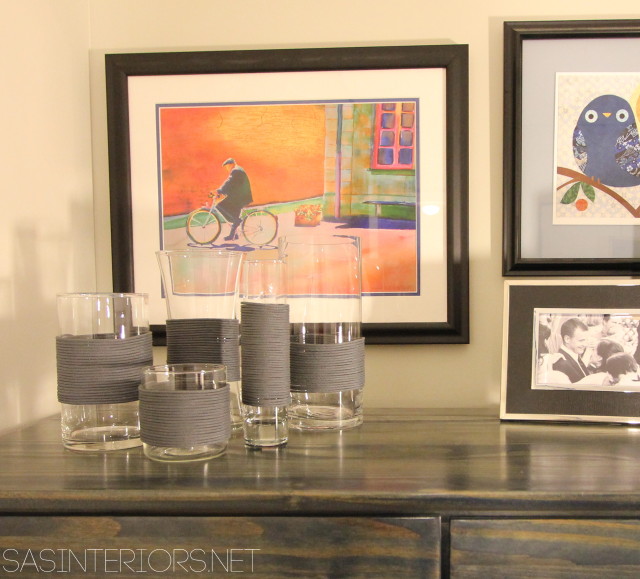
And the entire collection >

On the mantel.

DIY: Rope Wrapped Vases perfect for creating & displaying in an apartment and/or small space #apartment #diy #apartmentliving

On the dining table.

DIY: Rope Wrapped Vases perfect for creating & displaying in an apartment and/or small space #apartment #diy #apartmentliving

Outdoors.

DIY: Rope Wrapped Vases perfect for creating & displaying in an apartment and/or small space #apartment #diy #apartmentliving

Simple vases and glass jars changed into creative decor for little money and little time = a perfect DIY for an apartment dweller. No matter where you live, creative do it yourself projects can be tackled.  It might take a little more planning, but a fun and successful result can be accomplished!

As I mentioned the other day, I’ve recently been working with a NYC E-Design client on a bedroom makeover.  She shared some great insight with a brief Q & A into Life in an Apartment, and also tackled the same project I did.  I thought it would be fun and interesting to see how my rope wrapped vase collection looked in a home, and hers in an apartment.  She used differing glass vases with the same rope.  Take a look…

DIY: Rope Wrapped Vases perfect for creating & displaying in an apartment and/or small space #apartment #diy #apartmentliving

DIY: Kids Play + Camping Tent

Happy July!

For me, it officially feels like Summer has begun.  The kids are out of school now for just about a week, and the Summer sun is setting in (despite all the rain we’ve been having).  The kids and I have been enjoying fun outings each day, while also spending some down-time at home just relaxing.  Often on those home-bound days, the hours creep by with boredom, so when Lowe’s put me up to the challenge this month to create something related to DIY camping, I thought of the perfect solution…

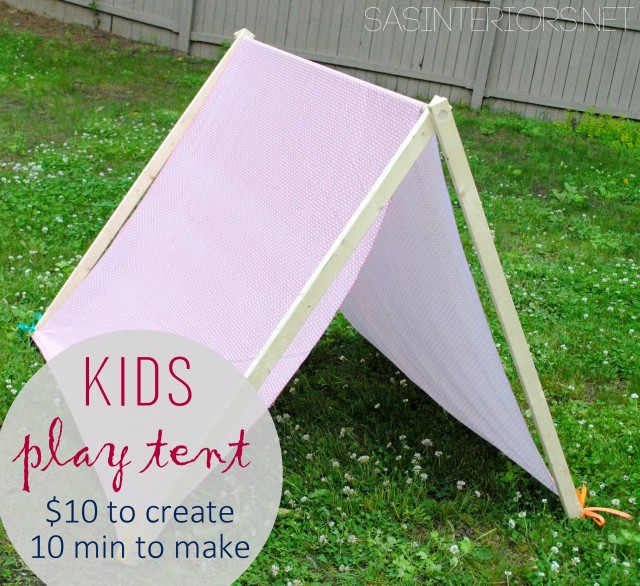
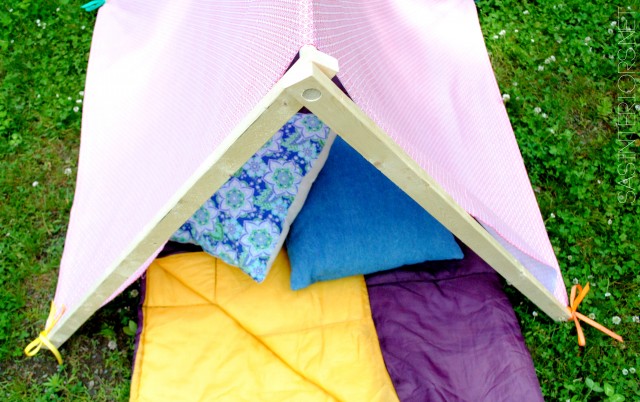
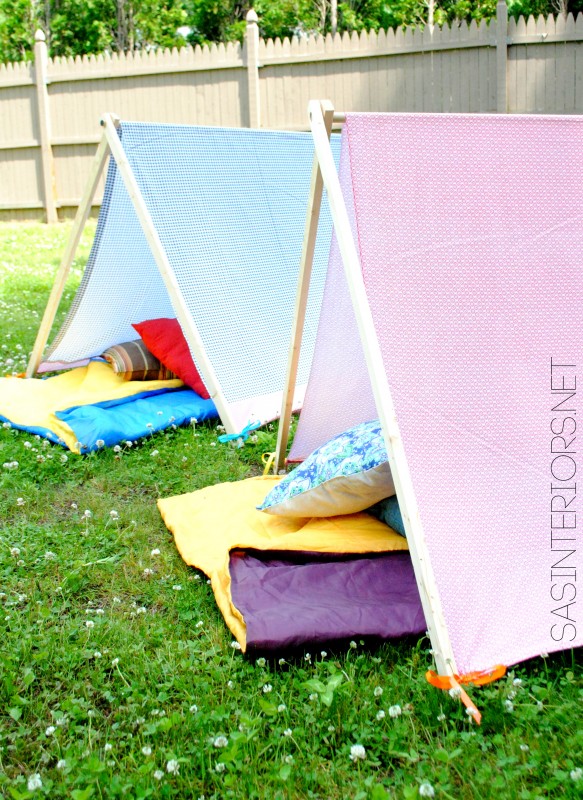
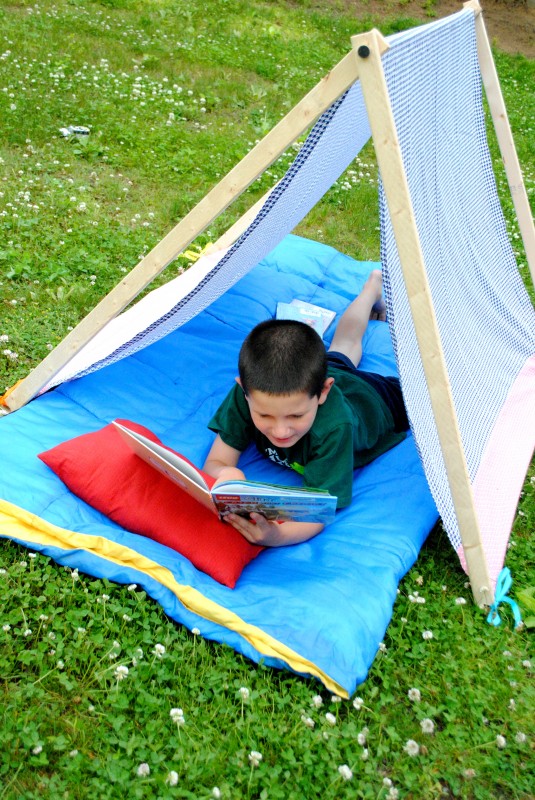
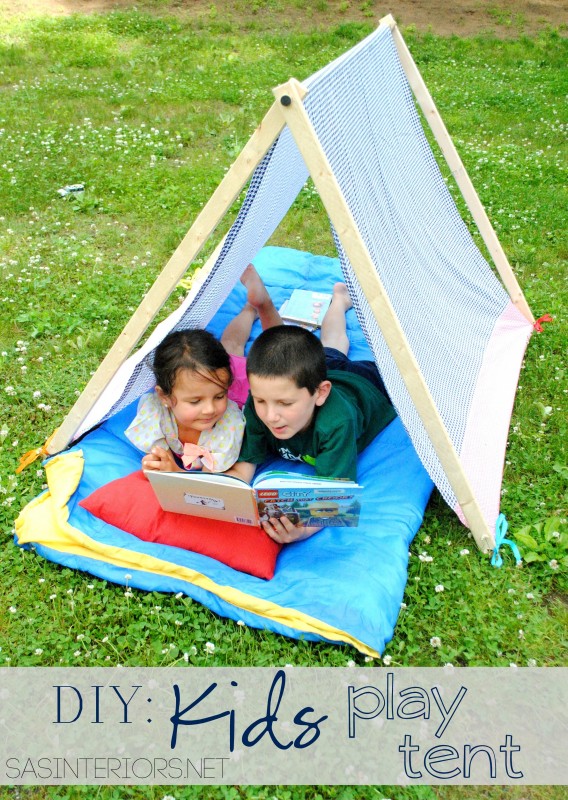
a kids play + camping tent.  They can use it as a tent to play in during the day, as well as a spot to sleep in once the sun sets and the stars peak.

Kids Play + Camping Tent - 10 dollars to make +10 minutes to create! Super simple creation that your kids will love!

The the best part about this tent is that it only took about $10 to make + 10 minutes to create!  I made two, so the cost and time were double.

Supplies for (1) Tent:

  • (4) 1 x 2 piece of wood at 42″ long ($2.16)
    • At Lowe’s I had them cut down (1) 1 x 2 x 8 which cost $1.08 into my (2) 42″ long pieces
  • (1) 3/4″ diameter dowel at 48″ long ($2.85)
  • 2.5 total yards of fabric ($2.25/yard x 2.5 = $5.63)
  • 1.5 total yards of ribbon (leftovers)
  • Drill with a 3/4″ drill bit

This tent is really easy to create, and what’s even better is that you can put it up and take it down very easily with each use.   I made it so it can be easily assembled and just as easy to disassemble for storage.  More on that later…

1. (2 minutes)

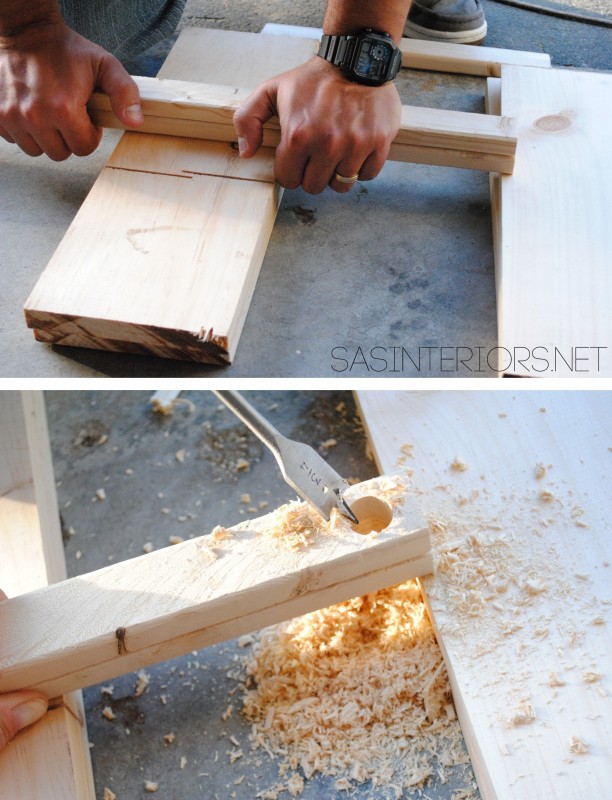
To start off, I drilled a 3/4″ hole at each end of the 1 x 2 piece of wood.  The Mister and I set up a “drilling station” by creating two piles of stacked wood so the 1 x 2 could bridge across the top.  As an alternative, you can drill through your piece of lumber with a scrap piece underneath.  Either method will work.

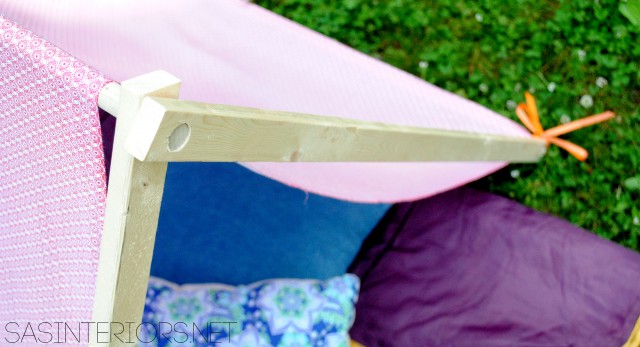
One hole of each piece will be for the peak of the tent, while the other hole will be for the ribbon to tie through.  Keep reading and it’ll all come together…

Kids Play + Camping Tent - 10 dollars to make +10 minutes to create! Super simple creation that your kids will love!

2. (1 minute)

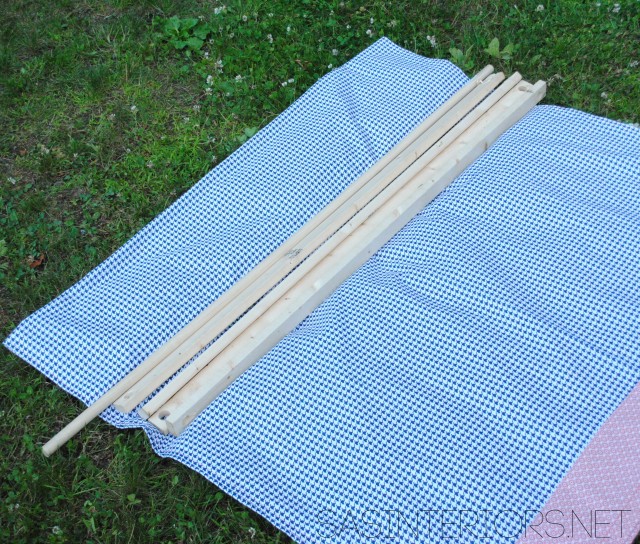
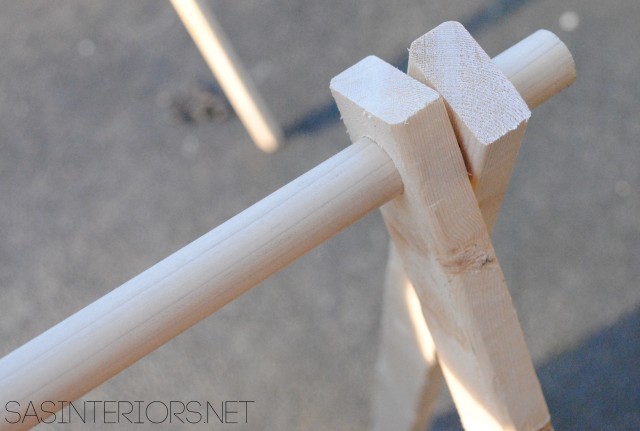
Once the holes were drilled, I fed one end of the dowel through two of the 1 x 2’s, then fed the other end of the dowel through the other two 1 x 2’s.

Kids Play + Camping Tent - 10 dollars to make +10 minutes to create! Super simple creation that your kids will love!

Note: The drill bit size needs to match the dowel size, so it fits snug.  I used a 3/4″ dowel and a 3/4″ drill bit.  The dowel needs to be snug in the 1 x 2’s so it stays in place, yet is still easily adjustable.

And the frame was done!

Onto the fabric.

3. (2 minutes)

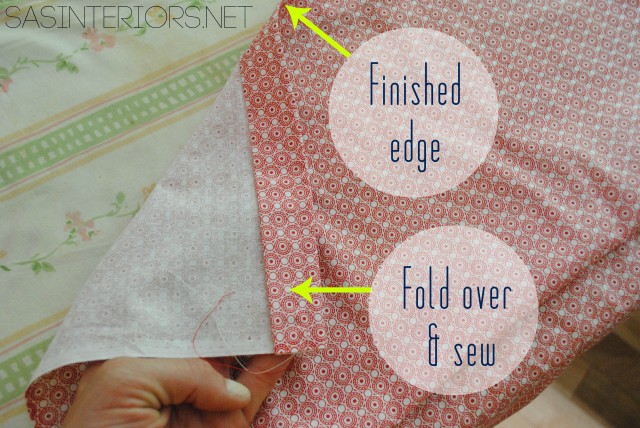
Many fabric comes in a 44/45″ width, so the sides don’t need to be hemmed (if you want to hem them you can, but I didn’t).  To start off, I folded over one end of the fabric and sewed.

Kids Play + Camping Tent - 10 dollars to make +10 minutes to create! Super simple creation that your kids will love!

4. (2 minutes)

I draped the fabric (with one finished edge) over the tent frame.  I lined up the finished edge side with the bottom of the legs, so I could determine how much needed to be trimmed off the other side – be sure to leave enough fabric to fold over and sew (about  1″ extra inch).

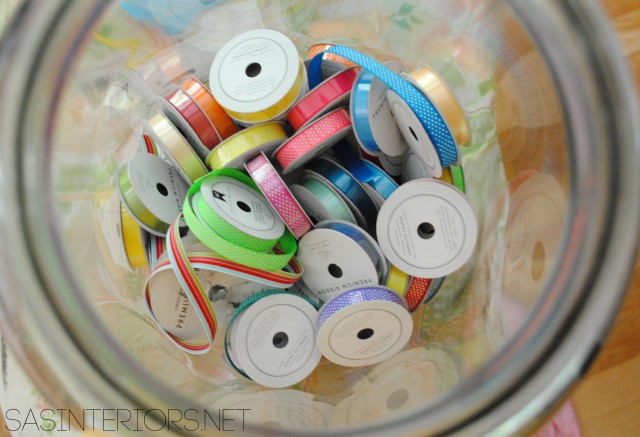
Using my Jar O’ Ribbons, I picked out 4 fun colors.

Kids Play + Camping Tent - 10 dollars to make +10 minutes to create! Super simple creation that your kids will love!

5. (2 minutes)

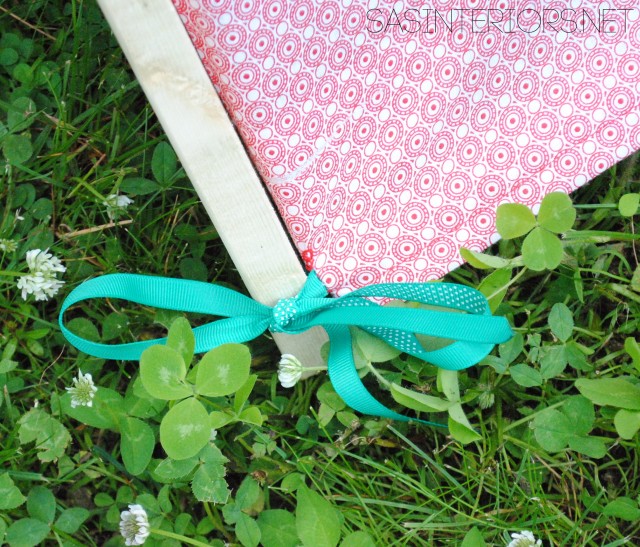
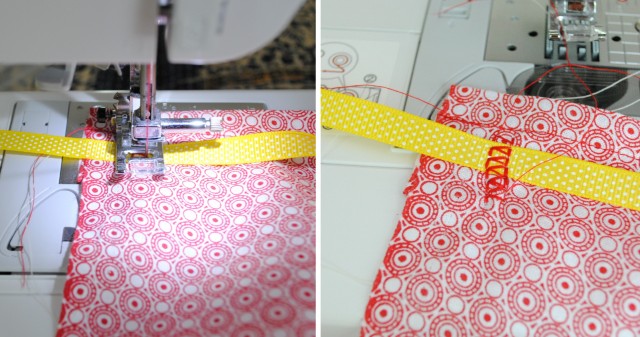
To secure the fabric to the frame,  I added ribbon.  I cut (4) 12-15″ long pieces of ribbon, and sewed the center of it to the right side of each corner using a fun stitch.

Kids Play + Camping Tent - 10 dollars to make +10 minutes to create! Super simple creation that your kids will love!

After cutting the loose threads, it was complete!

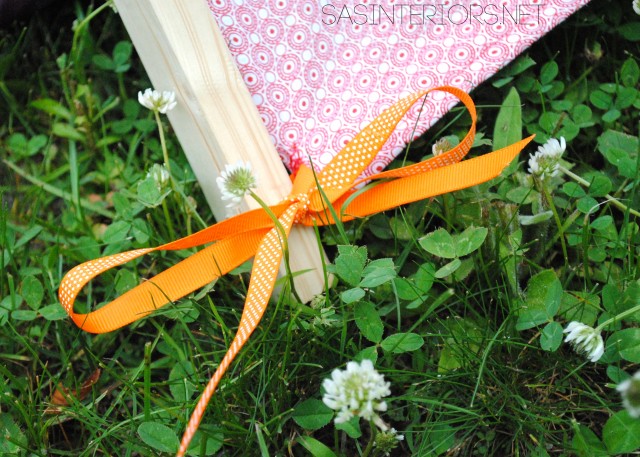
I draped the fabric over the dowel, attached the 4 ribbons through the 4 bottom holes, and secured. (1 minute)

Kids Play + Camping Tent - 10 dollars to make +10 minutes to create! Super simple creation that your kids will love!

Kids Play + Camping Tent - 10 dollars to make +10 minutes to create! Super simple creation that your kids will love!

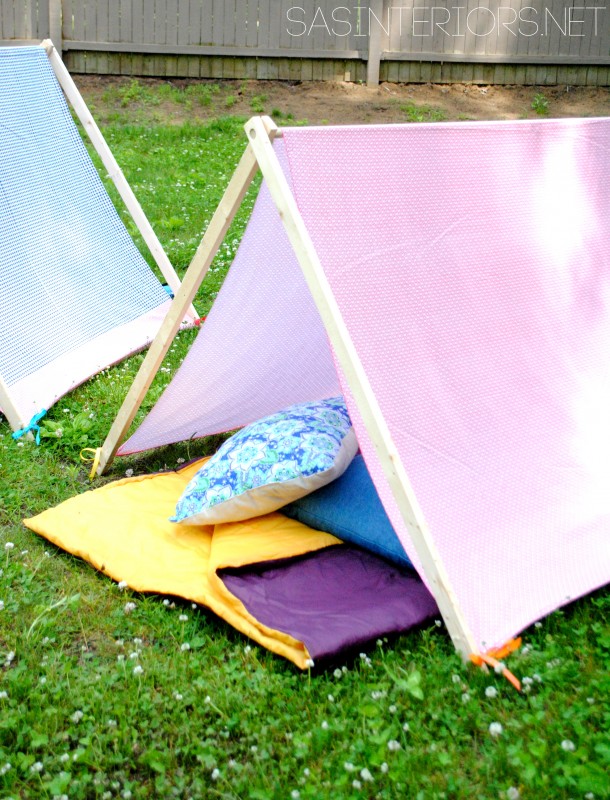
And the dual play + camping tent was complete.

Kids Play + Camping Tent - 10 dollars to make +10 minutes to create! Super simple creation that your kids will love!

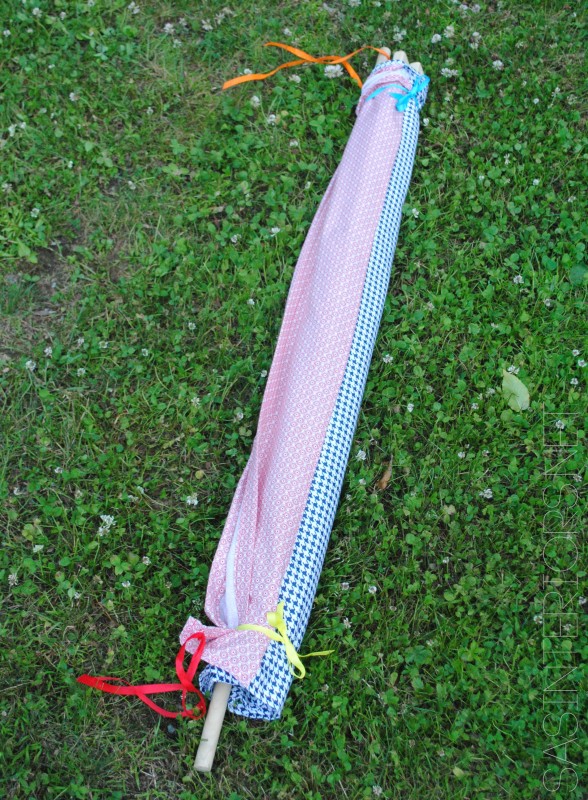
It’s just as easy to disassemble as it is to assemble!  Plus it folds right up to store away.  I put all the legs together, wrapped the fabric around them, and secured it at both ends with the attached ribbon.

Kids Play + Camping Tent - 10 dollars to make +10 minutes to create! Super simple creation that your kids will love!

Kids Play + Camping Tent - 10 dollars to make +10 minutes to create! Super simple creation that your kids will love!

The details.

Kids Play + Camping Tent - 10 dollars to make +10 minutes to create! Super simple creation that your kids will love!

Kids Play + Camping Tent - 10 dollars to make +10 minutes to create! Super simple creation that your kids will love!

Kids Play + Camping Tent - 10 dollars to make +10 minutes to create! Super simple creation that your kids will love!

Kids Play + Camping Tent - 10 dollars to make +10 minutes to create! Super simple creation that your kids will love!

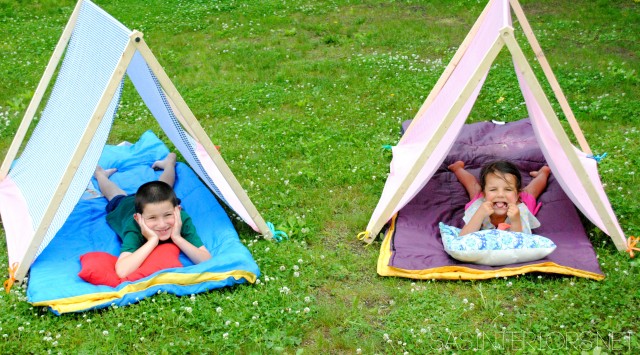
My kids are having such a fun time with their new creations.

Day for Play…

Kids Play + Camping Tent - 10 dollars to make +10 minutes to create! Super simple creation that your kids will love!

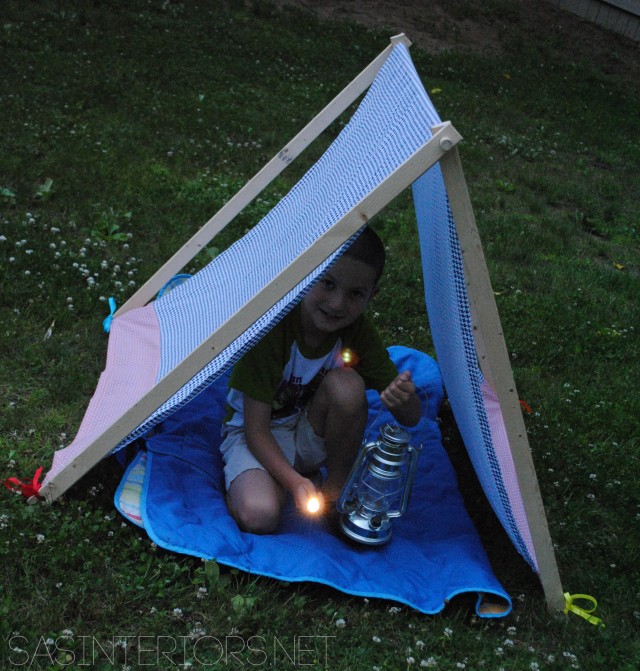
And night for camping… (well kinda.  it didn’t last the whole night).

Kids Play + Camping Tent - 10 dollars to make +10 minutes to create! Super simple creation that your kids will love!

Either way, they are fun, easy to make, and are perfect for some Summer Fun!

Kids Play + Camping Tent - 10 dollars to make +10 minutes to create! Super simple creation that your kids will love!