
Month: August 2015

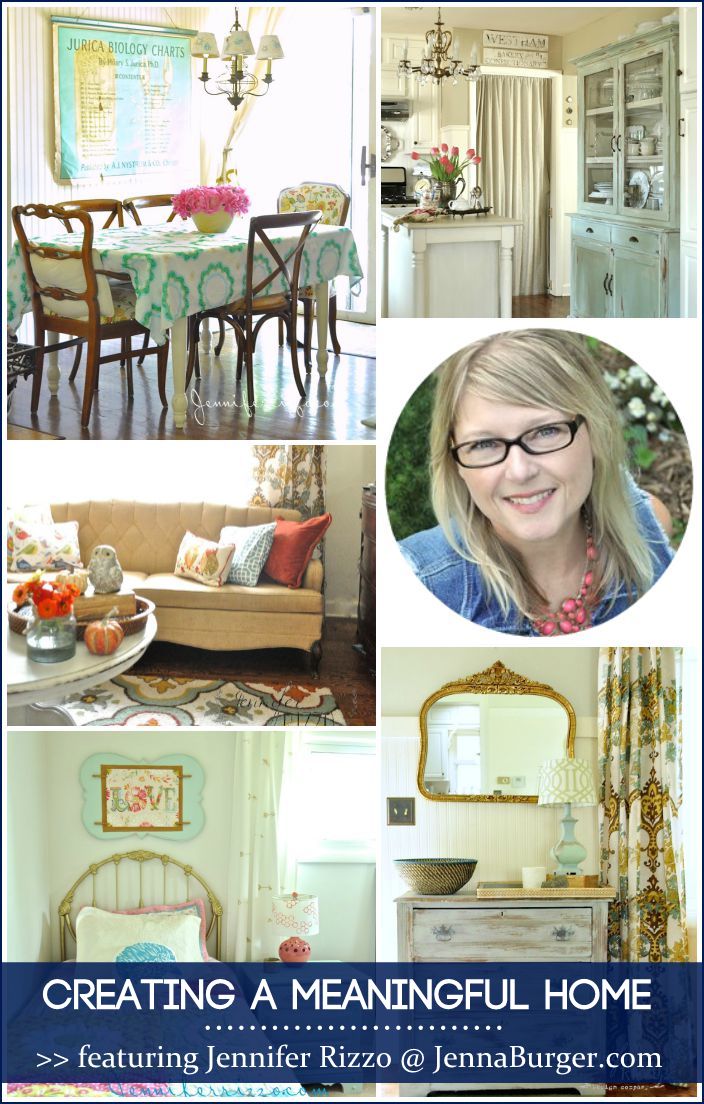
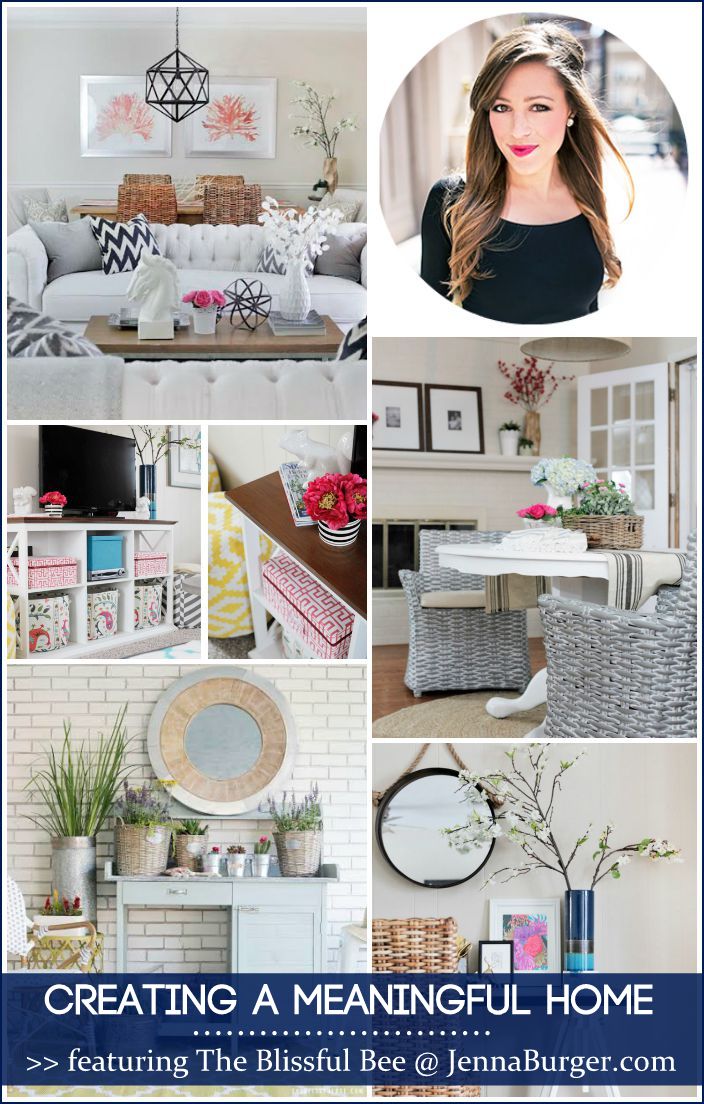
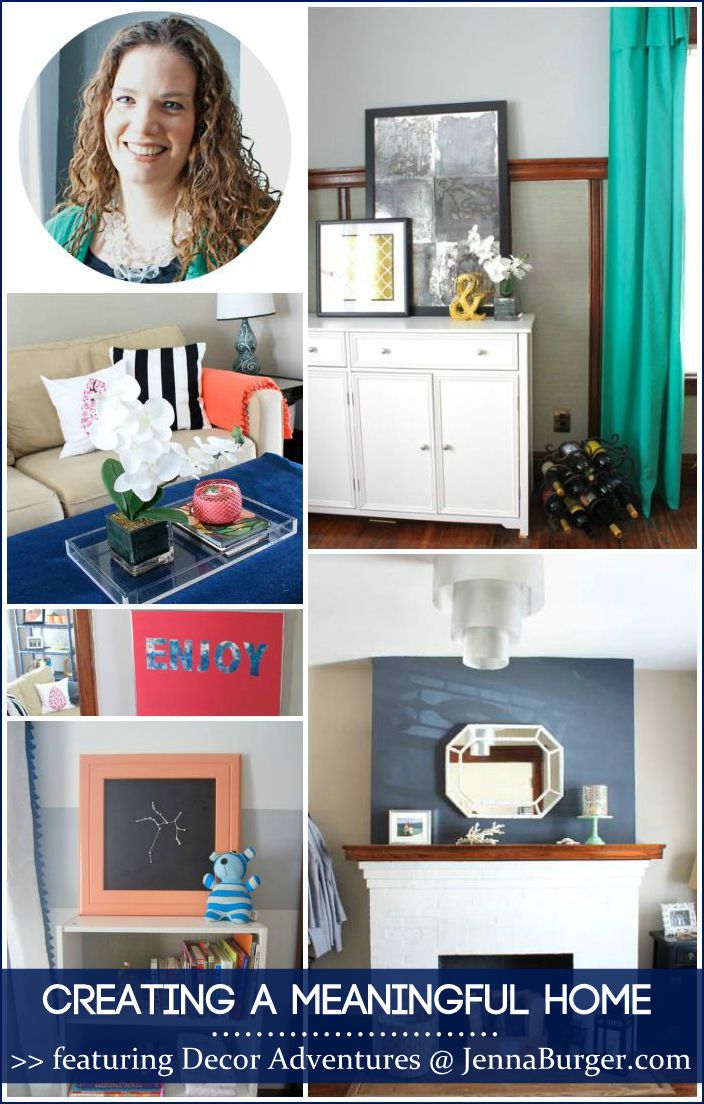
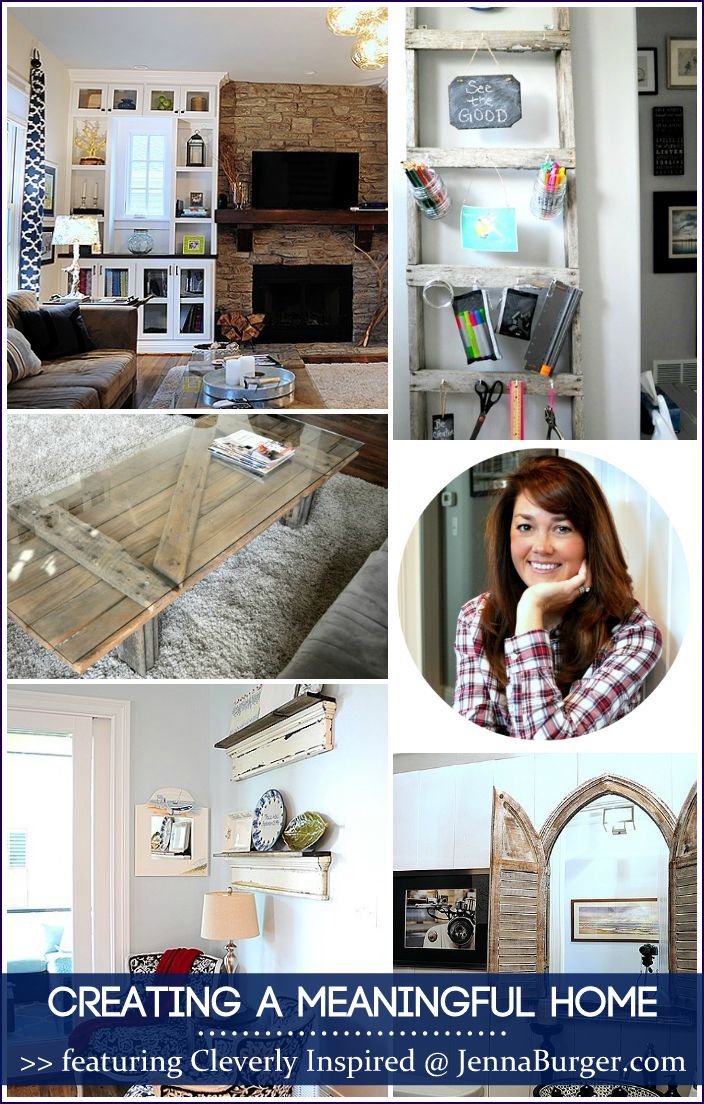
Creating a Meaningful Home: Beneath My Heart

CREATING A MEANINGFUL HOME blog series featuring Bloggers sharing the story of their home: FEATURED is Traci of Beneath My Heart - a MUST READ story!

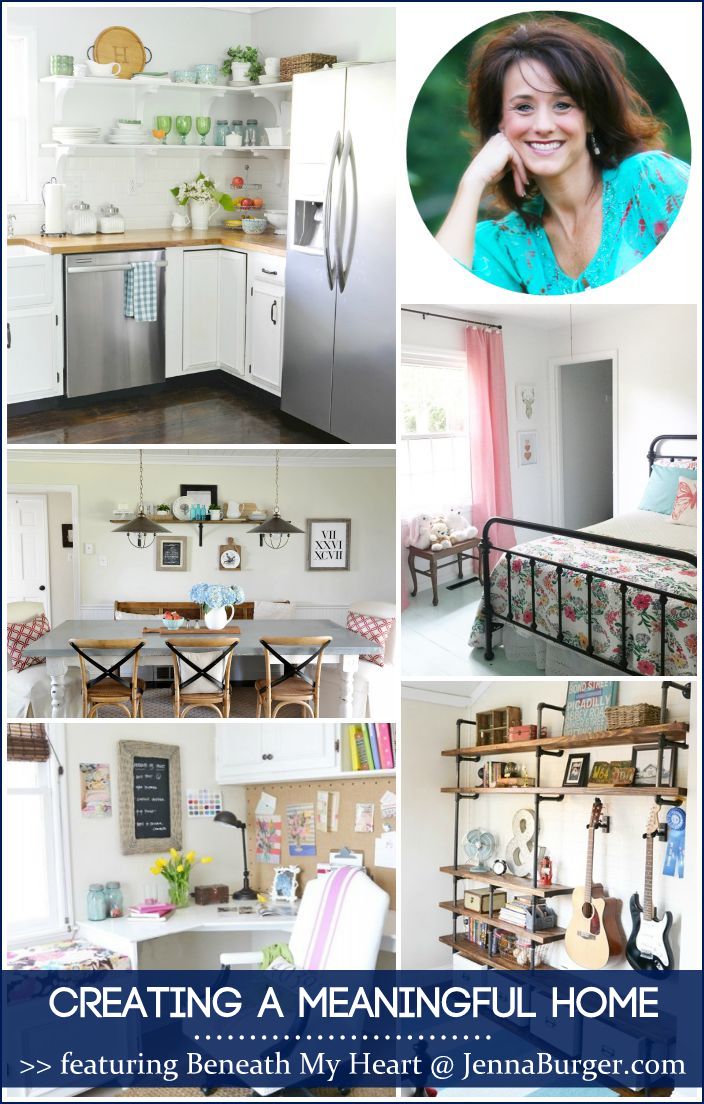
Today’s guest post for Creating a Meaningful Home blog series: Year 3 is Traci of Beneath My Heart.  Welcome Traci…

Hey there!  I am so glad to be here to talk about creating a meaningful home today because it’s has been on my heart a LOT lately.

It’s something that has been churning in my heart all summer.  Ya see, I am the mom of four boys (whom I adore!)

family

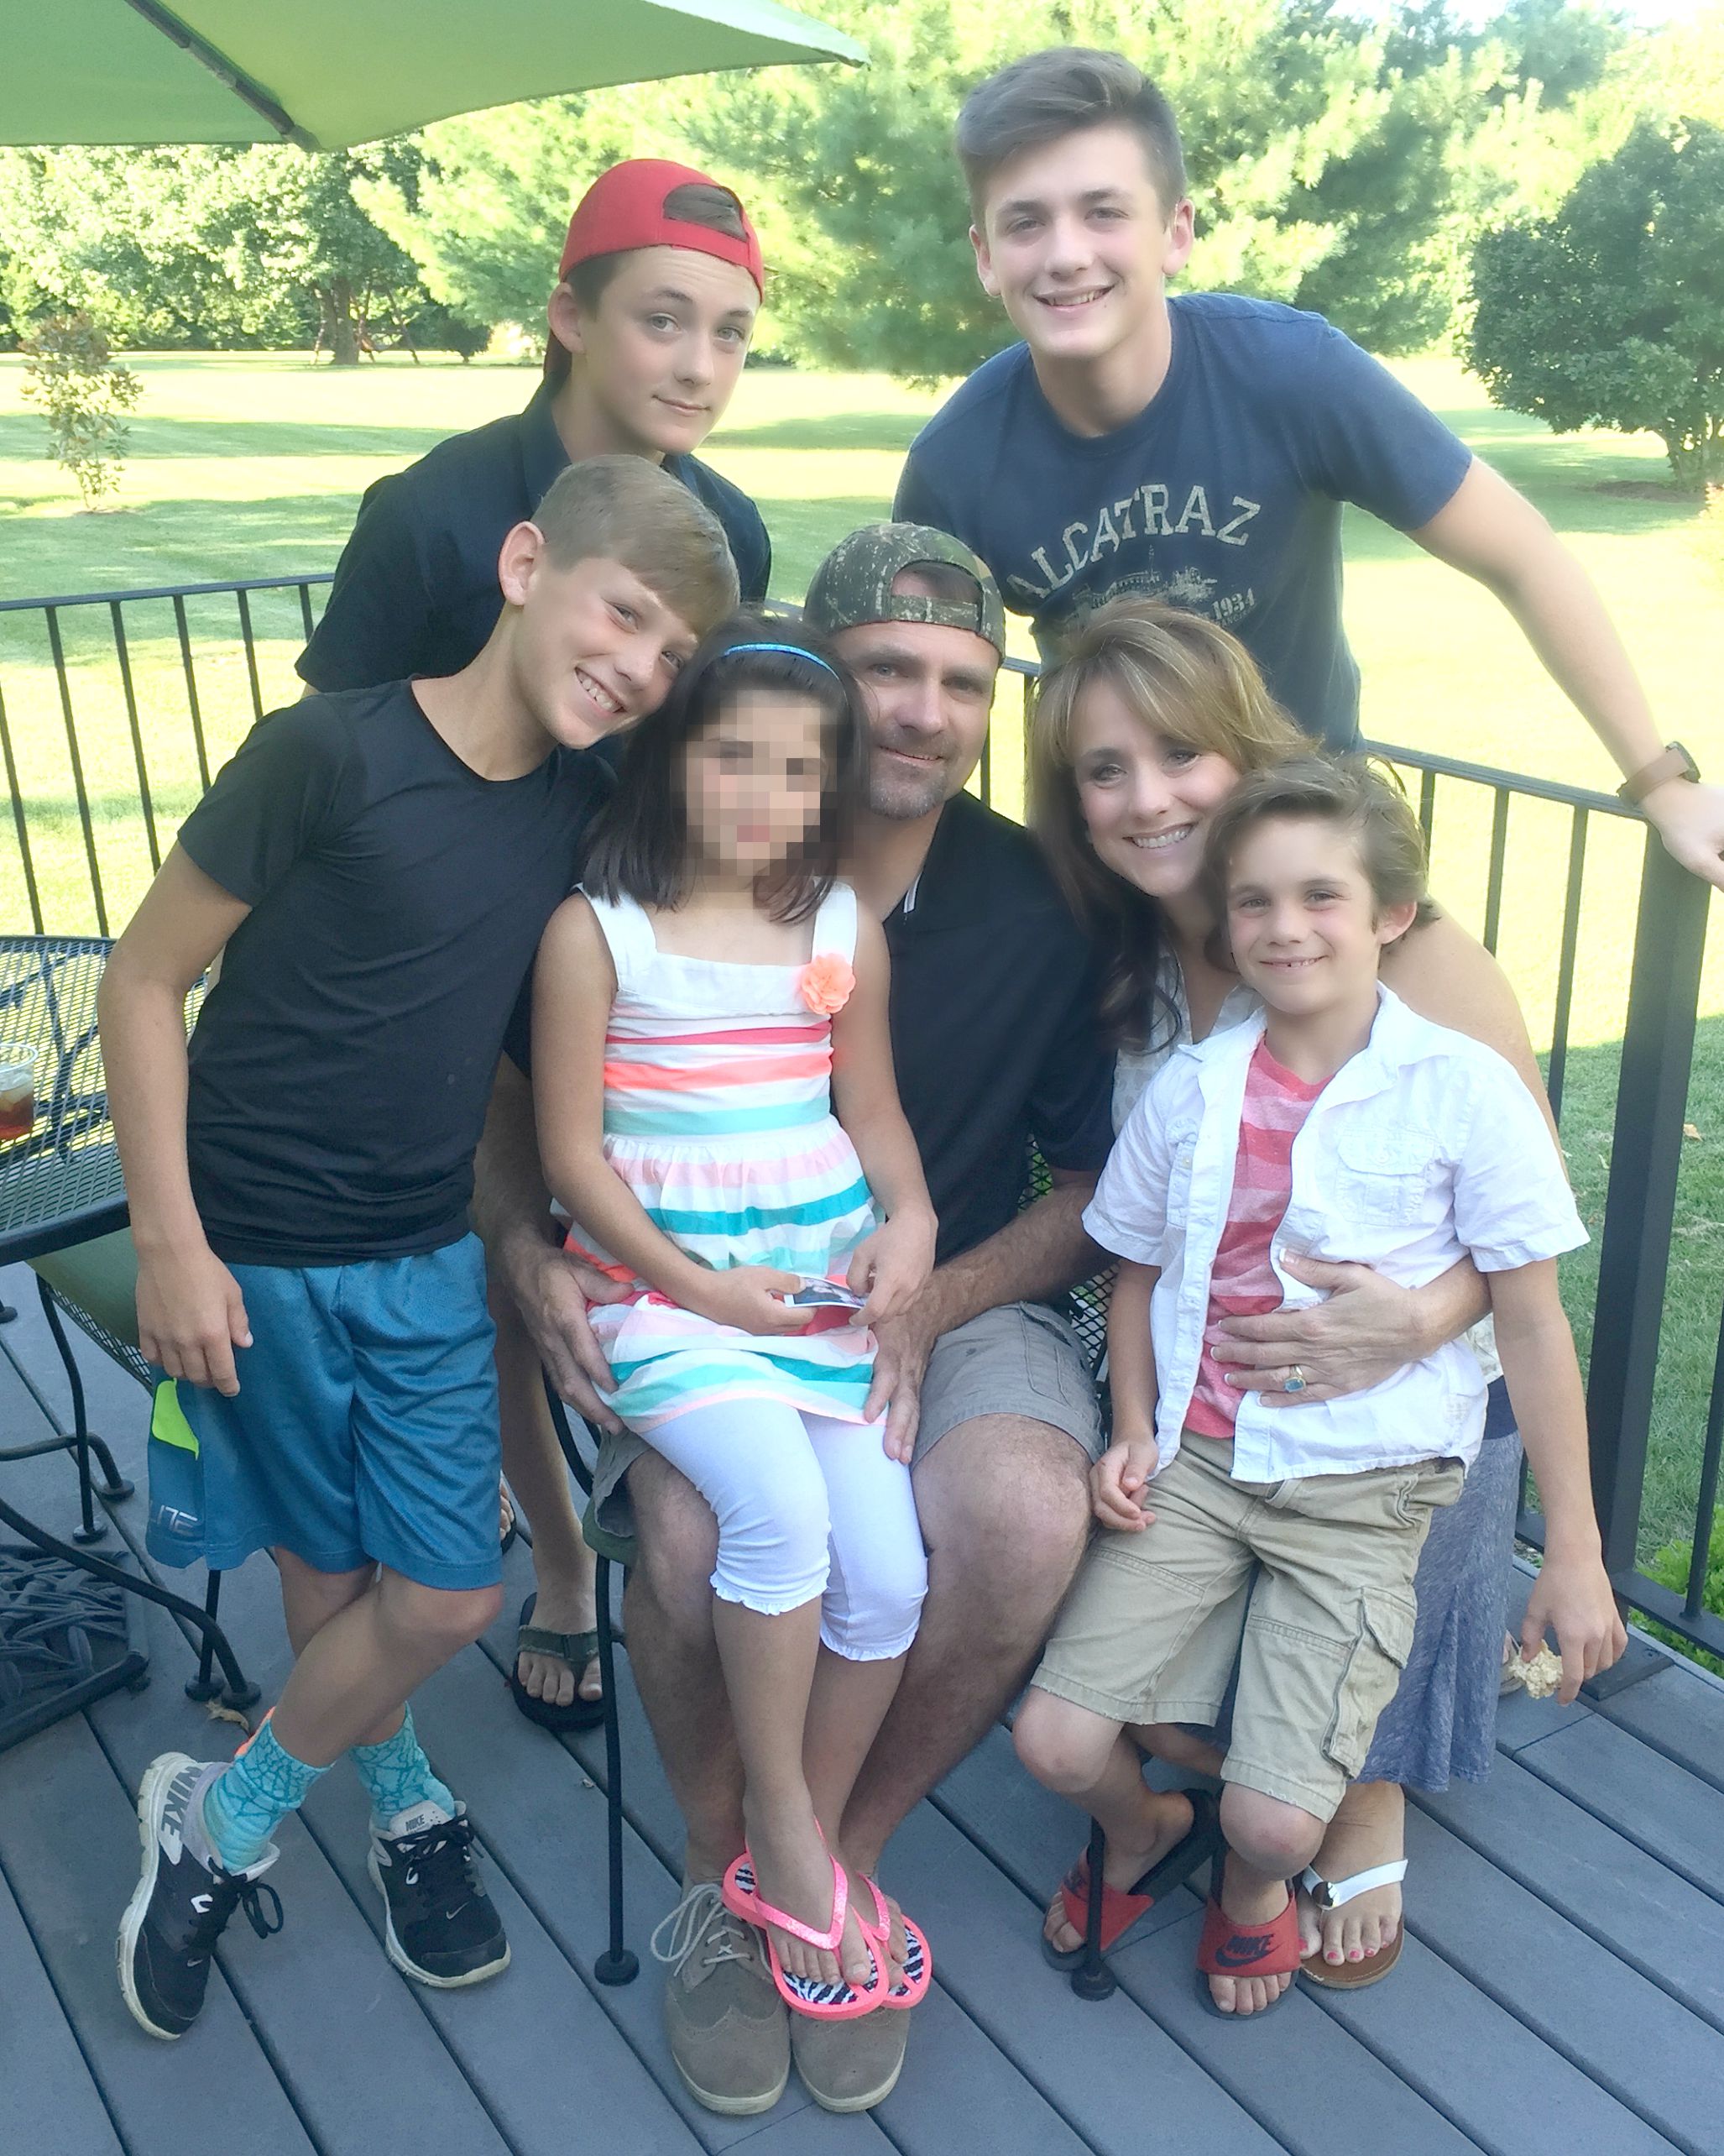
And for five weeks this past summer, our family had the amazing blessing of hosting an orphan from Eastern Europe.  She is eight years old (the same age as my youngest) and is the sweetest little thing you will ever meet.  (I would love to show you her adorable face, but it is against her country’s hosting guidelines.)

Because I wanted to be fully present while she was here and enjoy our time together as a family, I spent less time on my blog and blog projects.

After 6 years of being a DIY Home blogger, it was a much needed break.  And deep in my heart, I knew this little girl didn’t need a beautiful bedroom (although I did have fun decorating it for her!) or pinterest-worthy tablescapes, or inspiring how-to projects to do……she just needed a family.  

Bedroom Makeover by Beneath My Heart

I wanted her time with us to be meaningful.

As I thought about what makes a meaningful home, the word that kept coming to my mind was MOMENTS. 

Moments make a meaningful home.

My mom loved to decorate our home growing up, and it always looked meticulous…..but that is not what made home so meaningful to me.  It was the moments I spent with my family in our home that I remember most.

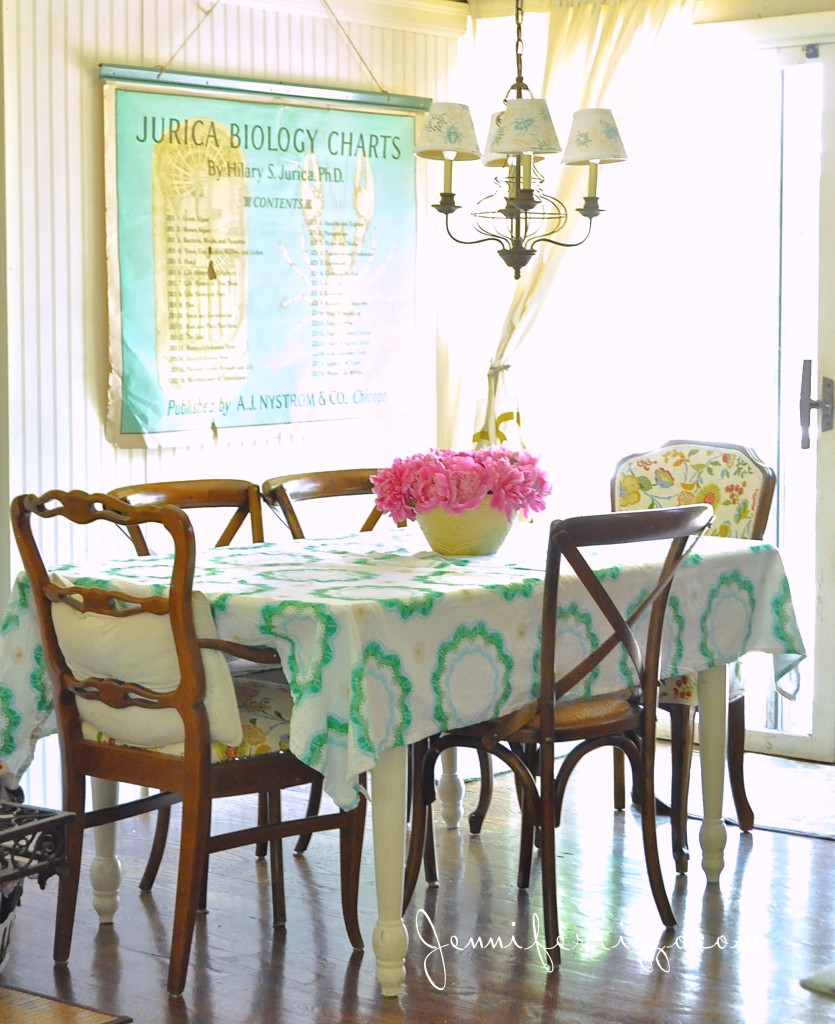
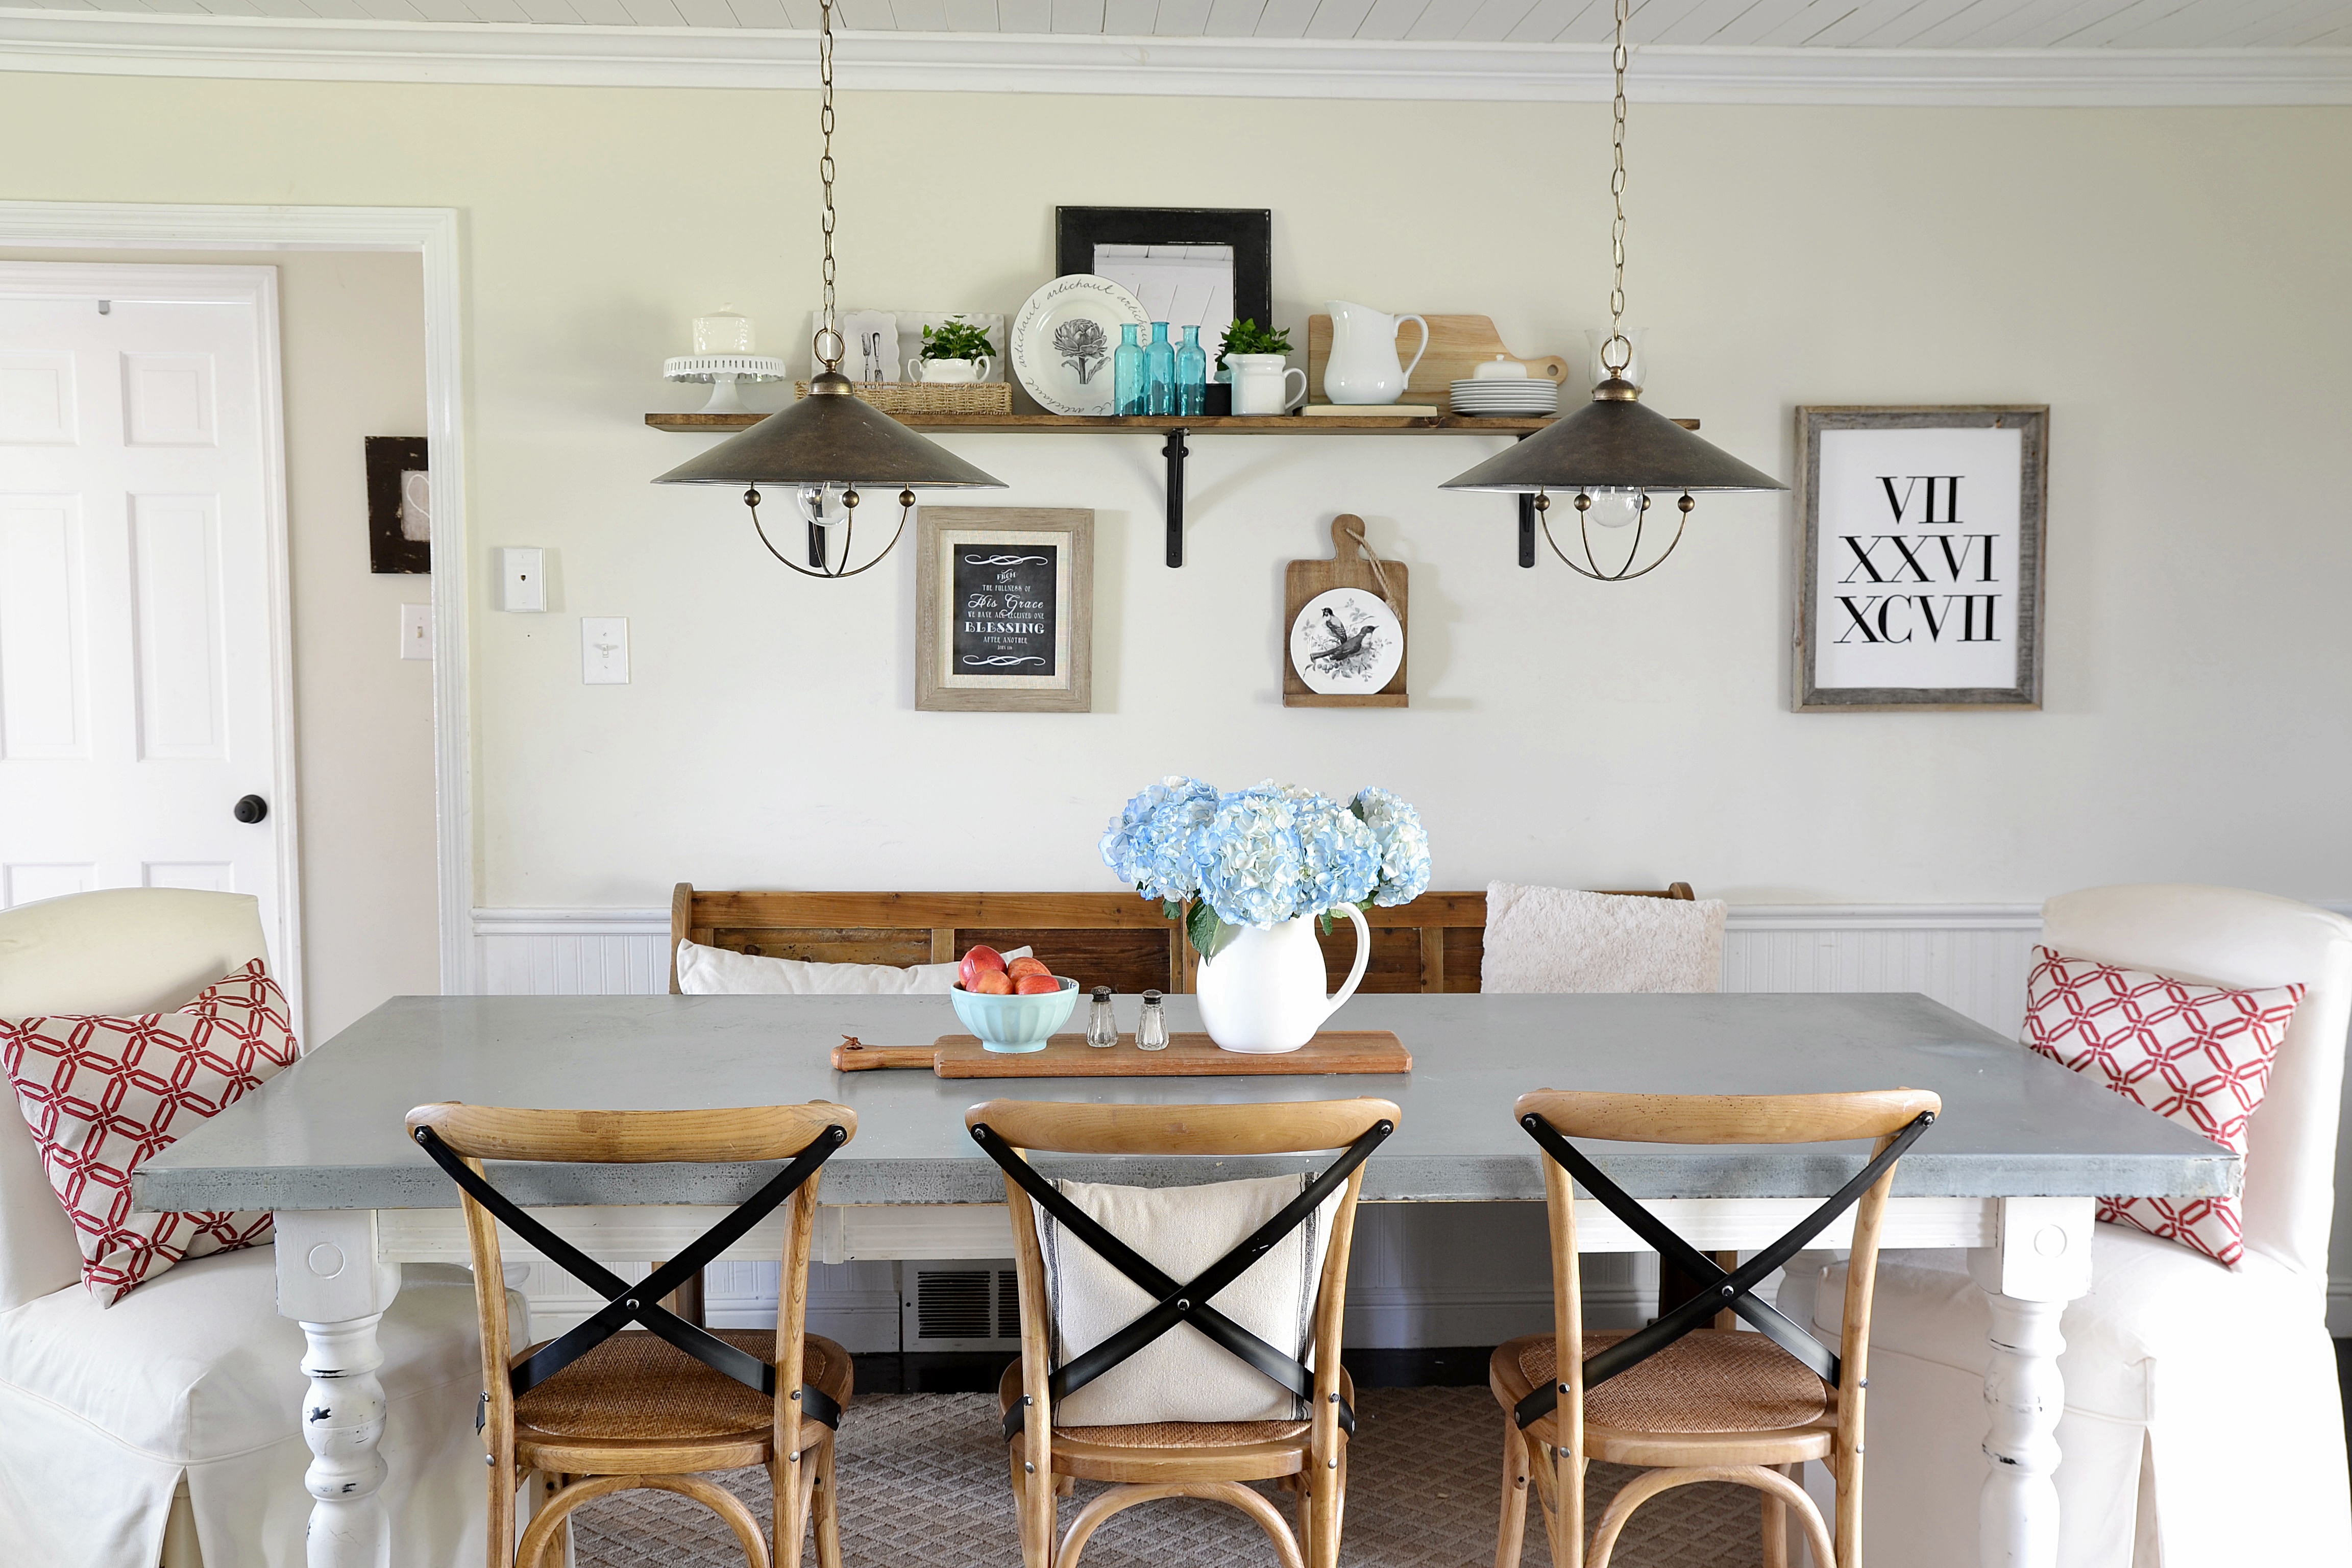
Sitting around the dinner table talking about our day.

Waking up in the morning to the smell of fresh biscuits cooking in the oven and eggs and bacon in the frying pan.

Sitting on the couch with my dad watching football.

Being tucked in at night with a prayer and a kiss on the forehead.

It makes my eyes fill up with tears just thinking about it now.  My mom passed away six years ago, and boy do I miss my moments with her!

I remember when she passed, I could hardly walk into her kitchen without it taking my breath away.  I felt so close to her in that space.  You see, my mom LOVED to cook.  It was her way of loving on her family and creating moments to cherish.  Her kitchen wasn’t always spotless, but it was filled with goodness and love.

Kitchen Makeover by Beneath My Heart{kitchen makeover}

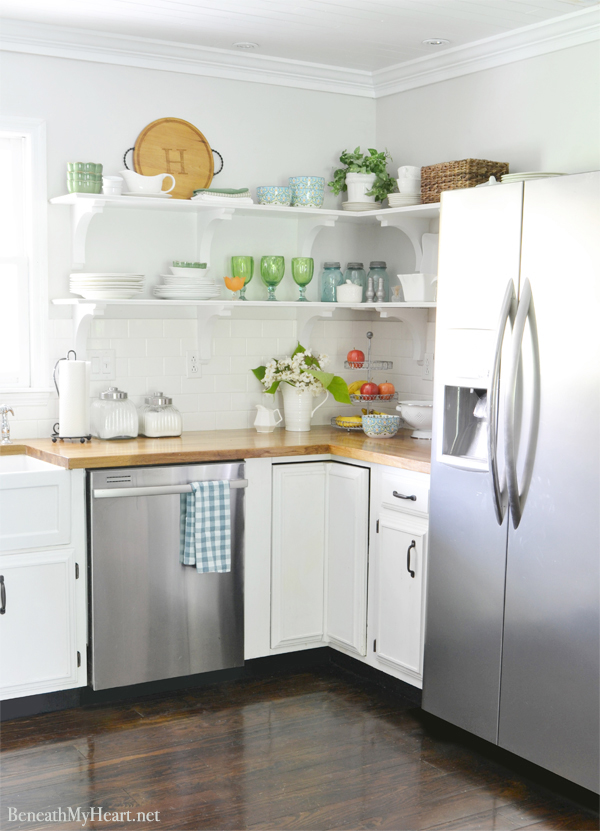
As much as I loved renovating our kitchen and how much fun I have decorating it throughout the seasons, that is not what I want my boys to remember about me or our home.  I want them to remember feeling LOVED when they walk into the kitchen.  I want them to remember the moments we shared around the table.

Dining Room Makeover by Beneath My Heart{Dining Area Makeover}

We are in the process of adopting our sweet little girl, and we are praying that she will be back home with us before Christmas.  As we prepare our home for her arrival, my heart is focusing not on how our home looks, but how it feels to her.  I look forward to spending many moments with her, laughing, hugging, crying, dreaming, and just being a family.  Something she has never had but desperately needs.  Truthfully, those moments are what we ALL need to make our homes and lives meaningful.

Thank you, Jenna, for inviting me to be a part of this series.  Thank you for helping me write down in a post what has been written  on my heart by God…

Moments are what make a meaningful home. 

Blessings,

Traci

 subscribe1

That’s it… “Moments make a meaningful home”!  Simple, but true.  I love Traci’s story because she’s so real and speaks from the heart.  I am so happy that she had a life-changing Summer with her beautiful foster child (who hopefully she will be able to adopt)!

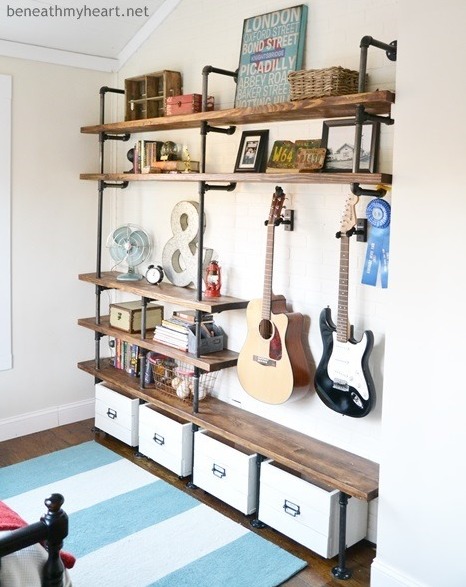
One of my favorite projects of Traci’s is the industrial bookcase using plumbing pipes she made for her son’s room…  Plus she added a brick backdrop and it’s so cool – I totally want to do it for an upcoming project!

DIY: Industrial Shelves using plumbing pipes by Beneath My Heart

Head on over to Beneath My Heart, and give Traci a BIG HELLO!

Check out all the Bloggers that have contributed to this series on
Creating a Meaningful Home

Plus don’t miss out on all the previous Bloggers who contributed to this series in 2013 and 2014!

A Green Planter + A Turquoise Table + A Coral Chair

Before picture of my garage sale finds— a before shot of my garage sale finds that I shared on my instagram page last week —

This Summer I have been in complete survival mode. Simply surviving, making sure to create memories each day with the kids so they have the Best Summer Ever.  BUT as each night falls, this mama is just d-o-n-e. It’s been a blast, but it’s been tiring. And we still have 2+ more weeks till school starts…

Packed days have left little time for personal creating, but after a quick stop at a garage sale last week where I picked up some ‘trash treasures’, I found myself with a few spare minutes + 2 cans of spray paint.  And that makes this gal gitty with excitement!

First up, Green Citrus (by Rustoleum)…

Before and After planter - $1 garage sale find transformed with Green Citrus spray paint

Isn’t that such a vibrant, unexpected, fun color?! For $10 I made out well after stopping on a whim at a garage sale last Wednesday…

I picked up a wicker chair, a planter, and a table.  ALL need a bit of TLC, but I am confident that ALL will look great with a splash of color!

THE PLANTER.

The planter update is complete.  I chose to spray paint it a lime green hue called Green Citrus in a glossy finish…

Before and After planter - $1 garage sale find transformed with Green Citrus spray paint

A few coats later, it was complete.

Before and After planter - $1 garage sale find transformed with Green Citrus spray paint

And ready to fill with a pretty plant.

Before and After planter - $1 garage sale find transformed with Green Citrus spray paint

Now it sits beautifully on the front porch and looks awesome with the green front door.

Before and After planter - $1 garage sale find transformed with Green Citrus spray paint

Definitely one of the best + EASIEST before and afters ever…

Before and After planter - $1 garage sale find transformed with Green Citrus spray paint

THE TABLE.

A splash of turquoise spray paint gave this falling-apart-table new life.  It’s still rusty but I find that beautiful.  The new color is complete, but there is still work to be done – it needs a top.  I’ve got some ideas, but still need to put it together…

Before and After Table: $3 garage sale find transformed with turquoise spray paint

Want to know how to spray paint like a PRO?  Need Tips?
Check out these 2 helpful posts:

Simple Steps to Spray Painting Success

5 Surfaces to Spray Paint

THE CHAIR.

The chair hasn’t been touched, but I have a plan. CORAL is the COLOR that is going to make this chair shine again.  I first need to prime it, then I’m going to paint it.  I think I’m going to skip spray painting this one and instead try a hand sprayer.  I’ve had one sitting in the garage forever and I think this is just the project to try it on…  Wish me luck 😉

Plans to spray paint this chair a new coral hue

Plans to spray paint this chair a new coral hue

I’m looking for a wicker sibling to go along with this beauty.  Not a twin, but a something alike.  Have a wicker chair?  Share details.

I’ve got plans for these new green + turquoise + coral additions.

You’ll see them finished soon. AND all together.

Somewhere around the homestead.

Before I let you go, here is another great score from the weekend.  The fam & I were up & out early on Saturday at a ‘biggest yard sale’ event & I found these 2 headboards for the girls room (in a couple years).  Oh the potential!  Here is a picture I shared on my Instagram page

Headboard find!


How To Paint Pegboard + Build a Pegboard Frame

Thanks for all your kind + sweet words on my latest DIY endeavour of organizing my work space + creating a command center.  No joke, I have been so motivated + productive over the past week since clearing the clutter!

The highlight of my newly organized office, hands-down, is the addition of the pretty pegboard.  This was my 1st project using pegboard, but I have wanted to create something using pegboard for quite some time.  When I first thought about the idea, I was bewildered at how the hooks would mount if the pegboard was attached to the wall…  Right?  Same thought you had?  humor me please…

Well anyway, a few seconds later, I realized there does need to be some space behind the pegboard for the hooks to attach.  Alas, build a frame. But how?  I’ve got 2 ways, one of which I am sharing today!

DIY: How-To Paint Pegboard + Build and Install a Frame Surround. Pegboard is an organizational dream fit for every room in the house. Check out this easy-to-follow tutorial at Jenna Burger Design

The easiest way to build a frame (for anything) is with a Kreg Jig, but I know many of you don’t have one, so here is a down & dirty way using tools most of you have. I hope.  And if you don’t, go buy them… you won’t regret it 😉

MATERIALS.

> (3) 1″ x 2″ x 8′ long wood pieces

> 2′ x 4′ piece of pegboard (I purchased a 4′ x 4′ piece @ Lowe’s and they cut it to my desired size)

> “L” brackets

> Wood screws, 1″ length

DIY: How-To Paint Pegboard + Build and Install a Frame Surround. Pegboard is an organizational dream fit for every room in the house. Check out this easy-to-follow tutorial at Jenna Burger Design

HOW TO BUILD A FRAME.

I started off by cutting the 1″ x 2″ pieces of wood using a miter saw (my recommendation for a good one) so they fit to size around the 2′ x 4′ pegboard.  If you don’t have a miter saw or tool to cut the wood, Lowes will cut it to your desired length.

> Arrange the 1″ x 2″ pieces so they lay on the short side.

DIY: How-To Paint Pegboard + Build and Install a Frame Surround. Pegboard is an organizational dream fit for every room in the house. Check out this easy-to-follow tutorial at Jenna Burger Design

Once your wood sides are the right lengths around the pegboard, attach them using “L” brackets (if you have a Kreg Jig, then use it to connect the corners).  Lay the “L” bracket on the front face of the wood and screw in.

DIY: How-To Paint Pegboard + Build and Install a Frame Surround. Pegboard is an organizational dream fit for every room in the house. Check out this easy-to-follow tutorial at Jenna Burger Design

Then at the 4 inner corners of the frame, add a 2″ x 2″ wood block which the pegboard will be secured to so it sits proud of the wall creating space behind so hooks can be easily added.

DIY: How-To Paint Pegboard + Build and Install a Frame Surround. Pegboard is an organizational dream fit for every room in the house. Check out this easy-to-follow tutorial at Jenna Burger Design

HOW TO PAINT PEGBOARD.

Some pegboard already comes primed or white, but my local Lowe’s only had the brown version.  Similar to painting walls or furniture, it’s important to use primer first.  So first I gave the face of my pegboard a quick coat of Zinsser Primer.

DIY: How-To Paint Pegboard + Build and Install a Frame Surround. Pegboard is an organizational dream fit for every room in the house. Check out this easy-to-follow tutorial at Jenna Burger Design

DIY: How-To Paint Pegboard + Build and Install a Frame Surround. Pegboard is an organizational dream fit for every room in the house. Check out this easy-to-follow tutorial at Jenna Burger Design

Once it was dry, I added 2 coats of my desired taupe-y color (I mixed a few hues to get the color just right).

DIY: How-To Paint Pegboard + Build and Install a Frame Surround. Pegboard is an organizational dream fit for every room in the house. Check out this easy-to-follow tutorial at Jenna Burger Design

Once it was dry, I was going to call it DONE… buuuut, I couldn’t stop myself and thought it would be really fun + unique to jazz it up even more, so I added a pretty stencil design.

DIY: How-To Paint Pegboard + Build and Install a Frame Surround. Pegboard is an organizational dream fit for every room in the house. Check out this easy-to-follow tutorial at Jenna Burger Design

Tutorial on > HOW TO PAINT USING A STENCIL

A few touch-ups and THEN the painting steps were complete!

DIY: How-To Paint Pegboard + Build and Install a Frame Surround. Pegboard is an organizational dream fit for every room in the house. Check out this easy-to-follow tutorial at Jenna Burger Design

I attached the dry pegboard to the frame using pretty gold wood screws…

DIY: How-To Paint Pegboard + Build and Install a Frame Surround. Pegboard is an organizational dream fit for every room in the house. Check out this easy-to-follow tutorial at Jenna Burger Design

…and then it was time to hang.

I used the screws that were already in place from the large inspiration board that was there before.  The screws were anchored in the wall and at just the right height.

DIY: How-To Paint Pegboard + Build and Install a Frame Surround. Pegboard is an organizational dream fit for every room in the house. Check out this easy-to-follow tutorial at Jenna Burger Design

Because there is relief behind the pegboard, the frame was able to simply rest on the screws. The result…

DIY: How-To Paint Pegboard + Build and Install a Frame Surround. Pegboard is an organizational dream fit for every room in the house. Check out this easy-to-follow tutorial at Jenna Burger Design

Pretty cool, right?!  And super simple.  Pegboards are THE BEST organizational component for any room in the house. AND they can be jazzed up to look great for all decor styles. Maybe I should do a round up post of great uses for pegboards around the house…  What do you think?  Yay or Nay??

Anyway, after the pegboard was in, I was ready to start getting organized…

DIY: How-To Paint Pegboard + Build and Install a Frame Surround. Pegboard is an organizational dream fit for every room in the house. Check out this easy-to-follow tutorial at Jenna Burger Design

DIY: How-To Paint Pegboard + Build and Install a Frame Surround. Pegboard is an organizational dream fit for every room in the house. Check out this easy-to-follow tutorial at Jenna Burger Design

Here is how it all came together…

WORK SPACE REVAMP: getting organized and creating an office command center using a framed pegboard and organizational supplies. Office Revamp by Jenna Burger Design

Check out my WORK SPACE REVEAL >>>>>>> click here

Where do you find pegboard most useful around your home?

Check back soon for details on how to build another simple frame for a pegboard!

Creating a Meaningful Home: Cleverly Inspired

CREATING A MEANINGFUL HOME blog series featuring Bloggers sharing the story of their home: FEATURED is Tracie of Cleverly Inspired - a MUST READ story!

Today’s guest post for Creating a Meaningful Home blog series: Year 3 is Tracie of Cleverly Inspired.

Welcome Tracie…

I was so honored to be asked to be a part of Jenna’s creating a meaningful home series this summer. Since I started my blog 5 years ago that has been one of the main missions in my life and on Cleverly Inspired, to not only place objects in my home that fill the space but those objects should bring joy and bring meaning to our life. I think that when you create a space that has meaning and is purposeful, any guest or friend that visits can feel that energy and they will know how you and your family feel about the space. It is a challenge because there are so many things out there to buy! All the pretties catch our eyes…and we want to just bring home the baskets, tins and the pictures and the artwork and put them all in your space. It becomes a clustered mess! One of my mantras that I live by when it comes to decorating is…

If everything is special than really nothing is special.

If you put everything on a shelf that you love or every piece of art on a wall …then very quickly those special things become not very special at all. Your eyes should rest on an object or part of your space and be able to take it in without having to look past a lot of other things. What I tell folks is the things that you love should rotate in and out, maybe with the seasons or maybe just every couple times a year so that you can really rest your eye on the things that you love and really appreciate those items.

cleverlyinspired (3)

For me those things are items from my our past. Things from my childhood that I remember in my Grammie’s house. Things that my dad has refinished for me….pictures of our kids when they were younger. These things I want my eye to rest on every day so that I’m constantly connected and comfortable in those spaces.

cleverlyinspired (1)

We recently moved last summer into a brand new home. I think that is one of the challenges with a new home is to find your nook and crannies again. It’s kind of like buying new shoes that quickly become your favorite boots because they get old and worn ,tattered and comfortable and you sink into them when you put them on.When you buy a new home, even though the space is completely you and you designed it and you love it….it takes a little bit of time for you to sink into it. After we have been here a year I noticed where my favorite spots are to sink into and where I find peace. My husband and my kids feel the same way. We all have found our little spot that we like to crawl into and that is what a home should do for you at the end of the day. Allow you to drop your keys , take your coat off… put your purse where it goes and then you just breathe a sigh because you know you’re in your space.

DIY shiplap @cleverlyinspired (11)

When I help people design for their spaces that is my one question that I want the real answer -, what will make you love being in this space. Sometimes it’s a piano…. sometimes it’s a particular favorite chair, sometimes it’s books, a it’s a bar stool, finding what that thing is and using it to inspire your space will immediately calm you when you enter it. What is current might not make you comfortable… so finding what makes you and your family at ease and comfortable might be a look from the 1970’s it might not be a current style. That doesn’t mean it has to look dated but to replicate what you see in a catalog or a magazine might not necessarily be your design style.Finding out what will make you and your family let out an “ahhhhhhh” at the end of your day….that is your goal. It really it really can be a very simple task.

Thank you so much Jenna!

Tracie has many wonderful thoughts that she shared.  I like her perspective of, “if everything is special than really nothing is special” and the idea of rotating things you love seasonally or yearly to give your walls & space a break.   It’s okay to love alot (I certainly do), but sometimes it doesn’t all mesh together at the same time in the same space.

One project of Tracie’s that I love and is perfect as the back to school time approaches is this repurposed ladder office organizer.  So creative, cute, AND functional!

Repurposed old ladder office organizer by Cleverly Inspired

Head on over to  Cleverly Inspired, and give Tracie a BIG HELLO!

Check out all the Bloggers that have contributed to this series on
Creating a Meaningful Home

Plus don’t miss out on all the previous Bloggers who contributed to this series in 2013 and 2014!

World Market Store Opening in Chelsea NYC

Grand Opening World Market NYC - store images

Happy Monday my friends – I hope you had a fabulous weekend!

I have very exciting news to share with you today… World Market, one of my favorite decor stores, is opening a new store in New York City later this week. You see, this is a BIG DEAL.  Why?  Because there is no World Market in the Northeast area.  Until Now.  You Southerners out there know what I am talking about, right?  If you’ve never been, you are in for a treat!

So the 2nd part of this fabulous news is… I am going to their sneak preview party TOMORROW.   How lucky am I?  I totally know you want to be me right now, hehe.  No worries though because I will sharing pics on instagram & facebook throughout the event AND I will have a full recap of the event + lots of pictures of the new Chelsea store to share when I return – pinky promise.

I’ll, of course, take my own pictures when at the event, but here are a few to gawk over in the meantime…

Grand Opening World Market NYC - store images

crushing over that table.  AND the mirror!

Grand Opening World Market NYC - store images

so many rugs.  so many options…

Grand Opening World Market NYC - store images

lighting galore…

Grand Opening World Market NYC - store images

Grand Opening World Market NYC - store images

And this chair with the lucite legs… OMG goodness!

Grand Opening World Market NYC - store images

In the New York area and want to check out this awesome + gorgeous new store?

DETAILS.

GRAND OPENING – CHELSEA (18TH & 6TH – 620 6TH AVENUE), NEW YORK

> The World Market Grand Opening is this Thursday, August 20th and there will be several events, special giveaways, and offers through Sunday

> Free tote bags for the first 100 customers in store each day + 10 lucky customers will find a $50 World Market in their tote each day

> 20% off Coupon —–> Click here to print

> On Thursday – grand opening day – Cost Plus World Market will be decorating 3 TOP PARK LOCATIONS in NYC adorned with their products.  Snap a picture of yourself with their products using #WorldMarketNYC for a chance to win a $50 gift card (50+ cards @ each park location – don’t miss it).  Follow along with World Market on IG, FB, and Twitter for hints on the locations…

Who’s as psyched as I am??

I’ll circle back with you later this week when I return from the event!

THIS IS A SPONSORED POST BY COST PLUS WORLD MARKET.  THEY HAVE REQUESTED I SHARE INFORMATION ON THIS STORE OPENING AND RETURN HAVE BEEN COMPENSATED FOR MY TIME.  ALL THOUGHTS + WORDS ARE 100% MY OWN.

Work Space Revamp: Creating an Office Command Center

THIS IS A SPONSORED POST THROUGH NATIONAL HARDWARE.  ALL OPINIONS ARE 100% MY OWN!

Last week I hit a breaking point with my office niche.  I just had enough with the clutter, piles of paper, and disorganization.

Since I’ve given up hope on keeping the rest of the house tidy while the kids are still out of school on Summer break (still a month to go till school starts in our neck of the woods…), I thought it’d be best to put my time + attention + energy on my little nook in the home, my desk…

For a while I’ve been thinking about saying adios to my beloved large inspiration board.  As much as I love it, I knew the large span of wall could be better utilized.  It was a bit sad to take down all the pretty + inspiring pictures (no worries, I didn’t toss them but instead stuck them in a folder for now), but once the board was removed, a world of ideas came fluttering to my head.

In no time (well it did take some time), I had a plan of action, my desk space was spruced up, and a new command center for my office supplies was created…

WORK SPACE REVAMP: getting organized and creating an office command center using a framed pegboard and organizational supplies. Office Revamp by Jenna Burger Design

The command center all came together around the new pegboard.

WORK SPACE REVAMP: getting organized and creating an office command center using a framed pegboard and organizational supplies. Office Revamp by Jenna Burger Design

I have wanted to work on a project using pegboard for a long time.  From the garage to the office to the laundry room, pegboard is great for organizing any nook & cranny of the home and there are a plethora of peg hooks in a range of shapes and sizes to hold and hang whatever you need! For my project, I got my pegboard from Lowe’s and all the hooks came from National Hardware.

When working with pegboard, it needs to have a frame surround to create space behind for the hooks to connect in the holes.  For the pegboard in my office, I had the kind people at Lowe’s cut me a 2′ x 4′ piece.  Then I painted on a stencil design + created a frame around the outer edge – click for tutorial  (I have an alternate pegboard frame tutorial coming soon too).

Before I decked out my new pegboard with all the organizational hooks, this is how it looked…

Stenciled Pegboard before

Let’s get started…

WORK SPACE REVAMP: getting organized and creating an office command center using a framed pegboard and organizational supplies. Office Revamp by Jenna Burger Design

Organizing jars and small trays were the ideal solution for all the smaller necessities in my office.  I found the jars perfect for holding pins, paper clips, erasers, labeling tags, etc.  And the trays are just the right size for post-its, business cards, and larger tags + labels.  As I was laying out my new command center, I was astonished at how much I had to fill these organizational tools!

WORK SPACE REVAMP: getting organized and creating an office command center using a framed pegboard and organizational supplies. Office Revamp by Jenna Burger Design

WORK SPACE REVAMP: getting organized and creating an office command center using a framed pegboard and organizational supplies. Office Revamp by Jenna Burger Design

Another need for organization was a home for my growing washi tape collection.  The angle hooks and the hanging bar (from the assortment pack) gave me enough room for all my favorites + space to store more in the future (room for expansion – bonus).

WORK SPACE REVAMP: getting organized and creating an office command center using a framed pegboard and organizational supplies. Office Revamp by Jenna Burger Design

I love that everything is so accessible and easy to get at, yet has a designated spot.  And it really is all so pretty to look at too, don’t you think?!  I love all the color & patterns.

WORK SPACE REVAMP: getting organized and creating an office command center using a framed pegboard and organizational supplies. Office Revamp by Jenna Burger Design

Also on the new organizational pegboard, I was able to add a hook for my scissors (using a curved hook), hole punch (using a pliers holder), and clipboard that I take with me to client meetings.  Above I was able to add a small shelf using shelf brackets.

WORK SPACE REVAMP: getting organized and creating an office command center using a framed pegboard and organizational supplies. Office Revamp by Jenna Burger Design

WORK SPACE REVAMP: getting organized and creating an office command center using a framed pegboard and organizational supplies. Office Revamp by Jenna Burger Design

WORK SPACE REVAMP: getting organized and creating an office command center using a framed pegboard and organizational supplies. Office Revamp by Jenna Burger Design

My revamped work space feels so fresh and new, even though all the elements, with the exception of the pegboard, were here before. It’s amazing how a space can take on a new life with a few simple moves + freshening up!

WORK SPACE REVAMP: getting organized and creating an office command center using a framed pegboard and organizational supplies. Office Revamp by Jenna Burger Design

My work space was freshened up 2+ years ago, and then got an overhaul when it was photographed for Storage magazine (which was on the cover).  The stylist brought in the white console table and other organizational items like the baskets, white desk caddy, and orange boxes.   I’ve lived with them + loved them for the last years, but found my office wasn’t functioning anymore as my needs have changed.

Over the years, I’ve collected many samples which I’ve organized nicely in the orange boxes which sit on the console top. It is so handy to have them right there to grab and go.  And if I want, I can easily put the lids on the boxes for those moments when I want them hidden.  I do feel though I am more accountable for keeping tidy + neat when things are open and visible – my laundry room is still looking good since the doors were removed.

WORK SPACE REVAMP: getting organized and creating an office command center using a framed pegboard and organizational supplies. Office Revamp by Jenna Burger Design

These 12″ x 12″ boxes, which were purchased from Homegoods, are ideal for storing all the office supplies.  From business cards, to envelopes, to receipts, to paper, everything has a spot!

In the box on the bottom shelf, I store all my camera supplies + cables…

WORK SPACE REVAMP: getting organized and creating an office command center using a framed pegboard and organizational supplies. Office Revamp by Jenna Burger Design

I am a bit bummed not to have my large inspiration board anymore, so I added a small strip of cork (used from a 1/2″ thick sample) about 2″ wide X 24″ long under the pegboard frame to pin special, striking images that I can’t live without…  I have another spot that I am thinking of to add more cork panels – my office isn’t complete without having inspiration surround me.

WORK SPACE REVAMP: getting organized and creating an office command center using a framed pegboard and organizational supplies. Office Revamp by Jenna Burger Design

And there you have it. My complete revamped work space.  Here’s another overall…

WORK SPACE REVAMP: getting organized and creating an office command center using a framed pegboard and organizational supplies. Office Revamp by Jenna Burger Design

WORK SPACE REVAMP: getting organized and creating an office command center using a framed pegboard and organizational supplies. Office Revamp by Jenna Burger Design

What do you find keeps your office organized?

A few other blogger friends have been hard at work organizing too.  Come check out what others have done using pegboard…

Jessica_FGORJessica – Four Generations One Roof
Back to School Homework Station

under desk ombre pegboard with attachmentsBecky – Organizing Made Easy
Office Organization

z1Karianne – Thistlewood Farm
Garage Organization

DecorChickEmily – Decor Chick
Garage Organization

disclosure: This post is sponsored by National Hardware.  They reached out to me about sharing organization tips using pegboard with their many organizational components.  They did not tell me what to create or what to say – the project + my words are all 100% my own!

Creating a Meaningful Home: Jennifer Rizzo

CREATING A MEANINGFUL HOME blog series featuring Bloggers sharing the story of their home: FEATURED is Jennifer Rizzo - a MUST READ story!

Today’s guest post for Creating a Meaningful Home blog series: Year 3 is Jen of Jenniferrizzo.com.

Welcome Jen…

I want to thank Jenna so much for having me as a part of this amazing series. My name is Jennifer Rizzo and I blog at Jenniferrizzo.com. I am an artist, home decor designer, and author of the book Creatively Christmas.  I’ve been blogging for over 8 years and it has been fascinating to look back and see how my home has been created over time. That’s the thing that I think is the hardest about a home… I am very impatient, want everything done at once, and to look like it comes from a magazine. The truth is, creating a home you truly love takes time, and should evolve for the needs of your family. It’s not a static thing. Your home should be forever changing in a dynamic way and filling it with what you love and what means the most to you.

When my kids were little, our eating area was more of a breakfast nook style, which was perfect in keeping them corralled during meal times. As they grew, we realized that the confines of a bench seat just didn’t work anymore and we ended up pulling the table into the center of the room to make space for growing arms and legs.

Pretty and bright breakfast nook by Jennifer Rizzo

It was liberating and a little sad at the same time. I loved our little nook, and while it was nice to change, it also made me realize how much the kids were changing and how flexible I needed to be with how our home changed.

Dining space with Target tablecloth by Jennifer Rizzo

When we had the opportunity to gut and redo our living room in the sub-level, I wanted to use it as an opportunity to make it feel less like a cave and more like a real living room. Basement rooms and sub-level rooms share their own lighting challenges and it can be hard to make it feel like an above-ground level room. In fact here’s a peek of how it looked in 2009, very cave-like.

I took the opportunity to add layer after layer of family photos. I think there is nothing more meaningful than to be surrounded by family, even if it’s only the memories.

Fun use of old family pictures for decorating

And I keep adding photos as I go. I am grateful I have family photos from when my grandparents were little.

For us, our home has meant changing the kids rooms as their tastes changed.  It was easy when they were little to make the decisions for them, but now, I want them to have their own say in the space they live in and fill it with what they love, so when they have their own homes, they will be able to do the same.

Girls bedroom makeover by Jennifer Rizzo

Thank you so much for having me here today. You can see more before and after images of our home here, and please feel free to stop over and visit my blog here for home decorating and inspiring craft ideas.

Jen signature

Thank you for sharing your eclectically styled + meaningful home Jen!  “The truth is, creating a home you truly love takes time, and should evolve for the needs of your family. It’s not a static thing.” Perfectly stated.

I adore the many furniture makeovers that Jen tackles.  For a recent entry makeover, she transformed this thrift store vintage dresser with a quick coat of light gray paint and then used a wet paper towel to wipe off the excess for a distressed look.  What a great trash t treasure project…

painted side dresser with gray paint by Jennifer Rizzo

Head on over to Jenniferrizzo.com, and give Jen a BIG HELLO!

Check out all the Bloggers that have contributed to this series on
Creating a Meaningful Home

Plus don’t miss out on all the previous Bloggers who contributed to this series in 2013 and 2014!

Creating a Meaningful Home: The Blissful Bee

CREATING A MEANINGFUL HOME blog series featuring Bloggers sharing the story of their home: FEATURED is Amy of The Blissful Bee - a MUST READ story!

Today’s guest post for Creating a Meaningful Home blog series: Year 3 is Amy of The Blissful Bee. Welcome Amy…

Hi guys! I’m Amy of The Blissful Bee and I’m so super excited to be guest blogging today on Jenna’s blog! I am so passionate about home design and I cannot wait to share with you the meaning behind my home.

Chic + Soft living room by Amy @ The Blissful Bee

(Formal Living Room Makeover)

Make Today Awesome quote

Chic + Soft living room by Amy @ The Blissful Bee

(Kitchen Makeover)

So I don’t know about you, but there are so many times where I ask myself one very important question. What in the world makes a home special? Such a complex question, right? As a gal who’s moved around quite a bit over the last 7 years, it’s hard for me to answer this question with walls or floors or furniture or doors. For me, a meaningful home means so much more.

Chic + Soft dining room + kitchen by Amy @ The Blissful Bee

Chic + Soft dining room + kitchen by Amy @ The Blissful Bee

(Formal Living Room Makeover)

A meaningful home isn’t about the furniture or décor you throw into it. Of course those pieces help, but in my opinion, it’s more about the feeling you have when you walk into a room or walk up your front porch. It’s that initial reaction you have to your home when you pull into your driveway. It’s that feeling of happiness when you come home to greet your loved ones; and in my case, my two little fur balls, Bailey and Bella.

Coffee table chic... + a cute cat

garden table with pretty plants

Back porch makeover by Amy @ The Blissful Bee

(Back Porch Makeover)

It’s the smell of your favorite candle burning in your kitchen or the lamps you for some reason always have to keep on. It’s the throw that is strategically placed next to your favorite spot on the couch or your favorite coffee mug waiting for you every morning.

Chic + Soft den makeover by Amy @ The Blissful Bee

(Den Makeover)

Chic + Soft office makeover by Amy @ The Blissful Bee

(Mini Office Makeover)

Chic + Soft office makeover by Amy @ The Blissful Bee

(Kitchen Makeover)

As much as I love designing and decorating a space, the feeling that home provides and whom you fill it with is so much more important to me. What about you?

Thank you Amy!

Goodness, I can not get enough of Amy’s home.  Every nook and cranny is engaging and filled with beautiful, unique layers.  As Amy has moved many, many times over the years, decorating with meaning has been a bit of a challenge, but with her thought of “the feeling of happiness is most important when you come home”, a space that reflects her style shines through!

One of Amy’s incredible makeover projects is the back porch garden center she created with a great potting table, garden necessities, and the most adorable seating to relax, reflect, and enjoy.  Wouldn’t you love to do some potting in this cozy spot?!

Chic + Soft back porch makeover by Amy @ The Blissful Bee

Head on over to The Blissful Bee, and give Amy a BIG HELLO!

Check out all the Bloggers that have contributed to this series on
Creating a Meaningful Home

Plus don’t miss out on all the previous Bloggers who contributed to this series in 2013 and 2014!


Creating a Meaningful Home: Decor Adventures

CREATING A MEANINGFUL HOME blog series featuring Bloggers sharing the story of their home: FEATURED is Jessica of Decor Adventures - a MUST READ story!

Today’s guest post for Creating a Meaningful Home blog series: Year 3 is Jessica from Decor Adventures. Welcome Jessica…

Hello friends! Glad to meet you, I’m Jessica from Decor Adventures. Blogging about the fun I have at home is my creative outlet and opportunity to have fun with my power tools, not to mention paint something new every once in a while. My husband, baby daughter and I live in a 115-year old home in the city.

Bee News Feature

This is our first house and we’ve spend 5 years so far making it our own. We have amazing wood trim and floors, stained glass and 4 floors of old house quirks where nothing is square and I love it that way.

It’s easy to move into a place, set up your things, paint the walls, and get to living. But it’s hard to figure out what meaningful means to you and how to create a home that’s special, organized and function for your family and life.

CREATING A MEANINGFUL HOME blog series featuring Bloggers sharing the story of their home: FEATURED is Jessica of Decor Adventures - a MUST READ story!


Here are a few simple ways I bring meaning and life into my home.

INVOLVE YOUR FAMILY

Although one of my family members is only 8 months old, she is is a big part of how I now design and decorate my home. And she’s my super cute mini assistant. I made this constellation art work for her room and this fall I’m about to start baby-proofing everything. If you have any tips, I’d love to hear them.

CREATING A MEANINGFUL HOME blog series featuring Bloggers sharing the story of their home: FEATURED is Jessica of Decor Adventures - a MUST READ story!


My husband Dan and I make joint decisions on our home. It didn’t always used to be that way. I used to tell him an idea of what I wanted to do and he’s offer a counter opinion to try something different and I hated it! It was hard to compromise about things but I have cooled my heels a lot and now we talk about what kinds of things we’ll BOTH do to our house.

CREATING A MEANINGFUL HOME blog series featuring Bloggers sharing the story of their home: FEATURED is Jessica of Decor Adventures - a MUST READ story!

Involving your family in designing and decorating your home will make you all feel a part of the process of creating a meaningful place to live and there isn’t anything more important than having your family feel loved, important and valued.

USE WHAT YOU GOT

Using items in your home to redecorate and renovate a new space is not only fun, it’s challenging and exhilirating. These days budget is a major factor in my decor projects and who doesn’t want to save money anyway they can? After turning into a blog-at-home mom from a full-time professional, making items for my home for little or no money is what I dream about at night. I do! See all of the things I’ve made for free here, including this poster I painted over with supplies I had on hand including trendy hot pink.

CREATING A MEANINGFUL HOME blog series featuring Bloggers sharing the story of their home: FEATURED is Jessica of Decor Adventures - a MUST READ story!

Other ways to use what you’ve got are by rearranging your furniture, shopping the attic or swapping items with friends. It’s a great time to switch a room around or make something from the leftover supplies from that last craft day. I love recycling, and these are all easy ways to do that and bring a special meaning to your rooms and decor.

HAVE PEOPLE OVER

Even if the living room isn’t as pretty as you’d like it, or the grass needs cutting, schedule that dinner party you’ve been wanting. You’ll wonder why you didn’t spend time with friends or family sooner. The one thing I believe most about creating a meaningful home is that you have to share it with people you love. Dinner parties, Friendsgiving, which we regularly host, and even a casual dinner after the baby goes to bed all count. So who cares if the floors are dusty, open up some drinks and have fun with the ones you love.

CREATING A MEANINGFUL HOME blog series featuring Bloggers sharing the story of their home: FEATURED is Jessica of Decor Adventures - a MUST READ story!

I hope these tips help you create a meaningful home in your space. Please visit me at Decor Adventures and find me on Facebook, Pinterest and Instagram too.

Decor Adventures

“It’s easy to move into a place, set up your things, paint the walls, and get to living. But it’s hard to figure out what meaningful means to you and how to create a home that’s special, organized and function for your family and life.” Absolutely! Incorporating ‘meaning’ takes time; it doesn’t come together overnight.  I am in love with her 115-year old home – goodness, the stories it could tell. And the woodwork… I’m drooling.  I love the updates Jessica has been making to her beautiful, aged homestead!

A favorite project of Jessica’s is the recent master closet makeover she created for the Buffalo Decorators Show House.  Check out this fun + vibrant space… Who wouldn’t love this part of the home?!

Master Closet Makeover

 Head on over to Decor Adventures, and give Jessica a BIG HELLO!

Check out all the Bloggers that have contributed to this series on
Creating a Meaningful Home

Plus don’t miss out on all the previous Bloggers who contributed to this series in 2013 and 2014!