


Demo Day: Steps for Demolishing the Kitchen

Demo Day means one thing… construction has begun!
Last week demolition of the existing kitchen started and I was full of emotions from excitement to nervousness. After months of planning, I just couldn’t believe the day had come.
After spending the weekend clearing + cleaning out the kitchen and adjacent areas, the kitchen was ready to be teared down.
I was anticipating DEMO DAY to be rugged & raw with sledgehammers flying and earsplitting noise of walls being tore down. Like this…

Yay, not so much. Guess it’s a good thing with a baby in the house who typically naps for 3+ hours…
I was a little disappointed that I couldn’t get the days anxieties out with a haul of a hammer, but I got over it quickly.
A few hours in to demo day, the window treatments were down, the cabinets were out, and the contractors were well on their way to clearing out the kitchen area.
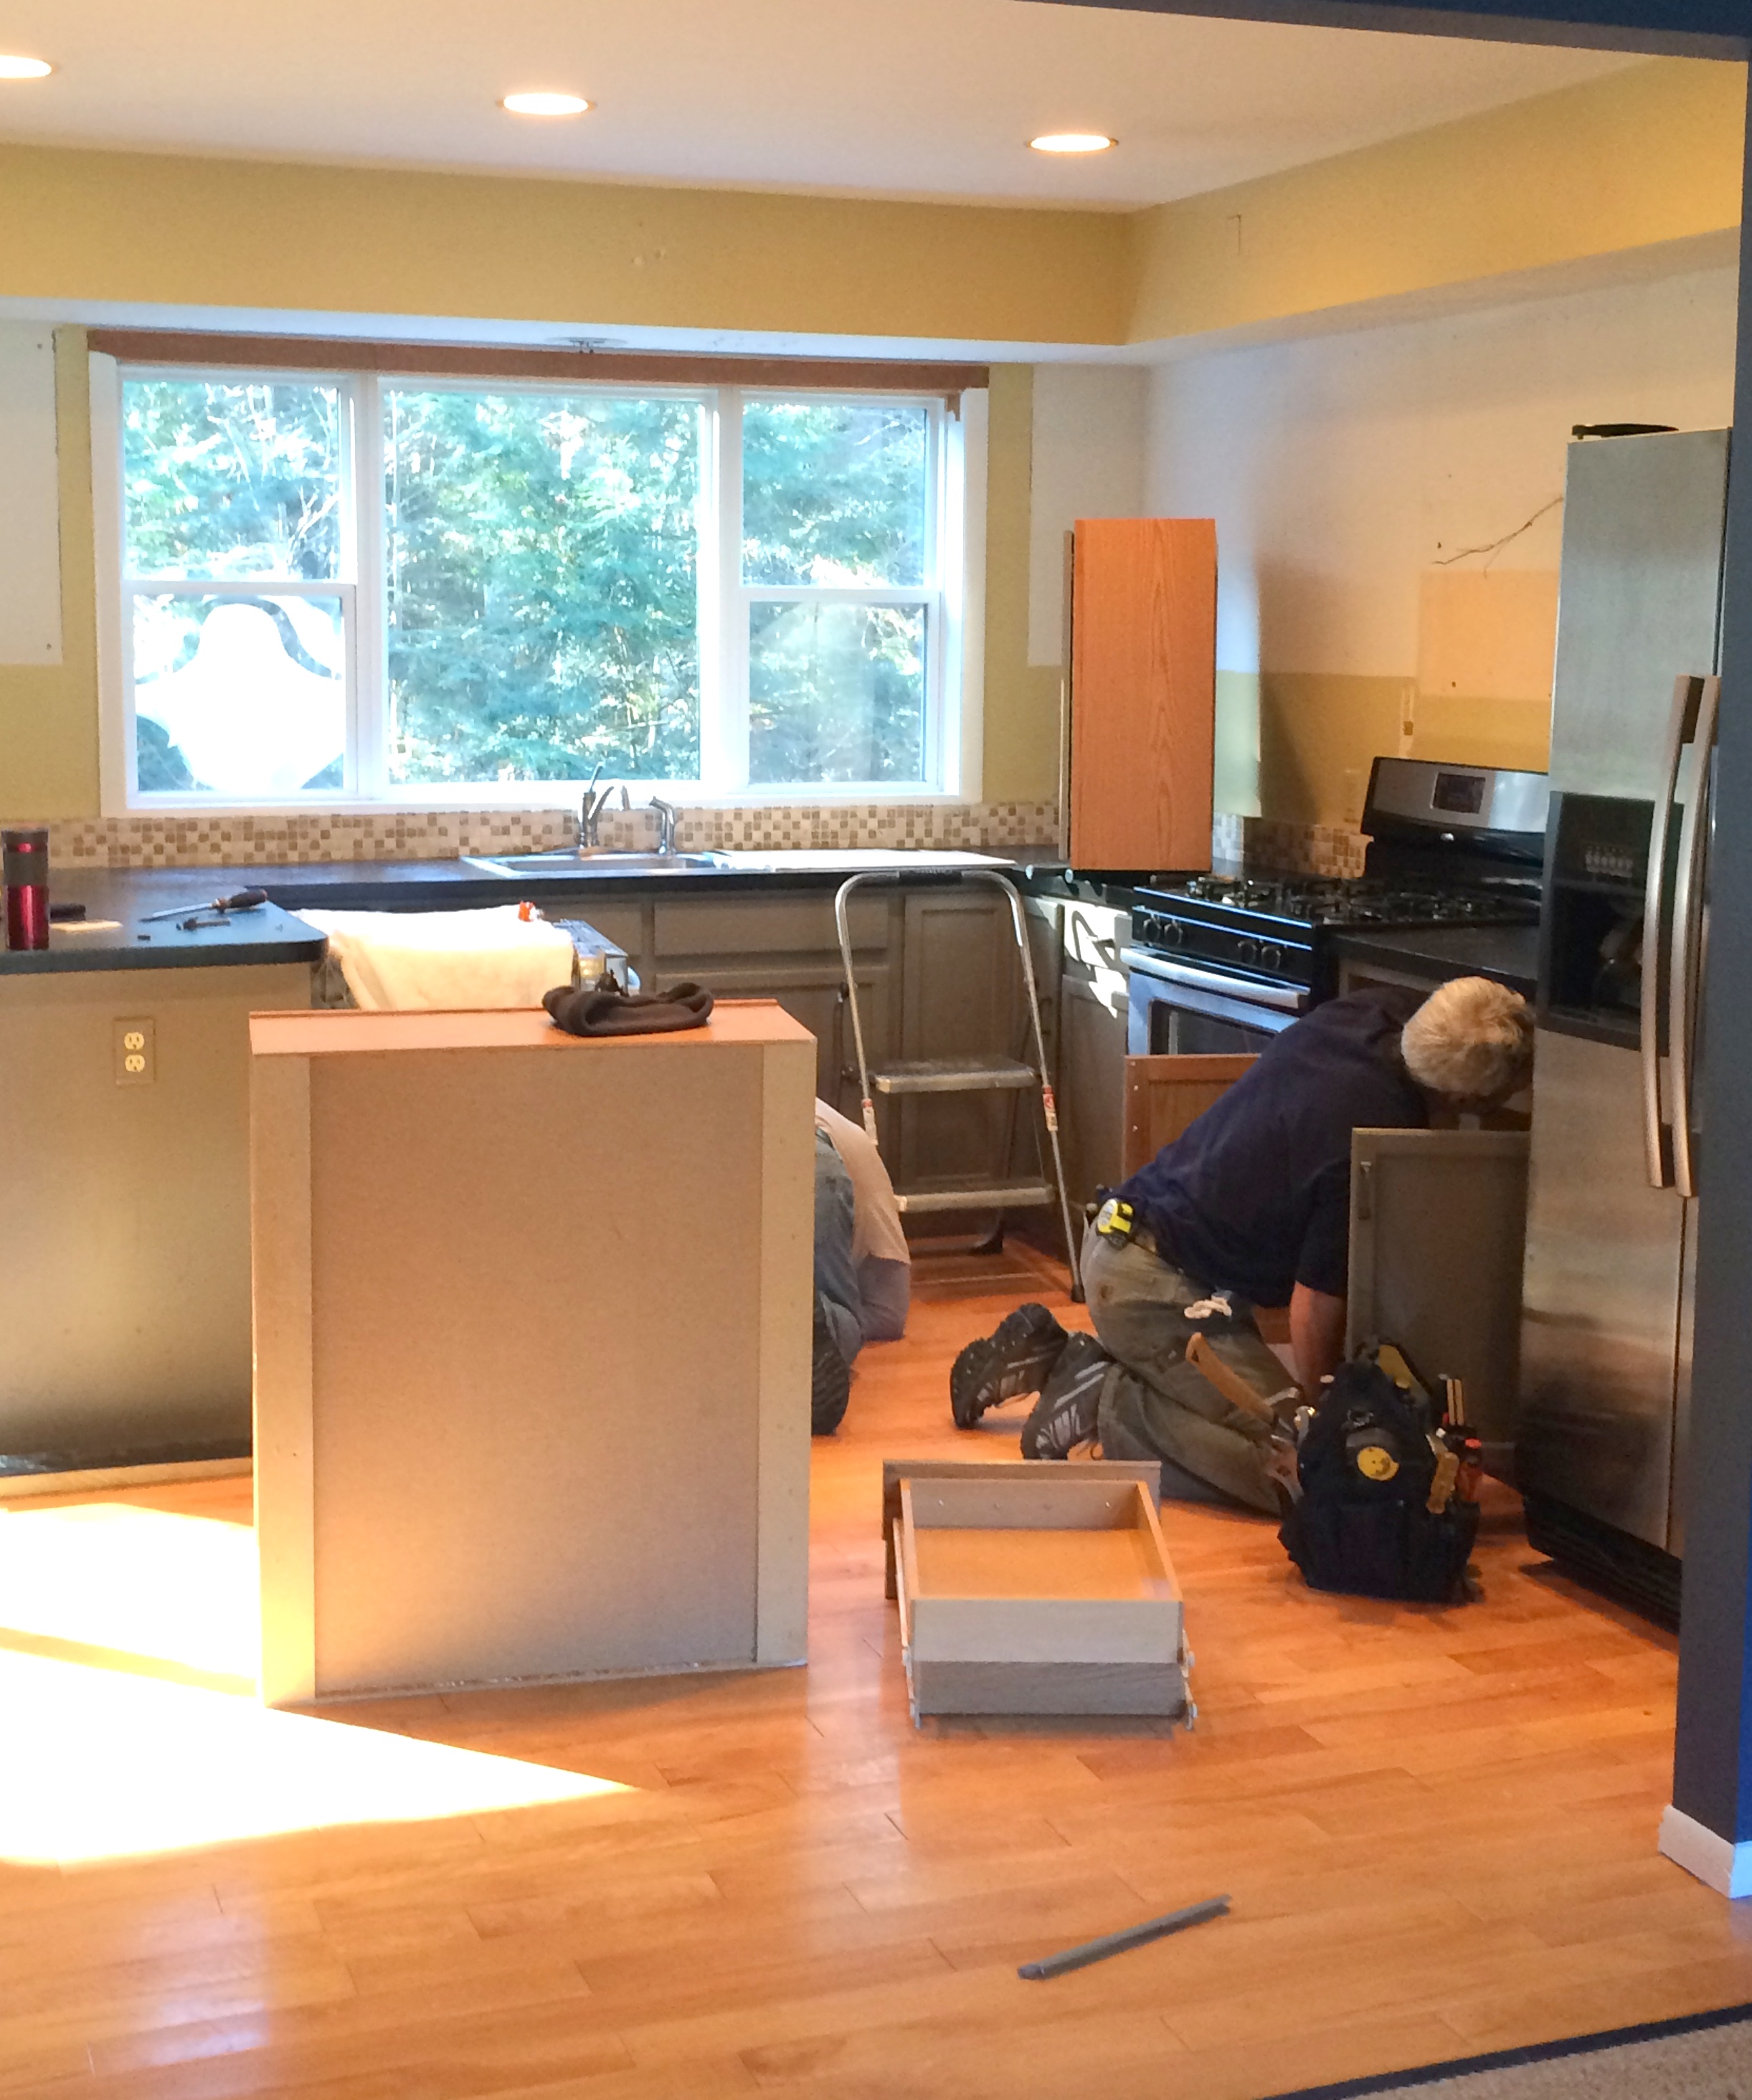
The kitchen cabinets came out first, followed by the soffit above the existing cabinets. The new upper cabinets will continue to the ceiling with decorative moulding, which will really heighten the space+ provide more storage space inside.
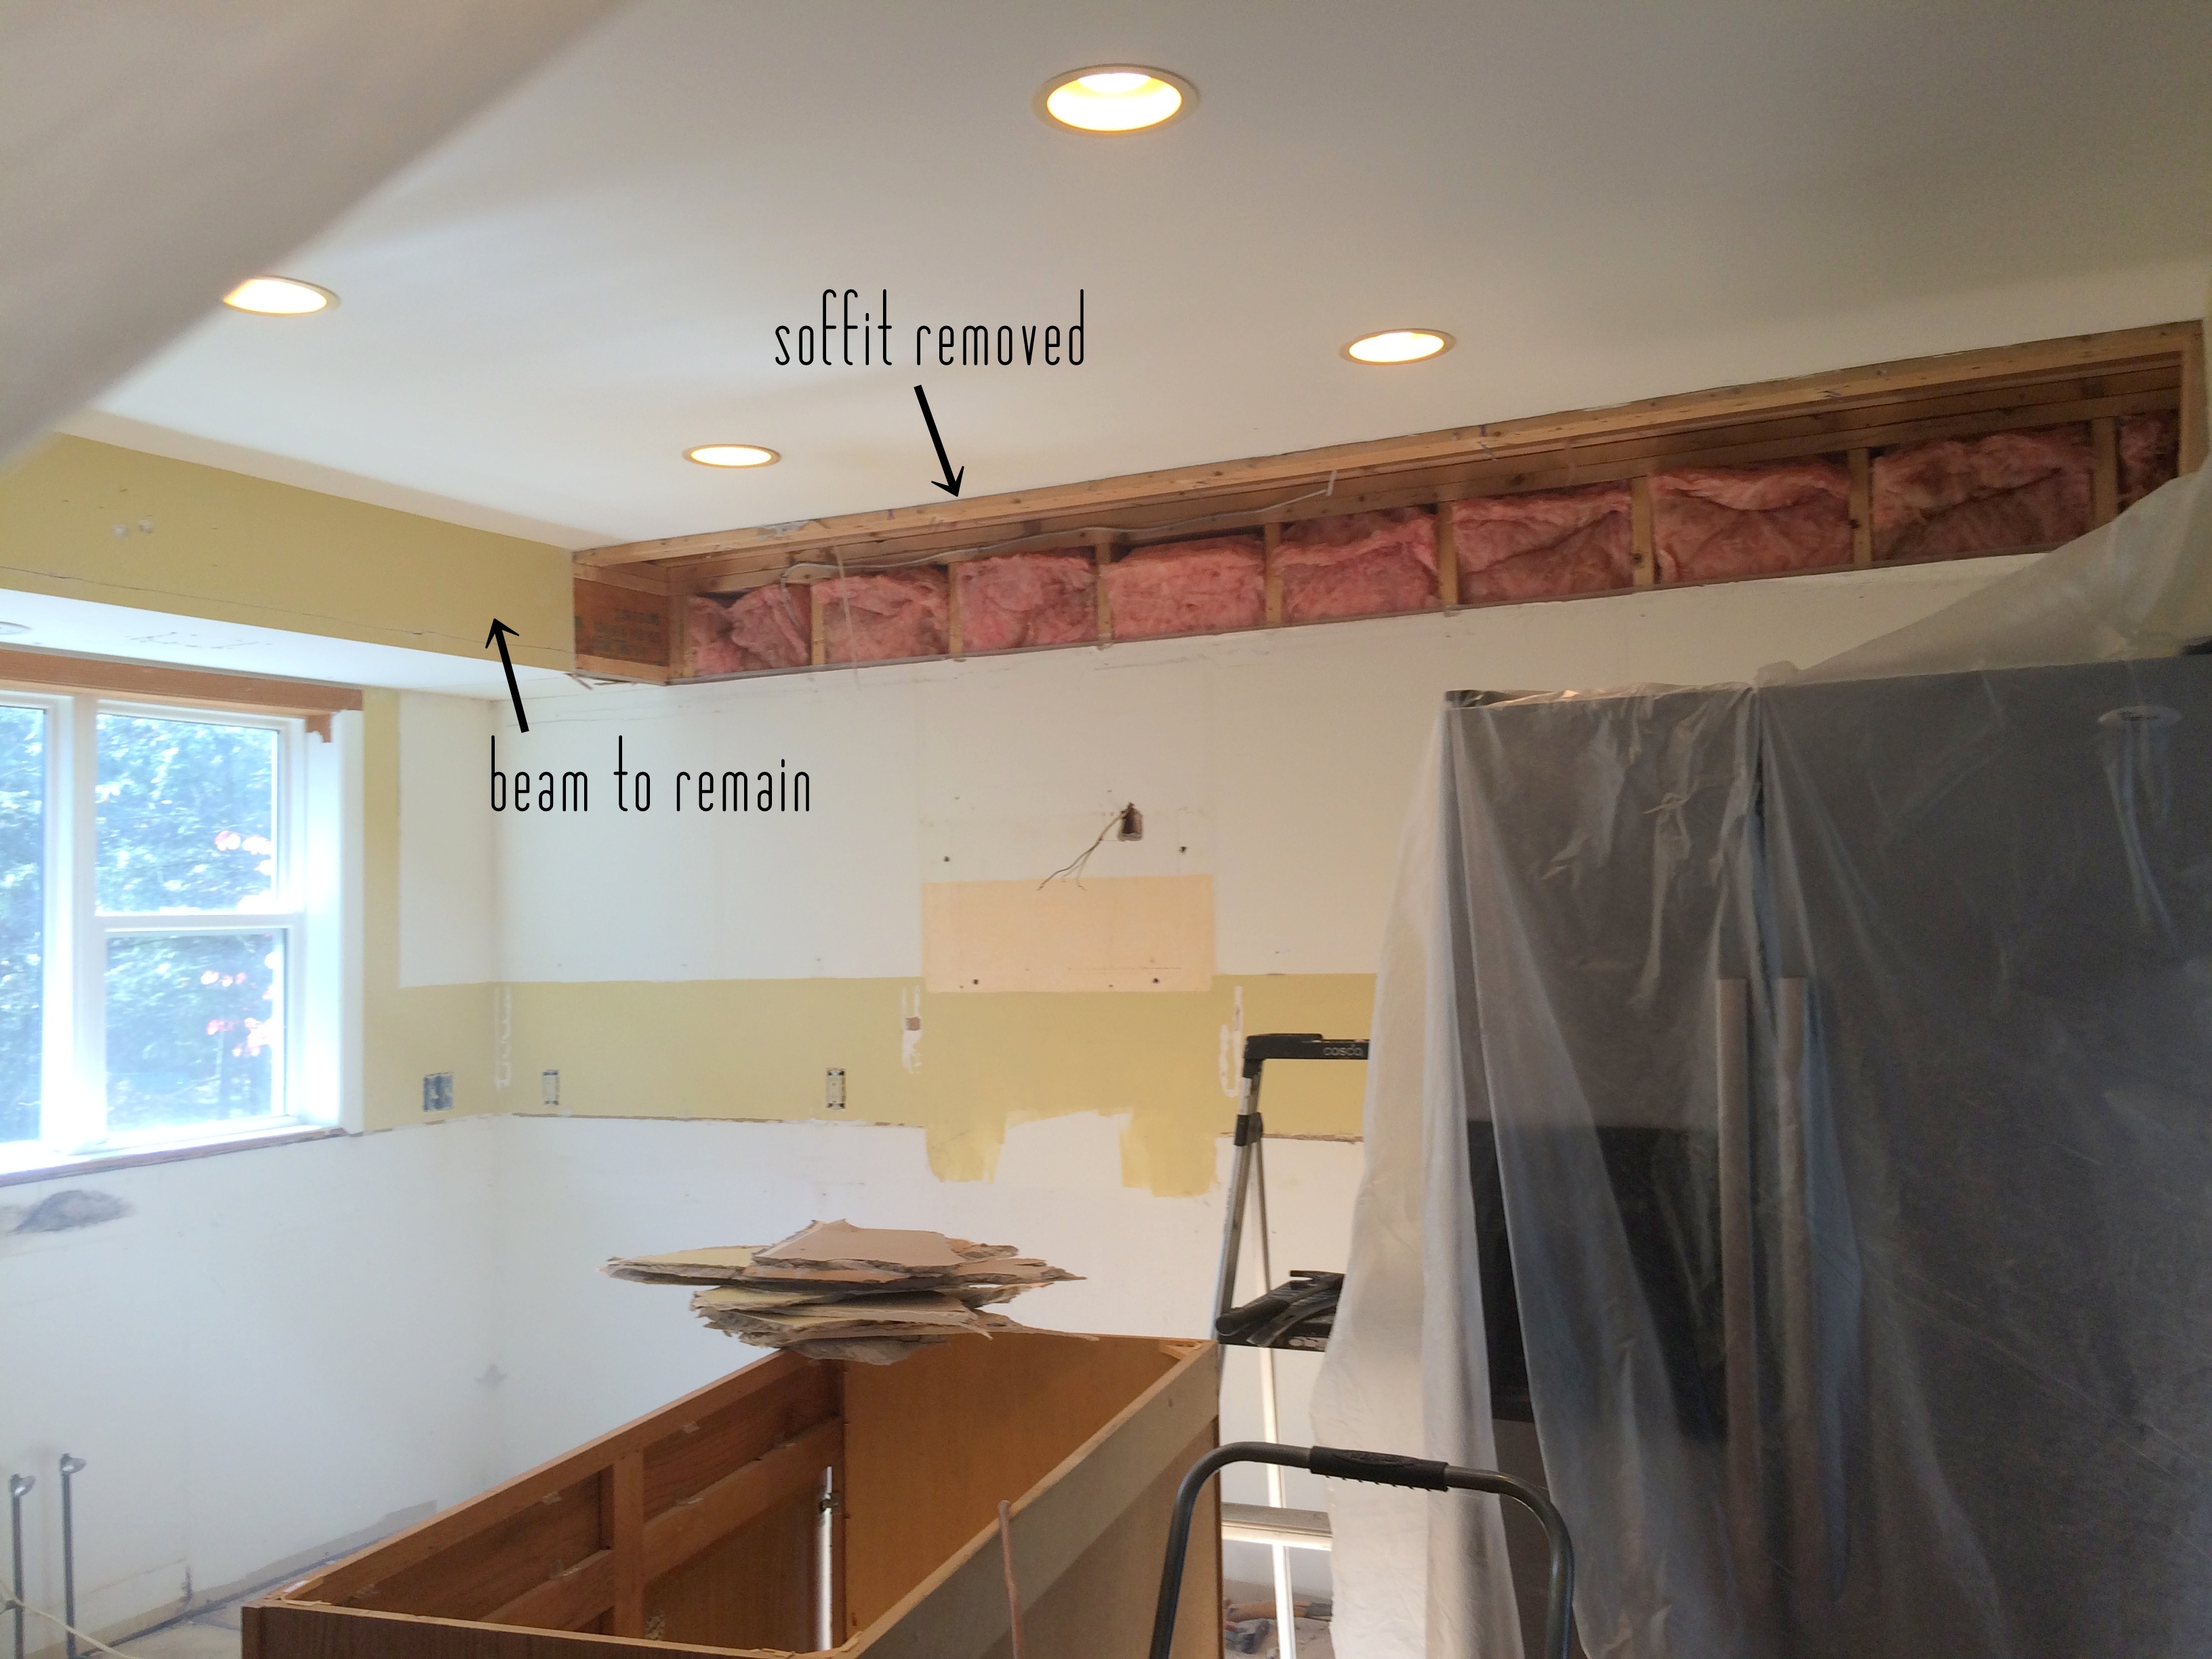
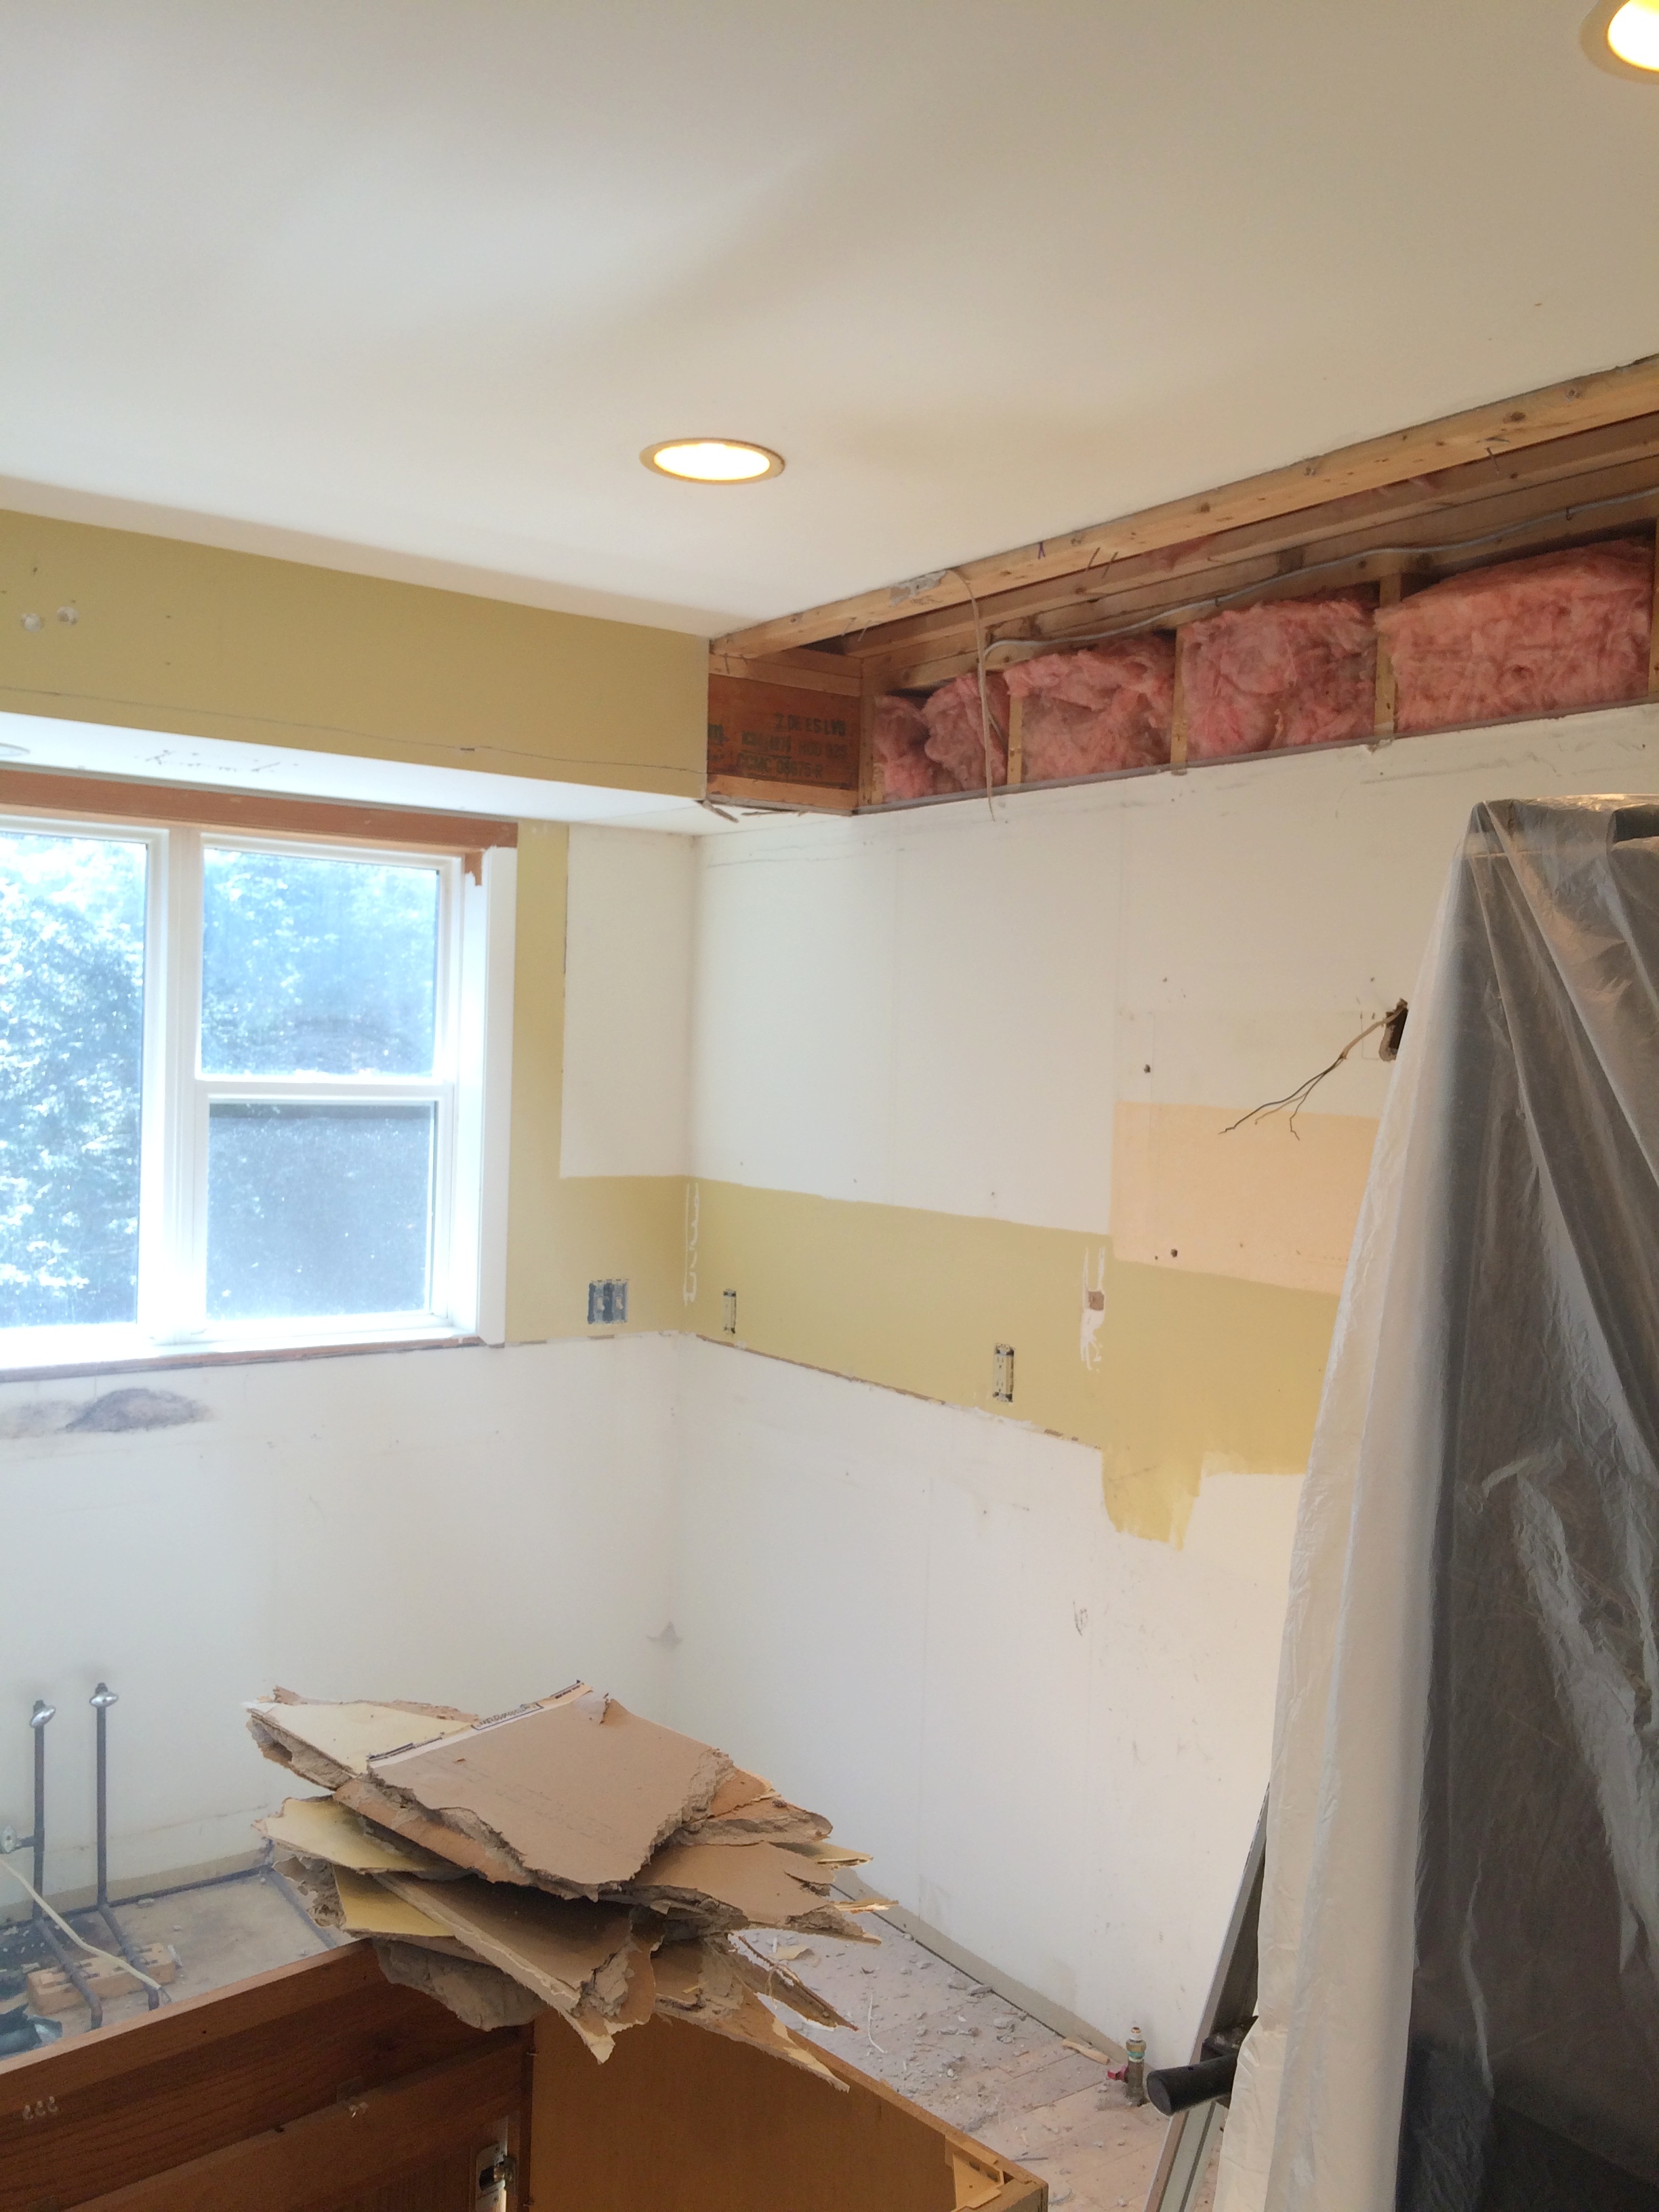
The ‘soffit’ in front of the window (above the sink) we discovered is a beam, which will need to remain. Can’t take out what is holding up the house!
Beyond the beam though, we will be able to heighten the soffit, which will allow new tile to continue up and around all sides of the window. A pretty new pendant over the sink will also be installed.
Over the coming days once demo is complete, other areas of focus will be the plumbing + electrical. The electrical changes will include relocating + adding outlets, repositioning the recessed lights in the ceiling, and adding pendant lights over the island.
All the wiring for the electrical will take place now during the demo + repair phase, then when the cabinets are in, the contractor will be able to cut the exact locations in the sheetrock, so they are in the exact position that I’d like. Not too shabby…

See that ugly tile? That was the original floor for the kitchen + dining space. I couldn’t imagine… The hardwood flooring was installed by the previous owners and since the kitchen was already in place, they followed the footprint perimeter of the cabinets.
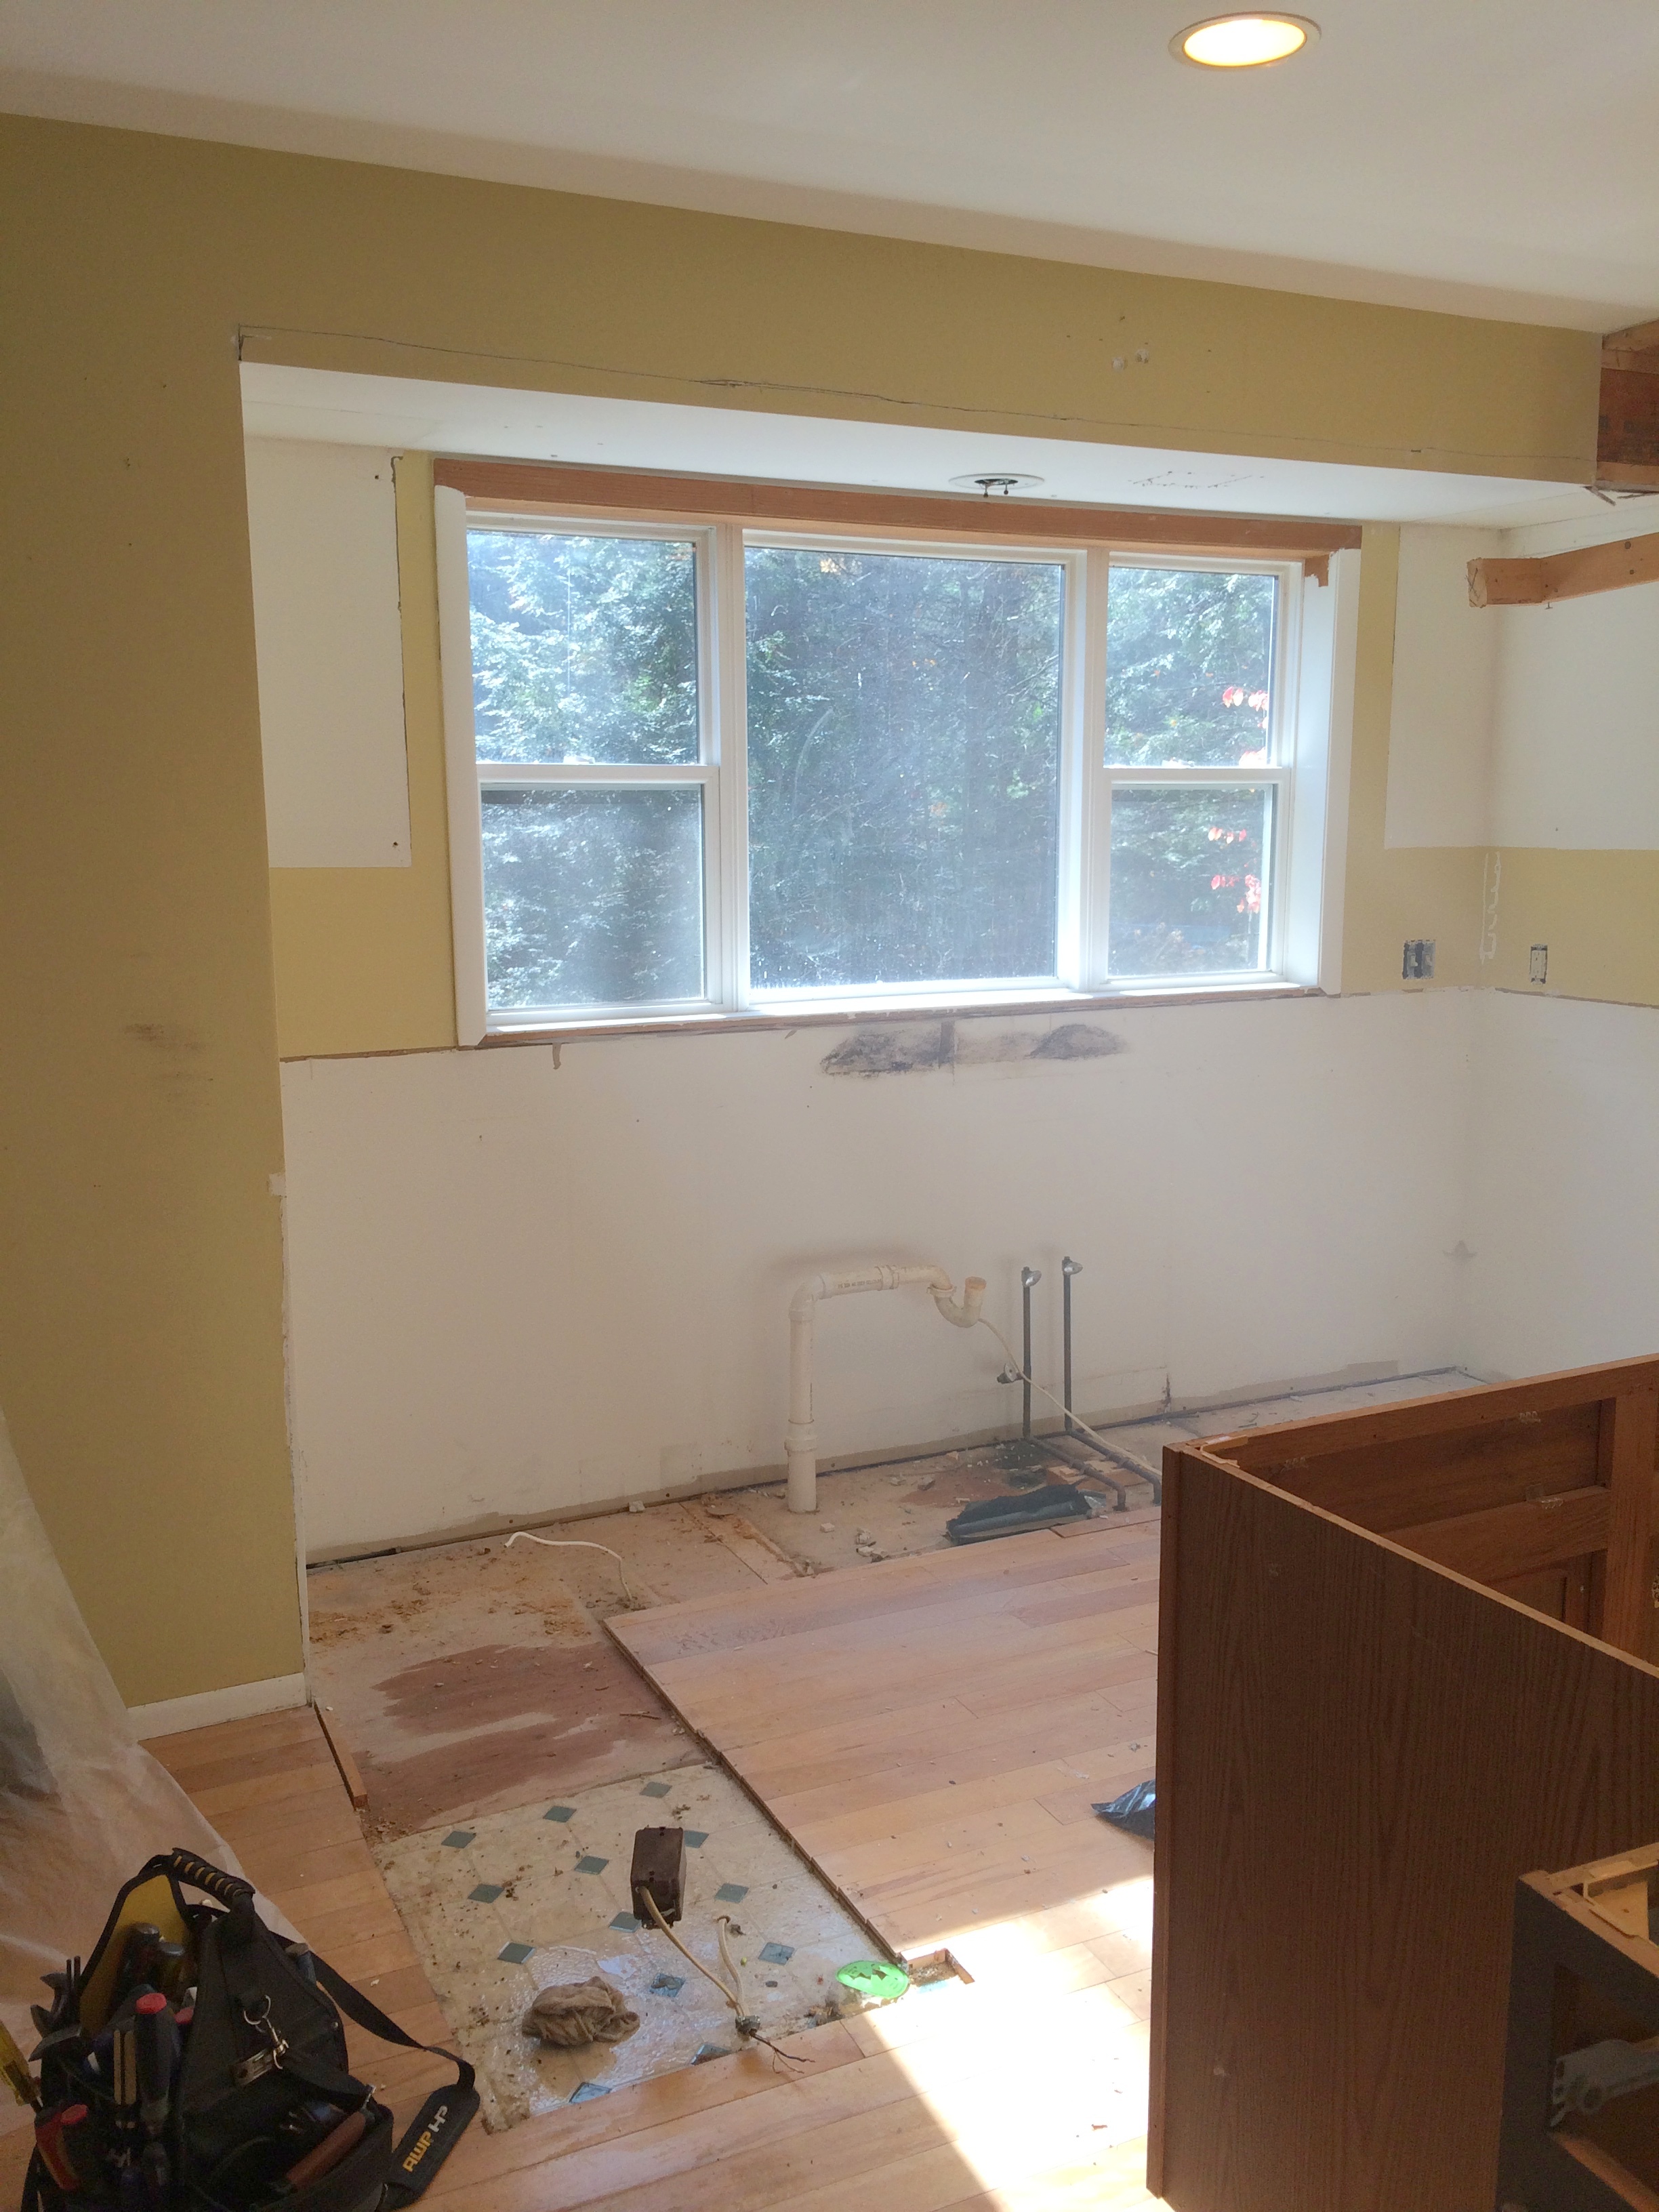
The challenging part that we’re going to encounter with our proposed plan is weaving new flooring into this area where the dishwasher once was because we are eliminating the footprint of this “peninsula” and instead creating a big ole’ island.
Once the new floor is installed, ALL the first floor hardwood floors will be sanded & restained. By weaving in new floor with the old though, it’s unknown how the stain will take and the new floor boards might be obvious & stand out. I was told, the darker the floor, the higher probability that it’ll be apparent. It’s an unknown at the moment, so we shall see what happens…
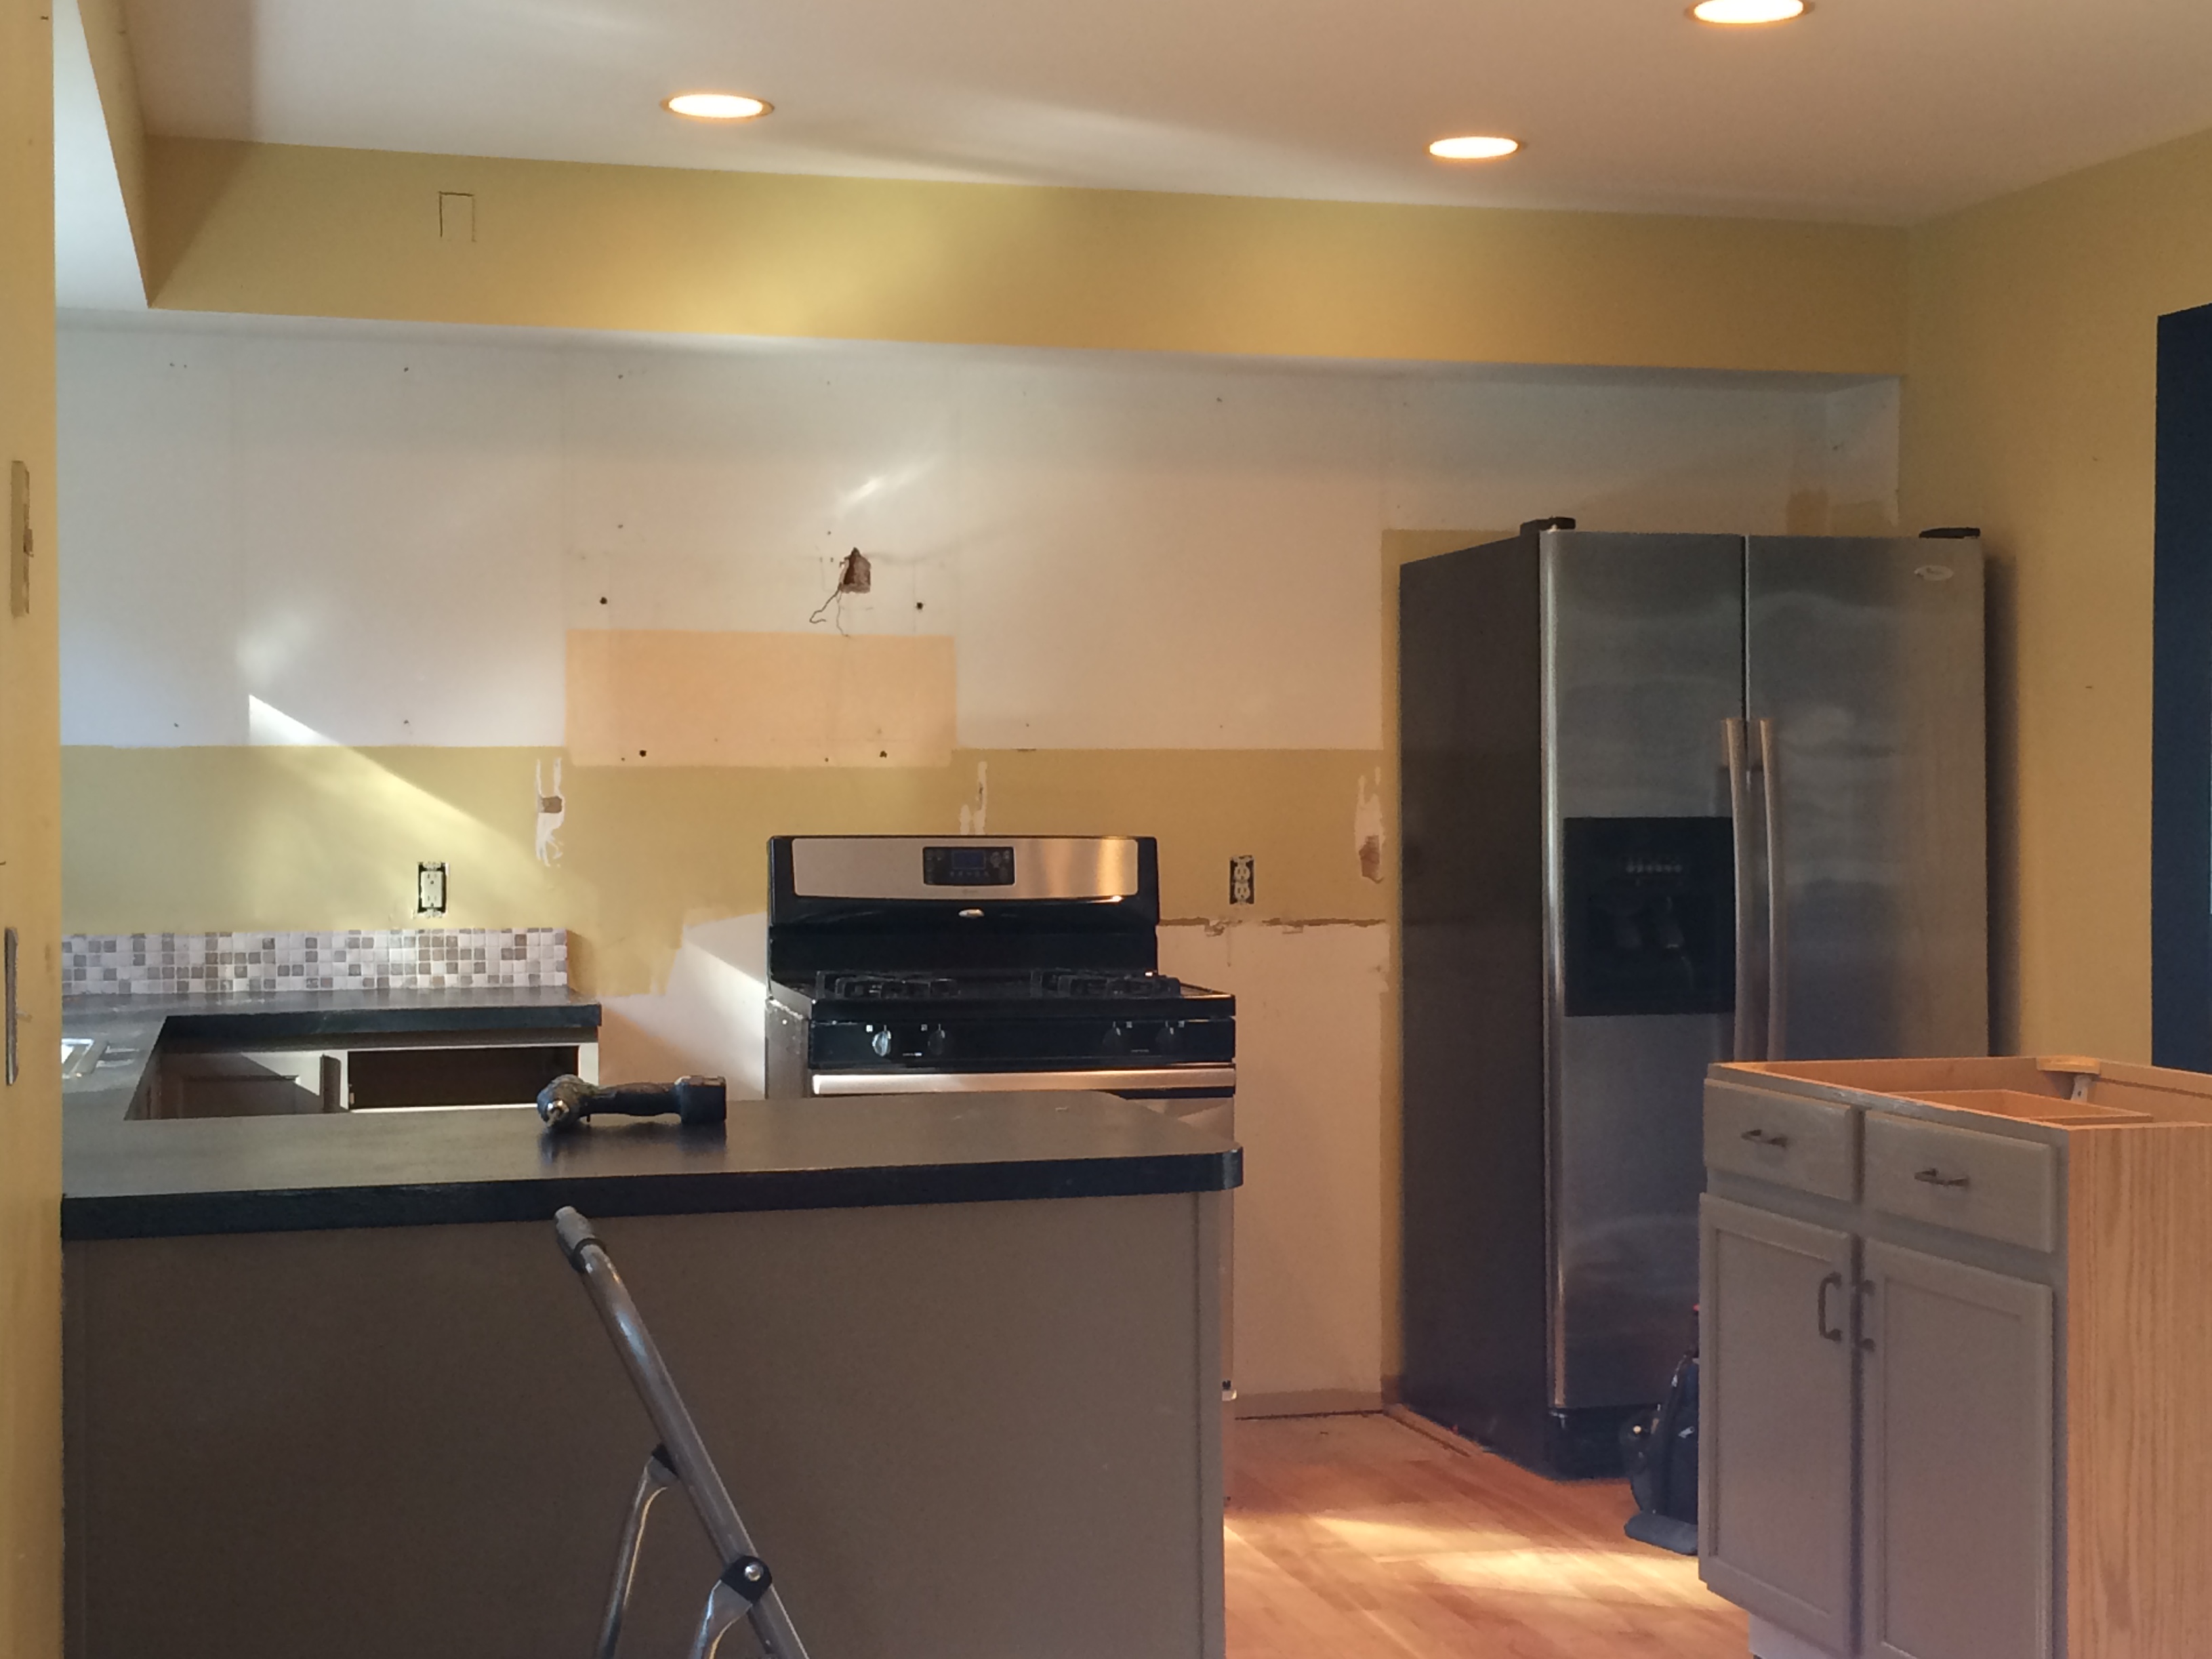
By days end, just the shell of the space was left.
I couldn’t believe how everything was out & already how different the kitchen space felt. And all I kept thinking was, it’s really happening…
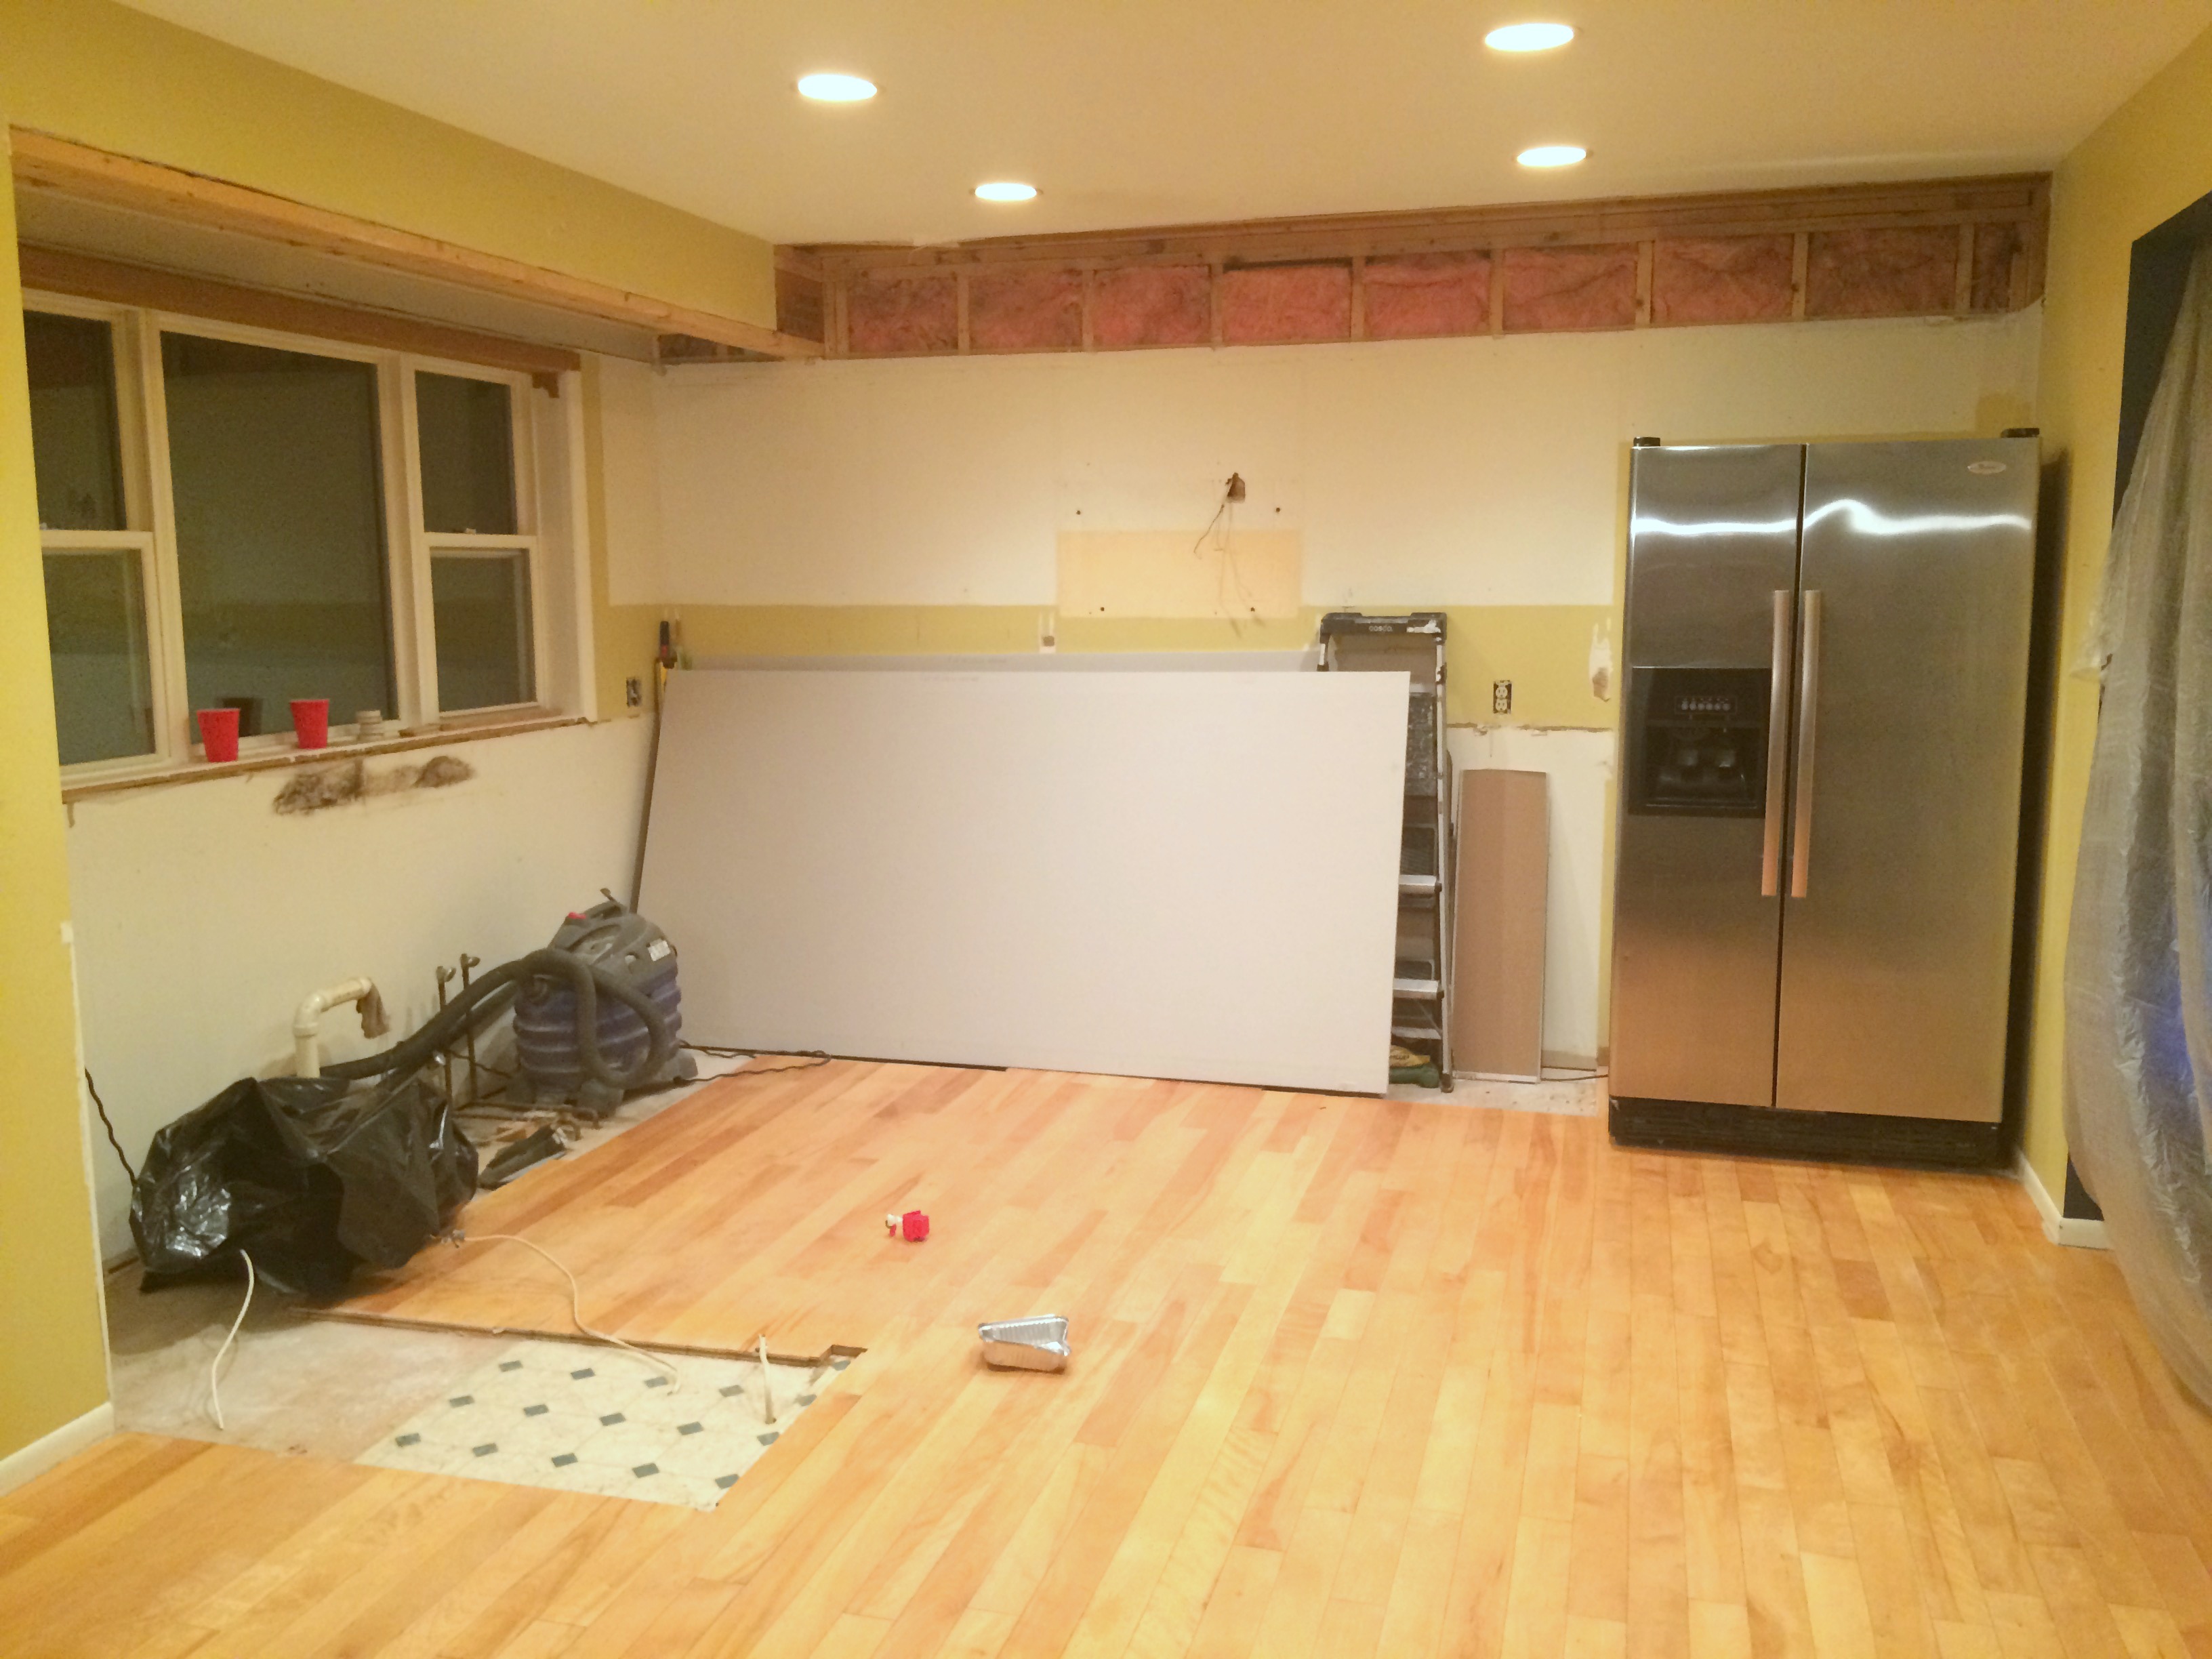
It’s amazing how a room can look + feel so different when everything is removed. Your eye isn’t drawn to what it sees anymore, but instead with a clear palette a world of new thoughts + ideas come flurrying in.
For months (maybe even years in my head), I planned + designed every nook & cranny of the new kitchen, but having it actually go from a dream to reality is mind-boggling.
As my kitchen adventure continues, I plan to share the good, the bad, and all the steps in between with hopes to inspire + educate if you ever decide to renovate the kitchen in your home.
Next up for this kitchen renovation… finishing repairing the walls & then the patching + staining of the hardwood floors. After that, cabinets will be delivered.
Thanks for following along!


If you want to see all the posts documenting the kitchen renovation, here they are from start to finish:
Wonderful White Kitchen Inspiration
Kitchen Remodel: Before + Plan of Action
Demo Day: Steps for Demolishing the Kitchen
Kitchen Progress: Staining Hardwood Floors
The Cabinets Arrive + Get Installed
Natural Quartz Countertops in the Kitchen
10 Countertop Materials to Consider for the Kitchen
Subway Tile Installation + Choosing the RIGHT Subway
Kitchen Backsplash Tile Options + Inspiration
Choosing a Paint Color + Wallpaper for the Kitchen and Dining Room
Kitchen Renovation: The Appliances
Dissecting the Details
Kitchen Renovation: REVEAL + RESOURCES
DISCLAIMER: THIS KITCHEN RENOVATION IS A COLLABORATION WITH LOWE’S. ALL OPINIONS + SELECTIONS ARE MY OWN WITH THE ASSISTANCE OF THE LOWE’S DESIGN TEAM.
Comments are closed.