


KITCHEN: Prime + Paint
Happy 2018! It’s been a few weeks since I shared about the progress of the DIY Kitchen Remodel in the Brick Ranch Fixer Upper. Last I left off, I finished prepping the existing wood stained cabinets and I shared the design vision for the space. Now that the cabinets are prepped, it’s time to get them painted so we can call this kitchen FINISHED!
Before sharing the progress of the cabinets, lets walk down memory lane with a preview of how the kitchen looked before and where it started…
BEFORE

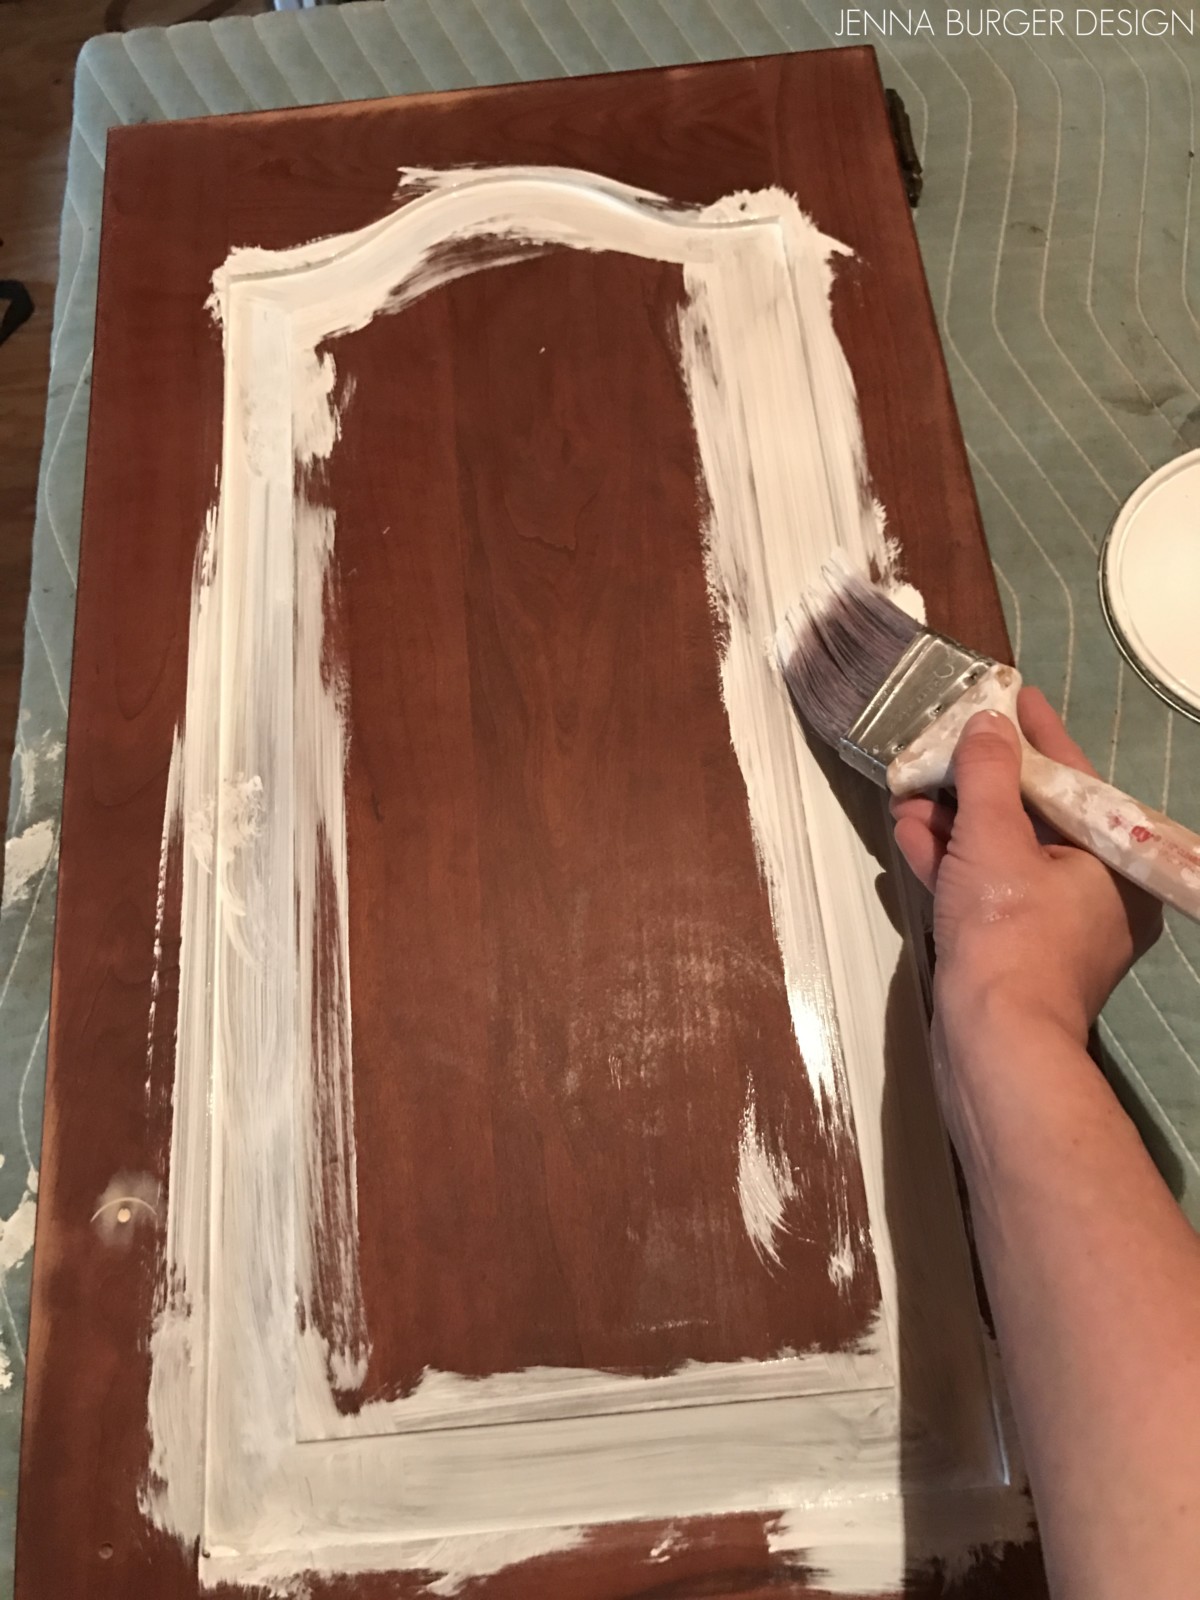
After the cabinets were removed from the face frame and sanded, they were ready for primer. With most furniture projects that I’ve painted, I always start with using a high-quality stainblocking primer and sealer to give a solid base to the paint color. For this project, I used KILZ 2 Latex (so it’s waterbased for easy cleanup) Multi-Surface Stainblocker.

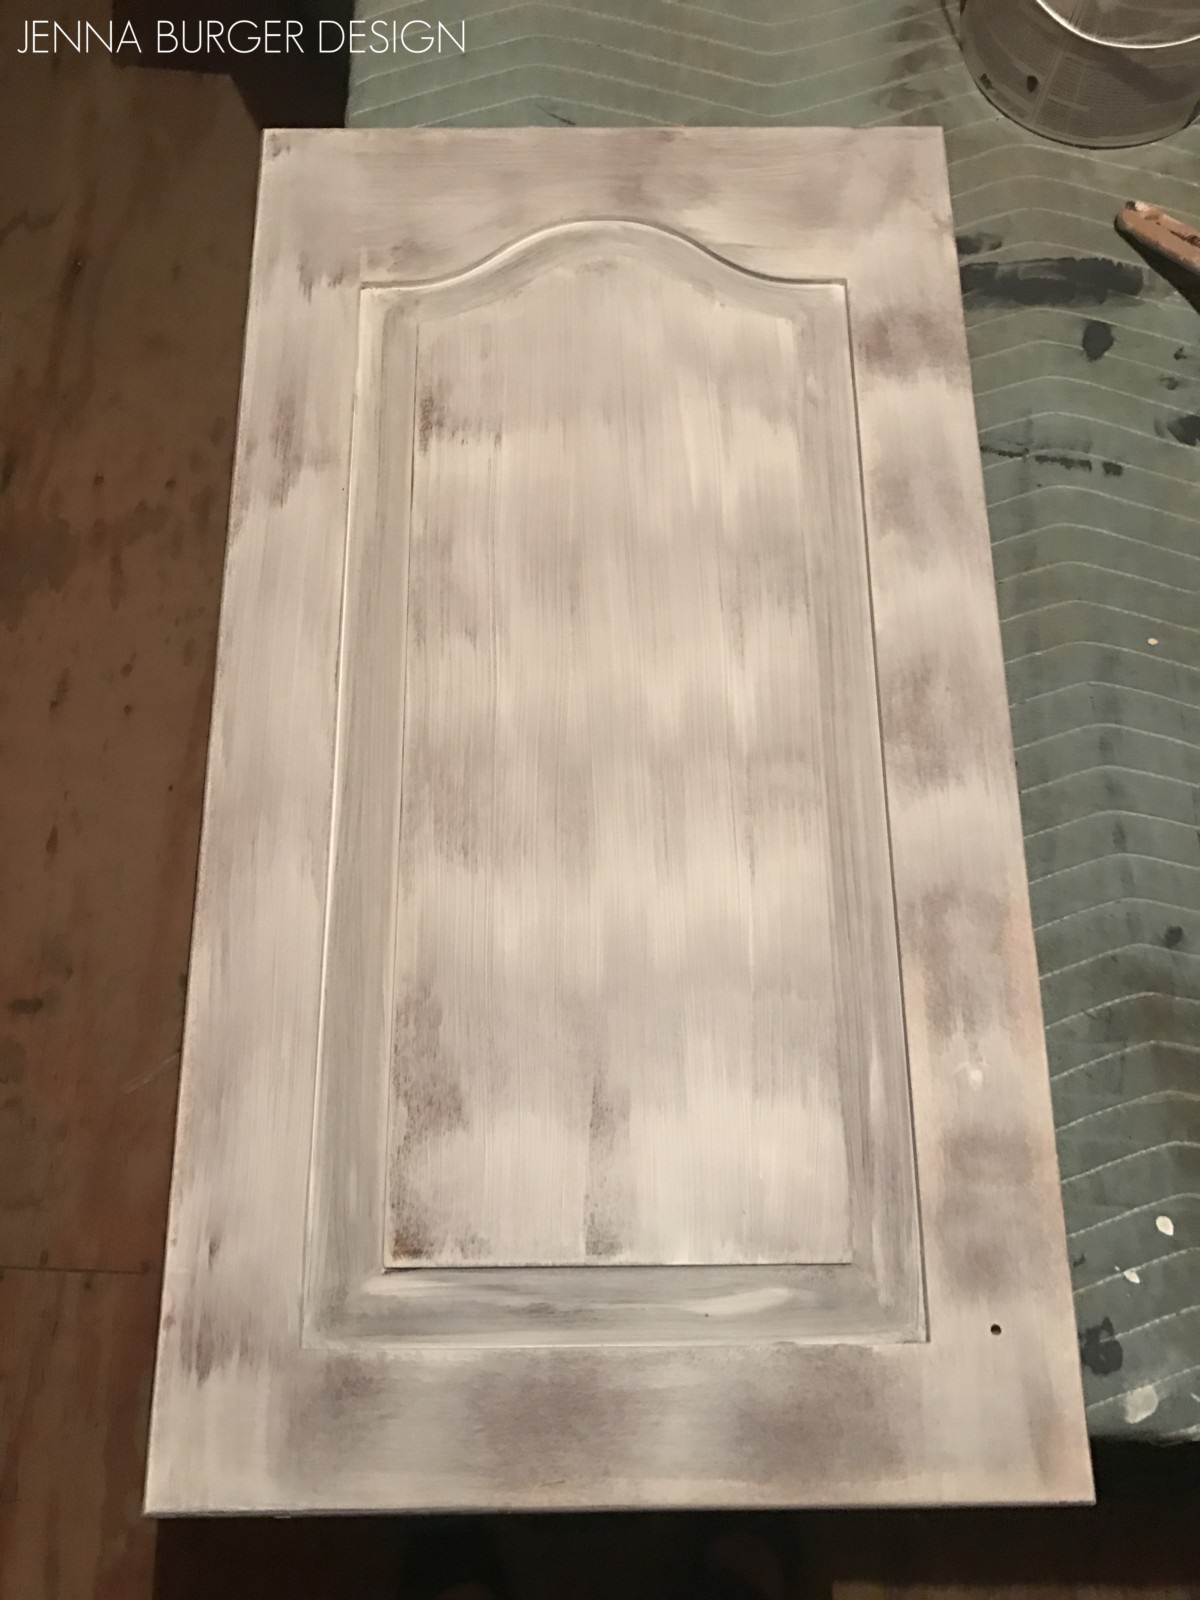
On a clean, flat, protected surface, I started off by using a paint brush to apply the paint in all the grooves and crevices. After smoothing it out, I followed with using a brush on all the flat areas. See the 2 pictures below for more visual detail…
PRIMER PAINT, STEP 1
PRIMER PAINT, STEP 2

Cabinet primer complete. 22 more doors to go…
As I was priming the doors (on late nights + early mornings), I also painted the face frames of the kitchen.
Eek, this is a disastrous picture. Much of our furniture was stored in the kitchen during the renovation, so it was a challenging area to work! You gotta do, what you gotta do, right?!?

Using similar steps as with the doors, I used a small foam roller brush to apply the primer to the face frames of the cabinets. At the edges and in difficult spots, I used an angled brush.

A few hours later, here was the result.

Thankfully, with the primer coat, it does not have to be applied thick and only one coat is needed. As long as the surface it covered, it’s good to move forward with PAINT!
Continuing with the face frames, I applied the semi-gloss paint in the same way… Roller brush for flat surfaces and an angled brush at edges and corners. To get a brushless look, it’s important to have a continuous stroke instead of starting and stopping partially on the surface. Start at one end and continue the brush or roller to the other end.

I decided that two of the cabinets – the space above the hood and above the refrigerator – would be open cabinets that I wouldn’t install the doors back on to. I chose to make these cabinets open display with cookbooks and baskets to bring some color and depth to the space.
This is the open cabinet that I painted inside. For the cabinets with doors, I did not paint the interiors, I left them the clear maple.

Once the face frames were complete, this was the result…
It’s starting to look like something – I think. I hope.


Check out this quick 13 seconds video I created of me painting one of the cabinet door fronts. This will give you a thorough look into how and when I use the brush and the roller on the face of the door.
And this is the completed cabinet. Again, 22 more to go…

Aside from the cabinet doors and face frames, the soffit above the cabinets also needed major attention. I removed the wallpaper border above the cabinets and found that the soffit was made using wood instead of sheetrock, which is typical. Repair to the damaged areas wouldn’t be as easy as just adding spackle. Ugh.
After sanding and trying to create a smooth surface (as much as possible), I first primed the soffit bulkhead.

Then I painted the soffit using a semi-gloss white. In hindsight, I should have used a flat sheen since the semi-gloss finish shows every imperfection, but it’s fine and I’ve learned to live with it.

I also chose to reuse the exposed door hinges instead of buying new. Using spray paint in a brushed chrome finish, I layed out the hinges on a protective surface (outside before the snow) and gave them a few coats. Voila, new hinges and only a few dollars spent!

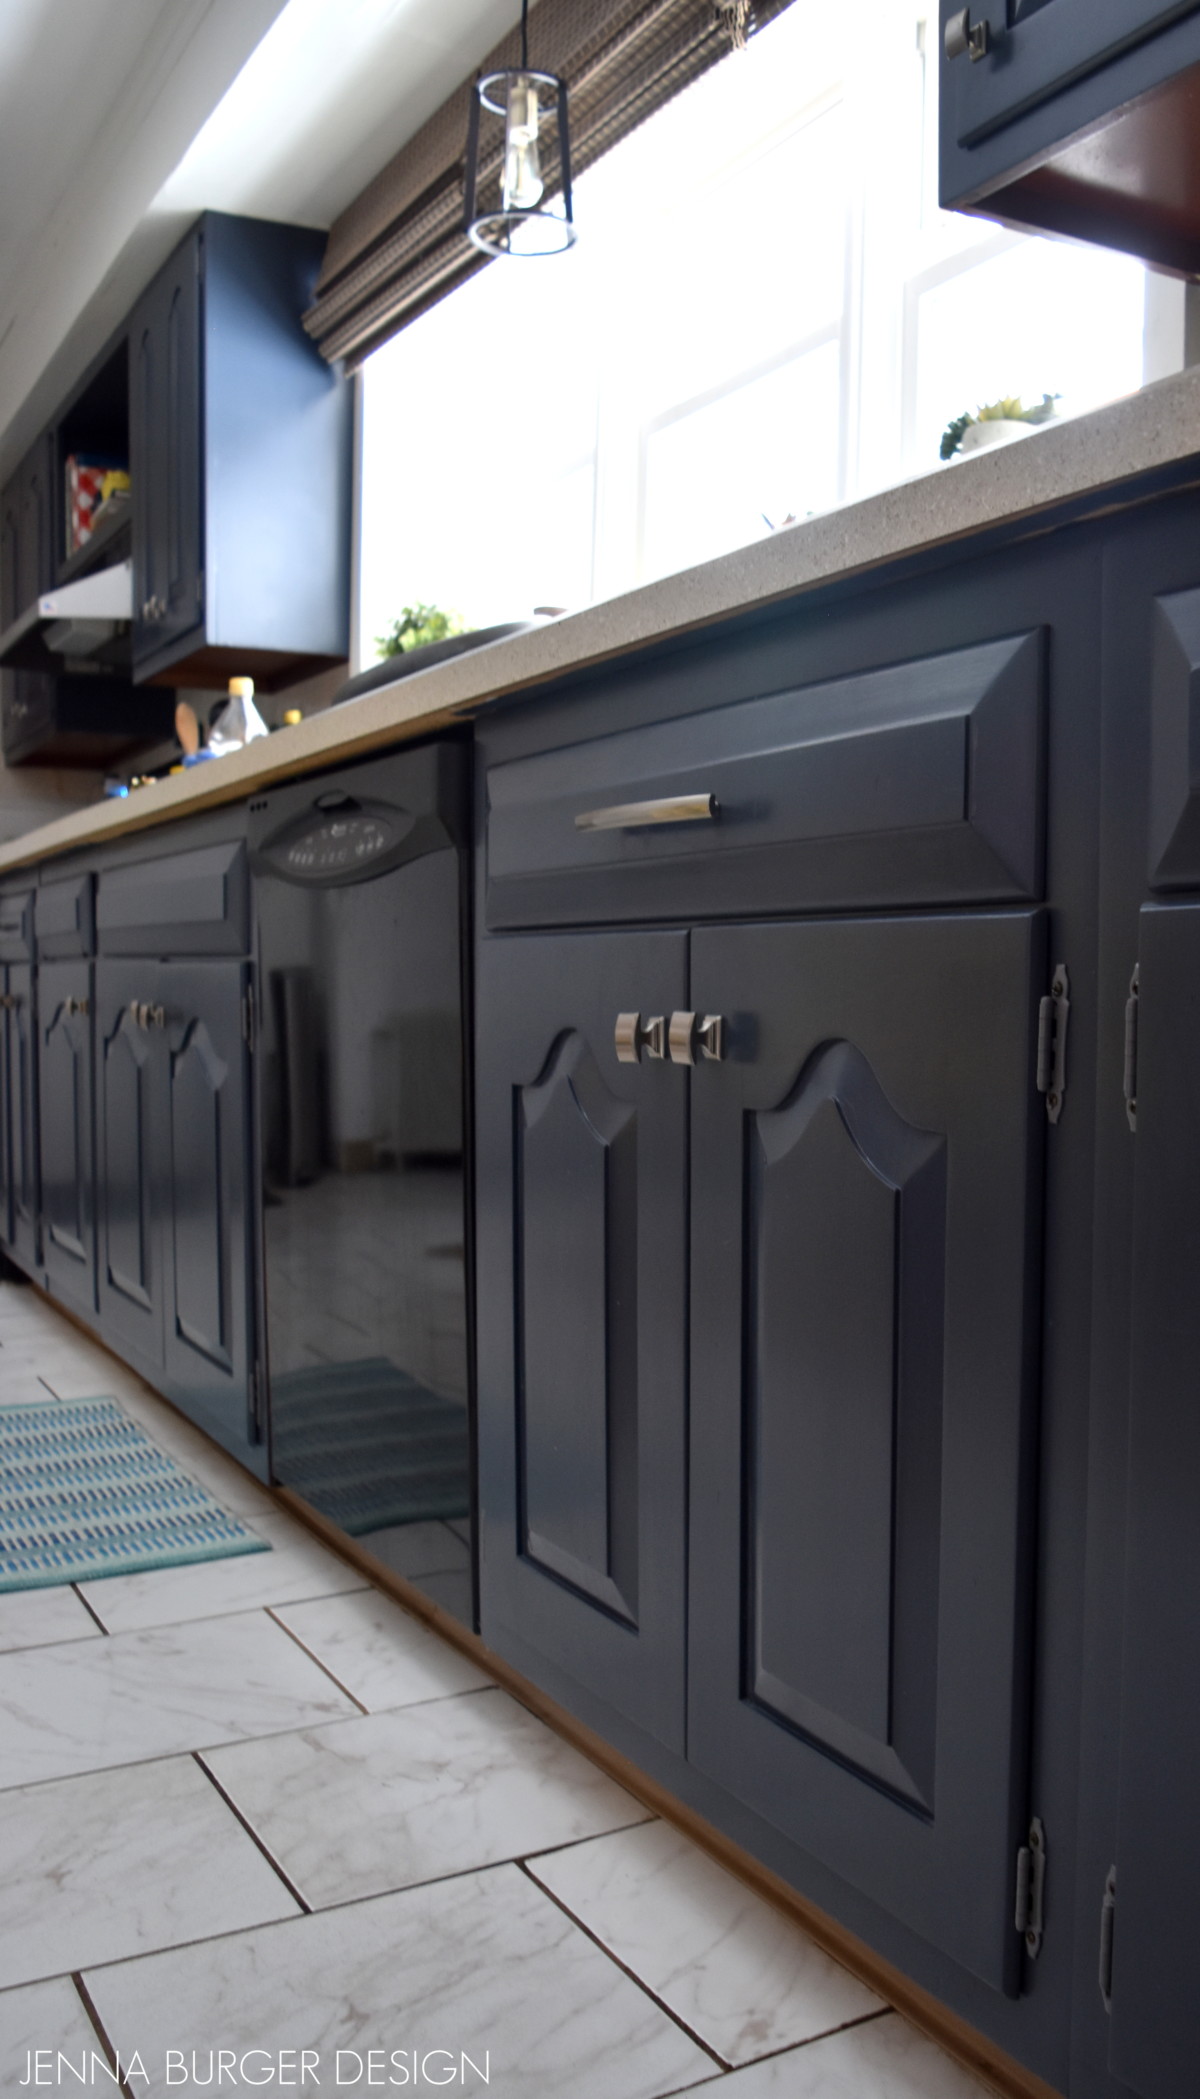
Once the face frames and doors were complete, they were ready to go back into place. In many of the images above, the paint color looked so dark, but in natural light the deep blue hue can really be appreciated.
The paint color of the cabinets is: Valspar Mystified 4011-8

After many hours of love + attention, the cabinets were finished and ready to be hung with new hardware and repurposed hinges.
This is the result…


That’s a wrap for now… I have a few more details for the DIY Kitchen Remodel coming up. Stay tuned for the reveal of the overall space!
DISCLAIMER: THIS KITCHEN REMODEL IS A COLLABORATION WITH LOWE’S. ALL OPINIONS + SELECTIONS ARE MY OWN.
Comments are closed.