
DIY: Painted Brick Fireplace

Do It Yourself: Painting a Brick Fireplace; Details on www.JennaBurger.com on how to paint a brick fireplace black!

When we moved into our brick ranch fixer house a little over a year ago, we originally planned on painting the exterior brick on the house. In the end because of the era and placement of the house, we decided to leave it and add some other elements to break up the monotony of brick.

So what does that have to do with the fireplace??? Good question! Even though we were definite on keeping the exterior brick natural, I had an equally definitely feeling that the brick fireplace inside had to be painted!

Do It Yourself: Painting a Brick Fireplace; Details on www.JennaBurger.com on how to paint a brick fireplace black!

So what color did I choose? BLACK! I love a good focal wall that introduces black. I feel that with lighter elements in the space, black (or a darker hue, in general) gives such amazing contrast.

I’ll admit, even though the designer-side of me know black was best, I hesitated. And then one day, I just went for it!

I’ve heard certain types of paint are best for brick, but I had a gallon of low lustre semi-gloss black paint from another project and it worked great (and is still holding up perfect 4 months later).

With a good-quality angled brush, I put on some good tunes and simply, painted the brick. Here are pictures during the transformation…

Do It Yourself: Painting a Brick Fireplace; Details on www.JennaBurger.com on how to paint a brick fireplace black!

Two full coats of paint + a third coat for a few spots that needed additional coverage, it was complete.

Do It Yourself: Painting a Brick Fireplace; Details on www.JennaBurger.com on how to paint a brick fireplace black!

Thankfully, I love the result. The fireplace is not only a striking focal point now, but the natural brick was too busy + distracting (plus dirty). With the brick being one color now, it really gives the eye a calming place and provides a beautiful backdrop for layering.

Check out the before & after again…

And can spot another difference between the before and after?!? I’ll give you a hint… look at the hearth.

DIY Ideas for Book Organization

Happy Monday + Happy Spring!

Even though it doesn’t feel like Spring at the moment with a 30 degree chill, I am so thankful we didn’t wake to snow this mornin’ like those in NYC and Boston.  By the weeks end, I hear temps will be back in to the 50s – 60s. Phew.  Snow in Spring… what?

Anyway, I hope you had a fabulous weekend.  We did some DIYing around the homestead and ran into a bajillion (yes that’s a real word in my book) issues, but we kept with it and the result is pretty cool, I have to say.  More on that coming soon. In the meantime, I have a busy week ahead but wanted to share that I have a new post up on  my Better Home and Gardens page!

For all you book worms, I am sharing 5 Clever DIY ideas for organizing books

Book-obsessed? Love being surrounded by the classics? Ditch the idea that books are only for the bookcase in the living room. Organizing and displaying books can be fun and functional with unique do-it-yourself creations to hold beloved tall tales and display the kids’ favorites.

Click to read the full article on >>>DIY Book Organization

5 DIY Ideas for Book Organization! Ditch the idea that books are only for the bookcase. Organizing + displaying books can be fun and functional with unique do-it-yourself creations to hold beloved tall tales and display the kids' favorites.

Check out my bio page + all my articles on Better Homes and Gardens

More content coming soon to be featured on BHG.com!

Details + Hardware + Styling {China Cabinet Makeover}

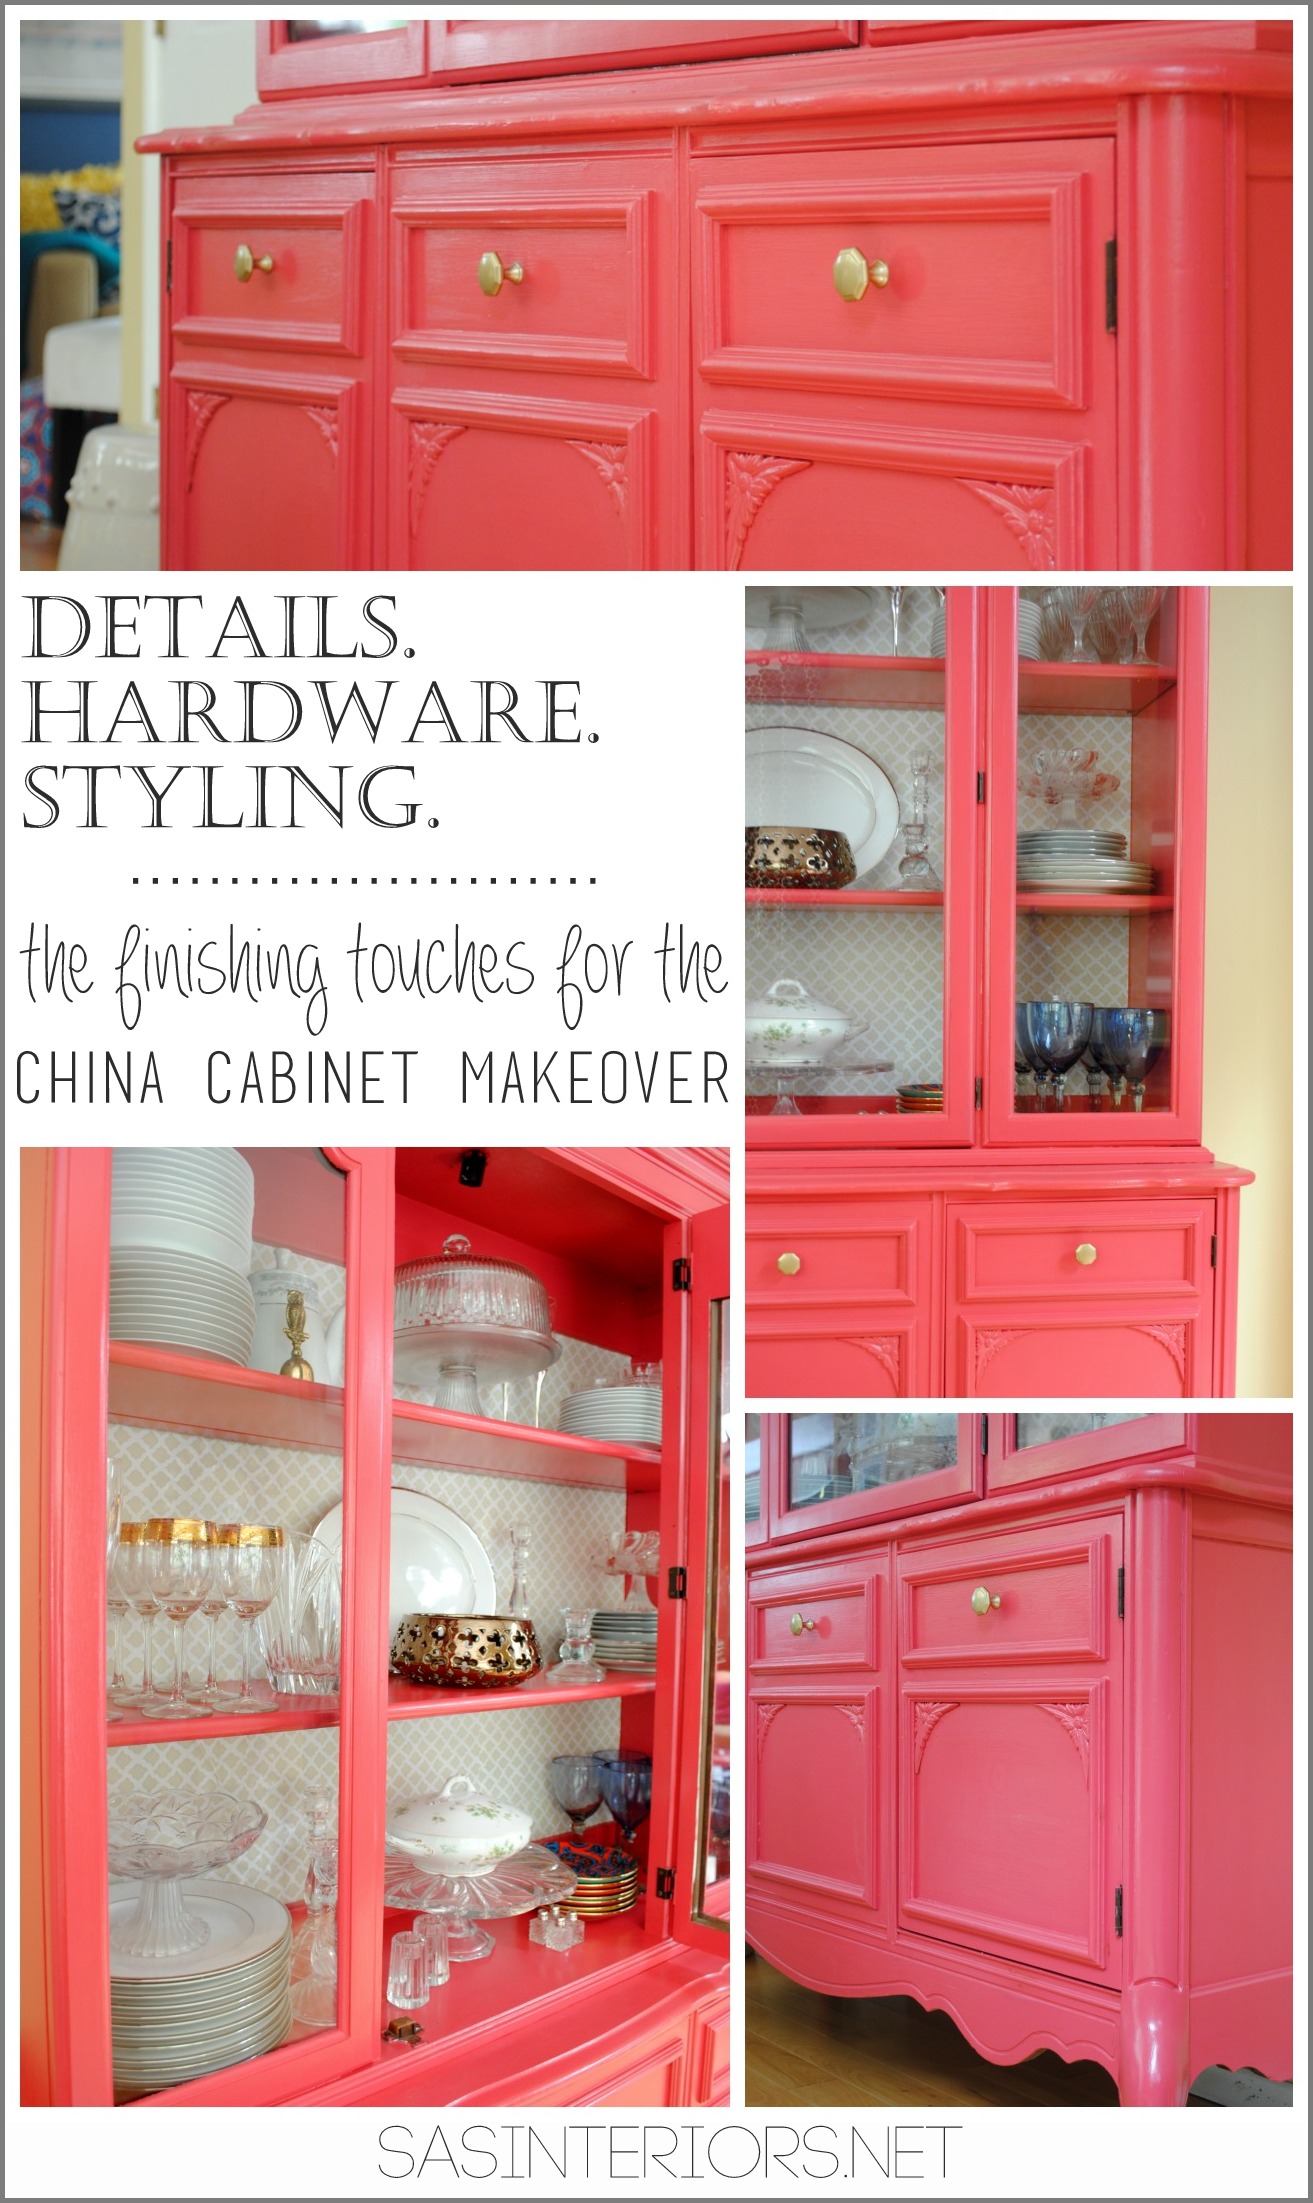
Yes, the paint color is unexpected, but adding a few other unique details to the china cabinet makeover has really made it a one-of-a-kind, perfect piece (in my eyes).

Last week I finished the most tedious part of the makeover which was painting the cabinet.  It took a few days and lots of patience, but the effort was absolutely worth the result in my book!  Once the cabinet was complete and dry, I started styling the interior.  After living with it for a few days (and sharing a peak on IG), I knew it needed something.  I loved the overall dramatic color, but I did want to pare it down a bit and decided to add a special something to the back + this bad boy needed some hardware!  Take a look…

Adding unique, one-of-a-kind details to the finish the china cabinet makeover!

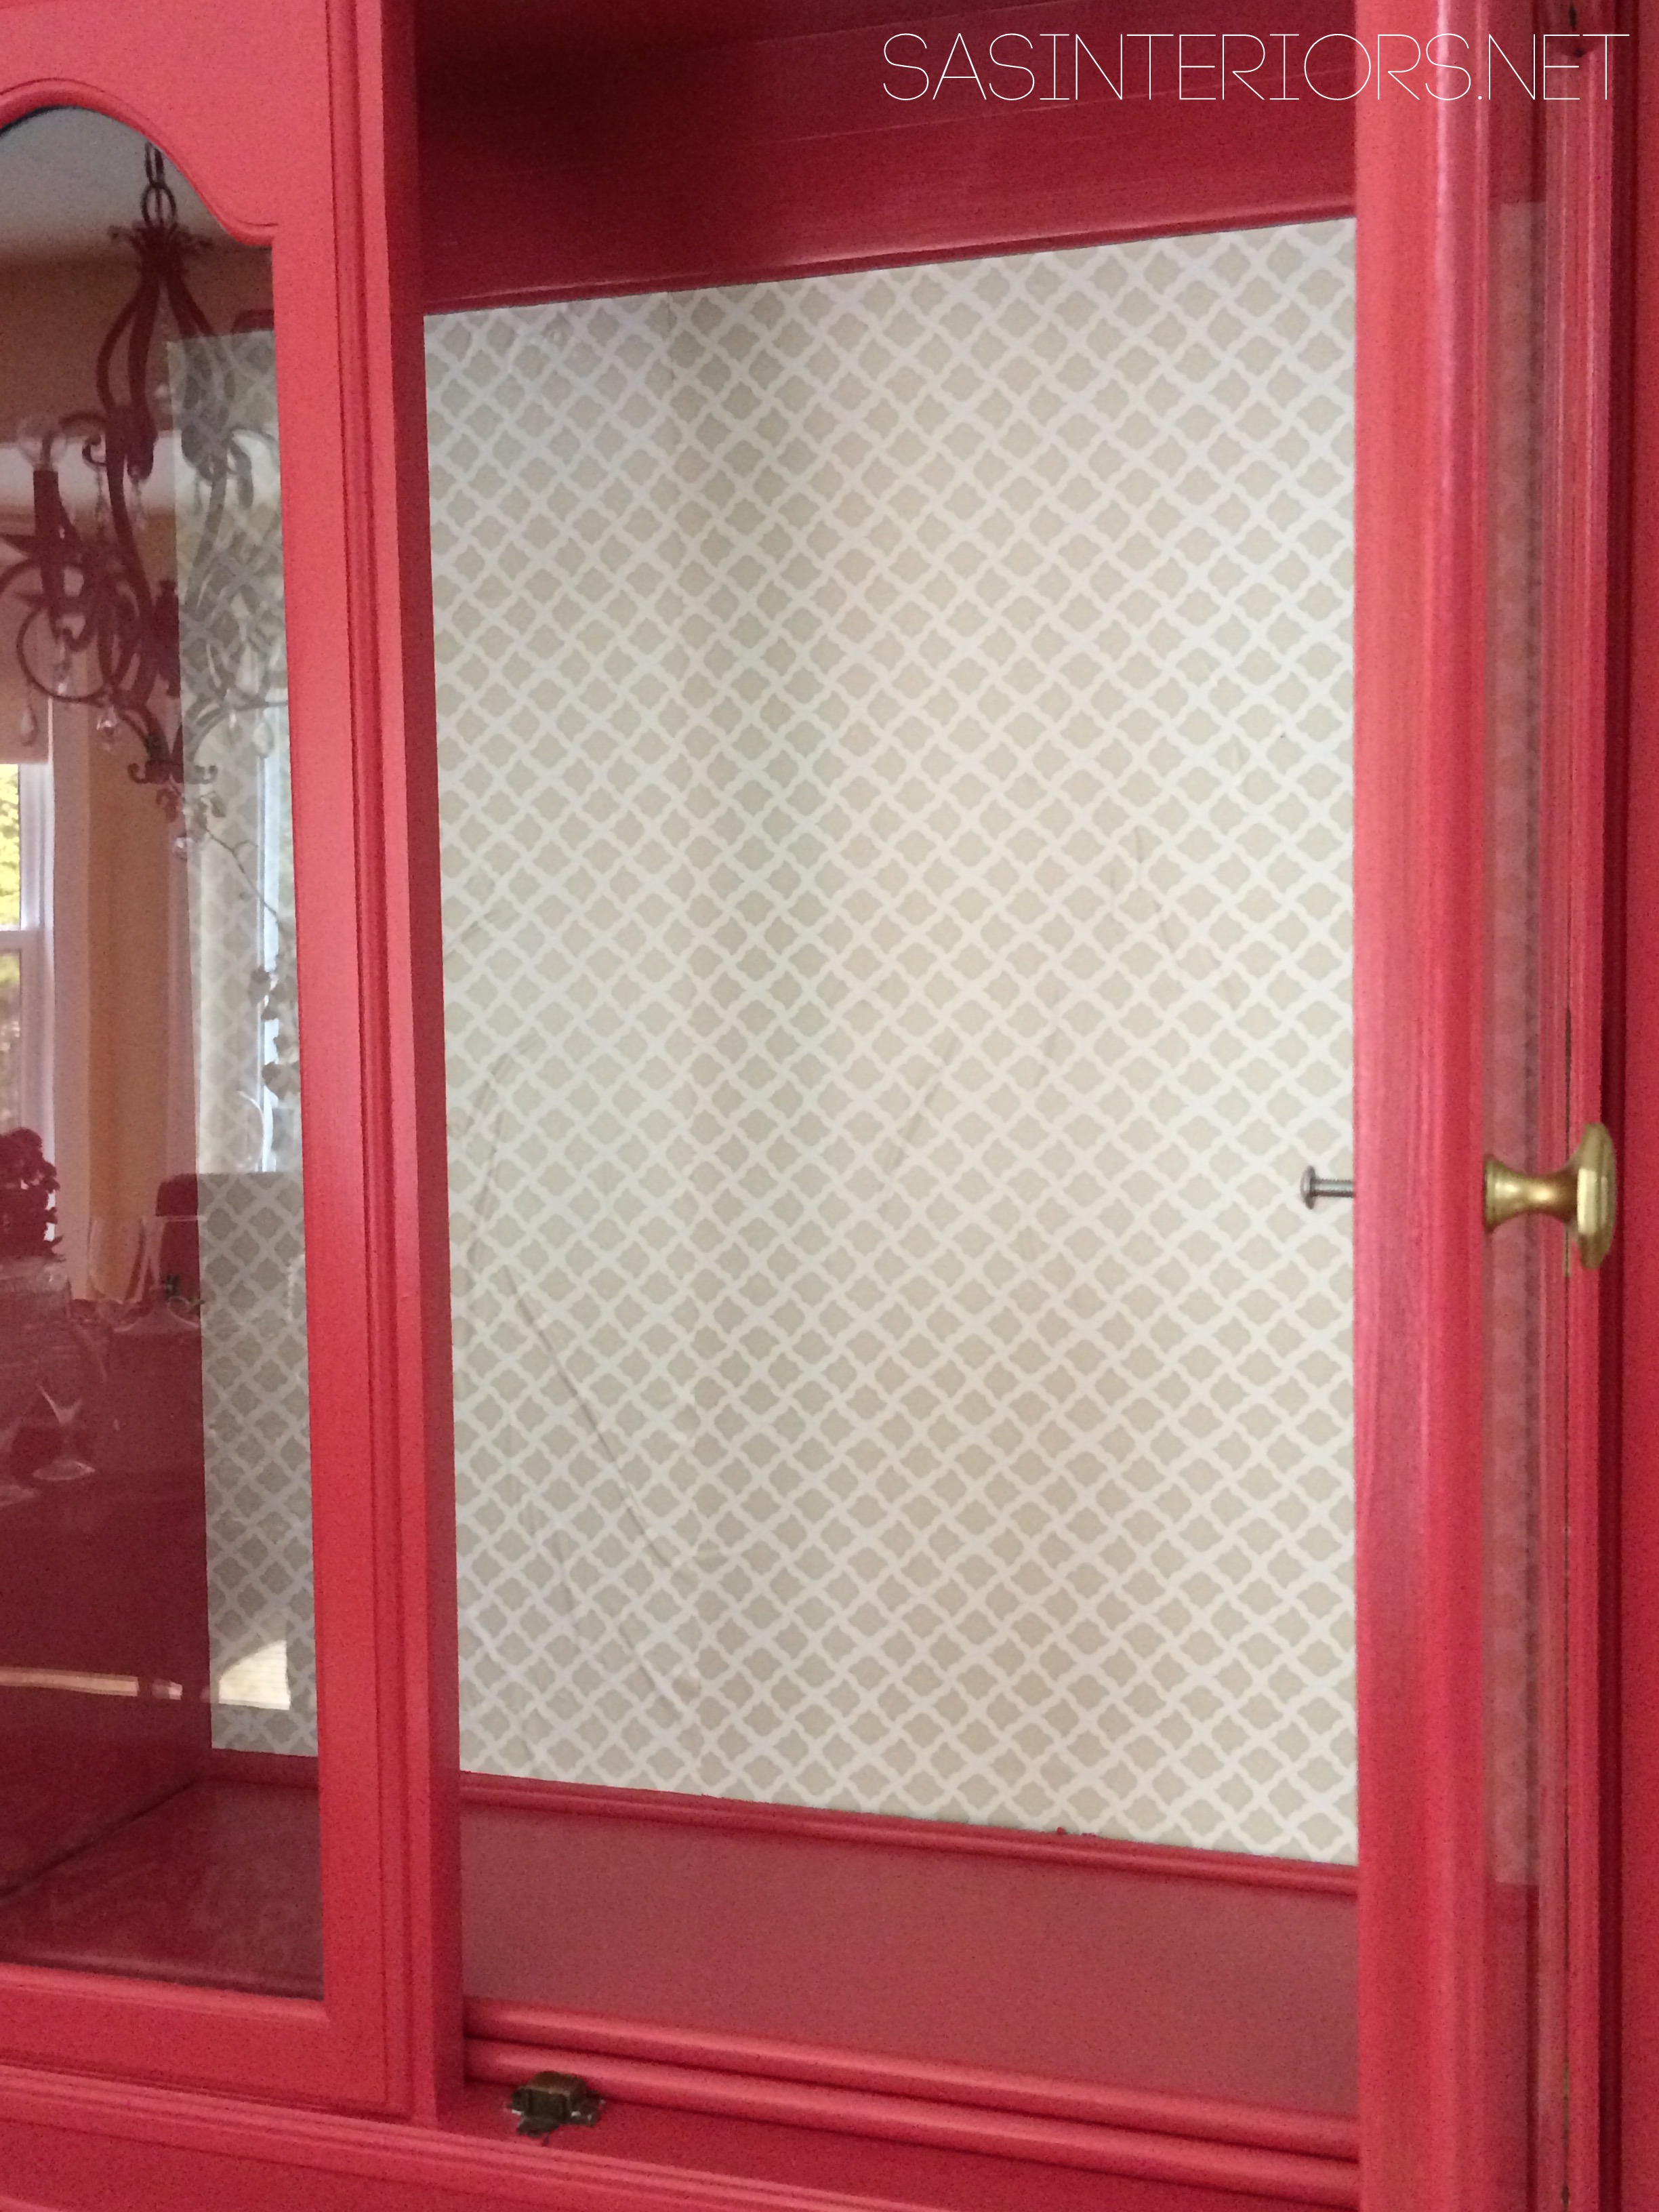
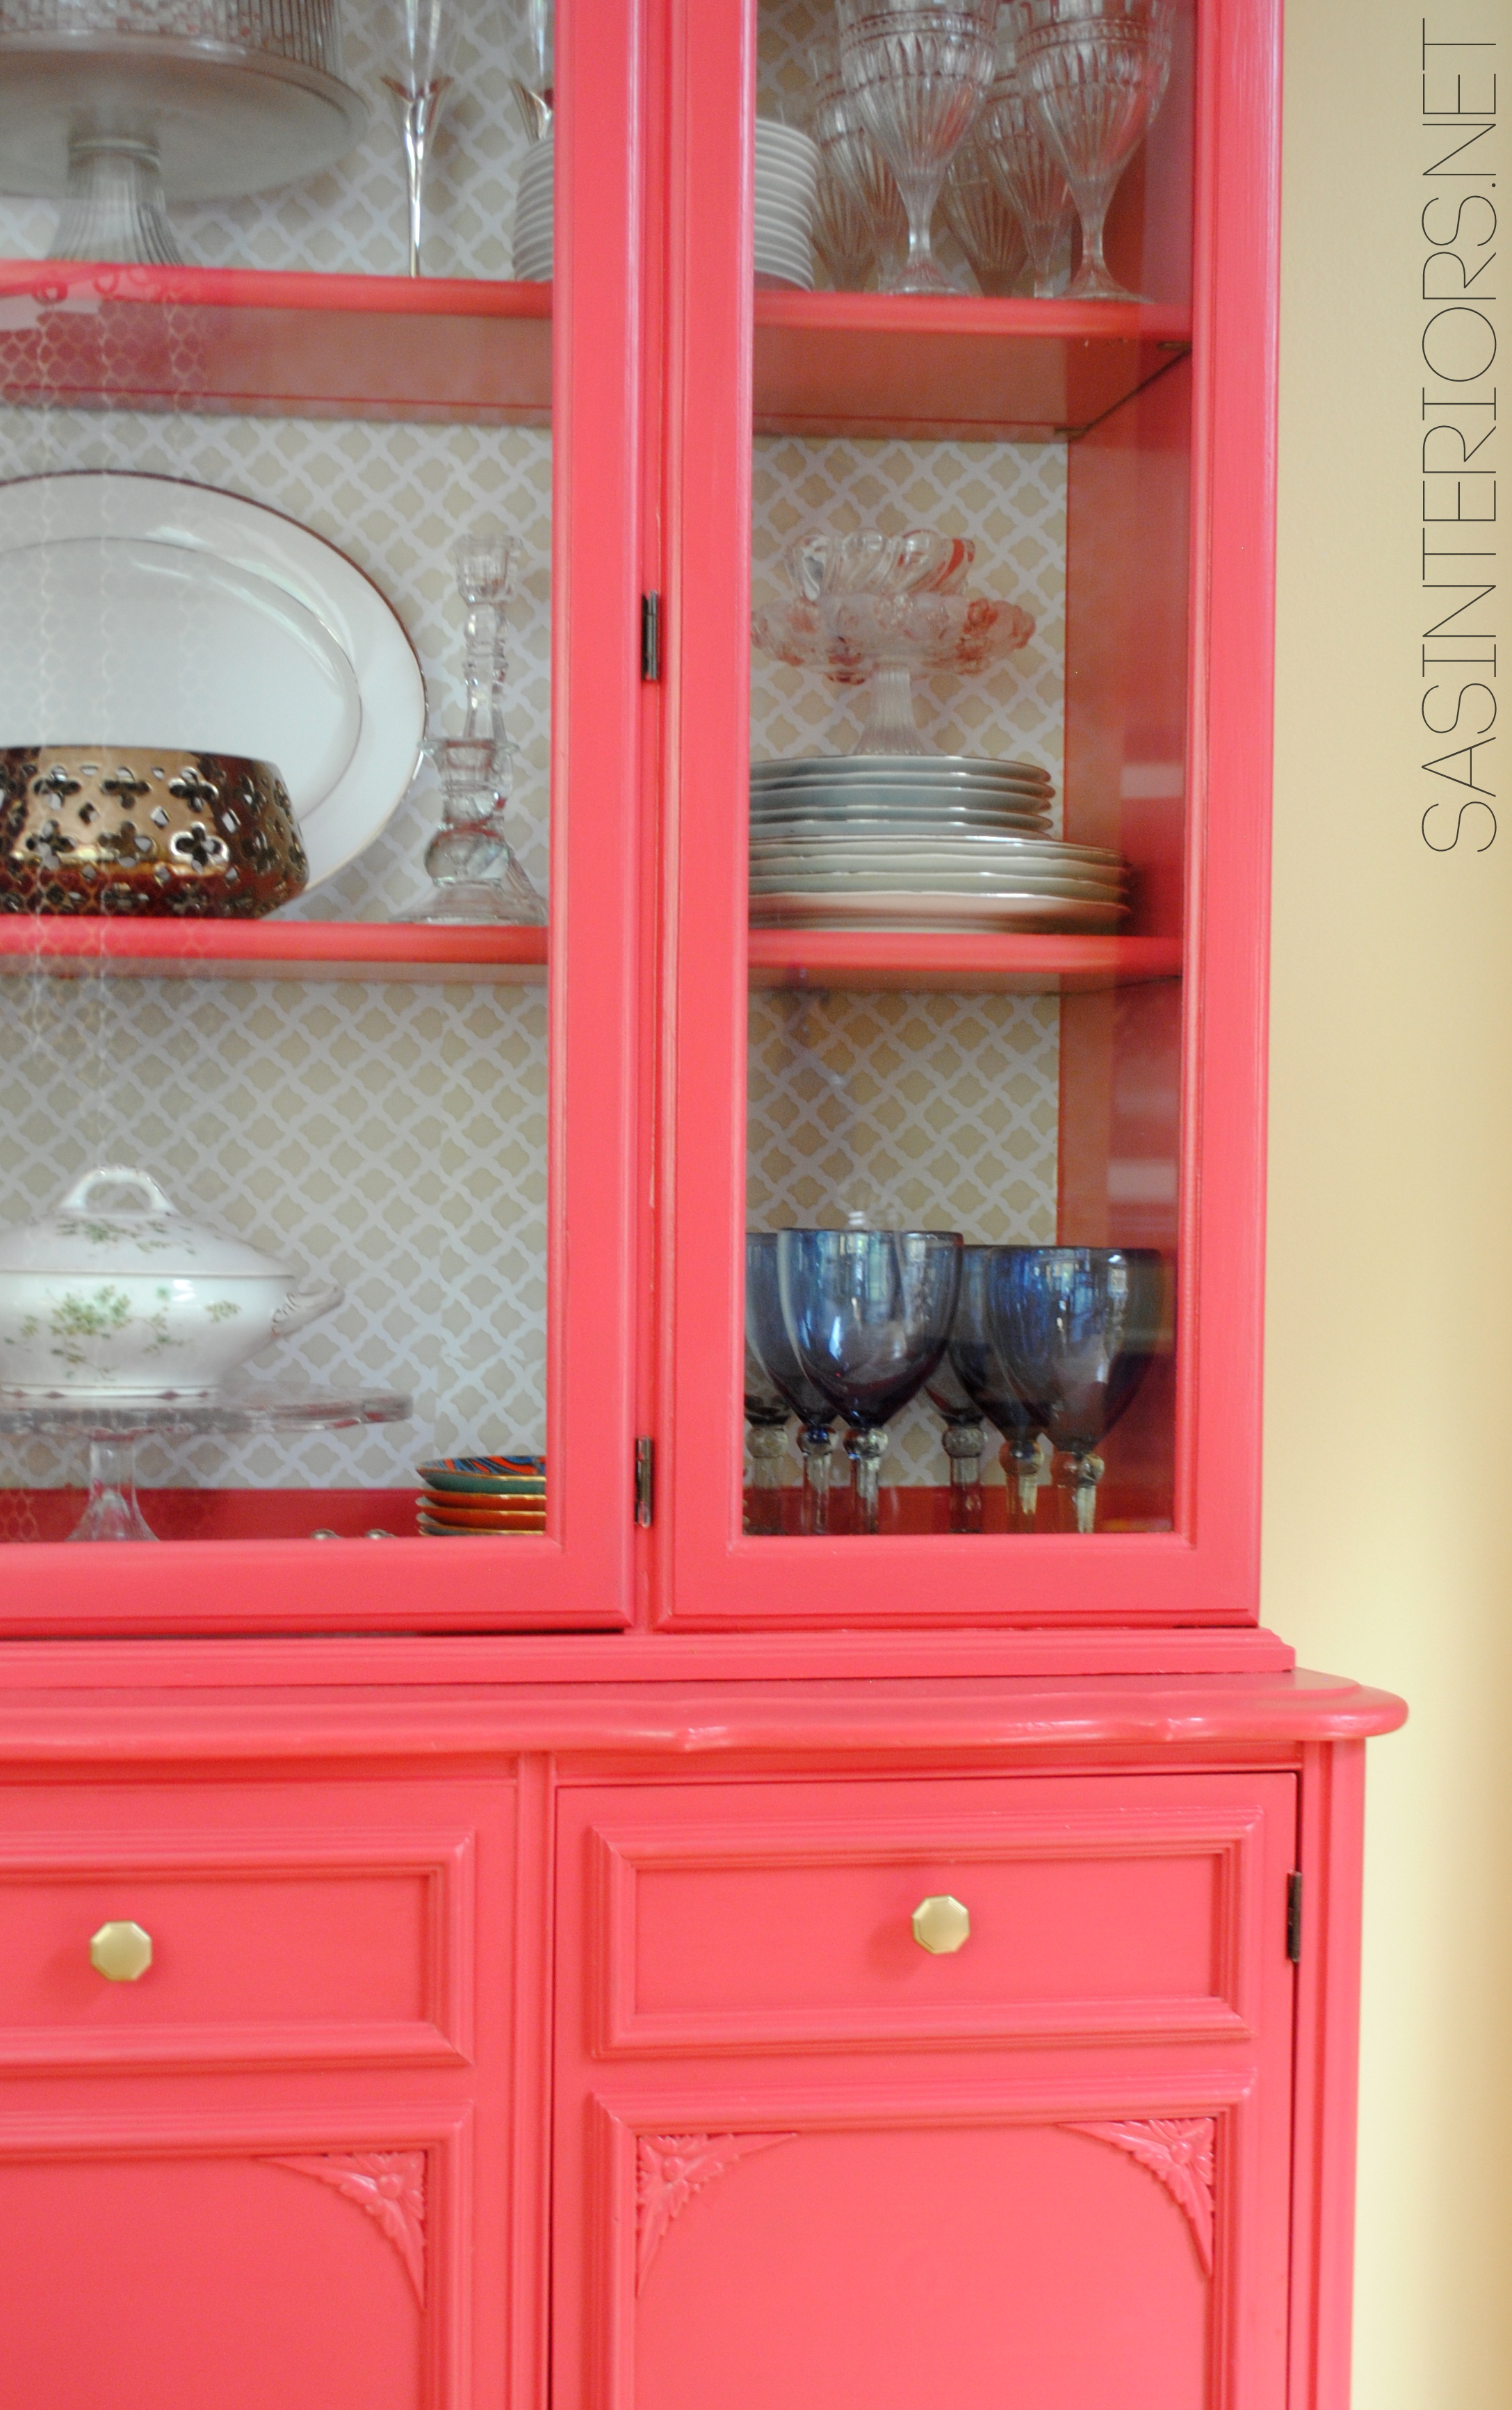
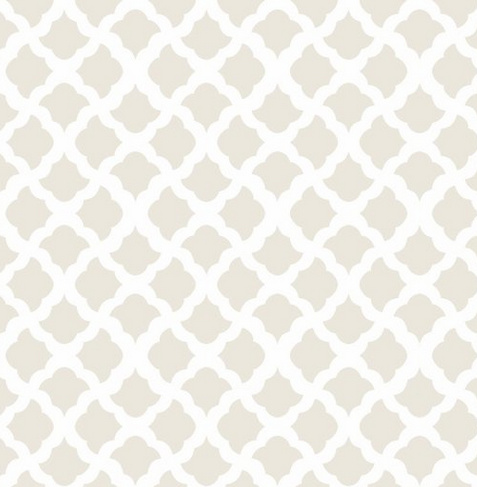
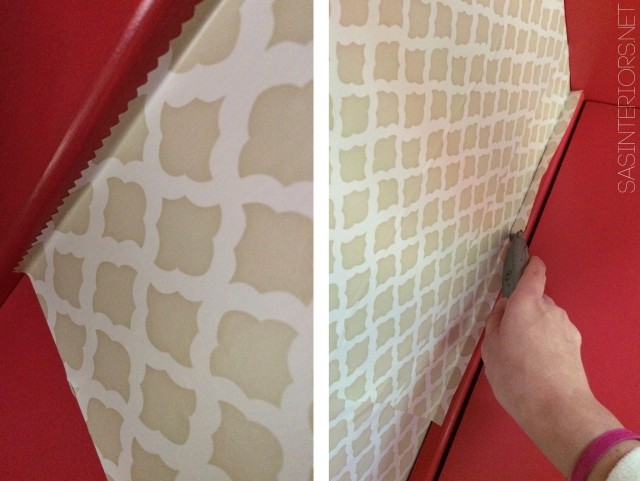
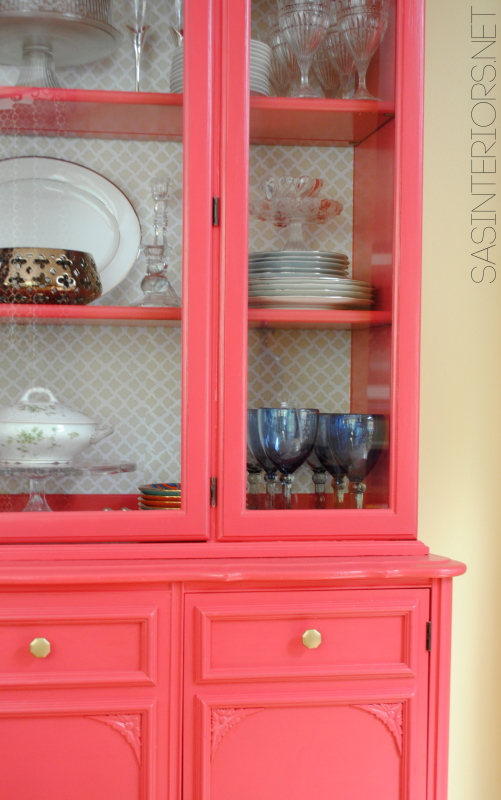
Most of my china dishes and platters are plain white (with simple detailing on the edges) so I thought sitting against a dark background they’d look great.  Unfortunately though, the interior seemed kind of cavernous, so bringing in something lighter for the back of the cabinet made sense. I found this pretty patterned contact paper and thought it would be the ideal addition to lighten and brighten the cabinet.

Con-Tact Brand Creative Covering Self-Adhesive Shelf Liner, Talisman Pale Grey

Details.

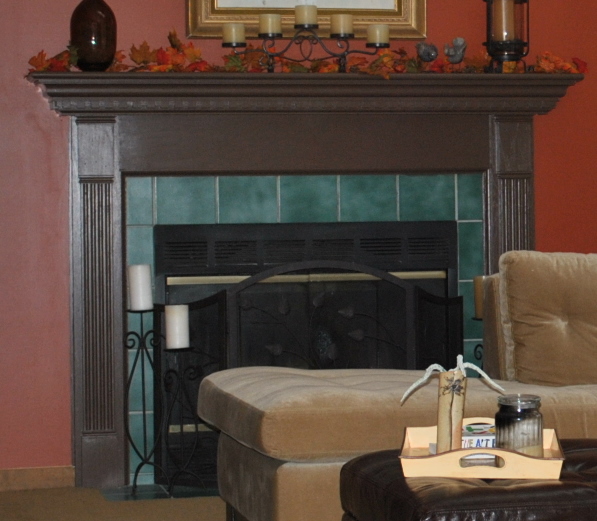
This is a similar project/process to when I added the geometric contact paper to my media cabinet

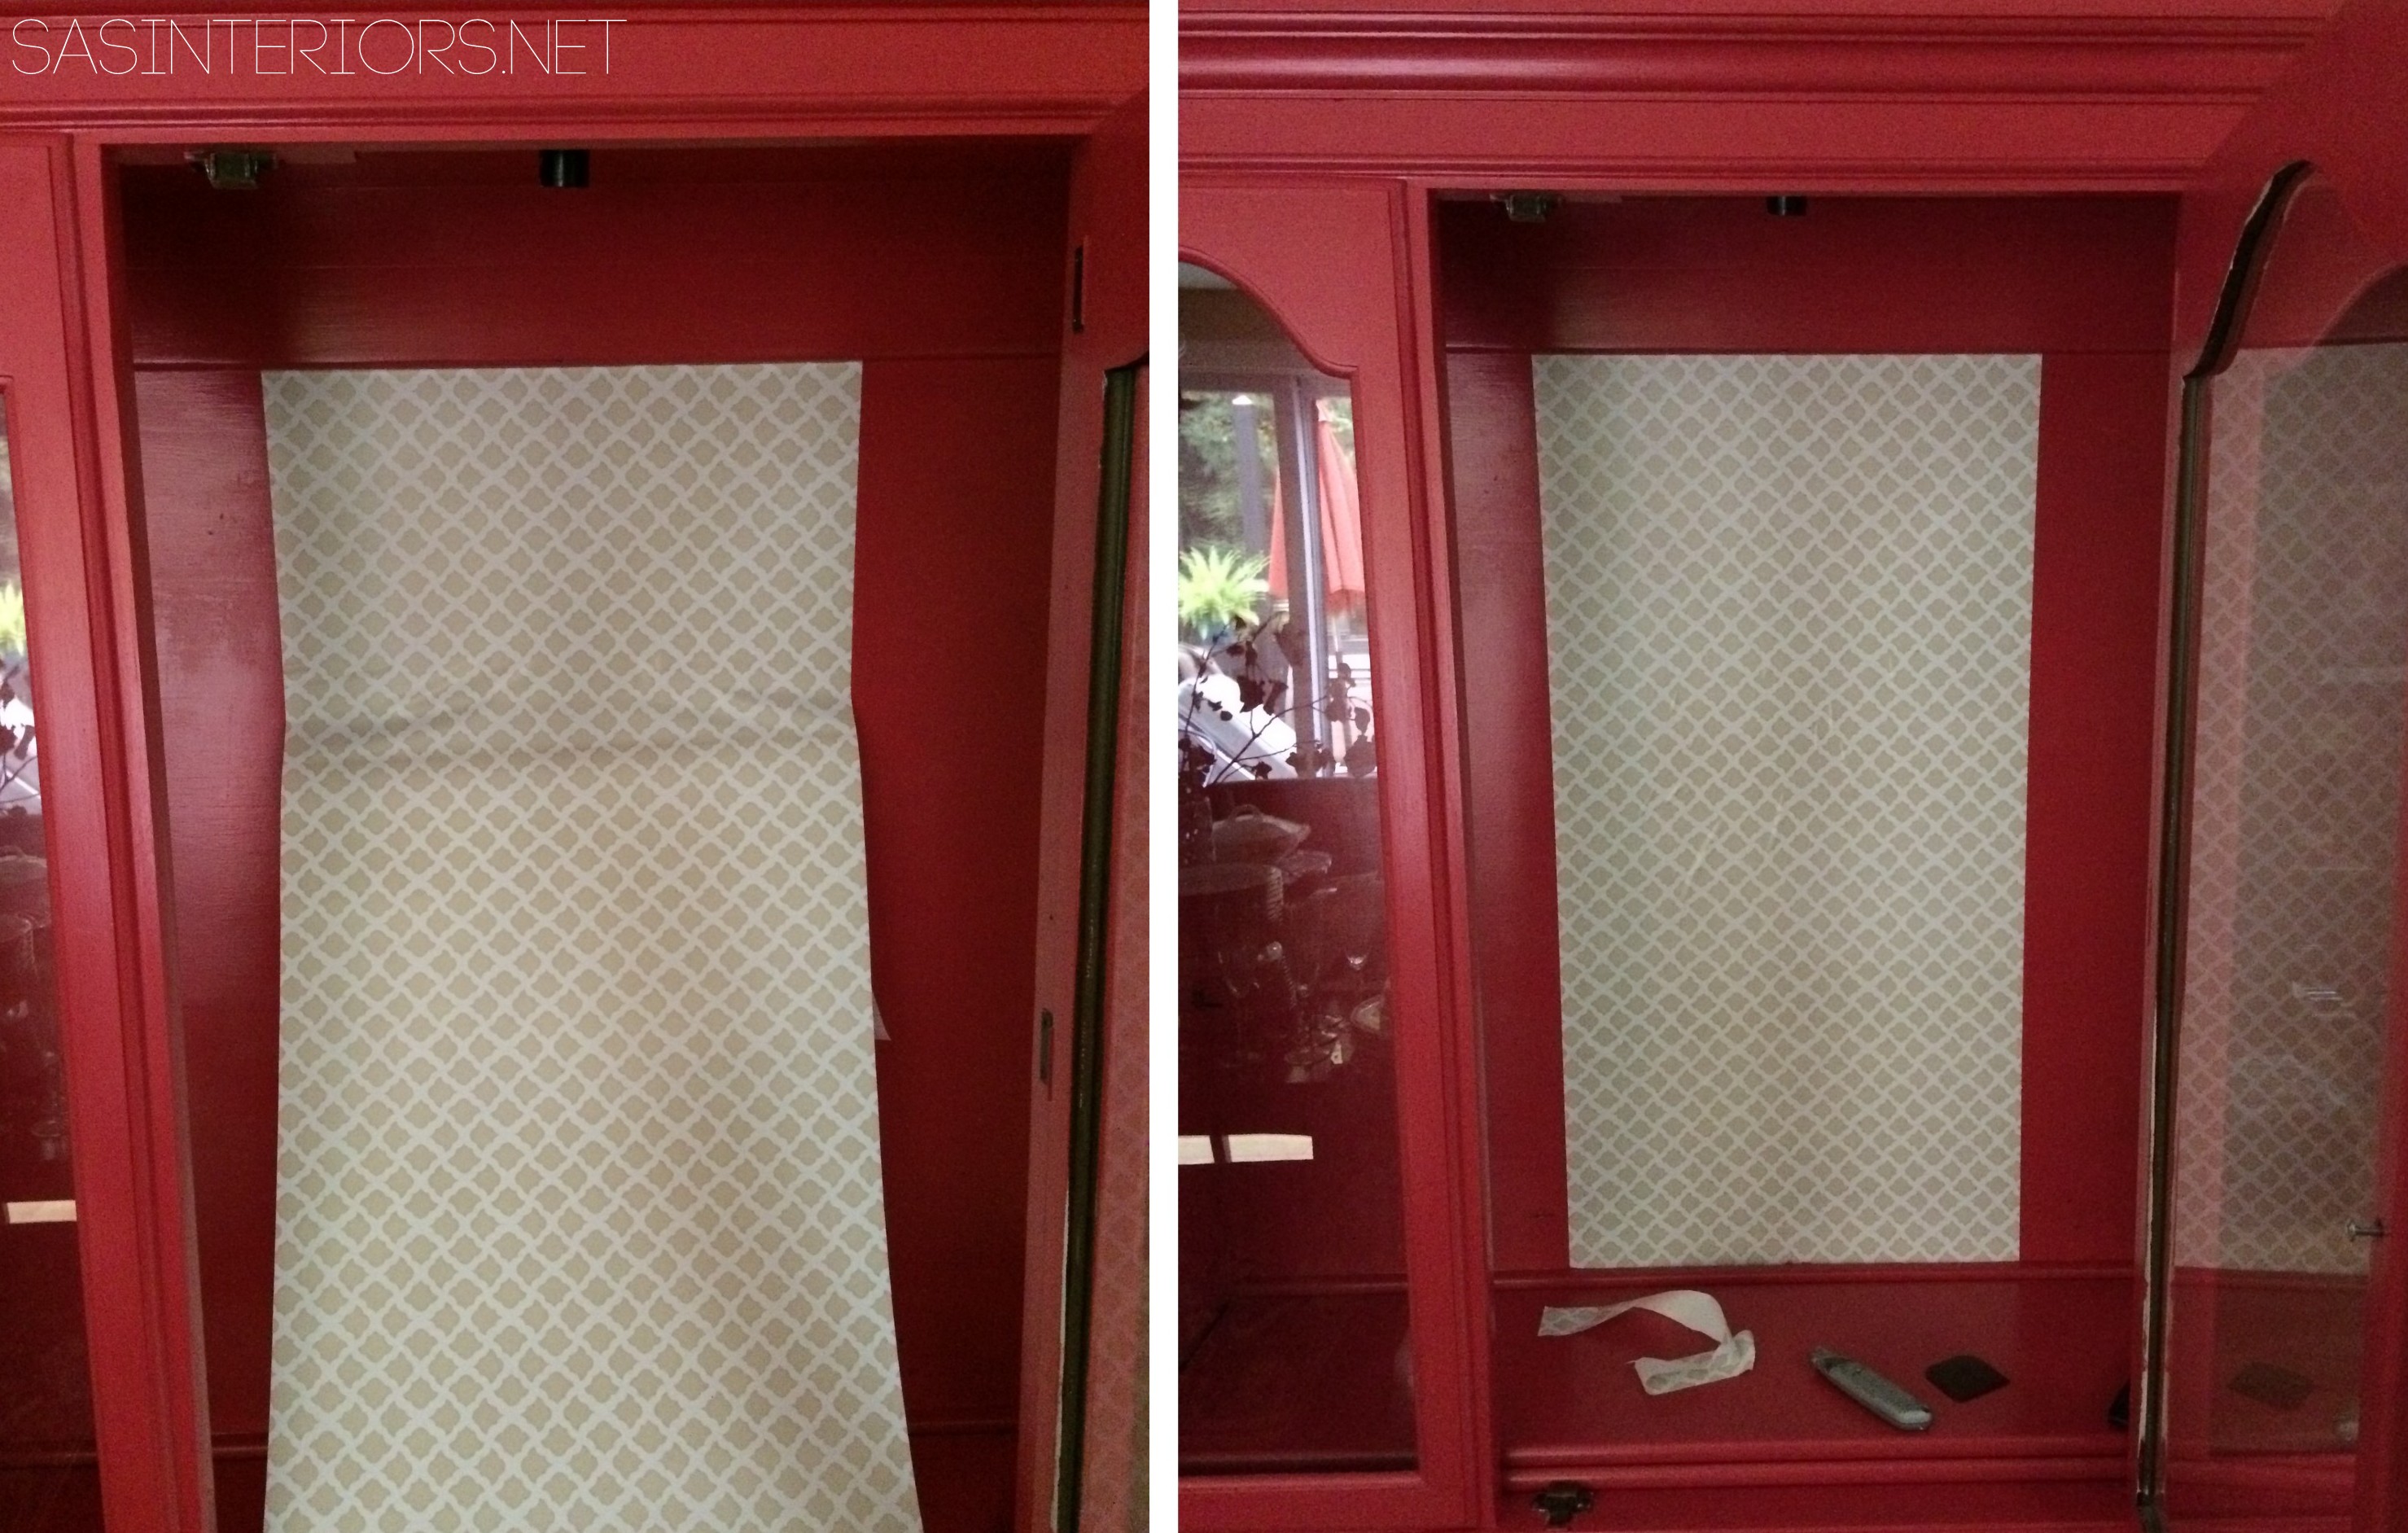
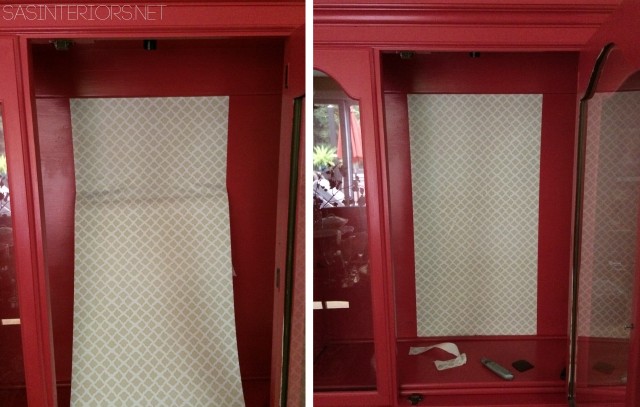
After finding the center of the cabinet, I started off by adding the contact paper at the top edge.  I then slowly peeled off the backing, section by section, and adhered the paper to the cabinet back while pushing out the air bubbles with my hand.

Adding unique, one-of-a-kind details to the finish the china cabinet makeover!

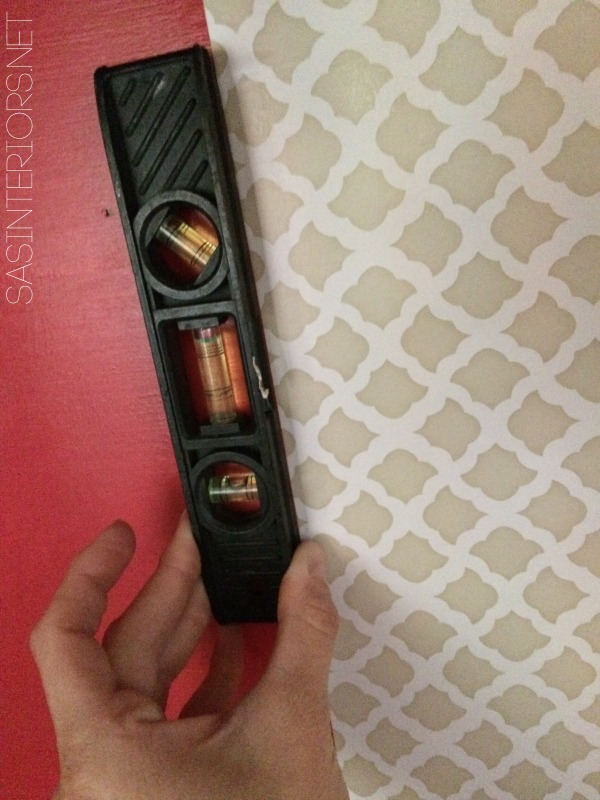
I also made sure it was vertically plumb so it was hung straight.

Adding unique, one-of-a-kind details to the finish the china cabinet makeover!

Once I was towards the bottom, I left about an 1-2″ extra and cut the contact paper with scissors.  I followed that by using a straight edge blade and trimmed the paper so it fit perfectly at the bottom.  I also did the same at the top…

Adding unique, one-of-a-kind details to the finish the china cabinet makeover!

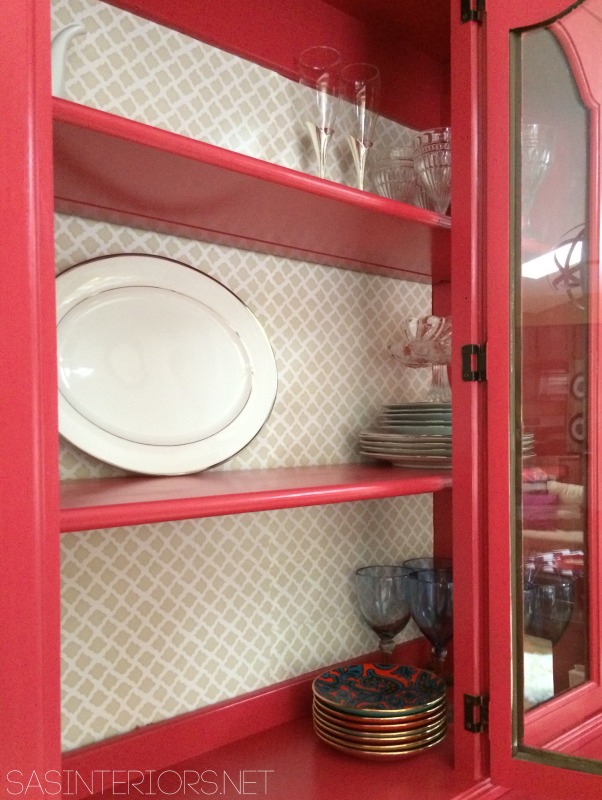
Once the center panel was done, I added the self-adhesive paper to the other two sides.  In the end, just being honest, there were a few air bubbles that I could not get out.  O well, it’s not perfect…  The dishes and layered accessories will hide those messy spots.

Adding unique, one-of-a-kind details to the finish the china cabinet makeover!

Once that was complete, I was able to accessorize!  But before that, I want to show you what I did with the hardware.

Hardware.

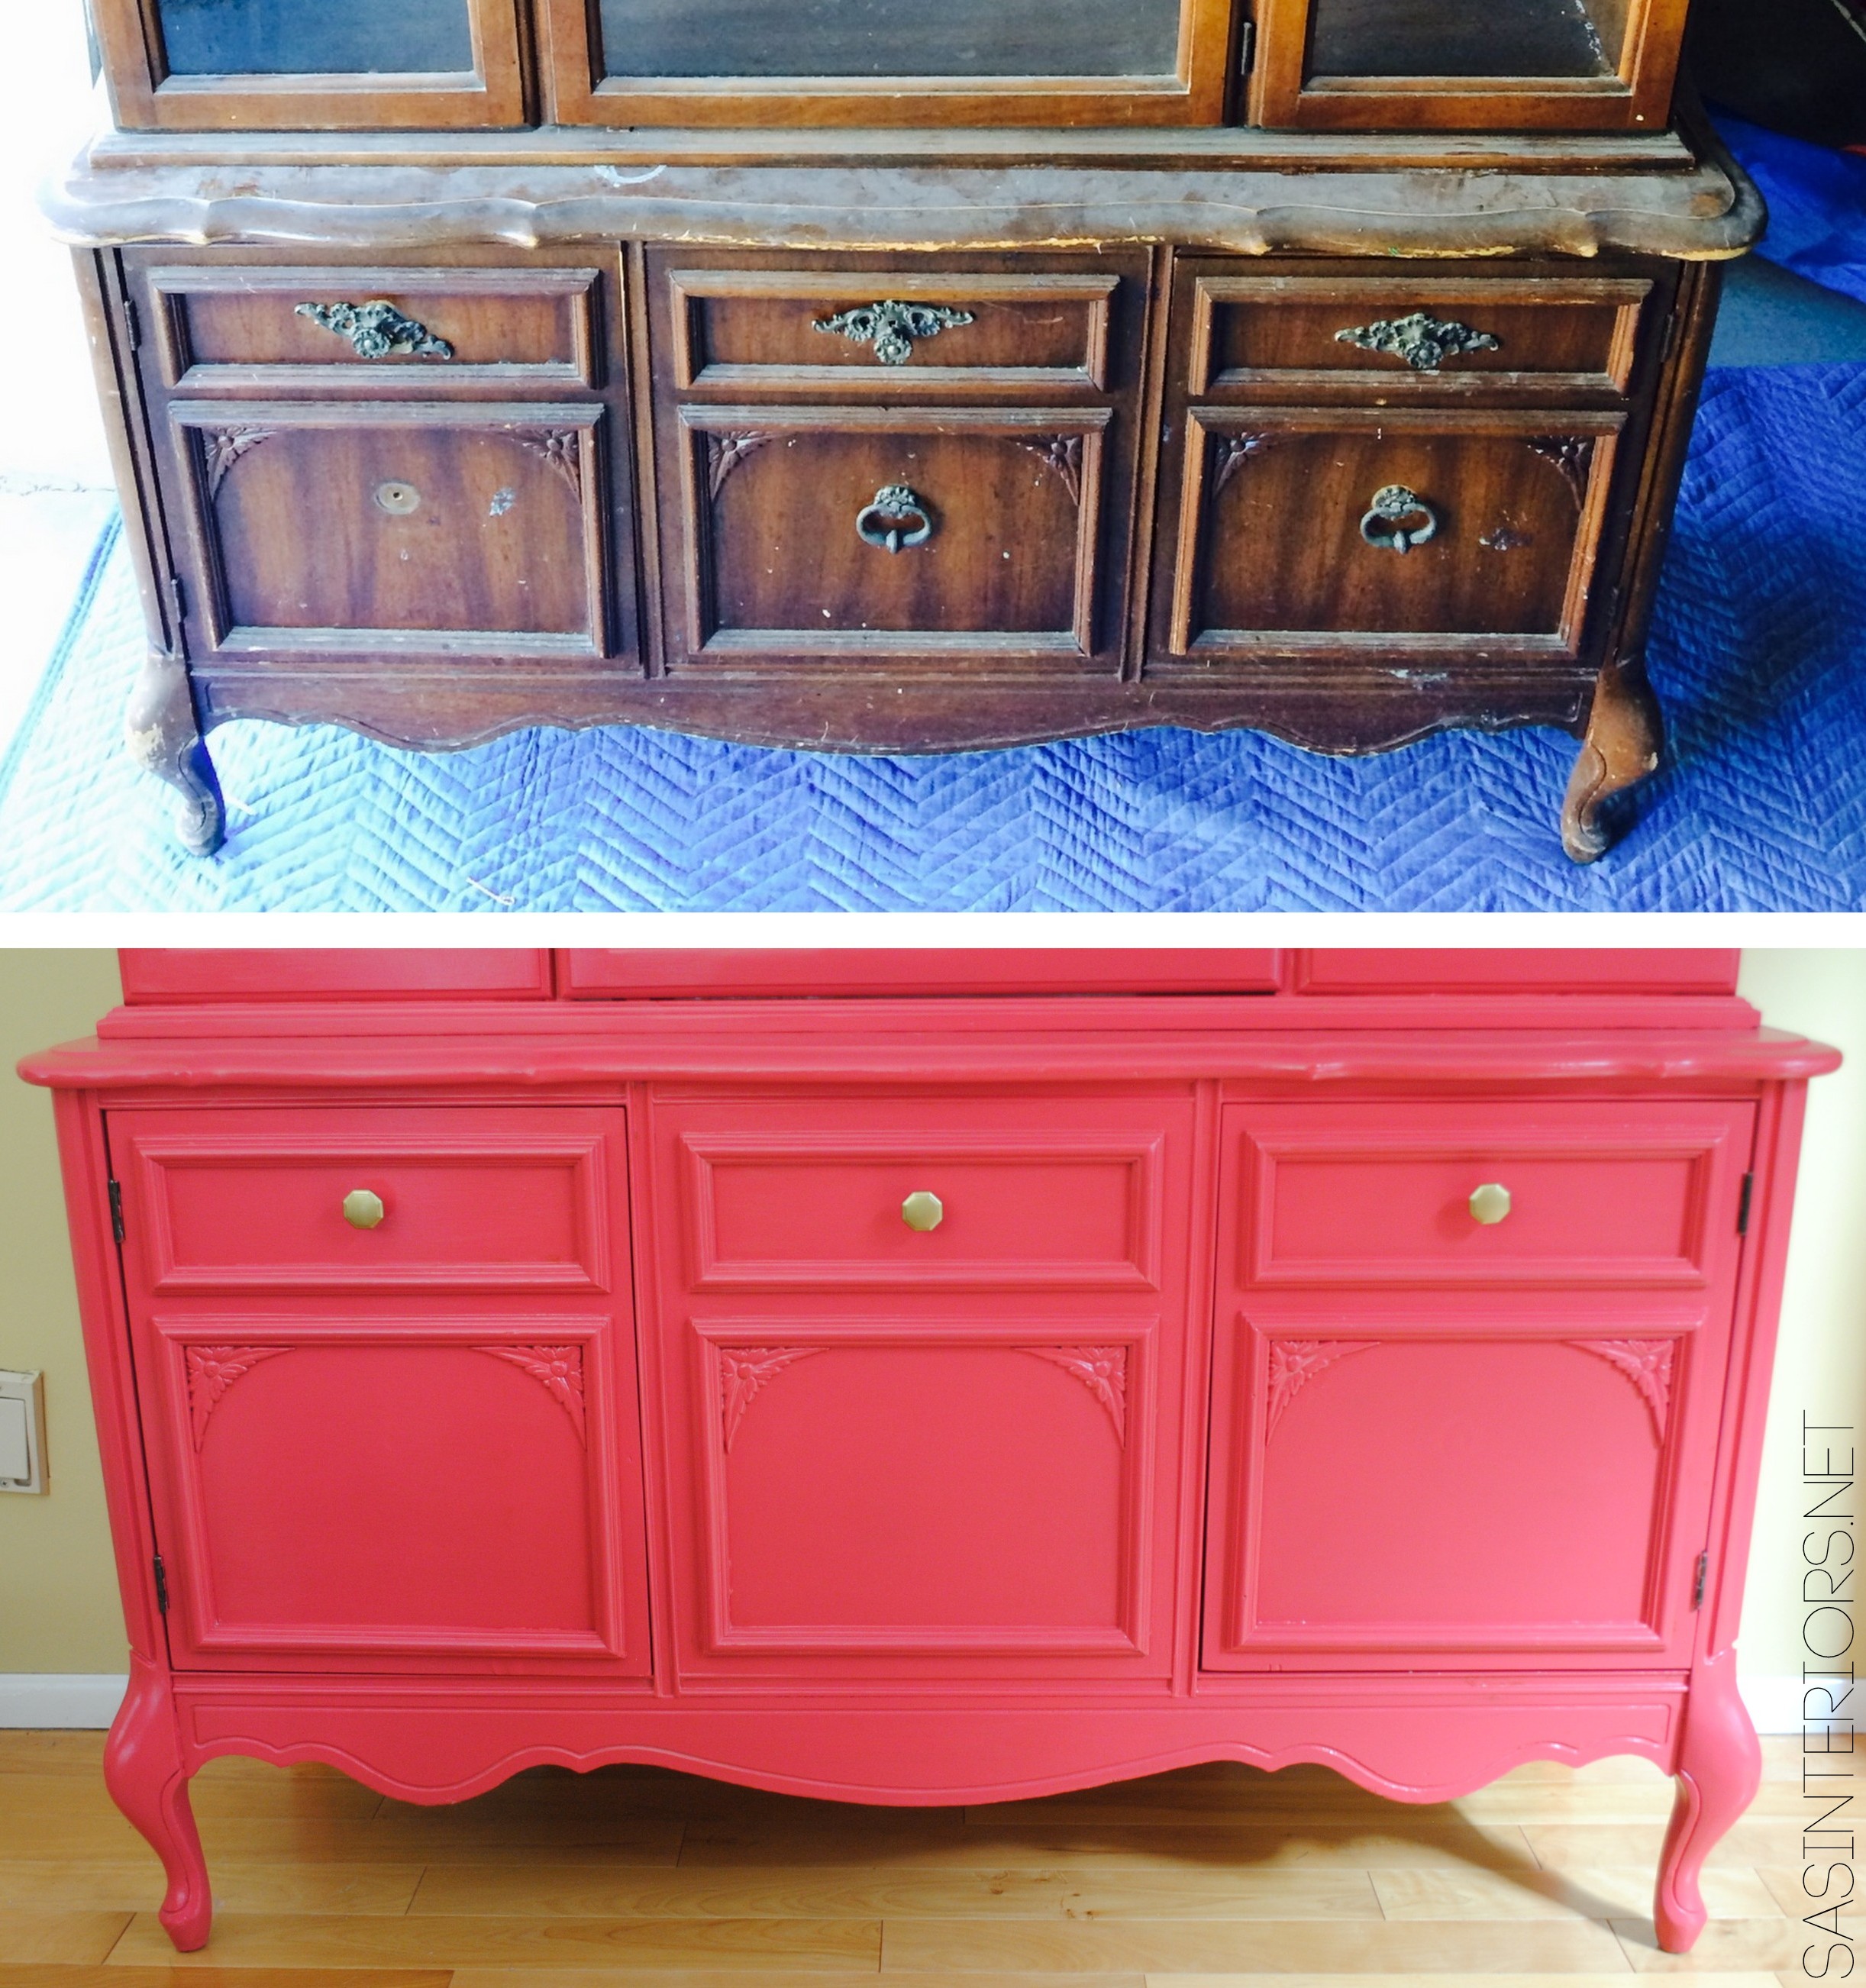
Remember at the beginning of this project I wasn’t sure what to do with the hardware… go with new or use what was original?  Well I decided on new.  Why? 2 reasons.  (1) Some of the hardware was missing – good reason for new, right? (2) I really wanted this piece to be a mix of old and new.  I adore the traditional lines of this cabinet (old), yet the color and the added details are more modern (new)… thus my style, Classic Eclectic!

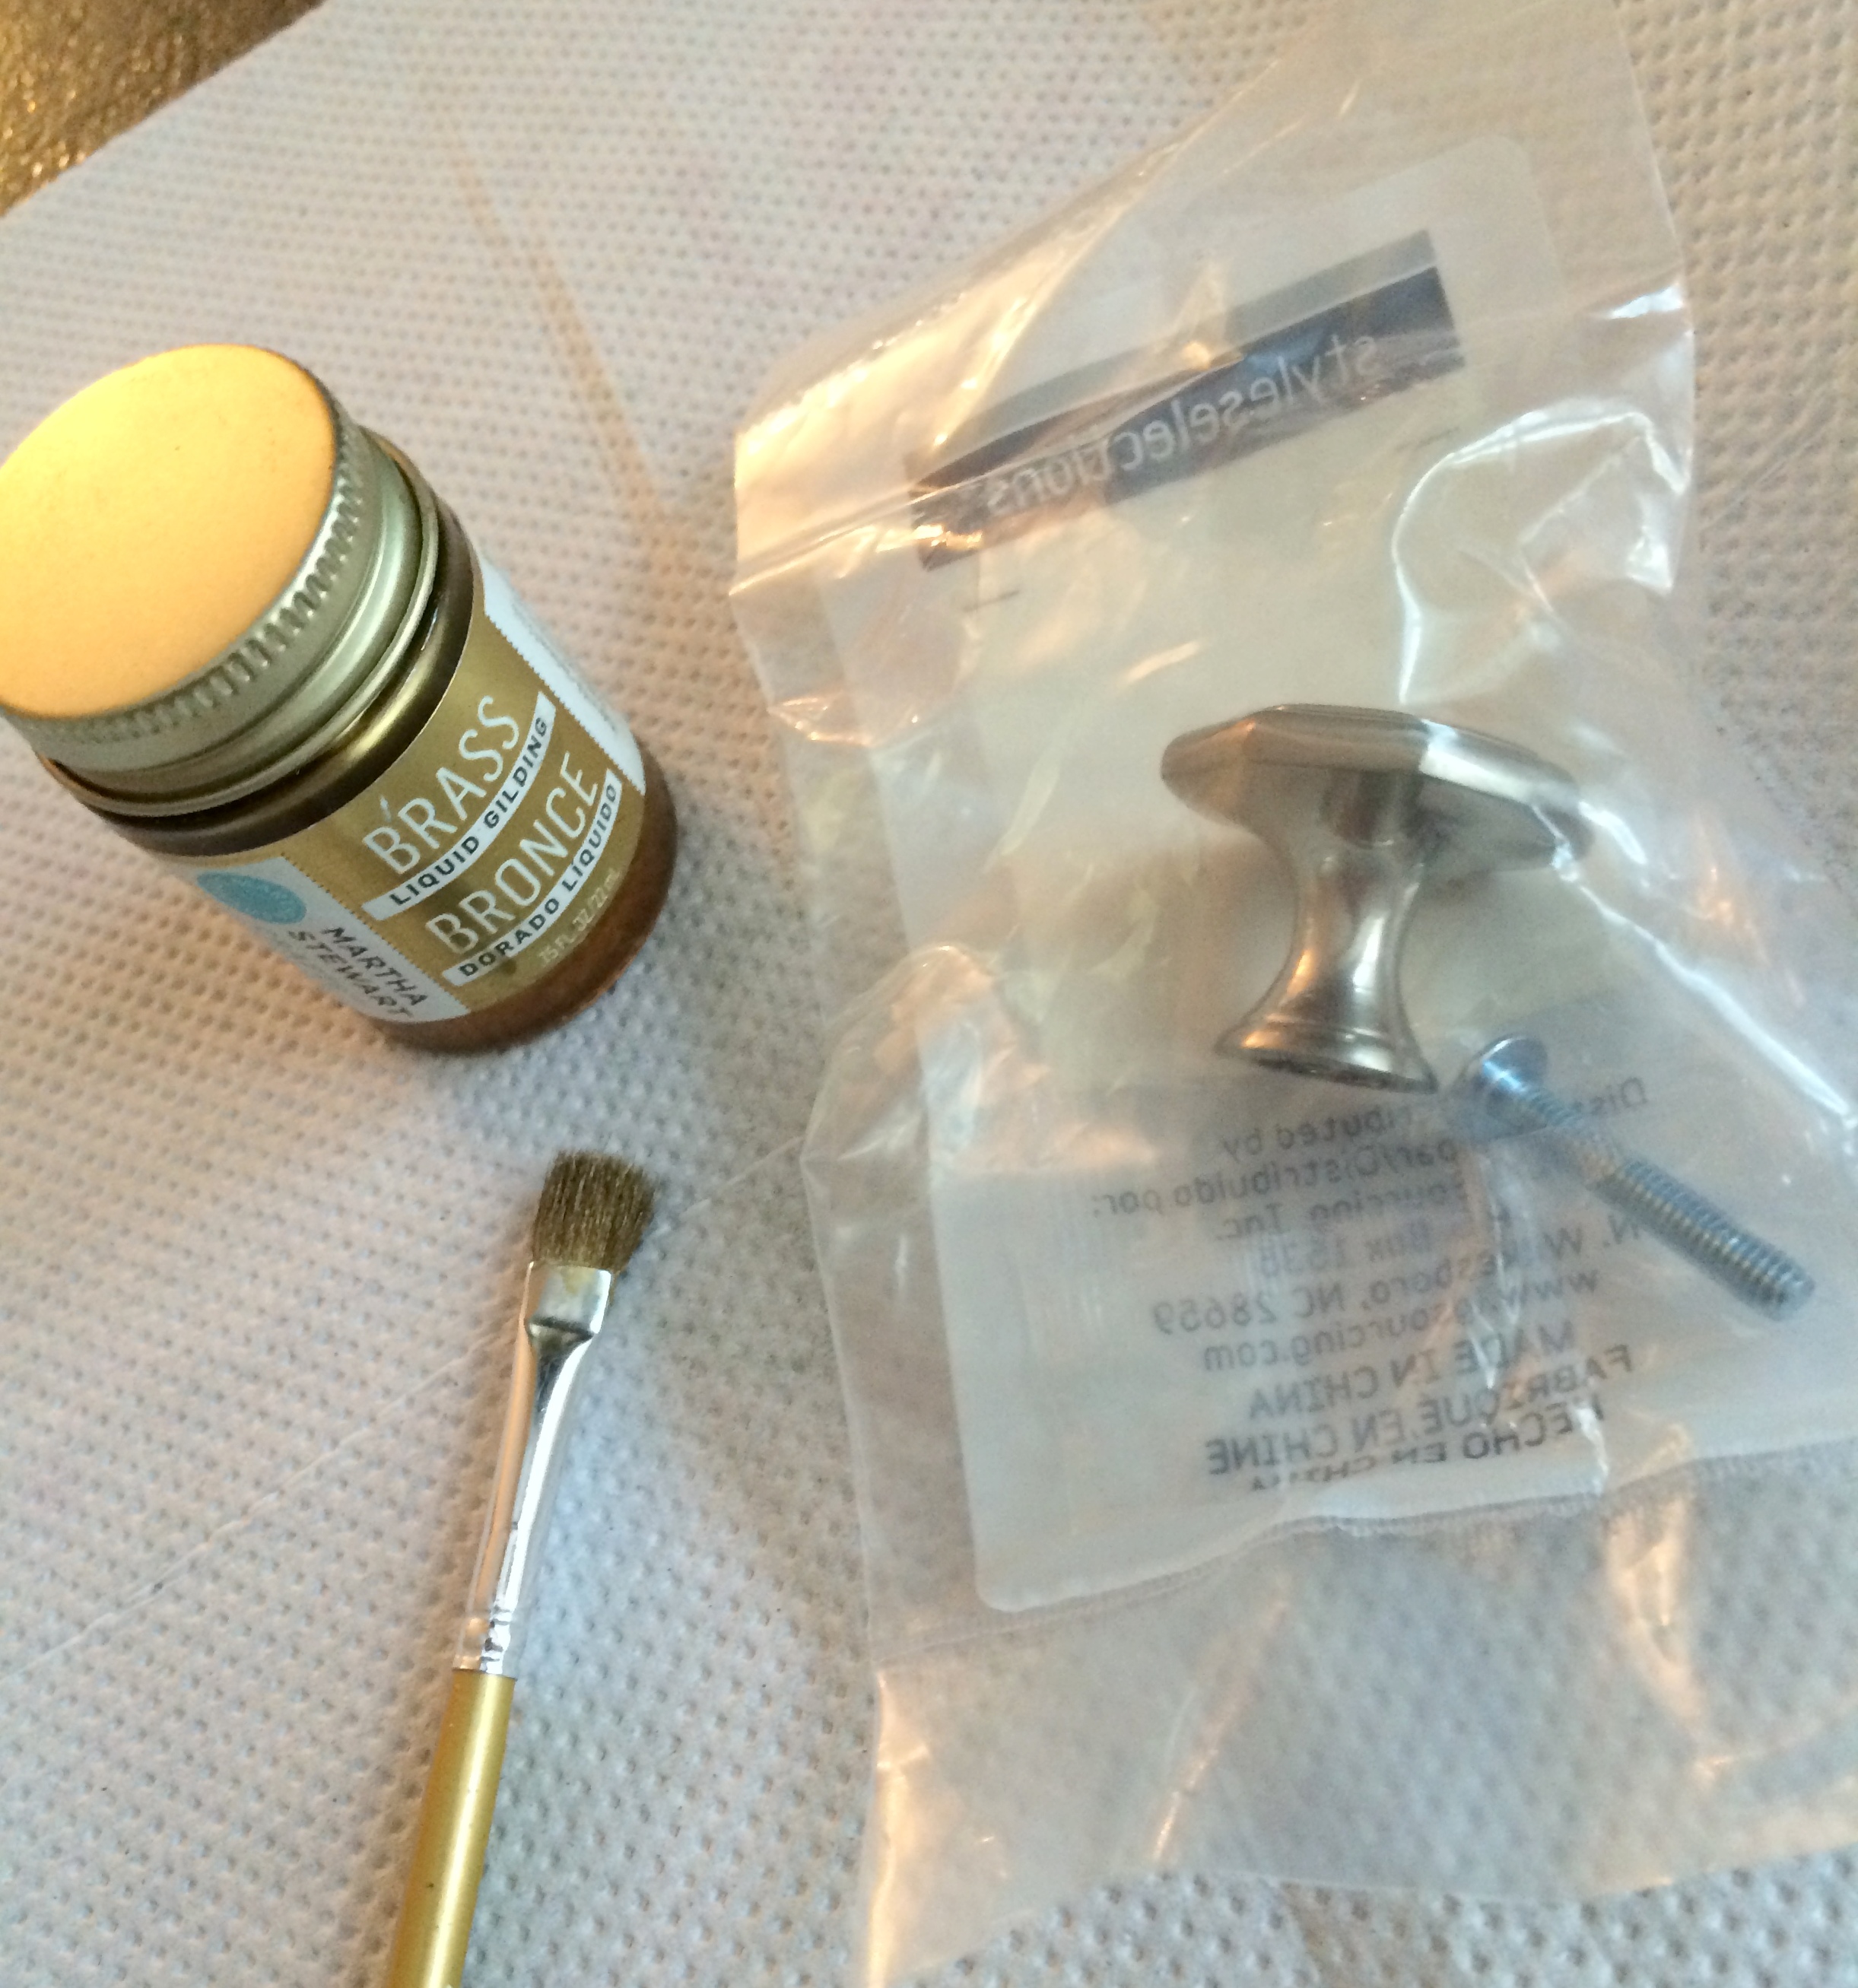
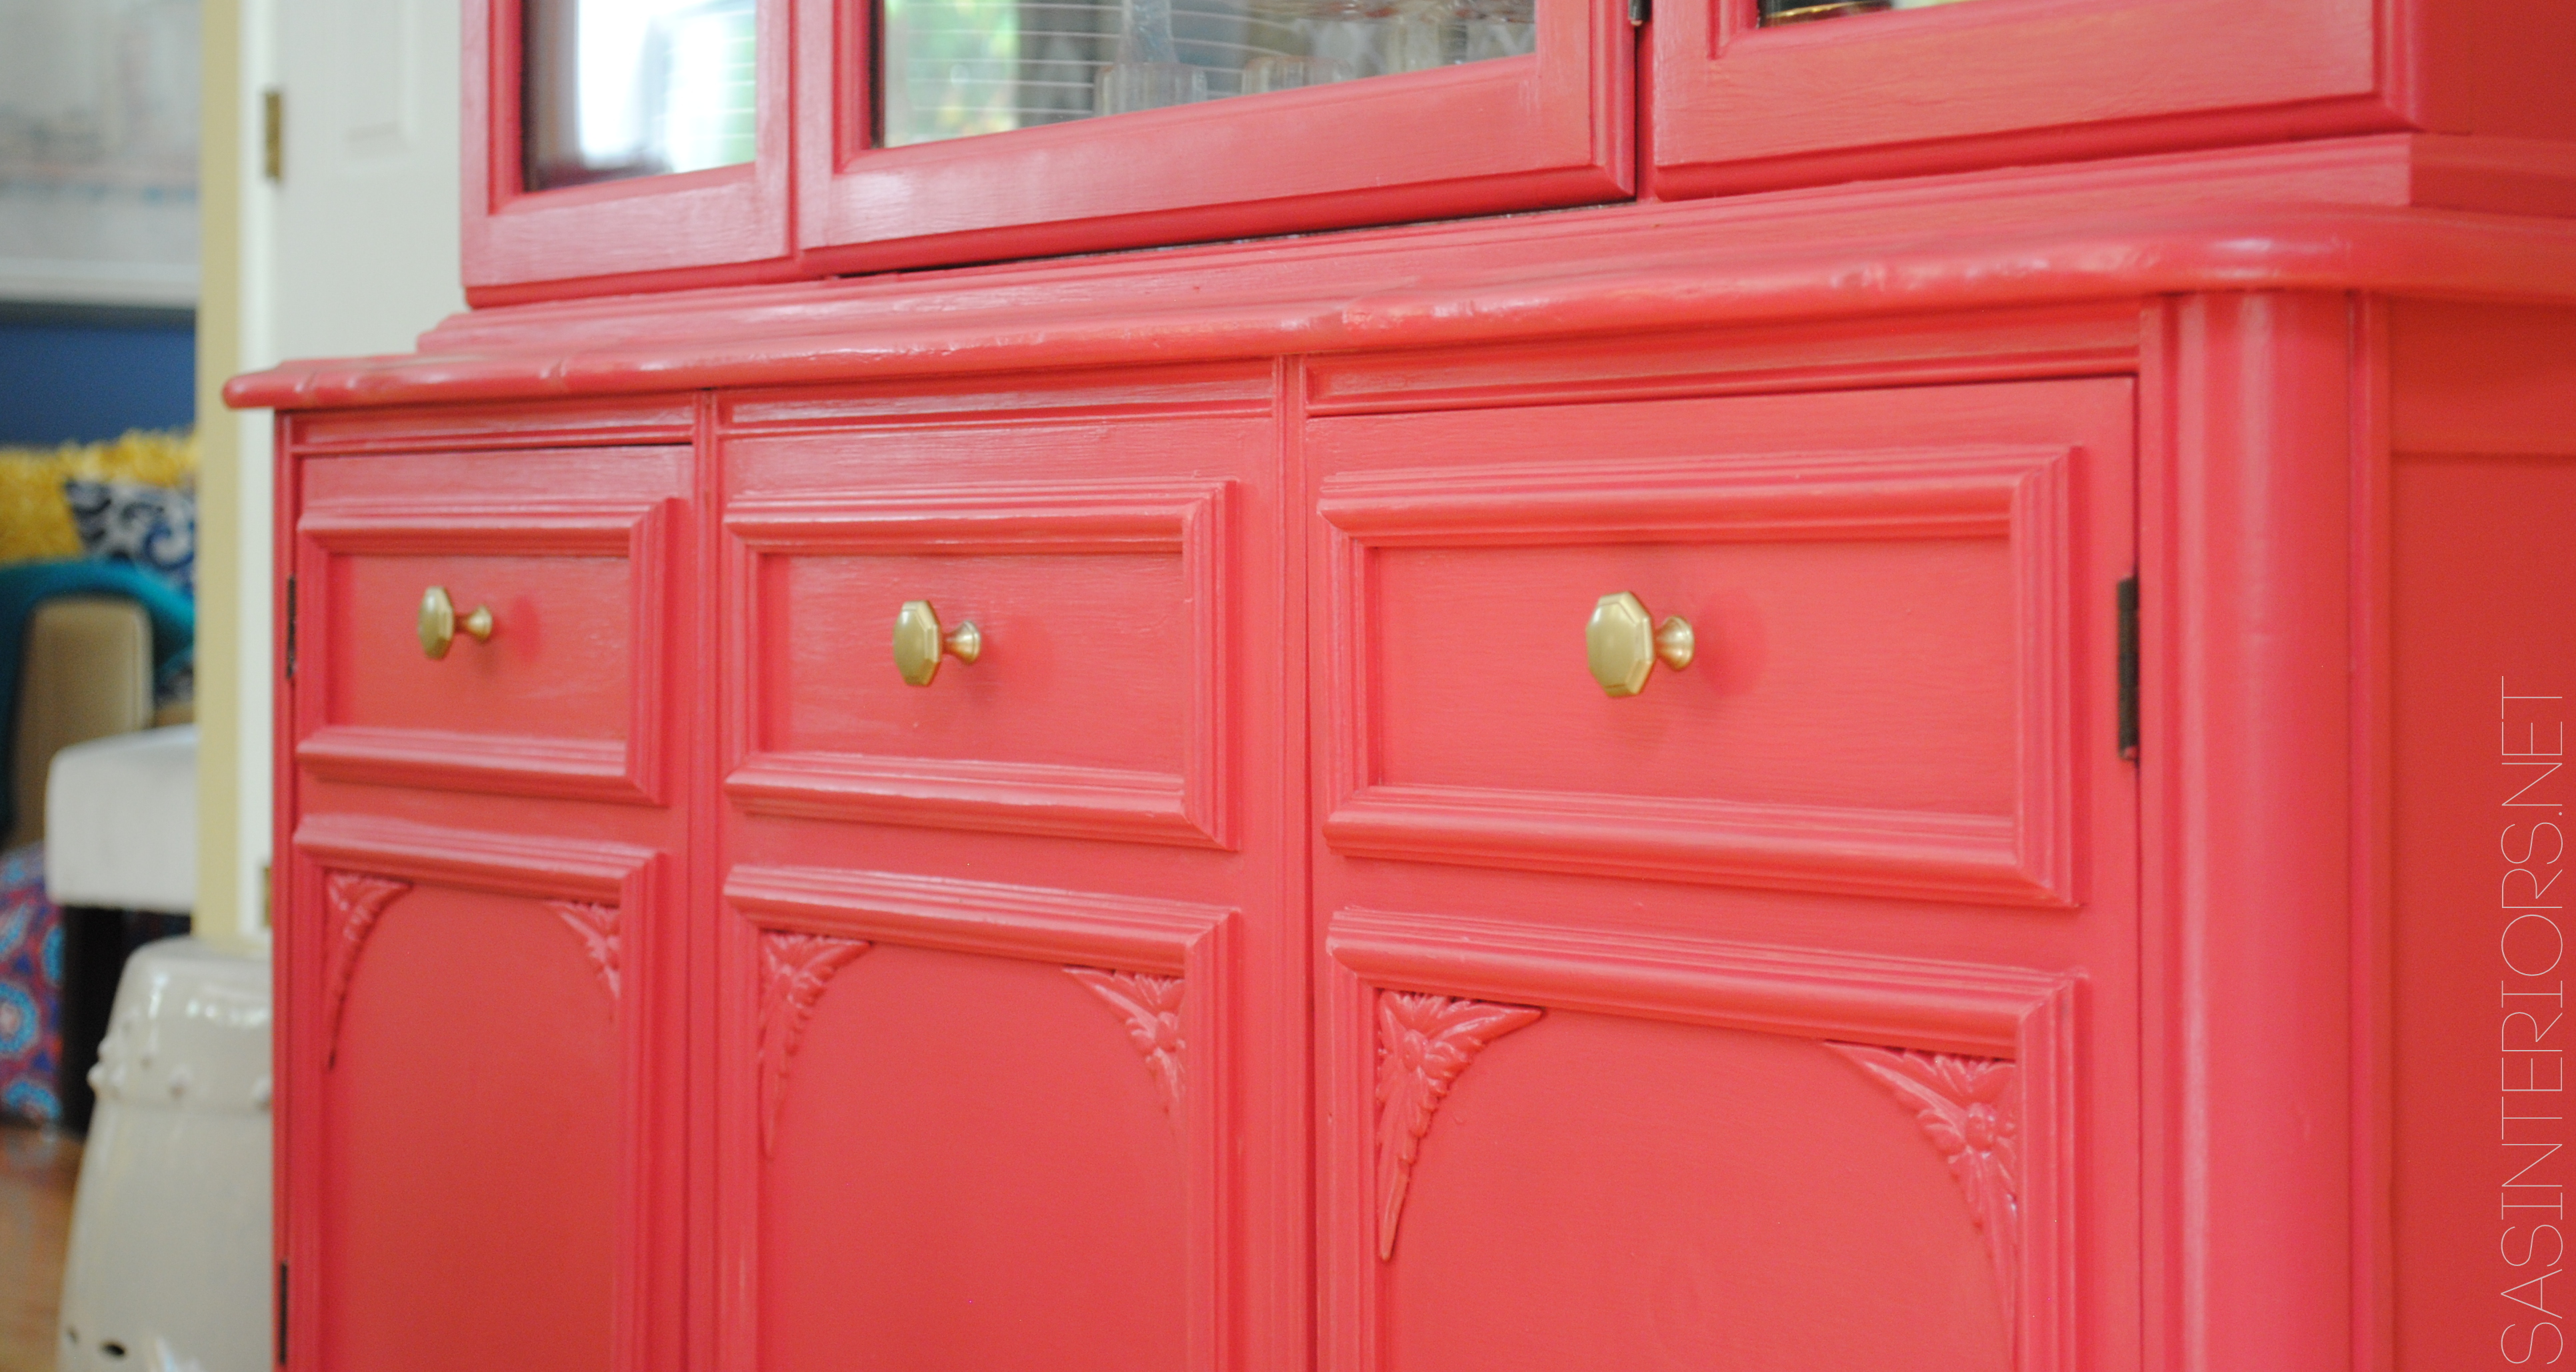
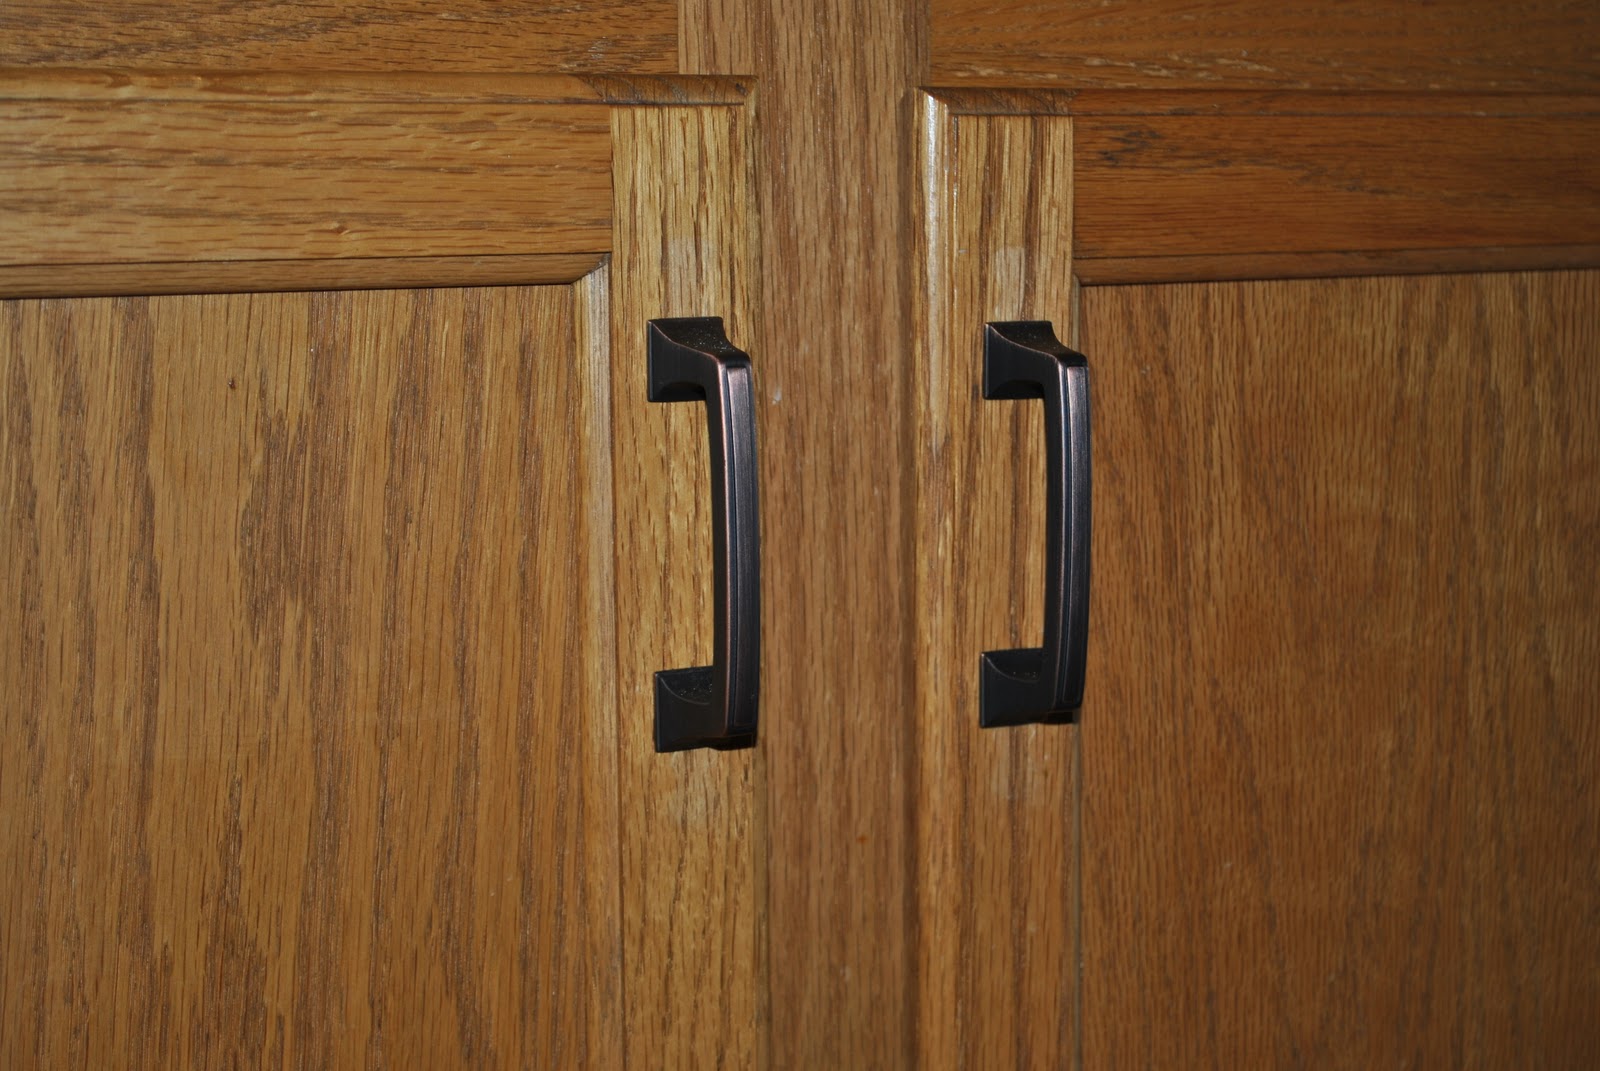
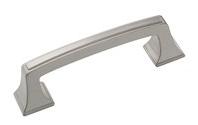
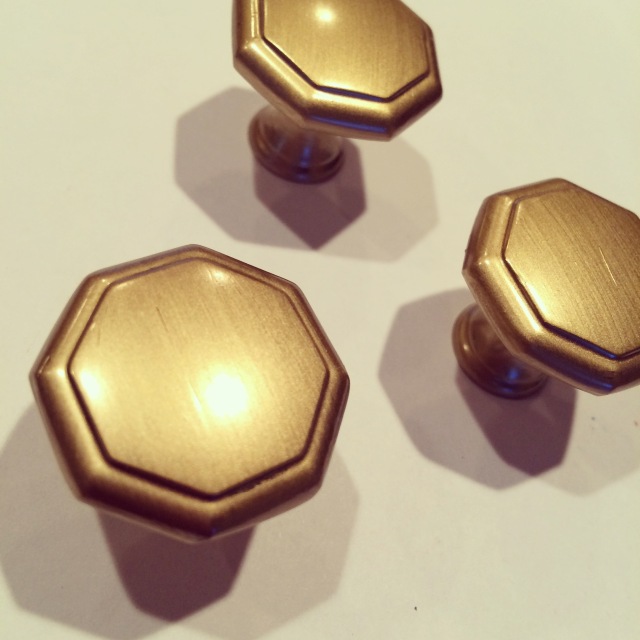
For the hardware, I wanted a bit bling-bling, but on a budget.  On one of my daily trips to Lowe’s, I found these beautiful octagonal shaped knobs.  I really wanted a brass finish, but they didn’t have them, but for $3 +/- a knob, I couldn’t leave them.  So I painted them…

DIY Hardware: Adding unique, one-of-a-kind details to the finish the china cabinet makeover!

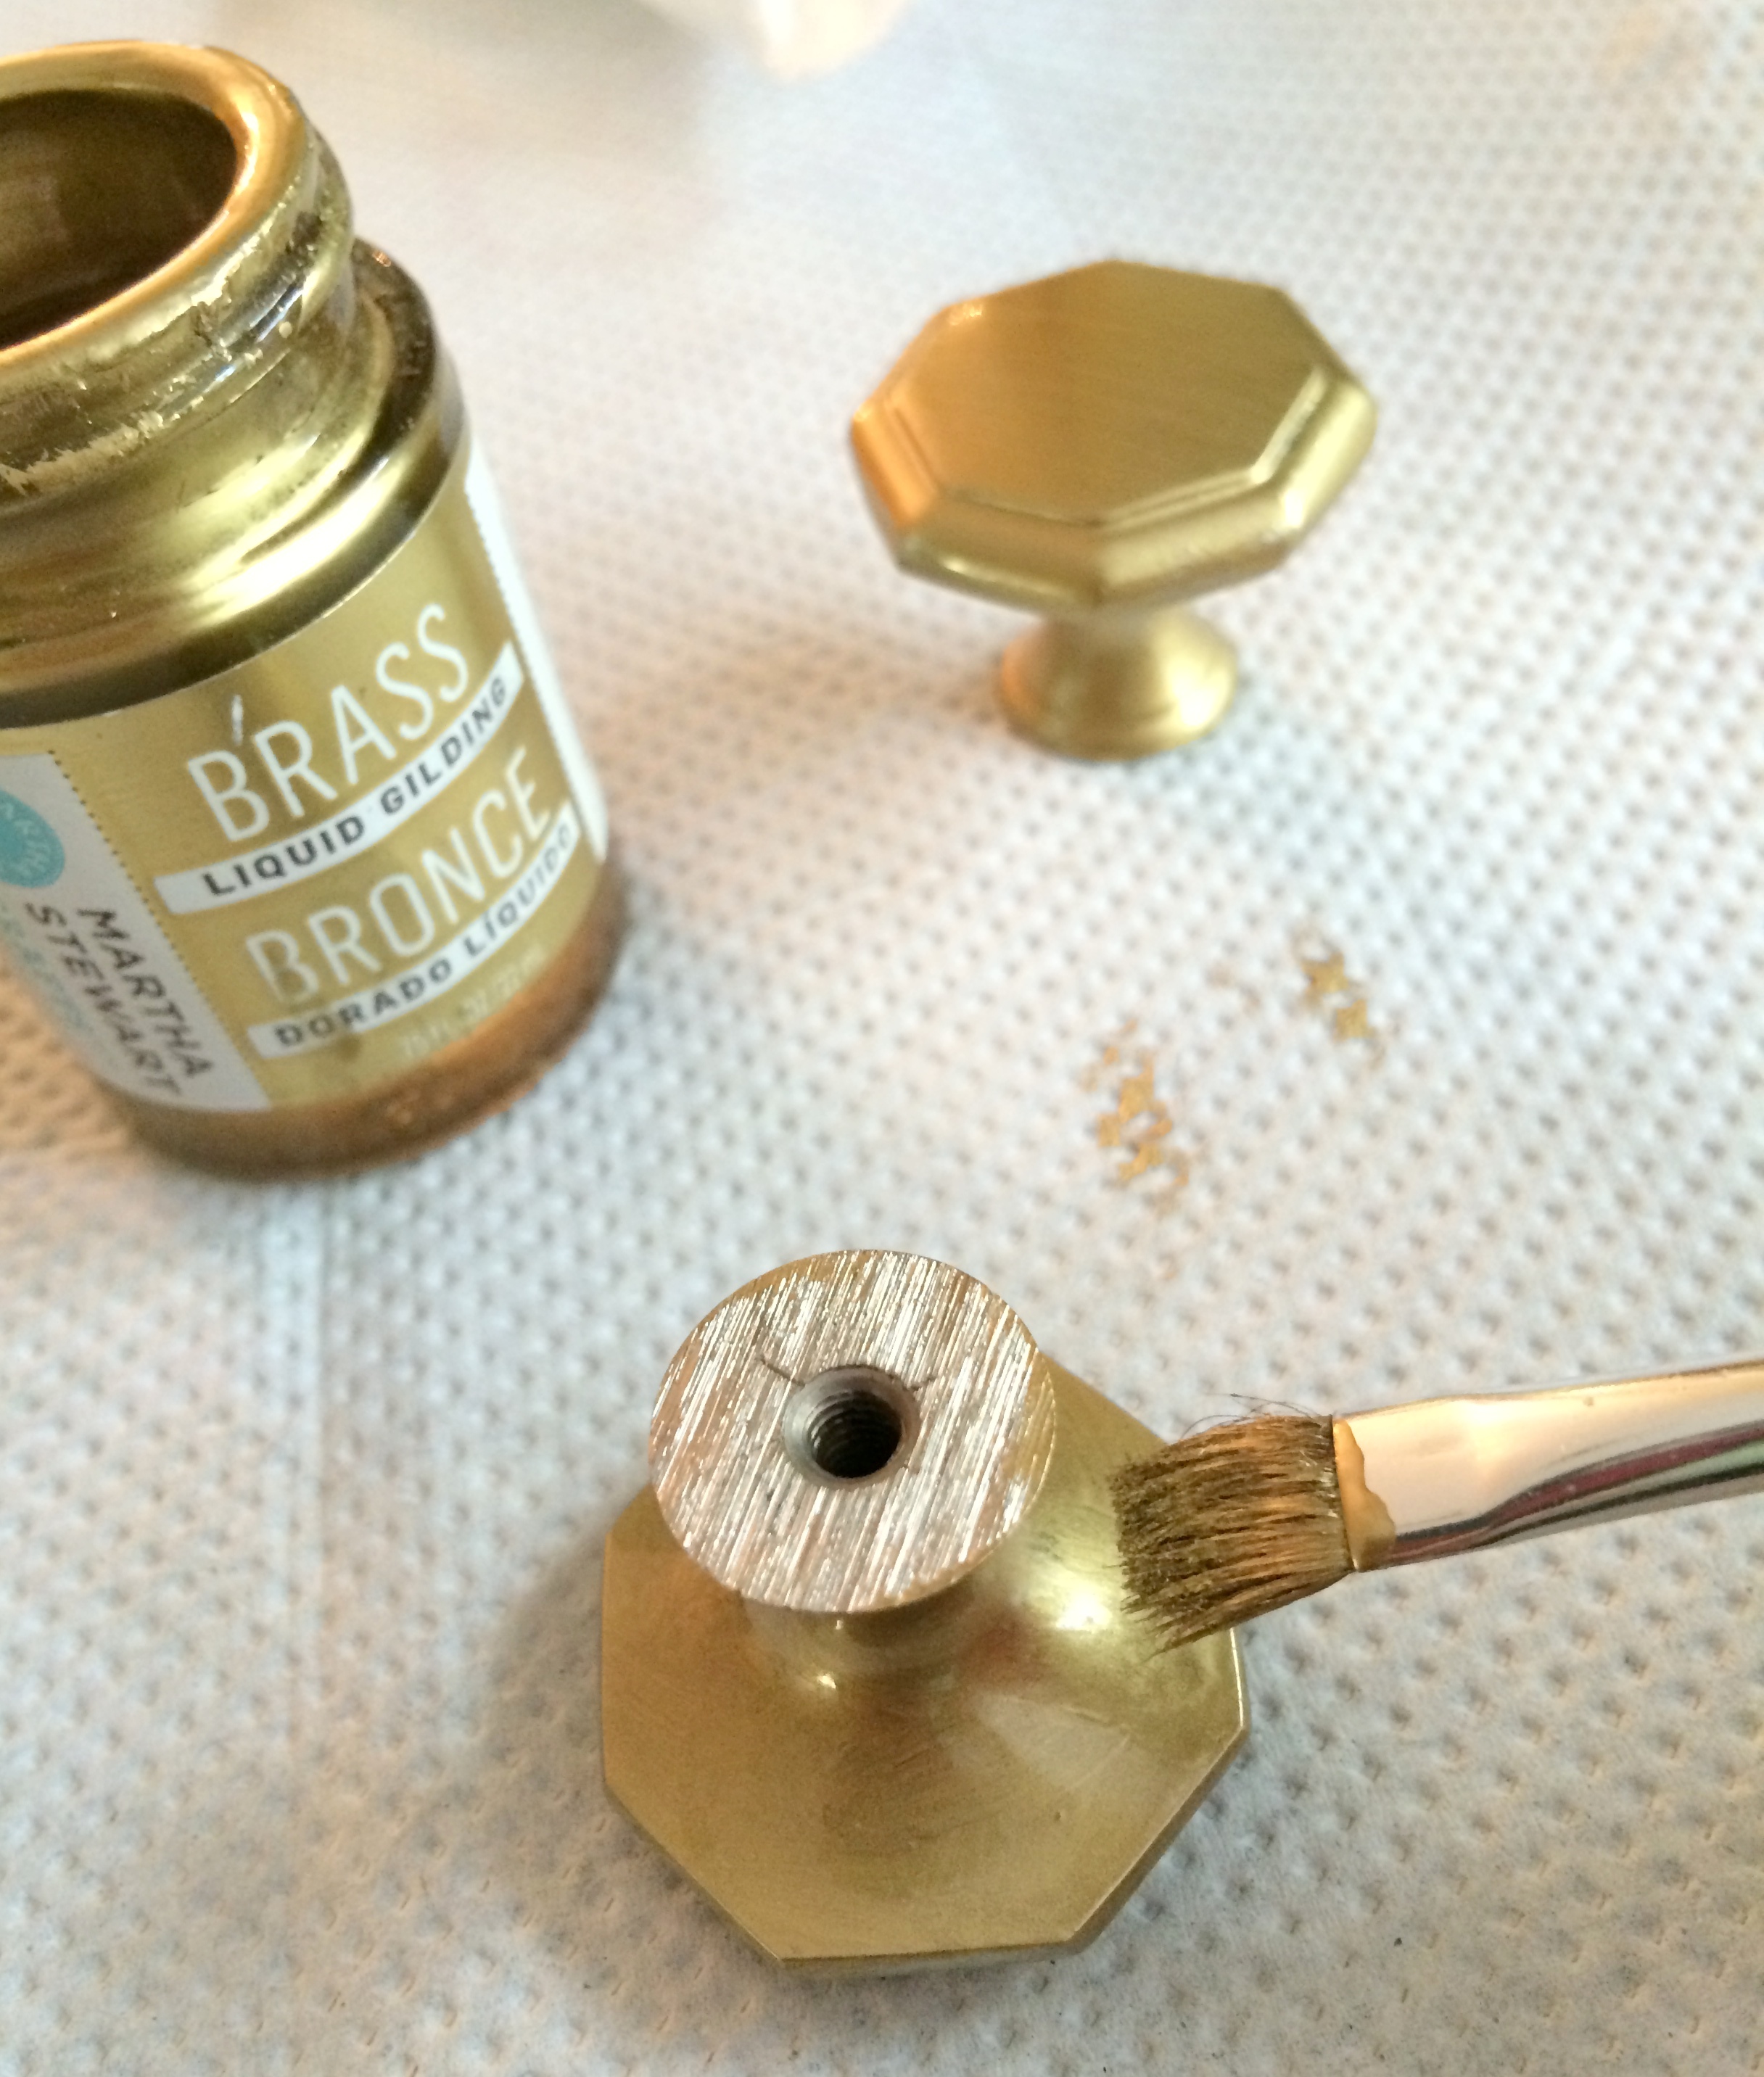
Using brass paint (liquid brass gilding, to be exact) that I had from another project, I painted them using a small brush.  It dried within minutes and this unique detail was added to the cabinet.

Adding unique, one-of-a-kind details to the finish the china cabinet makeover!

Adding unique, one-of-a-kind details to the finish the china cabinet makeover!

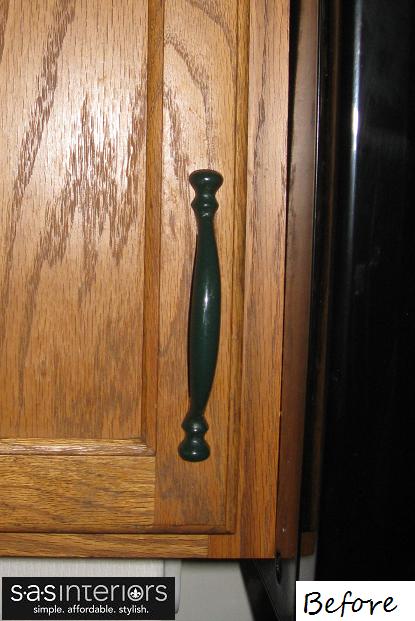
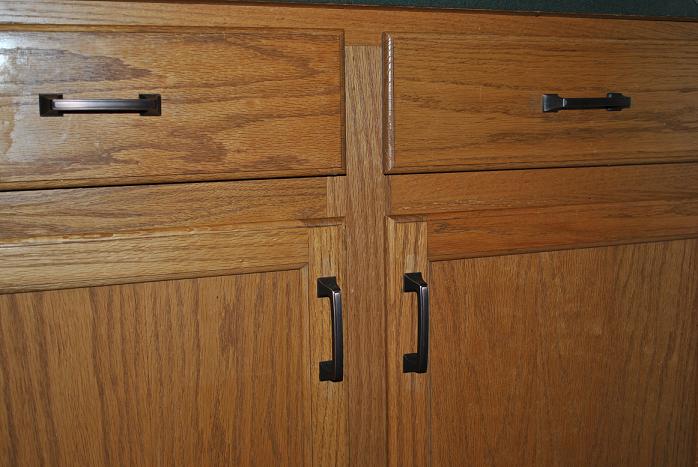
Check out the before and after of the hardware…

Hardware for the china cabinet makeover before & after

As I shared in the first post [prepping & sanding], I removed the existing hardware before getting started on the makeover.  To hide the holes that were on the door fronts, I used wood filler and then sanded once it was dry.  The holes that are on the sections that look like drawers, but really aren’t, remained and that is where the new knobs were installed.

What a change, right?!

Hardware for the china cabinet makeover before & after

Styling.

The last part of the makeover was beautifying it with all my stuff… my treasures!  Instead of showcasing my china + bowls + glasses the traditional way – by the set (plate/dish/bowl/cup) – I went for a more casual, non-symmetrical route of stacking the plates and dishes, and ‘displaying’ the glasses in groups.  This allowed me to maximize the space provided, plus achieve a simpler, less tailored look.

When I started the styling process, I began with the large stack of dinner plates and because they were the heaviest (physically and visually), I put those on the bottom shelf.  Then on the middle shelf on the other side, I added in some other random larger + smaller plates and stacked a few glass bowls on top.  After adding in some wine glasses (groups of 3 or 6 looked best) on the each side , I stepped back and it looked like this…

Styling Tips: Adding unique, one-of-a-kind details to the finish the china cabinet makeover!

I then added in some more pieces to balance out what I had started with.  Basically, the plates and glasses are mixed together on each side.  Neither side is weighted with only plates and/or only glasses.

Achieving balance is key to successful styling or a successful visual vignette!

Styling Tips: Adding unique, one-of-a-kind details to the finish the china cabinet makeover!

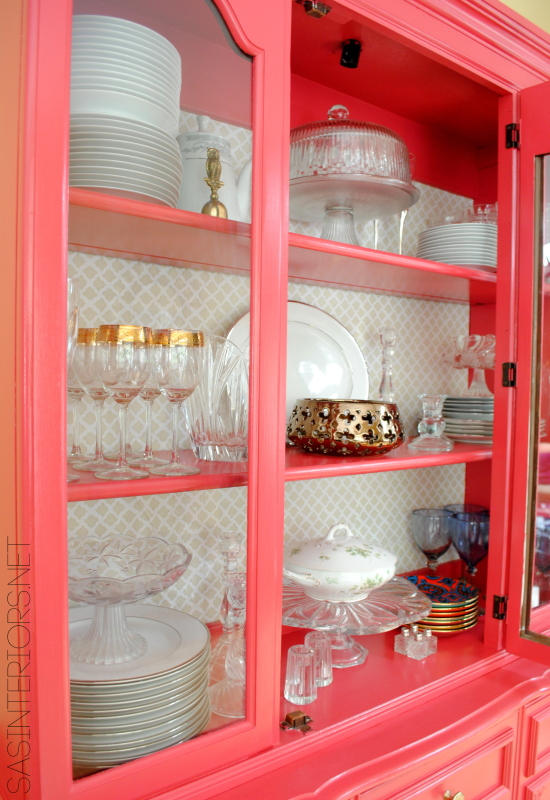
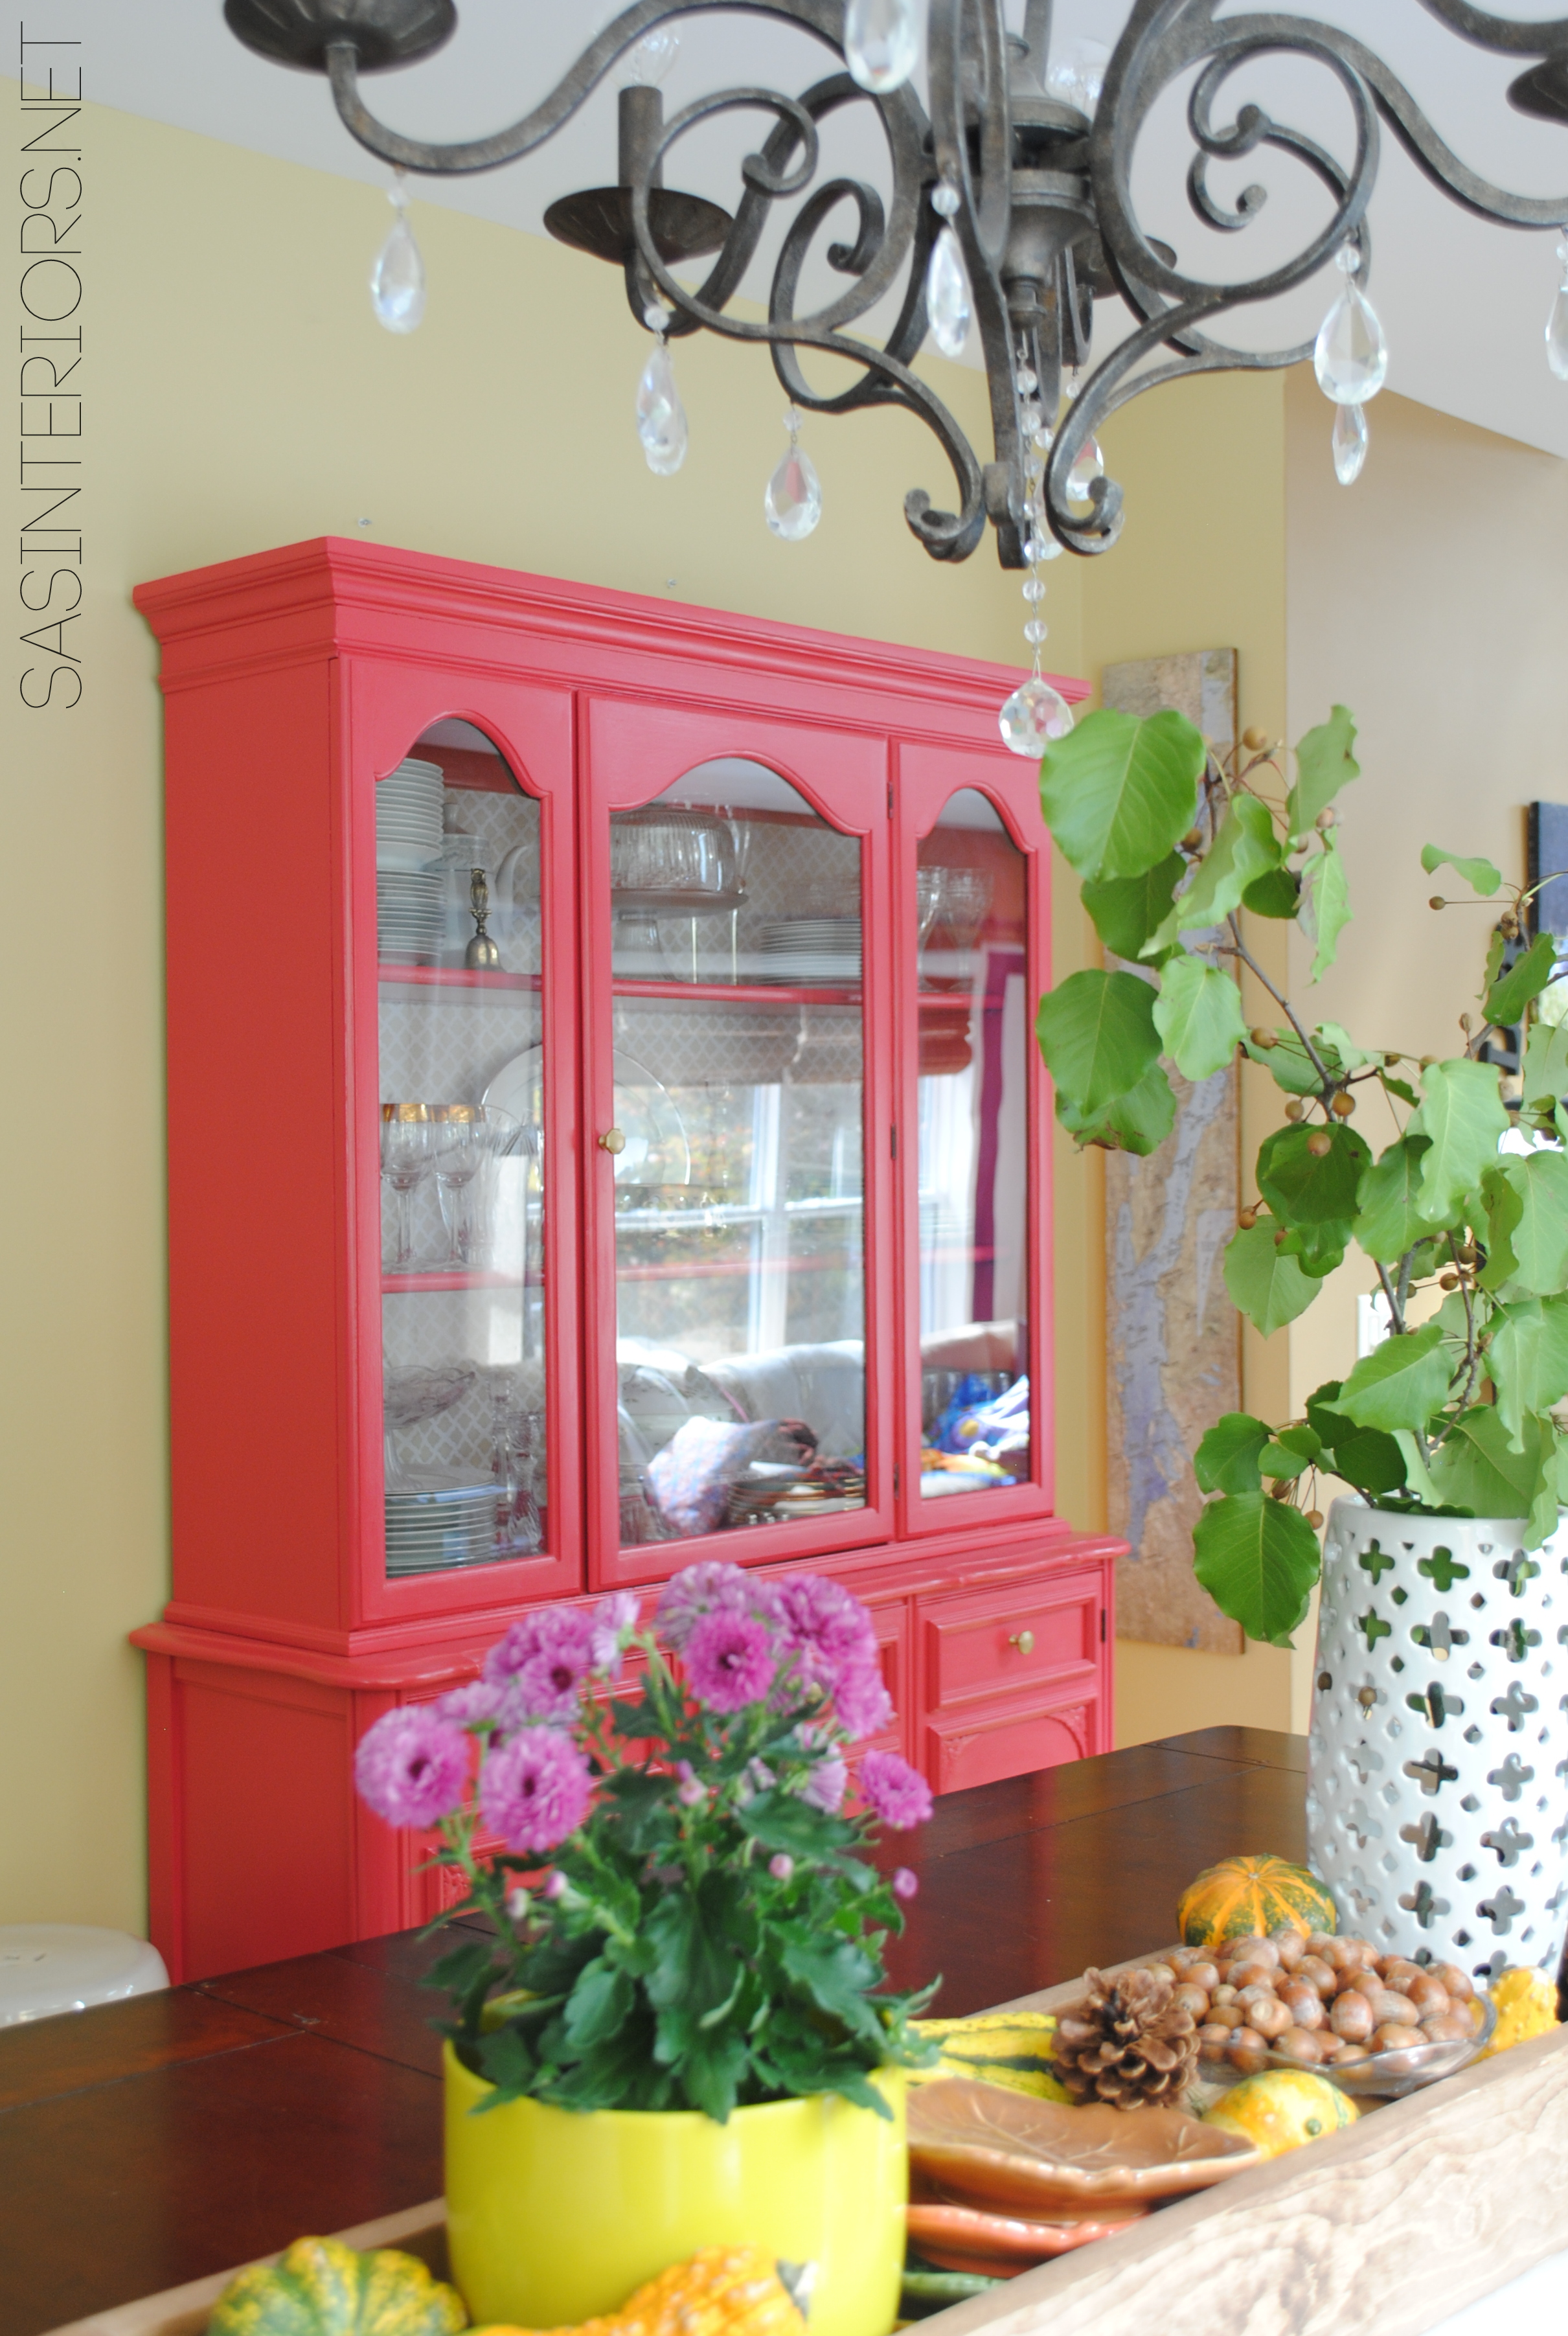
I saved the center section of the top cabinet for serving pieces, platters, and bowls.  I centered some of the elements, which gives a traditional feel, but other elements are off-center which brings a casual, organic feel.

After adding, editing, moving, and contemplating, it was finished.  Styling can be a little tricky, but go with what feels/looks right.

Styling Tips: Adding unique, one-of-a-kind details to the finish the china cabinet makeover!

For those not-so-pretty pieces or one-offs, I stored them in the closed section below.  I love space with doors… perfect for the not-to-seen decor.

Confession time…  I tried getting a picture of the overall styled cabinet, but it was impossible without capturing the reflection as well.   I’m not the best photographer, but I try 🙂

Styling Tips: Adding unique, one-of-a-kind details to the finish the china cabinet makeover!

I adore how the dining space is coming together and looks so beautiful for Fall…

Adding unique, one-of-a-kind details to the finish the china cabinet makeover!

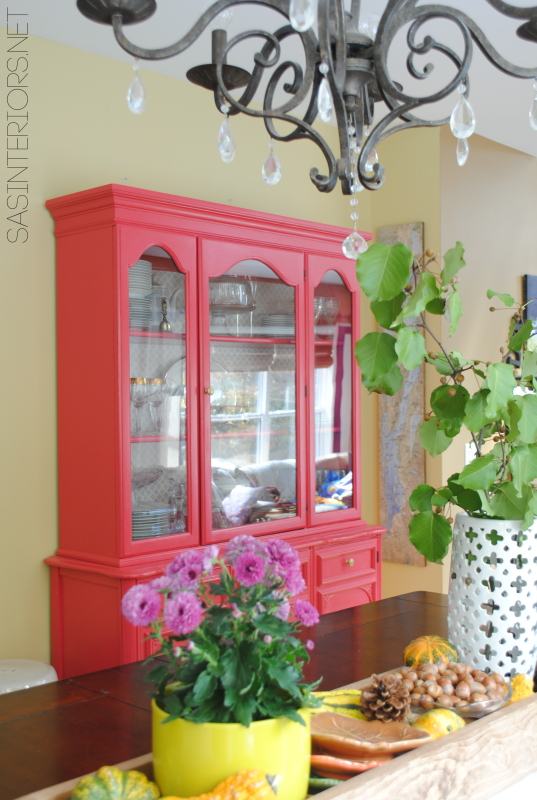
What a transformation, right?!  Now that the cabinet is styled, it’s 99% complete.  The next post on this china cabinet makeover will be the reveal – yay!  Coming Soon…

Follow along on this makeover with these other posts
Backstory + Choosing a Color
Prepping & Sanding Wood Furniture
Why & How to Prime Wood Furniture
Tips + Tricks to Painting Wood Furniture
Accessories, Details, & Styling {China Cabinet Makeover}

Coming up (still to do)
China Cabinet Makeover {Reveal}

The Simplest Pinecone Wreath!

I love the look of wreaths filled with pinecones, and was about 5 seconds from buying two over the weekend, until I looked at the price tag.  I was not paying $25 for pinecones, when my own backyard is filled with these lovely organic treasures.  But before putting the pinecone wreaths (that I loved) back on the shelf, I looked to see how they were made, and couldn’t believe how easy it appeared.  So off to the craft store I went…


Play by Play…Pinecone-Style

I bought an 18″ round wreath for $1.99 and collected a bucketful of pinecones from the backyard.  Now I have to confess, that I also used some store-bought pinecones because they were rounder and fuller, opposed to my skinny, sap-filled, backyard pinecones.

Using brown or green (green is all I had) wire, wrap it through the pinecone and twist, so it’s secure on the back side.

After adding the pinecones, the back of the wreath will look like a wire craze…that’s OKAY!  You won’t see the back.  If you want, trim the pieces about 1/4″ above the twist for a cleaner look.

Continue attaching the pinecones around the wreath and overlap them to add interest.

Voila – The simplest pinecone wreath is complete.

And I actually made 2.  These beautiful pinecone wreaths hang in my dining area on the sliding glass door, but you can hang them anywhere….on your front door, interior door(s), the wall, etc…

This year, my color palette is chocolate gold.  I love how gold looks with brownish tones.  Also in this space, is the new Organic Centerpiece I created!  It’s complete and ready to enjoy.

My Winter Wreath Creation

In the midst of preparing for Thanksgiving and taking care of my two crazy fun and amazing children, I had a few ~ very few ~ moments of downtime to create this Holiday wreath…I have to say, I’m quite happy with it!
I’m always searching the web for new ideas and inspiration.  One of my favorite design / DIY bloggers, Kate at Centsational Girl, created this whimsical wreath (below) for her front door…and it triggered my creative spark! So on one of my (many) recent trips to the craft store, I thought instead of buying an ordinary Holiday wreath, why not create my own….so here is the breakdown:
{MY INSPIRATION}
 {My Wreath Making Journey}
 I purchased a $5 wreath from AC Moore, which I scored for $2.50 with my 50% off coupon.  Then to give it some more interest and a whimsical-feel, I introduced some ‘curly-cue’ branches that I bought, as well as some sticks, branches, and pinecones from trees around my house.
 
Here is a pic of some of the other supplies I purchased to create my wreath, including a bouquet of poinsetta-like white flowers, different styles of berry branches, and ribbon.
Kate of Centsational Girl used spray on faux snow, so I tried it out….and I wouldn’t do it again.  I am a faux-snow-virgin, and it didn’t work as anticipated 🙁   I thought, like spray paint, that it would dry after a few hours…NO, it doesn’t really ever dry.  Anyway…I made it work. Next time, I think I’d use a spray paint or something similar.
So this morning, I started adding the details!
To create this white willowy wreath, I used my hands,
Hot Glue and…
 Floral Wire.
{VOILA…THE RESULT}
Since my front door is green, I decided to use white flowers along with deep gold and brown accents (berries). Then to pop it with color, the ribbon has some gold and red tones.  It’s a simple, yet fun wreath that is a welcome statement for our guests over the Holiday season!

I hope I’ve inspired you to create a fun and personal wreath for your home!  
And don’t you just LOVE the leaping reindeer wreath hanger?!…It’s available at Willow House.

A Simple Switch: Changing Your Cabinet Hardware

When we first moved into our home, a renovation to our kitchen space passed my mind, but didn’t happen 🙁  That’s okay….one day (I can dream for now ~ And if I got all my dreams today, I would have nothing to dream/strive for, right?! )  Anyway, SOOO….a quick fix that made a huge change to the overall look of my kitchen was changing the cabinet hardware.  See some before and afters and the step by step changes.  Also check out some some other cabinet pulls and knobs that I love!
 Cabinet hardware is SO easy to change, and makes such an impact!
all you need is a screwdriver and some time.  The existing hardware on my kitchen cabinet was a plastic laqcuered handle in forest green…  See the AFTER…
The cabinet hardware is now a simple, stream-lined look with a matte oil rubbed bronze finish.  The quick switch even made the cabinets themselves look better!
Check out this great resources for Cabinet Hardware:
Here are some samples of my favorite cabinet hardware that would complement any decor.  Hardware also is available in a huge range of finishes (chrome, nickel, oil rubbed bronze, polished, matte, etc)…choose what’s best to suit your space!
   

{Tutorial} Tiling a Backsplash

Simple things, make a BIG difference.
I’m always sprucing my house, thinking about what to update, and continually making changes.  A quick reno that I just finished was adding a tile backsplash to my powder room sink.
This is how the powder room looked before we moved in.
The walls were painted a semi-gloss, DARK forest green color and there was an ugly flower border at the top ~ too bad I don’t have a picture of that…you would have loved it, NOT!
Once we got our hands on it, we removed the ugly border and painted the room a card board brown color (one of my favs) and the sink wall, a burnt orange (very warm and inviting ~ the accent color throughout the house).  BUT the sink was still missing something…
So on one of our numerous Home Depot trips, I was strolling down the tile aisle, and picked up a 12×12 sheet of 1×1 slate tiles and thought they’d be perfect for the backsplash of the powder room.  I also picked up this great product that’s an adhesive and grout; its available in different colors as well…I got a bone color.
All-in-one….FABULOUS!

The process is fairly simple and straight-forward.  Before putting on the adhesive, lay the tile onto the wall and mark the outline with a pencil.  Then using painters tape, tape the outer perimeter so you avoid any glue getting onto your wall.  Then using a putty knife or your finger (which is what I did), put a thin layer of adhesive onto the back of the tile.  Do this in stages….one tile at a time.  In my case, the tiles were adhered to a mesh bag, but I cut the mesh lining and adhered the tile in 3 row segments.  So now all the tile is up…

Once the tile is on the wall, carefully remove the painters tape ~ you can do this before the adhesive dries.  The drying time is about 24-48 hours.

After the tile is completely dry, it’s time to grout.  The area that I was working in was tight and awkward, so I couldn’t use a typical grout application, using a float.  I put the grout in a Ziploc bag and snipped the corner edge off to create a 1/8″-1/4″ hole.  Then just like piping a cake, I filled the joints with the grout.

After the joints were grouted, it’s time to wash it away with water.  Using a rough sponge, go over the tile with water.  Over and Over and Over until the tile surface is clean and grit-free.  Depending on the look you want to achieve, you may want to use a sealing product on the tile BEFORE grouting. This will seal and protect the tile.  Also, when you are finished, it’s always a good idea to seal the grout lines too.  Both sealing products are available at any hardware store.

Voila…complete.
To cap off the top of the backsplash, I used a 1/4″ barliner….it just needed a final touch!  The next step is to replace the sink faucet…I’m thinking something in an Oil Rubbed Bronze finish….that I might need a little handyman help with 🙂
Onto my next tiling project….the fireplace surround
Check back soon for the results!!

Check out my metamorphosis at BNOTP
  • 1
  • 2