
Bathroom Makeover: Tile Accent Border {Day 18}

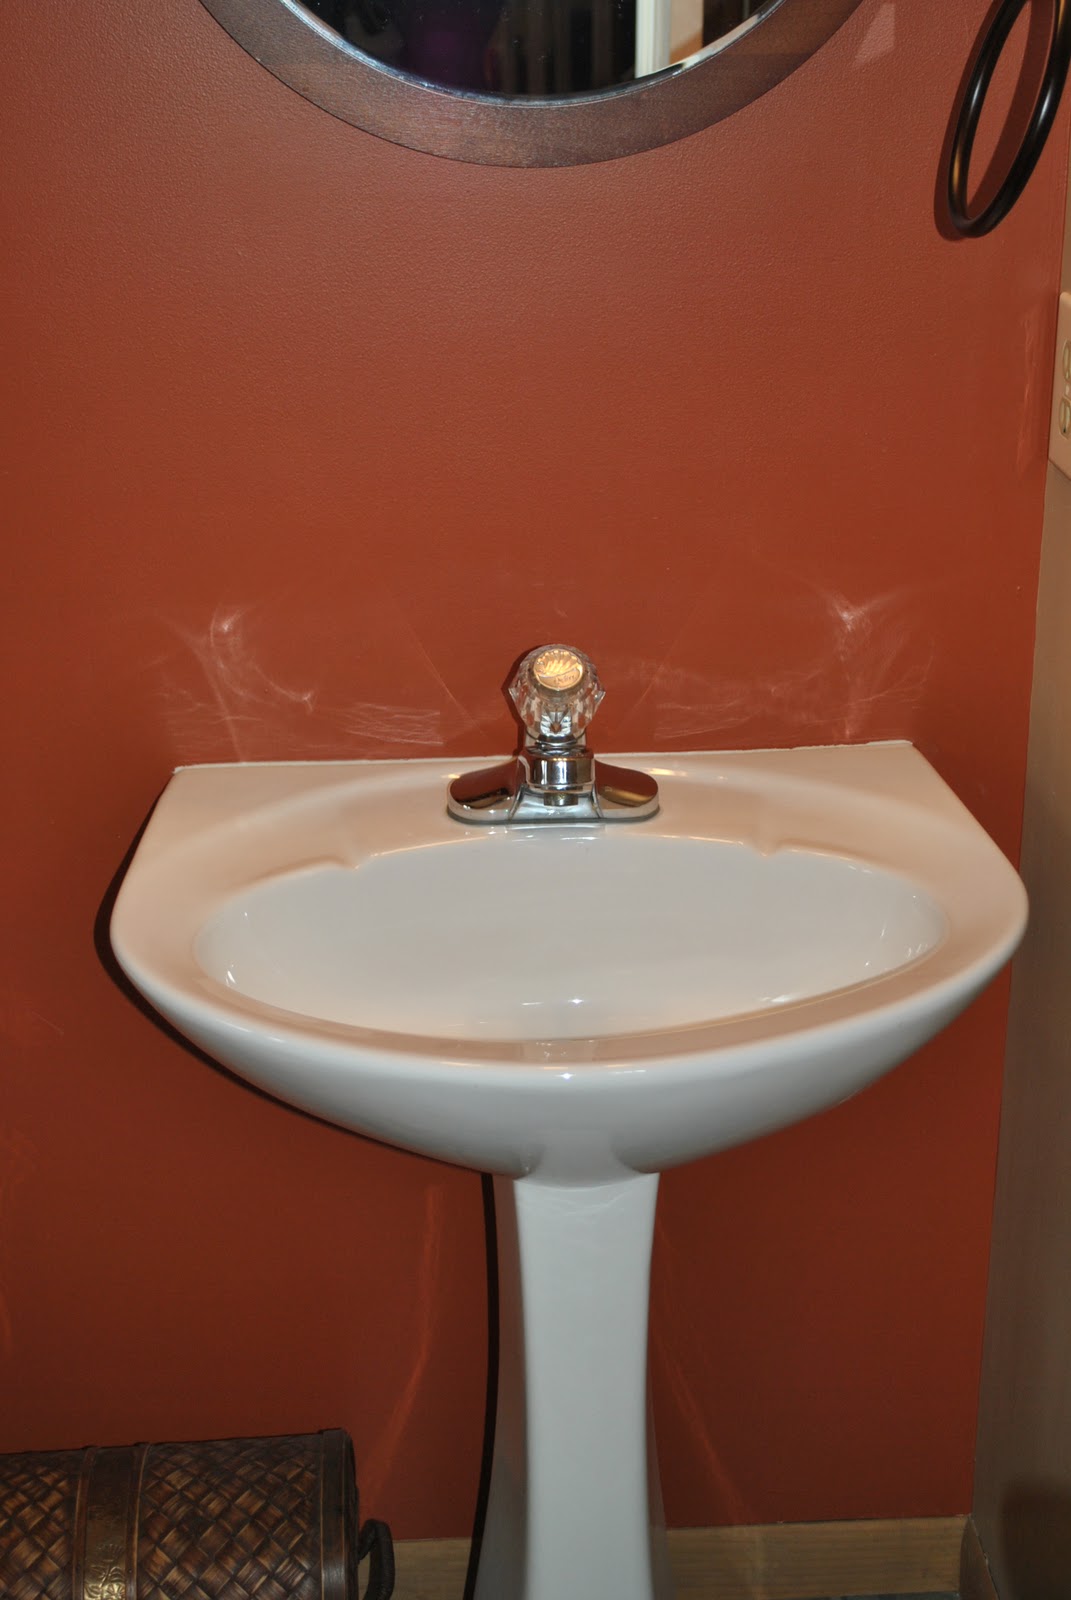
Since the wallpaper, the last phase of the bathroom makeover, was fairly quick taking only a day from start to finish, I was able to move on the next step pretty quick.  With the completion of the dynamic + bold wallpaper, I am feeling so happy with how the bathroom is coming along.  There were a few points that I questioned my decisions + selections, but I feel the wallpaper really pulled it together and added the interest needed to make this new space + funky against the stark white tile.  It’s all about the balance and the contrast…

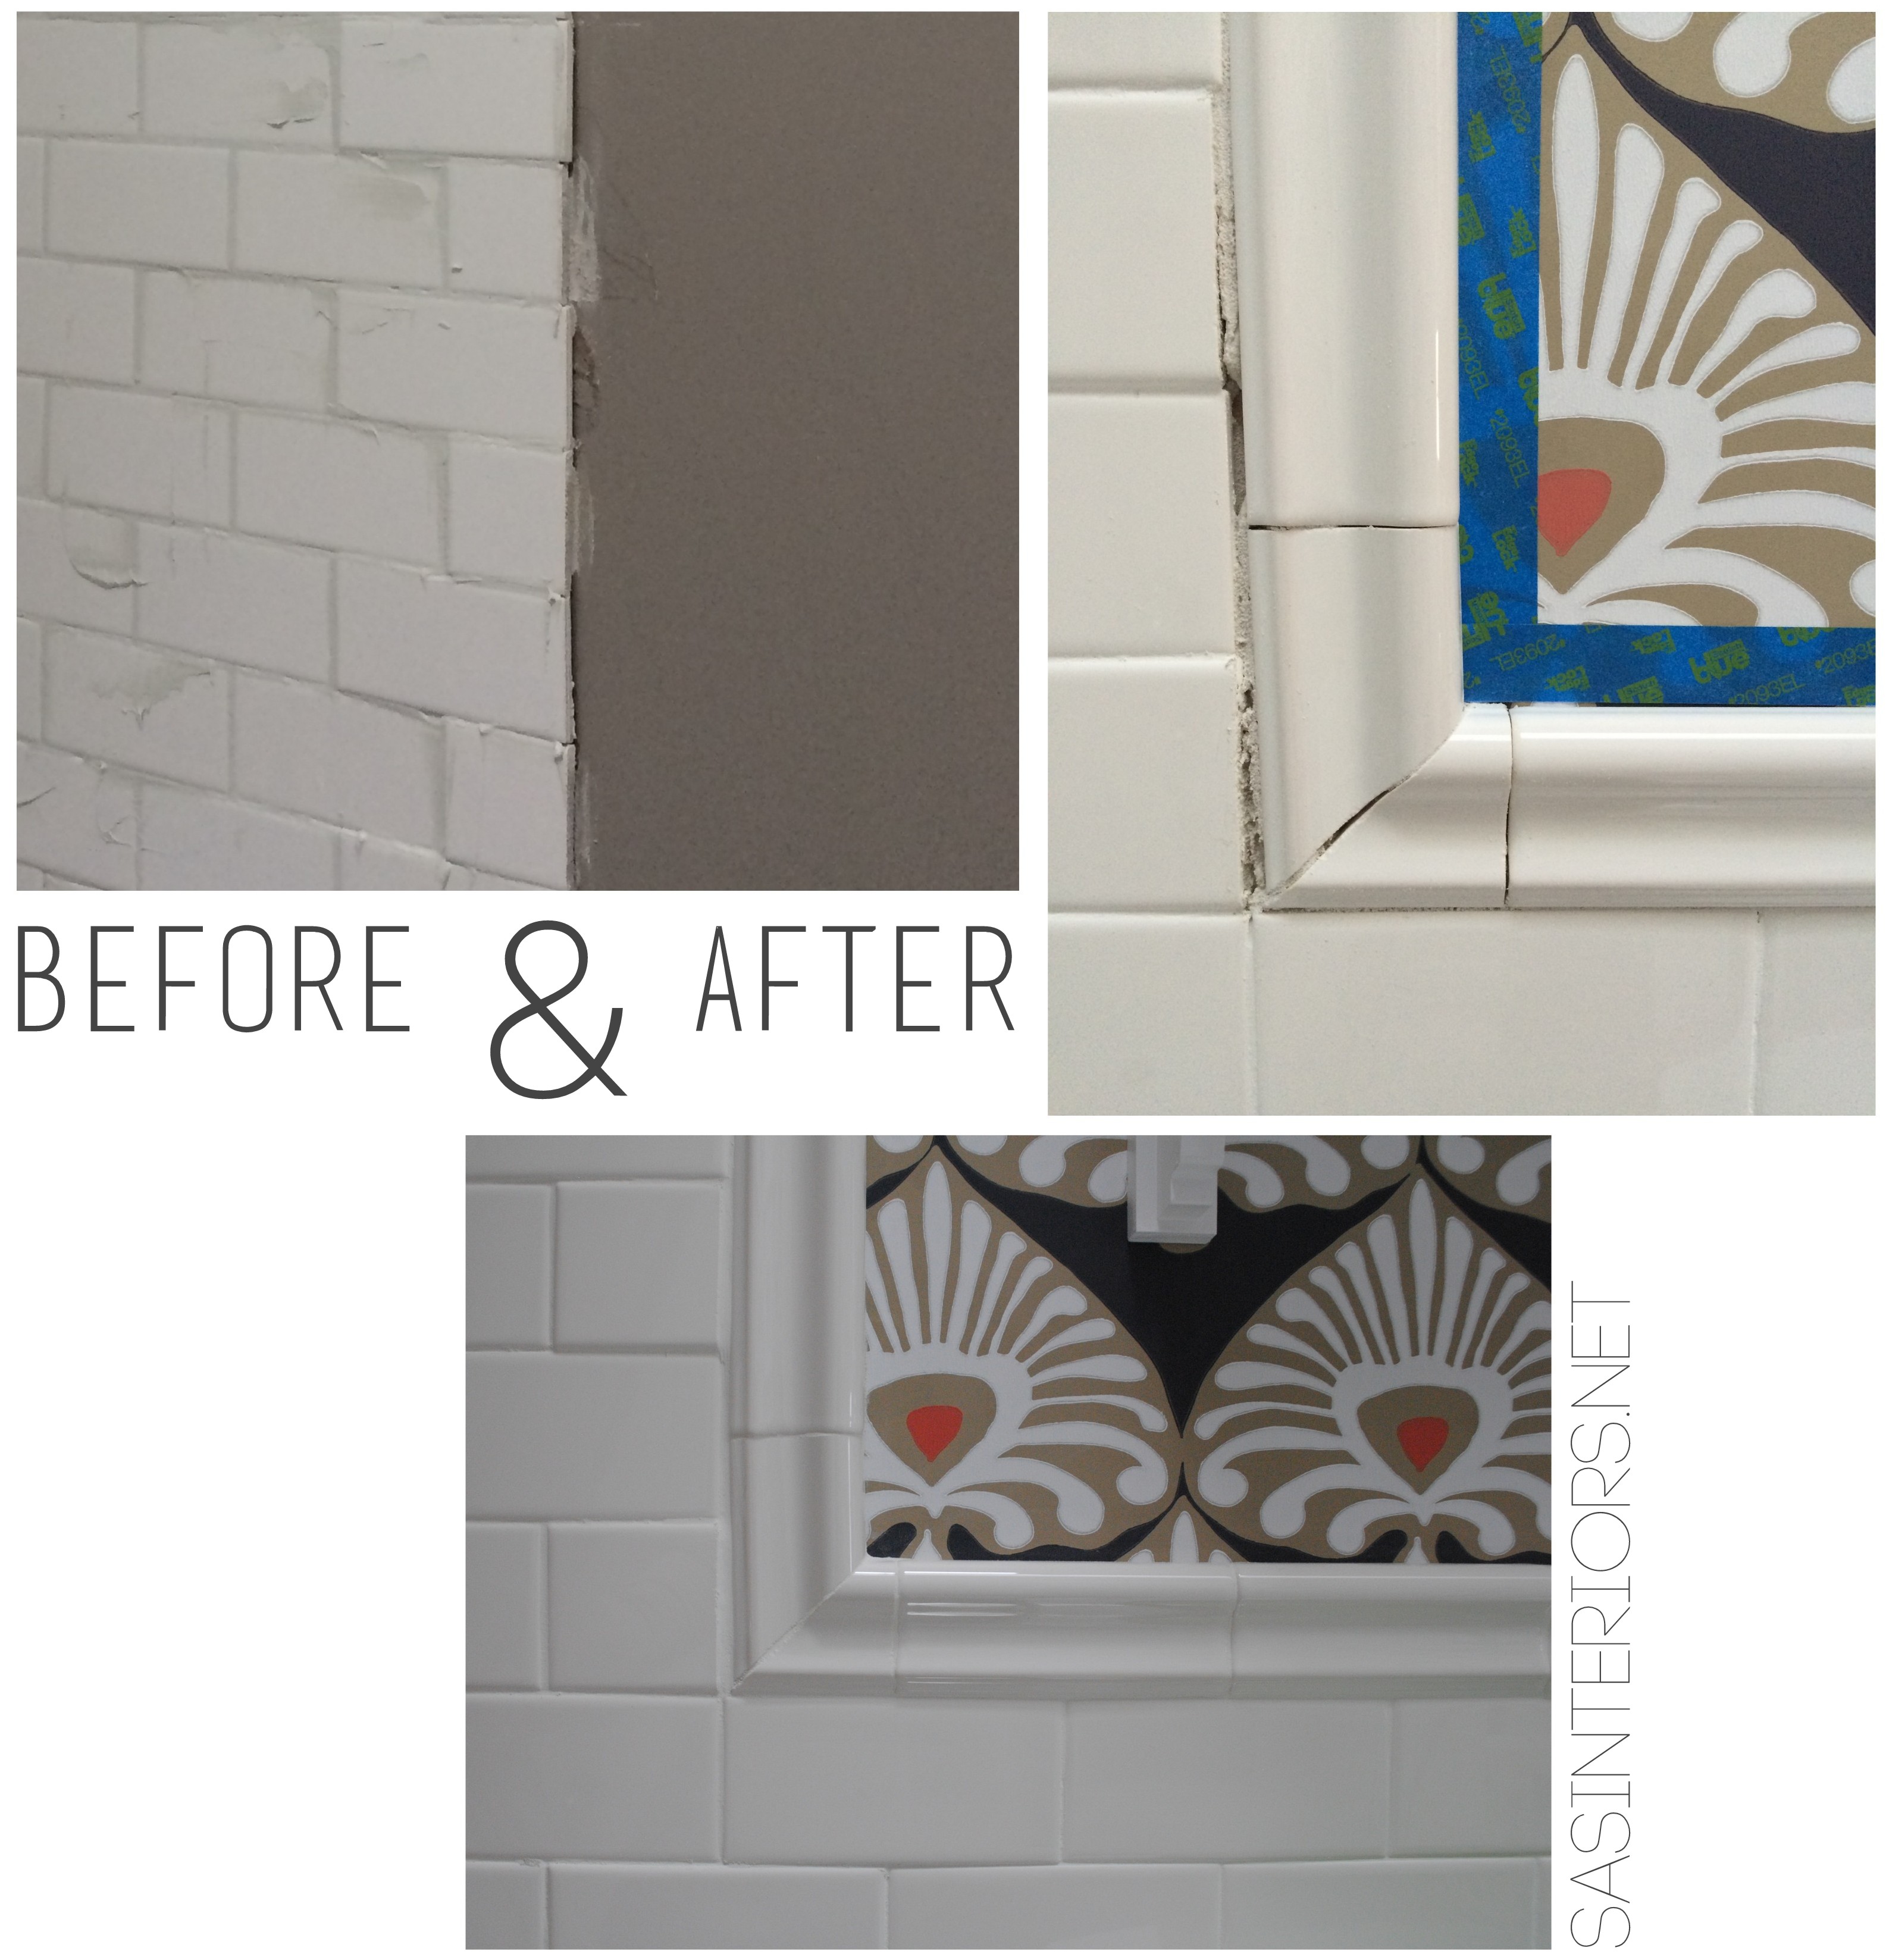
Onto the next phase to get this space done.  I’m on Day 18 of this Bathroom Makeover in 30 Days Challenge and it was spent adding a tile accent (trim) border to finish the edge of the subway tile.

Take a look…

Adding a Tile Trim Border in a bathroom to give a finished edge!

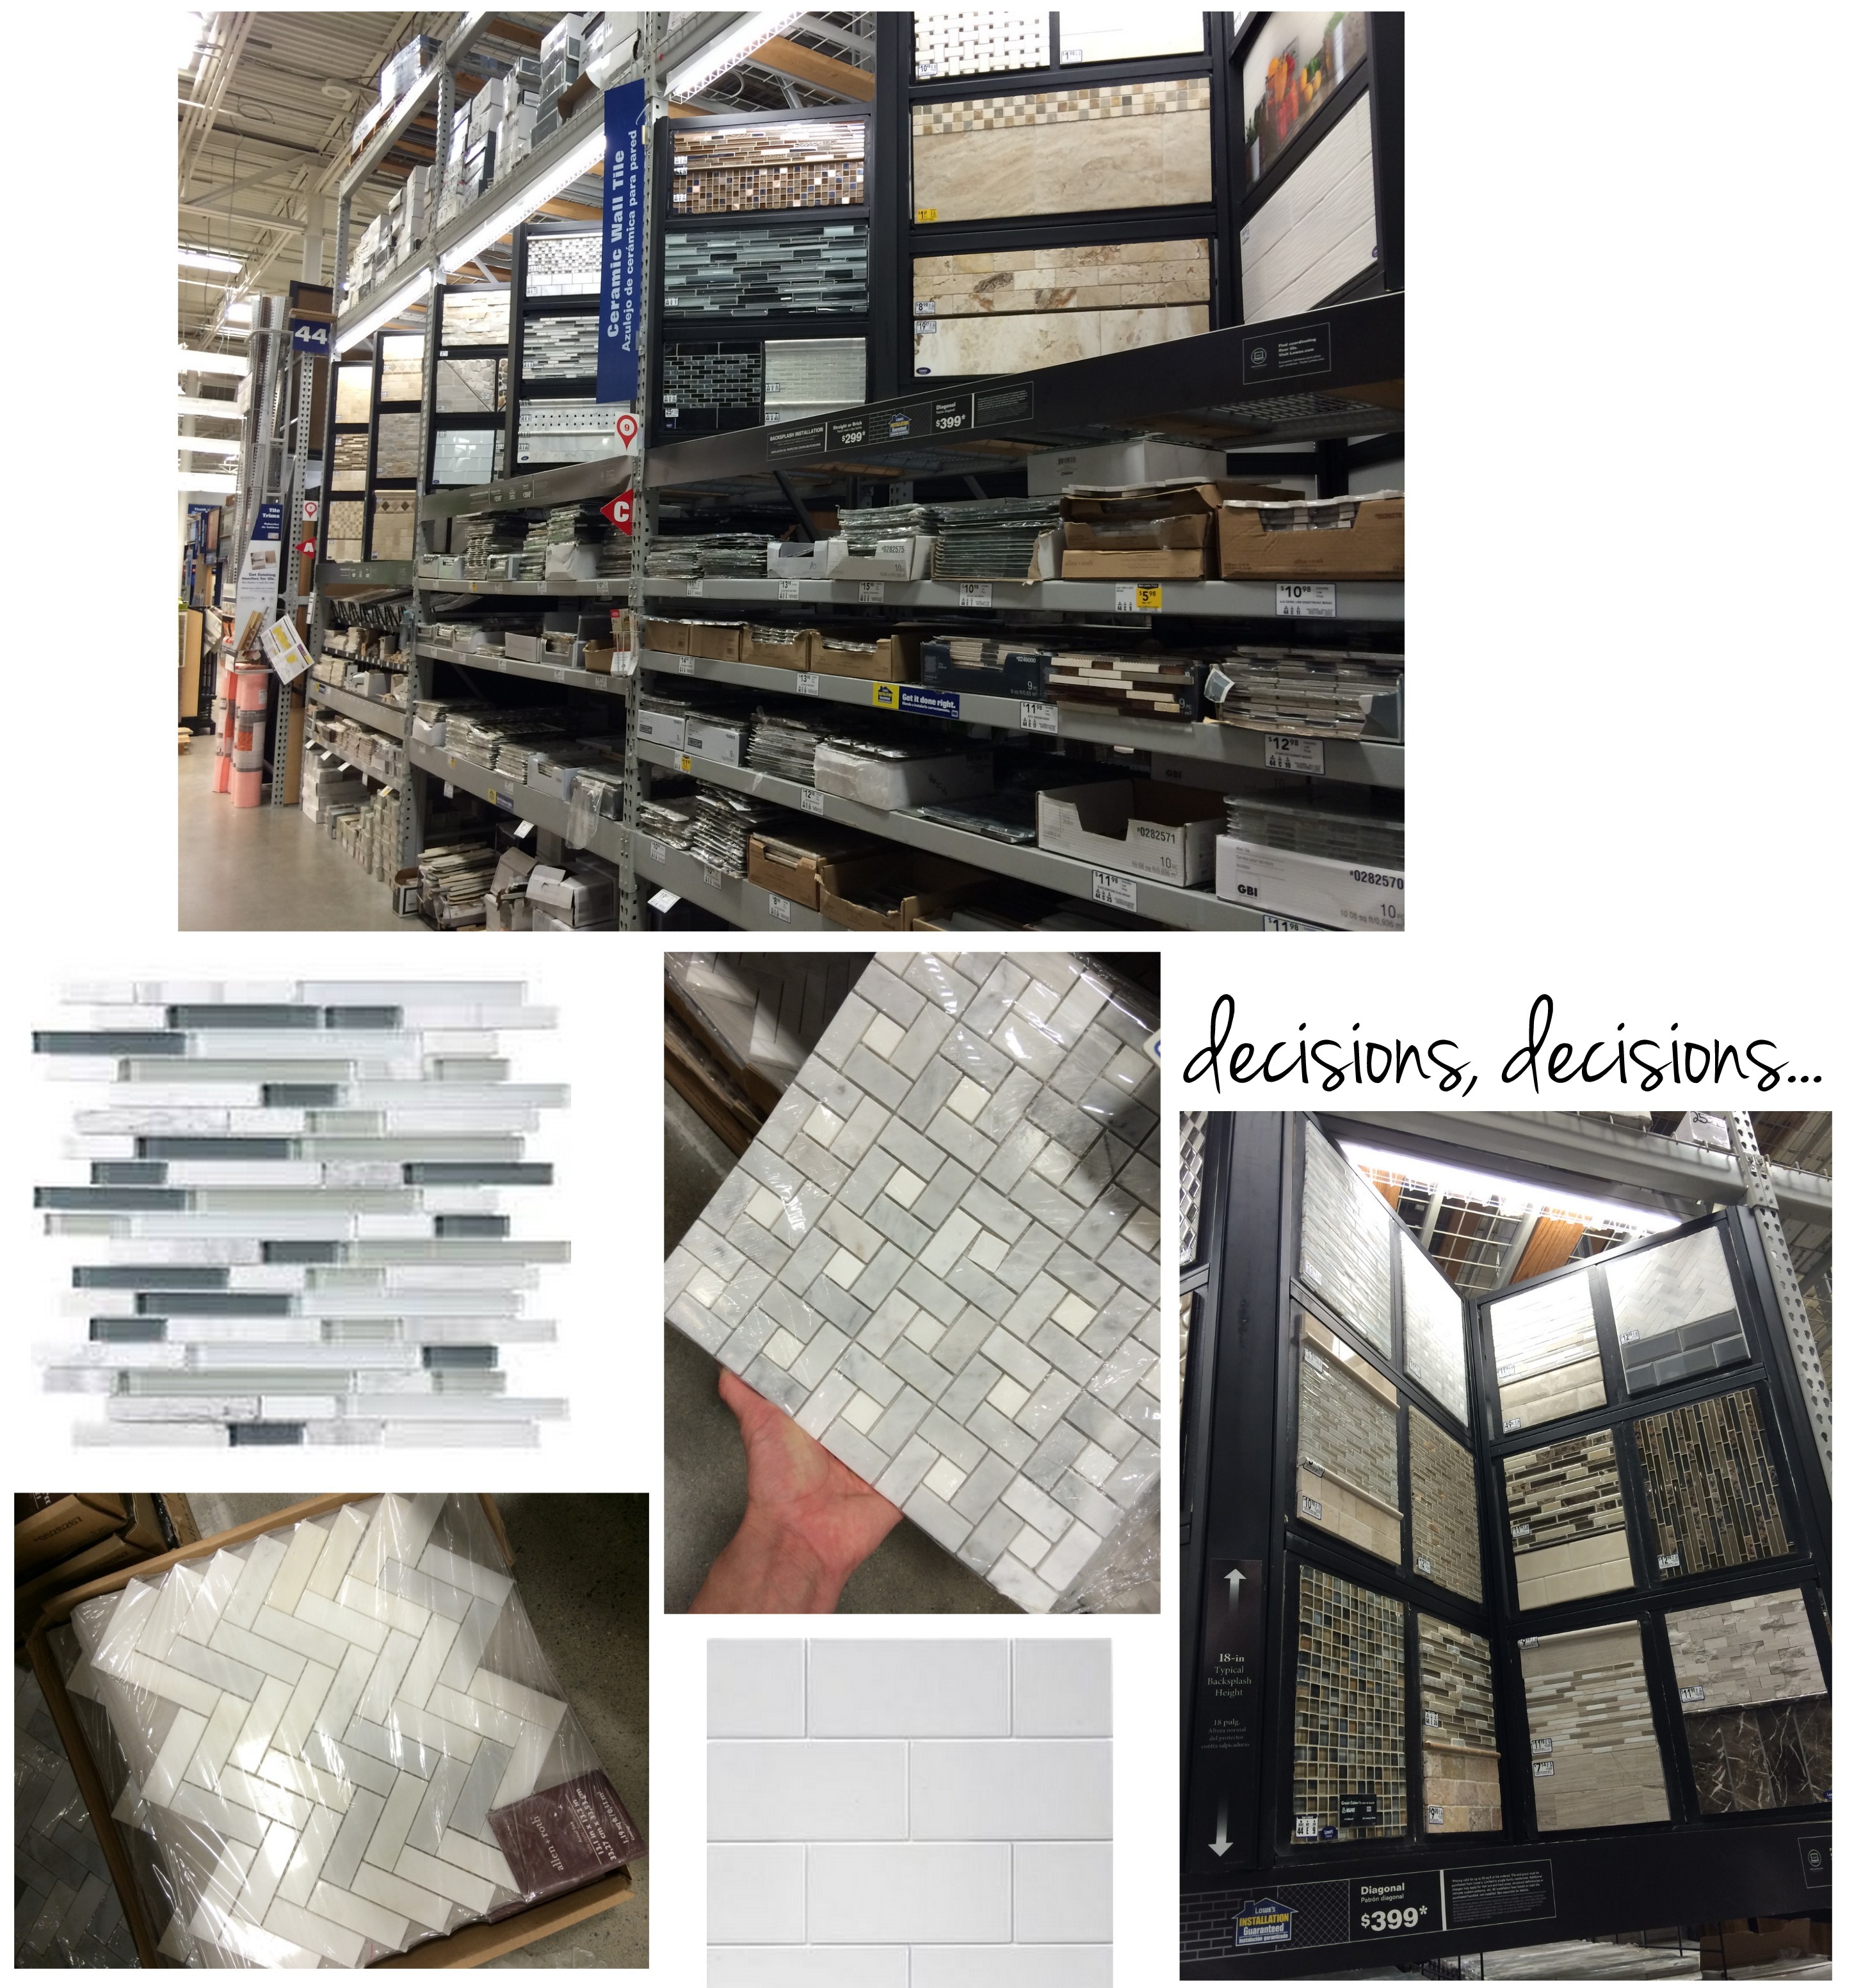
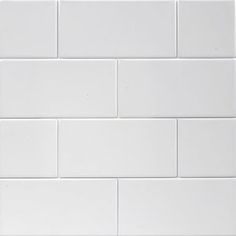
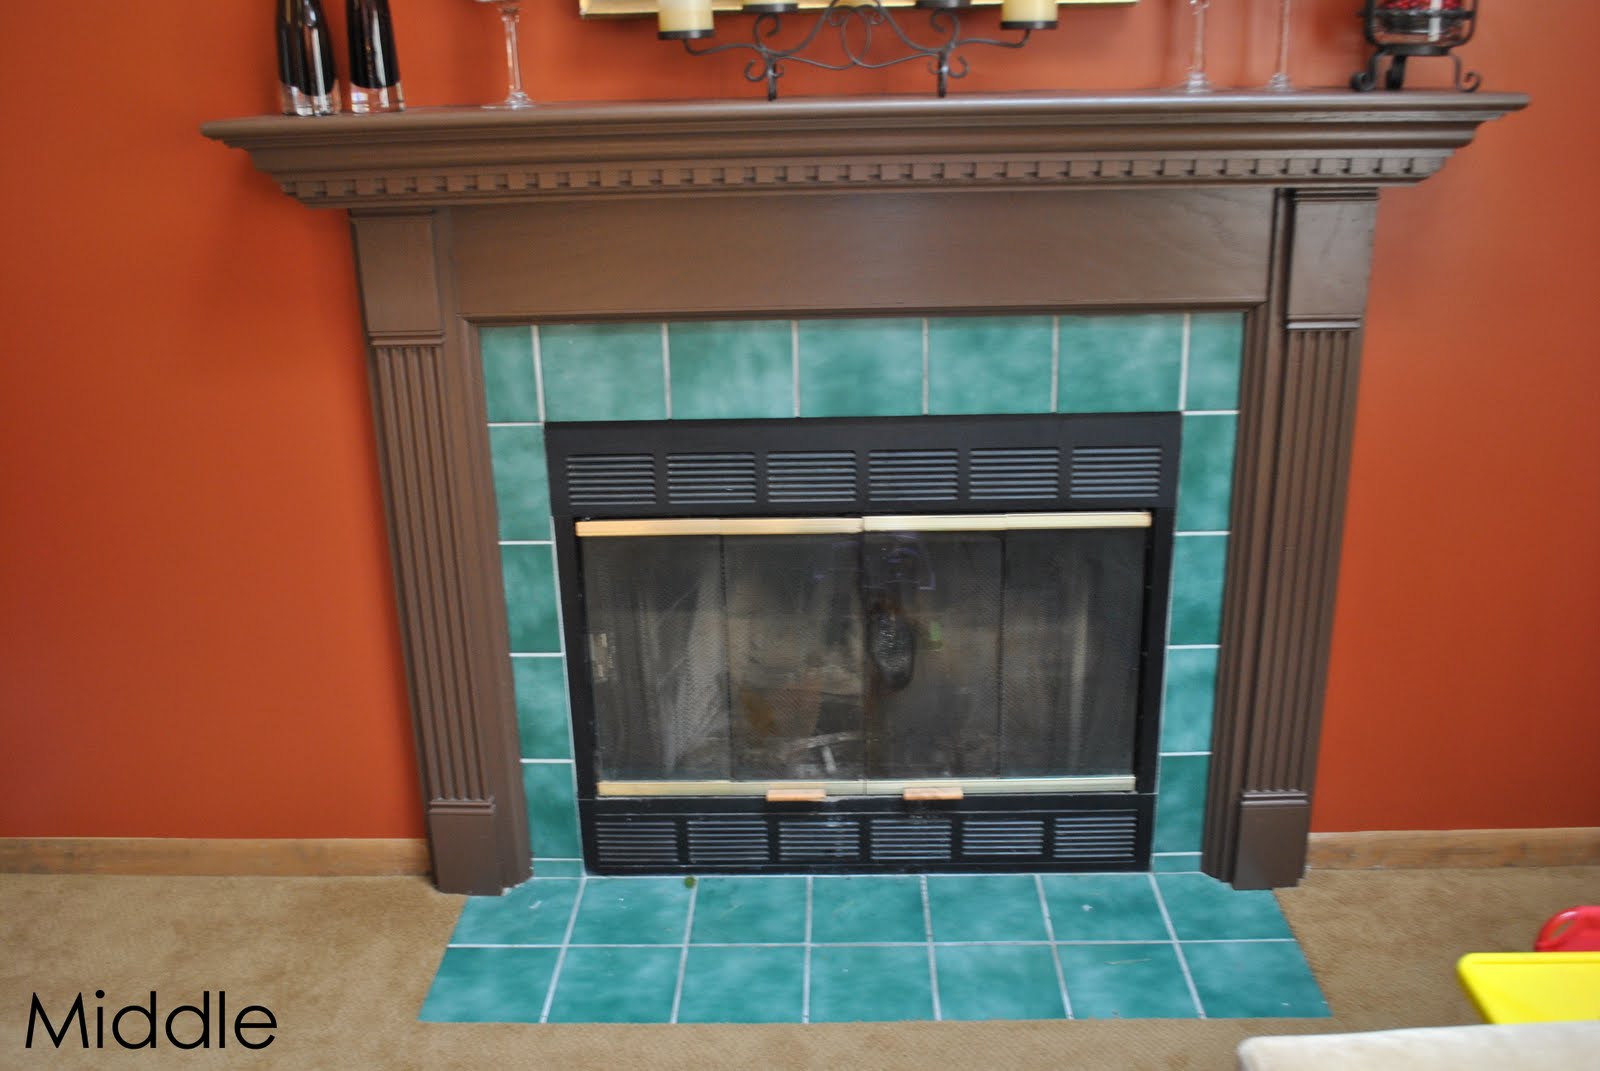
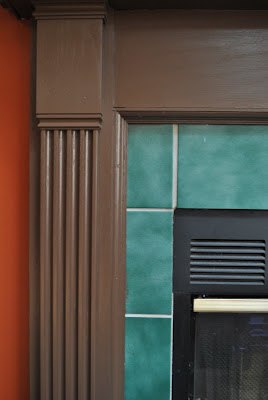
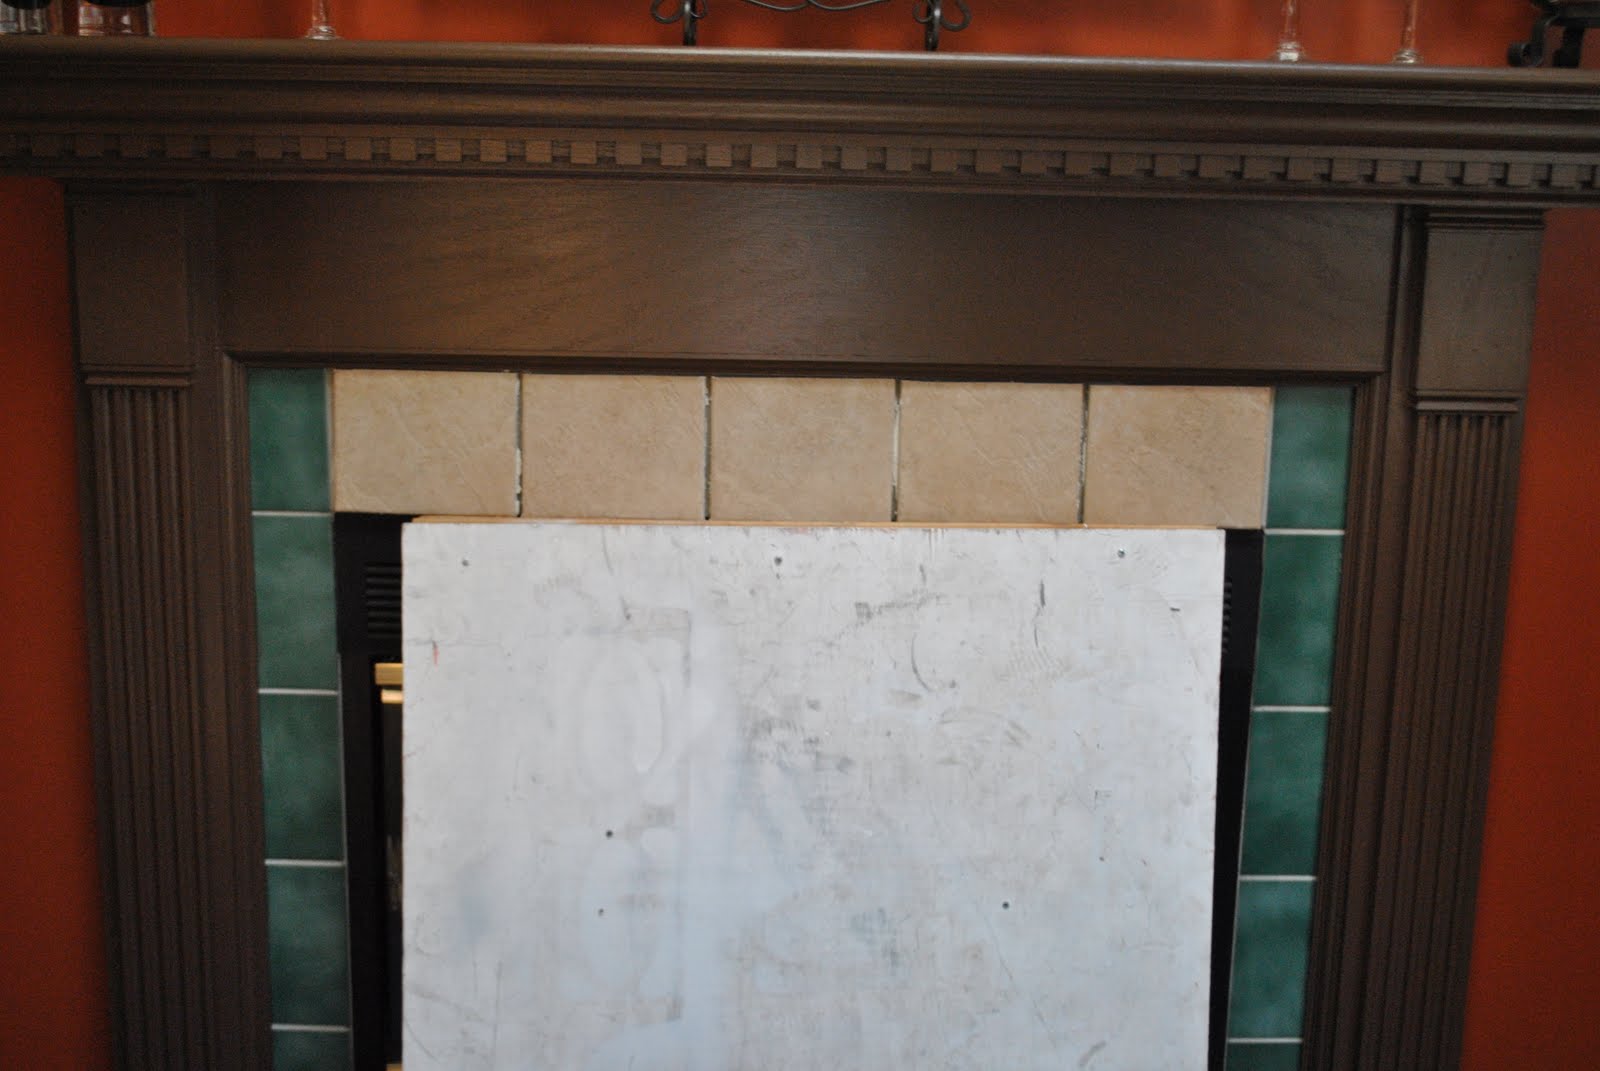
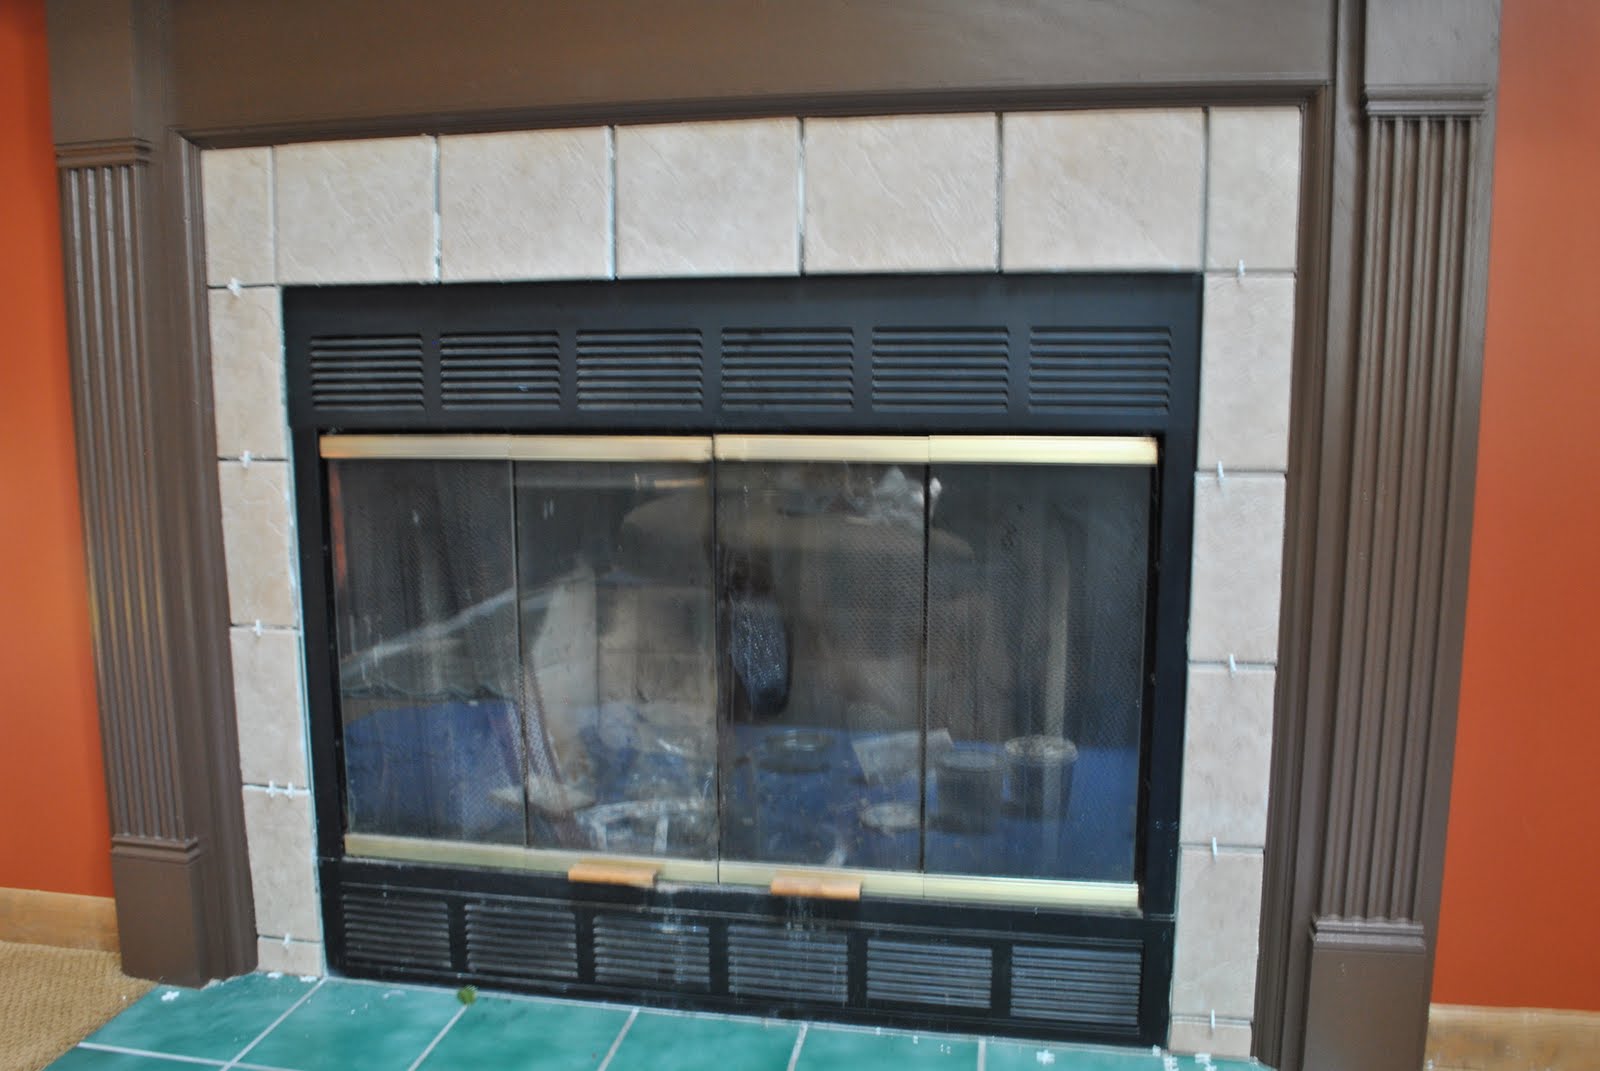
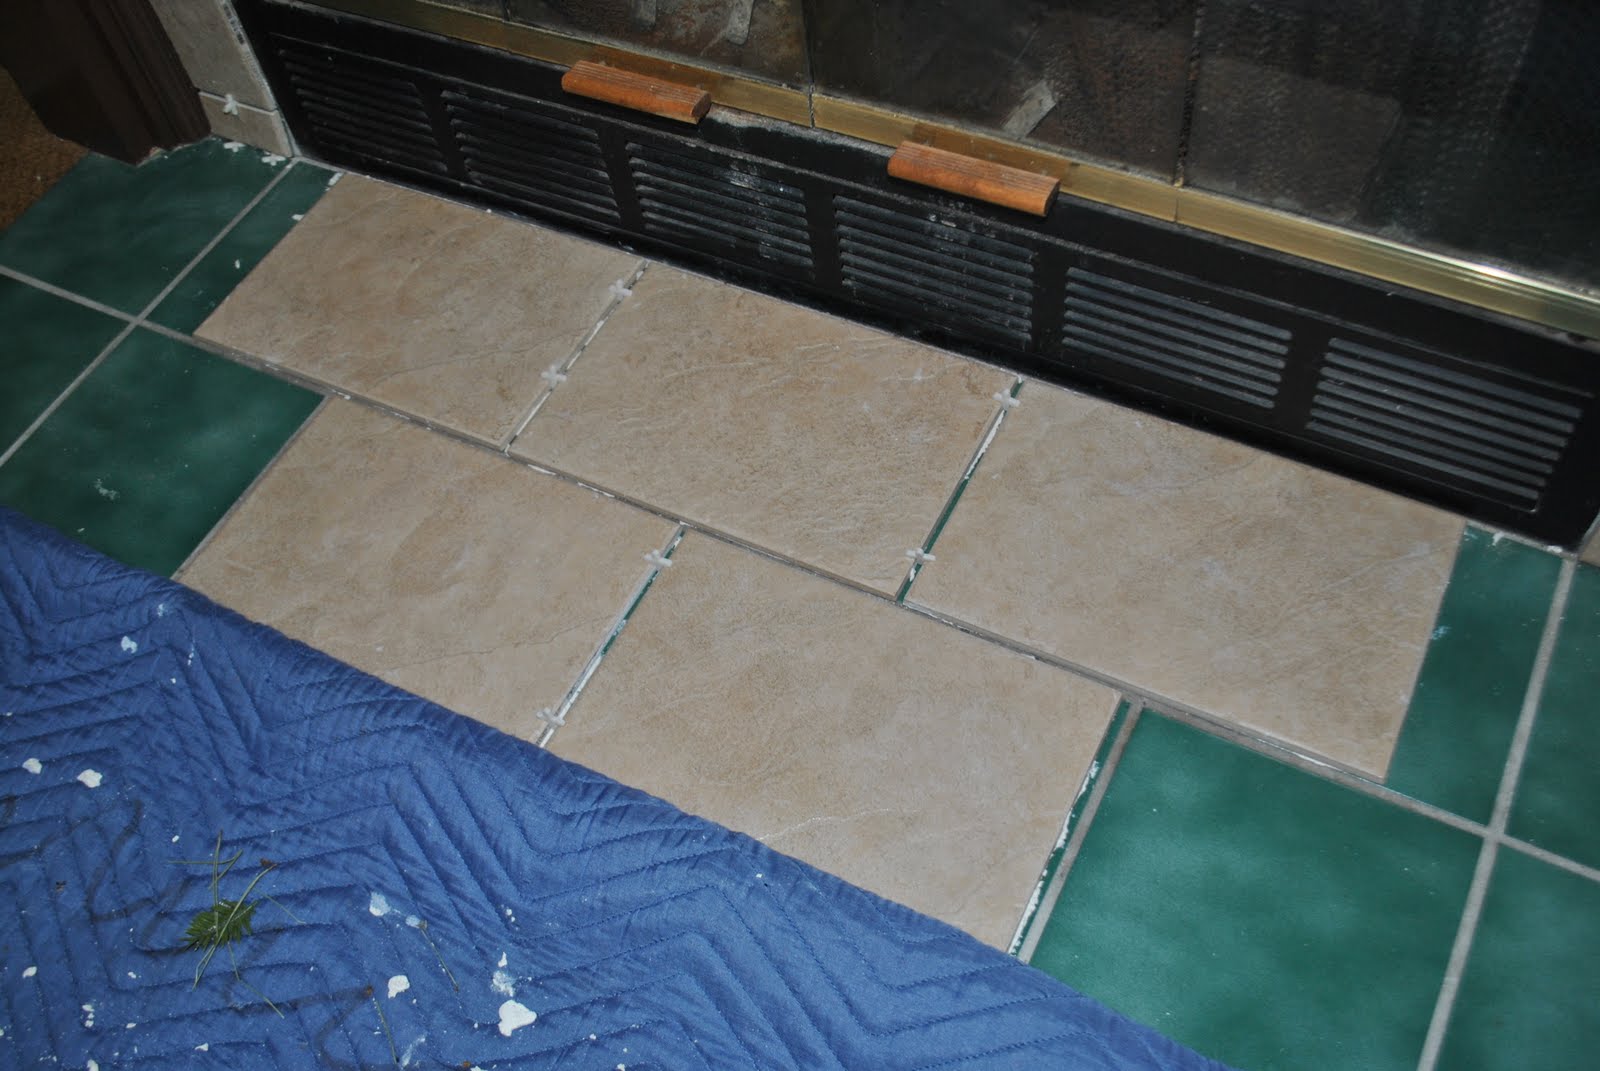
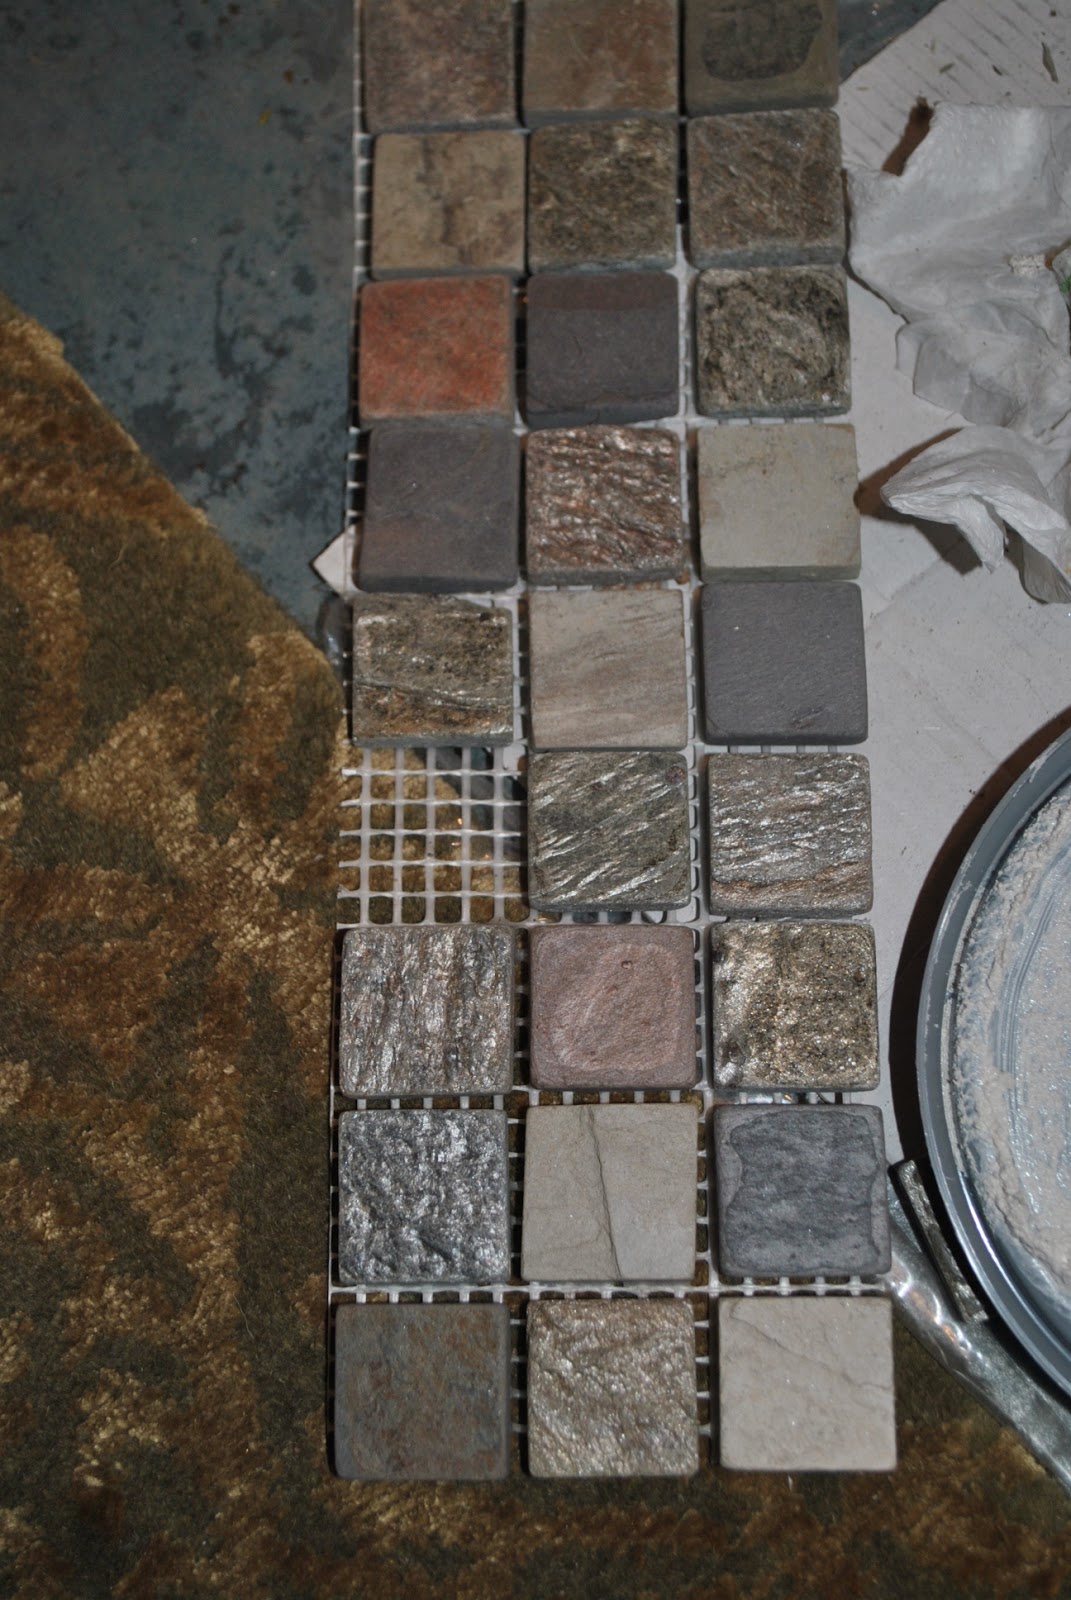
From the start, I had intention of using a tile board to finish off the subway tile, but once the installation of the horizontally layed subway tile was complete, it confirmed that something was definitely needed to finish the ends.  I chose a pretty decorative tile at Lowe’s that was the perfect complement to the subway tile.

American Olean Linea Gloss Ice White Ceramic Chair Rail Tile (Common: 2-in x 6-in; Actual: 2-in x 6-in)
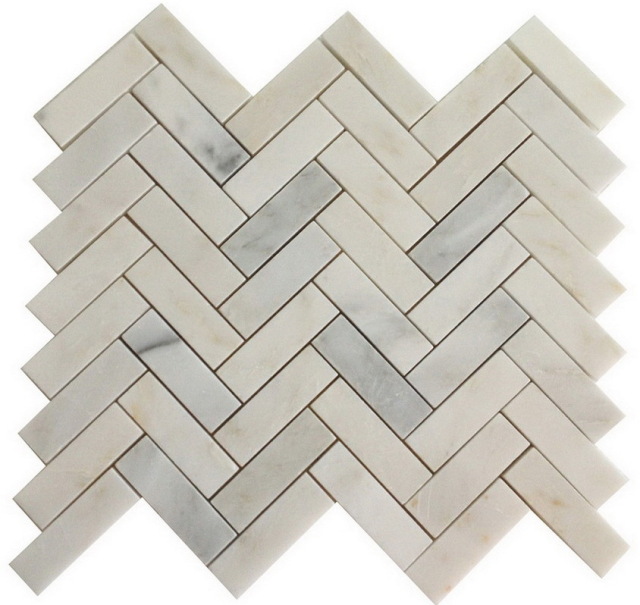
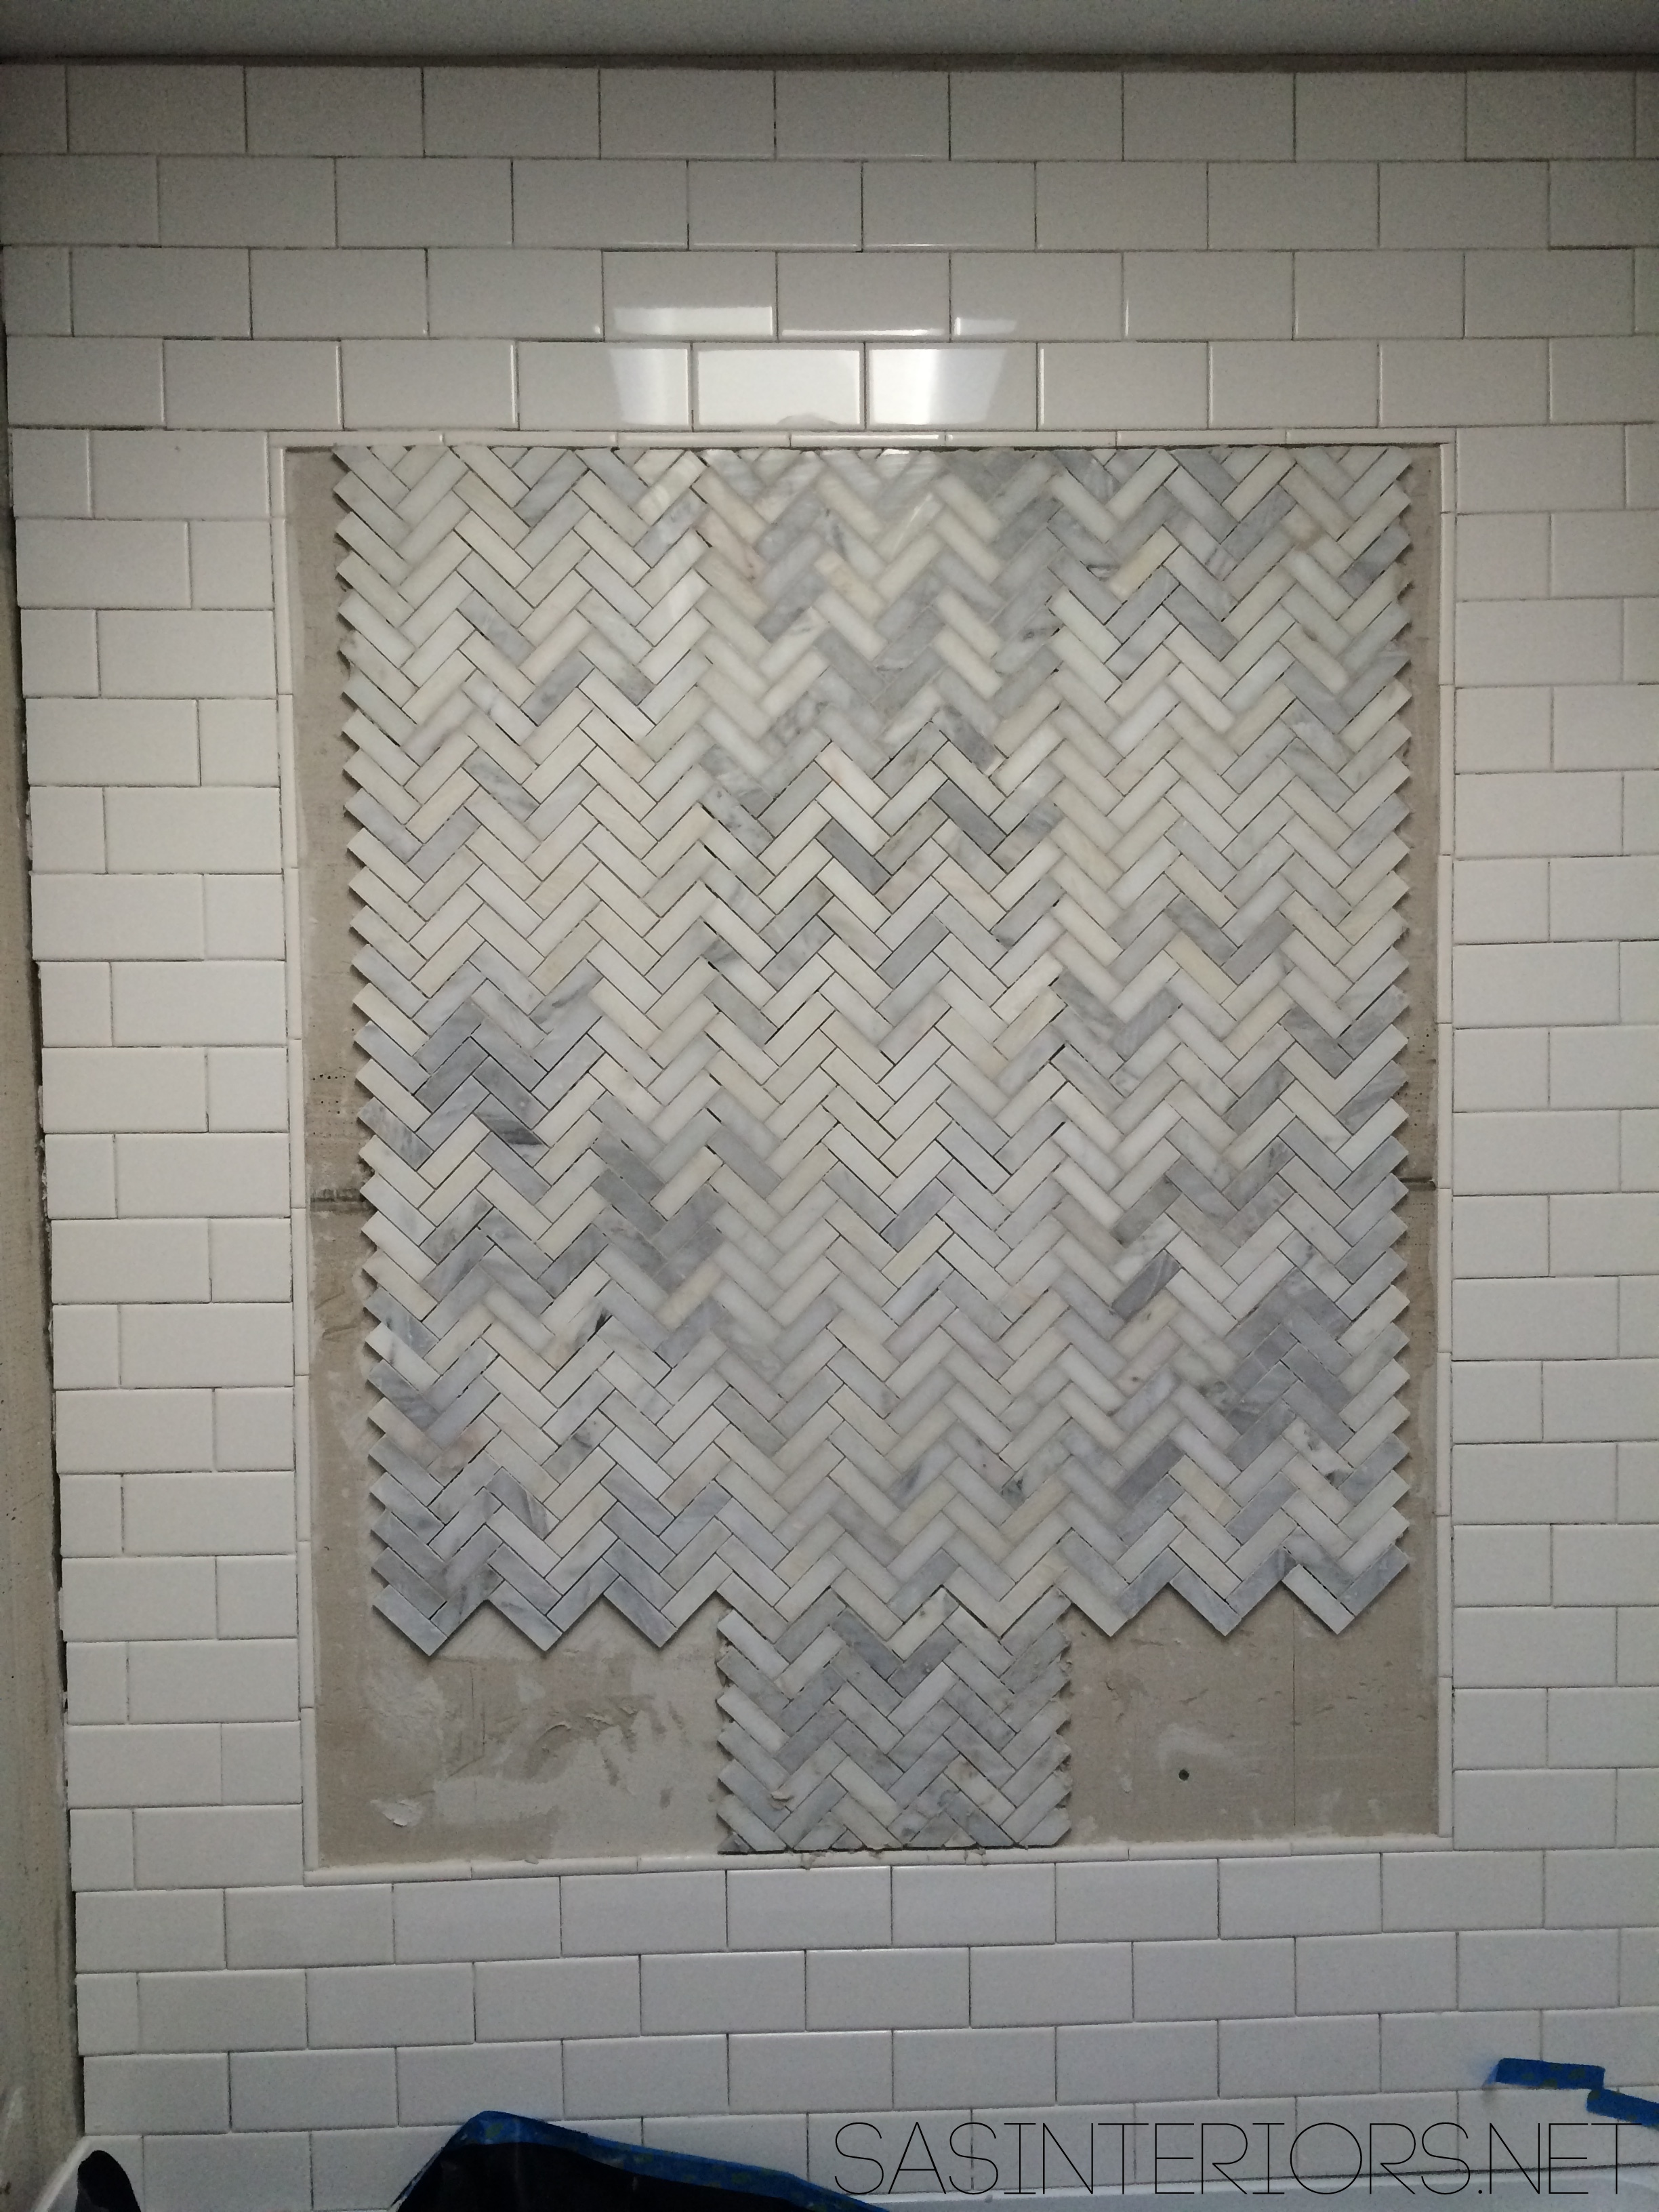
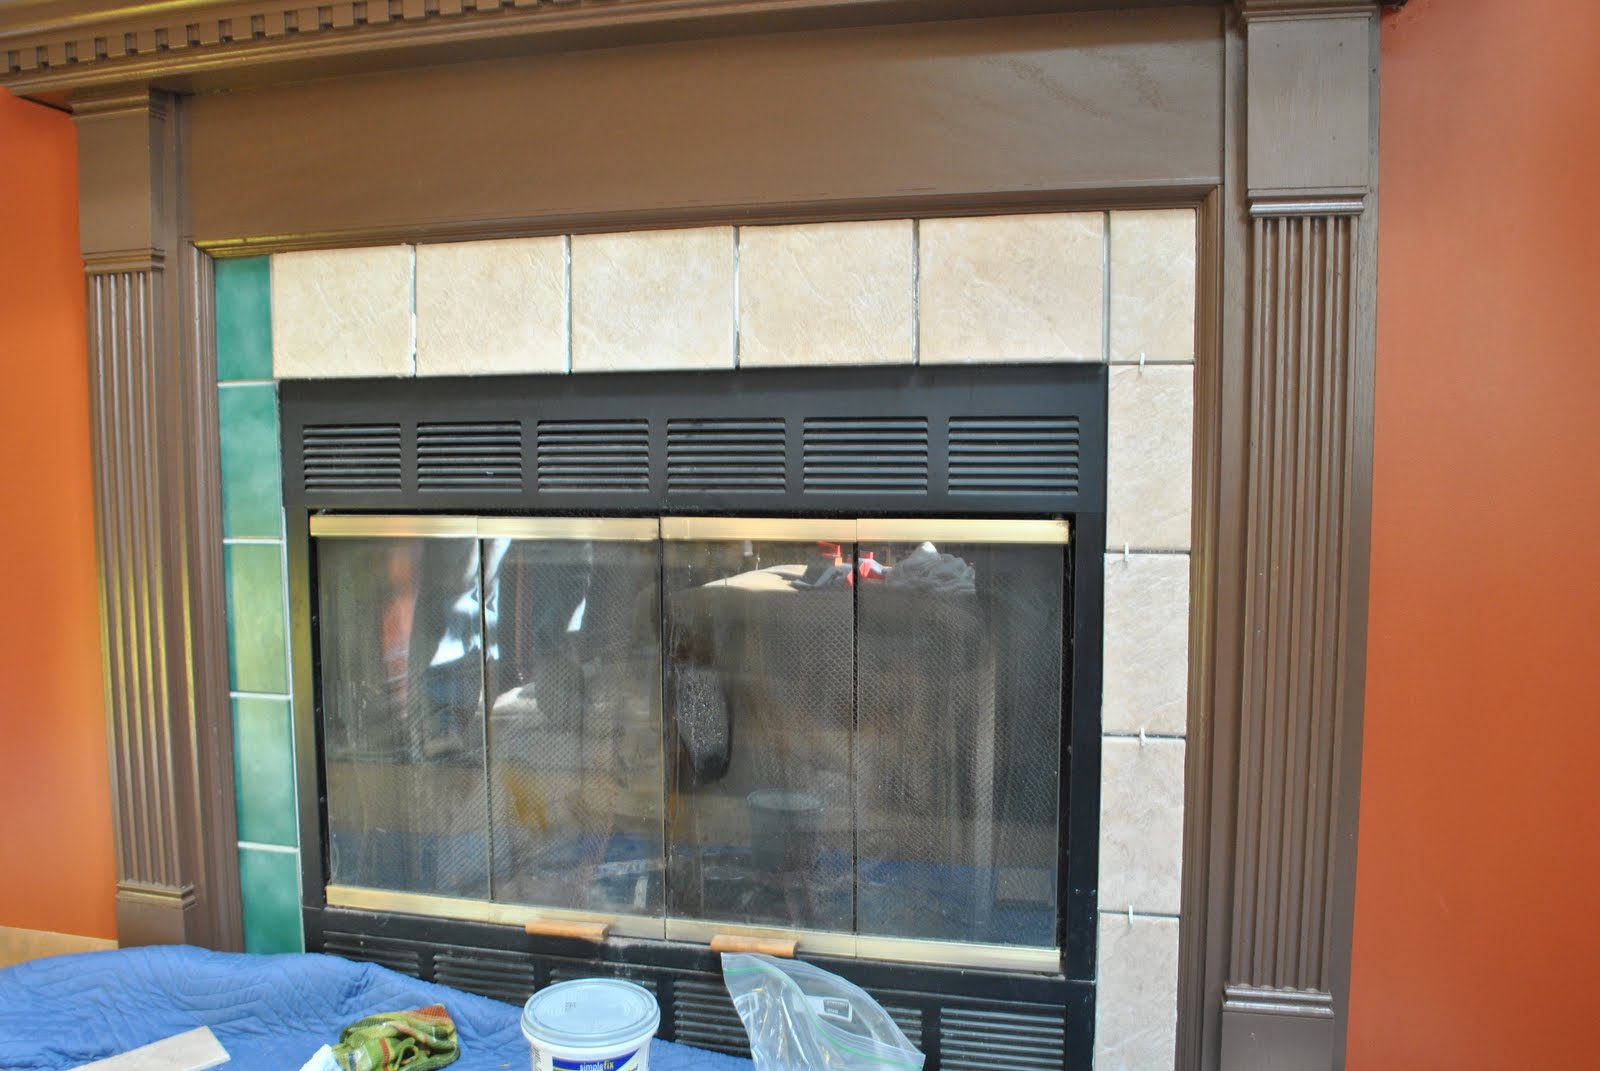
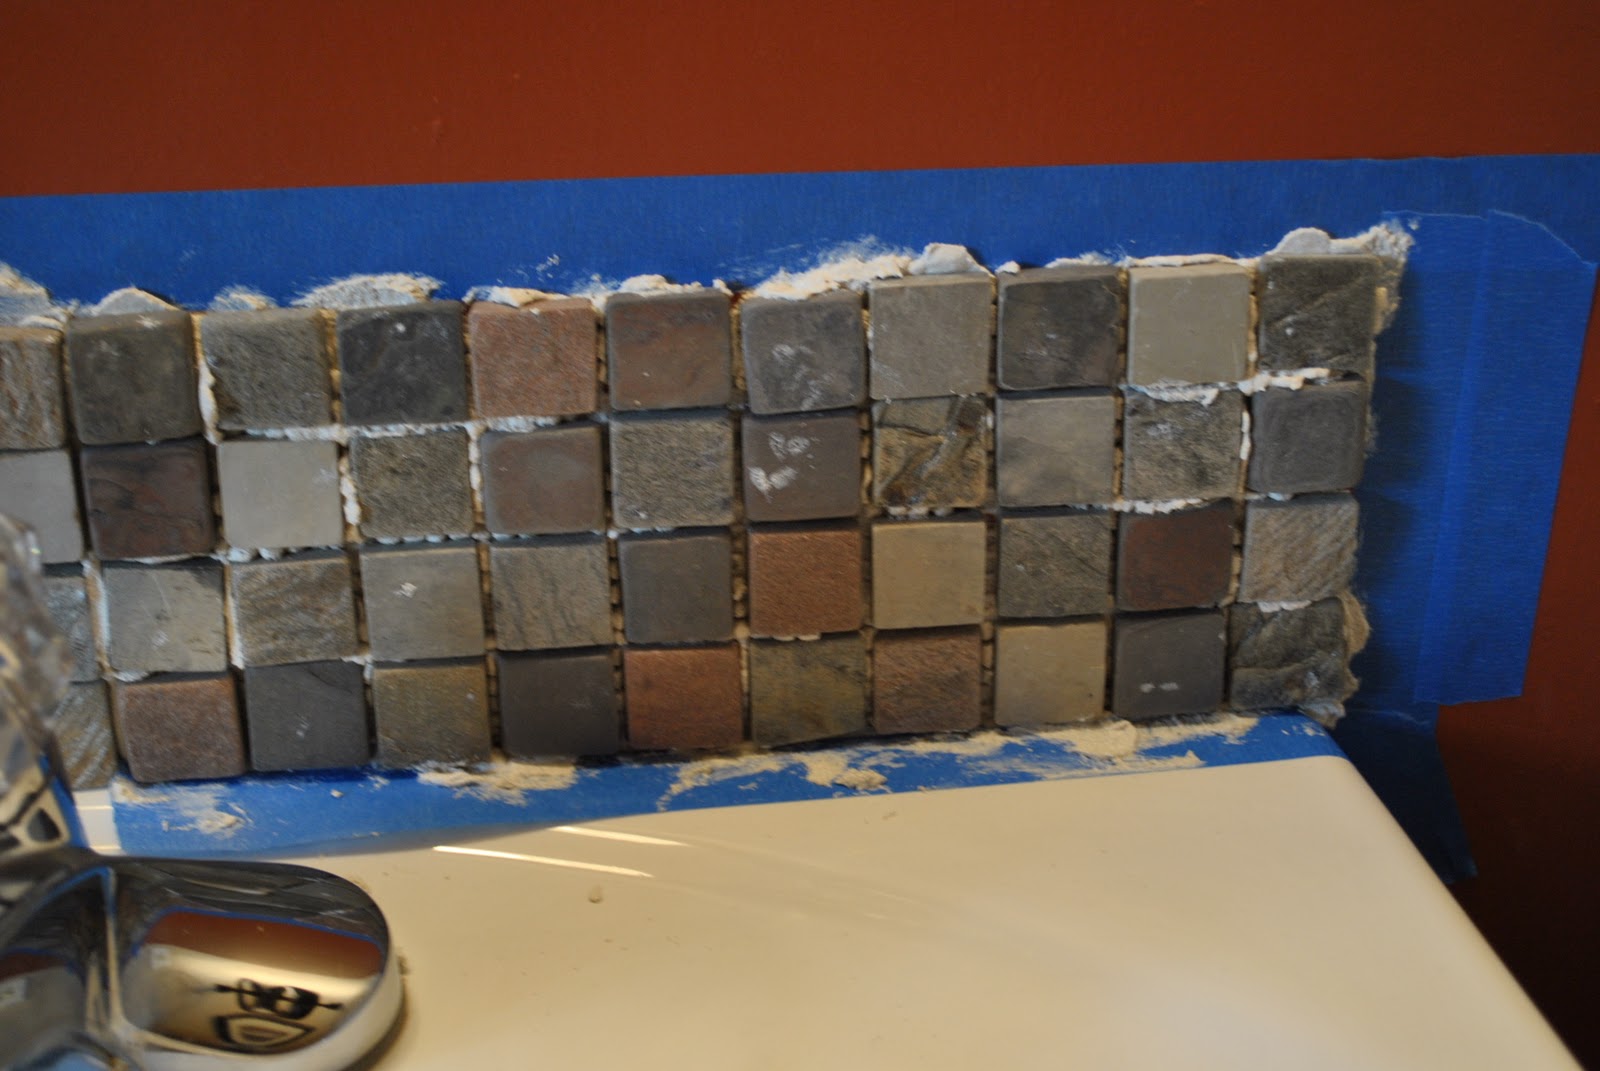
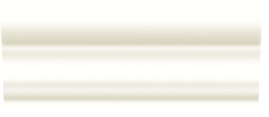
I chose to use the border tile vertically to border the shower tile and then turn it horizontally to border the subway tile on the walls outside of the shower space.  Originally I was going to use this accent barliner to border the herringbone tile in the shower as well, but I chose a simpler tile instead > see it here.   Like I said before, this has been my biggest tile job EVER.  I HAVE NEVER ventured into a project as big, so I was learning as I worked.  I questioned my skillset a few times along the way, but in the end I am very happy with the result.

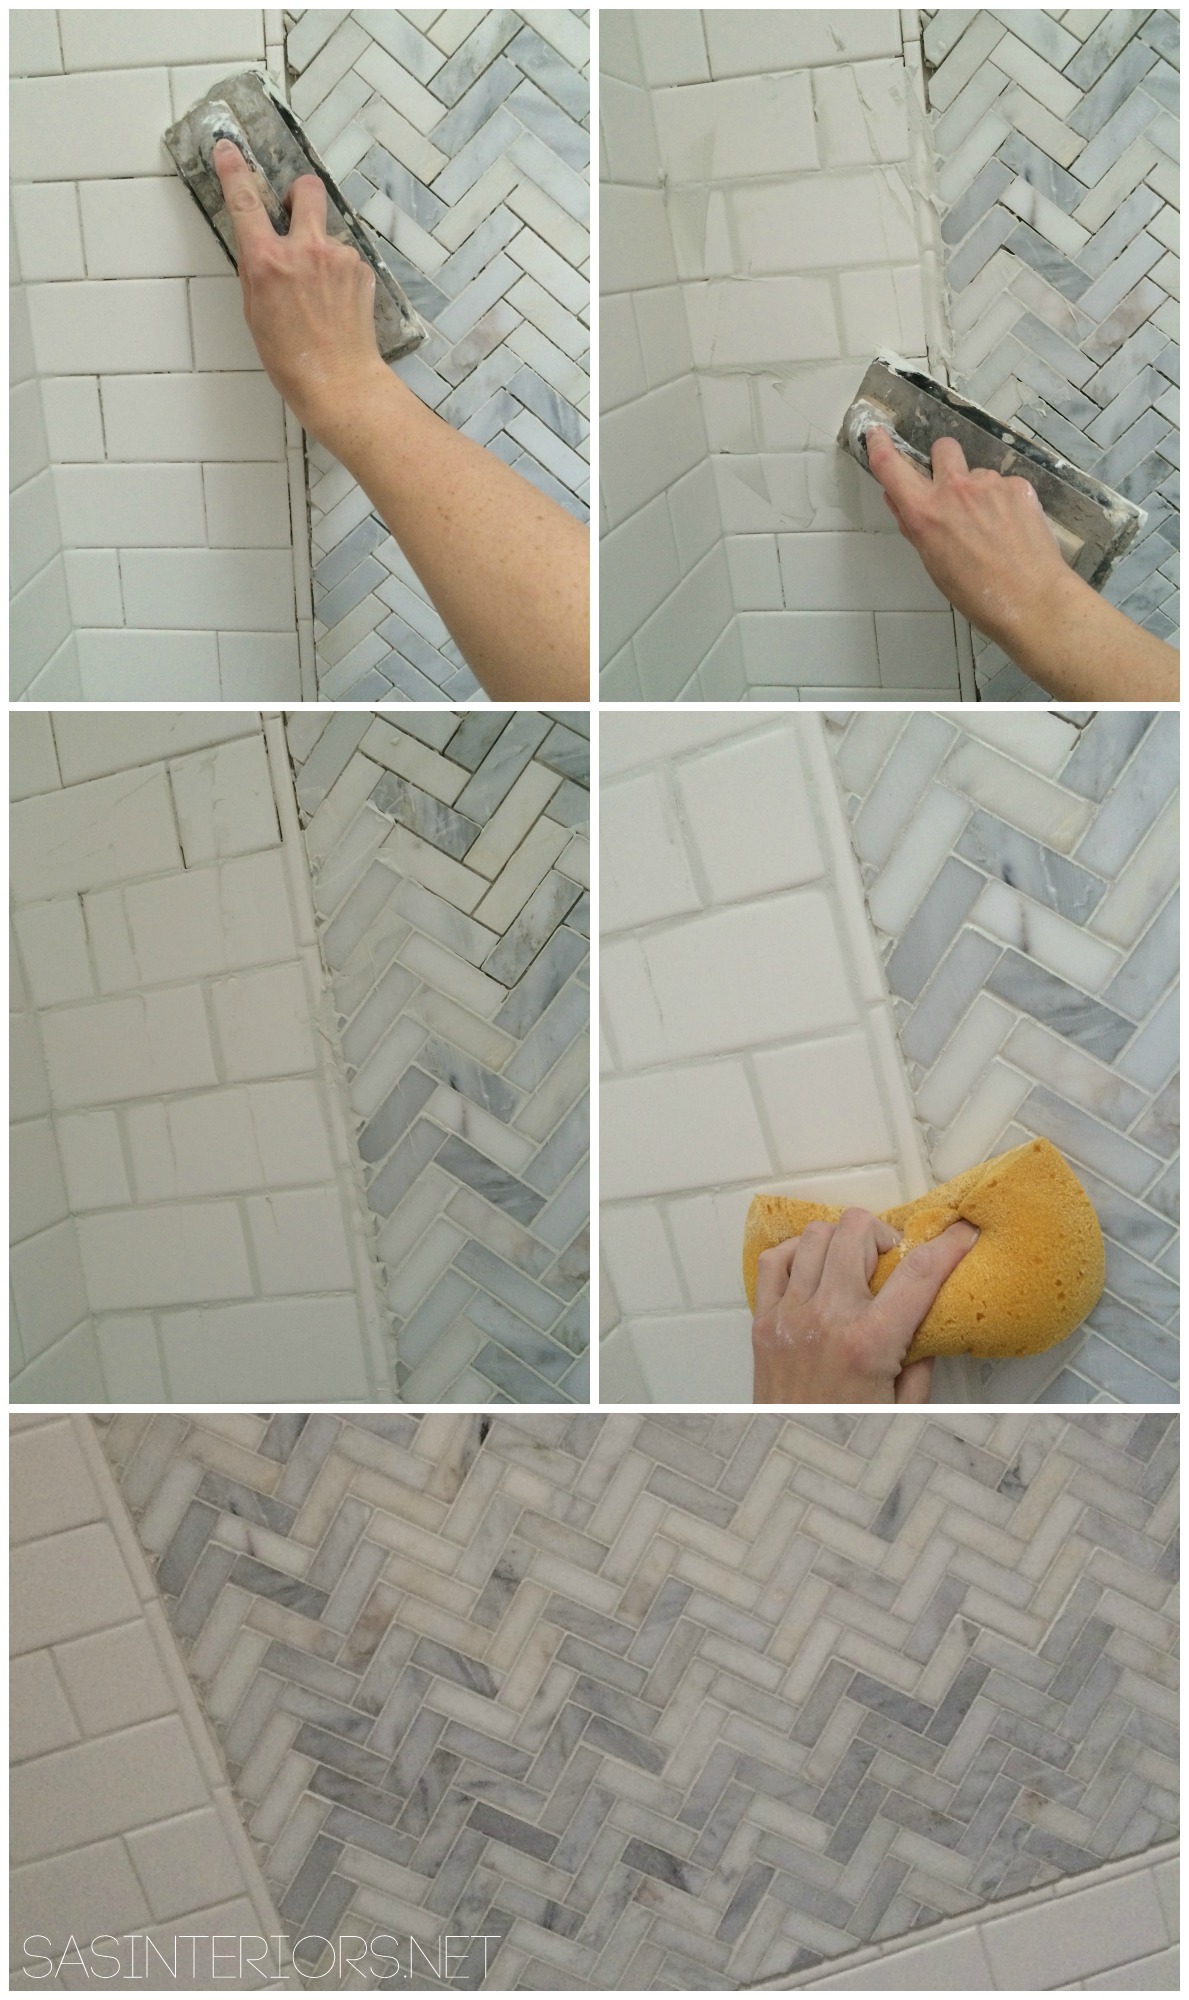
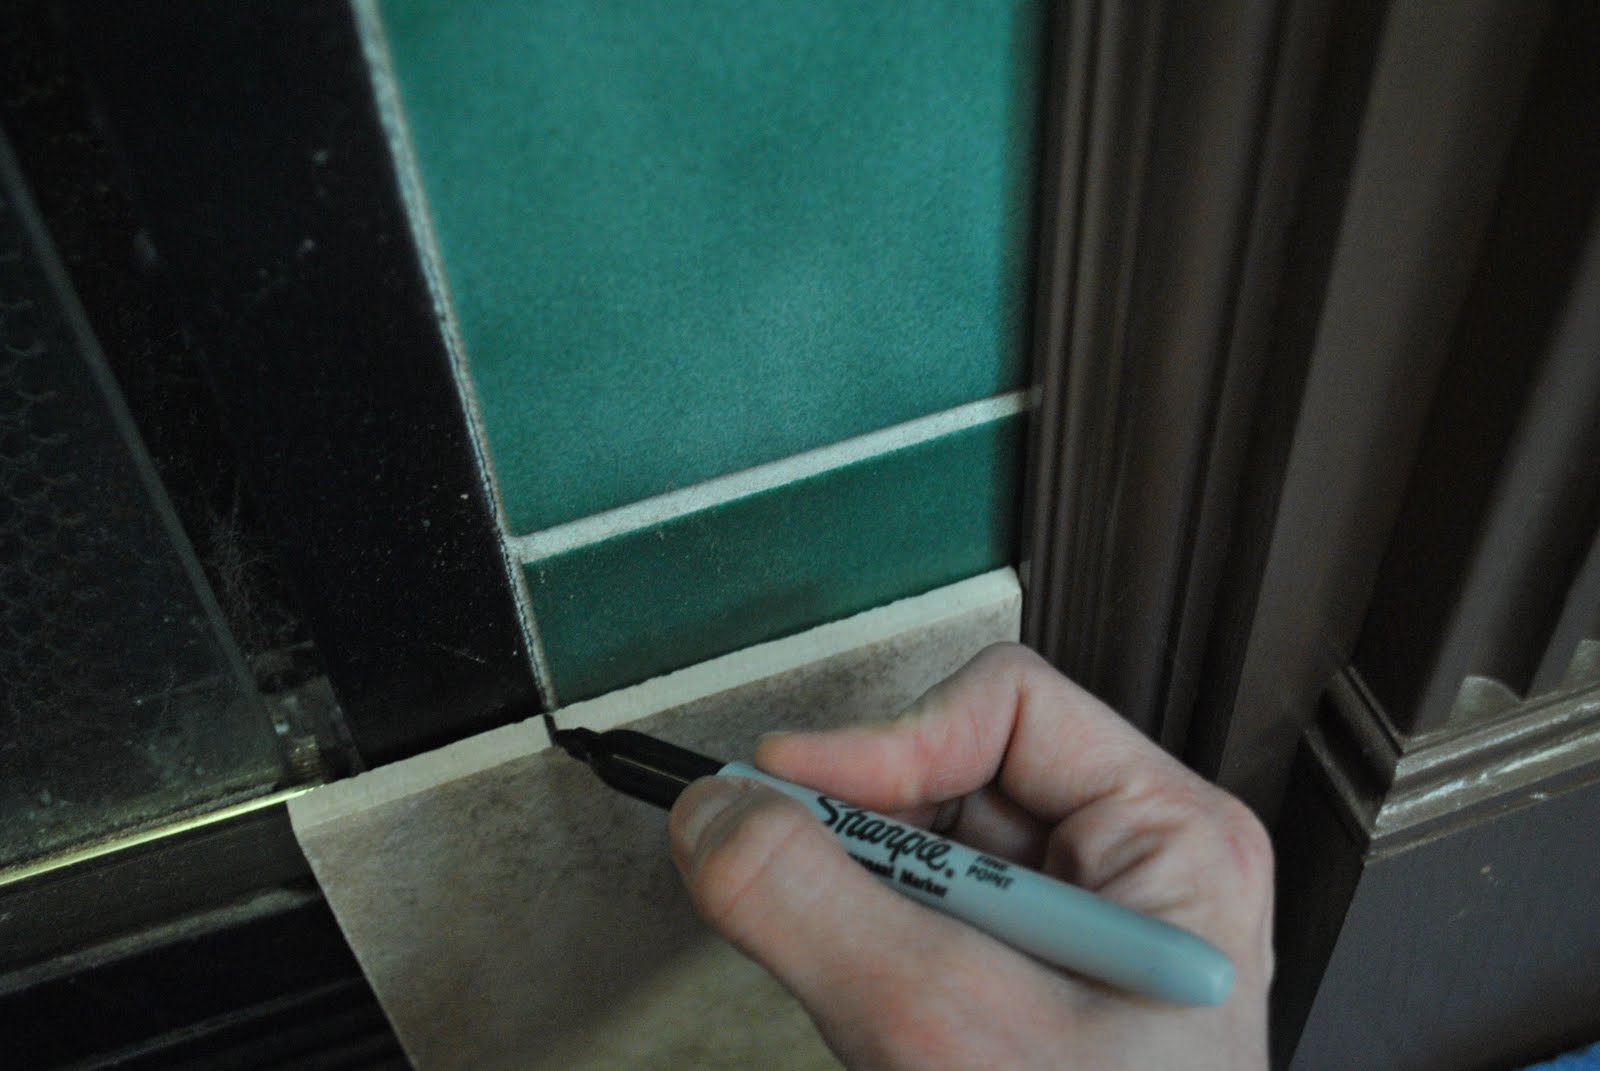
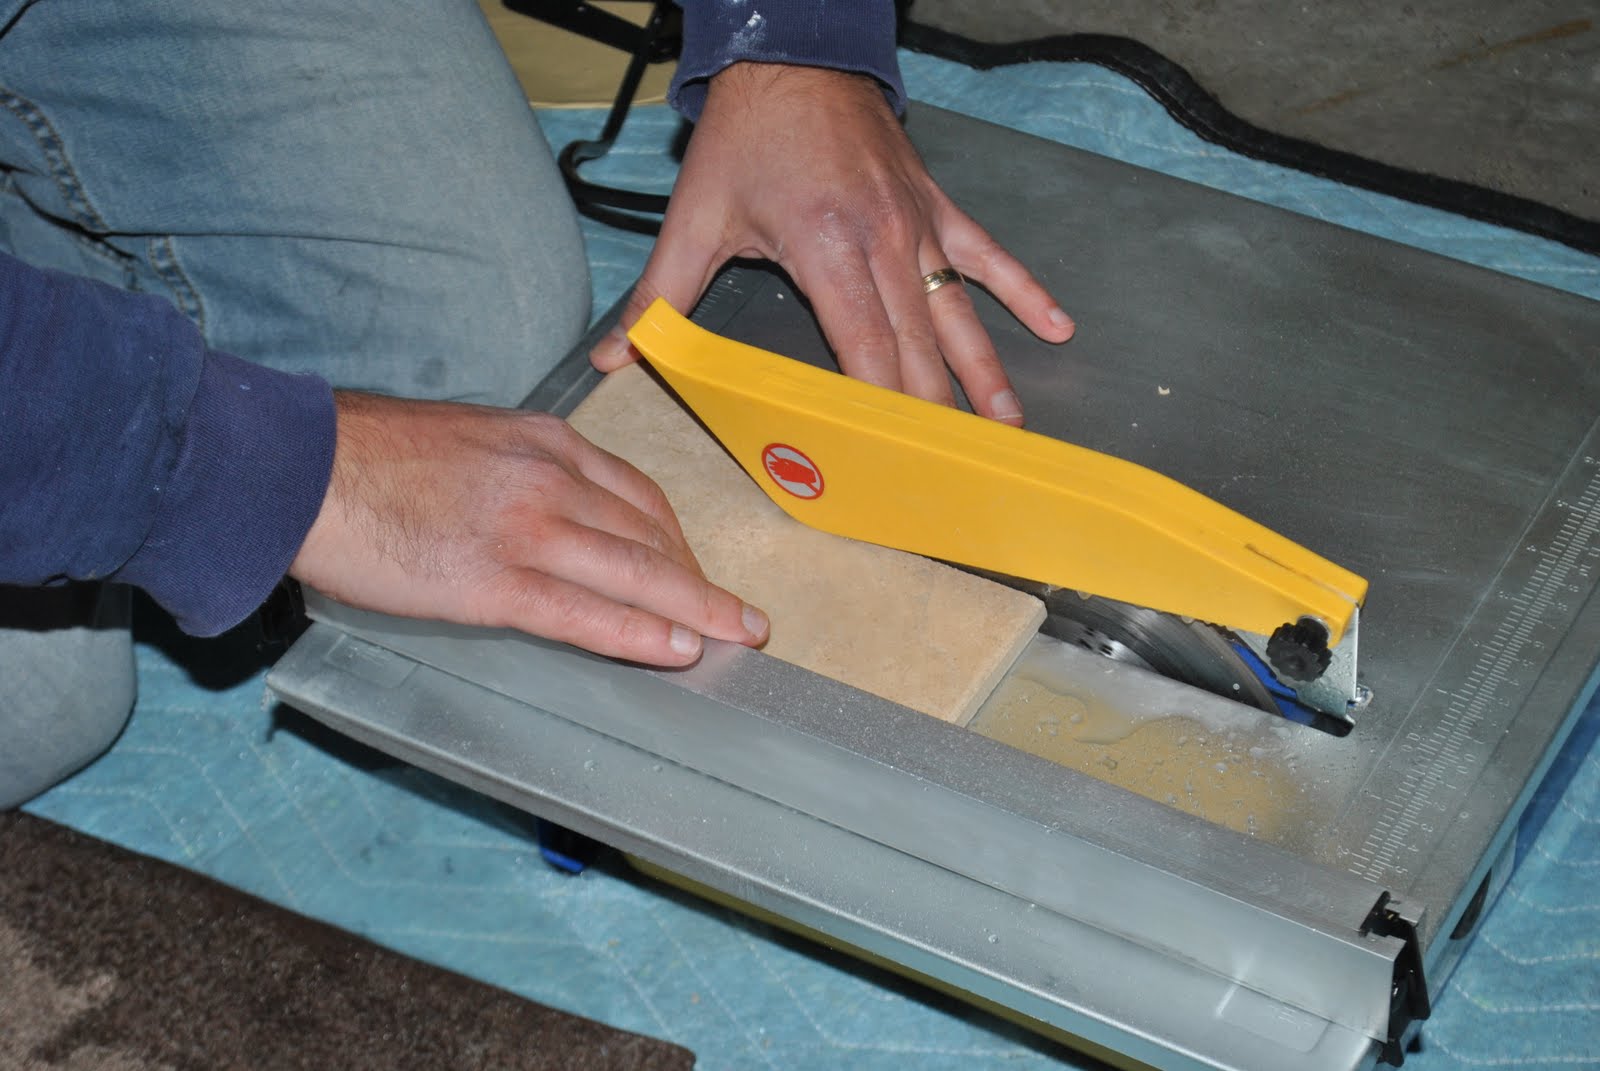
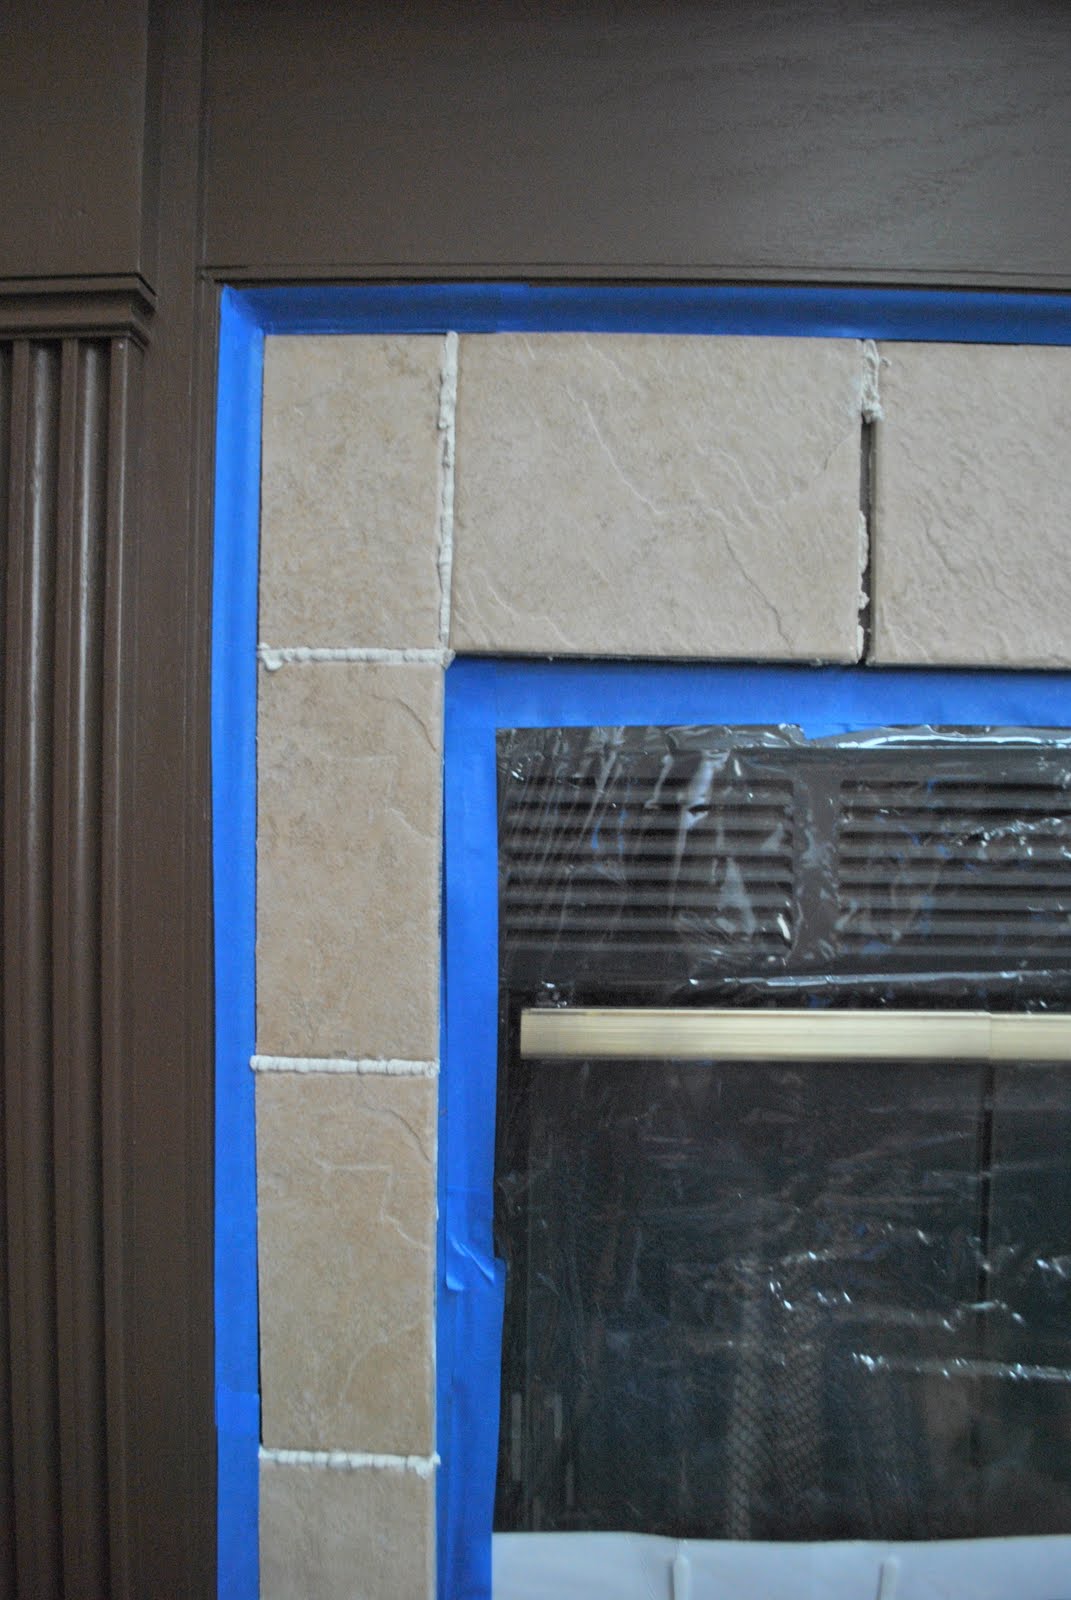
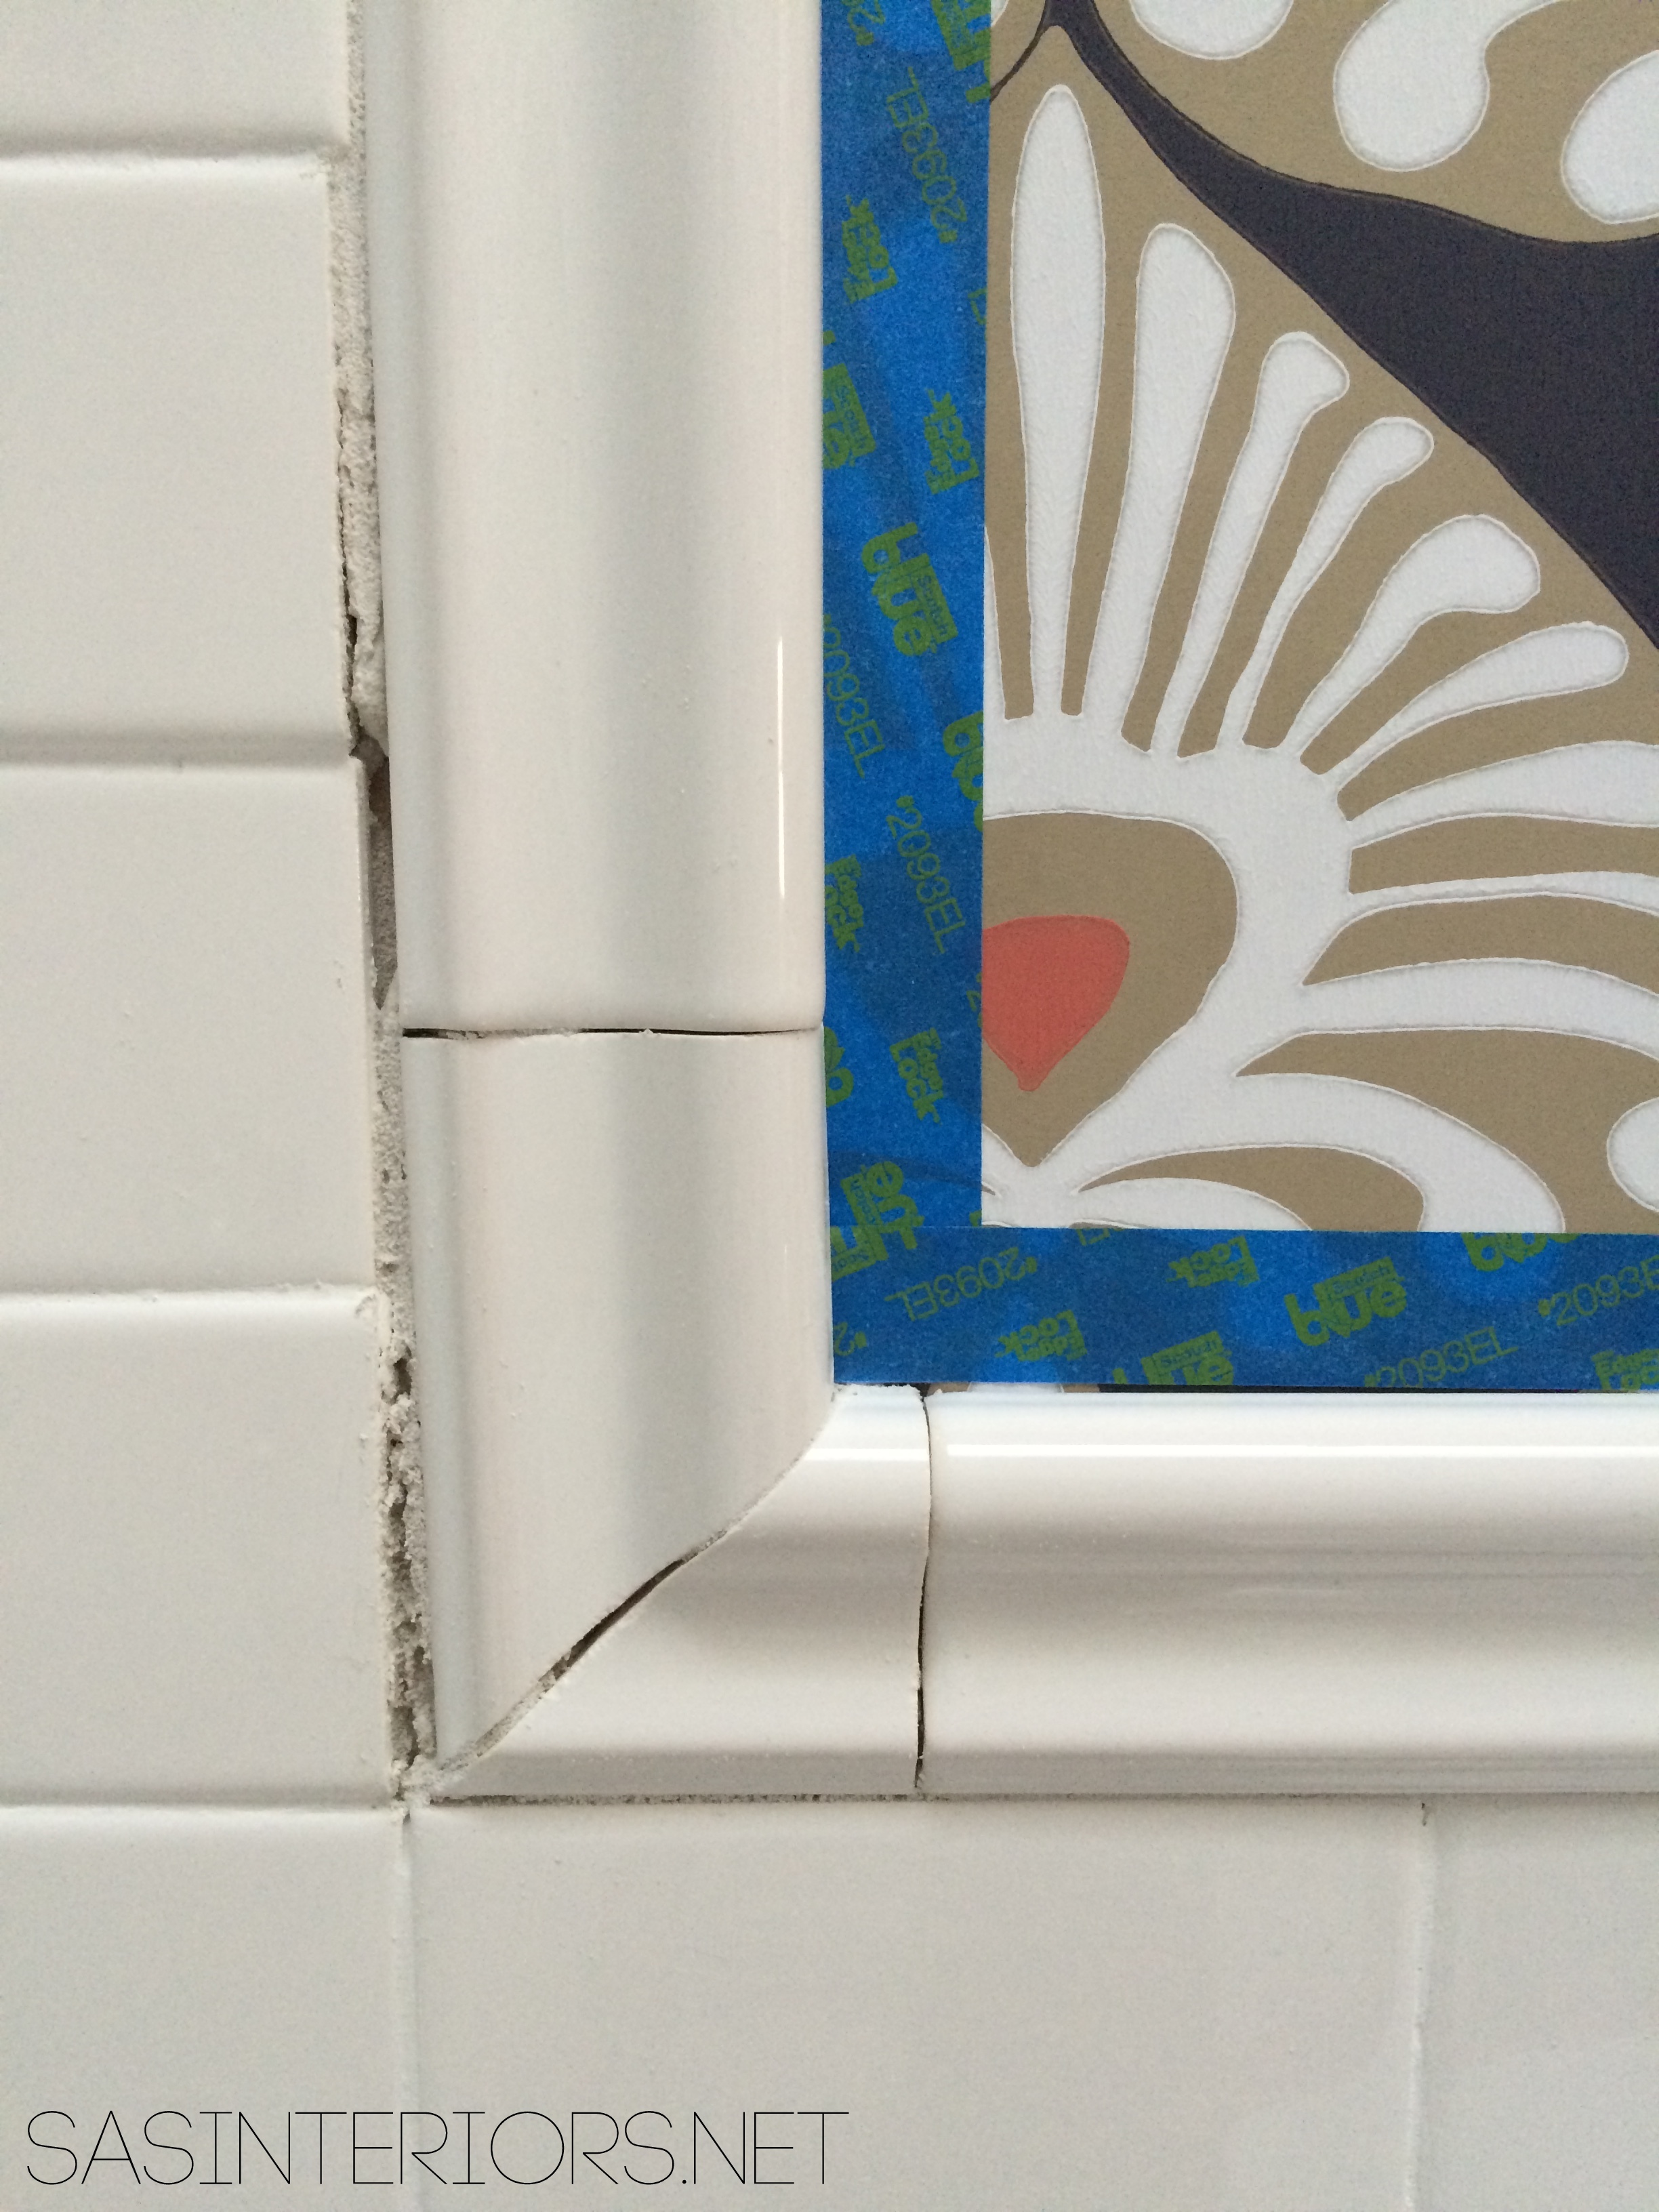
For the tile border, I started with the corner pieces because they had to be cut on a 45 degree angle.  I measured and cut the two pieces using a wet saw and then worked my way up vertically and over horizontally.

Adding a Tile Trim Border

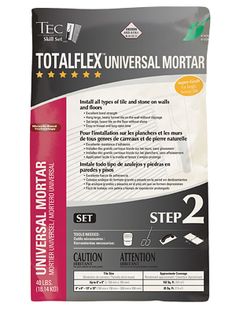
I installed the accent tile using the same method as I did for the subway tile.  To learn more about installing the tile, check out my post on How-To Tile + Grout Bathroom Walls

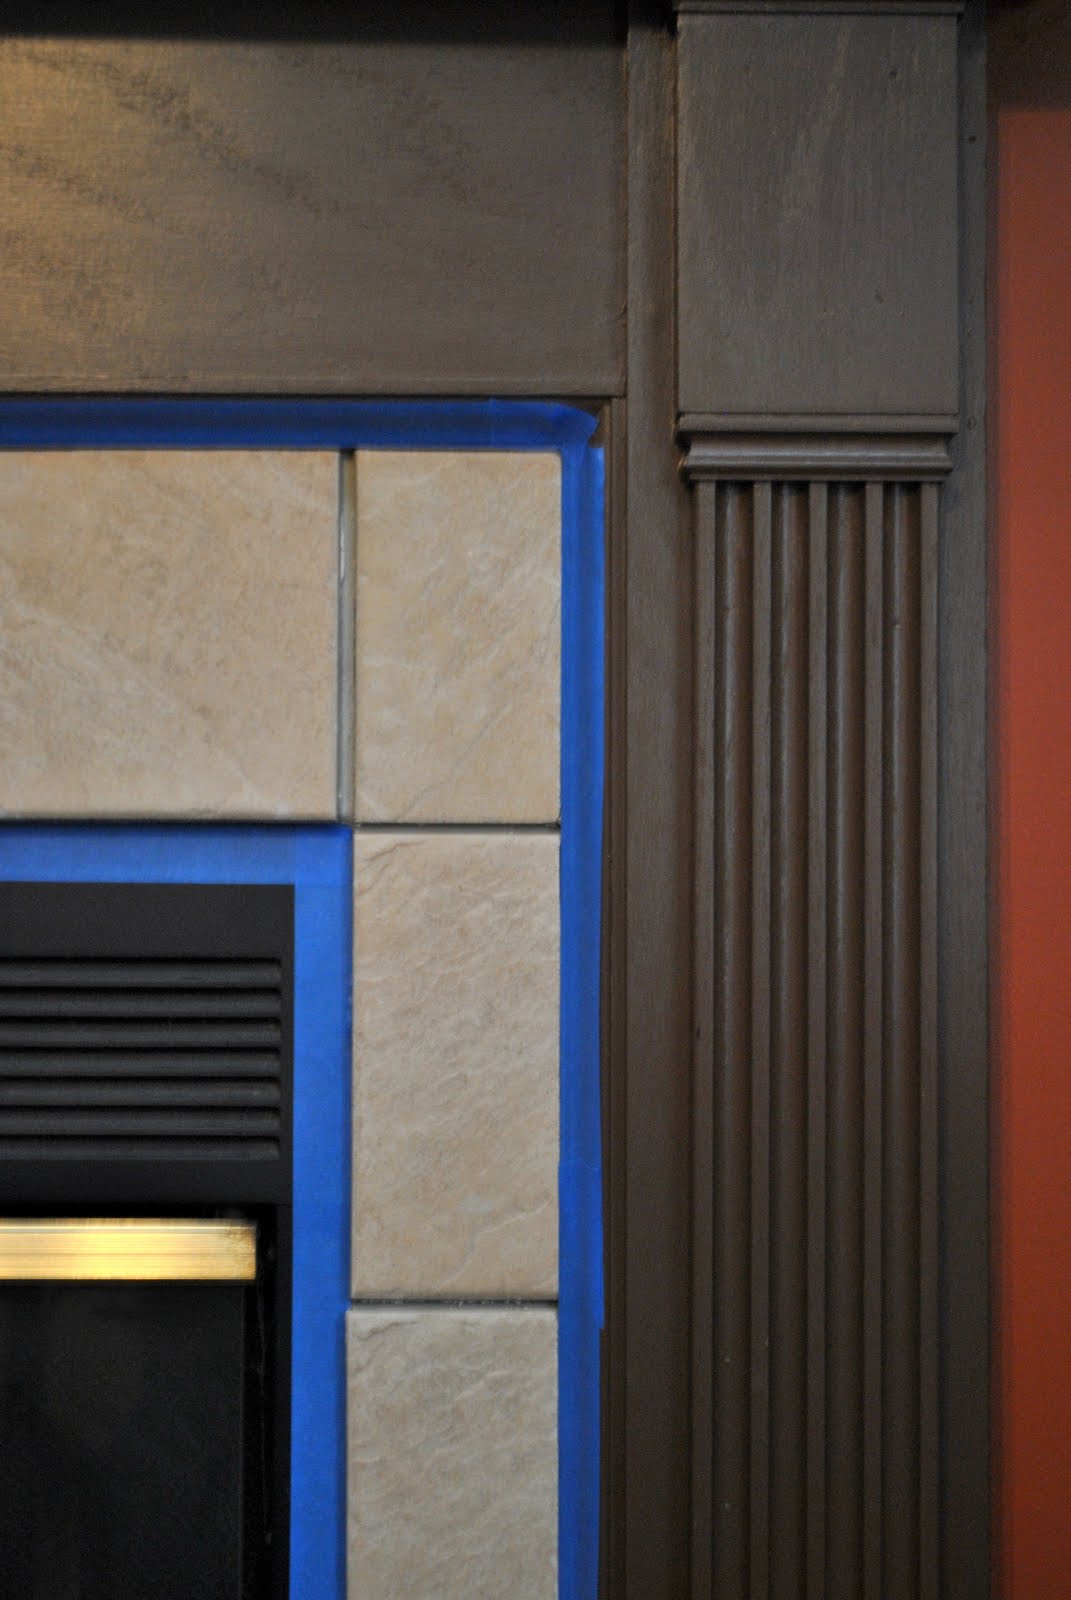
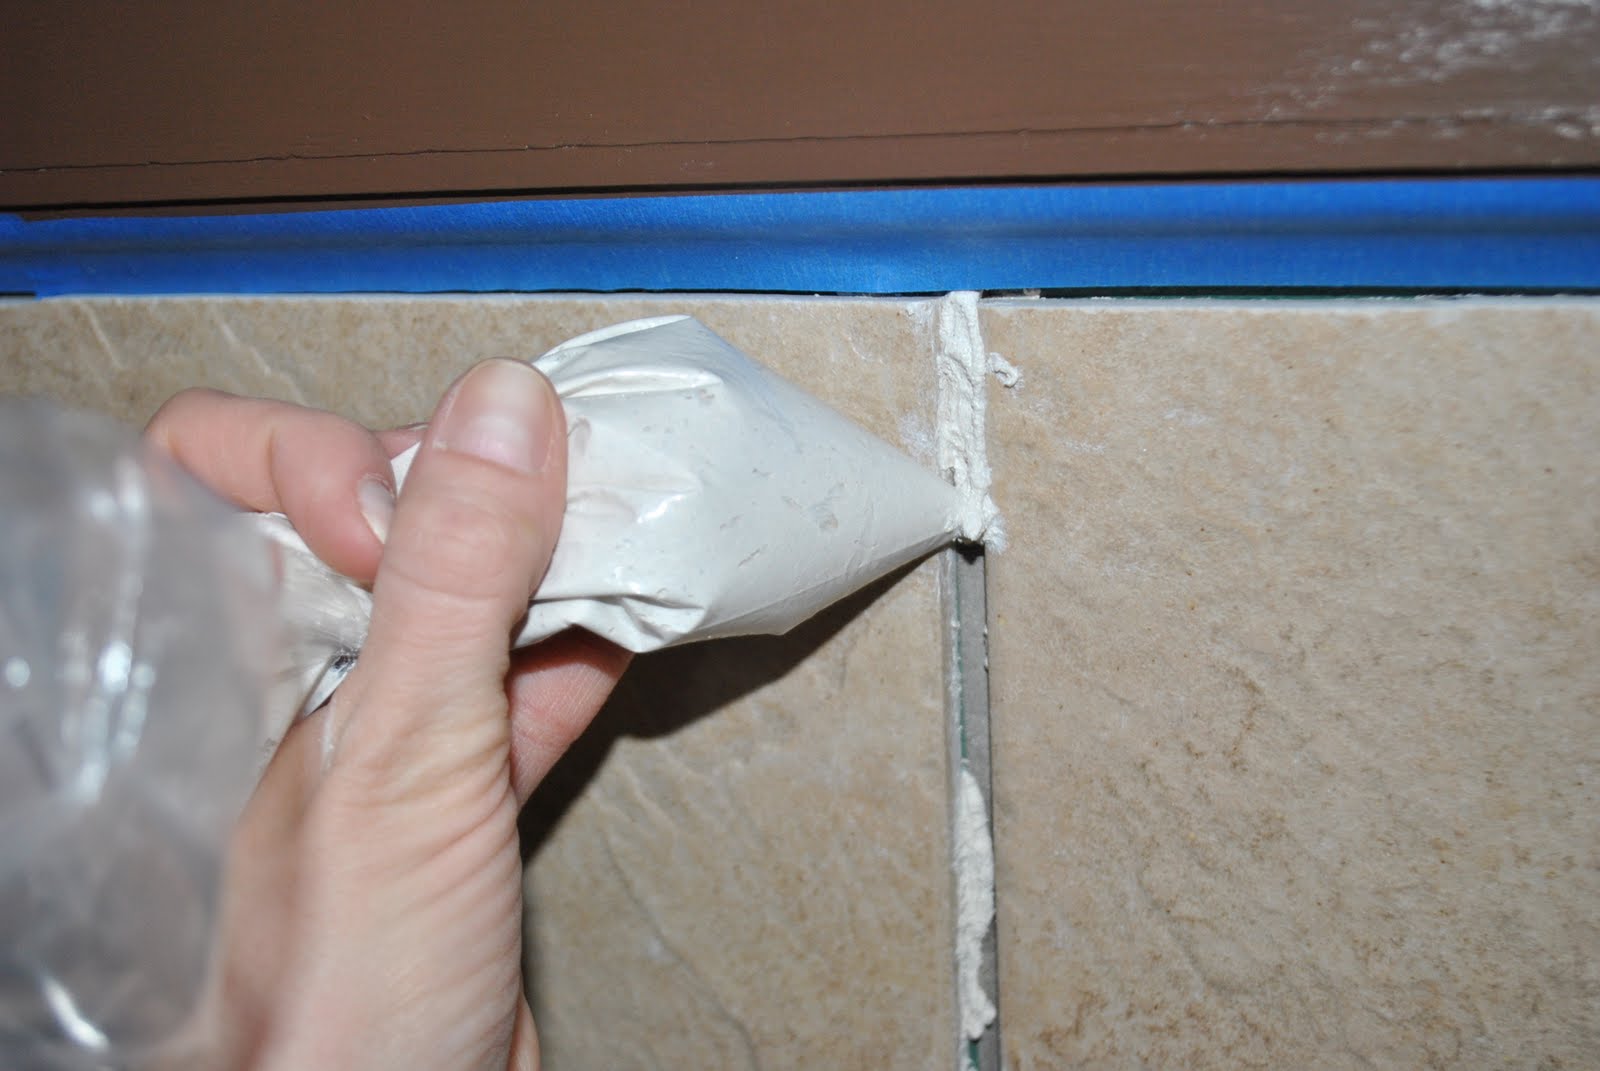
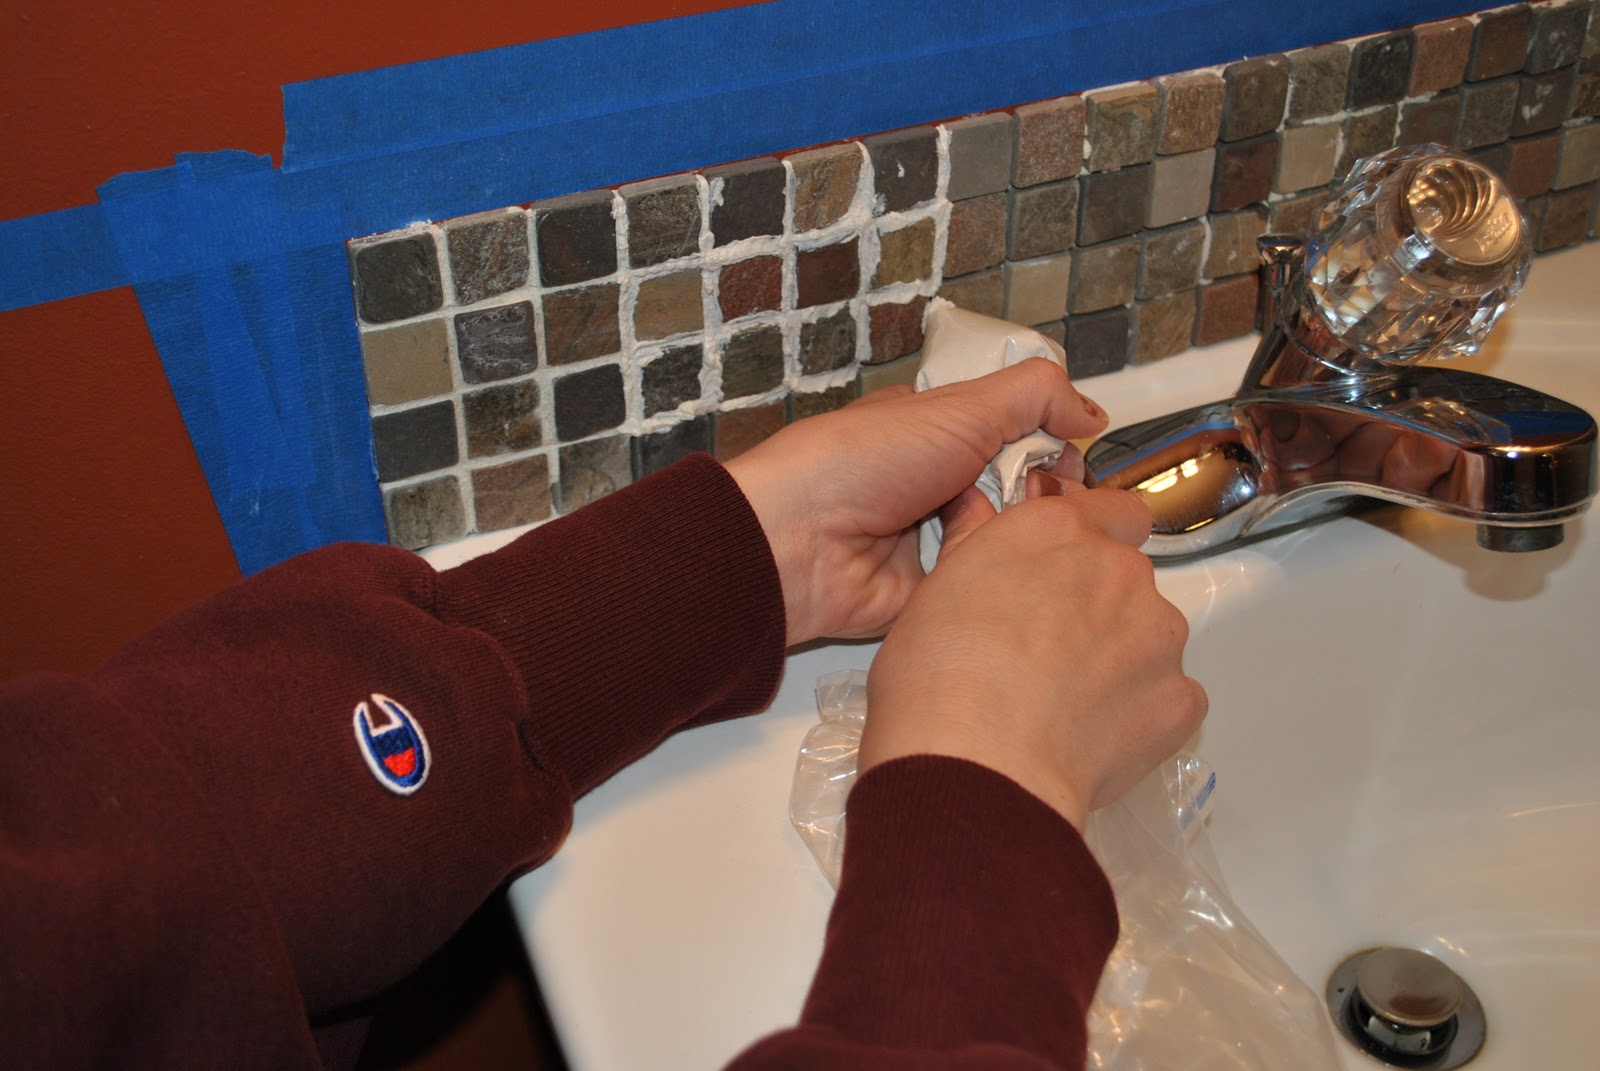
Once the tile border was in place, I used painters tape to tape off the wallpaper so the grout would not get on it.  After installing that gorgeous paper, the last thing I wanted was to get it ruined!

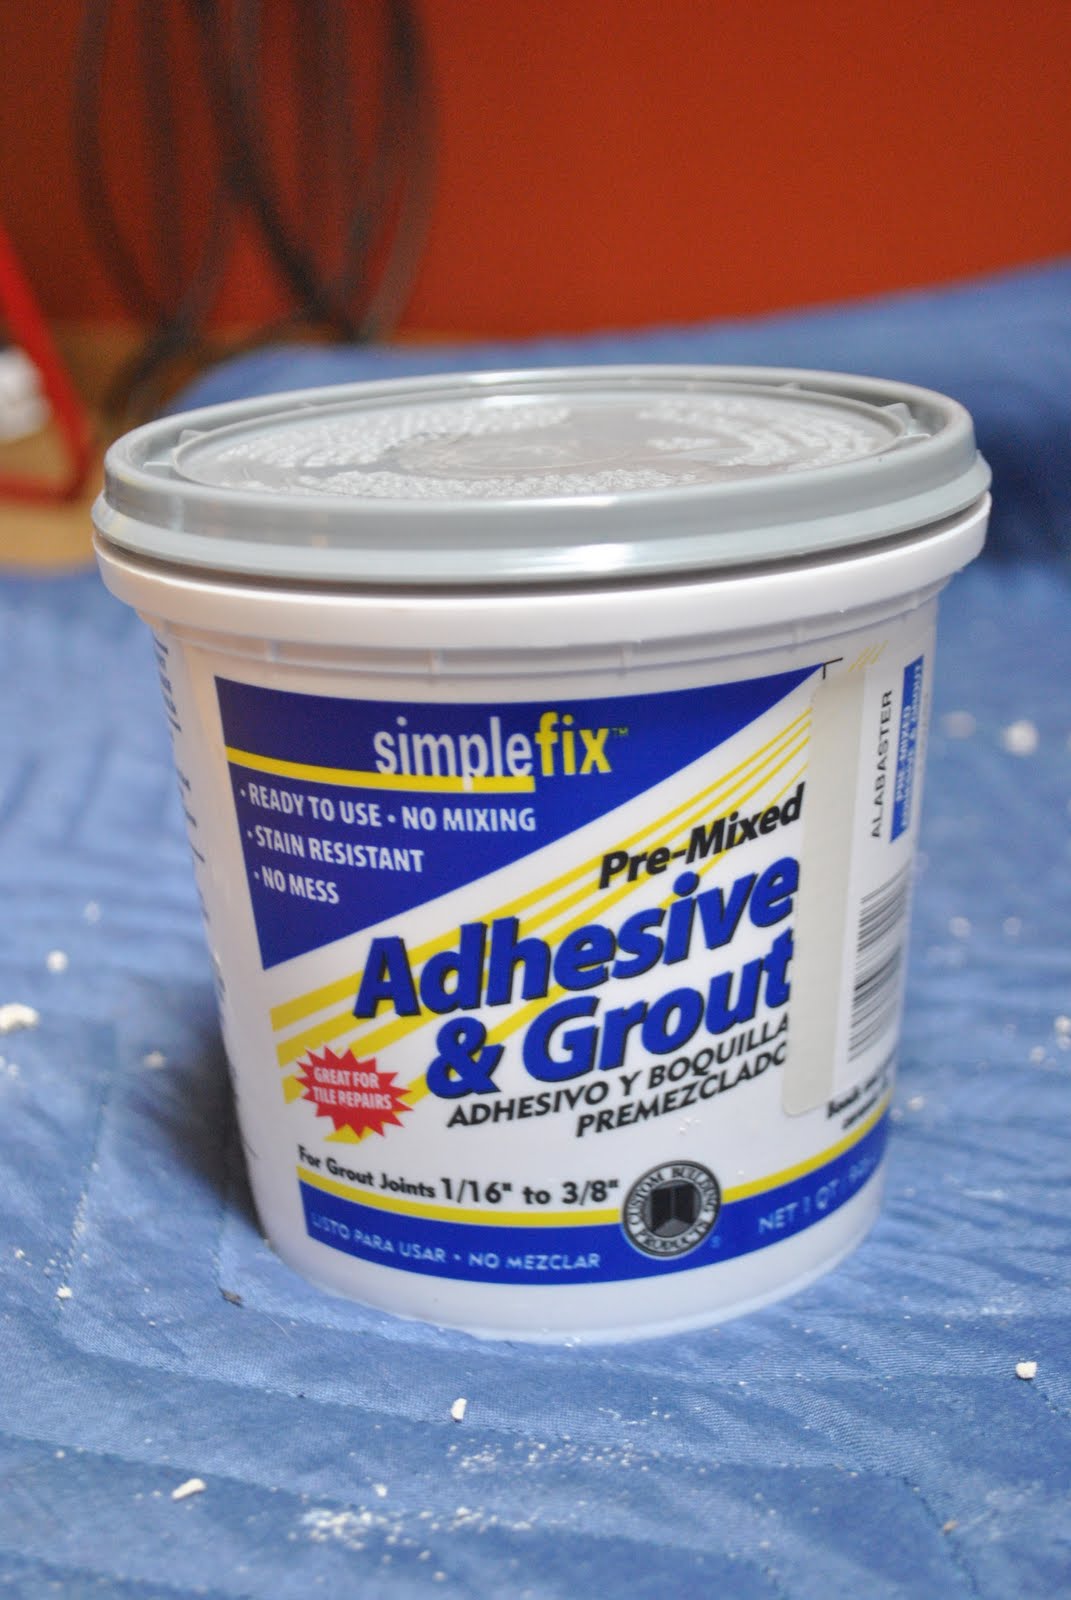
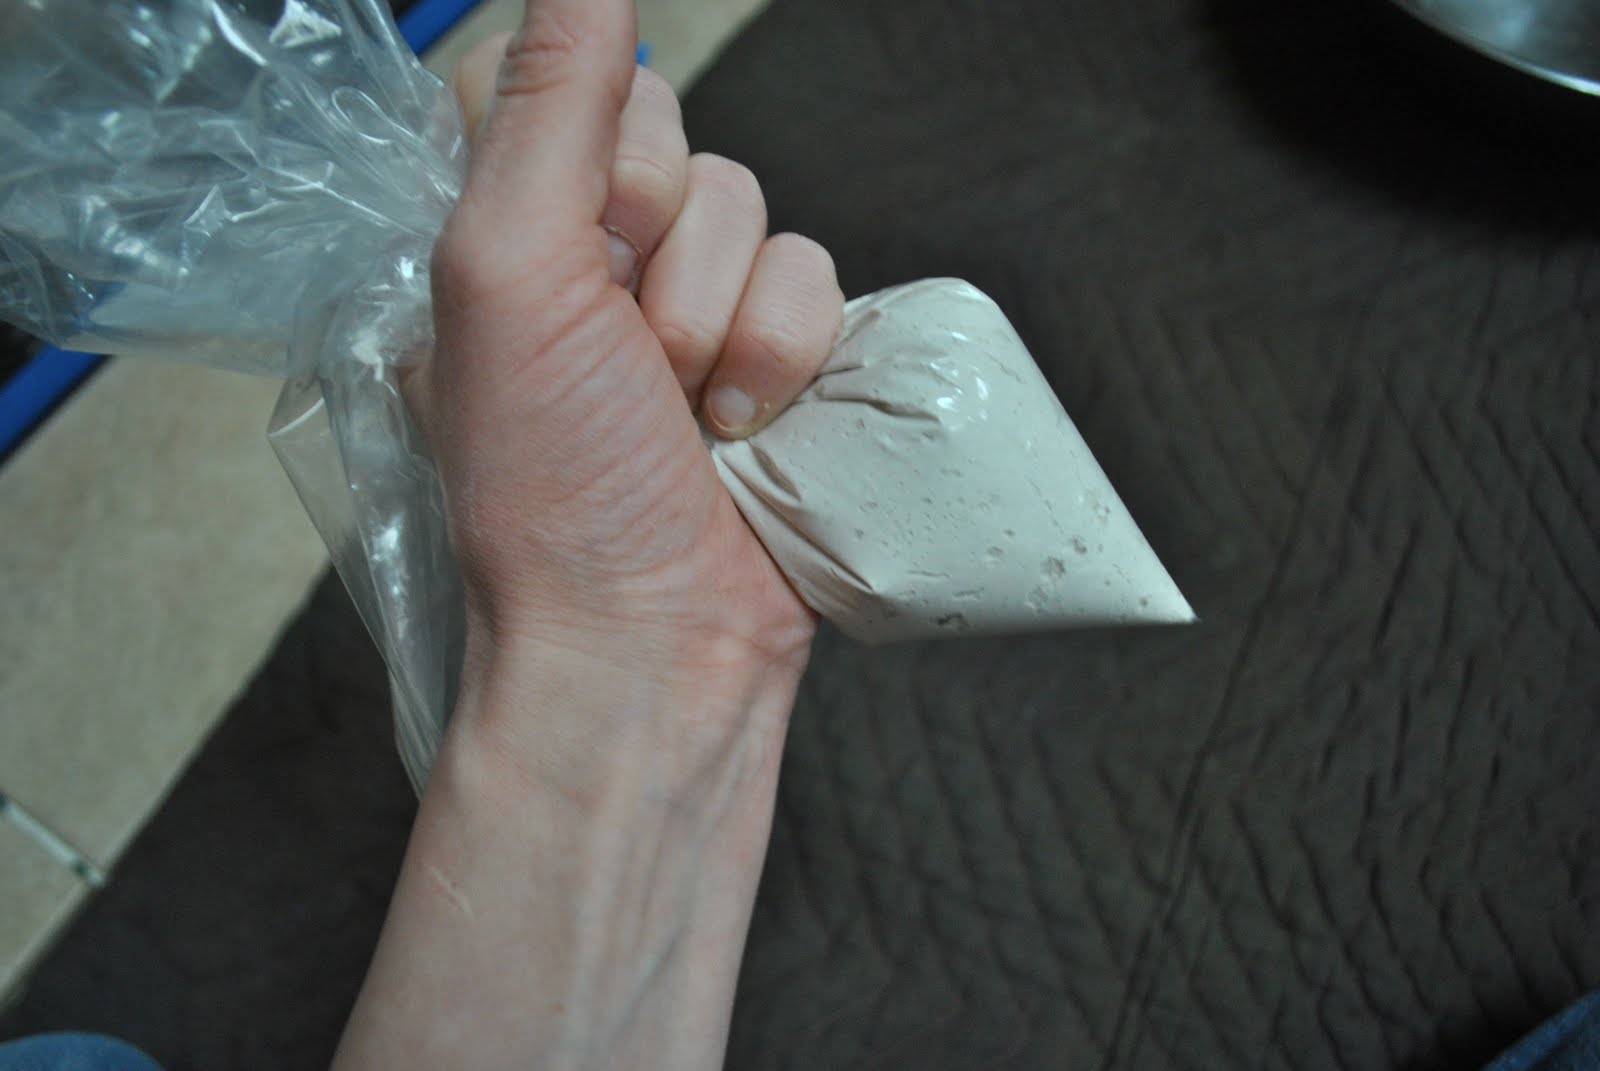
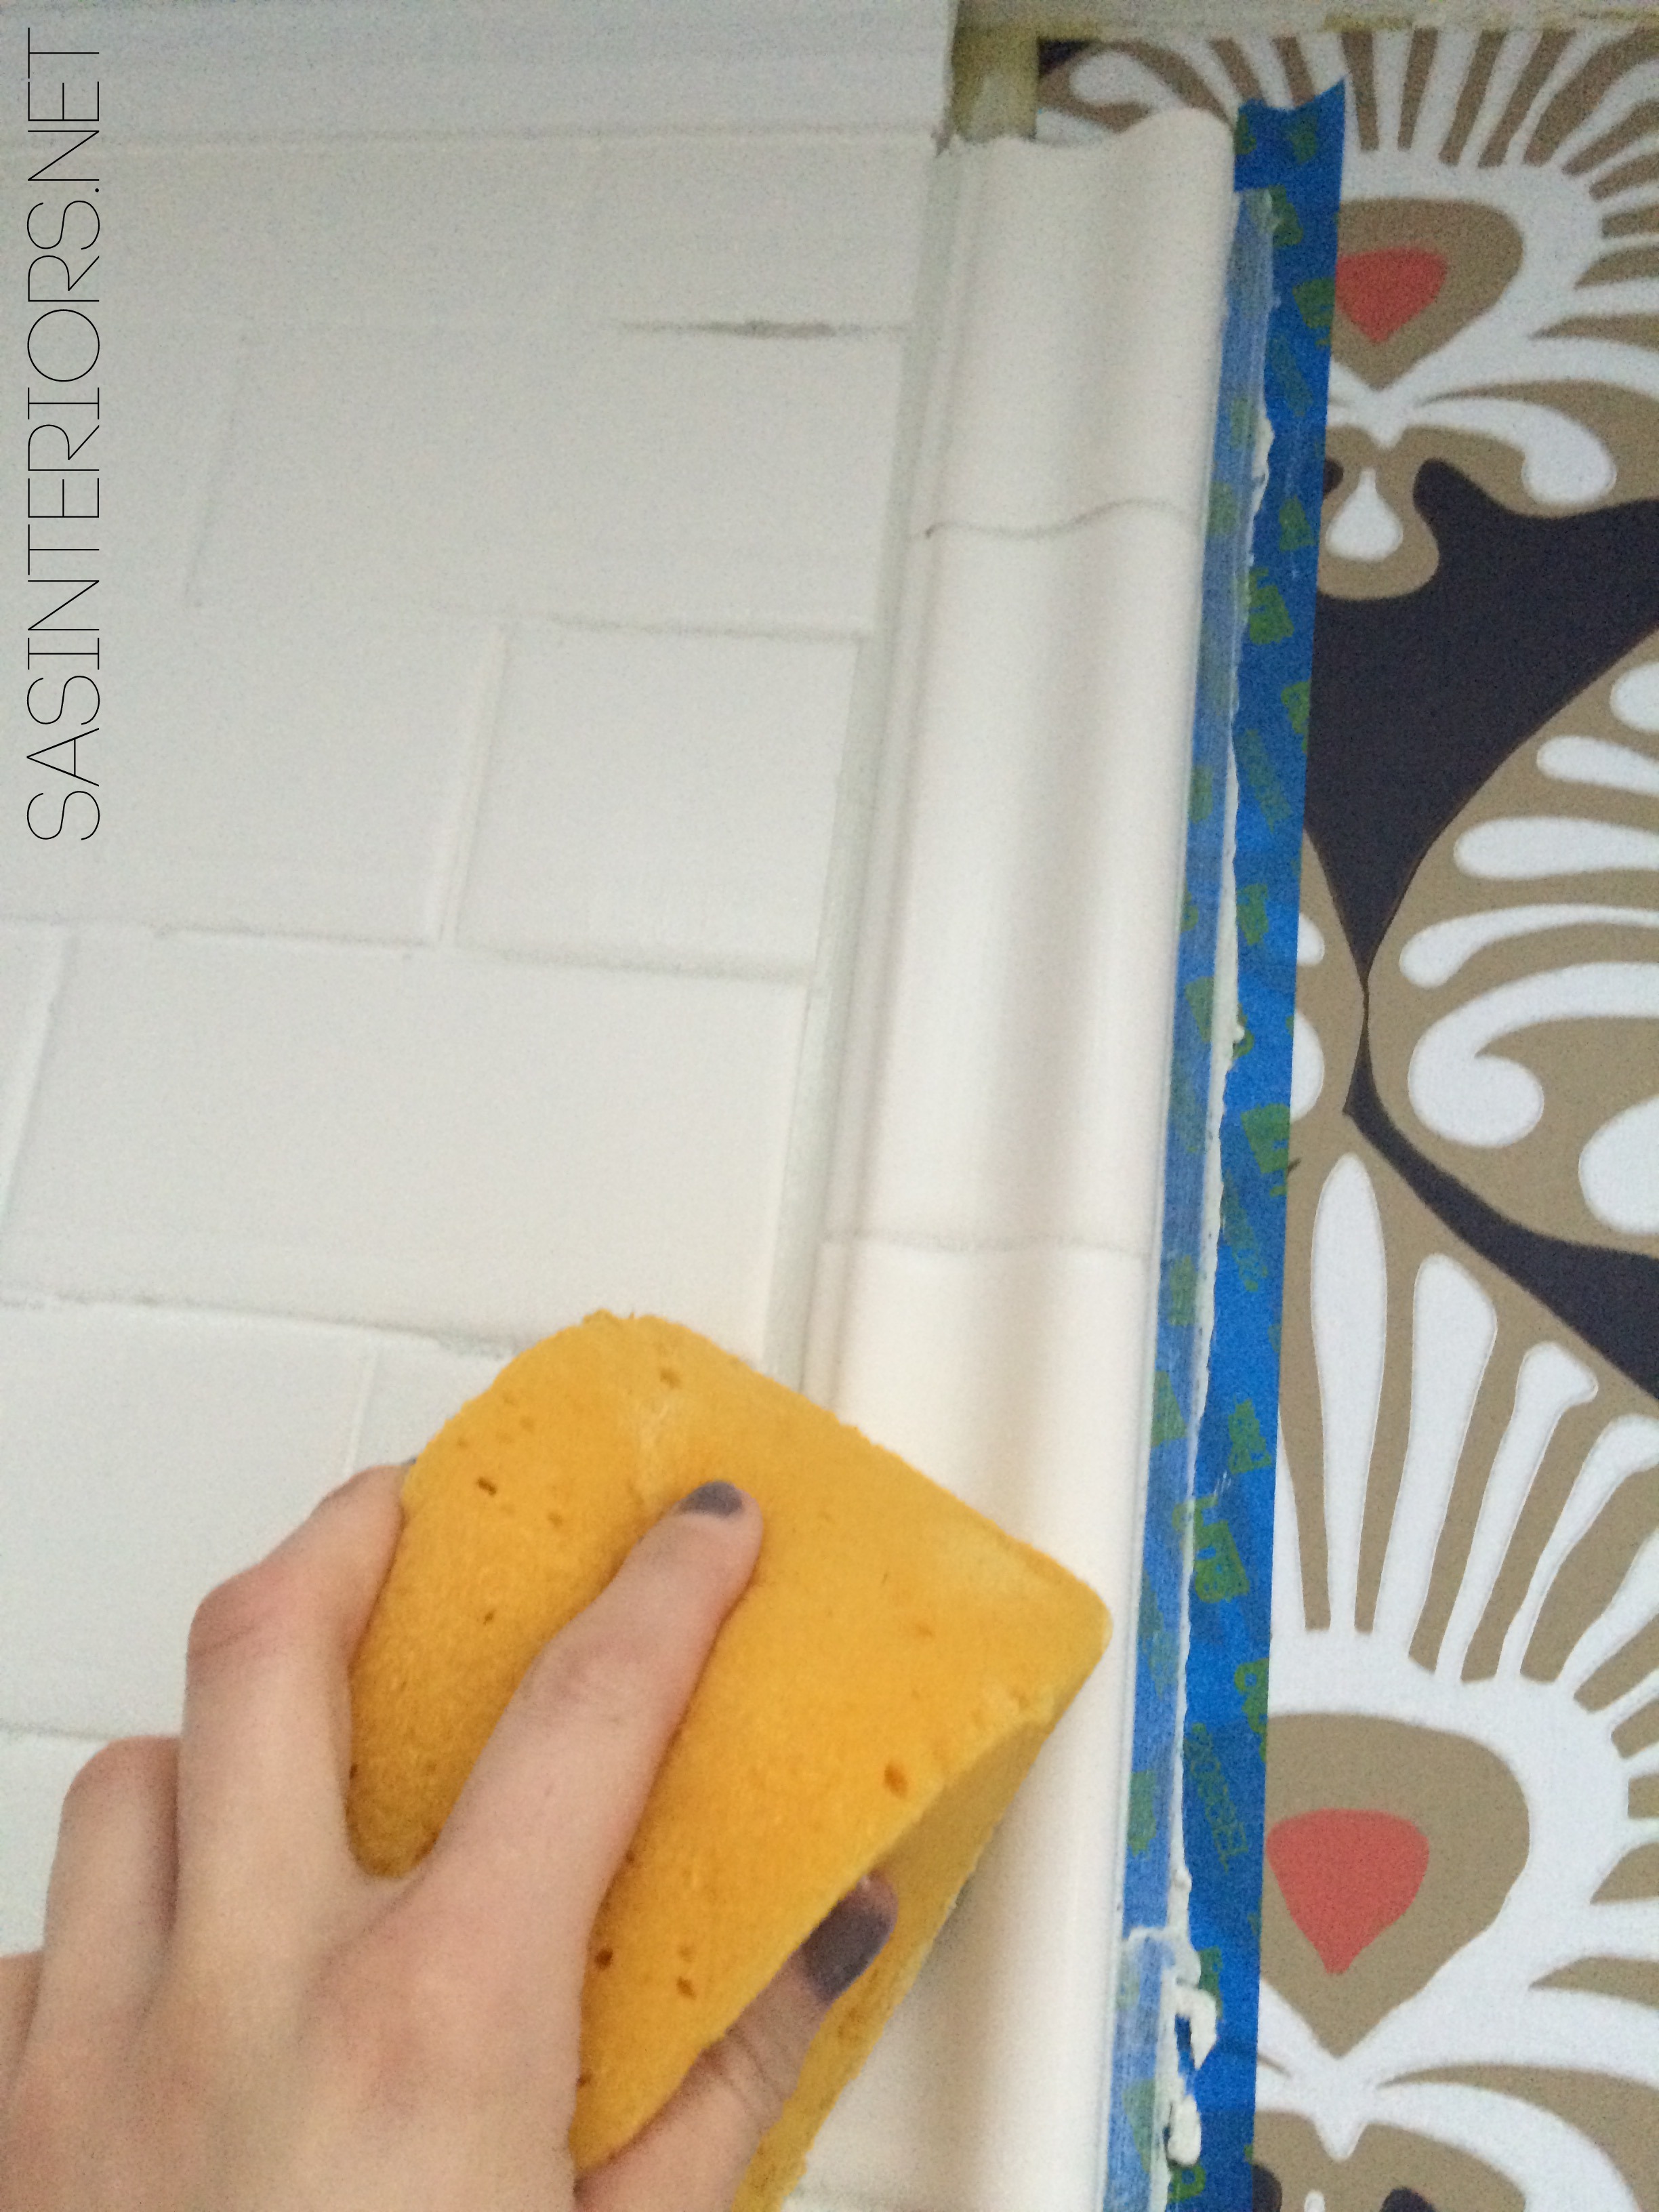
Then it was time to grout.  After mixed + made the grout mixture, I put it in a ziploc bag and cut one corner creating a small hole for the grout to come out of.  Kind of like icing a cake…  Then I worked the grout into the cracks & crevices.

Adding a Tile Trim Border

It was a little messy, but using the Ziploc bag was very helpful to direct the grout where I wanted it, instead of going on the entire tile surface.

Adding a Tile Trim Border

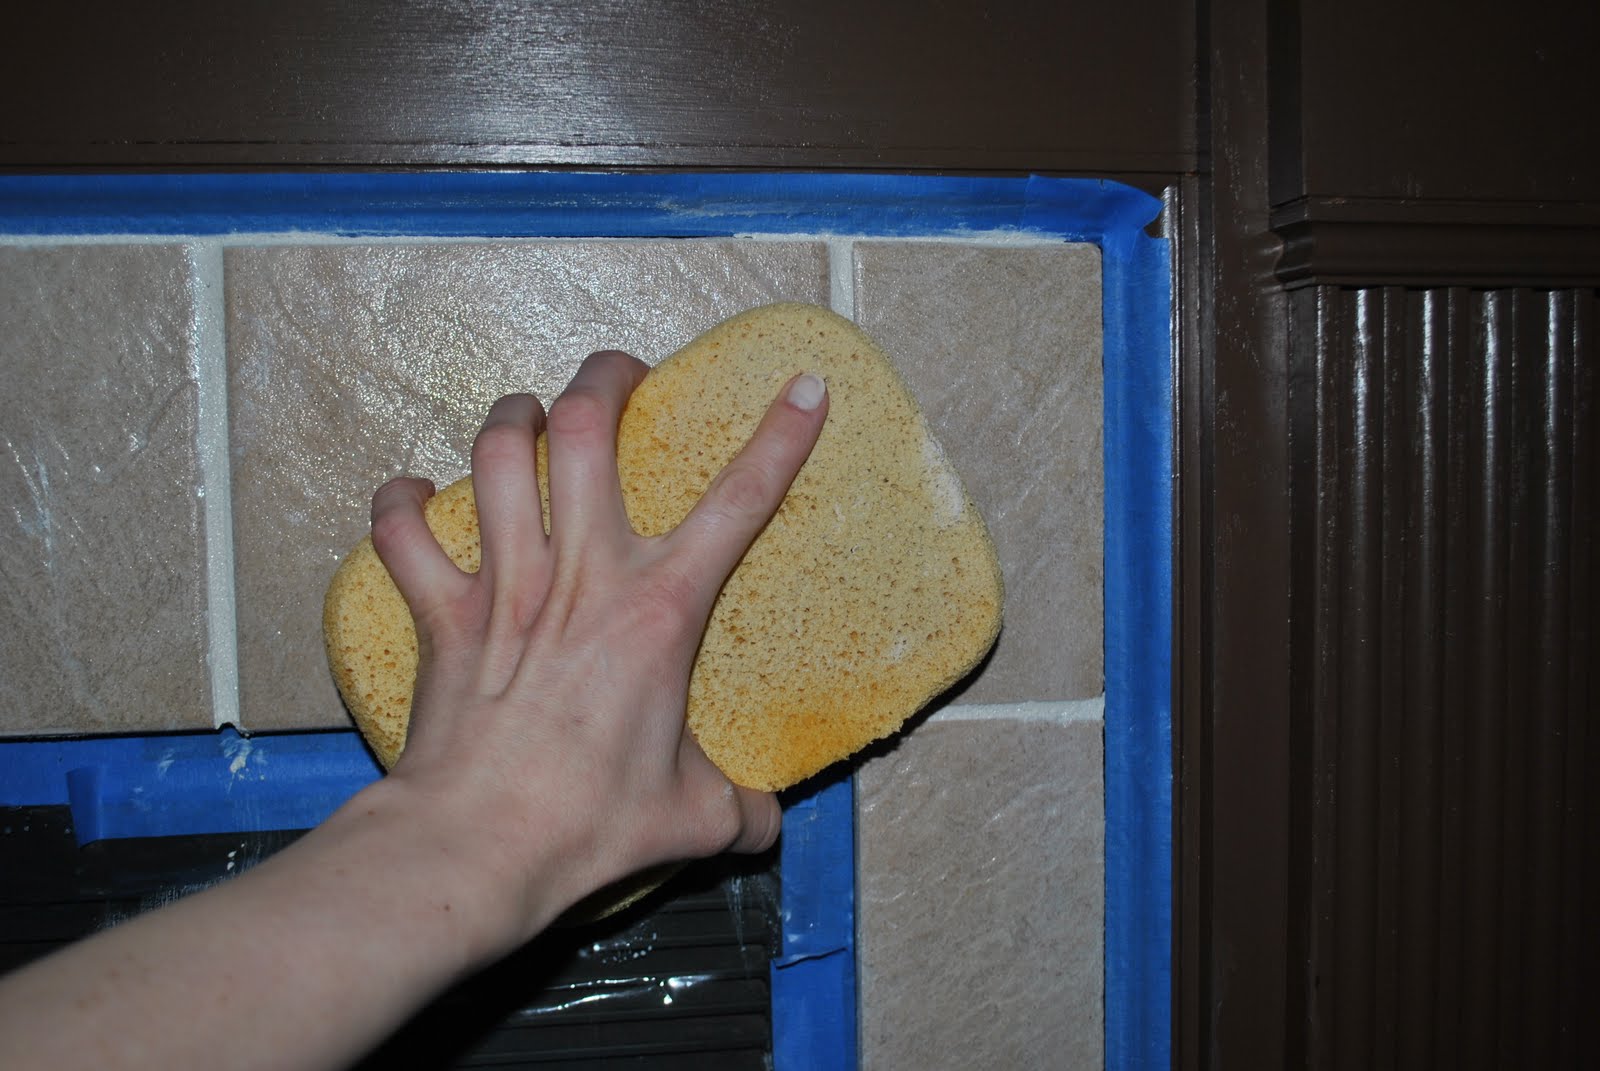
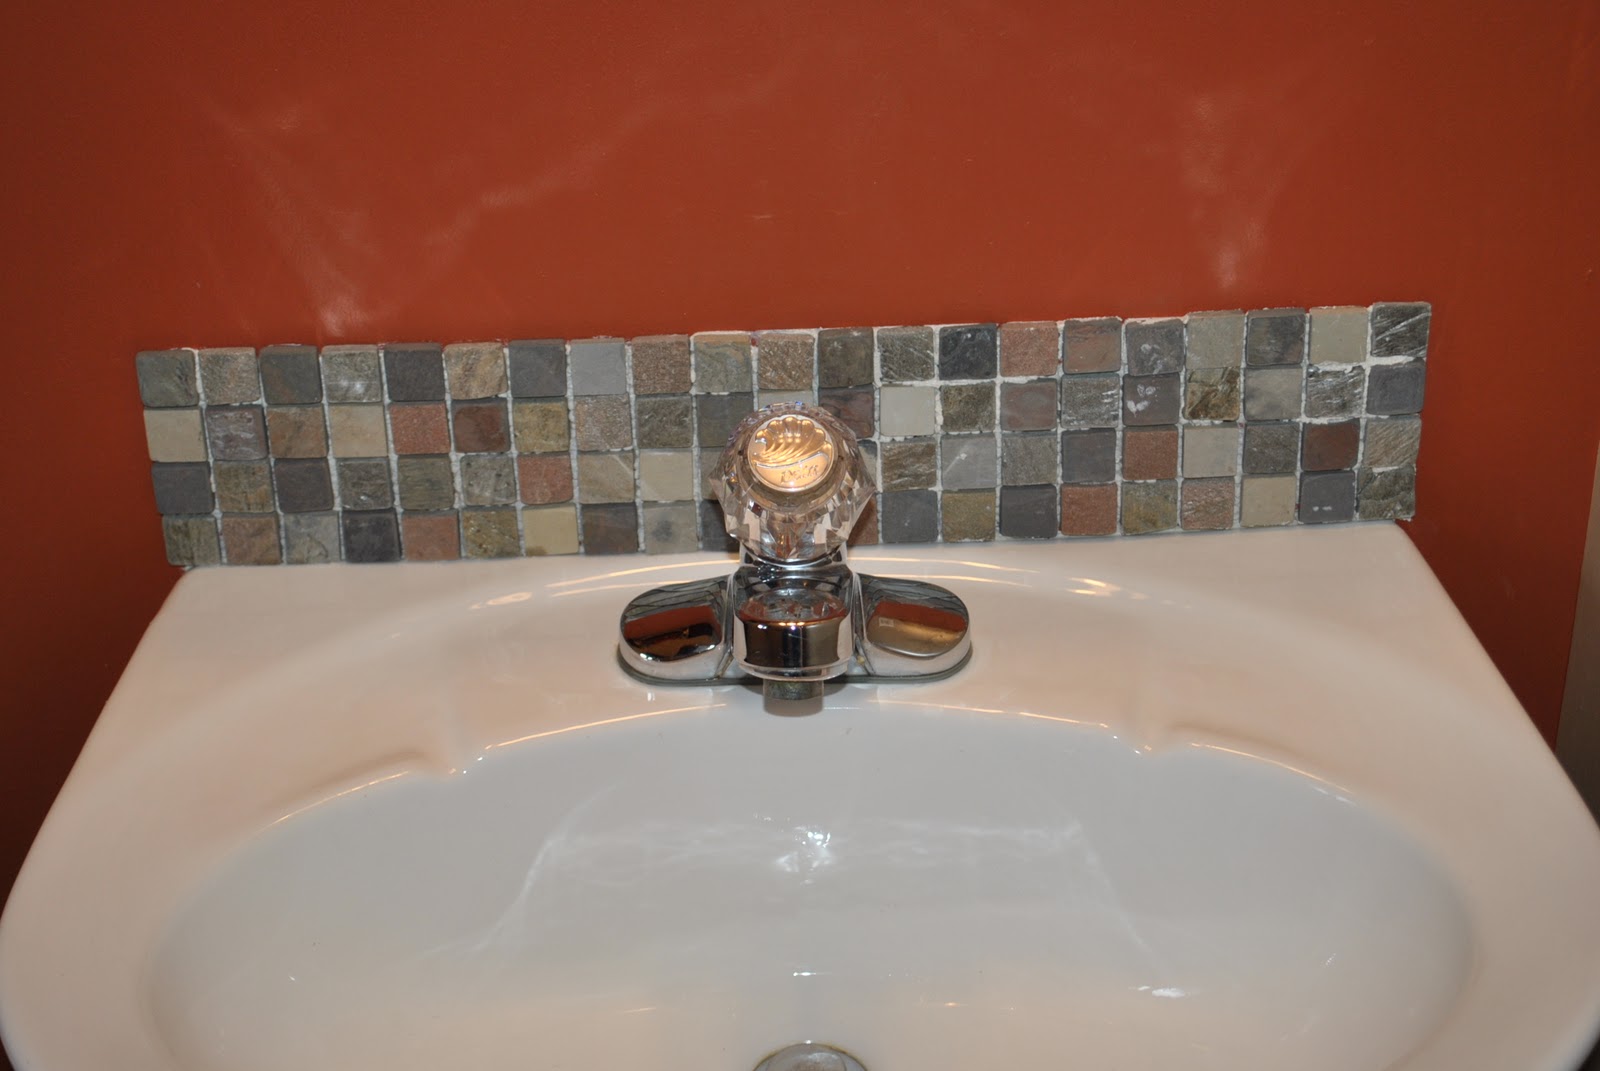
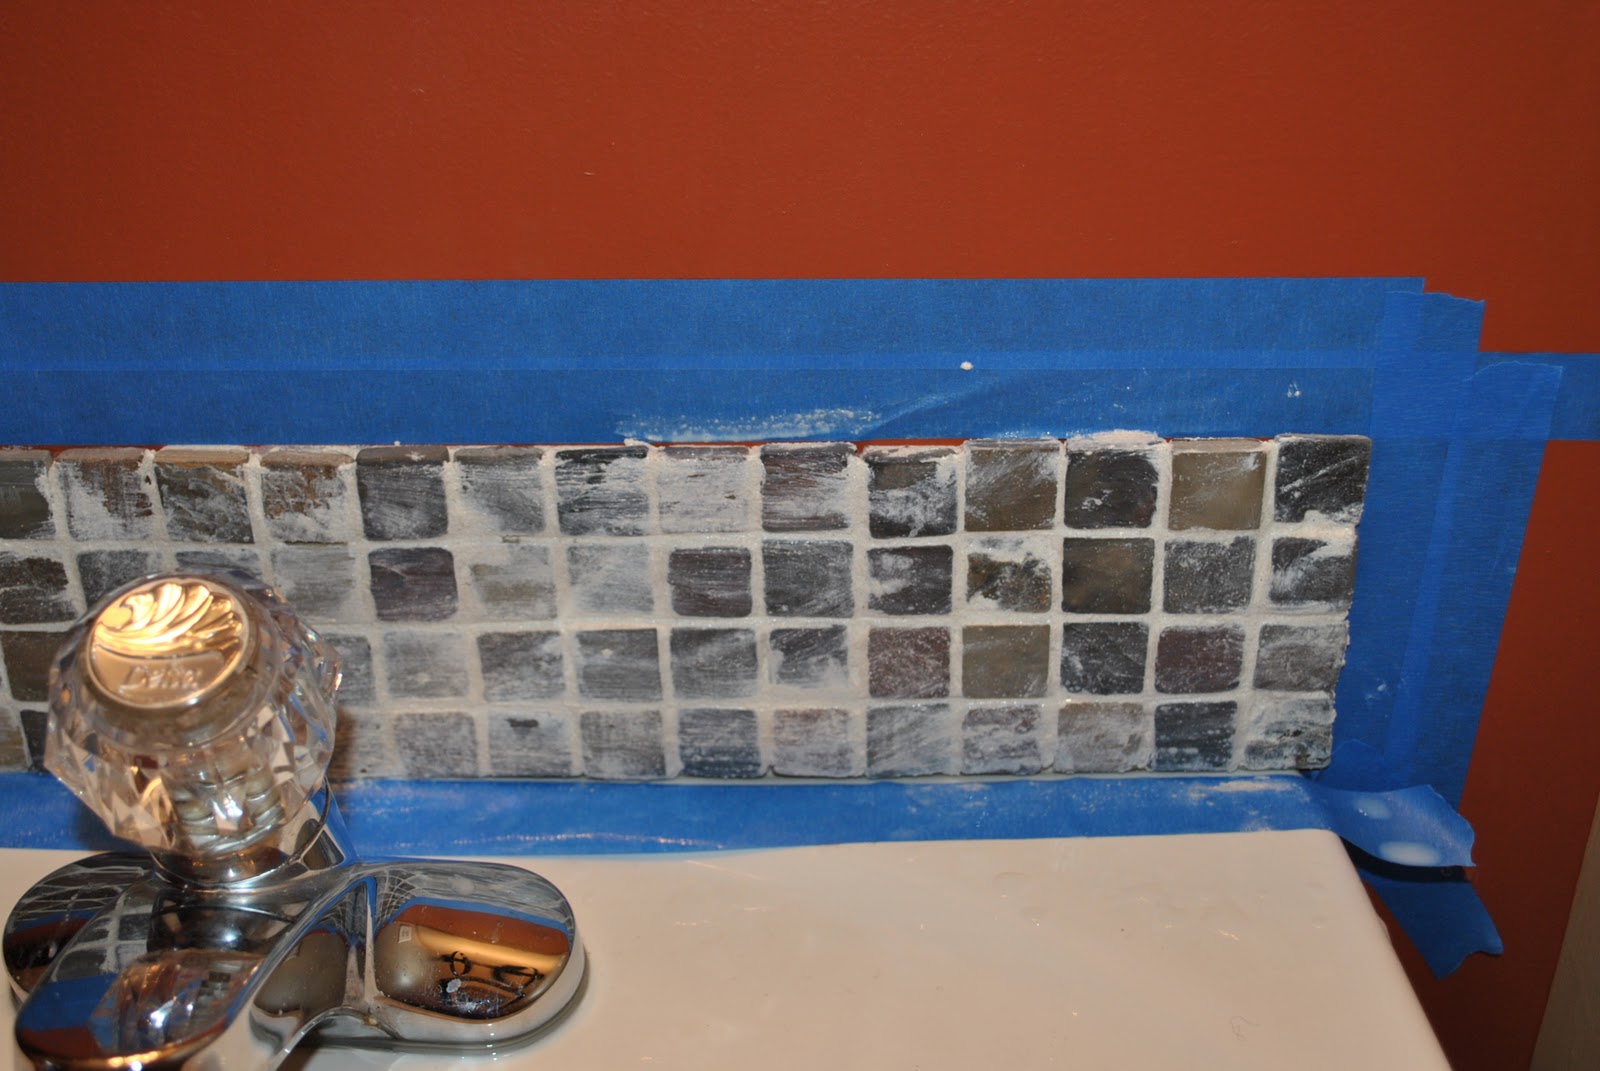
Once I filled all the holes and crevices, I used a damp sponge to smooth out the grout.  This not only cleans the tile face but smooths out the grout joints.

Adding a Tile Trim Border

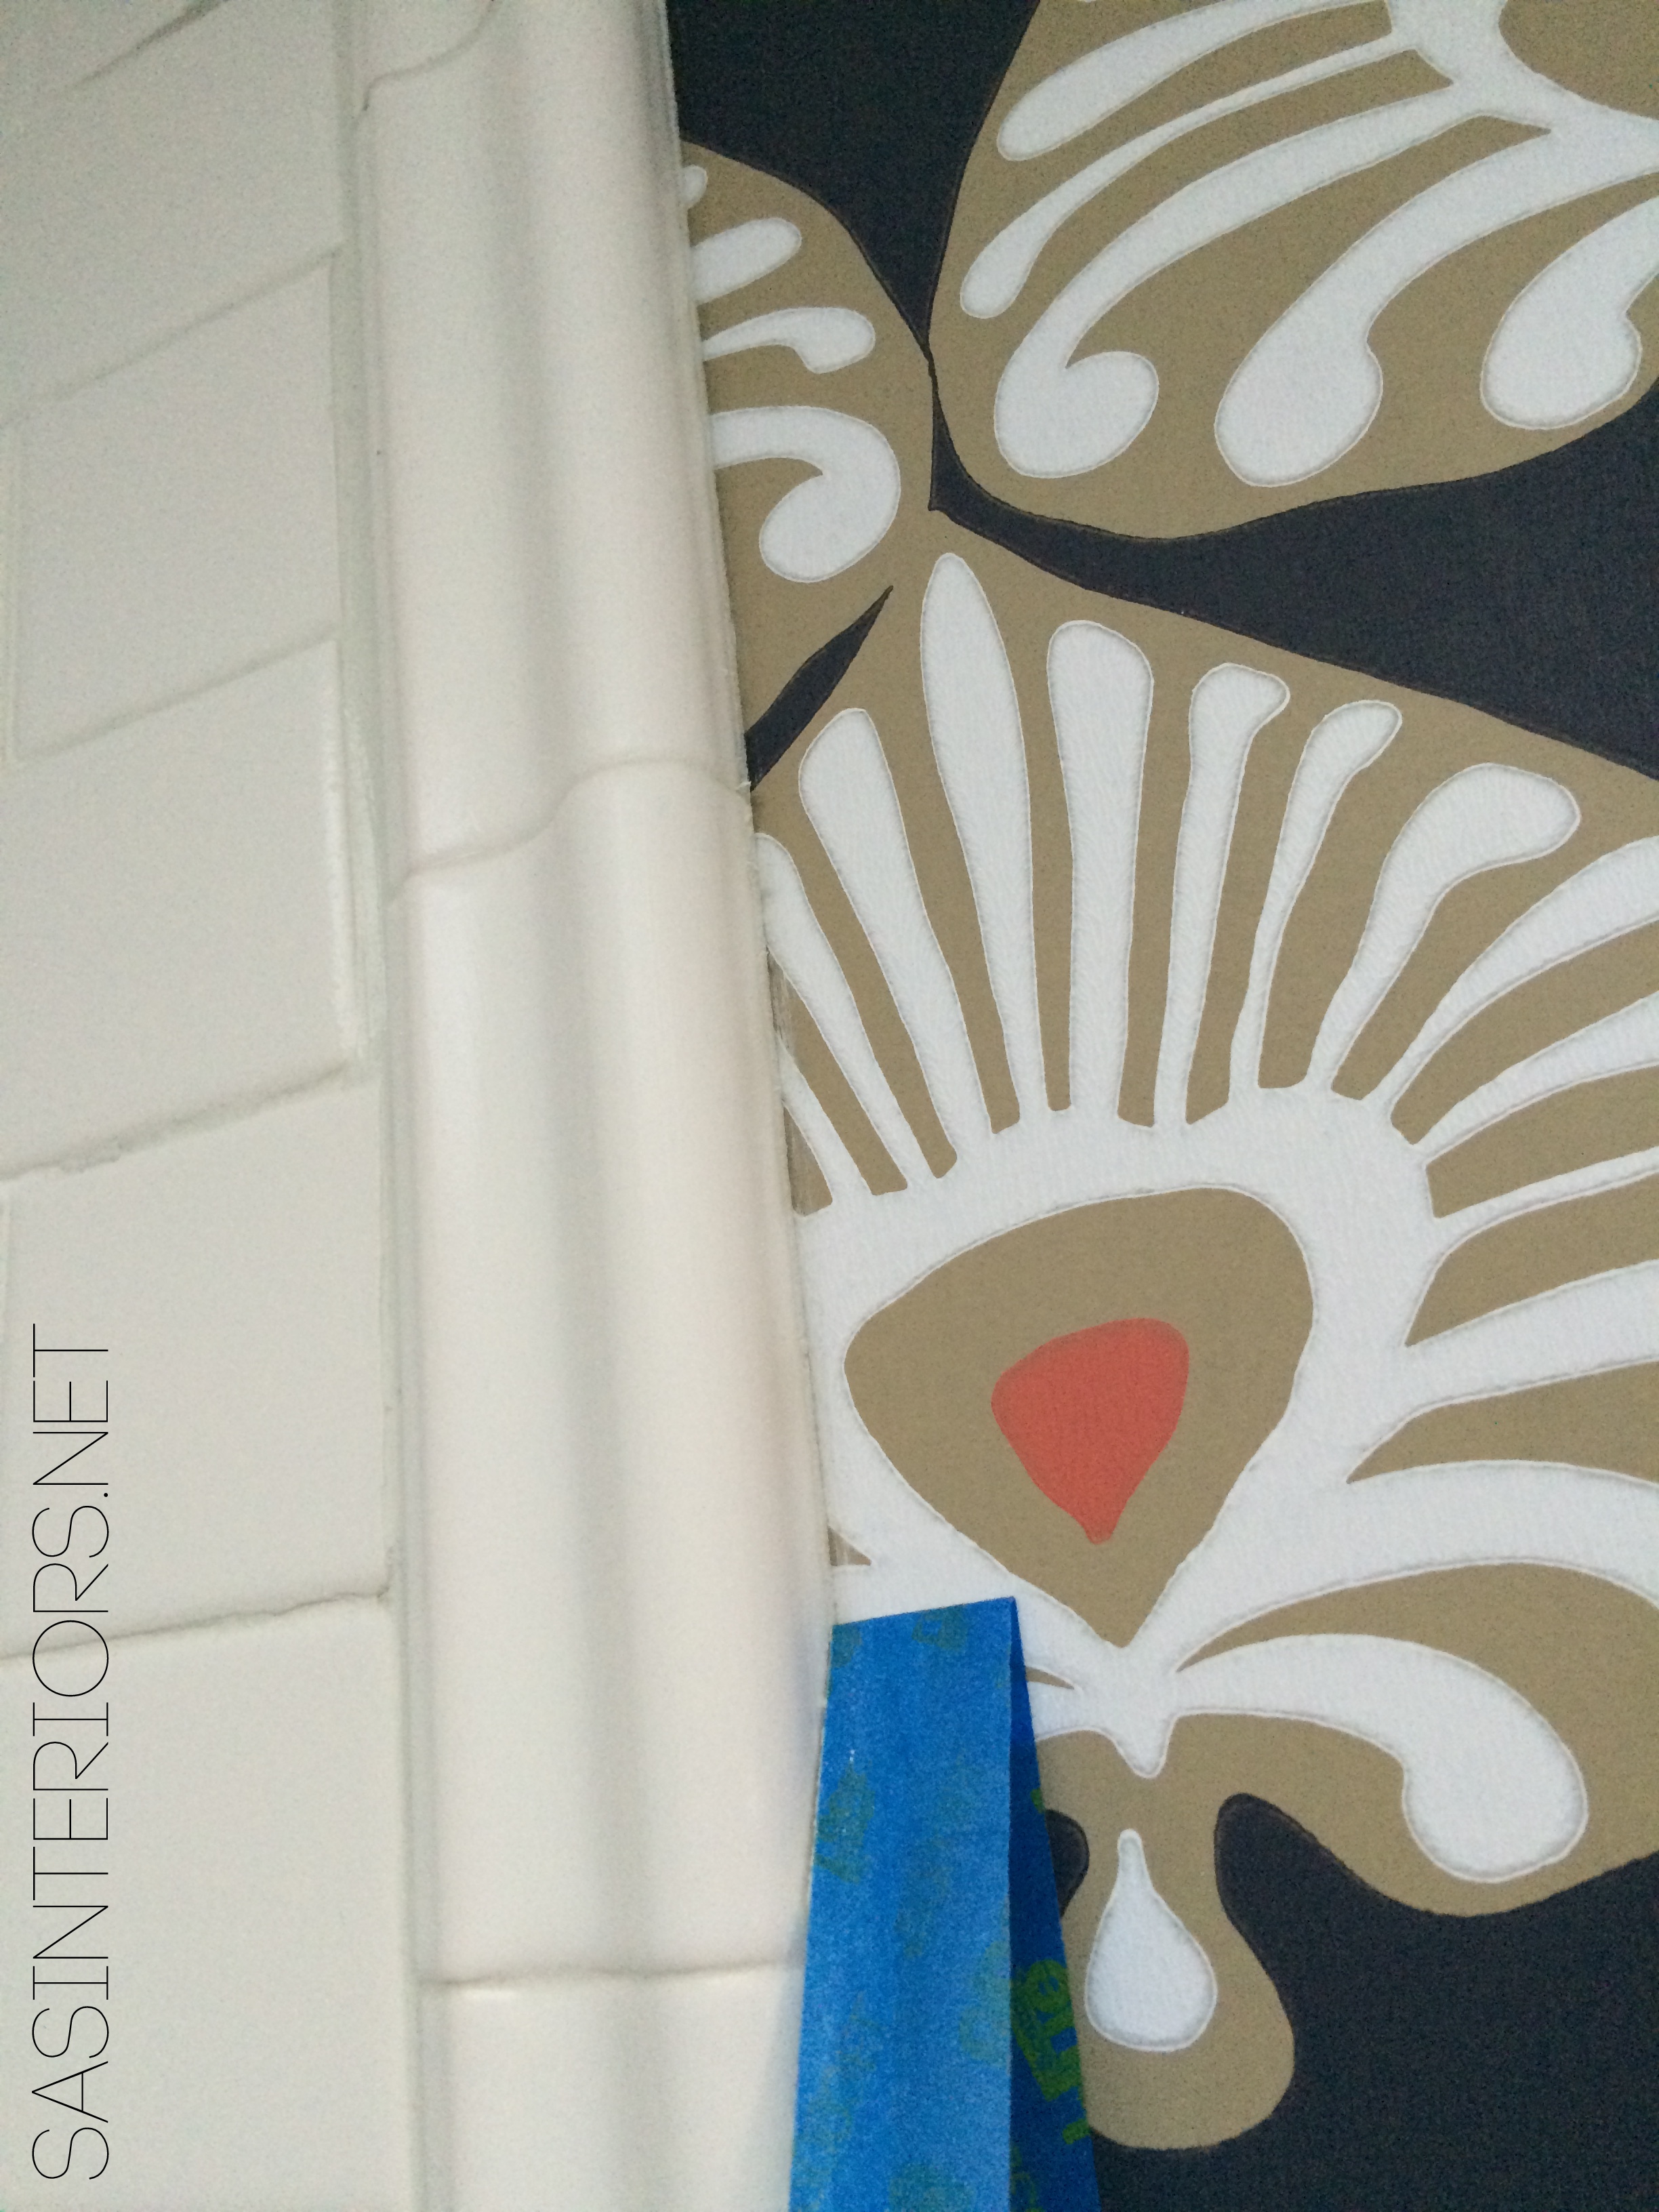
If your walls are painted or have wallpaper on them, like mine, go slow + be careful so the wall surface doesn’t get grout on it otherwise it’ll become hazy.  Thankfully the wallpaper was easy to wipe off, but I am sure paint wouldn’t be as simple.  I guess you could always touch up those spots…

BEFORE THE GROUT DRIES, REMOVE THE TAPE!  This is in caps because if not the tape will dry into the grout.  Yes, it’s happened to me (not on this project thankfully).  As soon as you finish grouting while the grout is still moist, pull the tape off.

Adding a Tile Trim Border

From start to finish…

Adding a Tile Trim Border in a bathroom to give a finished edge!

And the result…

Adding a Tile Trim Border

BathroomAdding a Tile Trim Border in a bathroom to give a finished edge!

Adding a Tile Trim Border in a bathroom to give a finished edge!

Adding a Tile Trim Border in a bathroom to give a finished edge!

And a peek at a few other things happening {art + accessories}…

Adding a Tile Trim Border in a bathroom to give a finished edge!

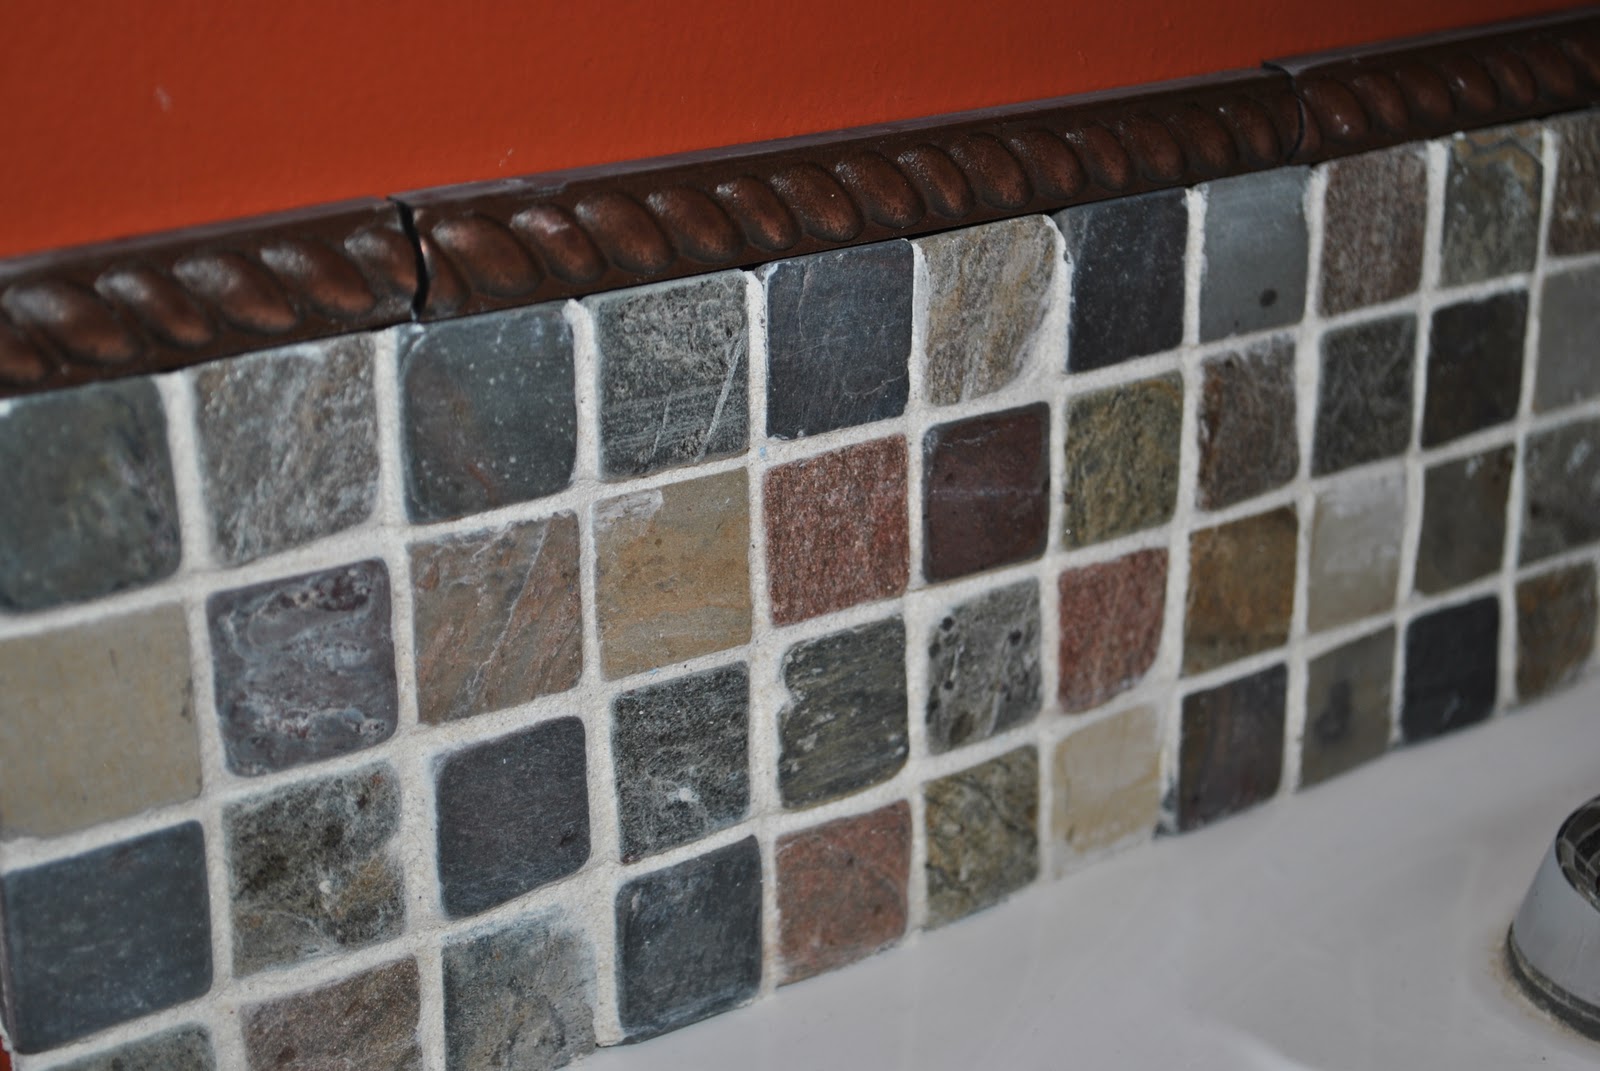
The tile accent border is truly a beautiful addition.  Not only did it hide a lot of little mistakes and imperfect spots, but it has given this bathroom such an elegant + sophisticated finished look.  I am so happy that I installed the wallpaper before adding the border because it has really given a nice clean edge.  If / when I ever want to remove the wallpaper, my plan would be to score the edge of the accent tile with a sharp blade and then peel the paper off.

Adding a tile accent border on Day 18 is complete!  Up next… creating a tiled niche.  I removed the old medicine cabinet and replaced the space with a tiled niche.  More to come next week!

The installation of the tile accent border took about 4 hours on one day

From start to finish, these are all the posts pertaining to this bathroom remodel
Plan of Action
Demo: Removal + Installation of the Tub & Walls
How-To Tile + Grout the Bathroom Walls
Installing Wallpaper
Adding a Tile Accent Border
Creating a Tiled Niche
Bathroom Makeover Reveal
Resources

{Day 18} Tile Accent Border – Complete!  12 more days to go…

This post is sponsored by Lowe’s, but all thoughts and opinions are 100% my own.  I am thrilled (and a bit nervous) about tackling this project, but very excited to be partnering with Lowe’s on creating an entirely new bathroom space.  I’d love for you to follow along on this new project!

Bathroom Makeover: DIY Tips & Tricks on How-To Tile + Grout a Bathroom {Day 5-16}

It’s Day 5-16 for the next phase of this Bathroom Makeover in 30 Days Challenge.

The tile is done.  I could not be more happy.  It wasn’t difficult, but it took a long time.  Rightfully so since this 5′ x 8′ space is almost completely covered in tile.

Before this I had only tiled small areas – a fireplace surround, a kitchen backsplash, and a bathroom backsplash (and a few floors but that was using luxury vinyl tile). But this was a mega job.  I was nervous and I got overwhelmed at times.  BUT it’s complete and it feels so good.  And looks good too.  I’m still no expert, but I surely have some tips to share.  Take a look at the bathroom now…

How-To Tile and Grout a Bathroom tub area: tips & tricks to do it yourself. Follow along on this DIY bathroom remodel!

And just to give you a reminder of what it looked like before…

Bathroom before makeover

Before I got started, I put together a Plan of Action and that has kept me on track when picking and choosing the new elements + items for the bathroom.

I’ll admit though, even though it is a small space finalizing a design direction was tricky.  My #1 objective was to make it functional (since it’s the hall / kids bath) and classic (subway tile), but I also wanted to bring the unexpected (wallpaper).  I searched the tile aisle of Lowe’s many times before finding a tile that I loved…

Walking the aisles of Lowe's searching for the right tile

In the end, I chose to move forward with 3 x 6 white subway tile and 13″ x 13″ natural stone herringbone mosaic

White subway tile - the most classic, most beautiful (an one of the least expensive) tile you can get!

Lowes Herringbone Carrera Marble

Once the removal & installation of the tub + cement board walls were complete, it was time to tile!   To start, I chose the center point of the space – the back wall – and worked my way out and around the room.  I marked out a level line at the base of the tile so I the tile would be as plumb as possible.

How-To Tile and Grout a Bathroom tub area: tips & tricks to do it yourself. Follow along on this DIY bathroom remodel!

When starting the first row, it is important to keep the tile about 1/8 – 1/4″ above the tub deck (I used shims so the tile would not slide down).  Instead of filling this gap with typical grout, use an expandable sealant to repel the water.

Tip to Know: Subway tile is the only tile that has a slight bevel, so there is no need to add a spacing/ joint between tiles. If you added a joint (using a spacer) than the joints would be very large.  The pro for using subway tile is they stack one on top of the other.  The con for using subway tile is you have no wiggle room.  If a tile is off (when using spacers), you can cheat on the next tile or the next row, but not with subway since ever tile butts next to each other.

I continued my way around the base of the tub and installed the tile on the plumb line.

How-To Tile and Grout a Bathroom tub area: tips & tricks to do it yourself. Follow along on this DIY bathroom remodel!

Once the first row was finished and the tile was cured, I continued my way up the wall starting at the back.

Somehow, somewhere I got this crazy-zany idea to introduce an accent tile.  Yes gorgeous, but should an inexperienced person (me) be acting like a pro on the Day 2 of tiling?  I asked myself late one evening.  Well there was no going back…

Once I figured out how large I wanted my accent tile inlay to be, I marked lines on the wall using a level.  Then to outline the accent tile, I used a 1/2″ x 6″ pencil liner.

How-To Tile and Grout a Bathroom tub area: tips & tricks to do it yourself. Follow along on this DIY bathroom remodel!

The two sides of the accent tile nearly killed me because of all the cuts, but I kept saying to myself, what doesn’t kill you makes you stronger.

But then, the sides were done, the pencil tile was added to the top and the bling-bling accent tile was ready to be installed!


How-To Tile and Grout a Bathroom tub area: tips & tricks to do it yourself. Follow along on this DIY bathroom remodel!

For the accent tile, I found the midpoint of the box and laid the first tile which is 13″ x 13″ natural stone herringbone mosaic (on a mesh sheet backing). Then I added the adjacent tiles.  For this part, the Mister and I worked fast because we wanted to avoid the tiles from sliding down (gravity was not our friend on this day).

How-To Tile and Grout a Bathroom tub area: tips & tricks to do it yourself. Follow along on this DIY bathroom remodel!

How-To Tile and Grout a Bathroom tub area: tips & tricks to do it yourself. Follow along on this DIY bathroom remodel!

FYI: I tried taking as many pictures along the way, but to be honest, my hands were messy and filled with mortar.  All the pictures were taken with my iphone and much of the project was tackled in the evening (with poor lighting).

[details on adhering the tile to the wall below]


Once the walls of the tub were complete, I continued the tile about 3′ up on the main walls of the bathroom.

How-To Tile and Grout a Bathroom tub area: tips & tricks to do it yourself. Follow along on this DIY bathroom remodel!

How-To Tile and Grout a Bathroom tub area: tips & tricks to do it yourself. Follow along on this DIY bathroom remodel!

Before & After of the sink area…

How-To Tile and Grout a Bathroom tub area: tips & tricks to do it yourself. Follow along on this DIY bathroom remodel!


What’s to Come

Once the subway tile is complete, I will be wallpapering the remaining exposed walls + a decorative border tile will be added to the edge of the subway tile to give a finished look.

Those were the steps I took for installing the tile and here are some details + specifics

How-To Cut Tile

There are two methods I used to cut the tile, (1) with a hand-held tile cutter (like this) or (2) with a wet saw (like this).  There are pros and cons to both.

Hand Held Tile Cutter
The subway tile was fairly easy to cut/trim, so for those cuts I used the hand-held tile cutter and was able to do it right on the bathroom floor.  This made the project easier and more manageable to tackle at night (which is when most of the bathroom came together).

Once I marked where the tile had to be cut.  I lined it up on the tile cutter.  Scored it 3-4 times with the manual blade.  And snap.  The tile was cut.

Using a hand-held tile cutter to cu subway tile. It's affordable and easy to use with no mess, no water, and simple clean up!

For smaller sized ceramic tile, I find that the hand held tile cutter is perfect, but for larger tile (ie: 12 x 12 or larger) and thicker natural stone (ie: the herringbone) a wet saw is needed!

Wet Saw
The beauty of the wet saw is the ease and preciseness of the cuts.  BUT it’s messy and there is a setup / cleanup process.  Many wet saws come with a stand, but we don’t have one and instead set it up on our driveway.  Since water is needed, there is a tendency to get wet and when working on a project late at night, who wants to be running up and down the stairs to go outside to cut tile?  NOT I.  So, for the cuts using the wet saw (herringbone accent tile and the decorative border tile) we waited till the weekend.

Using a wet saw will give you precise cuts for your tile. Ideal with larger and thicker tile!

Adding Adhesive to Tile

Because I couldn’t spend 8 hours a days tiling (I wish – I’m glad if I got in 2 hours each day), I mixed small amounts of adhesive at a time, so I had to alter the directions from the back of the bag since they called for using all the adhesive at once.  If you plan on tiling over many days, then mix small batches so the adhesive is fresh each time (otherwise it will harden).

Totalflex Universal Mortar tile adhesive

Tip: Instead of cleaning out the bucket of mortar (as well as grout) each time, grab about 5-10 small buckets so they can be thrown away.  And never ever, ever cleanup your tools in the sink of your home.  Yes you can wash your hands, but be sure to run hot water for a few minutes afterwards.  Washing a bucket or the tools in the sink of your home could result in the mortar (or grout) hardening in the pipes.

Why am I sharing this with you?  Because  it happened to me.

The consistency of powder to water should result in a pasty (not watery) mix…  It shouldn’t fall easily off the trowel.

How-To Tile and Grout a Bathroom tub area: tips & tricks to do it yourself. Follow along on this DIY bathroom remodel!

Most experienced tile installers put the adhesive on the wall to attach the tile.  I tried that and found it made a lot of mess + a lot of wasted product.  Instead, I found it much easier to add the adhesive directly to the back of the tile (for both the subway tile and the accent tile).  This process may seem longer, but for me it worked better and there was very coverage.

How-To Tile and Grout a Bathroom tub area: tips & tricks to do it yourself. Follow along on this DIY bathroom remodel!

Using a trowel, I added the adhesive to the back of the tile, then using the notched edge, I raked the adhesive in a vertical direction (perpendicular to how it will lay on the wall).   Then I applied the tile to the wall.

How-To Tile and Grout a Bathroom tub area: tips & tricks to do it yourself. Follow along on this DIY bathroom remodel!

Once the tile was on the wall, I wiped away the excess adhesive on the tile surface.  If I hadn’t, it would have hardened on the surface.

How-To Tile and Grout a Bathroom tub area: tips & tricks to do it yourself. Follow along on this DIY bathroom remodel!

Once the tile was set and the adhesive cured, it was time to grout!

How-To Grout Tile

Grout seals the deal!  It not only gives a finished look, but grout “locks in” and secures the tile to stay in position.

For this bathroom renovation, I chose to use unsanded grout (watch this video on how + why to use sanded / unsanded grout).  Sanded grout is typically for larger joints from 1/8″ – 1/2″, while unsanded grout is for smaller grout lines that are less than 1/8″.

Using a small bucket, I added the powder then the water to create a pasty mix (similar to the consistency of toothpaste).

How-To Tile and Grout a Bathroom tub area: tips & tricks to do it yourself. Follow along on this DIY bathroom remodel!

When the grout mix was ready, I added a nice amount on to the grout float.  Then I chose a starting point and worked the grout into the joints with the float.  Once a good sized section of tile was covered in grout, I took a damp sponge and wiped the surface.  This not only cleans the tile face but smooths out the grout joints.

How-To Tile and Grout a Bathroom tub area: tips & tricks to do it yourself. Follow along on this DIY bathroom remodel!

You can see how finished the wall looks with the grout by comparing the area with the joints filled in and the area without.

How-To Tile and Grout a Bathroom tub area: tips & tricks to do it yourself. Follow along on this DIY bathroom remodel!

Once the bathroom was tile and grouted, this was the result…

How-To Tile and Grout a Bathroom tub area: tips & tricks to do it yourself. Follow along on this DIY bathroom remodel!

The installation & grouting of the tile & grouting took about 12 days – in total about 25 hours

Just shy of 1600 words, this post is jam-packed with information – I hope I didn’t overwhelm you!  I was very apprehensive about tackling such a BIG project and at times I was overwhelmed, but in the end the job wasn’t difficult.  Long YES, but not difficult.  If I could tackle this huge space, so can you!

{Day 5-16} Tile & Grout – Complete!  14 more days to go…

From start to finish, these are all the posts pertaining to this bathroom remodel
Plan of Action
Demo: Removal + Installation of the Tub & Walls
How-To Tile + Grout the Bathroom Walls
Installing Wallpaper
Adding a Tile Accent Border
Creating a Tiled Niche
Bathroom Makeover Reveal
Resources

This post is sponsored by Lowe’s, but all thoughts and opinions are 100% my own.  I am thrilled (and a bit nervous) about tackling this project, but very excited to be partnering with Lowe’s on creating an entirely new bathroom space.  I’d love for you to follow along on this new project!

Bathroom Makeover: Plan of Action {Day 1}

I’m at it again…  another project!  And this is a biggie.  I know, I know…. I haven’t even waited 0.05 seconds before starting something new, but this project has been in the works for over a year and I’m thrilled that my thoughts + ideas are actually coming to fruition!  So the next big remodel… the hall/kids bathroom.

This bathroom got a mini DIY revamp about 3 years ago, but it’s been used & abused by two kiddos, so it was time to put my design expertise to work and create a space that would handle the everyday splashes & wear of two busy bees.

Of course, I can’t start the remodel without a plan of action.  So here it is.  My creative vision board for the new bathroom space…

Bathroom Makeover: Creative Vision Board for the new space. Filled with basics + layers of bold. An entire DIY bathroom remodel.

I’m thrilled to be partnering with Lowe’s on this bathroom renovation and they’ve put me to the test to create a dynamic, on-trend space using their in-stock products (items that can be found in store versus online).   My vision for this revamp is to mix my design style of classic eclectic – classic for the background with bold elements layered in!   Since the tile is the dominate feature (shower + 3′ up all the walls) in this bathroom, that’s where I started…

My design philosophy when creating any space is to go classic for the elements that are expensive and/or difficult to change.  Similar to buying a sofa (which I typically go neutral in color and pattern), I wanted a tile that could “live” a long time…  I DO NOT plan on changing the tile in a year or two (or even 5), so it had to be something that I would like now & in the future.   There is nothing more classic and beautiful than 3 x 6 subway tile.  The bonus, it’s only .22 cents a tile – one of the least expensive Lowe’s has.  But (there’s always a but), I wanted something more.  I needed to create a wow-factor.  So along with the classic subway tile, I am also going to incorporate a gorgeous herringbone carrara marble.  Crossing my fingers that it looks as good on the wall as I envision it in my head {squeal}.

White subway tile - the most classic, most beautiful (an one of the least expensive) tile you can get!

Lowes Herringbone Carrera Marble

But you all know me, I need color somehow, someway.  That’s where the layers in the space come in.  I’ve selected a dynamic wallpaper that is really give an incredible contract against the classic white subway.  It’s bold.  It’s unexpected.  It’s me.

Serena and Lily Palmetto Wallpaper – Inkwell Blue/Khaki

The classic and the bold are covered!  The other elements in this new proposed bathroom are all going to enhance the beautiful classic and bold selections.  The old builder-grade vanity will be headed curbside and a new, more modern vanity in an espresso finish will be installed in it’s place.  For the lighting, I wanted to introduce another unexpected element and chose an oversized single exterior industrial-style light fixture.

Here’s the catch… I’m doing 95% of this bathroom renovation on my own.   I’m crazy, right?!  Nutso, but I’m determined.  The part that I will not be tackling is the install of the new tub and shower components.  The mister nor I have ever installed a tub or shower fittings and are too nervous to tackle it on our own and want to avoid any possible leaks.  We know when to call in the pros and the tub install is not within our skill-set.  I am sure we could do it, but who wants to take the chance?  Not Us!  Beyond that though, it’s all on me.  Tile, toilet, vanity, lighting… All DIY baby!

Since this bathroom makeover is almost an entirely DIY job, it’s going to take longer than typical, so our goal is to tackle it in 30 days.  30 days start to finish, complete!  Can we do it?  Let’s see.  I hope you’ll follow along on another crazy DIY adventure…

{Day 1} Plan on Action – Complete!  29 more days to go…

From start to finish, these are all the posts pertaining to this bathroom remodel
Plan of Action
Demo: Removal + Installation of the Tub & Walls
How-To Tile + Grout the Bathroom Walls
Installing Wallpaper
Adding a Tile Accent Border
Creating a Tiled Niche
Bathroom Makeover Reveal
Resources

This post is sponsored by Lowe’s, but all thoughts and opinions are 100% my own.  I am thrilled (and a bit nervous) about tackling this project, but very excited to be partnering with Lowe’s on creating an entirely new bathroom space.  I’d love for you to follow along on this new project!

Groutable Luxury Vinyl Tile Floor {an Update}

In the 400+ posts I’ve shared over the years there are a select few that I receive questions about on a daily basis.  Which, by the way, I love!  Reader inquiries + questions make me so happy 🙂

One post, in particular, that many readers are interested in is my experience with groutable luxury vinyl tile flooring.

Post Update: Groutable Luxury Vinyl Tile, an amazing alternative to cermamic tile. How has it held up in 2 years? Reader Questions, ANSWERED! You will not believe how this flooring will change your life.

I’ve installed groutable LVT  in my parents floor + my foyer + my master bath + in the kids bath, so I can officially say I’ve had some experience with the product.

So the basic question I continually get asked is:  Has your vinyl tile held up + How is it today?

Here are just a few of the reader questions I’ve received:

From Rachele
> Hi!  I just came across you on pinterest about the groutable vinyl floor tiles I was curious how they hold up over time? I never knew you could do this so of course I’m thinking tomorrow we will go buy flooring and get busy! LOL but I wanted to ask over time how it held up? Thank you so much.

From Shirley
> I’m in the process of installing vinyl groutable tile in a kitchen and dining area. The area already have vinyl square tiles on the floor. My question is, do I need to install a sub-floor/wood boards before installing the vinyl tile ?

From Kamie
> Hello,  I came across your post about the installation of peel and stick vinyl tiles in January of 2012.  I found this same product today on my hunt for new flooring for my kitchen.  My question to you is, how has it held up so far?  Is it durable?  Are you still satisfied with the product?  You response and insight are greatly appreciated.

From Cathy
> I saw these vinyl tiles at Lowe ‘s and read the box, but it didn’t have a lot of details.  For example, we want to put these in our kitchen which has vinyl sheeting glued on concrete. Should we remove the old vinyl first or put these tiles directly ver the old vinyl.  I’m sure it will be extremely difficult to get the old stuff up.  Then there will be old glue to also get up. Another question I have is should you put  down additional glue besides the glue on the back of the tile?  If so, what kind?  These do appear to be easier than wood, cork, or porcelain tile.  We’ve used the old peel and stick before in other homes.  Thanks for your info.

From Carrie
> I am researching groutable tile and came across your blog. Now that it has been down for a year how is the grout holding up? We are thinking about putting this in our kitchen and keep going back and forth on whether or not we want to grout it. It seems like the people who put it over pre-existing ceramic tile or cement have the best results. Ours is just a lauan subfloor and we live in an old house (1870’s) so it is hard to have  perfectly level floor. Just wondering your thoughts of the durability. Right now in our renovation we are at the end of our budget so we wanted something we can do by ourselves but also looked good in the end. I am just terrified of having the grout crack and pull away. The tiles we are looking at are beveled so we could do it without grout, but that makes me worried that dirt and liquid could cause a problem.

From Joseph
> I came across your web page while looking for groutable vinyl tile and I was just curious how is it holding up 2 years later? Would you do it again.  Are there any cons to it that you have come across? Thanks

> Hello Jenna – I was so glad I found your great DIY on groutable vinyl floor tiles – this is exactly what I want to do for my kitchen floor. I will also be covering
smaller square ceramic tiles with larger vinyl tiles. My question is, did you have to put extra adhesive down in the lower grout lines of the ceramic floor to eliminate any “sunken” or dip lines in the finished vinyl tile floor?

From Janet
> Thank you for you thoughts. What you did for your parents foyer looks great and you have me very psyched to do this!!

And there are many more, but these are the general questions readers have asked & this post is dedicated to answering them all (or as much as I can…)

Post Update: Groutable Luxury Vinyl Tile, an amazing alternative to cermamic tile. How has it held up in 2 years? Reader Questions, ANSWERED! You will not believe how this flooring will change your life.

My Overall Thoughts on Groutable Luxury Vinyl Tile

I am very satisfied! Overall, all of the LVT floors I have installed have held up amazingly.  There has not been one issue with the flooring cracking, settling, sinking, etc.  With all the floors I have installed, I DID NOT remove the existing floor, but all the floors ‘before’ were ceramic and in good condition with no cracking.  In none of the spaces did I fill in the existing joints and none of the luxury vinyl floor tiles have “sunk” in those crevices.  LVT floor is thick and really not bendable as in typical vinyl tiles.  You can definitely tell the difference between the two and the cost reflects that.  LVT is more expensive than a typical vinyl tile, but it is absolutely worth the additional cost.  I still feel that using groutable luxury vinyl tile is a wonderful long-term solution for a floor.  The look is very similar to ceramic tile & the turn-around time and ease of installation is incredible.  A floor that can be done in one day (install + grout) with no prior experience is pretty great, don’t you think?!

Post Update: Groutable Luxury Vinyl Tile, an amazing alternative to cermamic tile. How has it held up in 2 years? Reader Questions, ANSWERED! You will not believe how this flooring will change your life.Luxury Vinyl Tile in the Master Bathroom

Now that I’ve shared my overall thoughts on LVT, here are answers to the Top TEN Questions that have been asked:

1. How has the tile held up over time?

Fabulous.  As I said in my overall thoughts, there has not been one issue in any of the spaces that I have installed the LVT.  With the use of grout, the tiles are very sturdy and there have been no issues with loosening of the glue or the tile shifting over time.  Once the grout hardens, the tile is fully adhered to the floor below.  When I remodeled the powder room and replaced the toilet, a few of the tiles had to be fixed because I had originally cut the tile around the base of the bowl.  The LVT and grout were installed so well to the floor below that it was actually difficult to lift the tiles. They eventually came up, but it took some muscle.

2. Do I need to install a sub-floor/wood boards before installing the vinyl tile?

This is a difficult question to answer because every floor, in every home is different and I’m sharing my experience and the installation process I took.  BUT, here is my thought… If the floor you are working with is in good condition – no cracks, lifting, etc – you should be okay to install the LVT directly on top.  So basically you are purely changing the floor because of how it looks versus because it is damaged.  If the floor you are covering has issues and/or is damaged, then it would be best to remove the floor, install / patch the existing subfloor, and then install the luxury vinyl tile.

3. Is it durable?

I think the product is very durable, especially with the use of grout.  All of the spaces (foyers + bathrooms) I have installed the LVT are high-traffic areas and the tile has been exposed to water, mud, wet shoes, and more. No where have I seen issues with lifting or general wear.

4. Why do you love LVT?

4 reasons…

> The ease of install – it’s a one day job (depending on the size of the space of course). Yes, I have tiled before, but I do not feel that installing LVT was difficult at all.  I think a person with little experience can complete this project with ease.  Measuring and cutting is really the most difficult part of the project, so take your time and measure correctly!  Installing ceramic tile is not difficult, but it is tricky and experience is helpful.  Cutting ceramic tile can often be difficult and time consuming.  For prior ceramic tile projects, I’ve used tile snips, a tile cutter, and a wet saw.  A wet saw is the best for cutting ceramic tile, but it’s not easy – I’ve made alot of mistakes.  In my estimation, ceramic tile would take about double the time for installation compared to installing groutable vinyl tile.

> No prior experience installing a floor is needed.

> The cost is more than half of ceramic tile. A standard 40-50 sq. ft. space is fairly inexpensive.  The typical luxury vinyl tiles that I purchased from Lowe’s were $1.08 and the premixed grout cost $7.  The total cost of an entire project for this square footage would cost about $65.  Ceramic tile is available in a range of prices, but usually starts at $2 per sq. ft., so the savings right there is 50%.

> Luxury vinyl tile is flexible + forgiving.  I’ve installed ceramic tile before and within a few months it started cracking in some areas because the subfloor wasn’t level.  I’m not a professional and don’t have the budget to pay a professional, yet I wanted change.  LVT is a great solution because it provides the flexibility for a slightly uneven floor below.  YET, by adding the grout, the result is a sturdy, durable finished product.

5. Should you put  down additional glue besides the glue on the back of the tile?

I never used additional glue.  I felt the glue that was on the back of the tile was enough for it to adhere to the floor below.  The glue on the back of the tile is very sticky and once the paper backing was removed, I immediately laid it into place.  IF the tile isn’t used right away and over time the back is exposed to air, additional glue might be needed.  I can not recommend a glue to use since I have never used one.

6. The tiles we are looking at are beveled so we could do it without grout?  What are your thoughts?

I don’t prefer the look of a beveled LVT because to me it defeats the purpose of them looking like ceramic tile and that is the reason I like LVT.  If you use a beveled tile and don’t use grout, I do not think you will get the same result as I did.  The finished look won’t be the same and durability could be compromised because the addition of the grout really keeps the tiles in place.  I would suggest if you are spending the money and taking the time to install a vinyl floor, the luxury vinyl tile + the grout is your best option for a long-lasting result.

7. Did you have to put extra adhesive down in the lower grout lines of the ceramic floor to eliminate any “sunken” or dip lines in the finished vinyl tile floor?

I did not.  In my foyer I was going to add a skim coat before installing the LVT but decided against it.  The grout lines were very large and deep which is what I was worried about, but I decided to move forward with the LVT.  After 1.5 years, there have been no issues and no “sinking” / dip lines.  Again, this is my experience with the LVT and I feel that because it’s thicker than typical vinyl tile, it holds up extremely well.

8. Where do I buy Luxury Vinyl Tile?

I purchased the luxury vinyl tile for my projects at Lowe’s.  There are a few companies that sell LVT and there is a special section with these specific tiles.  LVT is the general name, but don’t get them confused with other names like high-end or something else.  You will definitely know the different between LVT and regular vinyl tile – they feel much more durable.

Post Update: Groutable Luxury Vinyl Tile, an amazing alternative to cermamic tile. How has it held up in 2 years? Reader Questions, ANSWERED! You will not believe how this flooring will change your life.

9. How long do I have to wait to grout after the tile is installed?

0 minutes.  There is no “set time” with LVT as is with ceramic tile. As soon as your tiles are installed, you can immediately get to grouting!  How fab is that?!

10. Name 1 Con!

That’s a tough one…  I guess I would say, the one con is the color selection.  I have purchased groutable luxury vinyl tile at Lowe’s, but other home improvement stores also offer similar products.  The selection is not as vast as ceramic tile (which is a con), but I was surprised by the wide range of colors and textures.  When I was at the store making my purchase, I was told by a sales rep that any peel-and-stick vinyl tile is groutable, except for the styles that have the faux grout look around the edge.  I don’t know if this is true or not, but it’s what I was told.

Have more questions? Please Ask!

I’ve tried to cover it all.  How did I do??

Check out these posts on how-to install groutable luxury vinyl tile floor:
DIY: Installing Groutable Luxury Vinyl Tile {my foyer}
How-To Install Groutable Luxury Vinyl Tile {my parents foyer}

Since groutable vinyl tile takes no experience, is half the cost, and takes half the time, what will use for your next tile project?

DIY: Fireplace Surround Transformation

With the second week of the new decade upon us, I have lots of tile projects brewing in my head.  So far for 2011, I’ve accomplished three (of many) projects that have been on my mind since we moved into our home almost a year ago.  My latest project has been re-tiling the surround of the fireplace. 

Here is a preview of the completed fireplace:

{The TRANSFORMATION}
The first step of the transformation took place last year and that step alone was {HUGE}!  We updated the mantel by painting it a dark brown from the original oak finish.  There were decorative faux-appliques on the flat surface that we also removed to create a more transitional look.  Here are picture of the before, middle, and after!
This is a ‘pic’ from when we moved into the house….
fireplace = in need of some MAJOR LOVE!
We painted it a dark brown color, but left the tile.
It just didn’t go with our decor, so we…..
…transformed it to THIS! Voila….The new fireplace surround!
I’ve previously posted a tile project {click here} that I’ve worked on and provided a step-by-step tutorial, but here it is again!
{Step By Step to install TILE}
Tiling seems like a difficult process, but honestly, it really isn’t.  Just take your time…that’s the KEY! To start off, make sure the area/surface you are working is completely clean.  I also want to add that I DID NOT remove the old tile…we tiled right on top of the OLD tile.  Some may say this is a mistake, BUT, I did not want to deal with removing the old tile and it isn’t a surface that will be walked on…what the HAaaaaY…let’s go for it 🙂
Before using any adhesive, do a DRY RUN.  Layout your tile pattern to make sure it will work how you want it. Once you put adhesive down ~ YOU ARE COMMITTED!  Mark off where you want the tile to be cut. THEN….
…Use a WET SAW to cut your pieces!  This is my BEST ADVICE for the whole project….Did you hear me??  Definitely USE a Wet Saw!!!   In previous tile projects, we used a manual tile cutter…BIG MISTAKE.  You will waste sooo much tile and the project will take double the time.  Invest in a Wet Saw….we bought ours for $45 from Home Depot….it’s worth it!
Once the tiles are cut to size, it’s time to put on the adhesive. (Keep on reading for my recommendations on adhesive & grout).  Throw a glob of adhesive on the back of your tile OR on the surface you are tiling.  Because we were tiling a small area versus an entire floor, putting the adhesive on the back of the tile was MUCH easier!  Then using a V-grooved trowel, evenly coat the back of the tile (holding the trowel at a 45 degree angle) and adhere it to the surface. Set the first tile in place, pressing it firmly into the mortar.
For this project and my last tile project, I used a pre-mix adhesive and grout.  What a great product…no need to bother with mixing the grout powder and water.  BUT, this product is costly and is really best when tiling small areas.  For larger tiling projects, I would recommend a separate adhesive and grout mixture (only because of the cost factor).  For this project it worked perfectly.  Forgot to add…it is available in a variety of colors…I used alabaster.
We installed the tile at the top first and due to the laws of gravity, the tile started to fall…GGGrrreat!  SO… we used our son’s skateboard ramp to hold them in place….it worked perfectly, YAY (I knew that darn thing would come in handy)!!  NOTE: If tiling a vertical surface, you may need to use supports to keep the tile in place.
Then we started on the sides of the surround…
Then the floor…
 DONE!
 Because of the area I was working in, I didn’t want the fireplace mantel to get ruined, so using painters tape, I taped the surrounding surfaces.
 
 Tile is INSTALLED and now it’s time to GROUT!

This is the second time I grouted using a Ziploc bag and it made the process SO easy.  Usually the task of grouting is quite laborious, but NOT with a Ziploc bag!  Just like you would frost a cake, put your grout mixture into a Ziploc bag and grout-away!  

Squeeze out the grout and fill each joint with more than enough of the mixture ~ THEN…
….Once all the joints are filled with enough grout, start to wipe it away with a damp sponge (wring dripless) to remove grout residue.  Use a sponge that is specific for tile ~ one side is a typical sponge and the other side has a rough, abrasive surface.  The rough side is important to remove the grout off the tile surface, but DON’T scrub the joints!
Remove the haze immediately; If the tile starts to look like this, wipe the haze with a damp cloth again.  Then buff the tiles with a clean, dry cloth.  This may happen several times. Then…

YOU’RE DONE!
{COMPLETE}
I am SO happy to have finally completed this project.  It’s been on my to-do-list for a long time and I’m very happy with the results.
Do you have any tile projects planned around your house?

{Tutorial} Tiling a Backsplash

Simple things, make a BIG difference.
I’m always sprucing my house, thinking about what to update, and continually making changes.  A quick reno that I just finished was adding a tile backsplash to my powder room sink.
This is how the powder room looked before we moved in.
The walls were painted a semi-gloss, DARK forest green color and there was an ugly flower border at the top ~ too bad I don’t have a picture of that…you would have loved it, NOT!
Once we got our hands on it, we removed the ugly border and painted the room a card board brown color (one of my favs) and the sink wall, a burnt orange (very warm and inviting ~ the accent color throughout the house).  BUT the sink was still missing something…
So on one of our numerous Home Depot trips, I was strolling down the tile aisle, and picked up a 12×12 sheet of 1×1 slate tiles and thought they’d be perfect for the backsplash of the powder room.  I also picked up this great product that’s an adhesive and grout; its available in different colors as well…I got a bone color.
All-in-one….FABULOUS!

The process is fairly simple and straight-forward.  Before putting on the adhesive, lay the tile onto the wall and mark the outline with a pencil.  Then using painters tape, tape the outer perimeter so you avoid any glue getting onto your wall.  Then using a putty knife or your finger (which is what I did), put a thin layer of adhesive onto the back of the tile.  Do this in stages….one tile at a time.  In my case, the tiles were adhered to a mesh bag, but I cut the mesh lining and adhered the tile in 3 row segments.  So now all the tile is up…

Once the tile is on the wall, carefully remove the painters tape ~ you can do this before the adhesive dries.  The drying time is about 24-48 hours.

After the tile is completely dry, it’s time to grout.  The area that I was working in was tight and awkward, so I couldn’t use a typical grout application, using a float.  I put the grout in a Ziploc bag and snipped the corner edge off to create a 1/8″-1/4″ hole.  Then just like piping a cake, I filled the joints with the grout.

After the joints were grouted, it’s time to wash it away with water.  Using a rough sponge, go over the tile with water.  Over and Over and Over until the tile surface is clean and grit-free.  Depending on the look you want to achieve, you may want to use a sealing product on the tile BEFORE grouting. This will seal and protect the tile.  Also, when you are finished, it’s always a good idea to seal the grout lines too.  Both sealing products are available at any hardware store.

Voila…complete.
To cap off the top of the backsplash, I used a 1/4″ barliner….it just needed a final touch!  The next step is to replace the sink faucet…I’m thinking something in an Oil Rubbed Bronze finish….that I might need a little handyman help with 🙂
Onto my next tiling project….the fireplace surround
Check back soon for the results!!

Check out my metamorphosis at BNOTP