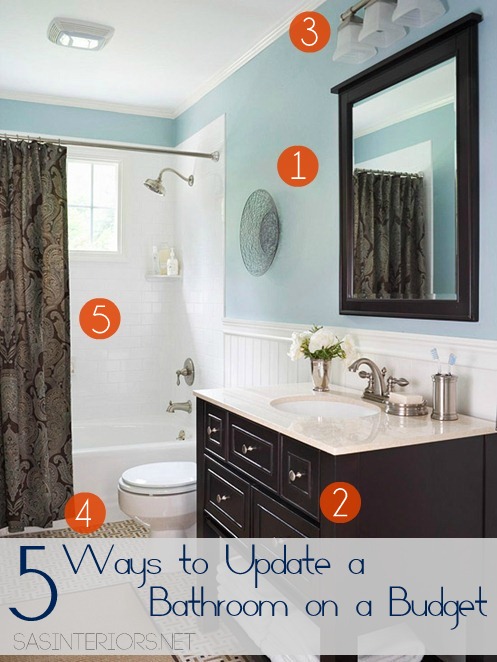
5 Ways to Update a Bathroom on a Budget
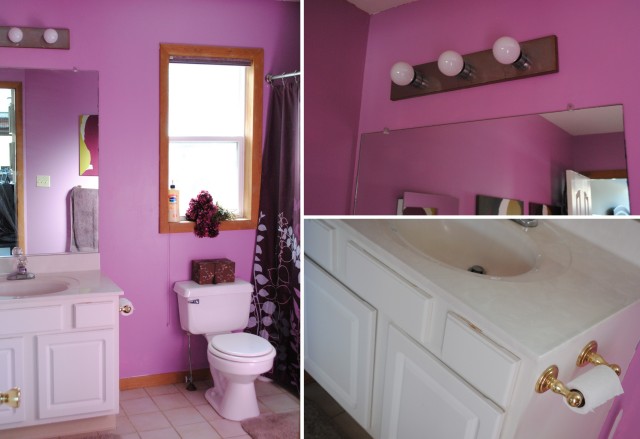
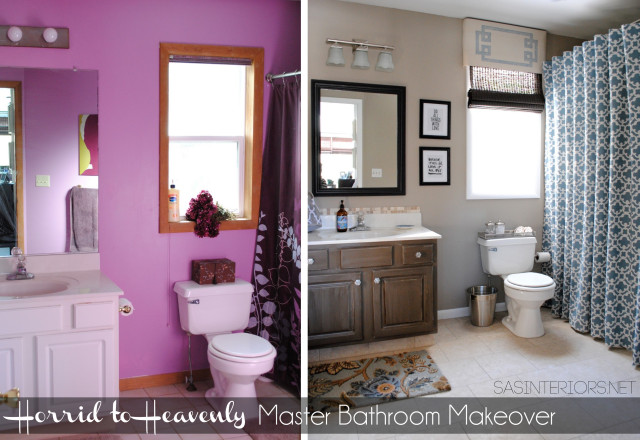
There have been some really qualified “entries” for the ugly bathroom makeover. I’m not going to lie… some of you are in desperate need of direction & a plan on how to jazz up your bathrooms. Most of the bathrooms I received pictures for, have good bones and are similar in layout of many homes, but they need to be taken to the next level to be practical and pretty!
Lowe’s and I are going through the pictures and next Monday will be the day when you’ll get to see what reader submitted bathroom we chose, along with a Creative Vision Board + ‘plan of action’ for the space. In the meantime, I wanted to share my thoughts + ideas with ALL of you on 5 Budget-Friendly Ways to Update a Bathroom…
I’ve been working on my fair share of client kitchens lately, which I adore, but I’m equally obsessed with revamping bathrooms. Having an educational and professional background in architecture and interior design, I love how all the components- cabinetry, hardware, and all the details in between – come together and interlink to create an incredible result. Even more so, I love all the added layers + color that can be brought into a bathroom to make it not only a functional space, but a magical oasis – remember I said last week, who doesn’t sneak away to the bathroom here and there for some peace + quiet?!
Unlike a typical 4 walled room in a house, bathrooms (as well as kitchens) can seem daunting when thinking about a makeover. There’s plumbing, electrical, tile, and more that is involved in changing. BUT, instead of neglecting the idea of an overwhelming revamp, embrace what you have and revamp the layers of the existing. Not only will a budget-friendly bathroom makeover increase the value of your home, but it will also simply make you happy!
Ditch those apprehensive, scary thoughts and let me share my 5 Ways to Update a Bathroom on a Budget…
1. Paint
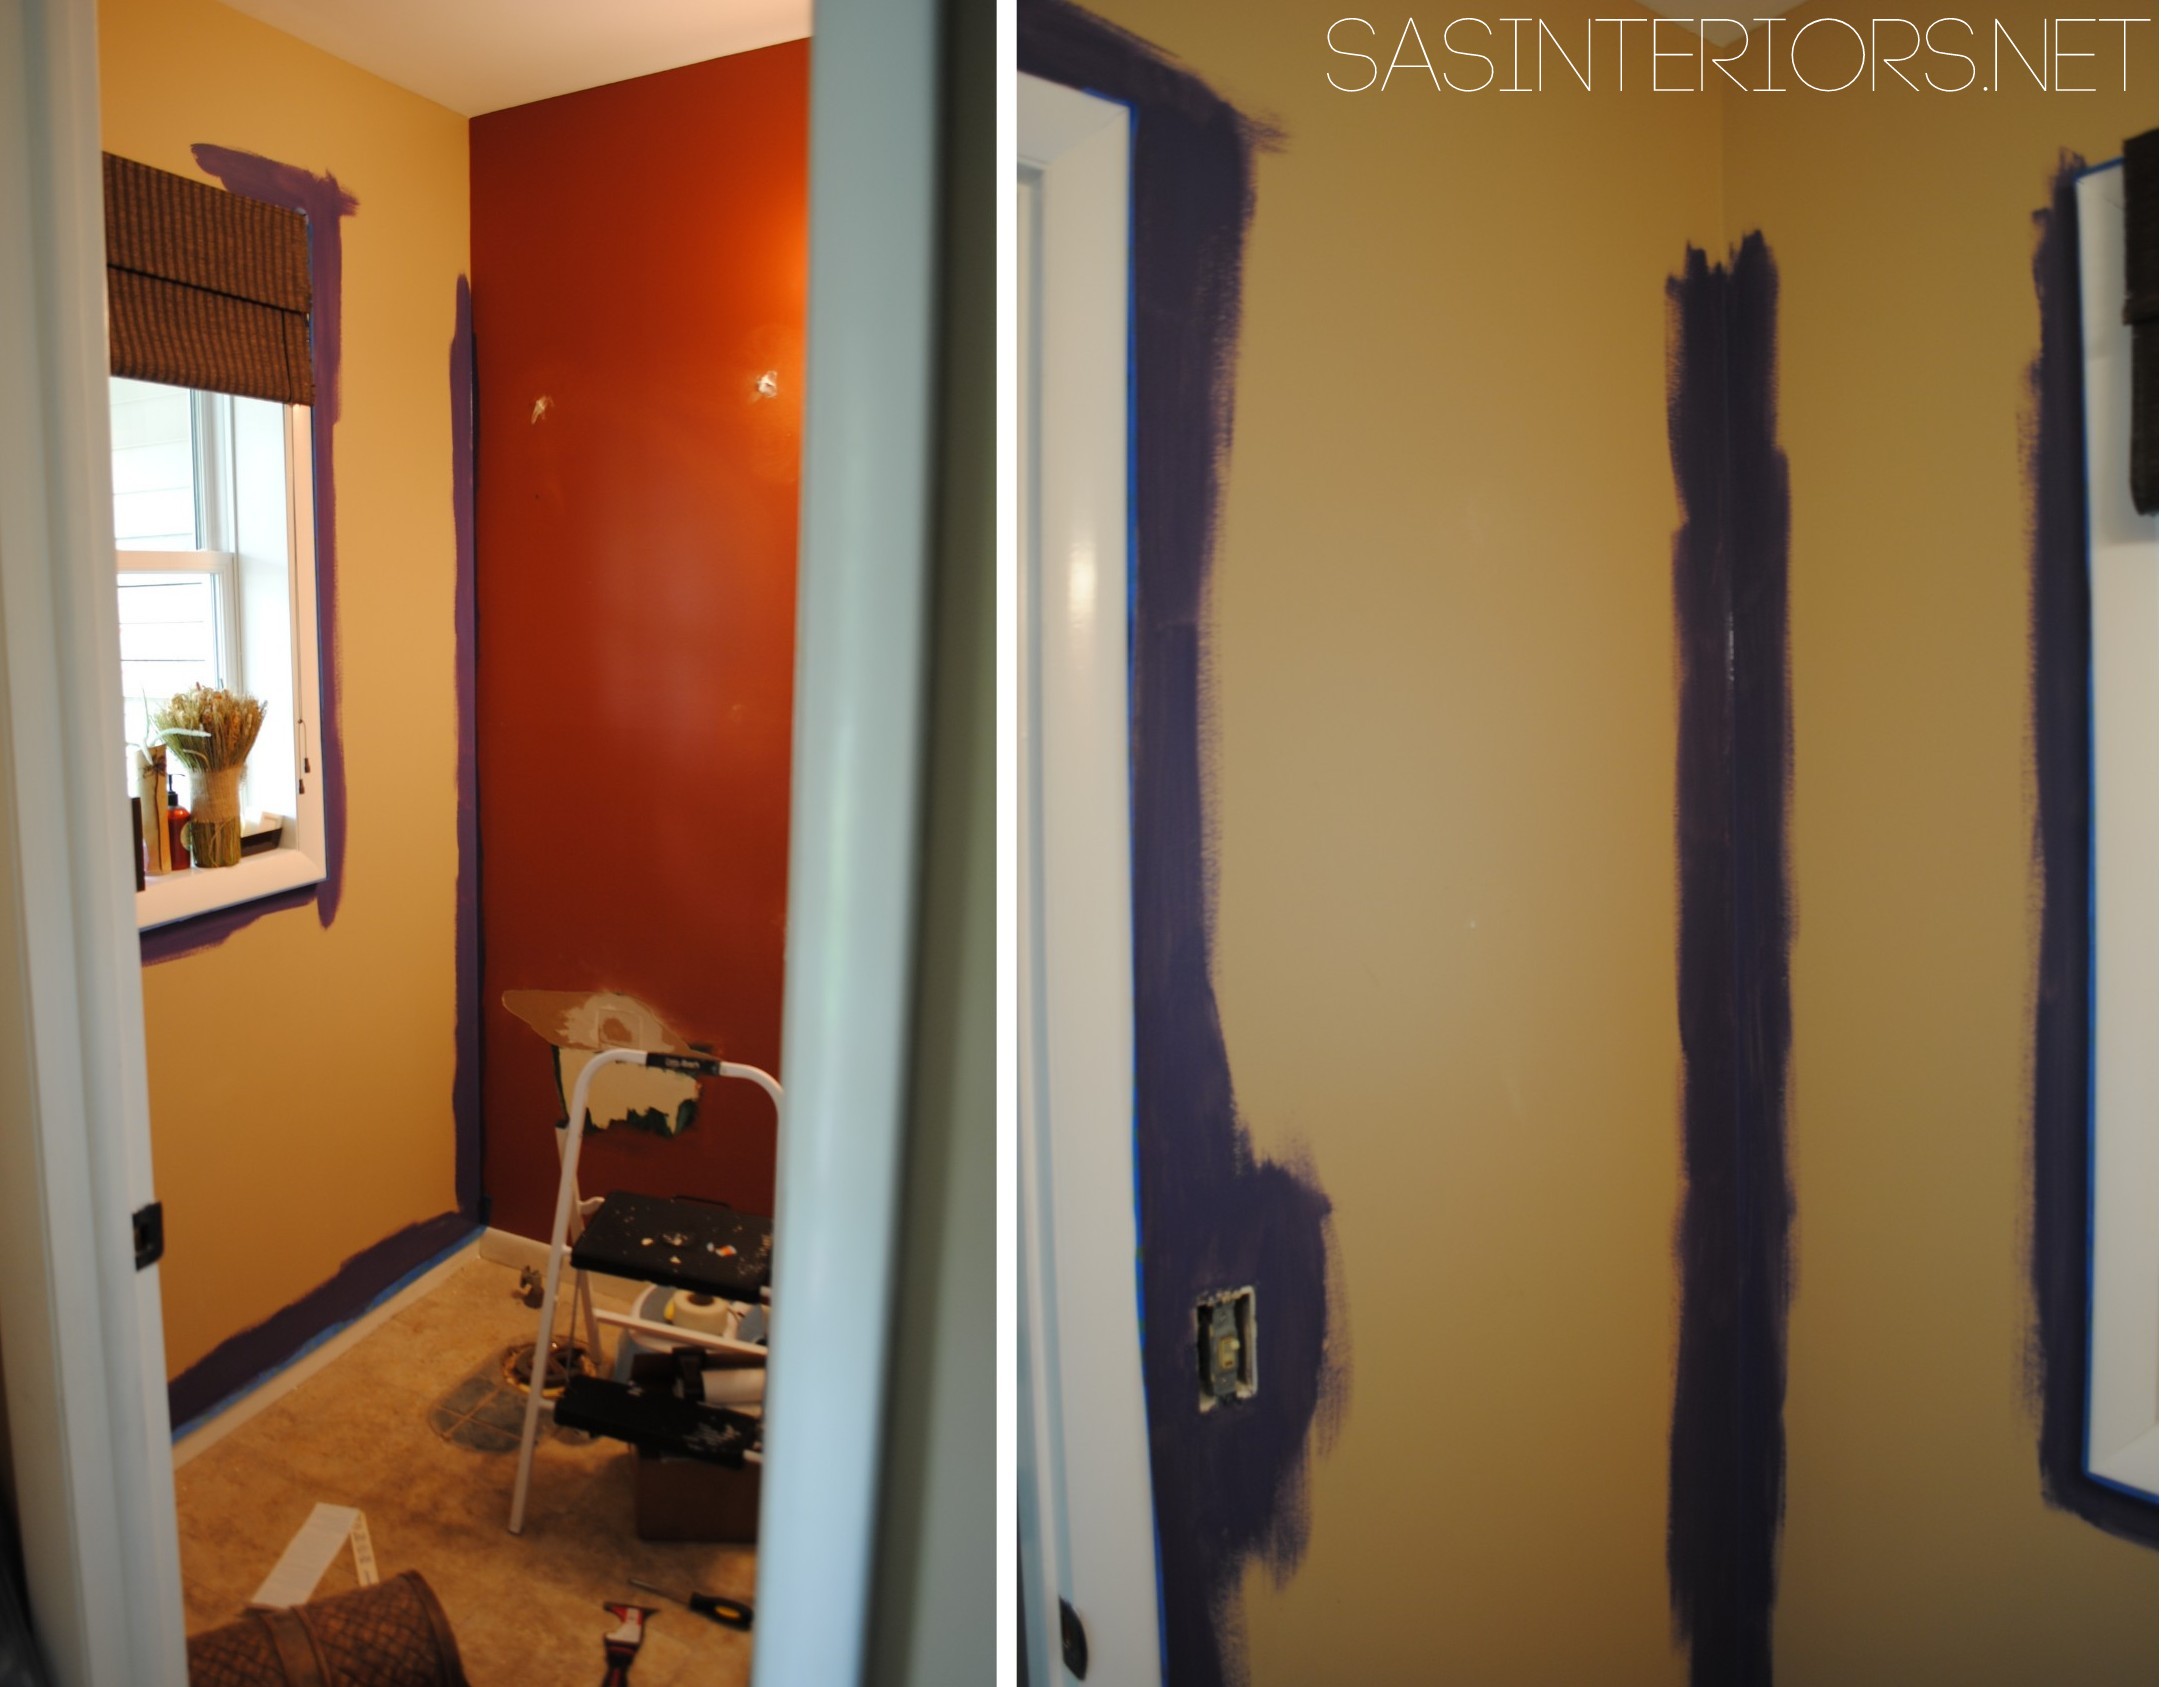
Easy (well fairly easy) and cheap! There is nothing like a fresh new coat of paint on the walls! And for a typical bathroom, from start to finish, it should really only take a few hours. Since the fixtures of a bathroom are often white or light-colored, think about adding a pop of color on the walls. Or, if you’re desiring a serene and calming space, go light – not white, but light.
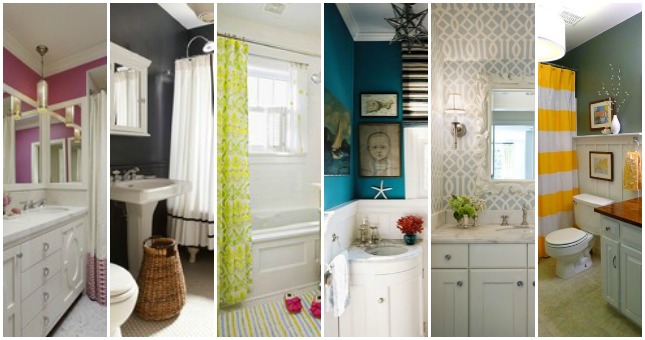
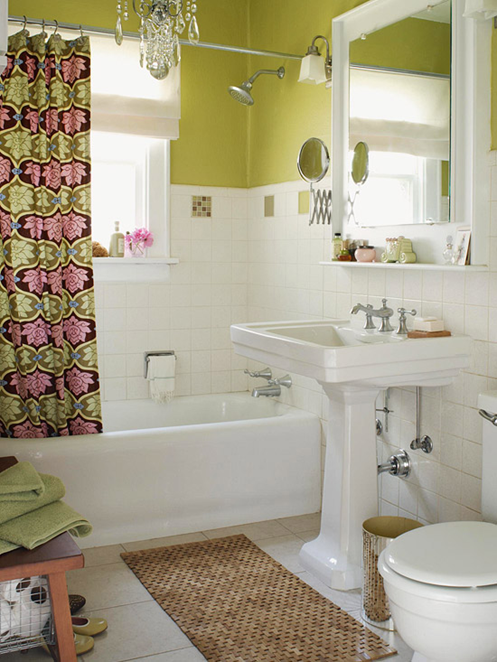
Let’s start off with a bang. Check out one of my all-time favorite before and after bathroom makeovers that incorporates a splash of color + fun on the walls, via BHG…
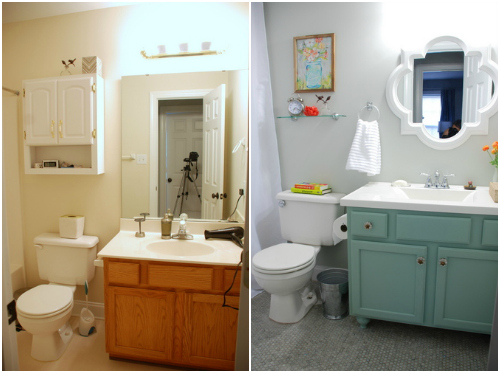
To step it up a notch, consider painting the existing bathroom cabinet. It’s not uber difficult to remove / upgrade a bathroom cabinet, but it does involve plumbing and the possible install of a new countertop and/or sink. If that’s not within your wheelhouse, a new coat of paint will be the answer.
Whether wood or laminate, the bath cabinet can most likely be revamped. If it’s not structurally stable or you don’t love the look, ditch it, but if it can be used there is a little prep work before you paint… Start by removing the doors and give them a good cleaning (diluted all-purpose cleaner, wood cleaner, or white vinegar with a little warm water usually works). Lightly sand the surface – using a hand sander is best. Then add a primer to seal the wood underneath and to give a solid base coat for the paint to adhere to. Then using a roller / brush combination or a hand sprayer, apply at least two coats of paint (read all instructions ahead of time and follow the directions on the product). The transformation will be breathtaking.
Check out this awesome bathroom upgrade with a newly painted cabinet…
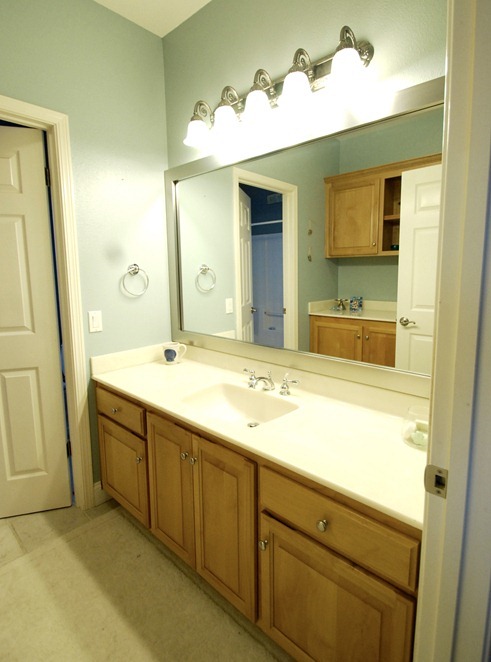
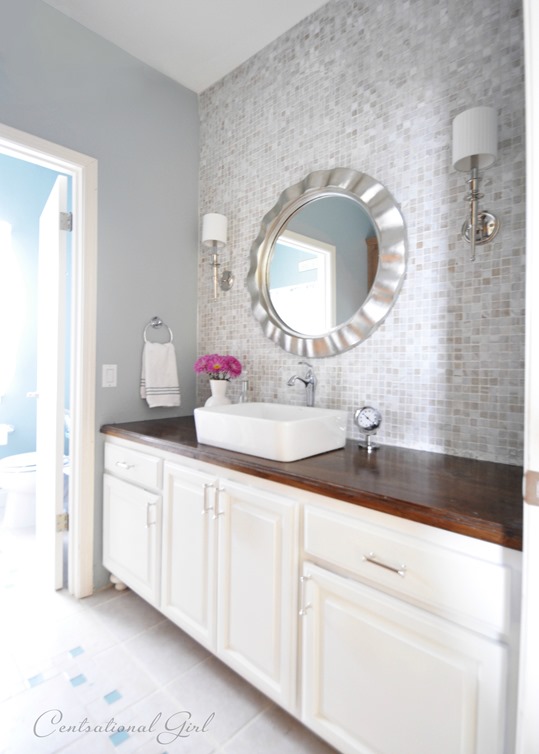 Before and After Bathroom space by Centsational Girl
2. Hardware
The layers of any space are key to making it unique and interesting. An easy upgrade in a bathroom is adding or changing the hardware on the bath cabinet. I’ve found that bath cabinets often don’t have any knobs or pulls, and once added the cabinet always comes alive. The cheap builder-grade vanity in my master bath had no hardware, so using a drill, I drilled 2 holes, added crystal knobs, and now the “black dress” is accessorized!

Check out how great this bathroom upgrade looks by The Turquoise Home…


I love the new paint color on that cabinet & the new hardware looks fabulous!
3. Lighting
I feel the light fixture in a space is so important. A fixture can truly make or break a room, and typically I live by the motto GO big, or GO home! How many of you have those old eye-ball style fixtures with 3 or 5 or 7 bulbs across and every time you walk into the bath you cringe because it’s so bright? {It’s okay to raise your hand}. Ditch em’! I’m all for good light in a bath space, but you don’t need a blinding light that is glaring into your eyes every time you enter. Upgrade to a fixture(s) that is different and maybe not typical for a bathroom.
I’m still loving the $17 light that I found at Lowe’s for my powder room. The ‘before’ light was fine, but expected. This light is functional + exciting >


If you’re on a tight budget for your bath, grab a can of spray paint + a few new glass bulbs, to revamp an old, drab fixture. Check out how Lindsay of Makely Home transformed her bath light >
 Lindsay also has a great post on finding the perfect bathroom light!
4. Flooring
I know, it sounds like a big, scary project, but it doesn’t have to be! As you may know, I continually profess my love for groutable luxury vinyl tile (LVT). It’s a quick, easy (no experience needed), and budget-friendly way to cover up the ugly mess of a floor that you may have. And if you don’t have an ugly mess of a floor, you might just want a change and LVT flooring is the answer. There are also a bunch of other flooring out there that you may love and adore, but either way, new flooring will truly jazz up a bathroom hands-down!
Here’s a recent update I shared on how the groutable luxury vinyl tile floor has held up after 2 years. If you’re thinking of installing this type of flooring in a bath or any space of a home, this is a must-read!
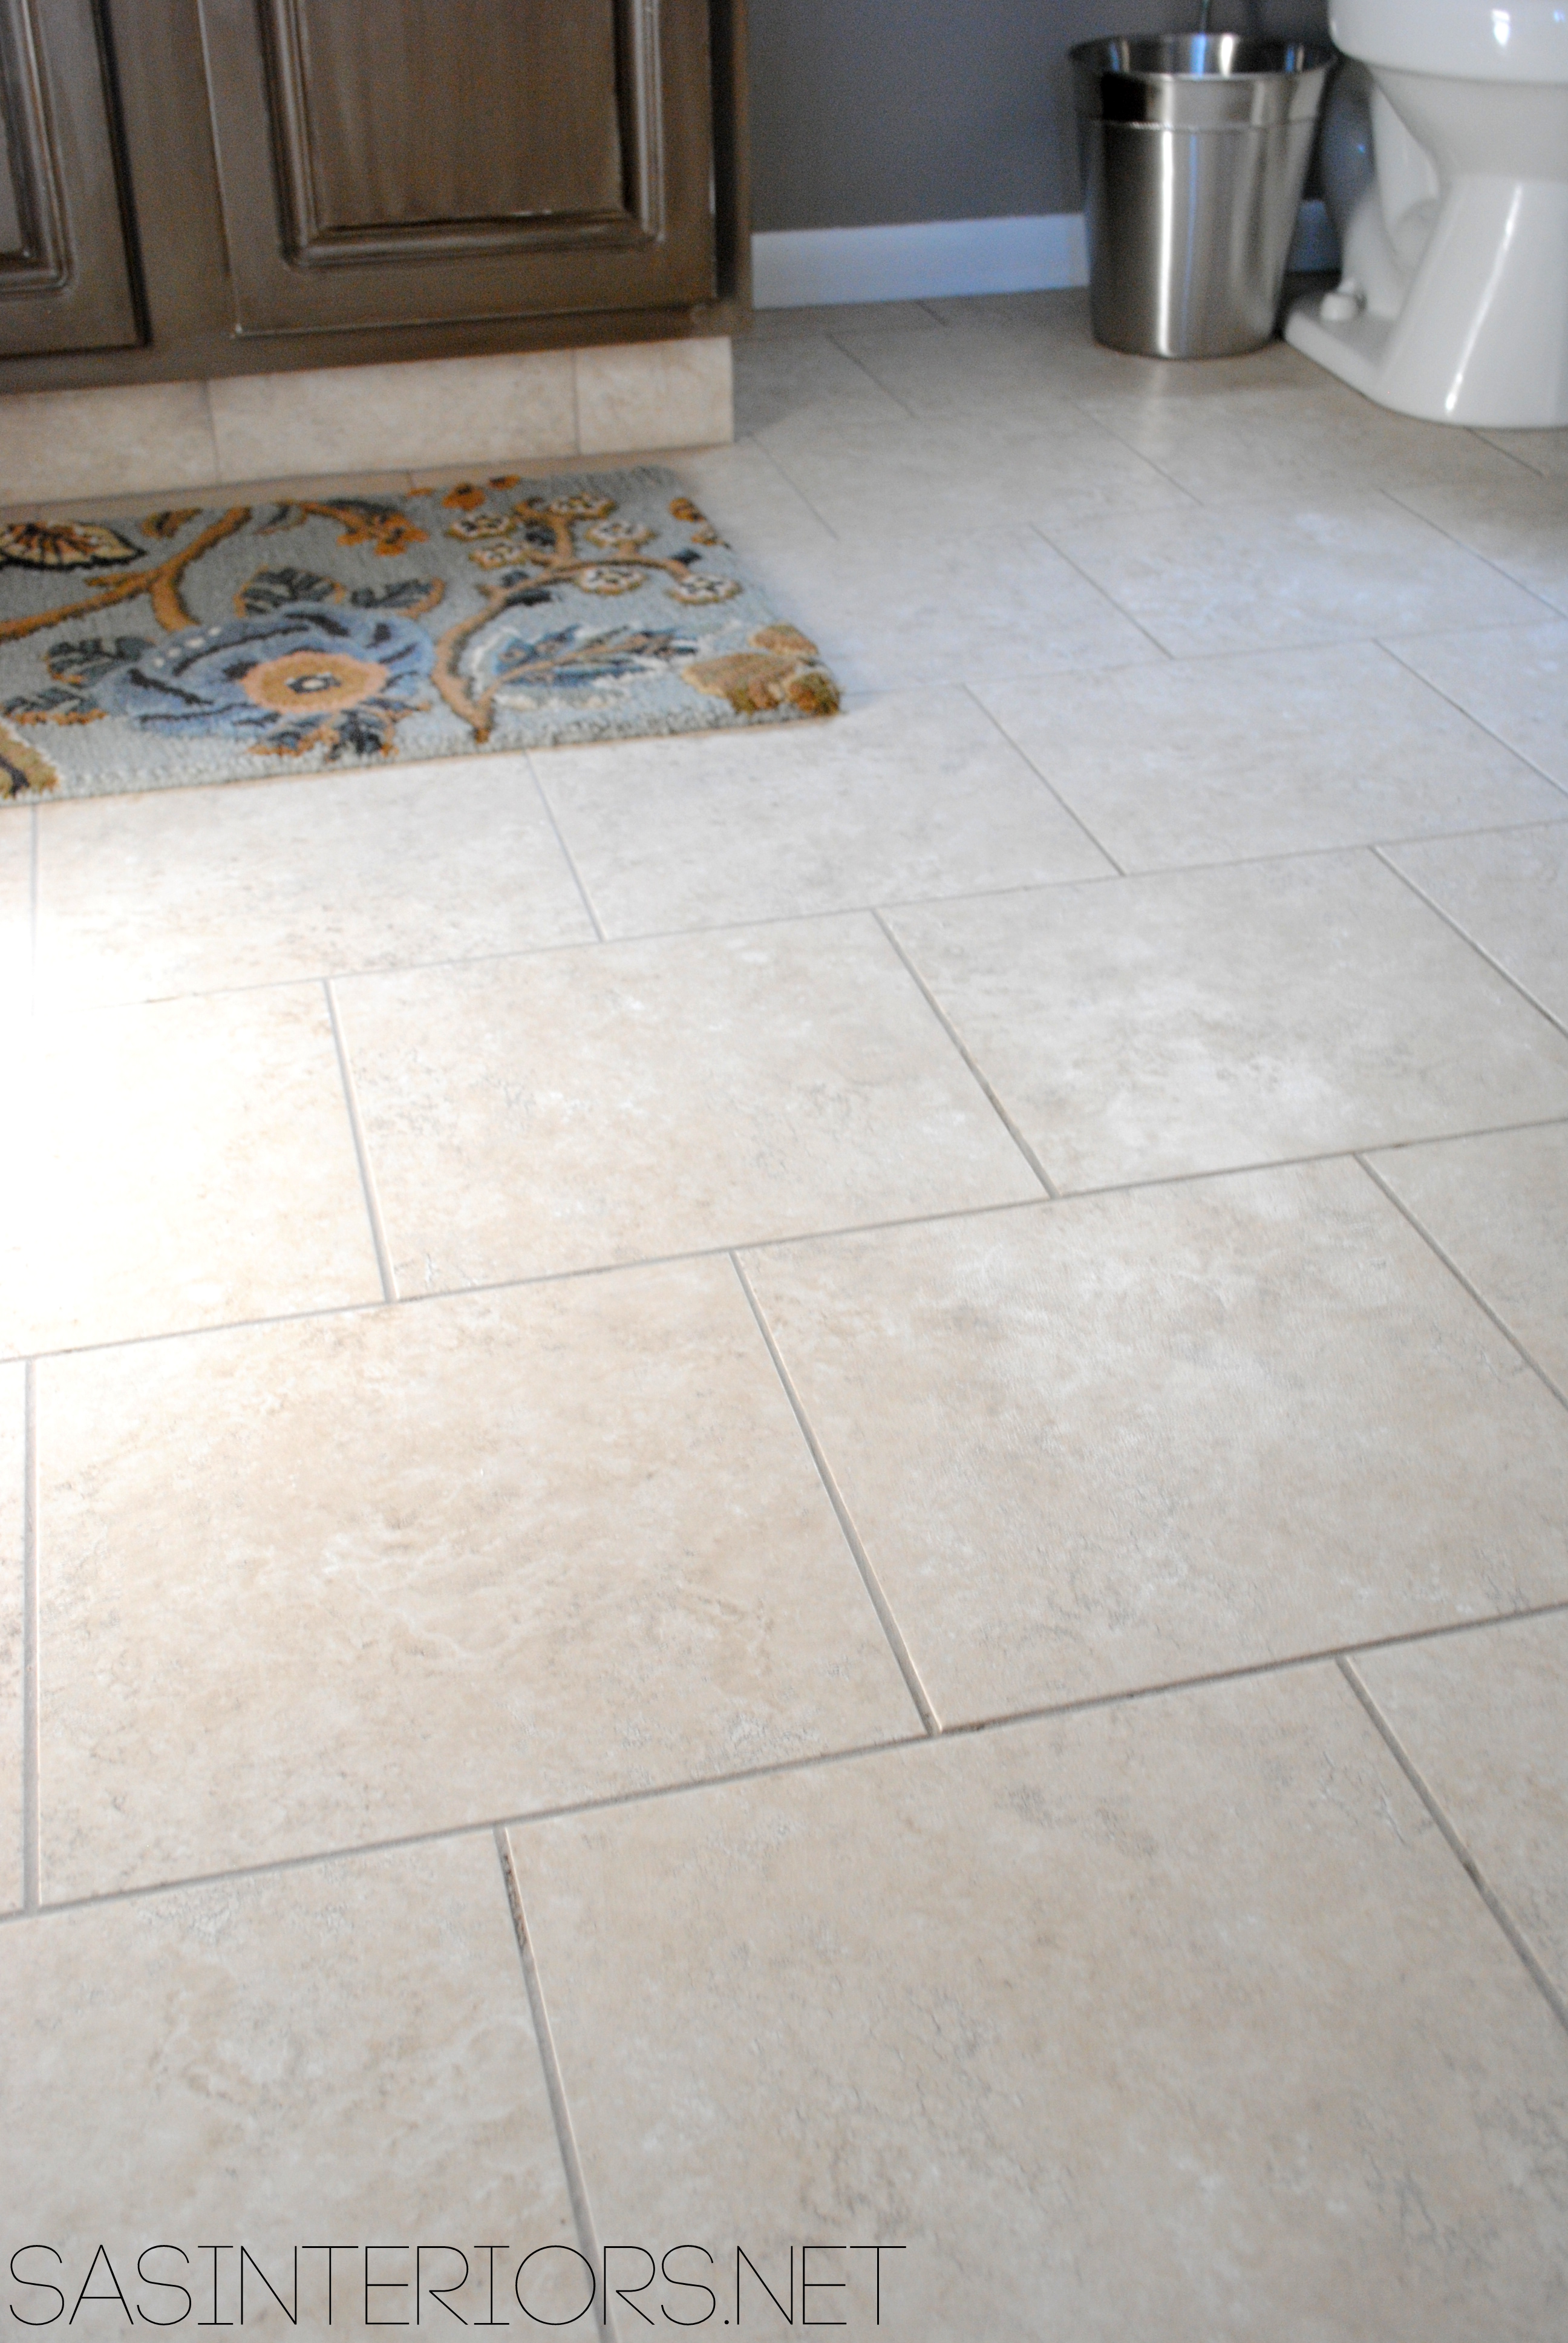
Want proof that a new floor can make for a killer new bathroom, take a look at this before and after bathroom transformation by Roeshel of DIY Show Off…

Another idea for an easy flooring upgrade is wood laminate, which most of the time can be installed directly over your existing floor. Take a look what Jen of I Heart Organizing did with her bathroom reno…

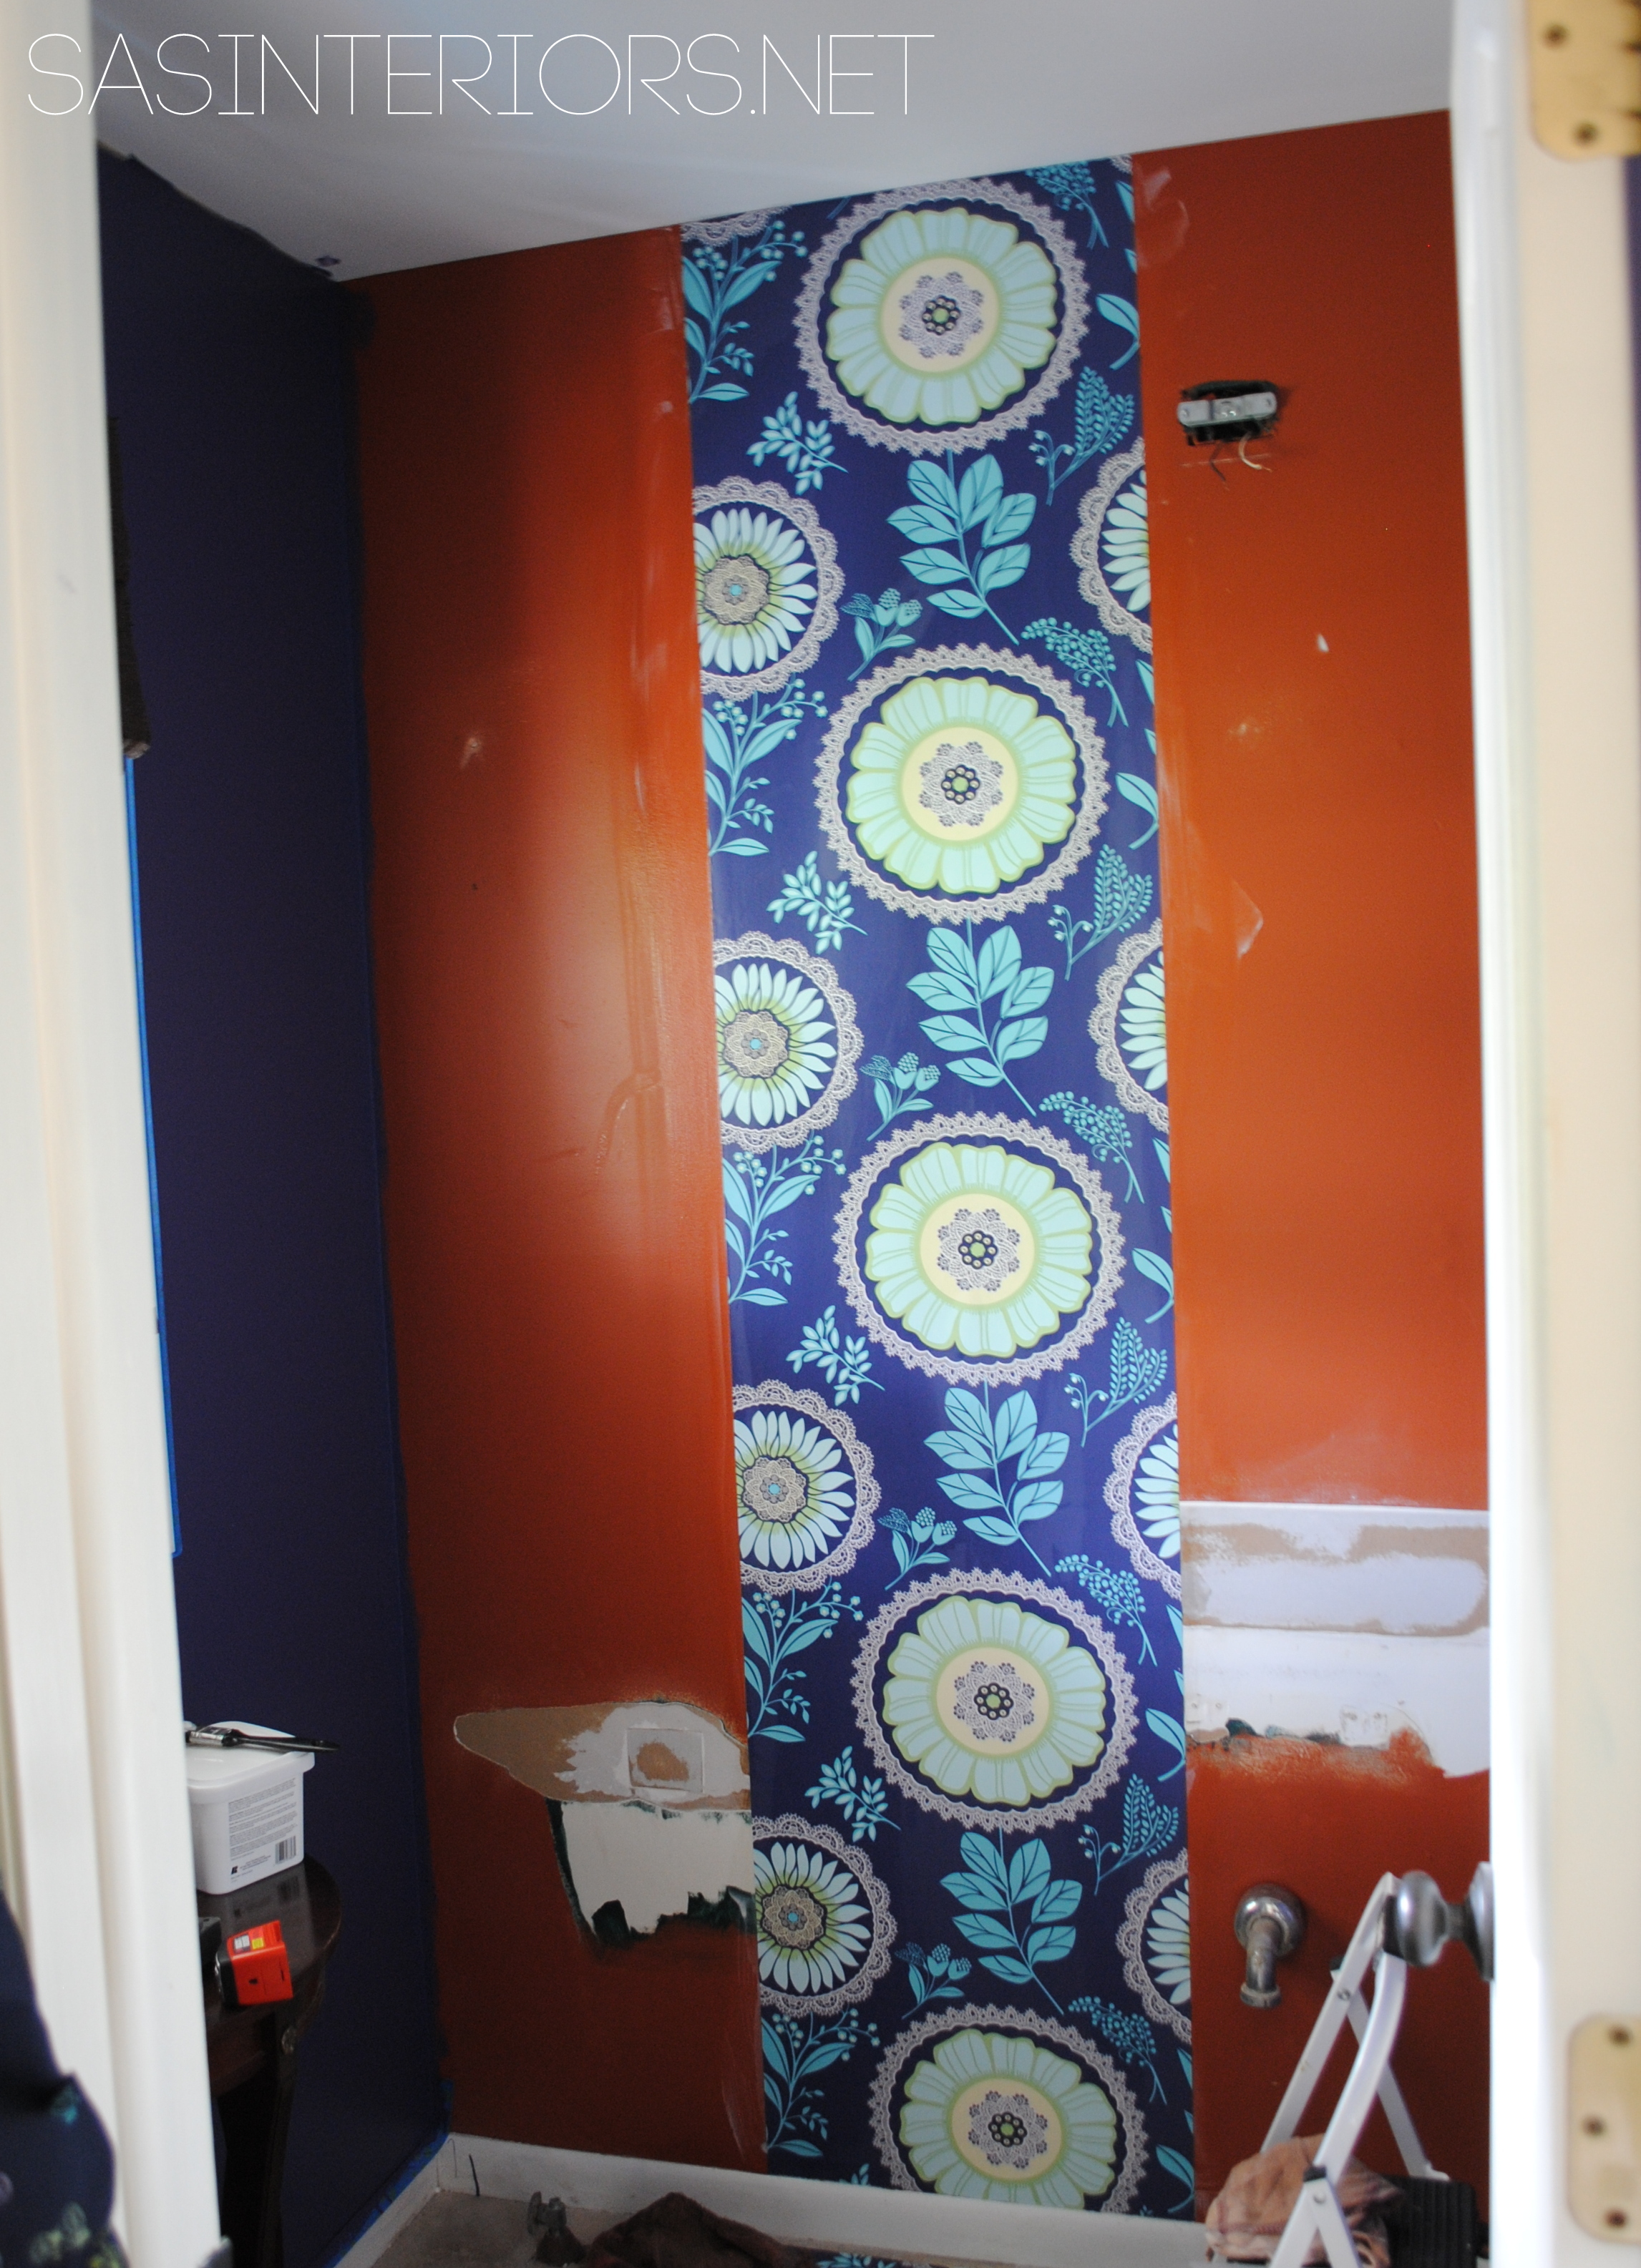
5. Layers
Last, but certainly not least, but actually the most important… The Layers! If you’re on a bare bones budget and have very little to spend, focus on the layers. What layers? a pretty shower curtain, a simple window treatment (if you’re bath has a view of the exterior), artwork, hooks, shelving, etc. The layers in any room of the home speak your style and share the story of who you are.
You saw a peek of Jen’s bathroom above, and here is the finished revamp >
 How fabulous of a space and it ‘s mostly all existing and/or DIY!
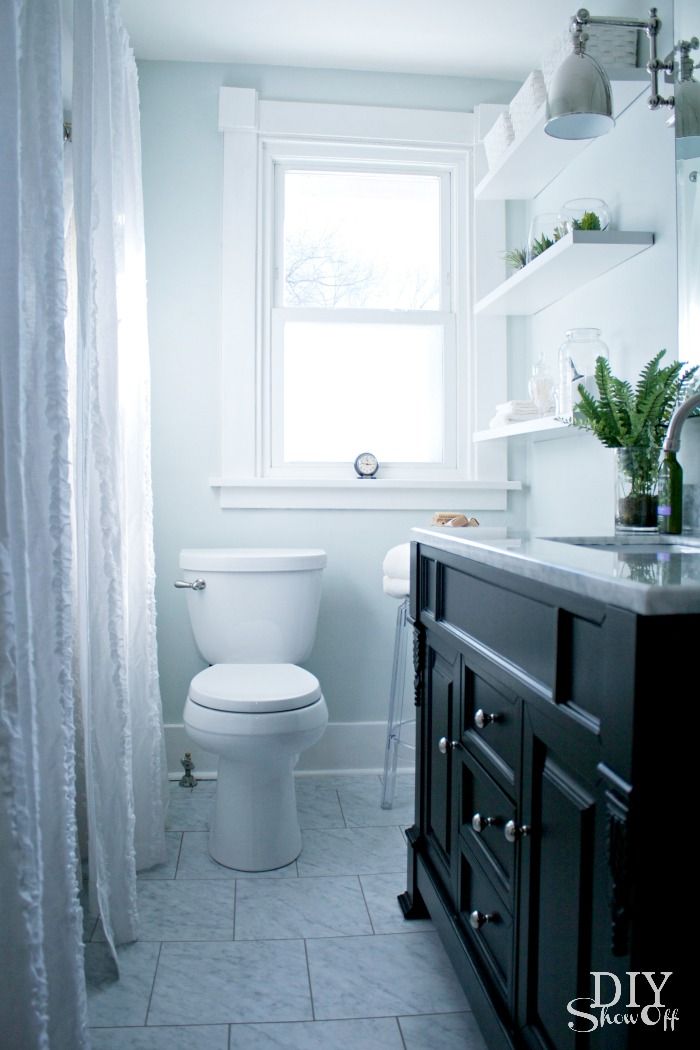
Another amazing transformation is Paige’s hall bath of Lively Green Door >
And lastly, check out this fun bathroom space. With a few new elements (no fixture changes), look how it has come alive with new paint, a killer light fixture, and a gorgeous shower curtain.
 via BHG
Are you now convinced that a bathroom doesn’t need a full gut to be fabulous? Who’s ready for a makeover?
As always, incorporate elements you love & those that are truly meaningful. Look for inspiration around you before executing, and remember it’s not a race. Now I’ve gotta get back to looking through all those ugly bathrooms to see which would be perfect for a makeover! Be sure to check back on Monday to see if it’s yours!
Want to pin & save for later, here you go…

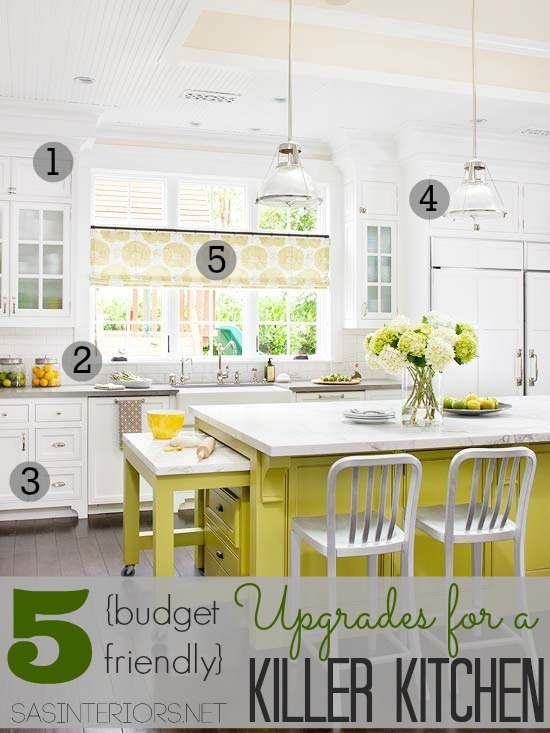
Kitchens are another space in the home that homeowners fear to upgrade because of time and budget. Totally understandable! BUT just as the bathroom can be revamped on a budget, so can a kitchen. Check out my thoughts for 5 Upgrades to a Killer Kitchen…