
Tag: Cabinet Makeover

Furniture Makeover: Cabinet Gone Green

New content on the blog has been a bit sparse as of late, but it doesn’t mean that I haven’t been hard at work conjuring up more awesomeness & greatness.

Along with family life that always keeps me busy, I’ve had a flurry of new + exciting client projects (near & far), and I was away for a few days in Boston at a design conference hosted by Wayfair (check out pictures from my trip on my Instagram feed).   Being surrounded by SO MUCH TALENT & hearing others speak so passionately about their businesses, really gave me the spark and motivation needed to be open to the exploration of new & different paths as my future unfolds.  I know I am just at the beginning of this long journey of exploration…

As each day continues to unfold with wonder, I am excited about TODAY and that’s because I have a new furniture makeover project to share with you.

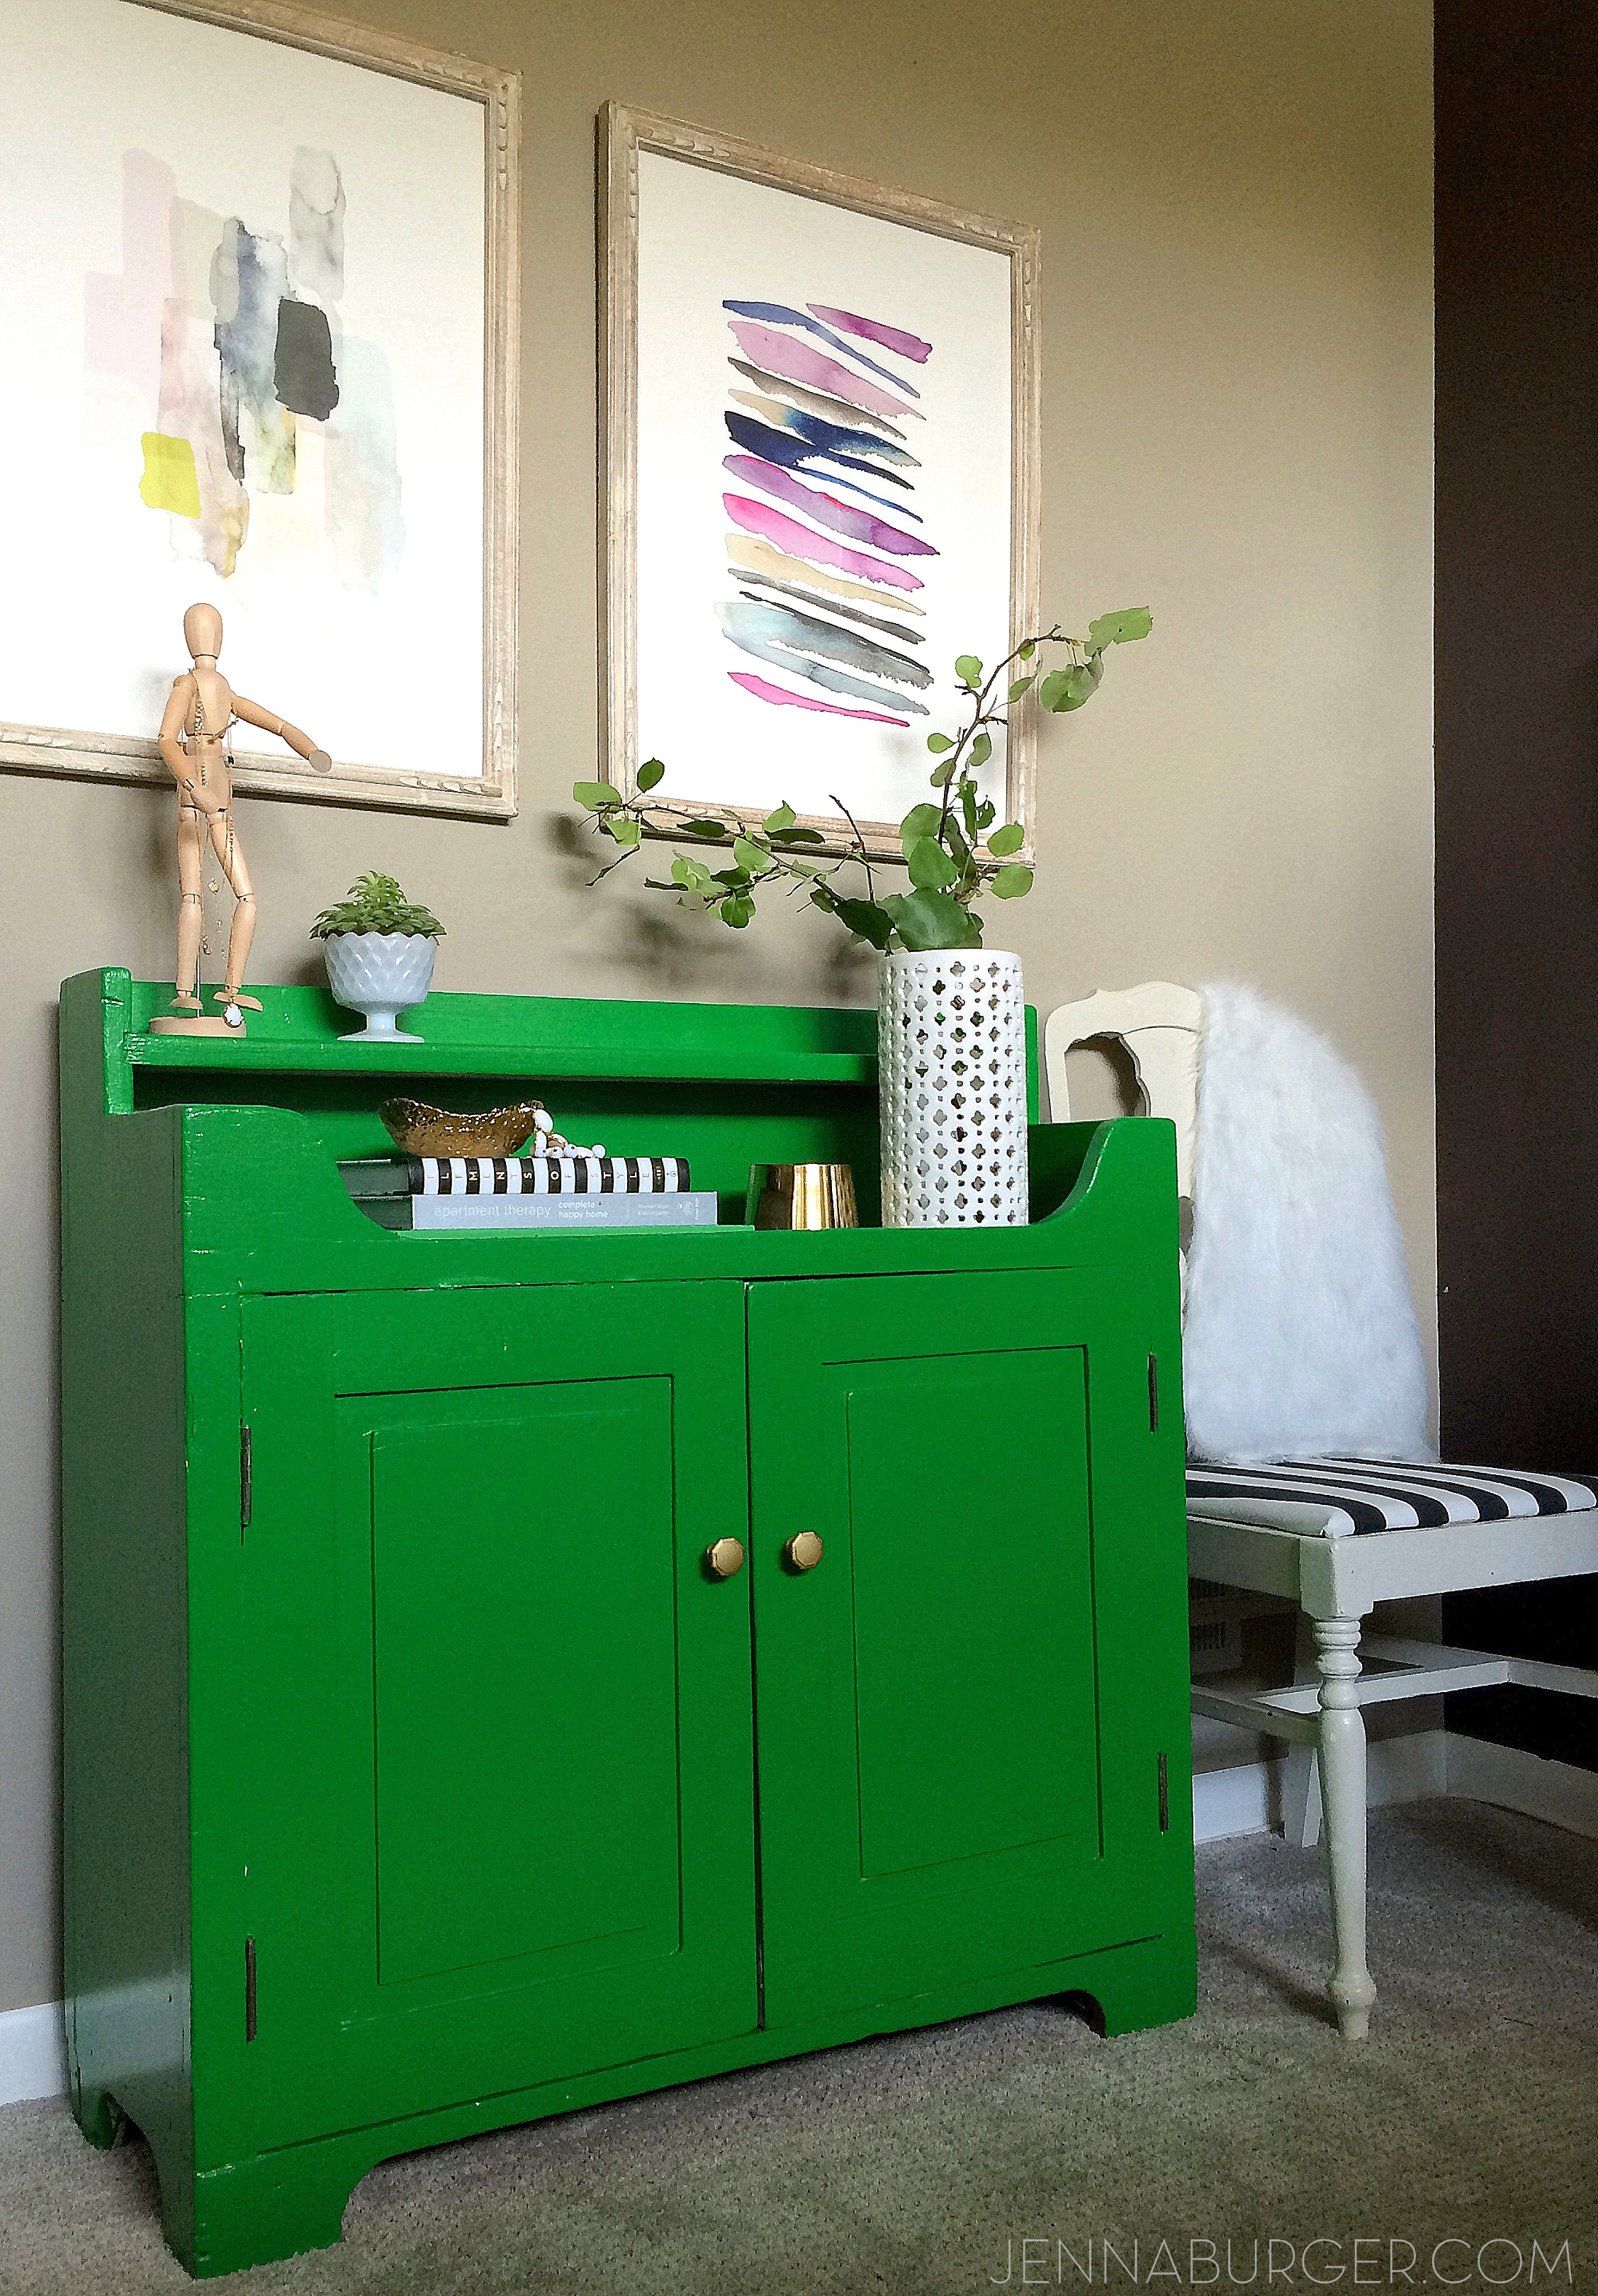
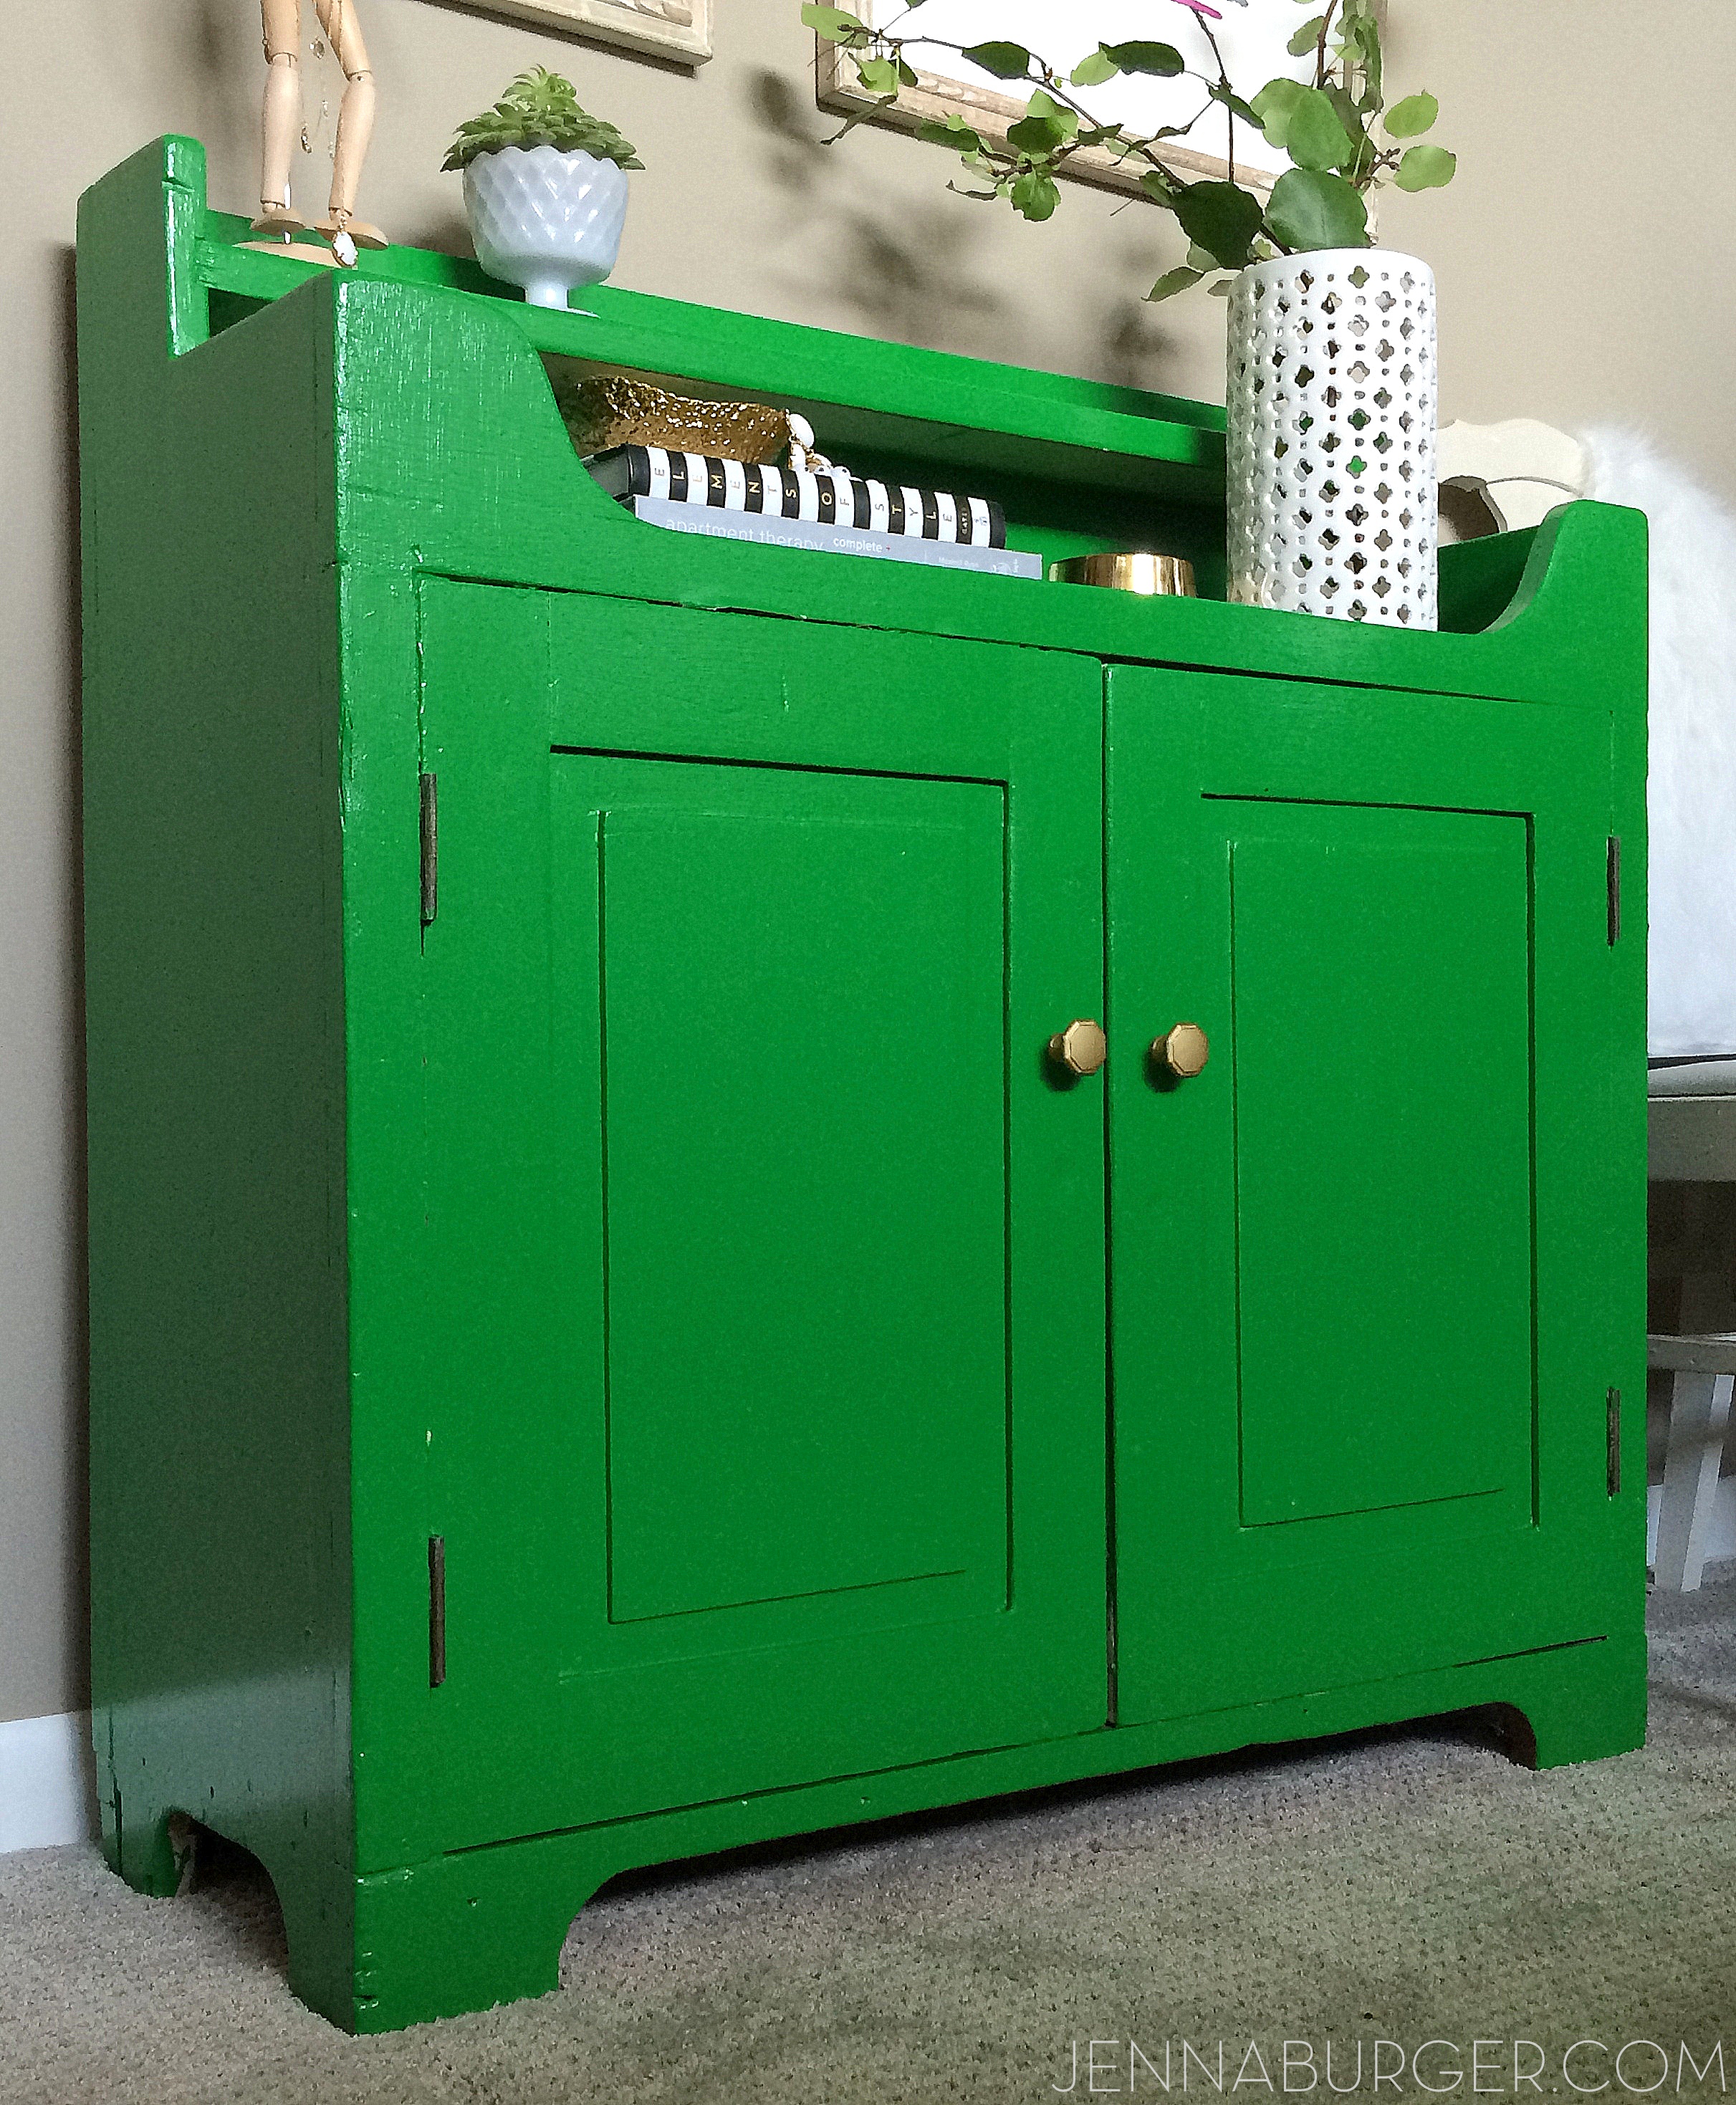
Check out this green beauty…

Furniture Makeover: TUTORIAL ON HOW-TO PAINT FURNITURE; before & after cabinet transformation by www.jennaburger.com

I love giving new life to old furniture.  A piece that is made well + has ‘good bones’, can truly live on for years.  Giving a favorite heirloom or thrift-store-find a pick me up with a dose of TLC + a fresh coat of paint, will just add to it’s life long story; its journey.

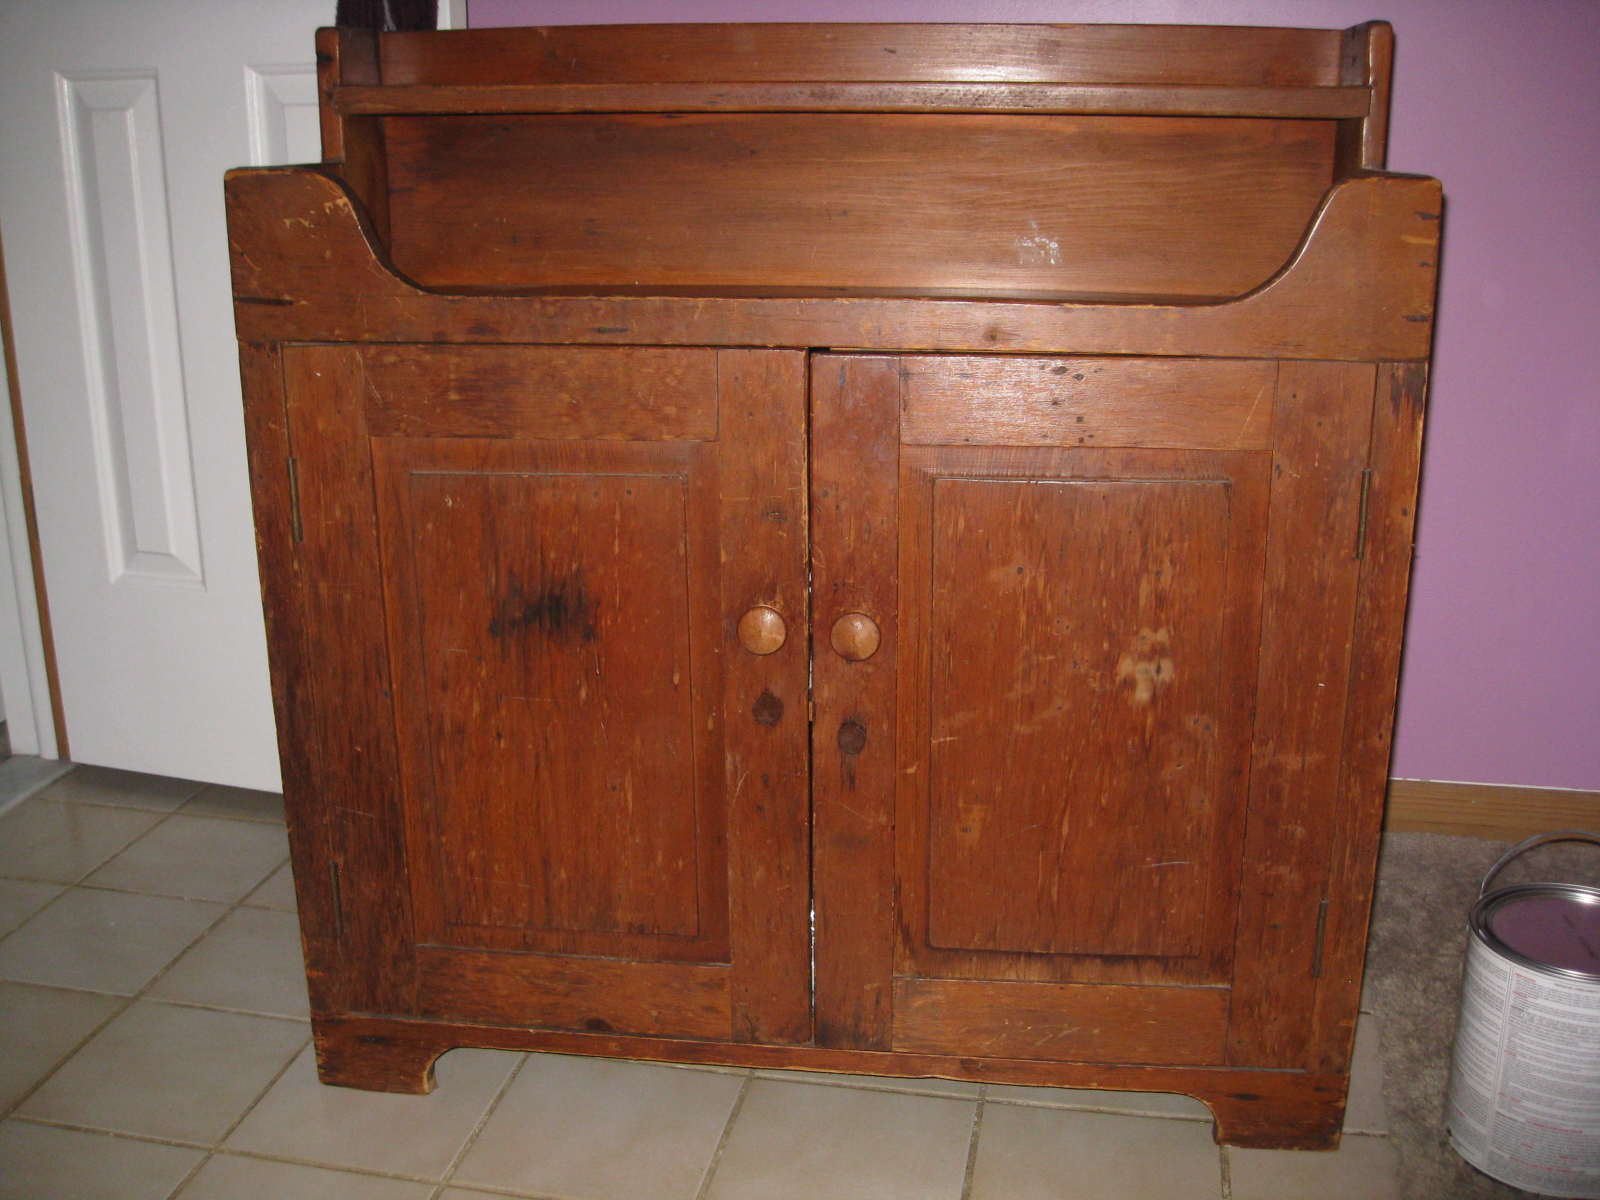
This cabinet that I have just given life #17, is older than me (so just over 21, hehe – NOT).  For decades it sat beautifully in my moms home, but for the last 9 years, it’s been a treasure in my humble abode.

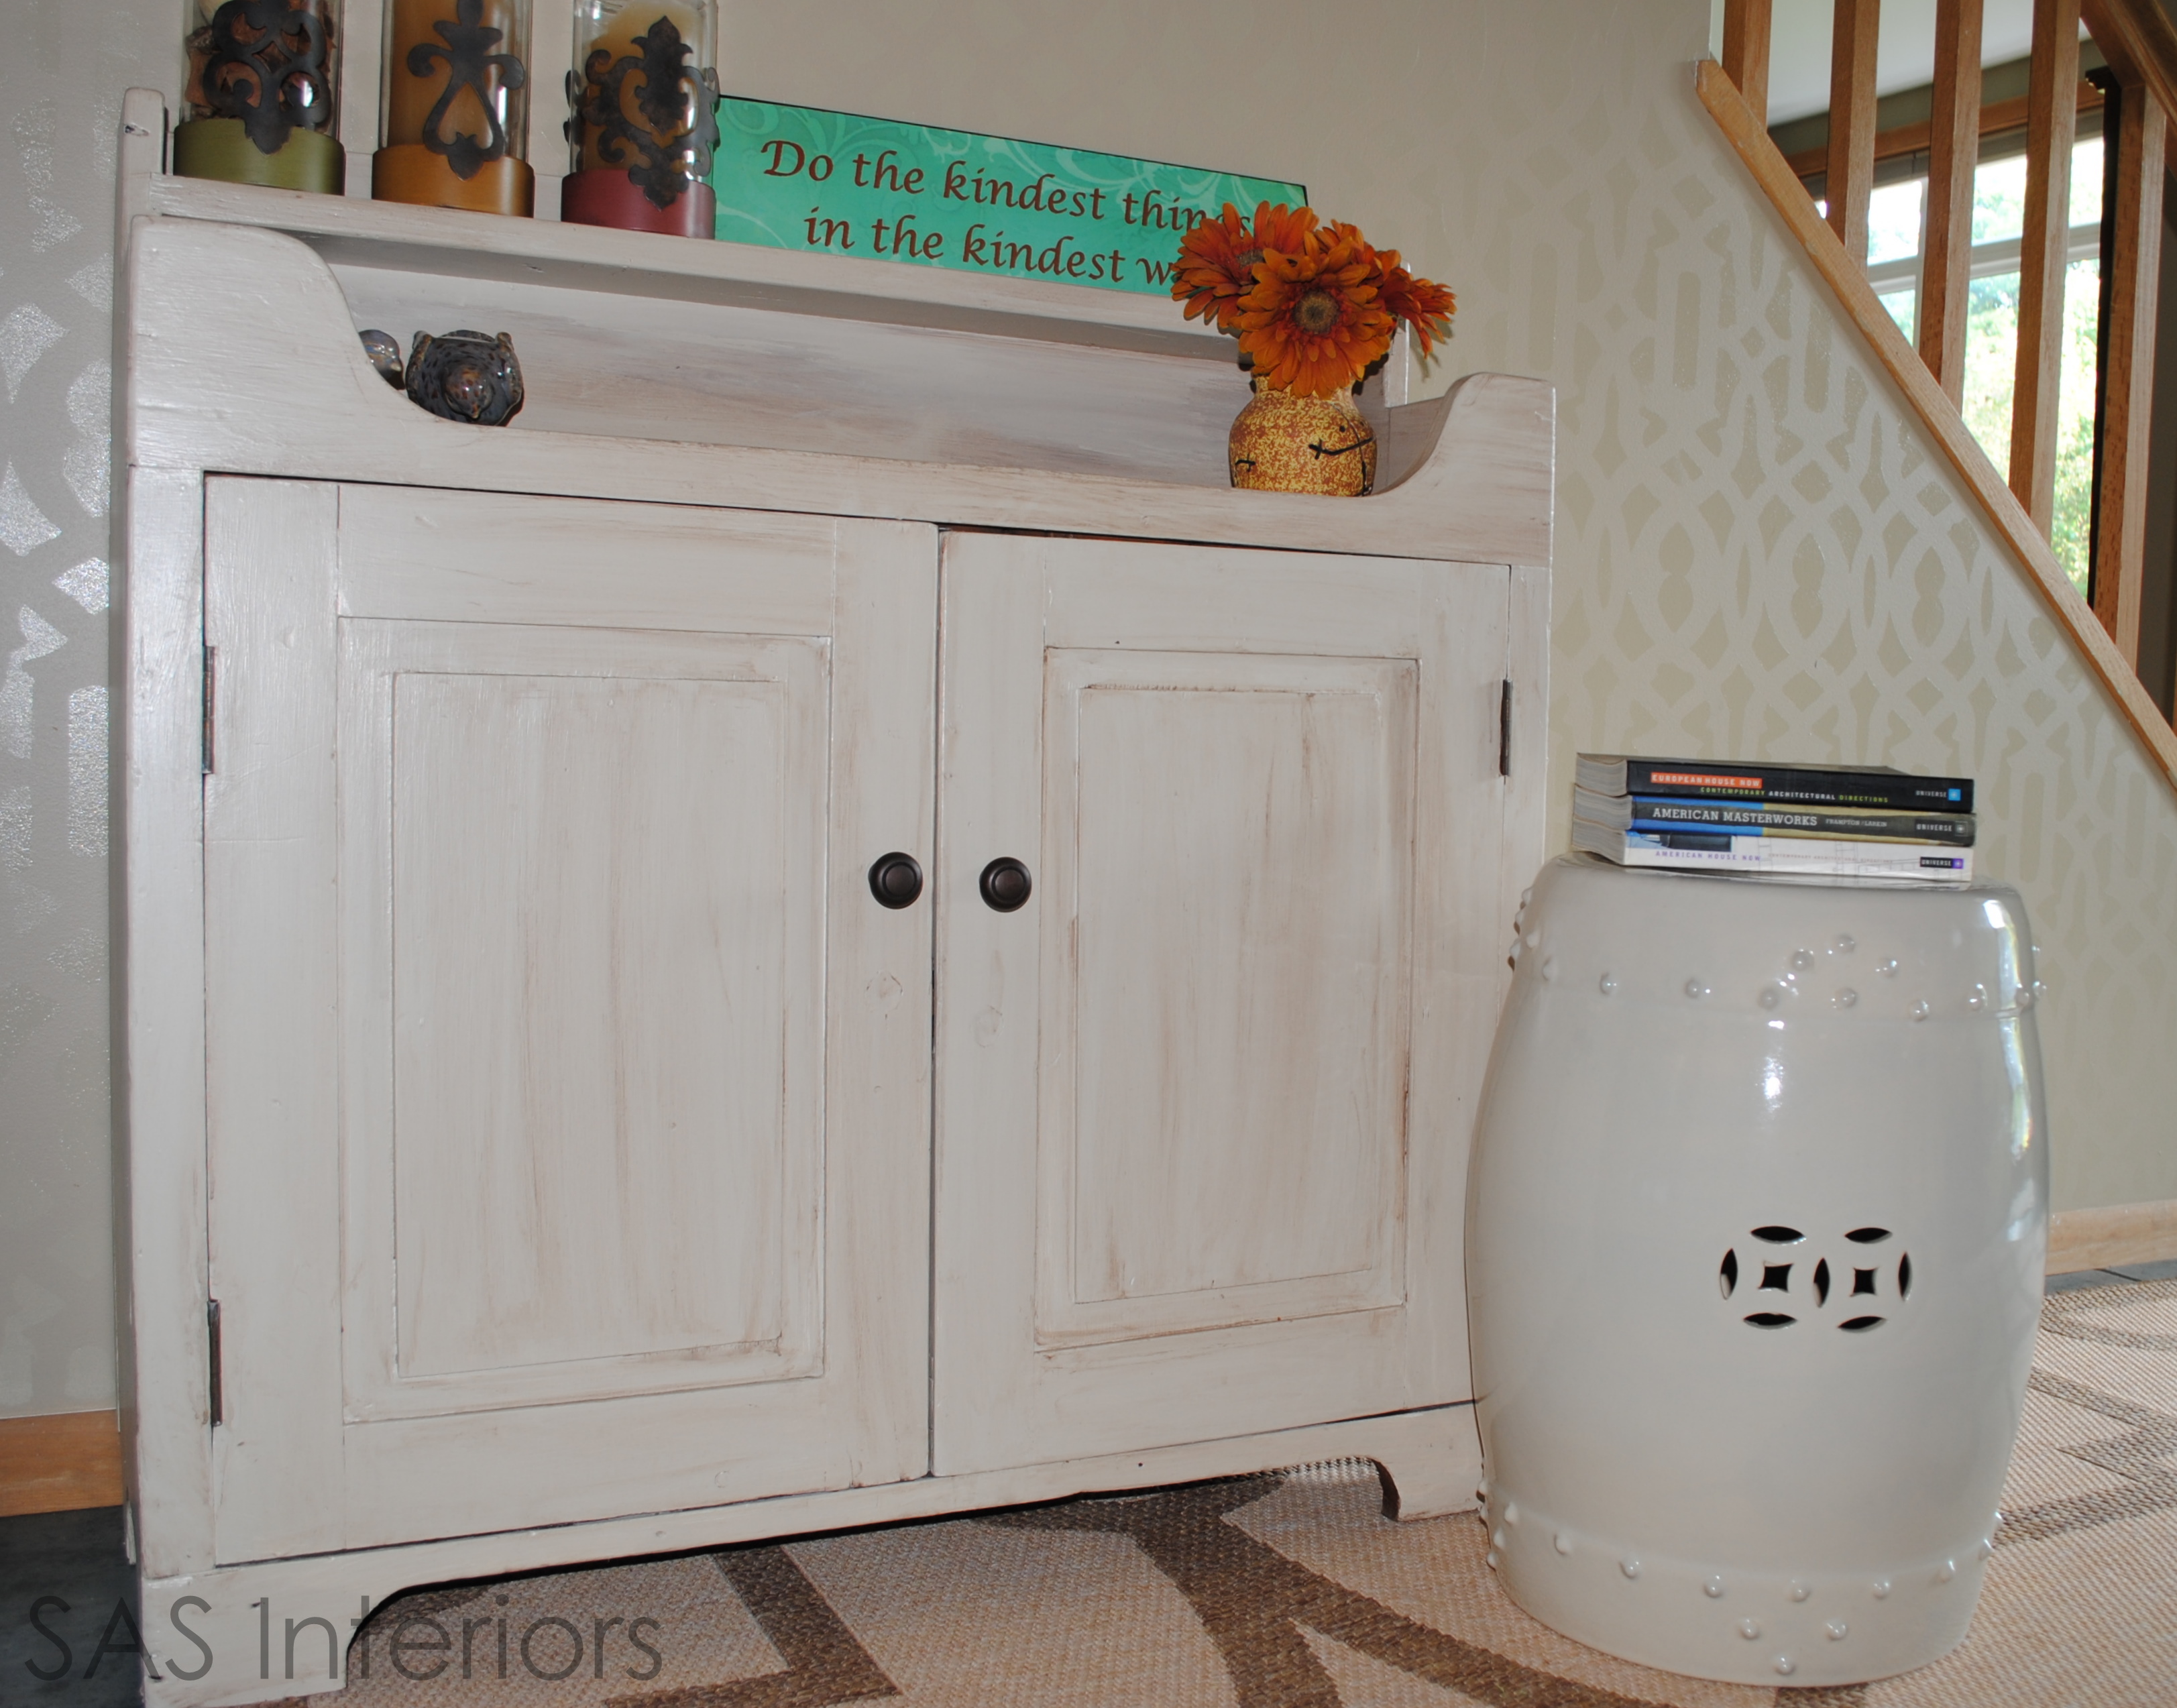
It started out stained, I gave it a makeover a few years back with paint + a glaze overlay, and now it got another refresh with a major splash of color.

Hello to my ‘new’ gorgeous green beauty…

Furniture Makeover: TUTORIAL ON HOW-TO PAINT FURNITURE; before & after cabinet transformation by www.jennaburger.com

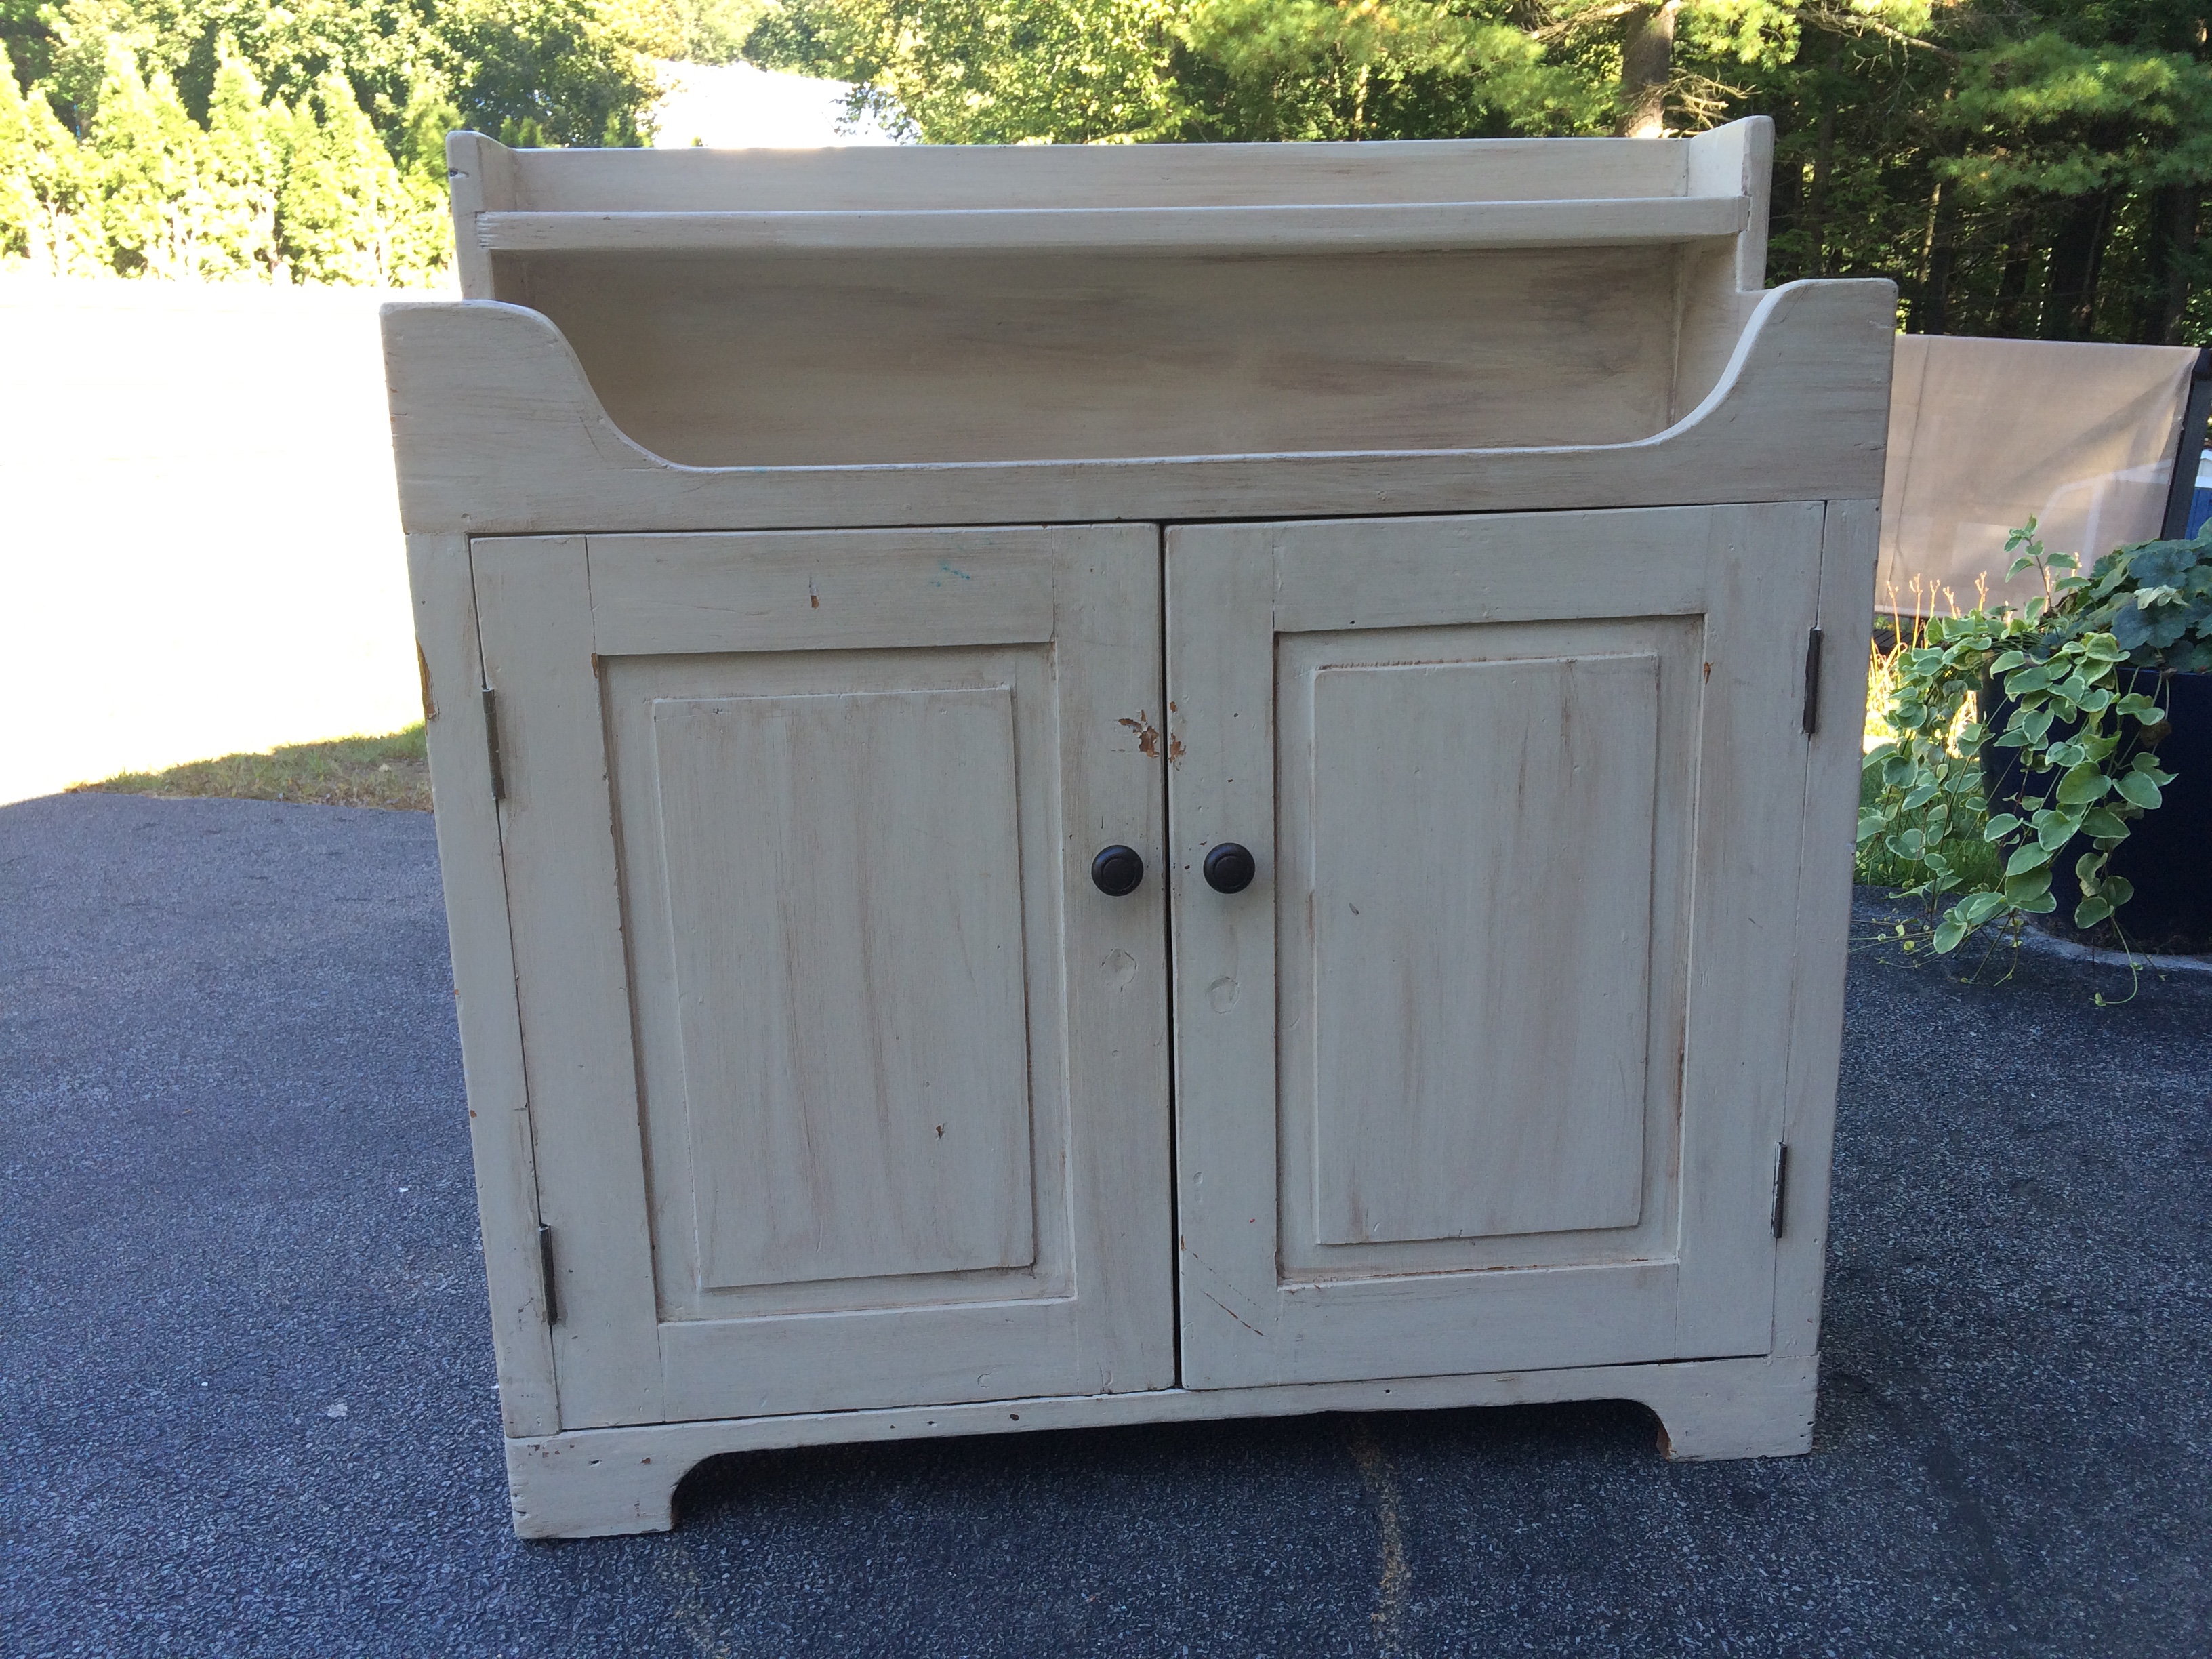
Before I share more on the process of painting it, let me take you back to what it used to look like…

FIRST 35 YEARS.

Cabinet Before

LAST 9 YEARS.

Cabinet Before

NOW.

Furniture Makeover: TUTORIAL ON HOW-TO PAINT FURNITURE; before & after cabinet transformation by www.jennaburger.com

She truly needed a revamp AND she got it!  She looks better now than she did at 20.  I hope they say the same about me some day…

THE PROCESS.

The last time I tackled a BIG furniture makeover >>> the china cabinet makeover, I broke all the steps into individual blog posts.  Since this is a smaller scale project, I’m going to include all the details in this one post, but if you want more specific detail on the various steps, here are the links t o check out.

> how-to prep + sand wood furniture

> why + how-to prime wood furniture

> tips + tricks to paint wood furniture

> adding details + styling

> china cabinet ‘reveal’

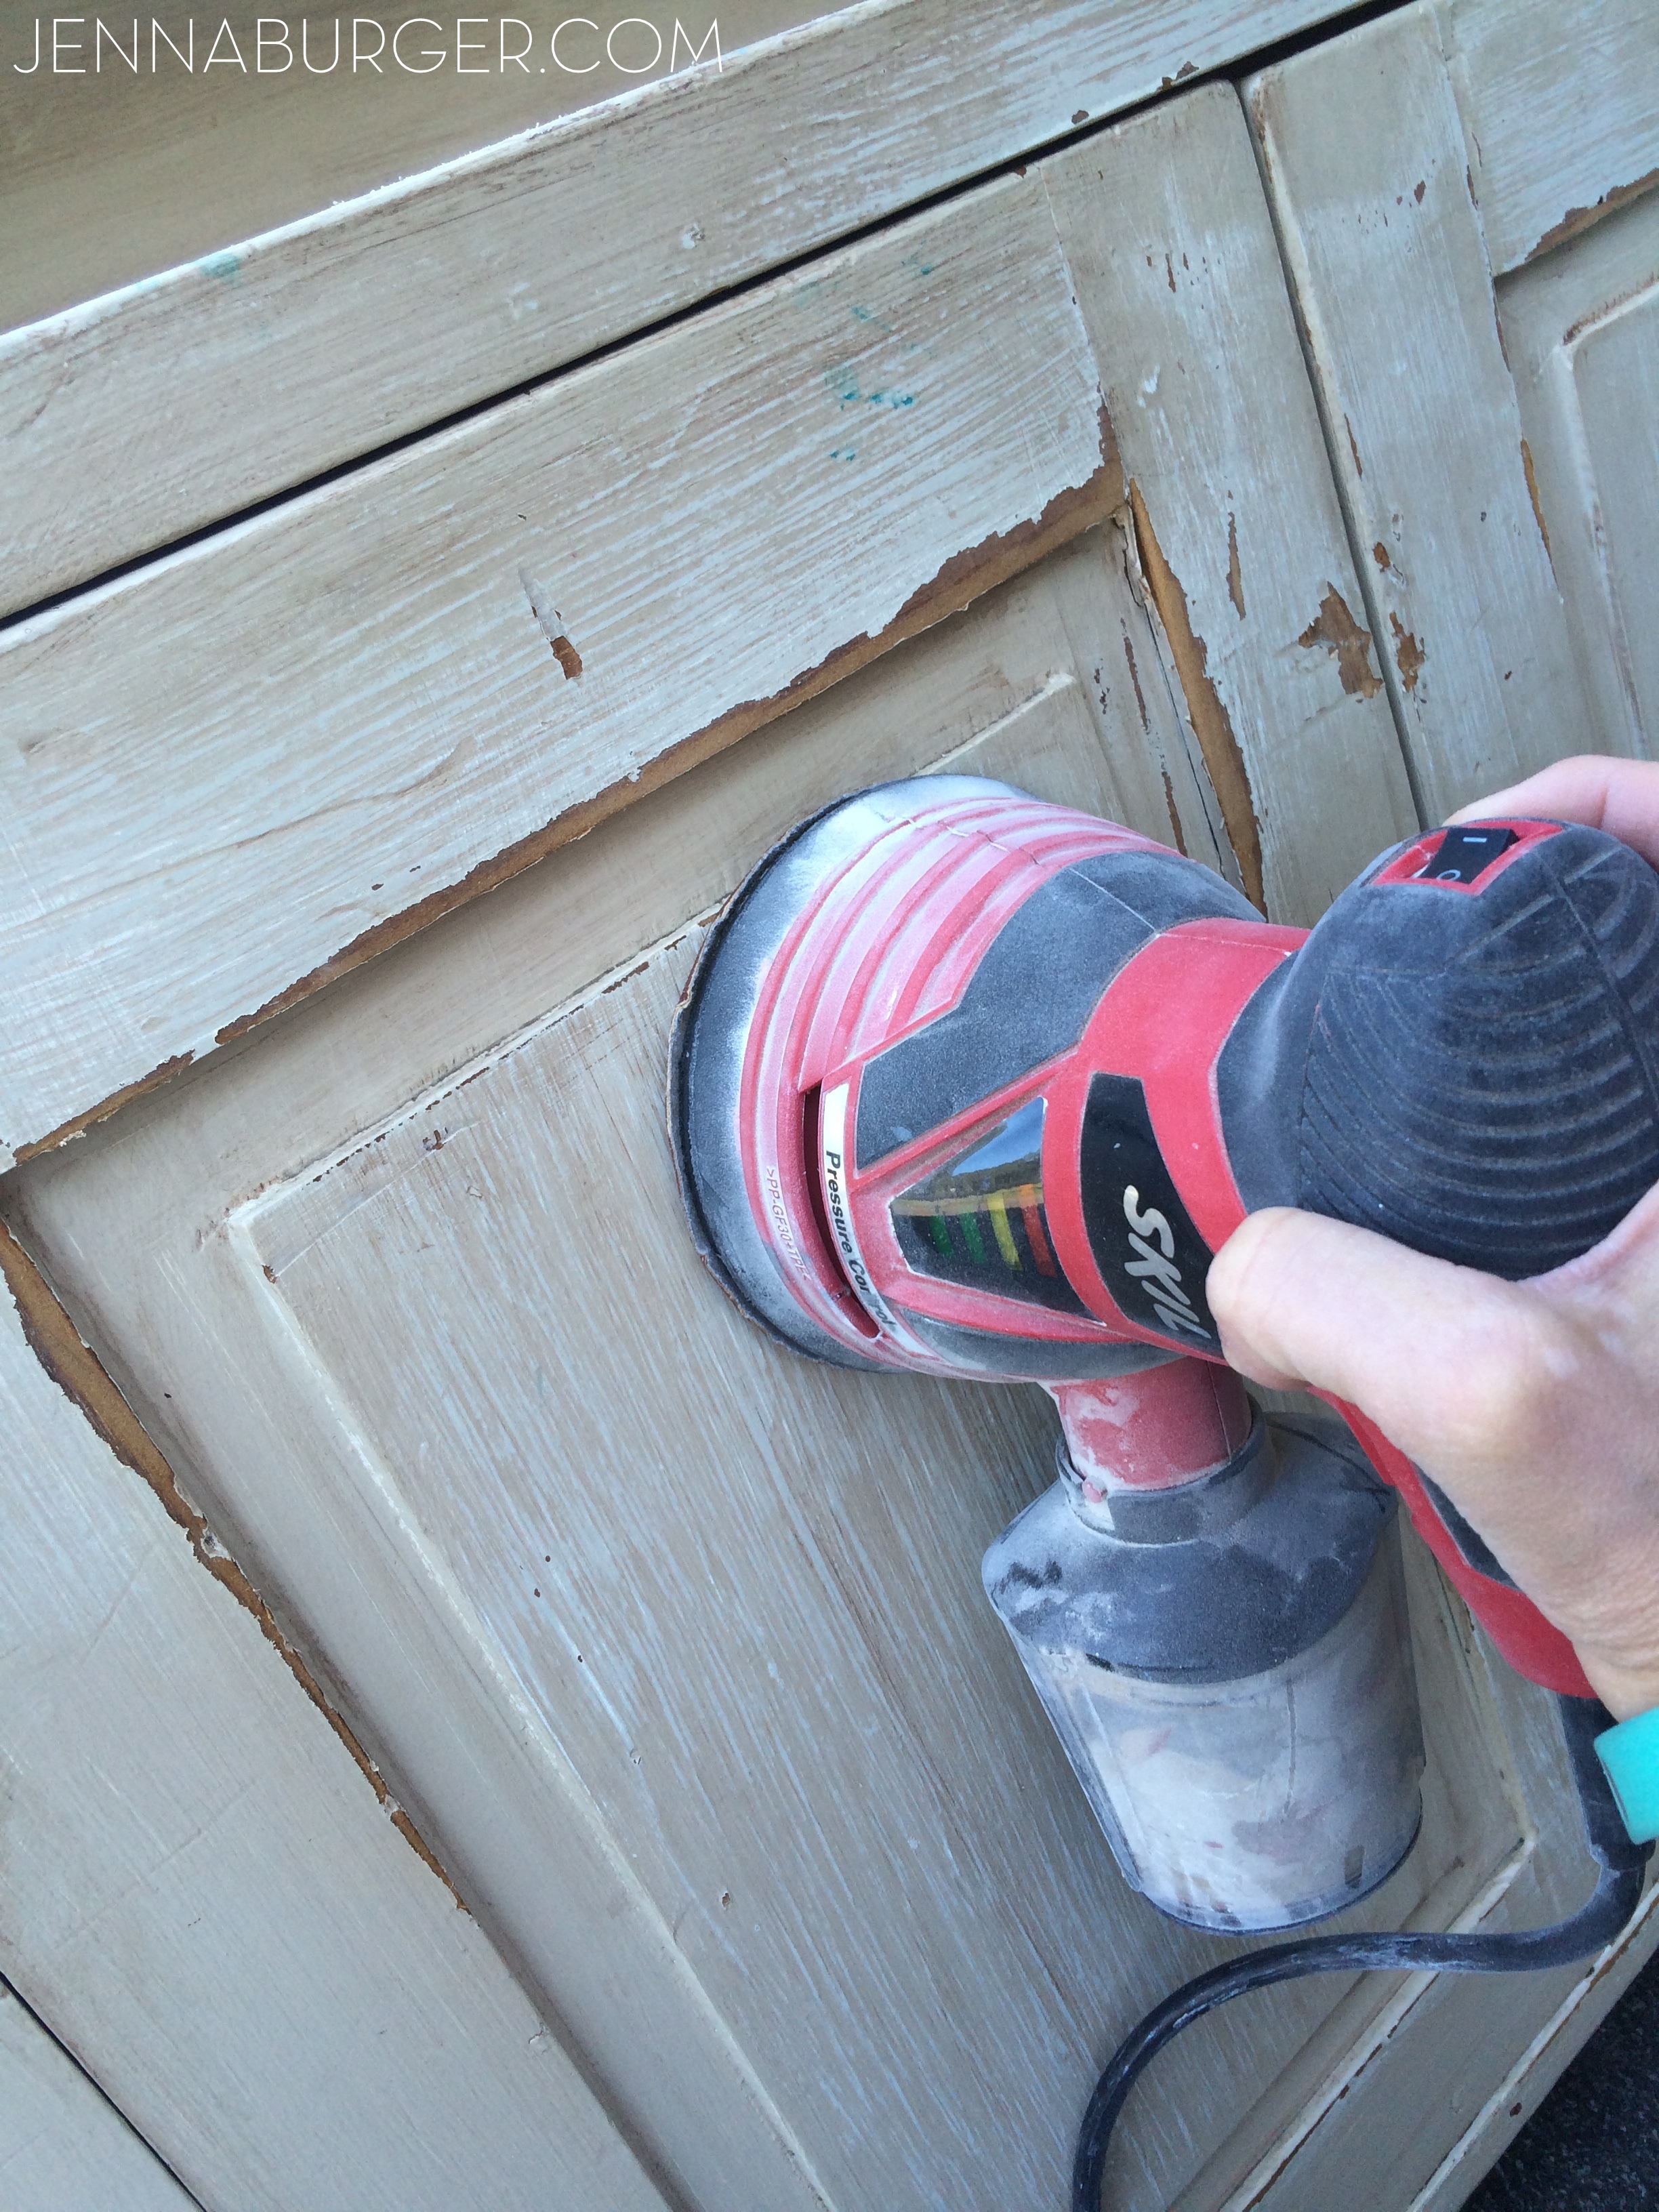
To start this makeover, I brought the cabinet outdoors on a pretty, sunny day a few weekends back.  When the weather is good, I love to work outdoors!  I set myself up on the driveway and got workin’.

Cabinet Before

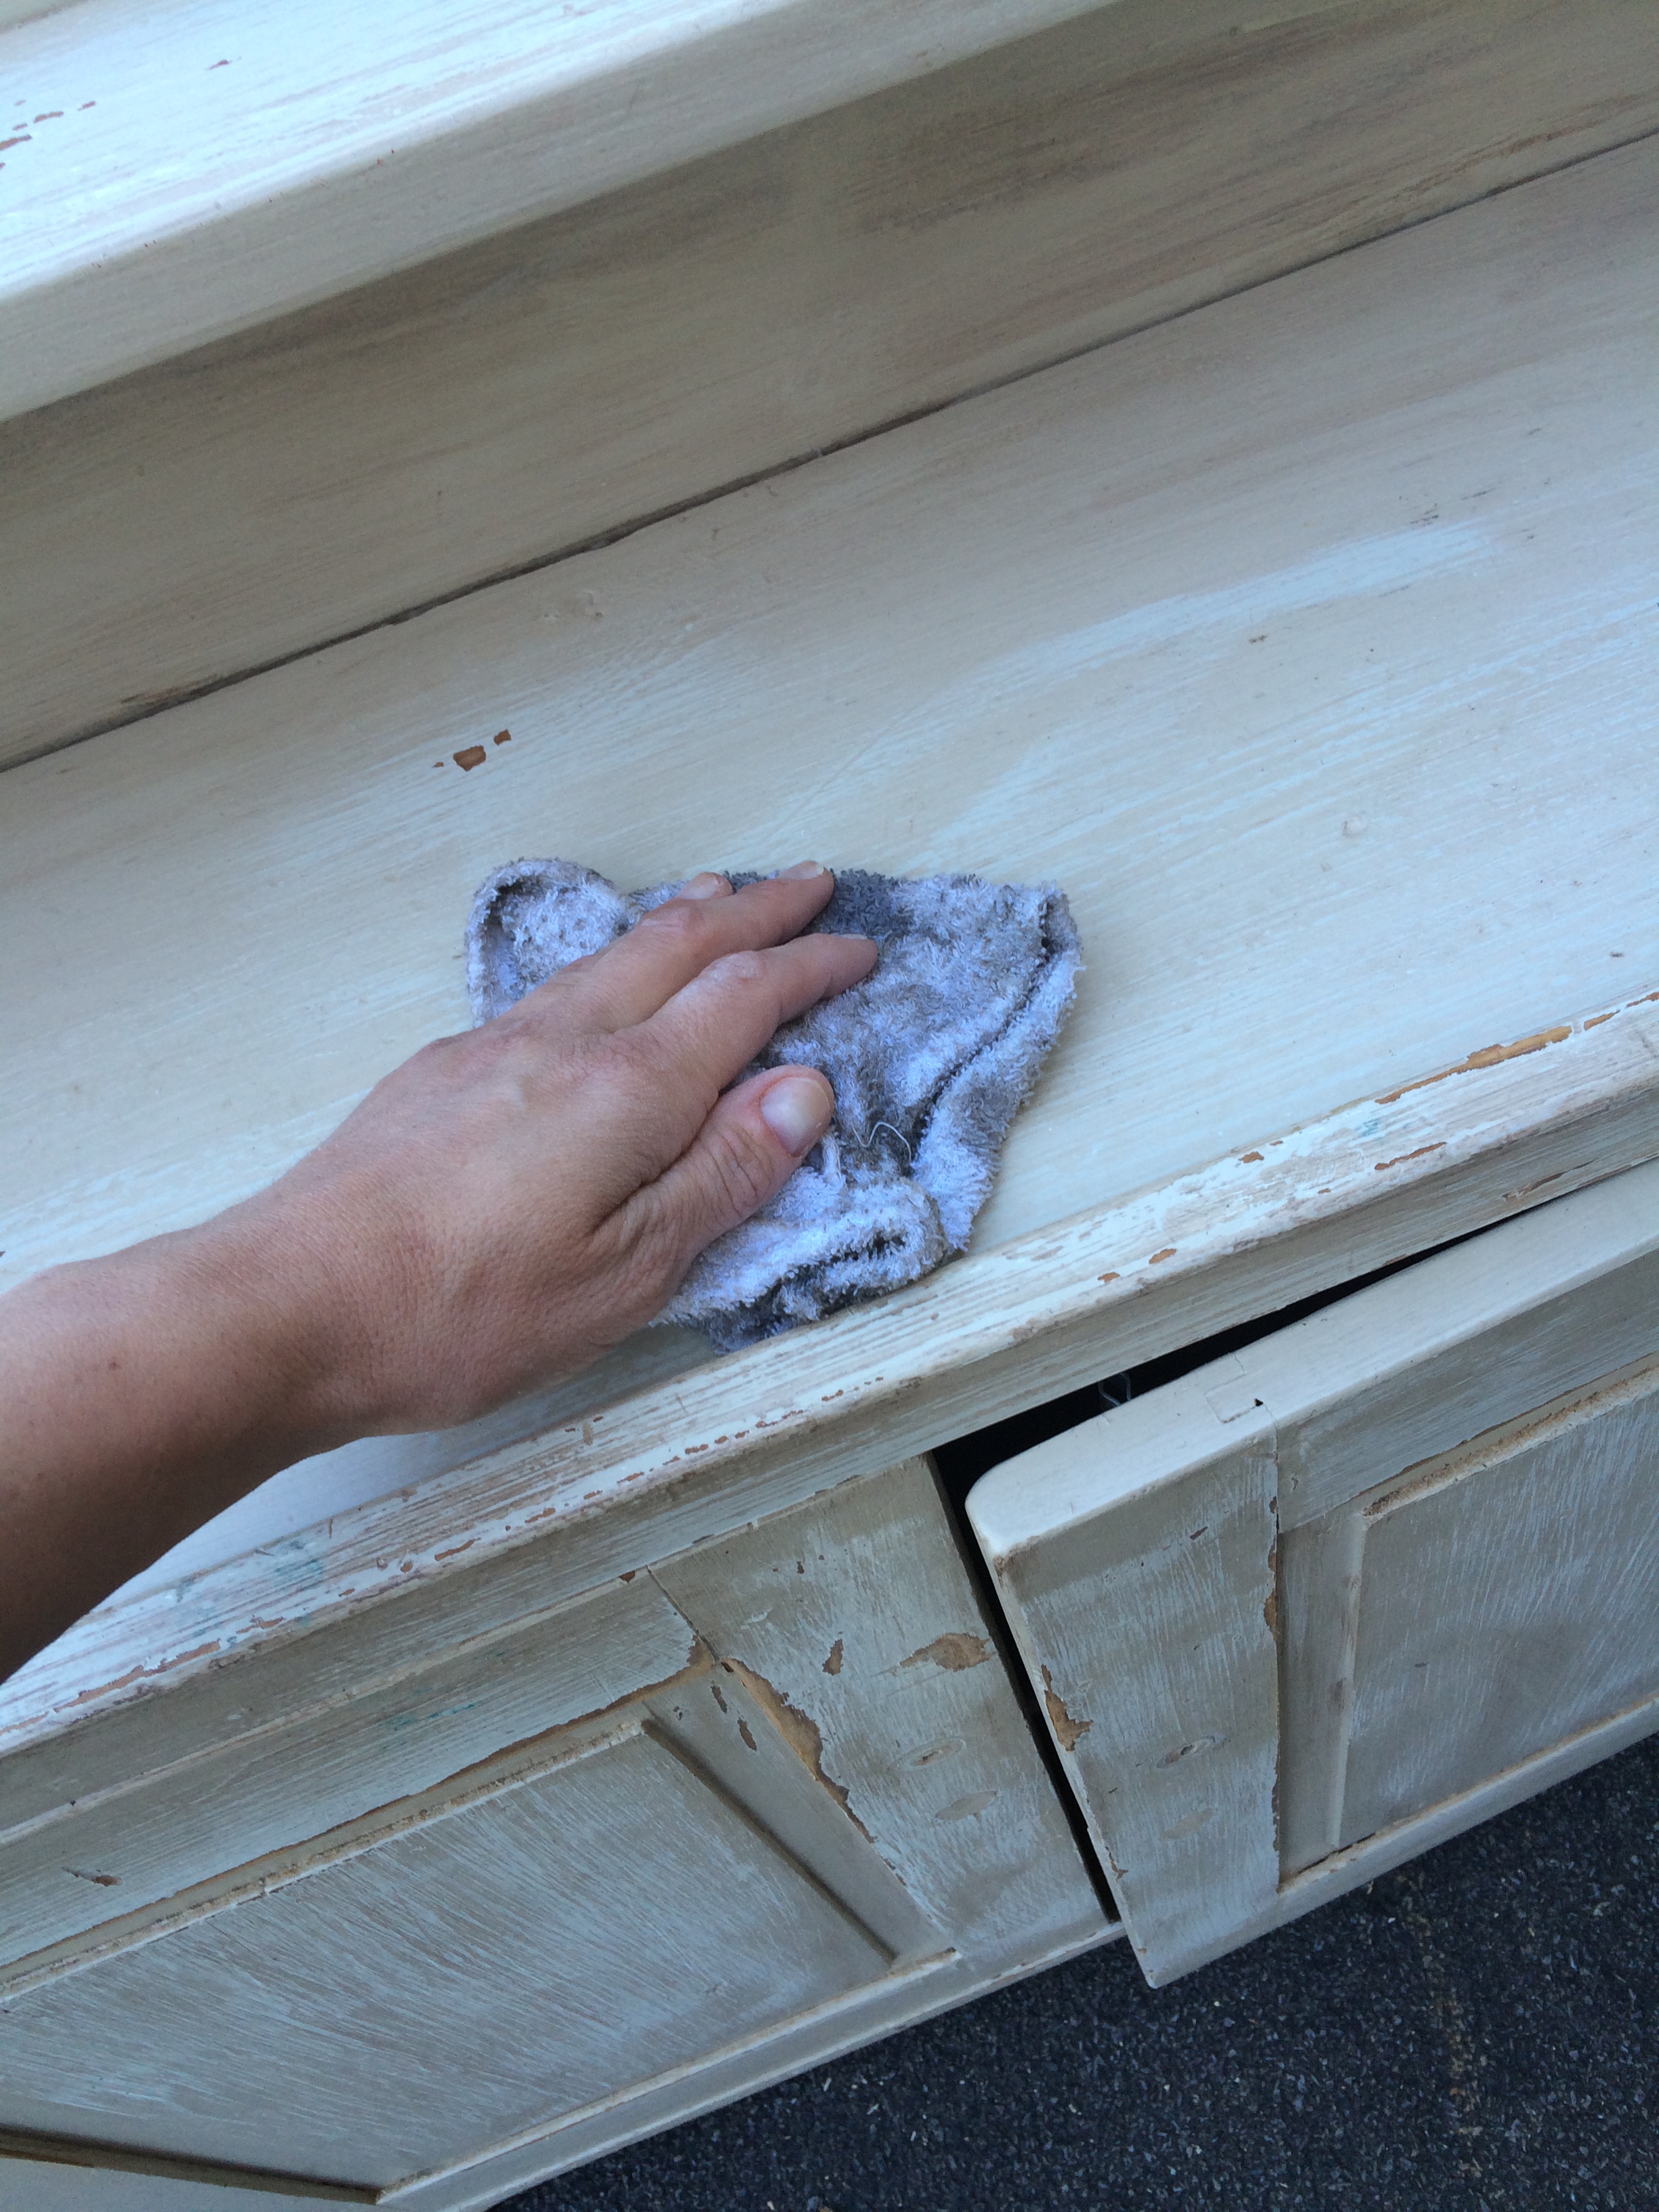
I sanded the all the surfaces using my orbital sander + hand sanded the nooks & crannies that couldn’t be reached.

Before & After CABINET MAKEOVER: The process of sanding, priming, and painting a cabinet to give it a fresh, new look. Tutorial on www.jennaburger.com

Before & After CABINET MAKEOVER: The process of sanding, priming, and painting a cabinet to give it a fresh, new look. Tutorial on www.jennaburger.com

Then I gave the entire cabinet a good wiping off with a lightly damp cloth.

Furniture Makeover: TUTORIAL ON HOW-TO PAINT FURNITURE; before & after cabinet transformation by www.jennaburger.com

Typically I would prime the surface next (as I did with the china cabinet), but since I primed this cabinet when I painted last using a stain blocking primer, it wasn’t needed. So I went right to painting with the new hue.

The color of choice for this project was an interesting one… there’s always a story.

I envisioned a true kelly green color for this cabinet and upon working with Glidden Paint last year on the china cabinet, I had to turn to them again for this makeover!  They pointed me in the right direction for choosing the best color using their Simplified Color Palette.

Call me crazy, but I finally chose a paint color featured in the Team Colors collection. My color of choice was Boston Green, the perfect green hue from the Boston Celtics. I had it mixed at The Home Depot in Glidden DUO Paint + Primer

Furniture Makeover: TUTORIAL ON HOW-TO PAINT FURNITURE; before & after cabinet transformation by www.jennaburger.com

Glidden Duo Paint + Primer is A+ because it truly is more than paint!  Because of the Paint + Primer formula, I save time & money.  The paint applied beautifully and the coverage was exceptional.

Furniture Makeover: TUTORIAL ON HOW-TO PAINT FURNITURE; before & after cabinet transformation by www.jennaburger.com

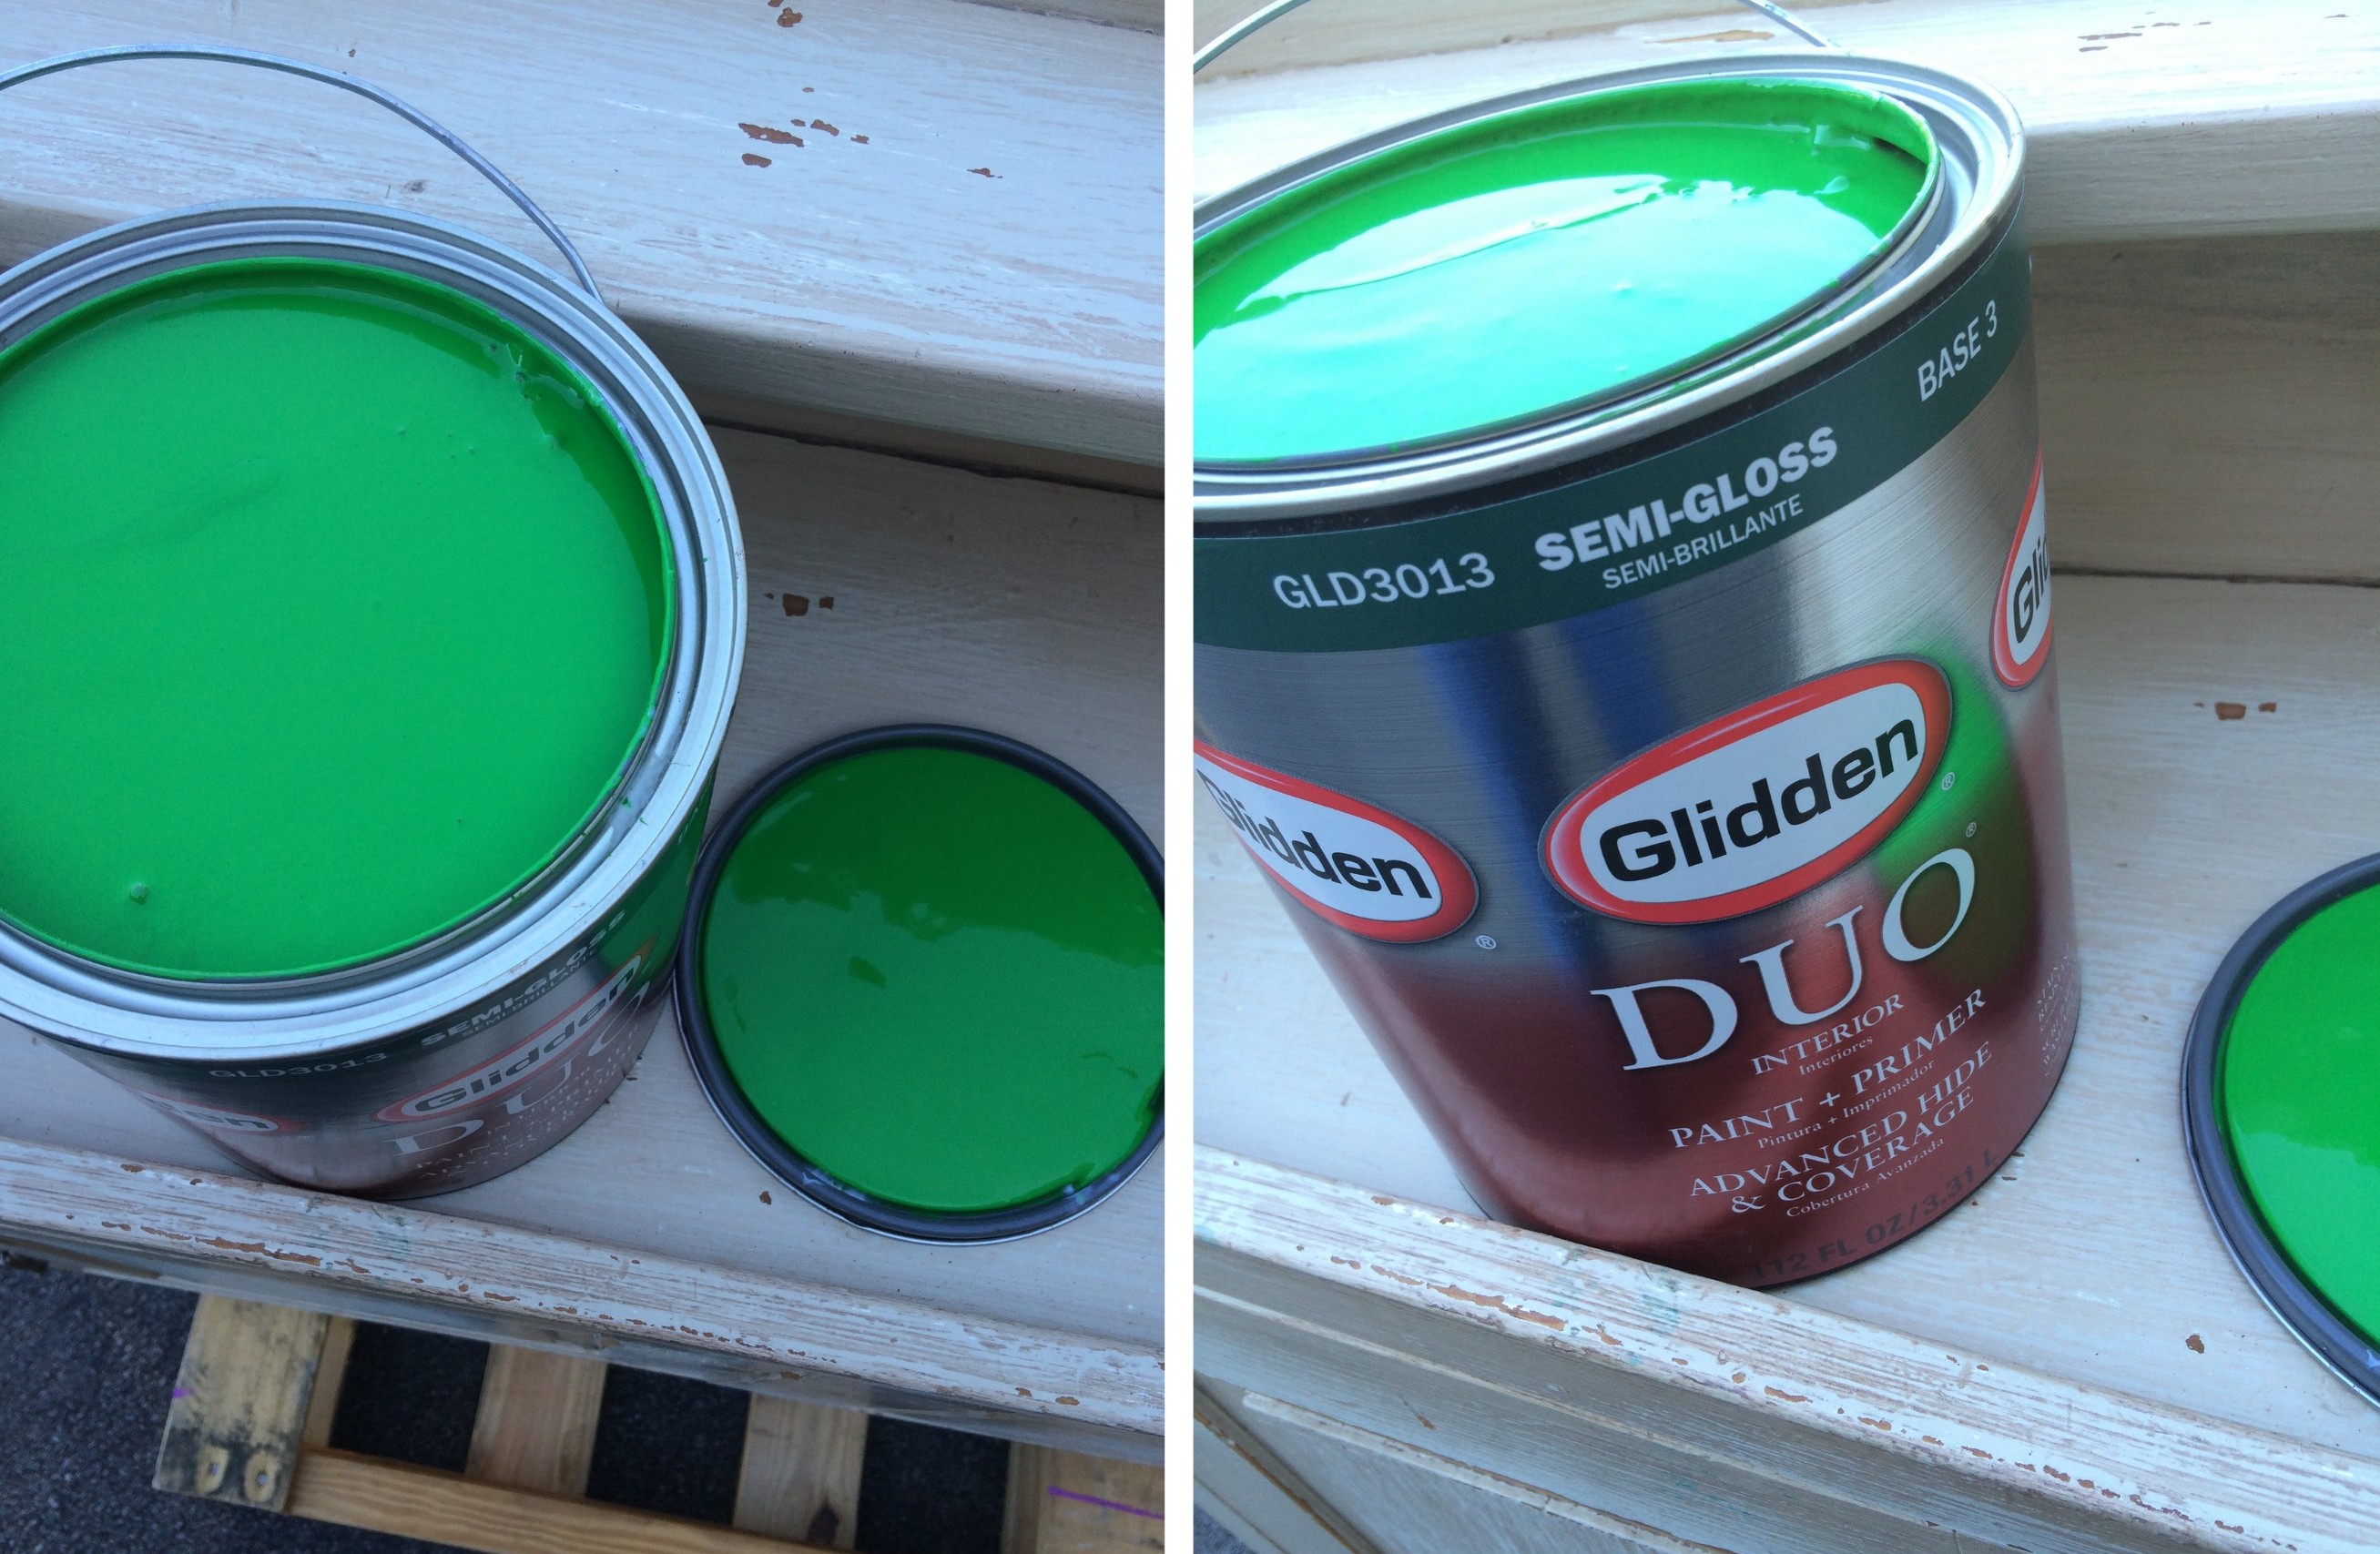
I opened the can of paint and was a little taken back by the color.  It was bright.  Thankfully when it was applied to the cabinet and dried, the intensity quieted.

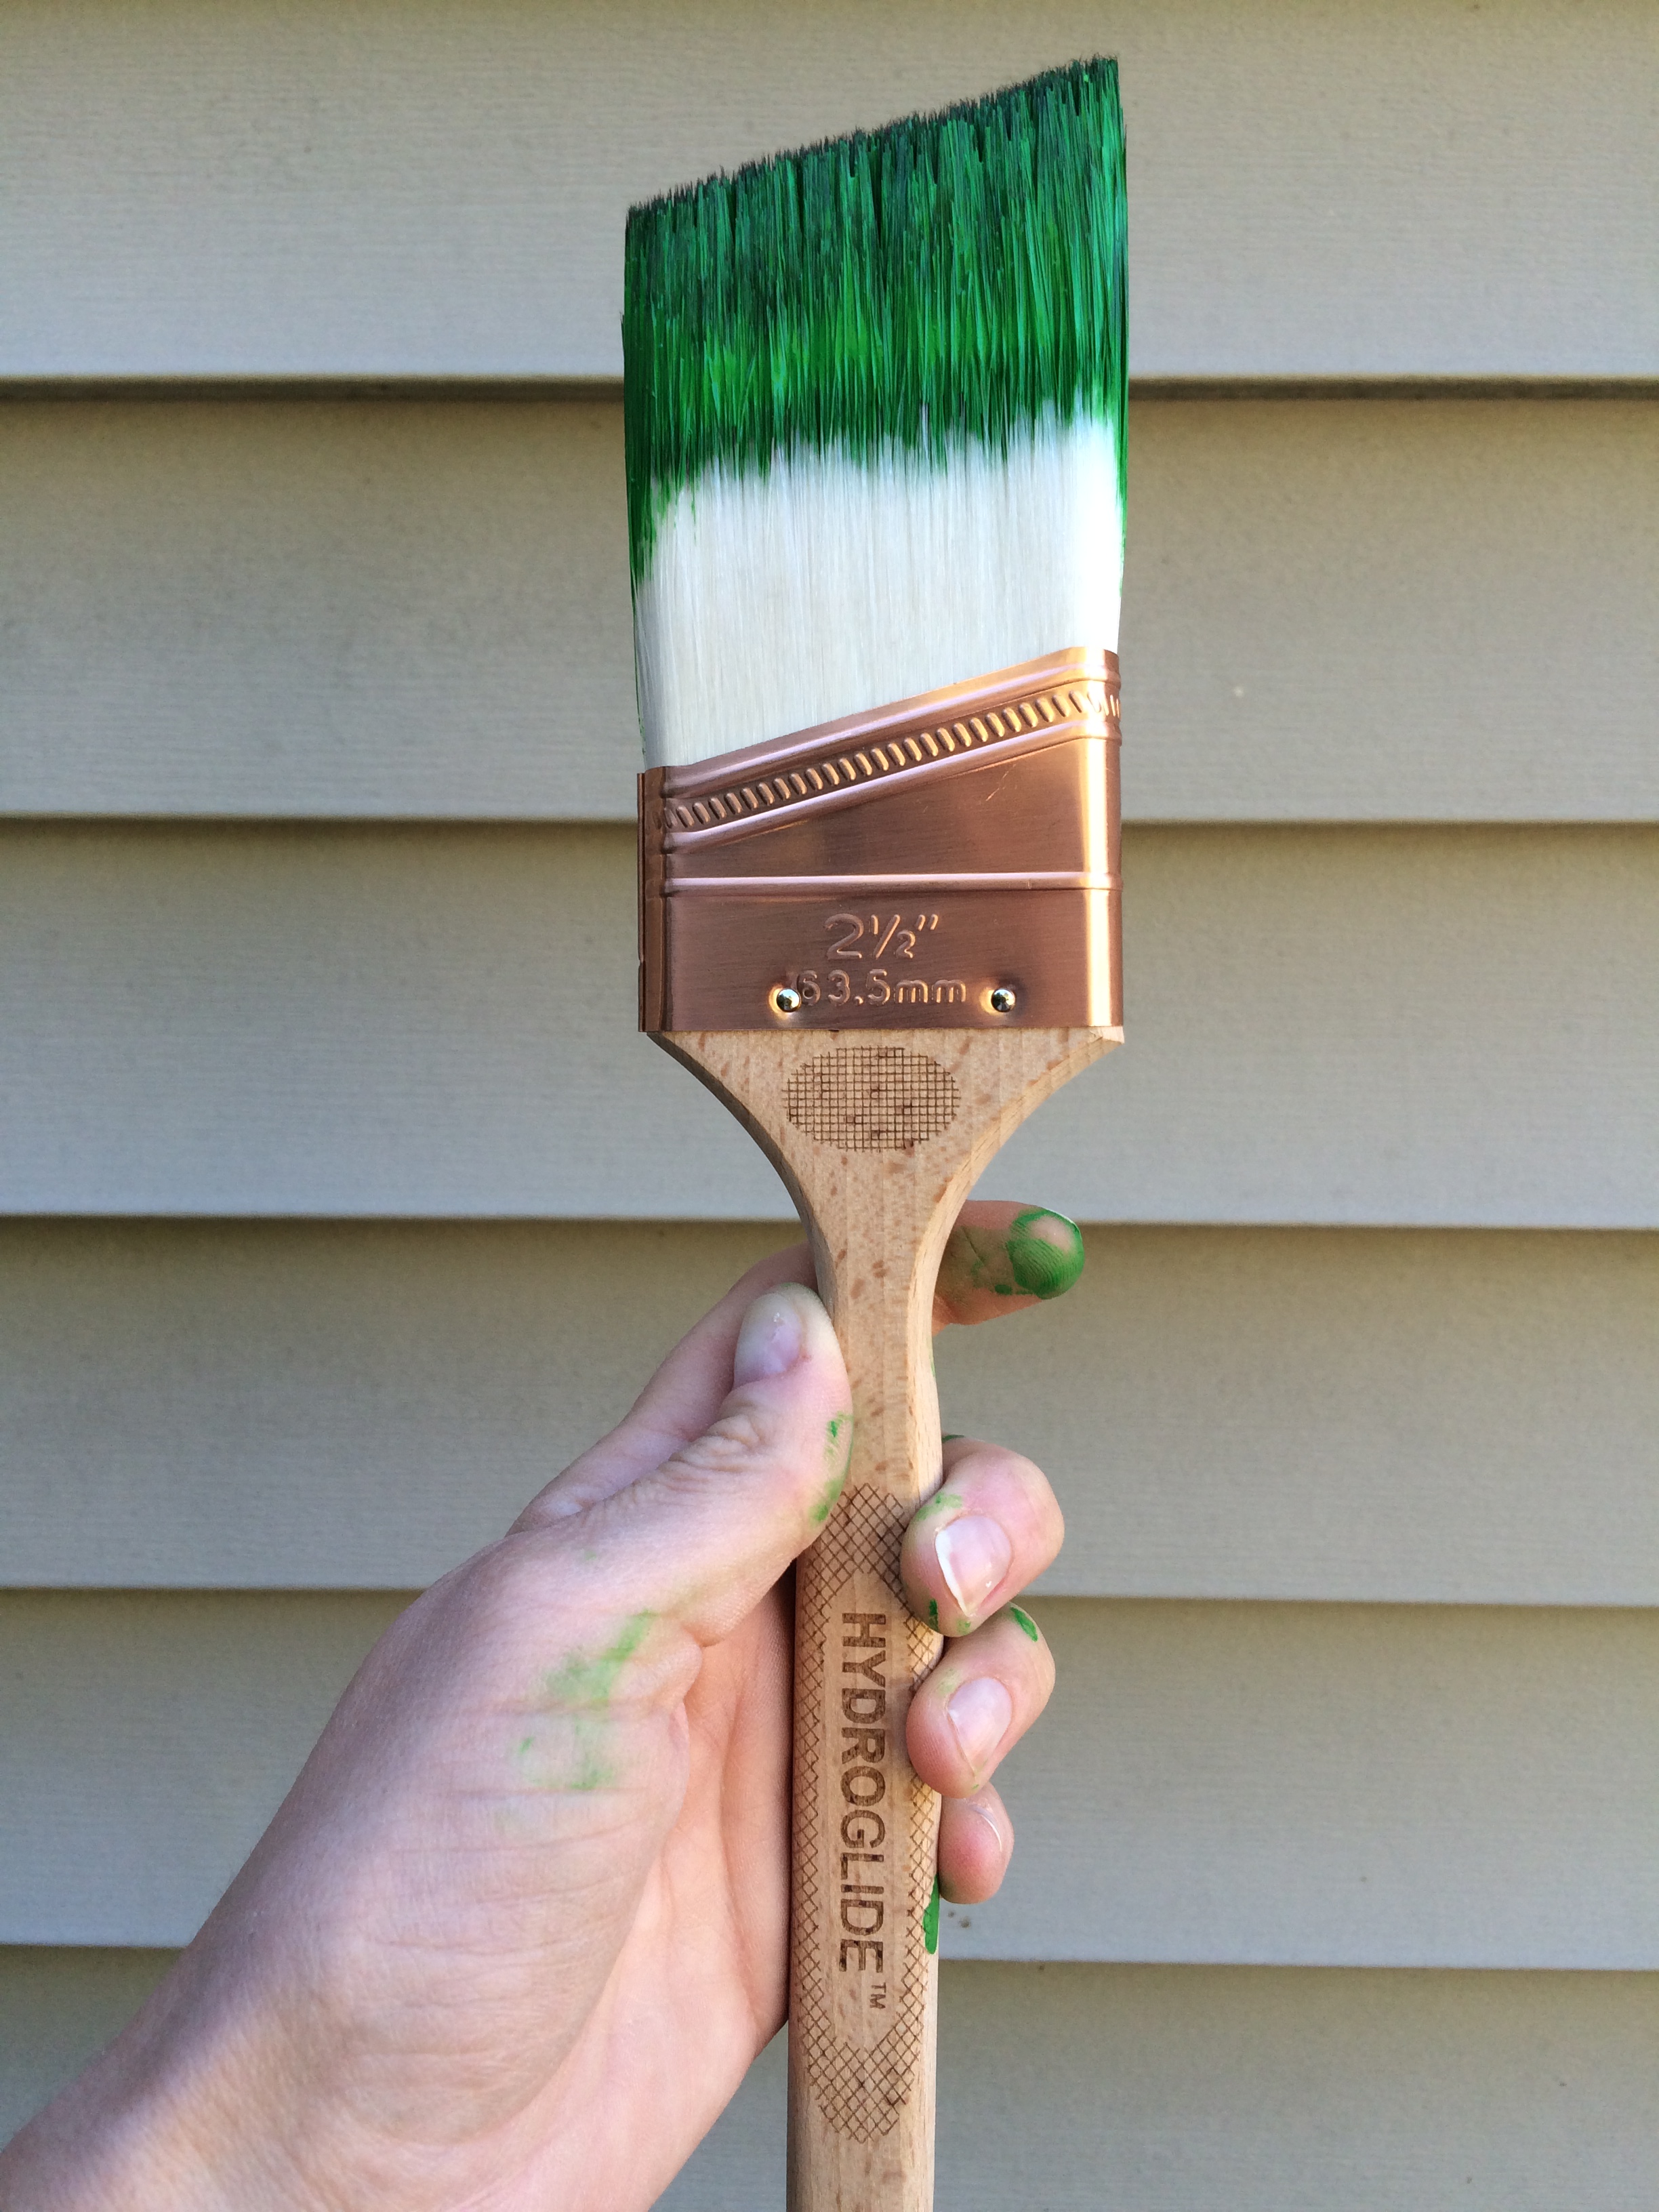
Using a new angled brush, I applied the first coat of paint in a semi-gloss finish.

Furniture Makeover: TUTORIAL ON HOW-TO PAINT FURNITURE; before & after cabinet transformation by www.jennaburger.com

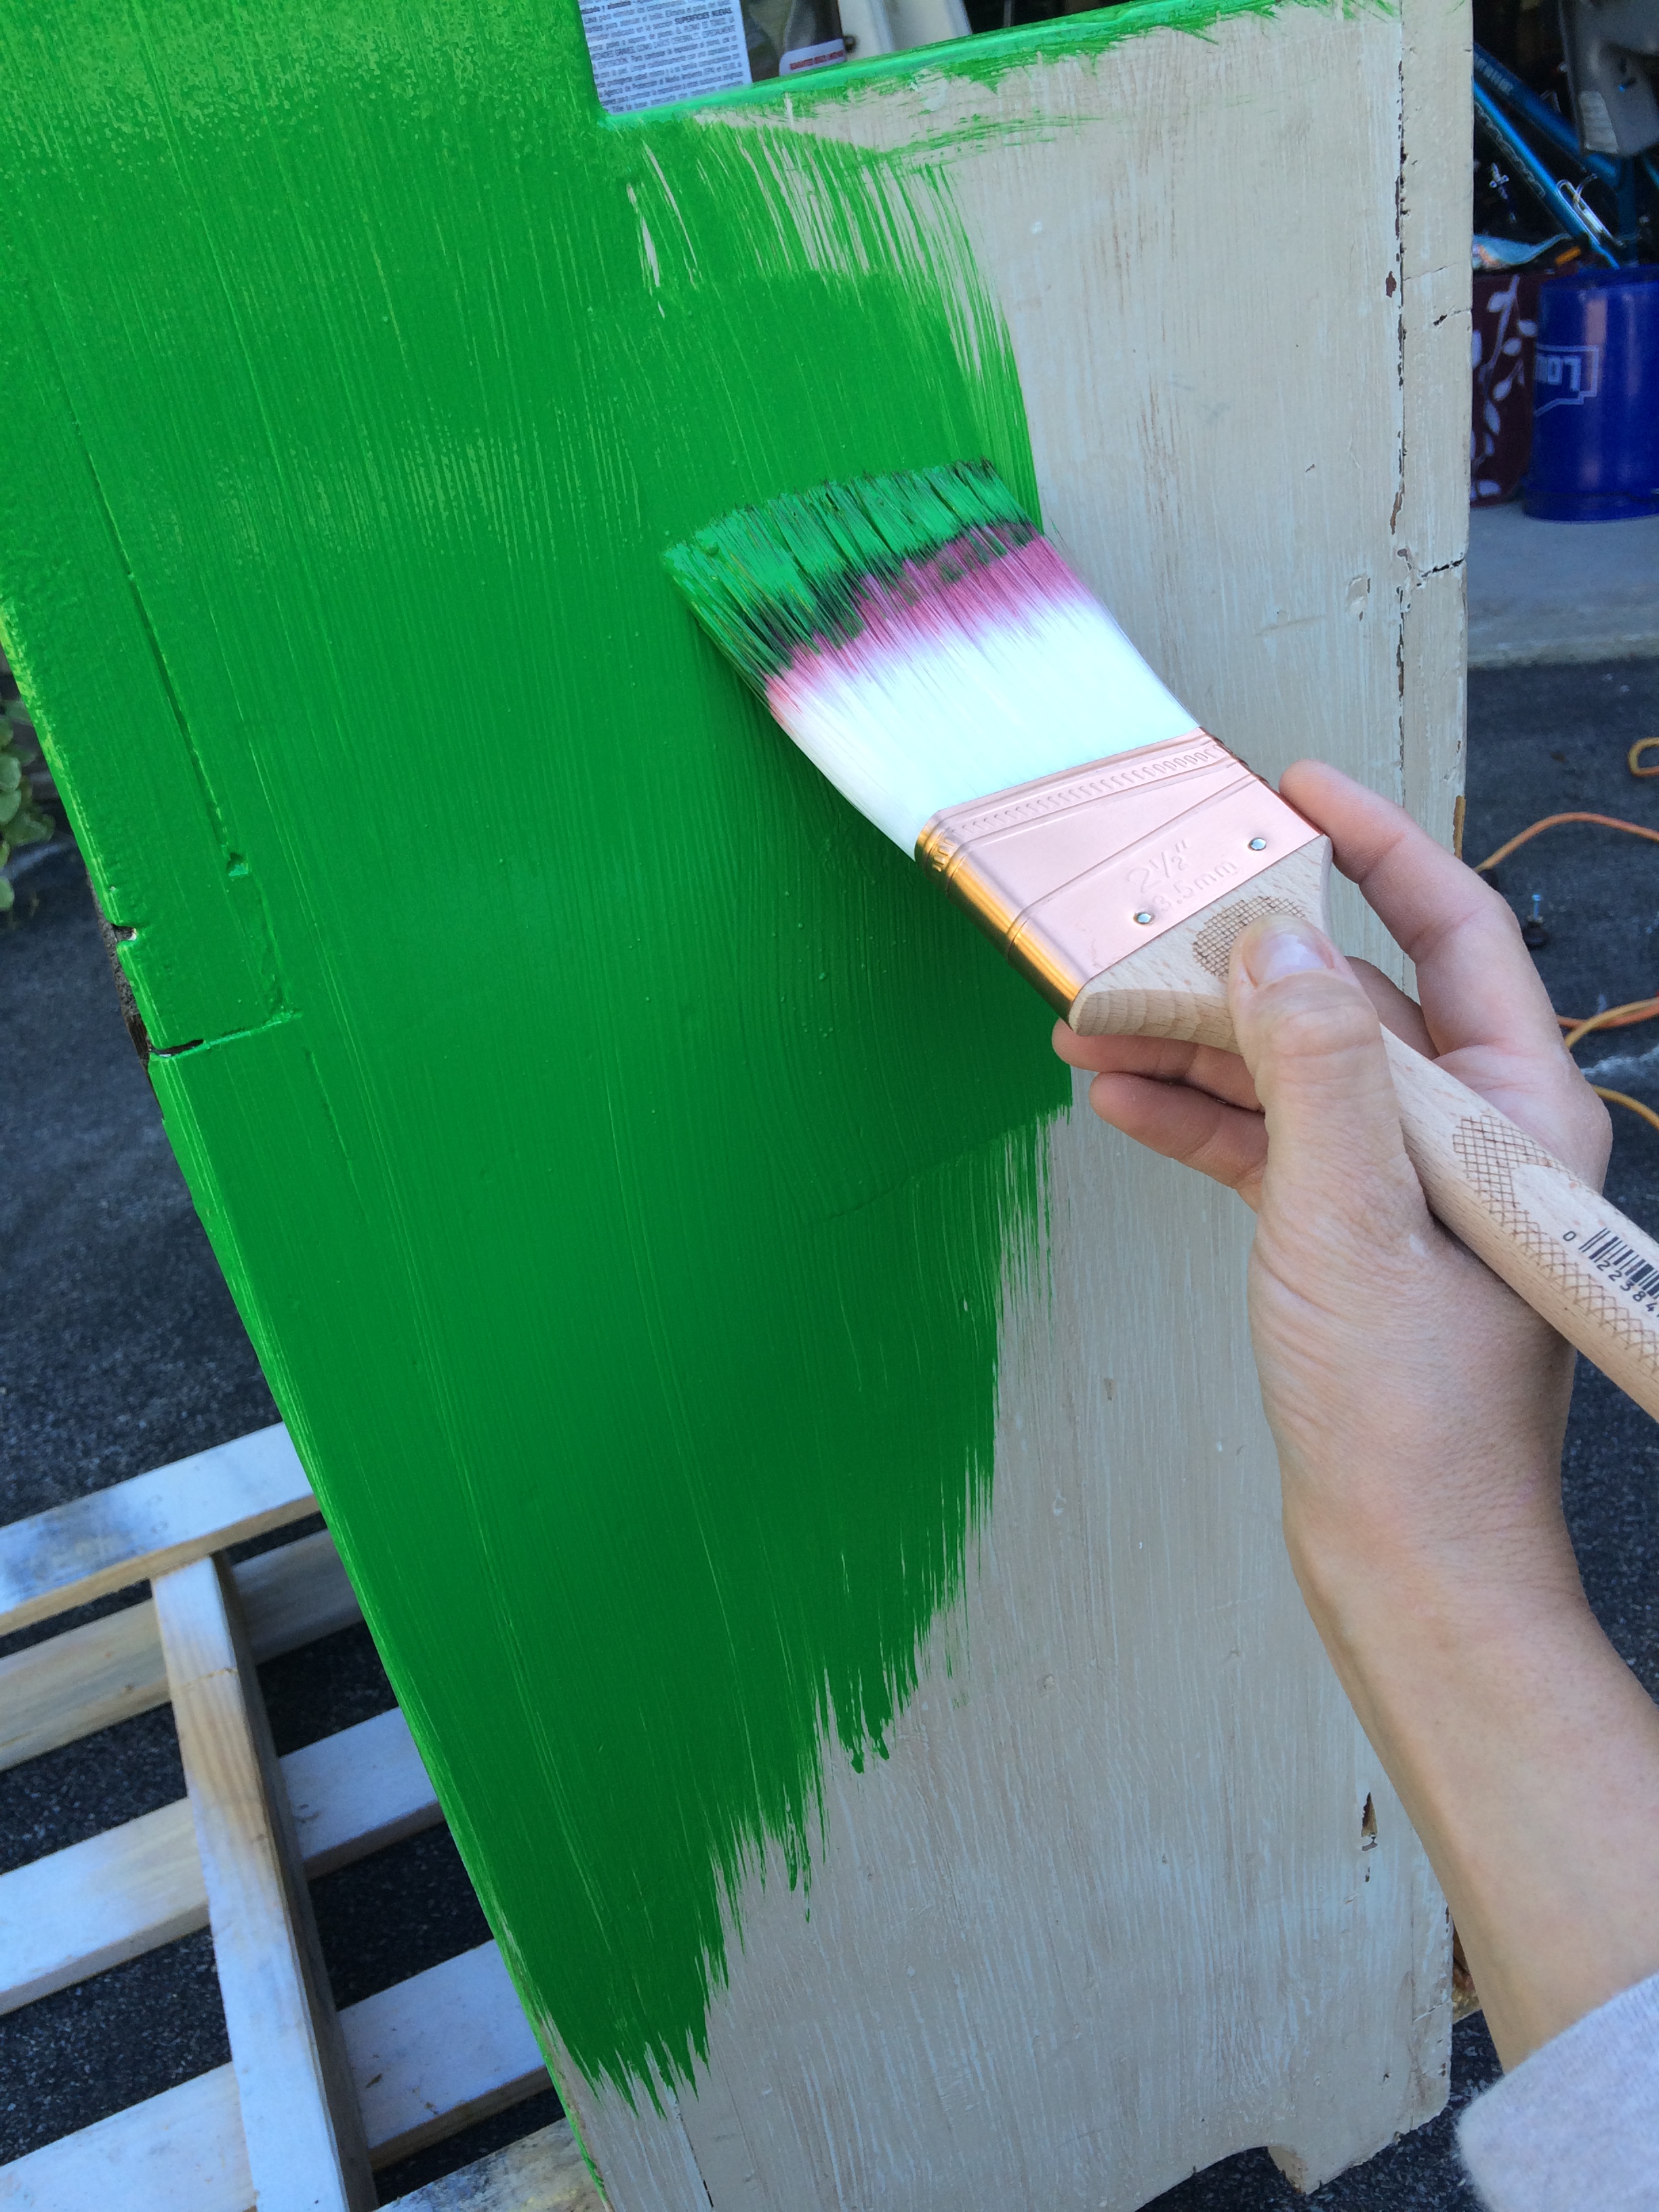
first coat complete.

Furniture Makeover: TUTORIAL ON HOW-TO PAINT FURNITURE; before & after cabinet transformation by www.jennaburger.com

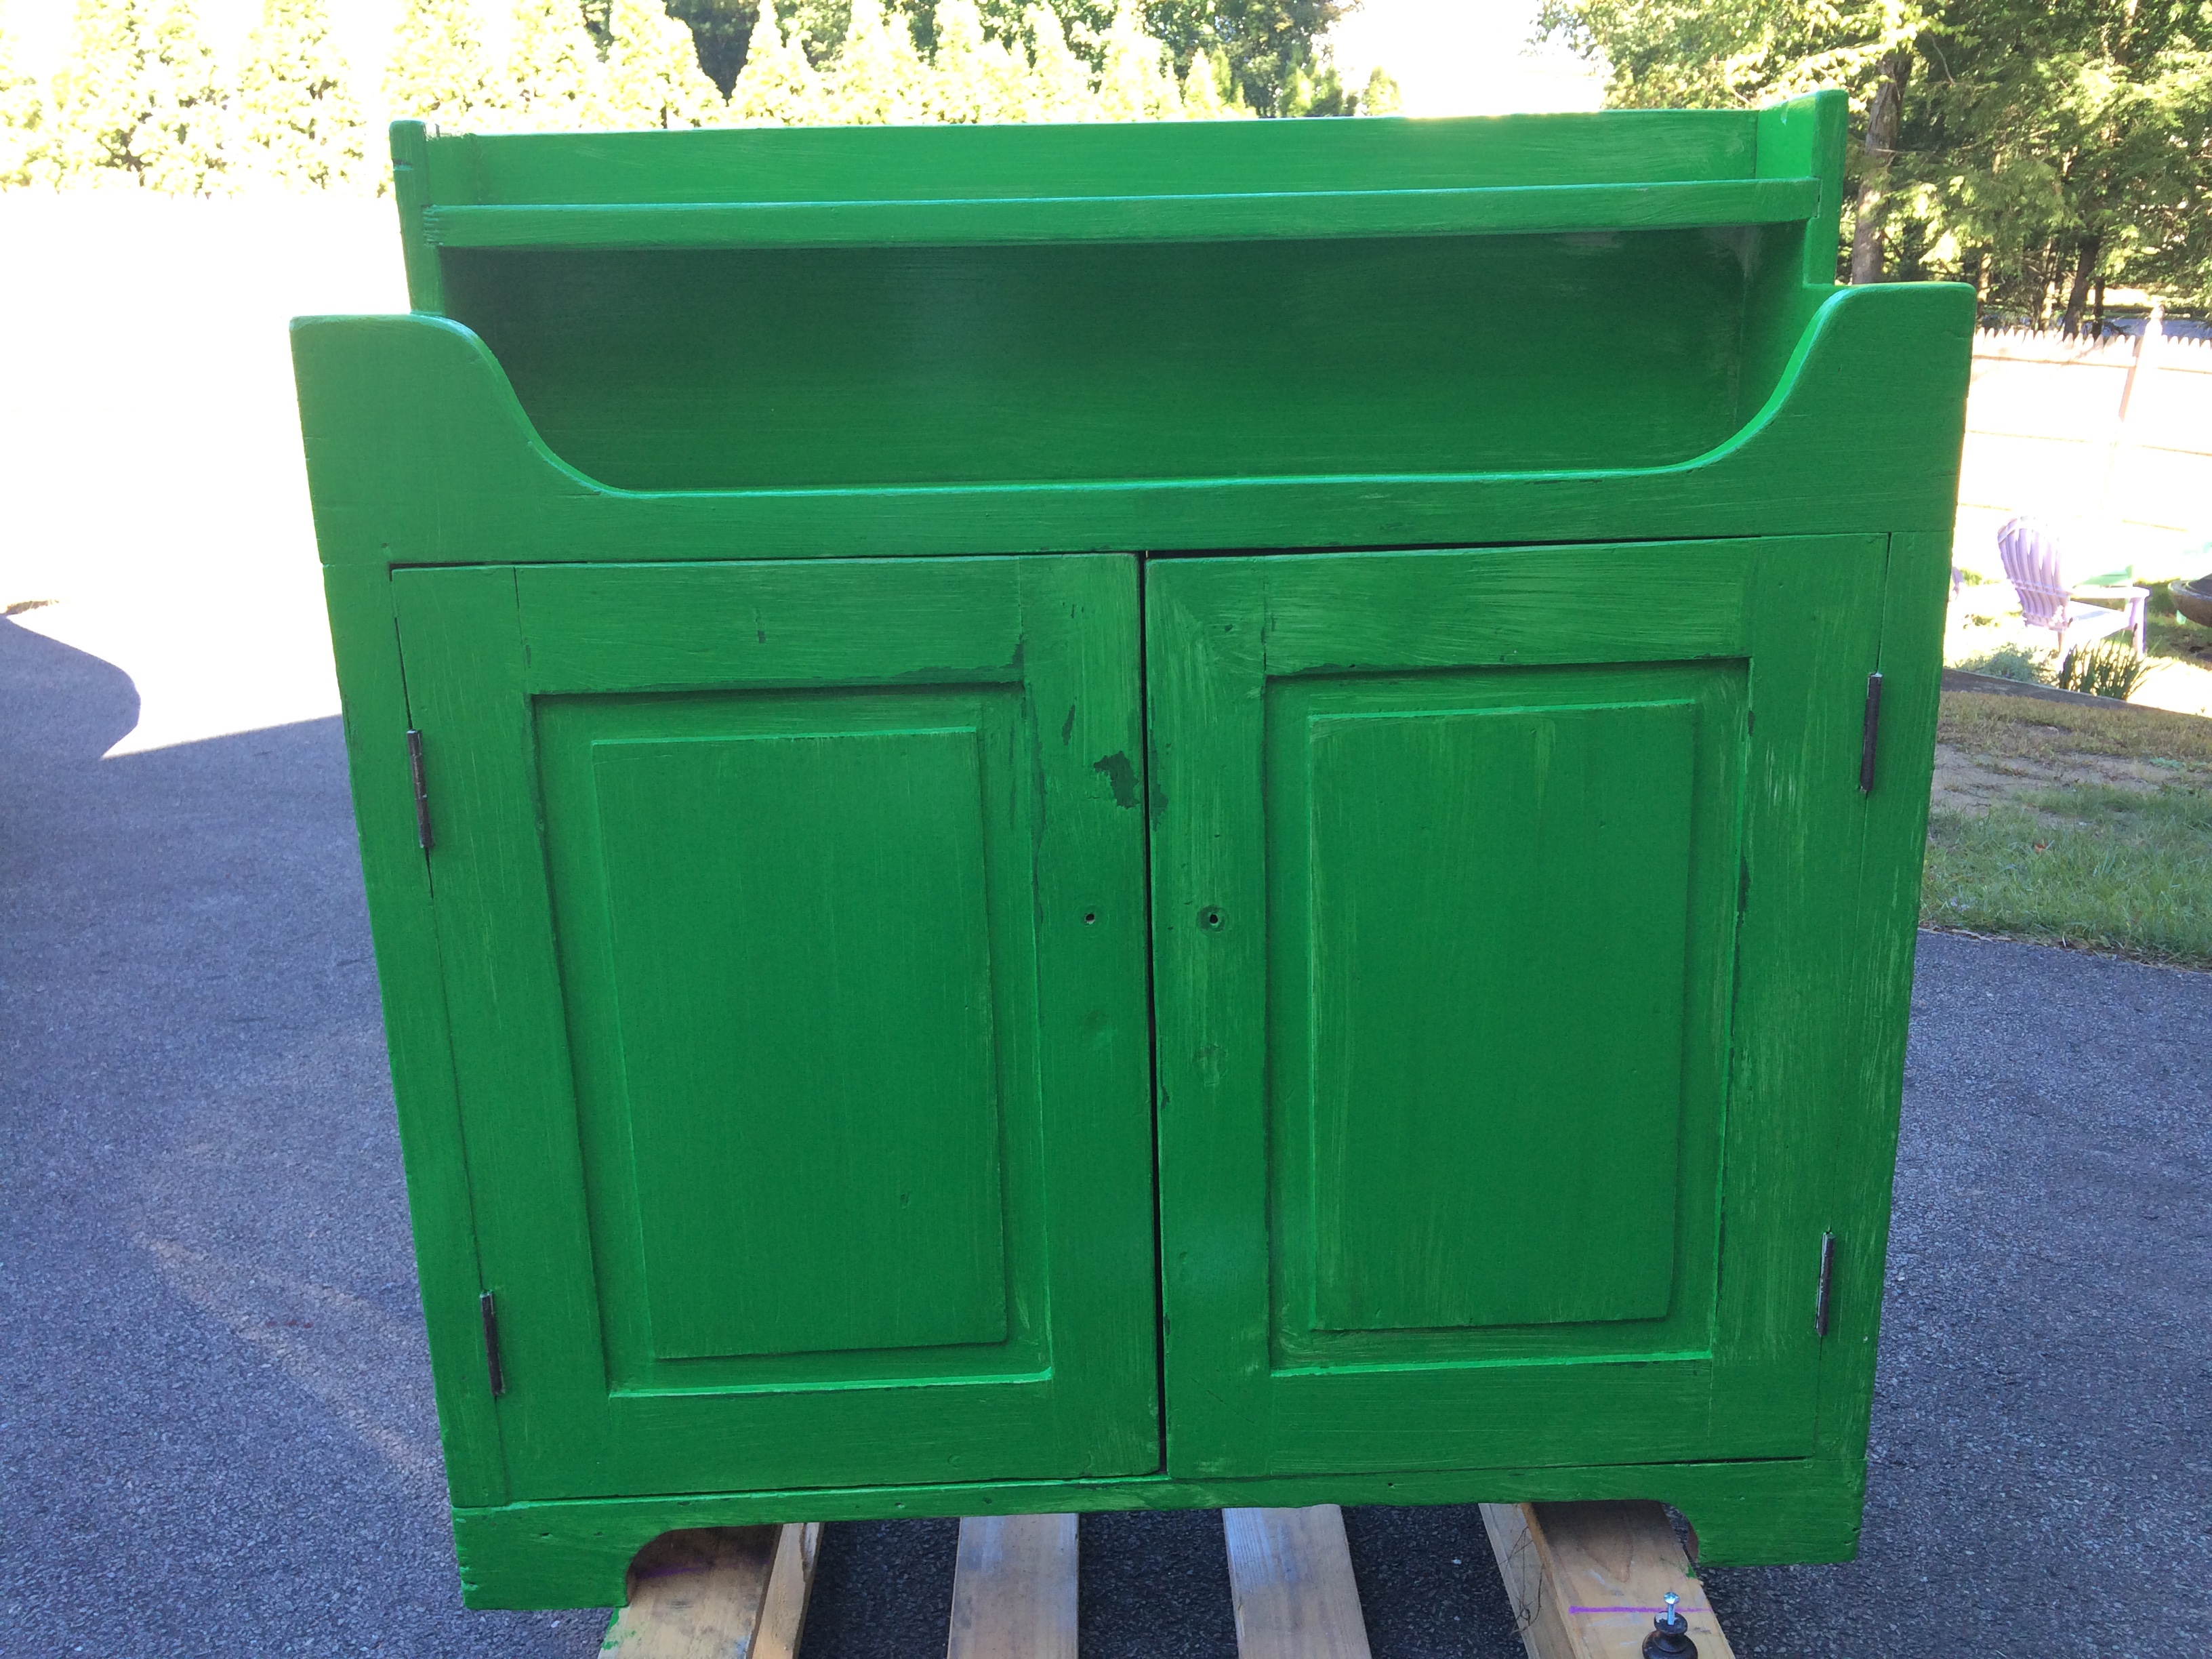
3 coats later it was complete.

Furniture Makeover: TUTORIAL ON HOW-TO PAINT FURNITURE; before & after cabinet transformation by www.jennaburger.com

Furniture Makeover: TUTORIAL ON HOW-TO PAINT FURNITURE; before & after cabinet transformation by www.jennaburger.com

Furniture Makeover: TUTORIAL ON HOW-TO PAINT FURNITURE; before & after cabinet transformation by www.jennaburger.com

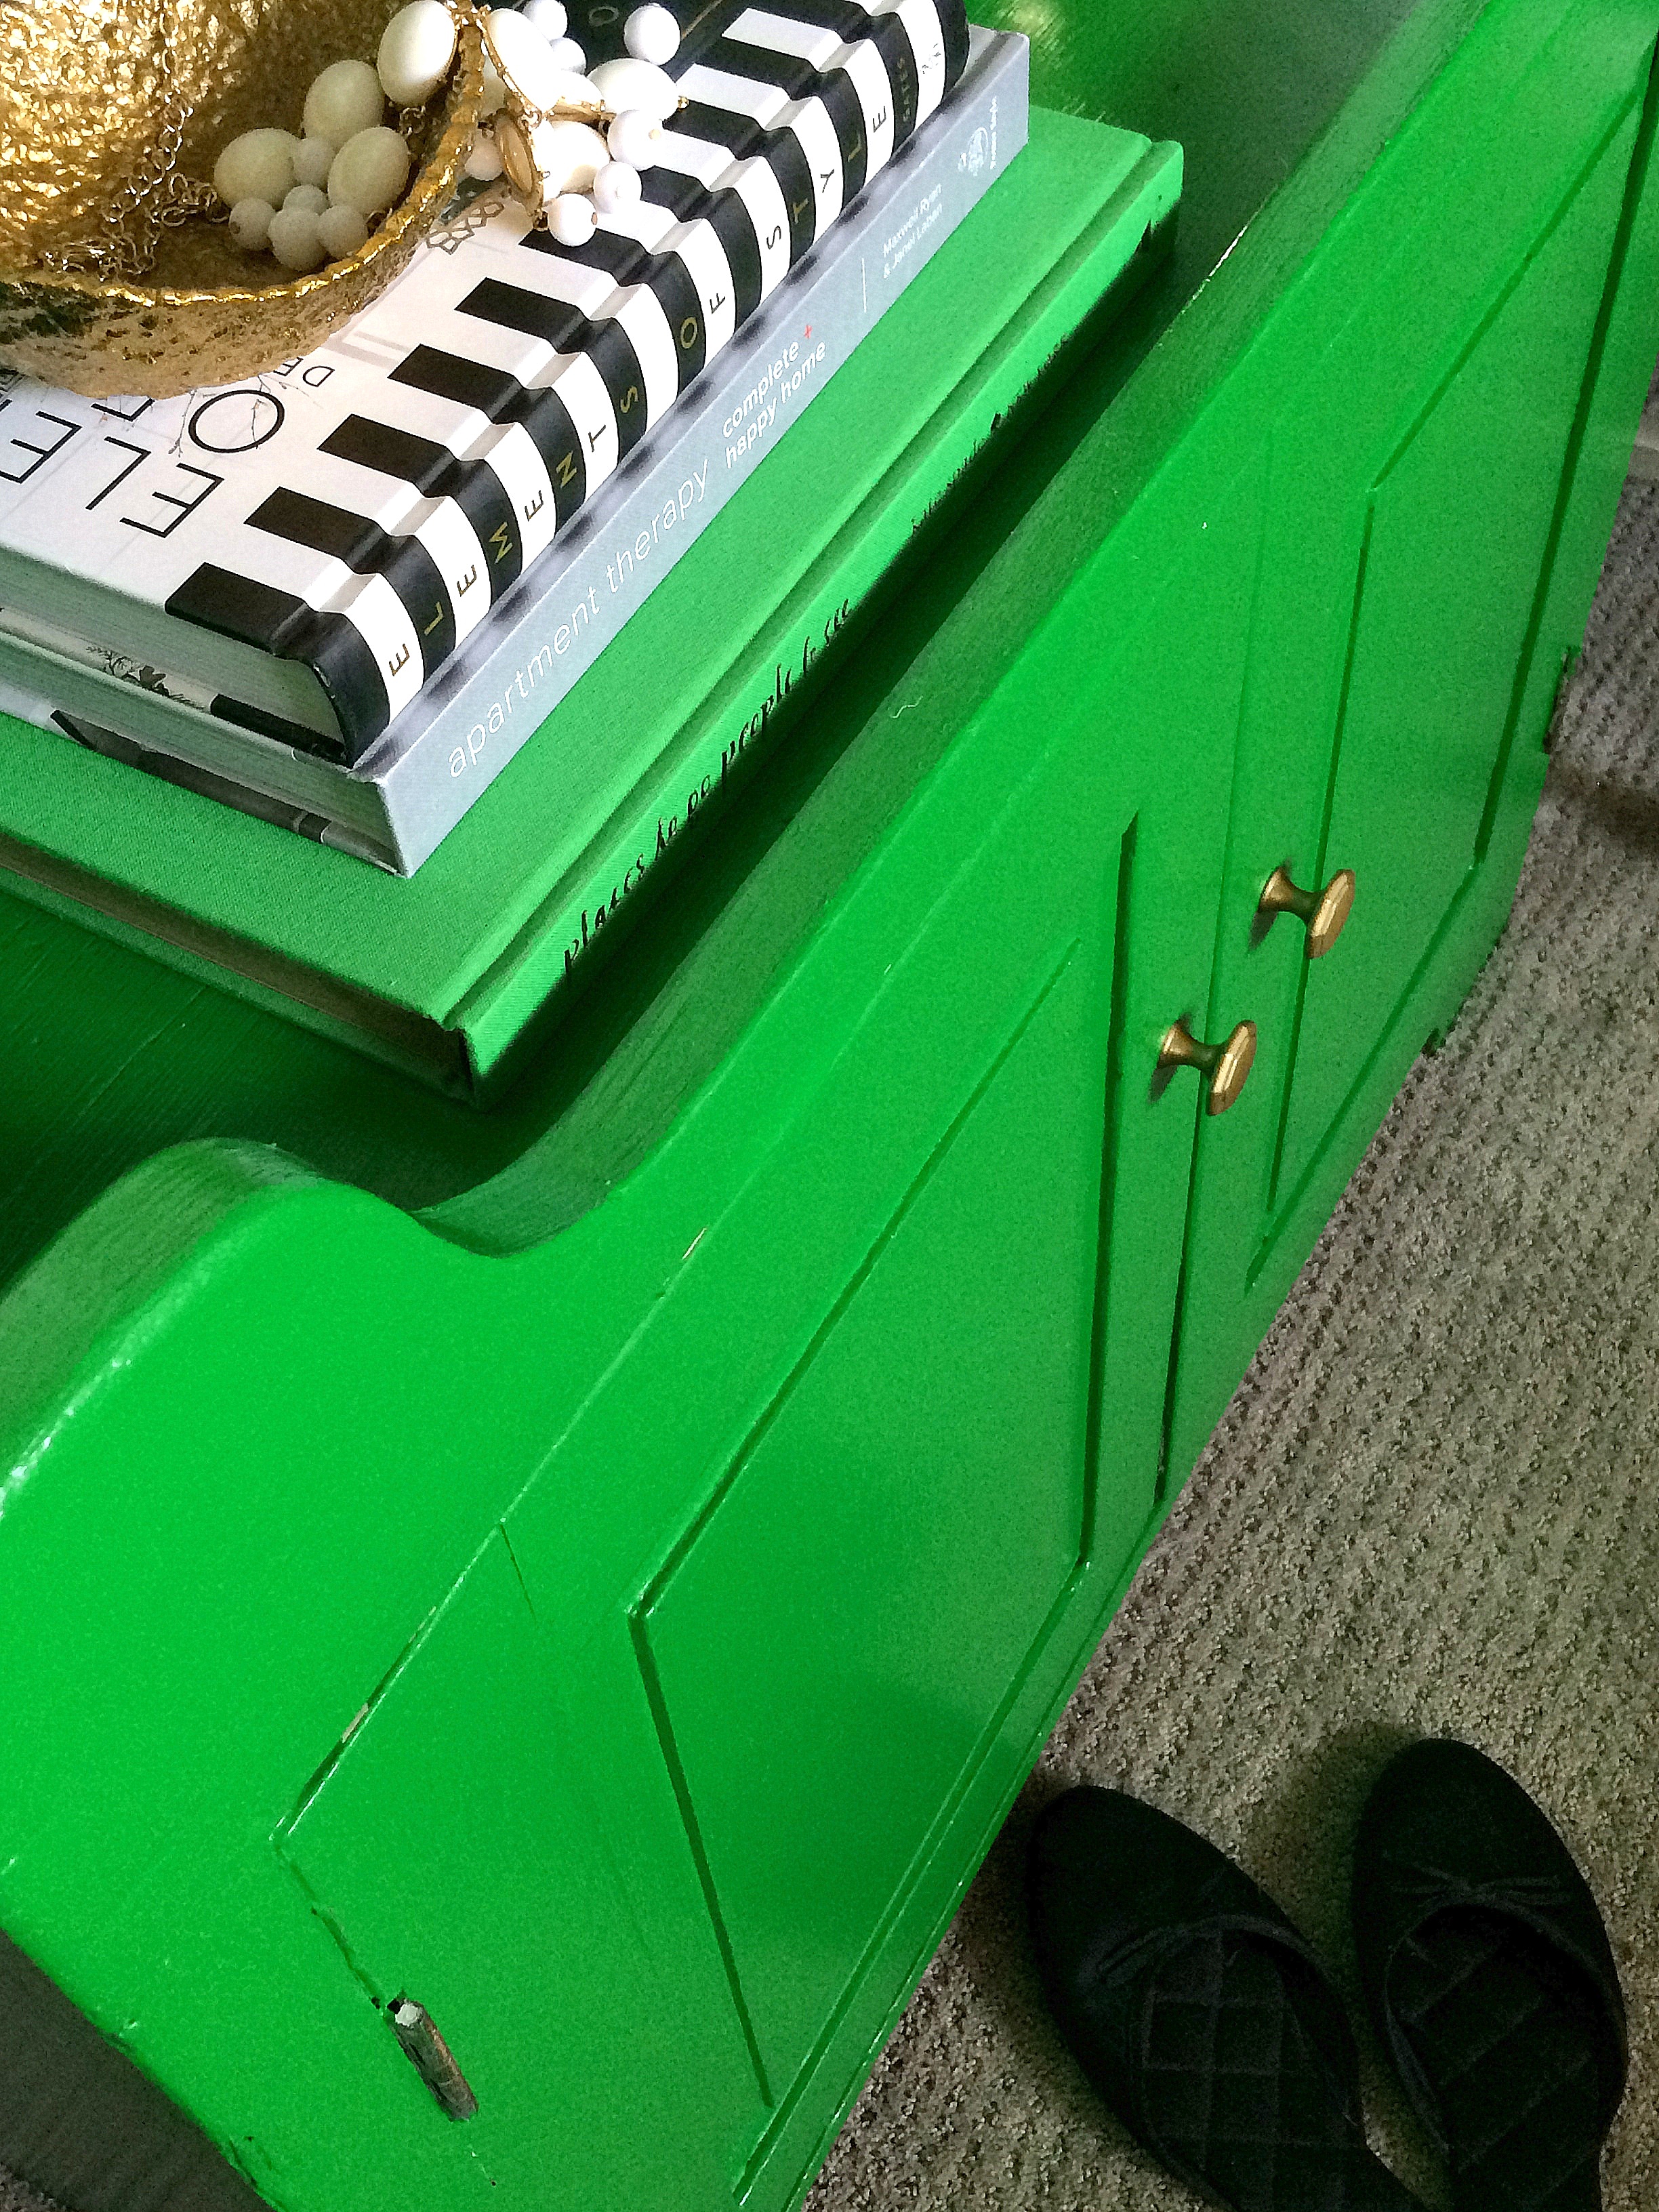
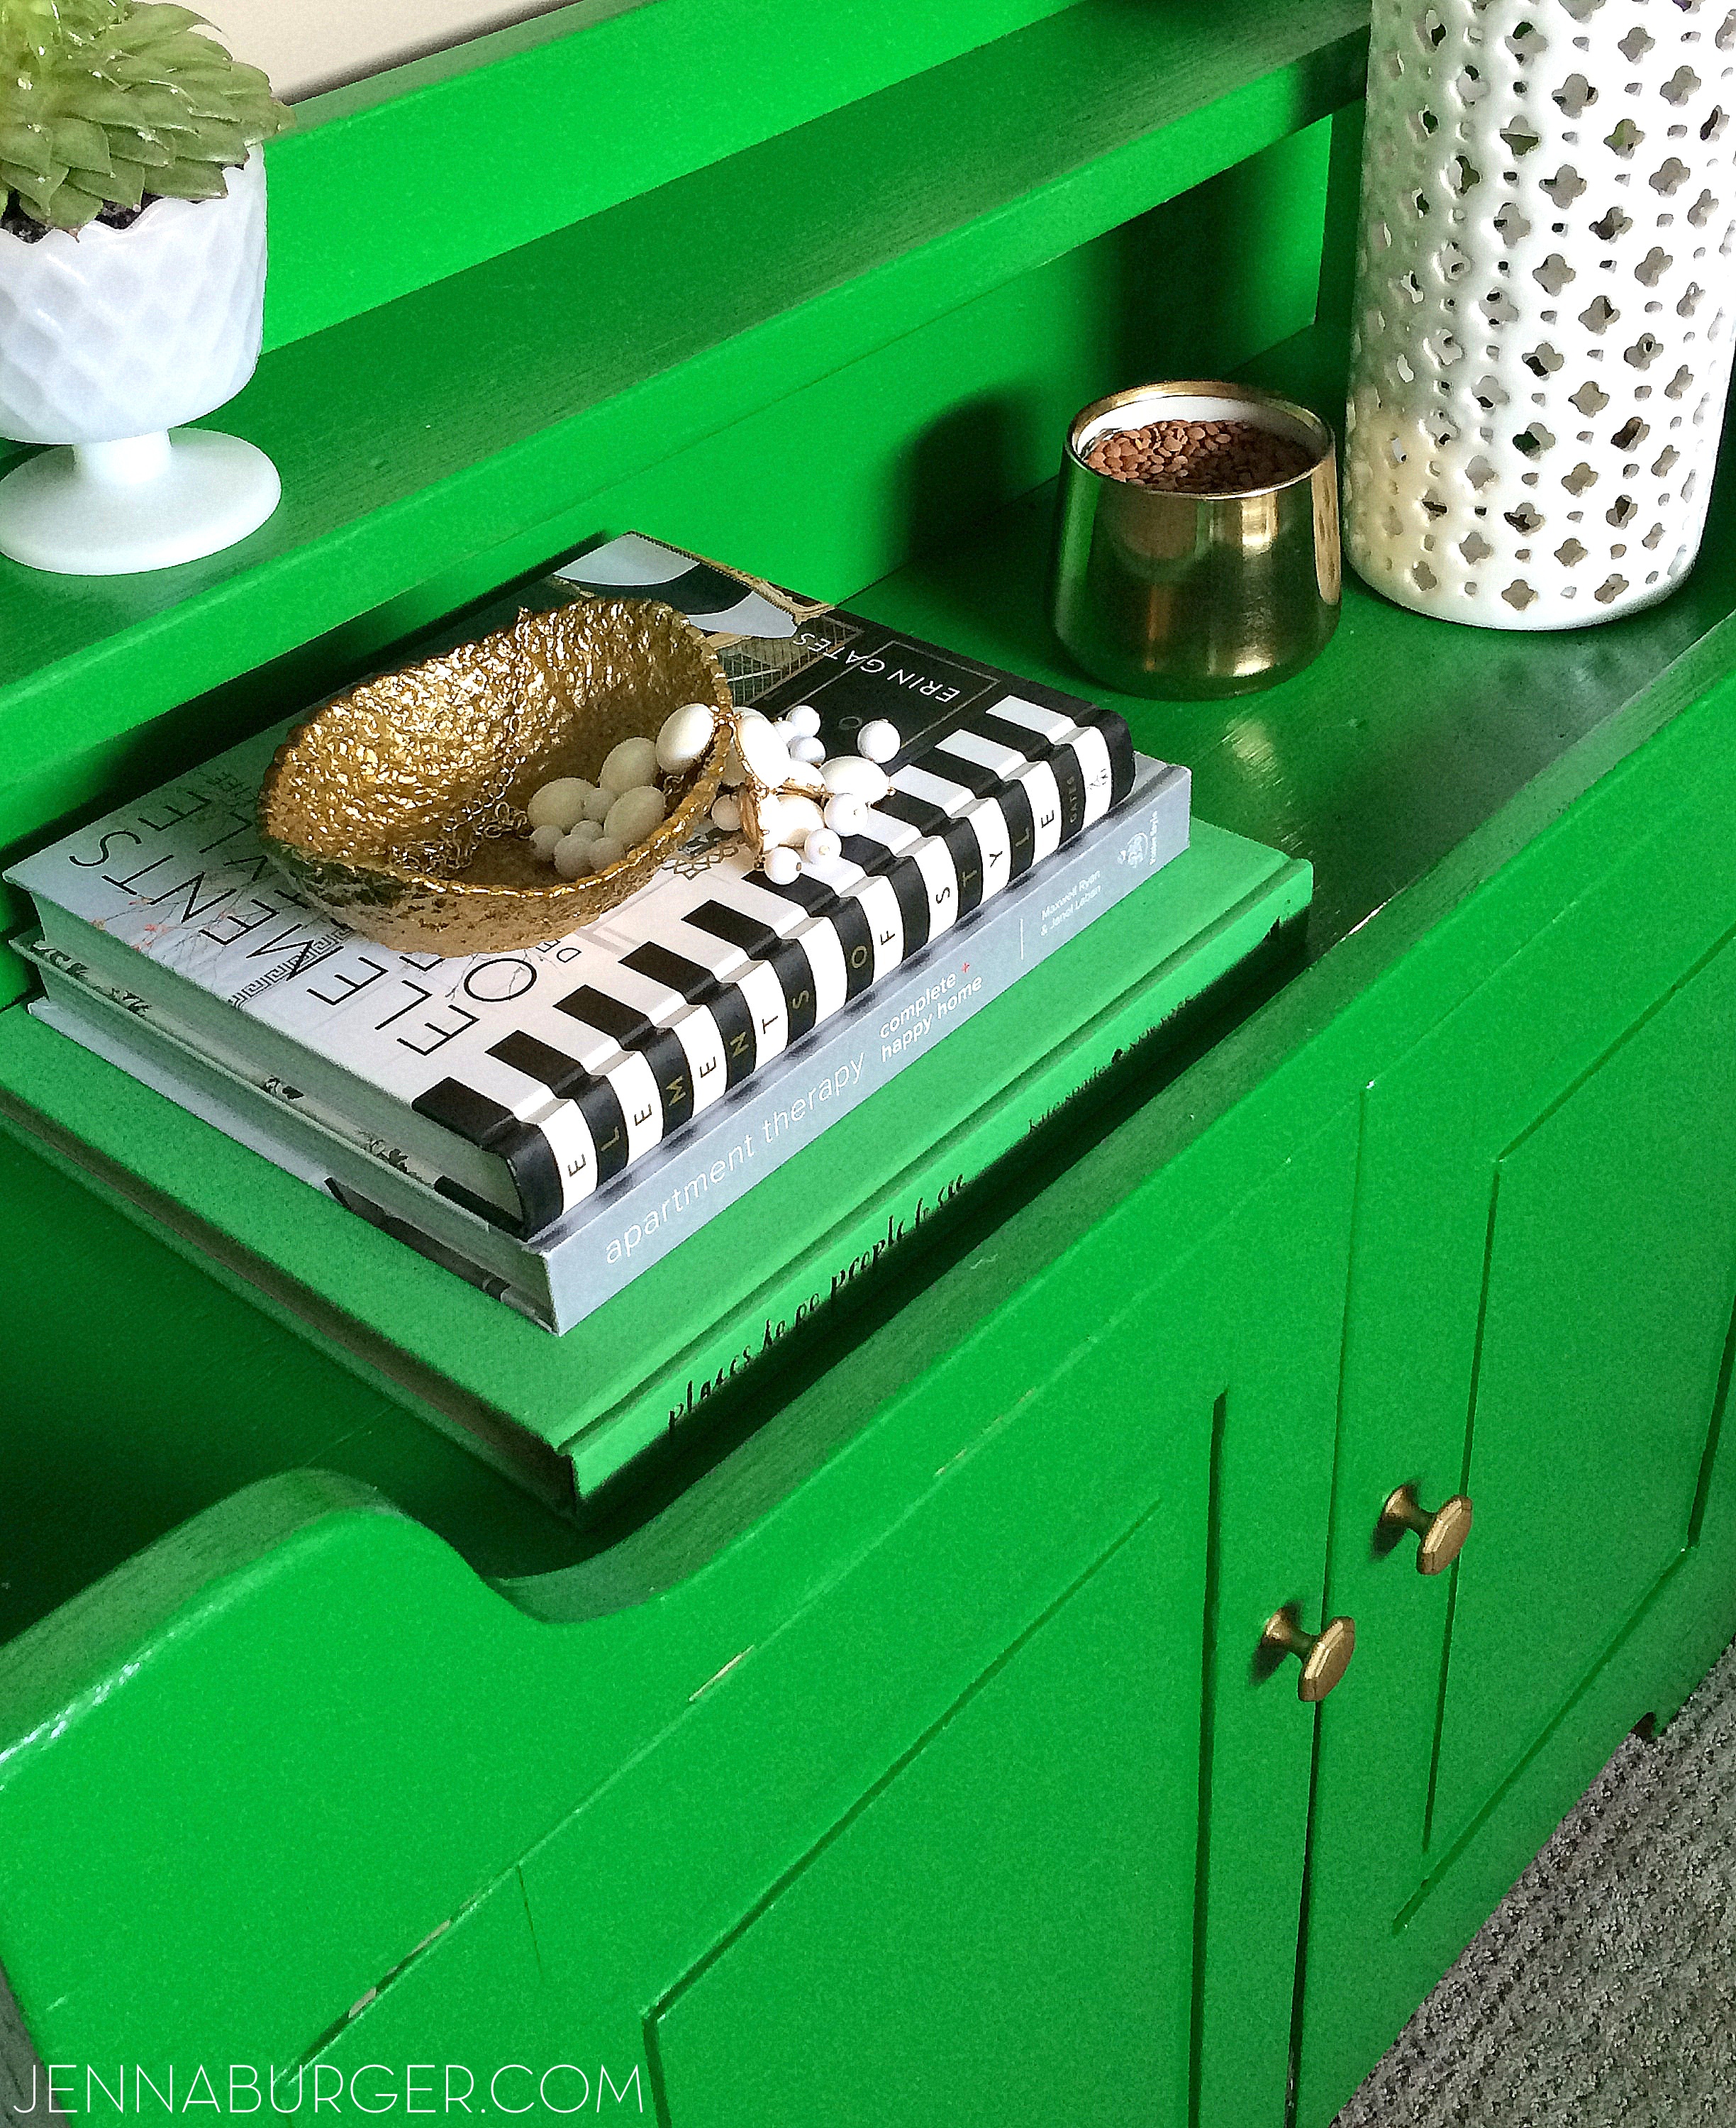
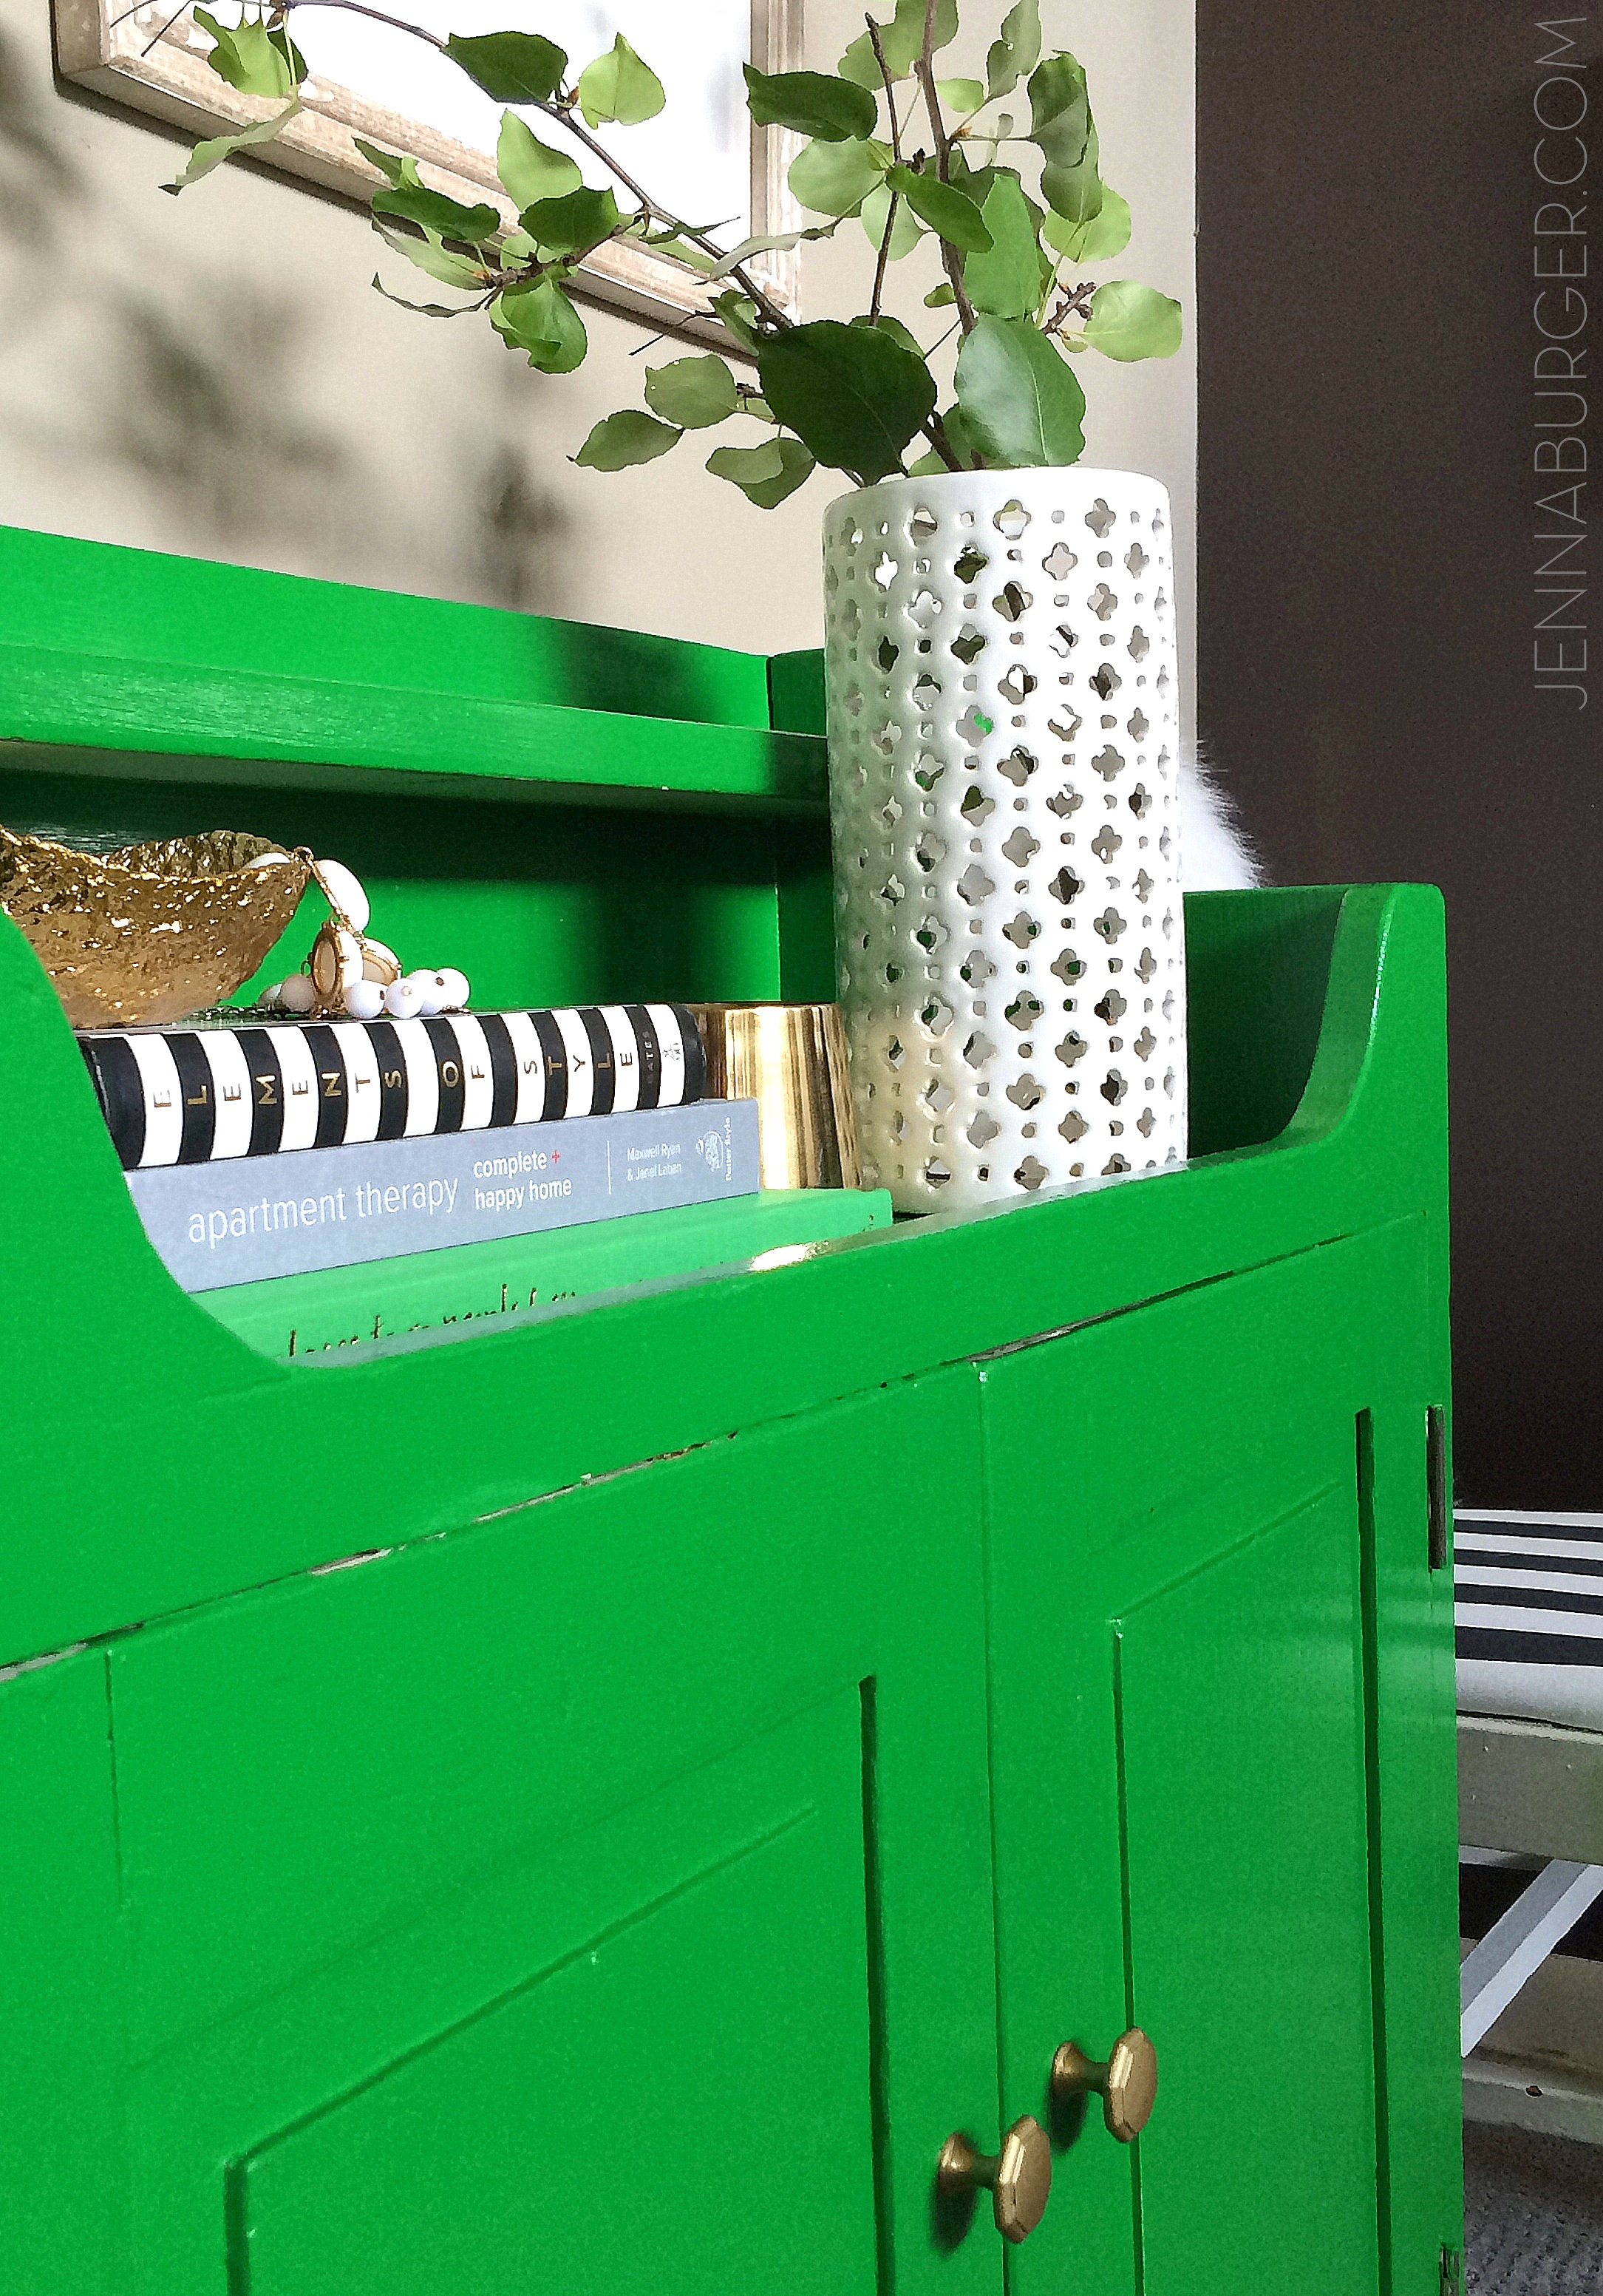
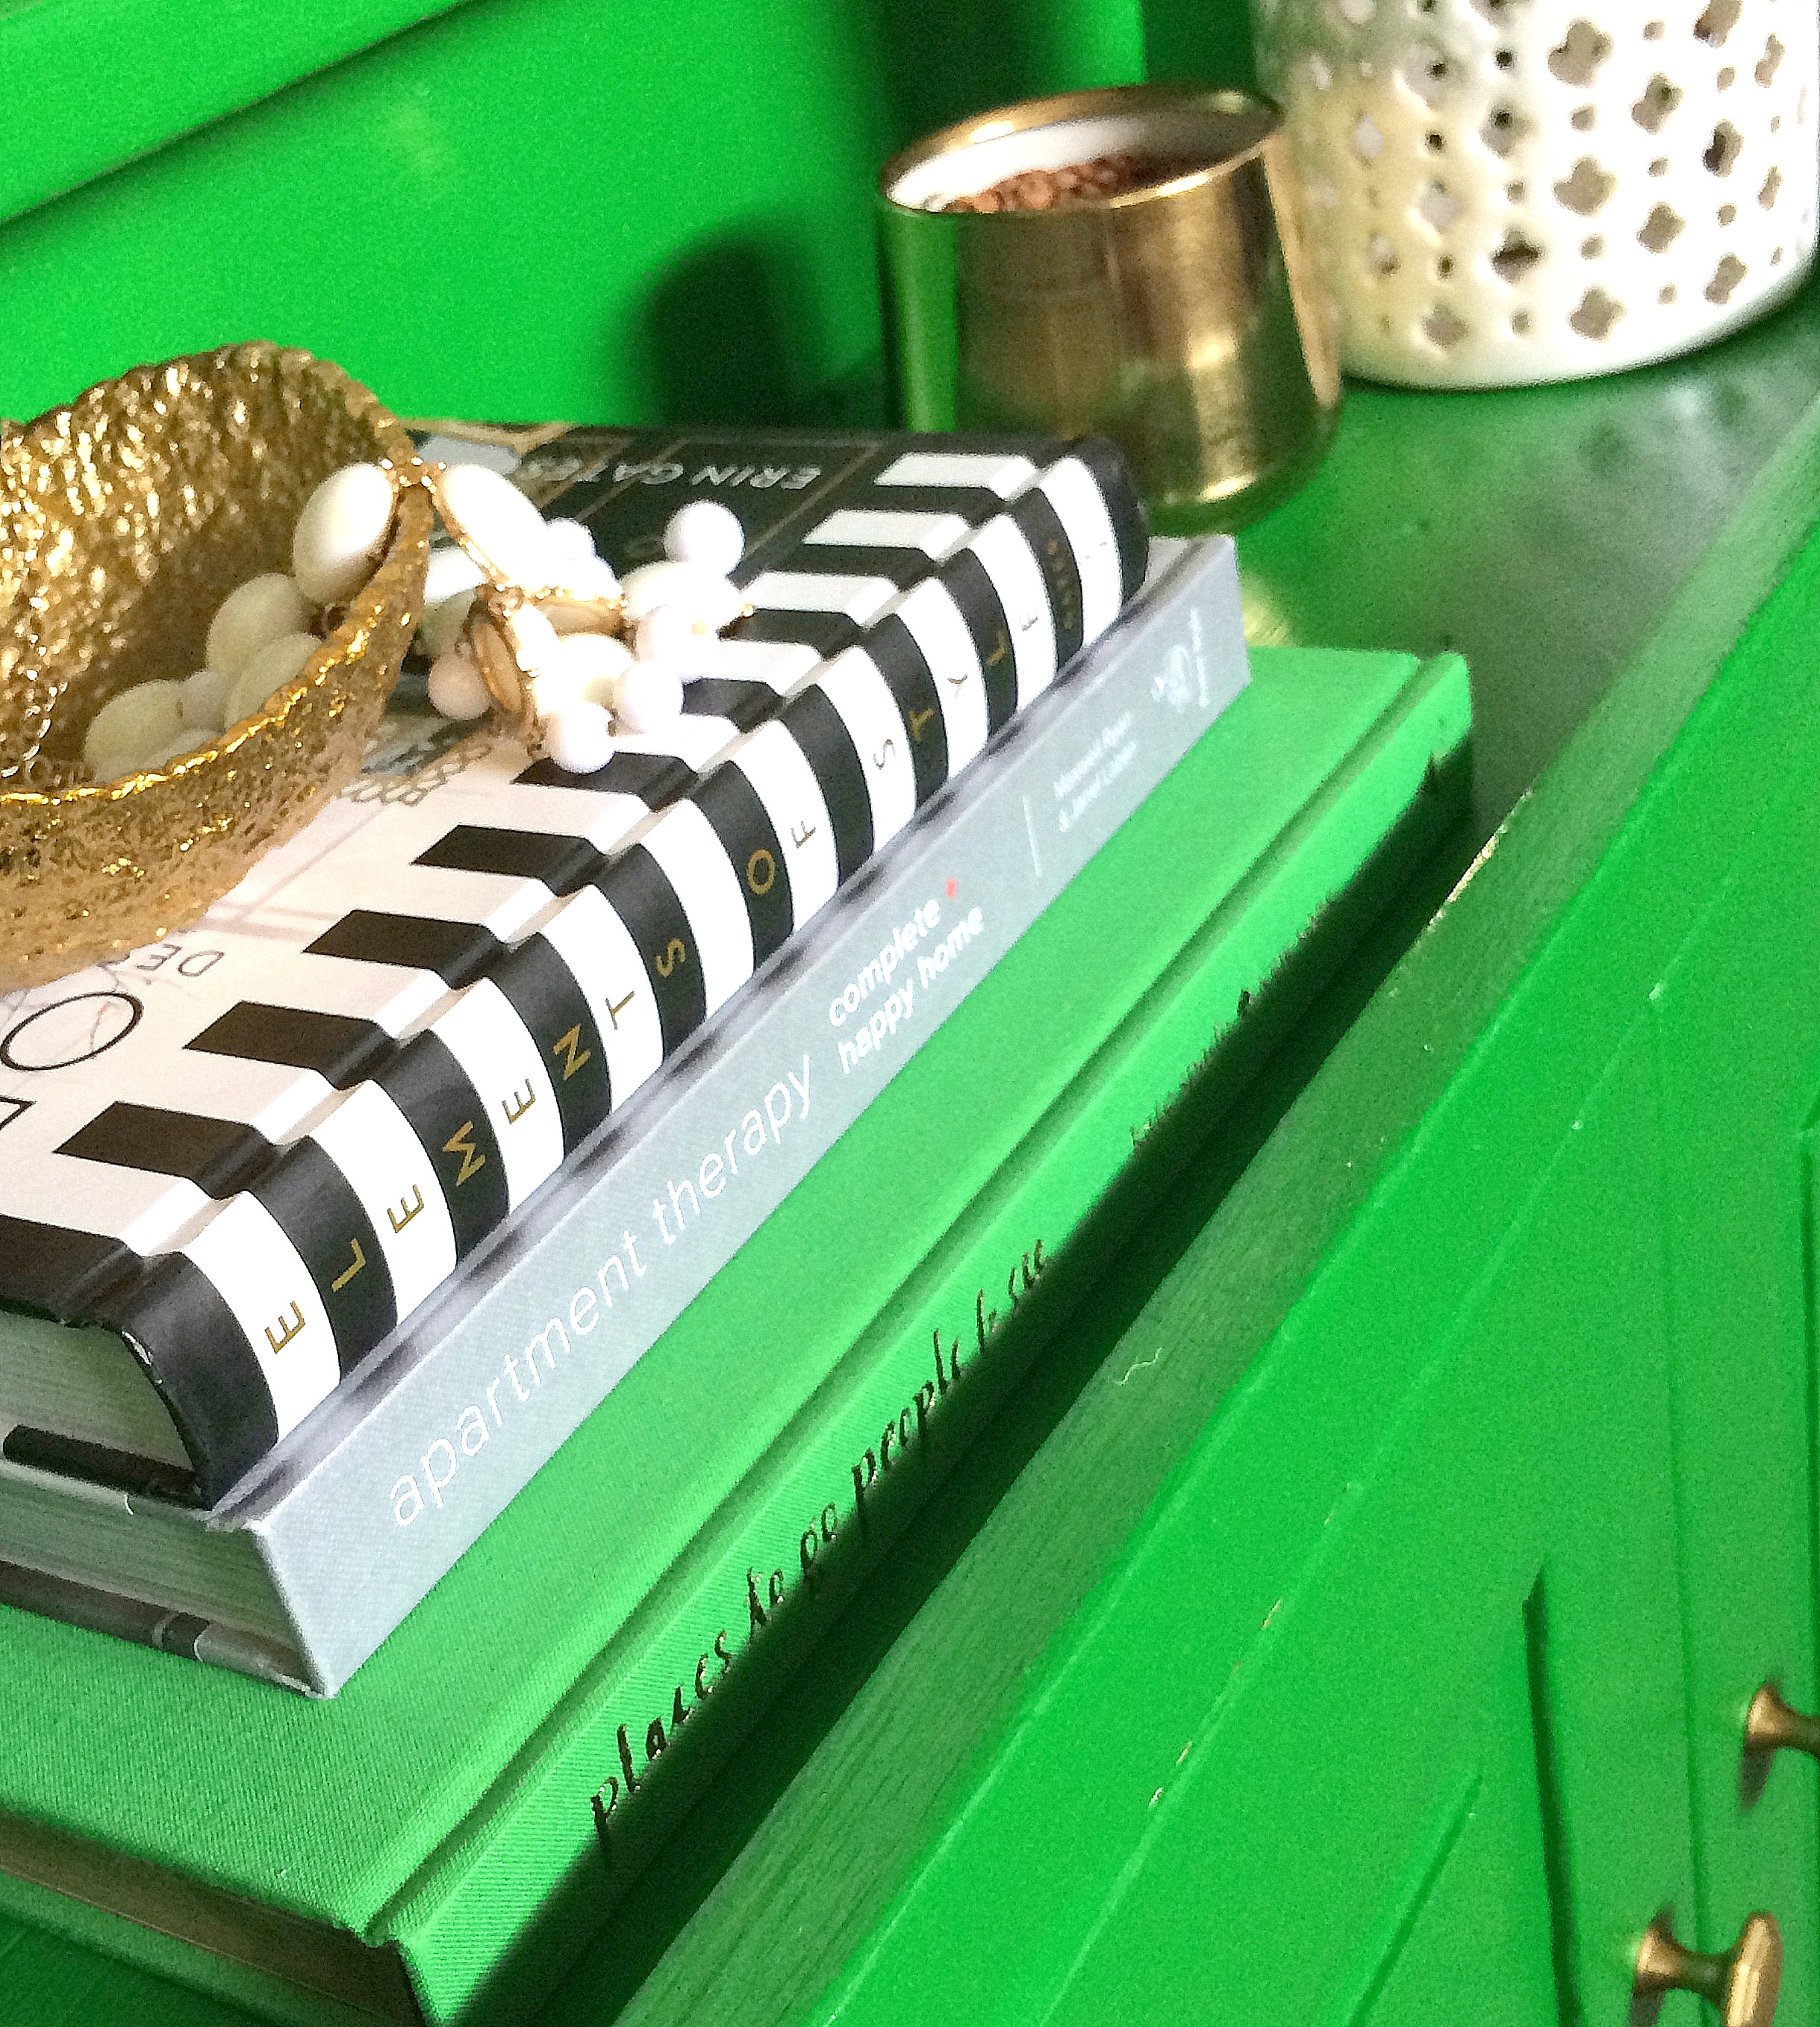
I paired the fiery, robust cabinet against a quiet, neutral wall and styled it with elements that were complimentary.

A few favorite books + accessories that aren’t as intense and loud sit atop the cabinet to balance out it’s boldness.

Furniture Makeover: TUTORIAL ON HOW-TO PAINT FURNITURE; before & after cabinet transformation by www.jennaburger.com

Go big or Go Home!  That is the motto for this cabinet makeover.

One last peek at the before & after…
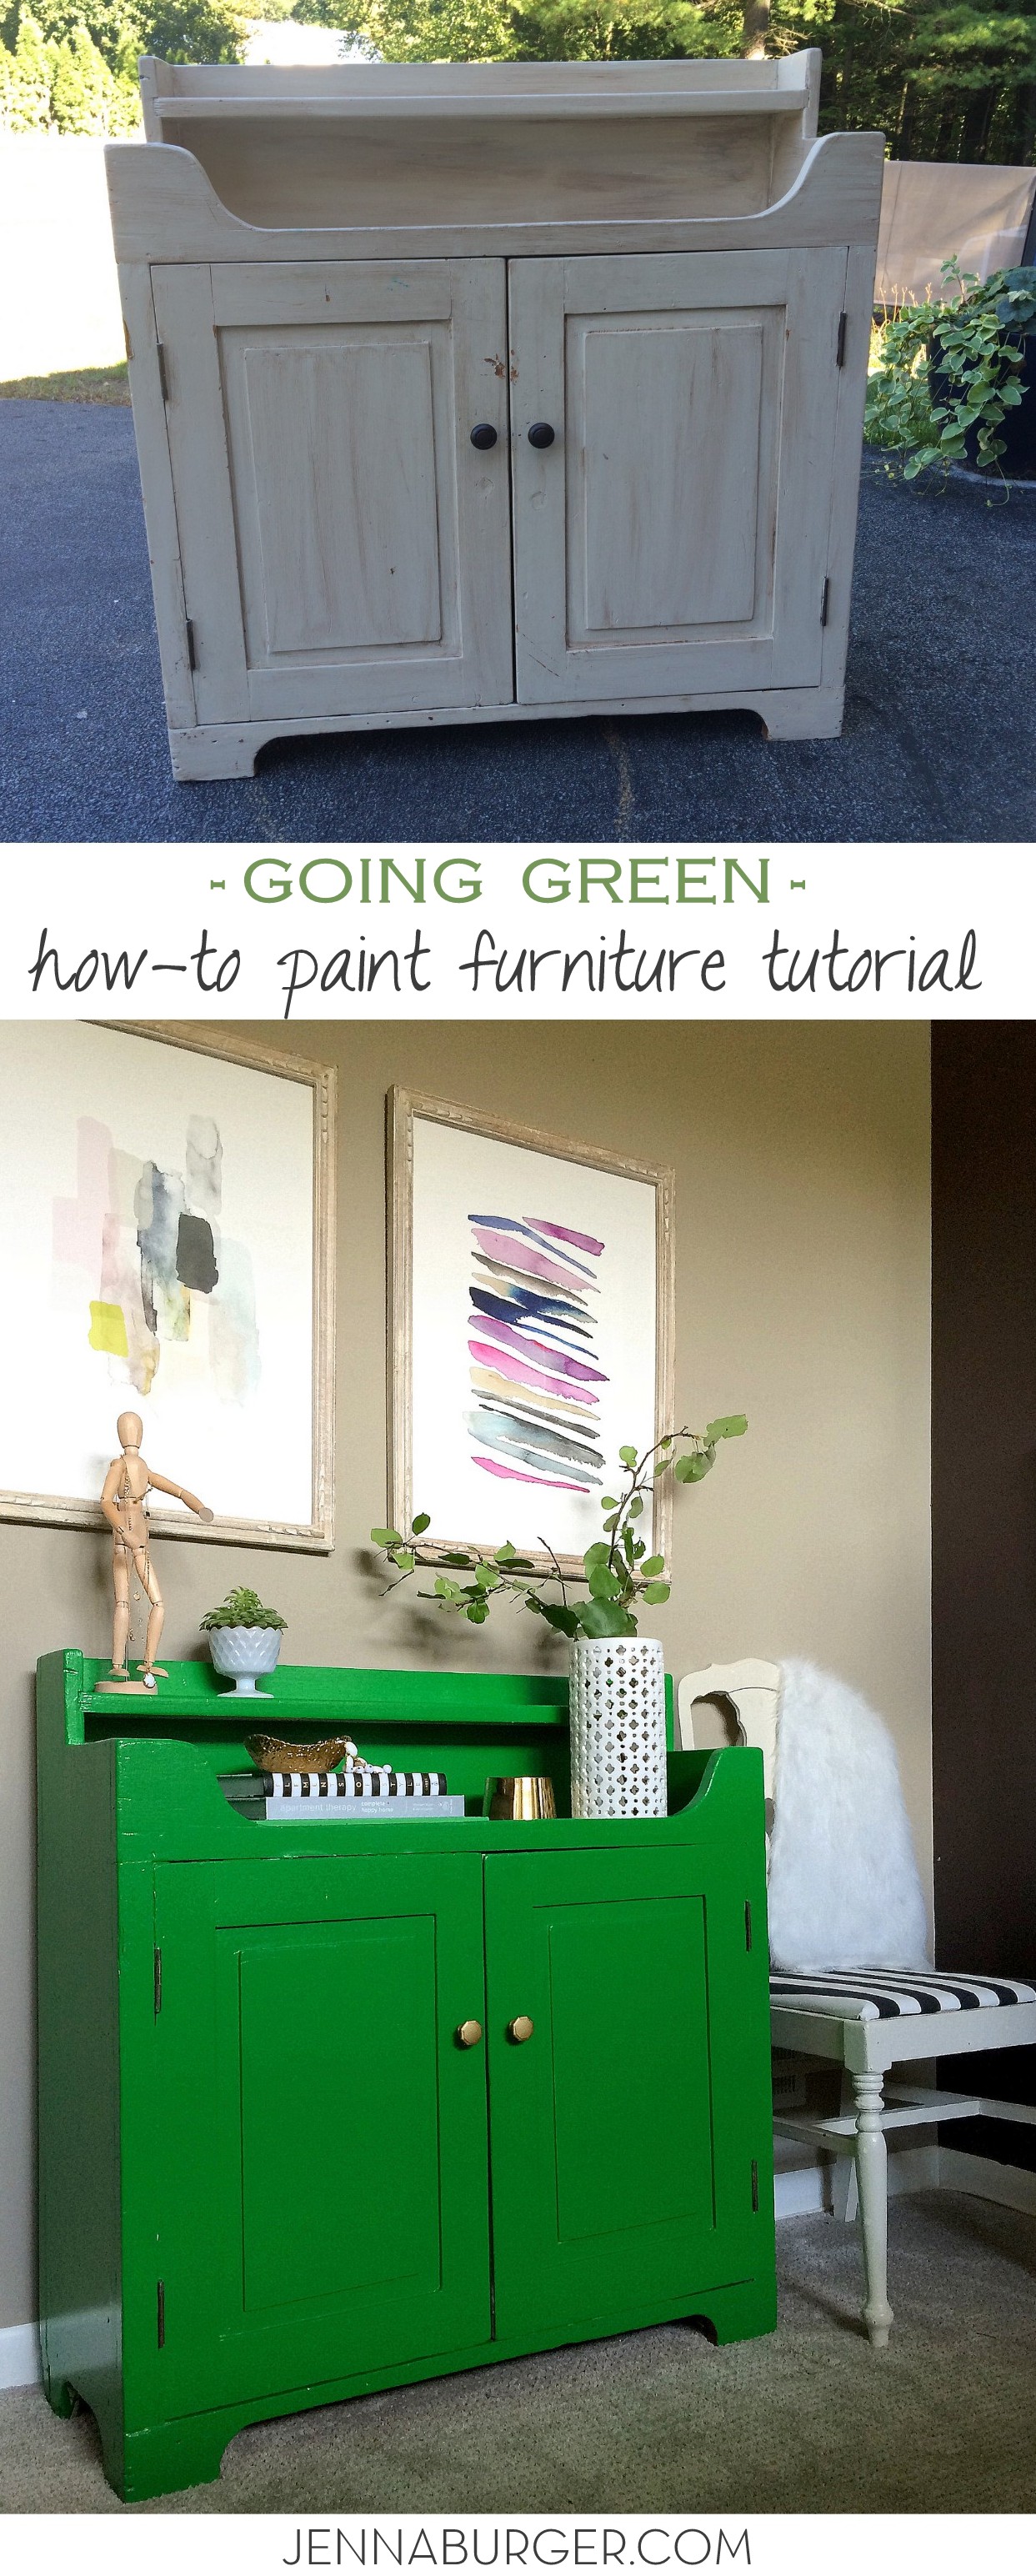
Furniture Makeover: TUTORIAL ON HOW-TO PAINT FURNITURE; before & after cabinet transformation by www.jennaburger.com

What a change!

Thanks for checking out my latest and greatest DIY project.  I’ve got plenty more up my sleeve, so stay tuned.

GLIDDEN is giving away a $50 gift card to Home Depot.  Whether you have a painting project to tackle or a DIY idea that you want complete before the holidays, this is the time to ENTER, WIN, and CHECK it off your to-do list!

TO ENTER, fill out the rafflecopter box below and you’re done.  GOOD LUCK…

a Rafflecopter giveaway
DISCLOSURE: THIS IS A SPONSORED POST WITH GLIDDEN.  ALL WORDS + OPINIONS ARE 100% MY OWN – I TRULY LOVE THIS PRODUCT.  AFFILIATE LINKS ARE ALSO INCLUDED IN THIS POST.

DIY: Cabinet Makeover with Glaze Overlay

Last week I shared my latest DIY: How-to Stencil project where I transformed one of the walls in my foyer.

Did you happen to notice the cabinet in the pictures?

It’s new.  Well not really “new” in the sense of just bought, but new to the place it now sits.  AND it just got a huge makeover!

This cabinet is about 40 years old.  My mom had it for about the first 35 years and I’ve had it for the last 5 (it’s had quite the life so far).  On a random day, a few weeks ago, the cabinet was looking quite sad, so I said, “let’s give you a makeover”!  And I did!!

To step back in time, this is how she looked before ~

Quite sad and in need of some L-O-V-E!

Here’s how I made her over

1. I’m often known to be a bit lazy and skip over steps, but after learning my lessons from other projects, this time I used a PRIMER!!

KILZ Premium Primer, Sealer, Stainblocker was what I turned to for this project.  It blocks heavy stains from showing through the paint (especially since the new color was light).

2. I applied the one coat of Primer using a good quality synthetic brush, then painted the cabinet with an off-white color.

Need help finding the right brush for your paint project?  Check out {this} post.

3. To cover this dark cabinet, I had to used 3 coats.  The 3rd wasn’t really necessary, but I wanted to make sure it was completely sealed and covered!

At this point, I thought I was done.  Just like a woman with a much-needed dye job, I had transformed this old cabinet into a new beauty.  But she was looking a little bland…she really needed highlights.

Yes, that would be the trick to make her fabulous!

After much thought, I decided to use a glaze overlay.  I had never before attempted a glaze, so I really didn’t know what I was doing. I thought I needed a special product for glaze, but I was wrong….

4. Here’s the glaze effect on the right and the plain painted door on the left.

How-to Glaze Furniture

5. Using the brown paint from my fireplace (Benjamin Moore Chocolate), I diluted it with water ~ about 3 parts water to 1 part paint.  Taking a dry brush, I lightly applied the watered down paint onto the cabinet.  (This must be done in SMALL SECTIONS because you need to move quickly).  Then using a paper towel (or rag), I wiped away the paint and what’s left was a lightly covered brown glaze.

* Note: It’s important to wipe the paper towel / rag in one direction (preferably in the direction of the grain).

Here is a closeup of the glazed cabinet~

6. Once the entire piece of furniture is glazed, you may want to go back and add a little more detail at the edges with a smaller paint brush.

With the addition of new hardware, she now sits beautifully in my foyer

Some colorful Spring accessories complete the look

Do you like glaze over a cabinet to give a distressed look?  Have you ever glazed a cabinet before?  If so, what technique did you use?