Tag: christmas decor

Christmas Mantel

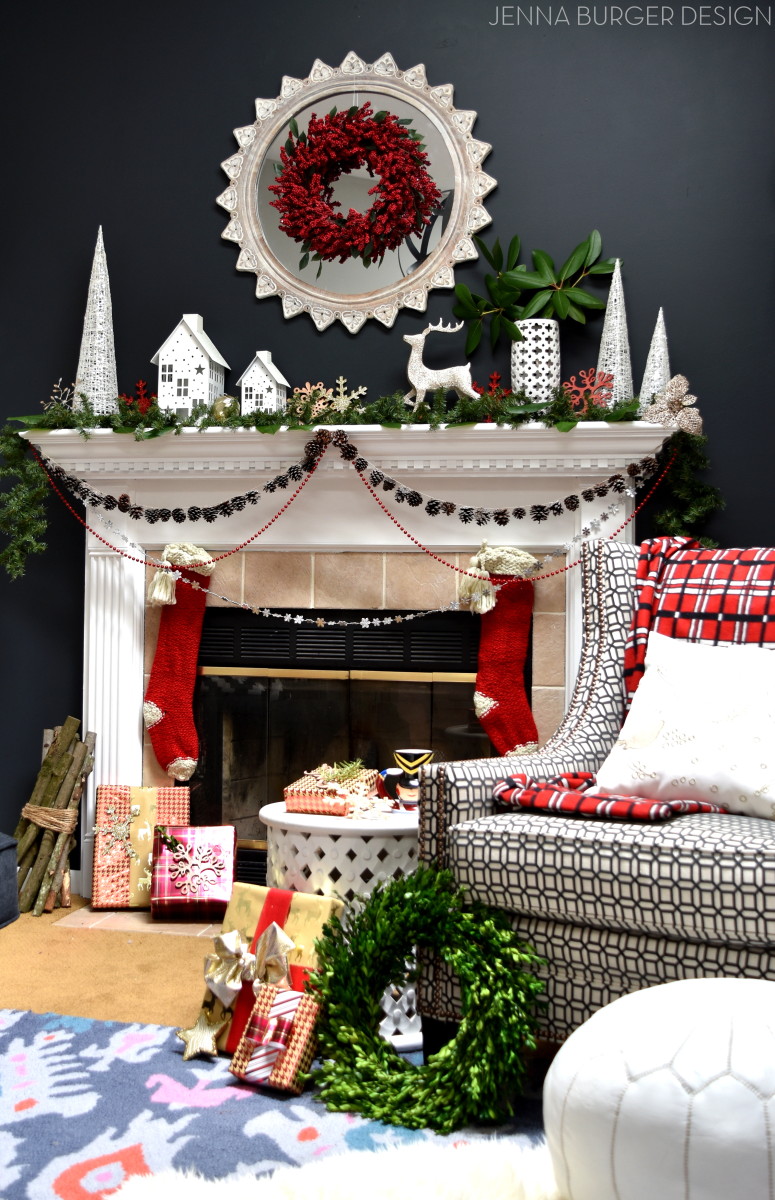
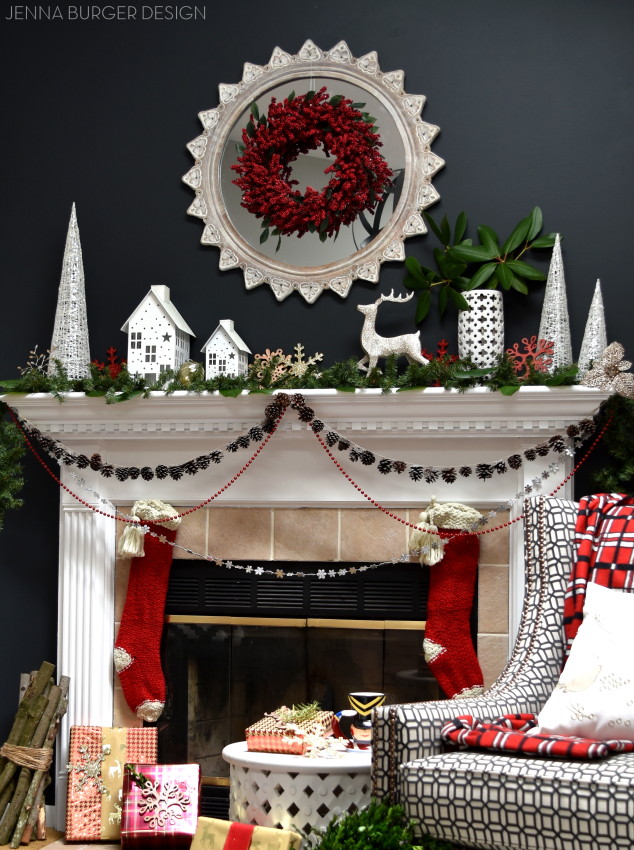
Christmas Mantel filled with old & new. Created by www.jennaburger.com

The Holiday season is underway – yay!

Since Friday – the day after Thanksgiving – we’ve been hustling + bustling indoors and out decorating for Christmas.  This year has been a bit tricky with the kitchen renovation (walls are still being painted & the hardwood floors are still curing), but we are making do with the areas that we can add our festive favorites…

One area of our home that’s been decorated for a few weeks is the mantel.

I got the Christmas bug a few weeks ago after making my way into the Christmas section of Lowe’s and leaving with a handful of new fun finds.  They’re selection of seasonal decor this year is stellar.

I incorporated a lot of new with the old…

Christmas Mantel filled with old & new. Created by www.jennaburger.com

Christmas Mantel filled with old & new. Created by www.jennaburger.com

I had such a fun + relaxing (well kinda in my OCD way) time creating this years Christmas mantel.  It was enjoyable to have a different backdrop to work with since this room, specifically the fireplace wall, got a revamp for burnt orange to black earlier this year >>> check out the living room transformation

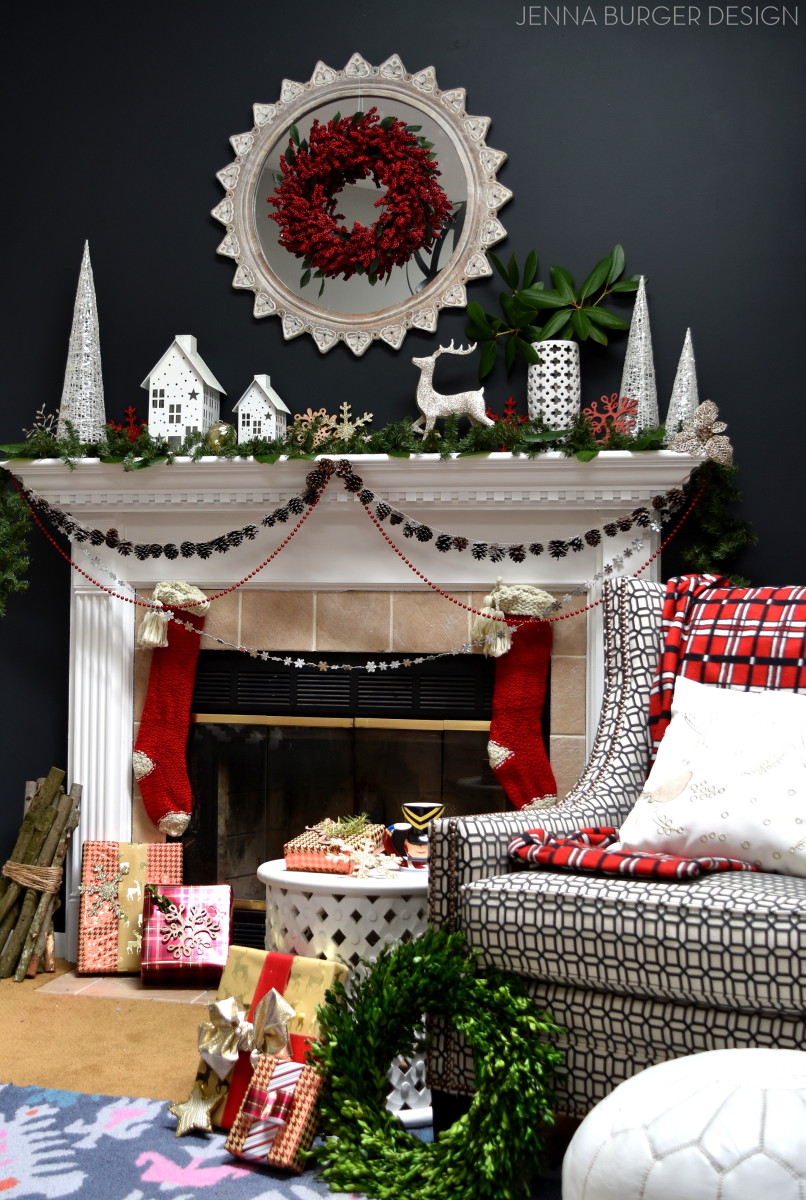
The new black wall – color: Valspar Black Heron – was the perfect backdrop to layering contrast white elements.

Christmas Mantel filled with old & new. Created by www.jennaburger.com

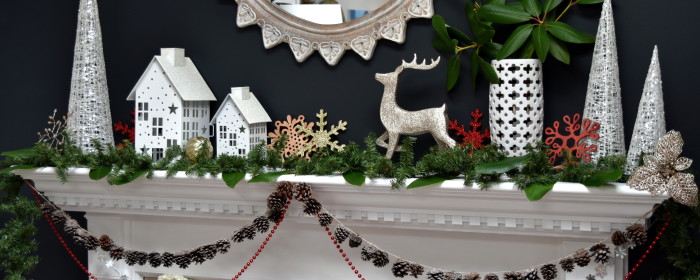
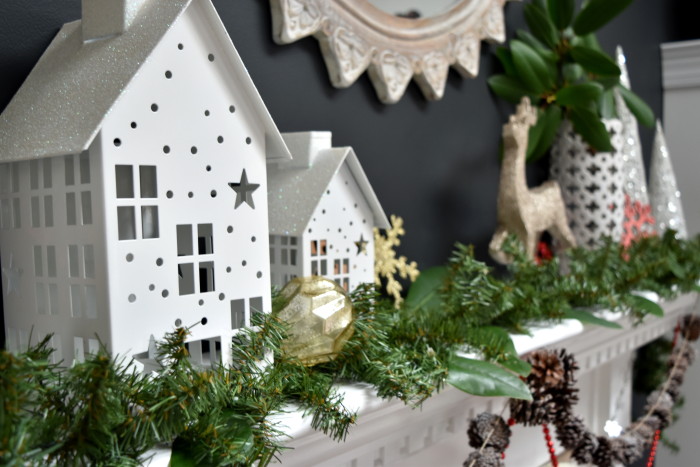
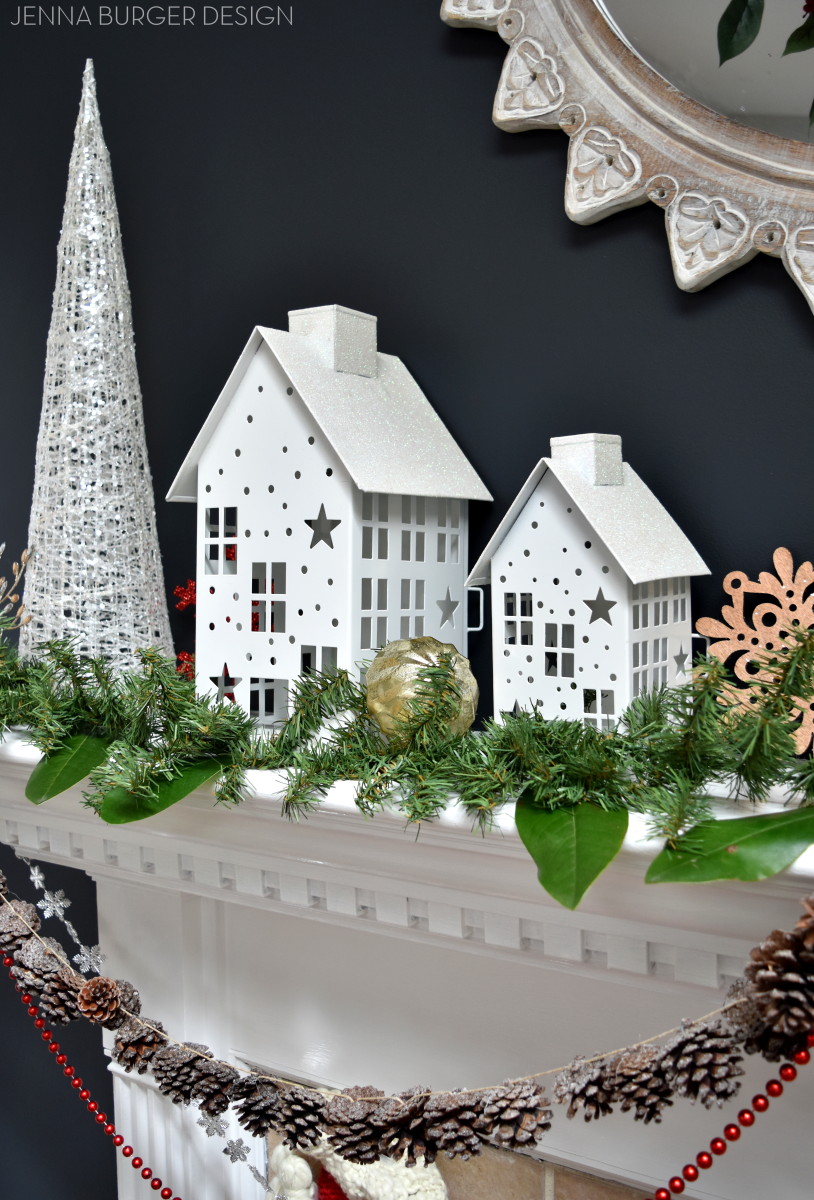
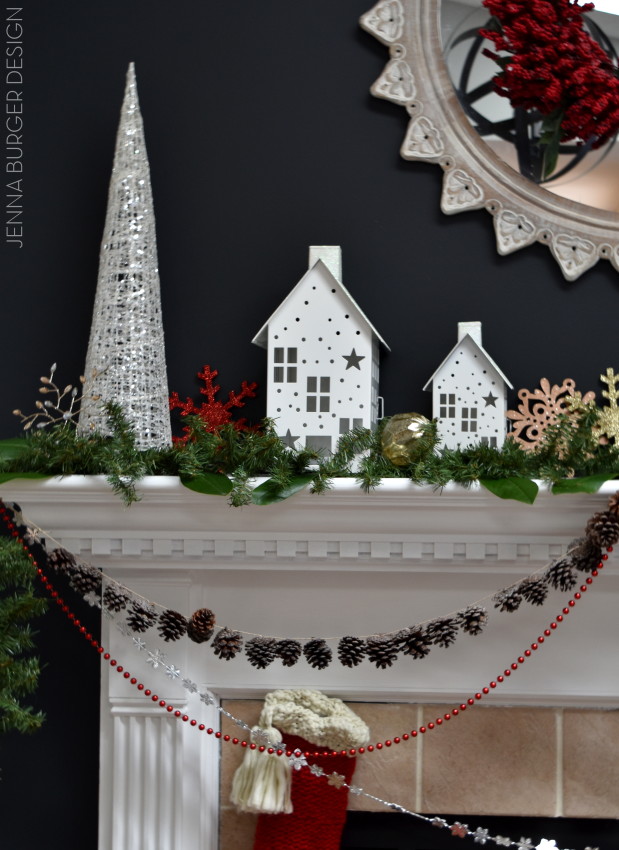
I stumbled upon these adorable white houses – in varying sizes – and couldn’t resist incorporating them in the mantel.  The same houses come in red as well, but I loved the crisp white with glitter roof.

Christmas Mantel filled with old & new. Created by www.jennaburger.com

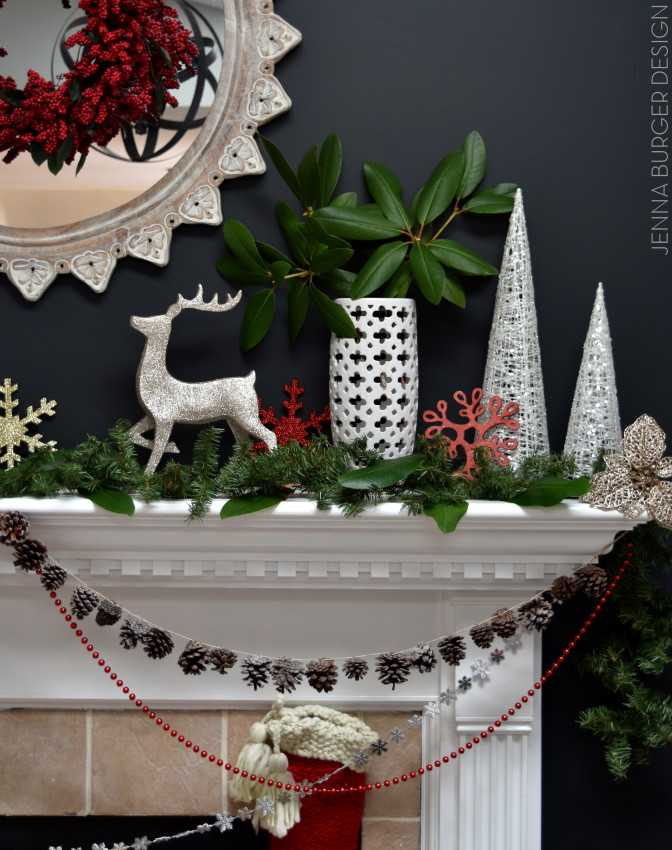
As the base of the mantel, I used a faux greenery garland and added in real cut magnolia leaves that I got from the tree in my yard.

Adding in real leaves amongst the faux, gives such a great look.  It is a nice idea to create a realistic-looking garland without the headache of drying branches + can be used year after year.

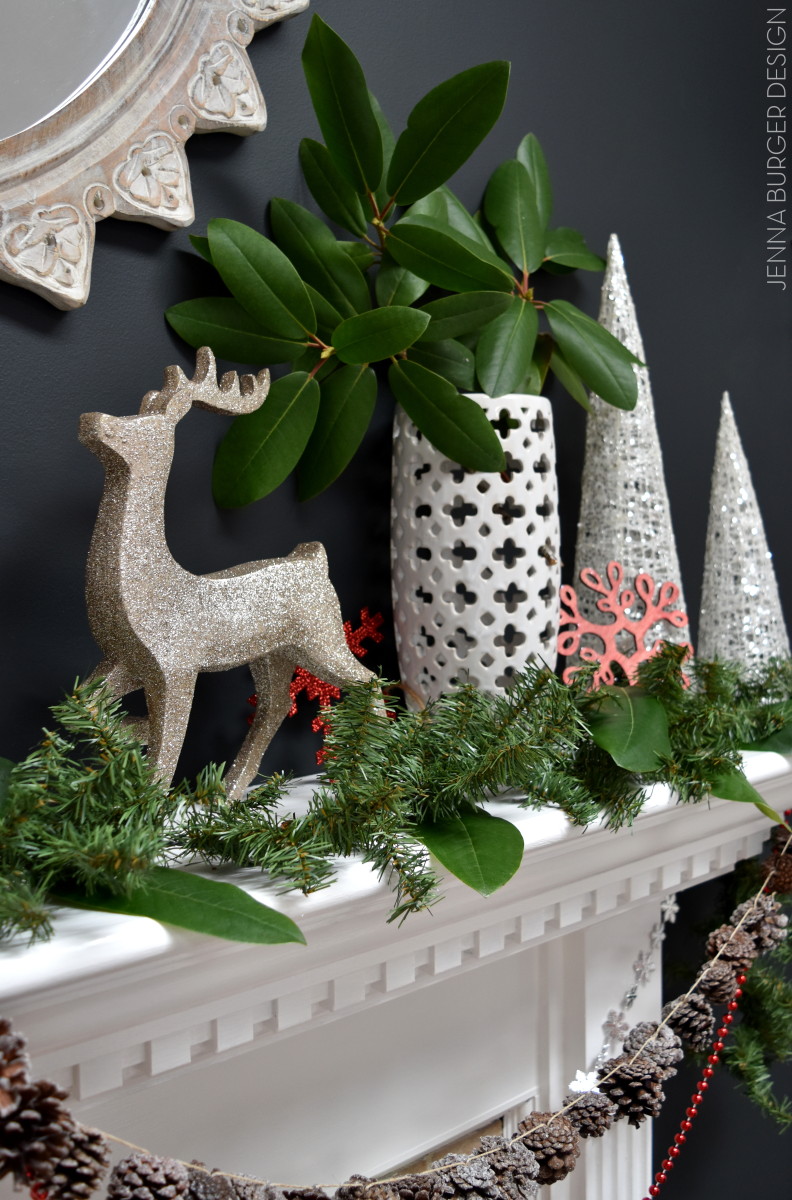
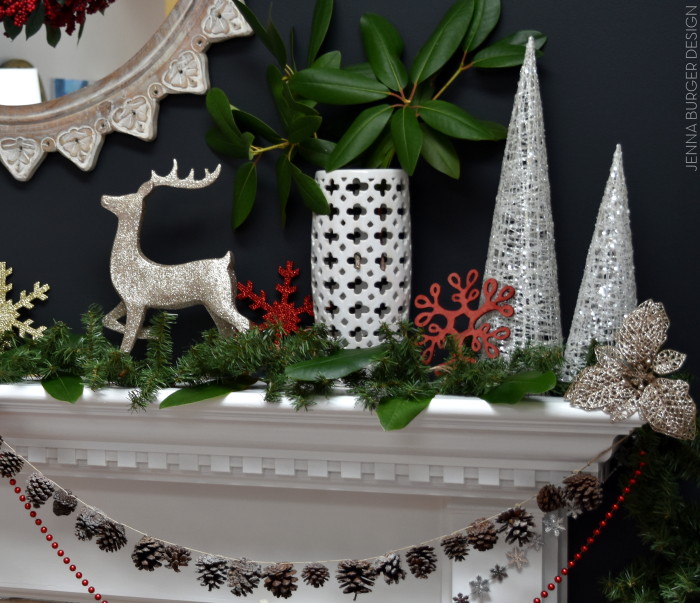
I also added a few magnolia branches to a tall white vase to introduce an organic element + height to the fireplace.

Christmas Mantel filled with old & new. Created by www.jennaburger.com

Christmas Mantel filled with old & new. Created by www.jennaburger.com

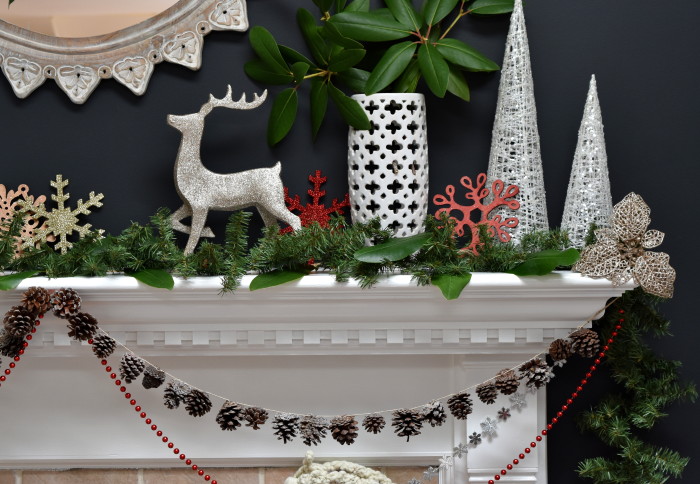
The sparkly reindeer is another new + fun find and if I could put my finger on a ‘theme’ for this years decor, it would be reindeer…

I snagged a few reindeer elements and I just love what they represent… a woodland, outdoorsy, winter feeling.

Christmas Mantel filled with old & new. Created by www.jennaburger.com

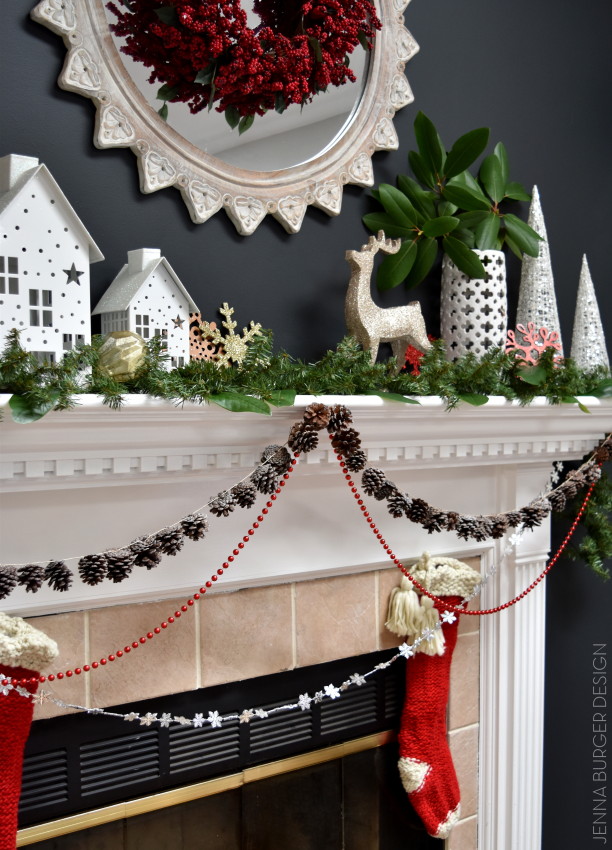
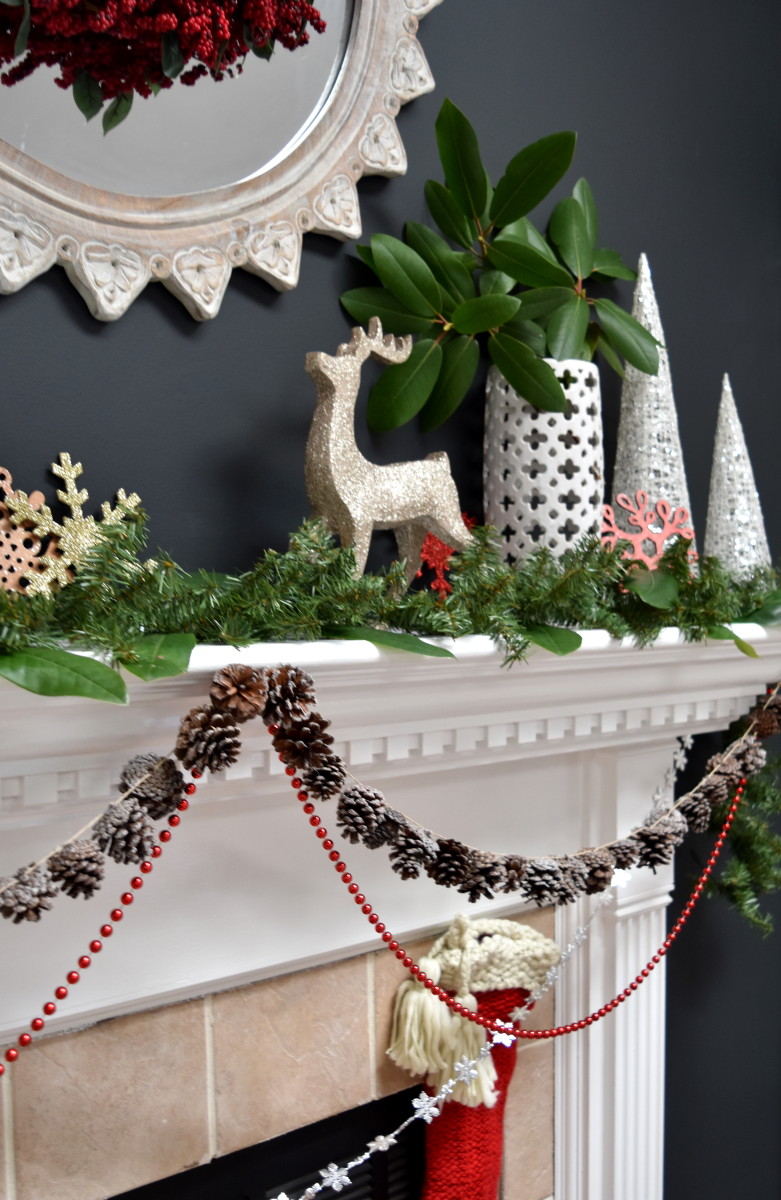
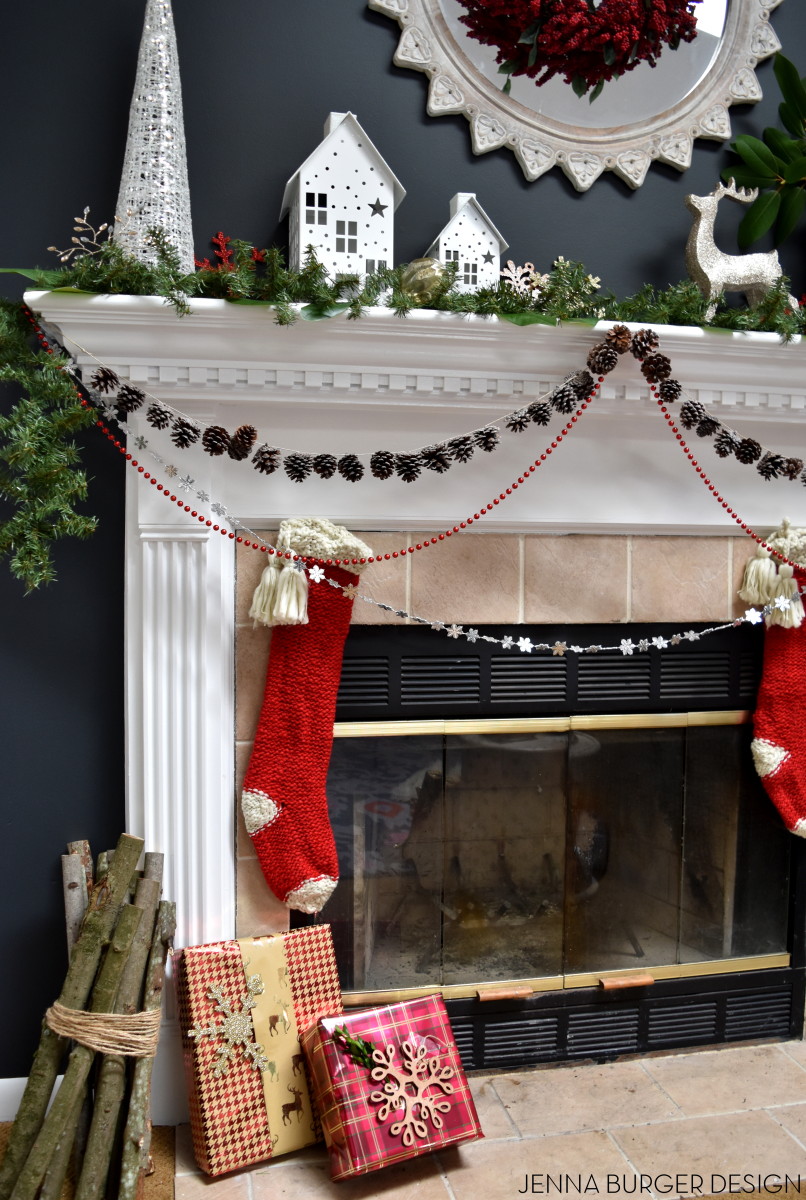
On the face of the fireplace, I draped several strands of differing garland.  I picked up a beautiful pinecone garland – which was a pleasant surprise because I thought they were individual pinecones which I was going to pile in a bowl – and hung it them from end to end on the mantel.

Then using red bead garland – that I got from Dollar General years ago – I hung a longer swag from edge to edge, and finished it with a silver snowflake garland across the front.

Hung by the fireplace with care are adorable knit red + white stockings.  I just love the oversized tassels!

Christmas Mantel filled with old & new. Created by www.jennaburger.com

Christmas Mantel filled with old & new. Created by www.jennaburger.com

Christmas Mantel filled with old & new. Created by www.jennaburger.com

Recognize the mirror?  I used it for my Thanksgiving table, then decided to use it as the focal point above the fireplace and mounted a beautiful berry wreath on the face.

Giving height and grounding each end, I added in my one of my seasonal favorites, the glitter cone-shaped trees in silver + white (check out similar ones here).  I have gold too and they’ll be someplace else in the room.

Christmas Mantel filled with old & new. Created by www.jennaburger.com

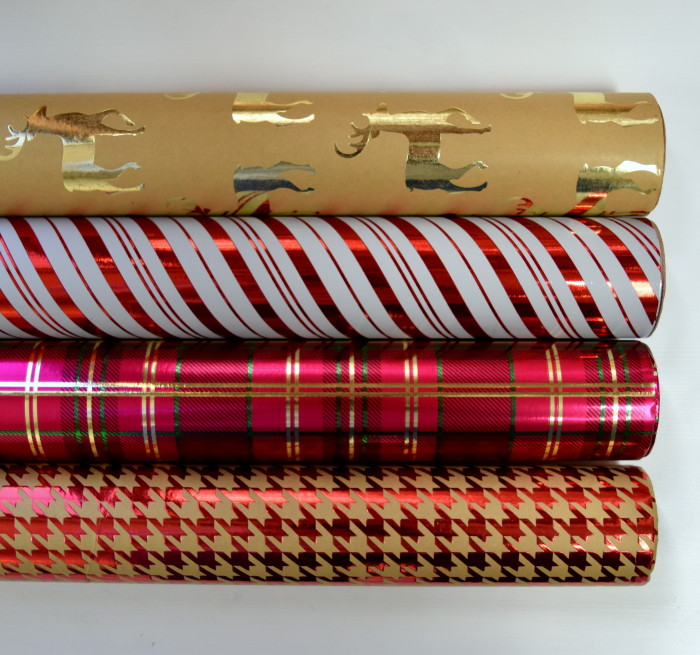
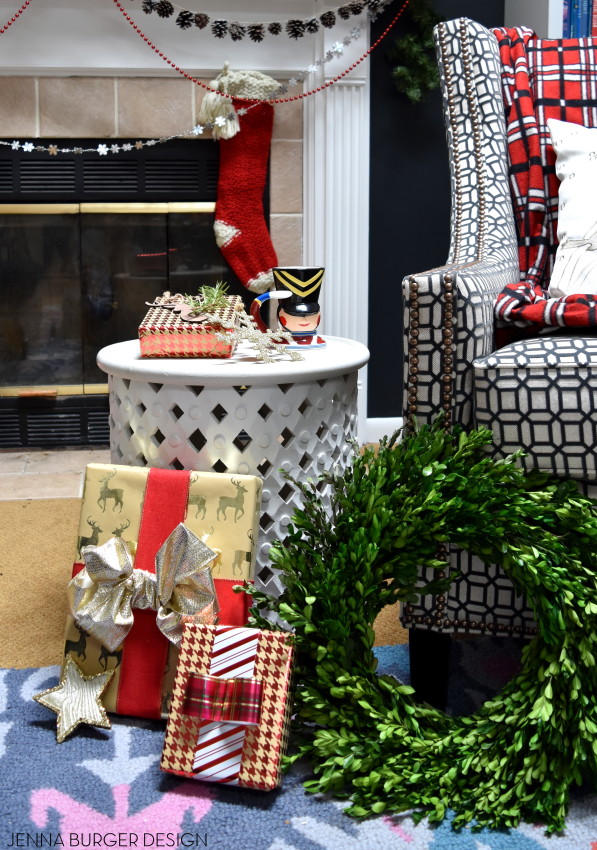
My reindeer ‘theme’ also continued with the wrapping paper I chose.  Check out this paper with the reindeer silhouette – I couldn’t resist.  I loved pairing it with the houndstooth + striped paper.

Christmas Mantel filled with old & new. Created by www.jennaburger.com

Christmas Mantel filled with old & new. Created by www.jennaburger.com

Throughout, I layered in new + old ornaments that added sparkle + shine.  These wood laser-cute ornaments were a surprising find this year and I grabbed a similar wood reindeer ornament version as well.

Christmas Mantel filled with old & new. Created by www.jennaburger.com

I am so happy with how this years Christmas mantel came out.  I had no real plan when I started decorating, but as usual when the everyday decor came down and I was left with a blank canvas, the ideas started to flow.

With some changes + tweaks, the result is pretty fantastically festive…

Christmas Mantel filled with old & new. Created by www.jennaburger.com

I can’t let you go without sharing that the annual Holiday Housewalk hosted by Jennifer Rizzo begins today!  This is the 3rd year that my home will be on the tour along with about 30 others.  You will NOT WANT TO MISS IT.  My home is coming up later in the week, so I hope you will stop back.

Holiday Housewalk hotsed by Jennifer Rizzo

Have a blessed Christmas season and thanks for checking out my mantel.

DISCLOSURE: THIS POST IS A COLLABORATION WITH LOWES, BUT ALL OPINIONS ARE 100% MY OWN.
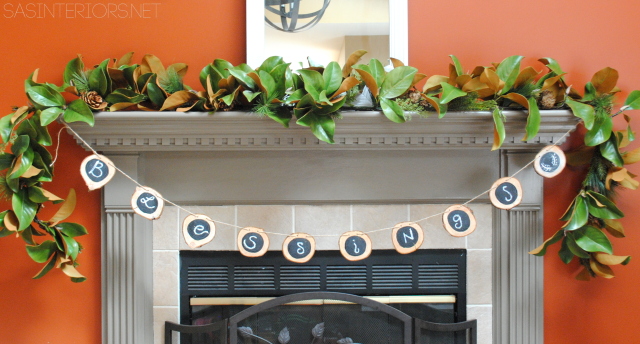
Chalkboard Wood Garland

Can you believe it’s November?  I’m breaking away from the bathroom for a bit (the remodel has taken over my life) to start thinking about this years seasonal decor.
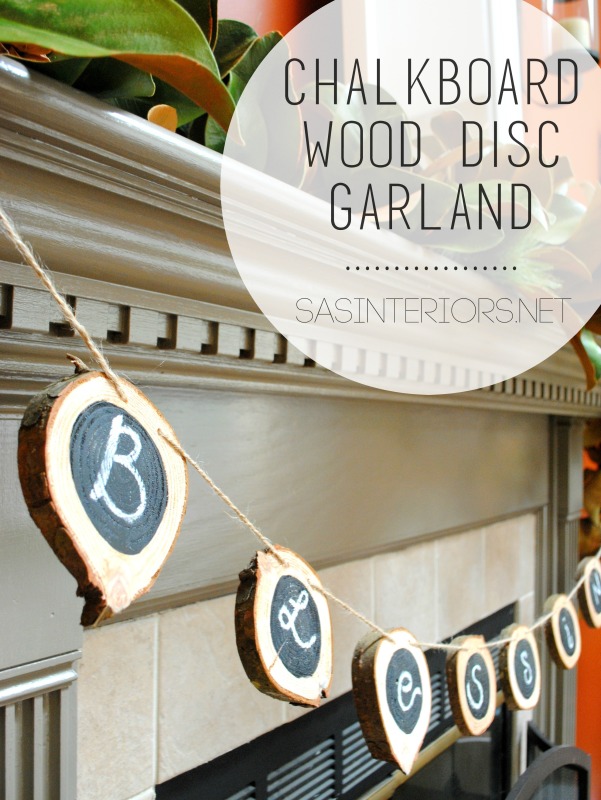
Every year, we enjoy displaying our Christmas favorites, but at the same time we like to introduce new elements & of course, make some fun festive creations (like last years pallet Christmas Countdown).  Even though we typically start the process of unpacking the holiday boxes before Thanksgiving arrives, we certainly don’t overlook the beautiful Holiday of giving.  For that tricky time when we’re transitioning from one holiday to the next I have created this pretty & nature-inspired Chalkboard Wood Garland.

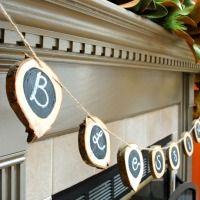
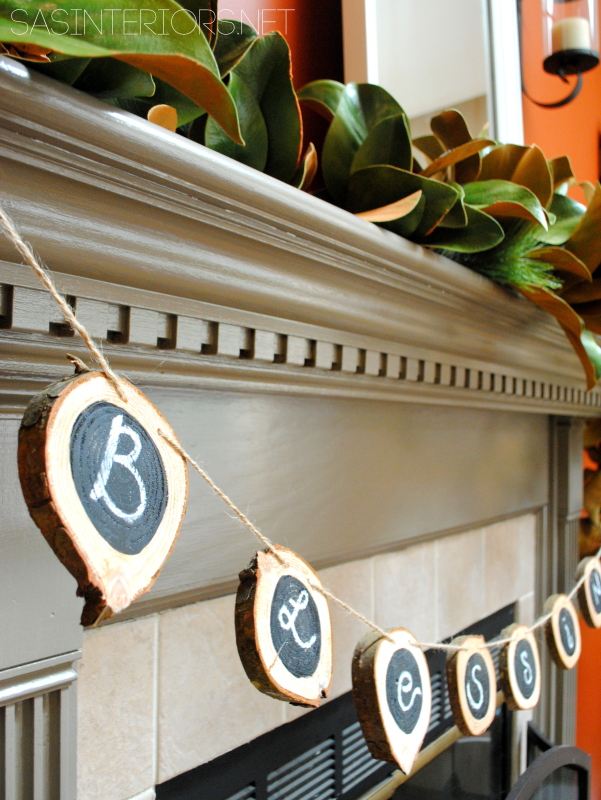
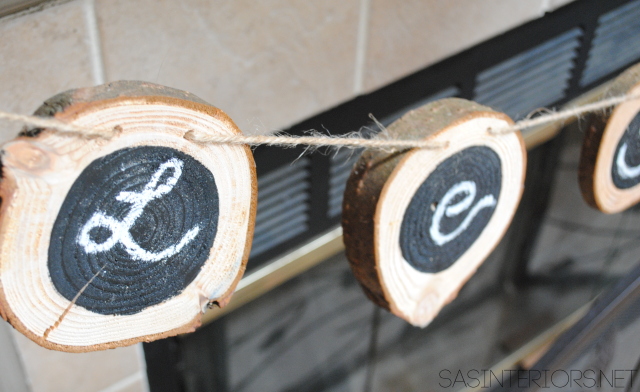
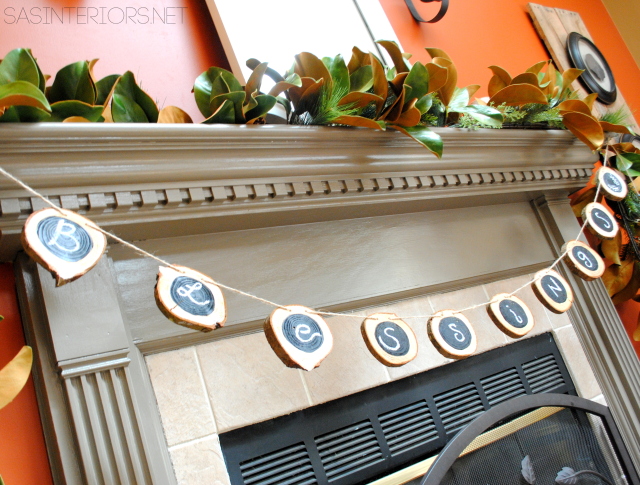
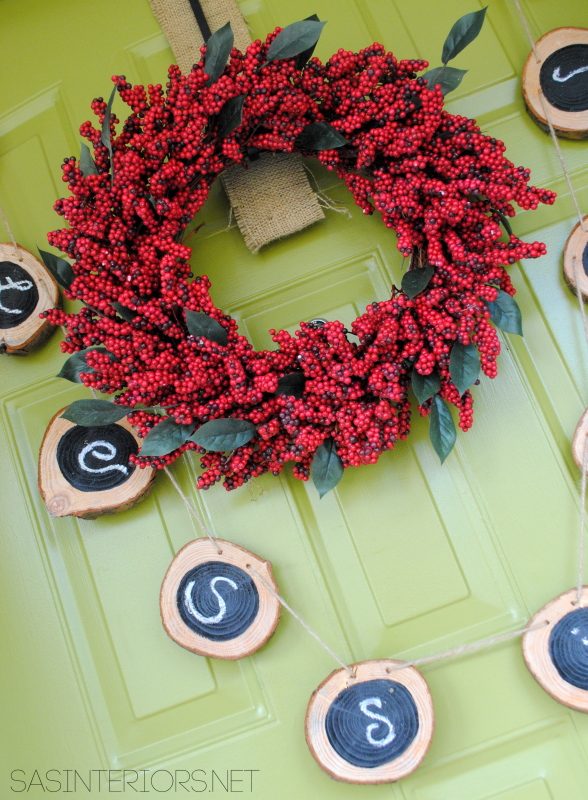
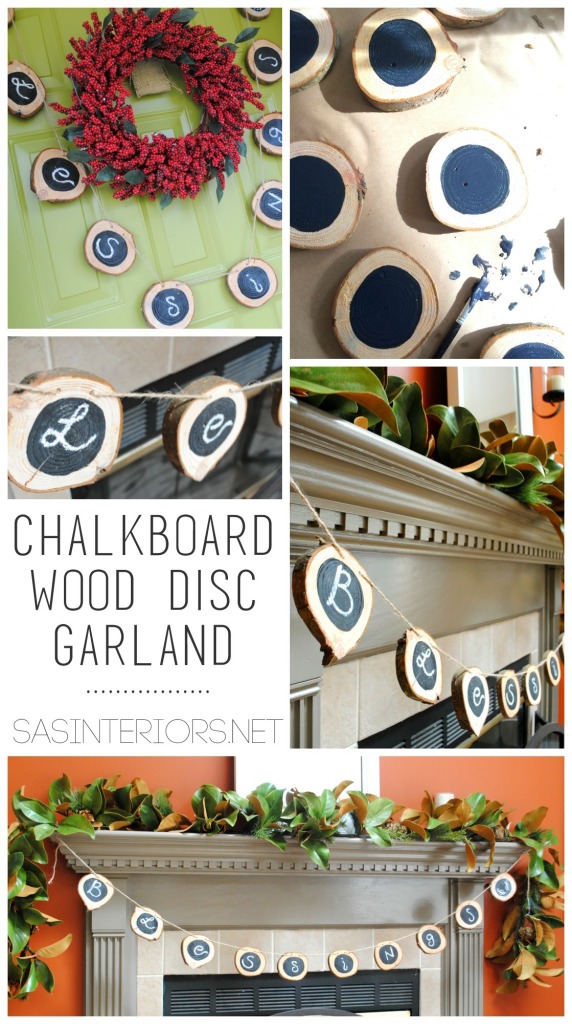
DIY: Wood Disc Garland with Chalkboard center - perfect to hang from the mantel, on the front door, or on any wall! Good for the holidays or any time of year.

As the Holiday prep begins, I wanted to make something that would give our family a little reminder to slow down (especially this time of year) & to truly enjoy the moment when everything around us is hustling & bustling.

For now, I thought the word blessings really sums up how we should be feeling and to be thankful for all we have – this time of year and always!   This is why the best part of the creation was the chalkboard layer – anything can be added and just as easily erased.

How To Make Wood Garland

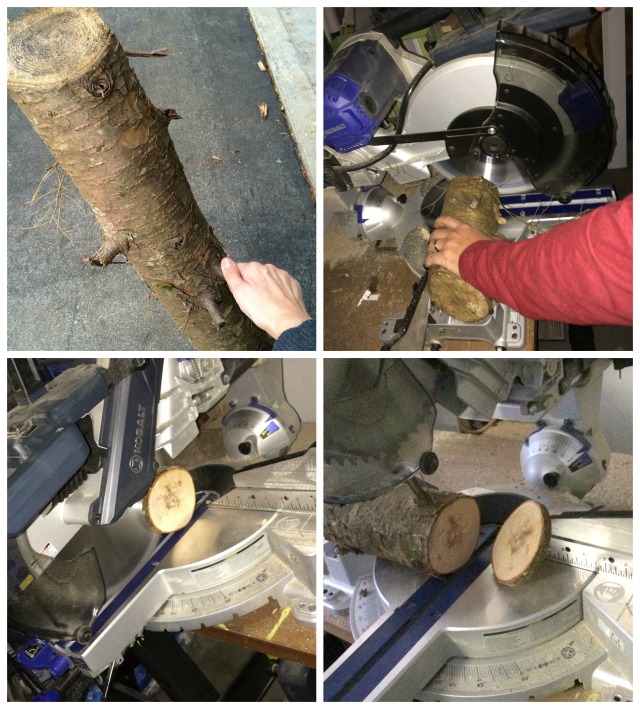
To make this wood disc garland, I headed straight to my backyard to grab a big ole’ log.  I actually first sent the mister on the hunt and he returned with a fallen branch about 1″ round.  That wasn’t going to do, so I threw on my boots and headed for the woods.  I returned with a log about 3.5 – 4″ round.  He was skeptical we could cut it, but I put our circular saw to the test and it cut like butter.

We created 10 discs about 1″ thick.  More or less discs can be cut depending on the word(s) you want to spell out.  I thought 10 would be ideal and if one or more discs aren’t used for letters, a pretty picture can be added instead.

DIY: Wood Disc Garland with Chalkboard center - perfect to hang from the mantel, on the front door, or on any wall! Good for the holidays or any time of year.

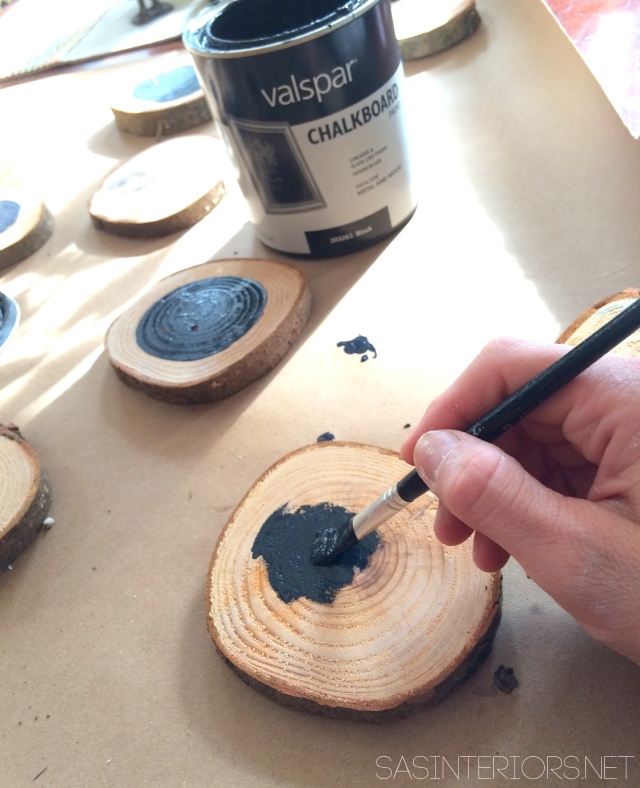
Once all the discs were cut, I took my chalkboard paint from Lowe’s (left over from the chalkboard wall)  and freehand painted a circle on each disc.

DIY: Wood Disc Garland with Chalkboard center - perfect to hang from the mantel, on the front door, or on any wall! Good for the holidays or any time of year.

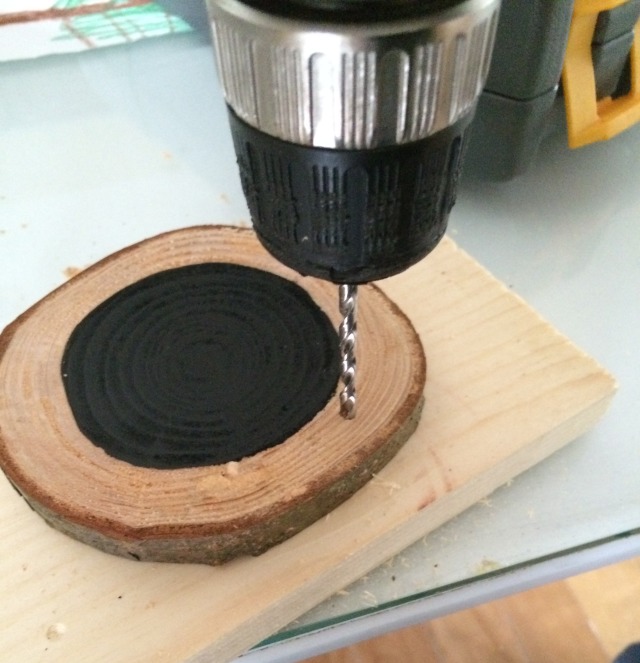
After they dried, which took about 2 hours, I drilled 2 holes about 1″ apart on the wood section of the disc.  These holes are for the twine to thread through in the next step.

DIY: Wood Disc Garland with Chalkboard center - perfect to hang from the mantel, on the front door, or on any wall! Good for the holidays or any time of year.

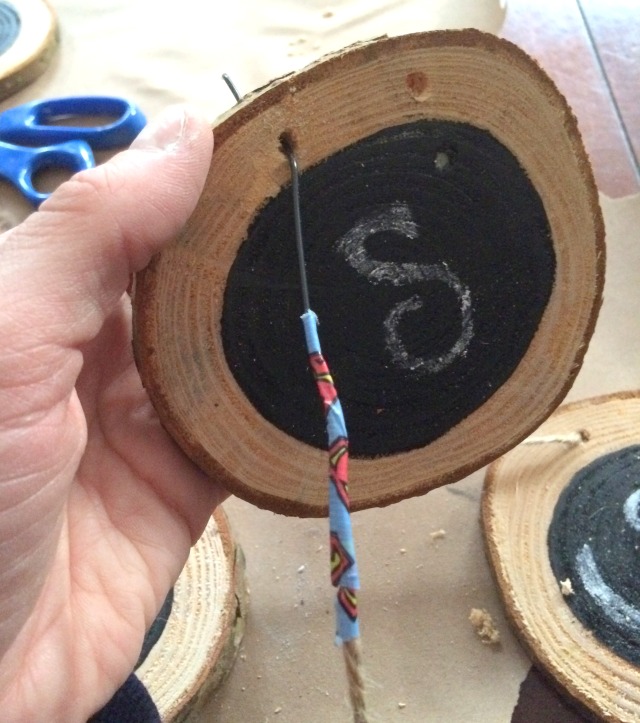
Then I threaded the twine through.  Twine seemed like the right material since it’s a natural feeling and looks rugged like the wood.  Though any type of string or ribbon could be used, it just depends on the look you want to achieve.

Since the drilled holes were kind of small, I attached an unfolded paperclip to the end of the twine and wrapped it with duct tape (superman duct tape to be exact, lol.  But any tape will do the trick).

DIY: Wood Disc Garland with Chalkboard center - perfect to hang from the mantel, on the front door, or on any wall! Good for the holidays or any time of year.

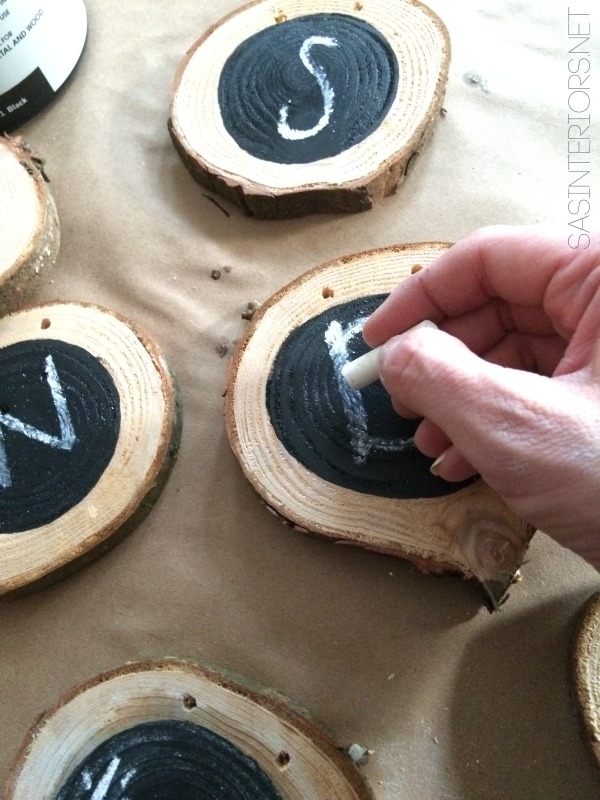
I added my letters for the word blessings.  I didn’t use any fancy fonts, just what came to mind…

DIY: Wood Disc Garland with Chalkboard center - perfect to hang from the mantel, on the front door, or on any wall! Good for the holidays or any time of year.

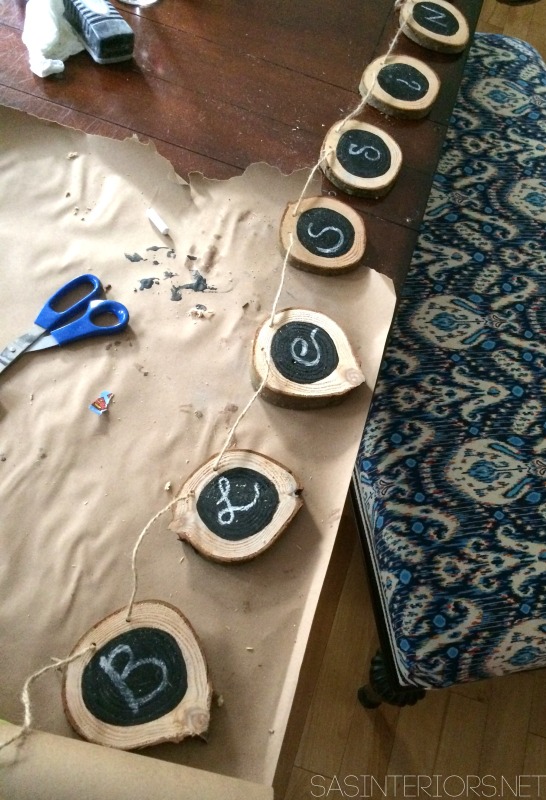
And voila… a beautiful festive garland was created.

DIY: Wood Disc Garland with Chalkboard center - perfect to hang from the mantel, on the front door, or on any wall! Good for the holidays or any time of year.

Perfect for the mantel, the door, or any wall in the home, this new wood garland can really be used all year round.

DIY: Wood Disc Garland with Chalkboard center - perfect to hang from the mantel, on the front door, or on any wall! Good for the holidays or any time of year.

DIY: Wood Disc Garland with Chalkboard center - perfect to hang from the mantel, on the front door, or on any wall! Good for the holidays or any time of year.

DIY: Wood Disc Garland with Chalkboard center - perfect to hang from the mantel, on the front door, or on any wall! Good for the holidays or any time of year.

DIY: Wood Disc Garland with Chalkboard center - perfect to hang from the mantel, on the front door, or on any wall! Good for the holidays or any time of year.

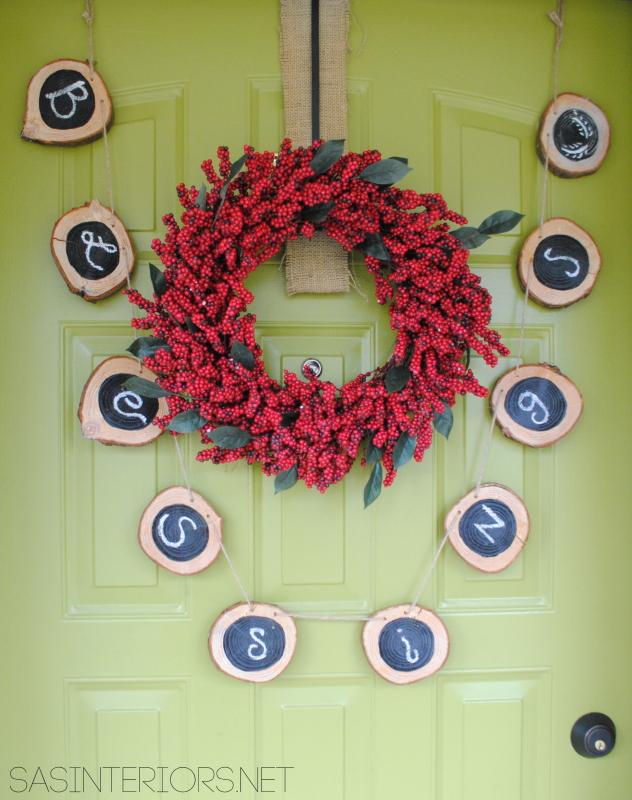
I also tried it on the front door along with a pretty red wreath…

DIY: Wood Disc Garland with Chalkboard center - perfect to hang from the mantel, on the front door, or on any wall! Good for the holidays or any time of year.

Something unique, right?!

DIY: Wood Disc Garland with Chalkboard center - perfect to hang from the mantel, on the front door, or on any wall! Good for the holidays or any time of year.

DIY: Wood Disc Garland with Chalkboard center - perfect to hang from the mantel, on the front door, or on any wall! Good for the holidays or any time of year.

This creation has been such a great break away from the bathroom renovation.  Even though I love diving into a big DIY project, sometimes simple + quick is much more gratifying.  Now I feel inspired & ready for the Holidays.

Have you started thinking about your seasonal & holiday decor?

When do you start decorating?

Lowes Creative Ideas Team Member

To gather even more unique, fun, and creative ideas for your indoor and outdoor Winter spaces, I would definitely suggest downloading the Lowe’s Creative Ideas app on your iphone and/or ipad.  I’m always checking out the FREE app for great seasonal + do-it-yourself inspiration.

 Also consider following Lowe’s on Facebook, Pinterest, and Instagram as well.

Disclosure: I am part of the Lowe’s Creative Team and was provided with a Lowe’s gift card to purchase items for my project.  I was also compensated for my time to use the products.  No one told me what to create, what to buy, how to use the product, or what to write.  All opinions are 100% mine!

DIY: Personalized Word Christmas Ornament

One week to go and Christmas will be here. Can you believe it?

As you know, my home has been decorated for quite a few weeks, but I have still been working on new holiday projects here and there to add to this years decor.   Once the house is ‘set’, I still enjoy adding new and unique touches for the season.

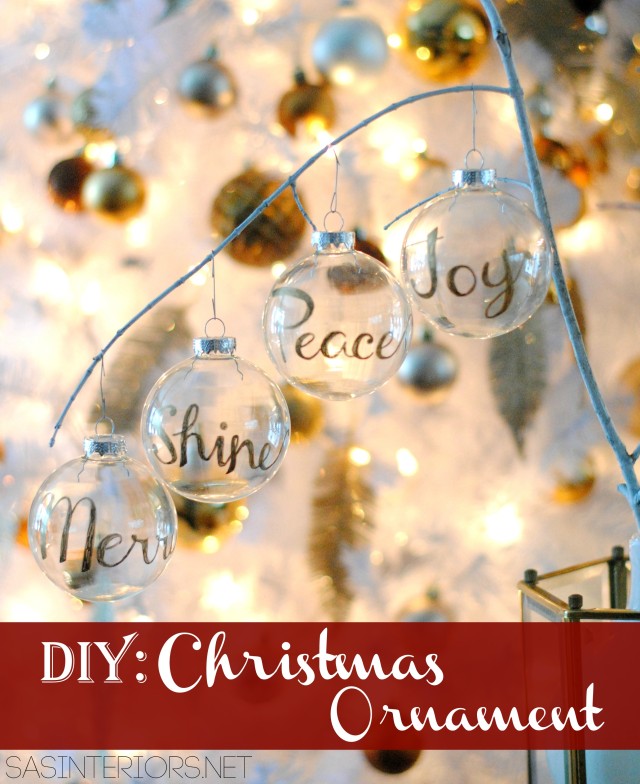
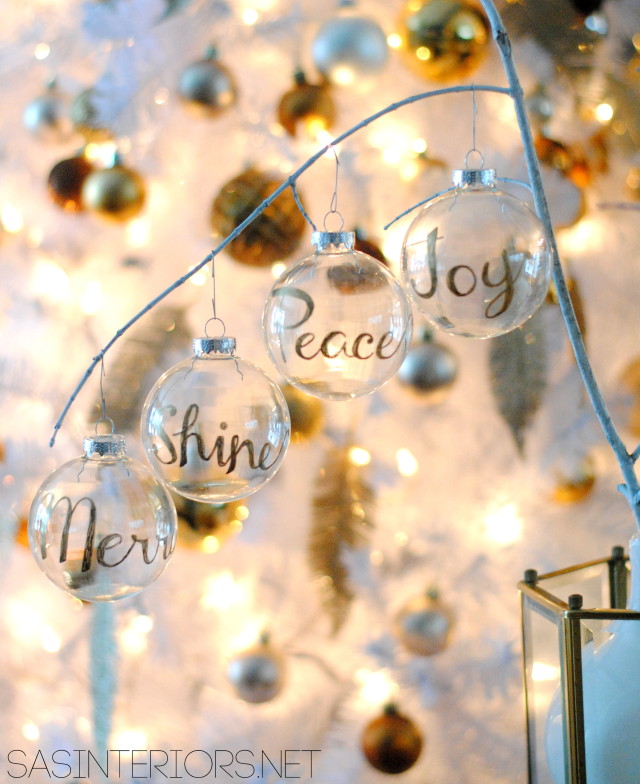
Since adding in a second tree this year, which is more of a pretty tree versus the sentimental traditional tree we decorate as a family, I’ve had fun with the gold + brown theme.  Along with the ball ornaments, I’ve added in some gold feathers (yes gold + feather in one combo: heaven) and just this past weekend, I jazzed it up even more with my latest DIY creations, word Christmas ornaments

DIY: Word Christmas Ornament using a Gold Sharpie by @Jenna_Burger, WWW.JENNABURGER.COM

Super fun, right?!  I got the idea from seeing a beautiful vignette in the Garnet Hill catalog.  I didn’t see the ornaments for sale (not like I would buy them anyway because they’d probably be $10+) and decided to create my own version.

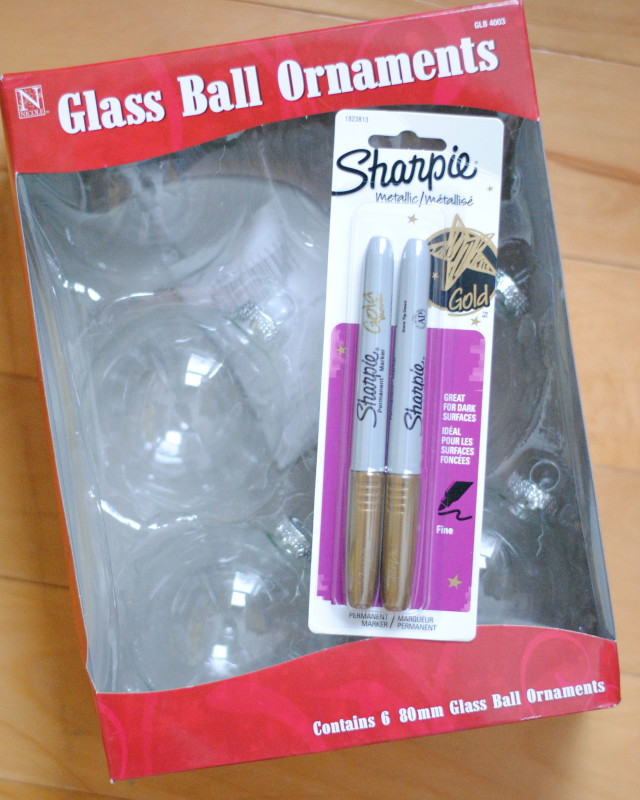
I started off by grabbing a box (set of 6) of clear bulbs and a gold Sharpie marker at AC Moore.  With my 50% off coupon, I ended up getting both items for a few cents over $6.  Not bad for 6 ornaments, which = about $1/ornament…

DIY: Word Christmas Ornament using a Gold Sharpie by @Jenna_Burger, WWW.JENNABURGER.COM

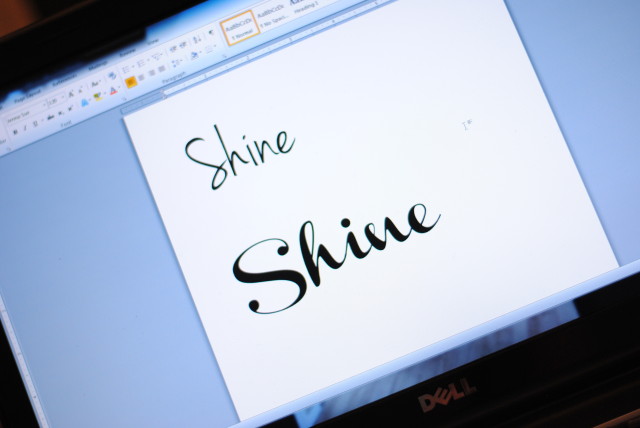
Before putting pen to glass, I wanted to find the perfect font and words to write.  I decided on the words Joy, Peace, Shine, Merry.  All words that are meaningful around Christmas.  For the font, there was a toss up between Jenna Sue and Channel.

Jenna Sue and Channel font

In the end, I decided on the Channel font because I thought bigger and bolder would be better, plus it’s a little more forgiving – I’ll tell you why in a moment…

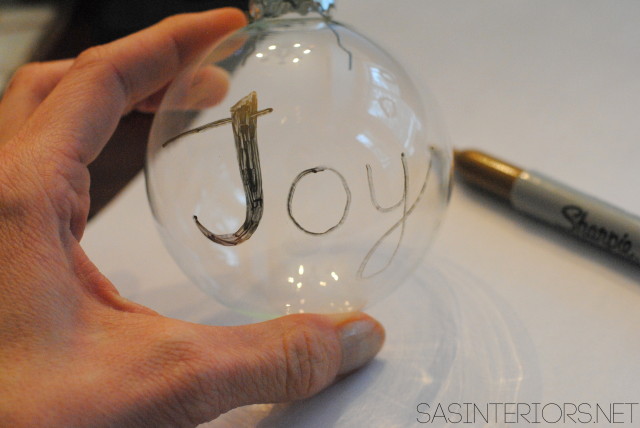
I started out by copying the script font from the computer screen to the ornament.

The result…  Not exact, but pretty close.

DIY: Word Christmas Ornament using a Gold Sharpie by @Jenna_Burger, WWW.JENNABURGER.COM

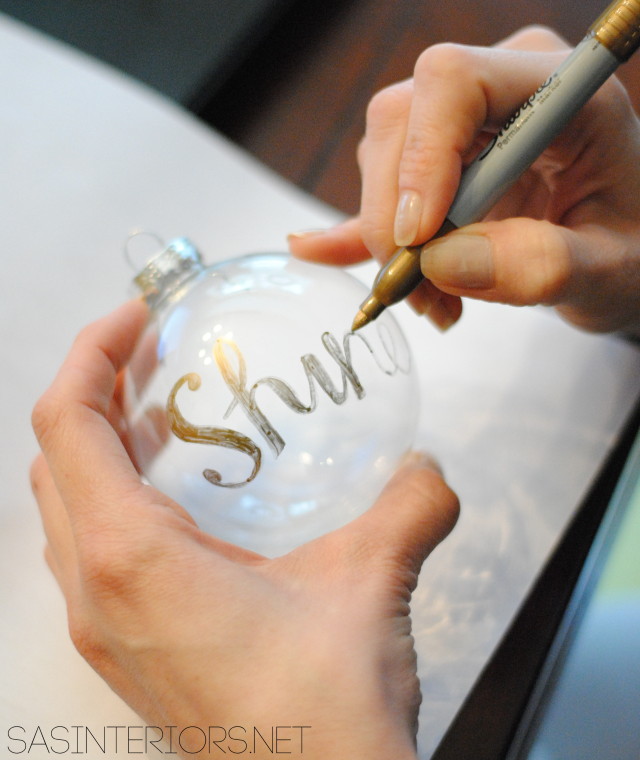
For each word, I started out with one line, then embellished each letter with thicker lines.  This type of font is more forgiving because you can layer and add onto each letter instead of it being a ‘one shot deal’.

DIY: Word Christmas Ornament using a Gold Sharpie by @Jenna_Burger, WWW.JENNABURGER.COM

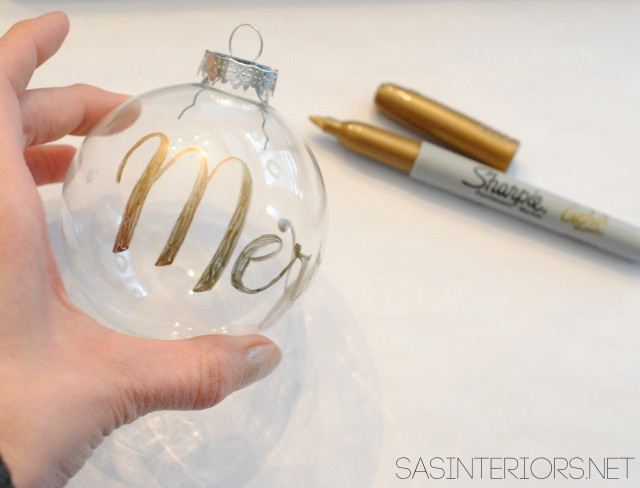
Once the first layer of gold Sharpie was dry, I added another layer for a second coat.

DIY: Word Christmas Ornament using a Gold Sharpie by @Jenna_Burger, WWW.JENNABURGER.COM

Each ornament took about 8-10 minutes, so within about 40-60 minutes, I was done with the project.

DIY: Word Christmas Ornament using a Gold Sharpie by @Jenna_Burger, WWW.JENNABURGER.COM

All 4 unique and personalized ornaments would be perfect for a gift.  Any words could be used.  Maybe each ornament could say a member of the family or something silly about the holidays…

Once I was done, the ornaments were ready to immediately hang since Sharpie’s take no time to dry.

DIY: Word Christmas Ornament using a Gold Sharpie by @Jenna_Burger, WWW.JENNABURGER.COM

DIY: Word Christmas Ornament using a Gold Sharpie by @Jenna_Burger, WWW.JENNABURGER.COM

DIY: Word Christmas Ornament using a Gold Sharpie by @Jenna_Burger, WWW.JENNABURGER.COM

DIY: Word Christmas Ornament using a Gold Sharpie by @Jenna_Burger, WWW.JENNABURGER.COM

DIY: Word Christmas Ornament using a Gold Sharpie by @Jenna_Burger, WWW.JENNABURGER.COM

  So what do you think?  A project you’d consider tackling?  What type of project does it inspire you to make?

Christmas in a Minute: Vintage-Inspired JOYful Sign

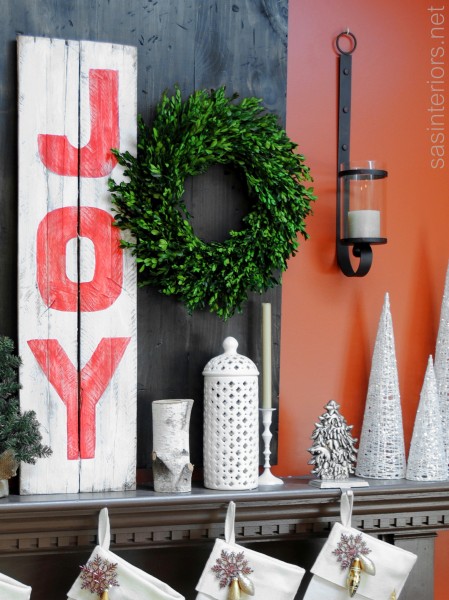
Happy Monday!  What a busy week upon us with Thanksgiving, Hanukkah, and the official start to the holiday season.  As the crazy Christmas sprint begins, I’m thinking simple, easy, and quick.  So this weekend, I created this fun + easy vintage-inspired JOYful sign.  Scraps of wood and a little bit of paint makes this a simple and very inexpensive creation.  It would be great for the mantel, outside patio, or as a gift.

Here’s the breakdown…

Christmas in a Minute: Vintage-Inspired JOYful Sign created by @Jenna_Burger, WWW.JENNABURGER.COM

Simple-to-follow tutorial on how to create a JOY sign

1. Cut the wood to your desired height and width. I used leftover pallet scraps to create this sign, but you could also use new wood instead.  I like the old pallets because they’re free, plus they have a distressed, worn look, which means no “beating up” the new wood.

2. Create the sign and sand.  If you have more than one piece of wood, you’ll need to attach them from the back.  Across the two pieces of pallet boards, I nailed two smaller pieces of pallet scraps on the back so the sign stayed together. Then I gave the wood a good sanding on the top and sides.

3. Paint the sign.  I painted the base of the sign with plain ole’ white paint leaving some of the raw wood to show through.

4. Outline letters.  I freehand sketched the letters J – O – Y on the sign.  You could use a stencil or silhouette if you wanted.

5. Paint the letters. Then I filled in the letters with red craft paint.  I used about 3-4 coats, but it dried quickly.  To give an even more distressed look, I gently went over the surface with a piece of sandpaper (by hand).

And that’s it.  Pretty simple, right?!

Easiest + Fastest + Cheapest Tree Skirt EVER

Monday Morning Confession: I already started decorating for Christmas.  It might seem early for some, but I have a few surprises up my sleeve that I wanted to prep early for this year.  While many of my daily favorites get tucked away for the next 6 weeks, the holiday decor is once again making it’s debut for another year.  As some ‘old’ traditional elements remain, there are many new projects and vignettes that I’ll be sharing over the coming weeks.  One in particular is my new tree skirt.  Definitely the easiest + fastest + cheapest tree skirt you ever did see…

Easiest, Fastest, + Cheapest Christmas Tree Skirt.  Use 1.5 yd of fabric and wrap around tree.  Follow easy instructions by @Jenna_Burger of WWW.JENNABURGER.COM

For the last few years I’ve wanted a new tree skirt.  I had grand plans of making something beautiful and chic, but honestly it just never happened.  And anyway, is something pretty + most likely expensive, even worth it?  I’ve found over the years that the tree skirt ends up getting thrown around either from the kids or the cats, and then once the presents are added, you don’t even see it.  Well this is in my house anyway. maybe it’s different in your casa…

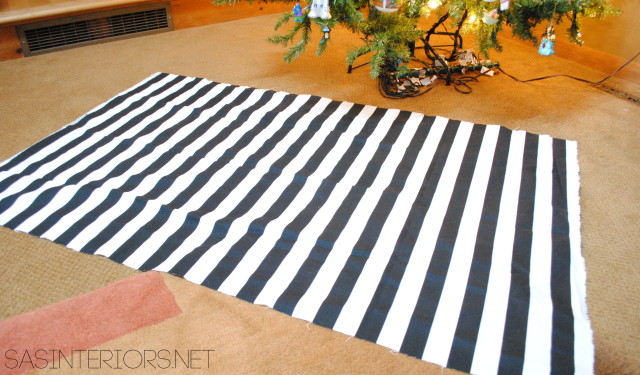
So after living with no tree skirt for a few days once the tree was up, I thought let me test out this pretty black and white striped fabric.  I threw it under the tree and loved it’s whimsical, non-perfect, simple look.  Plus it cost me nothing. So here we go… The black and white striped fabric I had on-hand was 1 yard, but I would recommend using 1.5 yards or even 2 yards for a fuller look. I placed the fabric in front of the tree.

Easiest, Fastest, + Cheapest Christmas Tree Skirt.  Use 1.5 yd of fabric and wrap around tree.  Follow easy instructions by @Jenna_Burger of WWW.JENNABURGER.COM

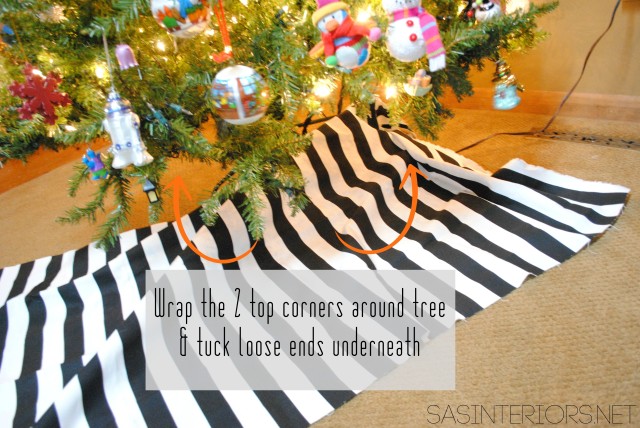
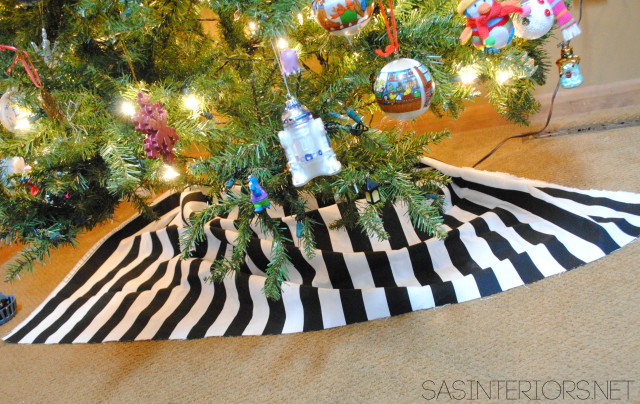
Then took the two top corners and wrapped them around the  bottom of the tree so they meet in the back.

Easiest, Fastest, + Cheapest Christmas Tree Skirt.  Use 1.5 yd of fabric and wrap around tree.  Follow easy instructions by @Jenna_Burger of WWW.JENNABURGER.COM

Easiest, Fastest, + Cheapest Christmas Tree Skirt.  Use 1.5 yd of fabric and wrap around tree.  Follow easy instructions by @Jenna_Burger of WWW.JENNABURGER.COM

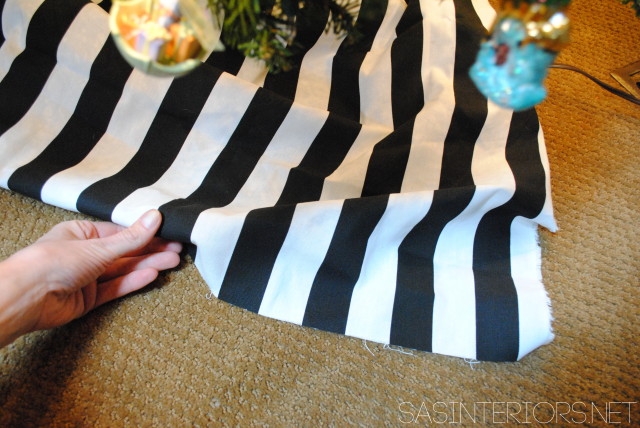
Lastly, I tucked the bottom corners and all the loose edges underneath.

Easiest, Fastest, + Cheapest Christmas Tree Skirt.  Use 1.5 yd of fabric and wrap around tree.  Follow easy instructions by @Jenna_Burger of WWW.JENNABURGER.COM

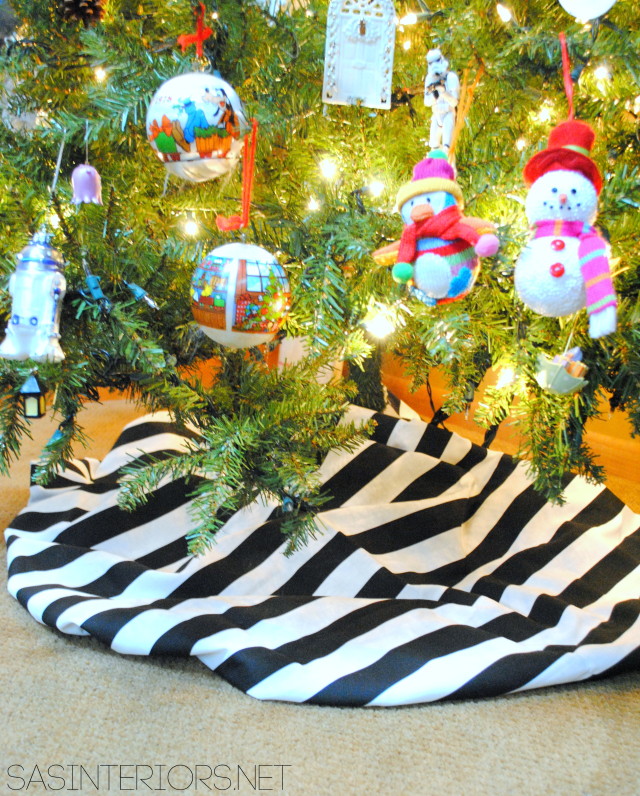
Literally, this took all of 30 seconds and it was done.

Easiest, Fastest, + Cheapest Christmas Tree Skirt.  Use 1.5 yd of fabric and wrap around tree.  Follow easy instructions by @Jenna_Burger of WWW.JENNABURGER.COM

By the end of the day, the tree skirt is all dishuffled anyway, so within seconds it looks good again.  There really is no right or wrong to this tree skirt, which makes it perfect for me!

And the best part is, it cost nothing and the fabric can be used for something else after the Holidays.  Next year, I may want a totally different pattern and I won’t be married to something store-bought or a creation that took hours. I hope you enjoyed my 30 second tree skirt creation.  Sometimes the easiest things are the best!

Be sure to check back next Monday when I’ll be partnering with a few Blogging friends who will all be sharing super simple holiday projects for our Christmas in a Minute series.  Cheers to a festive season. xo

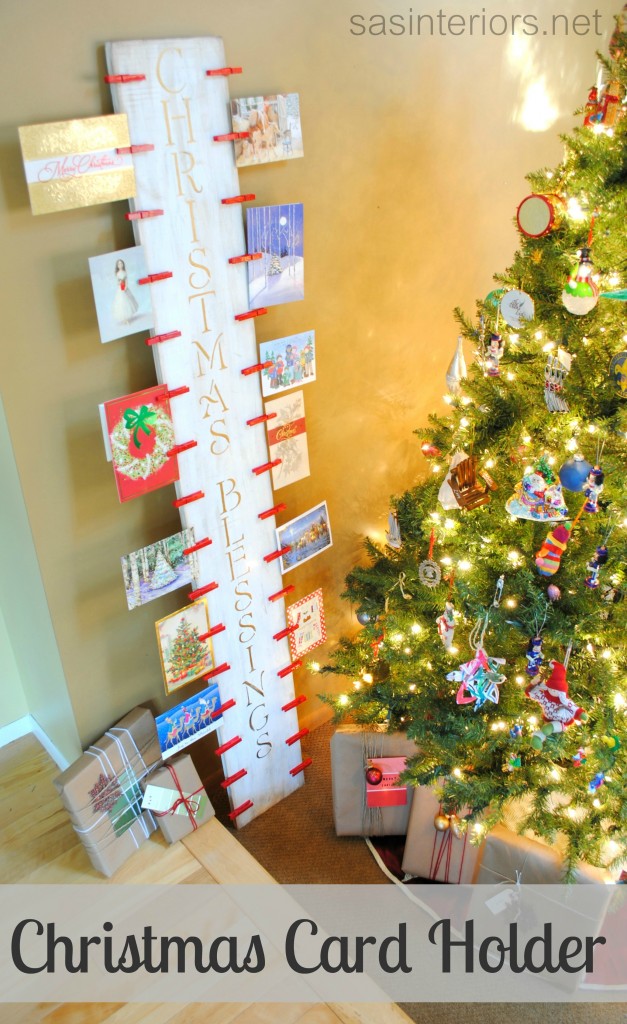
Christmas Card Holder – A Lowes Creative Idea #LowesCreator

I hope you had a wonderful Thanksgiving weekend and stuffed your tummies full of turkey and mashed potatoes (with butter of course) – my personal favorite.  We traveled and enjoyed the Holiday very much, but the only bummer about not hosting was the lack of leftovers.  Anyway, let’s get on to something fun…

I’m super excited for today because I have so much to share with you!  I’ve been busy preparing for the Christmas season (yes, alreadyI know for some it’s early), but wanted to let Thanksgiving pass before bombarding you with all my Christmas inspiration.  Now that the Holiday season countdown has begun, brace yourself for a fun few weeks ahead with DIY creations and decorating ideas and tips!
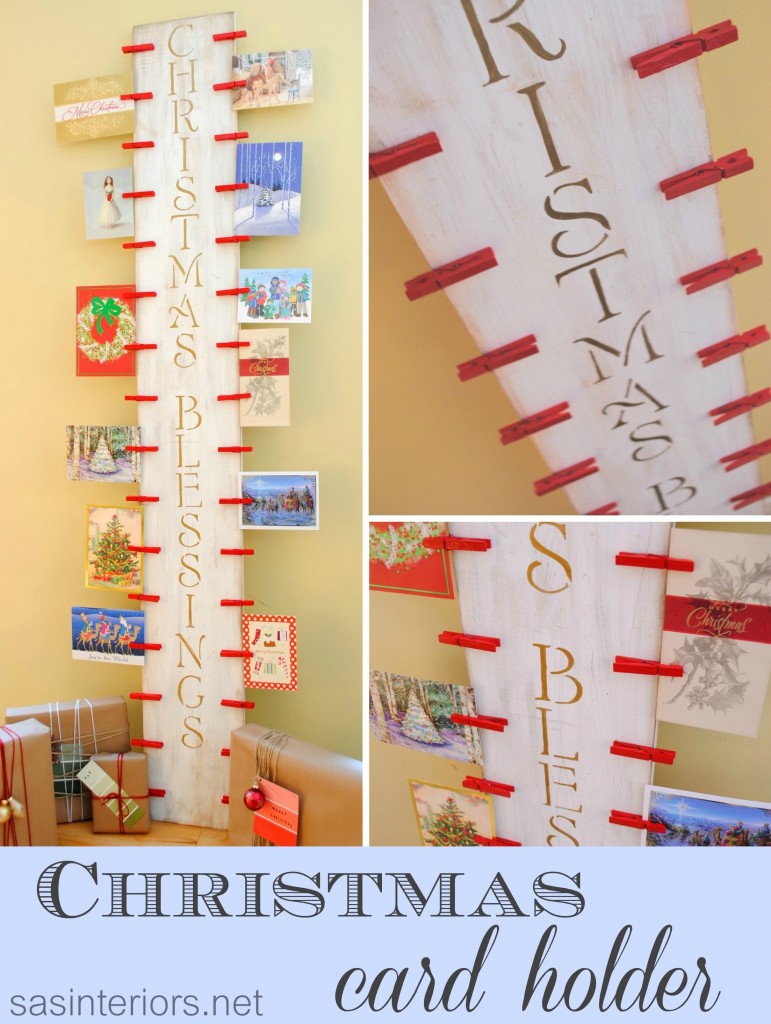
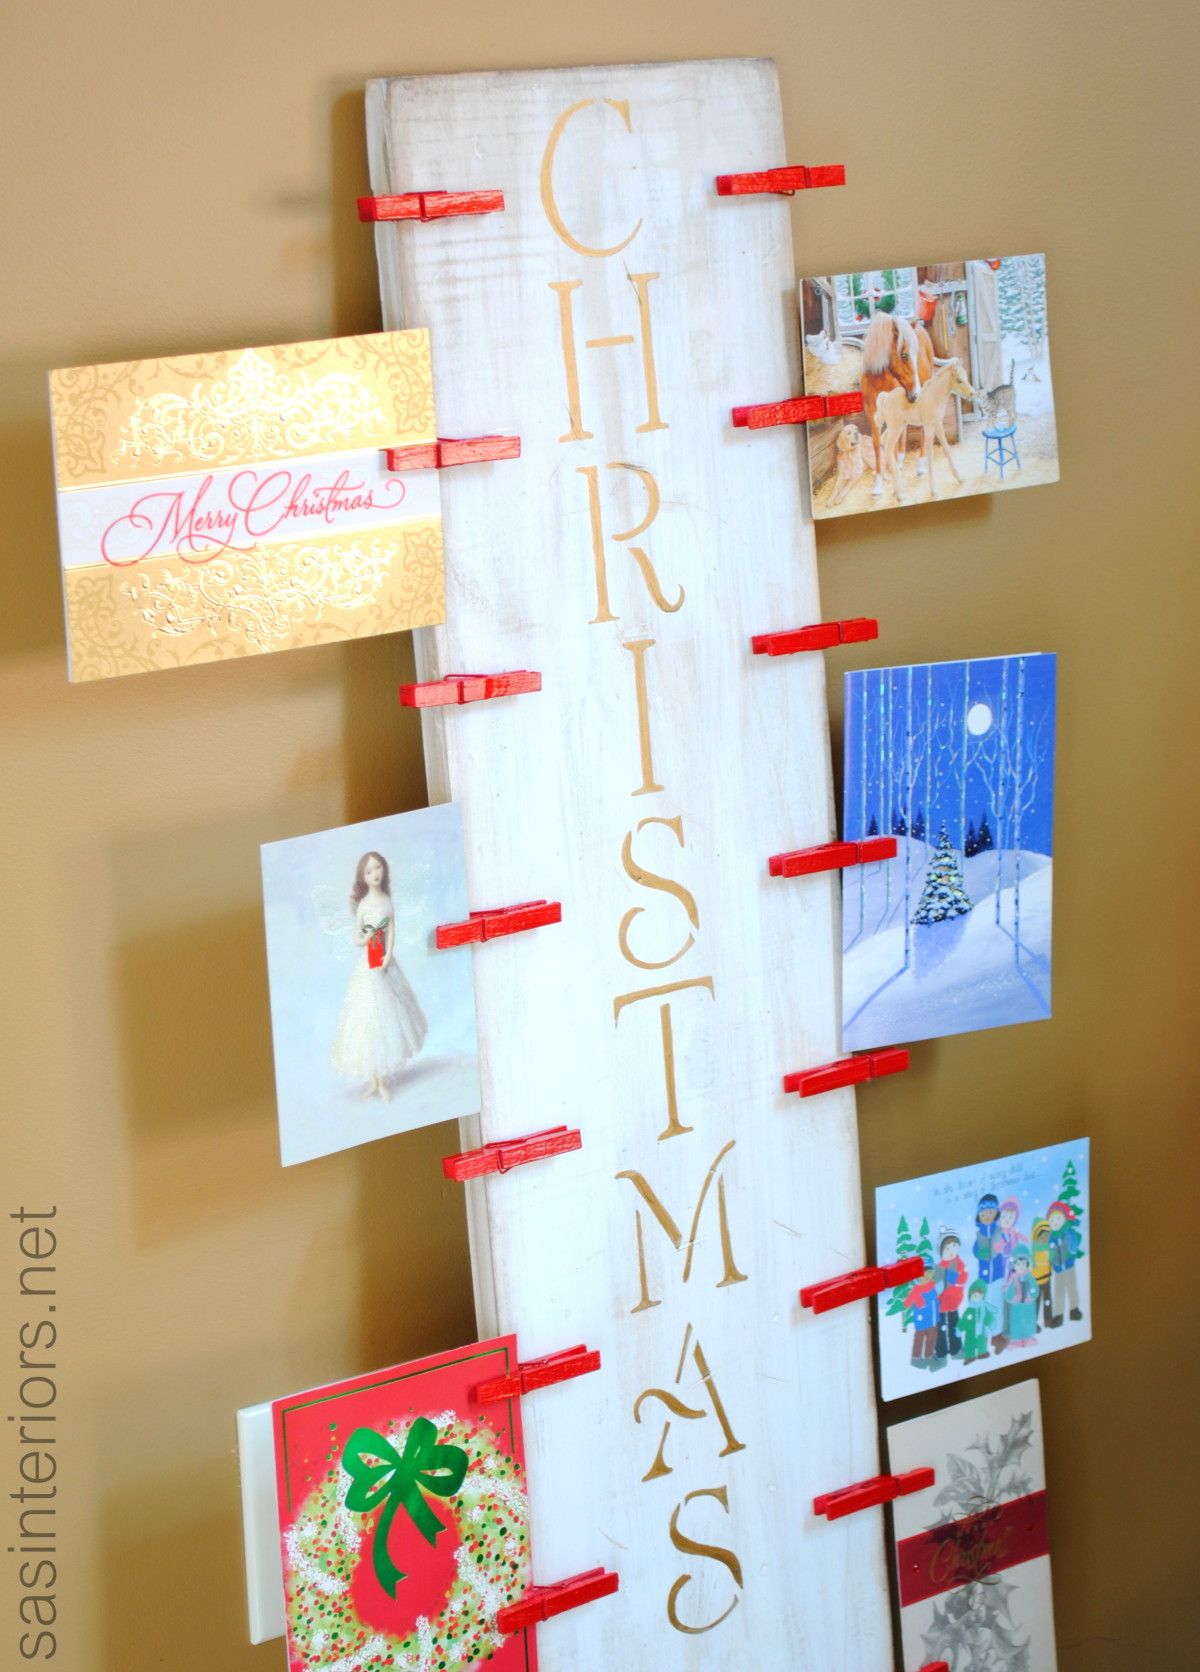
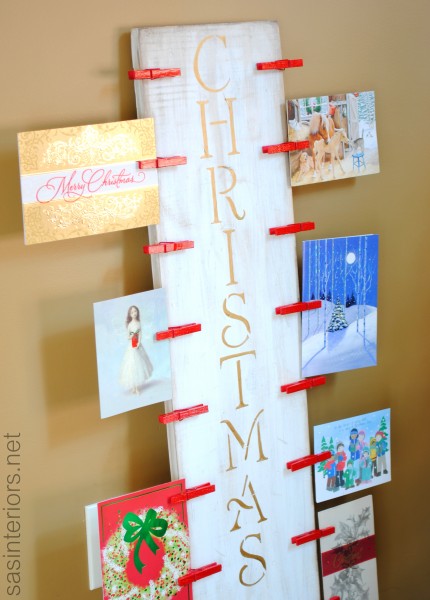
Now that Thanksgiving is over, the first Christmas cards started trickling in over the weekend and since my December Lowe’s Challenge was to create something for the upcoming Holiday season, a new Christmas Card Holder seemed so apropos.

This card holder is one of my favorite projects I’ve ever made.  I got the idea when creating the family pallet photo holder a few weeks ago.  At the time, I mentioned how I felt the photo holder was so versatile and didn’t have to just hold family photos, but also christmas cards during the holidays, as well as invitations, announcements, etc anytime of year.  Thus my Christmas Card Holder was created…

I started off my hitting the lumber and paint aisles of my local Lowe’s and picked up a few must-have items:

  • 6′ long X 12″ wide wood board
  • clothes pins (30 – 35)
  • spray paint (I chose Valspar Glossy Cut Ruby)
  • stencil (purchased at AC Moore / a silhouette would work too)
  • white paint & stain (for the distressing)
  • paint for the letter (I chose metallic gold)

I began by…

1. Distressing the Wood

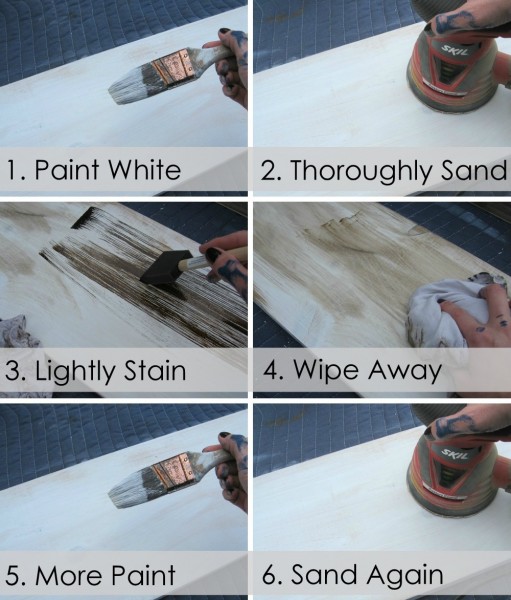
I was going for a worn look and wanted the wood to look old and distressed, so I banged-it-up a bit and layered it with a combo of paint and stain.

I began by using  nails, chain, and a hammer to bang up the surface to make it “used and abused”.  This is a great way to get out some of that pent-up aggressionhehe.

Once I achieved the desired “wear”, I added one coat of white paint.  I used a semi-gloss finish paint that I had laying around, but any kind will do.  Once dry, I sanded the wood thoroughly so some areas of the raw wood showed through and the surface was smooth.  I added a light coat of stain focusing more on the edges and ends. I applied it in small sections and quickly wiped it away so only a thin layered remained. Then I added another coat of white paint and sanded the surface once more.  This layering process resulted in just the right amount of wear.

Old to New in 30 minutes!

2. Stencil

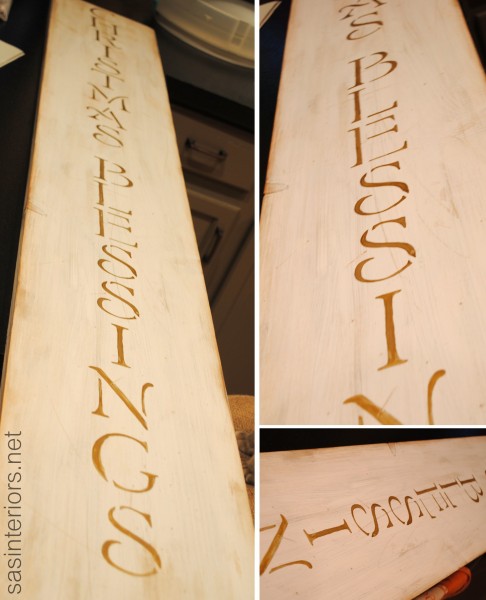
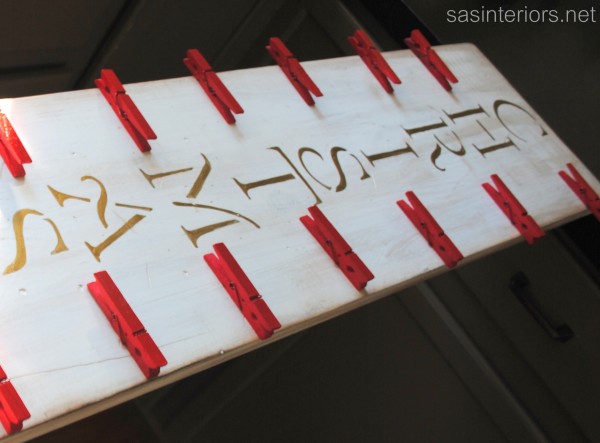
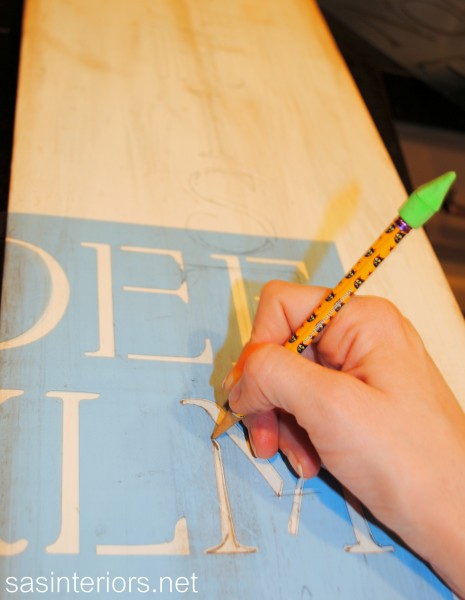
I found a pretty stencil at AC Moore which I got for about $3+ (using a 50% off coupon). The letters are 3″ high and the words CHRISTMAS BLESSINGS fit just right on the 6′ board.

3. Paint

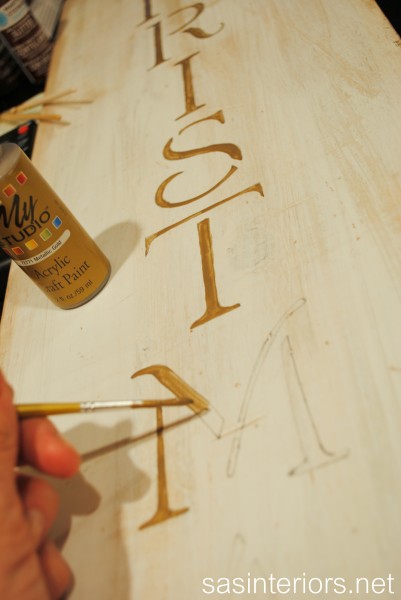
Once I outlined the stenciled letters with a pencil, I filled them in with a nice metallic gold craft paint. At first, I was going to use red or green for the letters, but I am so glad I chose gold – I’m loving the hue, especially with the other goldtones in my other holiday decor.

4. Adding the Clothespins

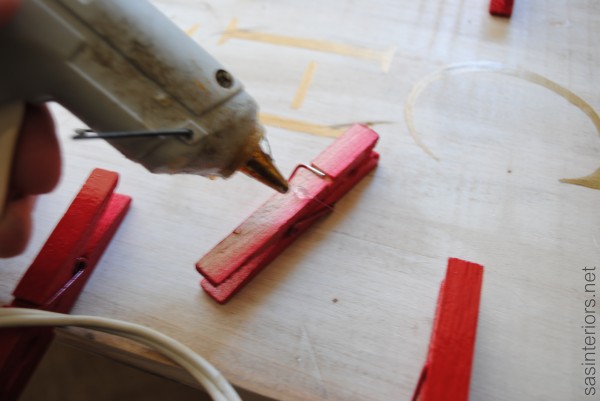
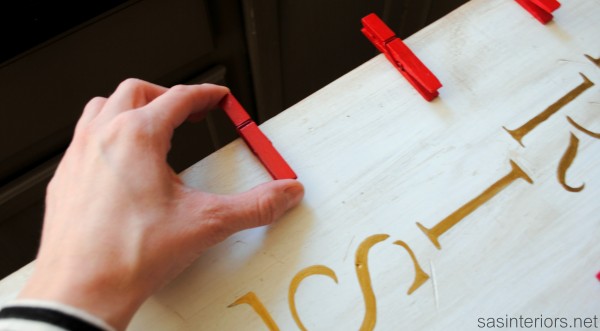
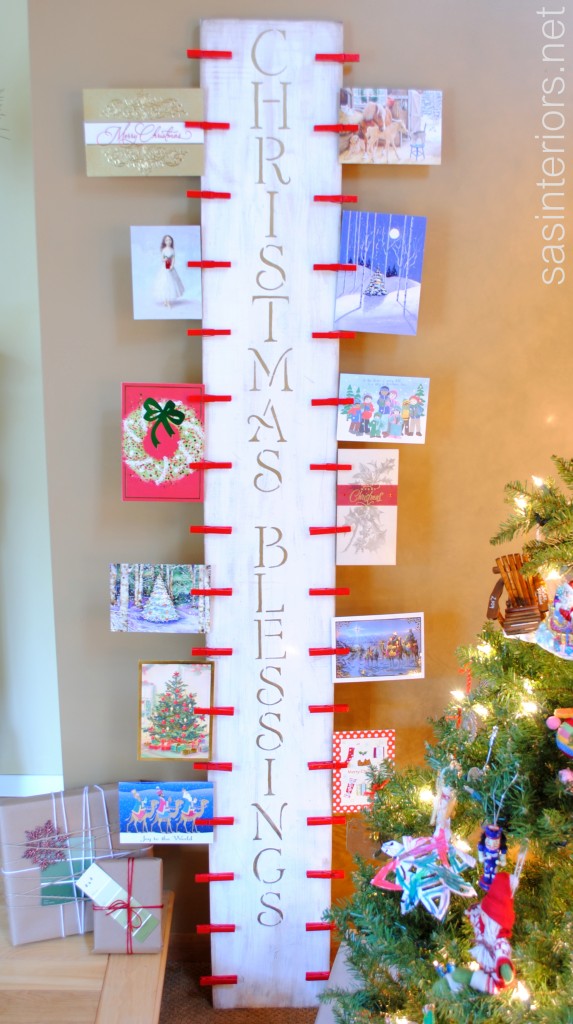
While the letters were drying, I spray painted the clothes pins with Valspar Glossy Cut Ruby.  Once they were ready, I attached them to the wood board with hot glue.  The spacing between each clothespin is about 5-6″ and there are 16 on each side.

 And it’s done…

I’ll admit, the Christmas cards are from last year – I haven’t received that many yet.  I always keep my cards and then use them the next year as tags for presents, so that’s what these will be used for in a few short weeks.

My new card holder is such a unique and fun addition to our Christmas decor. I have it situated right next to the Christmas tree so we can enjoy the treasures that are sent from family and friends – true Christmas Blessings!

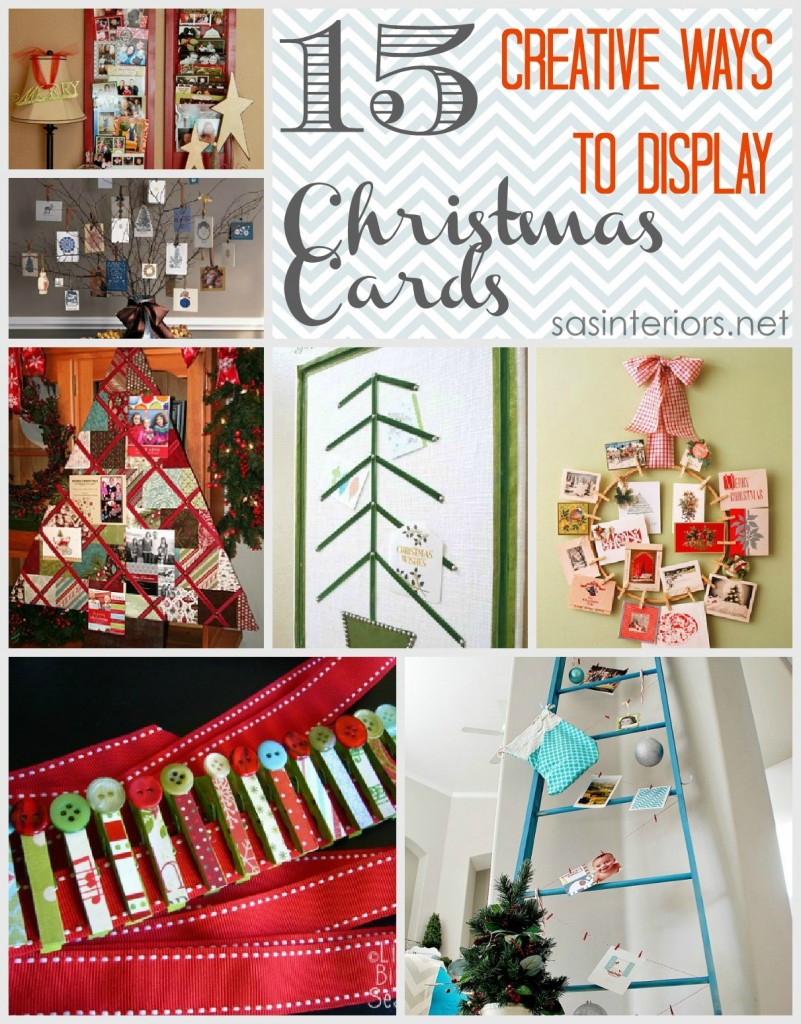
If you’re looking for more ideas on how to display Christmas Cards, check out the roundup I did last year, by clicking on the link: 15 Creative Ways to Display Christmas Cards.

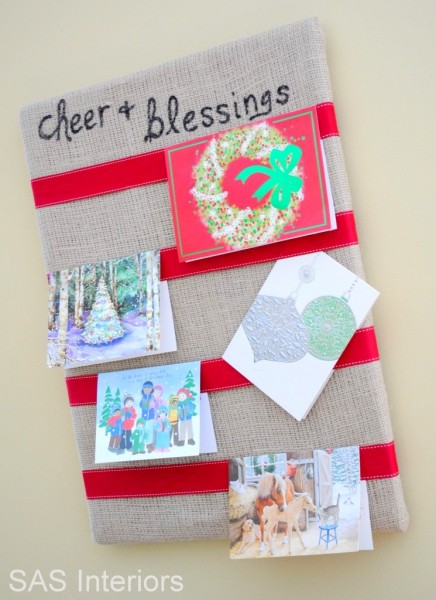
And I created another card holder last year if you want to see that as well.  I love this one too, but with all the cards we receive, it ended up not being large enough.  This new one though, has lots of room! Click to see: Holiday Card Holder.

I’m still working on putting the finishing touches on the rest of the house, and hope to share a Christmas Tour next week.  In the meantime, I’ll be showing you a few more DIY projects, as well as some easy and fun decorating ideas.

Have you decorated for the Holidays yet?  How to you display your Christmas cards?

Disclosure: I am part of the Lowe’s Creative Team and was provided with a Lowe’s gift card to purchase items for my project.  I was also compensated for my time to use the products.  No one told me what to create, what to buy, how to use the product, or what to write.  All opinions are 100% mine!

I link my projects to some of these parties: Skip to My Lou, Dittle Dattle, Between Naps on the Porch, Today’s Creative Blog, Stories of A to Z, All Things Heart & Home, House of Hepworths, Finding Fabulous, The Shabby Nest, Serenity Now, Tatertots and Jello, Thrifty Decor Chick, Tip Junkie