
Tag: craft

Colorful Washi Tape Initial

This is the first DIY project that I’m sharing having to do with my daughter’s room makeover.

The makeover has been takin’ a wee-bit longer than anticipated, not because of design challenges (thankfully) but because of her actually using the room (to sleep, to play, etc.), lol.  I tackle many of my projects while the kids are fast asleep and dreaming, so to actually work in her room has been challenging.

Thankfully I had some time this past weekend to get my hands dirty and this is a project that I just finished up and couldn’t wait to share… Washi Tape Initial Wall Decor.

Have you heard of washi tape (don’t be embarrassed to say no)? Until recently, I didn’t. I had seen this crafty goodness all over the web but didn’t actually know what it was or how to use it.  So what did I have to do? Buy it, of course!

Here’s the DL on washi tape  It’s basically pretty patterned tape.  Imagine typical tape with a pattern.  So it’s easy to add to anything to dress it up a bit -paper, a present, anything…

I recently was asked to check out the new online craft  store, Consumer Crafts.  While searching the site I found a huge selection of washi tape, plus this awesome large initial letter that I had been searching for, for a while.  Since not using washi tape before, I didn’t really know what I was getting myself into it, but in the end, I….  well you’ll just have to keep reading to see what I thought.

Once my package arrived (within a day or two – it was amazing how fast my supplies came), I laid everything out – Large initial letter, washi tape, and mod podge (I was initially thinking of using duct tape, but opted not to) – and got to work.

The most difficult part of using the Consumer Crafts website was stopping myself from filling my basket with $100s of dollars of stuff – they really have everything pertaining to crafting!  Once I narrowed down my list, and got started on my project, I was good as gold.  The colors in my daughters room are vibrant and strong, so the colors of the washi tapes were perfect.

I began at the edge of the “A” with a fun pink and white striped tape,  wrapping it around at the top and bottom.

I continued with different washi tape styles and added them edge to edge on the diagonal parts of the “A”, and then continued taping the inner and outer edges.

Lastly, I tackled the connector of the “A”.  Washi tape is fairly thin, so it’s easy to cut.  I lightly laid out the tape, then using an X-acto blade, trimmed the edge.

Within about 10-15 minutes, the washi tape was done. YAY!  To seal it all, I added 2 coats of Mod Podge in Matte – another goodie I ordered from Consumer Crafts.

A few hours later it was dry and DONE!

So my thoughts on washi tape is that it’s GREAT!  It’s just like tape with added color and cuteness. I might never use ordinary tape again.

Such a fun and easy project.
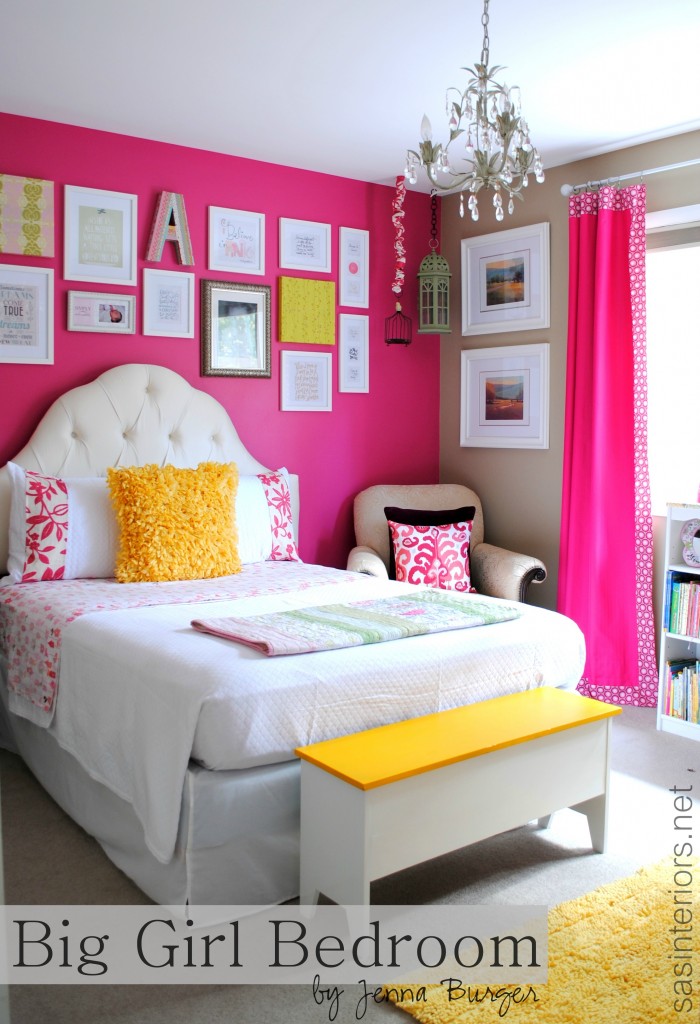
Here’s the result…

My daughter’s New Big Girl Bedroom

Big Girl Bedroom

Have you ever used washi tape before?  If so, what have you created with this crafty goodness?

Disclaimer: I was given a gift card to order product and test-out the online craft store, Consumer Crafts.  I was also compensated for my time to use the products.  No one told me what to create, what to buy, how to use the product, or what to write.  All opinions are 100% mine!

Ombre Halloween Pillow with RIT Dye

Halloween is just a few short weeks away and even though I’ve already decorated for Fall, I wanted to spice it up with some Halloween accents.  My favorite, inexpensive way to do that is with pillows.

I recently was lucky enough to get my hands on RIT Dye and thought an ombre design with a few spooky elements would fit the bill just perfectly.

Let me start by saying I have NEVER used liquid dye before and was a little apprehensive, but honestly it was really easy and fun to add a bit of color to a plain ole’ piece of fabric.

Here are all the colors I received for the project and since it was a Halloween pillow that I set out to create, I chose orange and black to work with.

I started off by making a simple white envelope pillow using a heavy cotton, which were scraps from another project.  If you want to save time when making something similar, you can also buy a plain white pillow, but make sure the insert can be removed so the cover can be dyed. (Need a tutorial for an envelope pillow?  Click here)

Once the pillow was complete, it was DYE TIME!

How you use the dye really depends on your fabric, plus how intense you want the color. For my project, I used a half bottle of dye + 2 gallons of warm tap water.  I first put the dye into an old bucket, then added the water + …

… 1 cup of salt.

The magical formula was now ready!

Because there are so many uses for this liquid dye, there are many different techniques and ways to dye materials, so my advice is to do a test for whatever you plan on creating before venturing into the actual project.  Never using dye before and wanting to create an ombre look (multiple, graduating depths of color) I had no idea if I was supposed to leave it in the dye for 5 seconds, 5 minutes, or 5 hours. So here’s my tester, and hopefully it’ll give you a guide when using the RIT products.

This swatch test really helped me to know how much I needed to dip the fabric for my real project.  Again, this was my fabric, and I’m sure if you try this out, your fabric type and weight will be different, so do a test before starting your actual project.

Here’s how the dipping process went.

It was fairly easy and while the darkest area of the pillow was soaking up the dye, I worked on a few other projects (like my Travel Subway Sign).  Once I was happy with the color, it was time to add the black. I didn’t really want an ombre look for the black and instead wanted it as intense and dark as possible, so I left this section of the pillow in the black dye for about 30 minutes.


When it was done, I hung it on my beautiful drying rack.  NOT!  The lawnmower handle was just the right size and only feet away from the dying area.  Be sure to put a rag underneath because it will stain (the mister was wondering what all the drips were on the garage floor when he came home that evening, hehe).

Once the pillow was good and dry (I waited till the next day about 24 hours later), I ironed it before starting the next step… Stenciling!

Using some fun, festive stencils that I got last year, I started adding them randomly on the orange ombre section of the pillow.  Using the bat and spider design, I dabbed black fabric paint onto the stencil.  Then on some of them I even added a little sparkly glitter.

These stencils have a sticky back so they stay nicely in place while painting. Then you can easily peel them off…

…and voila, it’s complete!

Have you ever used RIT liquid dye?  If so, what projects have you created?  I’ll admit, I was alittle weary to try it out, but I am thrilled that I did because it was really easy to use and I’m gushing over the result.  I’ve got alot more dying projects on my to-do list now!

Disclaimer: I was sent complimentary product from RIT dye and was compensated for my time to use the product, but no one told me what to create, how to use it, or what to write.  All opinions are 100% mine!

I link my projects to some of these parties: Skip to My Lou, Dittle Dattle, Between Naps on the Porch, Today’s Creative Blog, Stories of A to Z, All Things Heart & Home, House of Hepworths, Finding Fabulous, The Shabby Nest, Serenity Now, Tatertots and Jello, Thrifty Decor Chick, Tip Junkie

Glass Bottle Turned Candle

I’ve been working on so many big projects lately (like the stairs, painting, and this chair) that I wanted to take a quick break and create something super quick and easy to share with you. One of my favorite drinks, especially in the summer, is Saratoga Sparkling Water. Since I live in the town where this water is manufactured, it’s available most everywhere and everytime I see the gorgeous cobalt blue bottle, I just stare at it’s beauty.

I never get the nerve to throw the bottles away and have been stockpiling them in my garage waiting for a DIY project to pop into my head. And finally, here’s my first creation with the blue beauties…

Cute, right?  And it’s uber-easy to make.  Here’s how…

I started off with:

  • my used Saratoga Sparkling Water glass bottle with screw on top *
  • Lamp oil or citronella oil
  • Large Wicks (I found these replacement wicks for tiki torches at Target)
  • twine
  • hot glue gun
  • drill

* other glass bottles like wine bottles, spaghetti jars, mason jars, etc could also work to create this type of a candle. (check out the small Barefoot wine bottle in the pic below)

Once I was finished drinking my sparkly, I had the Mister drill a hole in the bottle cap (sorry no pic here because he did it while I was out n’ about).  The hole should be slightly smaller than the wick so it fits snugly. Once the hole is drilled, the wick went in.

We then filled up the glass bottle with the lantern oil and tested out the new candle.

And it worked!

Then it was time to add some bling (nautical bling, not diamond bling).  I love the Saratoga lettering, but decided to add some rope as an accent.  I’m probably the only DIY blogger who hasn’t created something using rope, so here it goes.

Starting at the back of the bottle, I added a small dab of hot glue and attached the end of the rope.

I continued the rope around and around and around…

…and then once I was at the end, I trimmed the rope and added another dab of hot glue.

Complete and ready to enjoy!

And here are some details…

Pretty simple to create, right?!

Have you ever upcycled a glass bottle or wine bottle?

I link my projects to some of these parties: Skip to My Lou, Dittle Dattle, Between Naps on the Porch, Today’s Creative Blog, Stories of A to Z, All Things Heart & Home, Savvy Southern Style, House of Hepworths, Finding Fabulous, Creation Corner, The Shabby Nest, Tatertots and Jello, Thrifty Decor Chick, Tip Junkie