
Tag: decorating

Burlap Candy Corn Pennant

DIY Craft: Burlap Candy Corn Pennant. Simple, Inexpensive, and Fun! Perfect for Halloween! Tutorial @ www.jennaburger.com

One day I’m writing about upcoming trends for the coming year, the next day I’m sharing a cutesy Halloween craft.  You truly never know what you’re going to read next or what I’ll be in the mood to inspire you with… always new + interesting!

Halloween is just a couple weeks away and upon being inspired by the fun festive decor in the Target Dollar Bin, I spruced up my Fall porch with a simple, inexpensive, and fun burlap pennant to look like candy corn… so yummy, don’t you just want to eat it?!

DIY Craft: Burlap Candy Corn Pennant. Simple, Inexpensive, and Fun! Perfect for Halloween! Tutorial @ www.jennaburger.com

I really am not a crafty gal but I just couldn’t resist making this pennant.  I could have spent the few dollars to buy it, but since I had all the materials on hand from past projects, I decided to DIY it!

MATERIALS

>1/4 yard burlap
>cardstock / heavy paper – I used a manila folder (for pennant template)
>craft paint in the colors of white, orange, and yellow
>sponge brush
>twine
>scissors
>toothpick + tape

1

Using cardstock or heavy paper (I used a manila folder), cut out a template for the pennant ‘flag’.  Size is up to you.  My template is about 5.5″  x 8″.  In all, I created (8) pennants, then cut them out with sharp scissors, and ironed them flat.

DIY Craft: Burlap Candy Corn Pennant. Simple, Inexpensive, and Fun! Perfect for Halloween! Tutorial @ www.jennaburger.com

2

Dividing each pennant in 3 sections, I used a sponge brush to paint on the orange in the middle section first, then followed it with the white and yellow paint at the top and bottom.

To create a straight line, I cut out a piece of cardstock (I used a manila folder again) and painted up to the line.

DIY Craft: Burlap Candy Corn Pennant. Simple, Inexpensive, and Fun! Perfect for Halloween! Tutorial @ www.jennaburger.com

DIY Craft: Burlap Candy Corn Pennant. Simple, Inexpensive, and Fun! Perfect for Halloween! Tutorial @ www.jennaburger.com

When they were complete & dry (the next day), I was ready to create the pennant.

They look so good, I could eat them… #yum

DIY Craft: Burlap Candy Corn Pennant. Simple, Inexpensive, and Fun! Perfect for Halloween! Tutorial @ www.jennaburger.com

For this part of the project, I used the twine, scissors, tape, and a toothpick.

DIY Craft: Burlap Candy Corn Pennant. Simple, Inexpensive, and Fun! Perfect for Halloween! Tutorial @ www.jennaburger.com

3

I lined up the end of the twine with the end of the toothpick and wrapped it tight with tape.  Then starting at one end of the pennant ‘flag’ top, I poked through the burlap with the toothpick and pulled through the twine.

At the other end of the ‘flag’ top, I poked through the burlap again and pulled the twine through to the backside.

I continued this step for all the ‘flags’.

DIY Craft: Burlap Candy Corn Pennant. Simple, Inexpensive, and Fun! Perfect for Halloween! Tutorial @ www.jennaburger.com

The spacing between each ‘flag’ is subjective but I chose about 3″ and left about 2′ of extra twine at each end to hang and adjust.

DIY Craft: Burlap Candy Corn Pennant. Simple, Inexpensive, and Fun! Perfect for Halloween! Tutorial @ www.jennaburger.com

And this is the result.

DIY Craft: Burlap Candy Corn Pennant. Simple, Inexpensive, and Fun! Perfect for Halloween! Tutorial @ www.jennaburger.com

It really was so easy to make and it dresses up the front porch so pretty!

DIY Craft: Burlap Candy Corn Pennant. Simple, Inexpensive, and Fun! Perfect for Halloween! Tutorial @ www.jennaburger.com

Inside the house or out, this simple + inexpensive burlap candy corn pennant was so fun + fast to make – 20 minutes total!

DIY Craft: Burlap Candy Corn Pennant. Simple, Inexpensive, and Fun! Perfect for Halloween! Tutorial @ www.jennaburger.com

Can you believe I got crafty?!  Kinda Crazy, but it really was enjoyable to step back from the big projects + big decisions and just have fun.  This crafty-business has me thinking…

HAPPY HALLOWEEN.

If you like this festive project, you might like this Halloween pillow I made a few years back which is also on my porch.

Halloween pillow using ombre effect & stencils. Festive + Fun! tutorial by www.jennaburger.com


Choosing Art + Accessories to Compliment the Home

Balancing bold with quiet: Choosing artwork that compliments your aesthetic

It’s pretty incredible + awesome what a fresh coat of paint can do.  Whether on the wall or on a piece of furniture, a new hue can instantly change the look & style.

I love bright & bold colors, but I don’t enjoy color overload.  In small doses it works. A vomit of too much color – not so much.

Where a vibrant hue is introduced it should equally be balanced with quieter, softer, more neutral colors.  There needs to be the quiet with the crazy.  Let the bold ‘speak’ and the quiet ‘enhance’, to create an interesting + engaging composition.

When I chose to revamp my latest furniture makeover, I chose a dynamic hue of ‘kelly green’ but knew that it would be surrounded & layered with neutrals.  The cabinet is the statement piece and the layers are what makes it breathe.

Each element that surrounds the cabinet needed to be methodically chosen to magnify the cabinets beauty but allow the eye to rest.  It’s the balance of fun & calm…

Furniture Makeover: TUTORIAL ON HOW-TO PAINT FURNITURE; before & after cabinet transformation by www.jennaburger.com

When it came time to choosing ART + ACCESSORIES, I felt it had to be subtle.  Not understated, but quieter.  Whatever was chosen had to compliment, not compete.  As much as the cabinet is a statement, the artwork + layers of accessories needed to be strong but in a different way than the strong of the bright color green.

What to put on the walls with a bold color, like this green beauty, was tricky.   A quiet wall color for the backdrop was a must and artwork that enhanced the intense green would pull the entire composition together.

It’s truly all about balancing the bold and the quiet.

Finally these beauties came into my life…

Balancing bold with quiet: Choosing artwork that compliments your aesthetic

Thanks to the many creative talented artists at Minted, there is no shortage of options.

Bold & Bright.

Quiet & Neutral.

Everything at your finger tips.  The only difficult part is making a decision. 

Balancing bold with quiet: Choosing artwork that compliments your aesthetic

With custom art being unattainable for many due to budget & resources, Minted makes it easy by connecting artists with those looking to fill their walls with beautiful, meaningful custom creations.  A nice bonus is that many of the prints are limited edition art and only a certain number of prints are produced. To me that makes each piece of art more special and unique. You and 5000 don’t have the same artwork on the walls of your home…

And let’s not forget how wonderful it is to support these artists to build their business and gain exposure.  I just love it!

Balancing bold with quiet: Choosing artwork that compliments your aesthetic

The two prints above the cabinet are Tradewinds and Weathered.  They have a cohesive thread, but were created by differing artists.

This new vignette is in my master bedroom, which has a serene, soft aesthetic.  Another reason why the bold green works so well.  The other colors in the space are shades of white and hints of plum, so the selection of this artwork was perfect.

Balancing bold with quiet: Choosing artwork that compliments your aesthetic

The artist who created Tradewinds shared this thought,

“I find sometimes the simplest stroke, laden with just the right value of pigments can invoke a feeling, or memory, or inspiration. This color study invokes the imagination. The colors are inspired by the ripples of the ocean as the trade winds play, the reflective sparkle of the sun on the waters surface, and soft hints of pink coral and colorful fish swimming beneath!”

I couldn’t have put it any better.

About Weathered,

“This mixed media piece explores varying degrees of opaque and translucent color, amidst layers of overlapping brushstrokes that create a warm yet weathered texture. I was inspired by the the various and ever-changing textures and palettes around our small hobby farm, including a chicken coop made from aging weathered barnwood, rusted vintage metal license plates, and acres of trees and foliage.”

Such beautiful words.

Balancing bold with quiet: Choosing artwork that compliments your aesthetic

All my artwork from Minted are such treasures because you can truly feel the artists love + devotion for their work shine through in each of their creations.

I’m thrilled with how this cabinet has evolved as my style has changed over the years.  And I am equally happy with the elements that surround it to enhance it’s beauty!

Balancing bold with quiet: Choosing artwork that compliments your aesthetic

DISCLOSURE: THIS IS A SPONSORED POST WITH MINTED.  ALL WORDS + OPINIONS ARE 100% MY OWN.

Furniture Makeover: Cabinet Gone Green

New content on the blog has been a bit sparse as of late, but it doesn’t mean that I haven’t been hard at work conjuring up more awesomeness & greatness.

Along with family life that always keeps me busy, I’ve had a flurry of new + exciting client projects (near & far), and I was away for a few days in Boston at a design conference hosted by Wayfair (check out pictures from my trip on my Instagram feed).   Being surrounded by SO MUCH TALENT & hearing others speak so passionately about their businesses, really gave me the spark and motivation needed to be open to the exploration of new & different paths as my future unfolds.  I know I am just at the beginning of this long journey of exploration…

As each day continues to unfold with wonder, I am excited about TODAY and that’s because I have a new furniture makeover project to share with you.

Check out this green beauty…

Furniture Makeover: TUTORIAL ON HOW-TO PAINT FURNITURE; before & after cabinet transformation by www.jennaburger.com

I love giving new life to old furniture.  A piece that is made well + has ‘good bones’, can truly live on for years.  Giving a favorite heirloom or thrift-store-find a pick me up with a dose of TLC + a fresh coat of paint, will just add to it’s life long story; its journey.

This cabinet that I have just given life #17, is older than me (so just over 21, hehe – NOT).  For decades it sat beautifully in my moms home, but for the last 9 years, it’s been a treasure in my humble abode.

It started out stained, I gave it a makeover a few years back with paint + a glaze overlay, and now it got another refresh with a major splash of color.

Hello to my ‘new’ gorgeous green beauty…

Furniture Makeover: TUTORIAL ON HOW-TO PAINT FURNITURE; before & after cabinet transformation by www.jennaburger.com

Before I share more on the process of painting it, let me take you back to what it used to look like…

FIRST 35 YEARS.

Cabinet Before

LAST 9 YEARS.

Cabinet Before

NOW.

Furniture Makeover: TUTORIAL ON HOW-TO PAINT FURNITURE; before & after cabinet transformation by www.jennaburger.com

She truly needed a revamp AND she got it!  She looks better now than she did at 20.  I hope they say the same about me some day…

THE PROCESS.

The last time I tackled a BIG furniture makeover >>> the china cabinet makeover, I broke all the steps into individual blog posts.  Since this is a smaller scale project, I’m going to include all the details in this one post, but if you want more specific detail on the various steps, here are the links t o check out.

> how-to prep + sand wood furniture

> why + how-to prime wood furniture

> tips + tricks to paint wood furniture

> adding details + styling

> china cabinet ‘reveal’

To start this makeover, I brought the cabinet outdoors on a pretty, sunny day a few weekends back.  When the weather is good, I love to work outdoors!  I set myself up on the driveway and got workin’.

Cabinet Before

I sanded the all the surfaces using my orbital sander + hand sanded the nooks & crannies that couldn’t be reached.

Before & After CABINET MAKEOVER: The process of sanding, priming, and painting a cabinet to give it a fresh, new look. Tutorial on www.jennaburger.com

Before & After CABINET MAKEOVER: The process of sanding, priming, and painting a cabinet to give it a fresh, new look. Tutorial on www.jennaburger.com

Then I gave the entire cabinet a good wiping off with a lightly damp cloth.

Furniture Makeover: TUTORIAL ON HOW-TO PAINT FURNITURE; before & after cabinet transformation by www.jennaburger.com

Typically I would prime the surface next (as I did with the china cabinet), but since I primed this cabinet when I painted last using a stain blocking primer, it wasn’t needed. So I went right to painting with the new hue.

The color of choice for this project was an interesting one… there’s always a story.

I envisioned a true kelly green color for this cabinet and upon working with Glidden Paint last year on the china cabinet, I had to turn to them again for this makeover!  They pointed me in the right direction for choosing the best color using their Simplified Color Palette.

Call me crazy, but I finally chose a paint color featured in the Team Colors collection. My color of choice was Boston Green, the perfect green hue from the Boston Celtics. I had it mixed at The Home Depot in Glidden DUO Paint + Primer

Furniture Makeover: TUTORIAL ON HOW-TO PAINT FURNITURE; before & after cabinet transformation by www.jennaburger.com

Glidden Duo Paint + Primer is A+ because it truly is more than paint!  Because of the Paint + Primer formula, I save time & money.  The paint applied beautifully and the coverage was exceptional.

Furniture Makeover: TUTORIAL ON HOW-TO PAINT FURNITURE; before & after cabinet transformation by www.jennaburger.com

I opened the can of paint and was a little taken back by the color.  It was bright.  Thankfully when it was applied to the cabinet and dried, the intensity quieted.

Using a new angled brush, I applied the first coat of paint in a semi-gloss finish.

Furniture Makeover: TUTORIAL ON HOW-TO PAINT FURNITURE; before & after cabinet transformation by www.jennaburger.com

first coat complete.

Furniture Makeover: TUTORIAL ON HOW-TO PAINT FURNITURE; before & after cabinet transformation by www.jennaburger.com

3 coats later it was complete.

Furniture Makeover: TUTORIAL ON HOW-TO PAINT FURNITURE; before & after cabinet transformation by www.jennaburger.com

Furniture Makeover: TUTORIAL ON HOW-TO PAINT FURNITURE; before & after cabinet transformation by www.jennaburger.com

Furniture Makeover: TUTORIAL ON HOW-TO PAINT FURNITURE; before & after cabinet transformation by www.jennaburger.com

I paired the fiery, robust cabinet against a quiet, neutral wall and styled it with elements that were complimentary.

A few favorite books + accessories that aren’t as intense and loud sit atop the cabinet to balance out it’s boldness.

Furniture Makeover: TUTORIAL ON HOW-TO PAINT FURNITURE; before & after cabinet transformation by www.jennaburger.com

Go big or Go Home!  That is the motto for this cabinet makeover.

One last peek at the before & after…

Furniture Makeover: TUTORIAL ON HOW-TO PAINT FURNITURE; before & after cabinet transformation by www.jennaburger.com

What a change!

Thanks for checking out my latest and greatest DIY project.  I’ve got plenty more up my sleeve, so stay tuned.

GLIDDEN is giving away a $50 gift card to Home Depot.  Whether you have a painting project to tackle or a DIY idea that you want complete before the holidays, this is the time to ENTER, WIN, and CHECK it off your to-do list!

TO ENTER, fill out the rafflecopter box below and you’re done.  GOOD LUCK…

a Rafflecopter giveaway
DISCLOSURE: THIS IS A SPONSORED POST WITH GLIDDEN.  ALL WORDS + OPINIONS ARE 100% MY OWN – I TRULY LOVE THIS PRODUCT.  AFFILIATE LINKS ARE ALSO INCLUDED IN THIS POST.

6 Foolproof Steps to Purge + Organize + Renew your Home

With the 859,934 organizational pins on Pinterest, I’m already feeling a bit behind + overwhelmed and it’s only the 5th of January!  Deep breath. Deep breath.  Please tell me I’m not alone… BUT I am strongly pushing away those anxious thoughts and instead putting my efforts on living with intention, my focus for the coming year.

Organizing doesn’t come easy to me.  I am known to be a hoarder collector & have difficulty parting with things – keep or toss, keep or toss???  But over the past few months things around the little ole’ homestead of mine have gotten a wee bit out of hand (I guess anew baby can do that to ya) and I am ready to rise above & take back this joint!

As we wind down from the Christmas craze, January typically is a quiet + cold + drear month in our neck of the woods.  As I start the process of transitioning our home back to the everyday after the holiday mayhem, I always feel the New Year is ideal to clear the mind and begin a fresh start.  Now is the time to clean house and create a more organized home!!

This past weekend, actually news years day to be exact (because over the past week I’ve completely lost track of time), I started the clearing out/organizing process.  4 bags have already gone to goodwill… go me!  Coming from the person who hates to throw things away, this is big.

Here are the 6 steps that I have found really work [my foolproof tips] to purge + organize + renew your home for a fresh step in the right direction for the New Year

6 Foolproof steps to PURGE + ORGANIZE + RENEW your home in the new year! www.jennaburger.com

1. Make a list
I am a list person. I love to write it down, perform the task, and then cross it off.  To me, the “cross off” is the best part.  I feel so accomplished afterwards! So here is what I do…

Go room to room around the home and make a list of what is working and what isn’t.  Look in the closets, peek under the beds, and open the drawers. Create a page for each room and write down a plan of action for what you want to organize and what you need to lose (ie: organize sock drawer, purge papers/magazines, donate unused toys, etc).

6 Foolproof steps to PURGE + ORGANIZE + RENEW your home in the new year! www.jennaburger.com

A list will keep you focused + stay on track. When a task is complete, cross it off. Once all the tasks on your list are finished, the best part is reflection; looking back at all your hard work + efforts. It will also keep you motivated to do more!

2. Get Moving

Once your plan of action is in place, it’s time to get moving. Don’t analyze (which I’m known to do) Just start.Choose a room to start with and let your list guide you. Most likely, the whole house won’t be fully organized in a day – it’s simply not possible unless you already live in a spotless pad.

Instead of stressing and overwhelming yourself, set a time limit or a specific goal to work towards. Once it’s reached, be done. Then the next day, do the same. This will help avoid burn-out and will keep you motivated to continue. Organizing and taking control of the stuff in your home can be exhausting, so mentally prepare yourself for the job.

You’ll be amazed at how much better every room in your home looks once you get rid of the useless items.  Like I said 4 bags already packed up & shipped out.  Many more to go!

3. Purge. Toss. Donate.

Just keep saying to yourself… purge, toss, donate.  purge, toss, donate.  purge, toss, donate.

When going room by room, start by sorting through the items you no longer need, use, and/or want. Set up 3 boxes or bags (I typically use large heavy-duty garbage bags) to purge, toss, and/or donate. This will make the process faster + more efficient.  Have you ever tried the 3-for-1 rule?  For every new item you bring into the home (think about all those Christmas presents – shirts, books, toys, etc.), say goodbye to three things. Keep in mind, if something hasn’t been touched/used in 6-12 months, you probably don’t need it.

If you don’t use it, lose it.

PURGE. TOSS. DONATE. 6 Foolproof Home Organizational Tips that will get you pointed in the right direction NOW!

Once you have everything bagged up, ship it on out as soon as you can.  That way there can’t be regrets or second guessing!

6 Foolproof steps to PURGE + ORGANIZE + RENEW your home in the new year! www.jennaburger.com

And toss the miss-matched hangers! Go for all one color… IT’S LIBERATING!

PURGE. TOOSS. DONATE. 6 Foolproof Home Organizational Tips that will get you pointed in the right direction NOW!

4. Organize

Organizing is different than cleaning.  Sometimes the 2 can get confused (according to my Mister).  I am a great cleaner (surface cleaning), but when you open a drawer, it often doesn’t look so hot.

Once you’ve removed your unused items, it’s time to organize. I have found baskets, bins, trays, and other storage caddies are a great way to organize items you want to keep. Make a point to have a spot / a place for everything. This is especially key to keep the clutter in check with kids toys, books, games, and art supplies.

Fullscreen capture 152015 100438 AM.bmpMy newly revamped bookcase…  Baskets + Boxes + Bins are my happy place!

And keep in mind, it doesn’t have to look perfect because the reality is it won’t stay that way for long.  As long as everything you keep is needed and placed/arranged in an orderly way, that is ‘perfect’.  Take a glimpse at my newly organized closet…  To some it may still look a mess, but to me, this is good!  Shirts are together.  Pants are in one section. Scarves are in a bin. Bags are in place.  DONE!

PURGE. TOSS. DONATE. 6 Foolproof Home Organizational Tips that will get you pointed in the right direction NOW!

These were snapped with my iphone cam which is why they’re a bit grainy, sorry…

Did I really just share a picture of my closet???

PURGE. TOOSS. DONATE. 6 Foolproof Home Organizational Tips that will get you pointed in the right direction NOW!

5. Go Vertical

Maximize your storage capabilities by using more wall space. Bookshelves are great for going vertical to get things off the ground, thus creating more floor area. In closets, add shelving as high as possible for extra storage of blankets or non-everyday essentials. Add hooks in the entry for additional coat/bookbag storage. Hang additional shelving in the basement and/or garage for more space to put large bins.

Get Organized! For an easy entry upgrade, add built-in coat hooks and wooden crates [easy do it yourself project] www.jennaburger.comour entry coat rack > click for DIY Tutorial

A side tip for you >>> Choose furniture that can serve double duty to save on space!

6. Commit

The most important, but most difficult part of organizing…

Getting organized is one thing, but staying organized is truly a commitment. Once you’re organized, take the extra 10 minutes each day to tidy up and monthly to go through each room to purge any unused items or papers. Each night once the kids are in bed, I make sure all their toys are back in place, the dishes are done, the counters + tables are cleared off.  It’s amazing what 10-15 can do to get the job done rather than piling up day after day!

Decide.  Commit.  Succeed.

Expect that there will be minor setbacks throughout the year (not a biggie), but remaining positive+ focused will help keep you motivated to stay organized.

While the snow is piling up outside, put that overabundance of extra energy and efforts into purging and organizing inside.  The simpler we live, the saner we are! Rid your lives of the clutter and unused things to achieve a more meaningful, organized home.

What ideas / tips / suggestions can you share that keep your home organized + clutter free?

Decorating with Leaning + Ladder Shelves

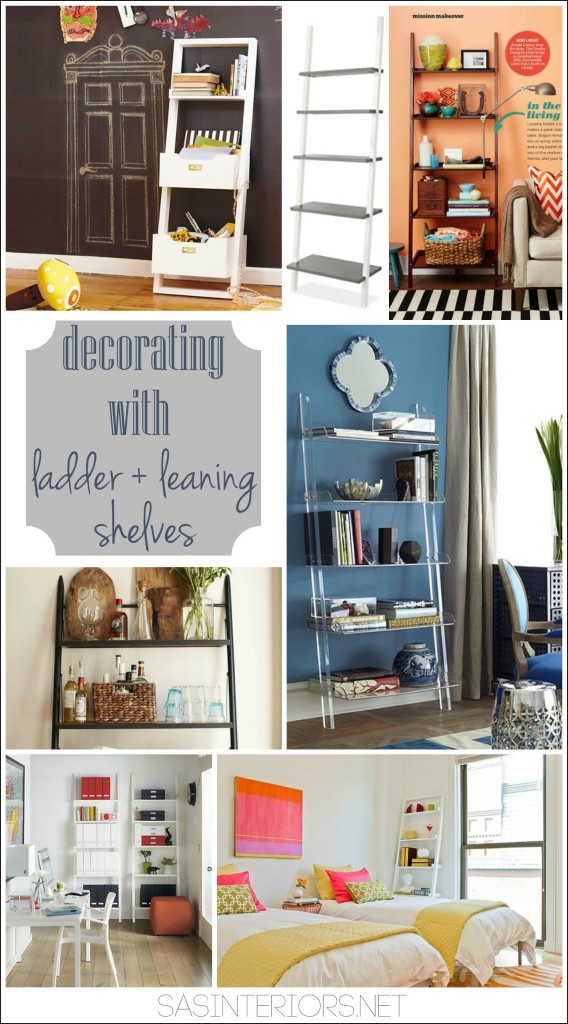
Within the past two months, I’ve purchased 4 leaning shelves (a.k.a. ladder shelves).

Obsessed? No.

Great for storage? Affordable? Open + Airy?  Yes.

For the same reason, I’ve been loving leaning shelves as of late, I’ve got my clients hooked too and I’d like to share with you why leaning shelves work so well for any room in the home.

Decorating with Leaning + Ladder Shelves - Leaning Shelves are affordable, open + airy, and bring great height to a space. So much inspiration + ideas in THIS POST!

Any style shelf gives height to the room. Most pieces of furniture (tables, sofa, chair, bed, etc) aren’t higher than 30/36″ off the floor, which often leaves pictures / artwork to be the only source of height in a room.  As much as it’s important to have “things” on the wall, it’s also important to break up the monotony and a bookcase / shelves can be that element.  Don’t get me wrong, I love the look of a closed bookcase, but I also really prefer the style of a leaning shelf.

Why?

> Height: Art + pictures are a must on the walls, but without anything else to grab the eye and break up the plane, a space can become boring and lack depth.  By adding shelving, specifically leaning shelves, a wall can have the needed to break and 3-dimensional look needed to add visual interest.  With the addition of books, accessories, baskets, and more, the shelves can become the star of a room.

> Storage: The aesthetic part of shelves is that it brings height + interest to a room, but the storage element of shelving brings in the functional aspect.  Who doesn’t desire more storage in their house?  I certainly do {raising hand in the air}…  Adding in a tall element, like a shelf, allows you to use the vertical plane of the wall instead of the horizontal, floor area, of a room.  Save on floor area, use height instead!

> Affordability: Leaning Shelves are very affordable, probably because there really isn’t much too them.  The most recent style I chose, I purchased at Target for a few dollars over $100. I’ve also been wanting to make my own version – I think it would be fairly easy – but I’m still gathering the guts + time to do it.  Anyway, there are versions that are less than $100, like this one and styles that are a lot more (but are pretty fabulous) like this one at $1600.  Add height to a room for around $100? Perfect!

> Open + Airy: I specifically like the look of leaning shelves because they provide the height and the storage needed in a room, but they aren’t closed in as a typical bookshelf with a back + sides are.  The leaning shelf is minimal allowing for any size space (even small spaces like bathrooms & laundry rooms/nooks) to handle the horizontal attention-grabber.  Plus I’ve seen leaning shelves in a variety of widths, as well.

I must be on the right design track with my recent purchases because I opened two design magazines this month and they both featured spaces with leaning bookshelves.

After reading the first feature in the March issue of HGTV magazine, it ‘s what inspired me to write this post. I know you all would love and feel confident to use leaning shelves after seeing these inspirational spaces!

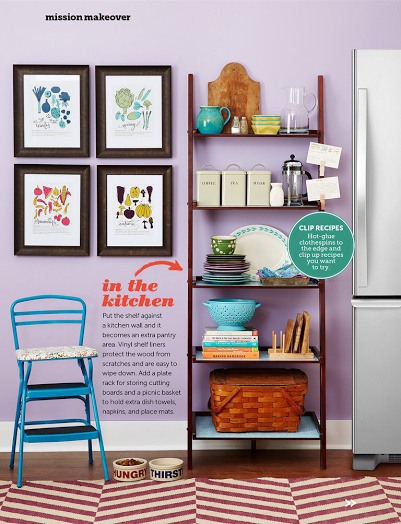
1.  A leaning shelf in the kitchen

Perfect for holding dishes, cookbooks, bowls, coffee supplies, and so much more.

Decorating with Leaning + Ladder Shelves - Leaning Shelves are affordable, open + airy, and bring great height to a space. So much inspiration + ideas in THIS POST!

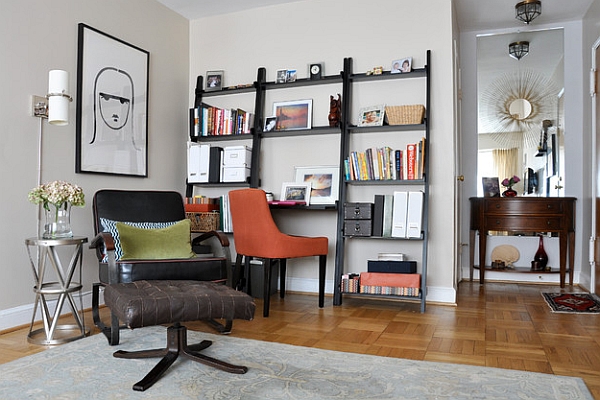
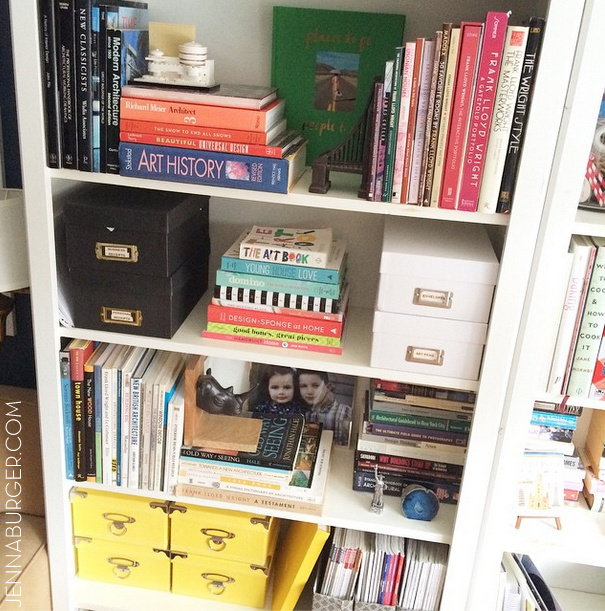
2. A leaning shelf in the living room

Ideal for books, pictures, accessories, and I adore the idea of a adding a reading light.  No more need for a side table.

Decorating with Leaning + Ladder Shelves - Leaning Shelves are affordable, open + airy, and bring great height to a space. So much inspiration + ideas in THIS POST!

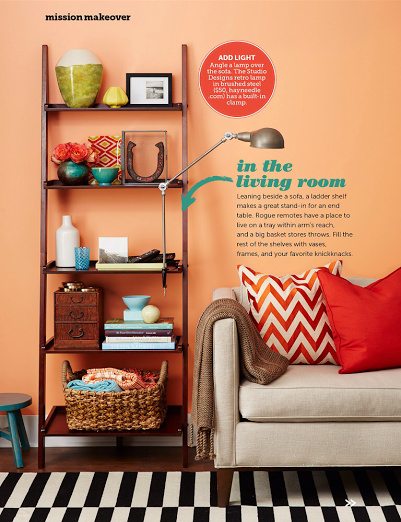
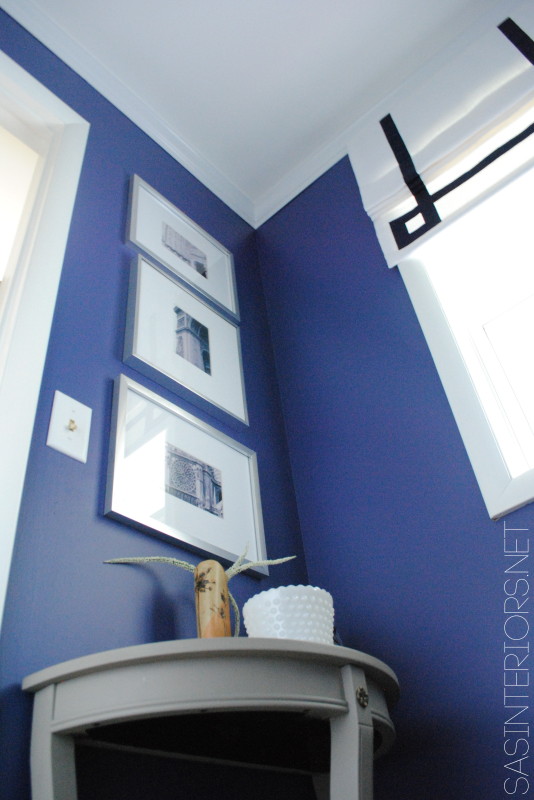
See how this ladder shelf gives so much height to the space, yet there is no real break of wall color or ‘closed-in’ feeling.

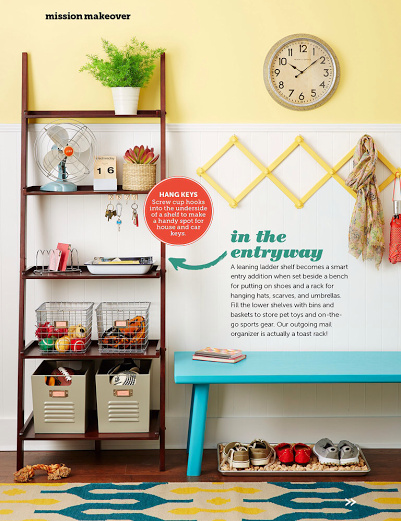
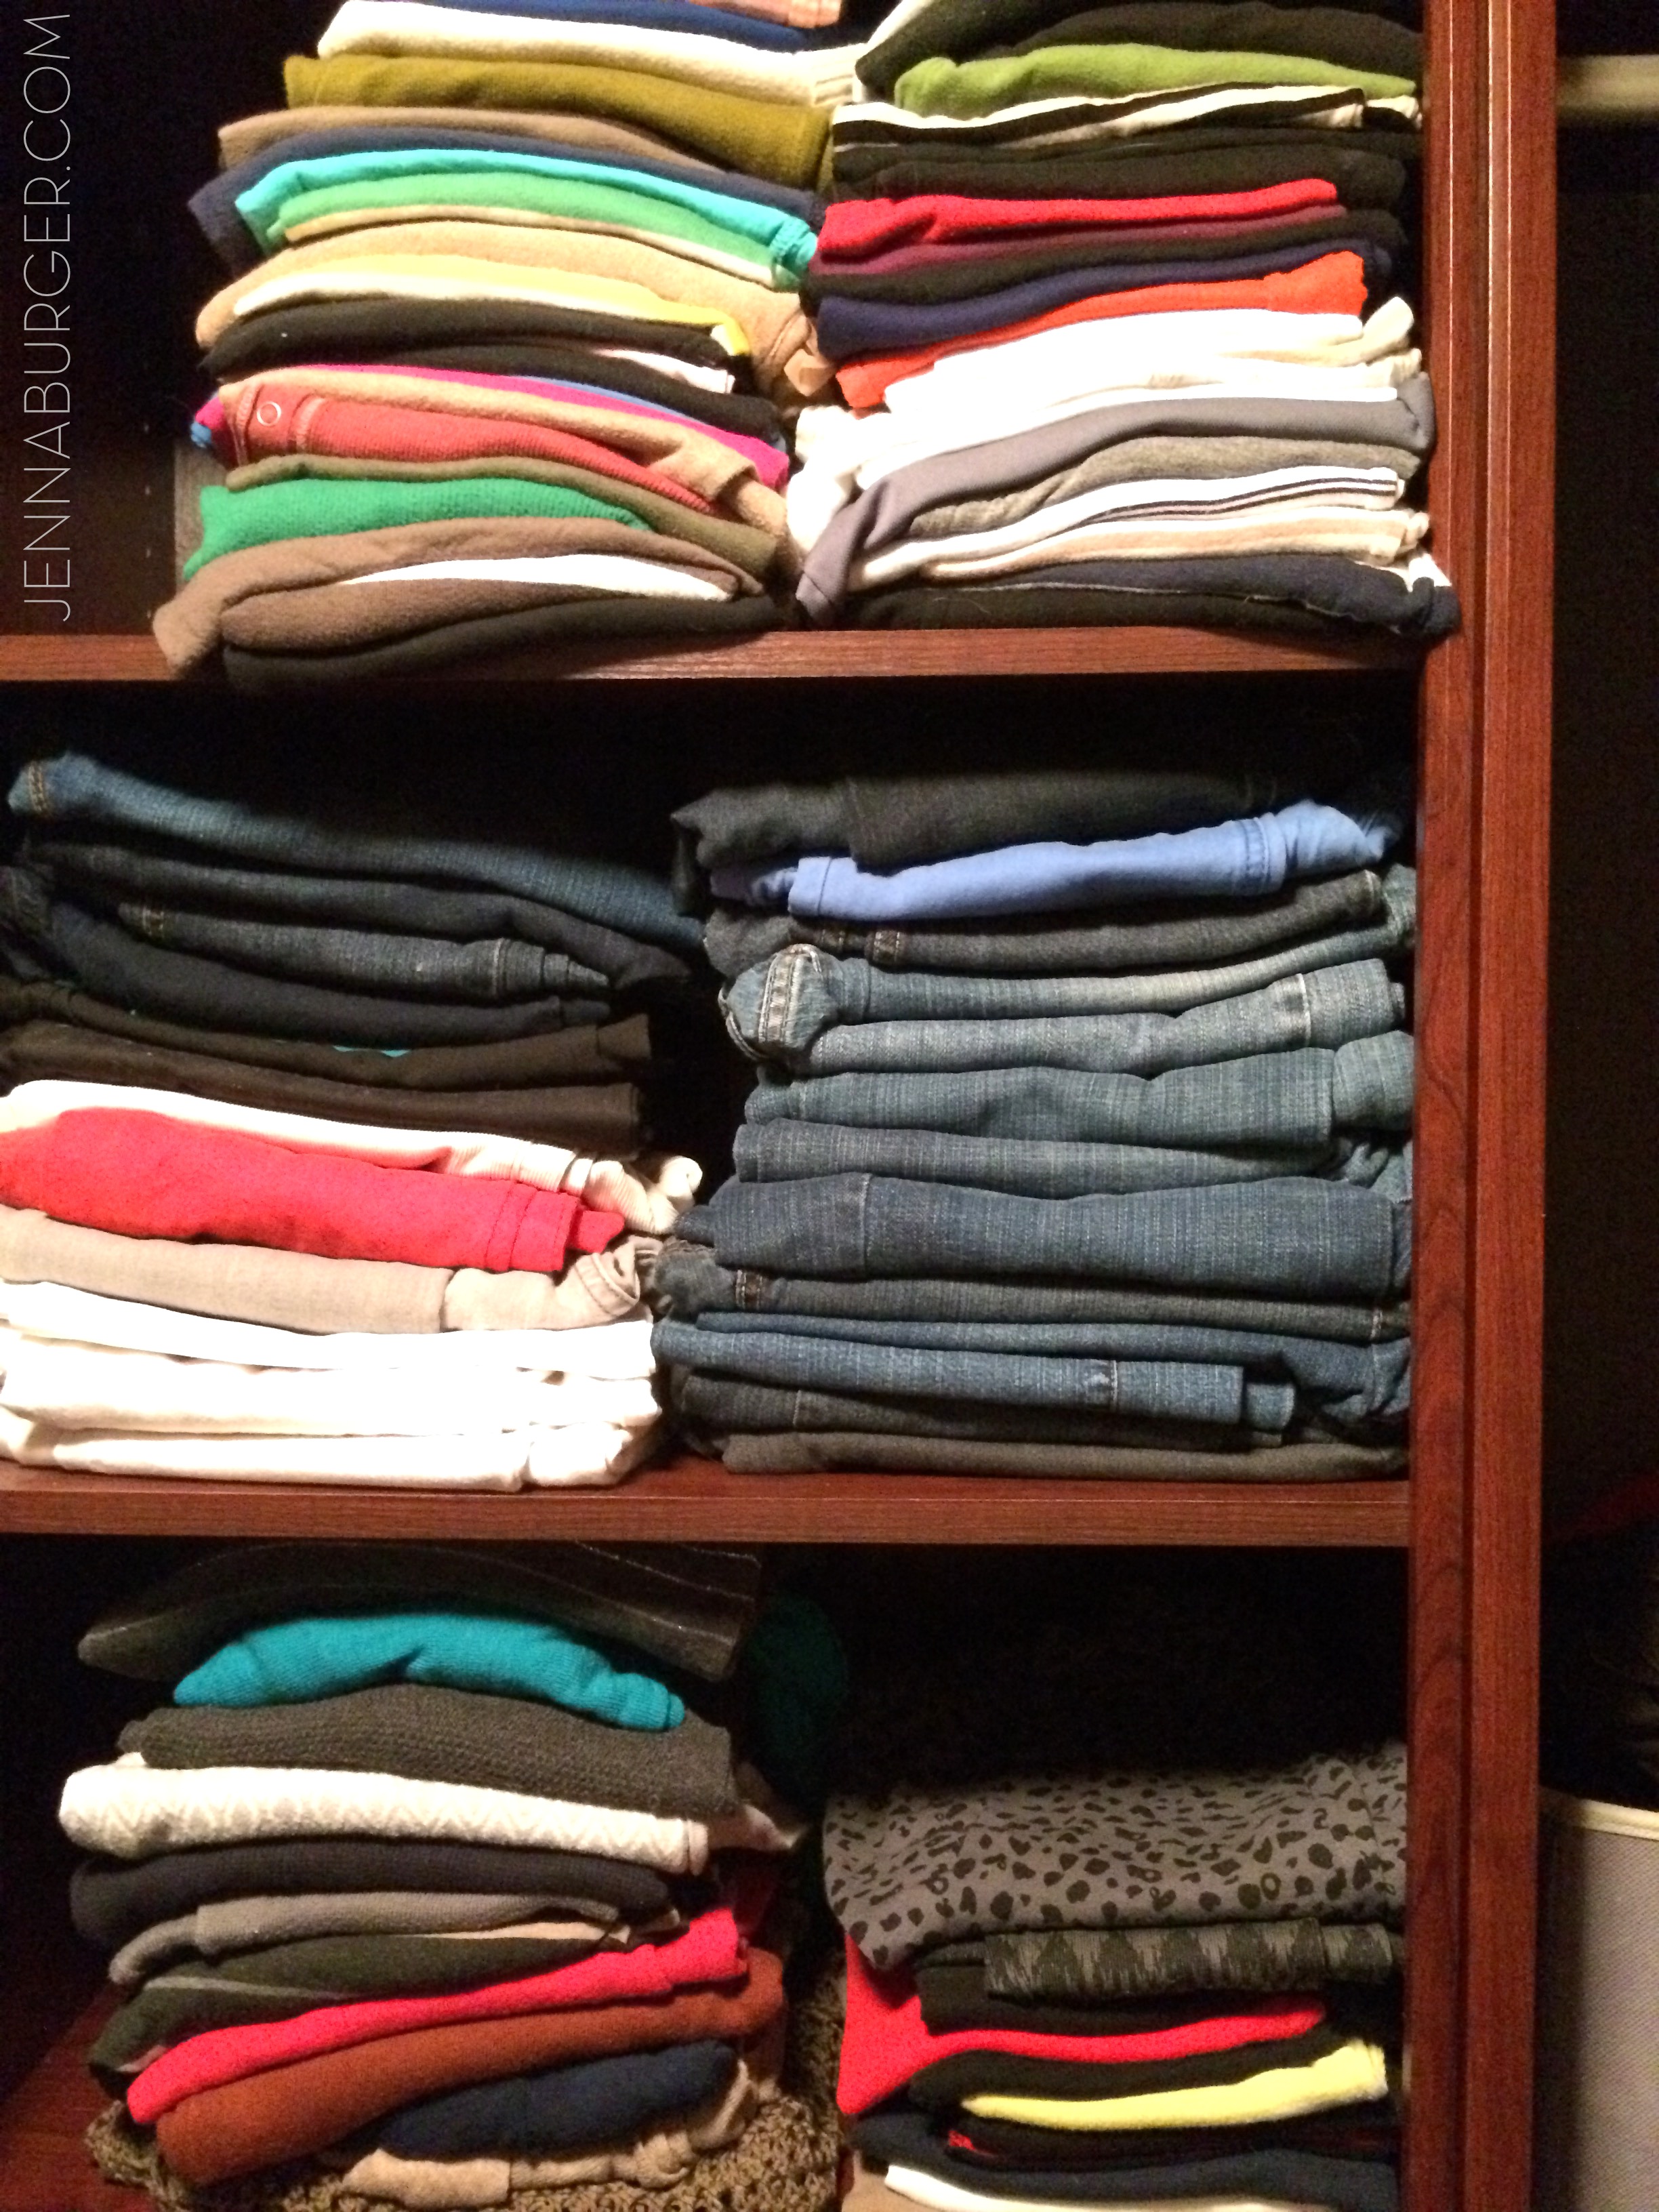
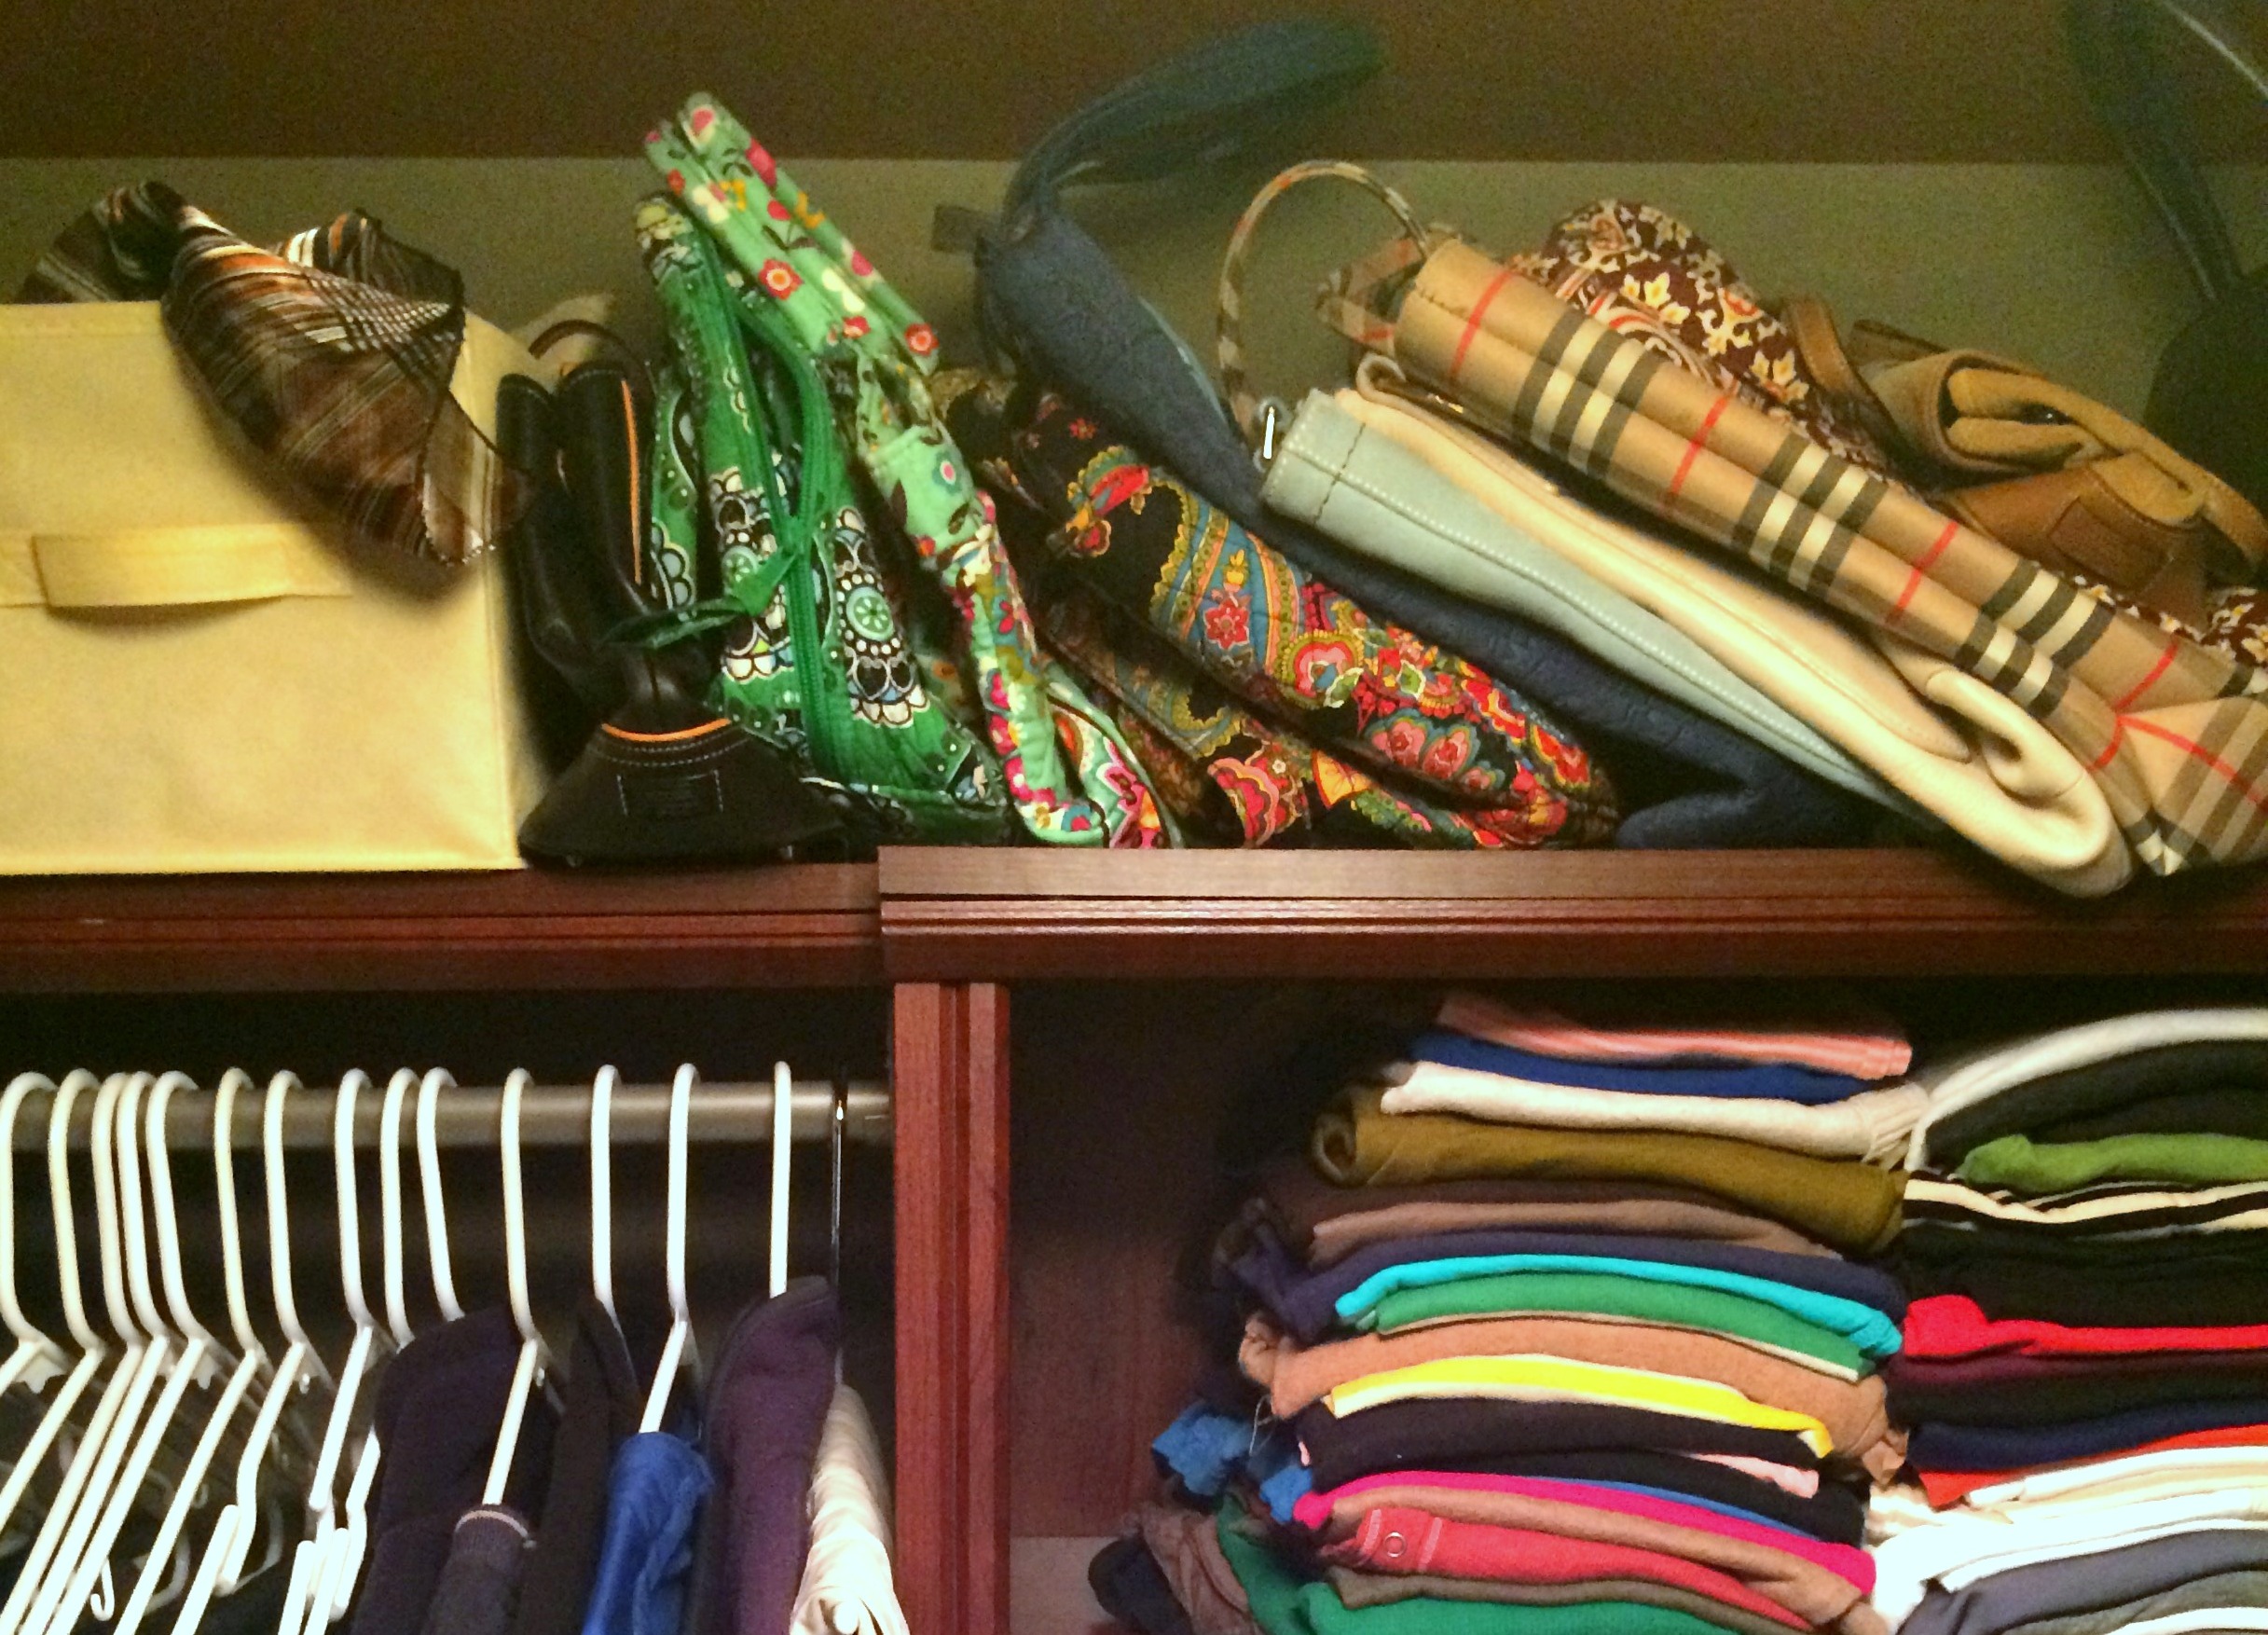
3. A leaning shelf in the entry

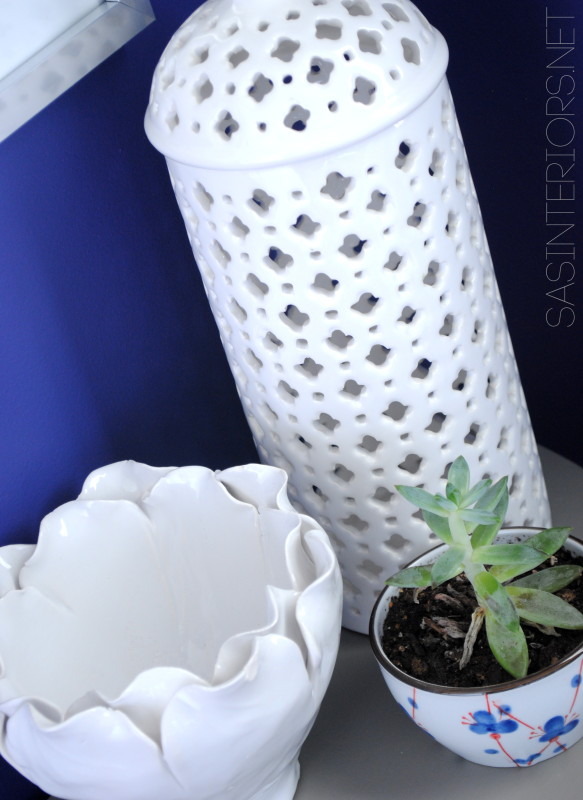
Essential for all the winter-wares, shoes, and bags!  The shelves allow space for the must-haves, along with some surface to display some pretty like a plant and cool fan.

Decorating with Leaning + Ladder Shelves - Leaning Shelves are affordable, open + airy, and bring great height to a space. So much inspiration + ideas in THIS POST!

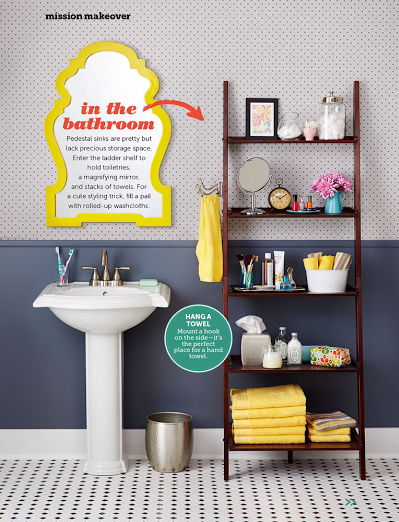
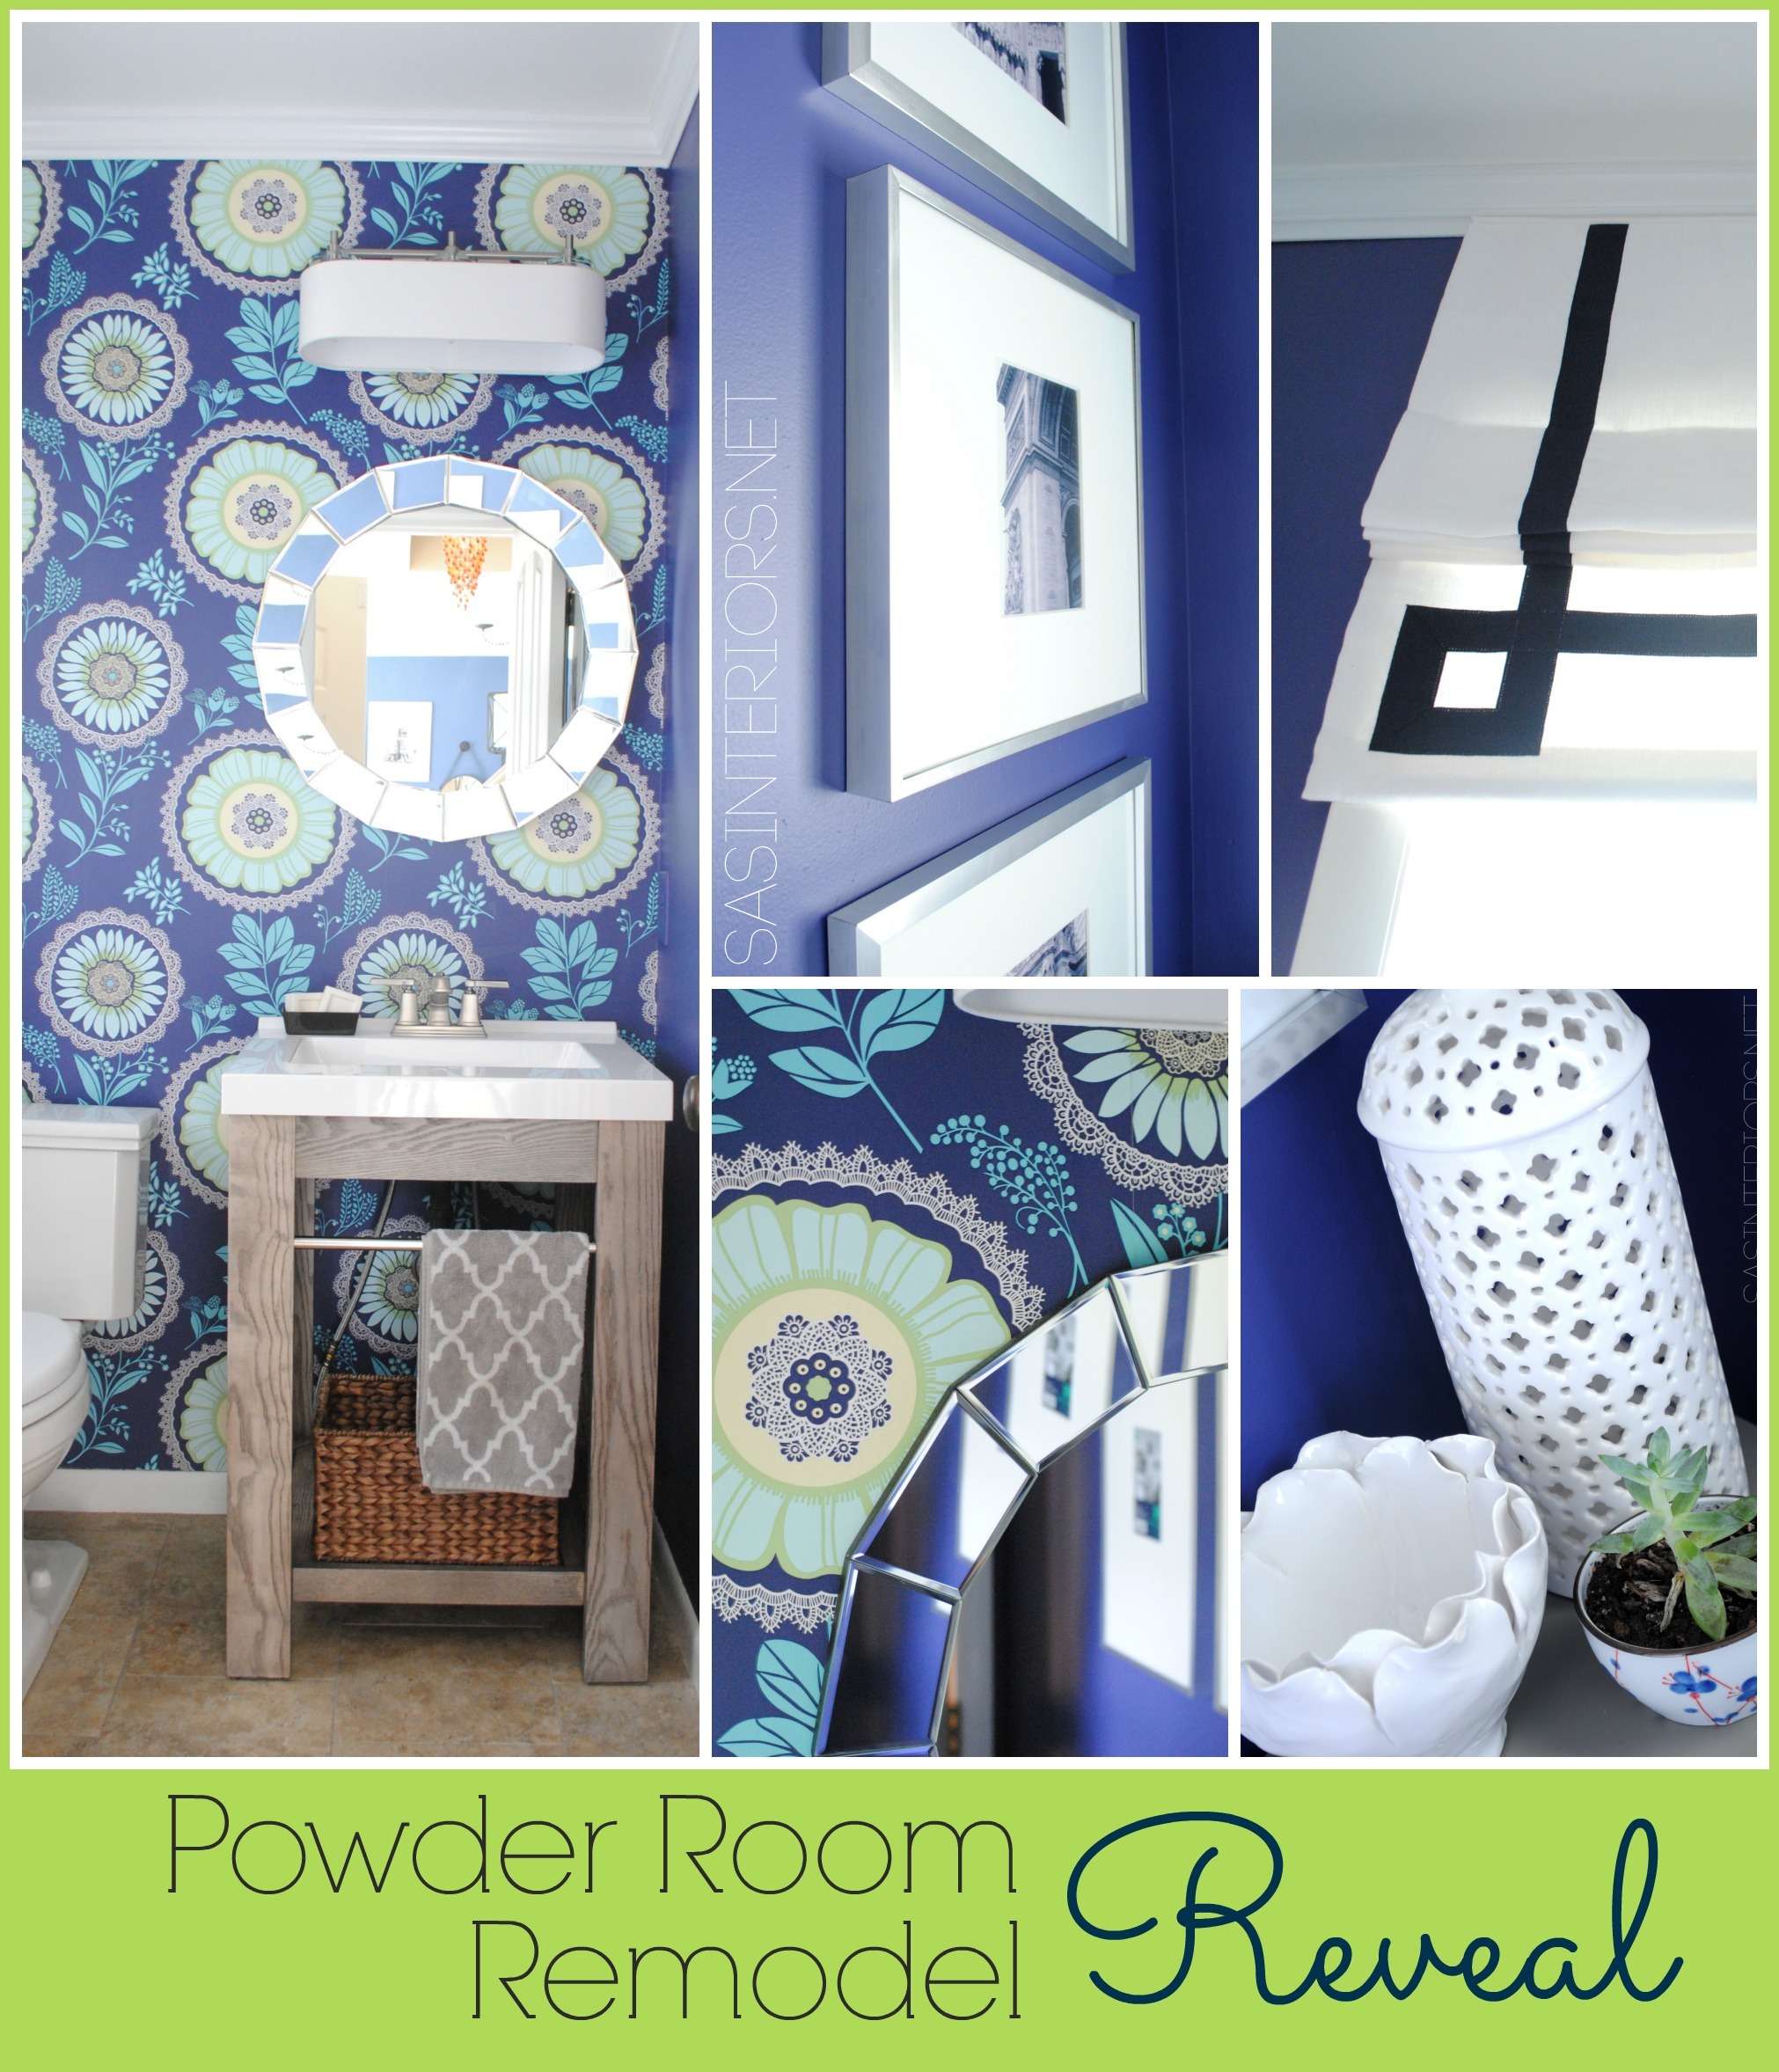
4. A leaning shelf in the entry

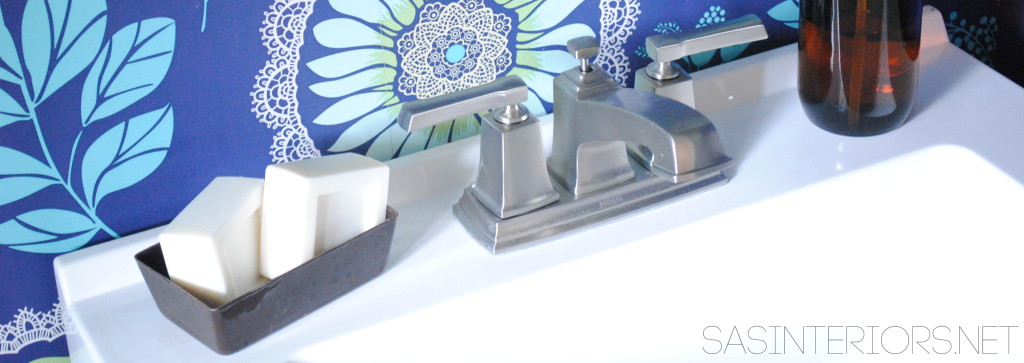
Big or small, most bathrooms could use more storage.  Am I right?? And if you have a pedestal-style sink, you really are in need of more surface space.  A ladder shelf is the perfect solution for all your products + towels.

Decorating with Leaning + Ladder Shelves - Leaning Shelves are affordable, open + airy, and bring great height to a space. So much inspiration + ideas in THIS POST!

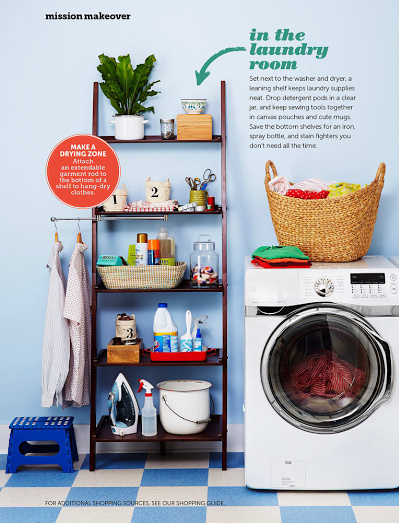
5. A leaning shelf in the laundry

Another spot that most everyone can use more space.  Depending on the layout of the laundry room or nook, a leaning shelf can provide the extra storage needed to keep the space tidy + organized.

Decorating with Leaning + Ladder Shelves - Leaning Shelves are affordable, open + airy, and bring great height to a space. So much inspiration + ideas in THIS POST!The above images of 5 ways to use a leaning shelf is from HGTV magazine

The other publication that I was flipping through and came across an interesting display of leaning shelves was Better Homes and Gardens April issue.

Decorating with Leaning + Ladder Shelves - Leaning Shelves are affordable, open + airy, and bring great height to a space. So much inspiration + ideas in THIS POST!

Decorating with Leaning + Ladder Shelves - Leaning Shelves are affordable, open + airy, and bring great height to a space. So much inspiration + ideas in THIS POST!

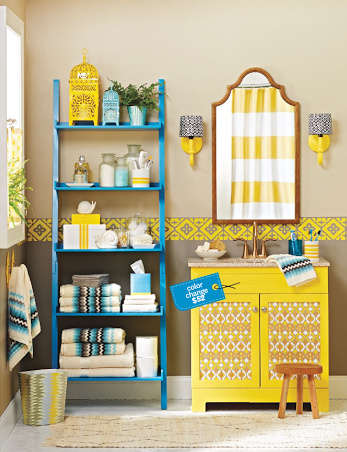
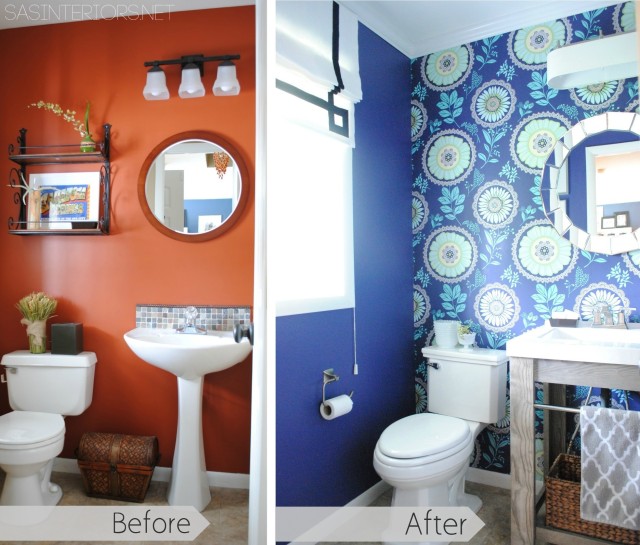
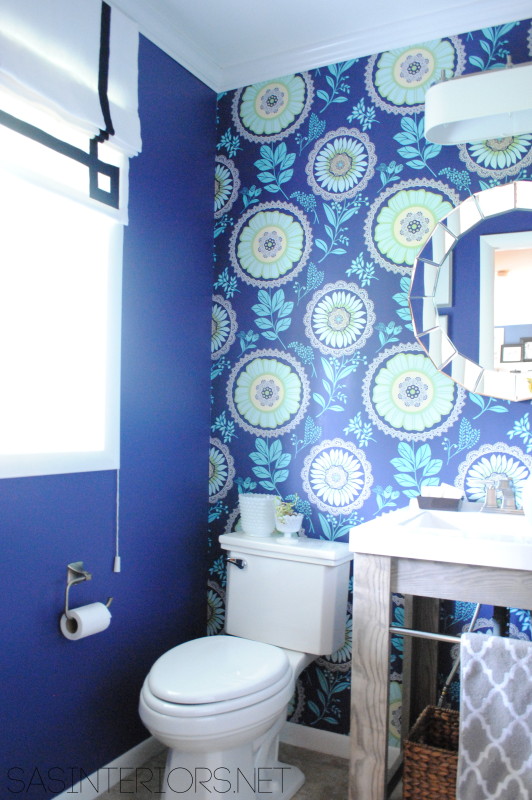
For these shelves, I am pretty sure they painted them the popping turquoise hue, but what a great space, right?!  I love the color palette of the vivacious yellow, gray, and turquoise.  If you can, get your hands on this issue – they’re are lots of great + affordable ideas for bathroom upgrades.

After seeing all these ideas, I am sure you want to get your hands on some new shelving.  Am I right?  I put together a collection of a few favorites with resource links.
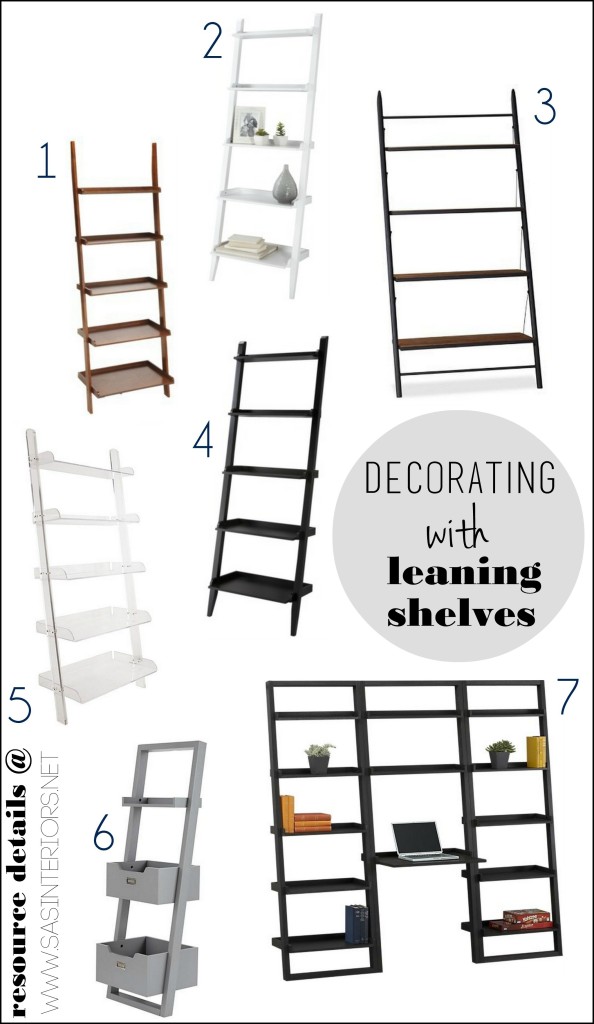
Decorating with Leaning + Ladder Shelves - Leaning Shelves are affordable, open + airy, and bring great height to a space. So much inspiration + ideas in THIS POST!

Resources:
1. Cherry-finish Leaning Shelf
2. White Leaning Shelf
3. Iron frame / Wood Shelves Leaning Shelf
4: Black Leaning Shelf
5: Lucite (clear) Leaning Shelf
6: Gray Leaning Shelf with Bins
7: Leaning Shelves with Desk

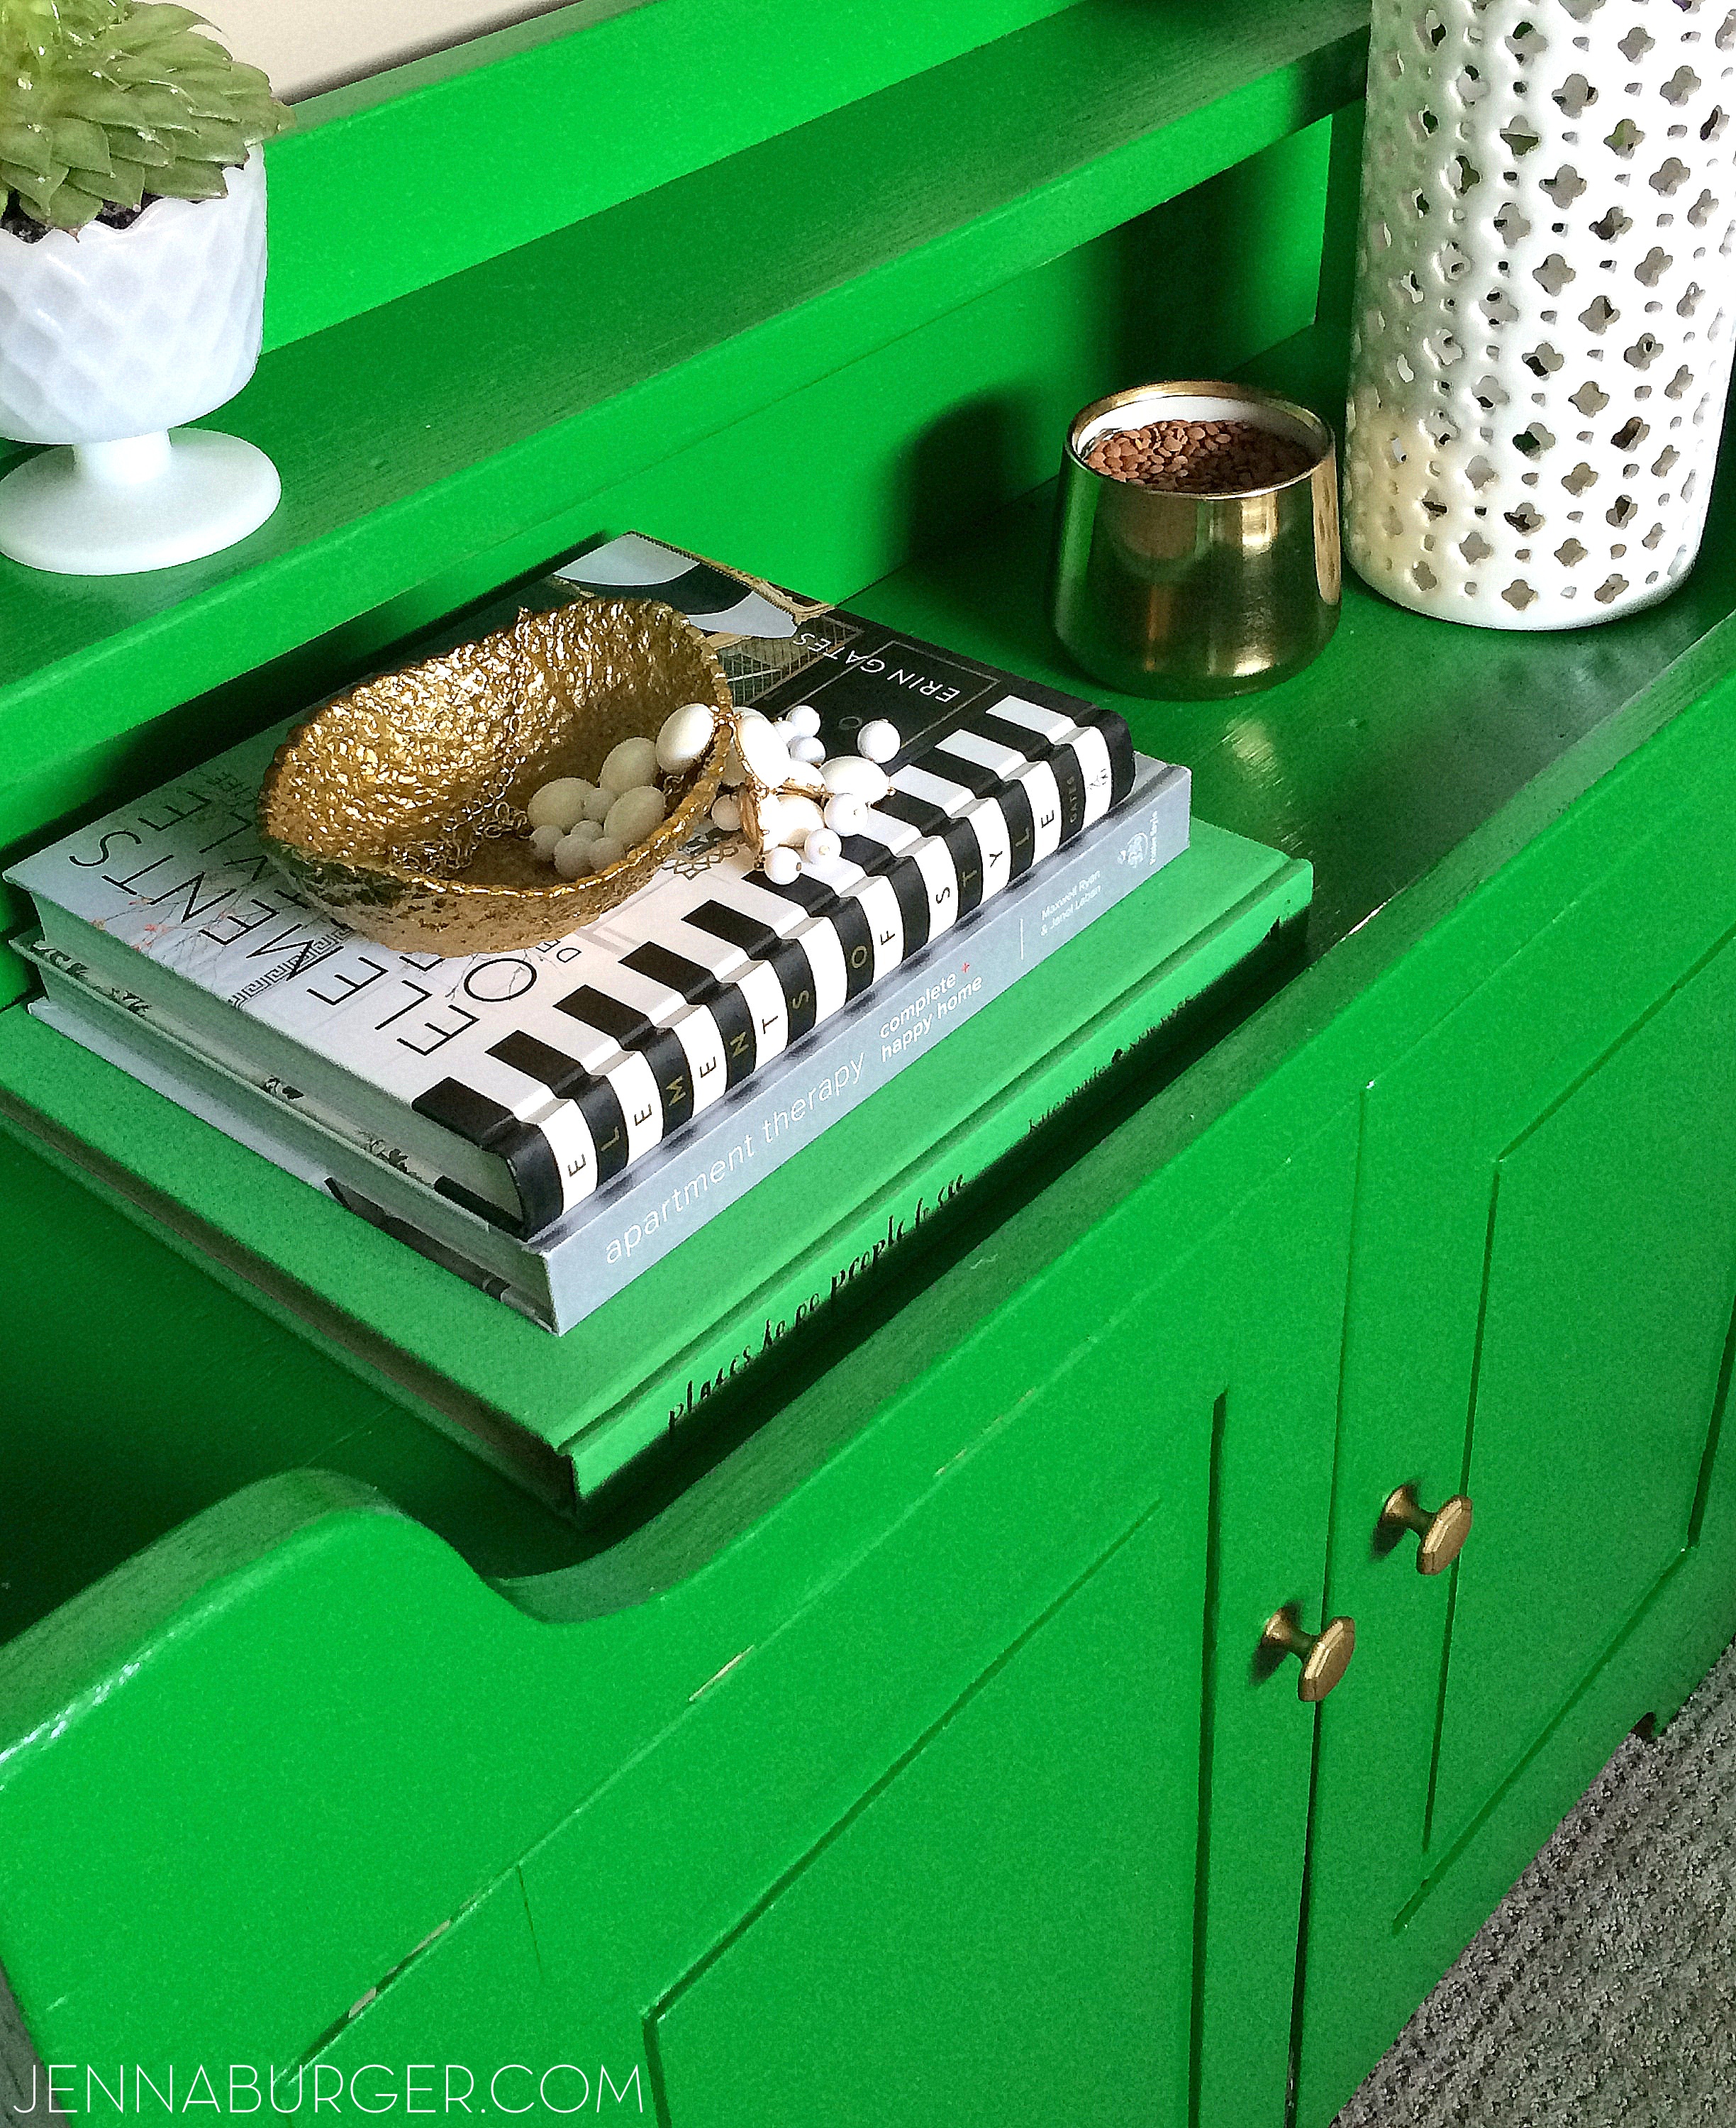
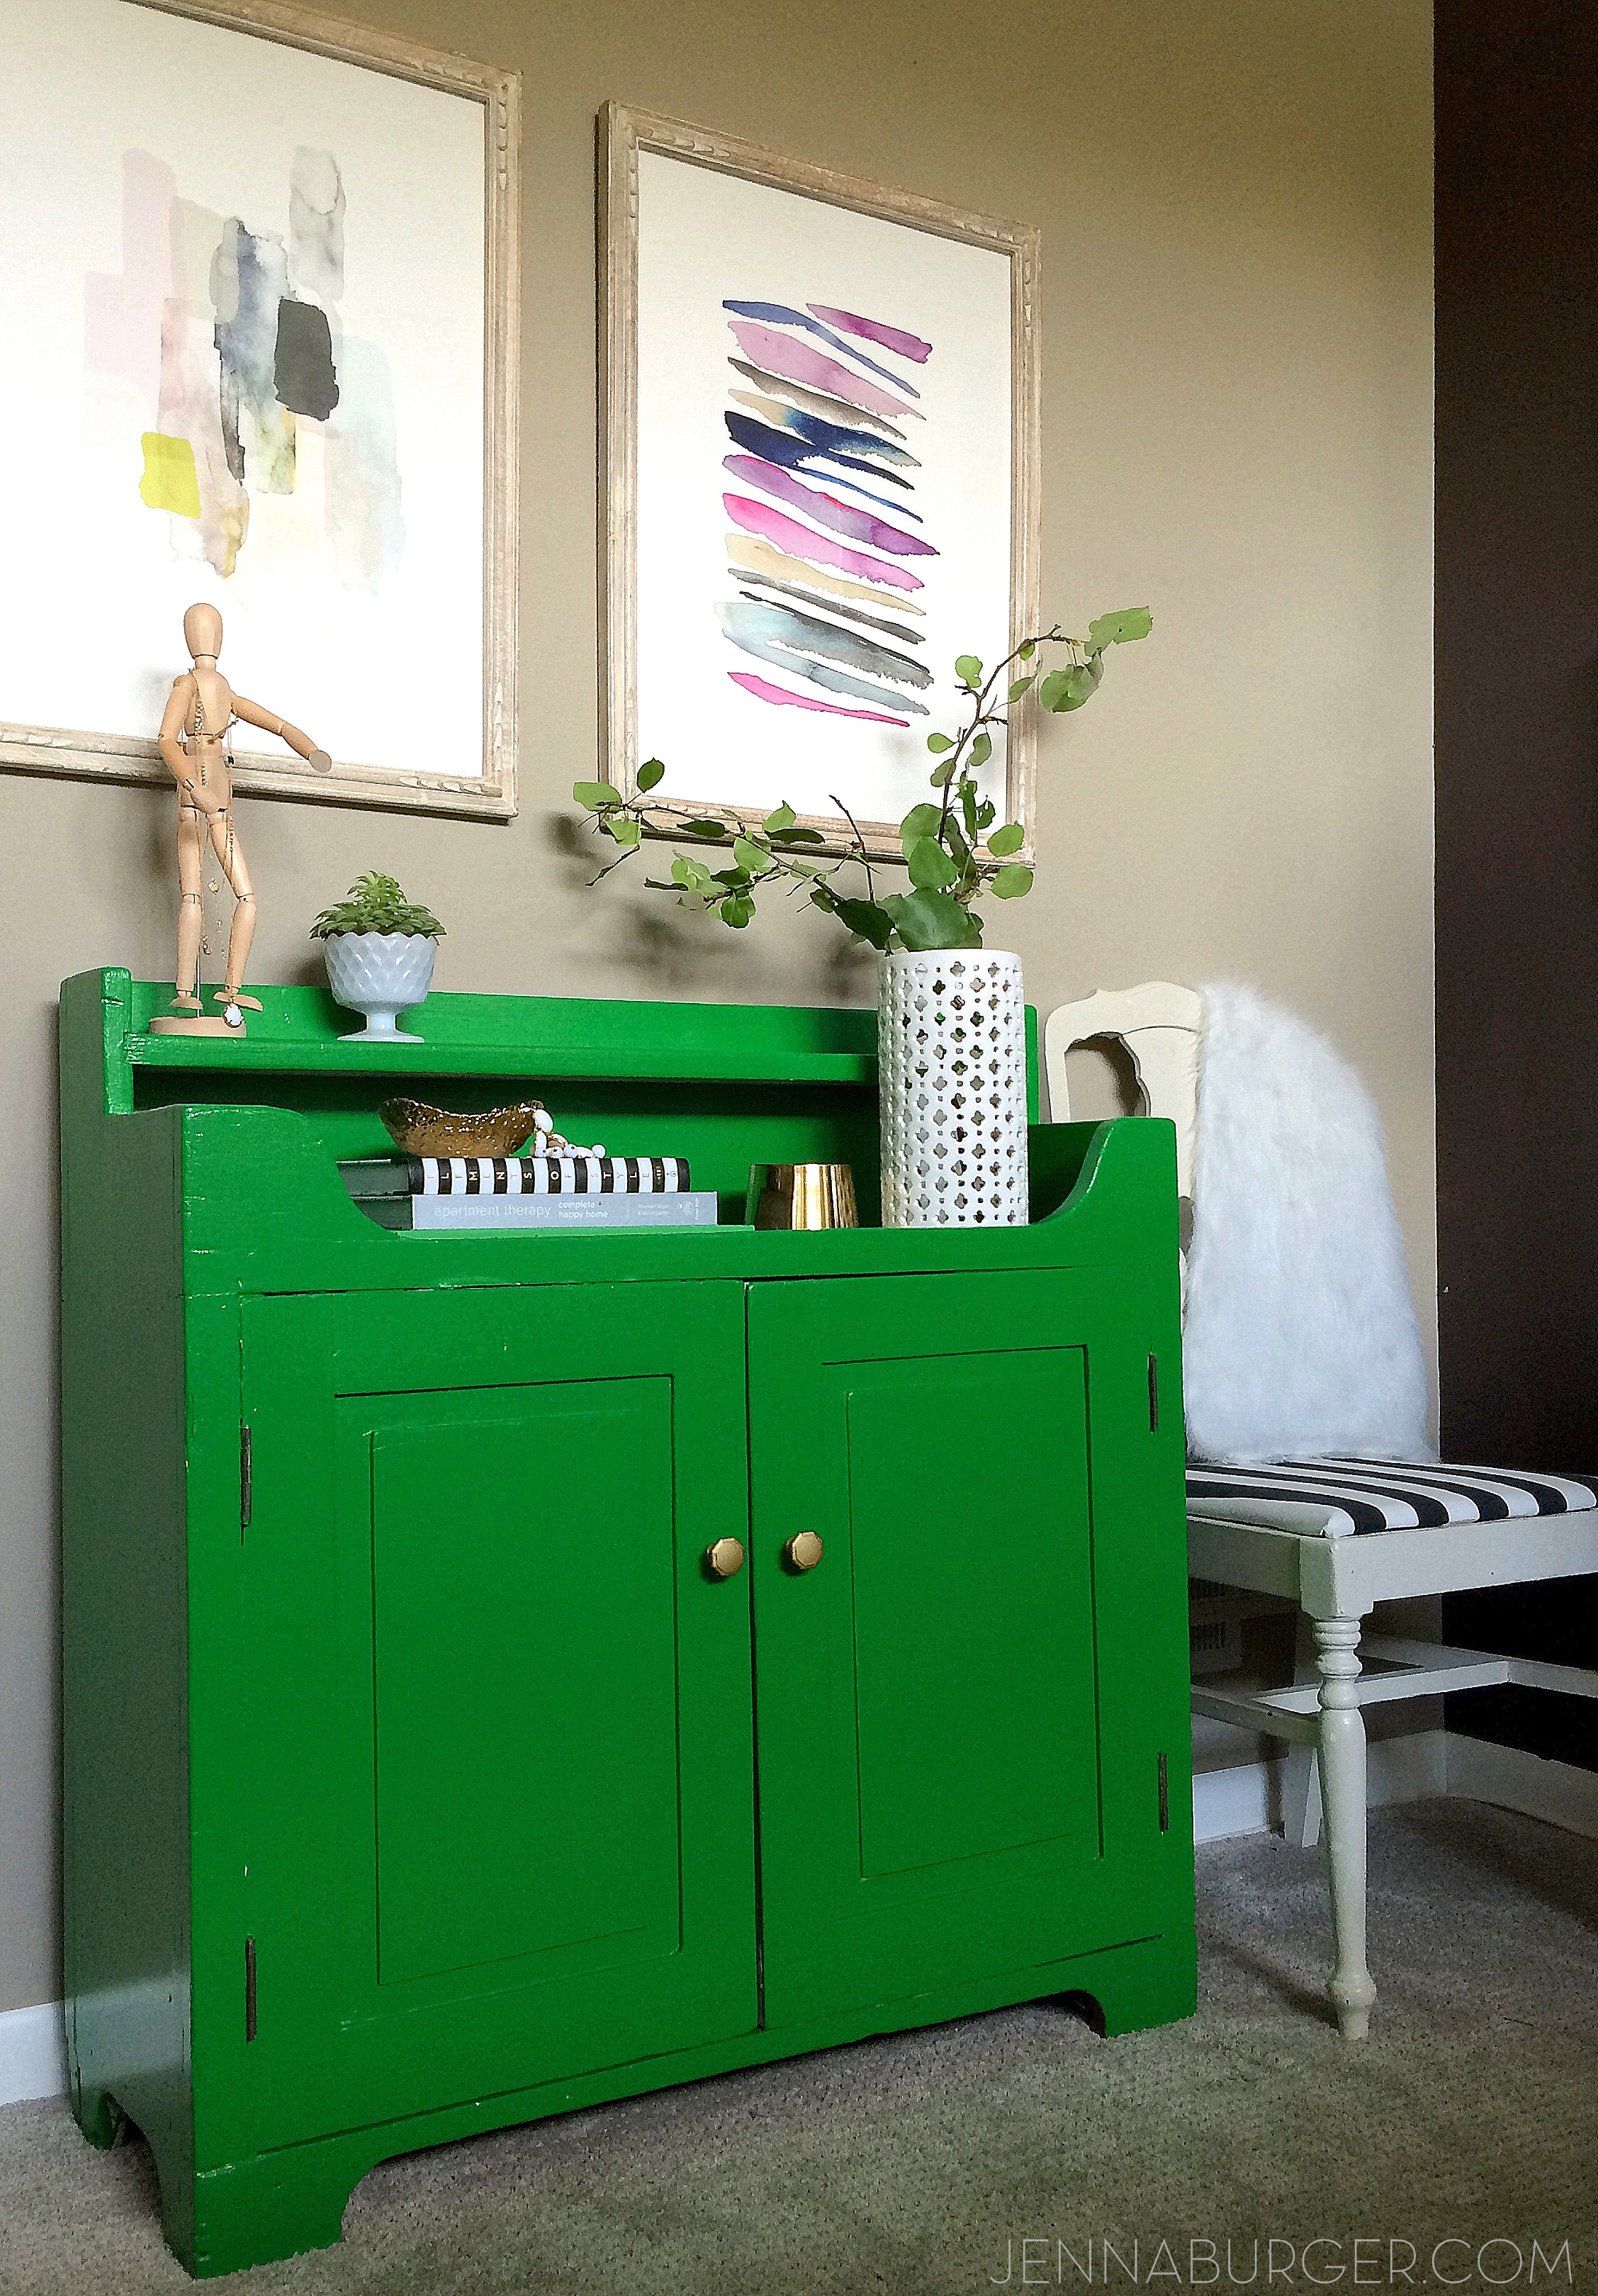
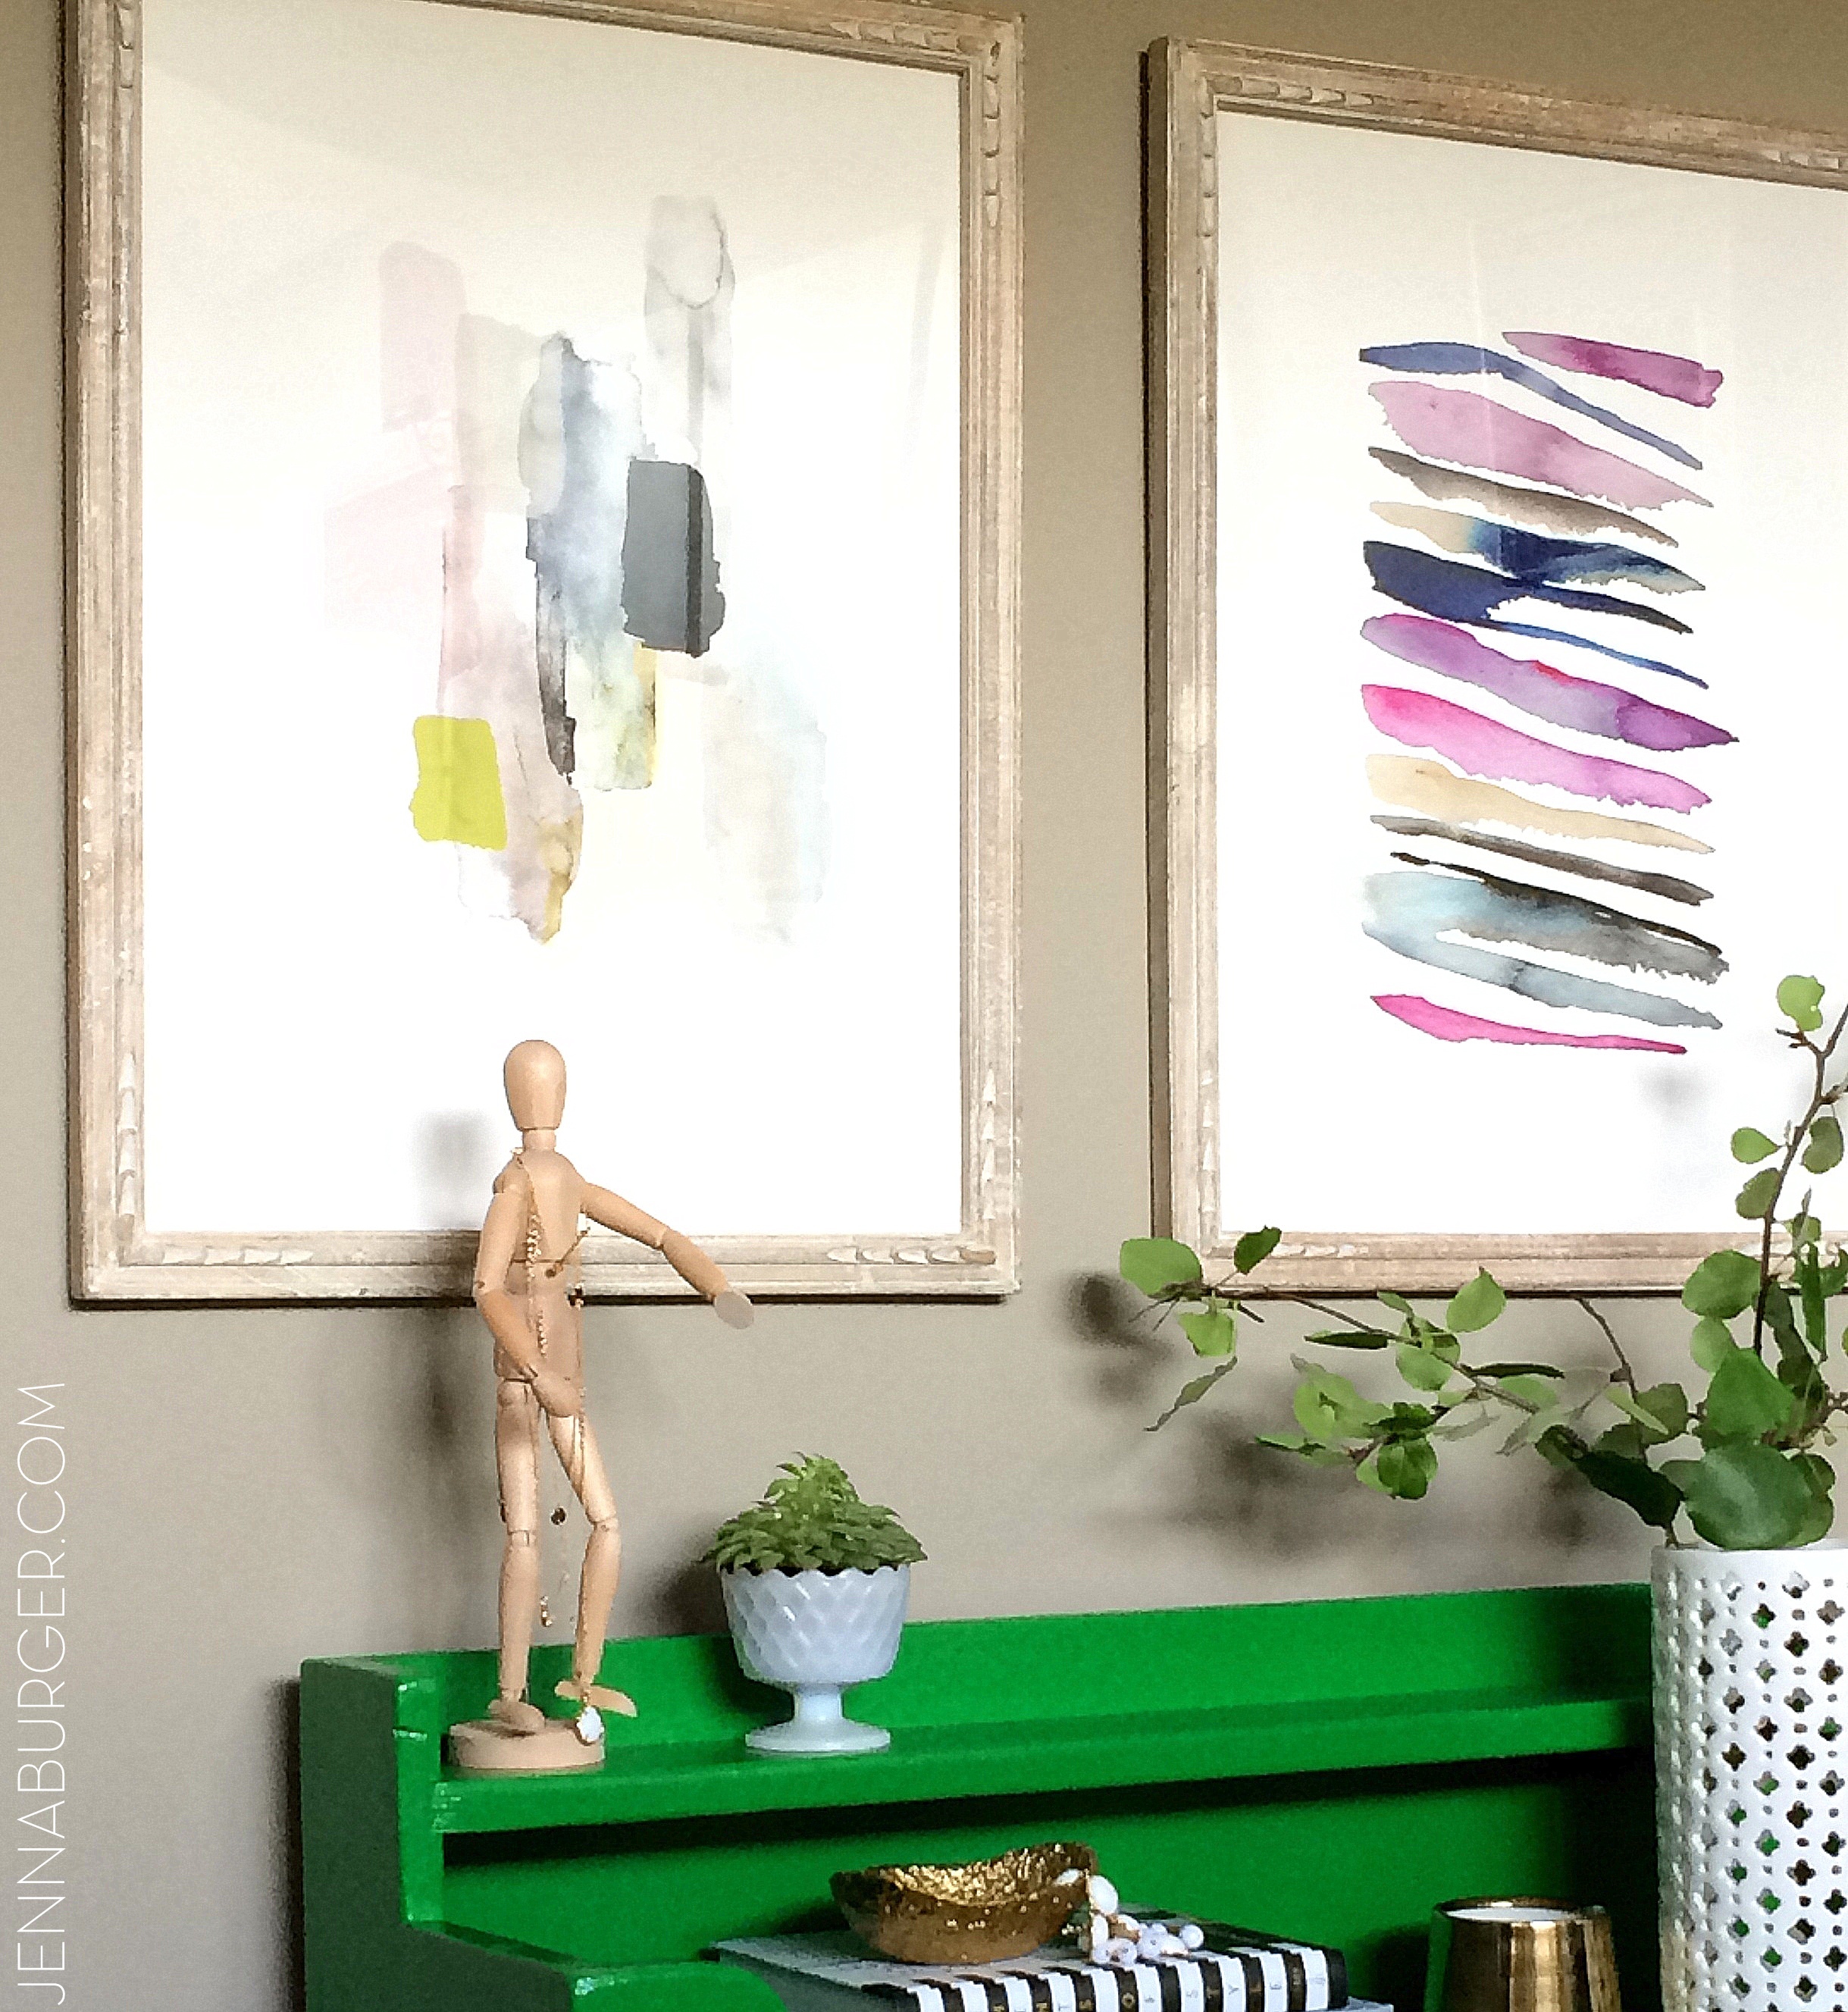
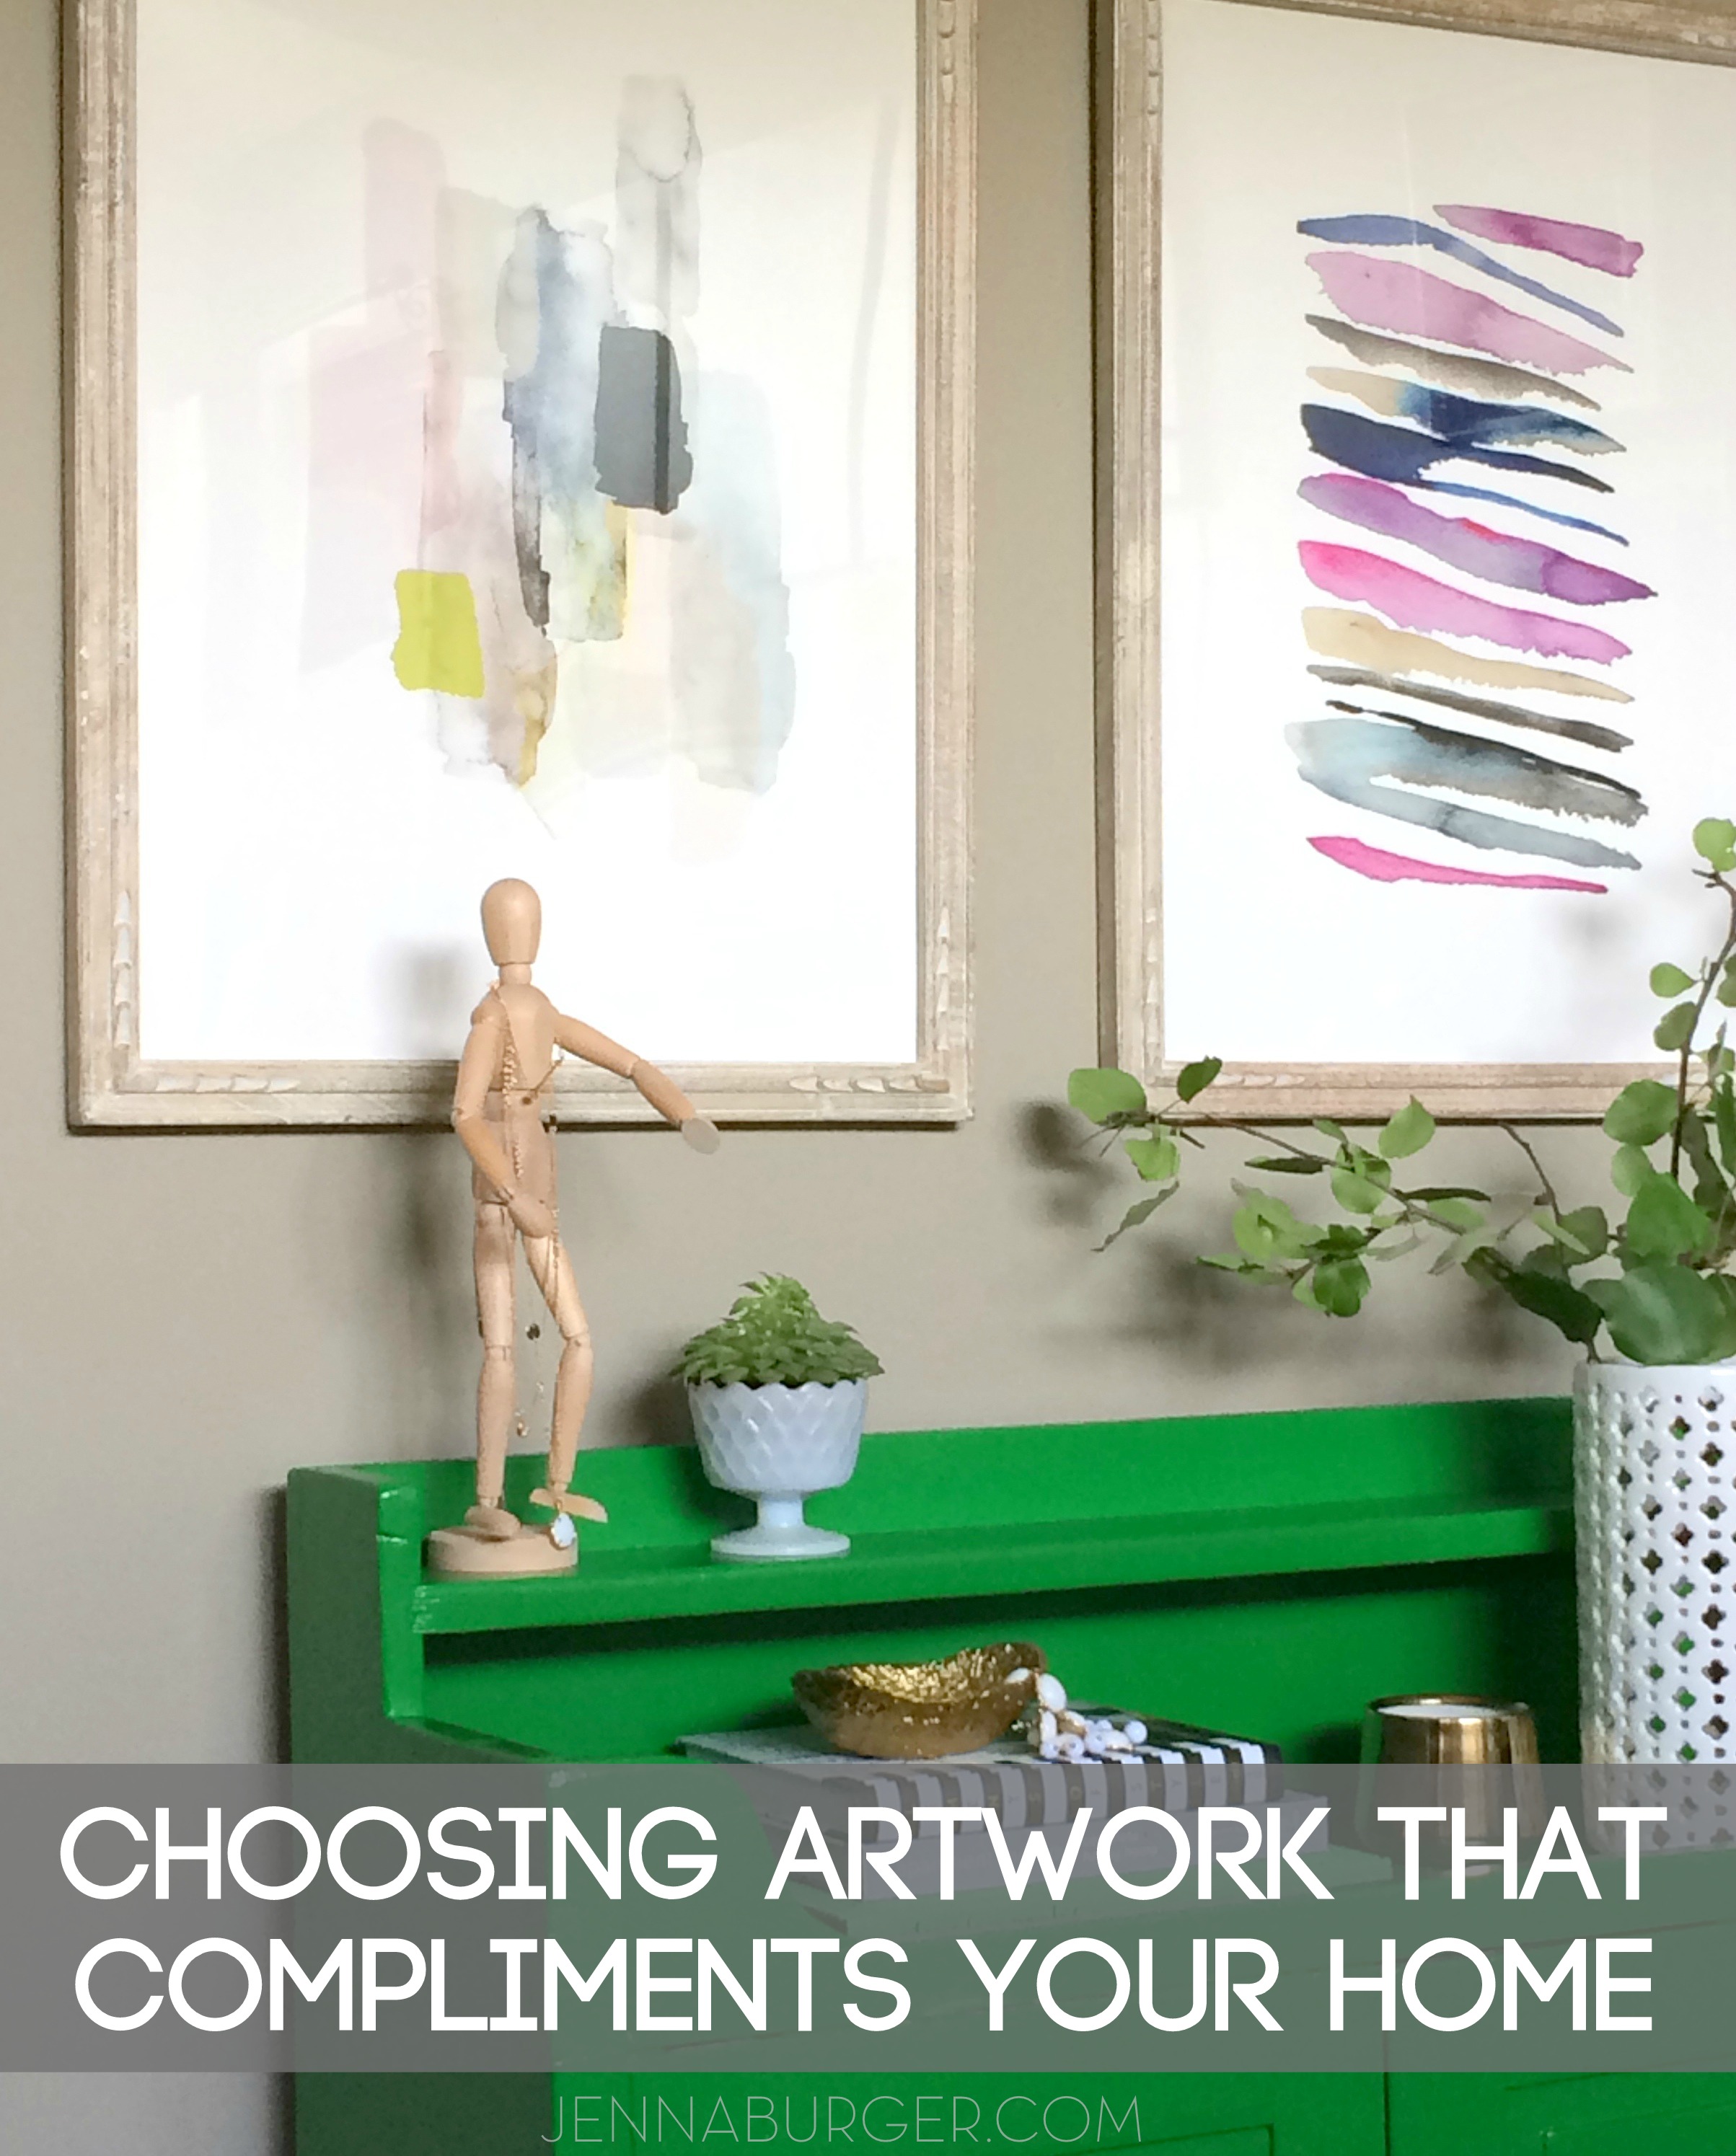
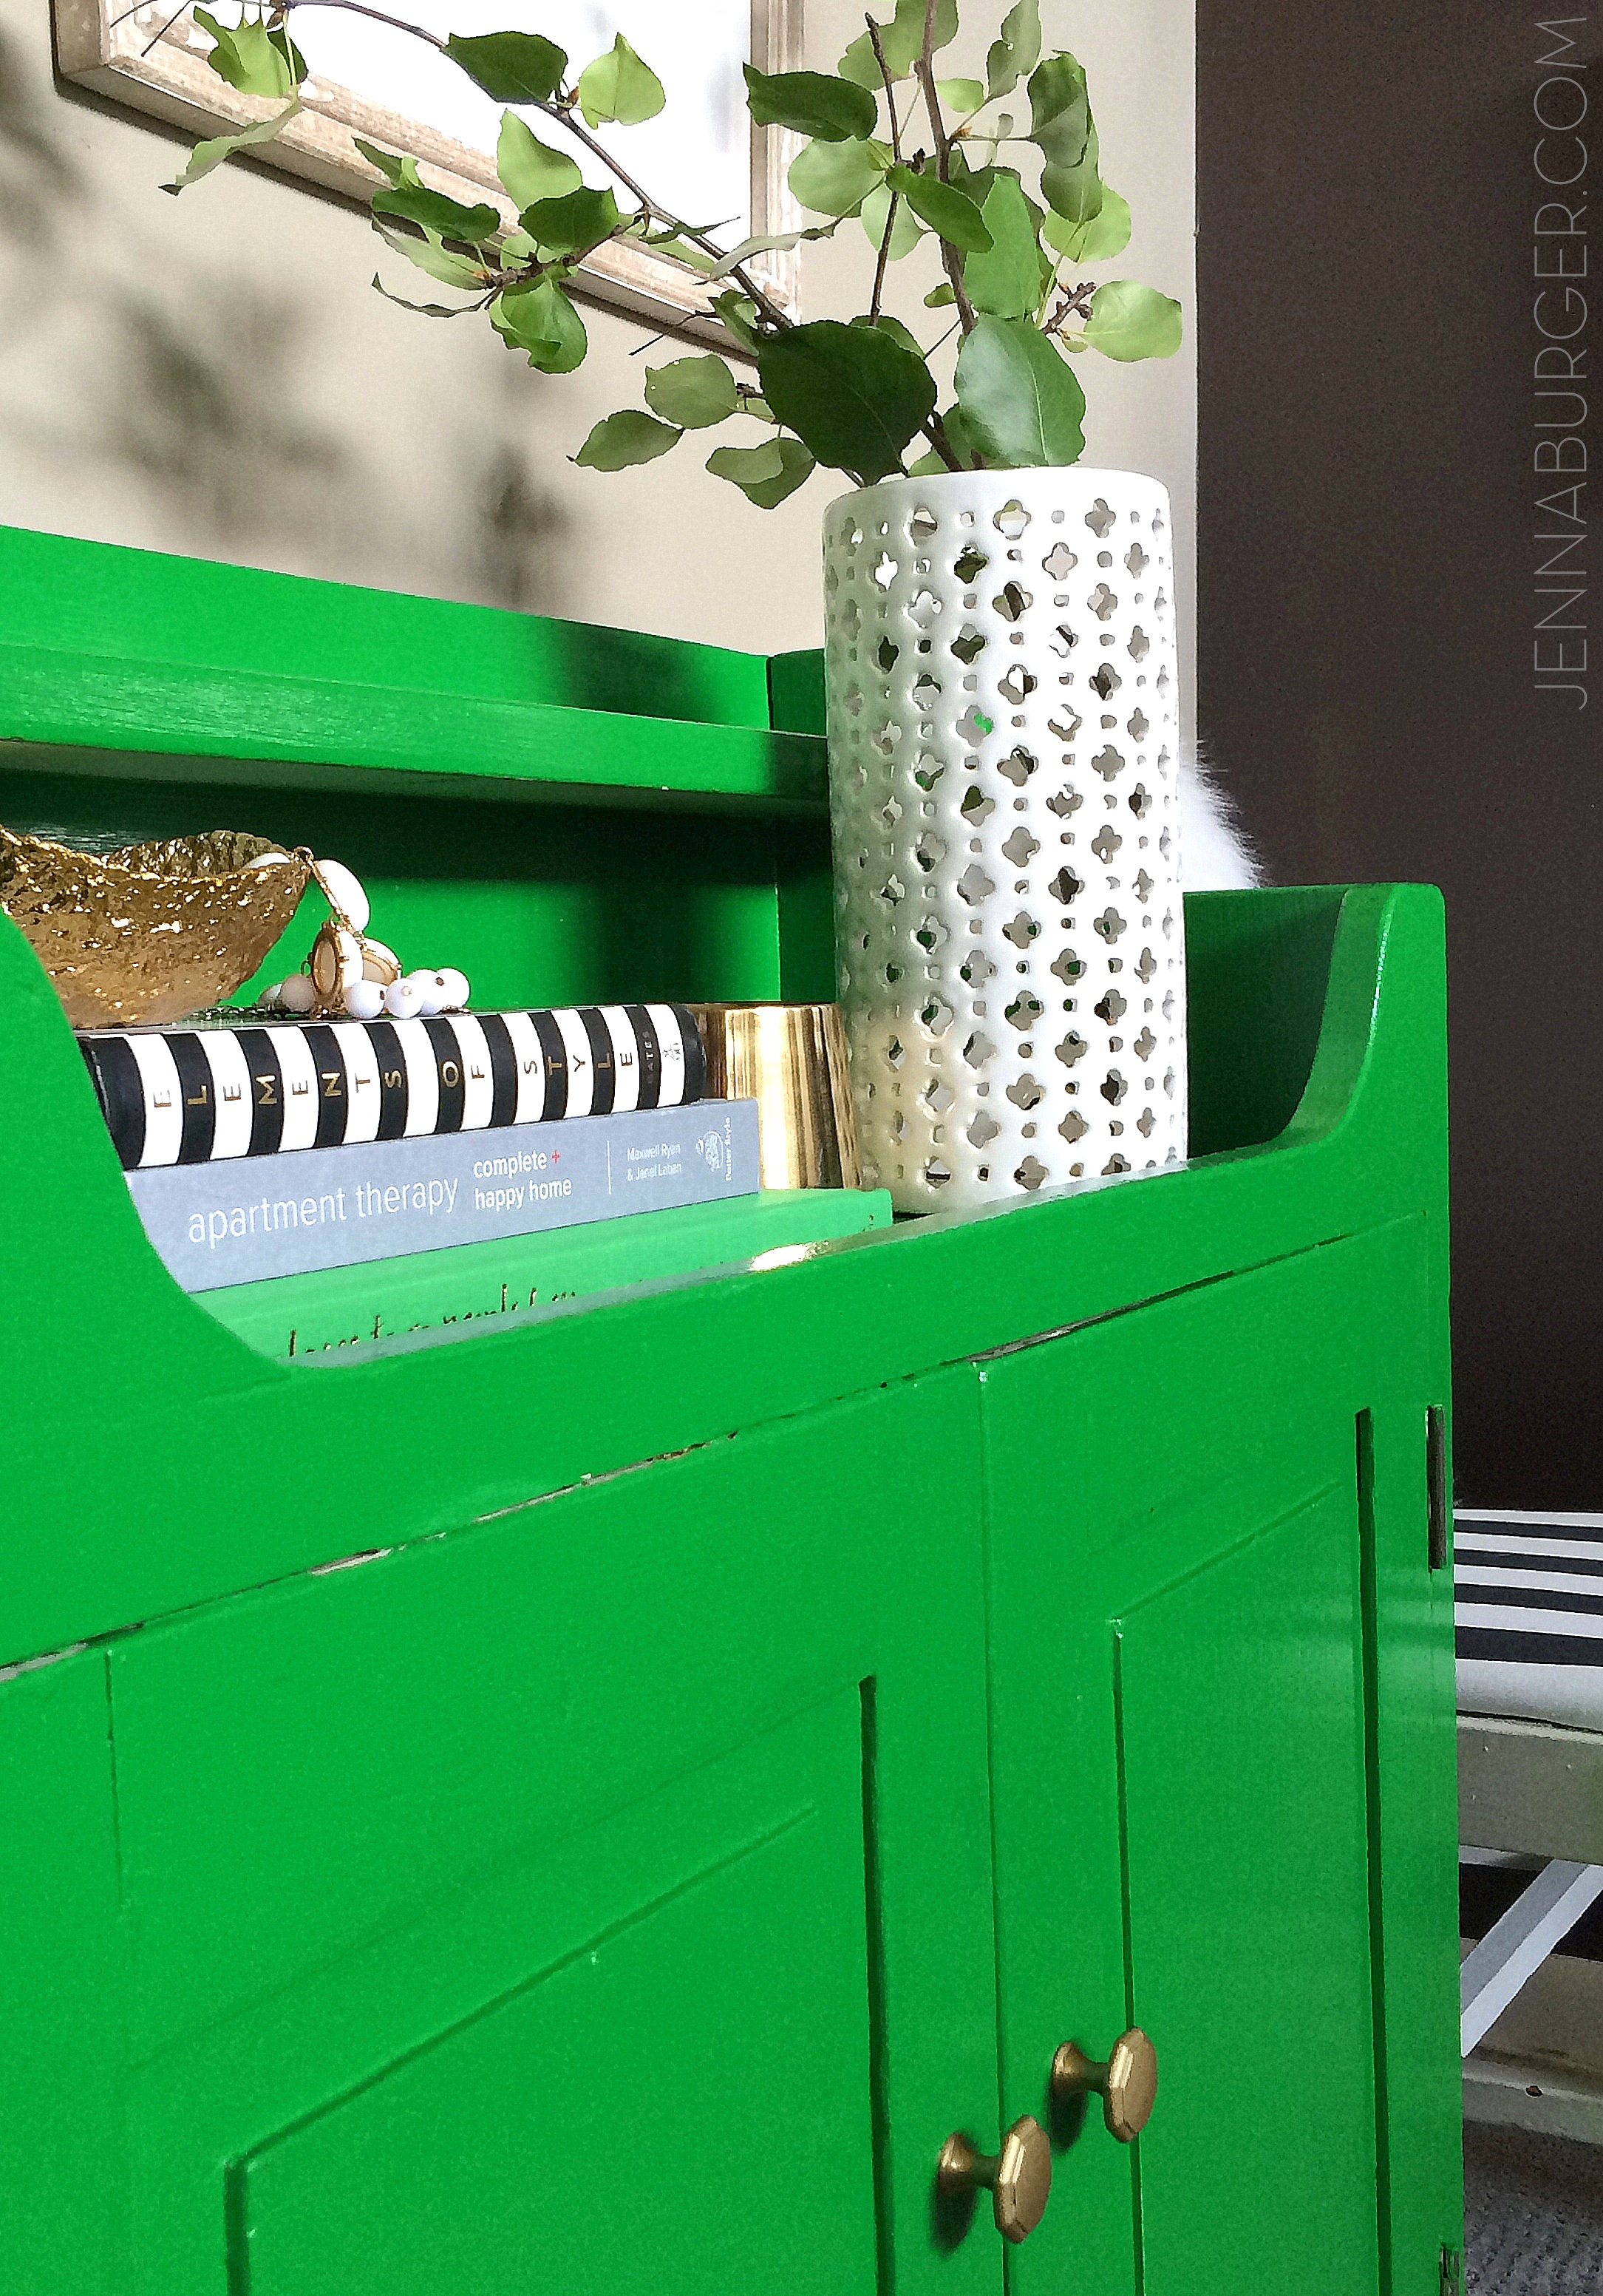
Here’s a peak at the recent leaning shelves I purchased…

Decorating with Leaning + Ladder Shelves - Leaning Shelves are affordable, open + airy, and bring great height to a space. So much inspiration + ideas in THIS POST!

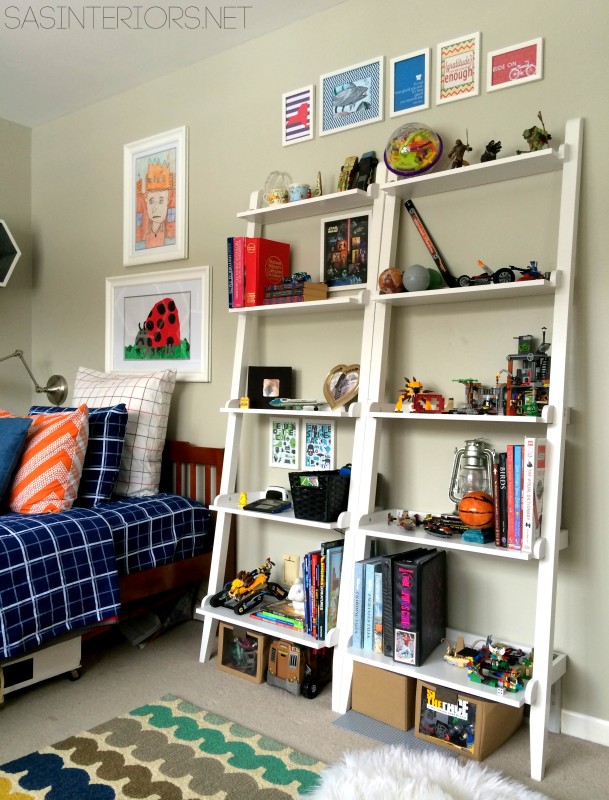
Recognize the room?  It’s my boys room that I am currently giving an overhaul.  work is still in progress…

I’m sharing this because it’s amazing how much these shelves have brought to the room!  The amount of storage / surface space is incredible.  From books, to ‘special things’ to ALL THE LEGOS, these shelves hold it all + have there is room for more.

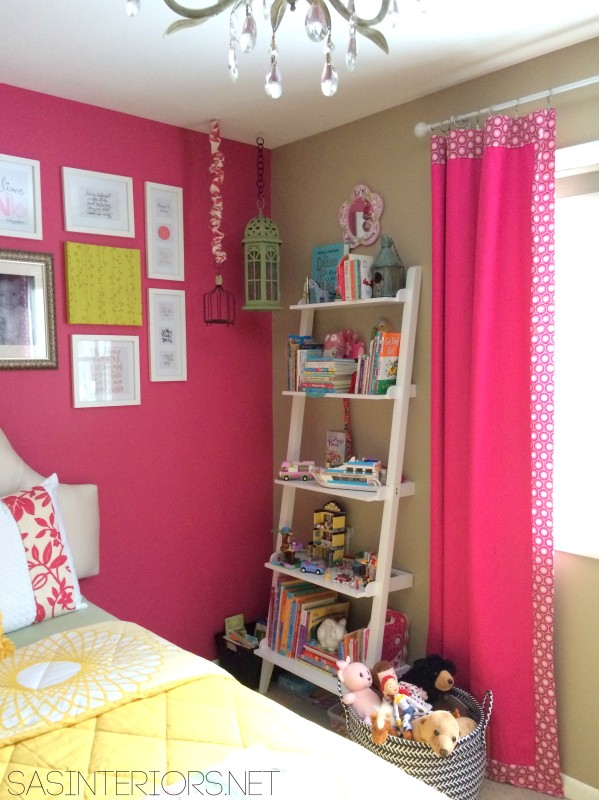
My daughter’s room also got a leaning shelf.

We moved the pictures that were there into the master and added the shelf in it’s place to hold books, and of course ALL THE LEGOS!

Decorating with Leaning + Ladder Shelves - Leaning Shelves are affordable, open + airy, and bring great height to a space. So much inspiration + ideas in THIS POST!

Seen enough?  No?  Okay, I’ve got more inspiration for you…

Decorating with Leaning + Ladder Shelves - Leaning Shelves are affordable, open + airy, and bring great height to a space. So much inspiration + ideas in THIS POST!
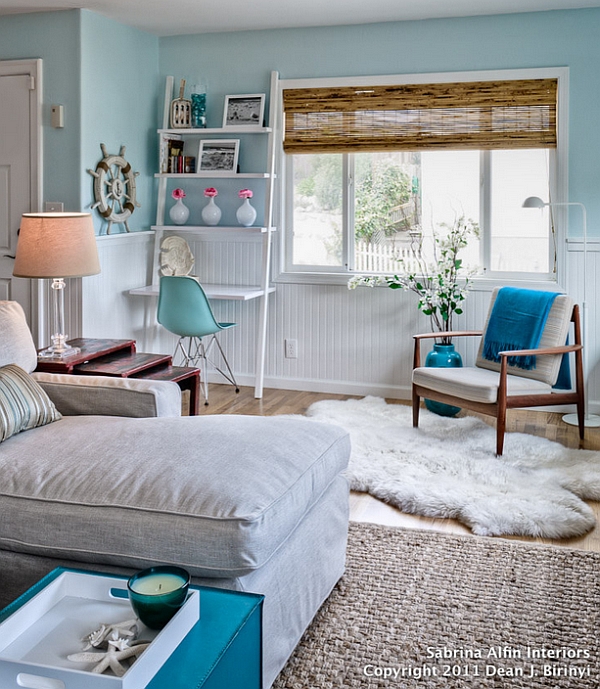
Awesome coastal living room with a leaning white shelf/desk. via: Sabrina Alfin Interiors

Decorating with Leaning + Ladder Shelves - Leaning Shelves are affordable, open + airy, and bring great height to a space. So much inspiration + ideas in THIS POST!
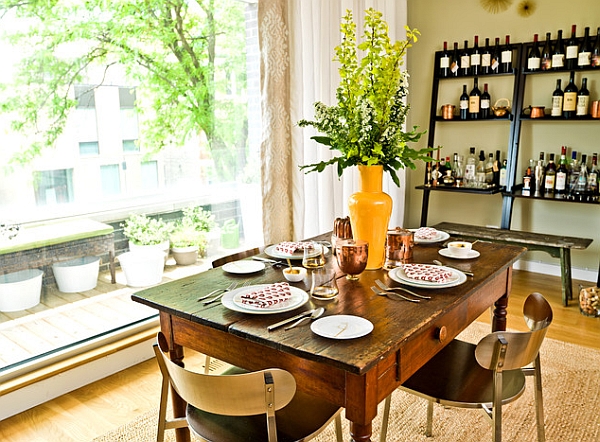
Seriously, how great is this space with the leaning shelves used for wine storage?  Doesn’t get much better than this! via: Cynthia Lynn Photography

Decorating with Leaning + Ladder Shelves - Leaning Shelves are affordable, open + airy, and bring great height to a space. So much inspiration + ideas in THIS POST!
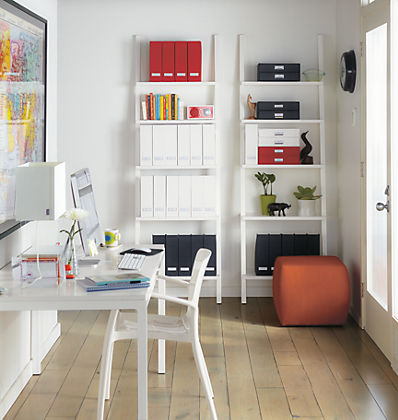
Work space with white leaning shelves. Shelves by The Container Store

Decorating with Leaning + Ladder Shelves - Leaning Shelves are affordable, open + airy, and bring great height to a space. So much inspiration + ideas in THIS POST!
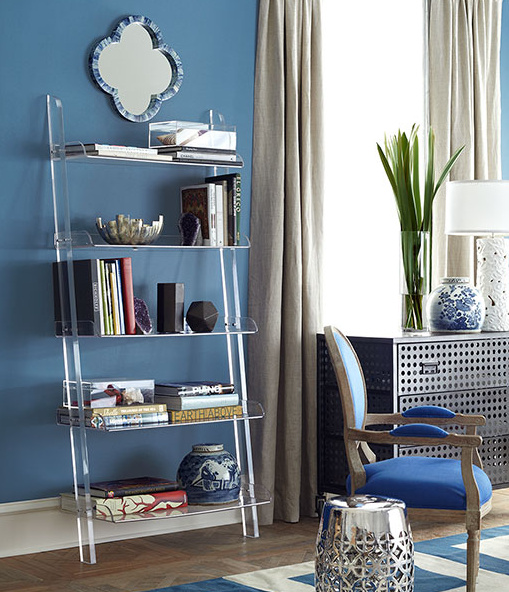
How amazing is this lucite leaning shelf?  It’s incredibly expensive, but is a show-stopper!  Leaning Shelf by Wisteria.

Decorating with Leaning + Ladder Shelves - Leaning Shelves are affordable, open + airy, and bring great height to a space. So much inspiration + ideas in THIS POST!Such a bright + vibrant space.  Ideal for a playroom or girly room.  Leaning Shelves by The Container Store

Decorating with Leaning + Ladder Shelves - Leaning Shelves are affordable, open + airy, and bring great height to a space. So much inspiration + ideas in THIS POST!

Decorating with Leaning + Ladder Shelves - Leaning Shelves are affordable, open + airy, and bring great height to a space. So much inspiration + ideas in THIS POST!
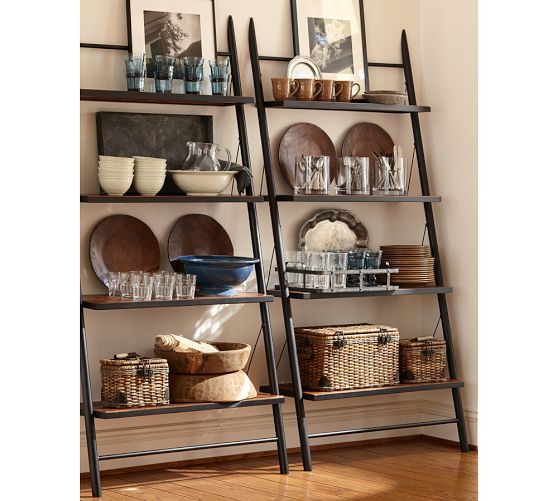
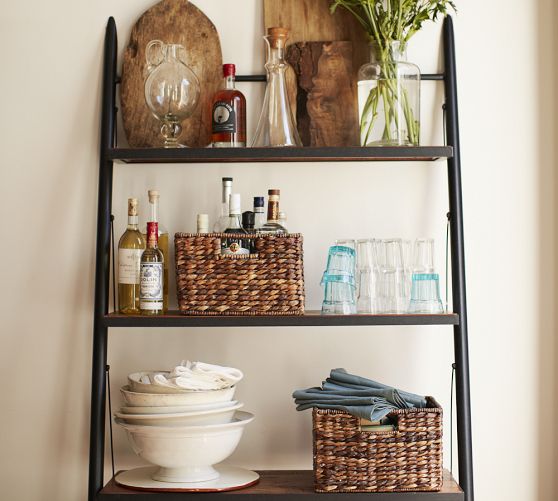
Metal + Wood combo shelves by Pottery Barn

Decorating with Leaning + Ladder Shelves - Leaning Shelves are affordable, open + airy, and bring great height to a space. So much inspiration + ideas in THIS POST!Such a bright, airy space with the perfect element to bring in some height…  a leaning shelf!  Unknown Source

Decorating with Leaning + Ladder Shelves - Leaning Shelves are affordable, open + airy, and bring great height to a space. So much inspiration + ideas in THIS POST!
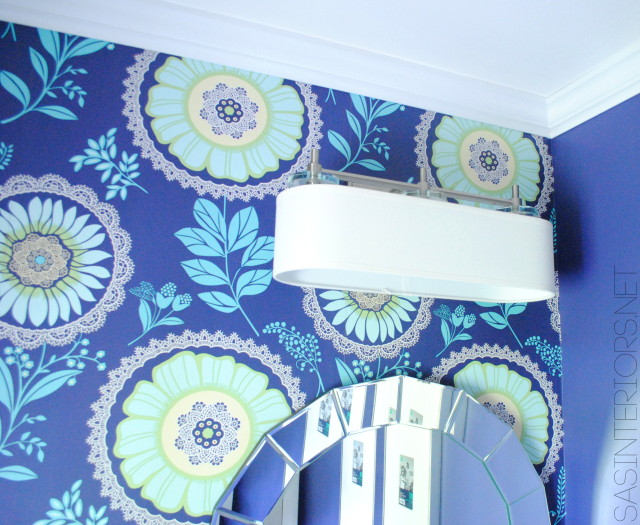
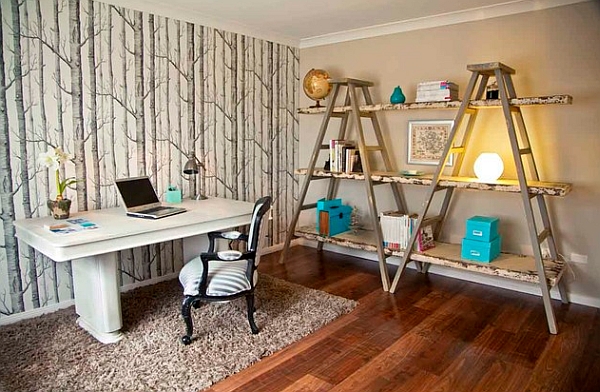
What a great office space with a non-traditional leaning shelf and I adore the pops of turquoise + the amazing wallpaper. via: Matilda Rose Interiors

Decorating with Leaning + Ladder Shelves - Leaning Shelves are affordable, open + airy, and bring great height to a space. So much inspiration + ideas in THIS POST!
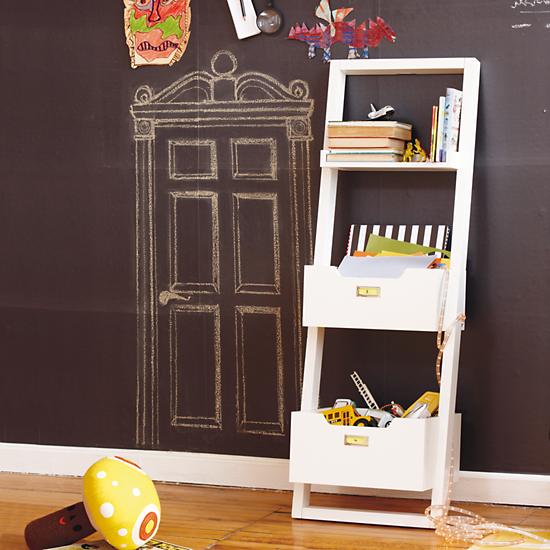
How fun is this?  I love chalkboard walls and layering it with a leaning bookcase still allows for the wall to be seen through it.  Same style as shown above in my favorite finds, this leaning shelf is by Land of Nod.

Decorating with Leaning + Ladder Shelves - Leaning Shelves are affordable, open + airy, and bring great height to a space. So much inspiration + ideas in THIS POST!Leaning shelves with a desk make a great combination for storage + work. via: CM Glover

Decorating with Leaning + Ladder Shelves - Leaning Shelves are affordable, open + airy, and bring great height to a space. So much inspiration + ideas in THIS POST!Leaning shelves come in all sizes.  This narrow style in a colorful deep red hue is adorable in this nursery. Unknown Source

Decorating with Leaning + Ladder Shelves - Leaning Shelves are affordable, open + airy, and bring great height to a space. So much inspiration + ideas in THIS POST!
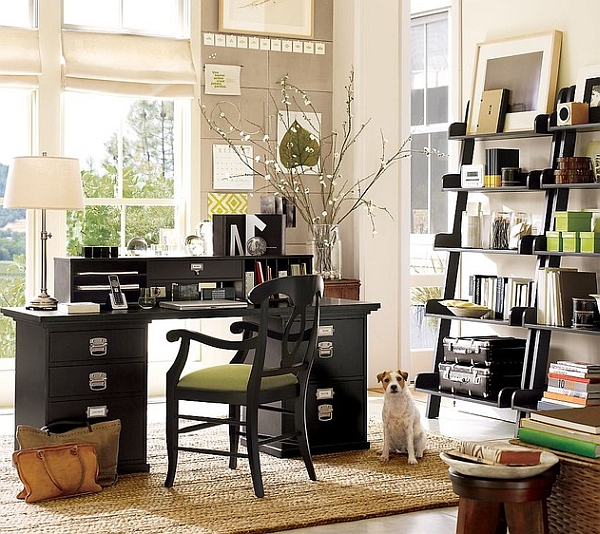
Leaning shelves are great for an office space! via: Asbury Remodeling & Construction

Decorating with Leaning + Ladder Shelves - Leaning Shelves are affordable, open + airy, and bring great height to a space. So much inspiration + ideas in THIS POST!
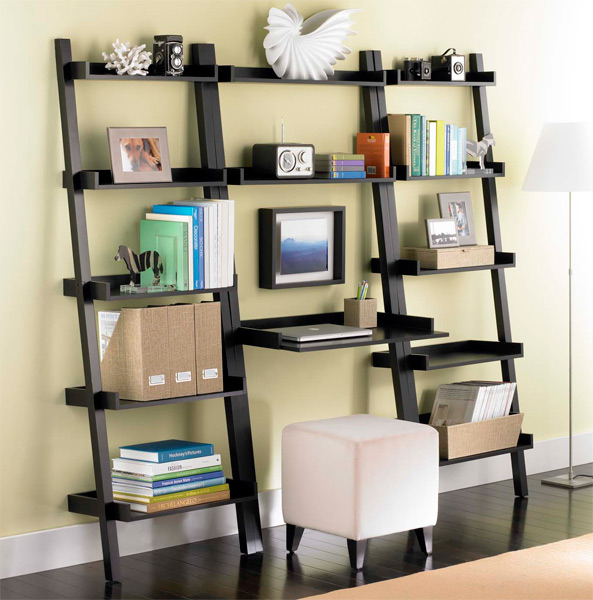
Shelf / Desk combo by The Container Store

Decorating with Leaning + Ladder Shelves - Leaning Shelves are affordable, open + airy, and bring great height to a space. So much inspiration + ideas in THIS POST!
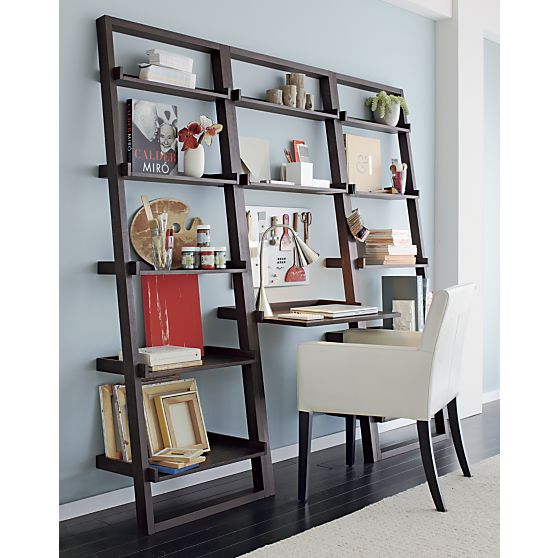
A more modern style shelf/desk combo at Crate and Barrel

Decorating with Leaning + Ladder Shelves - Leaning Shelves are affordable, open + airy, and bring great height to a space. So much inspiration + ideas in THIS POST!
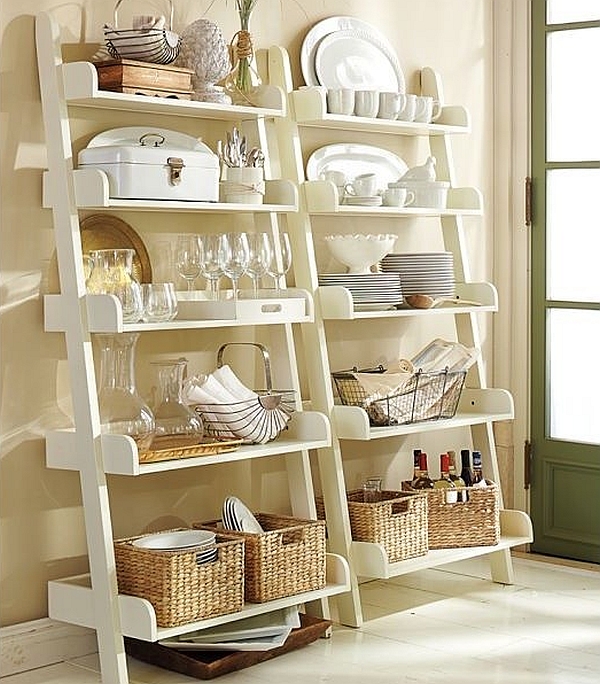
The shelves on this white ladder shelf are thicker which gives it more weight and style.  How great for a kitchen or casual dining space.

Leaning shelves for everyone.  Are you now ready to purchase one (or 2, or maybe 3) for your home?!

Powder Room Remodel Reveal

The powder room remodel is finally complete!

I hope you weren’t holding your breathe because it’s been 2 + months since my last progress postBoy, did I surely leave you hangin’…

BUT (and it’s a big but), it’s all worth it because this is the result >

Powder Room Remodel {REVEAL} #powderroomremodel

Big Time Awesome!

And just to remind you where we started, here is the before >

Powder Room Remodel {REVEAL} #powderroomremodel

And before that (when we moved in to the house), this is what the space looked like >

Before Powder Room Remodel

A bit scary, don’t ya think?!

Back to the progress…

Since the last post when I shared the steps of fixing the wall from the previous tile and hanging the wallpaper, we were busy with >

  • Hanging crown moulding (1st time ever, wow it was tough)
  • Hanging the new light (twice because the 1st one that I thought I loved, I really didn’t)
  • Painting the crown moulding
  • Putting together and installing the vanity
  • Installing the toilet
  • Hanging the mirror
  • Choosing and changing the pictures
  • Designing and installing the custom roman shade
  • Touch ups!

O, well now I know why it took me 2 months to show you the reveal.  That was alot.  Here are some progress pictures along the way…

Powder Room Remodel {REVEAL} #powderroomremodel

Alot happened to this small space.  The most challenging was absolutely the installation of the crown moulding.  It was the first time that the Mister and I ever tackled installing moulding and it was tough.  We made lots of mistakes day after day, and in the end called in a friend who has major talent for woodworking.  He’s not a professional woodworker, but someone who does it as a hobby and is quite knowledgeable and maticulous.  Anyway, he really made the bathroom what it is because without, the space wouldn’t have the same depth and pizazz.

If you’re familiar with installing moulding, our crafty guy used the coping method, which results in really tight corner joints.  Once the moulding was installed, there was very little need for wood filler.  With the time it took to do this simple bathroom (about 3-4 hours), I couldn’t imagine doing a large room or an overall house.  I’ve been drawing mouldings for client homes for years, but now I have the appreciation of how difficult it is to actually install.  Not sure I’ll be doing that again any time soon…

Want to learn more on the coping technique for crown moulding? Check out this post I found.

Anyway, it’s complete and I’m in love with the overall space.  Want to see more of the reveal?  I bet you do.  Go…

Powder Room Remodel {REVEAL} #powderroomremodel

The vibrant and eye-popping Amy Butler wallpaper sets the tone for the room.  It’s surely the statement of the space and the one element that started the design.  From the mirror to the vanity to the framed pictures on the wall, everything is very simple so the wallpaper can ‘speak’.

Powder Room Remodel {REVEAL} #powderroomremodel

Pretty white accessories fill the space, along with black and white framed images from my travels.  Both are beautifully set against the deep blue walls.

Powder Room Remodel {REVEAL} #powderroomremodel

The new roman shade is another amazing element in the room.  I designed it and the creative folks at Tonic Living fabricated it.  They are amazing. They offer an array of services for creating window treatments, pillows, futon covers, and more.  Their offering of fabrics is huge and very much in-trend.

Powder Room Remodel {REVEAL} #powderroomremodel

This was the sketch I sent them and you see the result…Window Treatment sketch

The top of the shade sits right under the bottom of the crown moulding and when fully lowered, you see the full border design.  The fabric is a heavy white linen and the border detail is a 2″ thick navy ribbon.

Powder Room Remodel {REVEAL} #powderroomremodel

The mirror was definitely the most difficult selection to choose.  I wanted something that was interesting, but minimal so the wallpaper behind would still shine through.  I finally decided on this mirror from Lowe’s and am thrilled with the overall look.  I like it’s round shape that emulates the flowers in the wallpaper, as well as it’s frameless design.

Powder Room Remodel {REVEAL} #powderroomremodel

The vanity and faucet are another element of the room that I adore.  The Moen faucet is the same style and finish that I used in my master bathroom.  It has great lines and works beautifully in the space. Plus the major awesome part is the finish doesn’t leave spots.  Read more about it here!

Powder Room Remodel {REVEAL} #powderroomremodel

More details…

Powder Room Remodel {REVEAL} #powderroomremodel

Powder Room Remodel {REVEAL} #powderroomremodel

The light fixture is a $17 steal from Lowe’s (on their website it’s more $$$).   I had previously chosen another light, but wasn’t thrilled with the look once home.  Actually this fixture is also hung upside down.  When I held it in place before install, the junction box was very high on the wall and a fixture hanging down was more appropriate.  My genius husband came to the rescue and said, “Why don’t we install it upside down?”  And that’s what we did.  You would never know and it looks great!

Powder Room Remodel {REVEAL} #powderroomremodel

Powder Room Remodel {REVEAL} #powderroomremodel

And I think my most favorite part of the new space is how I can enjoy it from so many other parts of my home…

This is my view from the office / family room looking through the foyer and into the new powder room.

Powder Room Remodel {REVEAL} #powderroomremodel

Here is a recap of all the elements in the newly created powder room:

Thank you for taking the tour of my new powder room.  What a refreshing new space to see and enjoy when you enter our home.

Craft Room: Progress Update 1

This morning, I mentioned that I was headed out early for a site visit to check on the progress of the mega craft room /office space that I’ve been working on for the last few months.  It’s a local project which I shared details about a few weeks ago and the transformation has been amazing.

In the last post about this project, the construction hadn’t even begun, but since then alot has happened, including:

  • Removal of the popcorn ceiling
  • Removal of old carpet and installation of new hardwood floor (in this room and throughout the entire house)
  • Removal of old window treatments
  • New recessed lighting / hi-hats
  • New painted walls
  • New crown moulding
  • And last, but not least GORGEOUS NEW BUILT-INS!

Here are some progress pictures…

Craft Room: Progress of Client Project _ Designed by @Jenna_Burger

Still in progress, but better than before…

Creative and Inspiring Craft Room Mood Board by @Jenna_Burger, WWW.JENNABURGER.COM

Crazy that it’s the same space, right?

Here are some more teasers…

The turquoise backs are gorgeous and all those cubbies are going to give plenty of room for storage!

Wait until you see what is going on the sides of that awesome built-in. {Major Goodness}

Craft Room: Progress of Client Project _ Designed by @Jenna_Burger

This is a view from the craft studio into the office.  It used to be a small doorway, but now it’s a large opening that lets in a huge amount of light and gives a unified flow to the overall space.

Craft Room: Progress of Client Project _ Designed by @Jenna_Burger

More turquoise.  This is just the beginning of how fabulous this room is going to look…

Craft Room: Progress of Client Project _ Designed by @Jenna_Burger

And the bench.  A 6′ long X 30″ deep heavenly haven.  Don’t you want one of these for your home??  And the little book nook is adorbs!

Craft Room: Progress of Client Project _ Designed by @Jenna_Burger

Last but not least, a few of the details.

Like the chandelier…

Craft Room: Progress of Client Project _ Designed by @Jenna_BurgerDoes it get better?!

And this darling fuschia C-table.  How can you not love it.  The fabulous contractor that I’m working with built-in using these Ana White plans. I so want one for myself!

Craft Room: Progress of Client Project _ Designed by @Jenna_Burger

More updates to come soon!

Spring Mantel with Sensational Succulents #LowesCreator

Happy Monday!  Yes, it’s Spring, but sadly it doesn’t feel like it (at least here in NY).

I am so ready for the warmer days ahead and am yearning for the array of colorful flowers, the endless chirping of birds, and the sounds of outdoor laughter.  I know it’ll be here soon, but I am just ready for winter (and the endless snow) to be over.

In my search for all things Spring, I decided this years seasonal mantel had to include elements of the outdoors. Last Friday when perusing the aisles of Lowe’s, specifically the outdoor section, I saw a huge display of succulents.  I immediately knew they’d be the ideal addition for my Spring mantel!

Spring Mantel with Sensational Succulents - Creative ideas for bringing in natural elements by @Jenna_Burger, SASinteriors.net

While in the gardening section, I gathered a variety of succulents in different sizes and styles, along with a new bag of potting mix.  I wasn’t going to dare dig through the garage in search of leftover soil from last year, plus I saw this soil that is fast draining and made for cactus type plants.  I thought I’d give it a try, since I don’t have a great track record with keeping greenery alive. Yes, I admit, I don’t have a green thumb…

Once home, I collected a bunch of glass vases, dishes, and bowls that I had laying around the house.  A few I picked up last week at TJ Maxx, but most I’ve had for a long time stored in the closet.

Spring Mantel with Sensational Succulents - Creative ideas for bringing in natural elements by @Jenna_Burger, SASinteriors.net

Then it was time to transplant these beauties into their new homes.

Choosing the right size bowl / vase for the size of the succulent is important.  One rule of thumb that I always try to follow is to be sure that the plant isn’t too big for the pot (or bowl / vase in my case) so it has room to grow.  The teeny size succulents (which I bought for $2.98/each) went in the smaller bowls and the larger styles ($3.98/each) went into the clear glass vases (which are my favorite because you can see the soil and plant roots – so interesting).

Once the right size “home” was chosen, I loosened up the roots and made the transfer.  A few minutes later, all my succulents were planted and ready to add to the mantel.

Spring Mantel with Sensational Succulents - Creative ideas for bringing in natural elements by @Jenna_Burger, SASinteriors.net

Gardening in the kitchen isn’t something I would suggest, but with 30 degree temps, I wasn’t going to dare be outdoors longer than I had to.  A little mess wasn’t too bad to clean up…

Spring Mantel with Sensational Succulents - Creative ideas for bringing in natural elements by @Jenna_Burger, www.JENNABURGER.COM

Then the fun started and here’s the result of my natural Spring mantel using sensational succulents…

Spring Mantel with Sensational Succulents - Creative ideas for bringing in natural elements by @Jenna_Burger, www.JENNABURGER.COM

It’s a beautiful collection of natural elements mixed in with colorful favorites.

Spring Mantel with Sensational Succulents - Creative ideas for bringing in natural elements by @Jenna_Burger, www.JENNABURGER.COM

Spring Mantel with Sensational Succulents - Creative ideas for bringing in natural elements by @Jenna_Burger, www.JENNABURGER.COM

Any style bowl, vase, cup, or container will make for the perfect holder to display succulents. My collection includes a clear glass round vase, a similar square style, a plain white double dish, a decorative ceramic bowl, and a white milk glass cup.

Spring Mantel with Sensational Succulents - Creative ideas for bringing in natural elements by @Jenna_Burger, www.JENNABURGER.COM

Spring Mantel with Sensational Succulents - Creative ideas for bringing in natural elements by @Jenna_Burger, www.JENNABURGER.COM

Choosing succulents of varying sizes allows for an interesting mantel composition.

Spring Mantel with Sensational Succulents - Creative ideas for bringing in natural elements by @Jenna_Burger, www.JENNABURGER.COM

Spring Mantel with Sensational Succulents - Creative ideas for bringing in natural elements by @Jenna_Burger, www.JENNABURGER.COM

Spring Mantel with Sensational Succulents - Creative ideas for bringing in natural elements by @Jenna_Burger, www.JENNABURGER.COM

Spring Mantel with Sensational Succulents - Creative ideas for bringing in natural elements by @Jenna_Burger, SASinteriors.net

Spring Mantel with Sensational Succulents - Creative ideas for bringing in natural elements by @Jenna_Burger, www.JENNABURGER.COM

Despite the frigid temps, the Lowe’s gardening section is already stocking up on their summer displays including an array of flowers, plants, and a large selection of outdoor furniture.

Lowe's Creative Ideas App - Great ideas & Inspiration

To gather even more unique, fun, and creative ideas for your indoor and outdoor Spring decor, I would definitely suggest downloading the Lowe’s Creative Ideas app on the iphone and ipad.  I’m always checking out the FREE app for great inspiration. Consider following Lowe’s on Facebook, Pinterest, and Instagram as well.

Disclosure: I am part of the Lowe’s Creative Team and was provided with a Lowe’s gift card to purchase items for my project.  I was also compensated for my time to use the products.  No one told me what to create, what to buy, how to use the product, or what to write.  All opinions are 100% mine!

I link my projects to some of these parties: Skip to My Lou, Dittle Dattle, Between Naps on the Porch, Today’s Creative Blog, Stories of A to Z, All Things Heart & Home, House of Hepworths, Finding Fabulous, The Shabby Nest, Serenity Now, Tatertots and Jello, Thrifty Decor Chick, Tip Junkie

Creating a Well Styled Table Vignette

I’ve shared my ideas and thoughts on how to create a well styled bookcase and today I’m back sharing simple, affordable, and stylish tips on how to create a beautiful table vignette (or any horizontal surface – could be a dresser, buffet, window sill, etc).  I just love the word vignette – it sounds so she-she and regal – but getting down to basics, it simply means a pulled together and balanced composition (that’s my meaning, not Webster’s, so please don’t head to your dictionary and quote me- hehe).

A well-styled table vignette is the perfect way to add warmth, interest, and unique character to your home.  Inexpensive elements can easily be introduced to create a beautiful and balance composition.  It’s really not about the value of the items you display (I have things that have cost mere pennies) , but instead how it’s put together!

Let’s get inspired (and dissect)…

To start off, this vignette atop an antique dresser is fun because of the variety of color.  I like color, but that’s my opinion.  Color isn’t always needed to achieve a well-styled vignette, but I would suggest adding in a splash here or there – a small dose is better than nothing. This composition works so well because of the layers, as well as varying heights and sized objects – 3 key elements to achieving a stylish vignette.  The overall setting is engaging and interesting because of the different textures and unique objects. Vignette via House and Home

Tip 1. Once you’ve chosen your perfect horizontal table to create a vignette, clear everything off.  When decorating ANYTHING, it’s a must to start with a blank slate.  It’s not only easy to add elements and move them around, but also to see the space in a different way – believe me, it works! I start every revamp (a room or a vignette) by clearing out and then bringing elements in.

Basically a beautiful vignette can be created on any horizontal surface, even a nightstand.  Don’t you just love this space? I sure do!  In this vignette there is a little pop of color and it goes a long way. It’s nice to make a nightstand look pretty, but I come from the school of thought that it also has to be functional.  Meshing the two isn’t difficult.  One favorite way is to use a decorative or antique bowl for holding jewelry, which can be layered on top of the book(s) you’re reading.  Of course you need lighting – again the lamp is not only functional, but also adds height to the table. Additionally, flowers bring a touch of freshness to a simple vignette. Inspirational Vignette found via Cape Code Collegiate

If you’ve noticed, there is a common theme with each of the three above pictures, and it’s my 3 key elements again – layers, varying heights, and varying sized objects.  Instead of a lamp in this vignette, this space has a tall plant filled urn with layered black and white framed photos behind.  In front is a nice-sized tray filled with colorful boxes (there is the pop of color again), with more interesting objects of varying sizes and heights to the right.

Tip 2. Choose an anchor: Starting with and positioning an anchor object is the ideal way to begin a vignette.  What’s an anchor object?  A lamp, floral arrangement, sculpture, etc – basically the dominate piece in the vignette.  It’s the focal point of the horizontal surface and brings height to the overall composition.

Tip 3. Layer: Add elements – pictures, artwork, accessories – from the back to the front of the horizontal surface. If there is a wall behind, have something large (picture, photo, mirror) on the wall or a smaller grouping, then layer objects in front on the surface.  Again start with the anchor object and layer around. Ideas: Position small pictures in front of large ones.  Add a small bowl, vase, or accessory on top of a stack of books.  Create a grouping of candles layered in front of each other.

A simple and elegant side table next to the bed.  Again the lamp is the dominate feature in this vignette with layered pictures leaning against the wall.  Books are layed on their side with a small flower arrangement atop. This table isn’t overloaded with “stuff” (what nightstand should be?), but all the elements are here to create a well-styled table vignette. Vignette via Traditional Home

Love this entryway by my friend, Pamela. It has all the elements to create a complete composition. She started with her large mirror behind, then added a beautiful tall lamp in front to anchor the vignette. Continuing, she introduced inexpensive elements of varying heights and layered them on the top of the table, as well as on the shelf underneath.

A little bit different type of vignette, but still using the same techniques.  The large bowl filled with rope is such a strong element in this vignette and is nicely balanced with 2 other elements – a smaller rope filled glass jar and an interesting sea creature (do you know what that is? looks kinda like a porcupine).  This grouping has awesome texture and would be simple and inexpensive to create! Vignette found via Pinterest (original source unfound)

Tip 4. Varying Heights and Sizes: Accessories and elements used in a vignette shouldn’t be all the same height and size – that would just look strange.  Play with the idea of introducing objects where some are smaller, some are larger, some are thin and tall, some are short and stout.  This will allow the layering to be more obvious and easy to create.

Just as you were probably getting comfortable with the idea of 1 major object, layer, and size variation, I throw you a curve-ball.

This table vignette has 2 major focal objects.  But it works because they’re the same. If you had one lamp and one large vase on the other said that would have been dominance overload, but this nautical composition works.  Also because of the intense main objects, the center accessories are minimal which gives a nice balance. Vignette Inspiration found via Brunch at Saks

Tip 5. Mix it up: Introduce different kinds of interesting elements / objects. Display a mixture of books, accessories, collectibles, DIY creations, and photos.

Tip 6. Display in odds: For some reason, designing in odd numbers (3 or 5 work best) makes better sense than even numbers.  Plus you can create a great layered composition with 3 rather than 2.

A few more inspirational vignettes …

Vignette Inspiration found via Brunch at Saks

Vignette Inspiration found via Forever Cottage

Vignette via Ladybird and Fellow

My final tips and tricks…

Tip 7. Affordable Vignettes: Creating a well-styled vignette doesn’t have to be expensive.  Honestly it could cost you nothing depending on what you already have on hand.  I’m always changing and revamping my vignettes by “shopping my home”. I move objects and accessories from table to table and purchase new pieces when I see something eye-catching and/or on sale.  I rarely go to a store specifically to find something.  9 out of 10 times, I see something I like, buy it, and somehow incorporate it now or in the future.  Aside from shopping-your-home, Craigslist, thrift stores, estate sales, garage sales, and of course discount stores like Home Goods or TJs are great go-to hot spots.

Tip 8. Enjoy and trust yourself: Just go for it! Don’t hesitate and say you’ll do it later.  Go for now and you’ll be so satisified once it’s done.  Again, clear everything off to start fresh and new.  Then start layering and moving things around.  Trust yourself in knowing what you like.  Use the images I provided to help you or find inspiration in magazines and pinterest of course.  And if you need extra help, I can always be of assistance!

Creating a table vignette can be thought of as tricky or challenging for some, but once those anxieties are lost a beautiful display can be achieved – patience and practice helps too!  Hopefully my tricks, tips, and ideas have helped you to create a well-styled table vignette.

If you’re interested in creating a well-styled bookcase, click to this post:

If you’d like to learn tips on designing a mantel, click to this post:

You can also check out my recently styled shelves, click to this post:

What do you display on your tables? What other ideas or tricks do you have to display objects on a table?

Boy Bedroom Makeover {Reveal}

I’ve talked about it enough and now I am finally delivering… my son’s bedroom is complete and I’m making the reveal {squeal}.  It’s been enjoyable and fun to work on some new do-it-yourself projects and make some design updates in his room, but I’m also happy to say, it’s DONE.  And what a coincidence that the reveal is today because it’s also his 6th birthday – wow the time has gone fast.

Let’s stop the chattin’ and get to the room reveal.

If you happen to remember way back when before painting the stripes, I created this quick sketch of what I wanted the space to look like once we took apart the bunkbeds (yes, the two twin beds used to be a bunkbed).

And here is the actual space…

A year ago he loved the bunkbeds, a year later he’s much happier with two separate beds (he’s definitely my child who loves to change furniture around).

Adding a few bold stripes on the bed wall really make a huge difference for the overall look of the space.  They are a great focal point when you enter the room.  The red dresser is an Ikea purchase from a few years ago and even though it’s a strong hue, it blends well with many colors, especially the various shades of blue and the crisp white. The bedding is also from Ikea and the vintage “flying” planes are from Homegoods.  And the sign?  Cute, right?  Well I made that and I can’t even share a tutorial because it took SOOO long and I would never want you to experience the same agony as I did.

My little boys room is surely an eclectic style showcasing various hobbies and interests.  From superheros to sports to skateboarding, his loves surround him.  The skateboard shelves that we installed last year remained in place (I wouldn’t dare ask the Mister to move them, hehe) and next to them are 3 pennants of teams he likes.  The pallet shelves at the end of the bed were alot of fun to create and the book fronts add a beautiful splash of color in the space.

Pallet Shelf Tutorial

Onto the desk.  Yes, the desk.  THE DESK.  I’m thrilled to have it complete. Do you remember “the” desk?  The infamous desk that took forever to get a makeover, but thankfully went from this, to this?  Another project that I am so glad is complete and I love it 😉  Above the desk I added a photo / happy sayings gallery. Beautiful quotes & sayings are one of my favorite things to display around the house and even though I envisioned (and still want to do) a wall filled with sayings, I added a few that I felt were most appropriate for a growing boy.

Just a few of my favorites…

Painted Desk Tutorial

One fun part of the desk space is the pallet shelf that I turned around and instead of holding books, it’s oriented horizontal and holds pictures and accessories.  This pallet shelf is made exactly the same way as the other two, but was drilled into the wall on it’s bottom.

And that’s the room! 

What do you think? Not too different than before, but the few design updates have really made the space unique and personal for my little guy! Thanks so much for sticking around for the ride and enjoying all the parts and pieces of my son’s bedroom makeover.

Have you made any design updates to your kids rooms lately?

Tutorials you may be interested in:
Painted Desk + Tips on Painting Furniture
How to Make a Pallet Bookshelf
How to Paint Stripes on a Wall