Tag: diy project

DIY Rolling Door Hardware using Plumbing Pipe

There are some do-it-yourself projects that are wham-bam-done and then there are those DIY creations that seem to take as long as building a house…

Well I just wrapped up a fantastic, in my eyes, DIY project but it didn’t come without a hundred hurdles along the way.  BUT we – yes, the Mister lent a hand for this one – kept chugging along and made it to the end.

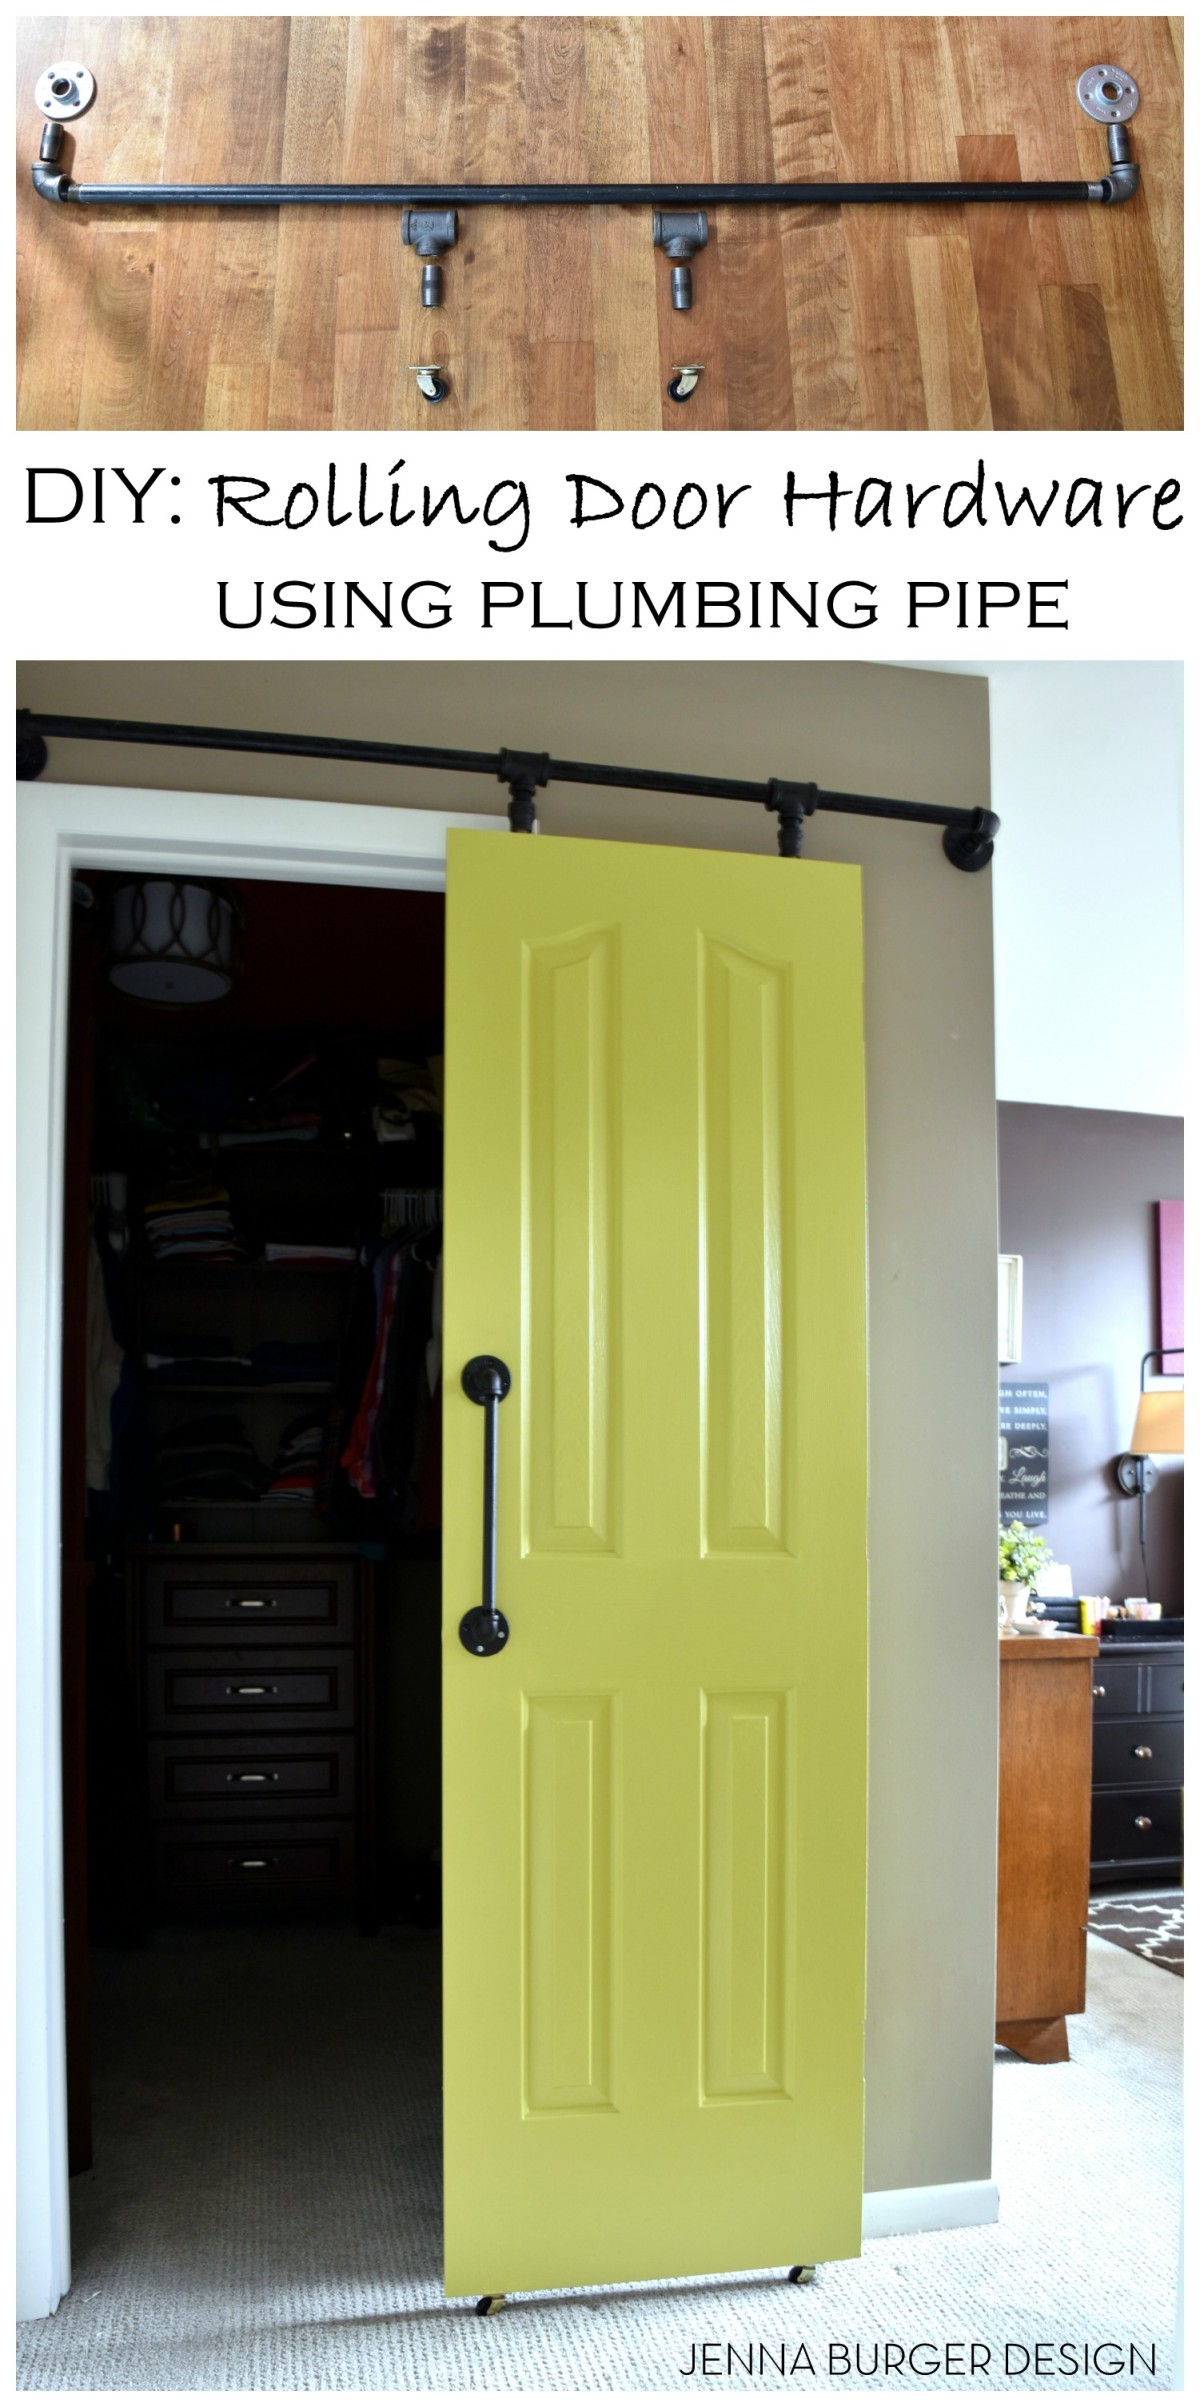
My latest + greatest project?  A rolling door with DIY hardware using plumbing pipe.  The popularity of rolling doors continues and even though I’m not in favor of following every trend, adding a door of this style was the only solution for our master closet.

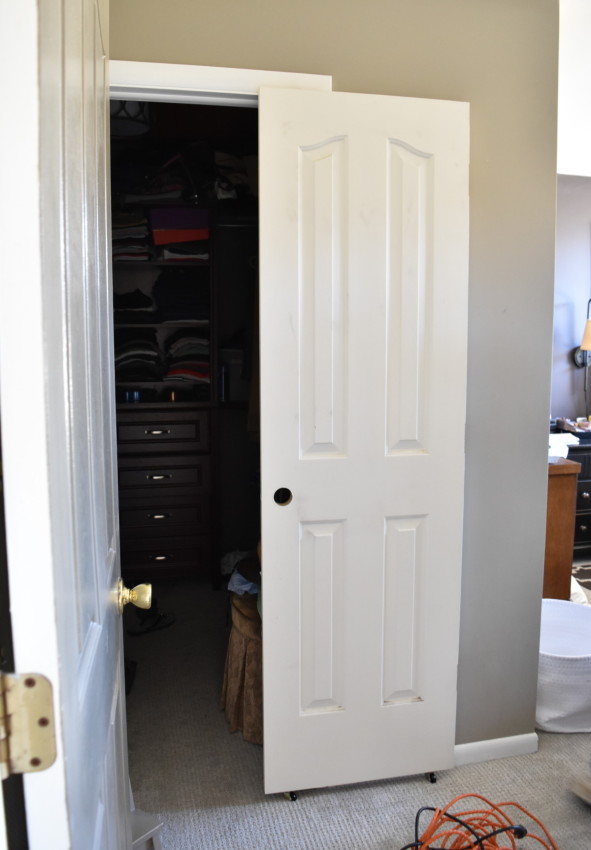
The door to the closet was removed a few years back when revamping the space to maximize on shelf area.  Since then there’s been no door…  Solution?  A rolling door to give privacy + a splash of color.

The result of this challenging, but rewarding result…

DIY: Rolling door hardware using plumbing pipe. Get the look + function of a rolling door for about $60. Custom size to fit your space. Tutorial by www.JennaBurger.com

Let me explain where the hurdles + difficulties arose with this project…

I had anticipated using a reclaimed door, so the hunt was on.  After scouring local thrift stores + ‘junk’ spots, I found the perfect door with the 29″ width that I needed. Brought the door home. Went to sand it but it was an old door, and we assumed it was lead paint.  So we stripped the door using a liquid stripper.  It didn’t work. Hours spent + poor results = a very frustrated DIYer.  We painted over the door to seal it.  Went to hang it and the door was 6″ TOO SHORT.  The salvaged door I spent hours prepping couldn’t be used – UGH.  In the end we used the hinged door that was originally used for this opening.  The width is not ideal, but it works.

Let’s move forward with the tutorial.  There are a lot of parts, so let’s dive in…

DIY: Rolling door hardware using plumbing pipe. Get the look + function of a rolling door for about $60. Custom size to fit your space. Tutorial by www.JennaBurger.com

DIY: Rolling door hardware using plumbing pipe. Get the look + function of a rolling door for about $60. Custom size to fit your space. Tutorial by www.JennaBurger.com

MATERIALS NEEDED

1 – Flange (qty 2)

2 – 3/4″ x 1″ Black Steel Nipple Fitting (qty 2)

3 – 3/4″ Elbow (qty 2)

4 – 3/4″ Black Iron Pipe – can be cut to size (qty 1)

5 – 3/4″ Black Iron Tee (qty 2)

6 – 3/4″ x 1/2″ Black Steel Nipple Fitting (qty2)

7 – Casters (qty 2)

8 – Black Iron Reducing Coupling (qty 2)

> Screws + anchors (if there are no studs)

> Drill

> Door to your liking

> Handle – plumbing pipe handle is made with (2) flanges + (2) elbows + (1) 12″ L x 1/2″ W pipe

These *should* be all the hardware that is needed, but of course, every project / condition is different.  In my initial trip to Lowe’s for the supplies, I got all of the above with the exception of the Reducing Coupling part.  That was needed because the pipe needed to be reduced from 3/4″ to 1/2″ to fit in the door…

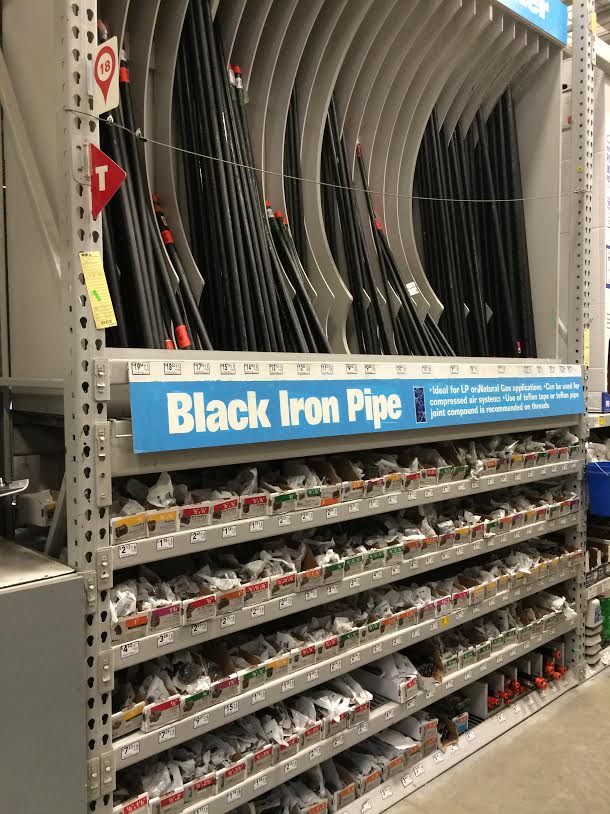
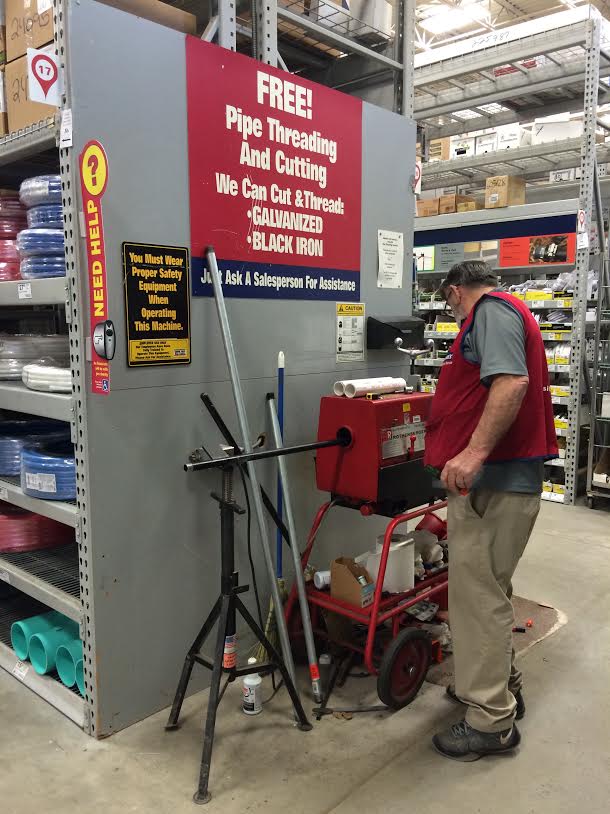
I shopped for all the plumbing parts at my local Lowe’s.  Using their cutting machine, they were able to cut the long pipe to fit my exact length.  For large plumbing pipe projects like a bookcase, this is a great source.

DIY: Rolling door hardware using plumbing pipe. Get the look + function of a rolling door for about $60. Custom size to fit your space. Tutorial by www.JennaBurger.com

DIY: Rolling door hardware using plumbing pipe. Get the look + function of a rolling door for about $60. Custom size to fit your space. Tutorial by www.JennaBurger.com

DIY ROLLING DOOR HARDWARE TUTORIAL

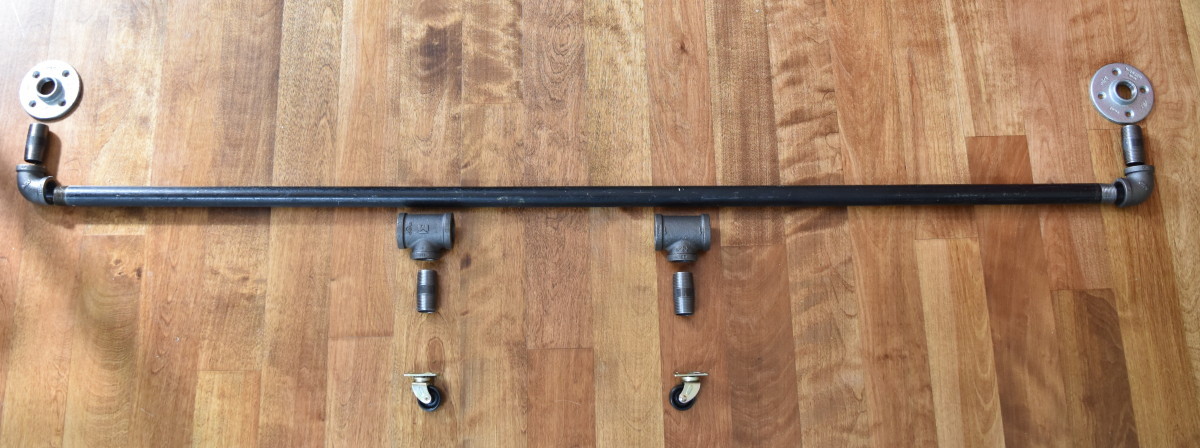
1 To start off, I laid out all of the parts for the rolling door track.

DIY: Rolling door hardware using plumbing pipe. Get the look + function of a rolling door for about $60. Custom size to fit your space. Tutorial by www.JennaBurger.com

2 Then I connected the pipes together. Before threading pipe to pipe, it’s best to use a pipe lubricant to make the connection easier + smoother.

DIY: Rolling door hardware using plumbing pipe. Get the look + function of a rolling door for about $60. Custom size to fit your space. Tutorial by www.JennaBurger.com

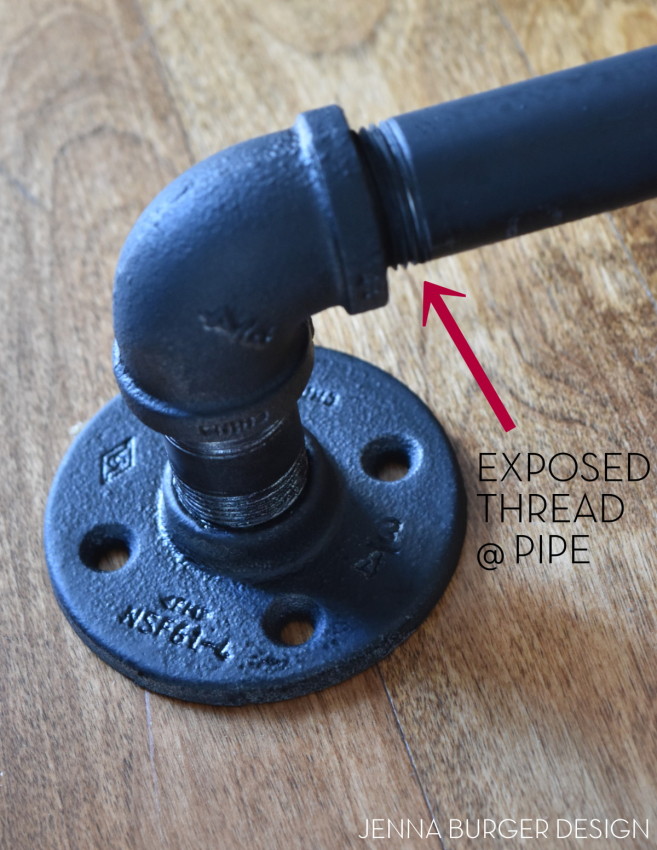
Note, connecting the pipes can be slightly challenging.  I anticipated screwing each connection the entire way so no threading would be exposed.  That is impossible.  A section of the pipe showing the threading will be exposed.  Account for that when taking measurements.

DIY: Rolling door hardware using plumbing pipe. Get the look + function of a rolling door for about $60. Custom size to fit your space. Tutorial by www.JennaBurger.com

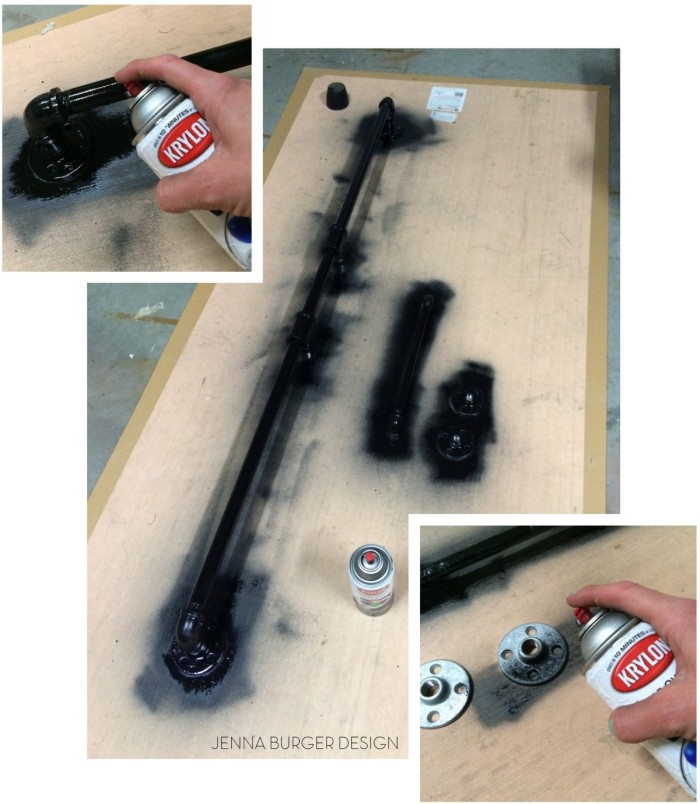
3 The plumbing pipes didn’t match in color, so to give them a unified look, I spray painted the track using a flat black color.

DIY: Rolling door hardware using plumbing pipe. Get the look + function of a rolling door for about $60. Custom size to fit your space. Tutorial by www.JennaBurger.com

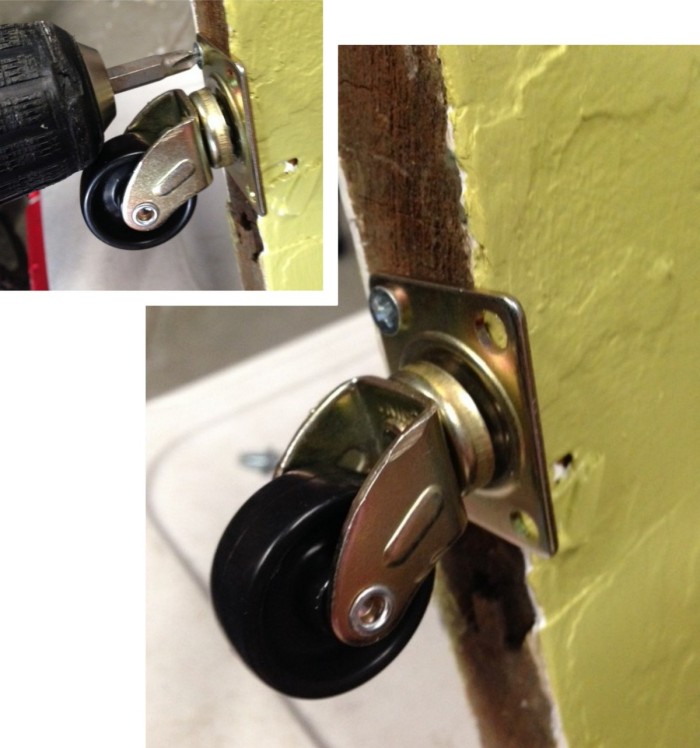
4 As I mentioned above, I ended up using the door that was previously hinged.  I added two caster wheels to the bottom of the door.

WHY? Plumbing pipe will bend under tension. If the door was hung from the pipe with no wheels support, the pipe would bend in time.  The wheels support the door and the track keeps the door in place.  

DIY: Rolling door hardware using plumbing pipe. Get the look + function of a rolling door for about $60. Custom size to fit your space. Tutorial by www.JennaBurger.com

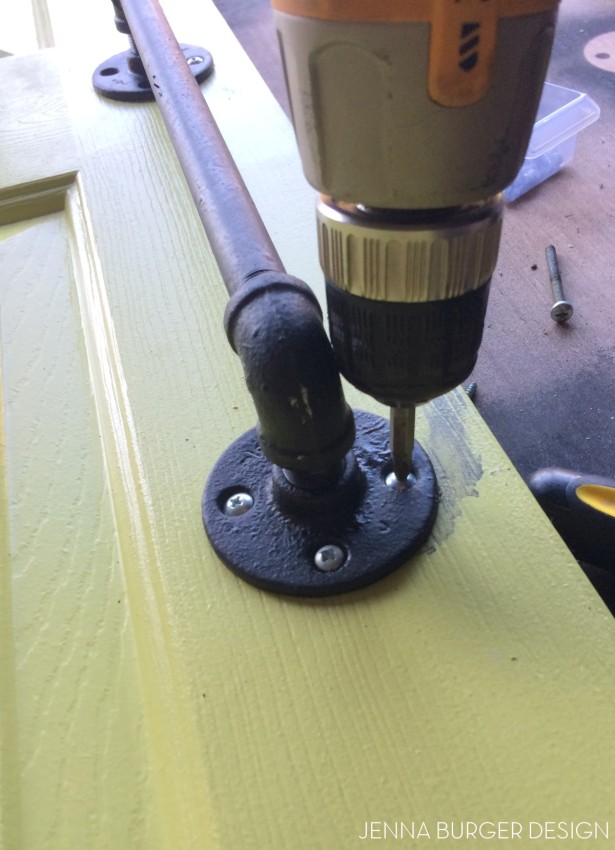
5 (2) Holes were drilled at the top of the door for which the nipple fittings will fit into.

DIY: Rolling door hardware using plumbing pipe. Get the look + function of a rolling door for about $60. Custom size to fit your space. Tutorial by www.JennaBurger.com

6 With the casters installed on the bottom + the holes drilled on the top, I got the door in position and measured out where the plumbing pipe track should be installed.

DIY: Rolling door hardware using plumbing pipe. Get the look + function of a rolling door for about $60. Custom size to fit your space. Tutorial by www.JennaBurger.com

7 Upon measuring and marking the wall (sorry, no pictures, all hands on deck), we were set to install the plumbing pipe.  Using 1.5″ long screws (no anchors needed because we drilled into a stud) we installed the (2) flanges to the wall.

DIY: Rolling door hardware using plumbing pipe. Get the look + function of a rolling door for about $60. Custom size to fit your space. Tutorial by www.JennaBurger.com

The nipple fittings held on by the tee fittings slide into the holes in the top of the door.  The drilled holes are just slightly larger than the nipples so they fit snug, BUT the door can easily come out any time.

DIY: Rolling door hardware using plumbing pipe. Get the look + function of a rolling door for about $60. Custom size to fit your space. Tutorial by www.JennaBurger.com

The reducing coupling fitting wasn’t originally planned for.  That was a part we added later because the 3/4″ nipple fitting (that comes out of the tee fitting) was too large to fit into a hole in the top of the door. This reducing coupling fitting allows the transition from a 3/4″ nipple fitting to a 1/2″ nipple fitting.

DIY: Rolling door hardware using plumbing pipe. Get the look + function of a rolling door for about $60. Custom size to fit your space. Tutorial by www.JennaBurger.com

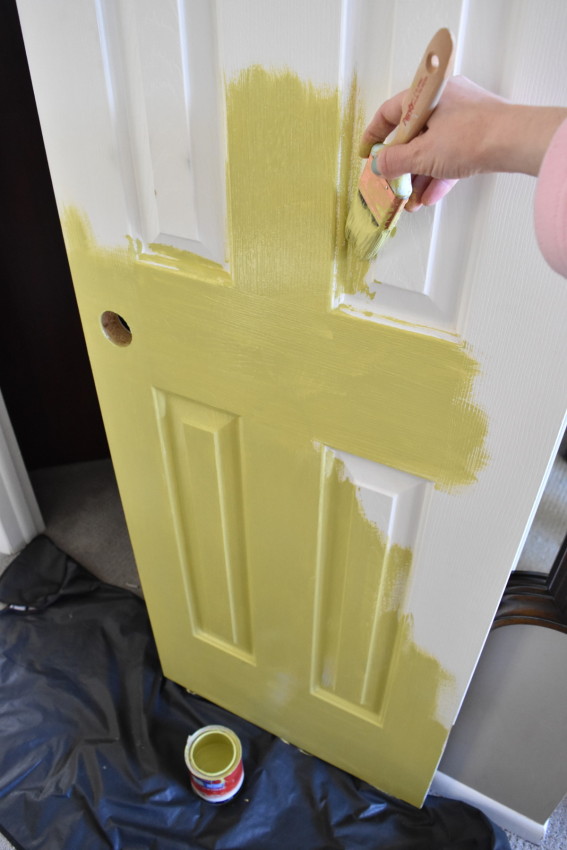
8 Once the track + door were place, I painted it a fun + vibrant green hue – it ties with the same color used for the DIY chalk paint desk transformation.  The color is Benjamin Moore Martini Olive CSP-890, which I had color matched at Lowe’s using Valspar Signature Paint.

DIY: Rolling door hardware using plumbing pipe. Get the look + function of a rolling door for about $60. Custom size to fit your space. Tutorial by www.JennaBurger.com

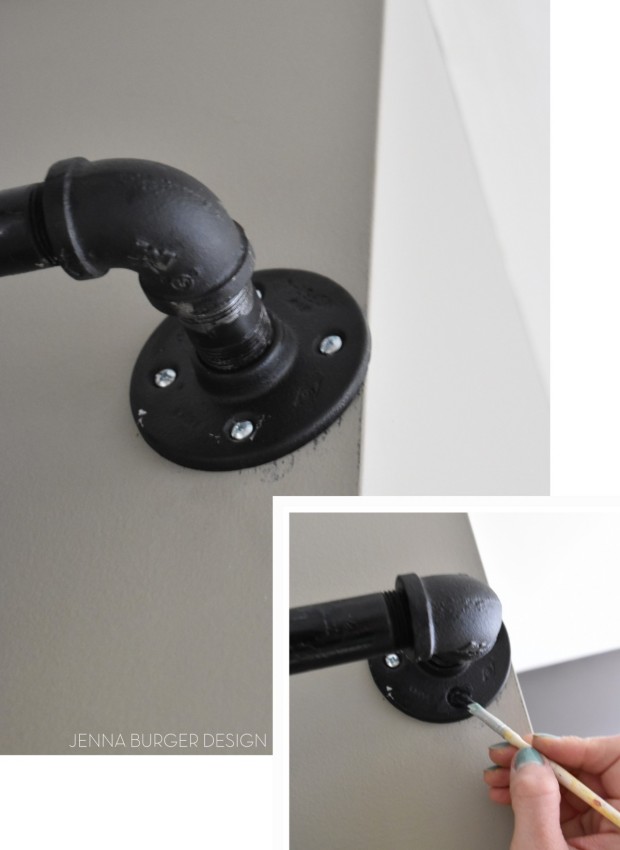
9 I also painted the screws that hold the track using black paint.

DIY: Rolling door hardware using plumbing pipe. Get the look + function of a rolling door for about $60. Custom size to fit your space. Tutorial by www.JennaBurger.com

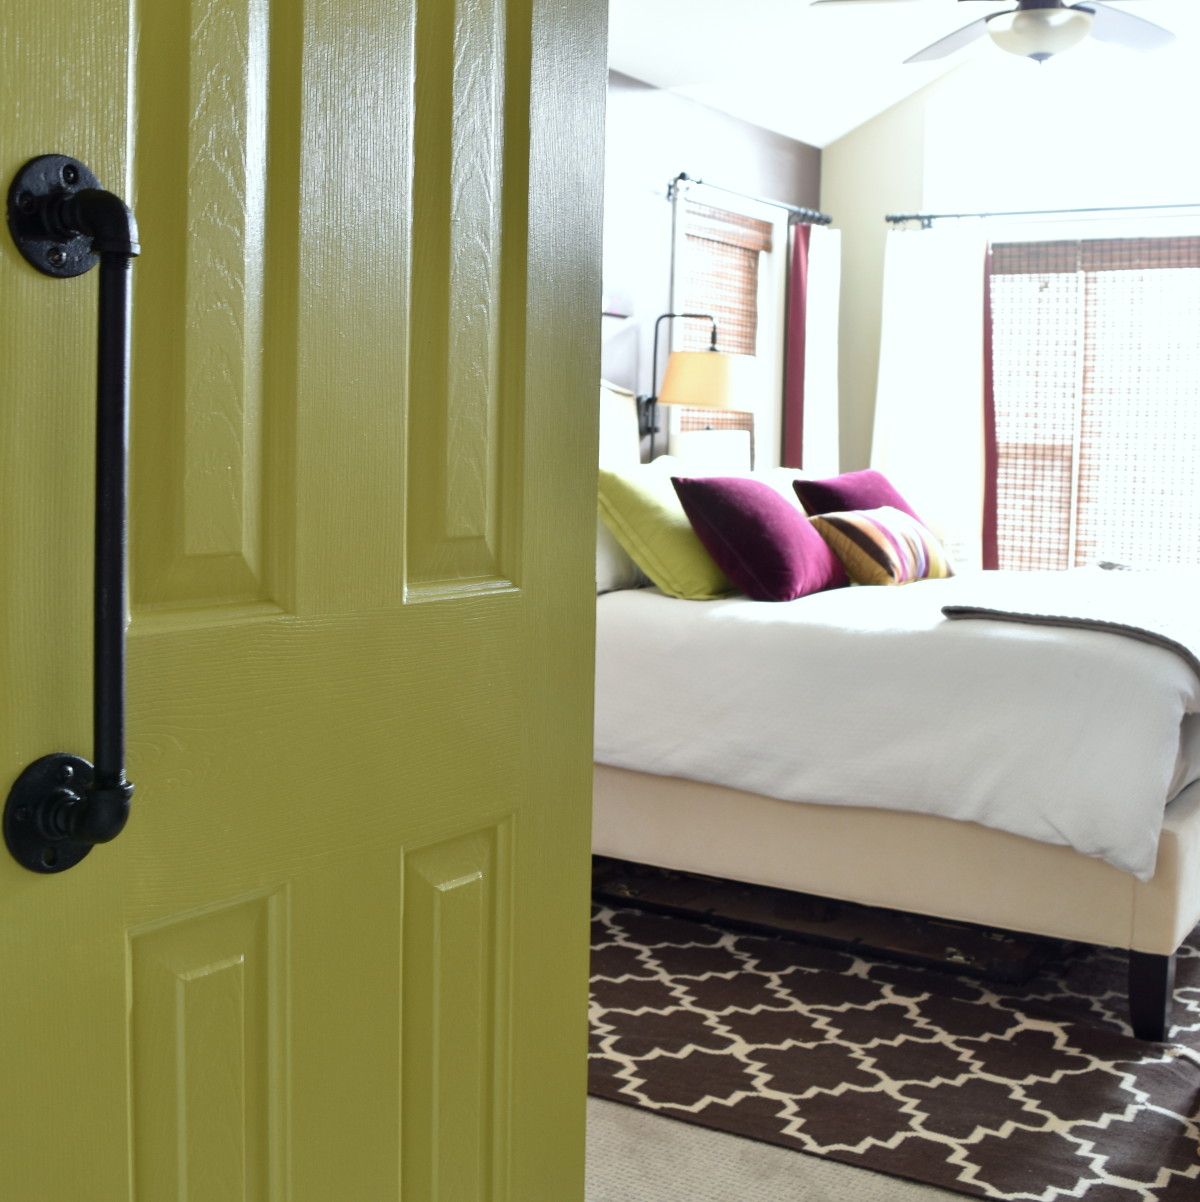
10 Once the I painted the door face with 2 coats of paint, I added a door handle using plumbing pipe parts.

DIY: Rolling door hardware using plumbing pipe. Get the look + function of a rolling door for about $60. Custom size to fit your space. Tutorial by www.JennaBurger.com

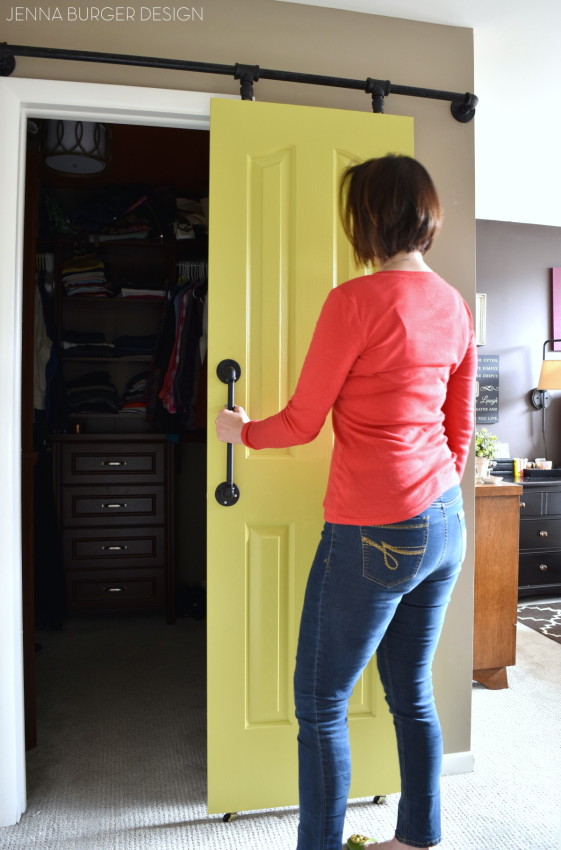
And finally, finally, finally, it was COMPLETE!  Phew, it took a village to get this project done…

With any DIY project there is a learning curve and hopefully if you tackle this project, it’ll be smoother sailing with the kinks ironed out from my experience.

THE RESULT

DIY: Rolling door hardware using plumbing pipe. Get the look + function of a rolling door for about $60. Custom size to fit your space. Tutorial by www.JennaBurger.com

DIY: Rolling door hardware using plumbing pipe. Get the look + function of a rolling door for about $60. Custom size to fit your space. Tutorial by www.JennaBurger.com

Something to note, this is a DIY track with parts that are metal on metal.  The door will go back and forth, but not with ease as a typical rolling door track.  When I first installed the track, it was very difficult to “slide” the door – another hurdle – but I added a lot of lubricant (actually I used petroleum jelly) to the long pole.  Adding the lubricant has made moving the door a lot easier.

That being said, this DIY track is a whole lot less expensive than true rolling door hardware, BUT I wouldn’t use it for areas that need privacy with high-traffic use multiple times a day. For us, this is DIY door is perfect for the master closet since most of the time it’s left open.  As a main hall closet, maybe not so much.

This DIY rolling door came together in part with the tutorial by Kristi @ Addicted 2 Decorating+ some sleuthy thinking and planning on my part for how to make it work for this space.  Because of the limited wall area, a standard track was too big, so without going custom, this was the only solution.

In the end, I love the result.  I’ll be honest though, it didn’t come without a few hiccups and flaws, but it absolutely suits the purpose for the setting.

DIY: Rolling door hardware using plumbing pipe. Get the look + function of a rolling door for about $60. Custom size to fit your space. Tutorial by www.JennaBurger.com

It’s definitely been nice to get some privacy – on a rare occasion – and see a pop of color when entering into the room.

AND on the random days when I don’t want to clean up the closet, I just close the door…

DIY: Rolling door hardware using plumbing pipe. Get the look + function of a rolling door for about $60. Custom size to fit your space. Tutorial by www.JennaBurger.com

The view from the side. Thankfully the projection of the door on the track allowed enough room for my mirror to stay in place.

Now you see it… Now you don’t…

DIY: Rolling door hardware using plumbing pipe.  Get the look + function of a rolling door for about $60. Custom size to fit your space.  Tutorial by www.JennaBurger.com

Here’s a peek at how the door looks with the rest of the bedroom.  There are pops of this citron color all over…

DIY: Rolling door hardware using plumbing pipe. Get the look + function of a rolling door for about $60. Custom size to fit your space. Tutorial by www.JennaBurger.com

Want to see more of this master bedroom revamp?  Check it out here.

DIY: Rolling door hardware using plumbing pipe. Get the look + function of a rolling door for about $60. Custom size to fit your space. Tutorial by www.JennaBurger.com

While I was working on the closet, I got a bit sidetracked and gave it a mini-makeover.  Some new organizational items – hooks + bins – made all the difference to jazz this space up.

Lowe’s has these awesome new bins that are faux leather.  I feel in love when I saw them.  They are oversized too (13″ x 13″), so they hold alot. They’re perfect for holding scarves, small bags, and summer flip flops.

Lowe's Faux Leather Bin

Here’s a peek at the inside of my closet…

DIY: Rolling door hardware using plumbing pipe.  Get the look + function of a rolling door for about $60. Custom size to fit your space.  Tutorial by www.JennaBurger.com

That’s a wrap!

Love this project and want to tackle it now or later? Save or Pin it to your favorite DIY board…

DIY: Rolling door hardware using plumbing pipe. Get the look + function of a rolling door for about $60. Custom size to fit your space. Tutorial by www.JennaBurger.com

Despite my challenges, the result of this project for the price is a great one.  Even though it resulted in my grays than I hoped, it was worth the few tears to achieve the style + function + look I was hoping for, and at the end of the day that’s what I call a success!

DISCLAIMER: THIS DO IT YOURSELF PROJECT WAS IN COLLABORATION WITH LOWE’S.  THE PROJECT IDEA + ALL OPINIONS ARE MY OWN.
DIY: Frame Turned Tray

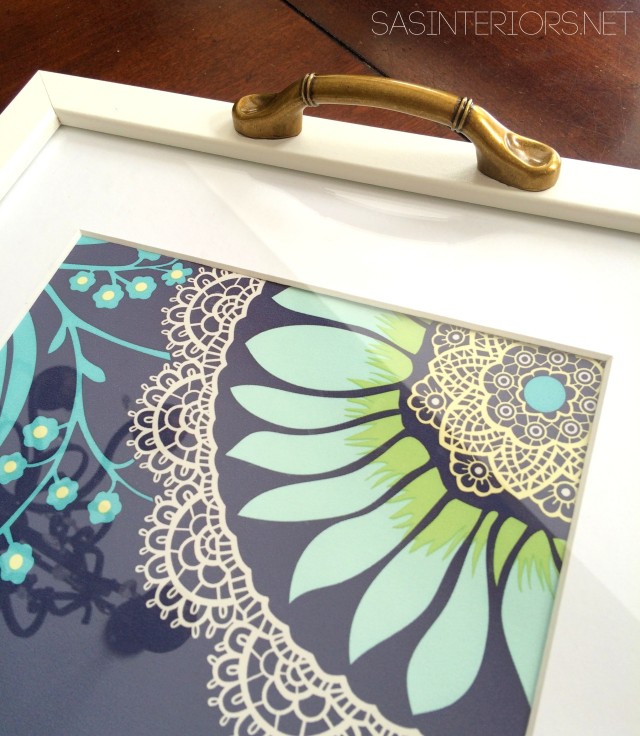
DIY: Frame Turned Tray; perfect for tabletop Spring vignette. So easy + affordable!
This post brought to you by Elmer’s ProBond Advanced. All opinions are 100% mine.

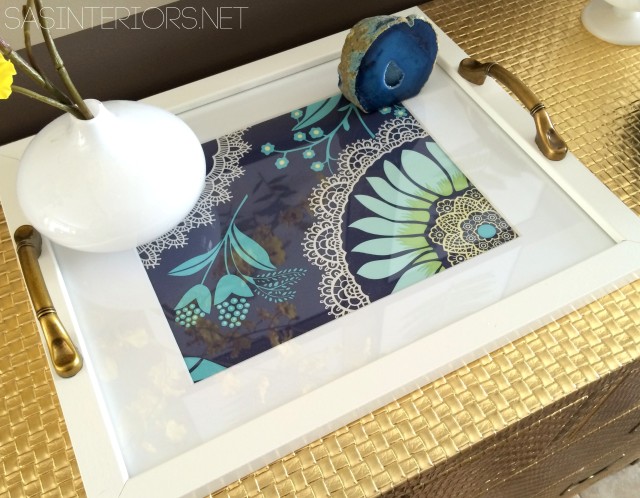
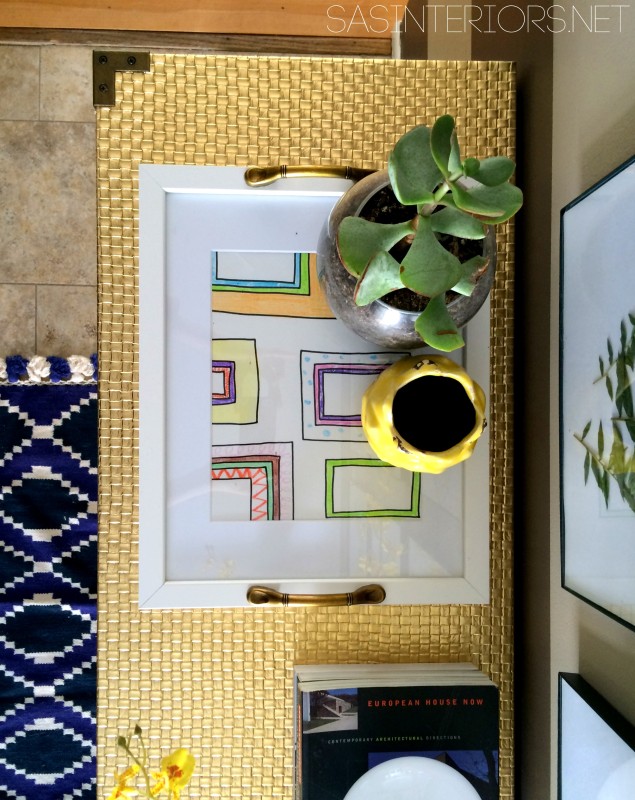
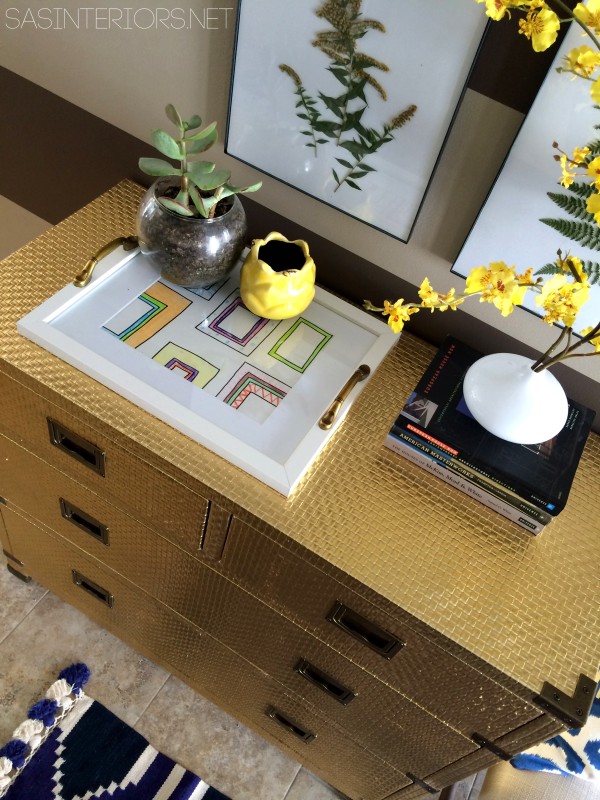
With the excitement of Spring finally here (our snow is almost all melted), I started spicing up the house with a few lighter + brighter elements.  The first area that I started with… The Foyer!  The entryway of the home is the perfect place to get the Spring time decor rolling.  Incorporating trays are a design-must in my book for styling tabletops + vignettes.  After clearing off the top of the gold dresser to start with a fresh palette, I knew I needed a new tray.   So I made one…

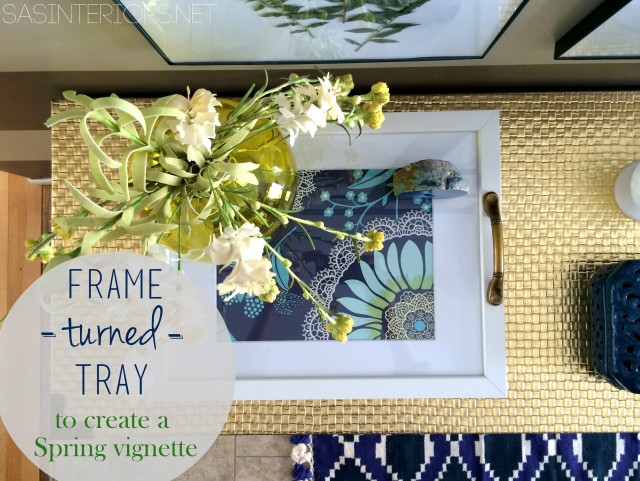
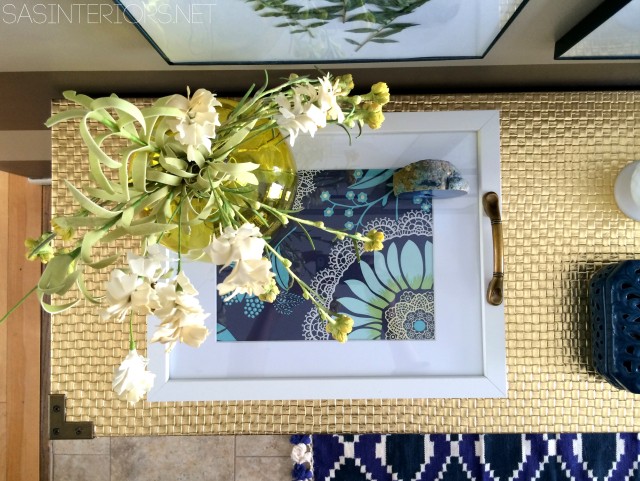
From Frame to Tray, check out my new Spring entry vignette. It’s simple, but fresh…

DIY: Frame Turned Tray; perfect for tabletop Spring vignette. So easy + affordable!

This frame turned tray took no time at all to create + the cost was much less than any trays I’ve recently seen or purchased in the past.  Plus, the beauty of it is, it’s customizable.  More on that in a minute…

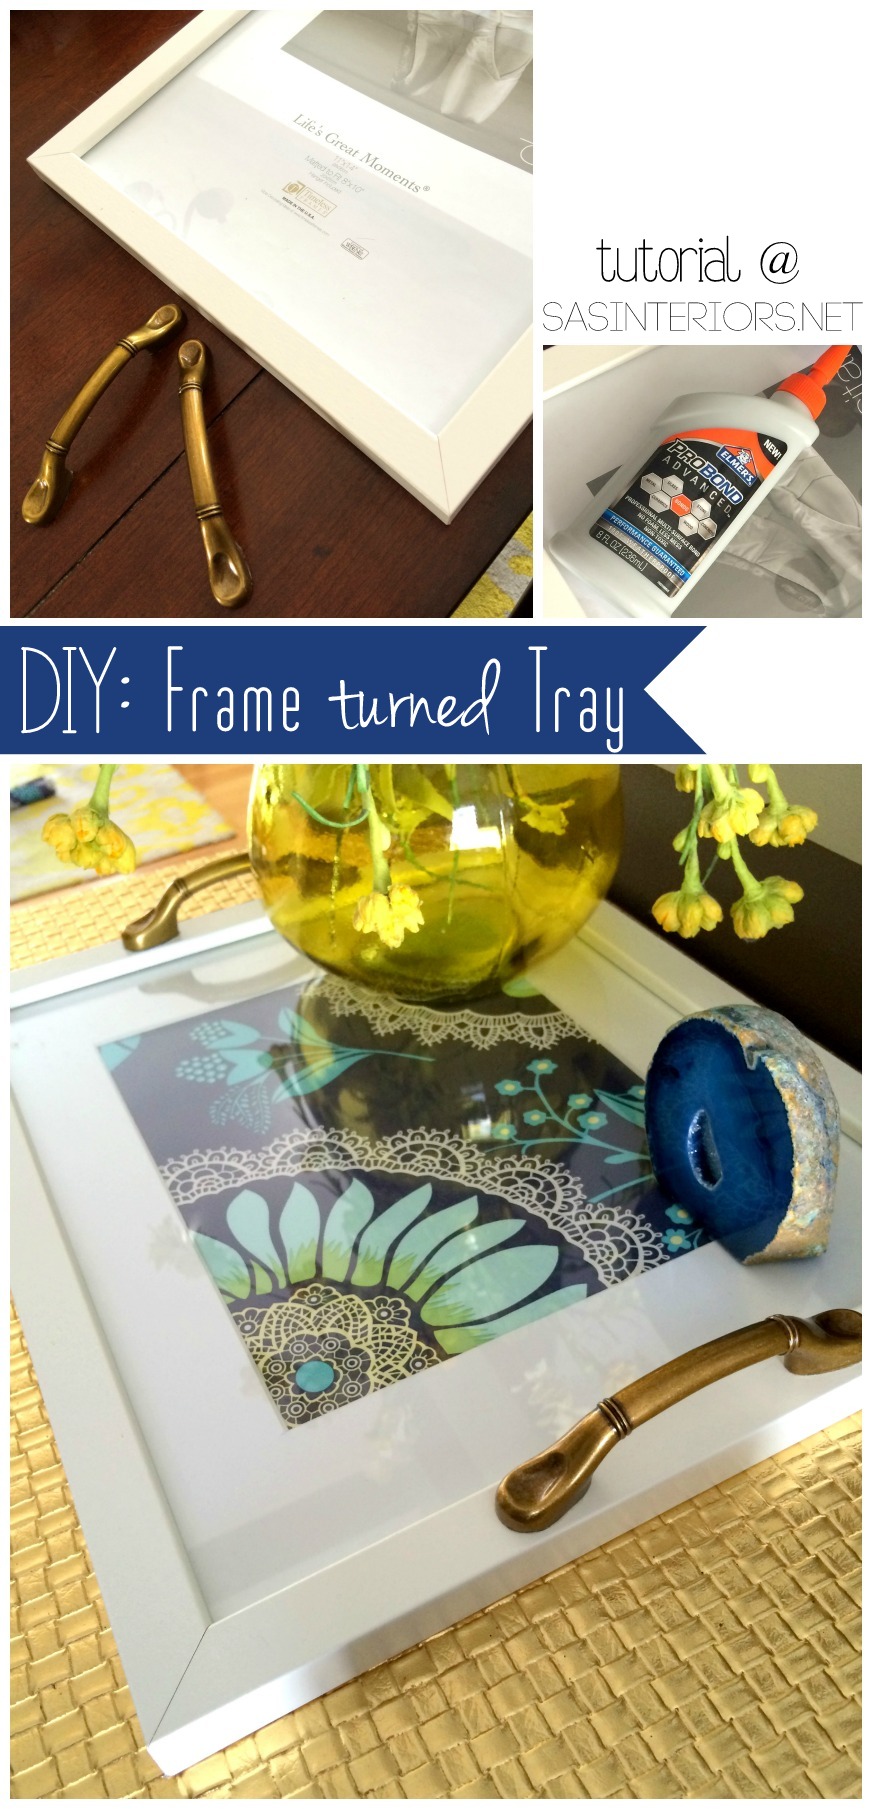
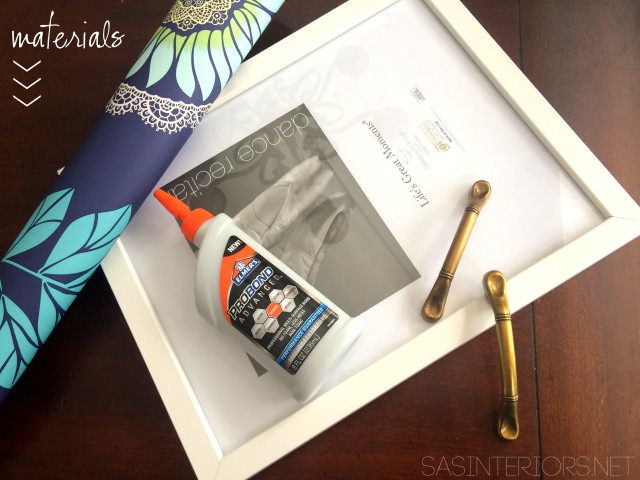
For this project, these are the materials I used:

> Frame – I simple picture frame with a flat, simple edge is a must for the hardware to lay flat.  The size frame I chose fits an 11 x 14 picture

>Cabinet Pulls (for the kitchen or bath – I got these gold pulls from Lowe’s)

> Something special to display – I chose to use a piece of leftover wallpaper from my powder room, but try a family picture, kids artwork, or anything that is meaningful to you.

Last, but most important for this project is Elmer’s ProBond Advanced!

Materials needed to turn a frame into a tray!

This project literally took minutes to make.

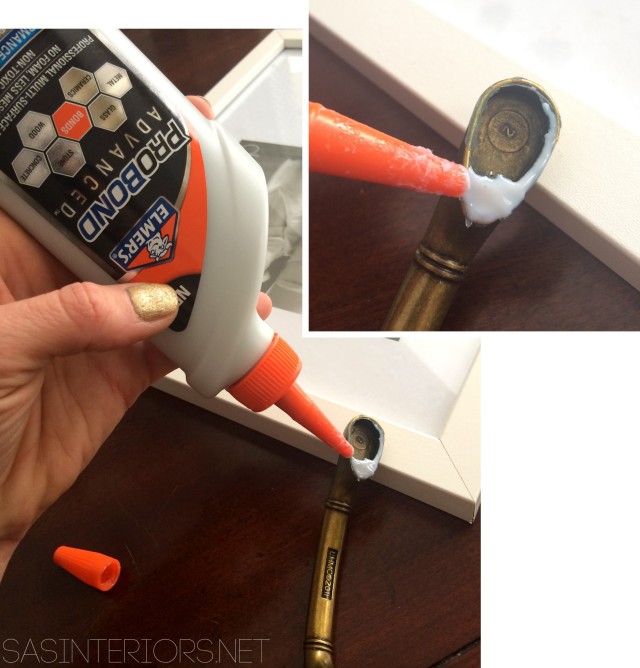
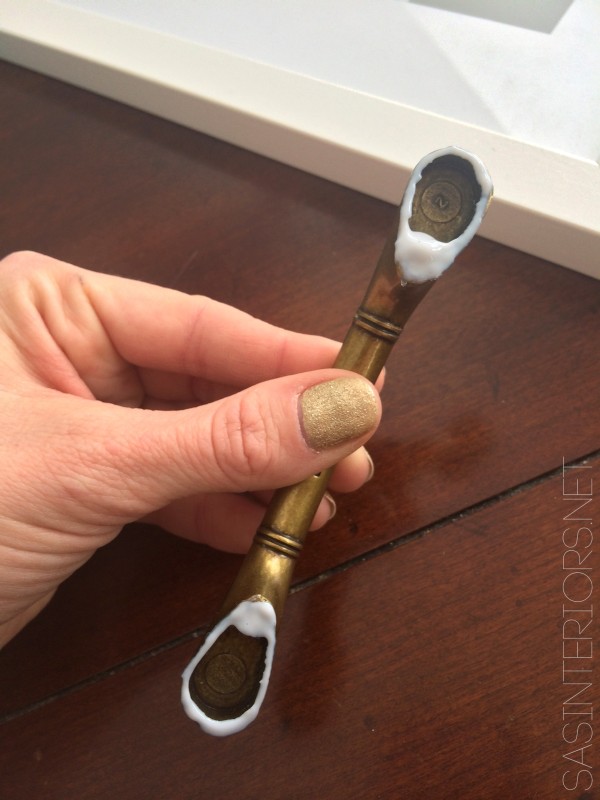
Using the amazing formula, Elmer’s ProBond, which is magical when it comes to adhering a porous material with a non-porous material (Mixed Materials like wood to metal for this DIY project), I added the “glue” to the metal pull.DIY: Frame Turned Tray; perfect for tabletop Spring vignette. So easy + affordable!

DIY: Frame Turned Tray; perfect for tabletop Spring vignette. So easy + affordable!

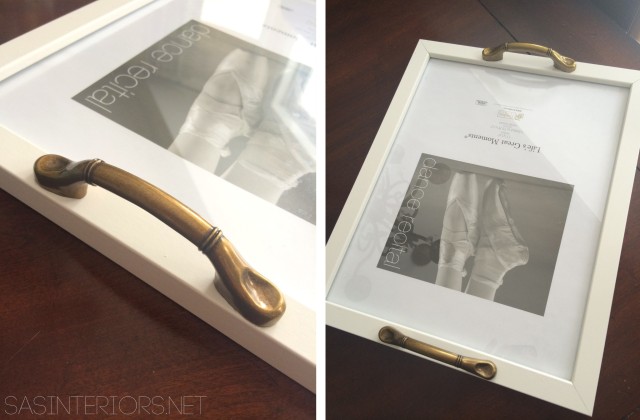
Then I “eyed it” and placed the pull in the center of the frame surround.  Same with the second pull, and voila, the frame instantly became a tray. From vertical to horizontal…

DIY: Frame Turned Tray; perfect for tabletop Spring vignette. So easy + affordable!

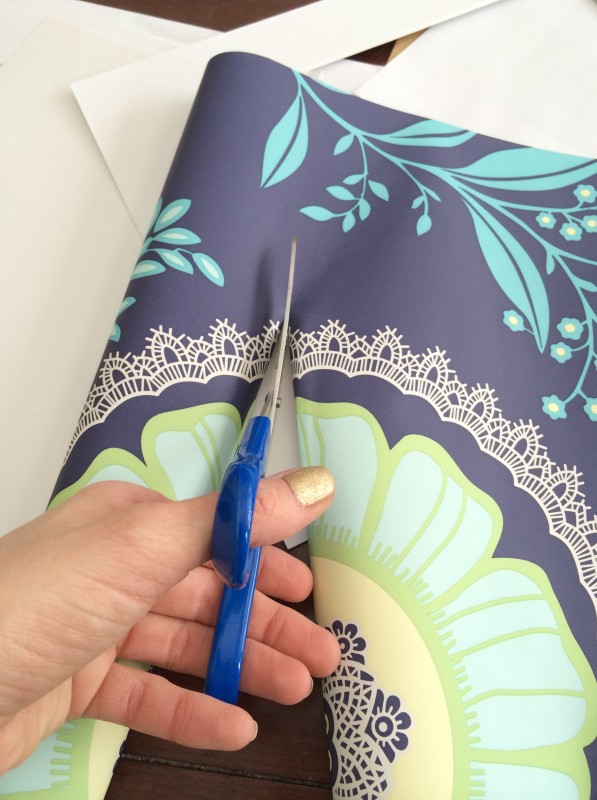
The next step was the fun part, customizing the tray with leftover wallpaper scrap (from the powder room).

After figuring out what I wanted to see within the matting space, I cut a piece of wallpaper to size.


DIY: Frame Turned Tray; perfect for tabletop Spring vignette. So easy + affordable!

And the result…

DIY: Frame Turned Tray; perfect for tabletop Spring vignette. So easy + affordable!

With the Elmer’s ProBond Advanced there was no messy foam residue, as sometimes found with other glues.  Just as we’re used to the plain ole’ white Elmer’s glue (yup, the kind our kids use), the ProBond didn’t run at all.  Once I attached the pull to the frame, there was a little “seepage” that I simply used a paper towel to clean up around the edges.

Think about all the projects – big and small – you could tackle with this magical formula?!

DIY: Frame Turned Tray; perfect for tabletop Spring vignette. So easy + affordable!

DIY: Frame Turned Tray; perfect for tabletop Spring vignette. So easy + affordable!

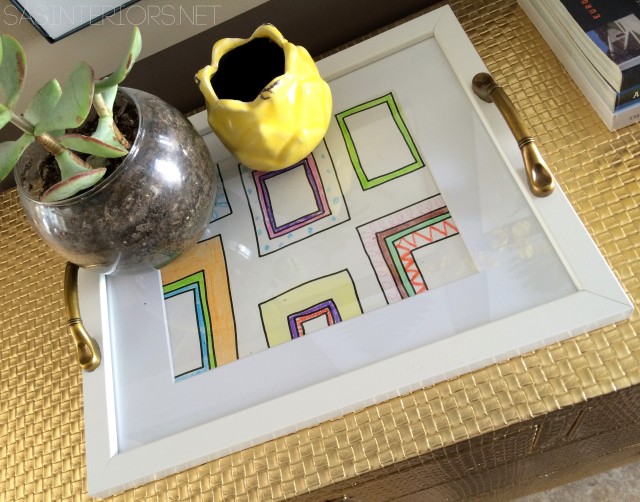
Taking a step further, I created another Spring tabletop vignette using the Frames Wallpaper that I used in my boys room and shared a few weeks ago…

DIY: Frame Turned Tray; perfect for tabletop Spring vignette. So easy + affordable!

DIY: Frame Turned Tray; perfect for tabletop Spring vignette. So easy + affordable!

DIY: Frame Turned Tray; perfect for tabletop Spring vignette. So easy + affordable!

And there it is.  A 10-minute DIY creation using a magic formula like no other!

Be sure to check back next week for the result of another DIY project I am working on.  It involves the Elmer’s ProBond Advanced again, but on a larger scale project.  Like I said, for big or small, this glue is awesome.

Visit Sponsor's Site

Glass Bottle Turned Candle

I’ve been working on so many big projects lately (like the stairs, painting, and this chair) that I wanted to take a quick break and create something super quick and easy to share with you. One of my favorite drinks, especially in the summer, is Saratoga Sparkling Water. Since I live in the town where this water is manufactured, it’s available most everywhere and everytime I see the gorgeous cobalt blue bottle, I just stare at it’s beauty.

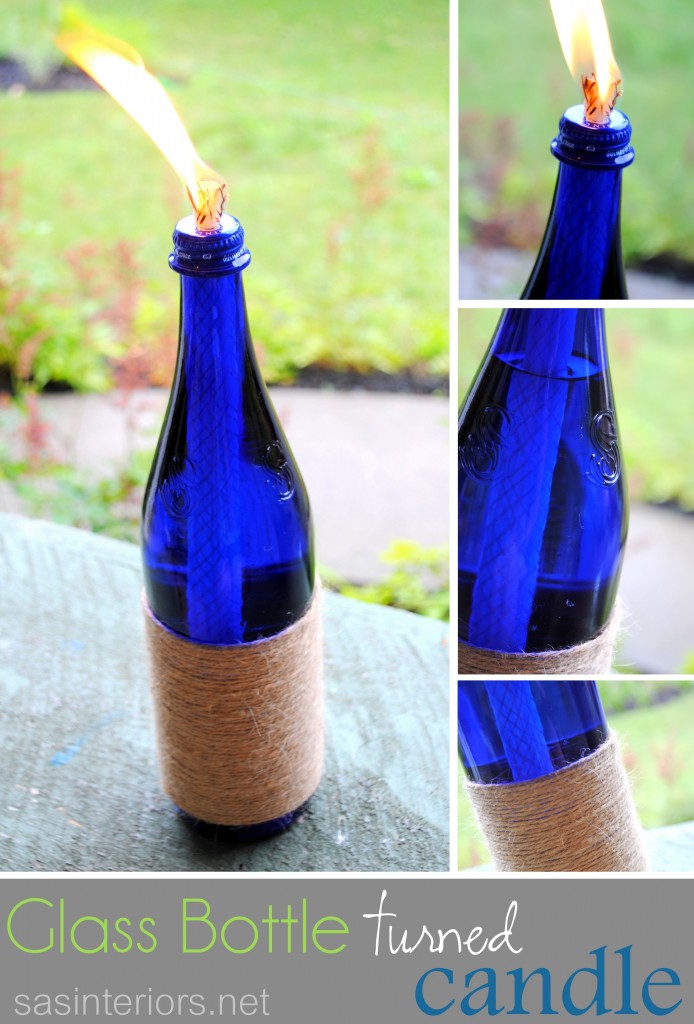
I never get the nerve to throw the bottles away and have been stockpiling them in my garage waiting for a DIY project to pop into my head. And finally, here’s my first creation with the blue beauties…

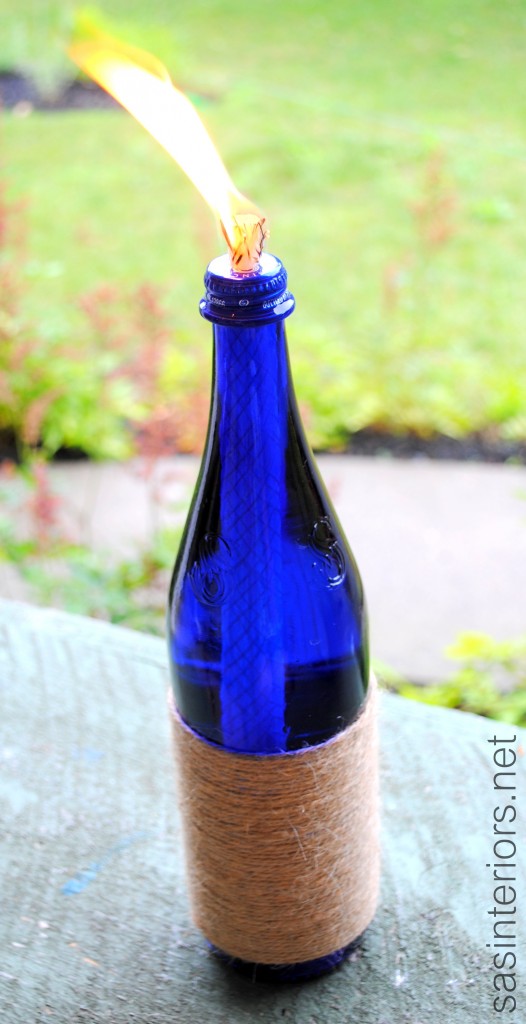
Cute, right?  And it’s uber-easy to make.  Here’s how…

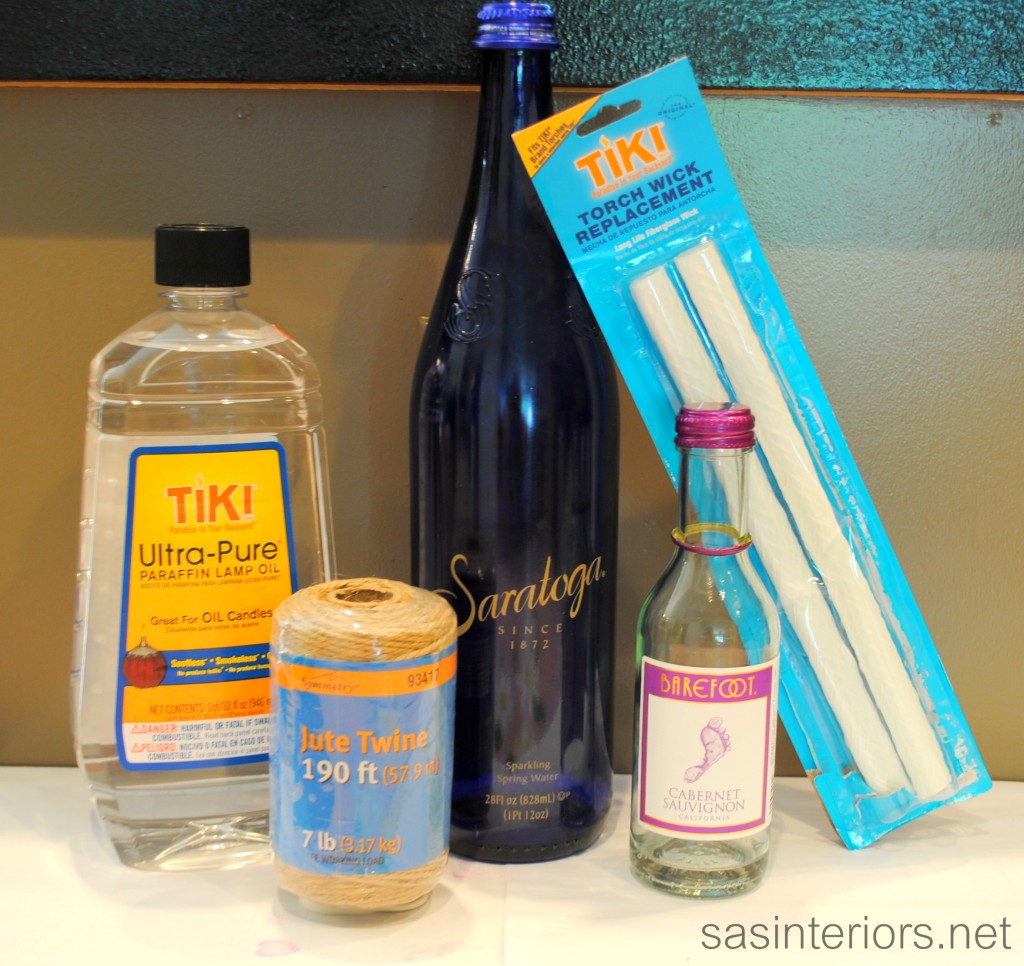
I started off with:

  • my used Saratoga Sparkling Water glass bottle with screw on top *
  • Lamp oil or citronella oil
  • Large Wicks (I found these replacement wicks for tiki torches at Target)
  • twine
  • hot glue gun
  • drill

* other glass bottles like wine bottles, spaghetti jars, mason jars, etc could also work to create this type of a candle. (check out the small Barefoot wine bottle in the pic below)

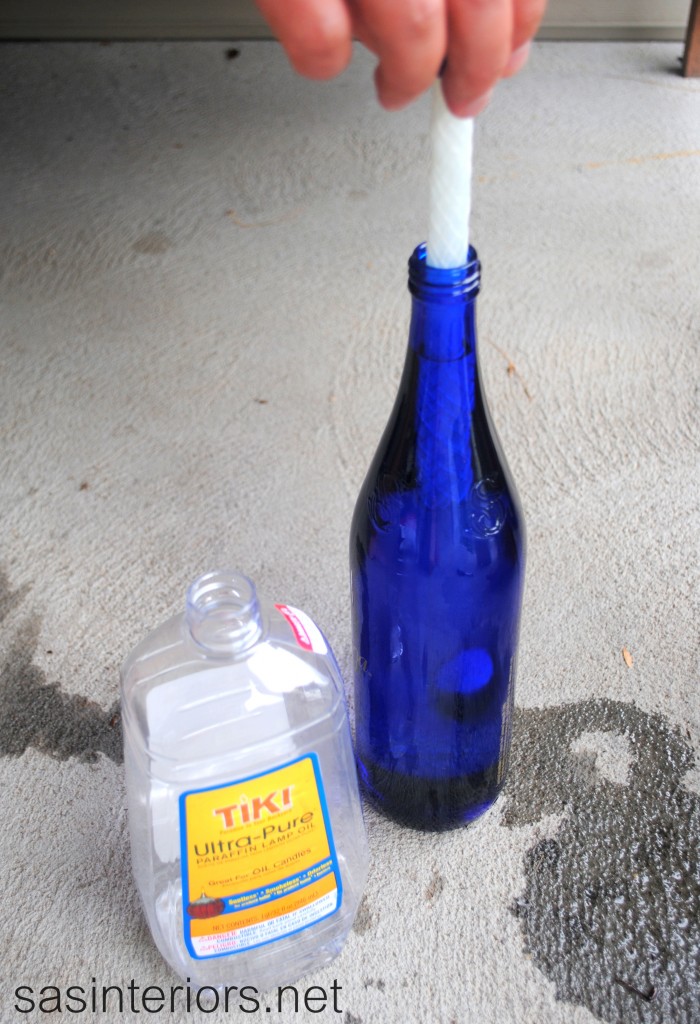
Once I was finished drinking my sparkly, I had the Mister drill a hole in the bottle cap (sorry no pic here because he did it while I was out n’ about).  The hole should be slightly smaller than the wick so it fits snugly. Once the hole is drilled, the wick went in.

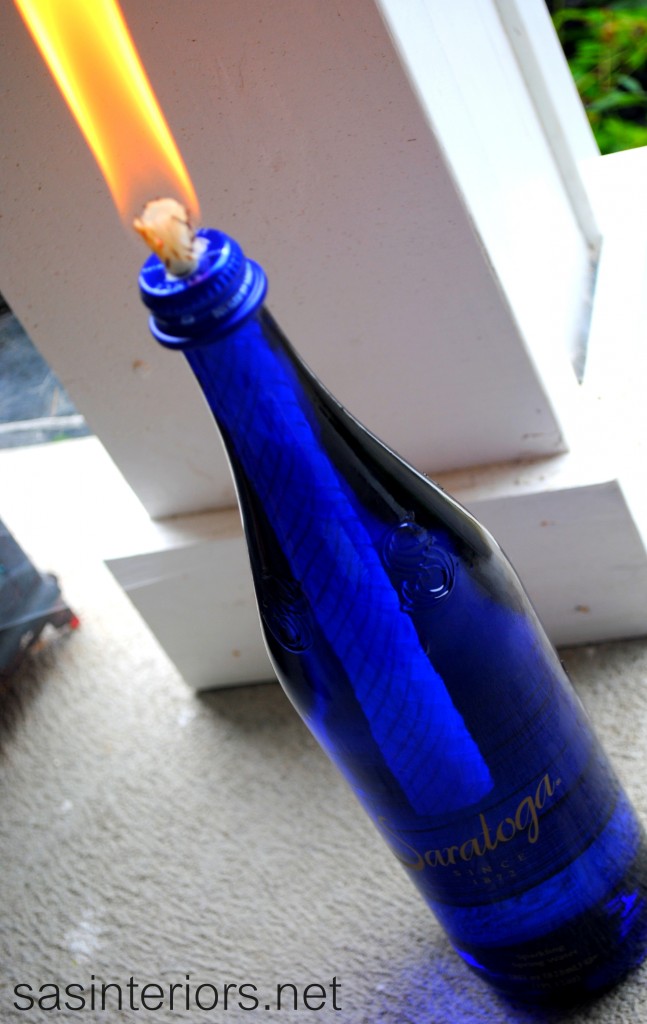
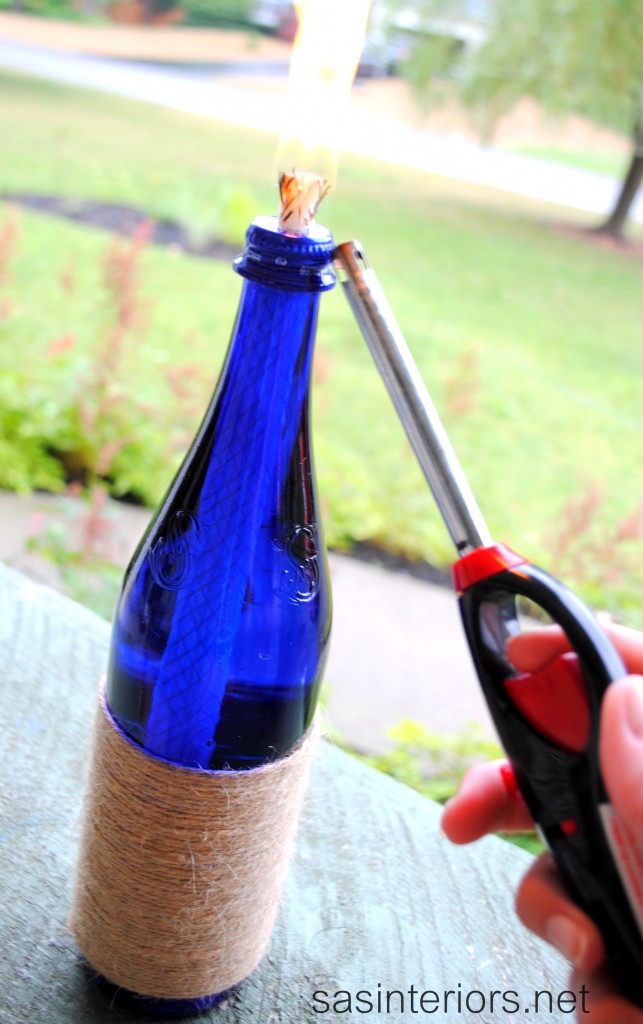
We then filled up the glass bottle with the lantern oil and tested out the new candle.

And it worked!

Then it was time to add some bling (nautical bling, not diamond bling).  I love the Saratoga lettering, but decided to add some rope as an accent.  I’m probably the only DIY blogger who hasn’t created something using rope, so here it goes.

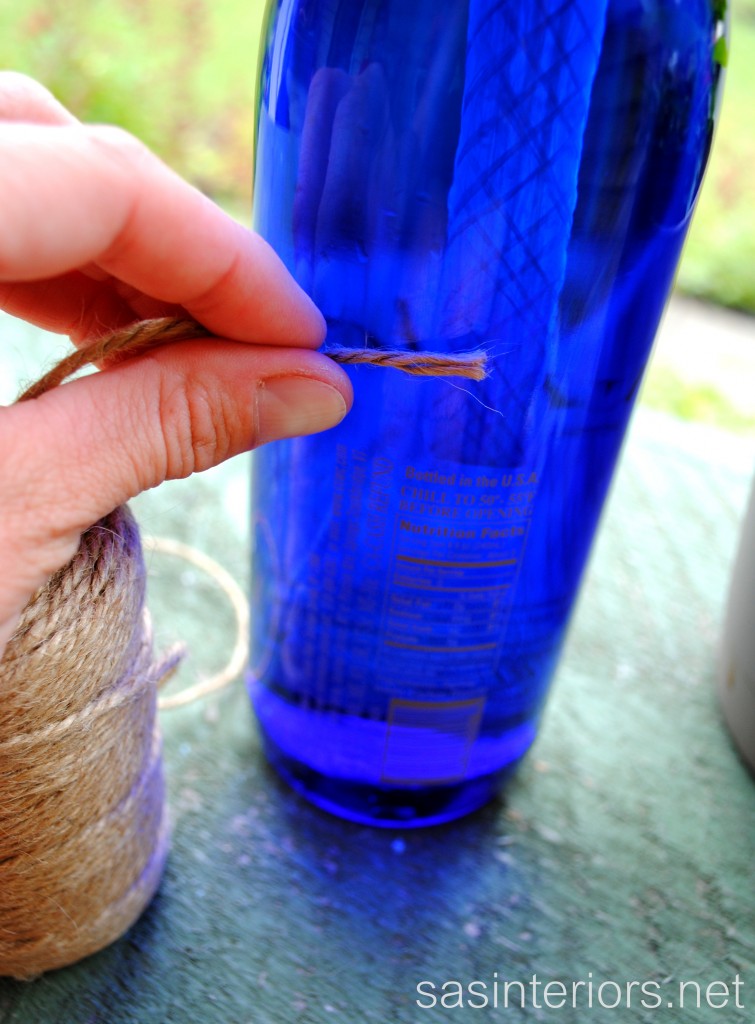
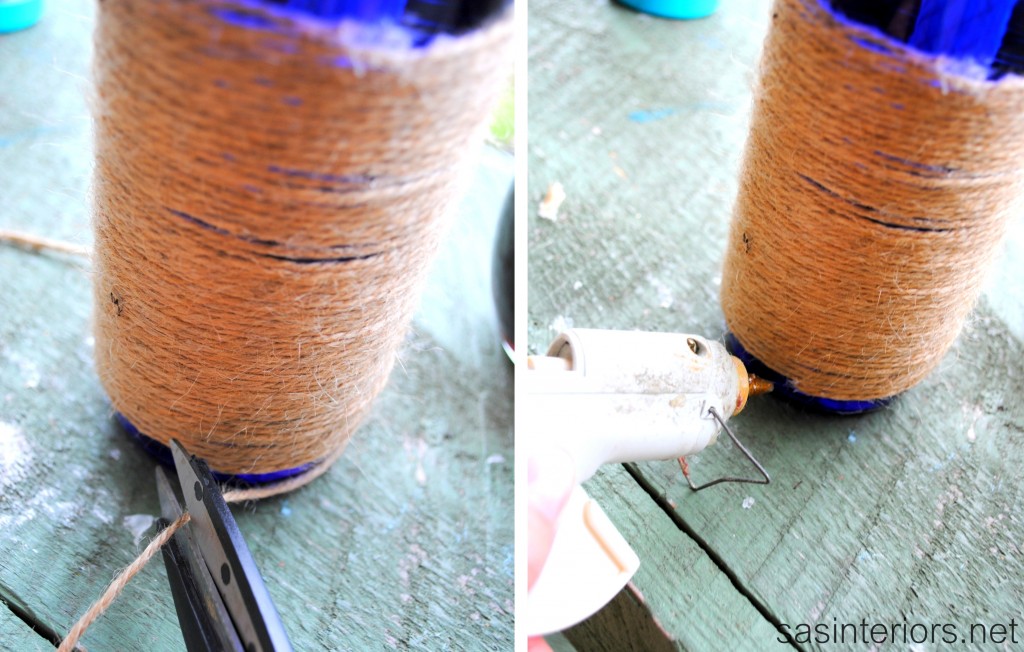
Starting at the back of the bottle, I added a small dab of hot glue and attached the end of the rope.

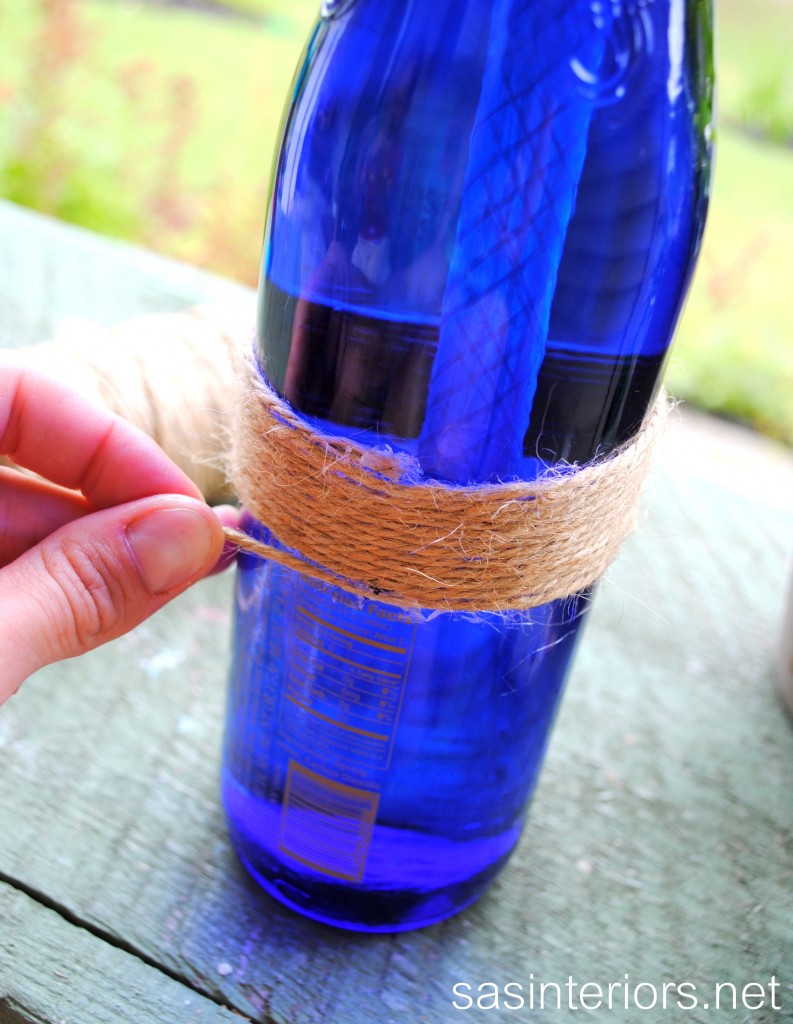
I continued the rope around and around and around…

…and then once I was at the end, I trimmed the rope and added another dab of hot glue.

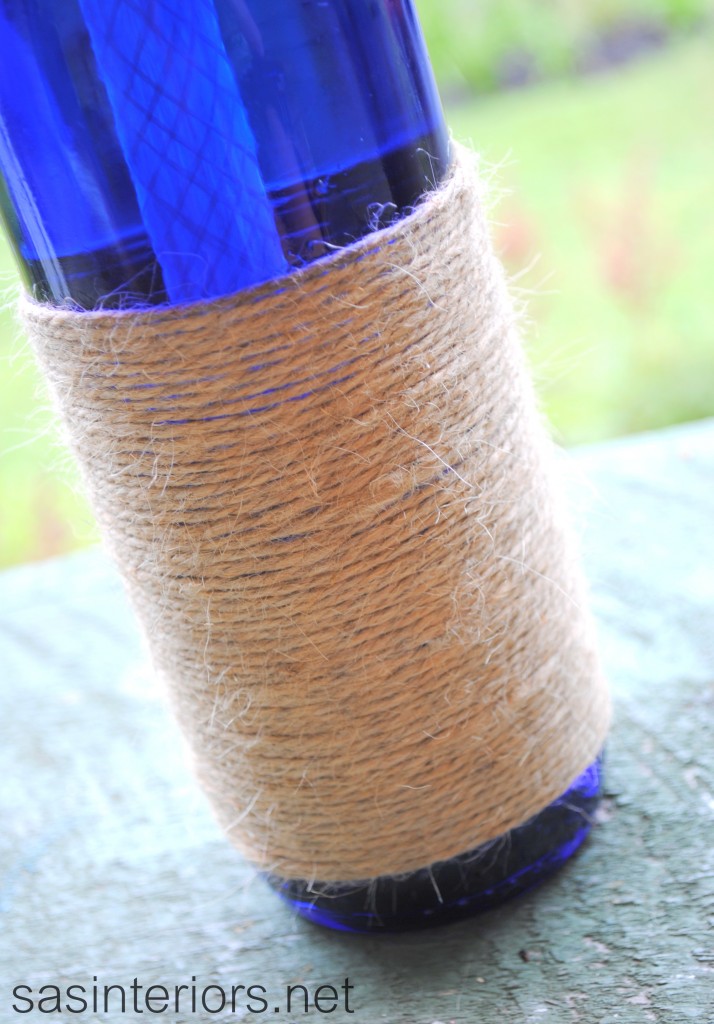
Complete and ready to enjoy!

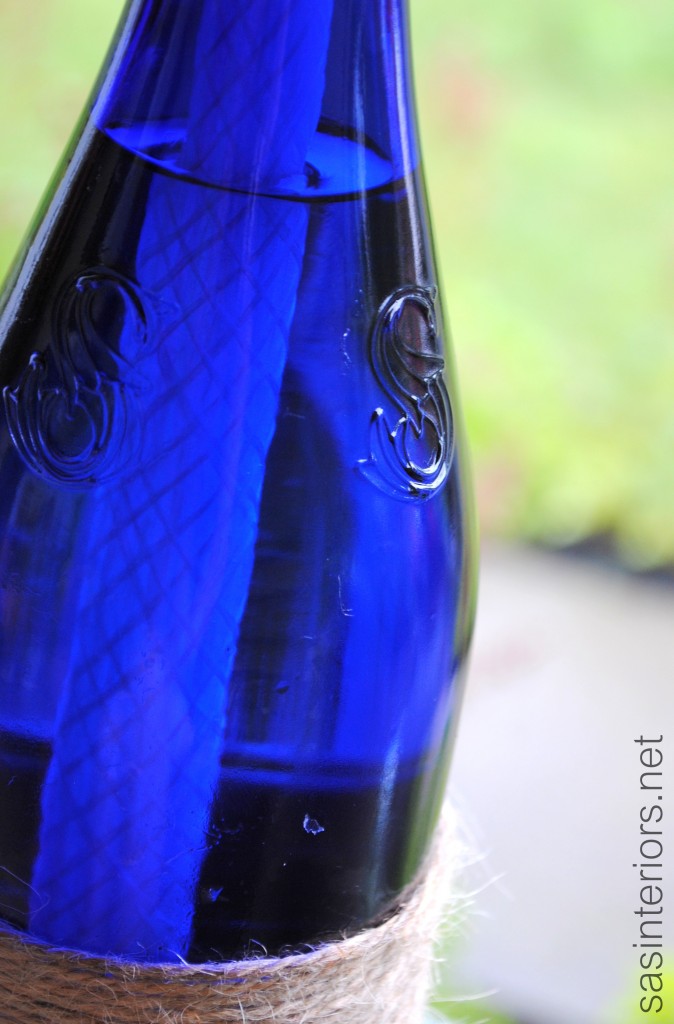
And here are some details…

Pretty simple to create, right?!

Have you ever upcycled a glass bottle or wine bottle?

I link my projects to some of these parties: Skip to My Lou, Dittle Dattle, Between Naps on the Porch, Today’s Creative Blog, Stories of A to Z, All Things Heart & Home, Savvy Southern Style, House of Hepworths, Finding Fabulous, Creation Corner, The Shabby Nest, Tatertots and Jello, Thrifty Decor Chick, Tip Junkie

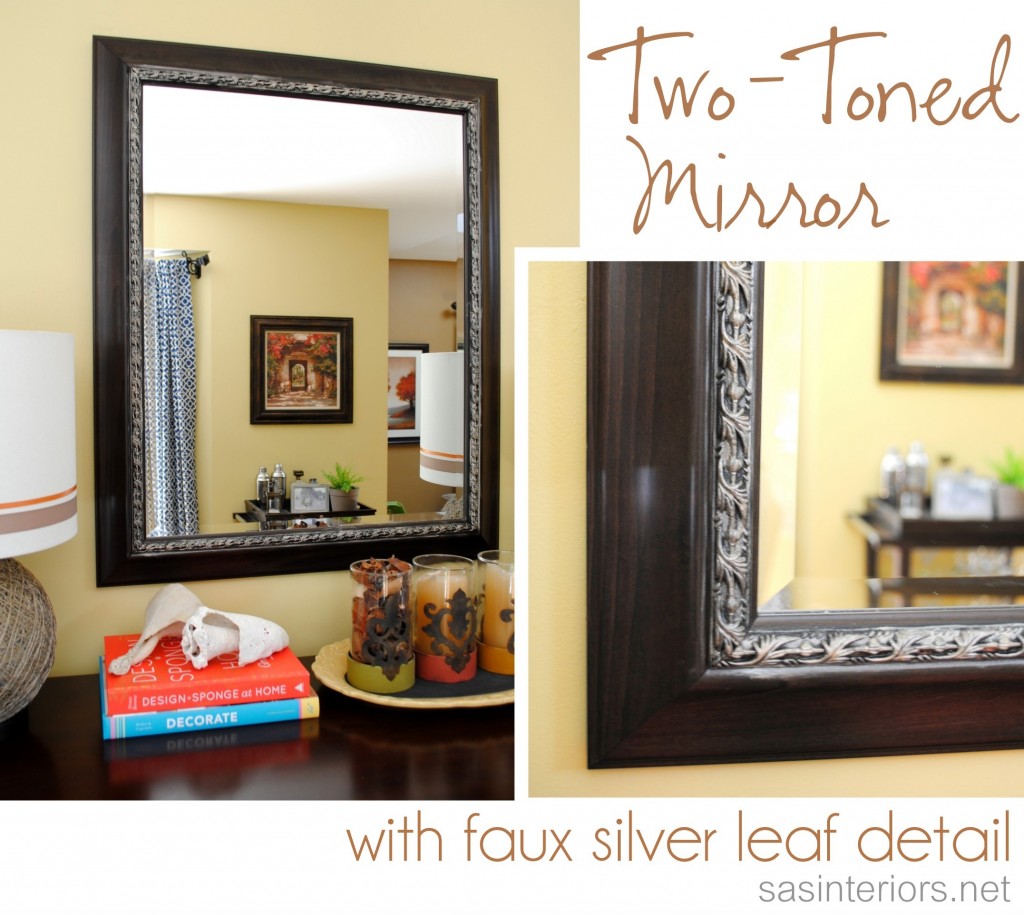
Two Toned Mirror with Faux Silver Leaf Detail

Another summer week is underway.  I can’t believe how fast it’s flying by, but I’m excited to be sharing a new DIY project with you – let’s get started…

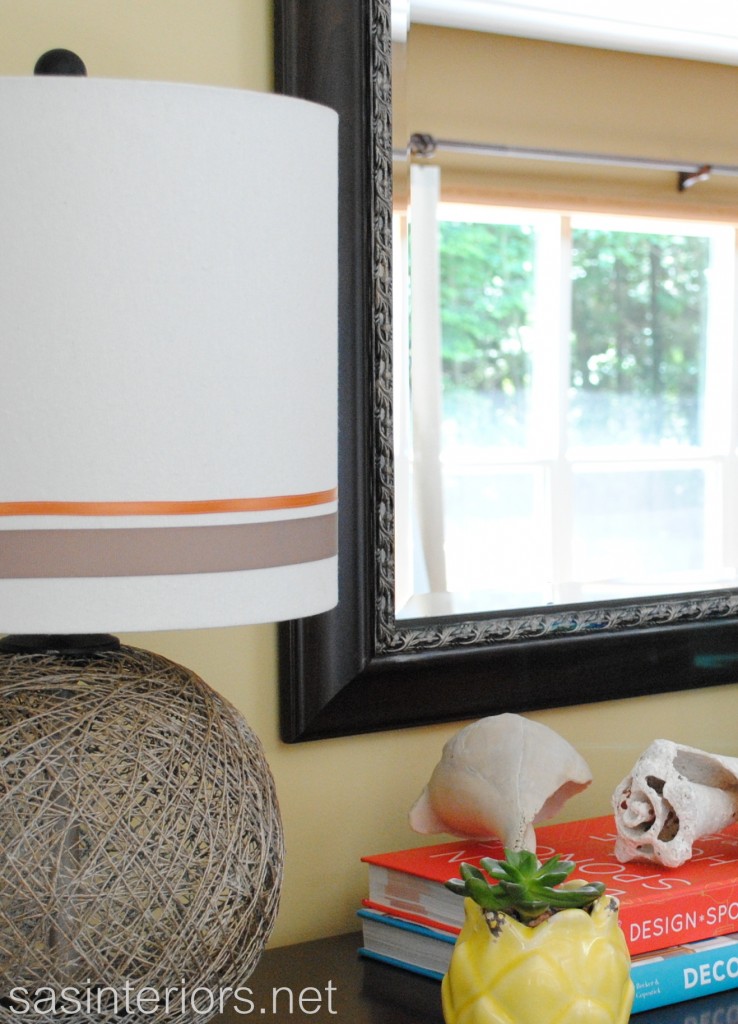
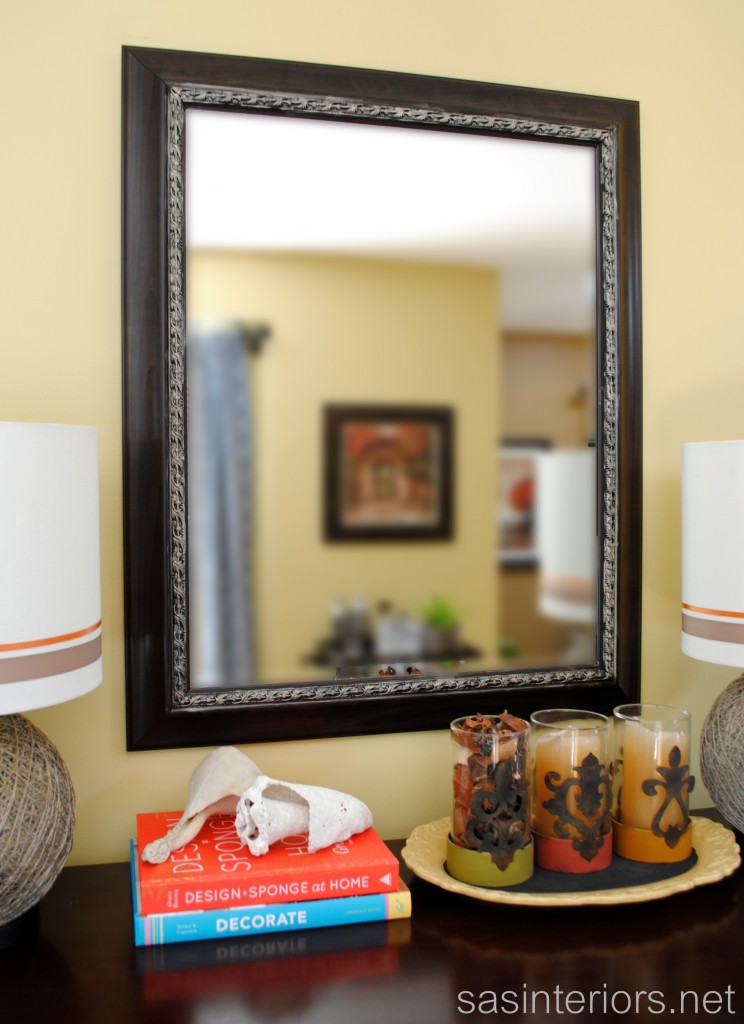
Sometimes a small added detail truly makes a piece look completely new again.  While updating the buffet in my dining room with the new lamps and sunburst mirror, I moved the dark wood mirror that was once over the mantel to this revamped area.  I’ve had the mirror for about 9 years and it was beautiful, but I felt like it needed a little pick-me-up and decided adding a little something around the inner rim would be the perfect update.

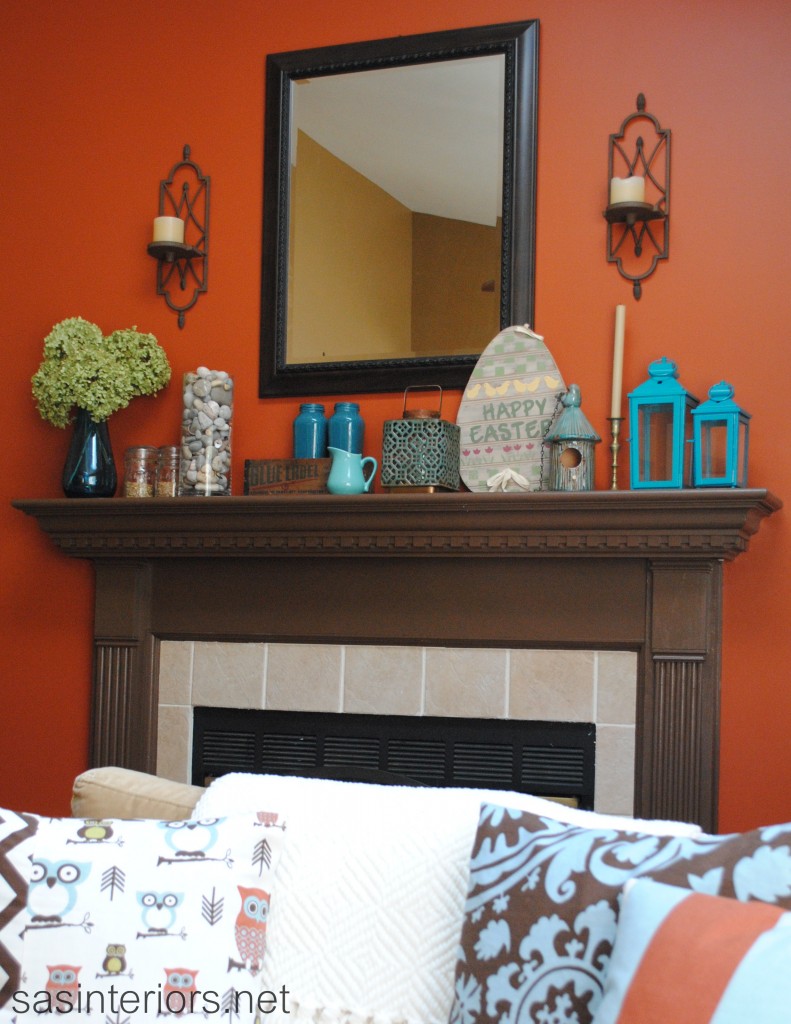
The mirror has been seen in many of my mantel makeovers, like this one decorated for Spring 2012. Since it was in fine condition, I was weary about messing-it-up, but I took the leap of faith anyway. Silver leaf detail was the first thought that came to mind.

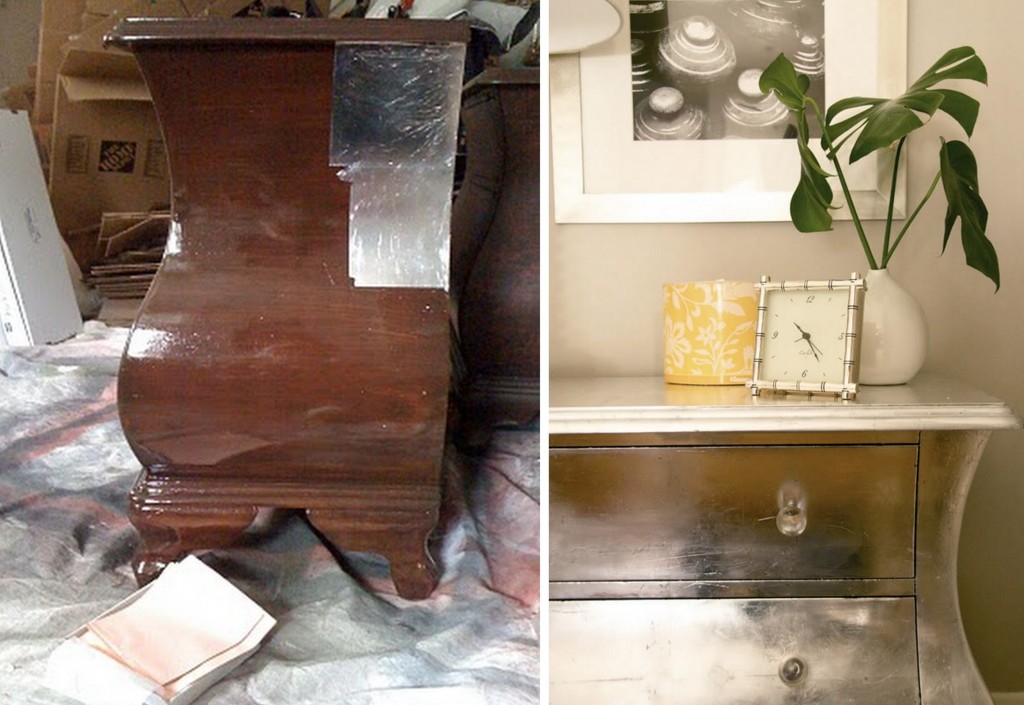
The addition of silver leaf, like in the dresser below by Jenny of Little Green Notebook, adds a beautiful and sophisticated accent, but since I was hesitant about how much detail would be appropriate for this mirror, I decided to use another method to get the silver leaf look, but make it totally faux.

Beautiful and I’d love to give silver leafing a try one day, but for my mirror, the faux way was alot easier and less time consuming.

Faux Silver Leaf

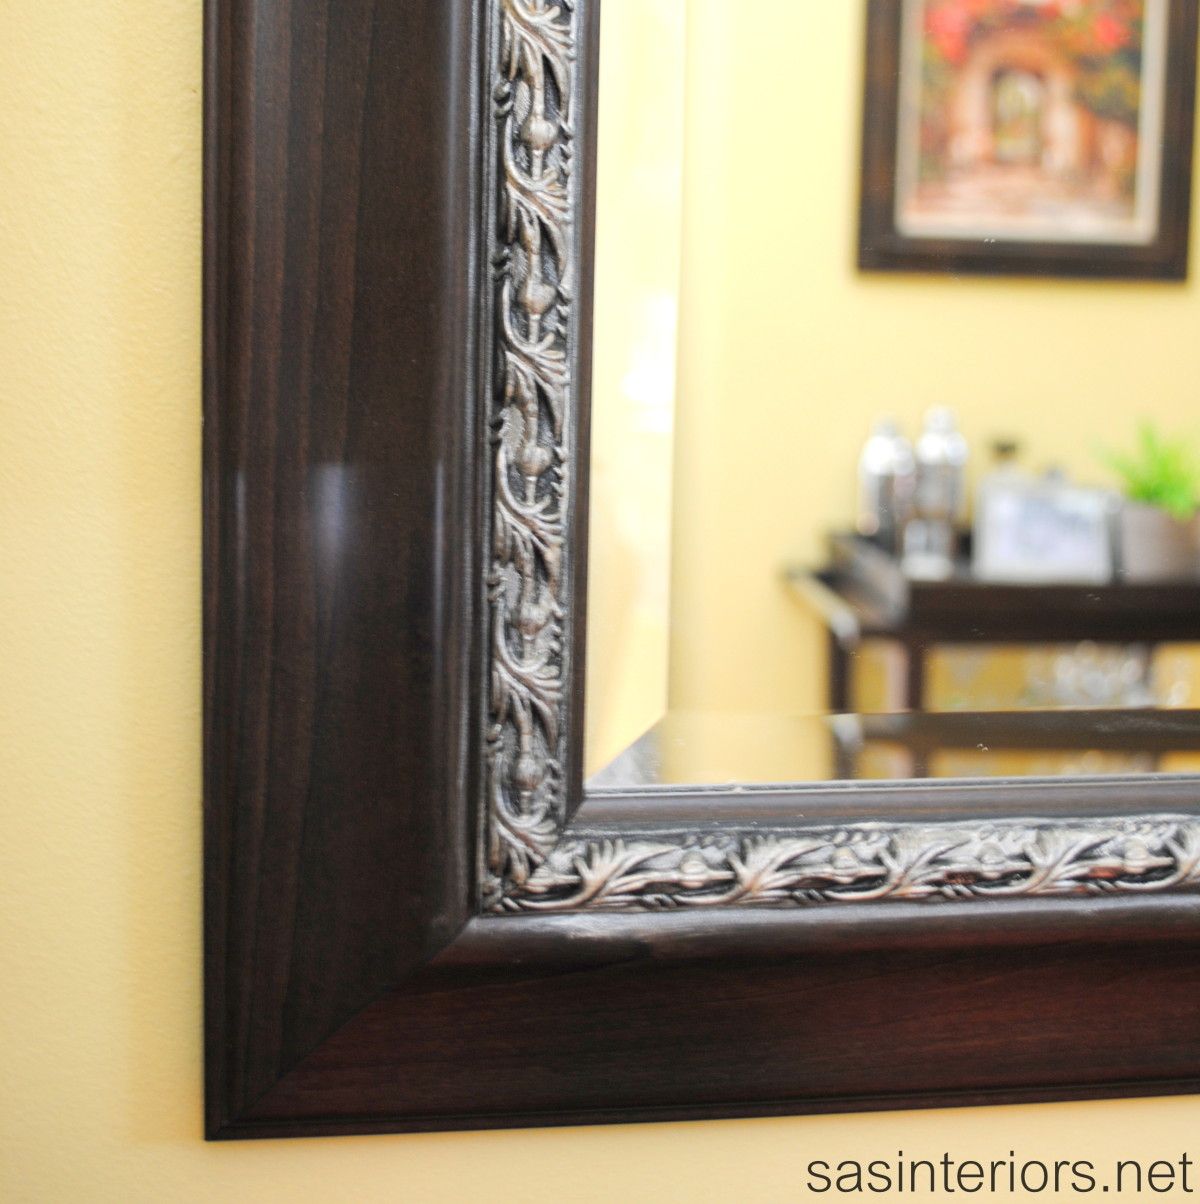
To achieve the silver leaf look, I used Krylon Spray Paint in Caramel Latte, which is the same color used for my lamp revamp – yes the lamps that now site right next to the mirror. LOVE this color. The cap shows it has more of a gold hue than silver, but the result on the mirror edge and the lamps is a more silver / gold combo.

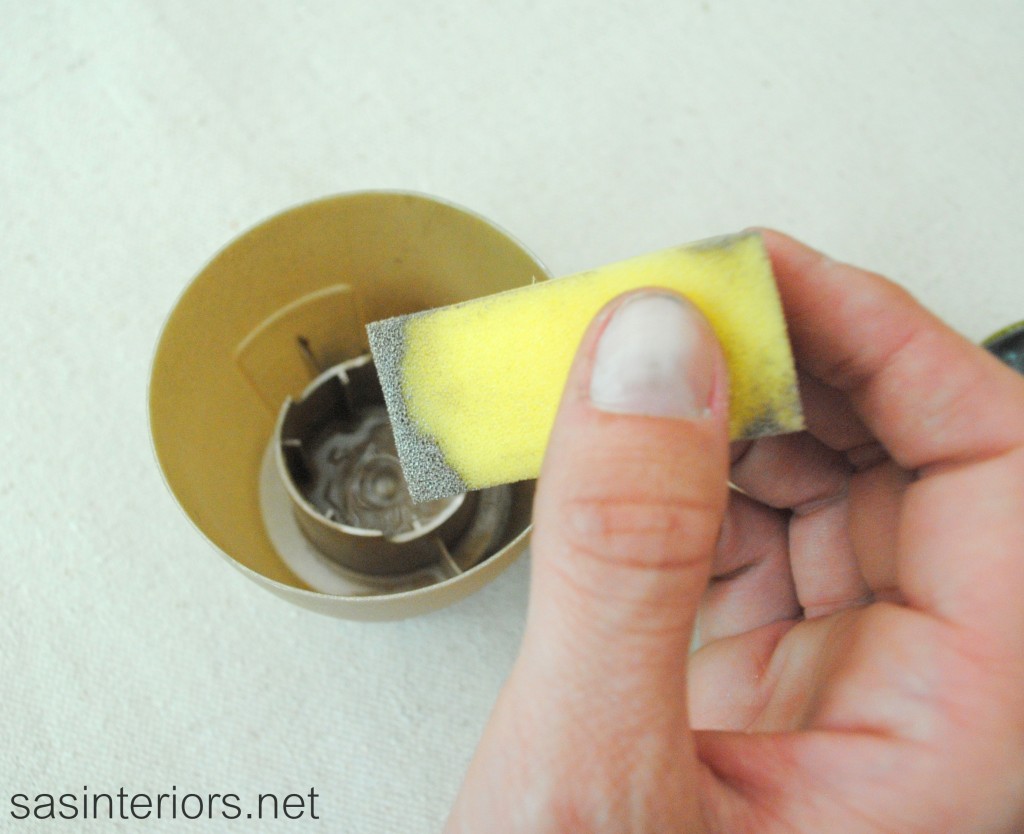
Instead of the traditional way of using spray paint – is there a traditional way? – I, sprayed a small amount into the cap (in a ventilated space, of course)…

…then using a small paint sponge, I dipped the edge into the paint.

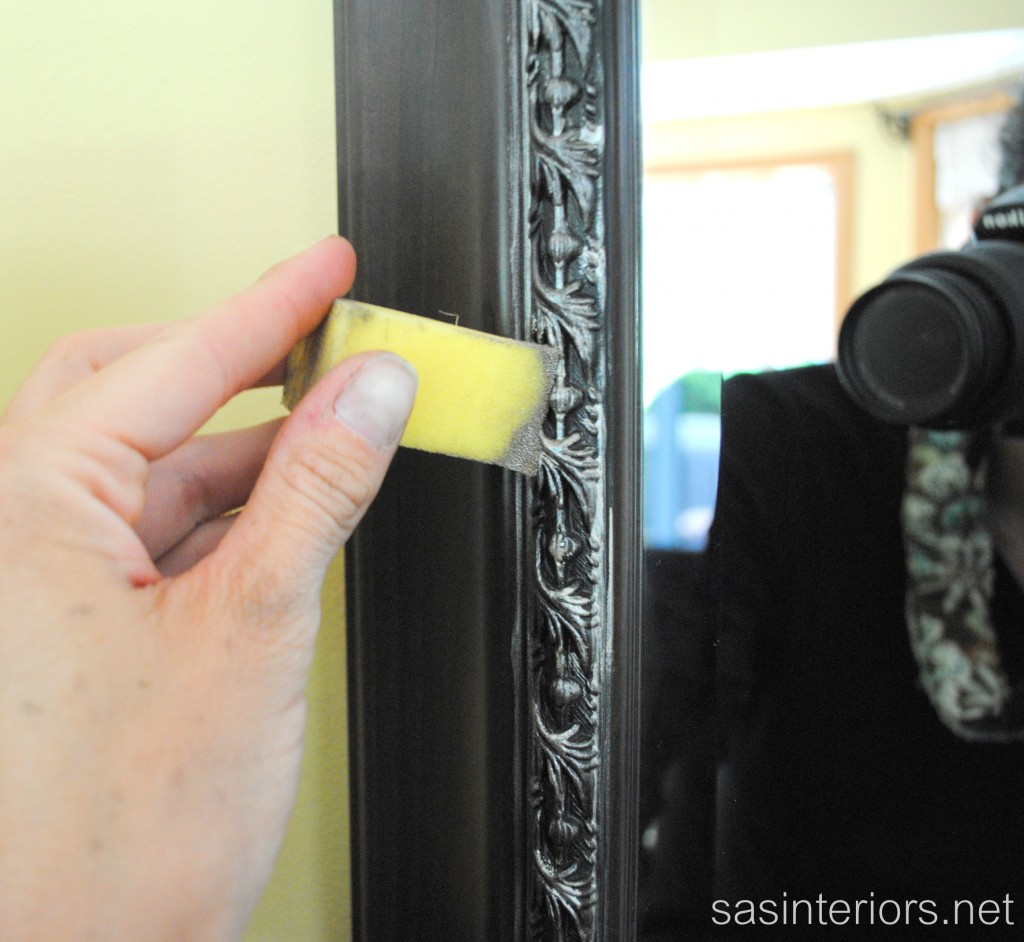
Then I lightly dabbed the sponge onto the leaf detail of the mirror edge.  I went slowly at first not sure of how much would be appropriate.

Well, hello there camera lense staring at me 😉

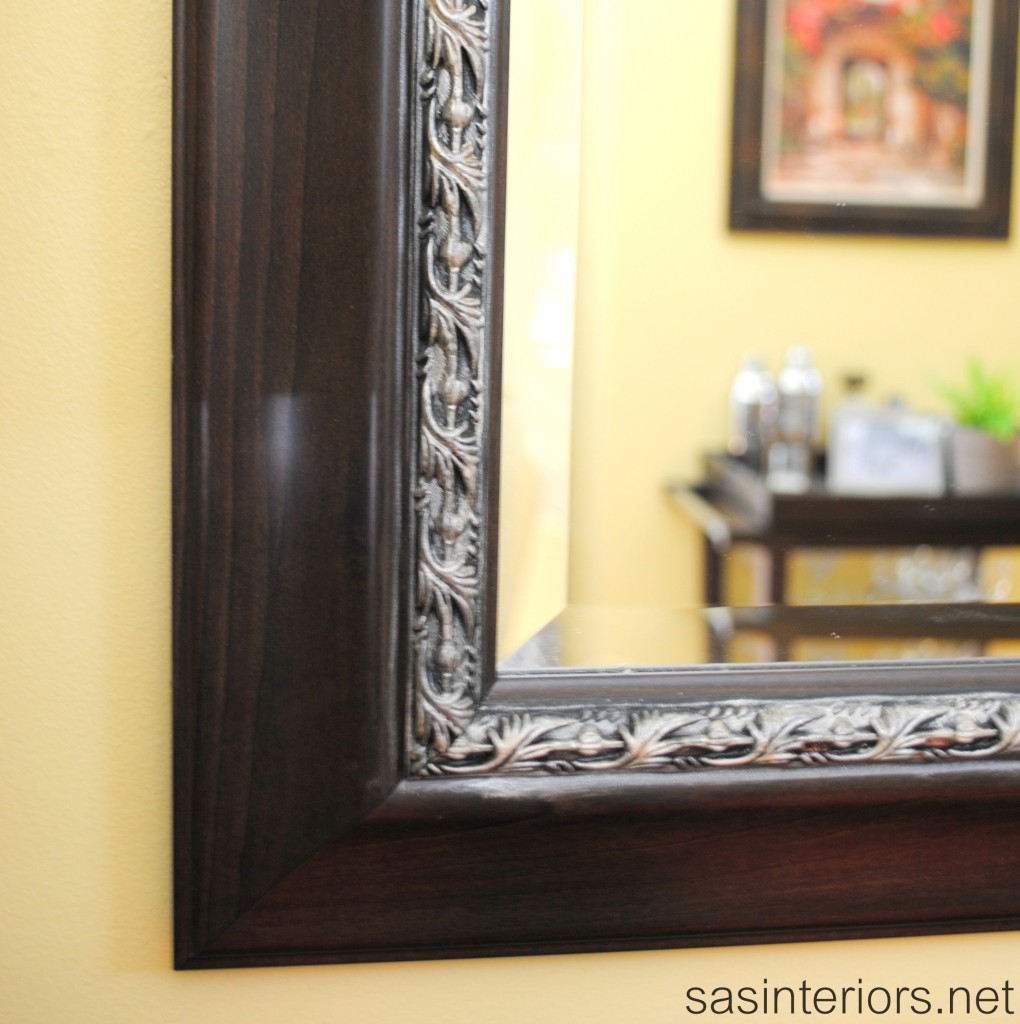
After I knew the look I liked, then I continued around the entire mirror, and this is the result…

The edge detail around the mirror can be seen more now with the newly added faux silver leaf touch, and the mirror is updated enough to look like new. Within 5 minutes this mirror got a complete makeover and it was really easy!  Hanging the mirror wasn’t difficult either with a method I’ve been using for years AND I’m going to spill the beans tomorrow – don’t miss it.

Have you ever used spray paint in a different or unconventional way?  Have you ever updated a piece of furniture with silver leaf?  It’s surely something I’d love to try!

I link my projects to some of these parties: Skip to My Lou, Dittle Dattle, Between Naps on the Porch, Today’s Creative Blog, Stories of A to Z, All Things Heart & Home, Savvy Southern Style, House of Hepworths, Finding Fabulous, Creation Corner, The Shabby Nest, Tatertots and Jello, Thrifty Decor Chick, Tip Junkie


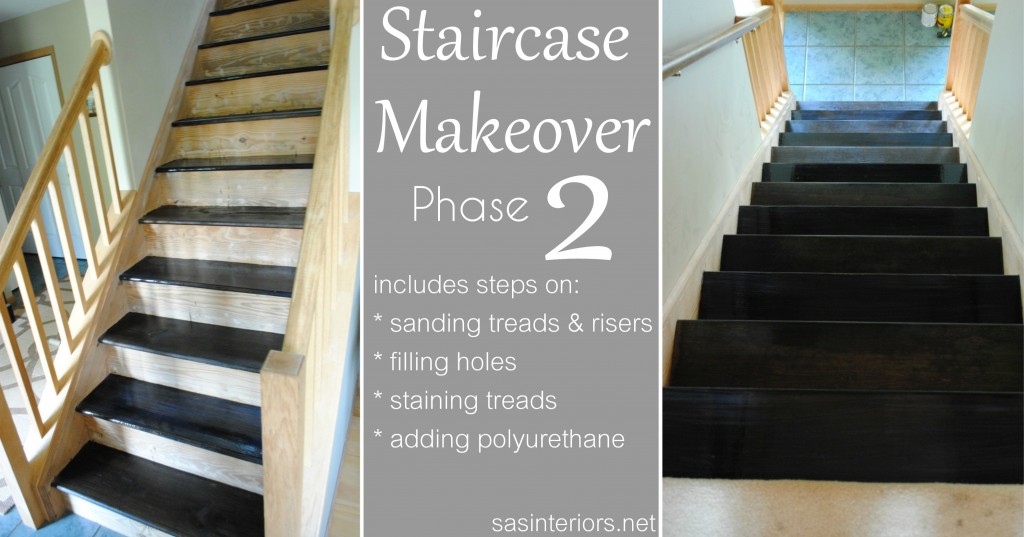
Staircase Makeover: Filling Holes and Staining Treads

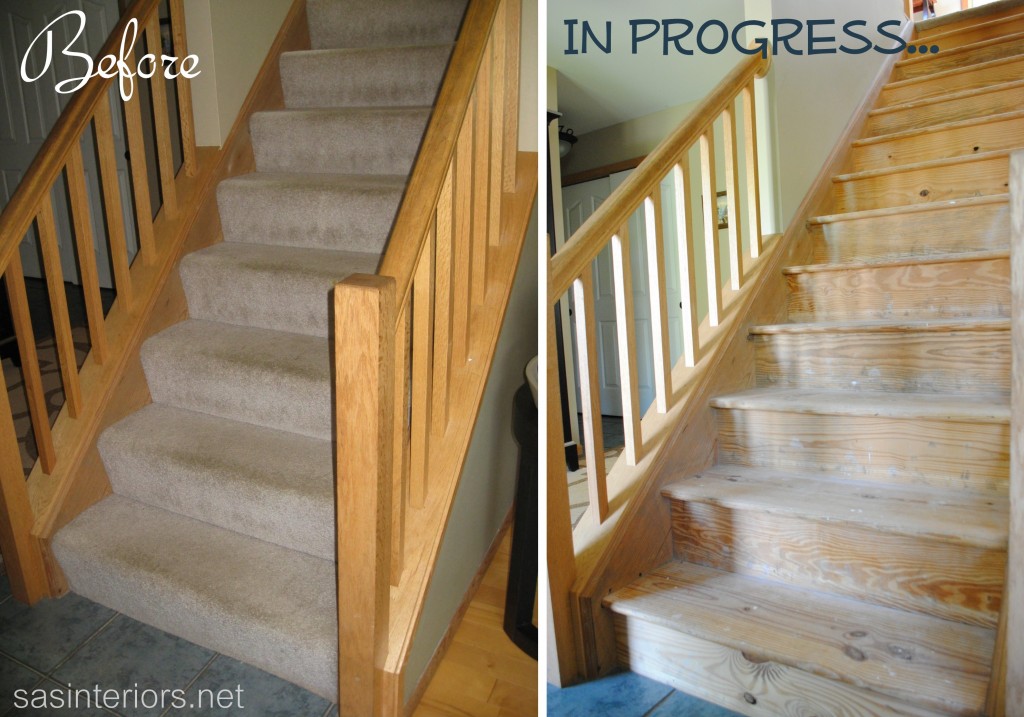
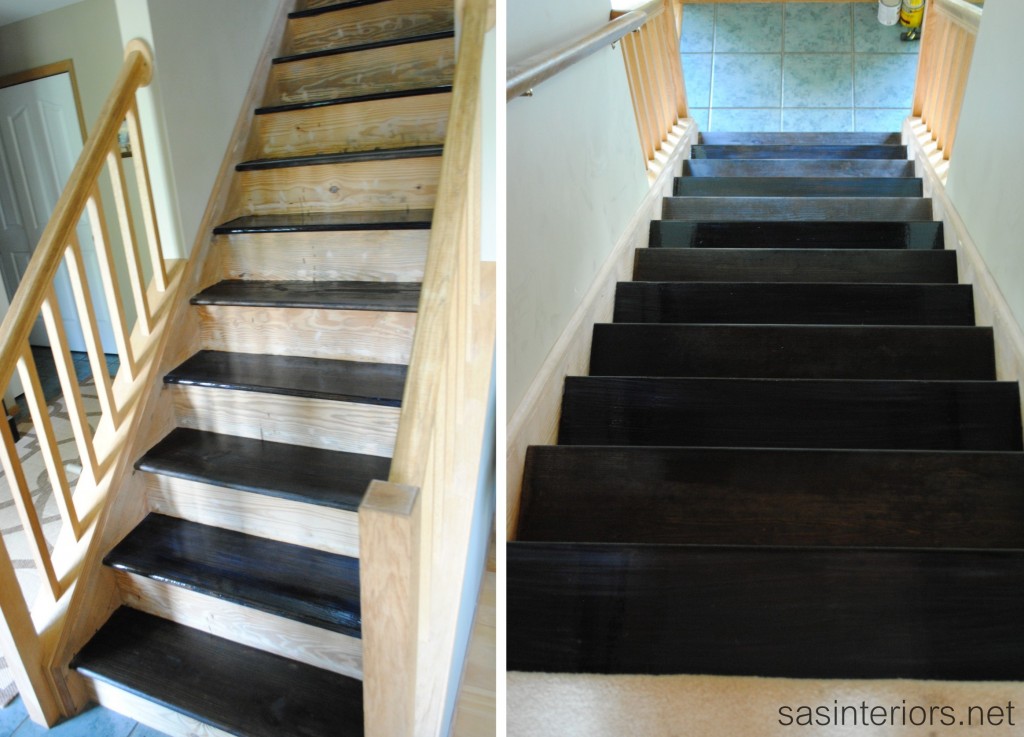
It’s almost been 2 weeks since I posted about the stair makeover, but don’t think I haven’t been hard at work.  The staining took quite a long time and not because it was difficult, but for another reason – keep on reading.  Anyway, I can officially say that the staining is complete and I am at the half way point now (I hope).

This second phase of the staircase makeover covers sanding the stairs, filling the gazillion holes from the carpet tacks and staples, and staining the treads. So let’s jump right in and get started!

Project Details

Duration of Phase Two: 1.5 hours for sanding & filling holes; 2 overall hours for staining / polyurethane (5-10 minutes for each coat)
Phase 2 Difficulty: Easy to Medium
How Many People Needed: 1

The supplies I used for this phase of the project are:

  • Orbital Sander (sandpapering by hand is also possible, but will take longer)
  • Wood Filler (in a color to match the wood)
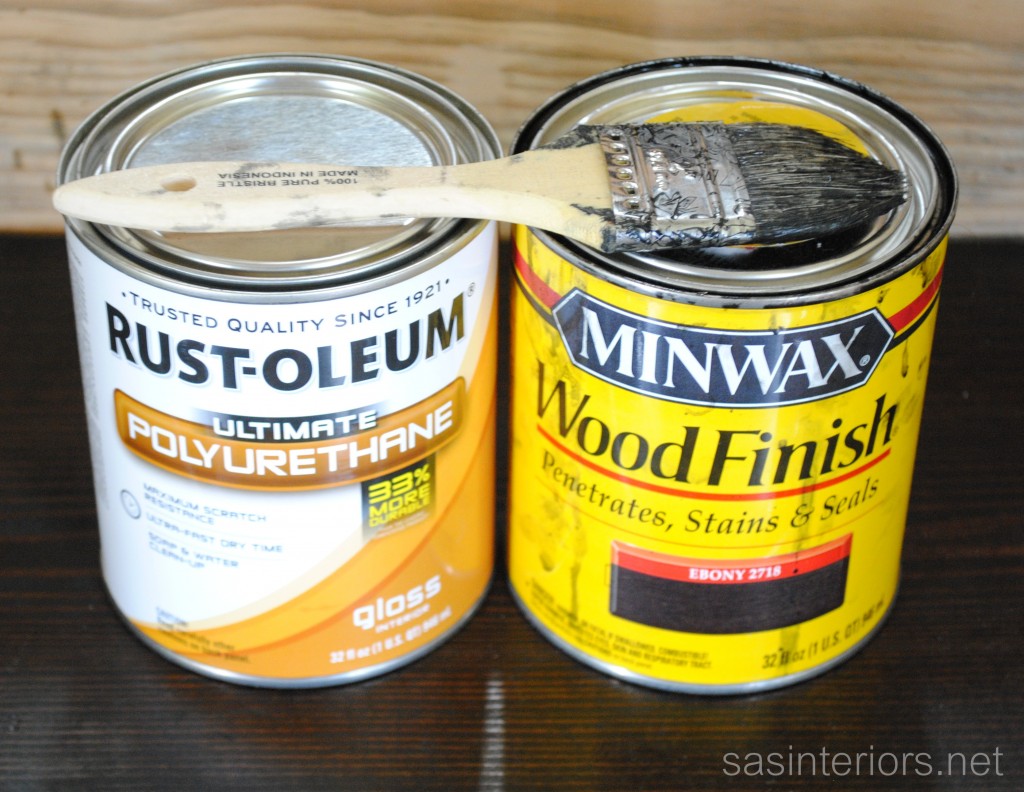
  • Stain – I used Minwax Wood Finish in Ebony
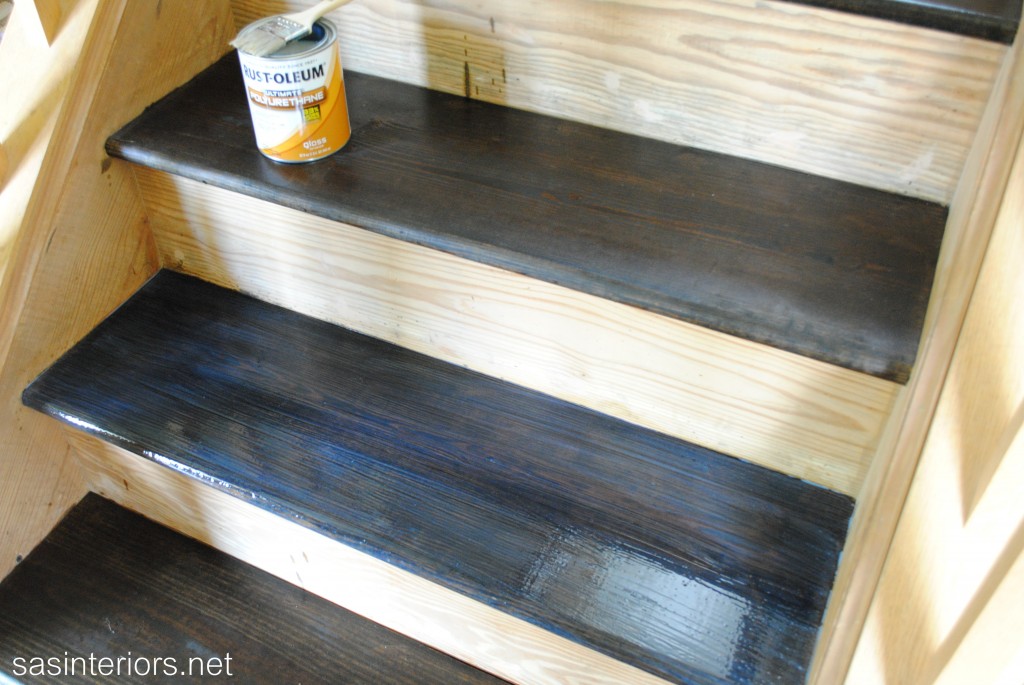
  • Polyurethane – I used Rustoleum (water-based) in a gloss finish
  • Cheap brush or sponge brush that can easily be thrown away
  • Mineral Spirits (if you don’t want to use a cheap brush and instead wash them)

In my last post on removing the carpet and prepping the stairs, I left you off with this…

Once the carpet tacks and staples were fully removed, it was time to sand the stairs.

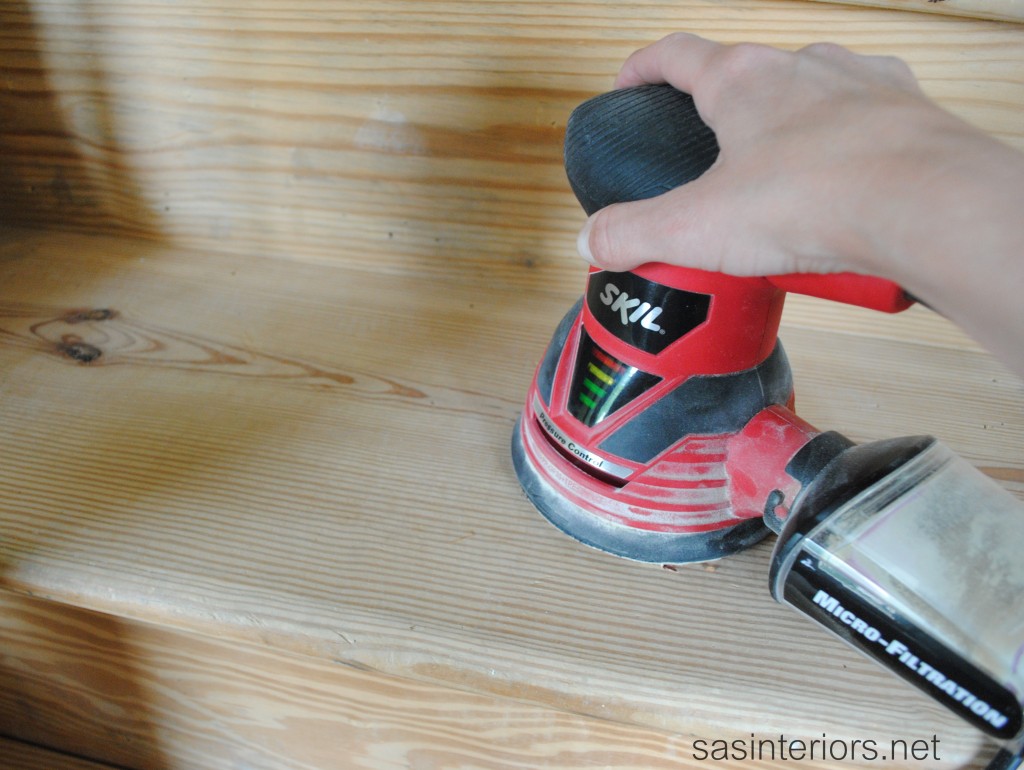
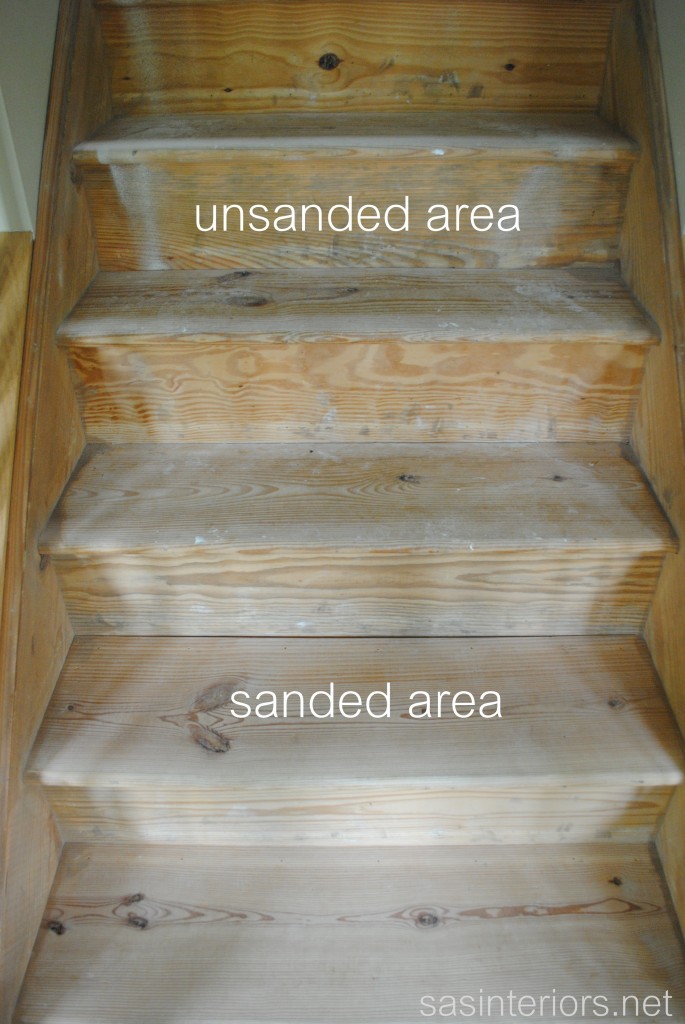
As I mentioned above in the supply list, I used my orbital sander to get a really smooth finish and to take away marks and old paint drippings.  Manually sanding the treads and risers with sandpaper is fine too, but will take longer and is more laborious – if you’re looking to build your arm muscles, this may be your calling 😉

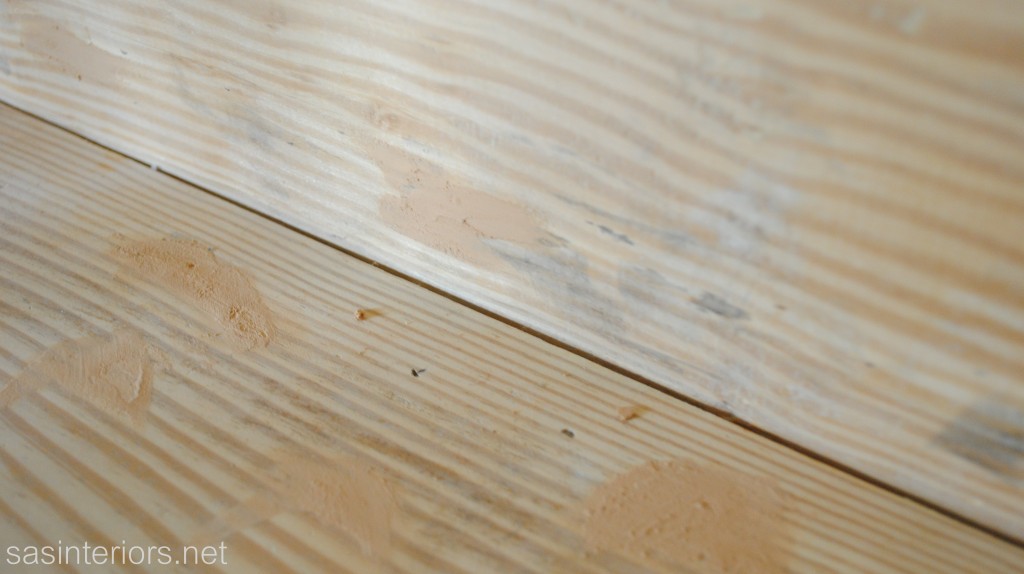
Once the stairs were smooth, I used wood filler to fill in the many holes left from the carpet strip tacks and the carpet pad staples.  There were also a few holes from the natural grain of the wood that I also filled in.

After the holes were filled and the wood filler was completely dried and hard 24+ hours later (it’s important that the wood filler is really dry!), I sanded again.  The wood treads were ready for staining when the stairs were completely smooth to the touch.

Now to the staining process…

I don’t have alot of staining experience, and frankly staining has always scared me.  Unlike painting, it seems so difficult, but thankfully I was proven wrong with this project.

As I mentioned in my last post, I was desiring a really dark stained tread for the stairs, so I chose to use an ebony finish.  Before making the final decision though, I reached out to my blogging bud and the very talented DIYer, Kate of Centsational Girl.  I had showcased her stair makeover as one of my inspirations, and wanted to know what she used for her dark tread.  She told me that she used a product called Duraseal, which has a molasses-like consistency and gave a darker finish because it was less watery than typical stain.  I couldn’t find the Duraseal and was anxious to get started on the staining, so I chose to use Minwax Wood Finish in ebony.  It was the darkest color they had, so I was up for the task of trying it out.  As an alternative, Kate gave me the advice of trying a gel stain which like the Duraseal has a thicker consistency.  I’m a bad girl because I didn’t take her advice, BUT thankfully I’m happy with the result I achieved, so all is good 🙂

When staining, it’s key to apply thin coats of stain and angle the brush at a 45 degree angle to avoid bubbles.  After cleaning the stairs with a rag to remove any remaining dust from the sanding, I was ready to get started. I used a cheap bristle brush to apply the stain, so I could easily throw it away after the stain applications.

Here are the few steps I took to stain the treads.

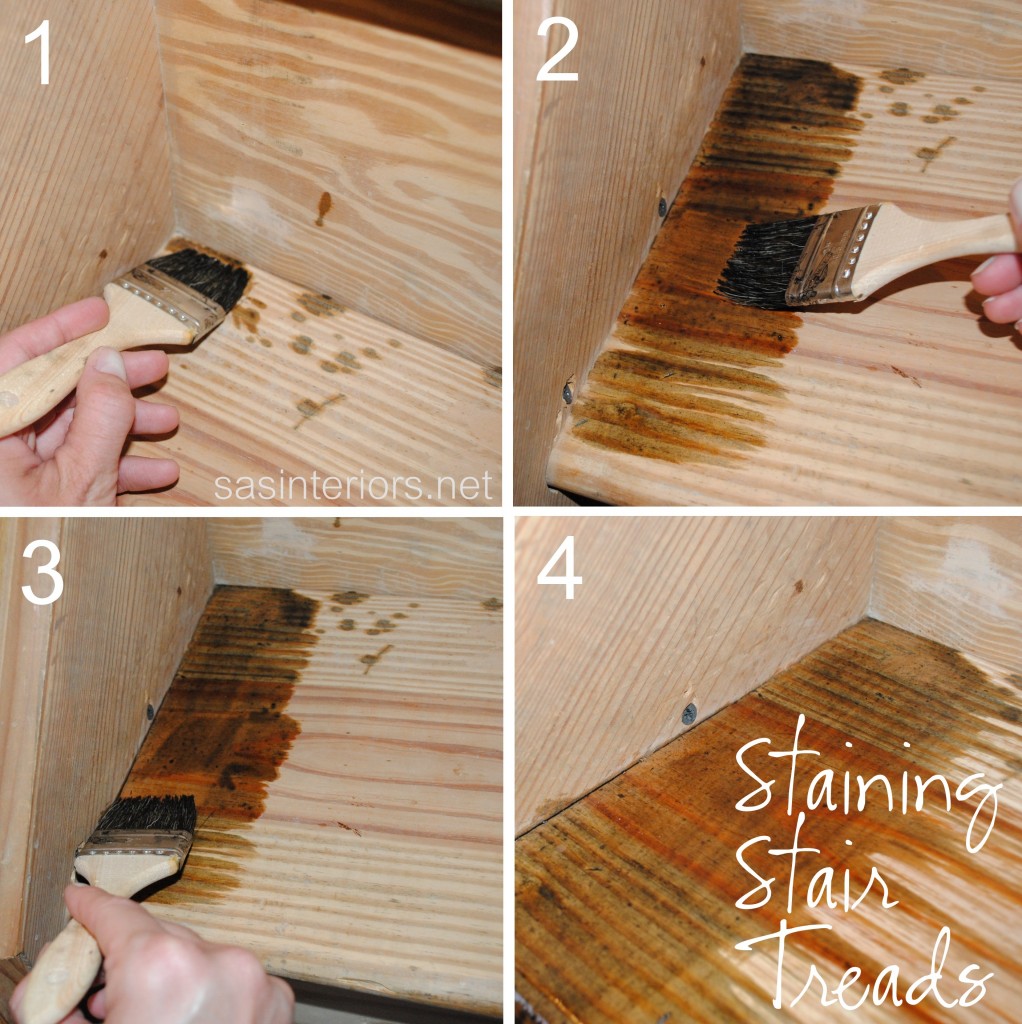
1. I started at the corner of the treads.

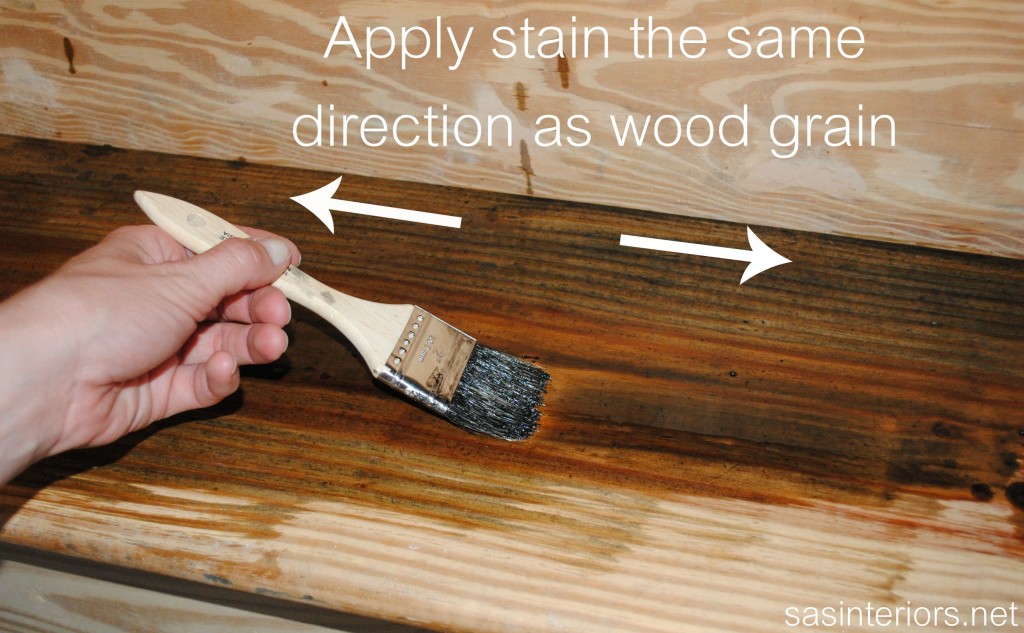
2. I feathered my brush towards the center, parallel to the wood grain.

3. Then I carefully dragged my brush along the edge of the tread and the stair stringer.

4.. After that I feathered the stain in the same direction of the grain again.

The reason for doing these steps is so the tread is thoroughly covered with stain AND minimal stain gets on the stringer (side piece).  For my stairs, I will be painting the stringer white and using a stain blocker beforehand, BUT I was nervous (here comes my apprehension of using stain again) and didn’t want too much stain to get onto the stringer.  Alittle nutty, I know… but it worked.

Continuing with the staining, I applied it to the remainder of the tread in the same direction as the wood grain.

Now that I shared the particulars on how to stain, let me tell you some more details…

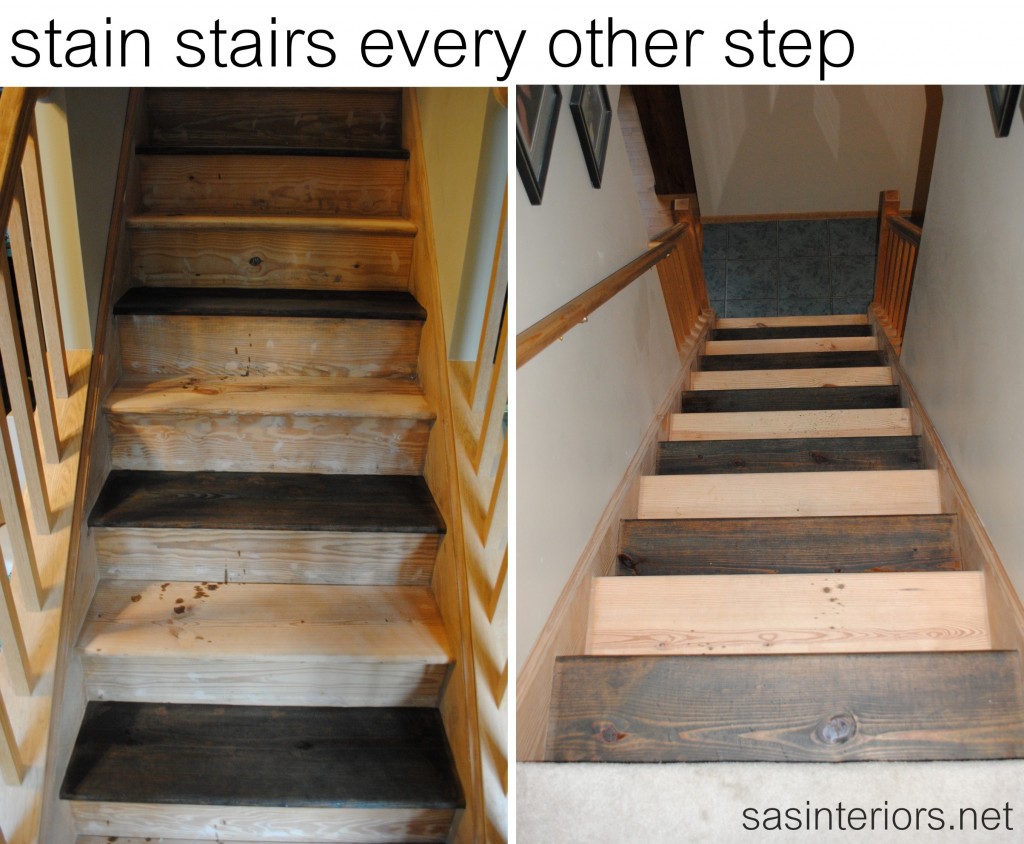
The staining process took a while and the major reason was because we still needed to use the stairs.  What to do??  Well, I ended up staining every other stair so we could still get up to the second floors. We did need to sleep, of course 😉

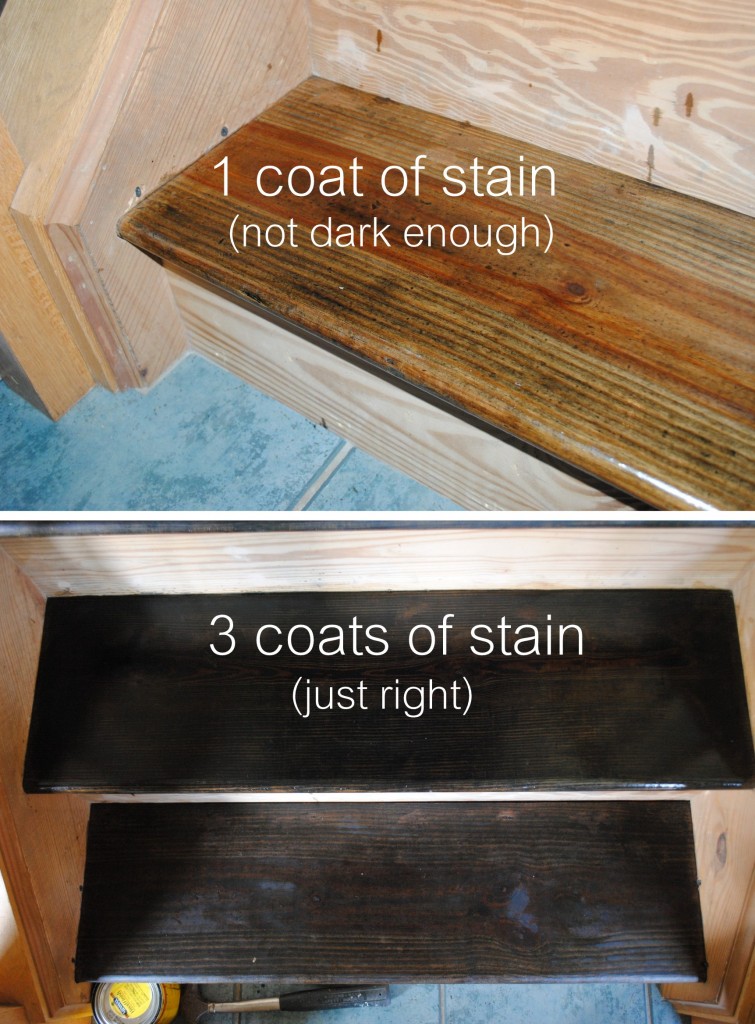
So… because I had to break the project up into two phases, it took longer.  After applying the first coat of stain, it soaked right into the wood, and was dry within about 1-2 hours – there was absolutely no wiping away needed.

Then I applied a second coat of stain, which also soaked right in and took about 1-2 hours to completely dry.  At this point, the stair had a really dull finish to it, but it still wasn’t dark enough for my taste.

So a day later, I added a third coat of stain and that was key!! It took a good day for it to completely dry, but I was happy. Then I was able to move on to the other stairs that were still raw.

The more coats you apply, the darker the result

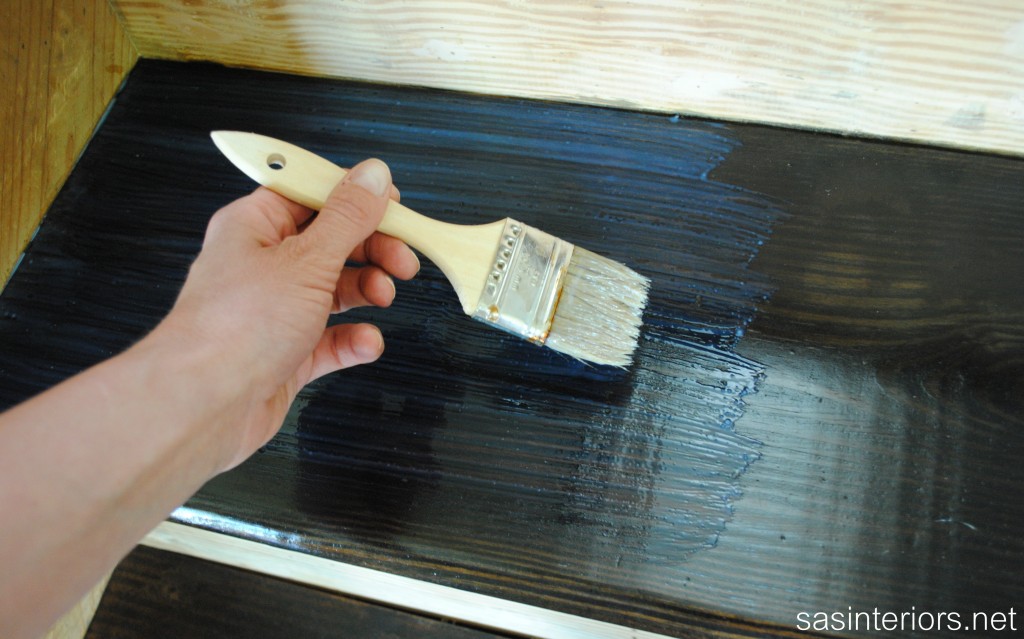
Once the third coat of stain was complete, I sealed the stairs with Polyurethane.  I had tested one small area using a semi-gloss finish, but it wasn’t right, so I decided on a gloss finish.  It gave just enough sheen, but wasn’t overly glossy (if that makes sense).

Kate recommended applying 2-3 coats of polyurethane and this time I took her advice.  After all my hard work, I wouldn’t want these stairs to get ruined!

The polyurethane that I used had a blue tinge when applied (which I freaked out about for only a few seconds), but quickly went away – thank goodness!

And that’s it for the staining process.  This same process and techniques could also be used for furniture.

I got a few comments from readers after my last post that they enjoyed how thorough and explanatory my post was, so I tried to do the same with this – I hope you enjoyed it and learned something new.  If you still have questions, let me know!

It’s really coming along and I’m excitedly anxious to start the next process… painting the risers, banister, baluster, and stringer! Until next time…