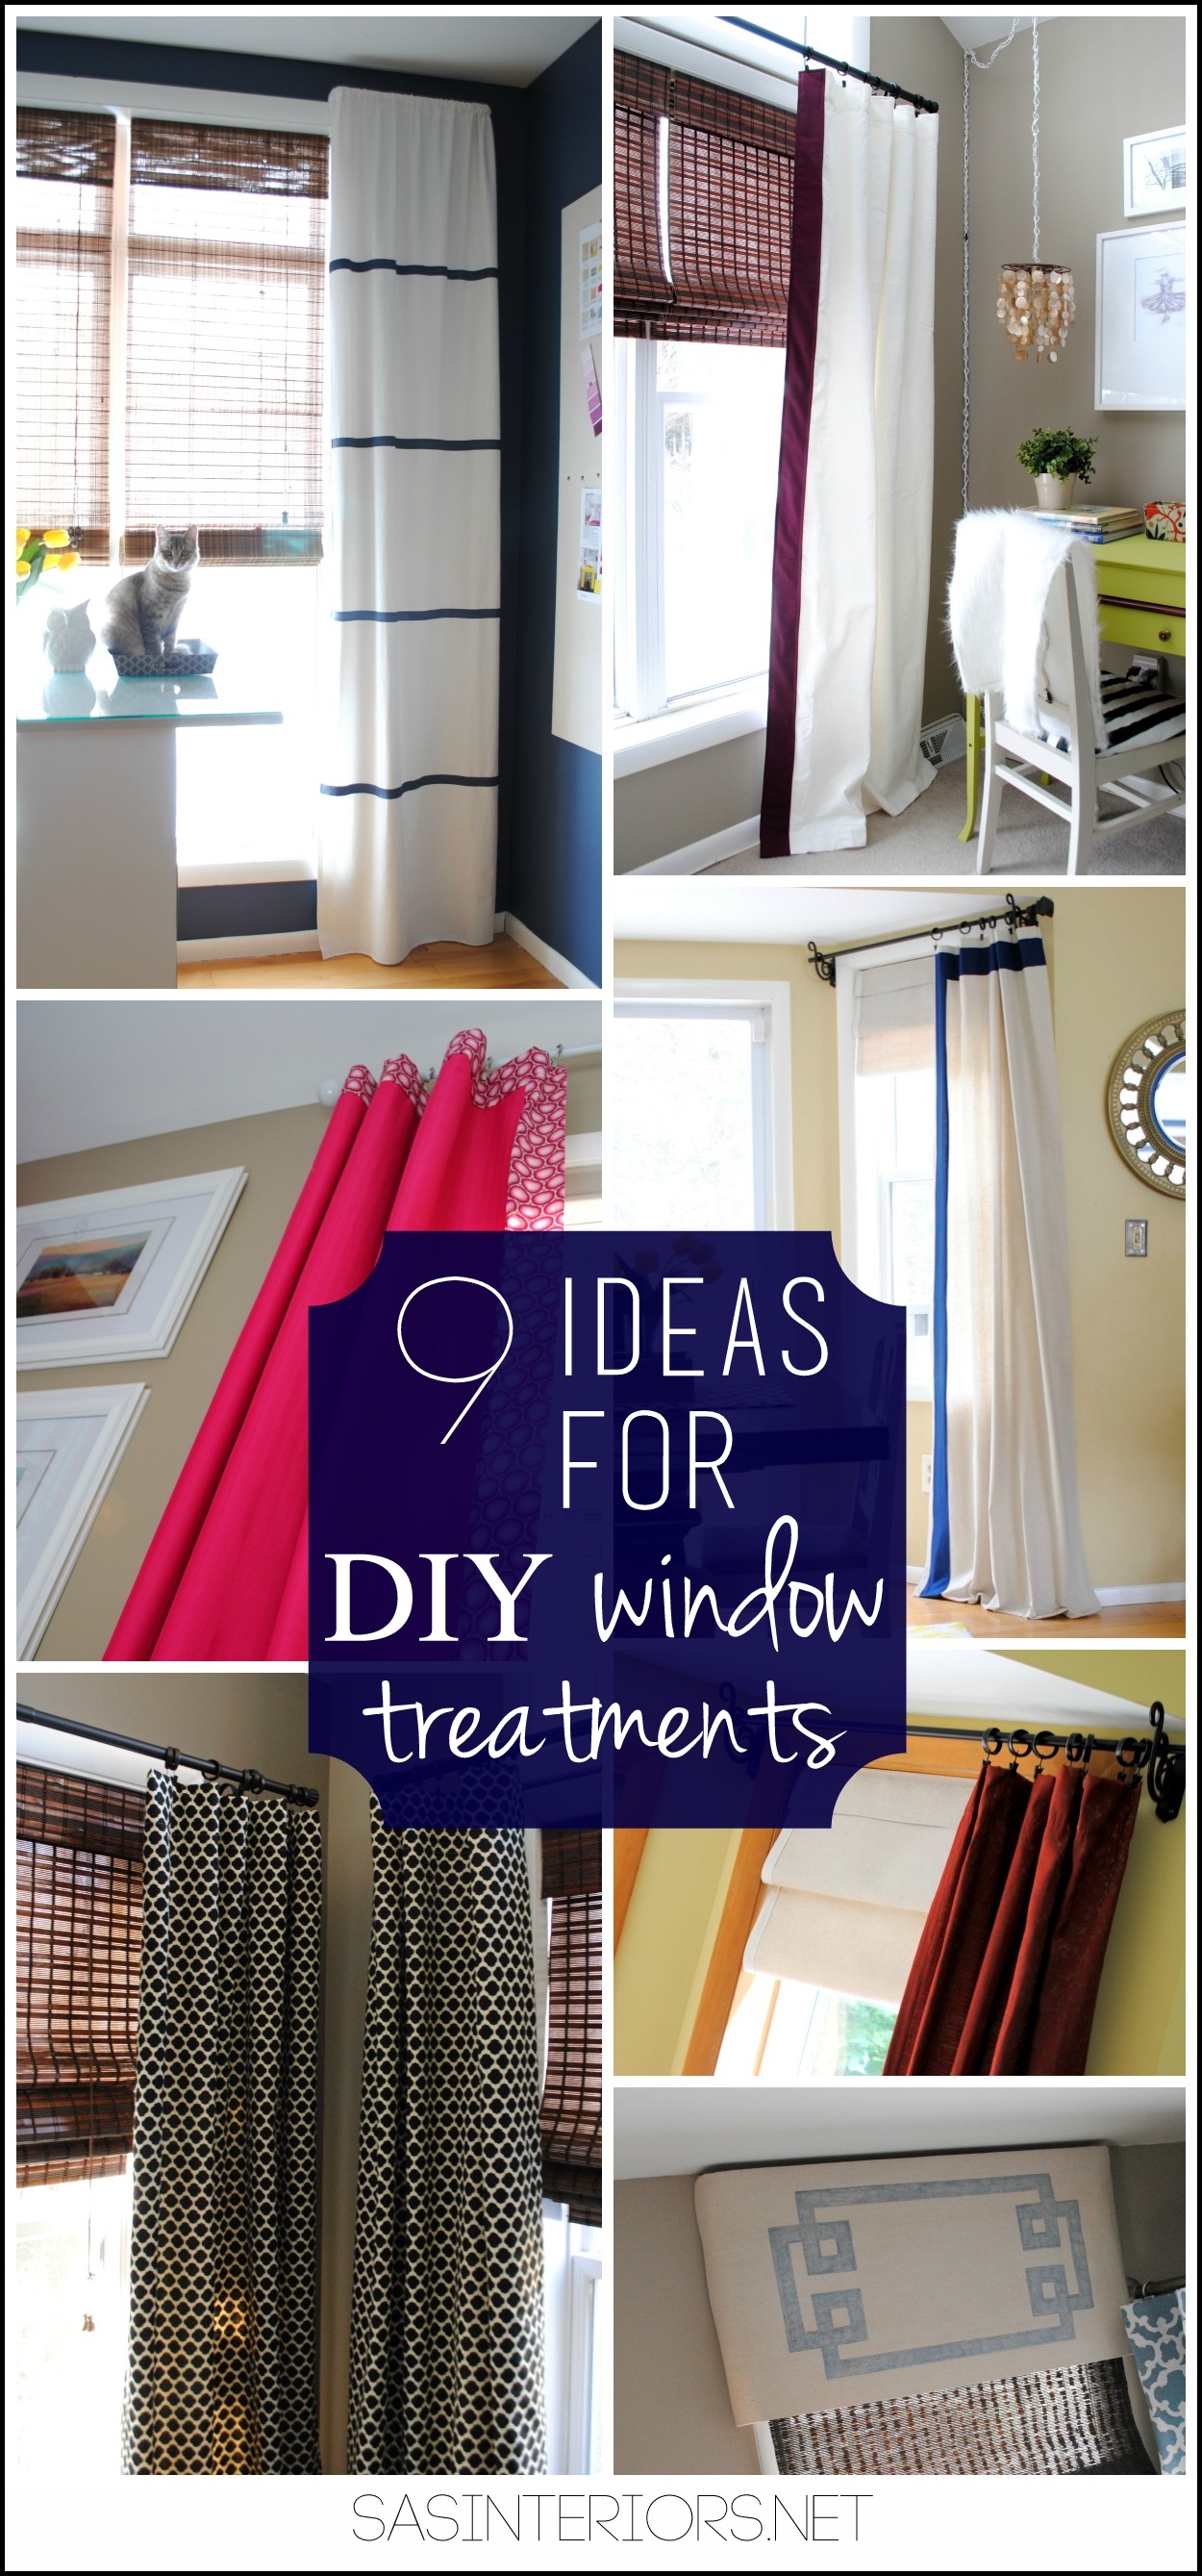
9 Ideas for DIY Window Treatments
Since the older kids have been back in school, I’ve been cleaning + organizing like a mad woman! It’s bittersweet not to have them home throughout the day, but it’s been nice getting the house back in order. As I’ve been making my way room by room, for some reason I’ve been paying extra attention to the window treatments and realized that almost every window “dressing” (with the exception of 2) have been DIY projects. Either I made them from scratch or partly DIYed them making them truly one-of-a-kind.
I’m a big believer that window treatments make (and break if not done right) a room and that something is needed on every window in the home. Whether a roman shade, a long panel, or a sheer, dressing up a window will truly bring everything in a room together and complete the overall look.
Since I have created so many one-of-a-kind treatments (most I have shared tutorials for, some I haven’t and will in this post), I thought I’d document them all in one place… alas this post on 9 Ideas for DIY Window Treatments.
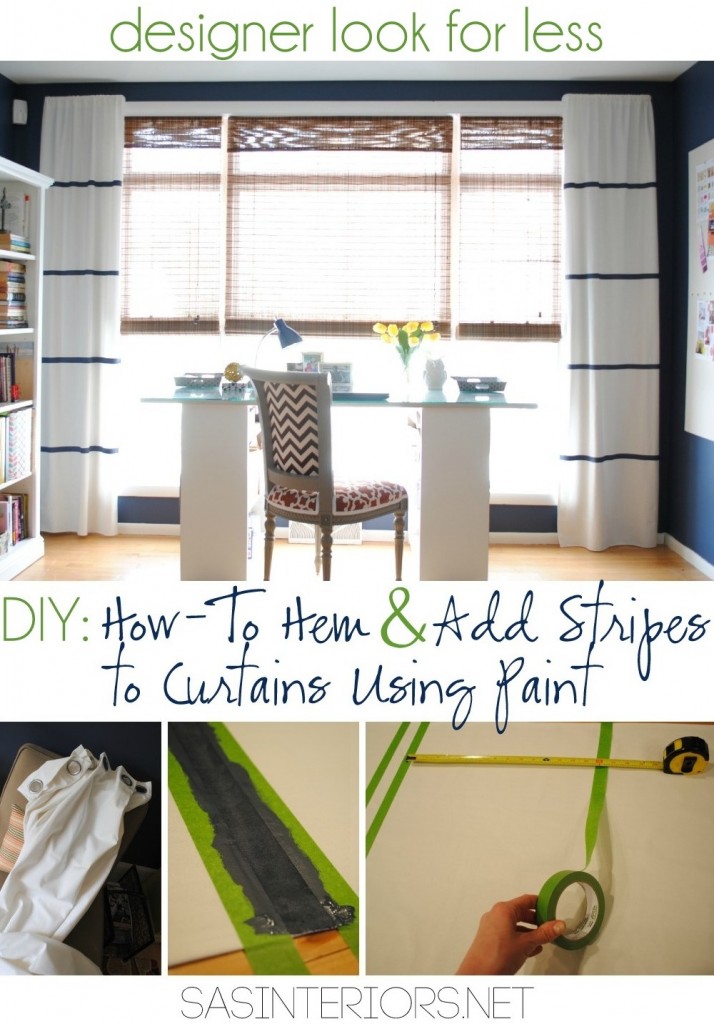
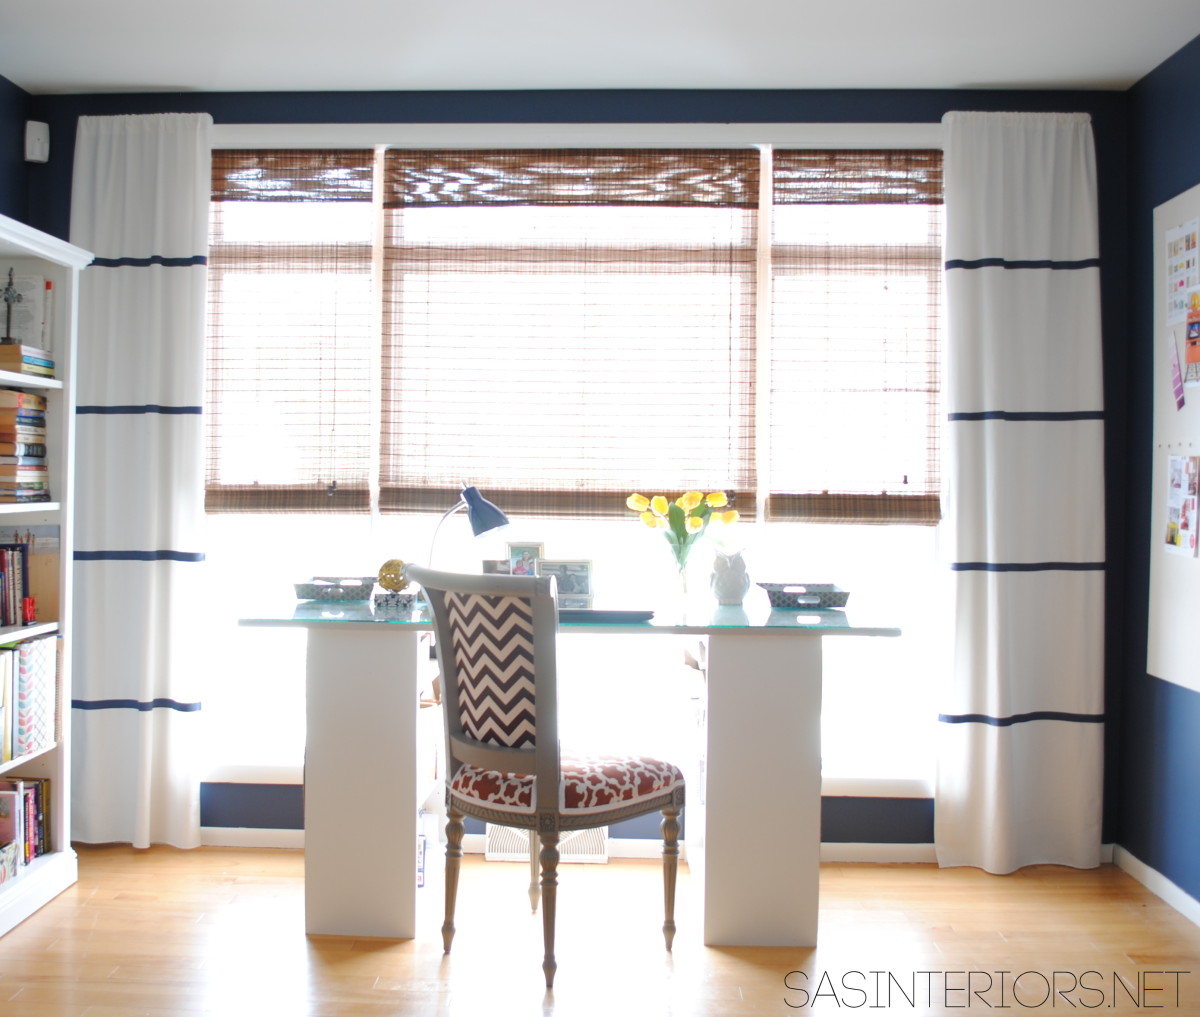
1
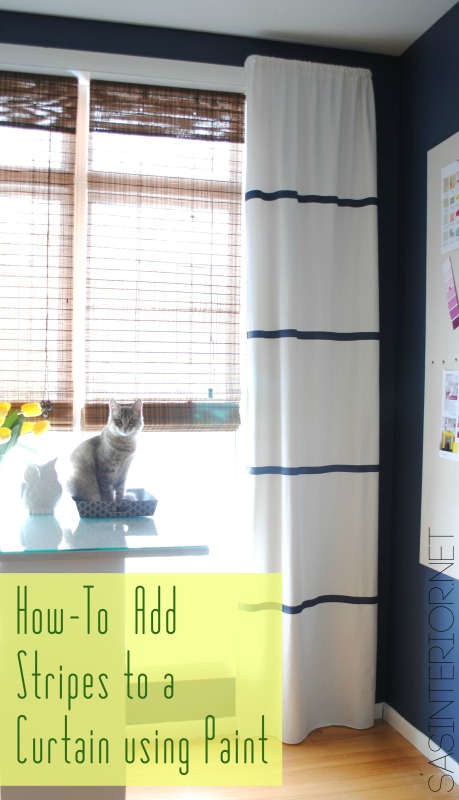
tutorial: Add stripes to a curtain using paint
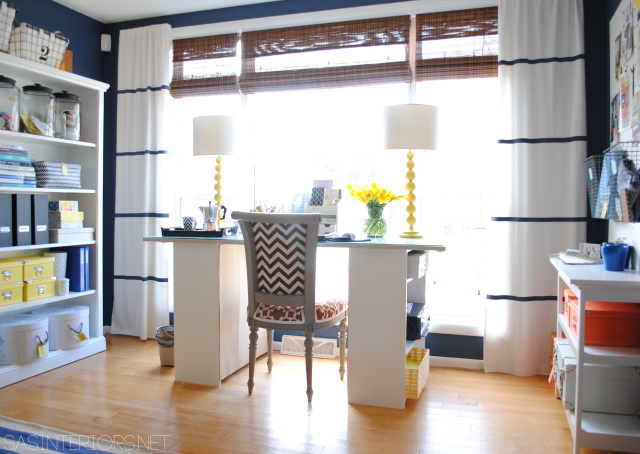
Many of the DIY window treatments that I’ve created have been inspired by spaces I’ve seen + loved. Instead of going custom which is typically big $$$ bucks, I try to figure out a way to get the look but for MUCH LESS. First up, are my fabulous living room/office panels. I was inspired by this space…
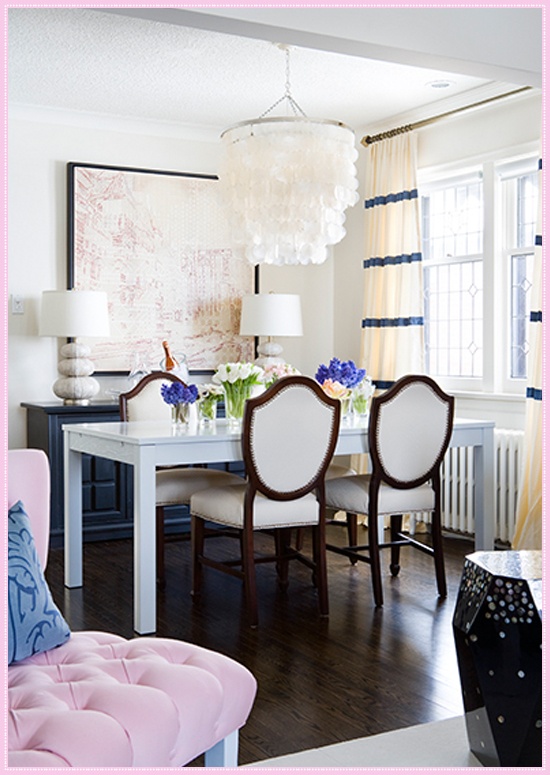
The thin-line striped panels were quite unique and I loved how they added a pop of color, yet didn’t overwhelm the space. To make my own panels, I took a simple white panel (from Ikea) and painted the stripes using the same color as the walls.
Here is the result…
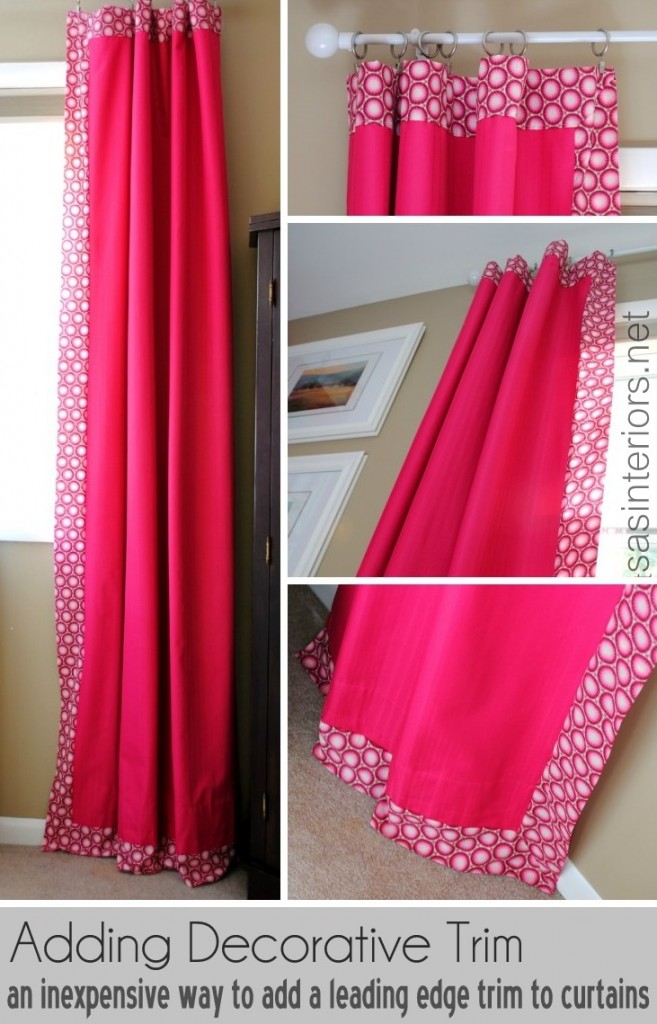
2
tutorial: Add decorative trim to store-bought curtain panels
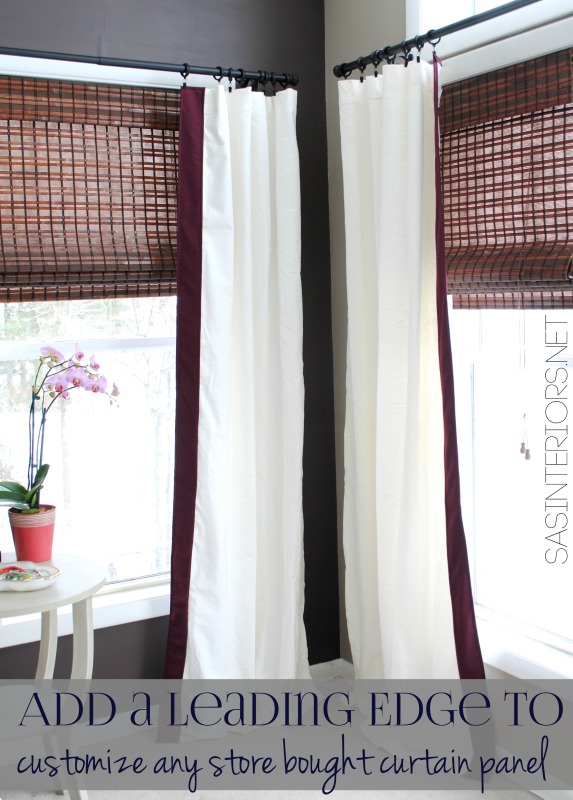
Another idea to creating a designer-looking window treatment at a fraction of the cost is to add a leading edge. For this window, I sewed on a fun fabric to the panel edges (top, side, and bottom). Not only does the new fabric draw the eye in, but I was able to make the panel longer so the rod can sit higher on the wall. Remember high and wide is best —> read more about that in this post!

3
tutorial: Drop cloth panels with a leading edge detail
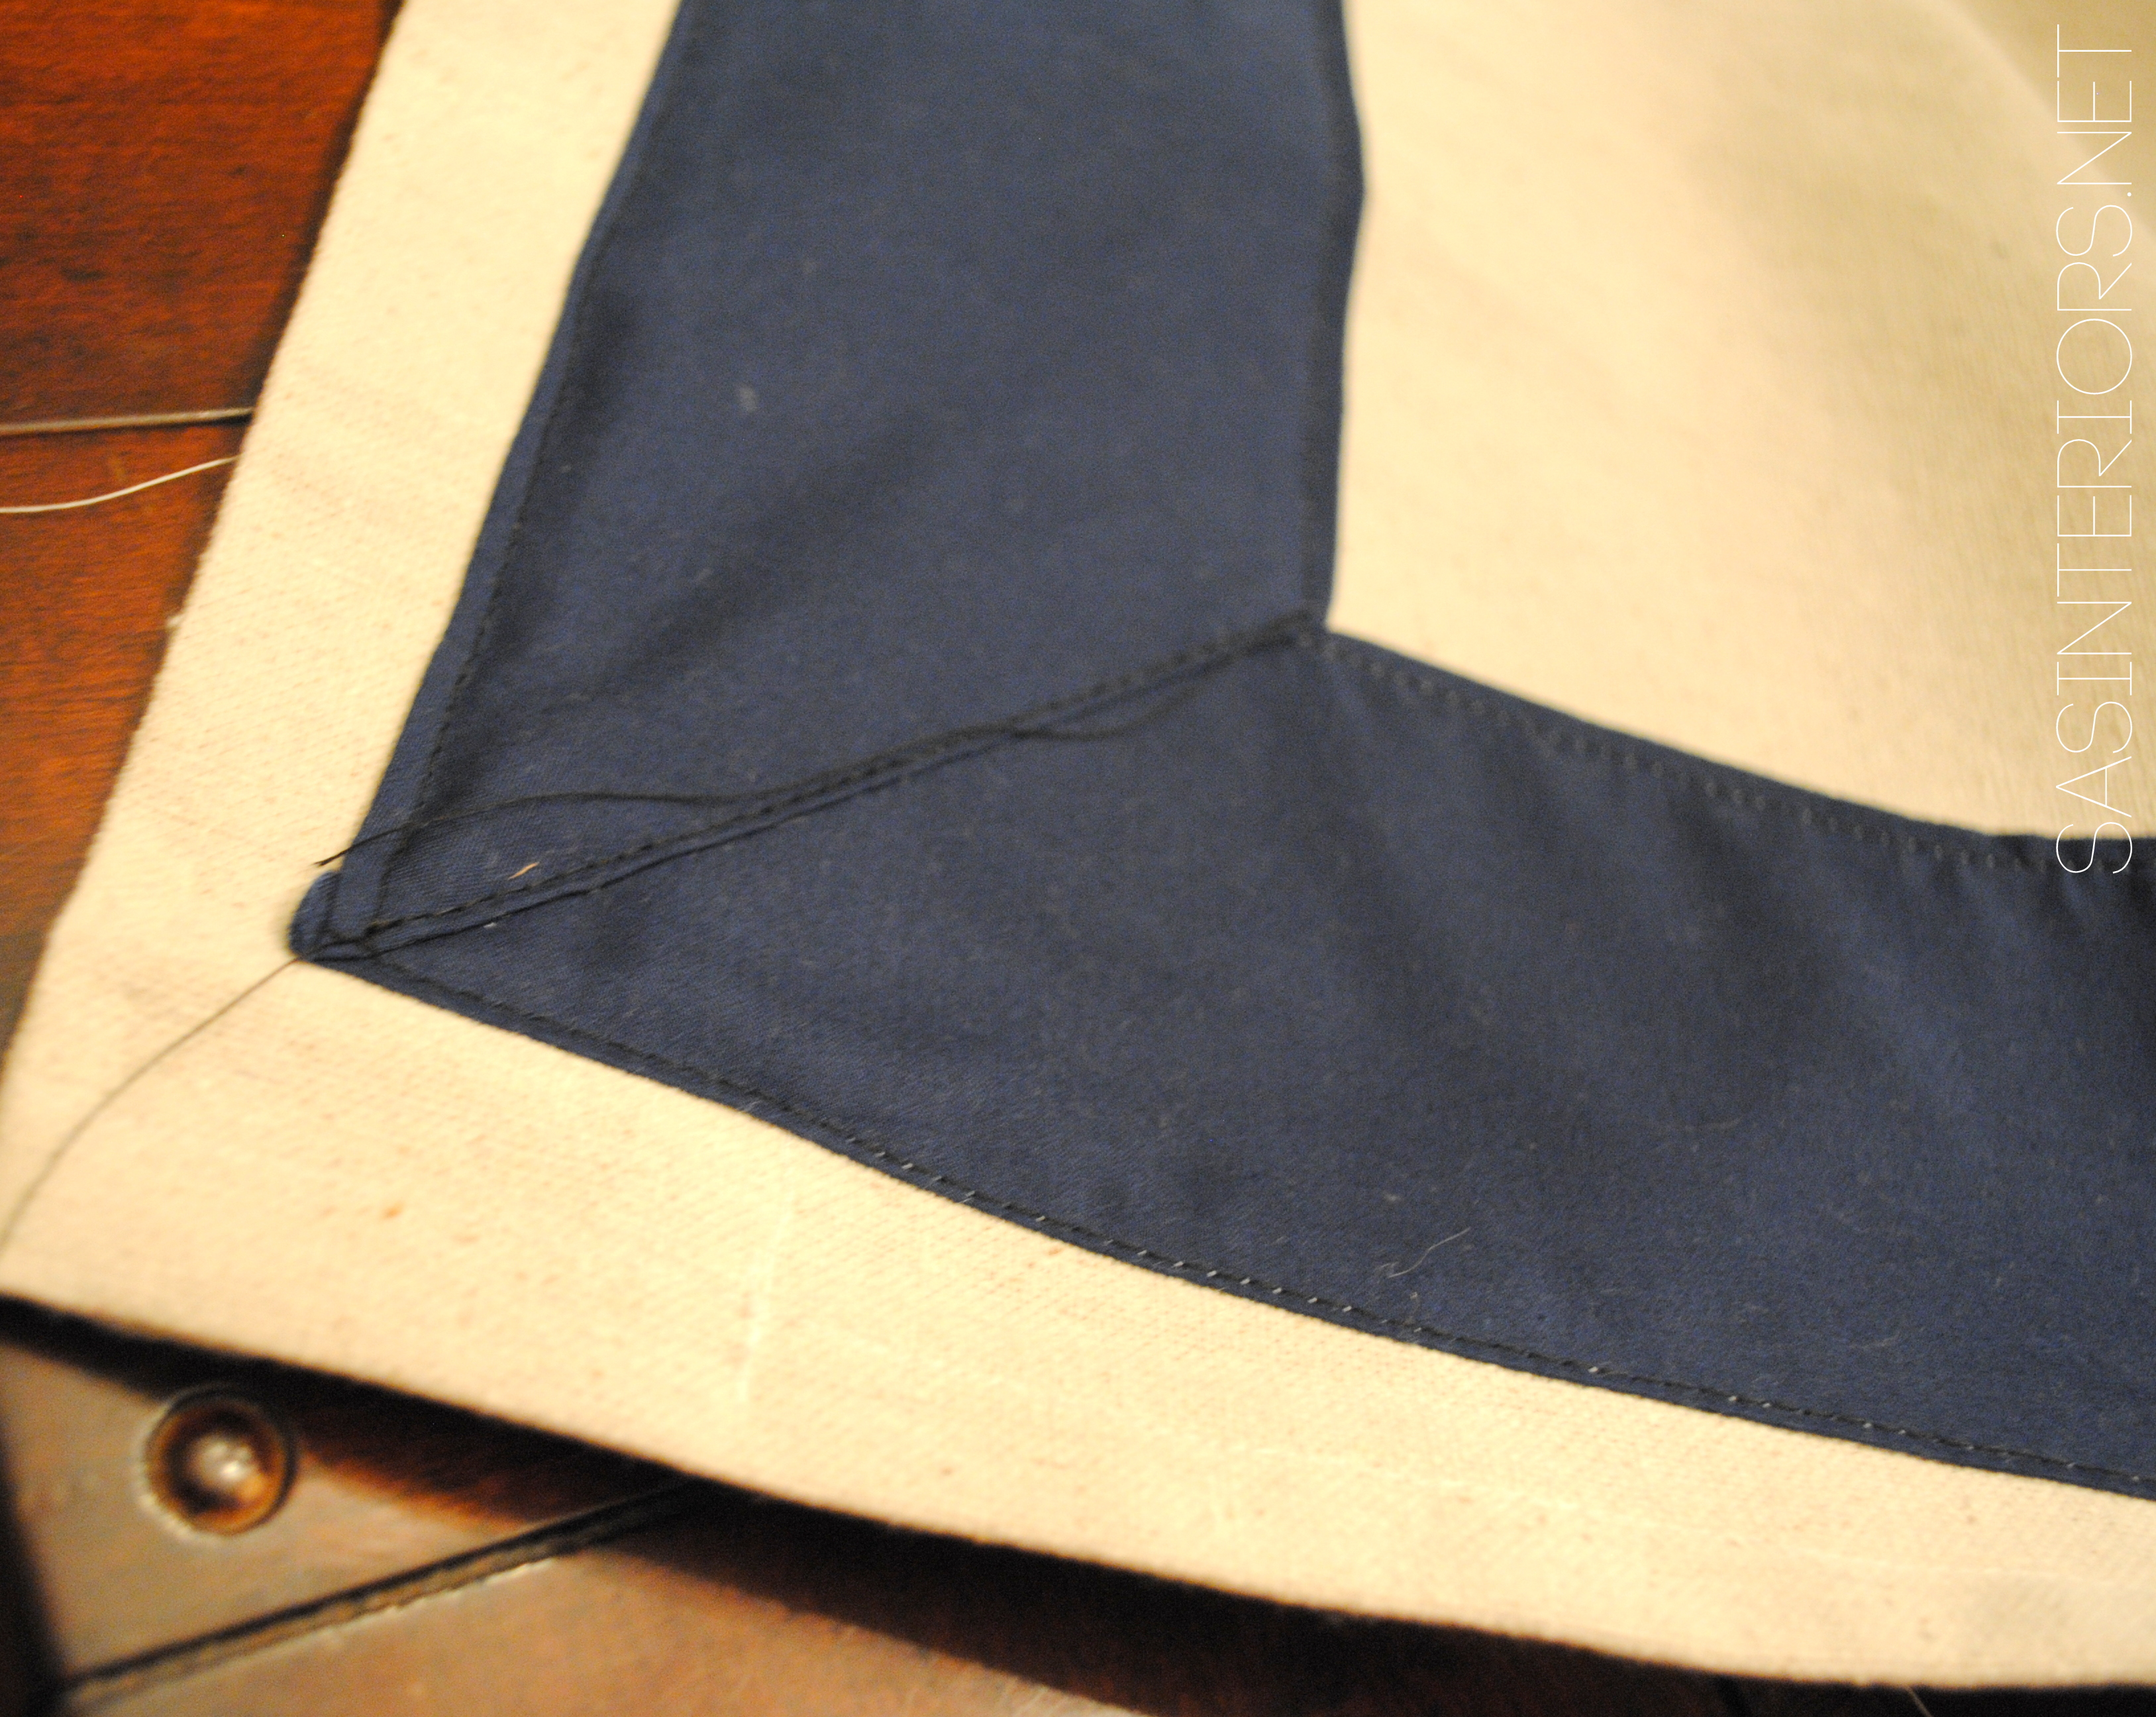
Sometimes I jazz up window panels that I buy at the store and sometimes I make them from scratch. One of my favorite fabrics to work with is drop cloth. Yes, painters use it for covering floors and furniture, but I use it to make things… like window treatments. For this DIY window panel, I made a panel (no need for lining it because drop cloth has good weight), then added a leading edge detail on top of the drop cloth fabric (instead of adding it to the edge like the pink panel above).
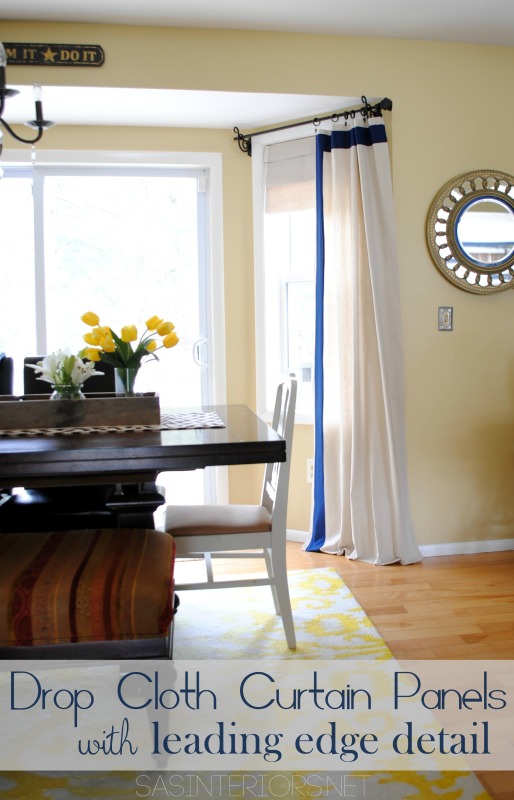
This is a close-up of the edging detail…
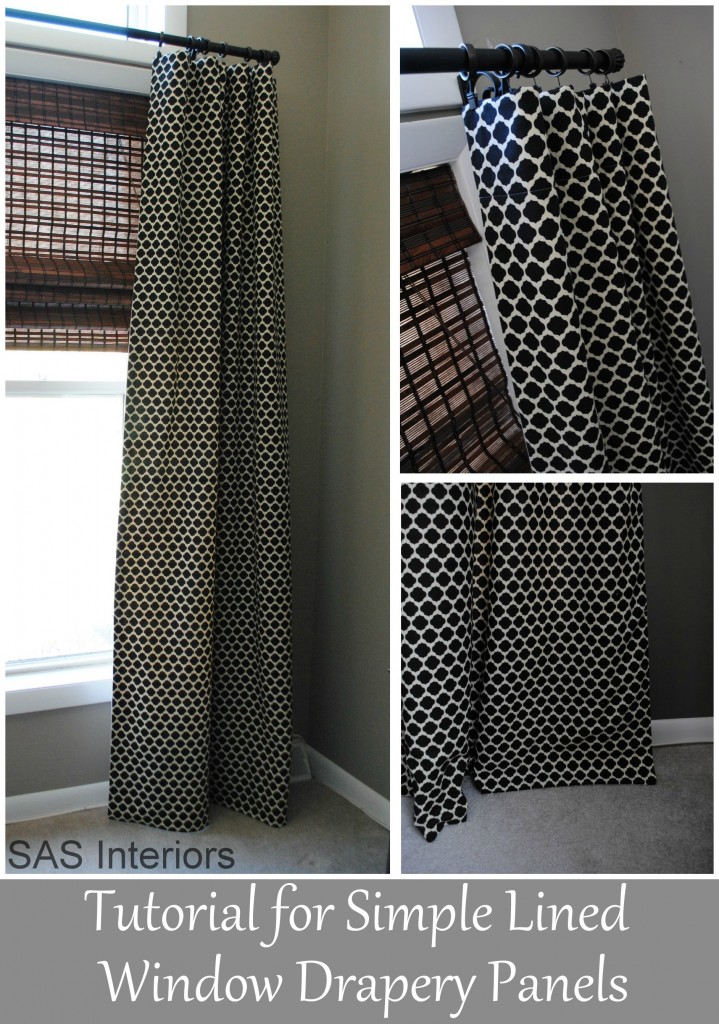
4
tutorial: Lined window panels using drop cloth material
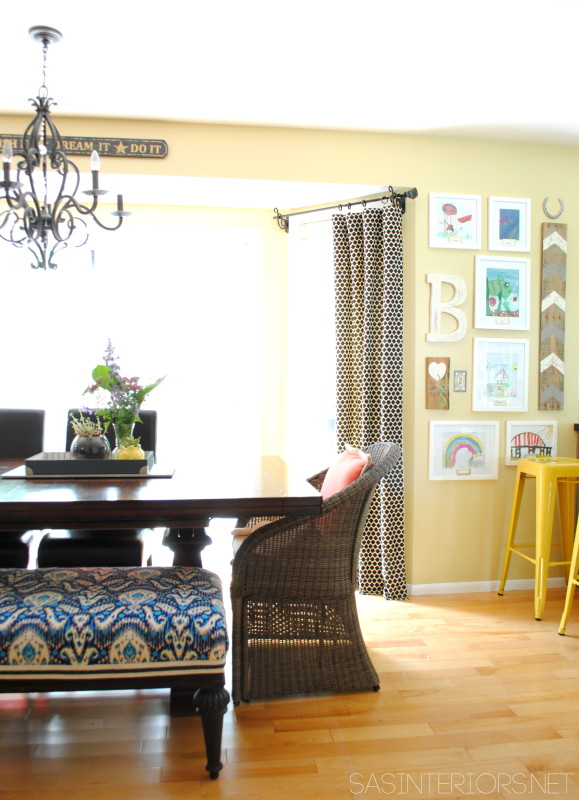
Since we’re on the topic of making panels from scratch, these DIY window treatments are lined panels I had originally made for the master bedroom, but recently moved to the dining room. Again, I used drop cloth, but this time I used it to line the back of the panels so they are heavier and block the sun.
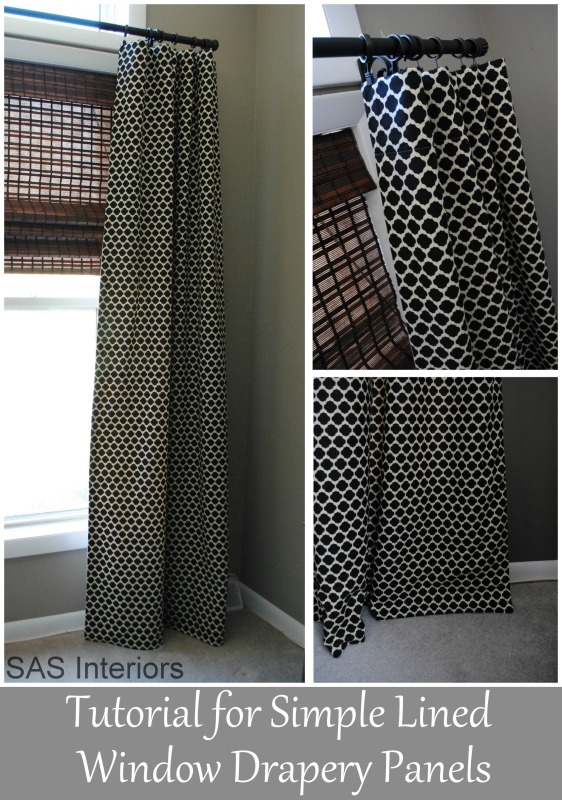
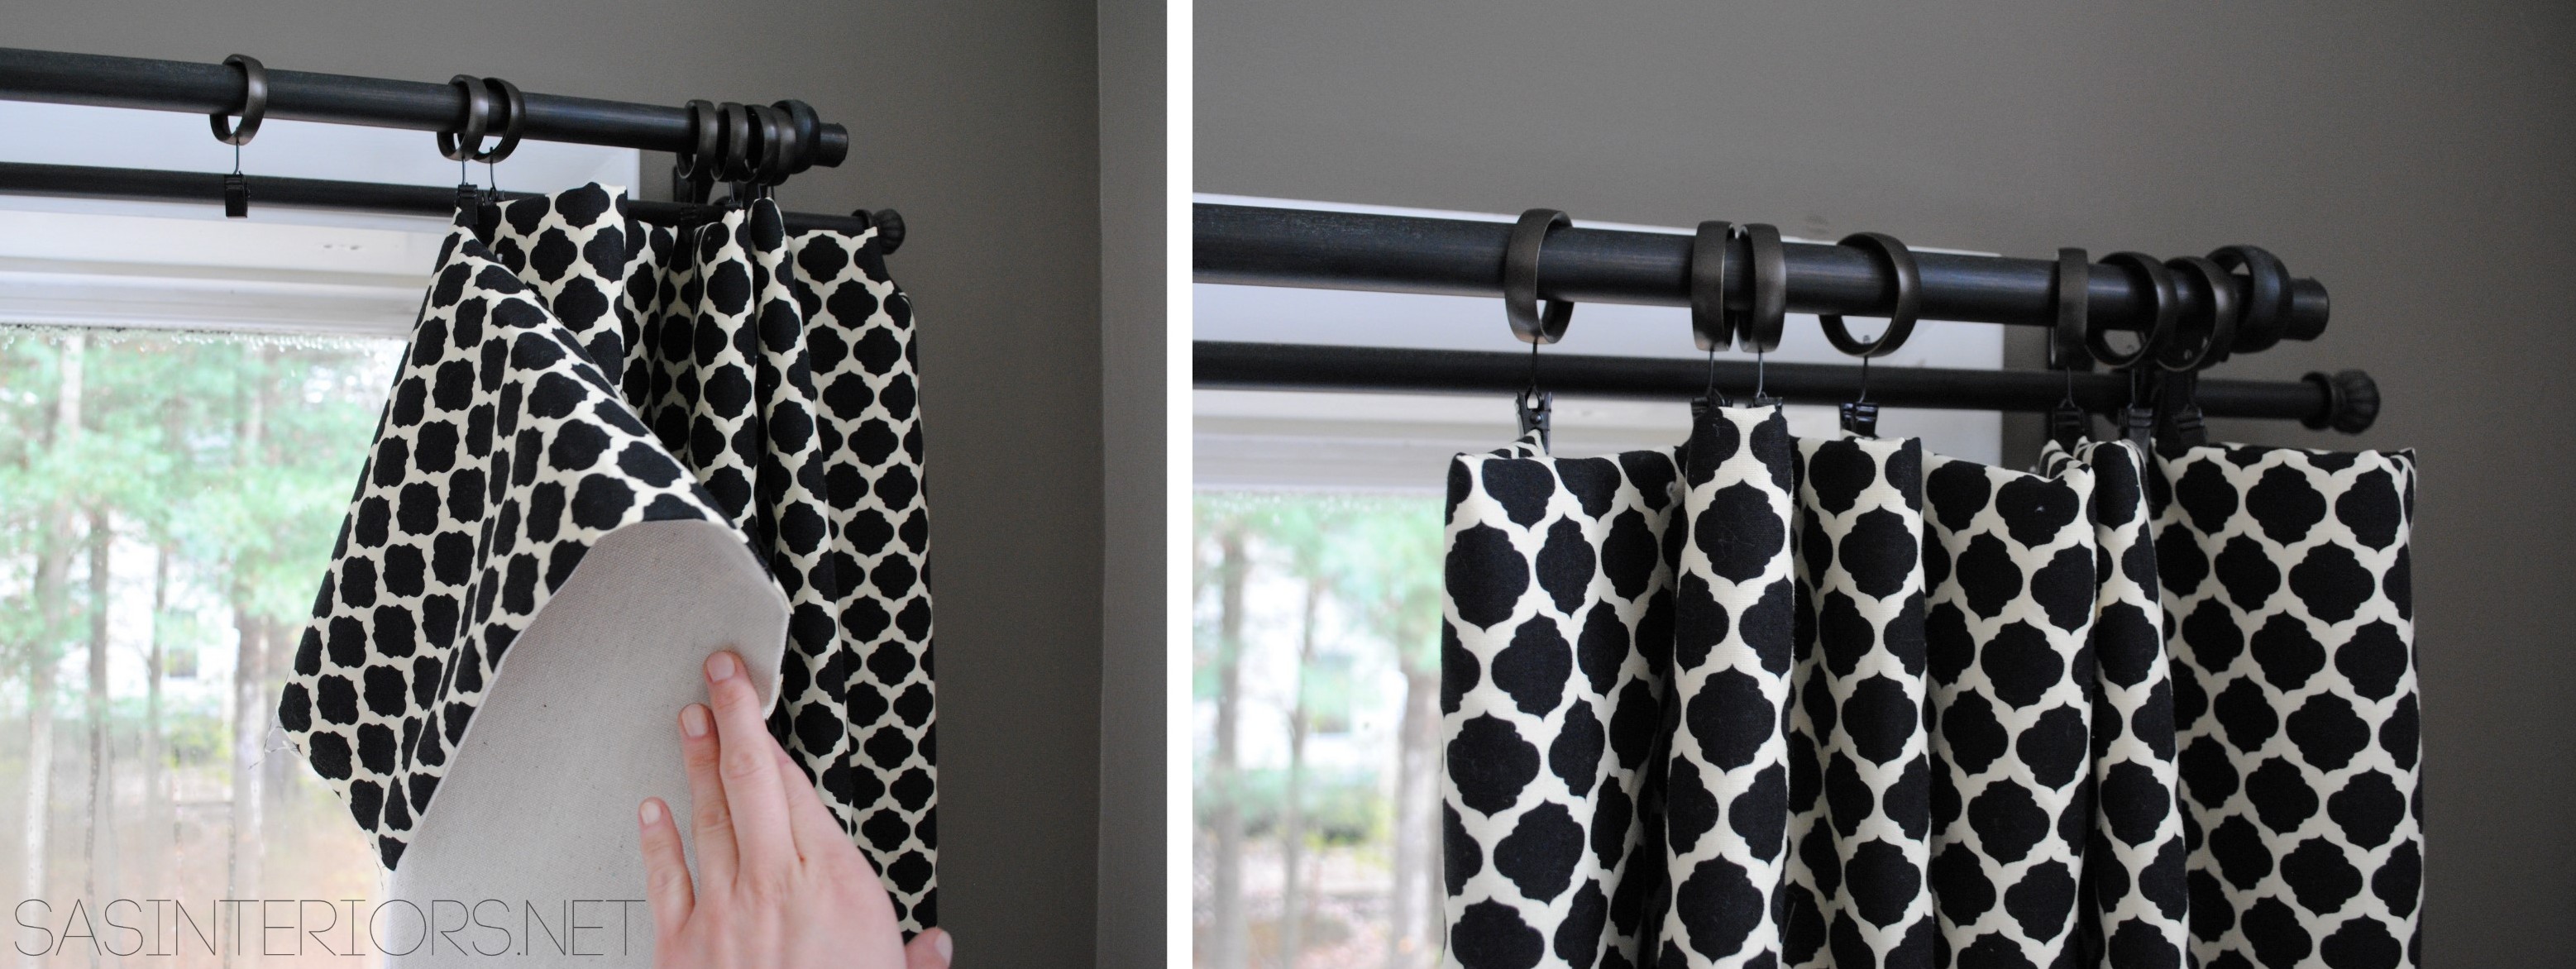
These drop cloth-lined panels now “dress” the dining room windows…
5
tutorial: Drop cloth box valance with greek key detail
Another drop cloth window treatment (i heart drop cloth), but this time instead of a long panel I created a box-style valance for my master bathroom.
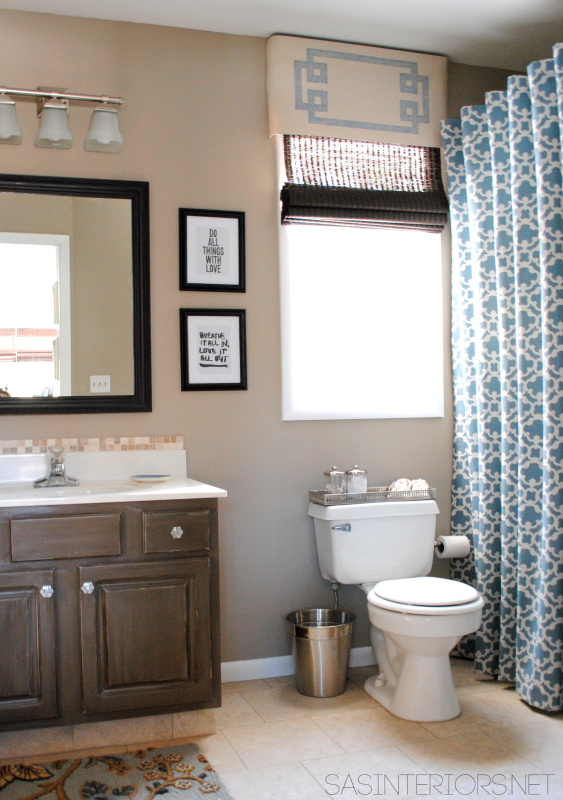
{This bathroom was recently featured in Kitchen + Bath Makeovers magazine}
6
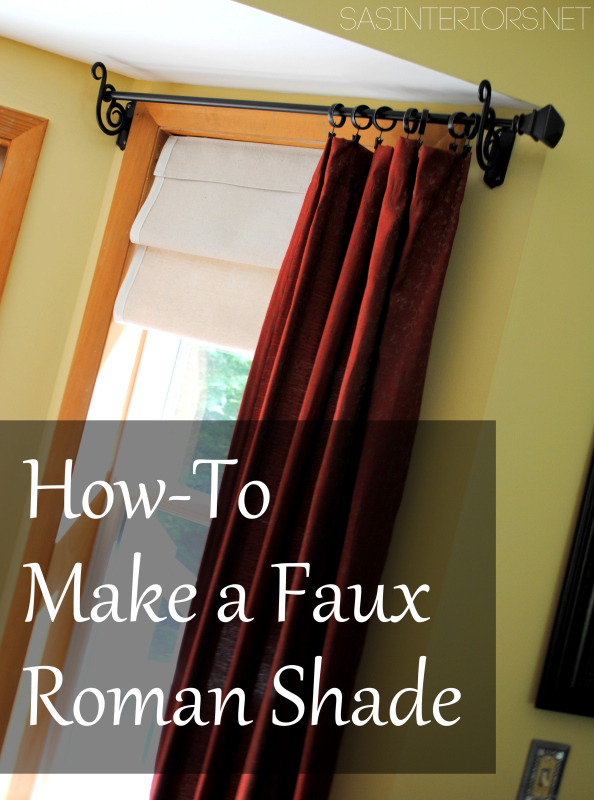
ONE MORE drop cloth DIY window treatment I created are the faux roman shades that are also in my dining room. I love the look of layered window treatments, so the roman shades I created look beautiful with the handmade window panels.
7
tutorial: Adding a leading edge
This DIY window treatment is similar to the project I shared above (#2), but the leading edge is only on the front edge of the store-bought panel. Why? Because the rod could only be hung at a specific place because of the window configuration, so if I had added a leading edge to the top and bottom as well, it would have been too long! These custom (for me) panels were a recent project for the master bedroom refresh that I tackled earlier in the year.
8
Adding a leading edge using woven trim (instead of fabric)
Another DIY window treatment that I didn’t share a tutorial for, but is super easy to do, are the panels I made for more my boys bedroom makeover (which I just finished). For these window treatments, I used white cotton Ikea panels (same panels as #1 above) and added a 1″ wide woven trim to the edge.
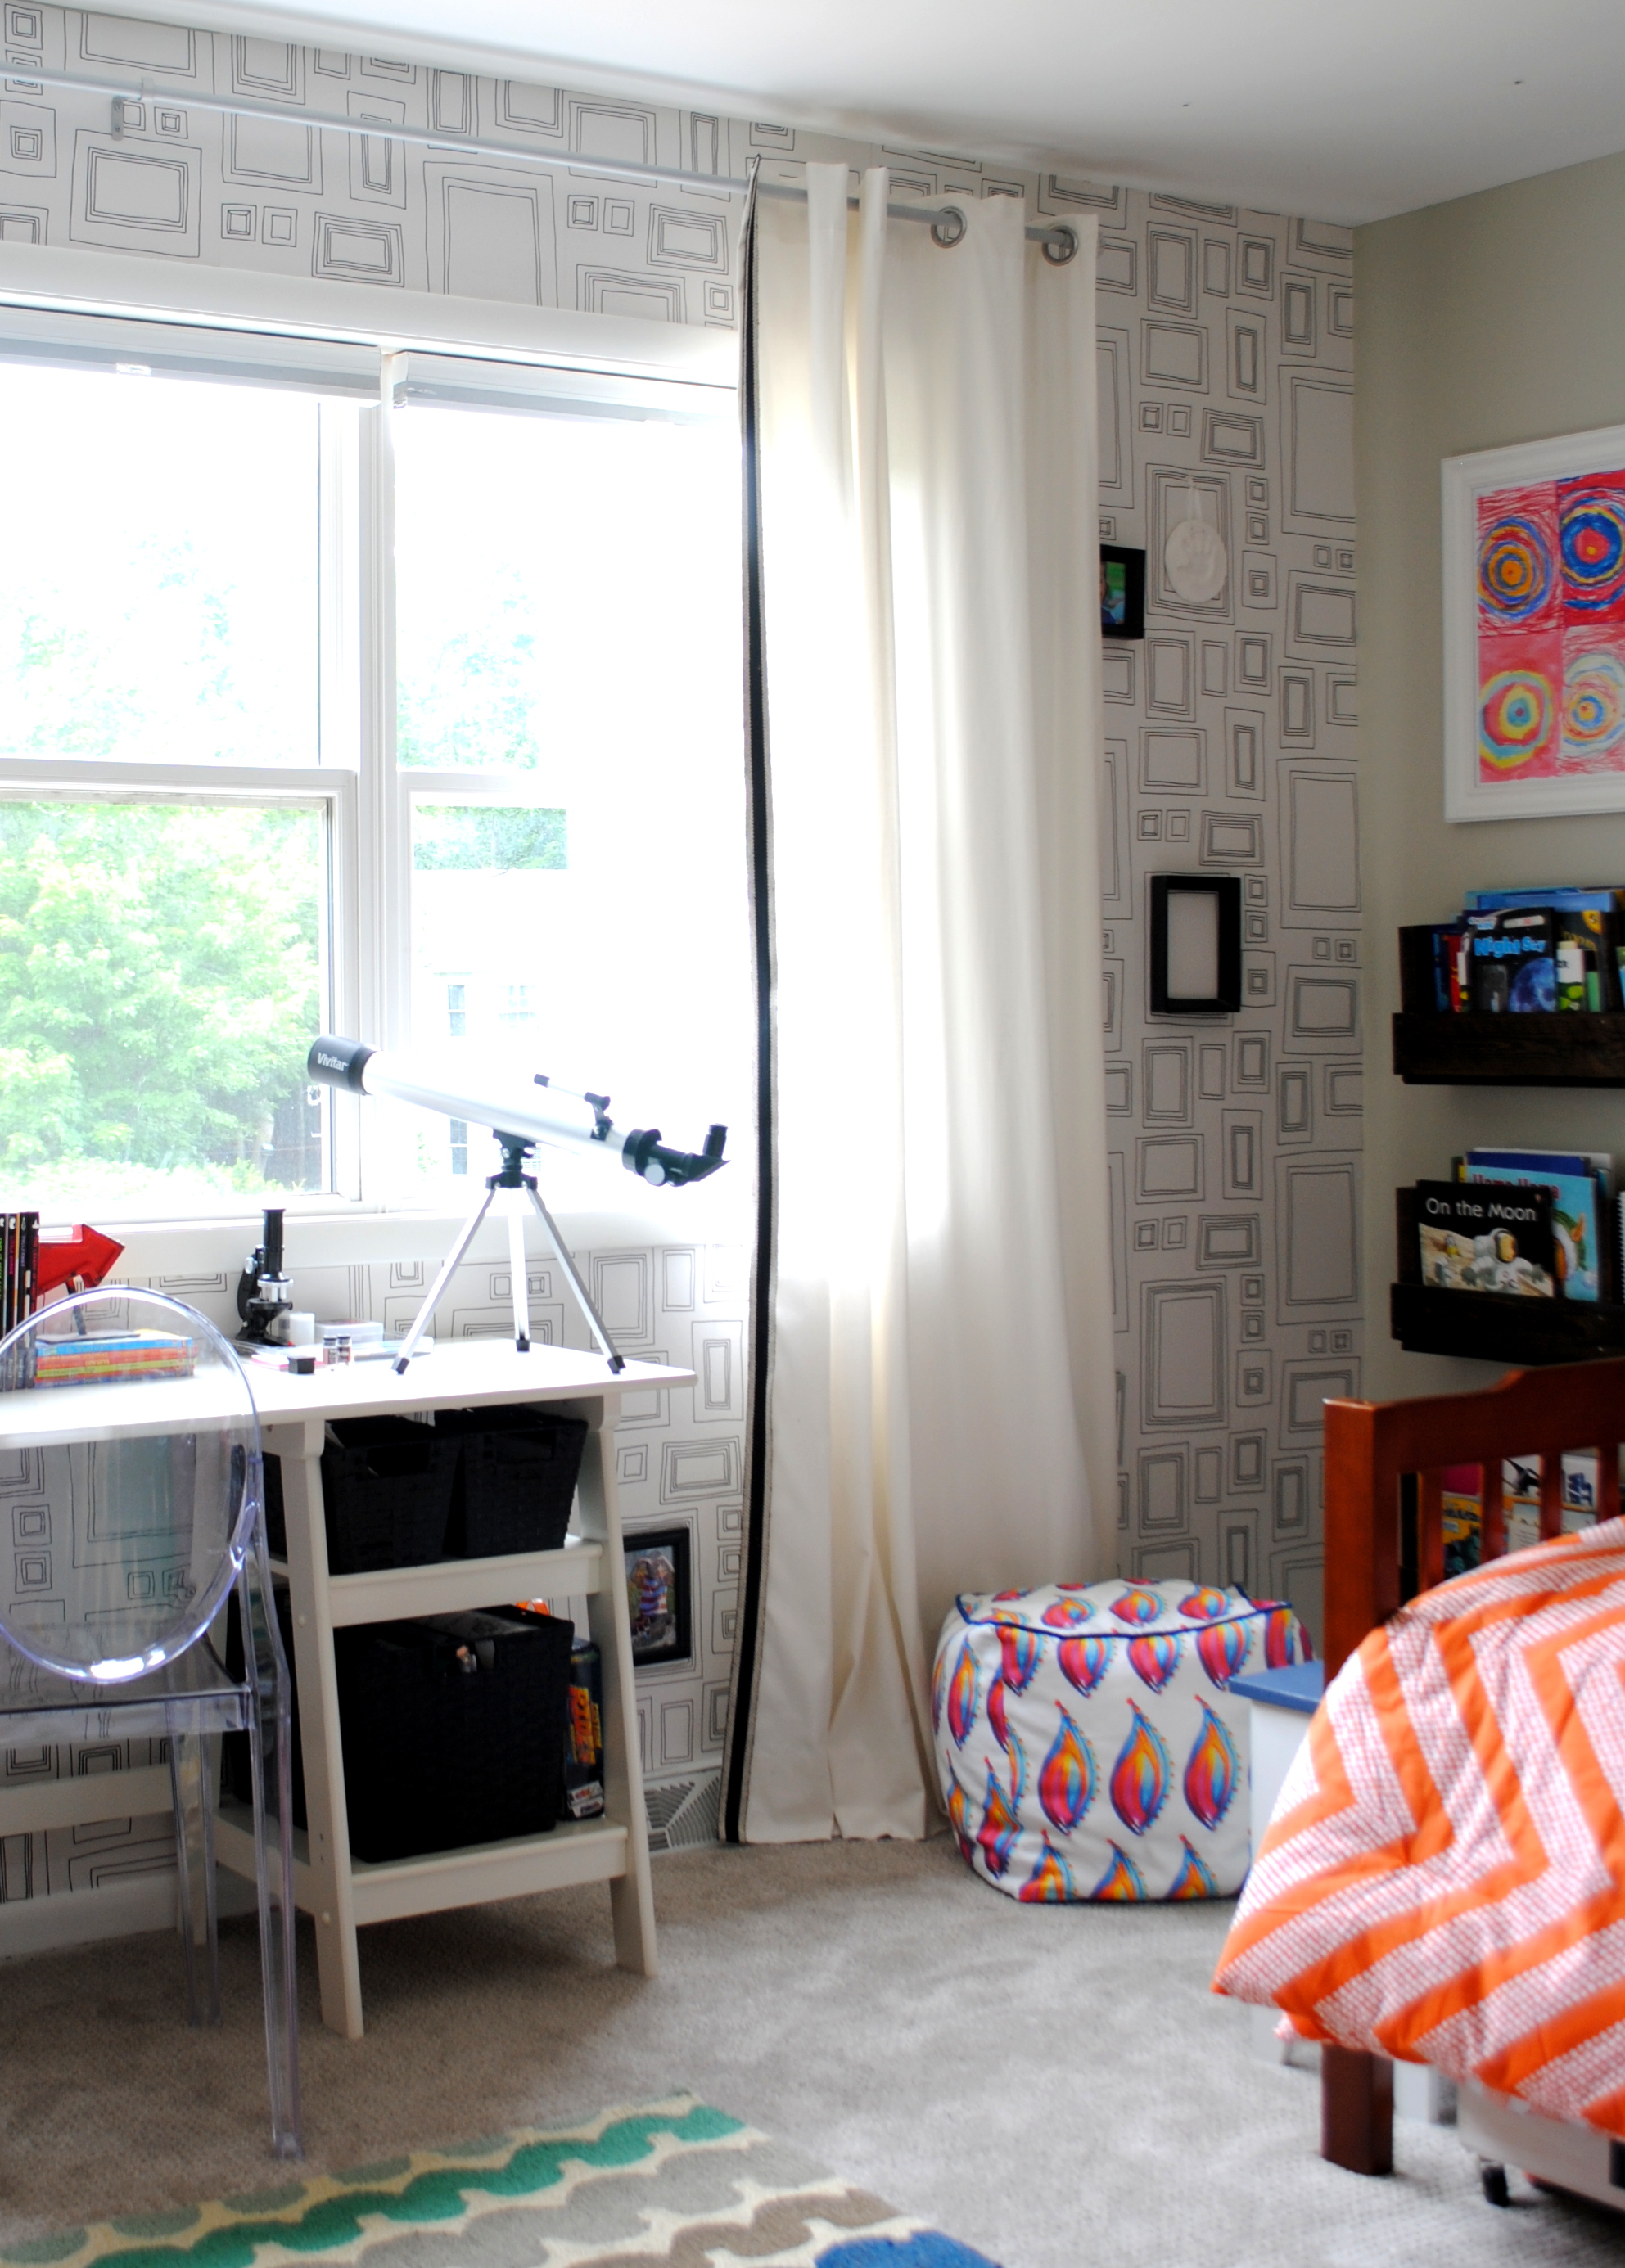
Using black thread (to match the woven trim), I sewed the trim on directly to the edge of the panel and this is the result…
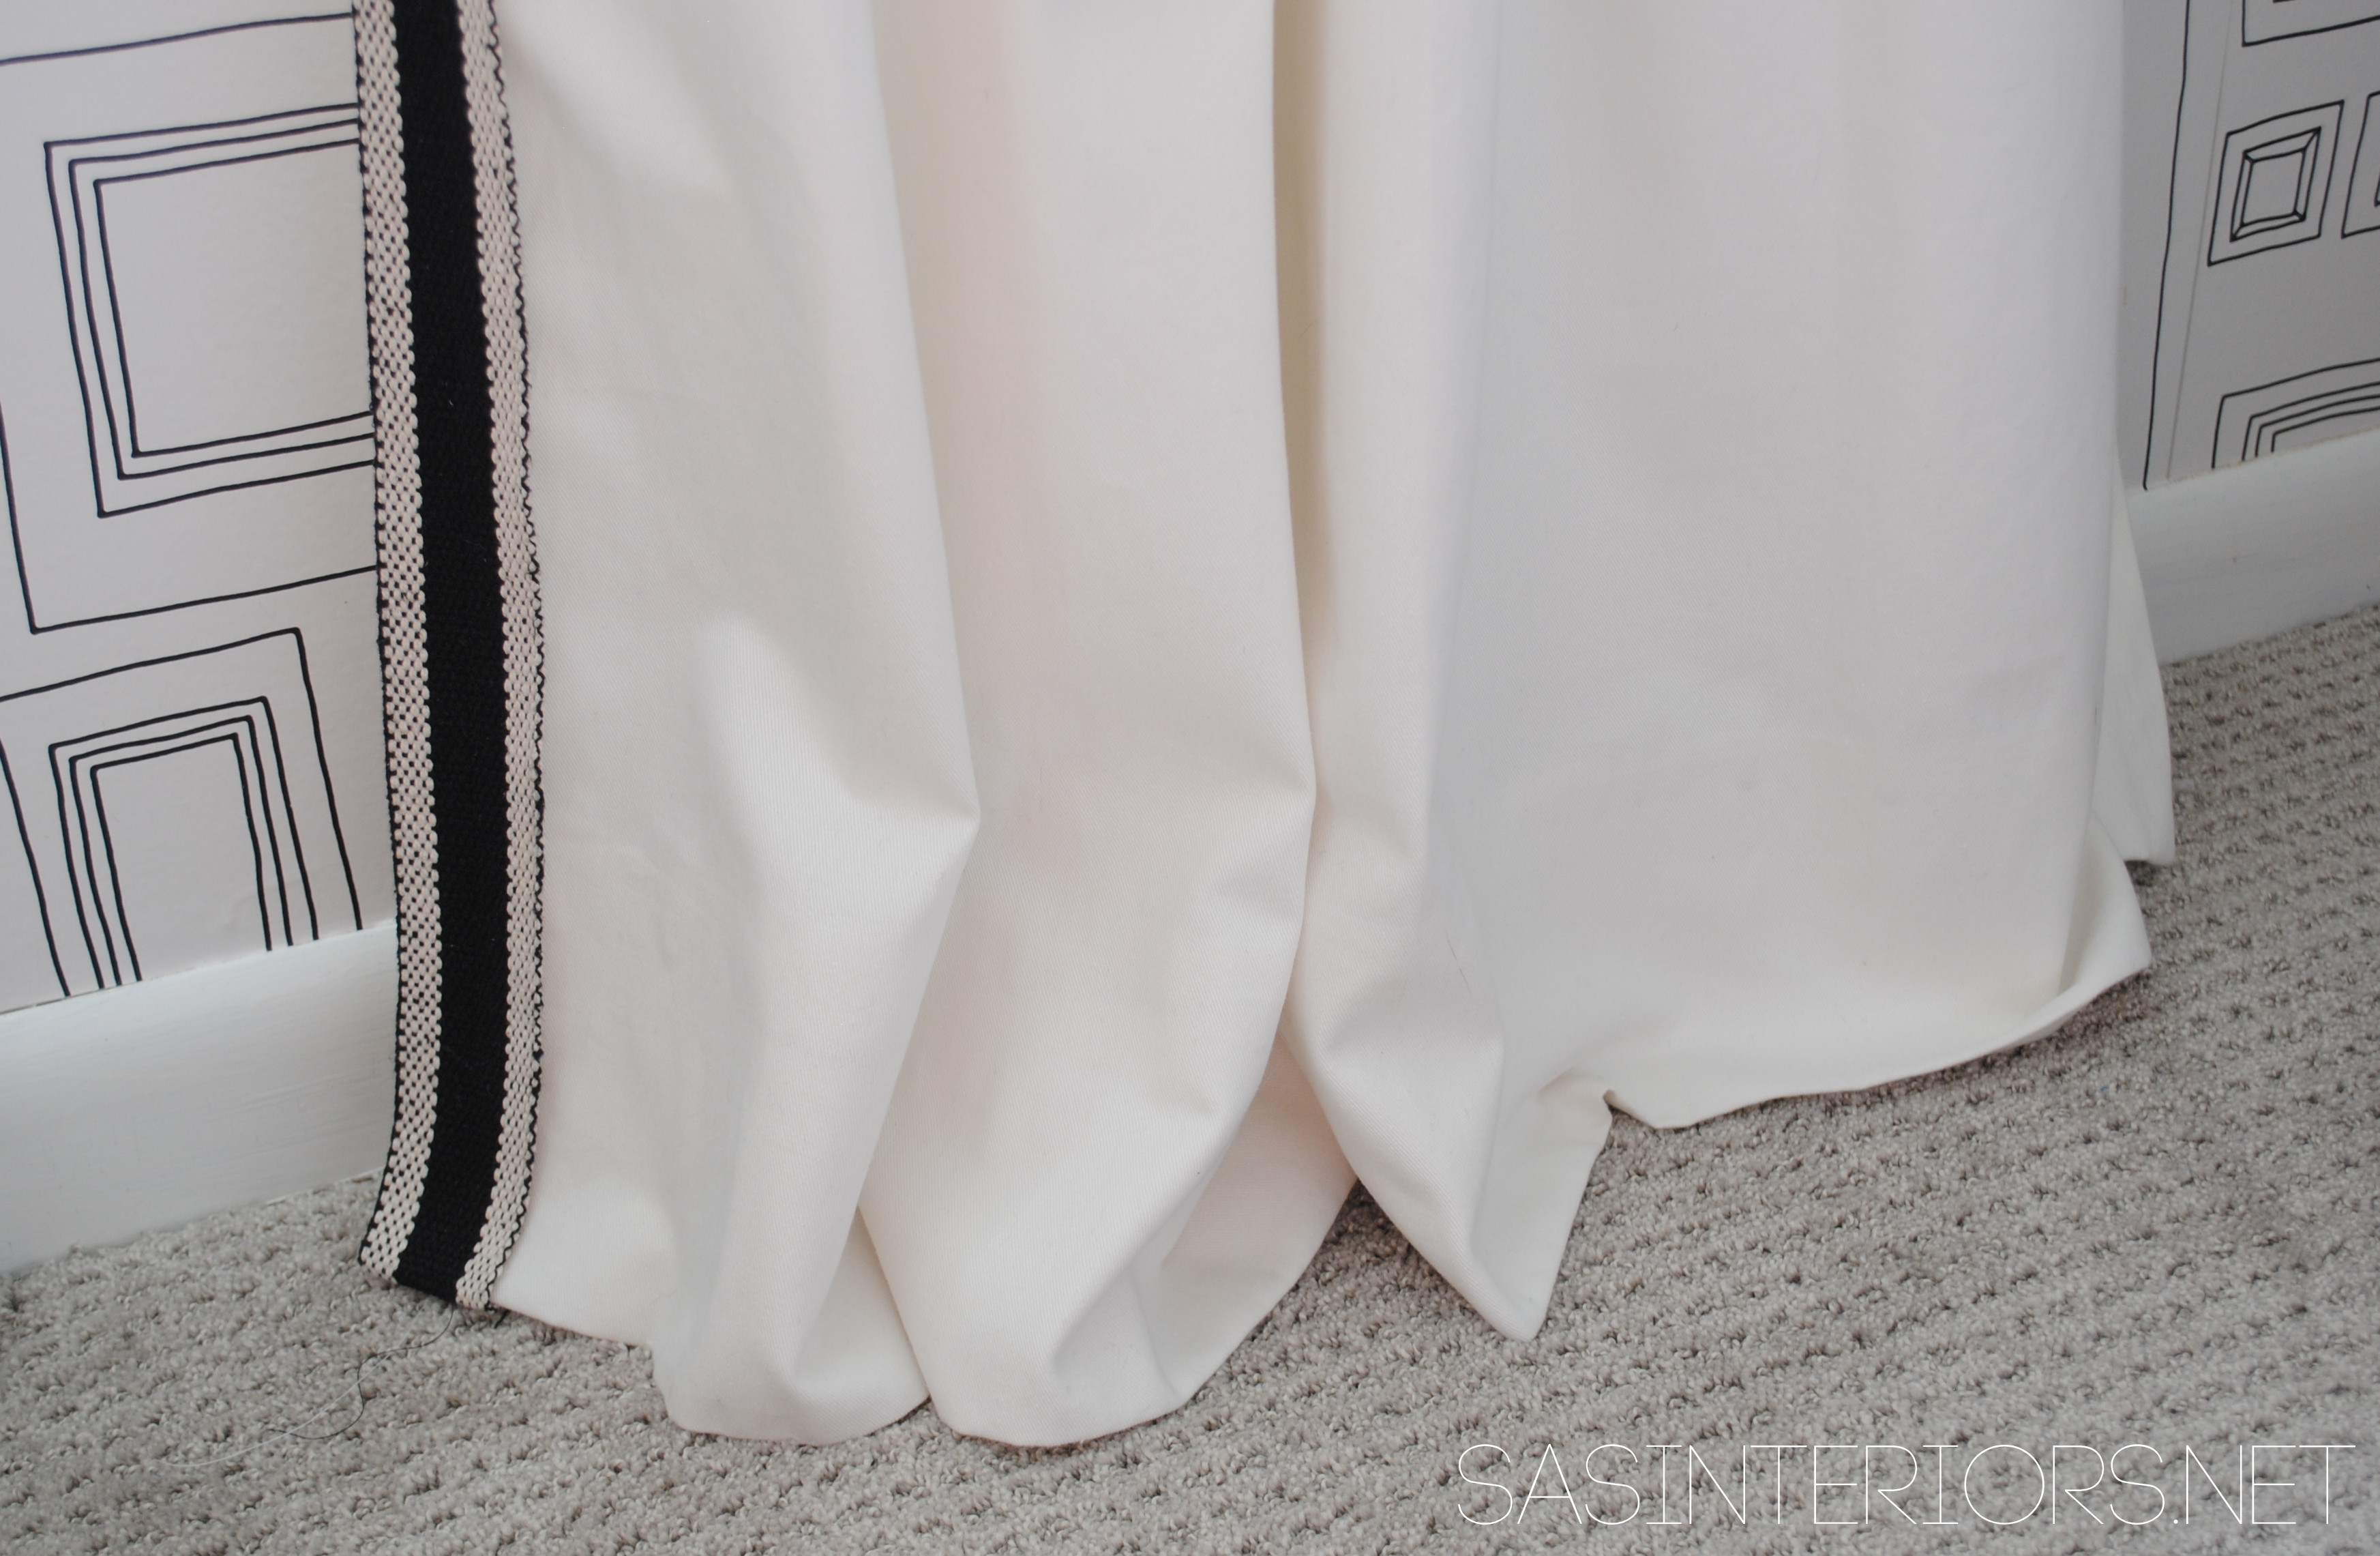 So simple and the perfect way to dress up a plain ole’ curtain!
9
Two tone window panels with decorative trim detail
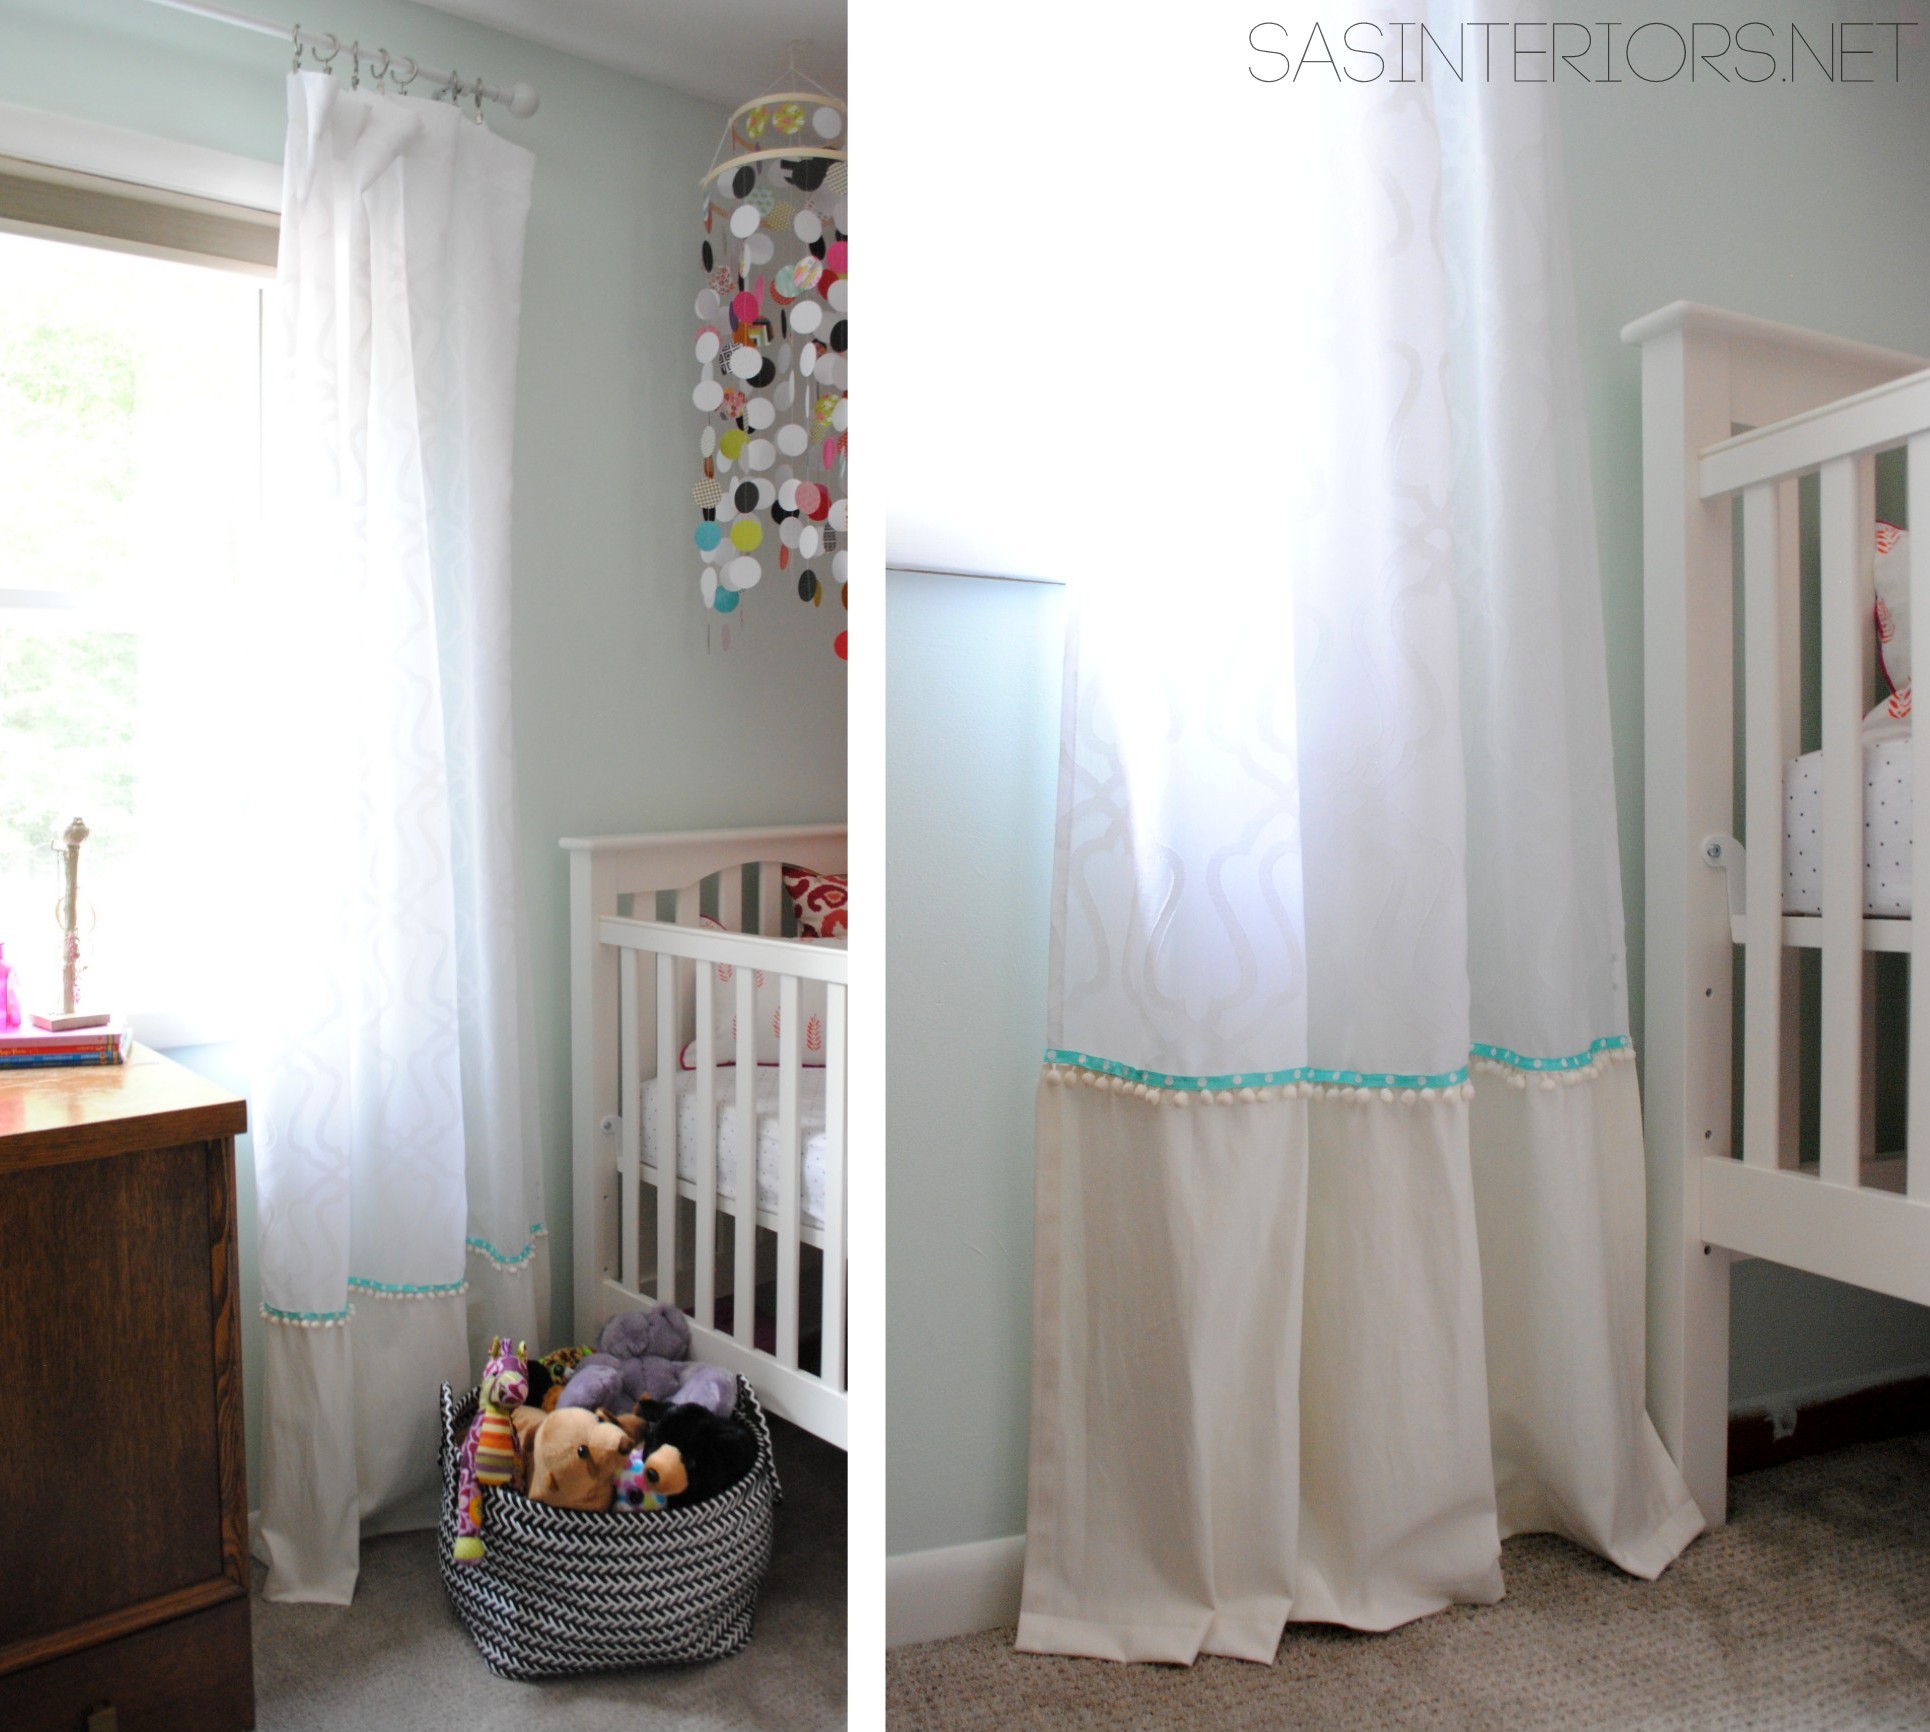
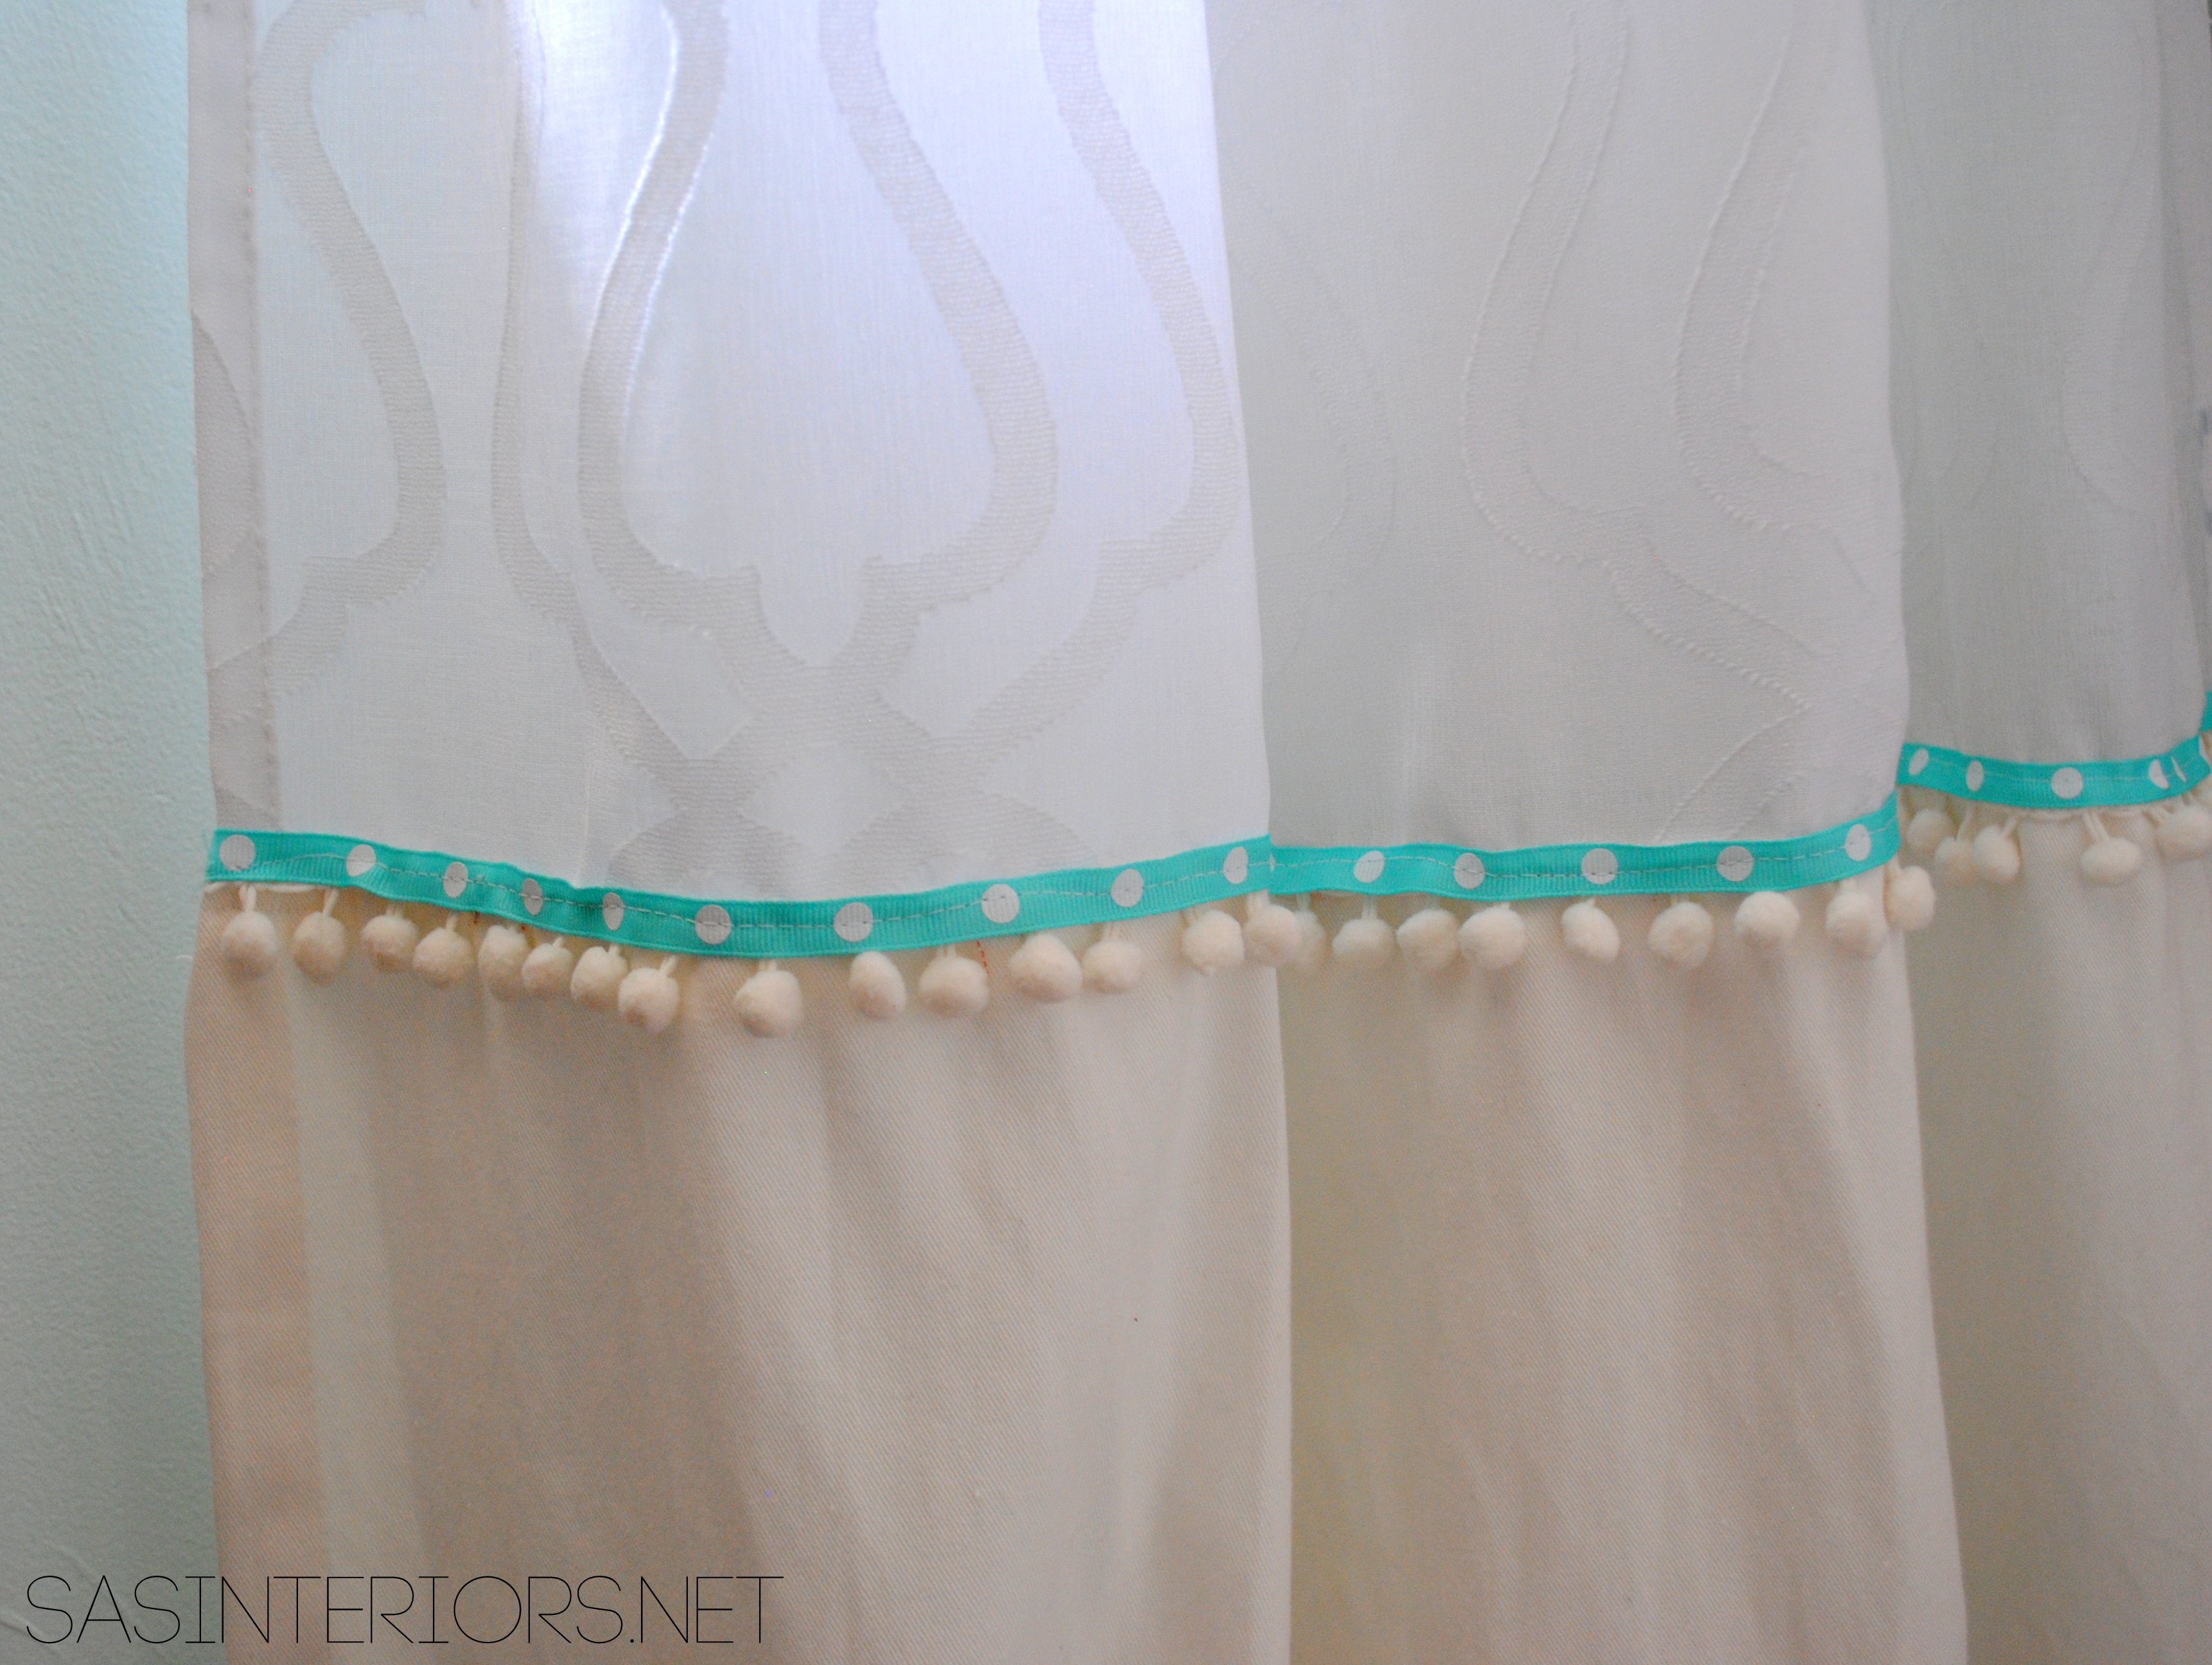
Last, but not least, new curtain panels that I’ve NEVER shown on the blog. These DIY window panels are the most recent I’ve made for my daughters’ bedroom. They replaced the fuschia panels (#2 above) when we recently created the nursery nook for baby #3. I haven’t put together a final reveal of the room changes, but promise to do so very soon – be on the look out. Anyway, to create the nursery nook, we removed the 3-in-1 play tent and when doing so I was left with lots of fabric. So I did some altering + sewing, and created new panels.
These panels are super cute and perfect for a girls room! I used a sheer fabric (with a pretty design) for the top section, then a solid cotton fabric for the bottom section. At the point where the two fabrics meet, I added decorative trim using a combination of a 1/2″ wide ribbon + white pom-pom trim.
So there you have it. 9 different DIY window treatments. All in my home.
My designer advice: Don’t leave your windows “undressed”. Choosing a window treatment can sometimes be a bit daunting, but use inspiration to guide you. And never be afraid of updating a store-bought window treatment to achieve a custom, designer look. The smallest change is sometimes all that is needed. Lastly, if you can’t find it, DIY it!