Tag: Do-It-Yourself

DIY: Rolling Barn Door

I am putting the final touches on the kitchen cabinets, but in the meantime I’ve been working on a slew of other projects for the brick ranch fixer upper.  It’s been a busy couple months with moving, the holidays, and client projects, but thankfully with the recent freezing temps, we’ve been homebound most weekends which has allowed me to tackle my growing list of big and small projects around the new homestead.

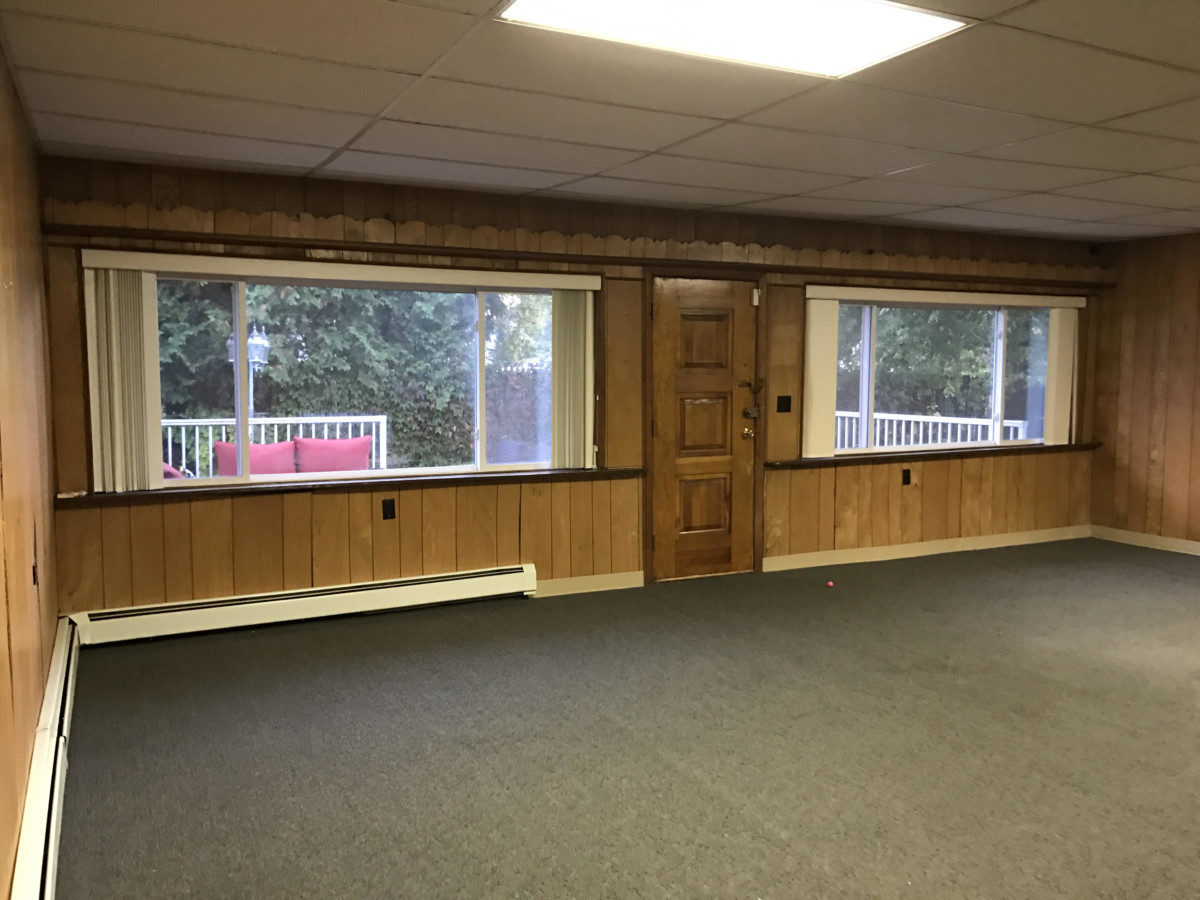
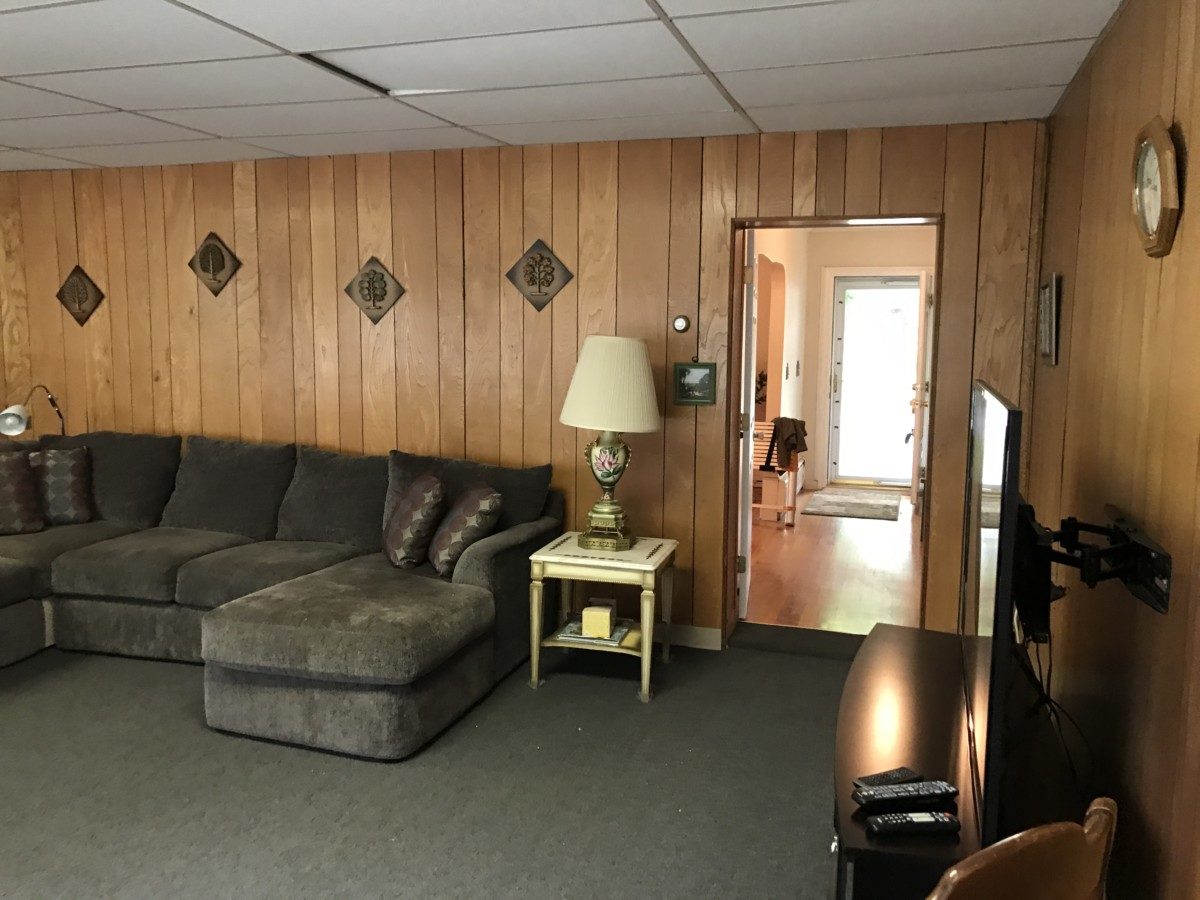
One of my recent endeavours, which I am crazy in love with, are adding rolling barn doors to the family room which got the most TLC during the renovation.  If you remember back, this is how the space looked when we moved in…

The door opening, seen in the picture below, used to have a hinged door to access the room. Our plan when renovating the space, was to add a rolling barn door at this opening and the other opening from the kitchen so the spaces flowed better…

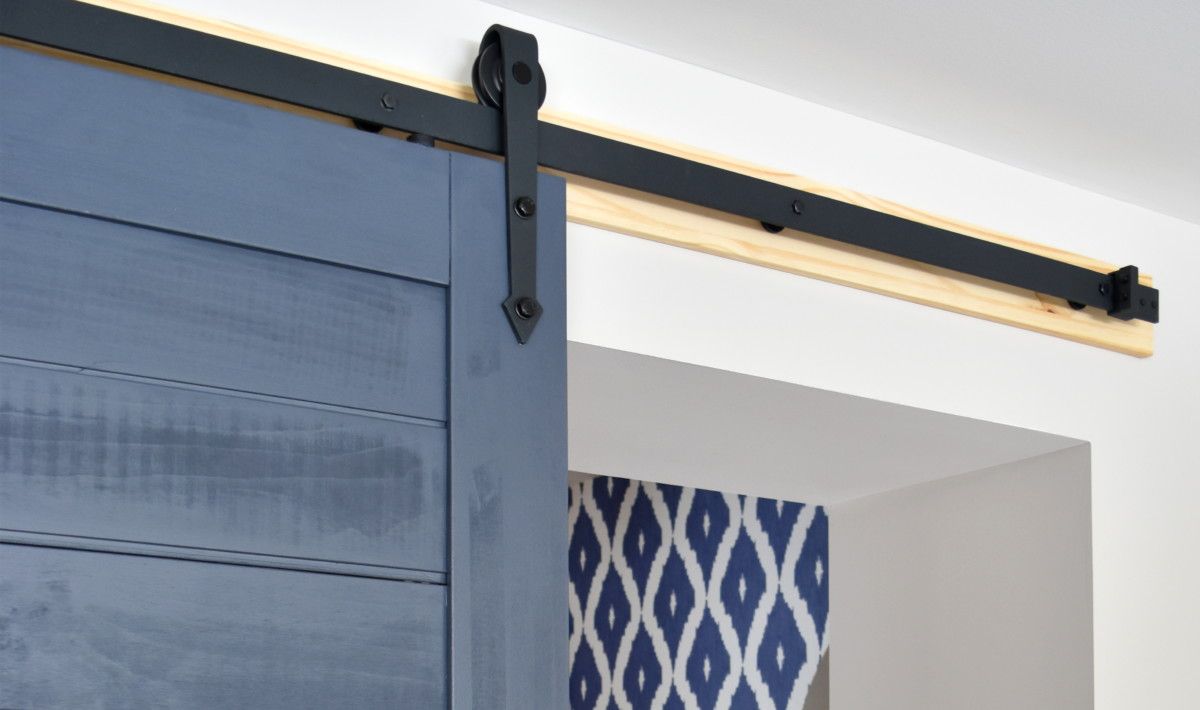
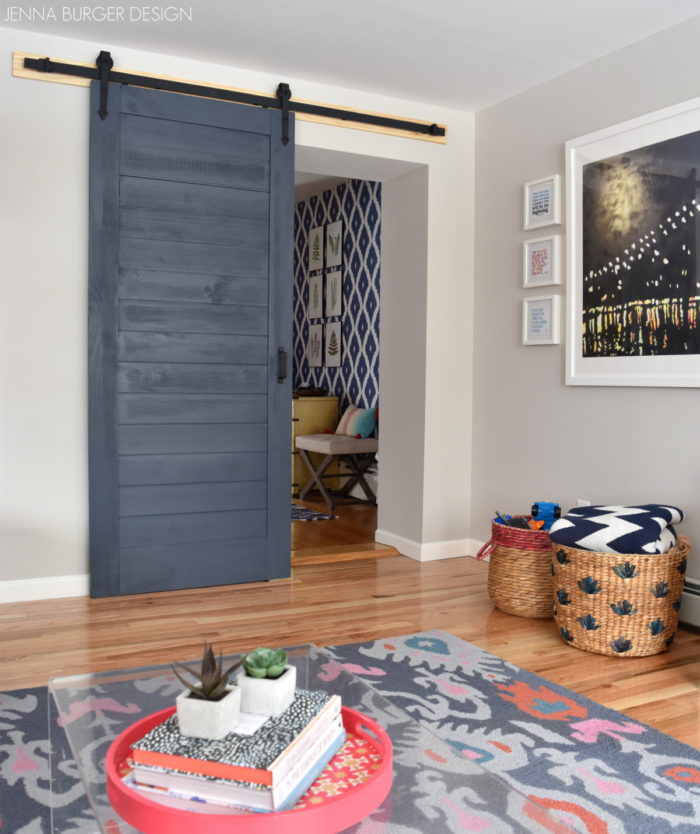
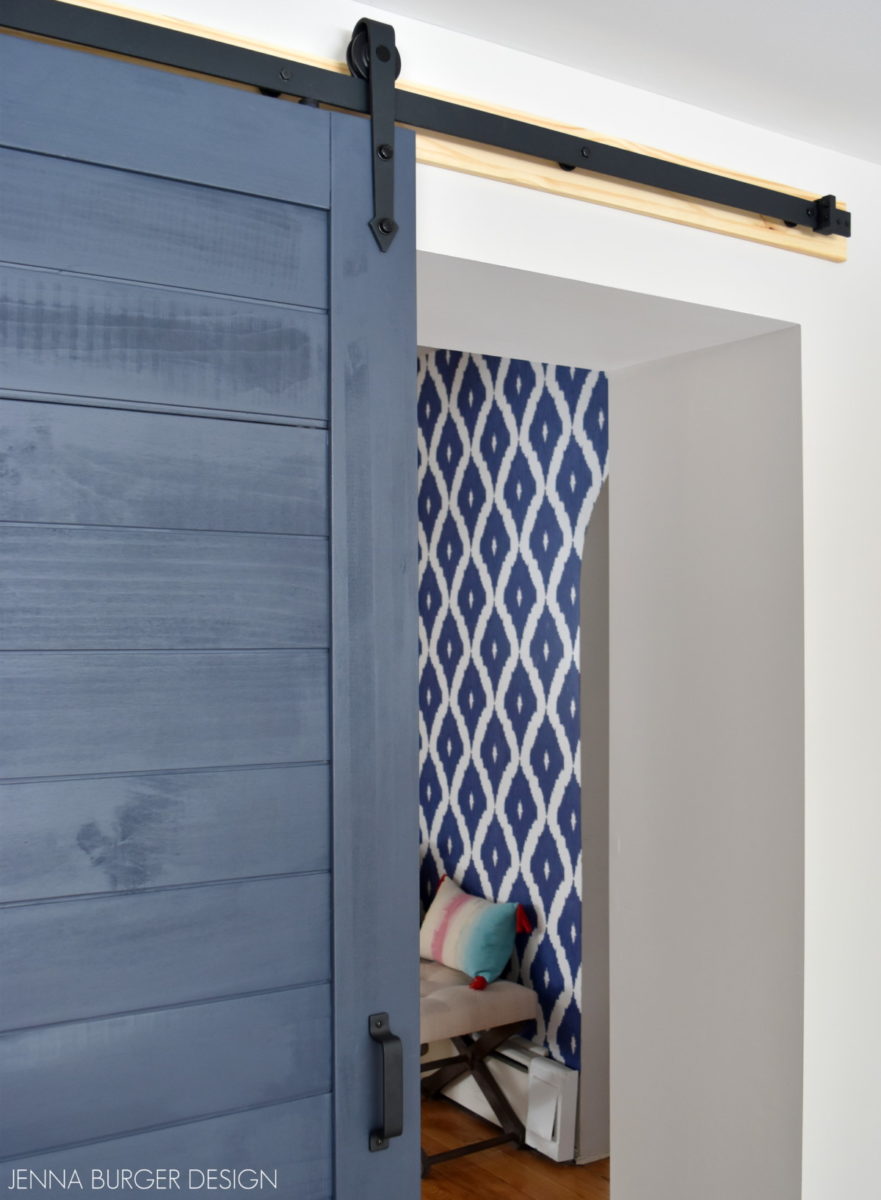
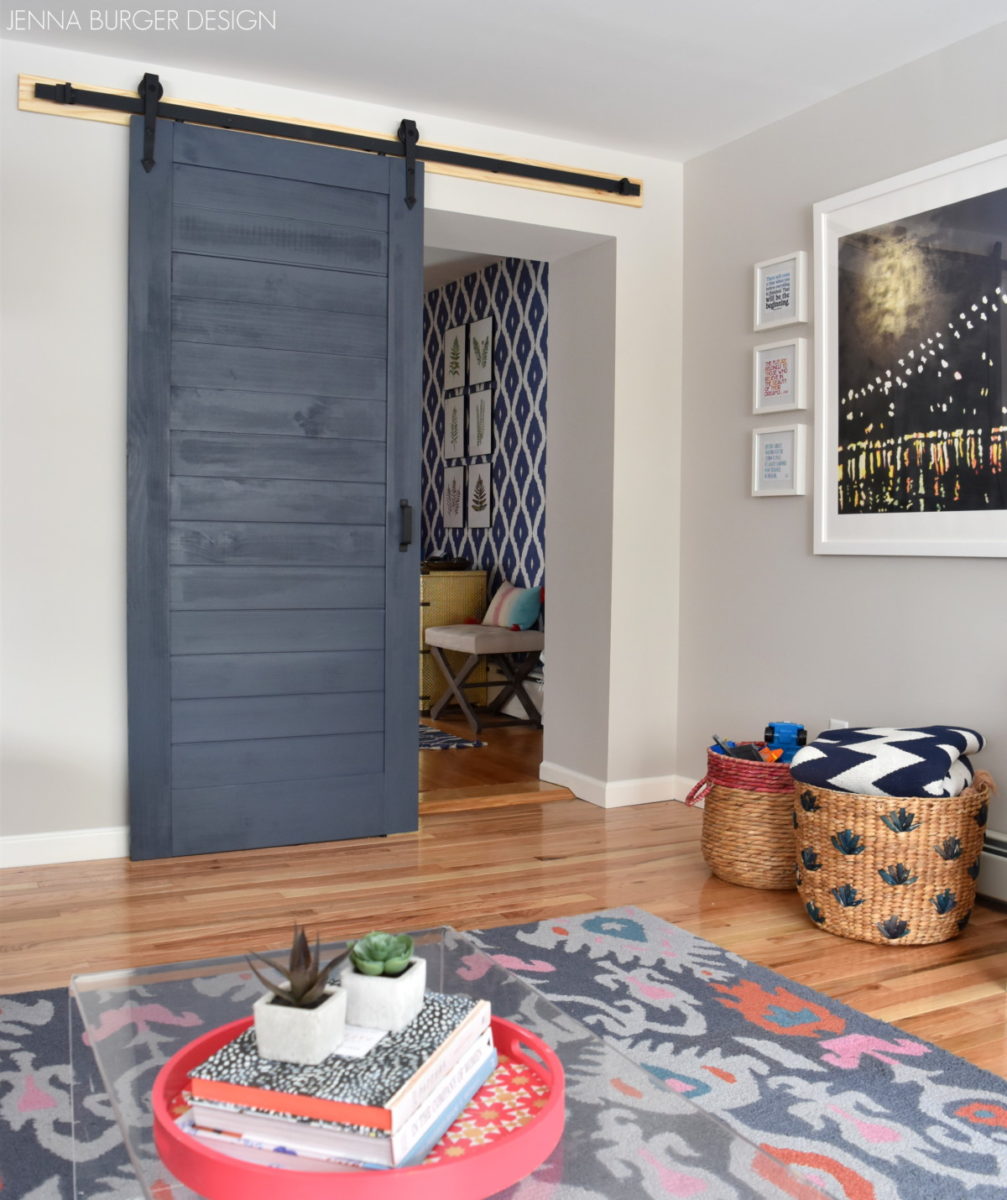
This is how the door opening with the new rolling barn door looks now…

Quite the transformation!

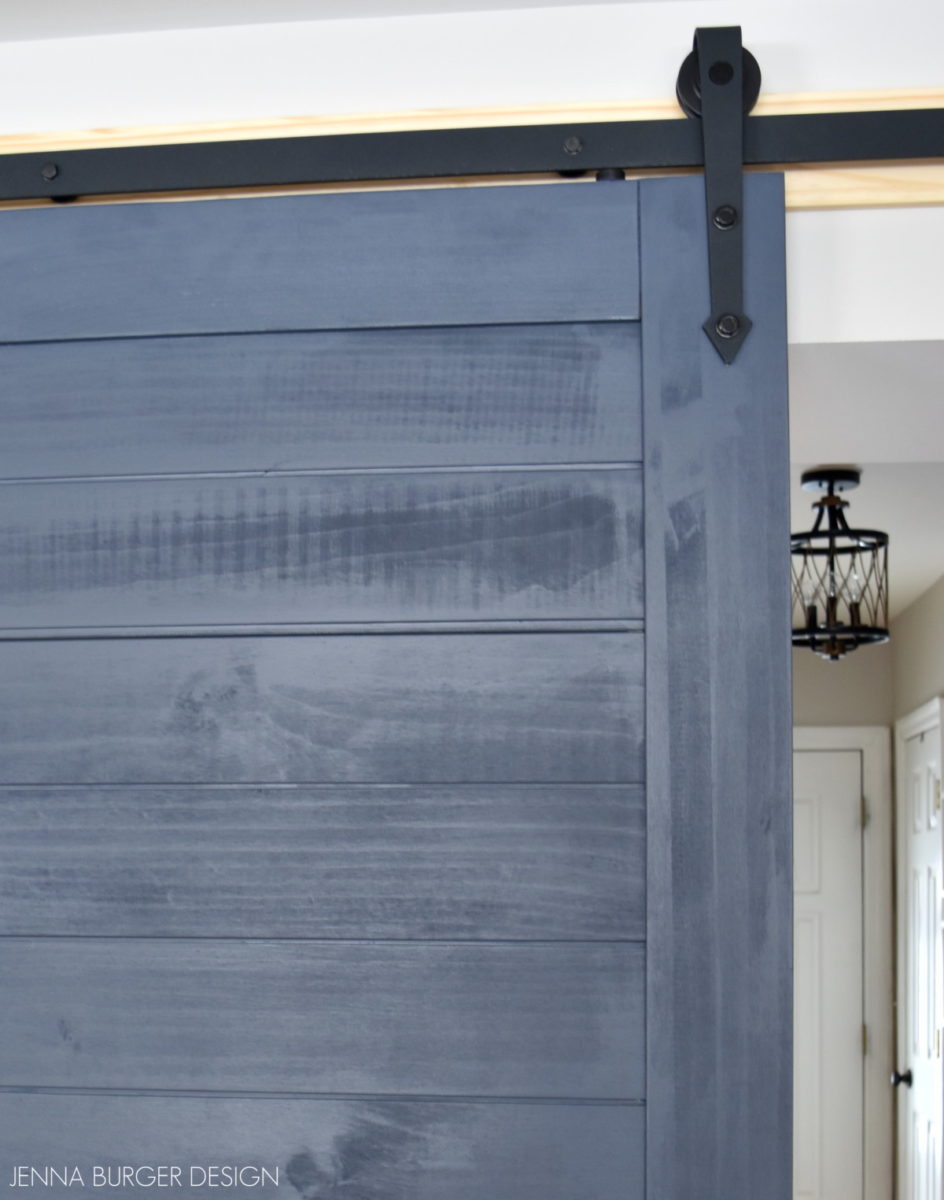
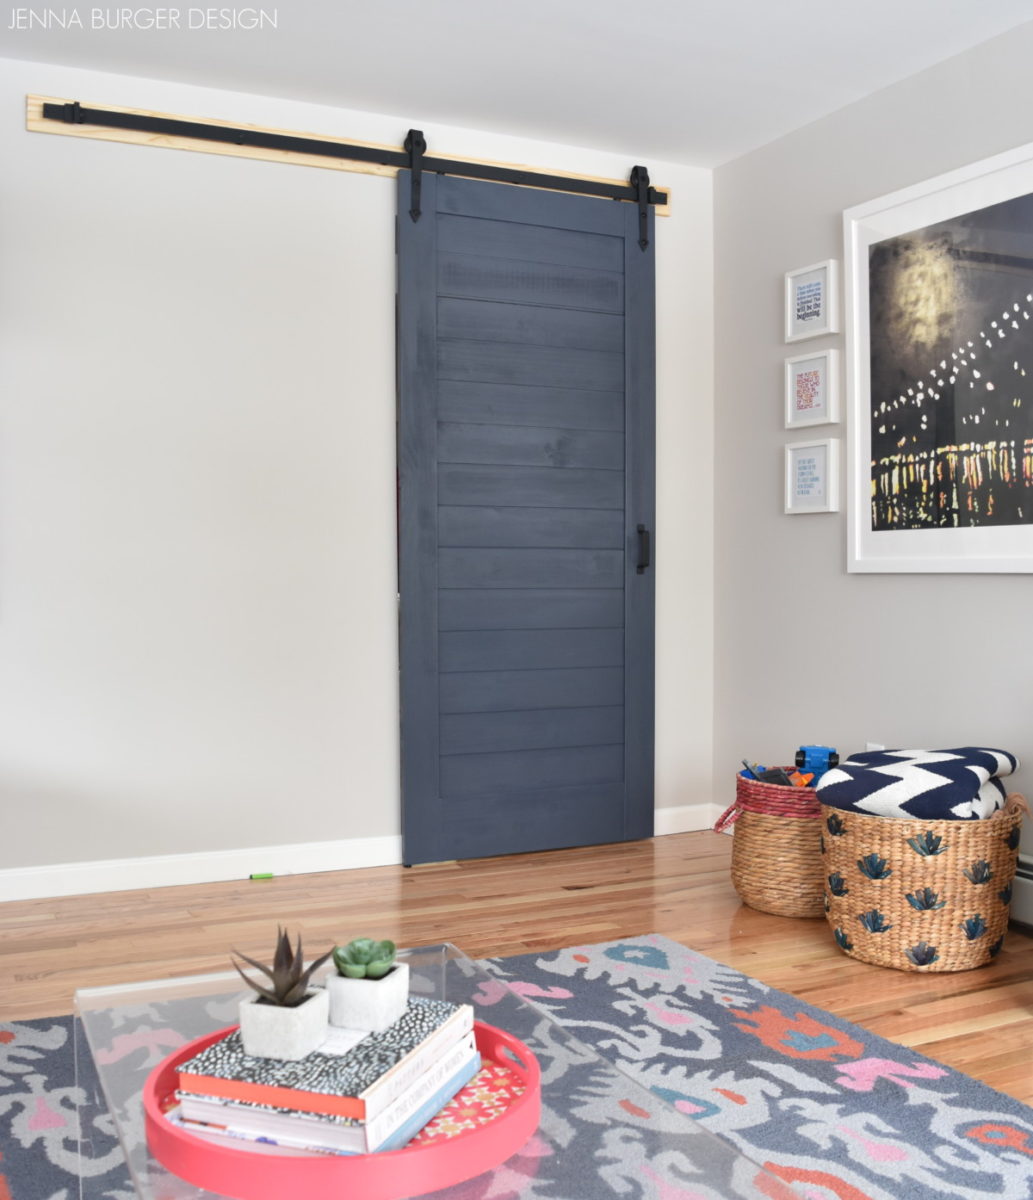
The rolling barn door, which was a complete kit – door + hardware – that we found at Lowe’s, has been a wonderful addition to the space.  Functionally + aesthetically, the door has added height, privacy, and a pop of color.  The deep navy color, Valspar Mystified 4011-8, on the door is the same as the kitchen cabinets that I painted.  I wanted to use this darker hue throughout the house to tie the spaces together + to give contrast to the lighter wall tone.

And check out the amazing wallpaper in the distance.  That’s the foyer…  More on that coming soon.

THE INSTALLATION

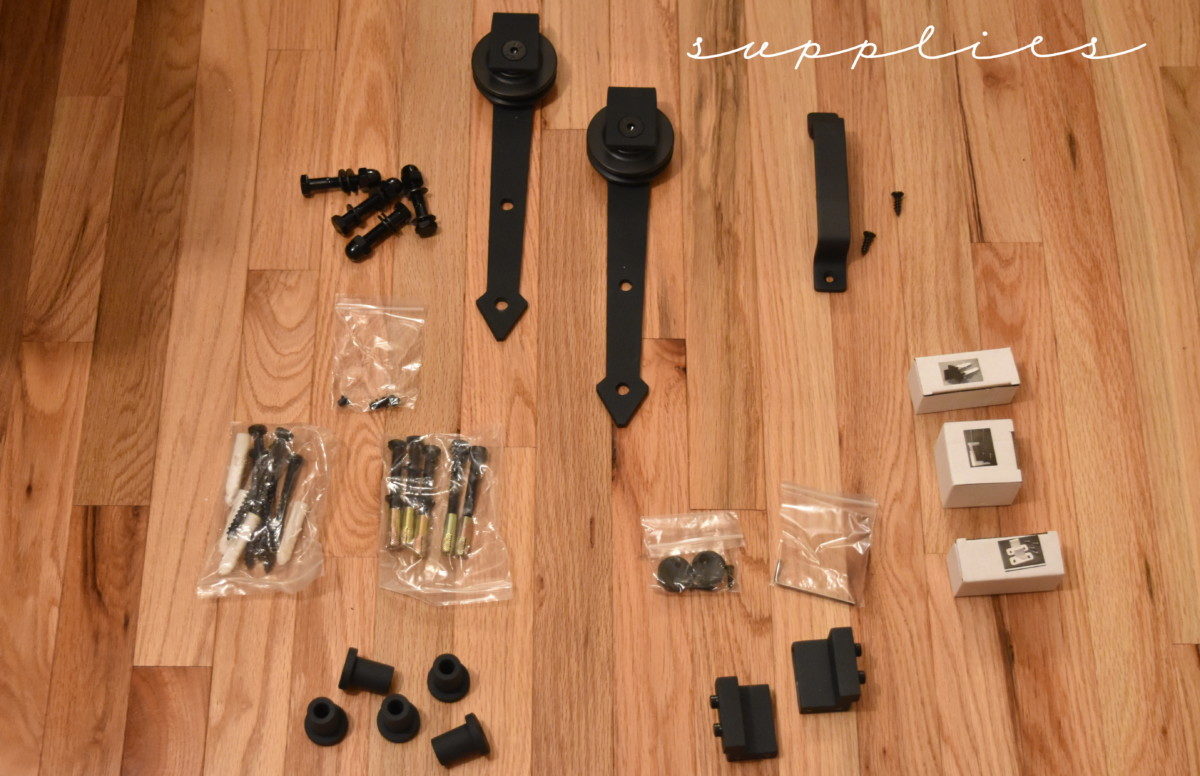
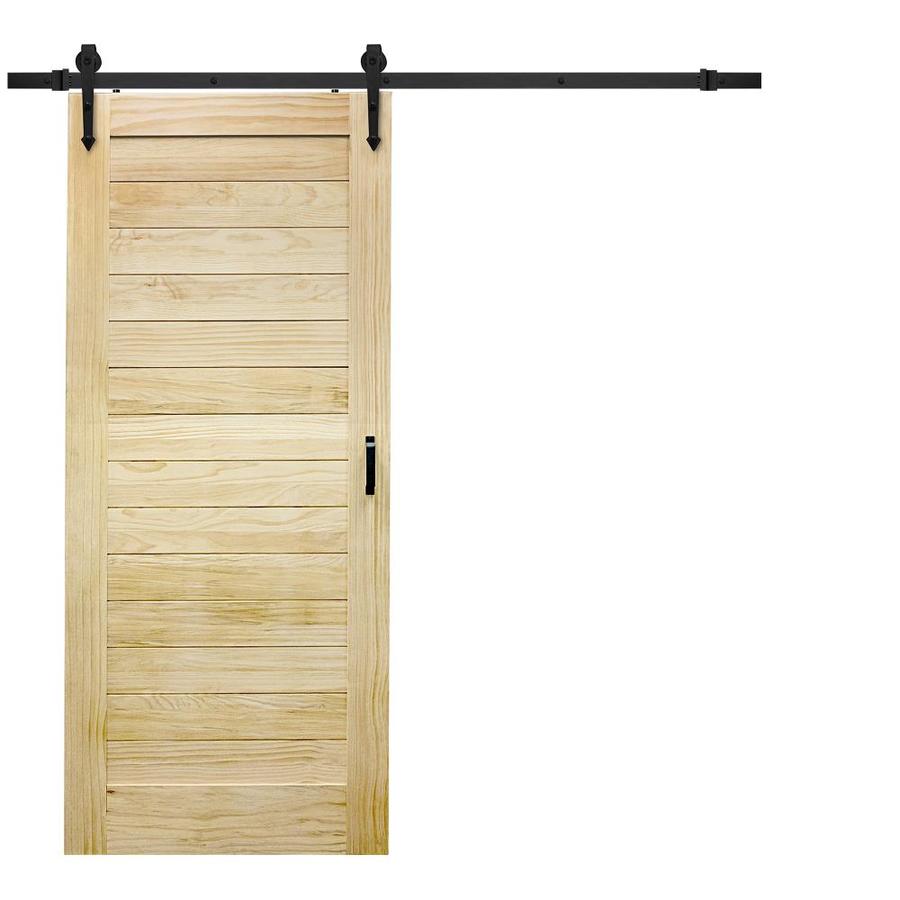
This is the rolling door kit we chose to use.  The design of the door was simple and not overly rustic + it was unfinished so any paint (or stain) color could be used.

The mister and I were a bit nervous to tackle installing the barn door hardware, but the directions were easy to navigate and the process for installation wasn’t as challenging as anticipated. Phew…

Since we had planned for the barn doors during the construction process, we had blocking added in the stud wall above the doors – yes there are two openings into the family room.  By adding blocking (extra framing) in the wall we knew there was no need to use anchors; the screws could go straight into the sheetrock with the blocking behind.

If you decide to tackle a similar project, you may need to use anchors which would add a few additional steps.

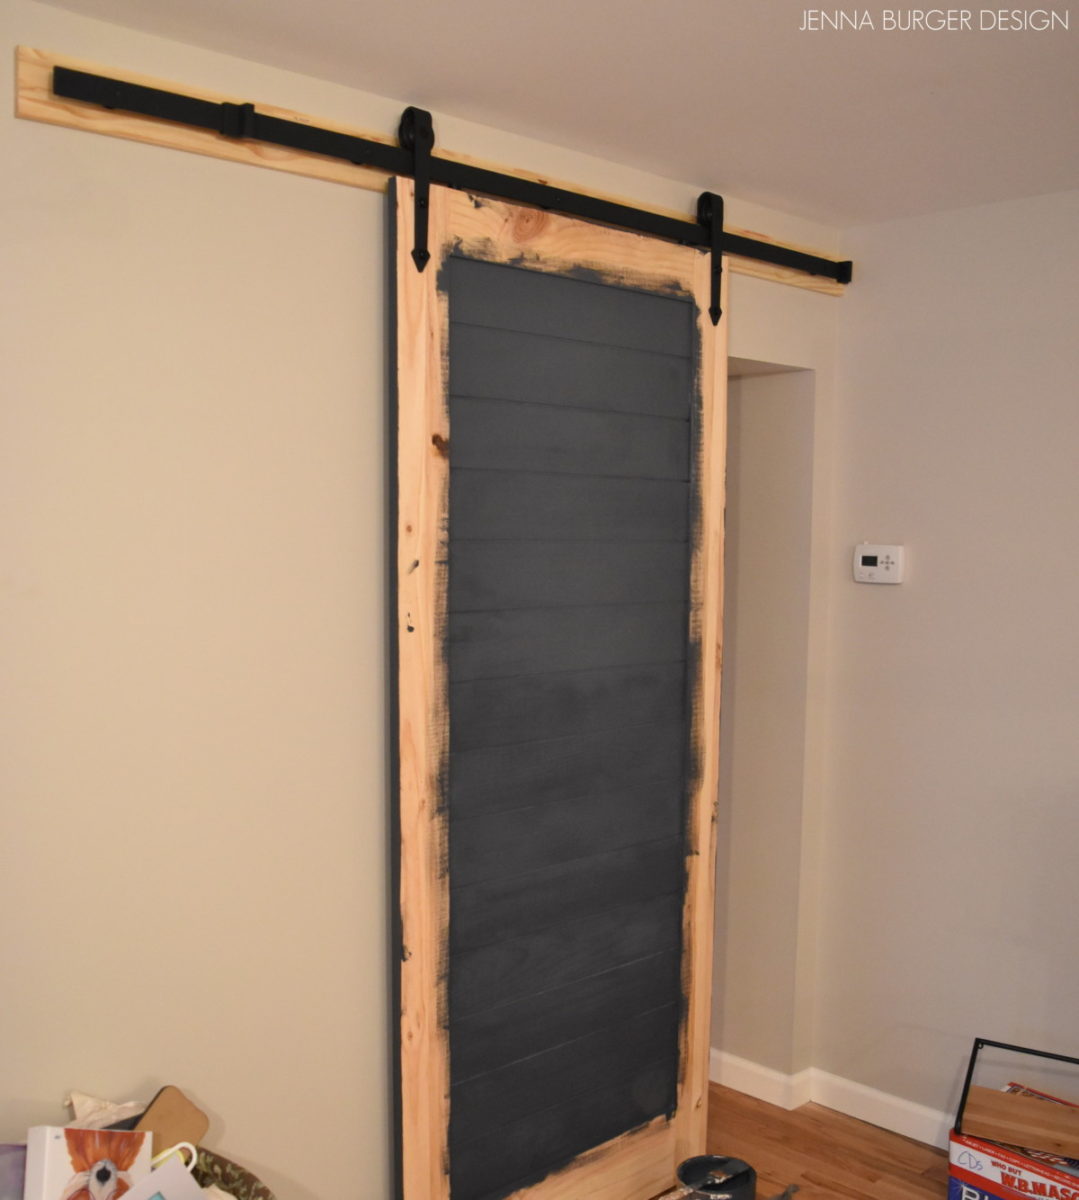
To start off, we painted the side of the door that would be facing the wall.  This was important because otherwise we wouldn’t have access to the whole side to paint once installed.

Using a combination of a brush for the corners and a roller for the flat surfaces, I painted the one side.

Once the paint was dry, we laid out all the hardware on a flat surface.

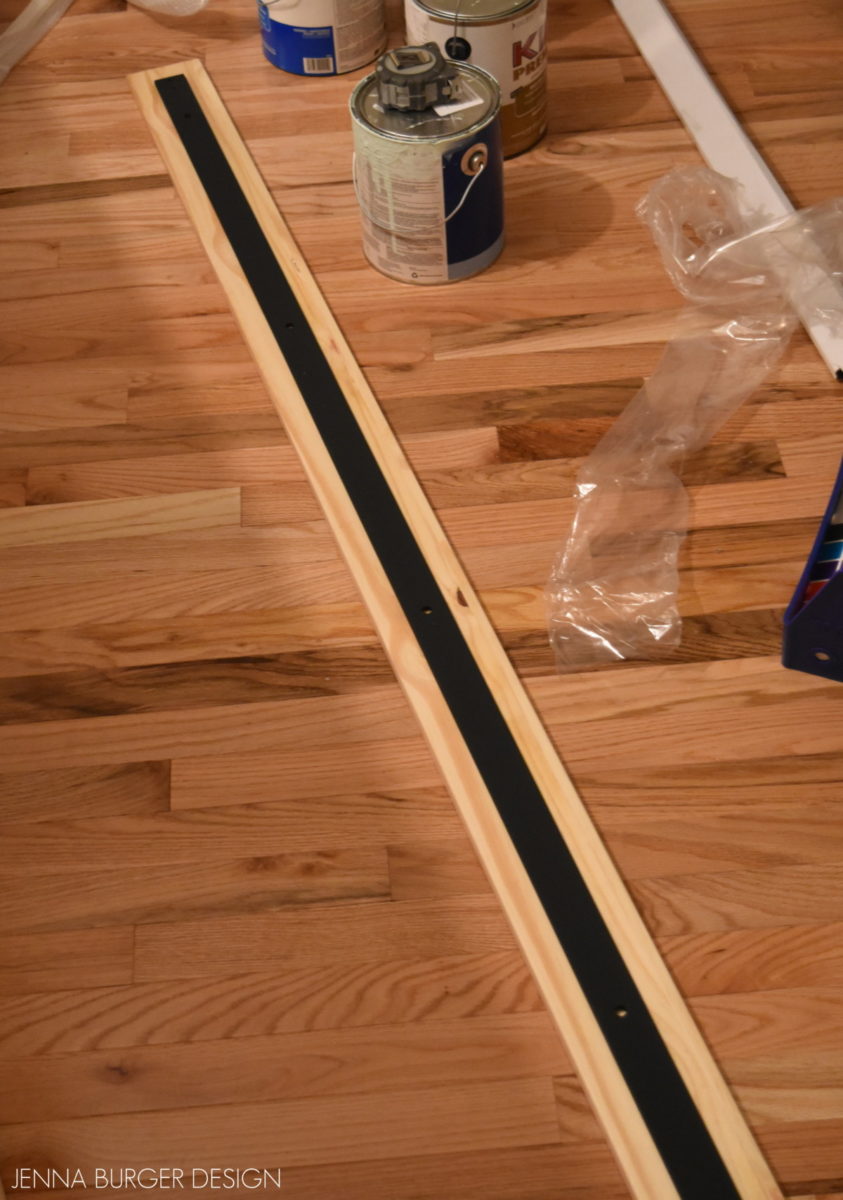
We then followed the directions to add the long track to the unfinished piece of wood which would be used to hang the door.

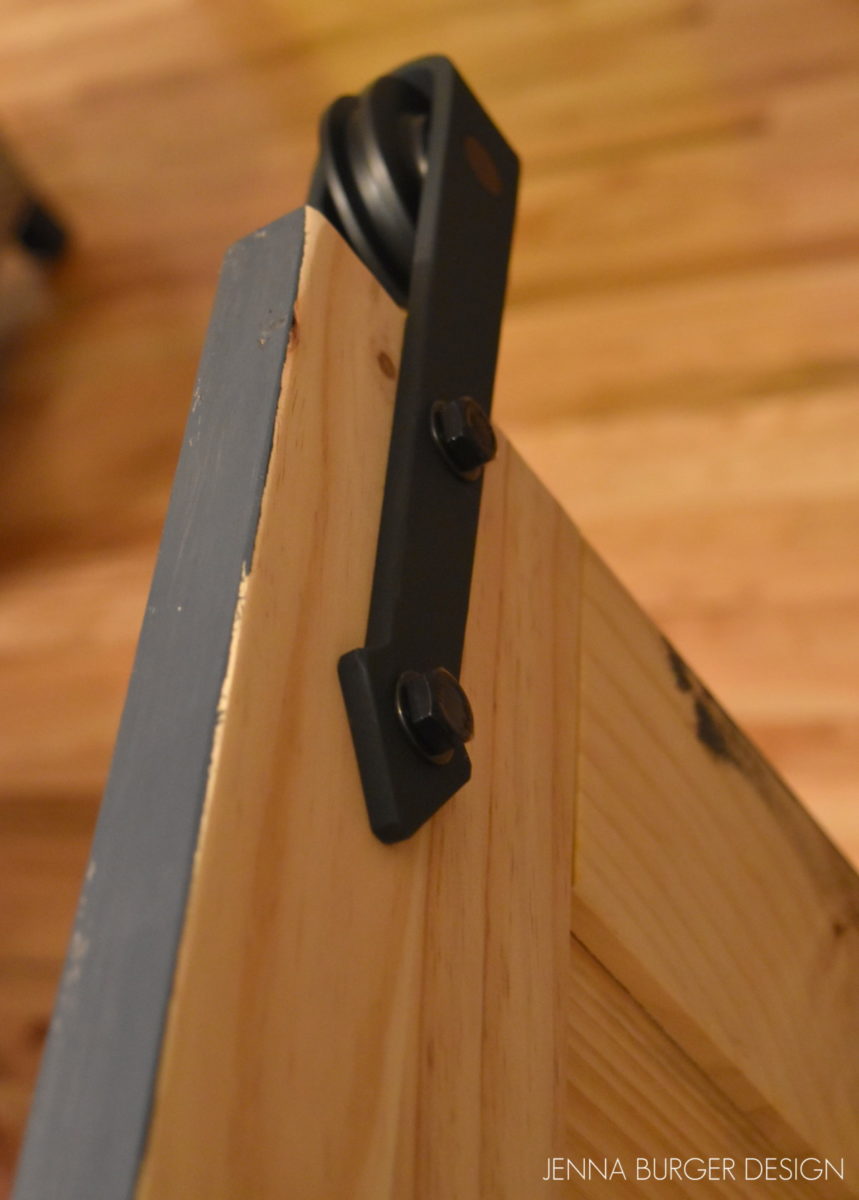
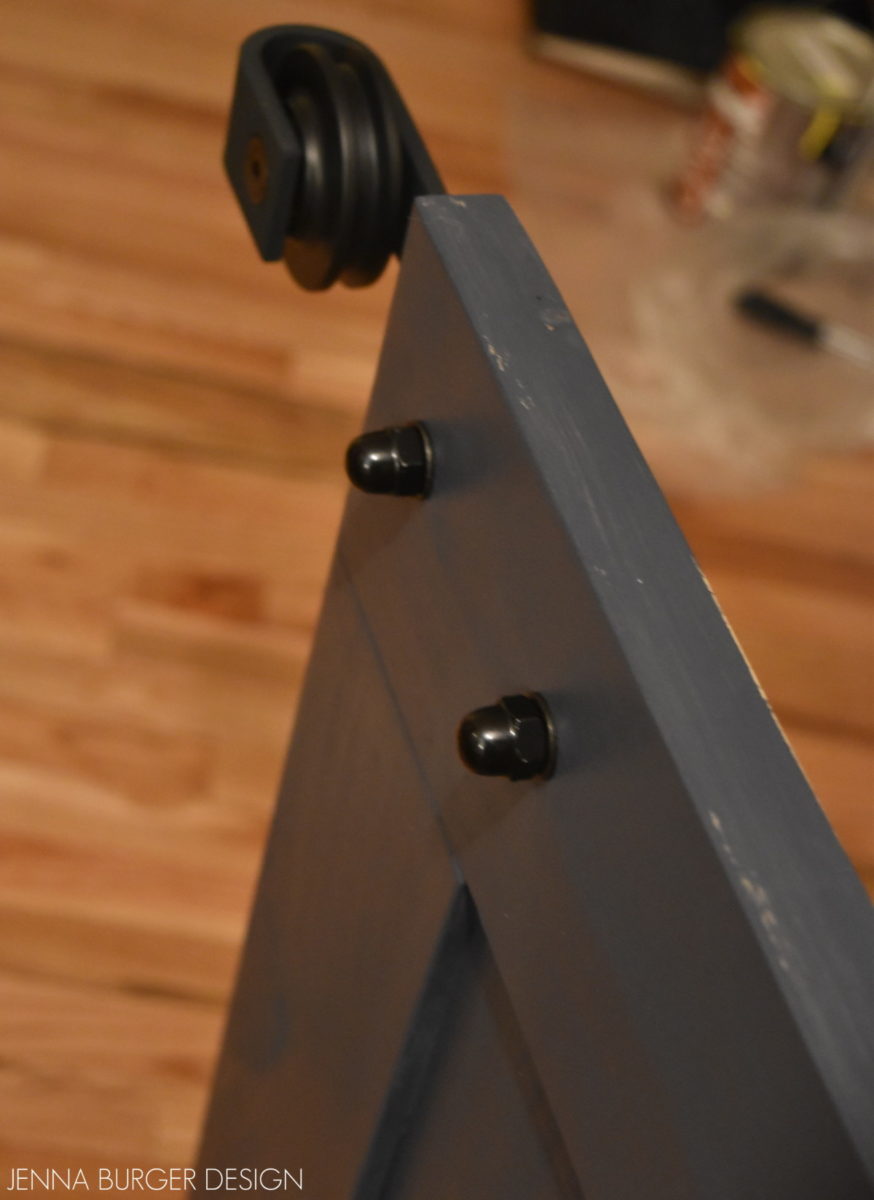
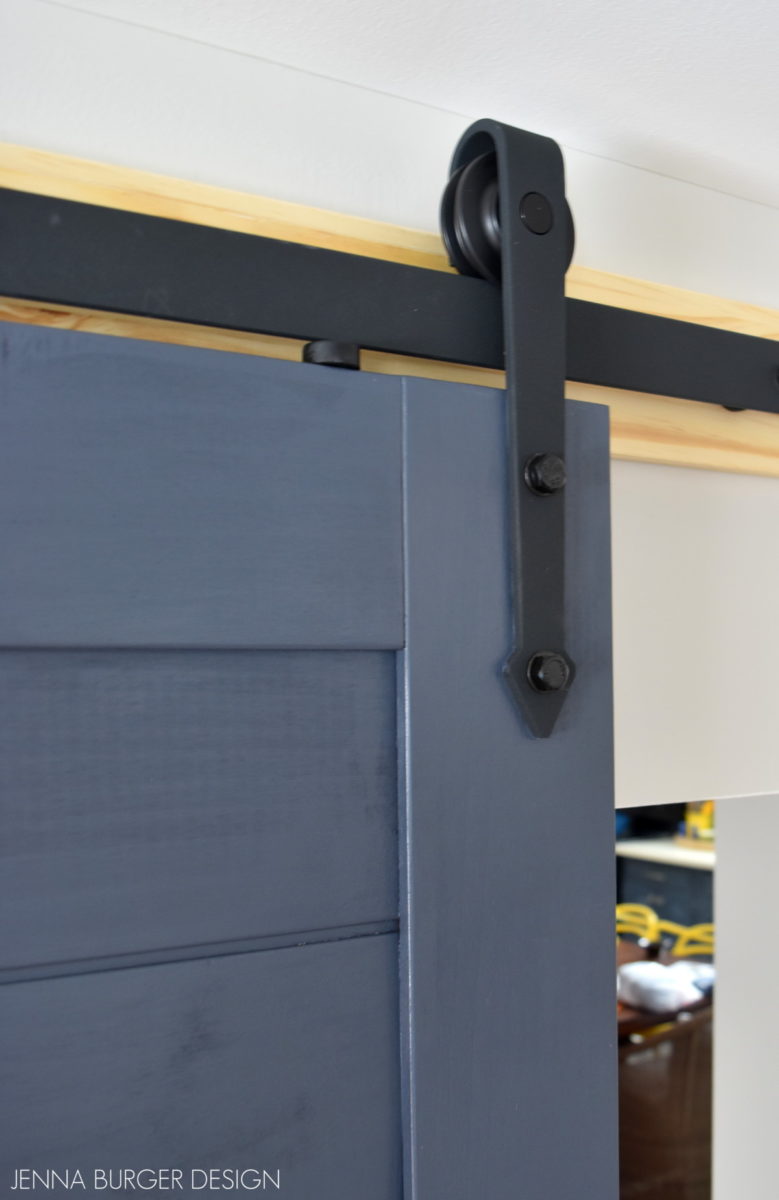
Then we added the 2 rolling brackets to the door.  The door had predrilled holes, which made the process effortless + easy.

There were a few additional steps to hang the door onto the track, but it was fairly straight forward.  The directions gave us multiple installation options, which took some time to review + anaylze.  The first door took about an hour from start to finish, but the second door was a breeze since we knew the steps to take.

Once the door was hung, I finished painting the exposed side.

Once the paint dried, I added the handle, and it was complete.

I was really impressed with the ease of installation + the beautiful look that the doors bring to the space.  Having the door included with the hardware also made the process so much easier.

Door open…

Door closed…

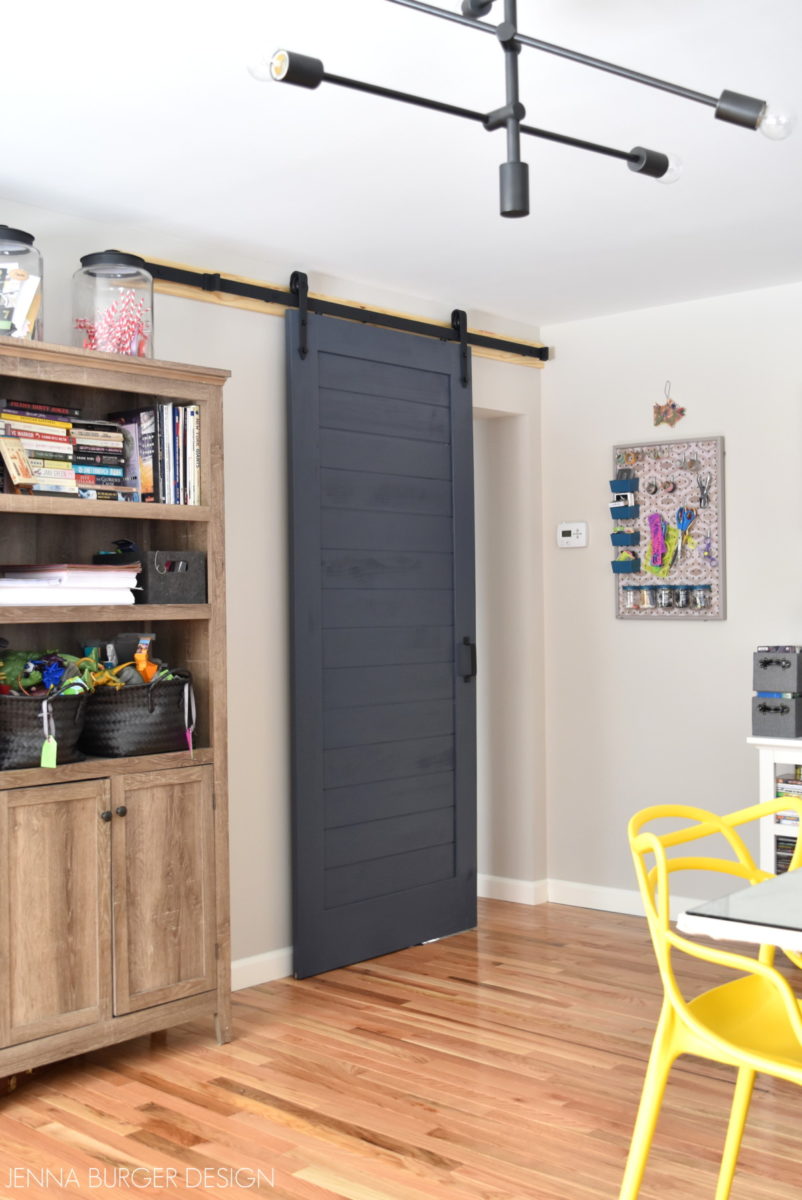
As I mentioned, there are two doors in this space.  Here’s the other…

I can’t wait to share the completed room and another fun color I brought into this space!

Shop the space…

DISCLAIMER: THIS POST IS A COLLABORATION WITH LOWE’S.  ALL OPINIONS + SELECTIONS ARE MY OWN.

DIY Rolling Door Hardware using Plumbing Pipe

There are some do-it-yourself projects that are wham-bam-done and then there are those DIY creations that seem to take as long as building a house…

Well I just wrapped up a fantastic, in my eyes, DIY project but it didn’t come without a hundred hurdles along the way.  BUT we – yes, the Mister lent a hand for this one – kept chugging along and made it to the end.

My latest + greatest project?  A rolling door with DIY hardware using plumbing pipe.  The popularity of rolling doors continues and even though I’m not in favor of following every trend, adding a door of this style was the only solution for our master closet.

The door to the closet was removed a few years back when revamping the space to maximize on shelf area.  Since then there’s been no door…  Solution?  A rolling door to give privacy + a splash of color.

The result of this challenging, but rewarding result…

DIY: Rolling door hardware using plumbing pipe. Get the look + function of a rolling door for about $60. Custom size to fit your space. Tutorial by www.JennaBurger.com

Let me explain where the hurdles + difficulties arose with this project…

I had anticipated using a reclaimed door, so the hunt was on.  After scouring local thrift stores + ‘junk’ spots, I found the perfect door with the 29″ width that I needed. Brought the door home. Went to sand it but it was an old door, and we assumed it was lead paint.  So we stripped the door using a liquid stripper.  It didn’t work. Hours spent + poor results = a very frustrated DIYer.  We painted over the door to seal it.  Went to hang it and the door was 6″ TOO SHORT.  The salvaged door I spent hours prepping couldn’t be used – UGH.  In the end we used the hinged door that was originally used for this opening.  The width is not ideal, but it works.

Let’s move forward with the tutorial.  There are a lot of parts, so let’s dive in…

DIY: Rolling door hardware using plumbing pipe. Get the look + function of a rolling door for about $60. Custom size to fit your space. Tutorial by www.JennaBurger.com

DIY: Rolling door hardware using plumbing pipe. Get the look + function of a rolling door for about $60. Custom size to fit your space. Tutorial by www.JennaBurger.com

MATERIALS NEEDED

1 – Flange (qty 2)

2 – 3/4″ x 1″ Black Steel Nipple Fitting (qty 2)

3 – 3/4″ Elbow (qty 2)

4 – 3/4″ Black Iron Pipe – can be cut to size (qty 1)

5 – 3/4″ Black Iron Tee (qty 2)

6 – 3/4″ x 1/2″ Black Steel Nipple Fitting (qty2)

7 – Casters (qty 2)

8 – Black Iron Reducing Coupling (qty 2)

> Screws + anchors (if there are no studs)

> Drill

> Door to your liking

> Handle – plumbing pipe handle is made with (2) flanges + (2) elbows + (1) 12″ L x 1/2″ W pipe

These *should* be all the hardware that is needed, but of course, every project / condition is different.  In my initial trip to Lowe’s for the supplies, I got all of the above with the exception of the Reducing Coupling part.  That was needed because the pipe needed to be reduced from 3/4″ to 1/2″ to fit in the door…

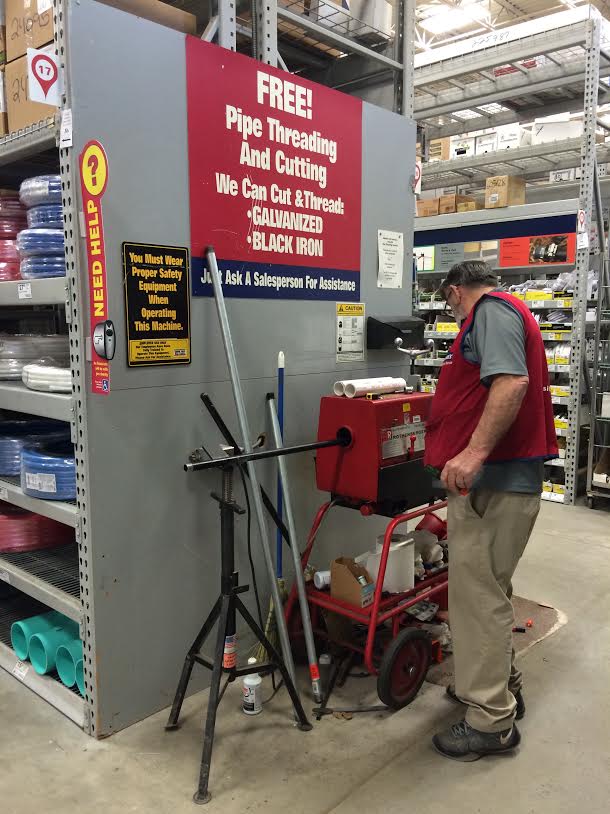
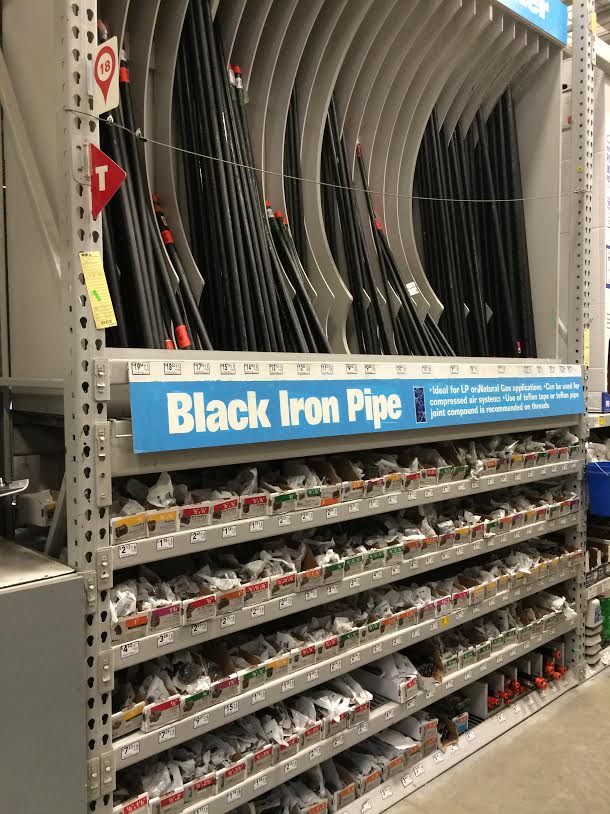
I shopped for all the plumbing parts at my local Lowe’s.  Using their cutting machine, they were able to cut the long pipe to fit my exact length.  For large plumbing pipe projects like a bookcase, this is a great source.
DIY: Rolling door hardware using plumbing pipe. Get the look + function of a rolling door for about $60. Custom size to fit your space. Tutorial by www.JennaBurger.com

DIY: Rolling door hardware using plumbing pipe. Get the look + function of a rolling door for about $60. Custom size to fit your space. Tutorial by www.JennaBurger.com

DIY ROLLING DOOR HARDWARE TUTORIAL

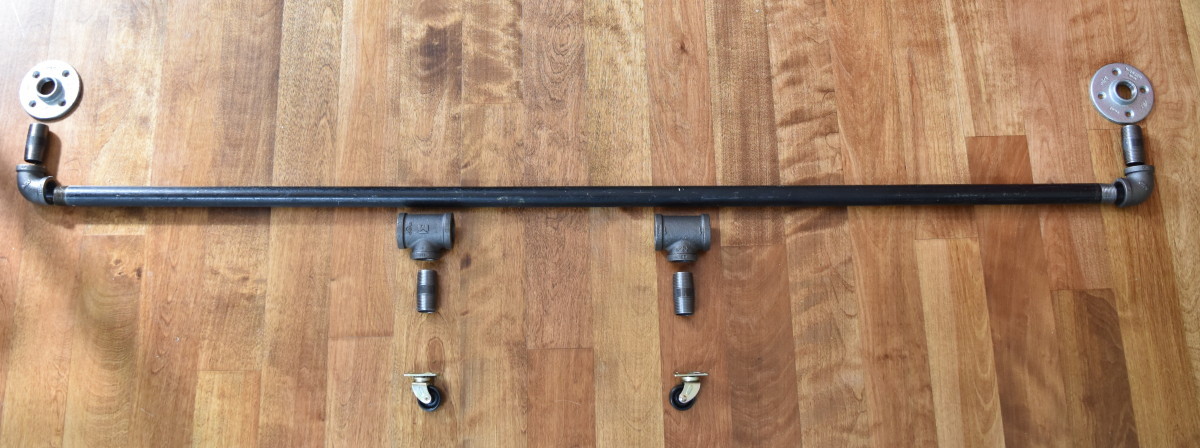
1 To start off, I laid out all of the parts for the rolling door track.
DIY: Rolling door hardware using plumbing pipe. Get the look + function of a rolling door for about $60. Custom size to fit your space. Tutorial by www.JennaBurger.com

2 Then I connected the pipes together. Before threading pipe to pipe, it’s best to use a pipe lubricant to make the connection easier + smoother.

DIY: Rolling door hardware using plumbing pipe. Get the look + function of a rolling door for about $60. Custom size to fit your space. Tutorial by www.JennaBurger.com

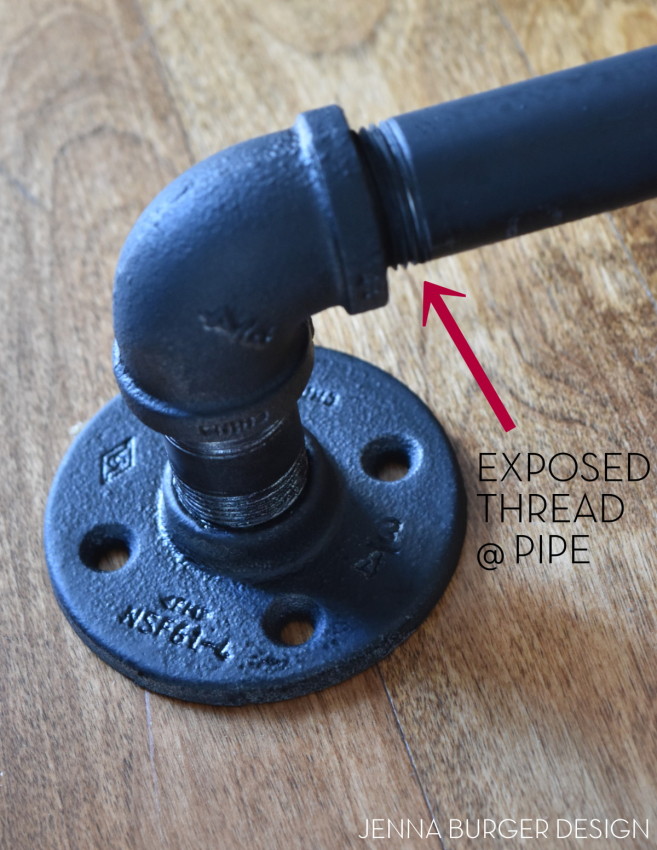
Note, connecting the pipes can be slightly challenging.  I anticipated screwing each connection the entire way so no threading would be exposed.  That is impossible.  A section of the pipe showing the threading will be exposed.  Account for that when taking measurements.
DIY: Rolling door hardware using plumbing pipe. Get the look + function of a rolling door for about $60. Custom size to fit your space. Tutorial by www.JennaBurger.com

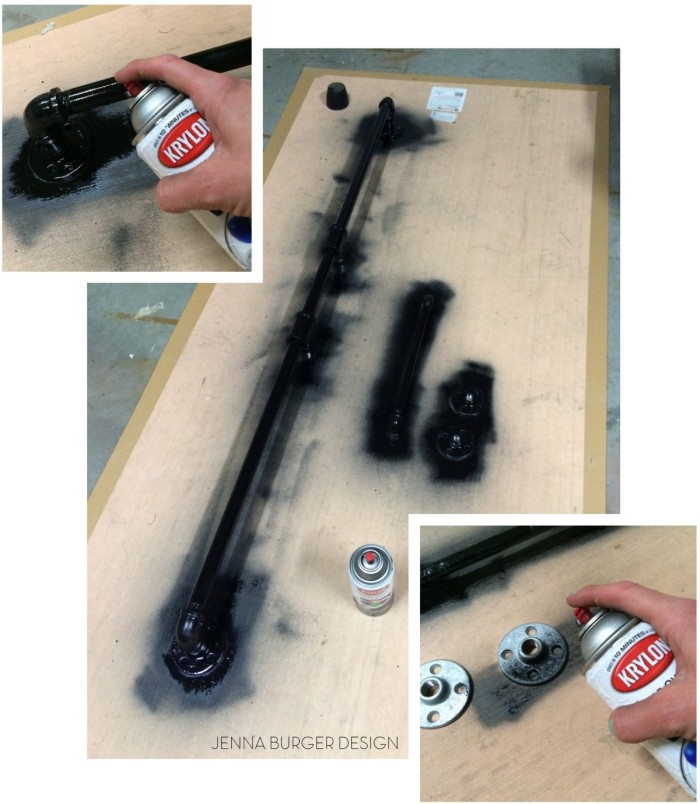
3 The plumbing pipes didn’t match in color, so to give them a unified look, I spray painted the track using a flat black color.
DIY: Rolling door hardware using plumbing pipe. Get the look + function of a rolling door for about $60. Custom size to fit your space. Tutorial by www.JennaBurger.com

4 As I mentioned above, I ended up using the door that was previously hinged.  I added two caster wheels to the bottom of the door.

WHY? Plumbing pipe will bend under tension. If the door was hung from the pipe with no wheels support, the pipe would bend in time.  The wheels support the door and the track keeps the door in place.  
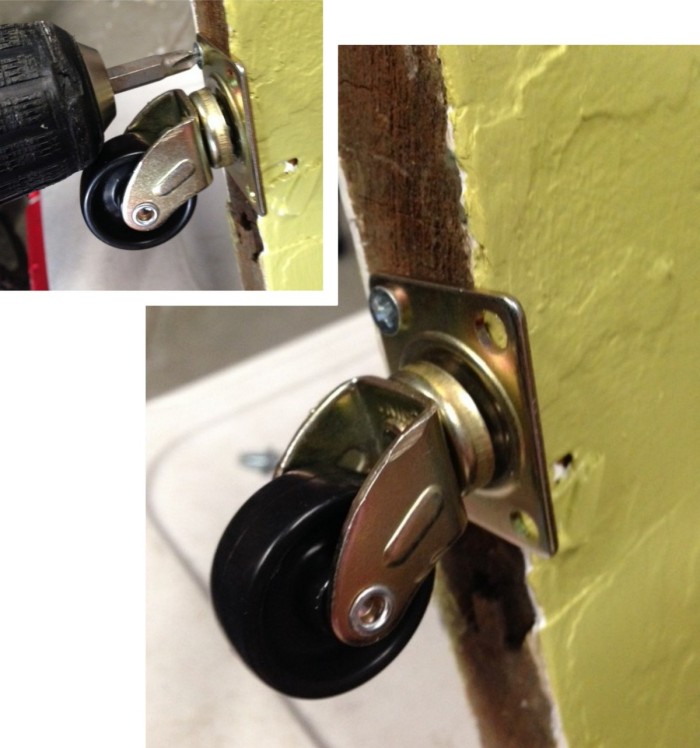
DIY: Rolling door hardware using plumbing pipe. Get the look + function of a rolling door for about $60. Custom size to fit your space. Tutorial by www.JennaBurger.com

5 (2) Holes were drilled at the top of the door for which the nipple fittings will fit into.

DIY: Rolling door hardware using plumbing pipe. Get the look + function of a rolling door for about $60. Custom size to fit your space. Tutorial by www.JennaBurger.com

6 With the casters installed on the bottom + the holes drilled on the top, I got the door in position and measured out where the plumbing pipe track should be installed.
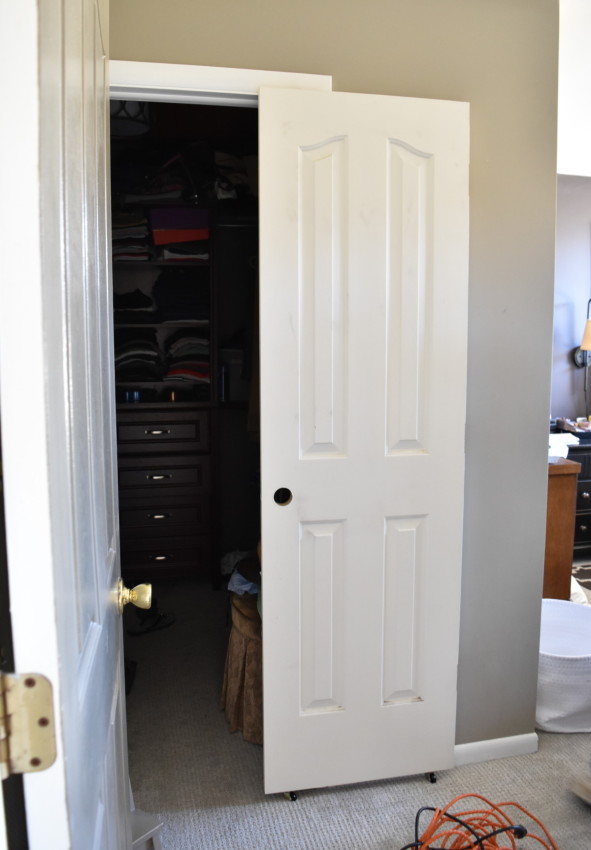
DIY: Rolling door hardware using plumbing pipe. Get the look + function of a rolling door for about $60. Custom size to fit your space. Tutorial by www.JennaBurger.com

7 Upon measuring and marking the wall (sorry, no pictures, all hands on deck), we were set to install the plumbing pipe.  Using 1.5″ long screws (no anchors needed because we drilled into a stud) we installed the (2) flanges to the wall.

DIY: Rolling door hardware using plumbing pipe. Get the look + function of a rolling door for about $60. Custom size to fit your space. Tutorial by www.JennaBurger.com

The nipple fittings held on by the tee fittings slide into the holes in the top of the door.  The drilled holes are just slightly larger than the nipples so they fit snug, BUT the door can easily come out any time.

DIY: Rolling door hardware using plumbing pipe. Get the look + function of a rolling door for about $60. Custom size to fit your space. Tutorial by www.JennaBurger.com

The reducing coupling fitting wasn’t originally planned for.  That was a part we added later because the 3/4″ nipple fitting (that comes out of the tee fitting) was too large to fit into a hole in the top of the door. This reducing coupling fitting allows the transition from a 3/4″ nipple fitting to a 1/2″ nipple fitting.

DIY: Rolling door hardware using plumbing pipe. Get the look + function of a rolling door for about $60. Custom size to fit your space. Tutorial by www.JennaBurger.com

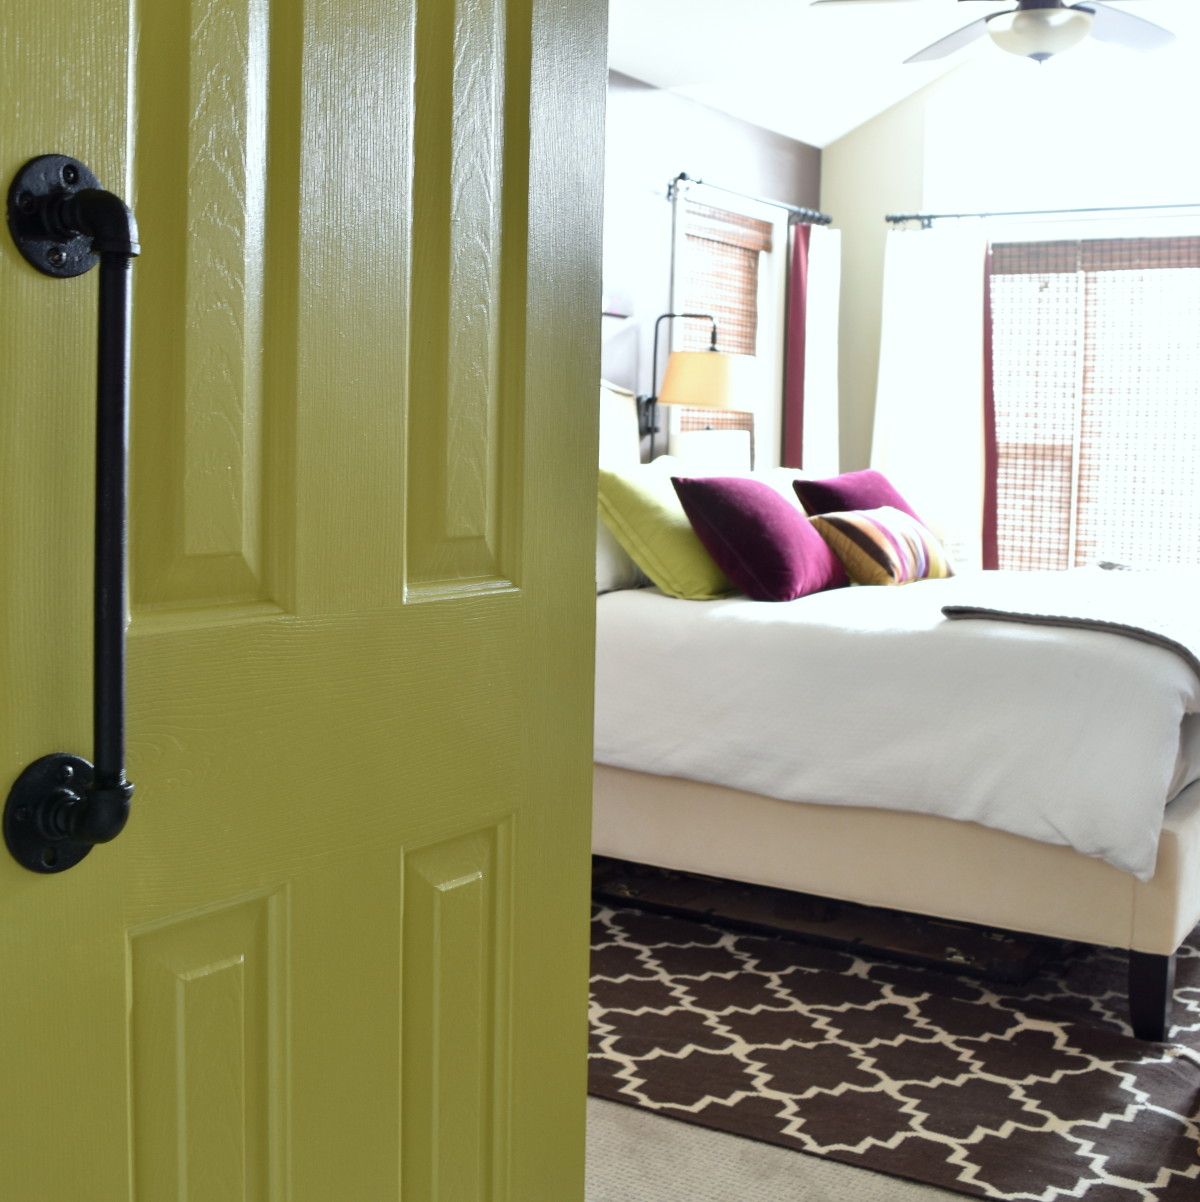
8 Once the track + door were place, I painted it a fun + vibrant green hue – it ties with the same color used for the DIY chalk paint desk transformation.  The color is Benjamin Moore Martini Olive CSP-890, which I had color matched at Lowe’s using Valspar Signature Paint.
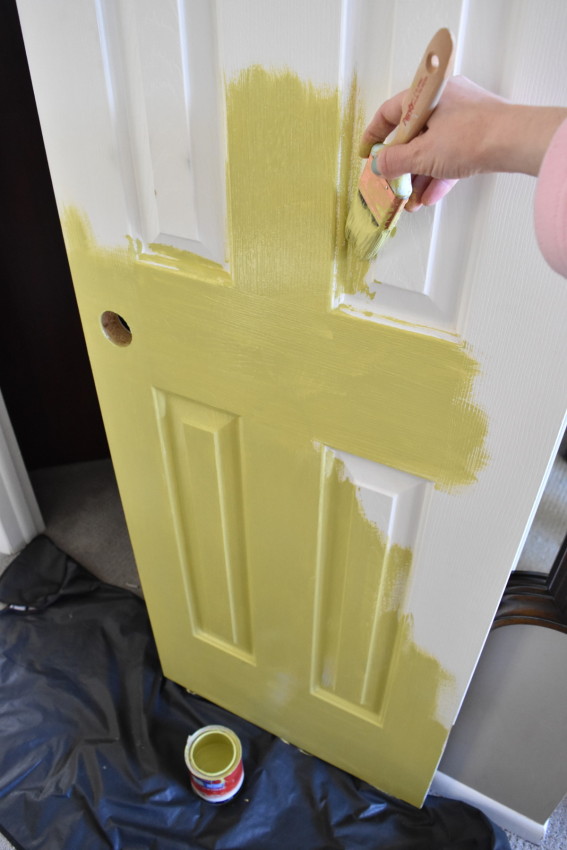
DIY: Rolling door hardware using plumbing pipe. Get the look + function of a rolling door for about $60. Custom size to fit your space. Tutorial by www.JennaBurger.com

9 I also painted the screws that hold the track using black paint.
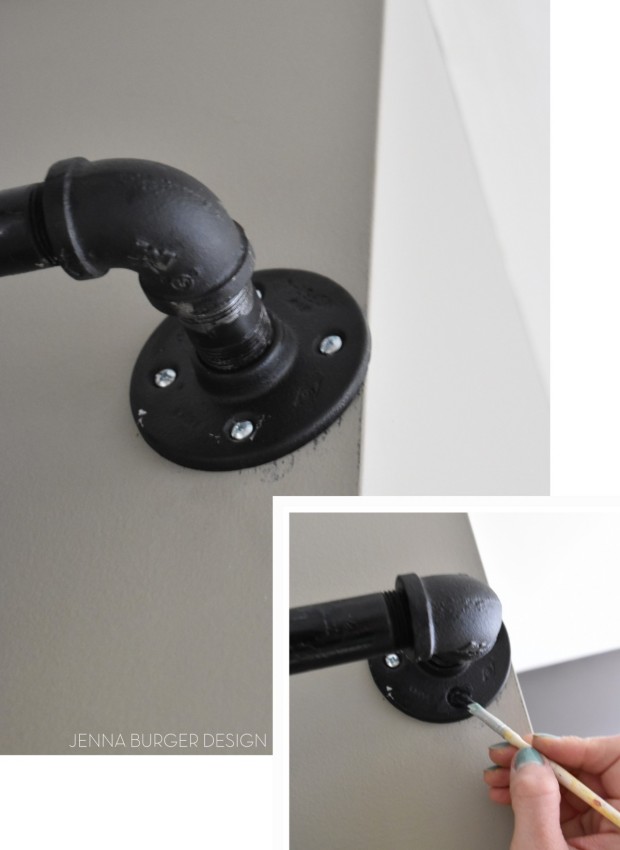
DIY: Rolling door hardware using plumbing pipe. Get the look + function of a rolling door for about $60. Custom size to fit your space. Tutorial by www.JennaBurger.com

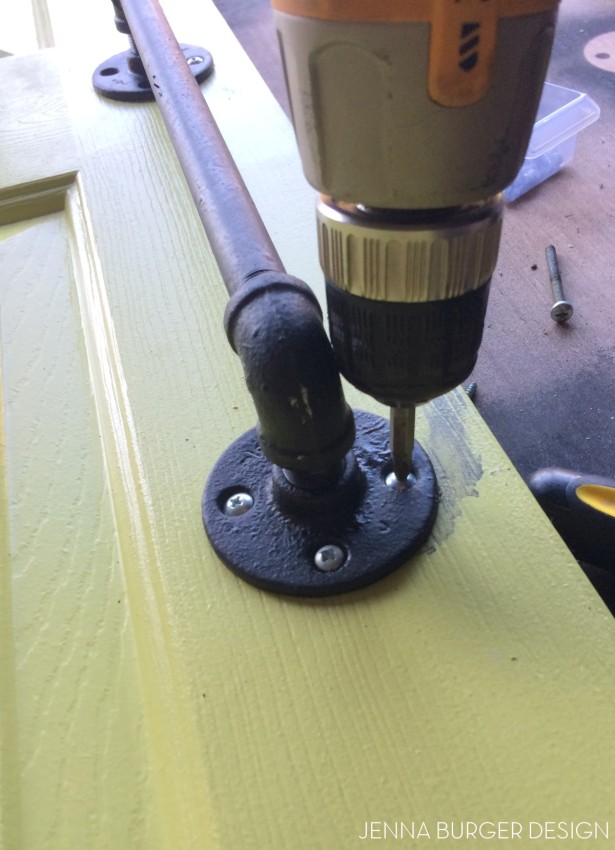
10 Once the I painted the door face with 2 coats of paint, I added a door handle using plumbing pipe parts.
DIY: Rolling door hardware using plumbing pipe. Get the look + function of a rolling door for about $60. Custom size to fit your space. Tutorial by www.JennaBurger.com

And finally, finally, finally, it was COMPLETE!  Phew, it took a village to get this project done…

With any DIY project there is a learning curve and hopefully if you tackle this project, it’ll be smoother sailing with the kinks ironed out from my experience.

THE RESULT

DIY: Rolling door hardware using plumbing pipe. Get the look + function of a rolling door for about $60. Custom size to fit your space. Tutorial by www.JennaBurger.com

DIY: Rolling door hardware using plumbing pipe. Get the look + function of a rolling door for about $60. Custom size to fit your space. Tutorial by www.JennaBurger.com

Something to note, this is a DIY track with parts that are metal on metal.  The door will go back and forth, but not with ease as a typical rolling door track.  When I first installed the track, it was very difficult to “slide” the door – another hurdle – but I added a lot of lubricant (actually I used petroleum jelly) to the long pole.  Adding the lubricant has made moving the door a lot easier.

That being said, this DIY track is a whole lot less expensive than true rolling door hardware, BUT I wouldn’t use it for areas that need privacy with high-traffic use multiple times a day. For us, this is DIY door is perfect for the master closet since most of the time it’s left open.  As a main hall closet, maybe not so much.

This DIY rolling door came together in part with the tutorial by Kristi @ Addicted 2 Decorating+ some sleuthy thinking and planning on my part for how to make it work for this space.  Because of the limited wall area, a standard track was too big, so without going custom, this was the only solution.

In the end, I love the result.  I’ll be honest though, it didn’t come without a few hiccups and flaws, but it absolutely suits the purpose for the setting.

DIY: Rolling door hardware using plumbing pipe. Get the look + function of a rolling door for about $60. Custom size to fit your space. Tutorial by www.JennaBurger.com

It’s definitely been nice to get some privacy – on a rare occasion – and see a pop of color when entering into the room.

AND on the random days when I don’t want to clean up the closet, I just close the door…
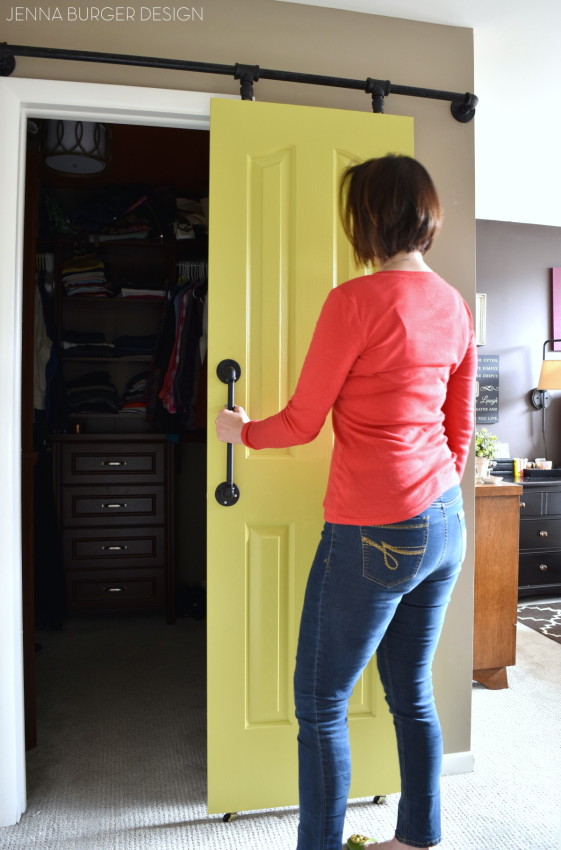
DIY: Rolling door hardware using plumbing pipe. Get the look + function of a rolling door for about $60. Custom size to fit your space. Tutorial by www.JennaBurger.com

The view from the side. Thankfully the projection of the door on the track allowed enough room for my mirror to stay in place.

Now you see it… Now you don’t…

DIY: Rolling door hardware using plumbing pipe.  Get the look + function of a rolling door for about $60. Custom size to fit your space.  Tutorial by www.JennaBurger.com

Here’s a peek at how the door looks with the rest of the bedroom.  There are pops of this citron color all over…

DIY: Rolling door hardware using plumbing pipe. Get the look + function of a rolling door for about $60. Custom size to fit your space. Tutorial by www.JennaBurger.com

Want to see more of this master bedroom revamp?  Check it out here.

DIY: Rolling door hardware using plumbing pipe. Get the look + function of a rolling door for about $60. Custom size to fit your space. Tutorial by www.JennaBurger.com

While I was working on the closet, I got a bit sidetracked and gave it a mini-makeover.  Some new organizational items – hooks + bins – made all the difference to jazz this space up.

Lowe’s has these awesome new bins that are faux leather.  I feel in love when I saw them.  They are oversized too (13″ x 13″), so they hold alot. They’re perfect for holding scarves, small bags, and summer flip flops.
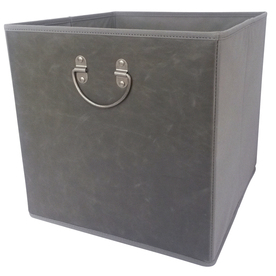
Lowe's Faux Leather Bin

Here’s a peek at the inside of my closet…

DIY: Rolling door hardware using plumbing pipe.  Get the look + function of a rolling door for about $60. Custom size to fit your space.  Tutorial by www.JennaBurger.com

That’s a wrap!

Love this project and want to tackle it now or later? Save or Pin it to your favorite DIY board…
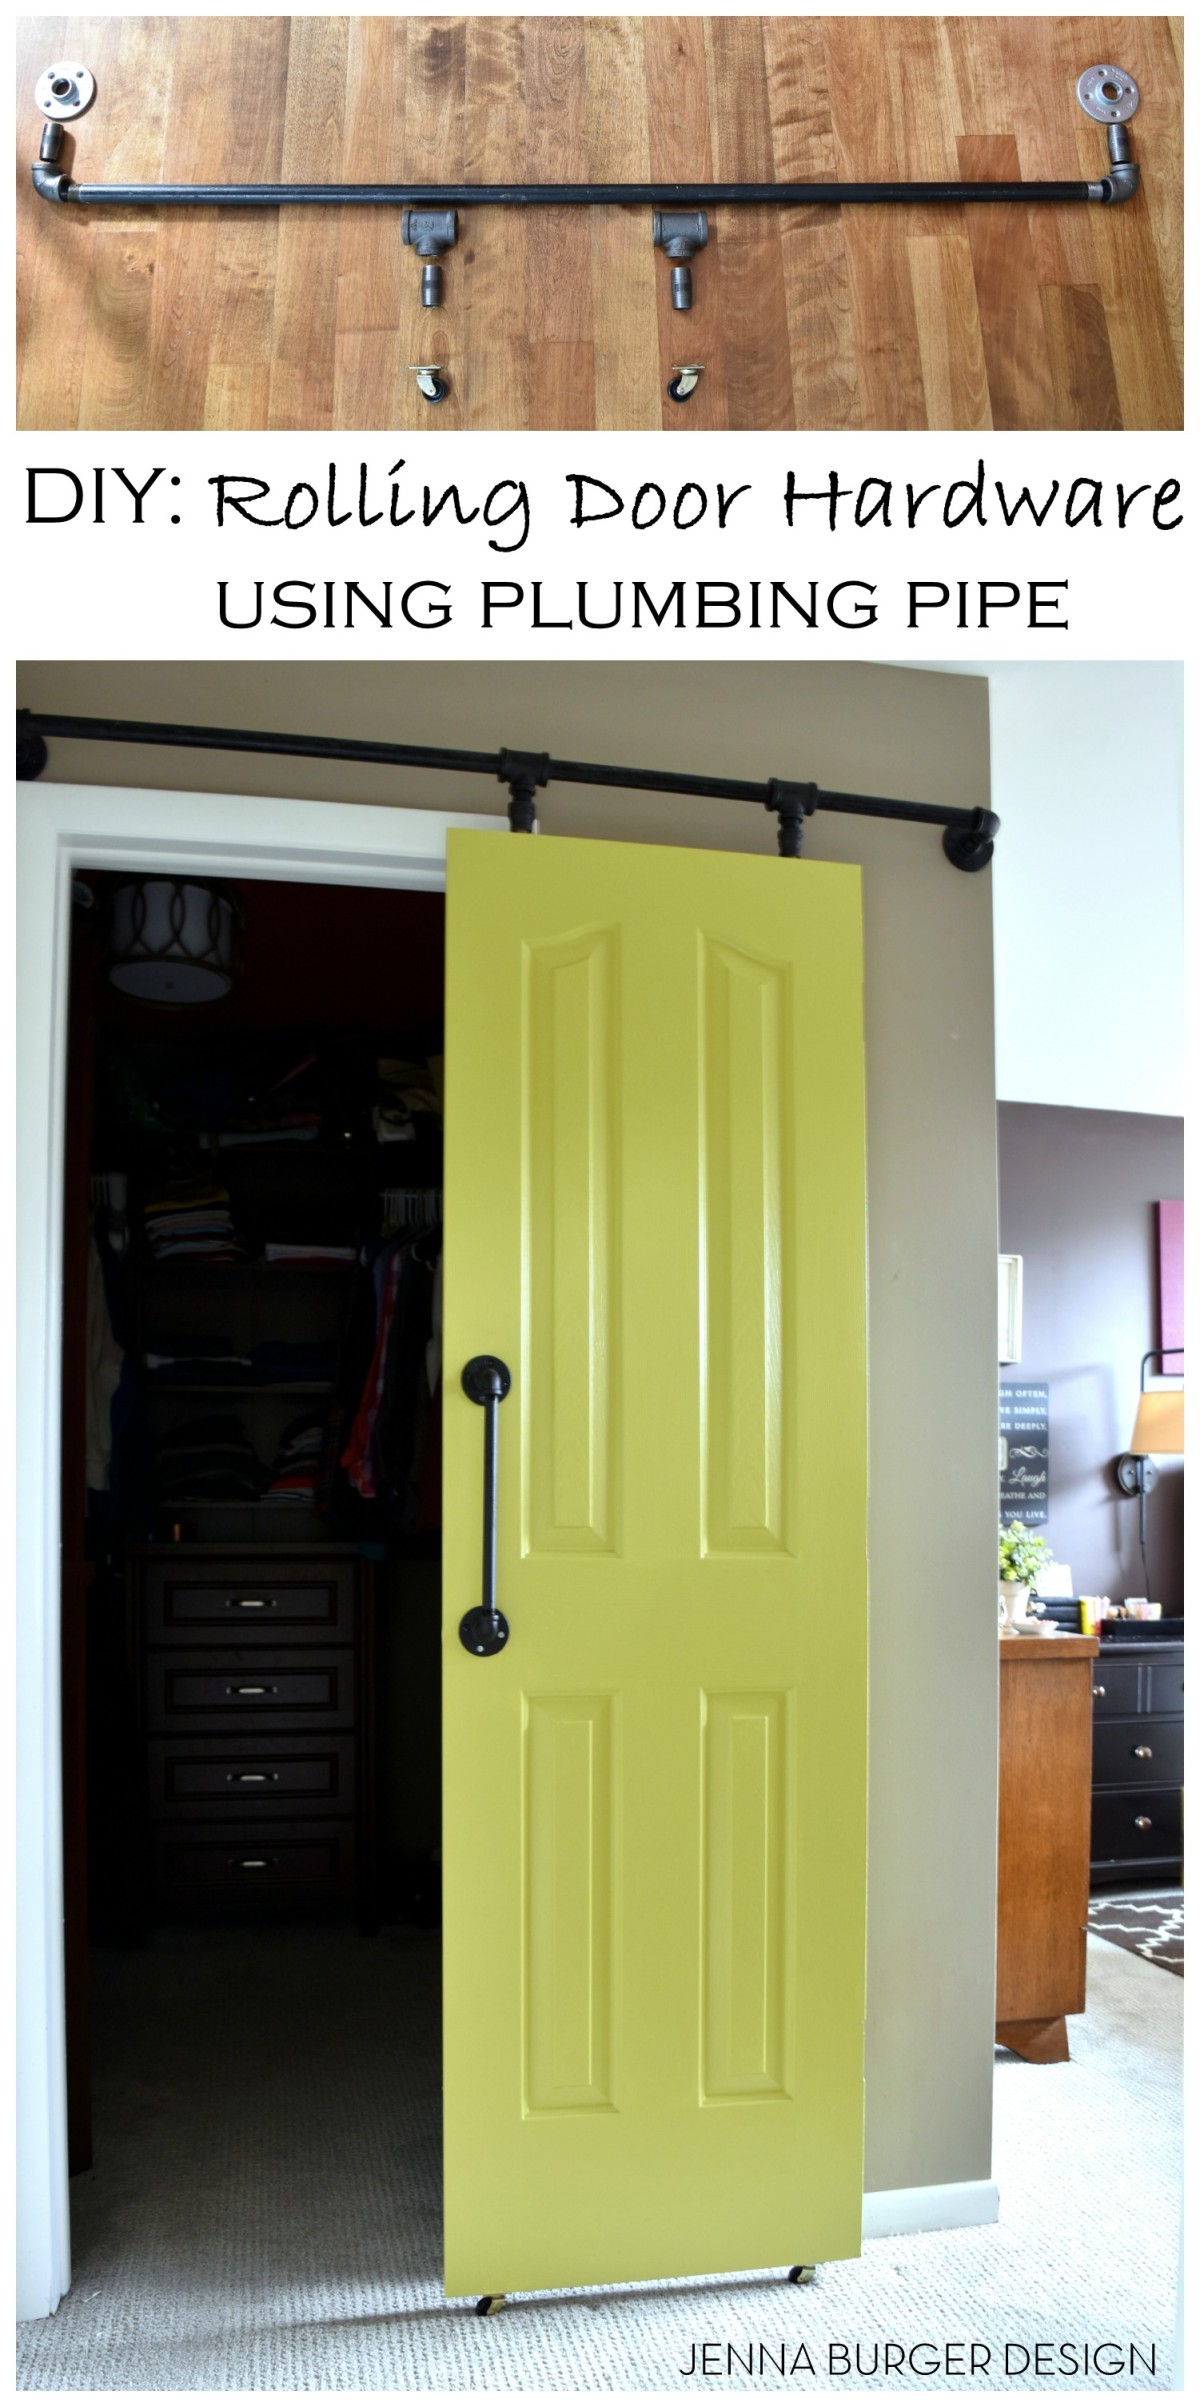
DIY: Rolling door hardware using plumbing pipe. Get the look + function of a rolling door for about $60. Custom size to fit your space. Tutorial by www.JennaBurger.com

Despite my challenges, the result of this project for the price is a great one.  Even though it resulted in my grays than I hoped, it was worth the few tears to achieve the style + function + look I was hoping for, and at the end of the day that’s what I call a success!

DISCLAIMER: THIS DO IT YOURSELF PROJECT WAS IN COLLABORATION WITH LOWE’S.  THE PROJECT IDEA + ALL OPINIONS ARE MY OWN.
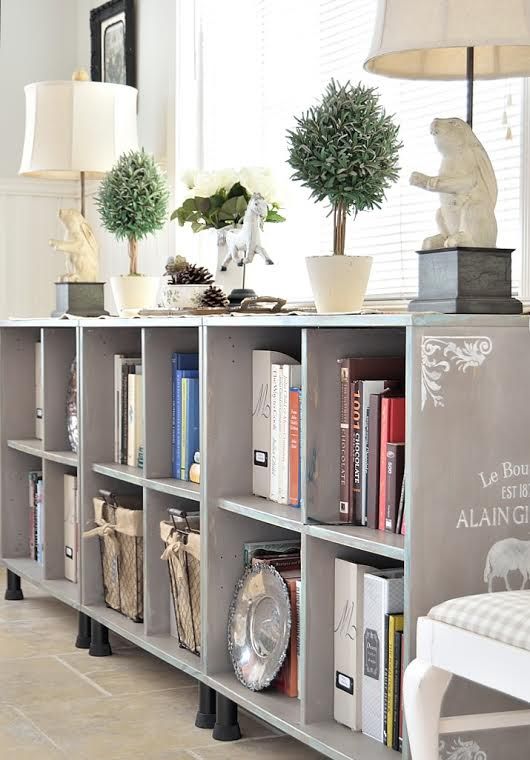
DIY Ideas for Book Organization

Happy Monday + Happy Spring!

Even though it doesn’t feel like Spring at the moment with a 30 degree chill, I am so thankful we didn’t wake to snow this mornin’ like those in NYC and Boston.  By the weeks end, I hear temps will be back in to the 50s – 60s. Phew.  Snow in Spring… what?

Anyway, I hope you had a fabulous weekend.  We did some DIYing around the homestead and ran into a bajillion (yes that’s a real word in my book) issues, but we kept with it and the result is pretty cool, I have to say.  More on that coming soon. In the meantime, I have a busy week ahead but wanted to share that I have a new post up on  my Better Home and Gardens page!

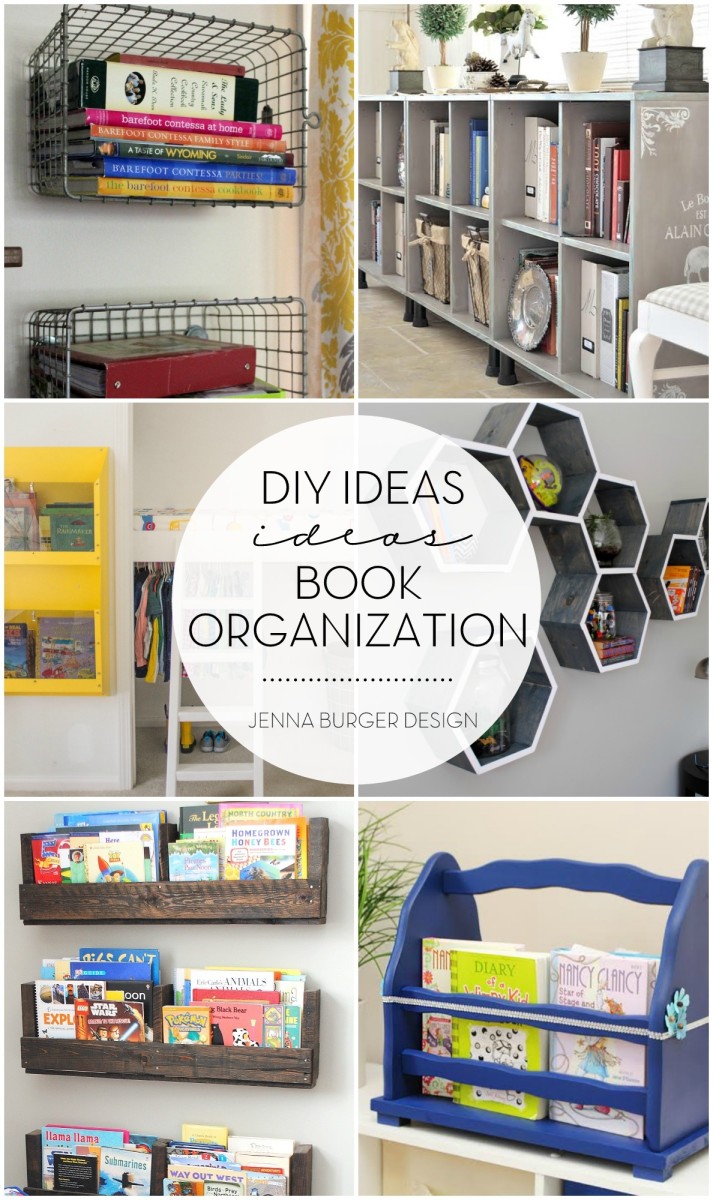
For all you book worms, I am sharing 5 Clever DIY ideas for organizing books

Book-obsessed? Love being surrounded by the classics? Ditch the idea that books are only for the bookcase in the living room. Organizing and displaying books can be fun and functional with unique do-it-yourself creations to hold beloved tall tales and display the kids’ favorites.

Click to read the full article on >>>DIY Book Organization

5 DIY Ideas for Book Organization! Ditch the idea that books are only for the bookcase. Organizing + displaying books can be fun and functional with unique do-it-yourself creations to hold beloved tall tales and display the kids' favorites.

Check out my bio page + all my articles on Better Homes and Gardens

More content coming soon to be featured on BHG.com!

Pegboard Baseball Cap Organizer

99.98% of men + boys I know have an extensive collection of baseball caps.  From teams they follow, to giveaways, to a gift shop purchase as a momento, baseball caps are a stable for most guys wardrobes.

So then the big question arises…  Where do all those caps go?   How does one organize the growing collection of baseball caps?
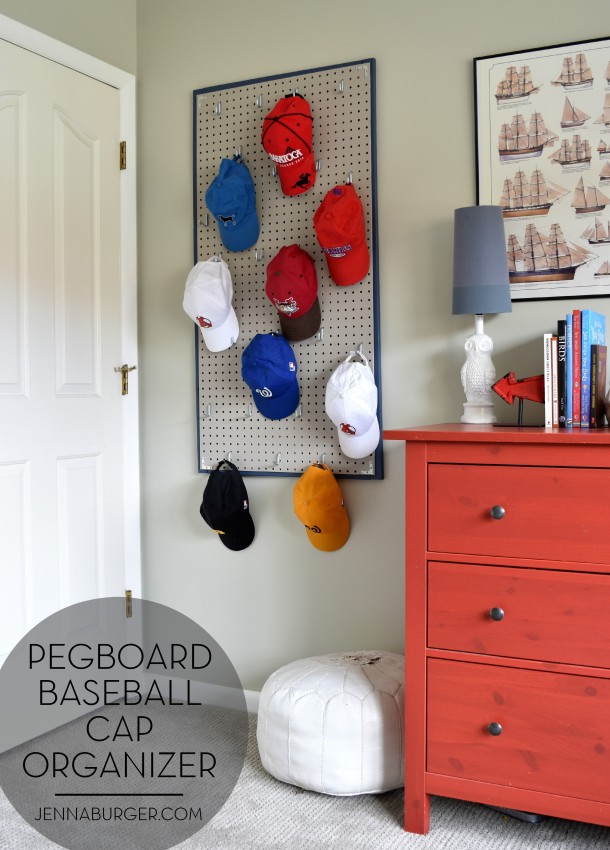
MY SOLUTION?  A pegboard baseball cap organizer…

DIY: Pegboard Baseball Cap Organizer - The perfect 'home' for the hat collection. Do It Yourself Tutorial @ www.jennaburger.com

I made this a couple months ago and it’s been a life saver.  Or should I say a hat saver, lol…

Honestly though, the collection of caps that my boy has acquired has gotten out of control and now they all finally have a happy home!

The best part of all, this organizer was easy to make.

MATERIALS

> (4) 1″ x 2″ x 4′ long wood pieces – cut to size

> 2′ x 4′ piece of pegboard (I purchased a 4′ x 4′ piece @ Lowe’s and they cut it to my desired size)

> “L” brackets

> Paint

1

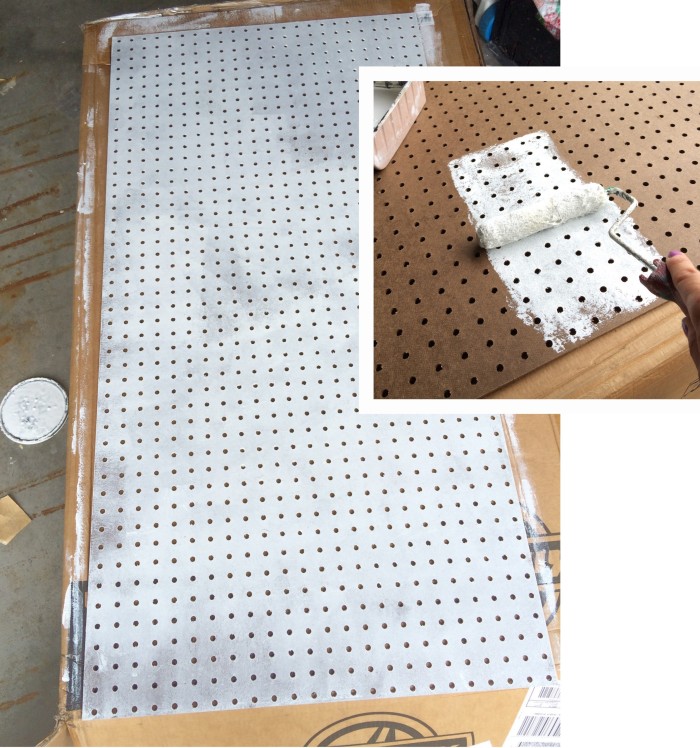
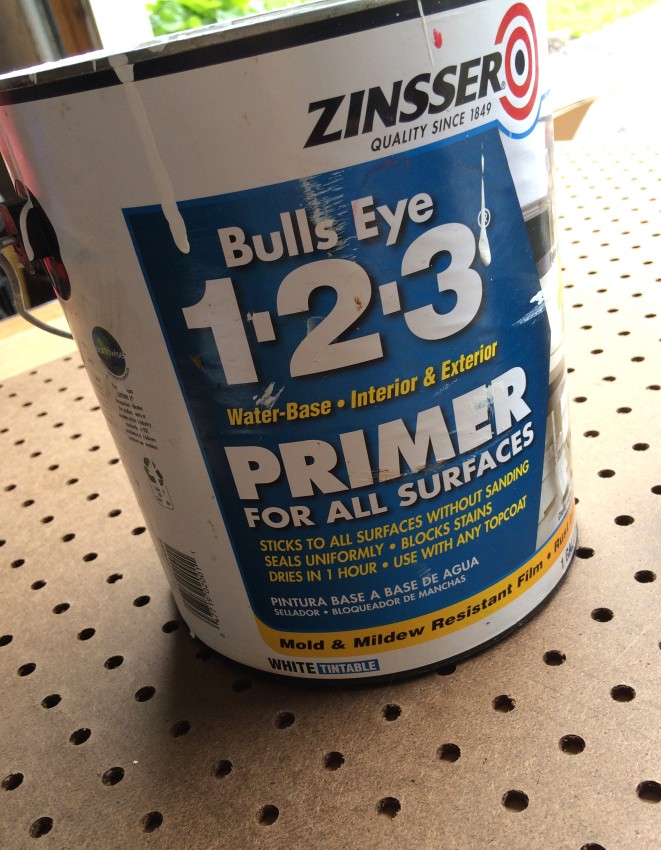
Some pegboard already comes primed or white, but my local Lowe’s only had the brown, unfinished version.  Similar to painting walls or furniture, it’s important to use primer first.  So first I gave the face of my pegboard a quick coat of Zinsser Primer.

DIY: Pegboard Baseball Cap Organizer - The perfect 'home' for the hat collection. Do It Yourself Tutorial @ www.jennaburger.com

DIY: Pegboard Baseball Cap Organizer - The perfect 'home' for the hat collection. Do It Yourself Tutorial @ www.jennaburger.com

2

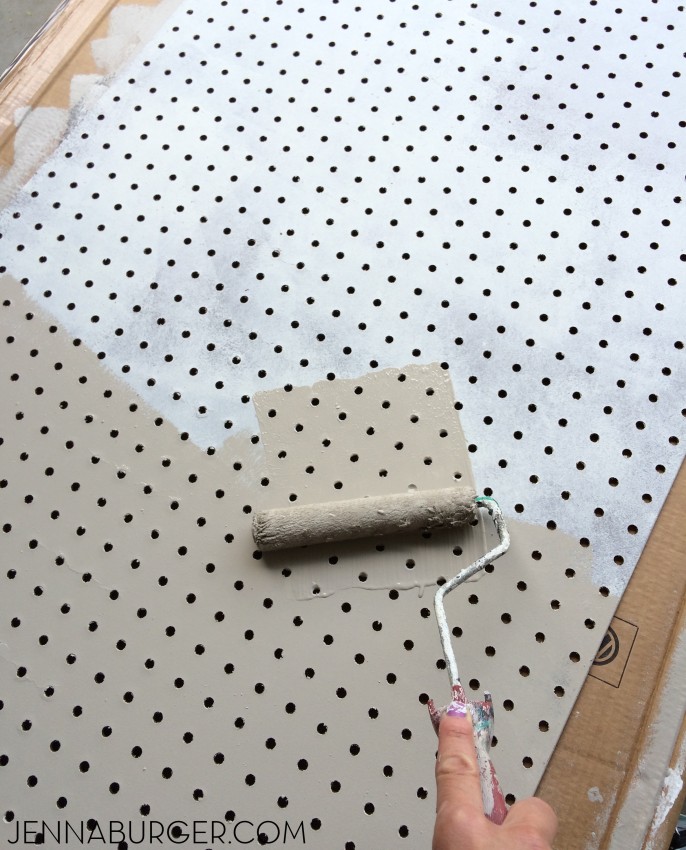
Once it was primed, I painted the pegboard with 2 fresh coats of color with a roller – a taupe-y hue was created by mixing a few leftover colors together

DIY: Pegboard Baseball Cap Organizer - The perfect 'home' for the hat collection. Do It Yourself Tutorial @ www.jennaburger.com3

For the frame, I layed the 2′ x 4′ pegboard on the wood strips allowing 1″ of exposed frame around, and marked them with a pencil.

Using a miter saw (my recommendation for a good one) I cut the wood pieces as needed.  If you don’t have a miter saw or tool to cut the wood, Lowes will cut it to your desired length.

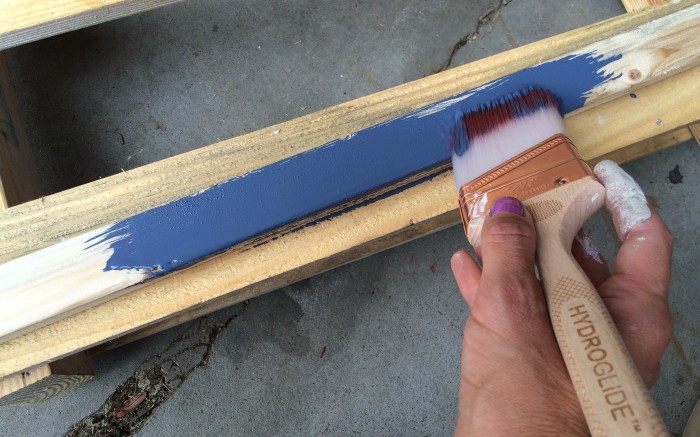
Then I painted the wood pieces using more leftover paint.  Since this pegboard was slated for my sons room, I coordinated the blue hue with the color I used for painting his closet door

/ Color: Benjamin Moore Van Deusen Blue

DIY: Pegboard Baseball Cap Organizer - The perfect 'home' for the hat collection. Do It Yourself Tutorial @ www.jennaburger.com

4

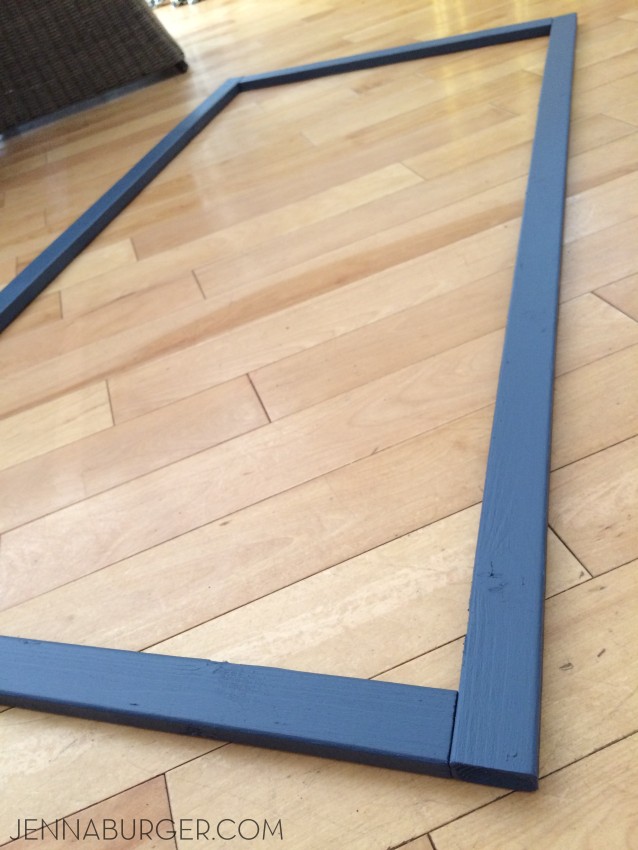
Once the wood pieces were painted + dried, I arranged them on the floor…

DIY: Pegboard Baseball Cap Organizer - The perfect 'home' for the hat collection. Do It Yourself Tutorial @ www.jennaburger.com

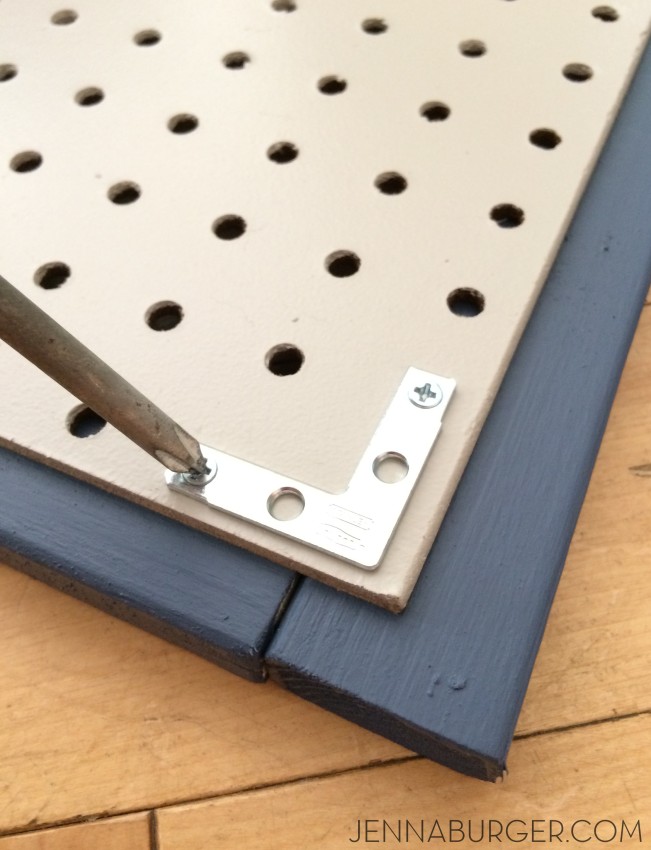
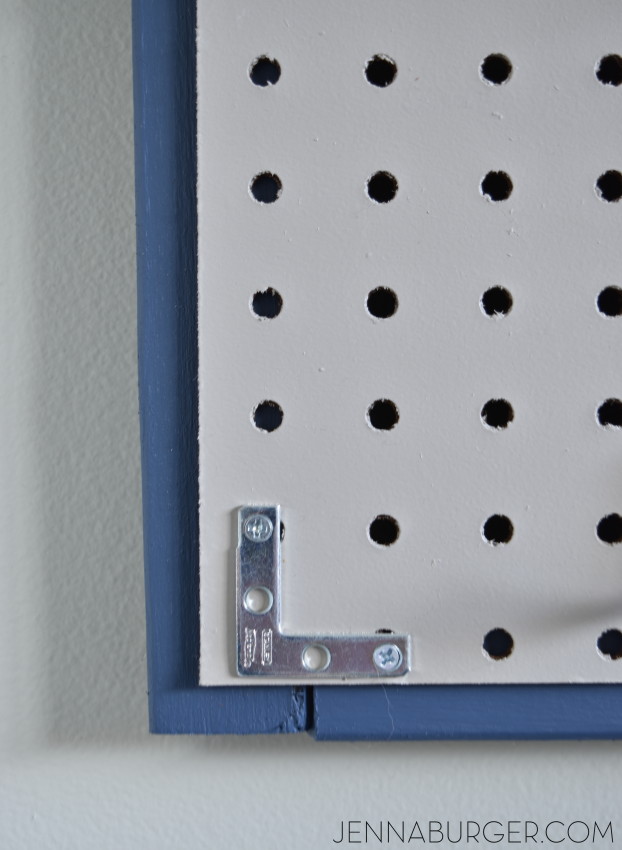
…and layed the pegboard on top.  Then I aligned the 4 “L” brackets at the corners and fastened them through the pegboard and wood frame surround.

DIY: Pegboard Baseball Cap Organizer - The perfect 'home' for the hat collection. Do It Yourself Tutorial @ www.jennaburger.com

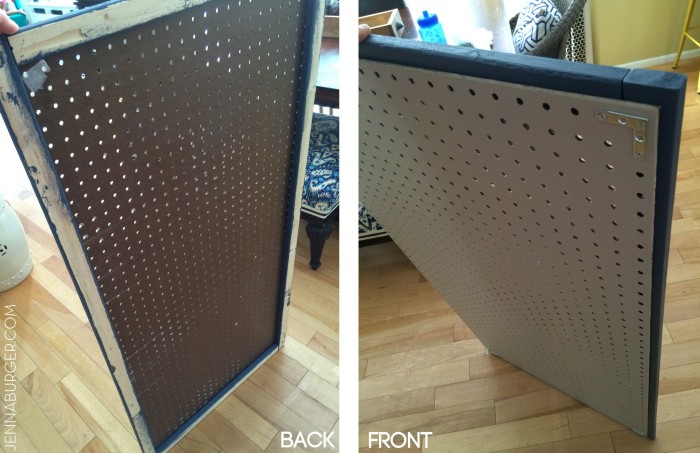
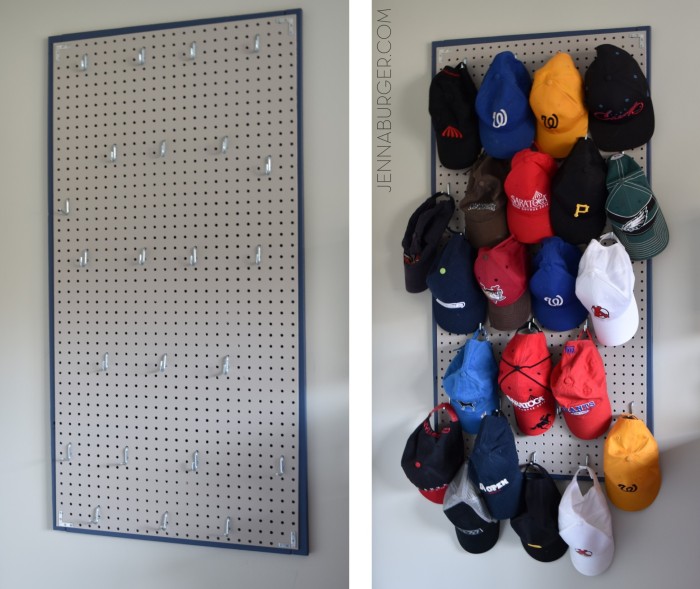
This is a view of the front and back when all 4 corners were complete.

DIY: Pegboard Baseball Cap Organizer - The perfect 'home' for the hat collection. Do It Yourself Tutorial @ www.jennaburger.com

DIY: Pegboard Baseball Cap Organizer - The perfect 'home' for the hat collection. Do It Yourself Tutorial @ www.jennaburger.com

5

I installed 2 screws + anchors into the wall and hung the framed pegboard.

I quickly + excitedly added these curved hooks.  I attempted to create a pattern to maximize the amount of hats that could hang, but it only kinda worked, so the hooks are hung part pattern / part random.

This 2′ x 4′ pegboard can hold a lot of hats. About 25 total. And it looks pretty!

DIY: Pegboard Baseball Cap Organizer - The perfect 'home' for the hat collection. Do It Yourself Tutorial @ www.jennaburger.com

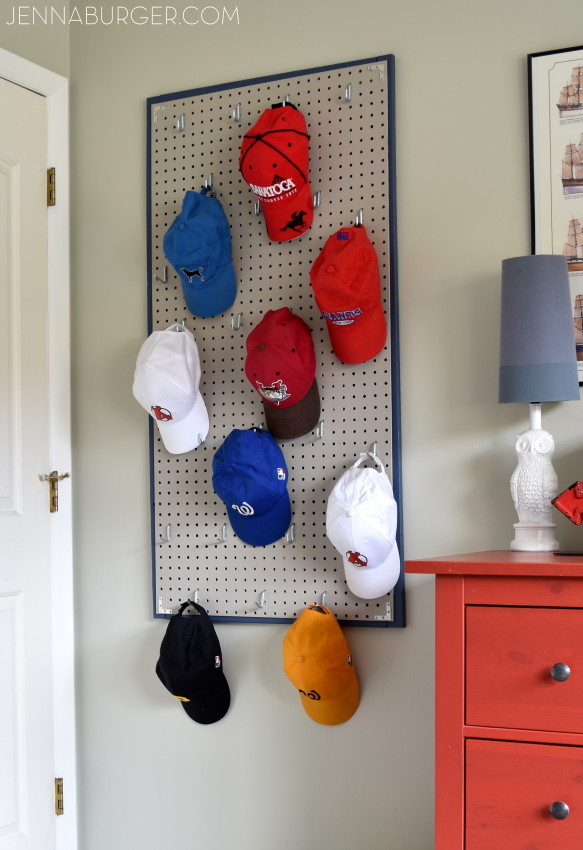
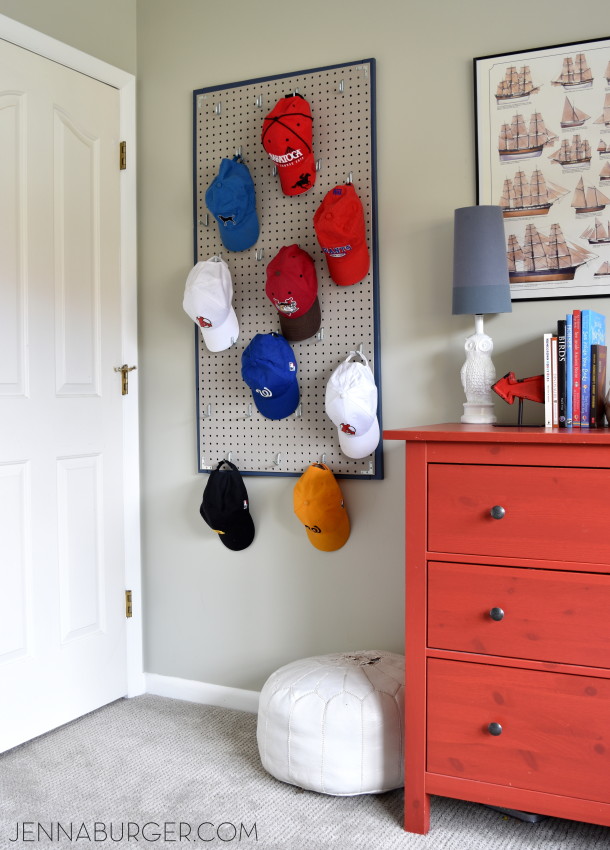
This is the finished pegboard baseball cap organizer.

It fits perfectly behind my little guys door…

DIY: Pegboard Baseball Cap Organizer - The perfect 'home' for the hat collection. Do It Yourself Tutorial @ www.jennaburger.com

A similar pegboard organizer would be perfect for a slew of other things like jewelry, crafts, pantry items, kitchen essentials, etc.

The potential is endless…  Let the ideas start to flow!

DIY: Pegboard Baseball Cap Organizer - The perfect 'home' for the hat collection. Do It Yourself Tutorial @ www.jennaburger.com

His room is such an awesome space!  If you want to see the entire room, click on over for a full tour.

Since creating a similar pegboard project for my office, I’ve been hooked on this amazing element to organize with.  To “house” all of my office supplies, I also made a frame, but used a different technique + I stenciled a pretty design on the front.

Take a look > an organized office using pegboard

Pegboard Organization in the Office!

I’m on to my next organizational project using pegboard.  I can’t get enough!!

Burlap Candy Corn Pennant

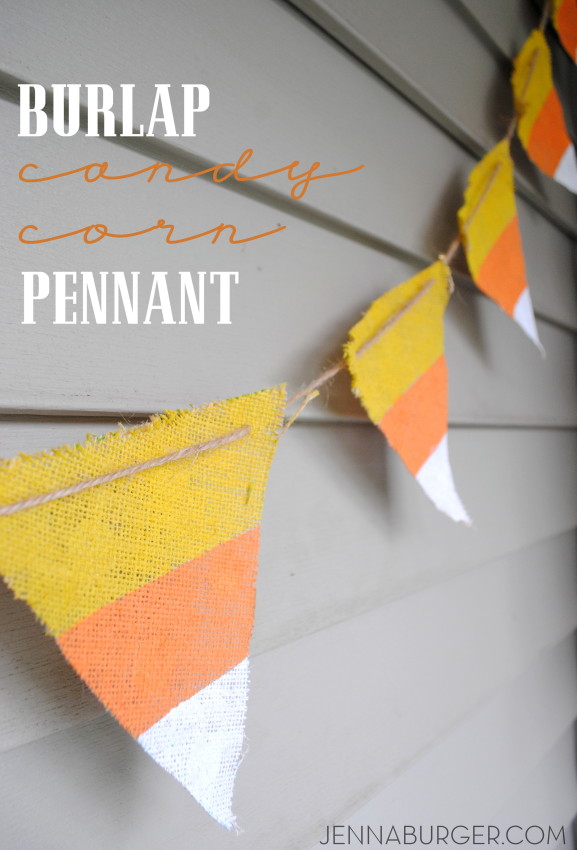
DIY Craft: Burlap Candy Corn Pennant. Simple, Inexpensive, and Fun! Perfect for Halloween! Tutorial @ www.jennaburger.com

One day I’m writing about upcoming trends for the coming year, the next day I’m sharing a cutesy Halloween craft.  You truly never know what you’re going to read next or what I’ll be in the mood to inspire you with… always new + interesting!

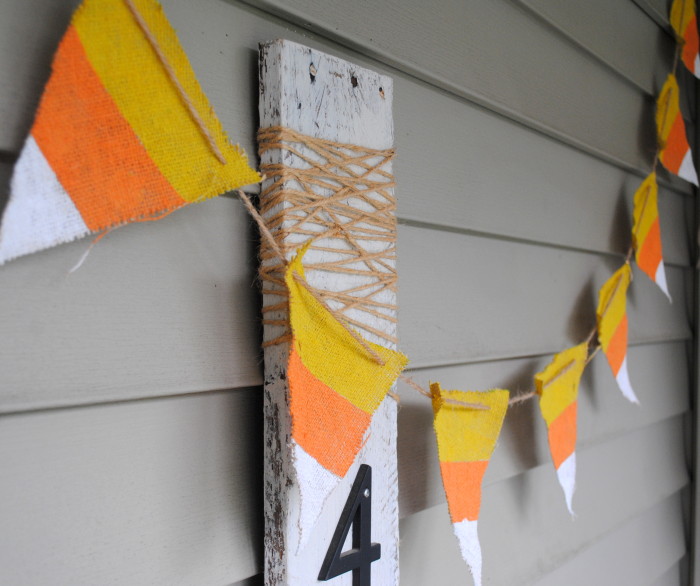
Halloween is just a couple weeks away and upon being inspired by the fun festive decor in the Target Dollar Bin, I spruced up my Fall porch with a simple, inexpensive, and fun burlap pennant to look like candy corn… so yummy, don’t you just want to eat it?!

DIY Craft: Burlap Candy Corn Pennant. Simple, Inexpensive, and Fun! Perfect for Halloween! Tutorial @ www.jennaburger.com

I really am not a crafty gal but I just couldn’t resist making this pennant.  I could have spent the few dollars to buy it, but since I had all the materials on hand from past projects, I decided to DIY it!

MATERIALS

>1/4 yard burlap
>cardstock / heavy paper – I used a manila folder (for pennant template)
>craft paint in the colors of white, orange, and yellow
>sponge brush
>twine
>scissors
>toothpick + tape

1

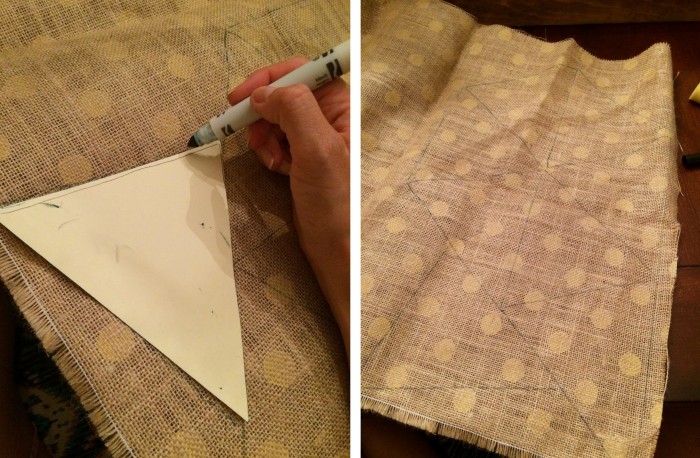
Using cardstock or heavy paper (I used a manila folder), cut out a template for the pennant ‘flag’.  Size is up to you.  My template is about 5.5″  x 8″.  In all, I created (8) pennants, then cut them out with sharp scissors, and ironed them flat.

DIY Craft: Burlap Candy Corn Pennant. Simple, Inexpensive, and Fun! Perfect for Halloween! Tutorial @ www.jennaburger.com

2

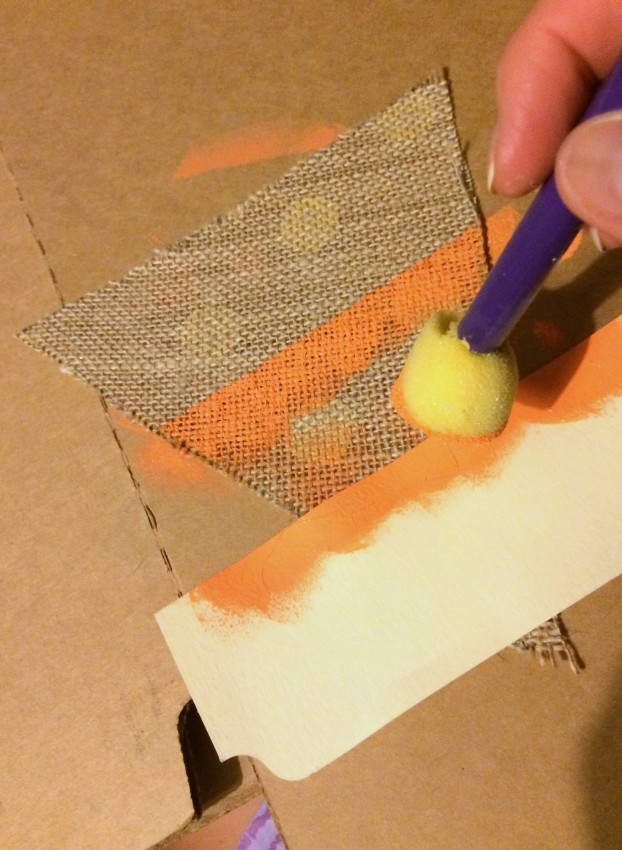
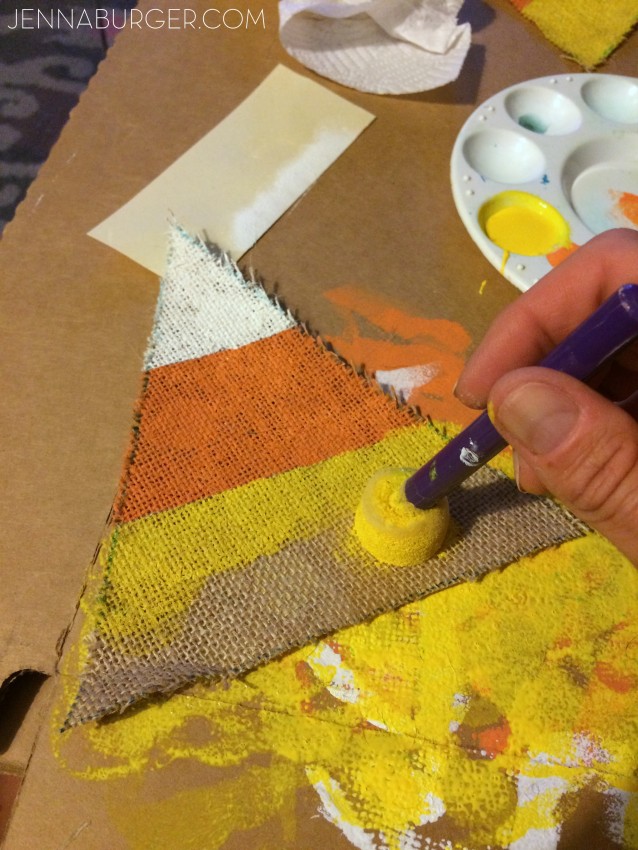
Dividing each pennant in 3 sections, I used a sponge brush to paint on the orange in the middle section first, then followed it with the white and yellow paint at the top and bottom.

To create a straight line, I cut out a piece of cardstock (I used a manila folder again) and painted up to the line.

DIY Craft: Burlap Candy Corn Pennant. Simple, Inexpensive, and Fun! Perfect for Halloween! Tutorial @ www.jennaburger.com

DIY Craft: Burlap Candy Corn Pennant. Simple, Inexpensive, and Fun! Perfect for Halloween! Tutorial @ www.jennaburger.com

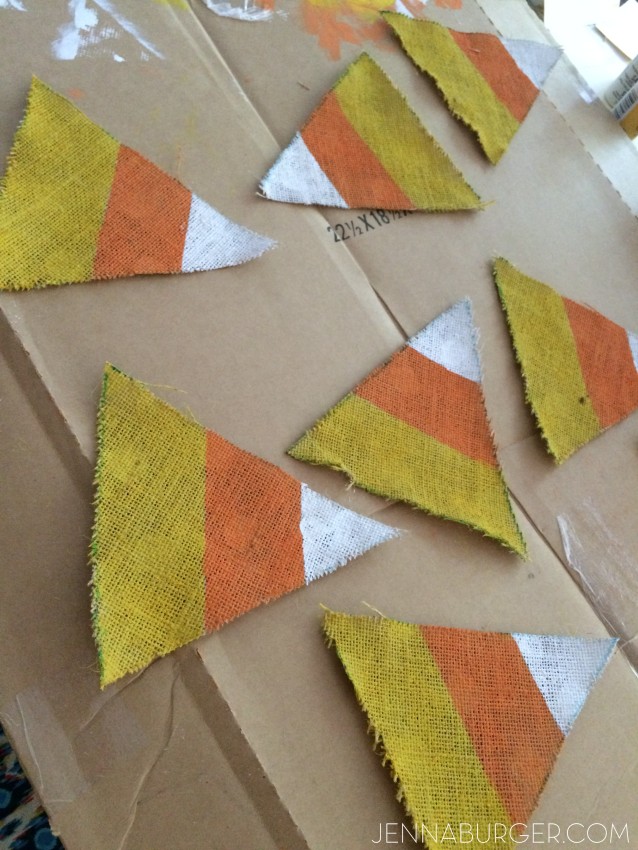
When they were complete & dry (the next day), I was ready to create the pennant.

They look so good, I could eat them… #yum

DIY Craft: Burlap Candy Corn Pennant. Simple, Inexpensive, and Fun! Perfect for Halloween! Tutorial @ www.jennaburger.com

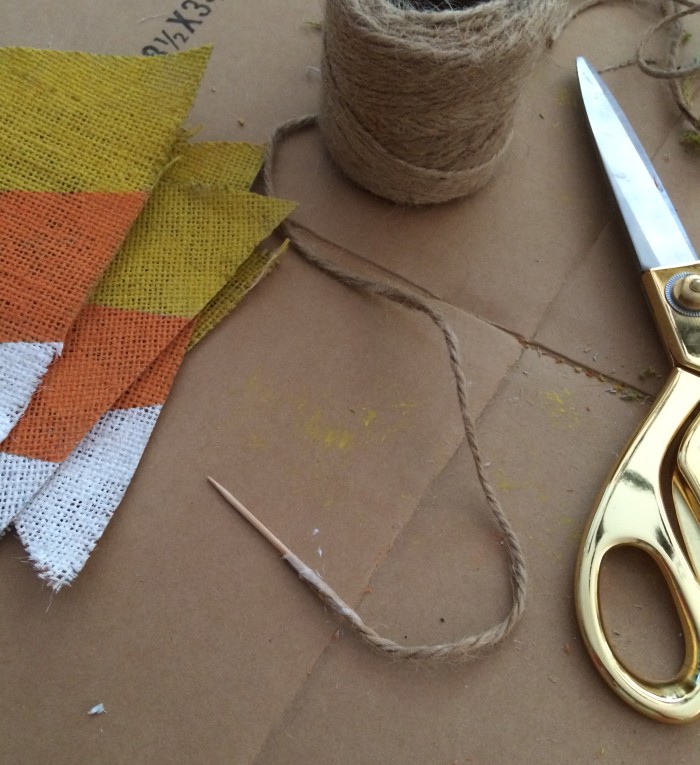
For this part of the project, I used the twine, scissors, tape, and a toothpick.

DIY Craft: Burlap Candy Corn Pennant. Simple, Inexpensive, and Fun! Perfect for Halloween! Tutorial @ www.jennaburger.com

3

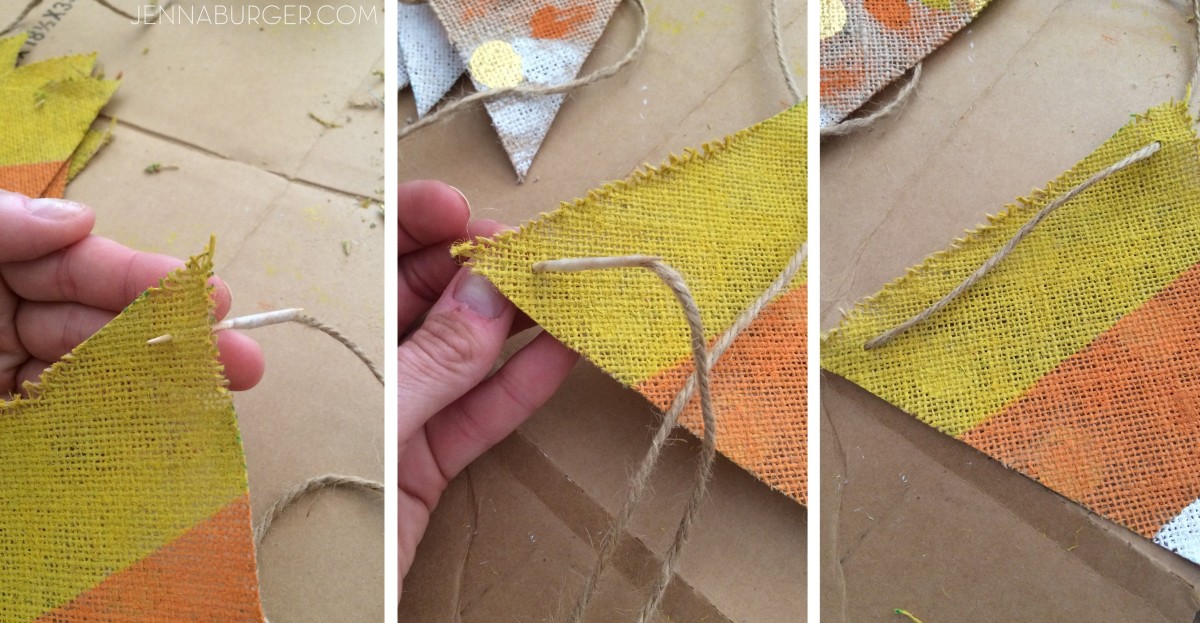
I lined up the end of the twine with the end of the toothpick and wrapped it tight with tape.  Then starting at one end of the pennant ‘flag’ top, I poked through the burlap with the toothpick and pulled through the twine.

At the other end of the ‘flag’ top, I poked through the burlap again and pulled the twine through to the backside.

I continued this step for all the ‘flags’.

DIY Craft: Burlap Candy Corn Pennant. Simple, Inexpensive, and Fun! Perfect for Halloween! Tutorial @ www.jennaburger.com

The spacing between each ‘flag’ is subjective but I chose about 3″ and left about 2′ of extra twine at each end to hang and adjust.

DIY Craft: Burlap Candy Corn Pennant. Simple, Inexpensive, and Fun! Perfect for Halloween! Tutorial @ www.jennaburger.com

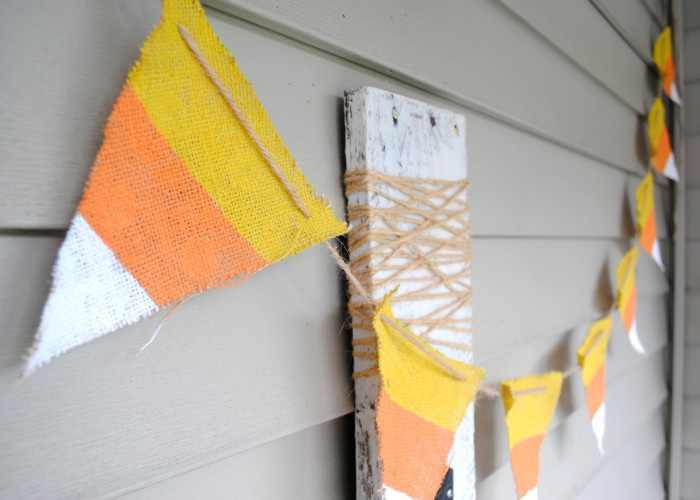
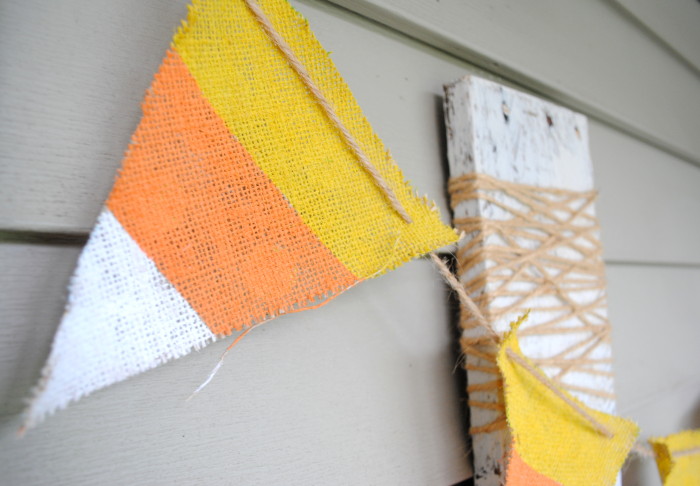
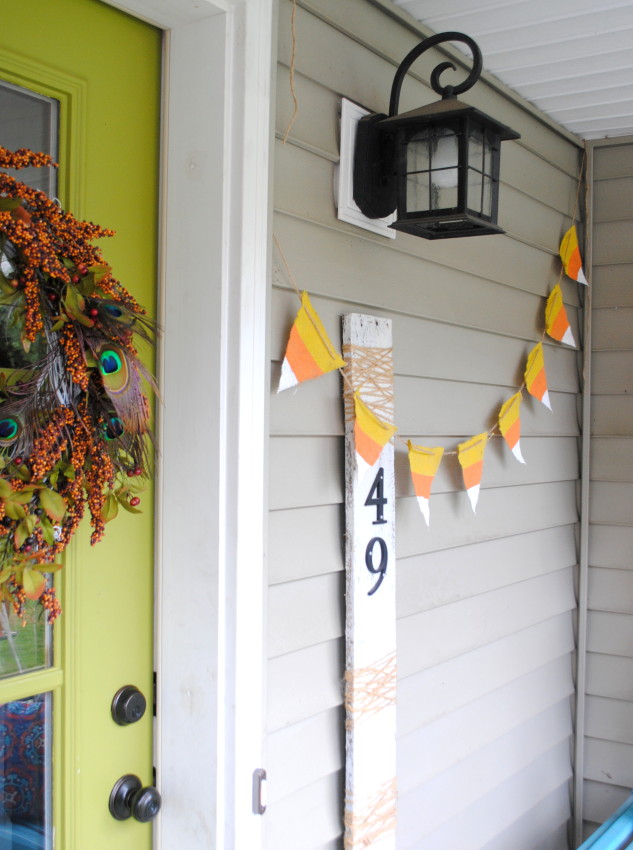
And this is the result.

DIY Craft: Burlap Candy Corn Pennant. Simple, Inexpensive, and Fun! Perfect for Halloween! Tutorial @ www.jennaburger.com

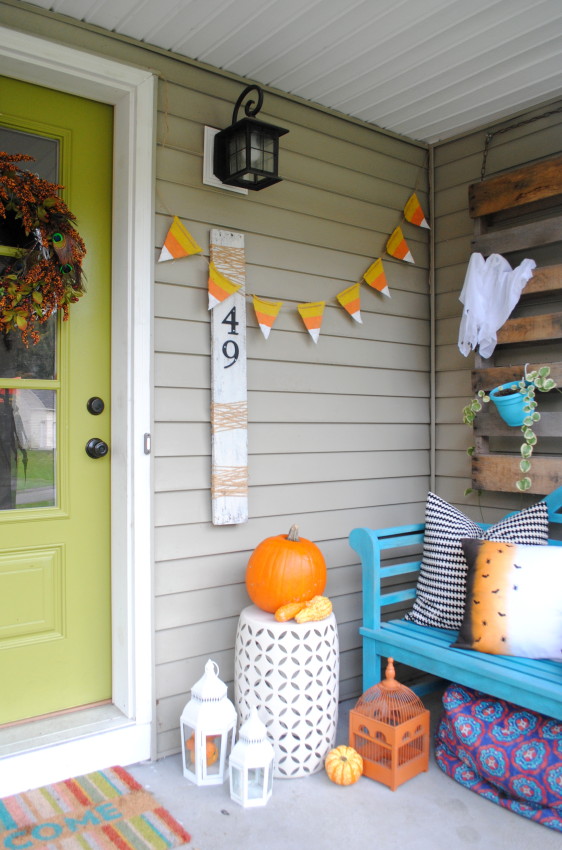
It really was so easy to make and it dresses up the front porch so pretty!

DIY Craft: Burlap Candy Corn Pennant. Simple, Inexpensive, and Fun! Perfect for Halloween! Tutorial @ www.jennaburger.com

Inside the house or out, this simple + inexpensive burlap candy corn pennant was so fun + fast to make – 20 minutes total!

DIY Craft: Burlap Candy Corn Pennant. Simple, Inexpensive, and Fun! Perfect for Halloween! Tutorial @ www.jennaburger.com

Can you believe I got crafty?!  Kinda Crazy, but it really was enjoyable to step back from the big projects + big decisions and just have fun.  This crafty-business has me thinking…

HAPPY HALLOWEEN.

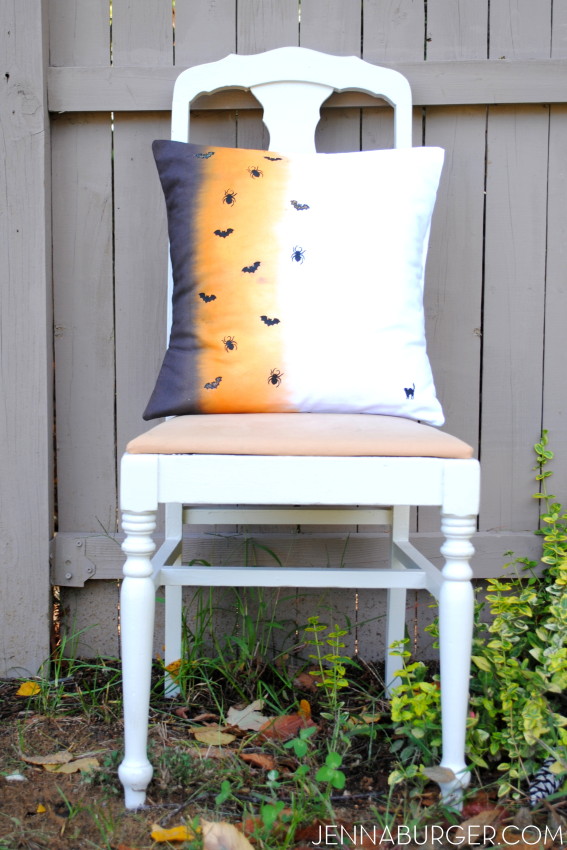
If you like this festive project, you might like this Halloween pillow I made a few years back which is also on my porch.

Halloween pillow using ombre effect & stencils. Festive + Fun! tutorial by www.jennaburger.com


Furniture Makeover: Cabinet Gone Green

New content on the blog has been a bit sparse as of late, but it doesn’t mean that I haven’t been hard at work conjuring up more awesomeness & greatness.

Along with family life that always keeps me busy, I’ve had a flurry of new + exciting client projects (near & far), and I was away for a few days in Boston at a design conference hosted by Wayfair (check out pictures from my trip on my Instagram feed).   Being surrounded by SO MUCH TALENT & hearing others speak so passionately about their businesses, really gave me the spark and motivation needed to be open to the exploration of new & different paths as my future unfolds.  I know I am just at the beginning of this long journey of exploration…

As each day continues to unfold with wonder, I am excited about TODAY and that’s because I have a new furniture makeover project to share with you.

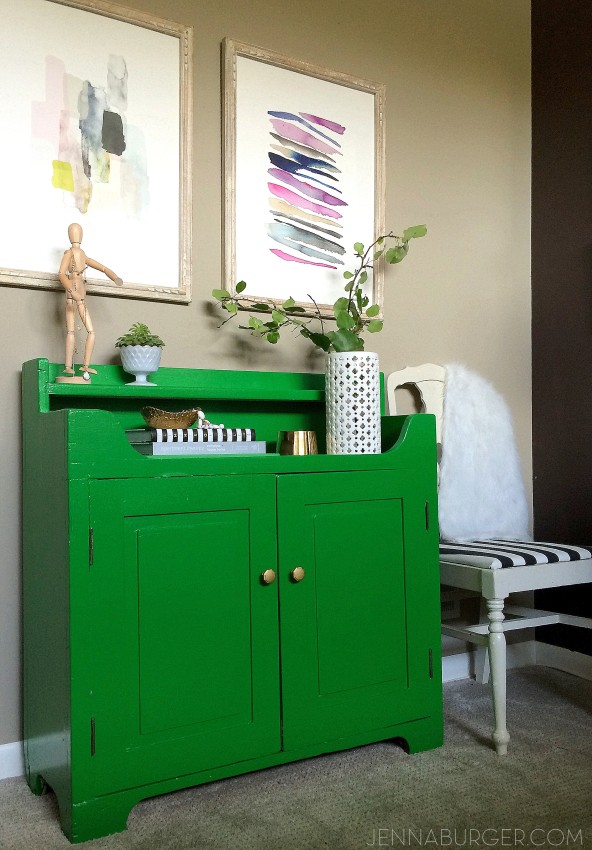
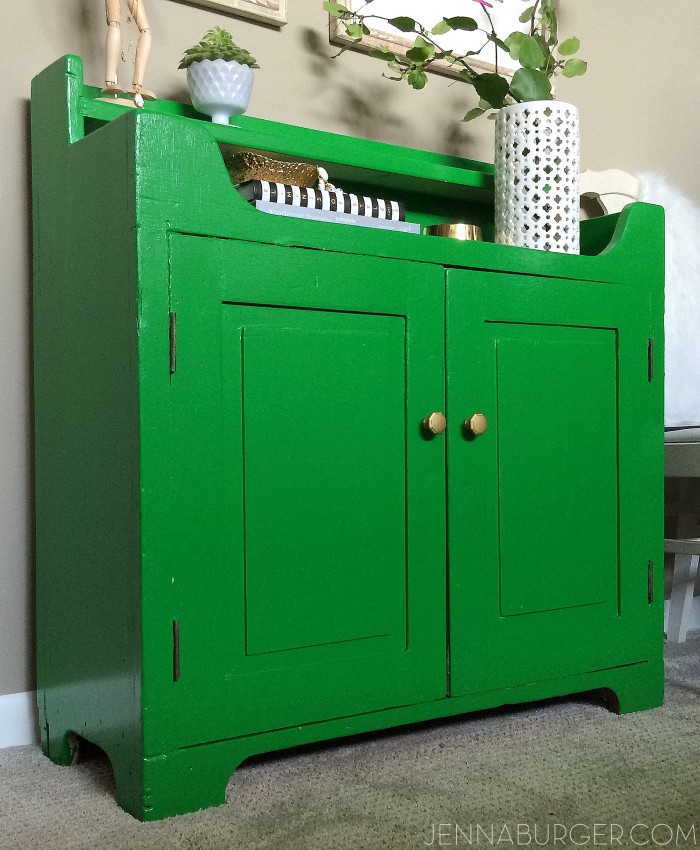
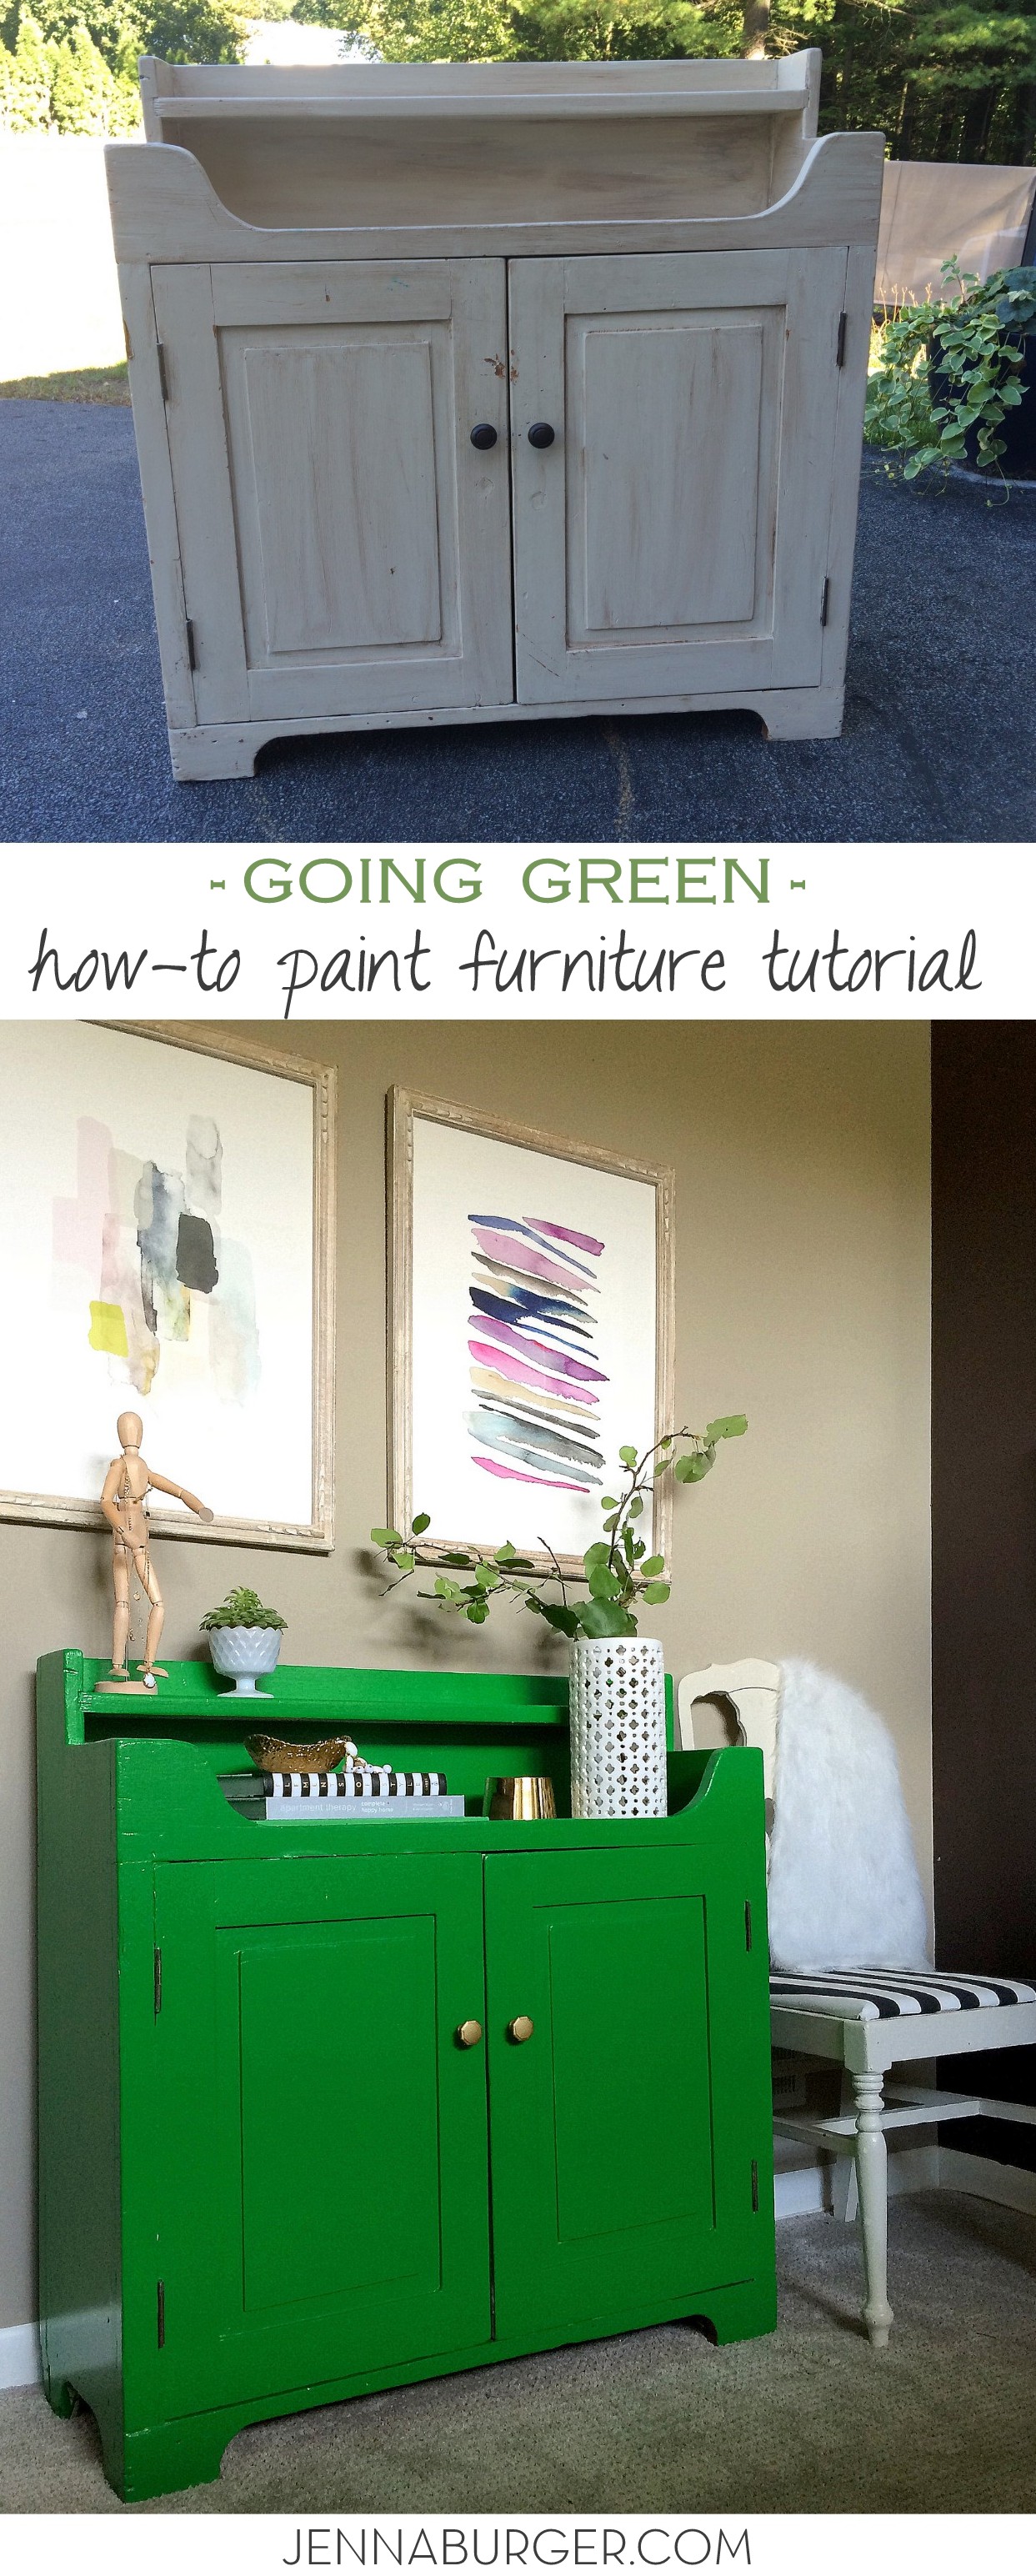
Check out this green beauty…

Furniture Makeover: TUTORIAL ON HOW-TO PAINT FURNITURE; before & after cabinet transformation by www.jennaburger.com

I love giving new life to old furniture.  A piece that is made well + has ‘good bones’, can truly live on for years.  Giving a favorite heirloom or thrift-store-find a pick me up with a dose of TLC + a fresh coat of paint, will just add to it’s life long story; its journey.

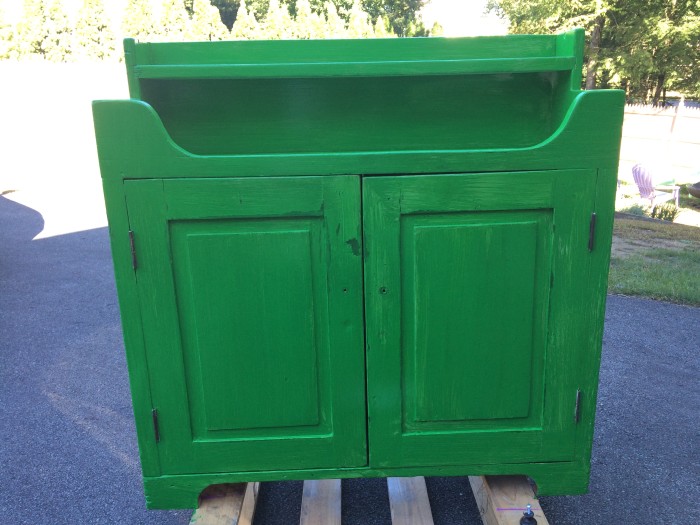
This cabinet that I have just given life #17, is older than me (so just over 21, hehe – NOT).  For decades it sat beautifully in my moms home, but for the last 9 years, it’s been a treasure in my humble abode.

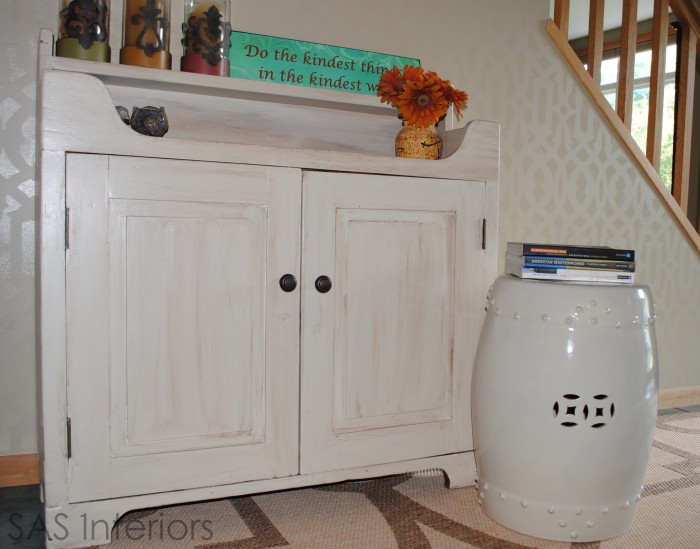
It started out stained, I gave it a makeover a few years back with paint + a glaze overlay, and now it got another refresh with a major splash of color.

Hello to my ‘new’ gorgeous green beauty…

Furniture Makeover: TUTORIAL ON HOW-TO PAINT FURNITURE; before & after cabinet transformation by www.jennaburger.com

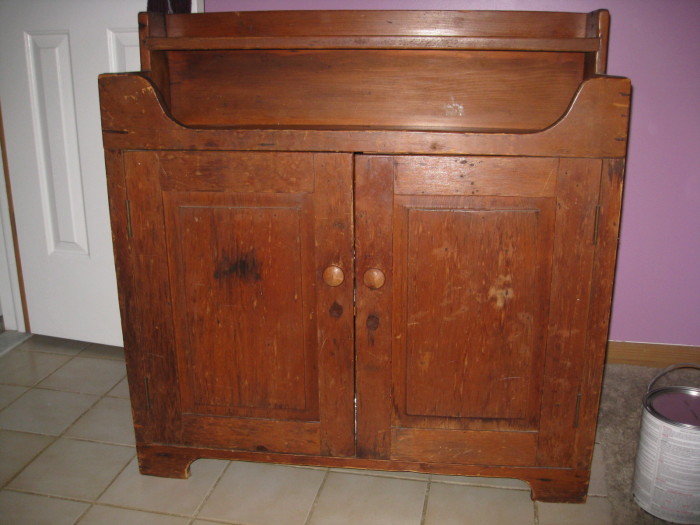
Before I share more on the process of painting it, let me take you back to what it used to look like…

FIRST 35 YEARS.

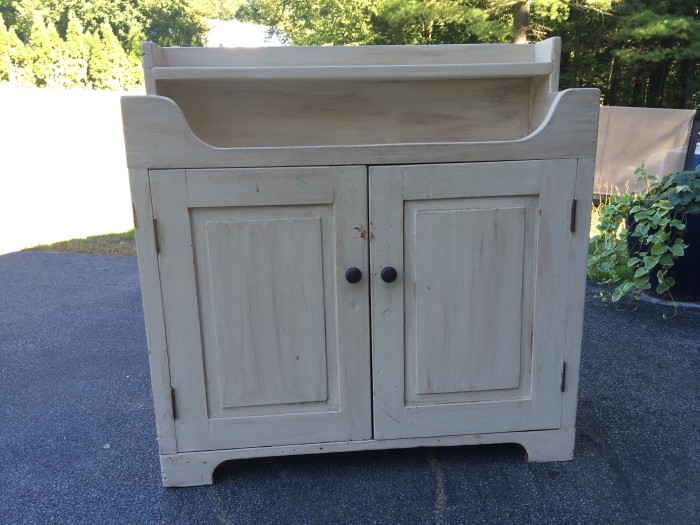
Cabinet Before

LAST 9 YEARS.

Cabinet Before

NOW.

Furniture Makeover: TUTORIAL ON HOW-TO PAINT FURNITURE; before & after cabinet transformation by www.jennaburger.com

She truly needed a revamp AND she got it!  She looks better now than she did at 20.  I hope they say the same about me some day…

THE PROCESS.

The last time I tackled a BIG furniture makeover >>> the china cabinet makeover, I broke all the steps into individual blog posts.  Since this is a smaller scale project, I’m going to include all the details in this one post, but if you want more specific detail on the various steps, here are the links t o check out.

> how-to prep + sand wood furniture

> why + how-to prime wood furniture

> tips + tricks to paint wood furniture

> adding details + styling

> china cabinet ‘reveal’

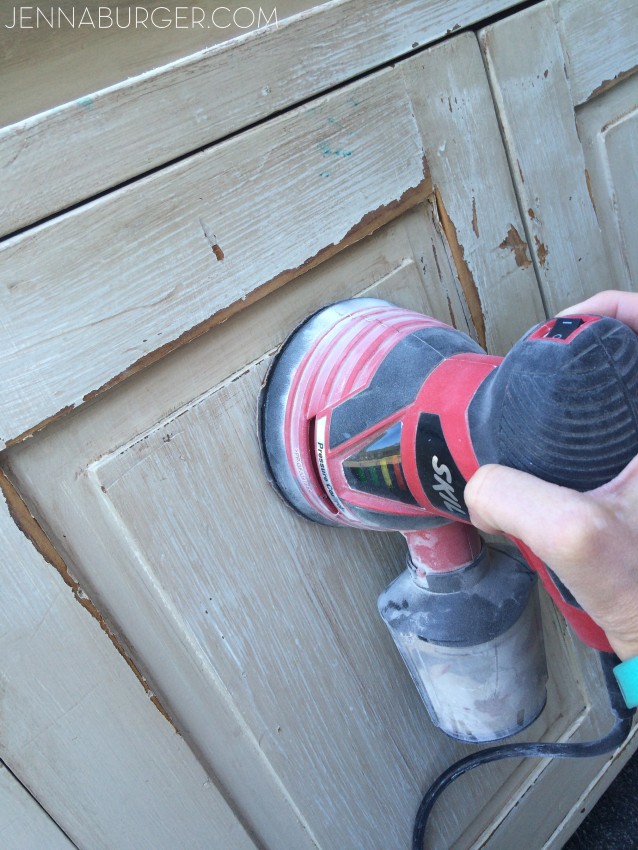
To start this makeover, I brought the cabinet outdoors on a pretty, sunny day a few weekends back.  When the weather is good, I love to work outdoors!  I set myself up on the driveway and got workin’.

Cabinet Before

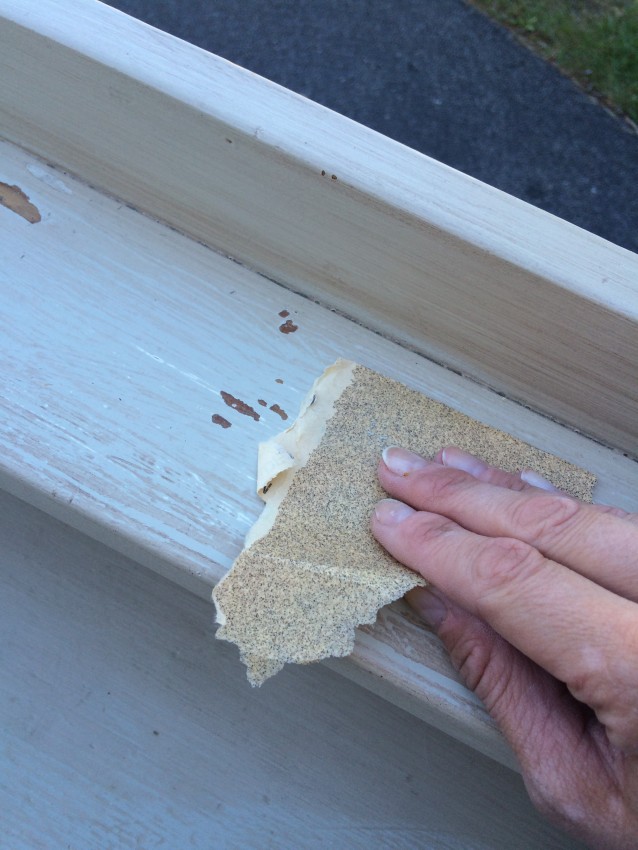
I sanded the all the surfaces using my orbital sander + hand sanded the nooks & crannies that couldn’t be reached.

Before & After CABINET MAKEOVER: The process of sanding, priming, and painting a cabinet to give it a fresh, new look. Tutorial on www.jennaburger.com

Before & After CABINET MAKEOVER: The process of sanding, priming, and painting a cabinet to give it a fresh, new look. Tutorial on www.jennaburger.com

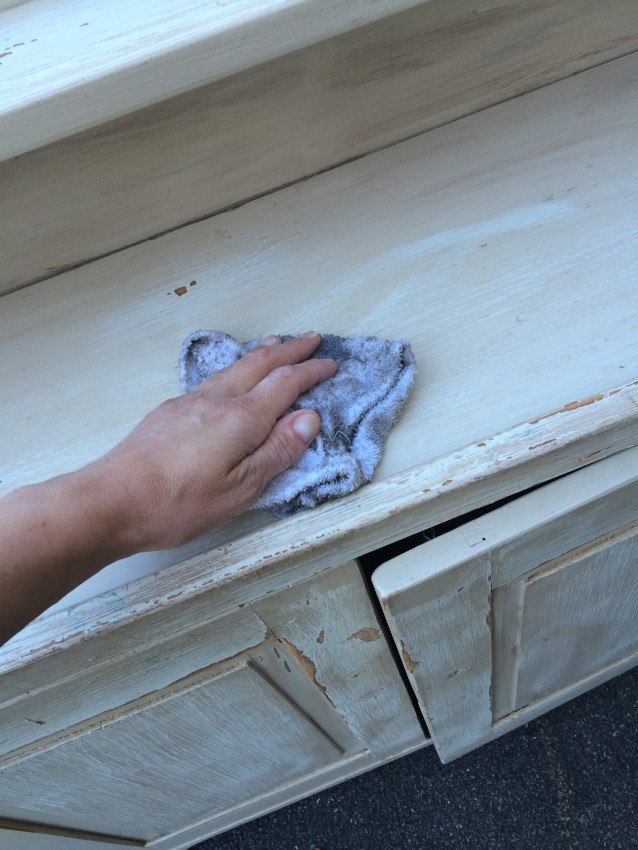
Then I gave the entire cabinet a good wiping off with a lightly damp cloth.

Furniture Makeover: TUTORIAL ON HOW-TO PAINT FURNITURE; before & after cabinet transformation by www.jennaburger.com

Typically I would prime the surface next (as I did with the china cabinet), but since I primed this cabinet when I painted last using a stain blocking primer, it wasn’t needed. So I went right to painting with the new hue.

The color of choice for this project was an interesting one… there’s always a story.

I envisioned a true kelly green color for this cabinet and upon working with Glidden Paint last year on the china cabinet, I had to turn to them again for this makeover!  They pointed me in the right direction for choosing the best color using their Simplified Color Palette.

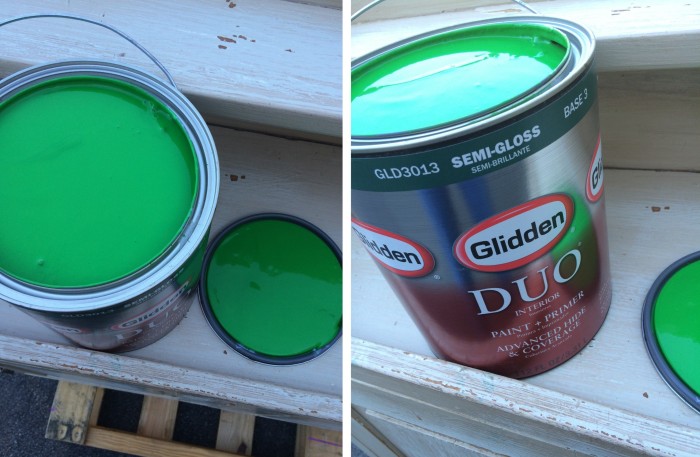
Call me crazy, but I finally chose a paint color featured in the Team Colors collection. My color of choice was Boston Green, the perfect green hue from the Boston Celtics. I had it mixed at The Home Depot in Glidden DUO Paint + Primer

Furniture Makeover: TUTORIAL ON HOW-TO PAINT FURNITURE; before & after cabinet transformation by www.jennaburger.com

Glidden Duo Paint + Primer is A+ because it truly is more than paint!  Because of the Paint + Primer formula, I save time & money.  The paint applied beautifully and the coverage was exceptional.

Furniture Makeover: TUTORIAL ON HOW-TO PAINT FURNITURE; before & after cabinet transformation by www.jennaburger.com

I opened the can of paint and was a little taken back by the color.  It was bright.  Thankfully when it was applied to the cabinet and dried, the intensity quieted.

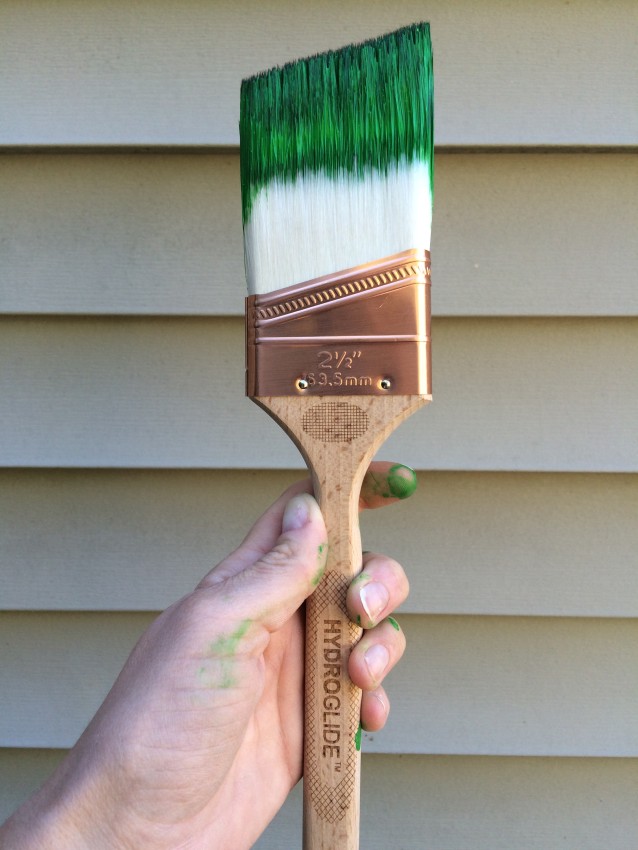
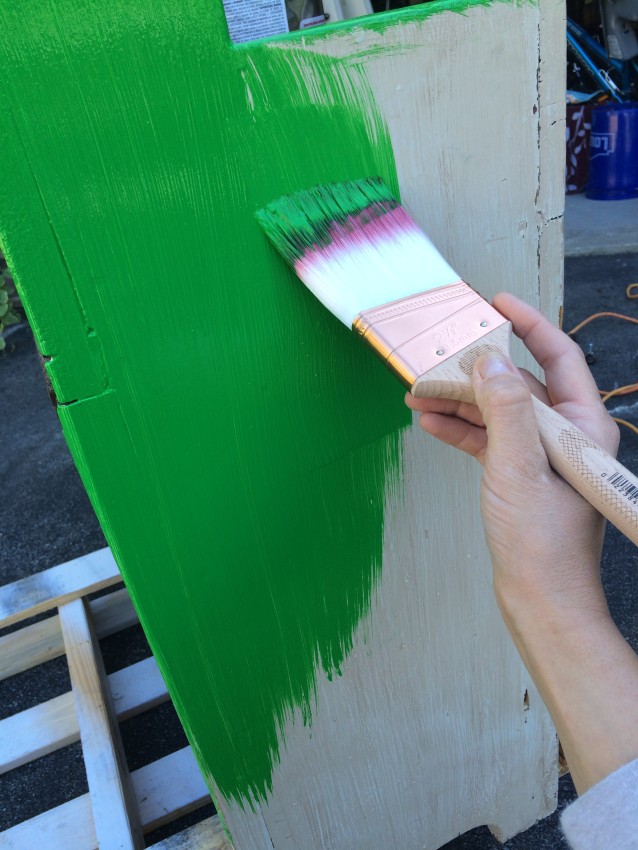
Using a new angled brush, I applied the first coat of paint in a semi-gloss finish.

Furniture Makeover: TUTORIAL ON HOW-TO PAINT FURNITURE; before & after cabinet transformation by www.jennaburger.com

first coat complete.

Furniture Makeover: TUTORIAL ON HOW-TO PAINT FURNITURE; before & after cabinet transformation by www.jennaburger.com

3 coats later it was complete.

Furniture Makeover: TUTORIAL ON HOW-TO PAINT FURNITURE; before & after cabinet transformation by www.jennaburger.com

Furniture Makeover: TUTORIAL ON HOW-TO PAINT FURNITURE; before & after cabinet transformation by www.jennaburger.com

Furniture Makeover: TUTORIAL ON HOW-TO PAINT FURNITURE; before & after cabinet transformation by www.jennaburger.com

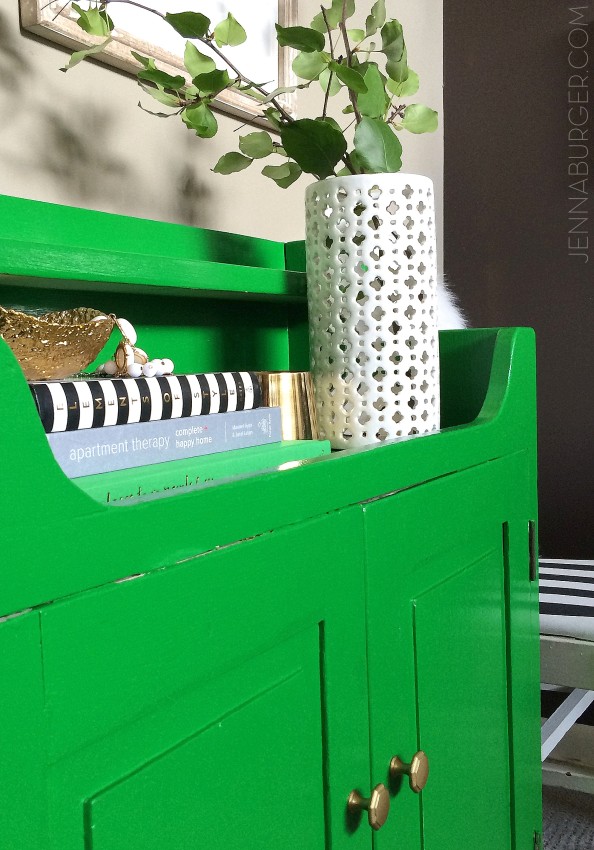
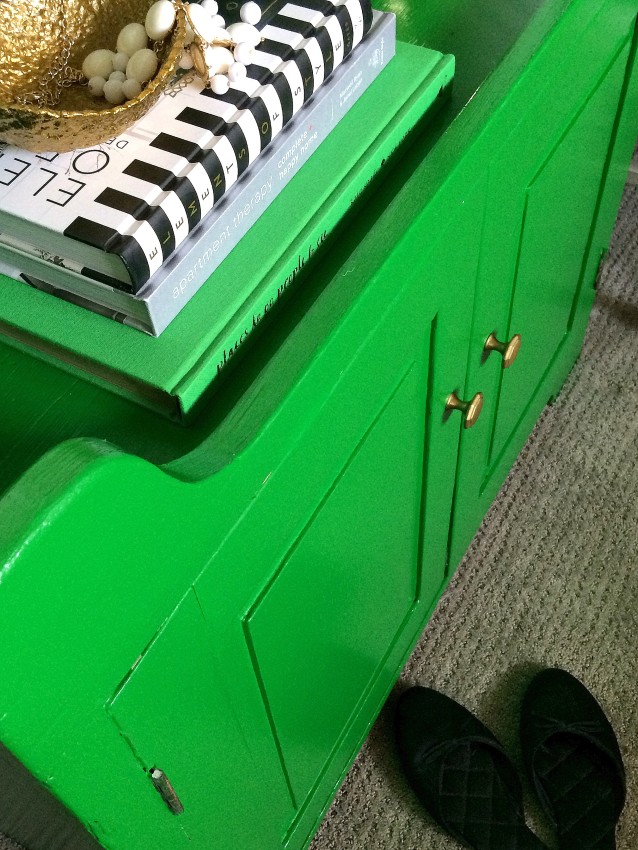
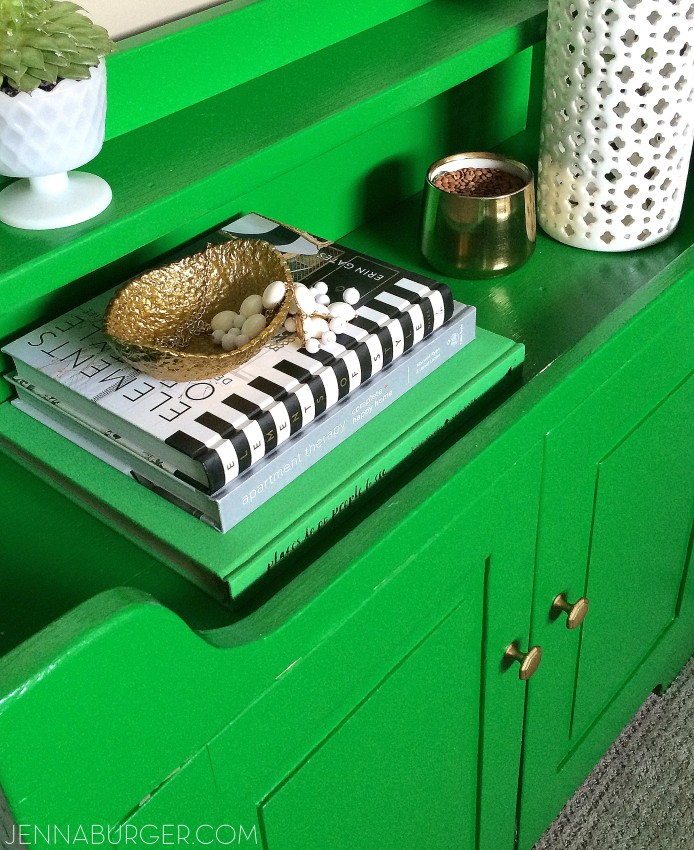
I paired the fiery, robust cabinet against a quiet, neutral wall and styled it with elements that were complimentary.

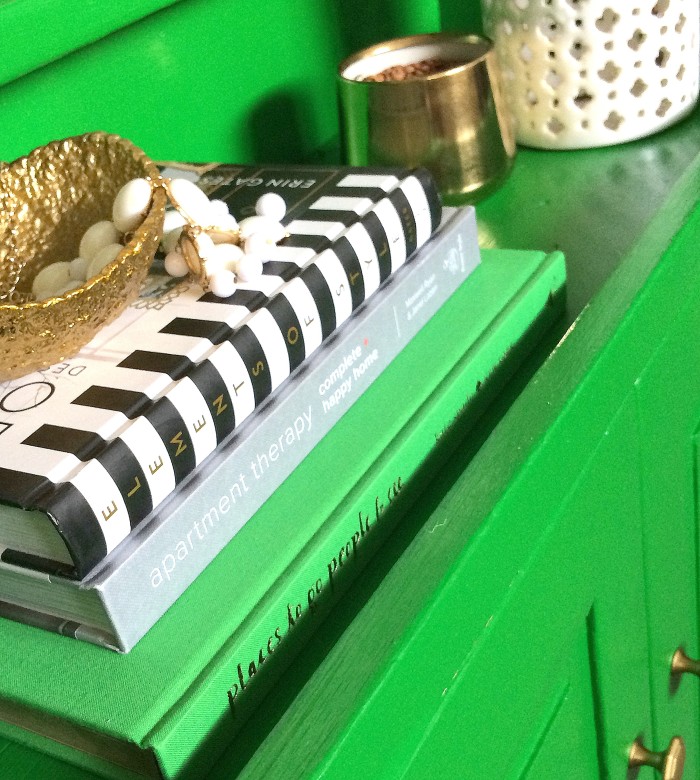
A few favorite books + accessories that aren’t as intense and loud sit atop the cabinet to balance out it’s boldness.

Furniture Makeover: TUTORIAL ON HOW-TO PAINT FURNITURE; before & after cabinet transformation by www.jennaburger.com

Go big or Go Home!  That is the motto for this cabinet makeover.

One last peek at the before & after…

Furniture Makeover: TUTORIAL ON HOW-TO PAINT FURNITURE; before & after cabinet transformation by www.jennaburger.com

What a change!

Thanks for checking out my latest and greatest DIY project.  I’ve got plenty more up my sleeve, so stay tuned.

GLIDDEN is giving away a $50 gift card to Home Depot.  Whether you have a painting project to tackle or a DIY idea that you want complete before the holidays, this is the time to ENTER, WIN, and CHECK it off your to-do list!

TO ENTER, fill out the rafflecopter box below and you’re done.  GOOD LUCK…

a Rafflecopter giveaway
DISCLOSURE: THIS IS A SPONSORED POST WITH GLIDDEN.  ALL WORDS + OPINIONS ARE 100% MY OWN – I TRULY LOVE THIS PRODUCT.  AFFILIATE LINKS ARE ALSO INCLUDED IN THIS POST.

Turquoise Table with Wood Top

Howdy there friends!  Happy Monday!!

I was brought many smiles last week from all the praises I received on my Fall front porch.  It’s fun to know that so many of you love color too.

Today’s post is going to be short, but good!

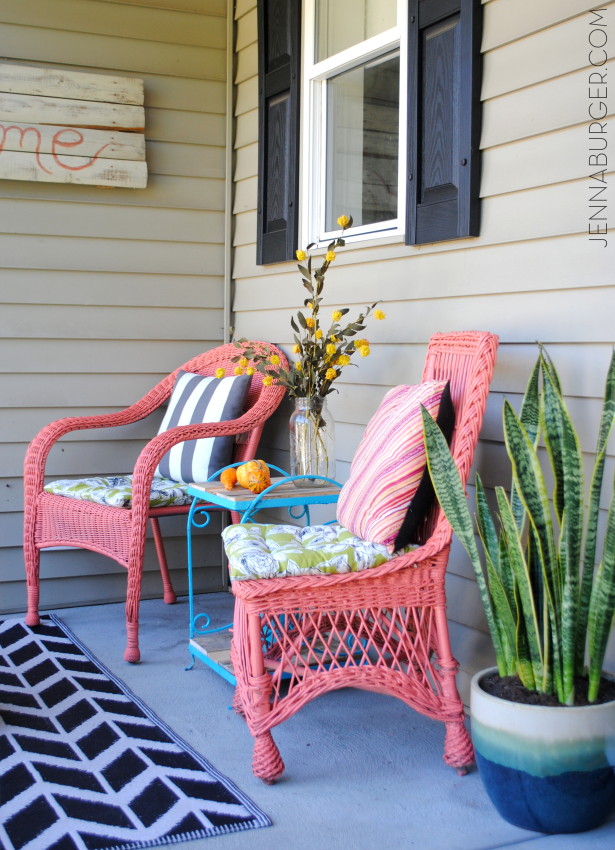
As I mentioned during the Fall front porch tour, I introduced a few new elements including the recently painted coral wicker chairs + the turquoise table, both of which were garage sale finds.

It’s amazing what paint can do.

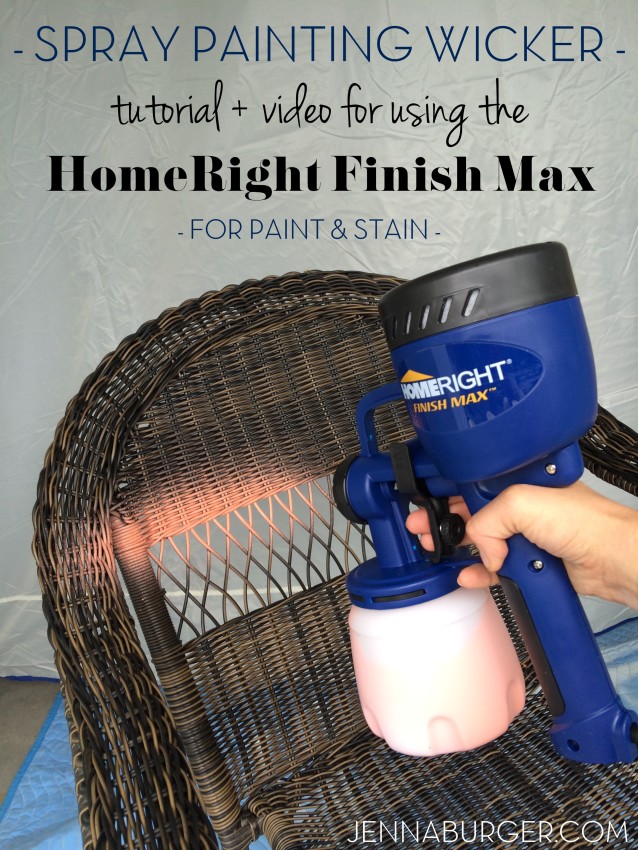
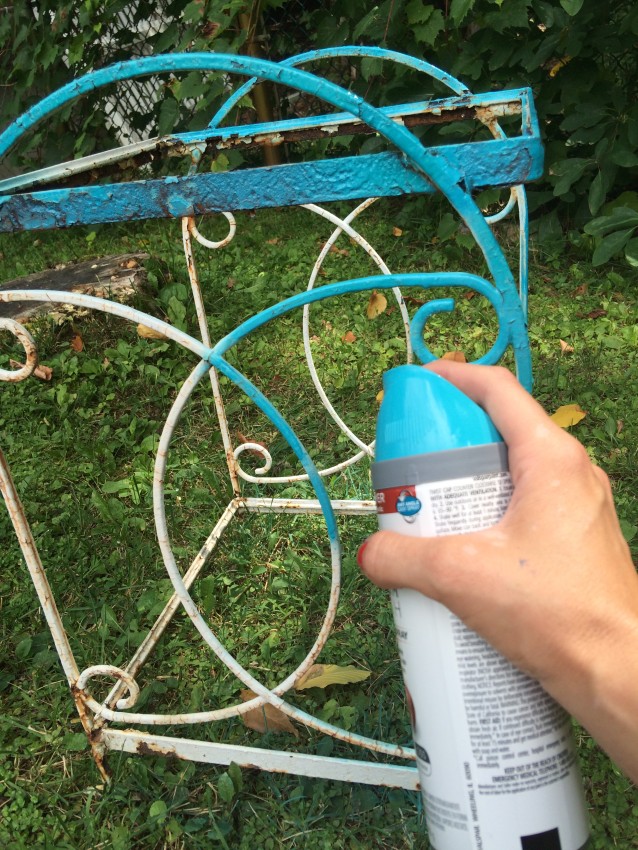
For the wicker chairs, I used my new Homeright hand spray painter but for the table that I turned turquoise, I used good ole’ spray paint in a can.

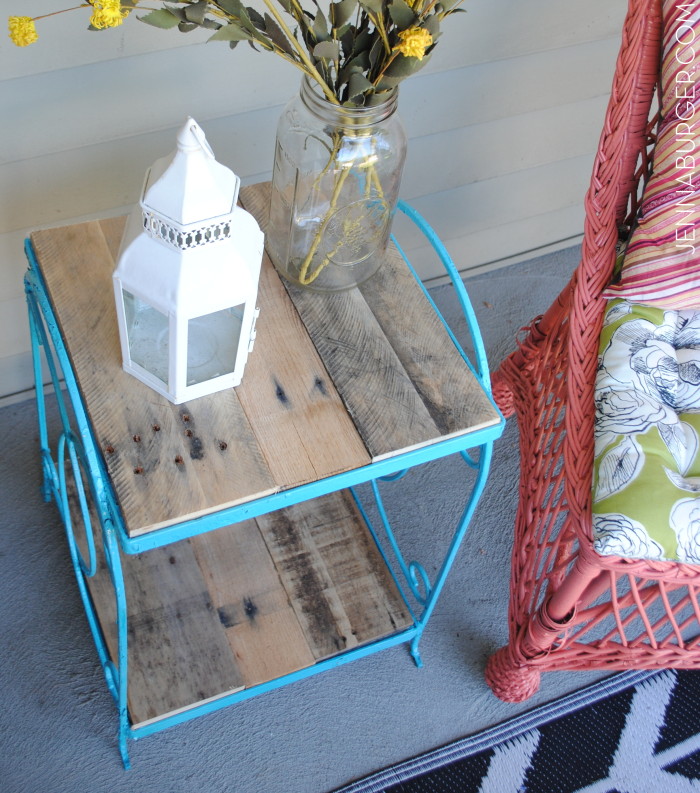
Here it is on the Fall front porch…

Turquoise Table Before & After: table that was falling apart with no top got a makeover using turquoise spray paint & pallets.

It didn’t always look like that.

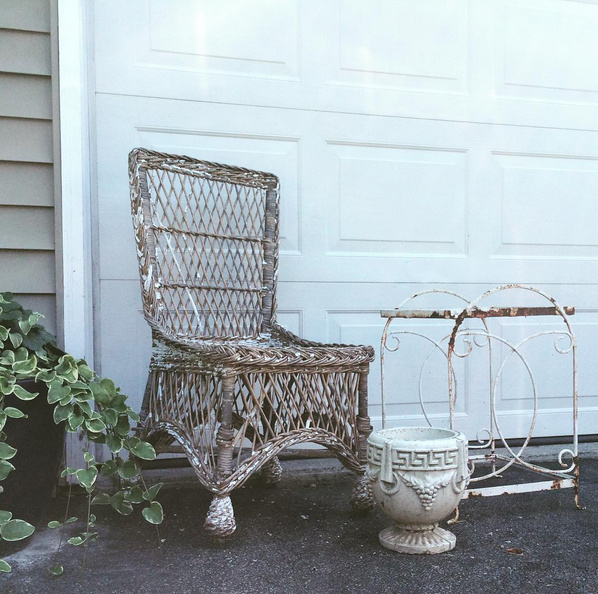
This is a quick pic I snapped and shared on Instagram of my finds a few weeks back…

Garage sale finds

3 items that were desperate for attention.

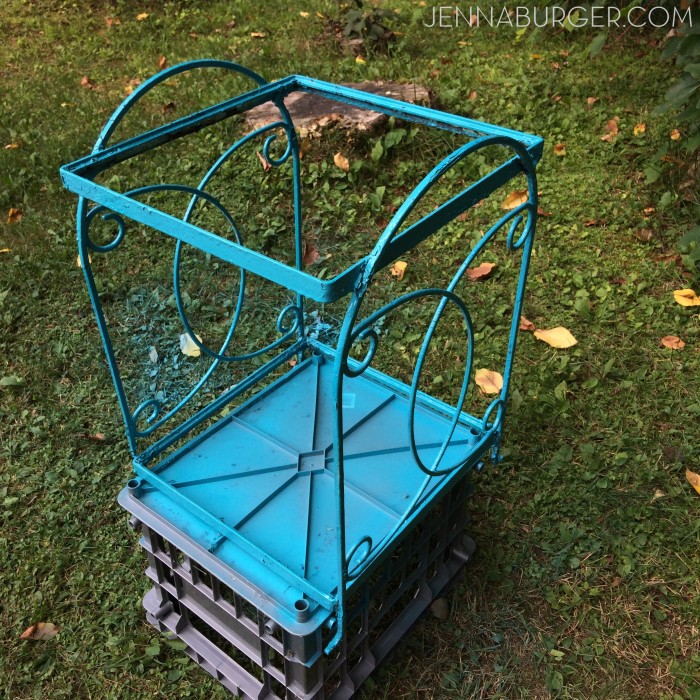
The table was rusted.

It’s paint was peeling + chipping off.

And it didn’t even have a top.

THE TRANSFORMATION.

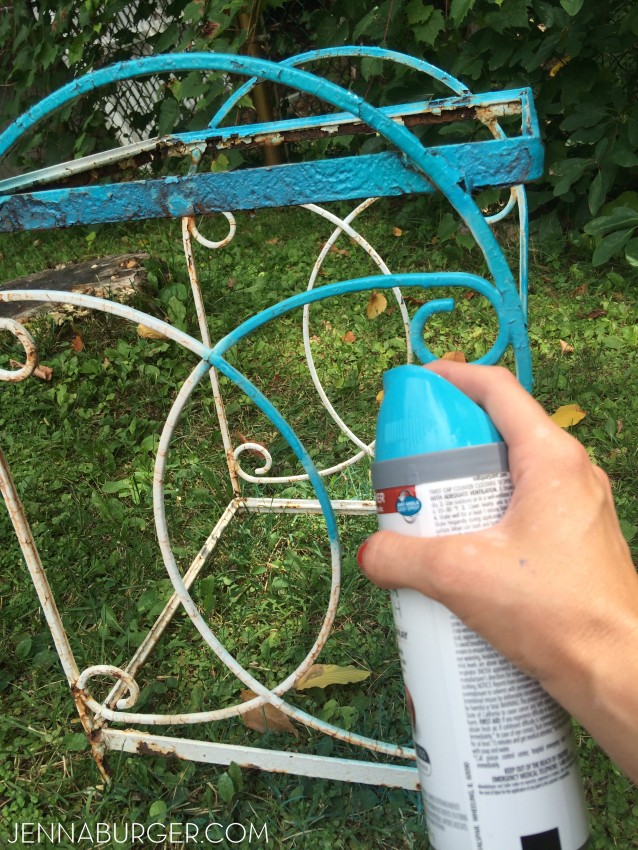
I started off by scraping off the chipping paint and sanding some of the edges.  To be honest, I didn’t go crazy with that.  I knew it would never be perfectly smooth and I was okay with that.  After I cleaned it up a bit, I whipped out a new can of turquoise spray paint.

Turquoise Table Before & After: table that was falling apart with no top got a makeover using turquoise spray paint & pallets.

A few coats later, it was complete.

Turquoise Table Before & After: table that was falling apart with no top got a makeover using turquoise spray paint & pallets.

THE WOOD TOP.

A few days later when the paint was completely dry, it was time to add a top.

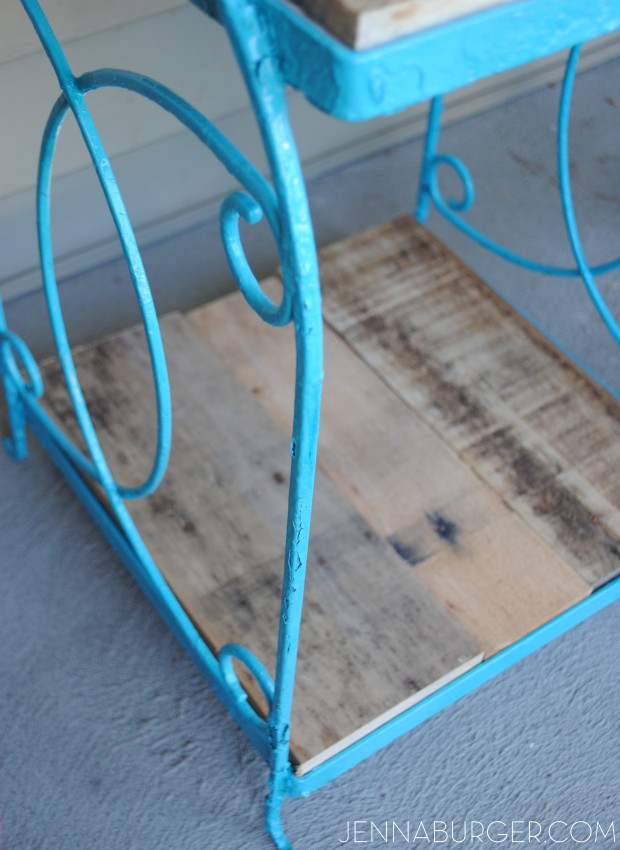
My neighbor had recently finished a pallet project (per my recommendation – wink, wink) and had a bunch of pallet boards left over.  They were already disassembled, cleaned, AND sanded, so all I had to do was cut them to size.

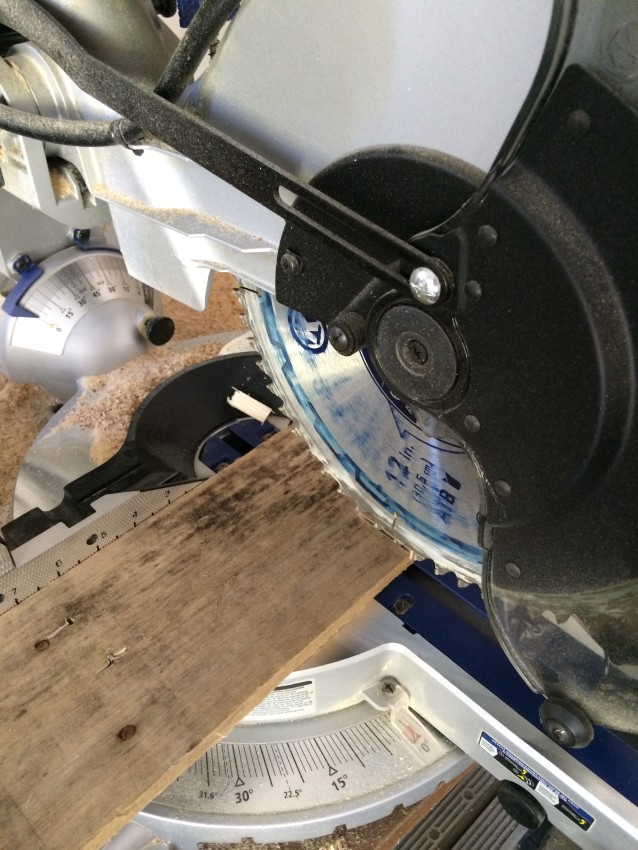
I measured the length of the table and using the powered miter saw (see my recommendation + favorite tools), I cut them to the correct length so the boards would set in to the existing lip around the edge of the table top.

Turquoise Table Before & After: table that was falling apart with no top got a makeover using turquoise spray paint & pallets.

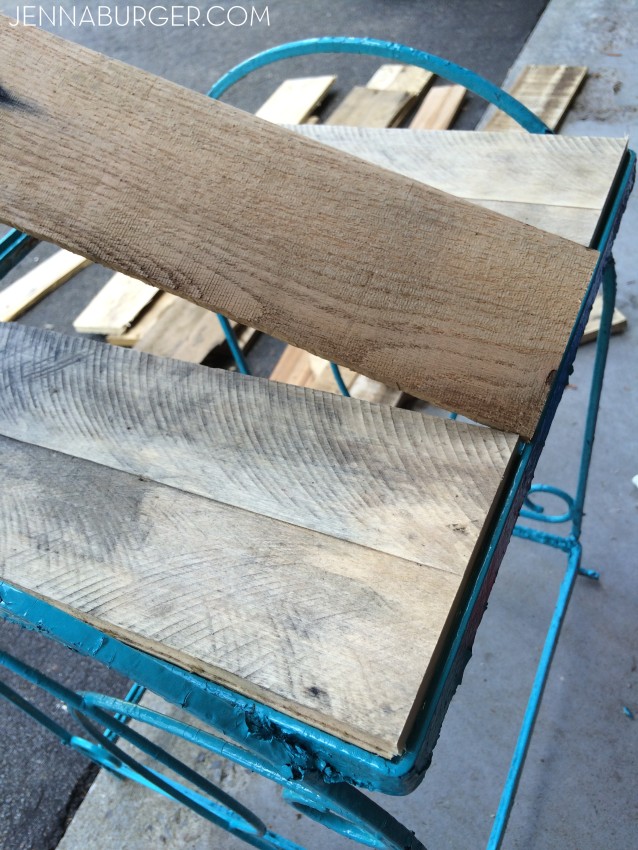
Once cut, I set them into place.

Turquoise Table Before & After: table that was falling apart with no top got a makeover using turquoise spray paint & pallets.

Turquoise Table Before & After: table that was falling apart with no top got a makeover using turquoise spray paint & pallets.

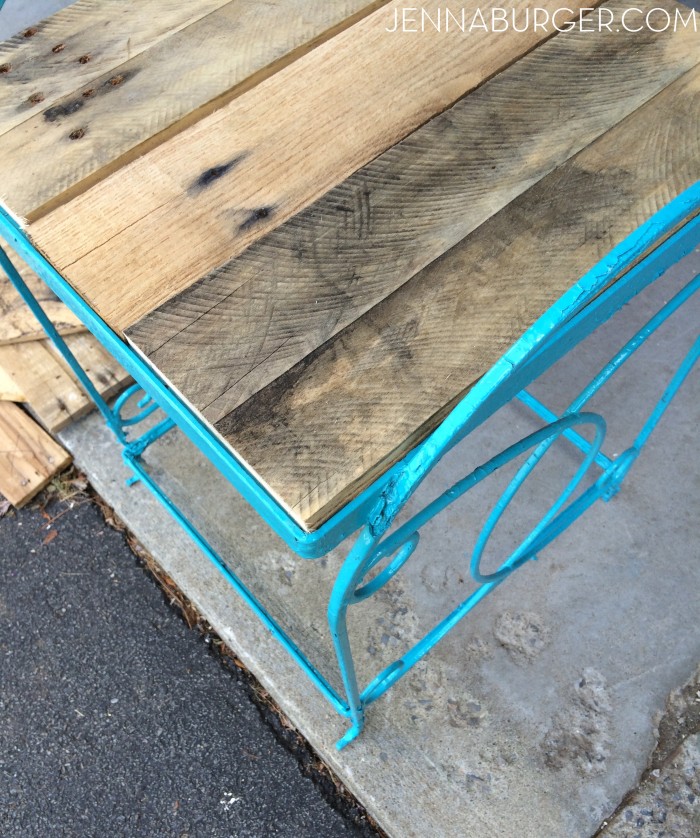
The boards took no time at all to cut and place in the lip – maybe 10 minutes.

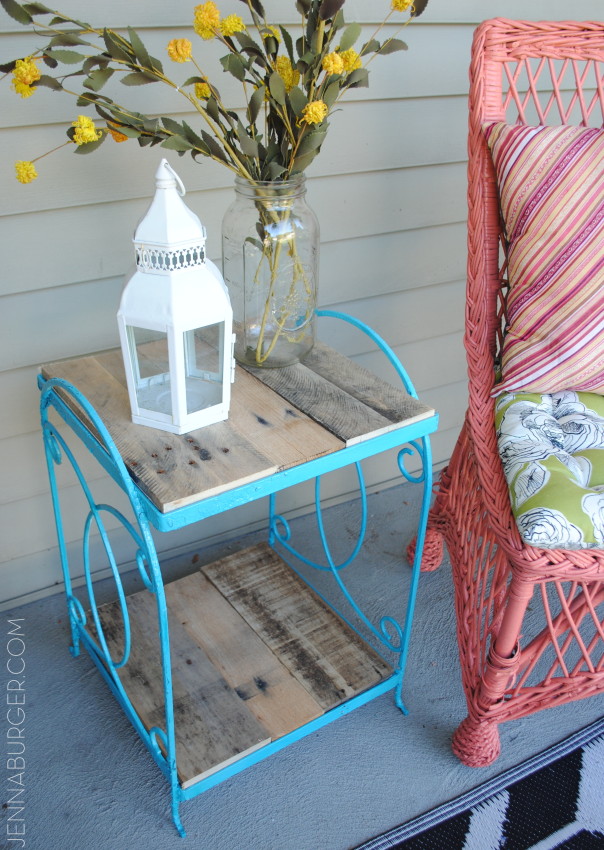
And transformed table that was once garbage-bound now sits beautifully on my front porch.

Turquoise Table Before & After: table that was falling apart with no top got a makeover using turquoise spray paint & pallets.

Turquoise Table Before & After: table that was falling apart with no top got a makeover using turquoise spray paint & pallets.

Turquoise Table Before & After: table that was falling apart with no top got a makeover using turquoise spray paint & pallets.

The turquoise hue gives the front porch such a vibrant pop of color, especially along with the coral chairs + the green door.

It’s amazing what spray paint + a bit of TLC can do!

>>> If you haven’t seen it, don’t miss out on taking a tour of this years Fall Front Porch


WOW to Painting Wicker

I’ve been excited all weekend to share an amazing WOW, Ah-Ha moment!

For the past few weeks, I’ve slowly been transitioning my decor to Fall by adding in seasonal favorites.  NO huge updates or changes, but a few touches here and there around the home to welcome the season.  One main focus has been the front porchI even shared a peek at it last week on Instagram when my prop assistant ran away with my gourds.  I feel like the entry of the home is a good place to put the most effort since it’s the first area you & your guests see as they enter the home AND a little effort can make a big impact.

I bought mums (some of which died – my black thumb has returned) and I have a few new trash-to-treasure items that I’ve slowly been introducing.  You got a peek of them a few weeks back – remember?

One new-to-me item was a wicker chair.  I was looking for a sister, and I found “her”.   They needed a bit of sprucin’ up, but I wasn’t in the mood to paint them.  Who wants to paint wicker?  NOT ME!  So they sat.

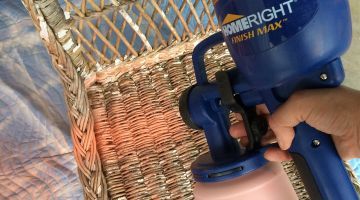
BUT THEN, I decided to finally use my hand paint sprayer that has been sitting in the garage for months and voila, no joke, 20 minutes total THEY. WERE. DONE.

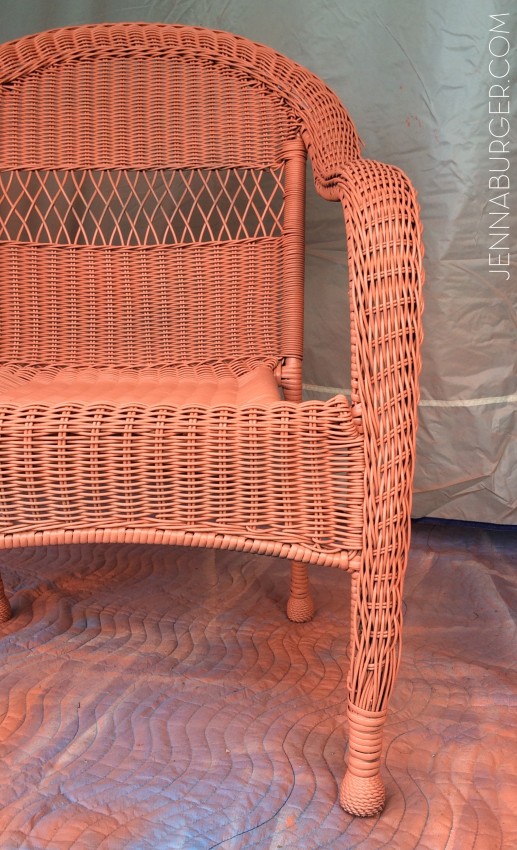
THE RESULT.

DIY tutorial for painting wicker using the HomeRight finish max hand sprayer. I painted 2 wicker chairs in less than 10 minutes. That would be impossible with a paint brush. A hand sprayer is a MUST TOOL for paint projects. Check out a step-by-step tutorial + video of how fast it covers > www.jennaburger.com

And guess what I didn’t do most of the work. WHAT? Why?

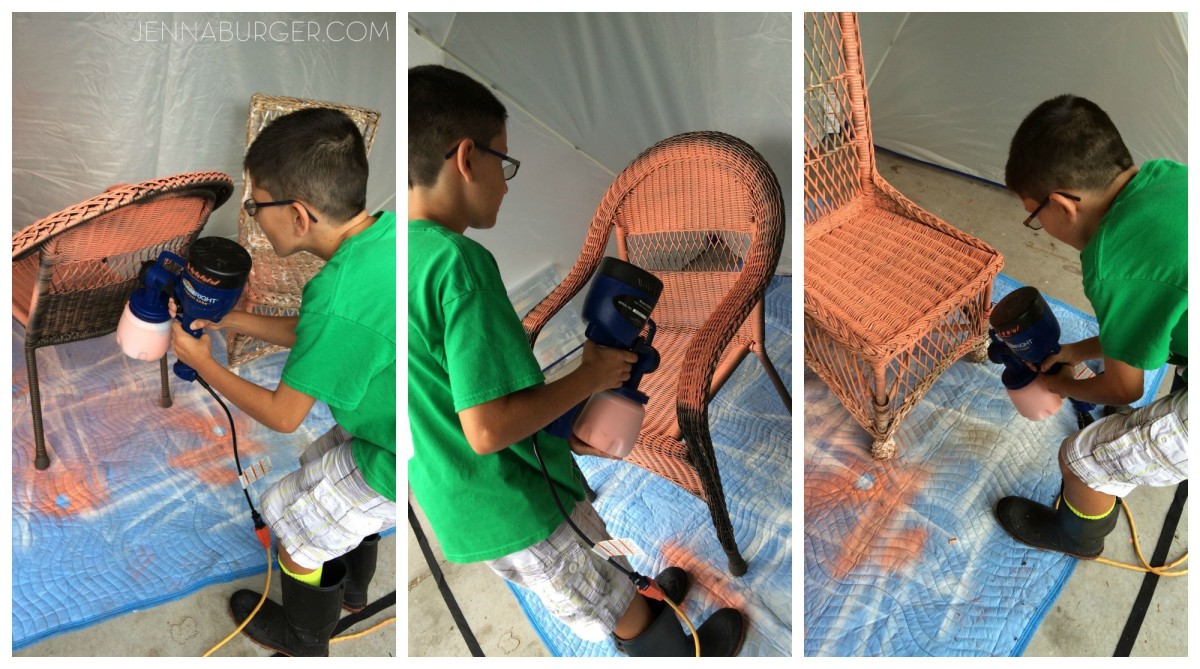
Yup, my 9 year old took over the job.  Literally we had so much fun spraying these 2 wicker chairs that we were battling who got the sprayer.  #hewon

DIY tutorial for painting wicker using the HomeRight finish max hand sprayer. I painted 2 wicker chairs in less than 10 minutes. That would be impossible with a paint brush. A hand sprayer is a MUST TOOL for paint projects. Check out a step-by-step tutorial + video of how fast it covers > www.jennaburger.comSeriously though, this hand spray painter by HomeRight is amazing.  It is incredible.  I am just mad at myself that I have not used it sooner.

REWIND.

Before I get ahead of myself with excitement, let’s rewind…  A few weeks back I had major success at a garage sale and snagged a bunch of new-to-me ‘trash treasures’.

I had shared this picture on InstagramGarage sale finds

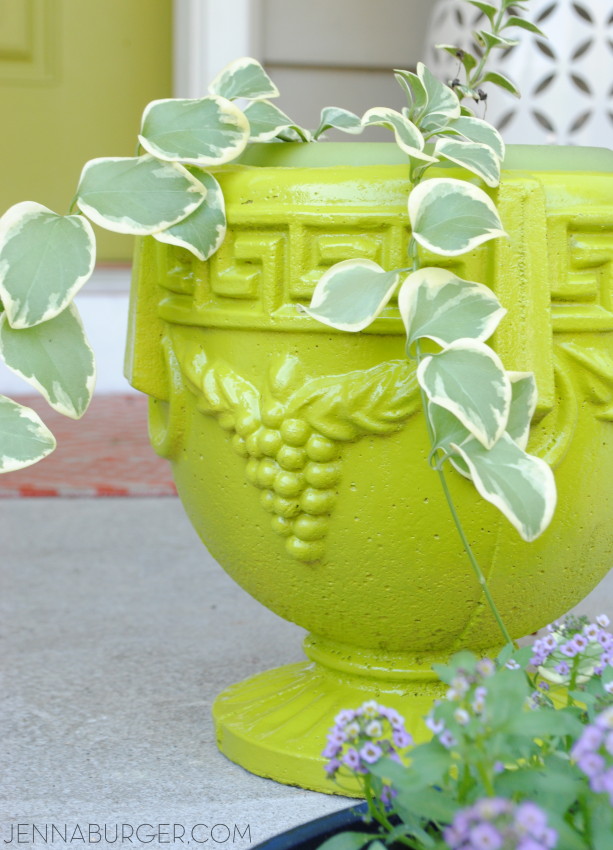
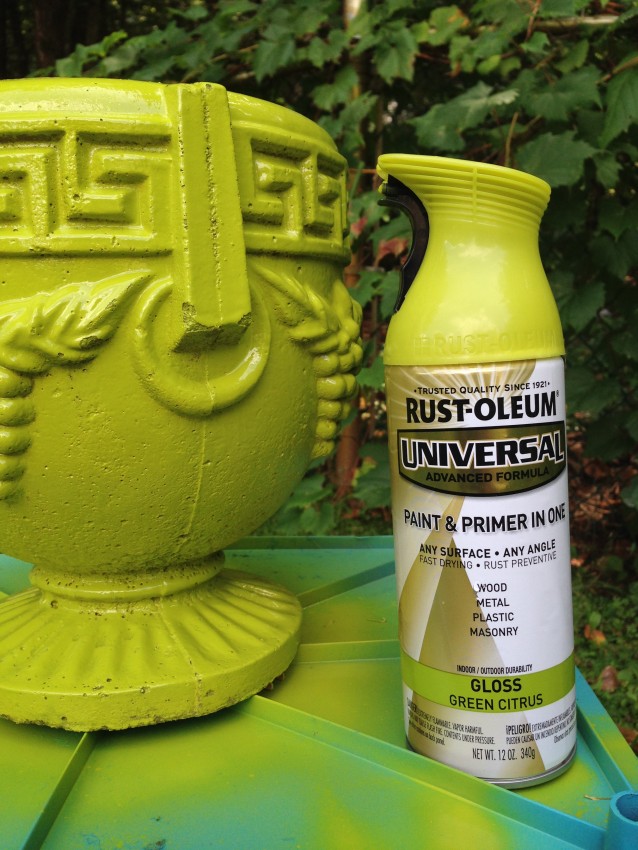
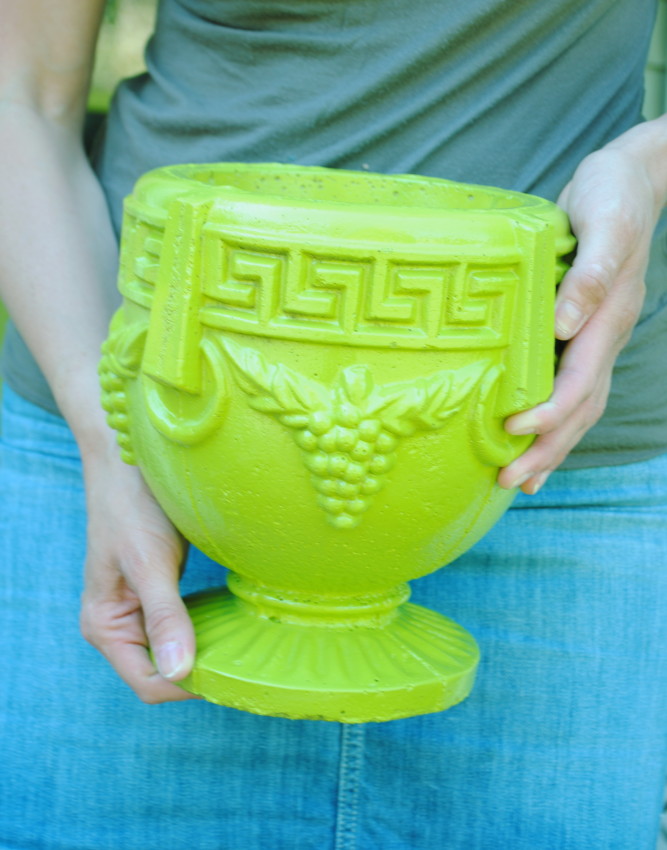
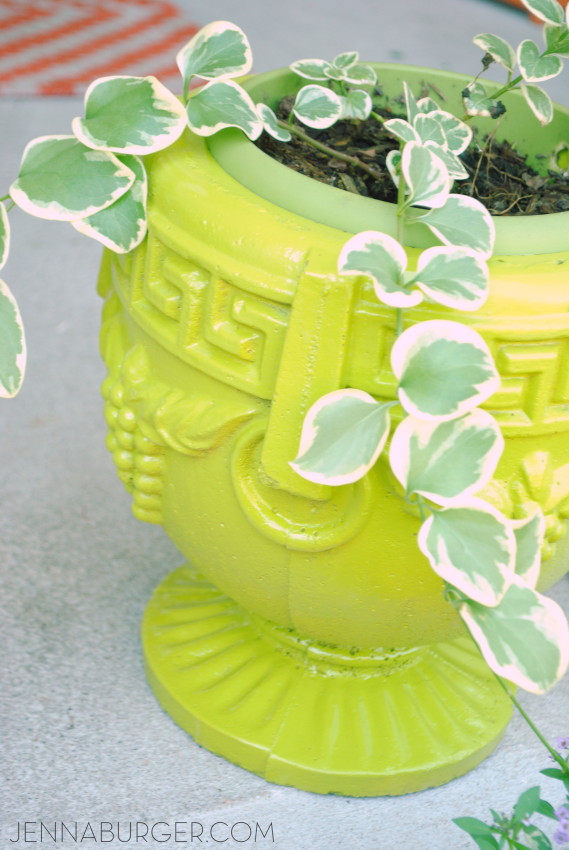
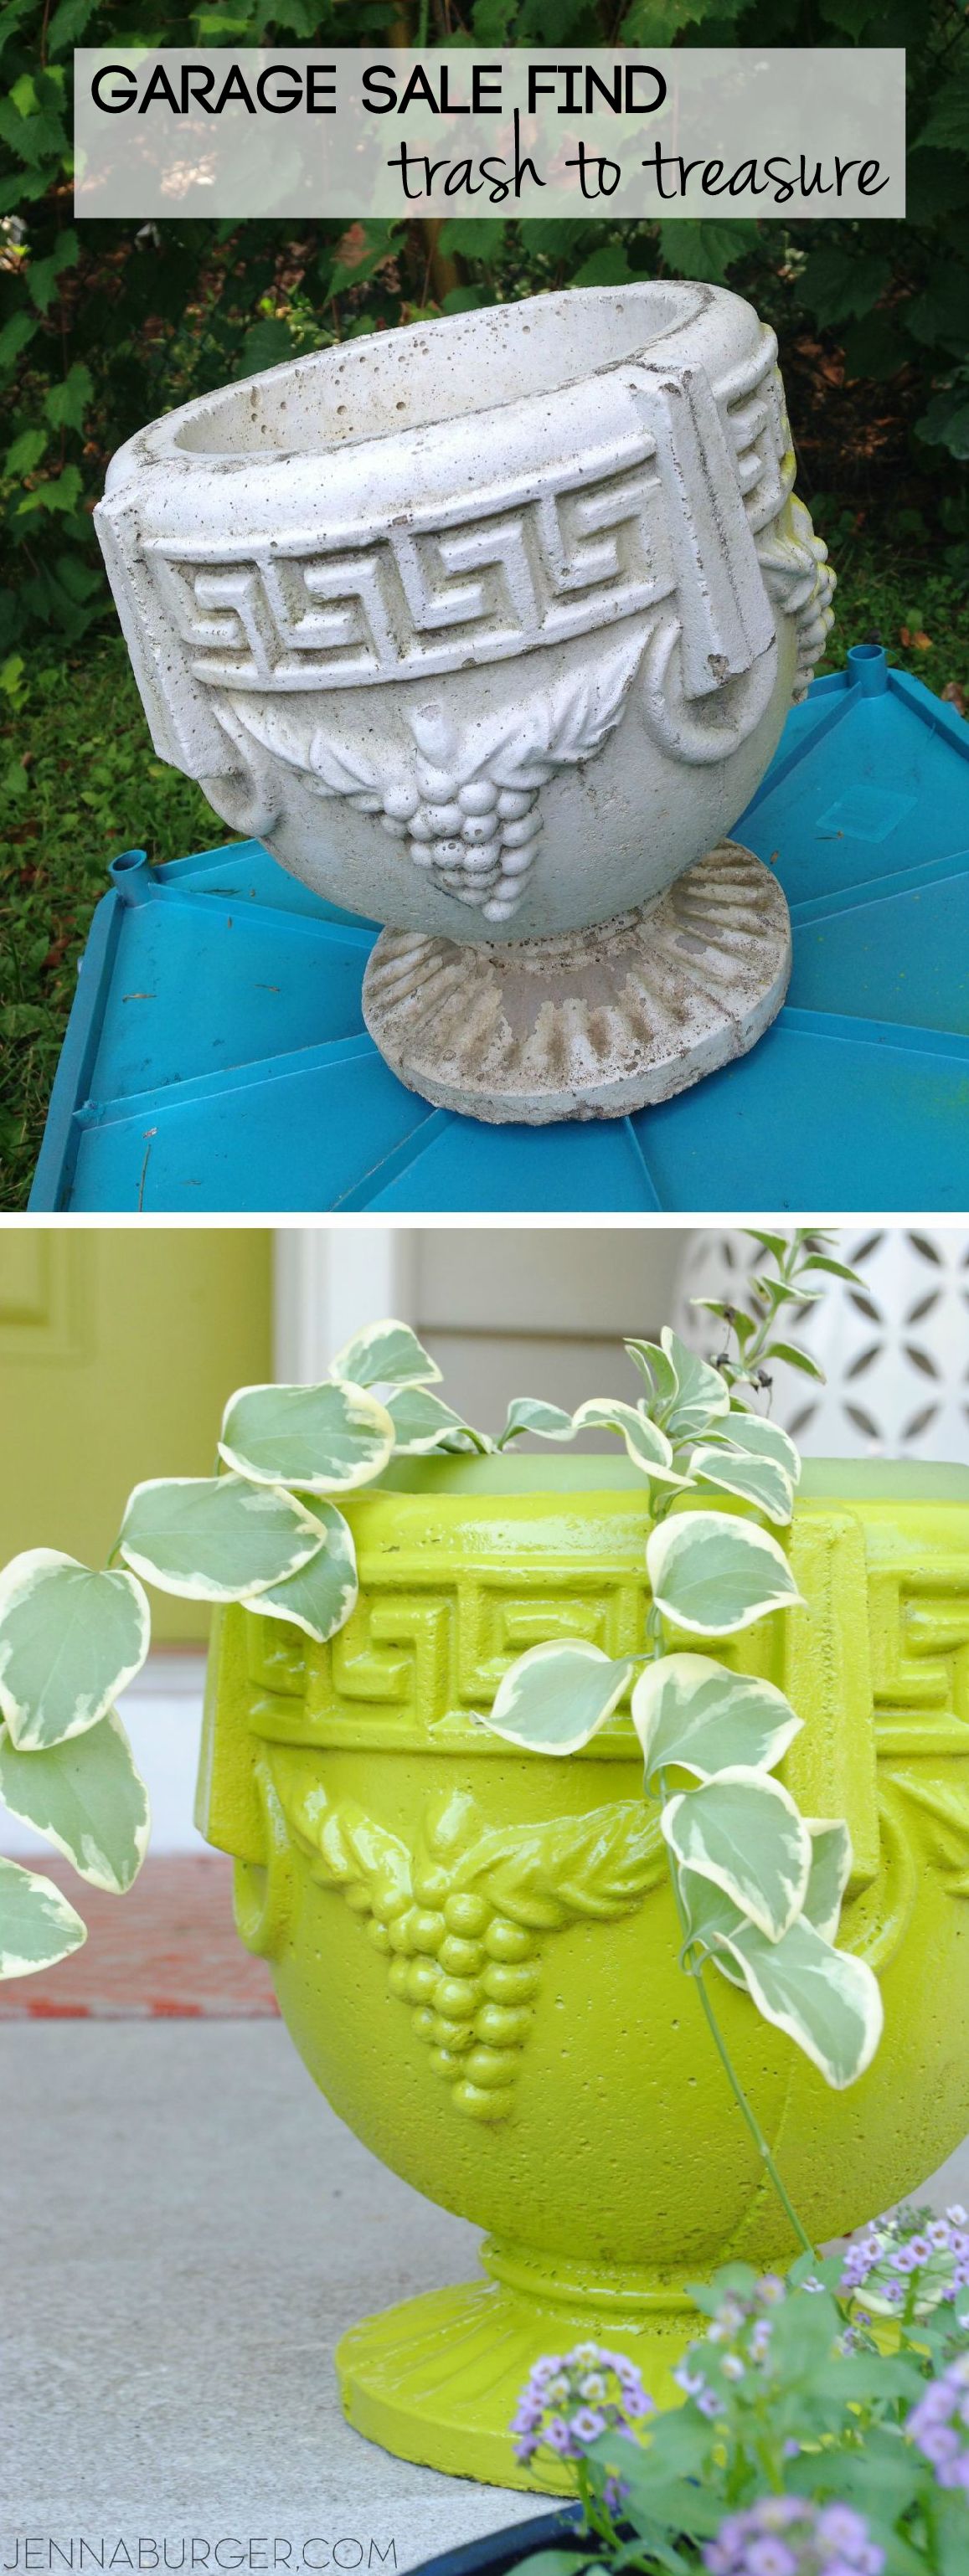
I transformed the planter with the most gorgeous green hue…

Before and After planter - $1 garage sale find transformed with Green Citrus spray paint

…And now it was time to finally paint the wicker chair (plus another one I found) a fun coral color.

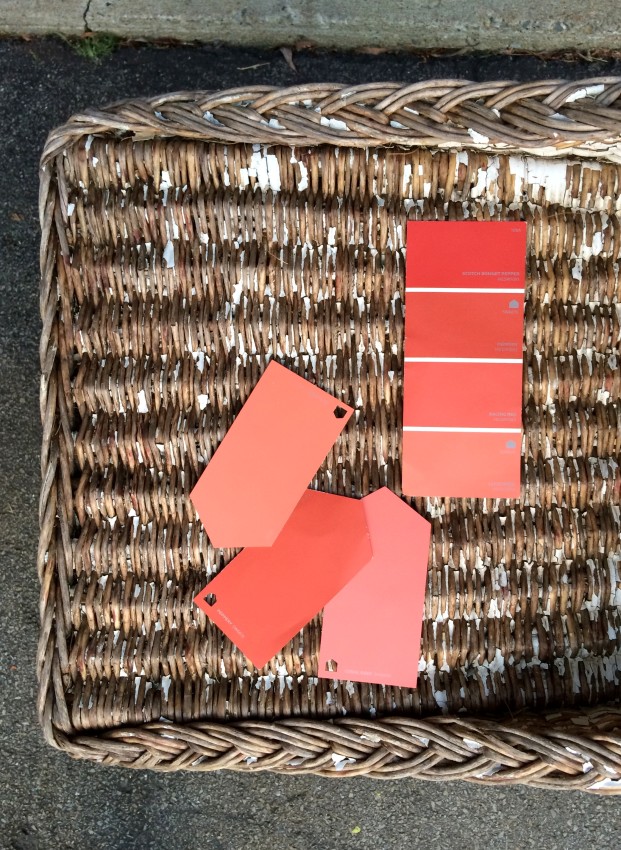
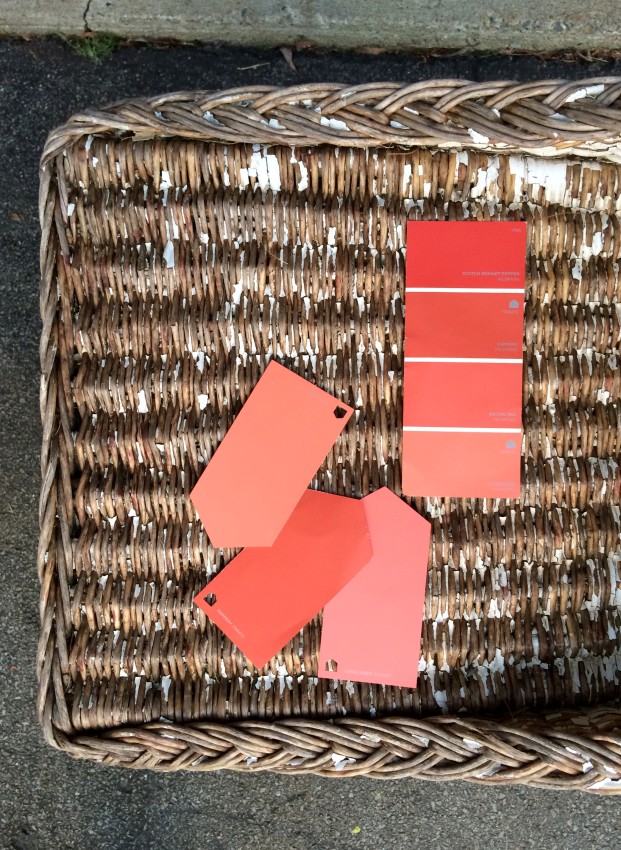
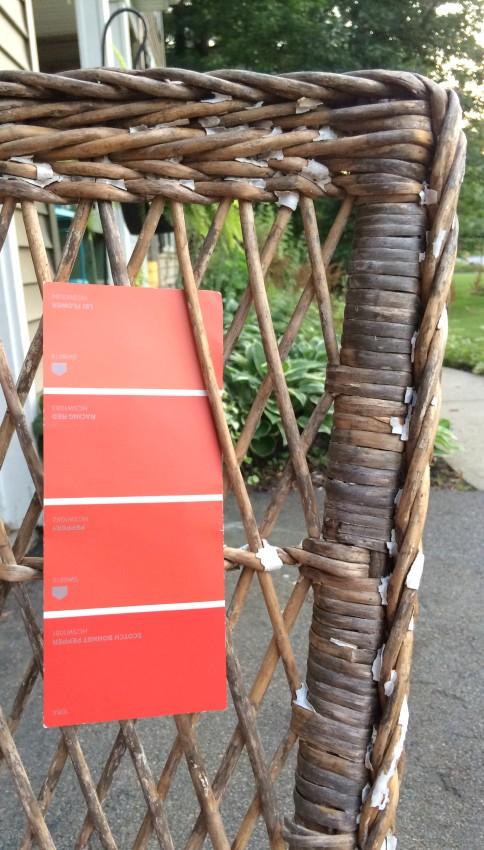
It took a few days to choose a color, but I decided on Sherwin Williams HGTV Home (available @ Lowe’s) Lei Flower – SW6613.

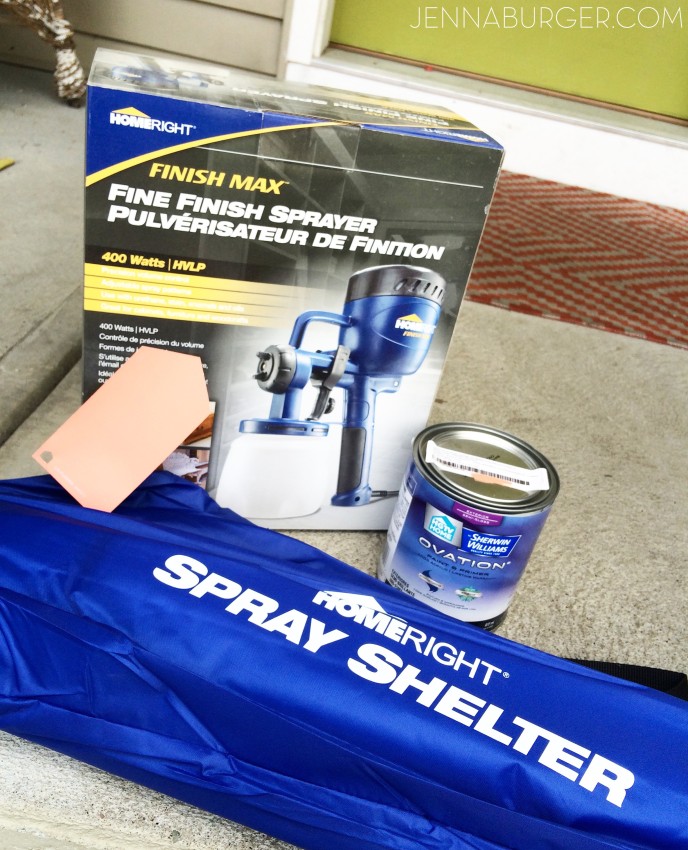
DIY tutorial for painting wicker using the HomeRight finish max hand sprayer. I painted 2 wicker chairs in less than 10 minutes. That would be impossible with a paint brush. A hand sprayer is a MUST TOOL for paint projects. Check out a step-by-step tutorial + video of how fast it covers > www.jennaburger.com

I was ready to GO!

DIY tutorial for painting wicker using the HomeRight finish max hand sprayer. I painted 2 wicker chairs in less than 10 minutes. That would be impossible with a paint brush. A hand sprayer is a MUST TOOL for paint projects. Check out a step-by-step tutorial + video of how fast it covers > www.jennaburger.com

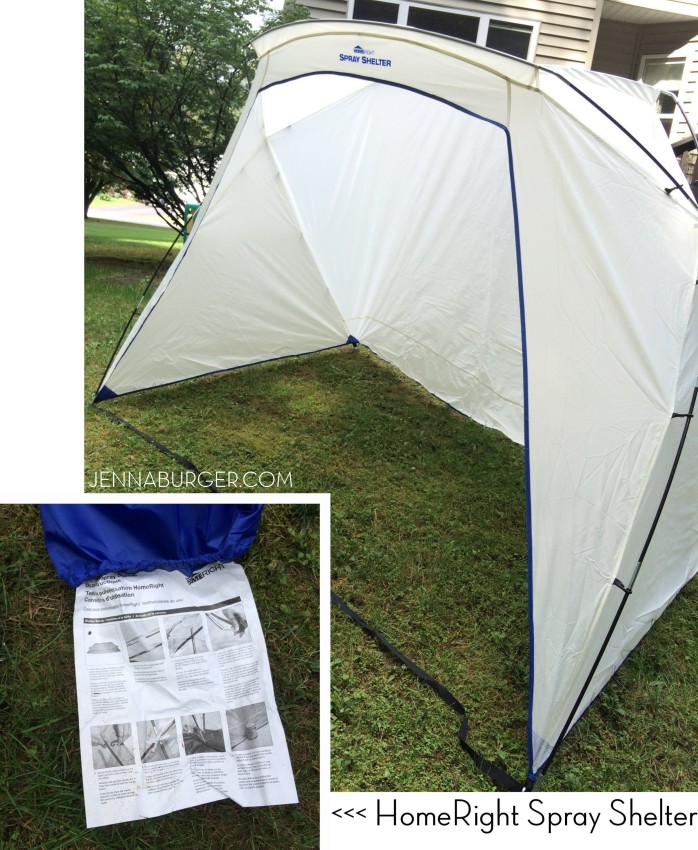
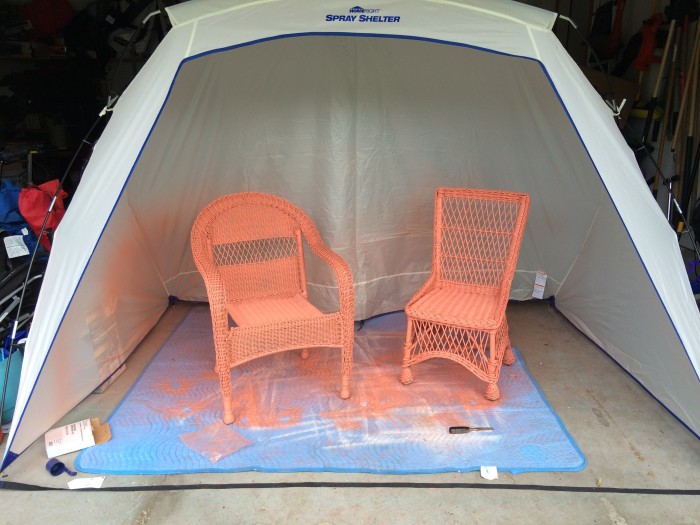
I didn’t want the paint to spray everything in sight, so the Spray Shelter by HomeRight really came in handy.  It too was my first time using it, but set-up took about 5 minutes and I had my son helping me a bit.  Assembly was just like putting a tent or beach shelter together.

The instructions are attached directly to the bag that the shelter comes in, which is genius!

DIY tutorial for painting wicker using the HomeRight finish max hand sprayer. I painted 2 wicker chairs in less than 10 minutes. That would be impossible with a paint brush. A hand sprayer is a MUST TOOL for paint projects. Check out a step-by-step tutorial + video of how fast it covers > www.jennaburger.com

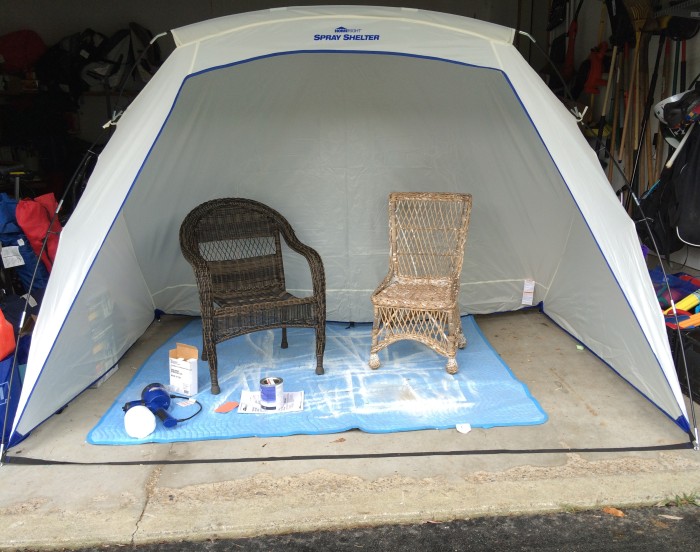
Right when I was done erecting the shelter, it started to rain.  Just my luck, ha.  So I moved it to the garage…

DIY tutorial for painting wicker using the HomeRight finish max hand sprayer. I painted 2 wicker chairs in less than 10 minutes. That would be impossible with a paint brush. A hand sprayer is a MUST TOOL for paint projects. Check out a step-by-step tutorial + video of how fast it covers > www.jennaburger.com

NOW, I was ready!

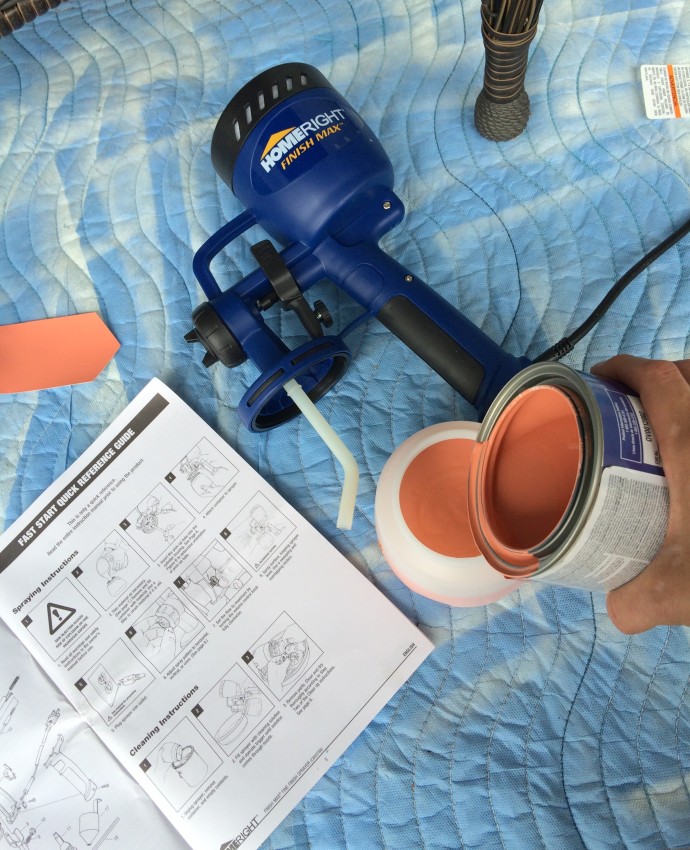
Being totally honest, I was nervous to use this ‘machine’, but there really was no learning curve and there was little set-up / clean-up.  I hate reading directions, but HomeRight has made it so easy with a one-page Fast Start Quick Reference Guide.  Within 3 minutes of opening the box, I was ready!

DIY tutorial for painting wicker using the HomeRight finish max hand sprayer. I painted 2 wicker chairs in less than 10 minutes. That would be impossible with a paint brush. A hand sprayer is a MUST TOOL for paint projects. Check out a step-by-step tutorial + video of how fast it covers > www.jennaburger.com

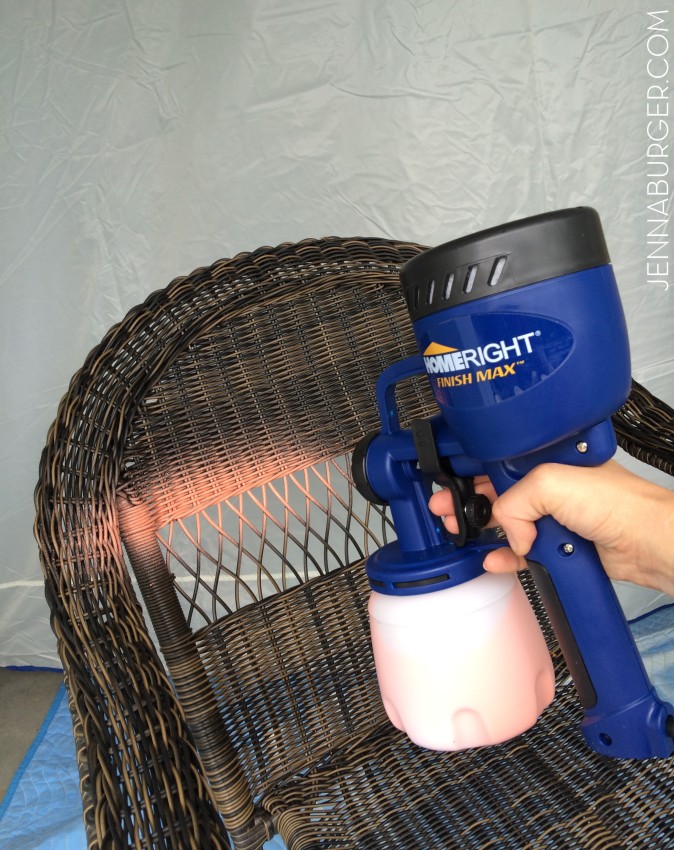
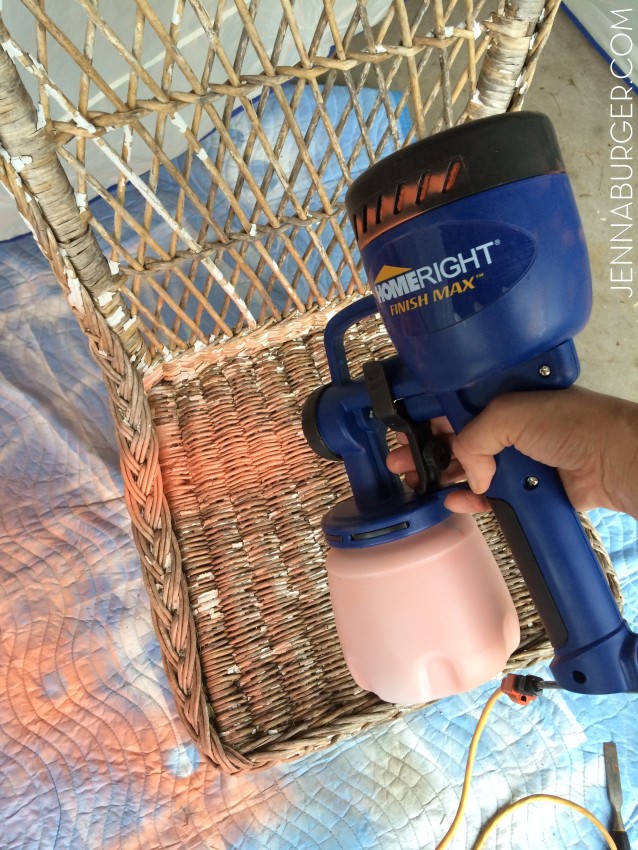
With the paint in the canister (read my helpful tips below before starting), I was ready to start.  I pushed the trigger and the paint started to flow.

DIY tutorial for painting wicker using the HomeRight finish max hand sprayer. I painted 2 wicker chairs in less than 10 minutes. That would be impossible with a paint brush. A hand sprayer is a MUST TOOL for paint projects. Check out a step-by-step tutorial + video of how fast it covers > www.jennaburger.com

Details on the HomeRight Finish Max Fine Sprayer

VIDEO

I never take videos, but I couldn’t resist.  I had to show you how quick + easy the paint covered the chair.

On to the next chair…

DIY tutorial for painting wicker using the HomeRight finish max hand sprayer. I painted 2 wicker chairs in less than 10 minutes. That would be impossible with a paint brush. A hand sprayer is a MUST TOOL for paint projects. Check out a step-by-step tutorial + video of how fast it covers > www.jennaburger.comIn about 10 minutes, both chairs were covered with coat #1.   A bit later I sprayed them again with a second coat and they were done.

DIY tutorial for painting wicker using the HomeRight finish max hand sprayer. I painted 2 wicker chairs in less than 10 minutes. That would be impossible with a paint brush. A hand sprayer is a MUST TOOL for paint projects. Check out a step-by-step tutorial + video of how fast it covers > www.jennaburger.com

TIPS + TRICKS

Here are some tips + tricks I learned along the way (plus my friends Jaime & Ashley shared a few tips with me on Instagram) so you too can ditch the nervousness of using this sprayer…

> Get full coverage of all nooks & crannies by moving the piece of furniture to spray at different angles – I especially had to do this with wicker!

> Paints & Stains need to be watered down so they flow through the sprayer properly.  With the sprayer comes a handy gadget to determine the appropriate water needed + there is a helpful chart in the instruction booklet.

> The Finish Max can spray horizontal, vertical, or in a cone pattern.  You can easily choose the direction by turning the dial on the front of the sprayer.

> There is no need to clean the sprayer between coats. Leave the paint or stain in the container (of course if time between coats is days long, then clean it).

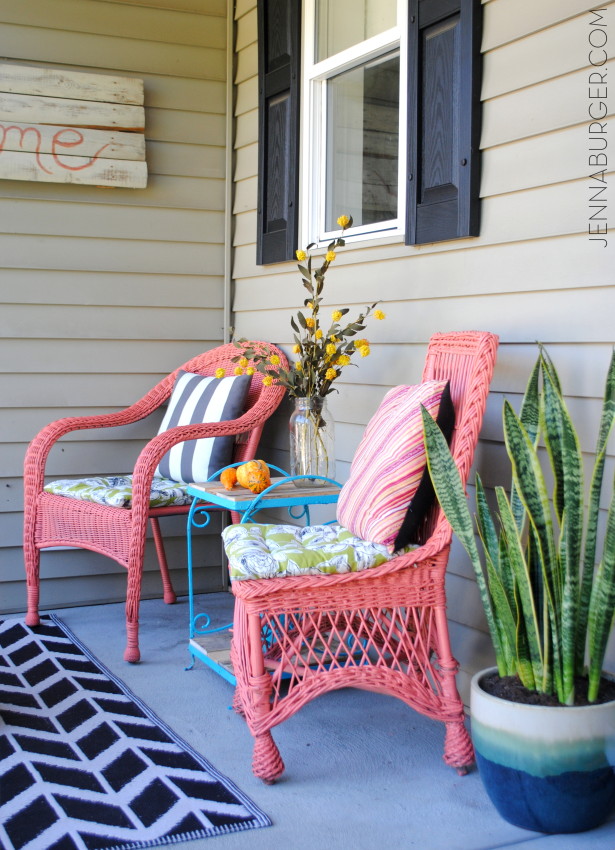
My new coral chairs looks Ah-Mazing on my front porch and it’s almost complete for Fall.

Want a peek?

Enjoy.

DIY tutorial for painting wicker using the HomeRight finish max hand sprayer. I painted 2 wicker chairs in less than 10 minutes. That would be impossible with a paint brush. A hand sprayer is a MUST TOOL for paint projects. Check out a step-by-step tutorial + video of how fast it covers > www.jennaburger.com

More to come later this week…

Want to save this tutorial for a later date – you know you want to try this sprayer 😉

PIN IT!

DIY tutorial for painting wicker using the HomeRight finish max hand sprayer. I painted 2 wicker chairs in less than 10 minutes. That would be impossible with a paint brush. A hand sprayer is a MUST TOOL for paint projects. Check out a step-by-step tutorial + video of how fast it covers > www.jennaburger.com

DISCLOSURE: THIS IS A SPONSORED POST WITH HOMERIGHT.  ALL WORDS + OPINIONS ARE 100% MY OWN – I TRULY LOVE THIS PRODUCT.  AFFILIATE LINKS ARE ALSO INCLUDED IN THIS POST.

A Green Planter + A Turquoise Table + A Coral Chair

Before picture of my garage sale finds— a before shot of my garage sale finds that I shared on my instagram page last week —

This Summer I have been in complete survival mode. Simply surviving, making sure to create memories each day with the kids so they have the Best Summer Ever.  BUT as each night falls, this mama is just d-o-n-e. It’s been a blast, but it’s been tiring. And we still have 2+ more weeks till school starts…

Packed days have left little time for personal creating, but after a quick stop at a garage sale last week where I picked up some ‘trash treasures’, I found myself with a few spare minutes + 2 cans of spray paint.  And that makes this gal gitty with excitement!

First up, Green Citrus (by Rustoleum)…

Before and After planter - $1 garage sale find transformed with Green Citrus spray paint

Isn’t that such a vibrant, unexpected, fun color?! For $10 I made out well after stopping on a whim at a garage sale last Wednesday…

I picked up a wicker chair, a planter, and a table.  ALL need a bit of TLC, but I am confident that ALL will look great with a splash of color!

THE PLANTER.

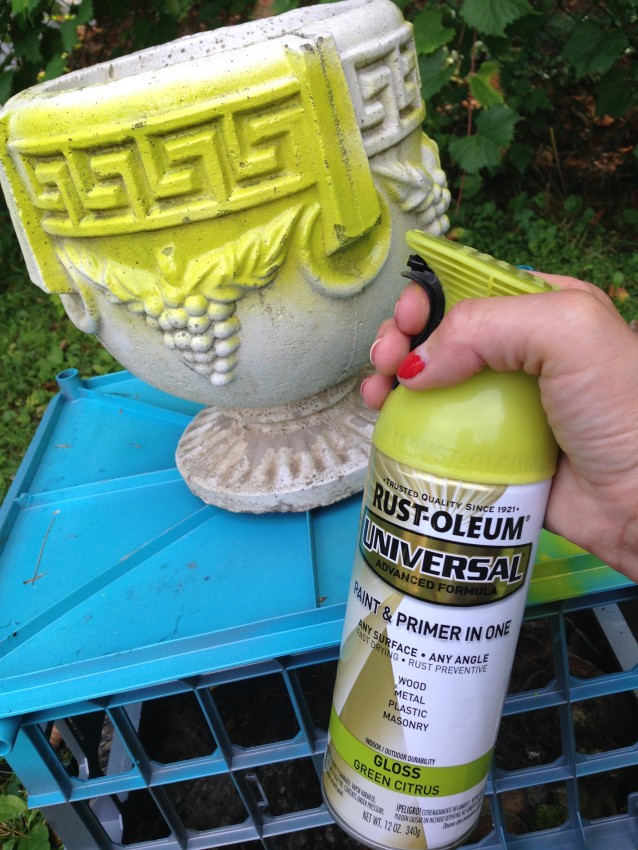
The planter update is complete.  I chose to spray paint it a lime green hue called Green Citrus in a glossy finish…

Before and After planter - $1 garage sale find transformed with Green Citrus spray paint

A few coats later, it was complete.

Before and After planter - $1 garage sale find transformed with Green Citrus spray paint

And ready to fill with a pretty plant.

Before and After planter - $1 garage sale find transformed with Green Citrus spray paint

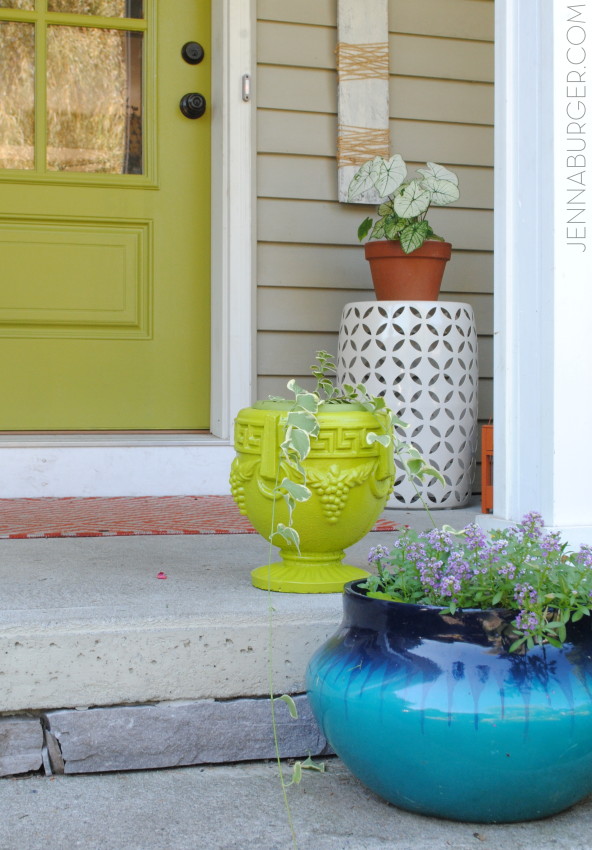
Now it sits beautifully on the front porch and looks awesome with the green front door.

Before and After planter - $1 garage sale find transformed with Green Citrus spray paint

Definitely one of the best + EASIEST before and afters ever…

Before and After planter - $1 garage sale find transformed with Green Citrus spray paint

THE TABLE.

A splash of turquoise spray paint gave this falling-apart-table new life.  It’s still rusty but I find that beautiful.  The new color is complete, but there is still work to be done – it needs a top.  I’ve got some ideas, but still need to put it together…

Before and After Table: $3 garage sale find transformed with turquoise spray paint

Want to know how to spray paint like a PRO?  Need Tips?
Check out these 2 helpful posts:

Simple Steps to Spray Painting Success

5 Surfaces to Spray Paint

THE CHAIR.

The chair hasn’t been touched, but I have a plan. CORAL is the COLOR that is going to make this chair shine again.  I first need to prime it, then I’m going to paint it.  I think I’m going to skip spray painting this one and instead try a hand sprayer.  I’ve had one sitting in the garage forever and I think this is just the project to try it on…  Wish me luck 😉

Plans to spray paint this chair a new coral hue

Plans to spray paint this chair a new coral hue

I’m looking for a wicker sibling to go along with this beauty.  Not a twin, but a something alike.  Have a wicker chair?  Share details.

I’ve got plans for these new green + turquoise + coral additions.

You’ll see them finished soon. AND all together.

Somewhere around the homestead.

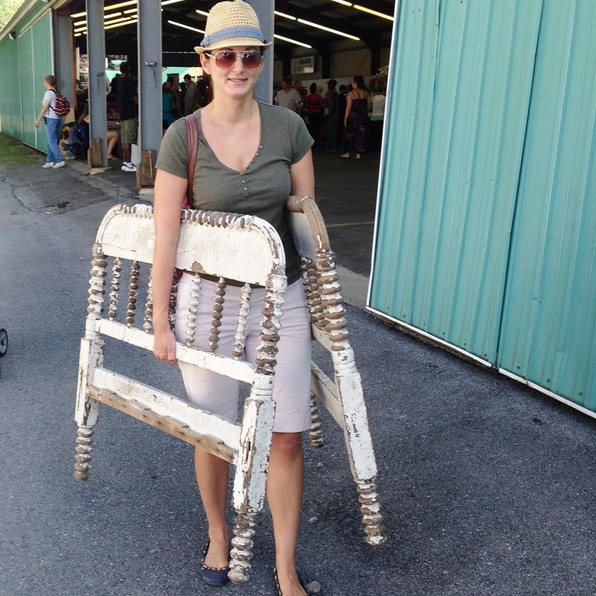
Before I let you go, here is another great score from the weekend.  The fam & I were up & out early on Saturday at a ‘biggest yard sale’ event & I found these 2 headboards for the girls room (in a couple years).  Oh the potential!  Here is a picture I shared on my Instagram page

Headboard find!


Adding Stone Veneer to a Concrete Foundation Wall

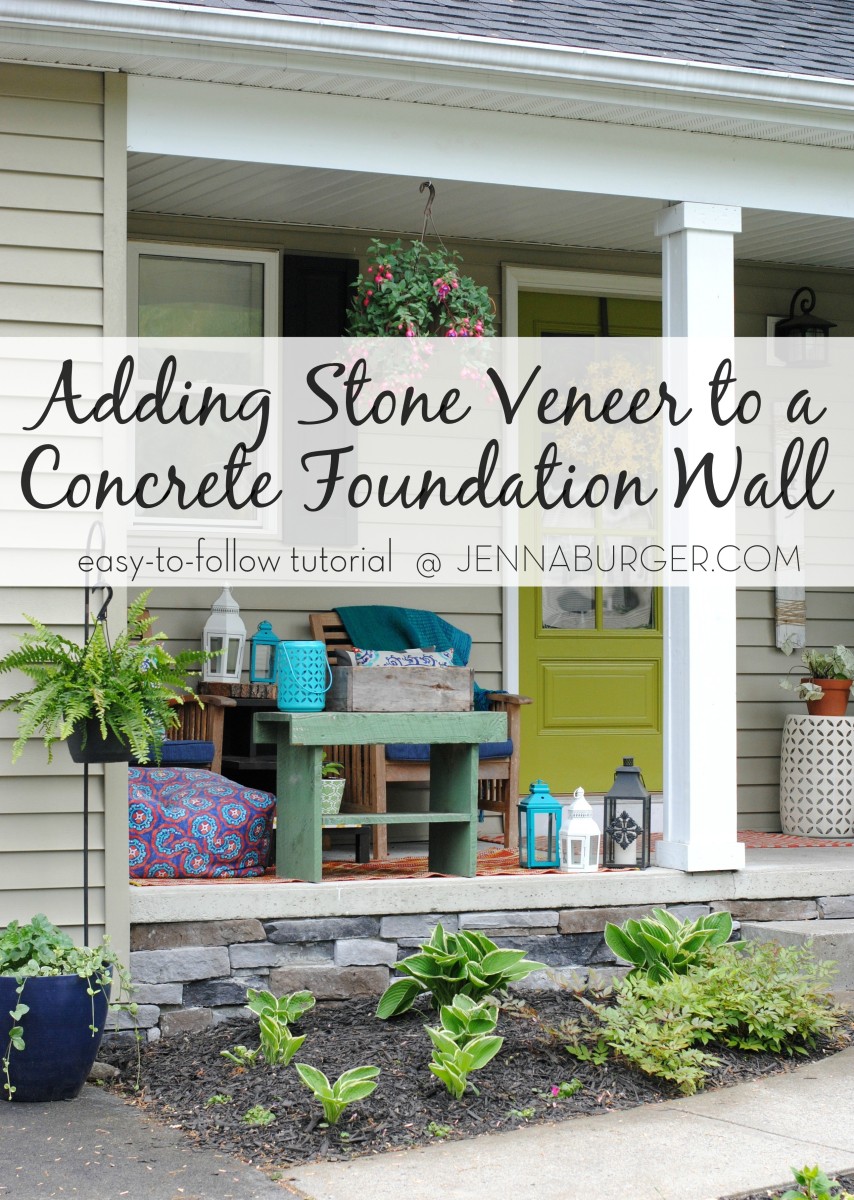
#DIY Tutorial for Adding a Stone Veneer to a Concrete Foundation Wall: Give a bare, untreated foundation wall a finished look with an affordable stone facing!  Easy-to-Follow tutorial @ www.jennaburger.com

May was A-MAY-zing (hehe, corny but true)! Really though, it was a wonderful month of sunshine + warmer temps for us in the North Country of New York – June not so much as of yet…

Anyway, with the warm, beautiful days last month we were able to tackle most of our yearly outdoor maintenance work + had some time to fit in a few new projects.  While the Mister worked on the grass, I spruced up the front porch (which I shared last week), then we both came together to tackle the new stone garden border + the DIY project featured today of adding stone veneer to the concrete foundation wall...

#DIY Tutorial for Adding a Stone Veneer to a Concrete Foundation Wall: Give a bare, untreated foundation wall a finished look with an affordable stone facing! Easy-to-Follow tutorial @ www.jennaburger.com  #DIY Tutorial for Adding a Stone Veneer to a Concrete Foundation Wall: Give a bare, untreated foundation wall a finished look with an affordable stone facing! Easy-to-Follow tutorial @ www.jennaburger.com

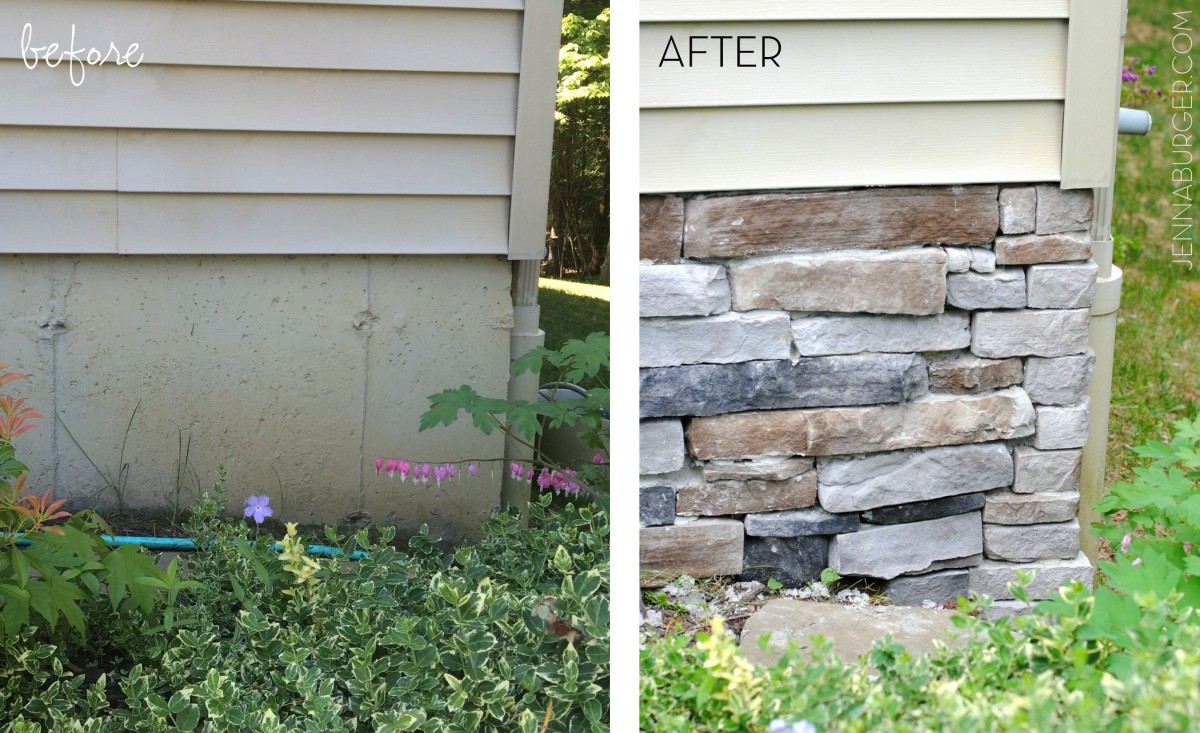
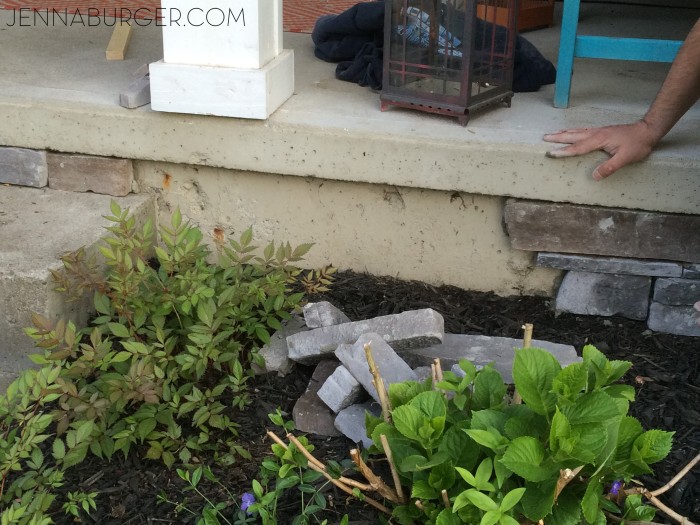
It’s typically for many homes – new and old –  to have a bare, “naked” foundation wall at the gap between where the siding stops and the ground starts.  Depending on the grade of the land, as little as a few inches or as much as 2’+ may be exposed giving an unattractive, unfinished appearance.

One way to make the plain wall look more finished is to add stone veneer to the foundation walls surface.

Stone veneer products, which are made from concrete, come in a range of colors + shapes and can be used for a variety of projects.  Their ‘pro’ is that they are lighter weight than real stone, less expensive, and only about 1″ – 2″ thick. And the best part of all… You really don’t need ANY EXPERIENCE to apply / install them.

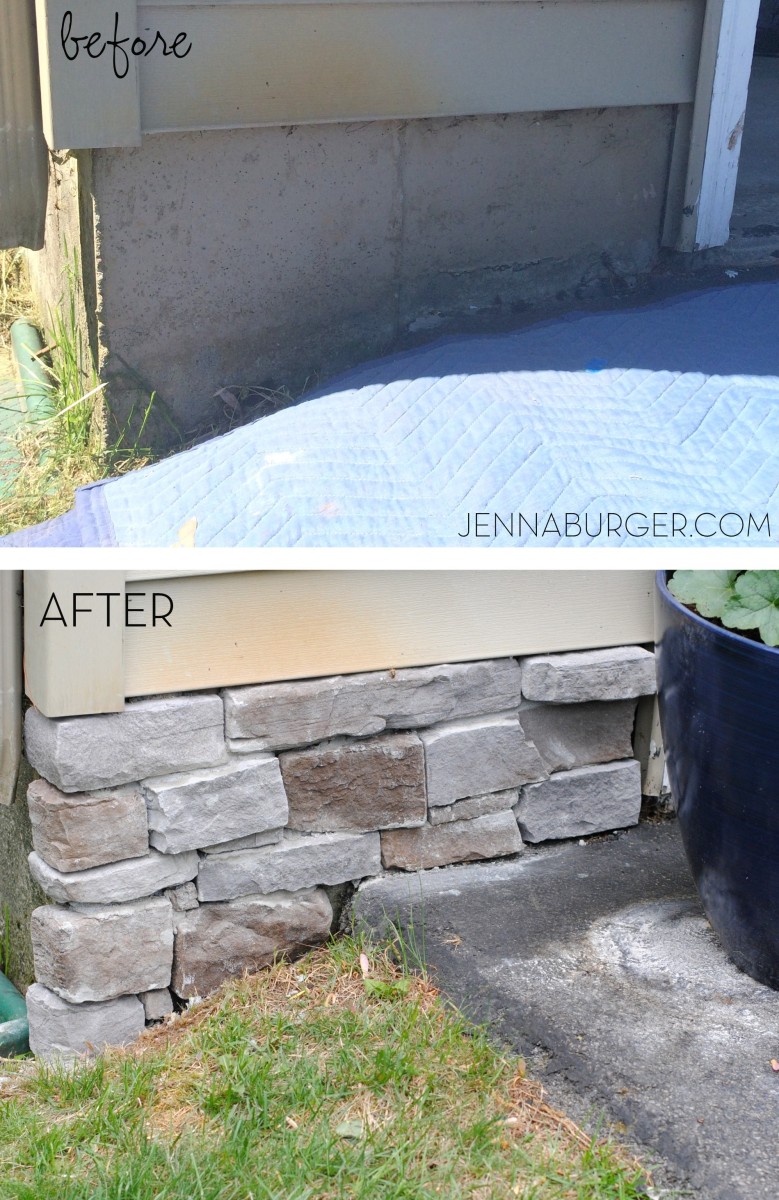
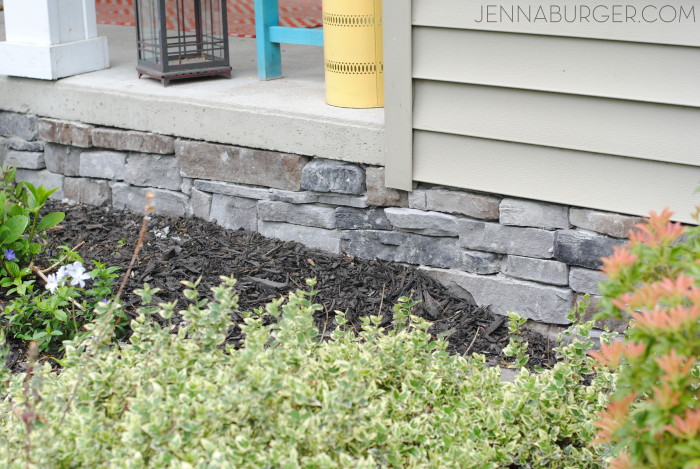
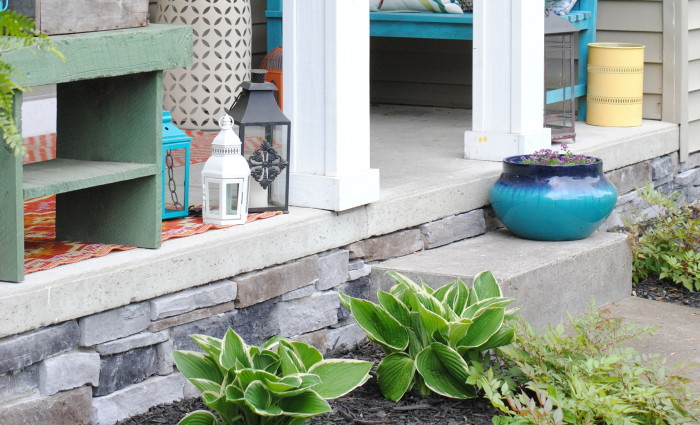
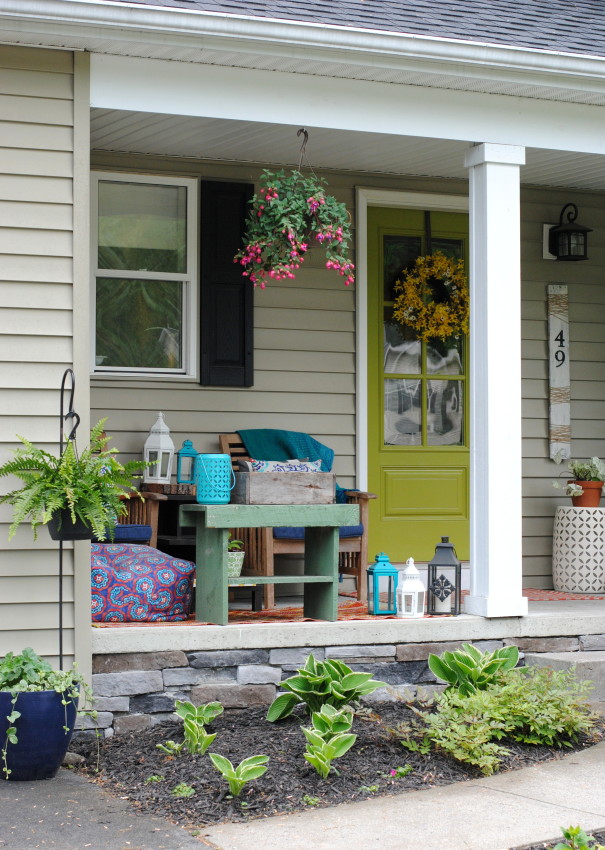
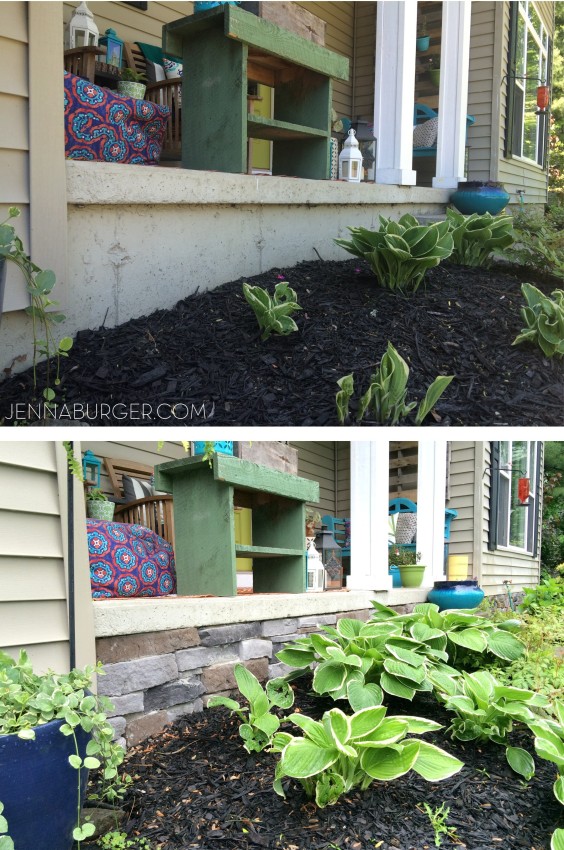
Check out the before & after on the far side of our front facade where over 2 feet of bare foundation wall was previously exposed.  What a difference!

#DIY Tutorial for Adding a Stone Veneer to a Concrete Foundation Wall: Give a bare, untreated foundation wall a finished look with an affordable stone facing!  Easy-to-Follow tutorial @ www.jennaburger.com

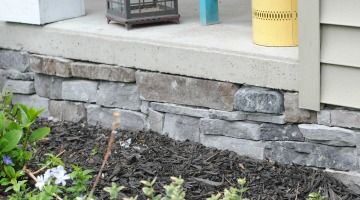
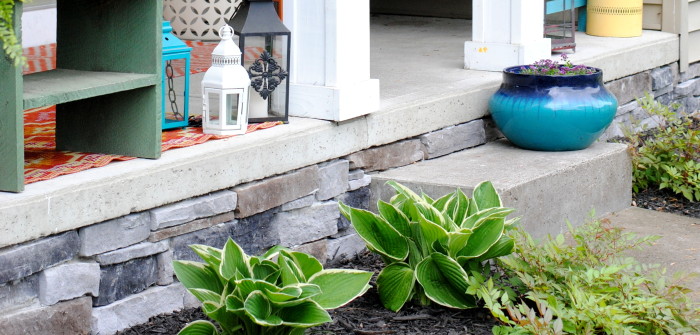
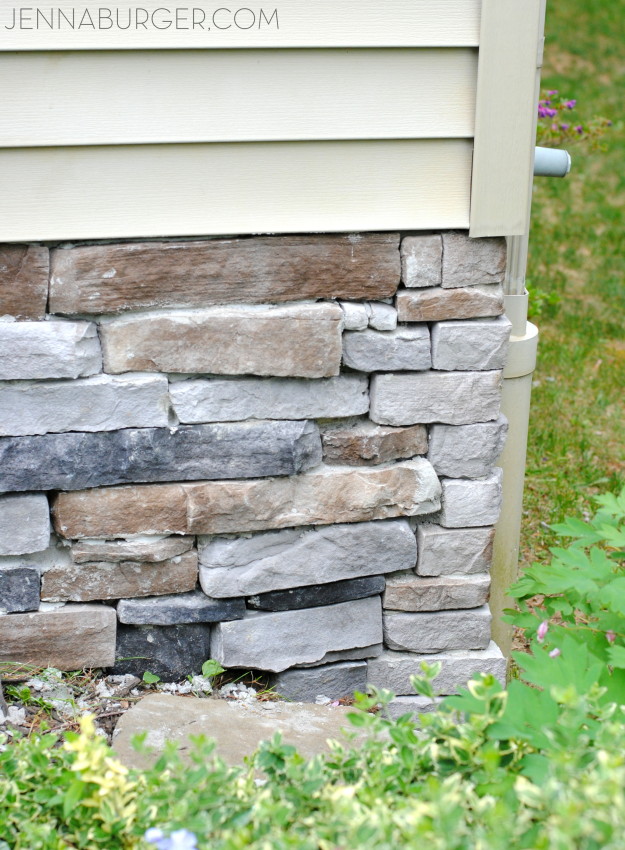
The stone veneer I chose is StoneCraft Pennsylvania Ledgestone Flats from Lowe’s.  The coloring has touches of grays & blues, with a medium-range stone size in a horizontal, linear pattern.

MATERIALS + COST

For the front facade only, I calculated about 45 square feet would be needed.   All the stone veneers at Lowe’s are special order and I ordered 6 boxes (@ 9 sq.ft. /per box), which gave me quite a bit extra for mistakes.  In the end, I had a full box and a half leftover.   Additionally, I ordered one box with corner pieces only.  Each of those boxes covers 7 linear feet, but I only needed about 3′-4′ linear feet.

Each box (which covered 9 sq. ft. + the corners which covered 7 linear ft.) was about $72, so the total was about $630

Other materials needed:

>  Circular Saw

> Masonry Blade

> Trowel (same as when tiling)

> Large bucket (to mix mortar)

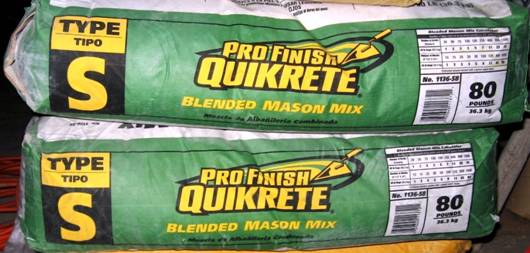
> Type S mortar (this is similar to what I purchased)

> Water (to mix mortar)

mortar

CREATING A PATTERN

The most difficult challenging part of this entire project wasn’t the actual install, but instead creating a pattern with an even mix of sizes & colors.  There was no tutorial or “how-to” for this so it took some thinking, looking, and analyzing along the way.

It’s important to vary the colors (in our case there was a mix of grays, taupes, blues, and blacks) and to vary the size + shapes of the stones.  With the pattern we chose, we stuck with a linear, horizontal direction, but it was kind of like a jigsaw puzzle.

As we worked along from one end to the other, we would “dry install” a few stones, confirm we liked how it looked, then removed them to add the mortar.

#DIY Tutorial for Adding a Stone Veneer to a Concrete Foundation Wall: Give a bare, untreated foundation wall a finished look with an affordable stone facing!  Easy-to-Follow tutorial @ www.jennaburger.com

Important note: If you have corners, start with them first, then work your way over!

MIXING MORTAR

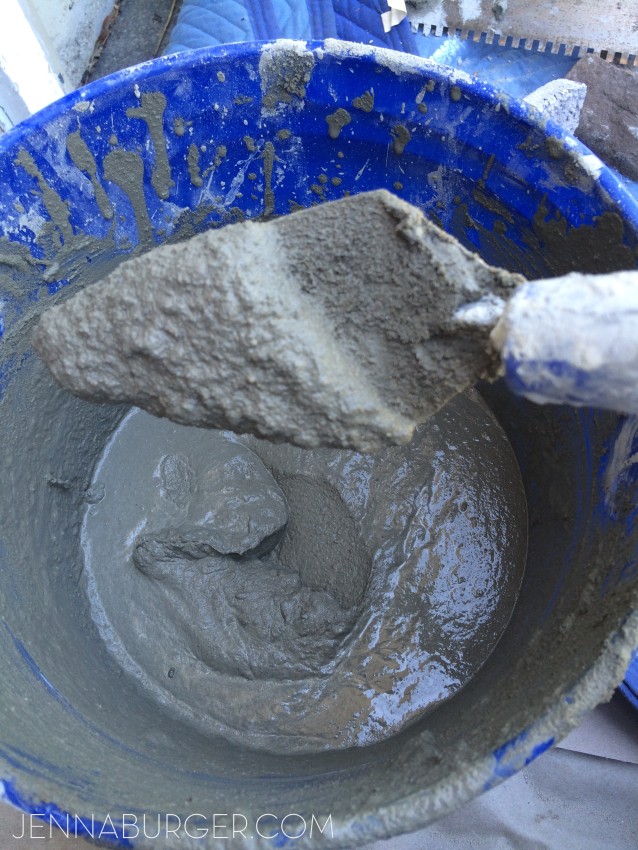
Using a large bucket (I used a 5 gallon bucket), add the mortar “powder”, then the water to make a mix that is pasty and that stays on the trowel without falling off when vertical.  If there is not enough water in the mix, the mortar will not join the stone to the wall, but if it’s too watery, the mix will run right off.

Sorry that I can’t be more specific or share an exact ratio, but it’ really trial and error.  There is a mixing ratio on the back of the bag, but it’s for the entire bag at one time and I don’t recommend doing that unless you work fast, have a large area to cover, and plan on using it all at one time.

This is a picture of the mortar mix just as I was about to begin the install of the stone…

#DIY Tutorial for Adding a Stone Veneer to a Concrete Foundation Wall: Give a bare, untreated foundation wall a finished look with an affordable stone facing!  Easy-to-Follow tutorial @ www.jennaburger.com

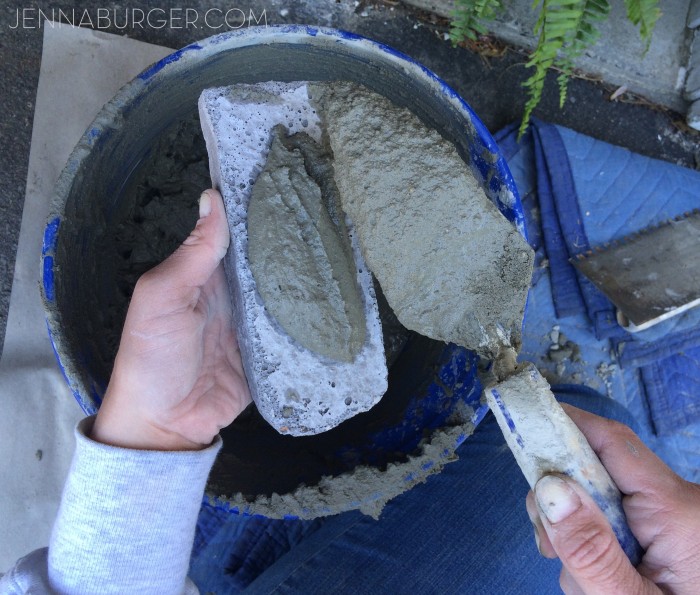
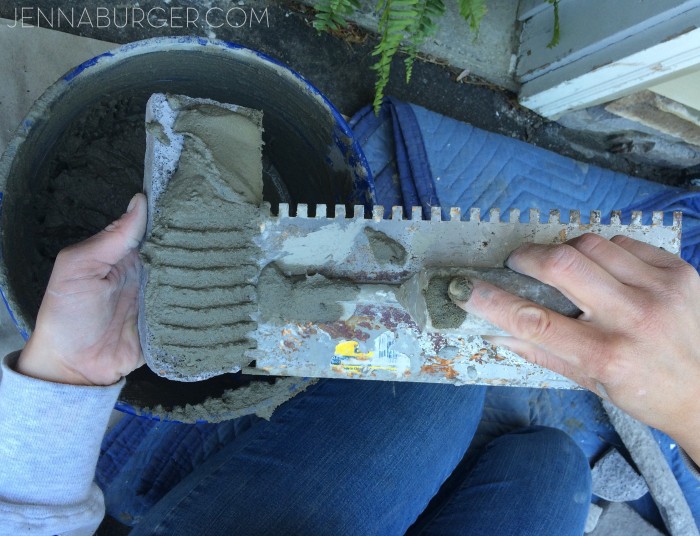
Once the mortar mix is ready, take a trowel and add a good amount to the back of the stone (the beauty of veneer is that the back is completely flat).

#DIY Tutorial for Adding a Stone Veneer to a Concrete Foundation Wall: Give a bare, untreated foundation wall a finished look with an affordable stone facing!  Easy-to-Follow tutorial @ www.jennaburger.com

Spread out the mortar so the entire stones back is covered, then run the grooved section of the trowel over the mortar to create “ridges” which gives the stone a better adhesion to the foundation wall.

#DIY Tutorial for Adding a Stone Veneer to a Concrete Foundation Wall: Give a bare, untreated foundation wall a finished look with an affordable stone facing!  Easy-to-Follow tutorial @ www.jennaburger.com

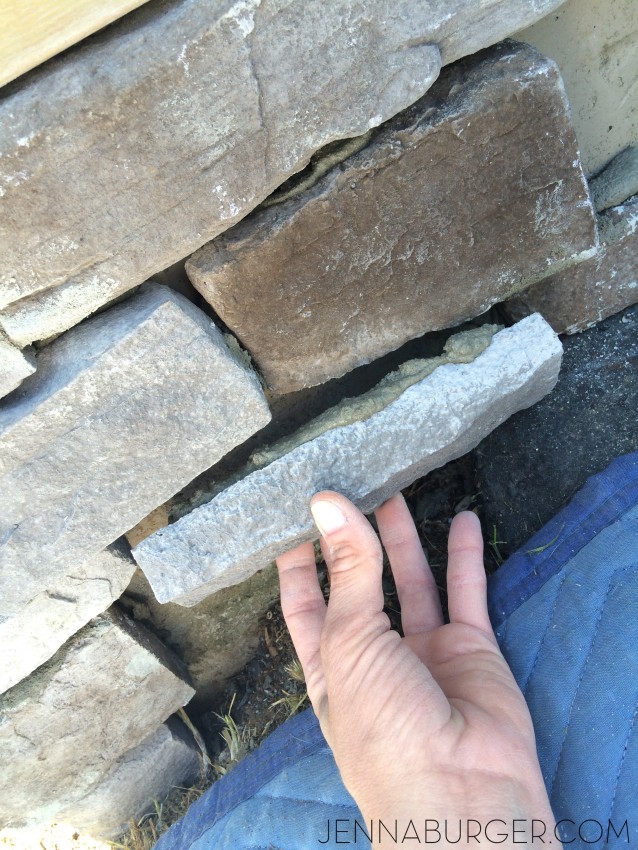
Then stick the stone in place…

#DIY Tutorial for Adding a Stone Veneer to a Concrete Foundation Wall: Give a bare, untreated foundation wall a finished look with an affordable stone facing!  Easy-to-Follow tutorial @ www.jennaburger.com

If you’ve ever tiled before, it’s a very similar process!  [tutorial on How-To Tile + Grout a Bathroom]

CUTTING STONE VENEER

Just as with tiling a bathroom, it’s inevitable that some stones will need to be altered / cut.

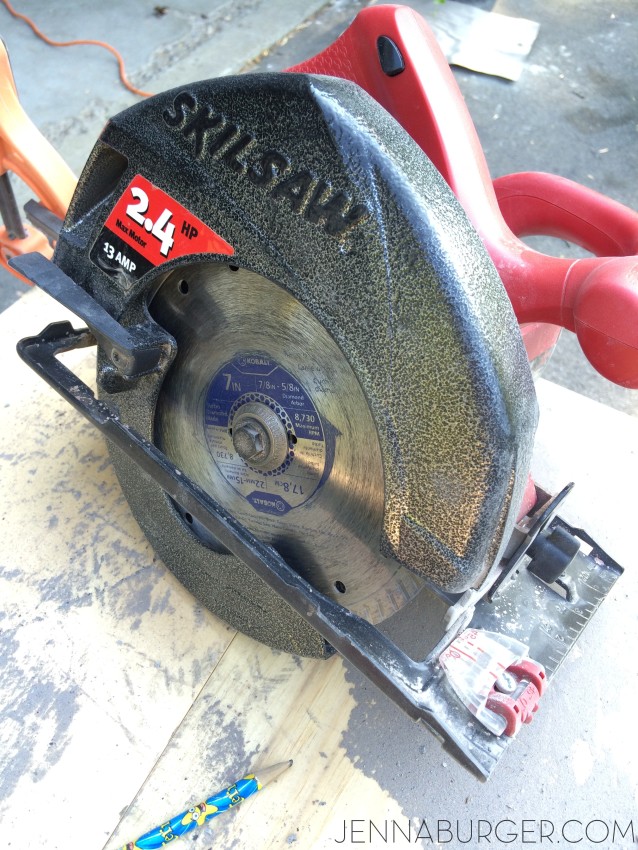
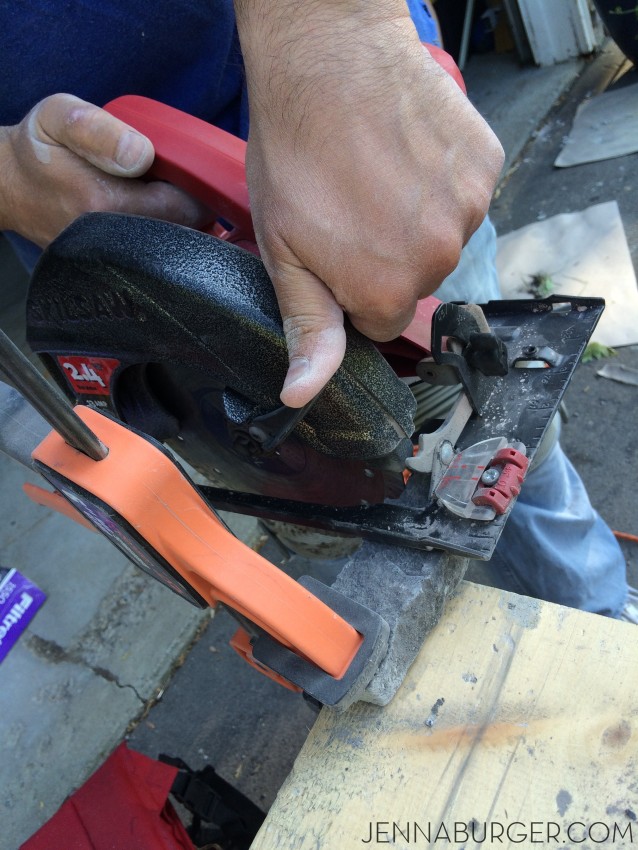
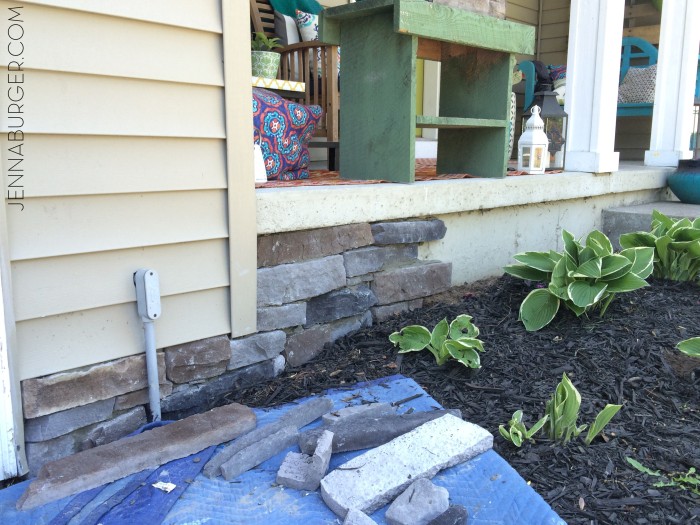
We used a Circular Saw (see my favorites tools) with a new Masonry Blade (it has an abrasive edge with no teeth) to cut the stones.  It was fairly easy to do and took little time to make cuts.  Be sure to clamp the stone down so it’s secure and slowly make the cut.

#DIY Tutorial for Adding a Stone Veneer to a Concrete Foundation Wall: Give a bare, untreated foundation wall a finished look with an affordable stone facing!  Easy-to-Follow tutorial @ www.jennaburger.com


#DIY Tutorial for Adding a Stone Veneer to a Concrete Foundation Wall: Give a bare, untreated foundation wall a finished look with an affordable stone facing!  Easy-to-Follow tutorial @ www.jennaburger.com

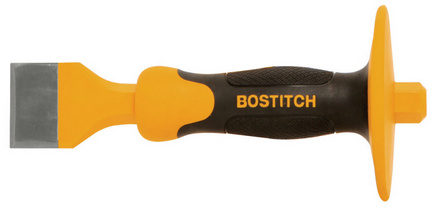
A Masons Chisel also comes in handy to cut small edges and/or make minor alternations.

Masons Chisel

#DIY Tutorial for Adding a Stone Veneer to a Concrete Foundation Wall: Give a bare, untreated foundation wall a finished look with an affordable stone facing!  Easy-to-Follow tutorial @ www.jennaburger.com

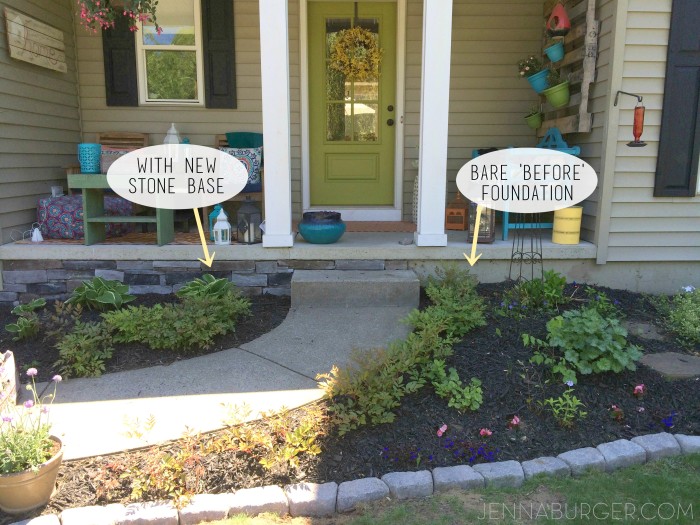
Check out the difference with part of the stone installed & the other side with the bare foundation wall…

#DIY Tutorial for Adding a Stone Veneer to a Concrete Foundation Wall: Give a bare, untreated foundation wall a finished look with an affordable stone facing!  Easy-to-Follow tutorial @ www.jennaburger.com

The total project took about 6 hours.  At times it was tiring being on the ground so long + our backs and knees were quite sore the next day, but it was really all worth the effort!

#DIY Tutorial for Adding a Stone Veneer to a Concrete Foundation Wall: Give a bare, untreated foundation wall a finished look with an affordable stone facing!  Easy-to-Follow tutorial @ www.jennaburger.com

THE RESULT

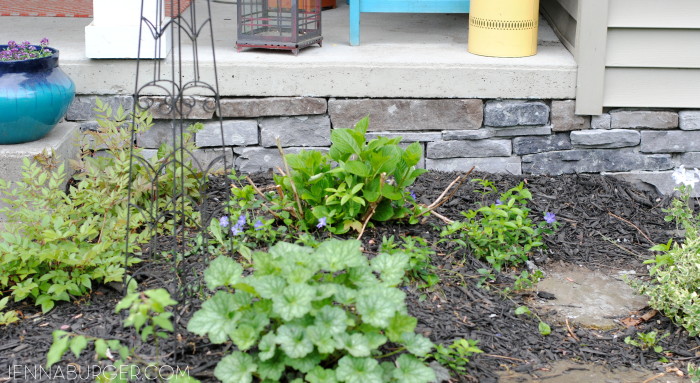
This was a 2 thumbs up project in our book.  Curb appeal is so important to how it ‘speaks’ to those visiting your home (and of course to those that live there).  Yes for many, $700 is a lot of money, but in the long term the addition of the stone veneer to the front of our home has made a big impact on the overall look.

#DIY Tutorial for Adding a Stone Veneer to a Concrete Foundation Wall: Give a bare, untreated foundation wall a finished look with an affordable stone facing!  Easy-to-Follow tutorial @ www.jennaburger.com

#DIY Tutorial for Adding a Stone Veneer to a Concrete Foundation Wall: Give a bare, untreated foundation wall a finished look with an affordable stone facing!  Easy-to-Follow tutorial @ www.jennaburger.com

#DIY Tutorial for Adding a Stone Veneer to a Concrete Foundation Wall: Give a bare, untreated foundation wall a finished look with an affordable stone facing!  Easy-to-Follow tutorial @ www.jennaburger.com

#DIY Tutorial for Adding a Stone Veneer to a Concrete Foundation Wall: Give a bare, untreated foundation wall a finished look with an affordable stone facing!  Easy-to-Follow tutorial @ www.jennaburger.com

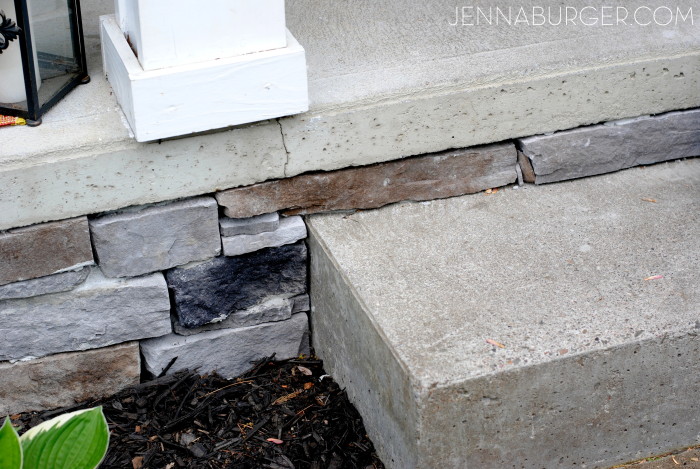
The new stone veneer absolutely enhances the front facade of our home and looks like it’s always been there.   It’s a beautiful complimentary addition to the other changes we’ve made!

#DIY Tutorial for Adding a Stone Veneer to a Concrete Foundation Wall: Give a bare, untreated foundation wall a finished look with an affordable stone facing!  Easy-to-Follow tutorial @ www.jennaburger.com

#DIY Tutorial for Adding a Stone Veneer to a Concrete Foundation Wall: Give a bare, untreated foundation wall a finished look with an affordable stone facing!  Easy-to-Follow tutorial @ www.jennaburger.com

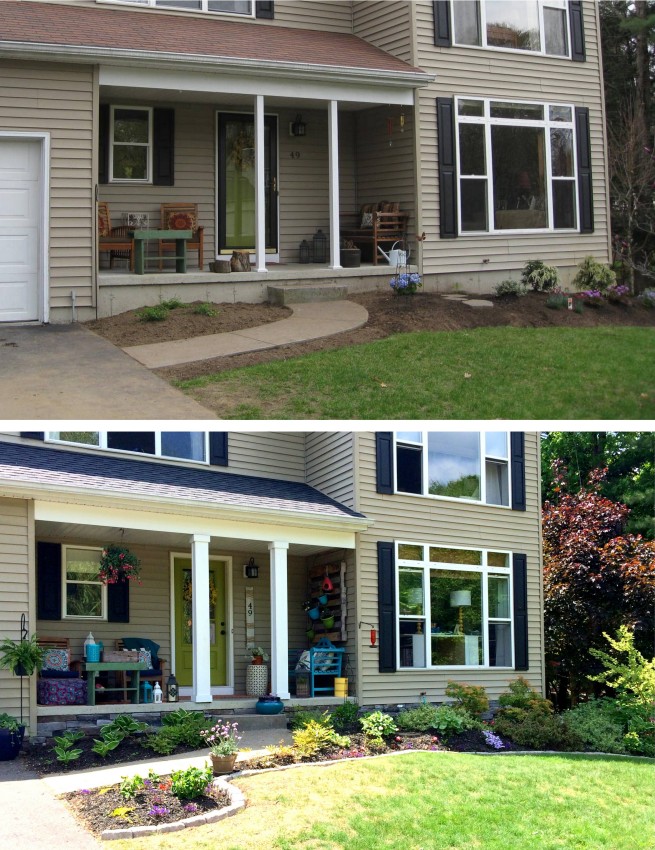
BEFORE + AFTER

In just a few years, here’s the progress…

#DIY Tutorial for Adding a Stone Veneer to a Concrete Foundation Wall: Give a bare, untreated foundation wall a finished look with an affordable stone facing!  Easy-to-Follow tutorial @ www.jennaburger.comone more…

#DIY Tutorial for Adding a Stone Veneer to a Concrete Foundation Wall: Give a bare, untreated foundation wall a finished look with an affordable stone facing! Easy-to-Follow tutorial @ www.jennaburger.com

Can I say, ‘I think we’re done outdoors?’…  Not quite yet.  All the big + more involved outdoor projects we wanted to tackle this year are finished, but I do have a few ideas that I want to focus on for the deck in the back of our house.  That will be a in a few weeks. For now, I just need to put my feet up & take a breather so I can truly enjoy what’s been accomplished.

I hope I’ve inspired you to look at what you have and enhance it to make it even more beautiful!  Curb appeal at it’s finest…