
Tag: Do-It-Yourself

DIY Hand Painted Wood Sign (using chalk transfer) #LOVEYOURHOMECHALLENGE

Hi there!  Today is a very exciting day.  Not only am I going to share an awesome, easy-peasy DIY project + tutorial, but I also have news about an incredible + talented person you might happen to know.

First to the latter… my sweet + uber-talented friend Melissa of The Inspired Room wrote a book which is being released today called Love the Home You Have (< affiliate link).

Love the Home You Have by Melissa Michaels

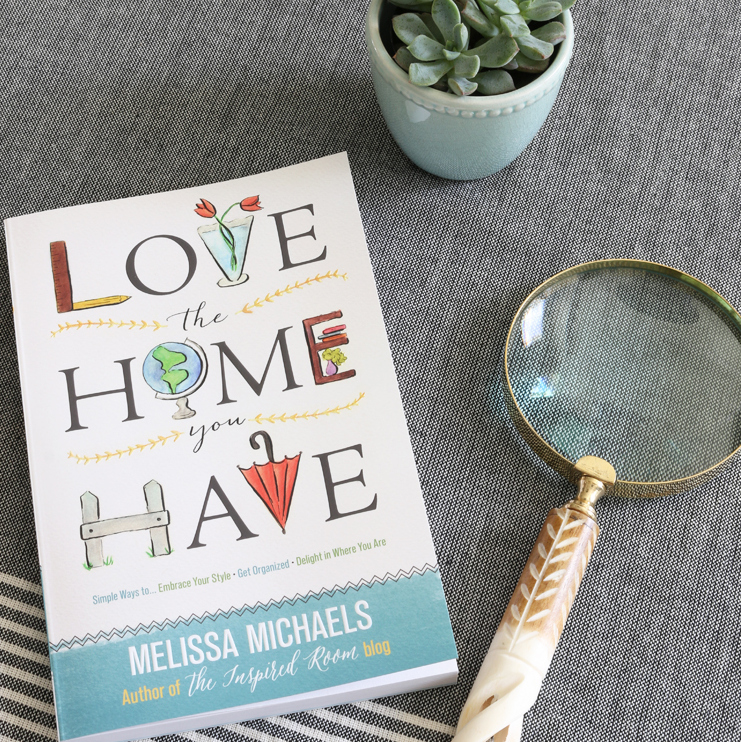
It is the first of many that she’s got lined up and it’s less about decorating and more about falling in love with your home & what you have now… today.  Some of the topics include: taking care of your home, finding beautiful in the simple things, finding balance between beauty and mess, using what you have to decorate, arranging furniture, decorating with things that mean something to you, finding contentment, and so much more.

If you recall back to last years Creating a Meaningful Home blog series: Year 2, Melissa started off the series with a bang and shared her poetic + inspirational words.  There is not a person more deserving to share thoughts of such meaning and beauty.

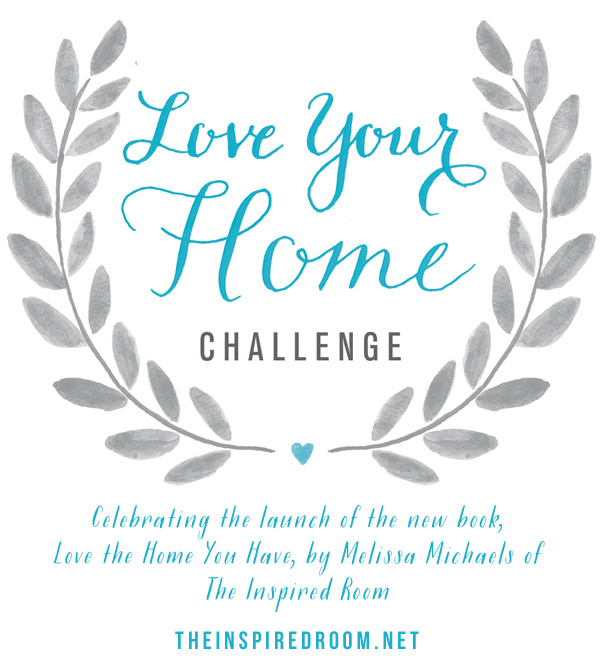
To kick off the launch of her first book, Melissa has put me to a challenge along with a bunch of other Blogger friends and has asked us to showcase a project using the 31-day LOVE YOUR HOME CHALLENGE section in the back of her book.  So fun!

31-Day Love Your Home Challenge from the new book Love the Home Your Have by Melissa Michaels of The Inspired Room

Similar to Melissa, I feel that our belongings should honor and reflect who we are, where we are from, and what we love.  A house is the shell, but it’s what we create in the shell that makes it a home.  For my home and the homes that I work on with clients, I always strive to create something that is a reflection of who resides there.

As I am slowly making progress on my living room makeover, I want to adorn the walls with not only prints that I love & have special meaning, but also DIY art that I create.  When this ‘challenge’ came up,  I knew it would be the perfect time + opportunity to share with you a recent creation…

DIY tutorial: HAND PAINTED SIGN using CHALK to transfer design onto wood.   An easy + inexpensive technique to transfer letters or a custom design.  Easy-to-follow step by step by @Jenna_Burger, www.jennaburger.com

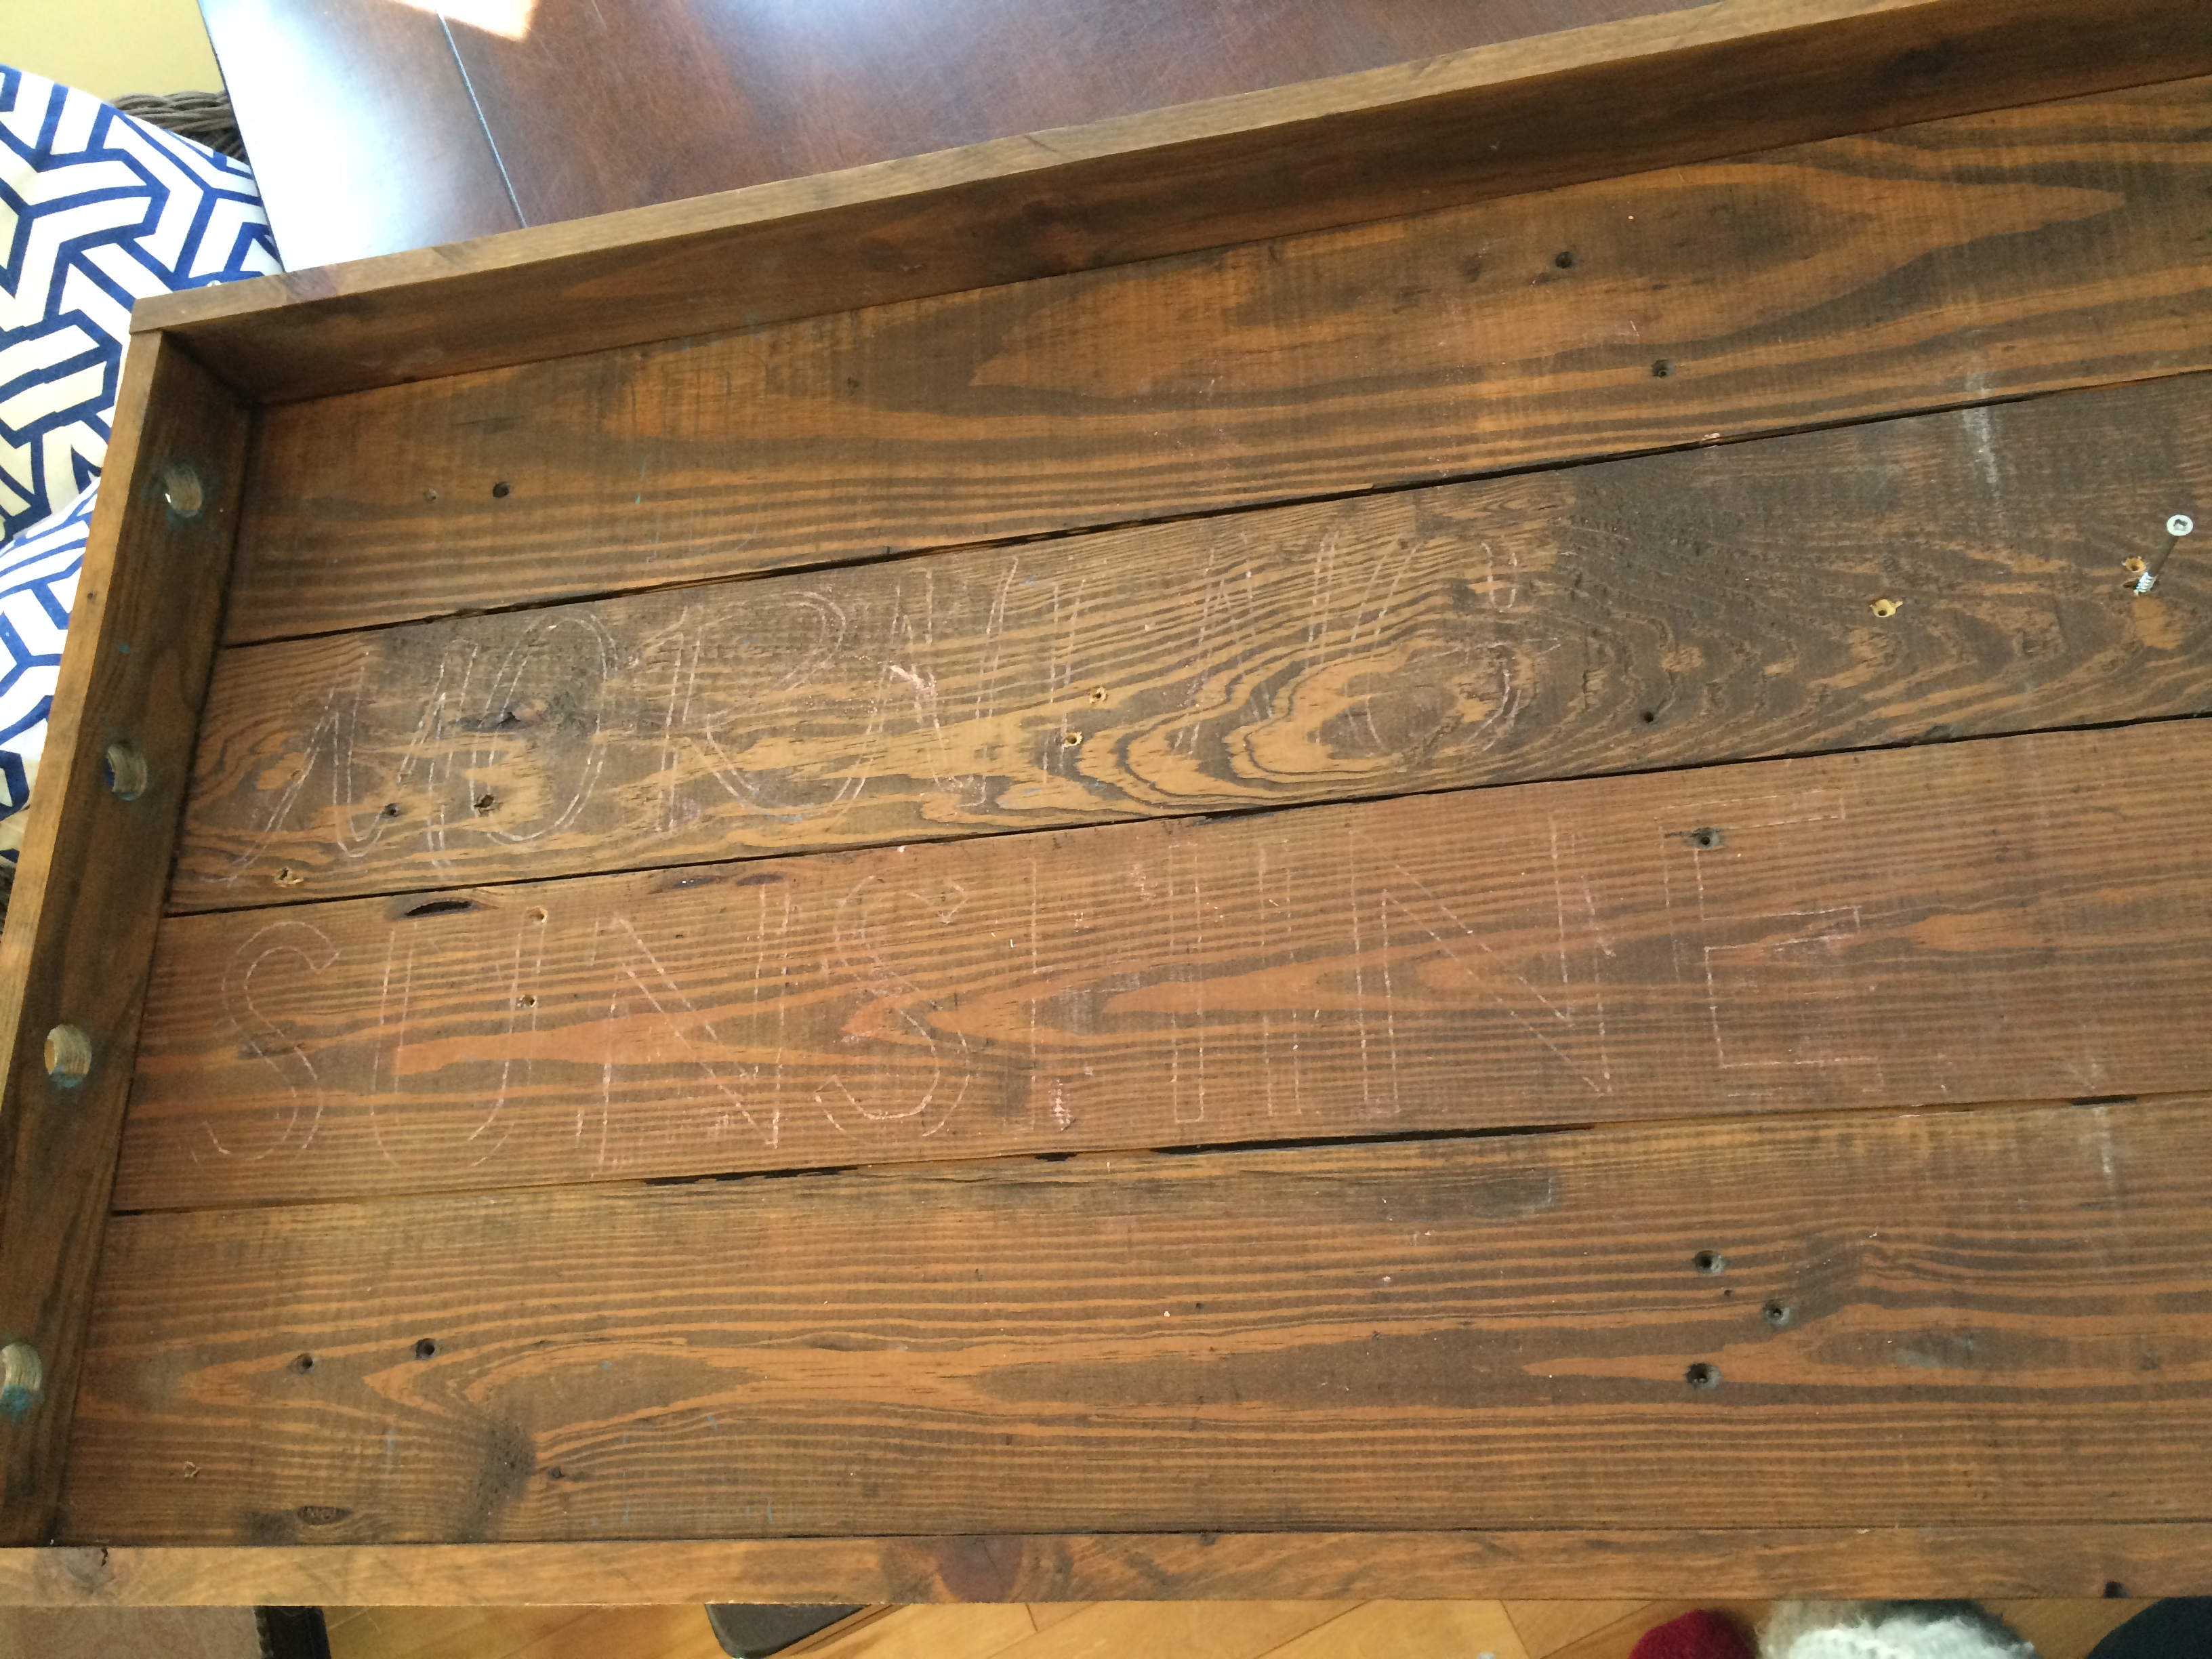
The previous owners that resided in our home, had a pool table in the basement.  While making some changes to create a basement that works + functions for us, I came across a cue stick holder that was tucked away in a closet.  Aside from a few cobwebs in the corners & screws hanging out, it looked like something I could totally make into something else.  An upcycling project was calling my name!  I left it in it’s place, but never forgot about it.  DIY ideas flurried through my head over the months and then I had an ah-ha moment while creating the new room.  It would be perfect for a big ole’ sign & with the 3″ lip, when hung it would create a ‘ledge’… almost like a knick-knack / chachka shelf to display collectibles from trips… we always grab a little something from places we visit to remember our experience – something cute to continue ‘our story’.

I thought and thought about the perfect quote to create on the cue stick holder-turned-DIY art and then Good Morning SUNSHINE came to mind!

Every morning when the kids wake, I always say “Good Morning Sunshine” in this over-the-top, probably annoying-to-them voice.  But it’s just what I do and it’s become a ritual.  I just feel like it’s a great, cheery way to start the day.

how to make a HAND PAINTED SIGN USING CHALK

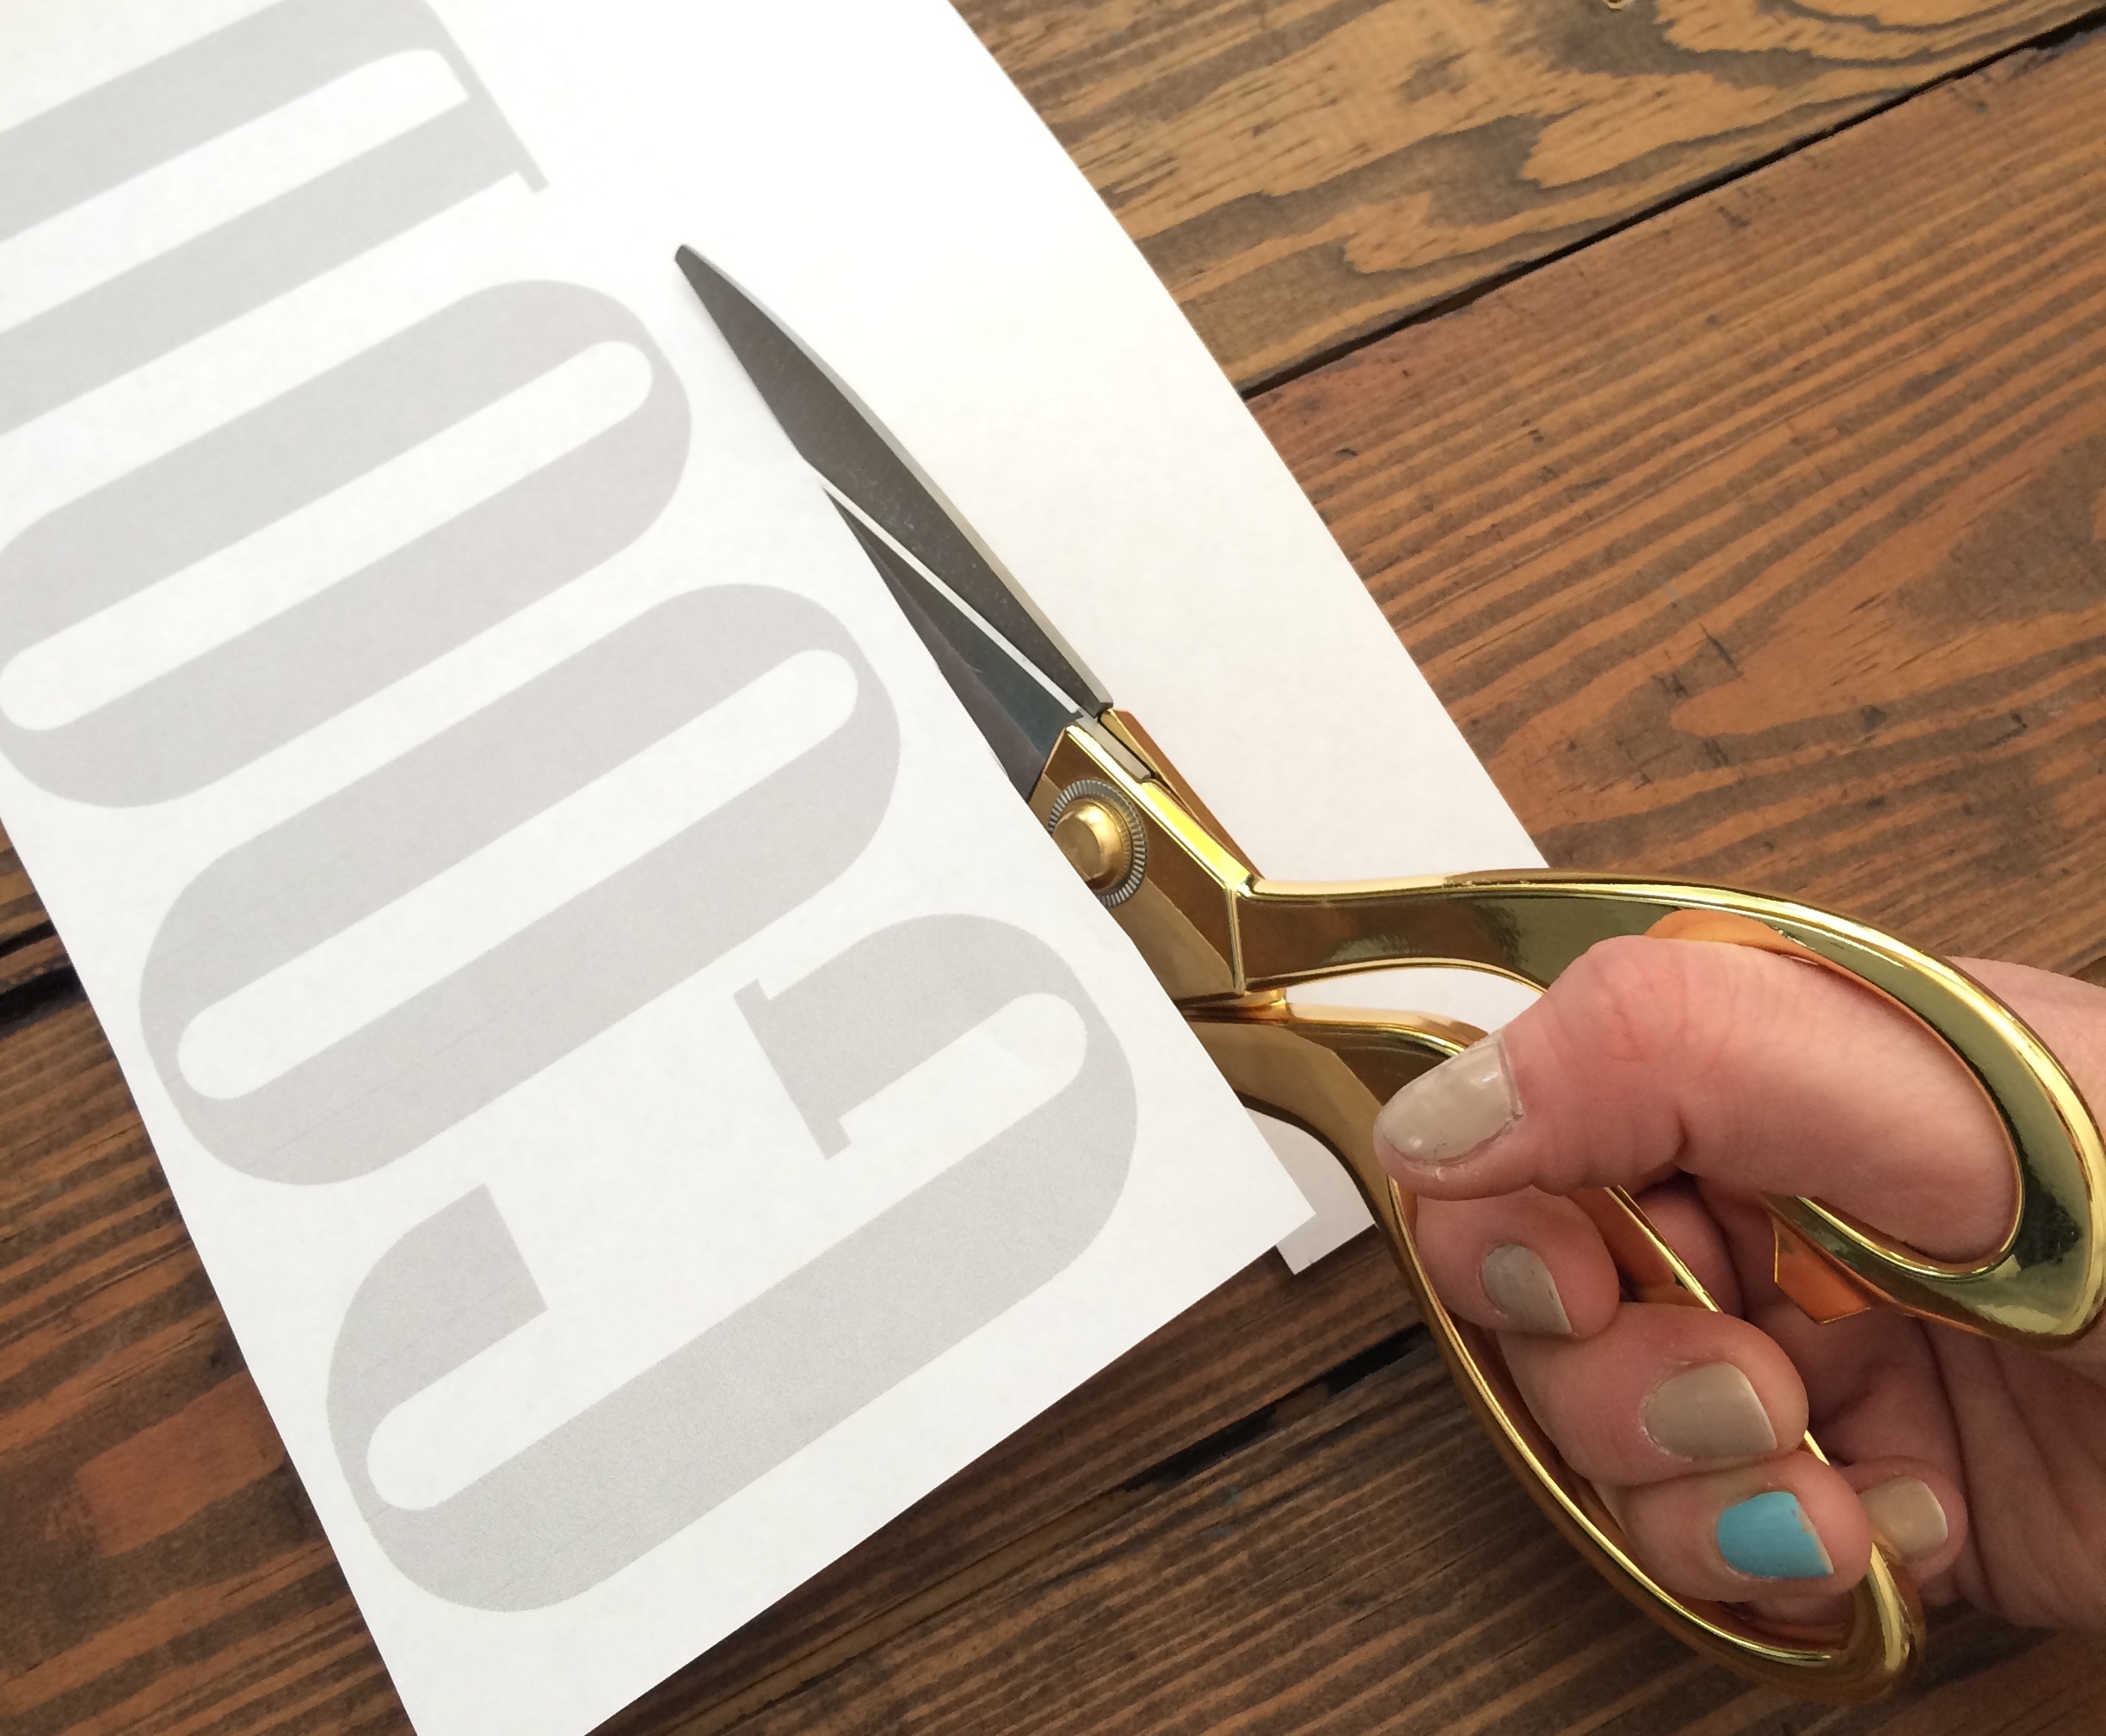
1. To start, I used a new Word doc and created the words to a size I desired (about 4.5″ high), then printed them (I used gray scale on a fast printing setting so I didn’t waste too much ink)

These are the fonts I used:

> GOOD – Pottery Barn font

> MORNING – Honey Script font

> SUNSHINE – Century Gothic font

Once printed the words, I cut around the edges…

DIY tutorial: HAND PAINTED SIGN using CHALK to transfer design onto wood.   An easy + inexpensive technique to transfer letters or a custom design.  Easy-to-follow step by step by @Jenna_Burger, www.jennaburger.com

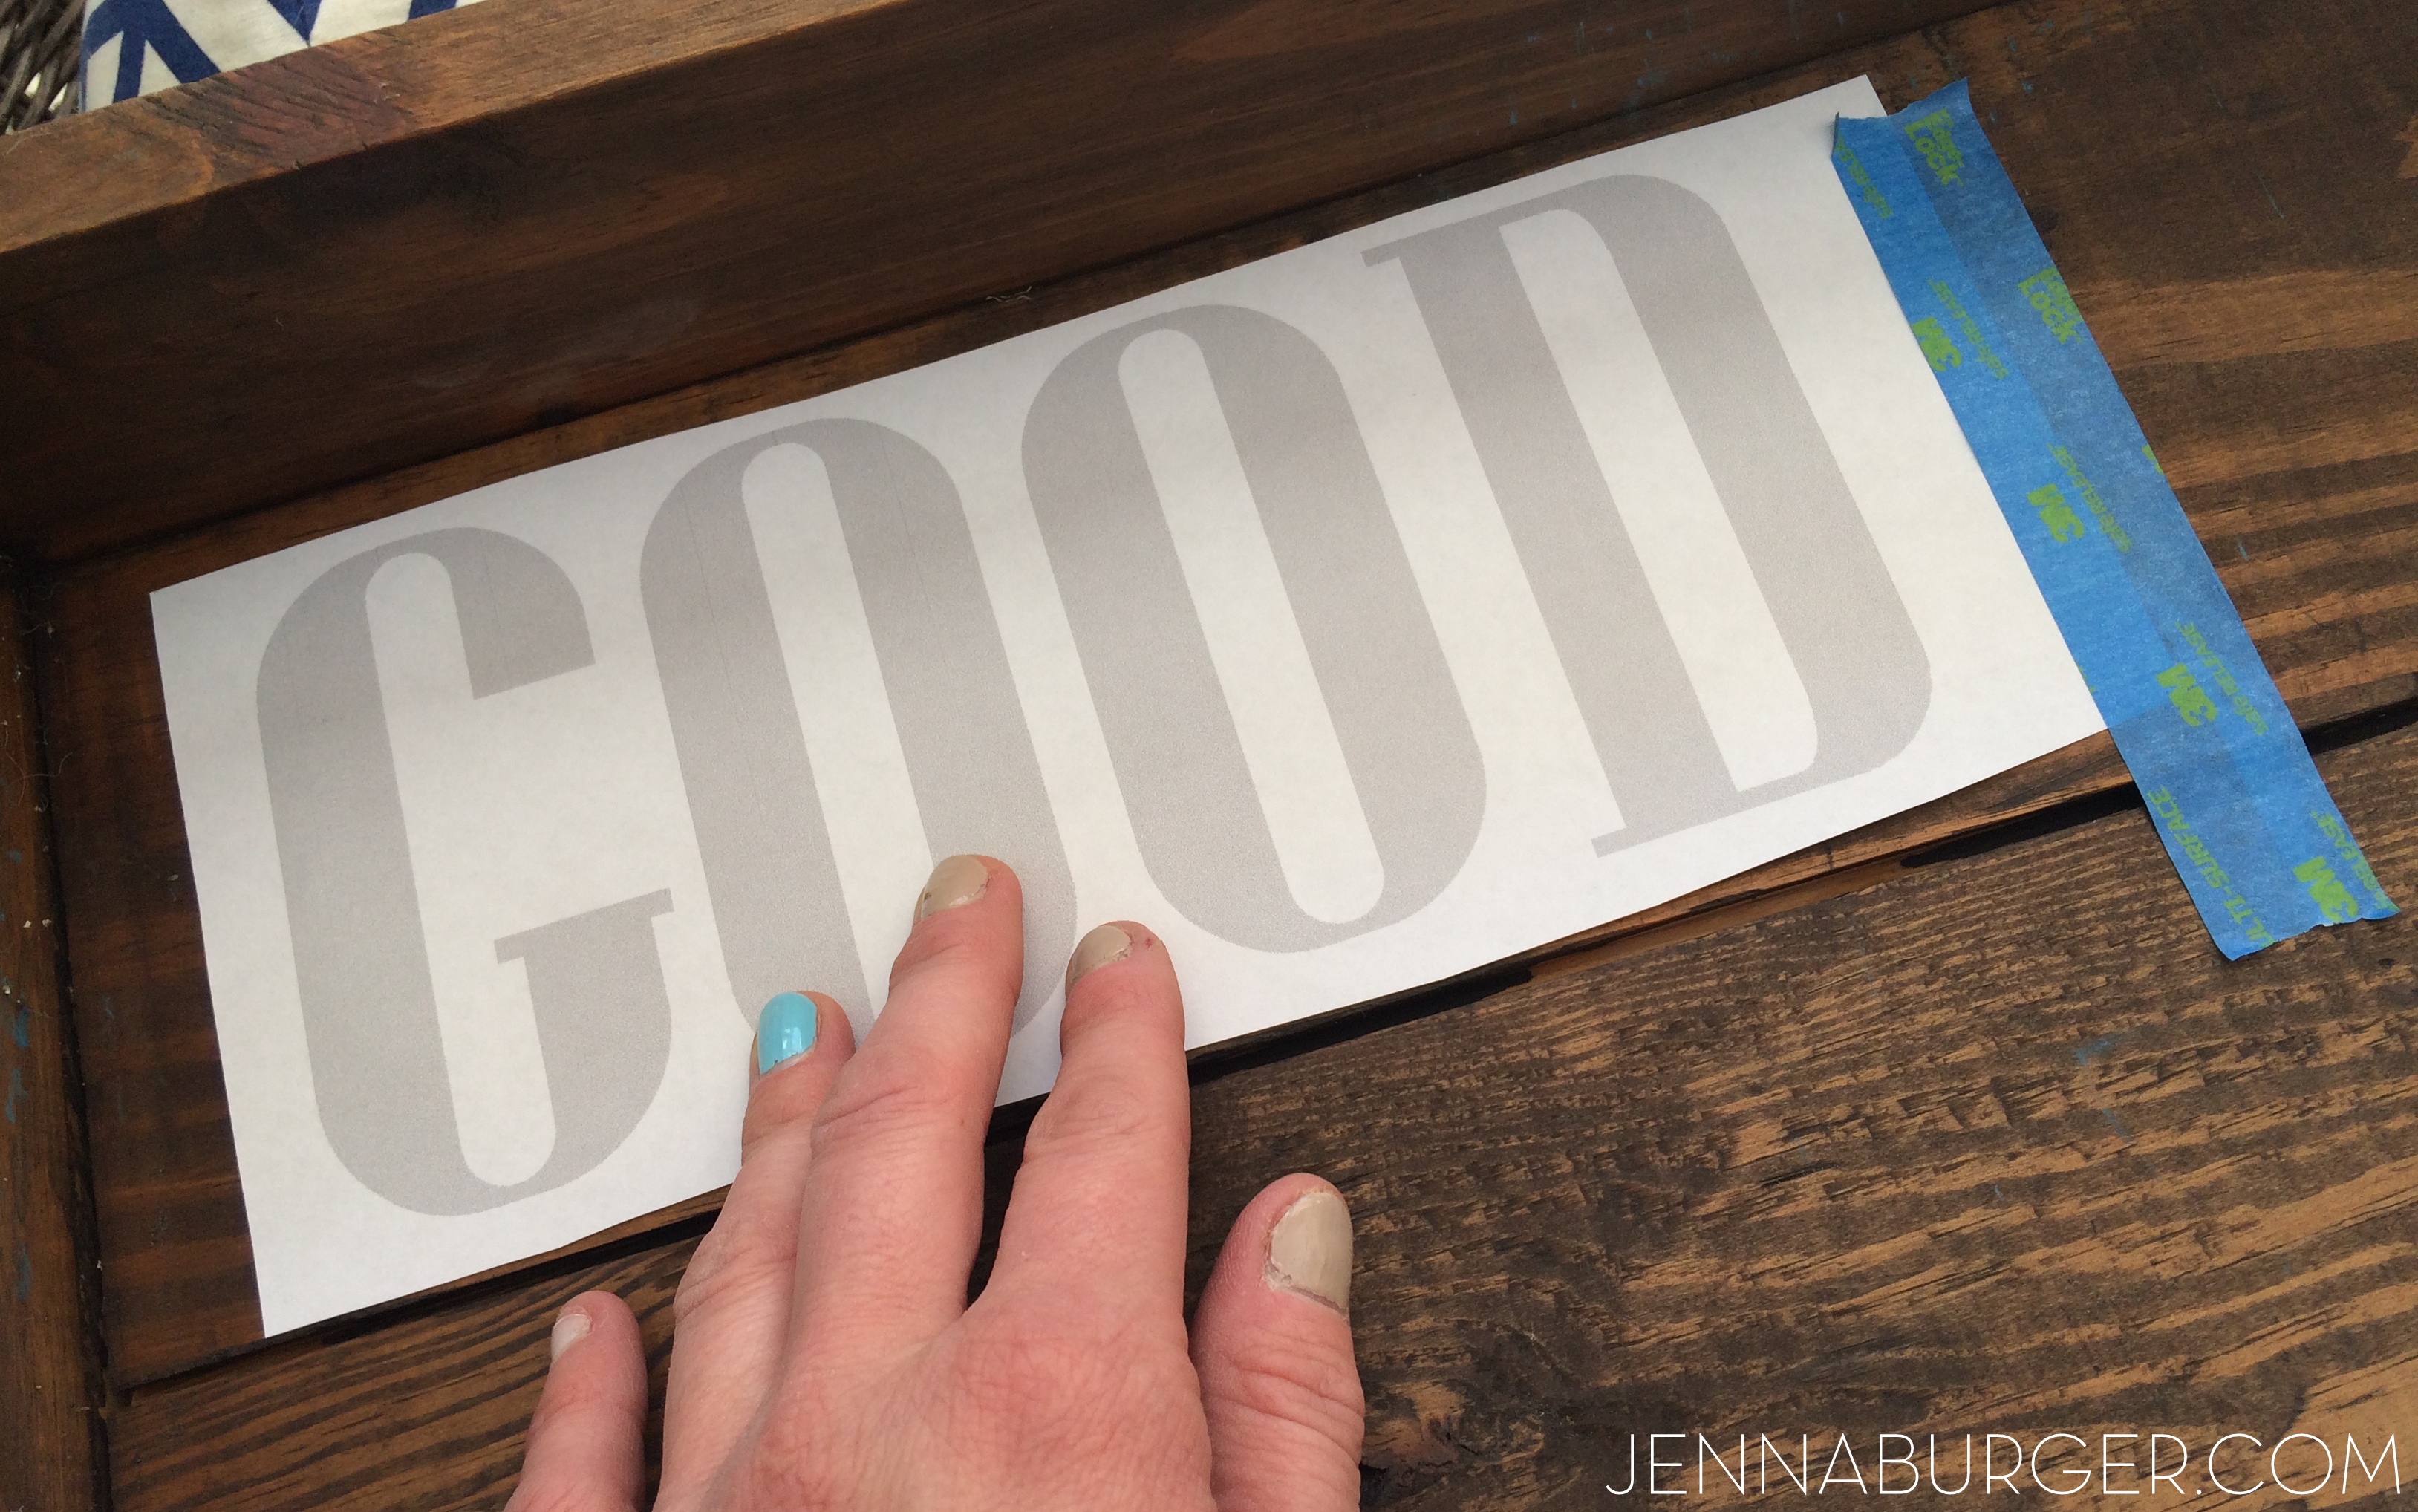
2. Before placing the paper on the wood, I flipped it over to the back and rolled on the chalk from edge to edge so the letters on the other side would be covered. A colored chalk, like red, works best!

DIY tutorial: HAND PAINTED SIGN using CHALK to transfer design onto wood.   An easy + inexpensive technique to transfer letters or a custom design.  Easy-to-follow step by step by @Jenna_Burger, www.jennaburger.com

3. Then I positioned the paper on the wood and taped down the edges so it stayed in place.

DIY tutorial: HAND PAINTED SIGN using CHALK to transfer design onto wood.   An easy + inexpensive technique to transfer letters or a custom design.  Easy-to-follow step by step by @Jenna_Burger, www.jennaburger.com

DIY tutorial: HAND PAINTED SIGN using CHALK to transfer design onto wood.   An easy + inexpensive technique to transfer letters or a custom design.  Easy-to-follow step by step by @Jenna_Burger, www.jennaburger.com

3. Using a pen (I found it was better than a pencil because of the hard tip), I traced over the letters.

DIY tutorial: HAND PAINTED SIGN using CHALK to transfer design onto wood.   An easy + inexpensive technique to transfer letters or a custom design.  Easy-to-follow step by step by @Jenna_Burger, www.jennaburger.com

And voila, when you lift the paper, the outline of the letter (or design) can be seen…

DIY tutorial: HAND PAINTED SIGN using CHALK to transfer design onto wood.   An easy + inexpensive technique to transfer letters or a custom design.  Easy-to-follow step by step by @Jenna_Burger, www.jennaburger.com

Here’s the overall design embossed on the wood…

DIY tutorial: HAND PAINTED SIGN using CHALK to transfer design onto wood.   An easy + inexpensive technique to transfer letters or a custom design.  Easy-to-follow step by step by @Jenna_Burger, www.jennaburger.com

After that, it was time to paint.

Because each word was a different font, I didn’t want to go crazy with different colors as well, but at the same time I didn’t want all one color, so I chose to create an ombre effect with the words starting with a very pale yellow for GOOD, then a light yellow hue for MORNING, followed by a vibrant yellow for SUNSHINE.

I used basic, inexpensive craft paint – wall paint or anything similar would also do just fine – along with a thin brush to be sure to stay within the lines (as much as possible).

DIY tutorial: HAND PAINTED SIGN using CHALK to transfer design onto wood.   An easy + inexpensive technique to transfer letters or a custom design.  Easy-to-follow step by step by @Jenna_Burger, www.jennaburger.com

DIY tutorial: HAND PAINTED SIGN using CHALK to transfer design onto wood.   An easy + inexpensive technique to transfer letters or a custom design.  Easy-to-follow step by step by @Jenna_Burger, www.jennaburger.com

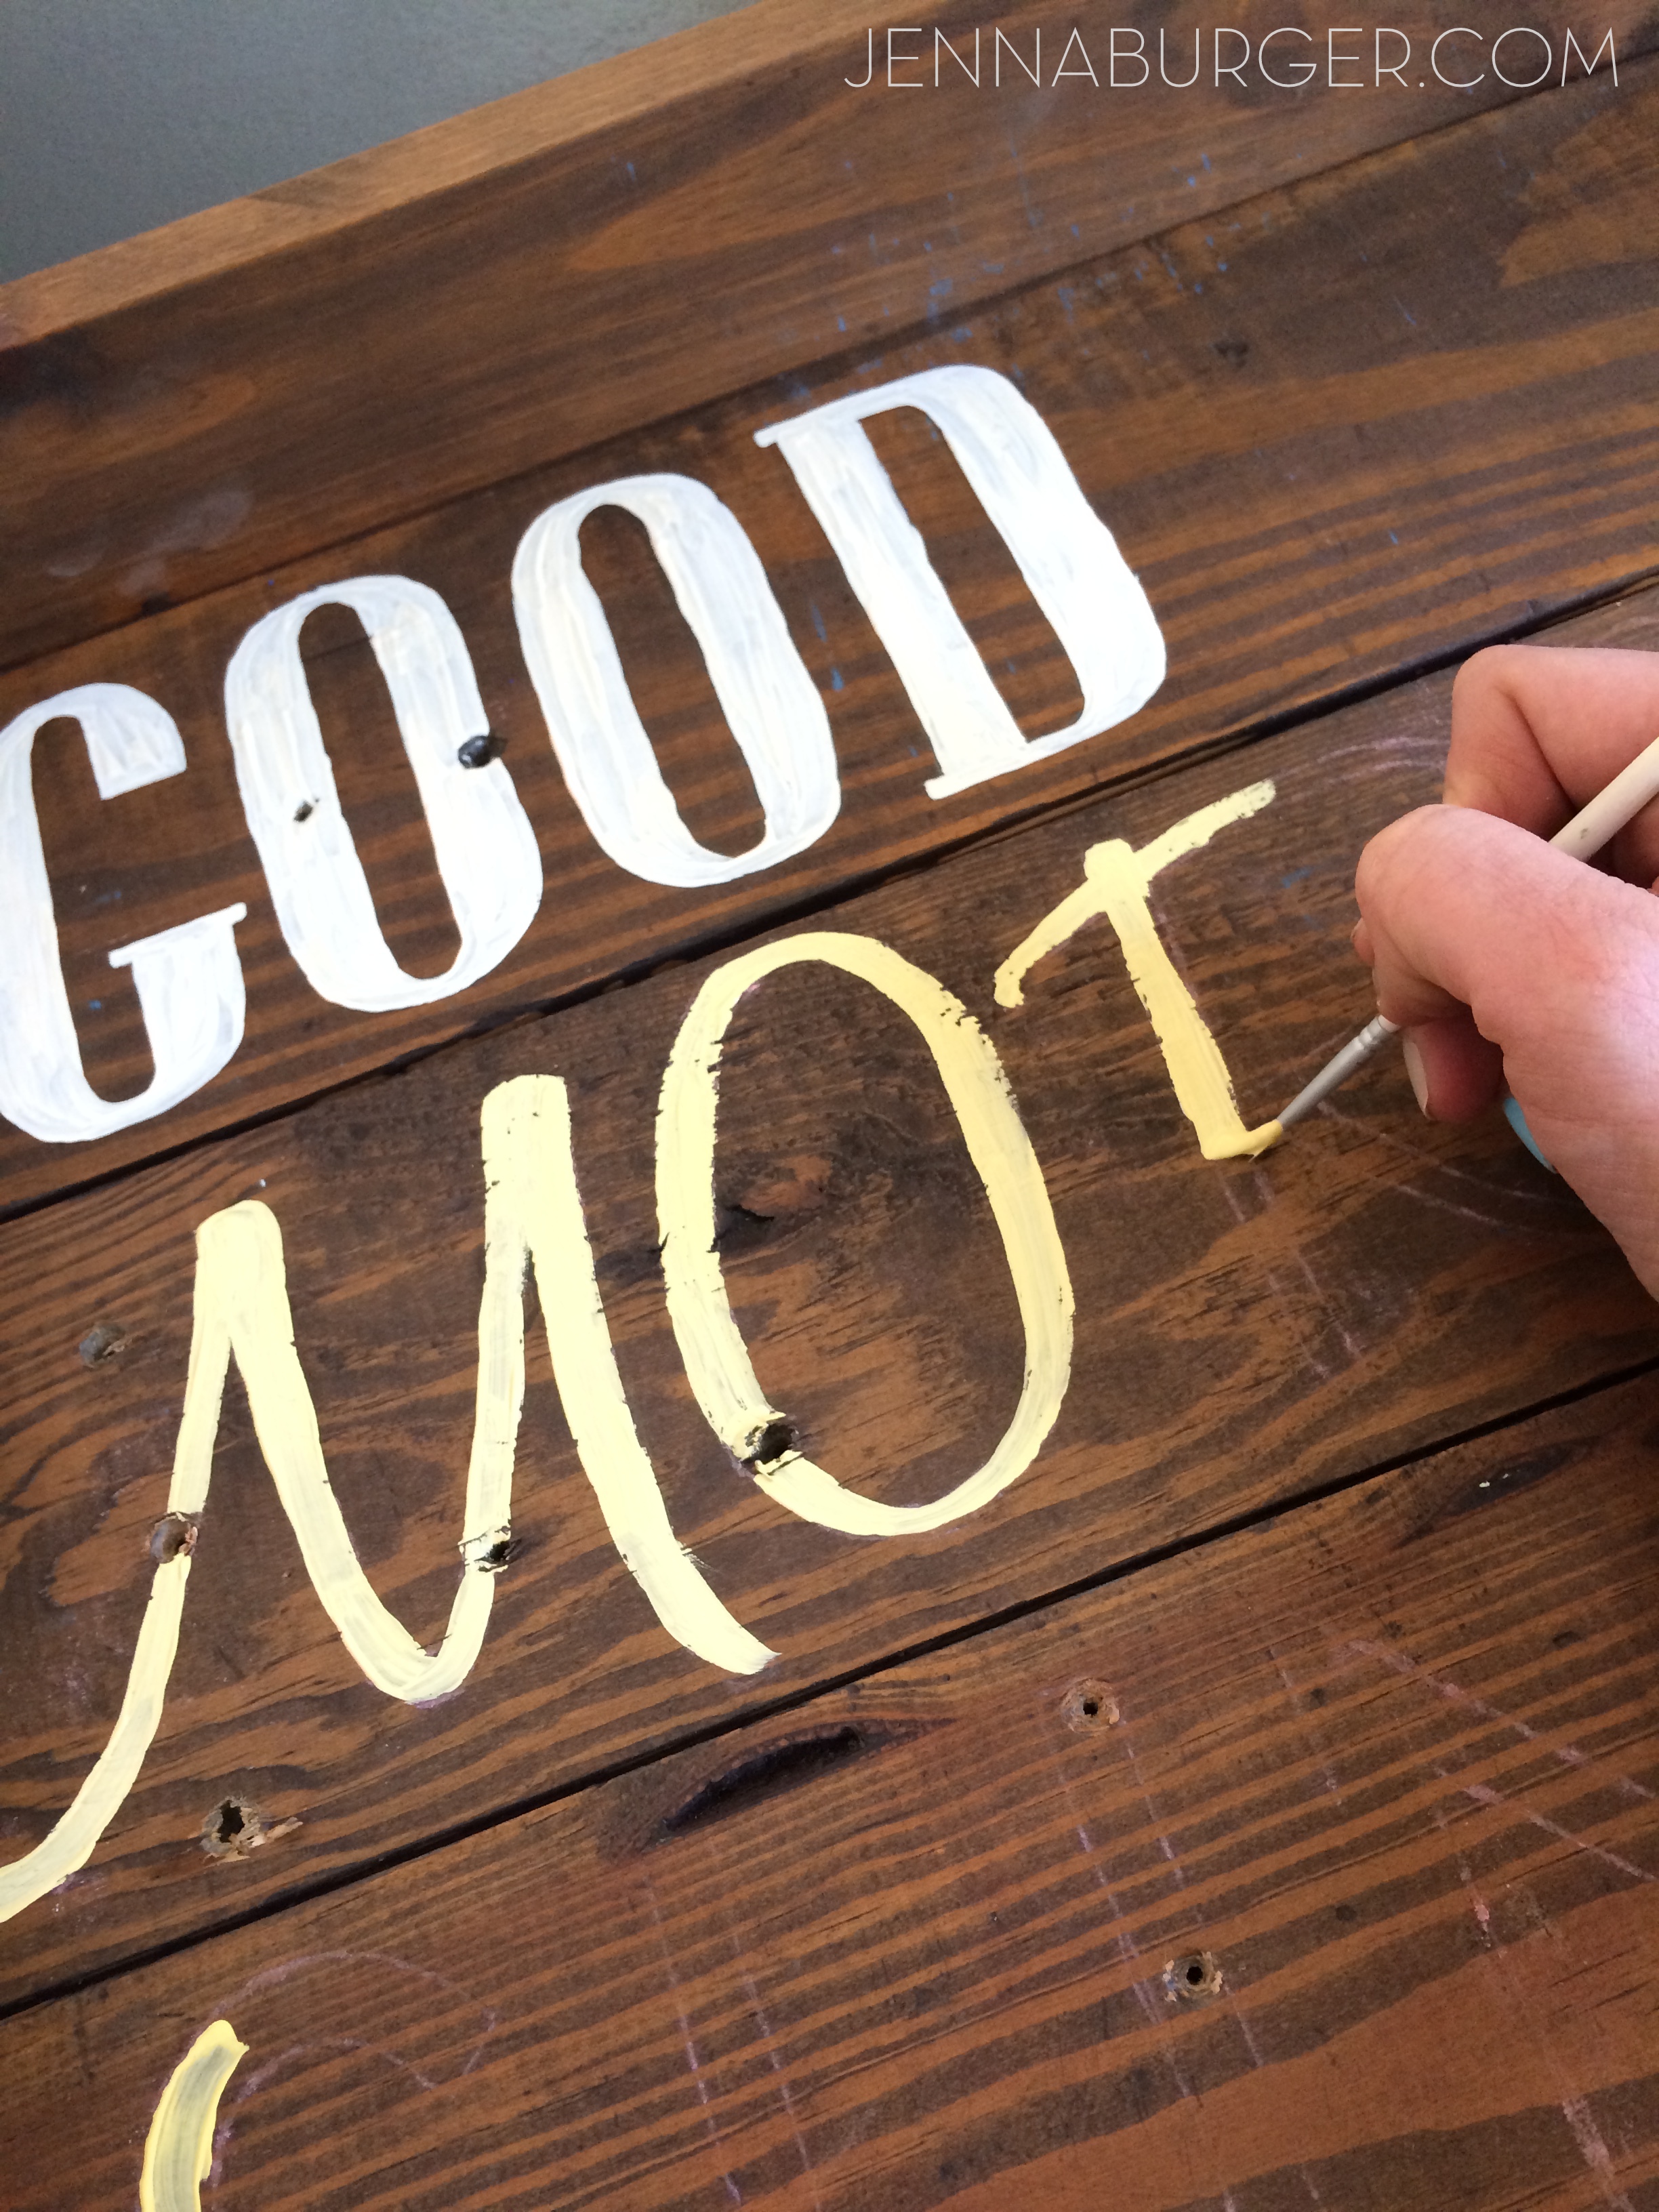
Perfectly in the lines wasn’t important…  Imperfect actually is perfect!

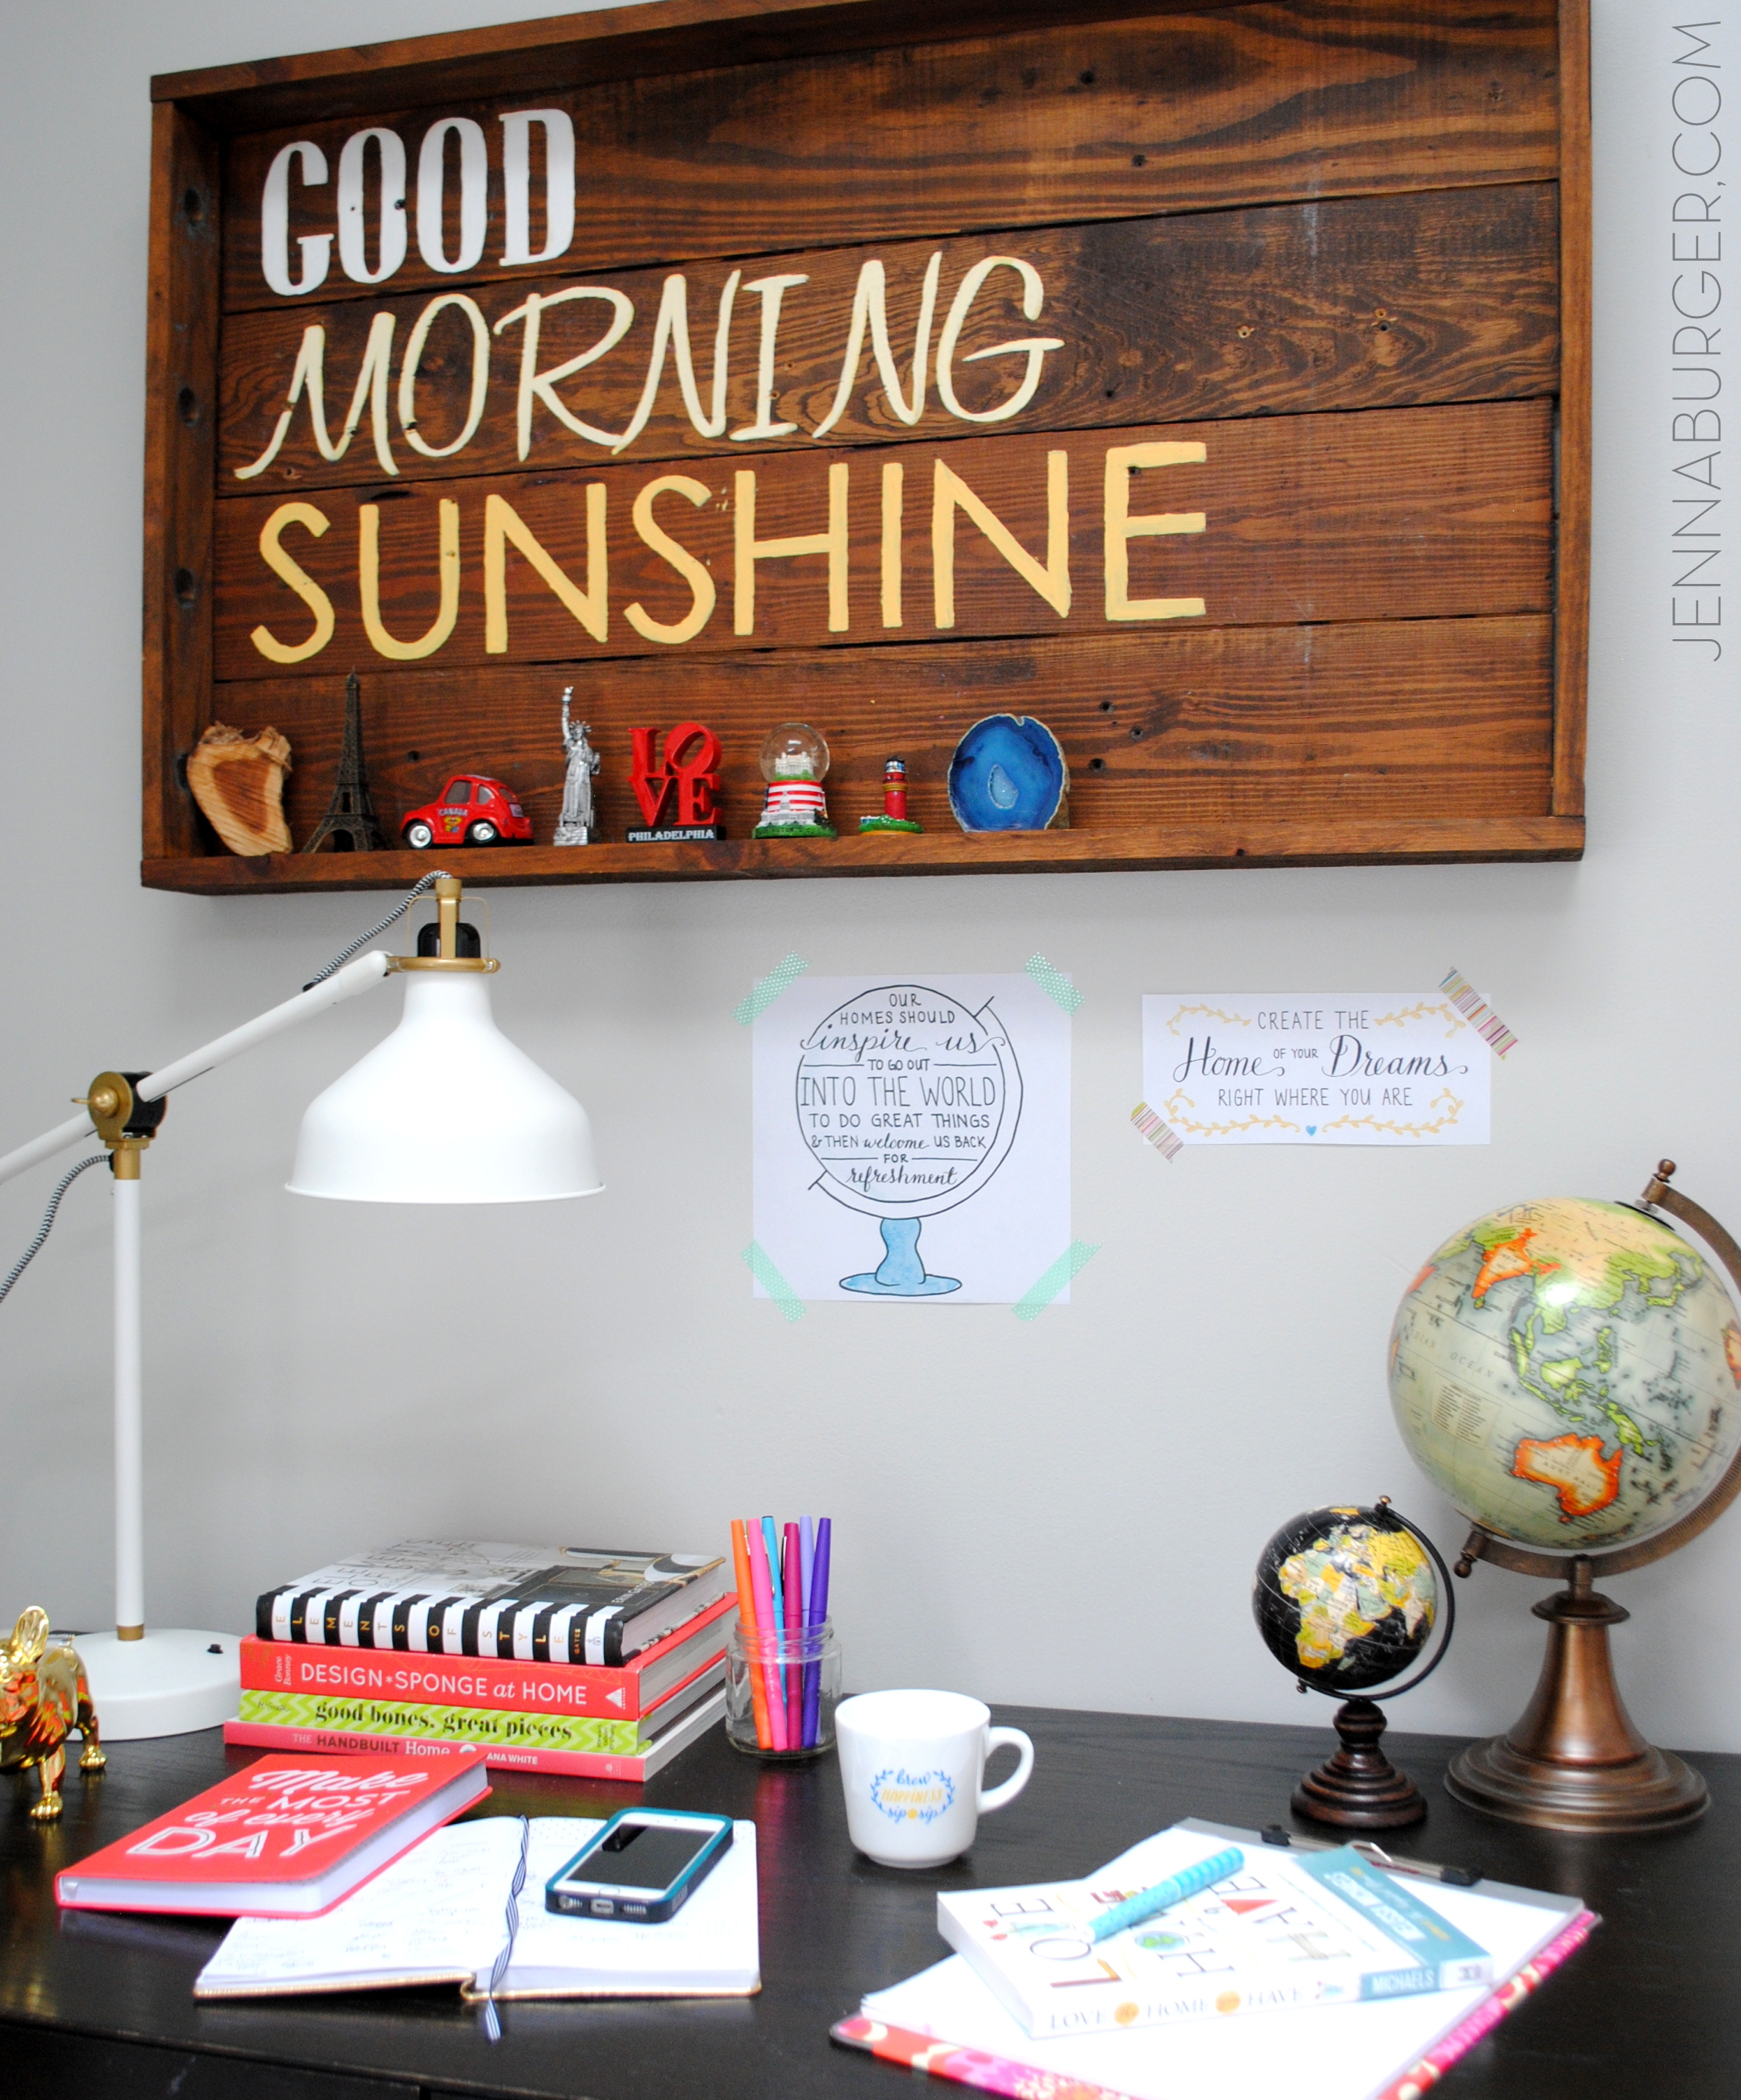
From start to finish, the overall project took about 2 hours to create.  This is who it looks done & hung on the wall…

DIY tutorial: HAND PAINTED SIGN using CHALK to transfer design onto wood.   An easy + inexpensive technique to transfer letters or a custom design.  Easy-to-follow step by step by @Jenna_Burger, www.jennaburger.com

Keepsakes from our travels sit on the ledge of this once cue stick holder, now hand painted sign.

DIY tutorial: HAND PAINTED SIGN using CHALK to transfer design onto wood.   An easy + inexpensive technique to transfer letters or a custom design.  Easy-to-follow step by step by @Jenna_Burger, www.jennaburger.com

DIY tutorial: HAND PAINTED SIGN using CHALK to transfer design onto wood.   An easy + inexpensive technique to transfer letters or a custom design.  Easy-to-follow step by step by @Jenna_Burger, www.jennaburger.com
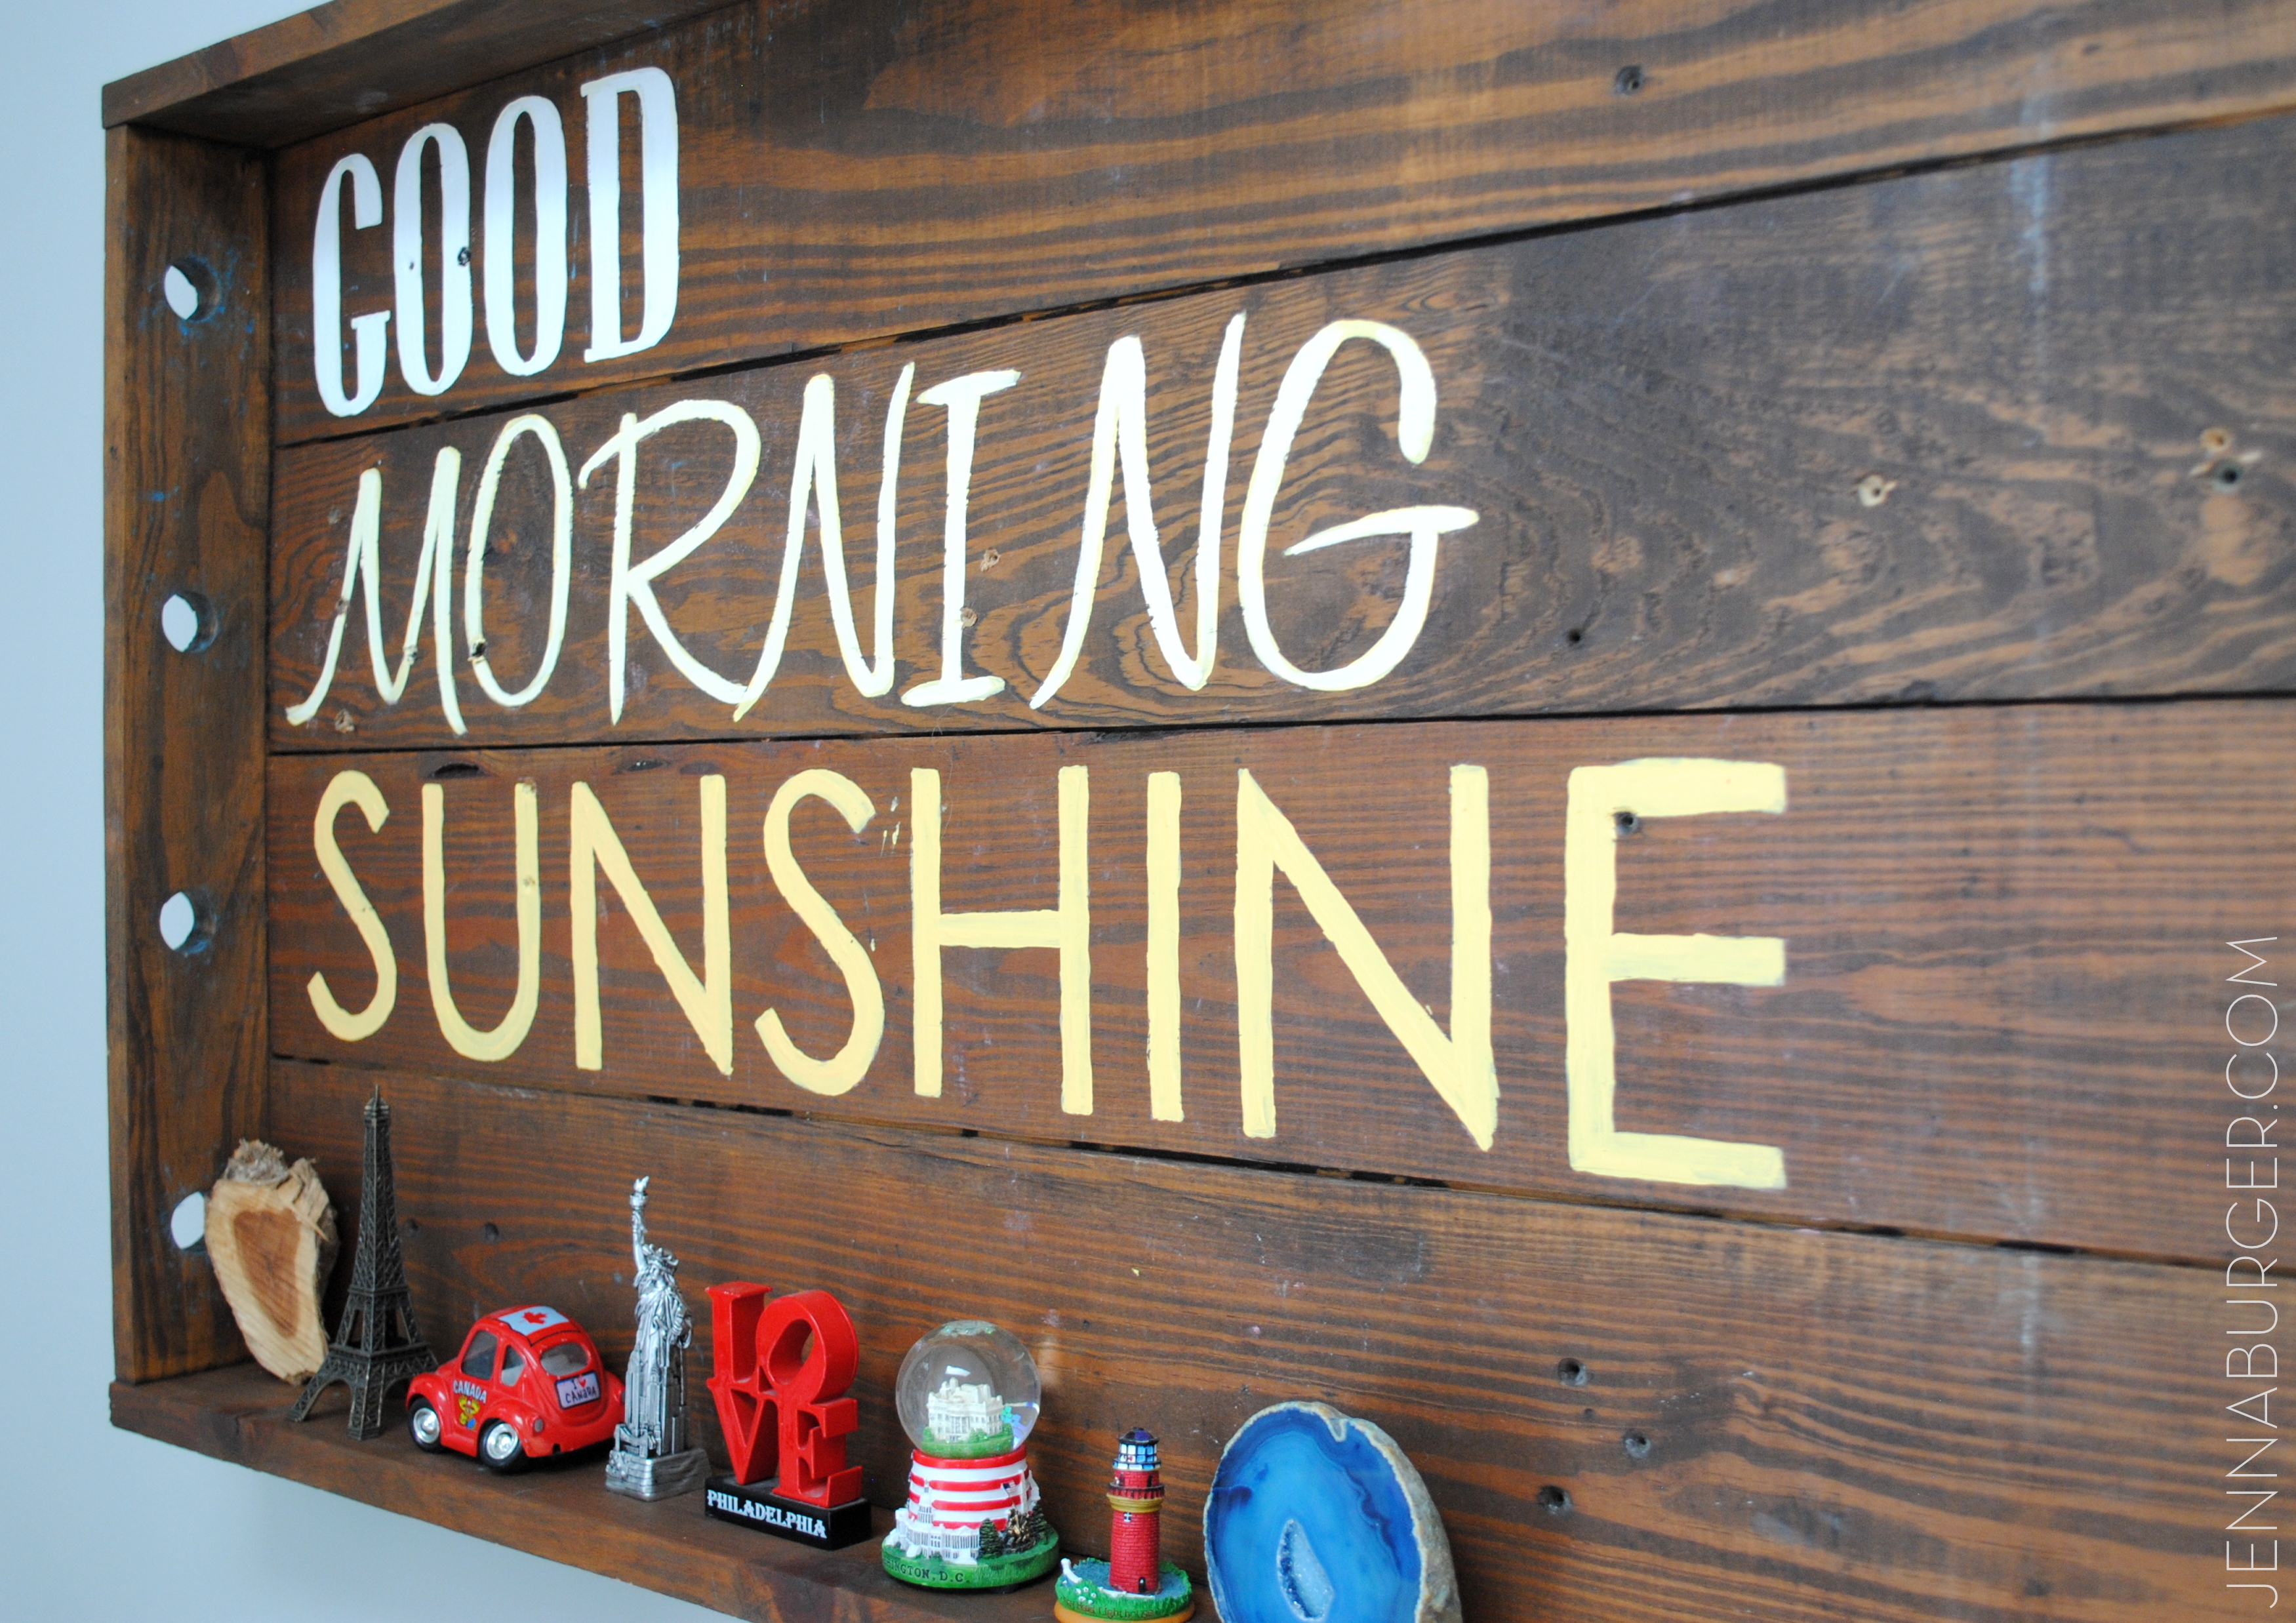
I love how it came out and it truly makes my day a bit sunnier, right SUNSHINE?!

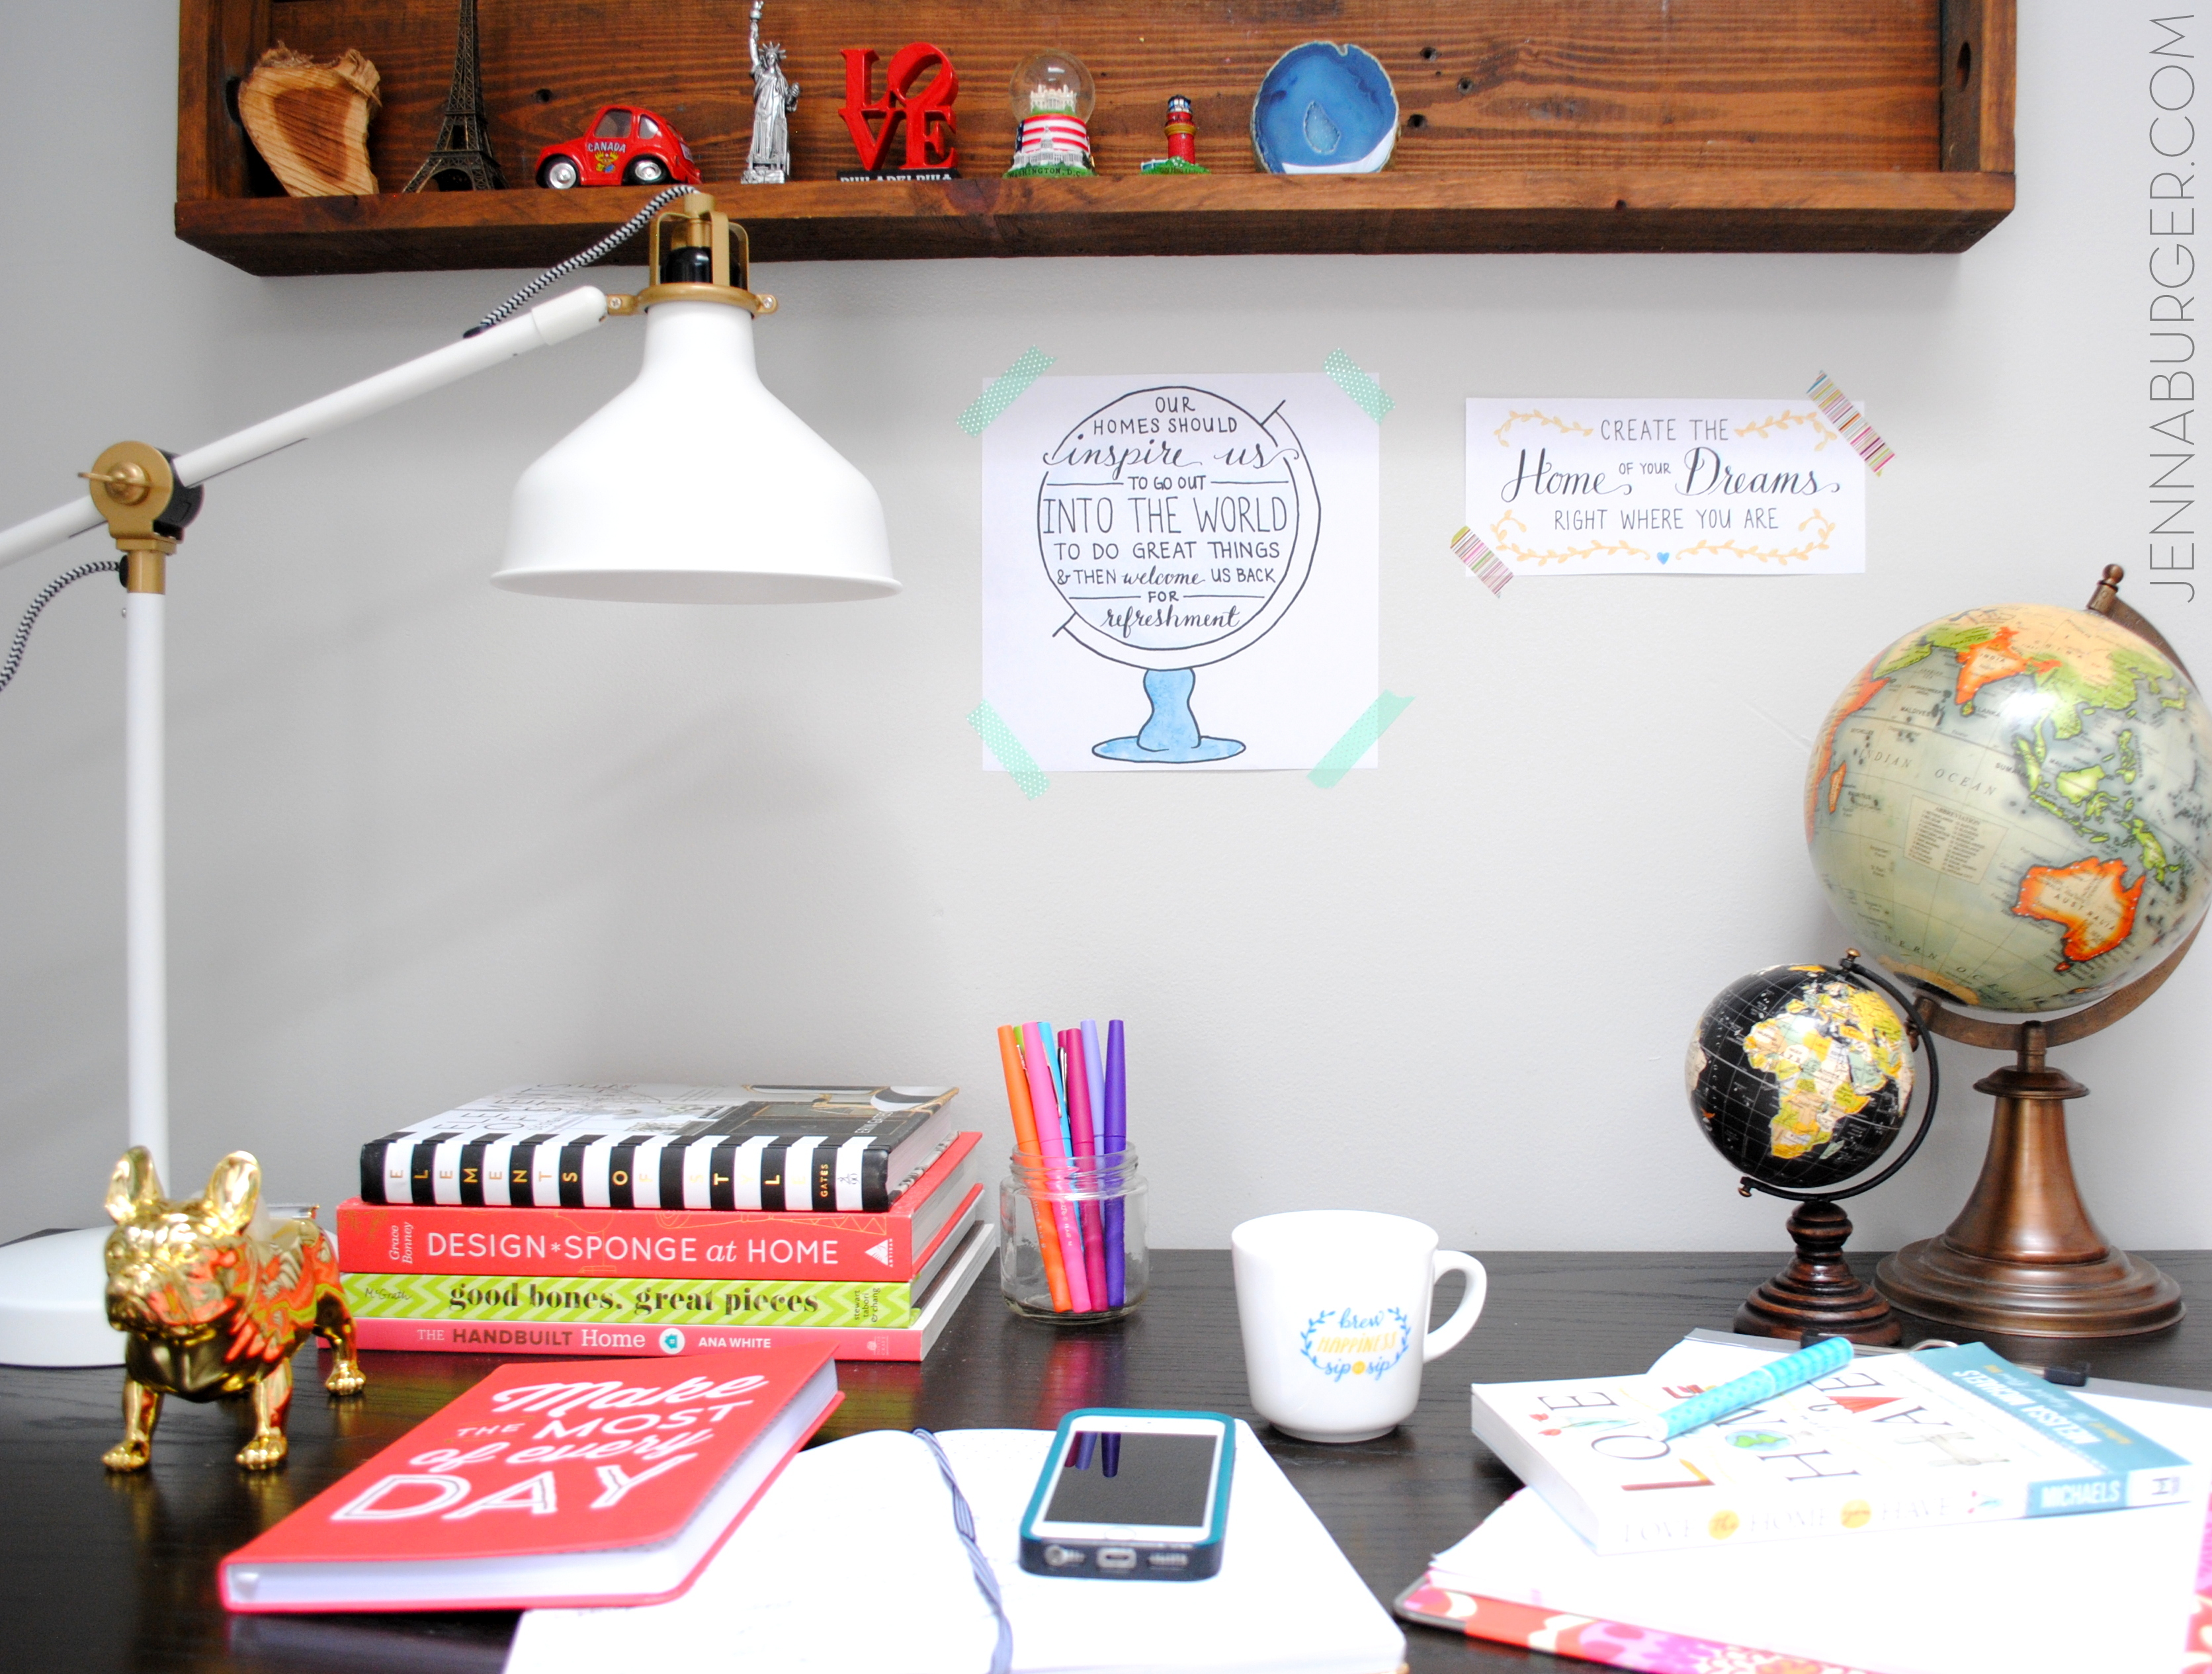
Along with the cute wood sign on this wall, I also added a few of Melissa’s illustrated quotes from her new book + website, and hung them with colorful washi tape.

DIY tutorial: HAND PAINTED SIGN using CHALK to transfer design onto wood.   An easy + inexpensive technique to transfer letters or a custom design.  Easy-to-follow step by step by @Jenna_Burger, www.jennaburger.com

If you’re interested in seeing what other Bloggers created for the #LOVEYOURHOMEchallenge, here is everyone that is included and if you head over to visit Melissa there will be links to all the projects.

Love the Home Your Have - #LOVEYOURHOMECHALLENGEIf you’re interested in joining in on the fun too, Melissa would love to have you share your own Home Love challenges on her new community site Home Love Stories.  If you’d lik, use the hashtag #LoveYourHomeChallenge to follow along and/or share your story.

The new revamped living room is really coming together – finally – and I can’t wait to share the reveal with you very soon!

5 Surfaces to Spray Paint

Warmer days are upon us – I just saw mid-40s for next week –  and that means the start of spray painting season!

As an avid DIYer, I have spray painted just about everything and anything.  From baskets to fabric, from lamps (like this one) to furniture, nothing in my home is safe from being revamped with a new coat of color.

When it comes to spray painting, there are a few tricks-of-the-trade to achieve a successful result, but with some practice & patience (and a few tips from my blogger friends), you’ll want to revamp every surface in sight!

Not sure what to spray paint? Here are tips for 5 types of surfaces to tackle using spray paint.

5 Surfaces to Spray Paint: How to spray paint wood, metal, upholstery, fabric, ceramic

Wood Furniture

Whether a dresser, chair, desk, or armoire, most all furniture can be revamped and livened up with a few fresh coats of spray paint.  You’ll be amazed how a new color can completely change the look and feel of something that was old and drear.  After a quick sanding, it’s always best to first apply a primer coat, then you choice of color.

5 Easy DIY Projects Using Spray Paint

Diane of In My Own Style refinished her dining chairs and chose to use a 5 different colors – orange, yellow, blue, pink, and turquoise.  What a fresh, happy update!

5 Surfaces to Spray Paint: How to spray paint wood, metal, upholstery, fabric, ceramic

This is a before & after chair I restored after finding it on the side of the road a few years back…

BEFORE & AFTER CHAIR MAKEOVER USING SPRAY PAINT + A GLAZE FINISH

Upholstery

From an ottoman to a wing back chair, another project to tackle using spray paint is upholstery.  Crazy sounding, but it’s true.  Recovering an upholstered piece of furniture can be costly (a typical wing back chair could cost about $600+), but for many who are on a budget, it’s an affordable and fairly easy way to get the result at a fraction of the cost.

If the fabric covered piece is in good condition, well built, and has good lines, then spray painting to change the upholstery color should be a fairly manageable task.  Here is a beautiful side chair makeover using spray paint – the pop of color with the bold blue is an incredible update.

5 Surfaces to Spray Paint: How to spray paint wood, metal, upholstery, fabric, ceramicCeramics

Because of the slick surface, ceramics can be challenging to spray paint.  To achieve a great result, it’s key to use multiple thin coats and lightly sand the surface between coats using sandpaper or very fine steel wool.  Wipe the surface clean again and spray another coat.  A glossy finish is most durable when spray painting ceramics.

Jennifer of Dimples and Tangle achieved a great result with her spray painting revamp after scooping up an inexpensive garden stool and totally changing the look to a desired white.

5 Surfaces to Spray Paint: How to spray paint wood, metal, upholstery, fabric, ceramic

Fabric (curtains)

Custom curtains can be expensive, but that shouldn’t stop you from getting the look you want.  DIY curtain panels (all of my window treatments are do it yourself creations) can be achieved on a tight budget and spray paint can often help with getting the desired look for less.

Stripes (any size, horizontal or vertical) are the easiest and most manageable style curtain to make when using spray paint.  Maury of Life on Mars chose to create a wide horizontal striped curtain panel for her bedroom in a vibrant, yellow hue.  The result is gorgeous.

5 Surfaces to Spray Paint: How to spray paint wood, metal, upholstery, fabric, ceramic

Metal

Despite dirt and rust, if a piece has good bones and is well built, it most likely can be rejuvenated with a few coats of spray paint.  With the array of color choices, you can truly take something from blah to beautiful with a little elbow grease and a few dollars.  When spray painting a metal surface, it’s important to sand down the surface and then use a primer.  The more your sand and smooth, the better the result.  If your style is more rustic / vintage, then sanding less and showing the “chippy” side of a piece is great, but for a modern aethestic, a slick / shiny surface is best.

From a bar cart that most people would steer clear of to a chandelier ready for the curb, these are two amazing metal pieces transformed with spray paint.

5 Surfaces to Spray Paint: How to spray paint wood, metal, upholstery, fabric, ceramicBar Cart redo by Monica of Living in Vogue featured on Design Sponge

5 Surfaces to Spray Paint: How to spray paint wood, metal, upholstery, fabric, ceramicSpray painted brass chandelier by The Little Green Notebook

You can truly spray paint anything! If you’ve never spray painted before, give it a try – here’s a tutorial.  With the arrival of Spring in only a few short weeks, now is the time to get thinking about what you want to revamp first.  From furniture to home decor, using spray painting is an affordable and fairly easy way to update anything!

DIY: Kids Fingerprint ART

DIY: KIDS fingerpaint art - inspired by the book Mix It Up, fingerpaint wall art can easily be created by kids

Many of the walls in our home are filled with beautiful creations made by our kids.  I just love their creative minds & the beautiful colors they use in their artwork.  Plus everything they create is so meaningful & it’s incredible how prideful they are to have their beautiful work displayed so prominently.

When it came time to add artwork to the walls of the remodeled bathroom, it took me a few weeks to find just the right art.  I wanted something that wouldn’t take away from the beauty of the wallpaper + it had to be meaningful.

As I was shopping in the local bookstore with my kids, I saw a book called Mix It Up by Herve Tullet (here is the book on amazon) and as soon as I opened it up, an idea came to me… fingerpaint art!  You see, this book is captivating from the first to the last page.  “Follow the artist’s simple instructions, and suddenly colors appear, mix, splatter, and vanish in a world powered only by the reader’s imagination.”

My inspiration…

DIY: KIDS fingerpaint art - inspired by the book Mix It Up, fingerpaint wall art can easily be created by kids

My interpretation…

DIY: KIDS fingerpaint art - inspired by the book Mix It Up, fingerpaint wall art can easily be created by kids

Not only does this fingerprint art look so beautiful, but it only took minutes to create!  How much better does it get when it comes to kids?!

I purchased 2 frames with an 8 x 10 opening and used 8 x 11.5 white paper from a drawing/art pad to create the artwork.

Using a ruler + pencil, I made a small mark about every 1.5″ – 2″ across & down creating a grid.

DIY: KIDS fingerpaint art - inspired by the book Mix It Up, fingerpaint wall art can easily be created by kids

The pencil marks are helpful to keep the fingerprints in a straight line…

Once the marks were made, it was time to get the kids involved.  If they’re old enough, you can let them do their thing or you can assist to get their thumb prints on the mark.

DIY: KIDS fingerpaint art - inspired by the book Mix It Up, fingerpaint wall art can easily be created by kids

We used craft paint in a mixture of colors and randomly added the colors…

DIY: KIDS fingerpaint art - inspired by the book Mix It Up, fingerpaint wall art can easily be created by kids

Minutes later, the result…

DIY: KIDS fingerpaint art - inspired by the book Mix It Up, fingerpaint wall art can easily be created by kids

Once they were dry by the next morning, each of the beautiful fingerprint creations were ready to hang…

DIY: KIDS fingerpaint art - inspired by the book Mix It Up, fingerpaint wall art can easily be created by kids

DIY: KIDS fingerpaint art - inspired by the book Mix It Up, fingerpaint wall art can easily be created by kids

DIY: KIDS fingerpaint art - inspired by the book Mix It Up, fingerpaint wall art can easily be created by kids

DIY: KIDS fingerpaint art - inspired by the book Mix It Up, fingerpaint wall art can easily be created by kids

DIY: KIDS fingerpaint art - inspired by the book Mix It Up, fingerpaint wall art can easily be created by kids

So fun, right? Fast + Meaningful + Inexpensive = Major Score!

Thanks for following along on every tid bit of this bathroom makeover!

 From start to finish, these are all the posts pertaining to this bathroom remodel
Plan of Action
Demo: Removal + Installation of the Tub & Walls
How-To Tile + Grout the Bathroom Walls
Installing Wallpaper
Adding a Tile Accent Border
Creating a Tiled Niche
DIY: Simple Painted Wood Shelf with Decorative Brackets
DIY: Kids Fingerprint Art
Bathroom Makeover Reveal
Resources

Chalkboard Wood Garland

Can you believe it’s November?  I’m breaking away from the bathroom for a bit (the remodel has taken over my life) to start thinking about this years seasonal decor.

Every year, we enjoy displaying our Christmas favorites, but at the same time we like to introduce new elements & of course, make some fun festive creations (like last years pallet Christmas Countdown).  Even though we typically start the process of unpacking the holiday boxes before Thanksgiving arrives, we certainly don’t overlook the beautiful Holiday of giving.  For that tricky time when we’re transitioning from one holiday to the next I have created this pretty & nature-inspired Chalkboard Wood Garland.

DIY: Wood Disc Garland with Chalkboard center - perfect to hang from the mantel, on the front door, or on any wall! Good for the holidays or any time of year.

As the Holiday prep begins, I wanted to make something that would give our family a little reminder to slow down (especially this time of year) & to truly enjoy the moment when everything around us is hustling & bustling.

For now, I thought the word blessings really sums up how we should be feeling and to be thankful for all we have – this time of year and always!   This is why the best part of the creation was the chalkboard layer – anything can be added and just as easily erased.

How To Make Wood Garland

To make this wood disc garland, I headed straight to my backyard to grab a big ole’ log.  I actually first sent the mister on the hunt and he returned with a fallen branch about 1″ round.  That wasn’t going to do, so I threw on my boots and headed for the woods.  I returned with a log about 3.5 – 4″ round.  He was skeptical we could cut it, but I put our circular saw to the test and it cut like butter.

We created 10 discs about 1″ thick.  More or less discs can be cut depending on the word(s) you want to spell out.  I thought 10 would be ideal and if one or more discs aren’t used for letters, a pretty picture can be added instead.

DIY: Wood Disc Garland with Chalkboard center - perfect to hang from the mantel, on the front door, or on any wall! Good for the holidays or any time of year.

Once all the discs were cut, I took my chalkboard paint from Lowe’s (left over from the chalkboard wall)  and freehand painted a circle on each disc.

DIY: Wood Disc Garland with Chalkboard center - perfect to hang from the mantel, on the front door, or on any wall! Good for the holidays or any time of year.

After they dried, which took about 2 hours, I drilled 2 holes about 1″ apart on the wood section of the disc.  These holes are for the twine to thread through in the next step.

DIY: Wood Disc Garland with Chalkboard center - perfect to hang from the mantel, on the front door, or on any wall! Good for the holidays or any time of year.

Then I threaded the twine through.  Twine seemed like the right material since it’s a natural feeling and looks rugged like the wood.  Though any type of string or ribbon could be used, it just depends on the look you want to achieve.

Since the drilled holes were kind of small, I attached an unfolded paperclip to the end of the twine and wrapped it with duct tape (superman duct tape to be exact, lol.  But any tape will do the trick).

DIY: Wood Disc Garland with Chalkboard center - perfect to hang from the mantel, on the front door, or on any wall! Good for the holidays or any time of year.

I added my letters for the word blessings.  I didn’t use any fancy fonts, just what came to mind…

DIY: Wood Disc Garland with Chalkboard center - perfect to hang from the mantel, on the front door, or on any wall! Good for the holidays or any time of year.

And voila… a beautiful festive garland was created.

DIY: Wood Disc Garland with Chalkboard center - perfect to hang from the mantel, on the front door, or on any wall! Good for the holidays or any time of year.

Perfect for the mantel, the door, or any wall in the home, this new wood garland can really be used all year round.

DIY: Wood Disc Garland with Chalkboard center - perfect to hang from the mantel, on the front door, or on any wall! Good for the holidays or any time of year.

DIY: Wood Disc Garland with Chalkboard center - perfect to hang from the mantel, on the front door, or on any wall! Good for the holidays or any time of year.

DIY: Wood Disc Garland with Chalkboard center - perfect to hang from the mantel, on the front door, or on any wall! Good for the holidays or any time of year.

DIY: Wood Disc Garland with Chalkboard center - perfect to hang from the mantel, on the front door, or on any wall! Good for the holidays or any time of year.

I also tried it on the front door along with a pretty red wreath…

DIY: Wood Disc Garland with Chalkboard center - perfect to hang from the mantel, on the front door, or on any wall! Good for the holidays or any time of year.

Something unique, right?!

DIY: Wood Disc Garland with Chalkboard center - perfect to hang from the mantel, on the front door, or on any wall! Good for the holidays or any time of year.

DIY: Wood Disc Garland with Chalkboard center - perfect to hang from the mantel, on the front door, or on any wall! Good for the holidays or any time of year.

This creation has been such a great break away from the bathroom renovation.  Even though I love diving into a big DIY project, sometimes simple + quick is much more gratifying.  Now I feel inspired & ready for the Holidays.

Have you started thinking about your seasonal & holiday decor?

When do you start decorating?

Lowes Creative Ideas Team Member

To gather even more unique, fun, and creative ideas for your indoor and outdoor Winter spaces, I would definitely suggest downloading the Lowe’s Creative Ideas app on your iphone and/or ipad.  I’m always checking out the FREE app for great seasonal + do-it-yourself inspiration.

 Also consider following Lowe’s on Facebook, Pinterest, and Instagram as well.

Disclosure: I am part of the Lowe’s Creative Team and was provided with a Lowe’s gift card to purchase items for my project.  I was also compensated for my time to use the products.  No one told me what to create, what to buy, how to use the product, or what to write.  All opinions are 100% mine!

Why + How to Prime Wood Furniture

It’s been a busy few days around my neck of the woods.  With revamping the china cabinet + another BIG project coming down the pipeline (which I can’t wait to share details about), I haven’t had 5 minutes to sit.  No worries though, I’ll sit when I’m old, ha.

So my last post was all about the beginning steps of prepping & sanding a piece of wood furniture.  The next step, which is what this post is dedicated to, is priming.  Primer is SO important!  I can not stress enough that primer is a must when painting something. anything.  YOU NEED PRIMER.

China Cabinet Makeover: PRIMING! An entire post on Why & How-To Prime a Wood Surface. Priming any surface before painting is so important & it can save you money. Come see the result of how what prime can do & follow along on this furniture makeover

Why Prime.

Whether a room or a piece of furniture, paint is truly one of the easiest & most affordable ways to update and/or change the look of something.   It’s amazing what a fresh coat of paint can do to a wall or a surface.  I read once, “Don’t expect paint to do a primer’s job”.   The purpose of paint is to provide color, but the purpose of primer is to provide the ideal base for the paint to be applied.  Without, the result can fall short.

What does Primer Do?

> Blocks Stain  Primers are made to block the natural pigments (tannin) of the wood and/or original stain from bleeding through the new paint.

> Hides Color  Priming the surface before painting hides / blocks the previous color from showing through.  Using a primer will also sometimes eliminate the need for multiple coats (cost savings!)

> Seals the surface  Priming before painting seals the surface so the paint doesn’t get soaked in.  The prime provides the perfect base for the paint to be applied.  Primer also provides the ideal surface for paint to adhere to.  Typically with a stained piece of furniture, like my china cabinet, the original surface is glossy which paint wouldn’t adhere to.  Adding a primer to a glossy surface will give the provide the ideal underlayment for a beautiful new color.  This same technique can be used for tile, glass, vinyl siding, and aluminum – all slick surfaces that wouldn’t be paintable without primer!

Do you recall when I was painting my laminate bookcase?  I failed to prime a spot and the paint just bubbled and didn’t stick to the surface.  Here’s a picture…

Priming is a must before applying paint!

> Lasting Result  Without primer, paint could easily chip or scrape off very easily + quickly.  Using one (thin) coat of primer + two (typically, maybe more) coats of paint you should have a long lasting, durable result!

The Right Primer.

There are many primers on the market and the decision on the right one for the job can be tricky.  When painting over furniture, you want to choose a primer that indicates on the can that it will block the stain and seal the surface.  The primer that I chose for this china cabinet makeover was Glidden Gripper because it truly grips to the surface and seals the stain from coming through.  It also created the perfect base for the new WILD color I chose.

Glidden Gripper

Applying Primer.

a how-to tutorial on applying primer.  Its so easy…

Note: This is the most important tip I can share about priming (told to me by someone – a pro – in the painting world), primer does not need to be applied like paint. A thin coat of primer is fine and actually better than “globbing” it on.  Primer does not need to fully cover the surface underneath, meaning you can still have wood showing through.  As long as the surface area has a thin coat (one coat), you are set to paint!

When painting a piece of furniture, I always start at one end and make my way across. Why?  Paint dries fairly fast and to avoid drips + brush strokes, it’s important to work in small sections and apply thin coats.
China Cabinet Makeover: PRIMING! An entire post on Why & How-To Prime a Wood Surface. Priming any surface before painting is so important & it can save you money. Come see the result of how what prime can do & follow along on this furniture makeover

Typically I apply the paint to the surface.  Then spread it out.  Then go back over it with my brush, using light stokes and following the wood grain.

China Cabinet Makeover: PRIMING! An entire post on Why & How-To Prime a Wood Surface. Priming any surface before painting is so important & it can save you money. Come see the result of how what prime can do & follow along on this furniture makeover

When painting furniture, the piece is typically vertical, so paint could drip.   Around the detailed edges and ornate areas, the less paint the better to avoid paint from dripping.  And once an area is done, always continue to look back to make sure paint isn’t seeping down.

China Cabinet Makeover: PRIMING! An entire post on Why & How-To Prime a Wood Surface. Priming any surface before painting is so important & it can save you money. Come see the result of how what prime can do & follow along on this furniture makeover

For this china cabinet, there were 3 doors, which I removed and are painting laying down.  It’s much easier to paint + drips don’t occur as much.

China Cabinet Makeover: PRIMING! An entire post on Why & How-To Prime a Wood Surface. Priming any surface before painting is so important & it can save you money. Come see the result of how what prime can do & follow along on this furniture makeover

For this piece, it took me about 40 minutes to prime.  To me, it’s very relaxing. This is the result…

China Cabinet Makeover: PRIMING! An entire post on Why & How-To Prime a Wood Surface. Priming any surface before painting is so important & it can save you money. Come see the result of how what prime can do & follow along on this furniture makeover

That’s a wrap… for now.

She’s ready for paint!

Want a peak?  Here you go…

Sneak Peak at the new color for the China Cabinet

I’m off to paint some more…

Follow along on this makeover with these other posts
Backstory + Choosing a Color
Prepping & Sanding Wood Furniture
Why & How to Prime Wood Furniture
Tips + Tricks to Painting Wood Furniture
Accessories, Details, & Styling {China Cabinet Makeover}

Coming up (still to do)
China Cabinet Makeover {Reveal}

DIY: Frame Turned Tray

DIY: Frame Turned Tray; perfect for tabletop Spring vignette. So easy + affordable!

This post brought to you by Elmer’s ProBond Advanced. All opinions are 100% mine.

With the excitement of Spring finally here (our snow is almost all melted), I started spicing up the house with a few lighter + brighter elements.  The first area that I started with… The Foyer!  The entryway of the home is the perfect place to get the Spring time decor rolling.  Incorporating trays are a design-must in my book for styling tabletops + vignettes.  After clearing off the top of the gold dresser to start with a fresh palette, I knew I needed a new tray.   So I made one…

From Frame to Tray, check out my new Spring entry vignette. It’s simple, but fresh…

DIY: Frame Turned Tray; perfect for tabletop Spring vignette. So easy + affordable!

This frame turned tray took no time at all to create + the cost was much less than any trays I’ve recently seen or purchased in the past.  Plus, the beauty of it is, it’s customizable.  More on that in a minute…

For this project, these are the materials I used:

> Frame – I simple picture frame with a flat, simple edge is a must for the hardware to lay flat.  The size frame I chose fits an 11 x 14 picture

>Cabinet Pulls (for the kitchen or bath – I got these gold pulls from Lowe’s)

> Something special to display – I chose to use a piece of leftover wallpaper from my powder room, but try a family picture, kids artwork, or anything that is meaningful to you.

Last, but most important for this project is Elmer’s ProBond Advanced!

Materials needed to turn a frame into a tray!

This project literally took minutes to make.

Using the amazing formula, Elmer’s ProBond, which is magical when it comes to adhering a porous material with a non-porous material (Mixed Materials like wood to metal for this DIY project), I added the “glue” to the metal pull.DIY: Frame Turned Tray; perfect for tabletop Spring vignette. So easy + affordable!

DIY: Frame Turned Tray; perfect for tabletop Spring vignette. So easy + affordable!

Then I “eyed it” and placed the pull in the center of the frame surround.  Same with the second pull, and voila, the frame instantly became a tray. From vertical to horizontal…

DIY: Frame Turned Tray; perfect for tabletop Spring vignette. So easy + affordable!

The next step was the fun part, customizing the tray with leftover wallpaper scrap (from the powder room).

After figuring out what I wanted to see within the matting space, I cut a piece of wallpaper to size.


DIY: Frame Turned Tray; perfect for tabletop Spring vignette. So easy + affordable!

And the result…

DIY: Frame Turned Tray; perfect for tabletop Spring vignette. So easy + affordable!

With the Elmer’s ProBond Advanced there was no messy foam residue, as sometimes found with other glues.  Just as we’re used to the plain ole’ white Elmer’s glue (yup, the kind our kids use), the ProBond didn’t run at all.  Once I attached the pull to the frame, there was a little “seepage” that I simply used a paper towel to clean up around the edges.

Think about all the projects – big and small – you could tackle with this magical formula?!

DIY: Frame Turned Tray; perfect for tabletop Spring vignette. So easy + affordable!

DIY: Frame Turned Tray; perfect for tabletop Spring vignette. So easy + affordable!

Taking a step further, I created another Spring tabletop vignette using the Frames Wallpaper that I used in my boys room and shared a few weeks ago…

DIY: Frame Turned Tray; perfect for tabletop Spring vignette. So easy + affordable!

DIY: Frame Turned Tray; perfect for tabletop Spring vignette. So easy + affordable!

DIY: Frame Turned Tray; perfect for tabletop Spring vignette. So easy + affordable!

And there it is.  A 10-minute DIY creation using a magic formula like no other!

Be sure to check back next week for the result of another DIY project I am working on.  It involves the Elmer’s ProBond Advanced again, but on a larger scale project.  Like I said, for big or small, this glue is awesome.

Visit Sponsor's Site

DIY: Wood Honeycomb Shelves

Even though we veered away from the original design for the revamped shared kids space, my son had his heart set on honeycomb shelves after I showed him the Land of Nod style.  And since this mama can’t let her boy down, I had to pull through.

But instead of buying, what did I do?  DIYed them, of course.  After a little research & this post by A Beautiful Mess, I was confident to move forward.

Not only are these honeycomb / hexagon shelves functional, the whole ensemble is like a piece of art.  And instead of painting the shelves a color or staining them a traditional wood finish, I chose an interesting blue hue which is in-trend and spot on with the other tones that I’ve introduced into the room.

Take a look…

{DIY Tutorial} How-To Make Wood Honeycomb Shelves. Why spend hundreds, when you can make them yourself! These shelves complete the look of the room. So many great projects in this kids room makeover.

The entire shelf composition runs the length of the twin bed, which is about 80″ long, and makes the entire wall truly come alive.  This “installation” also parallels with my Lowe’s Creative challenge project for this month which focuses on introducing the submerged color trend of watery, cool blue hues into a project.  With the size + interesting finish, this project is by far one of my favorites!

———————————–

Before we move forward, it has to be said that this project was a big challenge, but the bigger the venture, the better the result.  I don’t often do large-scale woodworking projects and at times I thought it was going to be a big F-A-I-L, but in the end the honeycomb shelves MAKE THE ROOM.  Take Away? Don’t be afraid to challenge yourself.  Push through because in the end, it’ll be worth it!

———————————–

Like usual, before starting a larger scale project, I sketched out my idea and figured out the supplies I needed.  This was the first sketch…

Design 1 for honeycomb shelves

And then the shelves ended up evolving into this layout instead so not all of the shelves are actually attached…

Design 2 for honeycomb shelves

Supplies I used:

  • (7) 1″ x 6″ x 6′ long pieces of wood – each shelf took approximately (1) board
  • 1-1/2″ wood screws
  • 1-1/2″ corner brackets
  • Plastic toggle anchors
  • Stain or Paint – depending on how you want to finish the shelf surface
  • Other supplies: miter saw, tape measure, drill, sander, level, pencil

To save on time, I often have my wood cut while at shopping at Lowe’s, but for this project, I cut it at home because of the quantity needed + the angles.

Here are the steps I took:

1. I set the miter saw to 30 degrees and never touched the saw again for the entire project.  This angle is crucial so each of the 6 pieces will make the perfect hexagon shape.  I approximated that I wanted each finished shelf to be an overall dimension of about 14″ x 14″, and chose the length of 7″ for the long side of each piece.

After marking the wood with my tape measure + pencil, I made the first cut using the miter saw. Then I flipped the piece of wood over to make the second angled cut.

{DIY Tutorial} How-To Make Wood Honeycomb Shelves. Why spend hundreds, when you can make them yourself! These shelves complete the look of the room. So many great projects in this kids room makeover.

This is what the first piece looked like when cut.

Then I cut about 42 more…

Size of cut for honeycomb shelf

2. Before taking the next steps of attaching each piece to make the shelves, I layed all the pieces out to see how they’d actually go together.

{DIY Tutorial} How-To Make Wood Honeycomb Shelves. Why spend hundreds, when you can make them yourself! These shelves complete the look of the room. So many great projects in this kids room makeover.

3. Then we were ready to chug forward and attach these bad boys…

The first hexagon box was created using 6 pieces and all the angles faced each other.  It’s best to stand them up on their sides, so the floor acts like the wall. The Mister (who was a huge part of this project as well) and I actually moved from the carpet to a flat, hard surface so the pieces would lay flat.  The carpet was too cushy.

TIP: You must use wood screws for this project.  We started out with screws, but it wasn’t working right (because we didn’t pre-drill), then changed over to using nails.  BIG MISTAKE.

Once you have the angled wood pieces in position, first pre-drill the holes, then drill in the wood screws.  If you don’t pre-drill the holes, the wood will probably split, which is what happened to us atfirst.  Using a nail won’t work because they’ll pull out and the overall shelf won’t be stable / sturdy.  Believe me, these are all lessons we learned along the way!

{DIY Tutorial} How-To Make Wood Honeycomb Shelves. Why spend hundreds, when you can make them yourself! These shelves complete the look of the room. So many great projects in this kids room makeover.

4. When the first box is complete, you can either be done or add on to it to create a multi-honeycomb shelf like ours.  If you continue adding on to the first hexagon, you’ll use one side of the original hexagon to create the second hexagon. This time though, the cut angles won’t touch each other, but instead overlap.  I’ll be honest, it does get tricky at this point and the shelves become a big jigsaw puzzle.  We ended up with (1) 3 box shelf, (1) 2 box shelf, and (1) stand alone shelf.

{DIY Tutorial} How-To Make Wood Honeycomb Shelves. Why spend hundreds, when you can make them yourself! These shelves complete the look of the room. So many great projects in this kids room makeover.

Once all the shelves were screwed together, we were ready for the next steps…  finish the surface + install.

It took me some time to determine how I wanted to finish the shelves.  At first I was going to paint them, but then steered away because I wanted to see the wood grain shine through.  That meant stain.  But, what stain?  In the end, I chose a gray / blue water-based stain by Minwax.  The submerged color seemed perfect with the other hues in the room and was ideal with what’s on-trend right now.

5. First, I gave the edges and all the surfaces a good sanding with my orbital sander.   Then using a rag, I applied the wood stain and almost instantly wiped it away so very little actually soaked into the wood.  Because of this, the drying time was very quick.

{DIY Tutorial} How-To Make Wood Honeycomb Shelves. Why spend hundreds, when you can make them yourself! These shelves complete the look of the room. So many great projects in this kids room makeover.

6. About a day later, the shelves were ready to install.  I first attached the metal angle brackets to the shelves. Then I determined the height + positioning of where the shelves would be hung.

Next, the Mister + I marked the holes through the brackets and pre-drilled the holes into the wall.  As with hanging anything, I always love using plastic toggle drywall anchors (I shared a pic recently on Instagram).

Once the anchors were in each hole, we repositioned the shelves in place and screwed them in using a drill + screw.  It’s key to use a level as well so the shelf doesn’t get installed crooked!

{DIY Tutorial} How-To Make Wood Honeycomb Shelves. Why spend hundreds, when you can make them yourself! These shelves complete the look of the room. So many great projects in this kids room makeover.

At this point, the shelves were almost done…

I loved the look of the blue shelves against the lighter gray walls, but I still wanted to make them pop.  To do so, I chose to paint the front edge of the shelves a white color which matches the moulding throughout the room.  Two coats later with a small, flat brush did the trick.

{DIY Tutorial} How-To Make Wood Honeycomb Shelves. Why spend hundreds, when you can make them yourself! These shelves complete the look of the room. So many great projects in this kids room makeover.

Lastly, so the metal brackets didn’t stand out so much, I painted those as well using the wall paint color.

{DIY Tutorial} How-To Make Wood Honeycomb Shelves. Why spend hundreds, when you can make them yourself! These shelves complete the look of the room. So many great projects in this kids room makeover.

And then they were finally complete!

{DIY Tutorial} How-To Make Wood Honeycomb Shelves. Why spend hundreds, when you can make them yourself! These shelves complete the look of the room. So many great projects in this kids room makeover.

{DIY Tutorial} How-To Make Wood Honeycomb Shelves. Why spend hundreds, when you can make them yourself! These shelves complete the look of the room. So many great projects in this kids room makeover.

Love the under-the-bed wood rolling carts?  I shared the tutorial on how to make them earlier this week.

{DIY Tutorial} How-To Make Wood Honeycomb Shelves. Why spend hundreds, when you can make them yourself! These shelves complete the look of the room. So many great projects in this kids room makeover.

These shelves are perfect to fill with books, toys in containers, and any fun thing(s) to display.

{DIY Tutorial} How-To Make Wood Honeycomb Shelves. Why spend hundreds, when you can make them yourself! These shelves complete the look of the room. So many great projects in this kids room makeover.

{DIY Tutorial} How-To Make Wood Honeycomb Shelves. Why spend hundreds, when you can make them yourself! These shelves complete the look of the room. So many great projects in this kids room makeover.

{DIY Tutorial} How-To Make Wood Honeycomb Shelves. Why spend hundreds, when you can make them yourself! These shelves complete the look of the room. So many great projects in this kids room makeover.

And here is a pretty pinnable picture if you want to remember this project for a later date…

{DIY Tutorial} How-To Make Wood Honeycomb Shelves. Why spend hundreds, when you can make them yourself! These shelves complete the look of the room. So many great projects in this kids room makeover.

So what do you think?

Do you like the honeycomb / hexagon look?  Have you incorporated this new trend into your home? What has been your most difficult DIY project endeavour?

Lowes Creative Team Member Badge - Spring 2014

To gather even more unique, fun, and creative ideas for your indoor and outdoor Spring spaces, I would definitely suggest downloading the Lowe’s Creative Ideas app on your iphone and/or ipad.  I’m always checking out the FREE app for great seasonal + do-it-yourself inspiration.

 Also consider following Lowe’s on Facebook, Pinterest, and Instagram as well.

Disclosure: I am part of the Lowe’s Creative Team and was provided with a Lowe’s gift card to purchase items for my project.  I was also compensated for my time to use the products.  No one told me what to create, what to buy, how to use the product, or what to write.  All opinions are 100% mine!

DIY: Rolling Underbed Wood Storage Cart

I’ve been busy-busy on finishing up the details for my boys room makeover.  This room has taken quite the turn from it originally being a boy/girl, sister/brother shared bedroom, to a full-on boy hangout haven!  Even though my little guy is only 7 (just shy of 8), I feel it’s a space he can grow with (until I get my hands on it for another makeover, hehe).

So my latest and greatest DIY project in the room is something that holds stuff that I often refer to as the ‘bane of my existence’… TOYS.  Specifically, the little, itty bitty toys like Legos and Kinex that somehow always end up under my feet giving me a great big ‘OW’.

Often under my kids’ bed is the ‘stuffing place’ where things are put that don’t have a home.  When I do a big cleaning, I never know what I will find…  Do you have that problem?  Please tell me yes and reassure me that I’m not the only one.  My solution to a neat under-bed space? Make something to take up the space so there is no room to stuff!

Thus the creation of these rolling underbed wood storage carts.

DIY Tutorial for a Rolling Underbed Wood Storage Cart! The perfect solution for holding toys + stuff. Less than $10 to make compared to $40+ to buy!

Pretty + Functional!  I’m in heaven.

Want to know how to make them? Let’s Go!

They are really easy & super inexpensive.  Actually after making them, I did a quick search online (not thinking I’d find anything similar) and saw similar styles for a minimum of $40…  Crazy that mine cost about $10/each to make.

Supplies You’ll Need:

for a 24″ x 24″ box (buy more or less if you want to change the size)

  • (2) 1″ x 6″ x 24″ long piece of wood
  • (2) 1″ x 6″ x 22.5″ long piece of wood
  • (4) 1.5″ rolling wheels
  • (1) 24″ x 24″ piece of 1/4″ plywood
  • 1.5″ long wood nails
  • 3/4″ long wood nails
  • optional: paint, chalkpaint, 1/2″ thick rope

DIY Tutorial for a Rolling Underbed Wood Storage Cart! The perfect solution for holding toys + stuff. Less than $10 to make compared to $40+ to buy!

Before buying the supplies, I determined that the size of rolling wood carts would be 24″ x 24″ and (2) under the twin bed would fit perfectly leaving some additional space for other awkward toys (like my little guys plastic skateboard ramp).  Here is a sketch I did before heading to the store…

Note:  a 1″ x 6″ is actually 3/4″ x 5-1/2″.  To make a perfect 24″ x 24″ square box, (2) sides were cut to 22.5″ long.

Here are the steps I took:

1. Using the 1.5″ long wood nails, I attached the 24″ piece to the 22.5″ long piece.  I first added a dab of wood glue, then followed it with (3) nails.

DIY Tutorial for a Rolling Underbed Wood Storage Cart! The perfect solution for holding toys + stuff. Less than $10 to make compared to $40+ to buy!

2. I continued attaching the other wood pieces so the box was created…

DIY Tutorial for a Rolling Underbed Wood Storage Cart! The perfect solution for holding toys + stuff. Less than $10 to make compared to $40+ to buy!
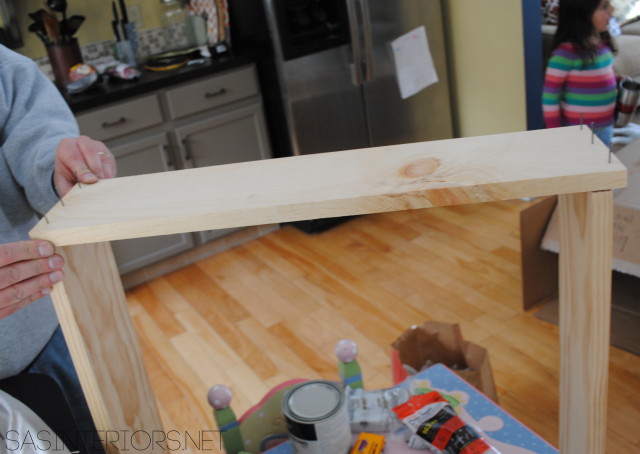
I’m not sure why my little girl in the background is holding a coffee cup, but rest assured she wasn’t drinking it. At least I hope she wasn’t…

3. Once the 4 sides were put together, I attached the 24″ x 24″ plywood using 3/4″ long wood nails. About 4 nails per side should be enough to make it sturdy.

DIY Tutorial for a Rolling Underbed Wood Storage Cart! The perfect solution for holding toys + stuff. Less than $10 to make compared to $40+ to buy!

4. The (4) wheels were next…  Using 3/4″ screws, I attached a wheel to each corner.

DIY Tutorial for a Rolling Underbed Wood Storage Cart! The perfect solution for holding toys + stuff. Less than $10 to make compared to $40+ to buy!

The result of the rolling cart thus far…

The beauty of this wood cart is that it doesn’t have to be only for under the bed.  Change the size – make it taller or less wide – and use them in the living room for toys, blankets, or DVDs.  How about in the garage for tools?  Or in the craft room for supplies?  There are so many ways, so many uses!

DIY Tutorial for a Rolling Underbed Wood Storage Cart! The perfect solution for holding toys + stuff. Less than $10 to make compared to $40+ to buy!

To jazz up the rolling cart, I thought it would be neat + easy to add a fun + functional rope pull.

But first, I gave the overall cart a good sanding. Kids + Splinters aren’t pretty…

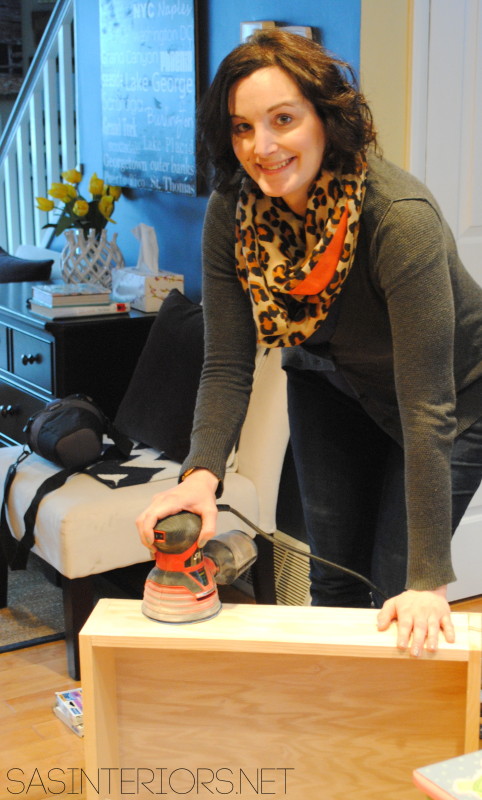
Yes I sometimes DIY with a leopard scarf…

And rest assured after posing for this pic, I put my eye protection on.  Promise!

Now onto the rope.

5. In the center of one side, towards the top, I drilled a hole slightly larger than 1/2″.

DIY Tutorial for a Rolling Underbed Wood Storage Cart! The perfect solution for holding toys + stuff. Less than $10 to make compared to $40+ to buy!

6. I then cut a piece of rope about 12″ long (I think, I actually eyed it and didn’t really measure) and threaded it through the hole and tied it on both sides.

DIY Tutorial for a Rolling Underbed Wood Storage Cart! The perfect solution for holding toys + stuff. Less than $10 to make compared to $40+ to buy!

The rope was a bit expensive – I think this roll was about $8 – but I plan on using it for another project, so it made sense.  You don’t really need rope if you don’t have it on hand.  Instead try a piece of cabinet hardware or something you already have in the home.

7. Once the rope was in, I gave the overall wood surface a quick dry-brush paint application. One quick, imperfect coat and it was almost complete.

DIY Tutorial for a Rolling Underbed Wood Storage Cart! The perfect solution for holding toys + stuff. Less than $10 to make compared to $40+ to buy!

8. To jazz the cart up one more step, I added a chalkboard front using chalkboard paint.  Using my eye, no measuring tape, I created a box with painters tape and painted 3 coats of the chalkboard paint.

DIY Tutorial for a Rolling Underbed Wood Storage Cart! The perfect solution for holding toys + stuff. Less than $10 to make compared to $40+ to buy!

DIY Tutorial for a Rolling Underbed Wood Storage Cart! The perfect solution for holding toys + stuff. Less than $10 to make compared to $40+ to buy!

9. Right after the last coat was brushed on, I had a little helper take off the painters tape while the paint was still wet.

Look at that beautiful straight line…

DIY Tutorial for a Rolling Underbed Wood Storage Cart! The perfect solution for holding toys + stuff. Less than $10 to make compared to $40+ to buy!

And the rolling wood carts were complete!

DIY Tutorial for a Rolling Underbed Wood Storage Cart! The perfect solution for holding toys + stuff. Less than $10 to make compared to $40+ to buy!

DIY Tutorial for a Rolling Underbed Wood Storage Cart! The perfect solution for holding toys + stuff. Less than $10 to make compared to $40+ to buy!


DIY Tutorial for a Rolling Underbed Wood Storage Cart! The perfect solution for holding toys + stuff. Less than $10 to make compared to $40+ to buy!

Check out the honeycomb shelves…  My longest, most difficult project yet, but I’m in love.  More to come on those later this week!

BTW, you can see more of that fabulous wallpaper on the wall to the left in a recent post I shared.

DIY Tutorial for a Rolling Underbed Wood Storage Cart! The perfect solution for holding toys + stuff. Less than $10 to make compared to $40+ to buy!

So what do you think?  Could these wood carts be something you could use in your home?  Each were about $10 to make and both took about a total of an hour (maybe a little more) to make.  Not too bad!

What are your favorite toy storage solutions? What are your favorite under-the-bed storage solutions?

Valentine Wreath with Paint Chip Flowers

Thanks all for loving my printables so much – I didn’t realize what a hit they’d be.  I guess next time I should have more confidence…  Weren’t all the other printables along the Blog Hop super cute as well?  I am still in the romance mood (that sounded corny), and wanted to share with you a wreath I created last year.  It was originally featured on Jen’s blog, but I wanted to give it a refresh and share it all with you.  It’s one of my favorites to-date!

Come see how I made this Valentine Wreath with Paint Chip Flowers

Valentine Wreath with Paint Chip Flowers created by @Jenna_Burger, WWW.JENNABURGER.COM

It wasn’t difficult to make at all and the flower petals were actually a bit calming to create.

The supplies I used for this wreath creation were:

  • Grapevine wreath ( I got mine on sale at AC Moore for $2.50)
  • Eucalyptus leaves
  • White spray paint (I used a gloss finish)
  • Paint chip samples in an array of pinks and reds
  • Hot glue gun
  • A heart punch or scissors to manually cut out hearts

I started off with the paint chip flowers.

Using paint chip samples in a range of colors from pinks to reds to purple, and a 1.5″ heart-shaped hole punch, I cut out about 40 hearts. I got this decorative paper punch at AC Moore for less than $10, but as an alternative, you could cut hearts out with plain ole’ “old school” scissors. The hearts may not result as exact, but the idea is still the same.

Valentine Wreath with Paint Chip Flowers created by @Jenna_Burger, WWW.JENNABURGER.COM

Then I cut a piece of felt about 3″ round (any heavier material will work as well), laid out 6 hearts around the outer edge, and secured them with a nice-sized dab of hot glue.

Valentine Wreath with Paint Chip Flowers by @Jenna_Burger of WWW.JENNABURGER.COM featured on tatertotsandjello.com

Then for the inner hearts, I curled the top edge using a pencil to create the look of a flower.

Valentine Wreath with Paint Chip Flowers by @Jenna_Burger of WWW.JENNABURGER.COM, featured on tatertotsandjello.com

I layered (4) ‘curled’ hearts in the center, on top of the outer edge of hearts. To complete each flower creation, I added a small 3 dimensional piece of paint chip for the center of the “flower”.

After making a few more flowers of different sizes (they don’t all have to be this large size – differing sizes make it more interesting), I added them to the wreath. Having the back of the flowers on felt, allows the ease of adding them to the wreath. With a dab of hot glue, I attached the felt-backed flowers to the wreath. Once Valentine’s Day is over, the flowers can easily be removed from the wreath, and different embellishments can be added for other holidays or occasions.

Valentine Wreath with Paint Chip Flowers created by @Jenna_Burger, WWW.JENNABURGER.COM

This wreath truly was a joy to create and took only about an hour to make (I add the eucalyptus & spray painted the wreath Day 1 which took about 15 minutes, then made the flowers and attached them Day 2 which took about 30 minutes).

Valentine Wreath with Paint Chip Flowers created by @Jenna_Burger,WWW.JENNABURGER.COM

Valentine Wreath with Paint Chip Flowers created by @Jenna_Burger, WWW.JENNABURGER.COM

This festive Valentine wreath would be great hanging on a front door or inside the home. I have it above my fireplace – it’s the perfect centerpiece above my mantel.

Valentine Wreath with Paint Chip Flowers by @Jenna_Burger of WWW.JENNABURGER.COM, featured on tatertotsandjello.com

Super cute, right?!

I like it so much because it doesn’t scream Valentine’s Day.  It could really take you right through the Spring months.  Wouldn’t it also look good with fall colored paint chips – Ooo, that gives me an idea!

Want to see some more of my Vday creations?  Here are a few:

> The valentine burlap wreath with felt flowers that I created a few years ago

click on image for tutorialValentine Burlap Wreath with Felt Flowers created by @Jenna_Burger of WWW.JENNABURGER.COM

> My ‘love’ connection wood sign.  Do you see lame / dorky or wow, she’s really creative?

click on image for tutorialValentines Love Connection Wood Sign created by @Jenna_Burger, WWW.JENNABURGER.COM

Do you decorate for Valentine’s day?

DIY: Personalized Word Christmas Ornament

One week to go and Christmas will be here. Can you believe it?

As you know, my home has been decorated for quite a few weeks, but I have still been working on new holiday projects here and there to add to this years decor.   Once the house is ‘set’, I still enjoy adding new and unique touches for the season.

Since adding in a second tree this year, which is more of a pretty tree versus the sentimental traditional tree we decorate as a family, I’ve had fun with the gold + brown theme.  Along with the ball ornaments, I’ve added in some gold feathers (yes gold + feather in one combo: heaven) and just this past weekend, I jazzed it up even more with my latest DIY creations, word Christmas ornaments

DIY: Word Christmas Ornament using a Gold Sharpie by @Jenna_Burger, WWW.JENNABURGER.COM

Super fun, right?!  I got the idea from seeing a beautiful vignette in the Garnet Hill catalog.  I didn’t see the ornaments for sale (not like I would buy them anyway because they’d probably be $10+) and decided to create my own version.

I started off by grabbing a box (set of 6) of clear bulbs and a gold Sharpie marker at AC Moore.  With my 50% off coupon, I ended up getting both items for a few cents over $6.  Not bad for 6 ornaments, which = about $1/ornament…

DIY: Word Christmas Ornament using a Gold Sharpie by @Jenna_Burger, WWW.JENNABURGER.COM

Before putting pen to glass, I wanted to find the perfect font and words to write.  I decided on the words Joy, Peace, Shine, Merry.  All words that are meaningful around Christmas.  For the font, there was a toss up between Jenna Sue and Channel.

Jenna Sue and Channel font

In the end, I decided on the Channel font because I thought bigger and bolder would be better, plus it’s a little more forgiving – I’ll tell you why in a moment…

I started out by copying the script font from the computer screen to the ornament.

The result…  Not exact, but pretty close.

DIY: Word Christmas Ornament using a Gold Sharpie by @Jenna_Burger, WWW.JENNABURGER.COM

For each word, I started out with one line, then embellished each letter with thicker lines.  This type of font is more forgiving because you can layer and add onto each letter instead of it being a ‘one shot deal’.

DIY: Word Christmas Ornament using a Gold Sharpie by @Jenna_Burger, WWW.JENNABURGER.COM

Once the first layer of gold Sharpie was dry, I added another layer for a second coat.

DIY: Word Christmas Ornament using a Gold Sharpie by @Jenna_Burger, WWW.JENNABURGER.COM

Each ornament took about 8-10 minutes, so within about 40-60 minutes, I was done with the project.

DIY: Word Christmas Ornament using a Gold Sharpie by @Jenna_Burger, WWW.JENNABURGER.COM

All 4 unique and personalized ornaments would be perfect for a gift.  Any words could be used.  Maybe each ornament could say a member of the family or something silly about the holidays…

Once I was done, the ornaments were ready to immediately hang since Sharpie’s take no time to dry.

DIY: Word Christmas Ornament using a Gold Sharpie by @Jenna_Burger, WWW.JENNABURGER.COM

DIY: Word Christmas Ornament using a Gold Sharpie by @Jenna_Burger, WWW.JENNABURGER.COM

DIY: Word Christmas Ornament using a Gold Sharpie by @Jenna_Burger, WWW.JENNABURGER.COM

DIY: Word Christmas Ornament using a Gold Sharpie by @Jenna_Burger, WWW.JENNABURGER.COM

DIY: Word Christmas Ornament using a Gold Sharpie by @Jenna_Burger, WWW.JENNABURGER.COM

  So what do you think?  A project you’d consider tackling?  What type of project does it inspire you to make?