
Tag: fall Wreath

Autumn Wreath with Plum + Peacock Accents

I haven’t created a new wreath in a long time.  I’ve had my go-to wreaths for Spring, Autumn, and Winter for the past couple of years and every few months they get rotated in-and-out.  But once the chill hit last weekend and the thoughts of Fall started to seep into my brain, I knew a new and unique wreath was ready to be made for the coming season.

The front door, often thought of as the “mouth” of a home, is the perfect place to make a statement.  My apple green colored front door always gives the best backdrop to any wreath that is displayed, and my latest creation fills my heart with a happy feeling & warm thoughts.  For me the front door, signifies the “entrance of”, so let’s enter this new season with my new Autumn Wreath with Plum + Peacock Accents…

Autumn Wreath with Plum + Peacock Accents by @Jenna_Burger, WWW.JENNABURGER.COM

This new wreath is a little out of the norm’ for Fall, but that was my goal.  I passed on reds, oranges, and yellows for Autumn and instead focused on using deeper hues of plum, navy, sienna, and browns.  And then I through in a bit of peacock.  Fun + unique + unexpected!  Exactly what I was going for...

I started off by recycling the white spray painted grapevine wreath that I had on-hand from Valentine’s Day.  It was just sitting around and even though I might have used it again, I took it apart anyway.  Then I scoured the aisles of my local AC Moore and picked out a bunch of faux festive “floral stems” (as they call them).  Other than the berries & the peacock feathers, I don’t know any of the “stems” by name, but basically they were an assortment of styles, colors, and textures.  All three always make a great composition.

Autumn Wreath with Plum + Peacock Accents by @Jenna_Burger, WWW.JENNABURGER.COM

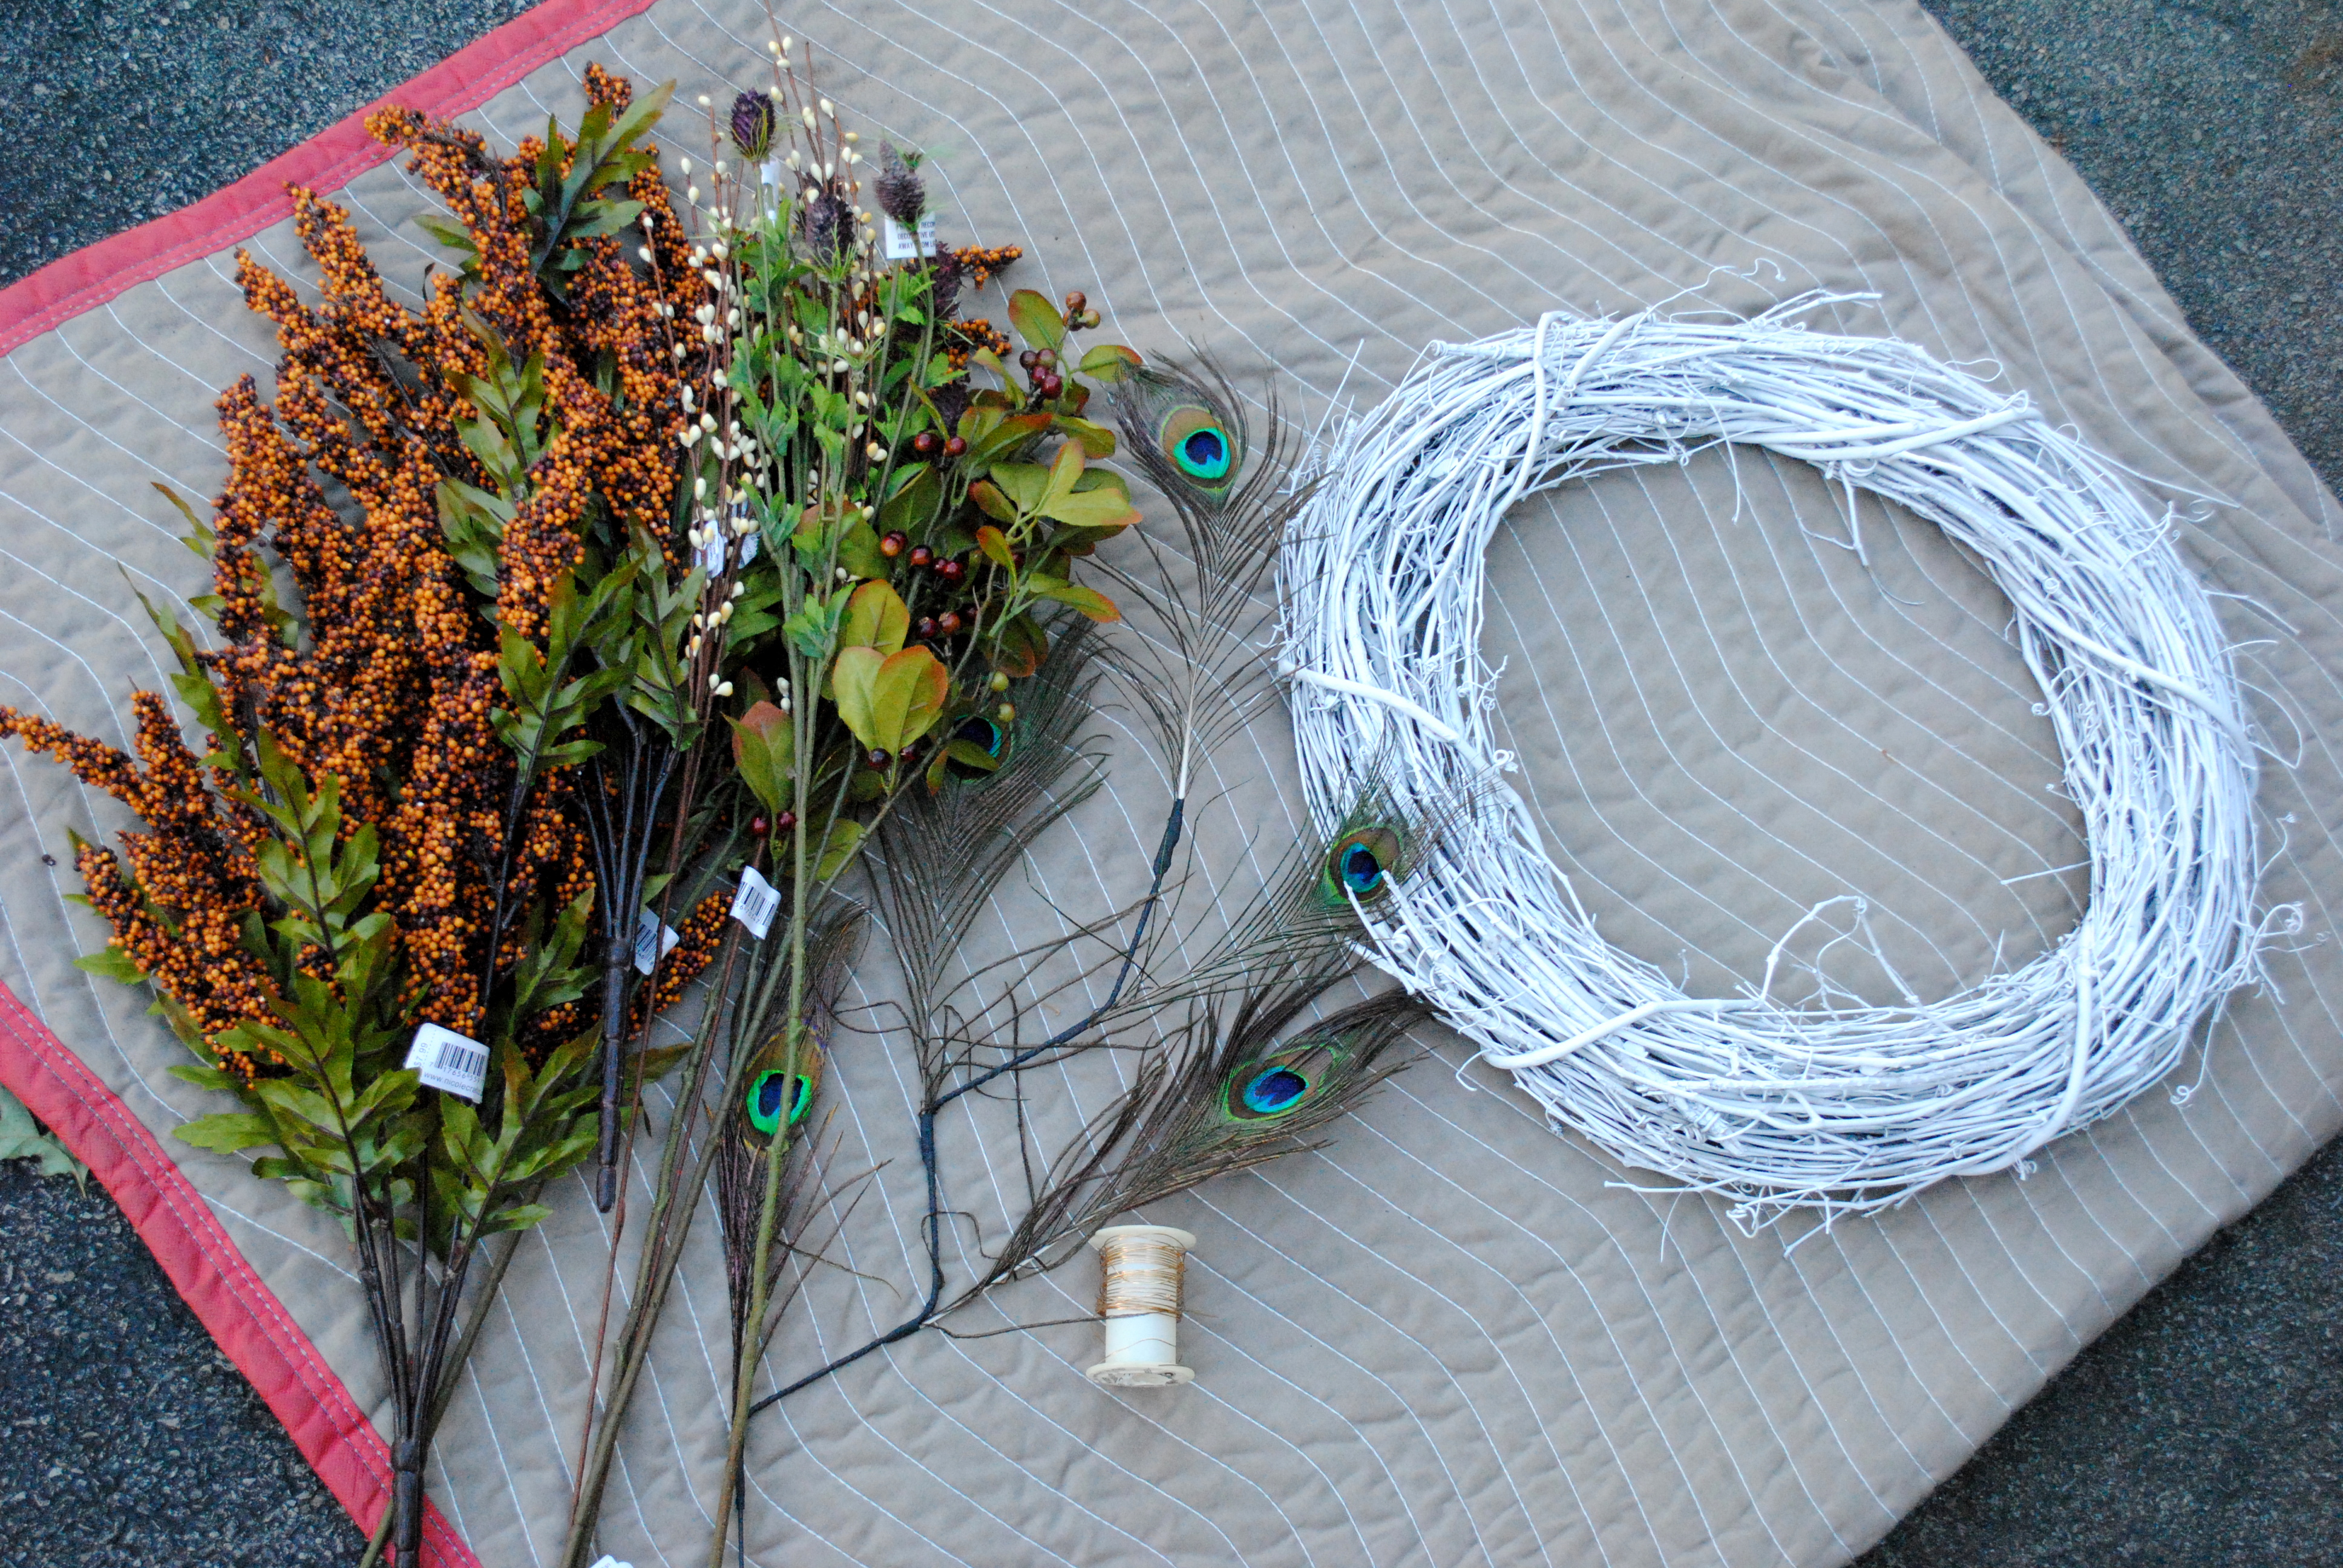
One the styles I got a bunch of with plans of using them as the base.  I thought they were a good neutral to then build the other stems and berries on top of.  Other than the faux stems and wreath, the only other supplies was the wire and snips (for cutting the wire and the stems).

When decorating with faux flowers, I always cut it up so there are individual branches instead of working with one bunch > more on that in this post.  After cutting the bunches apart, I started interweaving each branch through the grapevine wreath. Once the branch was fairly secure, I fastened it to the wreath with floral wire.  Well actually I just used regular gold wire  that I had on-hand, but it was hidden so no biggie.

Autumn Wreath with Plum + Peacock Accents by @Jenna_Burger, WWW.JENNABURGER.COM

About 10-15 minutes later, the base was finito…

Autumn Wreath with Plum + Peacock Accents by @Jenna_Burger, WWW.JENNABURGER.COM

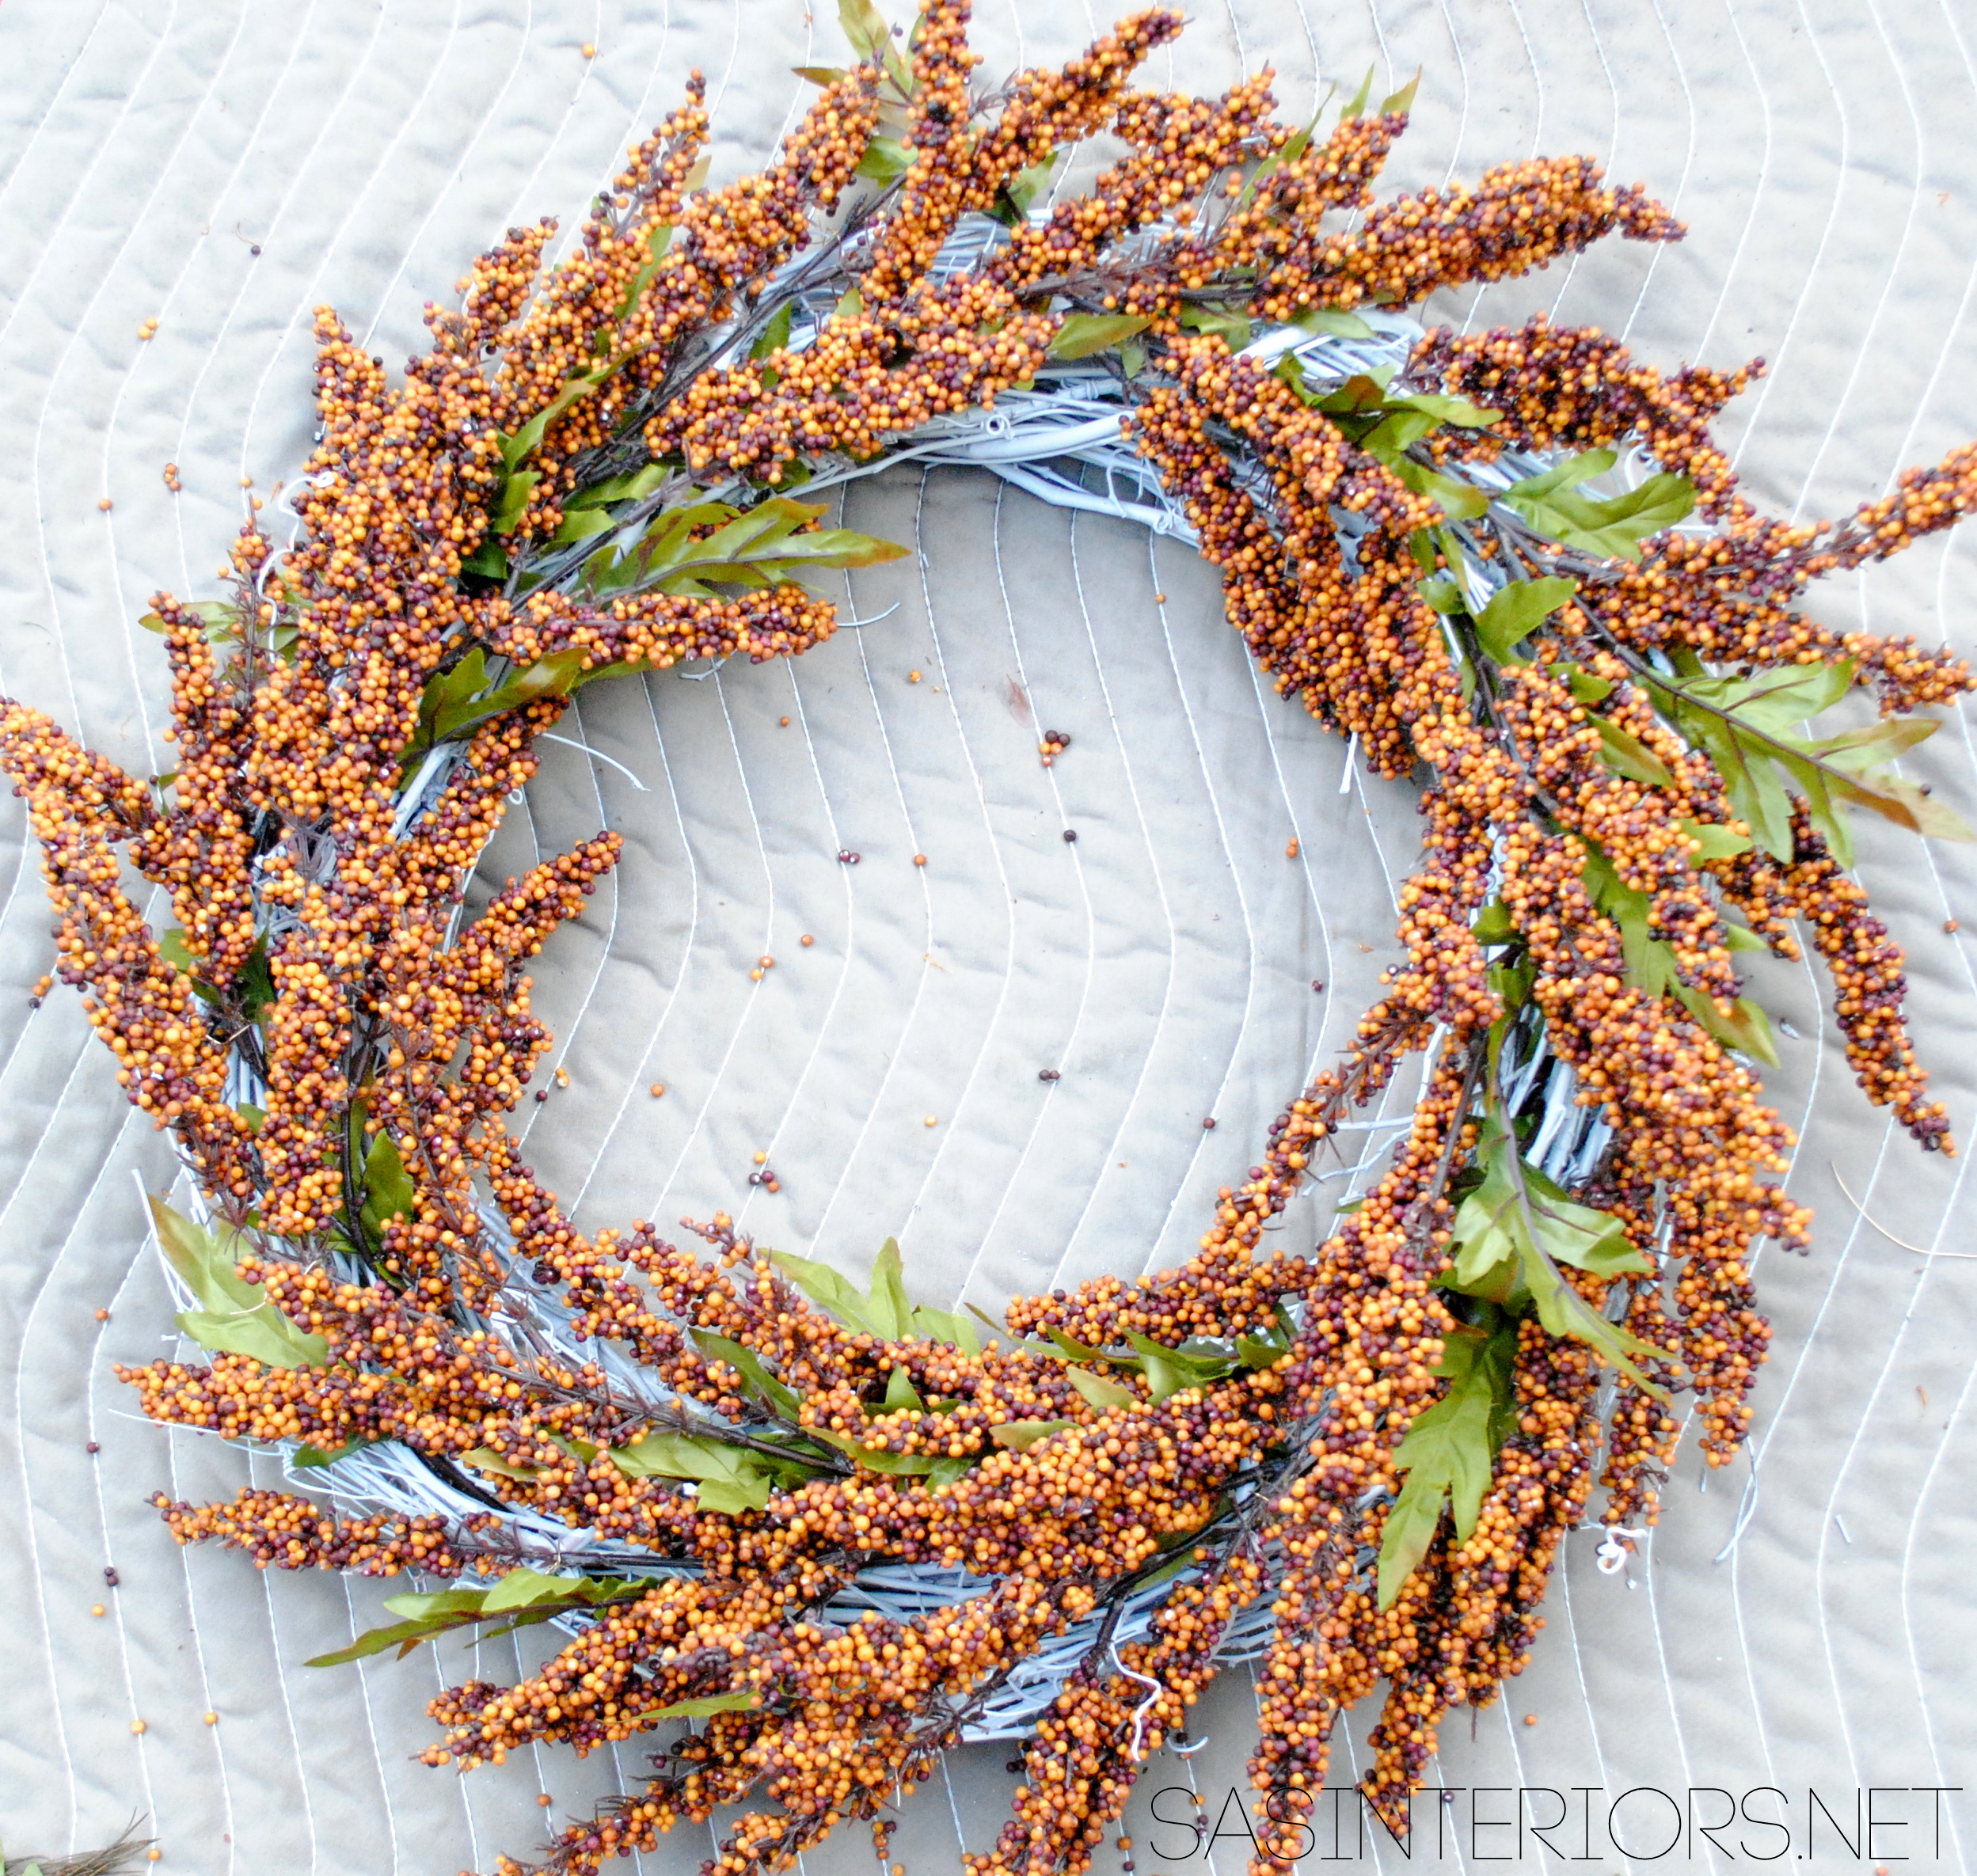
Honestly, this wreath was pretty with just the one style stem, but you know me, I always need more….

At this point, there was no specific hanging point, but with the added layers coming next I needed to choose a spot.  Once I chose a place for where it would hang, I started adding in the other stems + berries.

Autumn Wreath with Plum + Peacock Accents by @Jenna_Burger, WWW.JENNABURGER.COM

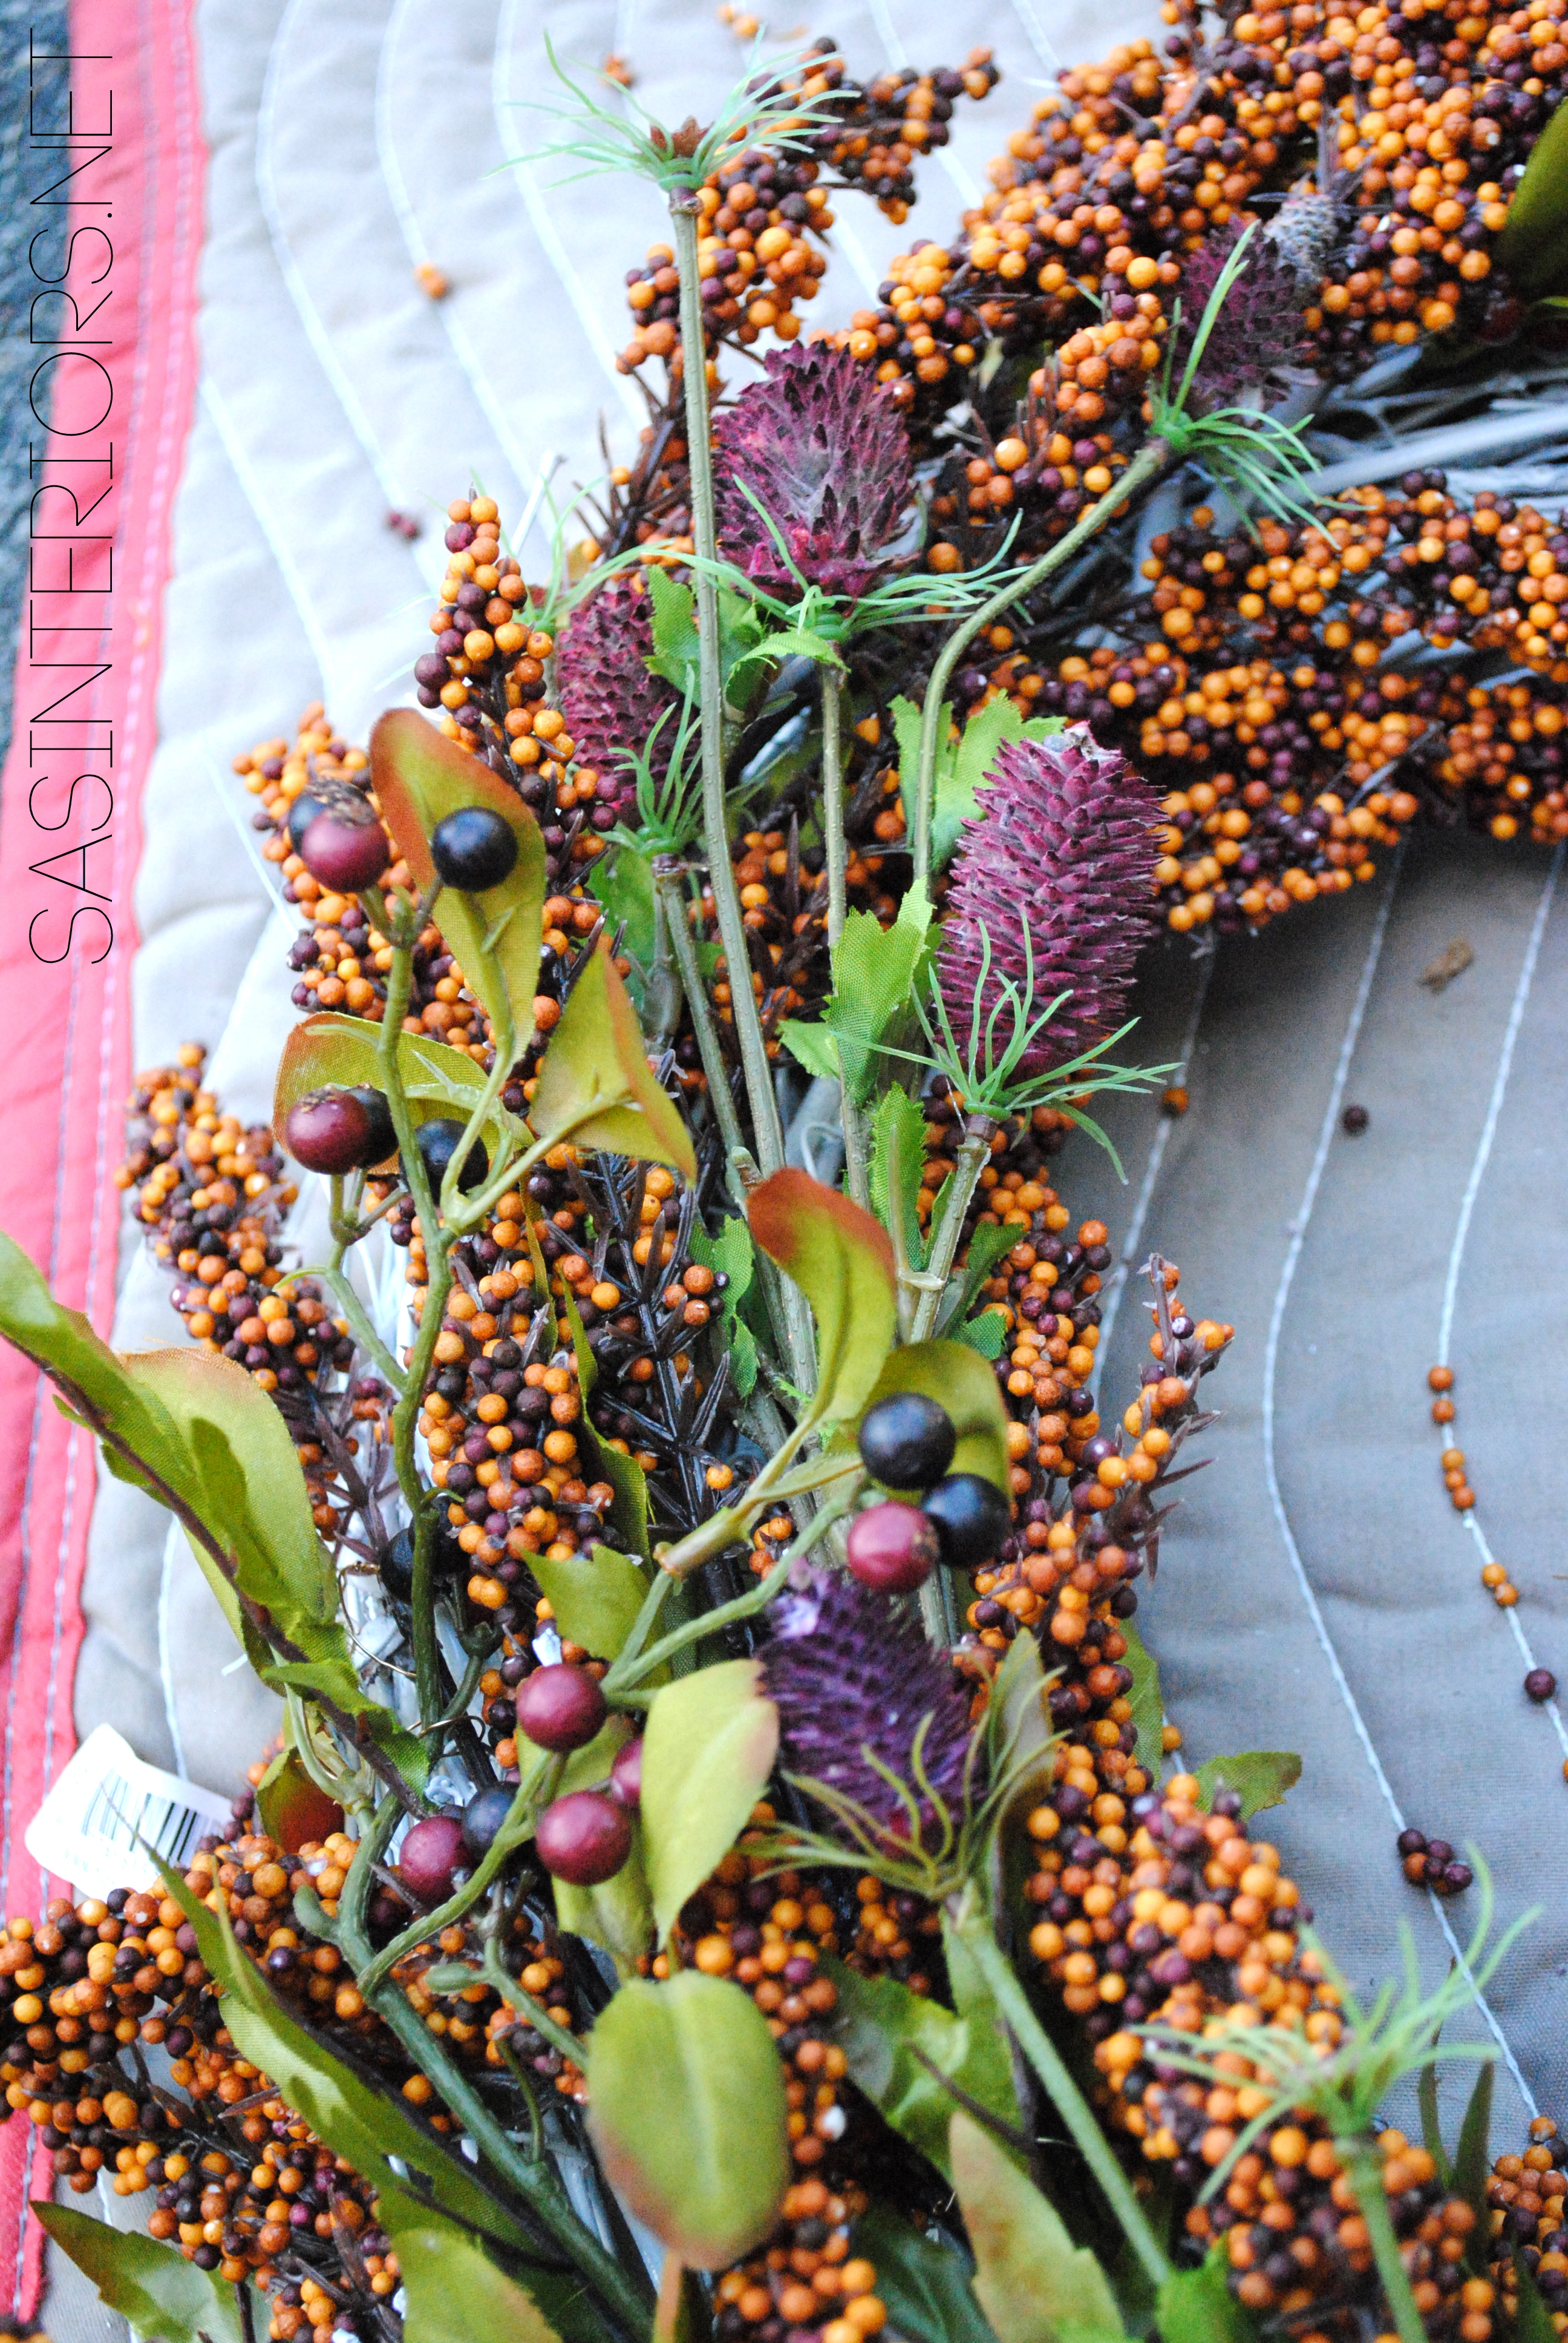
Choosing a place for where it would hang allowed me to pinpoint where on the wreath I wanted to position and see certain stems.  I knew I wanted the spikey plum stems to be on the left & the peacock to be on the right…

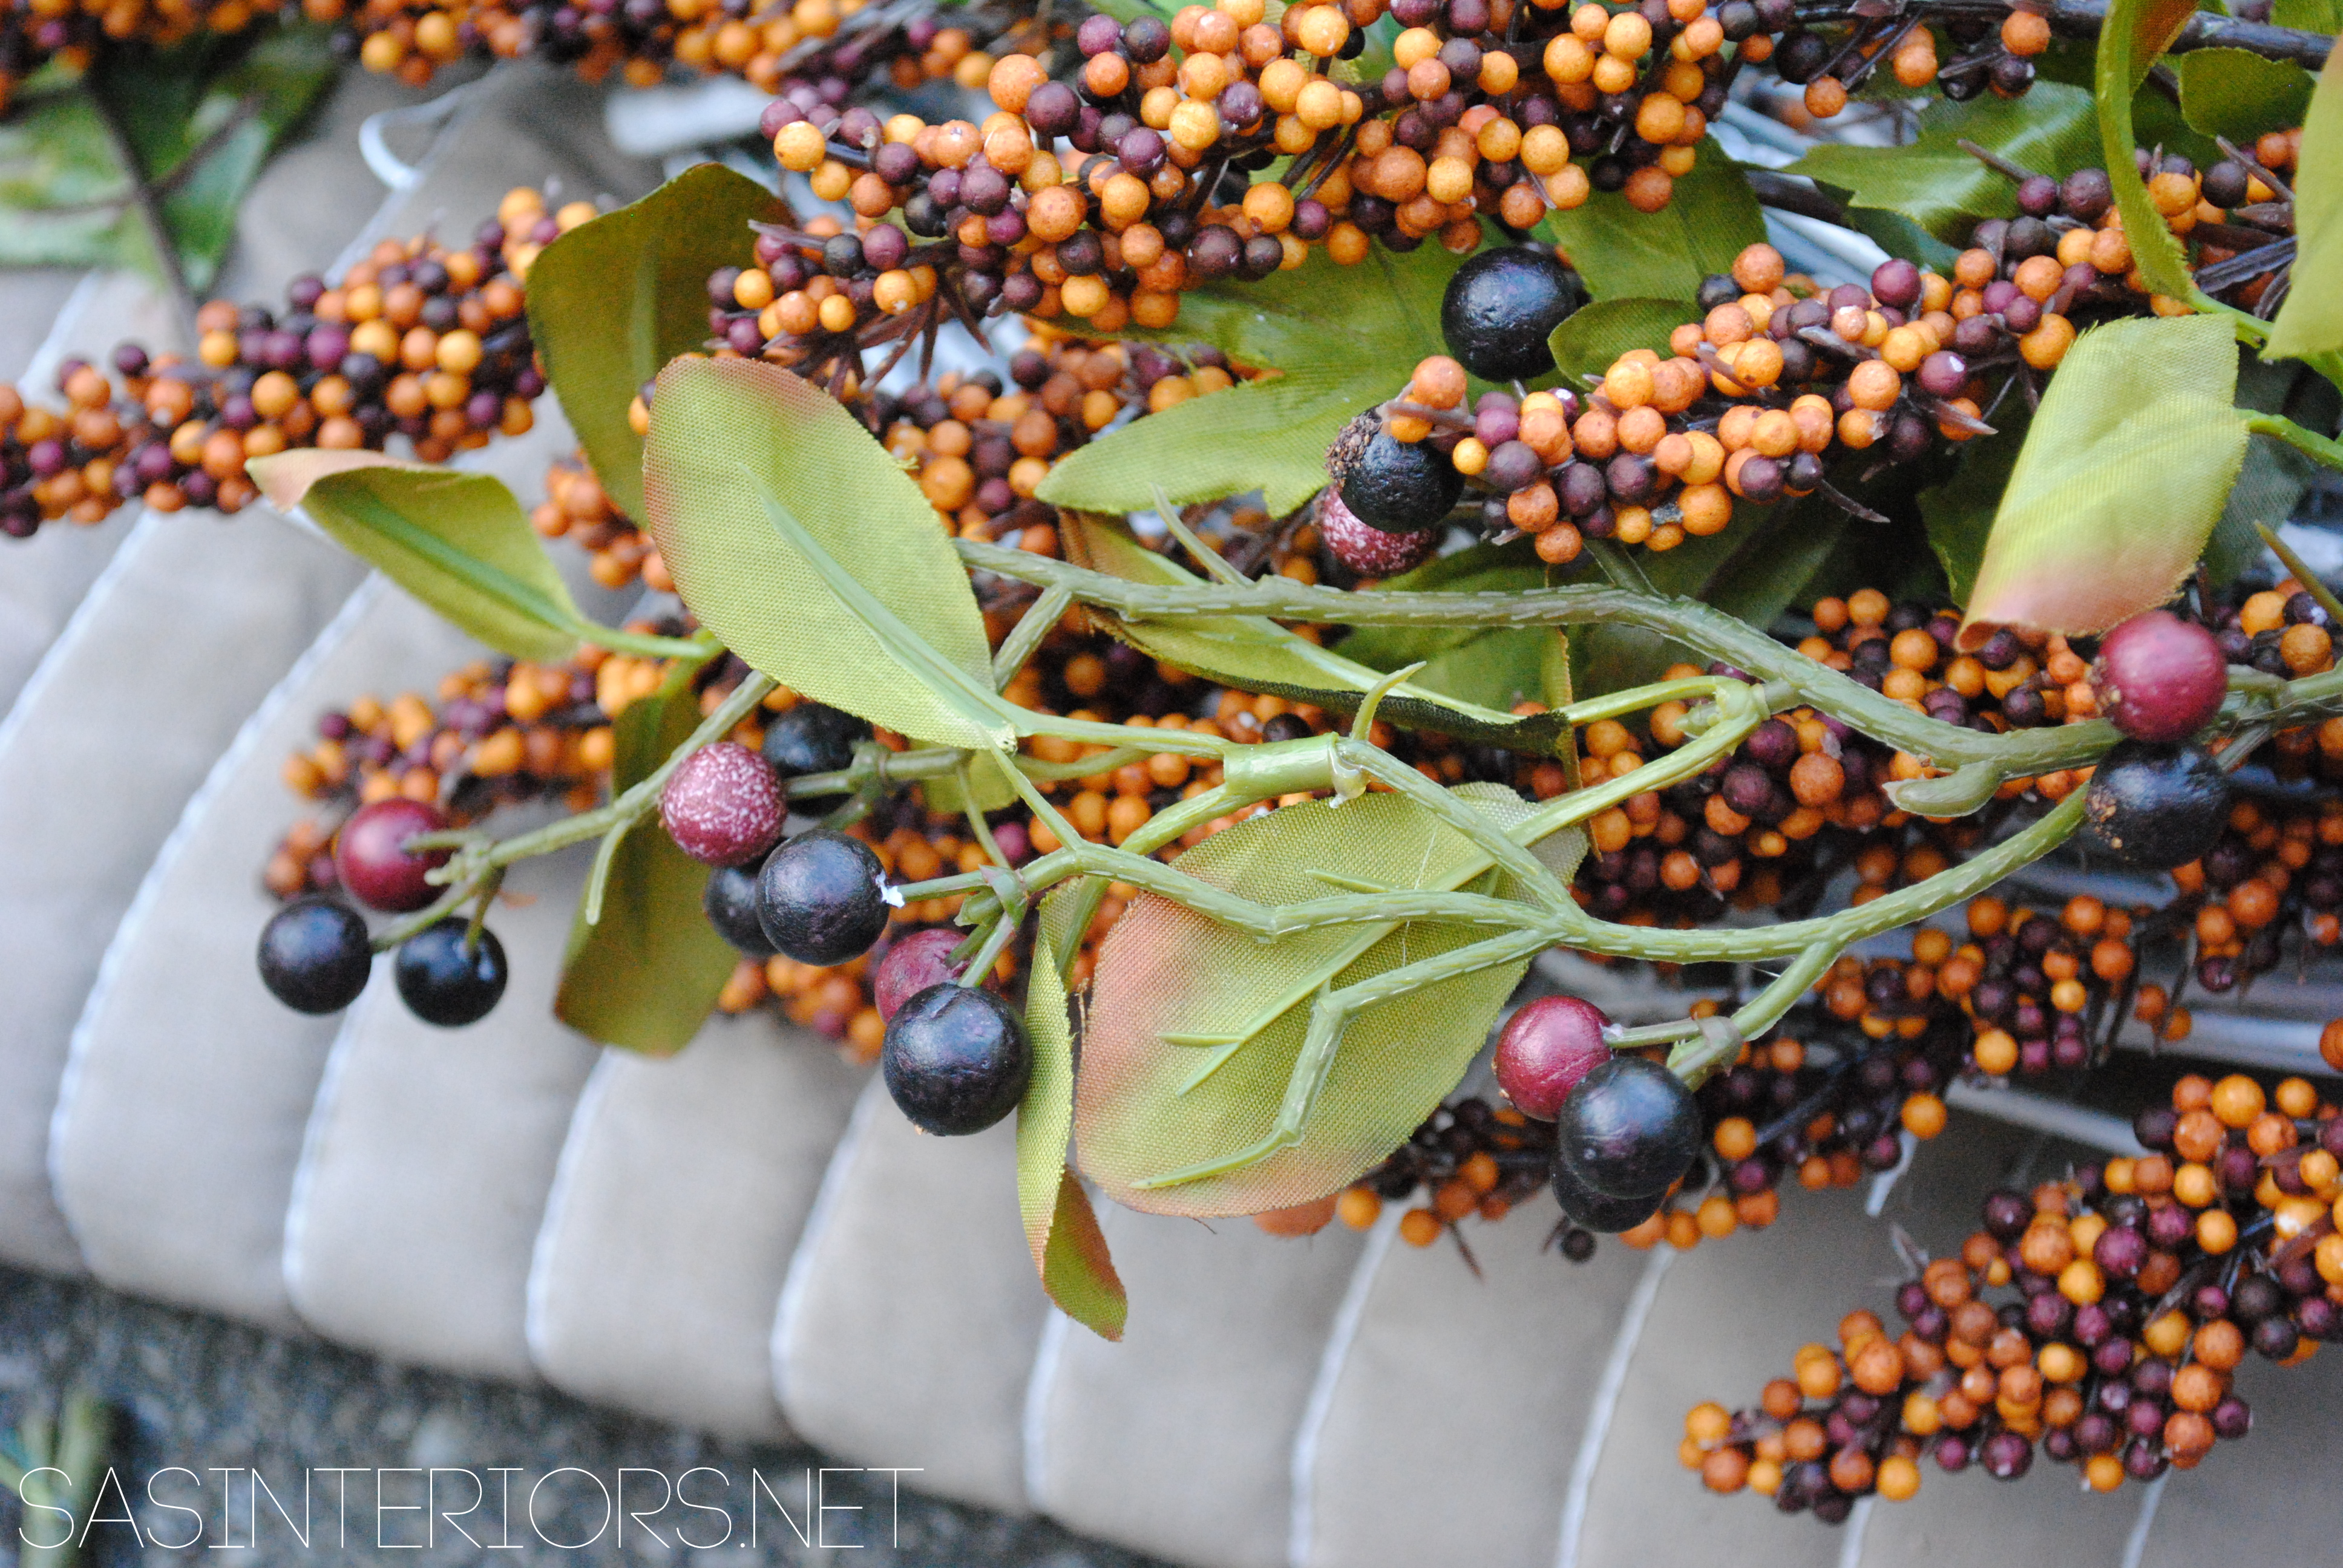
Then came the berries…

Autumn Wreath with Plum + Peacock Accents by @Jenna_Burger, WWW.JENNABURGER.COM

Then the final layer.  The peacock feathers…
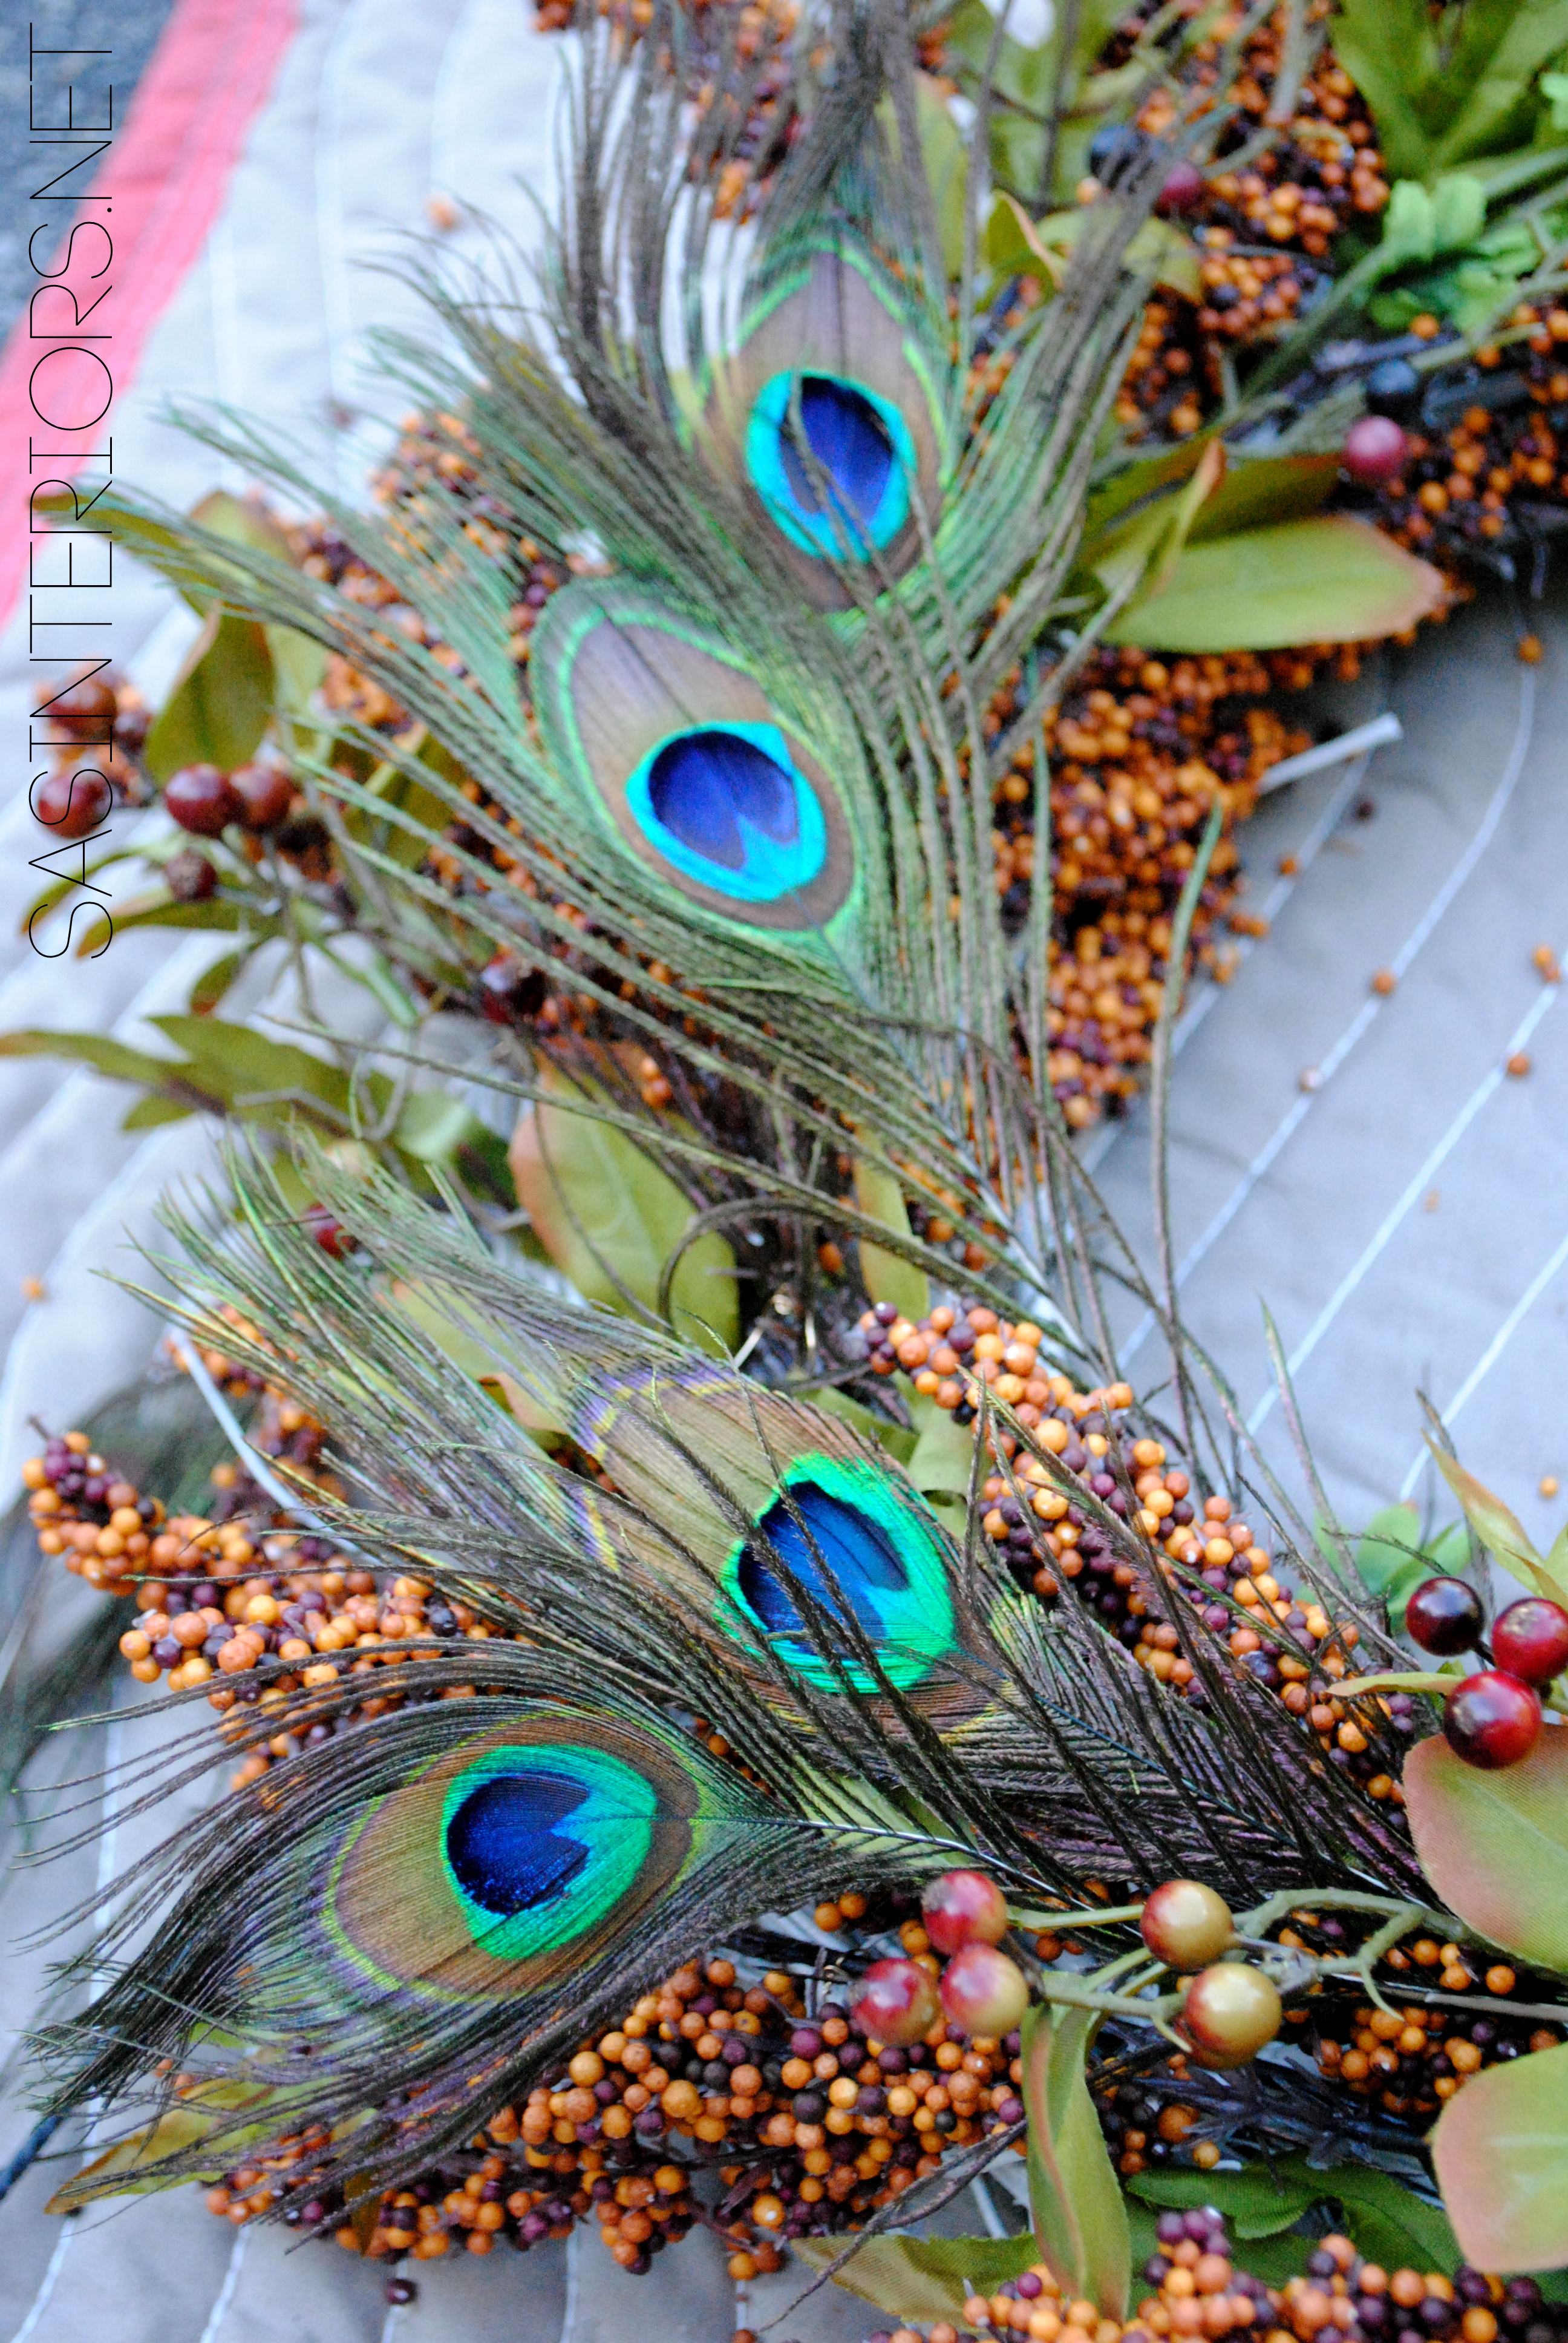
Autumn Wreath with Plum + Peacock Accents by @Jenna_Burger, WWW.JENNABURGER.COM

How fun are they?!

And then the final result.
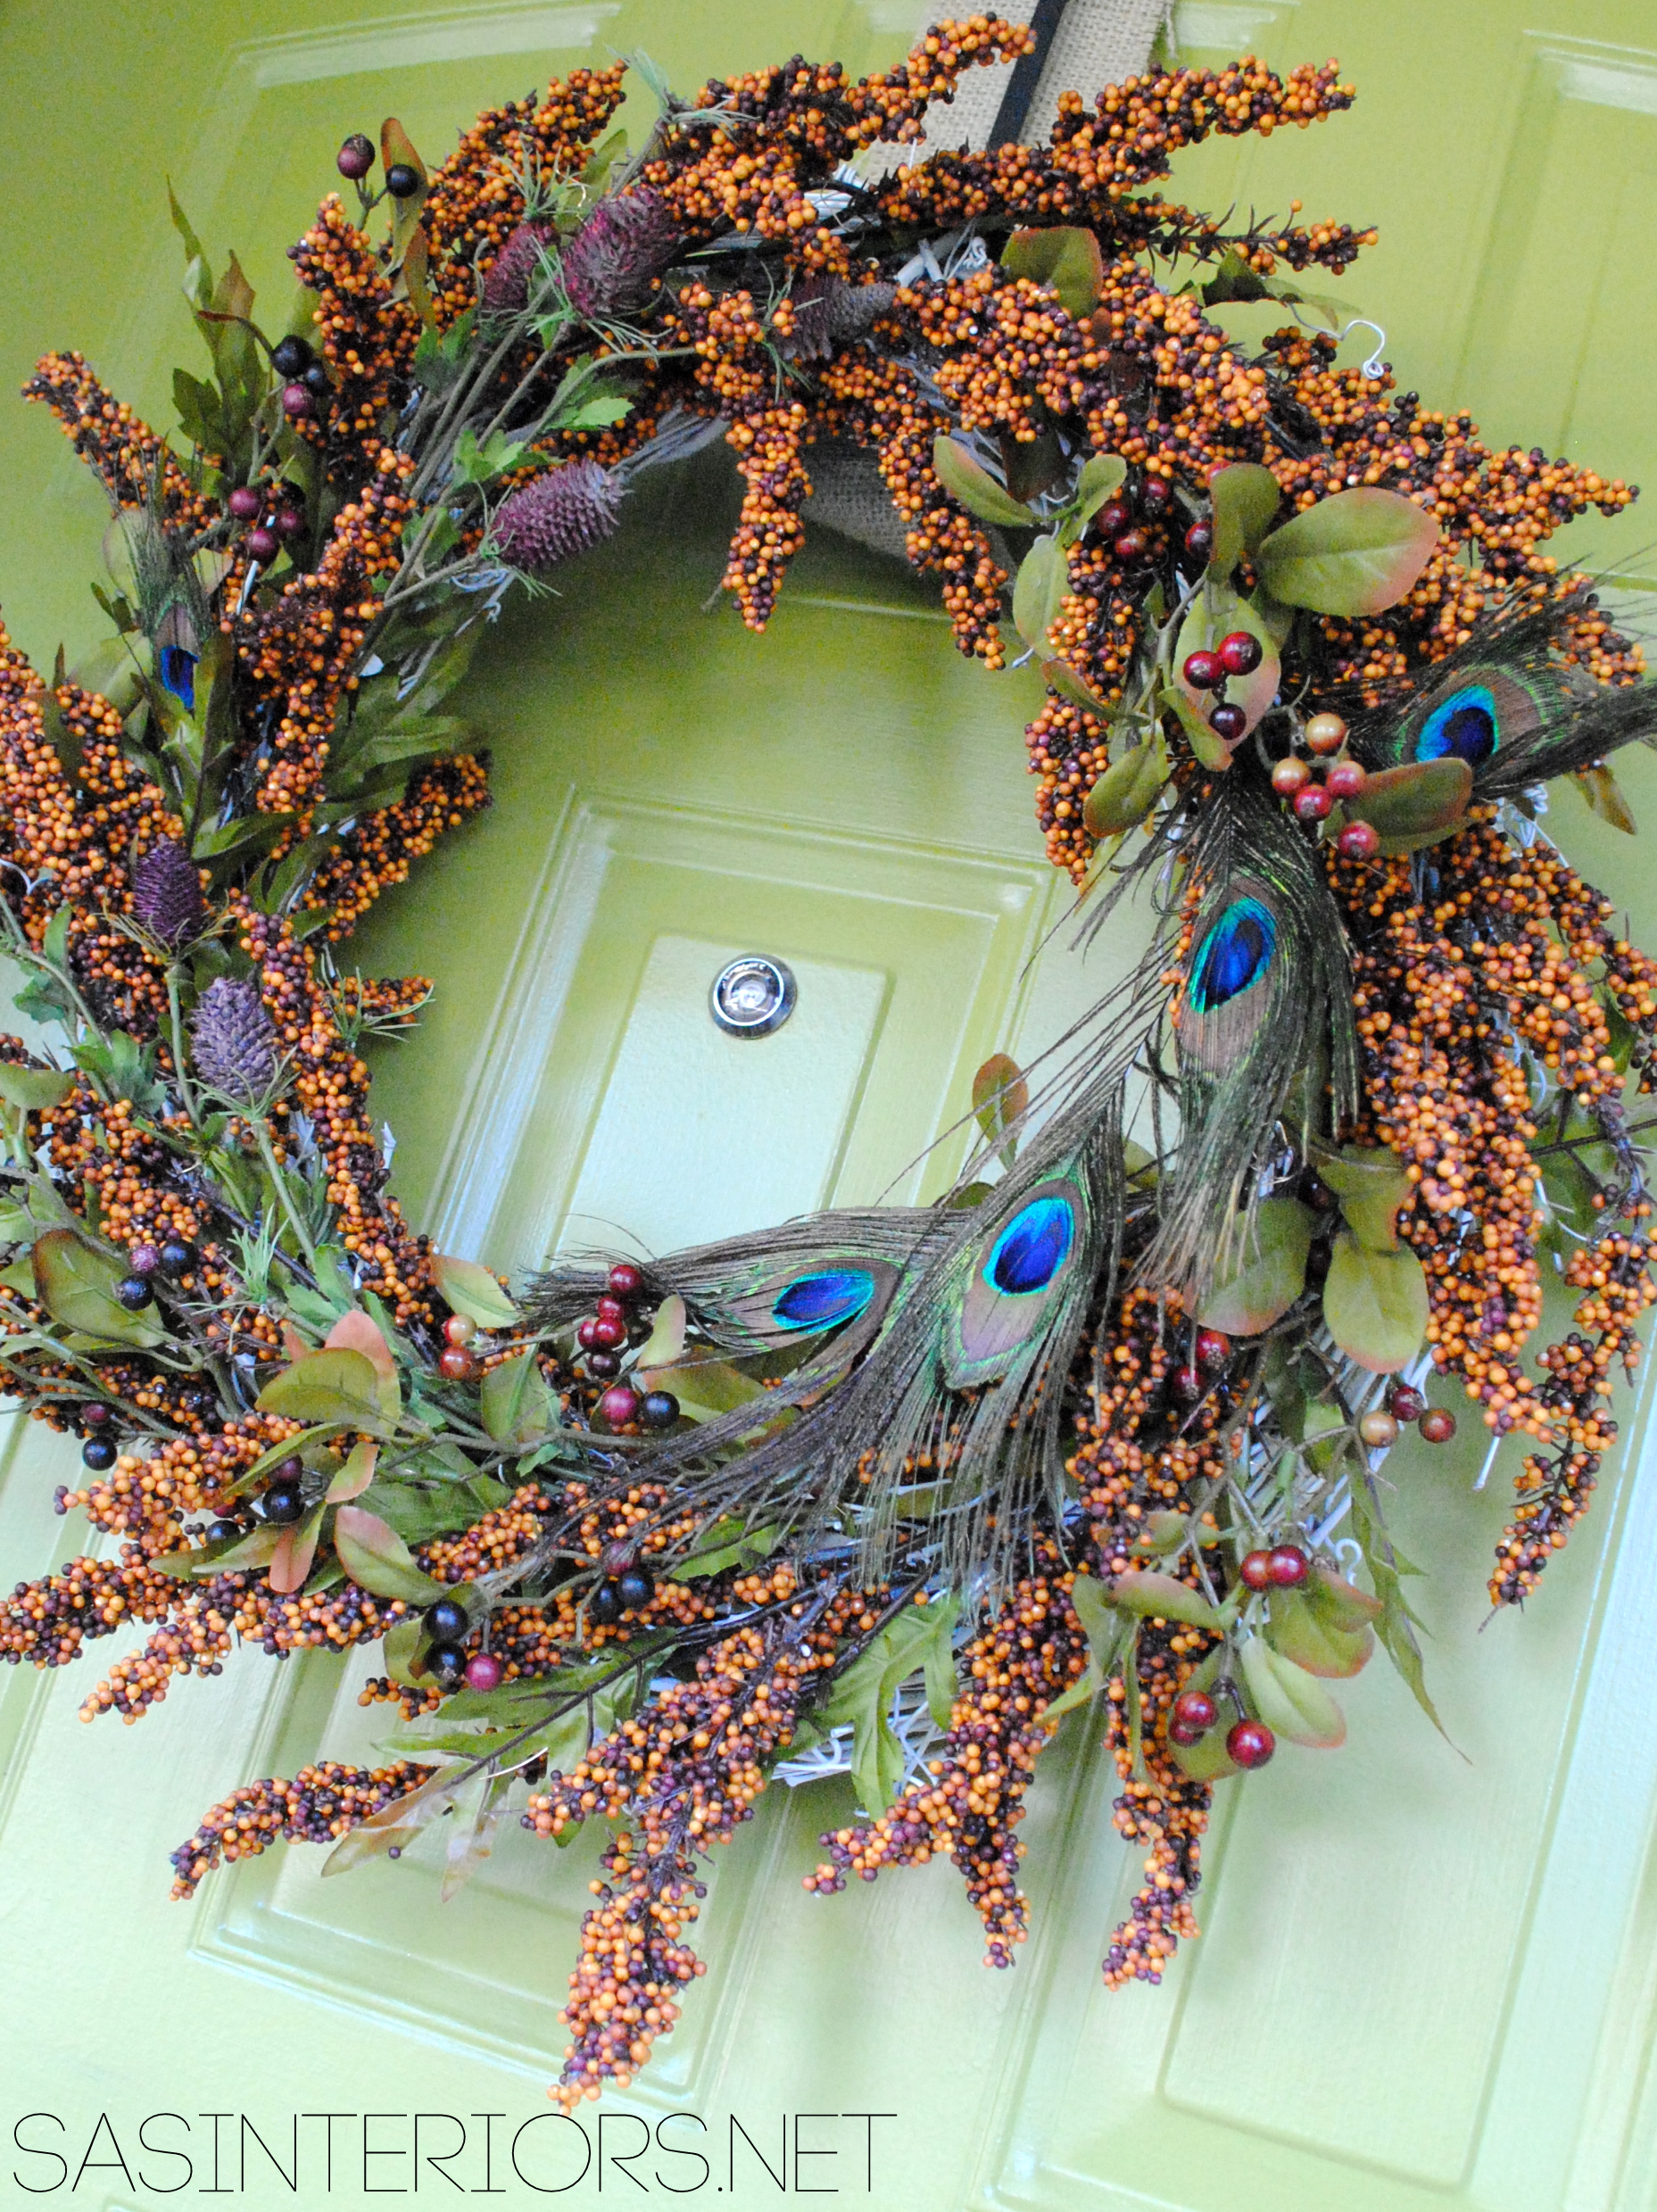
Autumn Wreath with Plum + Peacock Accents by @Jenna_Burger, WWW.JENNABURGER.COM

Autumn Wreath with Plum + Peacock Accents by @Jenna_Burger, WWW.JENNABURGER.COM

Autumn Wreath with Plum + Peacock Accents by @Jenna_Burger, WWW.JENNABURGER.COM

Autumn Wreath with Plum + Peacock Accents by @Jenna_Burger, WWW.JENNABURGER.COM

Autumn Wreath with Plum + Peacock Accents by @Jenna_Burger, WWW.JENNABURGER.COM

Autumn Wreath with Plum + Peacock Accents by @Jenna_Burger, WWW.JENNABURGER.COM

Welcome to my home…

Autumn Wreath with Plum + Peacock Accents by @Jenna_Burger, WWW.JENNABURGER.COM

Autumn Wreath with Plum + Peacock Accents by @Jenna_Burger, WWW.JENNABURGER.COMAnd there you have it.  My latest door creation set for Fall.

As an Apartments.com Brand Influencer, I strive to share ideas + do it yourself projects not only for those who live in homes, but also easy & affordable ideas + creations for apartment dwellers.  One of the reasons I love wreaths so much, no matter if you live in a house or in an apartment, is that it sets the tone for whats to come on the inside.  A wreath not only makes a door pretty, but it’s welcoming.  It’s a way to greet someone without actually greeting them.  And as the person that resides in the home, it’s a beautiful thing to see each time you come home.

And to wrap up this post, my door color!  It’s been this apple green color for years.  I’ve thought of changing it, but I’ve never come across another hue that I like better.  So apple green it is!  When this door gets featured, I always get asked the question – “What color is it?” Here is the info: Valspar Olive Tree WV34010

How do you don your door for the coming Autumn season?

Visit Sponsor's Site

Fall Wreath with Fabric Flowers

Fall is right around the corner and what better way to celebrate a new season than to don a new wreath on the front door.  The front door is often thought of as the “mouth” of a home, the entry point of comfort, happiness, and where great opportunities begin. For me the front door, signifies the “entrance of”, so let’s enter this new season with my new Autumn Wreath.

I loved last year’s wreath because it was different and unique, but for a long time, I’ve wanted to jump on the bandwagon and make a burlap round wreath with fabric flowers.  I was going to make this style wreath in the Spring, but made another wreath instead. So finally the time came, when that wreath came down and this new colorful one went in it’s place.

1. To start off, I purchased a round straw wreath from AC Moore which cost just under $3.  (FYI: I left the plastic cover on)

2. I dismantled my Valentine Burlap Wreath and used the burlap from it, to create this wreath.  I was a little tired of that wreath and plan on making something new and different for next V-day.  But I still have the felt flowers and plan on using them again somewhere on something!

If you are starting with new burlap, cut 3″ wide strips (the length doesn’t matter).  Dab alittle hot glue on the back side of the wreath and wrap the burlap around, creating an overlapping pattern (see picture) .  Then again,  dab alittle hot glue on the back of the wreath to complete and hold the burlap strip in place.

3. Continue wrapping the burlap around and around and around (don’t get dizzy…), until the entire wreath is covered!

DONE! Onto creating the fabric flowers…

How-To Make Fabric Flowers

4. Cut 1/2 – 3/4″  strips of fabric. The length of the fabric will depend on how large you want the flower to be.  I created varying sized flowers to give an overlap effect – keep on reading to find out what I’m chattin’ about…

(fuzzy picture sorry 🙂 – I was working on this project kind of late into the evening)

5. Starting from the end of the fabric (which will be the center of your flower), twist and bunch it together, while wrapping it around and around. After about 2 turns, dab alittle hot glue to hold it together.

6. Continue twisting and bunching around and around, and occasionally dab on some hot glue to hold the flower in place.

Continue until you have the perfect sized flower that you want!

7. Once your flower is complete, flip it over and add a backing.  You can use any heavy fabric material or felt is good too.  I had this heavy twill fabric left over from my Chair Makeover

And you’re done! Make as many fabric flowers as your little heart desires!  Use solid colors. Use patterned fabric. Make them different sizes.  I’ll warn you, it’s quite addicting!  I’ve got a few other thoughts on what I want to make more fabric flowers for (headbands, pins, necklaces, etc. – so many ideas, so little time).

Here’s a little grouping ~ so PUR-TAY!

Onto making the wreath with these pretty little additions!

Ta-Da

Layering the Flowers – I first placed the larger flowers on as a base, and layered the smaller flowers on top.  To give a 3-dimensional look, I raised some of the smaller flowers by hot gluing burlap underneath to give them more height.

Here’s a closeup~

And this is how it looks on my apple green colored door~

Any time I show pictures of my front door, I always get the burning question ~ What color is that?

So here’s the info: Valspar Olive Tree WV34010

Welcome, please come and stay awhile.  Want to Tour the rest of my home? Visit HERE

Have you created a beautiful Autumn wreath?  Share it with me and I’ll include it in my Wreath Inspiration Roundup!