


Bathroom Makeover: Demo {Day 2-4}
It just got real. No more dreaming or fantasizing about a new bathroom, because it’s happening NOW.
So it’s Day 2 for this Bathroom Makeover in 30 Days Challenge (day 1 was putting together the plan of action and by day 30 my goal is to be finished) and the DEMO HAS BEGUN!
Instead of me jumping ahead and sharing what it looks like now (a hot mess with walls missing), let me show you what it looked like before…
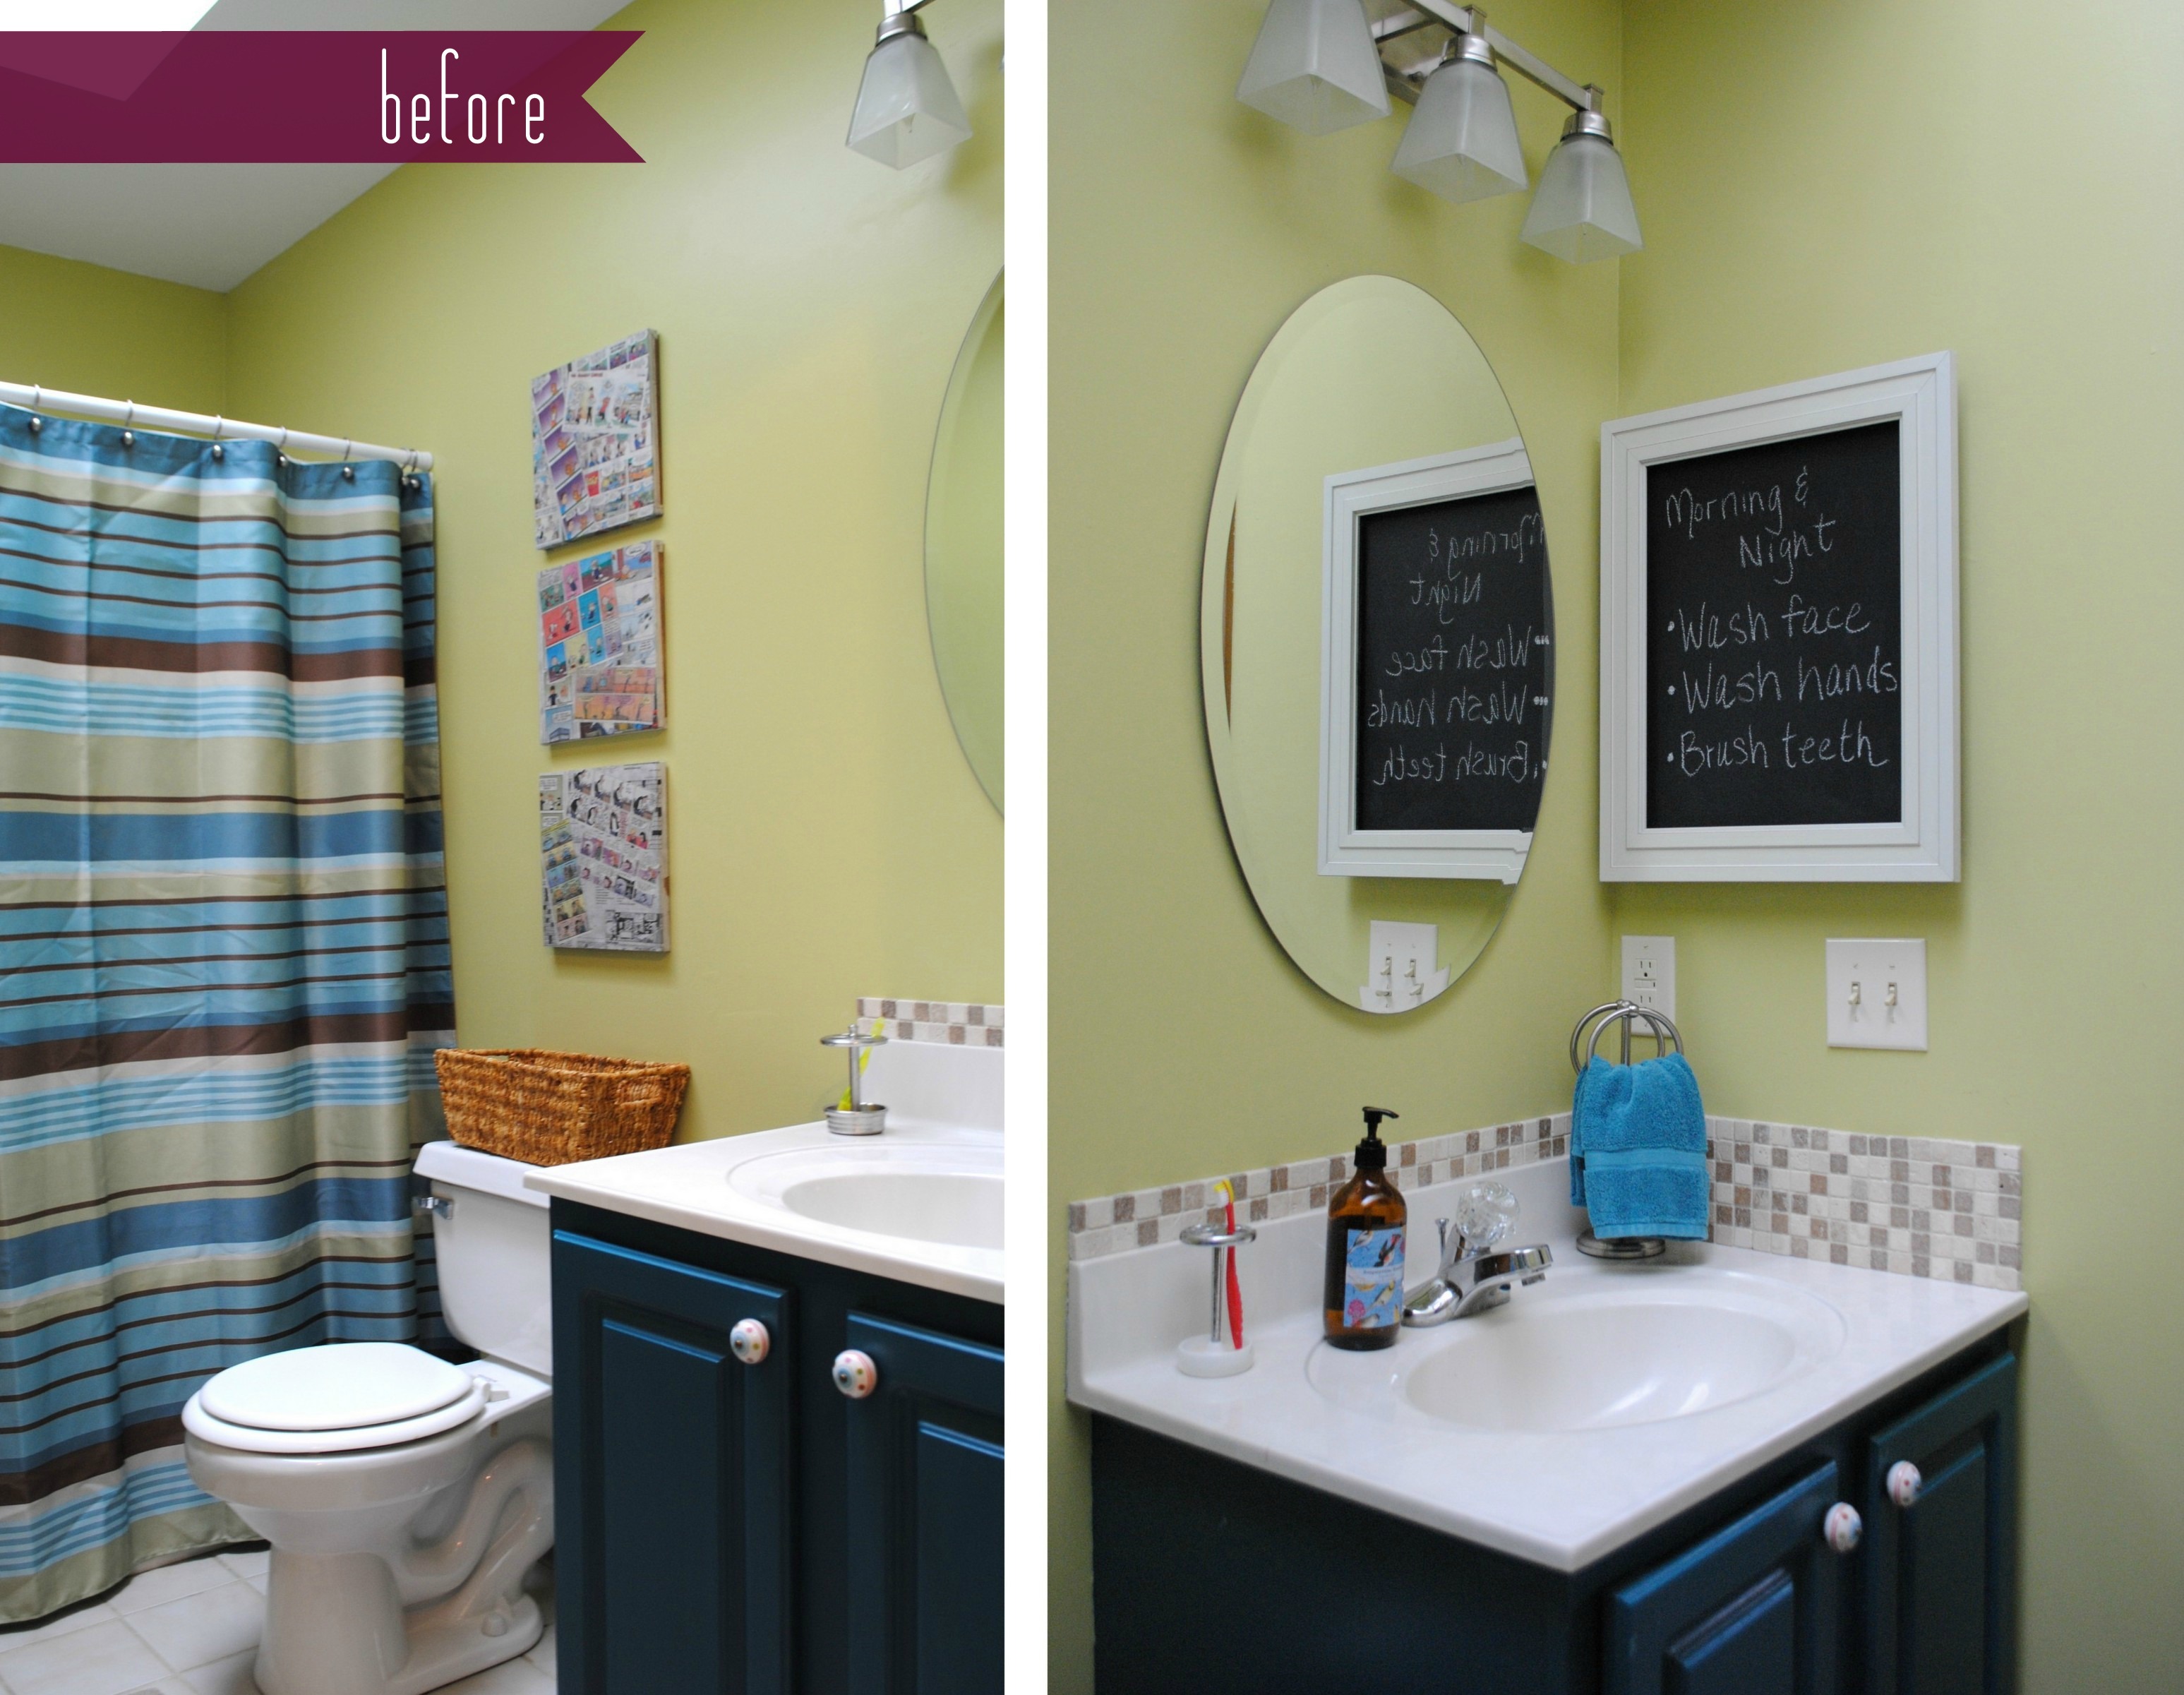
Yes, the space was fine, but it needed updating. All the fixtures had seen better days. The tub was an insert style and very dated, while the shower/tub fittings were starting to leak and even though I would scrub them regularly, the mildew would not go away.
It pains me to share these before images, but I’m just being real…
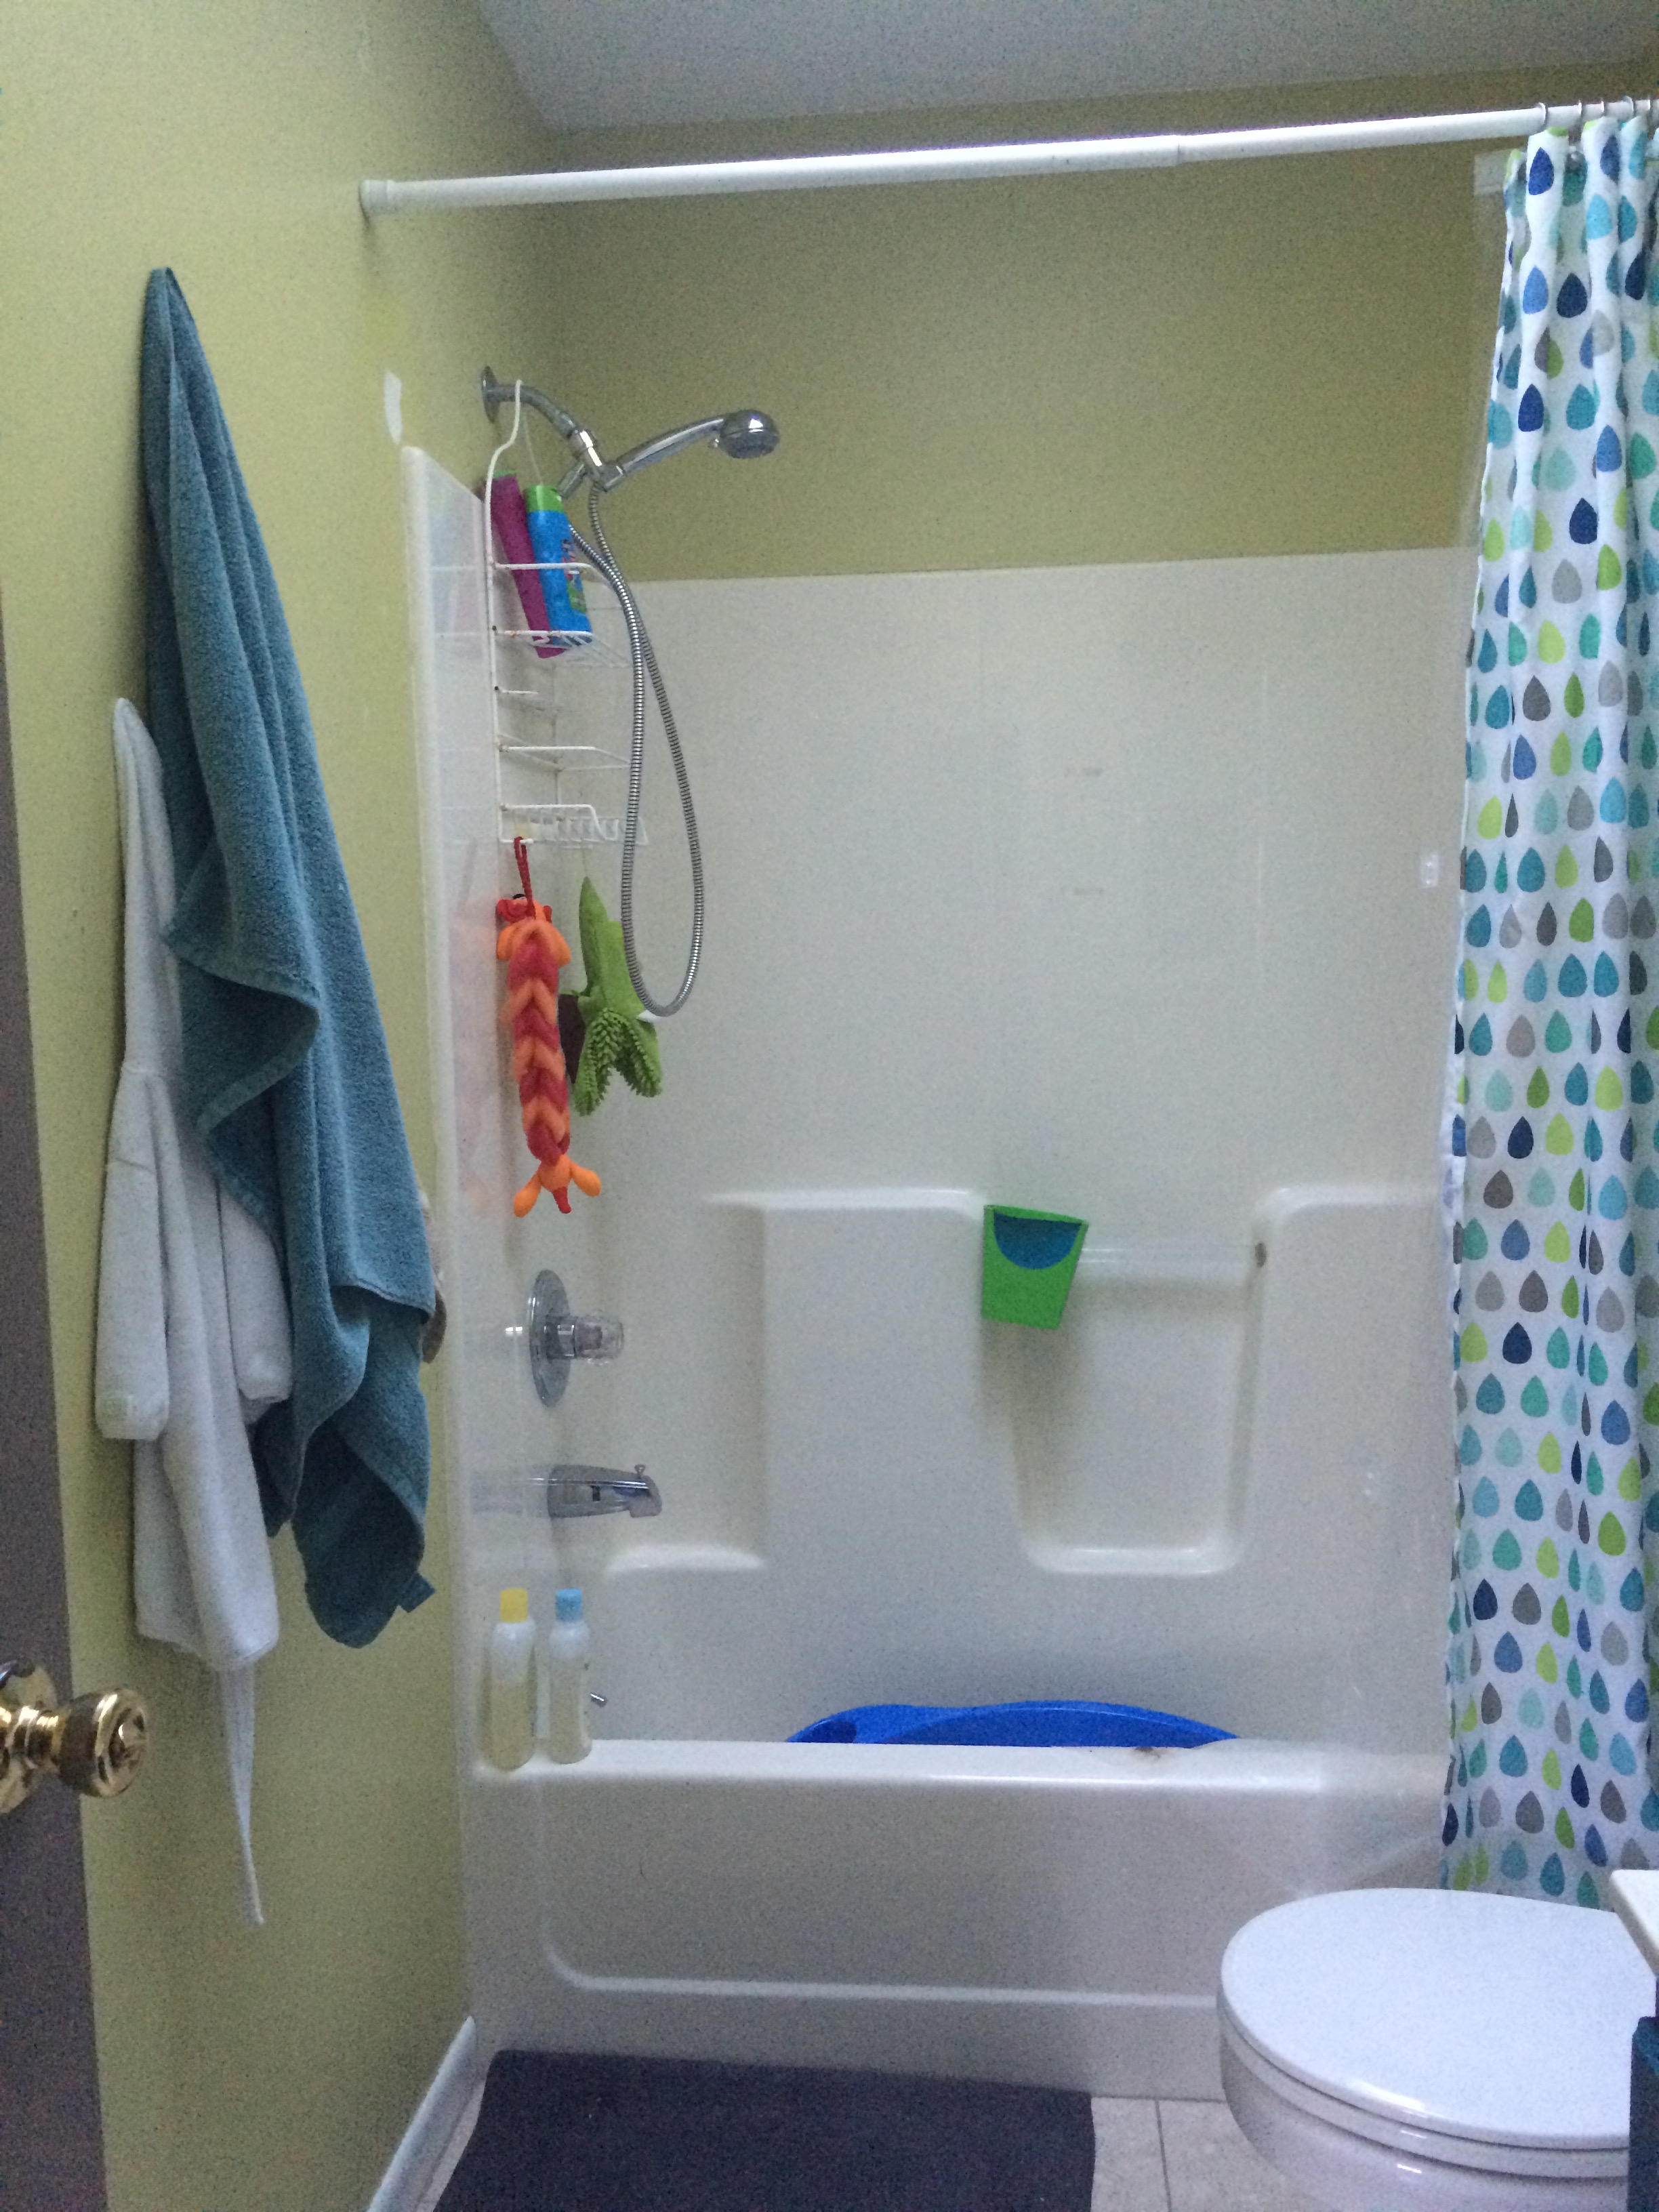
The difficult part about a tub insert is that it only goes 6′ high leaving the above space open for water splashing (which could lead to bacteria growth and/or warping of the walls). Because the kids really abuse use this bathroom, the new space not only has to be pretty, but extremely functional. With my kiddos it seems there is more water outside the tub than inside, so the surrounding areas really need to be protected (hence my decision to tile the entire tub area + the lower section of wall around the rest of the bathroom).

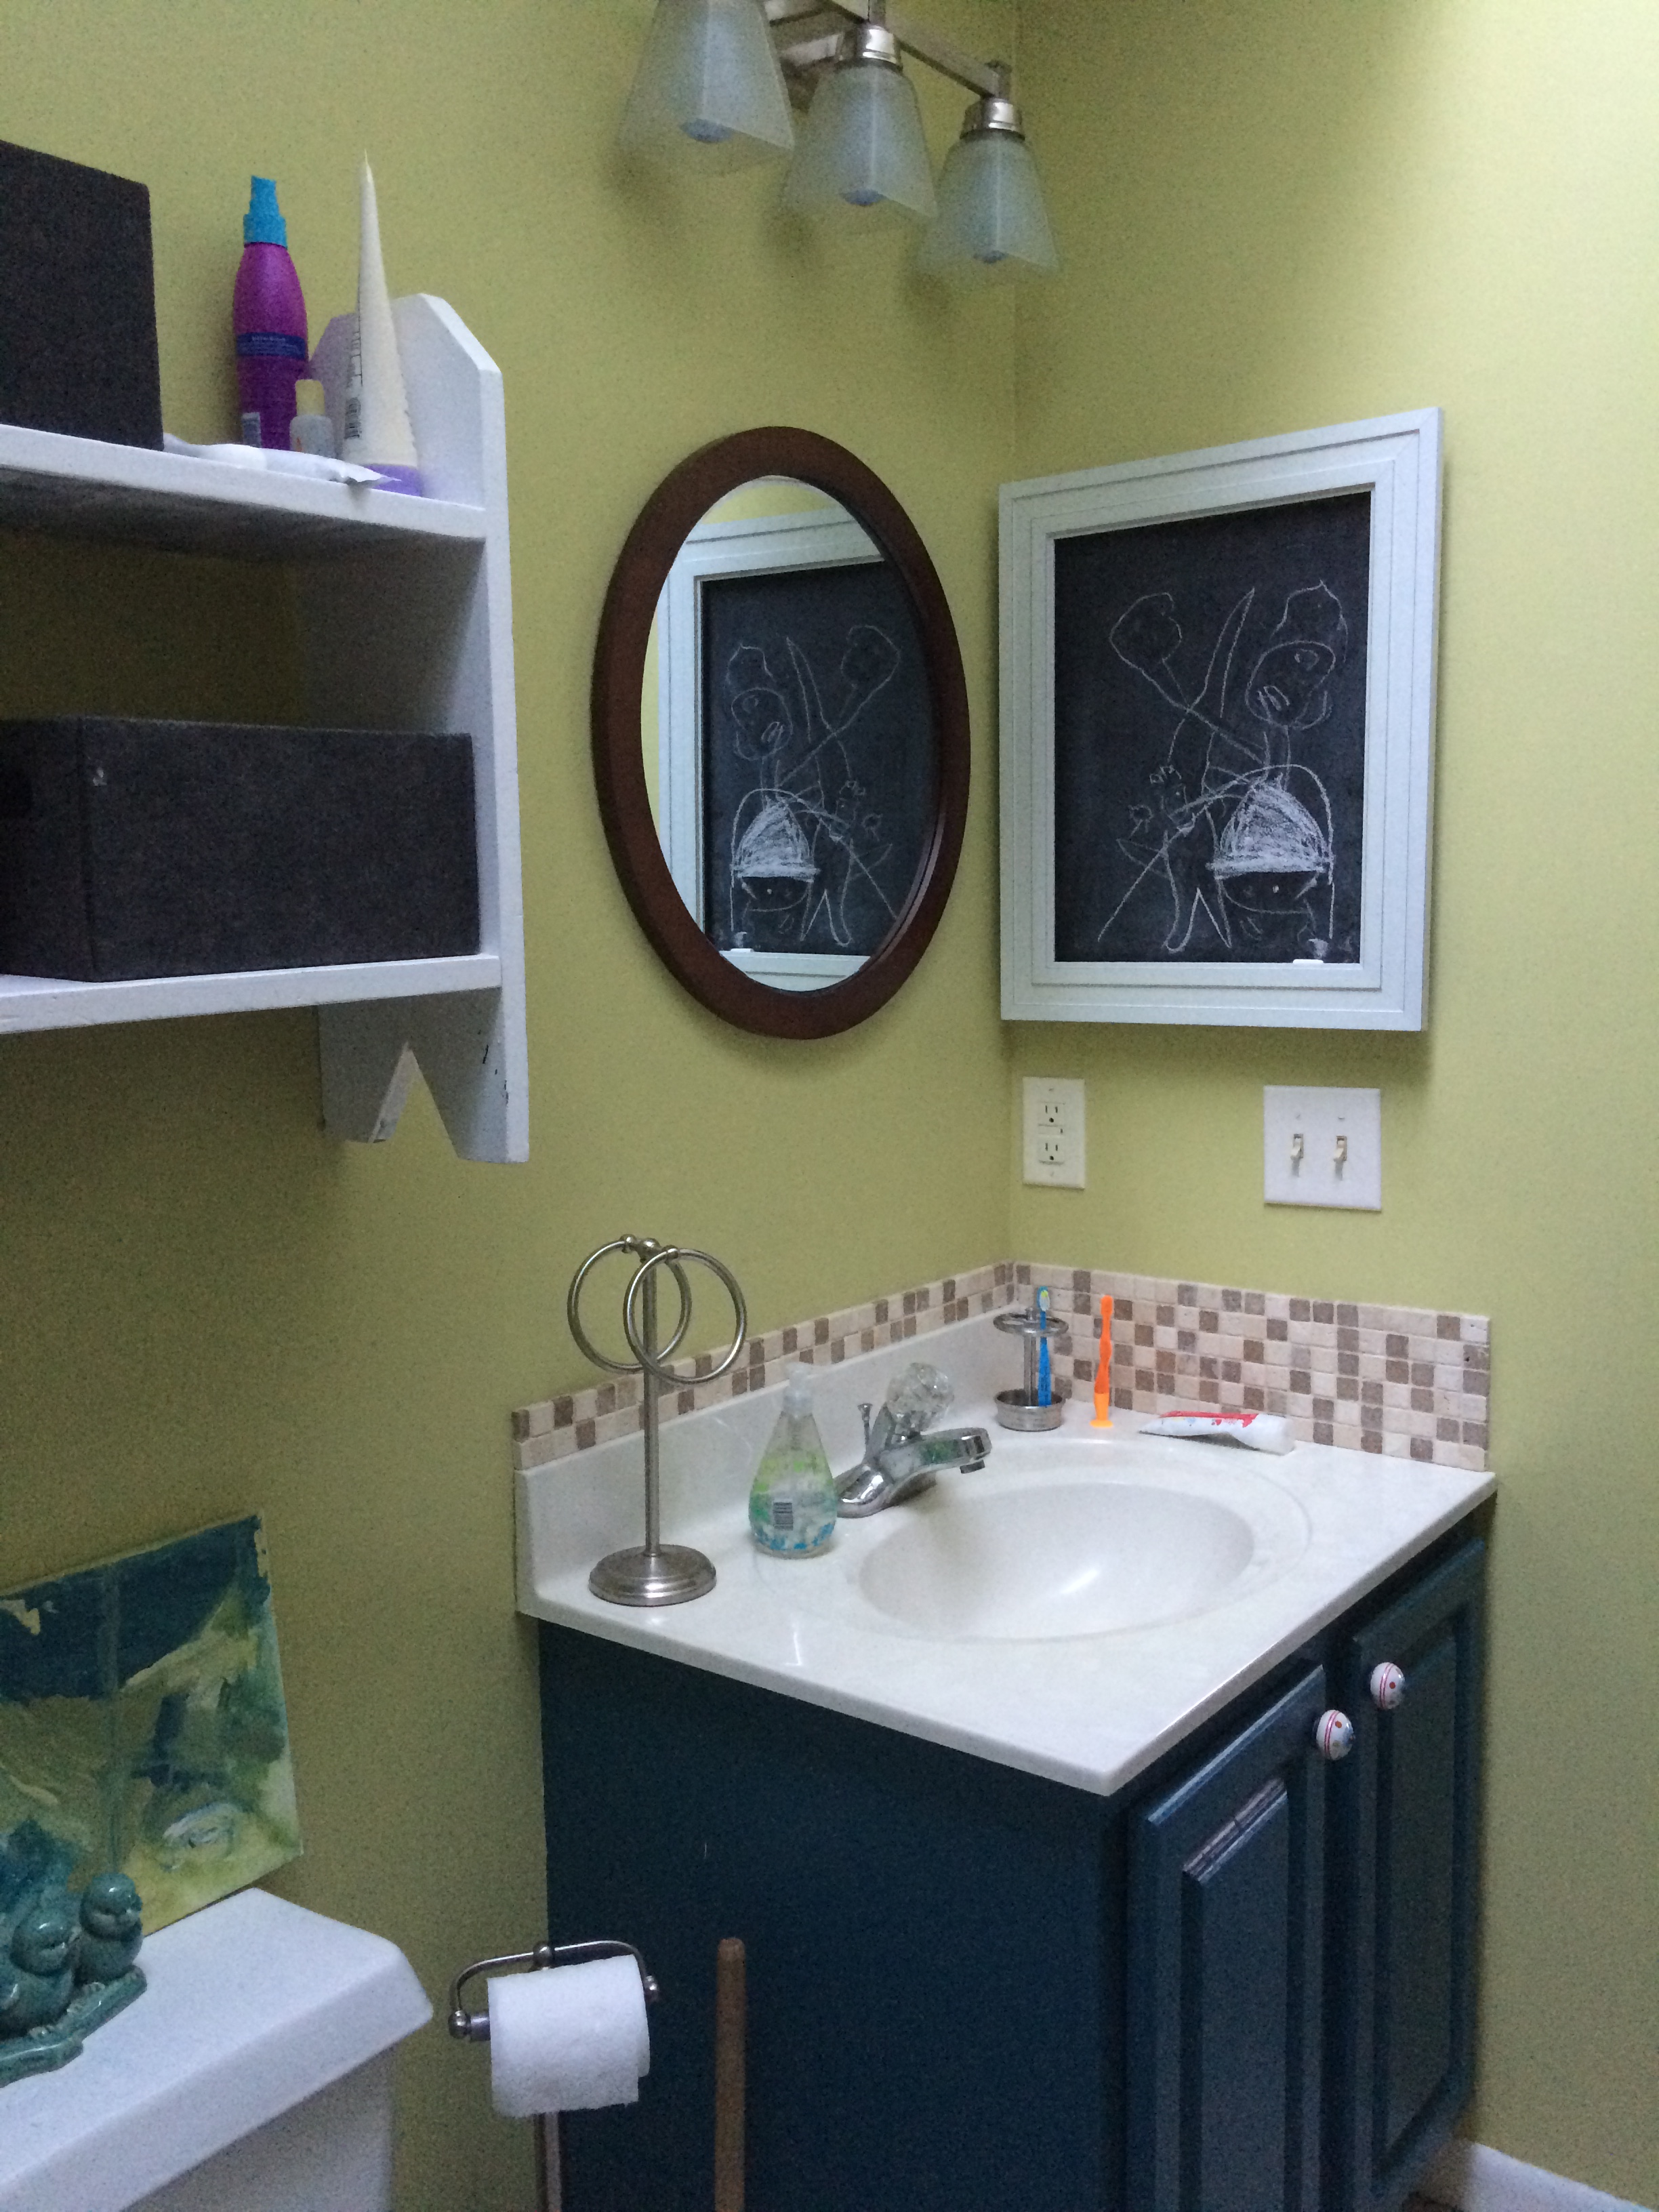
The current vanity is a factory-made cabinet and even though I freshened it up a few years ago with a coat of paint, it was starting to warp and fall apart (that’s what eventually happens to a paper composite cabinet that is in a moist area). From the pictures, the space may look okay to you, but close-up it’s not.
Here’s a snap shot of the bathroom right before demo started…
So that’s the story about the before bathroom…
Onto the current.
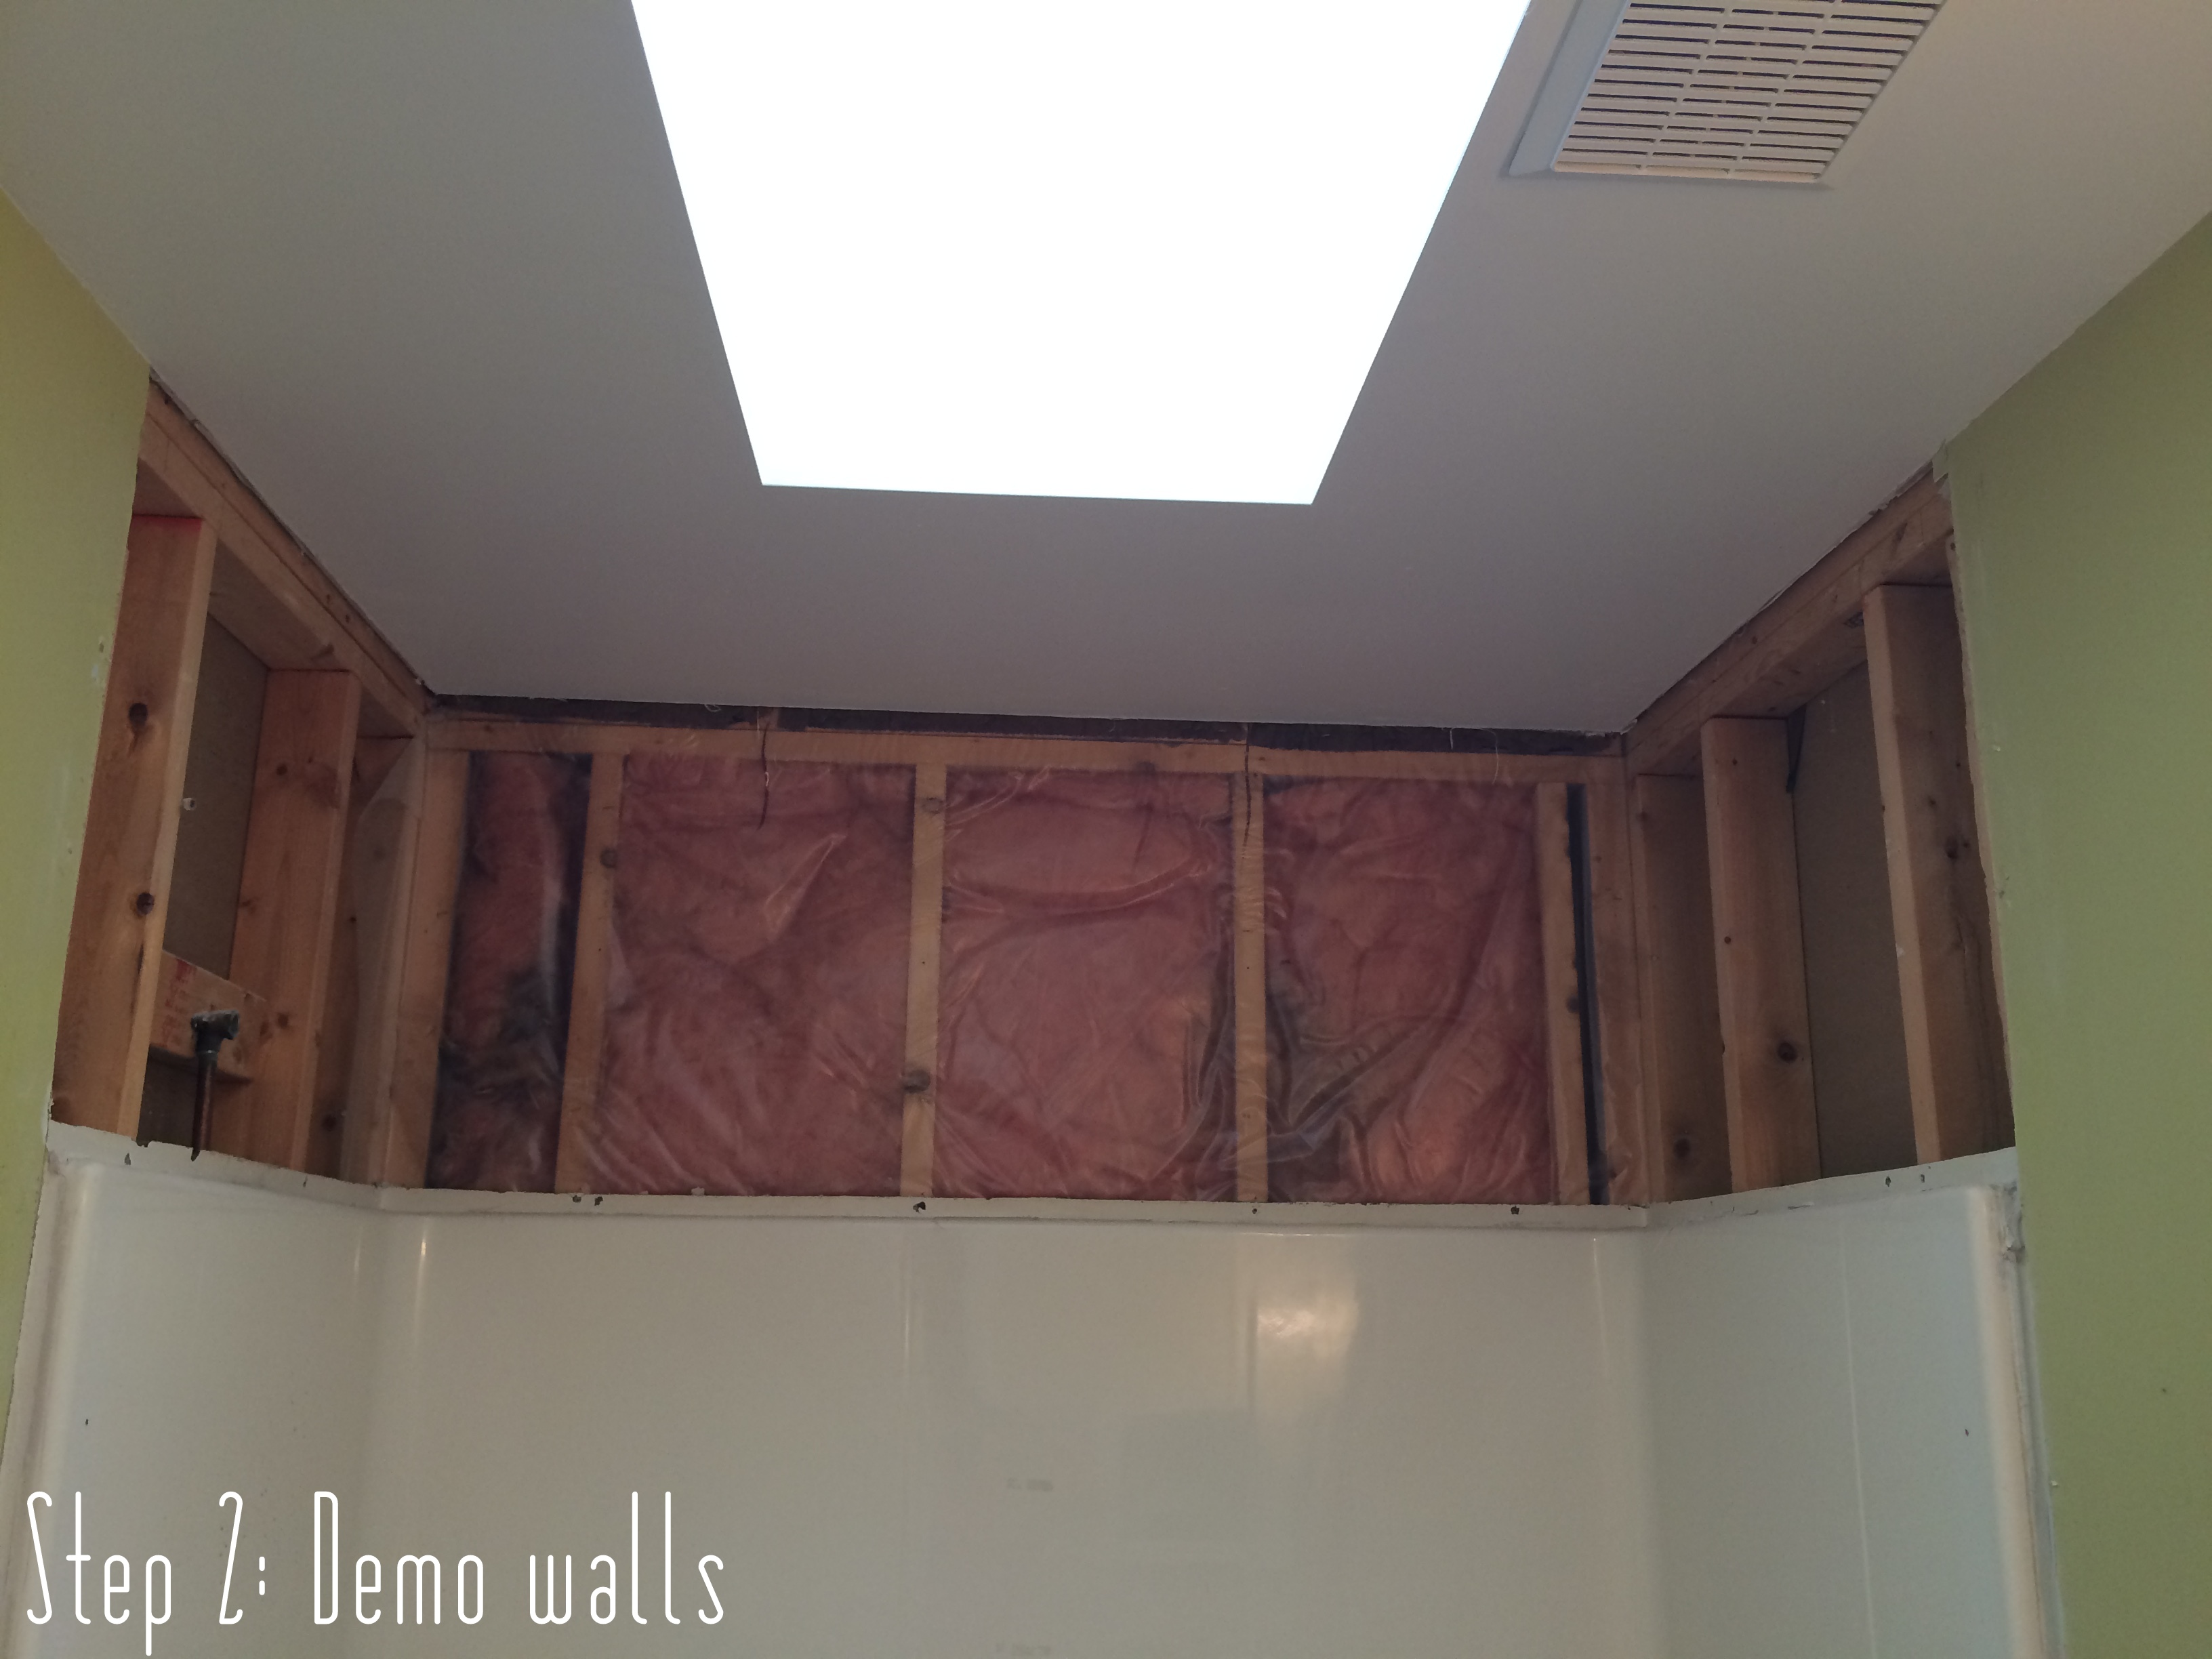
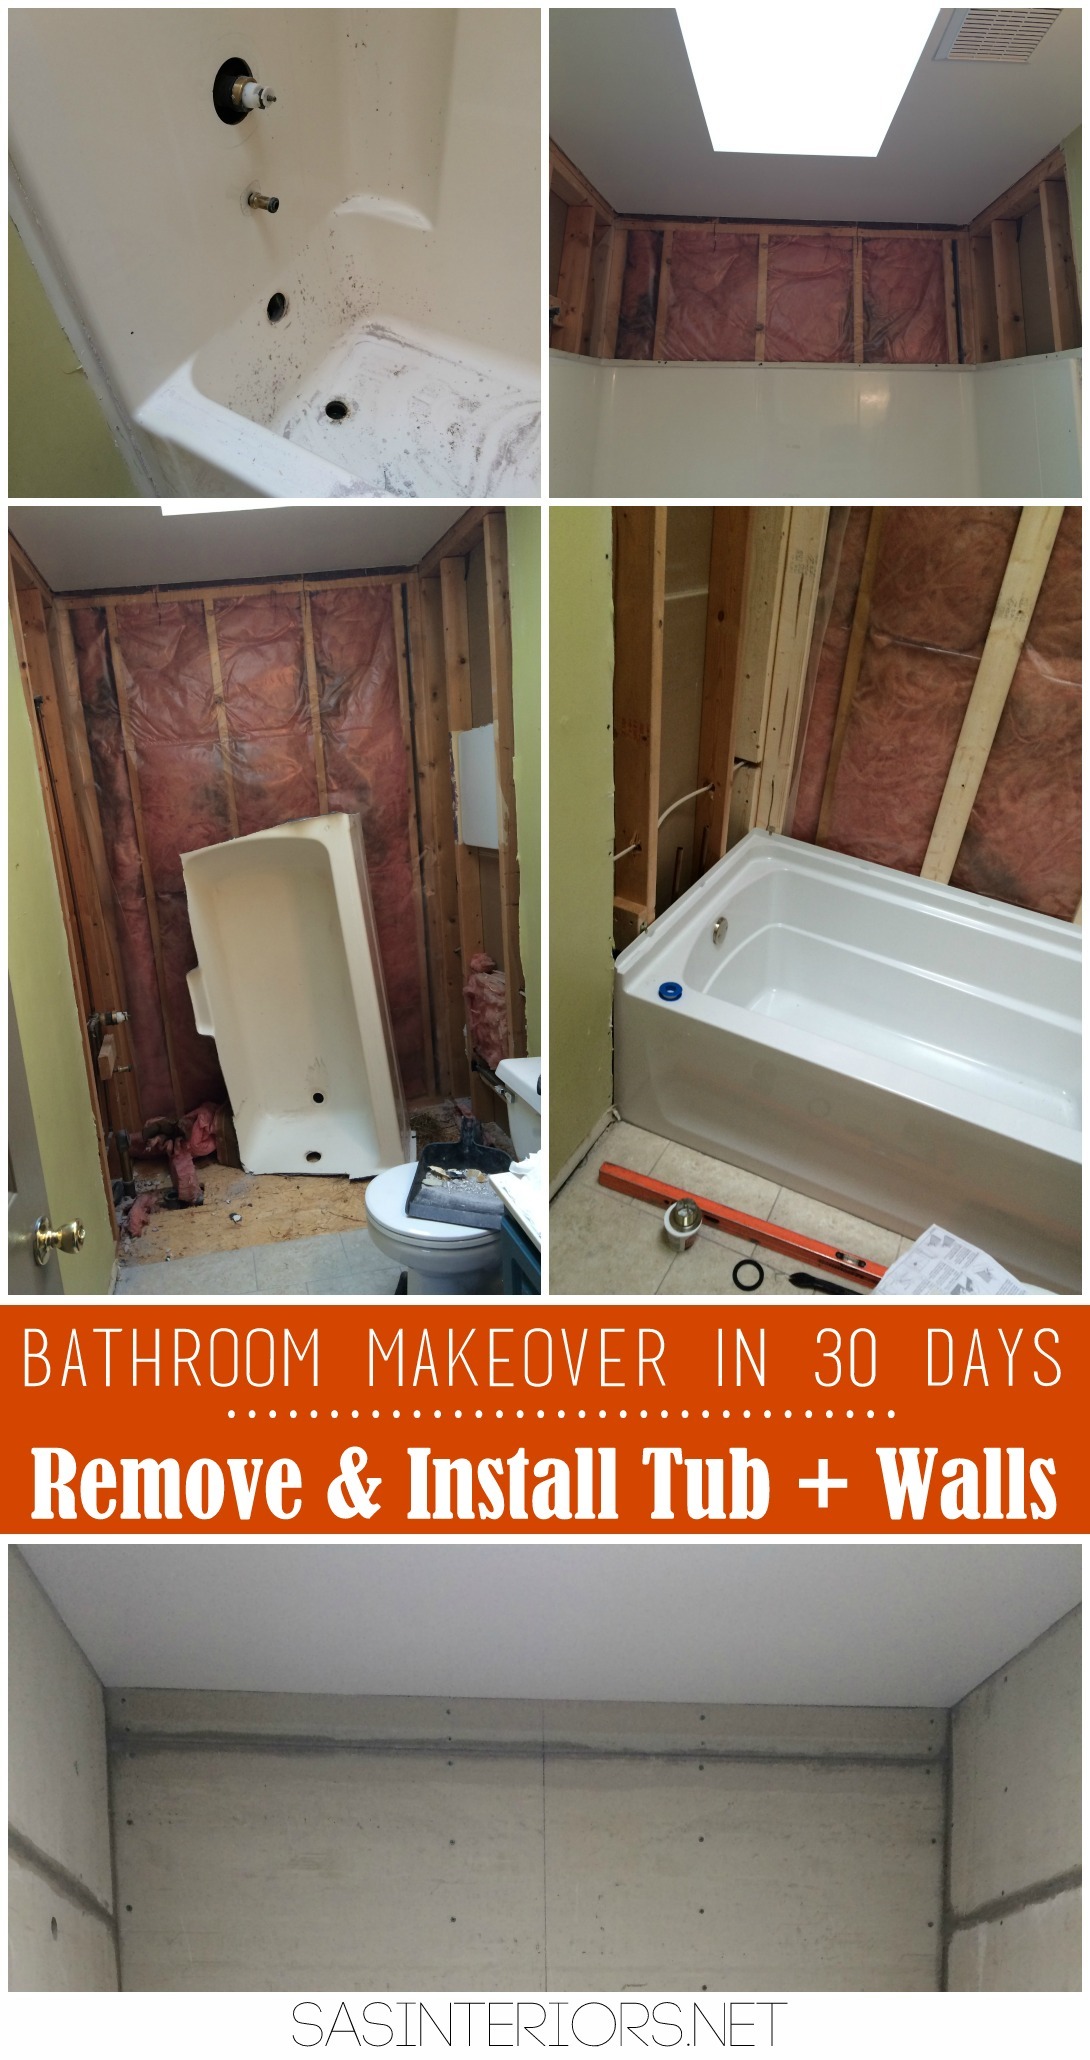
Removing the Tub + Walls
The plan of action is in place and the start of the renovation has begun. The other day I failed to mention that with all of the kitchens and bathrooms I have designed for others, I have never renovated my own kitchen or bathroom. I think because I know the process and the unknowns that could happen, I have a fear of embarking on such a big project. Putting fears aside, I am psyched about this new proposed space. Like with all big projects, not everything can go as planned. With that being said, LET THE DEMO BEGIN!
1. First up, the removal of the bath fittings.
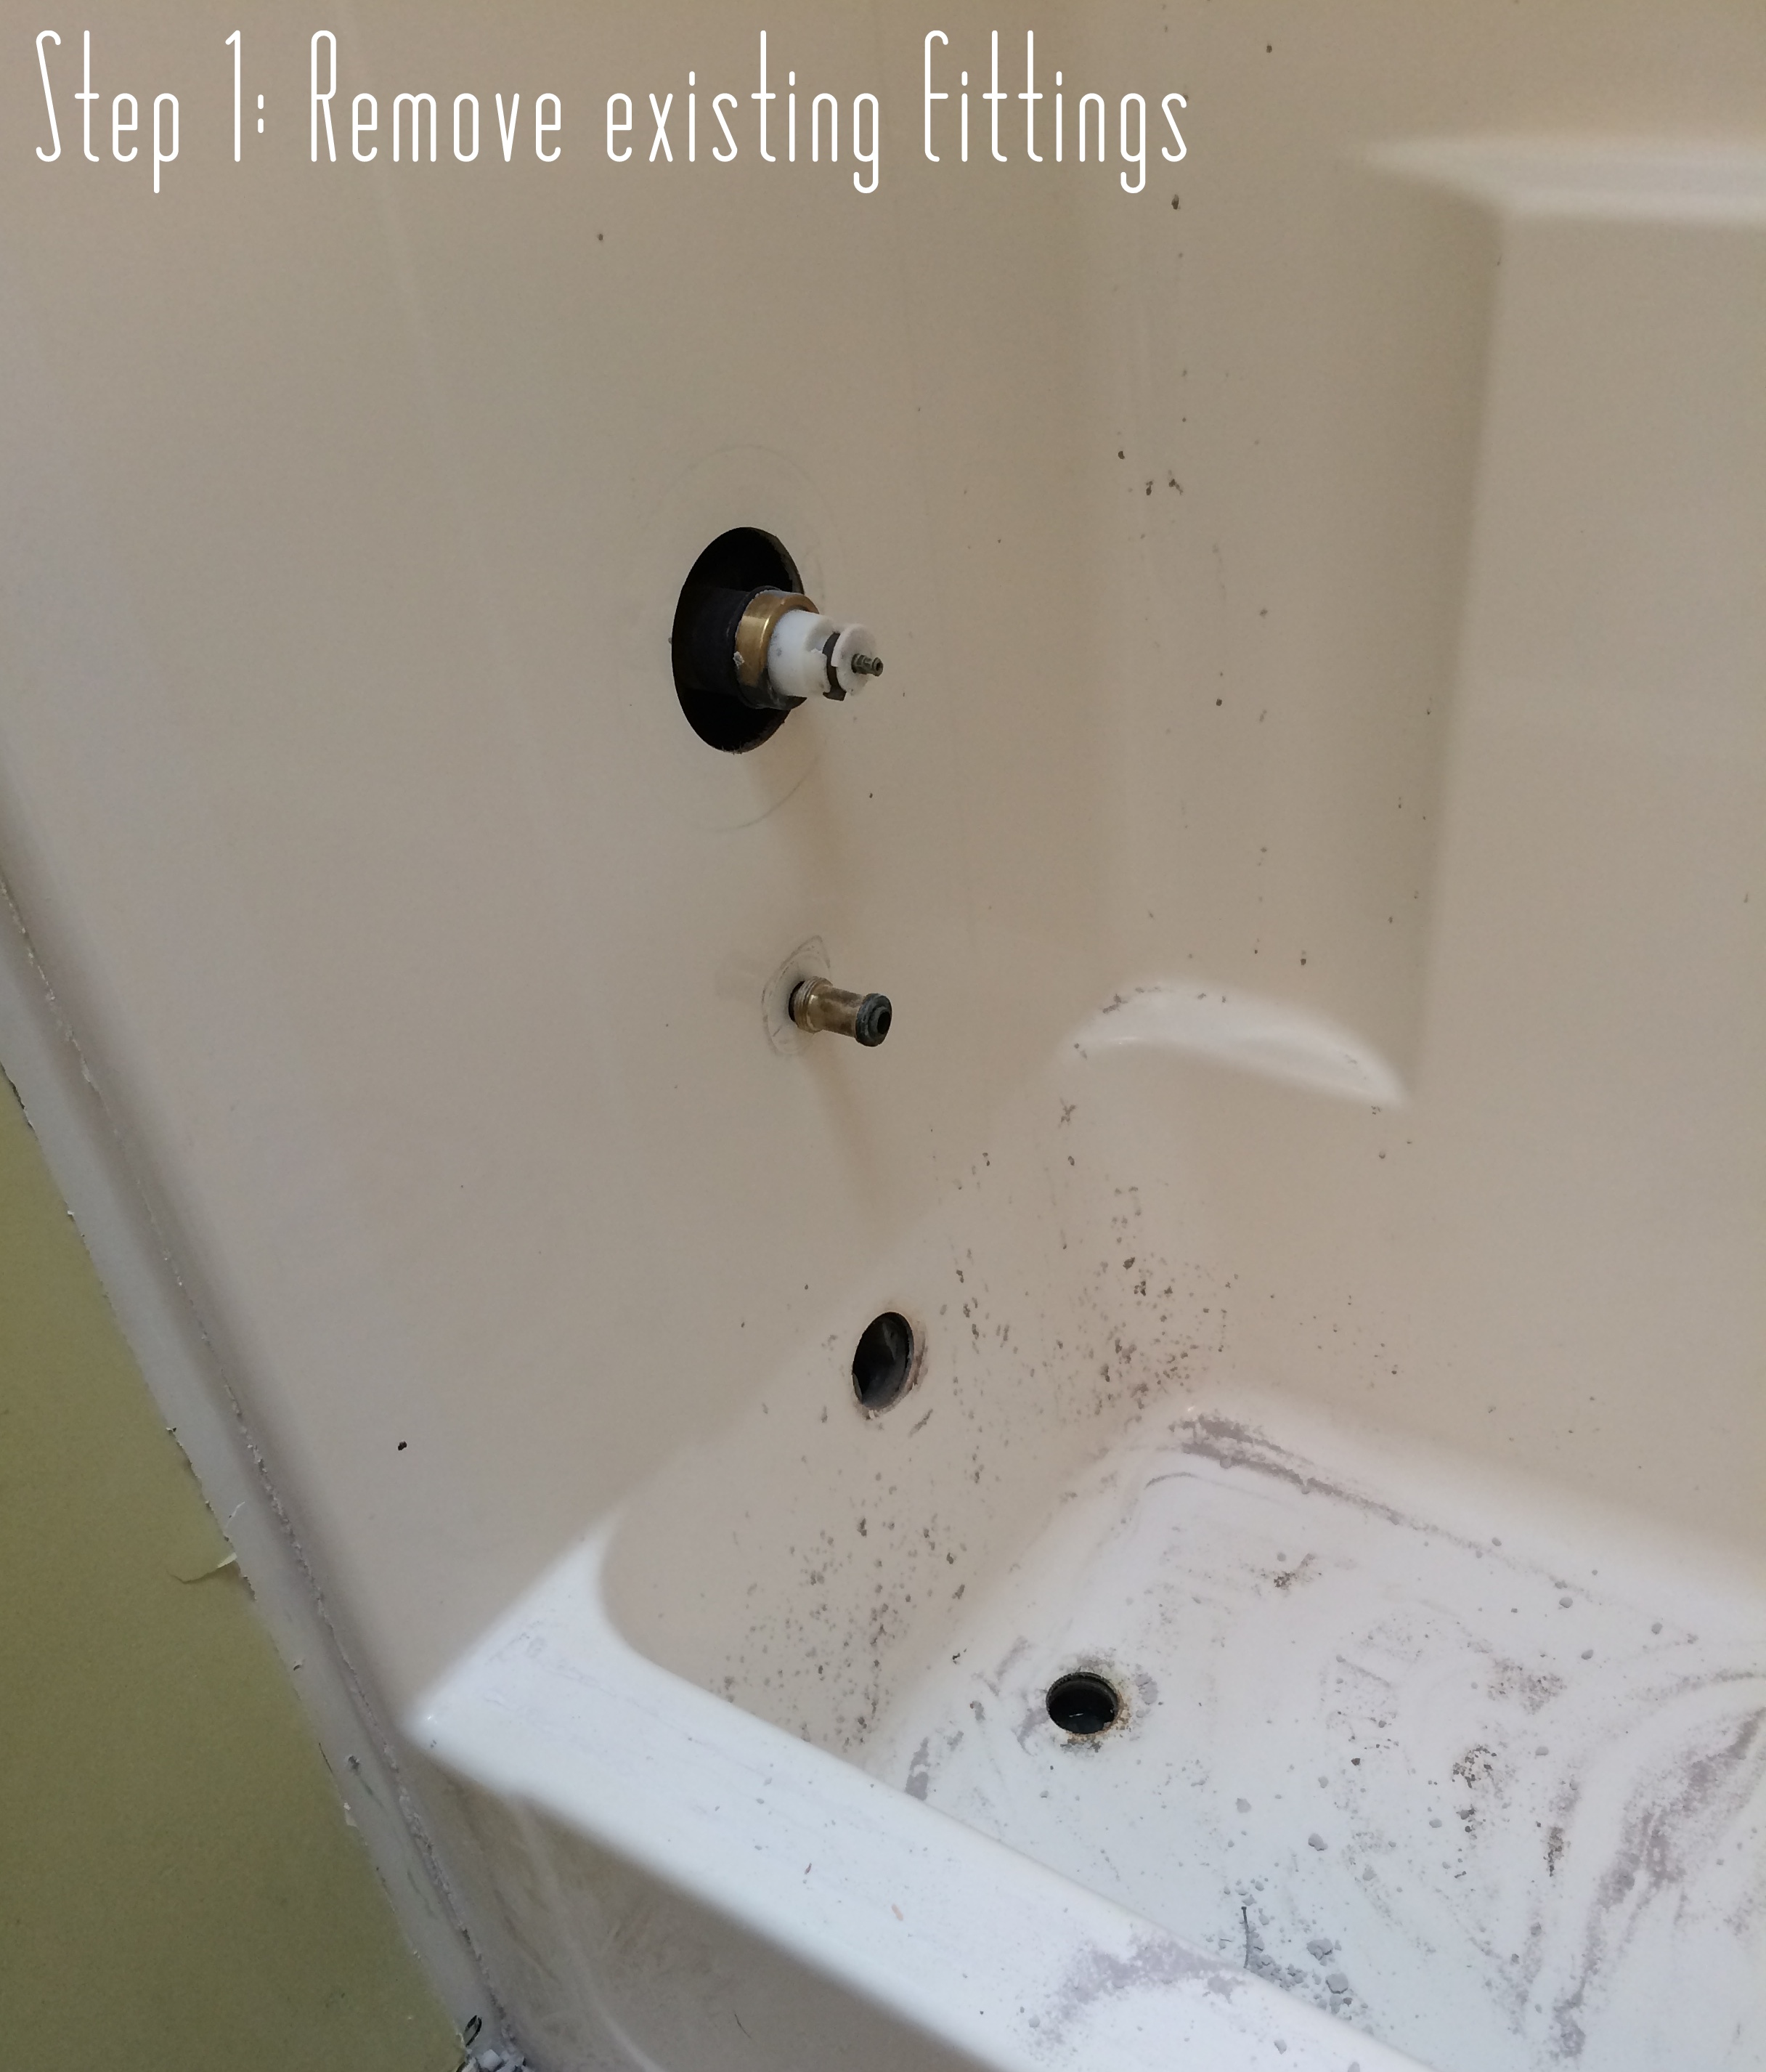
2. Next up, demoing the walls above the tub using a hack saw.
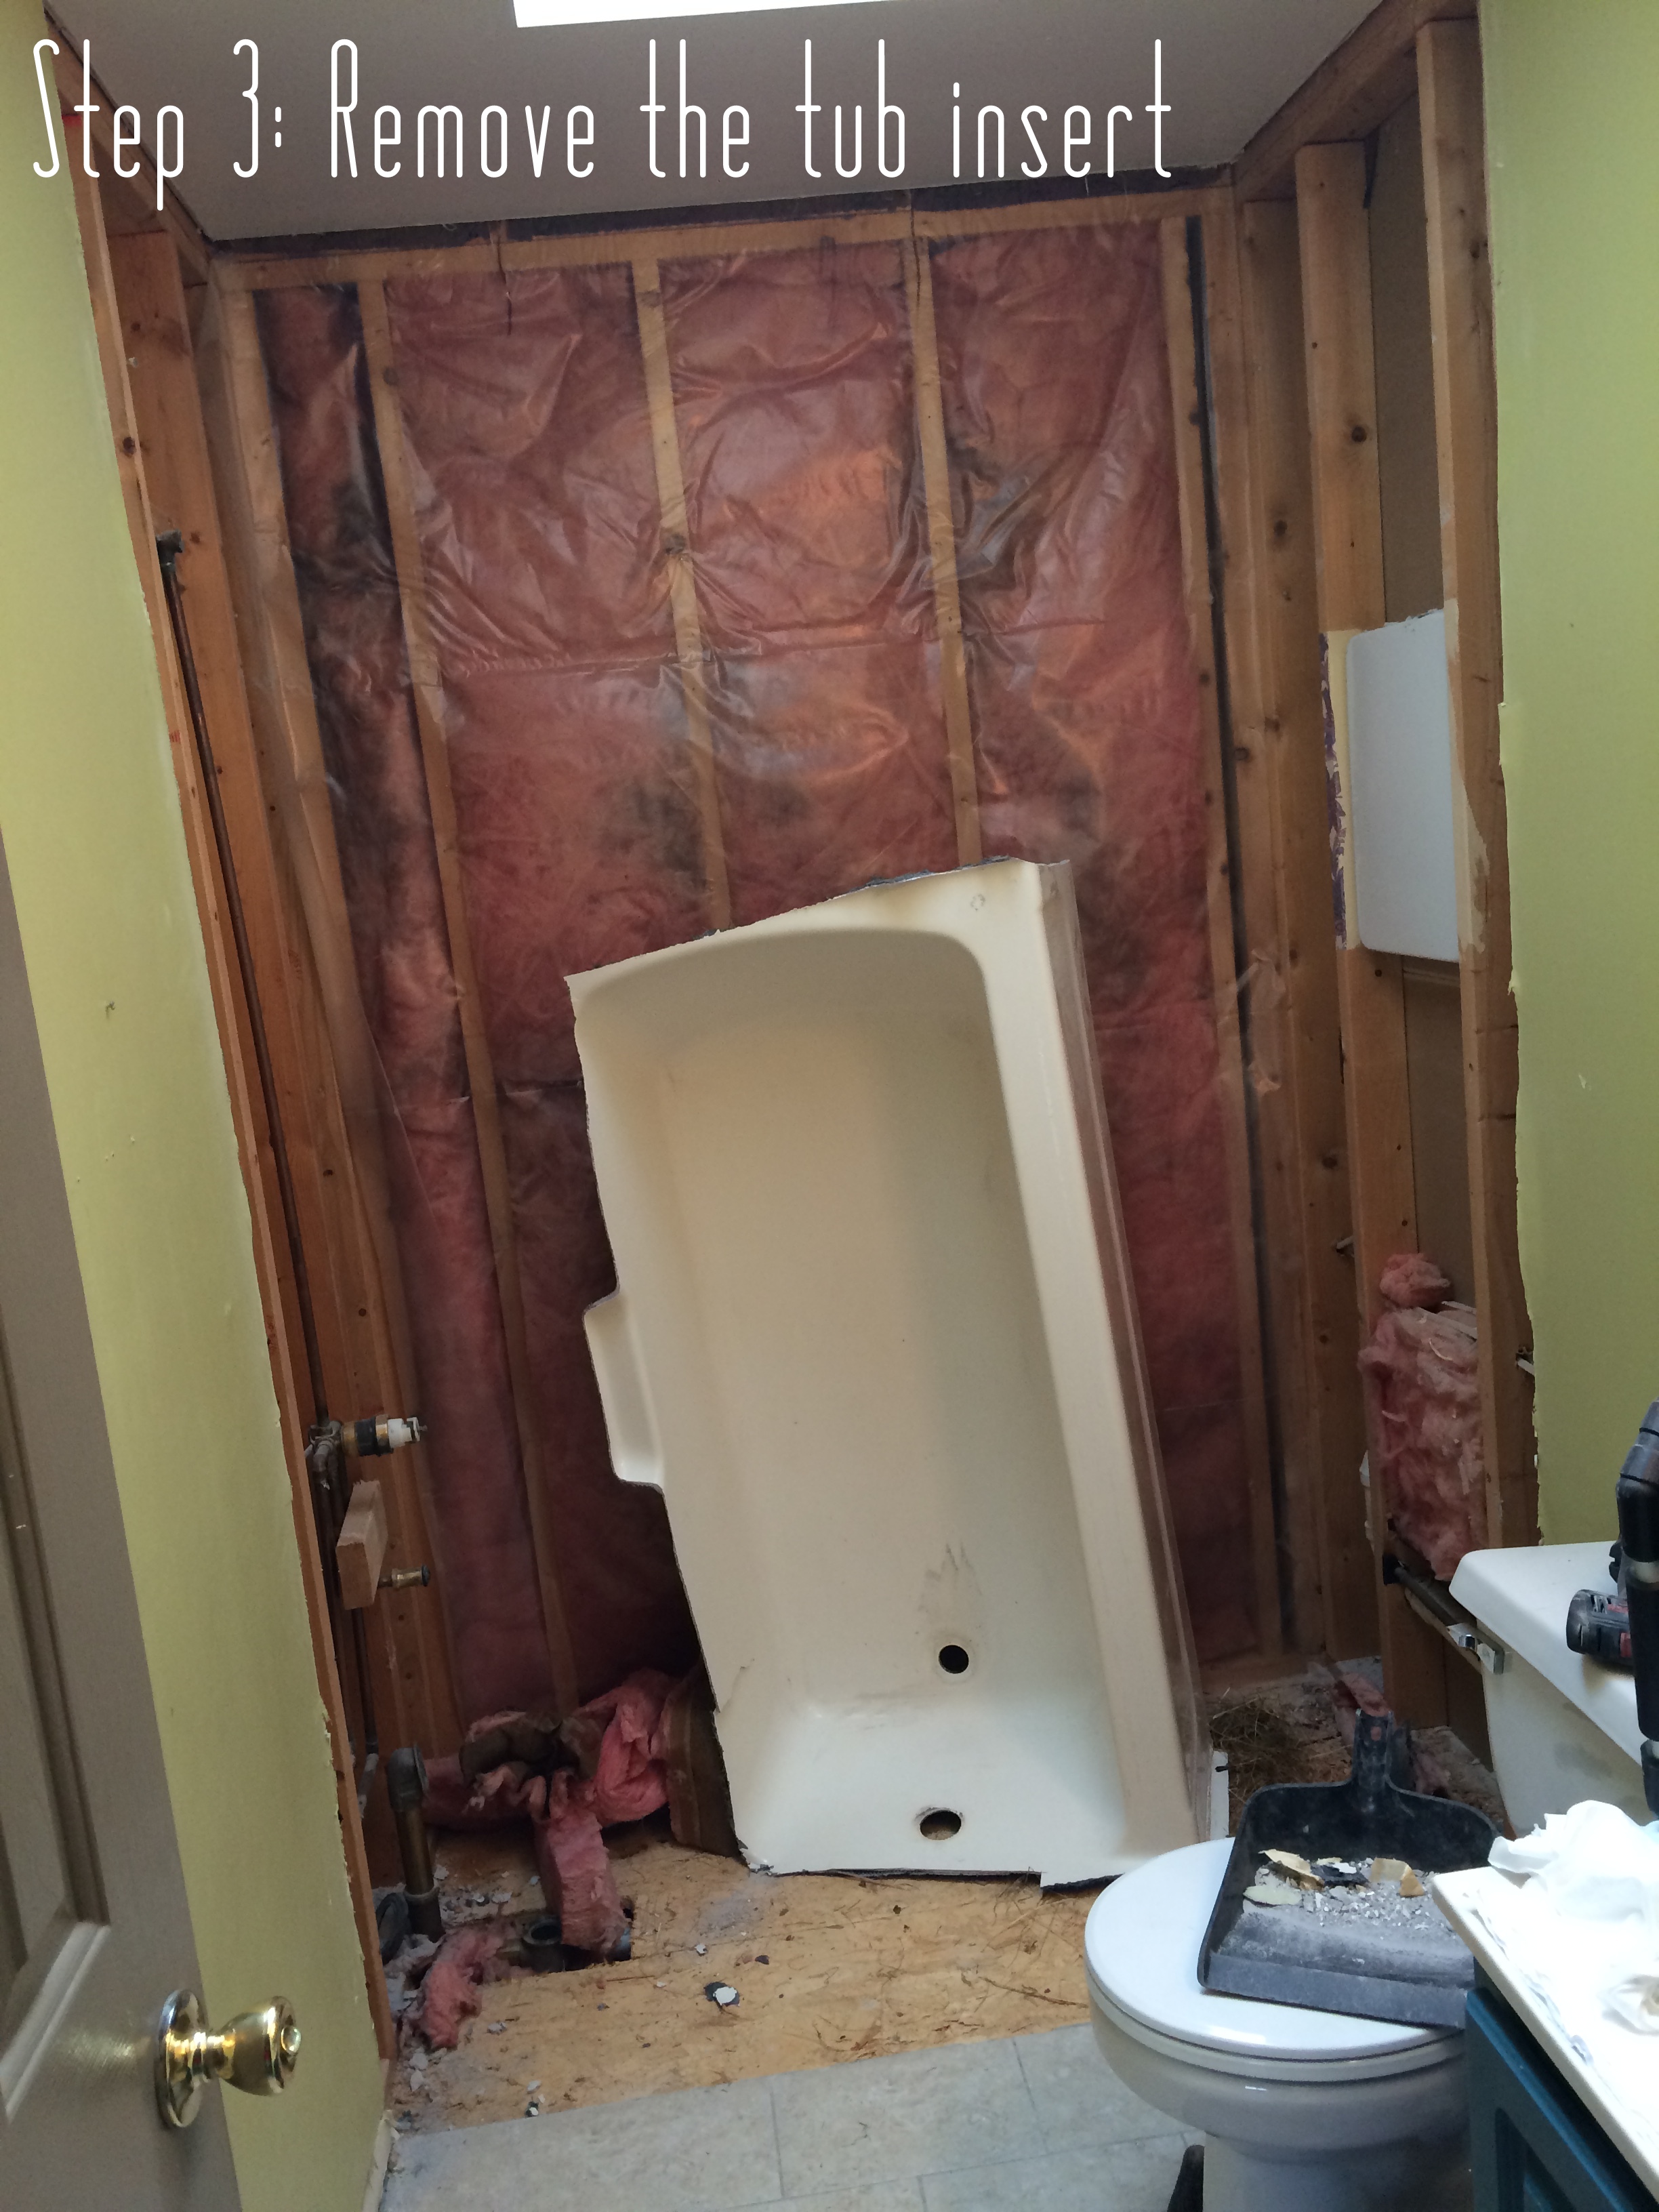
3. Once the walls above were removed, the screws that held the tub insert in place (to the studs) were removed and the tub got cut up into pieces (separating the sides from the tub) to be hauled out.
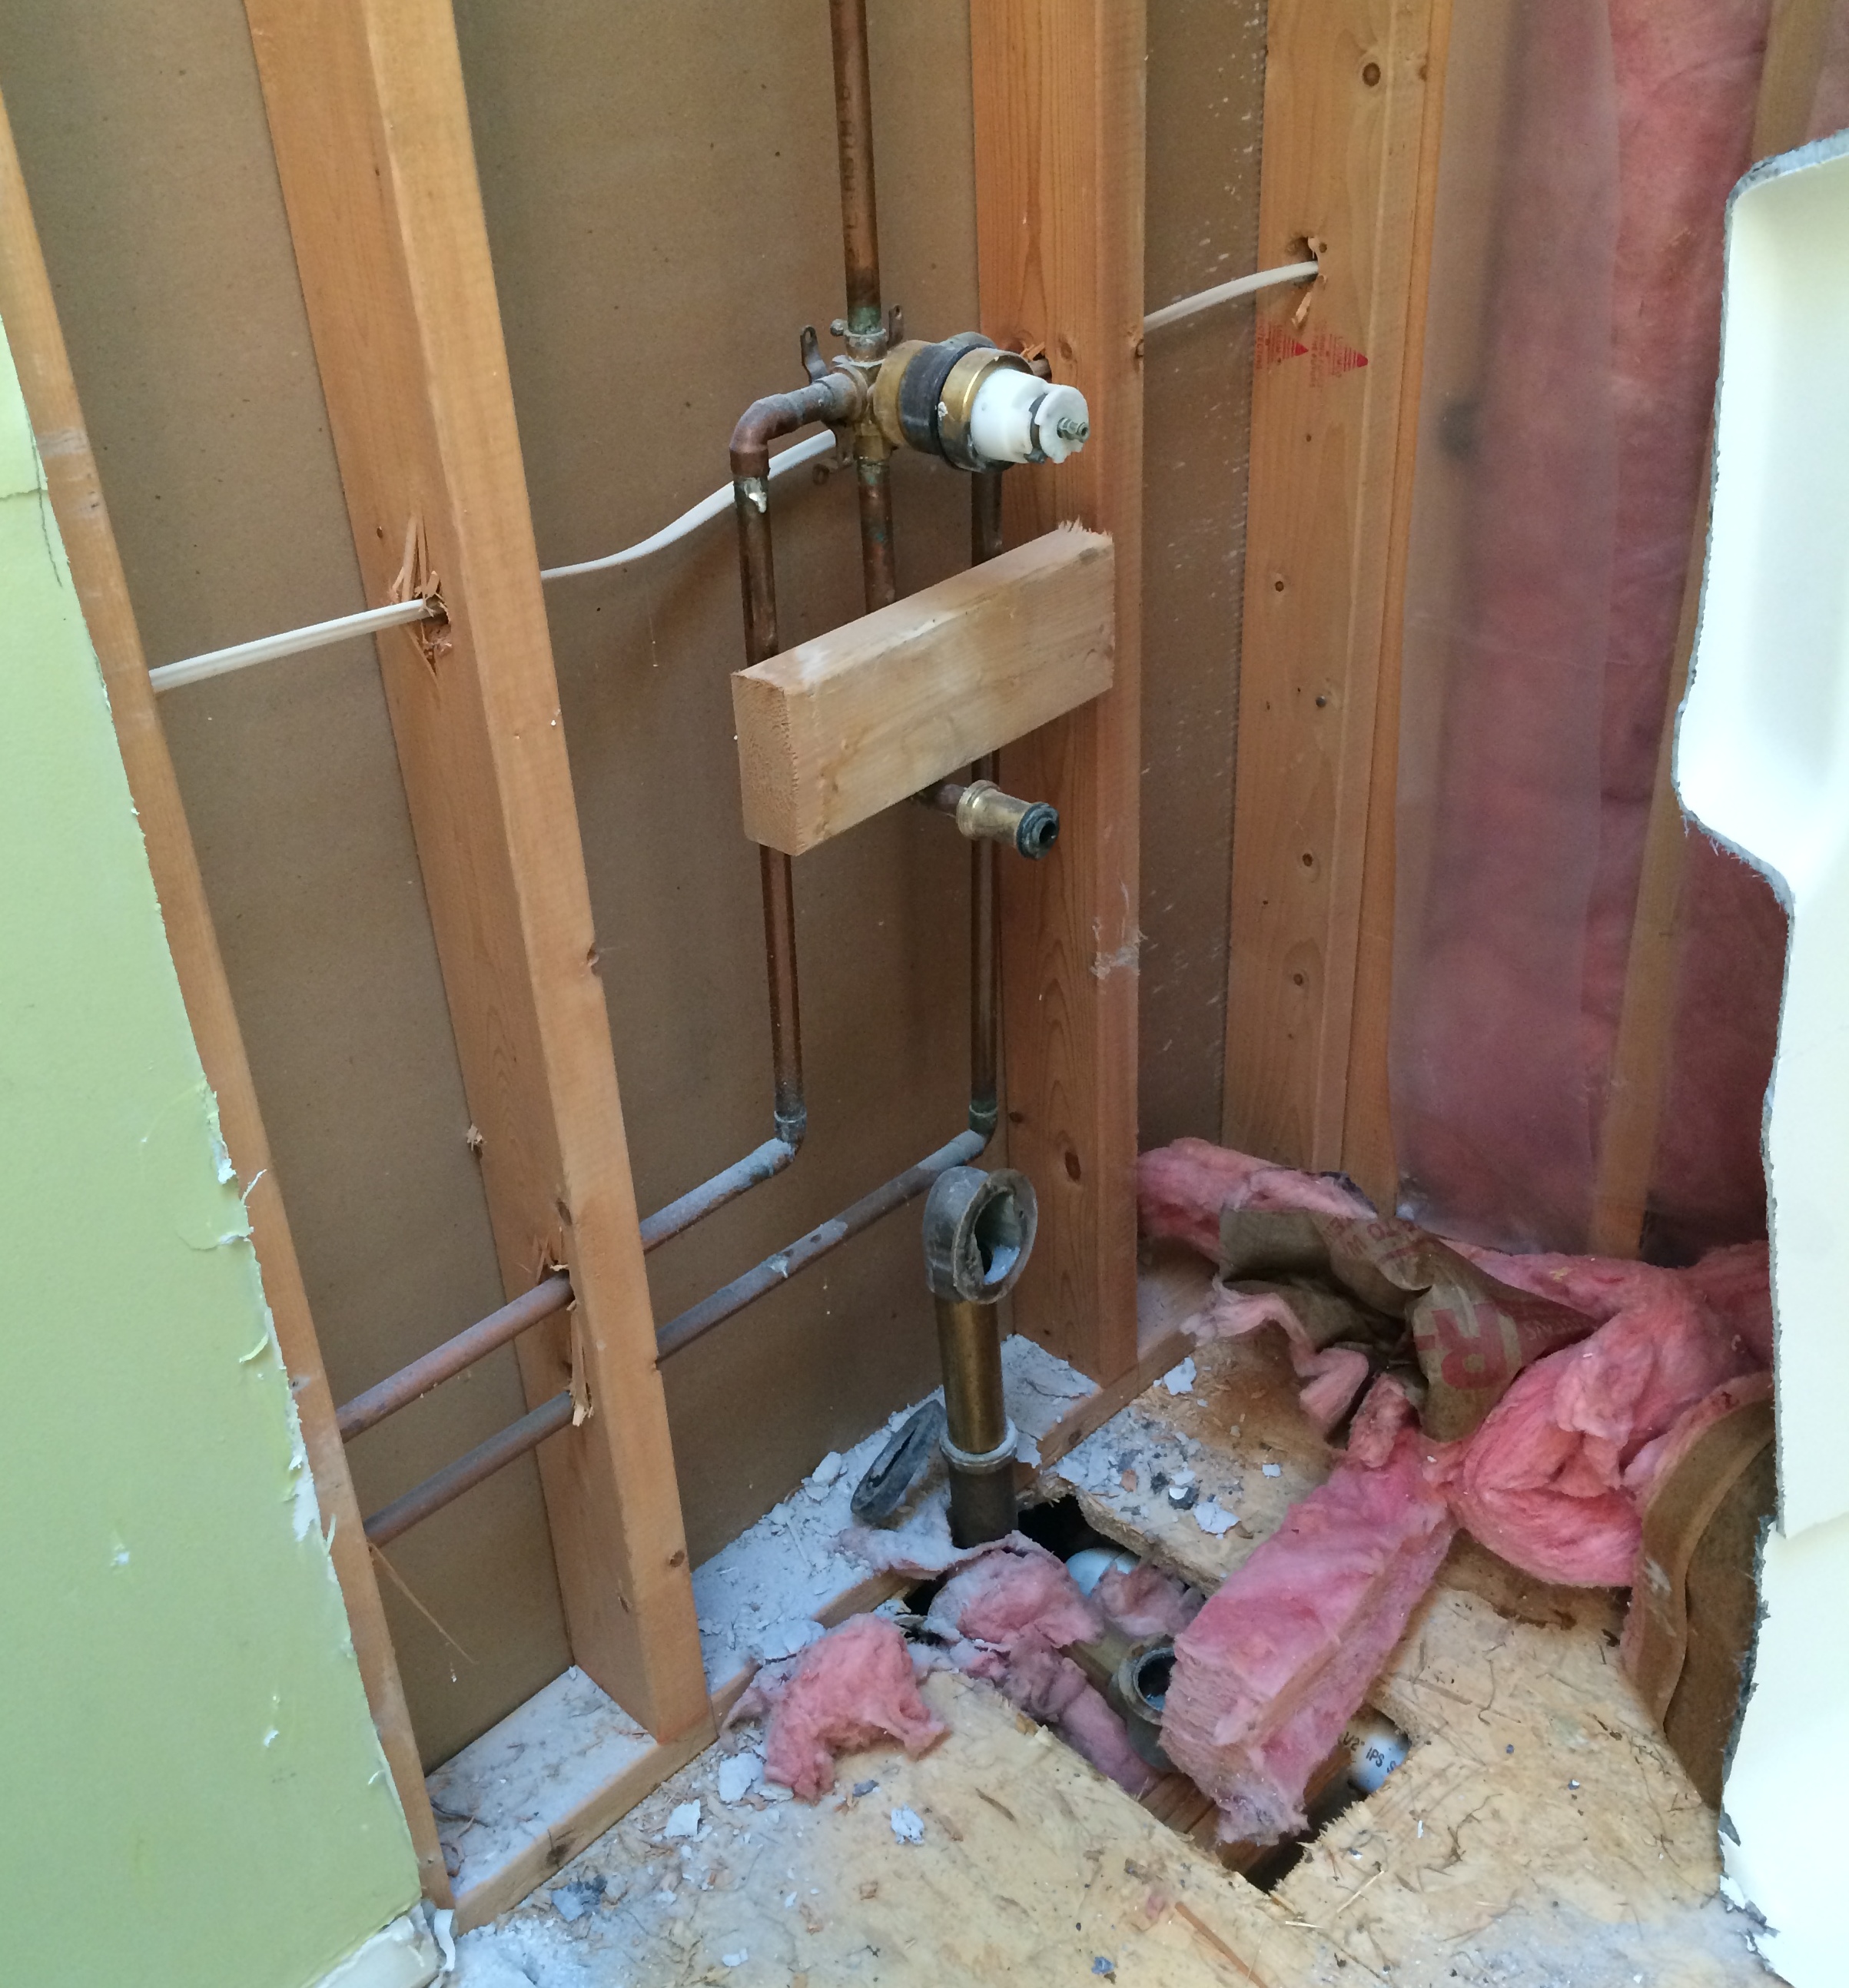
This is what the plumbing looked like (in the wall) once the tub was removed…
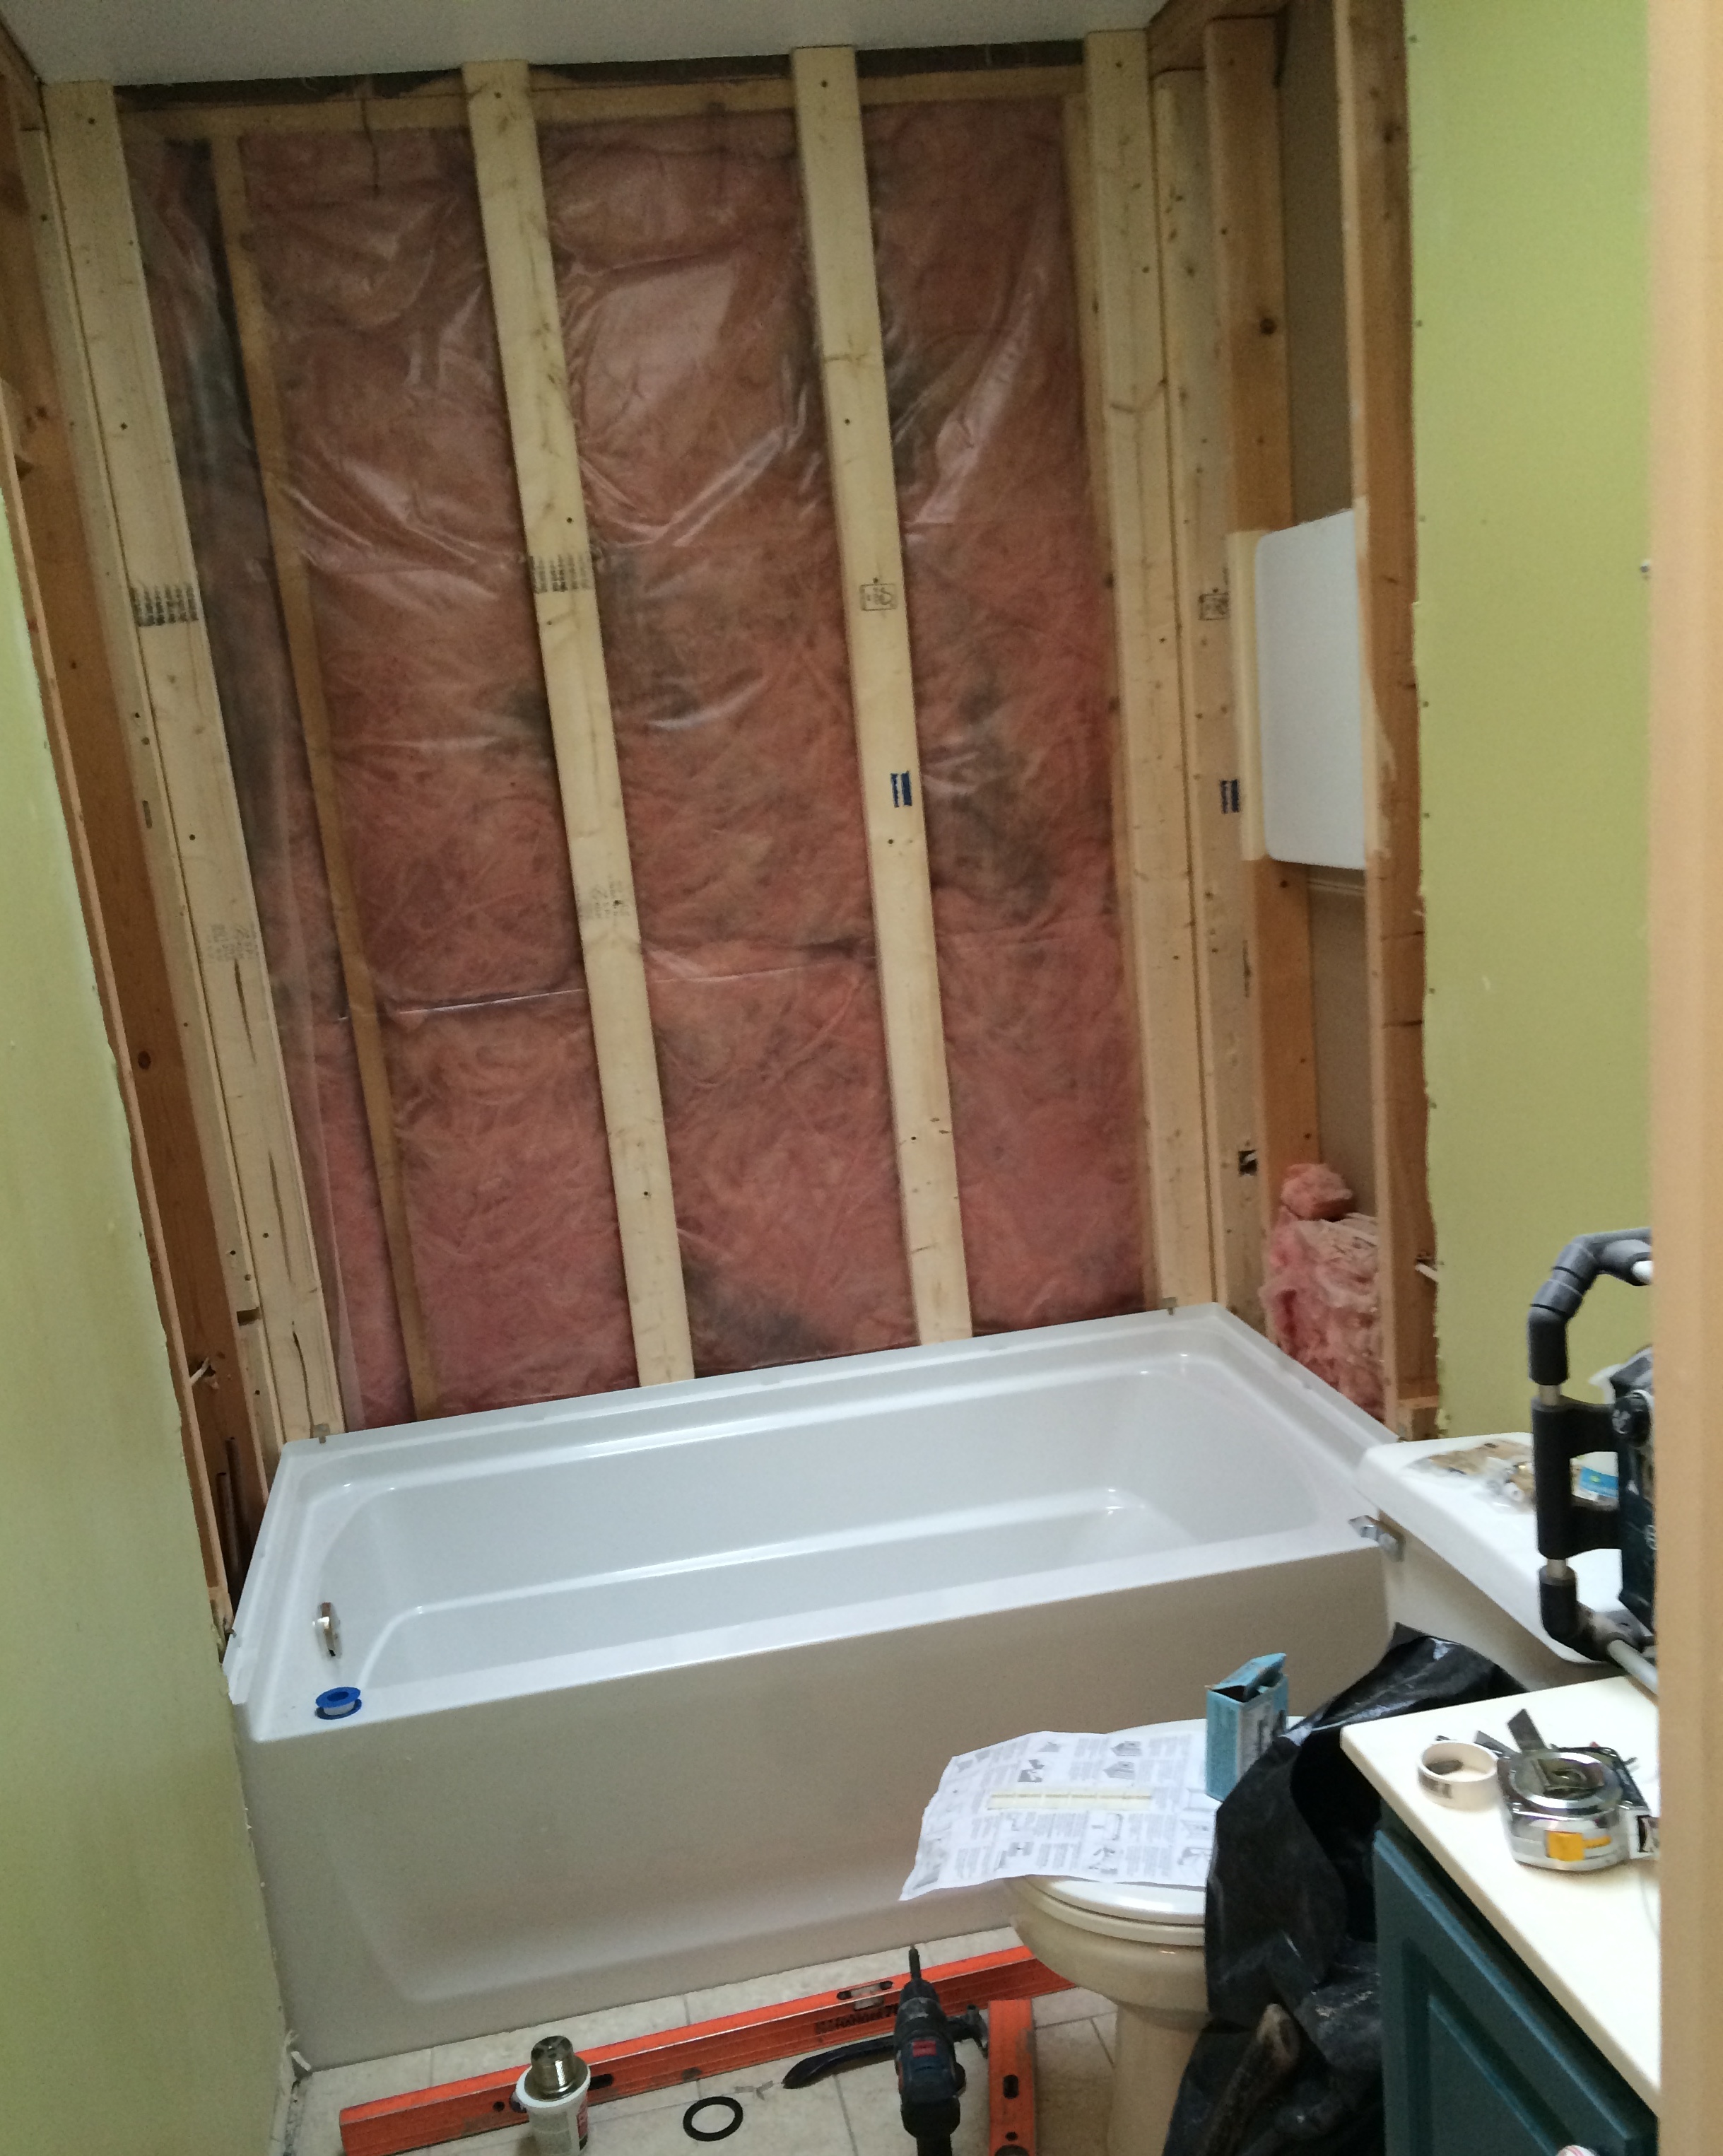
Installing the New Tub + Walls
4. When the tub was out and the space was cleaned up (somewhat), the new tub was put into place. As I mentioned the other day, we chose to hire this part out and called in a pro to install the tub, as well as the tub fittings so it was done right. We don’t have any experience with installing tubs / tub fittings and the hookups need to be done right to avoid any water leaking. A contractor + a plumber were definitely needed for this job – we know when to call in help, and this was the time!
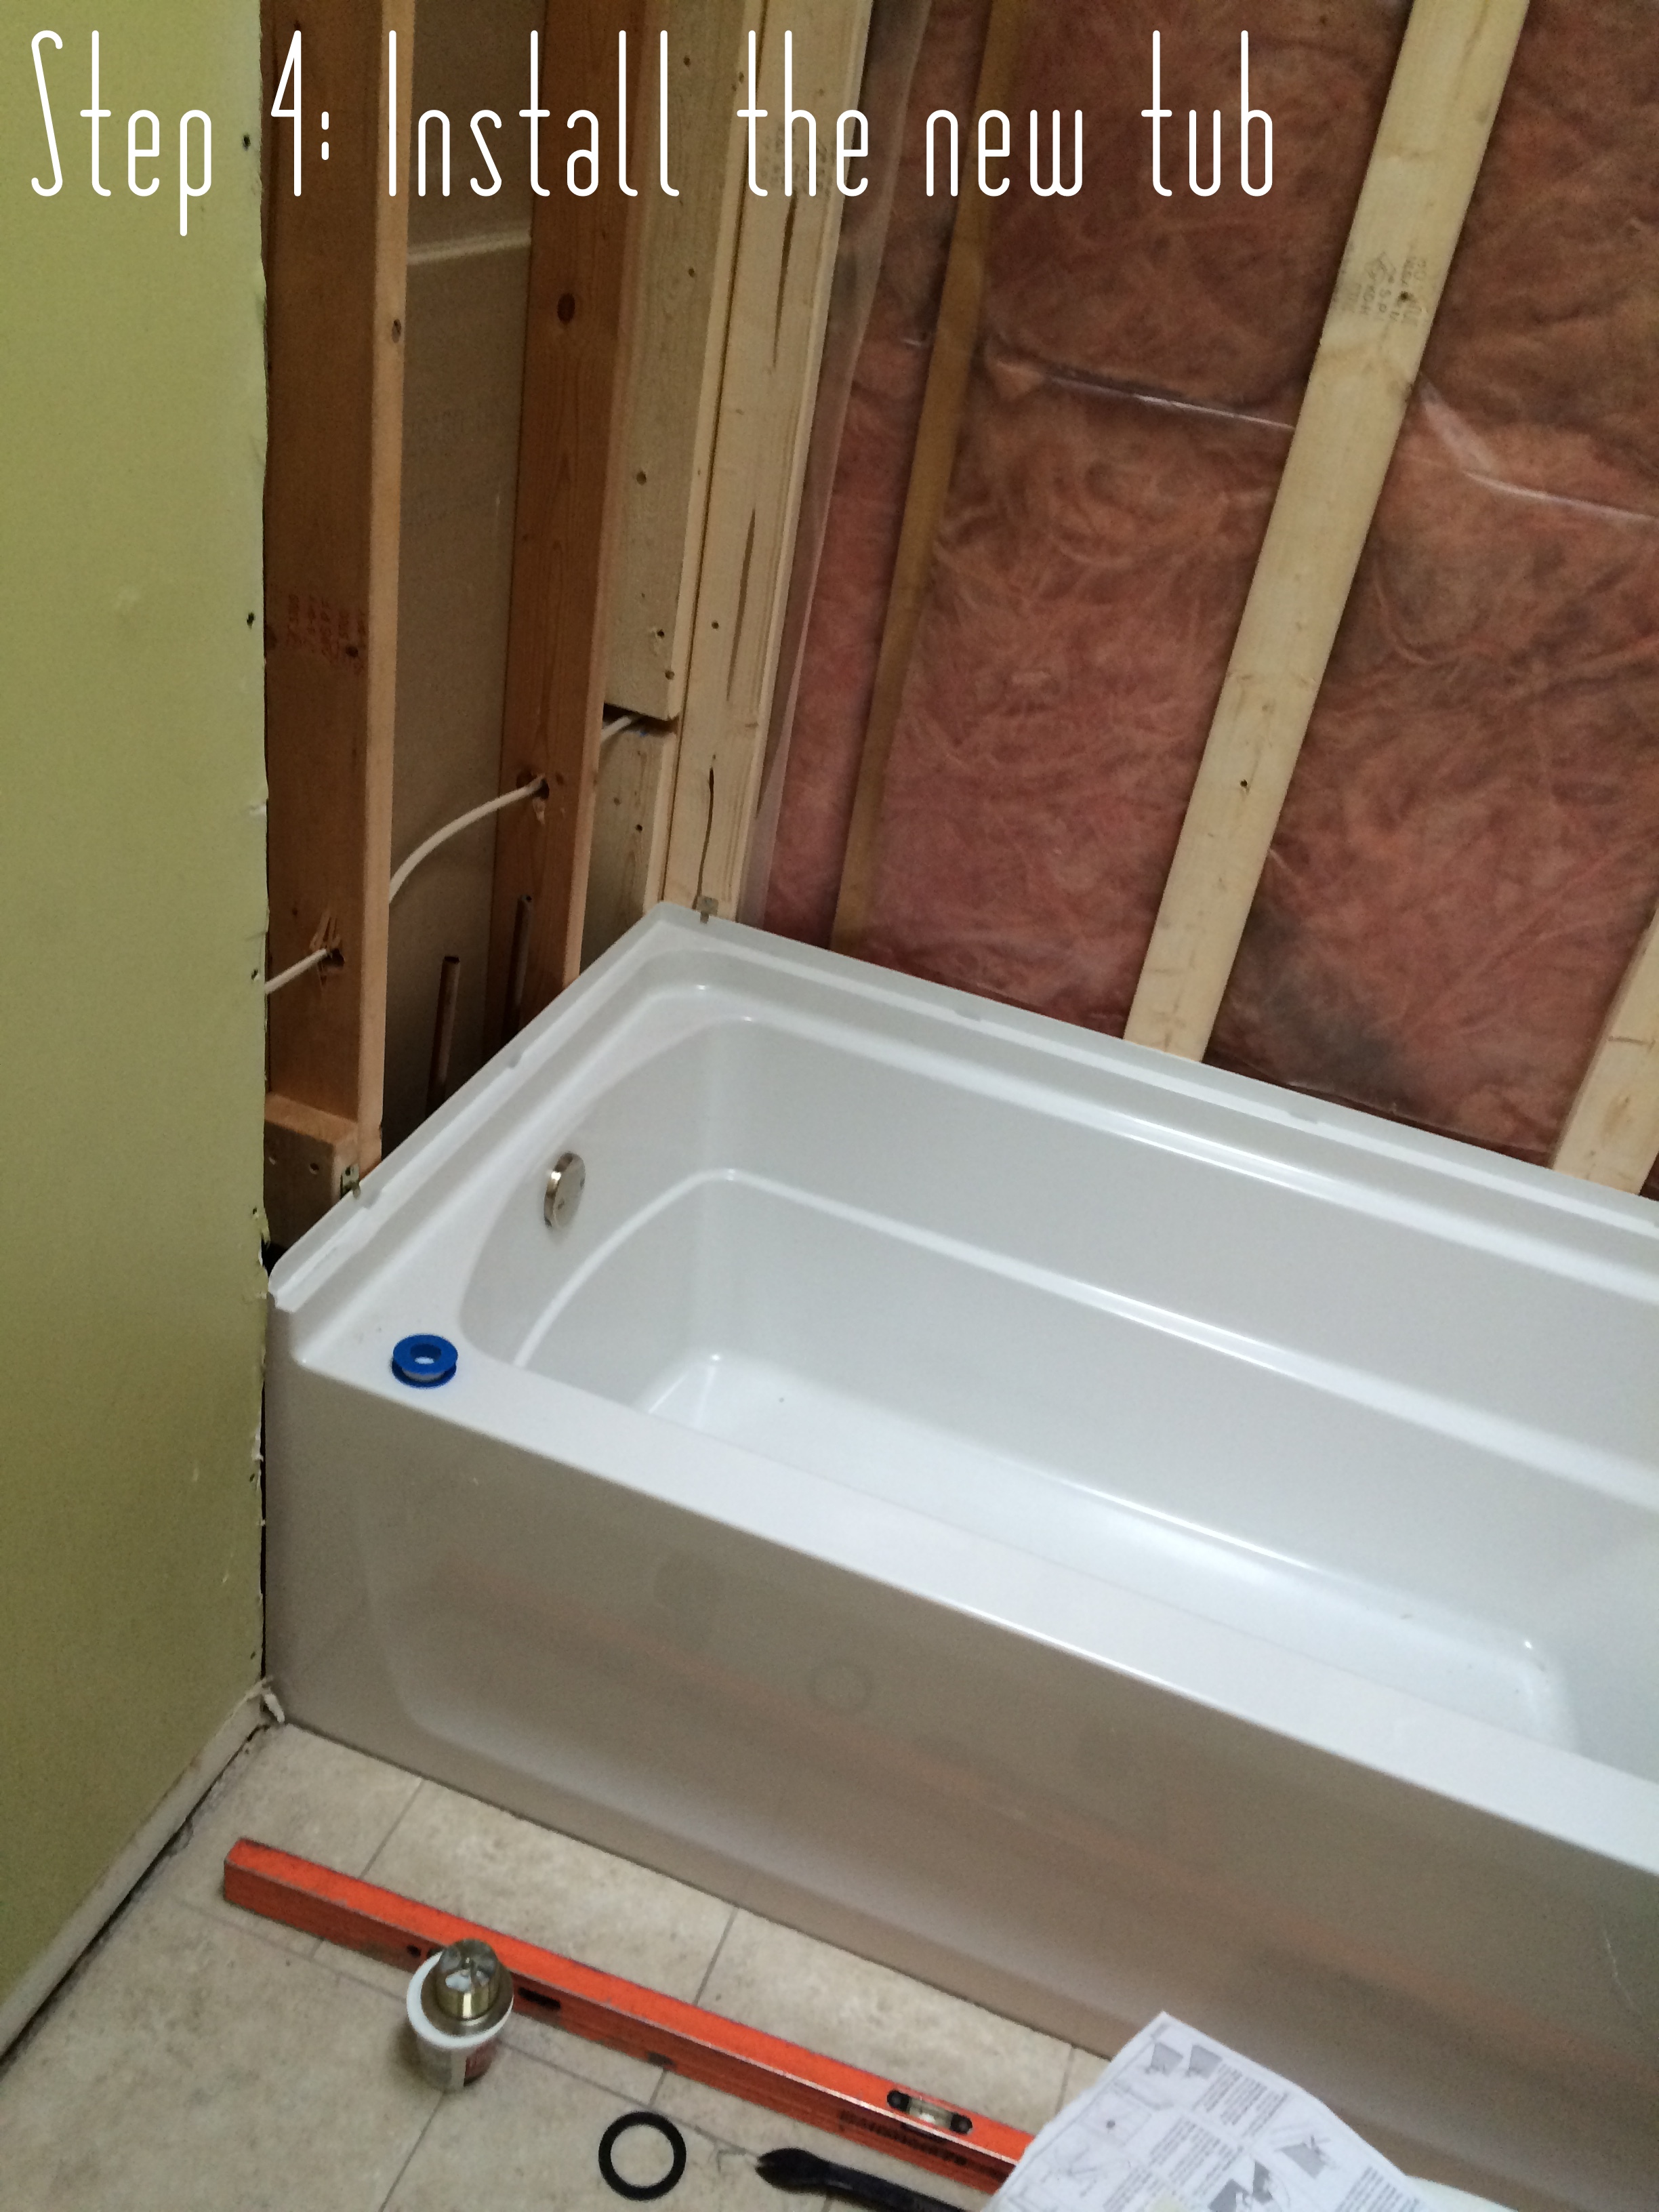
New studs were also added behind the tub + at the corners to provide the right support + best fit.
5. Next up, the walls! In the tub area cement board was installed (ie: DUROCK > Lowe’s) instead of sheetrock because it’s resistant to bacteria and fungus + will not warp, delaminate, or disintegrate when/if exposed to water – it really it a must-use material in a shower or tub.
I found this very helpful video with a great tutorial on installing backer board
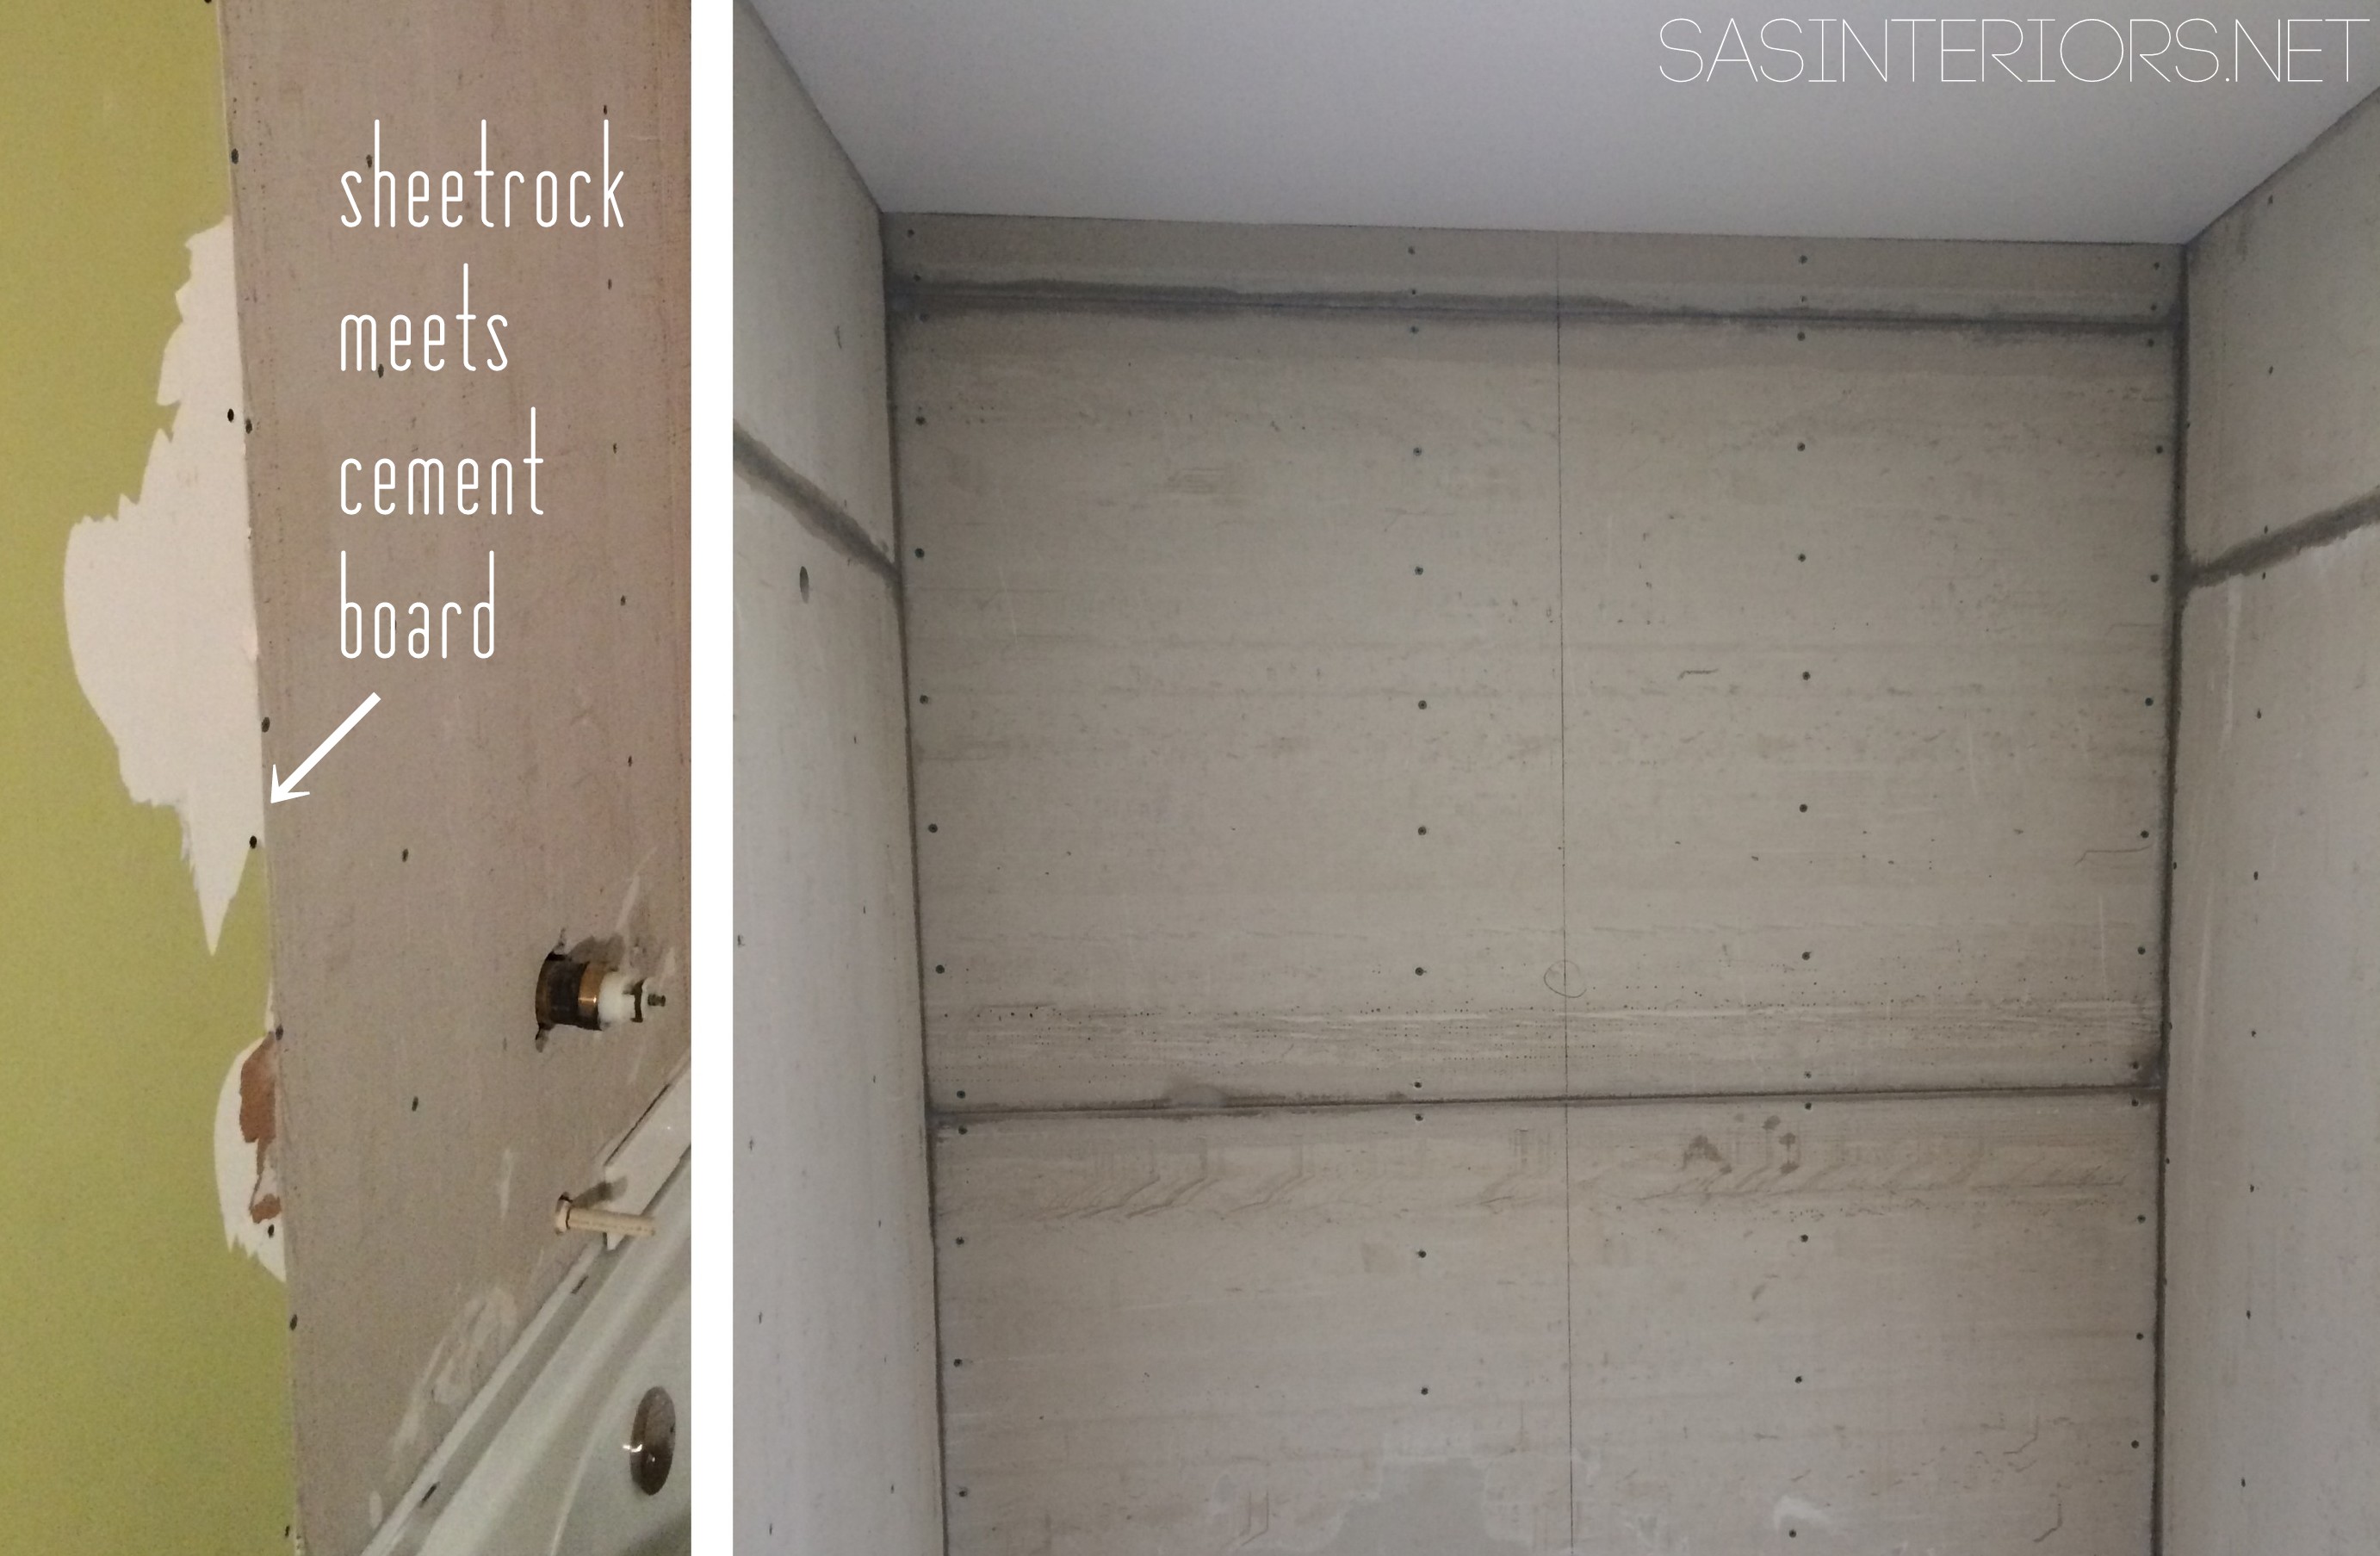
The new cement board butts up to the existing sheetrock walls that continue around the room. It is important to have the two materials align as perfect as possible and also be at the same plane so the tile can be seamlessly applied.
The removal of the old walls + tub and the installation of the new tub and cement board took about 2.5 days – about 10 hours
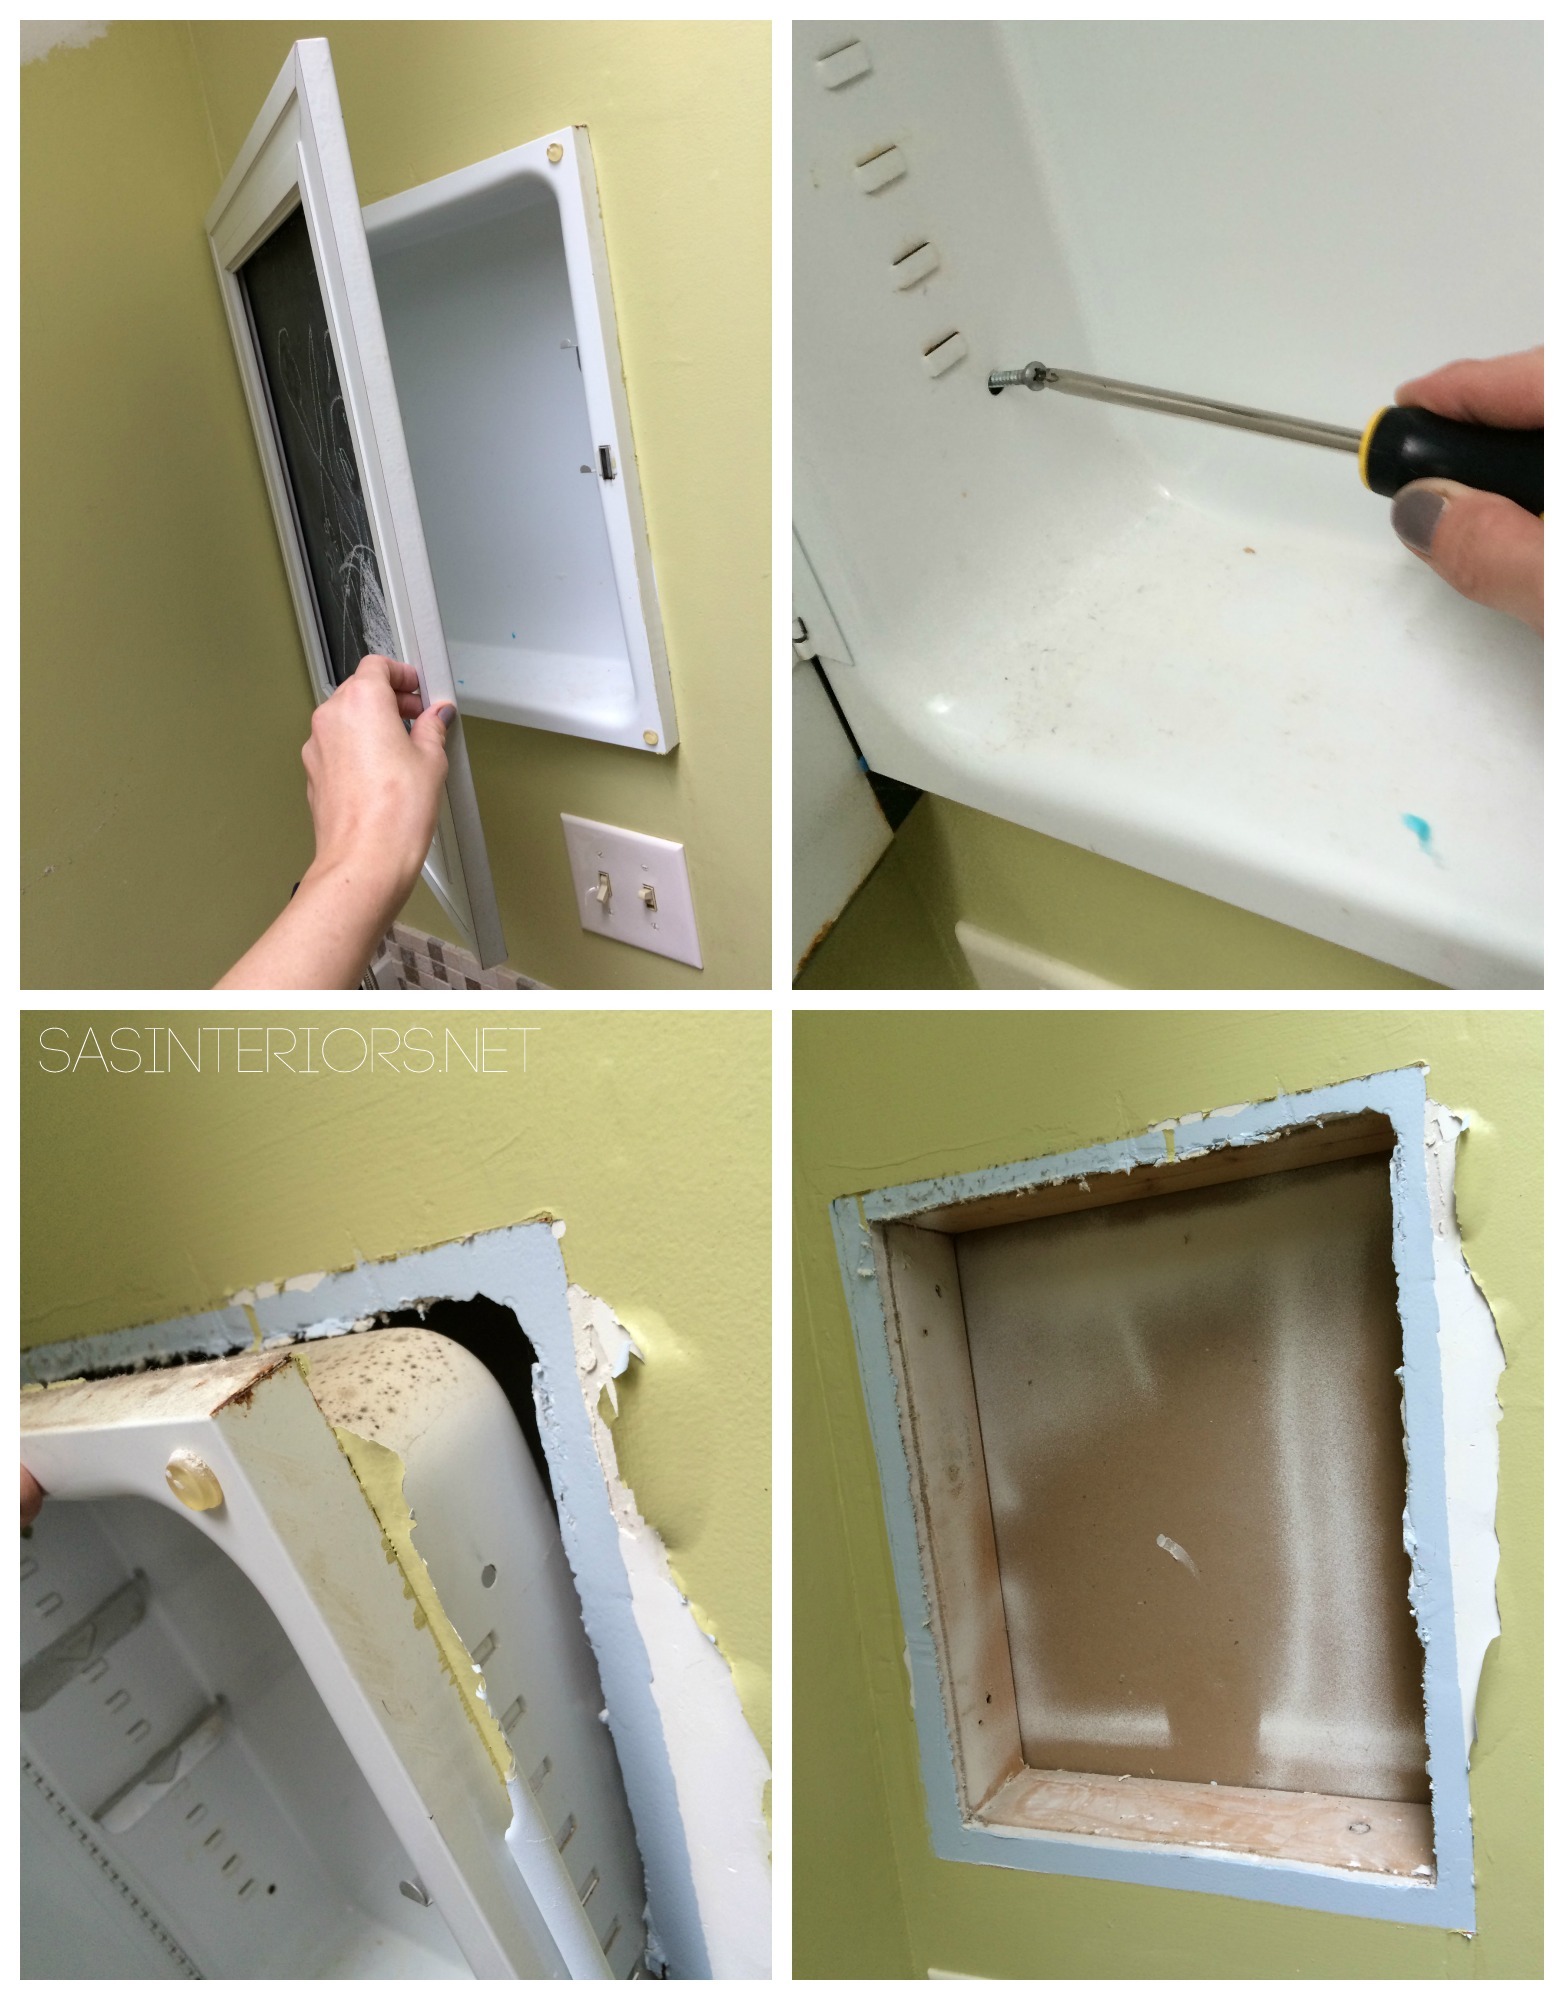
Removing the Medicine Cabinet
6. Also on day 2, I removed the medicine cabinet that sits near the sink. We never really used it in the past and I thought it would be better served as a niche. I thought the removal process would be tricky, but it was actually very simple.
Inside the medicine cabinet were screws that were screwed into the surrounding studs. I removed the screws and voila, the medicine cabinet came right out.
Now there’s a huge hole. O, the potential for this little niche!
So there you have it – day 2, 3, 4 are complete. There are 26 more days left to meet my goal of a complete bathroom in 30 days! The space looks pretty scary and I’m not feeling super confident, BUT I am trying to stay positive and like always, I’m going to keep chugging along…
Next up… TILE!
{Day 2-4} Tub Removed + Installed – Complete! 26 more days to go…
From start to finish, these are all the posts pertaining to this bathroom remodel
Plan of Action
Demo: Removal + Installation of the Tub & Walls
How-To Tile + Grout the Bathroom Walls
Installing Wallpaper
Adding a Tile Accent Border
Creating a Tiled Niche
Bathroom Makeover Reveal
Resources