Two blog posts and it’s still January… impressive. One of my goals / hopes for the year is to share and showcase more of our brick ranch fixer upper projects + in-progress and completed client projects… there’s always so much to show you!
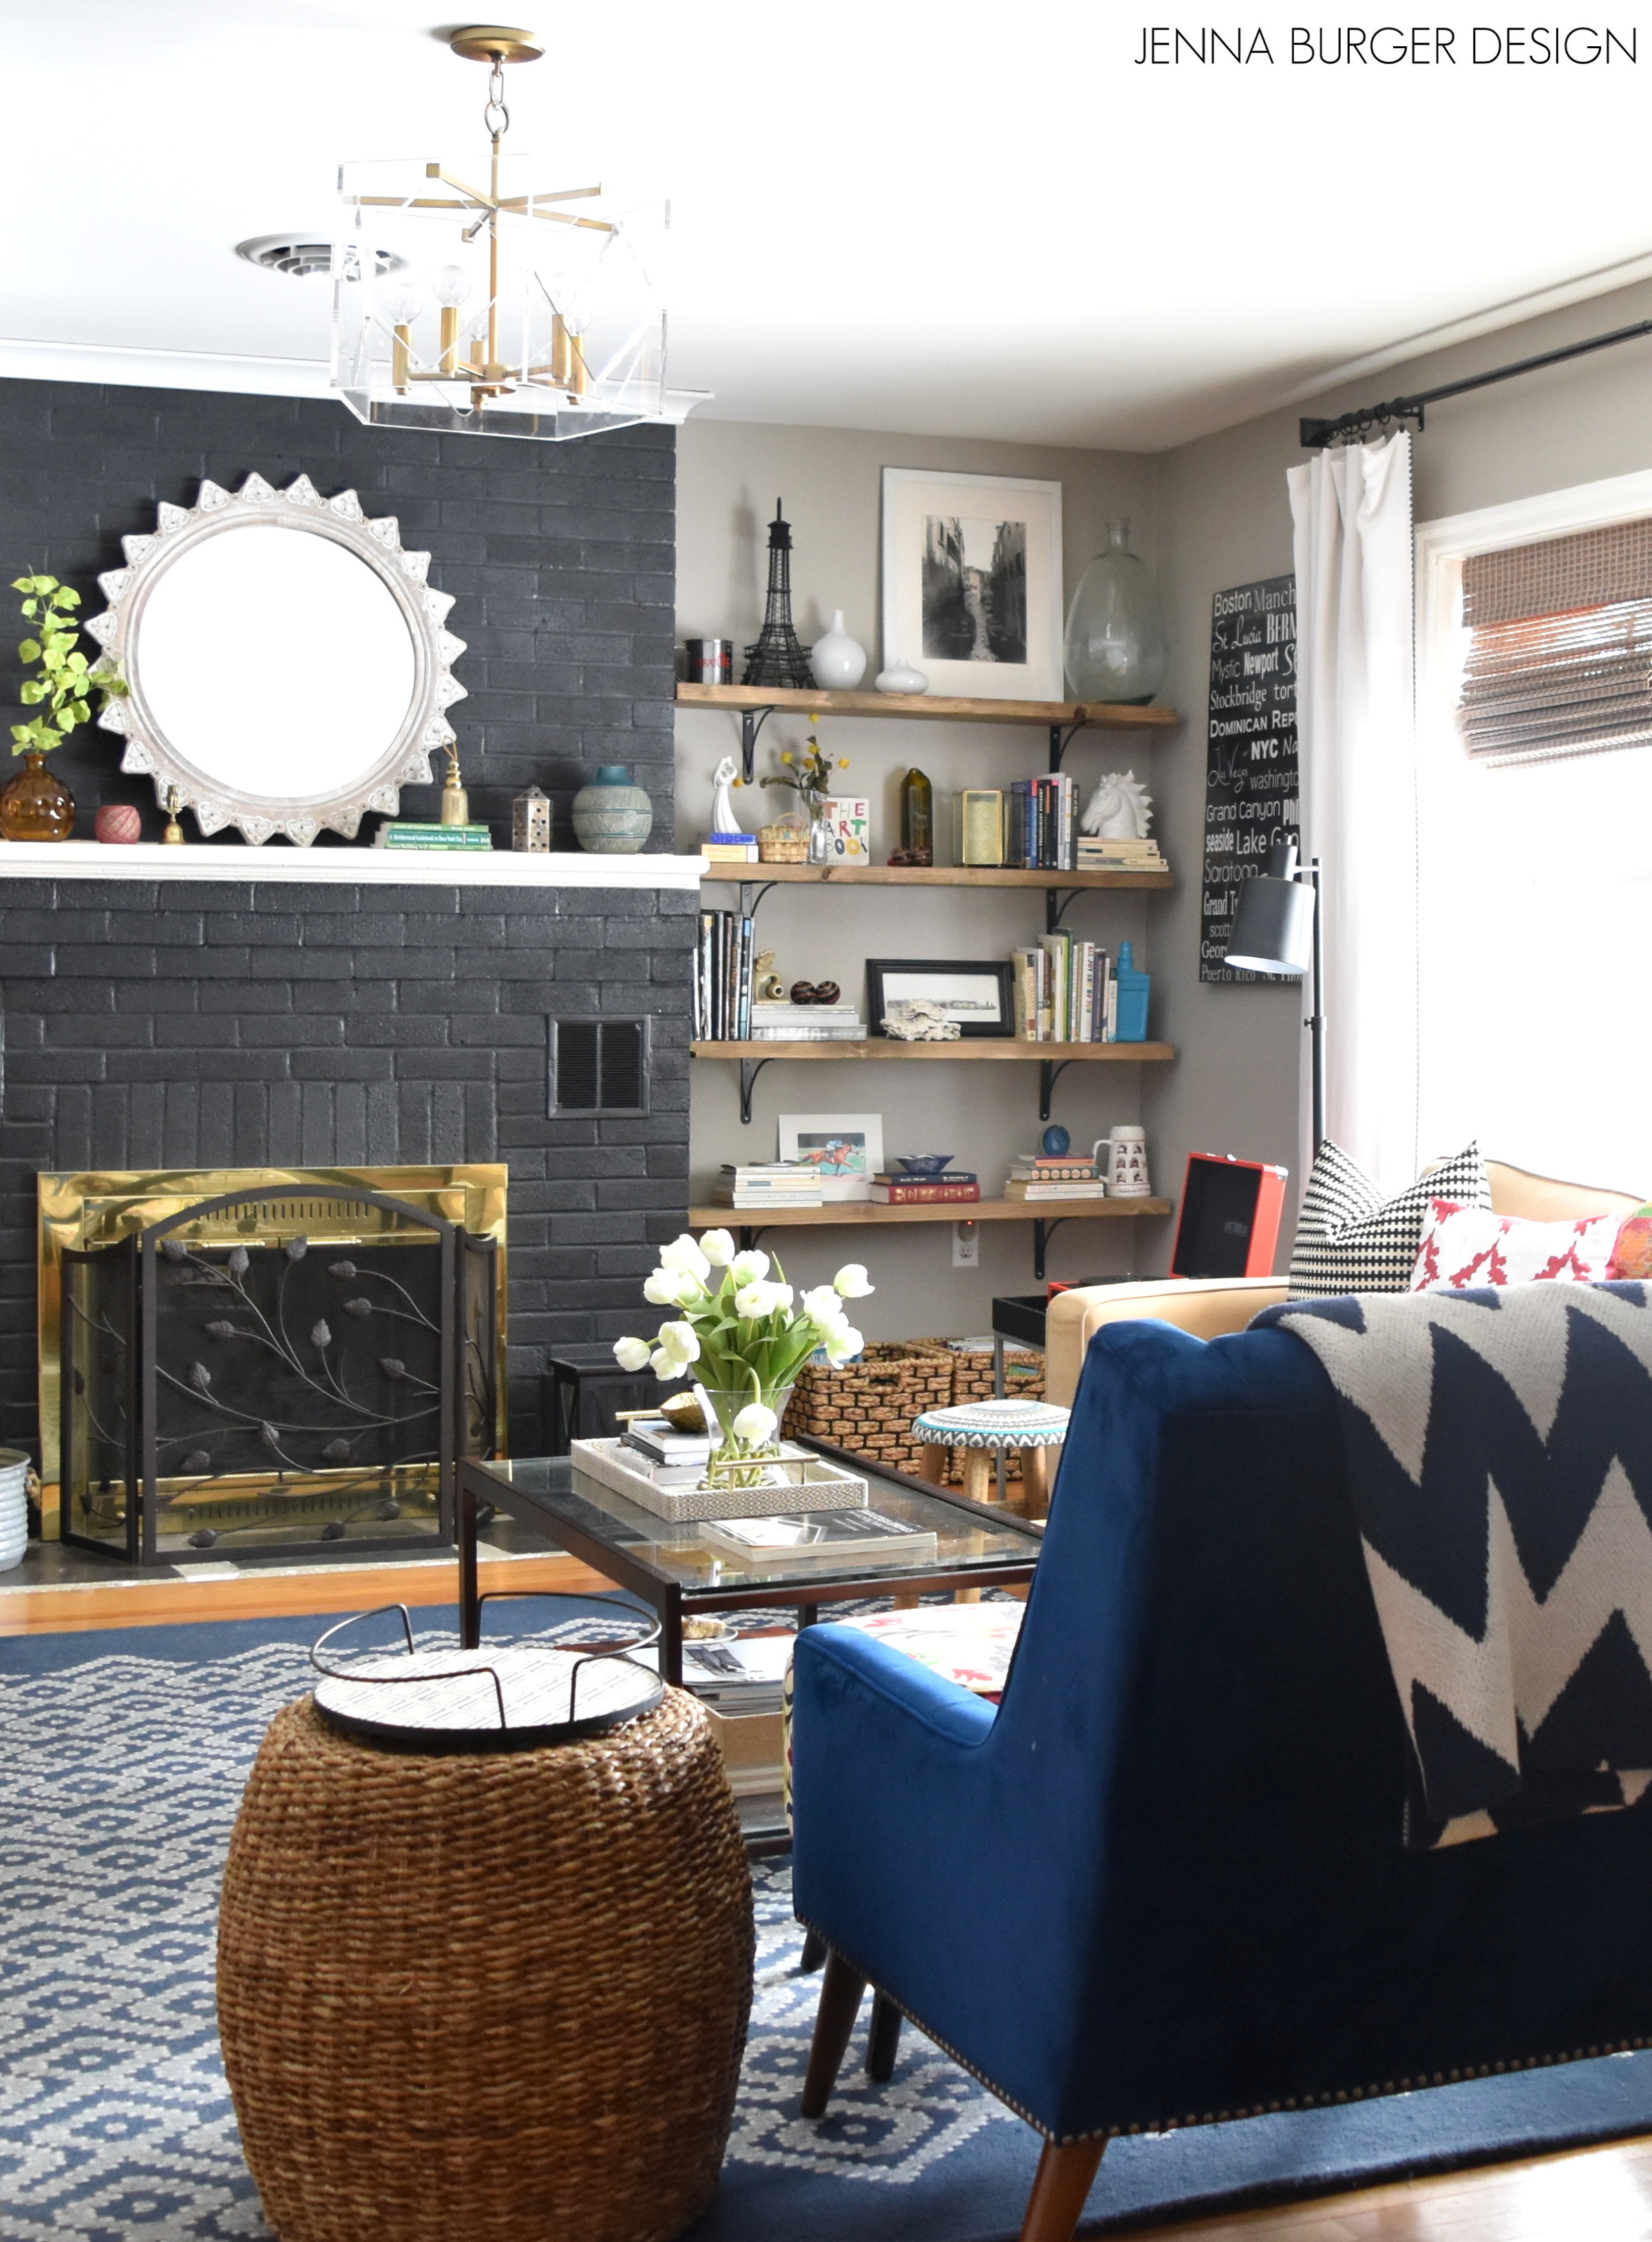
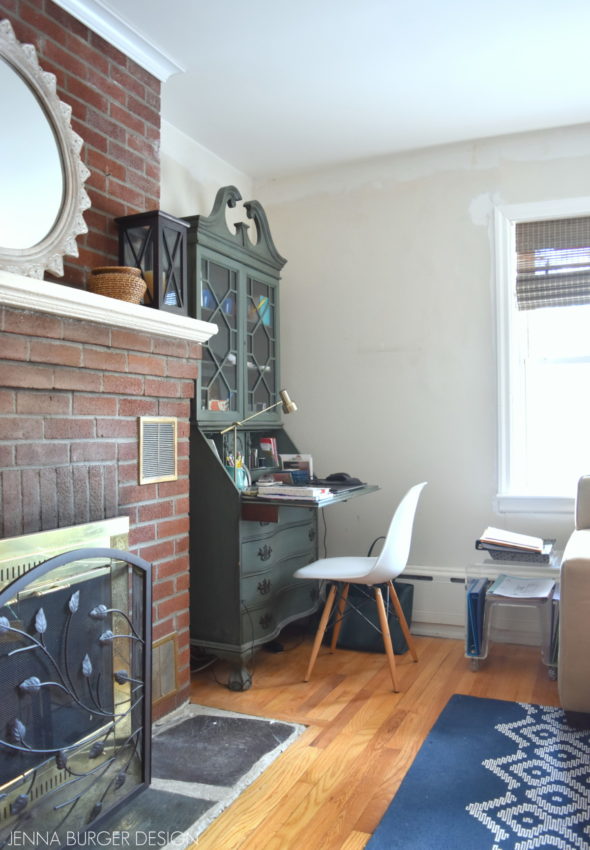
Onto today’s DIY… I shared a picture on instagram the other day of the finished living room. The space has been complete (well nothing is ever done as I’m always moving, adding, or removing little details) for about 6 months and earlier last year, I finally decided what to do with the nook to the right of the fireplace.
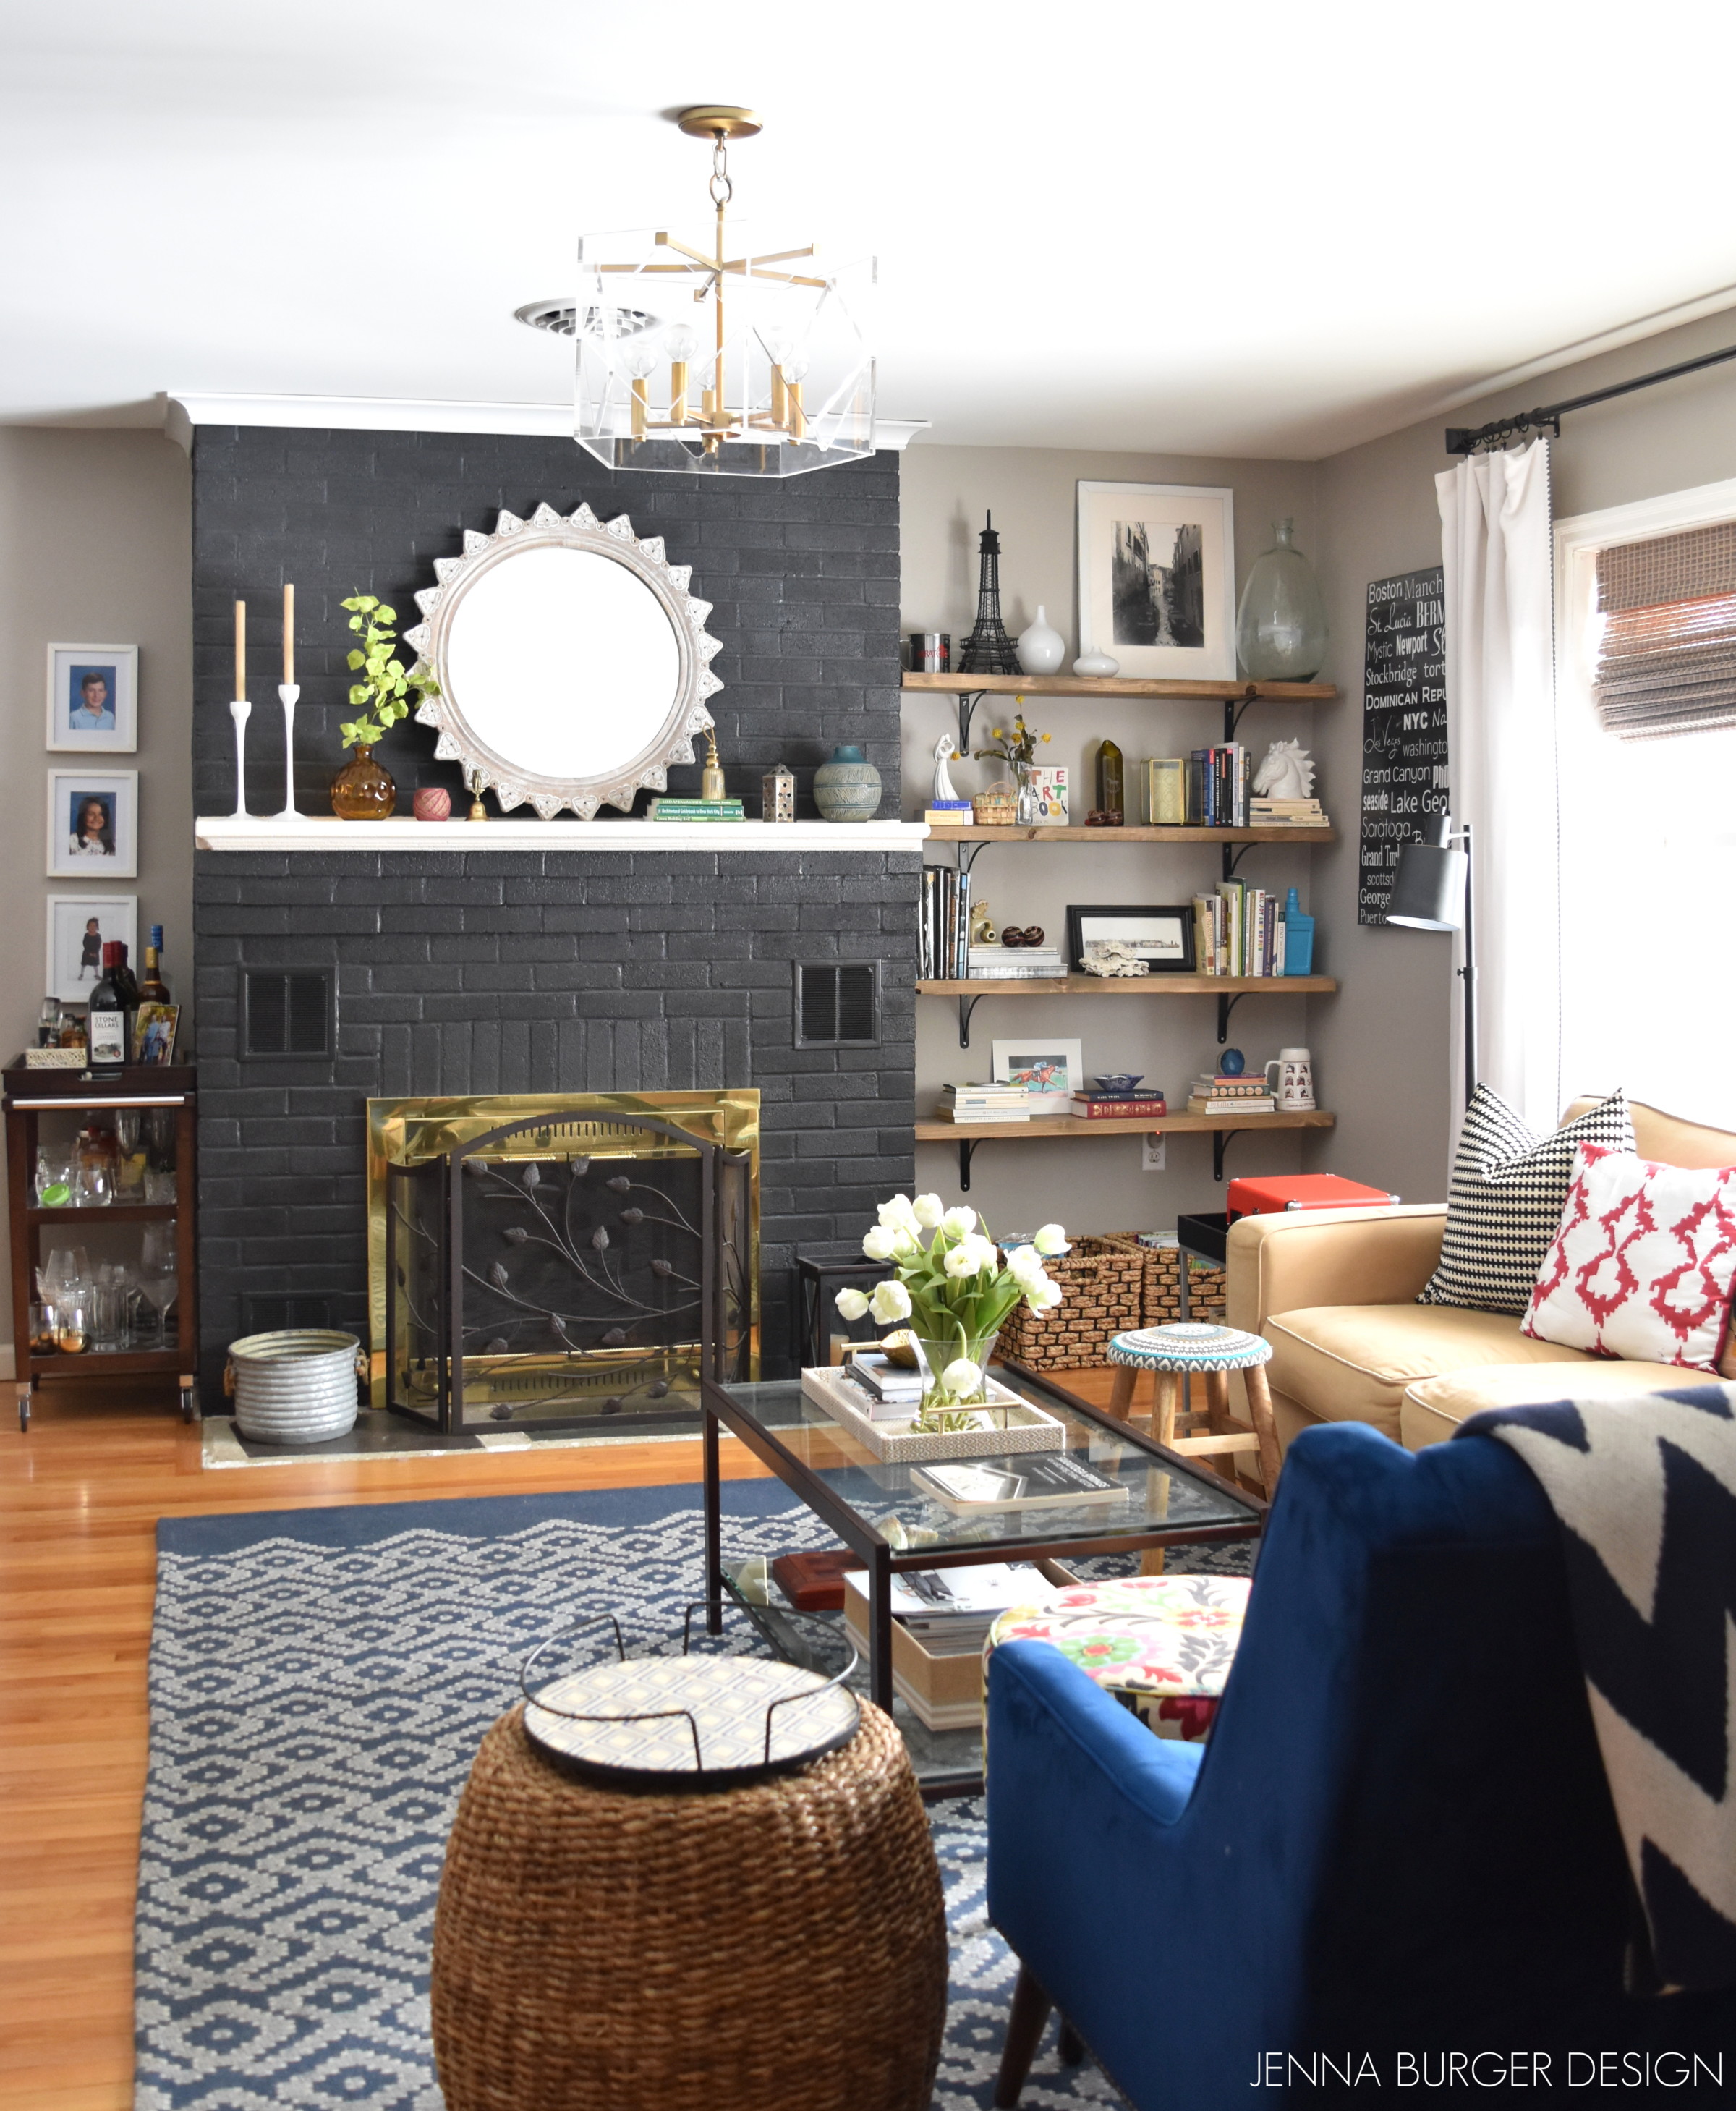
We needed more shelf space to display books and accessories, so shelves were the ideal solution for the setback wall space. I originally envisioned floating wood shelves, but I was worried about the length of the shelf and the potential of them bowing + floating shelves seemed very involved to build, so I decided on using shelves with simple brackets.
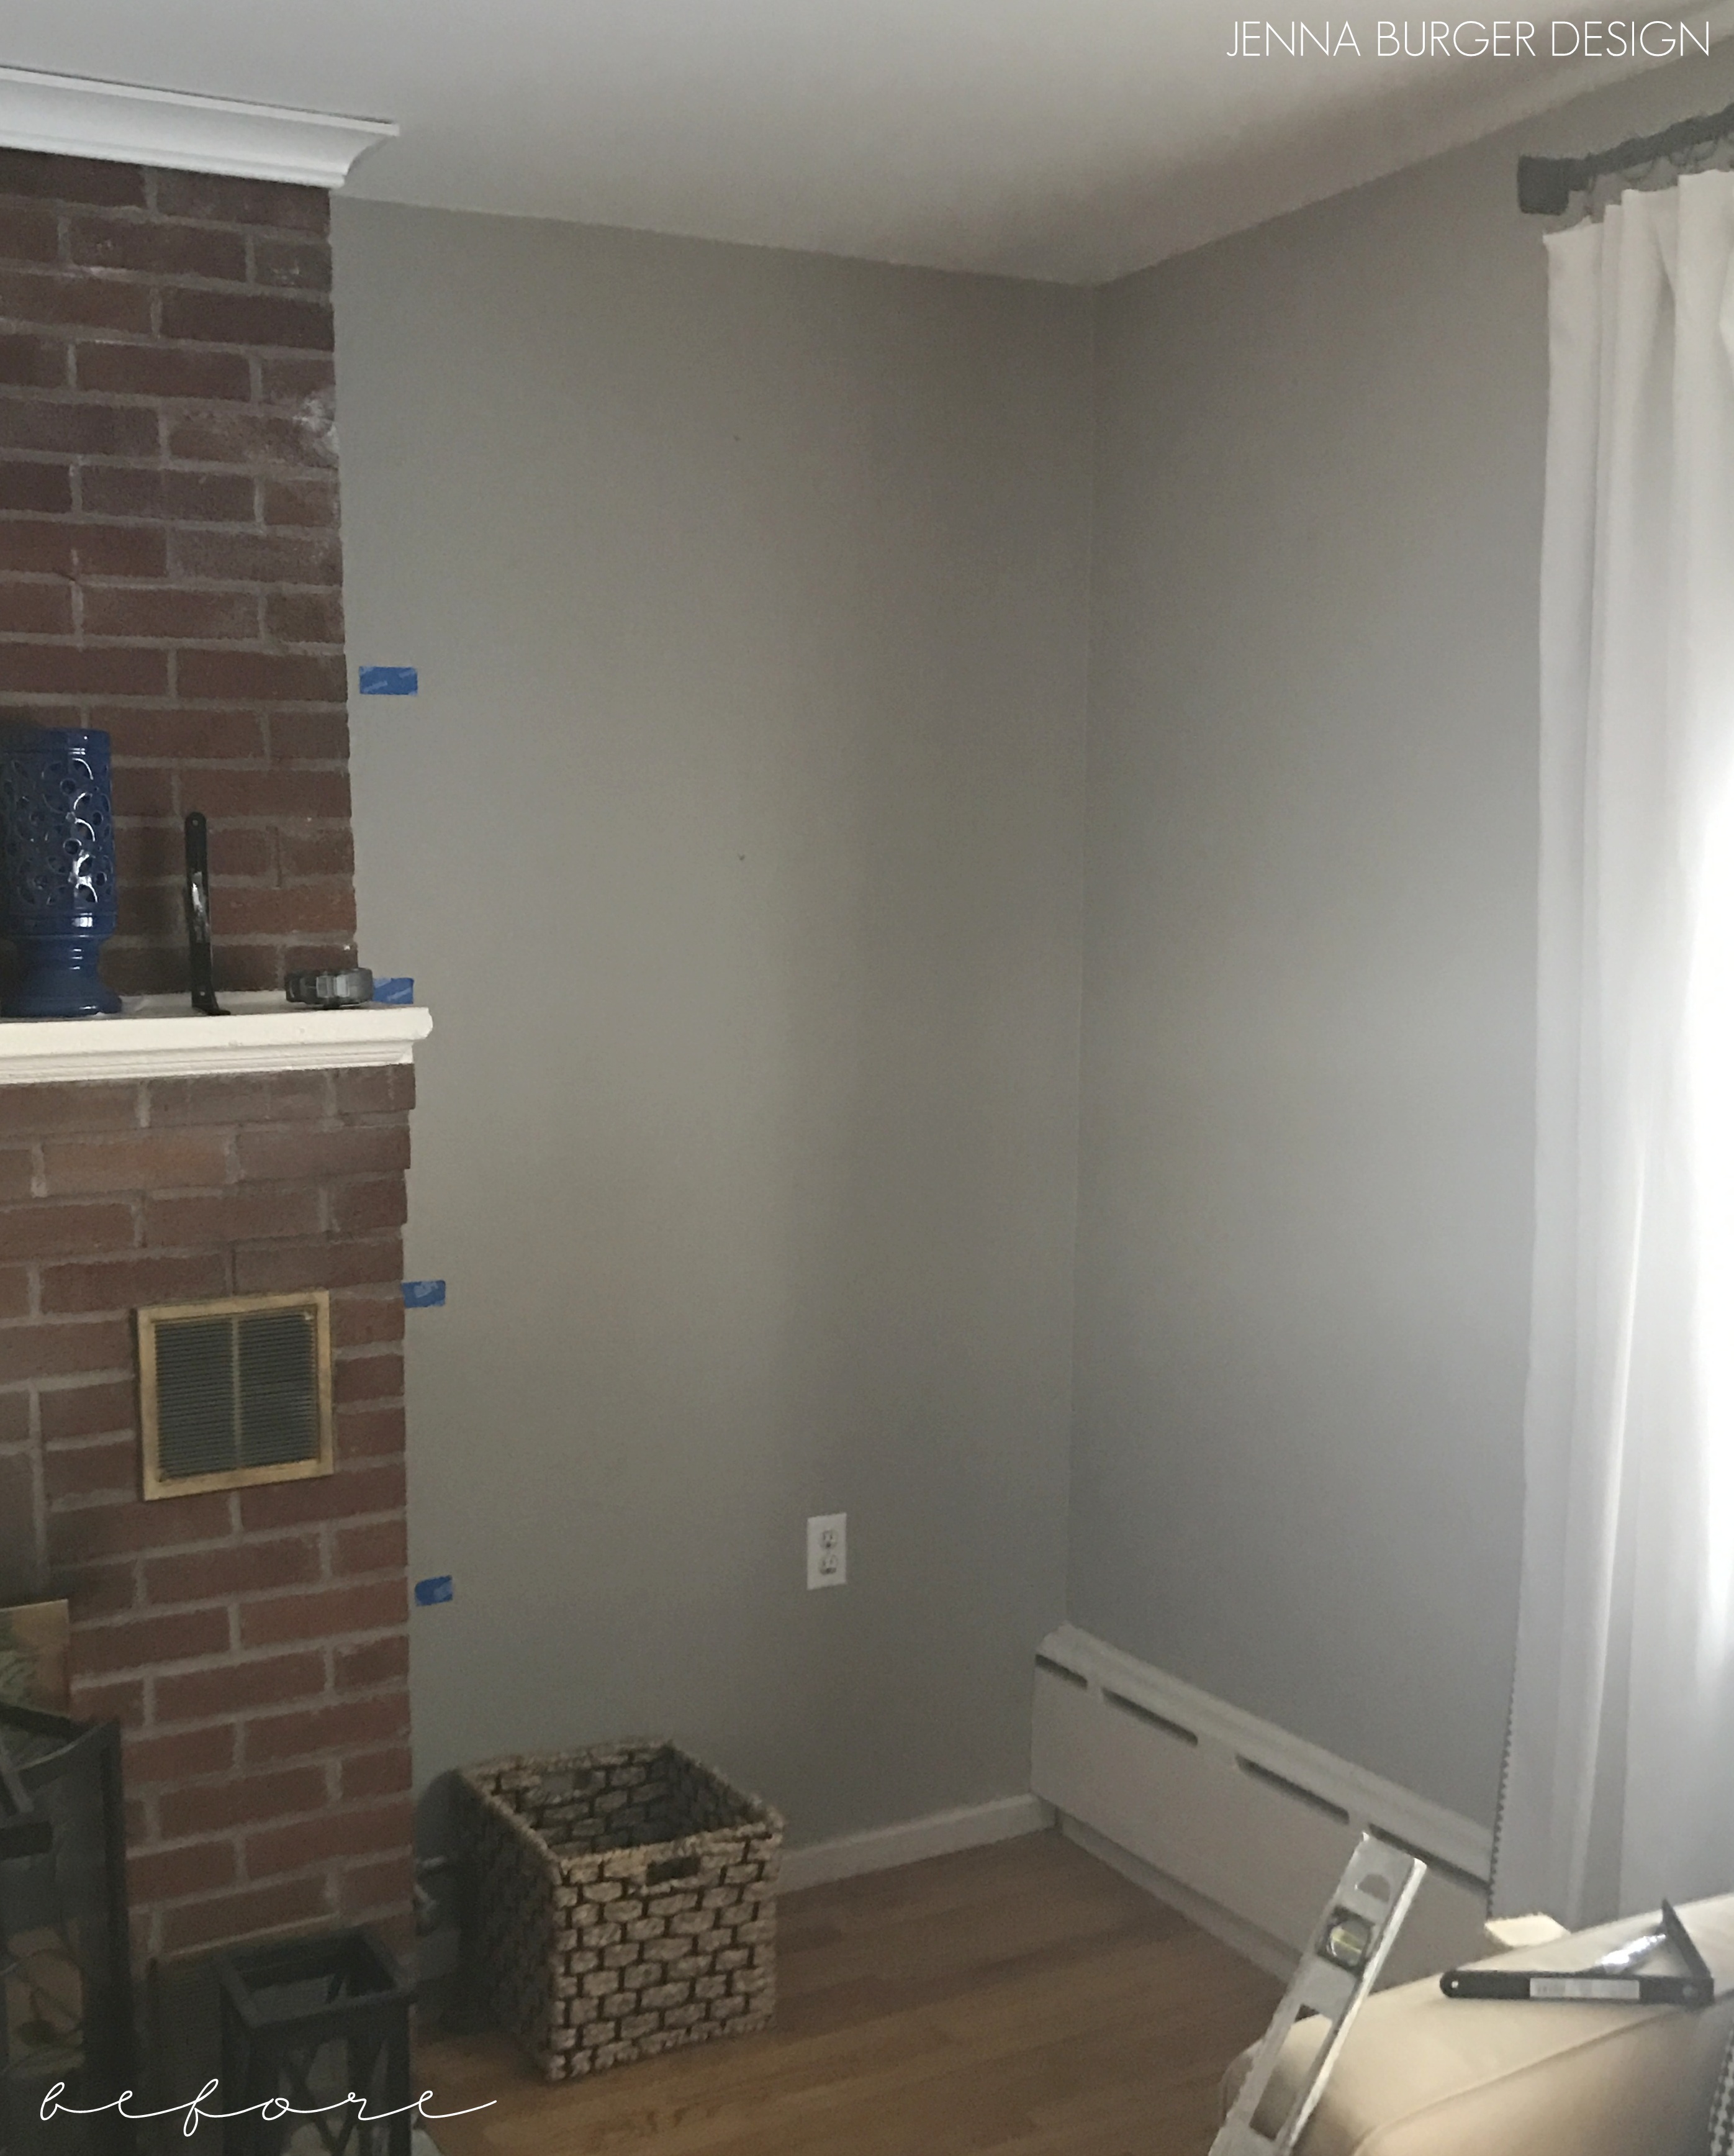
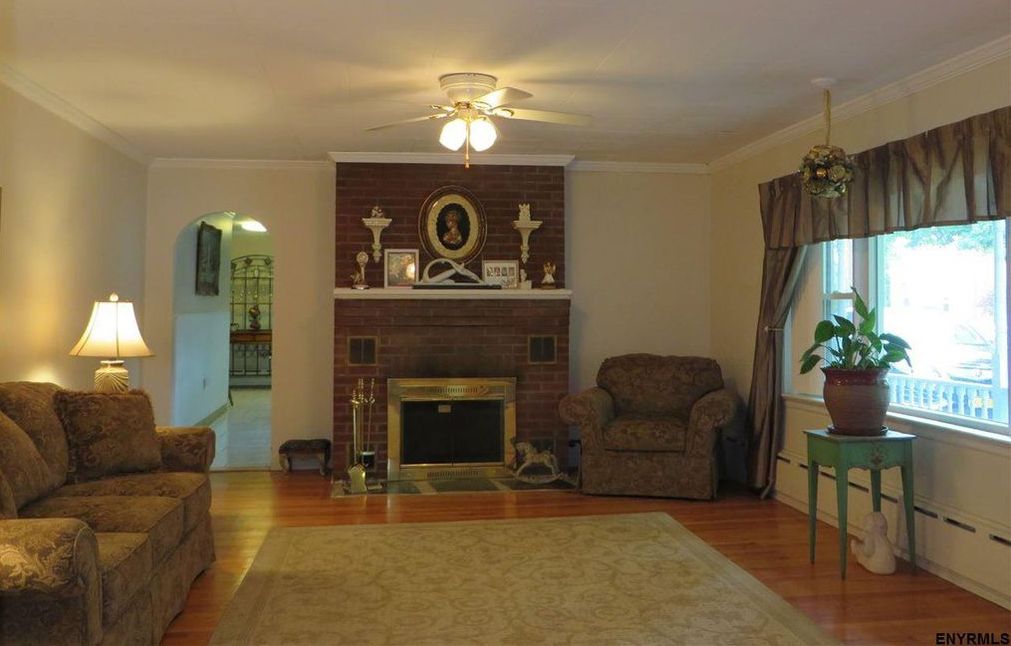
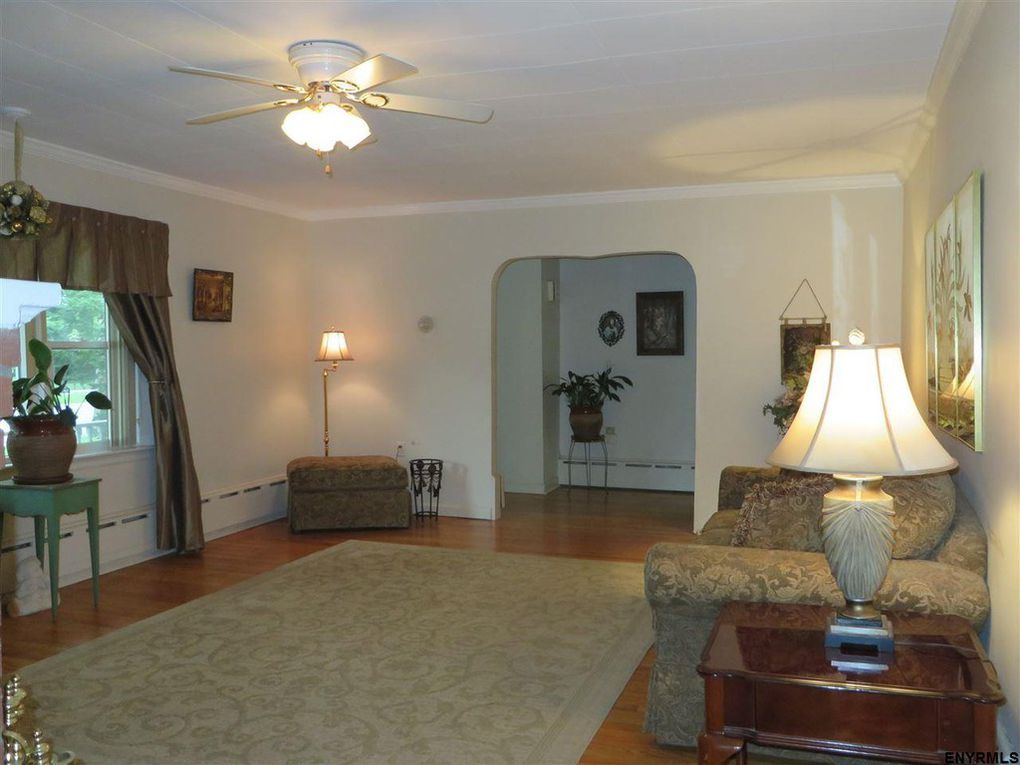
Here’s the before…
1 / To start, I removed everything in the space. Then I figured out the number of shelves + the heights. 1
> I wanted the one shelf to align with the top of the fireplace mantel, so I determined the shelf heights starting from that point.
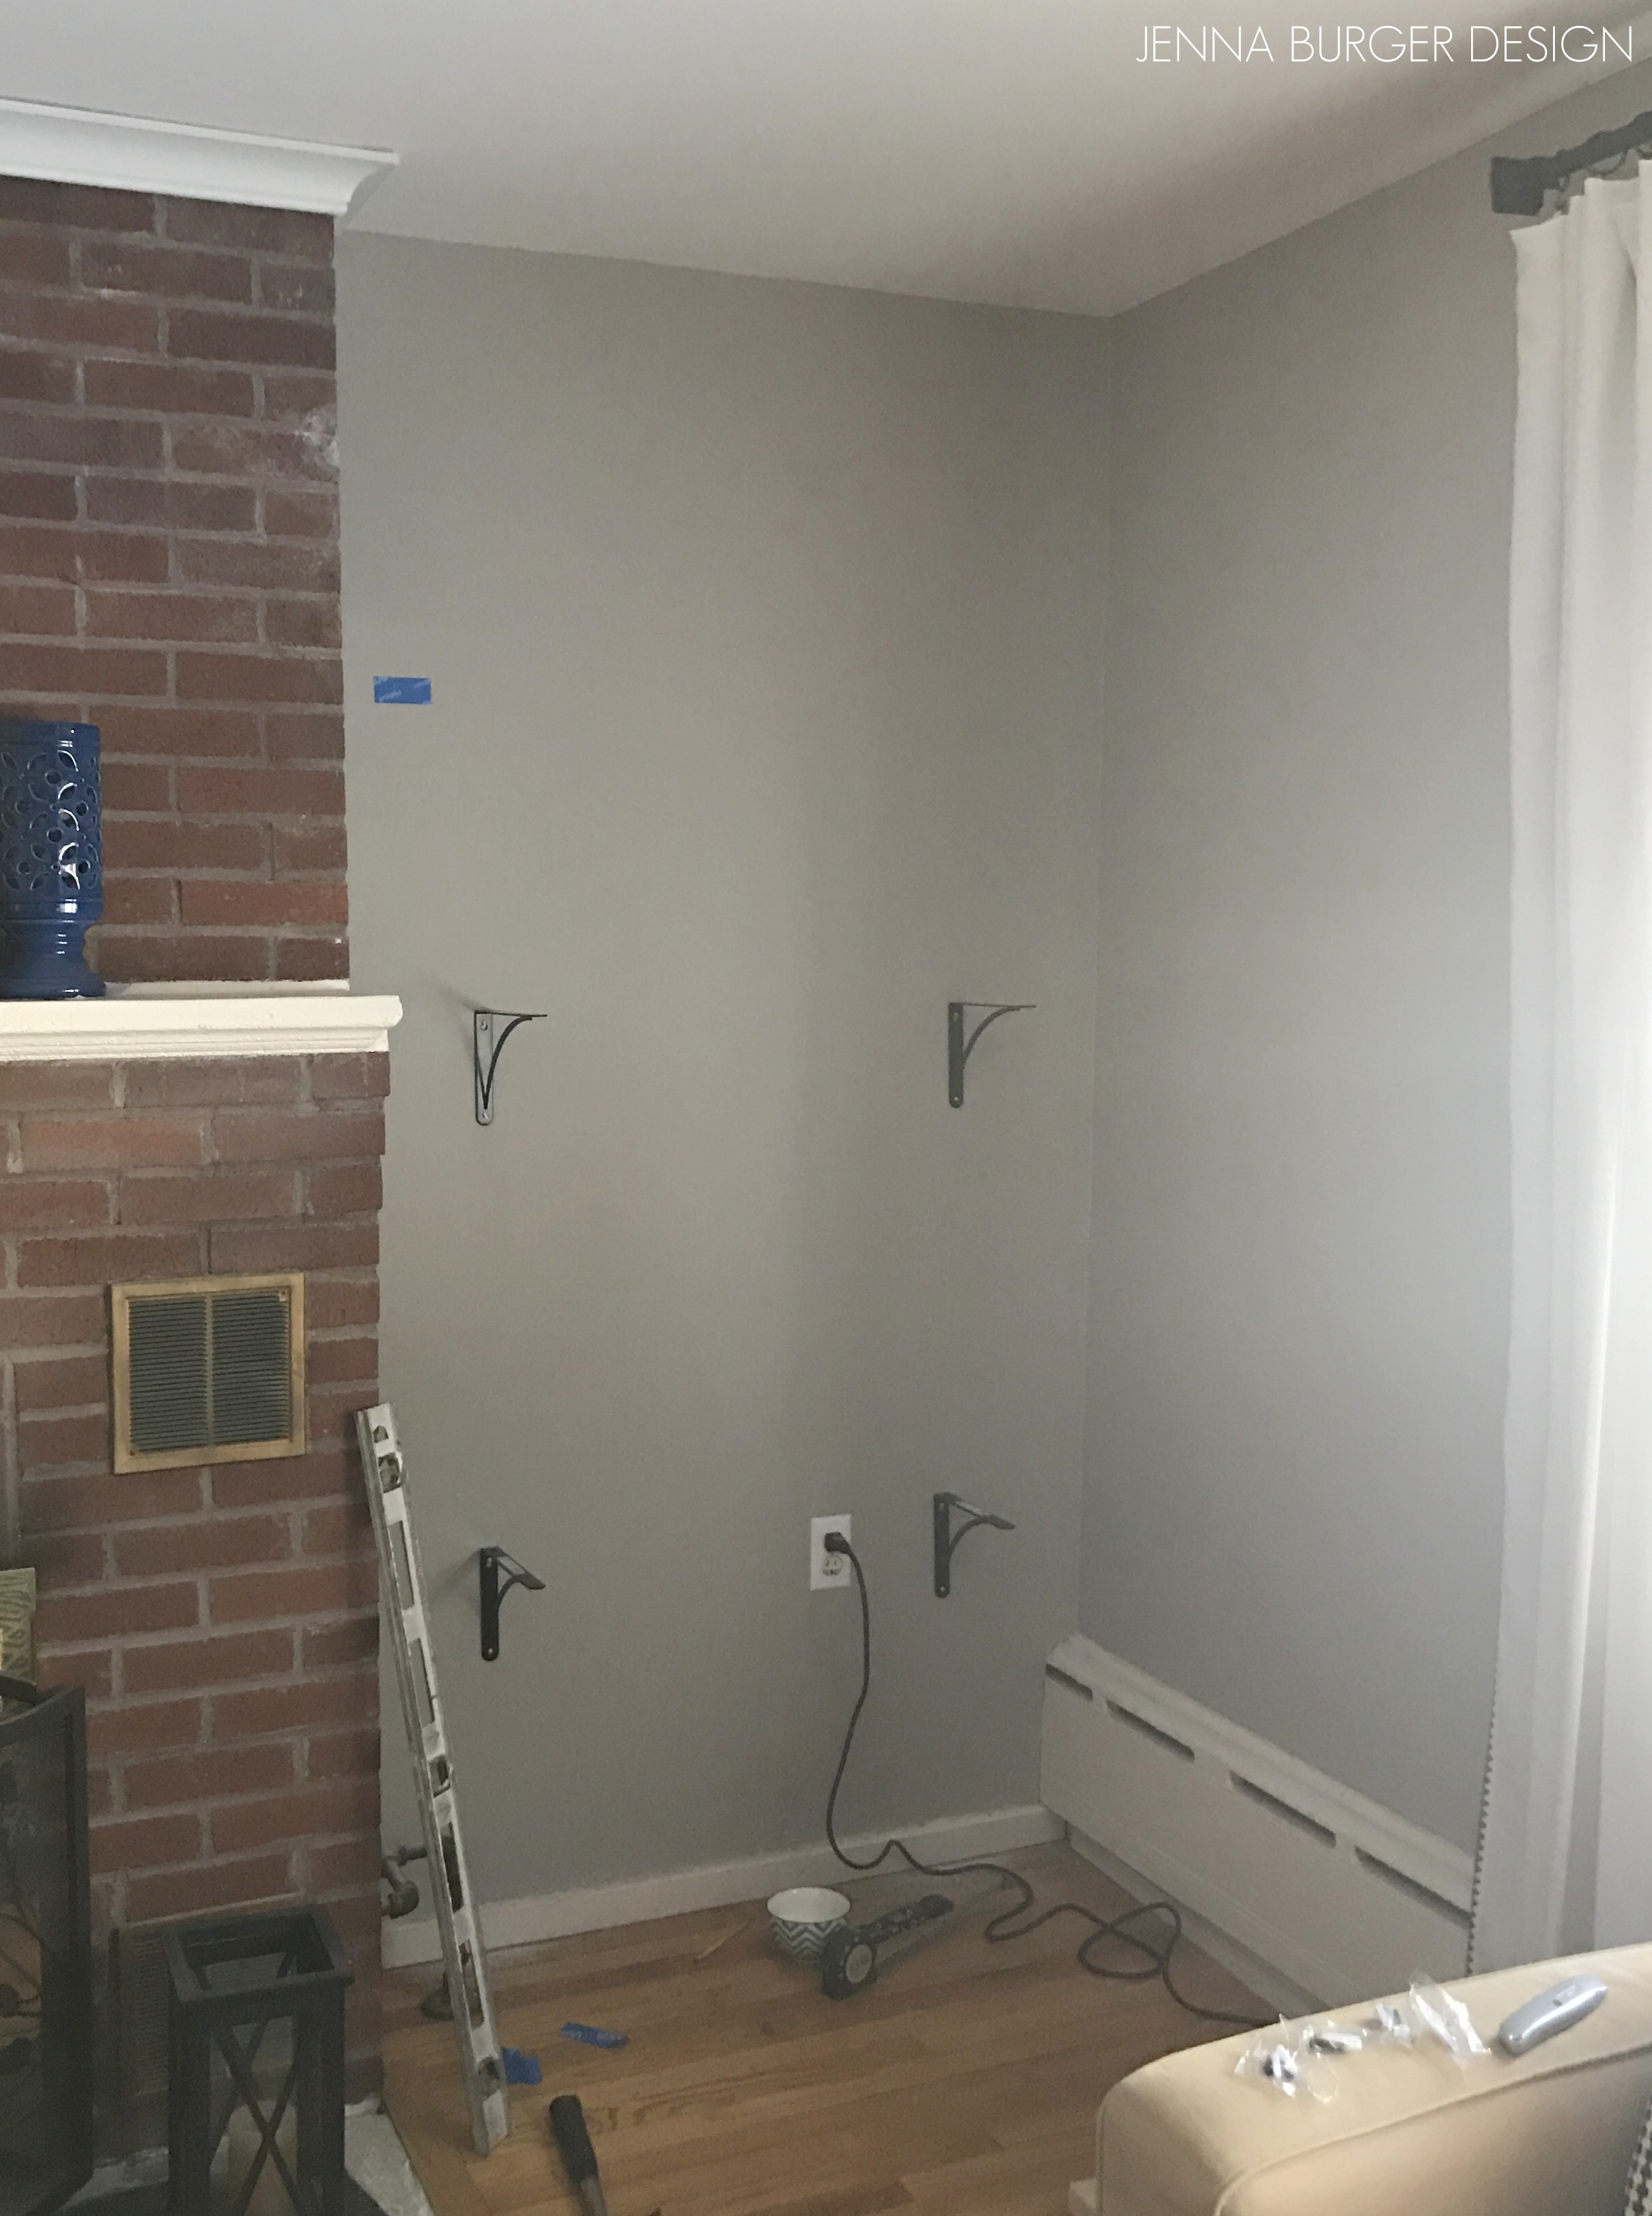
2 / BRACKETS – Using a measuring tape, I determined the bracket locations and made marks for the screws. Then with a drill, I installed toggle anchors and screwed the brackets in to the wall.
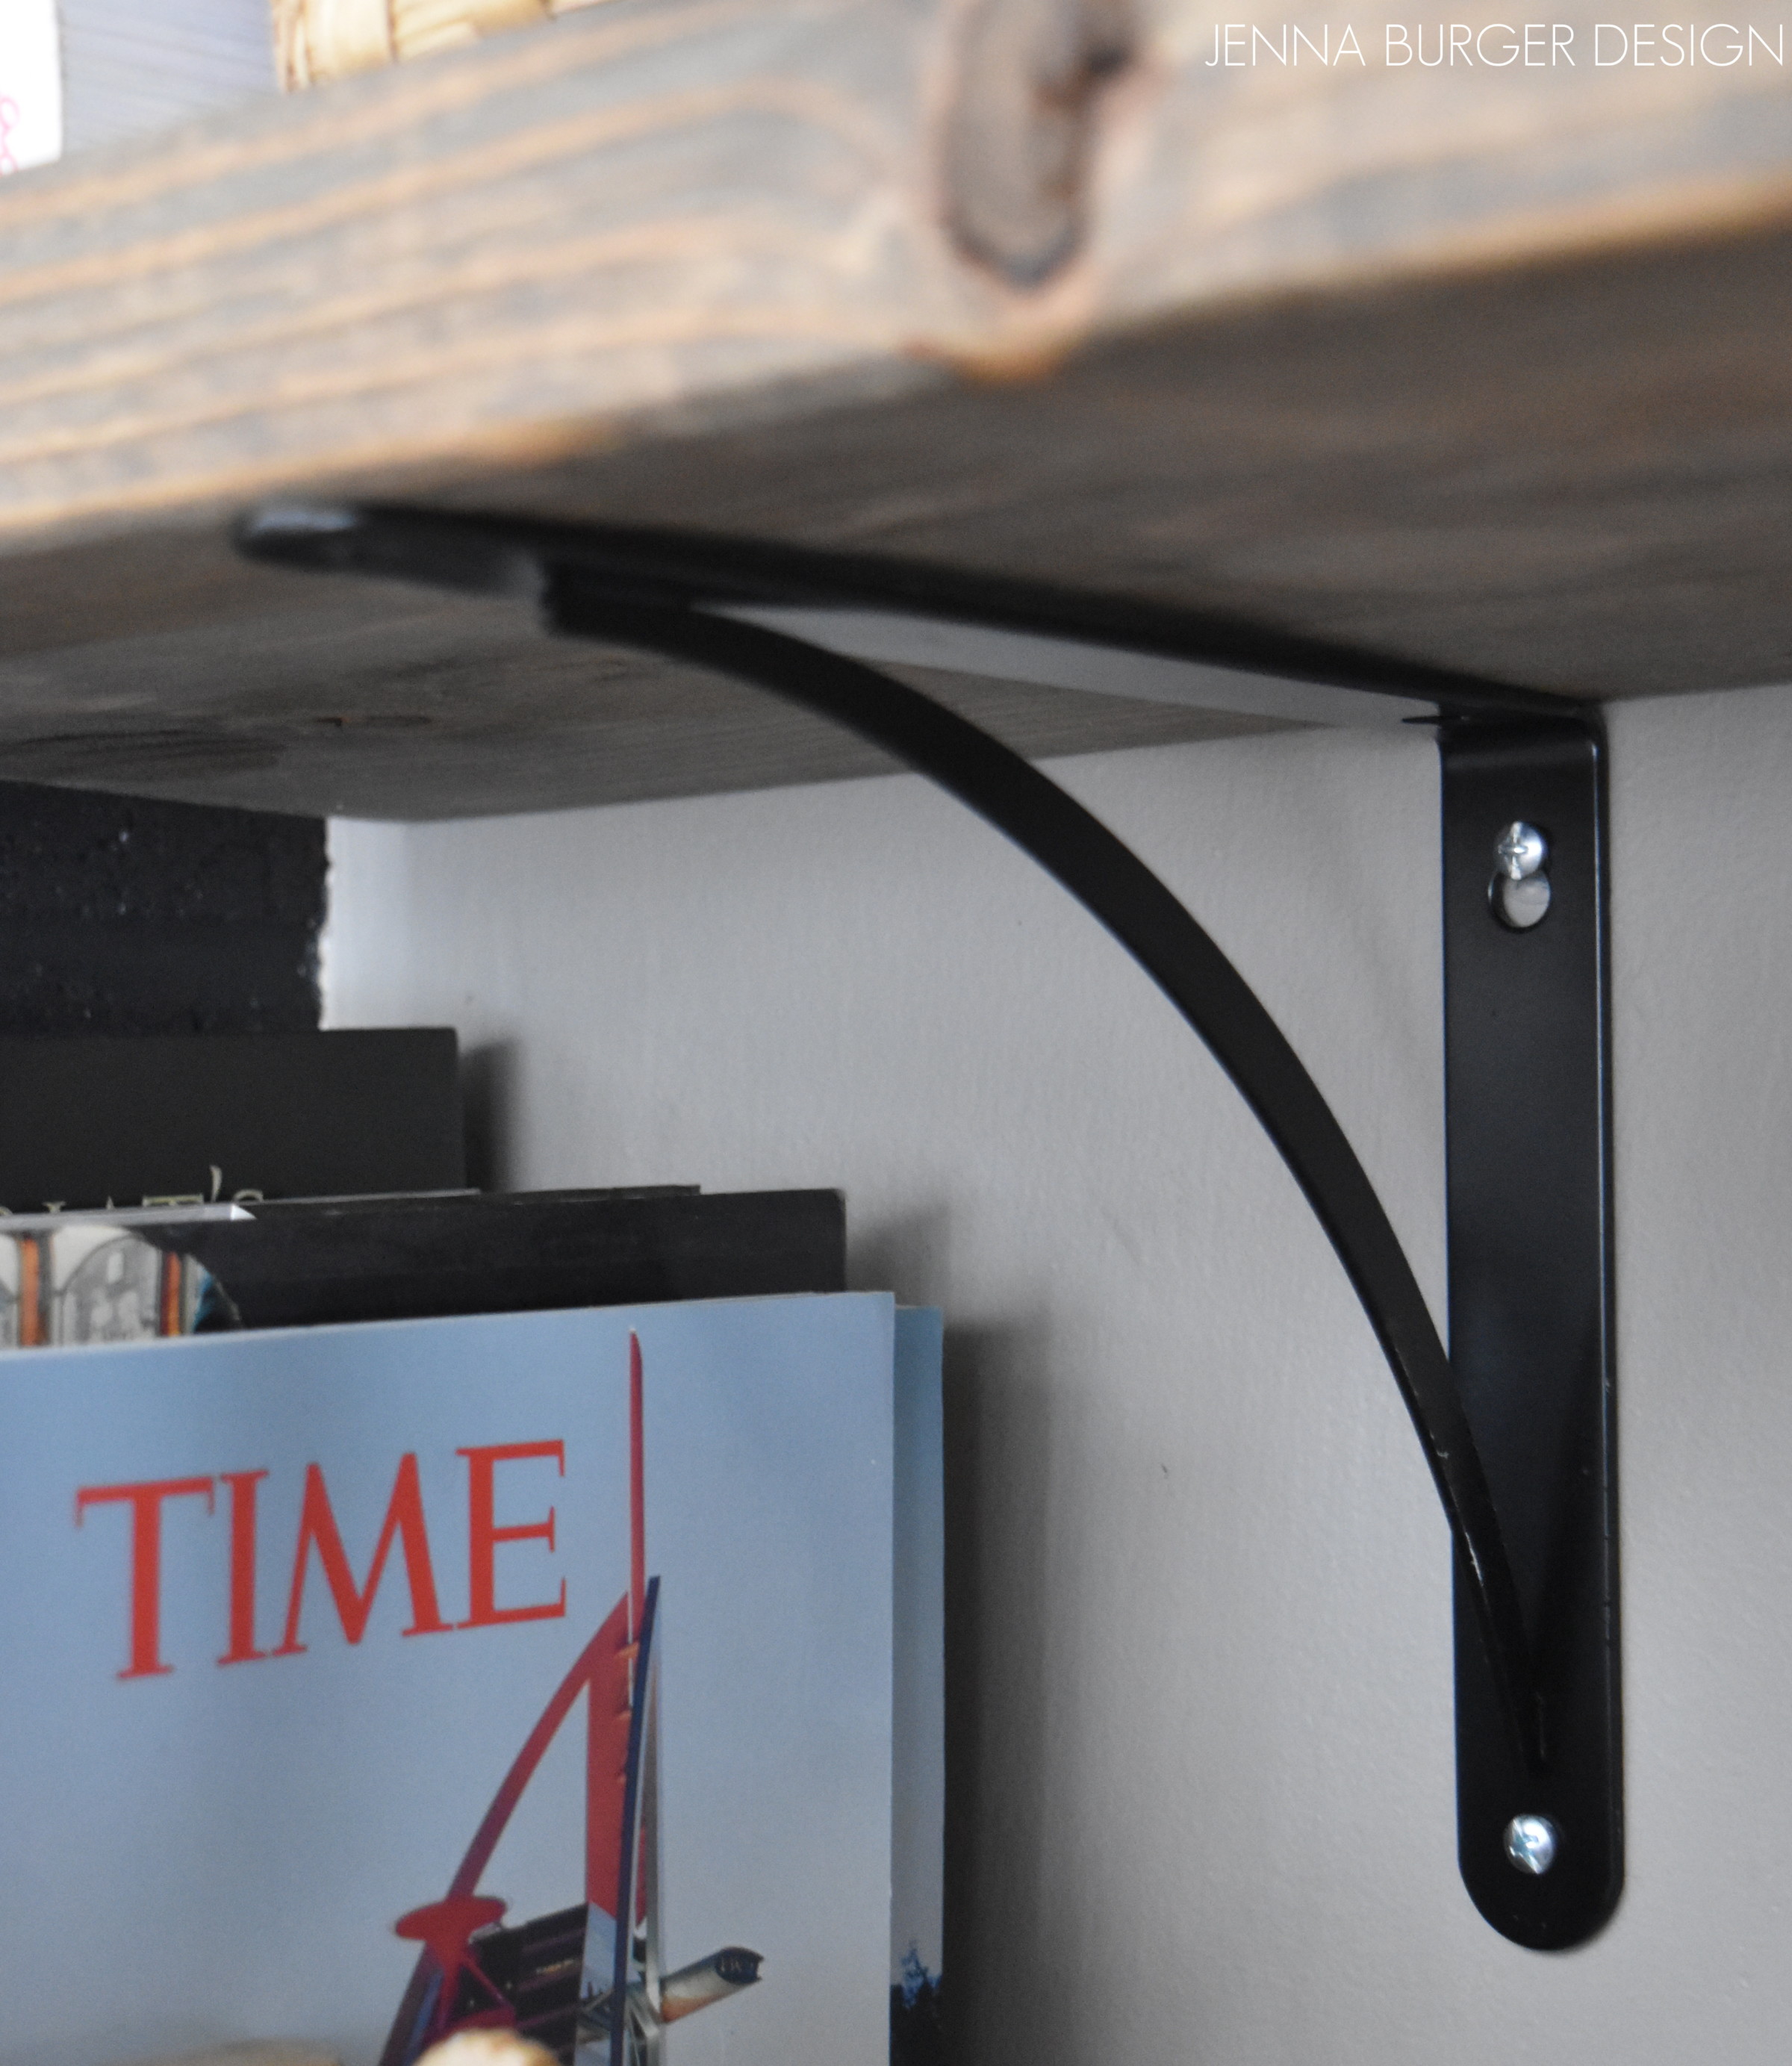
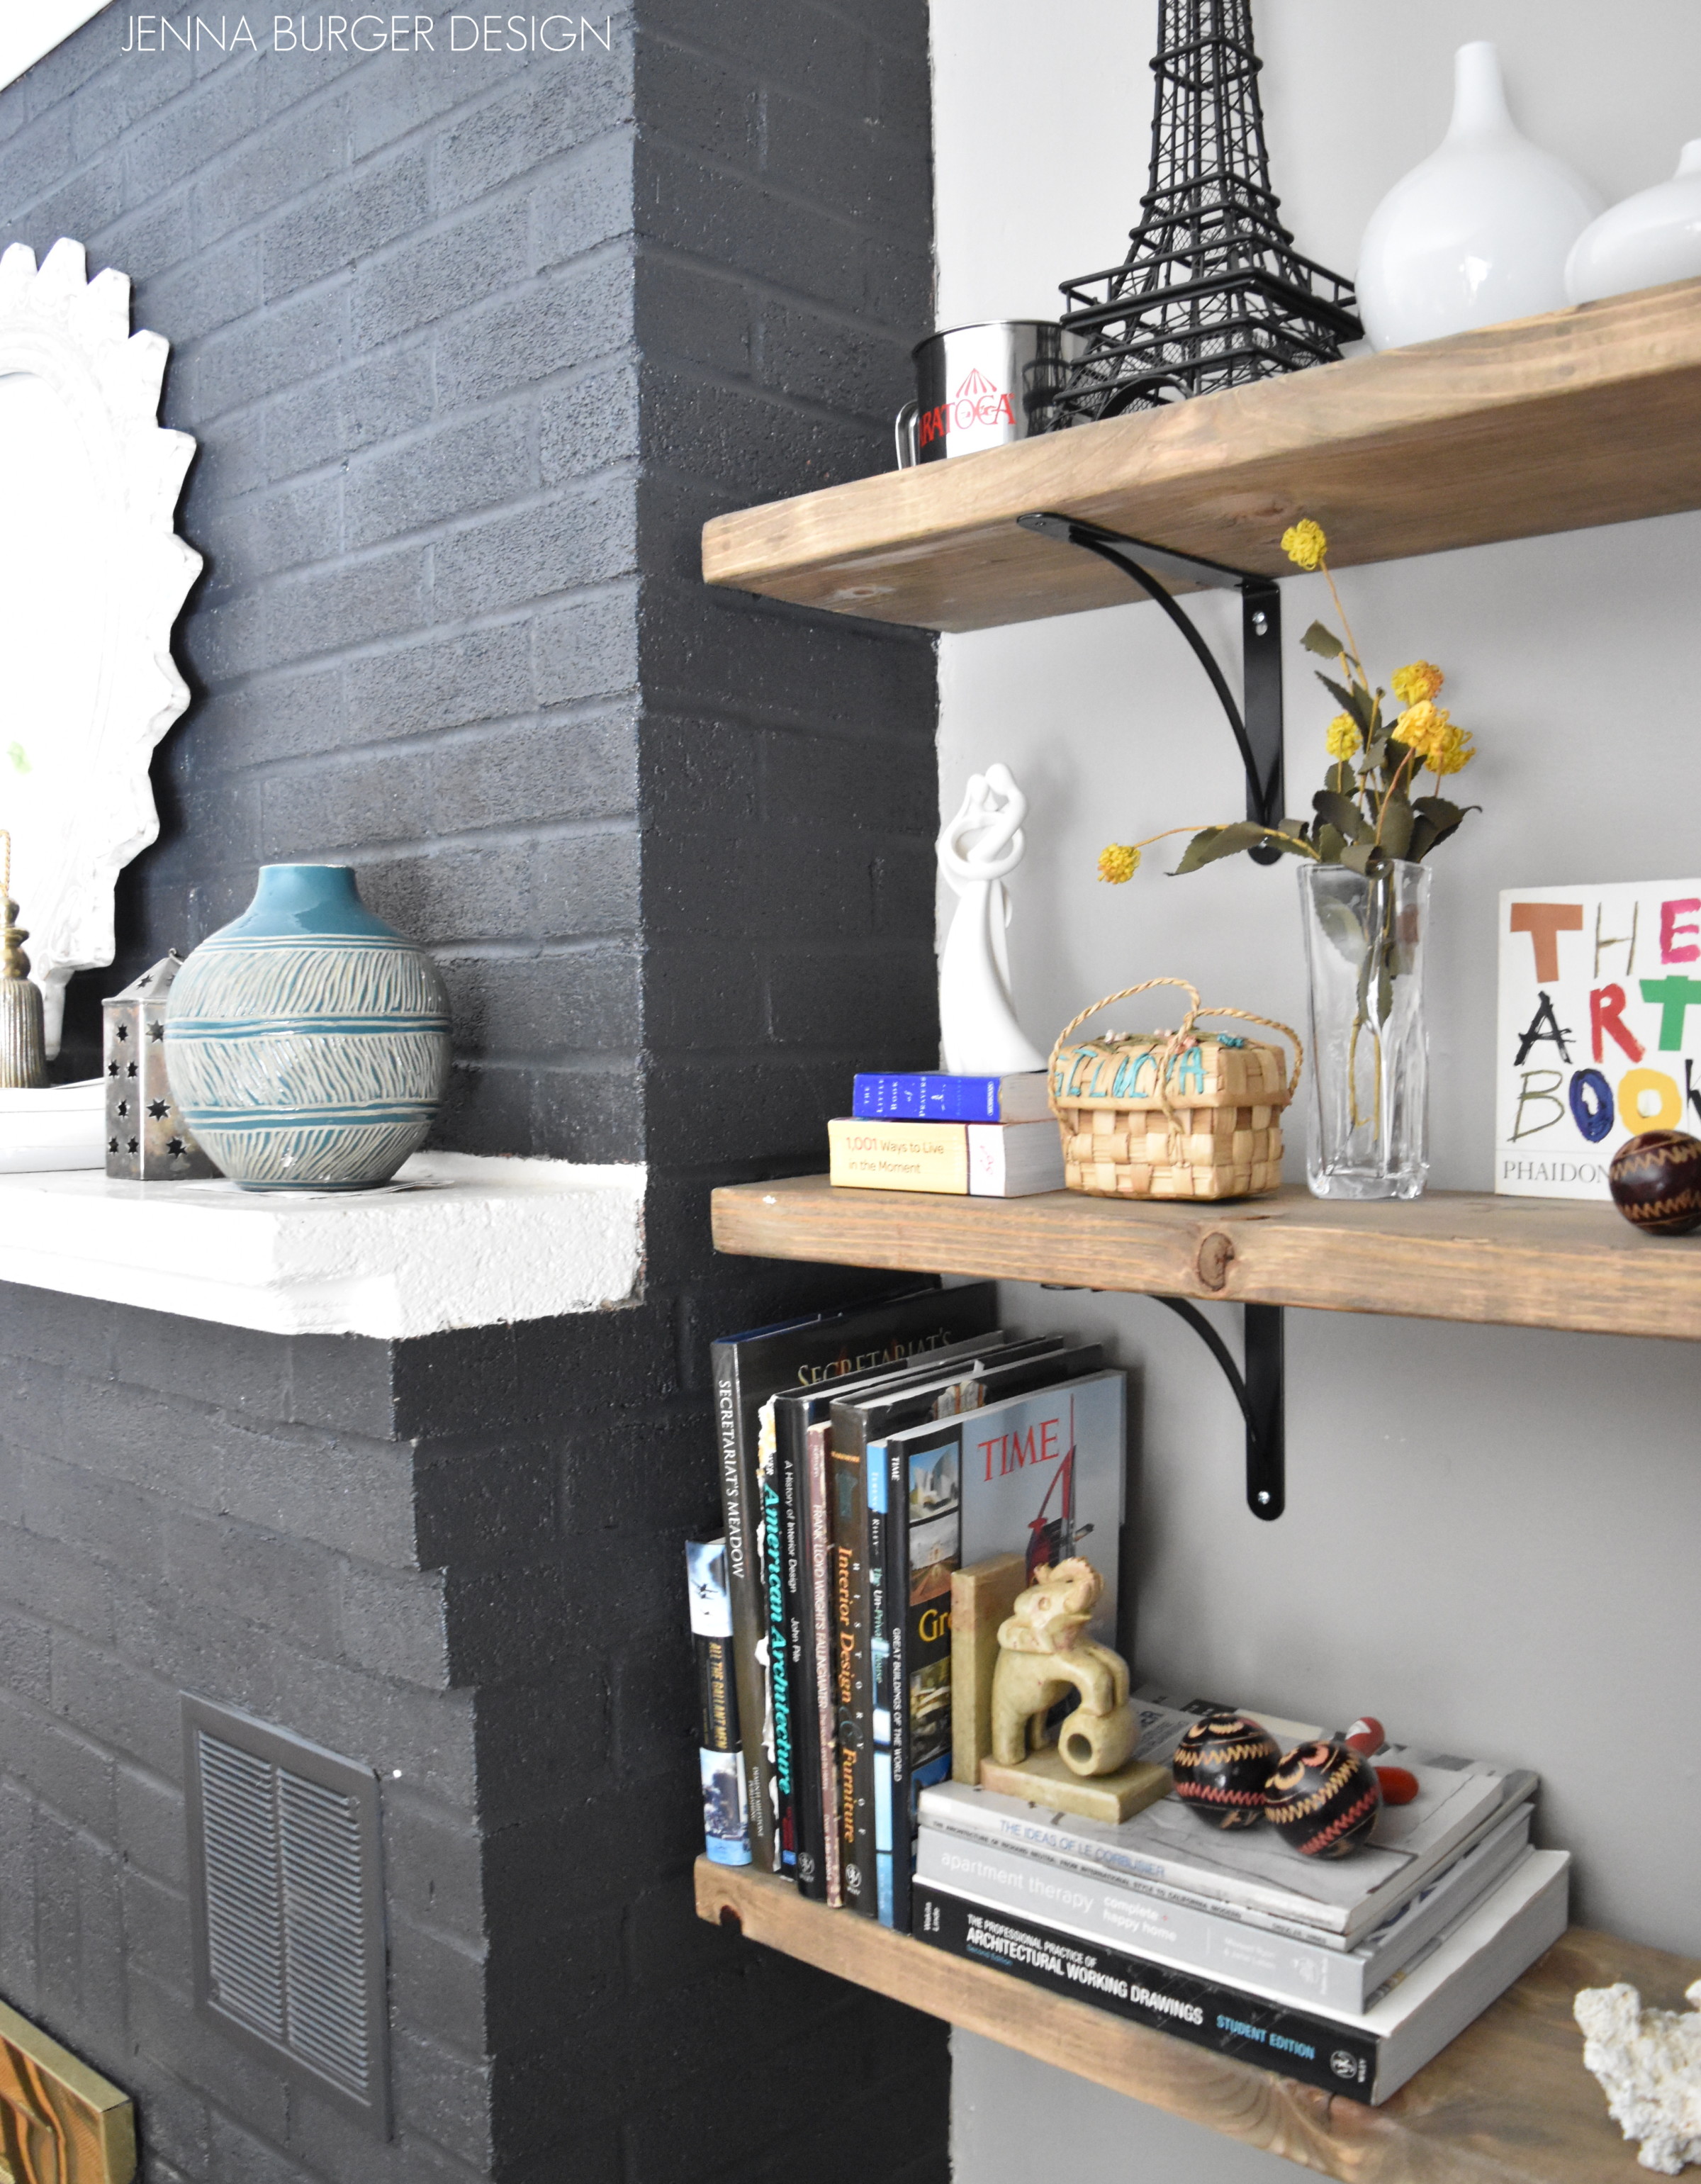
This is closeup of the finished brackets (I used regular screws and still have to paint the screw paints black).
3 / SHELVES – For the shelves, I chose 2×12 – I like the thicker look of the shelf.
When I purchased the wood at Lowes, I had them cut the boards to the desired length (about 1/2″ less than the exact wall length so there was some wiggle room to install the shelves in place).
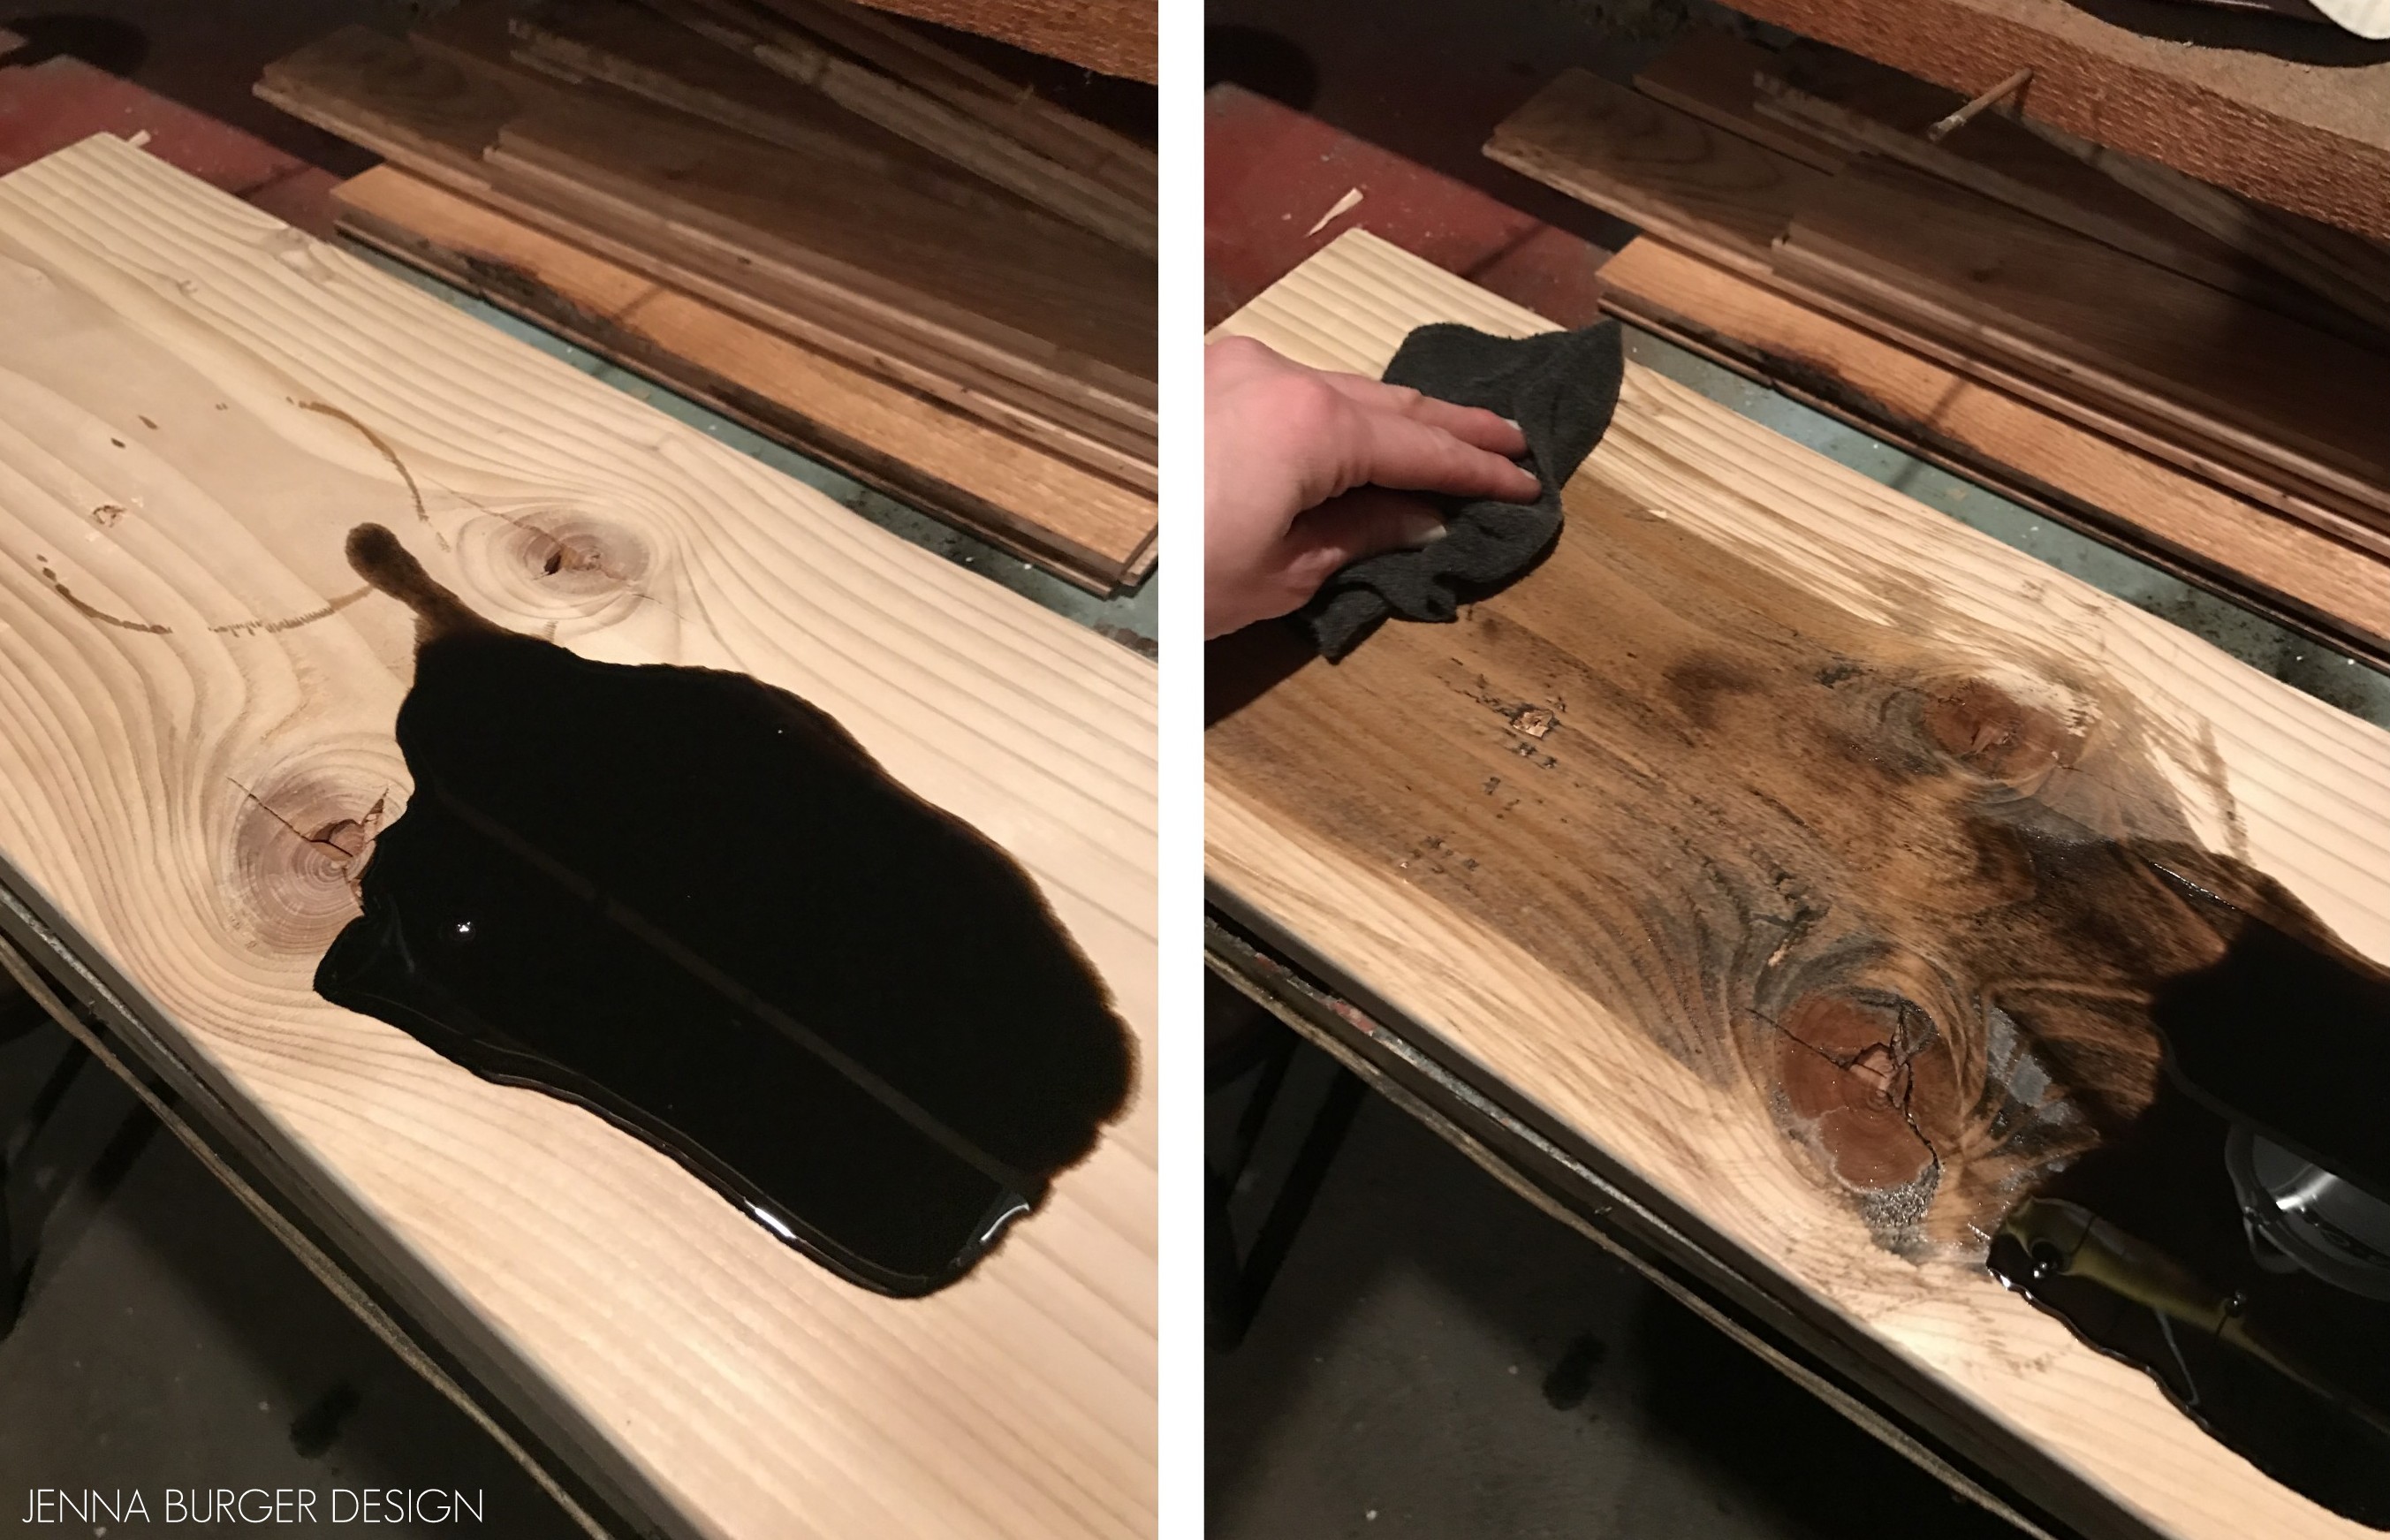
4 / STAIN – For the stain, I used special walnut, which is the perfect medium brown. I poured a small amount on the wood shelf and spread it out using a cloth. I covered the entire board (all sides) with the stain. In about 10 minutes all 4 boards were stained. The process is really easy.
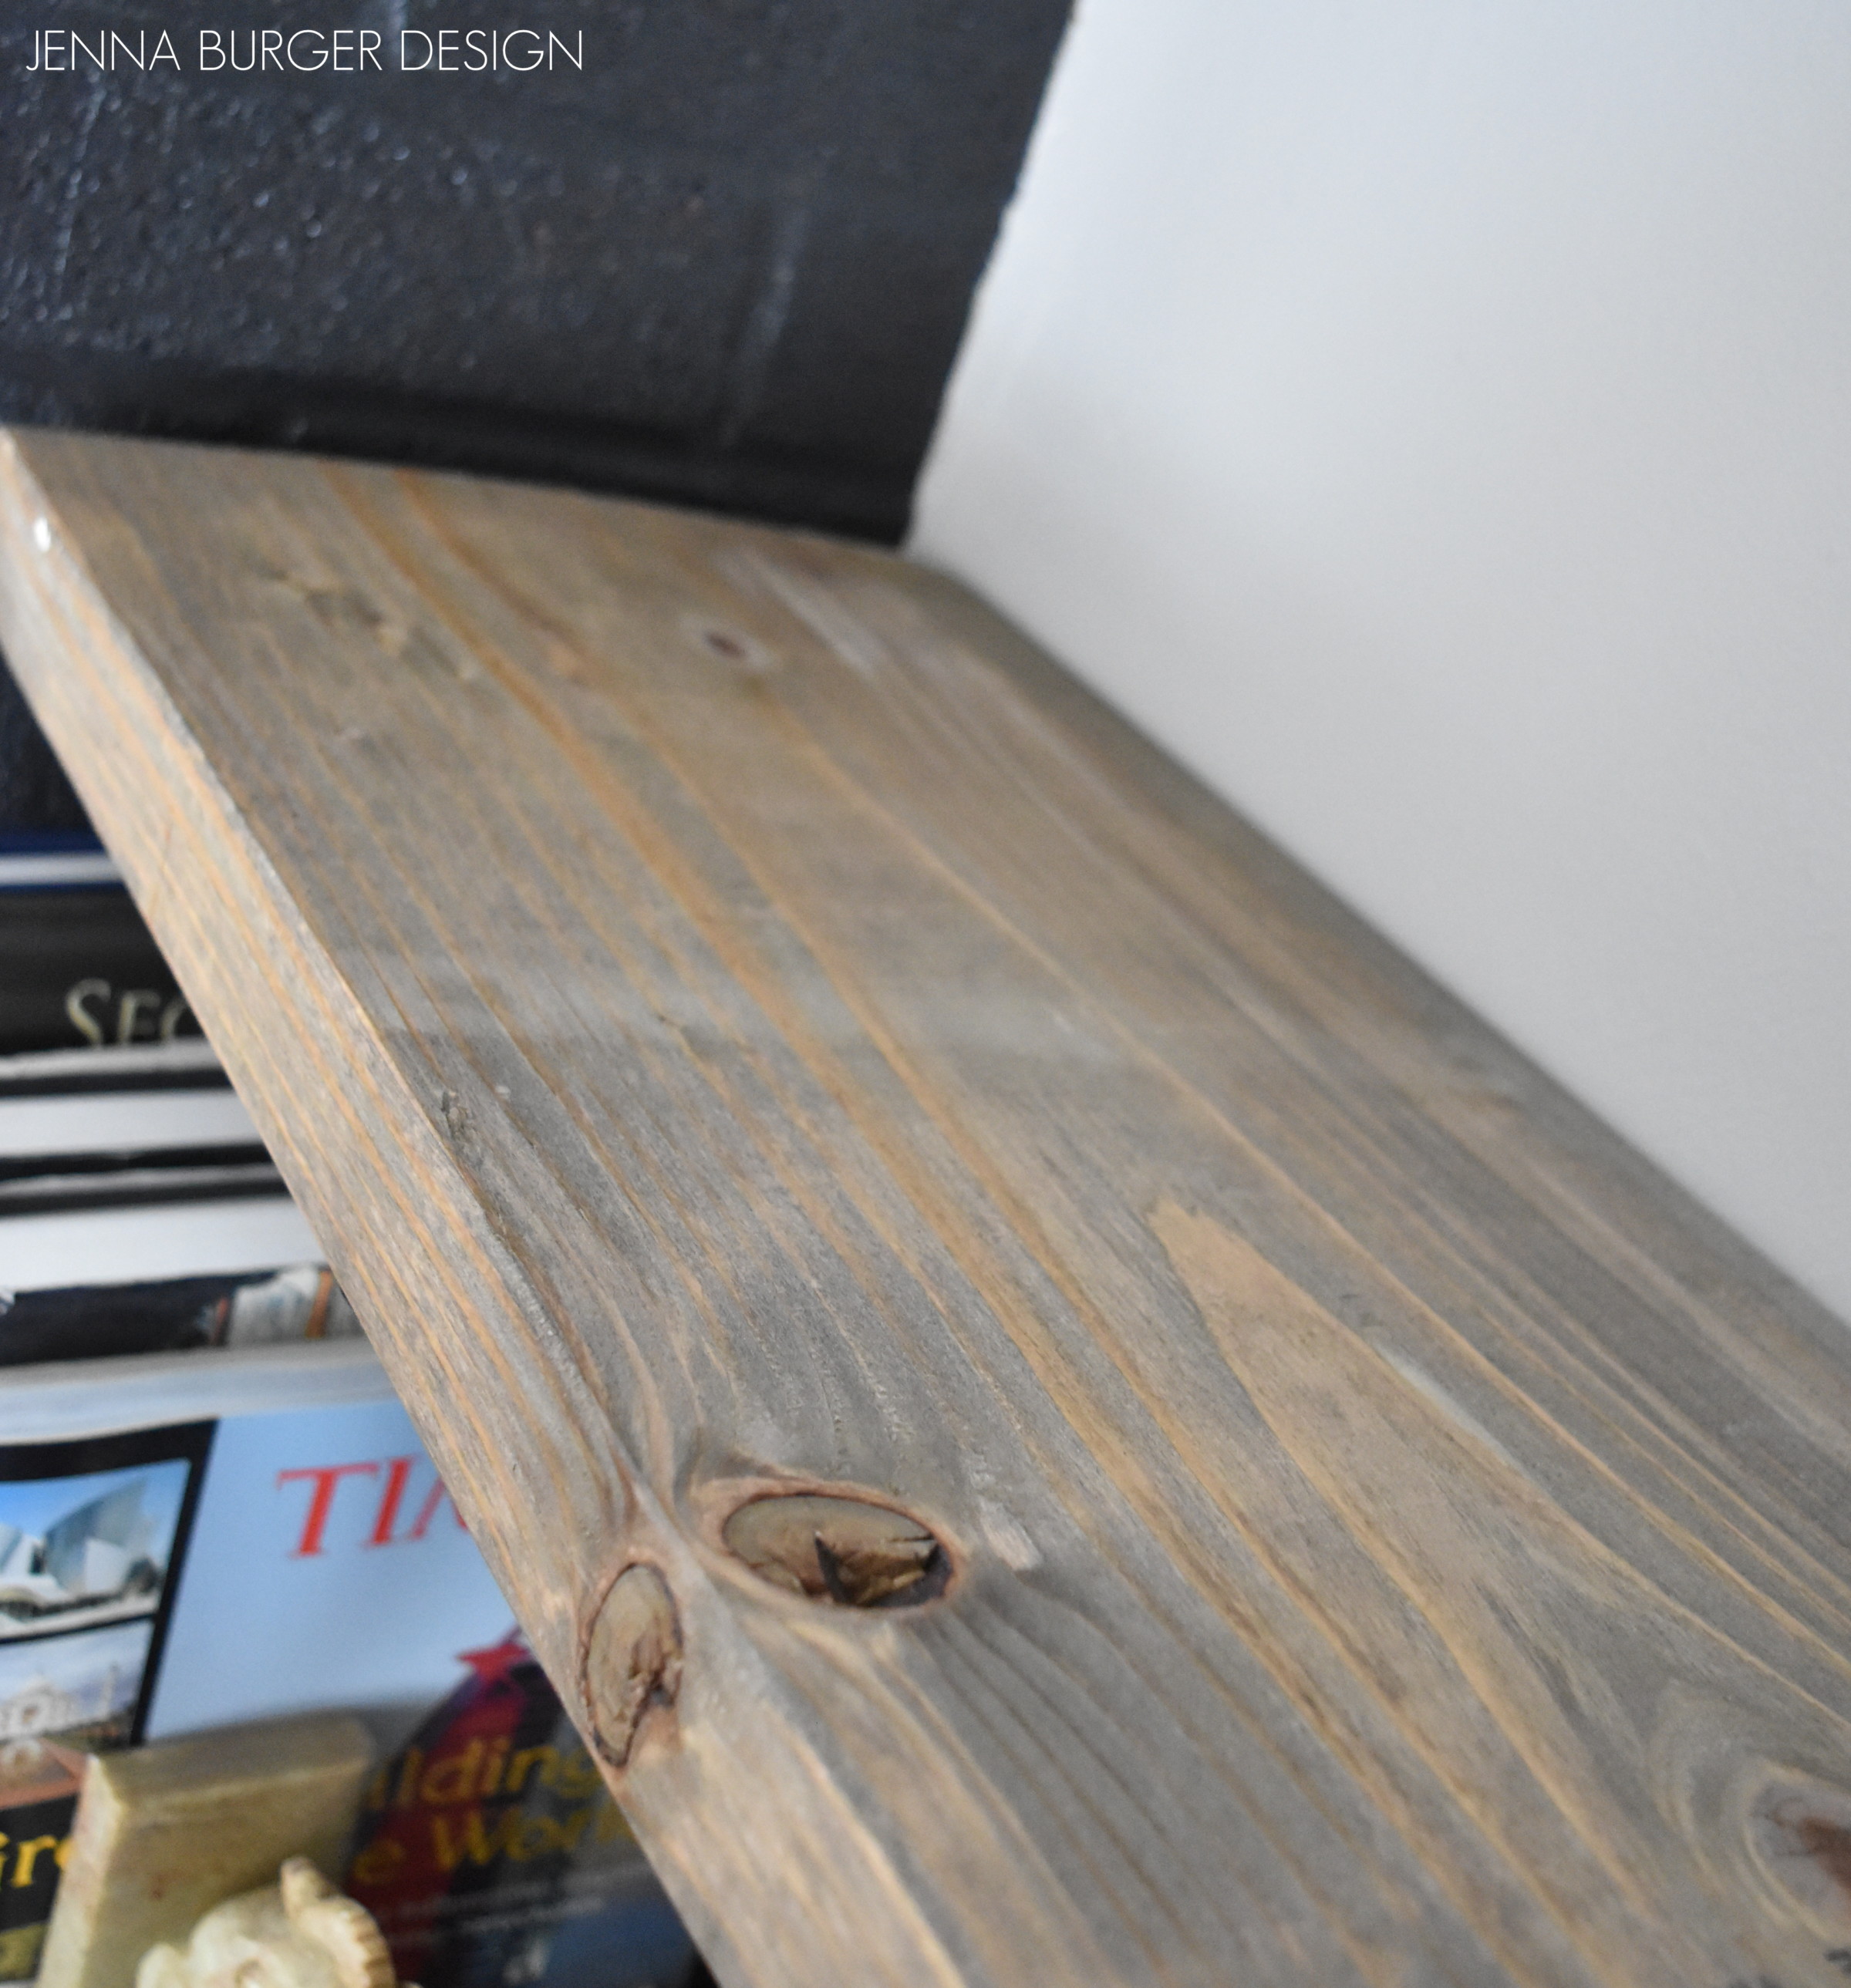
This is a closeup of the finished shelf in place…
5 / INSTALL – With the brackets in place and the shelves stained, the project was almost complete. The last step was to set the shelves in place. The shelves were set on to the brackets and screwed in place to the underside of the wood.
Done! This project – start to finish – took about one hour and was fairly easy to execute. The important part is to ensure the proper anchors + screws are used so the brackets are secure!
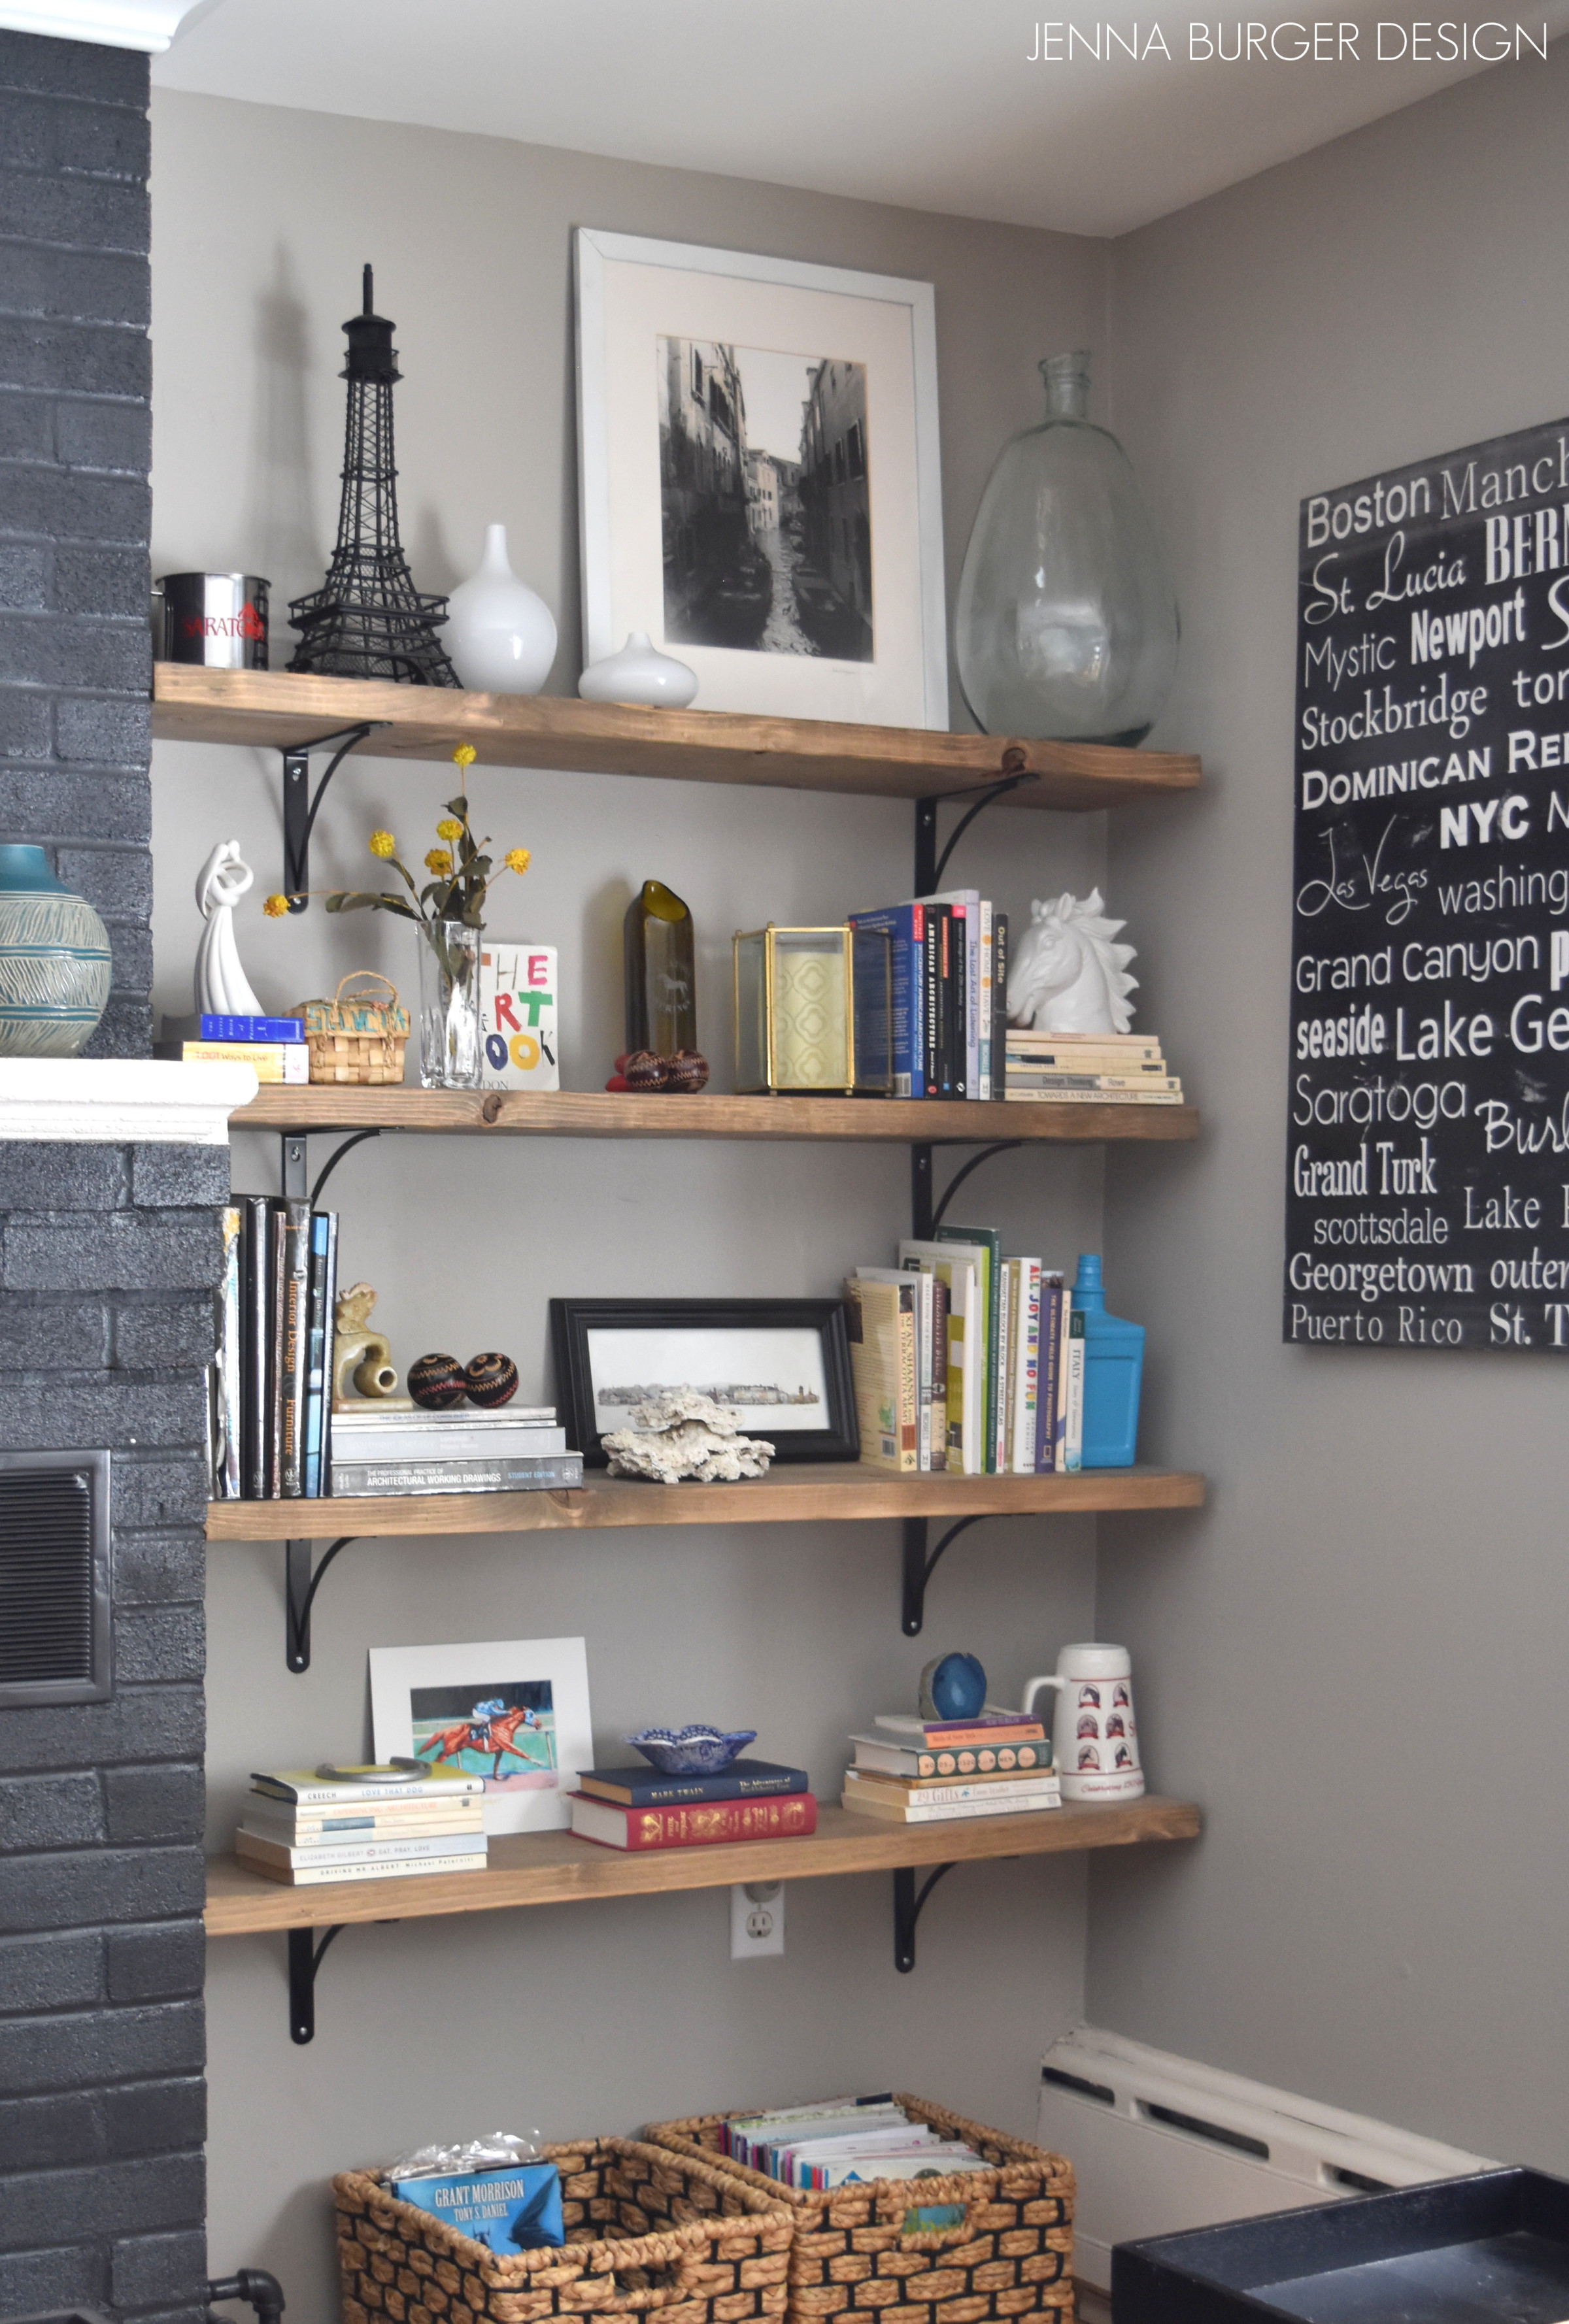
This is the finished result…
Definitely a big change from when we moved in and the space looked like this…
And now to this…
Next up is sharing pictures of the entire finished room… Maybe another post for January?!?
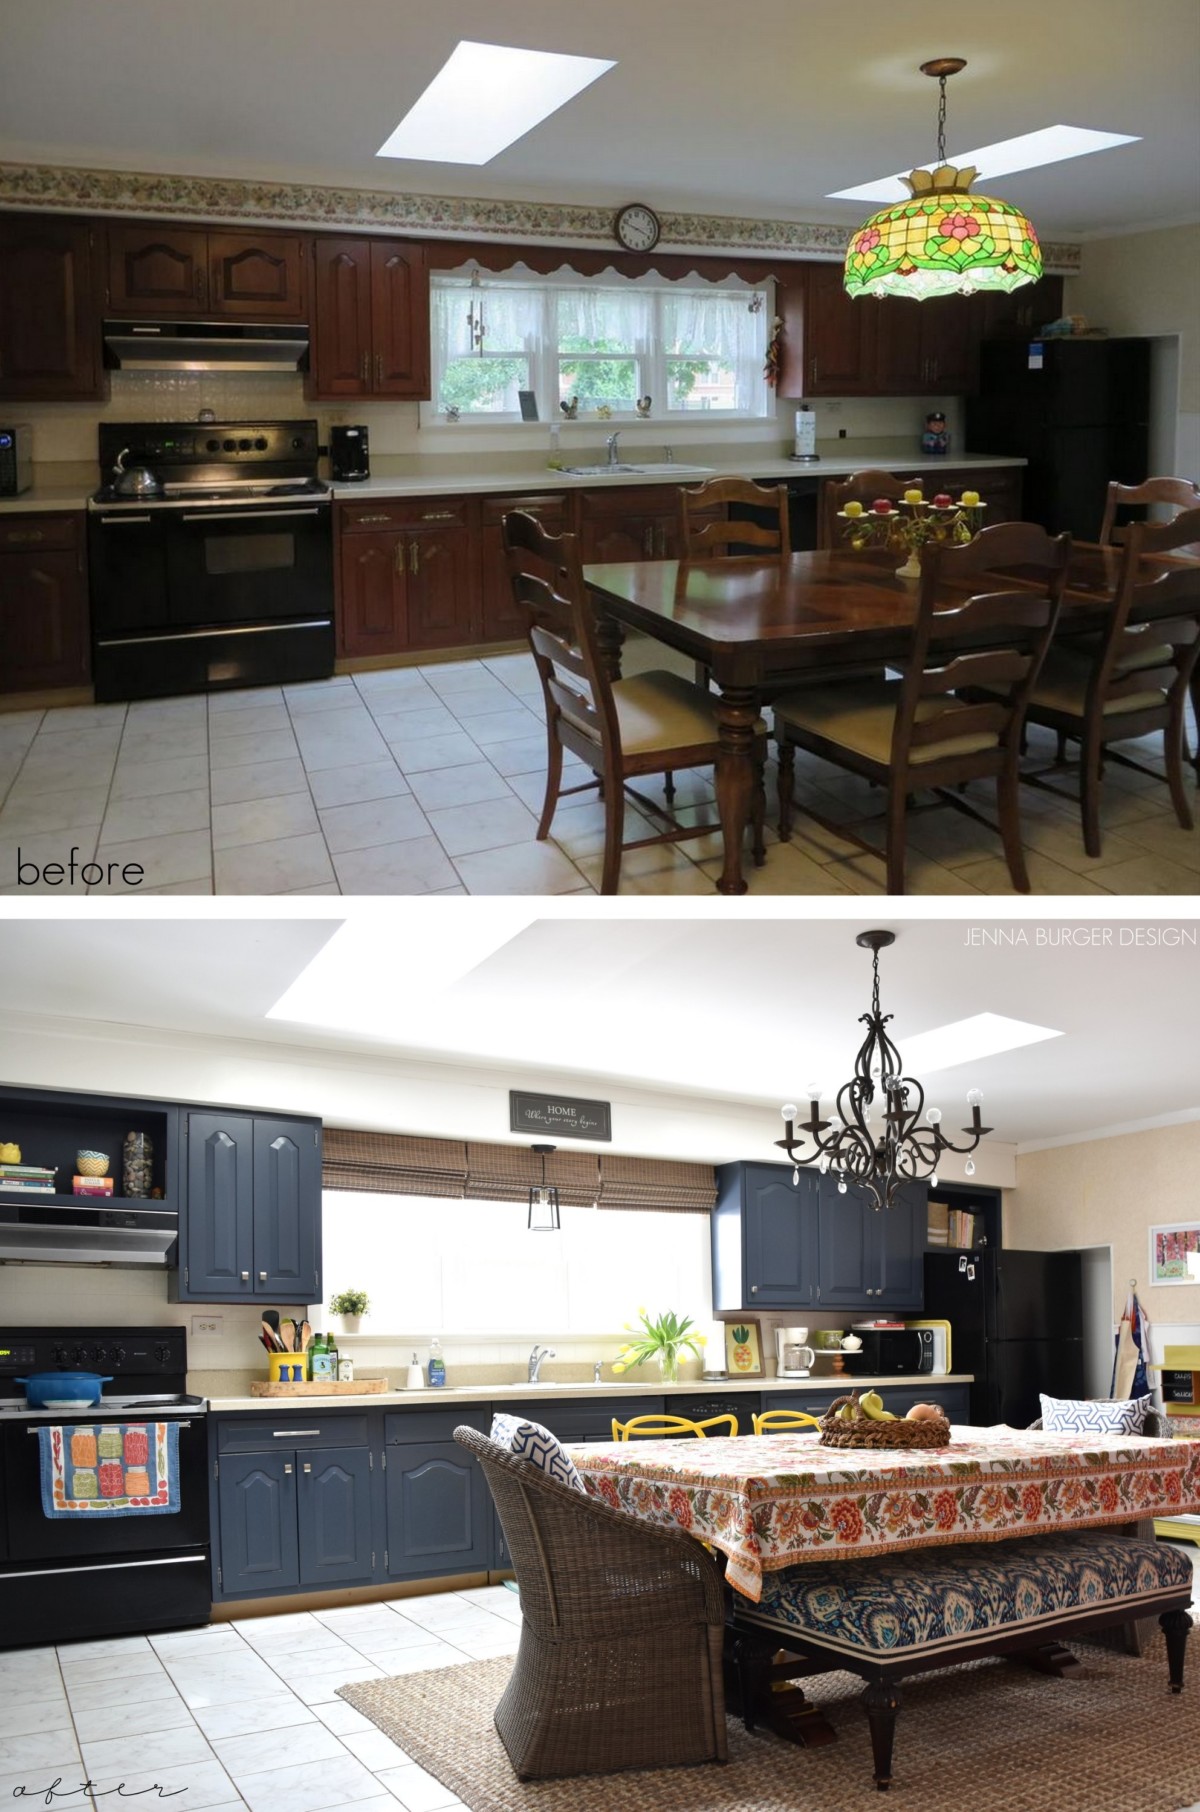
It’s been quite the process, but I am so excited to finally share the reveal of the DIY kitchen cabinet makeover. The steps to transforming the kitchen cabinets started when we first purchased our brick ranch fixer upper in the late Fall.
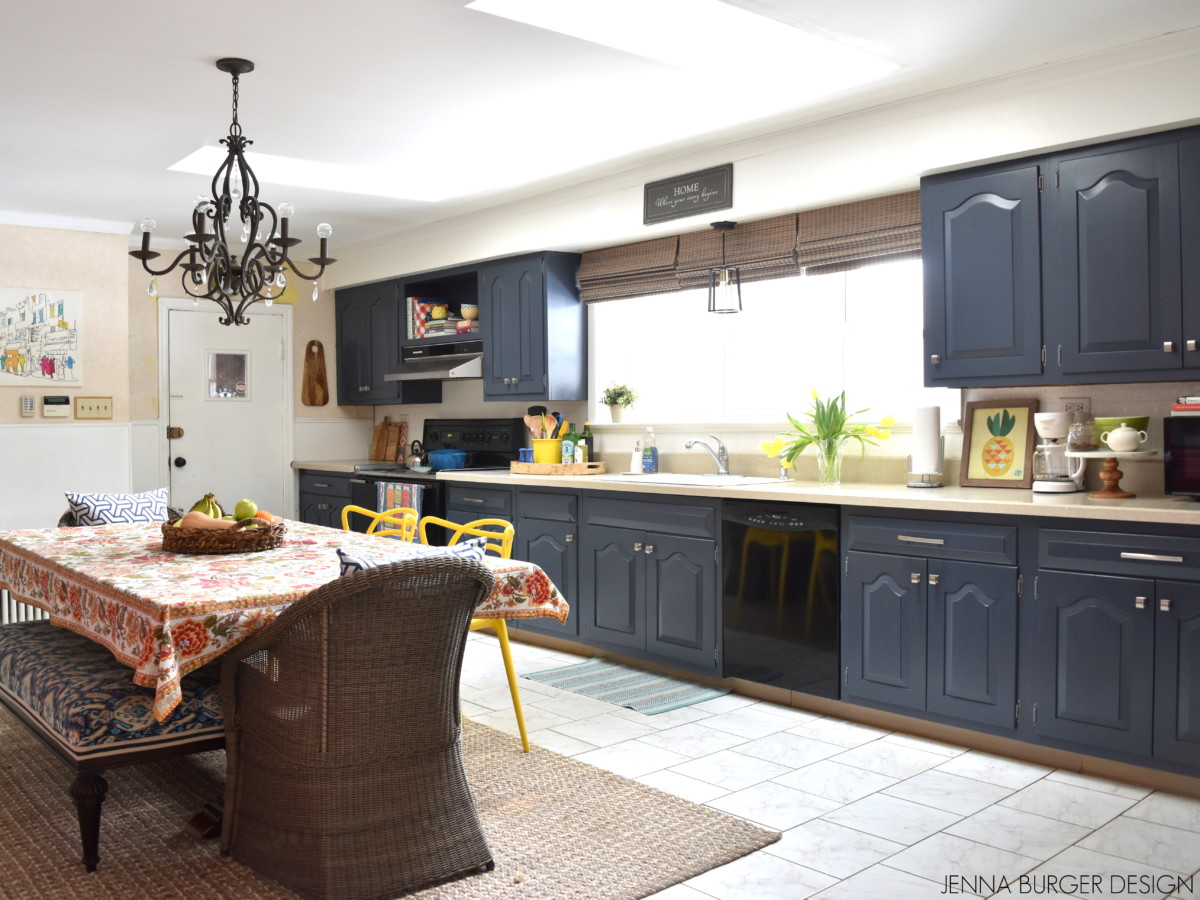
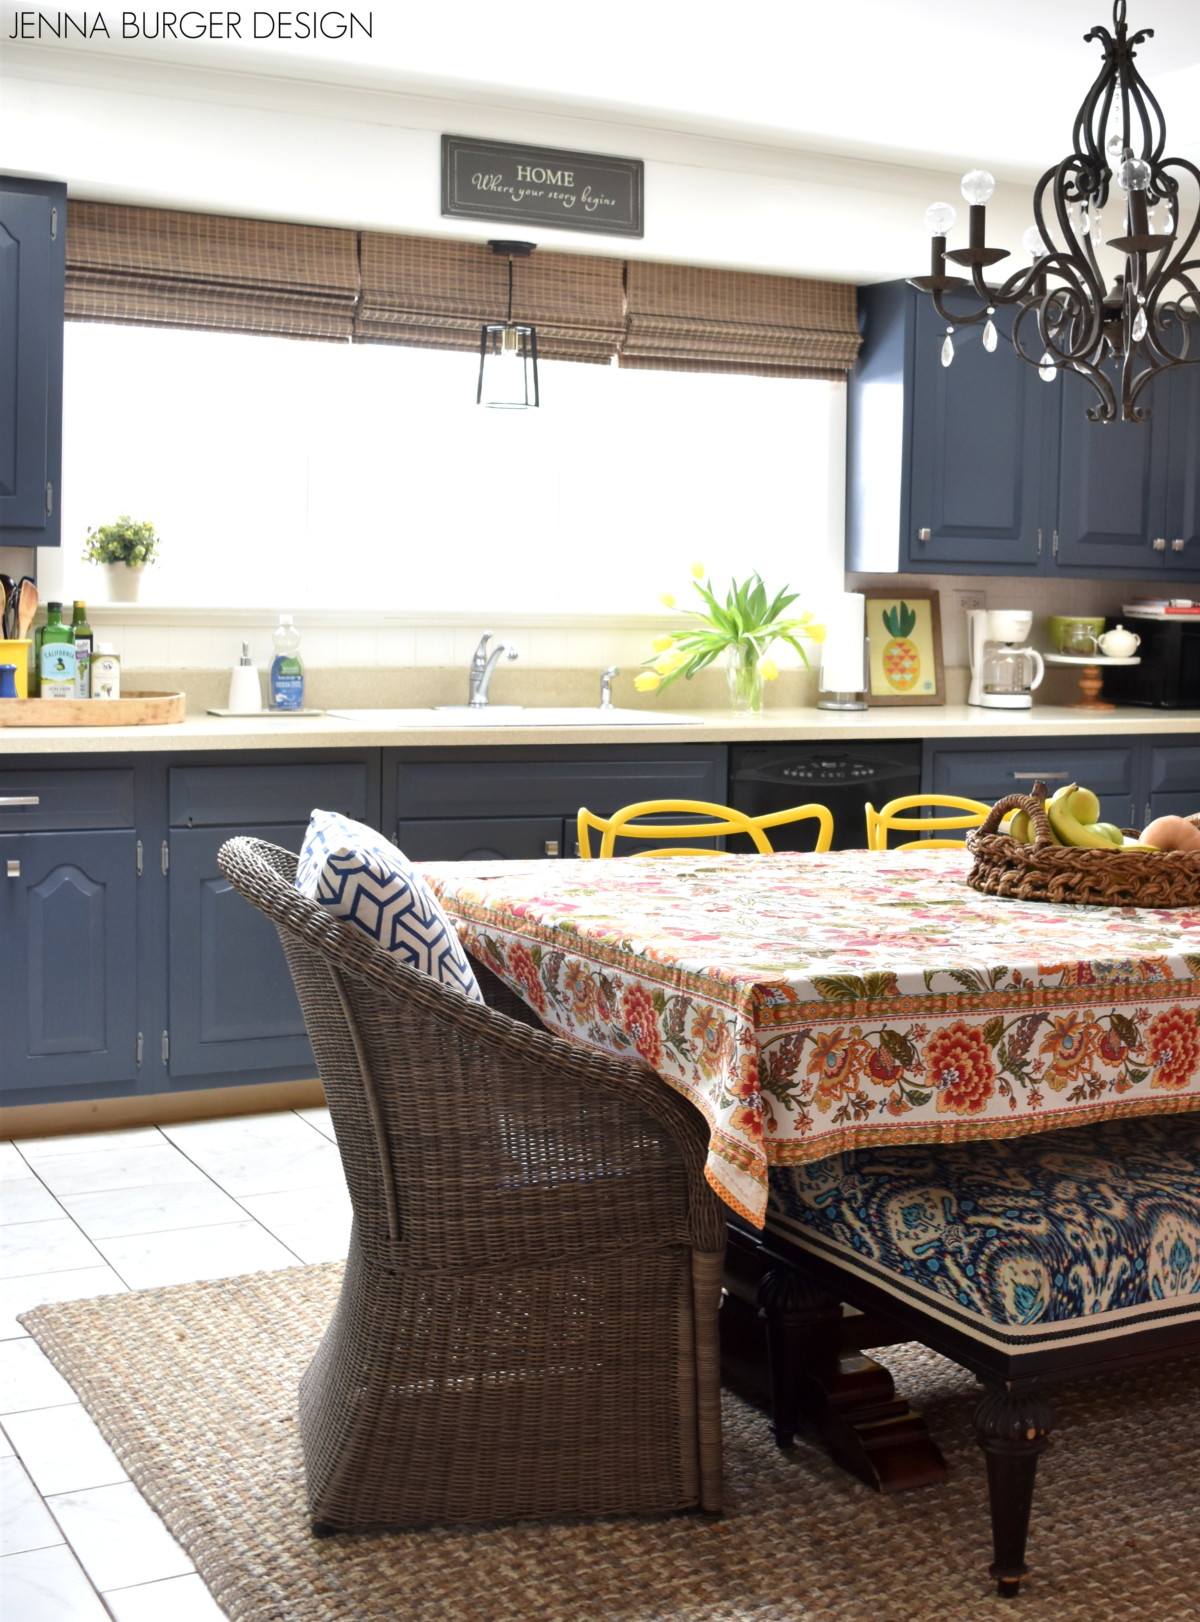
This is the result of the kitchen cabinet makeover…
Alot went into this do it yourself kitchen makeover, but there is still more to tackle in the space – more on that later. For the moment, let’s take a look at what has been accomplished.
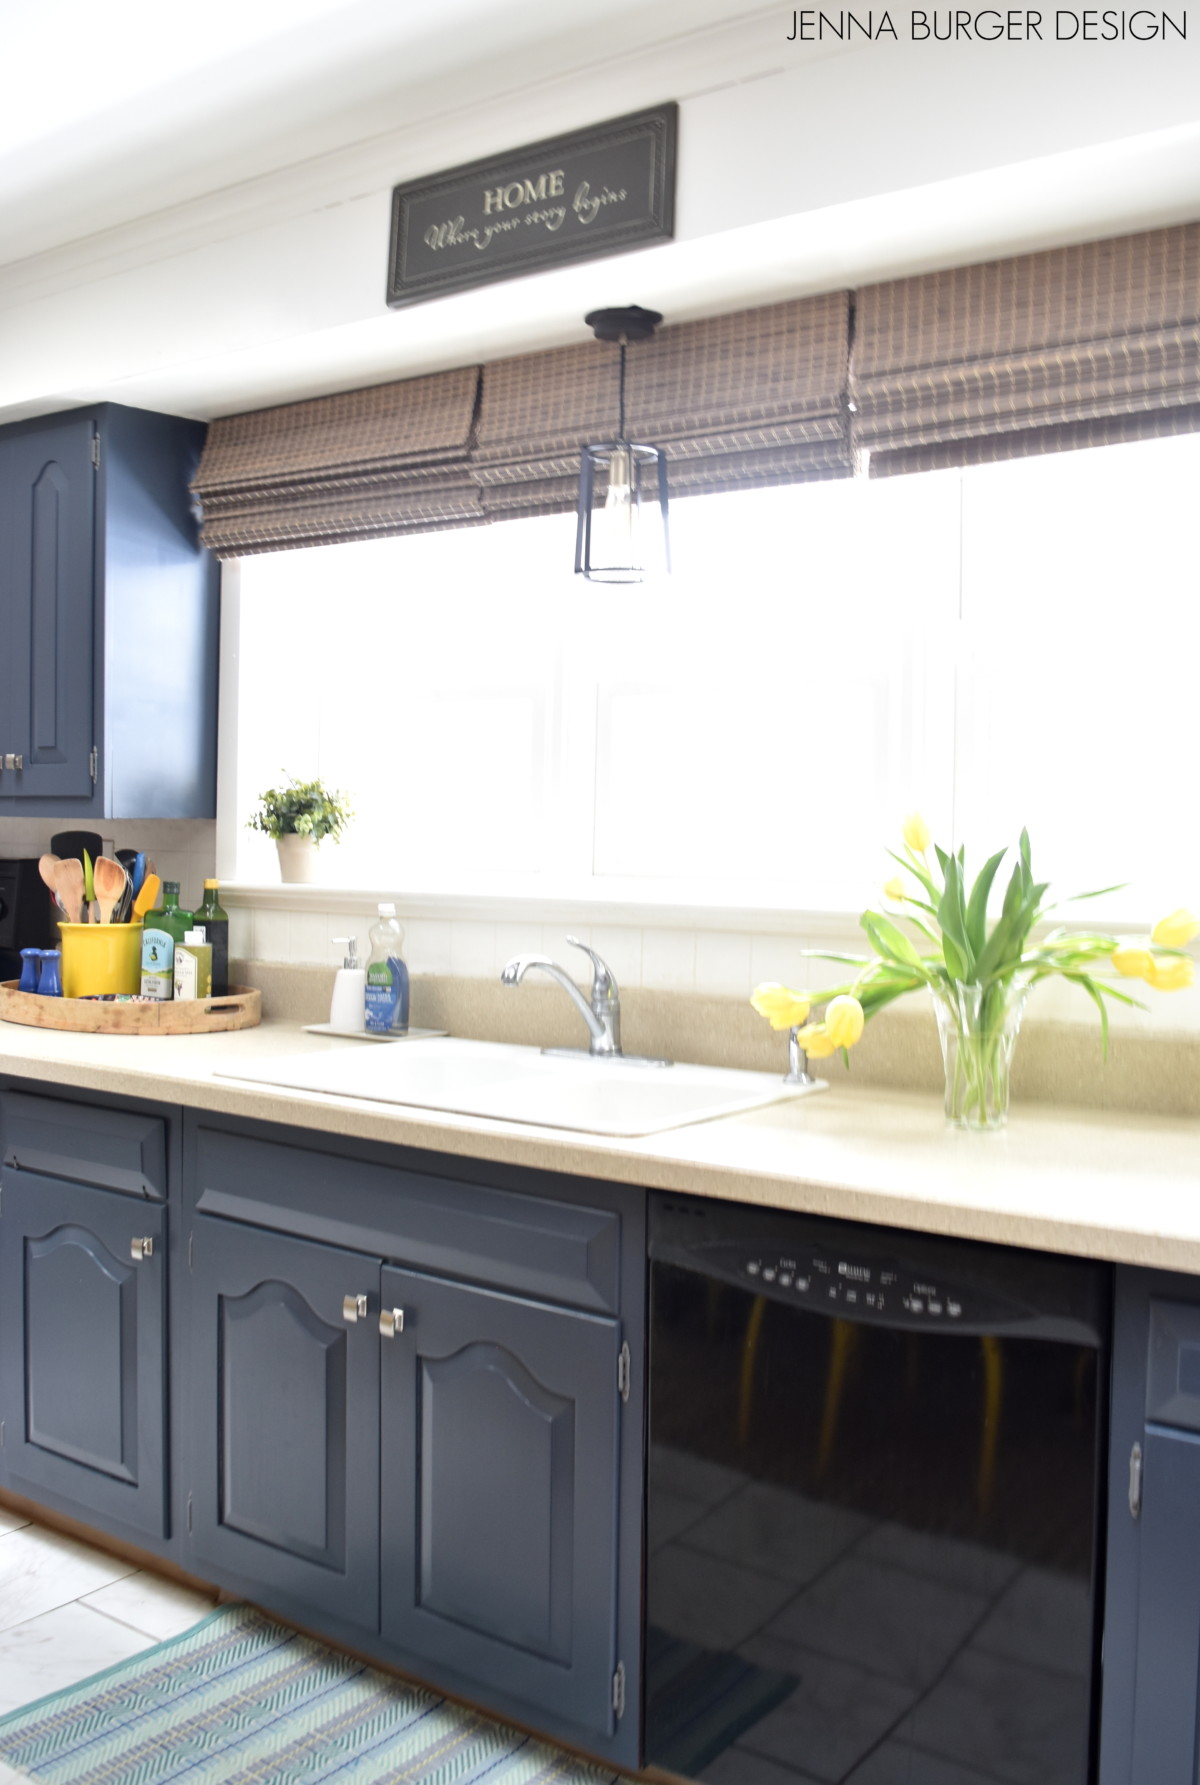
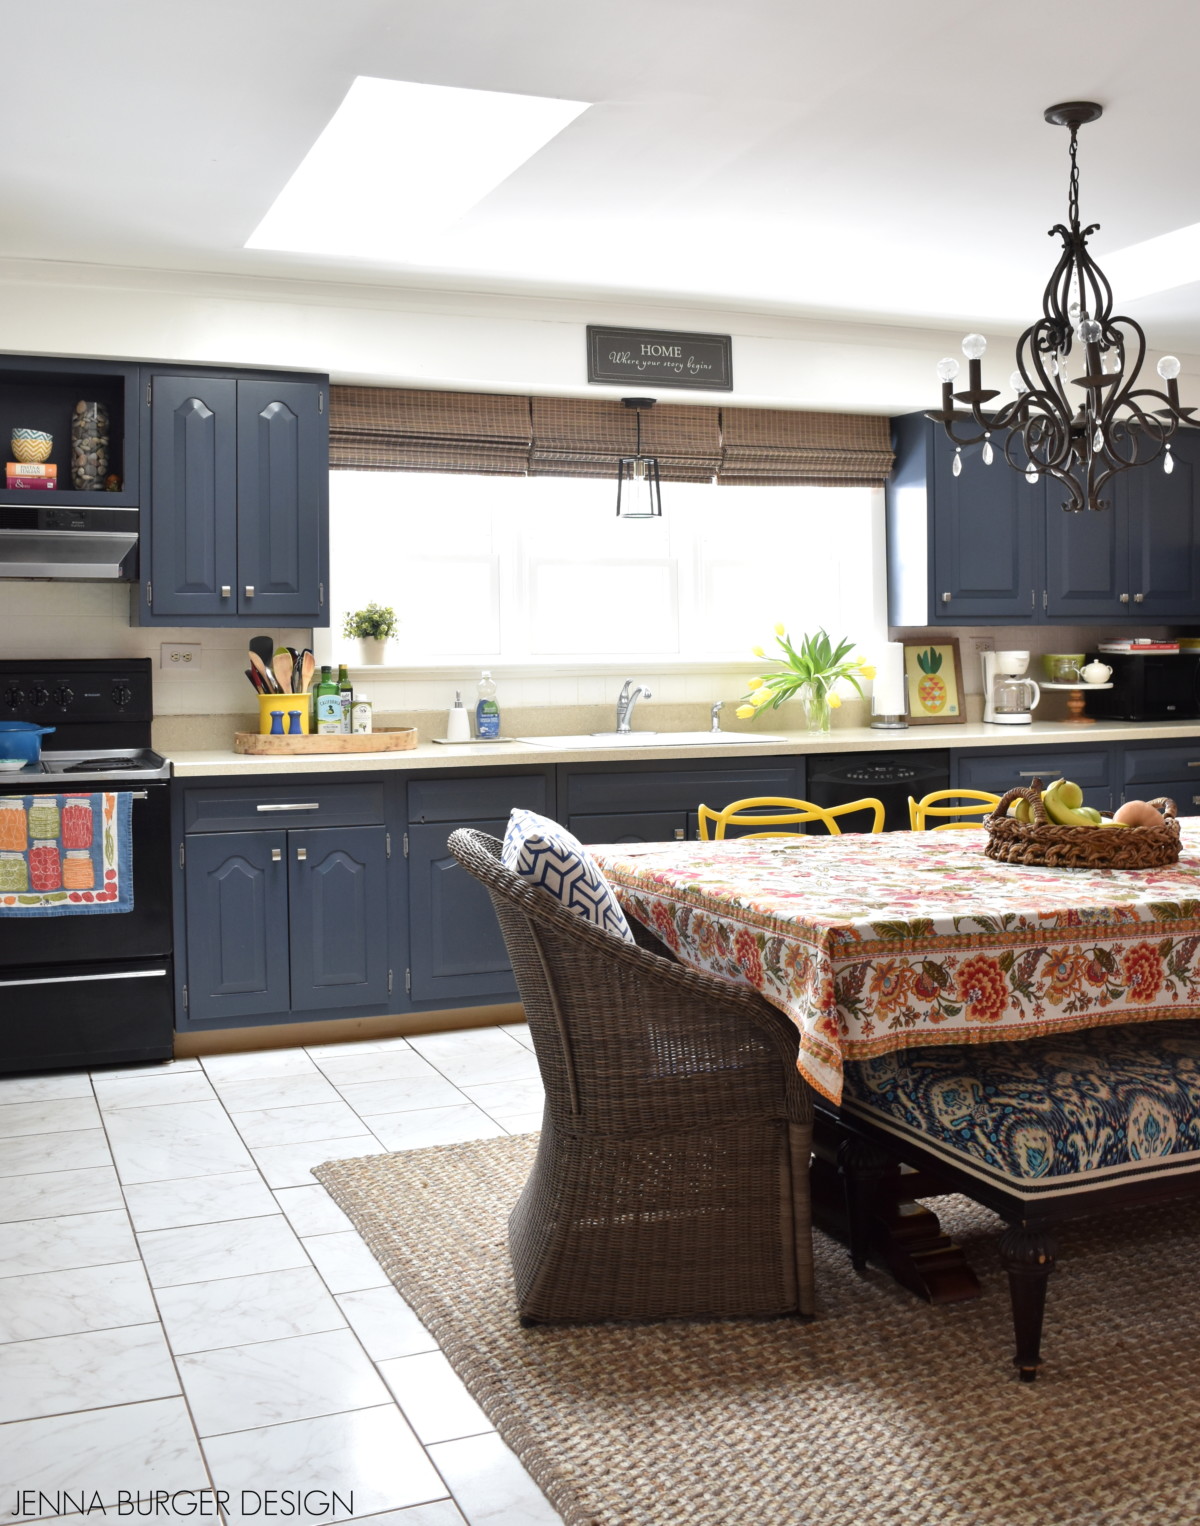
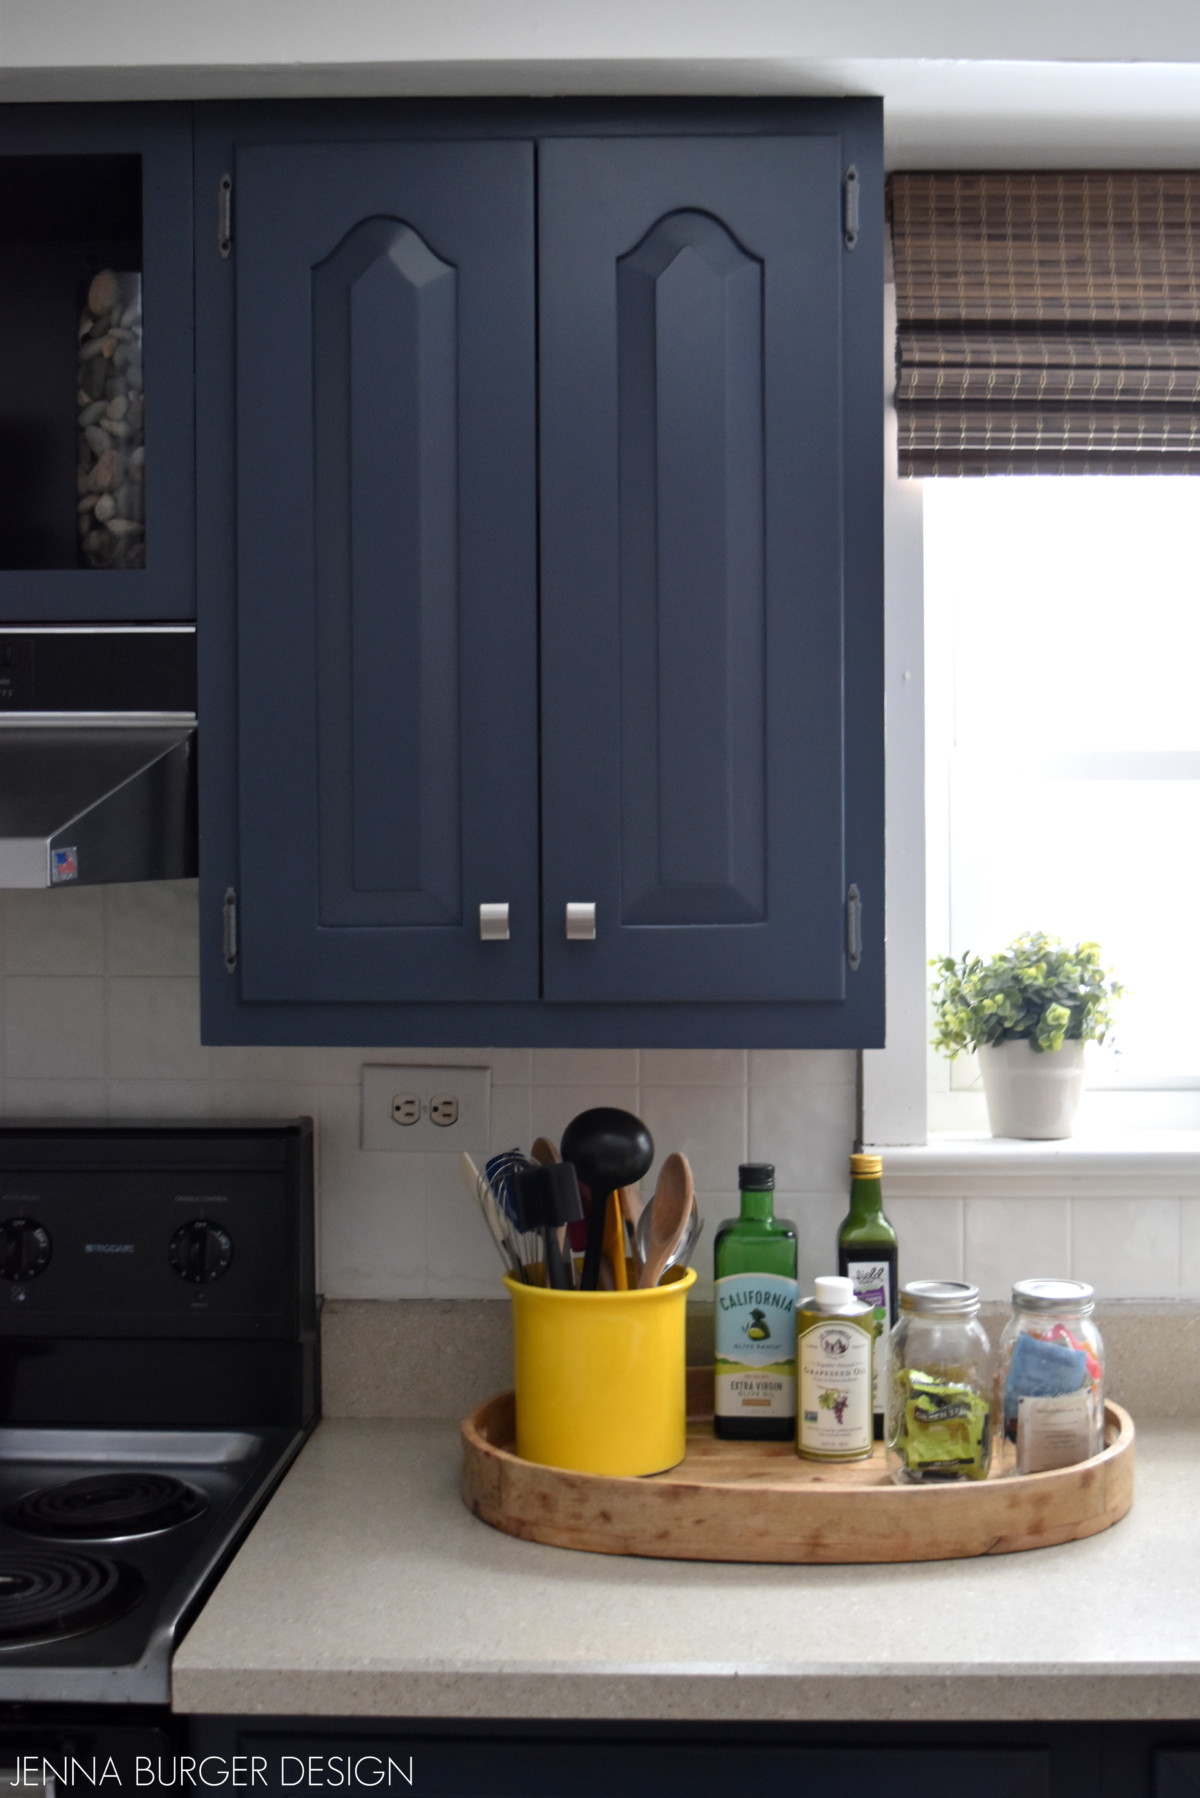
Despite the dark color on the cabinets, the space feels light + bright with the other lighter hues in the room. The window draws in beautiful natural light, along with the two skylights in the ceiling. The space is also offset by many lighter tones including a light brown laminate countertop, white subway tile, a light colored floor, and white paneling around the room – all of which is existing.
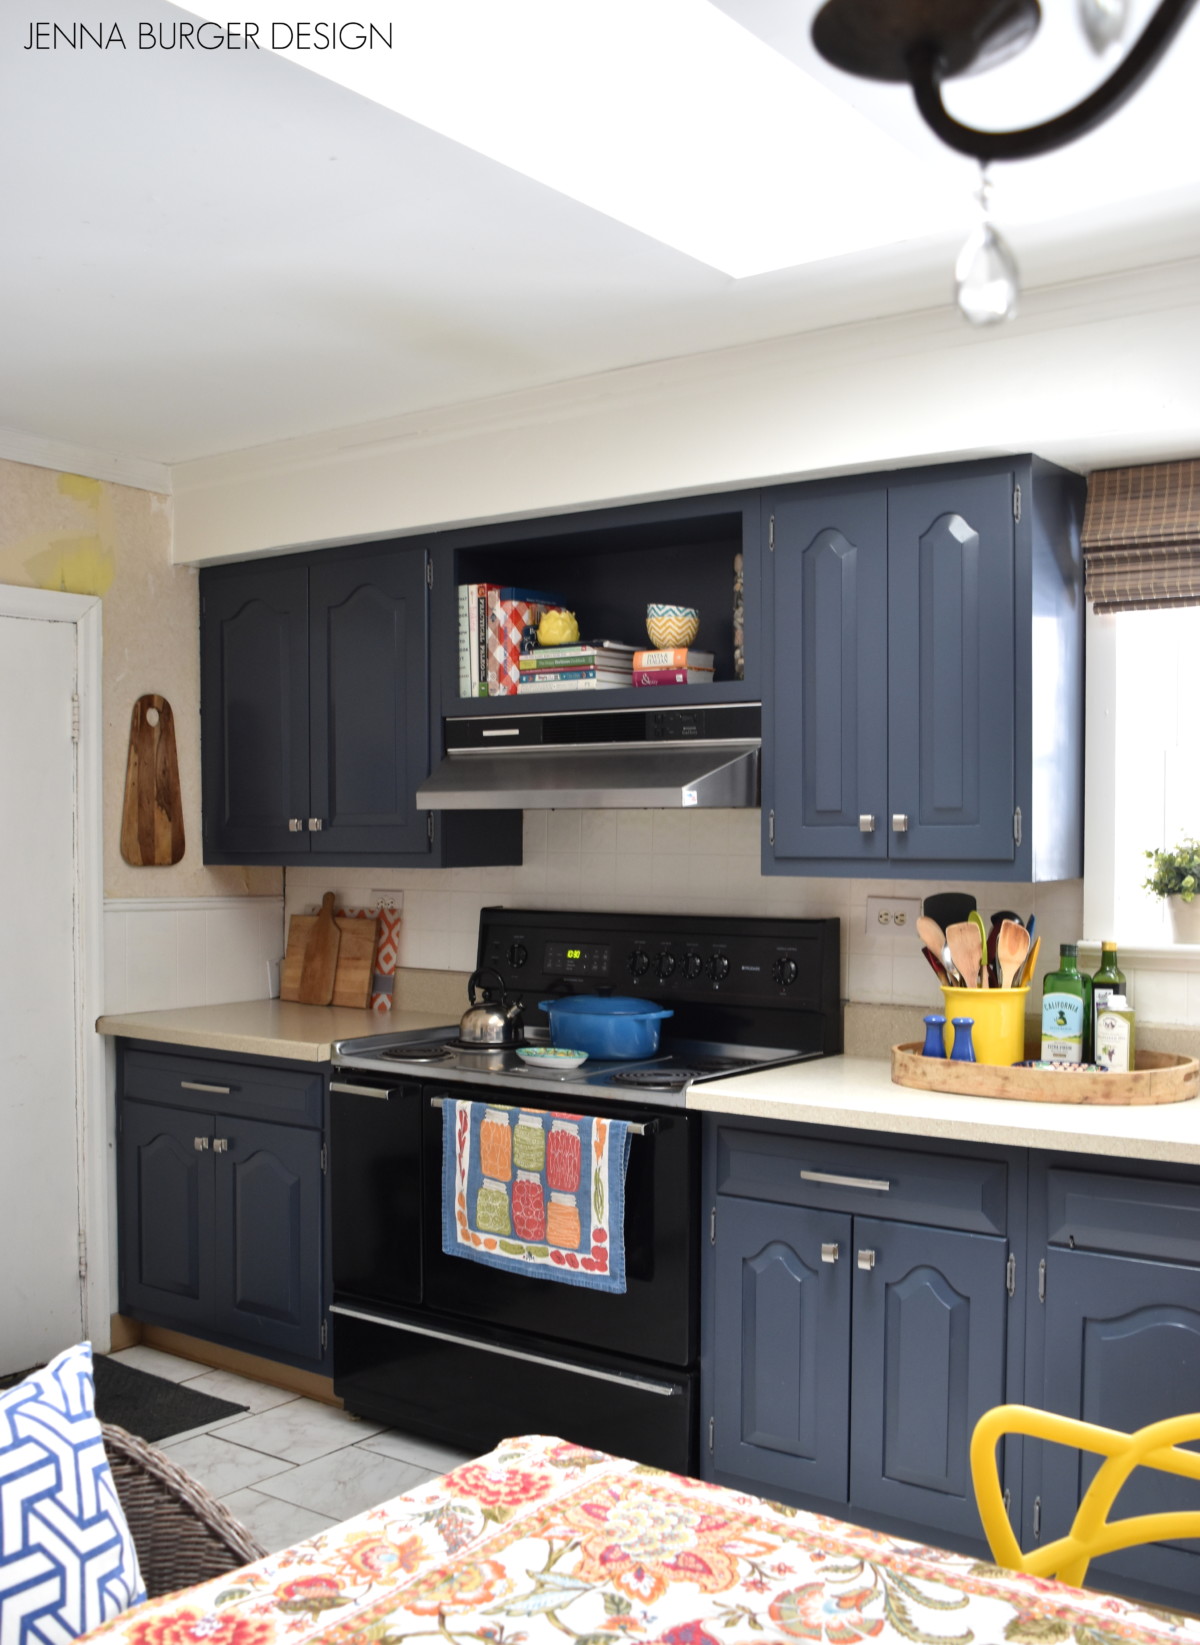
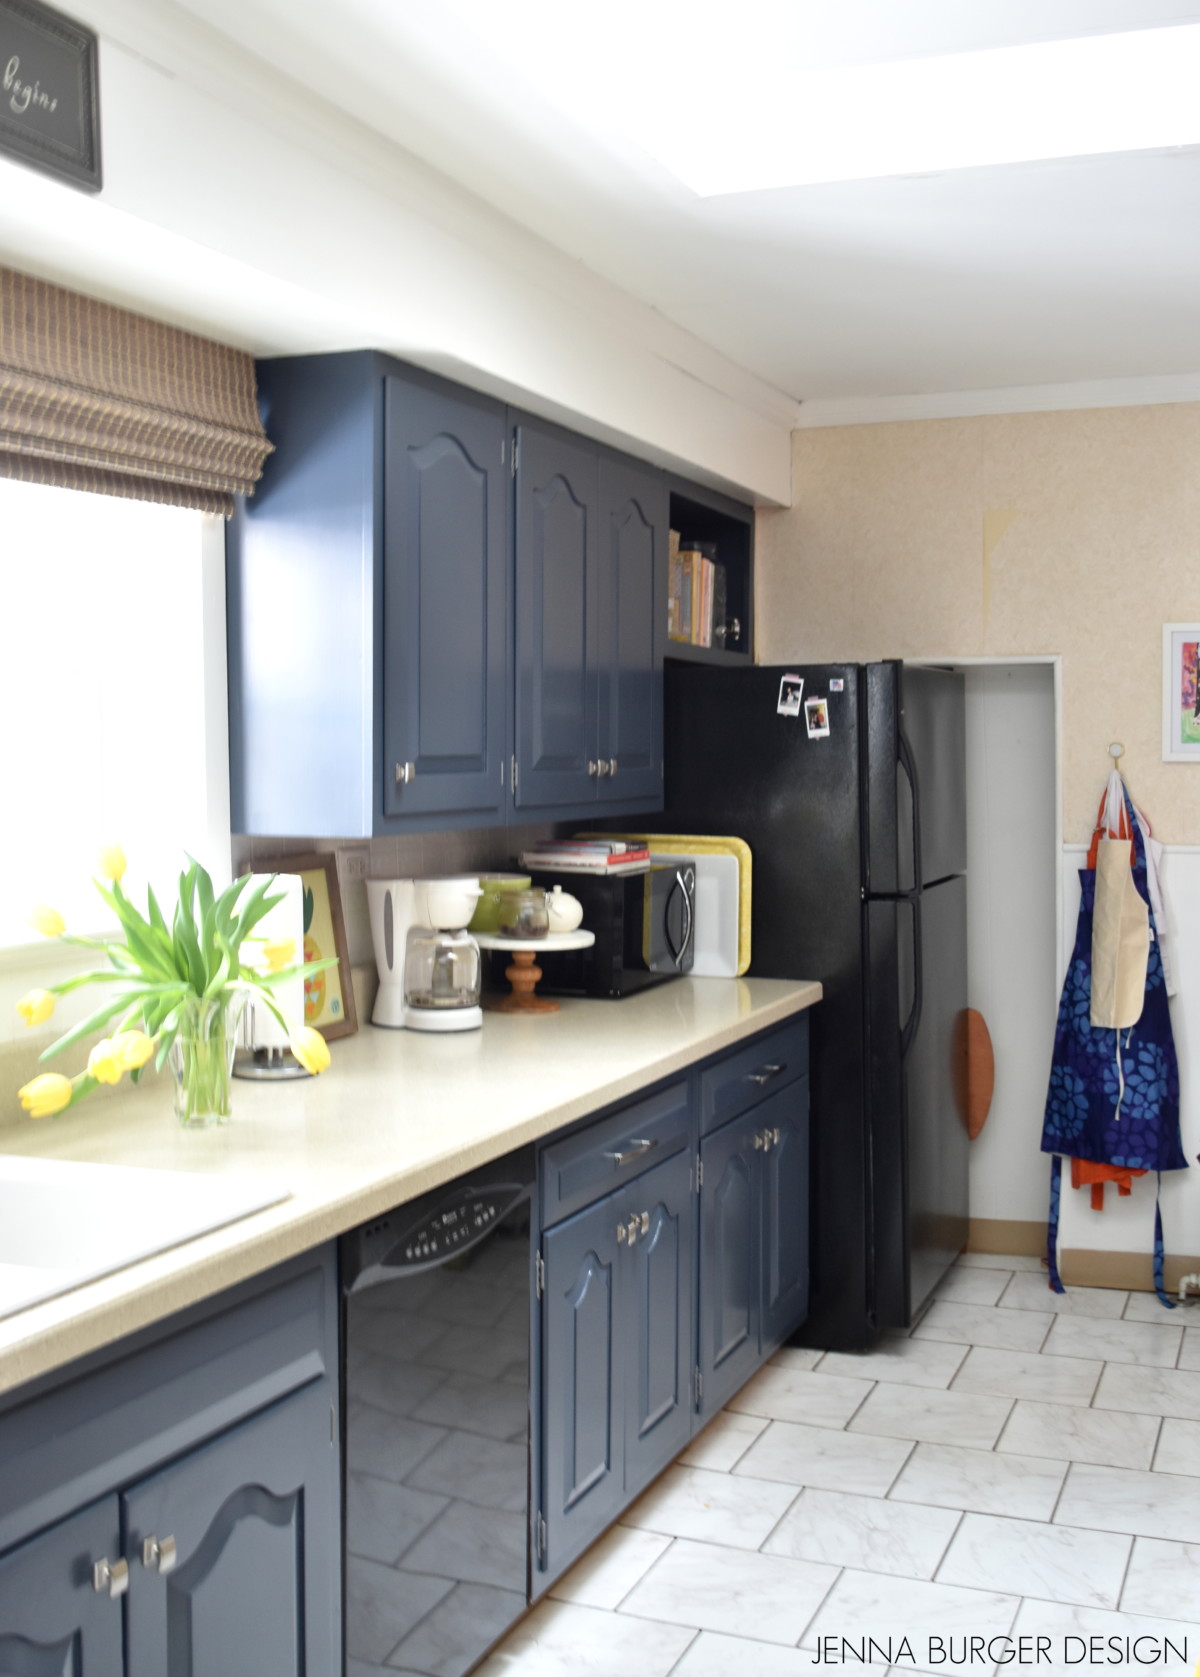
Aside from loving this deep moody hue, one of the reasons I thought the navy color would work well was to conceal the black appliances. They aren’t overly attractive (ie: they’re old and will eventually need replacing) so I thought a dark cabinet color would make the appliances blend in versus adding contrast as light or white cabinets would.
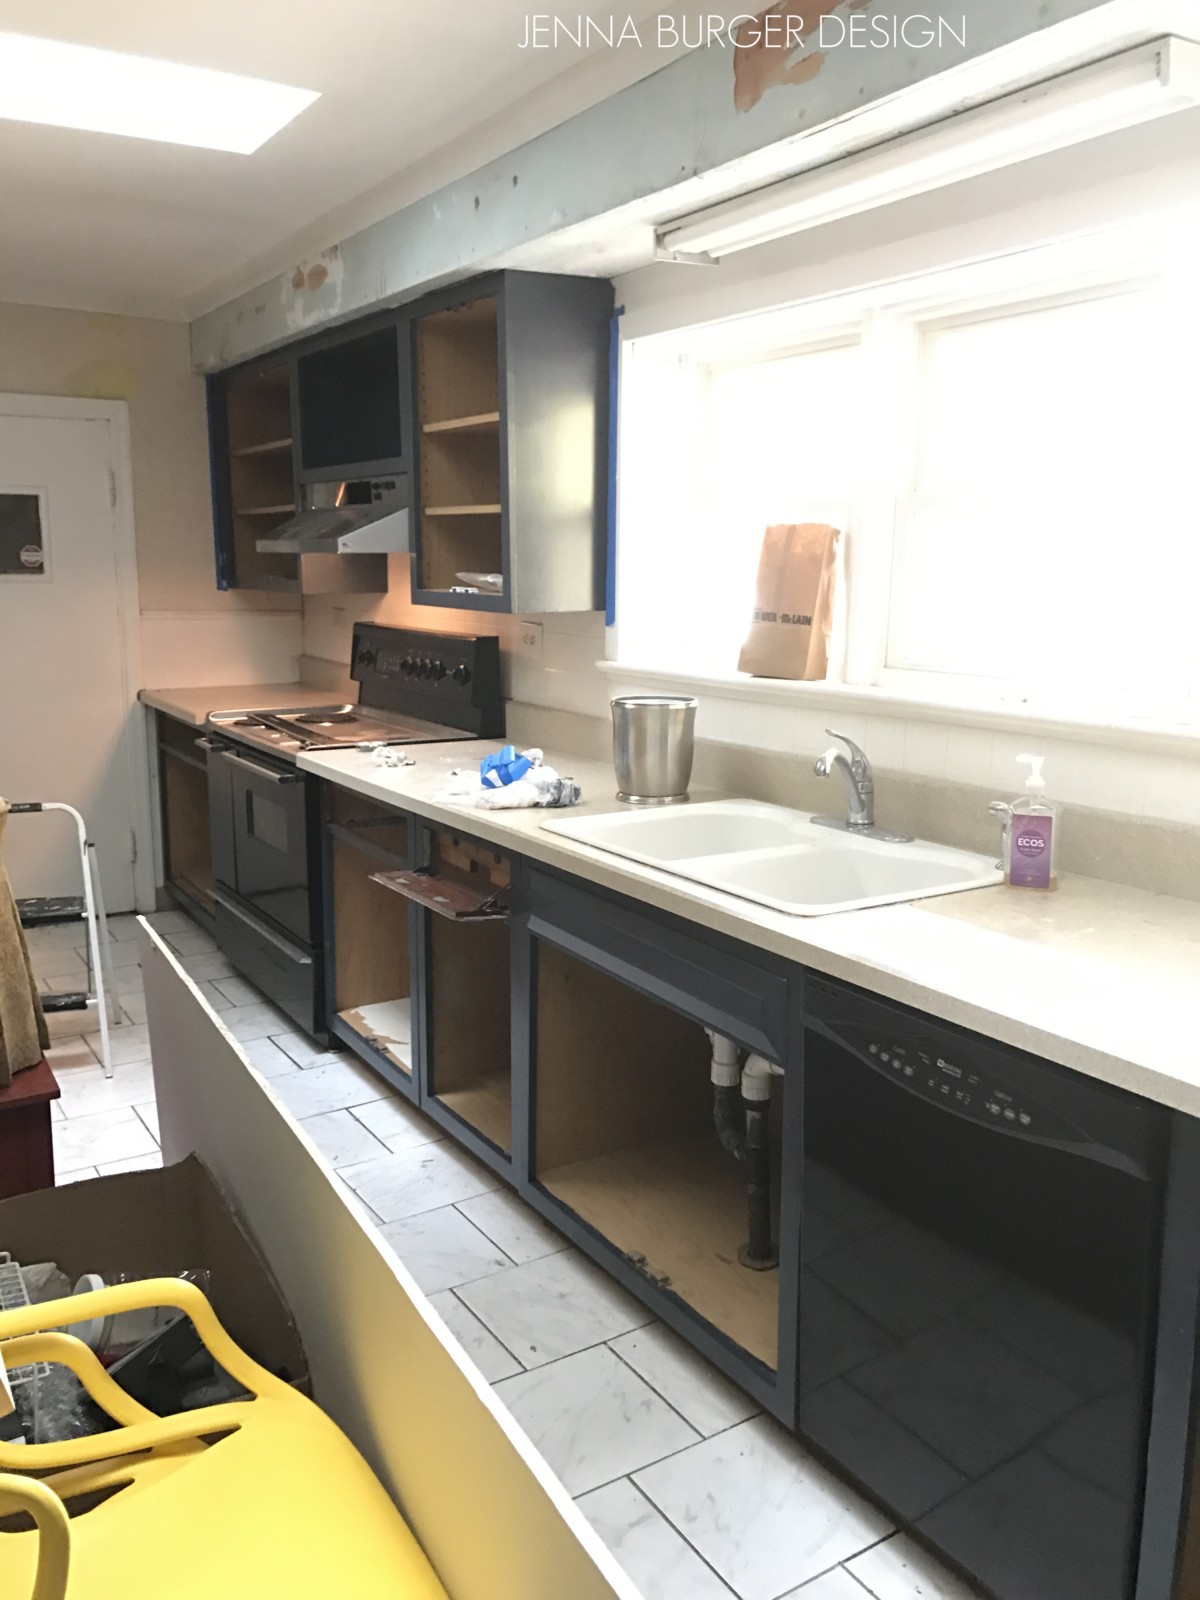
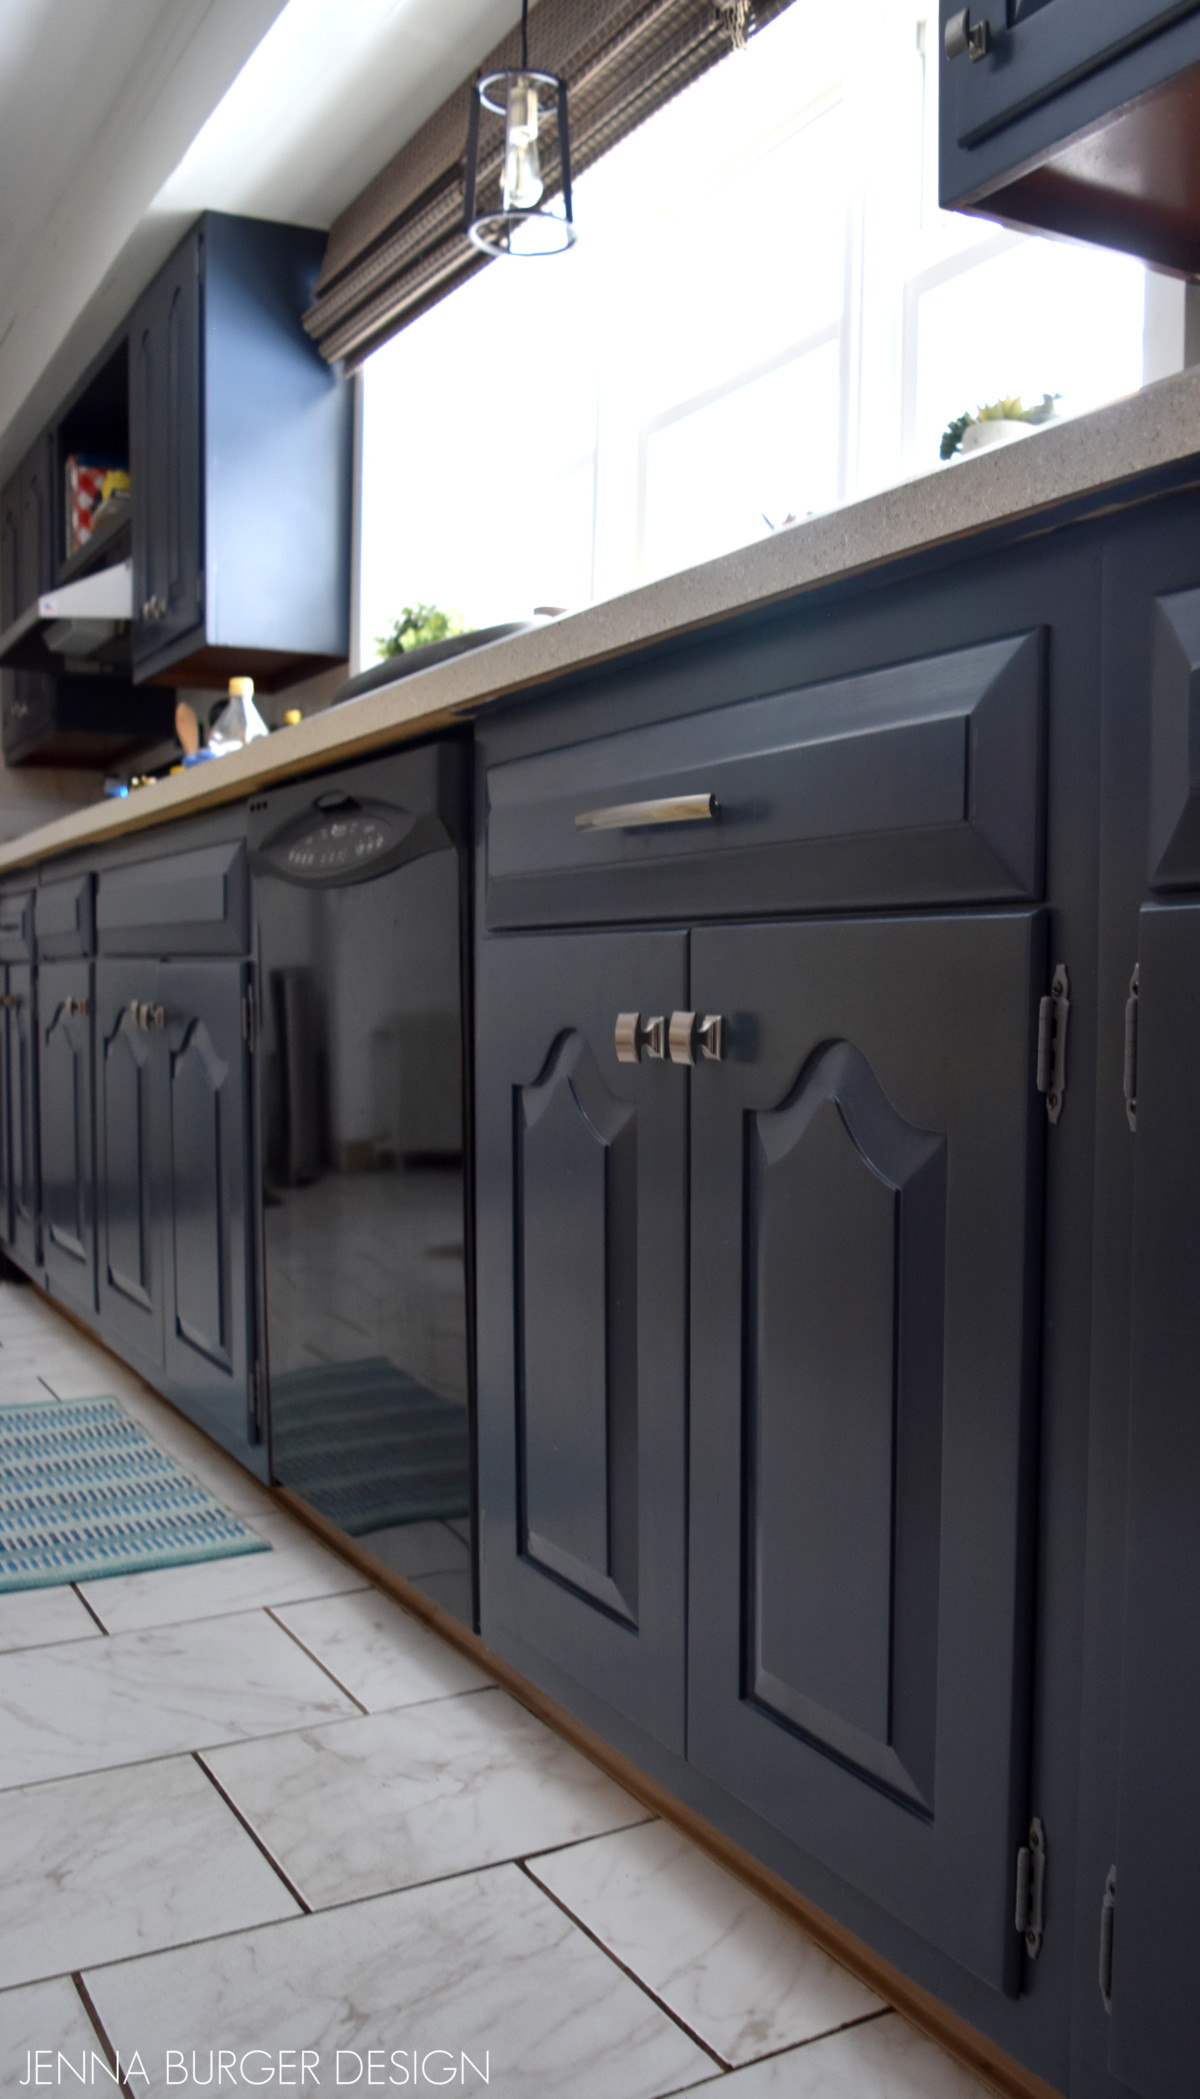
The kitchen space is significantly large and the cabinets run the full wall length. From one end to the other is about 20′. I’ve organized and reorganized the cabinet interiors a few times already to create as much function as possible while cooking. It’s amazing how many times I run back and forth to each end while making dinner – refrigerator, stove, refrigerator stove. This set up with one row of cabinets isn’t really the most ideal kitchen triangle, but it’ll work for now.
`
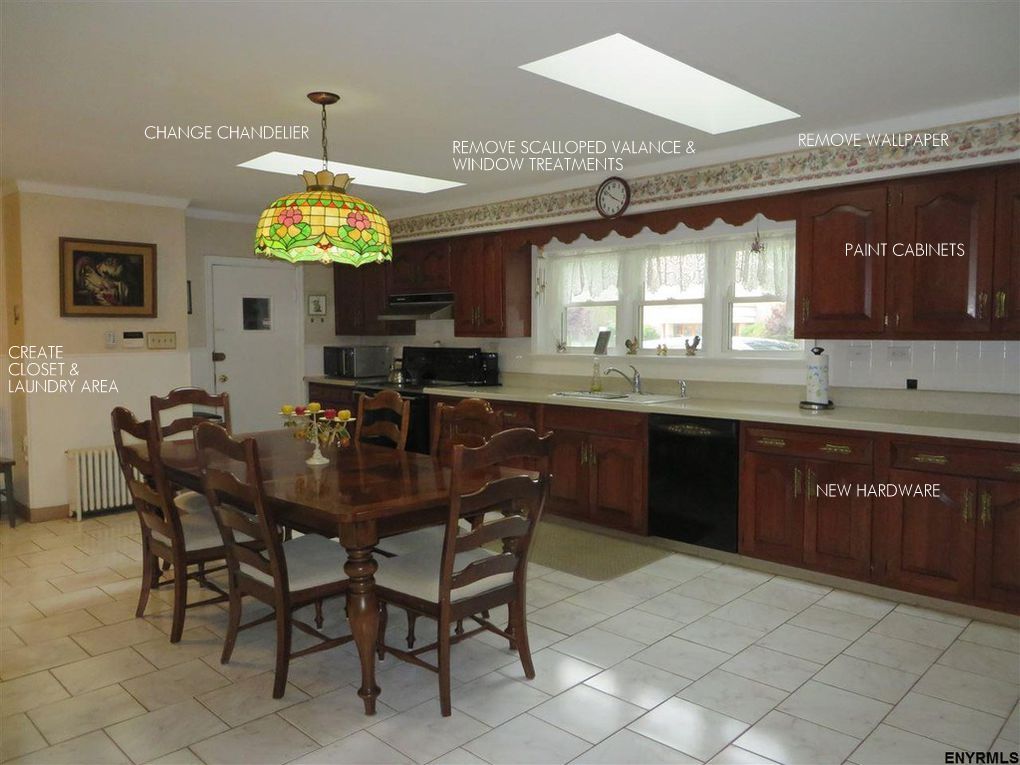
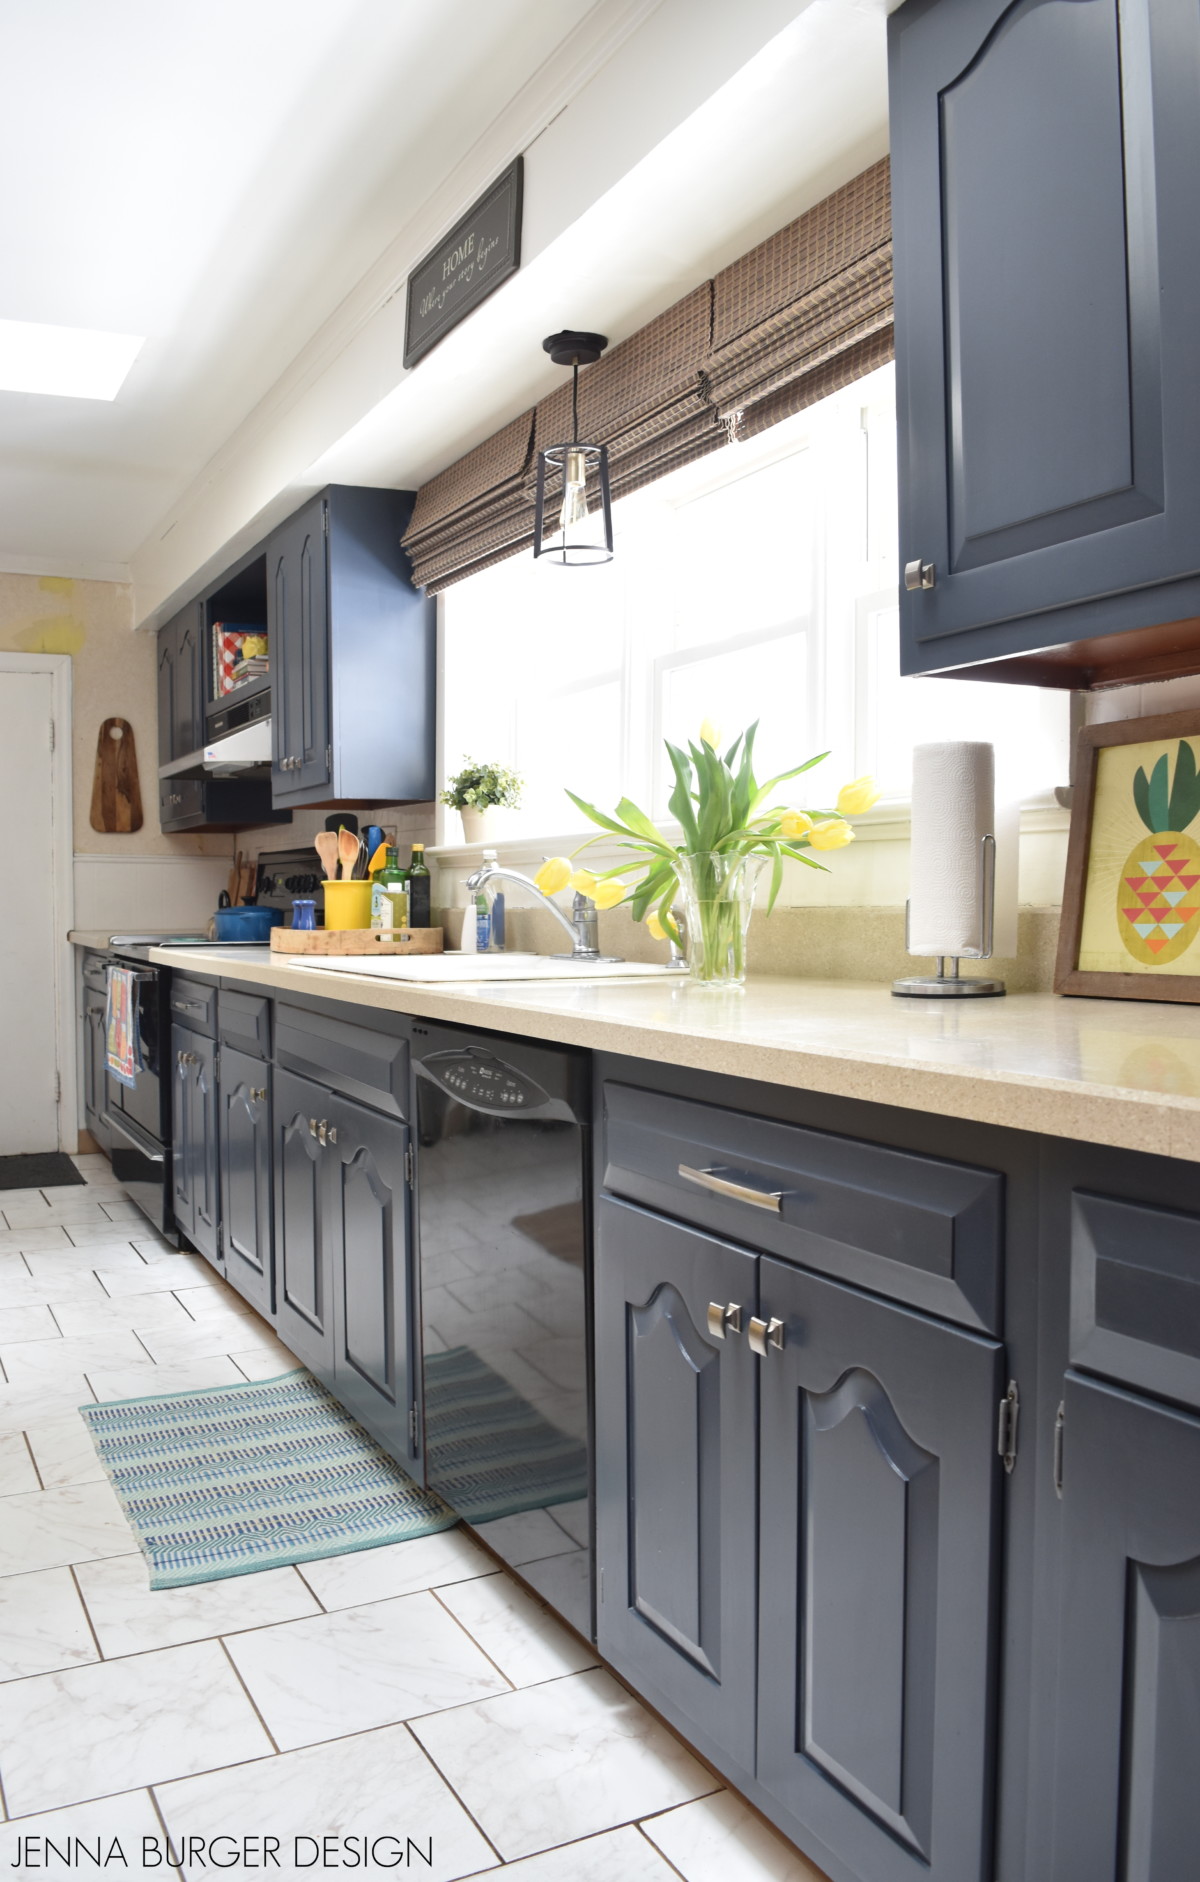
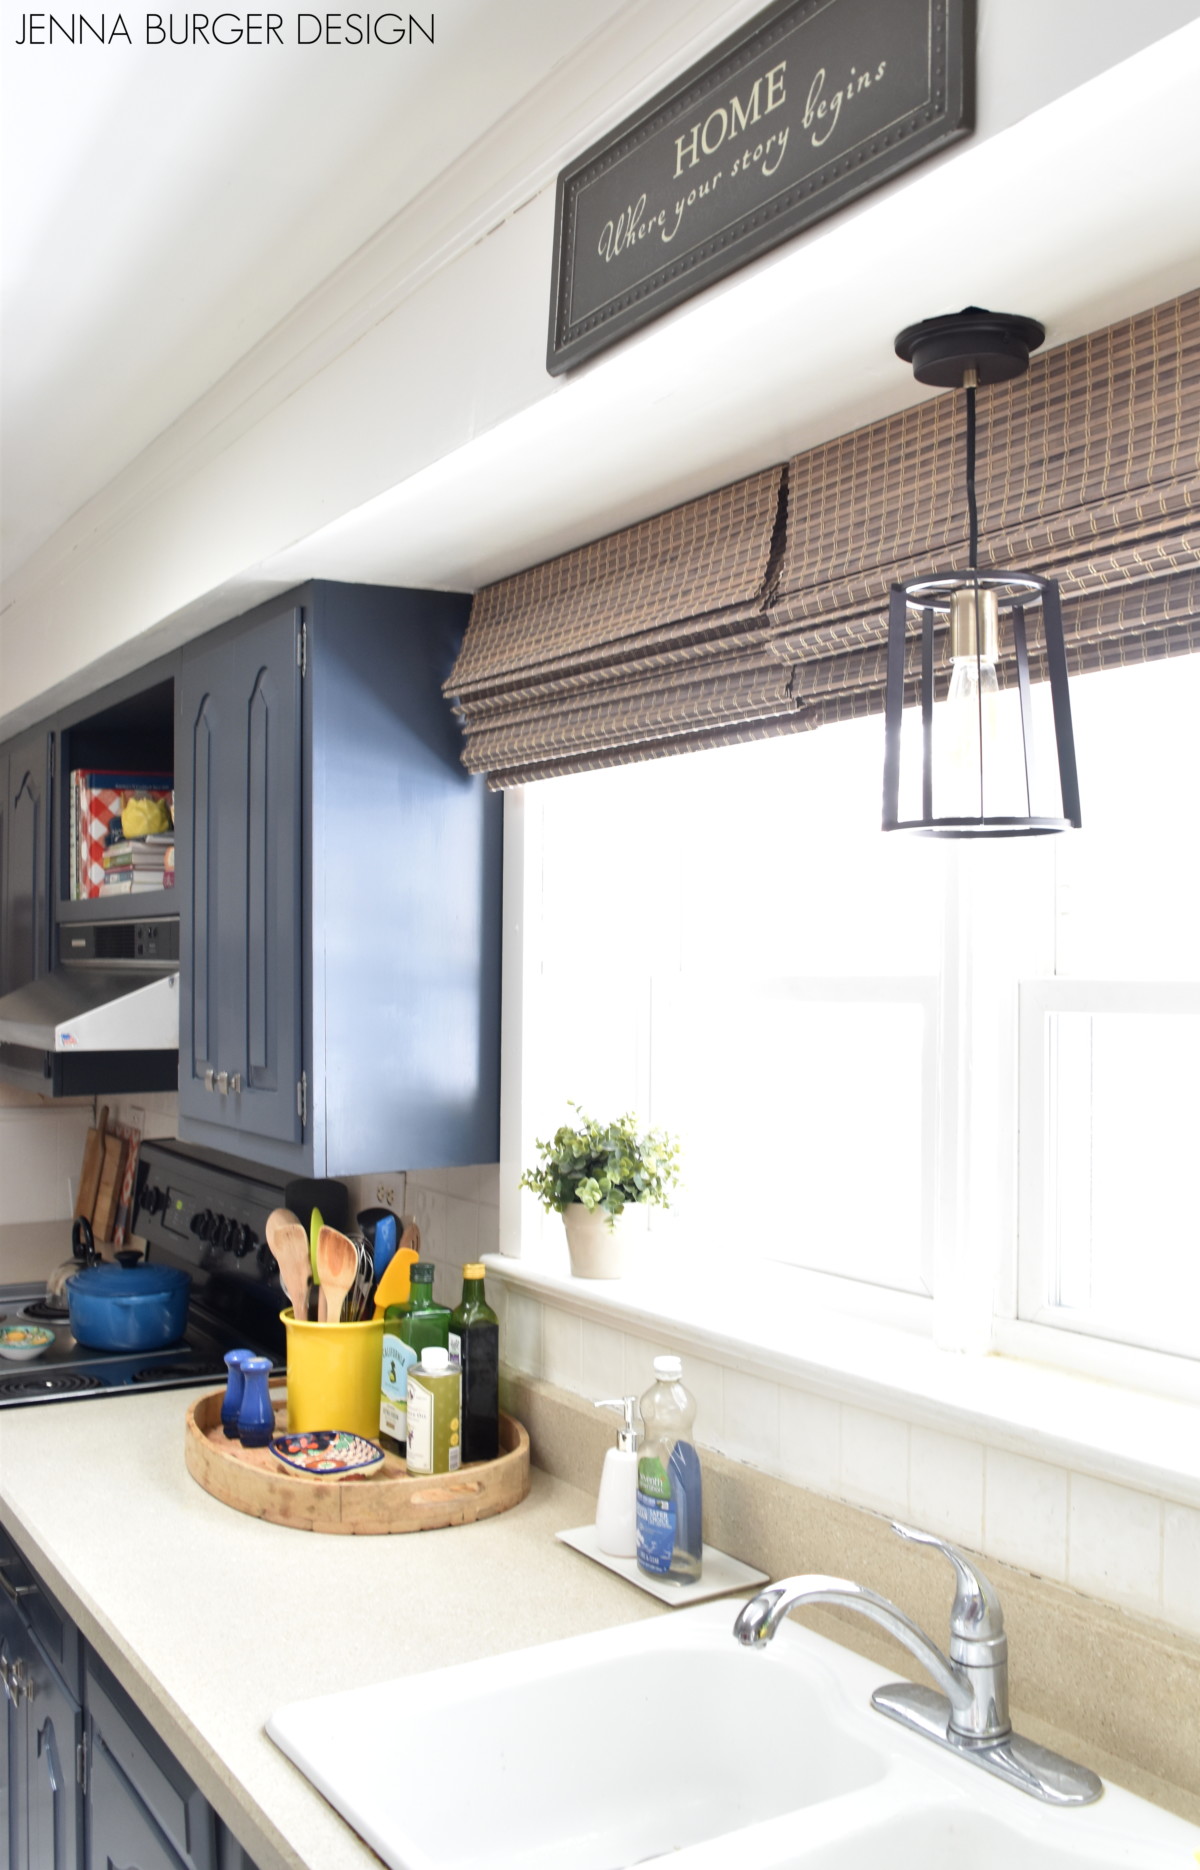
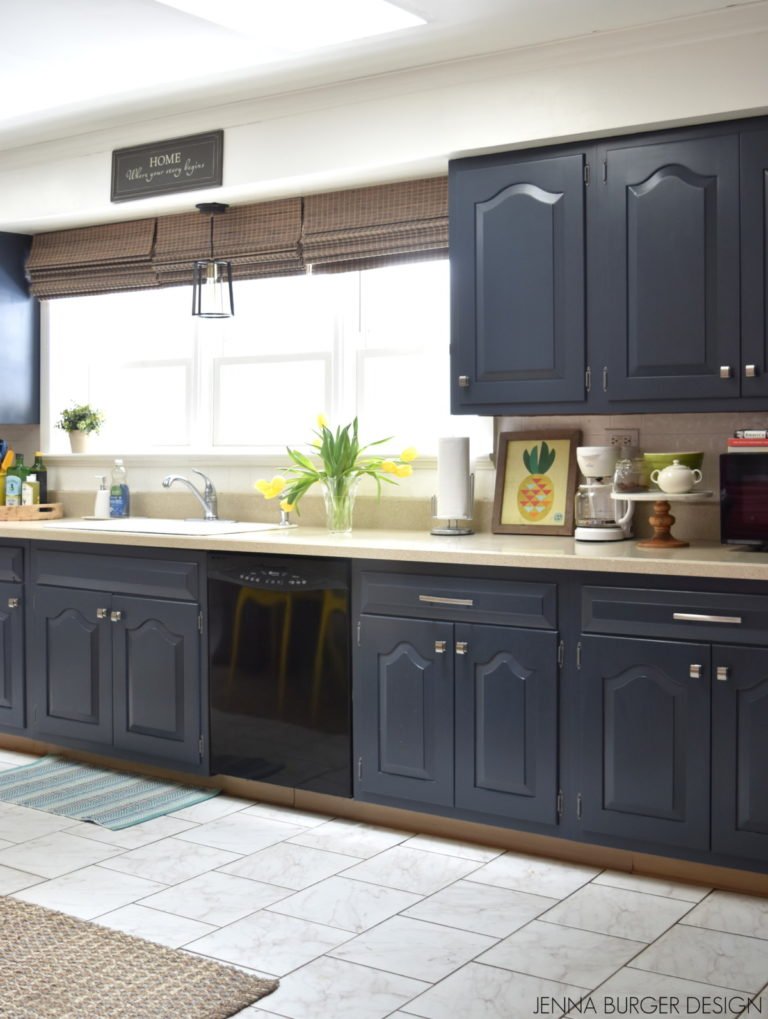
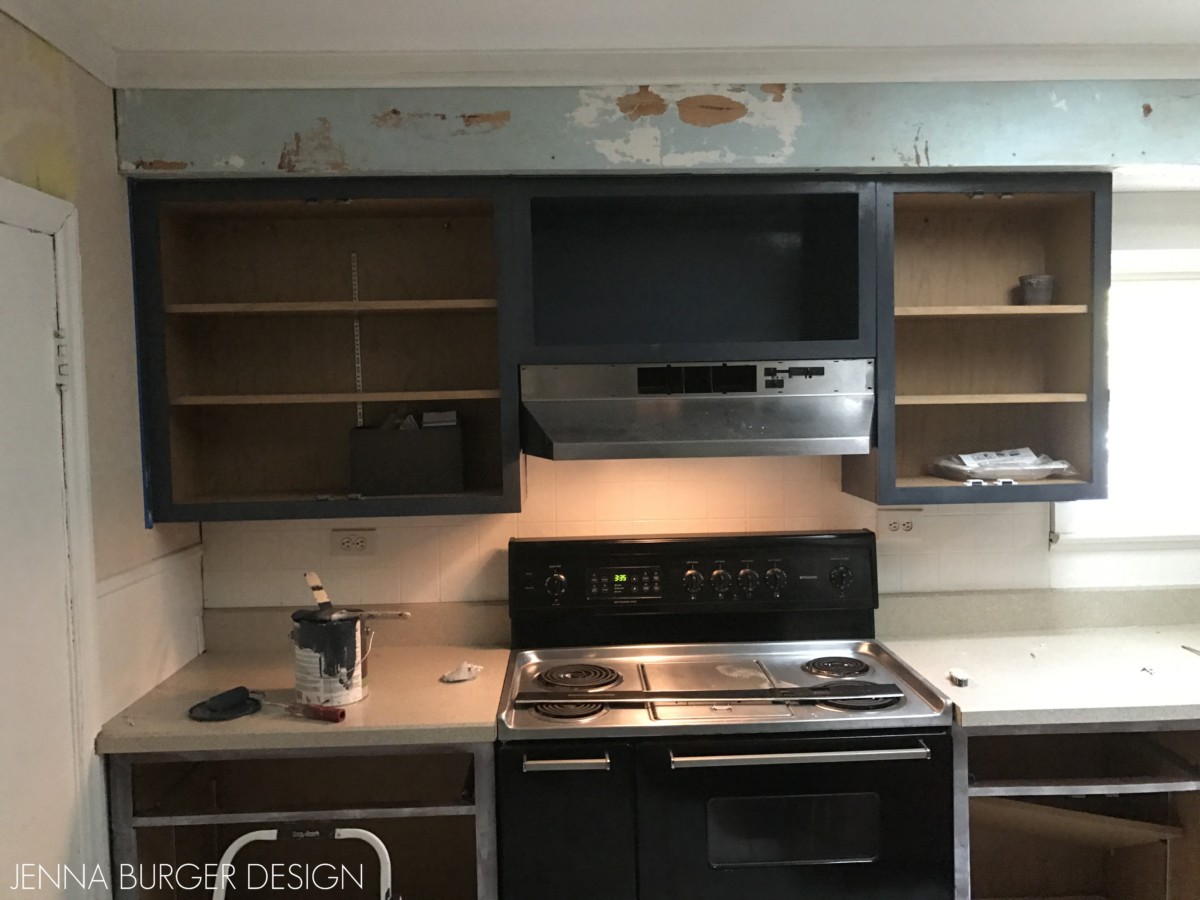
When we first started the makeover, one of the cabinet parts that had to go was the valance which was connecting the upper cabinets over the windows and concealing the fluorescent light behind. The scalloped valance was purely decorative and when removed, the space really opened up the window area. The fluorescent light was removed and in it’s place, I hung a new simple modern pendant.
The wallpaper border that was added to the bulkhead above the upper cabinets was also removed and the wall then had to get repaired and painted.
At the windows, I installed cordless roman shades in a driftwood color. The bamboo style shades add such beautiful texture and warmth. Being cordless it makes it so easy to lift and lower for privacy.
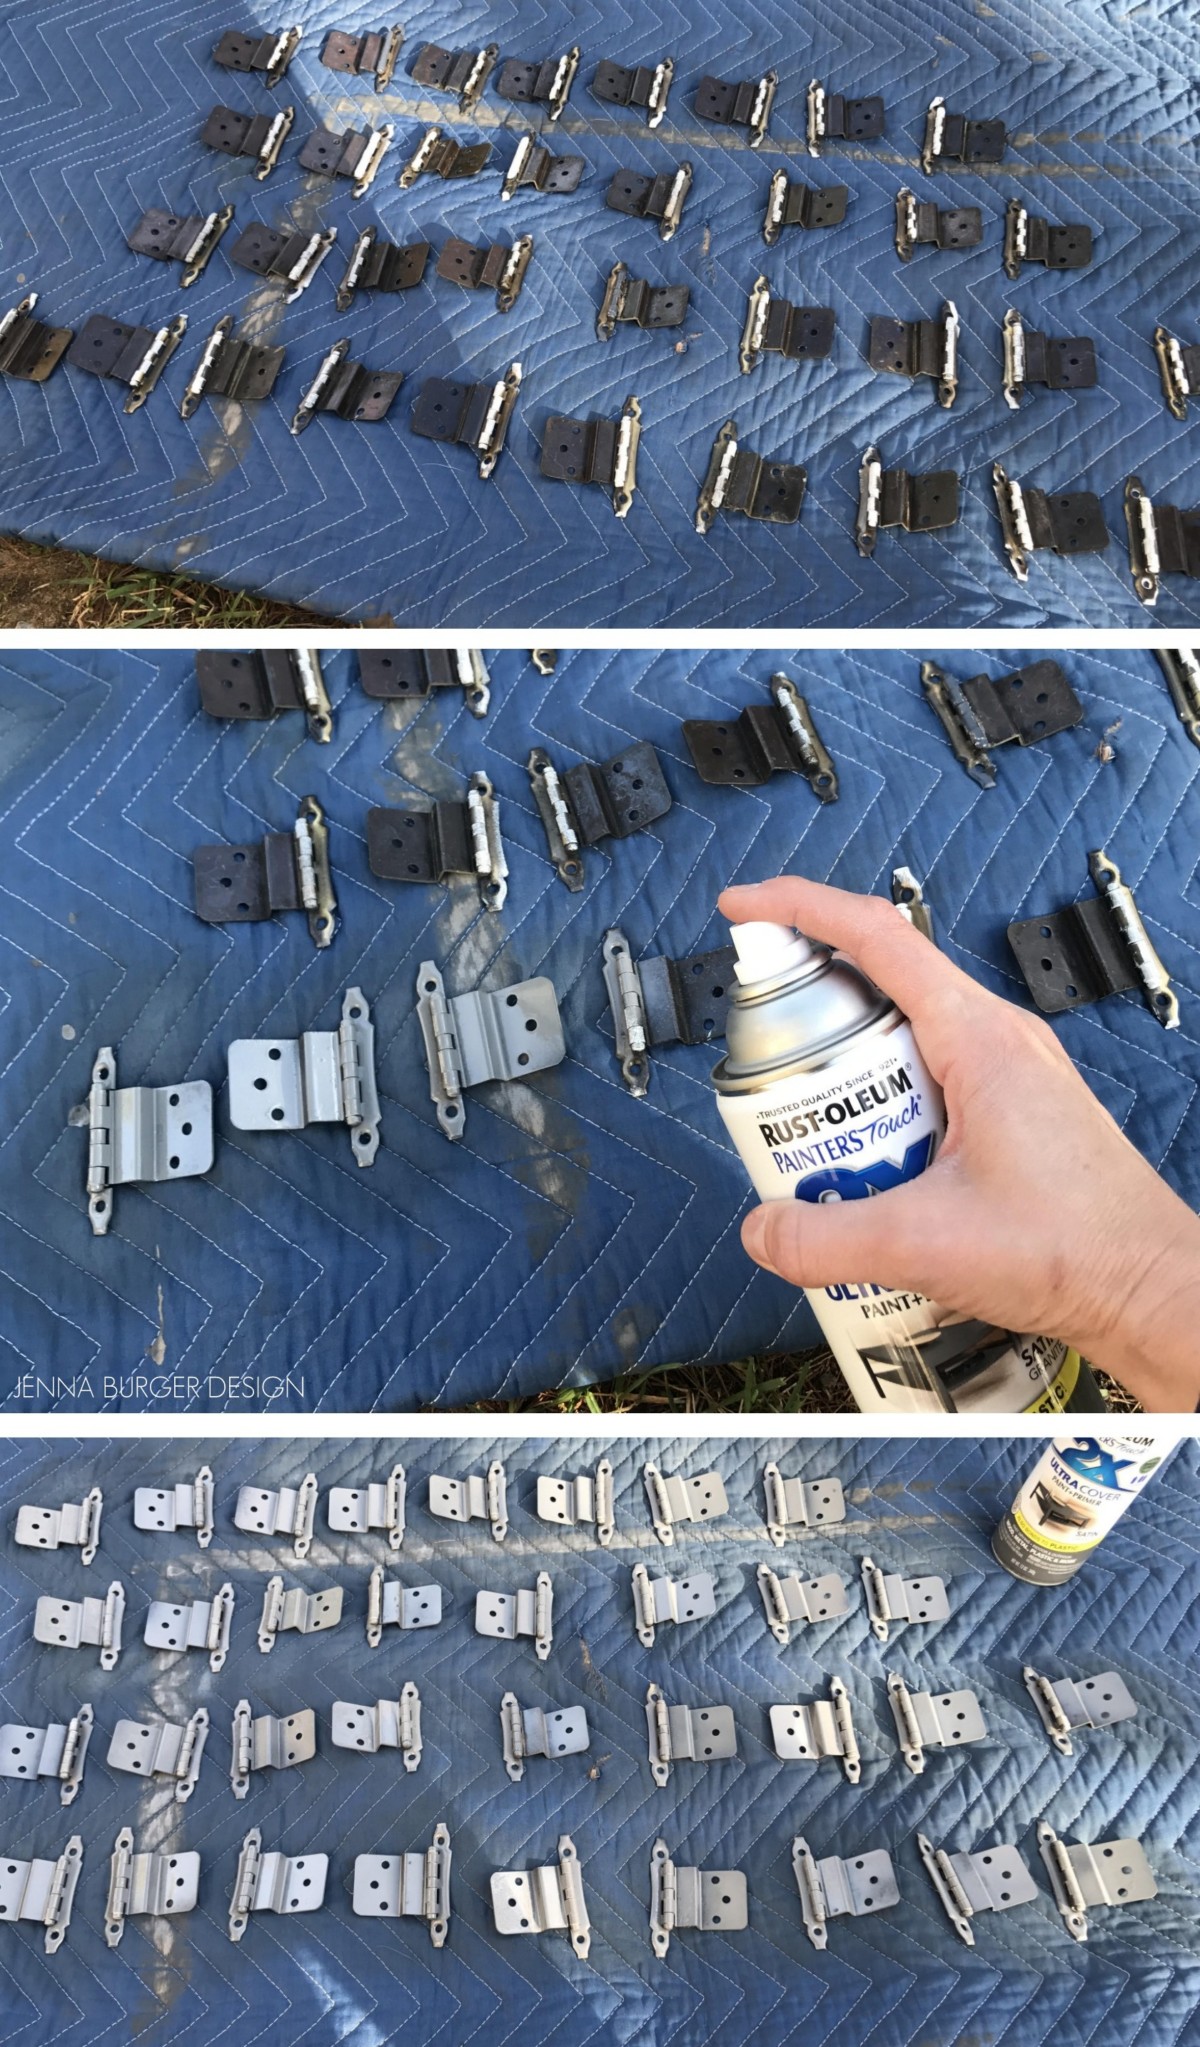
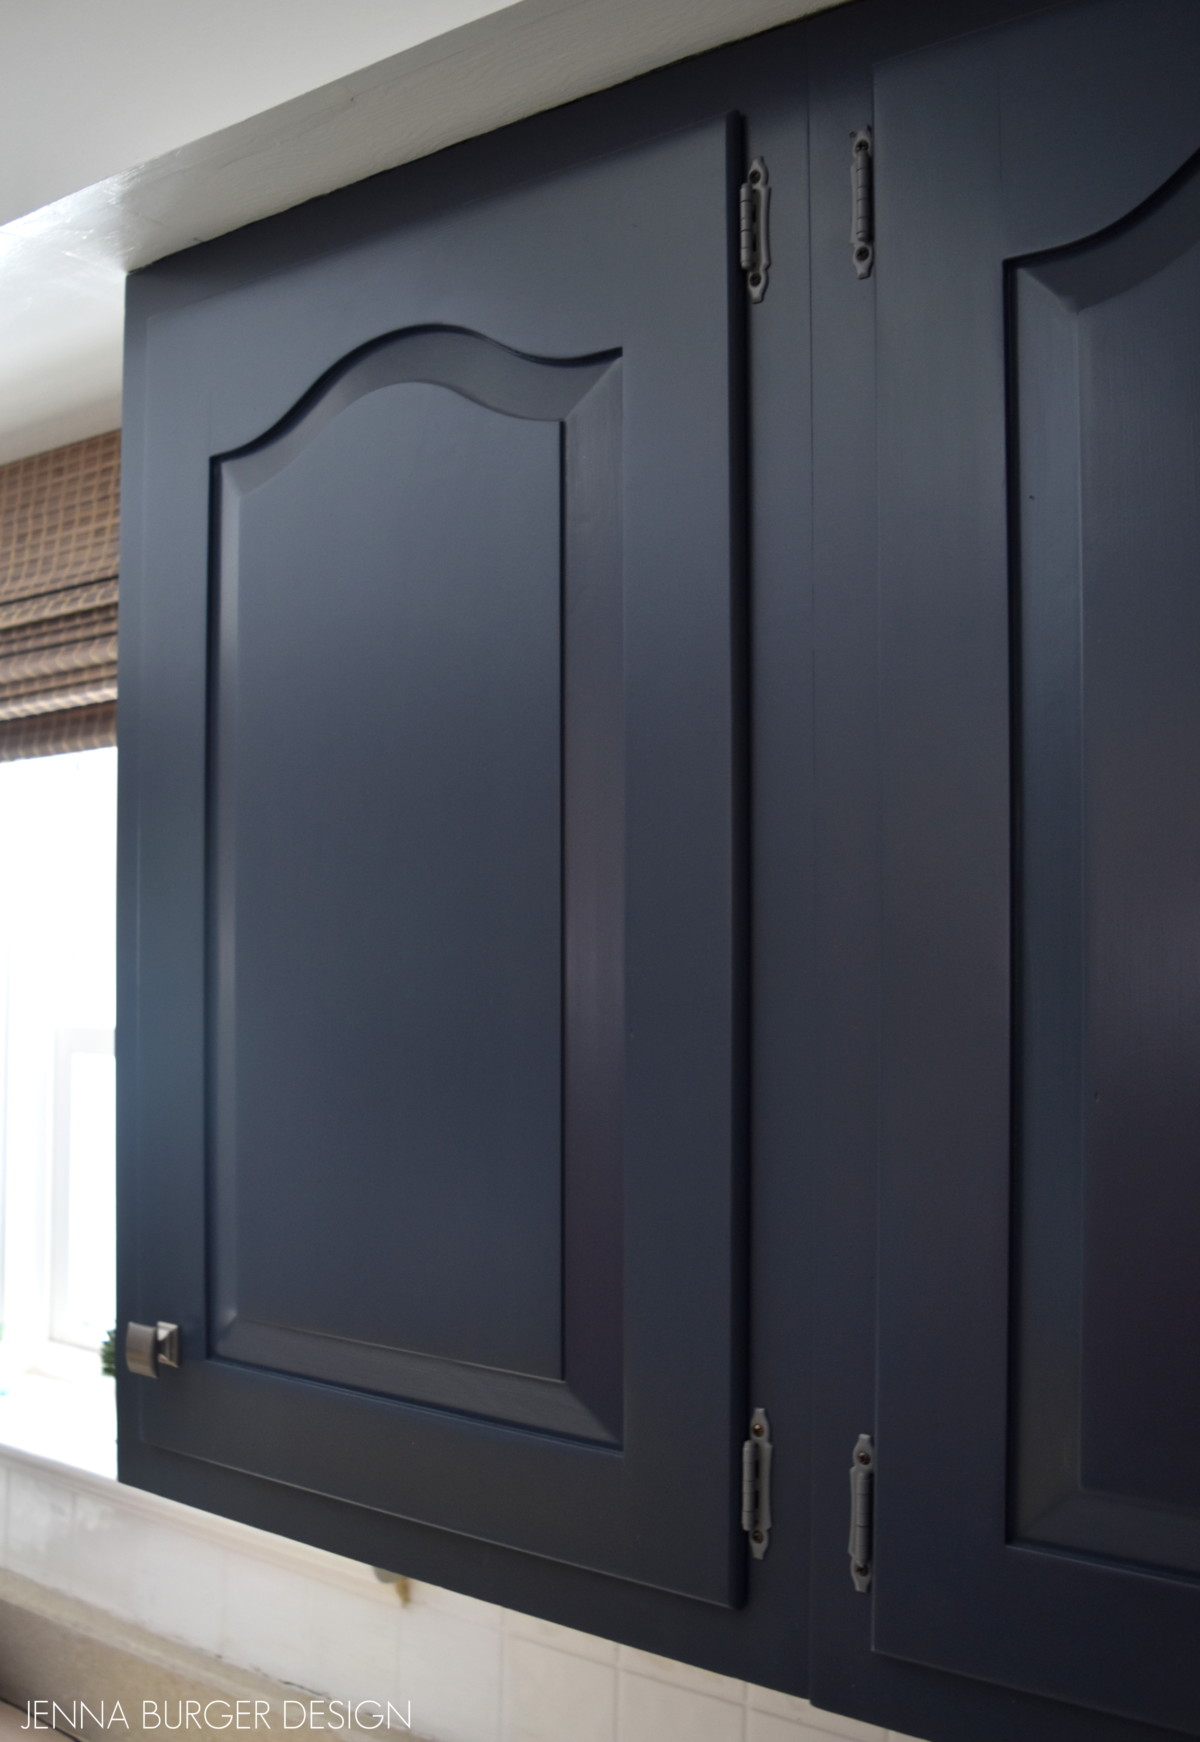
The cabinets and drawers adorn new stain nickel knobs and new stain nickel pulls, while the hinges were removed, cleaned up, spray painted, and reinstalled. It’s amazing what a freshened look new hardware can bring cabinetry.
The paint color of the cabinets is: Valspar Mystified 4011-8
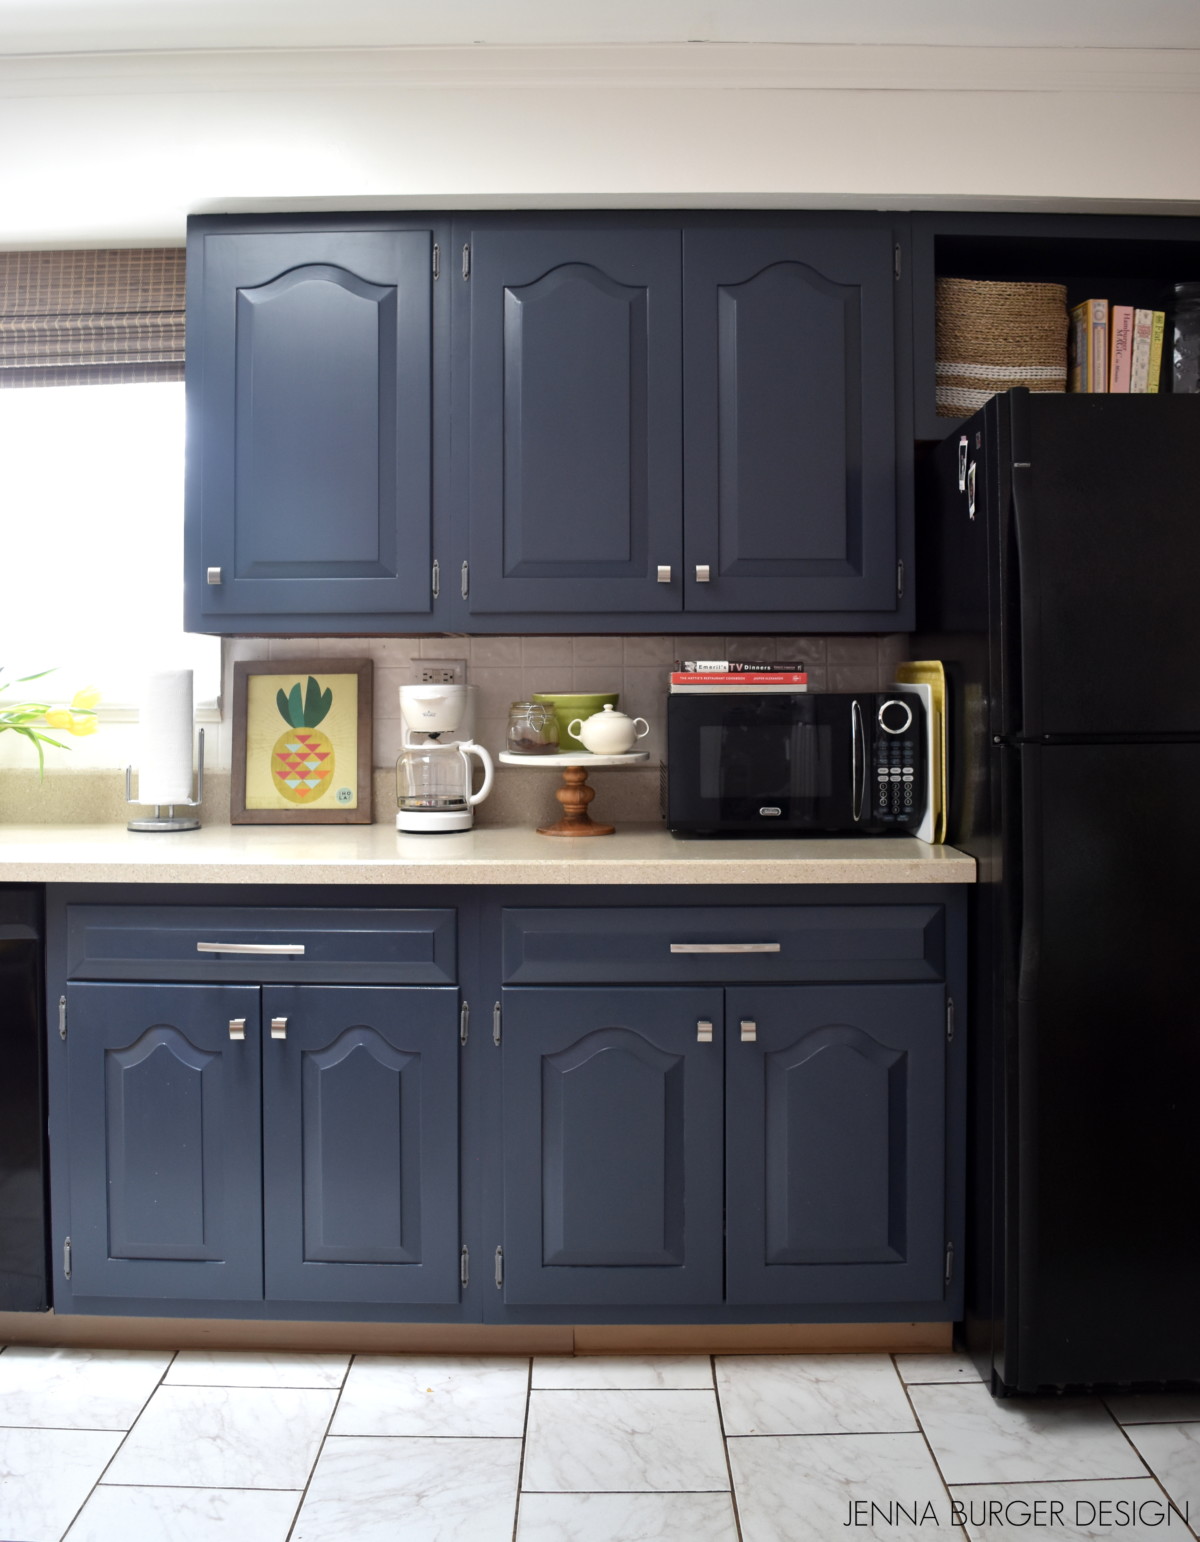
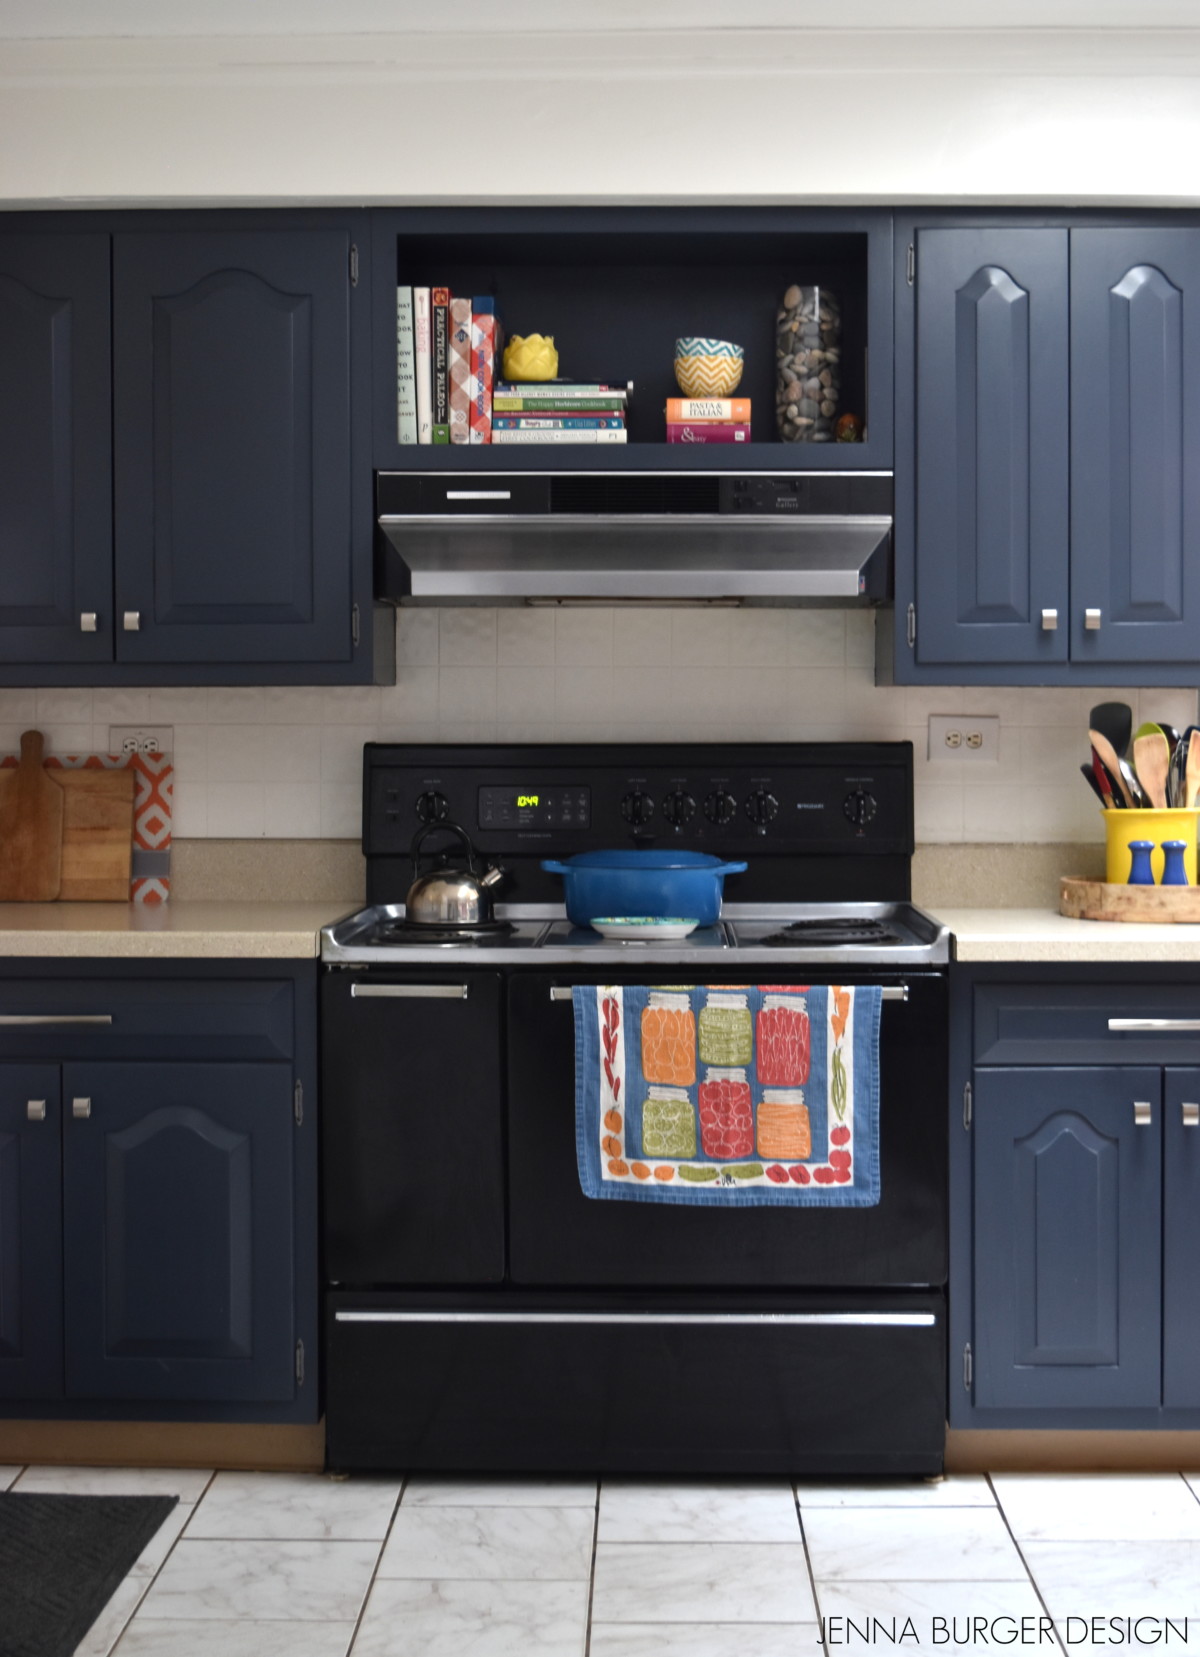
The cabinet above the range hood and the refrigerator are now open. Instead of reinstalling the doors, I chose to paint the interior of the two cabinets to display cookbooks, bowls, and kitchen items. I adored the open shelving in my last kitchen, so I took the opportunity to do something similar with this space. The bindings on the cookbooks and the colorful bowl exteriors give the space depth and a pop of interest.
The light cocoa colored counter is filled with many favorites including cutting boards that I use daily, a large yellow holder for utensils, olive oils that I use often for cooking, and of course tulips because this time of year we need a little sunshine in our lives!
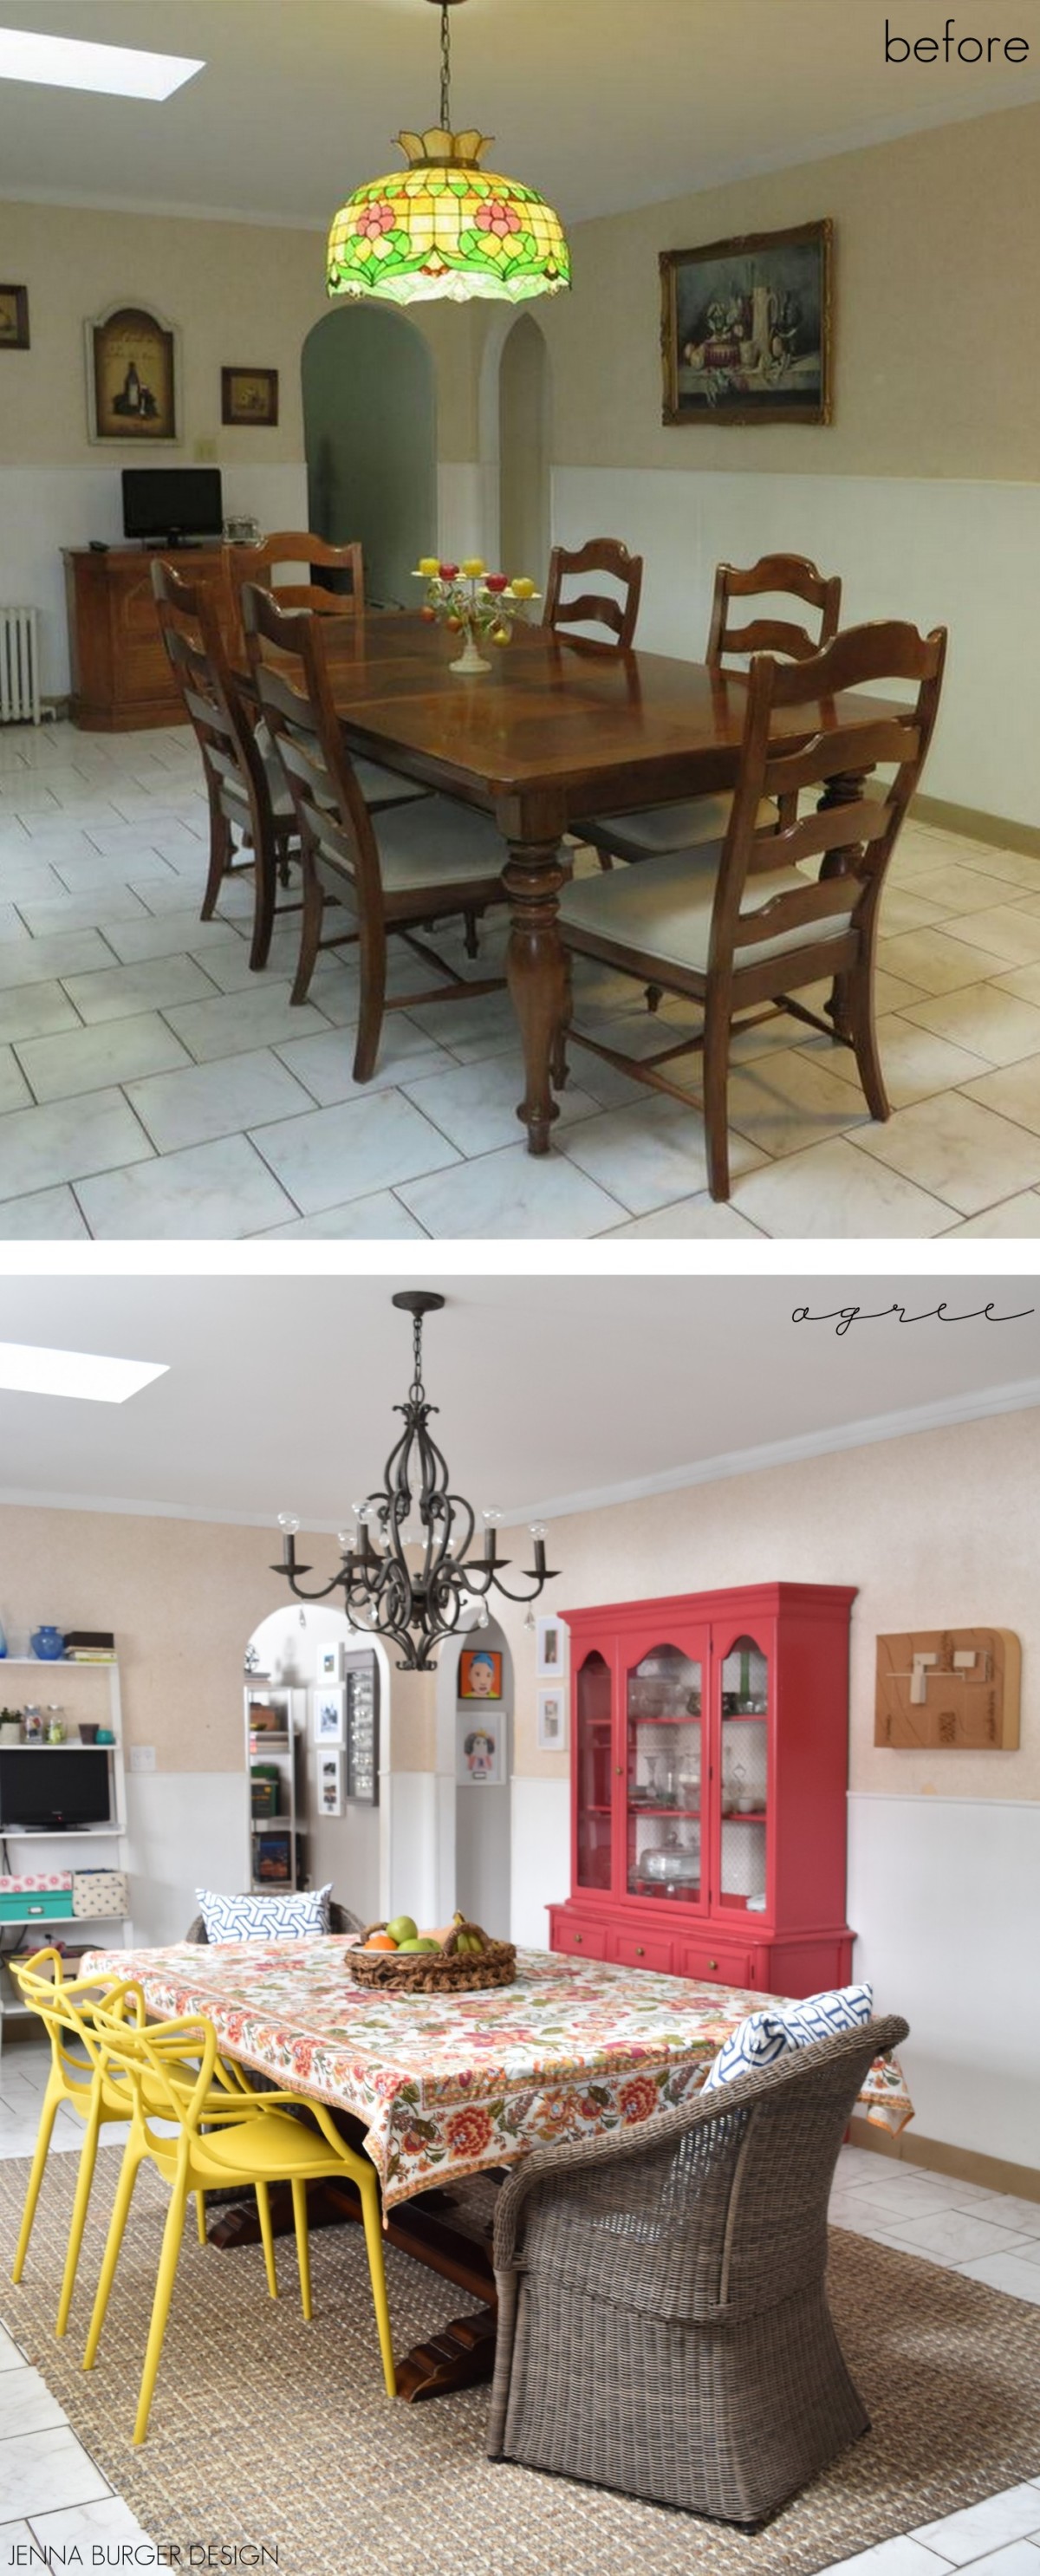
This kitchen is a large space and it also duals as our dining area. The chandelier, dining table, chairs, and bench are all items we brought with us from our previous home. I was excited that they integrated so well in this new setting.
One new addition to the dining setting is the jute rug. The white floor isn’t ideal – it looks somewhat fake and dated in person – and there is a lot of it, so to break up the monotony, I brought in this rug which fits perfectly under the table. It’s soft on the feet and like the roman shades, it brings texture and warmth to the space.
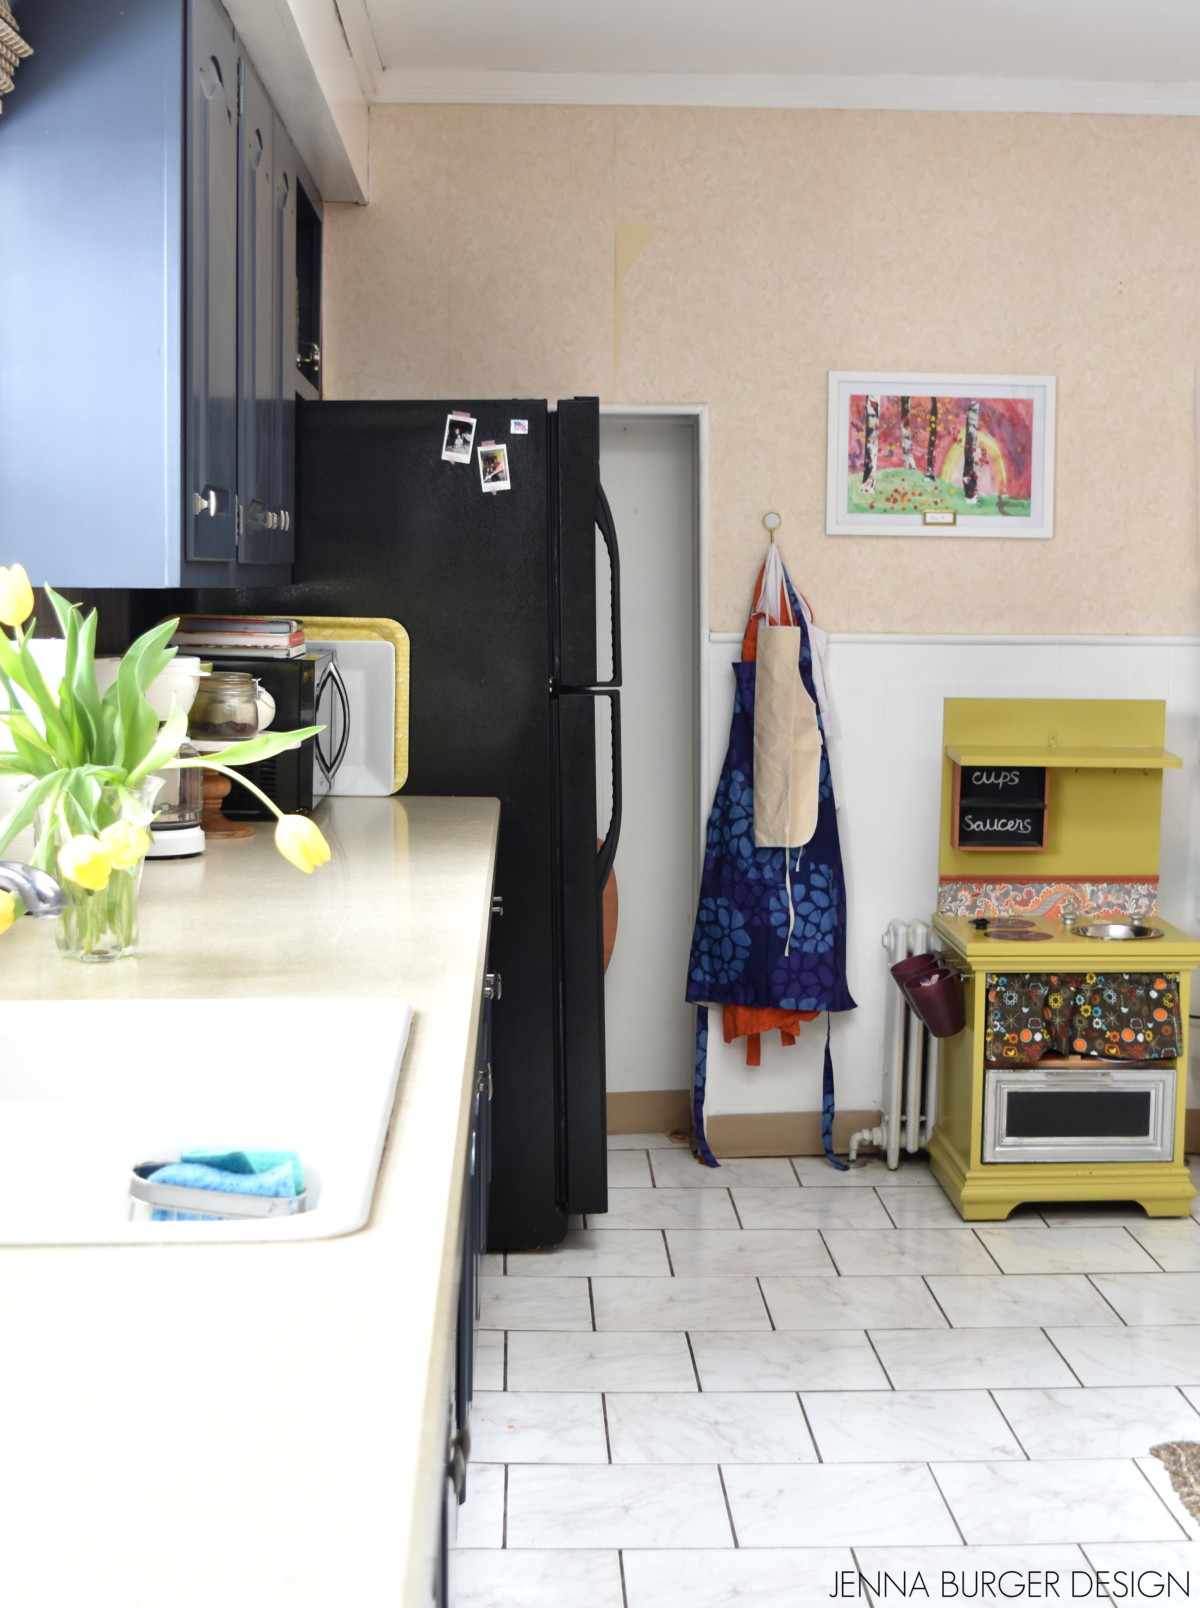
So let’s chat about the refrigerator. It’s placement is very quirky. I’d love to know the backstory behind it’s positioning because for some reason, someone chose to create an alcove in the wall because the refrigerator was too wide to fit. I’m not sure why the cabinets couldn’t have been been shortened (there’s only 20’+ of cabinets), but this was their solution. Anyway, this is a funky part of the existing kitchen…
When we moved to this kitchen, we had to invest in a microwave. I loved my under-the-counter microwave in our last home. It was out of the way and rarely used, except to reheat coffee, but I had it. About a month into living here, I was tired of daily cold coffee, so a new micro was a must. I decided to tuck it away and position it next to the refrigerator so it wasn’t so striking and bulky on the countertop. It’s actually ideal because it creates a small nook to store large platters and trays.
My beloved coral colored china cabinet wasn’t left behind and is also beautifully displayed in the kitchen space. Another reason I chose the deep navy color for the cabinets is that navy and coral are a beautiful complimentary color palette. I knew they’d work well and be happy together in the same setting.
As a recap, a few before and after looks at the kitchen…
There is quite a bit more work that needs to go into fully finishing the kitchen. Up next is removing the wallpaper, painting the walls, replacing the base mouldings, and creating a command center like in our last home.
Overall, I am thrilled with the result of the painted cabinets. As in our last home when we DIYed the kitchen, it lasted about 5 years before we actually tackled a full-on kitchen renovation. I don’t foresee this being the forever kitchen in this home, but for now it’s a beautiful upgrade. Before taking on a big renovation, I am taking this time to understand how the kitchen would work and function best – it being so large and serving multiple purposes, it’s a tricky space.
Thanks for following along on this kitchen cabinet makeover! If you’re inspired and want to try making upgrades to your kitchen, shop the look…
DISCLAIMER: THIS KITCHEN REMODEL IS A COLLABORATION WITH LOWE’S. ALL OPINIONS + SELECTIONS ARE MY OWN.
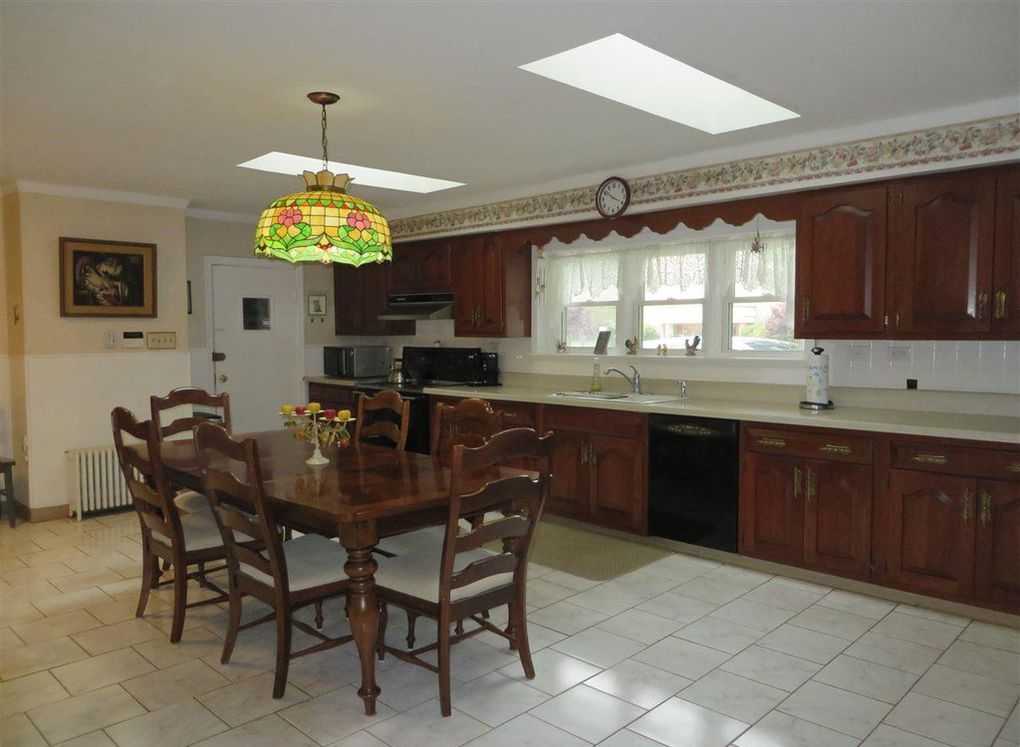
Before sharing the progress of the cabinets, lets walk down memory lane with a preview of how the kitchen looked before and where it started…
BEFORE
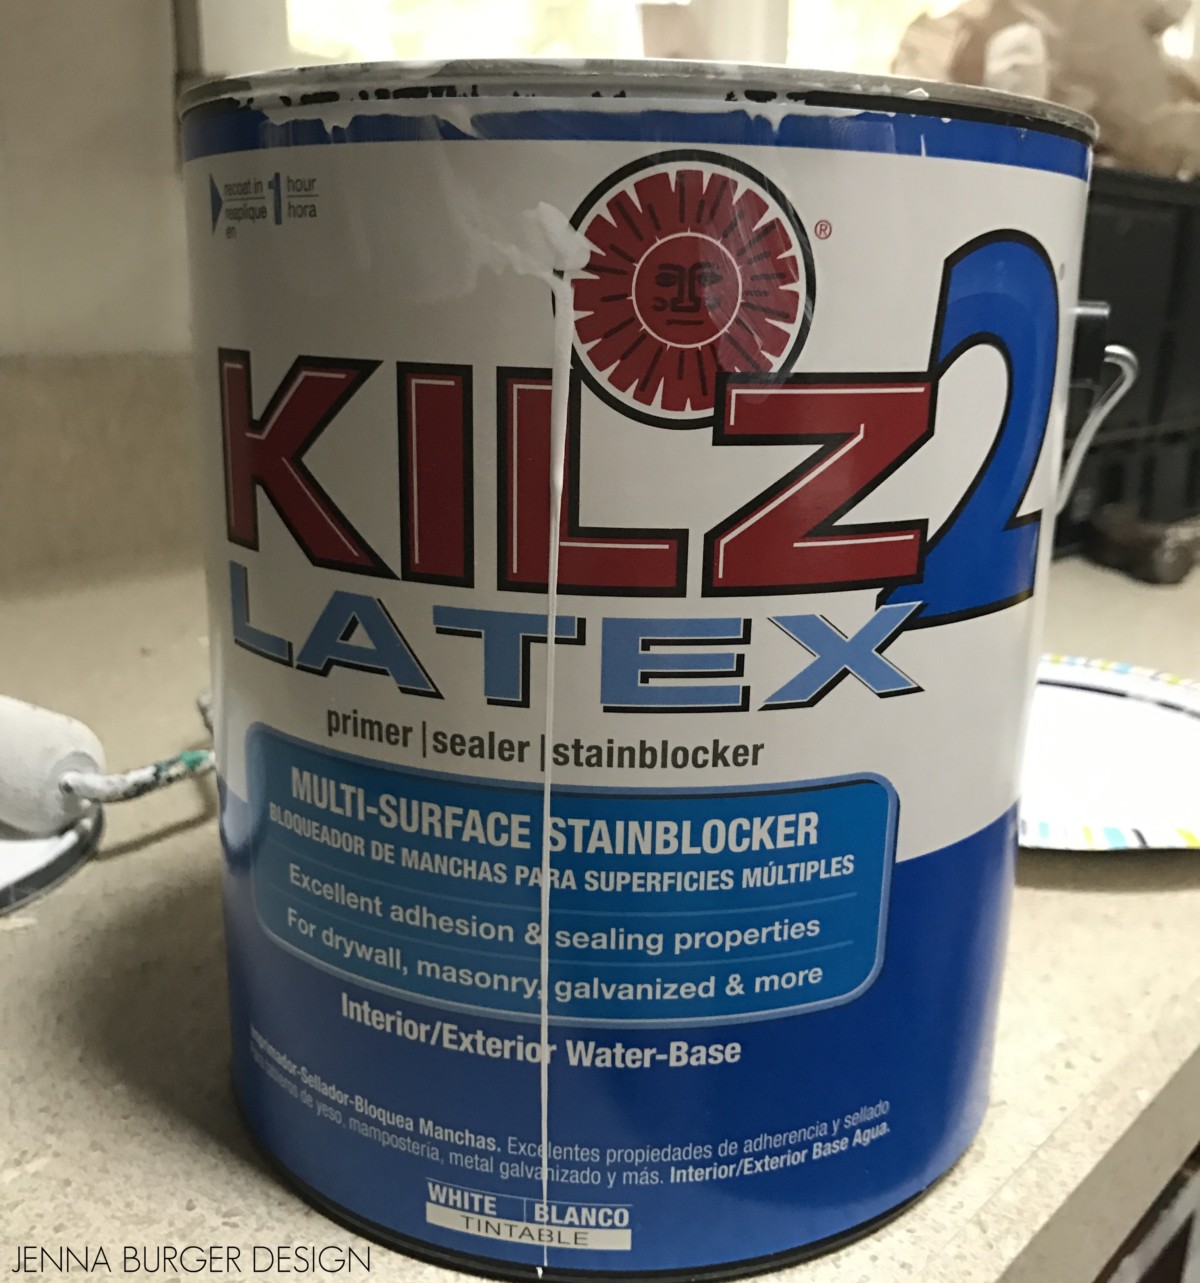
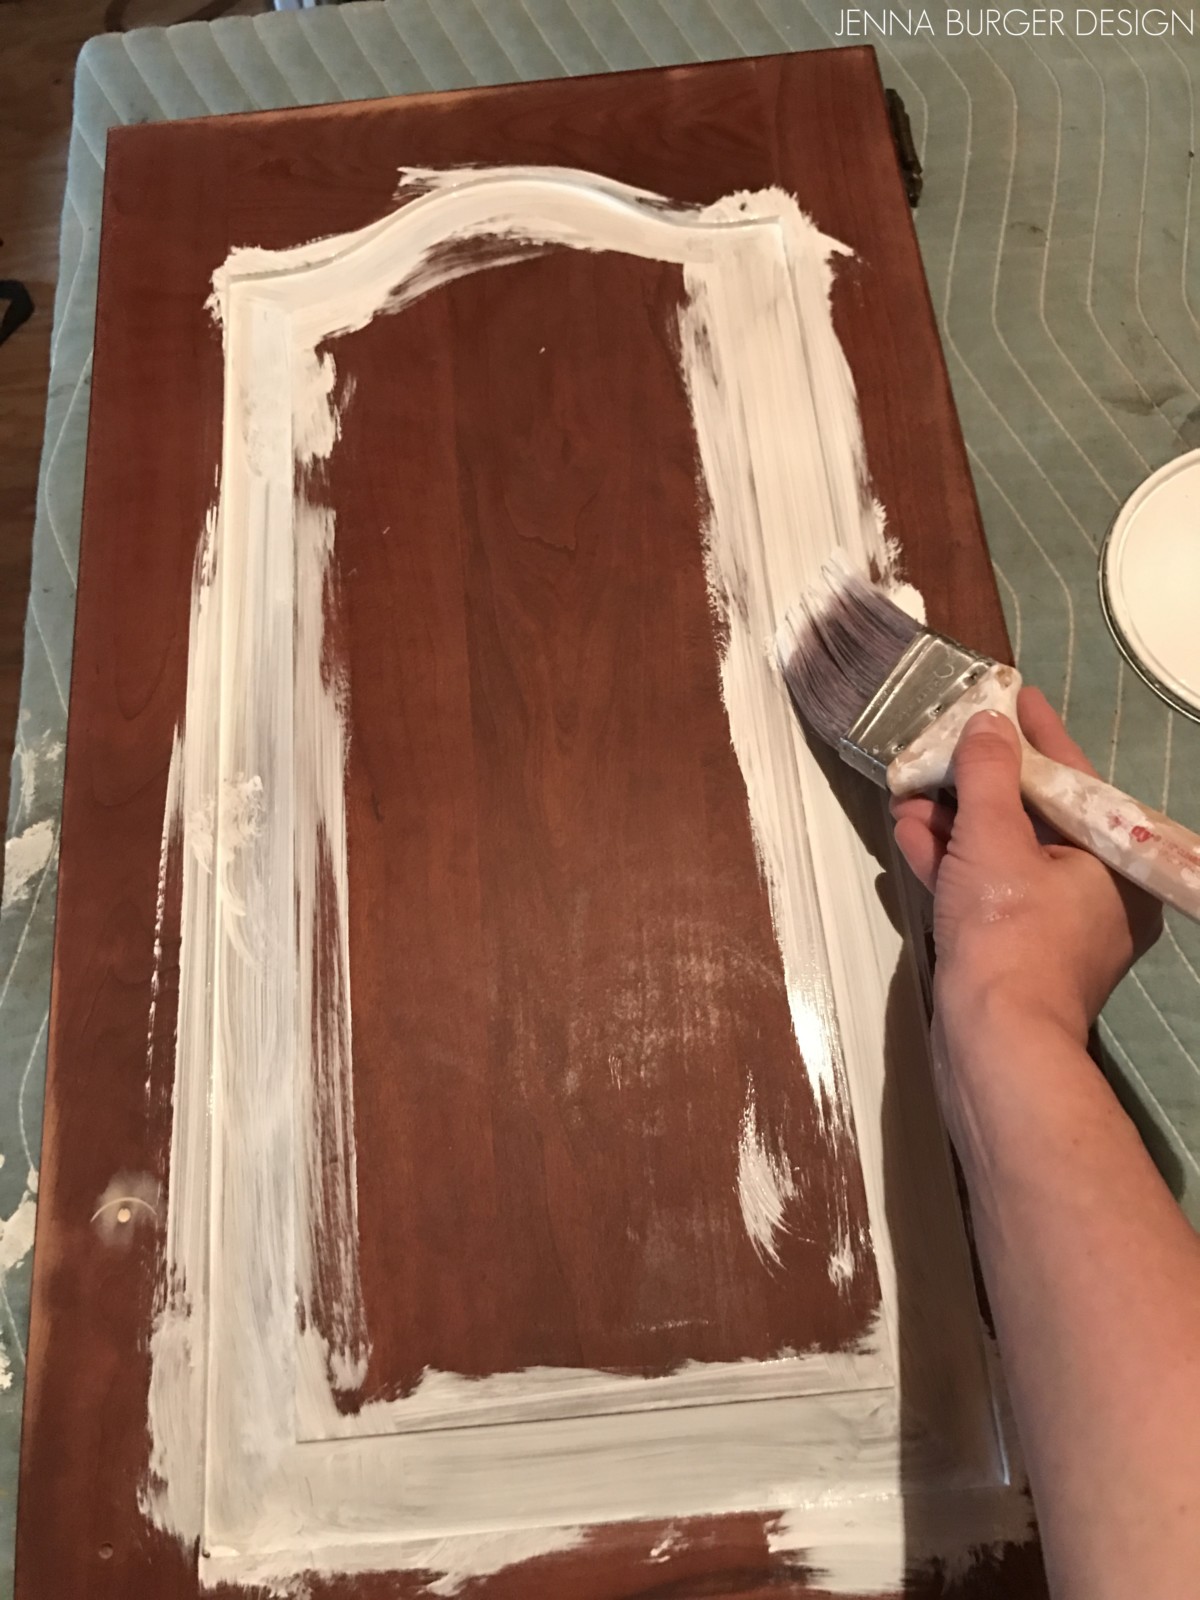
After the cabinets were removed from the face frame and sanded, they were ready for primer. With most furniture projects that I’ve painted, I always start with using a high-quality stainblocking primer and sealer to give a solid base to the paint color. For this project, I used KILZ 2 Latex (so it’s waterbased for easy cleanup) Multi-Surface Stainblocker.
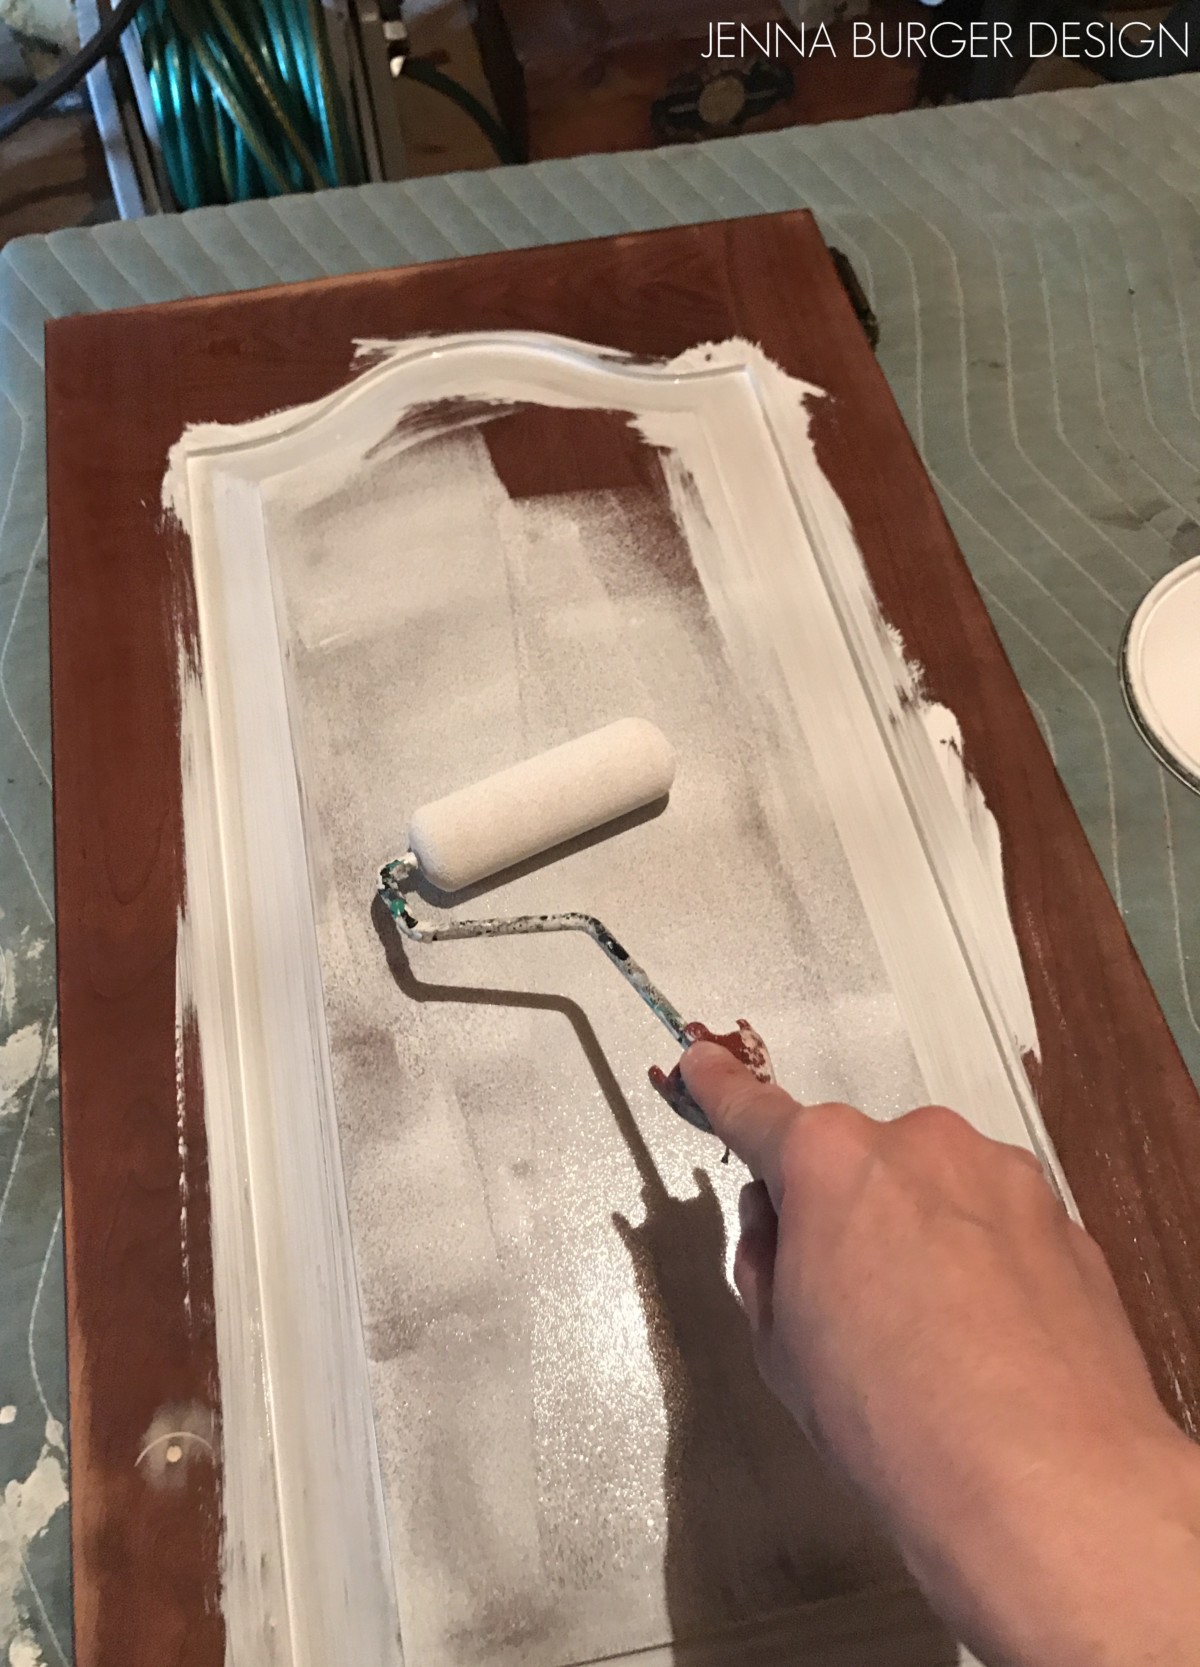
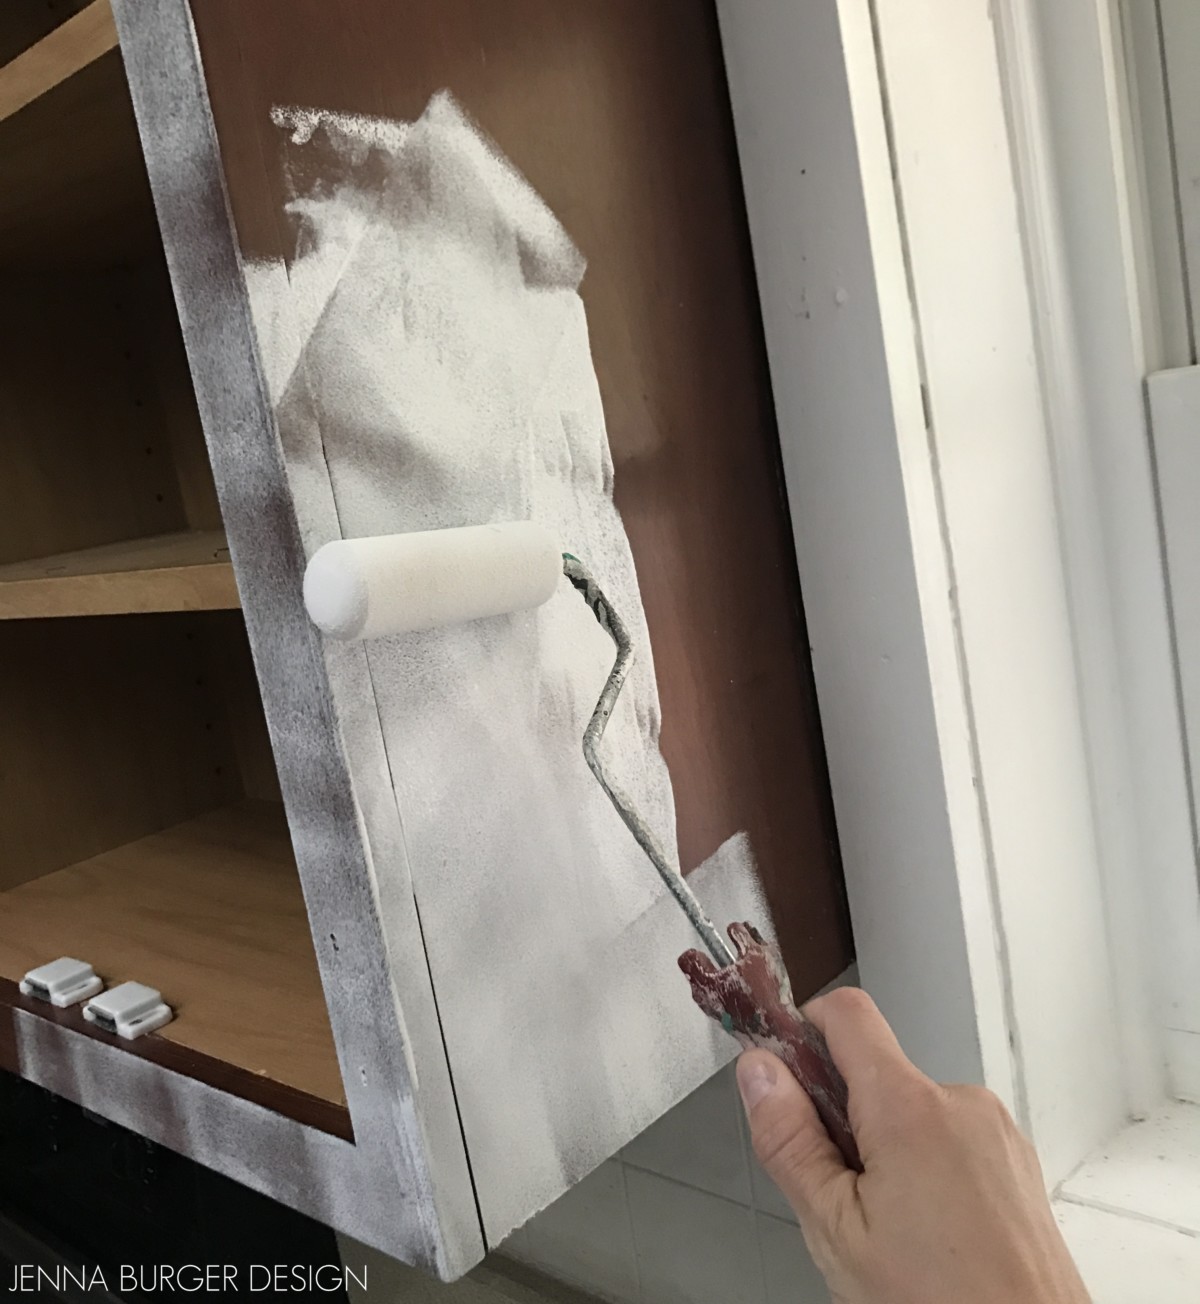
On a clean, flat, protected surface, I started off by using a paint brush to apply the paint in all the grooves and crevices. After smoothing it out, I followed with using a brush on all the flat areas. See the 2 pictures below for more visual detail…
PRIMER PAINT, STEP 1
PRIMER PAINT, STEP 2
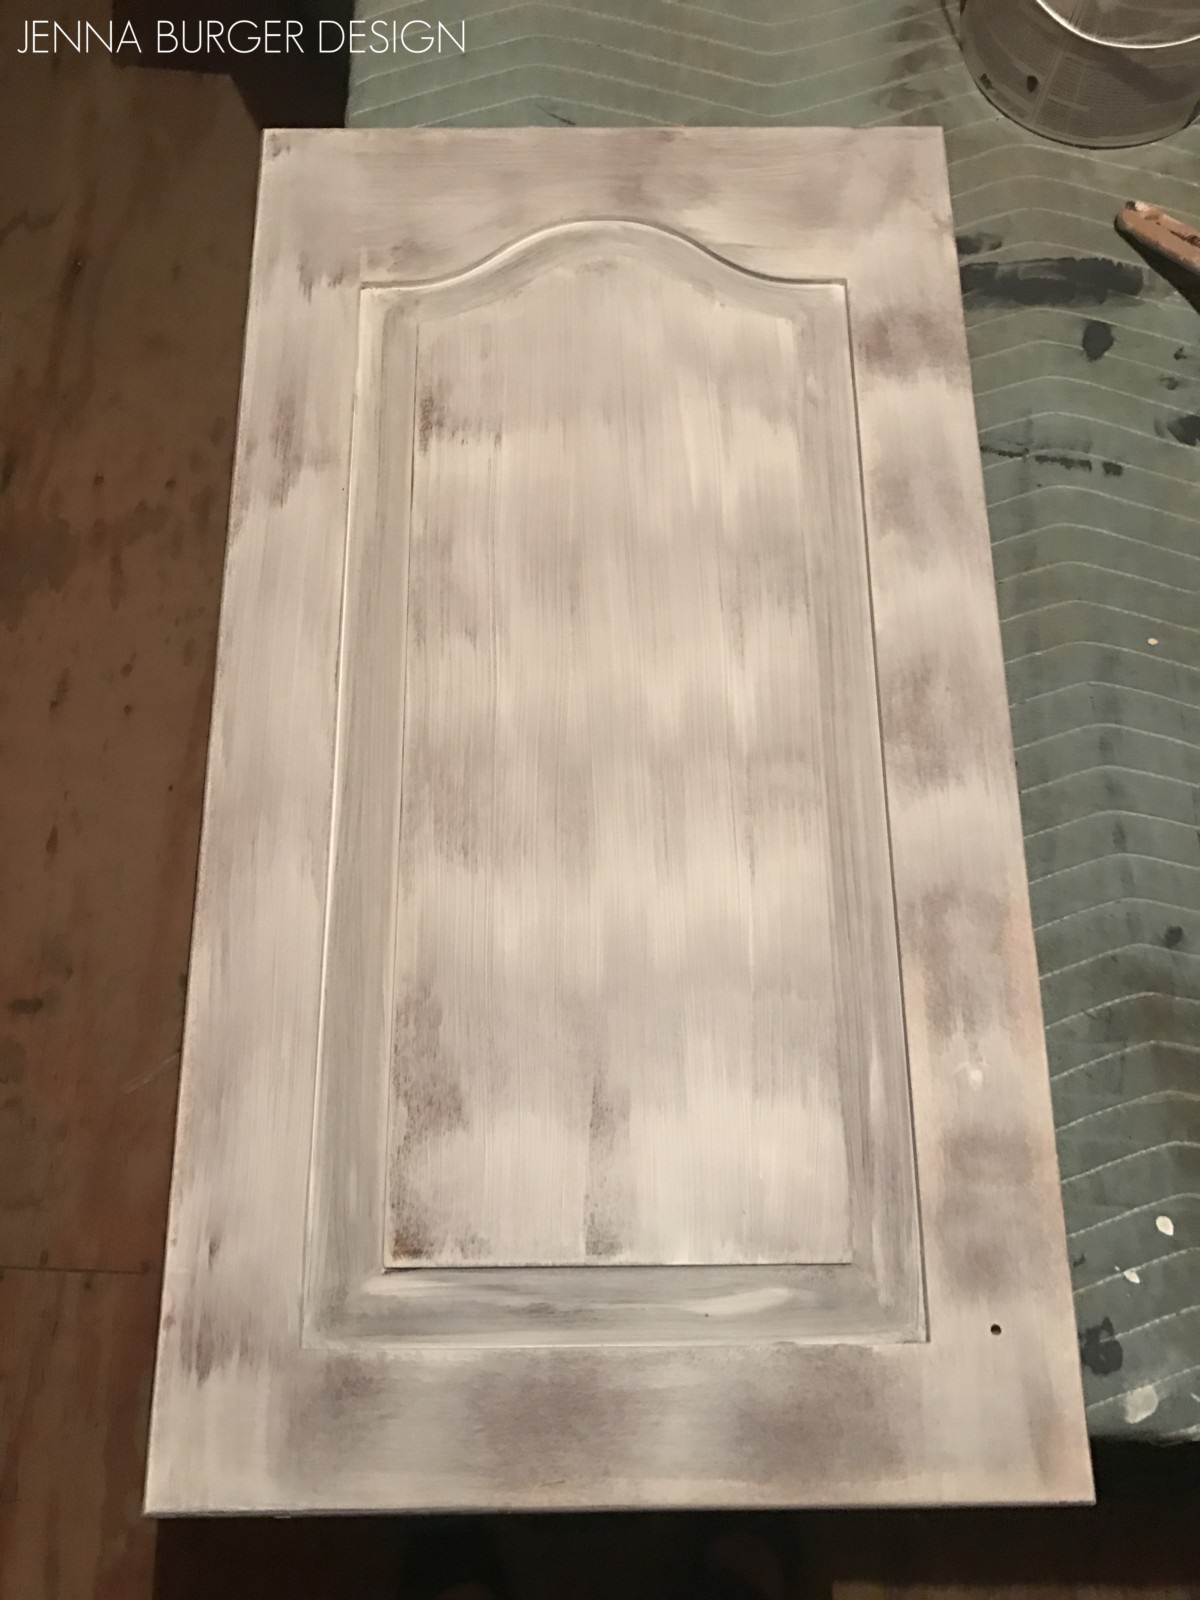
Cabinet primer complete. 22 more doors to go…
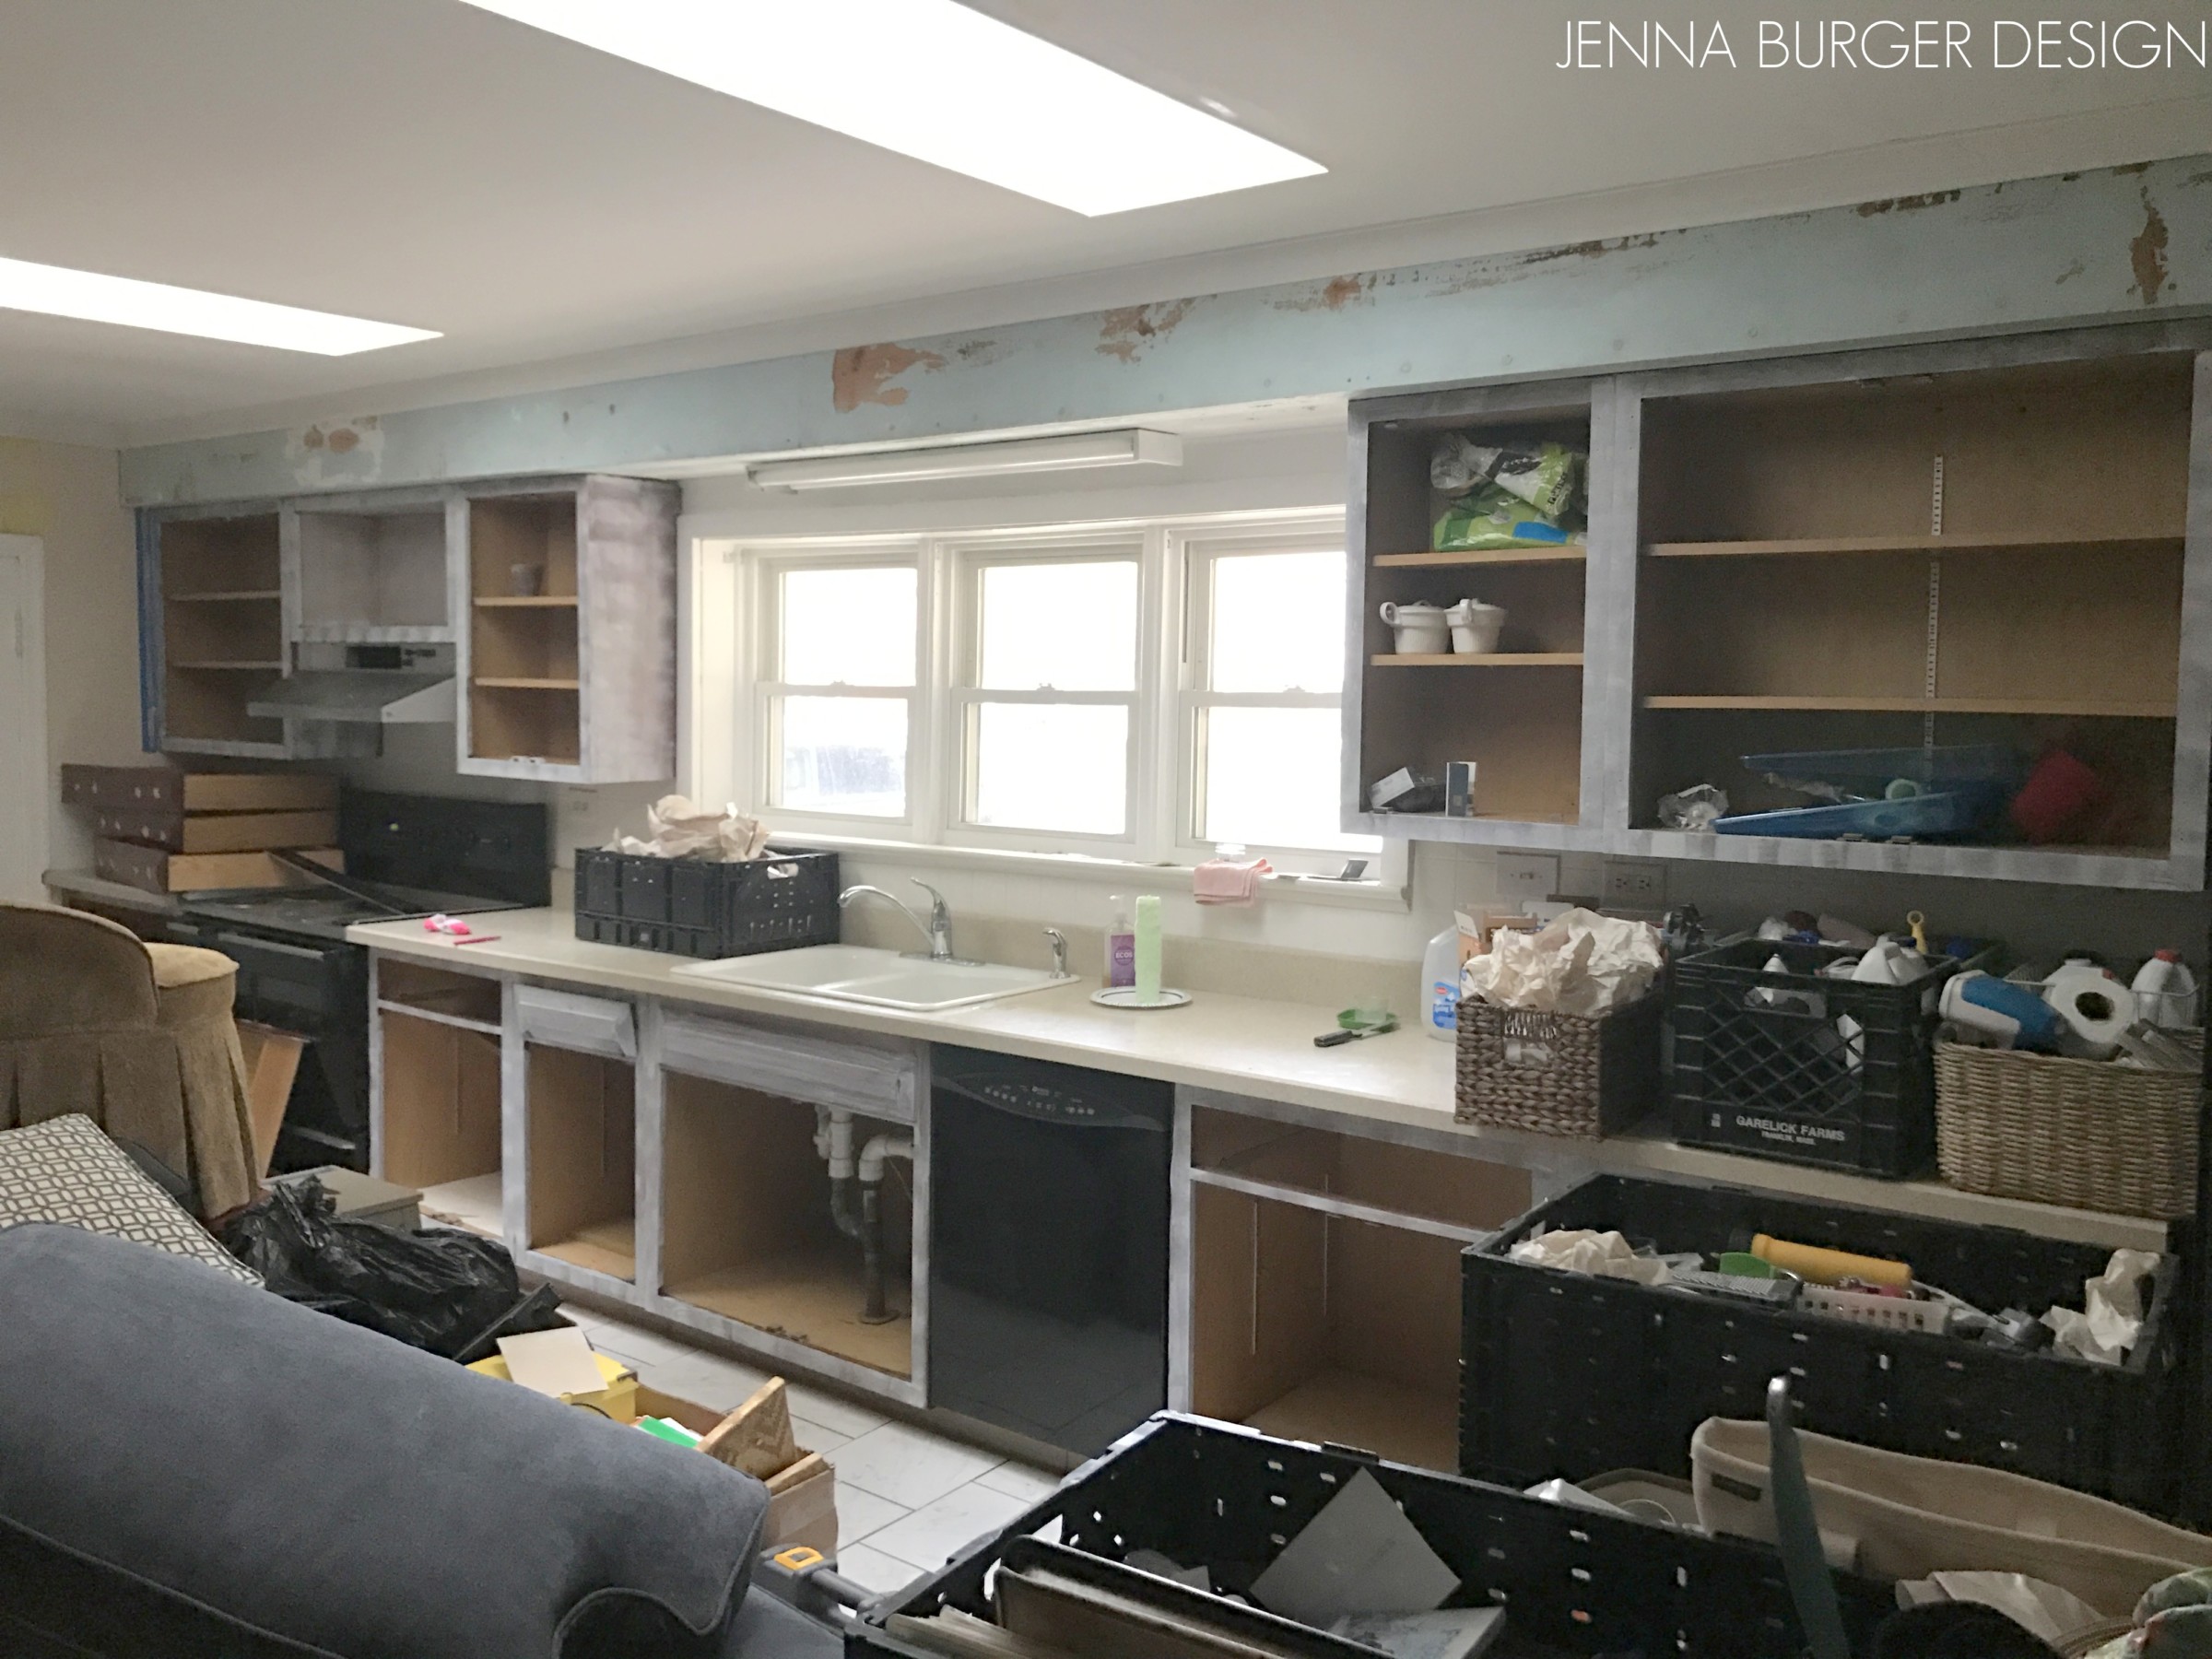
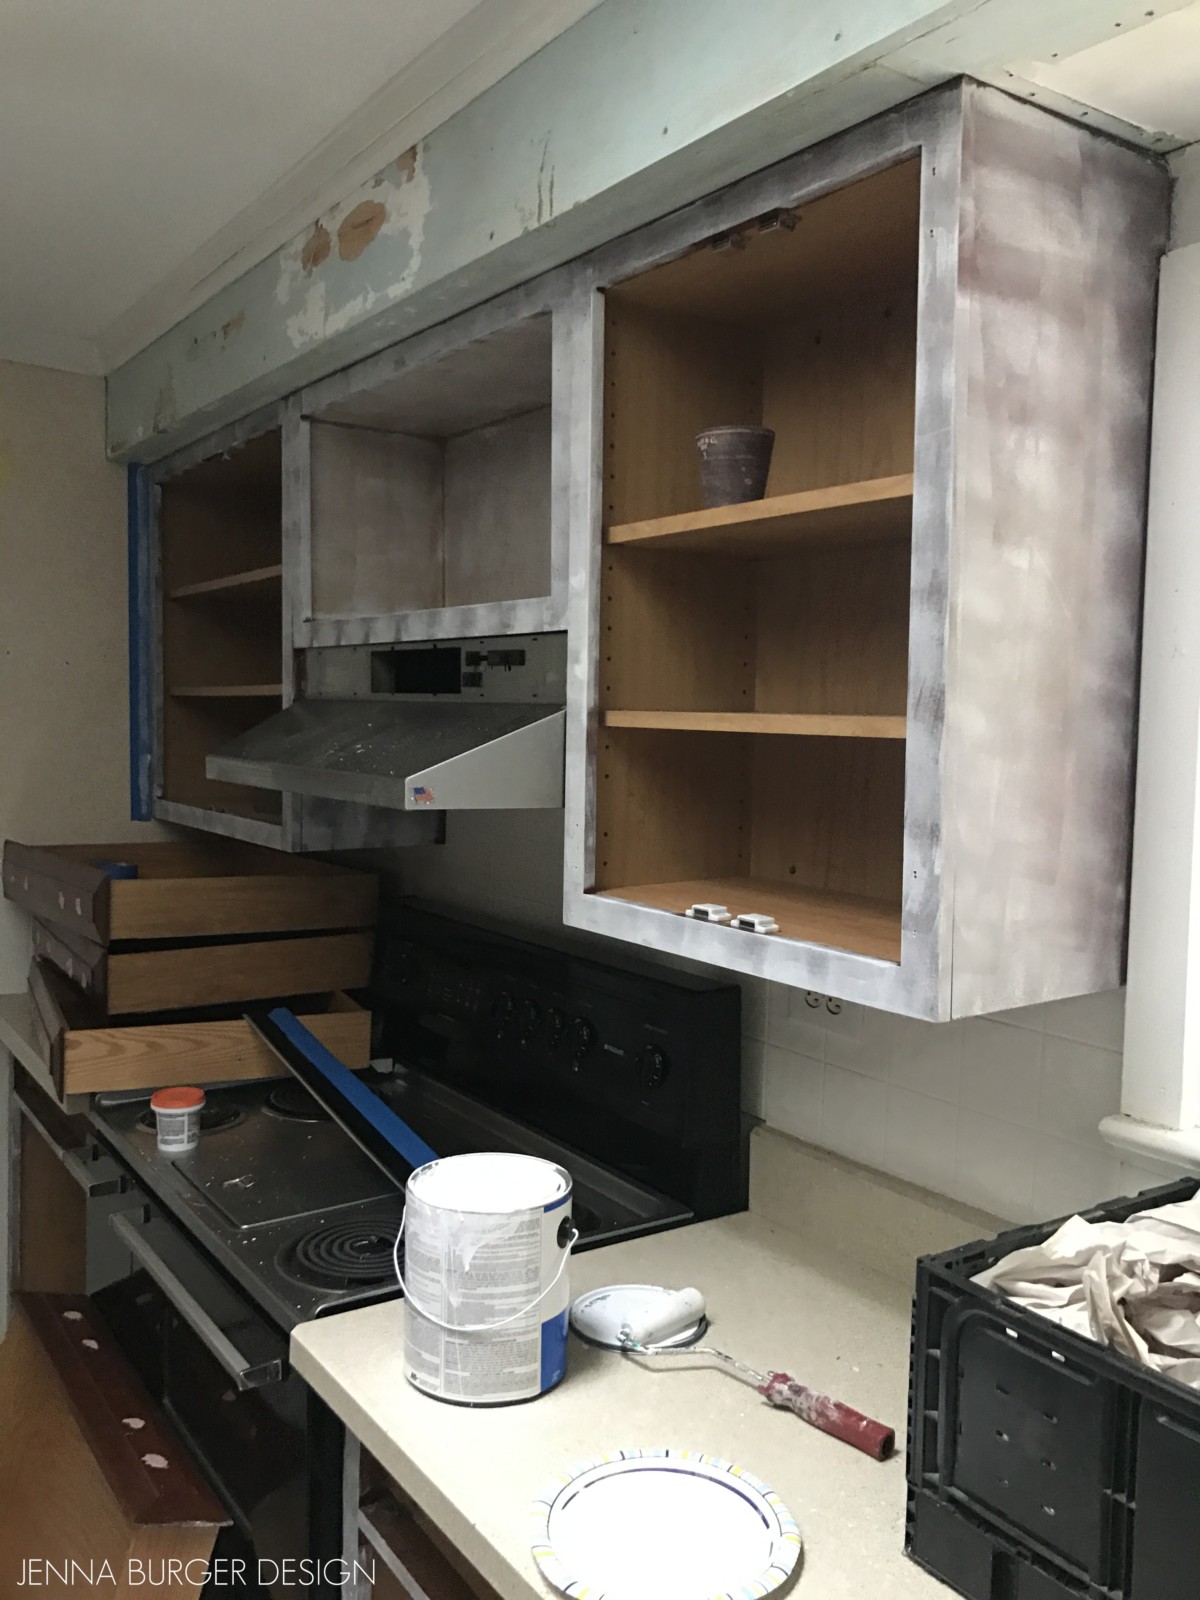
As I was priming the doors (on late nights + early mornings), I also painted the face frames of the kitchen.
Eek, this is a disastrous picture. Much of our furniture was stored in the kitchen during the renovation, so it was a challenging area to work! You gotta do, what you gotta do, right?!?
Using similar steps as with the doors, I used a small foam roller brush to apply the primer to the face frames of the cabinets. At the edges and in difficult spots, I used an angled brush.
A few hours later, here was the result.
Thankfully, with the primer coat, it does not have to be applied thick and only one coat is needed. As long as the surface it covered, it’s good to move forward with PAINT!
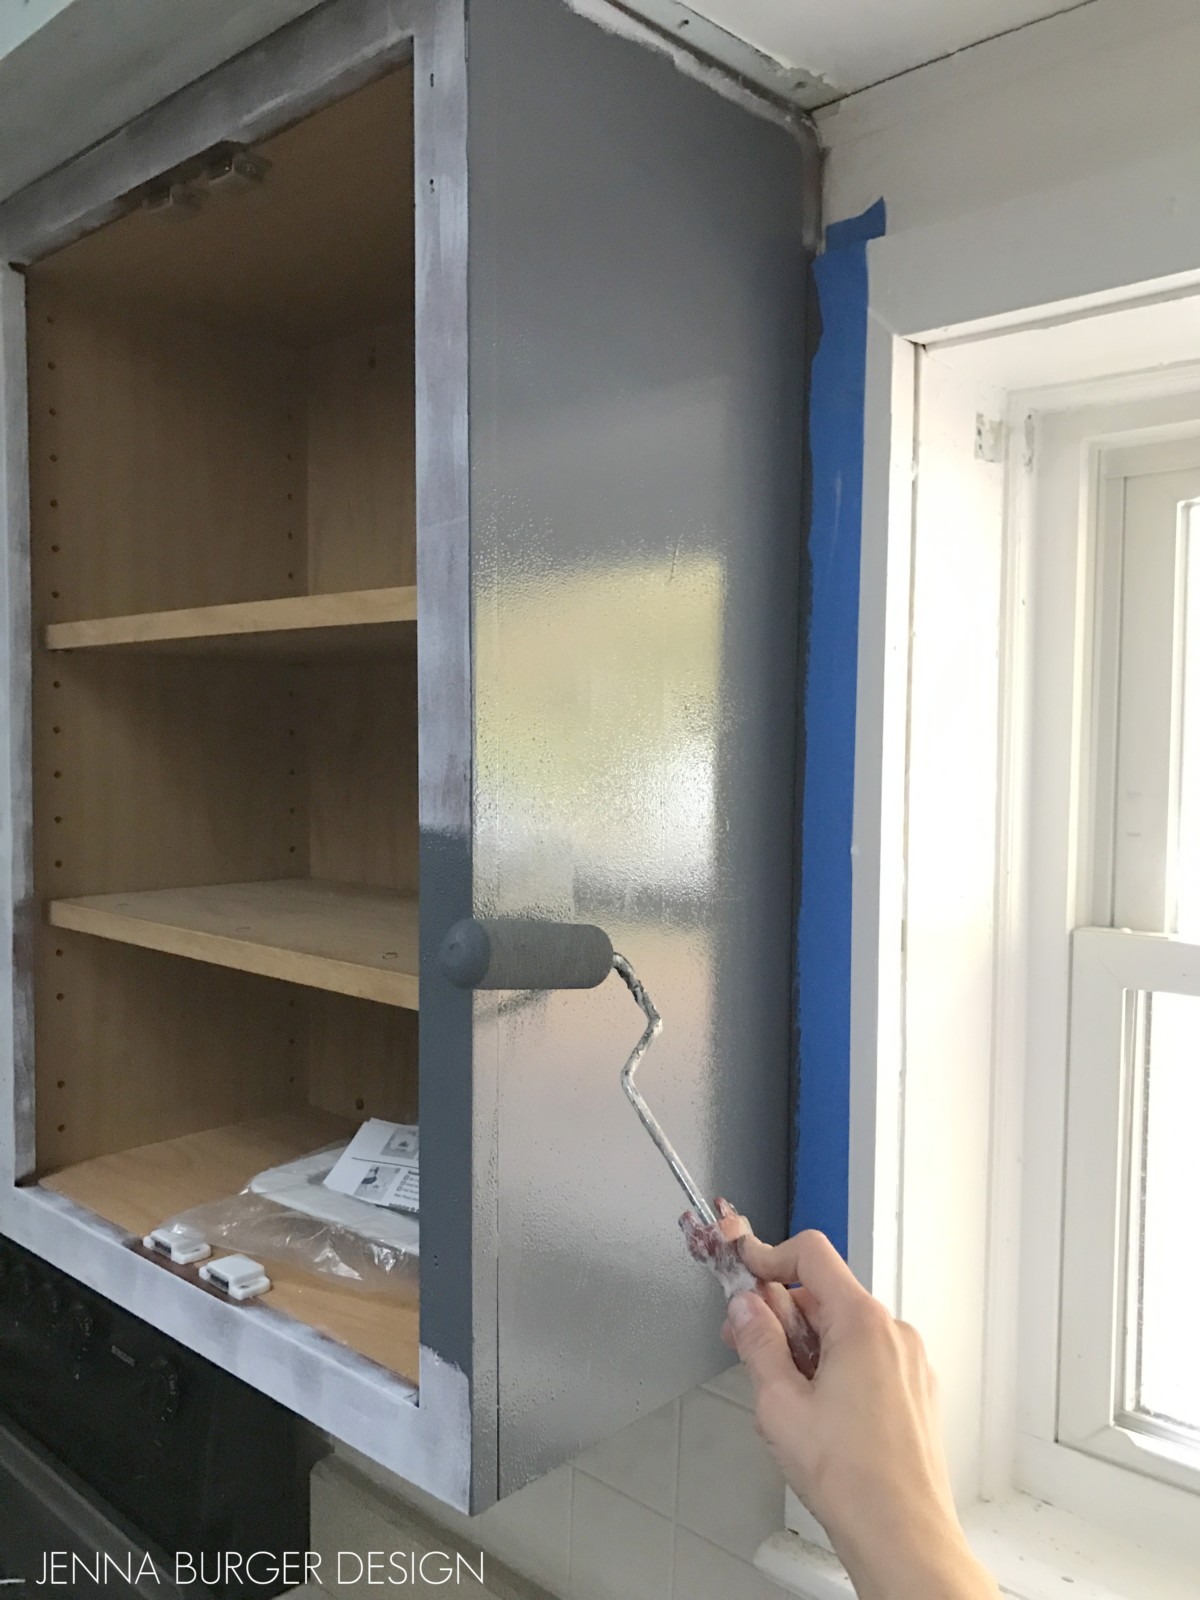
Continuing with the face frames, I applied the semi-gloss paint in the same way… Roller brush for flat surfaces and an angled brush at edges and corners. To get a brushless look, it’s important to have a continuous stroke instead of starting and stopping partially on the surface. Start at one end and continue the brush or roller to the other end.
I decided that two of the cabinets – the space above the hood and above the refrigerator – would be open cabinets that I wouldn’t install the doors back on to. I chose to make these cabinets open display with cookbooks and baskets to bring some color and depth to the space.
This is the open cabinet that I painted inside. For the cabinets with doors, I did not paint the interiors, I left them the clear maple.
Once the face frames were complete, this was the result…
It’s starting to look like something – I think. I hope.
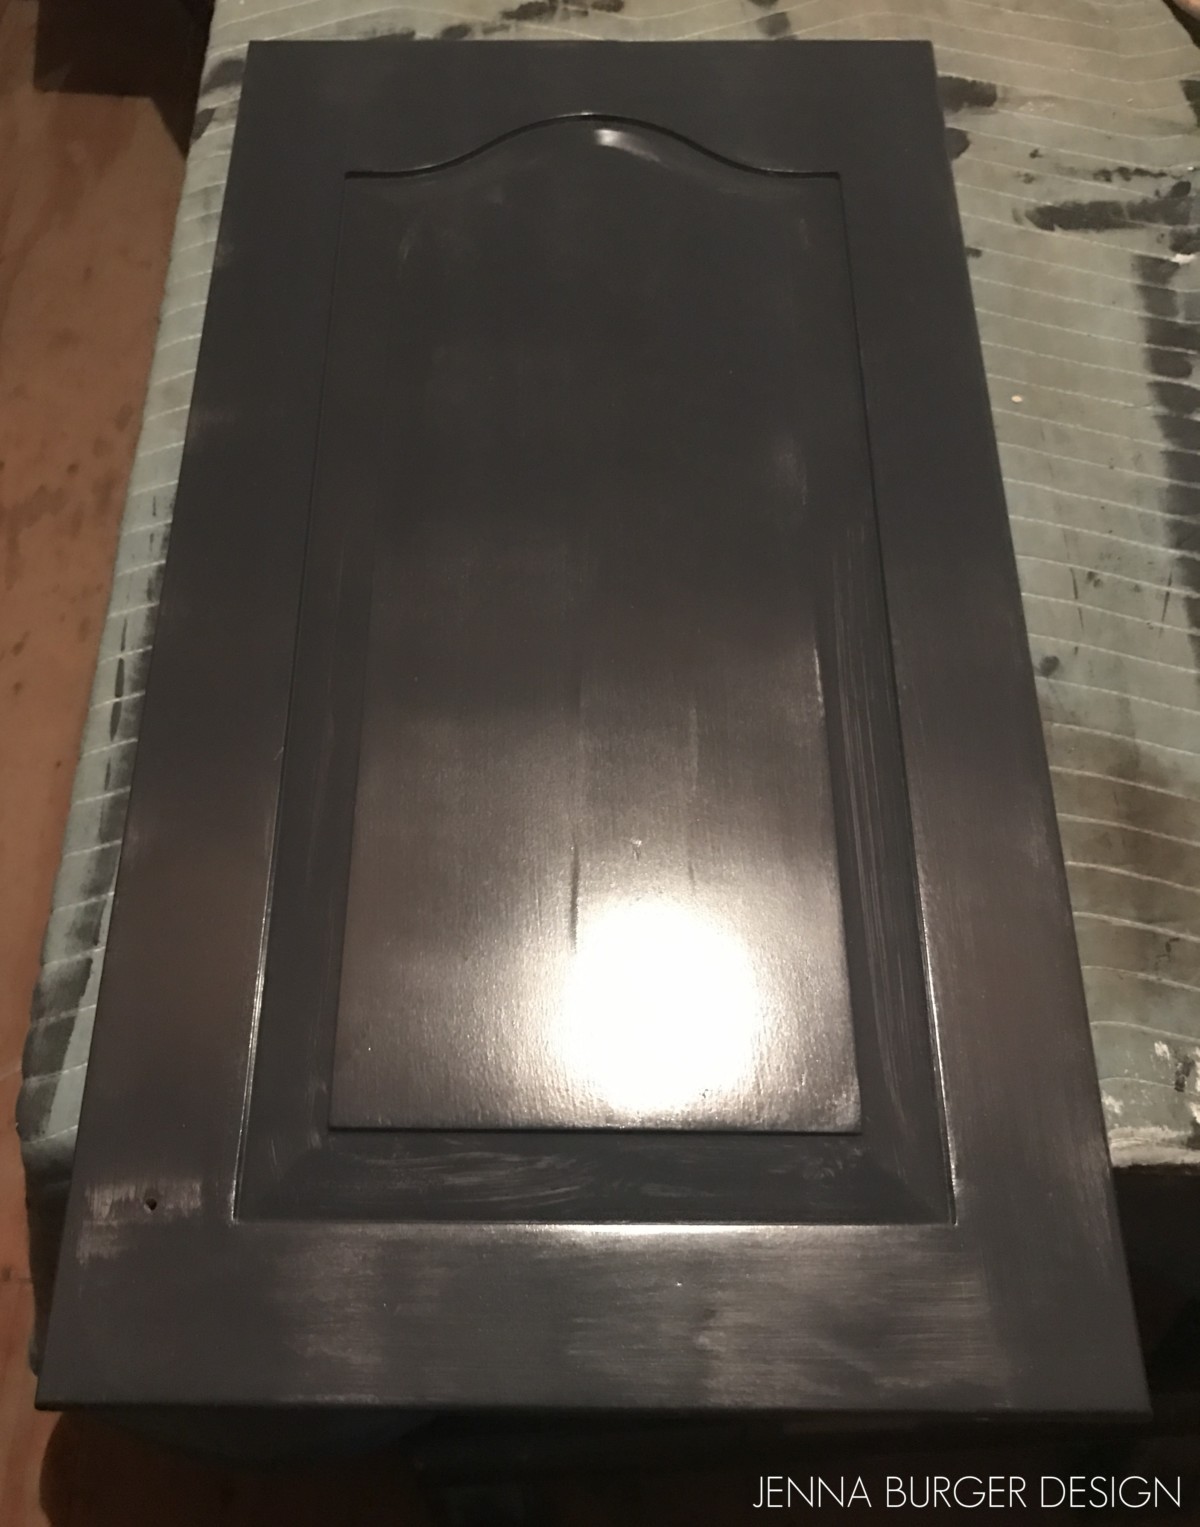
Check out this quick 13 seconds video I created of me painting one of the cabinet door fronts. This will give you a thorough look into how and when I use the brush and the roller on the face of the door.
And this is the completed cabinet. Again, 22 more to go…
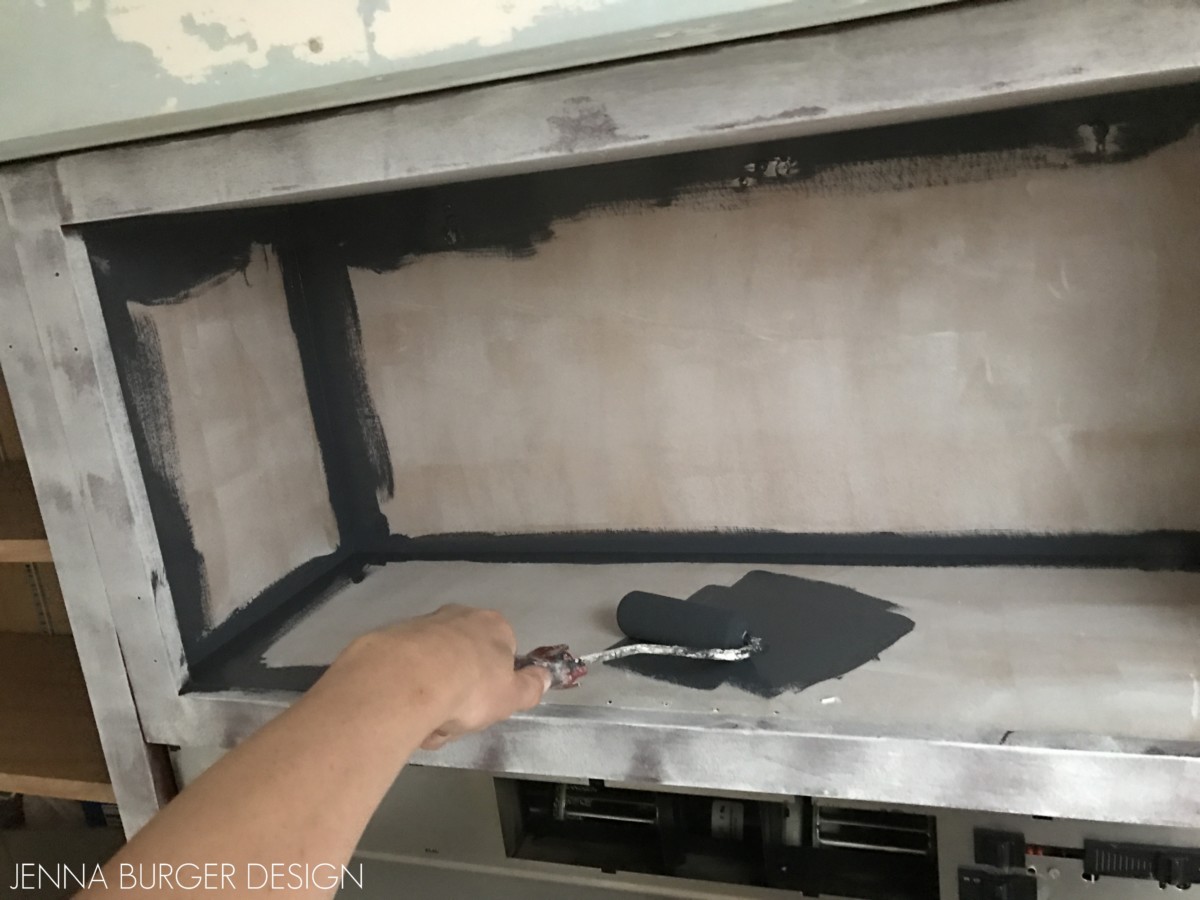
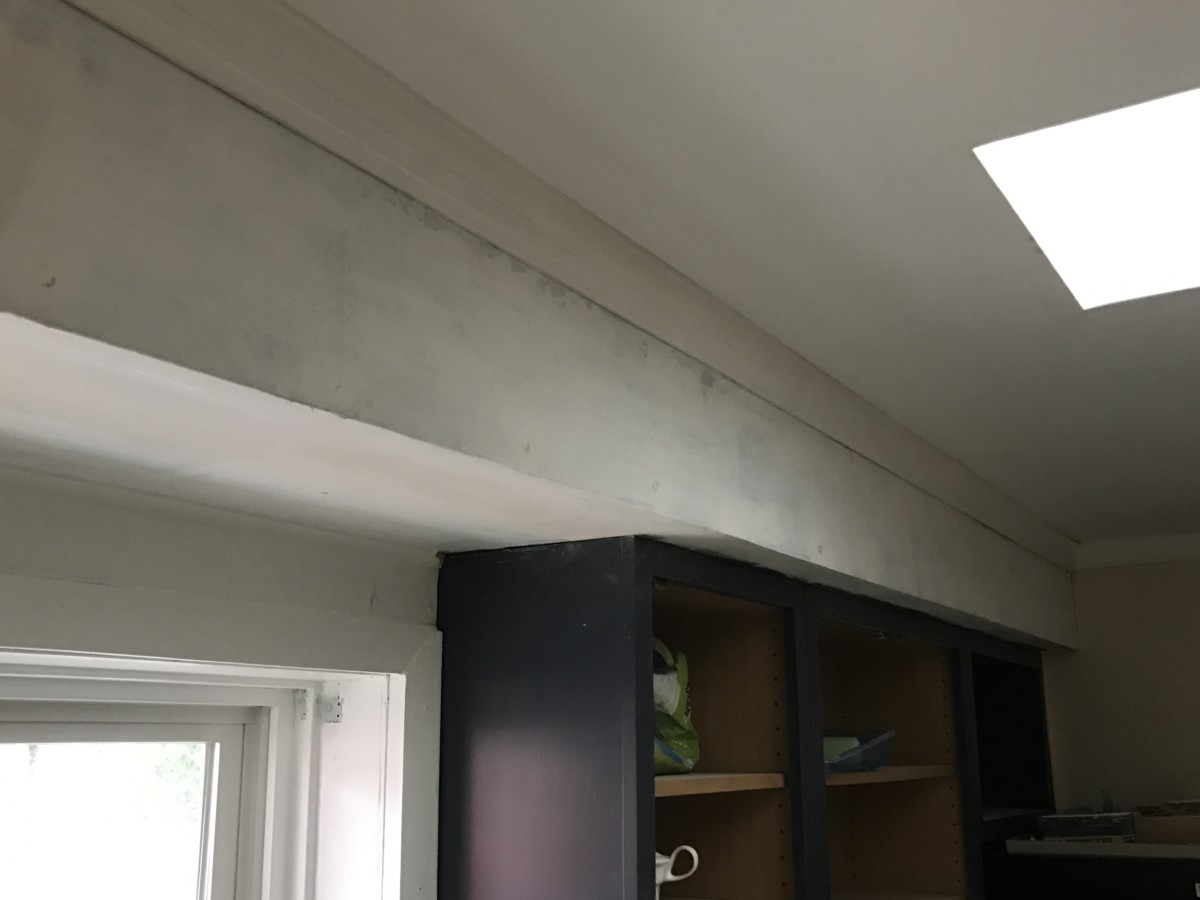
Aside from the cabinet doors and face frames, the soffit above the cabinets also needed major attention. I removed the wallpaper border above the cabinets and found that the soffit was made using wood instead of sheetrock, which is typical. Repair to the damaged areas wouldn’t be as easy as just adding spackle. Ugh.
After sanding and trying to create a smooth surface (as much as possible), I first primed the soffit bulkhead.
Then I painted the soffit using a semi-gloss white. In hindsight, I should have used a flat sheen since the semi-gloss finish shows every imperfection, but it’s fine and I’ve learned to live with it.
I also chose to reuse the exposed door hinges instead of buying new. Using spray paint in a brushed chrome finish, I layed out the hinges on a protective surface (outside before the snow) and gave them a few coats. Voila, new hinges and only a few dollars spent!
Once the face frames and doors were complete, they were ready to go back into place. In many of the images above, the paint color looked so dark, but in natural light the deep blue hue can really be appreciated.
The paint color of the cabinets is: Valspar Mystified 4011-8
After many hours of love + attention, the cabinets were finished and ready to be hung with new hardware and repurposed hinges.
This is the result…
That’s a wrap for now… I have a few more details for the DIY Kitchen Remodel coming up. Stay tuned for the reveal of the overall space!
DISCLAIMER: THIS KITCHEN REMODEL IS A COLLABORATION WITH LOWE’S. ALL OPINIONS + SELECTIONS ARE MY OWN.
It’s been several weeks since I shared an update on our brick ranch fixer upper which started with a preview of the progress on the large living room. Since then, we officially moved into our new home after 6 weeks of renovations, which included a lot of sheetrock work, a new bathroom, and a new laundry space.
The second room reveal, well I should say more progress reveal, is another living / family space. This room has much of the furniture from the blue room in our previous home + a few exciting additions.
Let’s dive in…
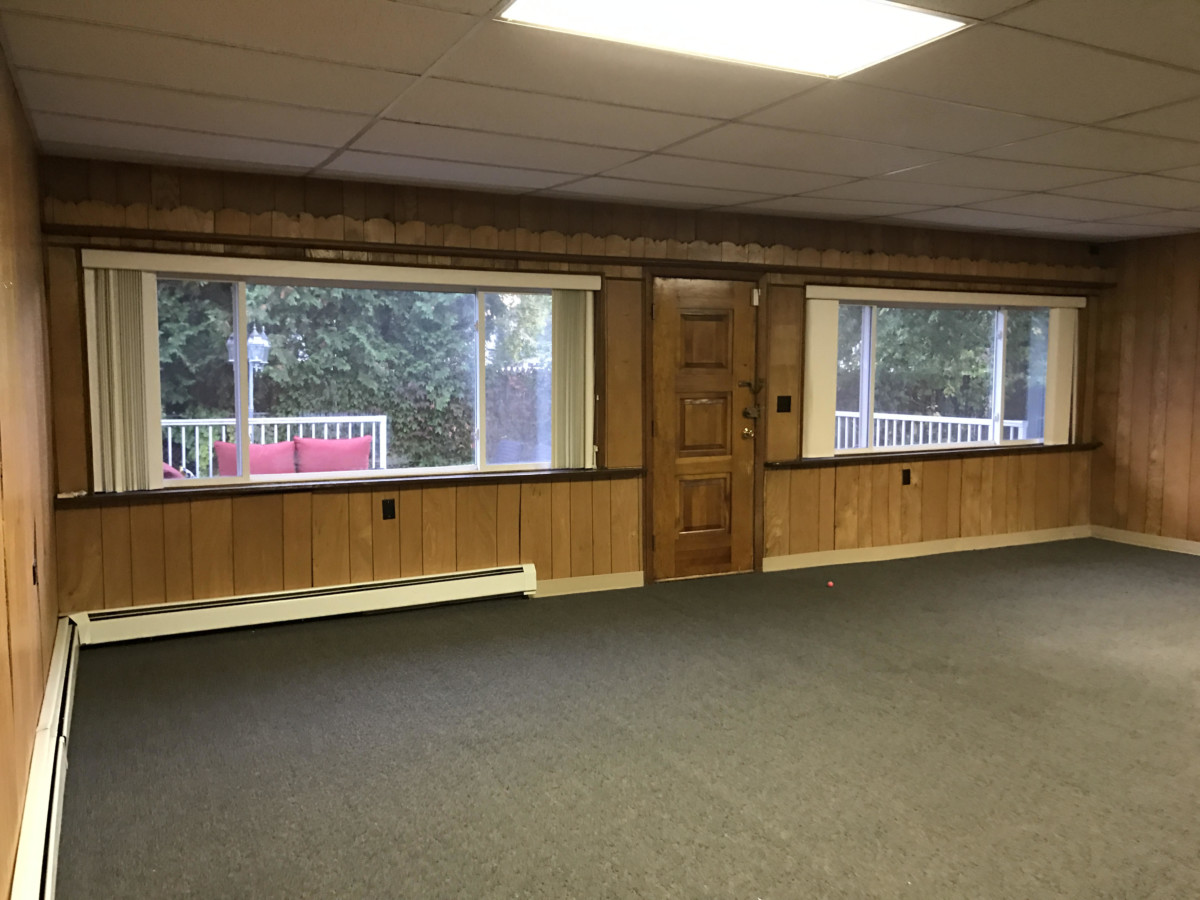
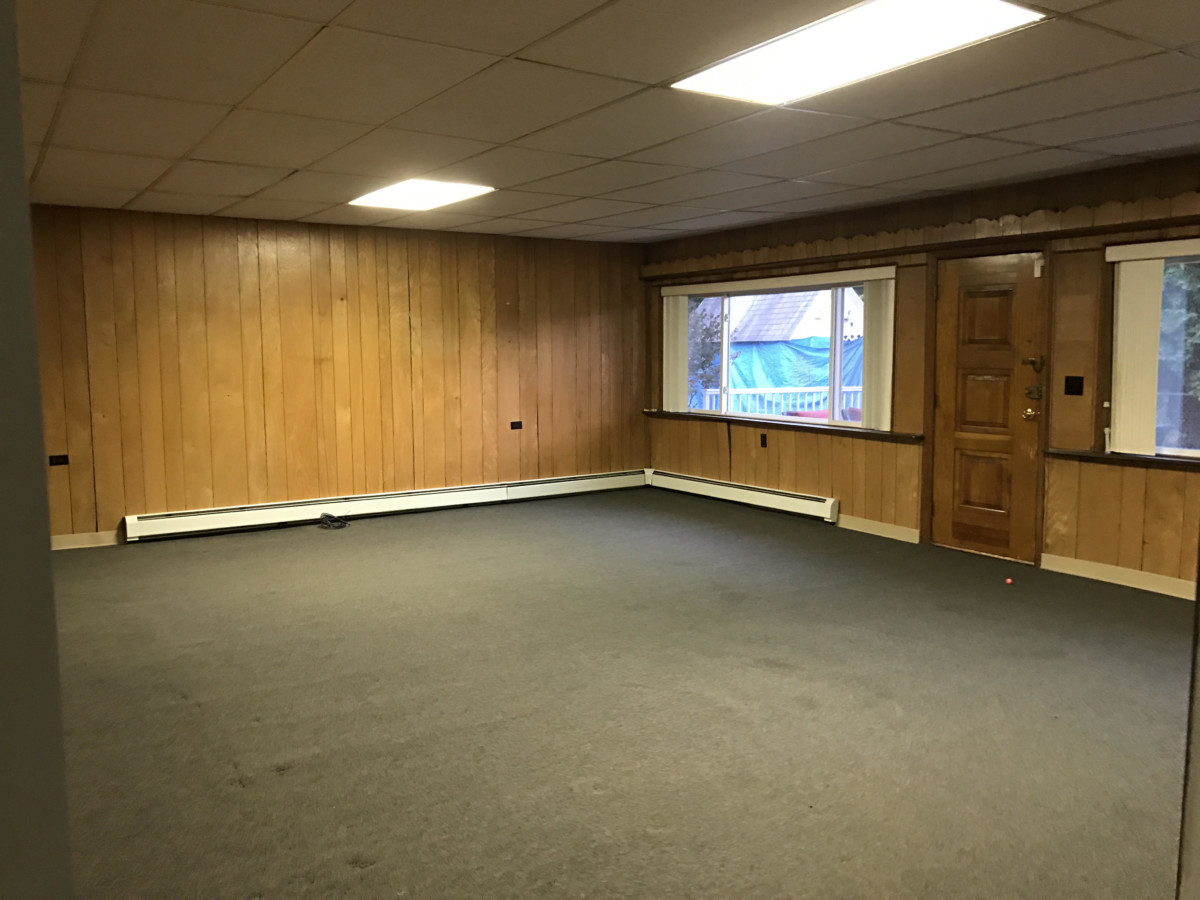
THE BEFORE
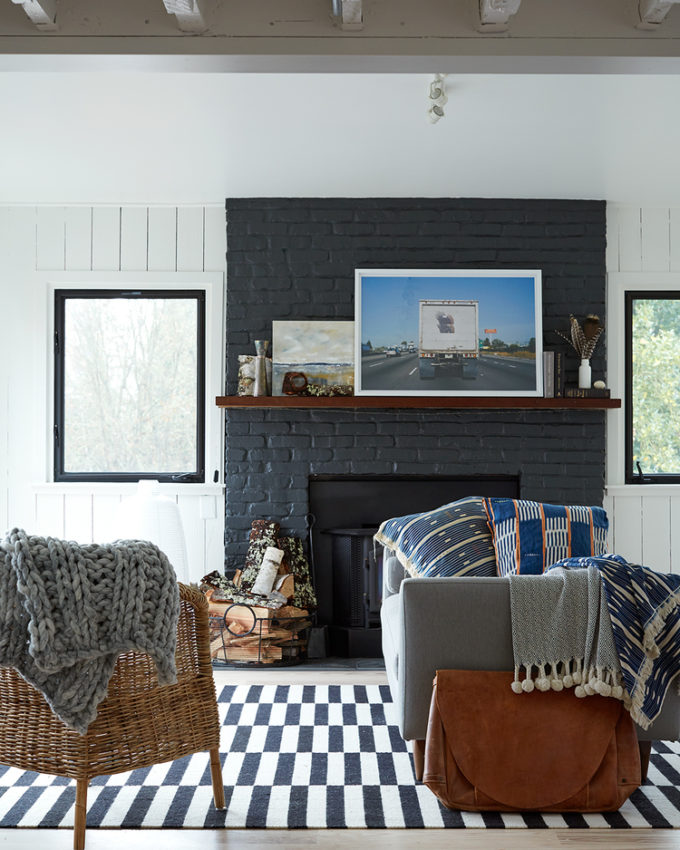
This is a sizable room about 15′ x 18′ with a brick fireplace, hardwood floors, a large window, and interesting architectural details like the rounded doorways.
The room still isn’t painted (despite my hanging pictures) and there is still work to be done like the fireplace (more on that in a bit), but here is what the space looks like now…
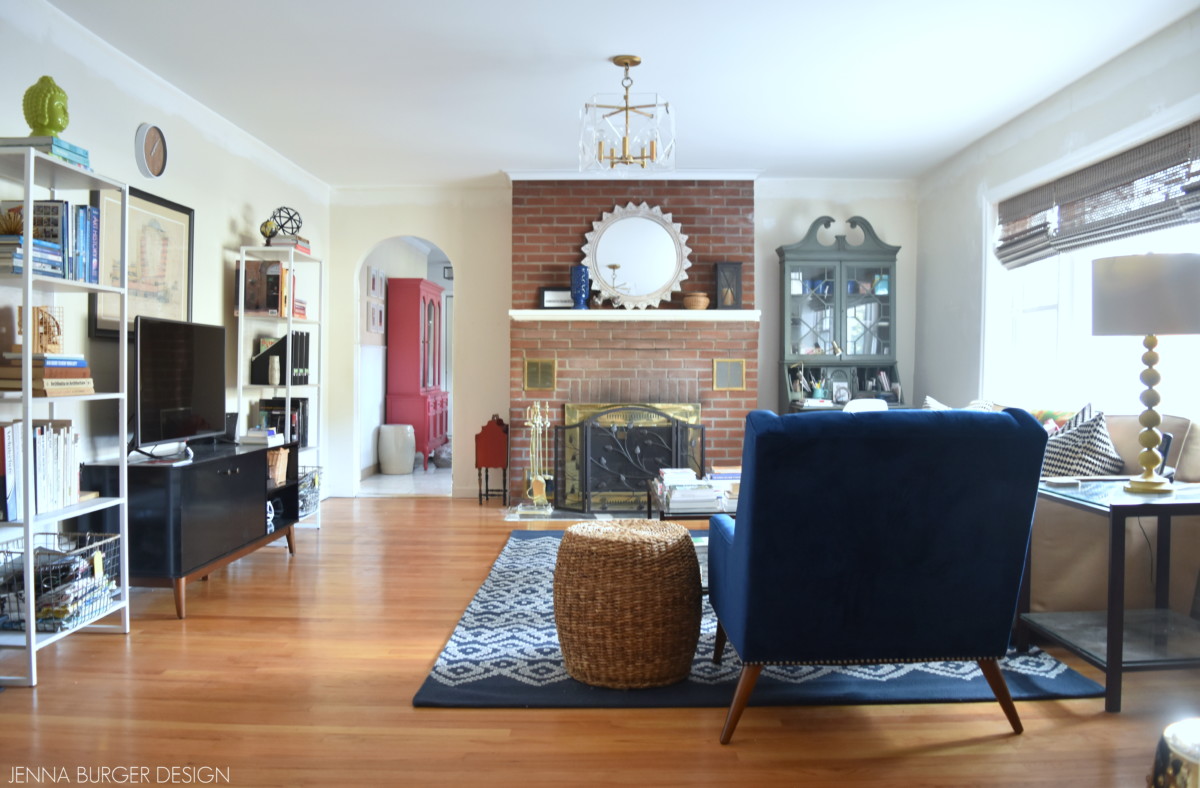
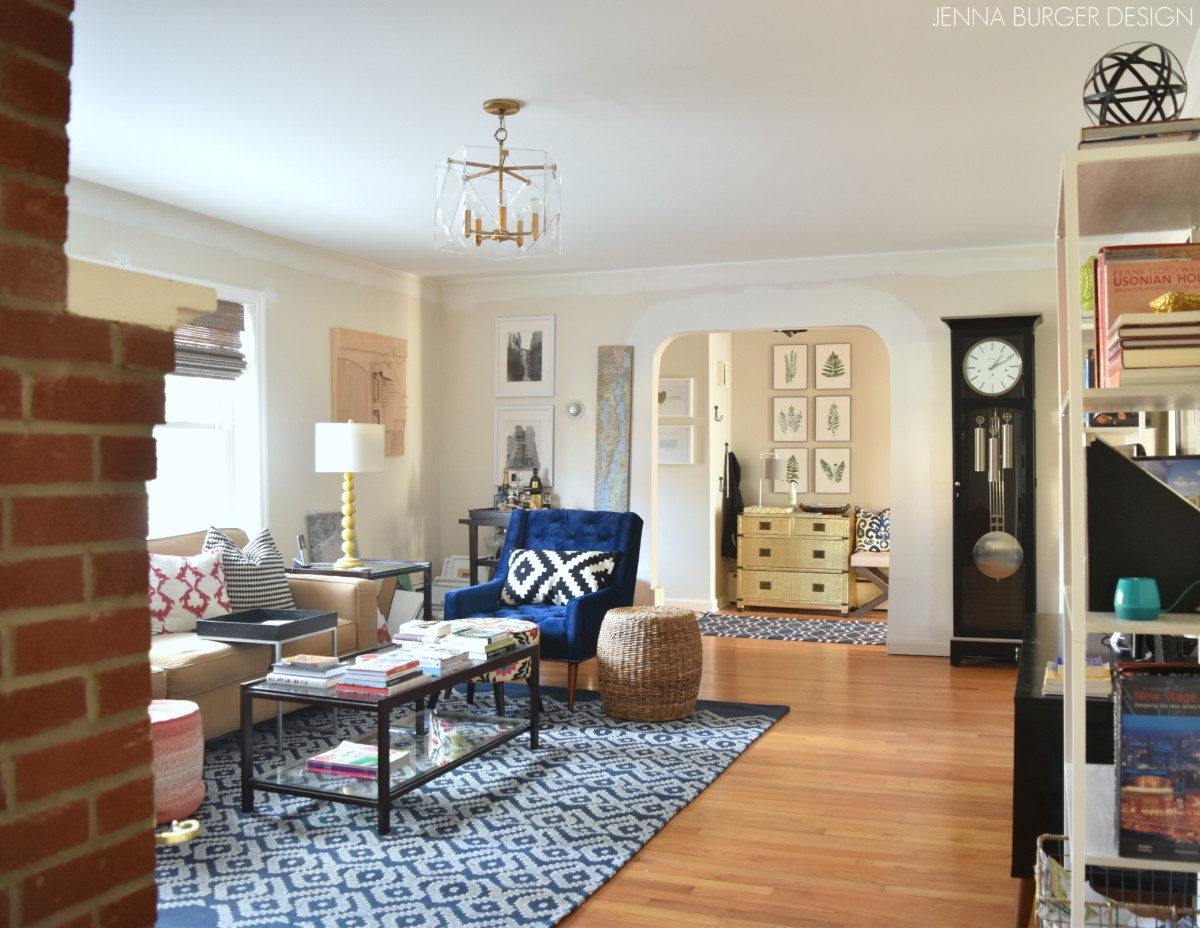
THE AFTER [PROGRESS]
The bones of the space are still here, but it’s been updated to reflect our style and personality.
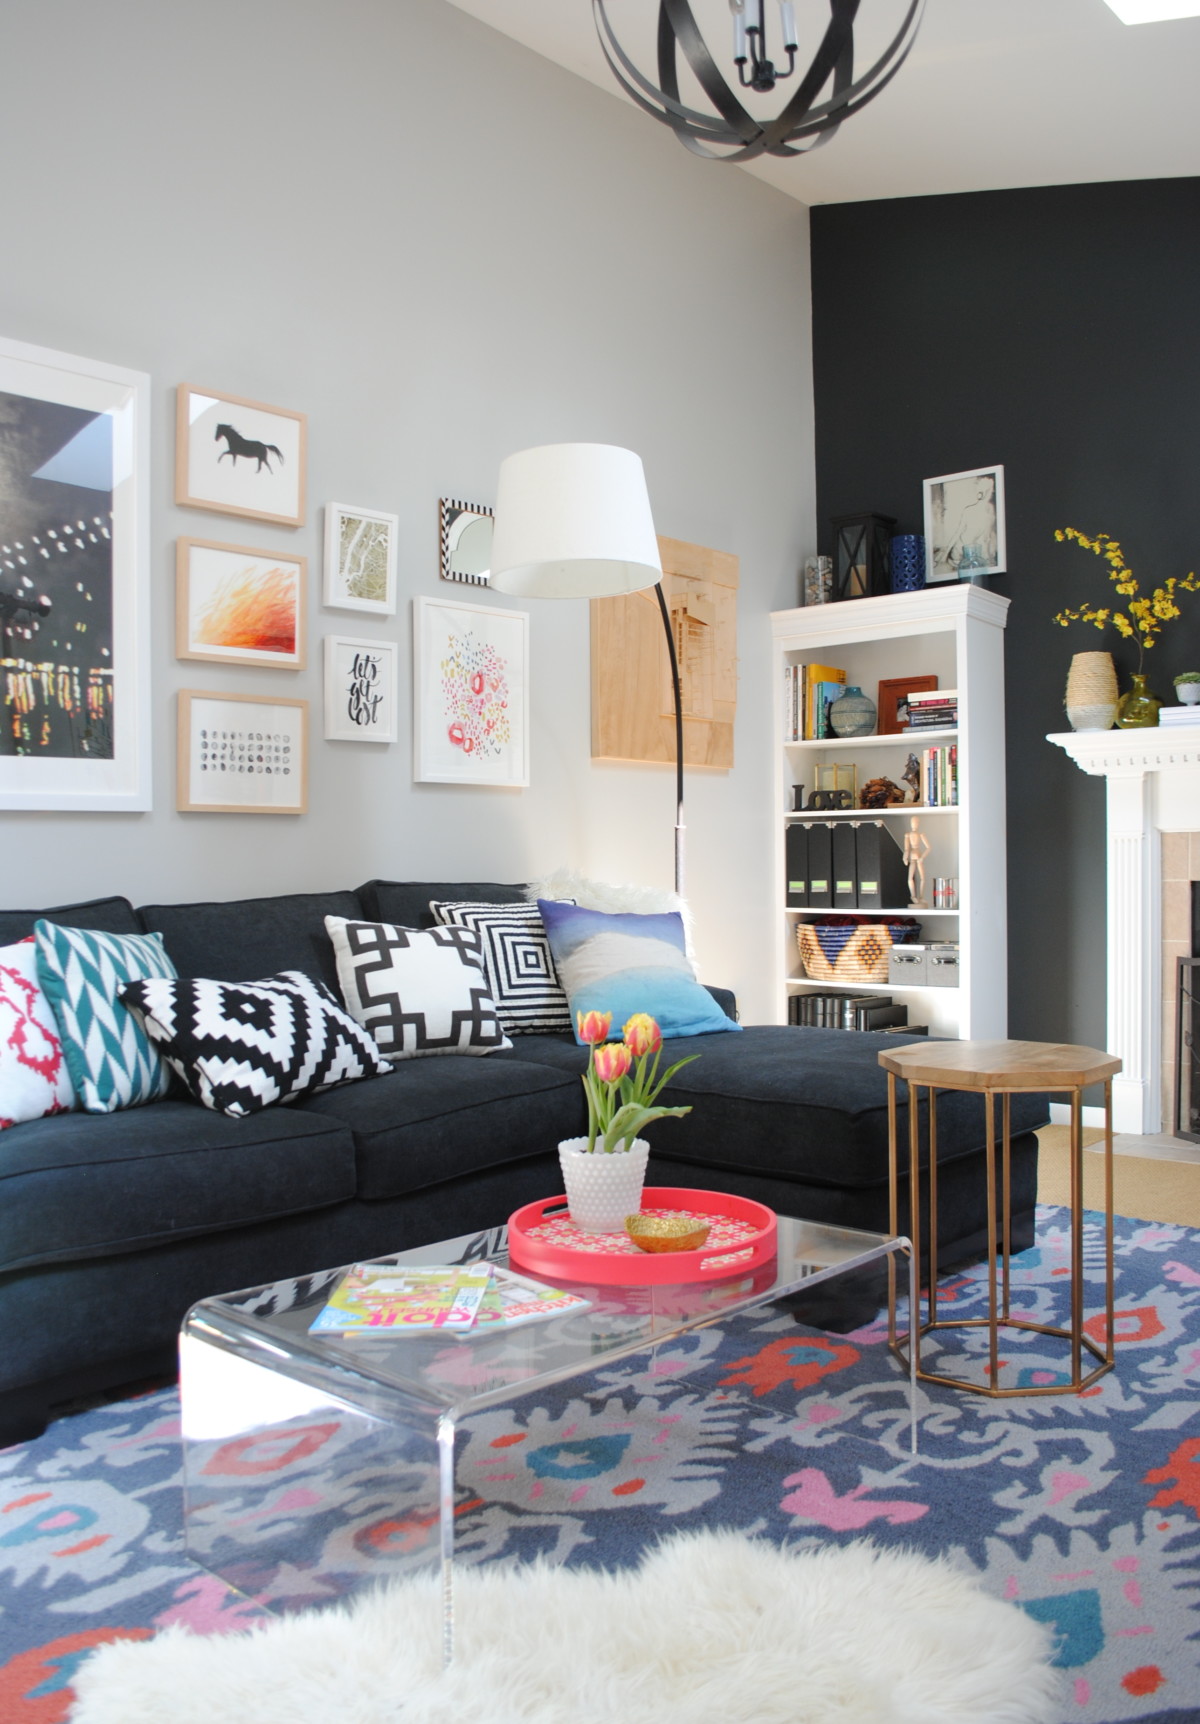
I chose to position the sofa (the Cameron sofa from Crate and Barrel that we purchased 15 years ago + still love) in front of the window, which has a straight on view of the TV and an equal easy view of the fireplace. I paired it with a metal coffee table that I actually changed a few years back with wood planks, but decided to change back with the original glass. It feels so fresh and new in this setting.
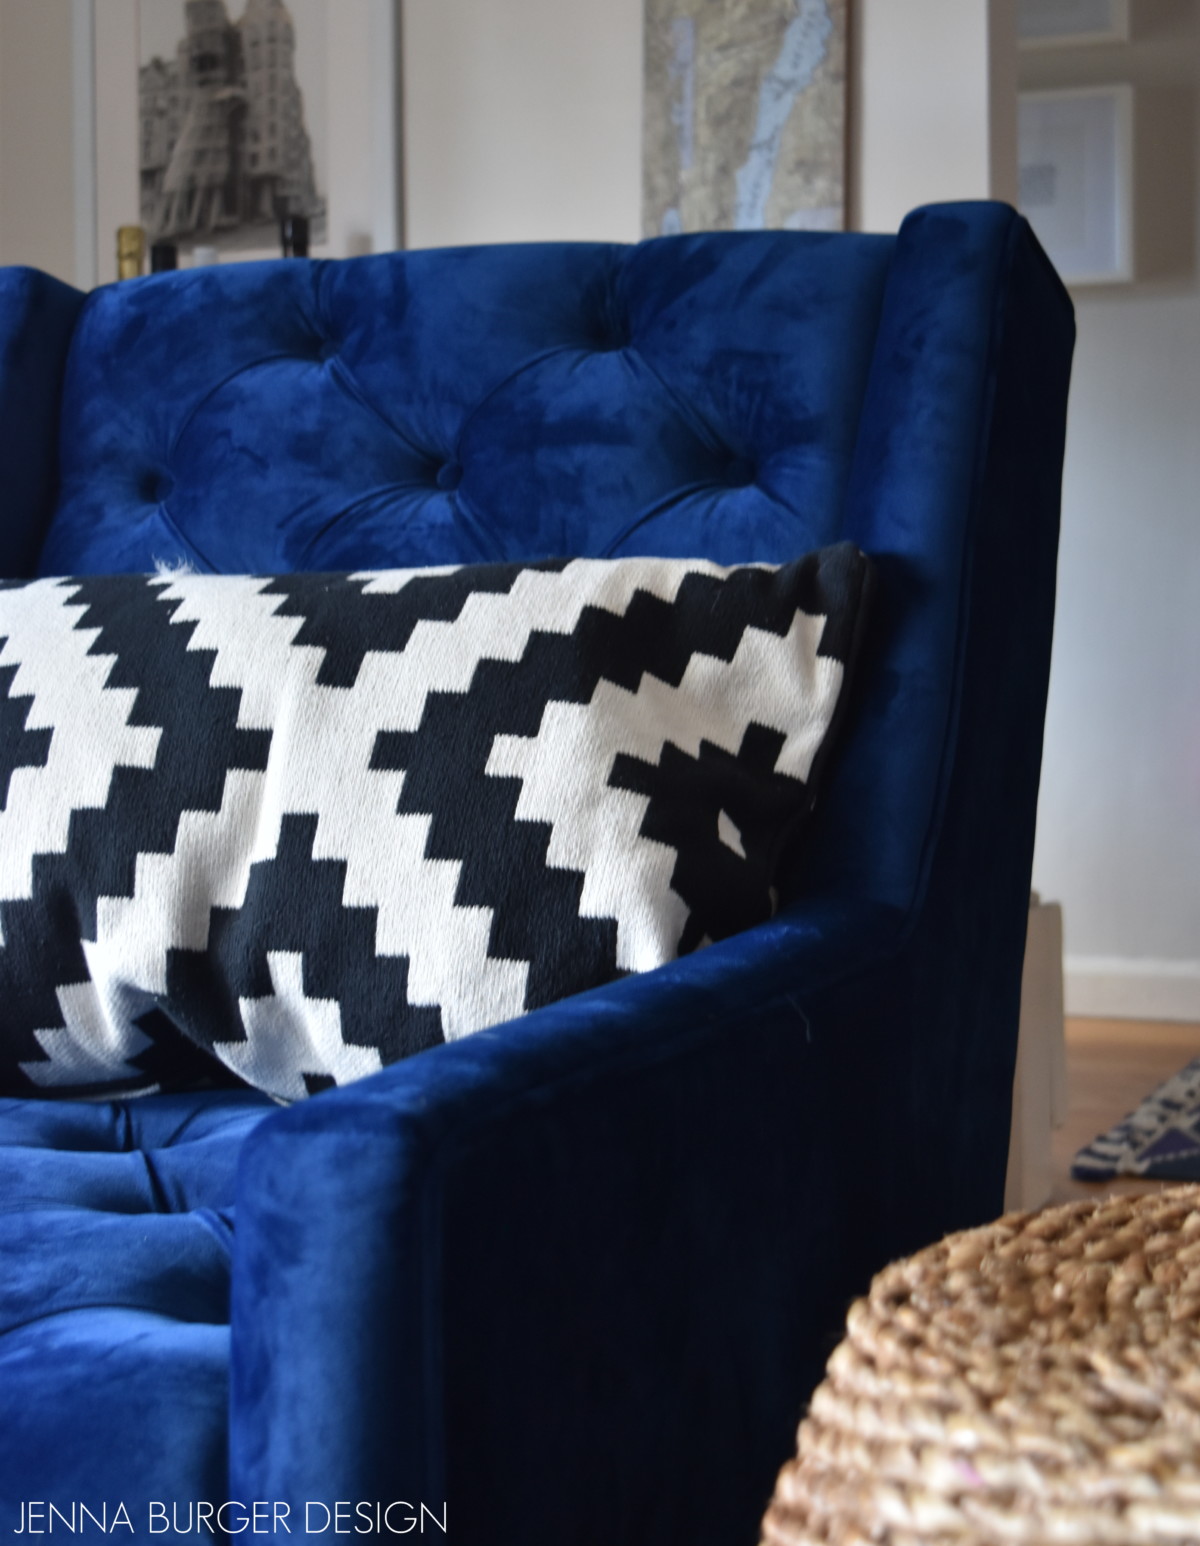
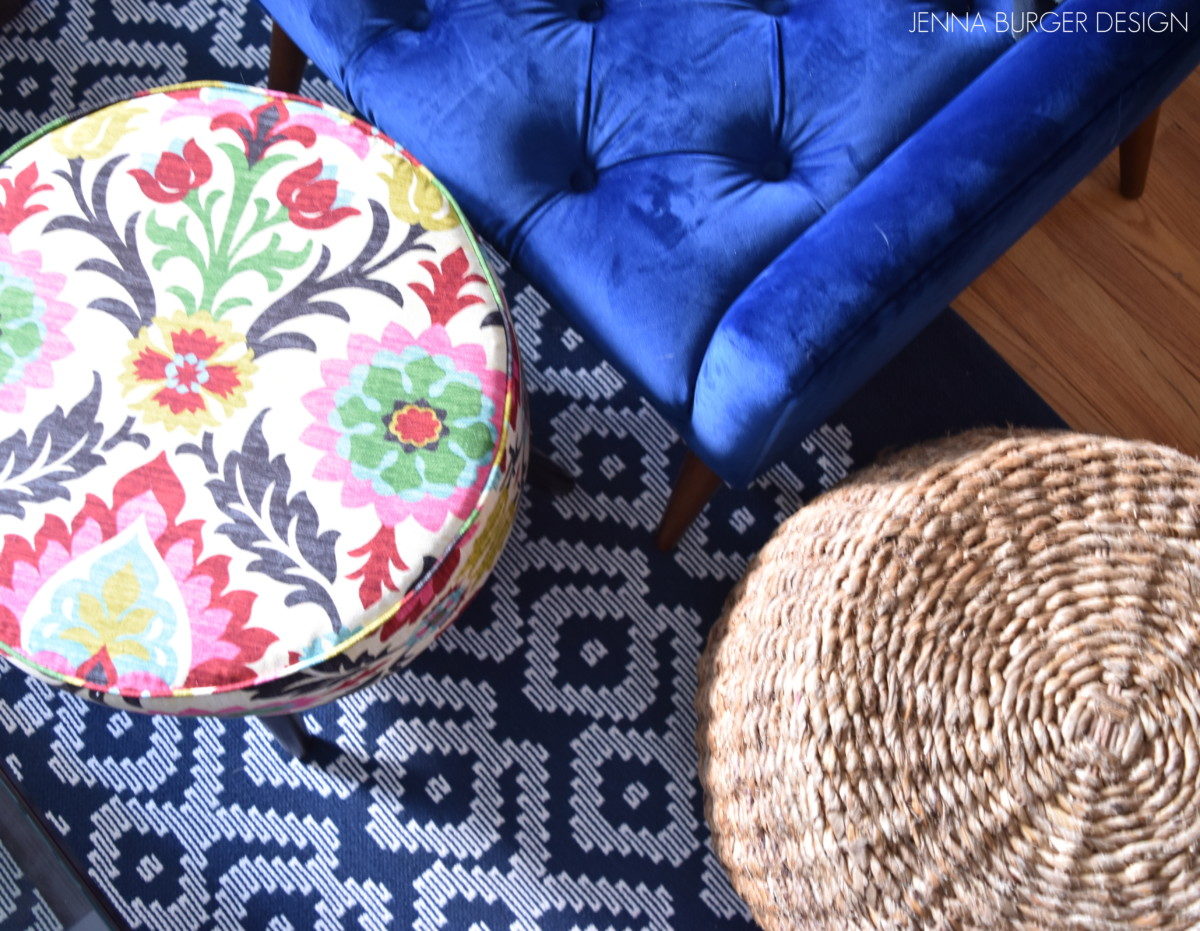
The velvet navy chair + graphic diamond rug are new purchases – both of which I am obsessed with. I adored the navy colored room in our last house and it worked well because so much light filtered into the space. This current home is different and I know the walls will have to be a lighter hue (color still to be determined), so I decided to bring in the deep navy color in a different way through layers and accessories.
This chair is a dream. It is SO luxurious. I found it on Wayfair, but it was out of stock – bummer. Then with some sourcing, I found it at bed, bath, and beyond, which I used a 20% coupon to purchase it with – score!
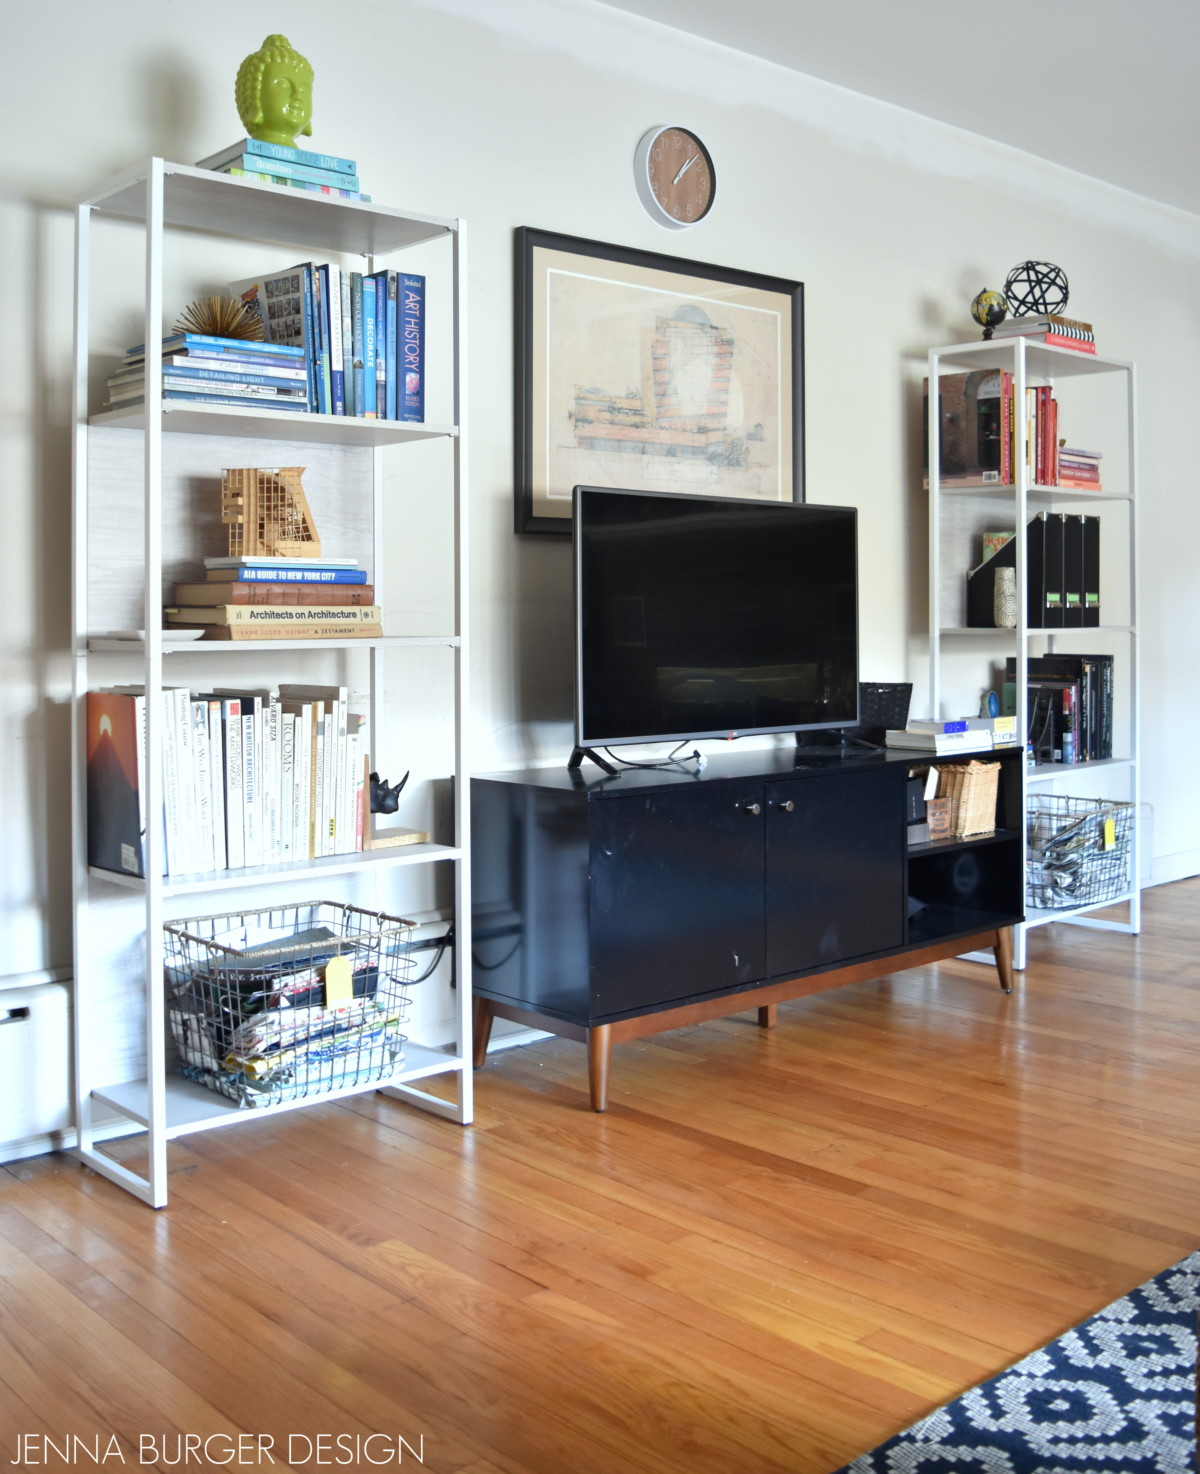
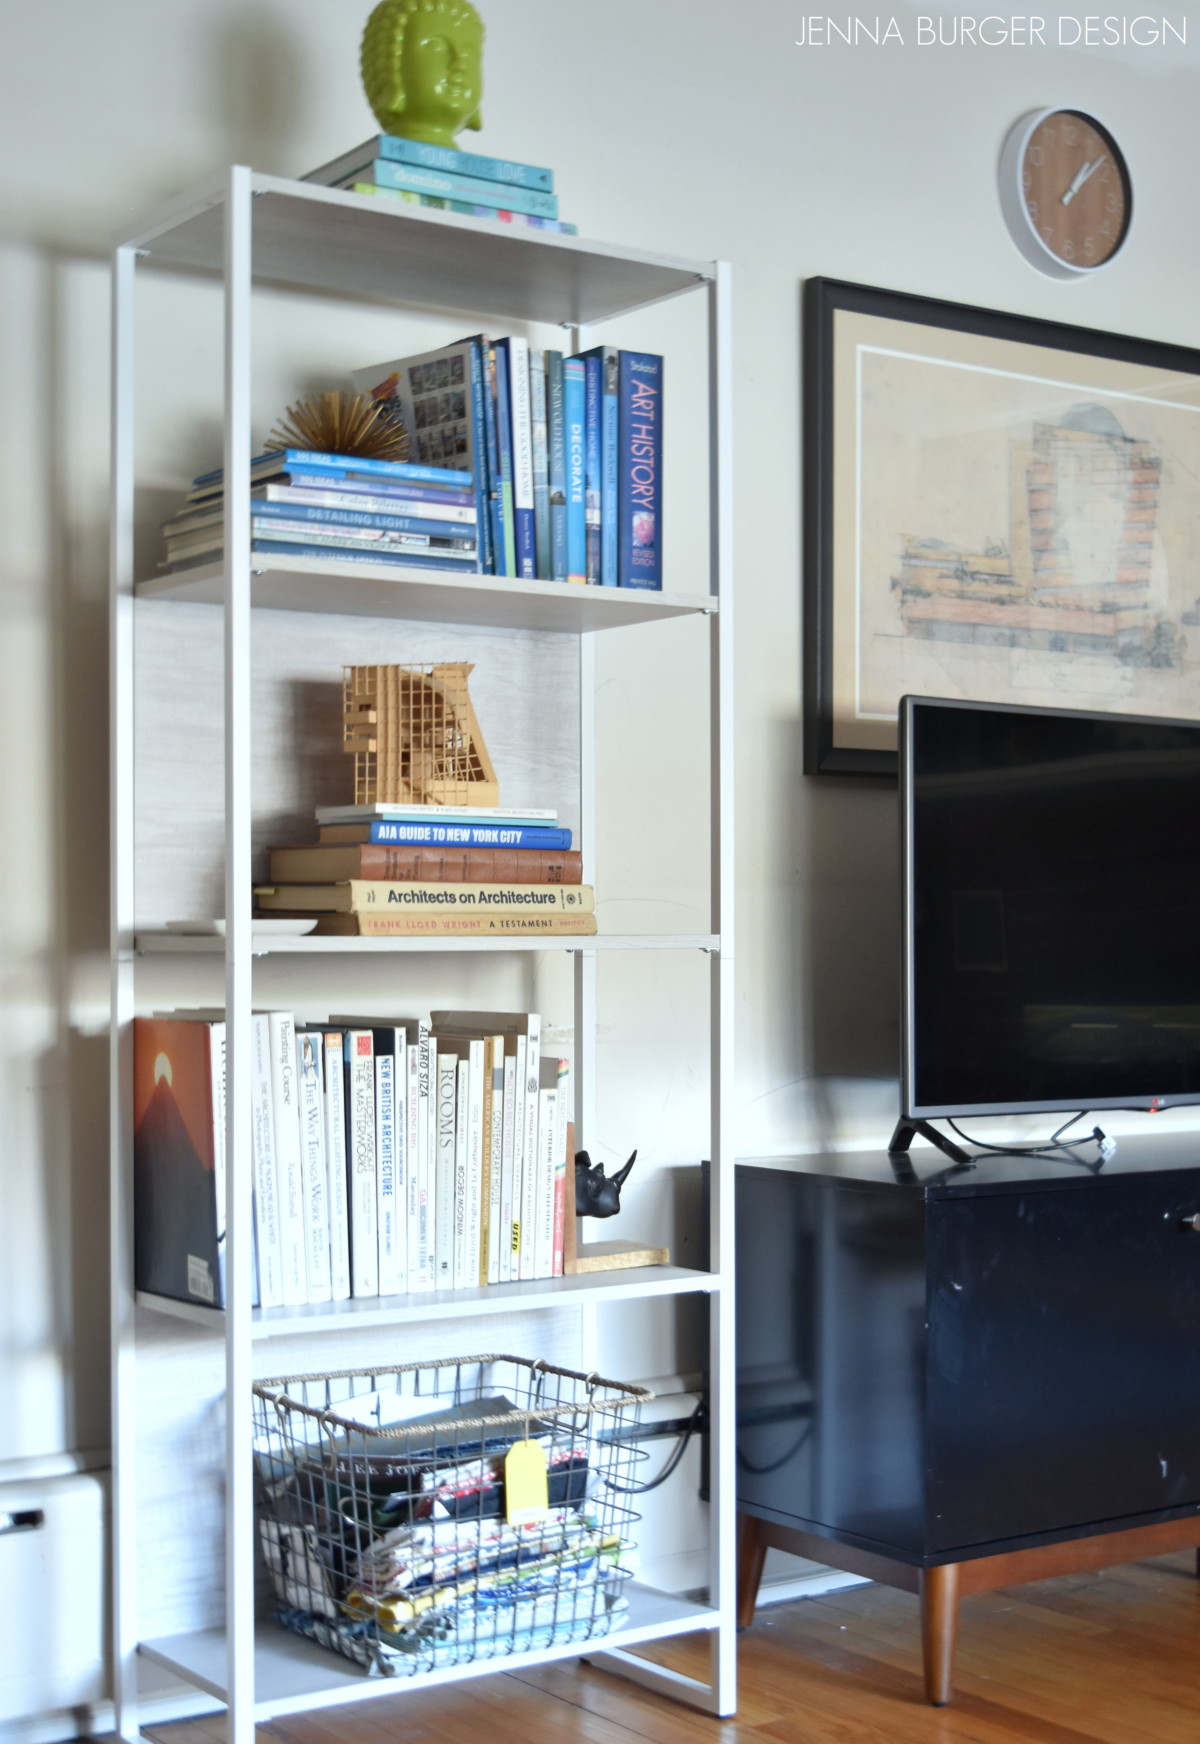
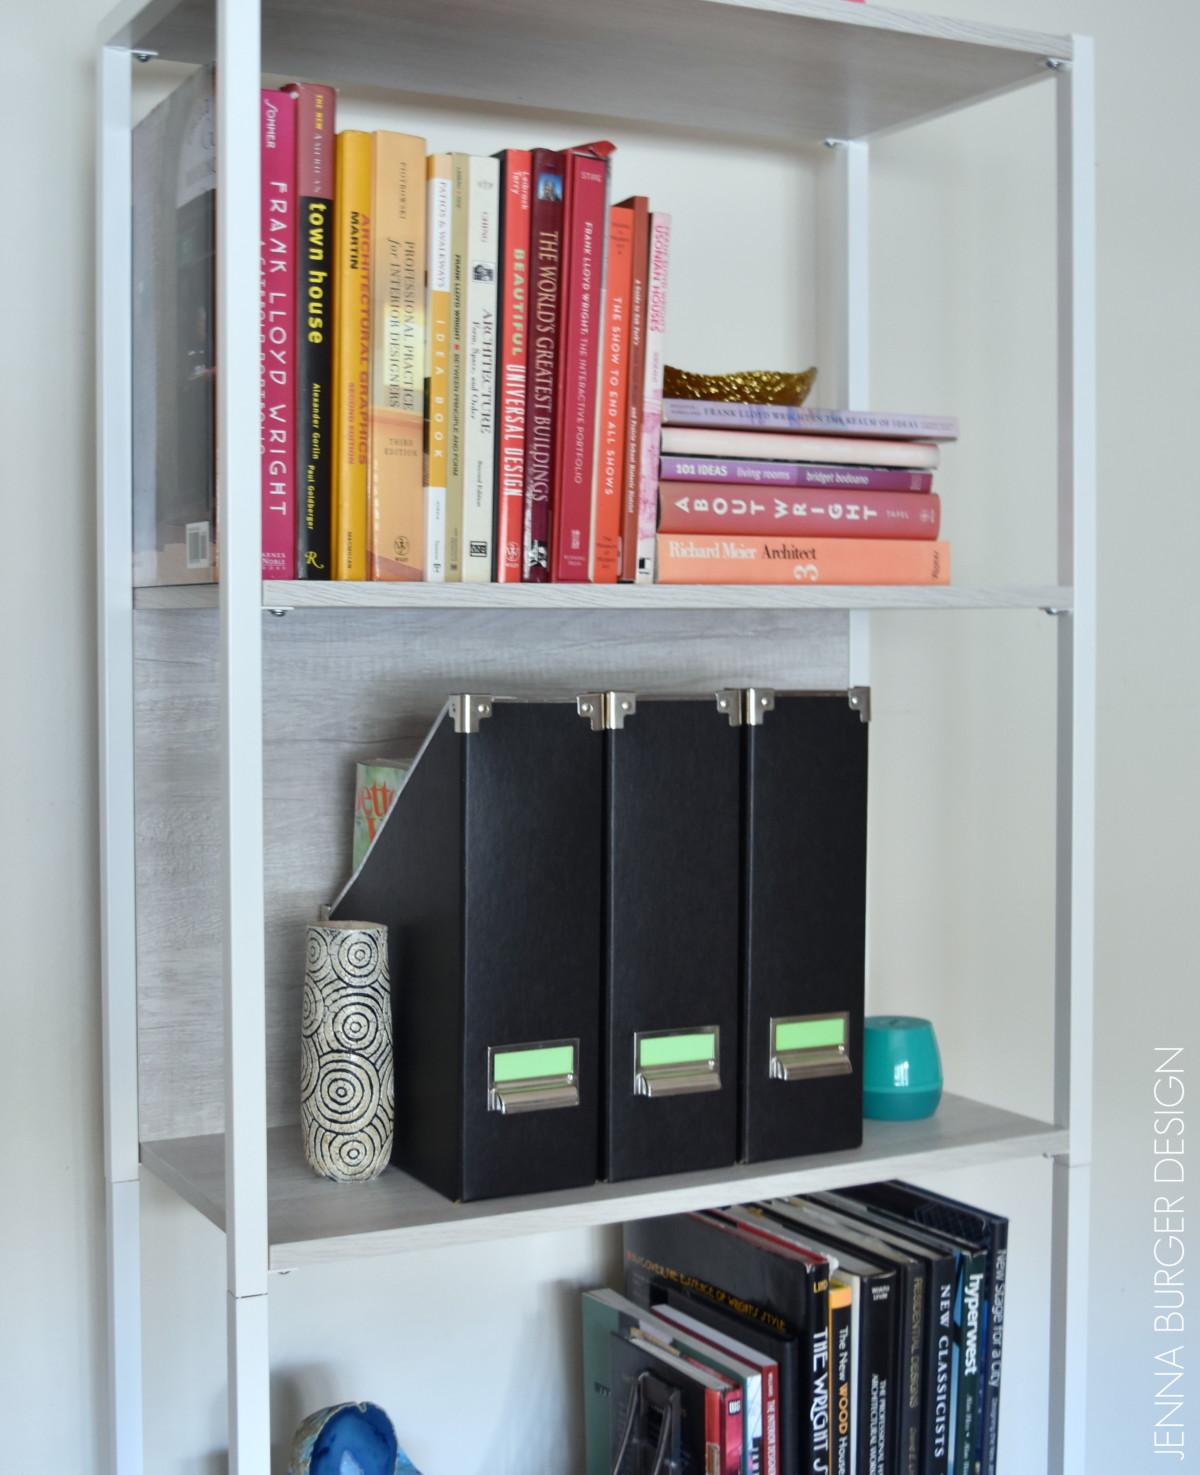
In this new home, we were desperate for shelving as we left behind two built-ins that flanked the fireplace + the two large bookcases in another room. We have many books + accessories, a.k.a “stuff”, and need space for them ALL!
TWEAKS TO THE ROOM
> Just a couple of days ago the TV stand arrived, yet I had already hung the picture above (a line drawing of the Guggenheim Museum by Frank Lloyd Wright), which now needs to be moved up slightly so it’s not overlapping.
> Pictures need to be added to either side of the bookcases.
> I feel the rug needs to be pulled out more from the sofa so there isn’t as much wood floor exposure in front of the media cabinet.
Before I wrap up this progress tour, we have to talk about the new lucite light fixture.
It’s another new addition to the room and it’s amazing. This lovely lucite light was love at first sight, but it took me a while to make the plunge and buy it. I absolutely was stopped in my tracks when I initially saw it, but I thought it would be too ‘glam’ or over the top for the room. After some thought and then seeing a similar fixture for 4x the cost, I had to get it. Once it was installed, I just about died!
RECAP
Another room almost complete.
From this…
To this…
From this…
To this…
More room updates on our brick ranch fixer upper coming soon.
It’s hard to fathom that a month & a day ago we bought a new home and moved. The month has been the longest, yet shortest ever. It’s been filled with joy, excitement, and moments of sheer nervousness. I’ve never slept so little or asked myself so many times, ‘did we make the right decision’?!? In the next beat, I just carry forward because there’s no looking back now… Right???
As I mentioned in the last posts when I shared the background story of the house + before pictures, extensive renovation was needed before we officially moved in. There was no major demo planned, but almost every room in the house needed something, and I don’t mean just spackling walls and paint. Most of the rooms needed sheetrock and wall repair, some more than others.
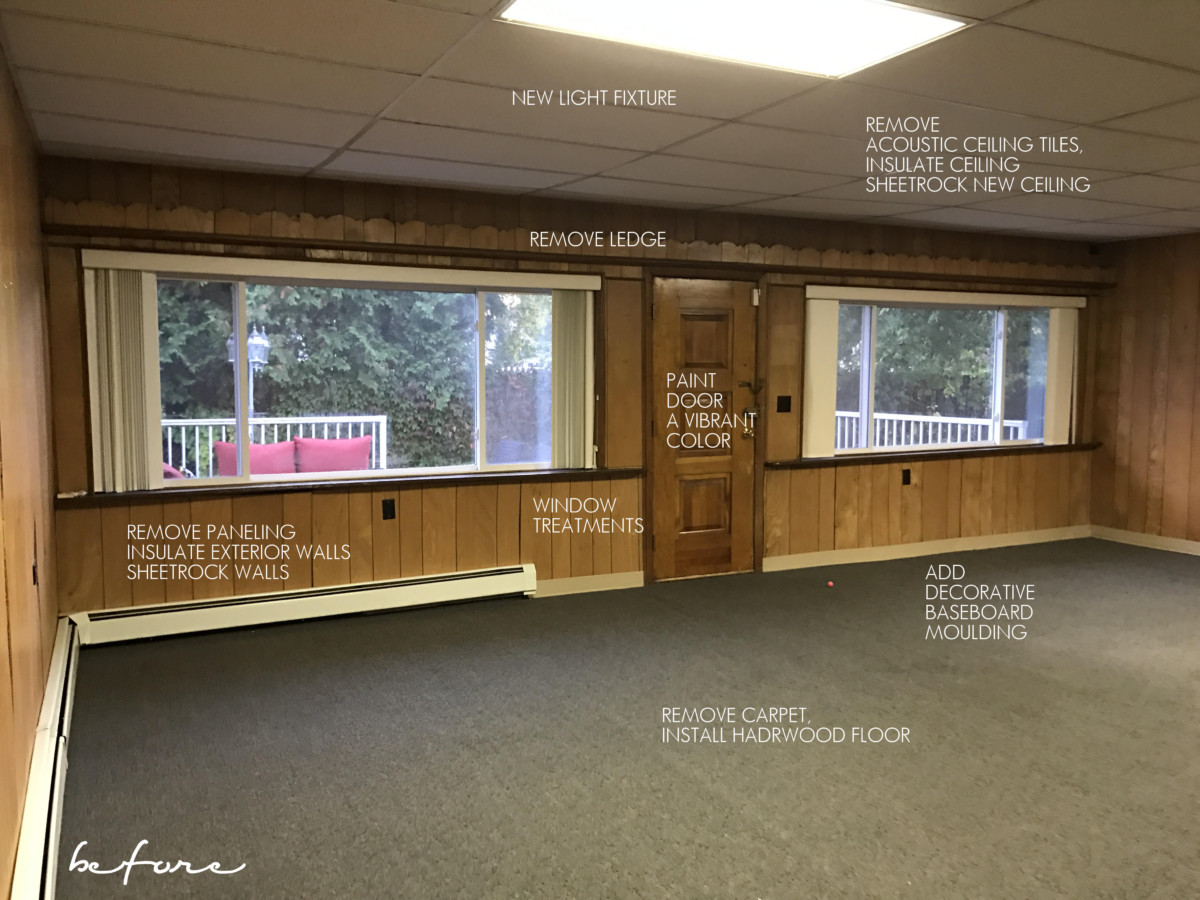
The room that needed the most attention was the living room. It wasn’t original to the house as we were told it was once an outdoor patio. At some point, the 20′ x 25′ space was enclosed, but whether it was an inexperienced contractor or to save money, the construction of it was poor. When we first saw the house, we knew this room was going to need the most attention and the most love, and we wanted to do it once AND right!
Let’s dive in to the transformation process…
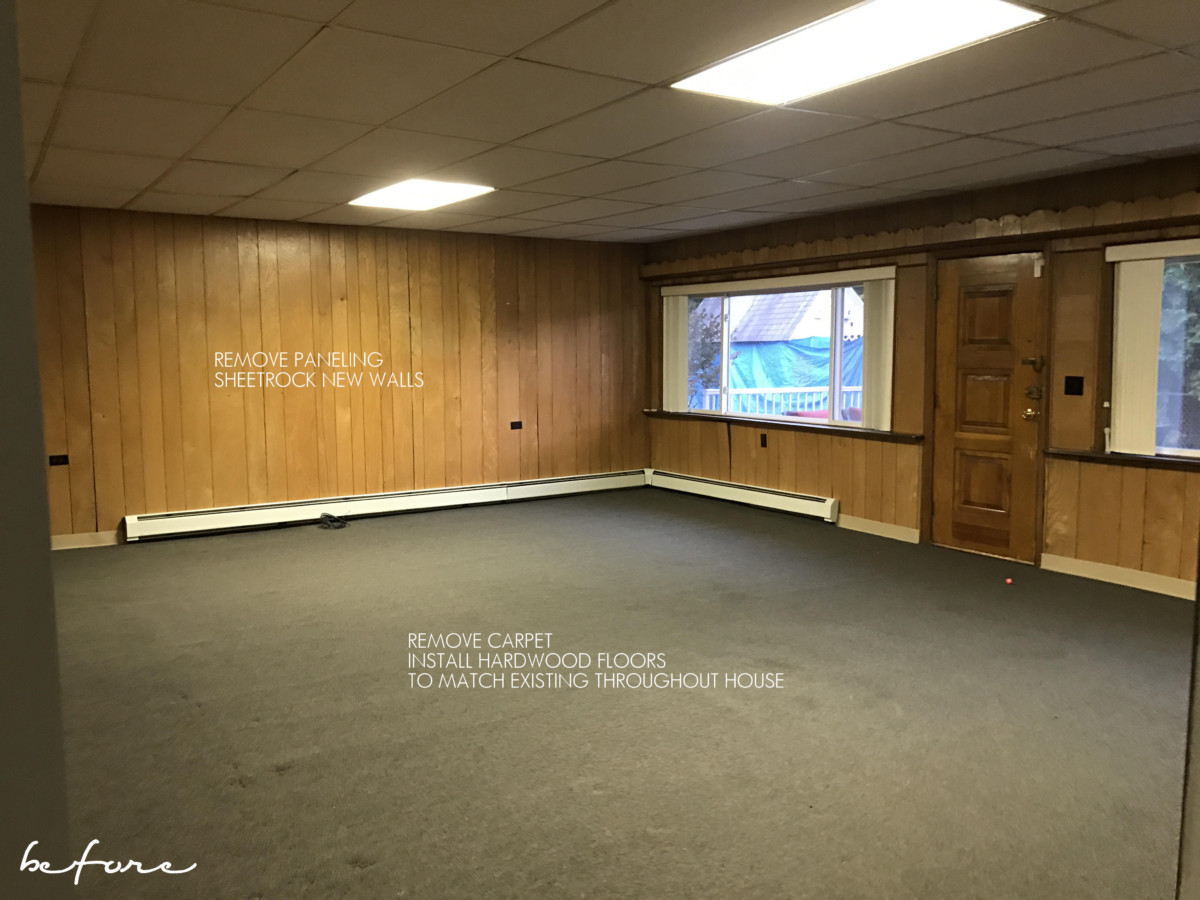
THE BEFORE.
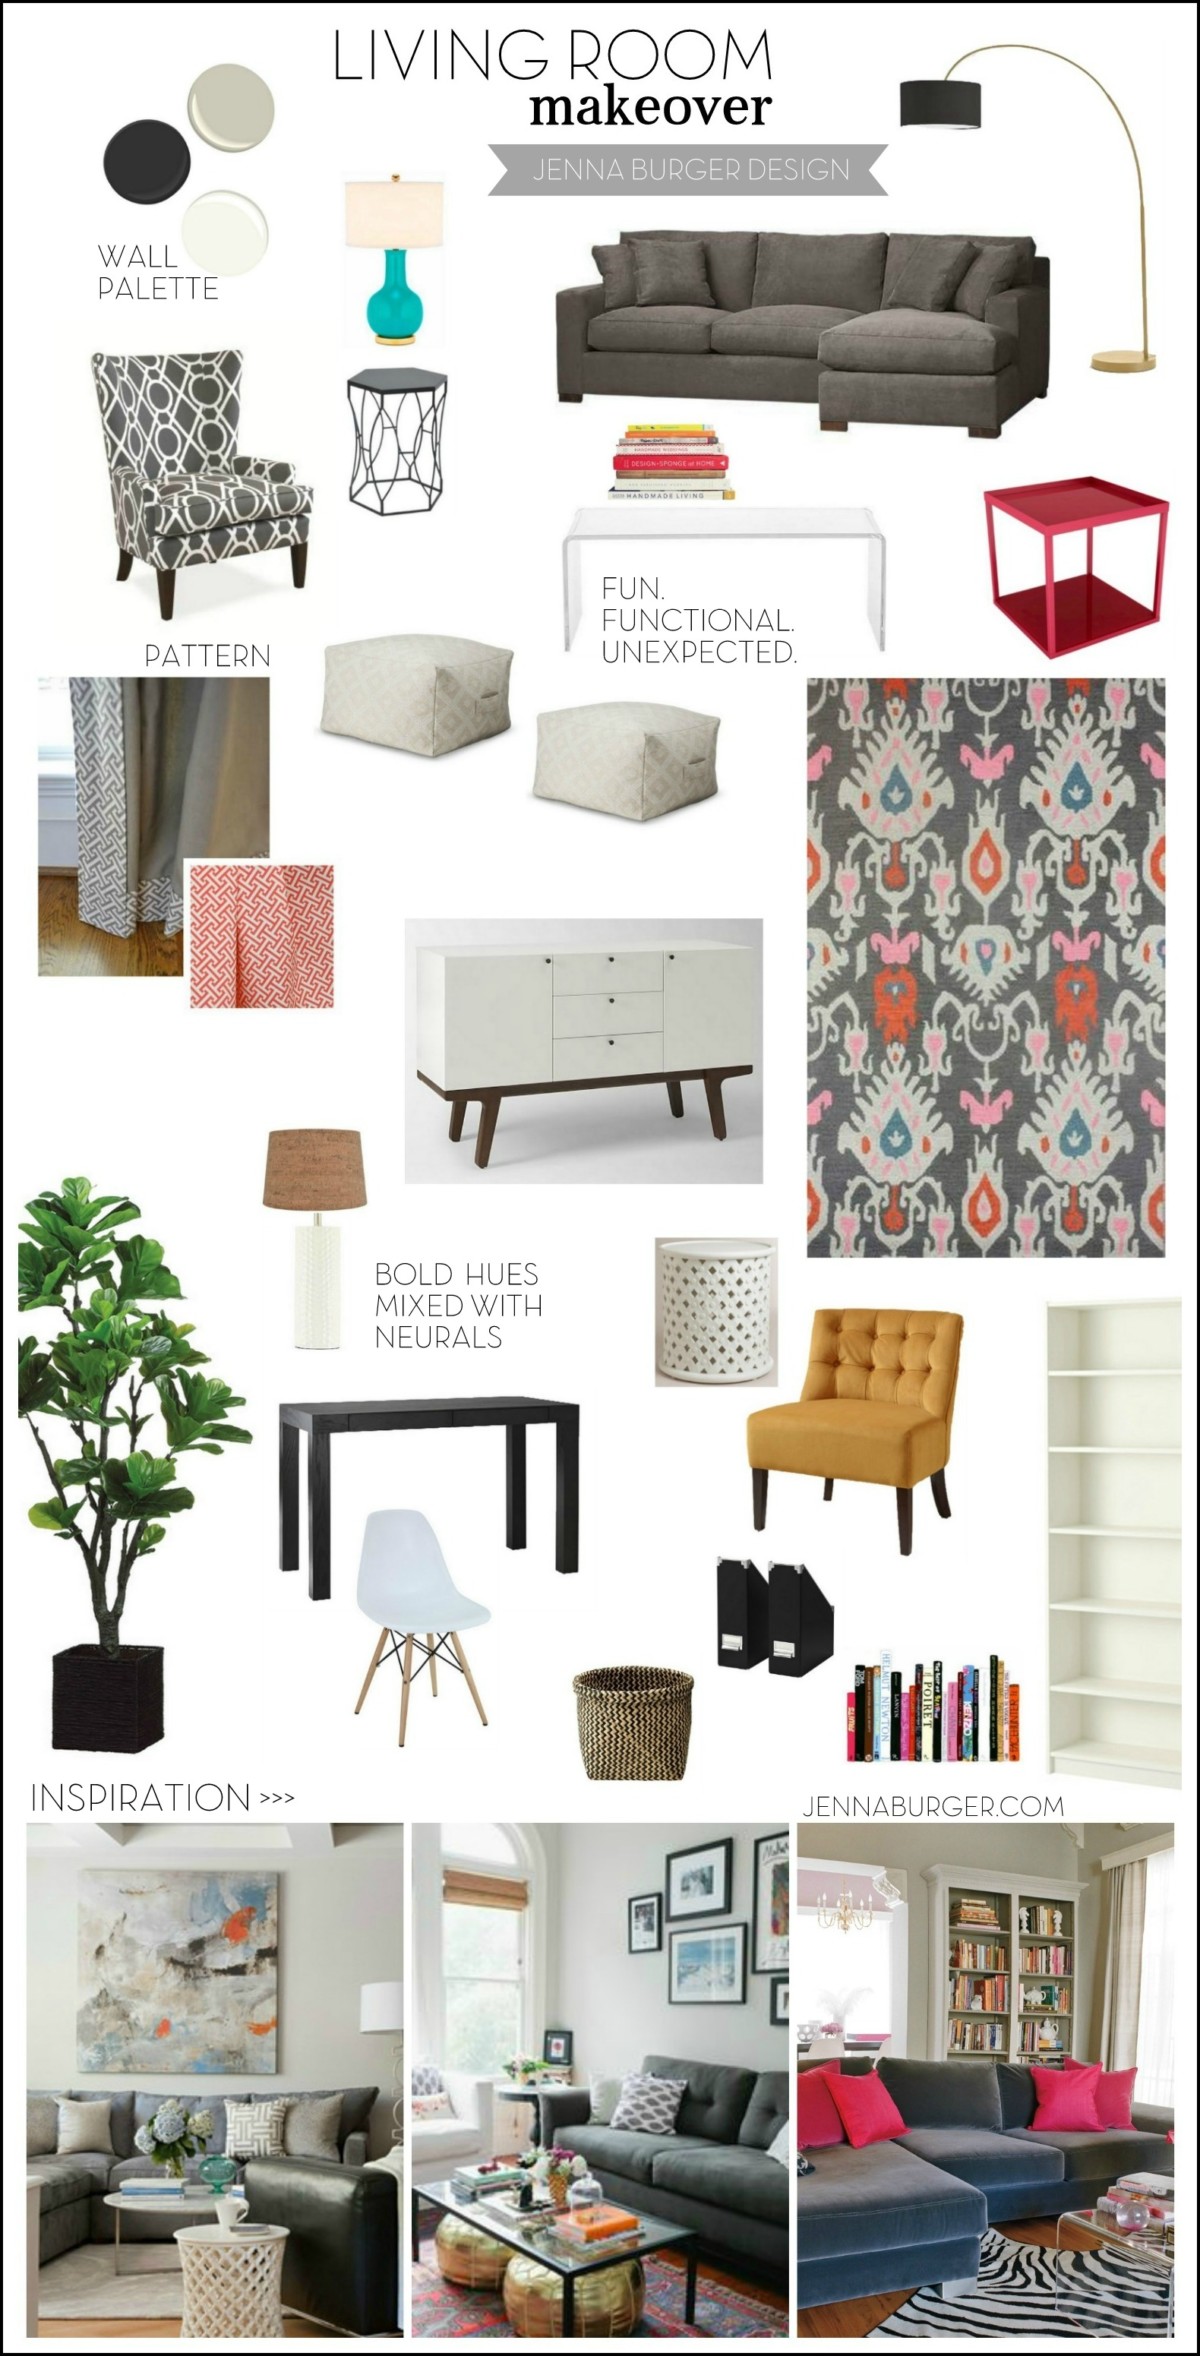
THE PLAN.
THE TRANSFORMATION.
Through pictures, this is how the room has evolved in 4 weeks. Later in the post, I’ll share more details on the process…
So there it is… The transformation in one month from dark + drear to light + bright.
THE DETAILS.
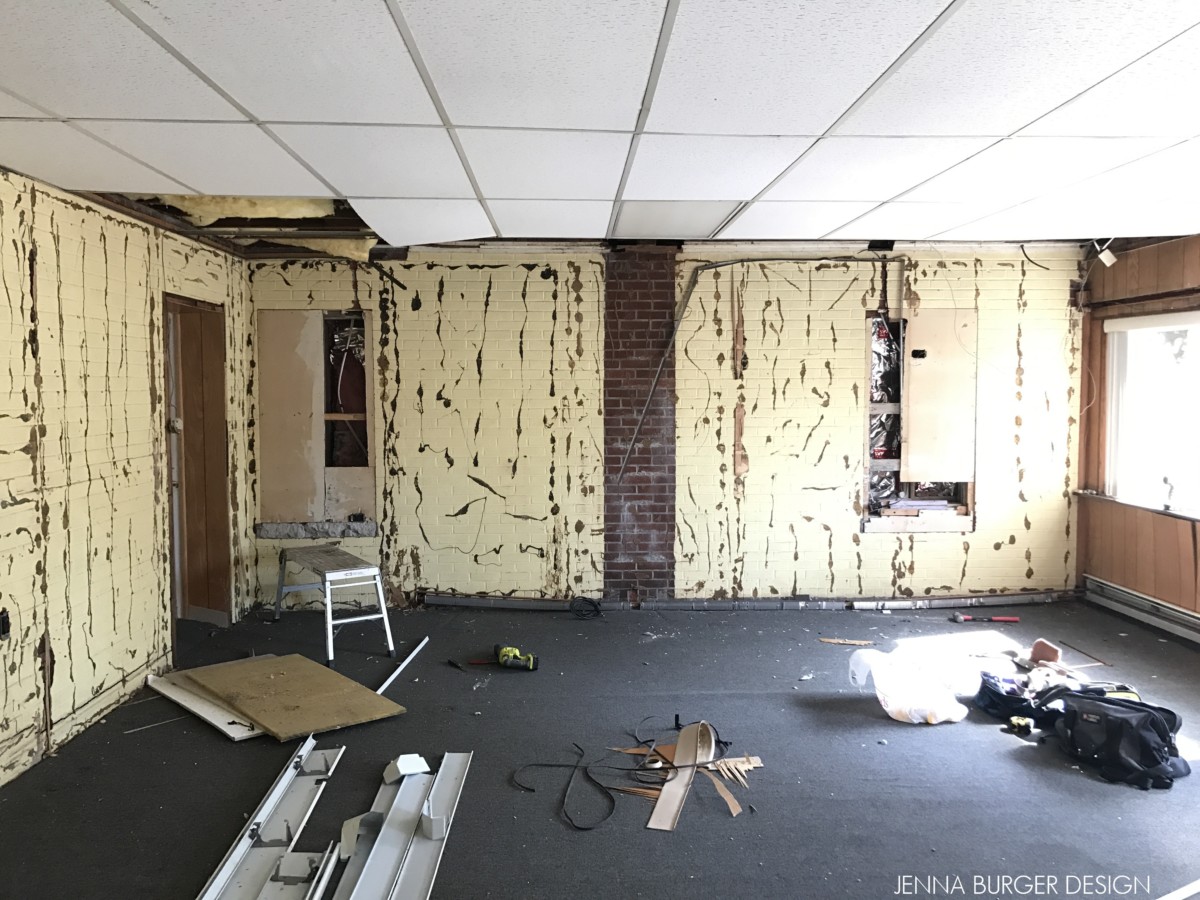
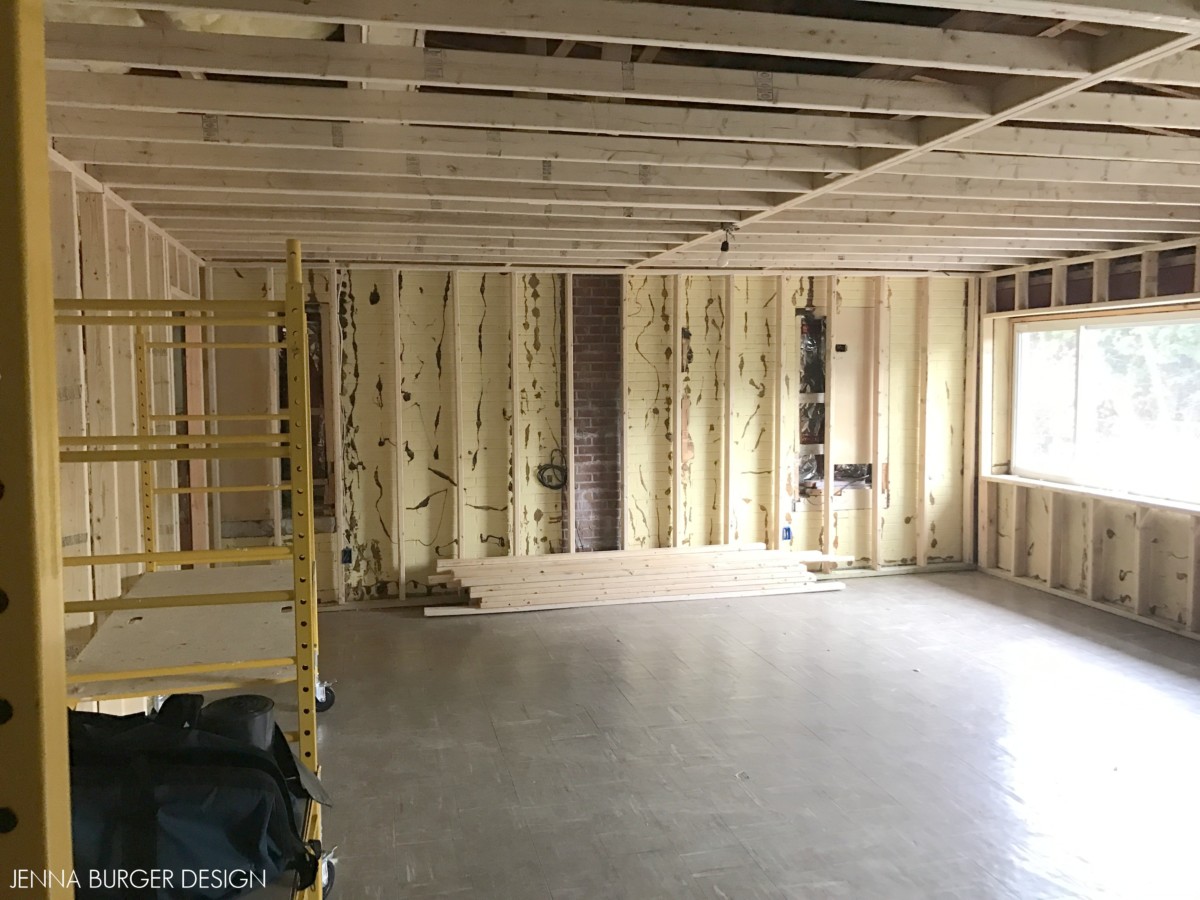
The first days of construction started with removing the paneling. The thin vertical paneling was adhered only with glue to the existing brick facade (remember this space was originally a patio, so the exterior walls were brick with windows that were closed in).
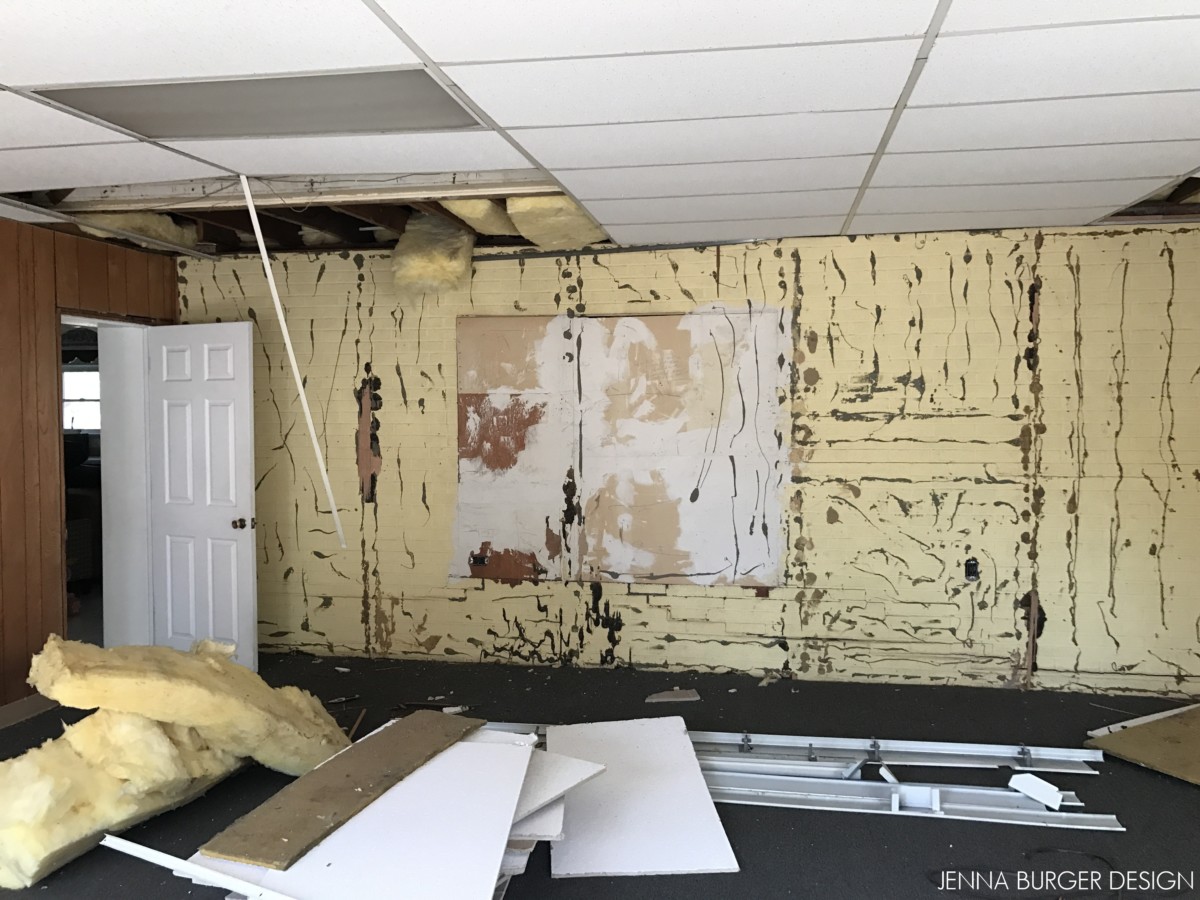
The yellow in the picture below is painted brick, the square holes were original windows, and the random black markings was the glue.
Along with the vertical paneling, the acoustic ceiling tiles and the track were also removed.
Once the demo was complete, the space was ready to be created into a room. We didn’t know the paneling was directly adhered to the brick. We assumed there was a stud wall, which the new sheetrock could then be attached to. Unfortunately that wasn’t the case, so walls had to be constructed around the room, along with new ceiling rafters.
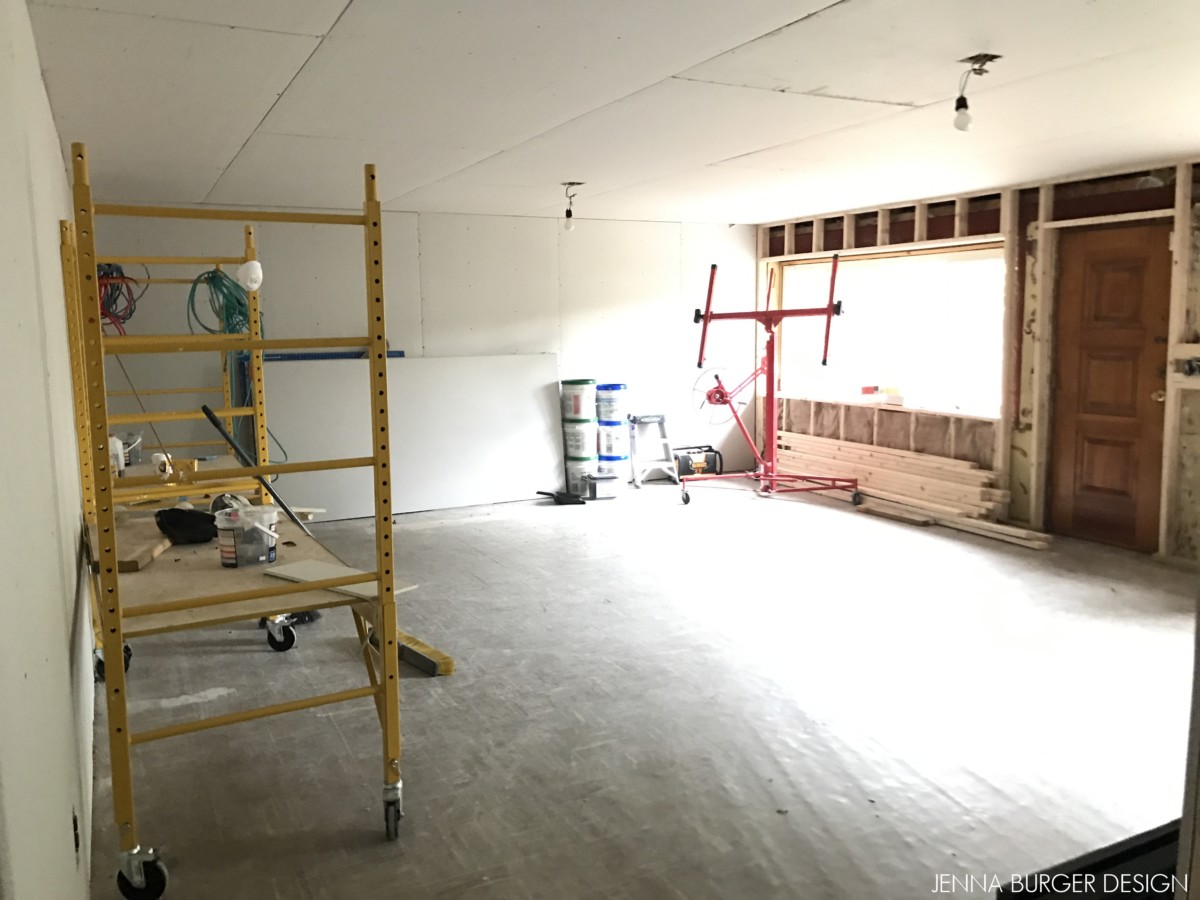
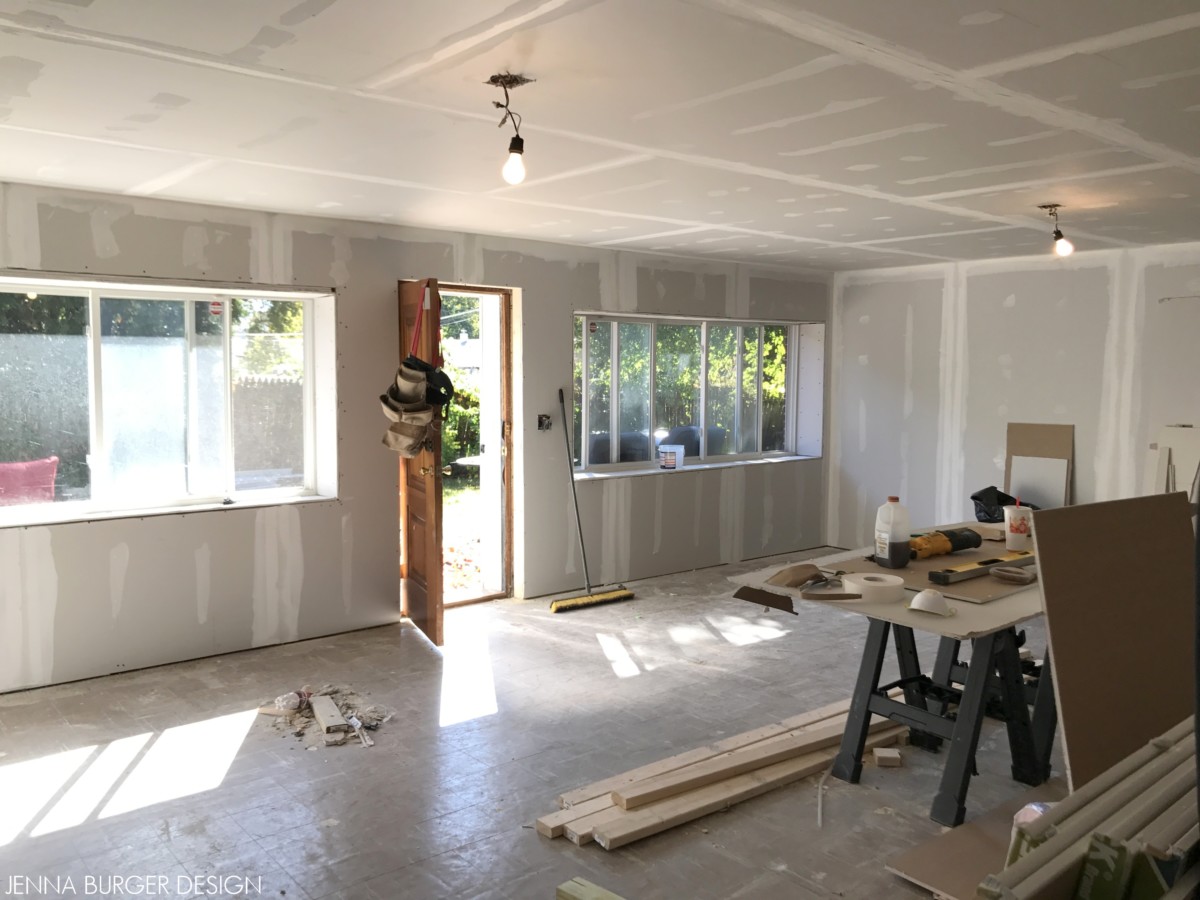
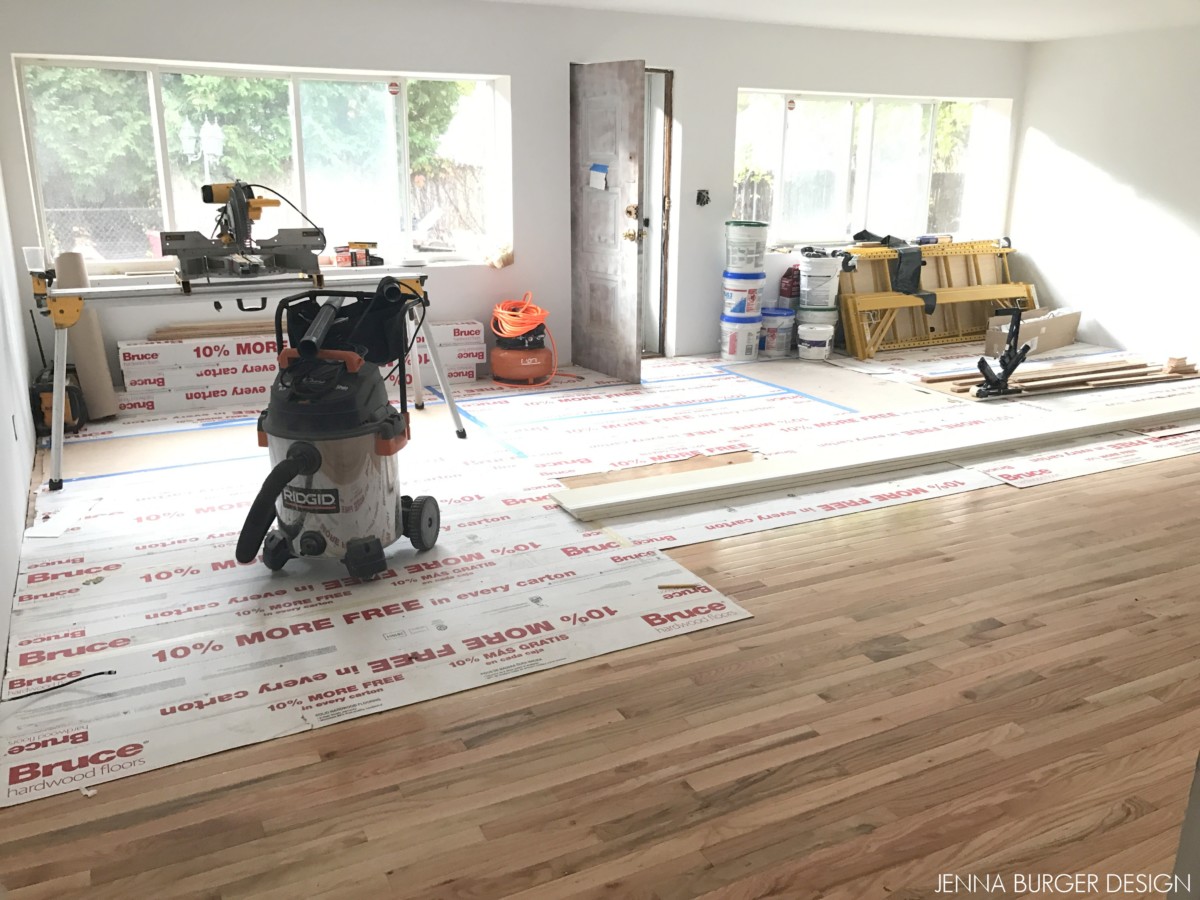
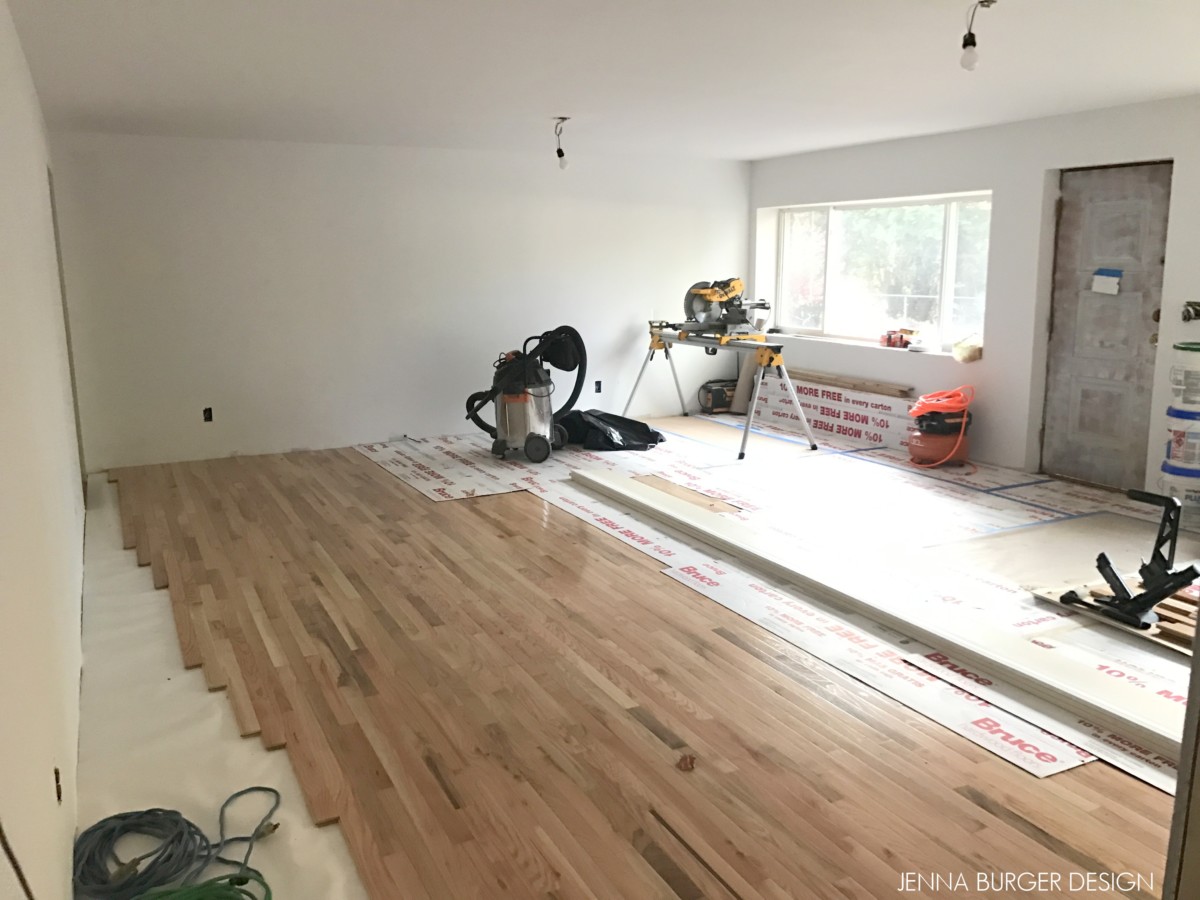
Once the framing was complete on the walls and the ceiling, it was time to enclose the space with sheetrock.
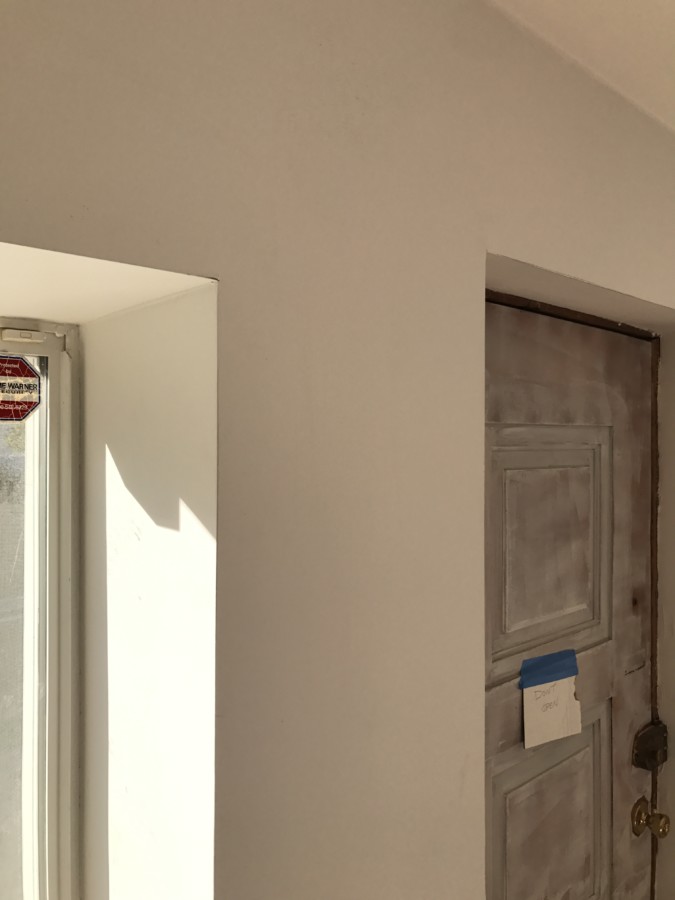
Because of the new wall build out, the windows and exterior door now have deeper jambs, which is quite nice and unexpected. I like that the window sills are so deep!
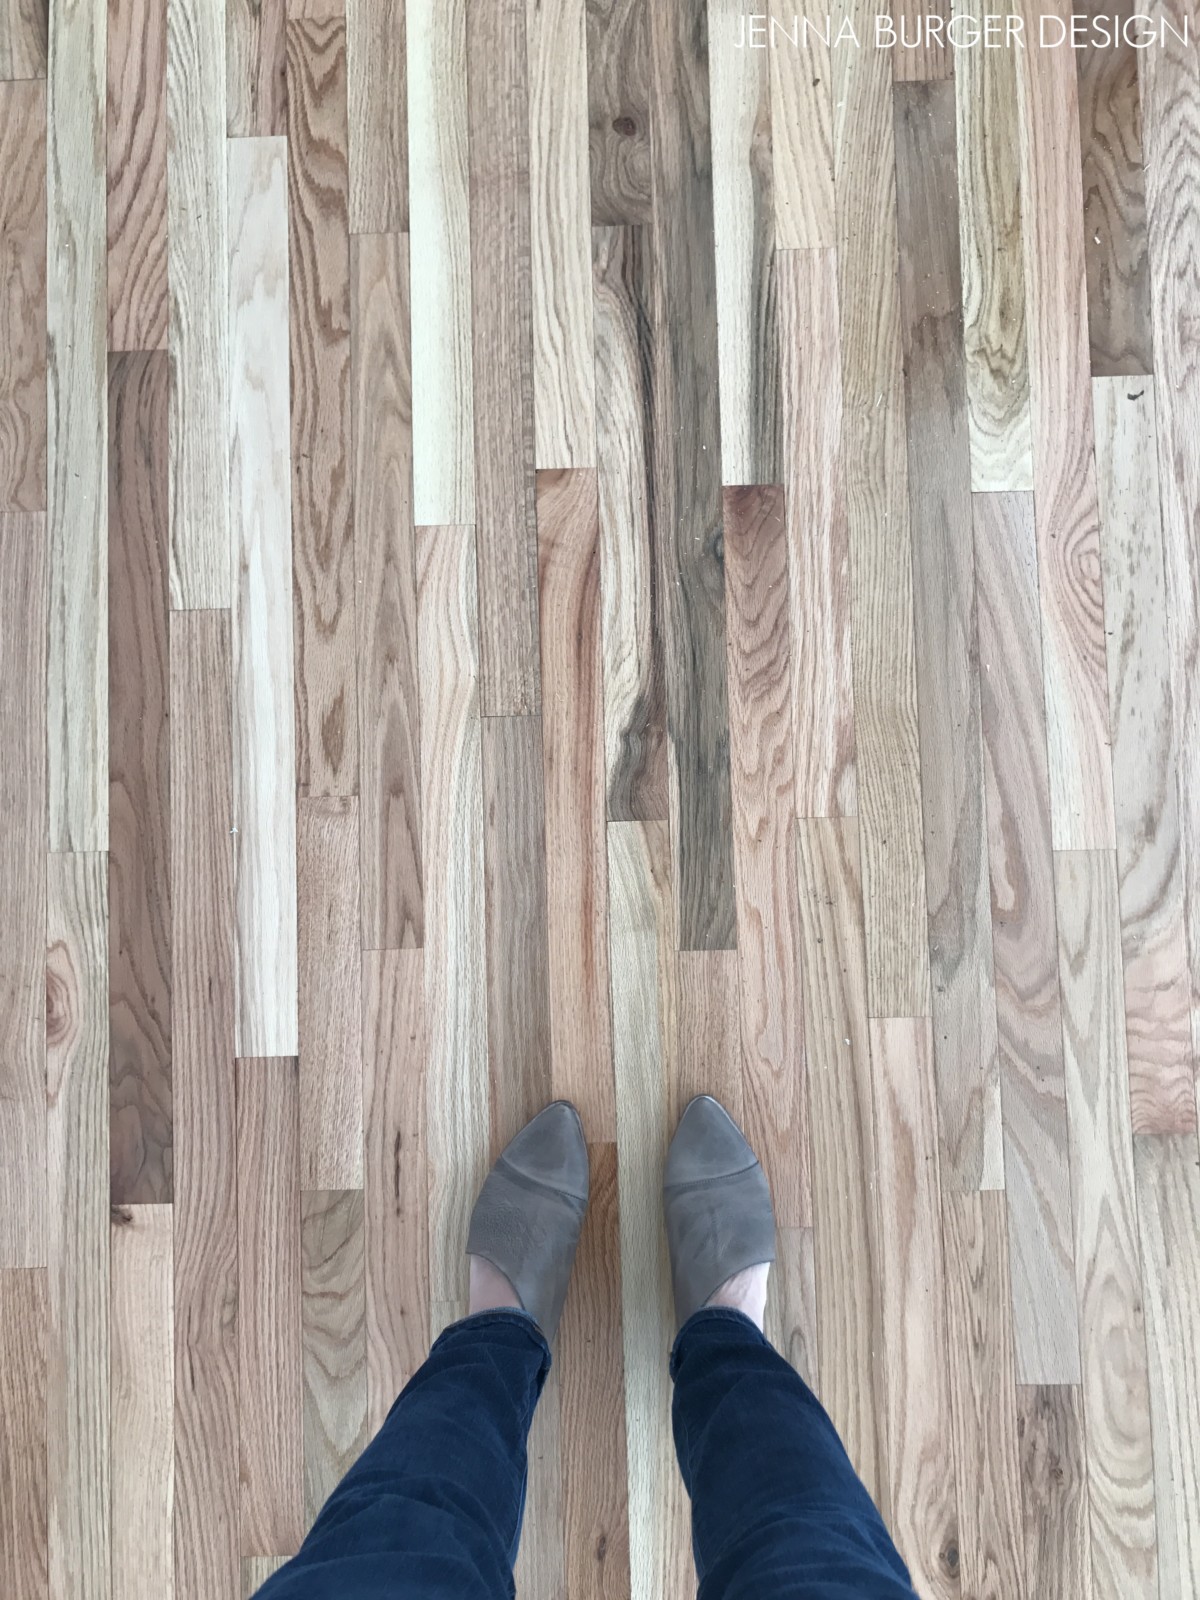
Between week 2-3 of construction, the sheetrock + taping + sanding was complete, and the wood floor could be installed. When the carpet was removed, we found the floor was a laminate material, which was left in place. A plywood backer was first installed on the floor, then the prefinished hardwood (which is a clear pine) was installed.
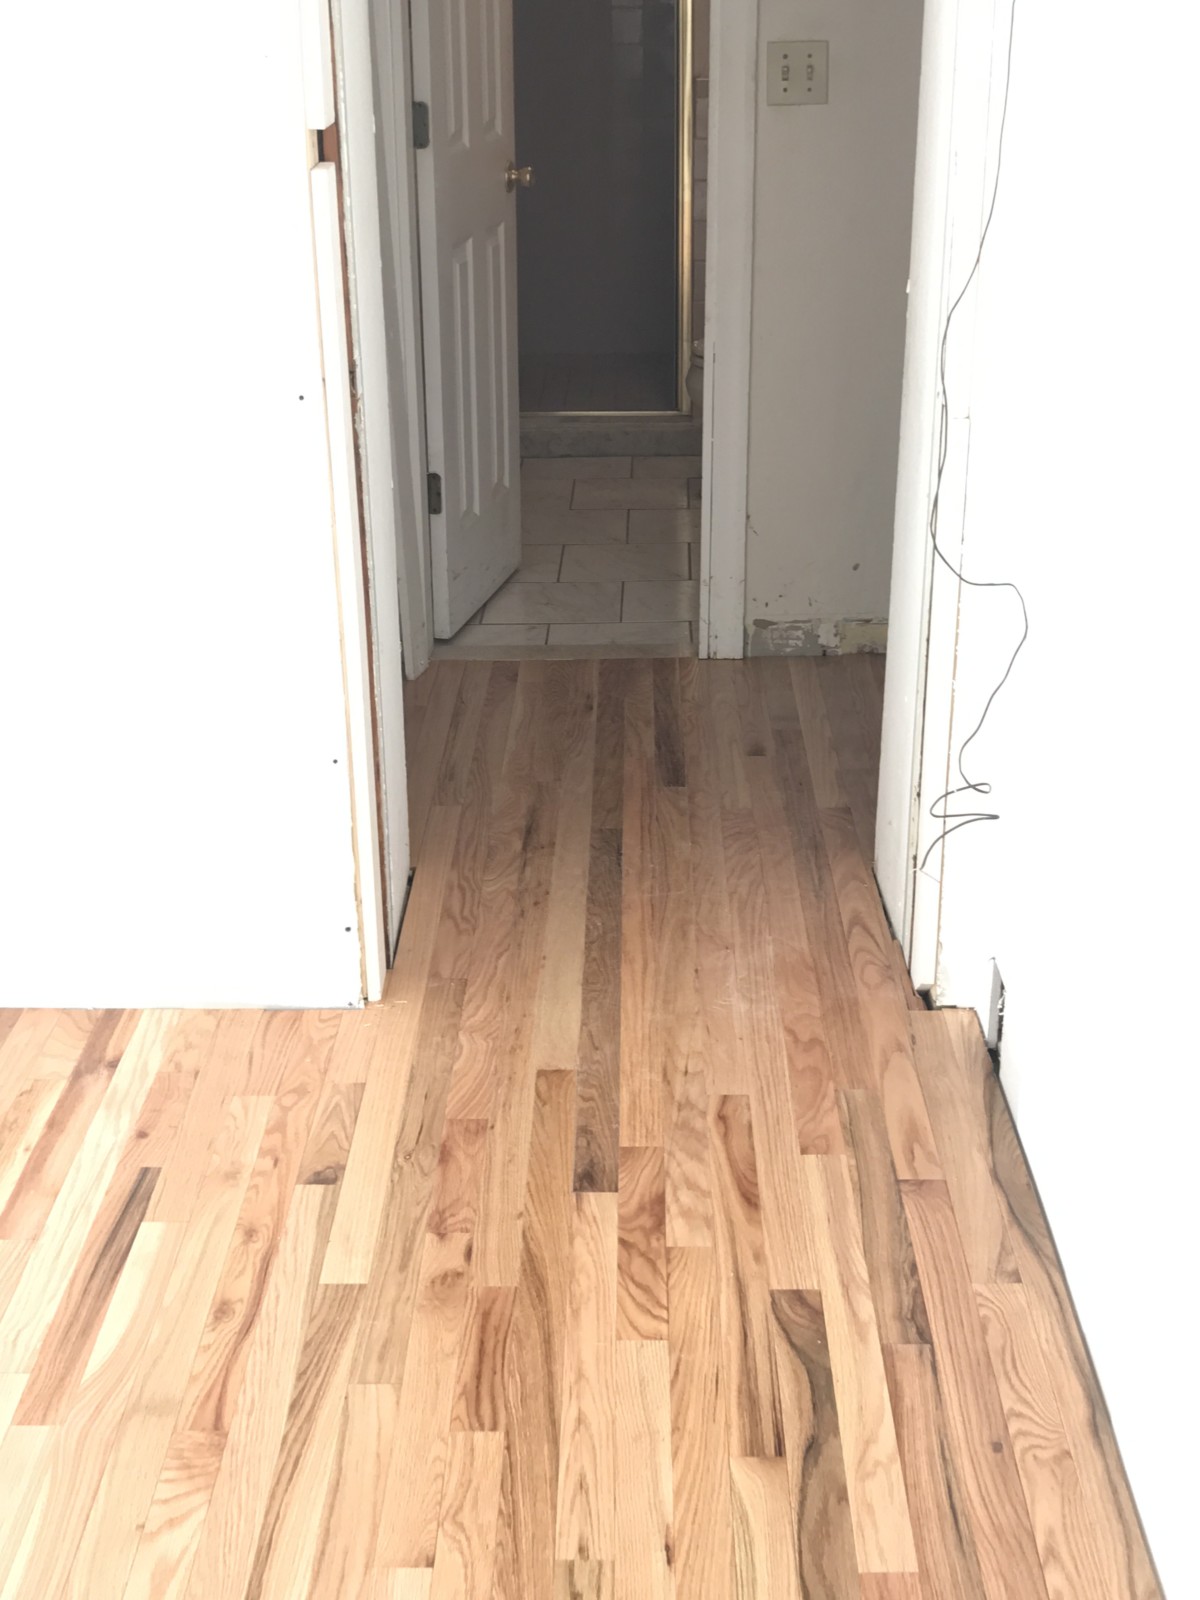
There were multiple floor materials throughout the original home, which we wanted to eliminate so it feels more cohesive. We chose to run the new hardwood into the small hallway which leads to a bedroom, bathroom, and the kitchen (which is tiled).
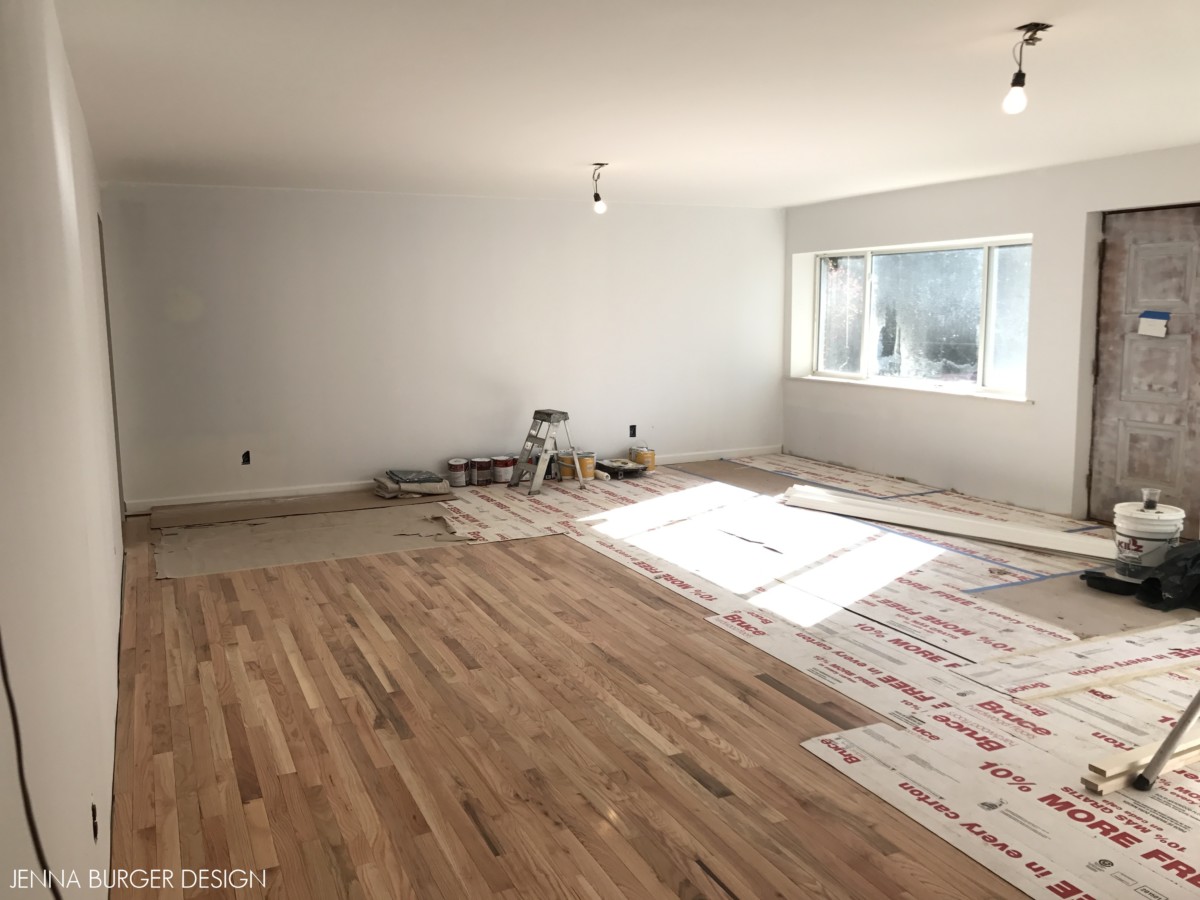
The hardwoods cast an orange hue in the pictures above because the artificial lights are typically on for the workers. But the floors actually aren’t as orange. This picture is truer to their actual coloring and depth. Aren’t they pretty? I adore the wood grain and multi-colors of lights and darks.
WHY WE CHOSE HARDWOOD.
Many hours of thinking + analyzation went in to the flooring choice. From carpet to tile to white washed floors, we considered many different materials. We first negated carpet because this will be a high traffic area that leads to the back yard, which is the pathway from the kitchen. Carpet would get damaged. We knew it had to be a hard material that can easily be cleaned. We considered tile and different toned hardwoods, but with the kitchen being tiled, there would then be three flooring materials throughout. In the end to make the new space feel cohesive with the rest of the house, we chose a clear pine hardwood. It was a good decision!
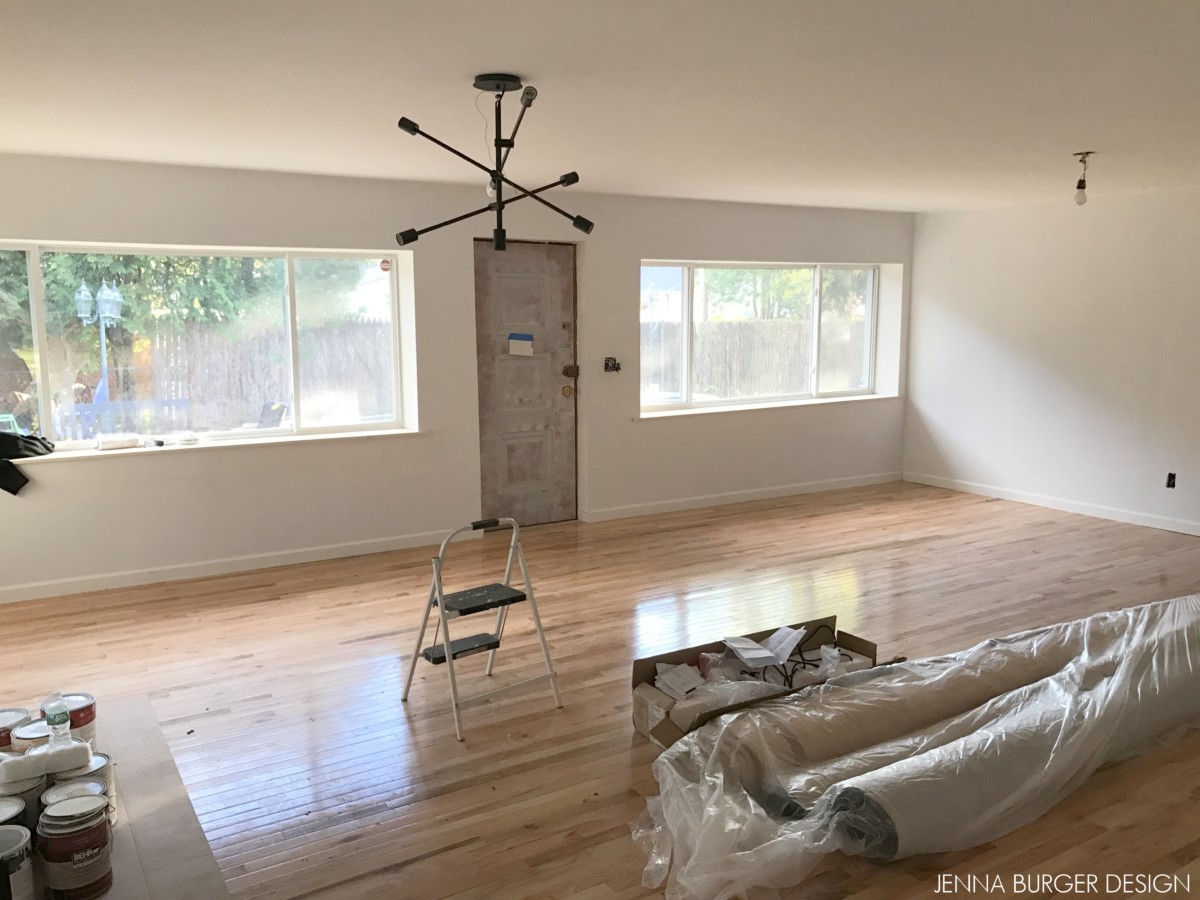
The space now is ready for paint + the finishing touches. And check out one of two light fixtures that will be beautifully hanging from the ceiling…
EEK, I’m getting excited!
I can not wait to add the finishing layers to this room.
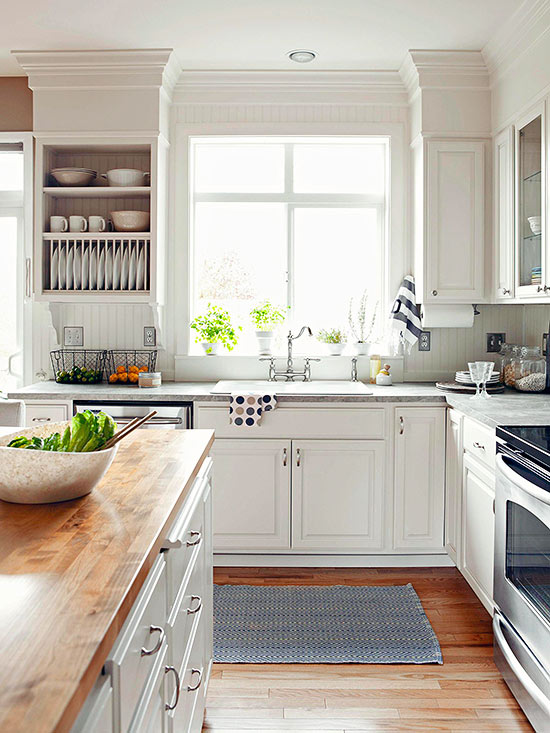
On the gloomiest of days, a white kitchen will always put a smile on your face!
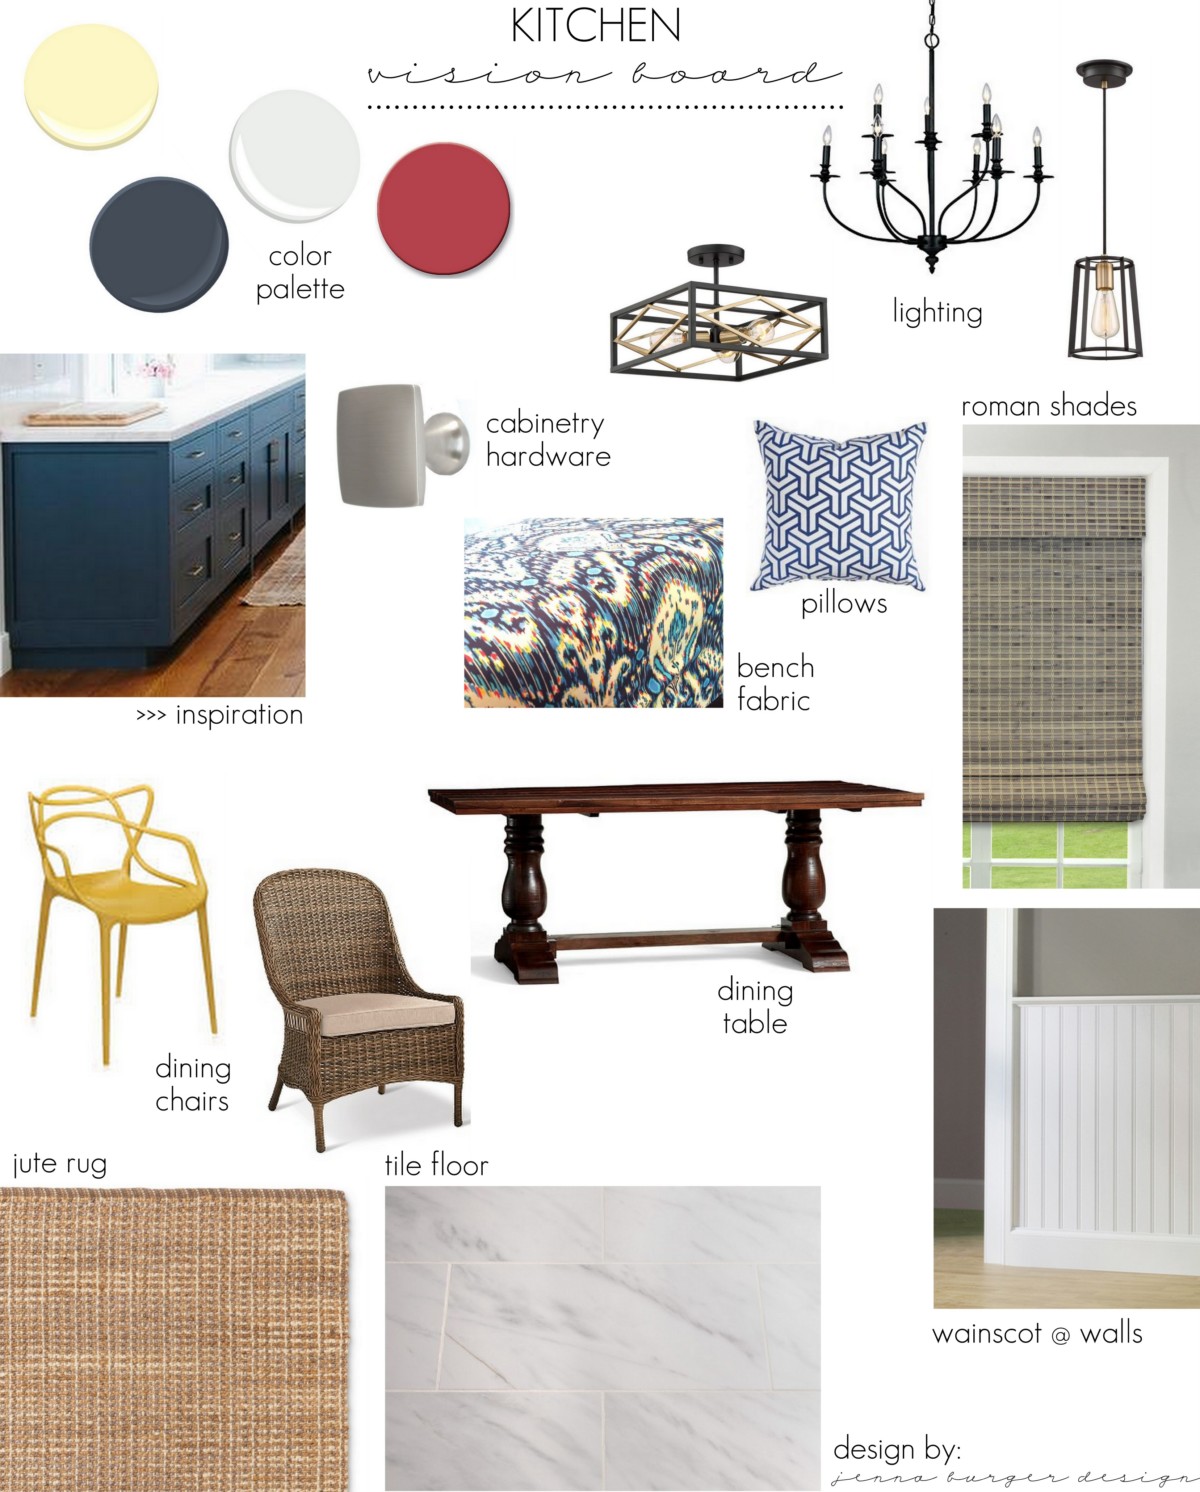
I am so excited to share that I am in the midst of designing a kitchen that I’ve always dreamt of AND it’s for me!
I’ve created beautiful kitchens for many clients & I am thrilled that I finally have the opportunity to put all the wants + needs of a gorgeous + uber-functional kitchen into my own home. I’ll be honest, I can walk in to a clients home and with a snap-of-a-finger see how to transform it. With my own kitchen, it hasn’t been so easy… my finger snapping failed me.
I, like many others, have always wished for white. And so of course, my new kitchen will have white cabinets (not all, but most). I was hesitant about white at first feeling that it might be too sterile or too ‘white’, but with layers + pops of color throughout, I know it’s the right choice for now + later.
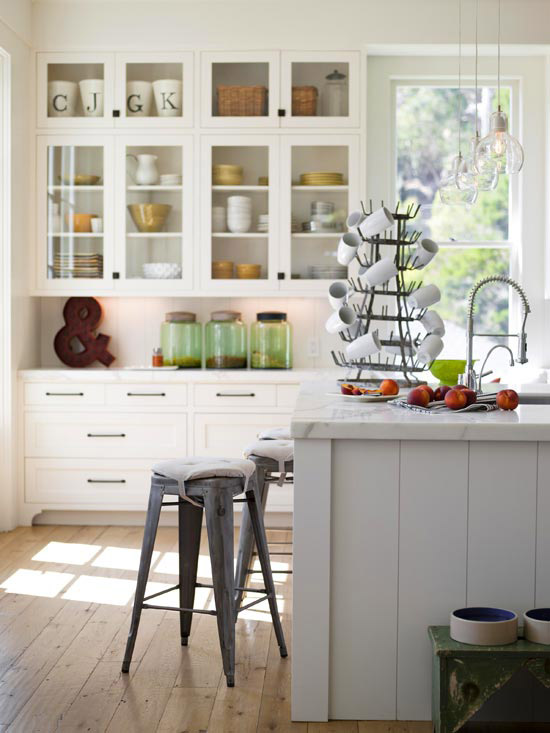
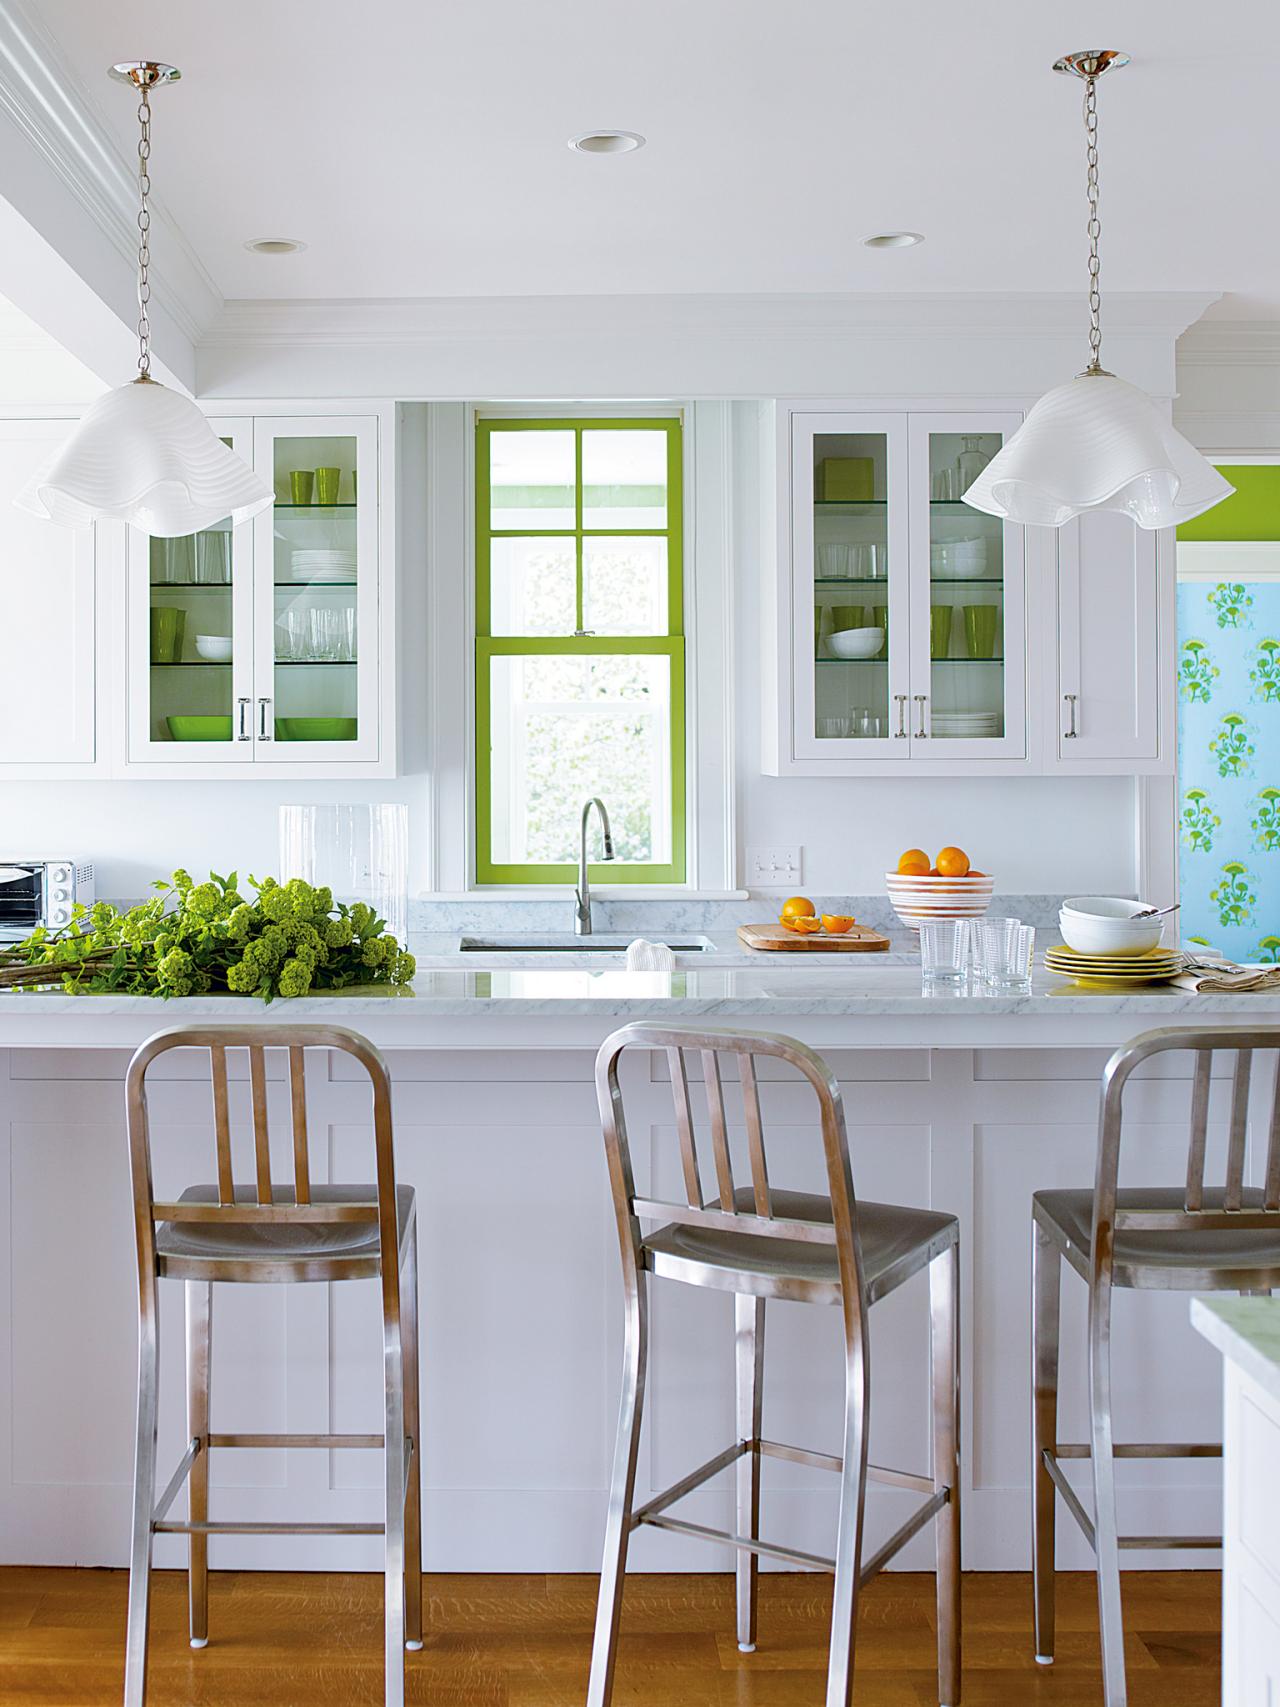
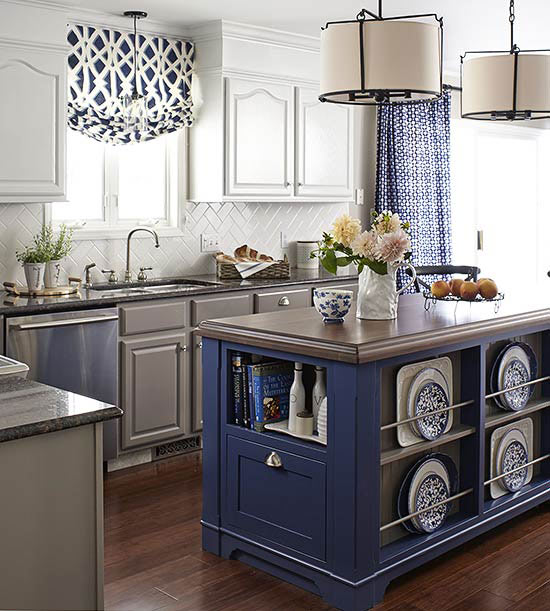
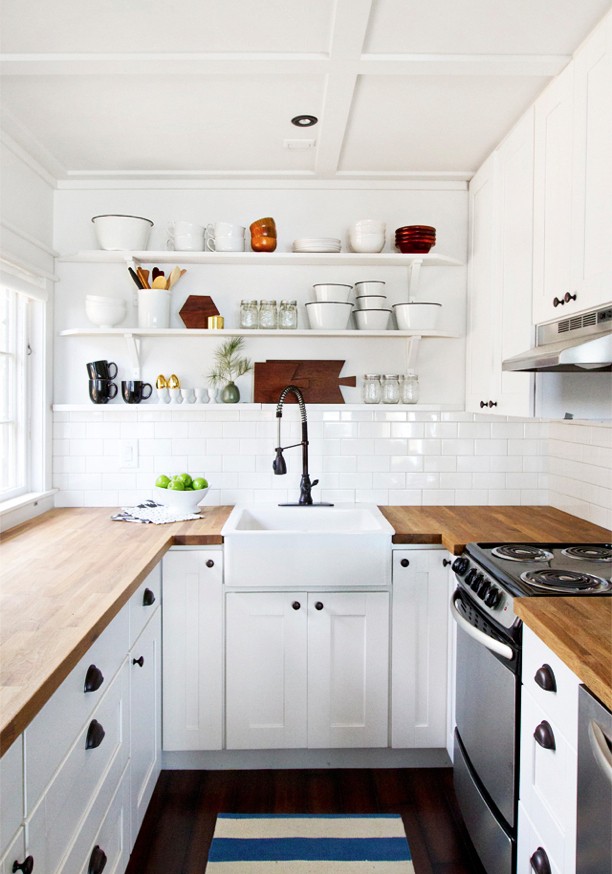
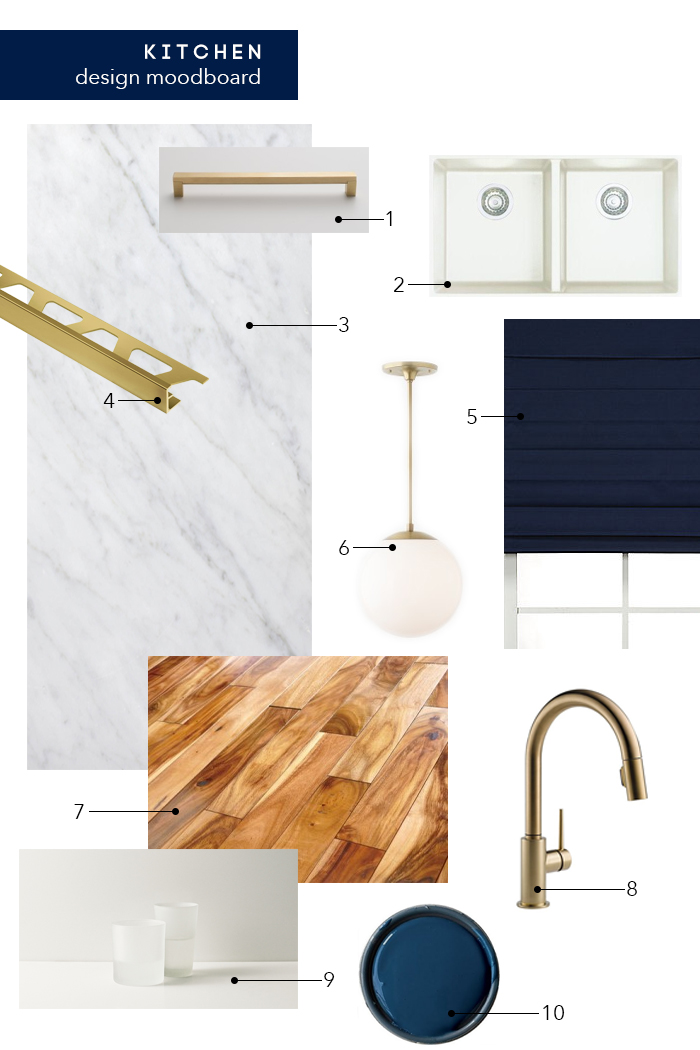
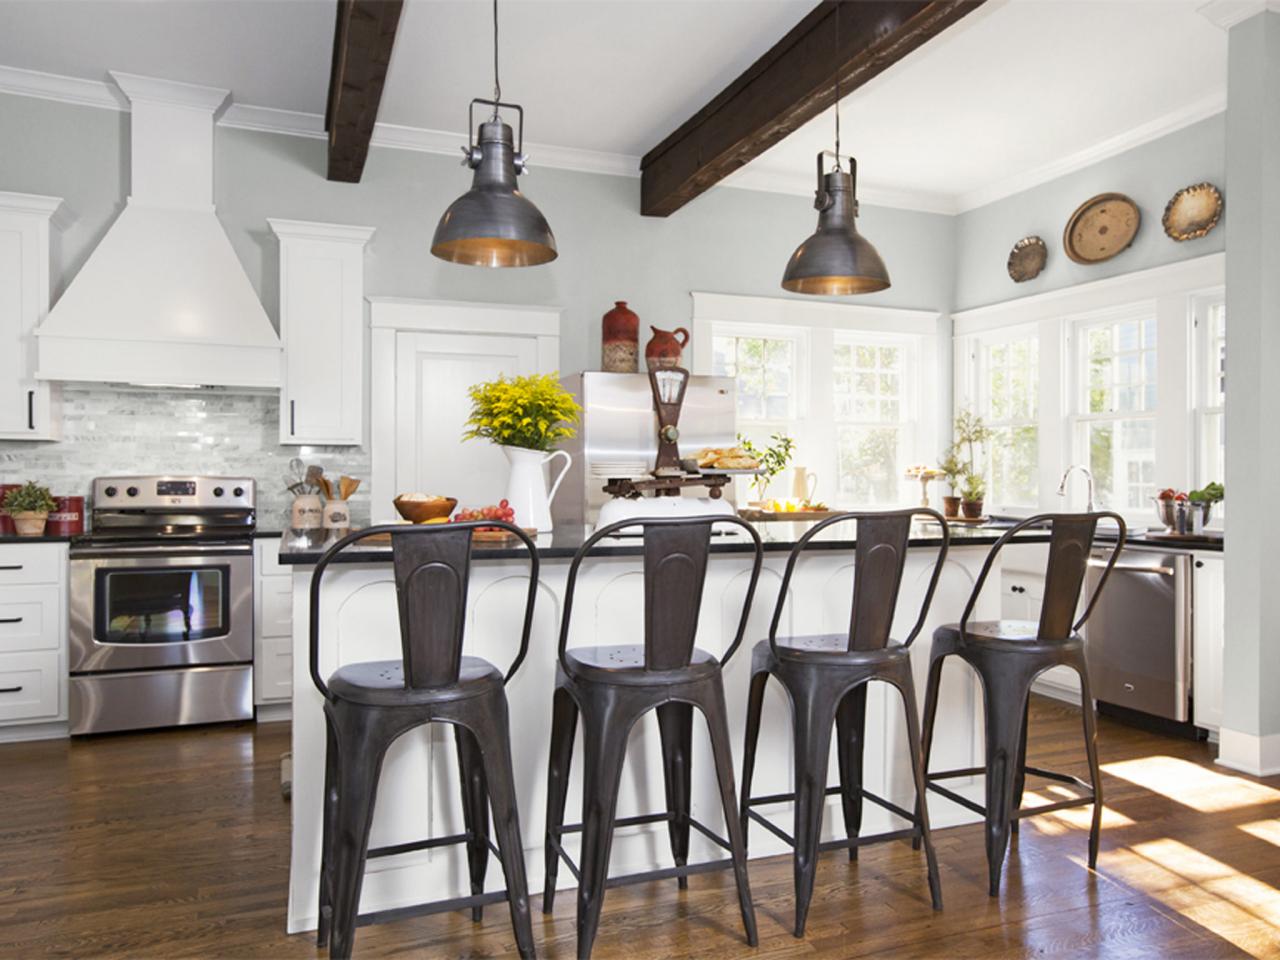
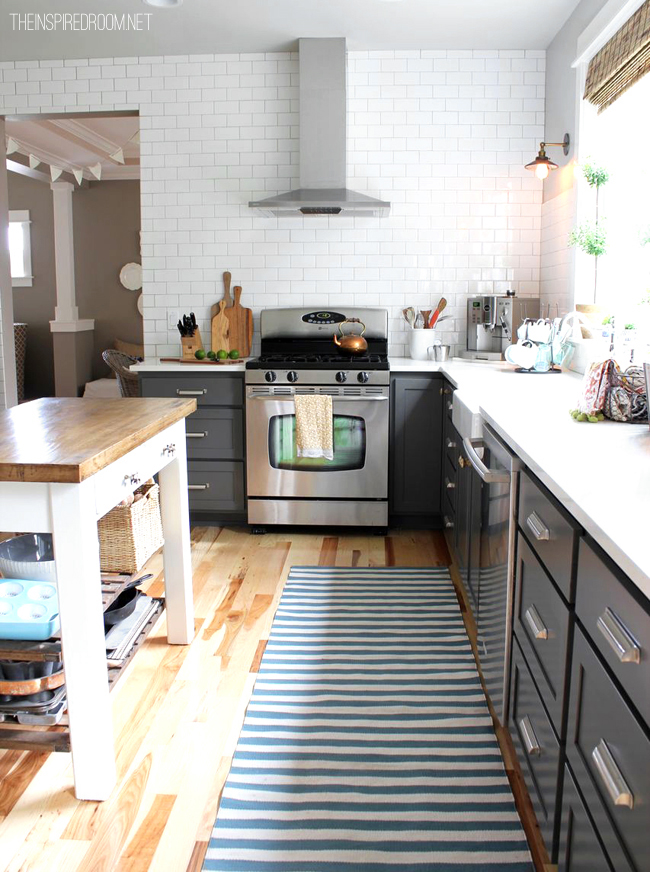
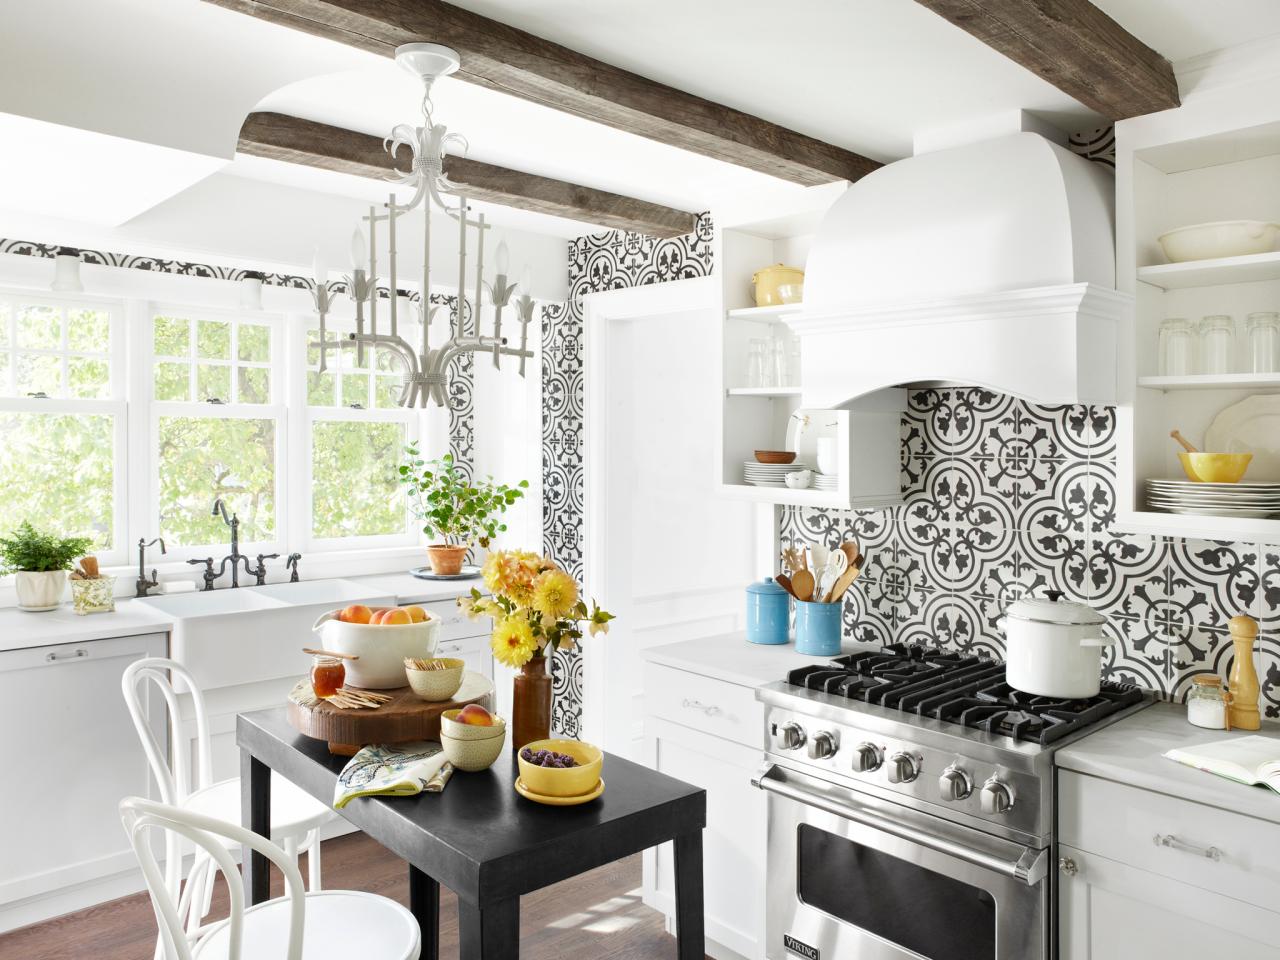
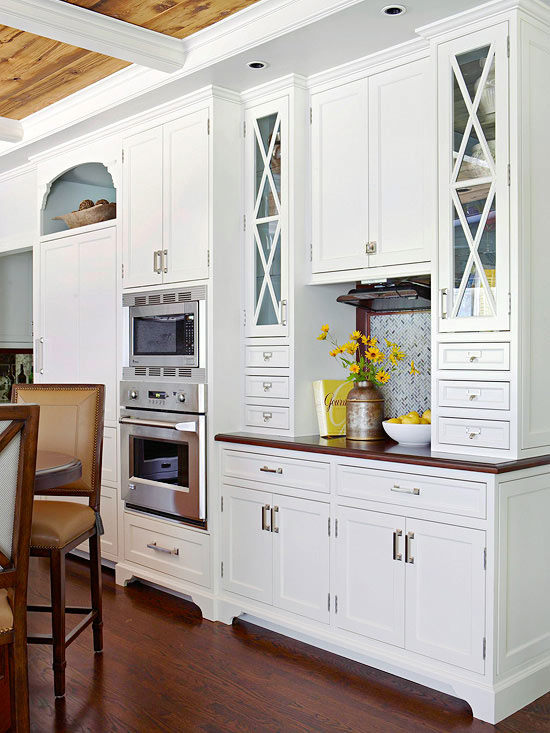
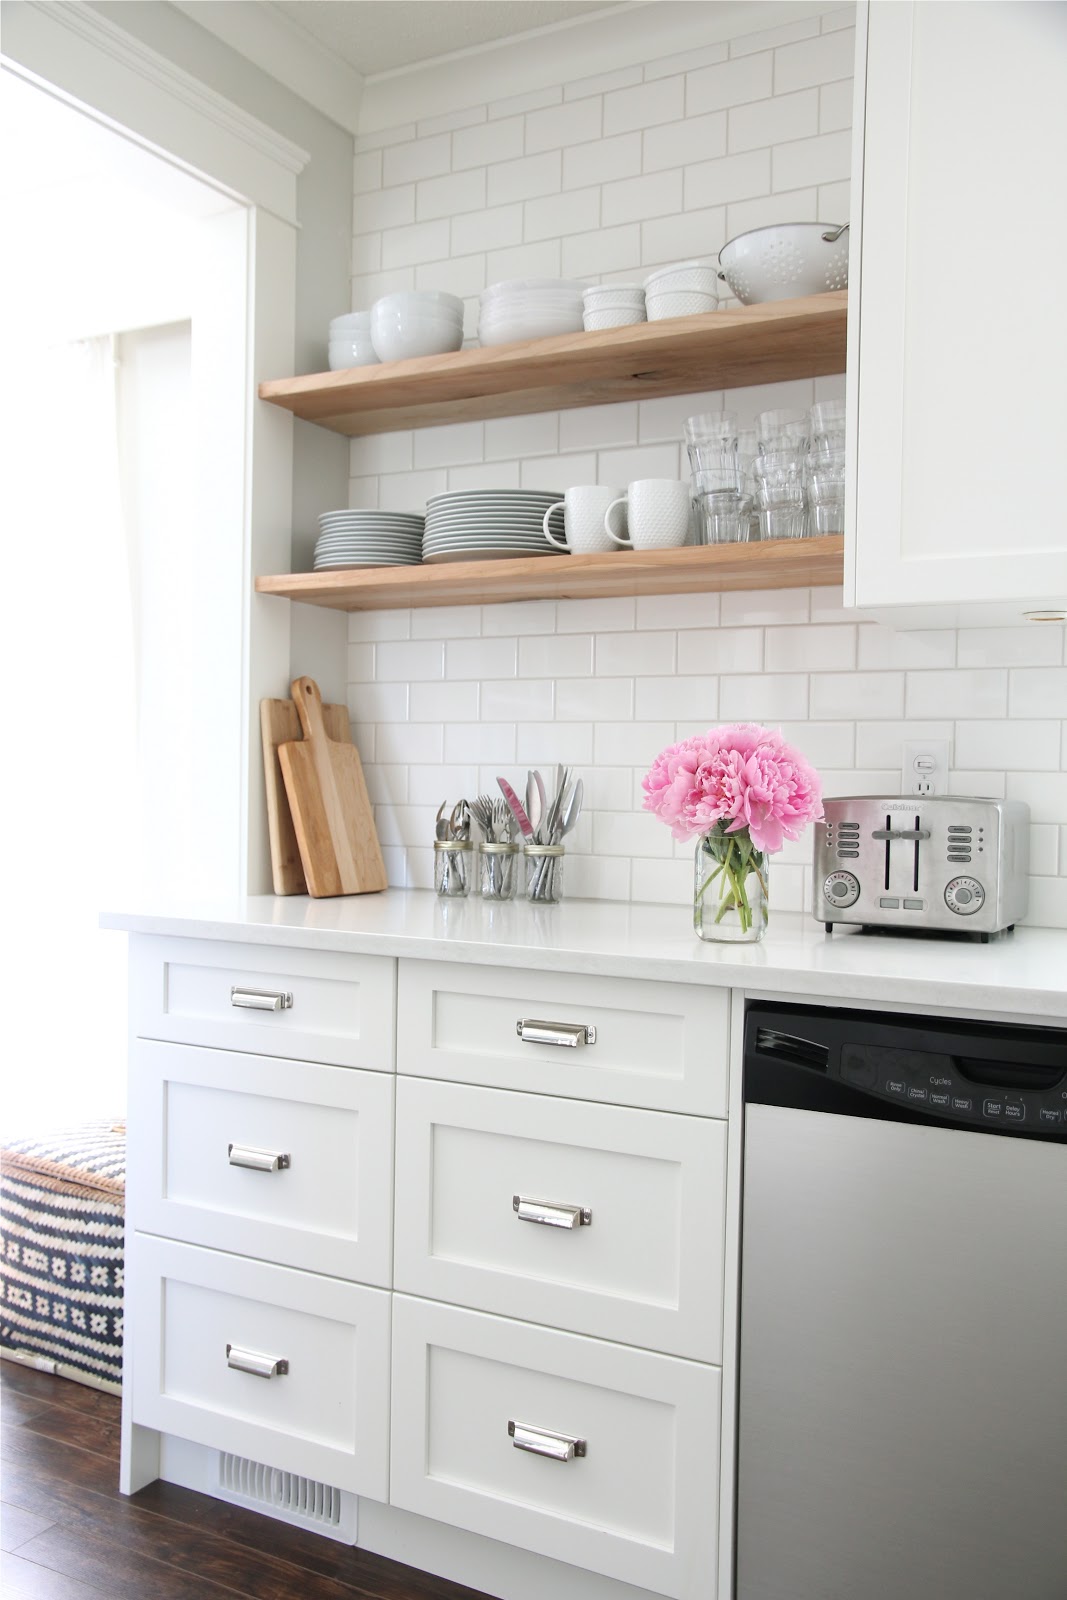
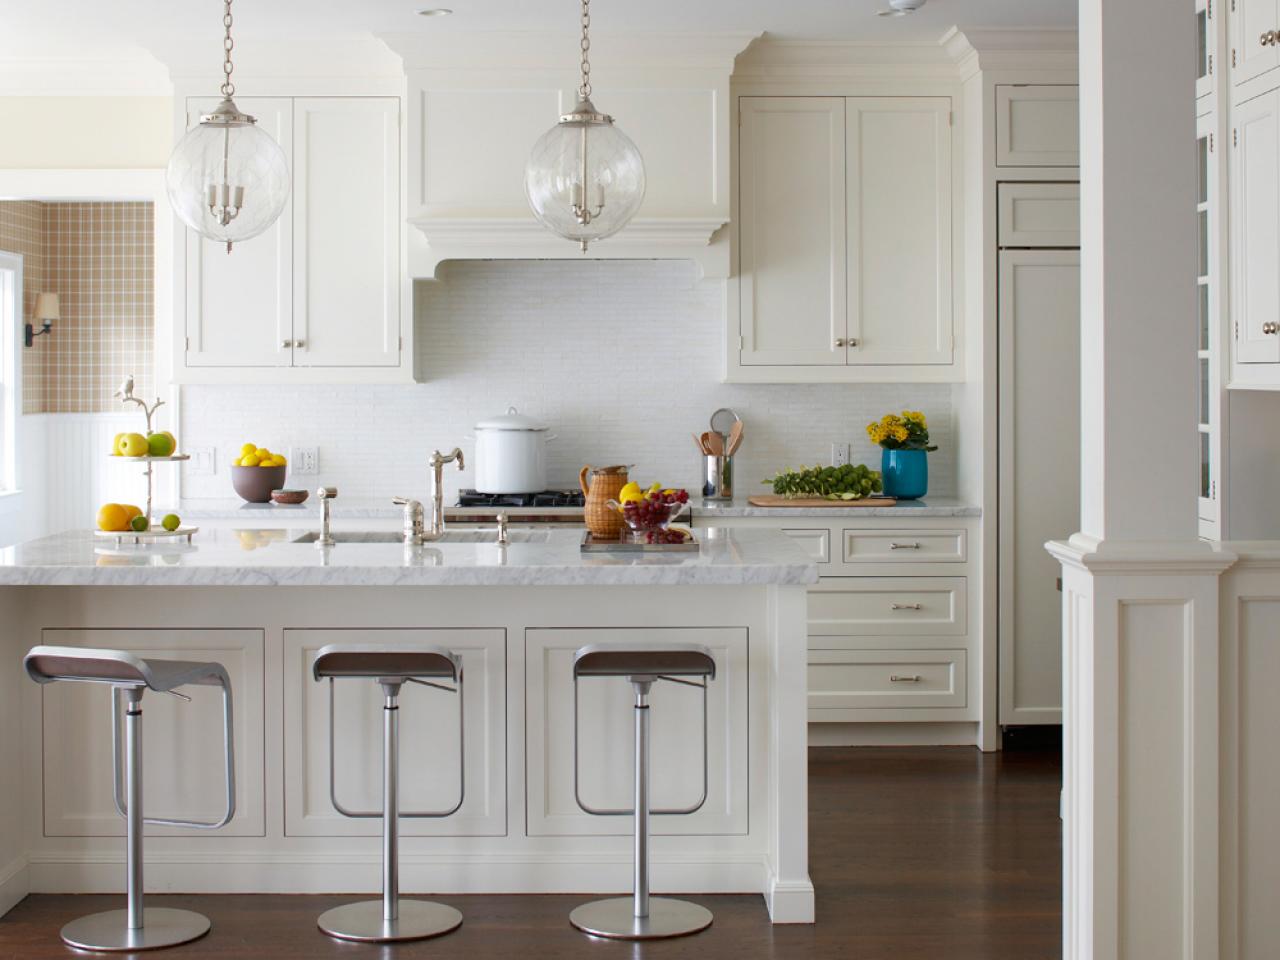
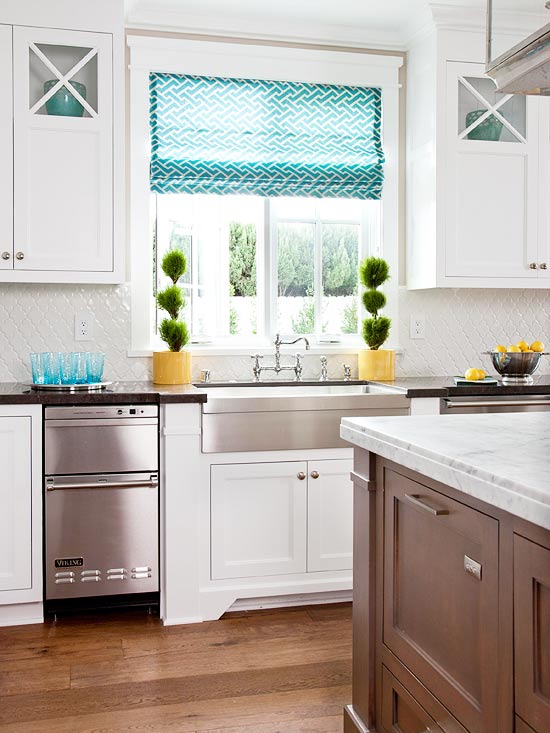
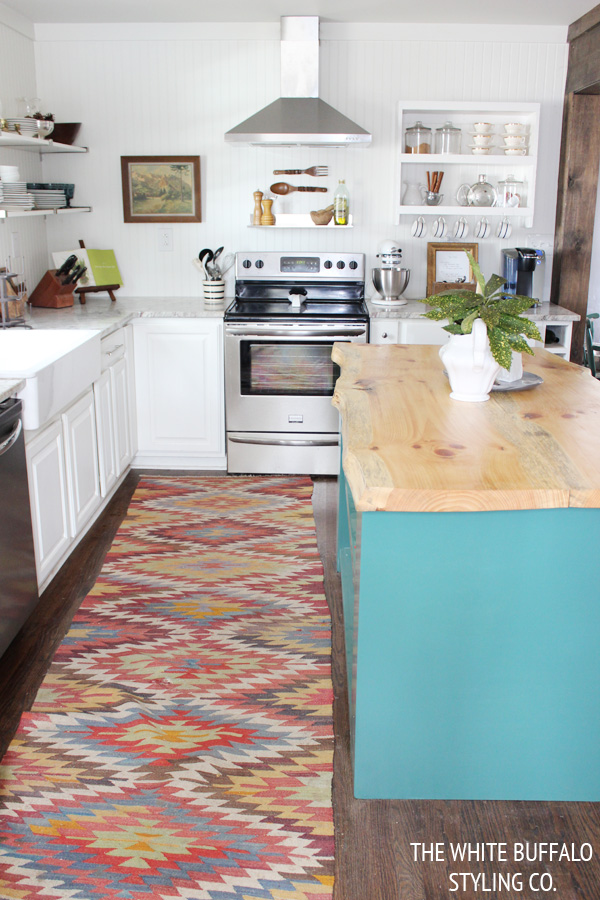
If you’re dreamy about white like me, here are some kitchens to be inspired by that perfectly balance white with layers of color, texture, and style…
Open Shelves. Wood. Pops of Color. White Tile. Contrasting Grout. Colored Island.
Many elements from these inspirational pictures have influenced the design decisions for my kitchen. I can’t wait to share the details + plan of action with you… Next Week hopefully!
What colored cabinets would be in your dream kitchen? Is it white?
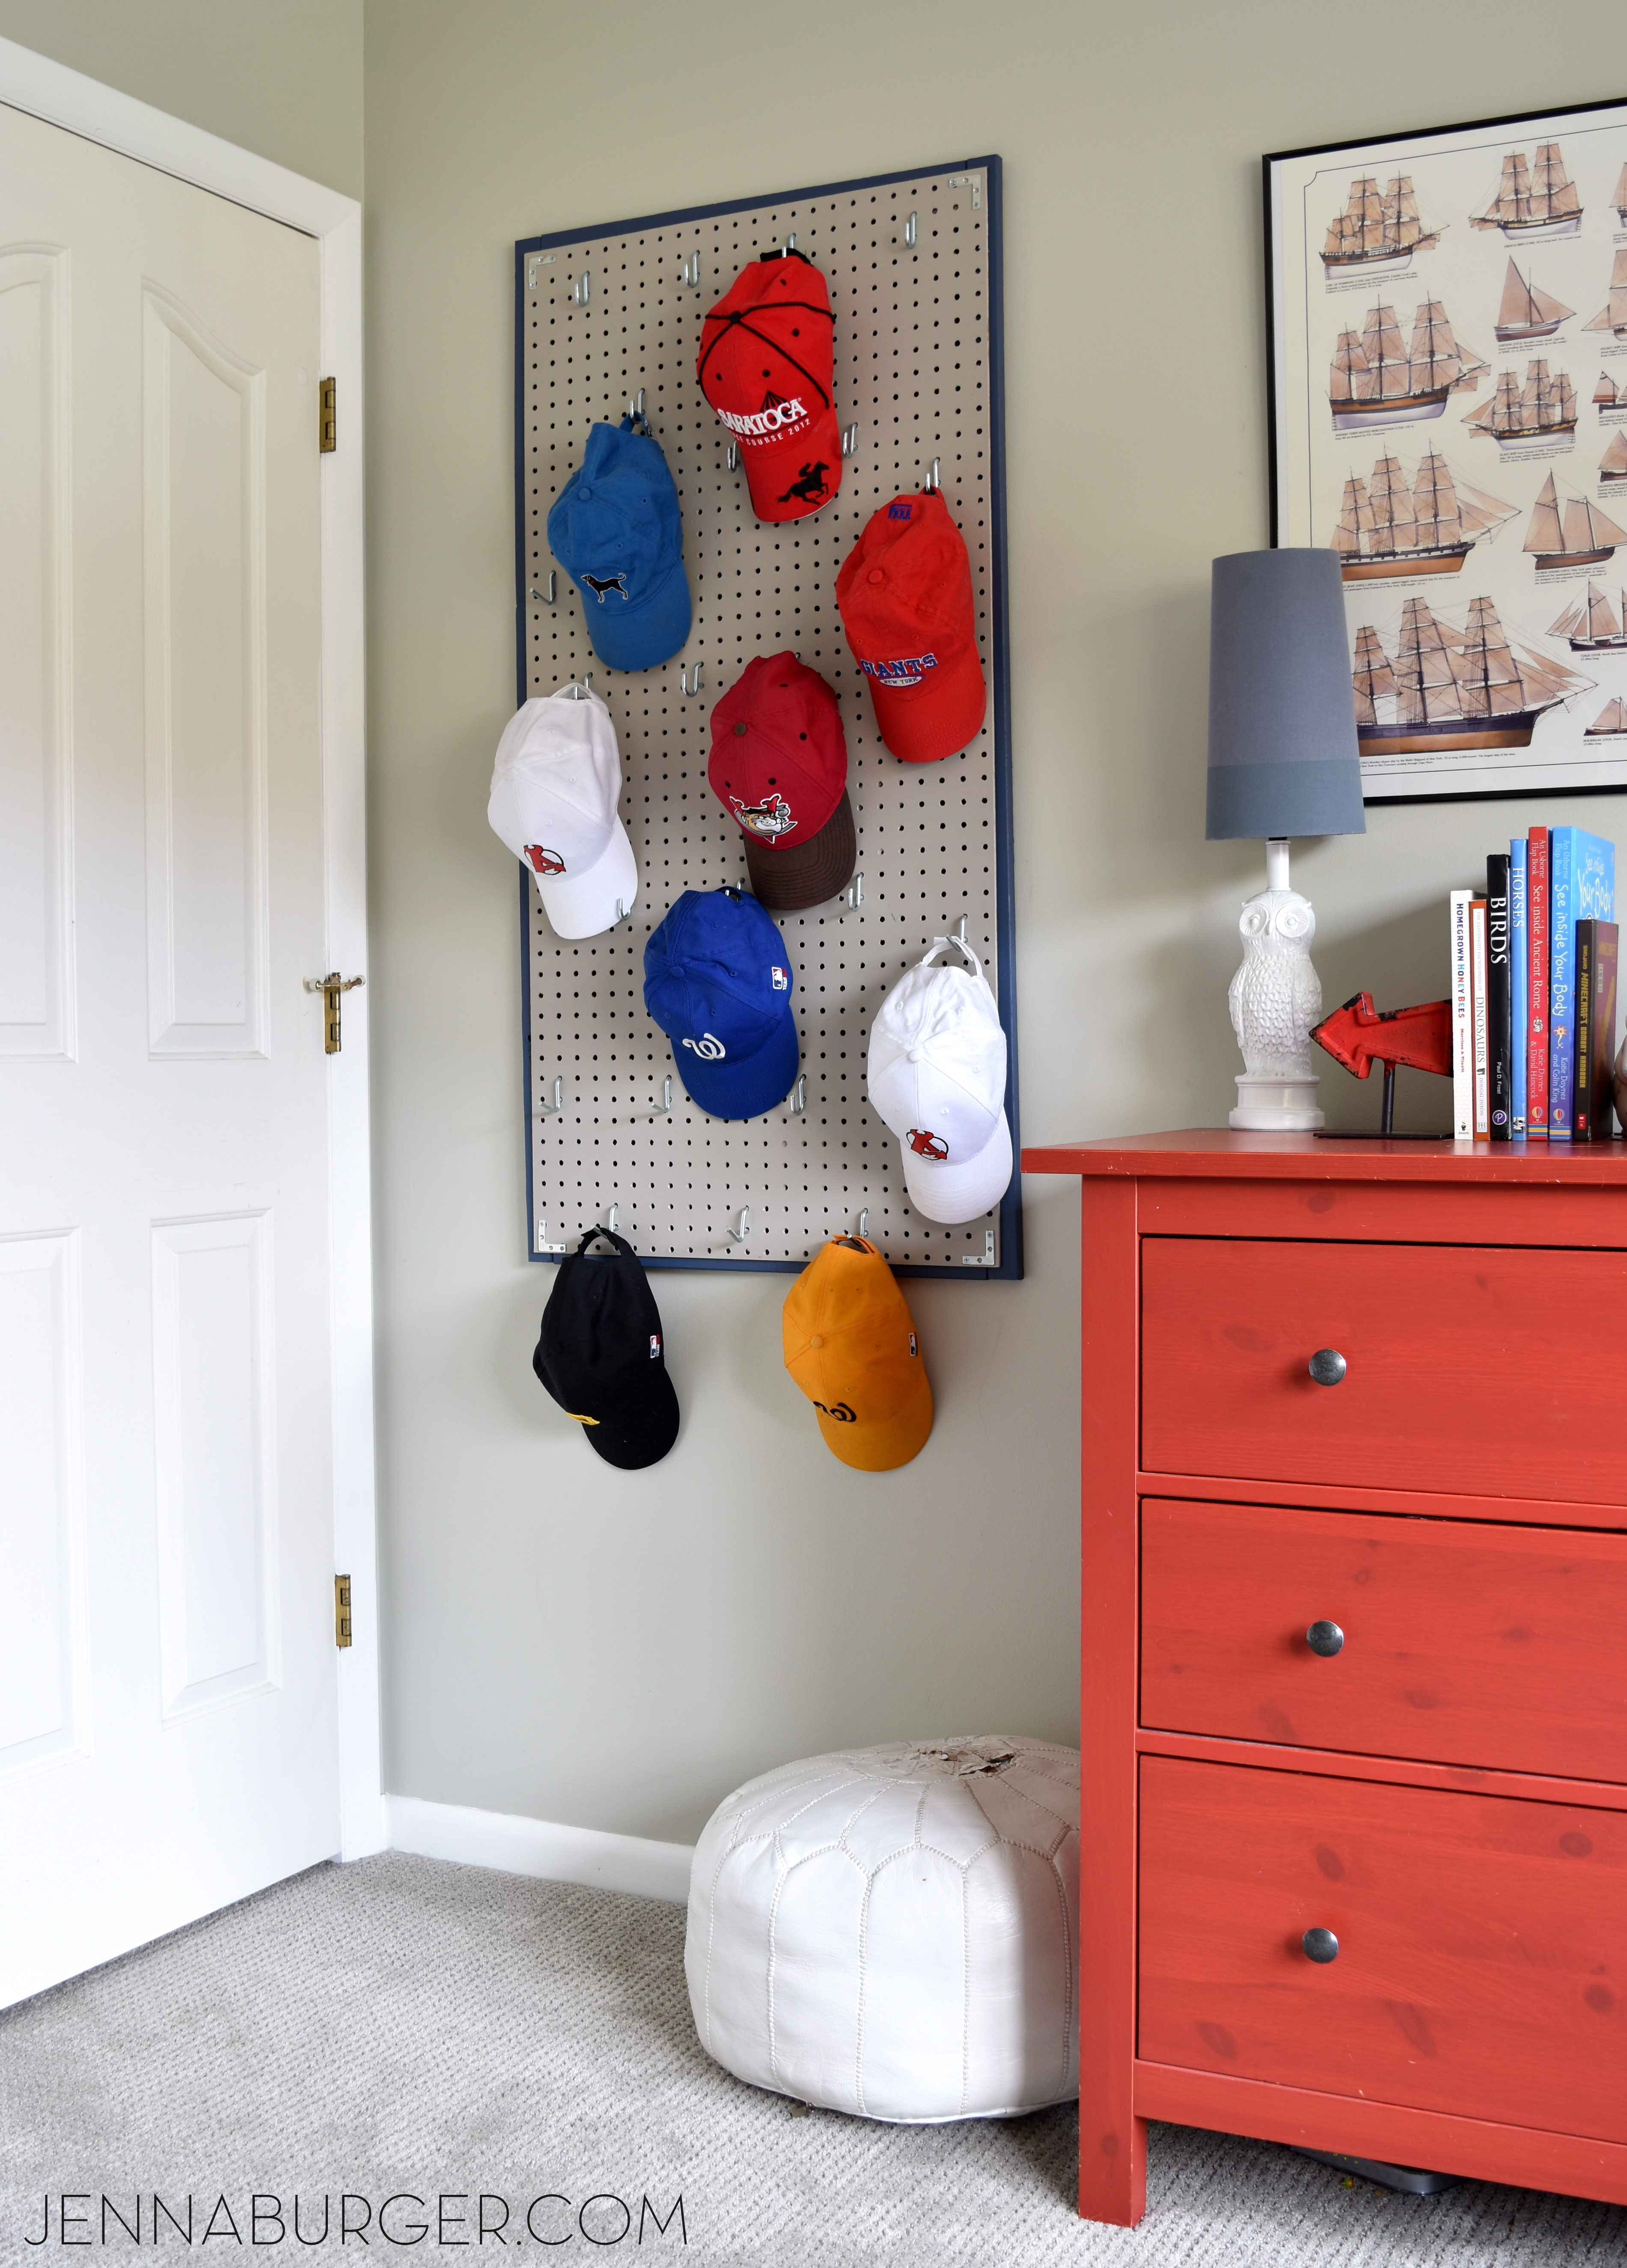
99.98% of men + boys I know have an extensive collection of baseball caps. From teams they follow, to giveaways, to a gift shop purchase as a momento, baseball caps are a stable for most guys wardrobes.
So then the big question arises… Where do all those caps go? How does one organize the growing collection of baseball caps?
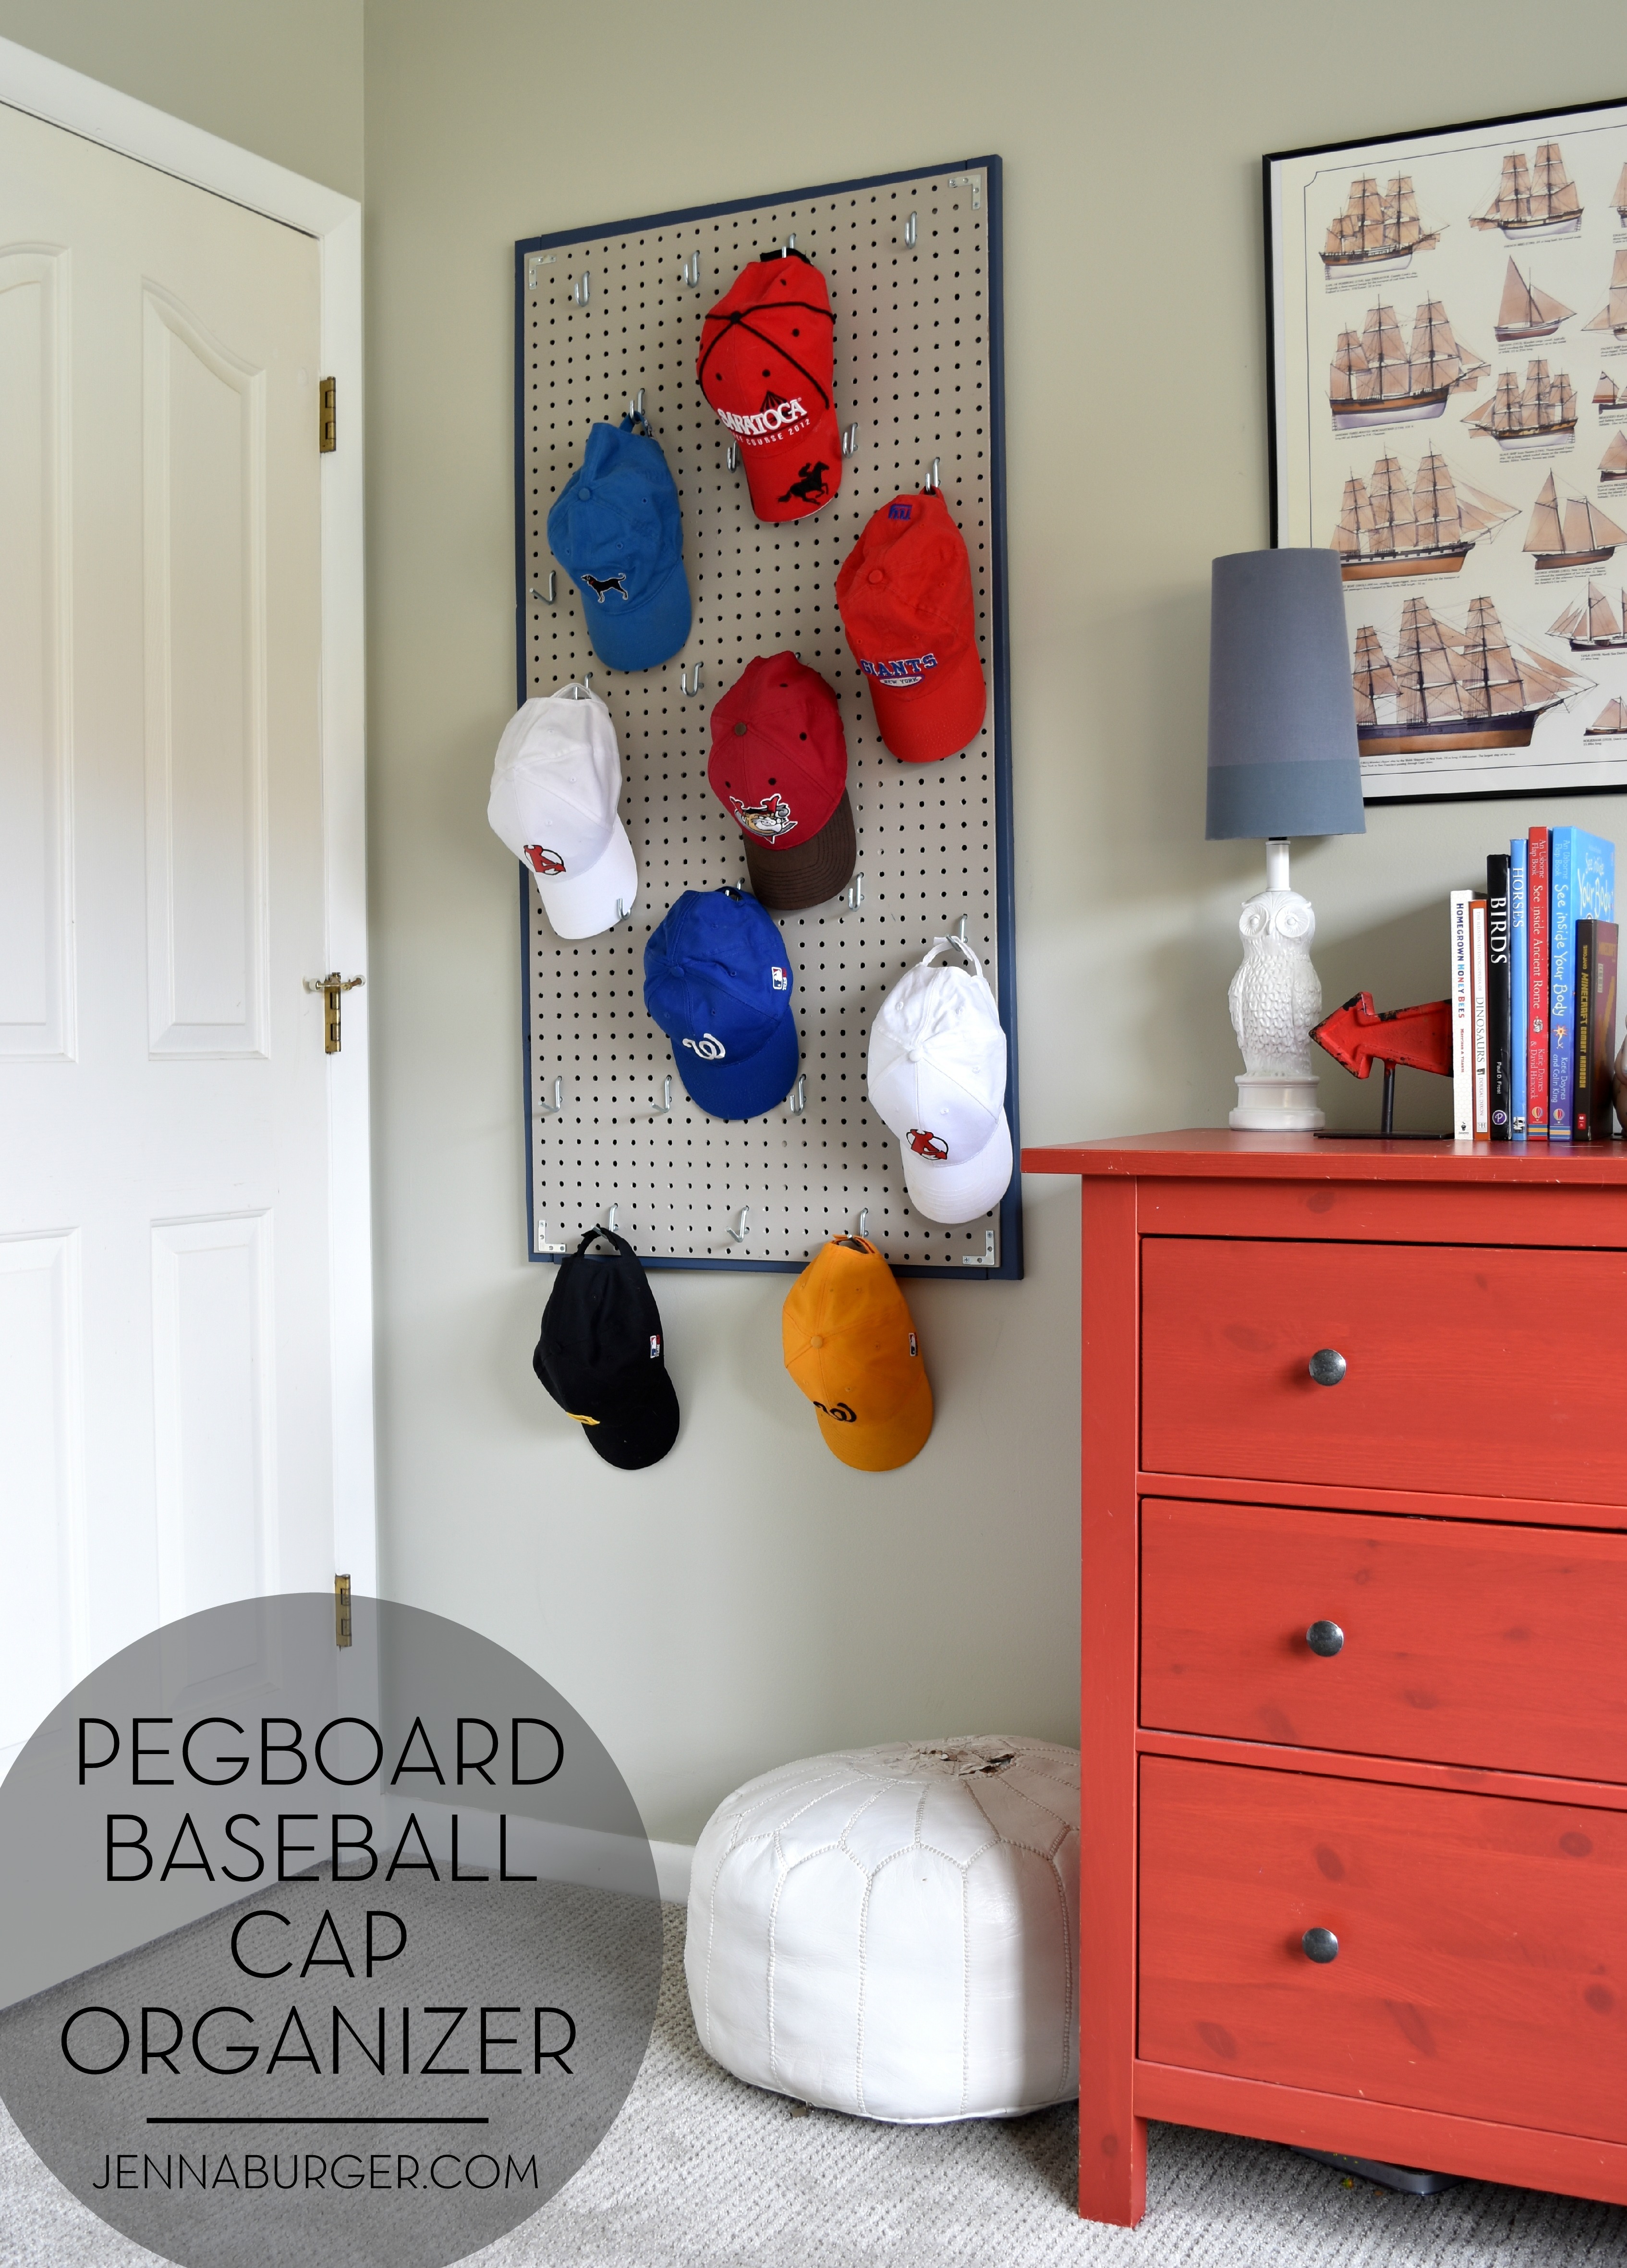
MY SOLUTION? A pegboard baseball cap organizer…
I made this a couple months ago and it’s been a life saver. Or should I say a hat saver, lol…
Honestly though, the collection of caps that my boy has acquired has gotten out of control and now they all finally have a happy home!
The best part of all, this organizer was easy to make.
MATERIALS
> (4) 1″ x 2″ x 4′ long wood pieces – cut to size
> 2′ x 4′ piece of pegboard (I purchased a 4′ x 4′ piece @ Lowe’s and they cut it to my desired size)
> “L†brackets
> Paint
1
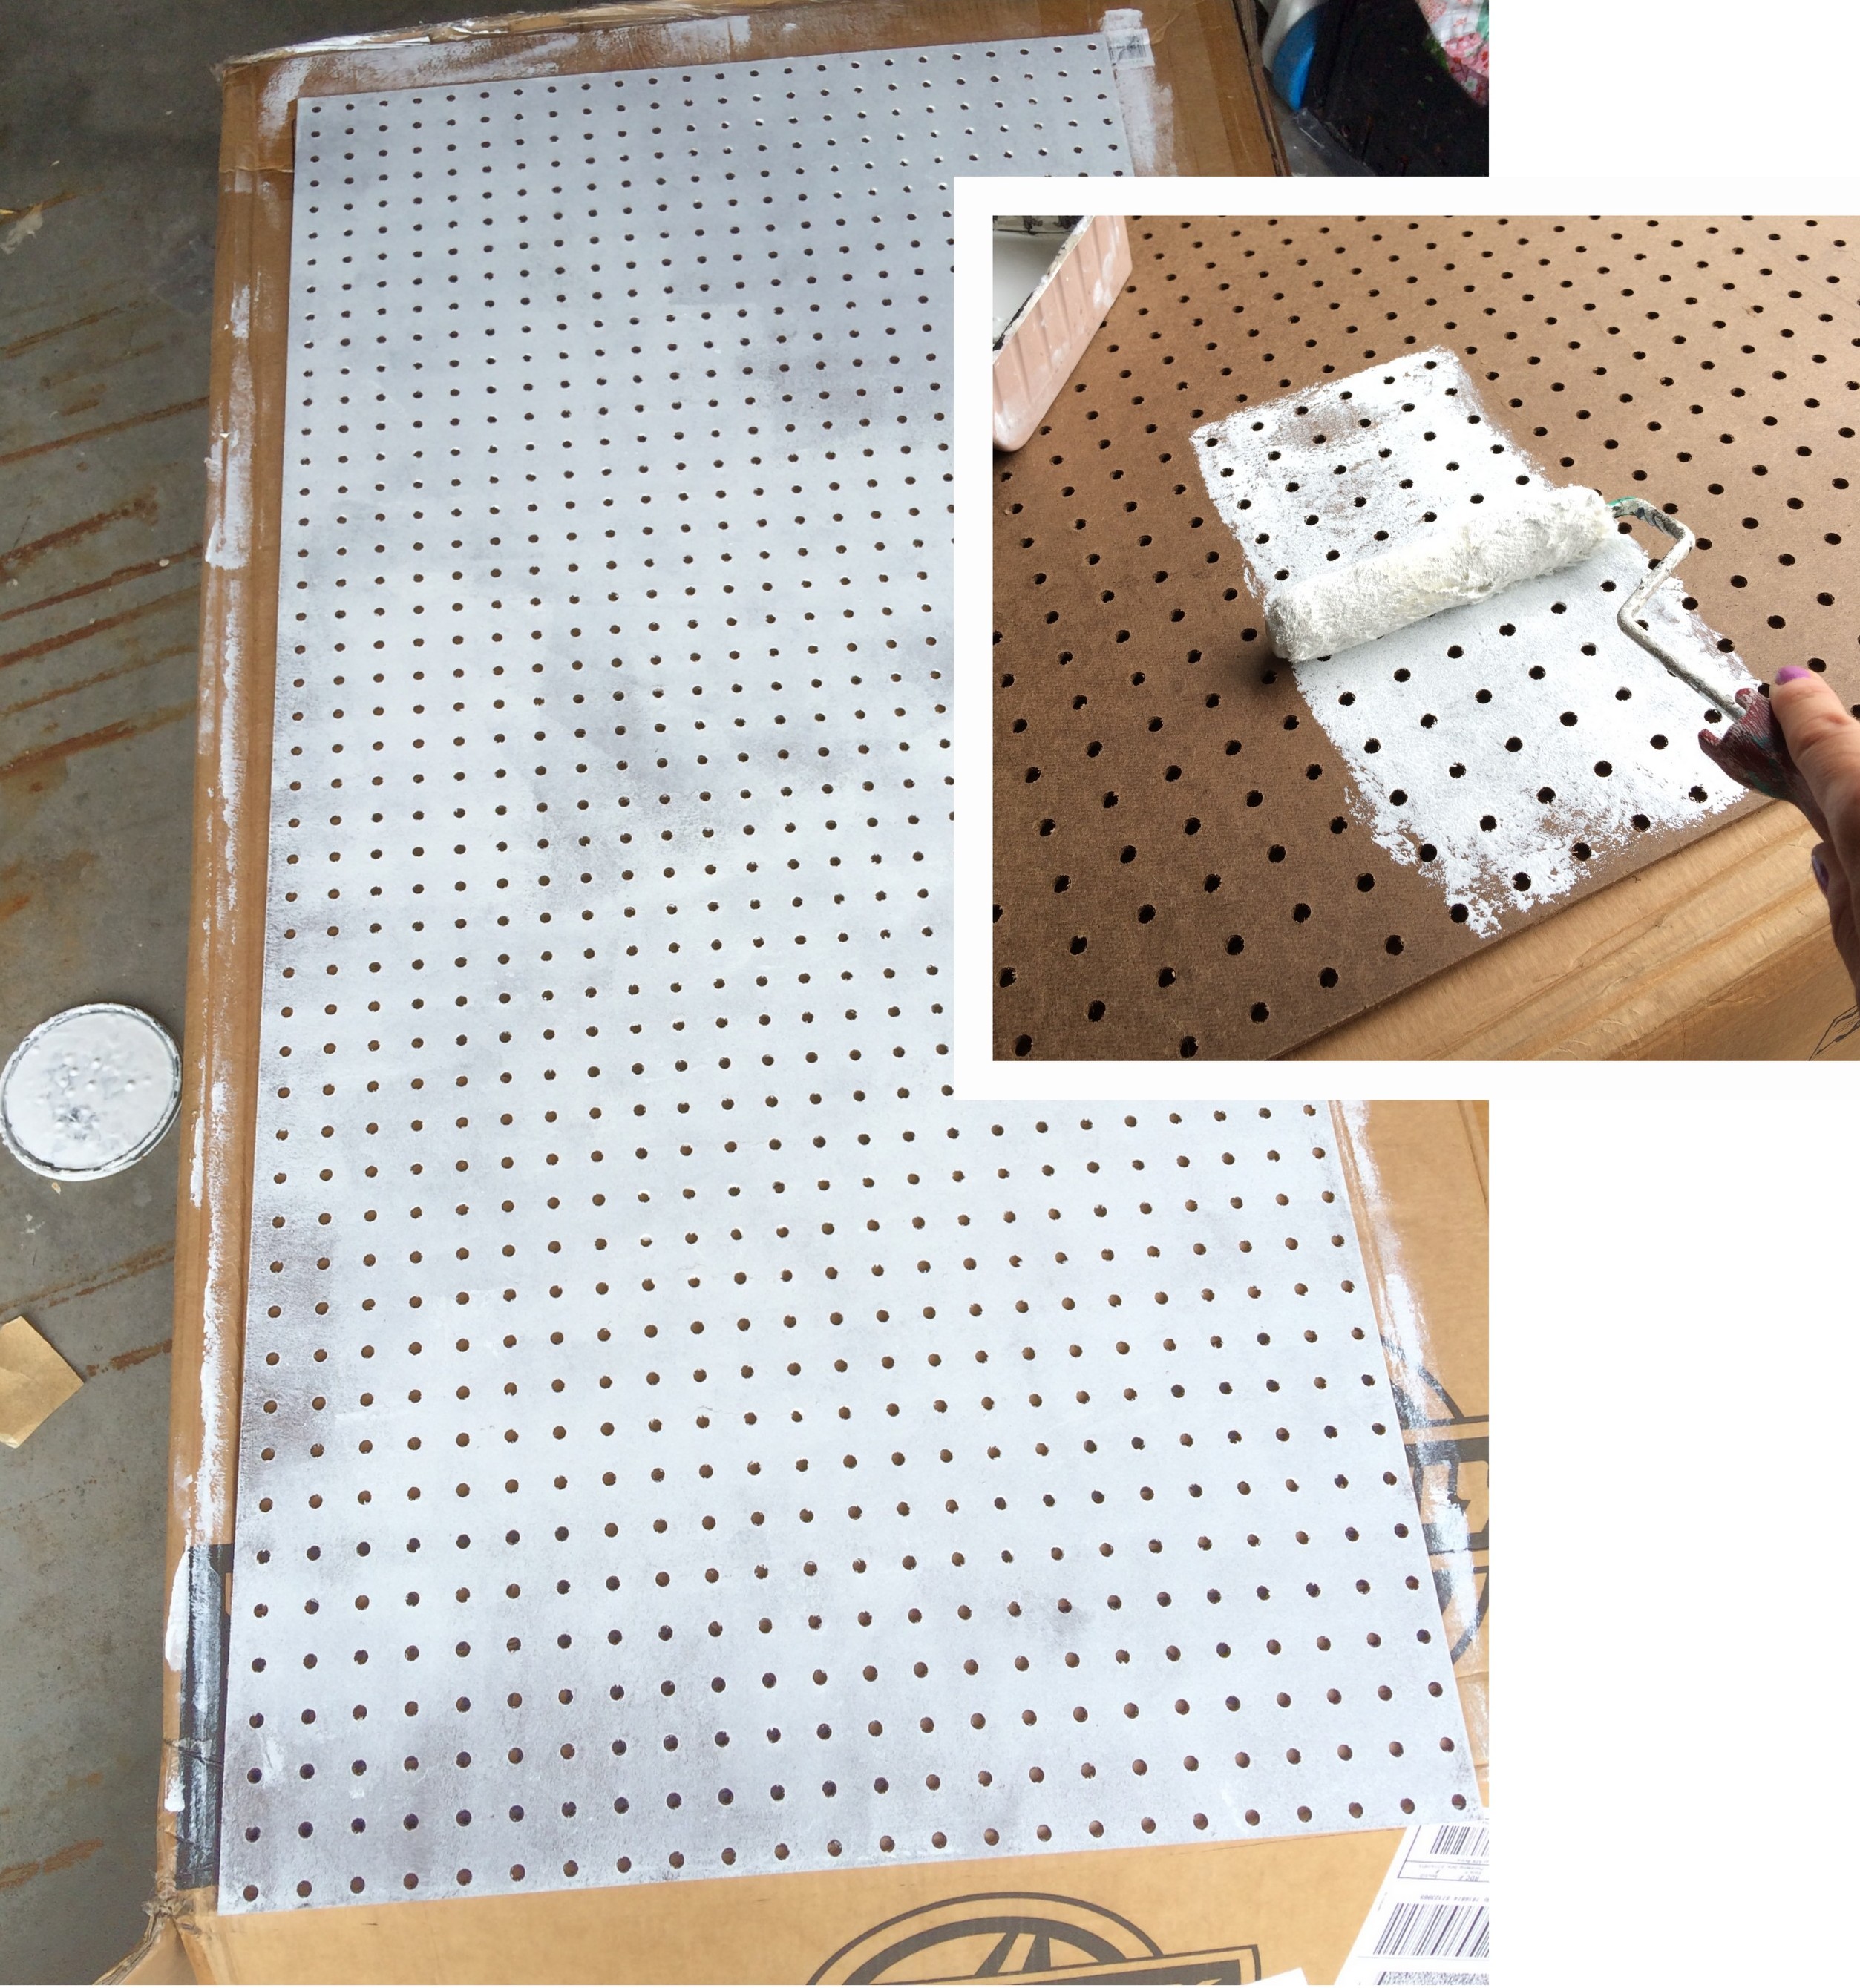
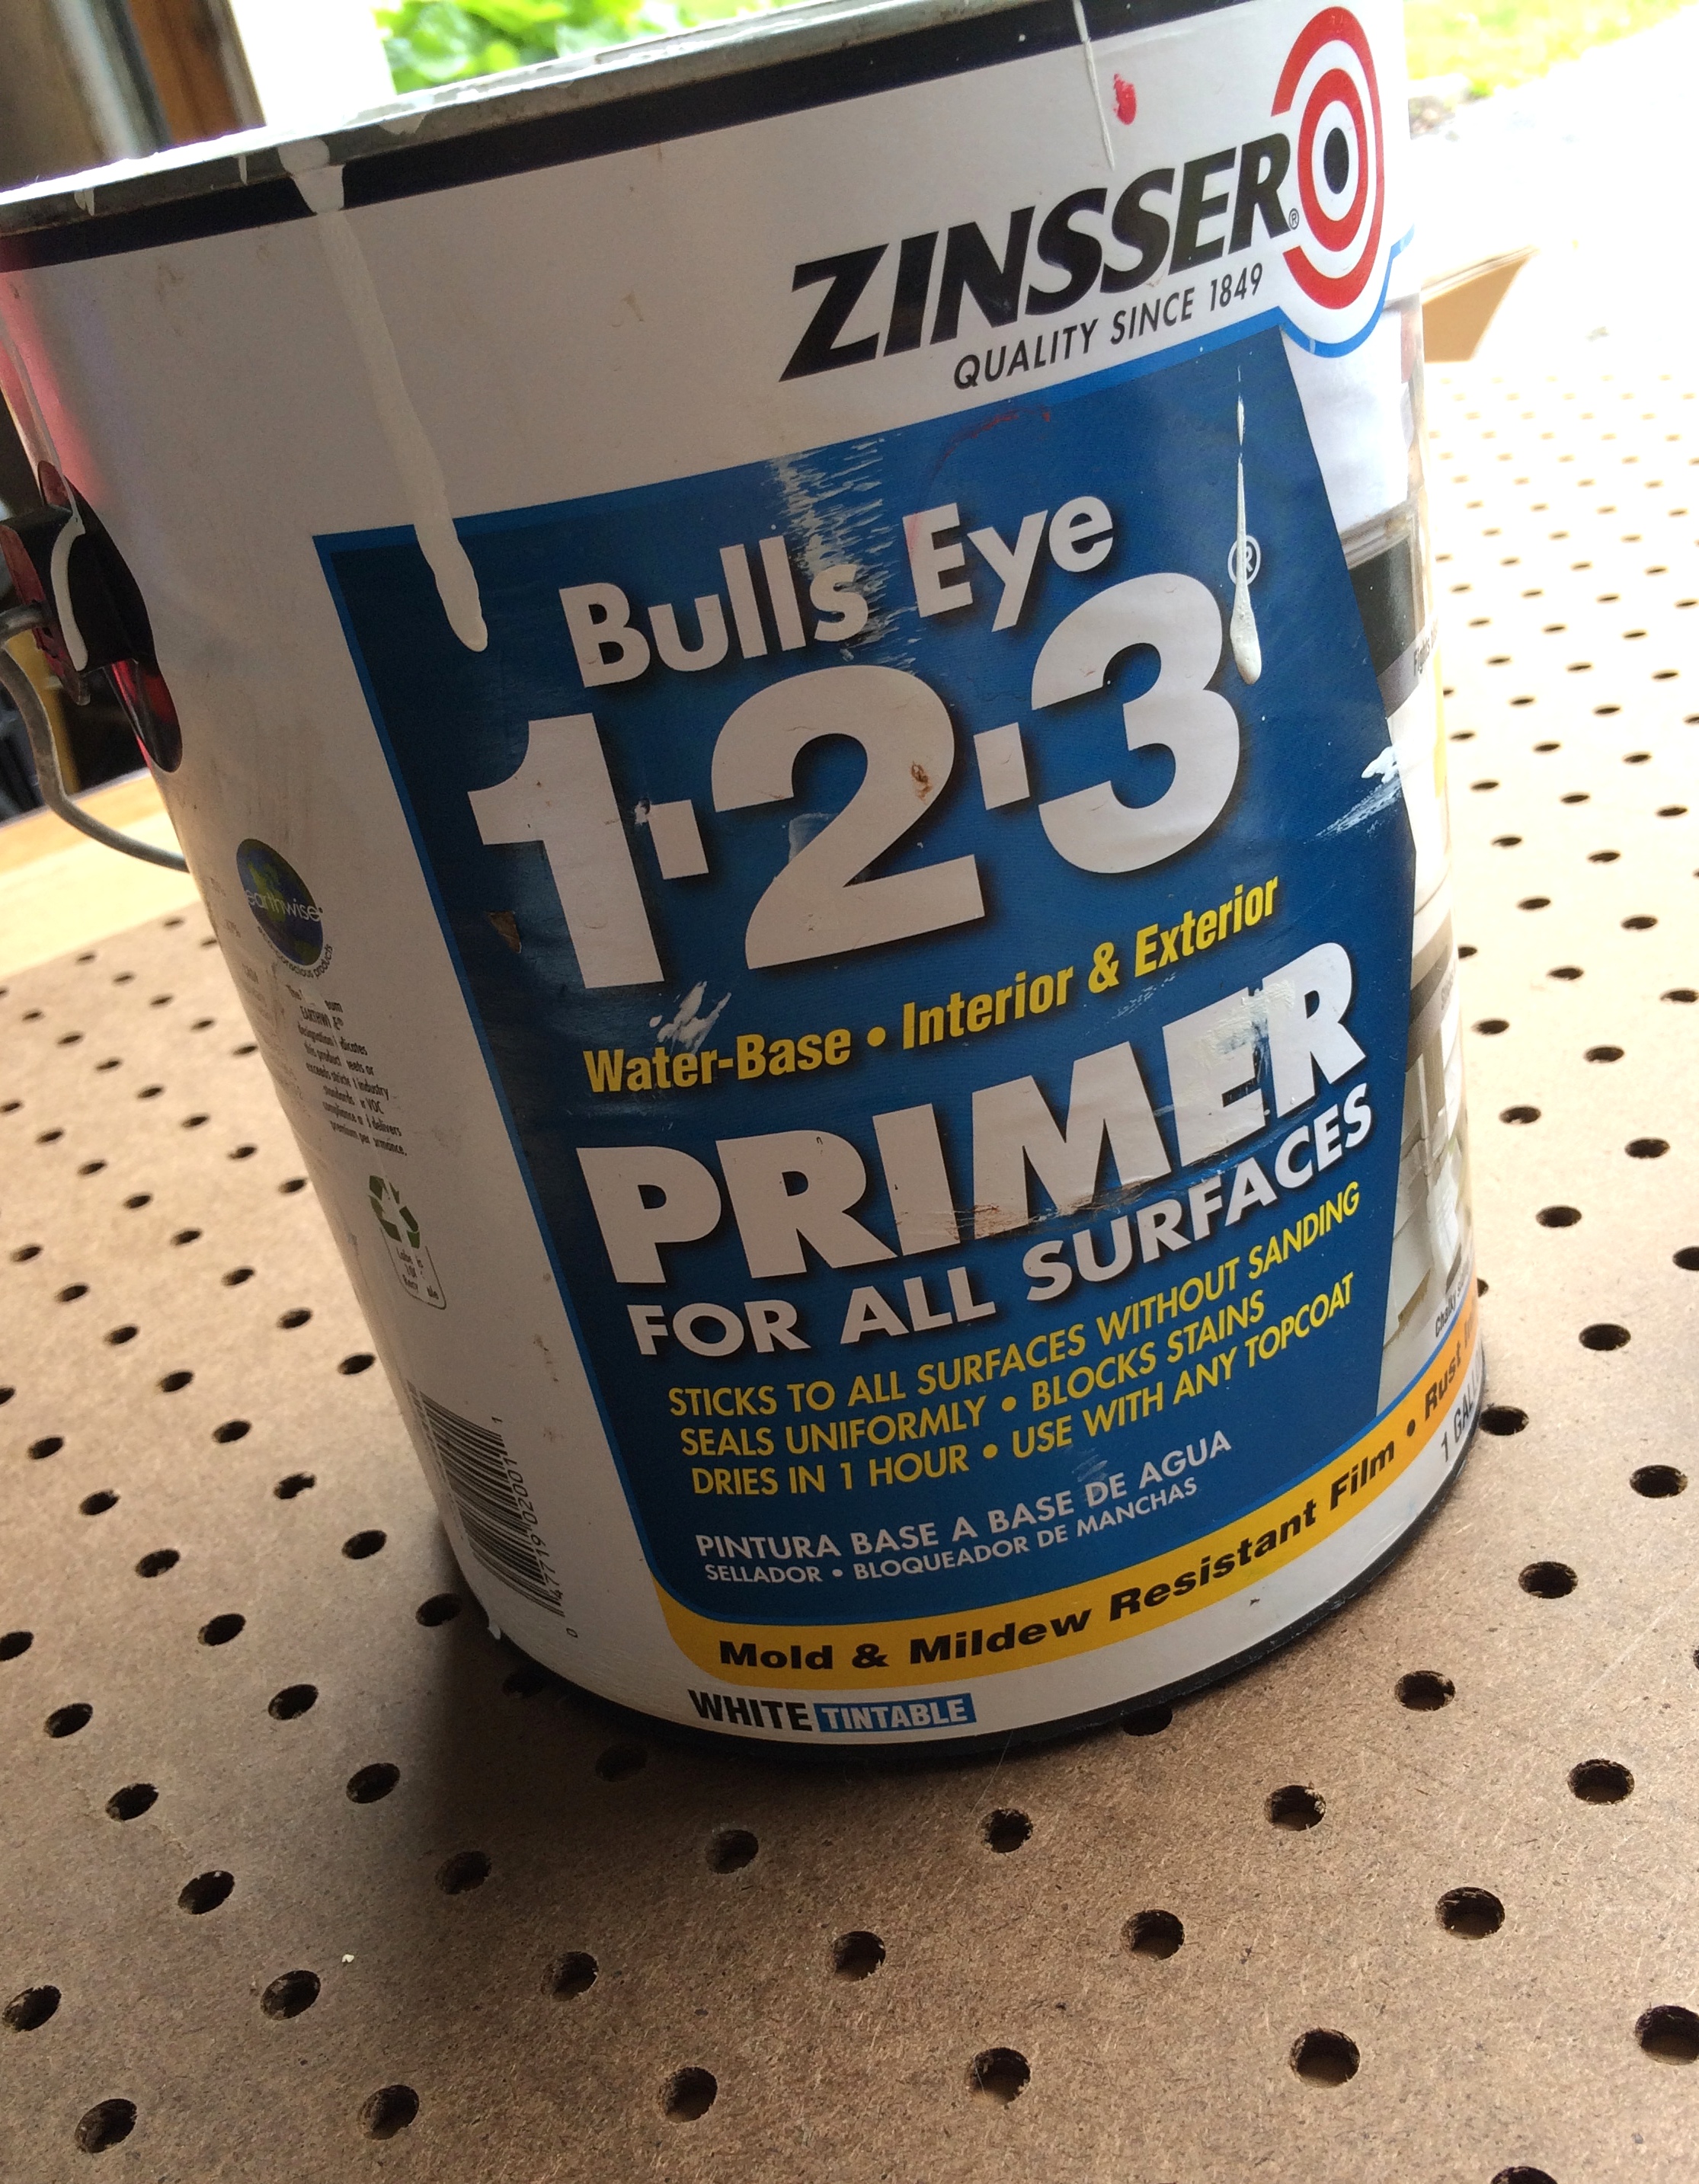
Some pegboard already comes primed or white, but my local Lowe’s only had the brown, unfinished version. Similar to painting walls or furniture, it’s important to use primer first. So first I gave the face of my pegboard a quick coat of Zinsser Primer.
2
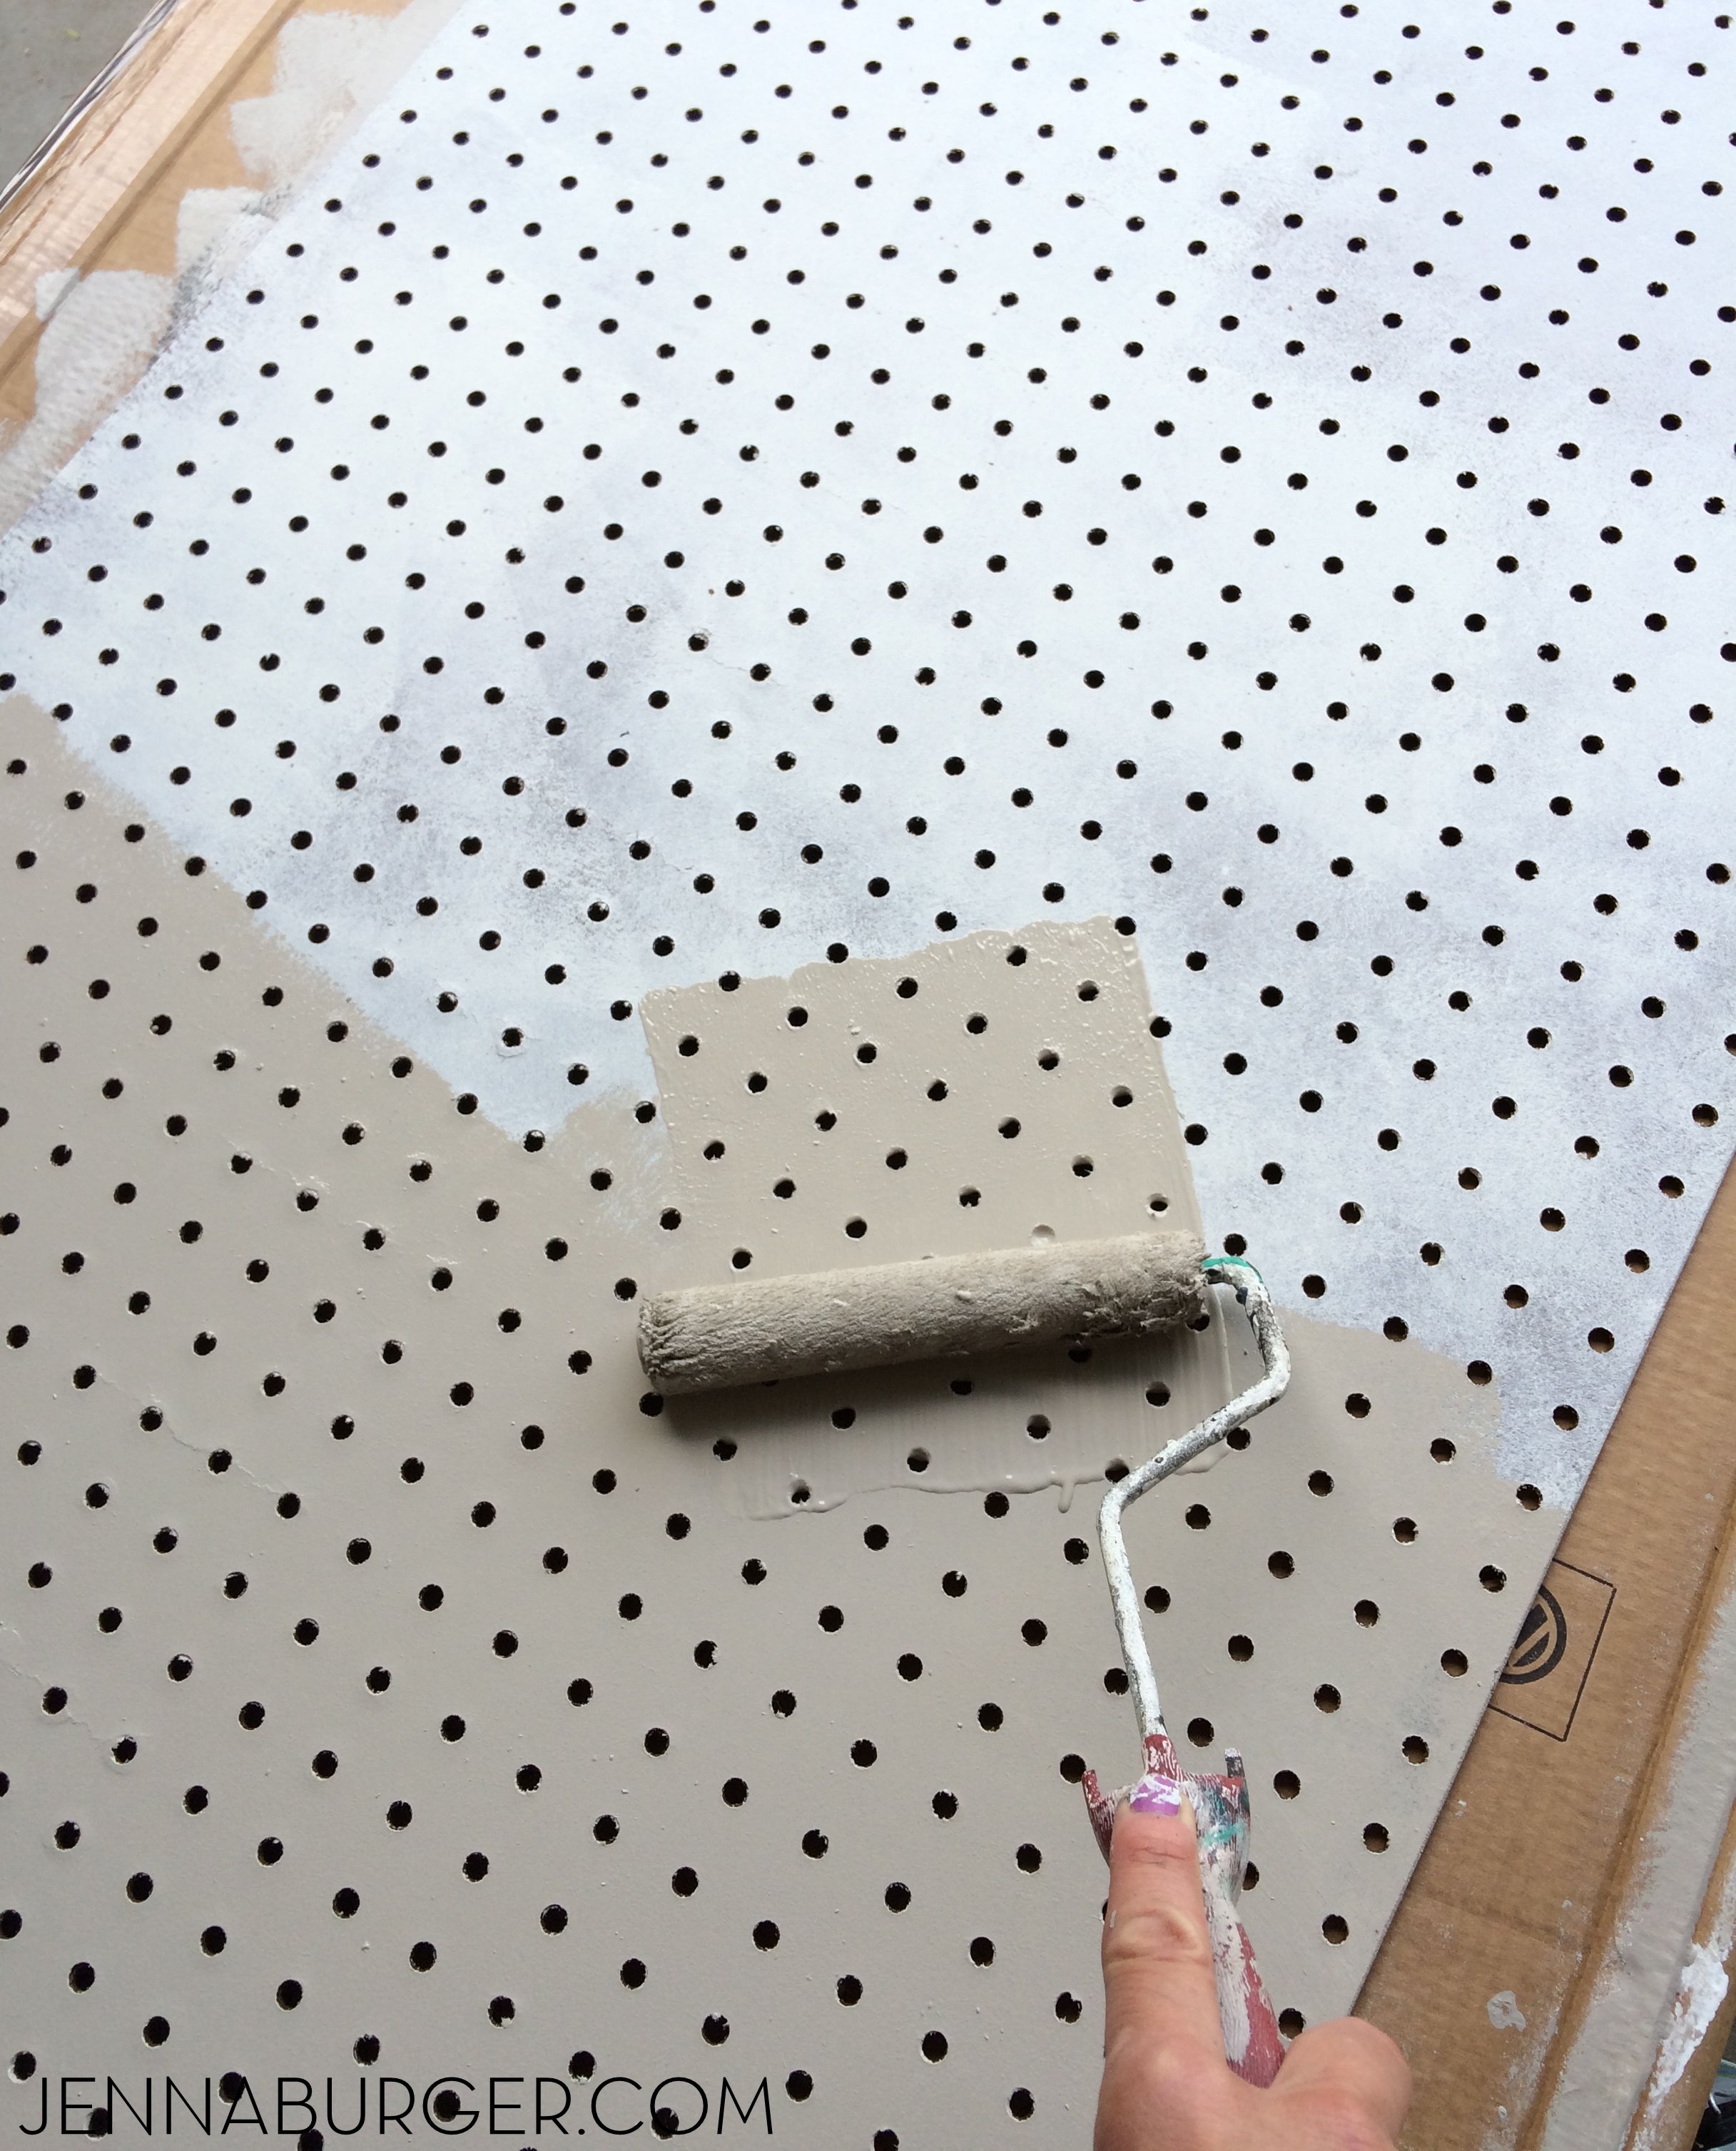
Once it was primed, I painted the pegboard with 2 fresh coats of color with a roller – a taupe-y hue was created by mixing a few leftover colors together
3
For the frame, I layed the 2′ x 4′ pegboard on the wood strips allowing 1″ of exposed frame around, and marked them with a pencil.
Using a miter saw (my recommendation for a good one) I cut the wood pieces as needed. If you don’t have a miter saw or tool to cut the wood, Lowes will cut it to your desired length.
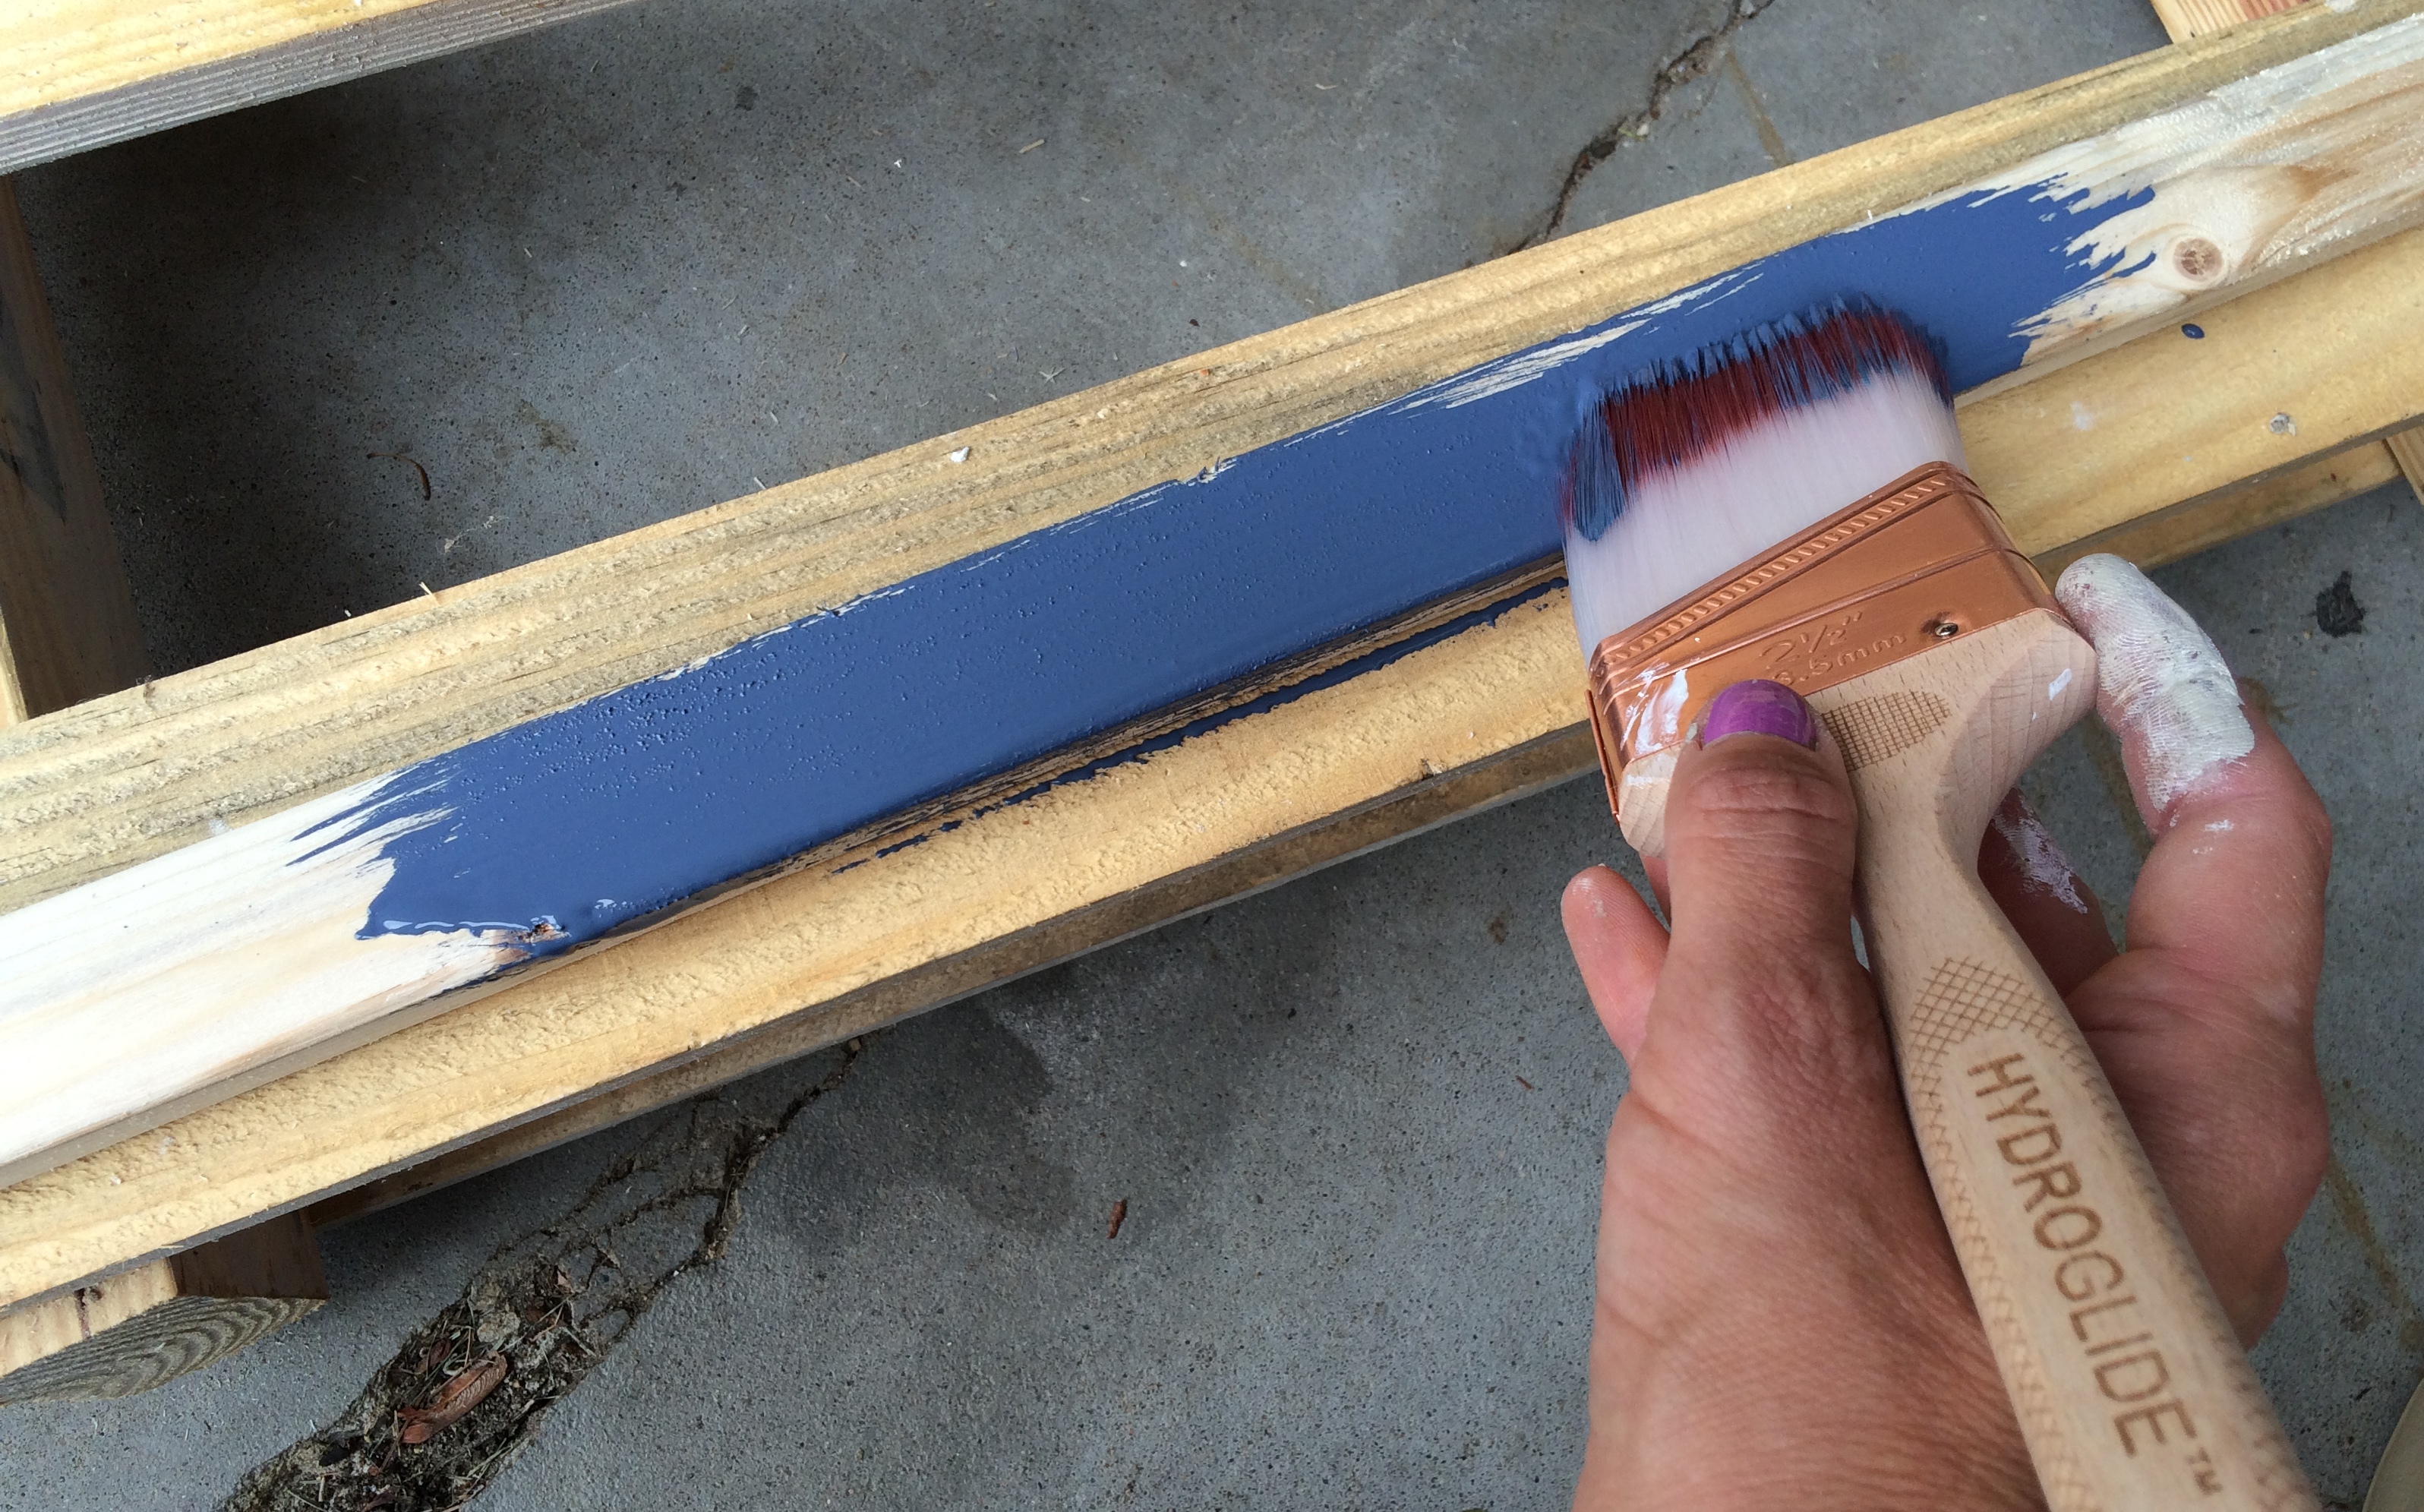
Then I painted the wood pieces using more leftover paint. Since this pegboard was slated for my sons room, I coordinated the blue hue with the color I used for painting his closet door
/ Color: Benjamin Moore Van Deusen Blue
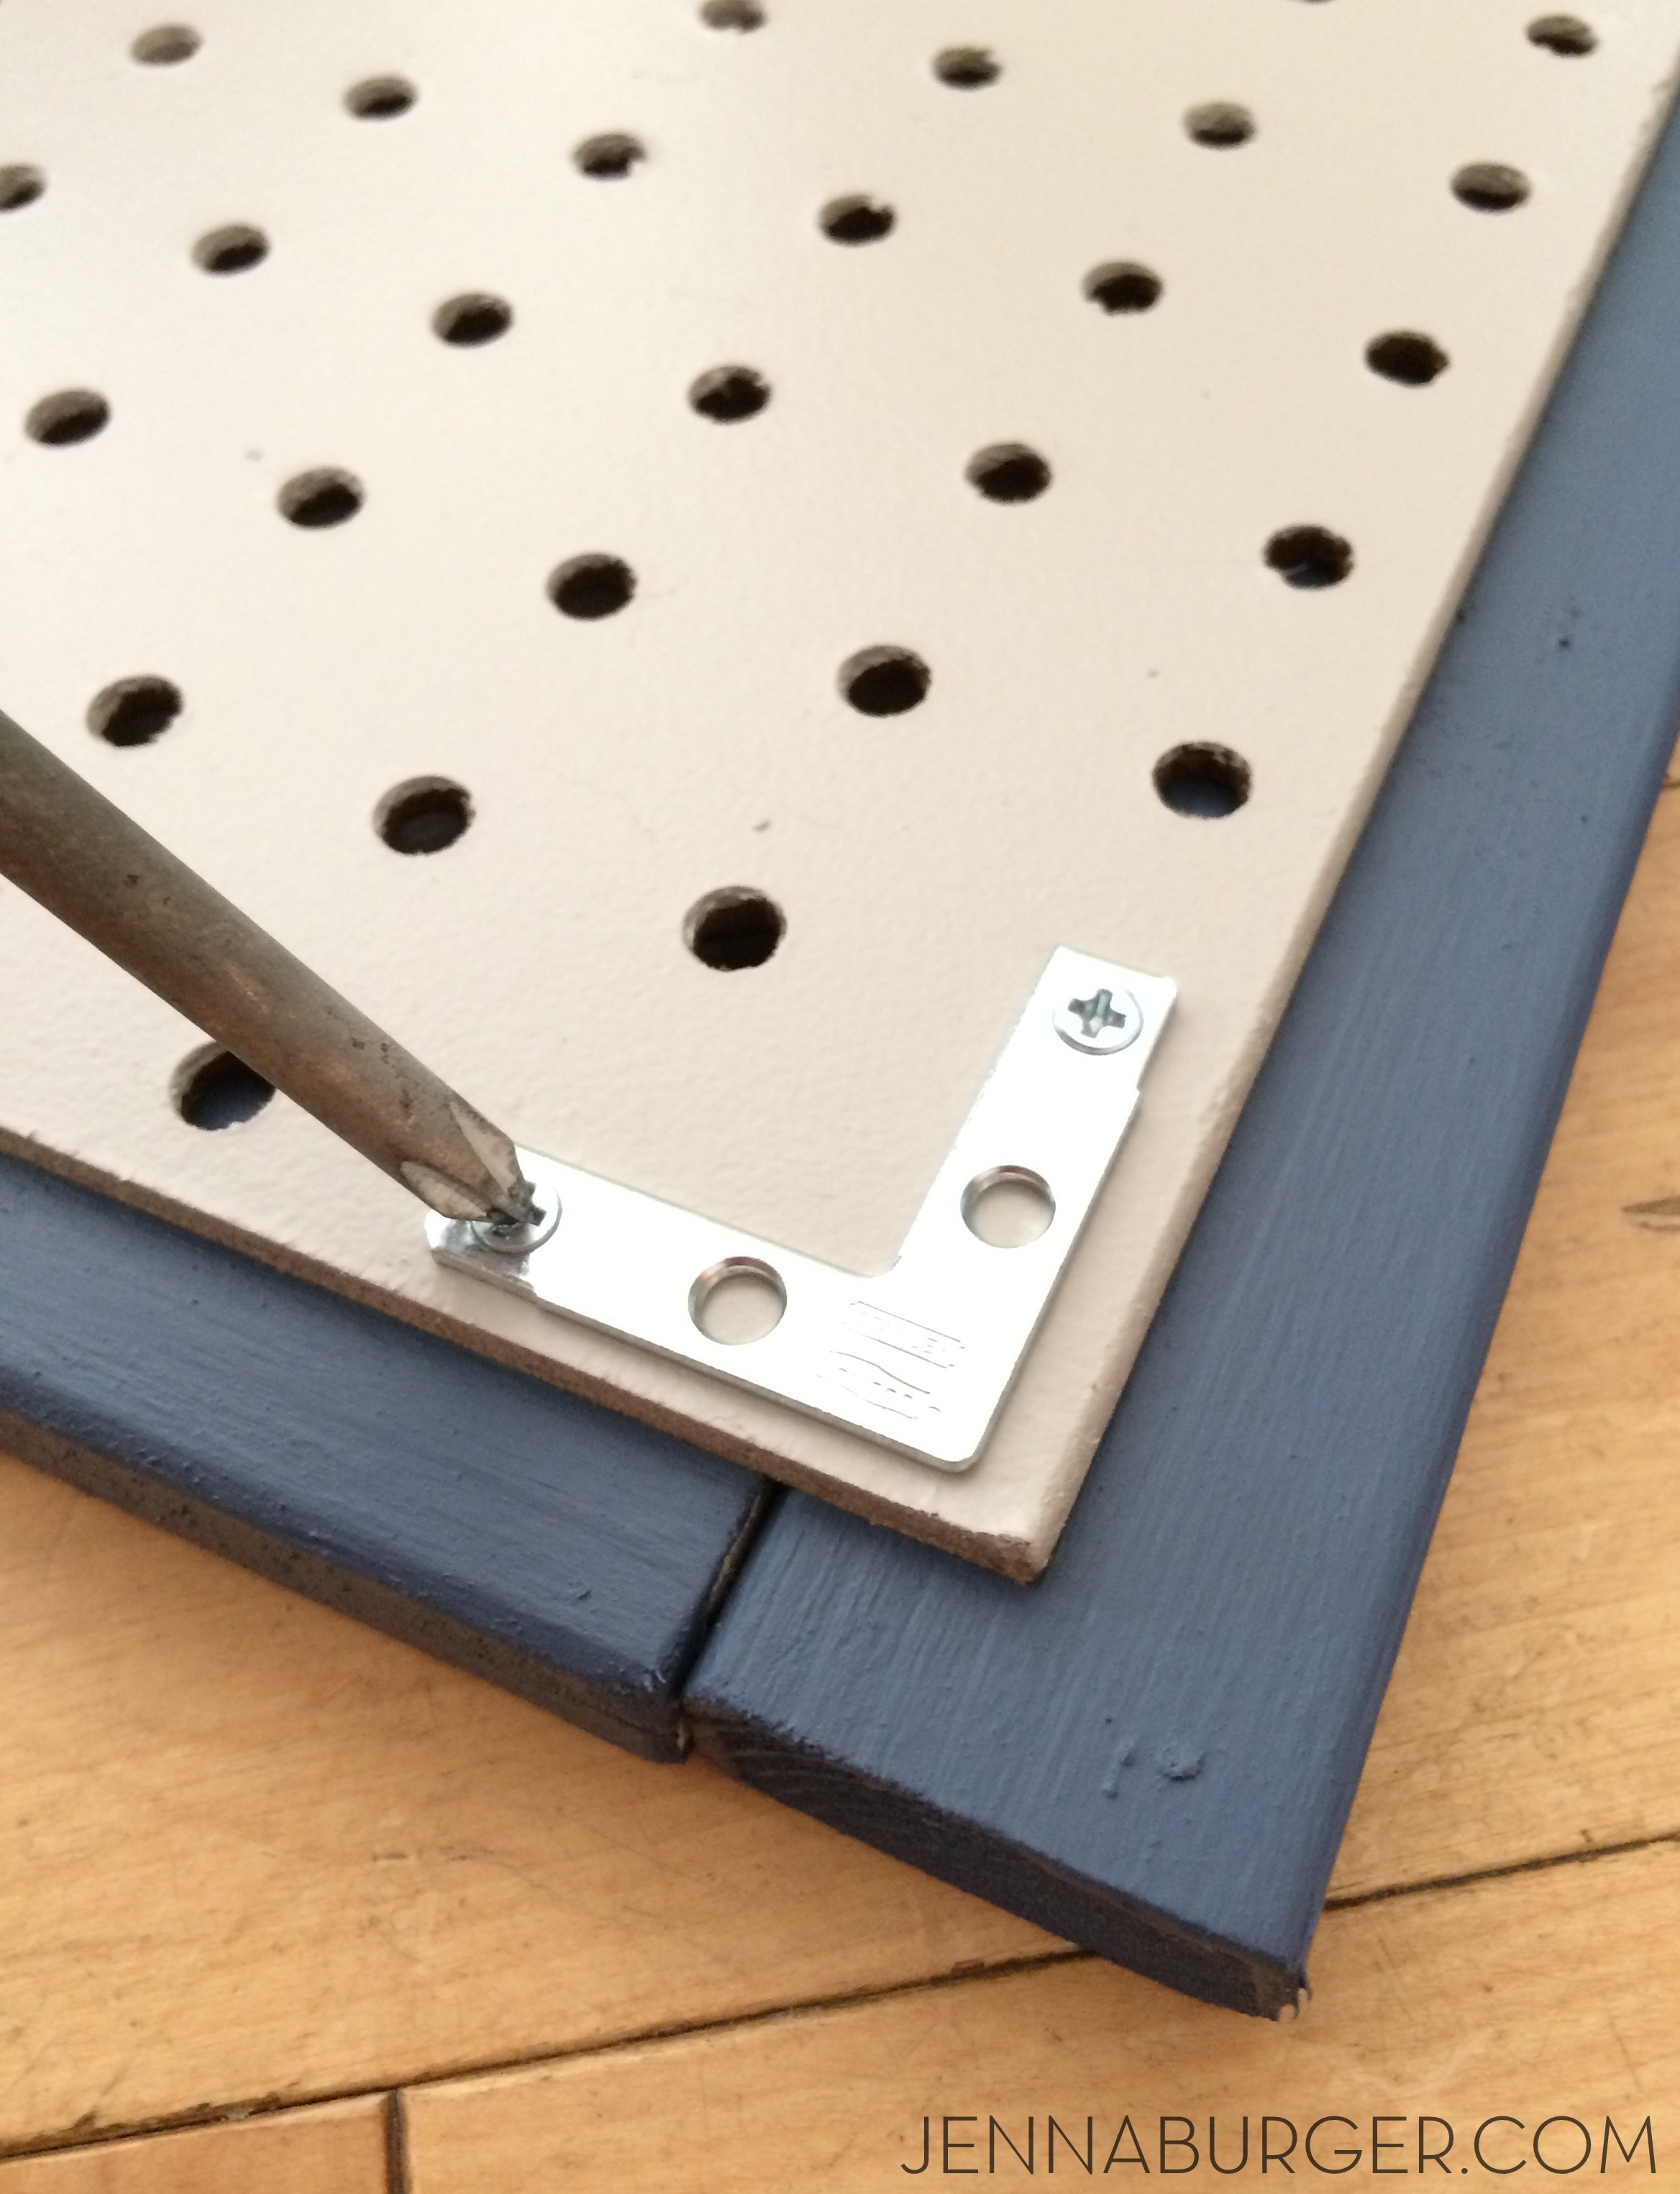
4
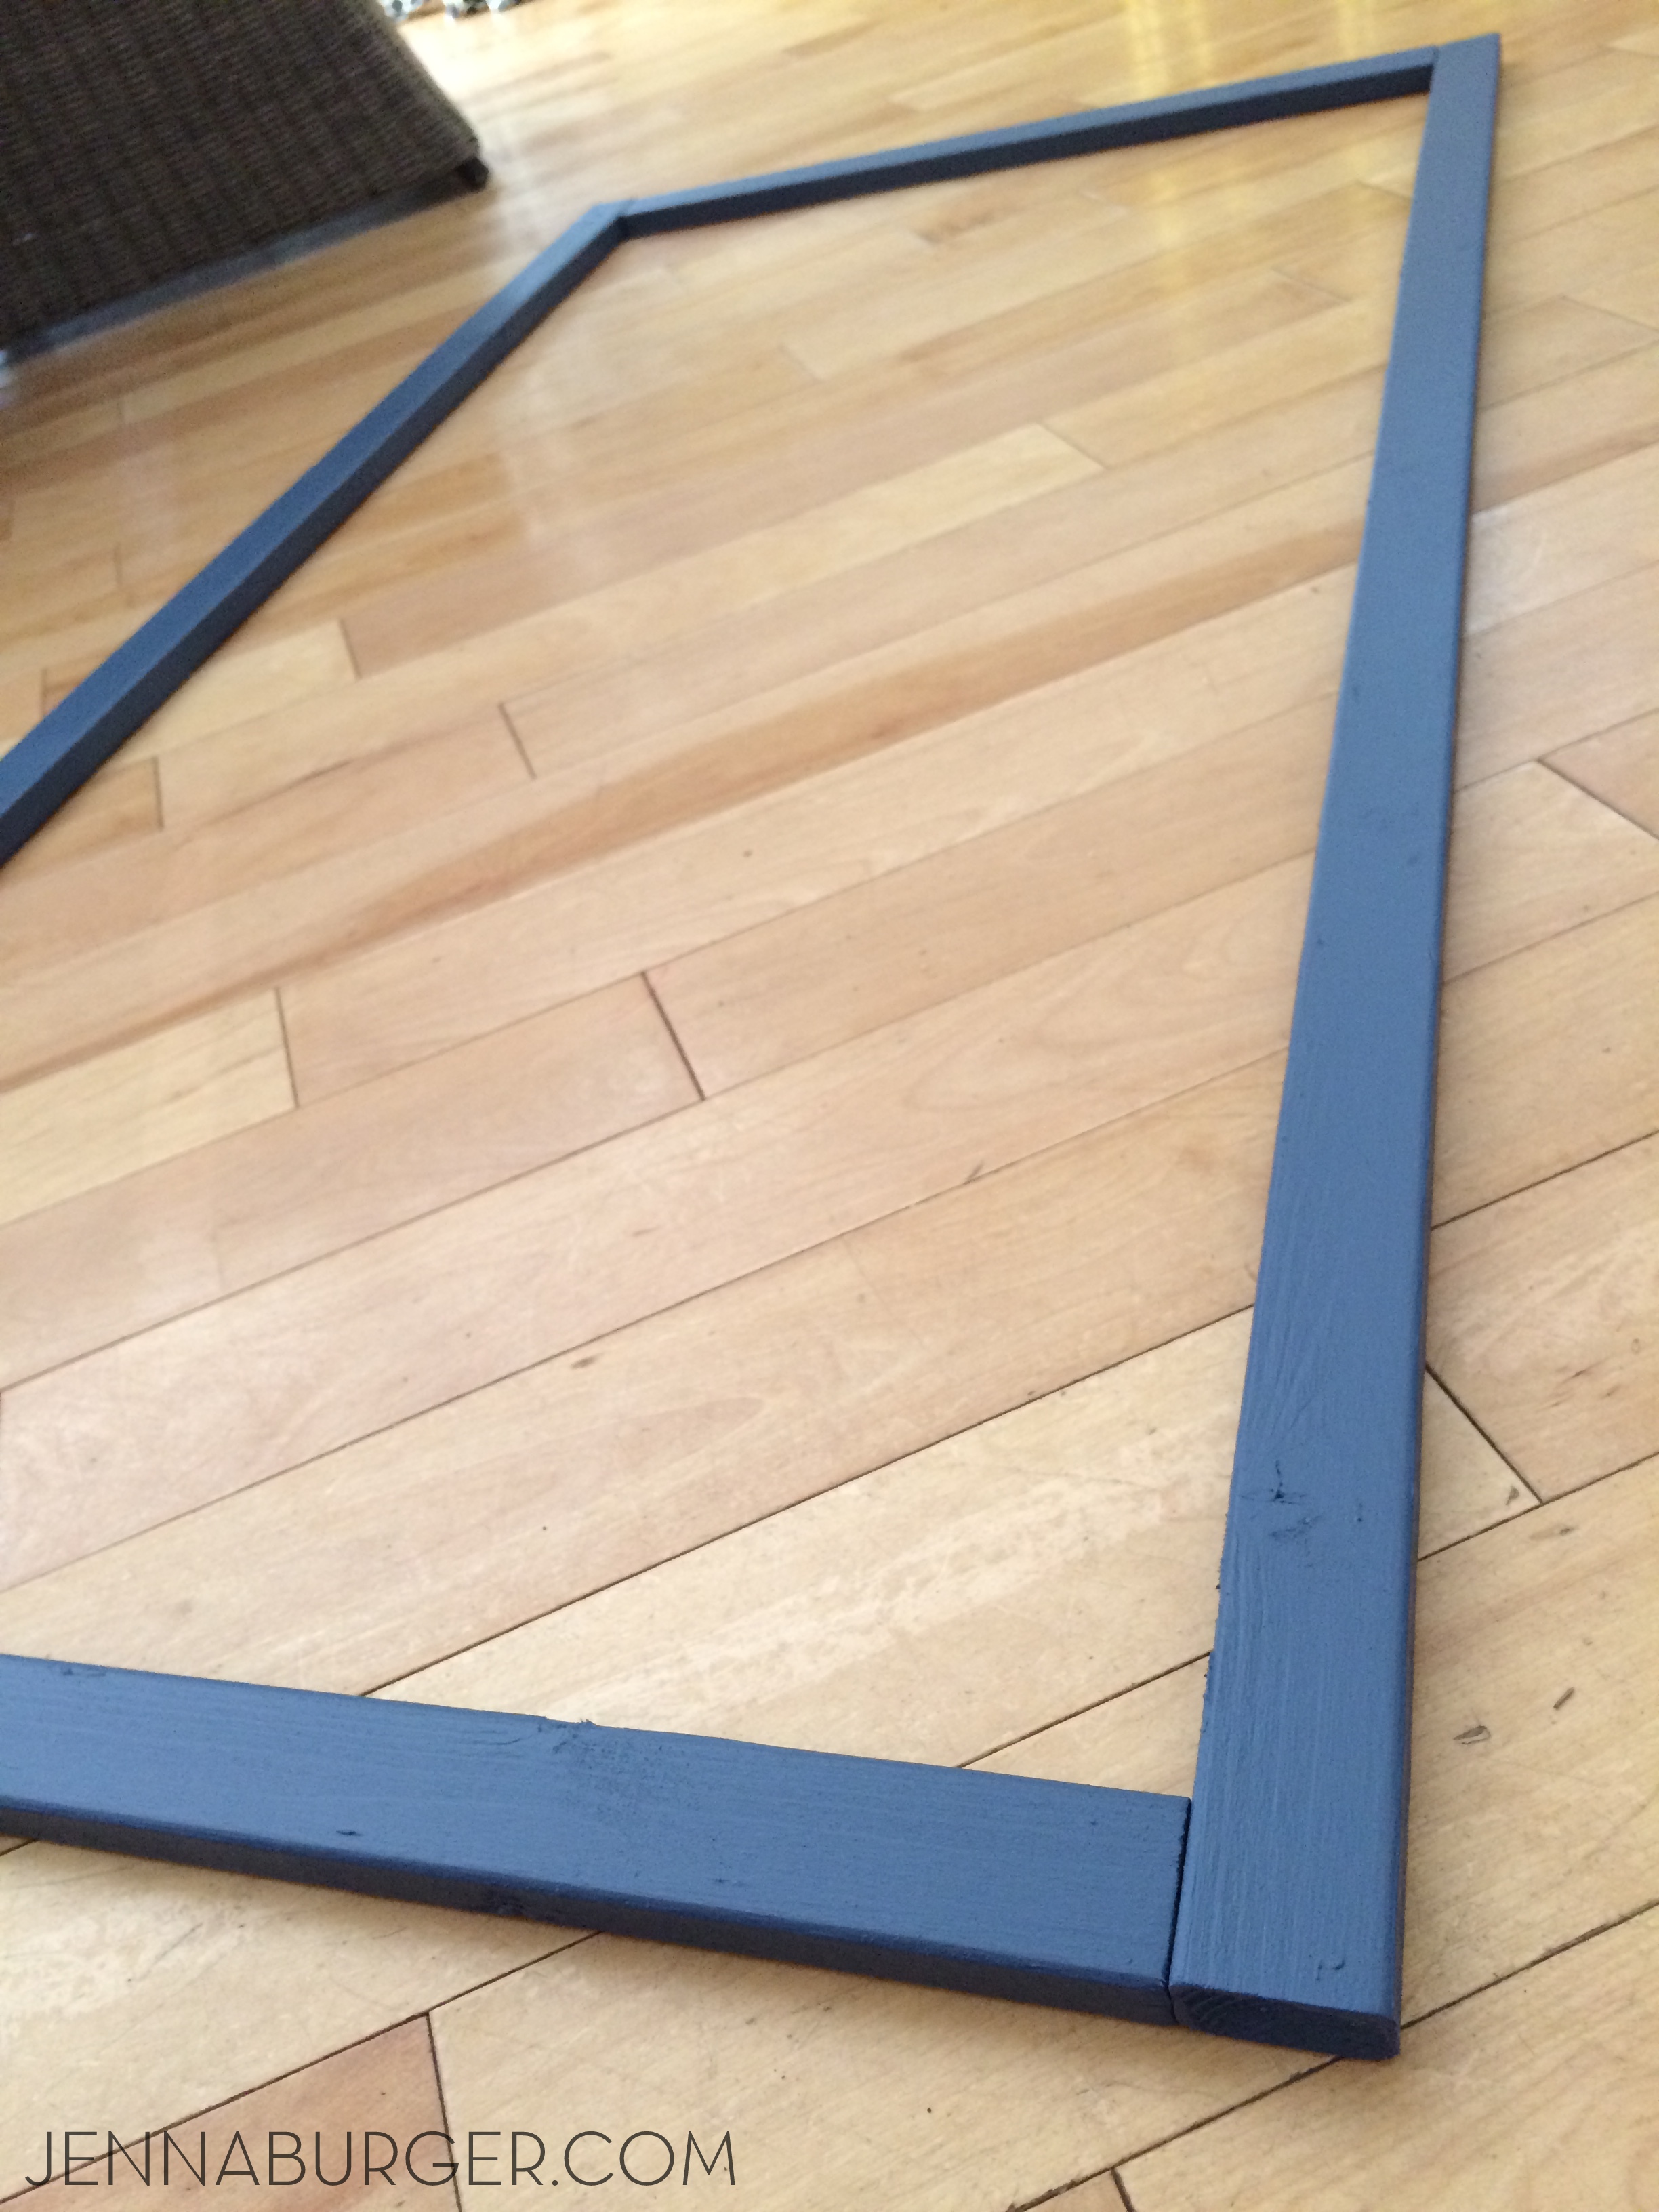
Once the wood pieces were painted + dried, I arranged them on the floor…
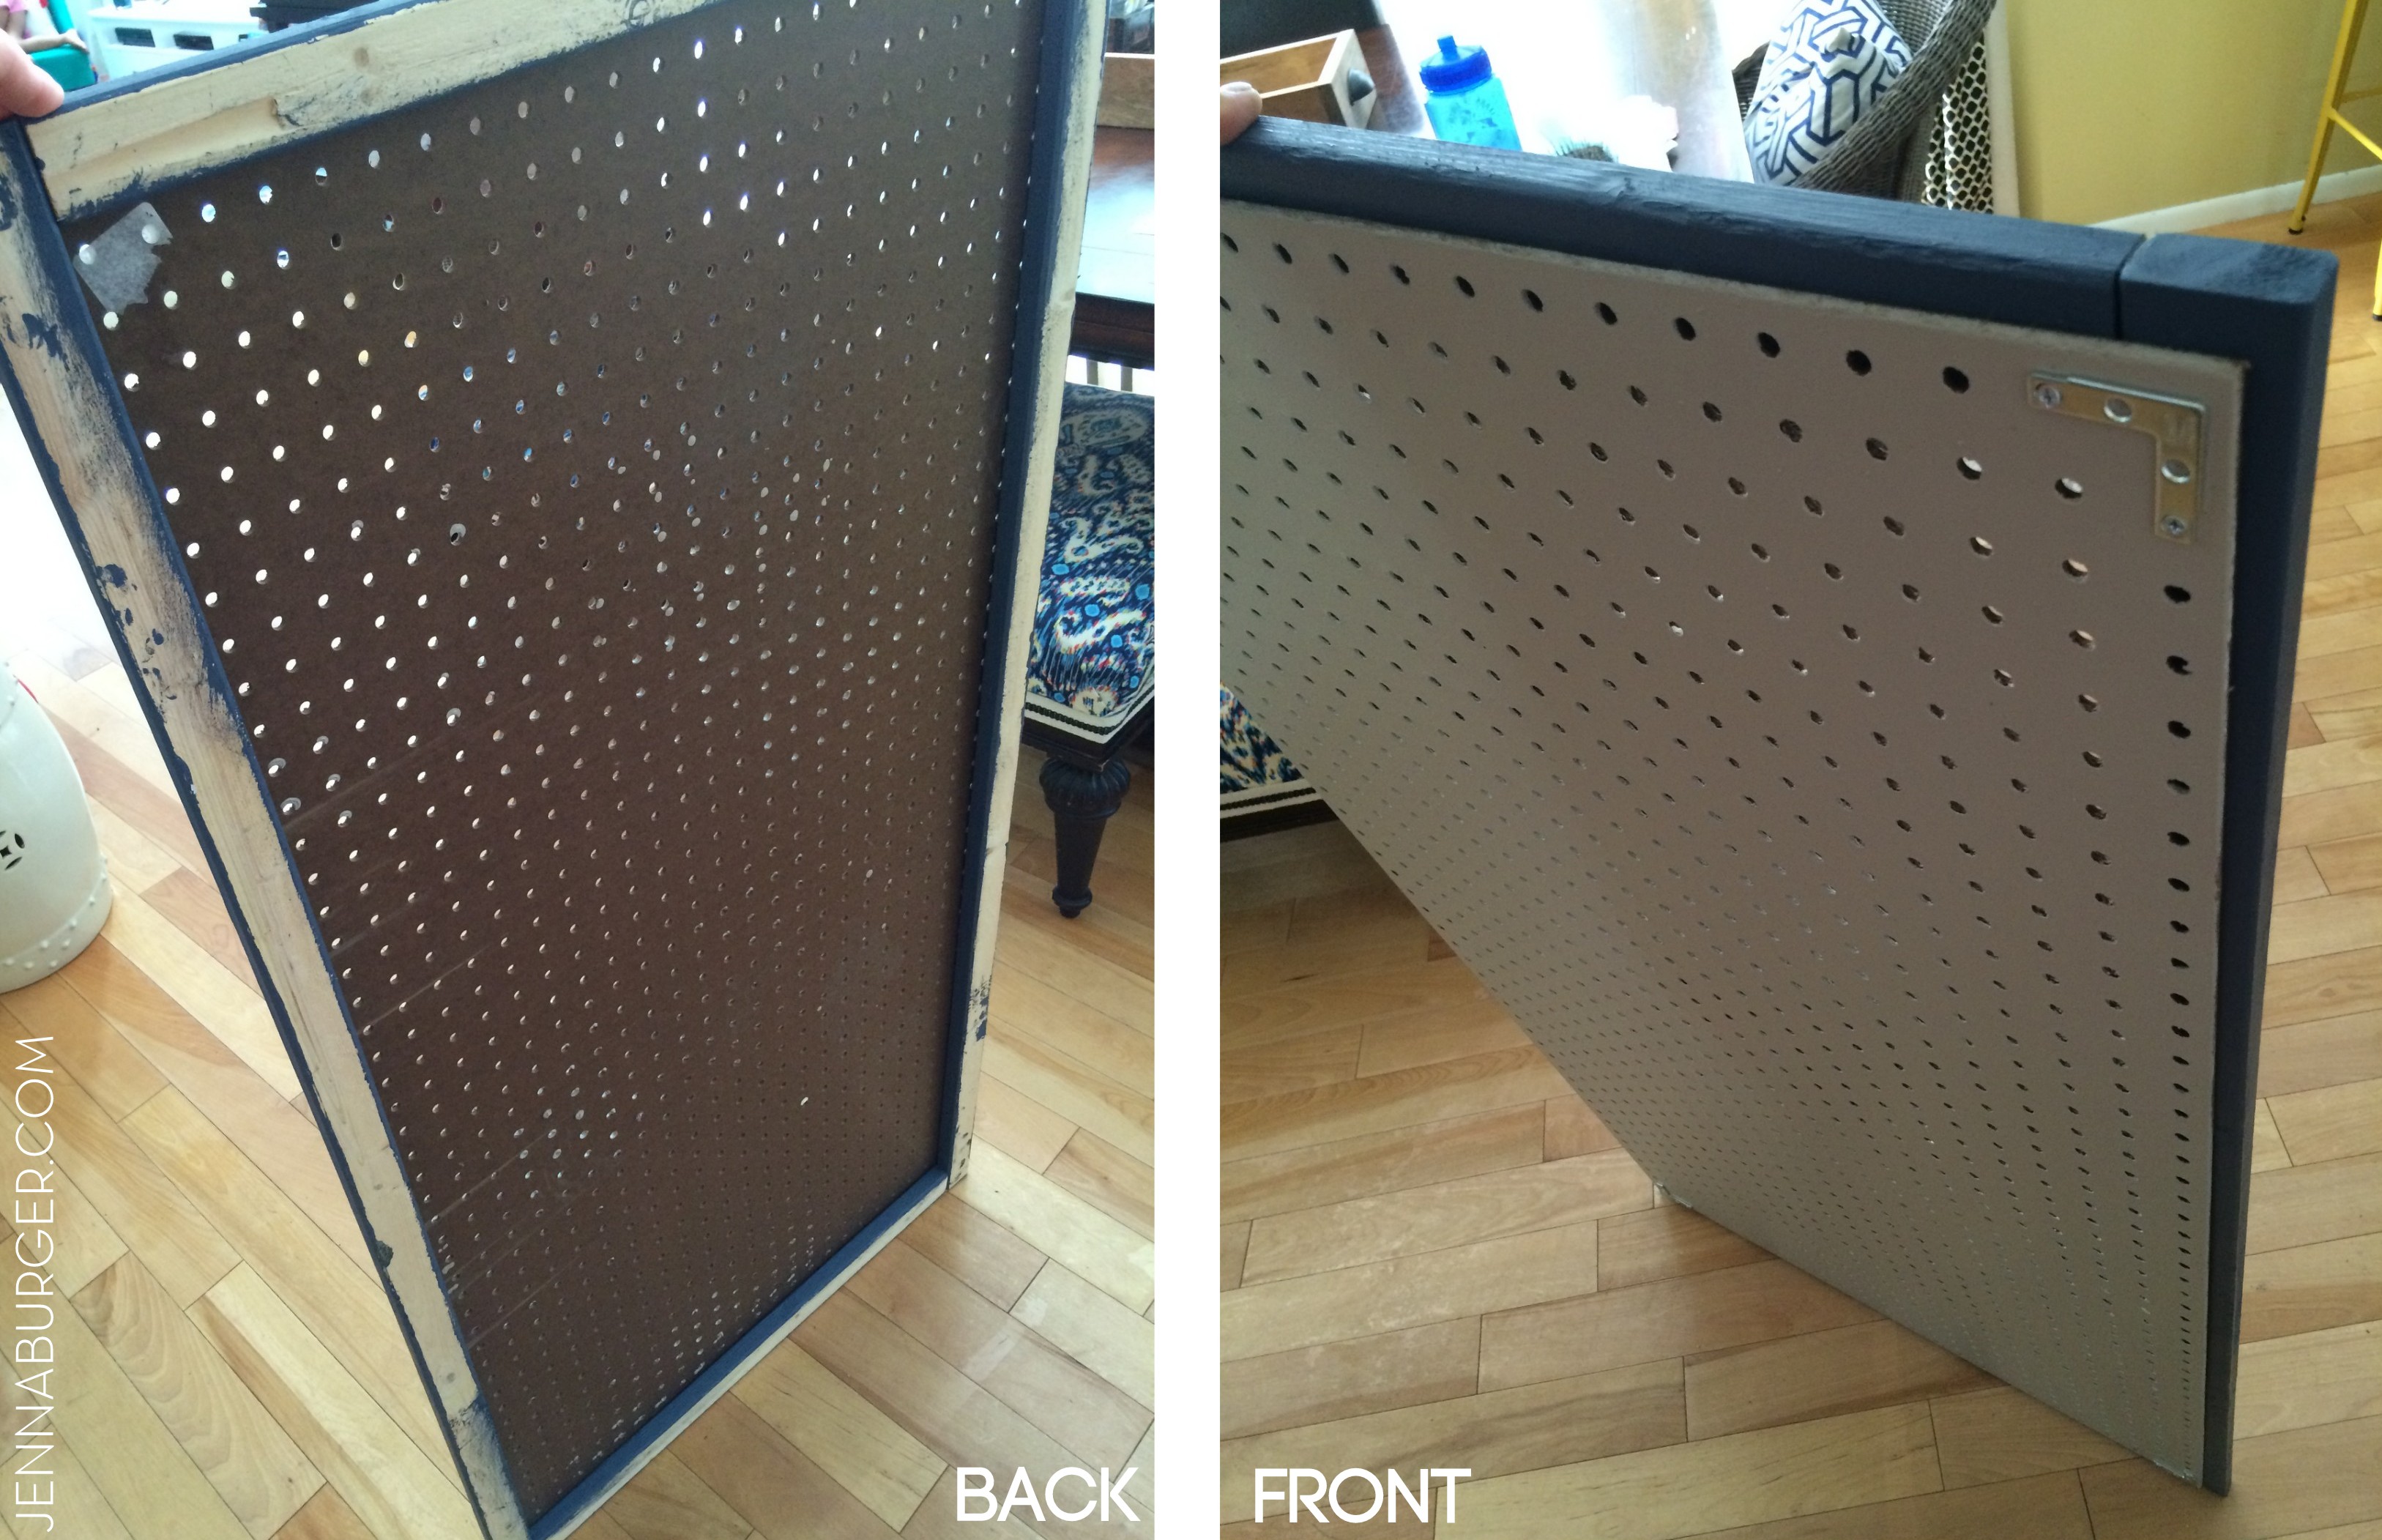
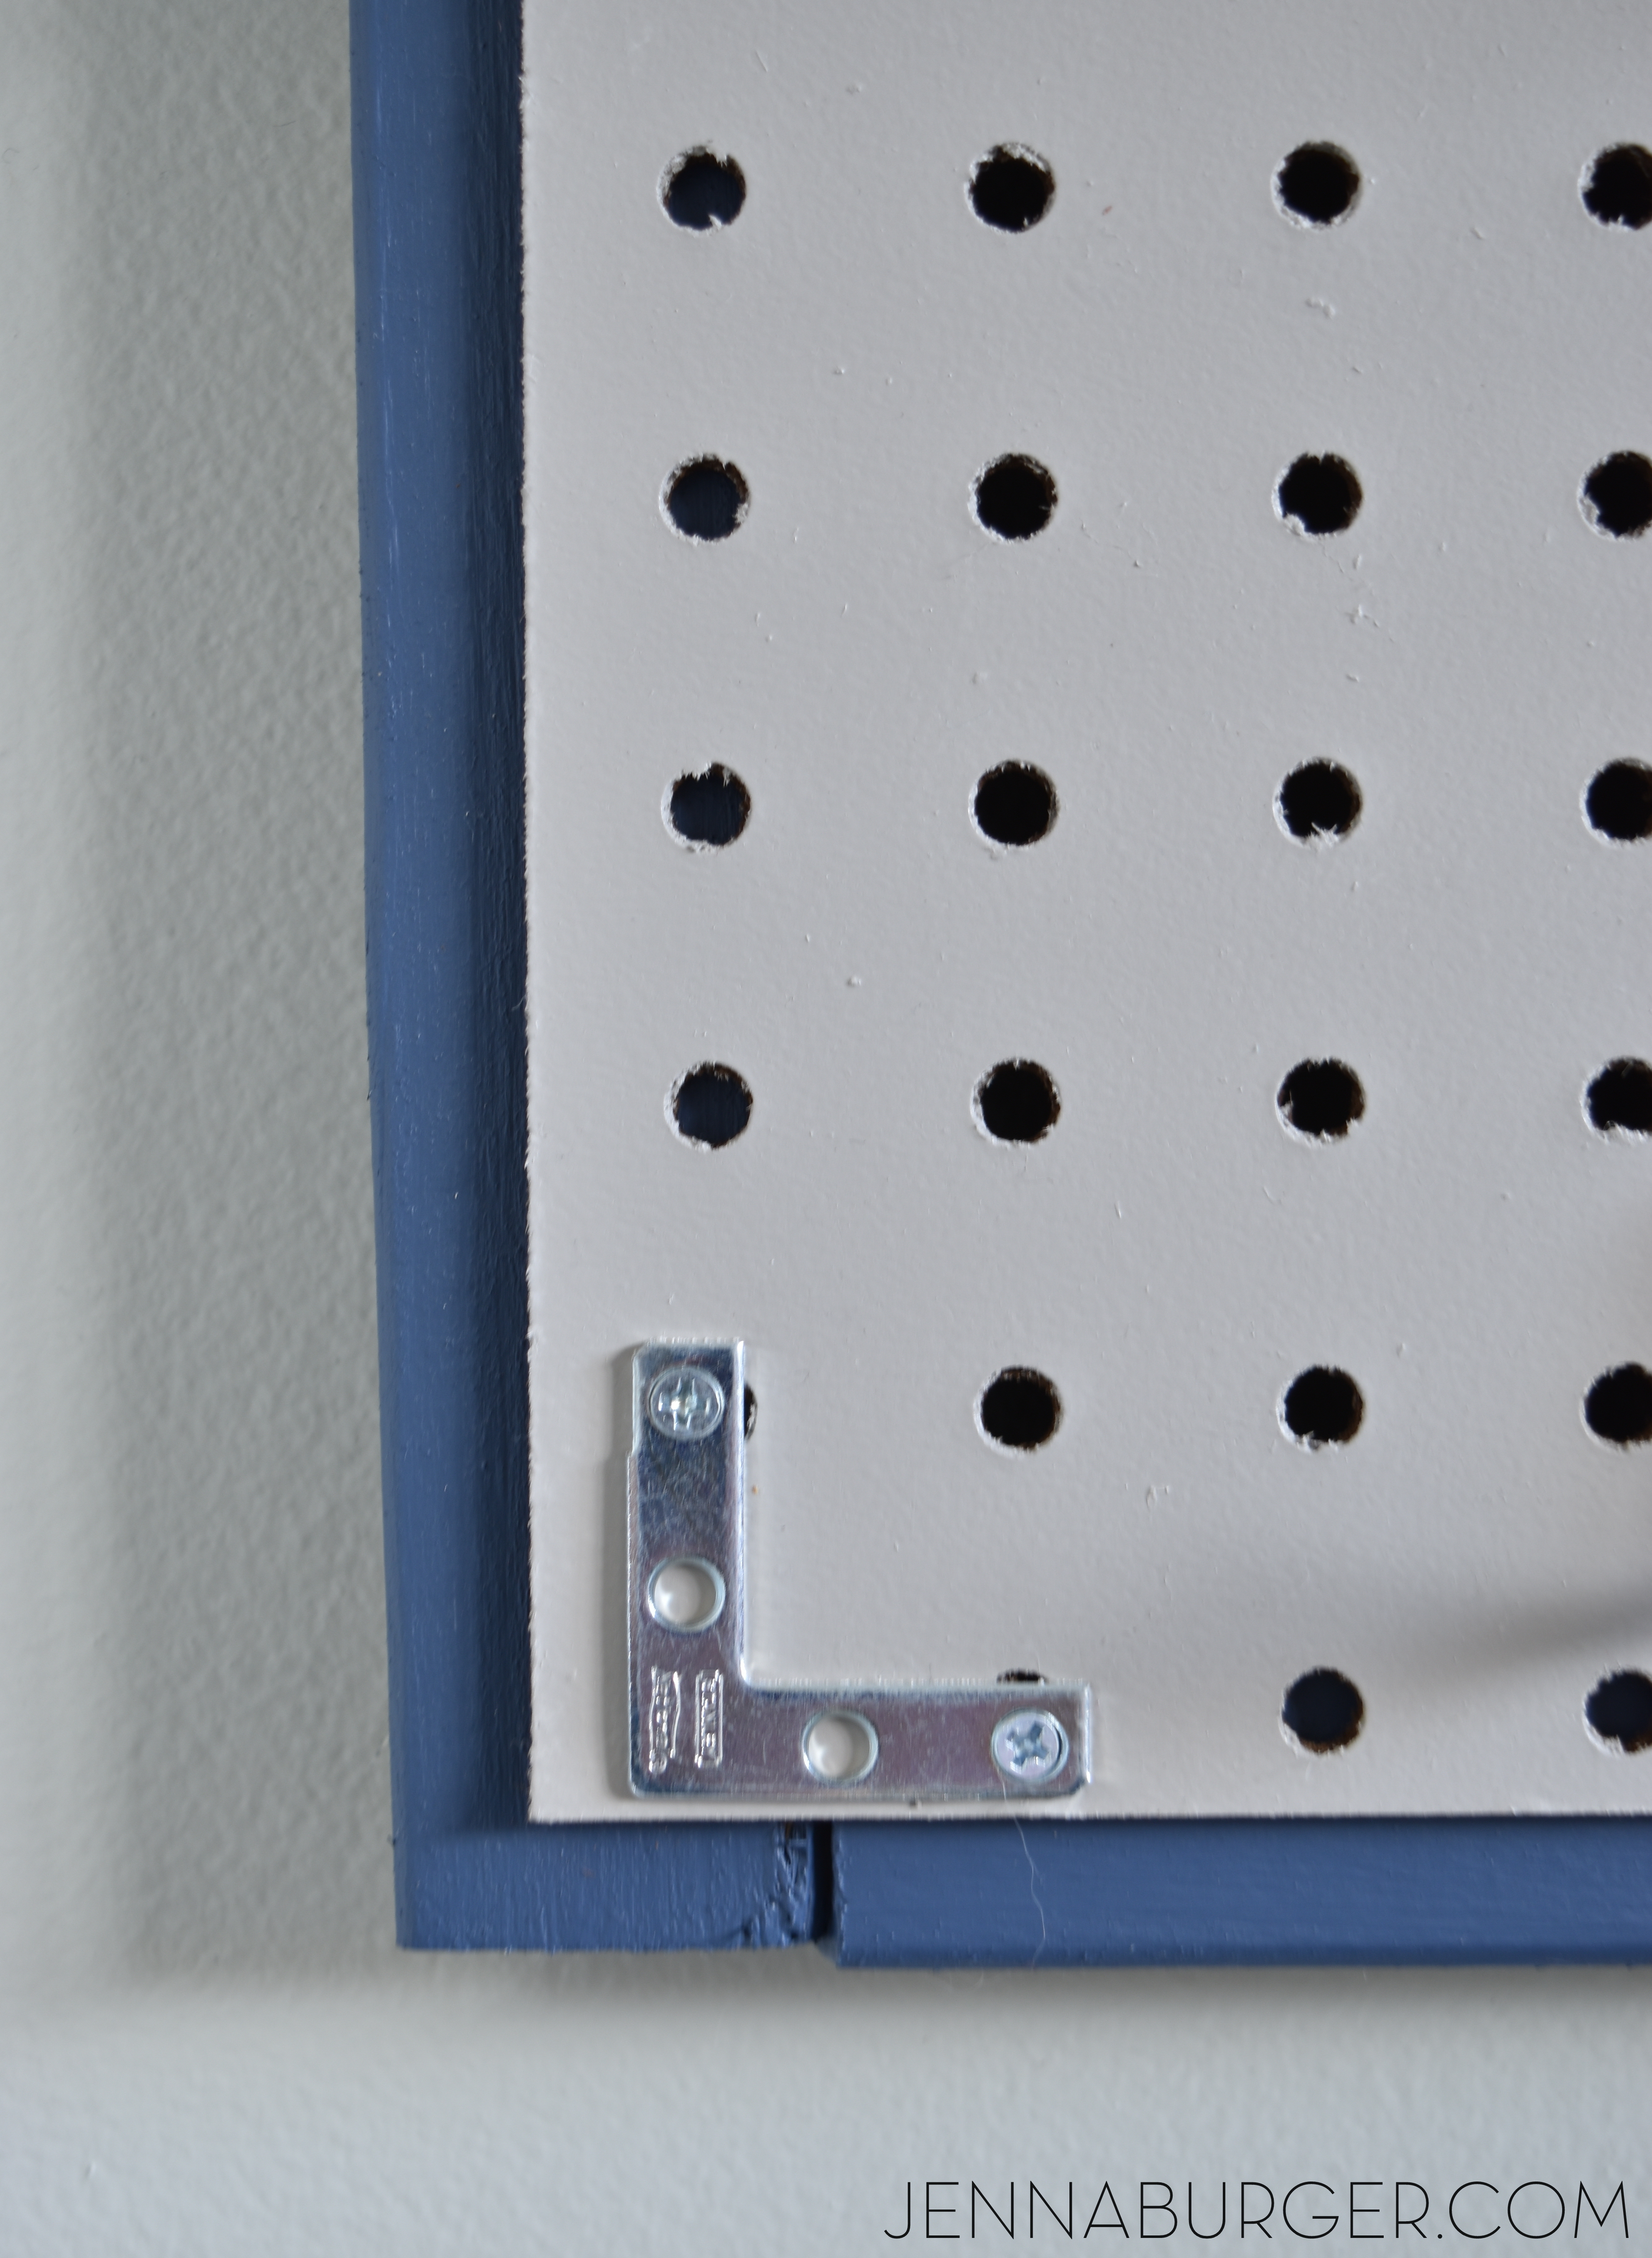
…and layed the pegboard on top. Then I aligned the 4 “L” brackets at the corners and fastened them through the pegboard and wood frame surround.
This is a view of the front and back when all 4 corners were complete.
5
I installed 2 screws + anchors into the wall and hung the framed pegboard.
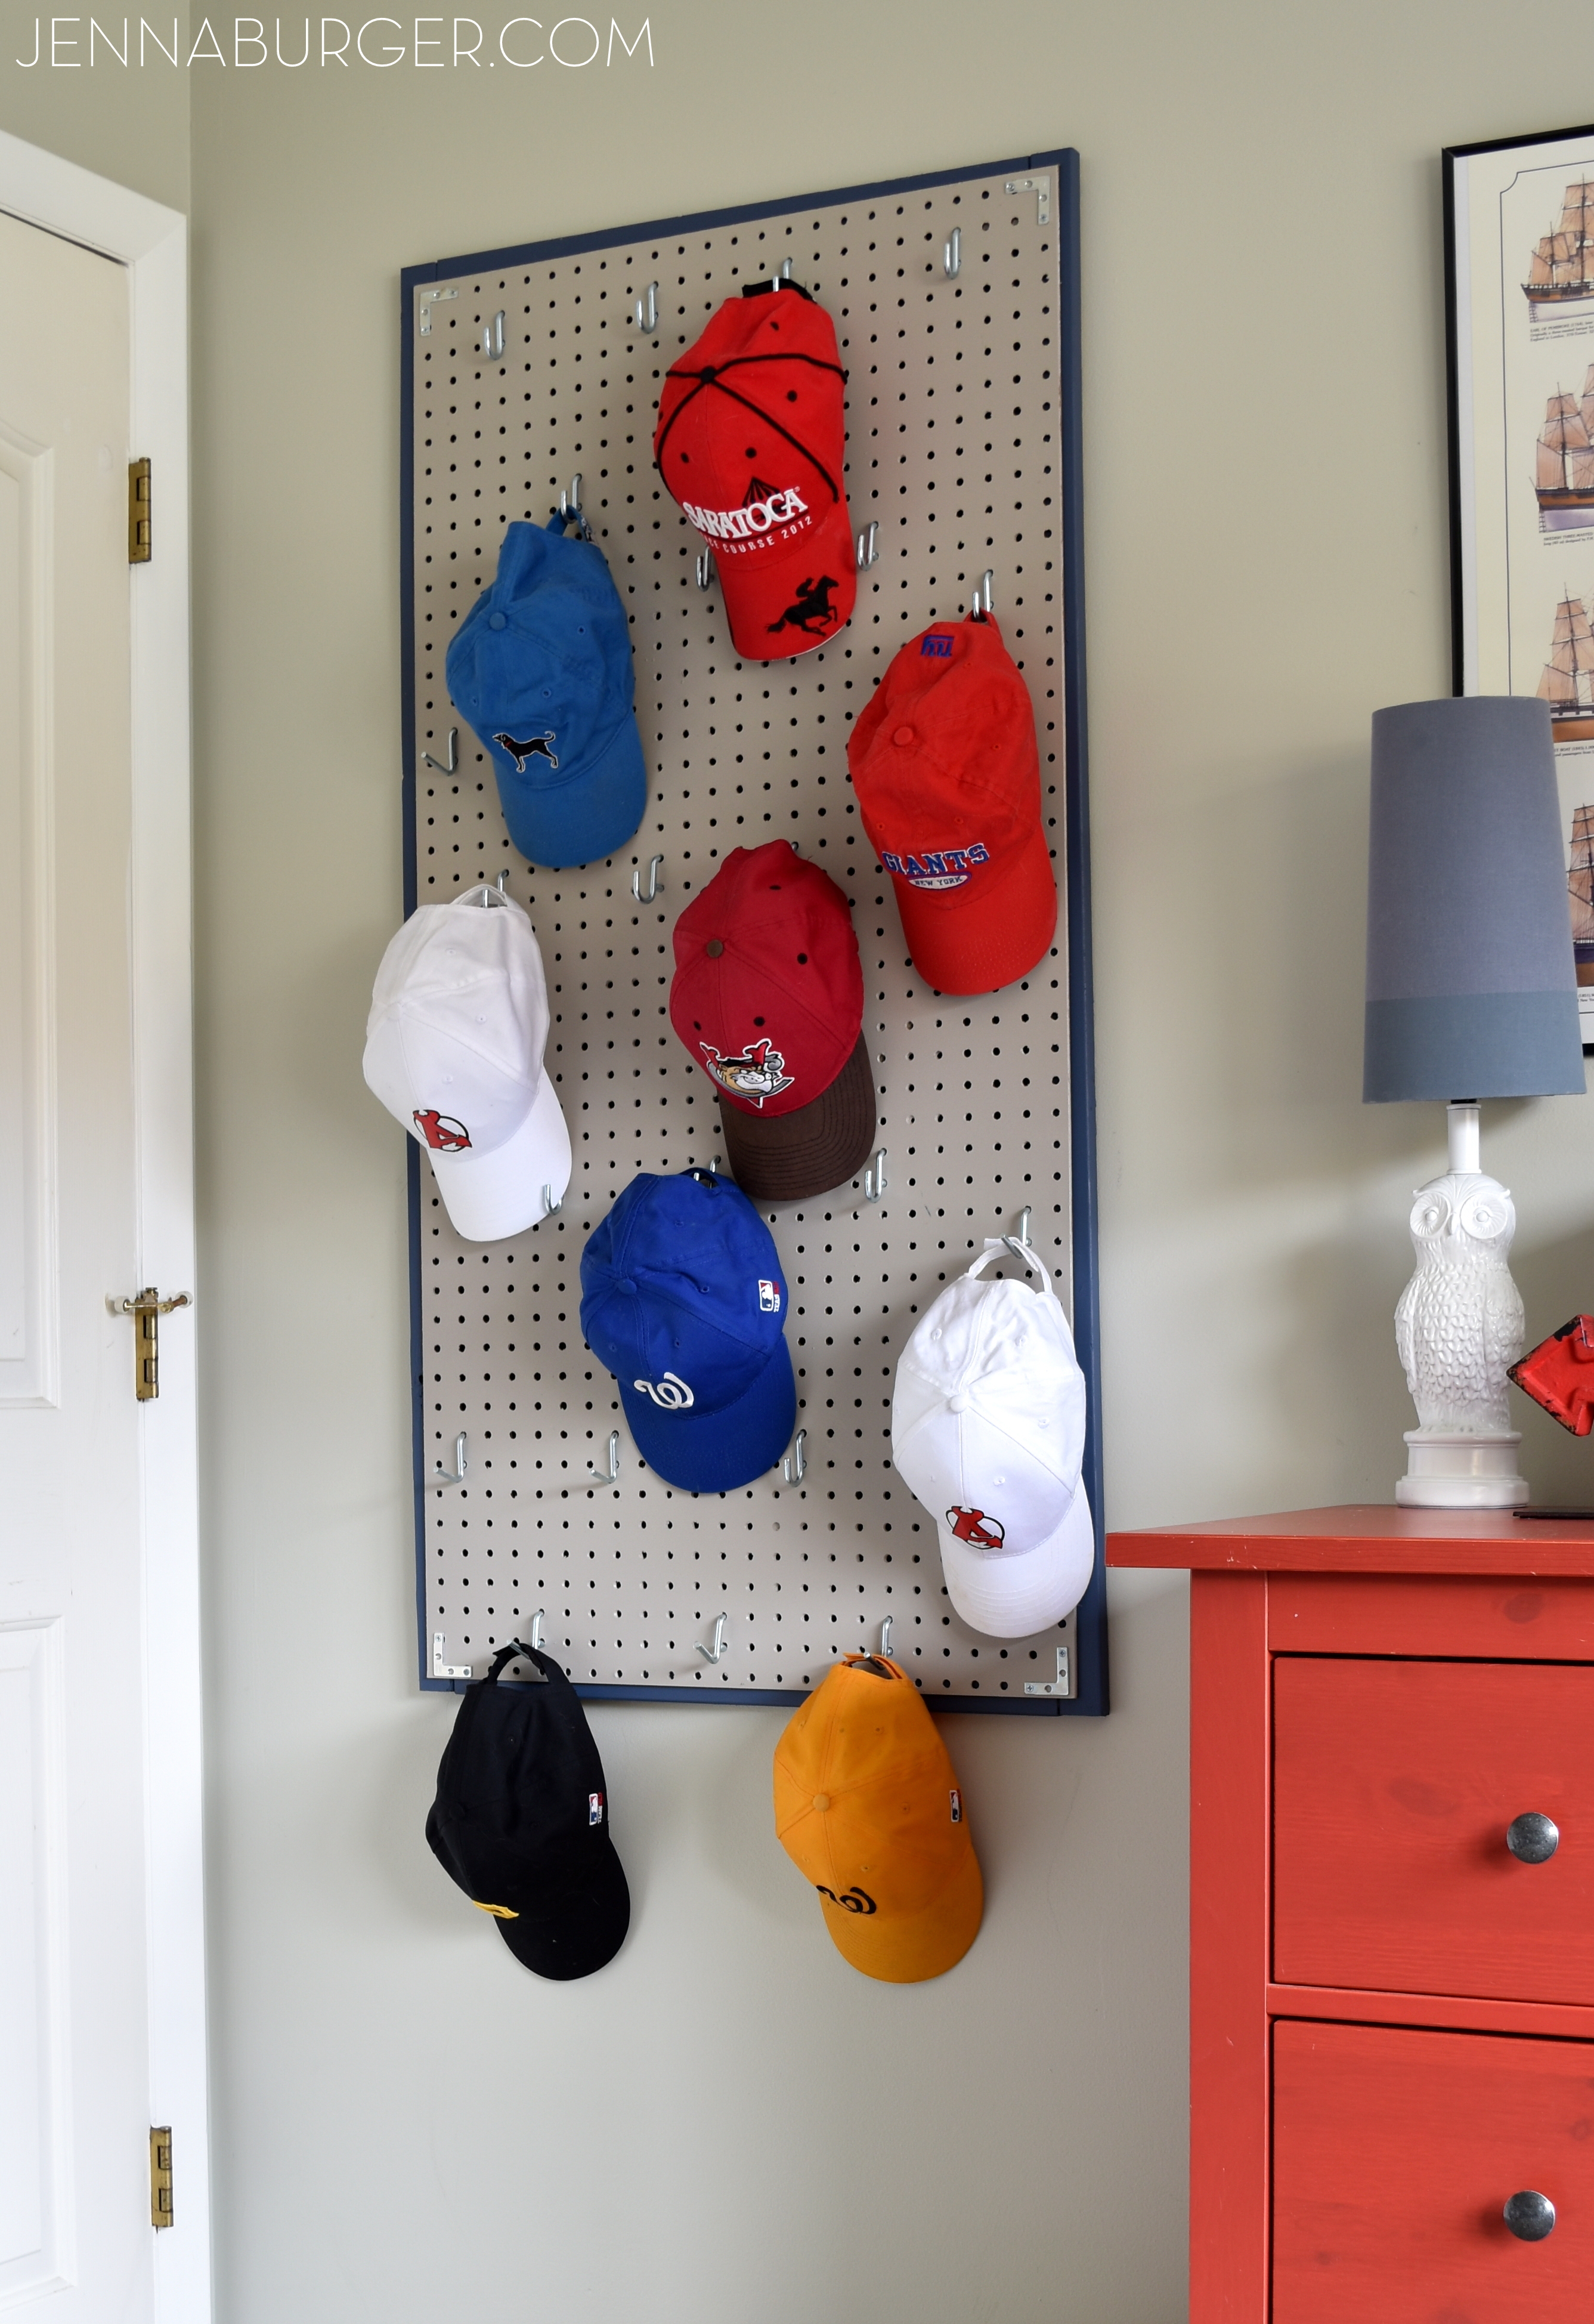
I quickly + excitedly added these curved hooks. I attempted to create a pattern to maximize the amount of hats that could hang, but it only kinda worked, so the hooks are hung part pattern / part random.
This 2′ x 4′ pegboard can hold a lot of hats. About 25 total. And it looks pretty!
This is the finished pegboard baseball cap organizer.
It fits perfectly behind my little guys door…
A similar pegboard organizer would be perfect for a slew of other things like jewelry, crafts, pantry items, kitchen essentials, etc.
The potential is endless… Let the ideas start to flow!
His room is such an awesome space! If you want to see the entire room, click on over for a full tour.
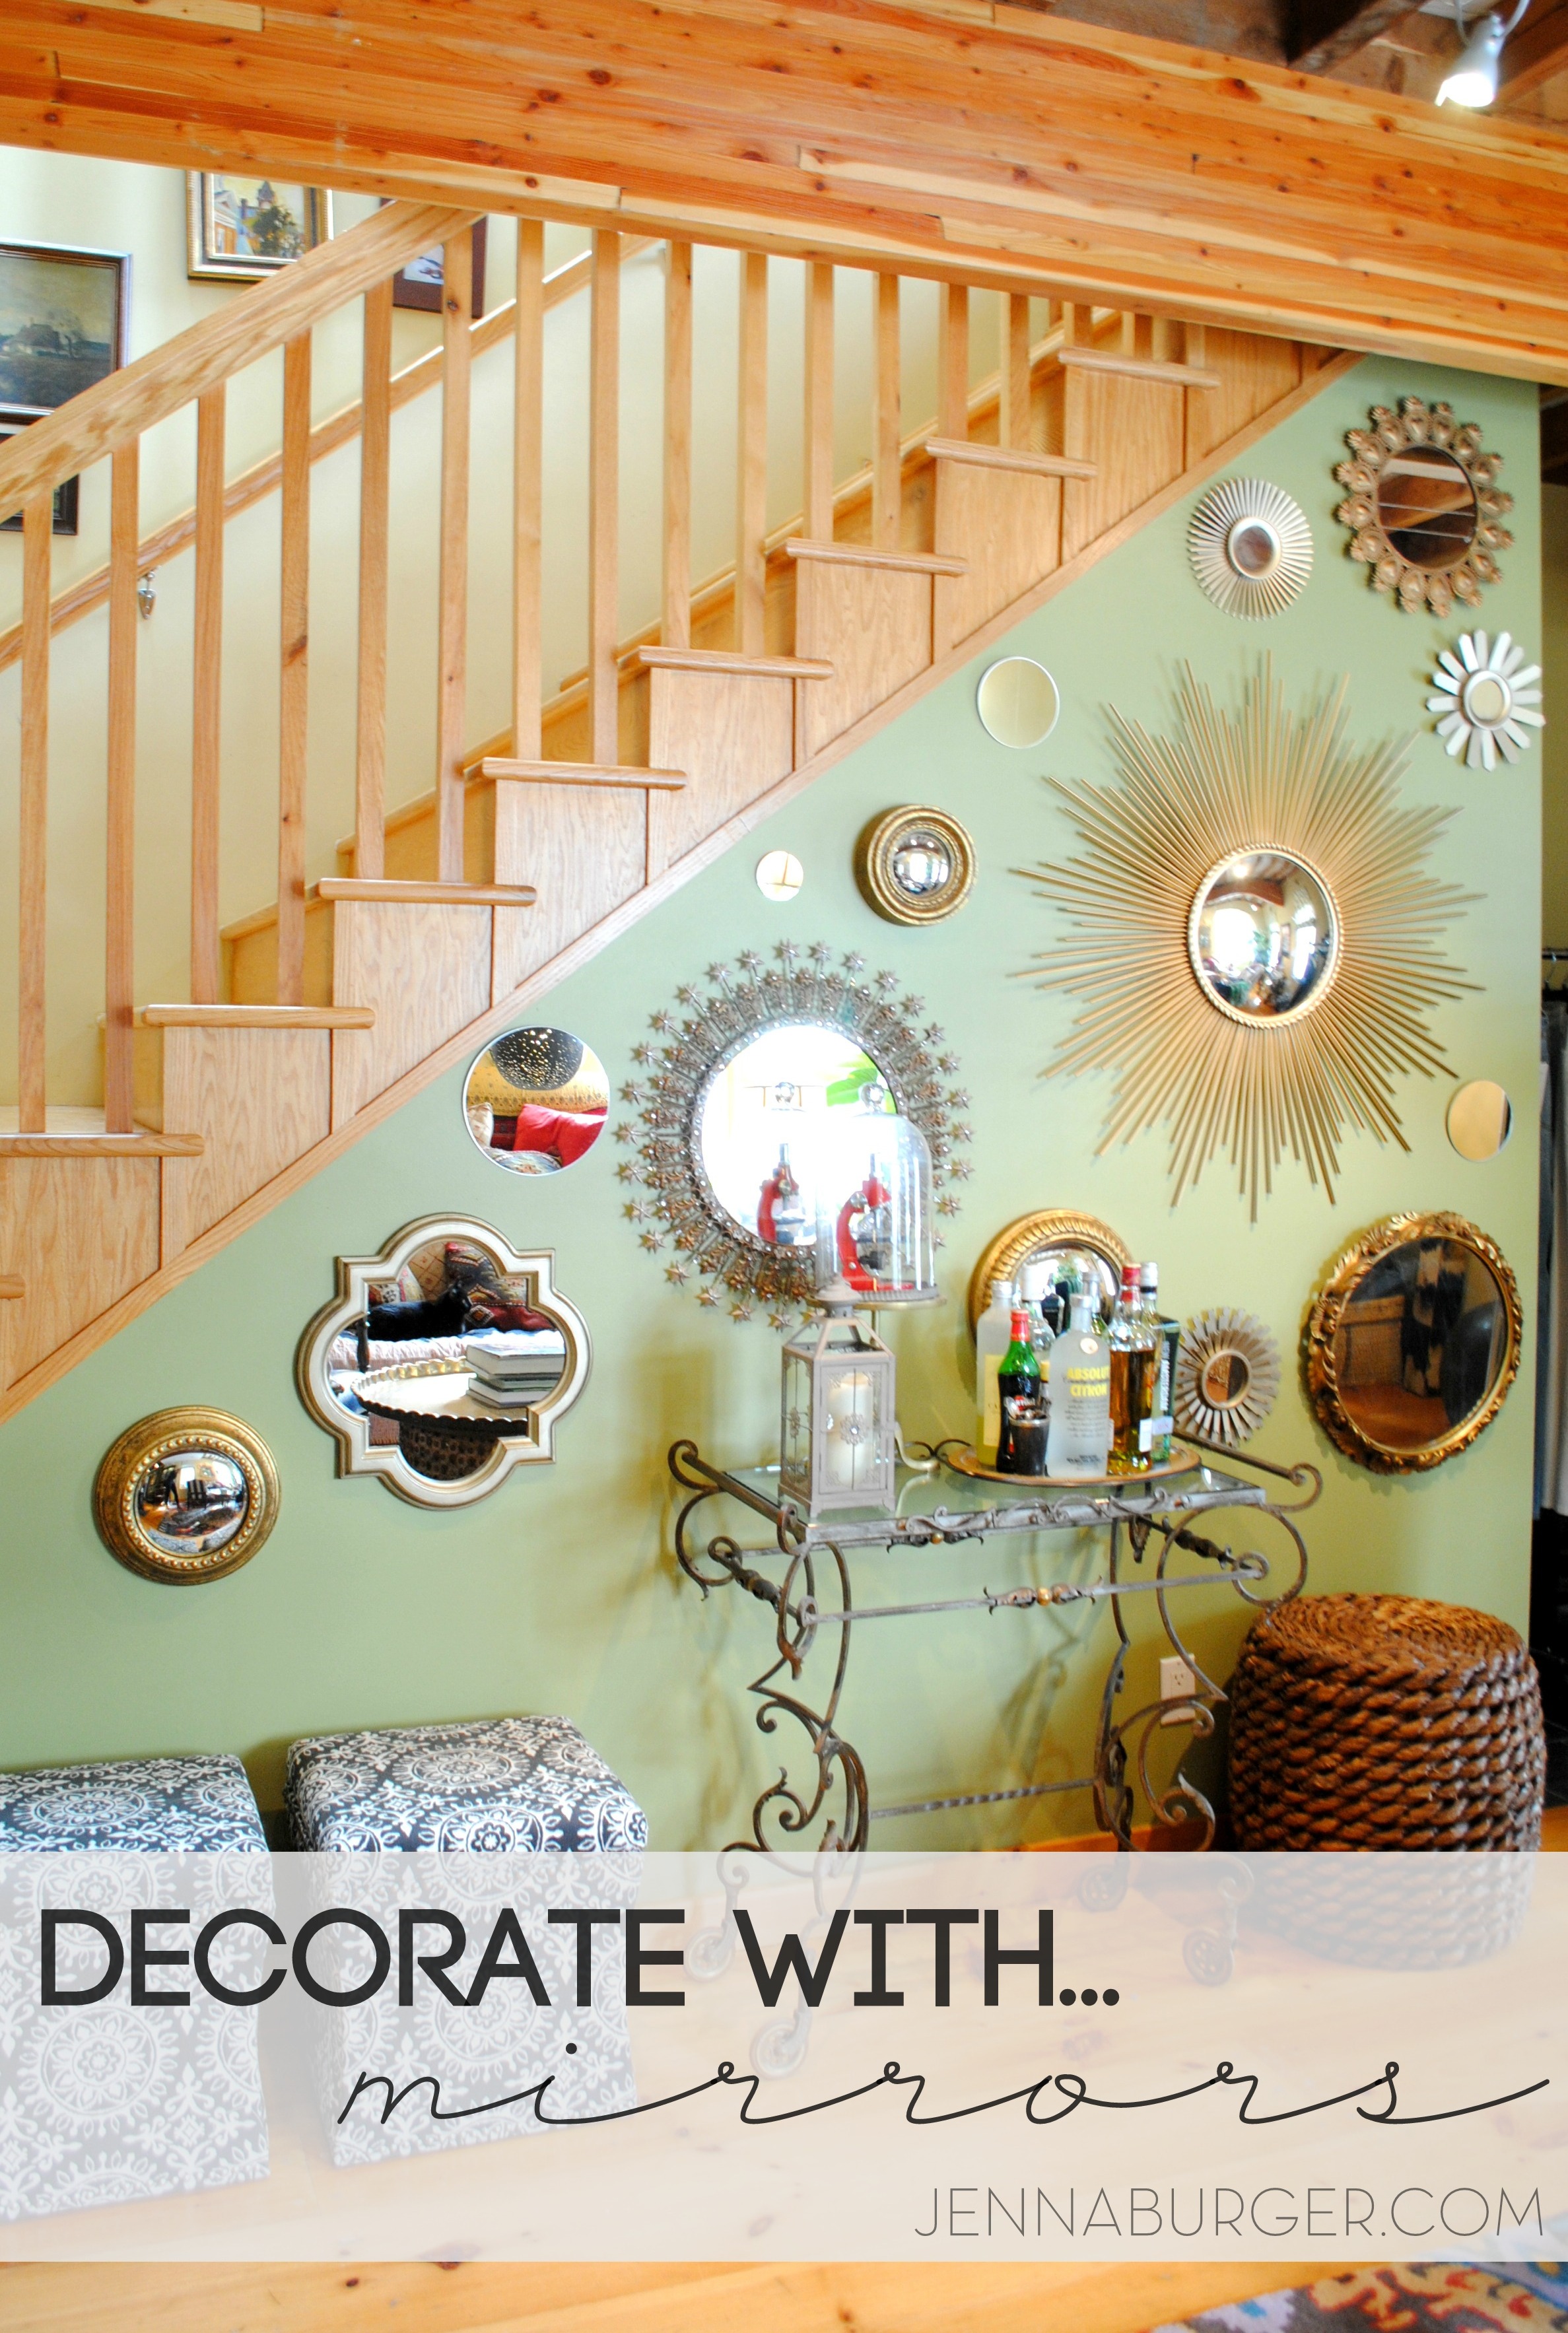
No matter the size, we’re always looking for ways to make a room appear bigger! Introducing mirrors – of any size and in any room – will give the illusion of a larger space, as well as providing visual interest + depth.
It often seems like with decorating, there are rules to follow to create a balanced, proportional space, but when you mix in mirrors, there really aren’t any rules to follow. Aside from being great wall “fillers”, mirrors can bring depth and light into a room.
Whether your desire is to display one large mirror, a grouping of the same mirrors, or a collage of different style mirrors, you truly will create a statement wall of art! Mirrors provide dimension and depth, and can be the focal point and conversation piece for any room.
INSPIRATION.
Picture inspiration via Coco Cozy
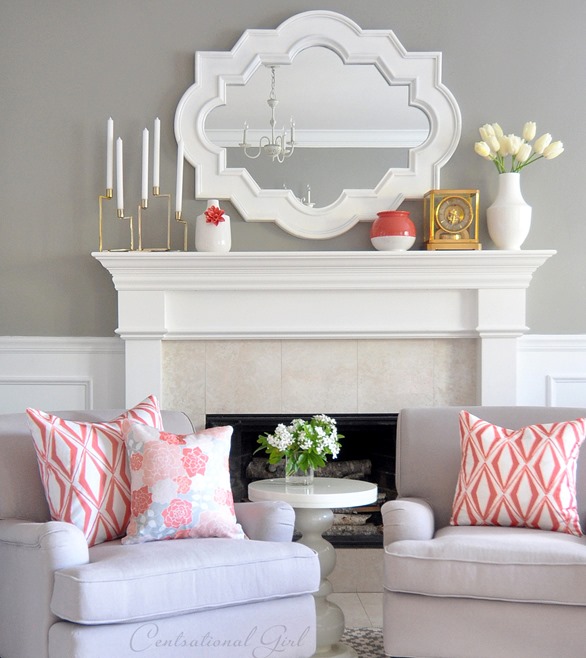
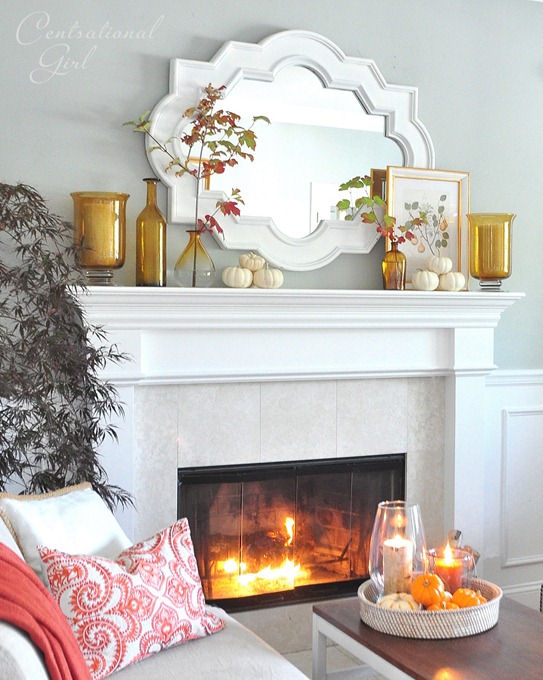
Kate of Centsational Girl always creates beautiful mantels for the seasons + holidays, but consistantly she will use her one large mirror as a backdrop to make a dramatic, bold statement…
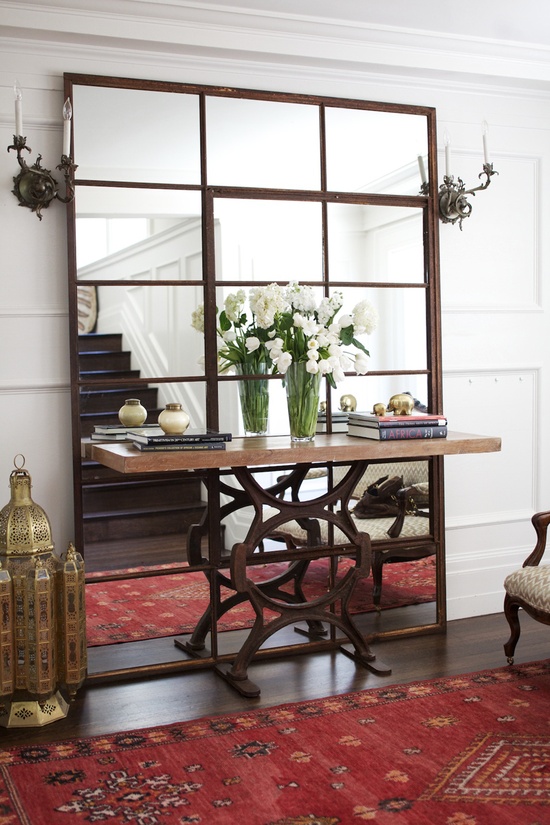
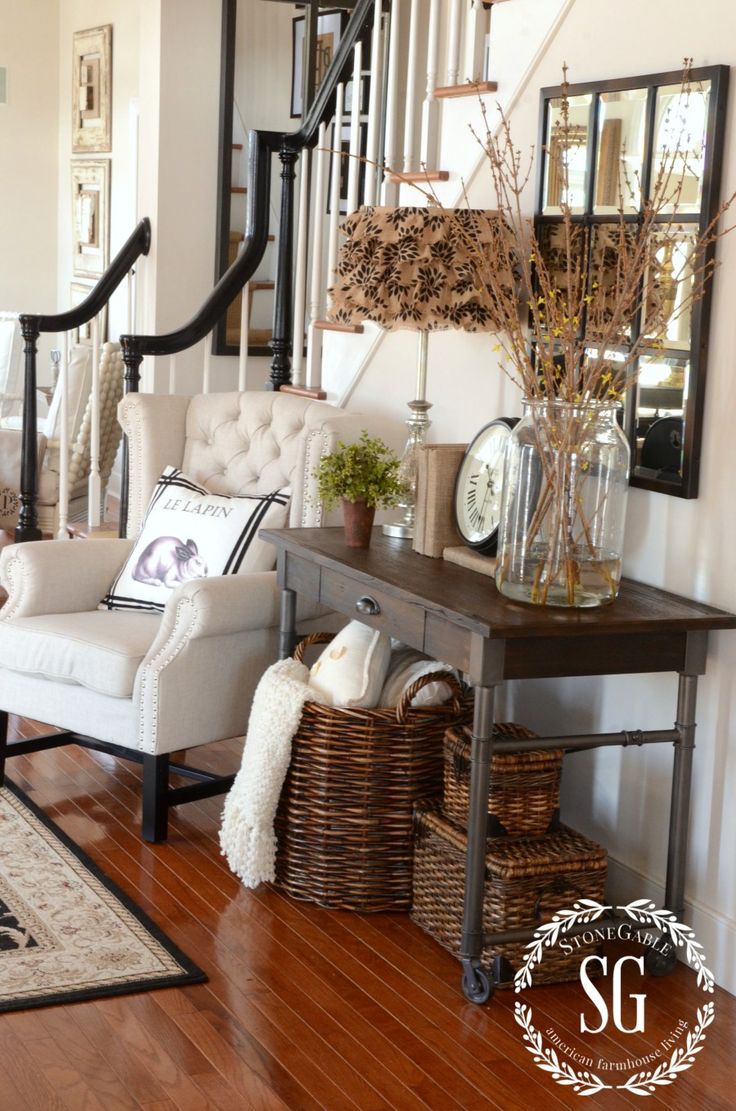
3 Use a mirror on the wall behind a tabletop vignette to create a backdrop, then add layers of accessories in front to give depth.
Tabletop vignette with mirror behind, by StoneGable
This intricately detailed mirror by Wisteria makes a beautiful backdrop to a foyer tabletop entry.
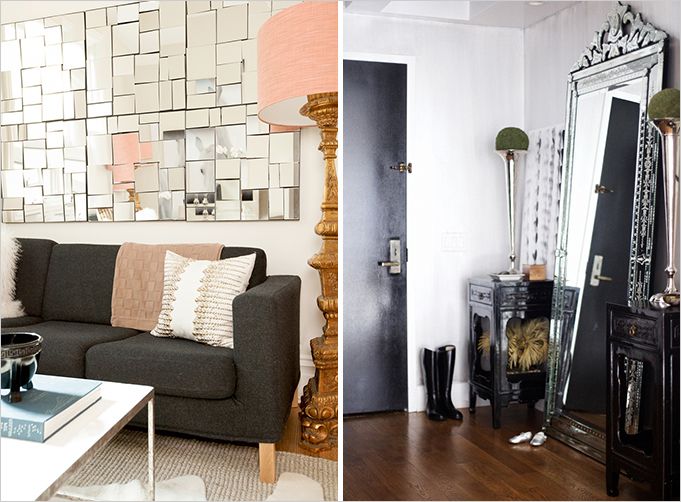
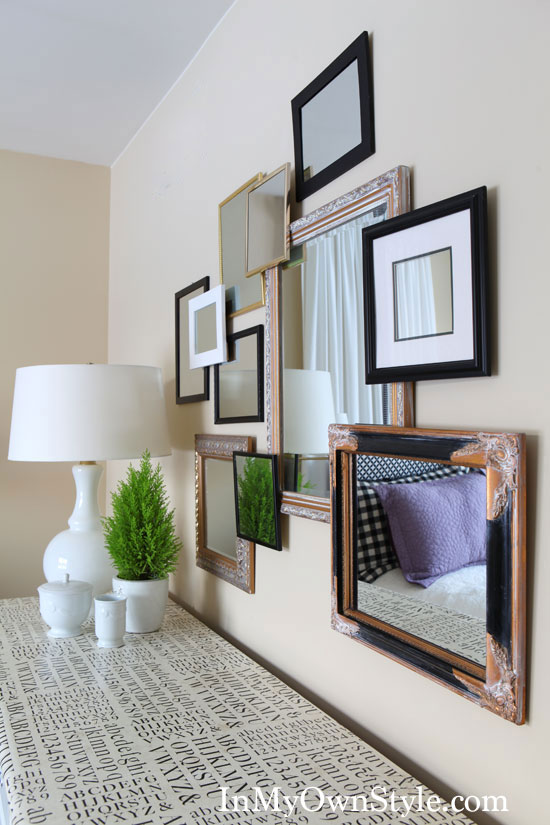
4 Layer mirrors to make an architectural statement & to create the look of art. Add a decorative smaller mirror (or just a frame) over a larger simple mirror like this…
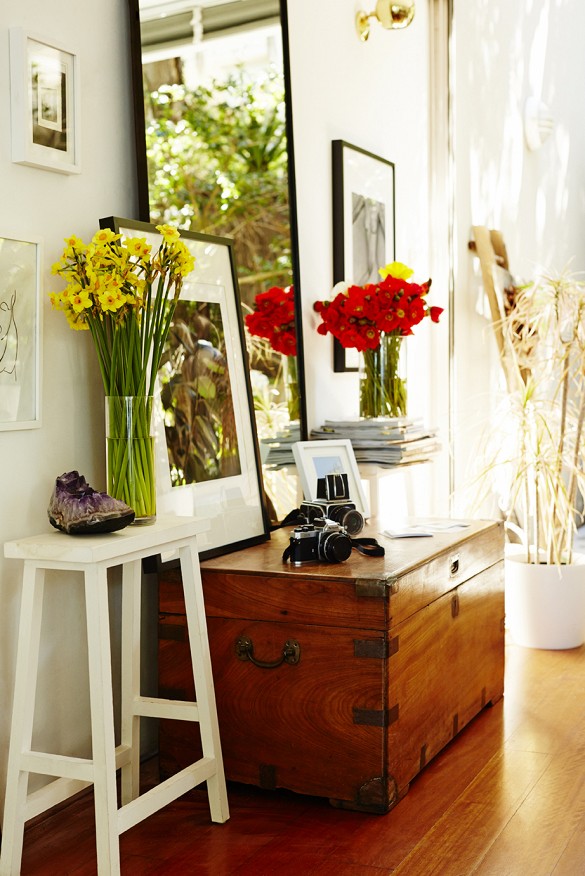
5 Don’t want to commit or put nails into he wall, try a large leaning mirror.
Large leaning mirror on a table top vignette in the home of Vicki Lee, painter and founder of lifestyle brand TheTwentyTwo, featured on My Domaine
Leaning mirror with a rustic reclaimed wood frame in the living room of YES Spaces
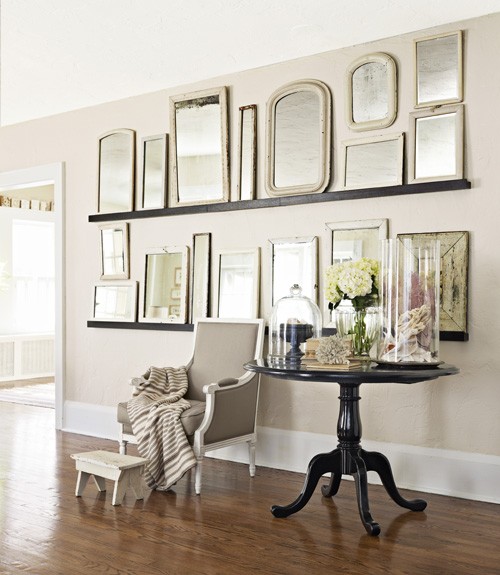
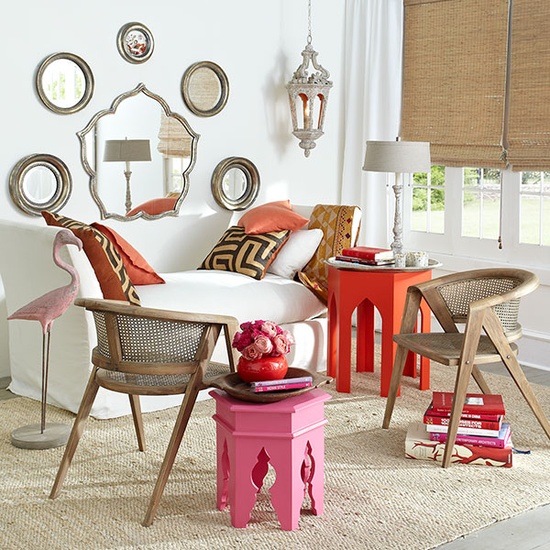
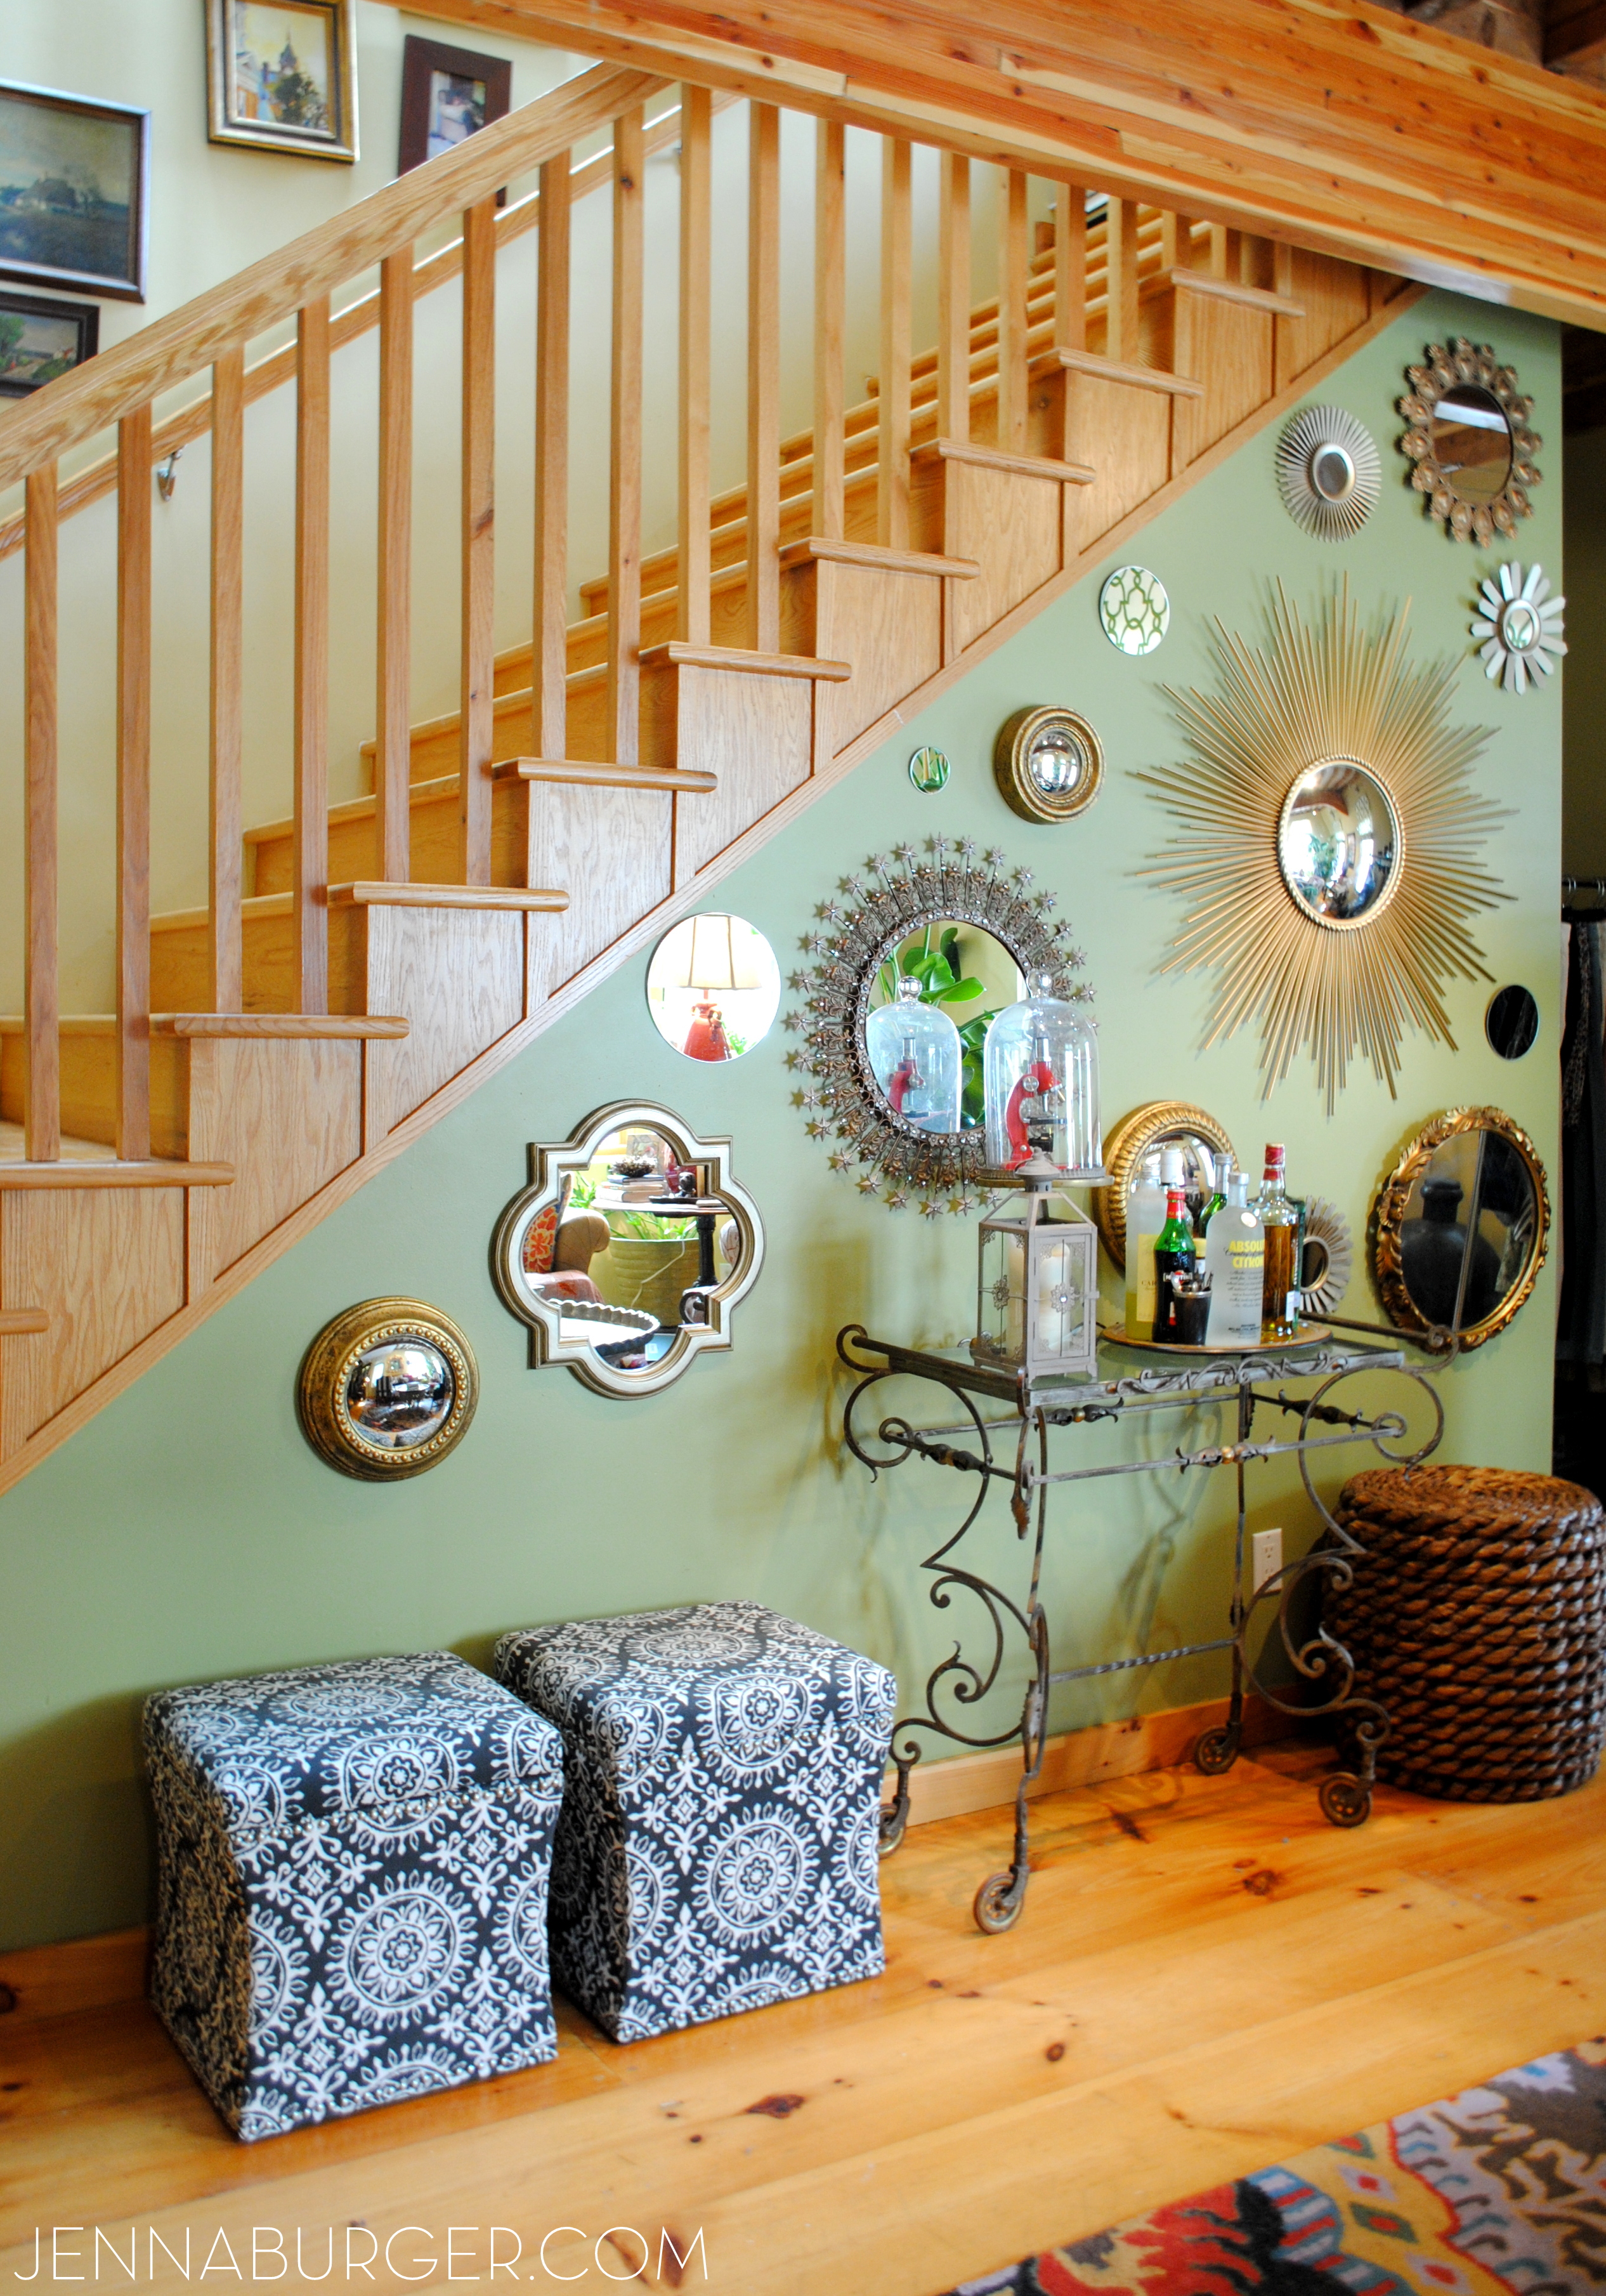
6 Forgo pictures by add a collage or wall of mirrors to make a bold, unexpected composition.
Back in the day, my grandmother had a wall of mirrors in her living room and it looked SO dated… but like theysay “everything old is new again” and the wall of mirrors has made the return, but with a twist. Here are 3 ideas…
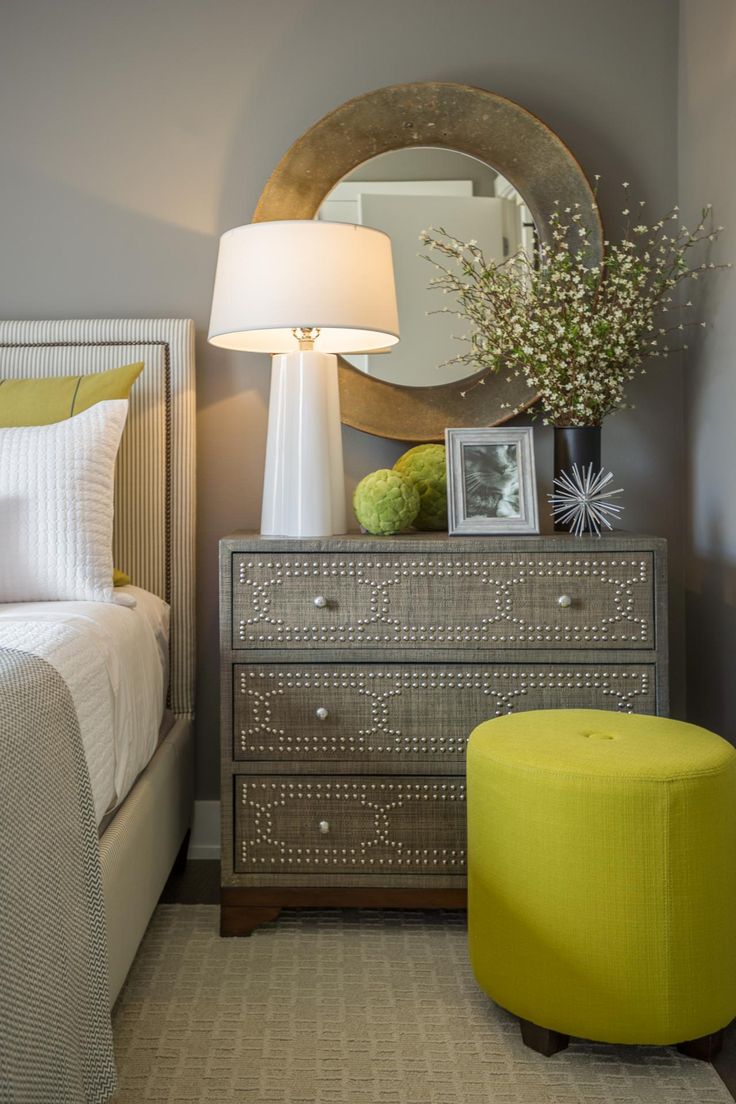
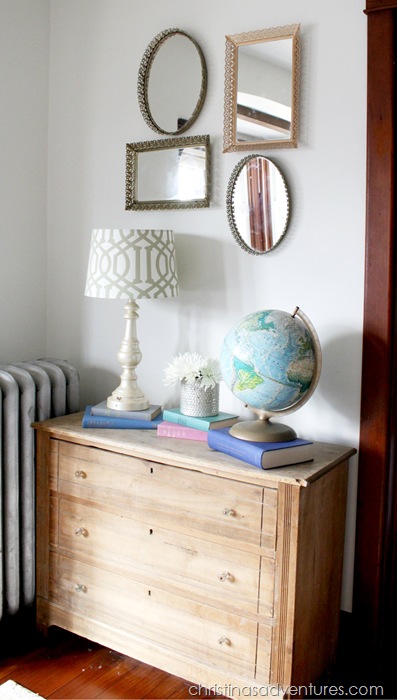
Diane of In My Own Style displays a beautiful collection of mirrors over a dresser
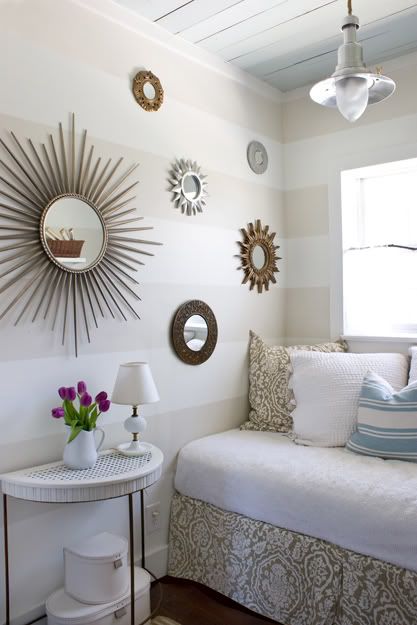
Different mirrors all in the same color (gorgeous kelly green) by Dimples & Tangles
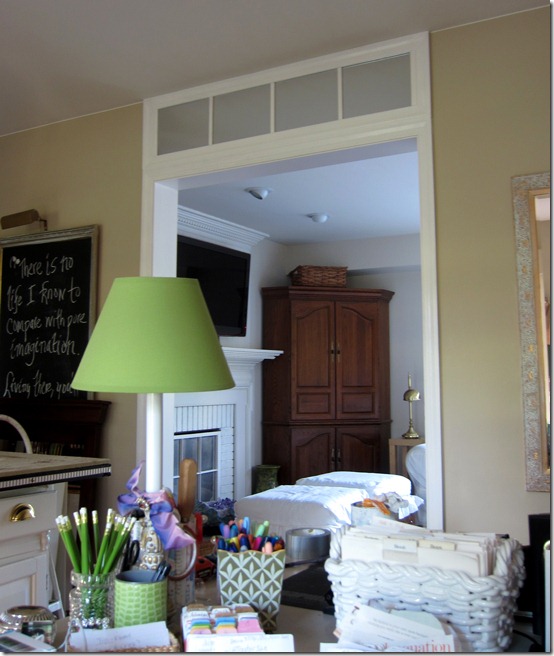
A client project of mine that I recently finished… It is amazing how each mirror reflects the light shining through from the windows that sit opposite
I can not be more excited that the warm weather is here! Over the last few weeks, it’s been hot. Spring skipped right over us this year, but after that brutal winter, who cares. As I’ve mentioned once or twice, we’ve been working hard on vamping up the outdoors for the warmer days ahead.
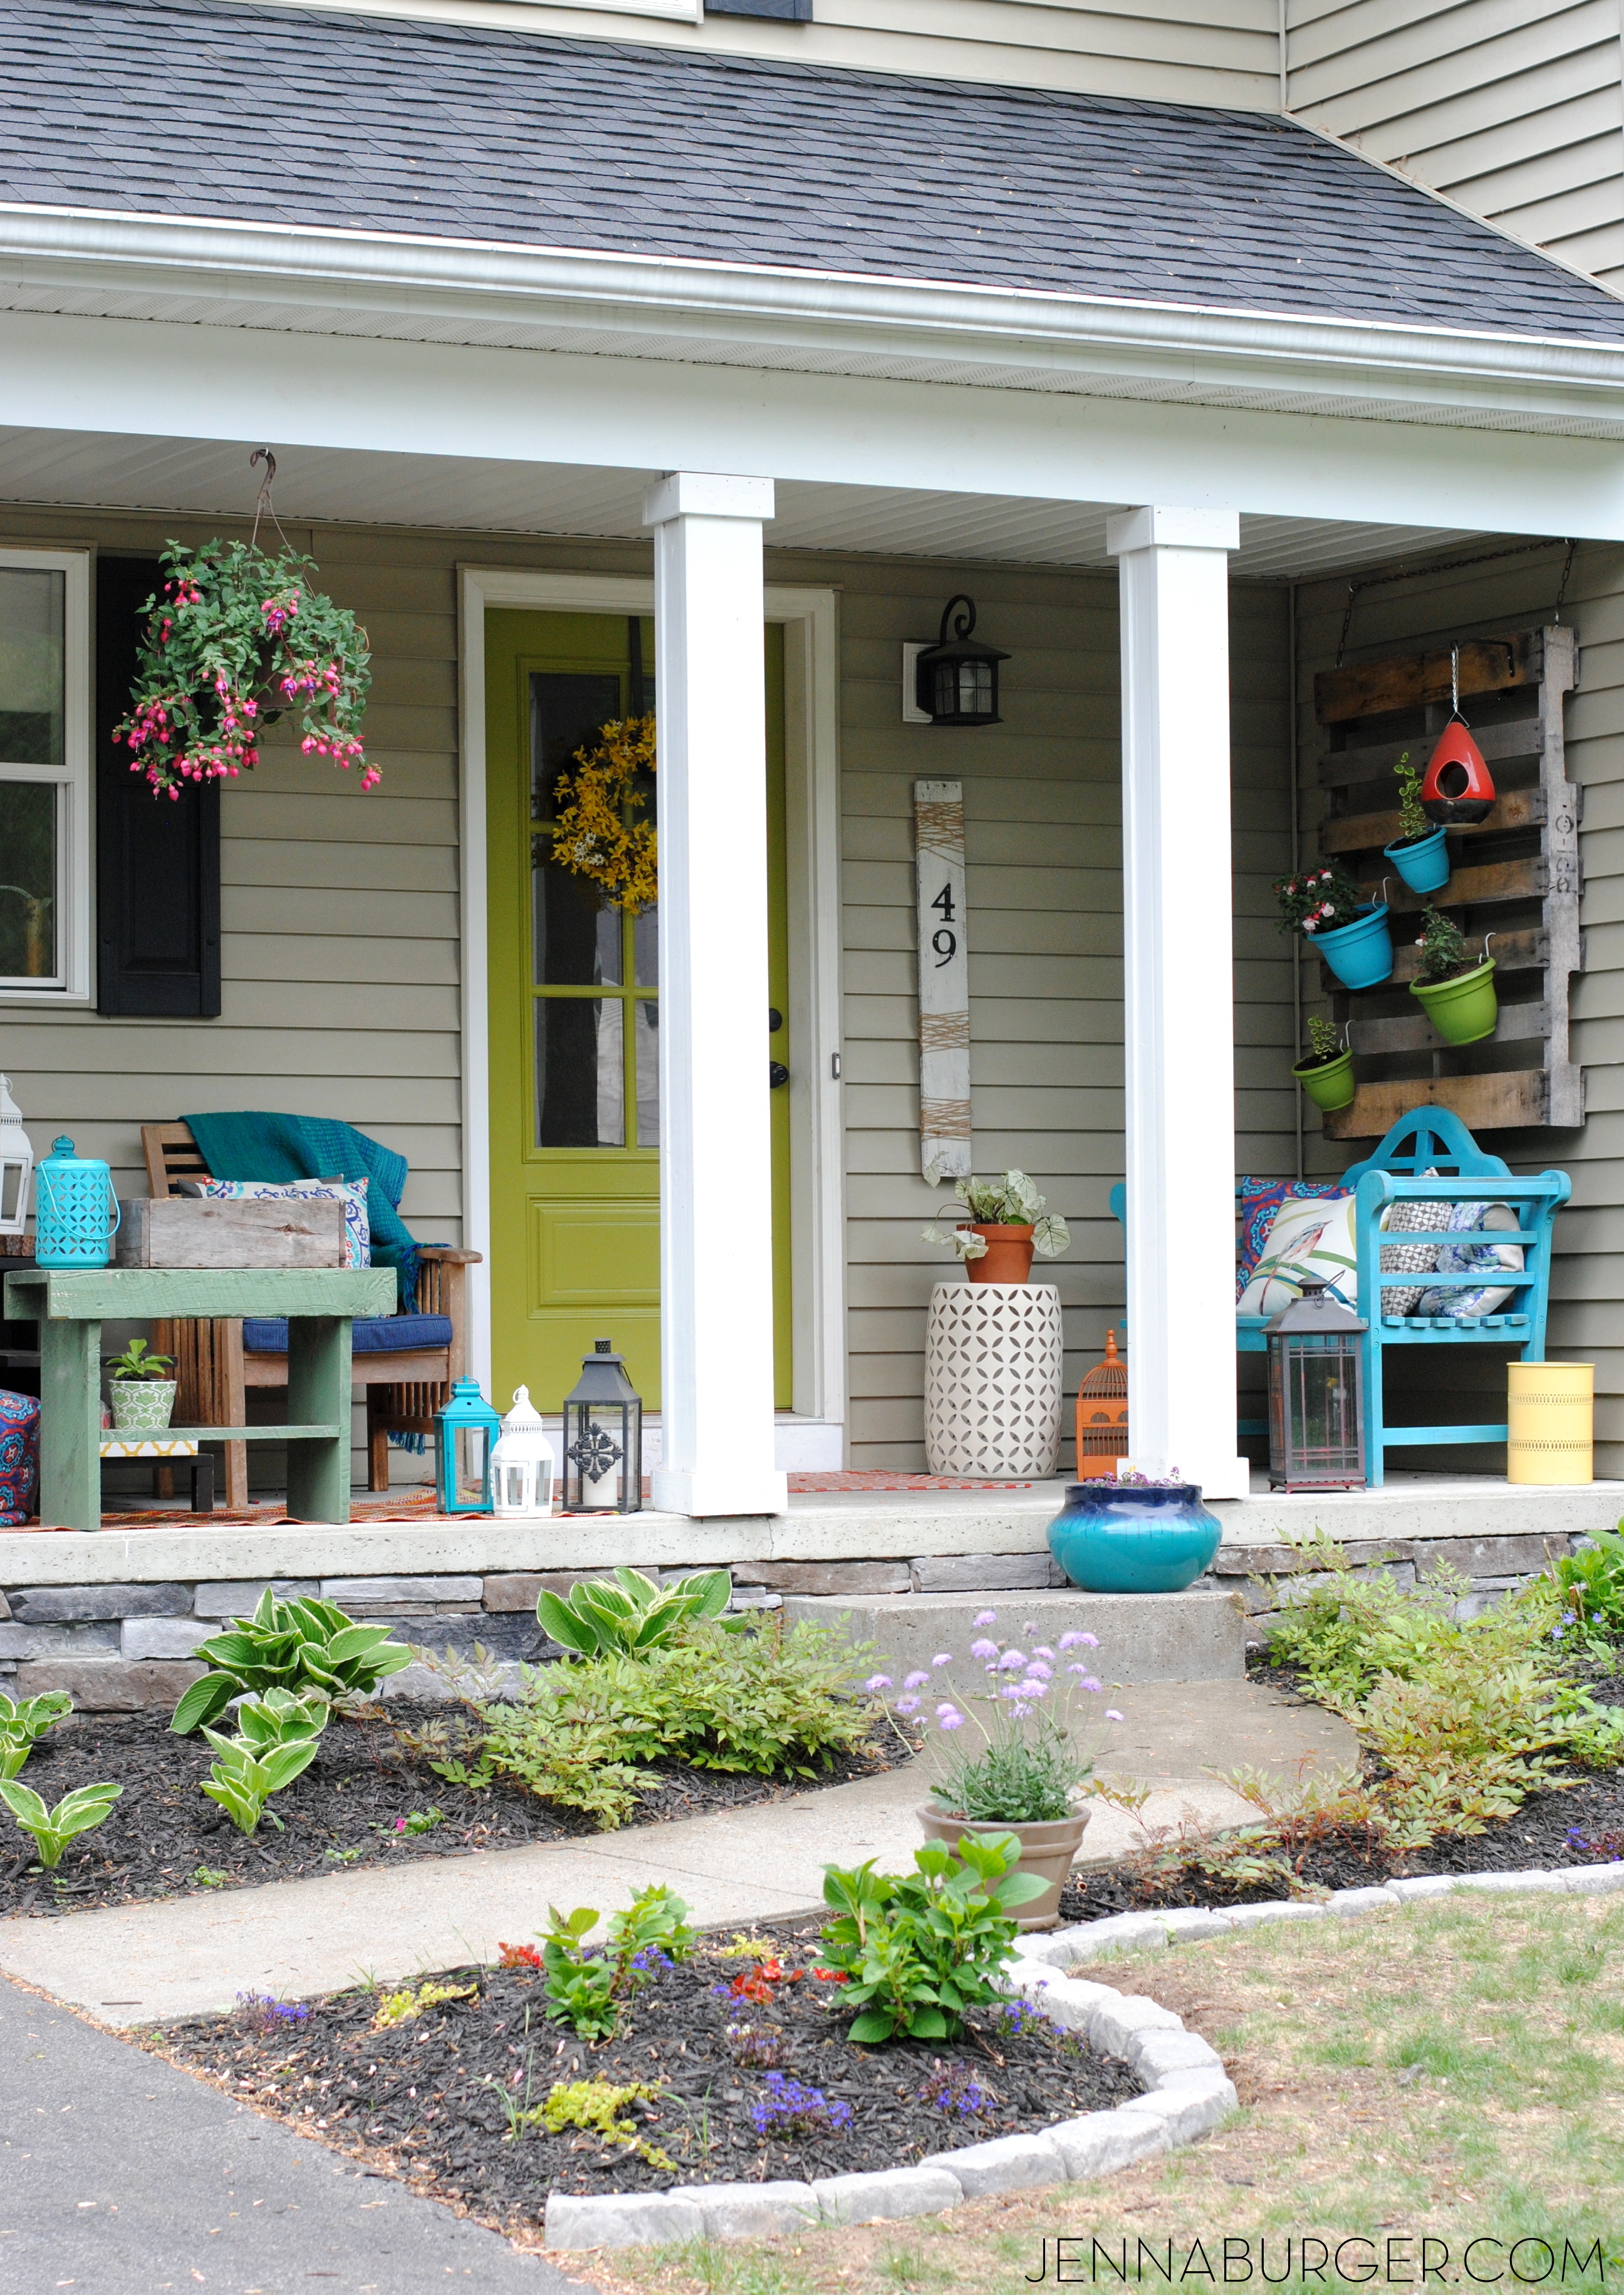
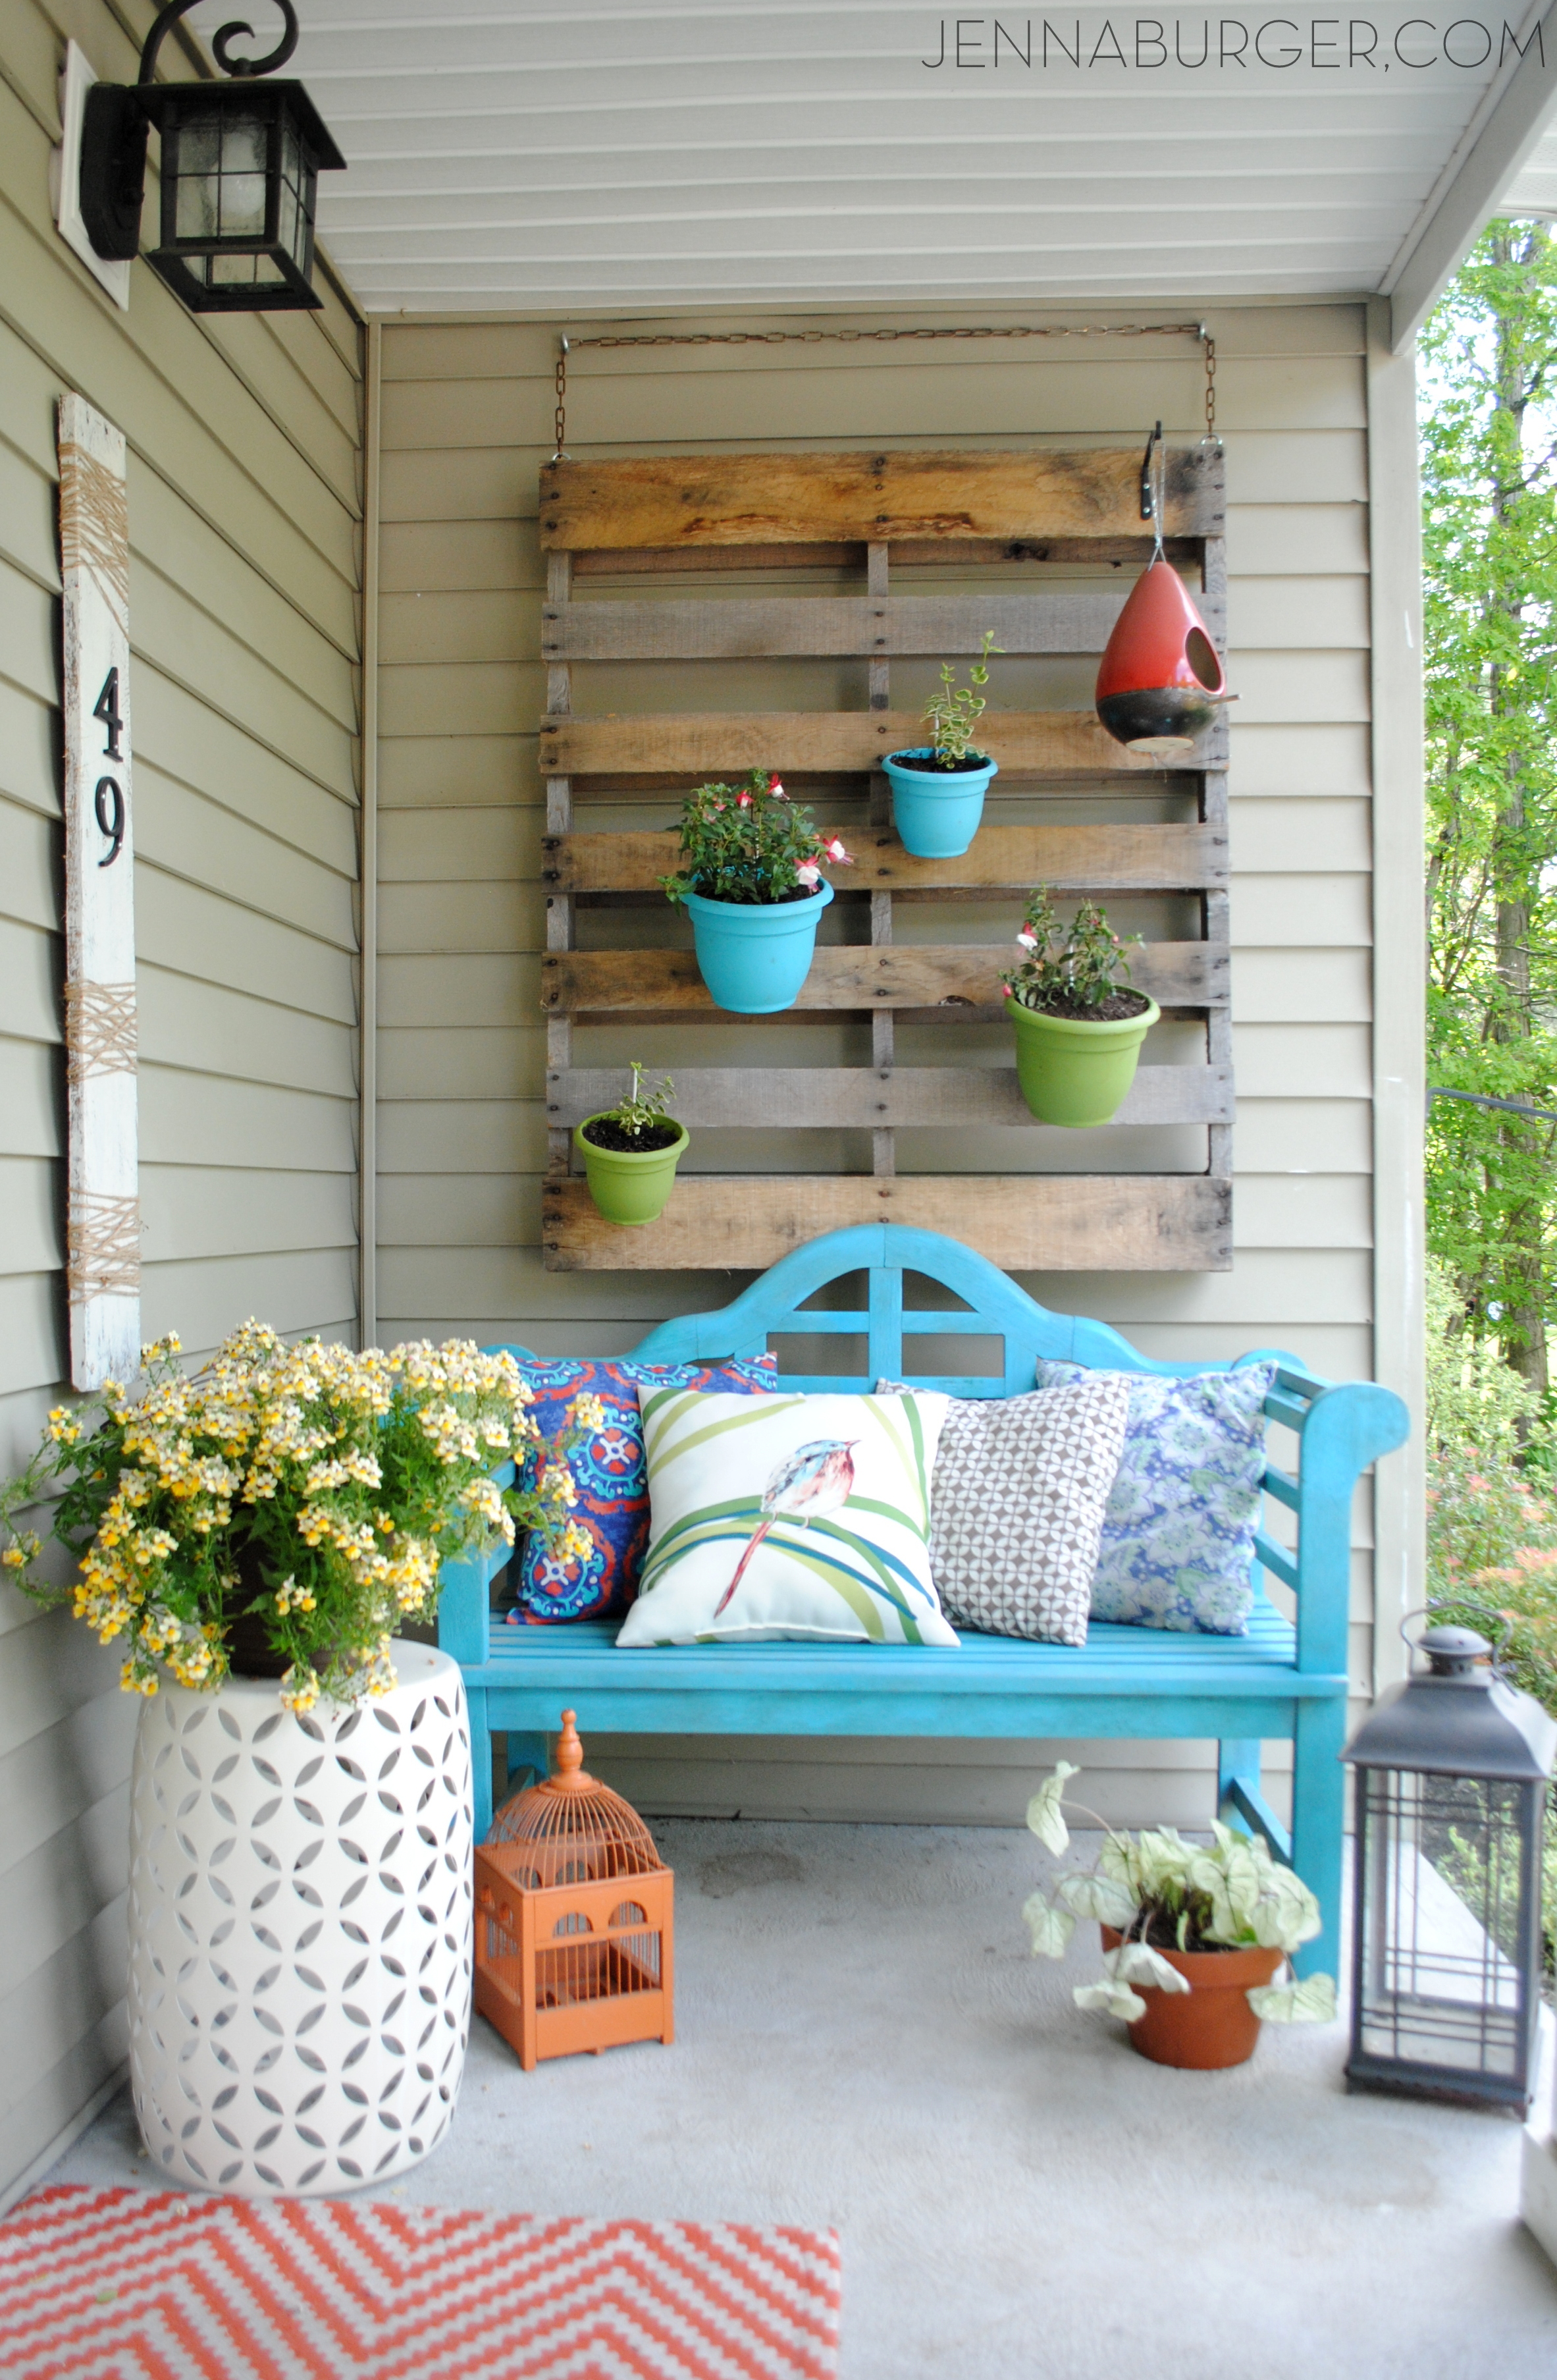
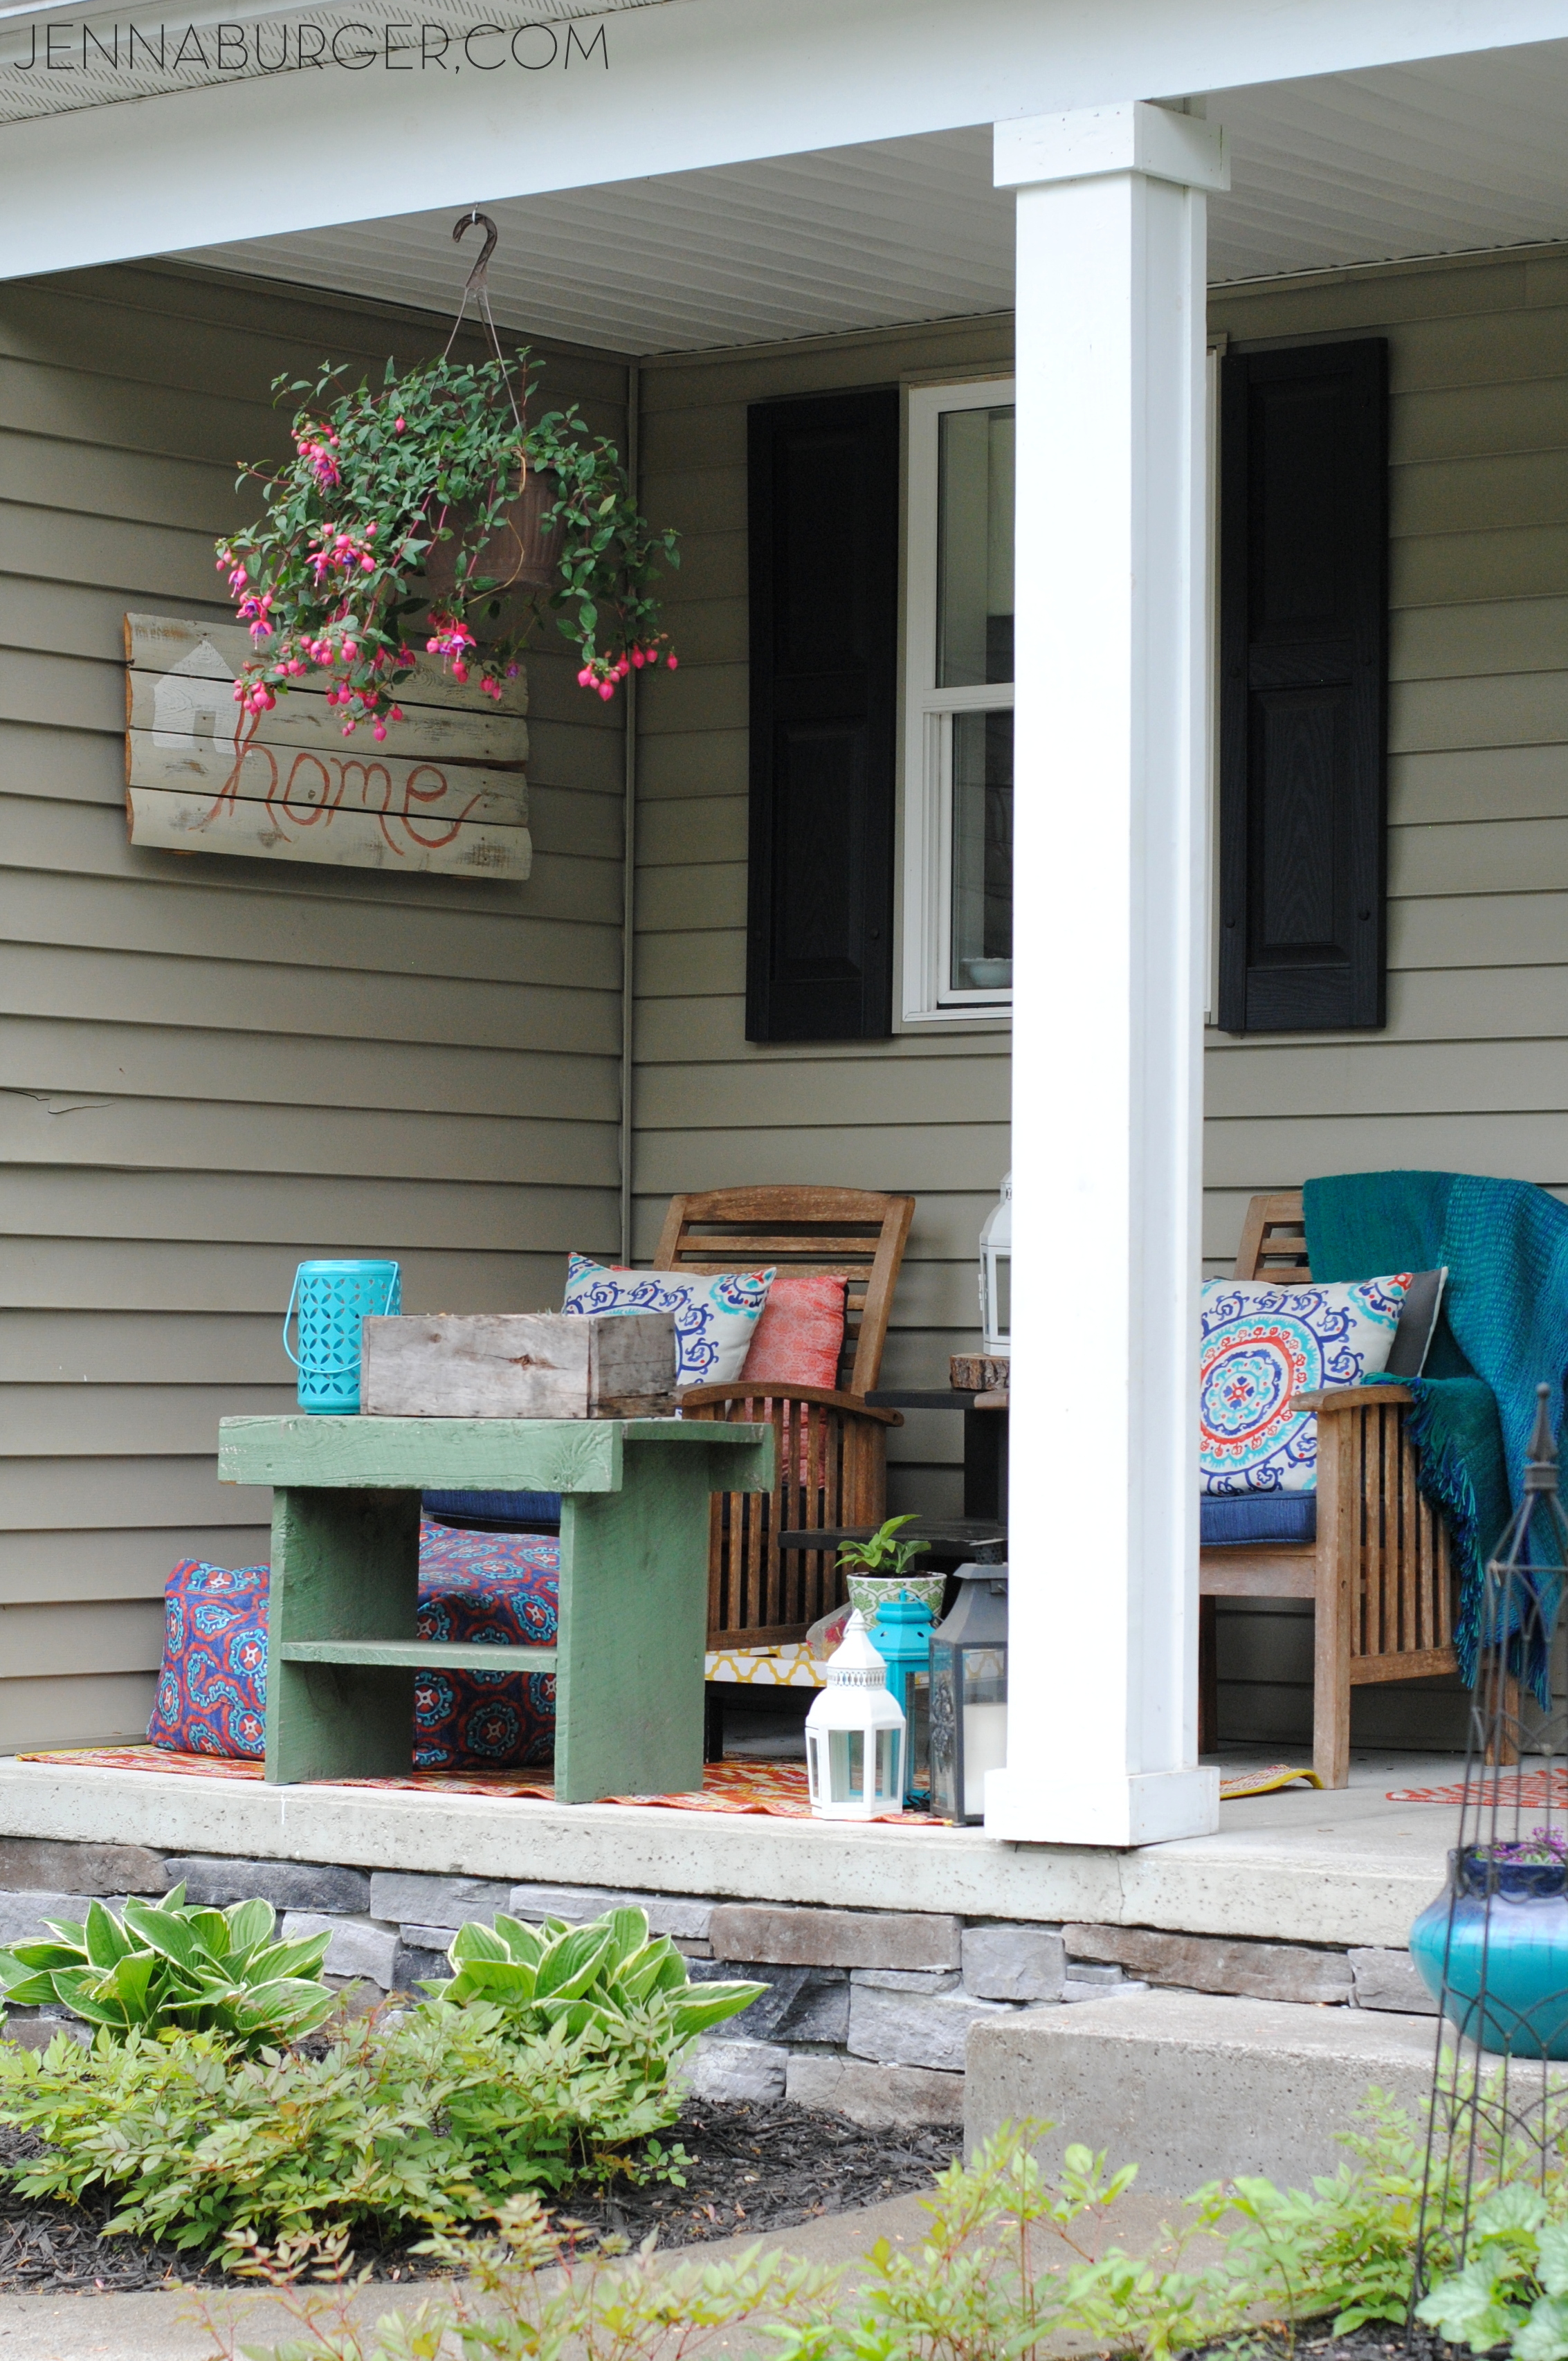
A lot of work has gone into the front of our home this year… curb appeal at it’s finest. The porch got quite a few updates. Here is this years Spring-right-into-Summer Front Porch…
I feel lucky to have so many spots around our homestead to chill + put our feet up (the patio / the deck), but the one spot (which is by far the smallest of all) our clan of 5 always seems to choose to relax is the front porch. Maybe it’s because the kids are often riding their bikes on the road or playing basketball in the driveway, but even when we’re playing a game of Uno, all of us pretty much always choose the front porch.
Front Door color: Valspar Crushed Oregano in semi-gloss
A few upgrades from when we first moved in – enlarging the columns, adding the vertical pallet, installing the new front door– have all made a big impact to the entry of our home. psst, another fairly easy DIY project with a big impact look coming your way next week.
EASY DO-IT-YOURSELF PROJECT
Dress up your house numbers…
Using a board from an old pallet, I brushed on a light coat of white paint. I installed the house numbers (that used to be attached to the house) on the board about 3/4 up from the bottom. Then I took jute cord and wrapped it around to create an interesting design. Simple & not a penny spent!
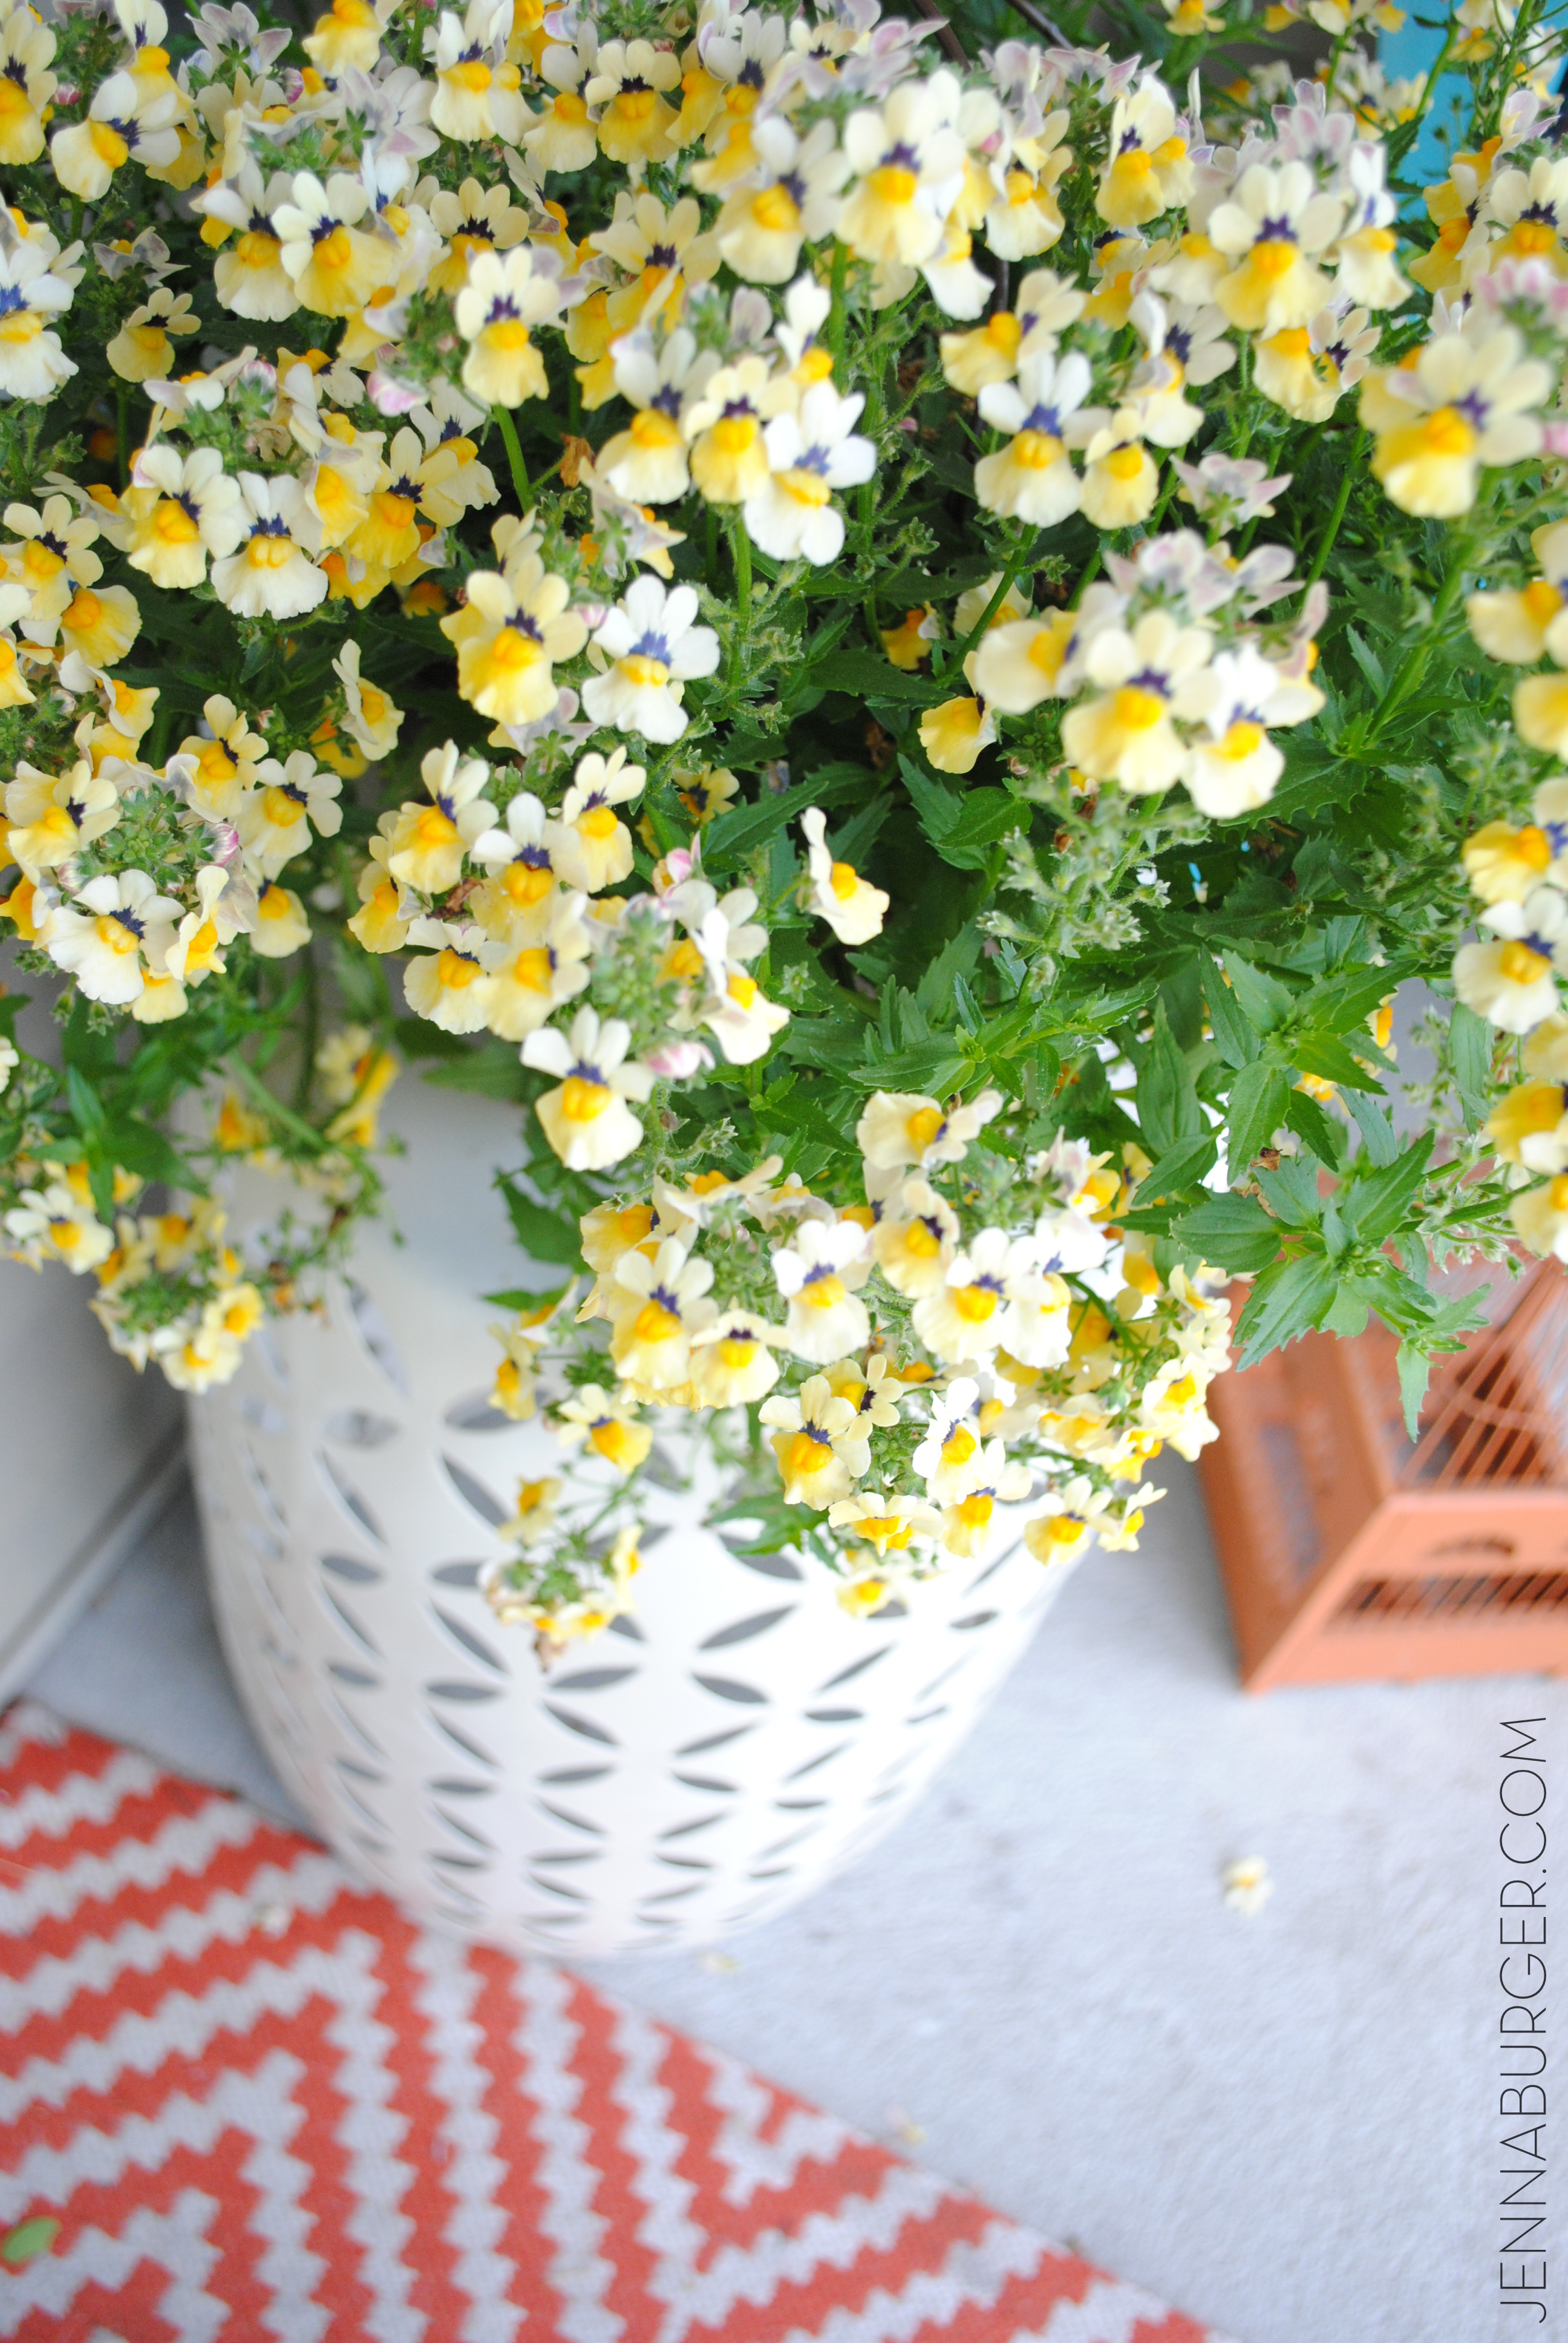
And pretty flowers do make a BIG difference. This porch looked far from how it does now only a few short weeks ago…
All of my flowers for this years porch came from Lowe’s. They always have such a great variety of flowers + plants!
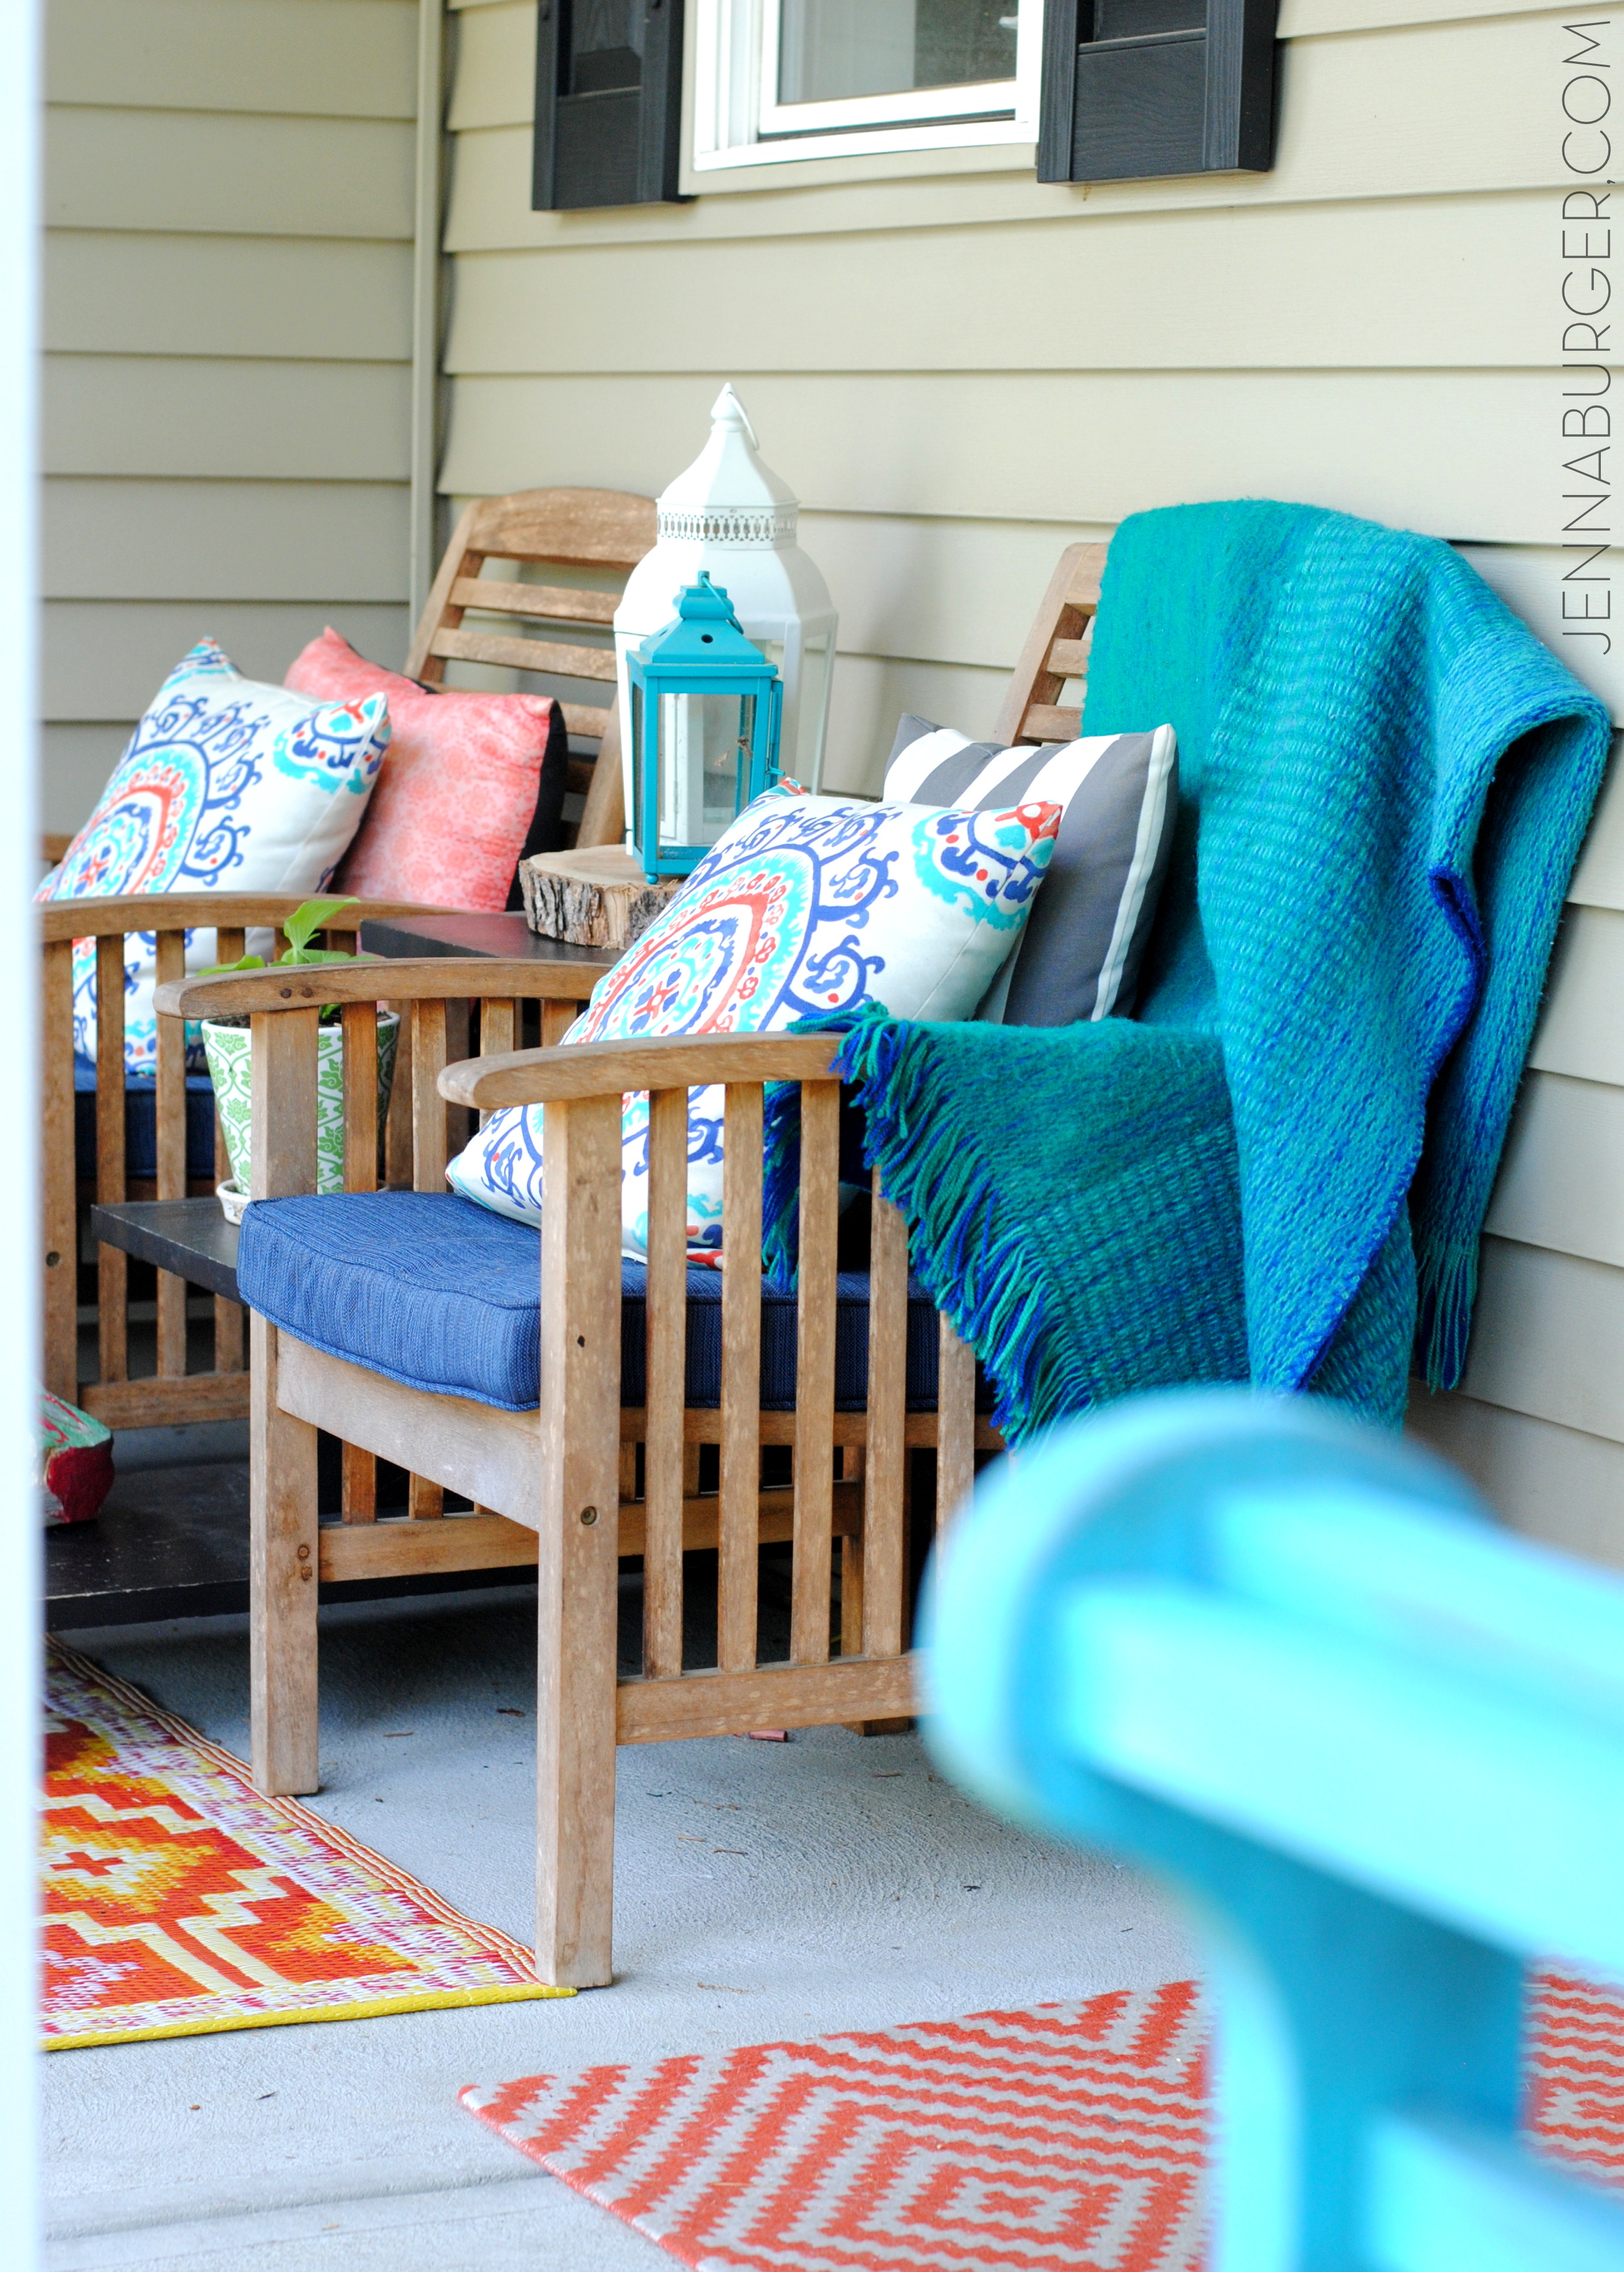
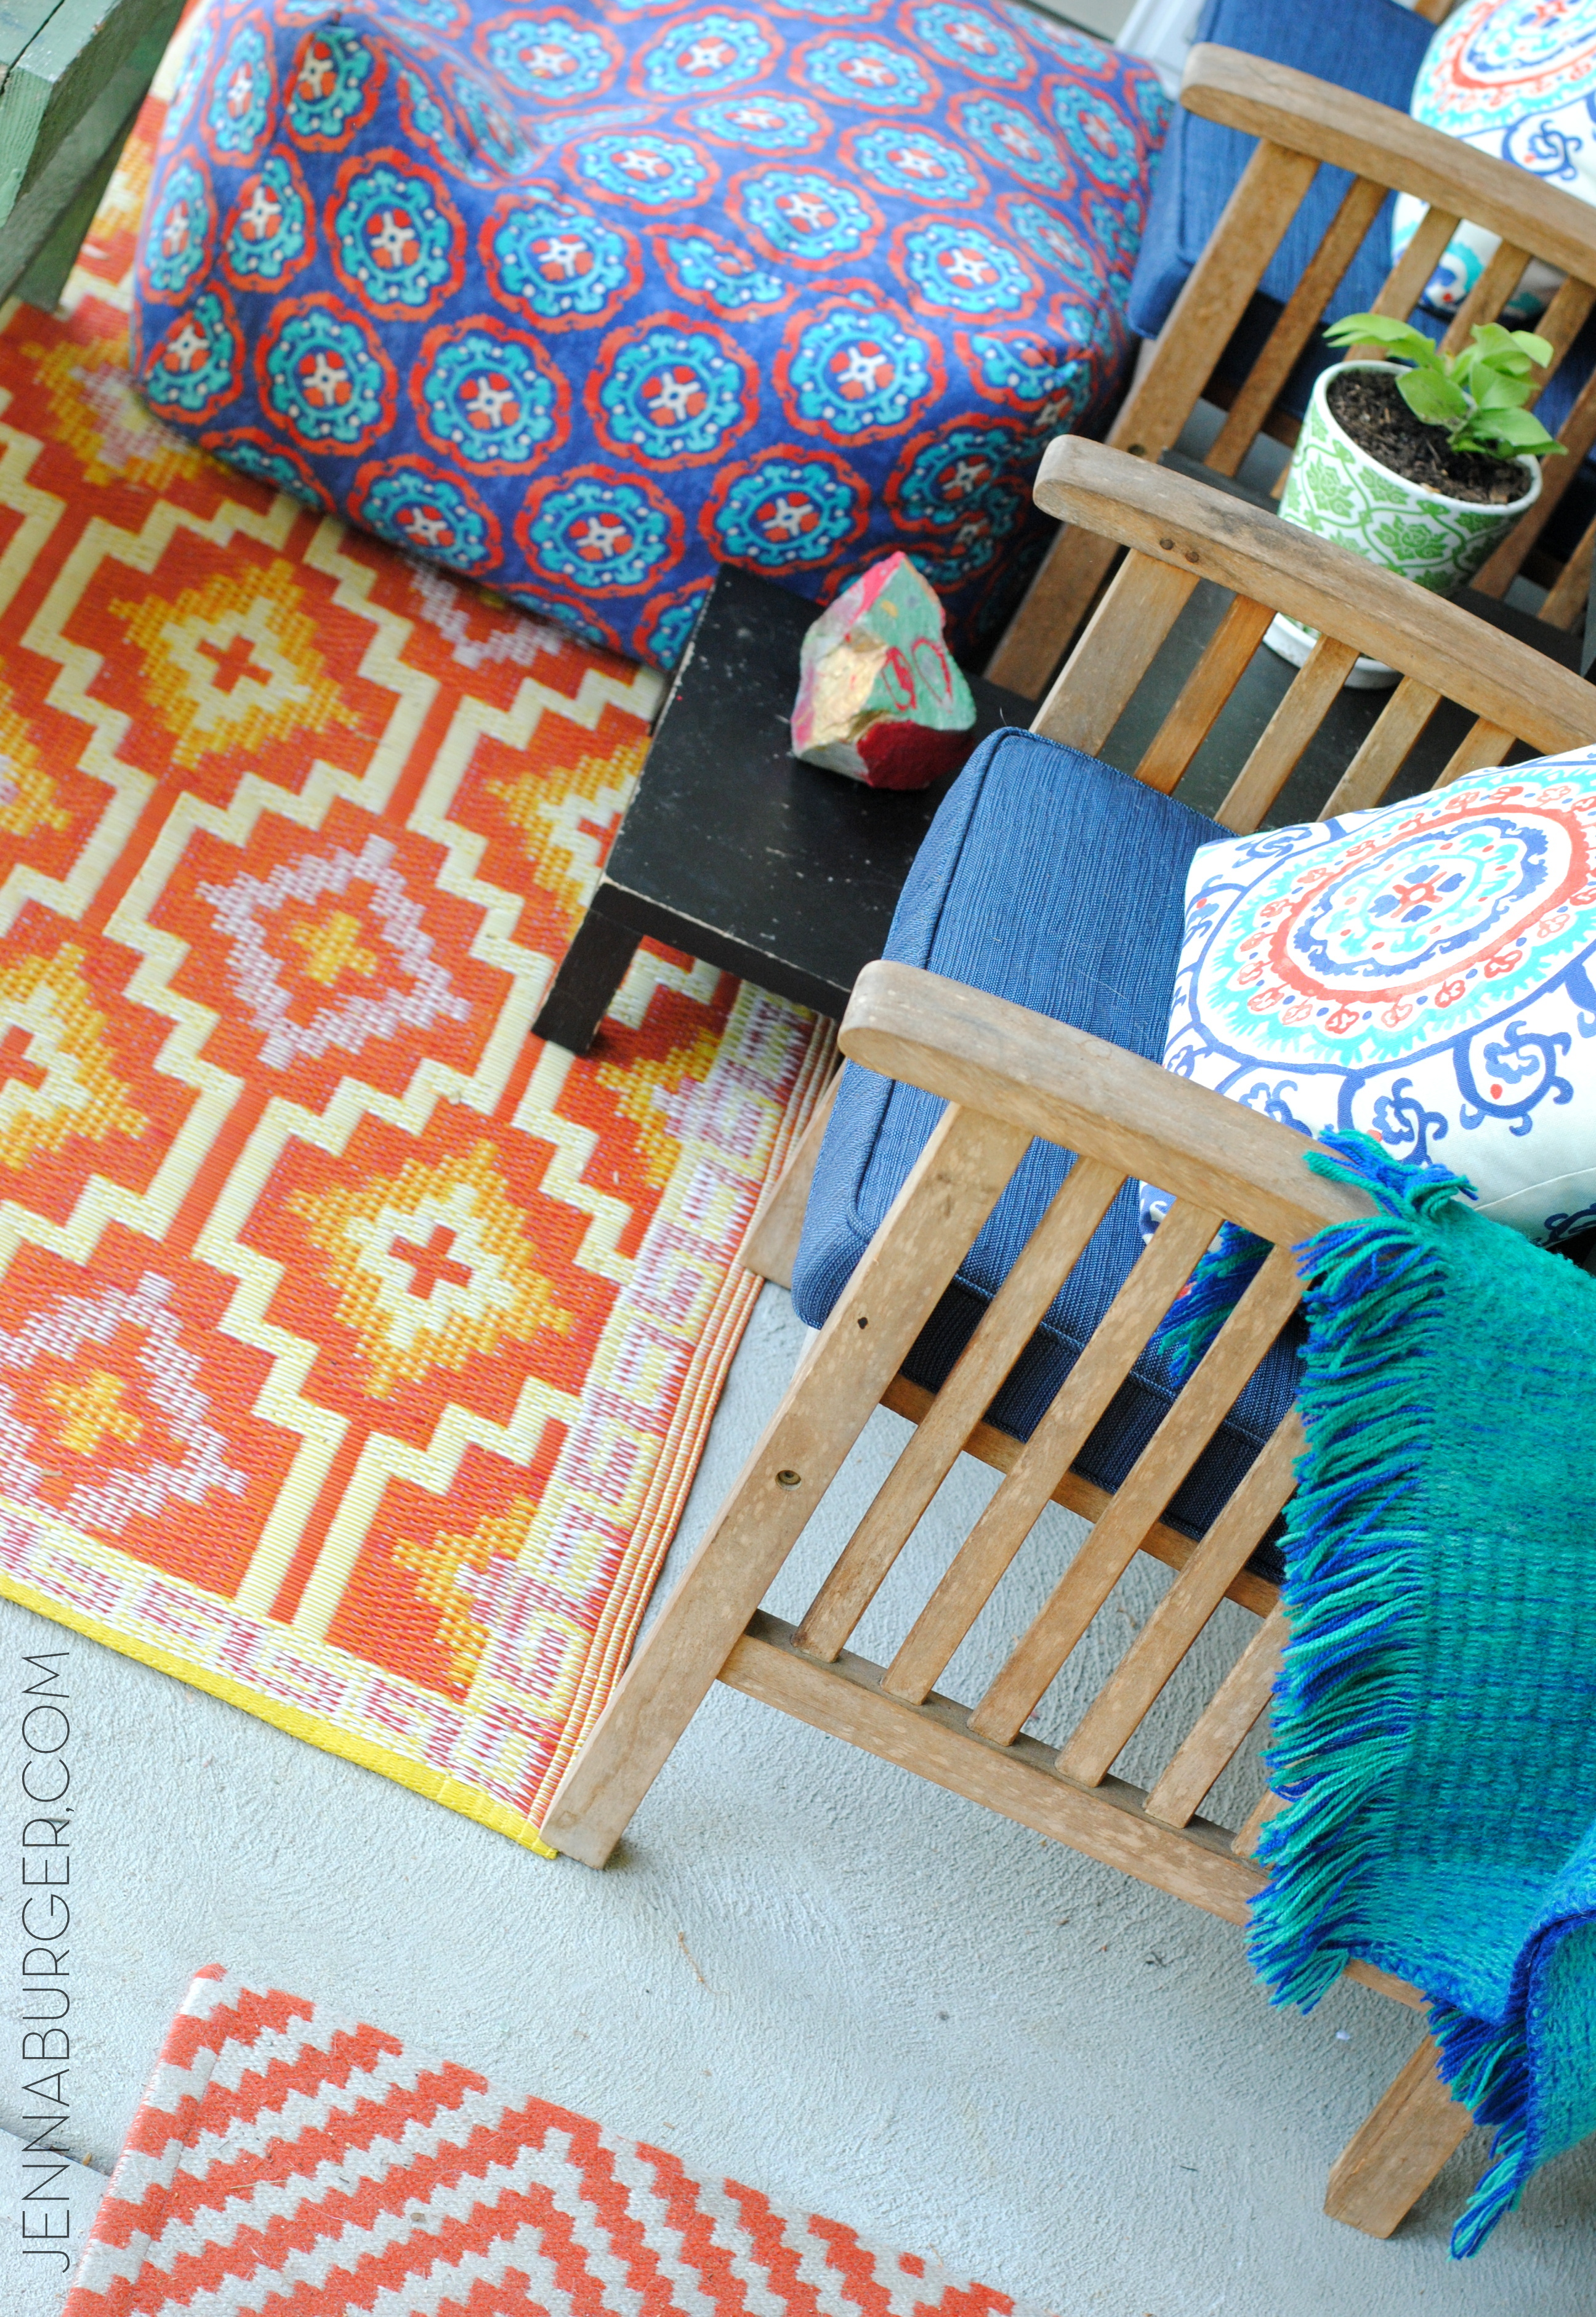
Not much is new; most of the furniture and layers on this years Spring + Summer front porch we’ve had for years. With some little updates, it’s amazing how old can look new in a snap.
The side chairs are inexpensive teak bought about 8 years ago from the Christmas Tree store. I thought about getting rid of them many times, but last year I added new cushions + a few vibrant pillows from Lowe’s and all of a sudden, they looked great again.
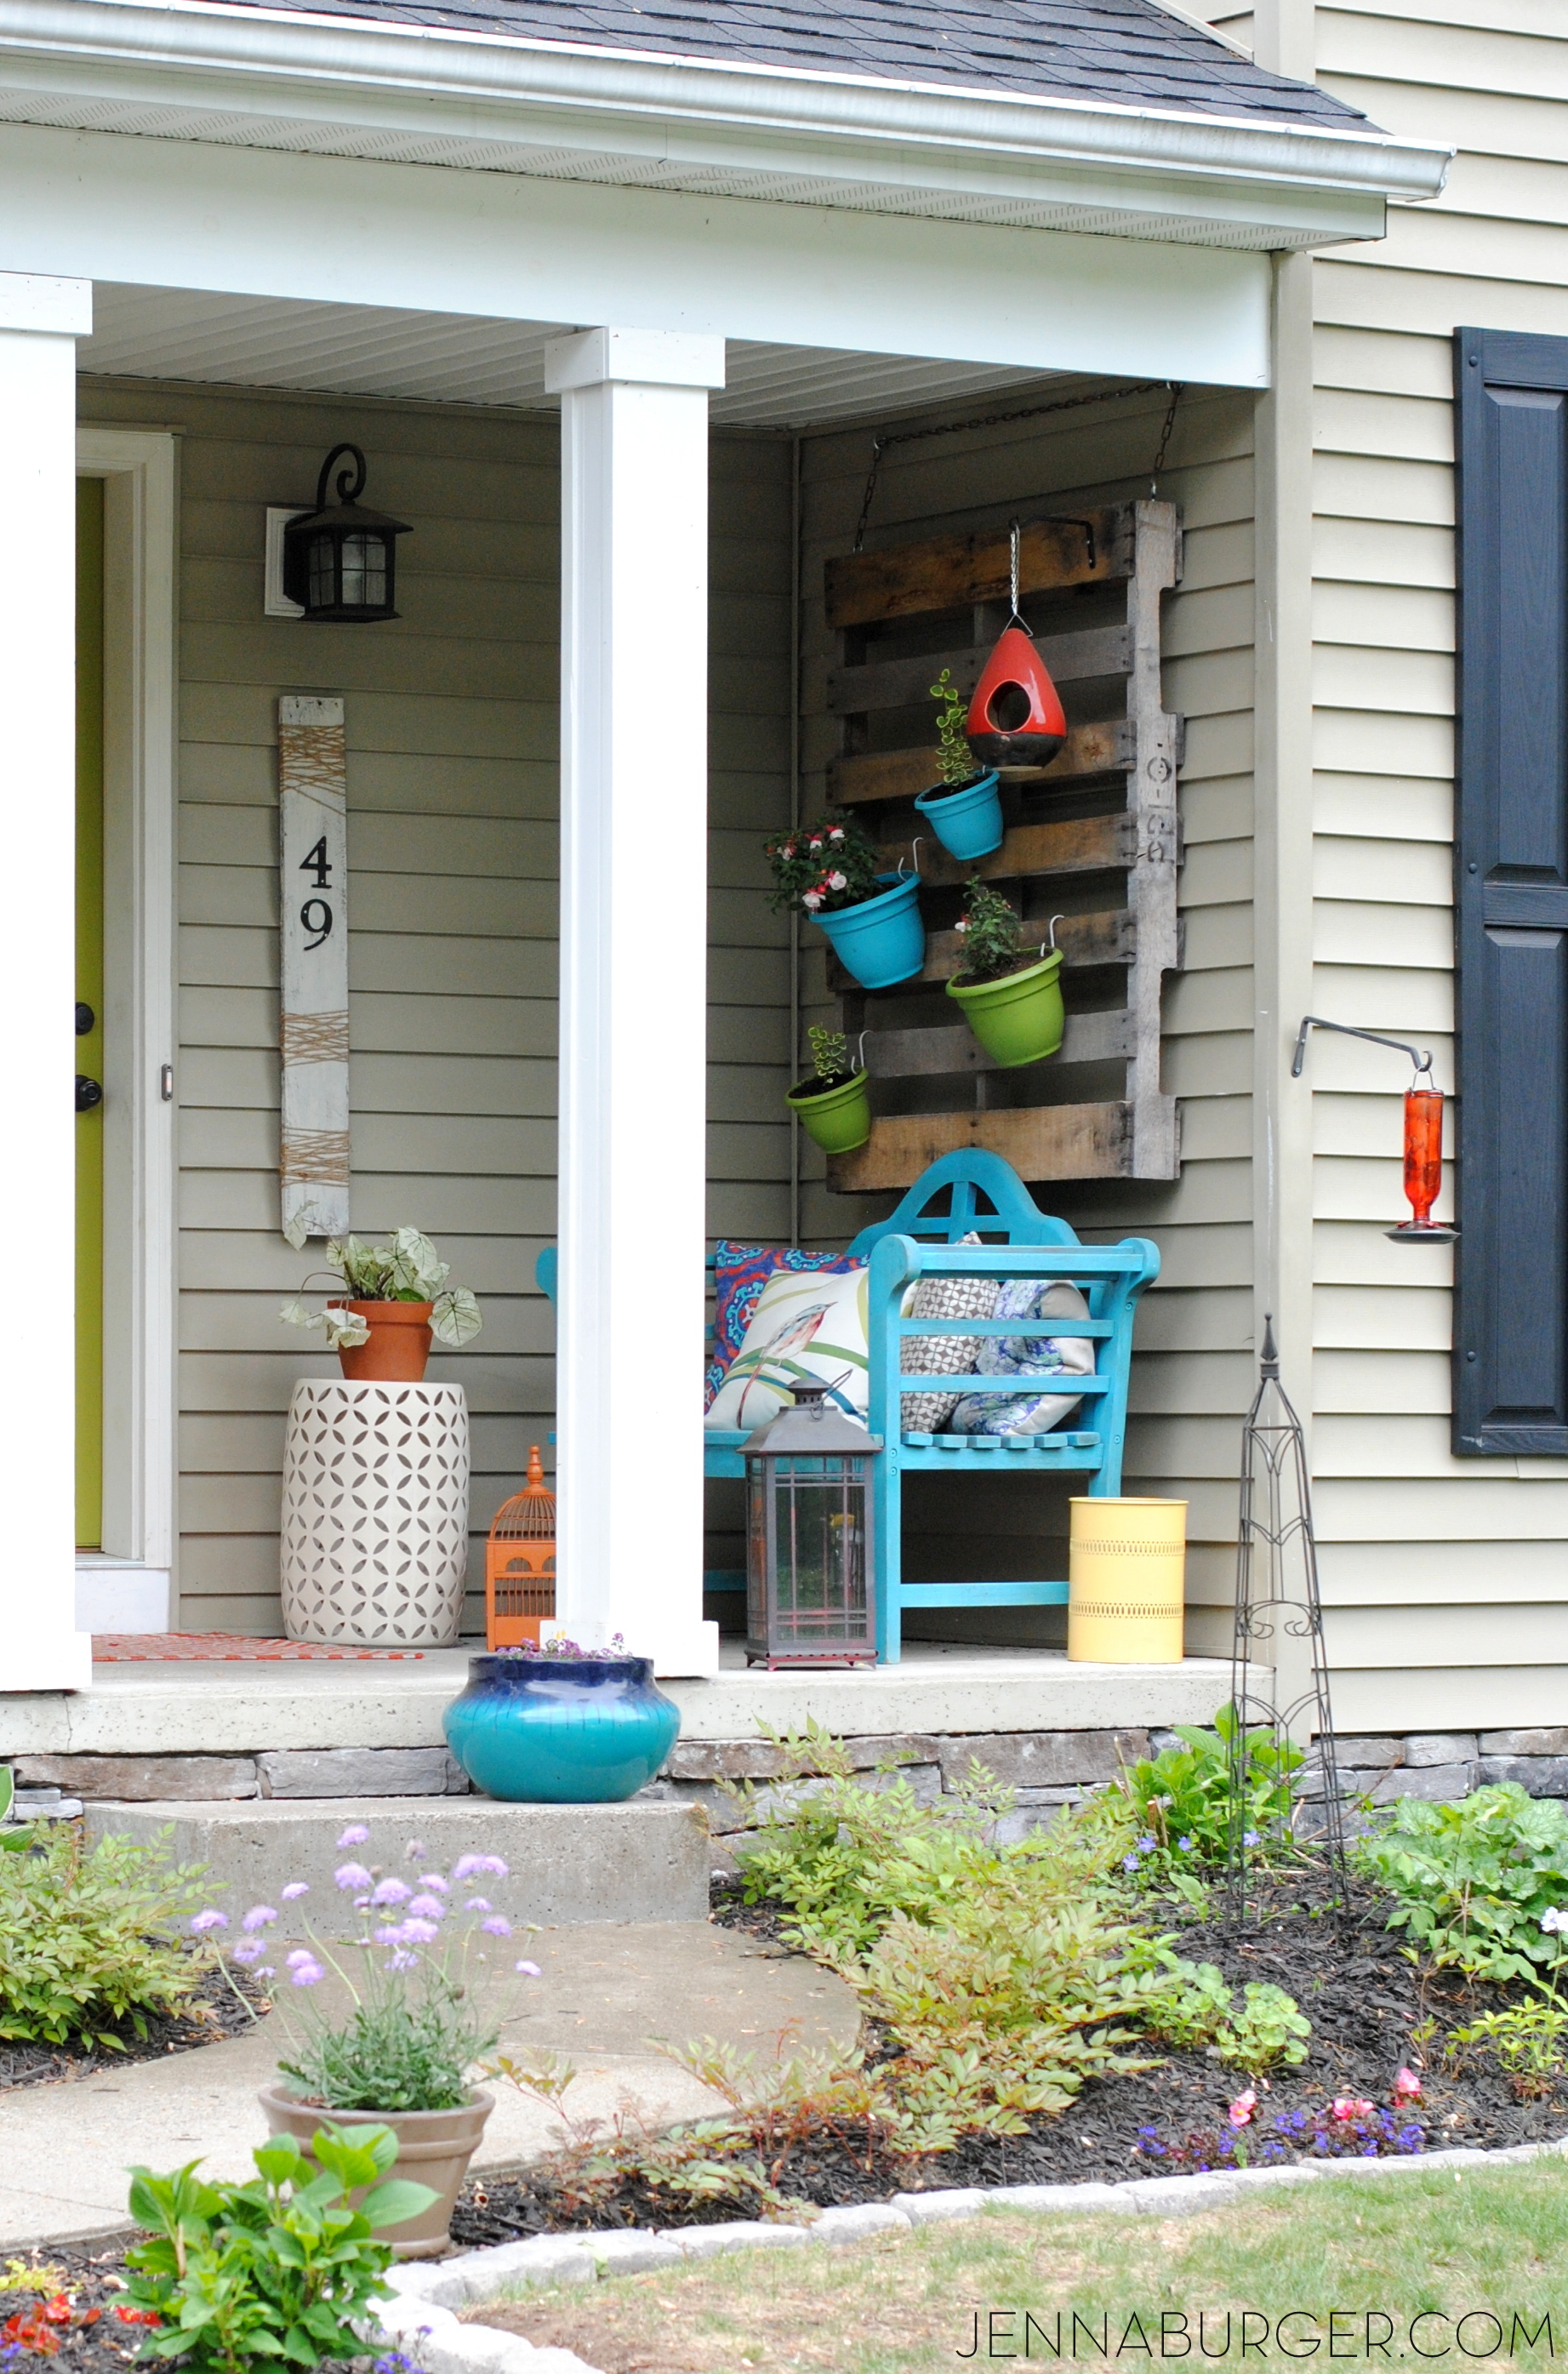
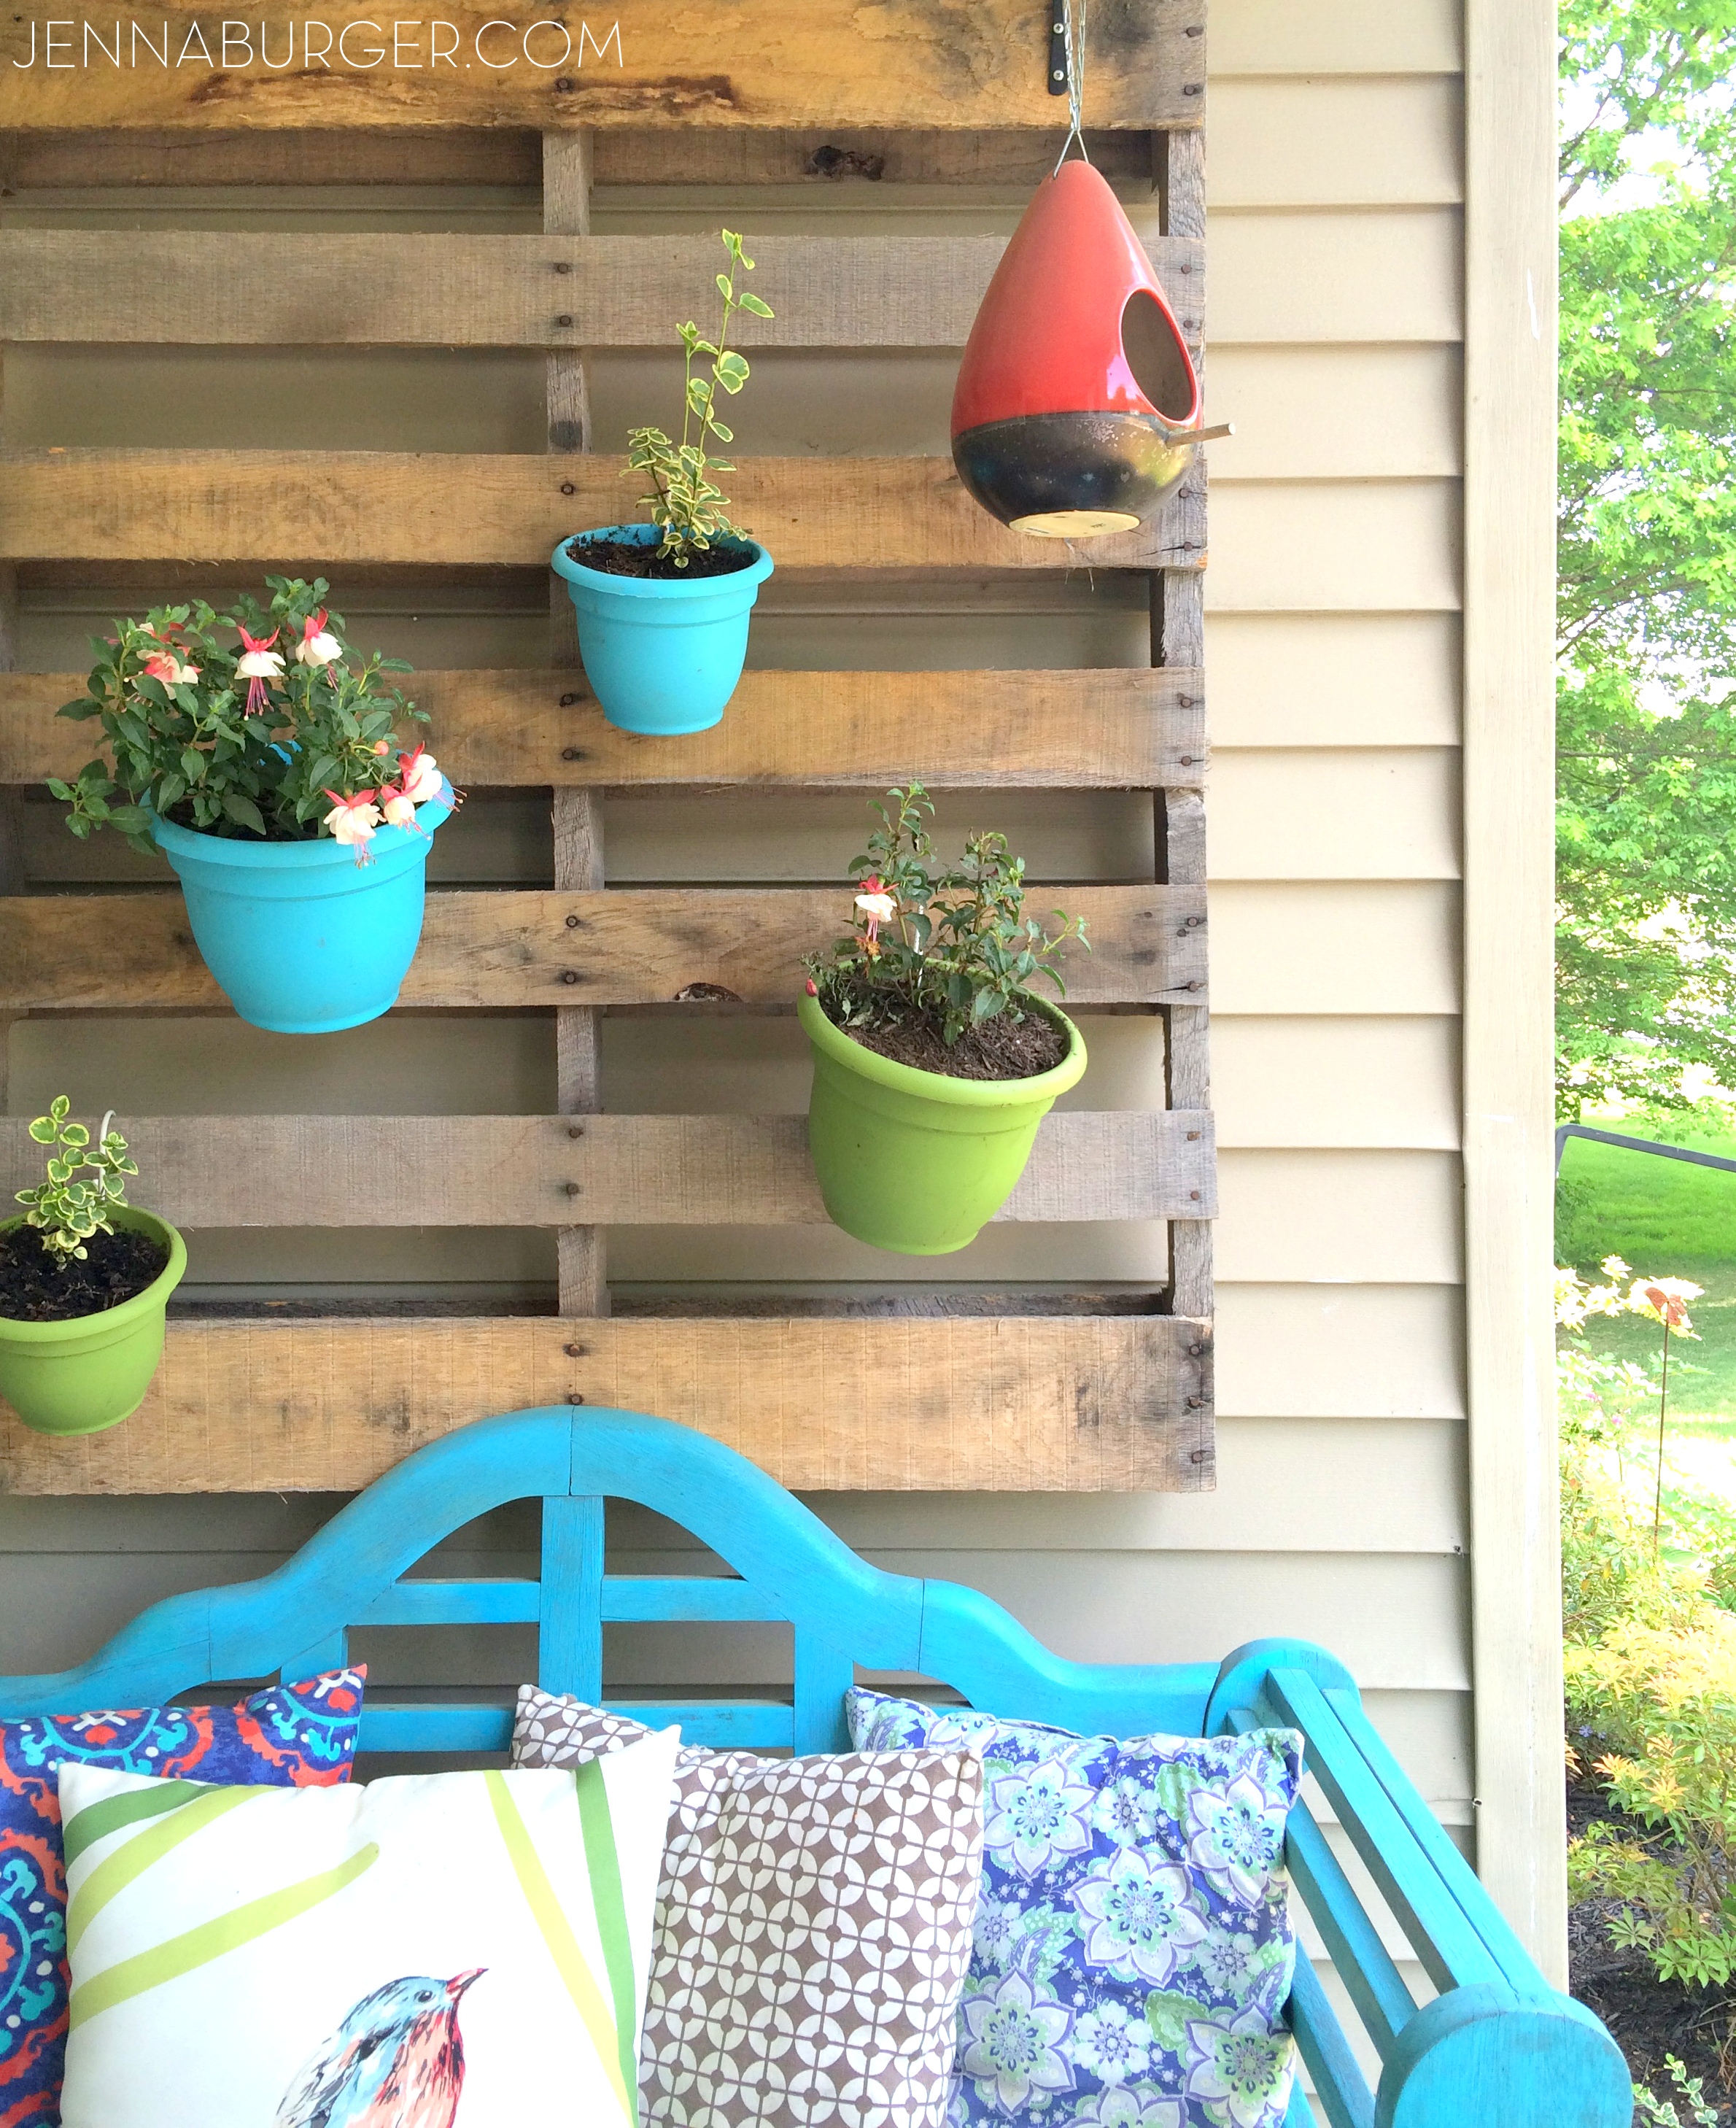
The vertical garden pallet is a DIY creation from a few years back and it’s still a show-stopper on the porch.
It is such a wonderful way to add height to a vertical space (and height = drama!). From herbs to succulents to vines, I’ve hung many different types of plants on this vertical pallet over the years! For this Spring season, I chose to plant Variegated Vinca Vines in the smaller pots and Fuchsia in the larger pots – they are both shade annuals.
Fuchsia is also what I chose for the hanging plant over the porch since this side of the house gets no sun.
Ferns are another great shade choice and I have that hanging from a tall hook next to the porch. It’s such a beautiful, hardy Summer staple.
Can you see why this spot is our favorite to spend those long dog days of Summer? Do you blame us?!
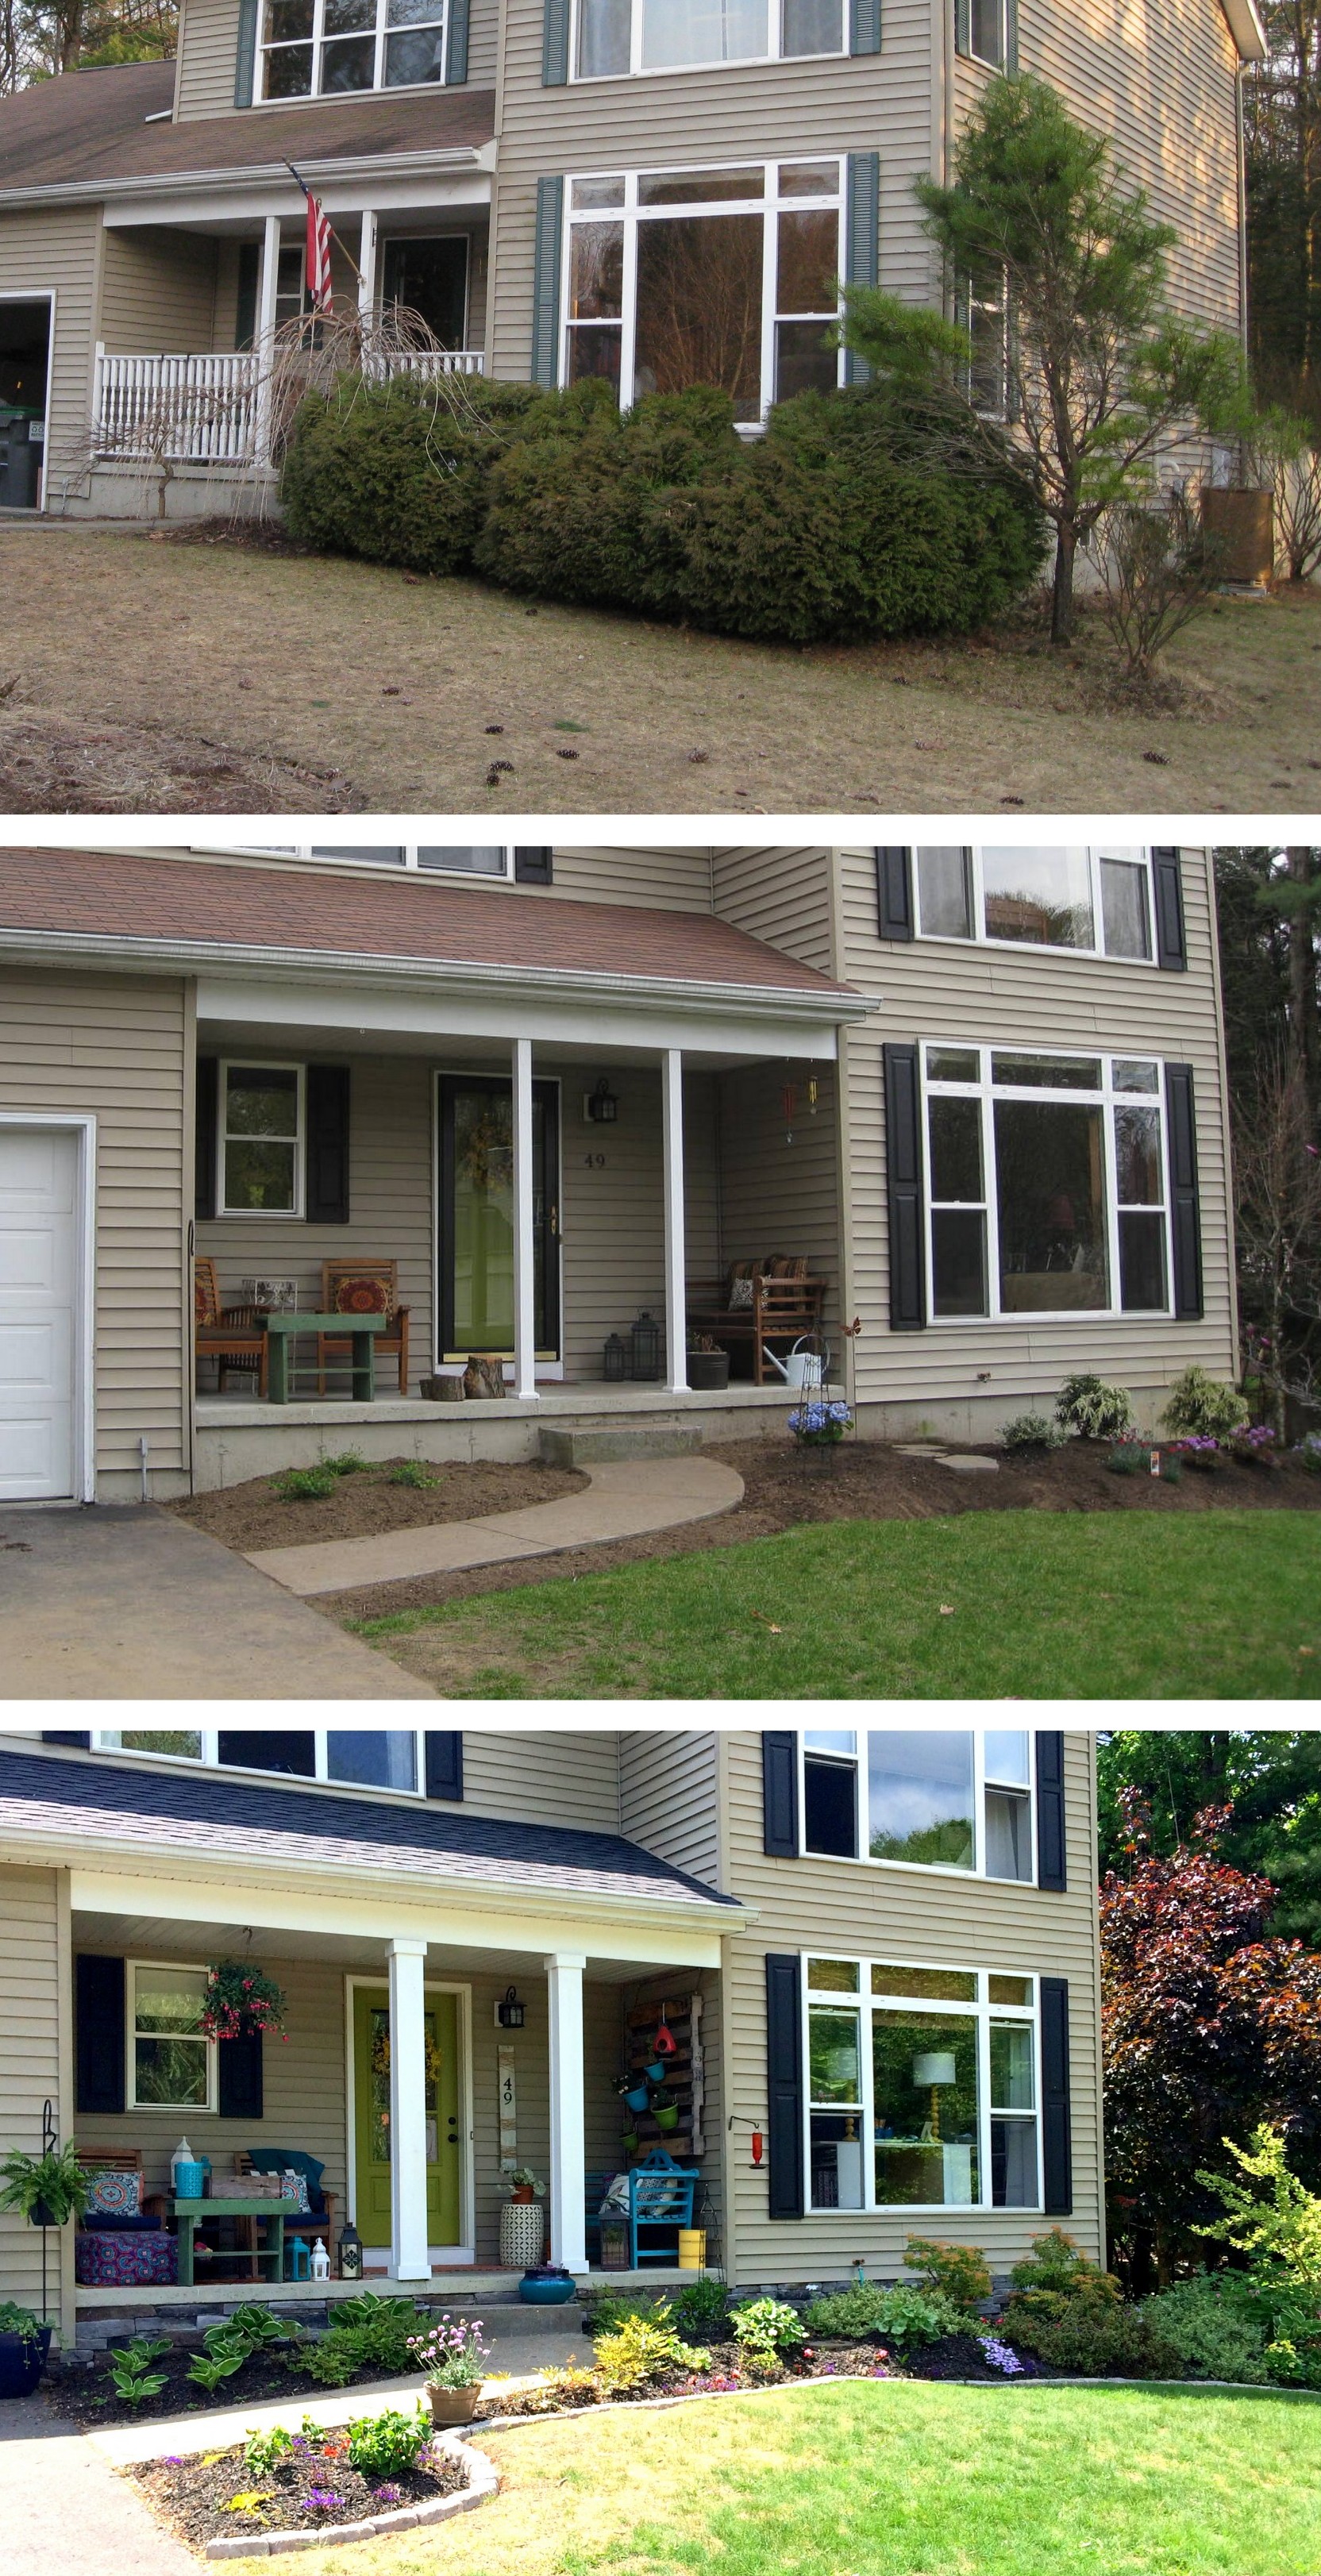
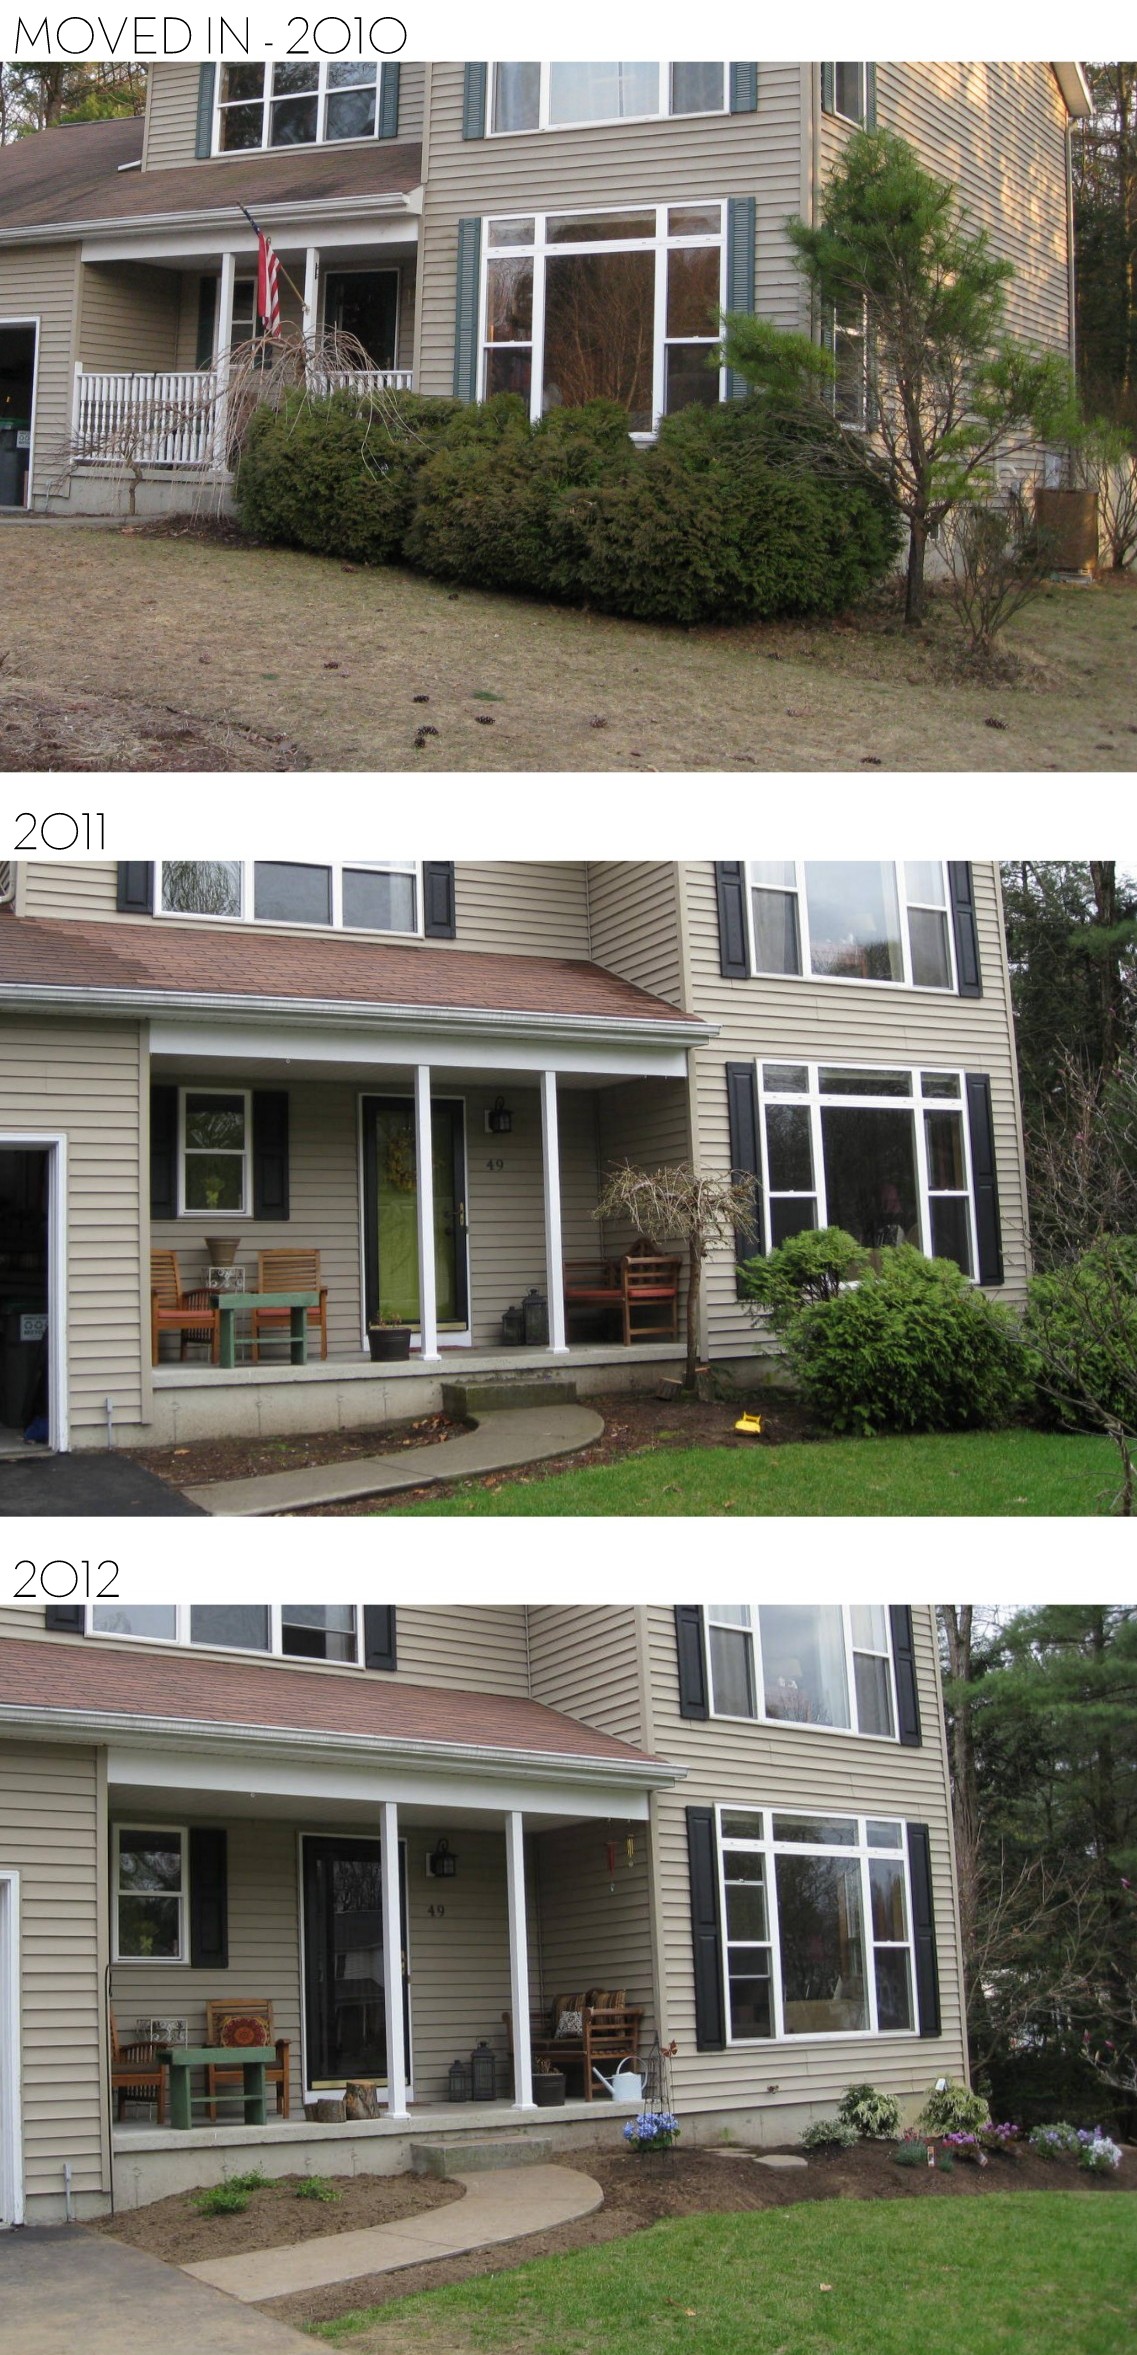
Lastly, I love seeing + sharing how our front facade has evolved over the years…
Crazy, right? All this TLC has been tackled with our own hands!
Thanks for taking the tour of our favorite Summer Space! And by the way, did you catch anything different about this years porch from years past – if you’ve been following along with me for over the years, you might have noticed. Well if not, I’ll give you a hint… we jazzed up the ugly foundation with new stone veneer. More on that + a tutorial on how we installed it coming up next week.
Cheers to a fantastic summer!
So tell me, are you more of a front porch sitter or a back deck lounger?
DISCLOSURE: I am part of the Lowe’s Creative Team and was provided with a Lowe’s gift card to purchase items for my project. I was also compensated for my time to use the products. No one told me what to create, what to buy, how to use the product, or what to write. All opinions are 100% mine!
As I mentioned last week while sharing ideas on creating an outdoor oasis, we’ve been fast + furious over the past few weeks on sprucing up the outdoors of our humble abode.
It’s what’s happening around our little ole’ homestead in the North Country and I am excited to share the updates we’ve been making! First up, the garden beds in the front yard…
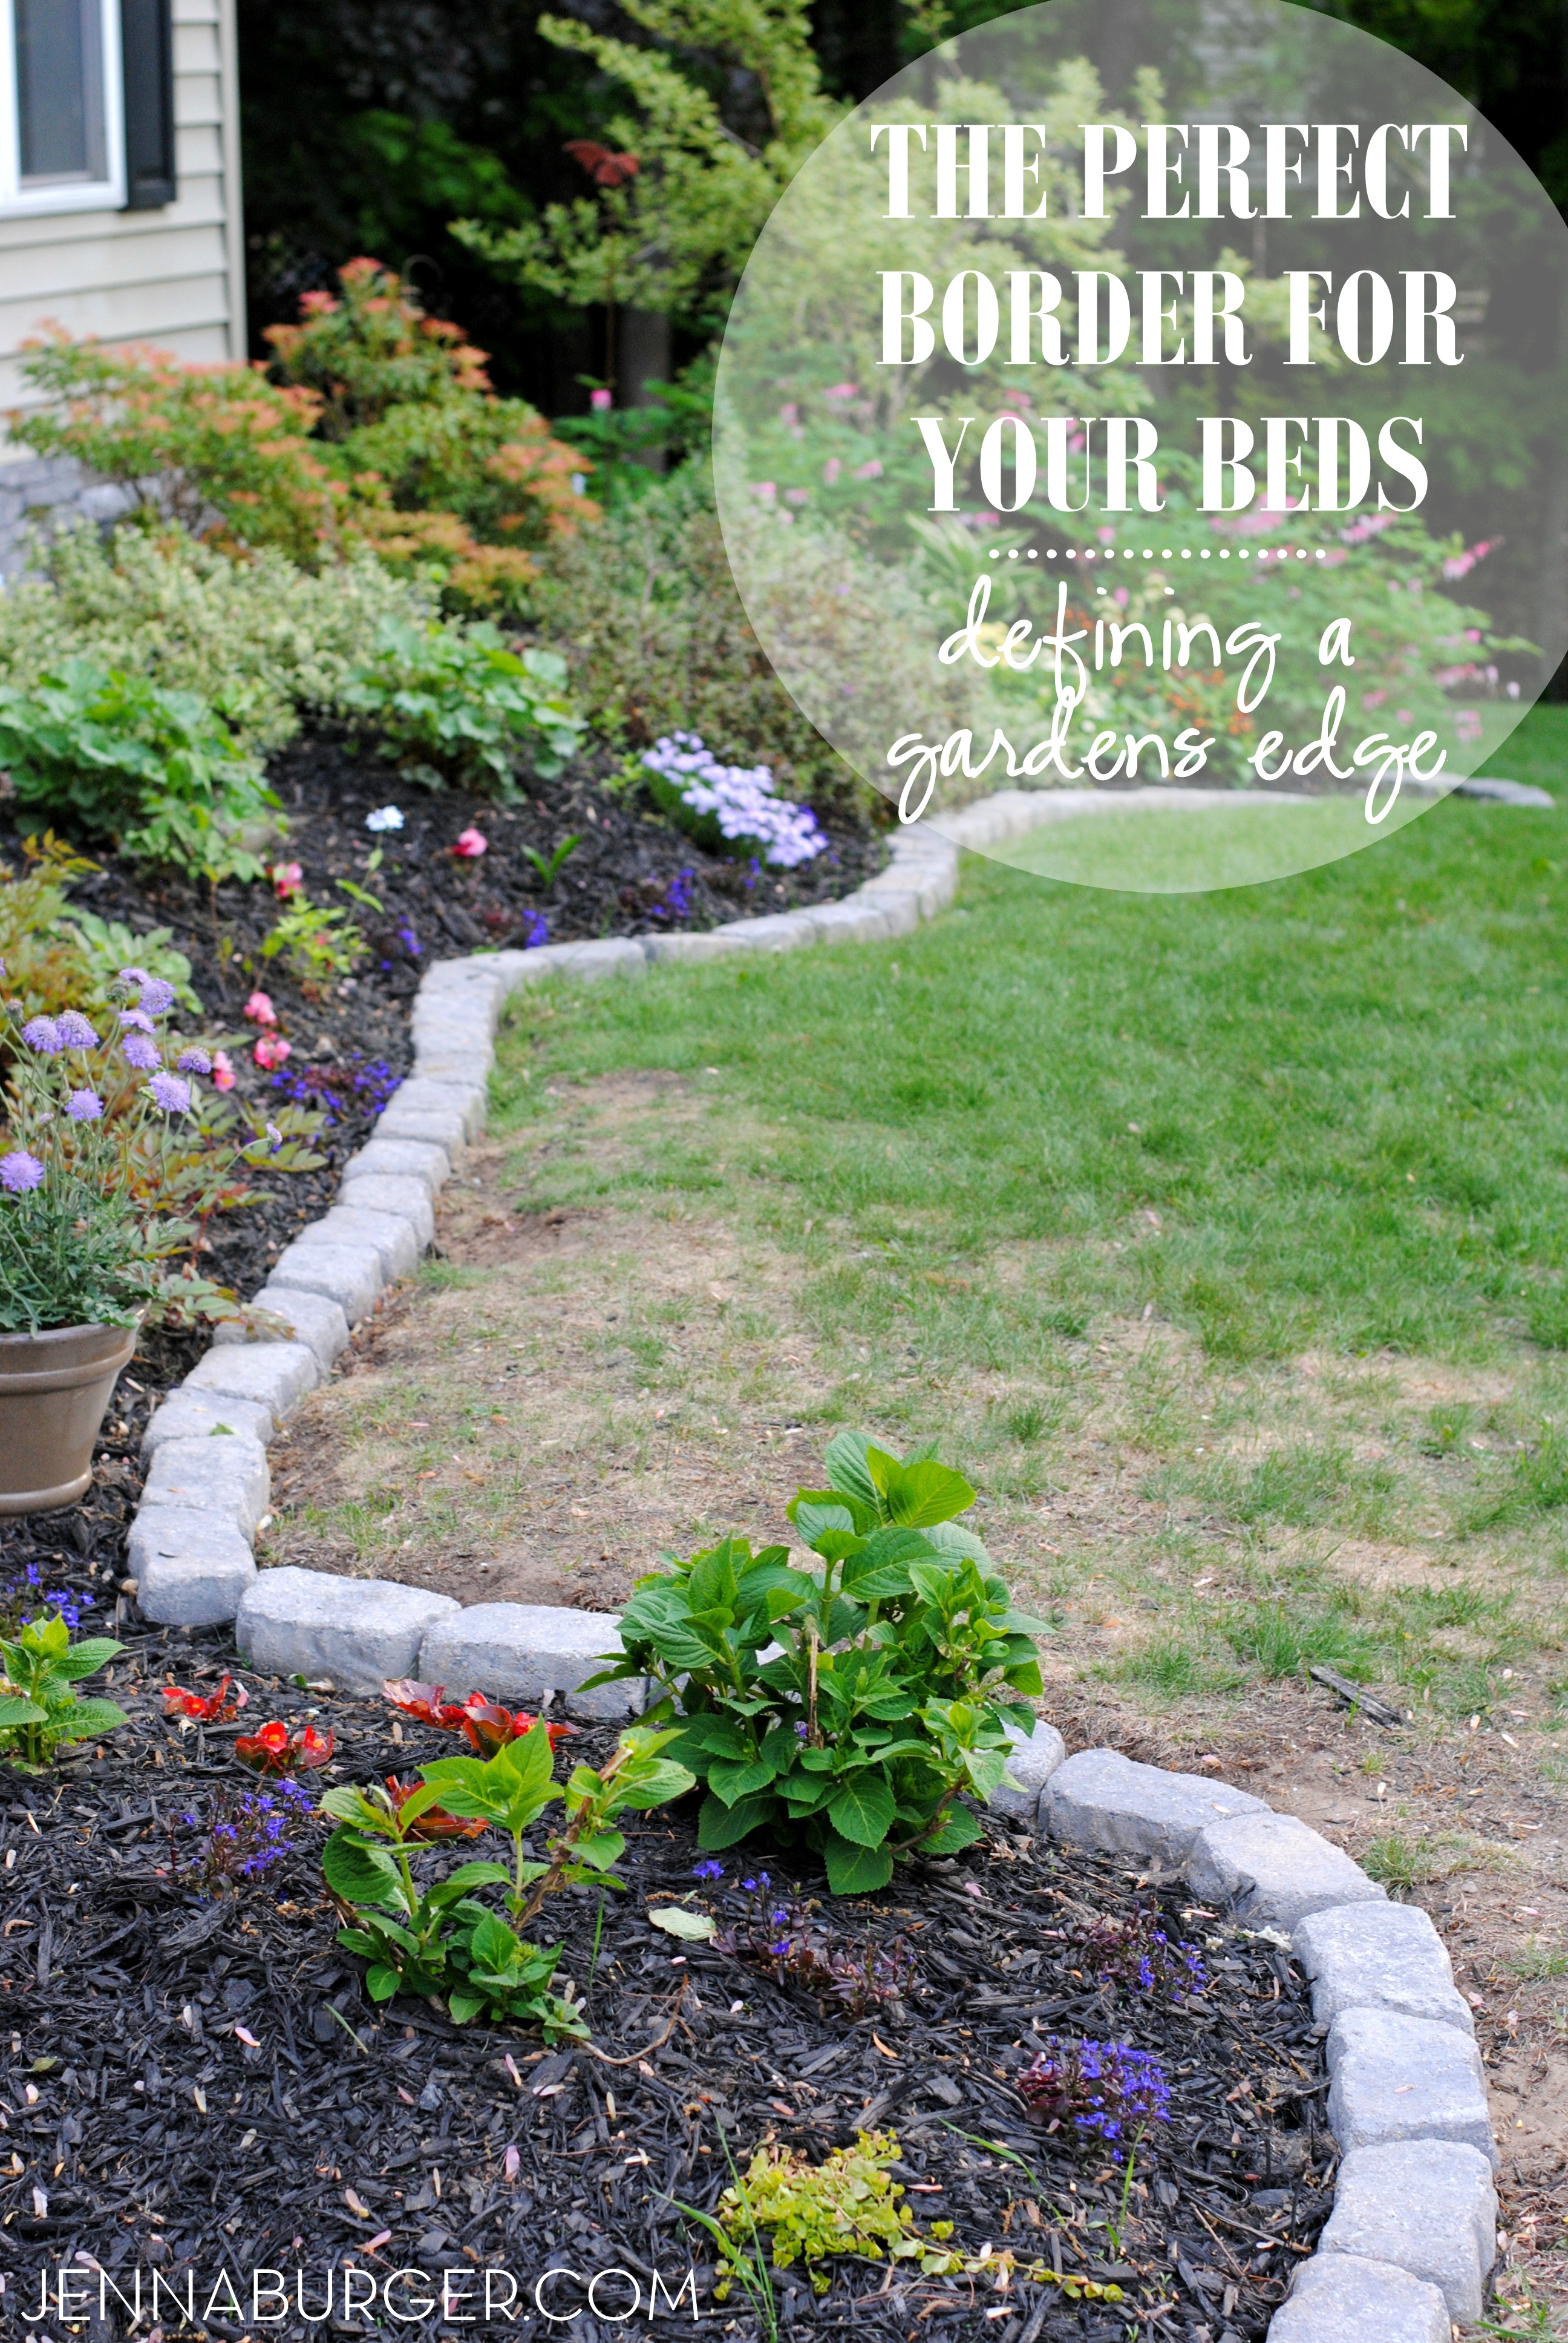
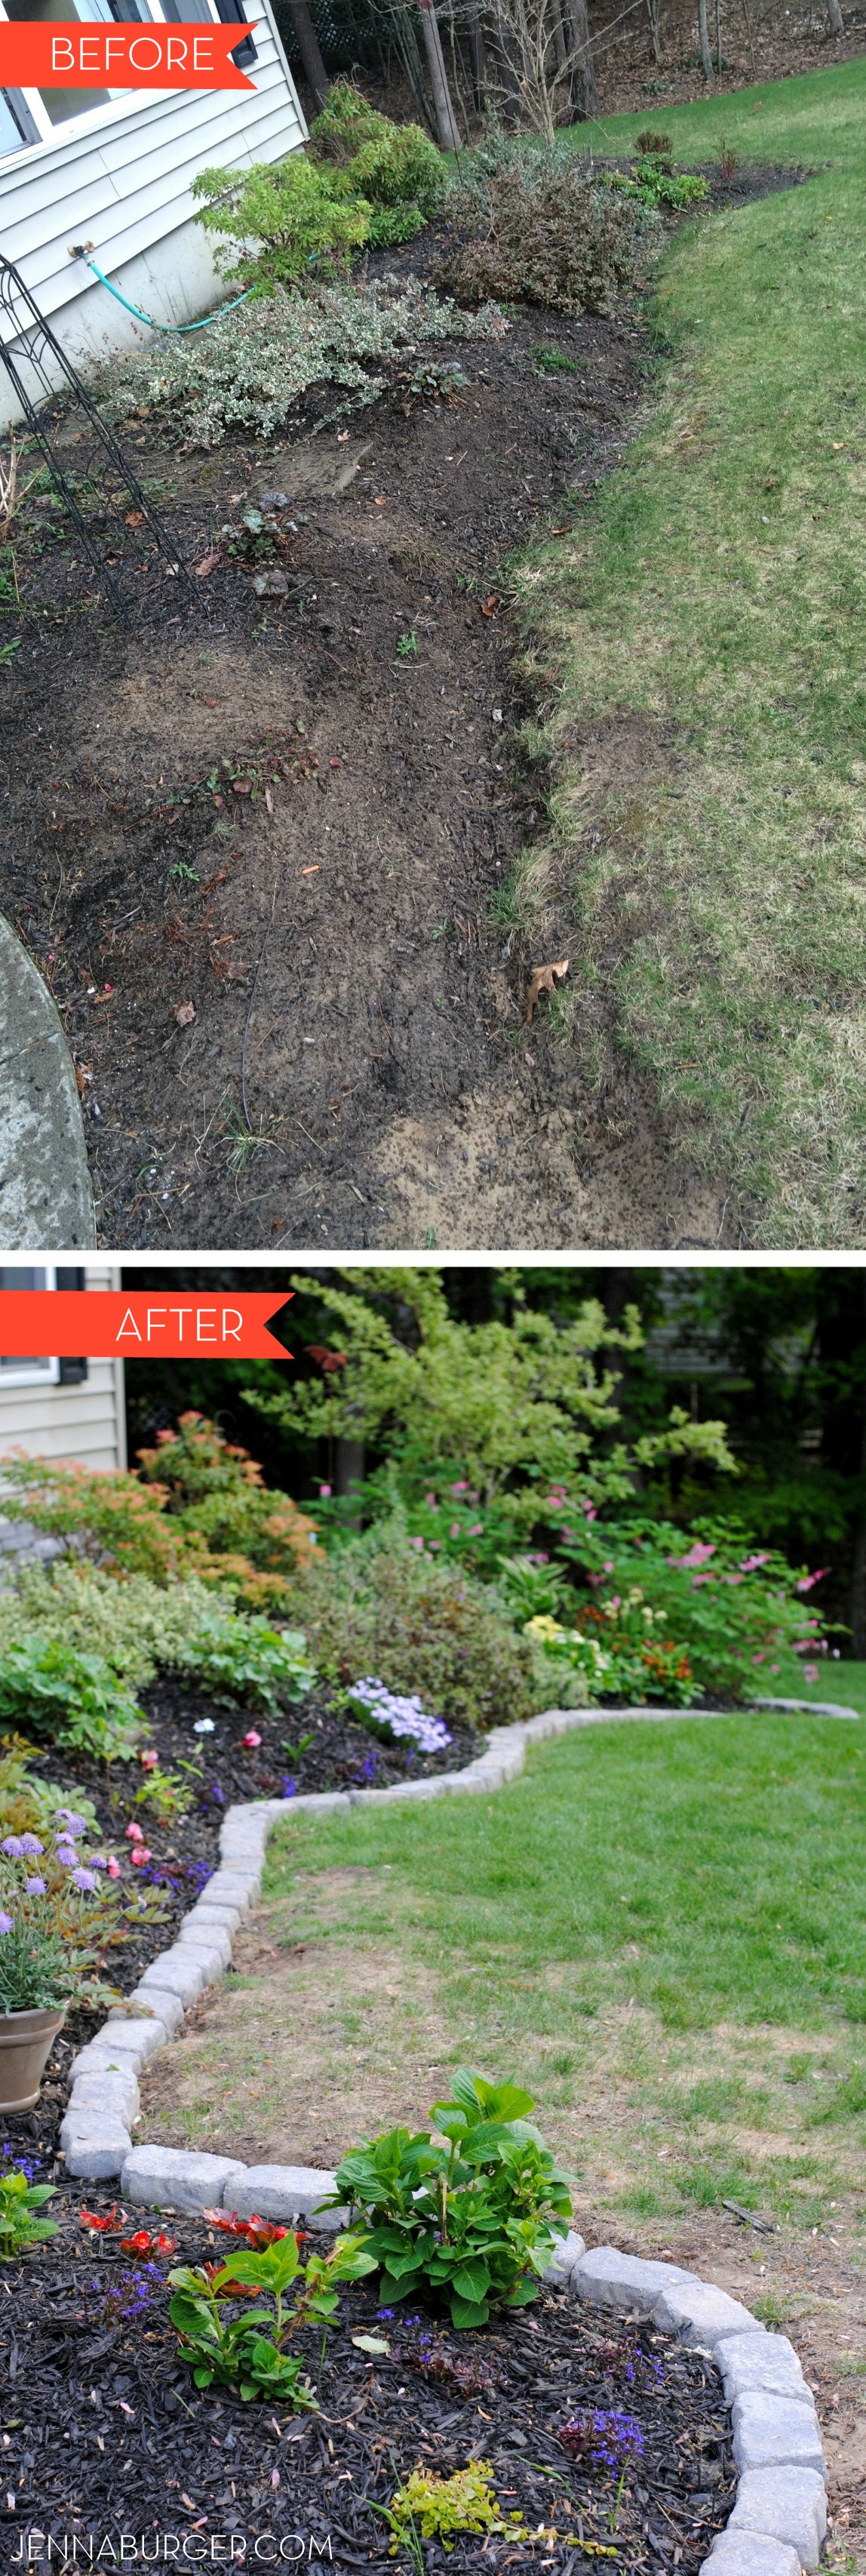
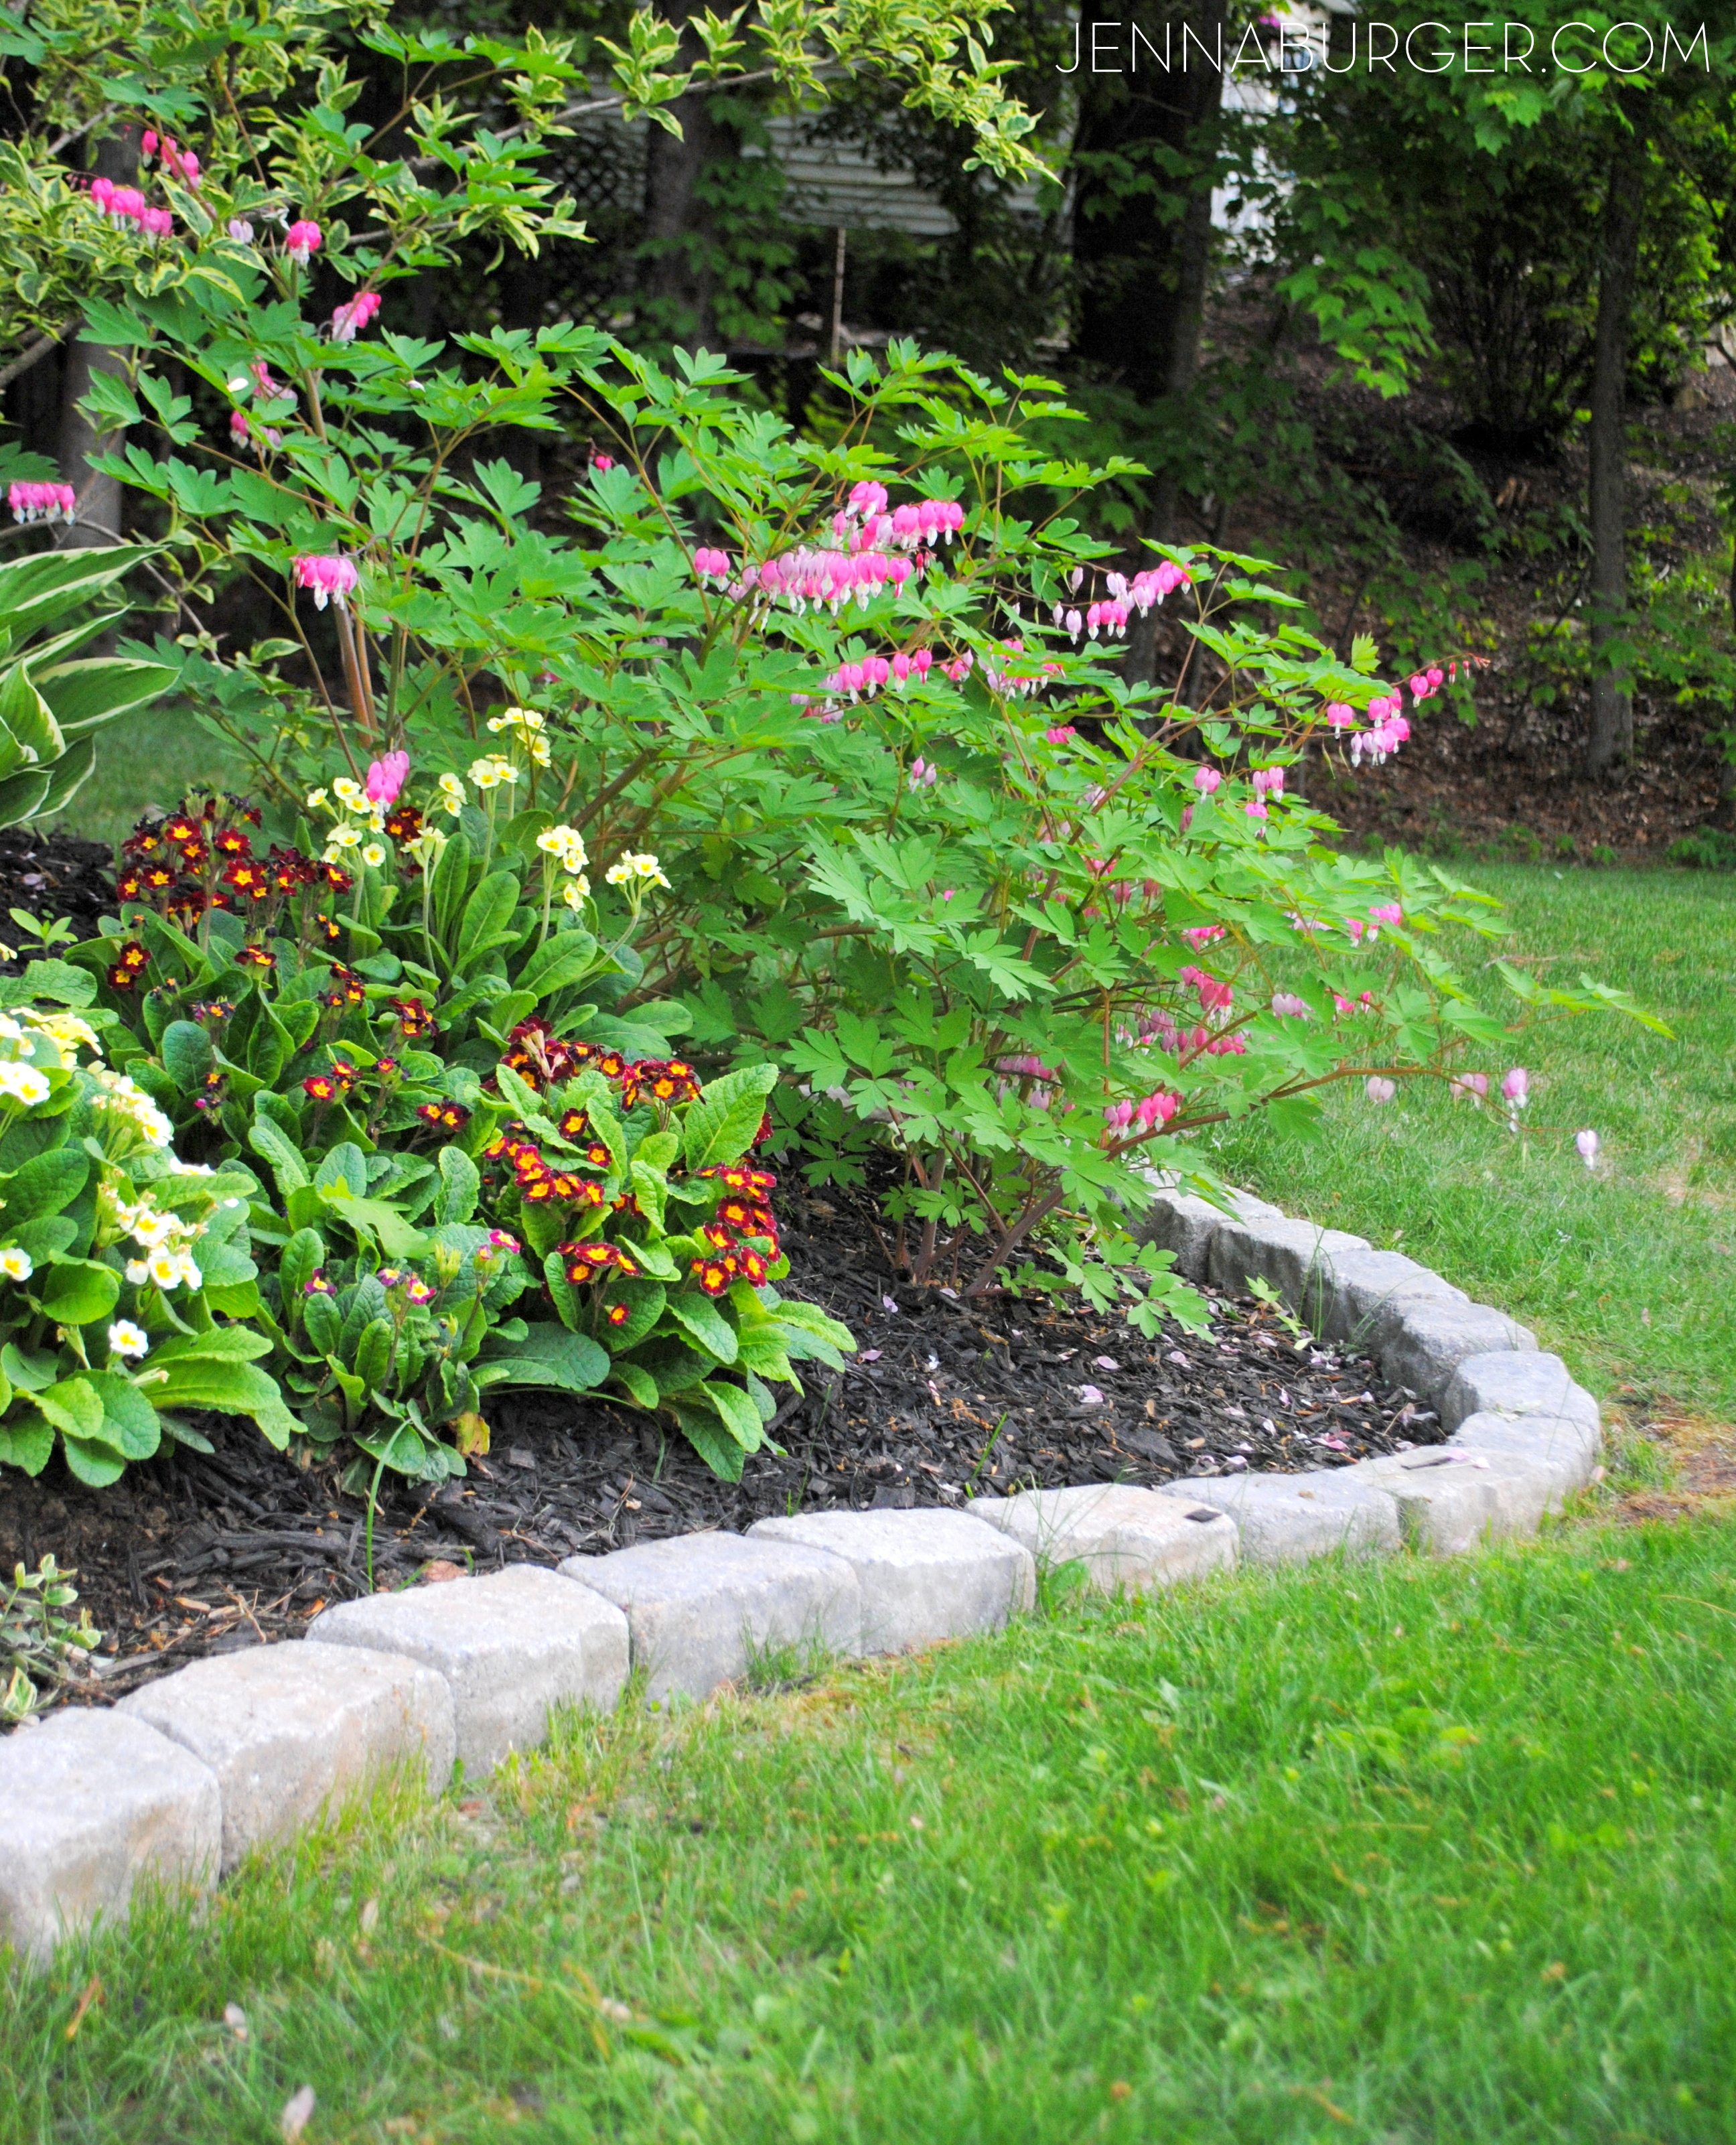
Granted the front beds have received a whole lotta TLC over the 5 years we’ve lived here, but I still felt like there needed to be more definition between the grass and the gardens. After cleaning out the beds and before laying the mulch, I installed a stone garden edge that not only defines the line between the grass & garden, but gives character and texture…
This is the garden bed that is against the front of our home and it looks much different than when we moved in a few years ago. It’s had quite the transformation…
Without giving too much away (the full ‘tour’ of this years Spring porch coming later this week), this is how the front of the house looks now…
One of the many reasons I love having a blog is documenting the evolution of our home. It’s wonderful to look back and see how much we’ve done!
So back to…
CREATING A GARDEN EDGE USING STONE
I found these edging stones at Lowe’s for $1.28 each.
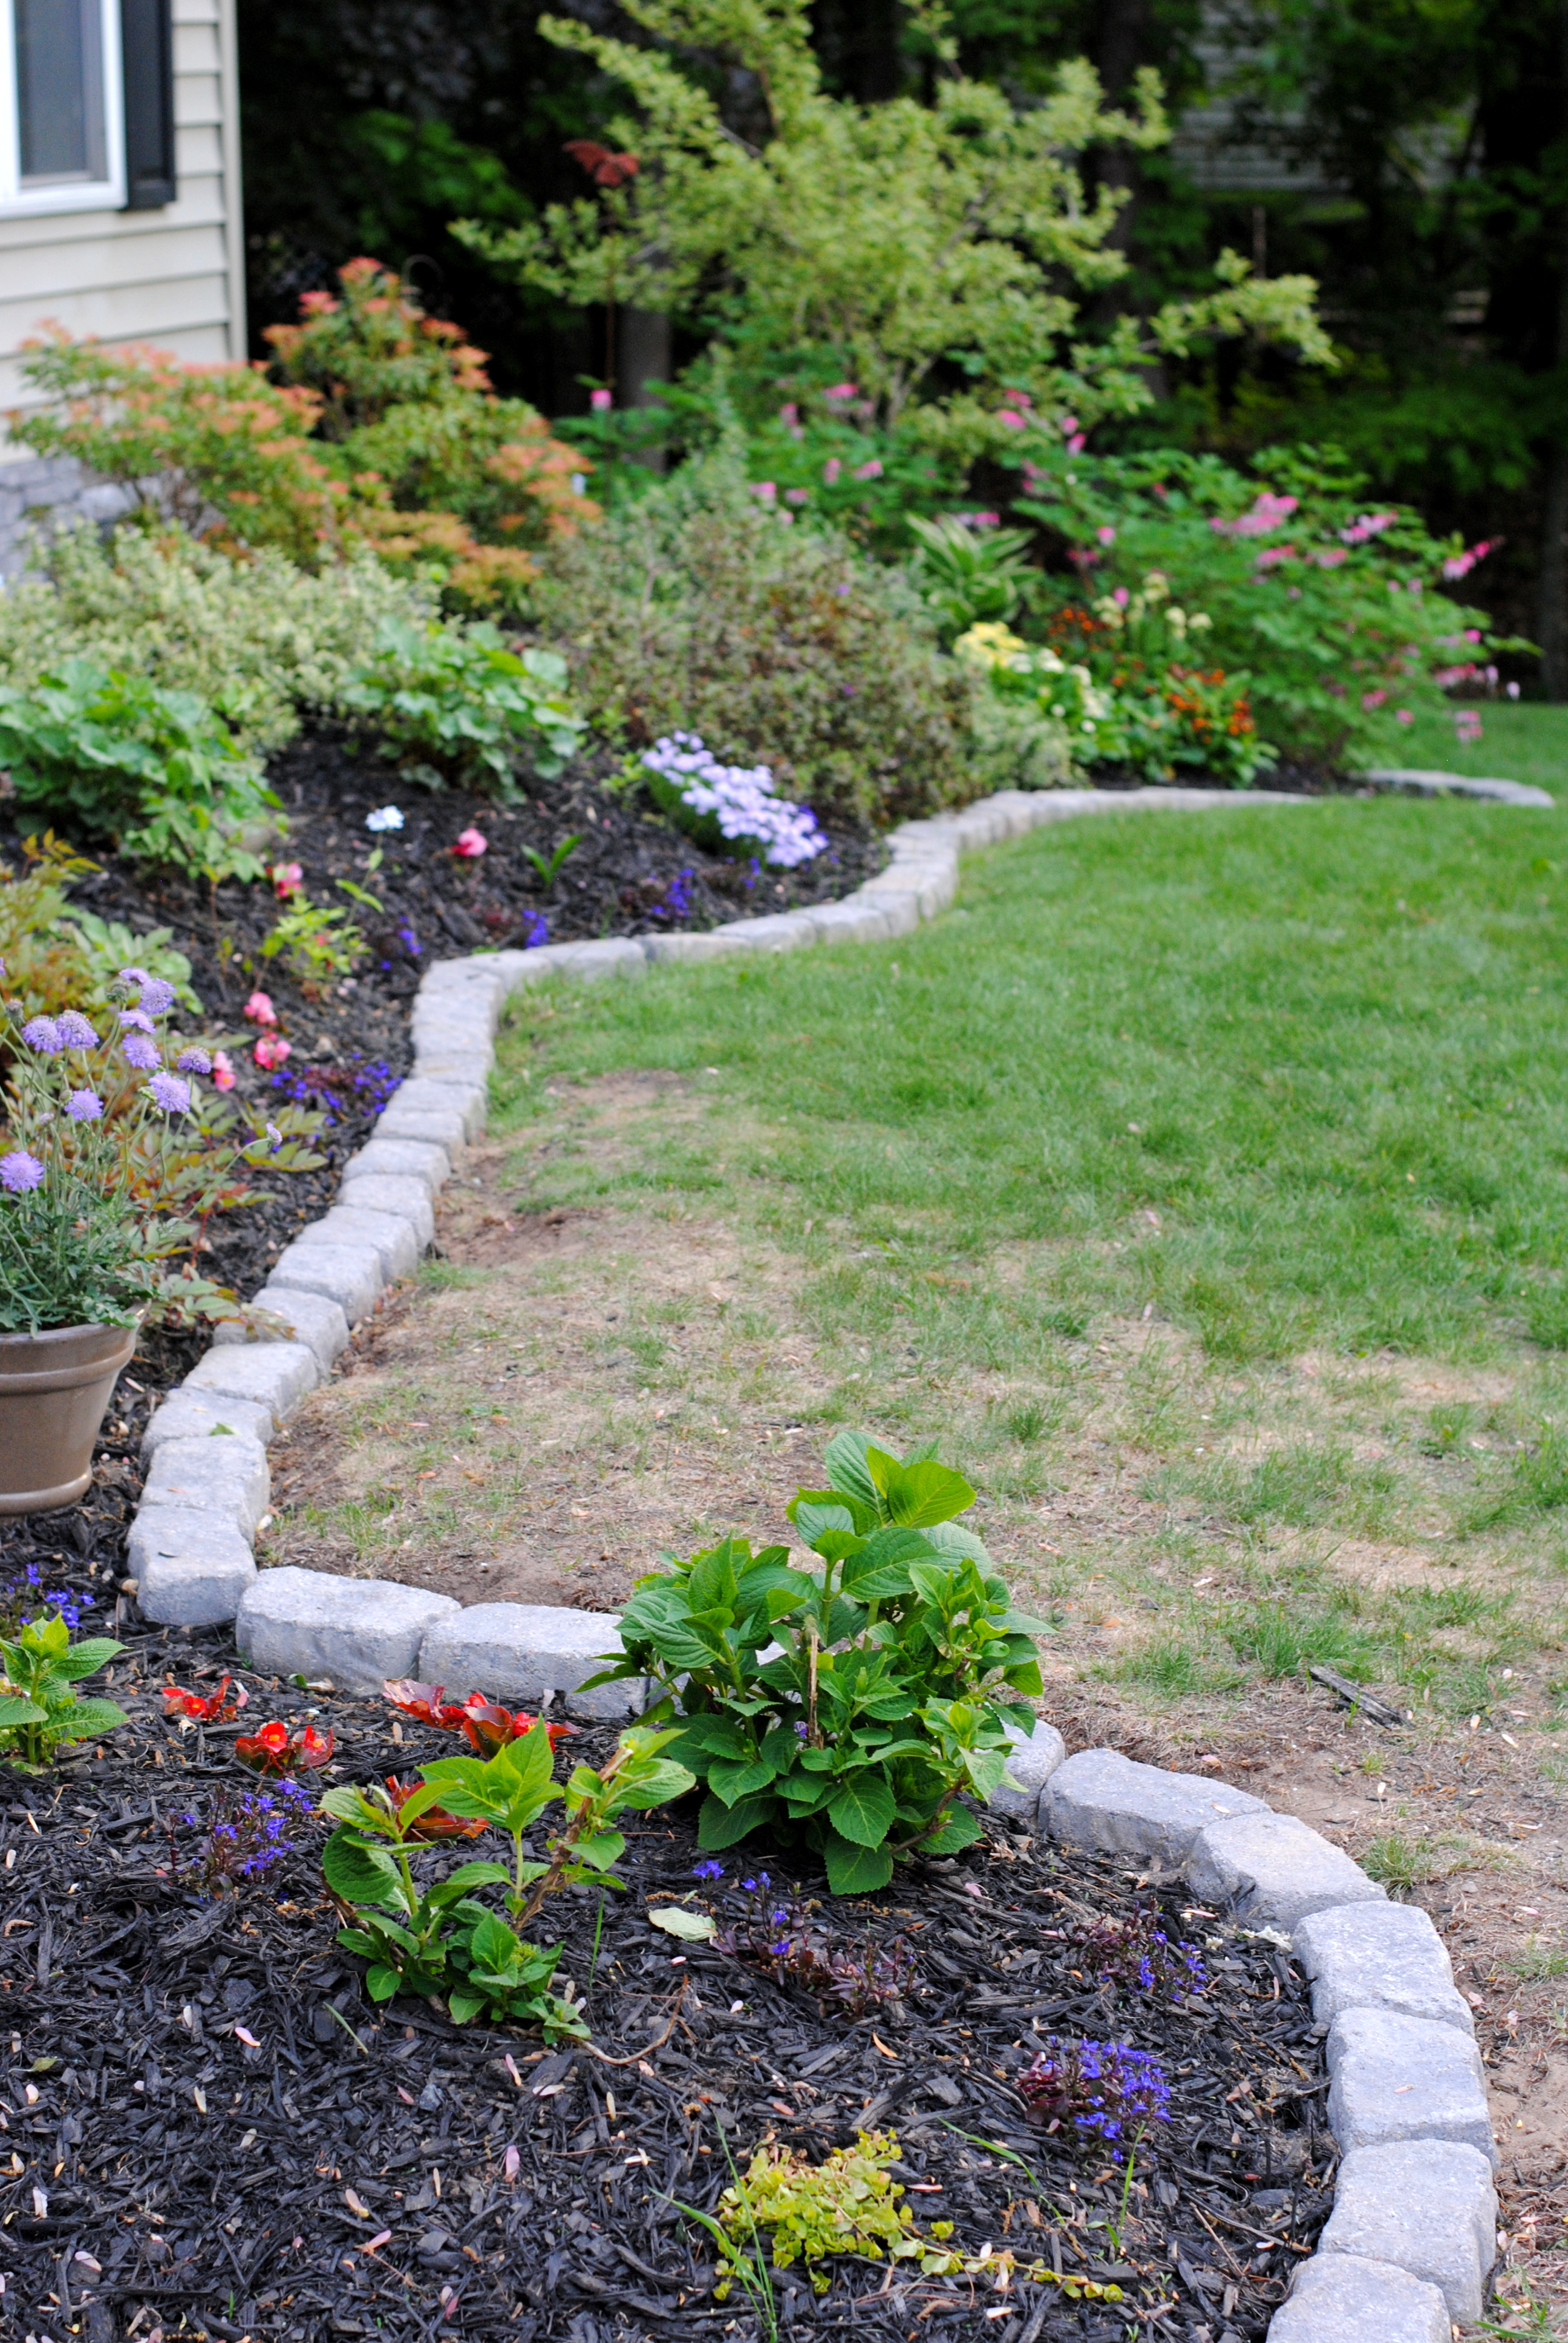
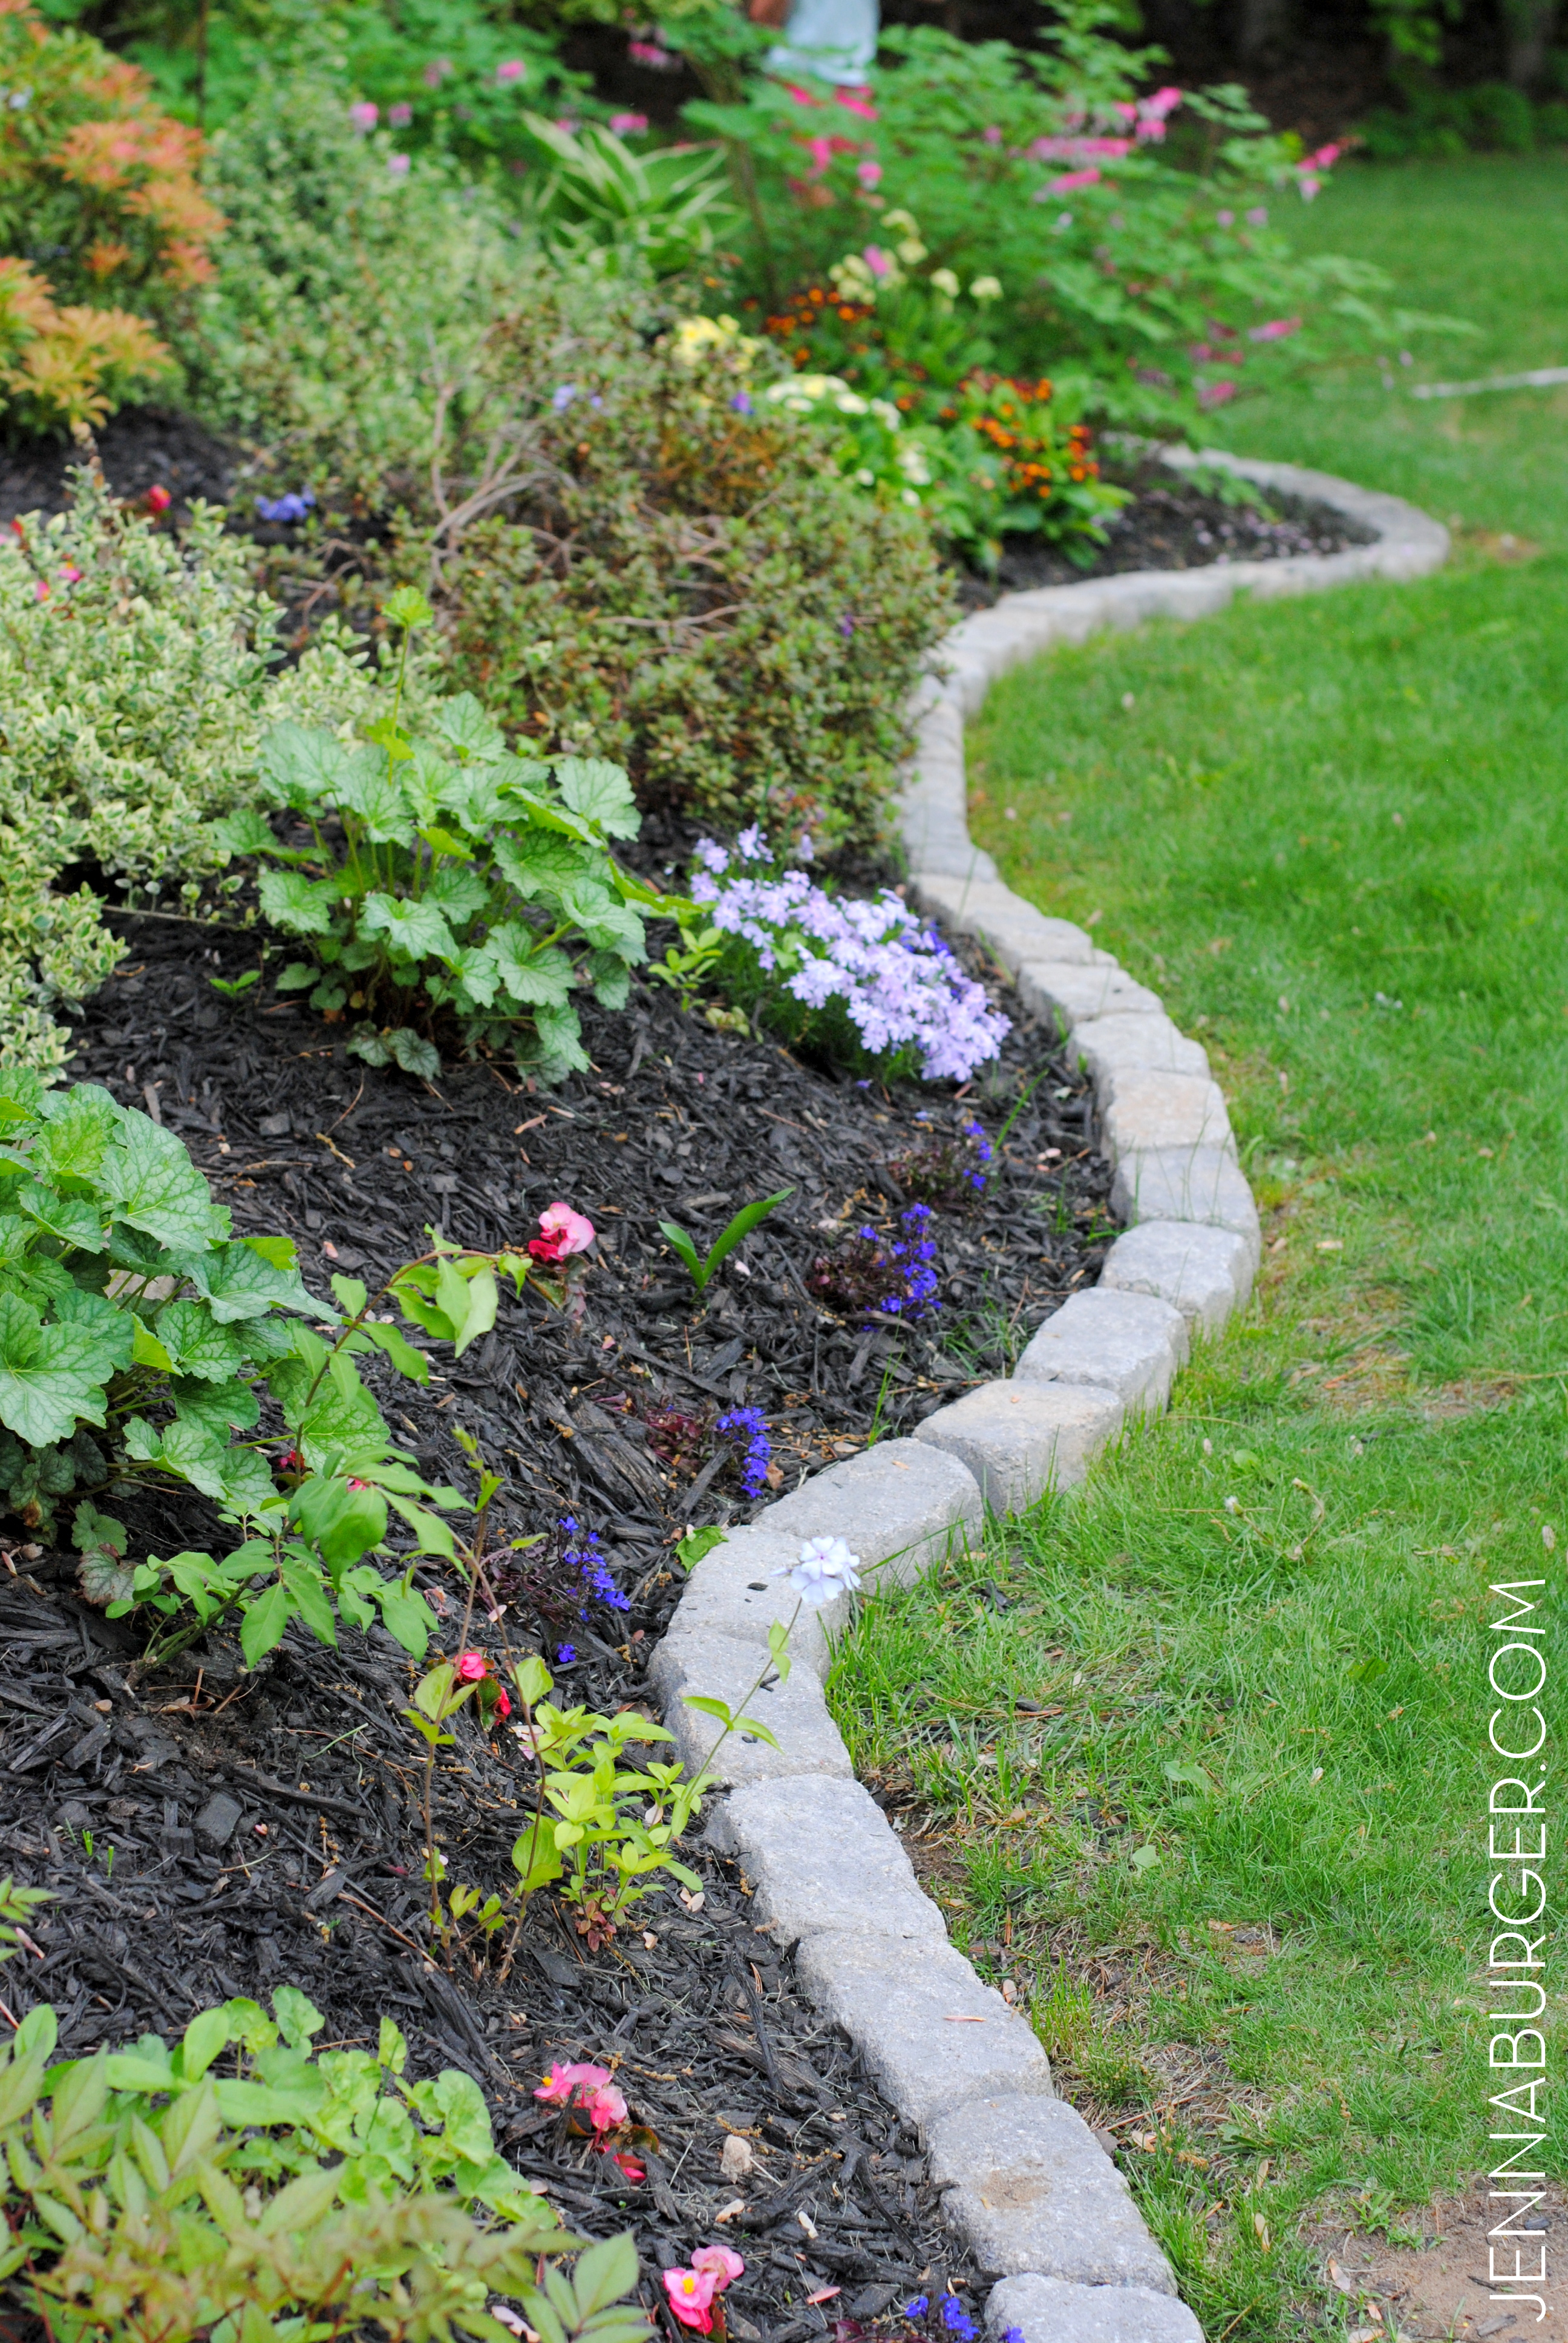
These stones are a trapezoid shape – about 7″ long on one side, about 5″ long on the other side. Because of the stones shape, they can be layed in a straight line (by changing the direction with each one) OR on a curve (tight curve or gradual curve) to border a garden. One row high is just enough (that’s what I did) or these inexpensive stones can be stacked (staggering the joint) to create a taller garden border or retaining wall. They can also be used to create a firepit.
The best part about these stones aside from the price is that there is truly no installation! You simply set it & forget it (I sound like an infomercial, but it’s really that easy).
The garden beds bordering the front of the house & in the yard had a natural trench at the edge, so I followed the line and layed the stones in place. A few tweaks needed to be in some spots to create a nicer curve but in all it took minutes to lay them all.
BEFORE & AFTER
Just a few weeks ago before the flowers started coming to life & before the mulch was added, I snapped the before picture. Now look how the new stones define the garden…
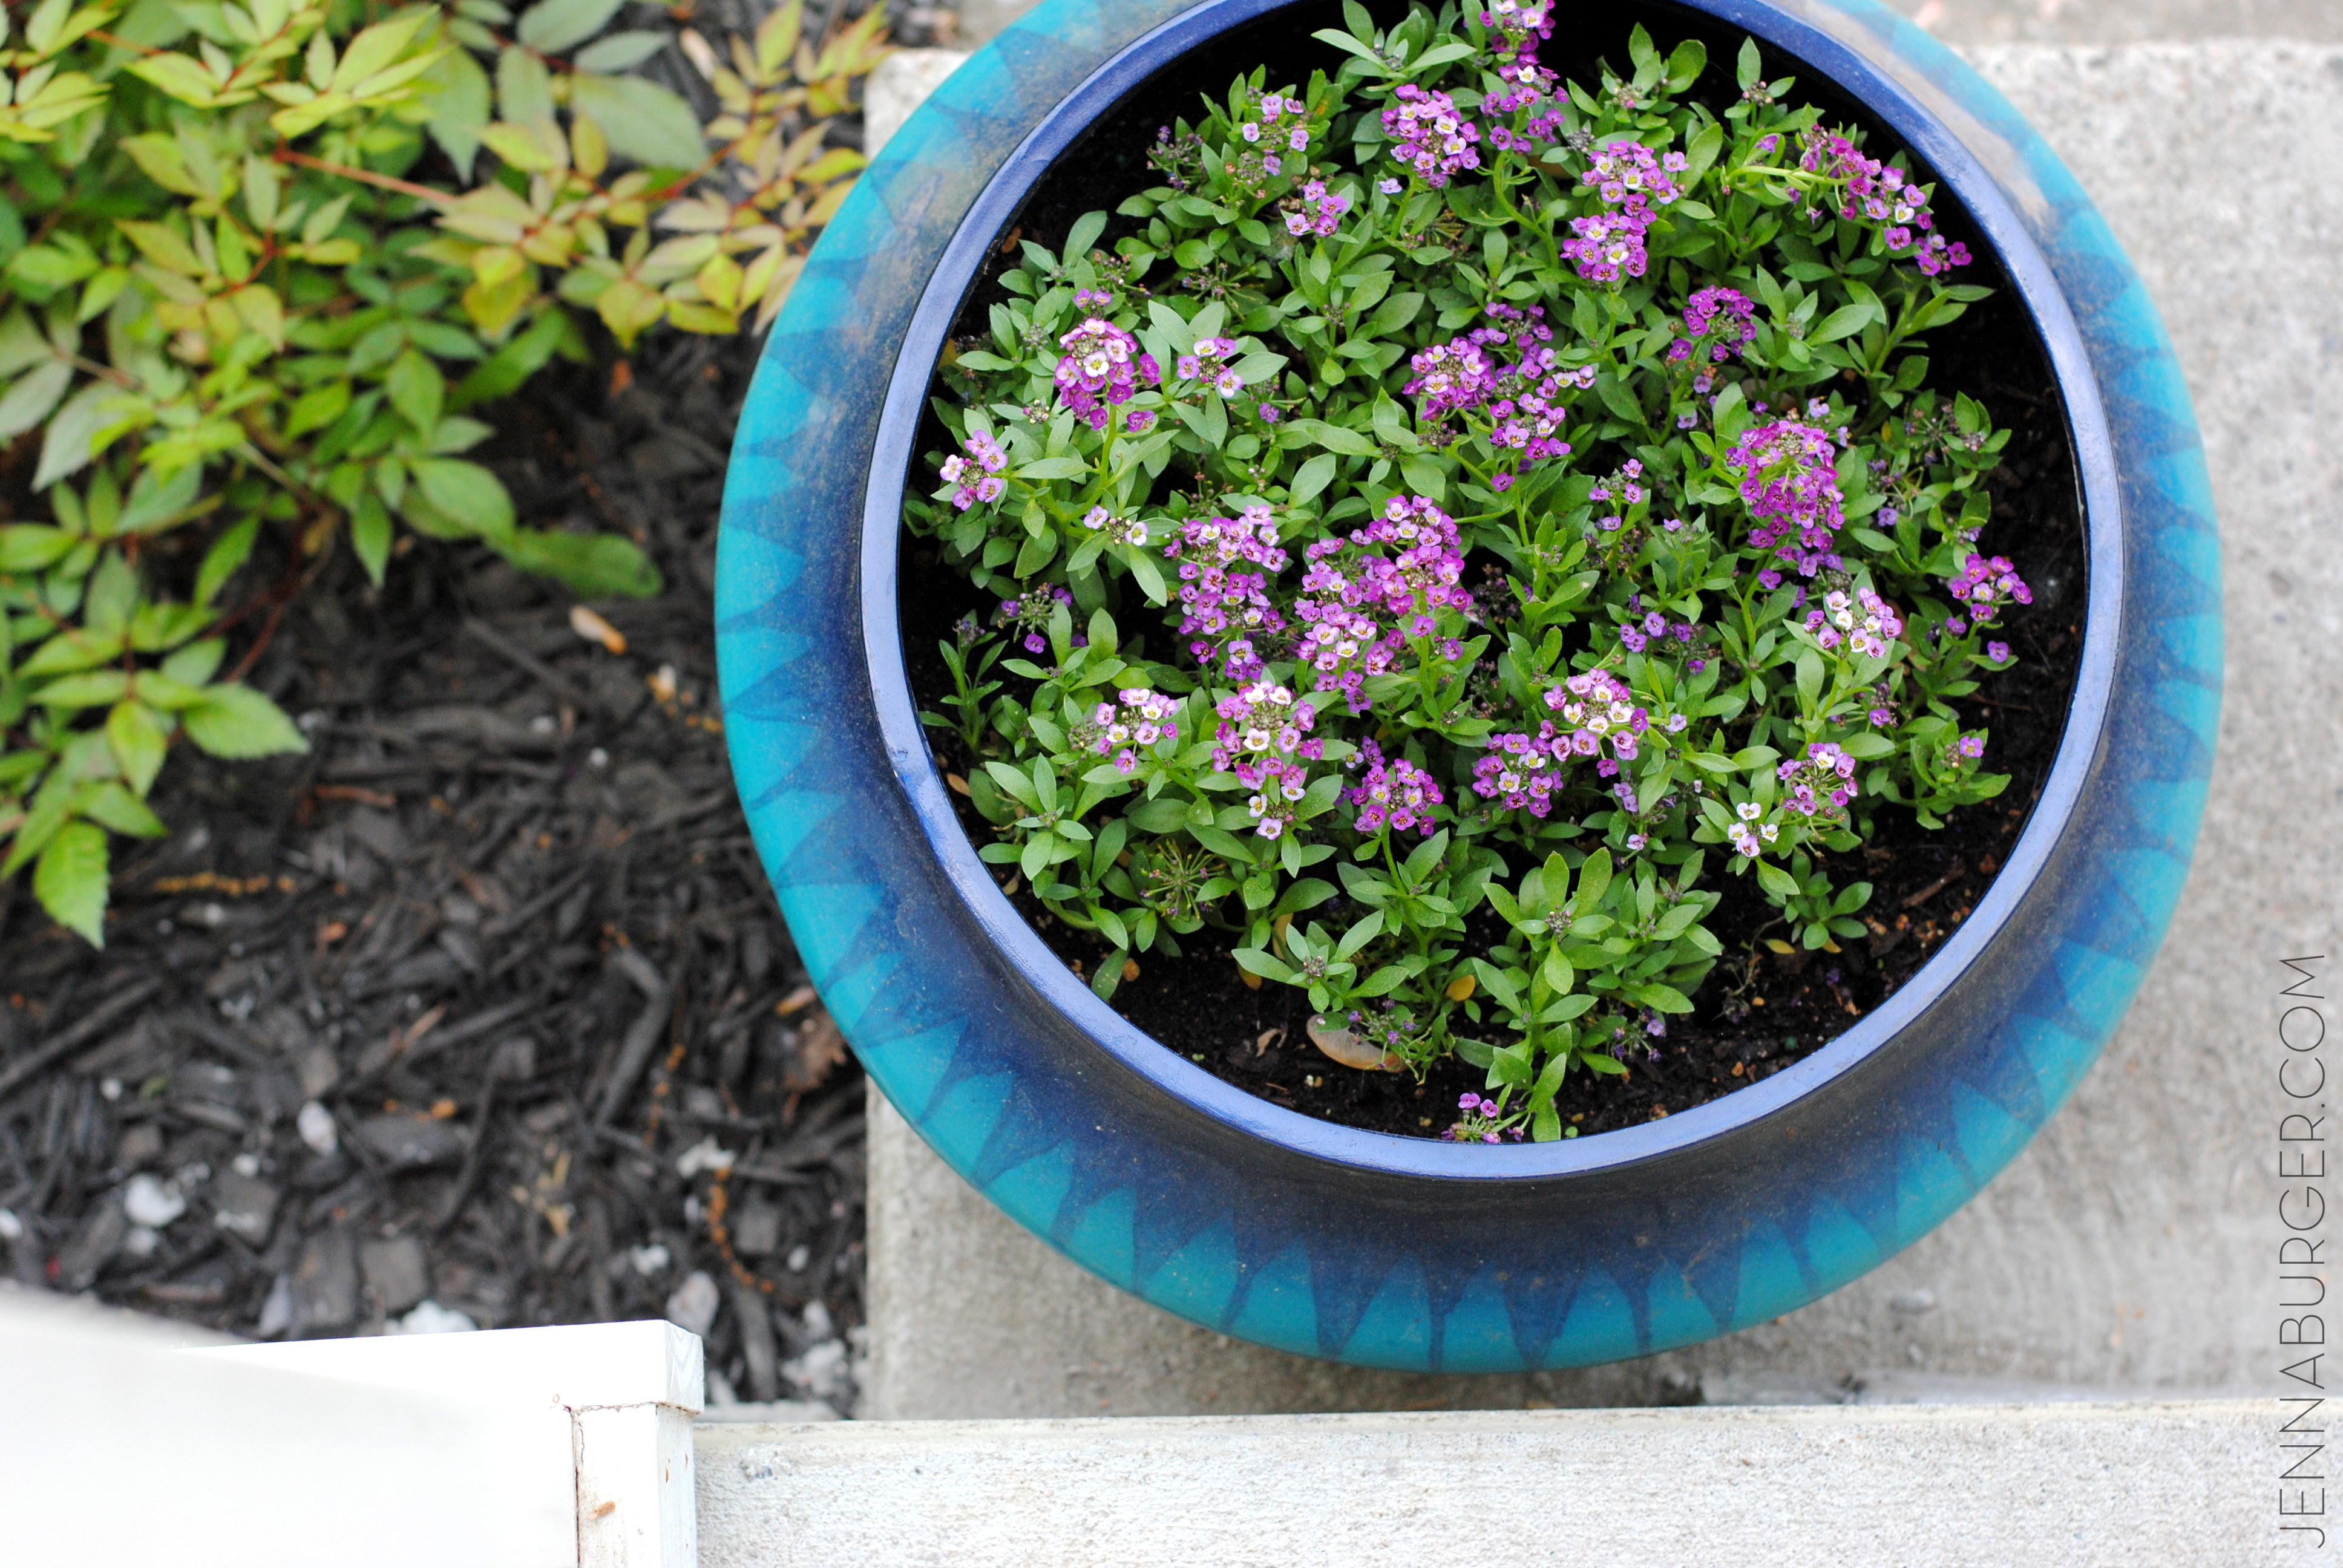
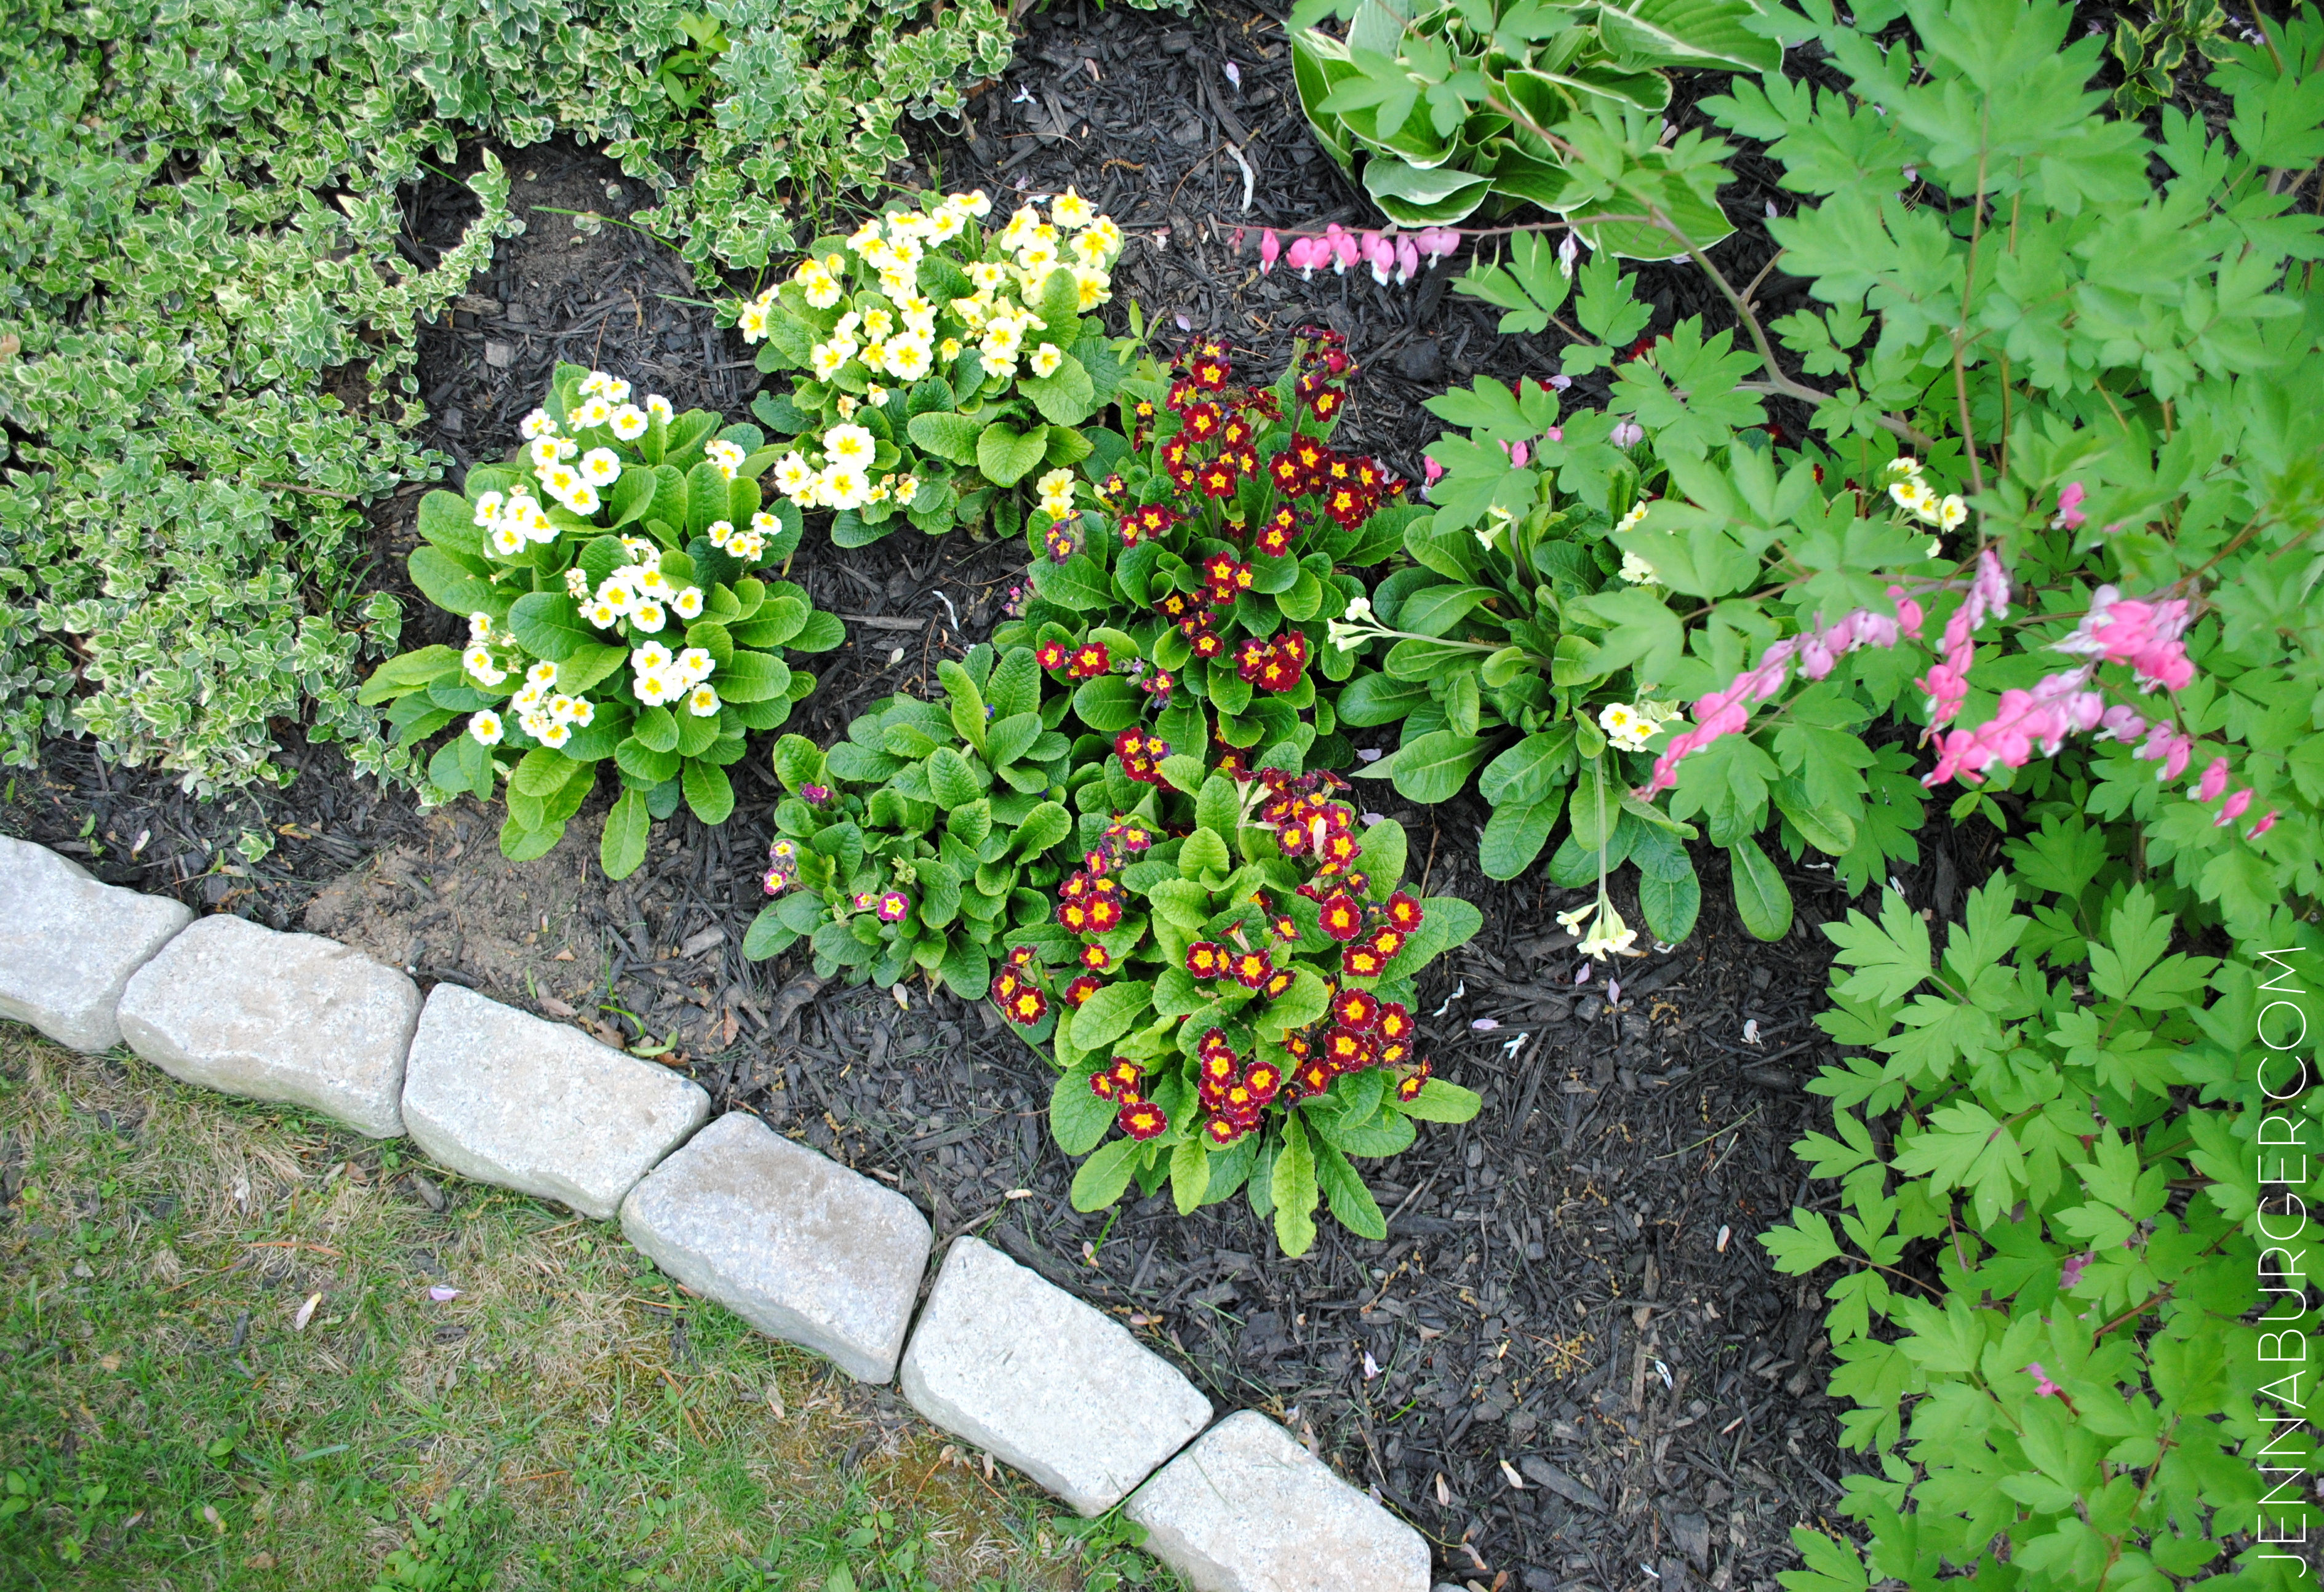
Once the stone edge was set, I planted a few annuals amongst the growing perennials and filled in the garden with mulch.
And it was complete…
It’s far from an award-winning garden, but it’s ours that we created.
Each day the flowers show more of their beauty.
I’ll admit, because I am a bit Type A & love instant gratification, gardening isn’t top on my list of favorite things to do. I often get frustrated & annoyed each Spring season not knowing what will bloom again. Thankfully looking back on old pictures, I am able to truly appreciate all the hard work we’ve put into creating a home we love. What an incredible lesson of patience, right?!
This stone edge was truly a simple + high impact DIY project to jazz up the front of our home. I am thrilled that it was inexpensive + easy to do – how much better does it get?!
The front facade of our home also got another big upgrade. More on that coming soon… In the meantime, if you have garden beds that merge into the grass, adding a stone edge will surely create the definition needed to add character & texture to your landscaping beds!
DISCLOSURE: I am part of the Lowe’s Creative Team and was provided with a Lowe’s gift card to purchase items for my project. I was also compensated for my time to use the products. No one told me what to create, what to buy, how to use the product, or what to write. All opinions are 100% mine!