
Tag: jenna burger saratoga springs new york

Creating an Outdoor Living Space

I don’t know about you, but around our homestead, it takes a solid 3 weeks to get the outdoors prepped + spruced to enjoy for the coming warmer months ahead.

As the final piles of snow melted only a little over a month ago, work began on Summerizing the exterior.  FINALLY after many trips to the garden center, the last flowers & plants were purchased yesterday, so our exterior living spaces are almost complete and I can’t wait to share them with you… coming soon.

In the meantime, I’ll inspire you with fresh ways + ideas to bring the indoors out with budget-friendly ideas for creating an outdoor living space

Bring the indoors OUT... Helpful budget-friendly ideas to create an outdoor oasis!

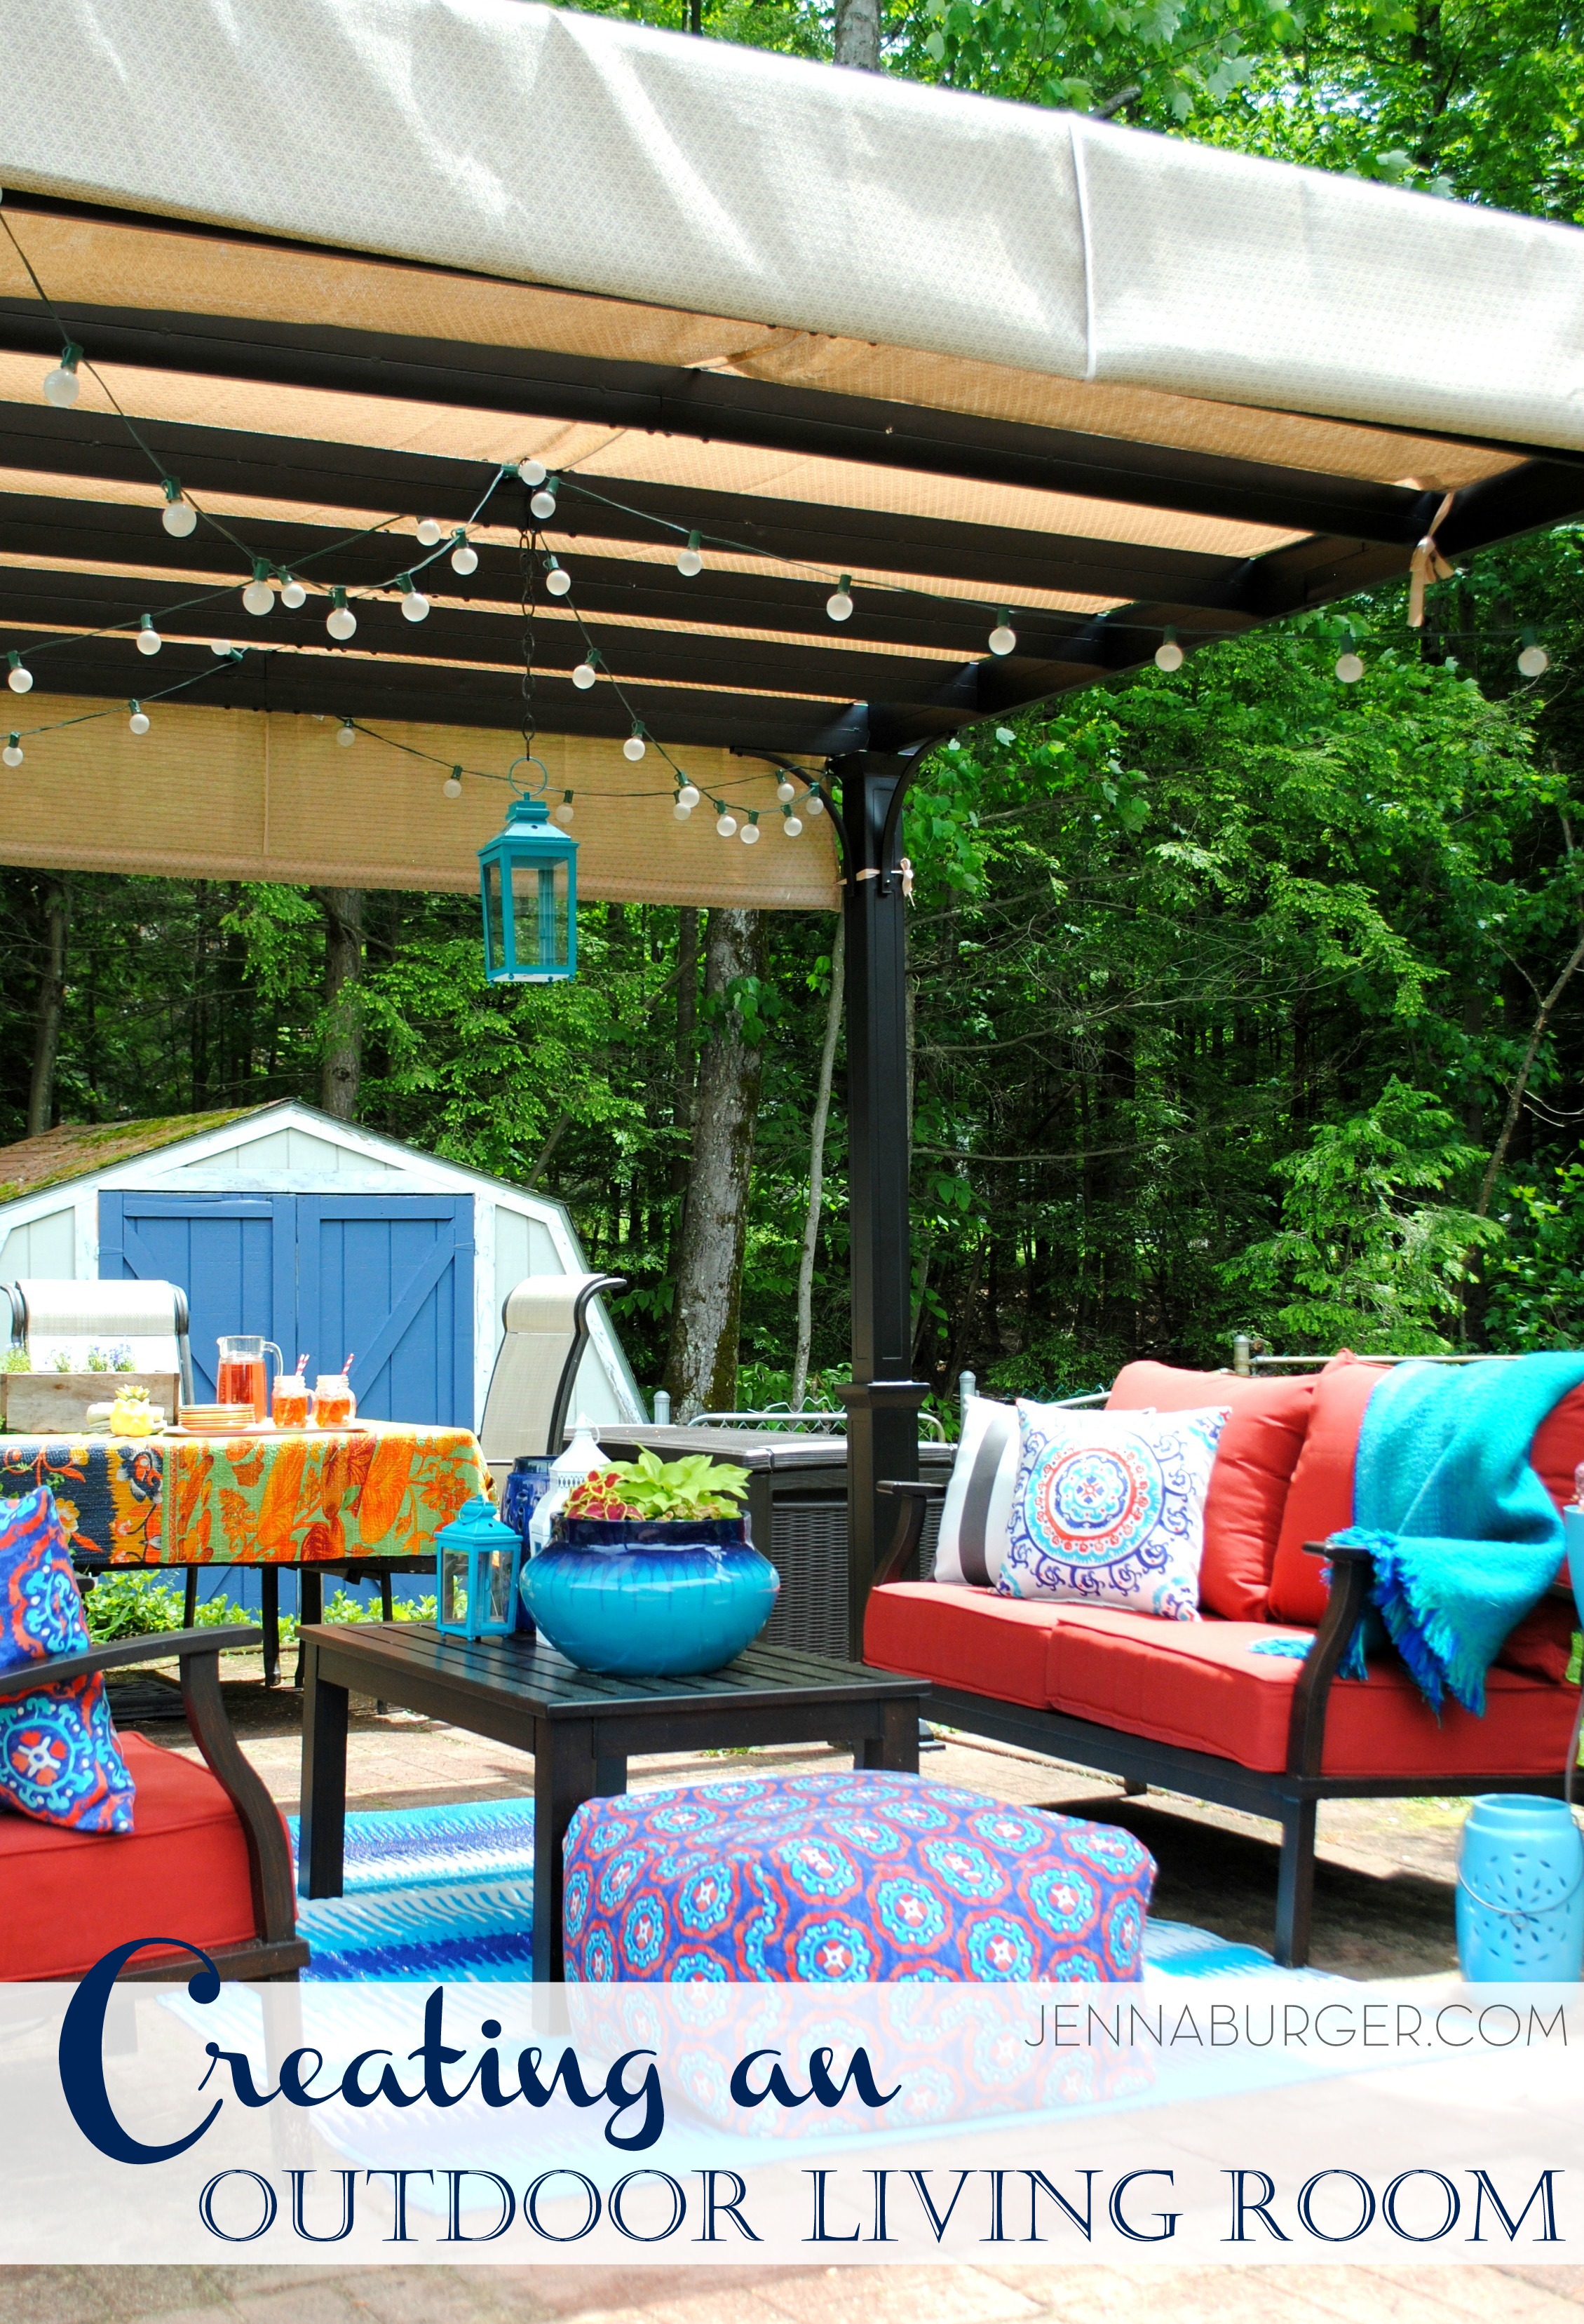
Whether a deck, porch, or patio there are ways to bring the indoors out to create a beautiful, serene, and inviting outdoor oasis. With comfortable seating, stylish layers, and lots of flowers and greenery, your outdoor space will become the most used “room” in, and outside, of the home for the Summer months.

BRING THE INDOORS OUT
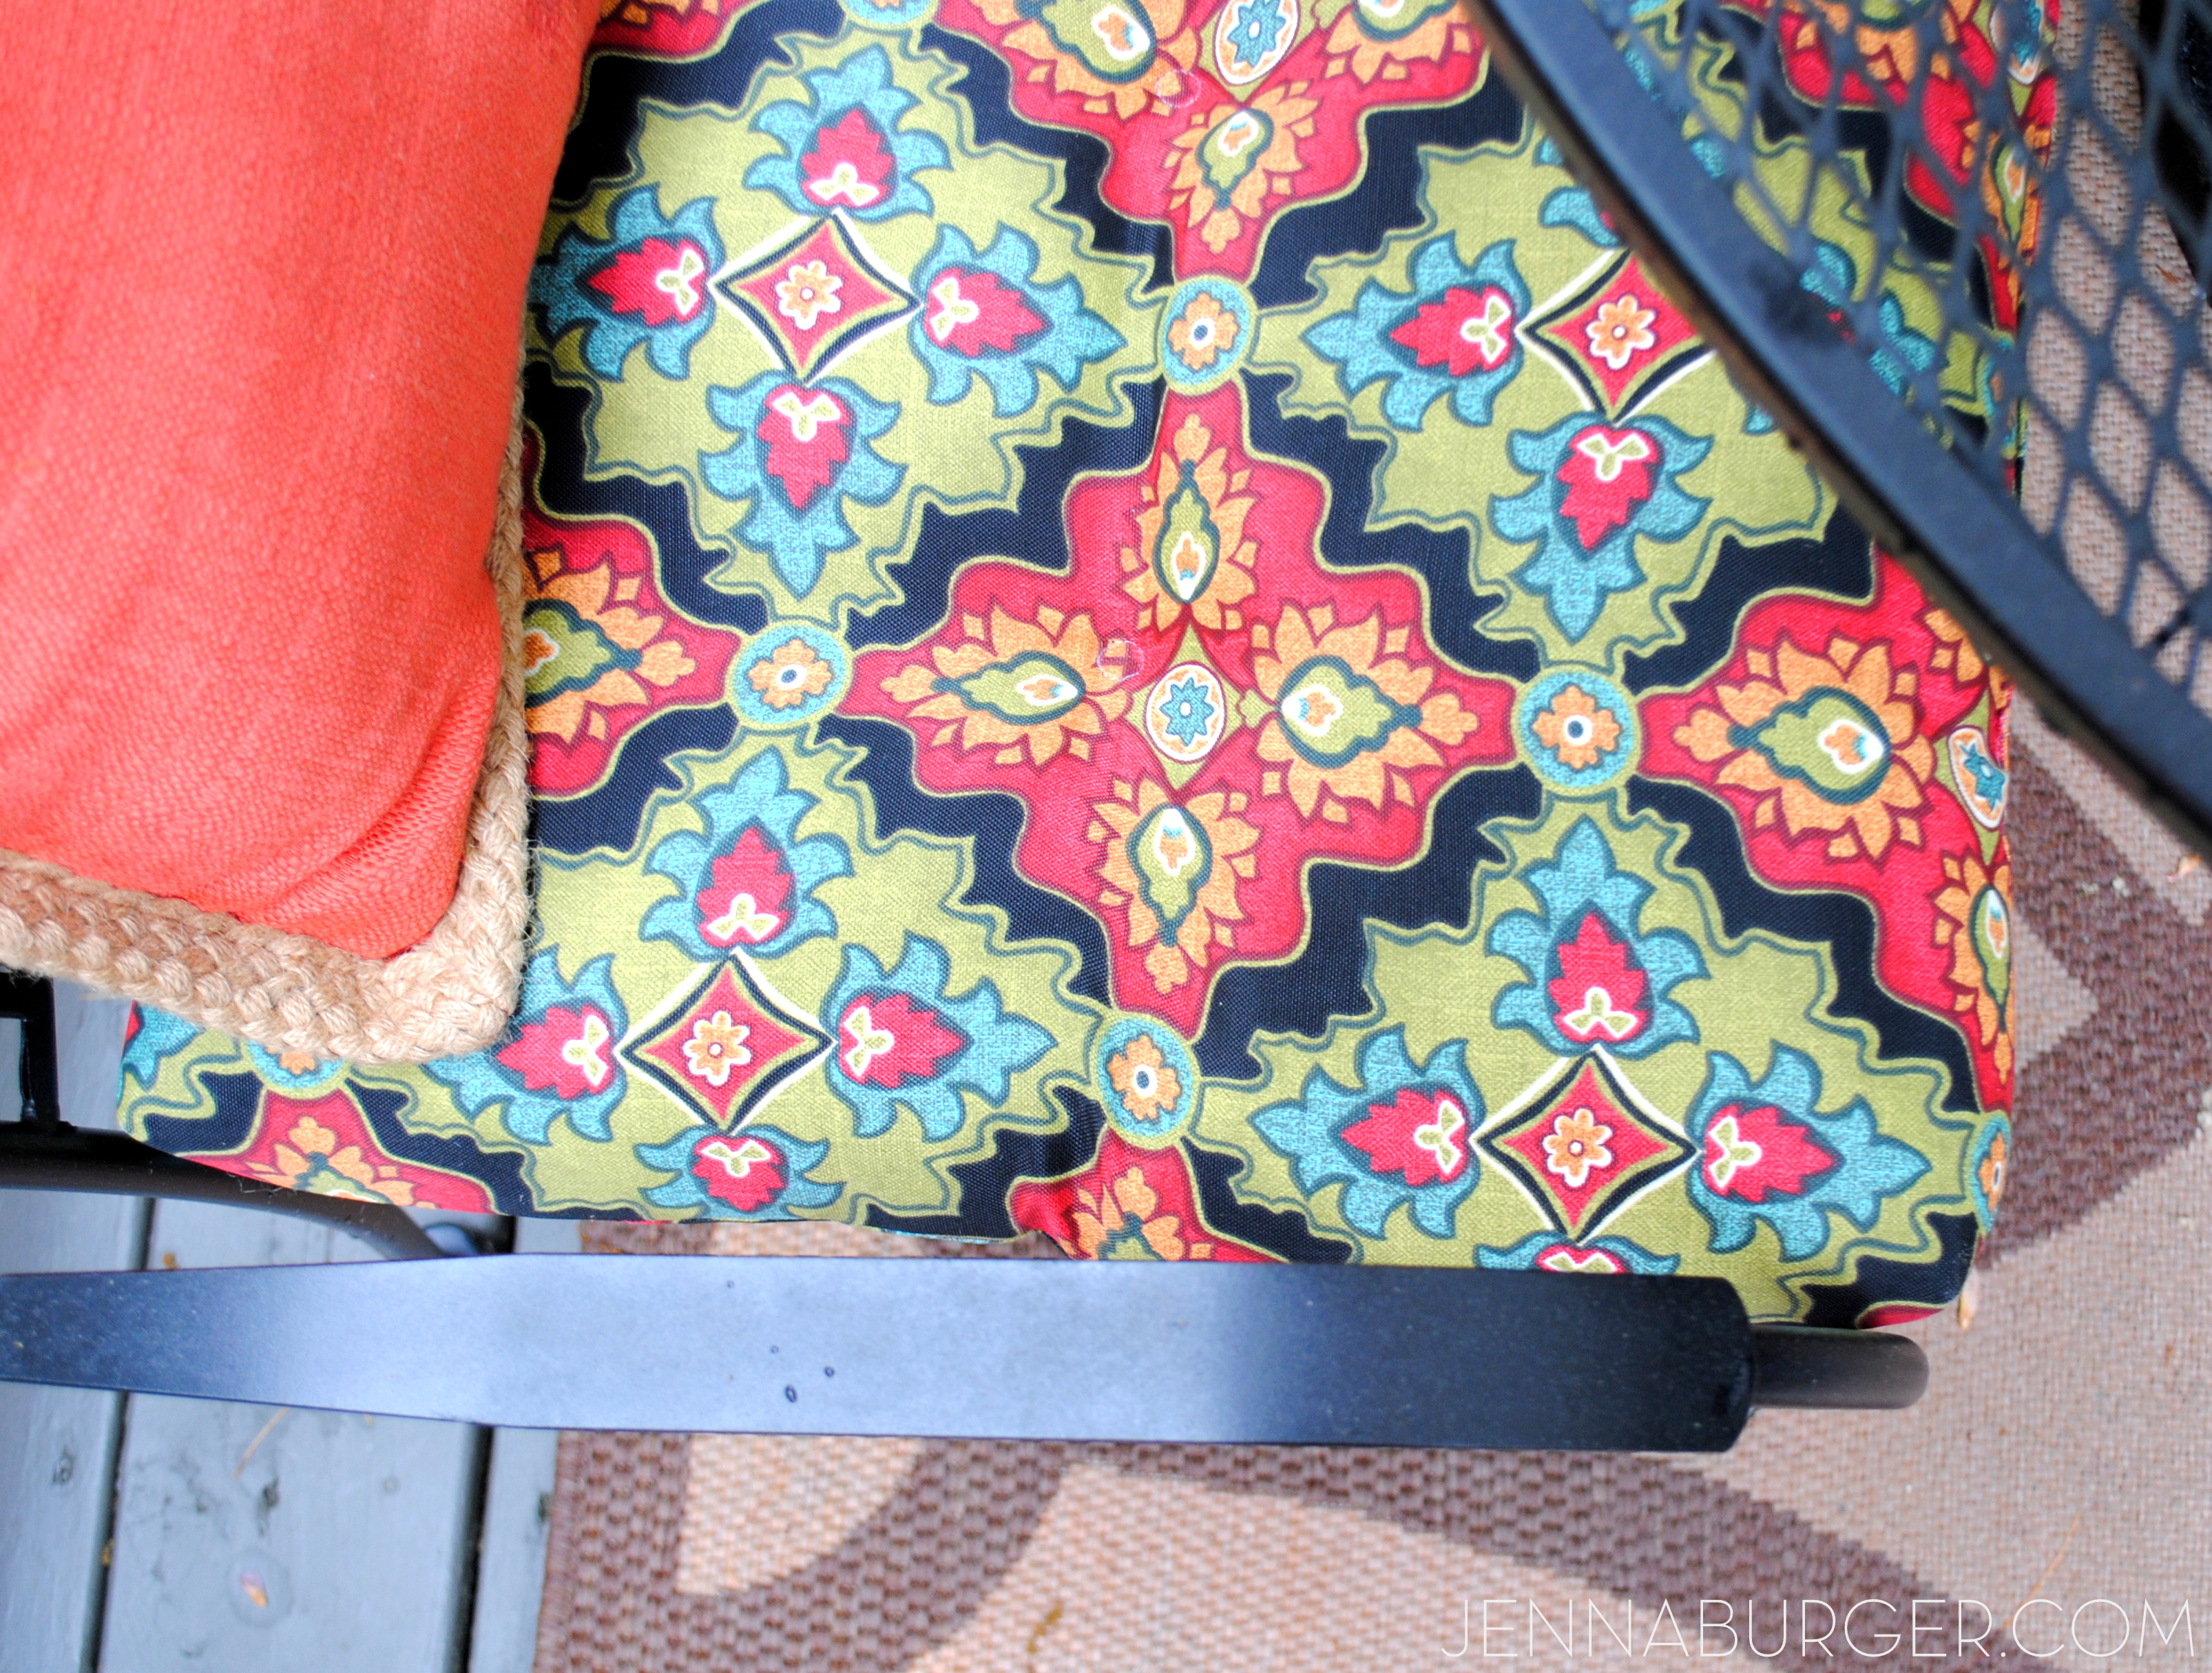
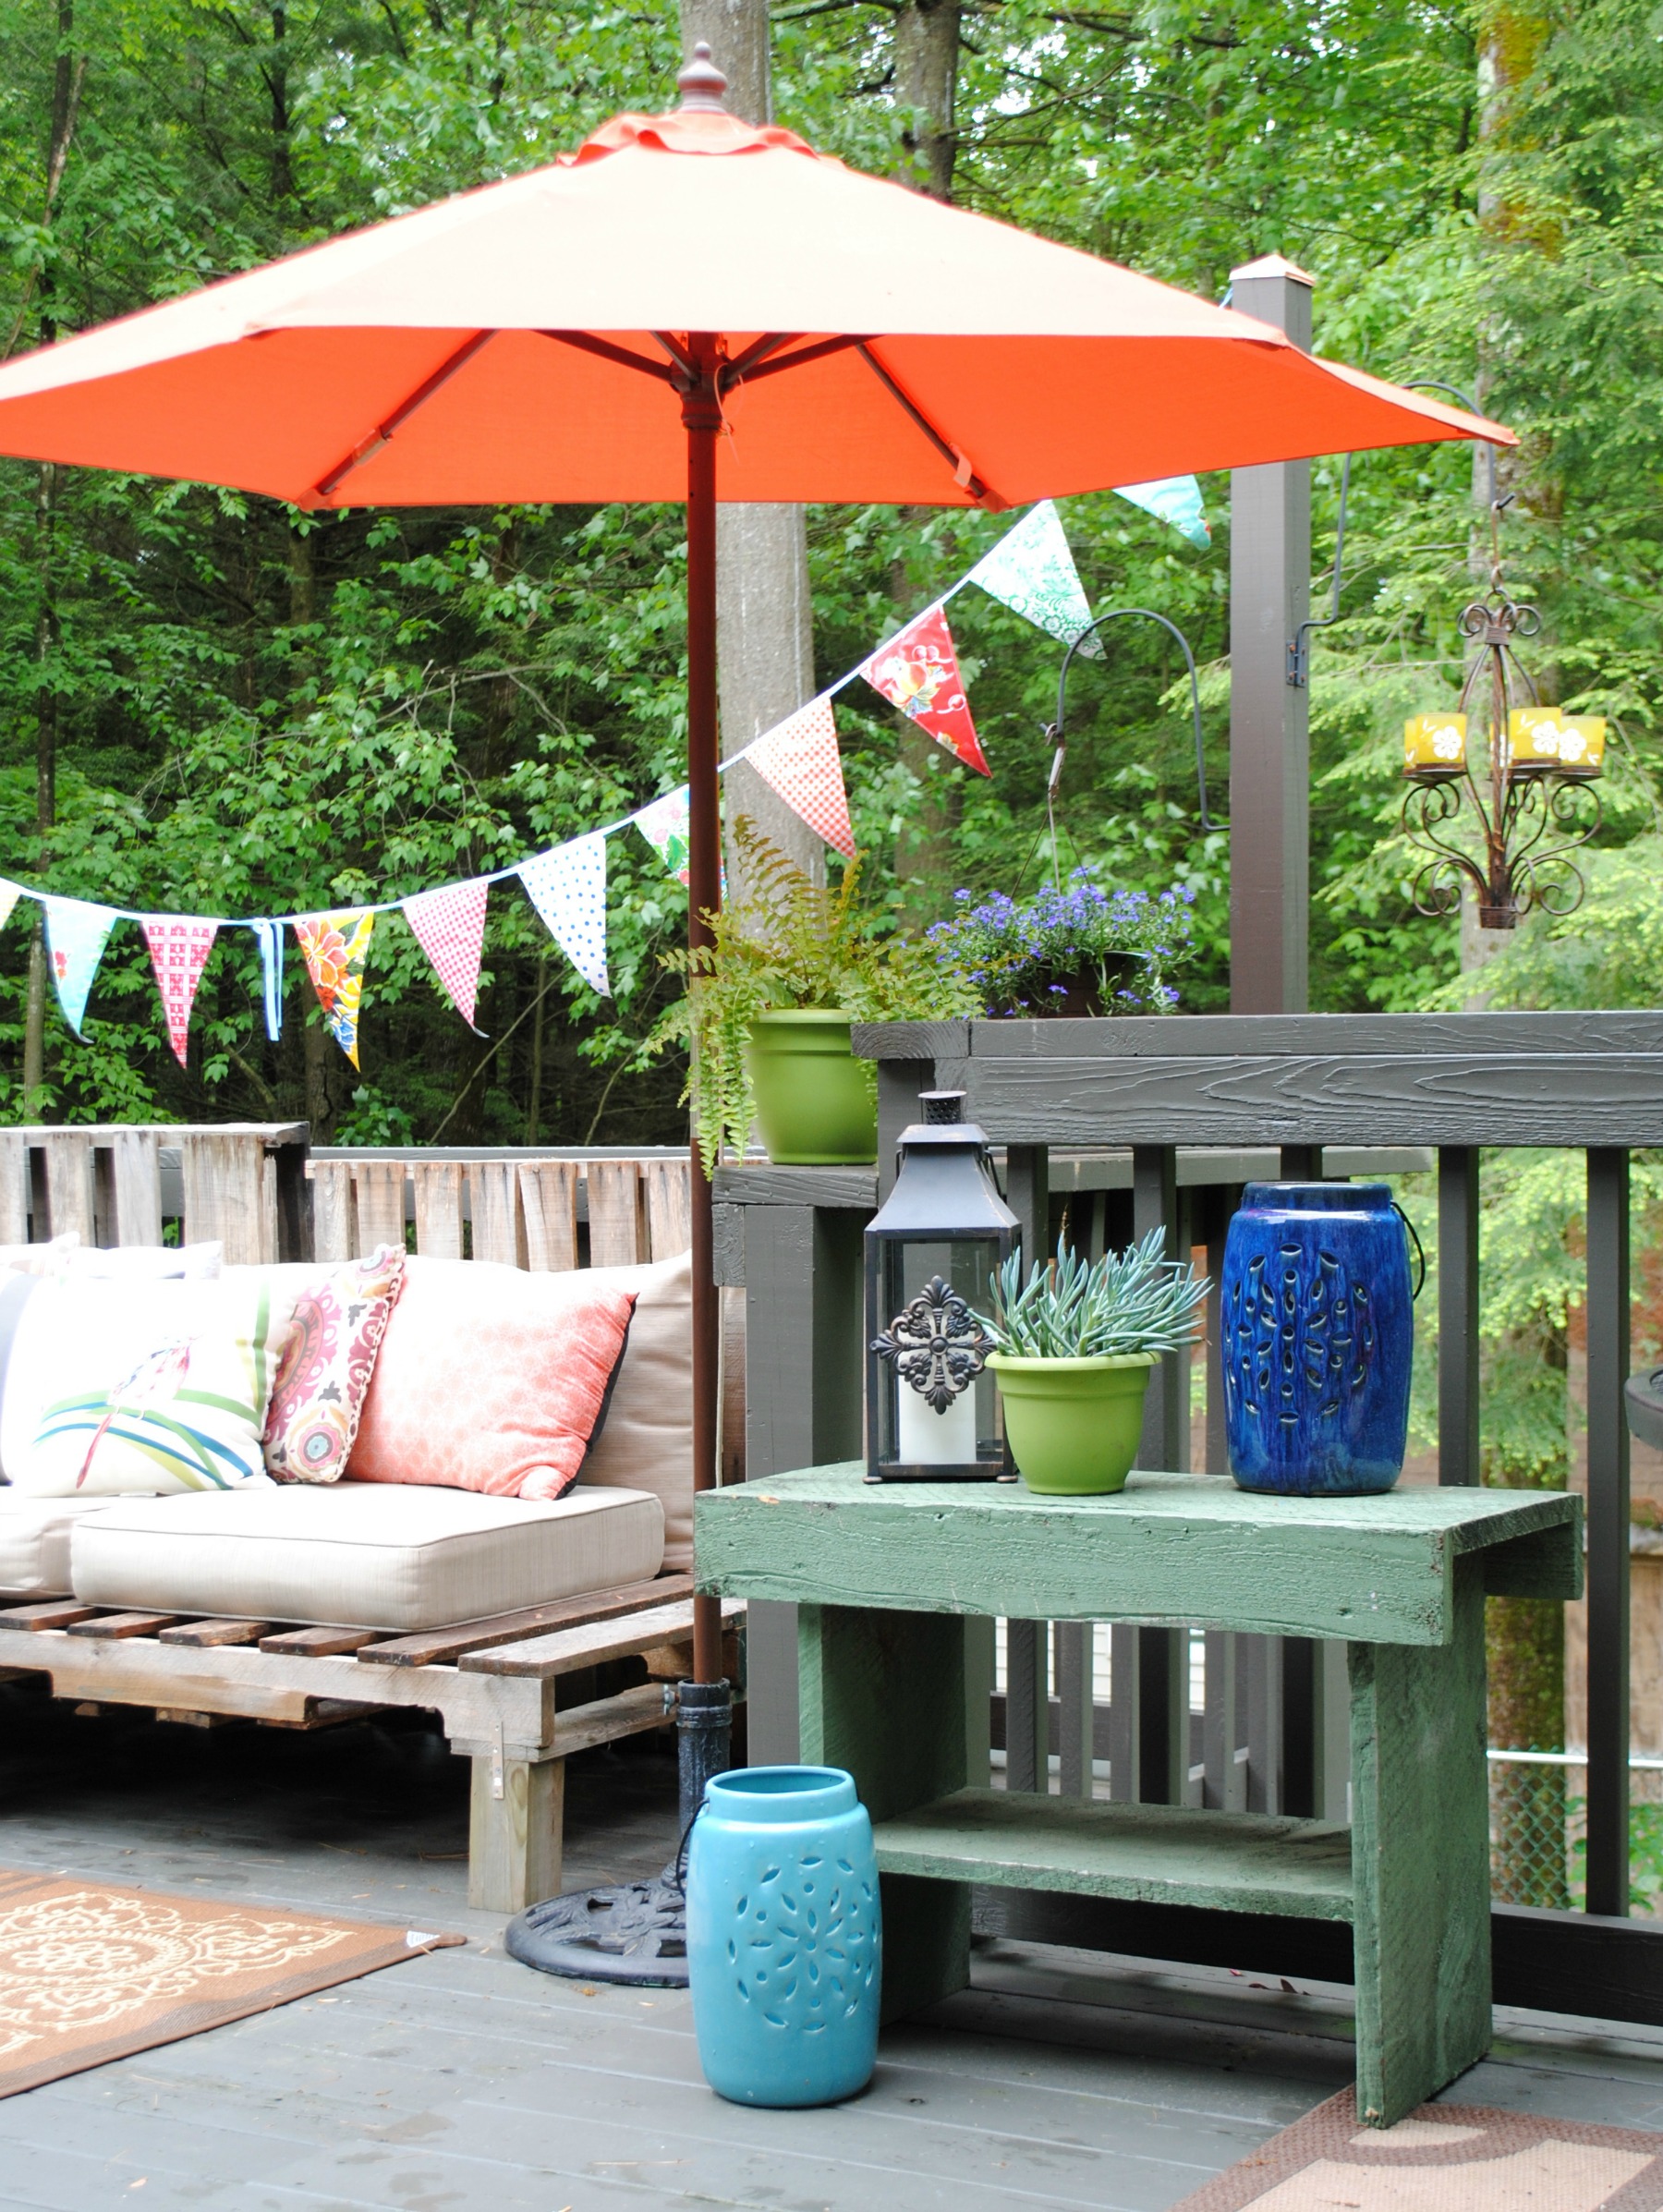
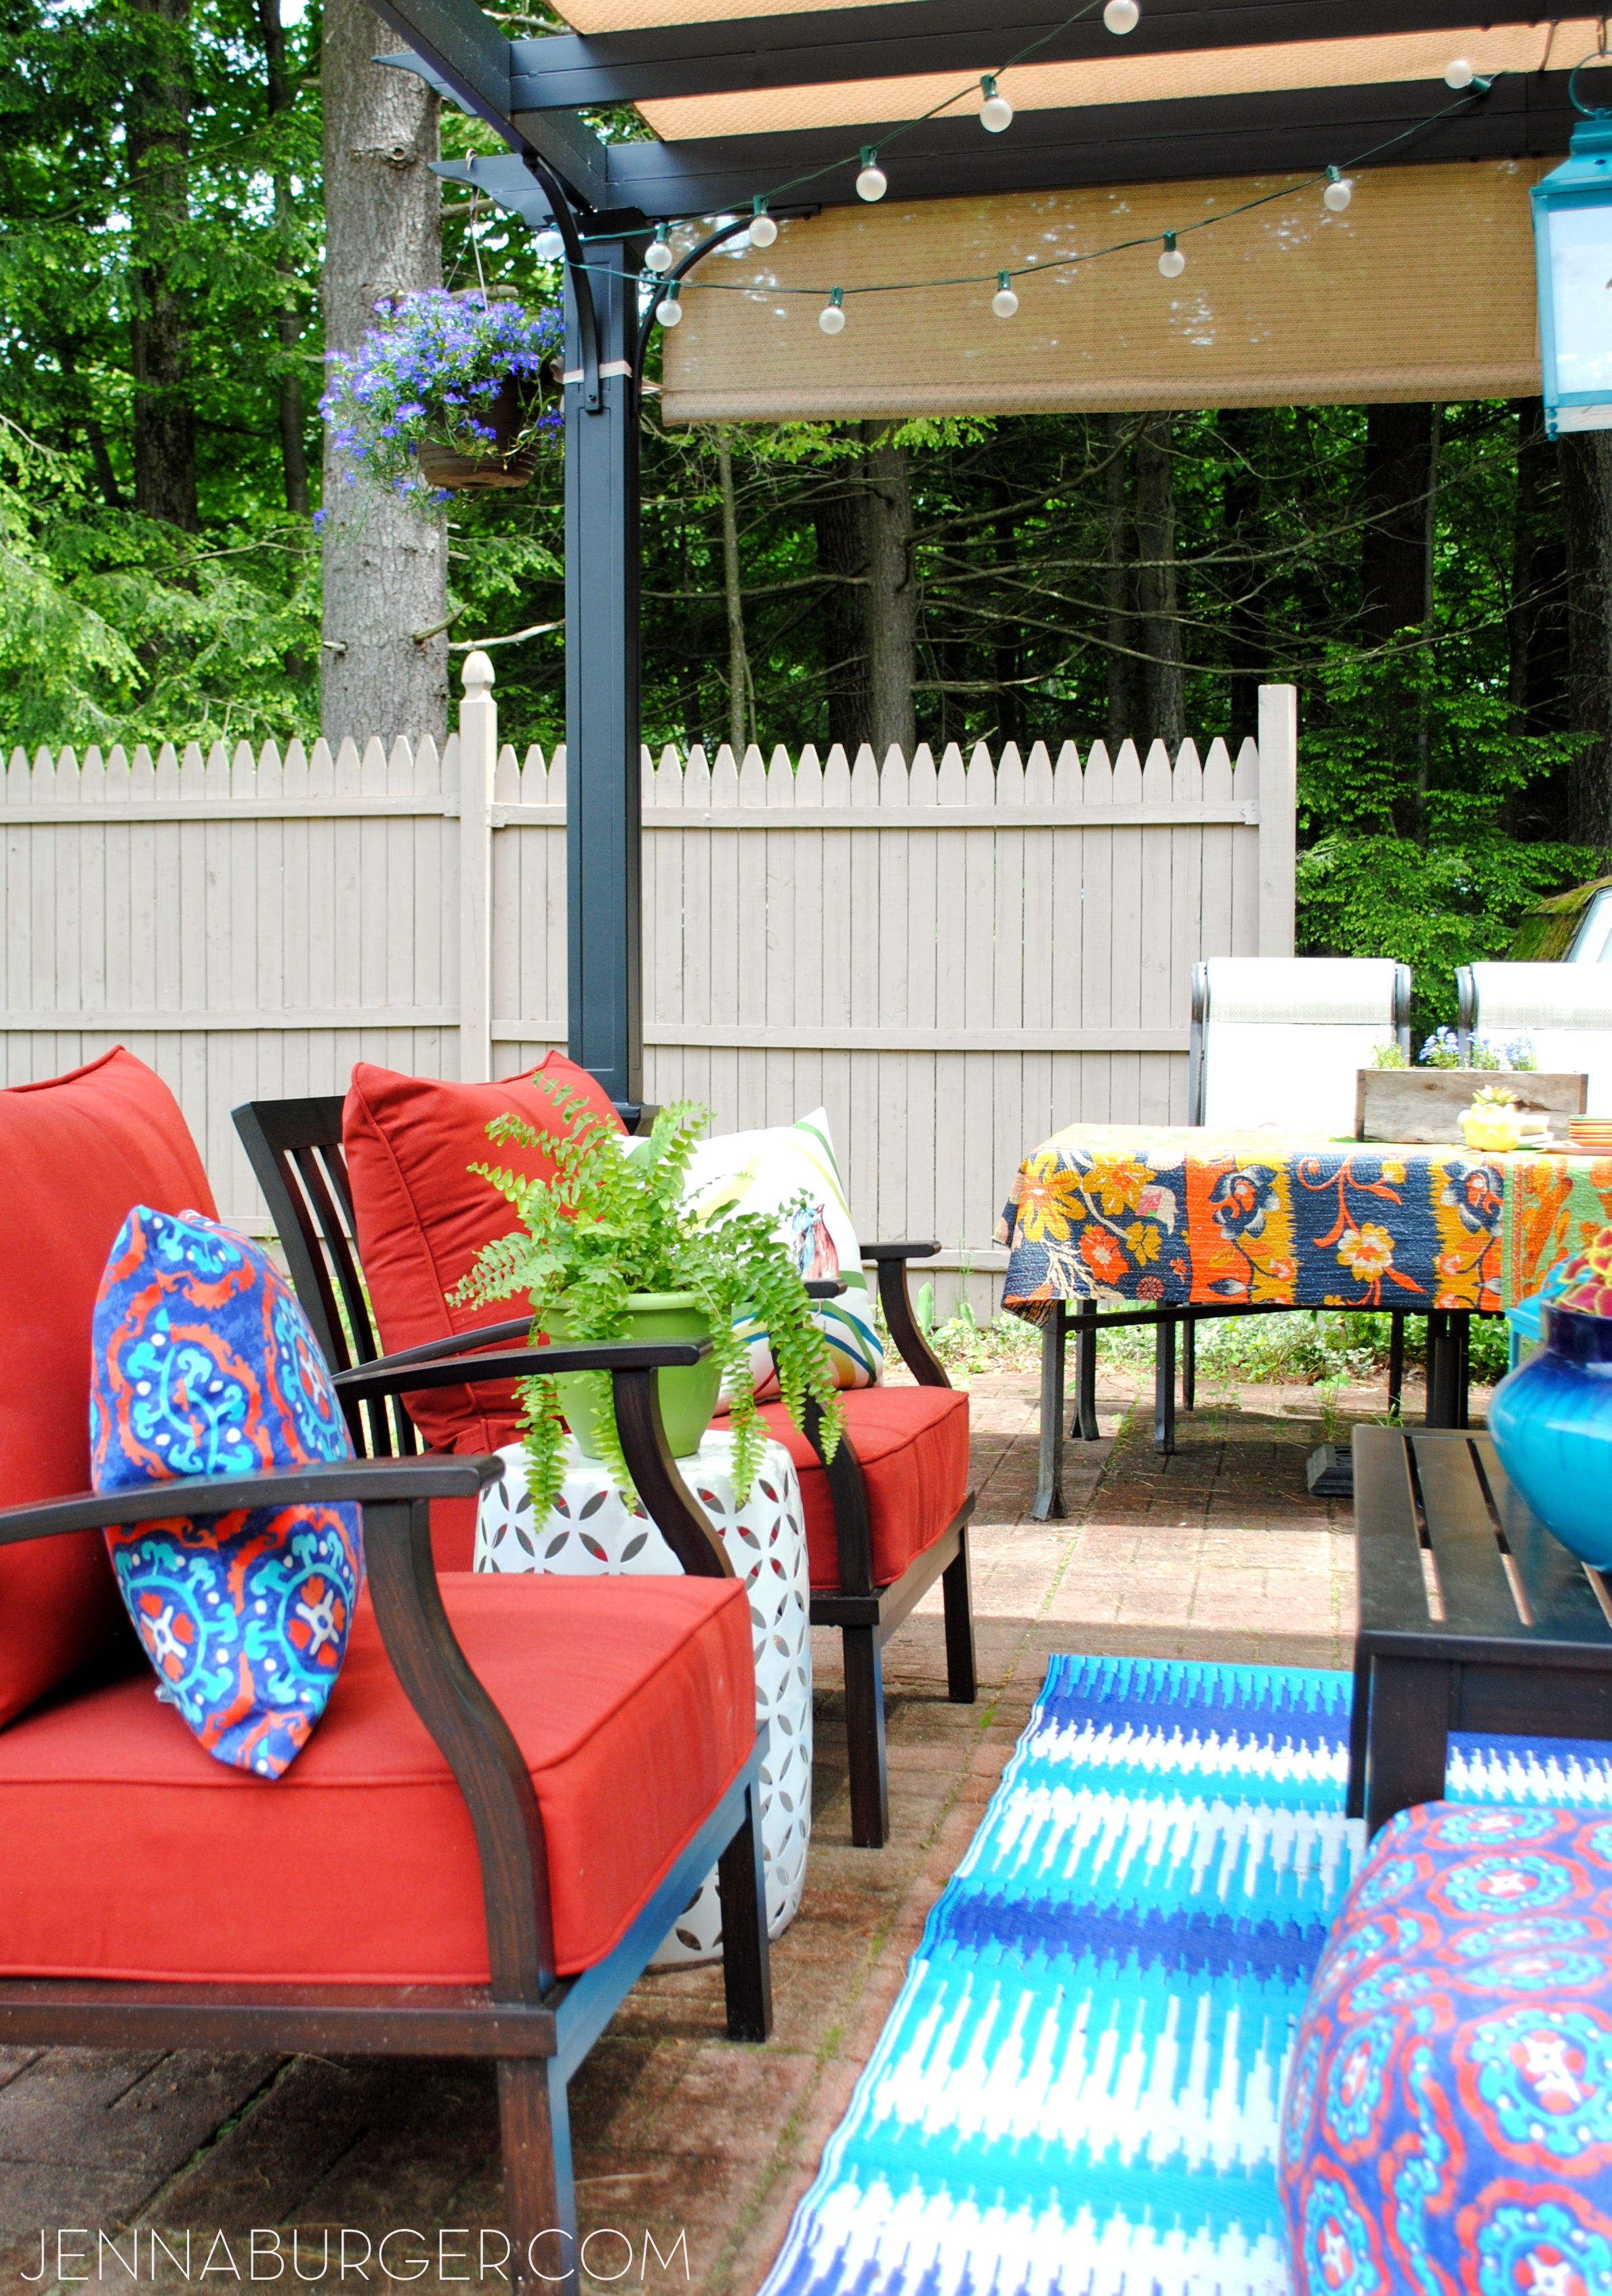
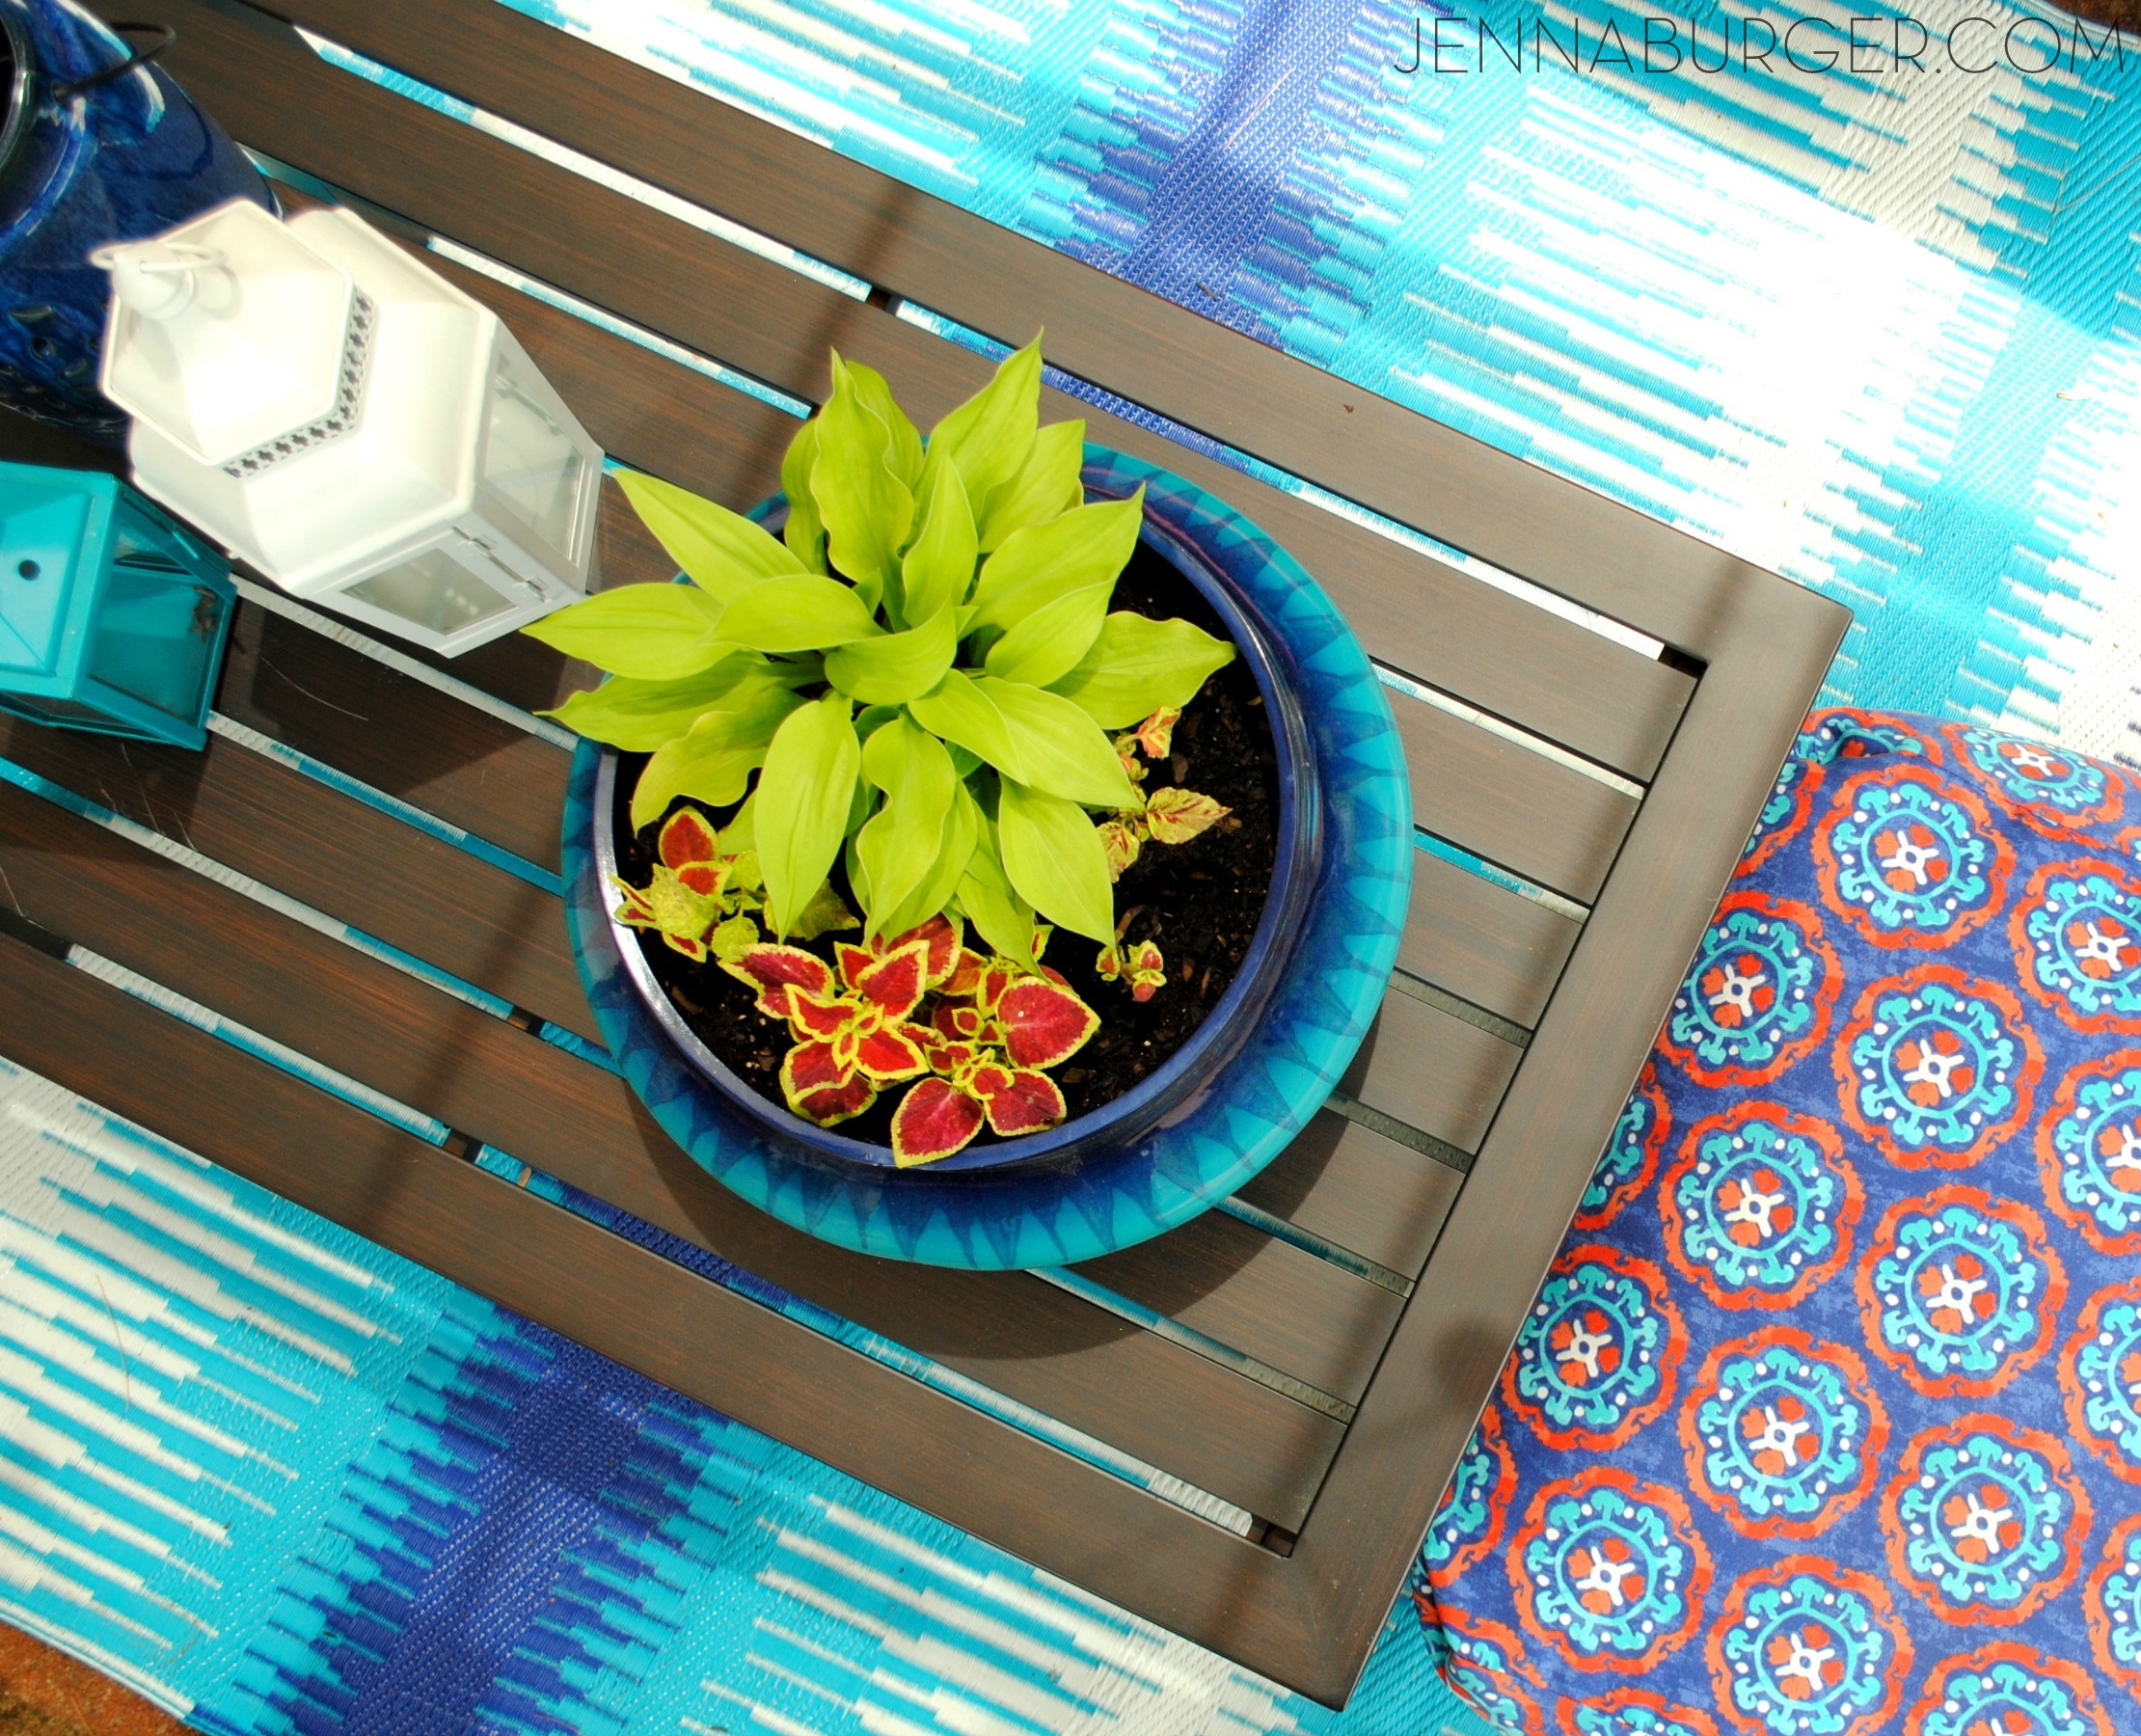
Surround yourself with what you love by bringing the indoors out. Creating an outdoor living room that is truly an outdoor oasis is similar to designing an interior haven. Surround yourself with things that are most meaningful to you and elements that bring you happiness.  Make an outdoor space fun and unexpected by introducing a pretty patterned table cloth, wind chimes that blow in the breeze, and pops of color through pillows.

Bring the indoors OUT... Helpful budget-friendly ideas to create an outdoor oasis!

Similar to a room inside your home, once you have your basics, add in layers – lanterns, candles, flowers, and plants.

Our Summer Deck 2014Bring the indoors OUT... Helpful budget-friendly ideas to create an outdoor oasis!

COMFORTABLE SEATING
An outdoor oasis isn’t complete without lots of comfortable seating. Once the summer months arrive, almost every waking moment will be spent outdoors soaking up the sun. Be the house where everyone gathers on weekend evenings.

Bring the indoors OUT... Helpful budget-friendly ideas to create an outdoor oasis!Our Patio Paradise 2014

Bring the indoors OUT... Helpful budget-friendly ideas to create an outdoor oasis!

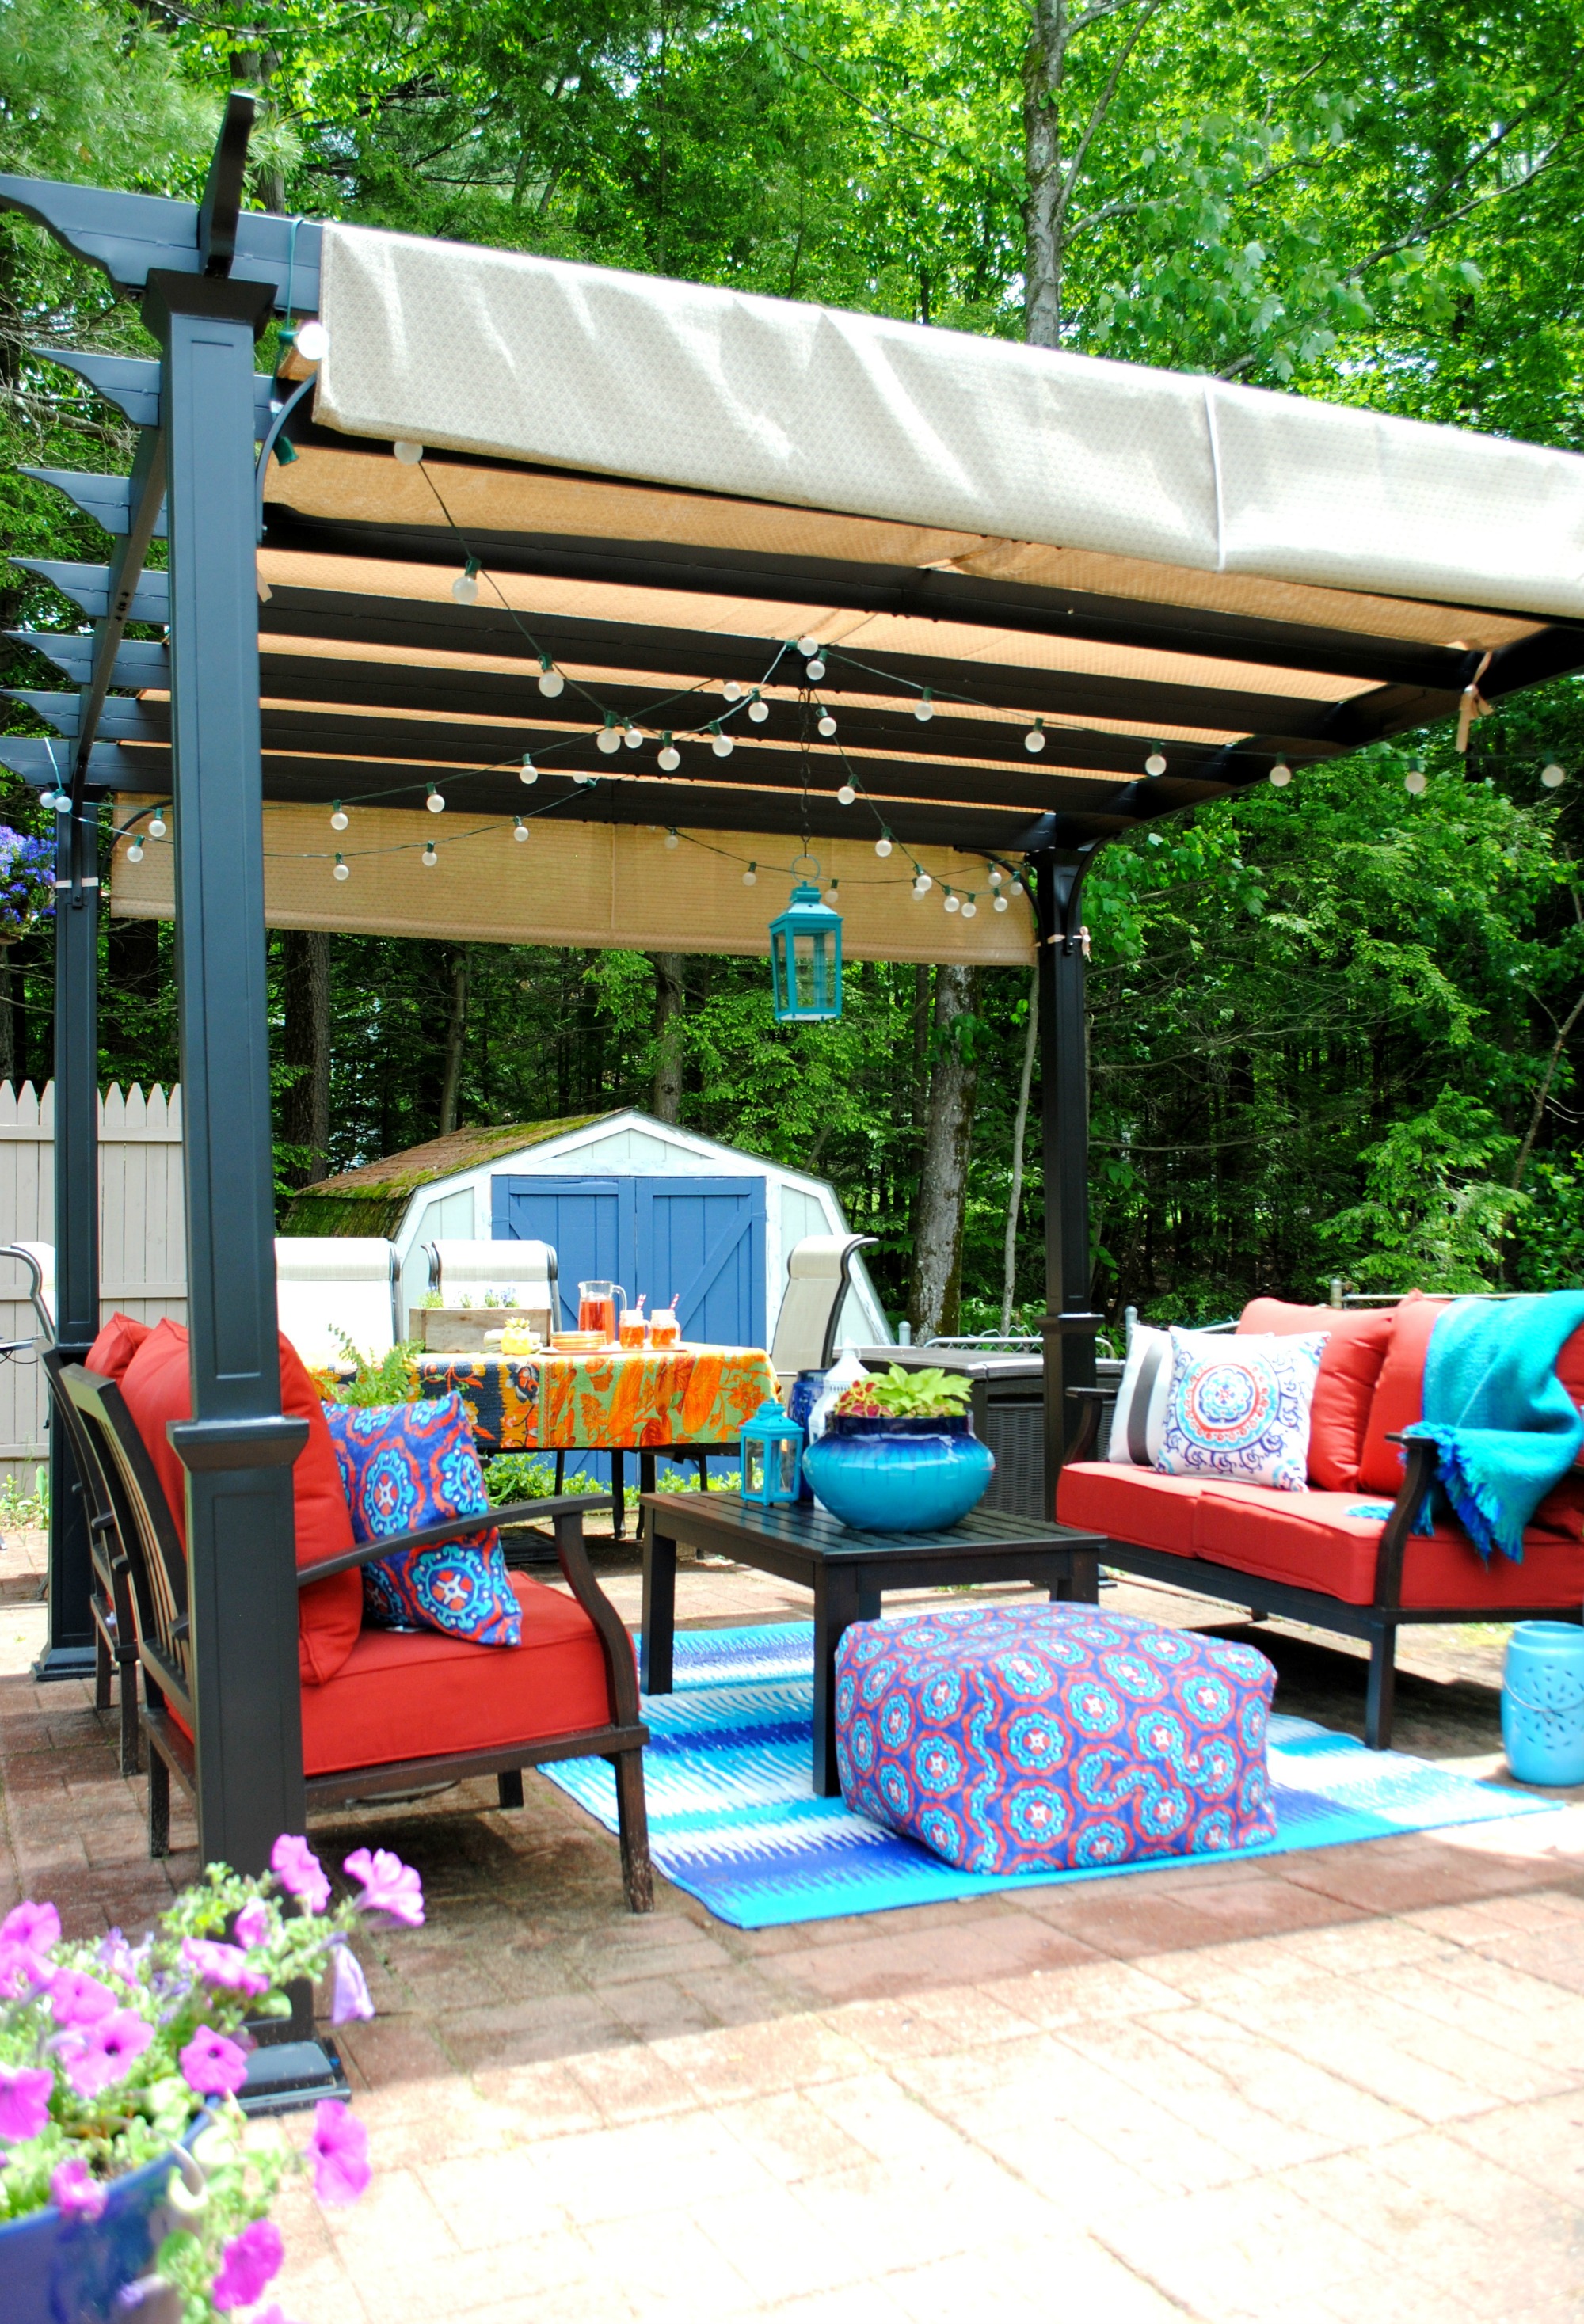
Either individual oversized Adirondack chairs or an outdoor sofa fit for two (or more) is a necessity for outdoor living. Load up on comfy pillows and you may never head back indoors.

Put your feet up by adding a few outdoor ottomans that are waterproof to truly create an outdoor living room.

There are many local furniture stores and online shops that have a wide selection of outdoor sofas and chairs that are similar to the comforts of your living room. Or make your own, like I did with shipping pallets.

Bring the indoors OUT... Helpful budget-friendly ideas to create an outdoor oasis!
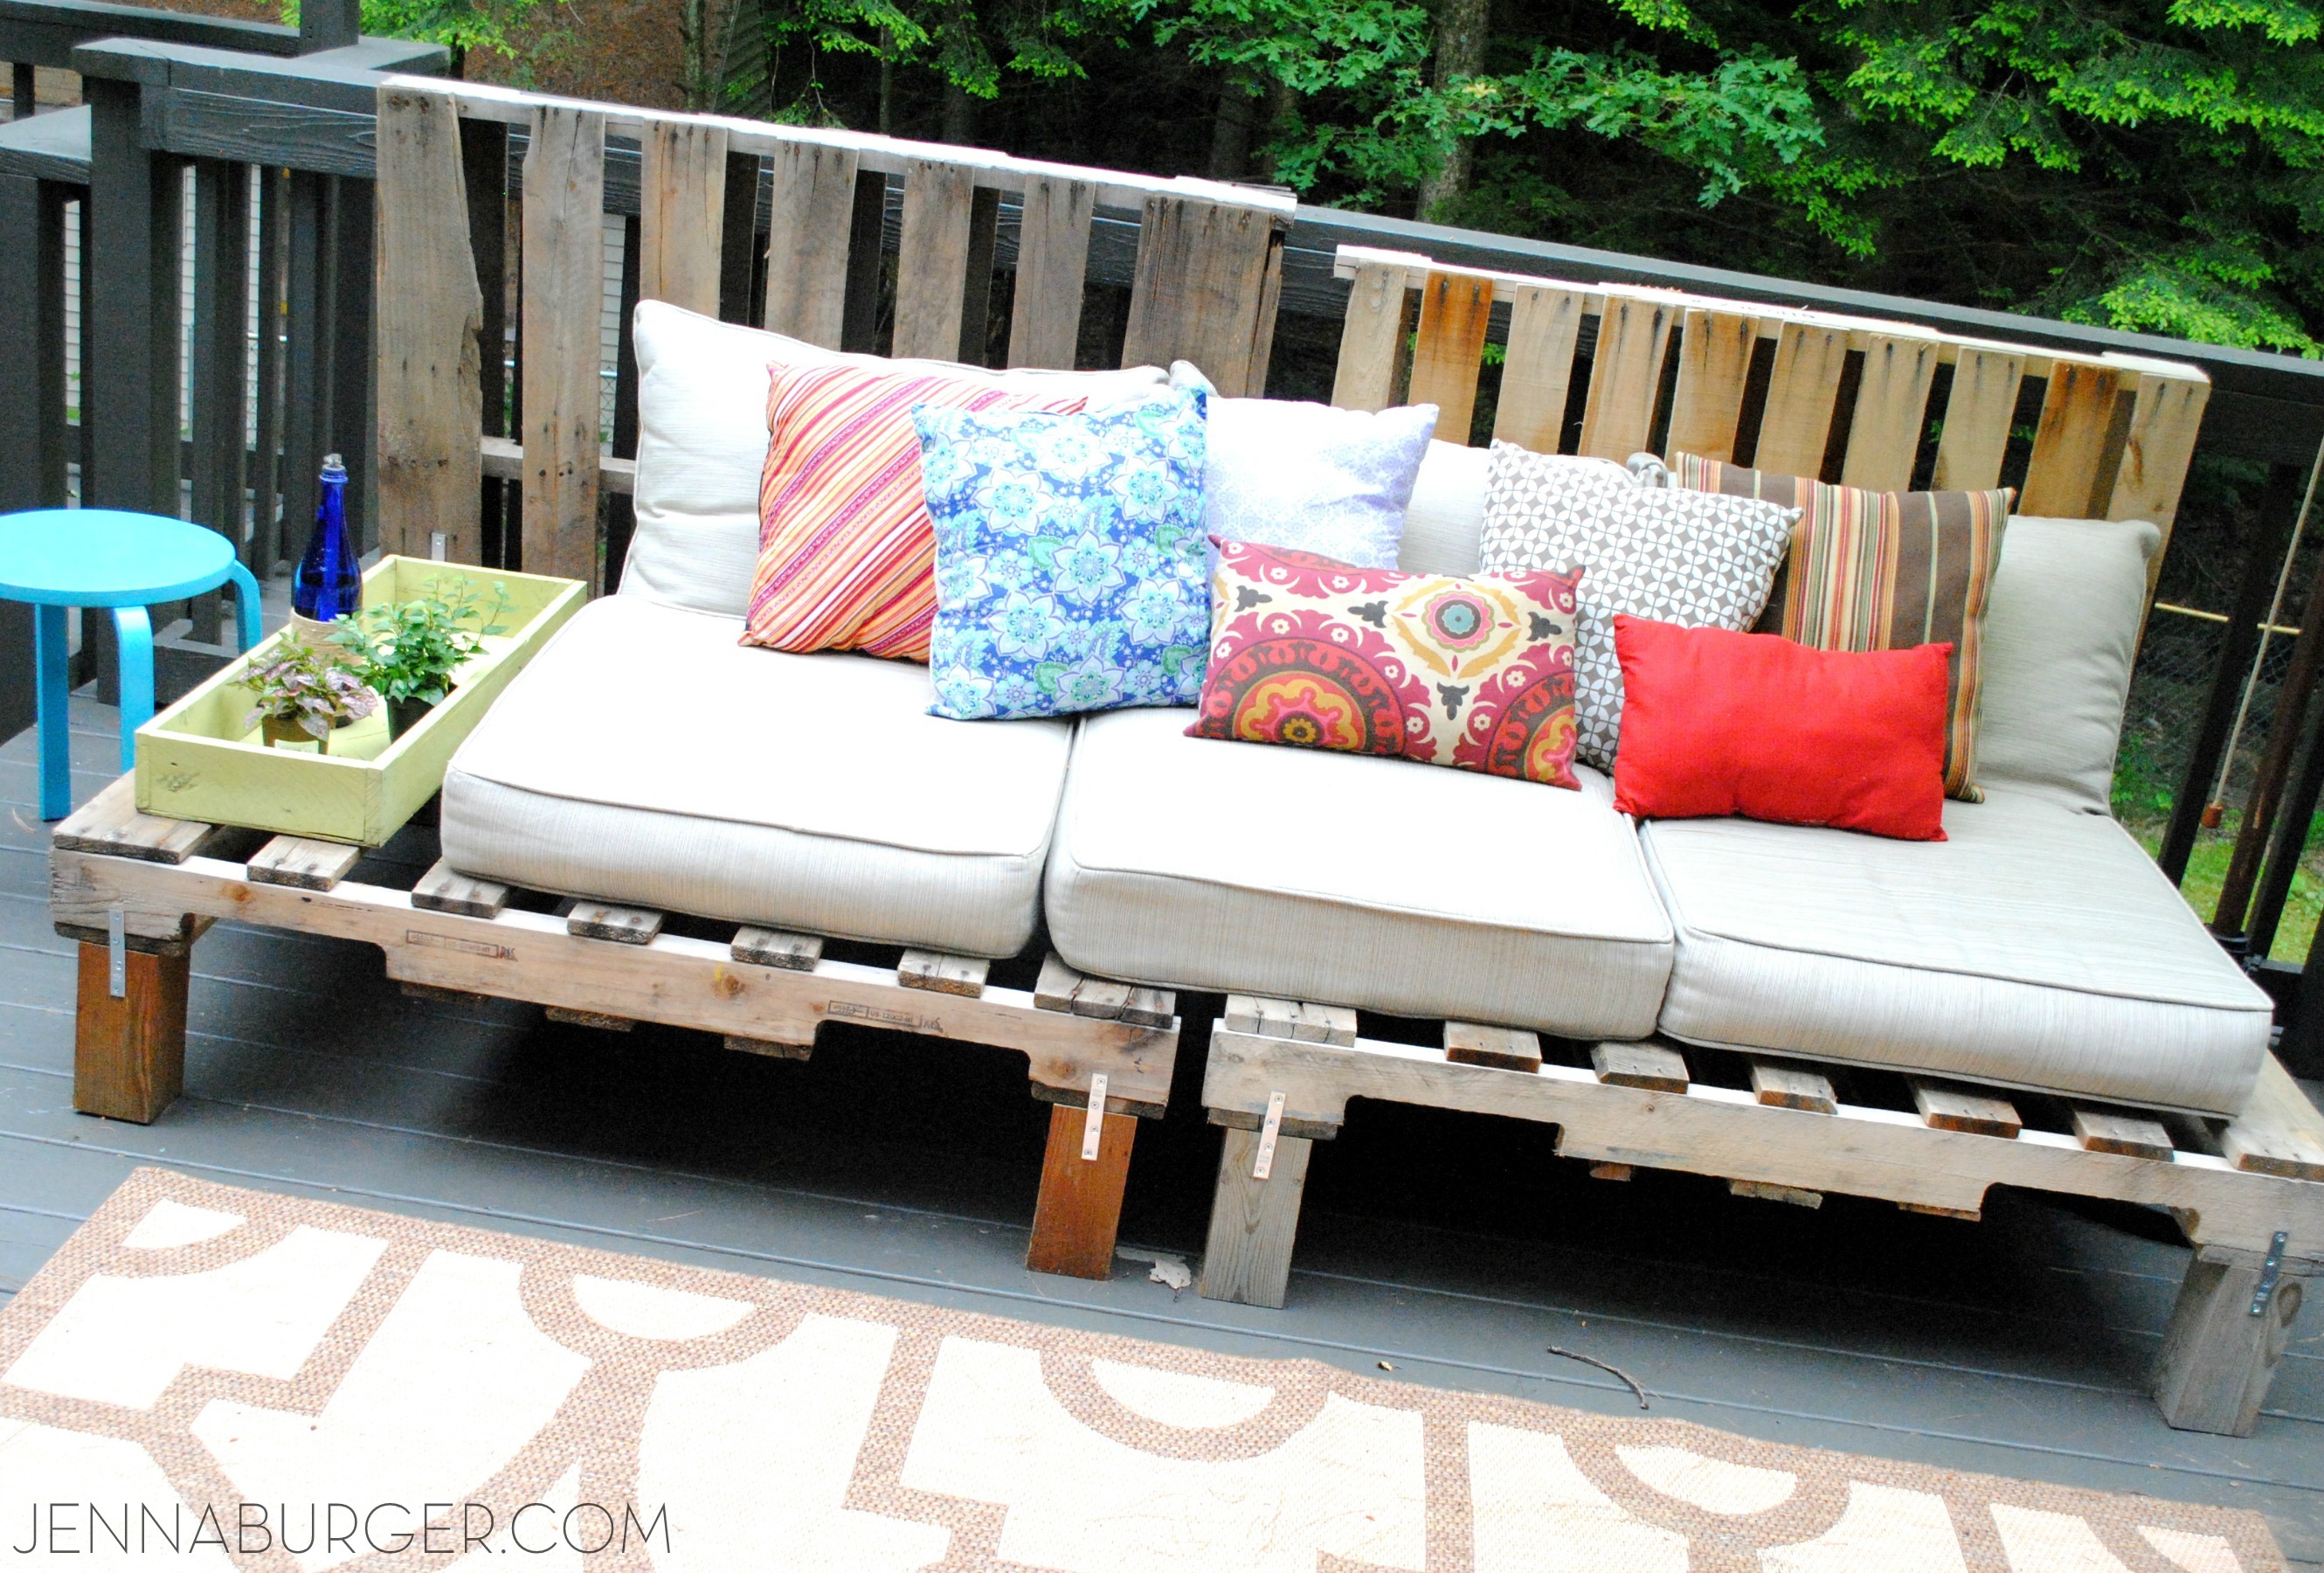
Tutorial for DIY Pallet Sofa

STORAGE
Similar to the indoors, space for storage is a must. No matter if you’re an empty nester or a family of 5, it’s essential to have a spot to store the outdoor pillows, BBQ necessities, and sand toys.

Many outdoor furniture pieces have built-in storage compartments or a stylish storage box that compliments the setting. Alternatively, try an outdoor ottoman flip top that duals as storage.

Outdoor Storage ideas
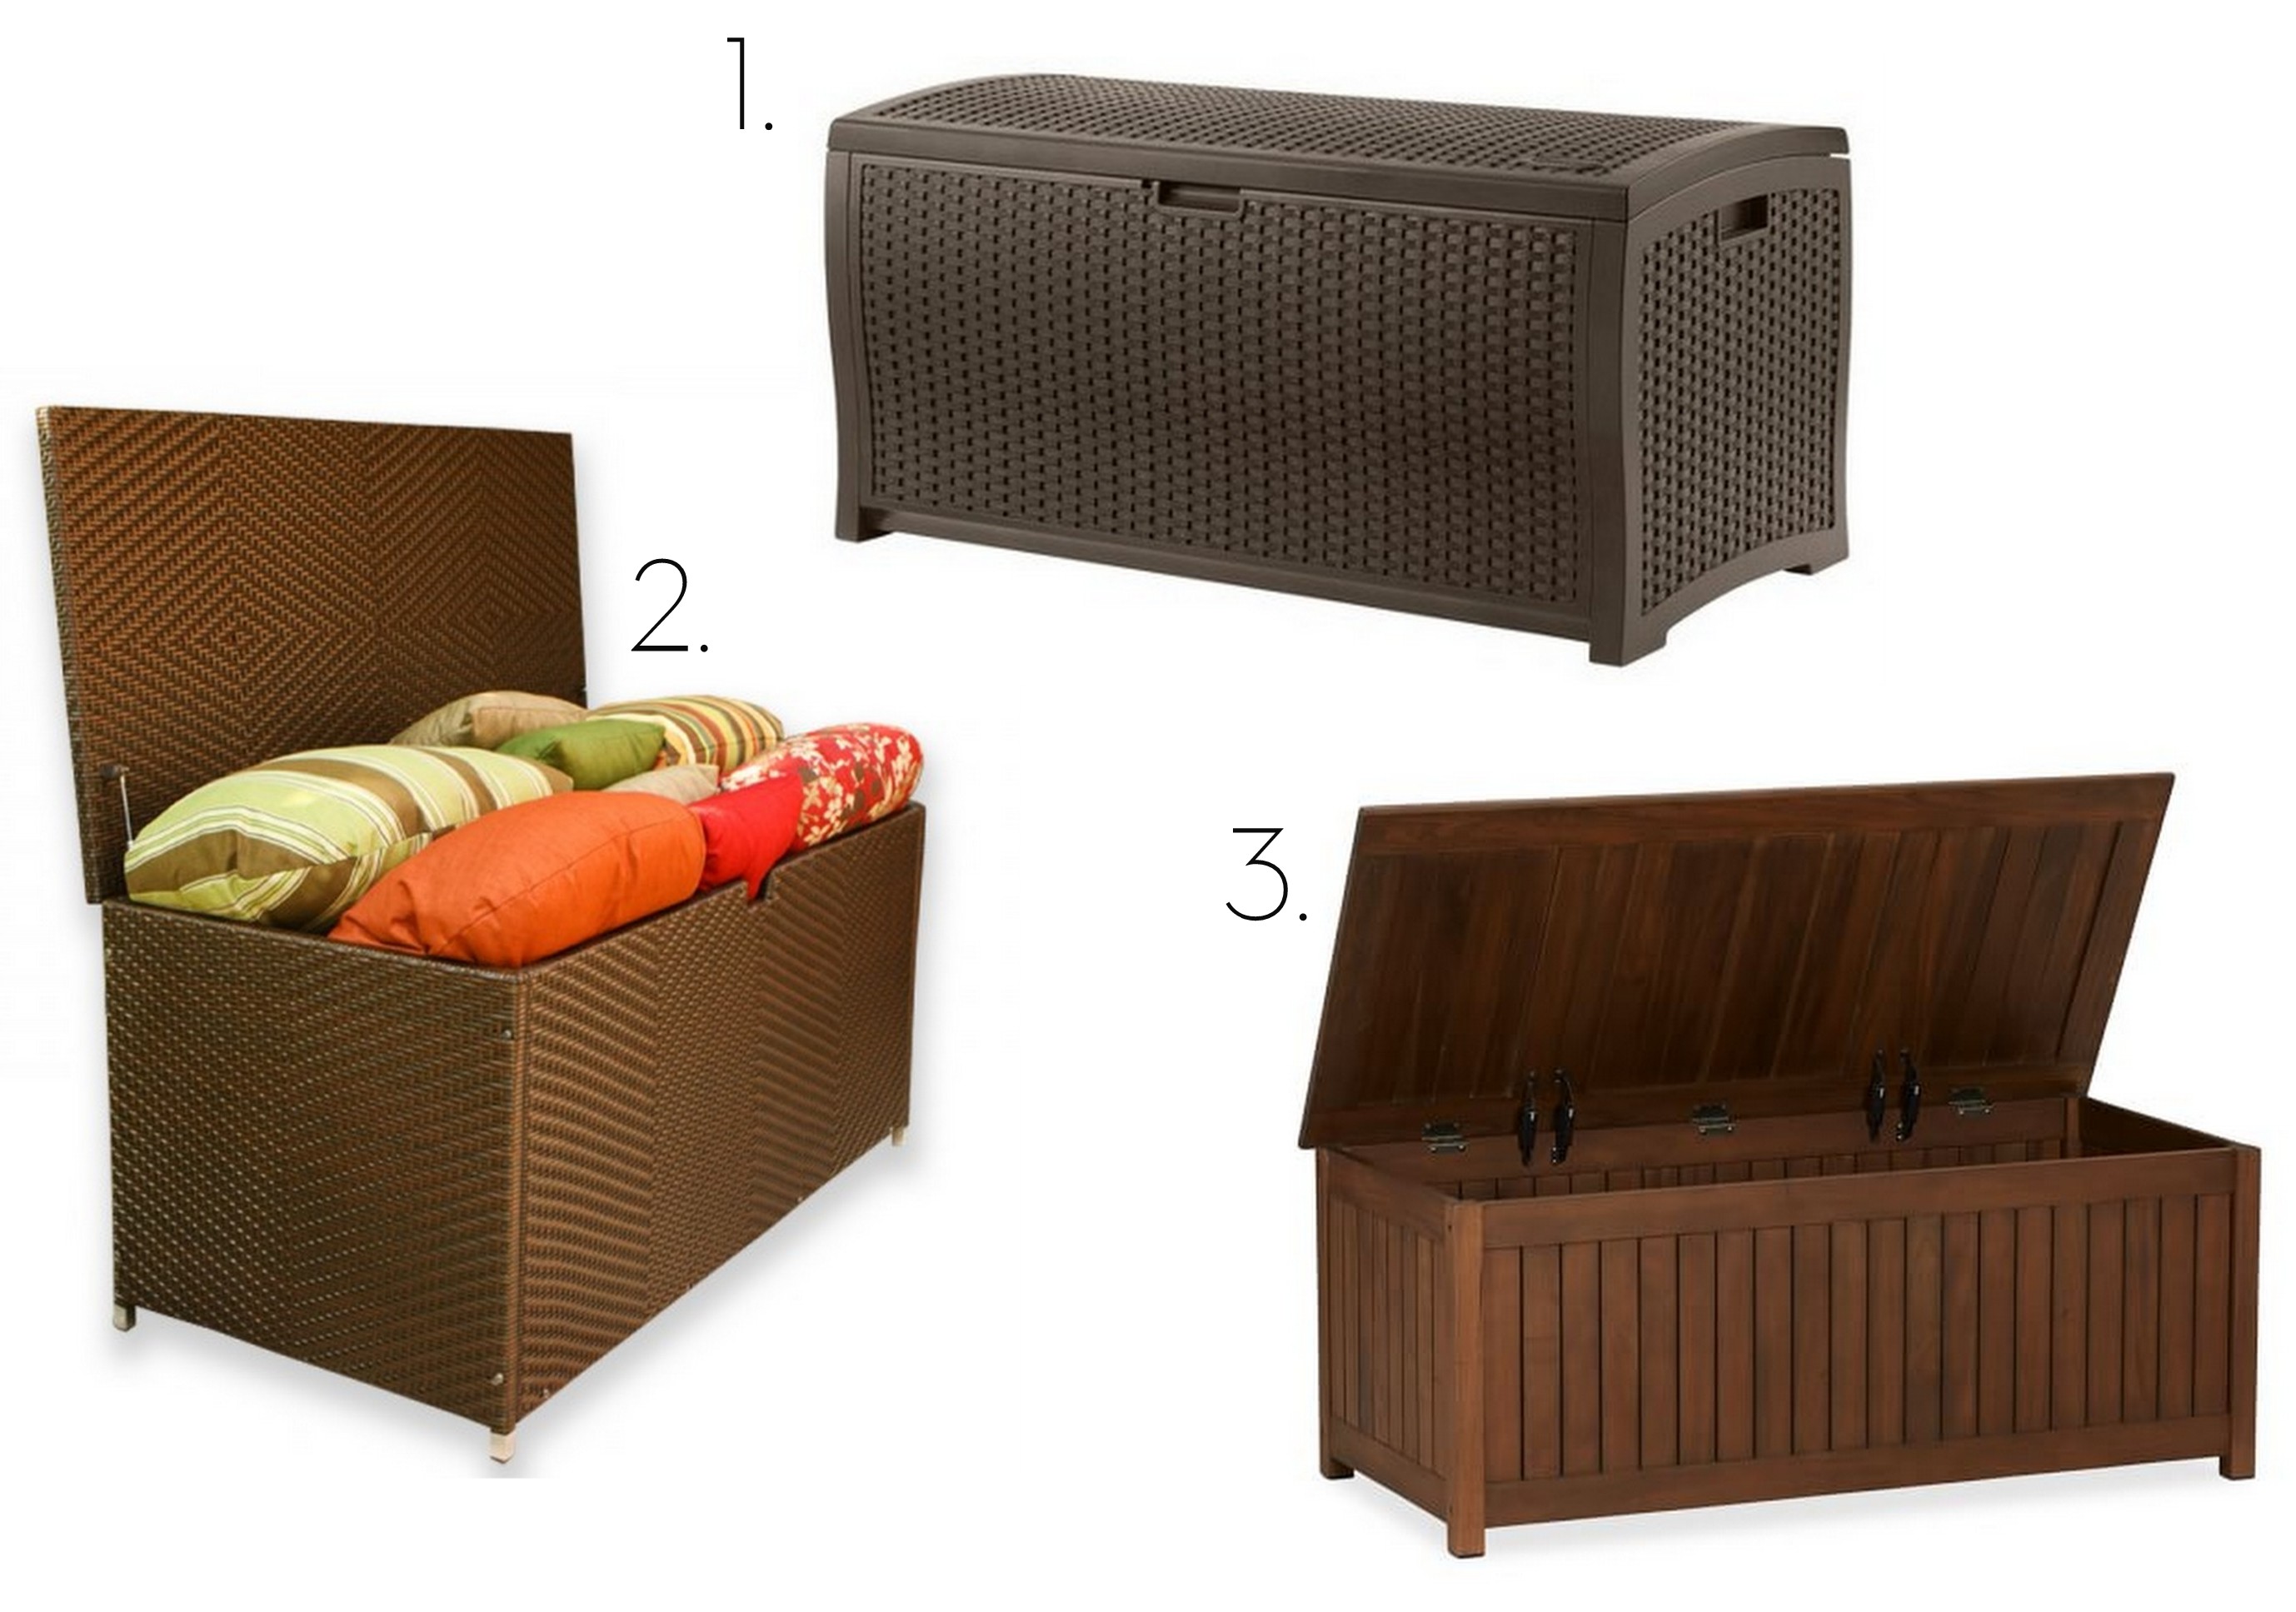
left to right: resin wicker box / wicker storage chest / wood storage bench

LAYERS
An outdoor setting isn’t complete without a stylish rug. Adding a rug to a porch or patio isn’t just needed to make a space pretty, but it also provides a comfy spot to kick off the flip flops without the fear of a stubbed toe or unwanted splinter. Kids can walk around barefoot (which most love to do in the summer months) while having a barrier between their toes and the hard surface.

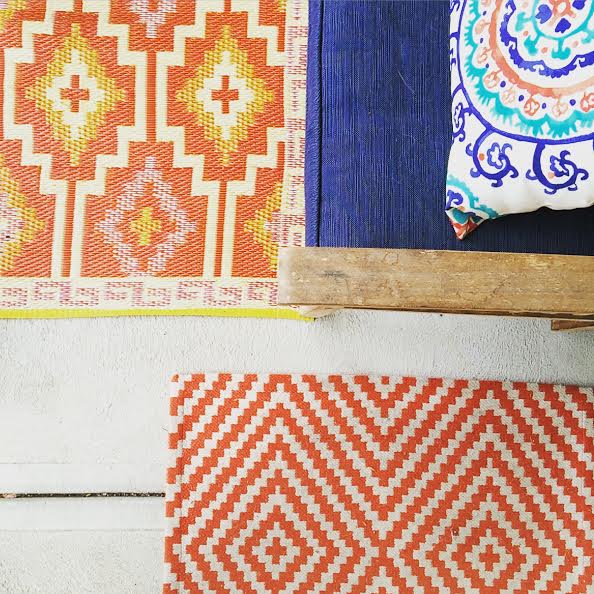
Outdoor rugs are a favorite because they can live outdoors for the summer and be brought indoors during the winter. Rugs made for the elements, are also ideal for foyers, mudrooms, and even under dining room tables (especially with youngsters in the home).

I am loving the outdoor rugs made of polypropylene because they are super easy to clean, fold up tight for storage, and are fairly inexpensive!

Bring the indoors OUT... Helpful budget-friendly ideas to create an outdoor oasis!

A sneak at this years front porch with a new 3′ x 6′ rug (upper left) that I found at Five Below for $5…

Bring the indoors OUT... Helpful budget-friendly ideas to create an outdoor oasis!

FLOWERS
Last, but certainly not least, an outdoor oasis isn’t complete without surrounding it with greenery. Whether your favorite spot is in the sun or the shade, surround your exterior setting with lush plants and colorful flowers in varying sized pots.

Bring the indoors OUT... Helpful budget-friendly ideas to create an outdoor oasis!
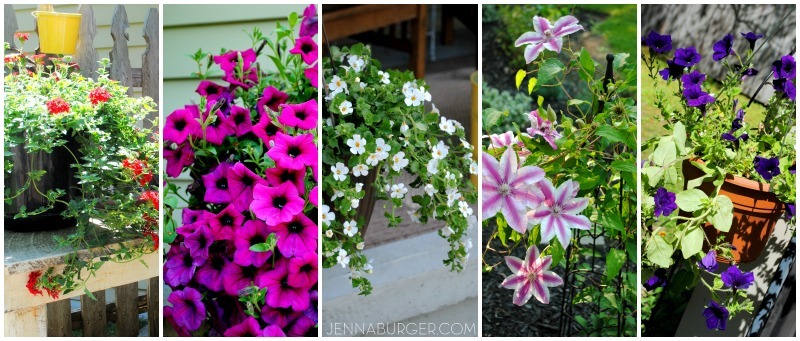
Potted herbs are a great alternative to flowers. Or try perennials in a pot, then transfer them into the ground at the end of the Summer season so they can be enjoyed again next year.

And there you have it…  5 ways to extend the beauty on the inside to the outdoors.  I’m off to finish up the last potted plants, lay mulch in the side garden, and finally snap some pictures so I can share what I’ve been working on for the last weeks.

Have a wonderful memorial day weekend!

Planning + Creating an Art Wall

It’s been over a month and there’s been nothing but crickets on the progression of the living room makeover (2 months to be exact).

I guess you could say that I lost my momentum with many other things going on…  By this time last year, I had tackled a slew of diy projects + 2 room makeovers.  All while pregnant. This year, I shared details on the proposed living room space and then nothing – FOR 2 MONTHS. Whether it was nesting or not, this year my game is totally off.  It may be non-motivation with this wicked weather, but honestly I think it’s more distraction and lack of time.

February was an overly busy 28 days. Not only was I in full-swing with 2 client projects, but I was also working on styling + producing my first 2 stories for Do It Yourself magazine. The experience was awesome and I hope to do it again, but it wasn’t just physically exhausting, but emotionally challenging too.  I felt so much pressure, self-induced like always.  And I won’t even go into my lack of time with 3 kids, one of which is now a full-on crawler…  Hello time sucker.  Her pure cuteness is just utterly distracting.

Anyway, as we say by-bye to month 3 and head into April, I am getting my butt back on track and finally getting this living room back-in-business and finished.

So the new charcoal sofa I ordered was delivered last week {squeal} and against the lighter gray/blue toned wall, it’s a striking contrast.  With the slanted ceiling which is 8′ at one side, and rises to 12′ on the other side, the wall behind the sofa is vast.  And vast begs for drama!  A few pretty pictures won’t do…

I was truly challenged with this blank wall!  There were so many ideas racing through my head – go symmetrical?  how about a family photo collage (but we have SO MANY photos already around the house)?  one large print?  multiple random prints?  DIY something – a map. maybe?

So many ideas, but what would look best + be meaningful + give the drama this space needed?

After much thought & planning, this is my plan of action

ideas & tips for Planning + Creating an Art Wall in your home

For my new art wall, I chose to turn to Minted, an online art shop filled with creations by independent artists.  To put it best… “Minted uses technology to allow consumers to discover great creative talent, making Minted a place where artists can learn, gain exposure, and build their businesses.”

Custom art is unattainable for many because of budget + resources, so Minted connects artists with those looking to fill their walls with beautiful, meaningful custom creations.  A nice bonus is that many of the prints are limited edition art so they only run a certain amount of prints – so you & your neighbor won’t have the same decor on the walls.

This is what the sea of wall currently looks like…

ideas & tips for Planning + Creating an Art Wall in your home

After going through the Minted site over and over and over (no joke, it took me days) finding what prints I loved most (goodness it was difficult), I then figured out what sizes would work best & in what configuration.  After some time, I created this mockup…

ideas & tips for Planning + Creating an Art Wall in your home

I also used my AutoCAD program to get the sizing + proportions just right.  This is the drawing I created…

ideas & tips for Planning + Creating an Art Wall in your homeIt was time to make these ideas a reality… 

Using brown kraft paper, which I had left over from Christmas wrapping, I cut out the sizes of the proposed prints. Wrapping paper or newspaper could also work – no need to buy anything, use what you have on hand.

ideas & tips for Planning + Creating an Art Wall in your home

Then I arranged the kraft paper on the wall (yes, a few looked a bit wonky) as I worked it out on the mock up…

ideas & tips for Planning + Creating an Art Wall in your home

ideas & tips for Planning + Creating an Art Wall in your home

Once I put the standing floor lamp in place, I realized the shade would really block the large print, so I decided to reverse the design…

ideas & tips for Planning + Creating an Art Wall in your home

Yes, better!

I didn’t actually remove the paper from the wall, but when the prints arrive and I am ready to hang them, I know I will make some tweaks including reversing the design, adding a bit more breathing room between the prints, and hanging them slightly higher on the wall above the sofa.

To be honest, I have never did a mockup like this before, but if I hadn’t gone through the exercise of doing it, I don’t think I would have nailed it (hehe, no pun intended) the first time.  Mistakes would have been made, which results in more time spent!  By creating the mock-up placement of the prints, I can see how the art collage will layout best & hopefully save on time and wall repair.

Once the artwork arrives and I hang it, here is how I envision the wall to look… we shall see.

ideas & tips for Planning + Creating an Art Wall in your home

Interested in these prints?  Here’s the info…
Down Under the Brooklyn Bridge
Snow Dancer
Blaze
Calculation
Gesture
Let’s Get Lost
NYC Map (gold foil)
Bits

My tips for creating an art wall you will love.

> Start with one large piece to be the ‘anchor’ for the art gallery wall

> Bring in other art in varying sizes & orientation – not all one size, not all horizontal or vertical!

> Keep at least 3″ between art for breathing room

> Create a continuity/common thread with the art, but mix it up by using 2 or 3 different frames

> Balance the art on the wall – don’t visually hang all ‘heavy’ art on one side & smaller on the other.

> Have fun. Display the unexpected.  Showcase what is most meaningful to you.  Let your art tell a story!

Other posts on creating a gallery wall that may be helpful:

> Gallery Wall Ideas to Transform Any Room
> Useful Ideas and Layouts to Create a Photo Gallery Wall
> Creating a Photo Wall Display

Recap…

IDEAS + TIPS for Planning & Creating an Art Wall in your home.more on the living room makeover coming soon… I promise!

Disclosure: Upon reaching out to Minted, I am thankful that they chose to work with me since I love their limited edition print selection so much.  I have been provided with product, but as always I was not told what to write and I only feature companies on my blog that I truly love and believe in 100%.

Easy-To-Make Instagram Photo Collage

With the 2000+ pictures I took & shared on Instagram (follow me if you’d like) last year, somehow + someway I wanted to enjoy them more than viewing them on the 2.5″ x 2.5″ screen of my phone.

As the new year rolled around and I was reflecting on 2014 and looking towards 2015, I got to reminiscing on all the personal + professional pictures I’ve showcased on my Instagram account and thought creating a photo collage would be the best way to enjoy those precious moments of my life from the years past.  There are plenty of sites out there where you can create posters and/or other fun creations using Instagram pics (or digital pictures too), but they’re pricey and spending bucks just doesn’t jive with me when I know I could make something comparable (or better) for mere dollars.

I got to thinking & creating and with a bit time, I created a 4 photo collages that captured some truly great moments from 2014…

Easy-to-Make Photo Collage using Instagram or digital photos for $5.  Tutorial by Jenna Burger, www.jennaburger.com

Easy-to-Make Photo Collage using Instagram or digital photos for less than $5.  Tutorial by Jenna Burger, www.jennaburger.com

The best part about this 80 picture photo collage is that it cost about $5. How much better does it get?!  more details on the $$$ below…

So obviously this photo collage doesn’t have to be created using only photos from Instagram.  Images from your phone or digital pictures from a snap & go camera can also be used to create a similar photo collage.  Since there are multiple ways to make this collage, I am sharing tutorials for all…

Creating a Photo Collage using Instagram Images

1. Go to your Instagram page.

2.  Choose a picture and take a screenshot of the image. If you are unfamiliar with what a screenshot is (as I was only a few years ago), you can capture a “shot” of your screen with a click of a button.  On my computer the button is towards the top right corner and it says PrintScreen (your computer might be different, but with all computers it’s possible).

3. Using a photo editing program – I use the free program, Picasa – crop your screenshot image so it is square.
Easy-to-Make Photo Collage using Instagram photos

if you don’t have an instagram account and want to create a similar photo collage using images from your phone or camera, follow this tutorial…

Creating a Photo Collage using a picture from your phone or Digital Image from your computer

Phone: Download the picture to your computer and crop it to a square size. Then save a copy.

Computer: Crop your picture of choice to a square size and save a copy.

Easy-to-Make Photo Collage using Instagram photos

The reason for cropping?  An image downloaded from your phone or a digital image on your computer doesn’t have to be cropped as showed above, but be sure that the image is fairly close up or “cropped” close so it shows detail.  Because the pictures on the final collage are small, a close-up/detailed image is best.

Next up… Creating the photo collage. 

For the collage, I used the free program of PicMonkey.  They offer different collage layouts, one specifically being a square template. When you go to PicMonkey, click collage.

Easy-to-Make Photo Collage using Instagram or digital photos for less than $5.  Tutorial by Jenna Burger, www.jennaburger.com

After clicking collage, you’ll be able to open & choose the 20 images (I think 20 images per 8 x 10 looks best) you want to use to create the photo collage. After choosing the images, click layouts (2nd button down on the left) and choose the template with 5 across & 5 down.  Then remove (by clicking “X” on the box) the boxes on the end row so you are left with 4 boxes across and 5 boxes down.

Easy-to-Make Photo Collage using Instagram or digital photos for less than $5.  Tutorial by Jenna Burger, www.jennaburger.com

First go to the bottom and set the size of your image to 2700 x 3379, which creates an 8 x 10 image.  Then click Autofill at the top and the 20 images will be inserted into the boxes.  If you want to move the images around to different locations, you can.

Easy-to-Make Photo Collage using Instagram or digital photos for less than $5.  Tutorial by Jenna Burger, www.jennaburger.com

Save the collage to your computer.  Depending on the amount of collages you want to create, follow the steps over and over again.

I chose 80 of my favorite images (out of 2k instagram images, it was very difficult to pair down and choose, but I did it) and then created (4) 8 x 10 collages – each collage has 20 pictures with 4 across and 5 down.  It was trial and error figuring out how many pictures would be best on each page so each image wouldn’t look too big or too small.  In the end, I am happy that I chose 20 images per page and the size of each image is about 2″ high x 2″ wide.  The images are not exactly square, but almost.

The result of my 4 photo collages which cost about $5…

Easy-to-Make Photo Collage using Instagram or digital photos for less than $5.  Tutorial by Jenna Burger, www.jennaburger.com

Once the 8 x 10 photos were created, I uploaded them to Snapfish to have them printed.  Typically an 8 x 10 image is $2.99 but they’re often on sale (right now there is a 50% coupon).  Other online retailers or local stores where you can print pictures works too.

Easy-to-Make Photo Collage using Instagram or digital photos for less than $5.  Tutorial by Jenna Burger, www.jennaburger.com

A photo collage like this is also a great way for capturing and enjoying kids artwork.  Kiddos come home with SO MANY beautiful creations, but it’s impossible to keep everything.  Instead of tossing them putting them in a box, snap a picture and then create a collage like this using the same steps.  Your child(ren) will feel so proud that their work can be displayed on the walls of your home!

The new photo collages that I created now deck the walls of my office / living room and replaced the travel subway art, which I moved to another spot.

Easy-to-Make Photo Collage using Instagram or digital photos for less than $5.  Tutorial by Jenna Burger, www.jennaburger.com

The frames that I used for the collages are a simple white style that I picked up at AC Moore for $6/per frame.  Inexpensive frames from Ikea would also make this project creation super inexpensive.

Easy-to-Make Photo Collage using Instagram or digital photos for less than $5.  Tutorial by Jenna Burger, www.jennaburger.com

Easy-to-Make Photo Collage using Instagram or digital photos for less than $5.  Tutorial by Jenna Burger, www.jennaburger.com

The walls of our home are adorned with pictures & meaningful art.  These new photo gallery creations just add another layer to our family’s story…

Embracing the Beautifully Imperfect Home

Live with intention by embracing your beautifully imperfect home NOW!

As the snow is piling up in my neck of the woods (it’s about 3′ + high) , as of late I’ve been spending a lot of time indoors.  As much as it feels suffocating at times, it’s also been enjoyable to take in the beauty of our home that is coveted by the surrounding walls & roof above.

I started out the year with a focus – not a goal because that is just too overwhelming for me – to live more with intention.  Living with purpose and meaning isn’t easy but with mindful thoughts, I’ve taken on less with more intentional focus.  Believe me, it hasn’t been easy and it’s not every day that I ‘live in the moment’, but I have gotten a wee-bit better and as long as I work on it, I feel like I am going in the right direction.

Embracing the Beautifully Imperfect Home

As I continue to strive towards living with intention, I am also working on accepting + embracing the beautiful of today. The beauty that lies within our 4 walls NOW.  I wrote an article recently for a local magazine and I was asked by a few friends to share it as it’s something many feel, but sometimes have difficulty expressing (as do I and admittedly it took me 2x longer than anything I’ve ever written before.  Tapping into my deeper, more meaningful side doesn’t come easy).

Living with Intention quote

When decorating a home, it can often be difficult to accept the now because of the constant striving for better or more so, the striving for perfection. There is no such thing as the perfect home, the perfect furniture, or the perfectly decorated walls. A home is more than the roof above and the 4 walls that surround us, it’s a place memories are made with unpredictable messy moments and a place we should embrace today.

In our Pinterest-perfect world, it can often be debilitating to do your own thing because the bar has been set so high with the best holiday crafts, the gorgeous room makeovers, and the looks-to-go-to-eat desserts. The reality is though on any given day in my home, no room is magazine-ready or perfect for Pinterest. There are dishes in the sink, crumbs on the floor, and those pictures I’ve been wanting to hang are still sitting in the corner. A home shouldn’t be about striving for the ideal or the perfect, but instead should truly be filled with what is most meaningful and decorated how YOU want, which in turn will bring the most acceptance, happiness, and joy.

Embracing the Beautifully Imperfect Home

Admittedly as a Designer, I often feel it’s expected that my home look perfect, showroom ready when someone comes through the door, but the reality is like most, I live in a chaotic, busy home of 5, and perfect is impossible. As I’ve gotten older (and a little wiser), I have learned (and am still learning) to let go of every room looking photo-ready at all times. As much as I want my home to look perfect, it already IS perfect and that is beauty. The imperfections and the lived-in feel are what make a home beautiful and meaningful. Even though I have a list of changes and updates, I accept and embrace the NOW which means slowing down and enjoying what we have today. This is our life; the home we’ve created. For others, it means accepting the imperfect, unfinished space instead of putting off doing things because perfect is too hard or too much work. Letting go of the Pinterest-perfect ideal will open up the opportunity to take risks to create a home that’s always been desired. Like the old saying, “Beauty is in the eye of the beholder”.

I recently received the book, It Doesn’t Have to be Perfect to be Beautiful by MyQuillyn Smith, a.k.a. The Nester, and cover to cover, it was eye opening and freeing. Even though I live and breathe design every day, it allowed me to accept our now home and confirmed that embracing what I already have created, is beautiful. Photo-ready with everything picture-perfect isn’t welcoming and it isn’t relatable. What is inviting about not being able to put a coffee cup on a table or move a pillow to sit on the sofa?

Embracing the Beautifully Imperfect Home

We all have different styles and there is no one size fits all. Decorating a home is a process that is ever-evolving and what’s most meaningful is the intangible beauty that resonates with love and laughter. A perfect home is what you make of it and its beauty is already there. A home is most meaningful when it is unique, personal, and authentic. And that is beautiful…

Embracing the Beautifully Imperfect Home

– Live with Intention –

Bathroom Makeover: Tiled Niche {Day 19 + 20}

The last few weeks have been a whirlwind with decking the halls and preparing for the Christmas season, resulting in the bathroom makeover being put on the backburner.  BUT, progress is still being made and it is almost complete – YAY!

I can officially say, the walls are complete.  Last I shared, I had finished the install of the wallpaper & the tile accent border.  It’s Day 19 & 20 of this Bathroom Makeover in 30 Days Challenge and it’s focused on creating a tiled niche near the vanity.  Here is the result…

Bathroom Makeover: a tutorial on how to create a tiled niche + many more DIY projects.

Before this niche was created, there was a medicine cabinet in this space. This is how it looked when we moved into our home about 5 years ago…

before bathroom makeover

Then about 3 years ago when I gave this bathroom a refresh, I painted the glass of the medicine cabinet with chalkboard paint and added a frame…

before bathroom makeover with chalkboard medicine cabinet

While creating the plan of action for this bathroom makeover, I had the idea of removing the medicine cabinet to create a niche – the perfect small storage solution.   Since I already had the natural stone herringbone tile planned for the shower, I thought the niche would be another ideal spot for it.   Unexpected & a great tie-in.

During the demo phase of the bathroom, I removed the medicine cabinet from the wall by unscrewing a few screws.  It was much easier than I thought it’d be.  In the end I was left with a sheetrocked cavity.

Removing the medicine cabinet

I wasn’t expecting “the hole” to be sheetrocked and was originally planning on needing to create a box to fit in the hole.  Upon removing the cabinet and discovering this, I was pleasantly surprised.  I was able to install the tile directly on the sheetrock that was already in place.

To create the tiled storage niche, I used the beautiful 13″ x 13″ natural stone herringbone mosaic and the 3 x 6 white subway tile that I found at Lowe’s.

White subway tile - the most classic, most beautiful (an one of the least expensive) tile you can get!

Lowes Herringbone Carrera Marble

1. To start, I created a template of the back surface of the niche using craft paper.  Then I layed it on the herringbone tile and traced the outline using a marker.

Bathroom Makeover: a tutorial on how to create a tiled niche + many more DIY projects.

Bathroom Makeover: a tutorial on how to create a tiled niche + many more DIY projects.

2. Then using the wet saw, the Mister (gotta give him creditwink, wink) cut along the line.

Bathroom Makeover: a tutorial on how to create a tiled niche + many more DIY projects.

3. Then I layed the tile inside the niche to make sure it was the right size (it wasn’t perfect, but I knew the grout would “hide” any imperfections).  It fit – yay – so using adhesive (the same method I used to install the wall tile), I added the herringbone accent tile to the back surface of the niche.

Bathroom Makeover: a tutorial on how to create a tiled niche + many more DIY projects.

4. When the back was finished, I cut and added 3 x 6 subway tiles (same tile as shower) on the sides, top, and bottom.

As I was working from bottom to top on the sides, I cut and added (2) shelves (marble slabs typically used for a door threshold) at varying heights.  The Mister cut it to the right length using the wet saw and we made sure it was long enough so it fit between + sits on the subway tiles.

Bathroom Makeover: a tutorial on how to create a tiled niche + many more DIY projects.

5. Once the tiles were in place, I grouted all the joints using the same method as the wall tile.

Bathroom Makeover: a tutorial on how to create a tiled niche + many more DIY projects.

6. After the joints were filled and the tile was cleaned off, I added trim around the edges using a 3/4″ decorative moulding.  It was basically like creating a picture frame surround. I cut all the pieces using the miter saw and nailed them in place with finishing nails.  To give an extra tap in place I also used a nail punch to drive home the nails – love that tool.

Bathroom Makeover: a tutorial on how to create a tiled niche + many more DIY projects.

7. Then I filled in all the holes using wood filler.

Bathroom Makeover: a tutorial on how to create a tiled niche + many more DIY projects.

Bathroom Makeover: a tutorial on how to create a tiled niche + many more DIY projects.

After the last piece was put in place, I gave the moulding a light sanding, and painted it with semi-gloss white.  Here’s the result…

Bathroom Makeover: a tutorial on how to create a tiled niche + many more DIY projects.

A closeup…

Bathroom Makeover: a tutorial on how to create a tiled niche + many more DIY projects.

Bathroom Makeover: a tutorial on how to create a tiled niche + many more DIY projects.

This new niche is such a fun, unexpected addition to the bathroom.  Pretty + Functional = A great storage solution

Here is the niche filled with a few things…

Bathroom Makeover: a tutorial on how to create a tiled niche + many more DIY projects.

And a glimpse a few steps back…

Bathroom Makeover: a tutorial on how to create a tiled niche + many more DIY projects.

Bathroom Makeover: a tutorial on how to create a tiled niche + many more DIY projects.

A few more details to go and I will be able to call this bathroom makeover DONE!  Adding a tiled niche on Day 19 + 20 is complete!  Up next… adding details – moulding, lighting, and accessories.  More to come soon!

The installation of the tiled niche took 2 days, about 4 hours each day

From start to finish, these are all the posts pertaining to this bathroom remodel
Plan of Action
Demo: Removal + Installation of the Tub & Walls
How-To Tile + Grout the Bathroom Walls
Installing Wallpaper
Adding a Tile Accent Border
Creating a Tiled Niche
Bathroom Makeover Reveal
Resources

{Day 19+20} Tiled Niche – Complete!  10 more days to go…

Lowes Creative Ideas Team Member

To gather even more unique, fun, and creative ideas for your indoor and outdoor Winter spaces, I would definitely suggest downloading the Lowe’s Creative Ideas app on your iphone and/or ipad.  I’m always checking out the FREE app for great seasonal + do-it-yourself inspiration.

Disclosure: I am part of the Lowe’s Creative Team and was provided with a Lowe’s gift card to purchase items for my project.  I was also compensated for my time to use the products.  No one told me what to create, what to buy, how to use the product, or what to write.  All opinions are 100% mine!

Christmas Mantel

Christmas mantel filled with old & new and lots of DIY creations!

Happy Friday!  Boy, am I glad it is FRIDAY.  It has been a heck of a week, how about for you?

I hope you enjoyed my Christmas Home Tour that I shared yesterday.  Thank you to all those that left the kindest, sweetest comments – I can not tell you how great they make me feel.  I am really loving how festive & warm our home feels right now and I hope I was able to convey that to you throughout the tour!

As I was putting the post of The Tour together, I was left with many more photos of the fireplace mantel.  Instead of making the post miles long, I thought I would create another post on just the mantel.  I am so smitten over how the mantel resulted this year, so let me show you around.

Come join me in the family room…

Christmas mantel filled with old & new and lots of DIY creations!

With our tree at one end of the room and the fireplace at the other, this is such a cozy, restful place.  The mantel this year is filled with a little old and a little new.

Christmas mantel filled with old & new and lots of DIY creations!

My approach for this years mantel was to lean and layerWhat do I mean?   From front to back, I added height with various items that I simply leaned on each other to give a layered (dimensional) look.

I started with the stained wood backdrop and added the pretty, glittery wreath I got from Lowe’s last year.  Leaning on it, I added the JOY pallet sign, which is really the focal point of the mantel.  Then I added a new chalkboard printable & the oversized wood snowflake (a roadside rescue).  It’s all about the layers!

Christmas mantel filled with old & new and lots of DIY creations!

The chalkboard printable is something new this year and it is a creation made by my friend KellieHow did I create it?  I saved the printable to a USB key, brought it to Staples and they printed it on blueprint paper for less than $4.  I then brought it home and framed it.  Easy-Peasy and it is a beautiful addition to the mantel.

https://www.jennaburger.com/2014/12/christmas-home-tour-2014/

For a bit of whimsy, the kids and I collected some branches from the backyard, which I used to fill a simple white vase.  It really grounds the fireplace.

Christmas mantel filled with old & new and lots of DIY creations!

When I initially placed the vase on the mantel, the brown branches got lost against the orange wall.  To make them stand out more, I took some white craft paint and painted them.  A few minutes later, they were finished and dry.

Christmas mantel filled with old & new and lots of DIY creations!

So pretty, right?

When decorating for this Christmas, I ended up changing the place of a few of our festive favorites.  One specific DIY creation that we all love & admire each year is the Christmas Card Holder.  This season, I chose to hang it to the right of the fireplace and it’s already starting to fill up.

Christmas mantel filled with old & new and lots of DIY creations!

On the other end of the mantel are a few more layered-in elements that give height & interest to the overall mantel.   For the last few years, my go-to favorites for Christmas are these modern cone-shaped Christmas trees from the Christmas Tree Shop a few years back.  We have them in a few different sizes in white and gold.  I just love how sparkly they are!  And how simple, yet glowing is a bowl filled with ornaments.  A 3-second creation that is beauty to the eye!

Christmas mantel filled with old & new and lots of DIY creations!

This years mantel would not be complete without a WOW.  The gorgeous cedar garland truly completed this years mantel montage.  I just adore how full and organic it feels.  My idea of being inspired by nature this holiday season really came to fruition with this garland.

Christmas mantel filled with old & new and lots of DIY creations!

I am so grateful to my friends at Lynch Creek Farm who sent me the garland, as well as the wreath for the front door.  And the smell…  I can’t even begin to explain how yummy our home smells.  I just wish you could dive through your screen to get a whiff.

Lynch Creek Farm

Here is a peek at the gorgeous wreath on the front door which you can see more of in my Christmas Home Tour.

Christmas Home Tour of Jenna Burger, one of the homes featured on the Jennifer Rizzo 2014 Holiday Housewalk

Back to the mantel…

I hung this beautiful cedar garland at each end of the mantel so it has a gentle swag in the center.  On the one side, I added a pretty red + black bow and on the other side, I hung 3 stockings that I just picked up from Lowe’s.

Christmas mantel filled with old & new and lots of DIY creations!

Christmas mantel filled with old & new and lots of DIY creations!

A few more views (I told you I couldn’t stop myself from photographing & sharing this mantel)…

Christmas mantel filled with old & new and lots of DIY creations!


Christmas mantel filled with old & new and lots of DIY creations!

Christmas mantel filled with old & new and lots of DIY creations!

From the kitchen to the dining room to the family room, you can see how the fireplace is a focal point in our home and we are truly admiring this years mantel creation…

Christmas mantel filled with old & new and lots of DIY creations!

Thanks for stopping by to enjoy my home decorated for Christmas!

Have you decorated your home for the holidays yet?

  • 1
  • 2