
Tag: Lowes Creative Ideas

Spring + Summer Front Porch

I can not be more excited that the warm weather is here!  Over the last few weeks, it’s been hot.  Spring skipped right over us this year, but after that brutal winter, who cares.  As I’ve mentioned once or twice, we’ve been working hard on vamping up the outdoors for the warmer days ahead.

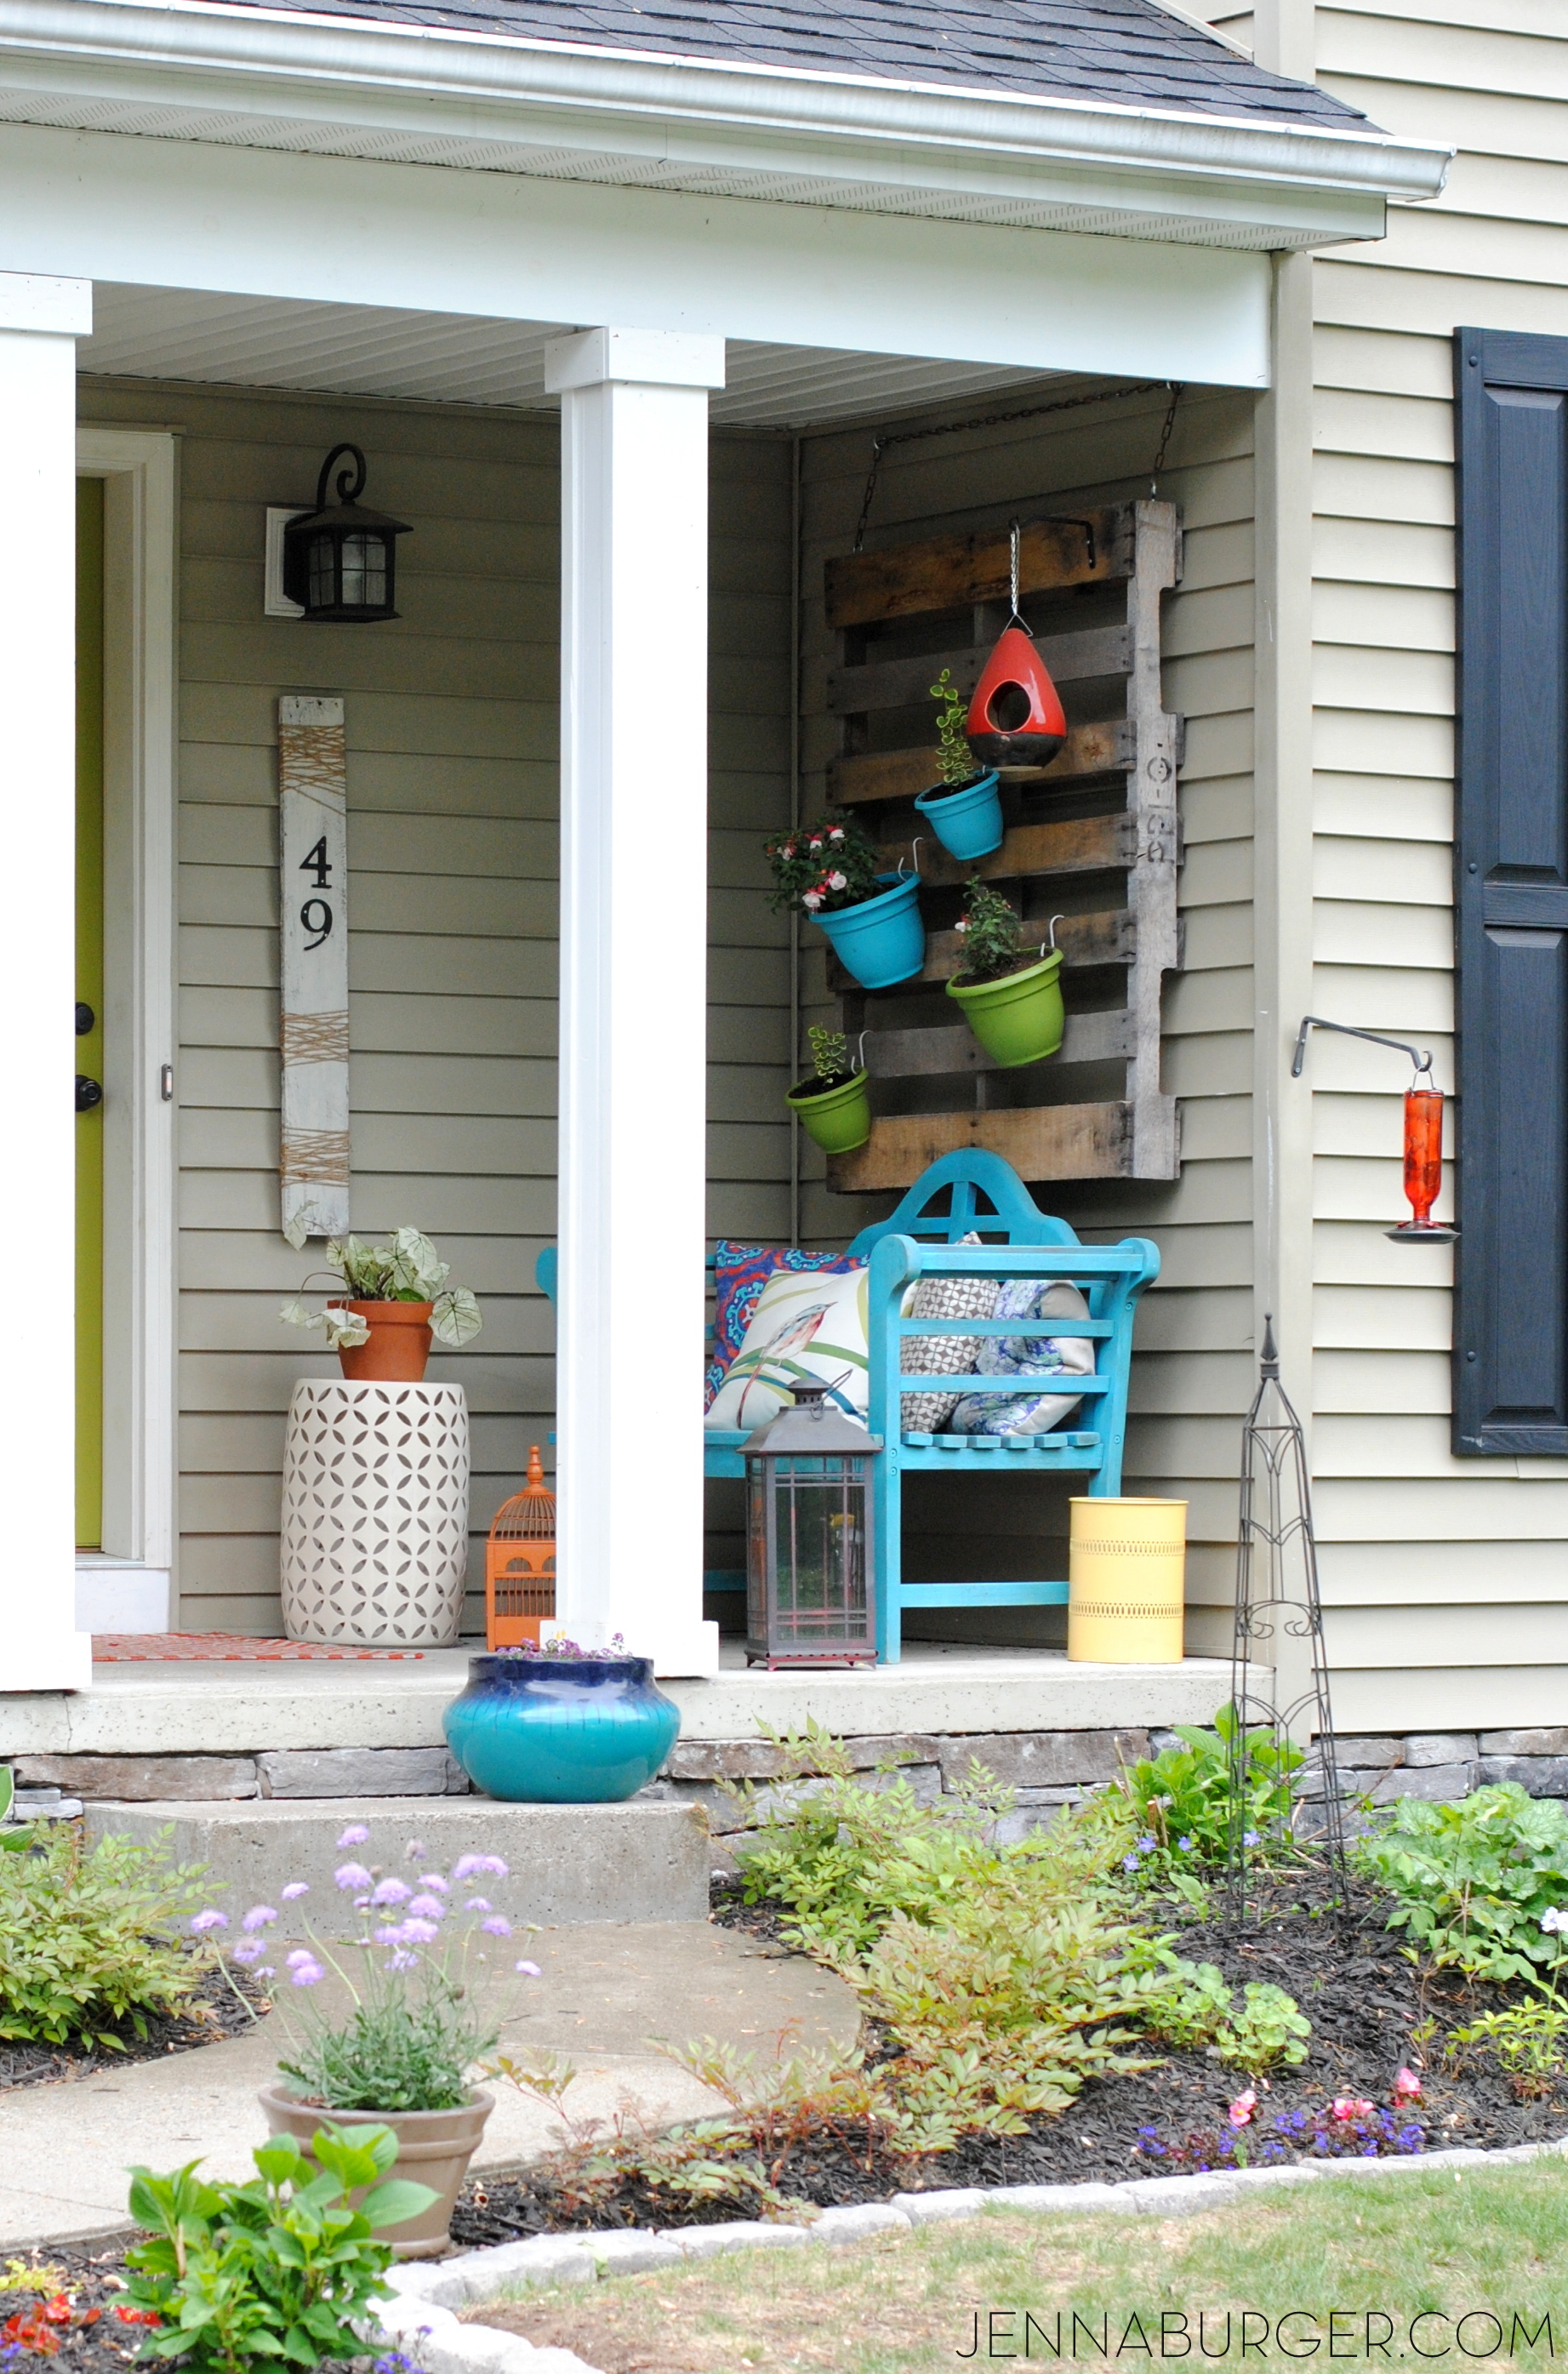
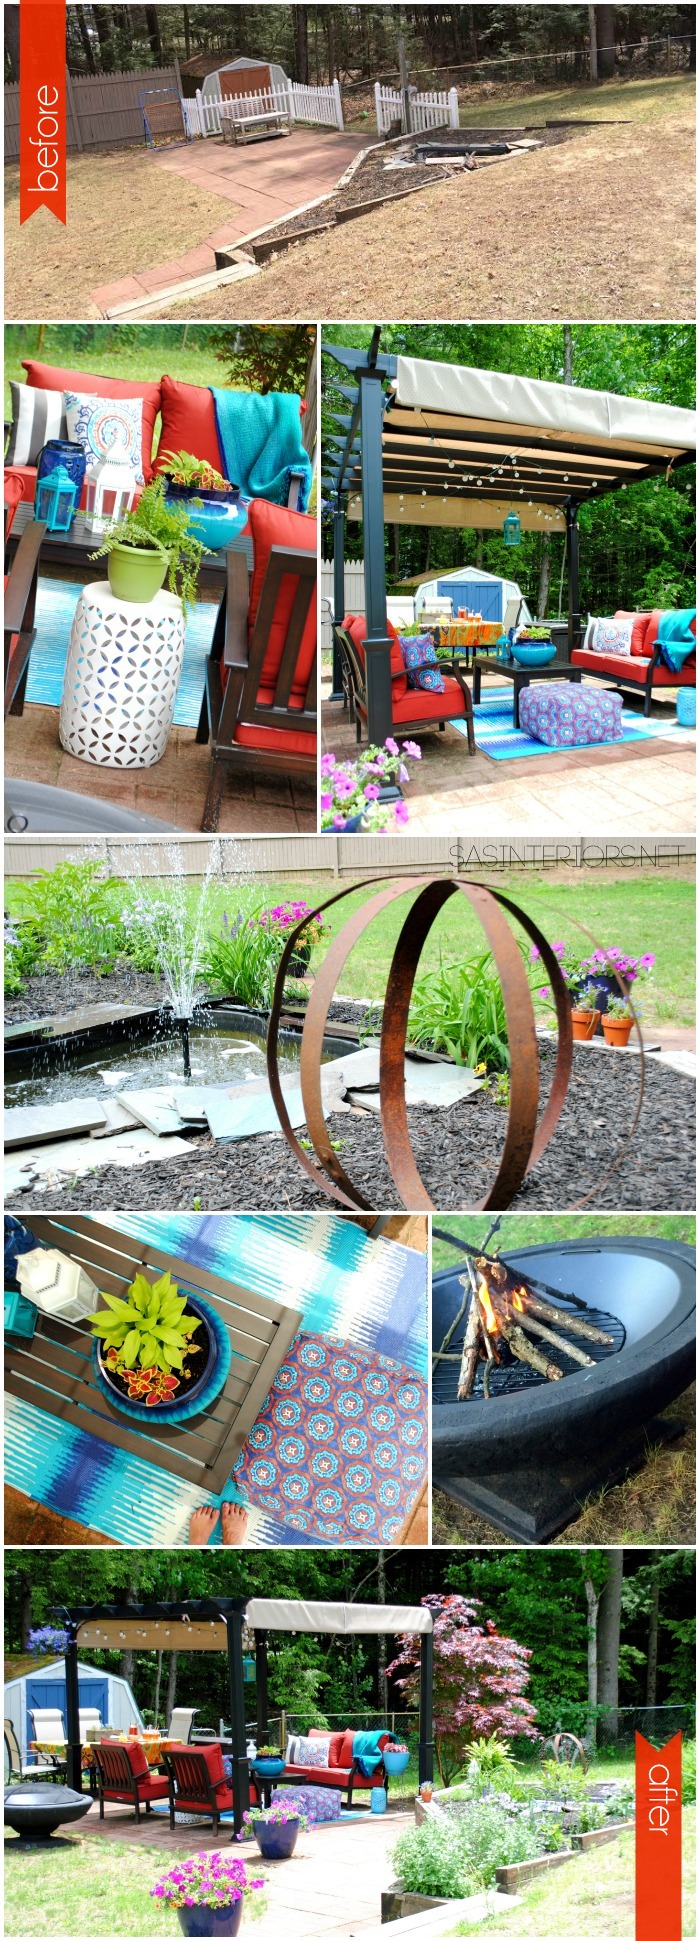
A lot of work has gone into the front of our home this year… curb appeal at it’s finest.  The porch got quite a few updates.  Here is this years Spring-right-into-Summer Front Porch…

Spring + Summer Front Porch: A small space filled with lots of colors and layers that create a welcoming entry.  See the rest of this porch + how it's evolved over the years! www.jennaburger.com

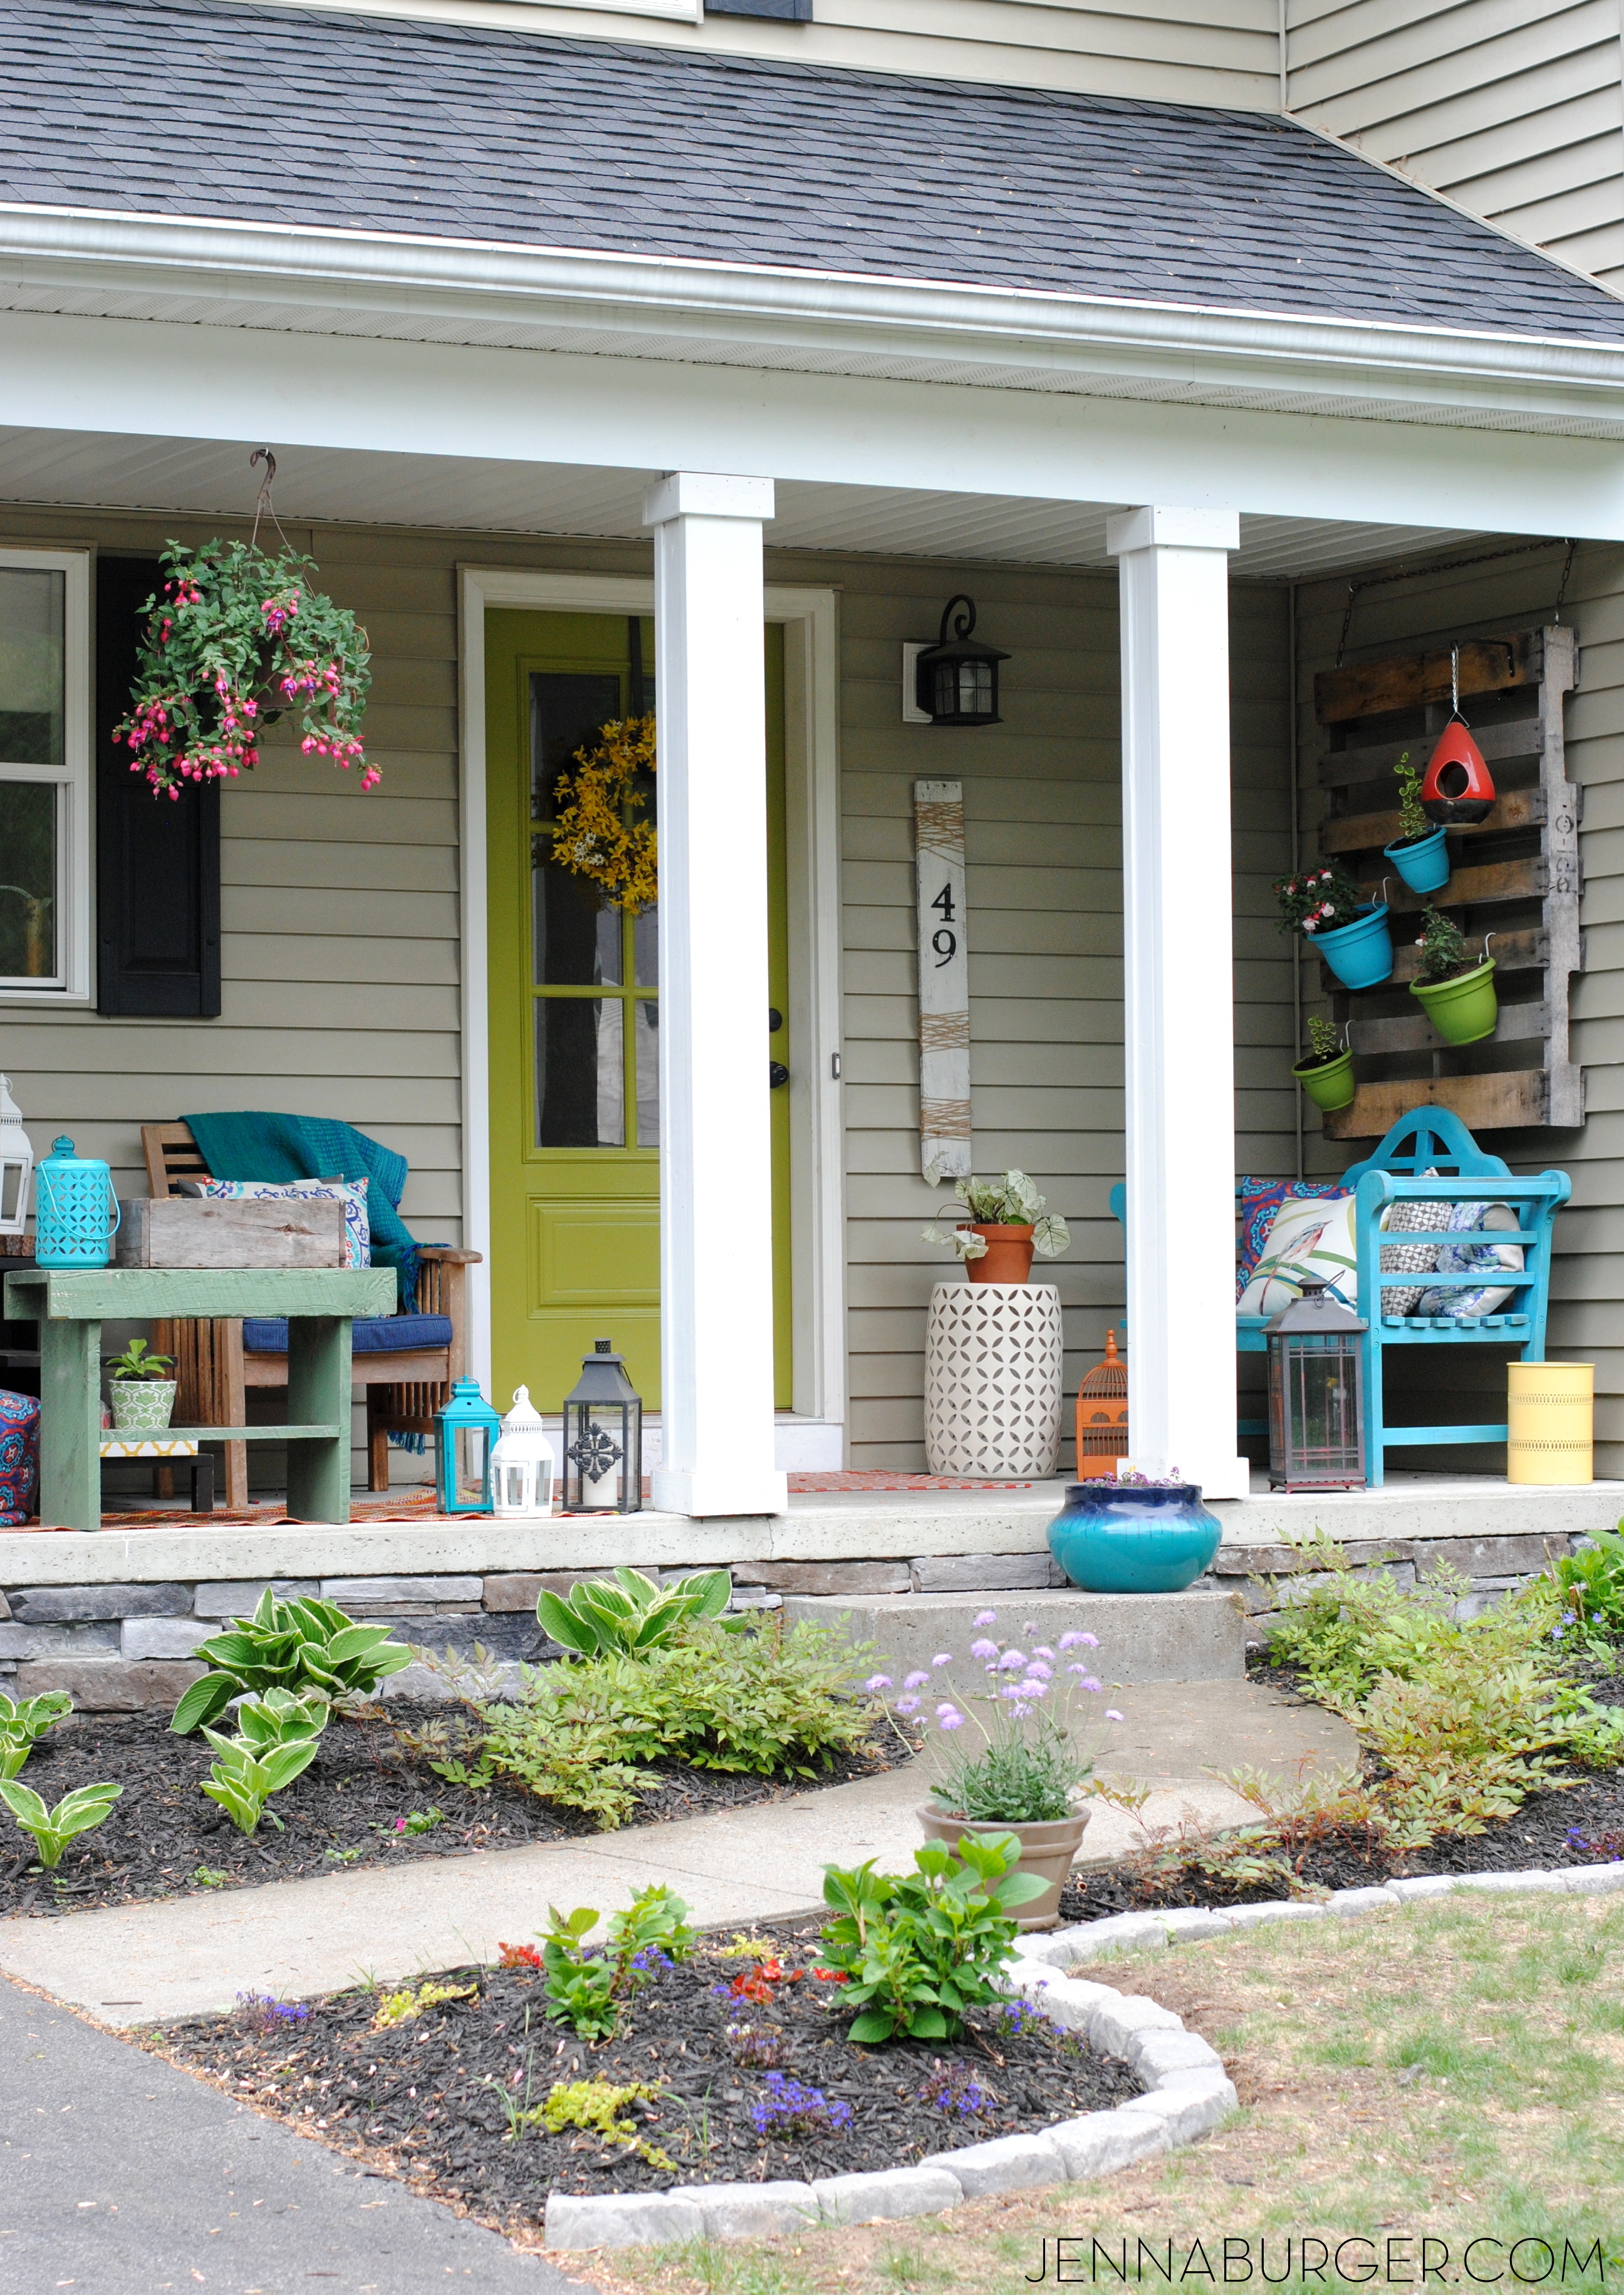
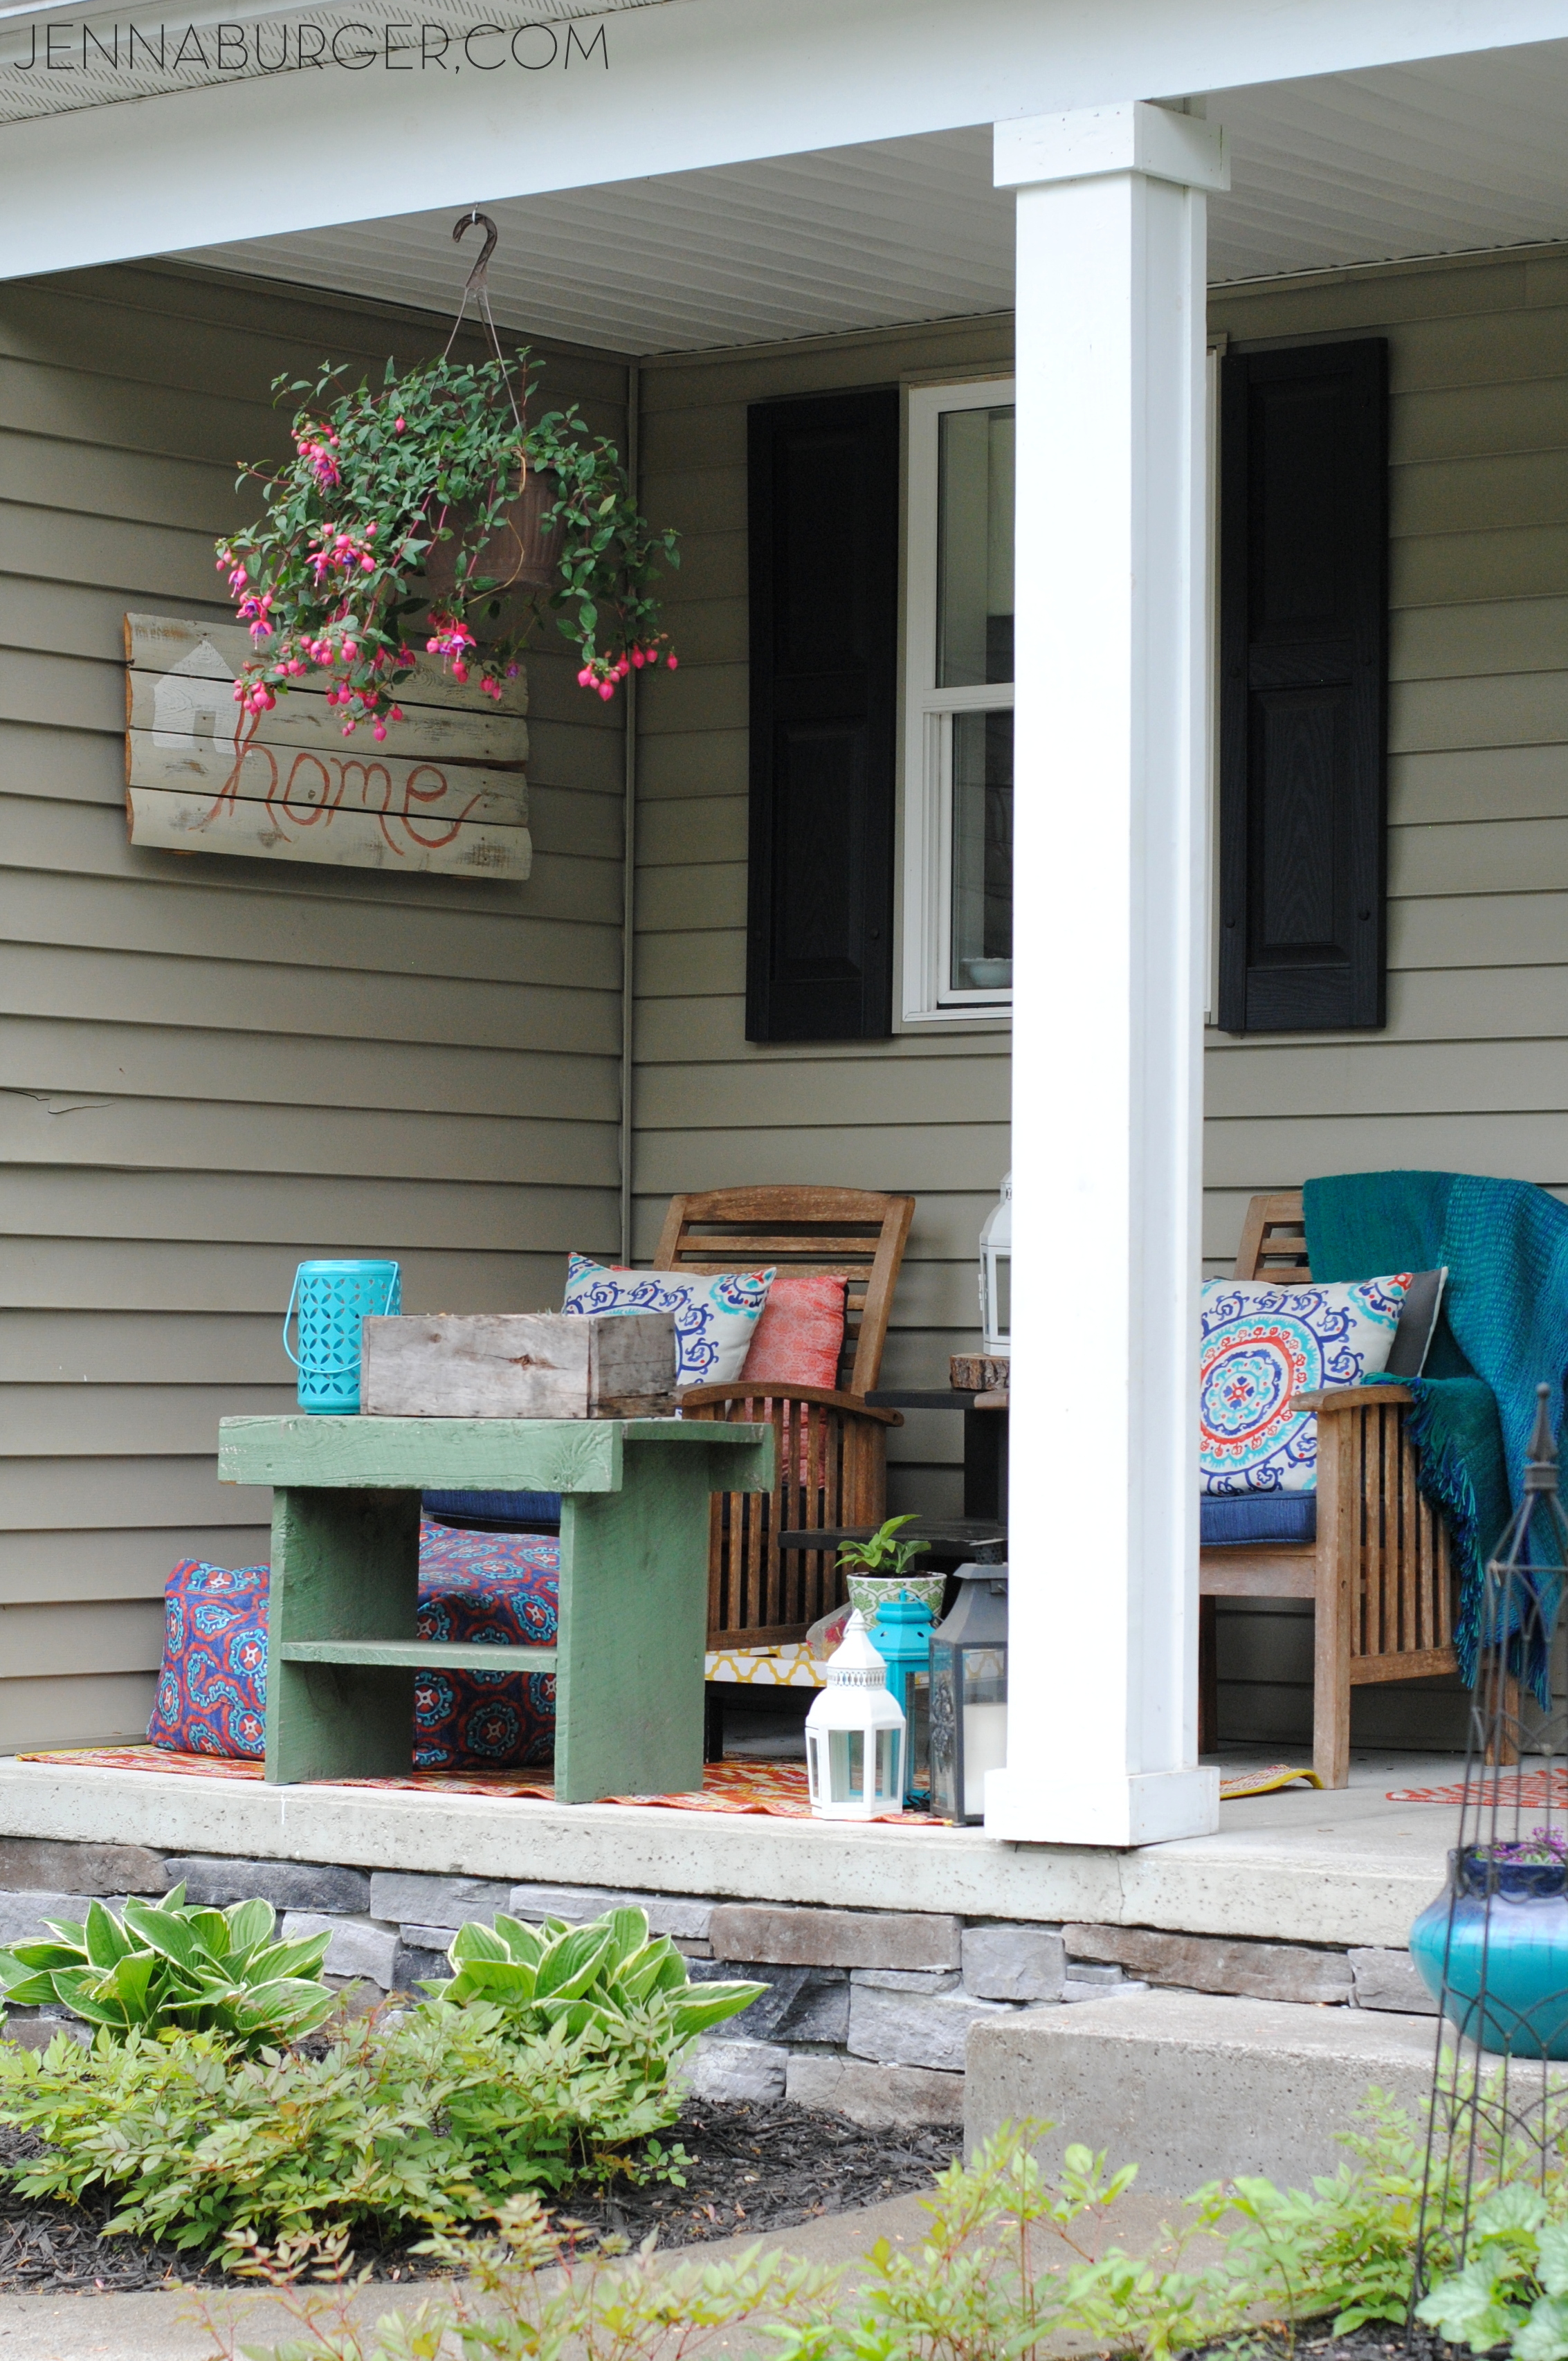
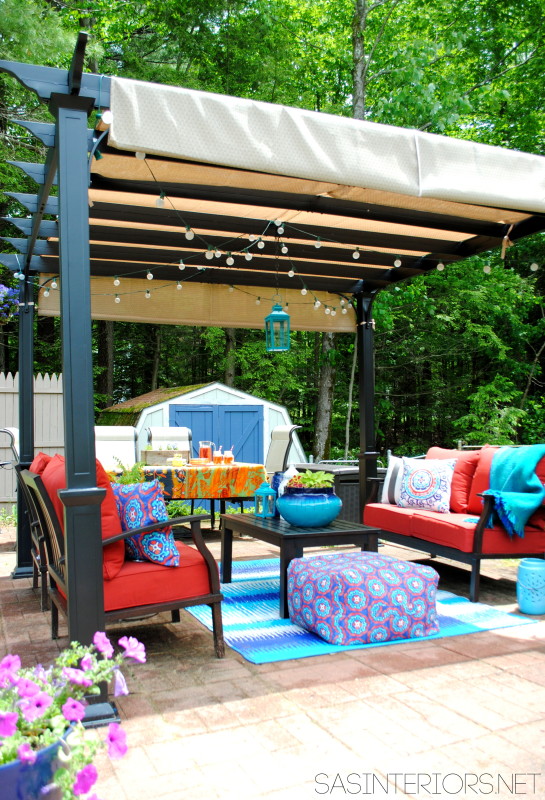
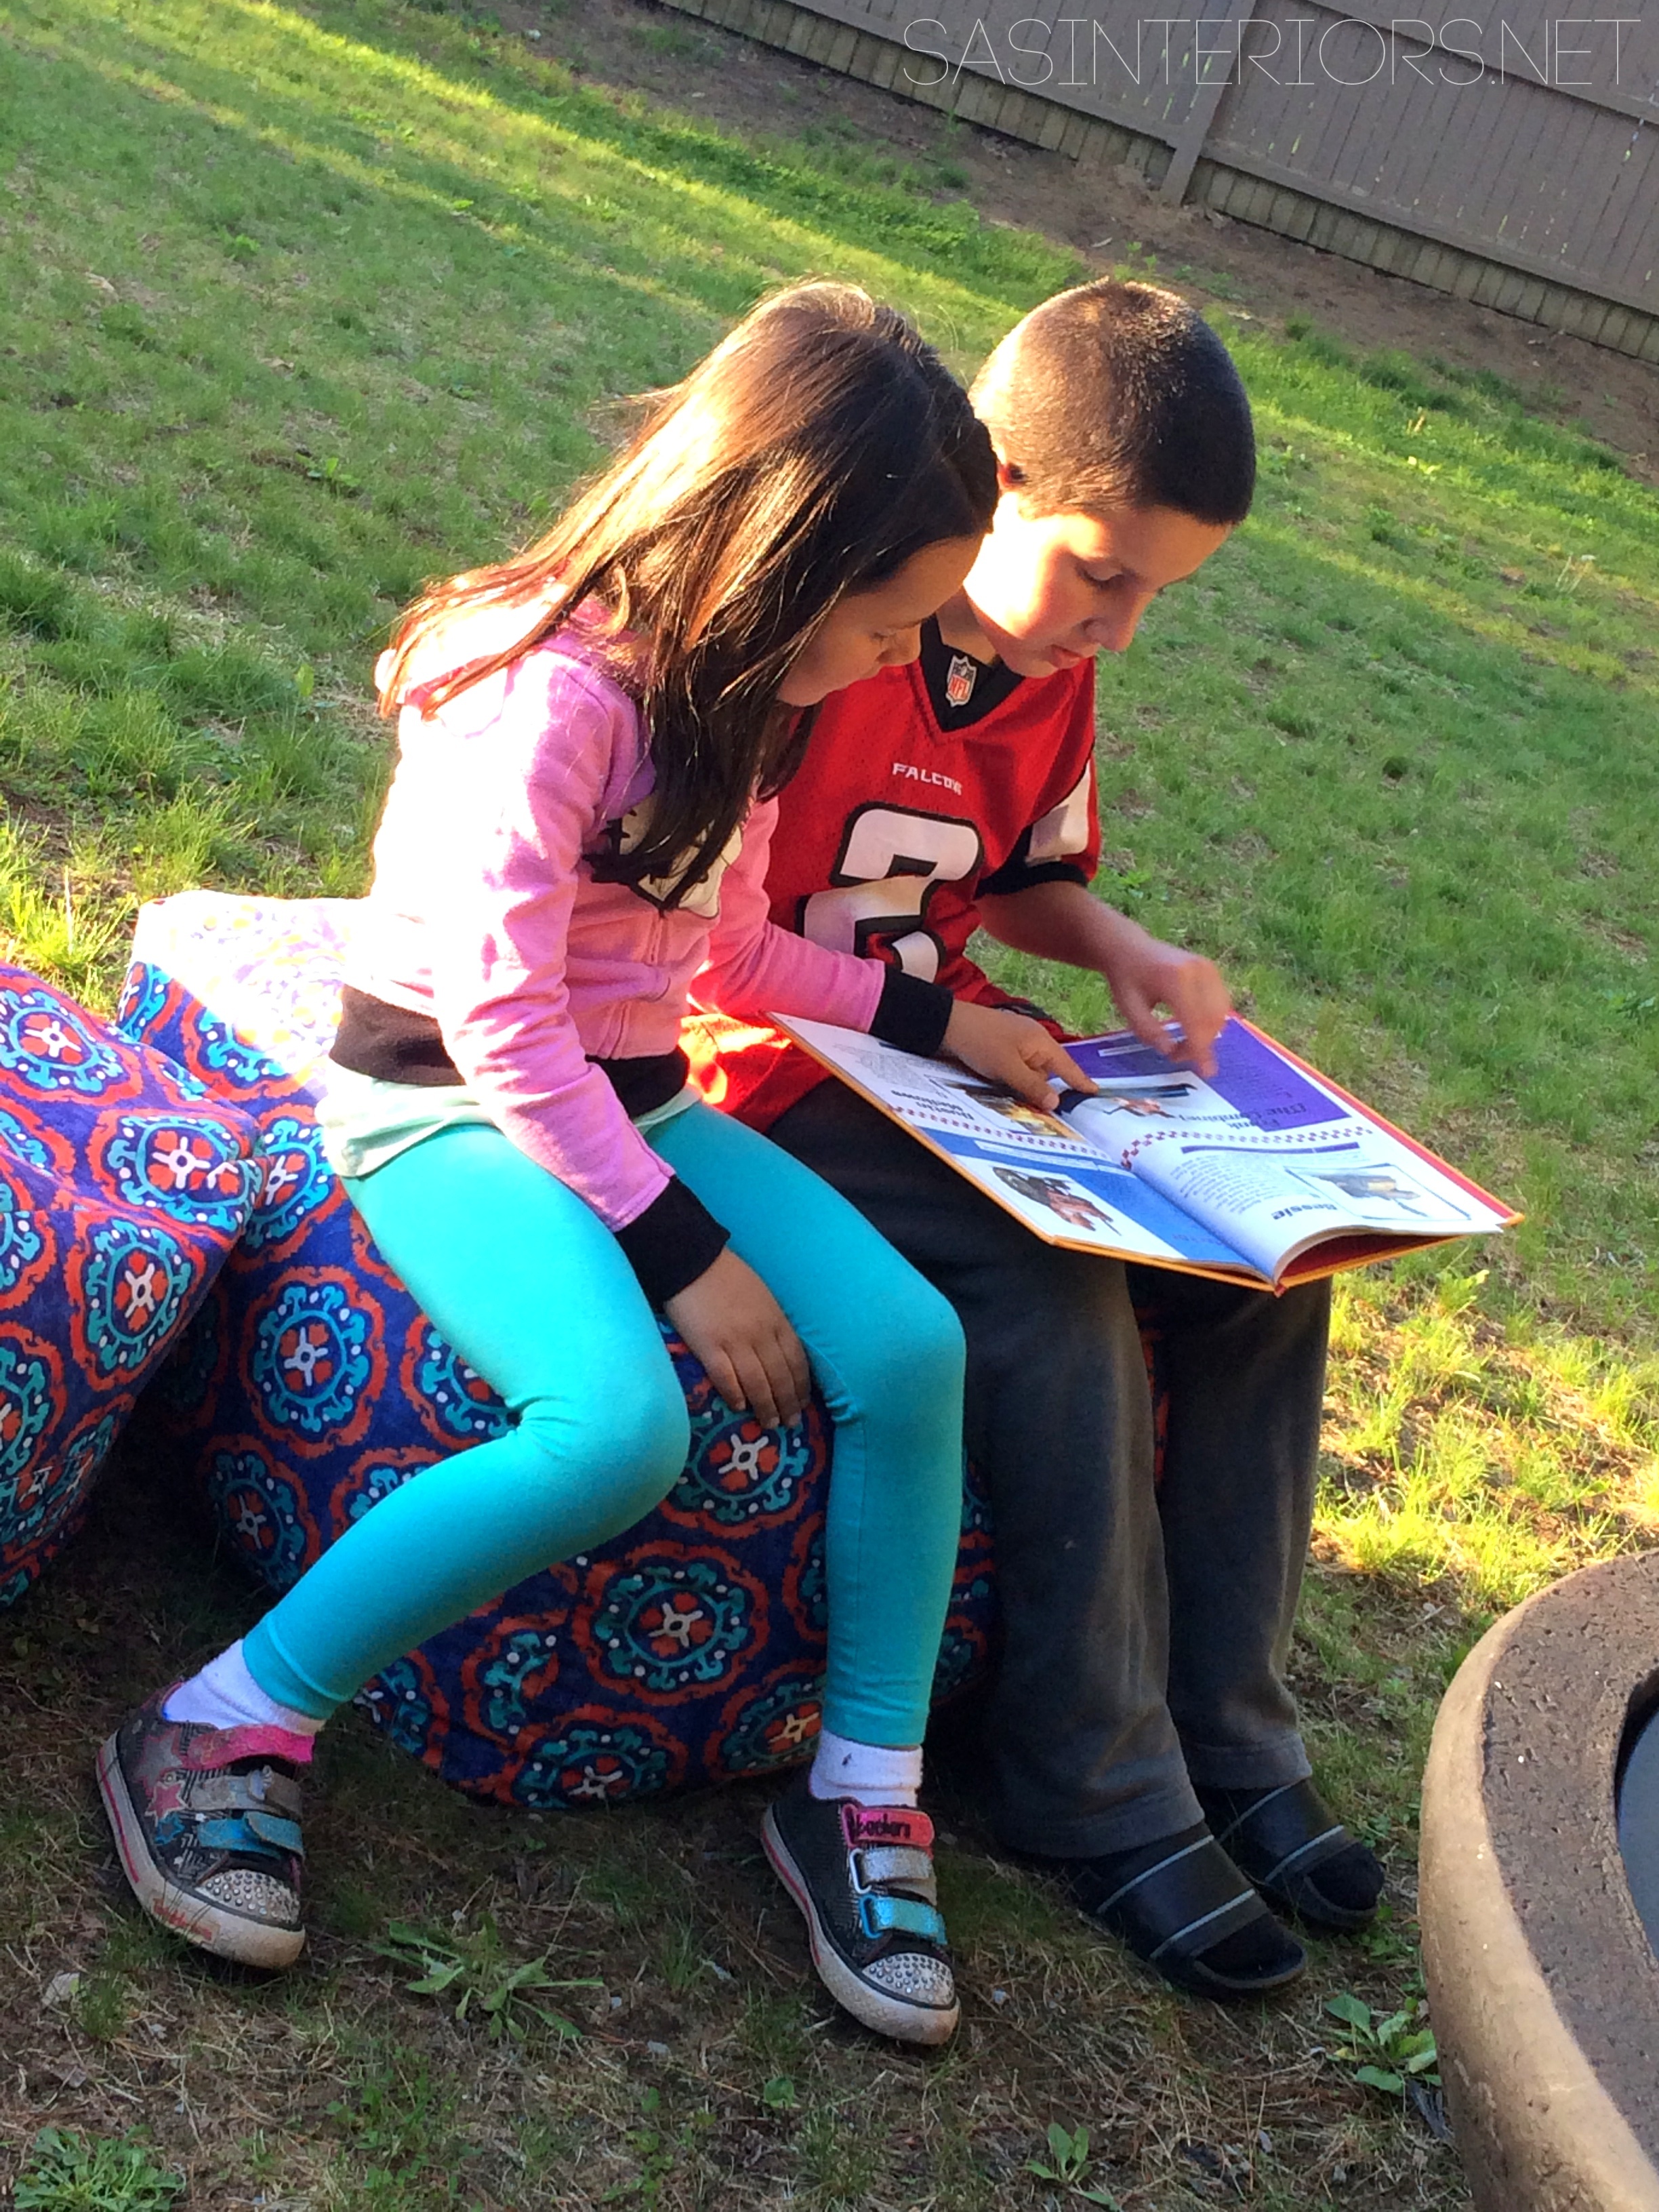
I feel lucky to have so many spots around our homestead to chill + put our feet up (the patio / the deck), but the one spot (which is by far the smallest of all) our clan of 5 always seems to choose to relax is the front porch.  Maybe it’s because the kids are often riding their bikes on the road or playing basketball in the driveway, but even when we’re playing a game of Uno, all of us pretty much always choose the front porch.

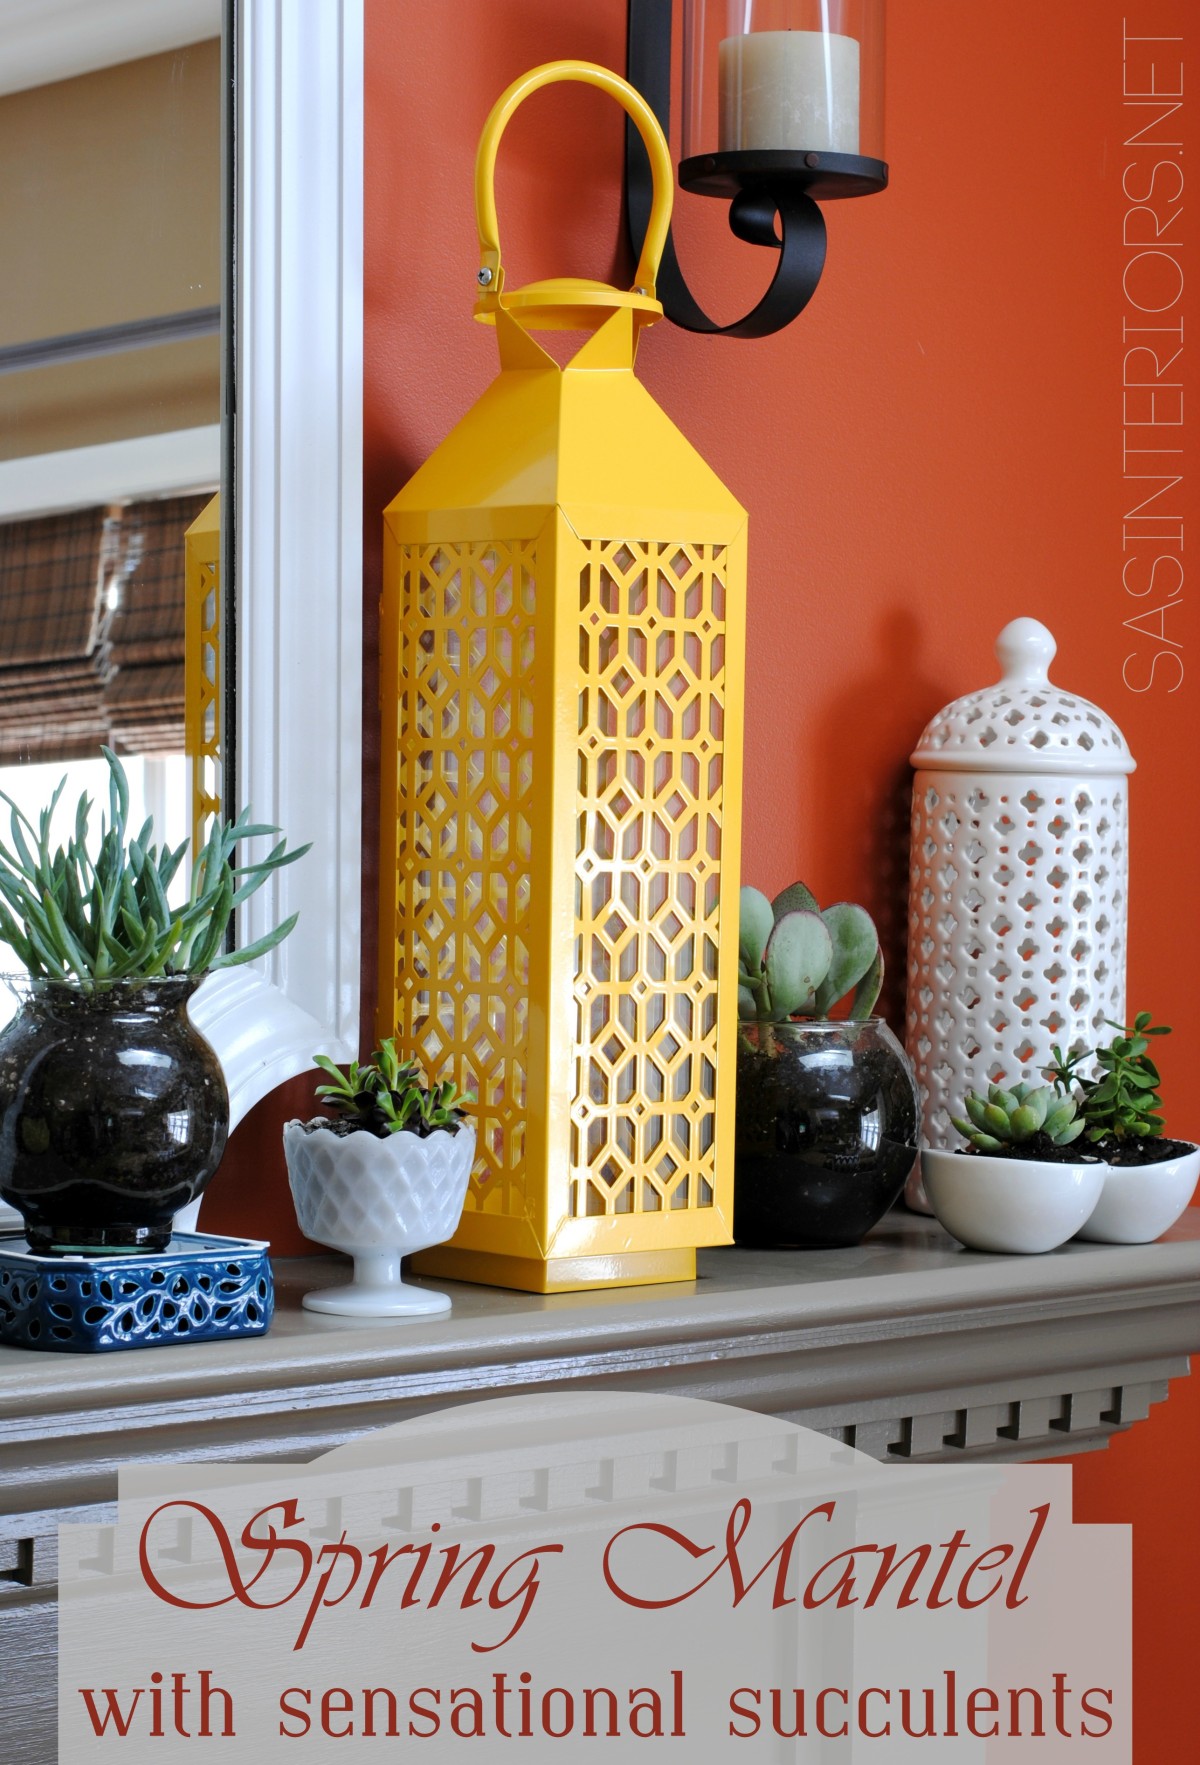
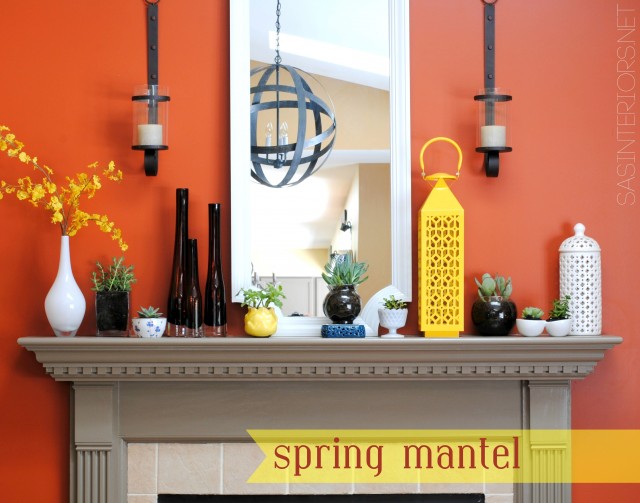
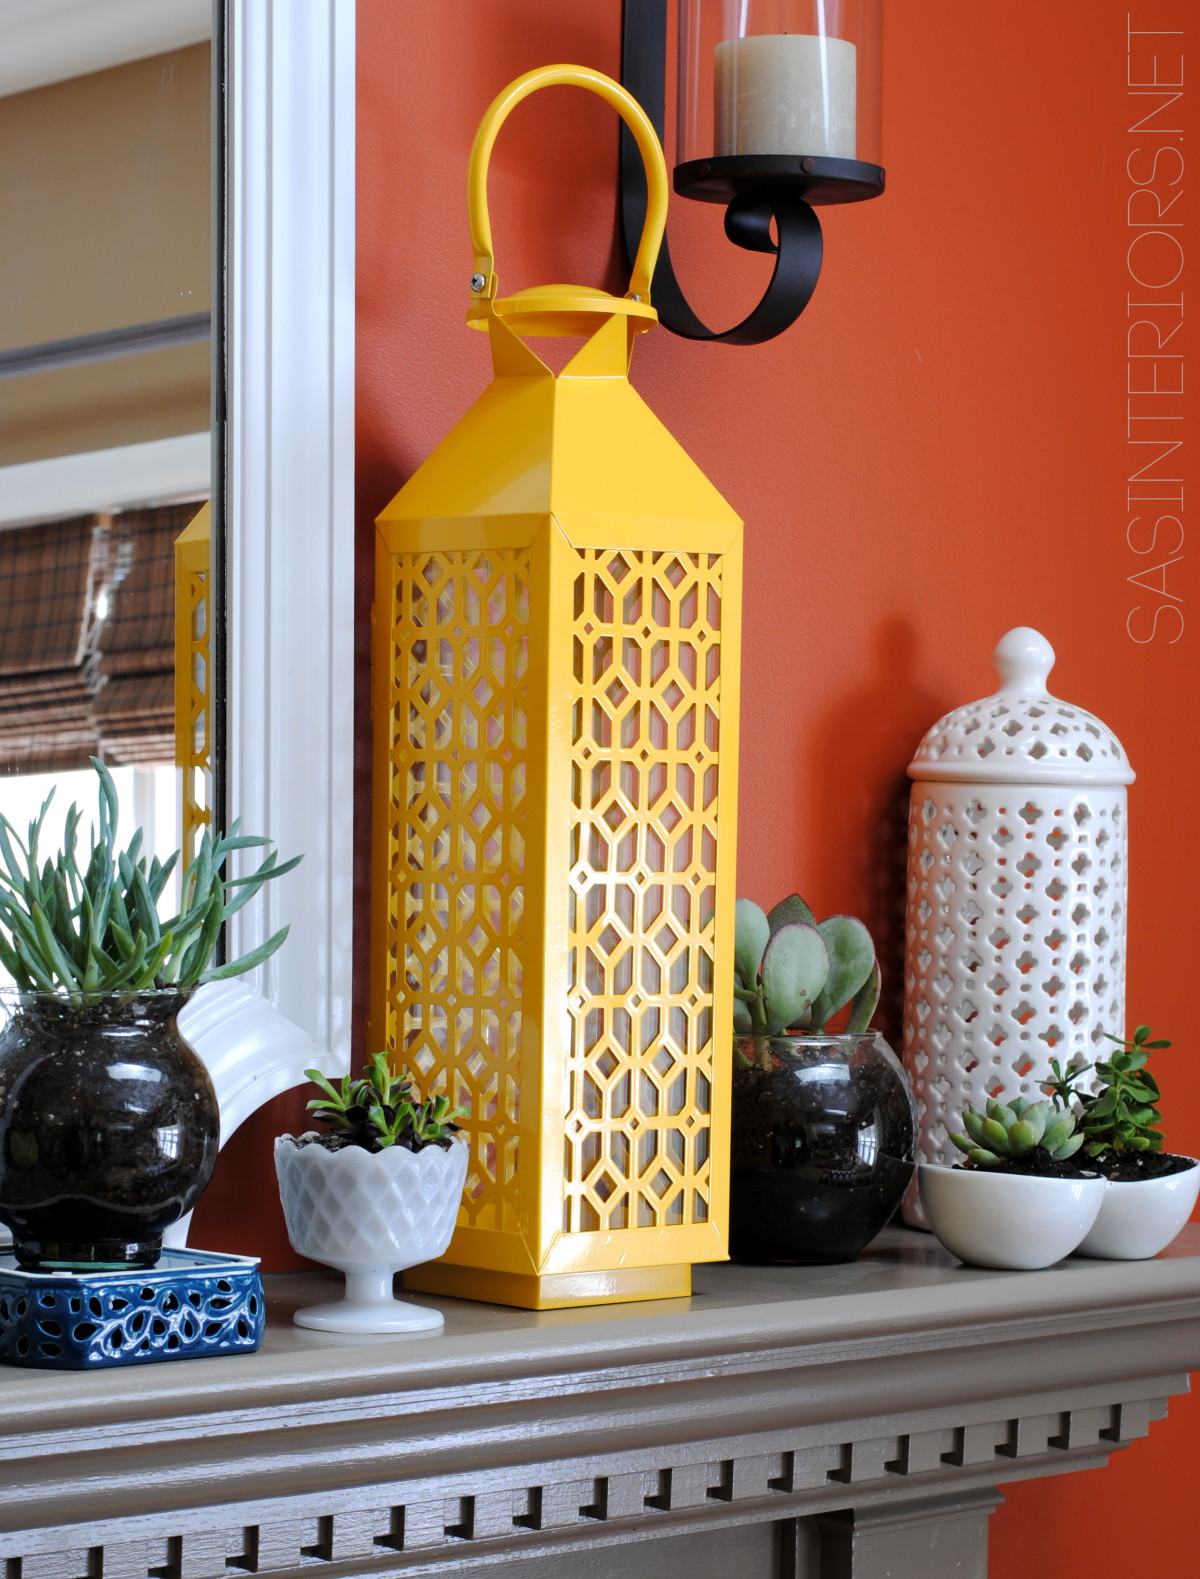
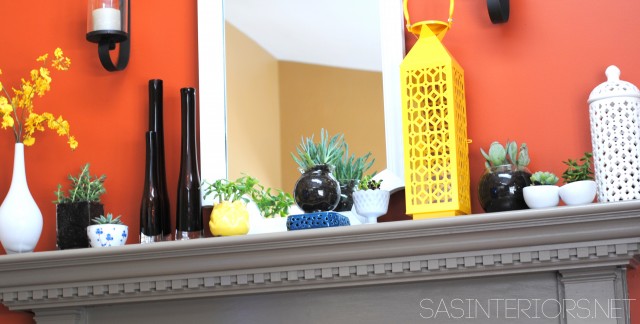
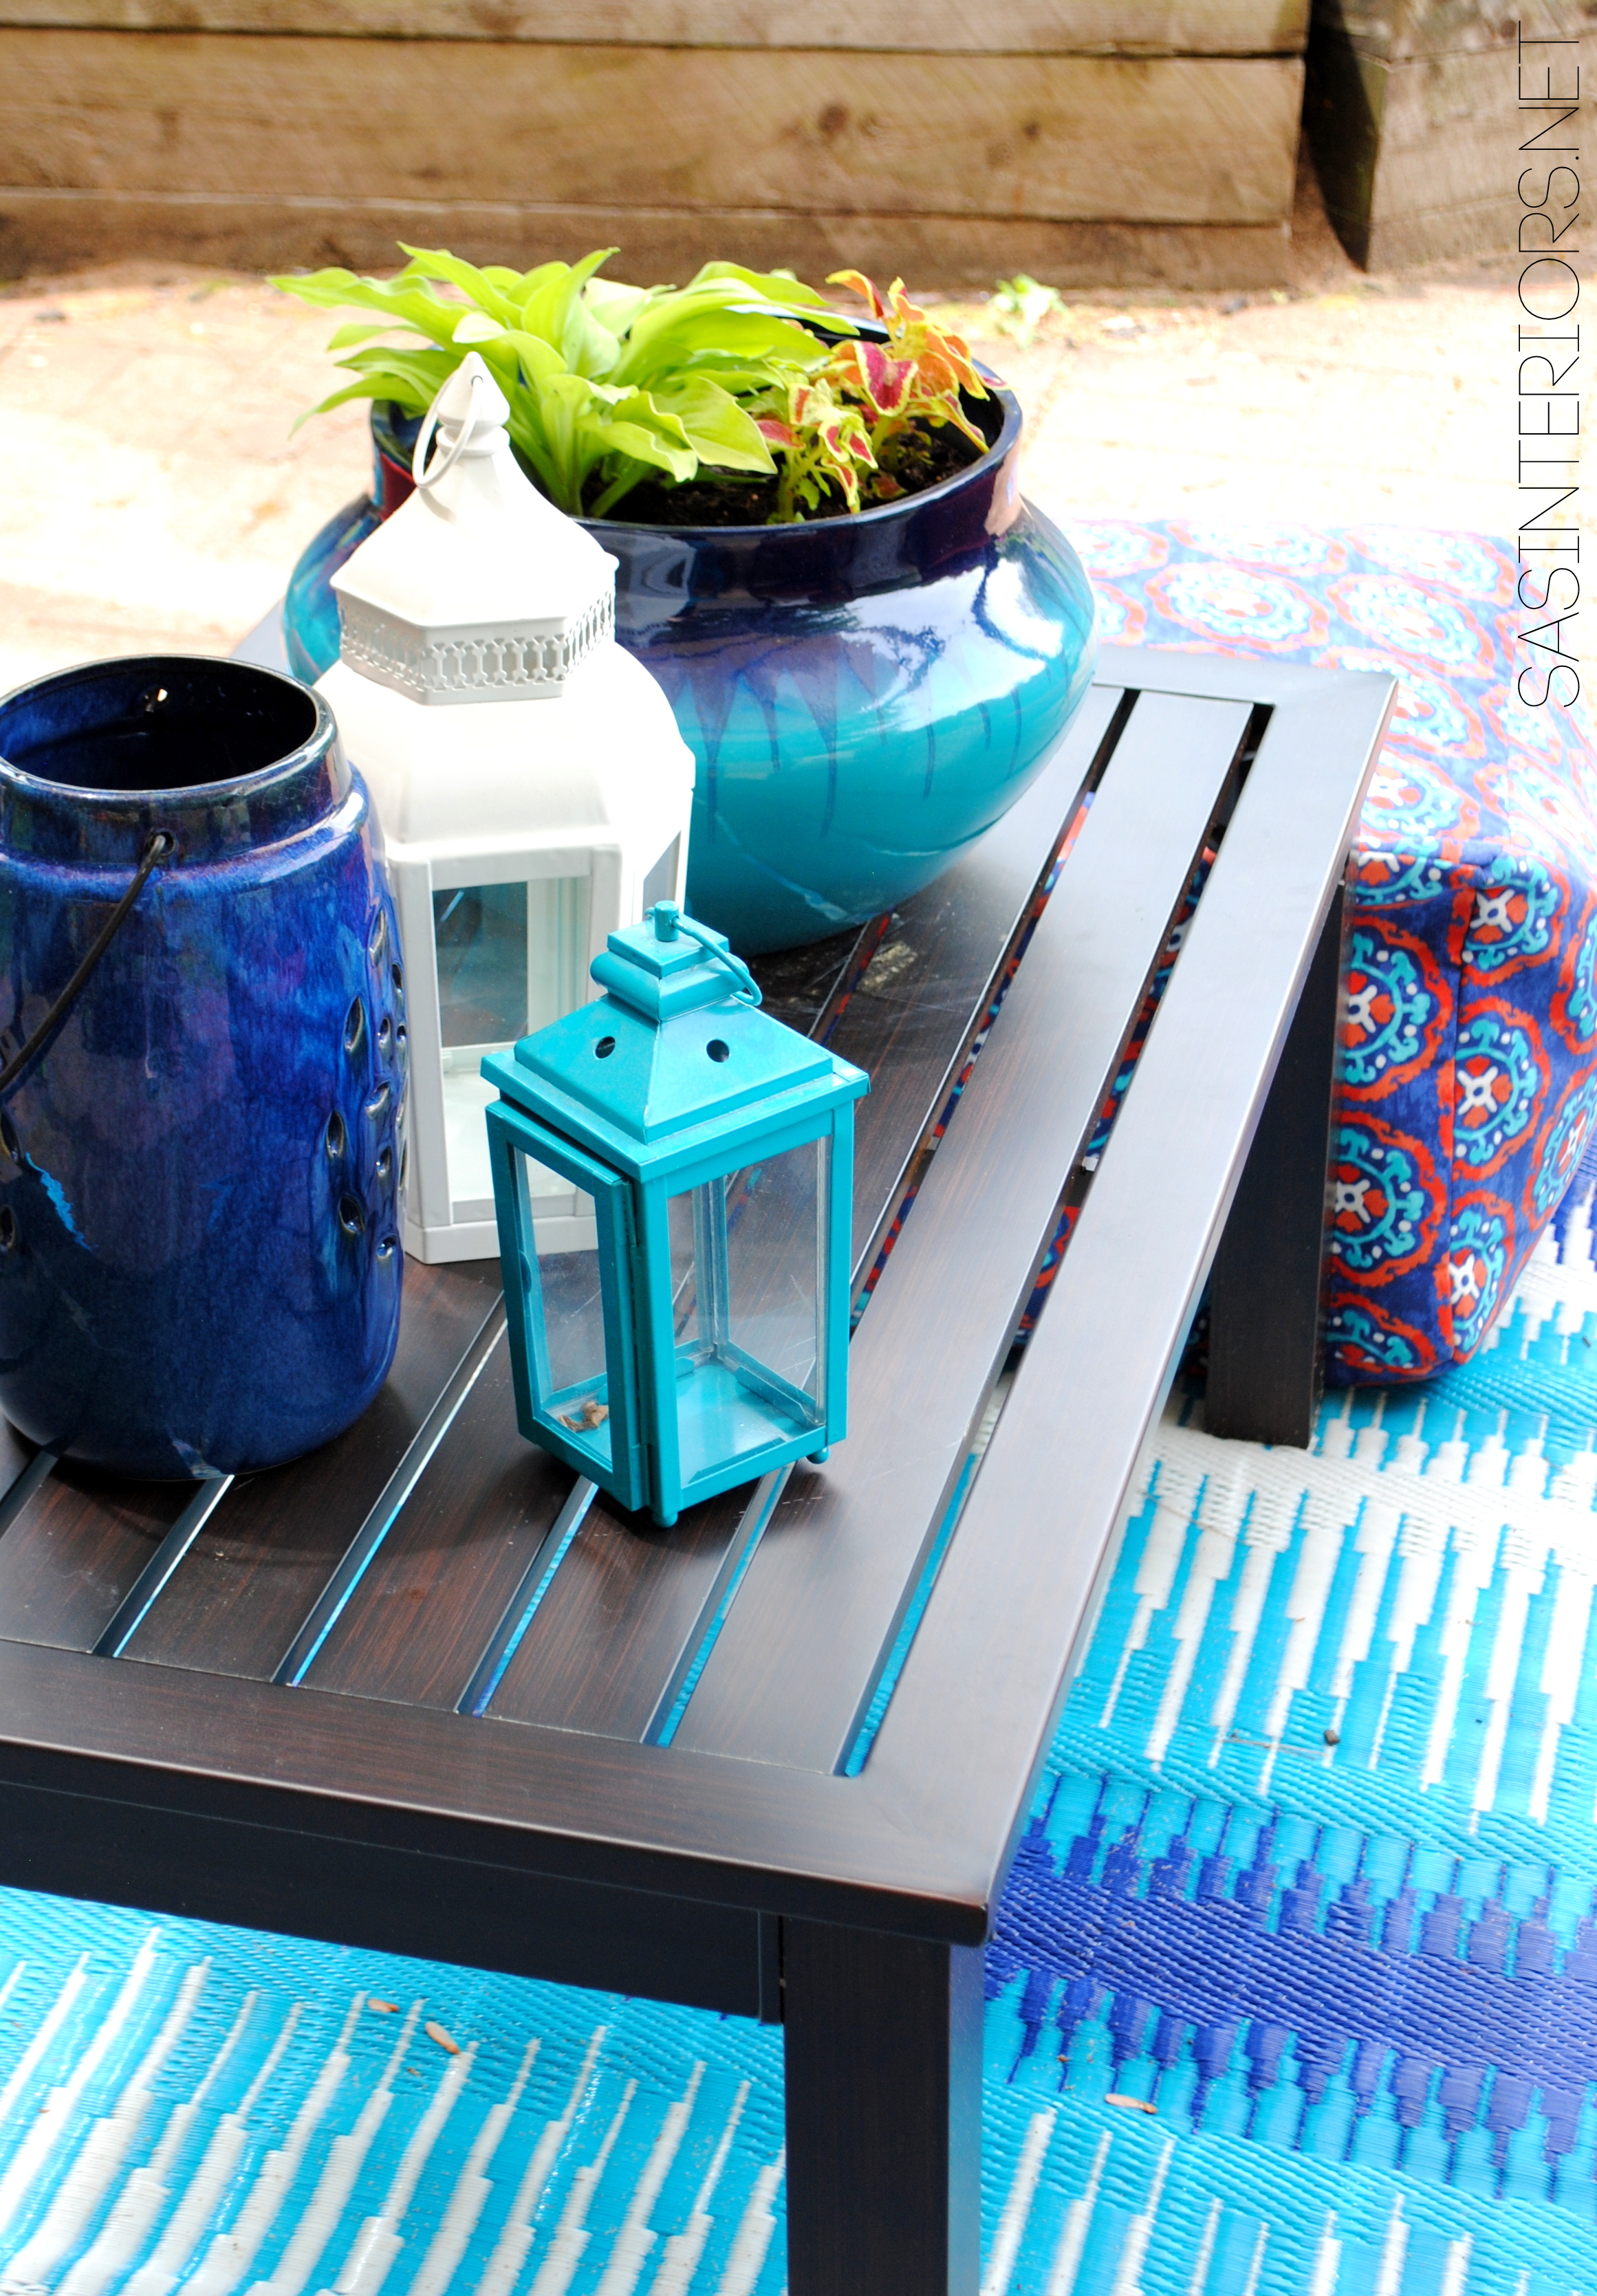
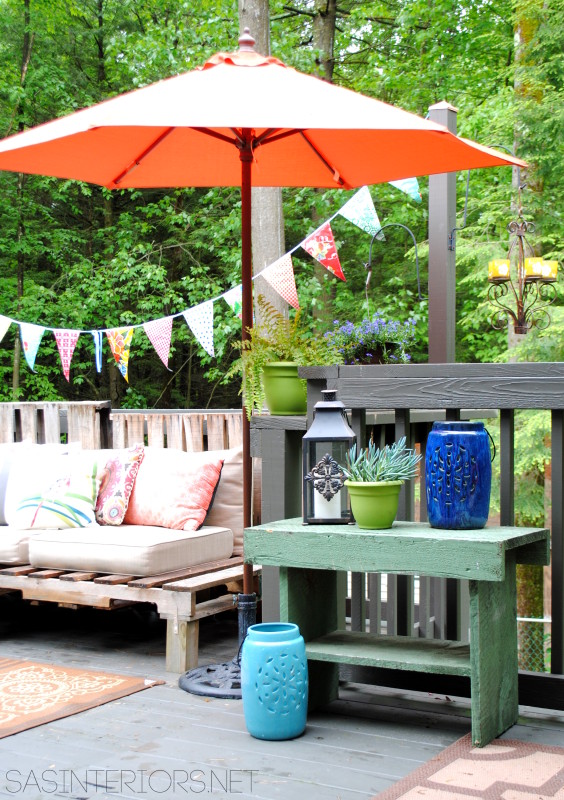
It certainly is quaint + cozy…

Spring + Summer Front Porch: A small space filled with lots of colors and layers that create a welcoming entry.  See the rest of this porch + how it's evolved over the years! www.jennaburger.com

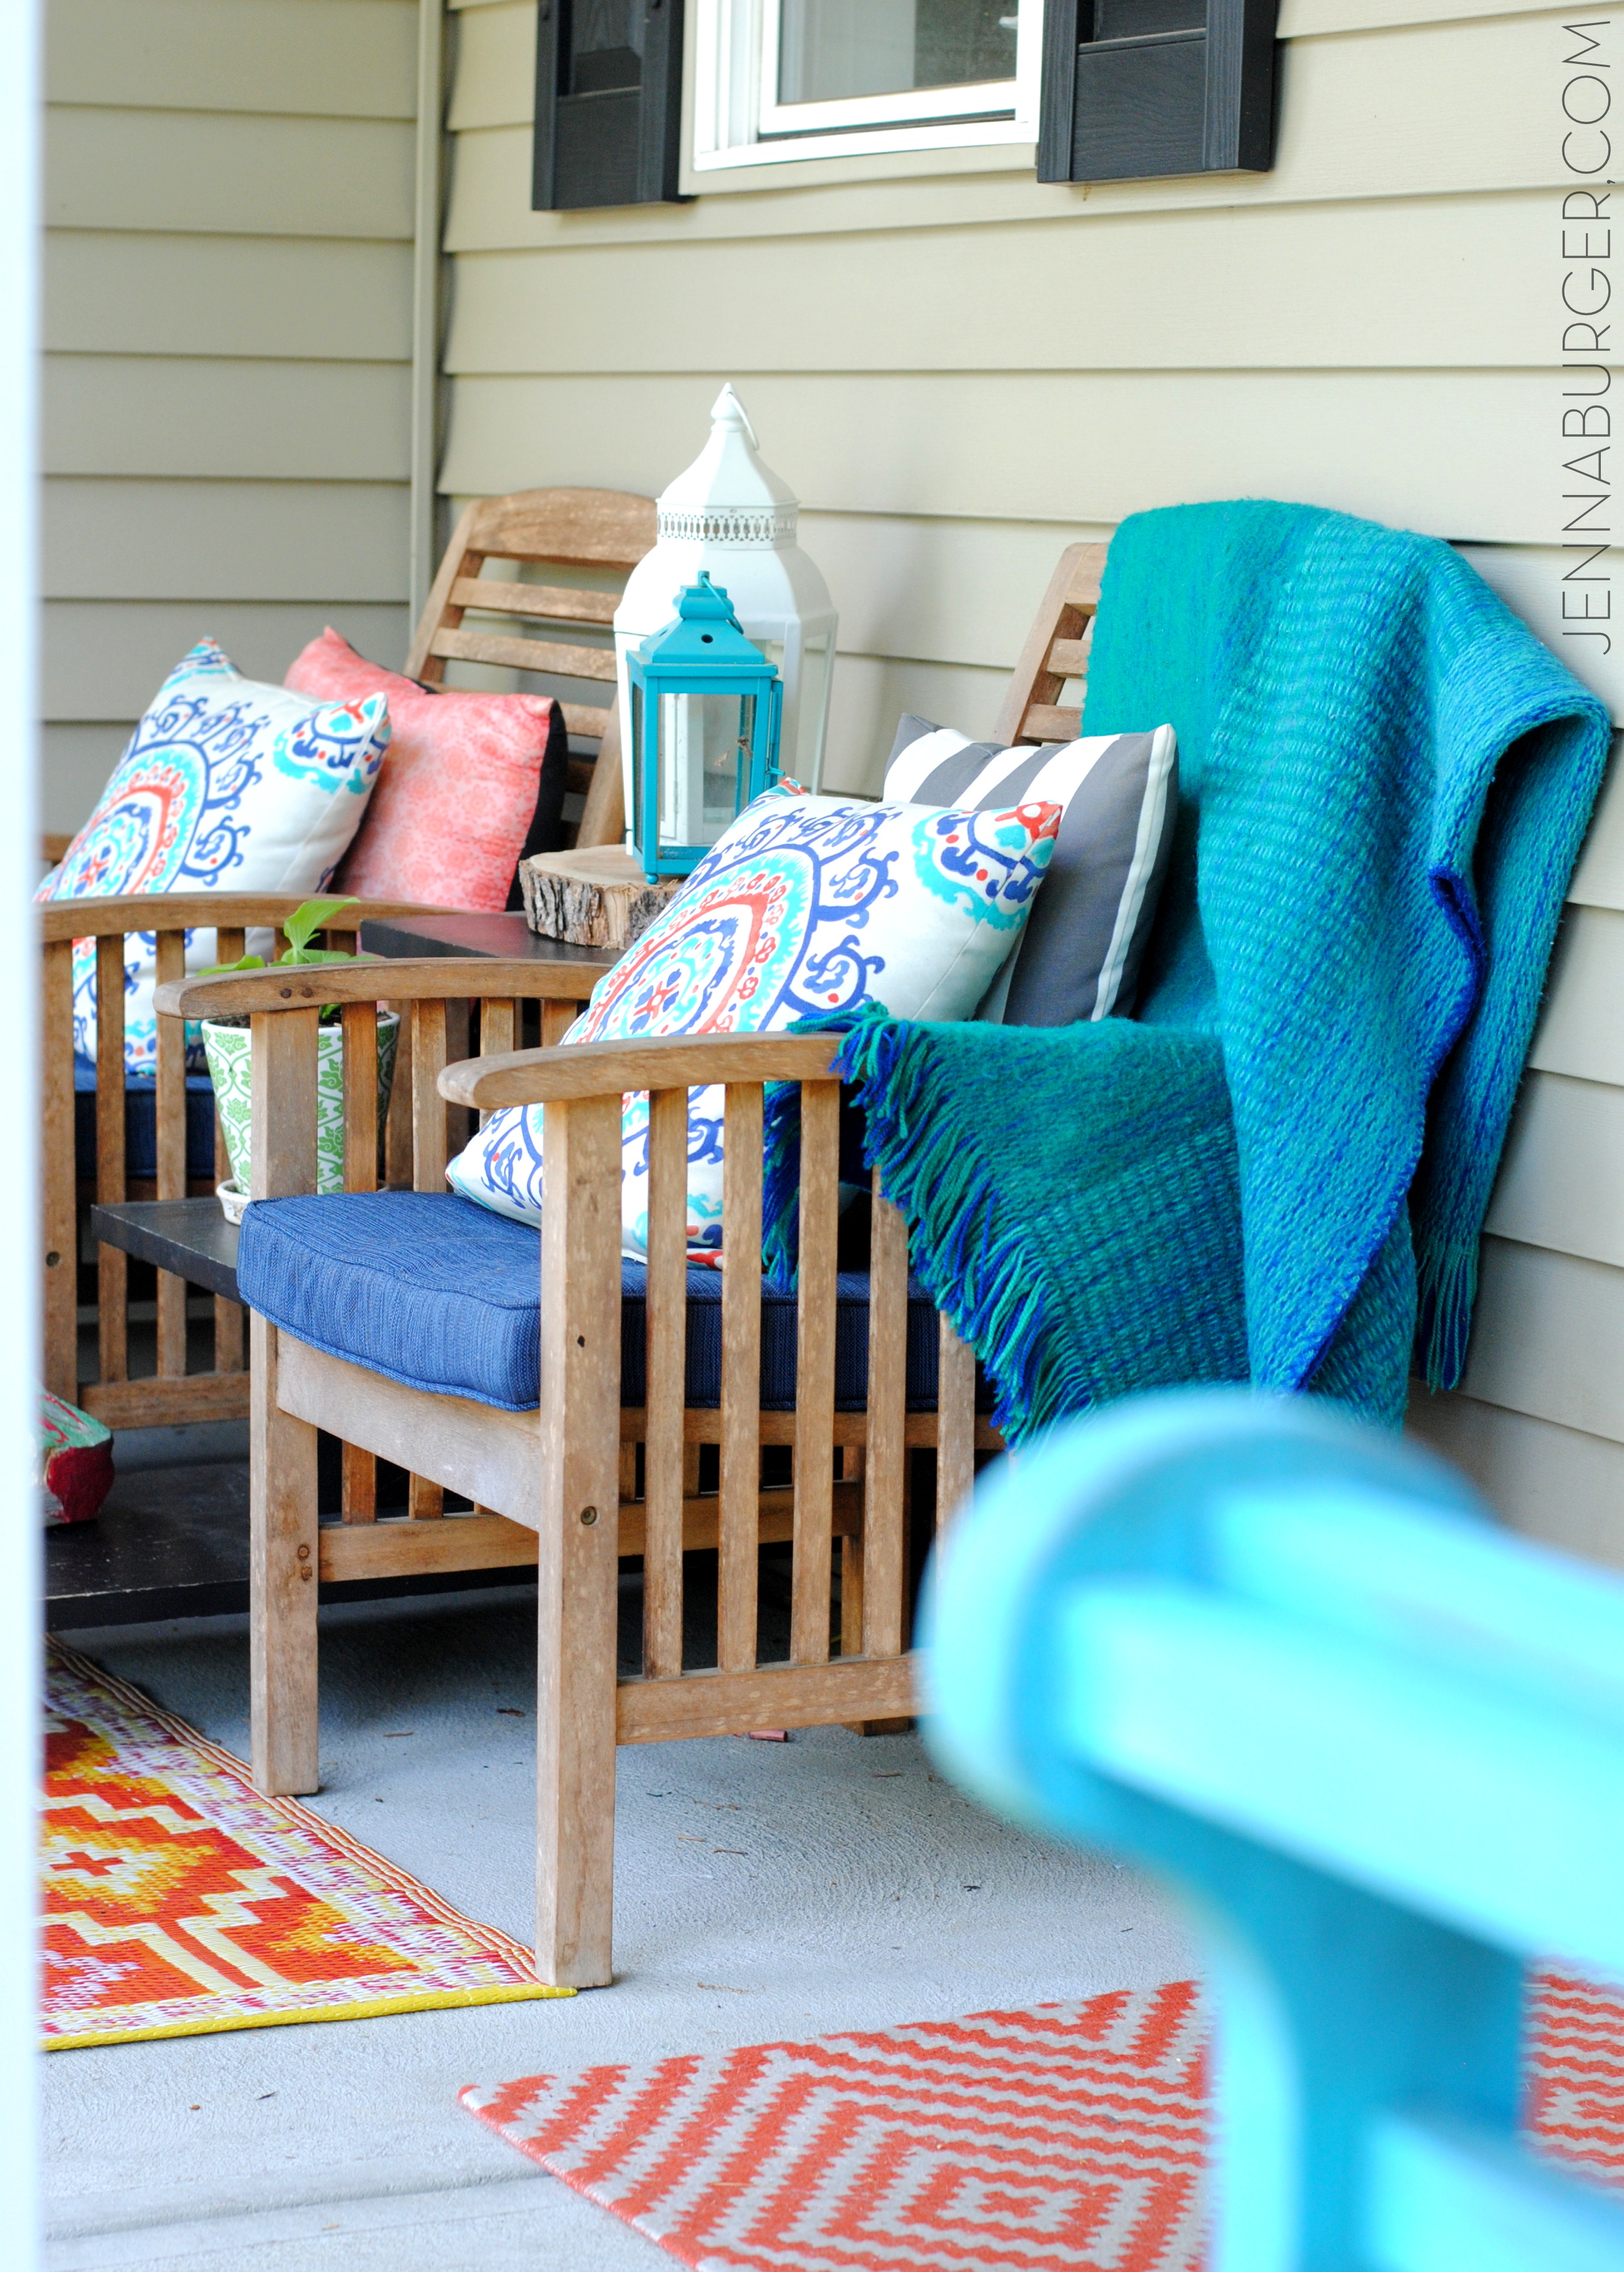
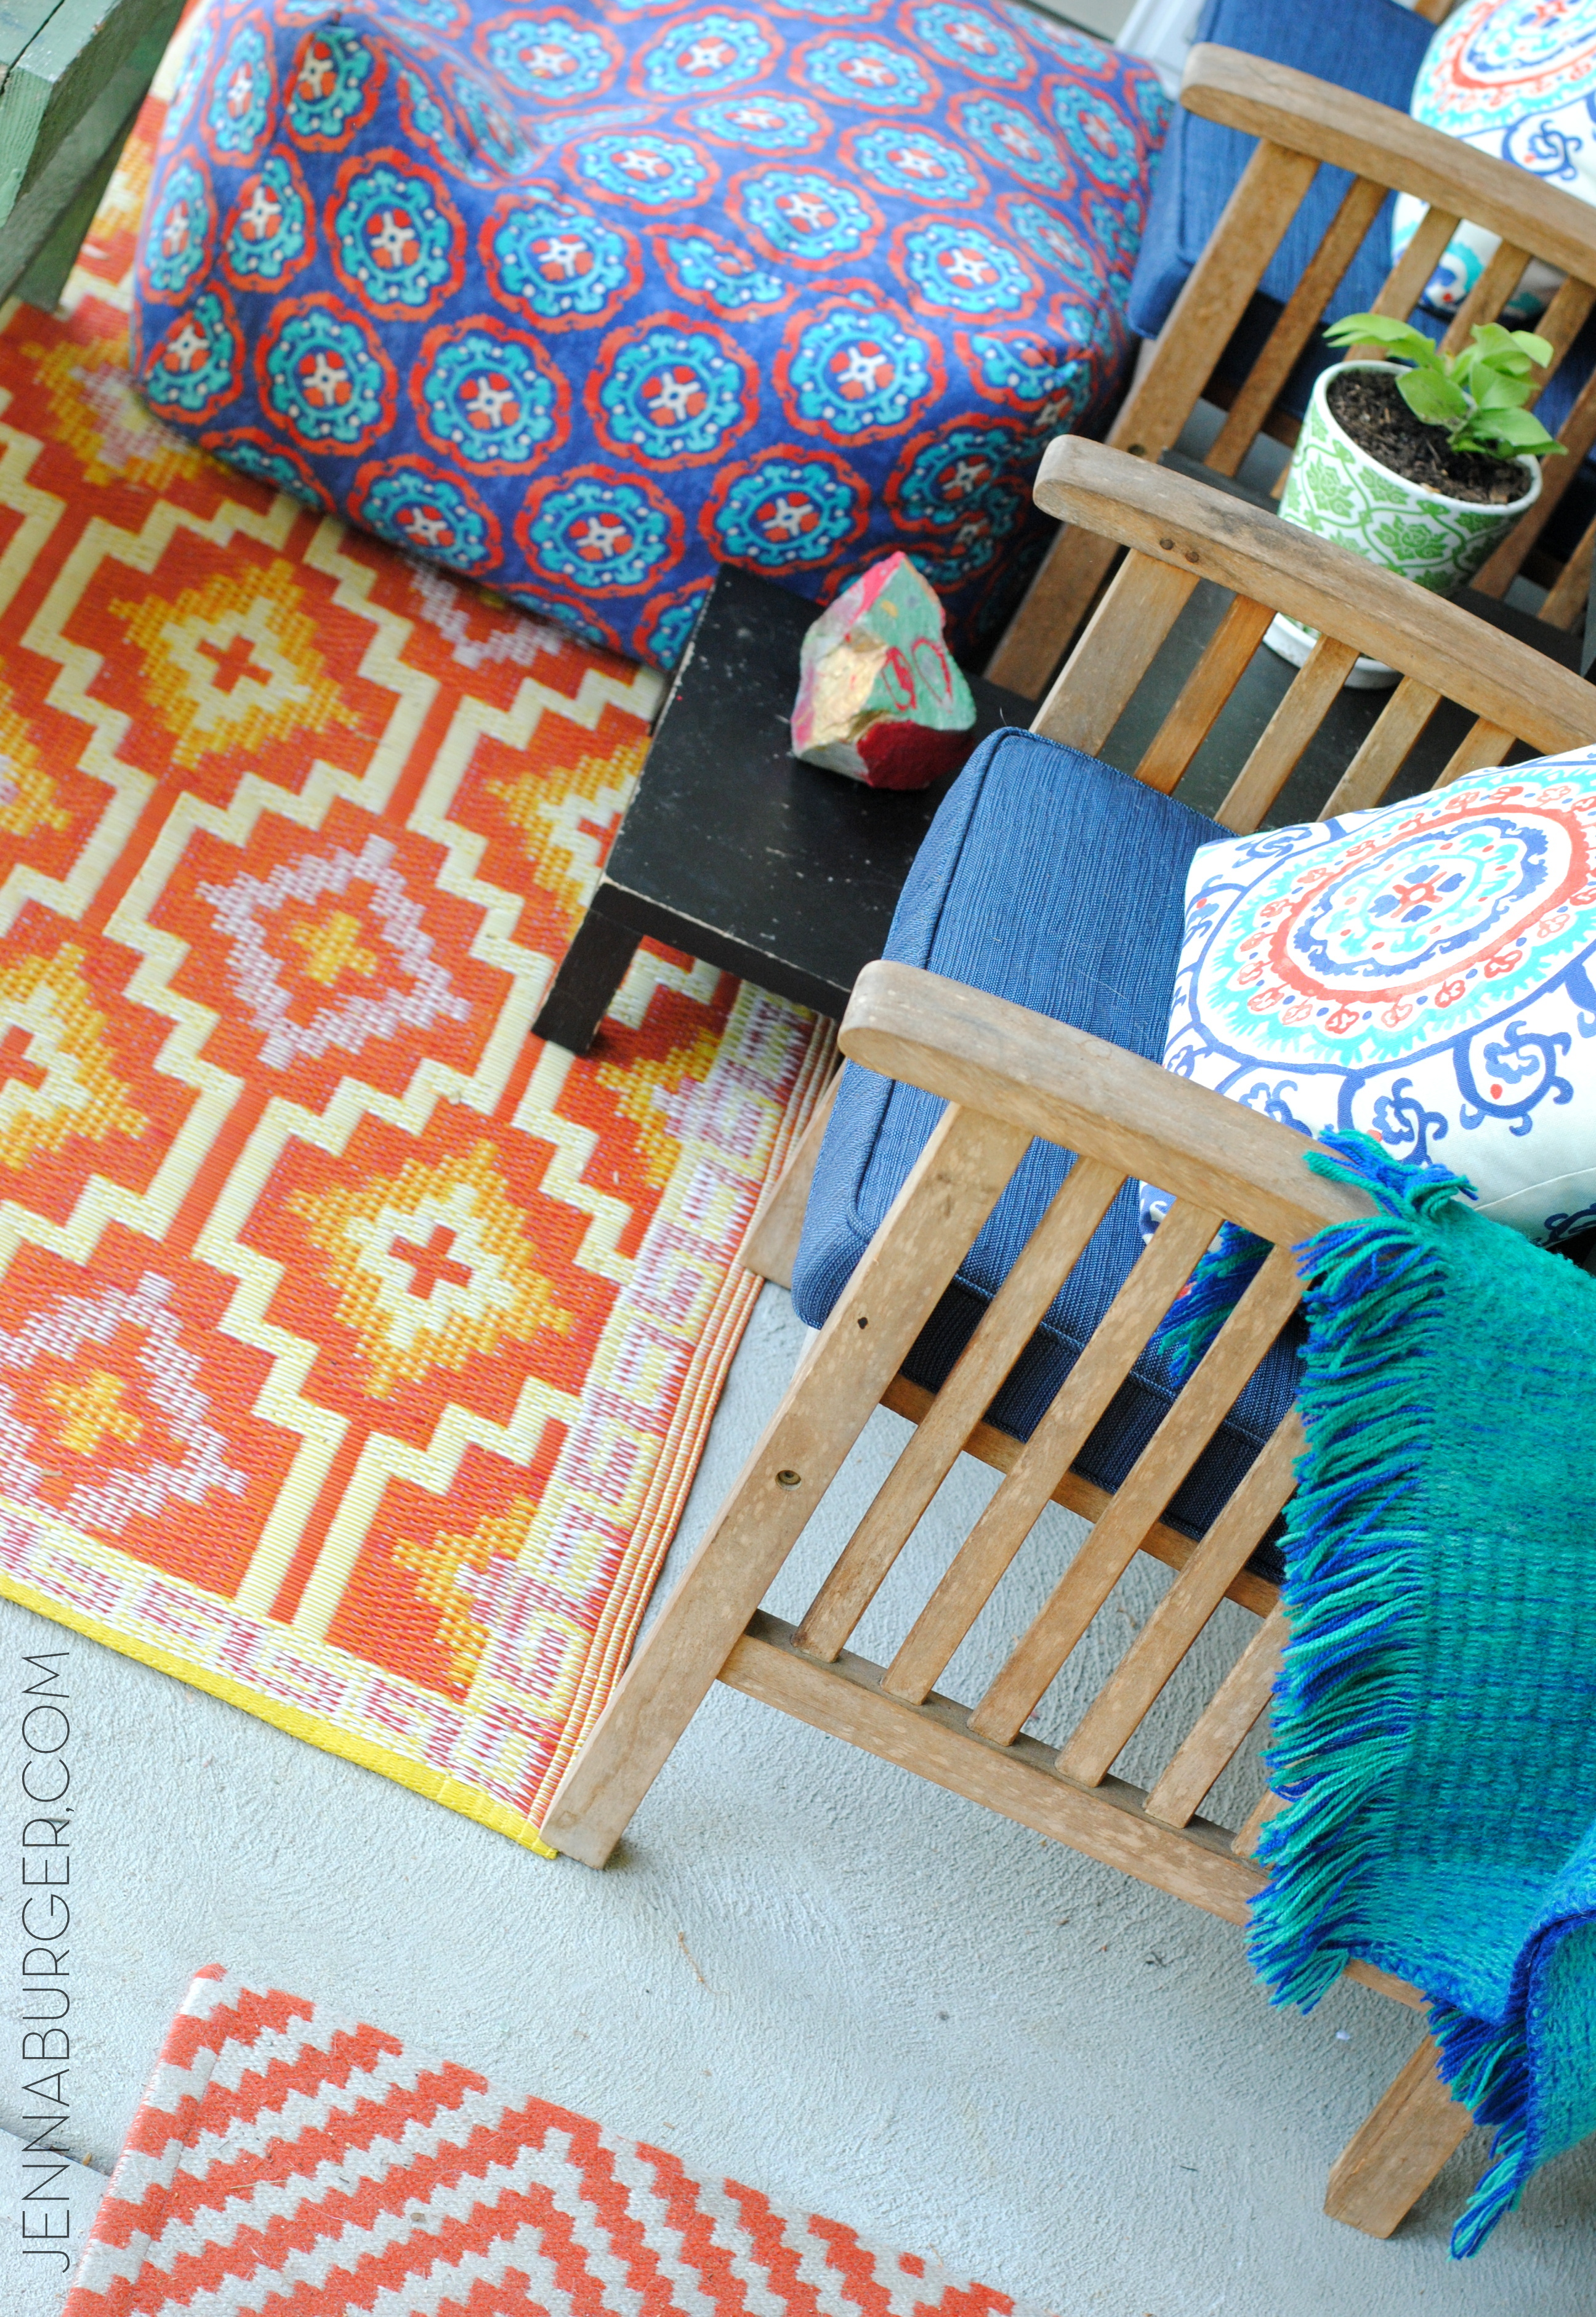
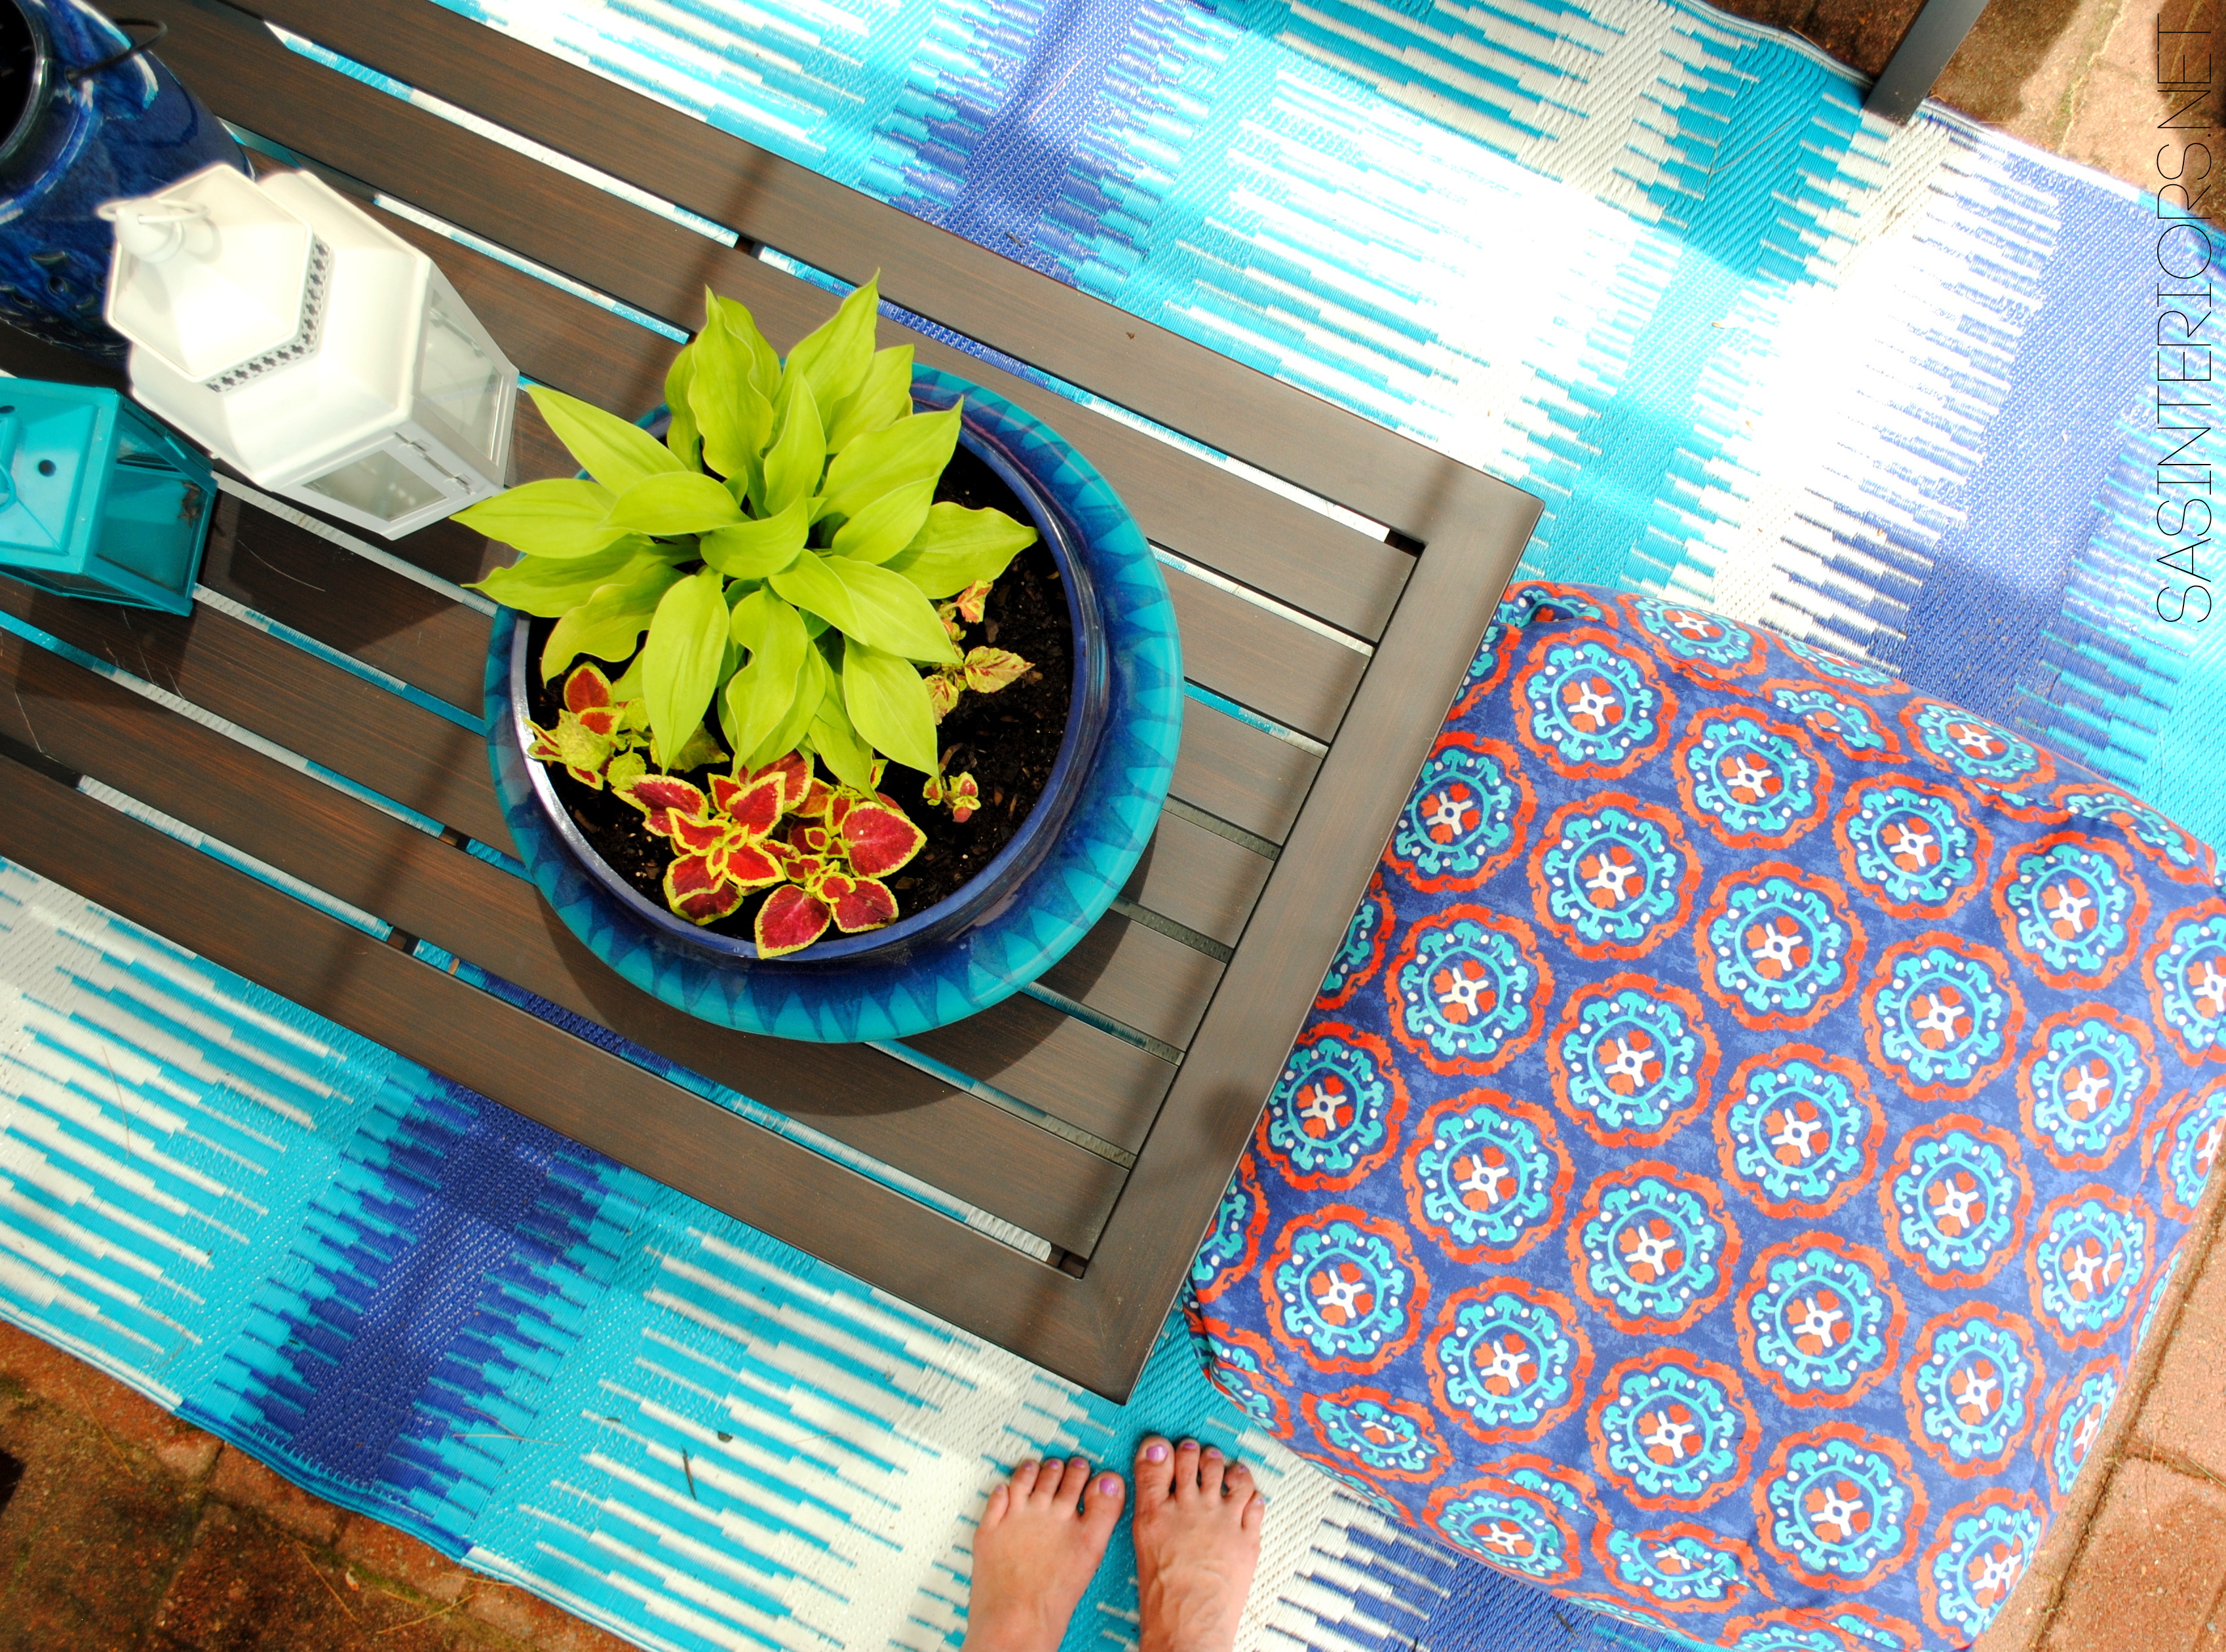
…with lots of color + texture.

Spring + Summer Front Porch: A small space filled with lots of colors and layers that create a welcoming entry.  See the rest of this porch + how it's evolved over the years! www.jennaburger.com

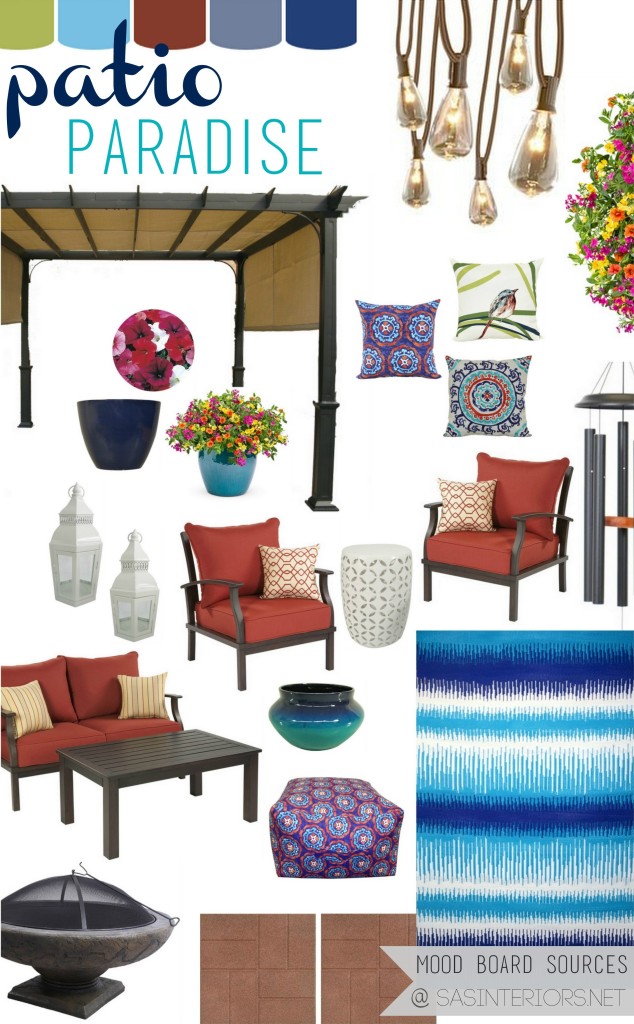
Pillows on the porch: Blue Multi / White Medallion / Bird

Carpet @ chairs: $5 polypropylene mats from Five Below

Mat @ front door: Target – similar to this

Pouf: Lowe’s

Front Door color: Valspar Crushed Oregano in semi-gloss

A few upgrades from when we first moved in – enlarging the columns, adding the vertical pallet, installing the new front door – have all made a big impact to the entry of our home. psst, another fairly easy DIY project with a big impact look coming your way next week.

Spring + Summer Front Porch: A small space filled with lots of colors and layers that create a welcoming entry.  See the rest of this porch + how it's evolved over the years! www.jennaburger.com

EASY DO-IT-YOURSELF PROJECT

Dress up your house numbers…

Using a board from an old pallet, I brushed on a light coat of white paint.  I installed the house numbers (that used to be attached to the house) on the board about 3/4 up from the bottom. Then I took jute cord and wrapped it around to create an interesting design. Simple & not a penny spent!

Spring + Summer Front Porch: A small space filled with lots of colors and layers that create a welcoming entry.  See the rest of this porch + how it's evolved over the years! www.jennaburger.com
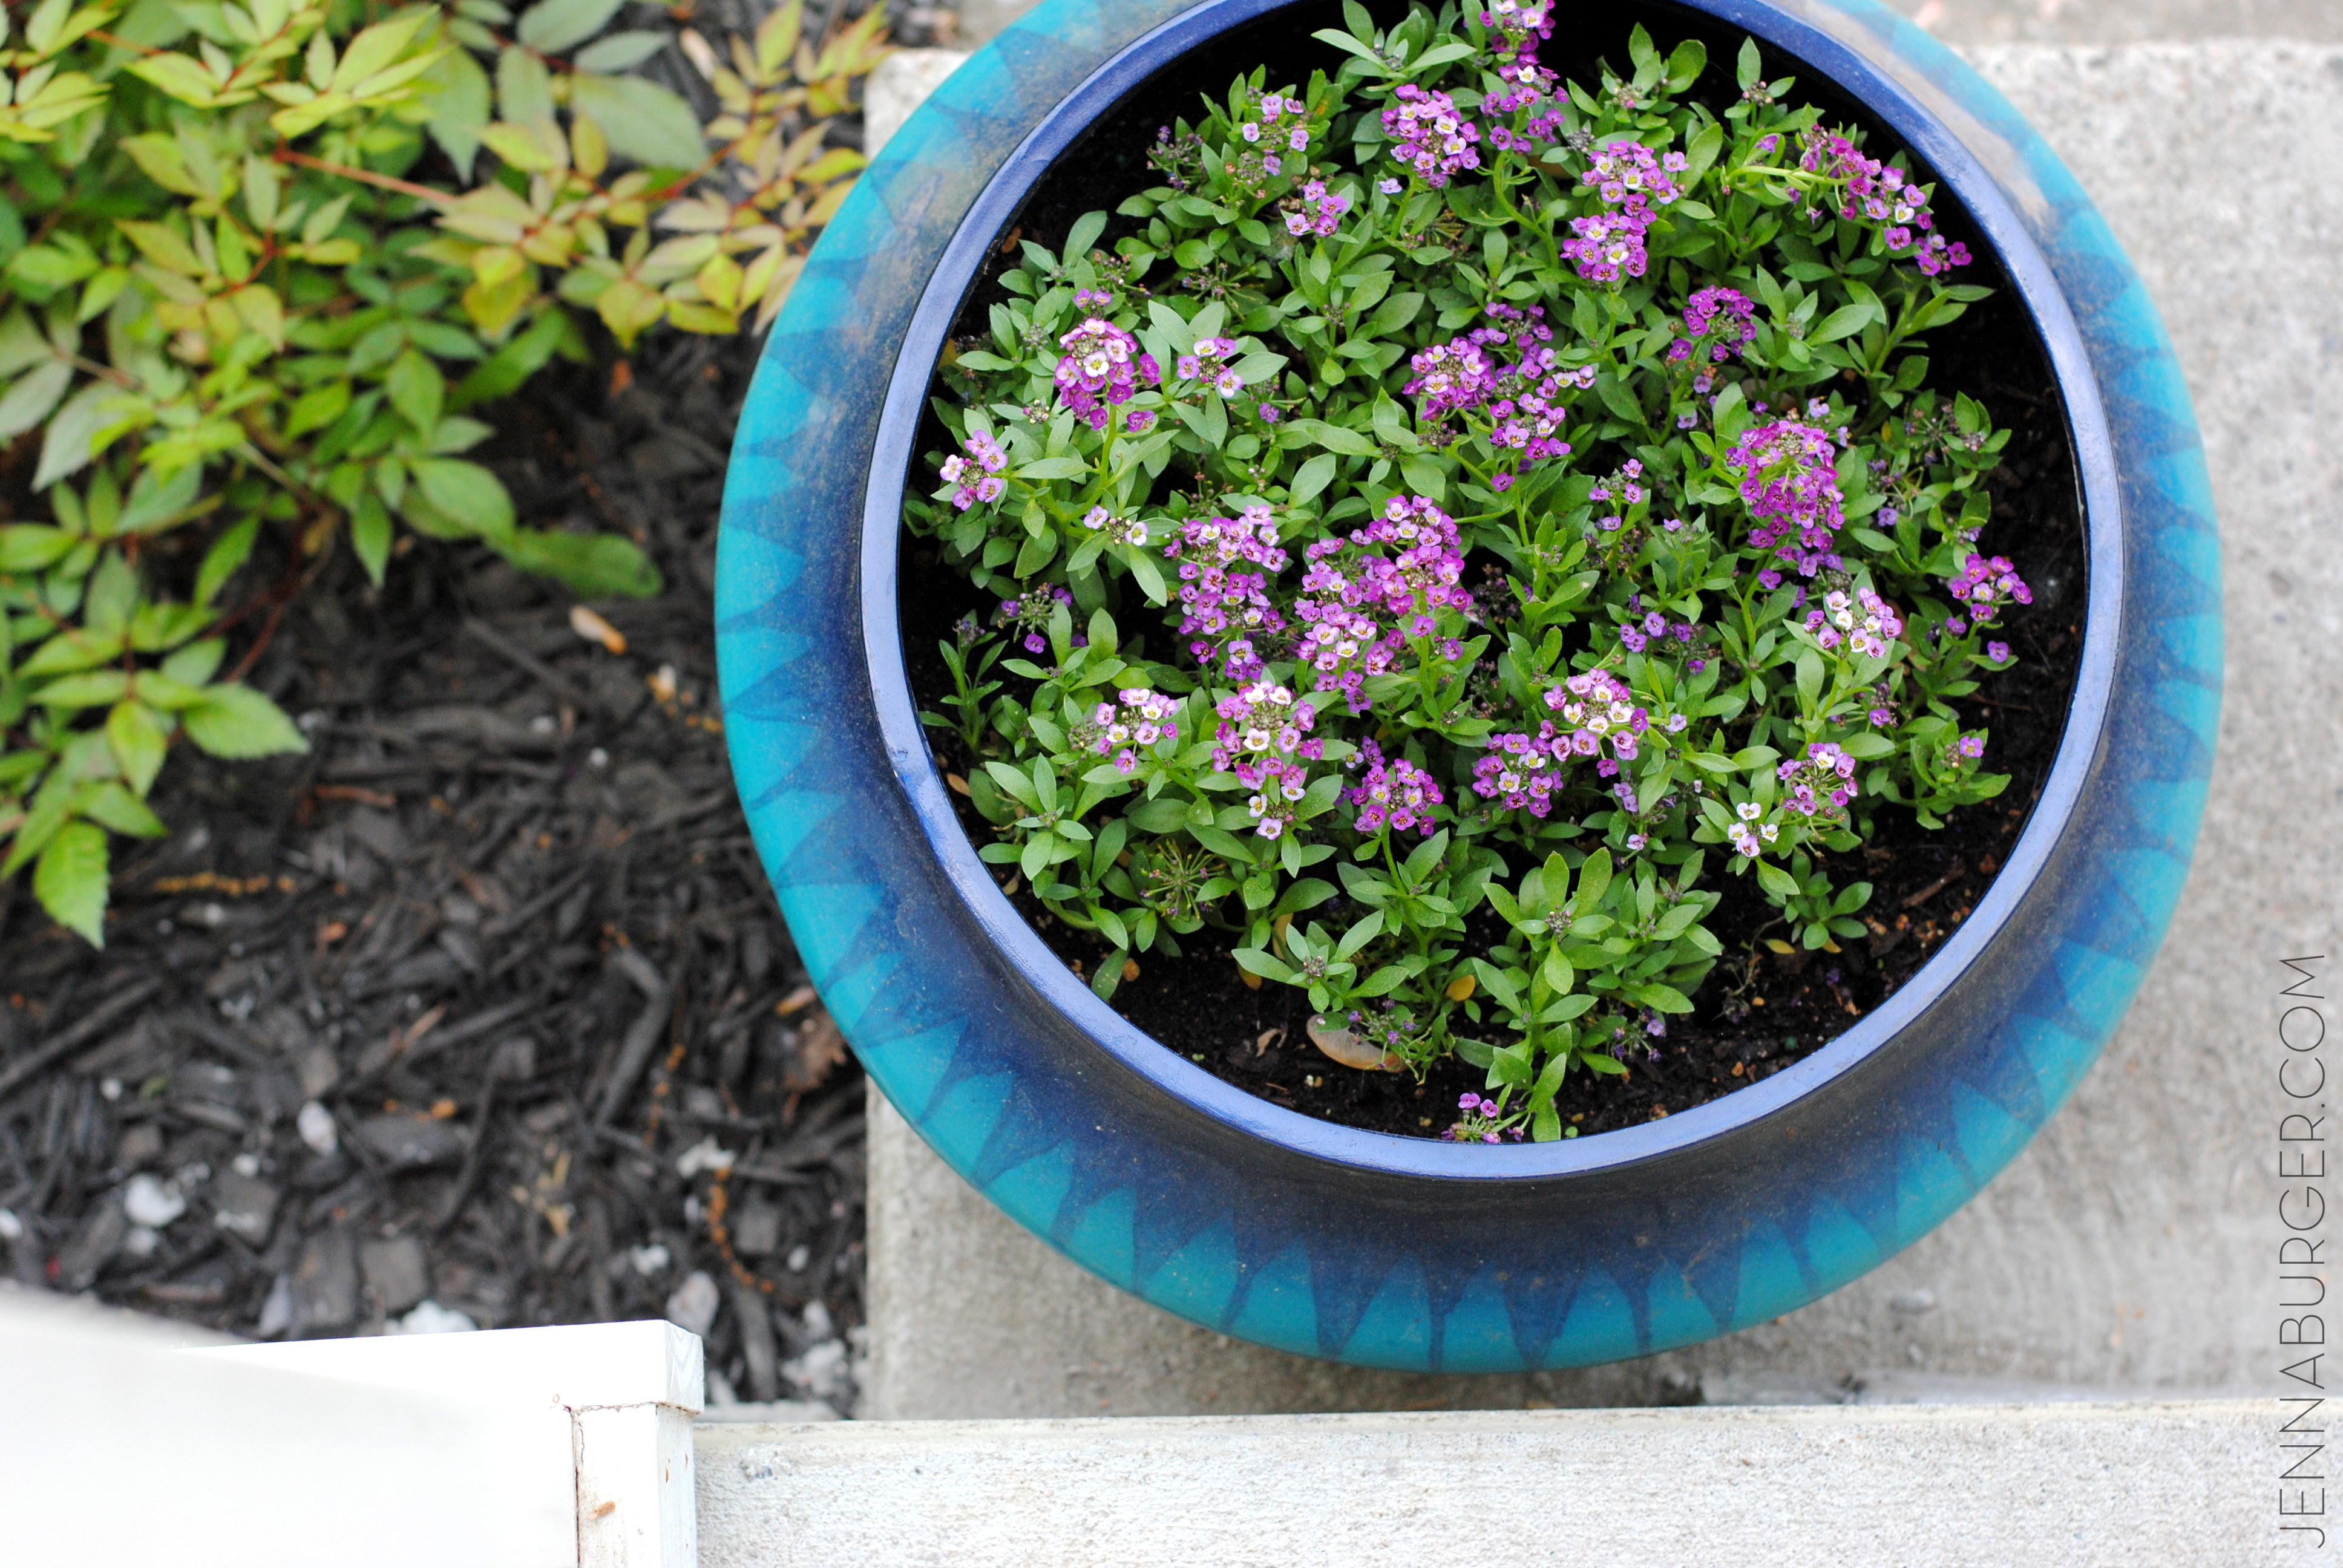
[The stone edging at the garden beds are a new addition this year. Check out the tutorial on creating the perfect border for your beds]

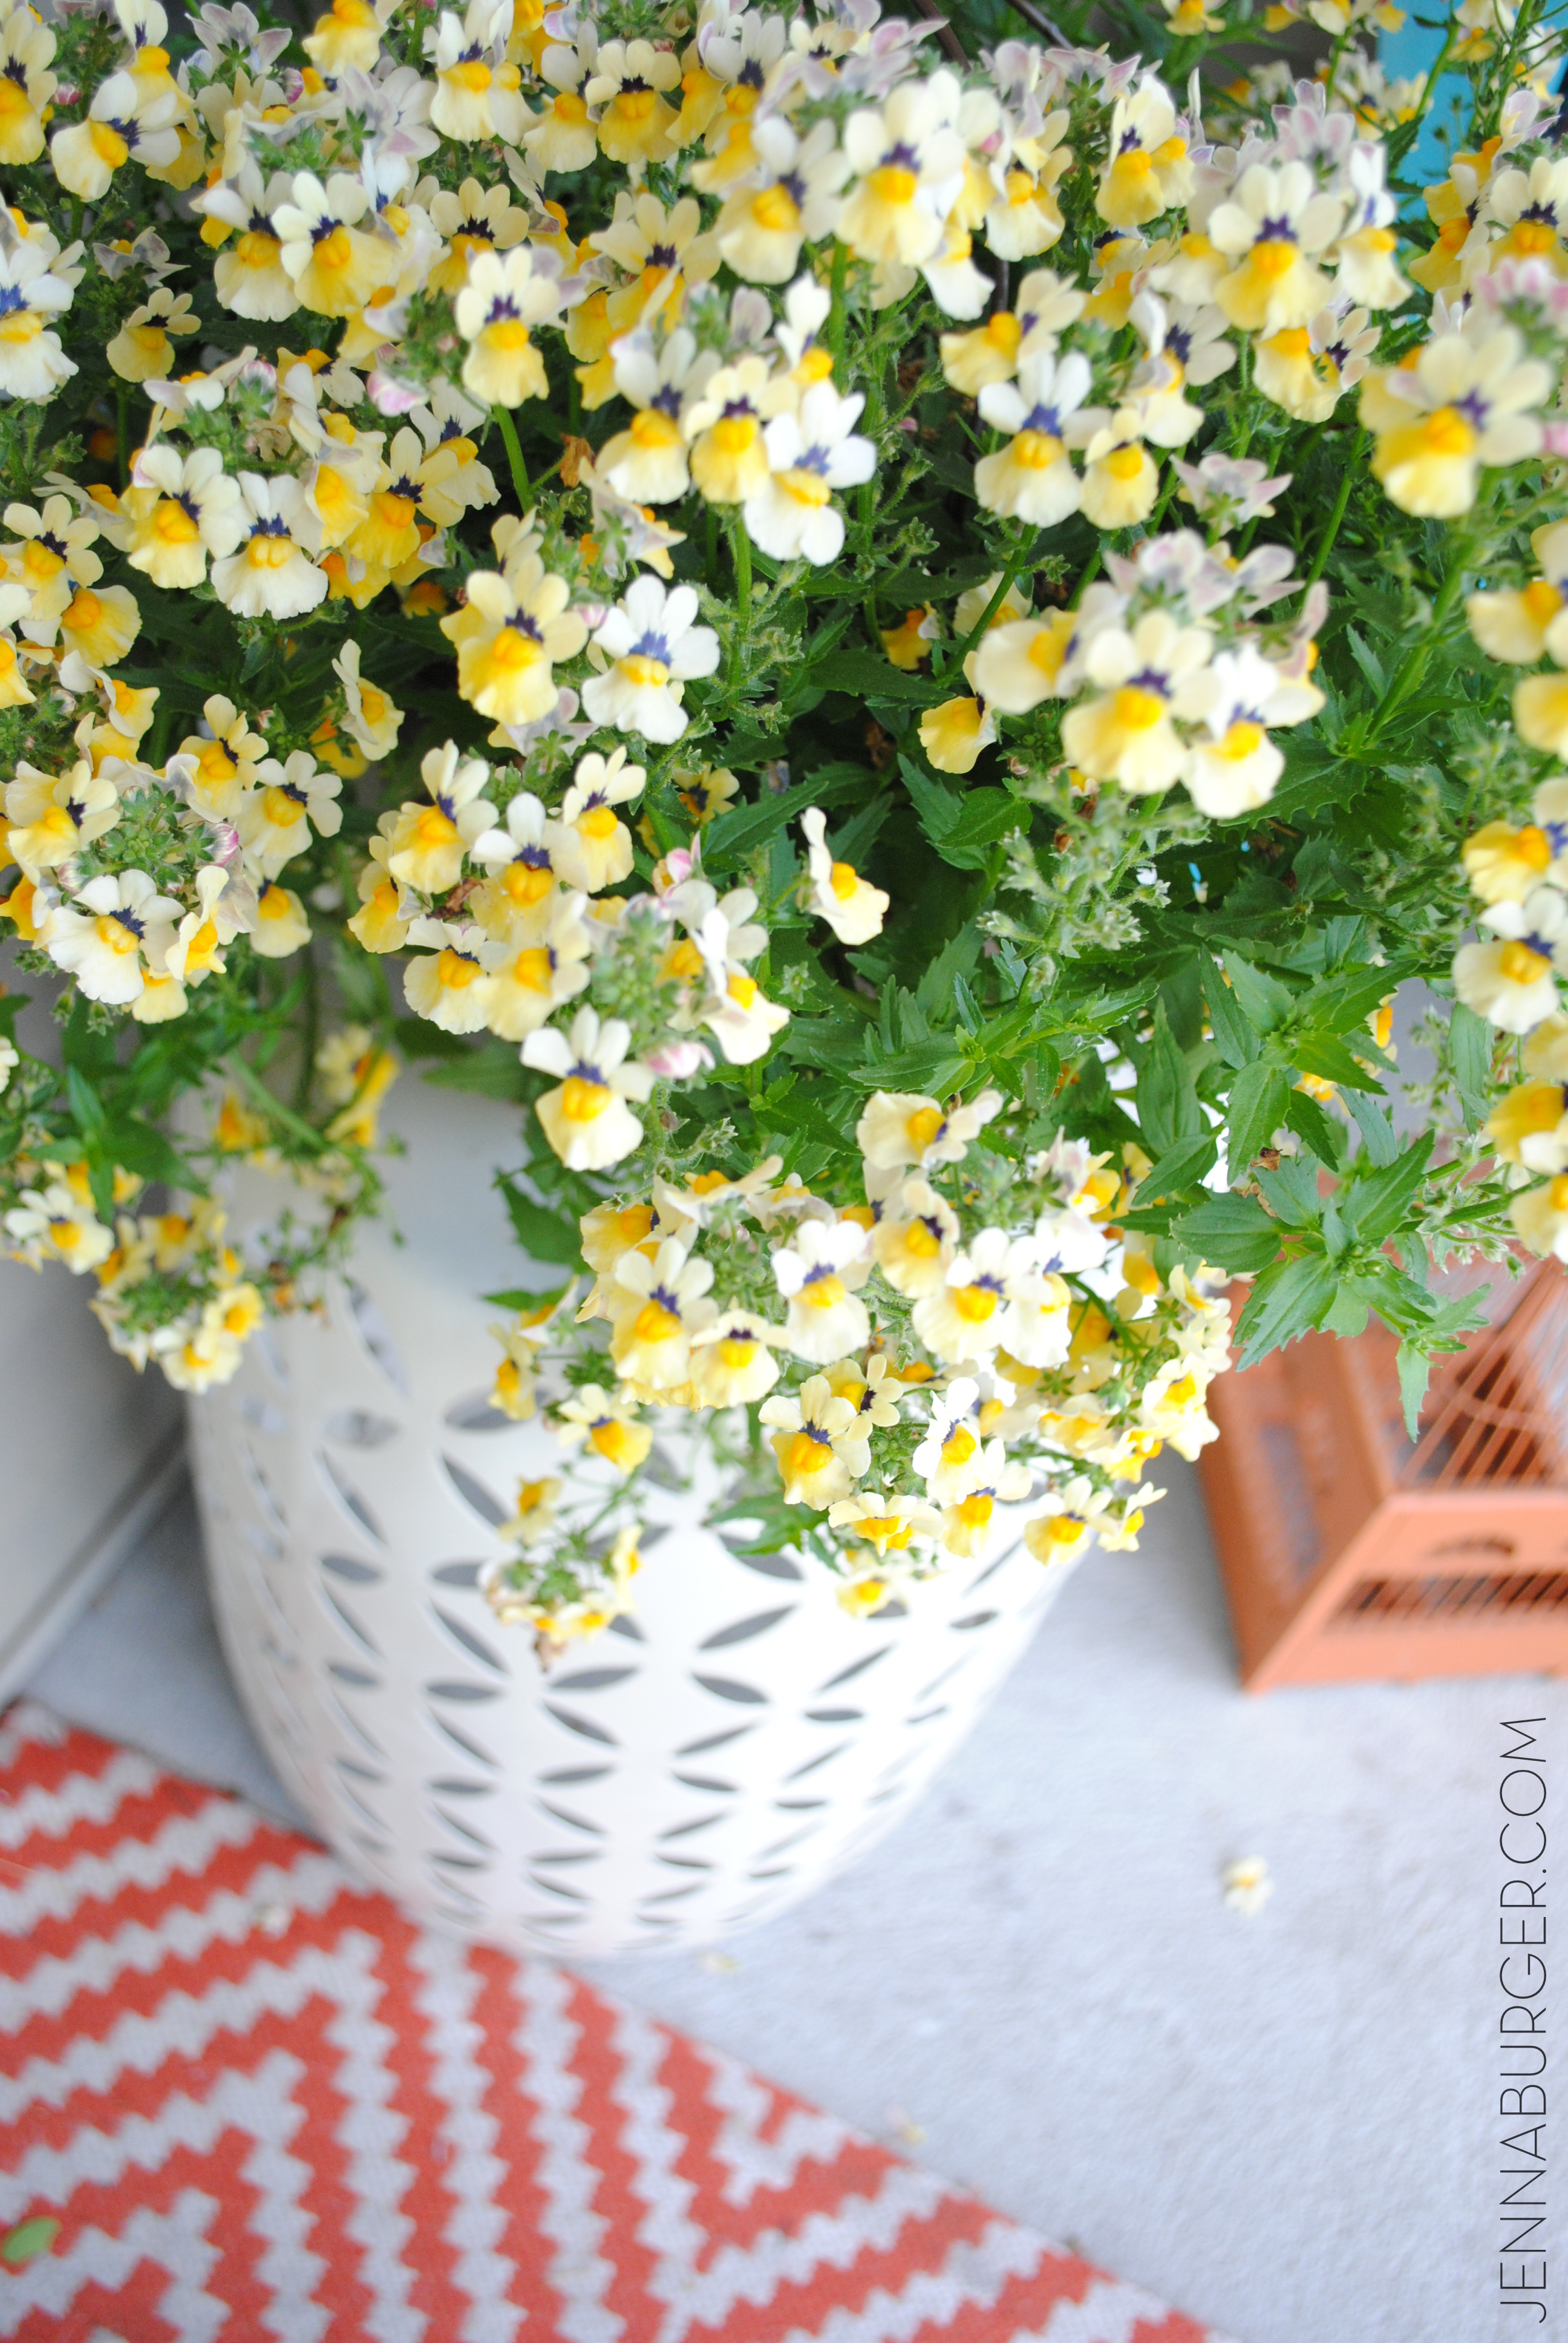
And pretty flowers do make a BIG difference.  This porch looked far from how it does now only a few short weeks ago…

All of my flowers for this years porch came from Lowe’s.  They always have such a great variety of flowers + plants!

Spring + Summer Front Porch: A small space filled with lots of colors and layers that create a welcoming entry.  See the rest of this porch + how it's evolved over the years! www.jennaburger.com

Spring + Summer Front Porch: A small space filled with lots of colors and layers that create a welcoming entry.  See the rest of this porch + how it's evolved over the years! www.jennaburger.com

Not much is new; most of the furniture and layers on this years Spring + Summer front porch we’ve had for years.  With some little updates, it’s amazing how old can look new in a snap.

The side chairs are inexpensive teak bought about 8 years ago from the Christmas Tree store.  I thought about getting rid of them many times, but last year I added new cushions + a few vibrant pillows from Lowe’s and all of a sudden, they looked great again.

The lutchens bench used to be stained, but then I got my hands on a can of turquoise spray paint and it took on a new life!

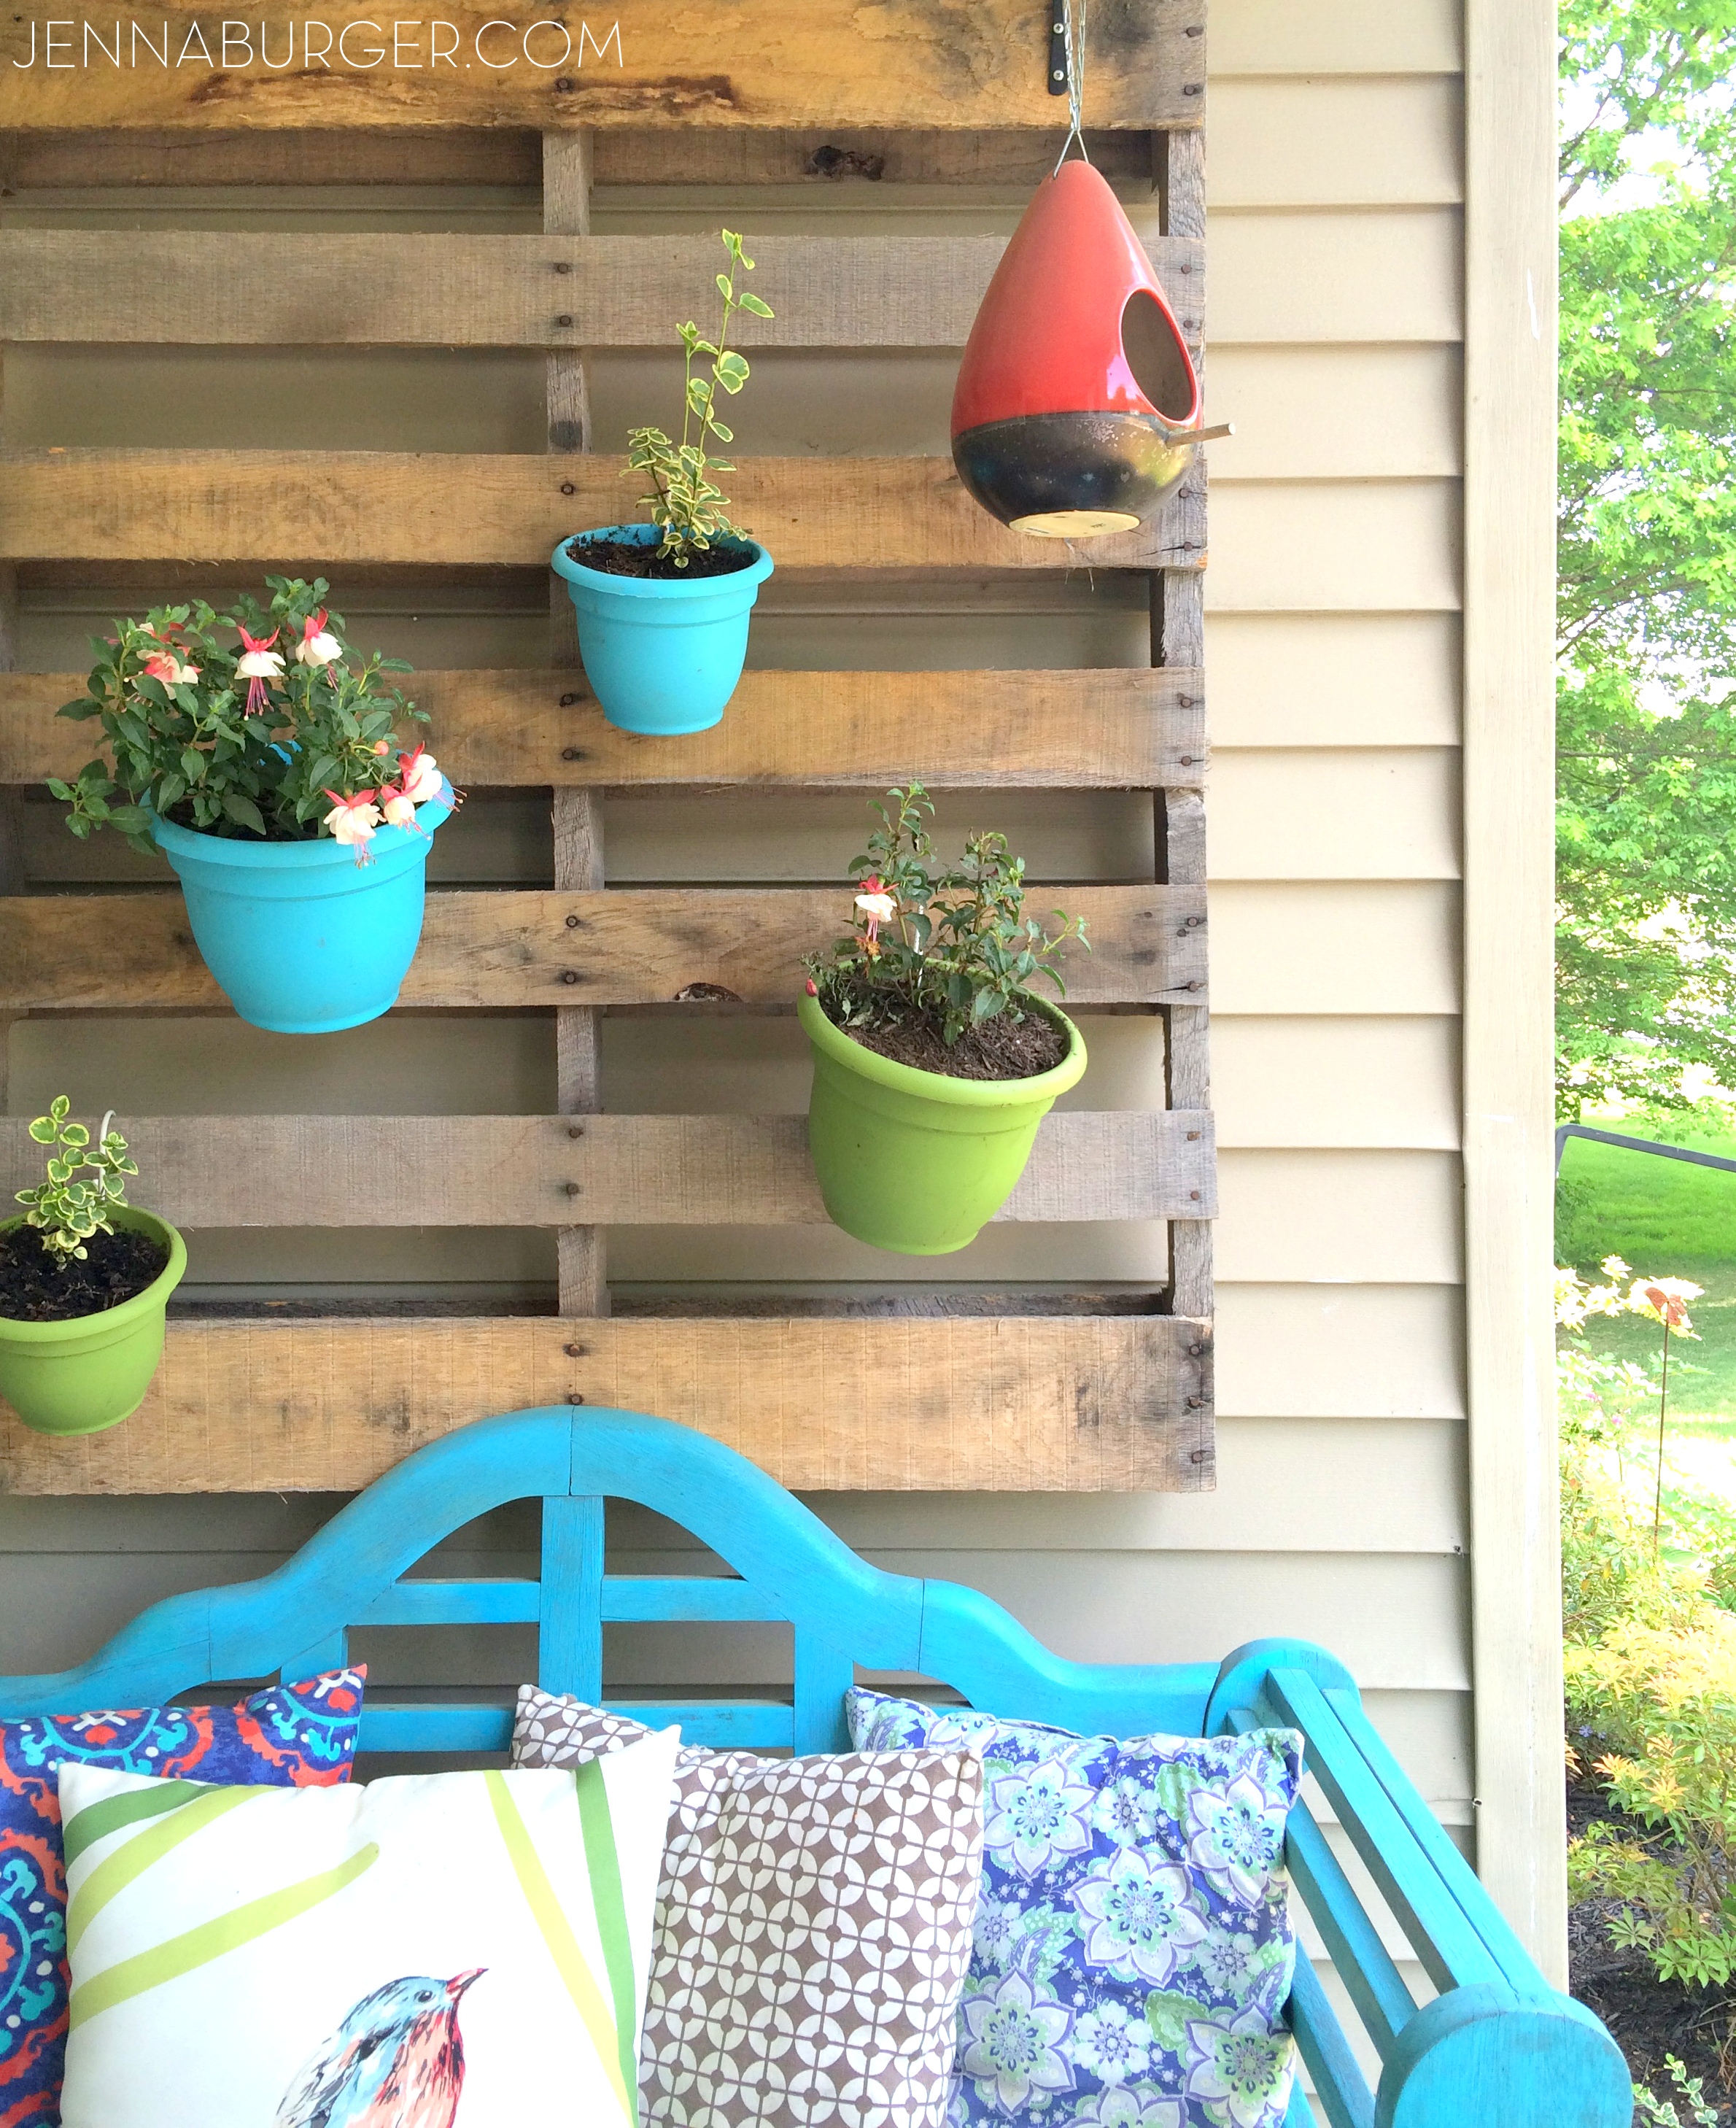
The vertical garden pallet is a DIY creation from a few years back and it’s still a show-stopper on the porch.

Spring + Summer Front Porch: A small space filled with lots of colors and layers that create a welcoming entry.  See the rest of this porch + how it's evolved over the years! www.jennaburger.com

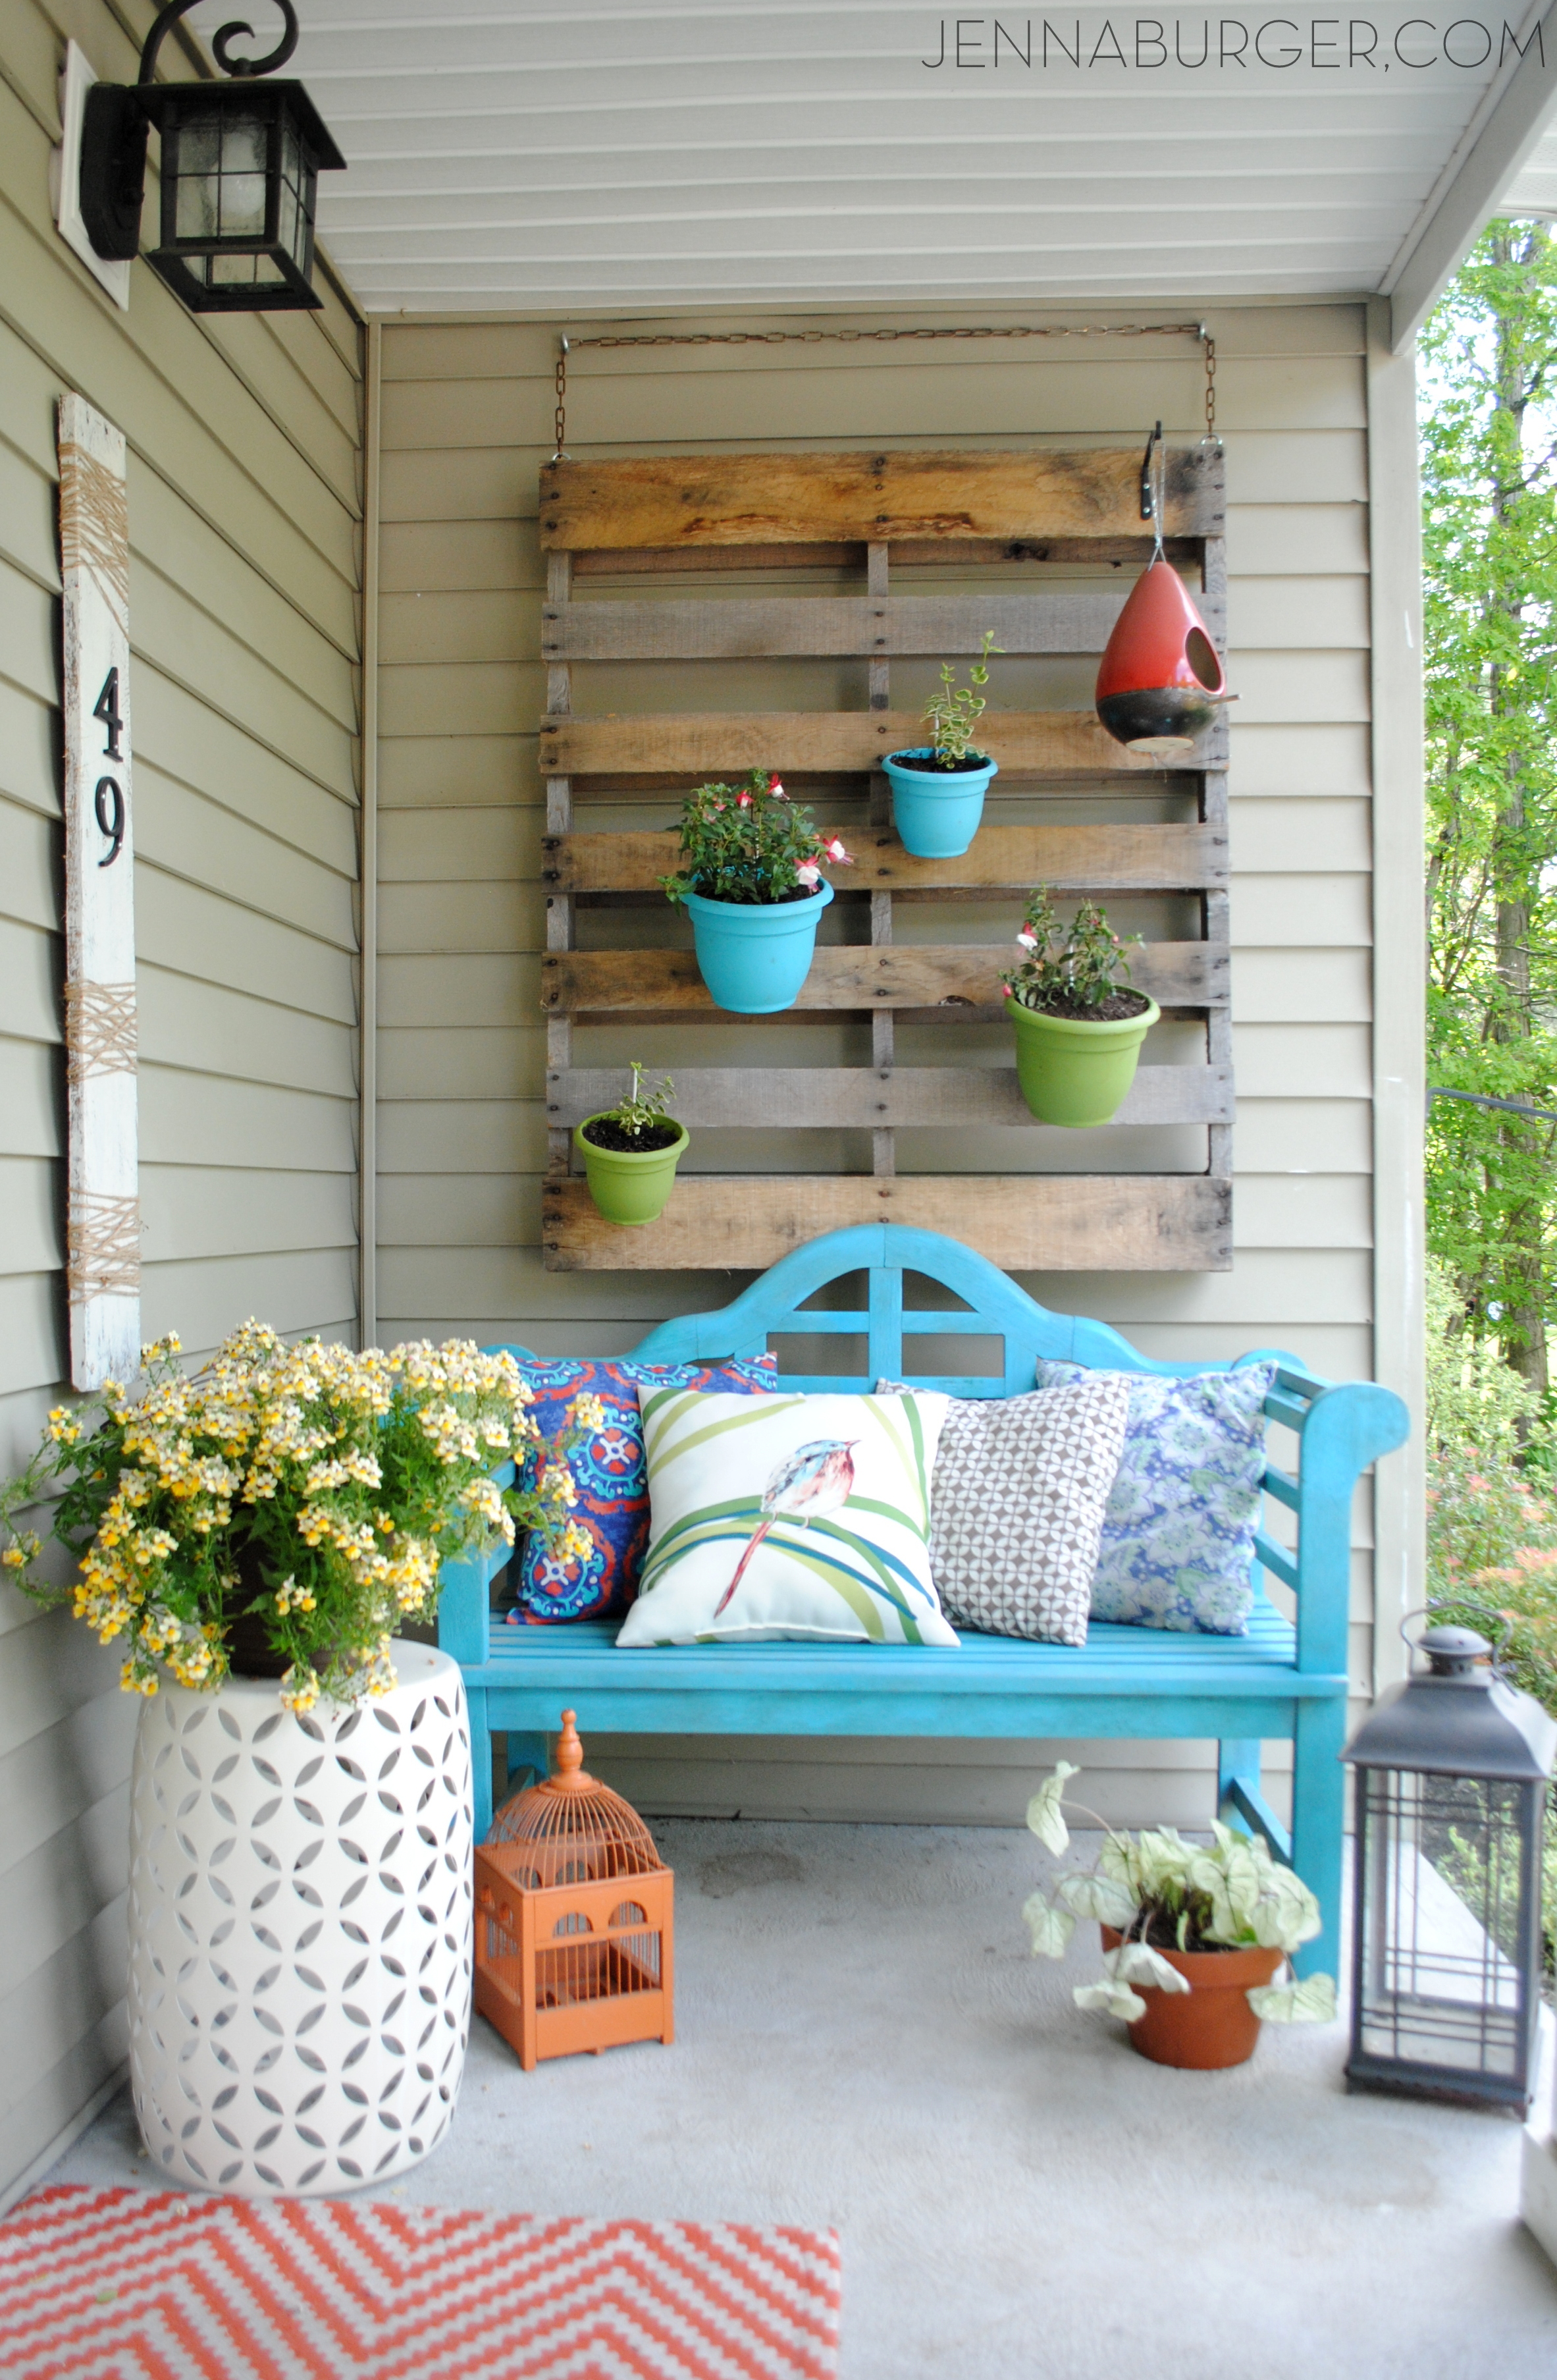
It is such a wonderful way to add height to a vertical space (and height = drama!).  From herbs to succulents to vines, I’ve hung many different types of plants on this vertical pallet over the years!  For this Spring season, I chose to plant Variegated Vinca Vines in the smaller pots and Fuchsia in the larger pots – they are both shade annuals.

Spring + Summer Front Porch: A small space filled with lots of colors and layers that create a welcoming entry.  See the rest of this porch + how it's evolved over the years! www.jennaburger.com

Fuchsia is also what I chose for the hanging plant over the porch since this side of the house gets no sun.

Spring + Summer Front Porch: A small space filled with lots of colors and layers that create a welcoming entry.  See the rest of this porch + how it's evolved over the years! www.jennaburger.com

Spring + Summer Front Porch: A small space filled with lots of colors and layers that create a welcoming entry.  See the rest of this porch + how it's evolved over the years! www.jennaburger.com

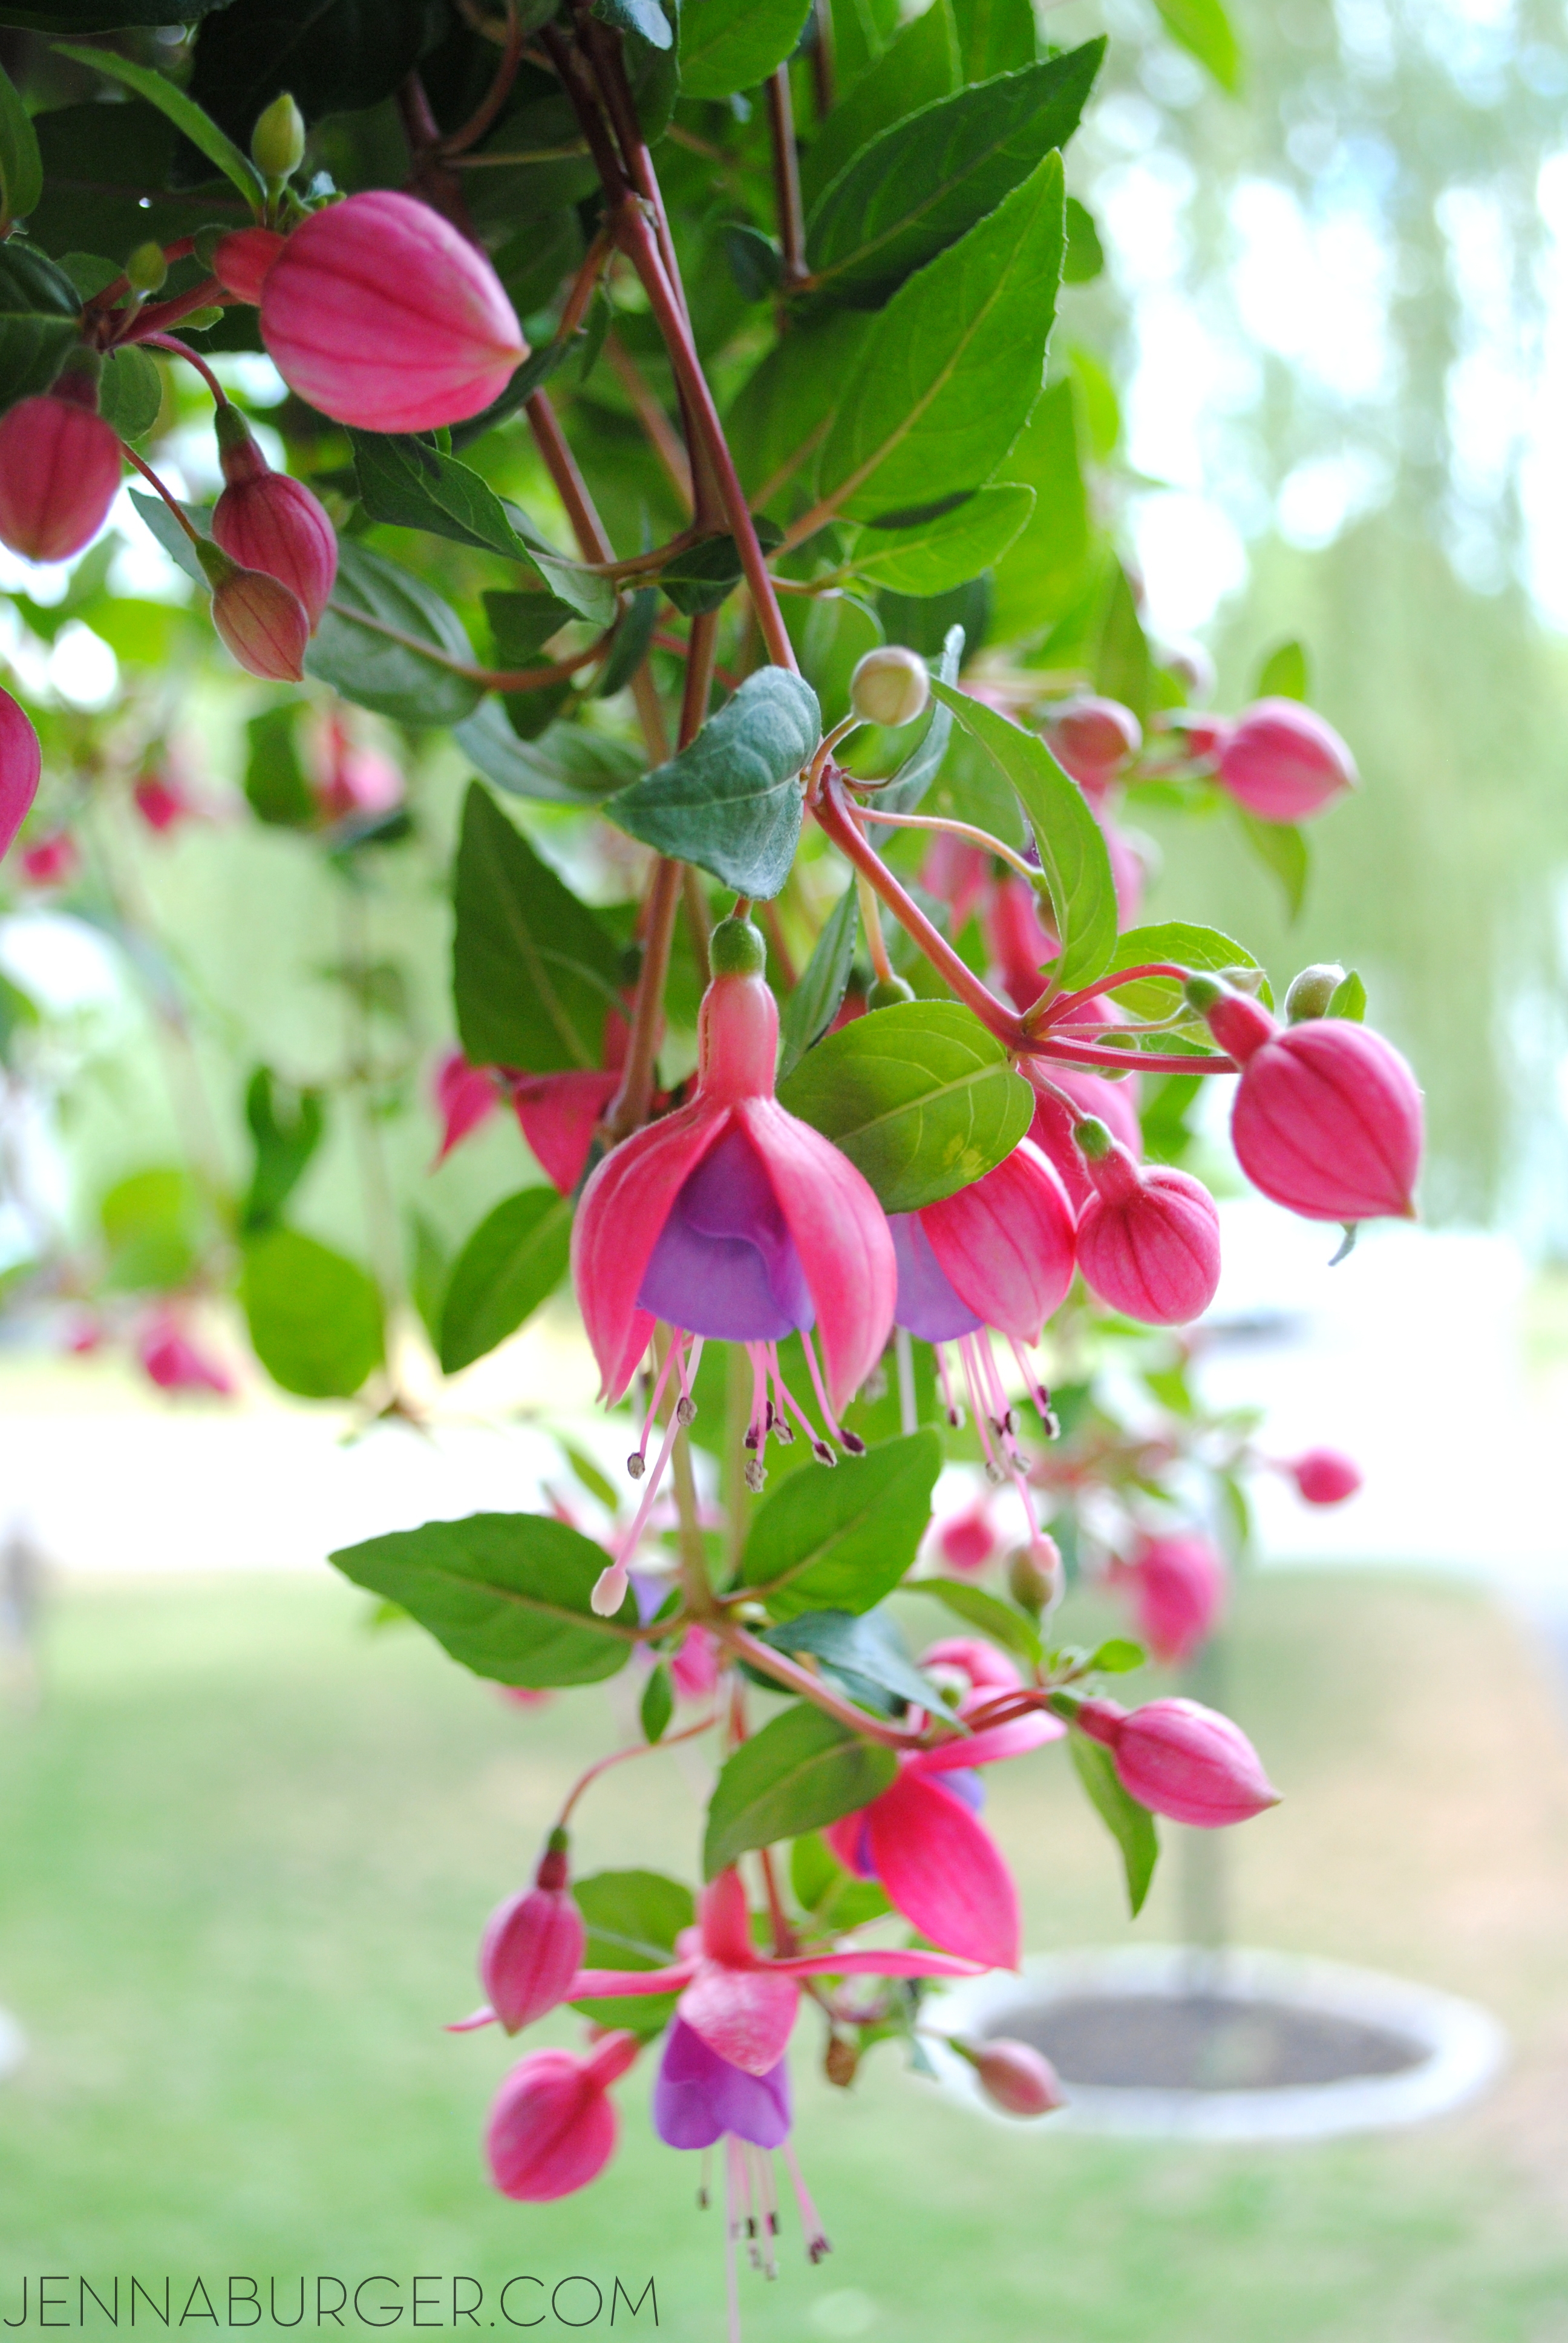
Ferns are another great shade choice and I have that hanging from a tall hook next to the porch.  It’s such a beautiful, hardy Summer staple.

Spring + Summer Front Porch: A small space filled with lots of colors and layers that create a welcoming entry.  See the rest of this porch + how it's evolved over the years! www.jennaburger.com

Can you see why this spot is our favorite to spend those long dog days of Summer?  Do you blame us?!

Spring + Summer Front Porch: A small space filled with lots of colors and layers that create a welcoming entry.  See the rest of this porch + how it's evolved over the years! www.jennaburger.com

Lastly, I love seeing + sharing how our front facade has evolved over the years…

Spring + Summer Front Porch: A small space filled with lots of colors and layers that create a welcoming entry.  See the rest of this porch + how it's evolved over the years! www.jennaburger.com

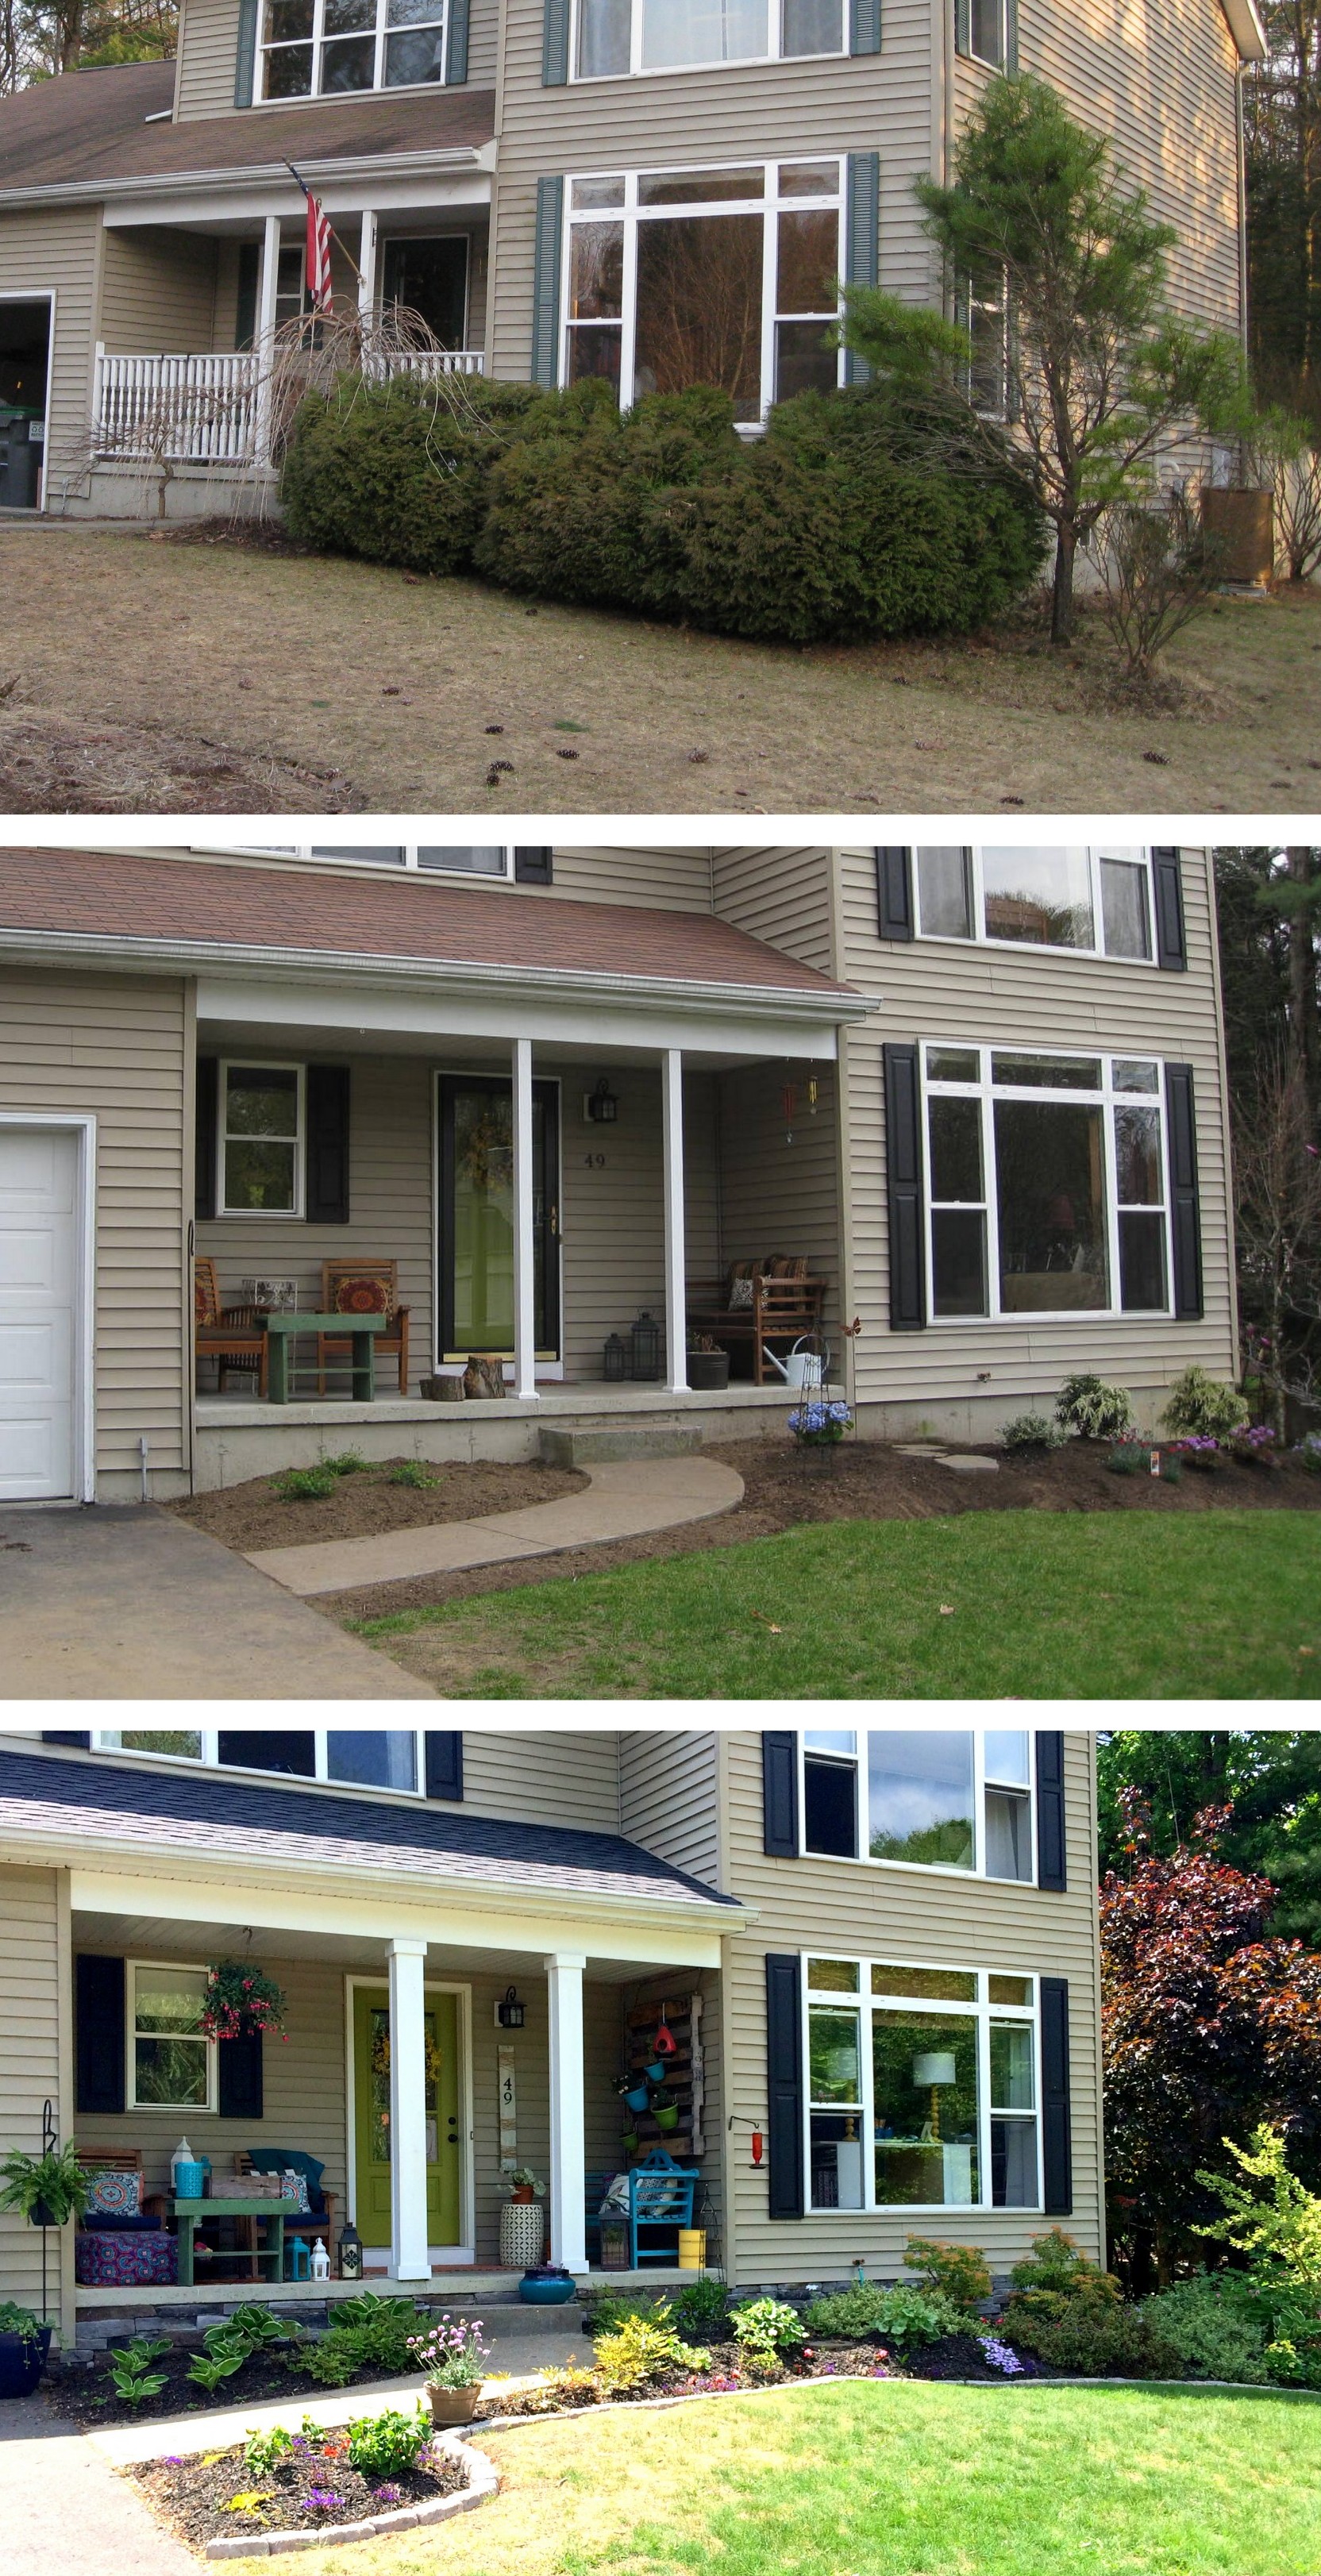
Crazy, right?  All this TLC has been tackled with our own hands!

Thanks for taking the tour of our favorite Summer Space!  And by the way, did you catch anything different about this years porch from years past – if you’ve been following along with me for over the years, you might have noticed.  Well if not, I’ll give you a hint… we jazzed up the ugly foundation with new stone veneer.  More on that + a tutorial on how we installed it coming up next week.

Cheers to a fantastic summer! 

So tell me, are you more of a front porch sitter or a back deck lounger?

DISCLOSURE: I am part of the Lowe’s Creative Team and was provided with a Lowe’s gift card to purchase items for my project.  I was also compensated for my time to use the products.  No one told me what to create, what to buy, how to use the product, or what to write.  All opinions are 100% mine!

Bathroom Makeover: Plan of Action {Day 1}

I’m at it again…  another project!  And this is a biggie.  I know, I know…. I haven’t even waited 0.05 seconds before starting something new, but this project has been in the works for over a year and I’m thrilled that my thoughts + ideas are actually coming to fruition!  So the next big remodel… the hall/kids bathroom.

This bathroom got a mini DIY revamp about 3 years ago, but it’s been used & abused by two kiddos, so it was time to put my design expertise to work and create a space that would handle the everyday splashes & wear of two busy bees.

Of course, I can’t start the remodel without a plan of action.  So here it is.  My creative vision board for the new bathroom space…

Bathroom Makeover: Creative Vision Board for the new space. Filled with basics + layers of bold. An entire DIY bathroom remodel.

I’m thrilled to be partnering with Lowe’s on this bathroom renovation and they’ve put me to the test to create a dynamic, on-trend space using their in-stock products (items that can be found in store versus online).   My vision for this revamp is to mix my design style of classic eclectic – classic for the background with bold elements layered in!   Since the tile is the dominate feature (shower + 3′ up all the walls) in this bathroom, that’s where I started…

My design philosophy when creating any space is to go classic for the elements that are expensive and/or difficult to change.  Similar to buying a sofa (which I typically go neutral in color and pattern), I wanted a tile that could “live” a long time…  I DO NOT plan on changing the tile in a year or two (or even 5), so it had to be something that I would like now & in the future.   There is nothing more classic and beautiful than 3 x 6 subway tile.  The bonus, it’s only .22 cents a tile – one of the least expensive Lowe’s has.  But (there’s always a but), I wanted something more.  I needed to create a wow-factor.  So along with the classic subway tile, I am also going to incorporate a gorgeous herringbone carrara marble.  Crossing my fingers that it looks as good on the wall as I envision it in my head {squeal}.

White subway tile - the most classic, most beautiful (an one of the least expensive) tile you can get!

Lowes Herringbone Carrera Marble

But you all know me, I need color somehow, someway.  That’s where the layers in the space come in.  I’ve selected a dynamic wallpaper that is really give an incredible contract against the classic white subway.  It’s bold.  It’s unexpected.  It’s me.

Serena and Lily Palmetto Wallpaper – Inkwell Blue/Khaki

The classic and the bold are covered!  The other elements in this new proposed bathroom are all going to enhance the beautiful classic and bold selections.  The old builder-grade vanity will be headed curbside and a new, more modern vanity in an espresso finish will be installed in it’s place.  For the lighting, I wanted to introduce another unexpected element and chose an oversized single exterior industrial-style light fixture.

Here’s the catch… I’m doing 95% of this bathroom renovation on my own.   I’m crazy, right?!  Nutso, but I’m determined.  The part that I will not be tackling is the install of the new tub and shower components.  The mister nor I have ever installed a tub or shower fittings and are too nervous to tackle it on our own and want to avoid any possible leaks.  We know when to call in the pros and the tub install is not within our skill-set.  I am sure we could do it, but who wants to take the chance?  Not Us!  Beyond that though, it’s all on me.  Tile, toilet, vanity, lighting… All DIY baby!

Since this bathroom makeover is almost an entirely DIY job, it’s going to take longer than typical, so our goal is to tackle it in 30 days.  30 days start to finish, complete!  Can we do it?  Let’s see.  I hope you’ll follow along on another crazy DIY adventure…

{Day 1} Plan on Action – Complete!  29 more days to go…

From start to finish, these are all the posts pertaining to this bathroom remodel
Plan of Action
Demo: Removal + Installation of the Tub & Walls
How-To Tile + Grout the Bathroom Walls
Installing Wallpaper
Adding a Tile Accent Border
Creating a Tiled Niche
Bathroom Makeover Reveal
Resources

This post is sponsored by Lowe’s, but all thoughts and opinions are 100% my own.  I am thrilled (and a bit nervous) about tackling this project, but very excited to be partnering with Lowe’s on creating an entirely new bathroom space.  I’d love for you to follow along on this new project!

Patio Paradise: Before & After Patio Makeover

A revamped patio with new outdoor furniture + a Pergola. This new space is surrounded by flowers & the sounds of water from a small pond. A tranquil & ideal oasis for the Summer!

For the past 2 months we’ve been plotting, planning, shopping, implementing, and transforming our outdoor patio.  It’s been a labor of love to get this space to be an inviting oasis that we always envisioned and now can truly enjoy.

We bought our home in the middle of winter when there was over a foot of snow on the ground.  Once Spring hit, the melting snow revealed what we were up against a lot of work – much more than we anticipated.  In the sideyard, there was an above ground pool, which had seen better days, plus 20+ overgrown trees that made the entire yard look dark & cavernous.

In the last 4 years, we’ve done a lot of work & spent a lot of money to upgrade the area (things that we had to hire out because we couldn’t tackle on our own).  We’ve made progress over the years, but more work to really pull this outdoor space together needed to be done…

If you haven’t seen the before in previous posts (and this is actually after a lot of work had already been done), this is how the outdoor area looked before…

Before

Yikes!

Before

Our objective: To use the patio we already had (no money in the budget for something new) and to create a little slice of paradise with colorful decor!  I’m no expert on outdoor landscaping (or even keeping a flower alive for that matter), but I put my mad decorating skills to the test to transform this space…

If I can do it, so can you!

Before we could sit back, enjoy, and relax, there were a whole lotta steps that went into pulling this patio together.

First, the shopping.

It started with the pergola.  I first spotted it at Lowe’s in late Winter and fell in love.  We’ve always wanted a pergola, but were hesitant on building it from scratch.  Fear sometimes gets the best of us. Anyway, the black steel pergola seemed like the perfect (and much easier) way to go.

Prepping the patio with a new pergola

After that the layers.  Pillows + lanterns + pots + lighting + flowers!  I found all of these beauties at Lowe’s.  They have a great new outdoor collection this year with bold colors & patterns.

Prepping the patio

Once back at the house, one of the first things I tackled was painting the doors to the shed.  I was going for an orange vibe a few years ago, but that idea was ditched and the new outdoor space called for blue.  I started off attempting to spray paint the doors and that didn’t work.  Then I used the HomeRight Mini Paint Stick + a paint brush, and that was just the trick for an easy project makeover…

Prepping the patio with a new color on the shed doors

The patio set we chose was incredibly easy to put together.  So easy that each chair took about 2 minutes and 34 seconds… no joke!  The sides + the back literally snapped into the seat and voila it was done.  No nails, no screws, no allen keys, just wam-bam done!

Prepping the patio with new furniture

The chairs were REALLY heavy, but my man could handle it.  With one hand – WOW.  totally kidding, they are actually incredibly light, but don’t tell him that because he was super impressed with himself.

Ya gotta laugh along the way, right?!

And of course with creating an outdoor oasis, there is a lot of planting involved.  From weeding, planting, and mulching, it took a few weekends to tackle.  Plus there was the cleaning of the pond, the removal of an old fence, and the putting together of the outdoor fireplace – which is a must for a Patio Paradise – so we’ve been busy to say the least…

Prepping the Patio

…but in the end it’s all been worth it because this is the result of our beautiful space.

A revamped patio with new outdoor furniture + a Pergola. This new space is surrounded by flowers & the sounds of water from a small pond. A tranquil & ideal oasis for the Summer!

Too fuzzy?  Want a clearer picture?  Check it out…

Come join me on the patio.

A revamped patio with new outdoor furniture + a Pergola. This new space is surrounded by flowers & the sounds of water from a small pond. A tranquil & ideal oasis for the Summer!

The garden which was created (not by us, but by a previous homeowner) with a retaining wall sits about 2′ high than the patio and brings nice height and elevation to the patio setting. When you come down to the patio level, you are greeted by a blooming, oversized (not yet, but by mid-summer it’ll be huge) Russian Sage perennial.

A revamped patio with new outdoor furniture + a Pergola. This new space is surrounded by flowers & the sounds of water from a small pond. A tranquil & ideal oasis for the Summer!

The pond, which until last week was a muddy, gross mess, brings such a special touch to this area of our yard.  There is nothing like the calming sounds of water.  We’re also still loving the garden sculpture created 2 years ago from an old barrel. It’s such a pretty focal point.

A revamped patio with new outdoor furniture + a Pergola. This new space is surrounded by flowers & the sounds of water from a small pond. A tranquil & ideal oasis for the Summer!

The cushions for the chairs & sofa are incredible because the rain beads away instead of soaking in.  I found that out the other day by mistake.  Typically we put the cushions away each night, but they were accidentally left out.  The next day I was super bummed {enter mad-at-myself-face}, but when I touched them, they were completely dry!  They are made of Sunbrella fabric & I’m really impressed.

With the patio furniture set came different pillows, but instead of being matchy-matchy, I swapped them for a few others that I was drawn to at Lowe’s.

A revamped patio with new outdoor furniture + a Pergola. This new space is surrounded by flowers & the sounds of water from a small pond. A tranquil & ideal oasis for the Summer!

A revamped patio with new outdoor furniture + a Pergola. This new space is surrounded by flowers & the sounds of water from a small pond. A tranquil & ideal oasis for the Summer!

Lantern Love…

A revamped patio with new outdoor furniture + a Pergola. This new space is surrounded by flowers & the sounds of water from a small pond. A tranquil & ideal oasis for the Summer!

A revamped patio with new outdoor furniture + a Pergola. This new space is surrounded by flowers & the sounds of water from a small pond. A tranquil & ideal oasis for the Summer!

Want some drinks? Let’s chill at the table.

I took this beautiful Indian throw that I typically have on a chair indoors and used it as a table cloth.  The colors are so vibrant + bold, so it really brought a fun & festive vibe to the new patio.  Again, using what I have on-handmade makes it easier and less costly.

A simple pallet box that the Mister made is set as the centerpiece filled with colorful annuals.

10

Can you blame me for not wanting to leave my house for the next 2 months?!

A revamped patio with new outdoor furniture + a Pergola. This new space is surrounded by flowers & the sounds of water from a small pond. A tranquil & ideal oasis for the Summer!

For the underside of the pergola, I hung a lantern that I purchased a few years ago and draped lights from each corner to the center.

A revamped patio with new outdoor furniture + a Pergola. This new space is surrounded by flowers & the sounds of water from a small pond. A tranquil & ideal oasis for the Summer!

Important Info: The pergola came with 6″ stakes to anchor it into the ground.  First, we positioned the pergola on the patio, so the stakes wouldn’t work.  Secondly, I would be reluctant using stakes because I could still see the pergola pulling away.  The pergola has received rave reviews on the Lowe’s site, but the anchoring to the ground has been the only issue.  With an intense gust of wind, the fabric could easily act as a sail.

To make the pergola sturdy and in-place, we first used a masonry drill bit to make a hole into the concrete patio.  Then we used Tapcon concrete screws (see them here) in each of the 4 holes on the 4 posts.  It was a fairly easy process which took about 10 minutes.

Patio Pergola

A revamped patio with new outdoor furniture + a Pergola. This new space is surrounded by flowers & the sounds of water from a small pond. A tranquil & ideal oasis for the Summer!

A revamped patio with new outdoor furniture + a Pergola. This new space is surrounded by flowers & the sounds of water from a small pond. A tranquil & ideal oasis for the Summer!

Now that it’s all complete {thank goodness}, we can sit back and simply enjoy!

A revamped patio with new outdoor furniture + a Pergola. This new space is surrounded by flowers & the sounds of water from a small pond. A tranquil & ideal oasis for the Summer!

We’ve already enjoyed our first fire.  And within minutes of us starting it, some neighbors popped over.  That’s what Summer is all about…

A revamped patio with new outdoor furniture + a Pergola. This new space is surrounded by flowers & the sounds of water from a small pond. A tranquil & ideal oasis for the Summer!

And it melted my heart when the kids grabbed the poufs and started to read side-by-side.  It didn’t last long (I’m not going to pretend we are some kind of ‘perfect’ family where our kids always get along), but for the short moment, it was a treasure which I bookmarked in my mind.

A revamped patio with new outdoor furniture + a Pergola. This new space is surrounded by flowers & the sounds of water from a small pond. A tranquil & ideal oasis for the Summer!

If you missed (or didn’t see) the mood board I created for the patio outdoor space, this was the original vision that I created.  It always helps to have a ‘plan of action’ when shopping & executing a new space – either indoors or out.   Sources (with links) for all the elements are in last week’s post: The Plan.

Patio Paradise Mood Board: Creating an inviting, relaxing patio oasis

No landscape expert designed this outdoor room, just lil’ ole’ me & I’m pretty darn satisfied!

Here’s a recap of the before & after…

A revamped patio with new outdoor furniture + a Pergola. This new space is surrounded by flowers & the sounds of water from a small pond. A tranquil & ideal oasis for the Summer!

Want to see another outdoor space of ours that I just finished?  Check out the deck

An Outdoor Deck for Outdoor Living: sharing our outdoor oasis where we'll be spending lots of time over the next few months!

You know where we will be all Summer!  Come join us!!

Thanks for coming over for a tour of our new patio paradise.  It’s a dream that this space (+ the deck) are finished.  I can now sit back & enjoy the Summer days to come!

What outdoor projects have you tackled this year?  Do you have a patio or deck that you transformed or plan on transforming?

Disclosure: I am part of the Lowe’s Creative Team and was provided with a Lowe’s gift card to purchase items for my project.  I was also compensated for my time to use the products.  No one told me what to create, what to buy, how to use the product, or what to write.  All opinions are 100% mine!

DIY: Wood Honeycomb Shelves

Even though we veered away from the original design for the revamped shared kids space, my son had his heart set on honeycomb shelves after I showed him the Land of Nod style.  And since this mama can’t let her boy down, I had to pull through.

But instead of buying, what did I do?  DIYed them, of course.  After a little research & this post by A Beautiful Mess, I was confident to move forward.

Not only are these honeycomb / hexagon shelves functional, the whole ensemble is like a piece of art.  And instead of painting the shelves a color or staining them a traditional wood finish, I chose an interesting blue hue which is in-trend and spot on with the other tones that I’ve introduced into the room.

Take a look…

{DIY Tutorial} How-To Make Wood Honeycomb Shelves. Why spend hundreds, when you can make them yourself! These shelves complete the look of the room. So many great projects in this kids room makeover.

The entire shelf composition runs the length of the twin bed, which is about 80″ long, and makes the entire wall truly come alive.  This “installation” also parallels with my Lowe’s Creative challenge project for this month which focuses on introducing the submerged color trend of watery, cool blue hues into a project.  With the size + interesting finish, this project is by far one of my favorites!

———————————–

Before we move forward, it has to be said that this project was a big challenge, but the bigger the venture, the better the result.  I don’t often do large-scale woodworking projects and at times I thought it was going to be a big F-A-I-L, but in the end the honeycomb shelves MAKE THE ROOM.  Take Away? Don’t be afraid to challenge yourself.  Push through because in the end, it’ll be worth it!

———————————–

Like usual, before starting a larger scale project, I sketched out my idea and figured out the supplies I needed.  This was the first sketch…

Design 1 for honeycomb shelves

And then the shelves ended up evolving into this layout instead so not all of the shelves are actually attached…

Design 2 for honeycomb shelves

Supplies I used:

  • (7) 1″ x 6″ x 6′ long pieces of wood – each shelf took approximately (1) board
  • 1-1/2″ wood screws
  • 1-1/2″ corner brackets
  • Plastic toggle anchors
  • Stain or Paint – depending on how you want to finish the shelf surface
  • Other supplies: miter saw, tape measure, drill, sander, level, pencil

To save on time, I often have my wood cut while at shopping at Lowe’s, but for this project, I cut it at home because of the quantity needed + the angles.

Here are the steps I took:

1. I set the miter saw to 30 degrees and never touched the saw again for the entire project.  This angle is crucial so each of the 6 pieces will make the perfect hexagon shape.  I approximated that I wanted each finished shelf to be an overall dimension of about 14″ x 14″, and chose the length of 7″ for the long side of each piece.

After marking the wood with my tape measure + pencil, I made the first cut using the miter saw. Then I flipped the piece of wood over to make the second angled cut.

{DIY Tutorial} How-To Make Wood Honeycomb Shelves. Why spend hundreds, when you can make them yourself! These shelves complete the look of the room. So many great projects in this kids room makeover.

This is what the first piece looked like when cut.

Then I cut about 42 more…

Size of cut for honeycomb shelf

2. Before taking the next steps of attaching each piece to make the shelves, I layed all the pieces out to see how they’d actually go together.

{DIY Tutorial} How-To Make Wood Honeycomb Shelves. Why spend hundreds, when you can make them yourself! These shelves complete the look of the room. So many great projects in this kids room makeover.

3. Then we were ready to chug forward and attach these bad boys…

The first hexagon box was created using 6 pieces and all the angles faced each other.  It’s best to stand them up on their sides, so the floor acts like the wall. The Mister (who was a huge part of this project as well) and I actually moved from the carpet to a flat, hard surface so the pieces would lay flat.  The carpet was too cushy.

TIP: You must use wood screws for this project.  We started out with screws, but it wasn’t working right (because we didn’t pre-drill), then changed over to using nails.  BIG MISTAKE.

Once you have the angled wood pieces in position, first pre-drill the holes, then drill in the wood screws.  If you don’t pre-drill the holes, the wood will probably split, which is what happened to us atfirst.  Using a nail won’t work because they’ll pull out and the overall shelf won’t be stable / sturdy.  Believe me, these are all lessons we learned along the way!

{DIY Tutorial} How-To Make Wood Honeycomb Shelves. Why spend hundreds, when you can make them yourself! These shelves complete the look of the room. So many great projects in this kids room makeover.

4. When the first box is complete, you can either be done or add on to it to create a multi-honeycomb shelf like ours.  If you continue adding on to the first hexagon, you’ll use one side of the original hexagon to create the second hexagon. This time though, the cut angles won’t touch each other, but instead overlap.  I’ll be honest, it does get tricky at this point and the shelves become a big jigsaw puzzle.  We ended up with (1) 3 box shelf, (1) 2 box shelf, and (1) stand alone shelf.

{DIY Tutorial} How-To Make Wood Honeycomb Shelves. Why spend hundreds, when you can make them yourself! These shelves complete the look of the room. So many great projects in this kids room makeover.

Once all the shelves were screwed together, we were ready for the next steps…  finish the surface + install.

It took me some time to determine how I wanted to finish the shelves.  At first I was going to paint them, but then steered away because I wanted to see the wood grain shine through.  That meant stain.  But, what stain?  In the end, I chose a gray / blue water-based stain by Minwax.  The submerged color seemed perfect with the other hues in the room and was ideal with what’s on-trend right now.

5. First, I gave the edges and all the surfaces a good sanding with my orbital sander.   Then using a rag, I applied the wood stain and almost instantly wiped it away so very little actually soaked into the wood.  Because of this, the drying time was very quick.

{DIY Tutorial} How-To Make Wood Honeycomb Shelves. Why spend hundreds, when you can make them yourself! These shelves complete the look of the room. So many great projects in this kids room makeover.

6. About a day later, the shelves were ready to install.  I first attached the metal angle brackets to the shelves. Then I determined the height + positioning of where the shelves would be hung.

Next, the Mister + I marked the holes through the brackets and pre-drilled the holes into the wall.  As with hanging anything, I always love using plastic toggle drywall anchors (I shared a pic recently on Instagram).

Once the anchors were in each hole, we repositioned the shelves in place and screwed them in using a drill + screw.  It’s key to use a level as well so the shelf doesn’t get installed crooked!

{DIY Tutorial} How-To Make Wood Honeycomb Shelves. Why spend hundreds, when you can make them yourself! These shelves complete the look of the room. So many great projects in this kids room makeover.

At this point, the shelves were almost done…

I loved the look of the blue shelves against the lighter gray walls, but I still wanted to make them pop.  To do so, I chose to paint the front edge of the shelves a white color which matches the moulding throughout the room.  Two coats later with a small, flat brush did the trick.

{DIY Tutorial} How-To Make Wood Honeycomb Shelves. Why spend hundreds, when you can make them yourself! These shelves complete the look of the room. So many great projects in this kids room makeover.

Lastly, so the metal brackets didn’t stand out so much, I painted those as well using the wall paint color.

{DIY Tutorial} How-To Make Wood Honeycomb Shelves. Why spend hundreds, when you can make them yourself! These shelves complete the look of the room. So many great projects in this kids room makeover.

And then they were finally complete!

{DIY Tutorial} How-To Make Wood Honeycomb Shelves. Why spend hundreds, when you can make them yourself! These shelves complete the look of the room. So many great projects in this kids room makeover.

{DIY Tutorial} How-To Make Wood Honeycomb Shelves. Why spend hundreds, when you can make them yourself! These shelves complete the look of the room. So many great projects in this kids room makeover.

Love the under-the-bed wood rolling carts?  I shared the tutorial on how to make them earlier this week.

{DIY Tutorial} How-To Make Wood Honeycomb Shelves. Why spend hundreds, when you can make them yourself! These shelves complete the look of the room. So many great projects in this kids room makeover.

These shelves are perfect to fill with books, toys in containers, and any fun thing(s) to display.

{DIY Tutorial} How-To Make Wood Honeycomb Shelves. Why spend hundreds, when you can make them yourself! These shelves complete the look of the room. So many great projects in this kids room makeover.

{DIY Tutorial} How-To Make Wood Honeycomb Shelves. Why spend hundreds, when you can make them yourself! These shelves complete the look of the room. So many great projects in this kids room makeover.

{DIY Tutorial} How-To Make Wood Honeycomb Shelves. Why spend hundreds, when you can make them yourself! These shelves complete the look of the room. So many great projects in this kids room makeover.

And here is a pretty pinnable picture if you want to remember this project for a later date…

{DIY Tutorial} How-To Make Wood Honeycomb Shelves. Why spend hundreds, when you can make them yourself! These shelves complete the look of the room. So many great projects in this kids room makeover.

So what do you think?

Do you like the honeycomb / hexagon look?  Have you incorporated this new trend into your home? What has been your most difficult DIY project endeavour?

Lowes Creative Team Member Badge - Spring 2014

To gather even more unique, fun, and creative ideas for your indoor and outdoor Spring spaces, I would definitely suggest downloading the Lowe’s Creative Ideas app on your iphone and/or ipad.  I’m always checking out the FREE app for great seasonal + do-it-yourself inspiration.

 Also consider following Lowe’s on Facebook, Pinterest, and Instagram as well.

Disclosure: I am part of the Lowe’s Creative Team and was provided with a Lowe’s gift card to purchase items for my project.  I was also compensated for my time to use the products.  No one told me what to create, what to buy, how to use the product, or what to write.  All opinions are 100% mine!

DIY: Kids Play + Camping Tent

Happy July!

For me, it officially feels like Summer has begun.  The kids are out of school now for just about a week, and the Summer sun is setting in (despite all the rain we’ve been having).  The kids and I have been enjoying fun outings each day, while also spending some down-time at home just relaxing.  Often on those home-bound days, the hours creep by with boredom, so when Lowe’s put me up to the challenge this month to create something related to DIY camping, I thought of the perfect solution…

a kids play + camping tent.  They can use it as a tent to play in during the day, as well as a spot to sleep in once the sun sets and the stars peak.

Kids Play + Camping Tent - 10 dollars to make +10 minutes to create! Super simple creation that your kids will love!

The the best part about this tent is that it only took about $10 to make + 10 minutes to create!  I made two, so the cost and time were double.

Supplies for (1) Tent:

  • (4) 1 x 2 piece of wood at 42″ long ($2.16)
    • At Lowe’s I had them cut down (1) 1 x 2 x 8 which cost $1.08 into my (2) 42″ long pieces
  • (1) 3/4″ diameter dowel at 48″ long ($2.85)
  • 2.5 total yards of fabric ($2.25/yard x 2.5 = $5.63)
  • 1.5 total yards of ribbon (leftovers)
  • Drill with a 3/4″ drill bit

This tent is really easy to create, and what’s even better is that you can put it up and take it down very easily with each use.   I made it so it can be easily assembled and just as easy to disassemble for storage.  More on that later…

1. (2 minutes)

To start off, I drilled a 3/4″ hole at each end of the 1 x 2 piece of wood.  The Mister and I set up a “drilling station” by creating two piles of stacked wood so the 1 x 2 could bridge across the top.  As an alternative, you can drill through your piece of lumber with a scrap piece underneath.  Either method will work.

One hole of each piece will be for the peak of the tent, while the other hole will be for the ribbon to tie through.  Keep reading and it’ll all come together…

Kids Play + Camping Tent - 10 dollars to make +10 minutes to create! Super simple creation that your kids will love!

2. (1 minute)

Once the holes were drilled, I fed one end of the dowel through two of the 1 x 2’s, then fed the other end of the dowel through the other two 1 x 2’s.

Kids Play + Camping Tent - 10 dollars to make +10 minutes to create! Super simple creation that your kids will love!

Note: The drill bit size needs to match the dowel size, so it fits snug.  I used a 3/4″ dowel and a 3/4″ drill bit.  The dowel needs to be snug in the 1 x 2’s so it stays in place, yet is still easily adjustable.

And the frame was done!

Onto the fabric.

3. (2 minutes)

Many fabric comes in a 44/45″ width, so the sides don’t need to be hemmed (if you want to hem them you can, but I didn’t).  To start off, I folded over one end of the fabric and sewed.

Kids Play + Camping Tent - 10 dollars to make +10 minutes to create! Super simple creation that your kids will love!

4. (2 minutes)

I draped the fabric (with one finished edge) over the tent frame.  I lined up the finished edge side with the bottom of the legs, so I could determine how much needed to be trimmed off the other side – be sure to leave enough fabric to fold over and sew (about  1″ extra inch).

Using my Jar O’ Ribbons, I picked out 4 fun colors.

Kids Play + Camping Tent - 10 dollars to make +10 minutes to create! Super simple creation that your kids will love!

5. (2 minutes)

To secure the fabric to the frame,  I added ribbon.  I cut (4) 12-15″ long pieces of ribbon, and sewed the center of it to the right side of each corner using a fun stitch.

Kids Play + Camping Tent - 10 dollars to make +10 minutes to create! Super simple creation that your kids will love!

After cutting the loose threads, it was complete!

I draped the fabric over the dowel, attached the 4 ribbons through the 4 bottom holes, and secured. (1 minute)

Kids Play + Camping Tent - 10 dollars to make +10 minutes to create! Super simple creation that your kids will love!

Kids Play + Camping Tent - 10 dollars to make +10 minutes to create! Super simple creation that your kids will love!

And the dual play + camping tent was complete.

Kids Play + Camping Tent - 10 dollars to make +10 minutes to create! Super simple creation that your kids will love!

It’s just as easy to disassemble as it is to assemble!  Plus it folds right up to store away.  I put all the legs together, wrapped the fabric around them, and secured it at both ends with the attached ribbon.

Kids Play + Camping Tent - 10 dollars to make +10 minutes to create! Super simple creation that your kids will love!

Kids Play + Camping Tent - 10 dollars to make +10 minutes to create! Super simple creation that your kids will love!

The details.

Kids Play + Camping Tent - 10 dollars to make +10 minutes to create! Super simple creation that your kids will love!

Kids Play + Camping Tent - 10 dollars to make +10 minutes to create! Super simple creation that your kids will love!

Kids Play + Camping Tent - 10 dollars to make +10 minutes to create! Super simple creation that your kids will love!

Kids Play + Camping Tent - 10 dollars to make +10 minutes to create! Super simple creation that your kids will love!

My kids are having such a fun time with their new creations.

Day for Play…

Kids Play + Camping Tent - 10 dollars to make +10 minutes to create! Super simple creation that your kids will love!

And night for camping… (well kinda.  it didn’t last the whole night).

Kids Play + Camping Tent - 10 dollars to make +10 minutes to create! Super simple creation that your kids will love!

Either way, they are fun, easy to make, and are perfect for some Summer Fun!

Kids Play + Camping Tent - 10 dollars to make +10 minutes to create! Super simple creation that your kids will love!

Spring Mantel with Sensational Succulents #LowesCreator

Happy Monday!  Yes, it’s Spring, but sadly it doesn’t feel like it (at least here in NY).

I am so ready for the warmer days ahead and am yearning for the array of colorful flowers, the endless chirping of birds, and the sounds of outdoor laughter.  I know it’ll be here soon, but I am just ready for winter (and the endless snow) to be over.

In my search for all things Spring, I decided this years seasonal mantel had to include elements of the outdoors. Last Friday when perusing the aisles of Lowe’s, specifically the outdoor section, I saw a huge display of succulents.  I immediately knew they’d be the ideal addition for my Spring mantel!

Spring Mantel with Sensational Succulents - Creative ideas for bringing in natural elements by @Jenna_Burger, SASinteriors.net

While in the gardening section, I gathered a variety of succulents in different sizes and styles, along with a new bag of potting mix.  I wasn’t going to dare dig through the garage in search of leftover soil from last year, plus I saw this soil that is fast draining and made for cactus type plants.  I thought I’d give it a try, since I don’t have a great track record with keeping greenery alive. Yes, I admit, I don’t have a green thumb…

Once home, I collected a bunch of glass vases, dishes, and bowls that I had laying around the house.  A few I picked up last week at TJ Maxx, but most I’ve had for a long time stored in the closet.

Spring Mantel with Sensational Succulents - Creative ideas for bringing in natural elements by @Jenna_Burger, SASinteriors.net

Then it was time to transplant these beauties into their new homes.

Choosing the right size bowl / vase for the size of the succulent is important.  One rule of thumb that I always try to follow is to be sure that the plant isn’t too big for the pot (or bowl / vase in my case) so it has room to grow.  The teeny size succulents (which I bought for $2.98/each) went in the smaller bowls and the larger styles ($3.98/each) went into the clear glass vases (which are my favorite because you can see the soil and plant roots – so interesting).

Once the right size “home” was chosen, I loosened up the roots and made the transfer.  A few minutes later, all my succulents were planted and ready to add to the mantel.

Spring Mantel with Sensational Succulents - Creative ideas for bringing in natural elements by @Jenna_Burger, SASinteriors.net

Gardening in the kitchen isn’t something I would suggest, but with 30 degree temps, I wasn’t going to dare be outdoors longer than I had to.  A little mess wasn’t too bad to clean up…

Spring Mantel with Sensational Succulents - Creative ideas for bringing in natural elements by @Jenna_Burger, www.JENNABURGER.COM

Then the fun started and here’s the result of my natural Spring mantel using sensational succulents…

Spring Mantel with Sensational Succulents - Creative ideas for bringing in natural elements by @Jenna_Burger, www.JENNABURGER.COM

It’s a beautiful collection of natural elements mixed in with colorful favorites.

Spring Mantel with Sensational Succulents - Creative ideas for bringing in natural elements by @Jenna_Burger, www.JENNABURGER.COM

Spring Mantel with Sensational Succulents - Creative ideas for bringing in natural elements by @Jenna_Burger, www.JENNABURGER.COM

Any style bowl, vase, cup, or container will make for the perfect holder to display succulents. My collection includes a clear glass round vase, a similar square style, a plain white double dish, a decorative ceramic bowl, and a white milk glass cup.

Spring Mantel with Sensational Succulents - Creative ideas for bringing in natural elements by @Jenna_Burger, www.JENNABURGER.COM

Spring Mantel with Sensational Succulents - Creative ideas for bringing in natural elements by @Jenna_Burger, www.JENNABURGER.COM

Choosing succulents of varying sizes allows for an interesting mantel composition.

Spring Mantel with Sensational Succulents - Creative ideas for bringing in natural elements by @Jenna_Burger, www.JENNABURGER.COM

Spring Mantel with Sensational Succulents - Creative ideas for bringing in natural elements by @Jenna_Burger, www.JENNABURGER.COM

Spring Mantel with Sensational Succulents - Creative ideas for bringing in natural elements by @Jenna_Burger, www.JENNABURGER.COM

Spring Mantel with Sensational Succulents - Creative ideas for bringing in natural elements by @Jenna_Burger, SASinteriors.net

Spring Mantel with Sensational Succulents - Creative ideas for bringing in natural elements by @Jenna_Burger, www.JENNABURGER.COM

Despite the frigid temps, the Lowe’s gardening section is already stocking up on their summer displays including an array of flowers, plants, and a large selection of outdoor furniture.

Lowe's Creative Ideas App - Great ideas & Inspiration

To gather even more unique, fun, and creative ideas for your indoor and outdoor Spring decor, I would definitely suggest downloading the Lowe’s Creative Ideas app on the iphone and ipad.  I’m always checking out the FREE app for great inspiration. Consider following Lowe’s on Facebook, Pinterest, and Instagram as well.

Disclosure: I am part of the Lowe’s Creative Team and was provided with a Lowe’s gift card to purchase items for my project.  I was also compensated for my time to use the products.  No one told me what to create, what to buy, how to use the product, or what to write.  All opinions are 100% mine!

I link my projects to some of these parties: Skip to My Lou, Dittle Dattle, Between Naps on the Porch, Today’s Creative Blog, Stories of A to Z, All Things Heart & Home, House of Hepworths, Finding Fabulous, The Shabby Nest, Serenity Now, Tatertots and Jello, Thrifty Decor Chick, Tip Junkie